HOLIDAY DONATION DRIVE - SUPPORT MSW - DO YOUR PART TO KEEP THIS GREAT FORUM GOING! (Only 20 donations so far - C'mon guys!)
×


cdrusn89
-
Posts
1,915 -
Joined
-
Last visited
Content Type
Profiles
Forums
Gallery
Events
Everything posted by cdrusn89
-
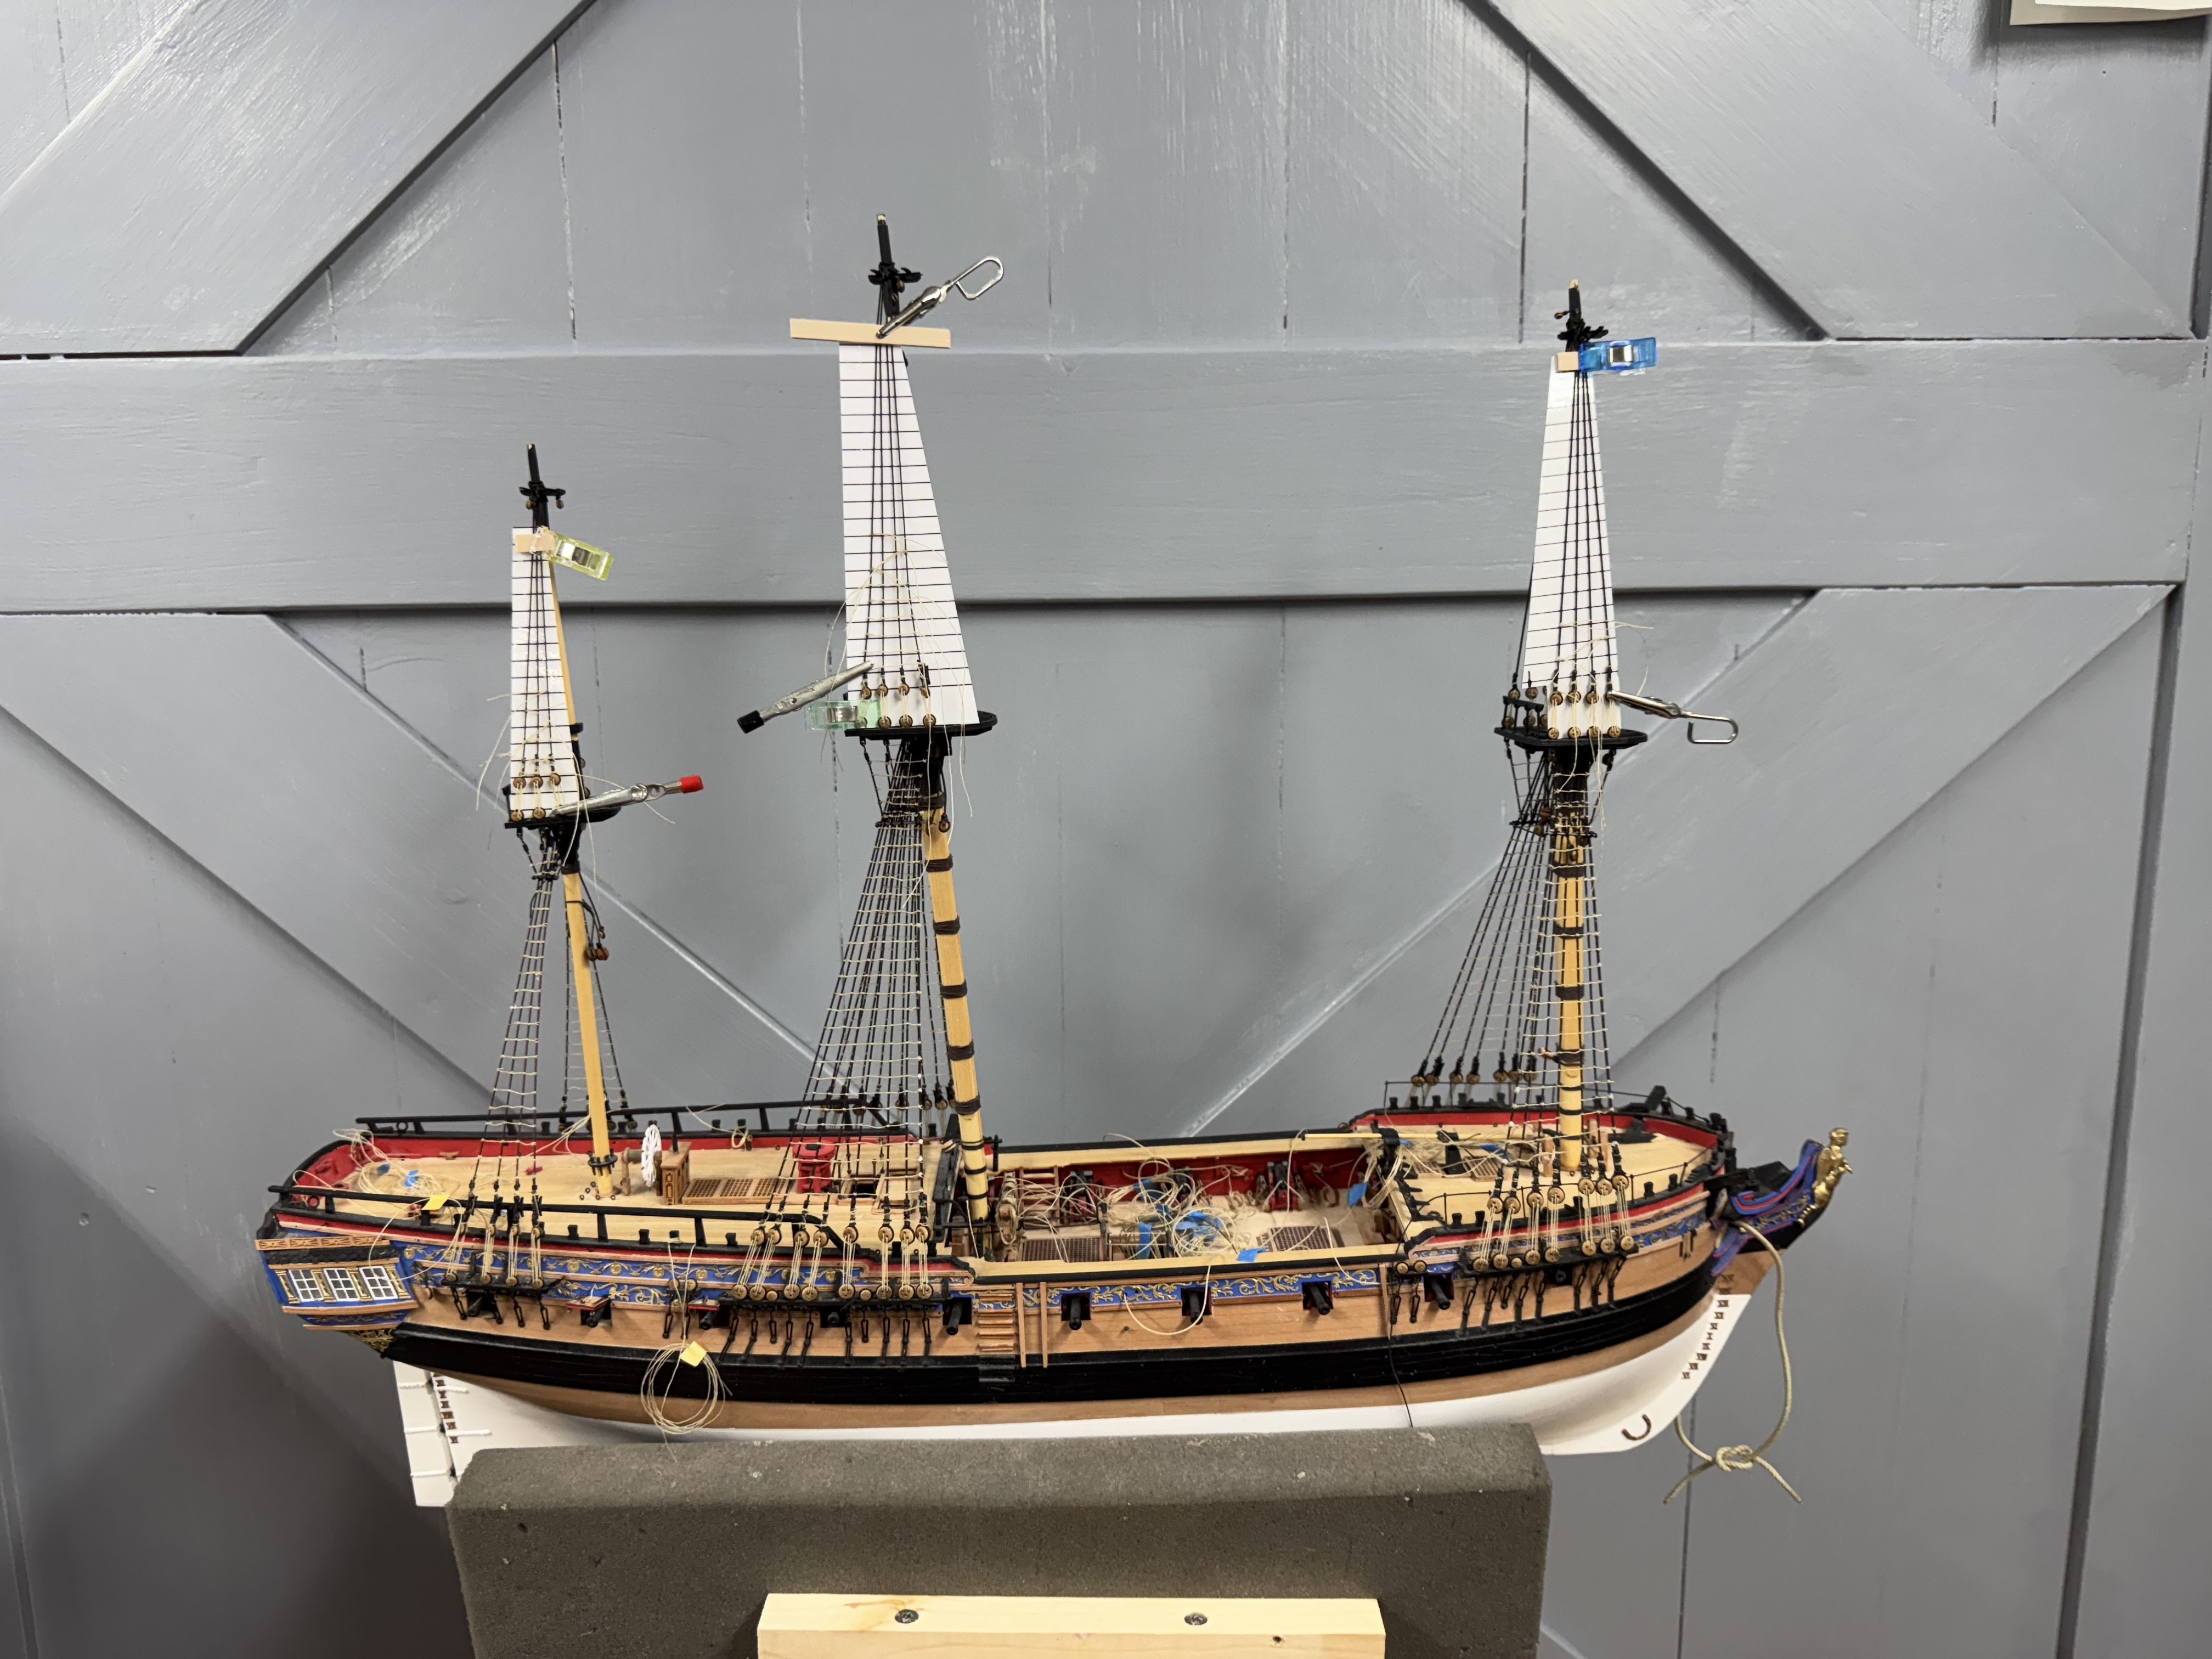
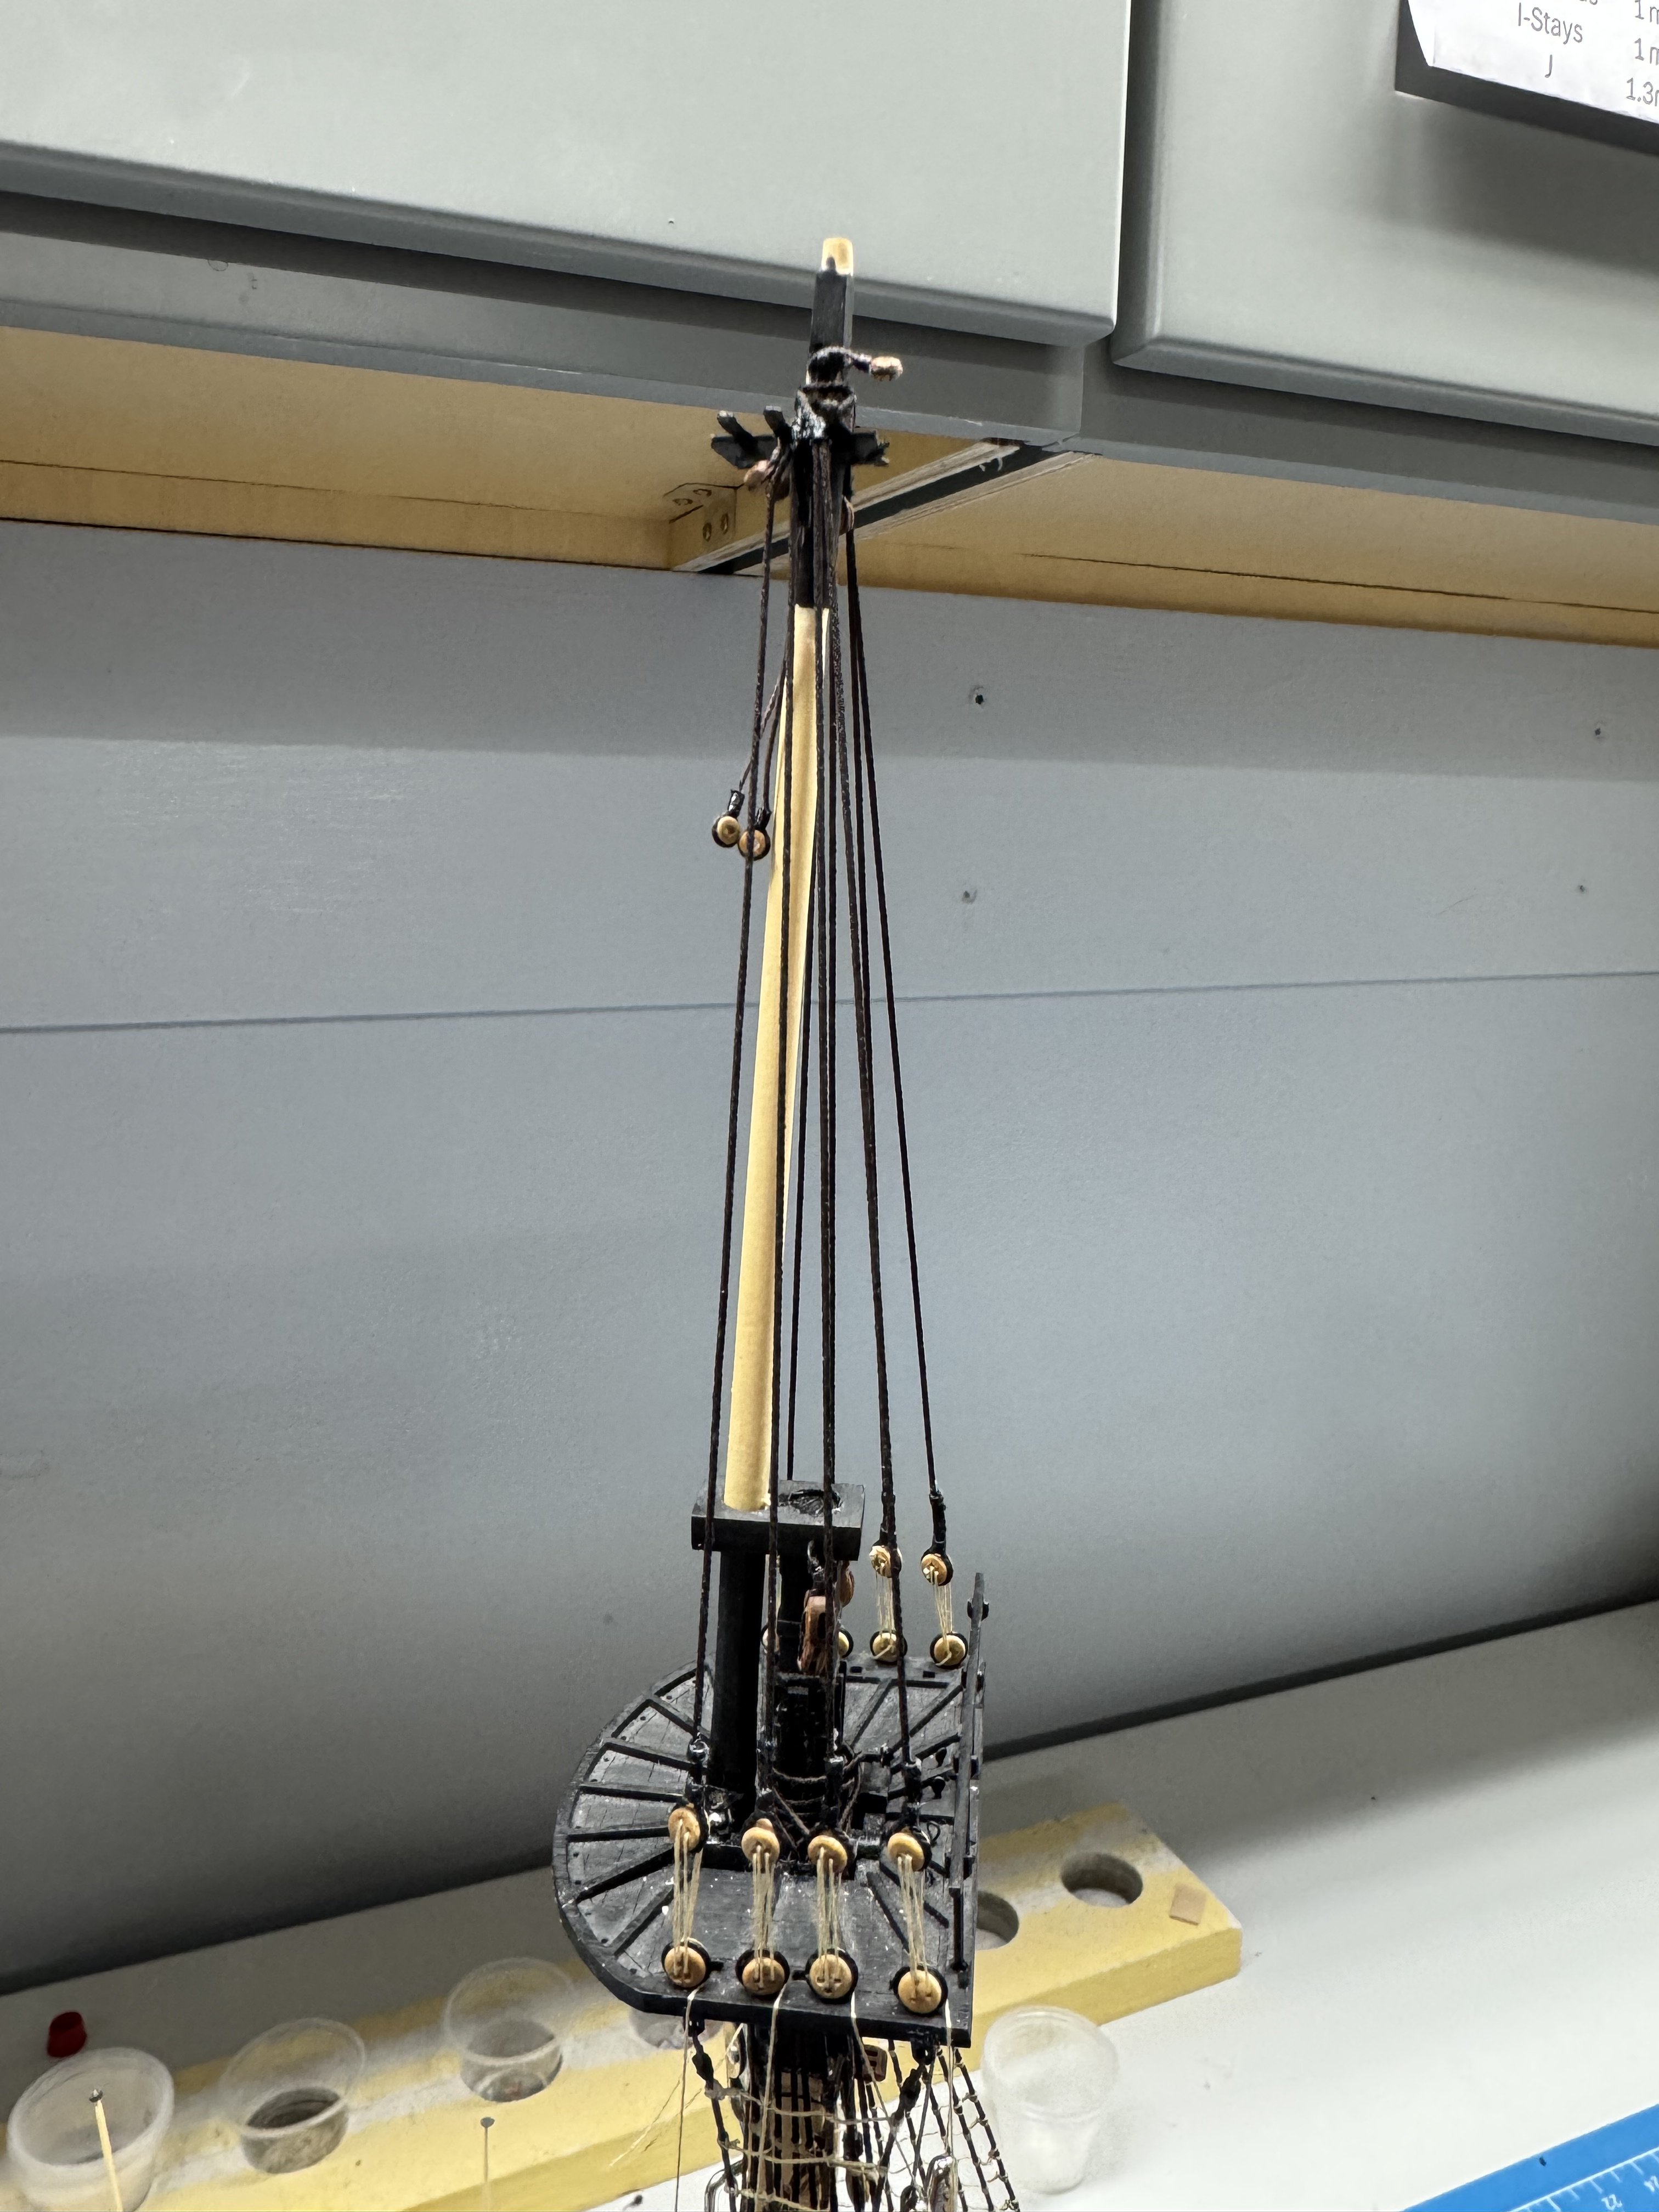
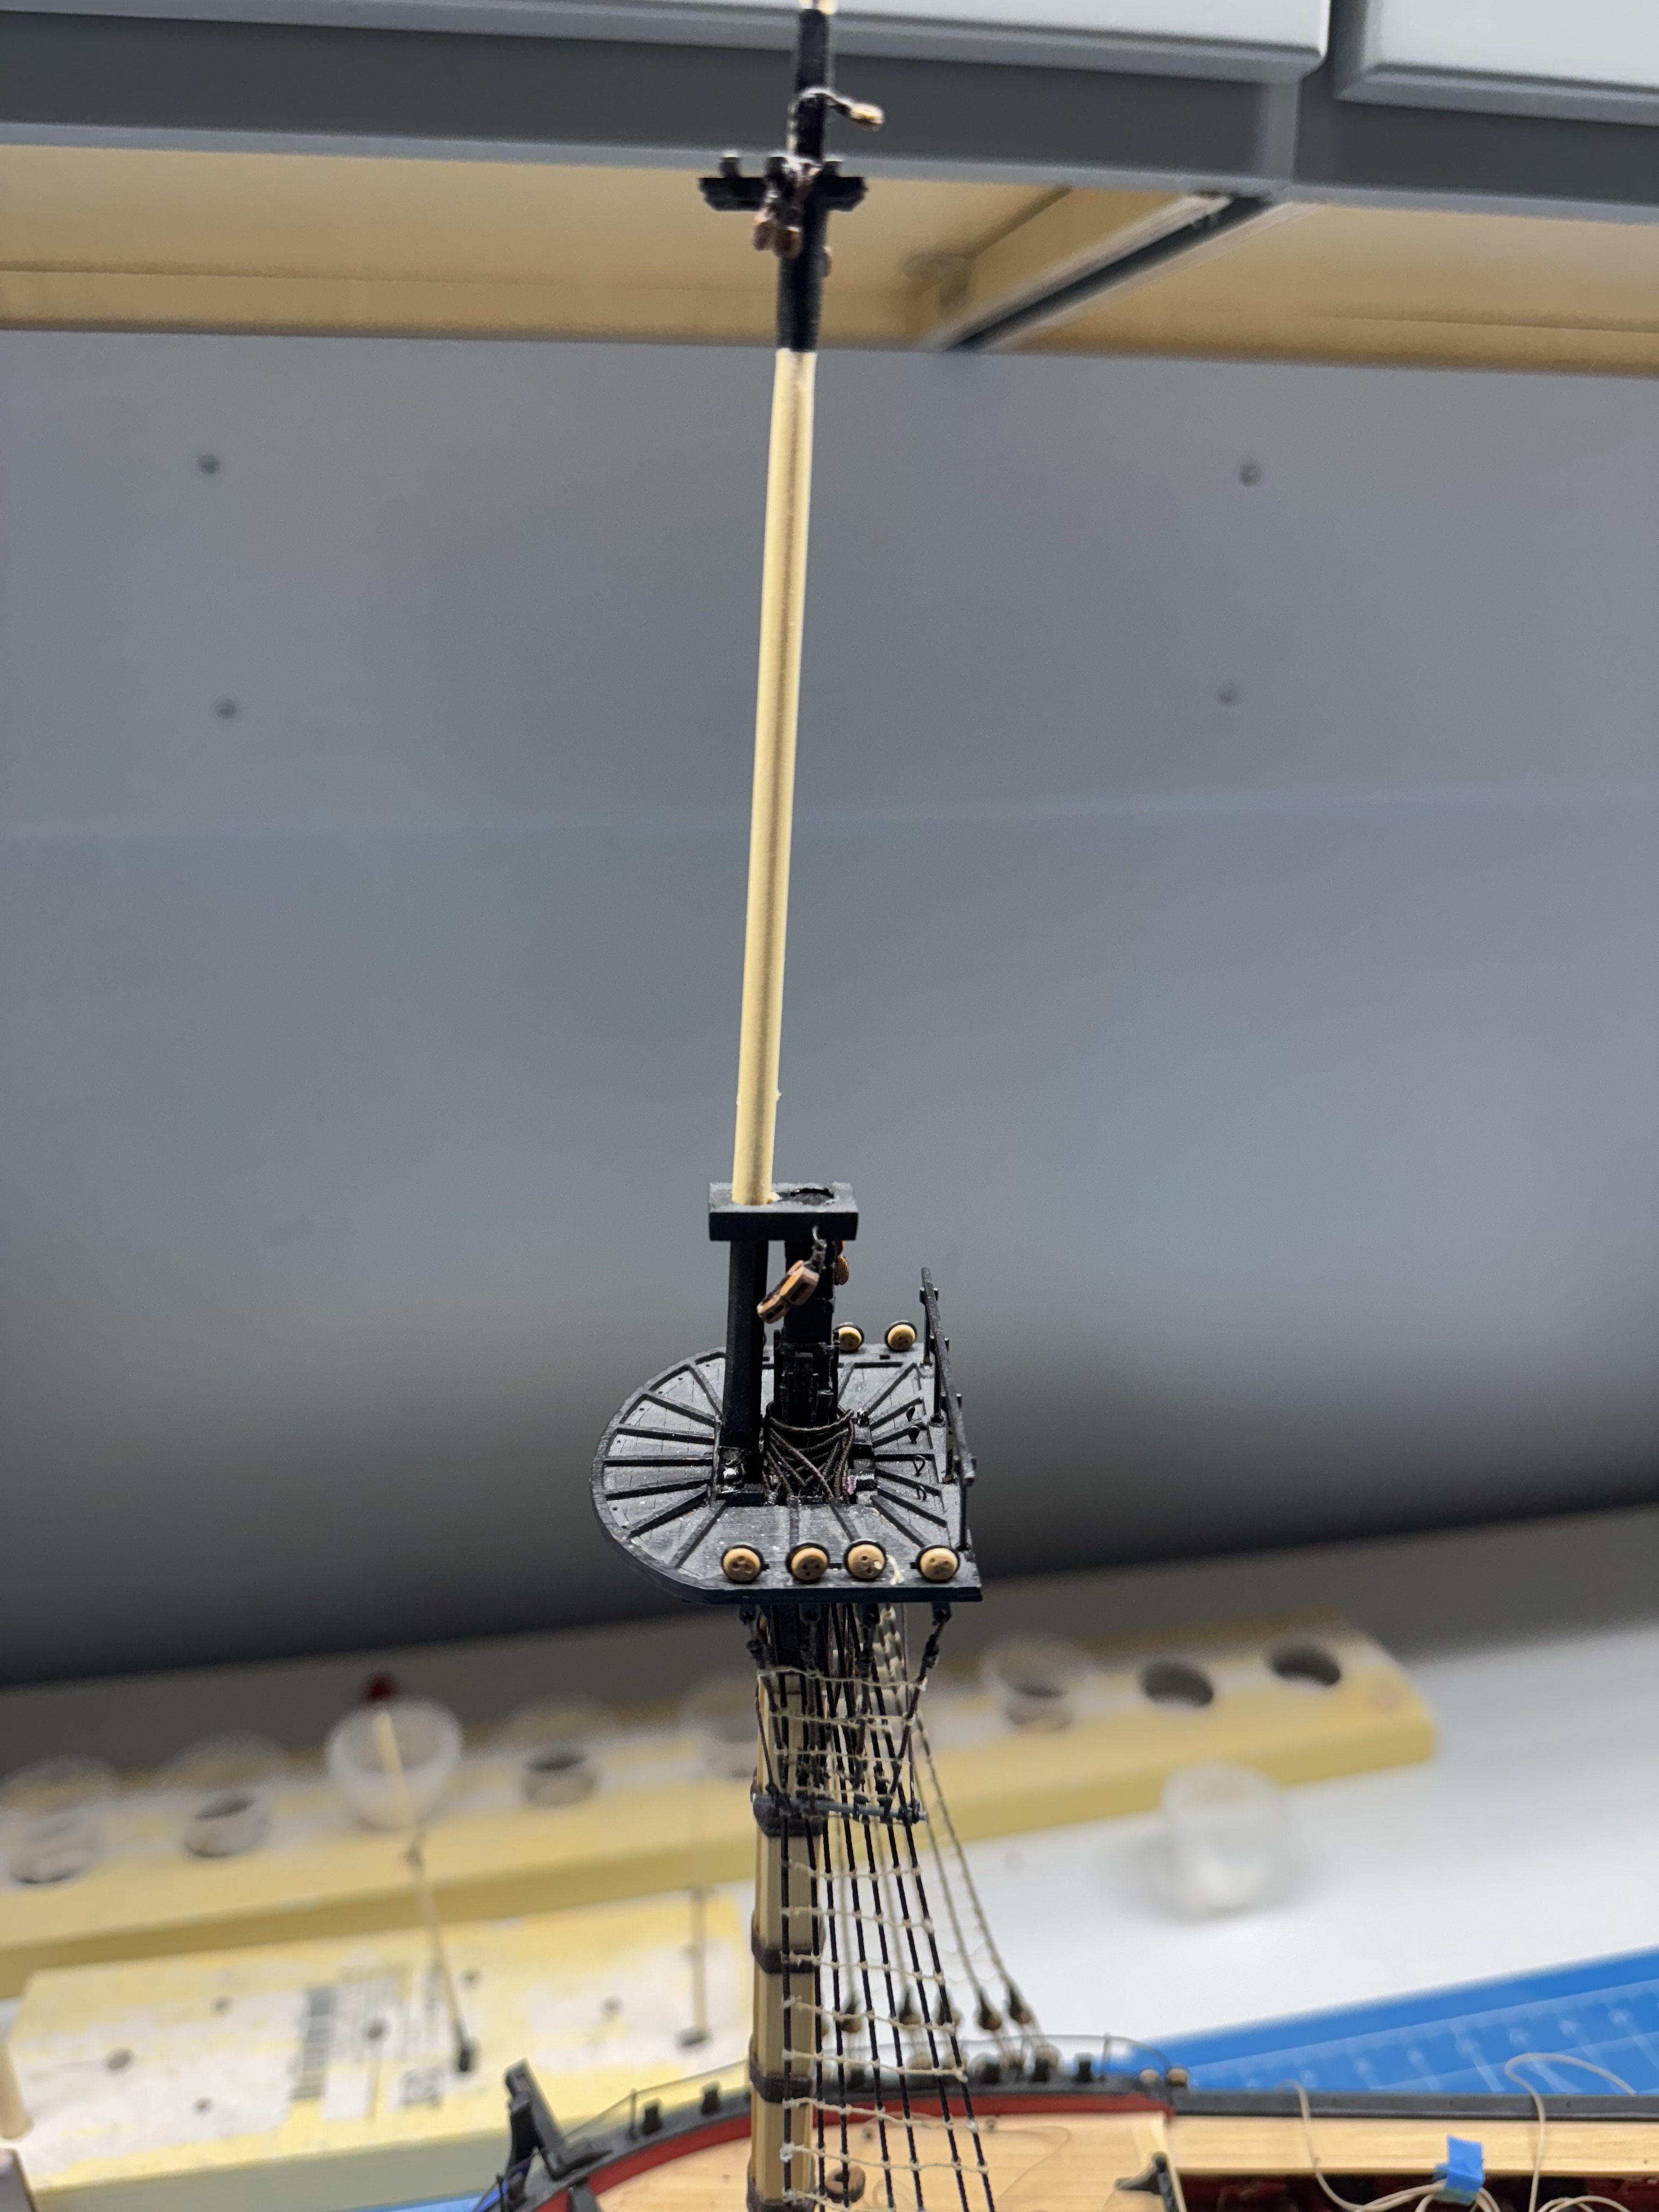
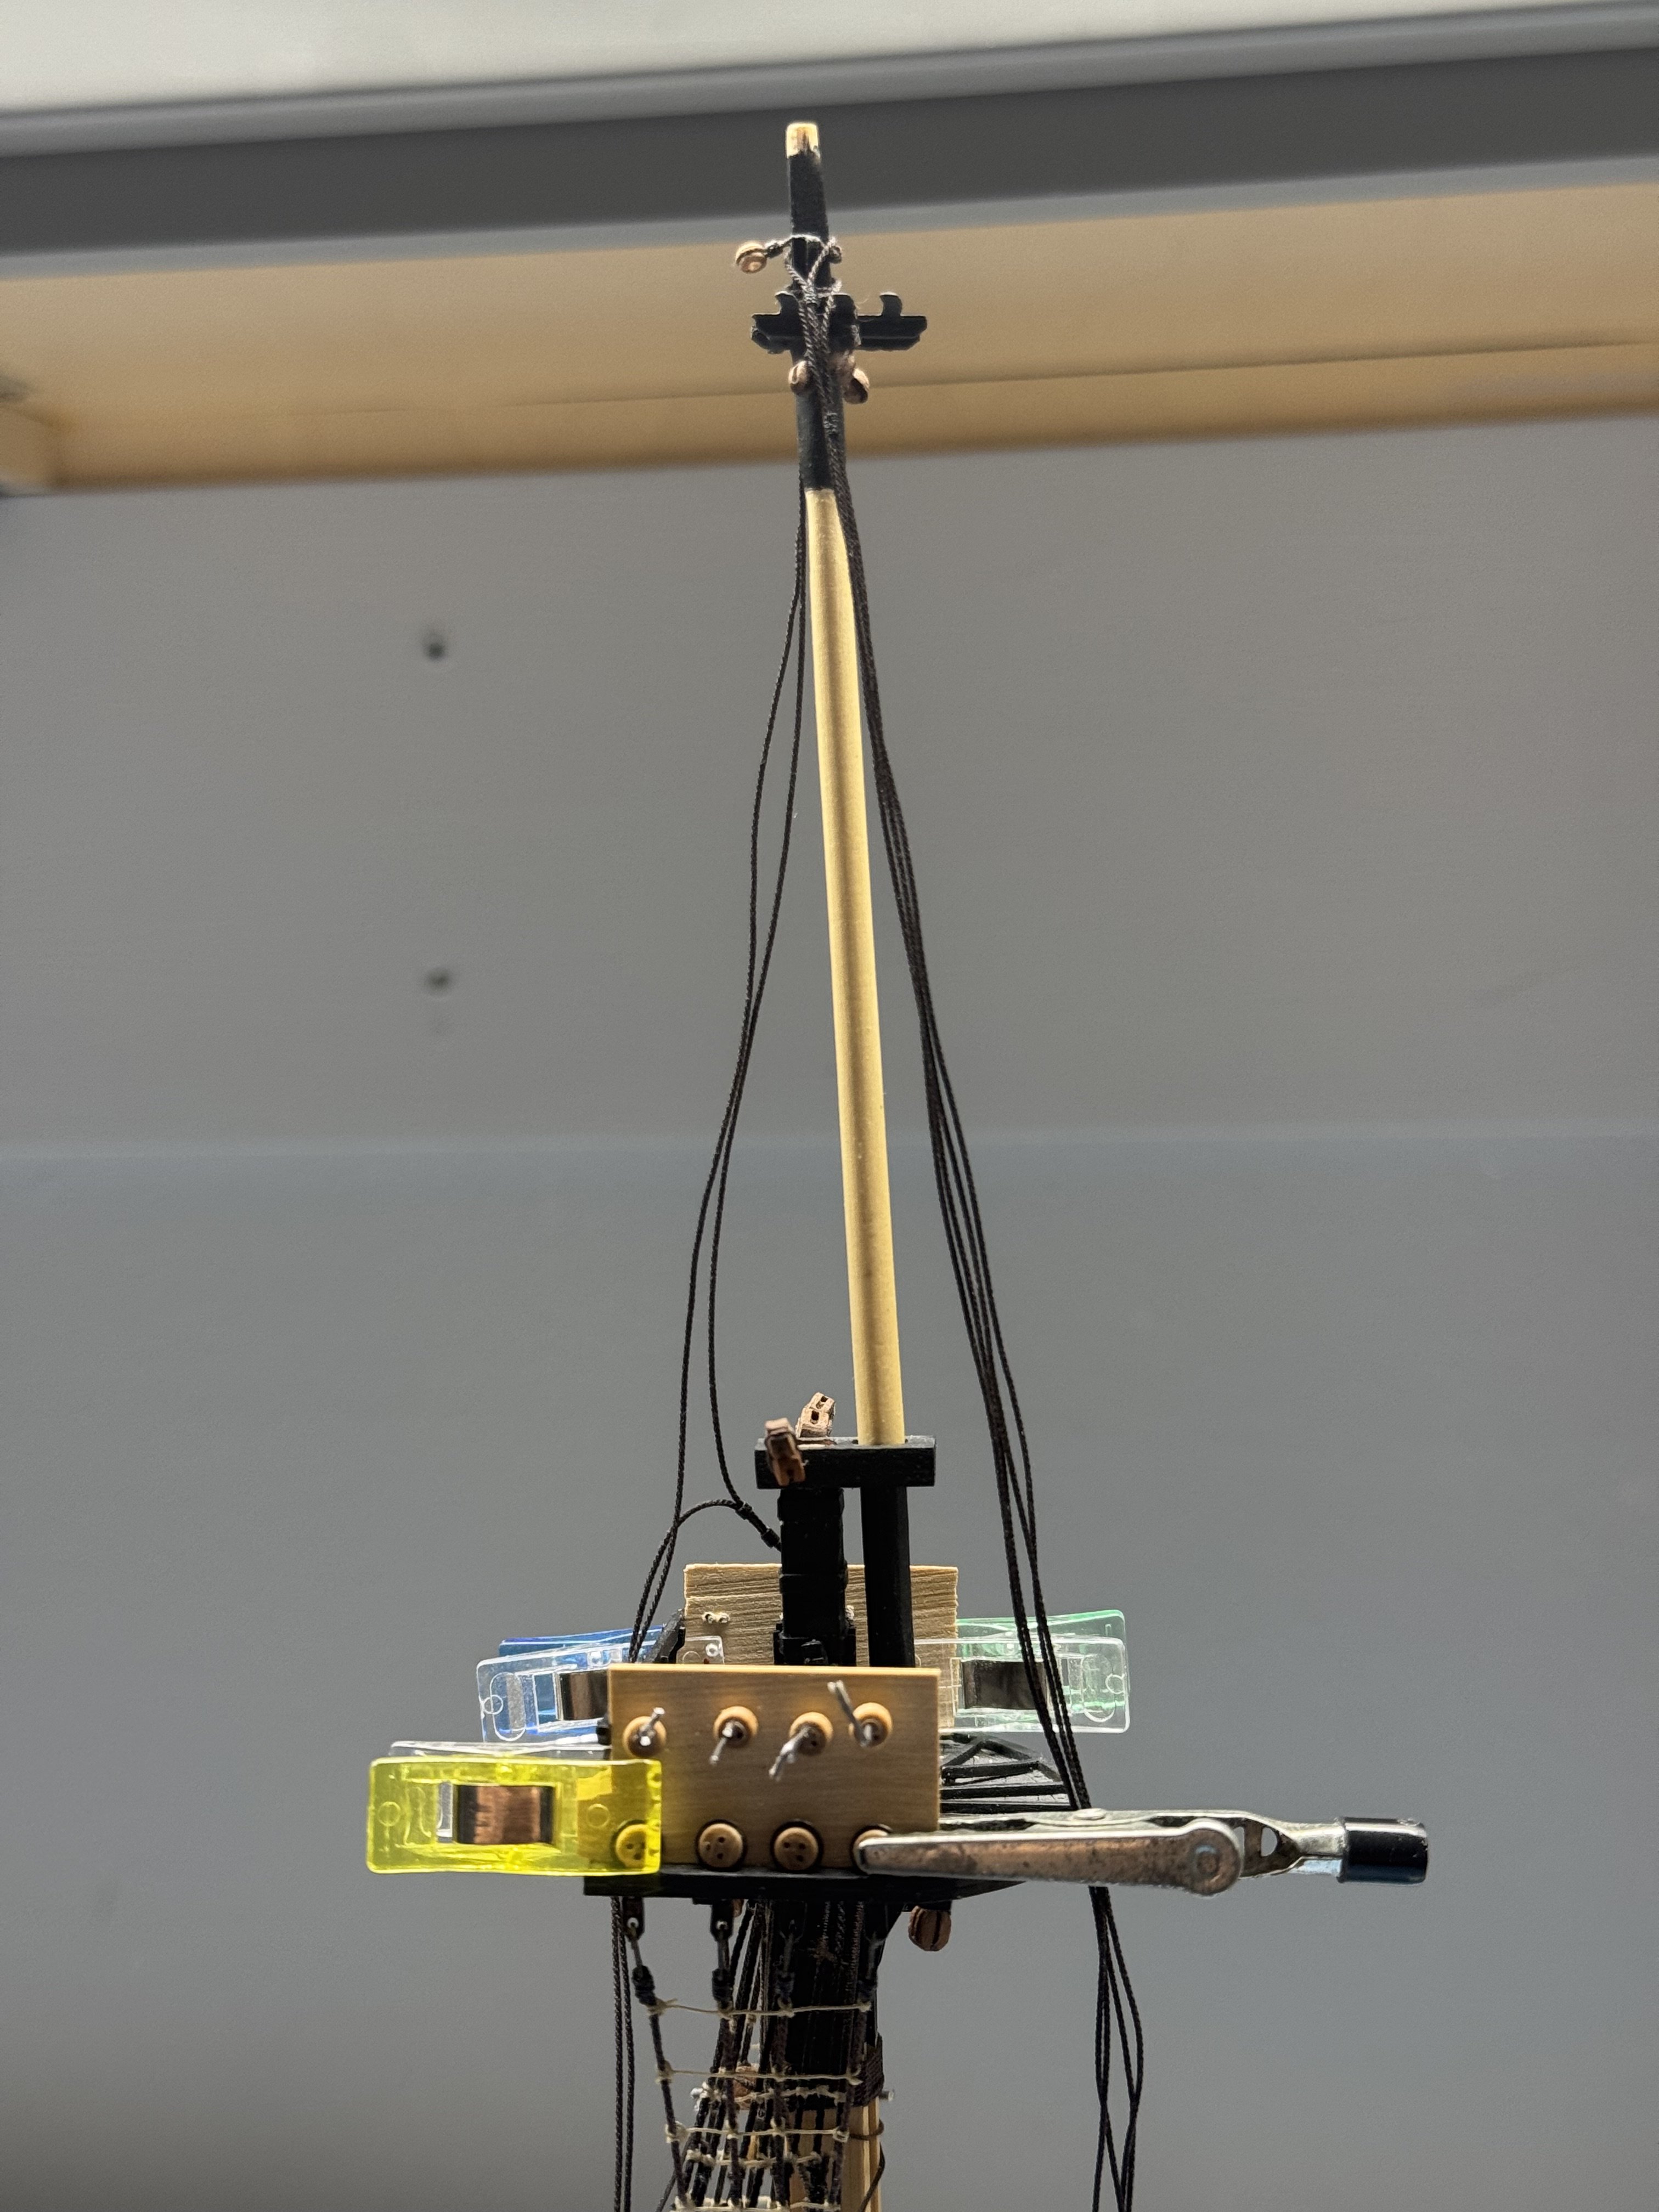
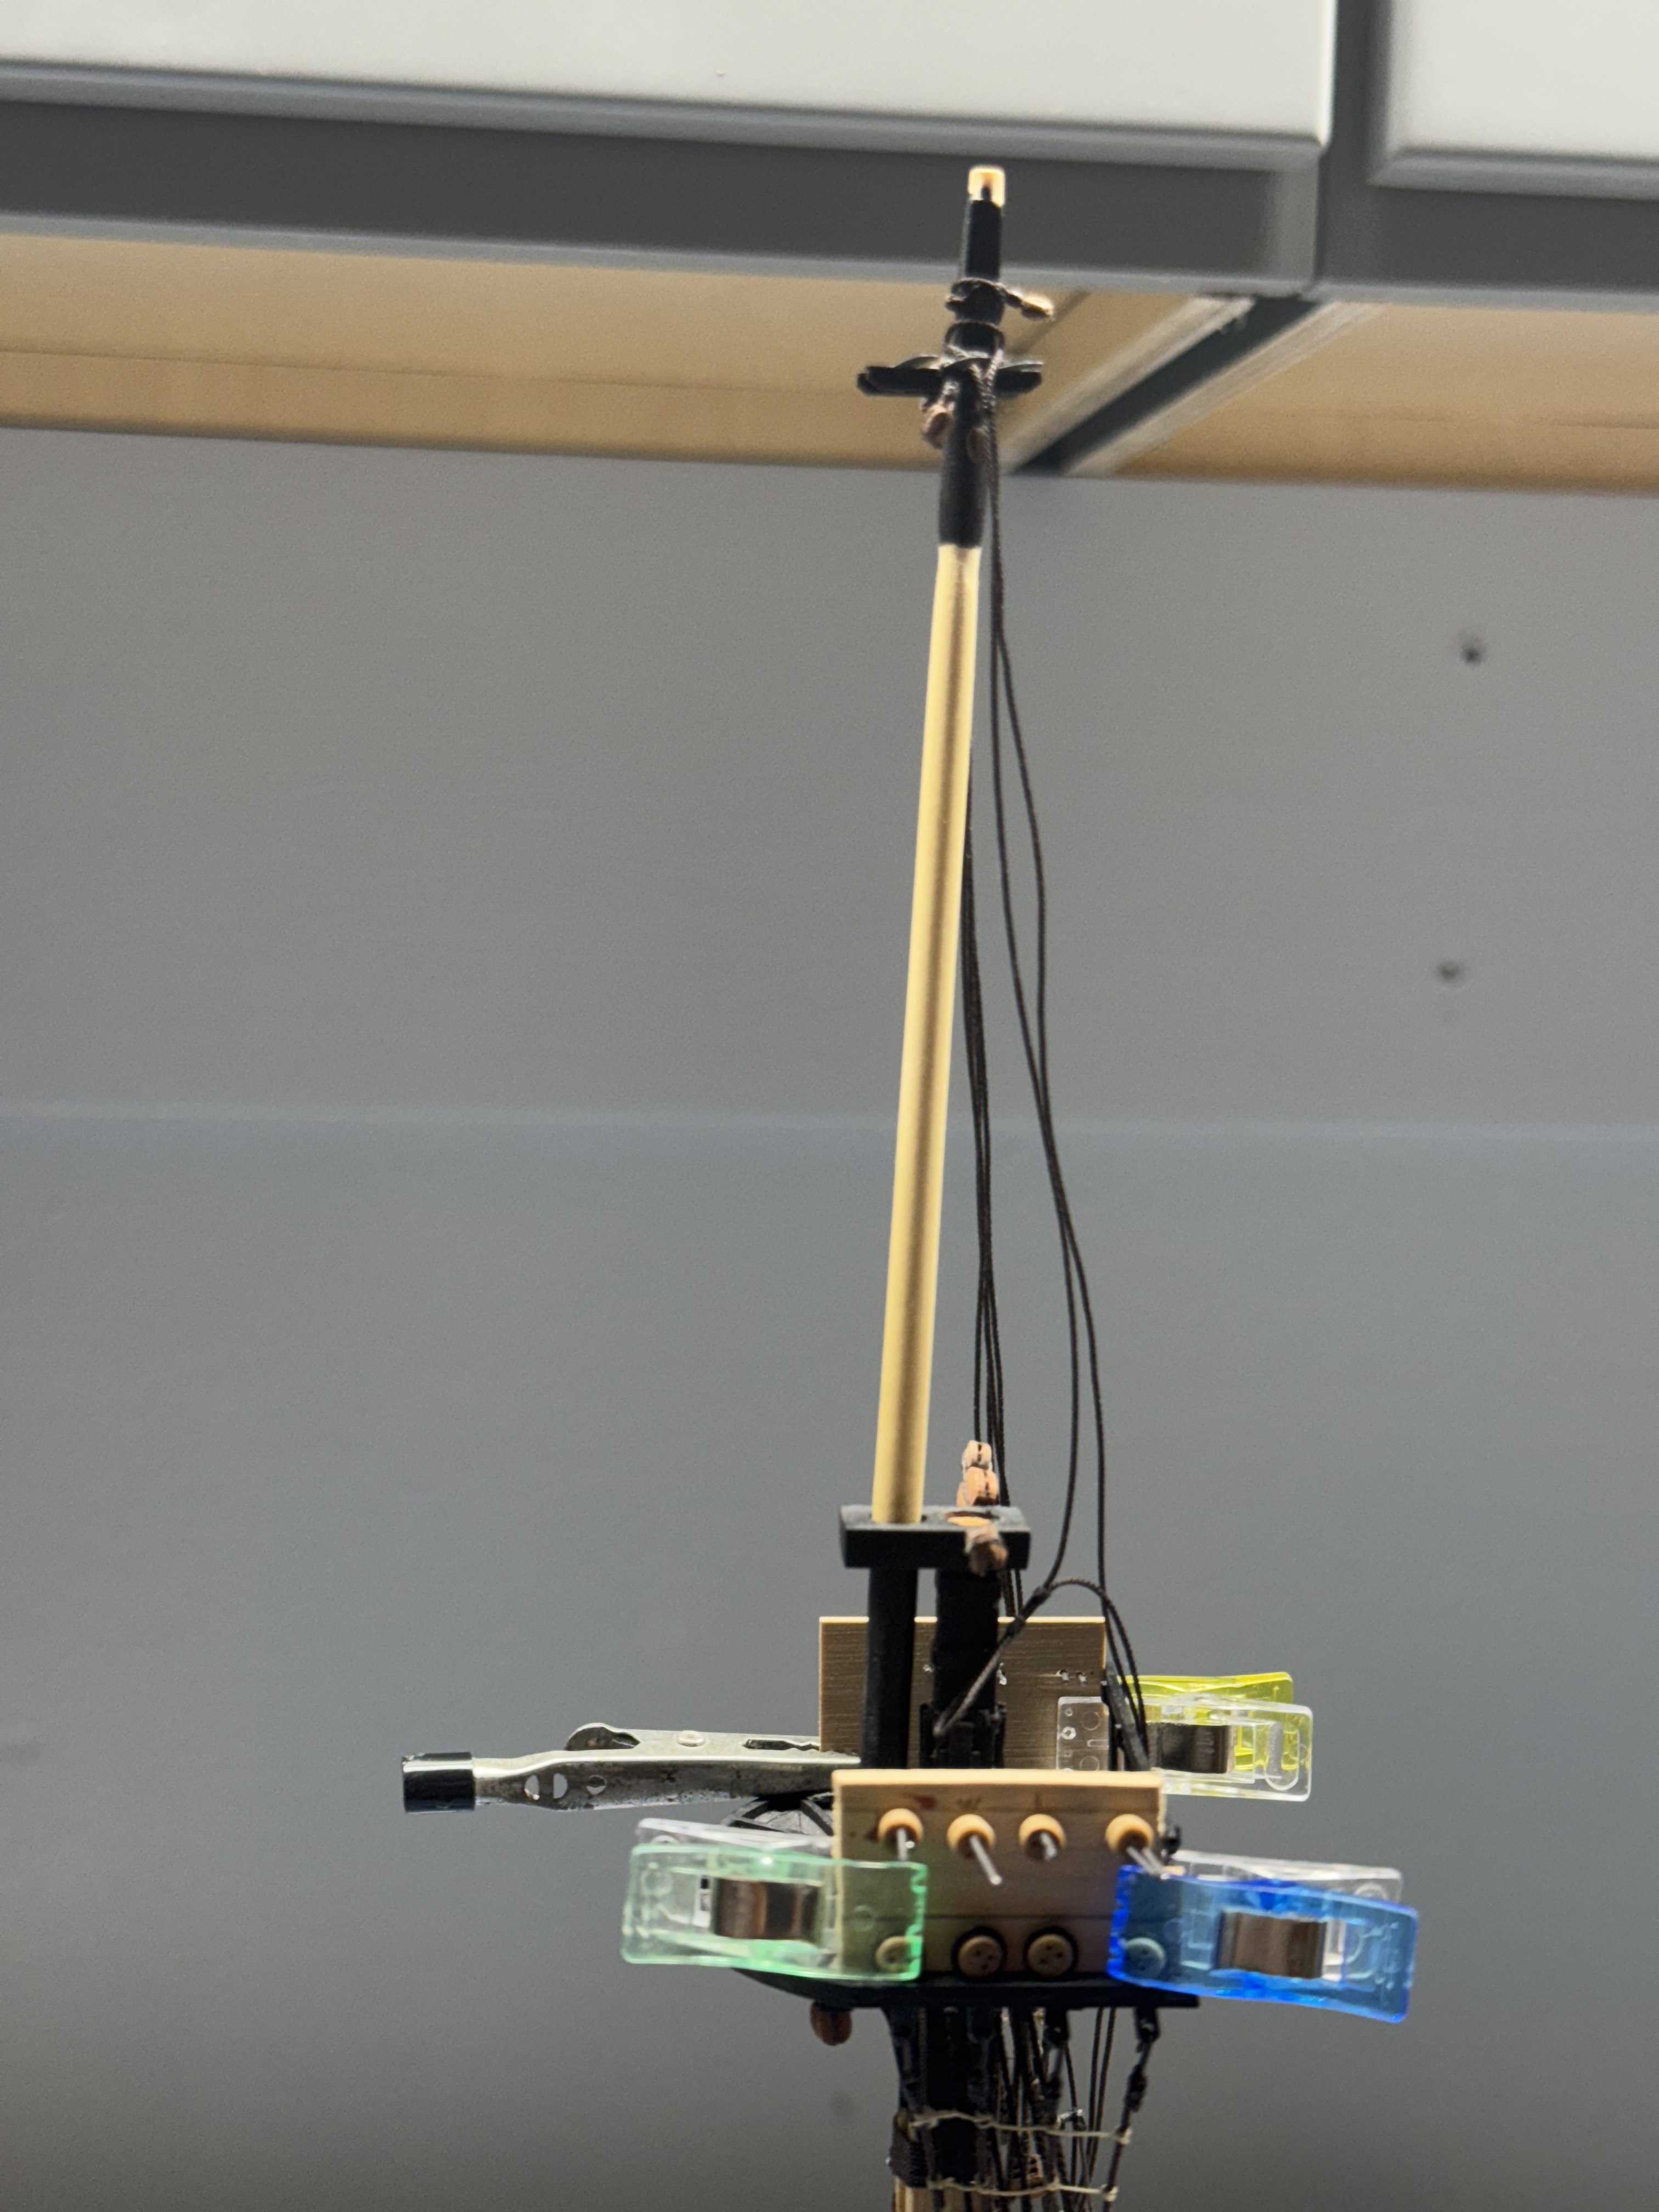
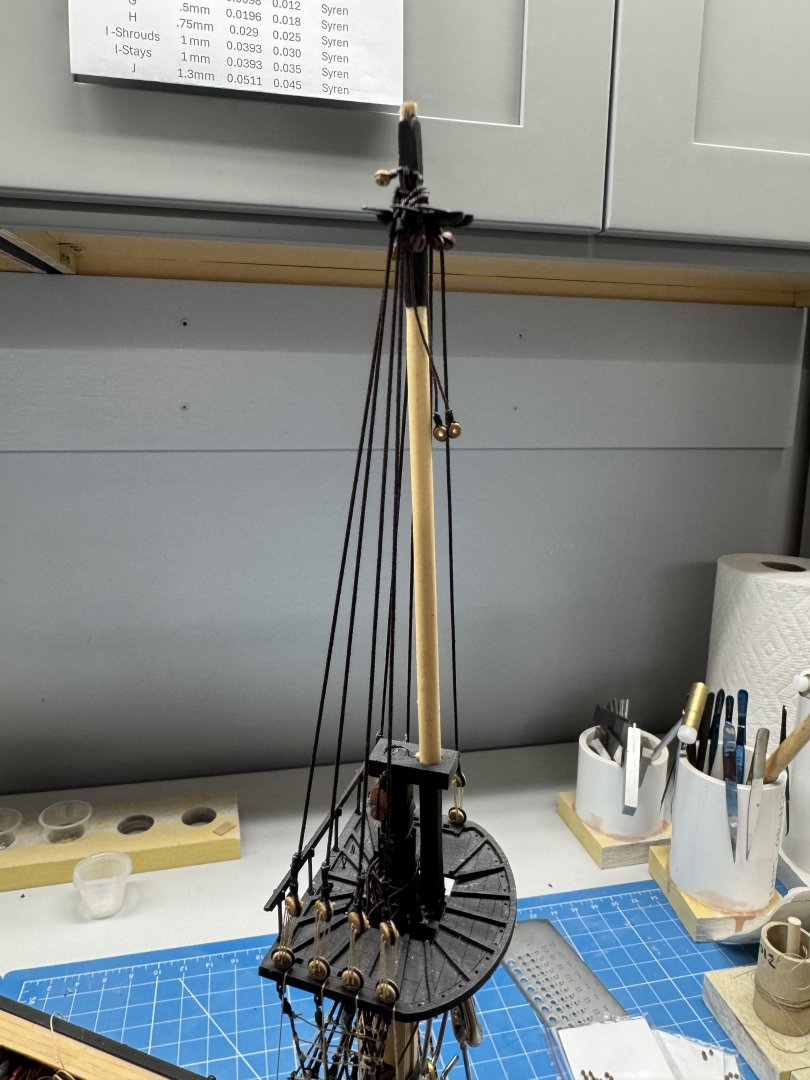
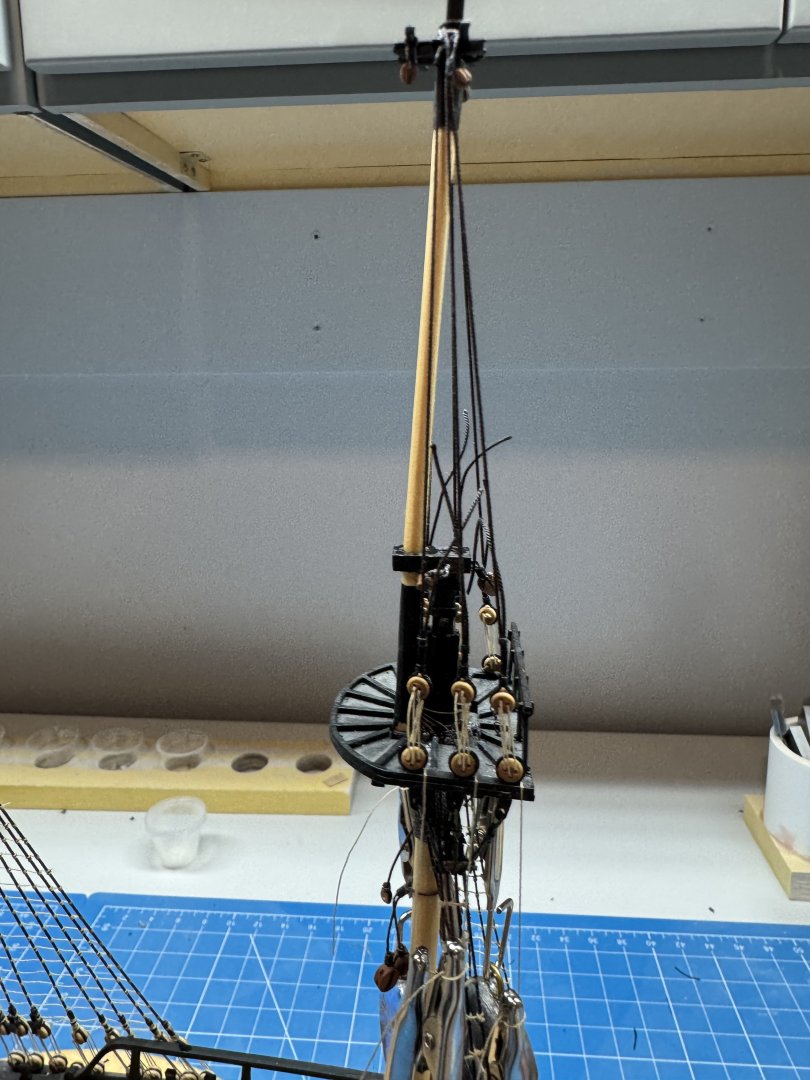
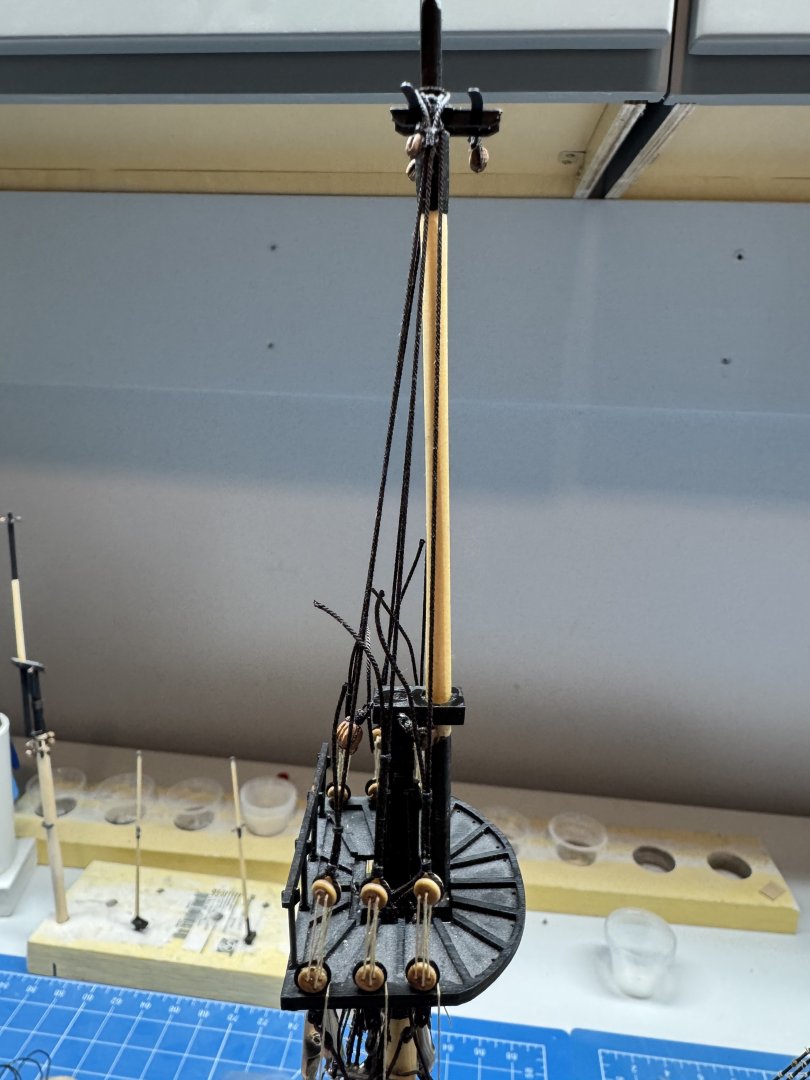
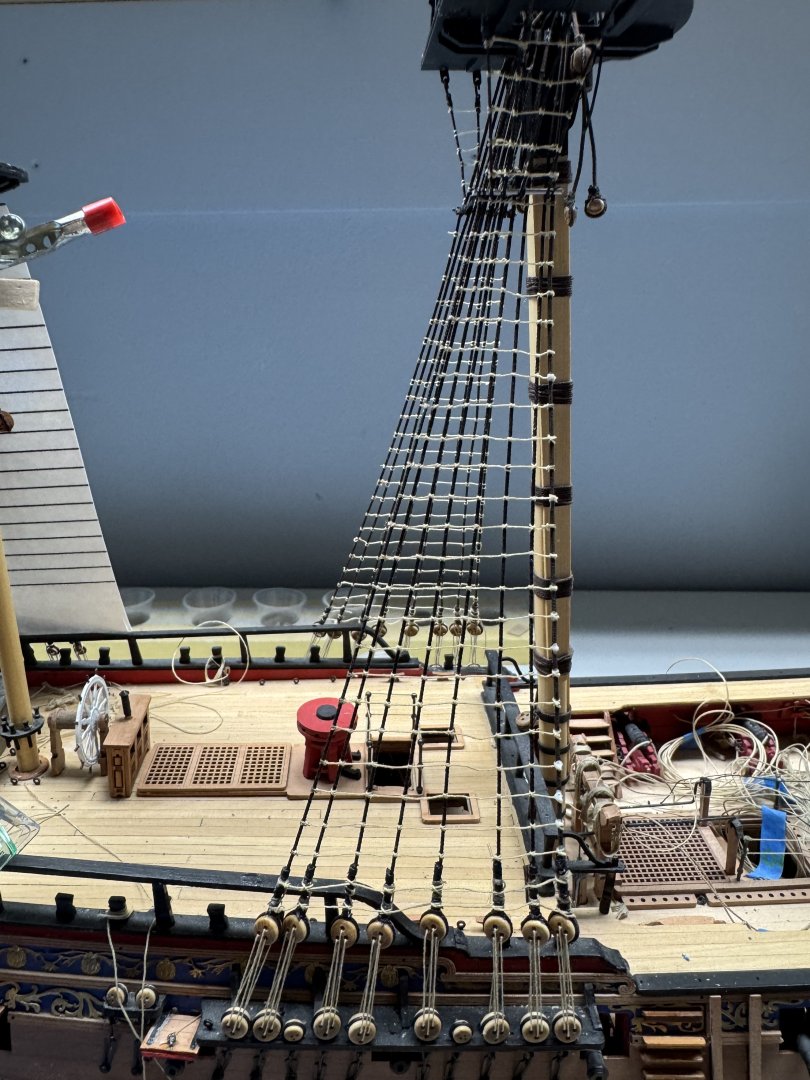
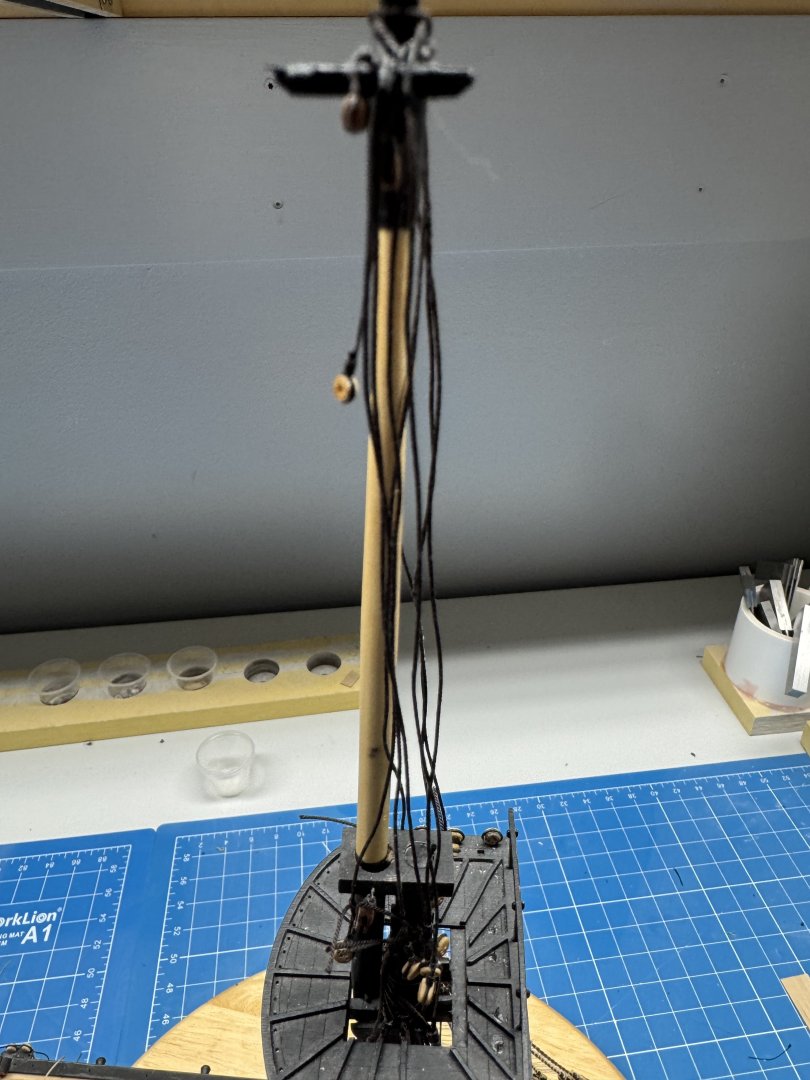
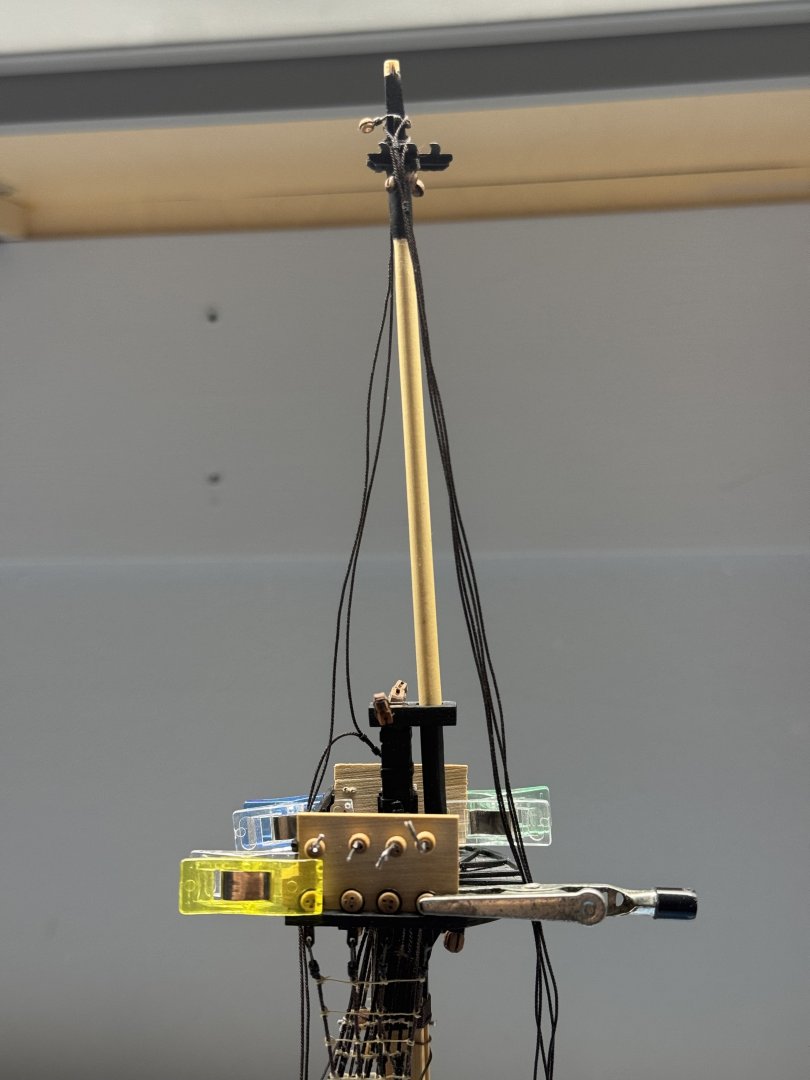
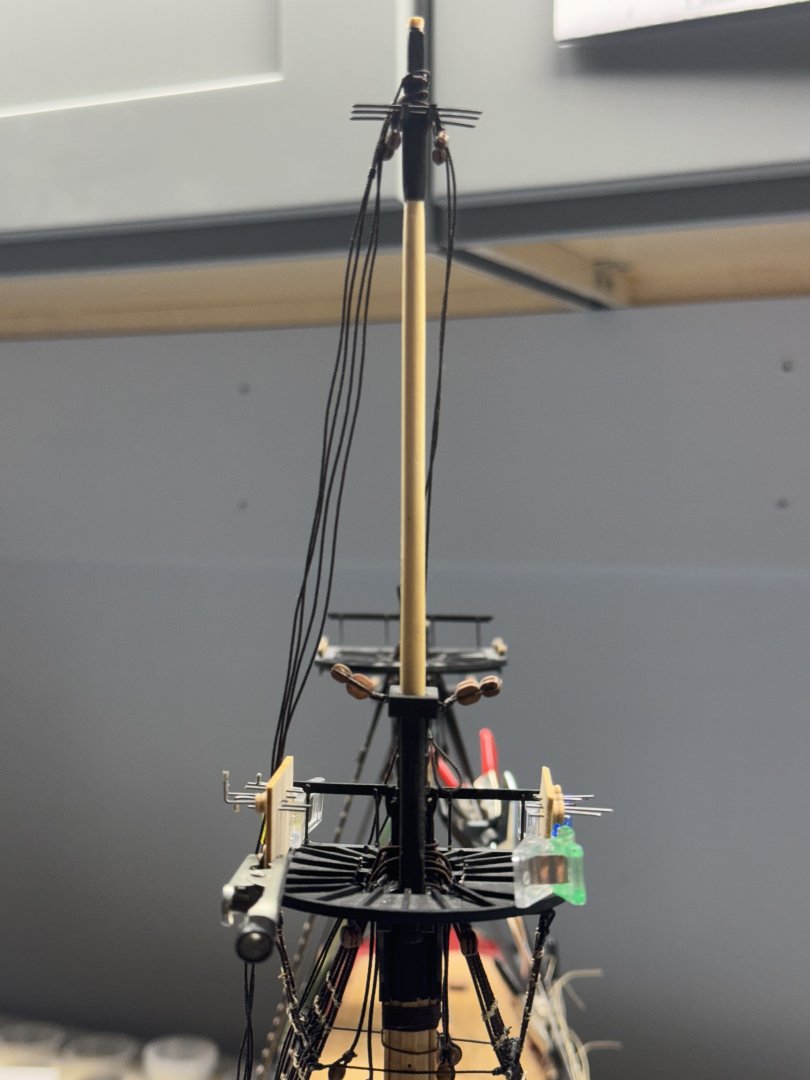
 Got all of the mizzen mast lower and topmast ratlines completed (YAH - only three more sets of ratlines to do). Feeling like I was on a roll I added the top gallant mast (no glue yet) - have to get to it at some point so why not now. I added the futtock shrouds and then rigged the top gallant shrouds. Easy, peazy only two per side and NO RATLINES. With the top gallant shrouds in place but not yet secured I put a small clamp on each shroud to provide some tension and broke out the laser to see make sure all three mast sections lined up. With the assistance of the laser I fiddled and fiddled until I got all the masts aligned then CAREFULLY glued the top gallant mast in place and put a big drop of PVA on top of the trestle trees where the top gallant mast shrouds pass through. Here is the shot showing the laser alignment "test".
- 422 replies
-
- 4
-

-
- Vanguard Models
- Sphinx
- (and 1 more)
-
Working ratlines on all three top masts. Port side main and mizzen top mast ratlines are already done so just four more sets to finish. Can't come a moment too soon. FYI background is new "barn door" closure for the workshop. I hated the old bi-fold doors.

- 422 replies
-
- 8
-
-
- Vanguard Models
- Sphinx
- (and 1 more)
-
Thanks Bob. With the new shrouds installed and the lanyards run and initially tensioned I thought it a good time to recheck the lower and top mast alignment. Would be unfortunate to have pulled things out of alignment after getting it right the first time. Laser check looks pretty good so on to securing the lanyards, adjusting the seizings and and installing shroud cleats to the forward most shroud on each side.

- 422 replies
-
- 9
-
-
- Vanguard Models
- Sphinx
- (and 1 more)
-
Somewhat of a major setback. While installing the ratlines on the port side of the fore topmast I noticed once I got most of the way done that the shrouds were very close together at the top. Considerably closer than on the starboard side. Further investigation showed that the shrouds had not been sufficiently secured and in the pushing and pulling involved in rigging the ratlines the shrouds had mover closer together. I saw no alternative to redoing the entire fore top mast shrouds. Soooo

- 422 replies
-
- 3
-
-
- Vanguard Models
- Sphinx
- (and 1 more)
-
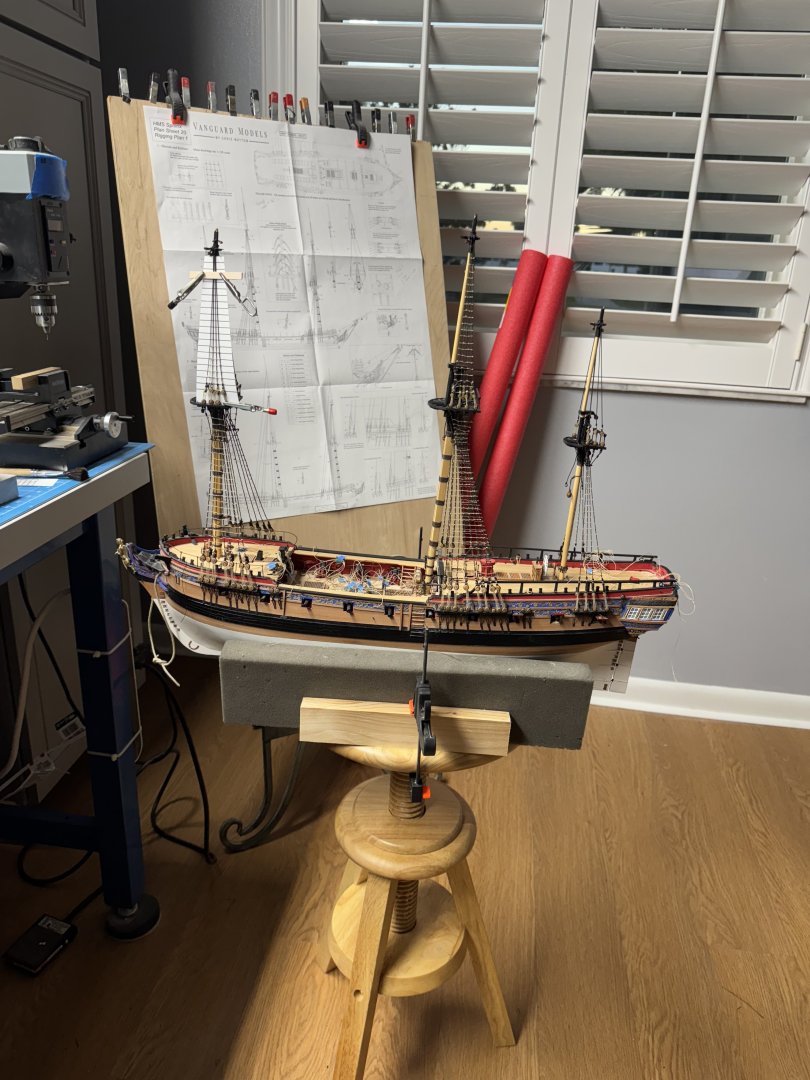
While working on the ratlines on the top masts I noticed that at least on the upper ratlines I was working with my arms at or above my shoulders and found this very tiring (and painful at times). I needed to find a way to either sit higher (but the workbench edge keeps getting in the way) or get the ship,lower. I saw this on a web site somewhere - uses an adjustable height stool to allow the model to be moved up and down to suit. The one I saw had pieces of wood permanently attached to the stool top and a cradle built from swimming "noodles" held together with duct tape. I already had the foam cradle (but have noodles if the foam cradle proves to be a problem) and decided not to destroy the stool's usefulness outside the workshop so I just clamped two pieces of wood to the stool to keep the cradle in place. I have the mizzen top mast shrouds in place and secured. Working ratlines and shroud cleats on the main mast.
- 422 replies
-
- 8
-
-
- Vanguard Models
- Sphinx
- (and 1 more)
-
Pressing on with the ratlines. Main top mast ratlines are complete. Seven down, 5 to go. That mess at the forward shroud is the cleat lashing, the lanyard lashing and the ratline. Makes me want to have done them all in black. Hopefully the other side will not look so bad. I seem to get better with practice and seeing what doesn't work so well as I proceed. Maybe someday (probably not soon) I will be able to do this consistently from the start. Mizzen top mast and shrouds in place. Need to make the final adjustments and then secure the lashings, add the shroud cleats and then - more ratlines.
- 422 replies
-
- 5
-
-
- Vanguard Models
- Sphinx
- (and 1 more)
-
A good bit of progress since the new year. I completed the ratlines and futtock shrouds and ratlines on the main mast. and started to install the shroud cleats on them as well. Not the most exciting activity so I only do a few at a time. I have the mizzen ratlines almost done Have the fore topmast shrouds in place and secured And I have the main top mast in place and the shrouds and Burton pendants in place "ready to rig". The upper deadeyes are not yet glued in place but held in place by friction between the shroud and the pre-made seizing. With any luck I can CAREFULLY adjust the length after the lanyards are in place to get the deadeyes lined up and the shrouds still taut. For the main (and mizzen) top mast shrouds I decided a single jig would suffice as making the "four place" jig for he foremast was a real pain I did not want to repeat. Here is the jig in place with the shroud "cinched" to the deadeye. I will start the next round of ratlines after I get the mizzen (and their futtock shrouds done. The fun never stops.


- 422 replies
-
- 9
-
-
- Vanguard Models
- Sphinx
- (and 1 more)
-
Mizzen shrouds (and shroud cleats) completed. Also installed the fore top mast, checked alignment with laser and secured to mast cap and trestle trees. Fabbed the top mast shrouds and the "holders" for the top mast deadeyes. Ready to rig fore top mast shrouds when I get tired of lower shroud ratlines and such.


- 422 replies
-
- 7
-
-
- Vanguard Models
- Sphinx
- (and 1 more)
-
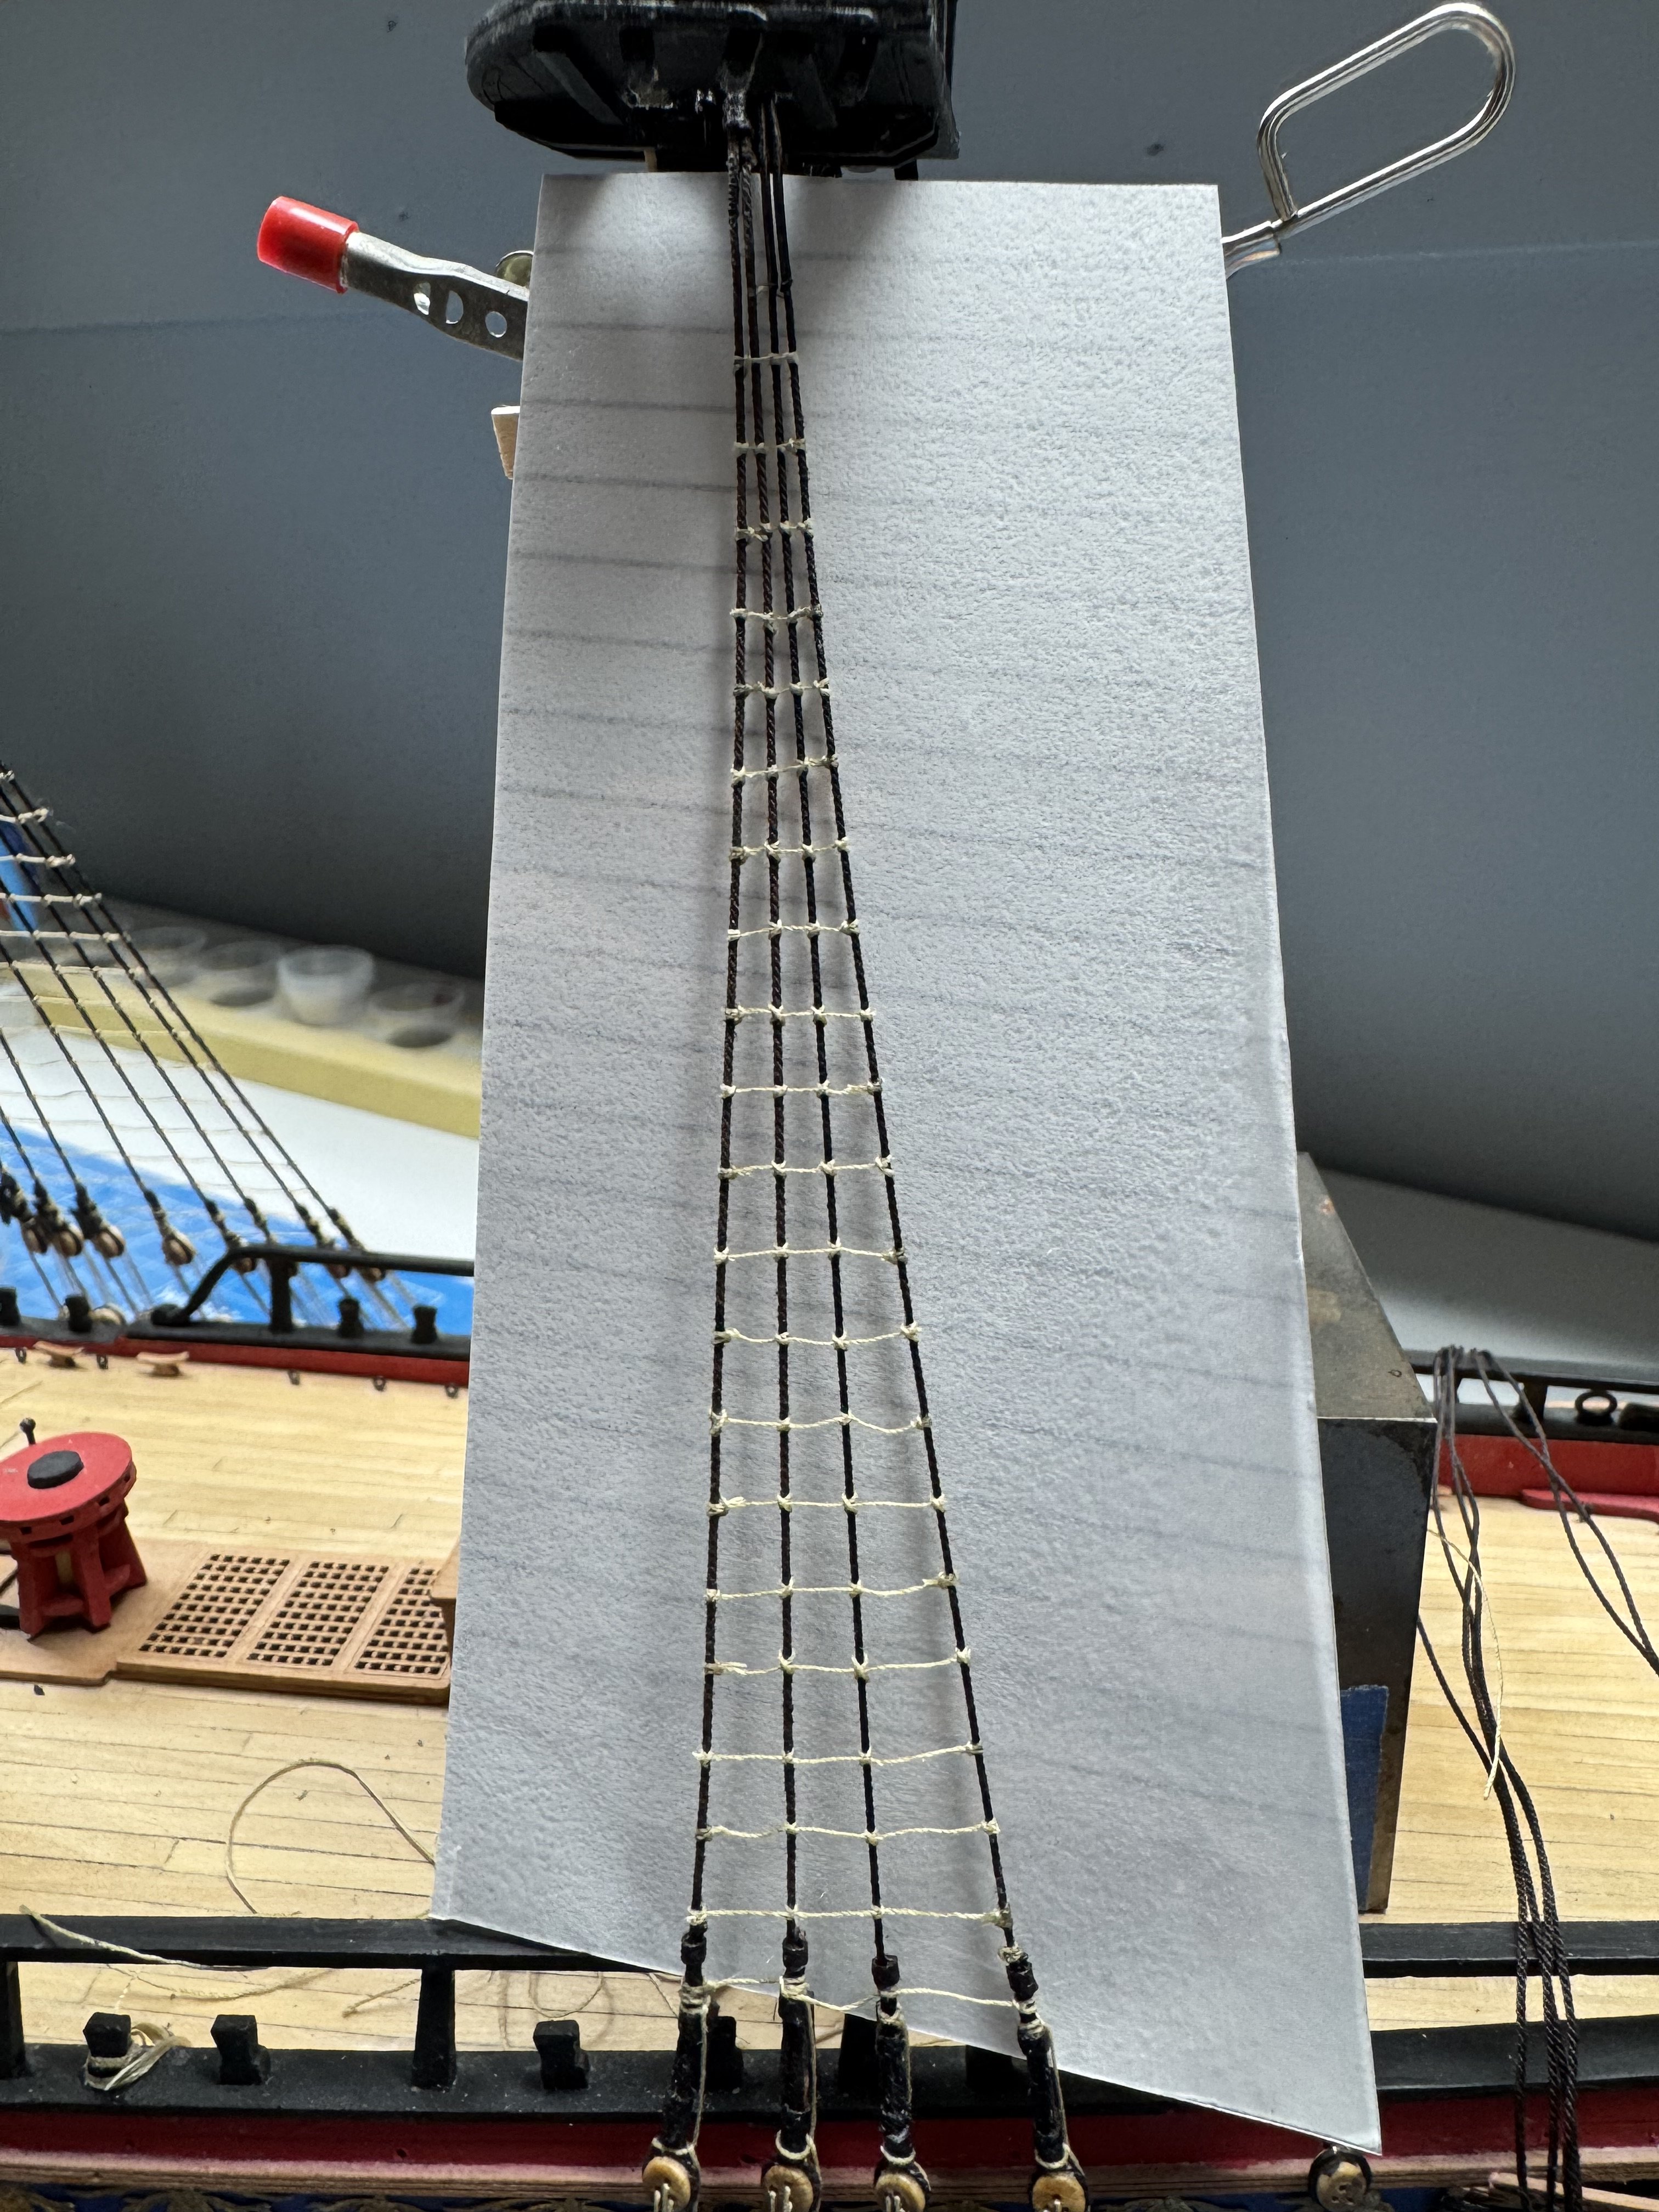
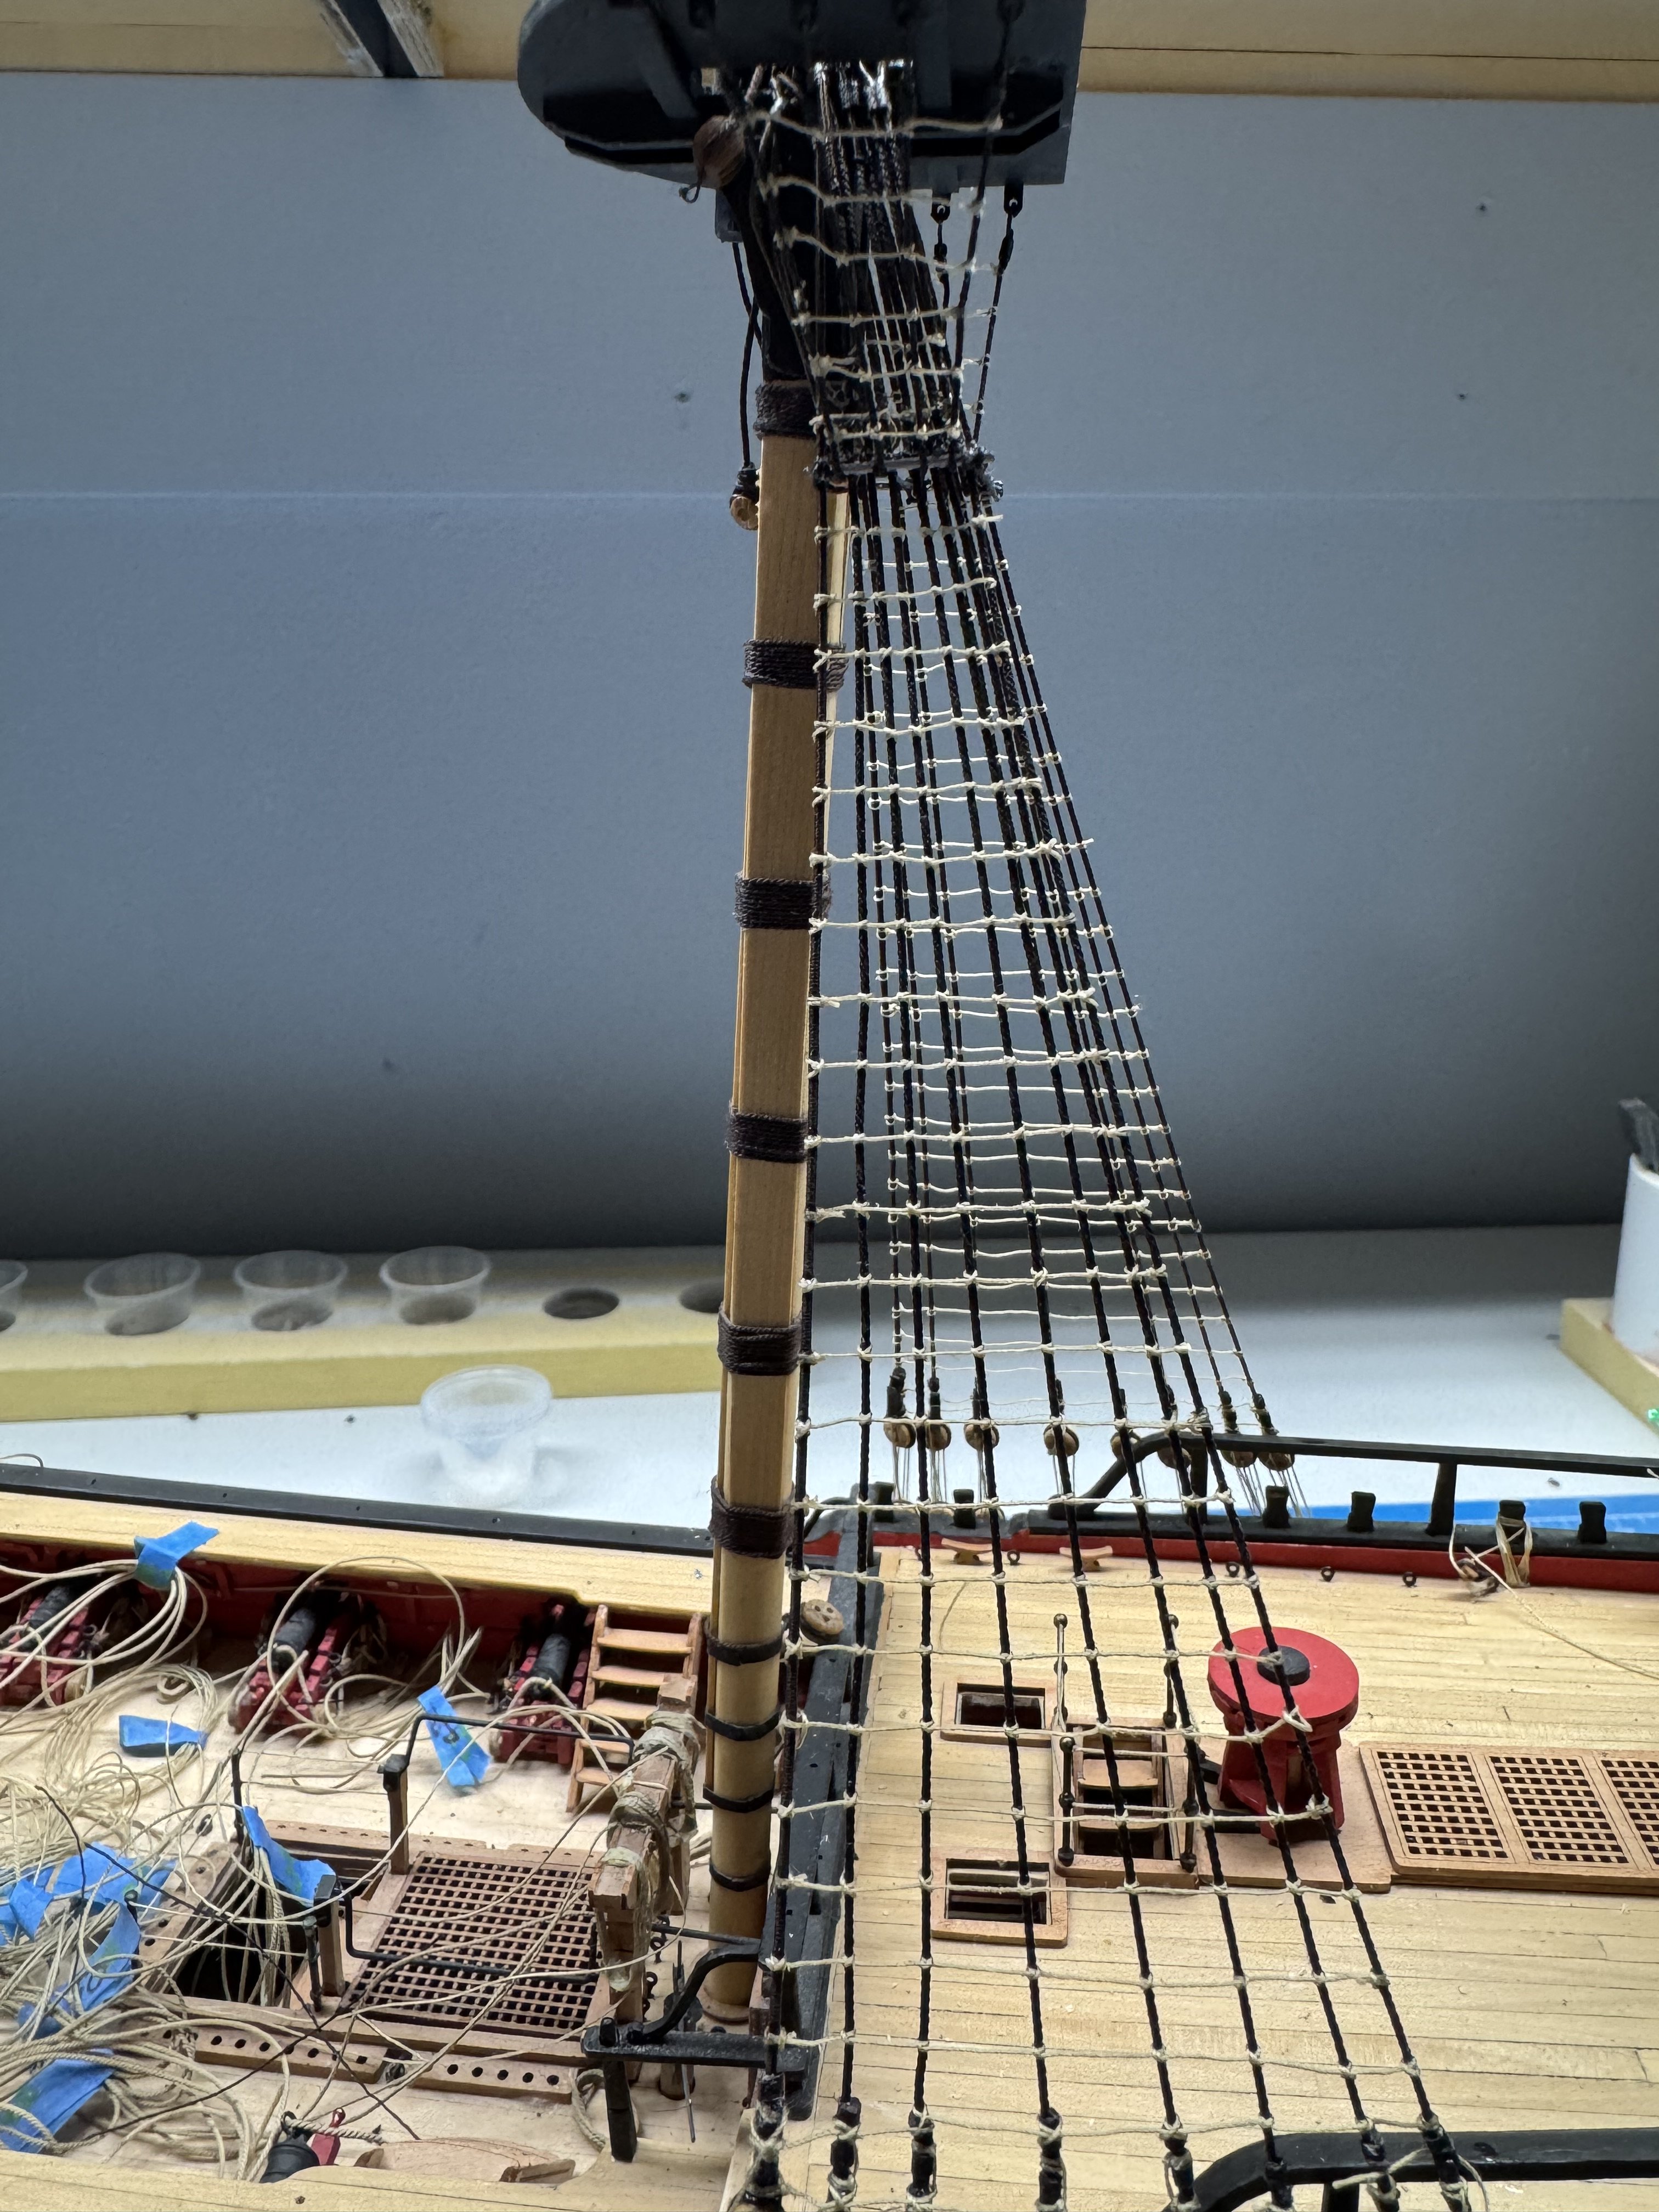
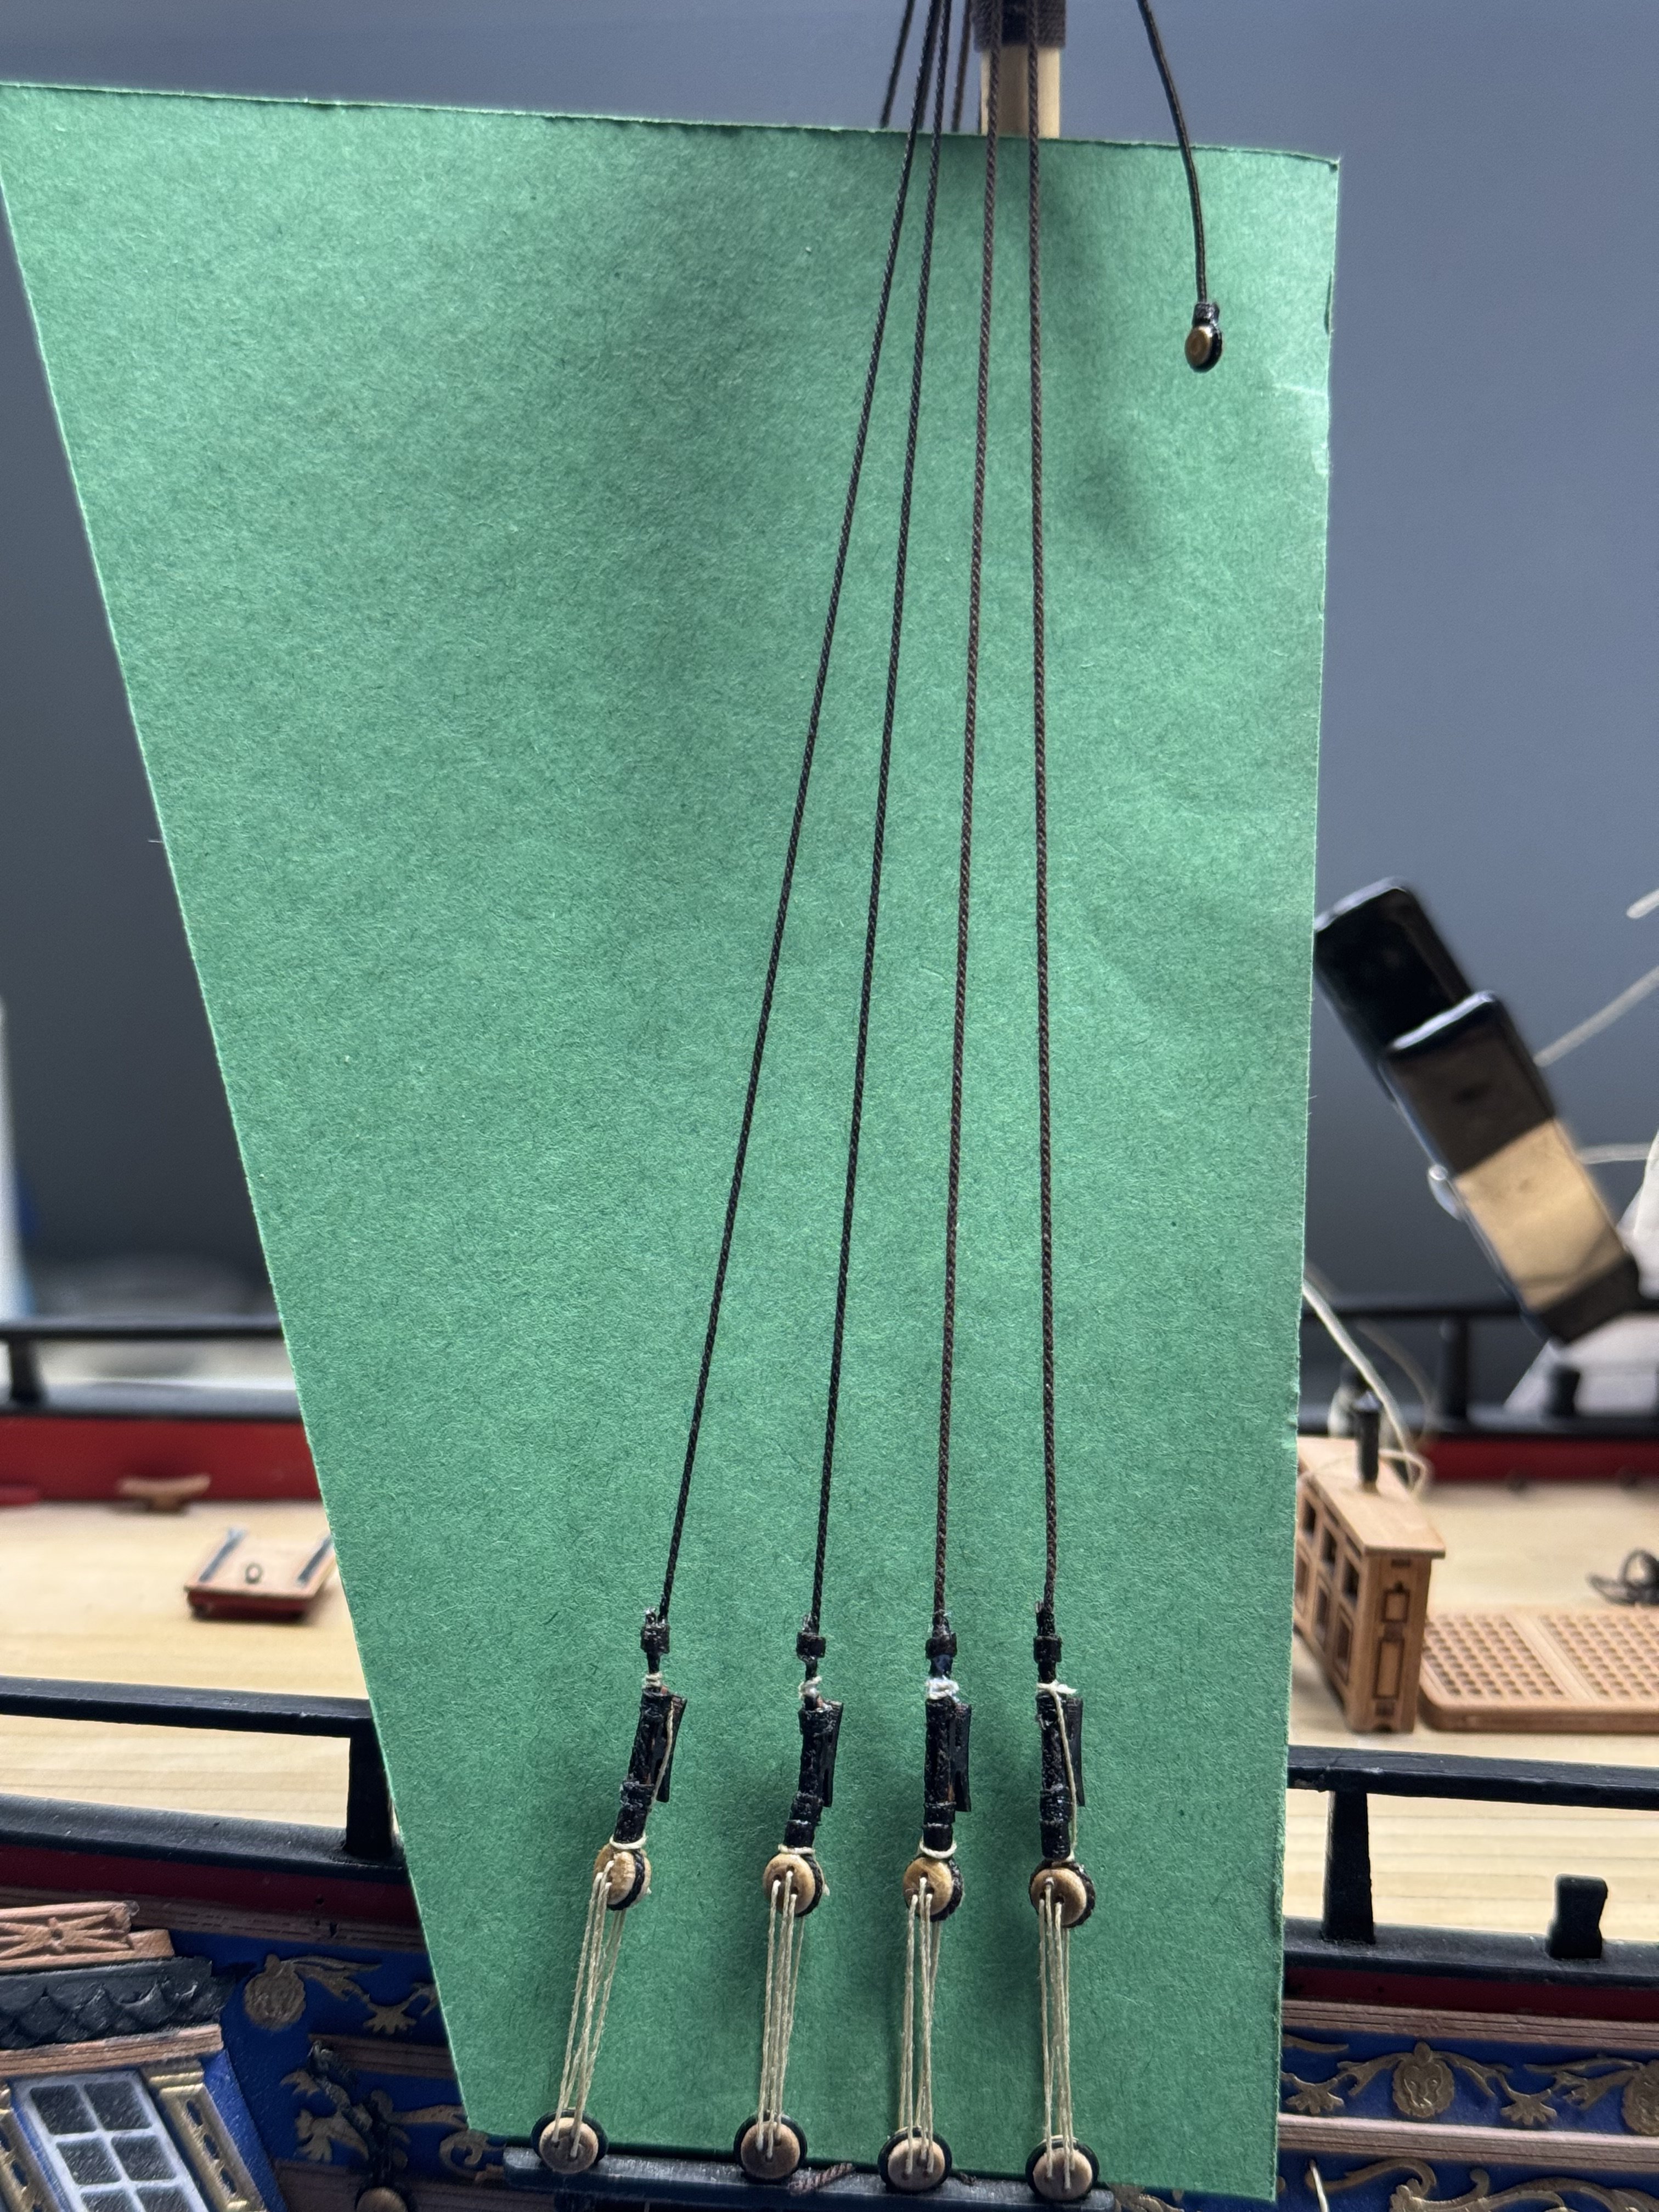
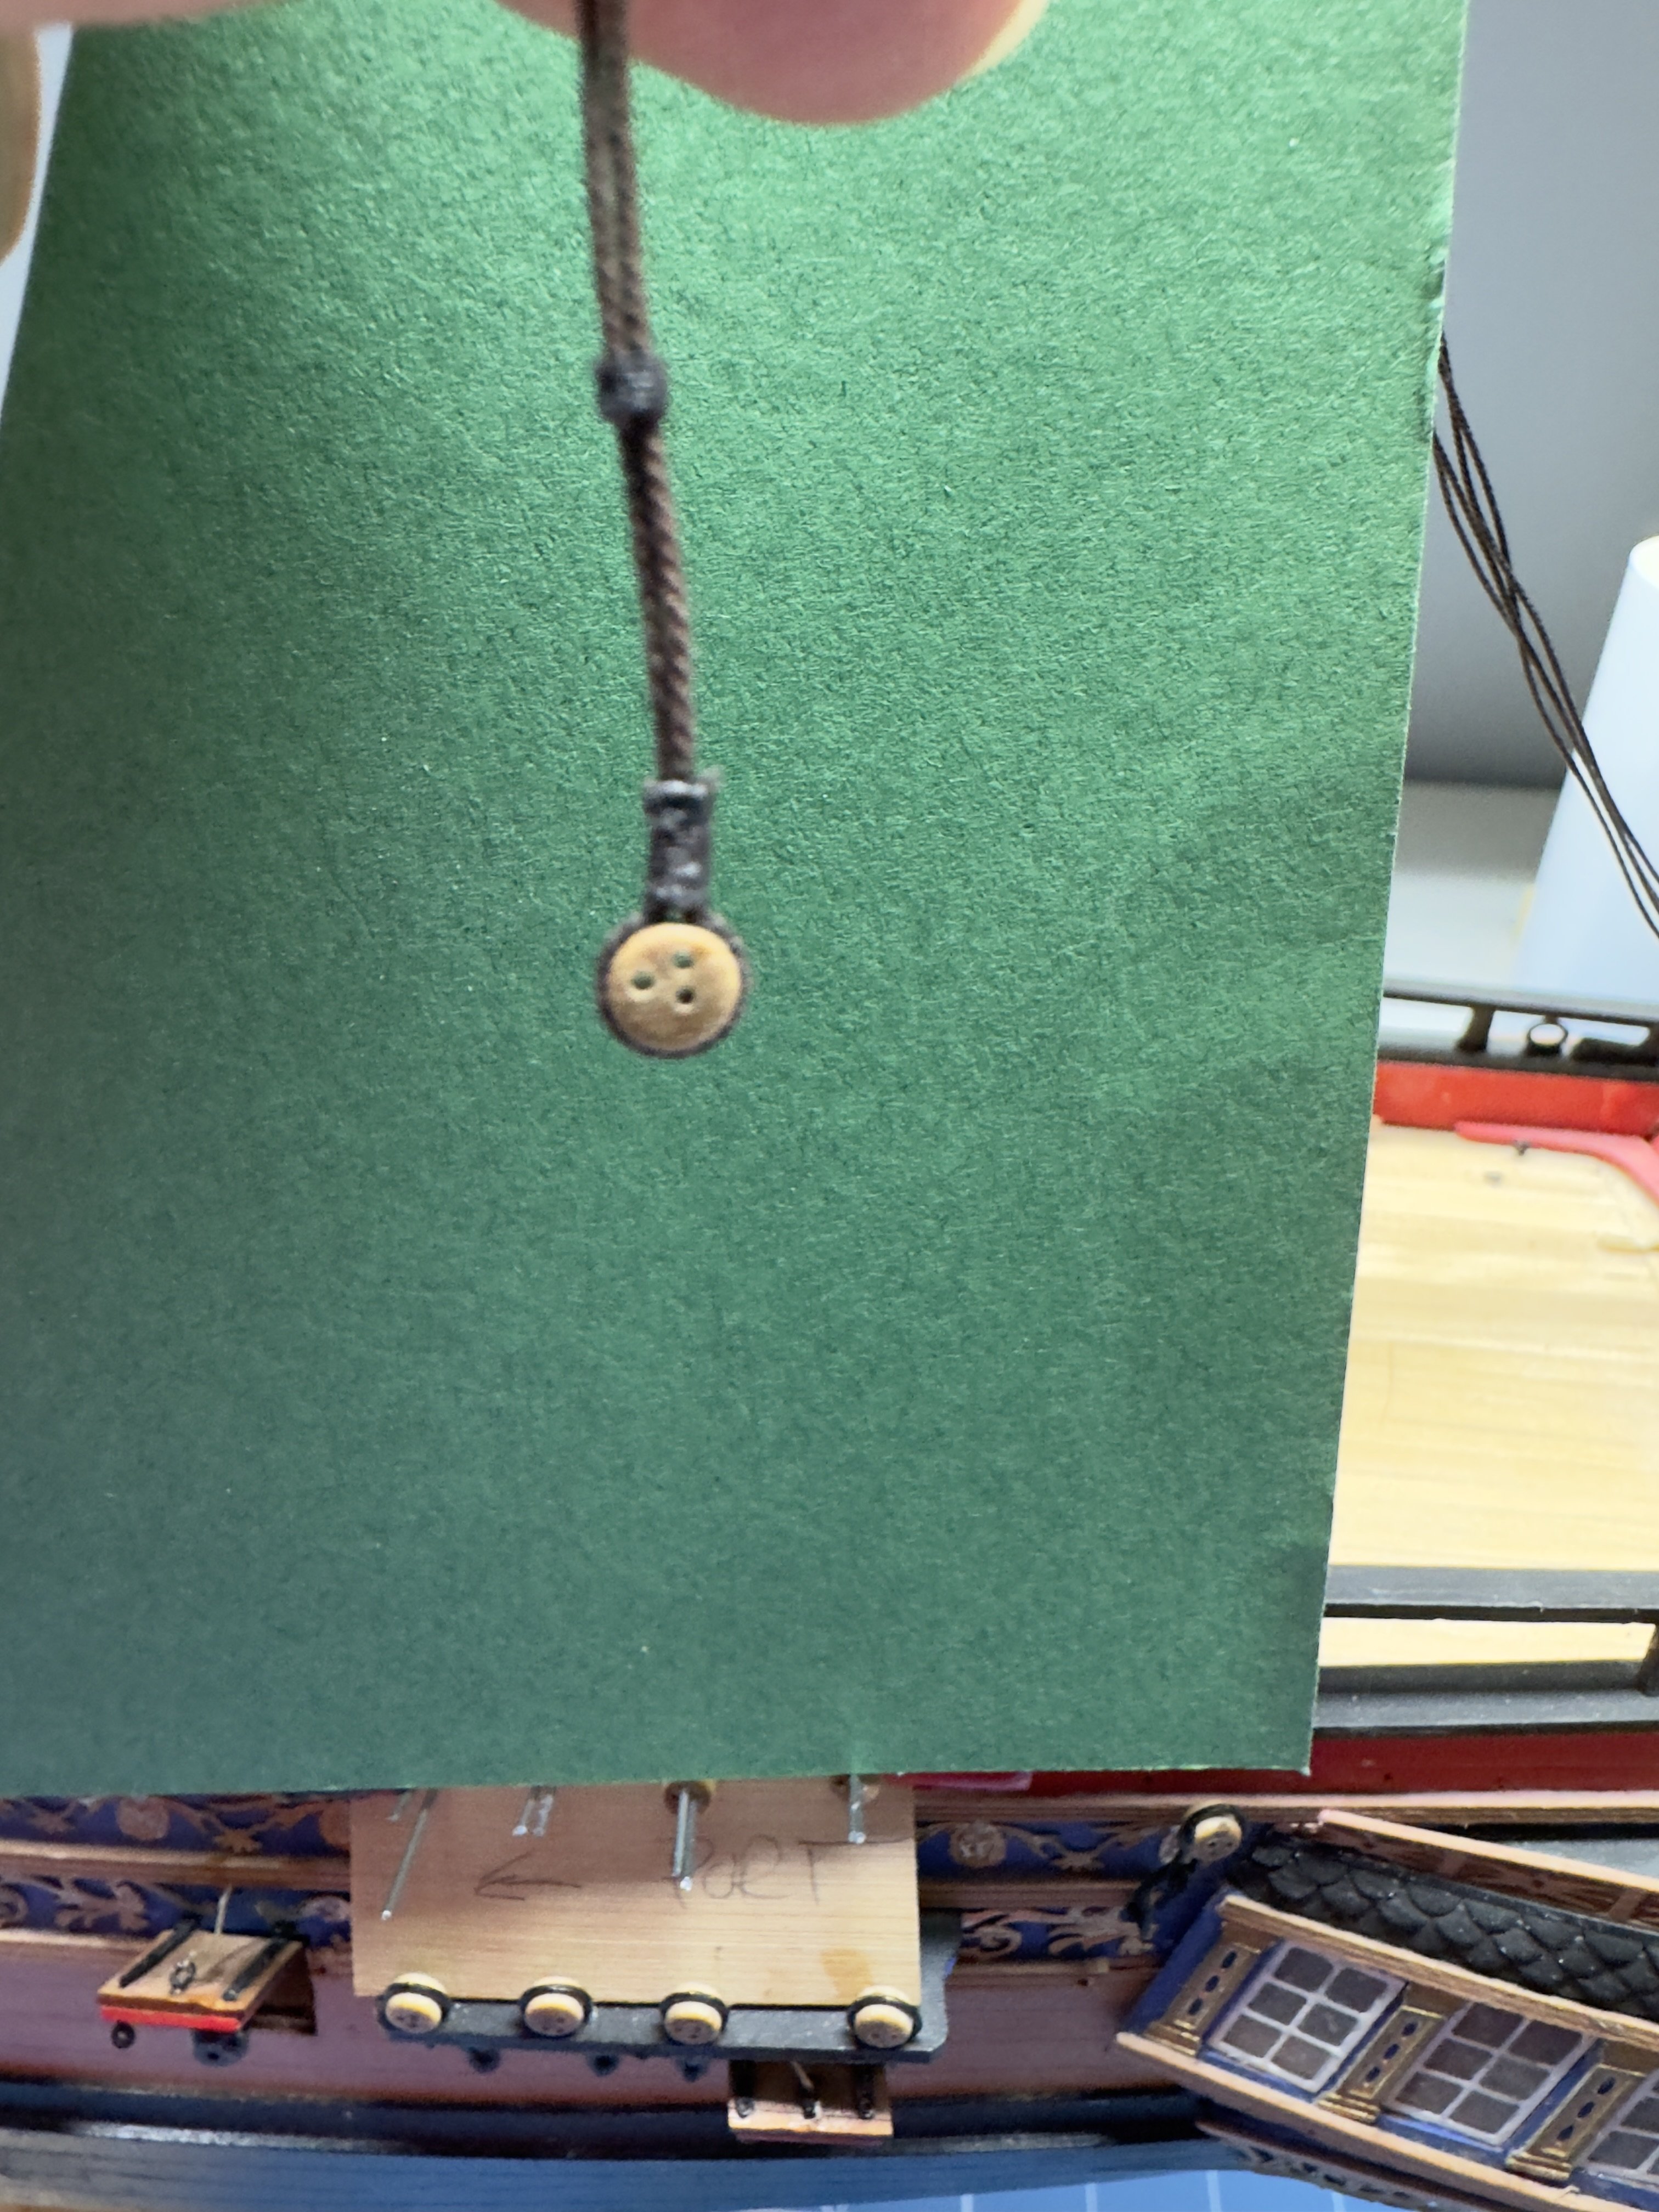
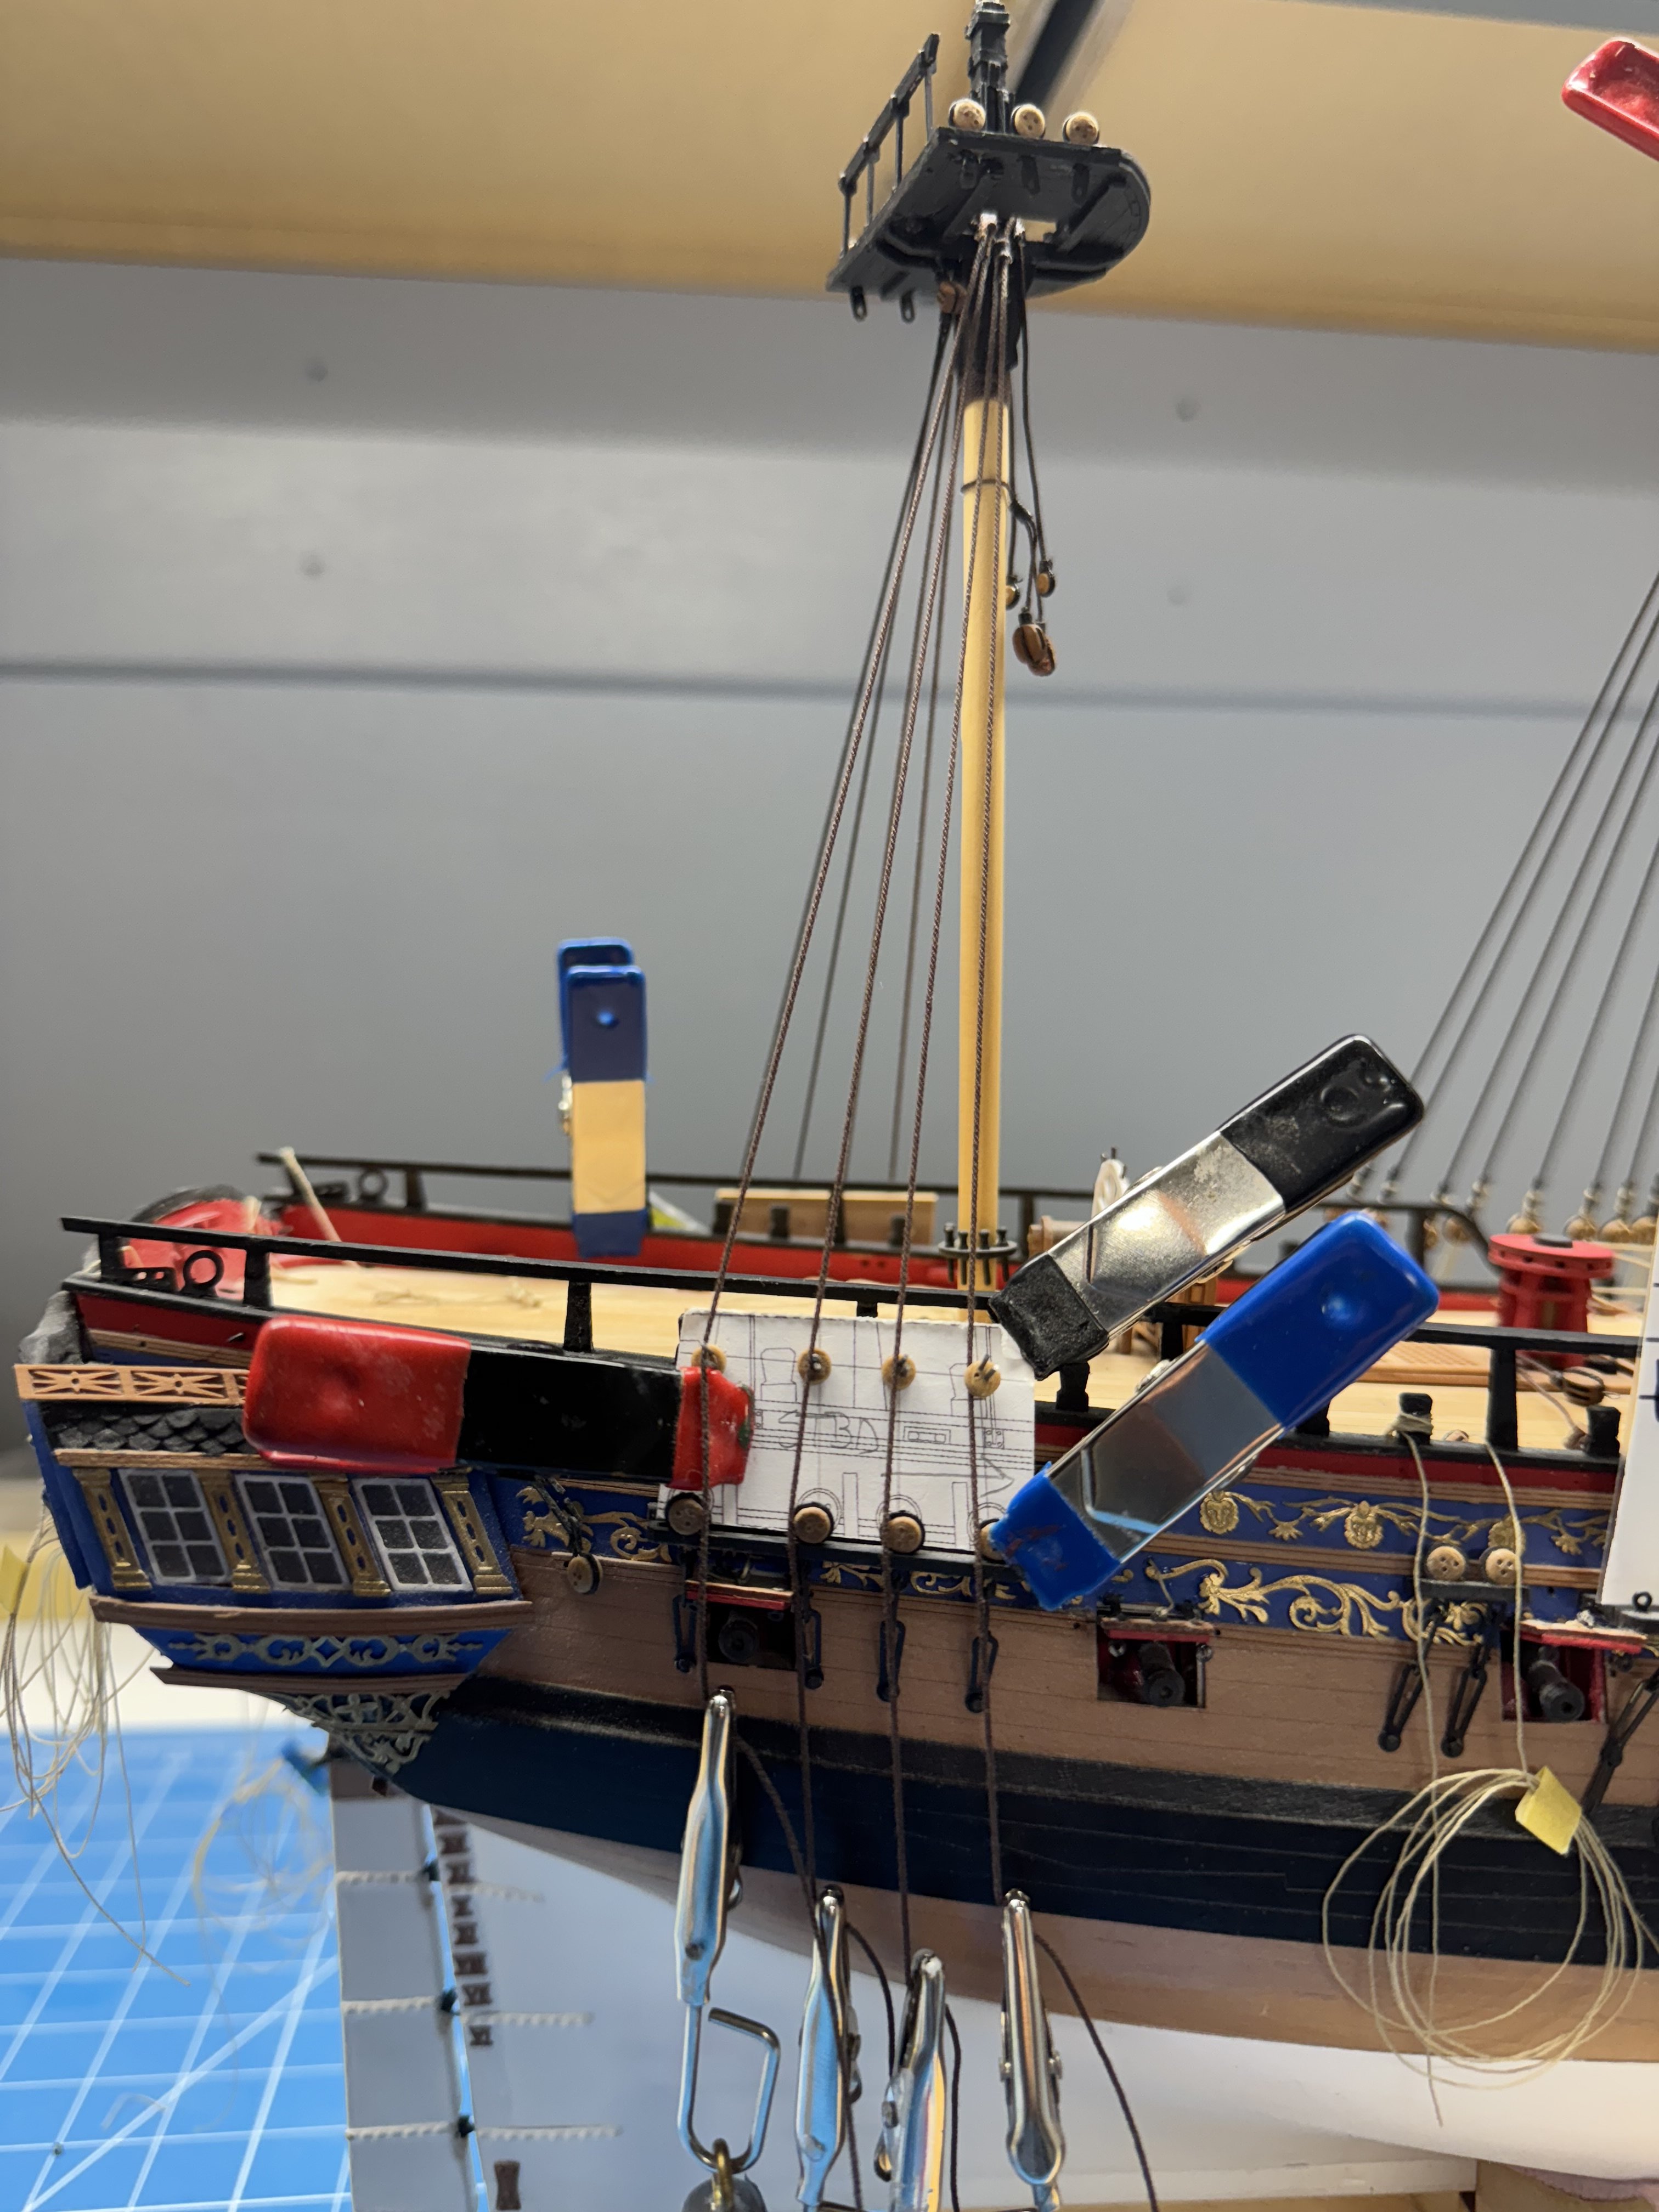
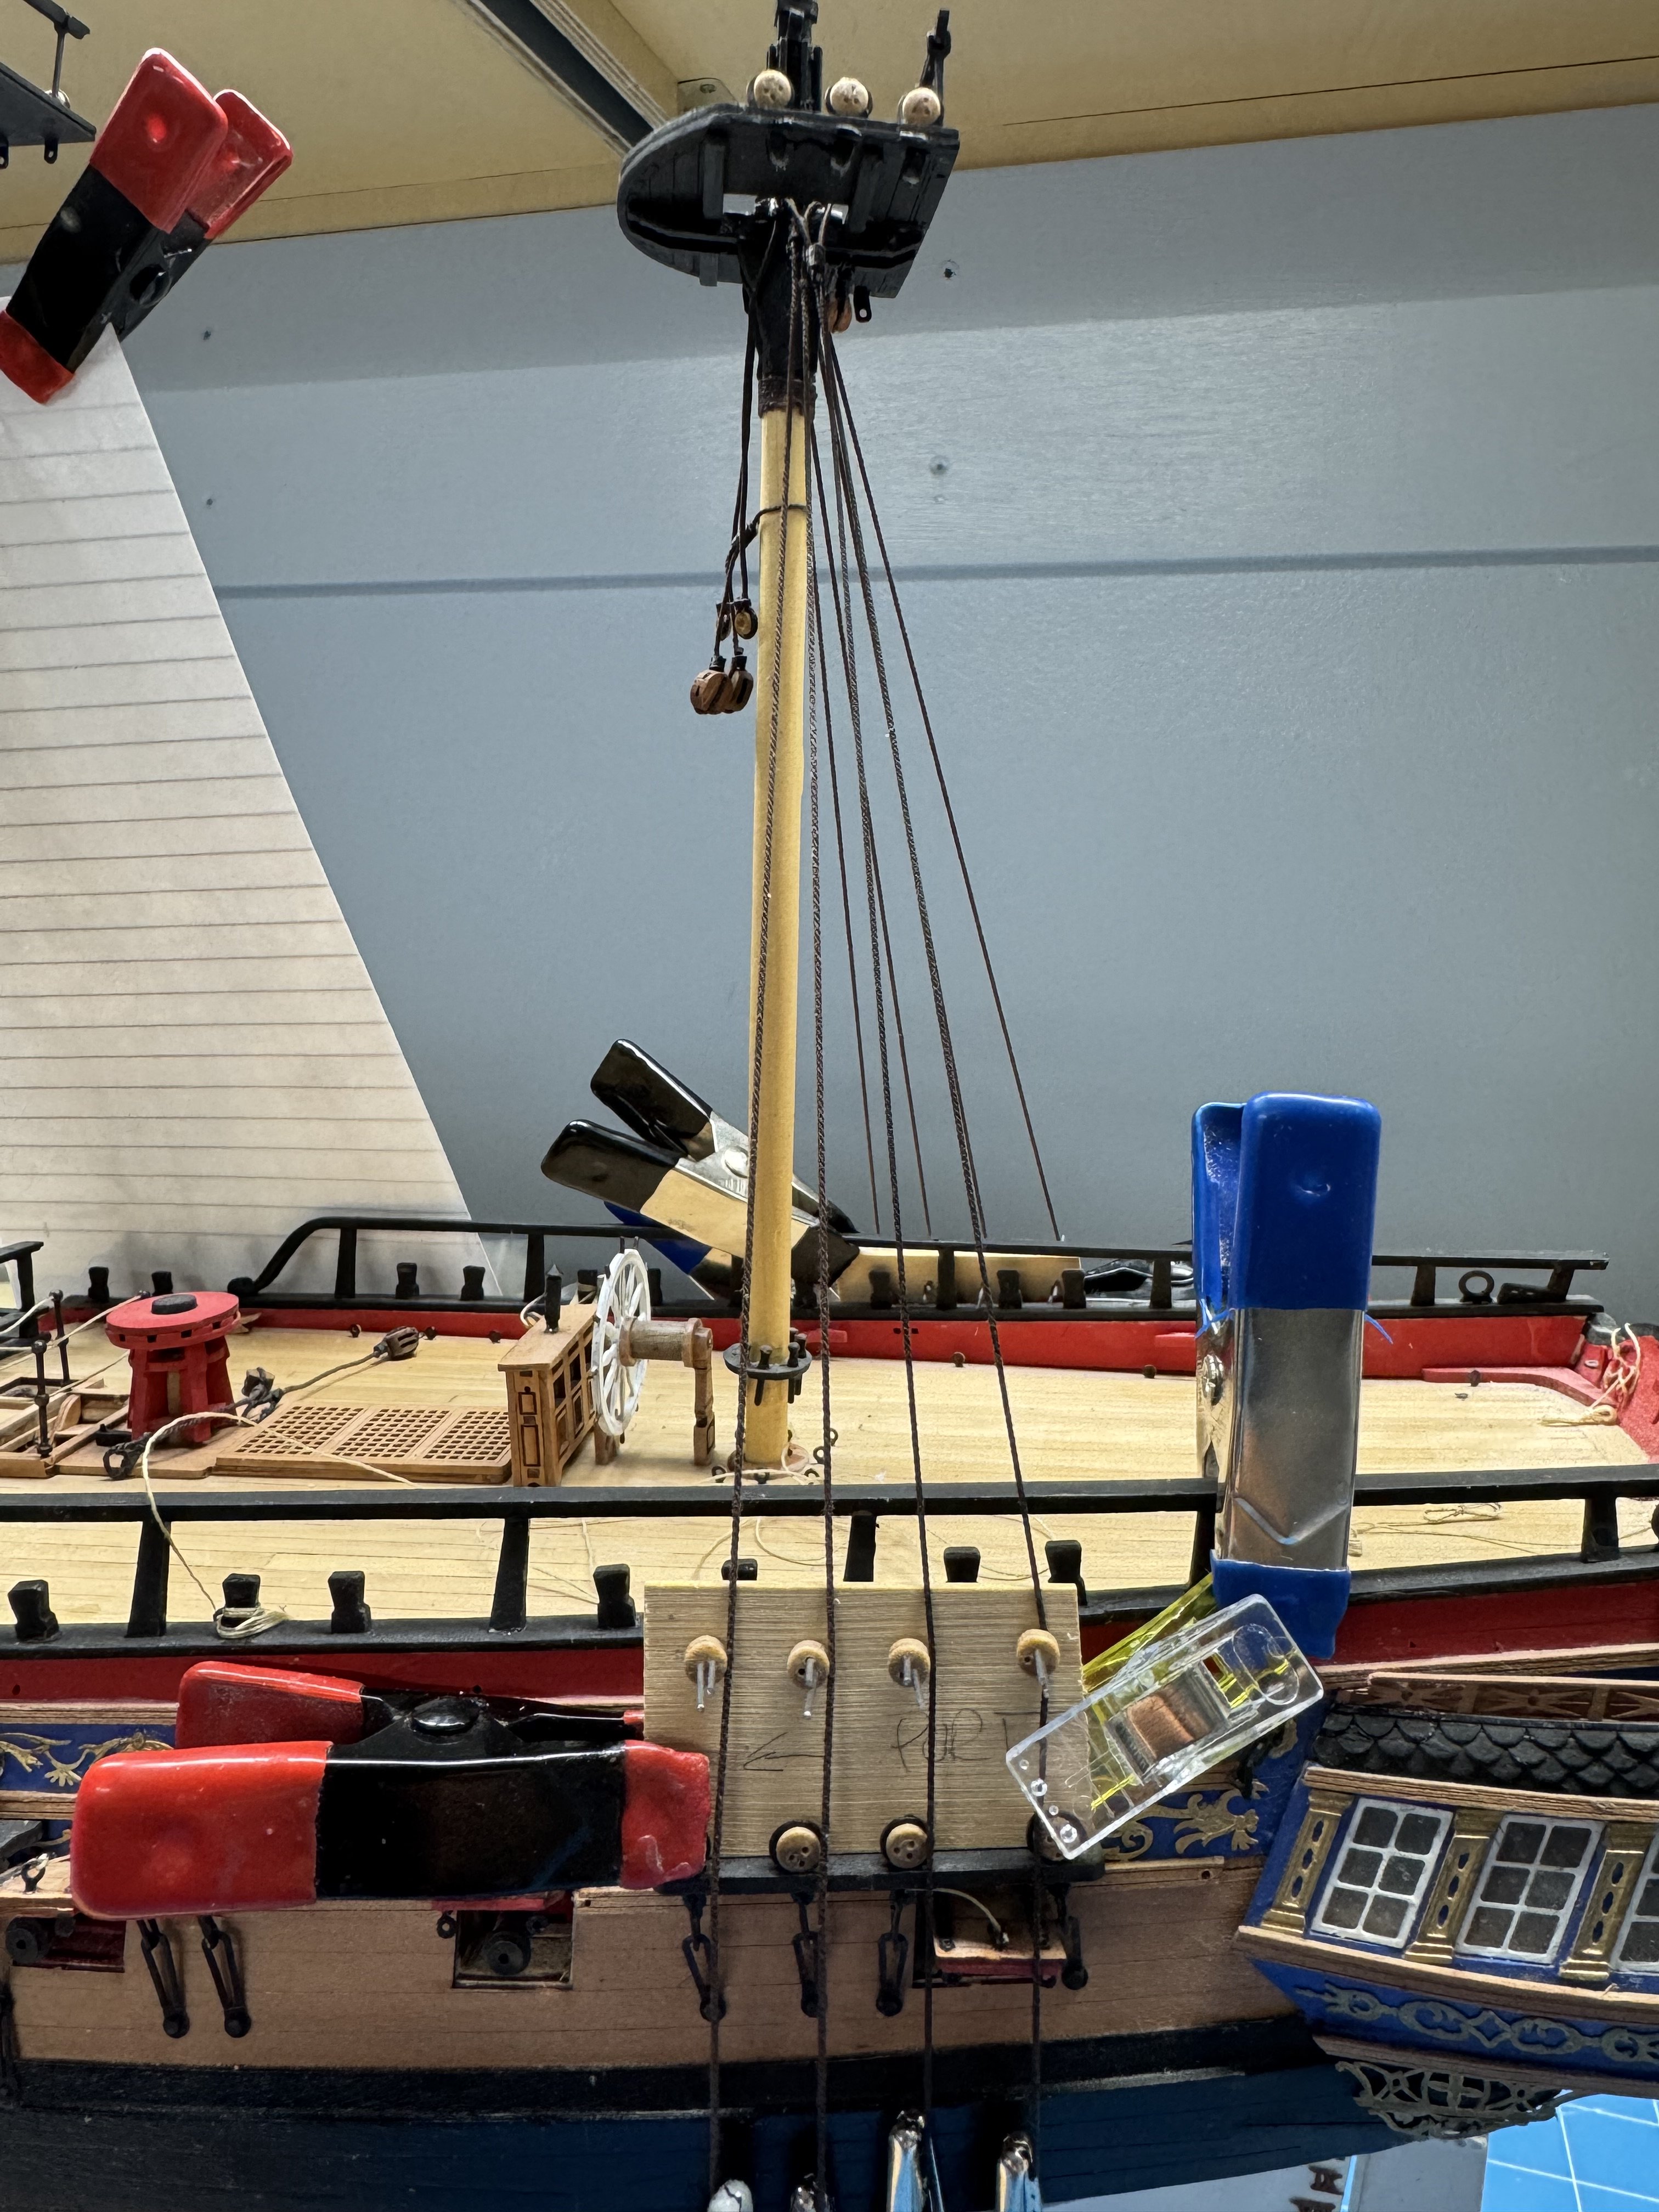
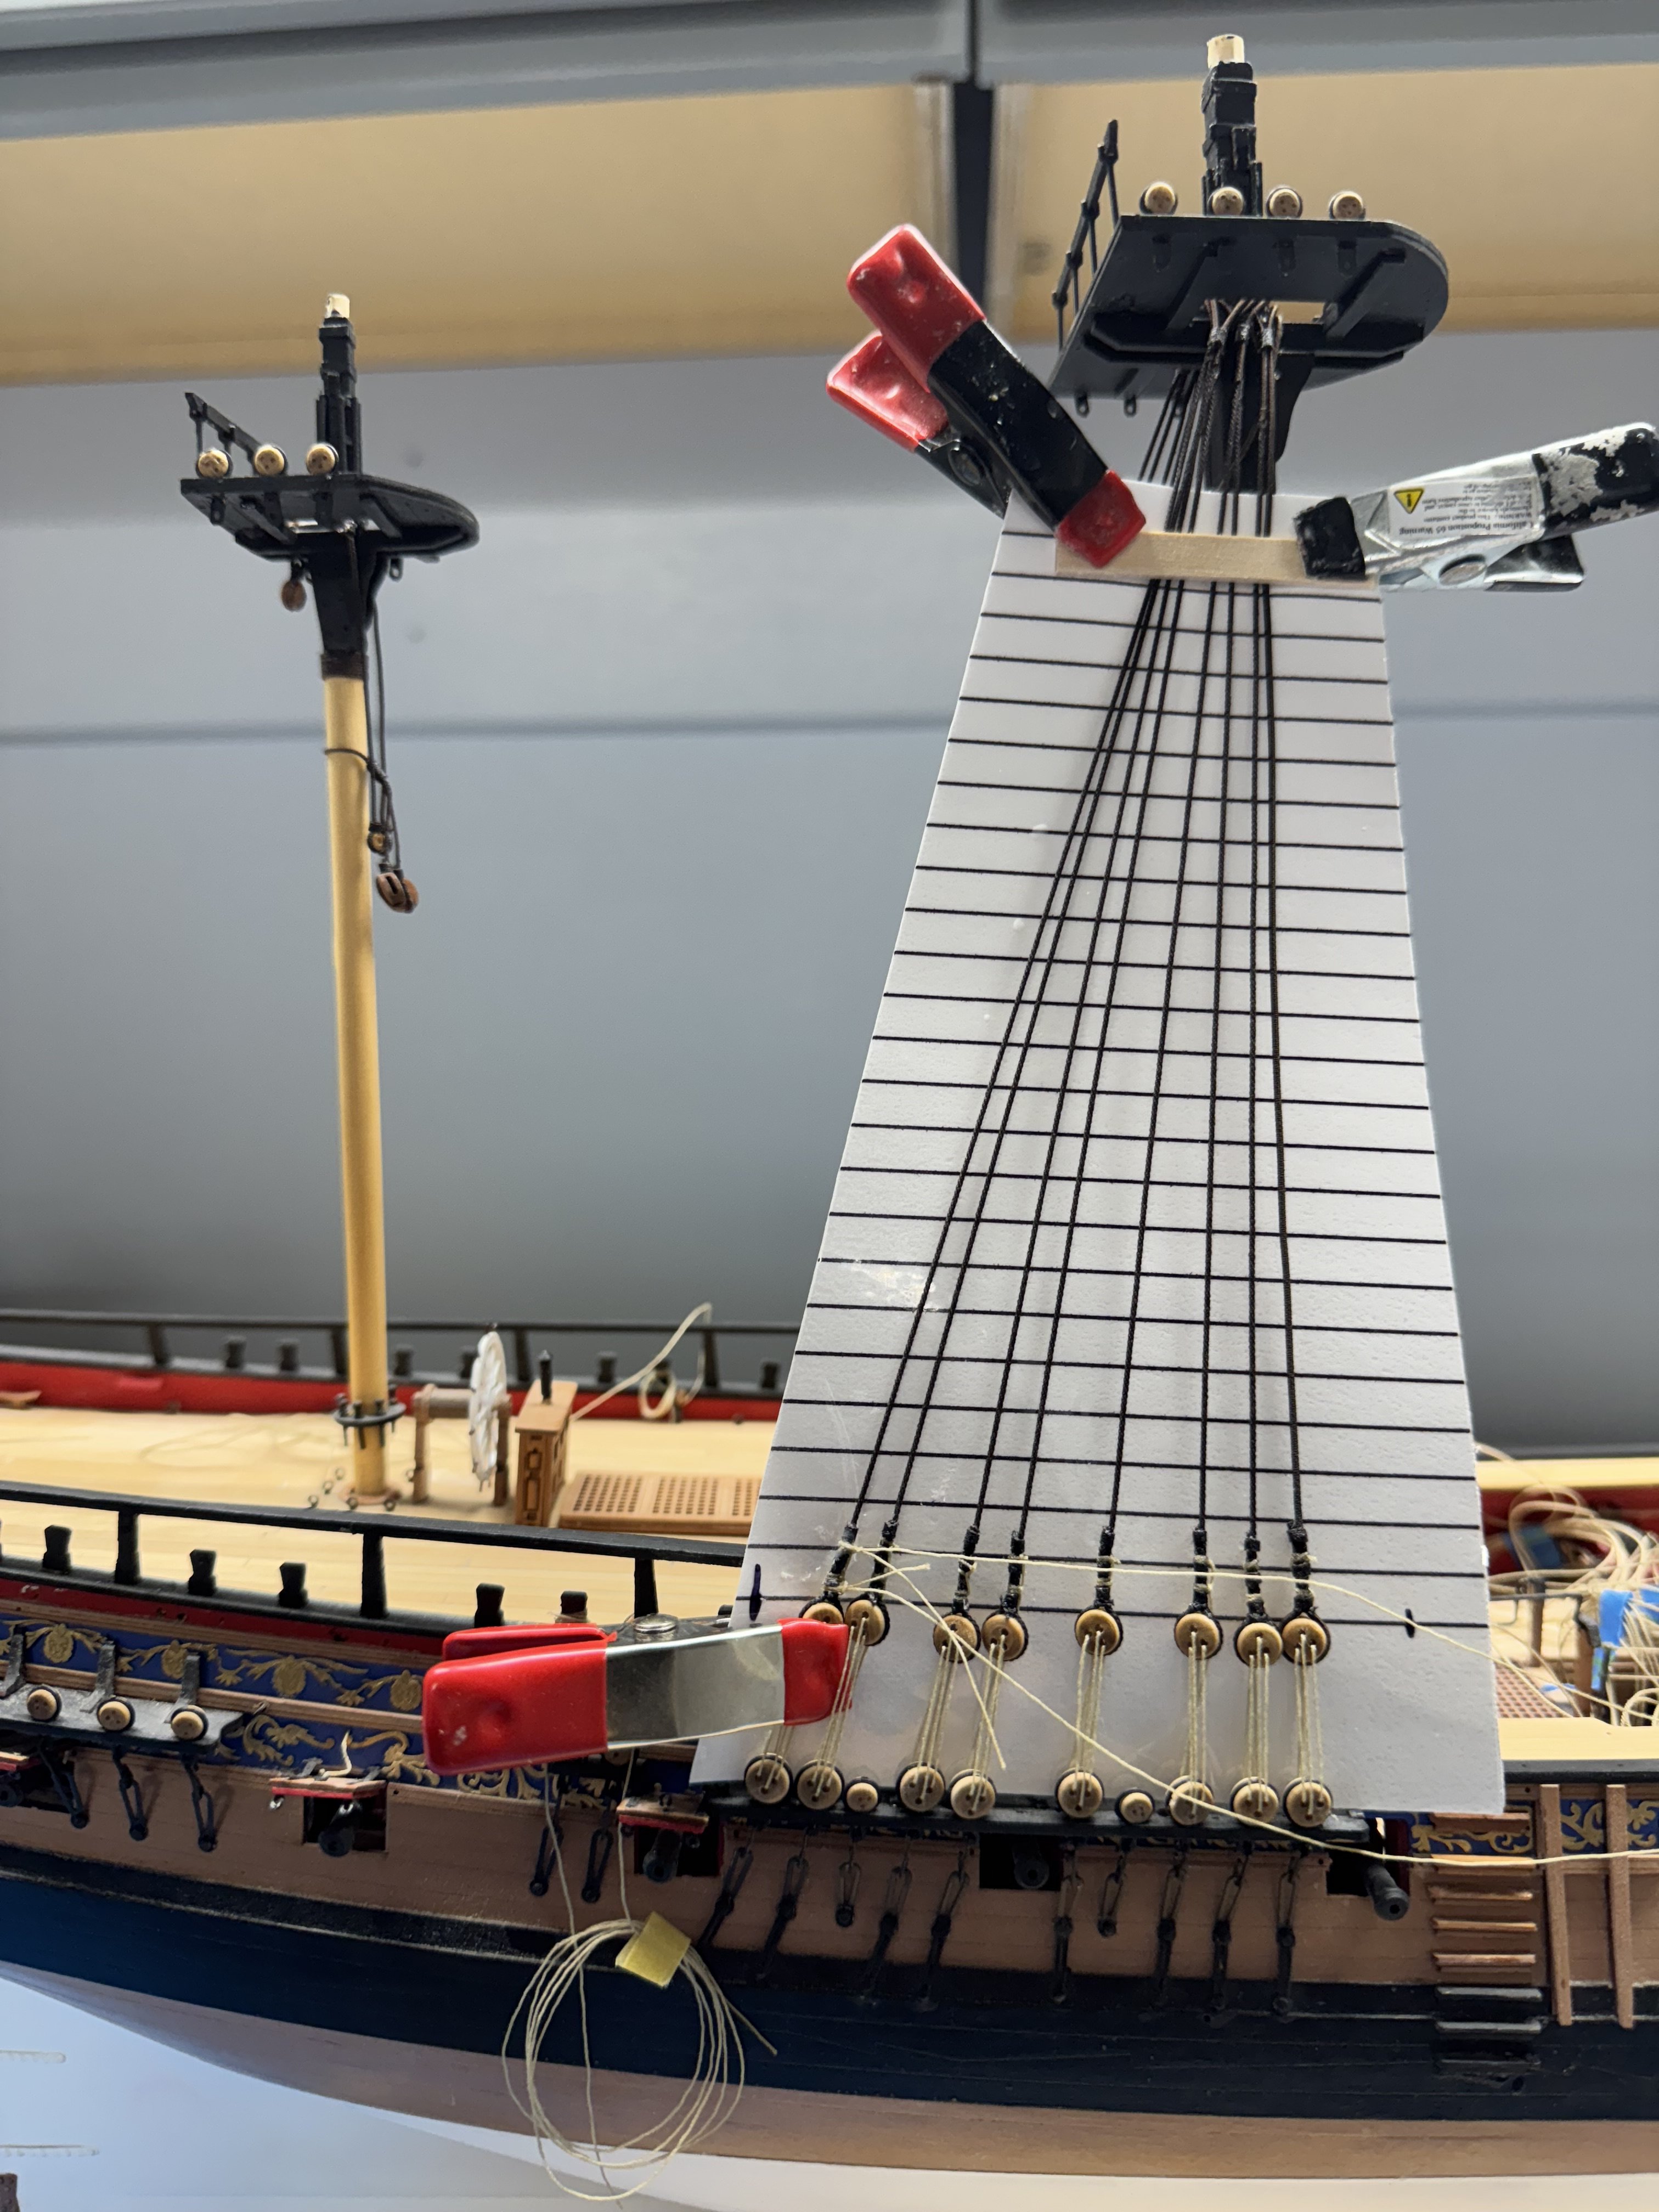
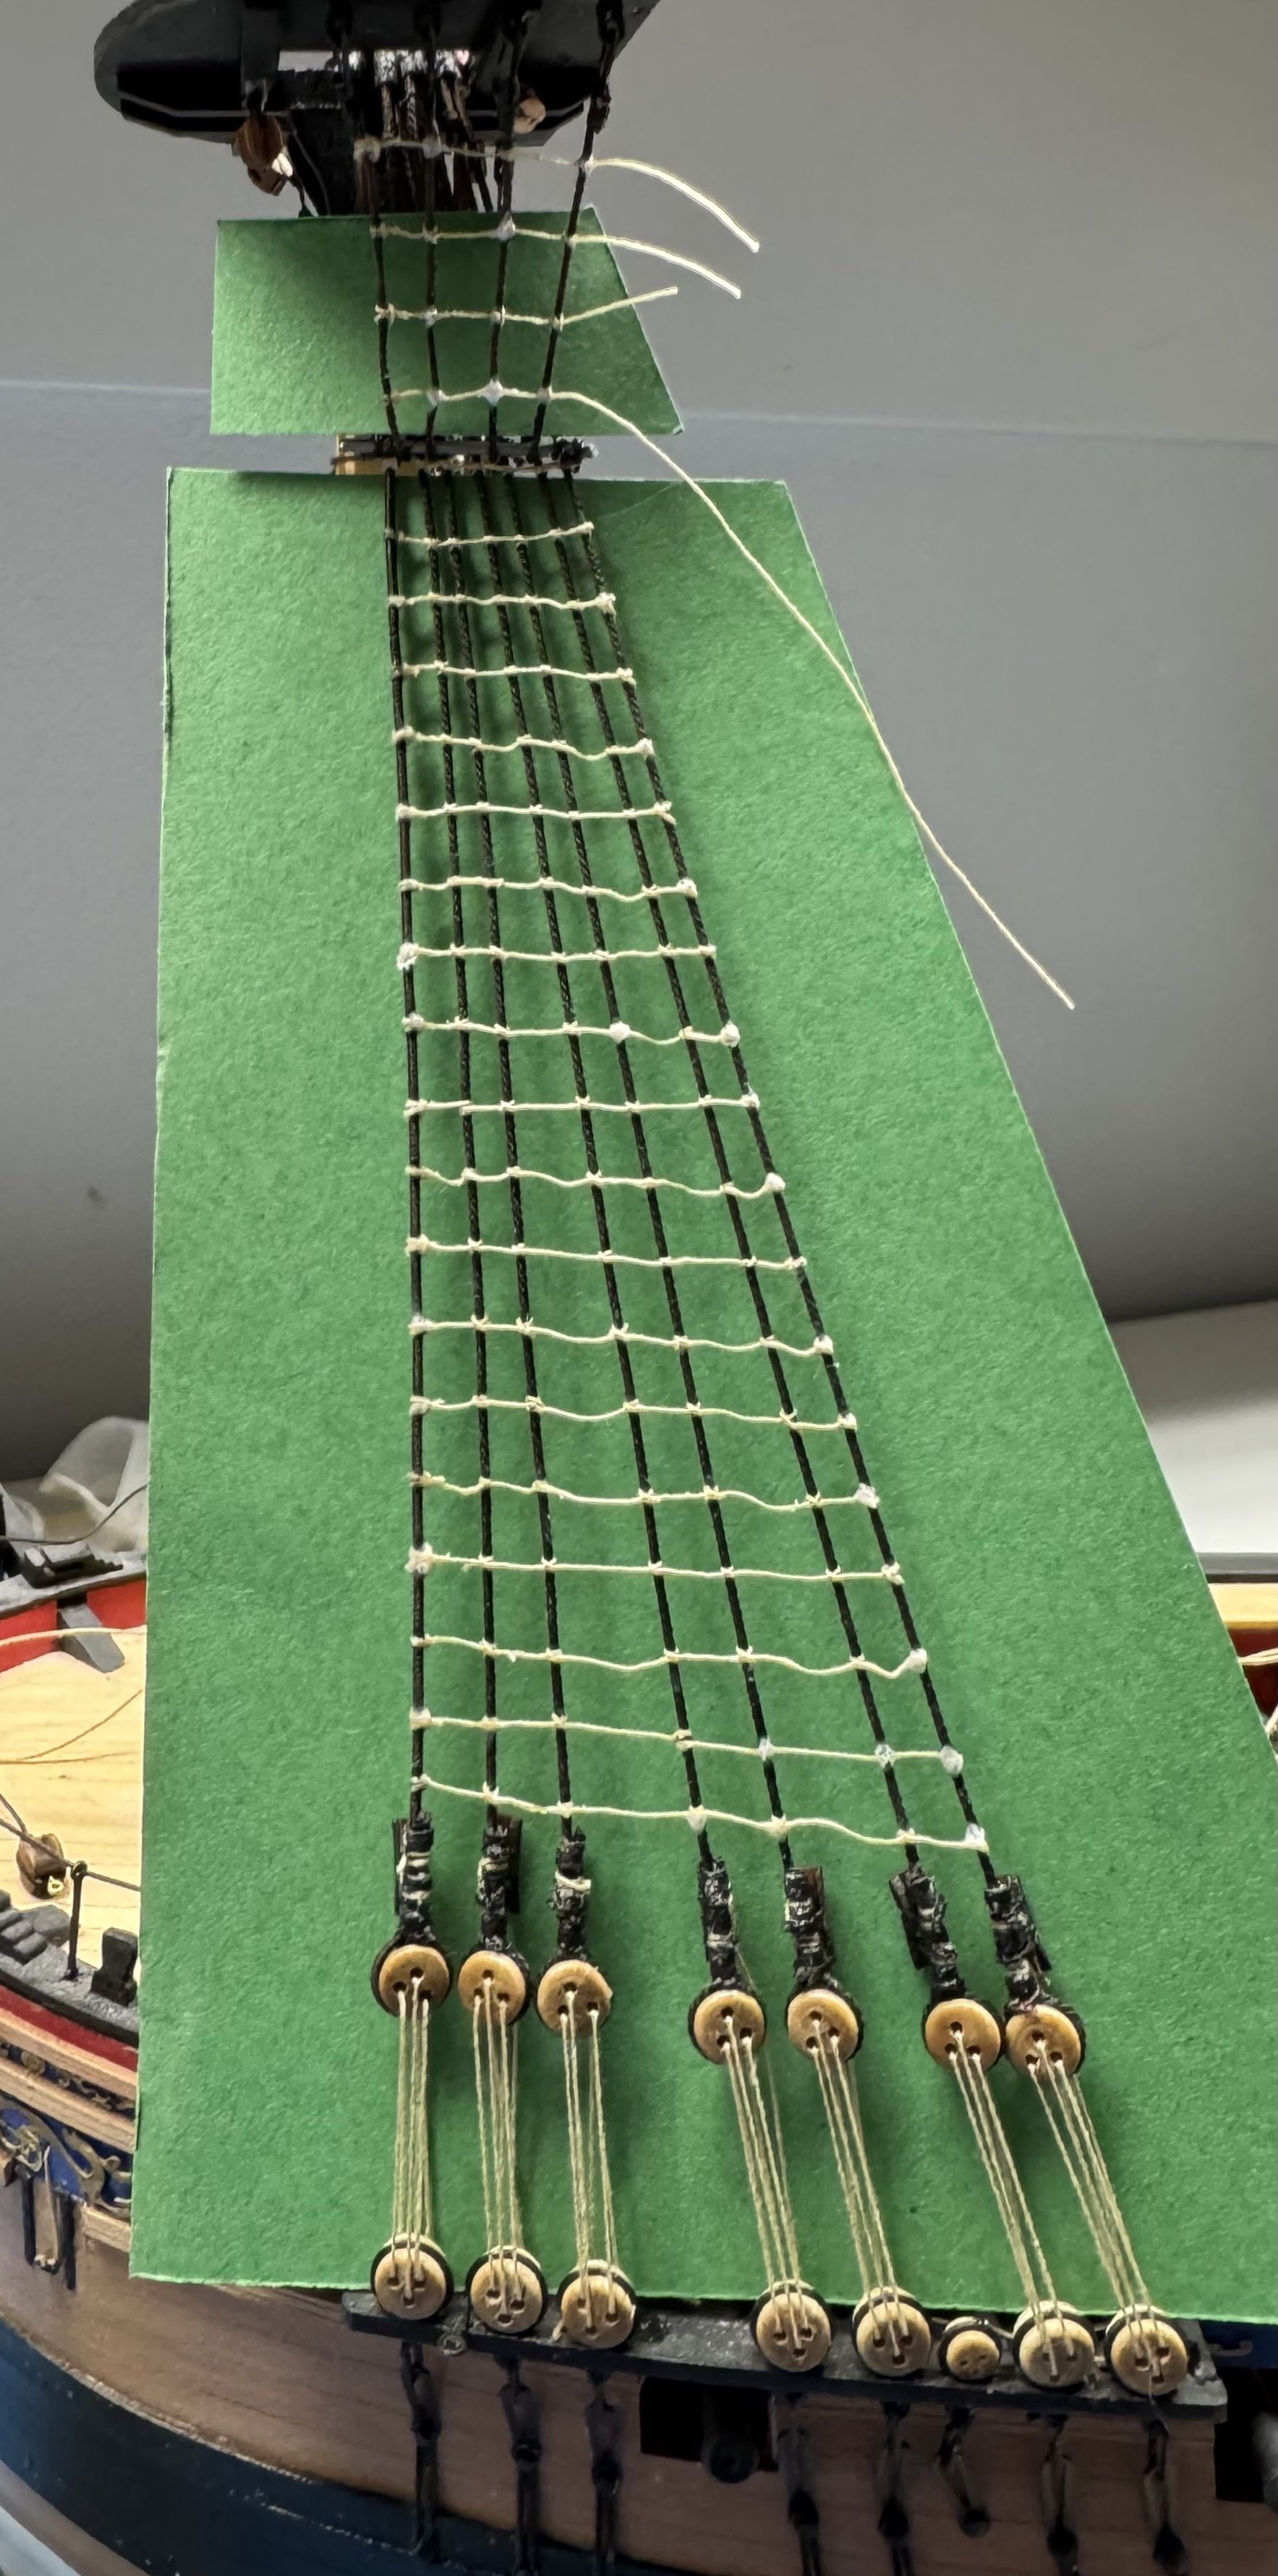
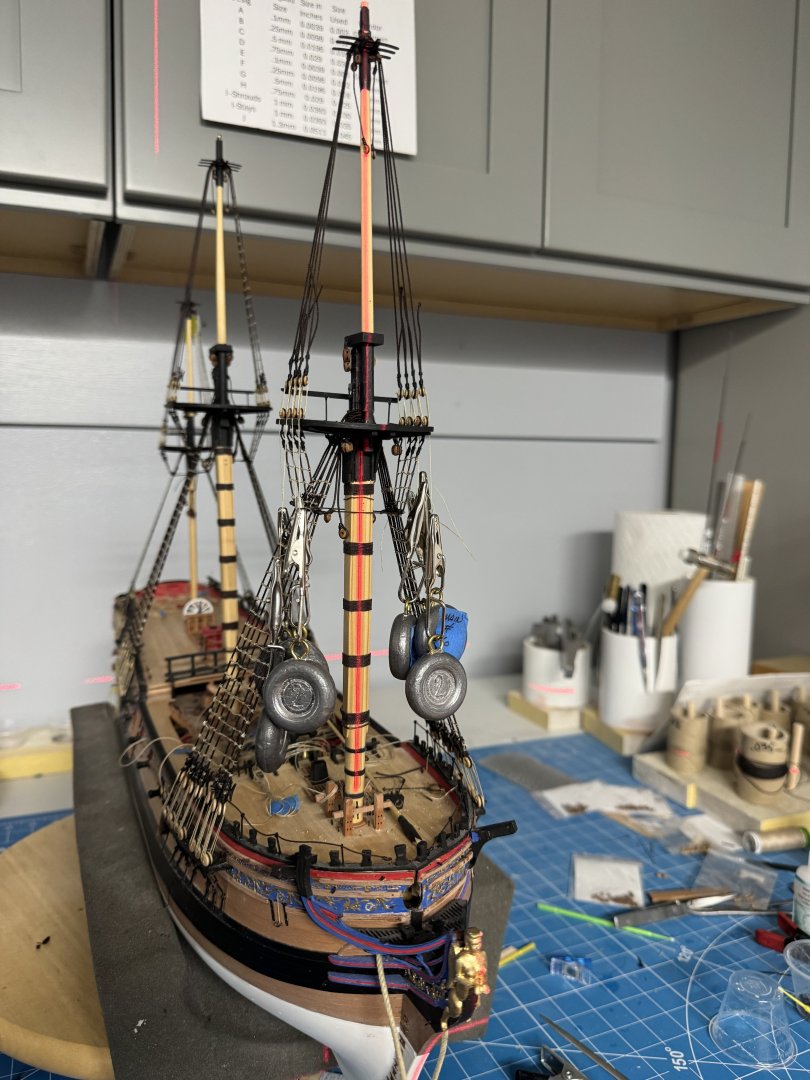
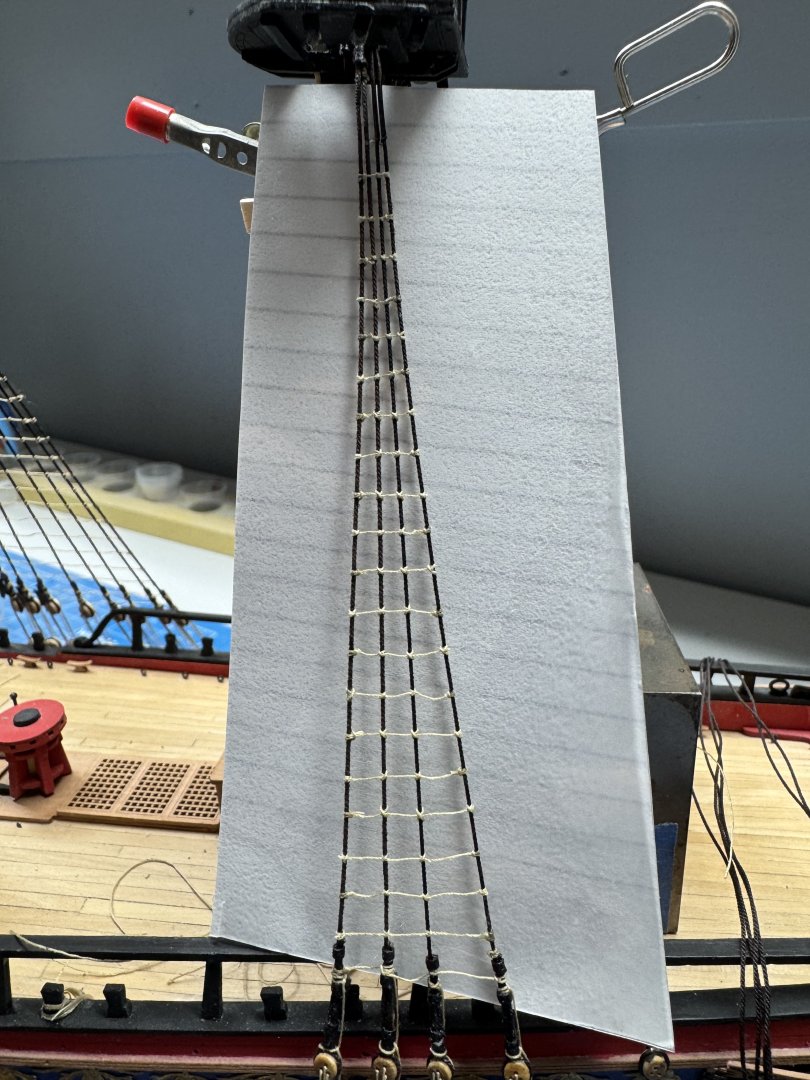
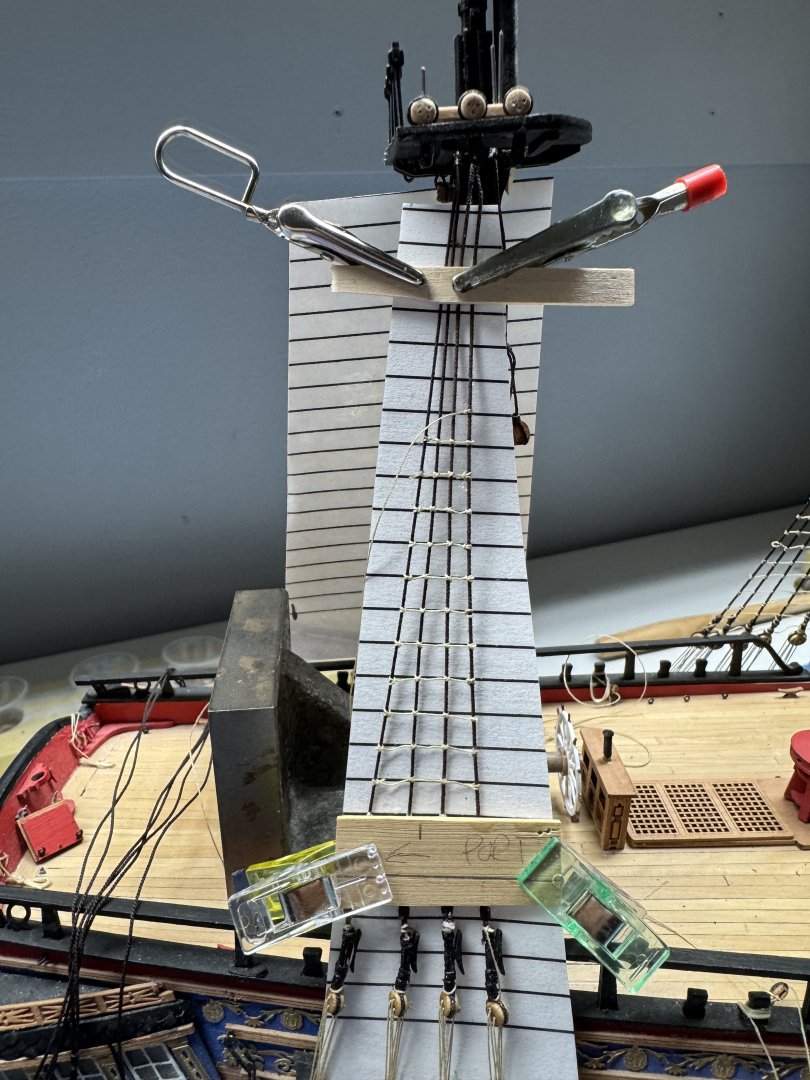
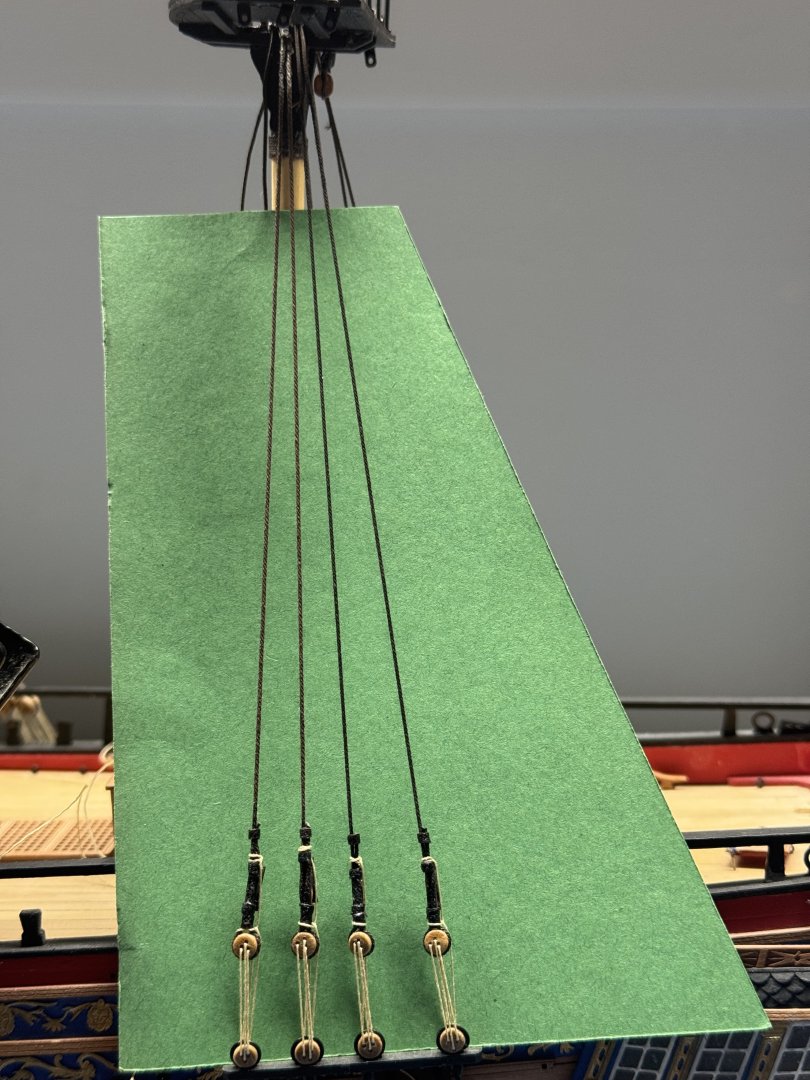
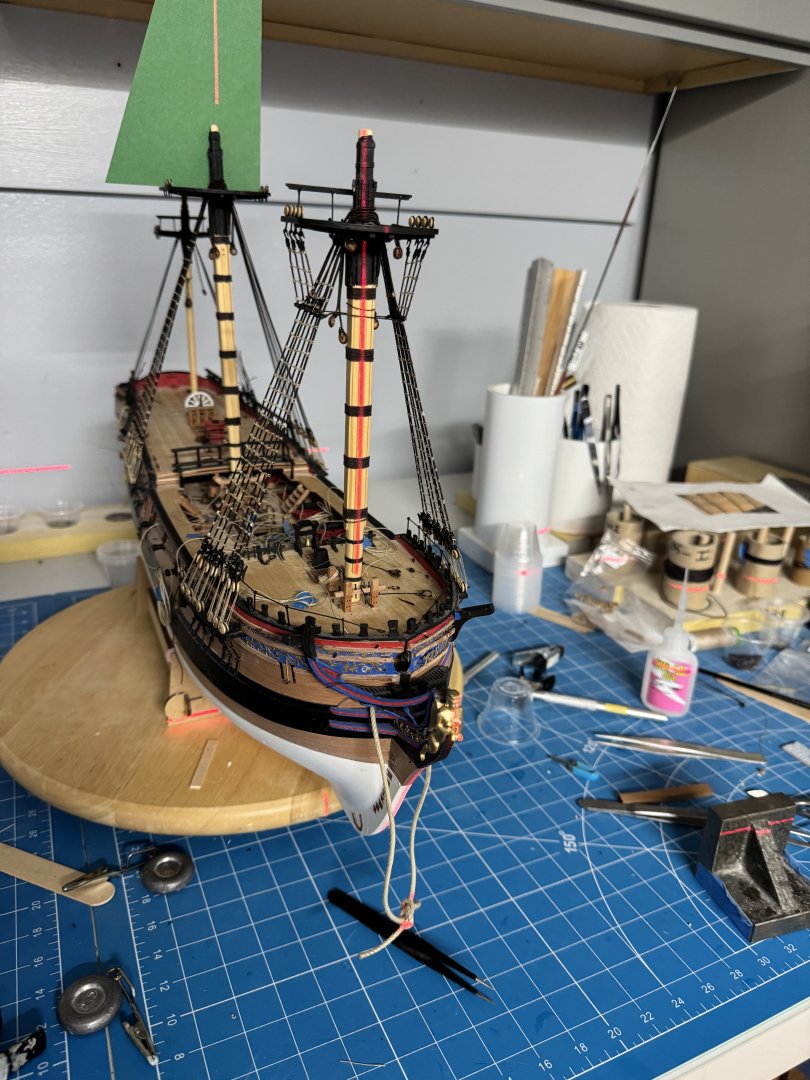
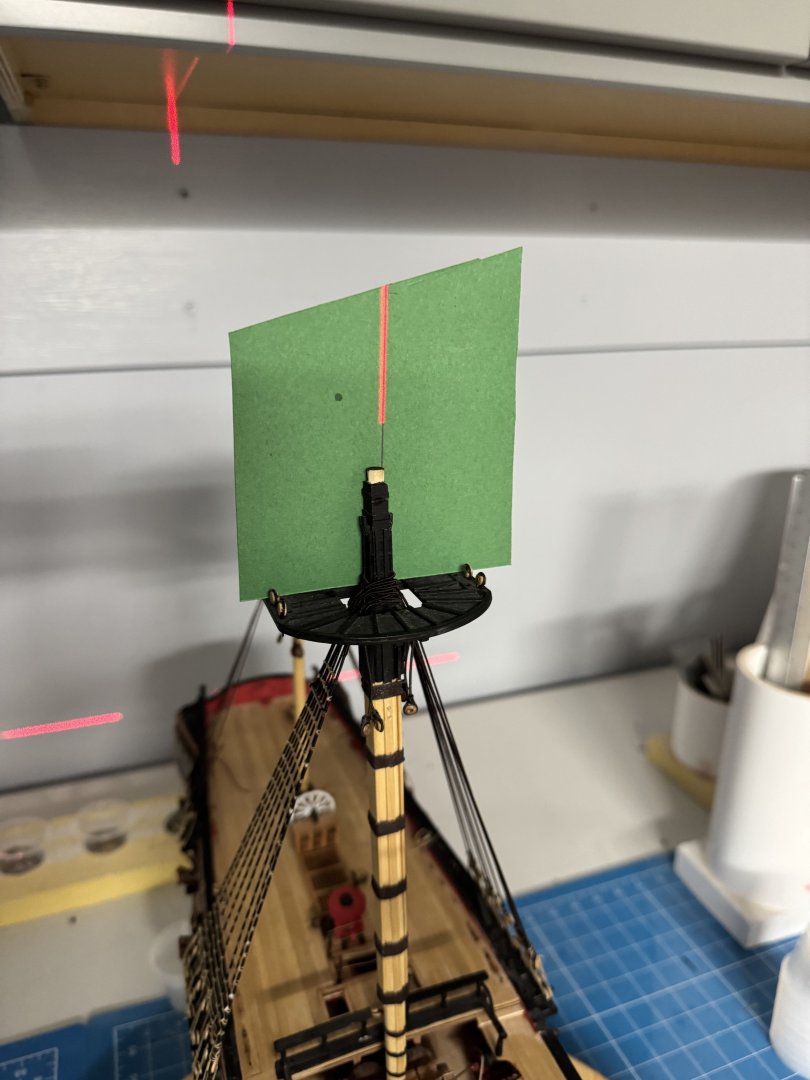
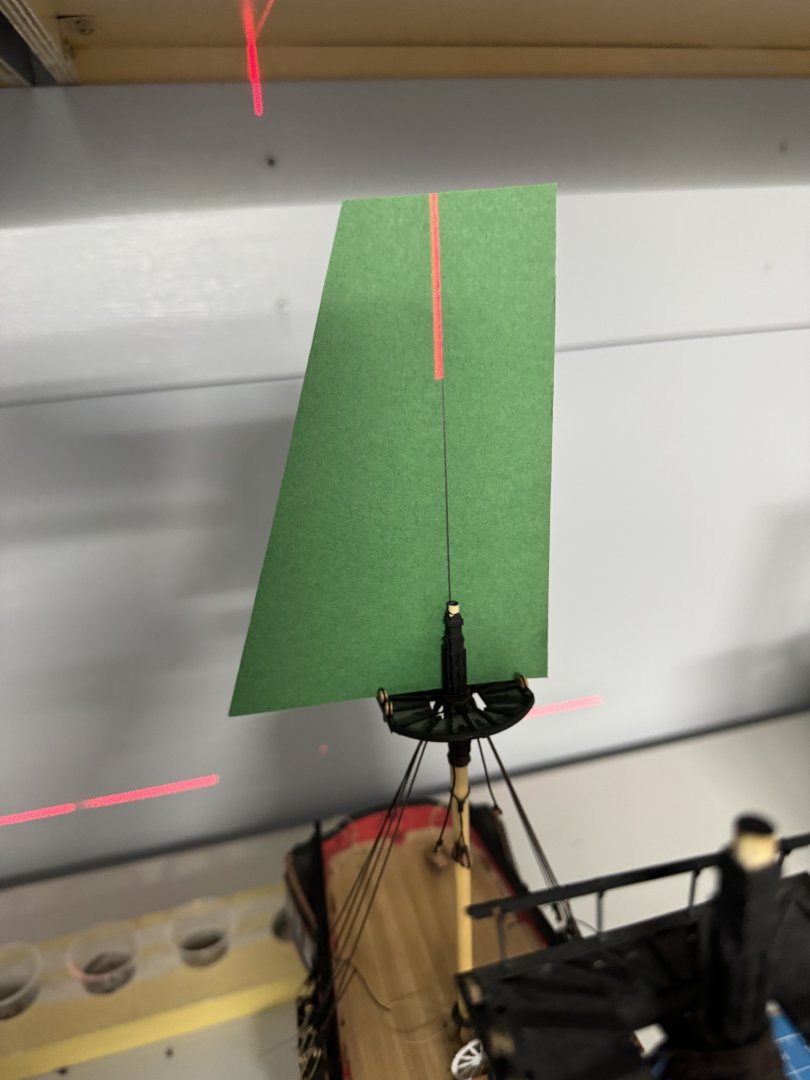
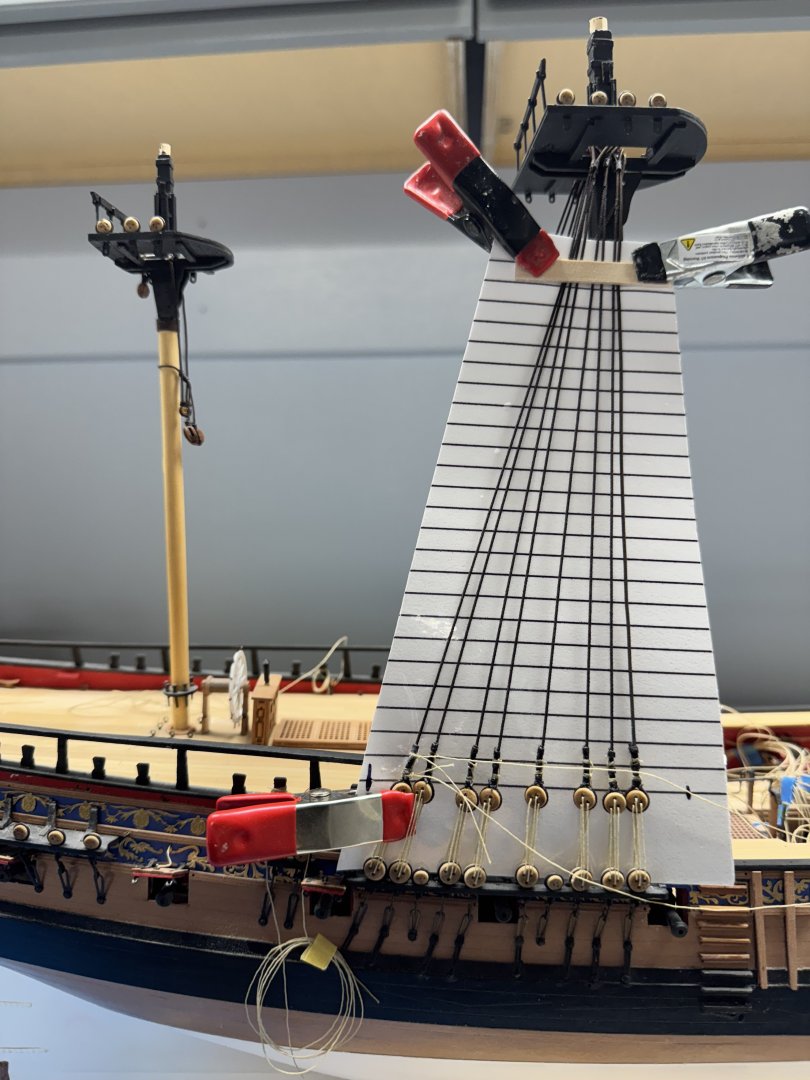
I have the mizzen shrouds in place and the lanyards strung but not yet "secured". I probably should have thought of this before but with all three masts in place (but only one with any 'adjustment" ability left without major rework) I should check to see if they are aligned. Given the cross section of the fore and main masts it seems unlikely (IMHO) that they could have been pulled out of alignment during the shroud installation but... So I got my laser level out to check. I lined things up so the head of the figurehead and the center of the foremast were aligned. Then, since the level is just below the level of the model I added pieces of card stock with lines perpendicular to the bottoms to see how the main and mizzen masts looked. If the laser was level with the model the main mast would show directly but that would involve stacking boxes of something to get the laser higher and the card stock seemed easier. Main mast The line is actually directly behind the mast but I had to take the picture from the side to avoid getting in the way of the laser. Mizzen Mast Everything looks okay so I can proceed to tie off the mizzen mast lanyards and return to my favorite activity - ratlines and such.

- 422 replies
-
- 7
-
-
- Vanguard Models
- Sphinx
- (and 1 more)
-
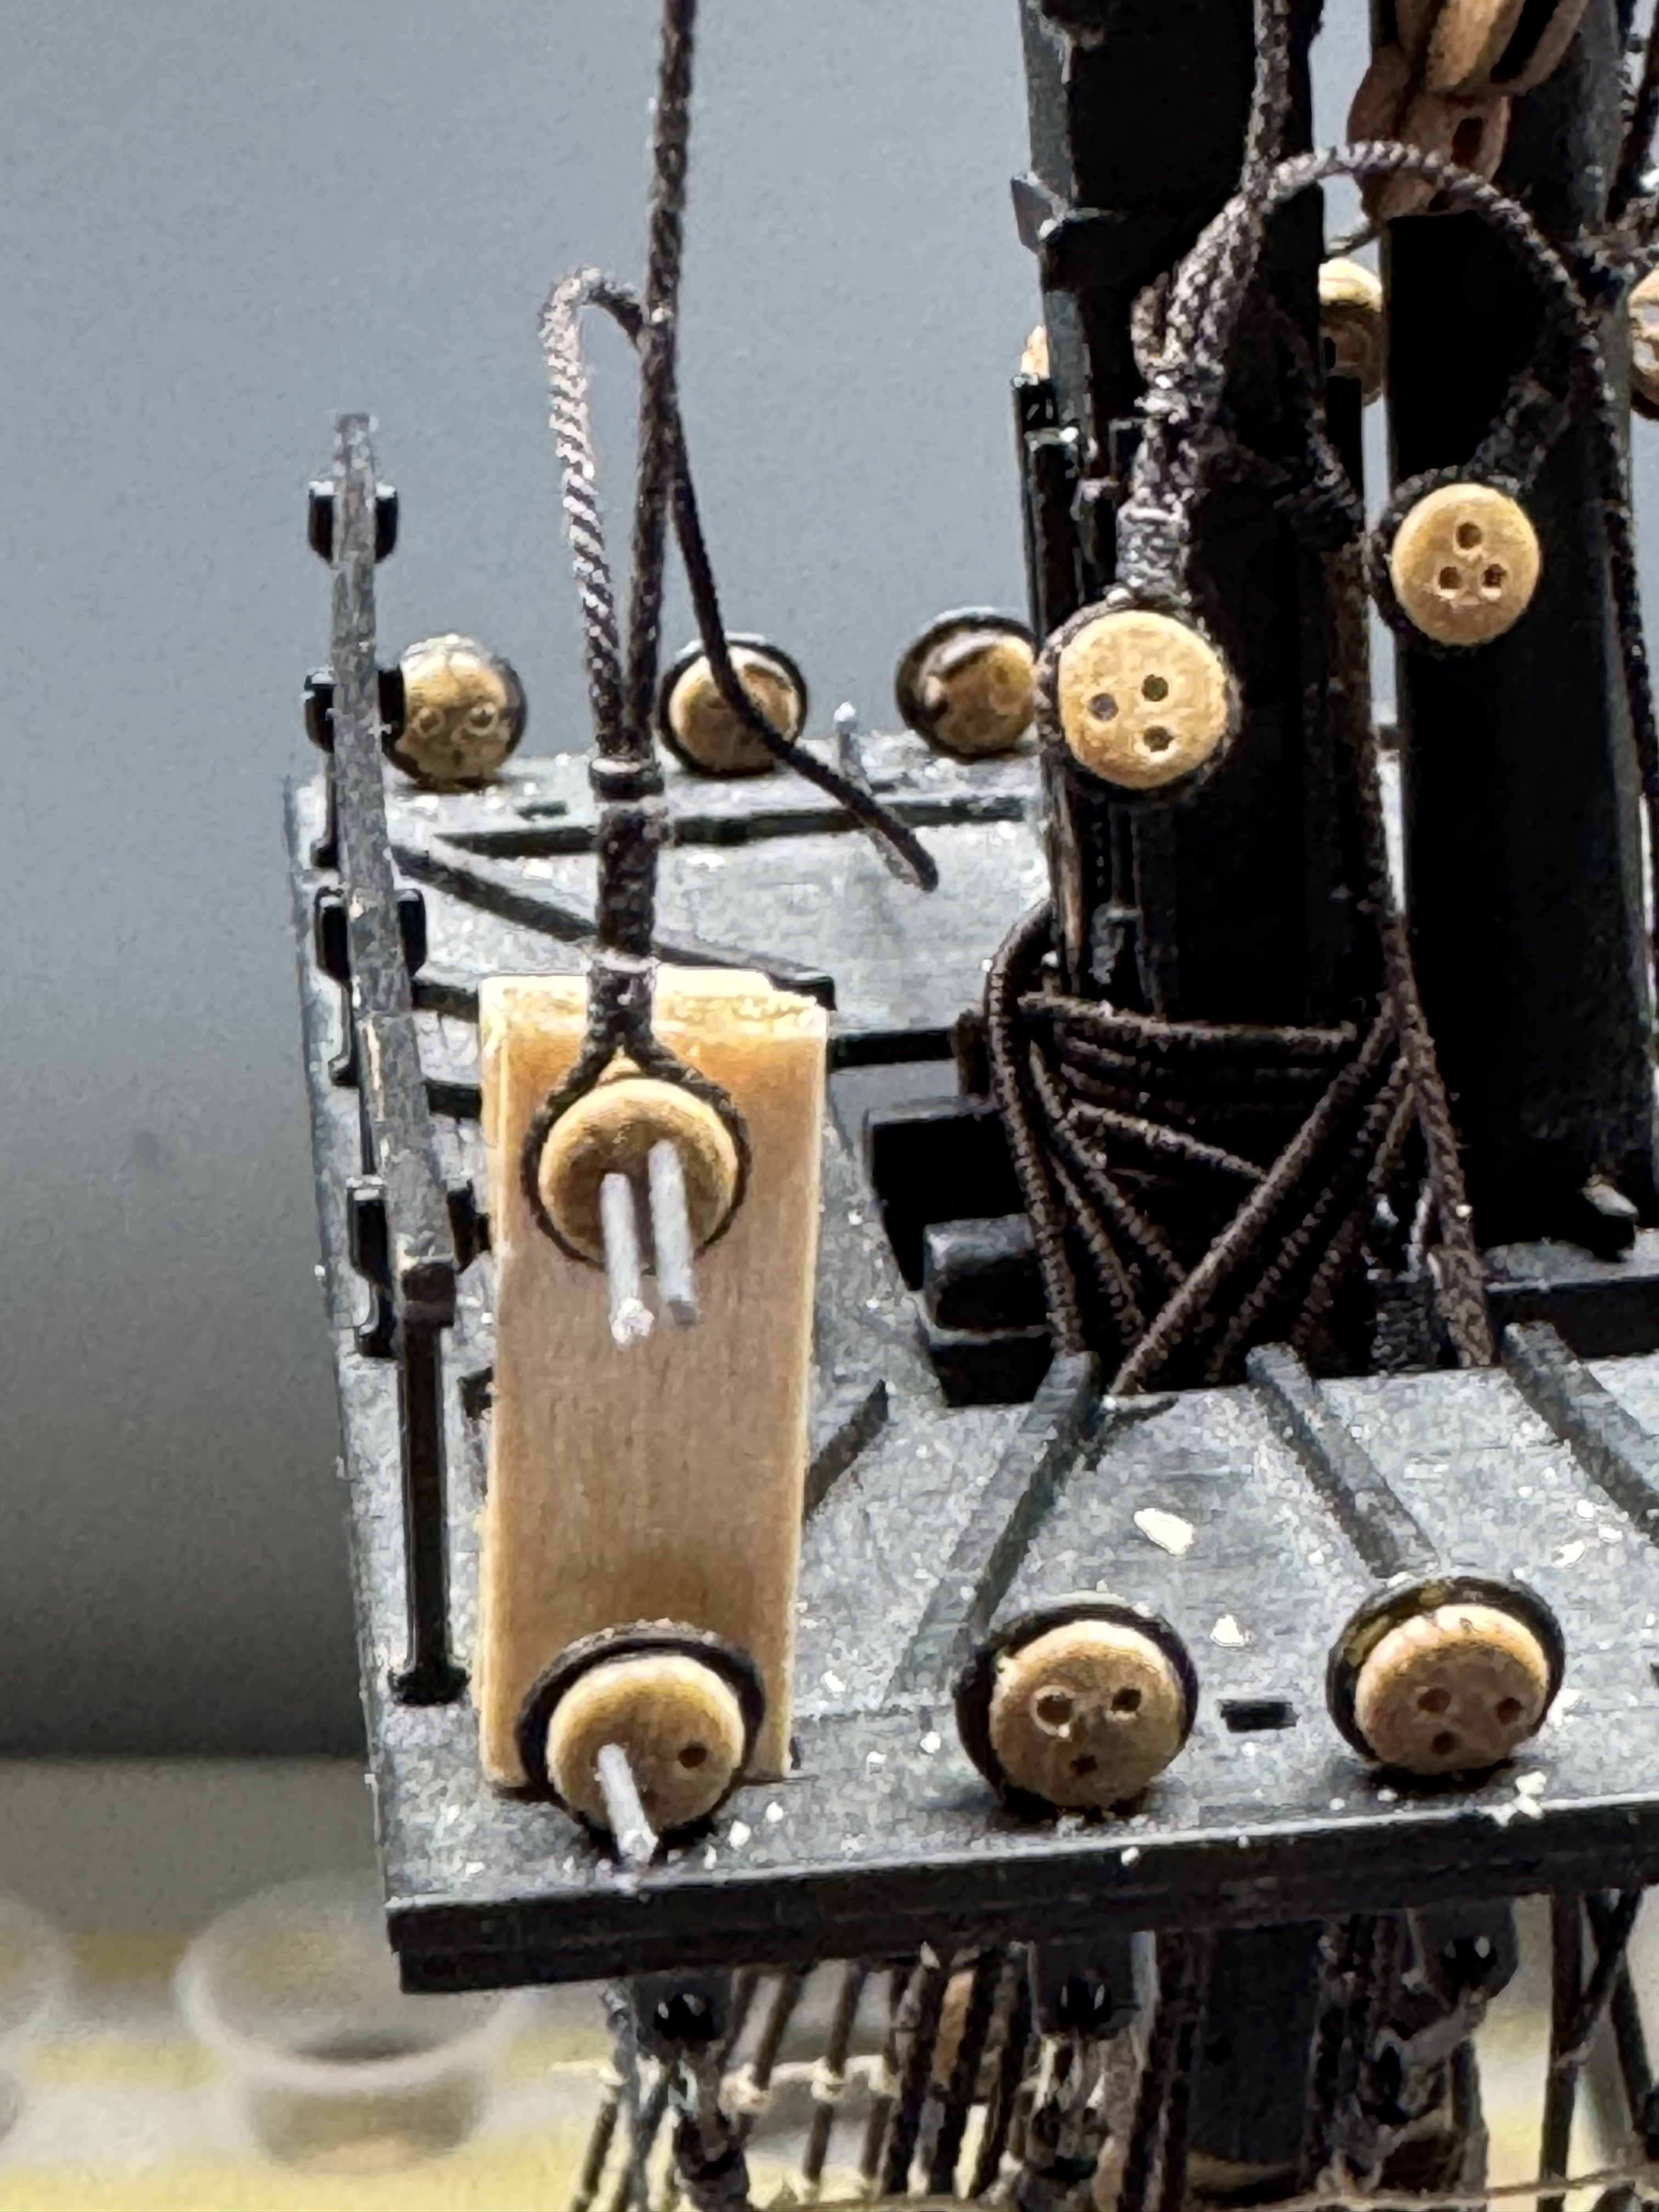
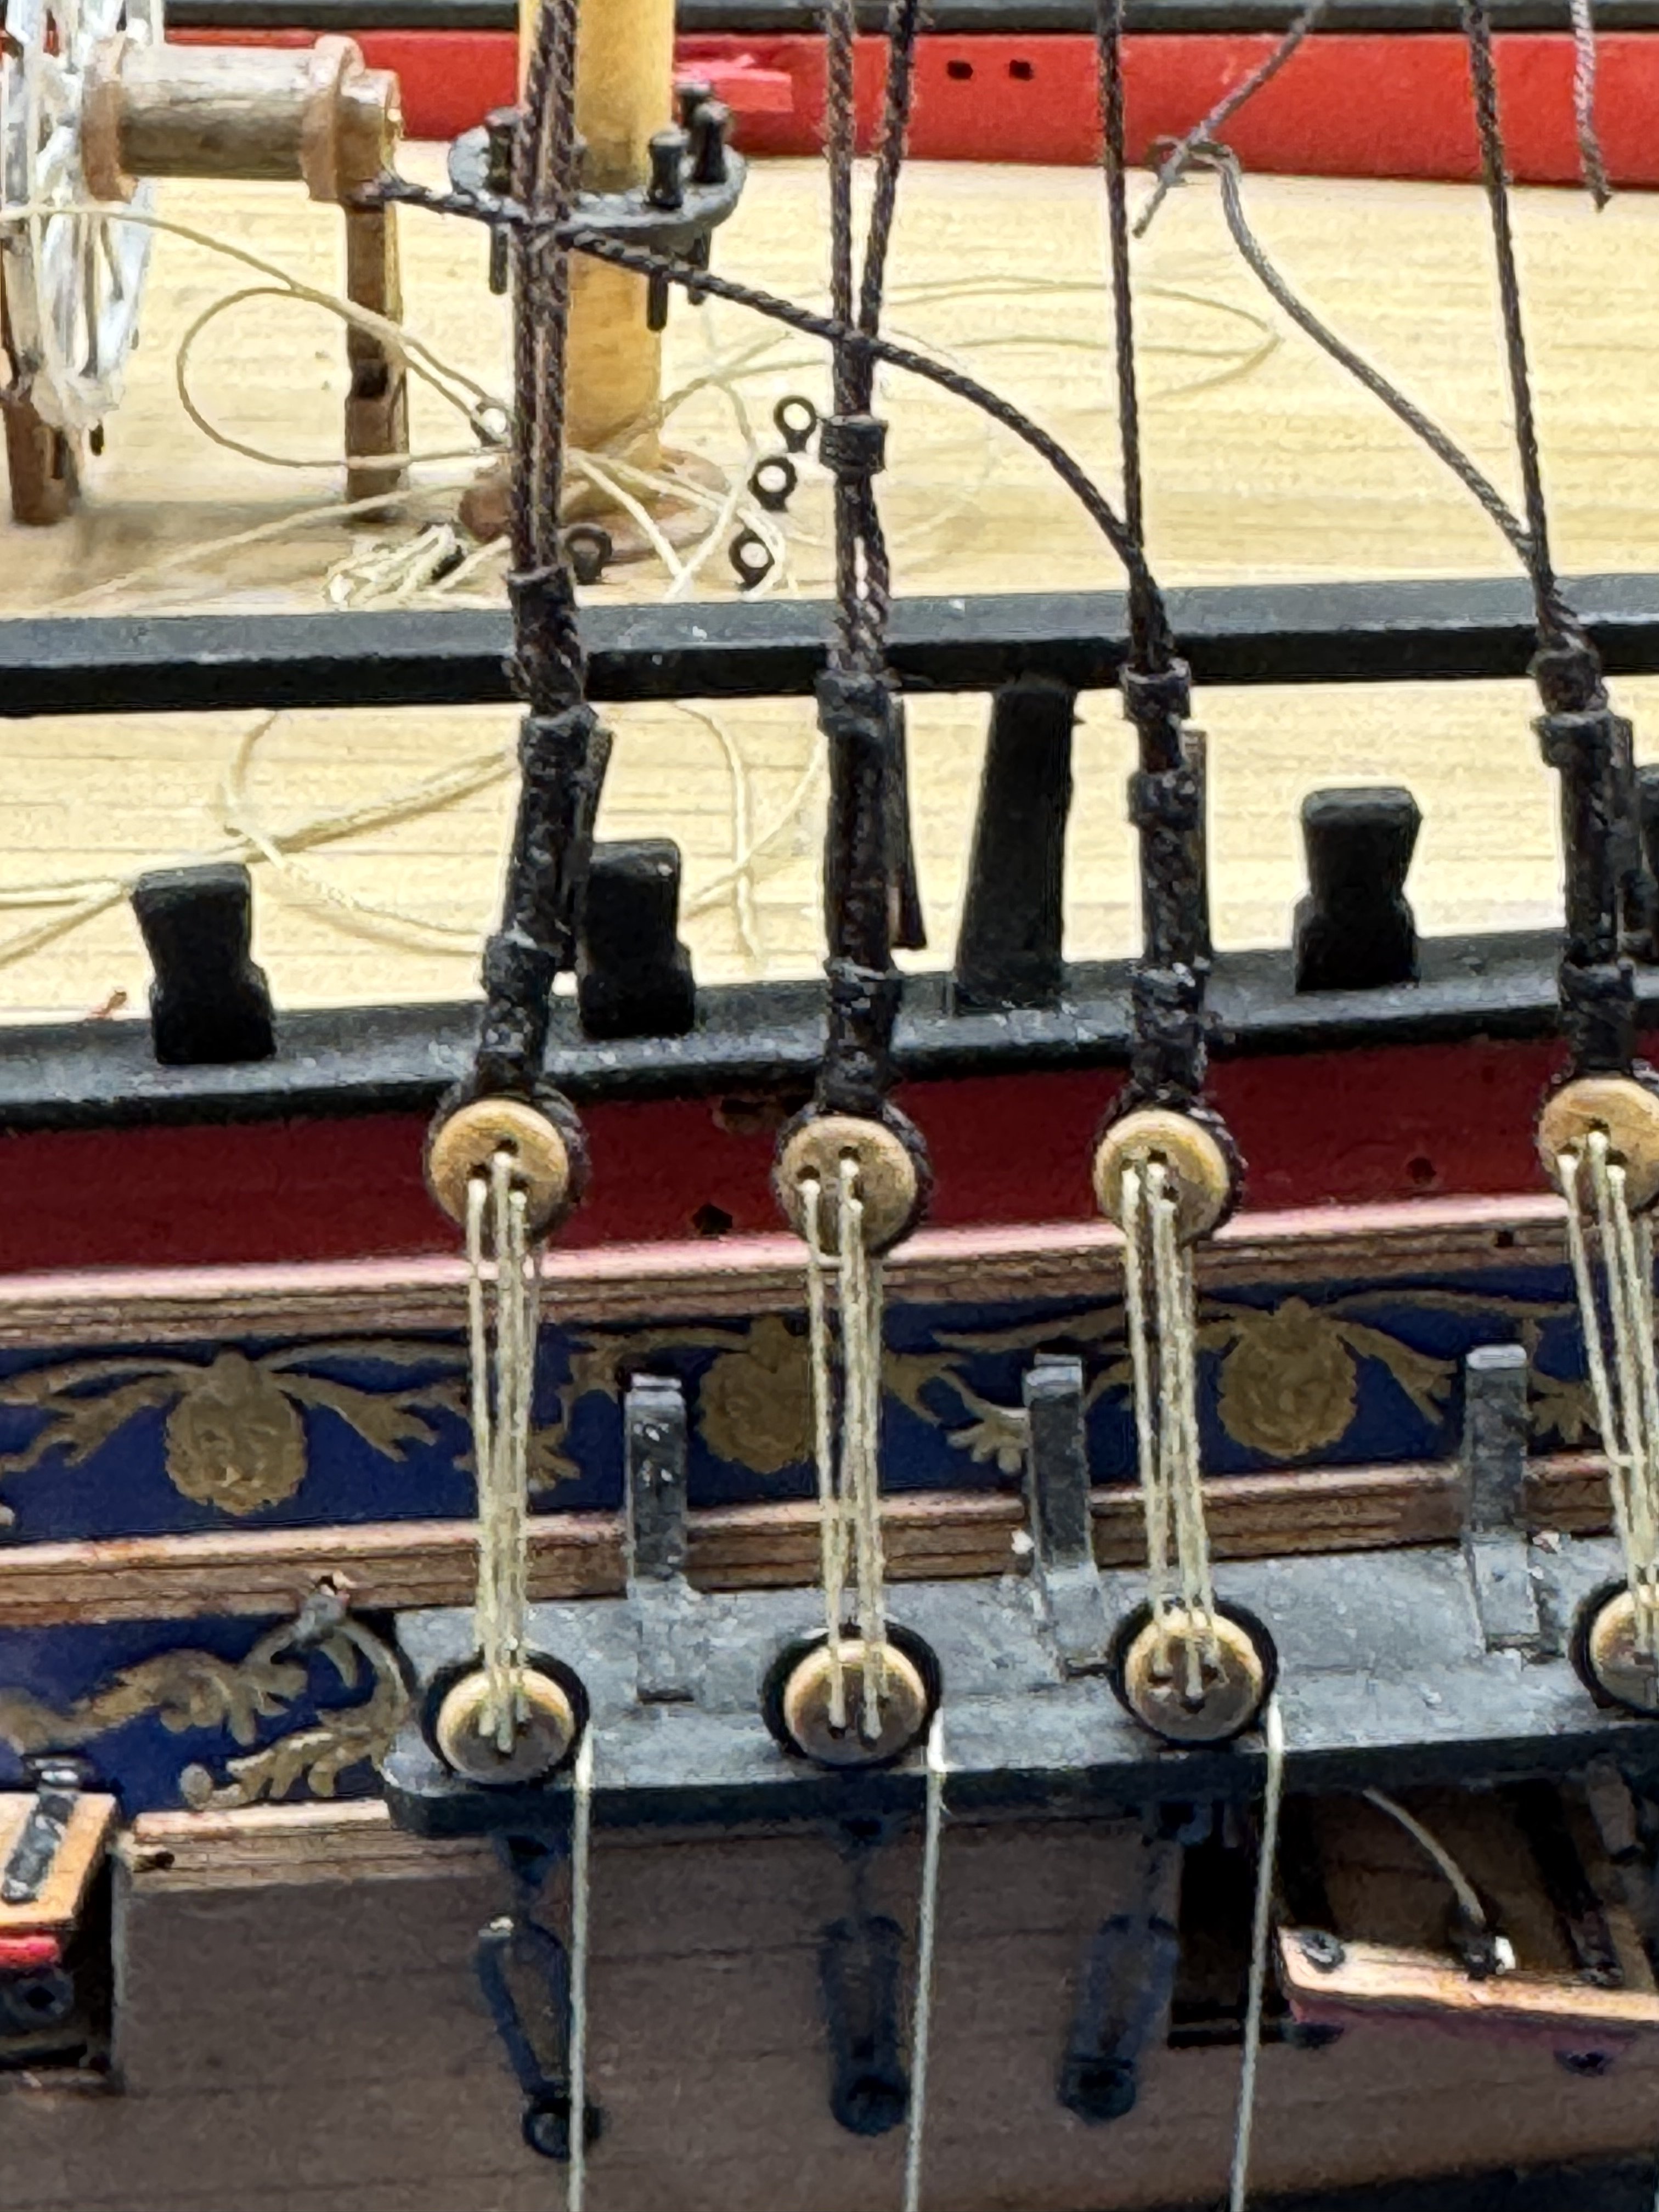
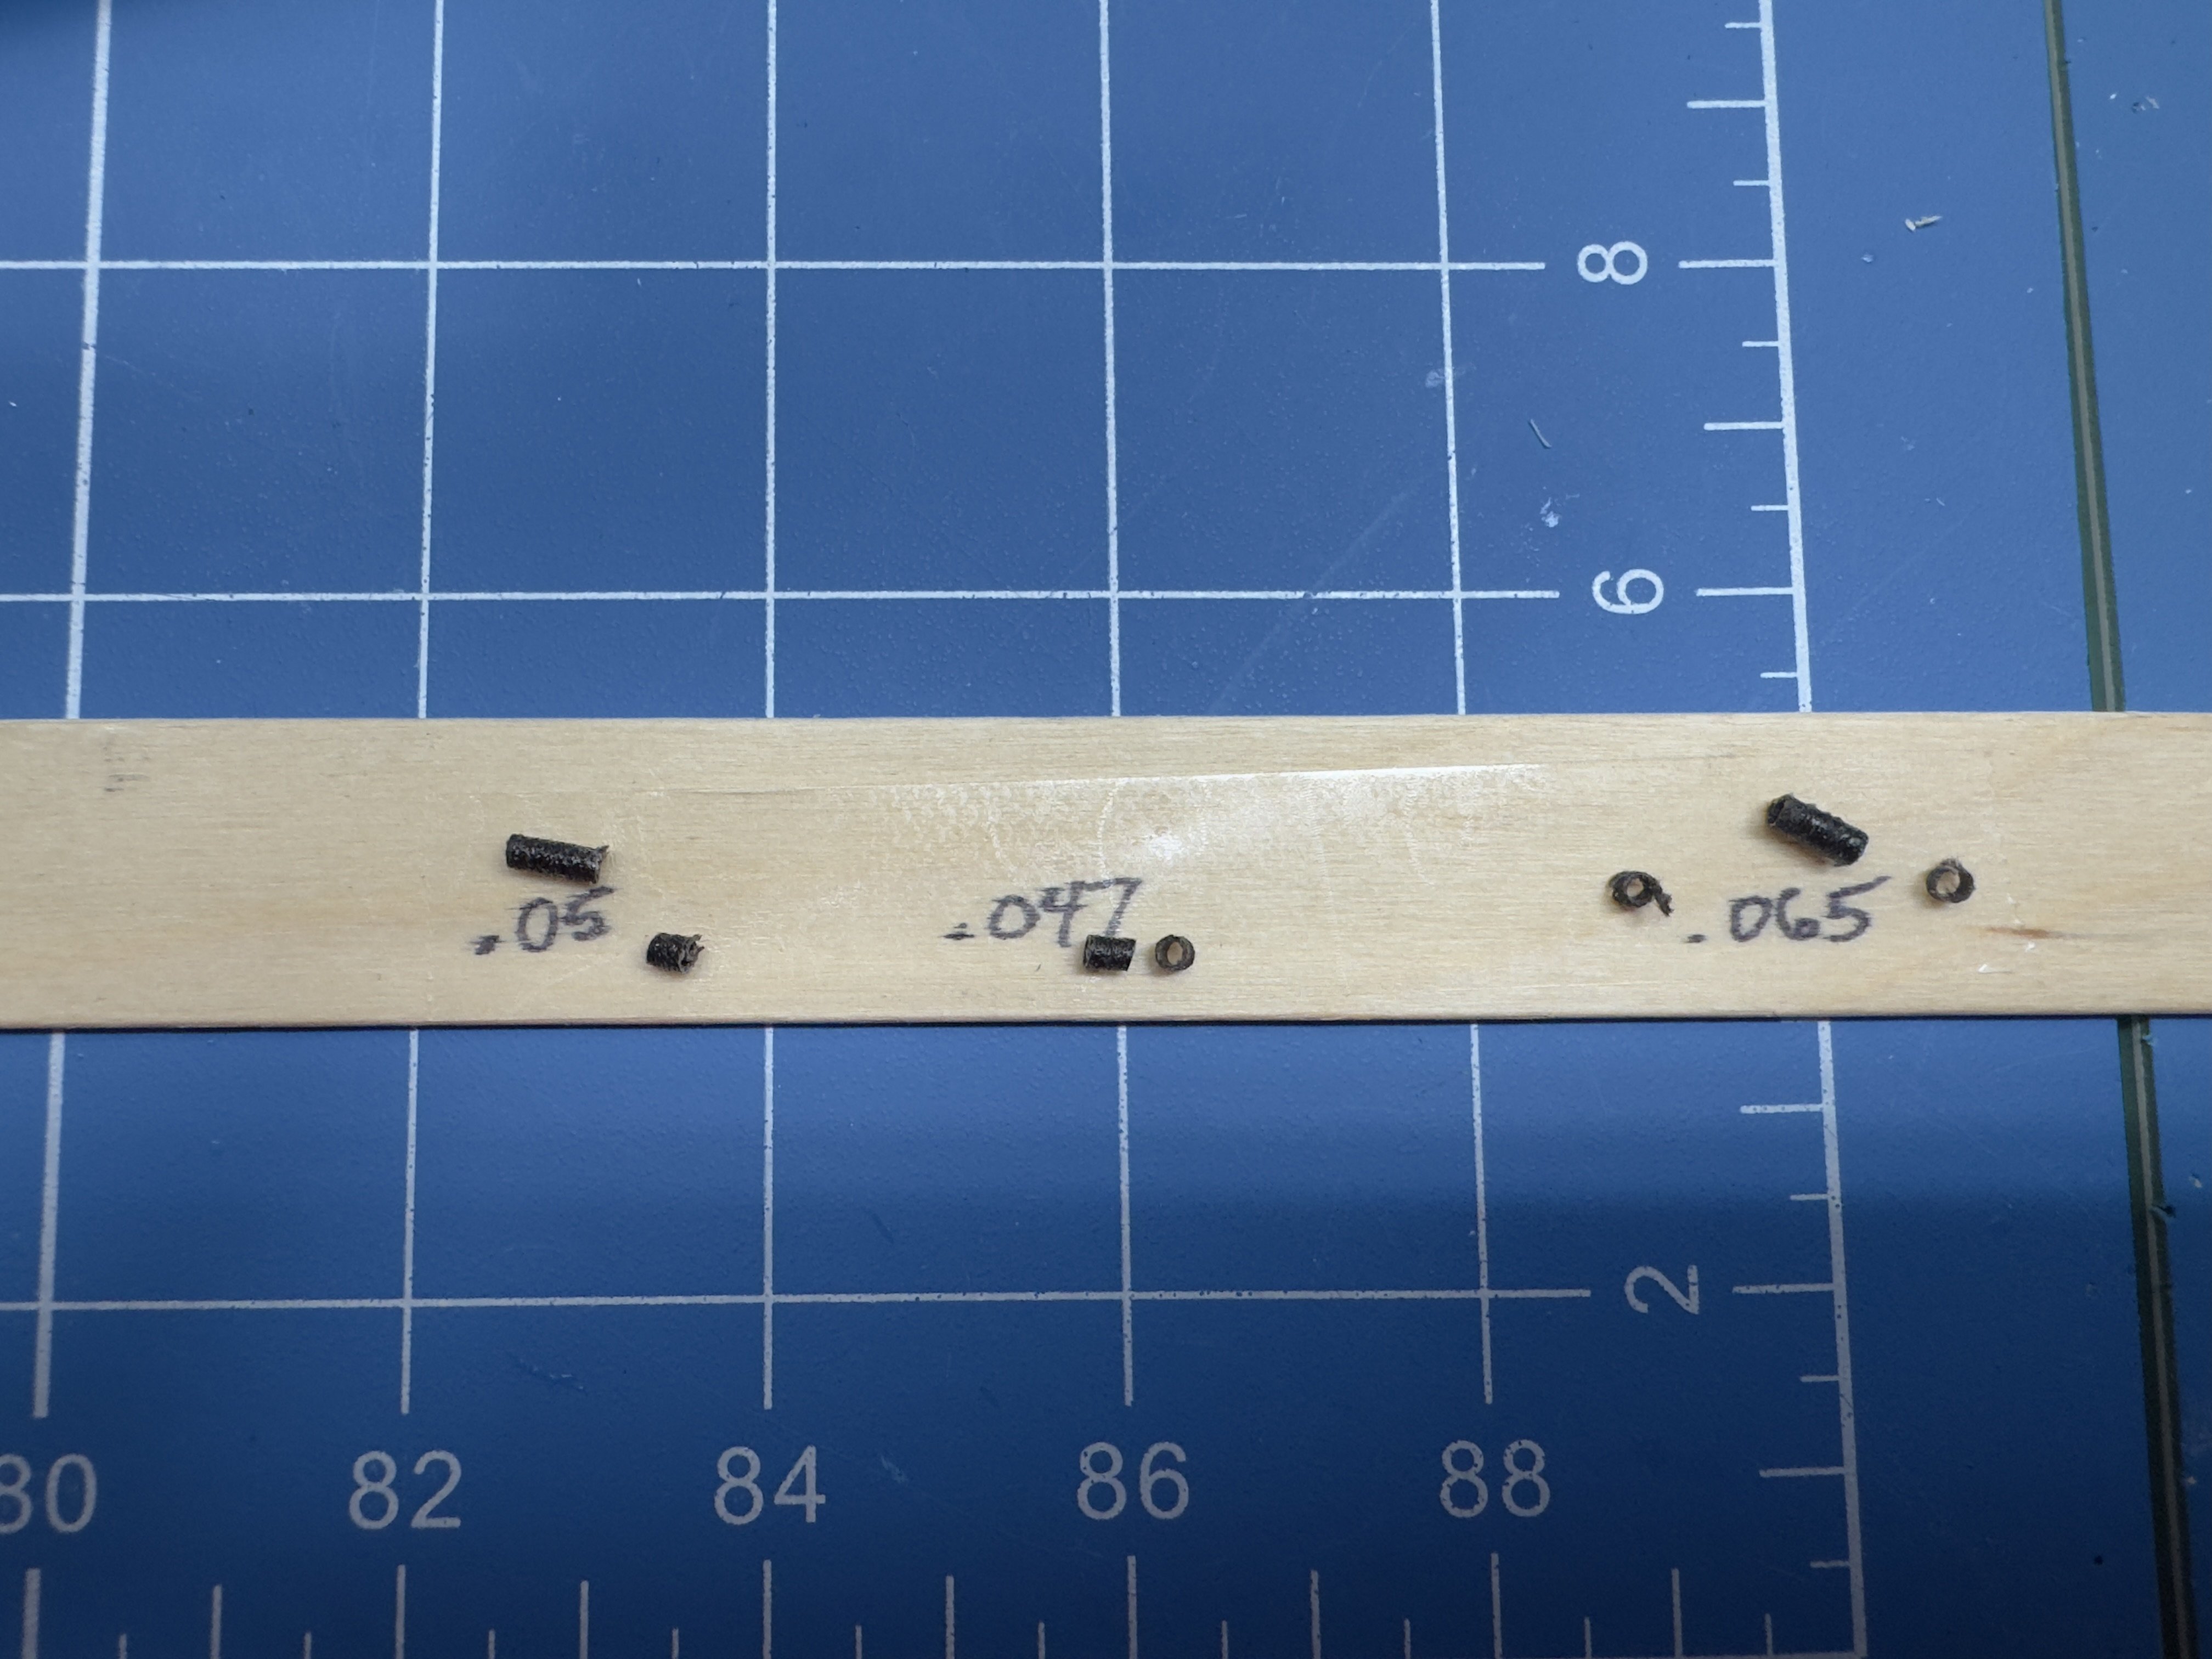
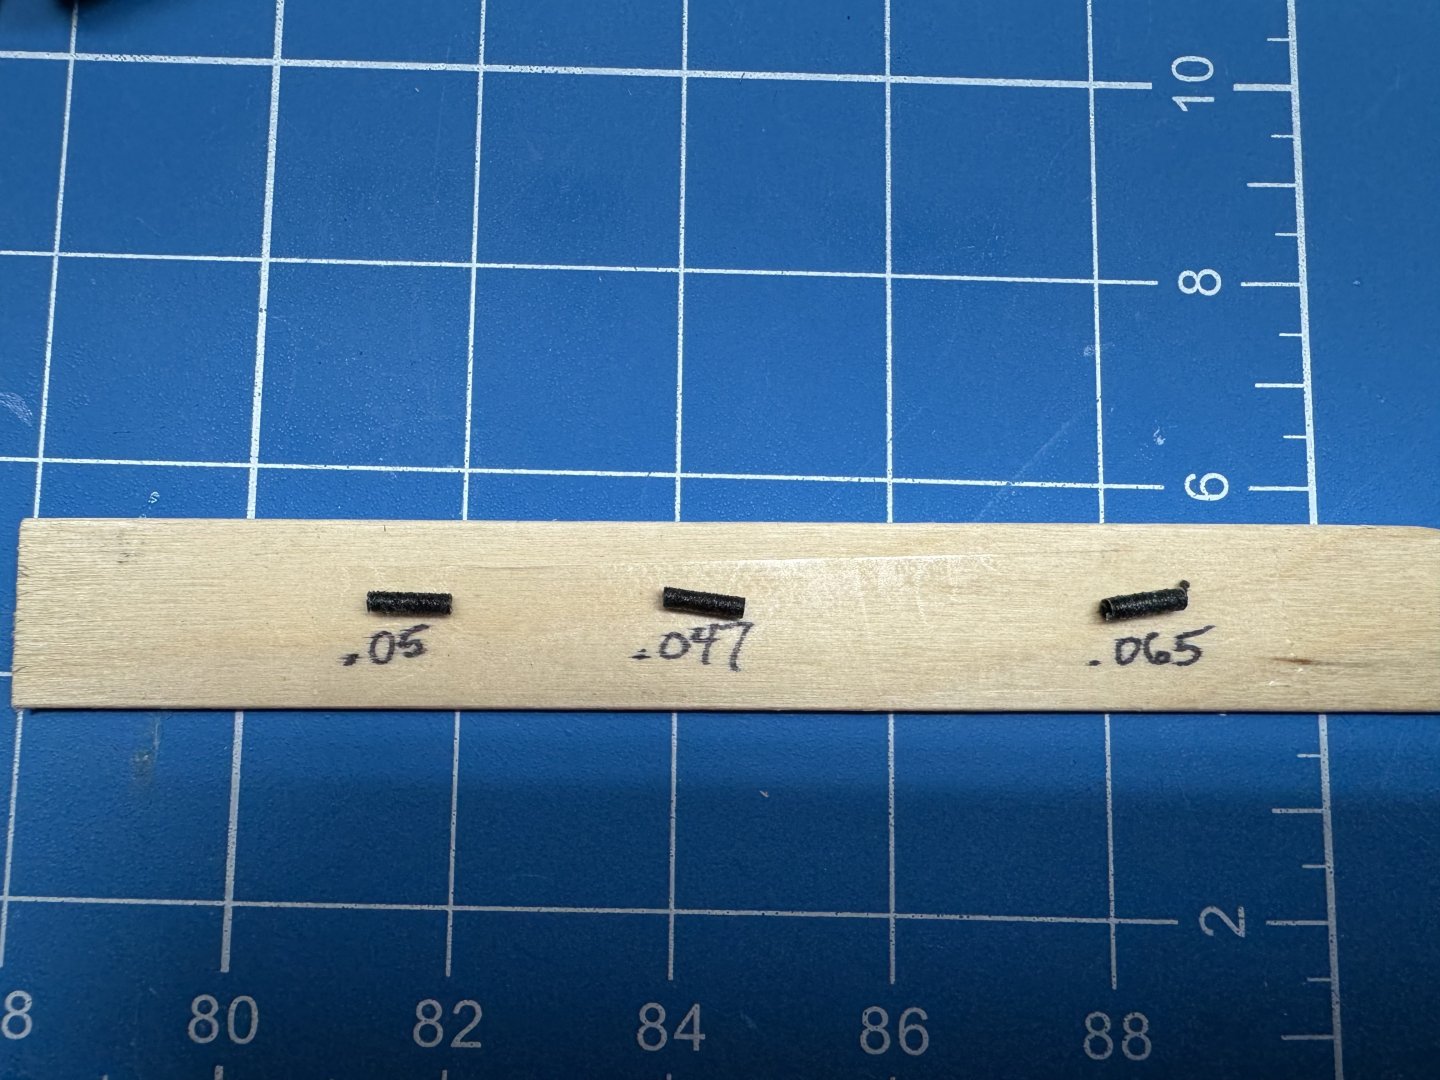
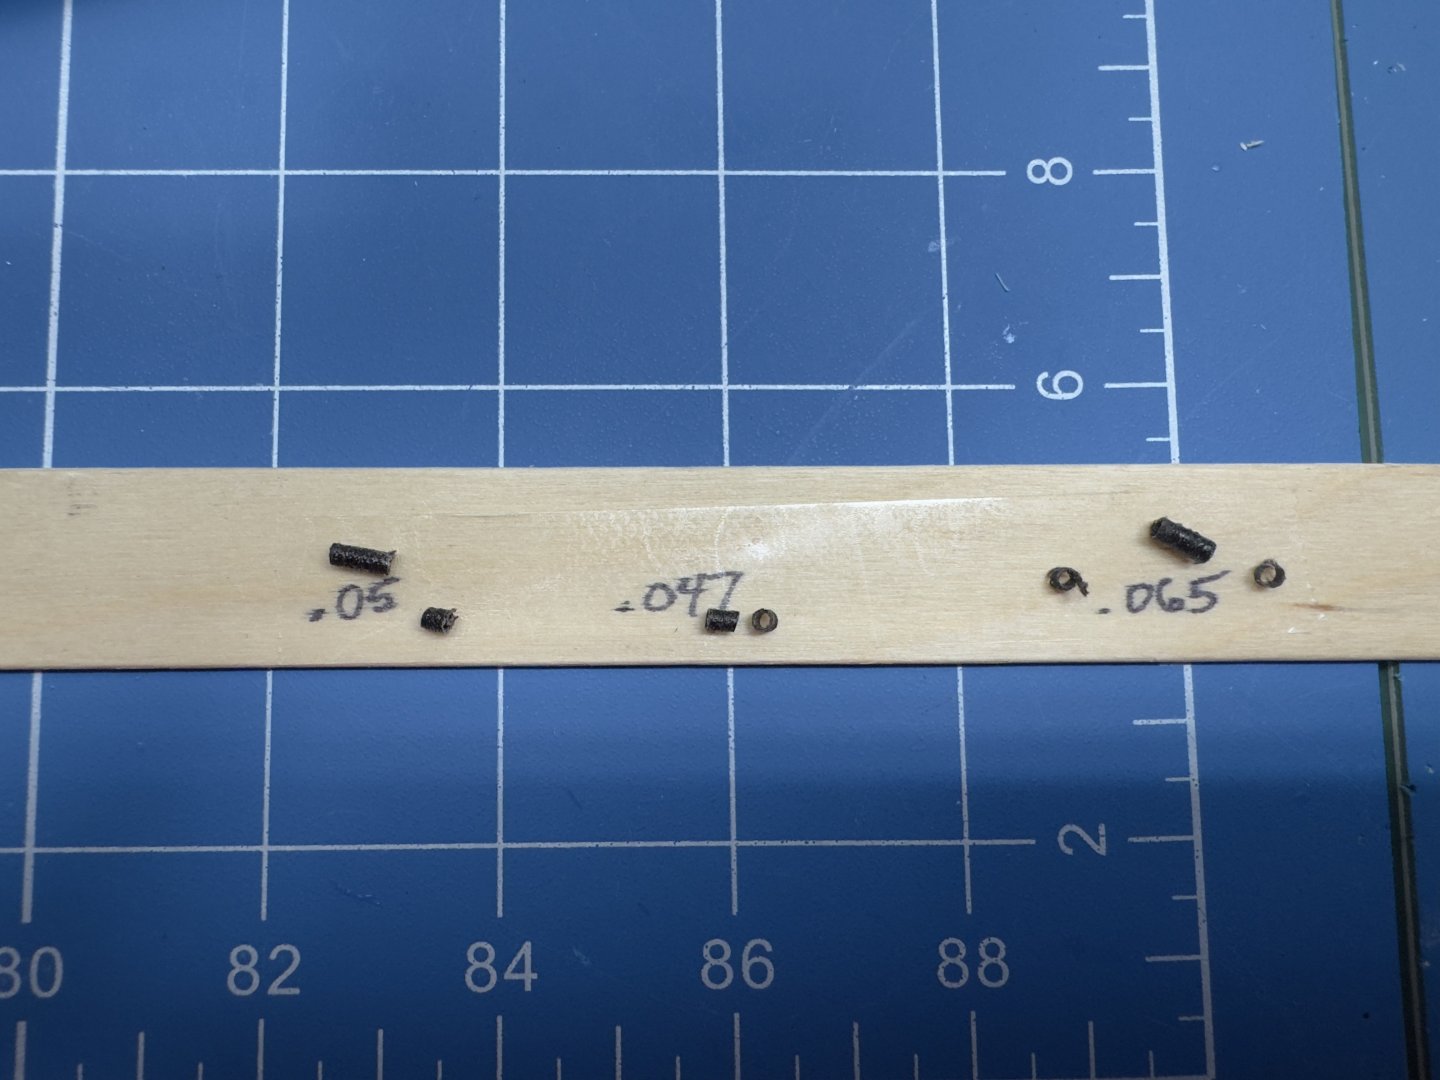
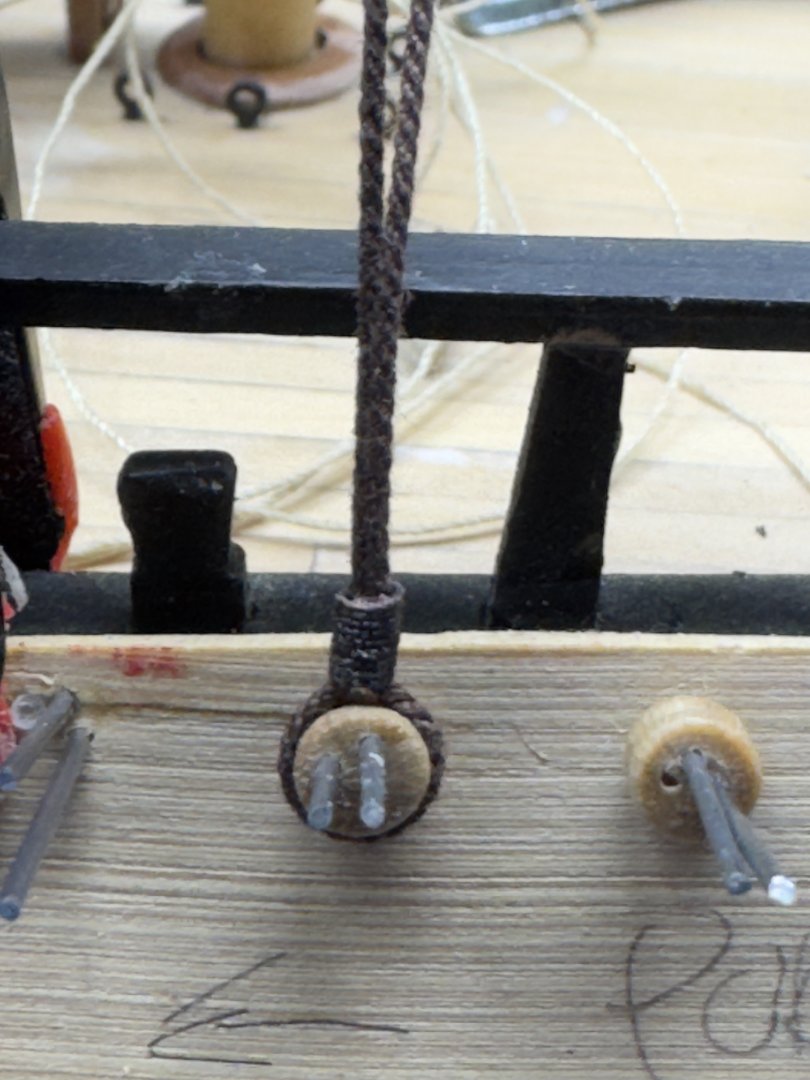
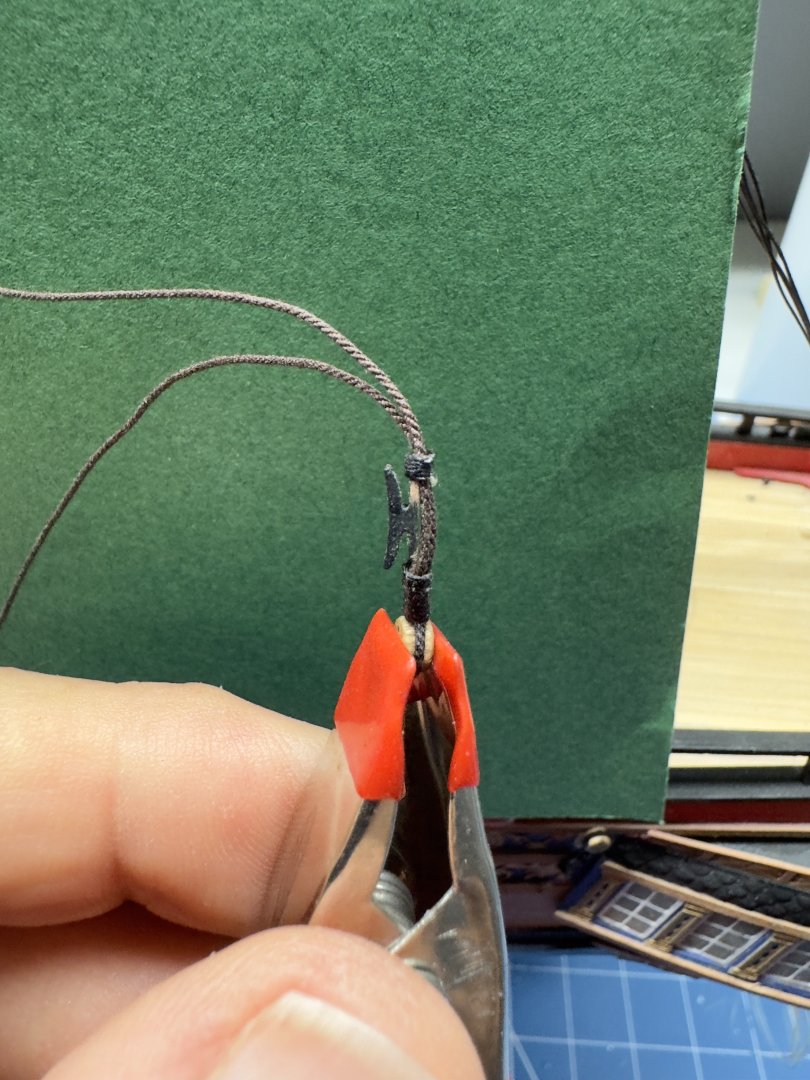
Now that I have "experimented" with rigging the lower shrouds on the fore and main masts I believe (IMHO) that I have "arrived" at the procedure that works (for me). Too late to go back and "fix" the fore and main but the next time I encounter shroud cleats I will remember (I hope) what I learned here. I explained (briefly) the pre-made seizings process in post 379 and that is where I will start. I made up sets of seizings in three sizes .047", .050" and .065". The mizzen shrouds are .025" Syren line served for a length of about 2" in the center where the shroud will pass around the mast. As I explained previously the pre-made seizings diameter (the diameter of what they are wound around) should be slightly less that the combined diameters of the lines to be joined. The .047s are to join the unserved part of the shrouds and the .050s are for the served part at the mast head. I use a piece of wood (tongue depressor) with double sided tape on it to hold the seizings so they don't "get lost". For each shroud I will need two .047s, two .065s and one .050. I used 1.5mm pieces for one of the .047s and the .050 and then 1mm lengths for the rest. First is the 1.5mm .050 which forms the loop that goes around the mast head. I try and get the loop in the center of the served section. This (of course) goes over the mast head and the ends lead down to the channels. I have found it a good idea to secure the joint between the two shroud lines before proceeding further. Don't ask me how I know but manipulating the shrouds while adding the deadeye can cause the seizing to slip down the shrouds and that can mess up your carefully preserved deadeye alignment. With the shroud end ready for deadeye installation the other for four seizing are added in this order 1mm .047, both 1mm .065s and last the 1.5mm .047. Then the shroud is led around the deadeye on your carefully constructed deadeye "holder" and the 1.5mm .047 is glued in place while the bitter end is under tension. Care is needed to keep the bitter end aft of the standing end. Now the first of the 1mm .065s is brought down above the deadeye seizing. I modified the shroud cleats so that the surface that lies on the shrouds is tapered a bit at each end. Unmodified on the top. Keeping track of which side faces out I insert the shroud cleat between the shrouds and the seizing which has been sized for this purpose (after a number of false starts). Then the second 1mm .065 captures the other end and the shroud lines are adjusted so there is no slack, A drop of thin CA glues the assembly together. I am leaving the remaining 1mm .047 "adrift for the moment as I want to get the shroud bitter ends all aligned once the deadeye lashings are in place. So here is the forward most shroud temporarily lashed in place with the shroud cleat. Hopefully the tension from the line secured to this cleat (which runs forward) will help get the deadeye better aligned as it wants to twist the forward edge inboard. My intention is to belay the lashing with half hitches above the shroud cleat and below the last .047 seizing.


- 422 replies
-
- 9
-
-
- Vanguard Models
- Sphinx
- (and 1 more)
-
I guess no additional ratlines are required for those who choose to go through the "lubbers hole". They would certainly be a challenge to tie if the futtock shrouds were in place.
- 422 replies
-
- 1
-
-
- Vanguard Models
- Sphinx
- (and 1 more)
-
Starboard side Main Mast ratlines done (except for trimming the ends). On the main I started at the bottom and worked up (obviously) one row at a time in sequence (no skipping) starting from the aft edge until about row 15 when I noticed a tendency to distort the shrouds. Then I switched directions (work from aft then work from forward as I moved up. When I got to about row 20 the aft two shrouds were so close together that the two knots were starting to force the shrouds apart so I skipped the inner (#7) of the two. A row or two more and I had to do similarly at the forward end skipping shroud #2. Now for some fun rigging the mizzen upper deadeyes and then on to the port side main ratlines.

- 422 replies
-
- 8
-
-
- Vanguard Models
- Sphinx
- (and 1 more)
-
Mizzen mast shrouds in place and templates for upper deadeyes fabricated and in place. I have been alternating between main mast ratlines and working the mizzen shrouds.


- 422 replies
-
- 5
-
-
- Vanguard Models
- Sphinx
- (and 1 more)
-
Mizzen mast in place (but not glued) and Burton pendants installed while I start on the Main mast ratlines.
- 422 replies
-
- 2
-
-
- Vanguard Models
- Sphinx
- (and 1 more)
-
While tying off the lanyards on the Main Mast and with the shroud cleats in mind it might have made sense to either raise the entire set of main mast upper deadeyes so the after 3/4 of them would be above the railing or just raise the aft ones although I do not believe I have ever seen upper deadeyes that were not at a constant heigth. As they stand mine are near the upper limit (three times the deadeye diameter) but unless the after cleats are little used working them with the railing in the way would have. not been any "fun".
- 422 replies
-
- 4
-
-
- Vanguard Models
- Sphinx
- (and 1 more)
-
Foremast lower rigging (lower shrouds, futtock shrouds and associated ratlines) completed - well almost completed - need to trim off those ends. The other side looks similar but the site will not download that photo for some reason. On to the Main mast

- 422 replies
-
- 3
-
-
- Vanguard Models
- Sphinx
- (and 1 more)
-
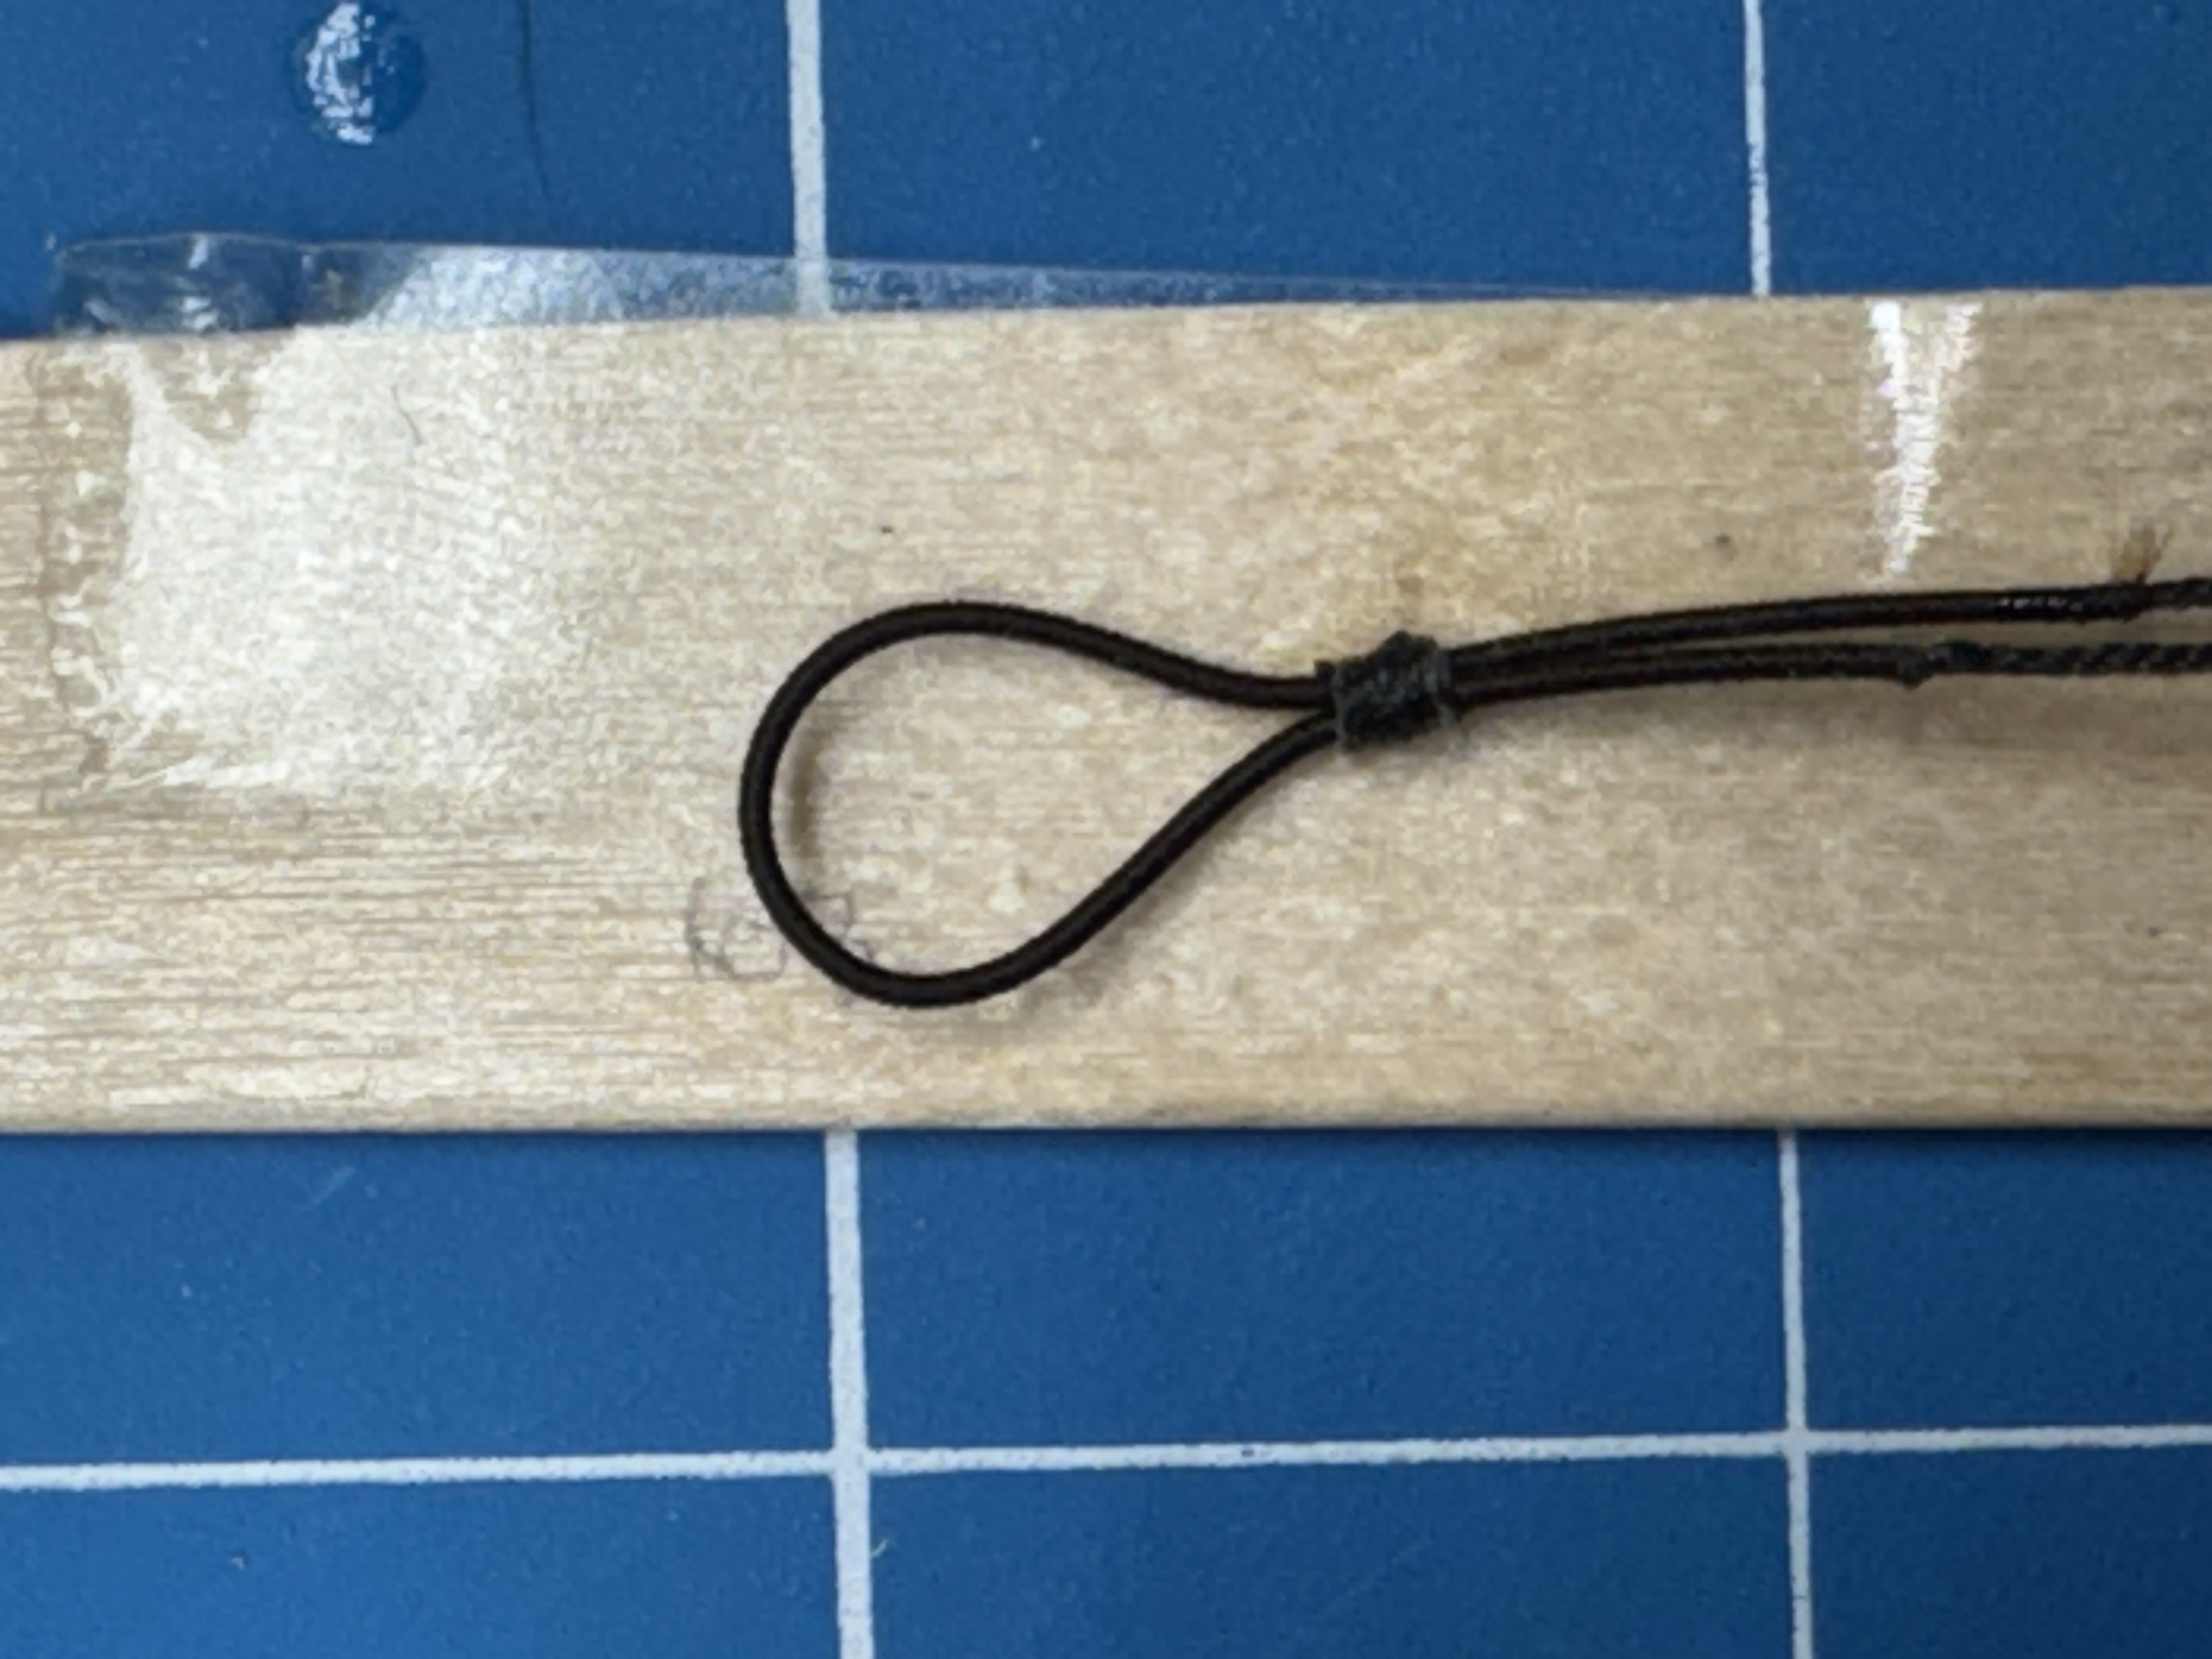
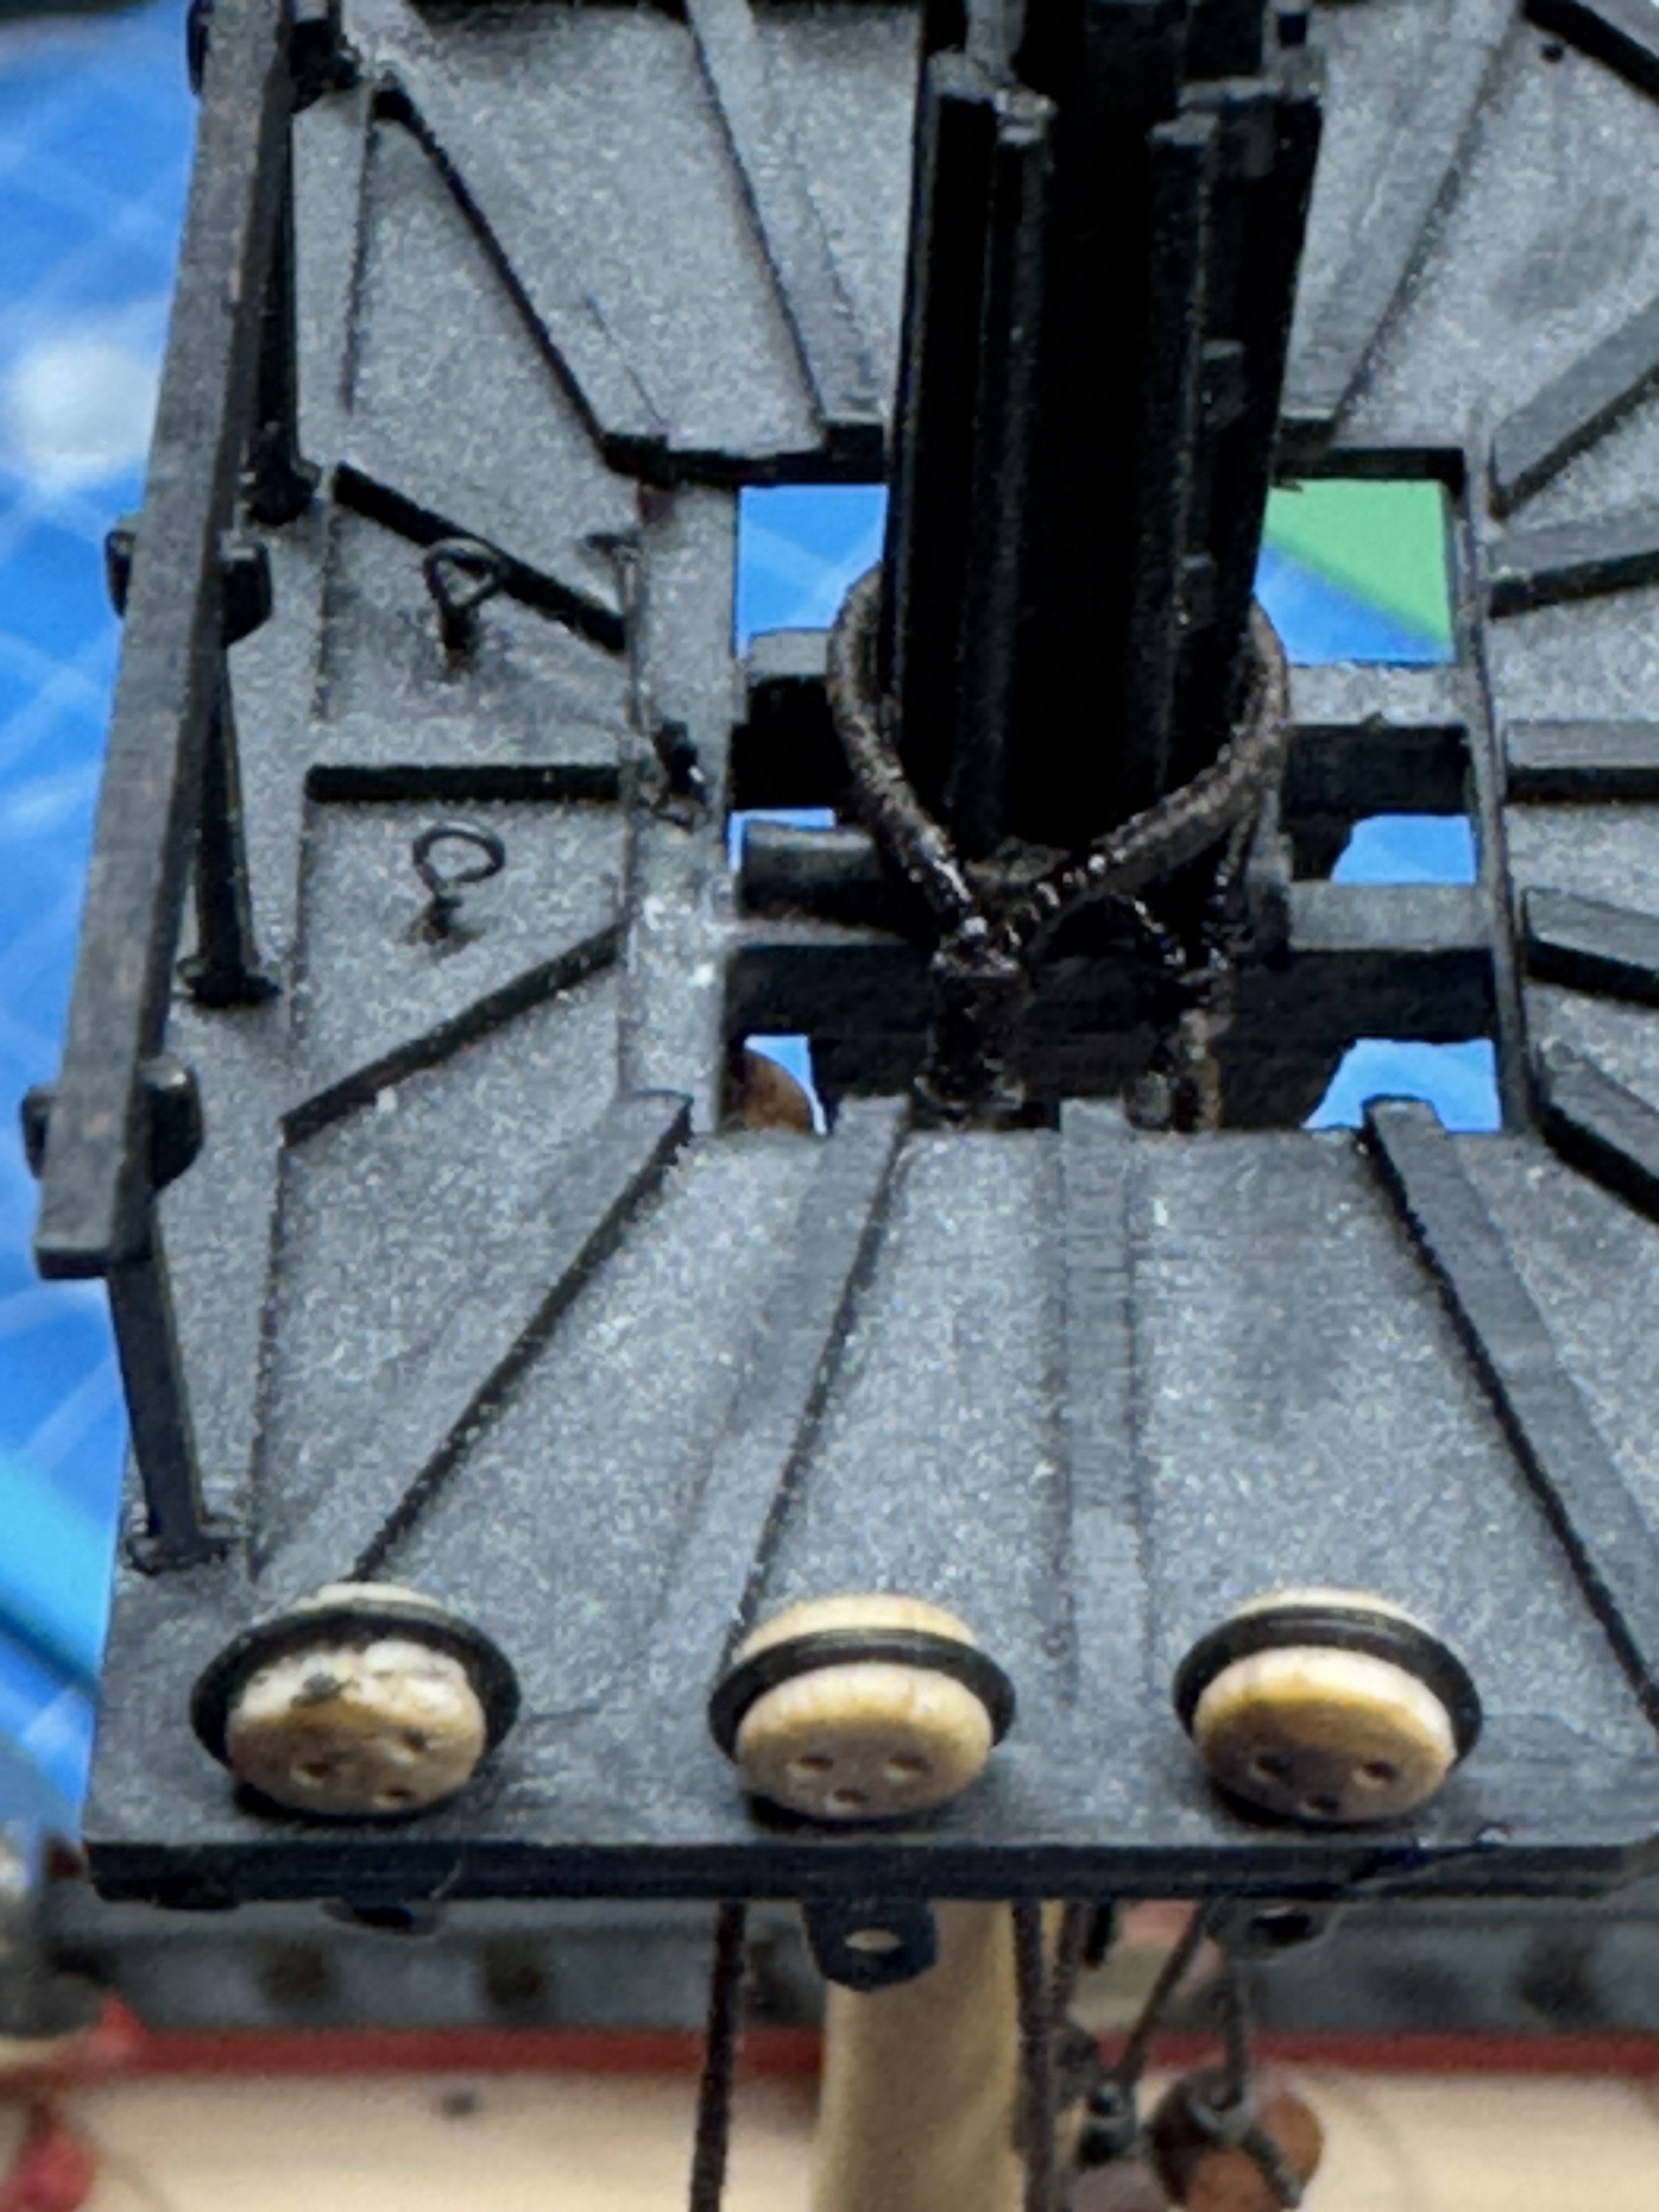
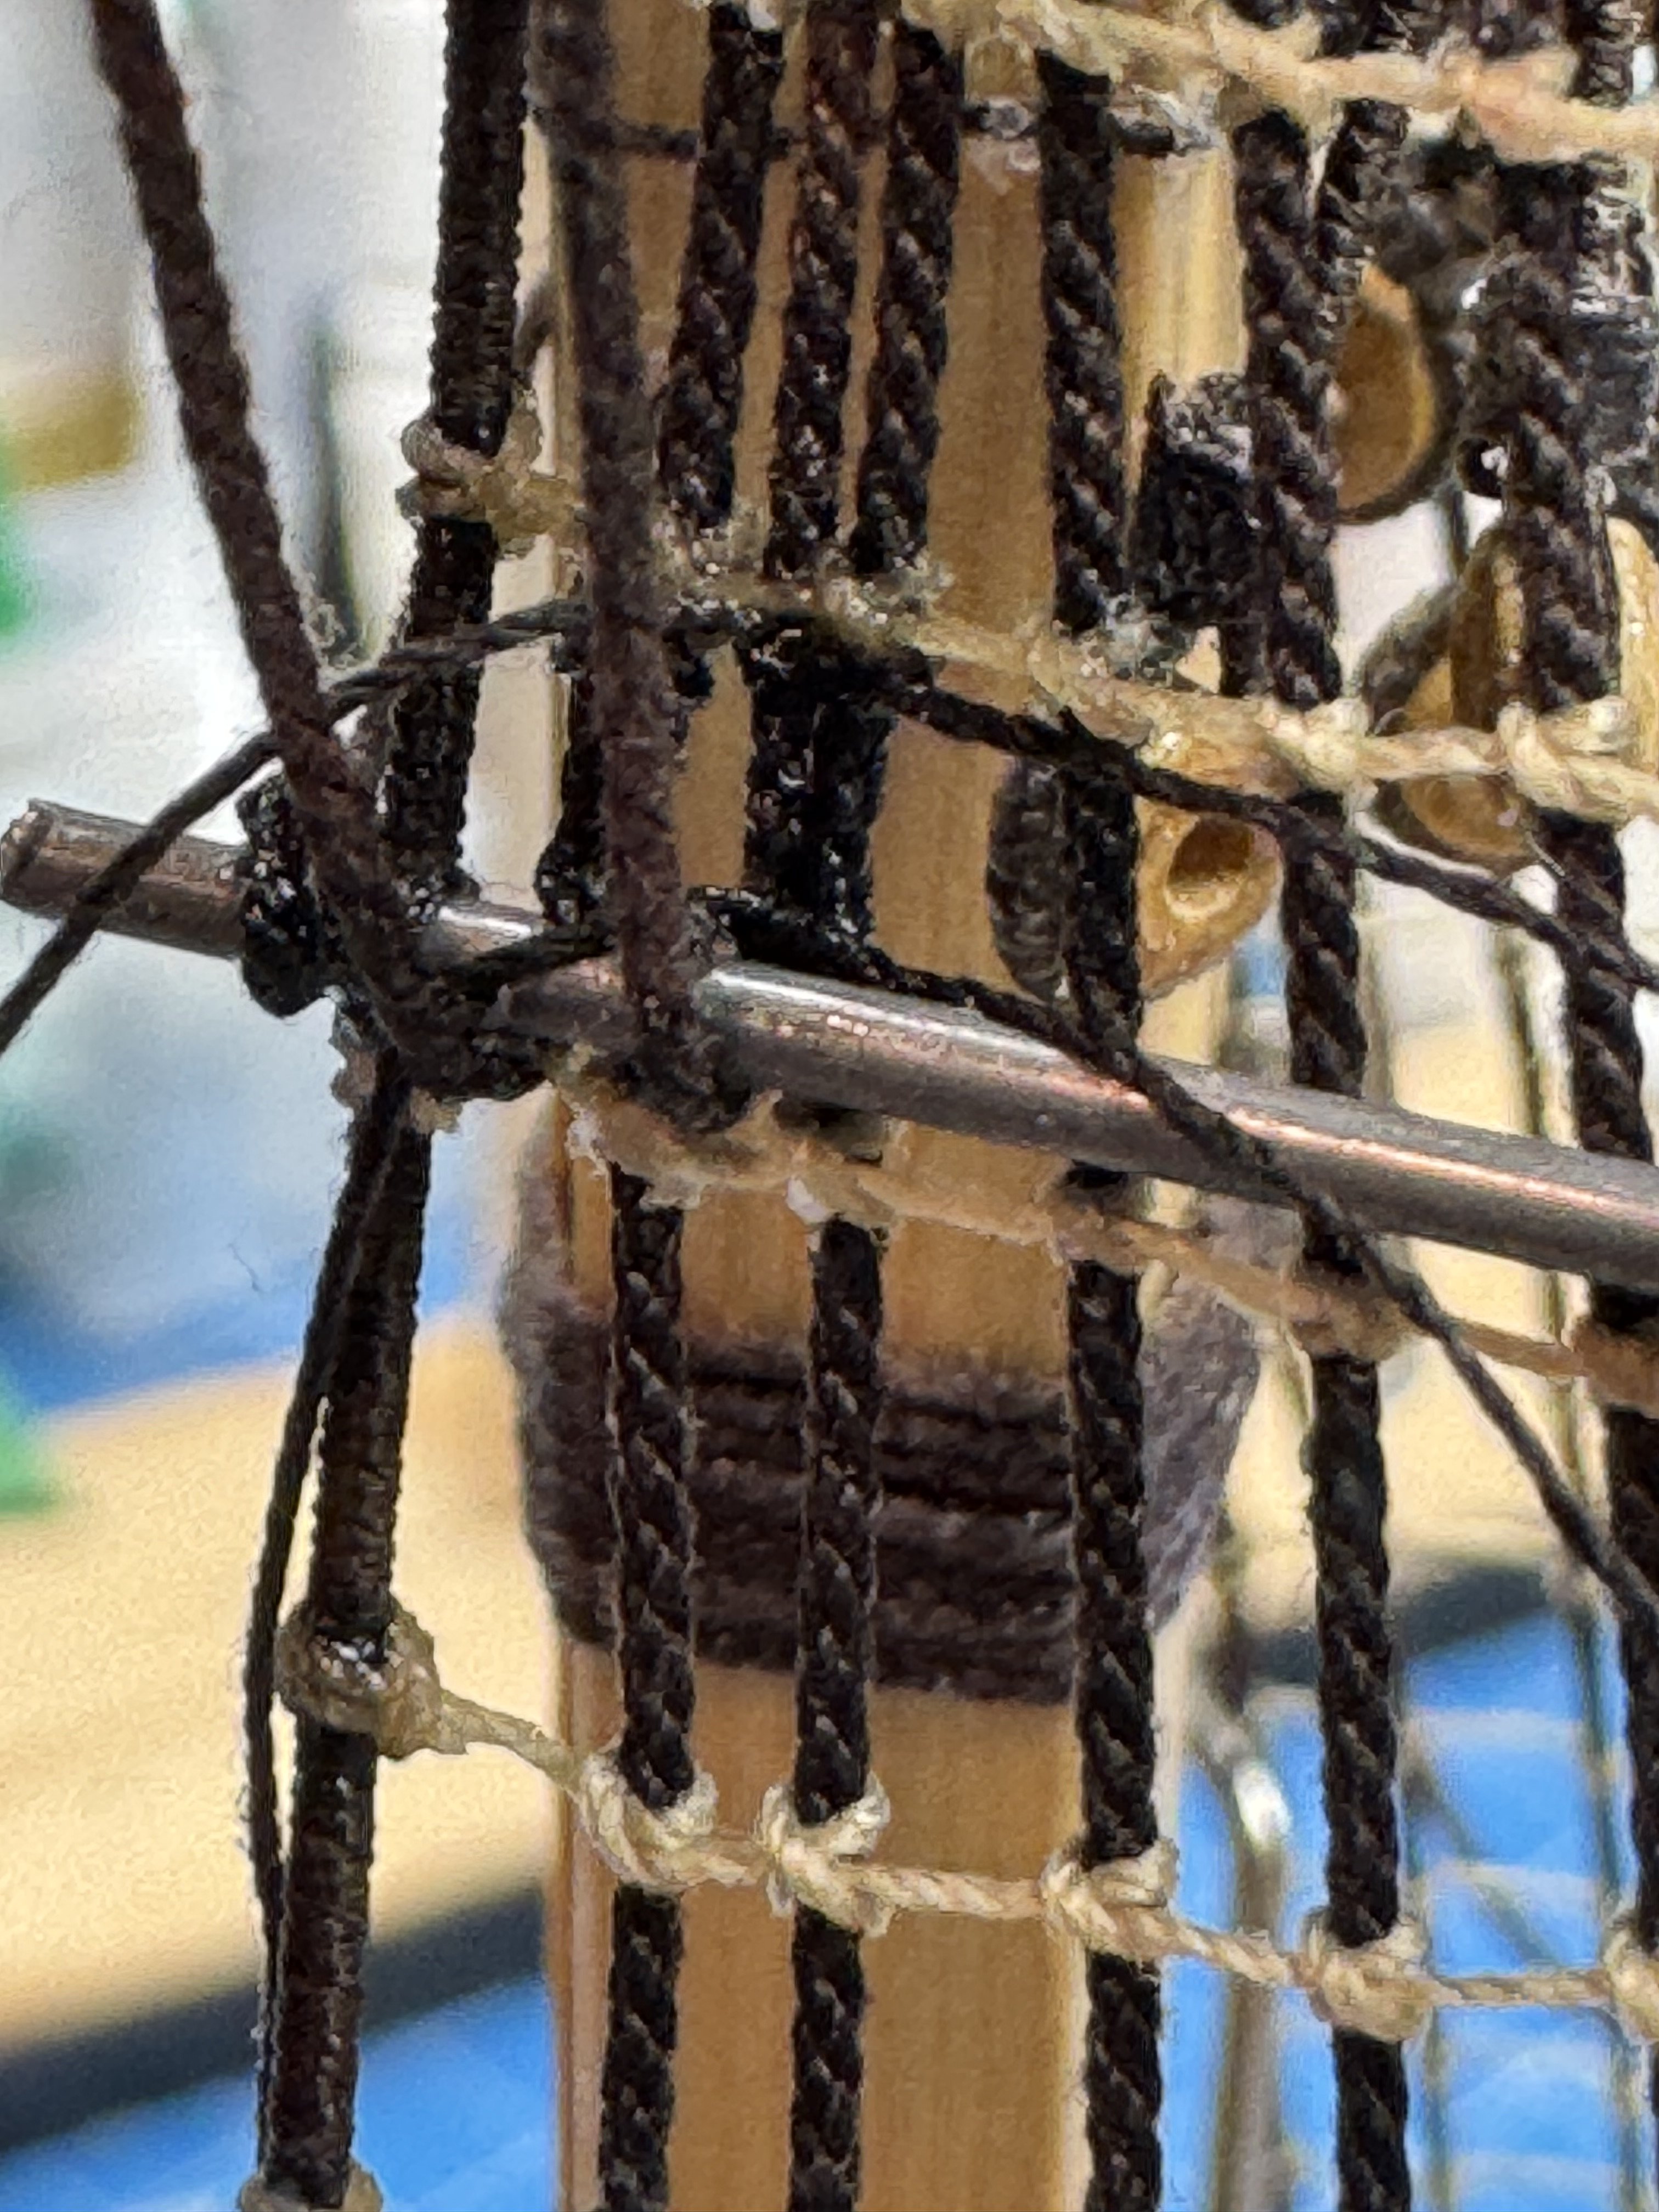
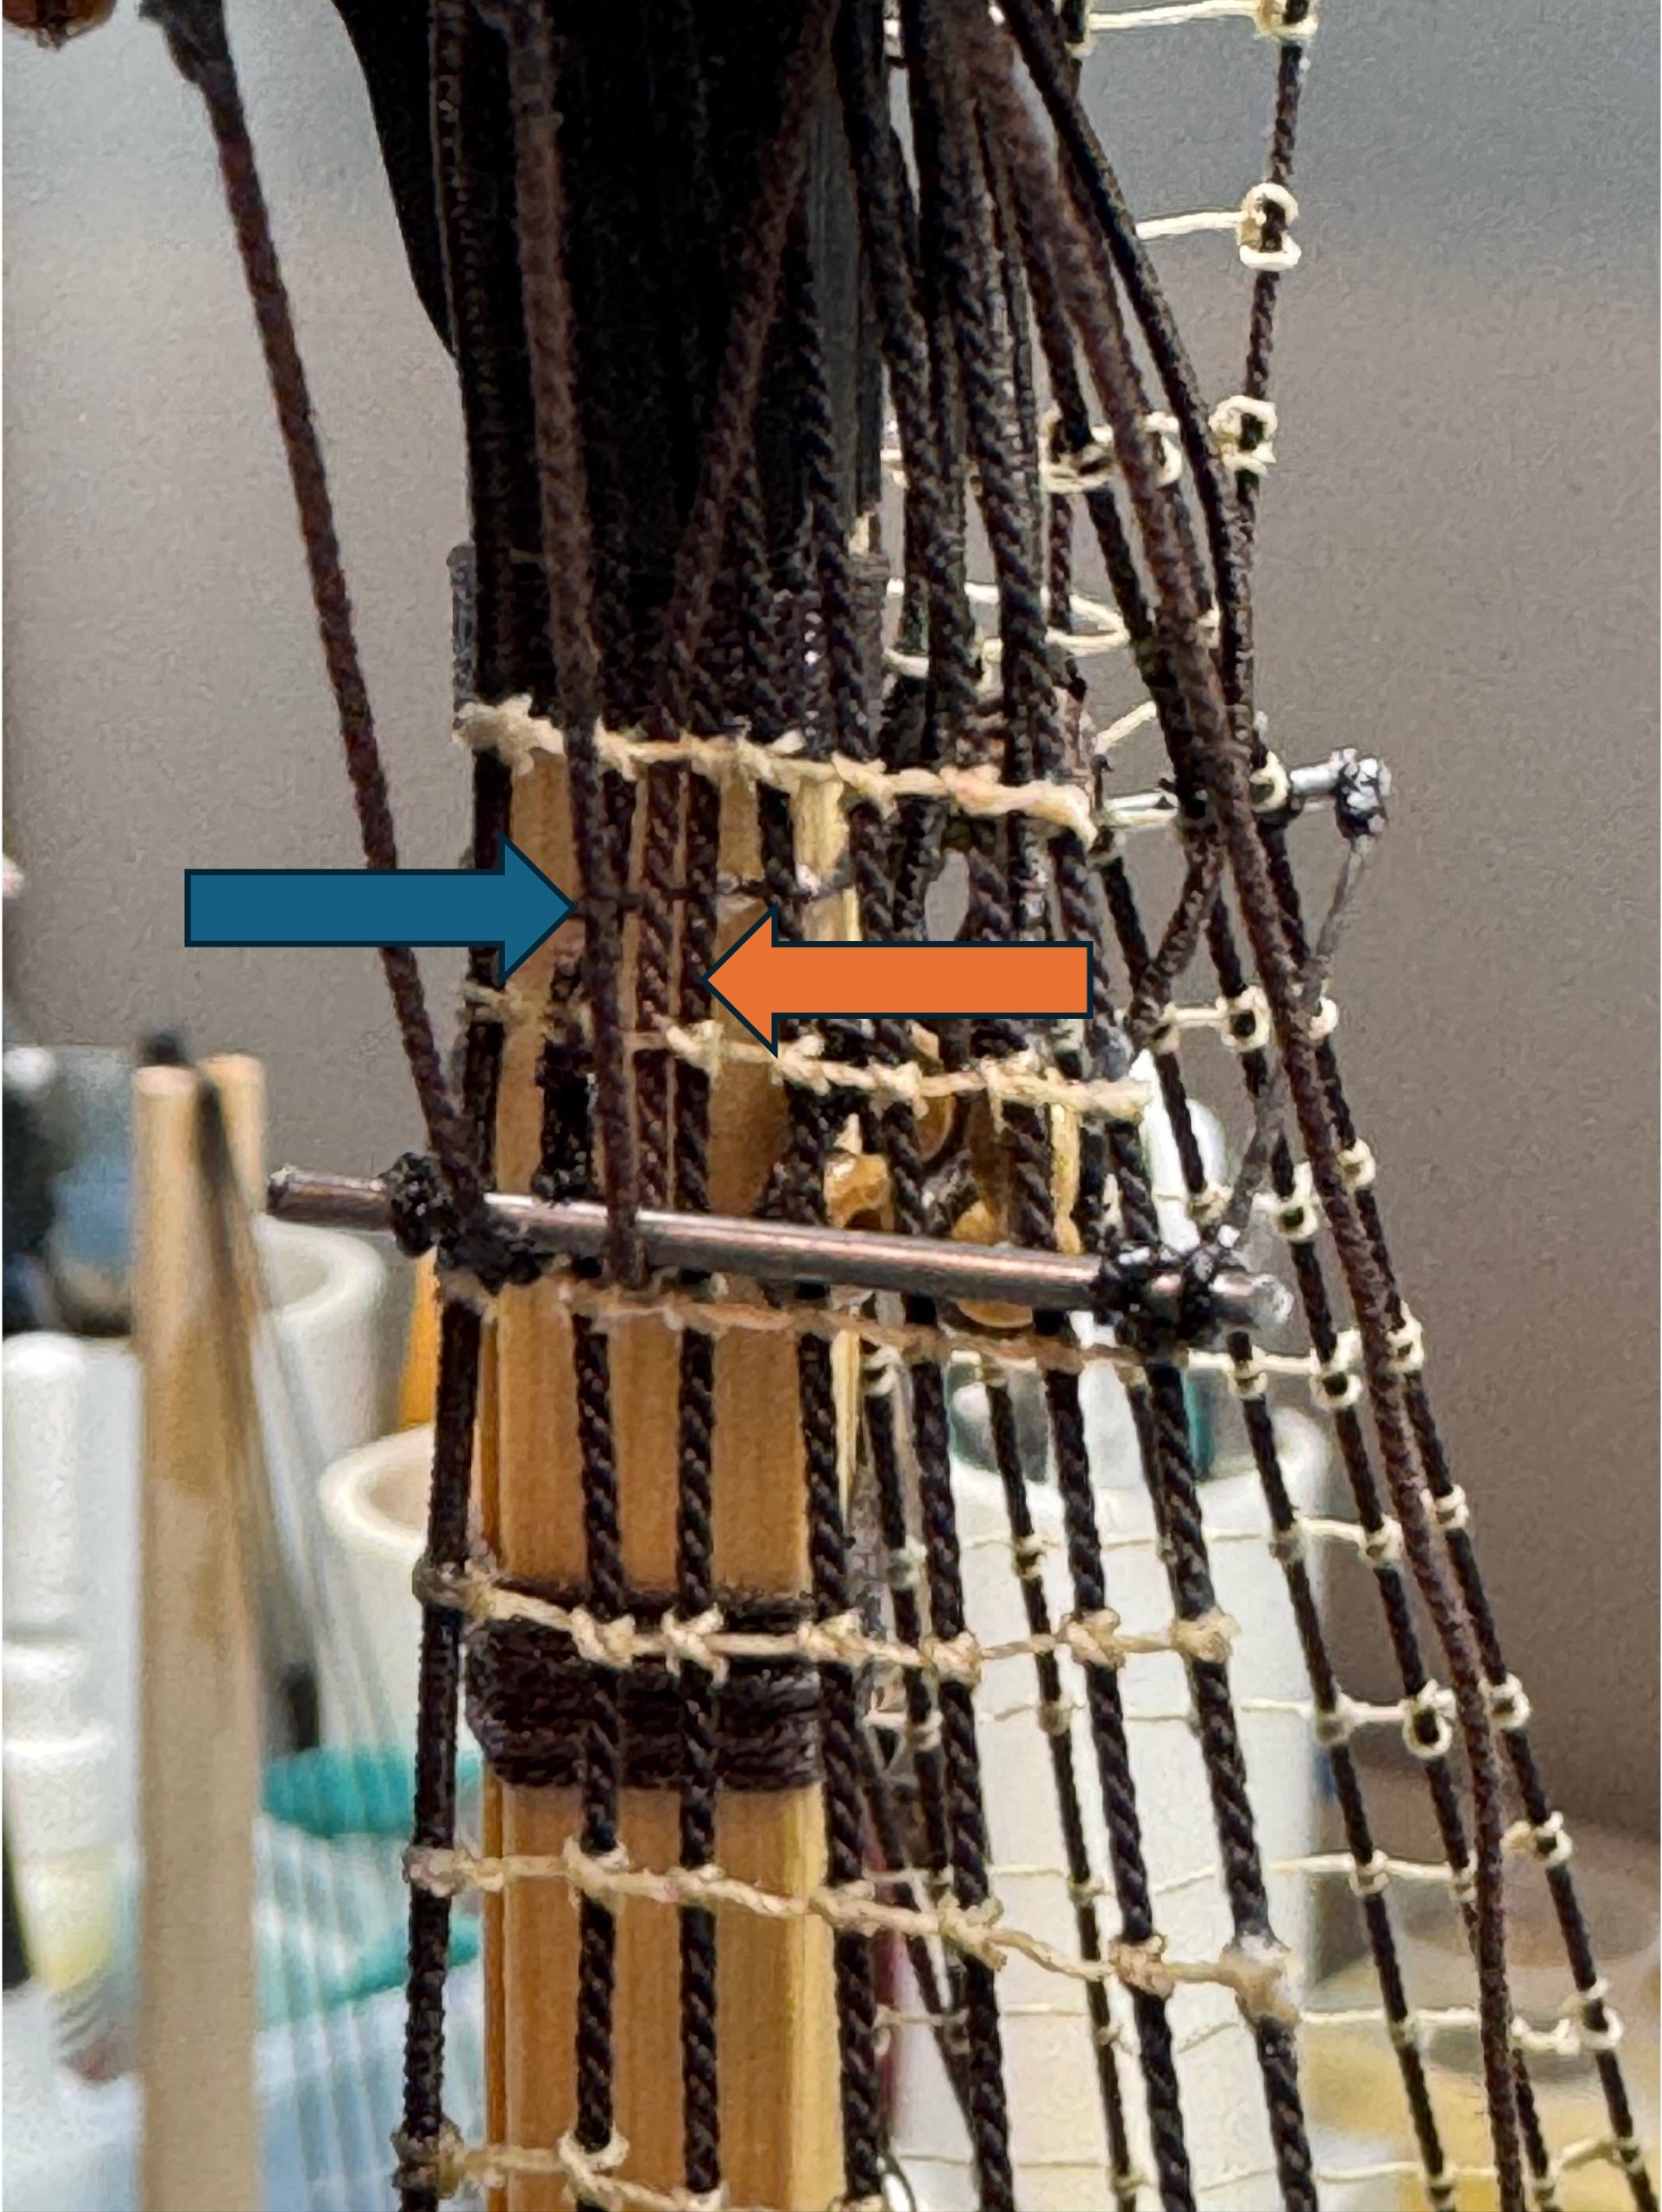
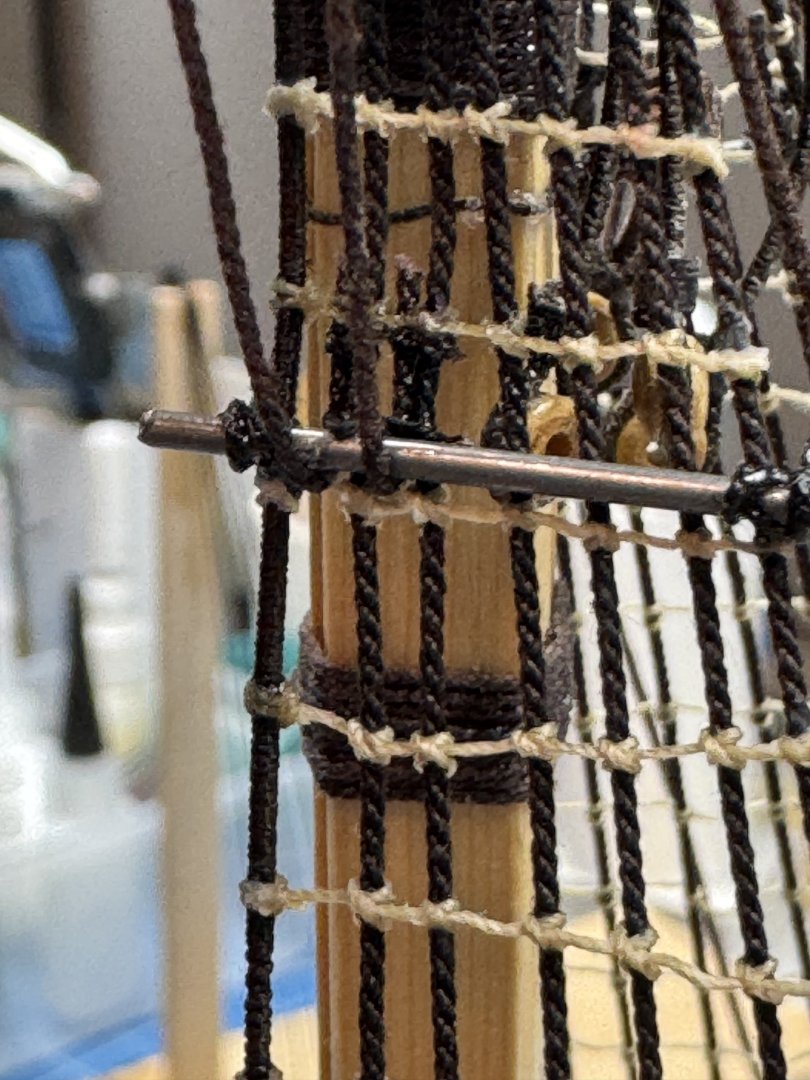
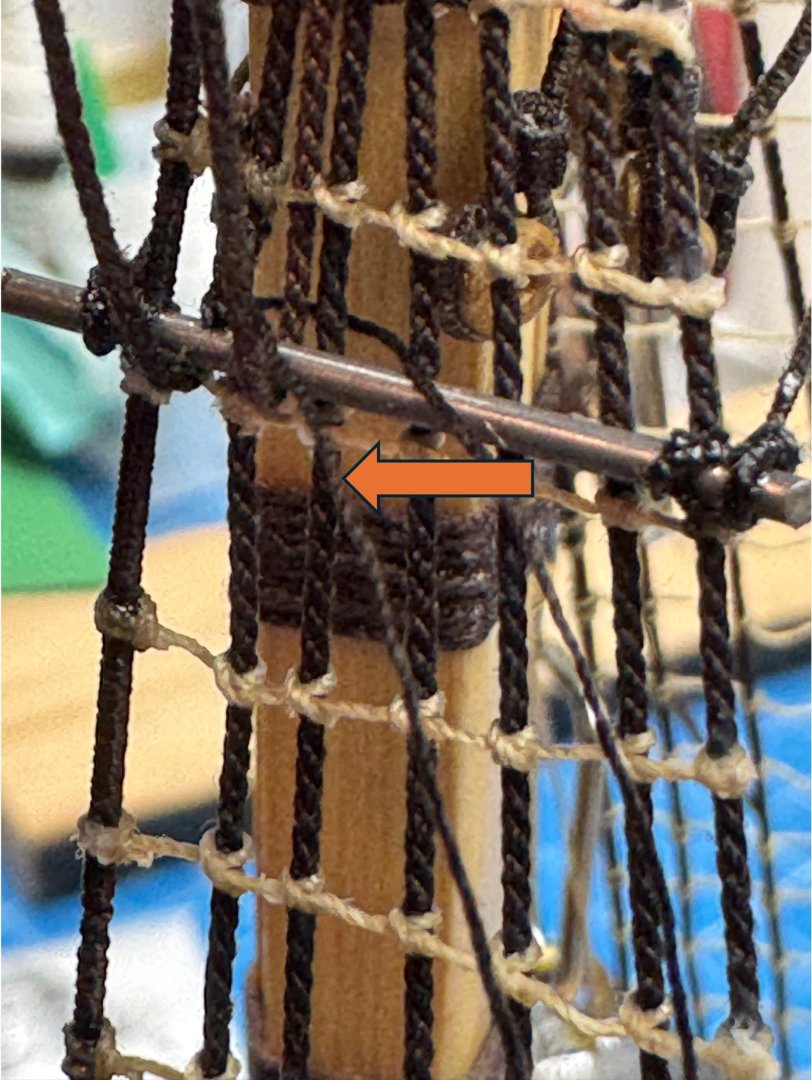
And here I thought ratlines were a pain. At least that is the same pain over and over and over. Futtock shrouds are another whole level. I cut the futtock shrouds extra long as I really had not figured out how I was going to get them installed when I started. As it turned out that was a good thing. One thing for those that follow - the eye in the PE-57 hooks provided need to be drilled out (I used a #68 drill bit) to get the .5mm line through (or my paint job is really thick - not likely since it was sprayed on). I followed the kit plans for how the futtock shrouds are located - from the futtock plate down around the futtock stave and then up along side the lower shroud and then secured to the lower shroud with seizings. Lennarth Petersson's book shows the futtock shrouds wrapping around the futtock stave and being seized to the lower shrouds below the futtock stave. For the fore mast the second, third, fifth and sixth lower shrouds are where the four futtock shrouds terminate. Here is the second (from the bow) futtock shroud in position. The green arrow points to the futtock shroud, the orange arrow to the third lower shroud. The extra length of the futtock shroud allows me to run the end up into and across the top and then hang a weight on the end to keep it in place while I secure it to the lower shroud. I use Syren .008 brown line to "seize" the futtock and lower shrouds together. Here the orange arrow shows the line that will be used to join the lines I used a simple overhand knot and kept the line just above the stave. A drop of thin CA secures the knot (and the two lines together). A second knot is added just under the ratline The ends of the "seizings" are trimmed off and the futtock shroud is cut off just above the ratline - I use cuticle shears to cut lines in these areas as they are easier (for me) to control and their sharp point makes getting into tight places (like here) easier. And when the futtock shrouds are all in place - MORE RATLINES!


- 422 replies
-
- 8
-
-
- Vanguard Models
- Sphinx
- (and 1 more)
-
Here are the fore mast port side shrouds complete - at least for now - still have to add the catharpins. Hopefully next time I can get the ratlines without so much slack.

- 422 replies
-
- 8
-
-
- Vanguard Models
- Sphinx
- (and 1 more)
-
If I had it to do over again I would add the cleats as I was tightening the shrouds. The drawing shows the cleats just above the upper deadeye so they should not interfere with the ratlines. The one down side that I see is that if you are using a ratline spacing template behind the shrouds the cleats may make getting that situated satisfactorily more difficult than not having them there.
- 422 replies
-
- 1
-

-
- Vanguard Models
- Sphinx
- (and 1 more)
-
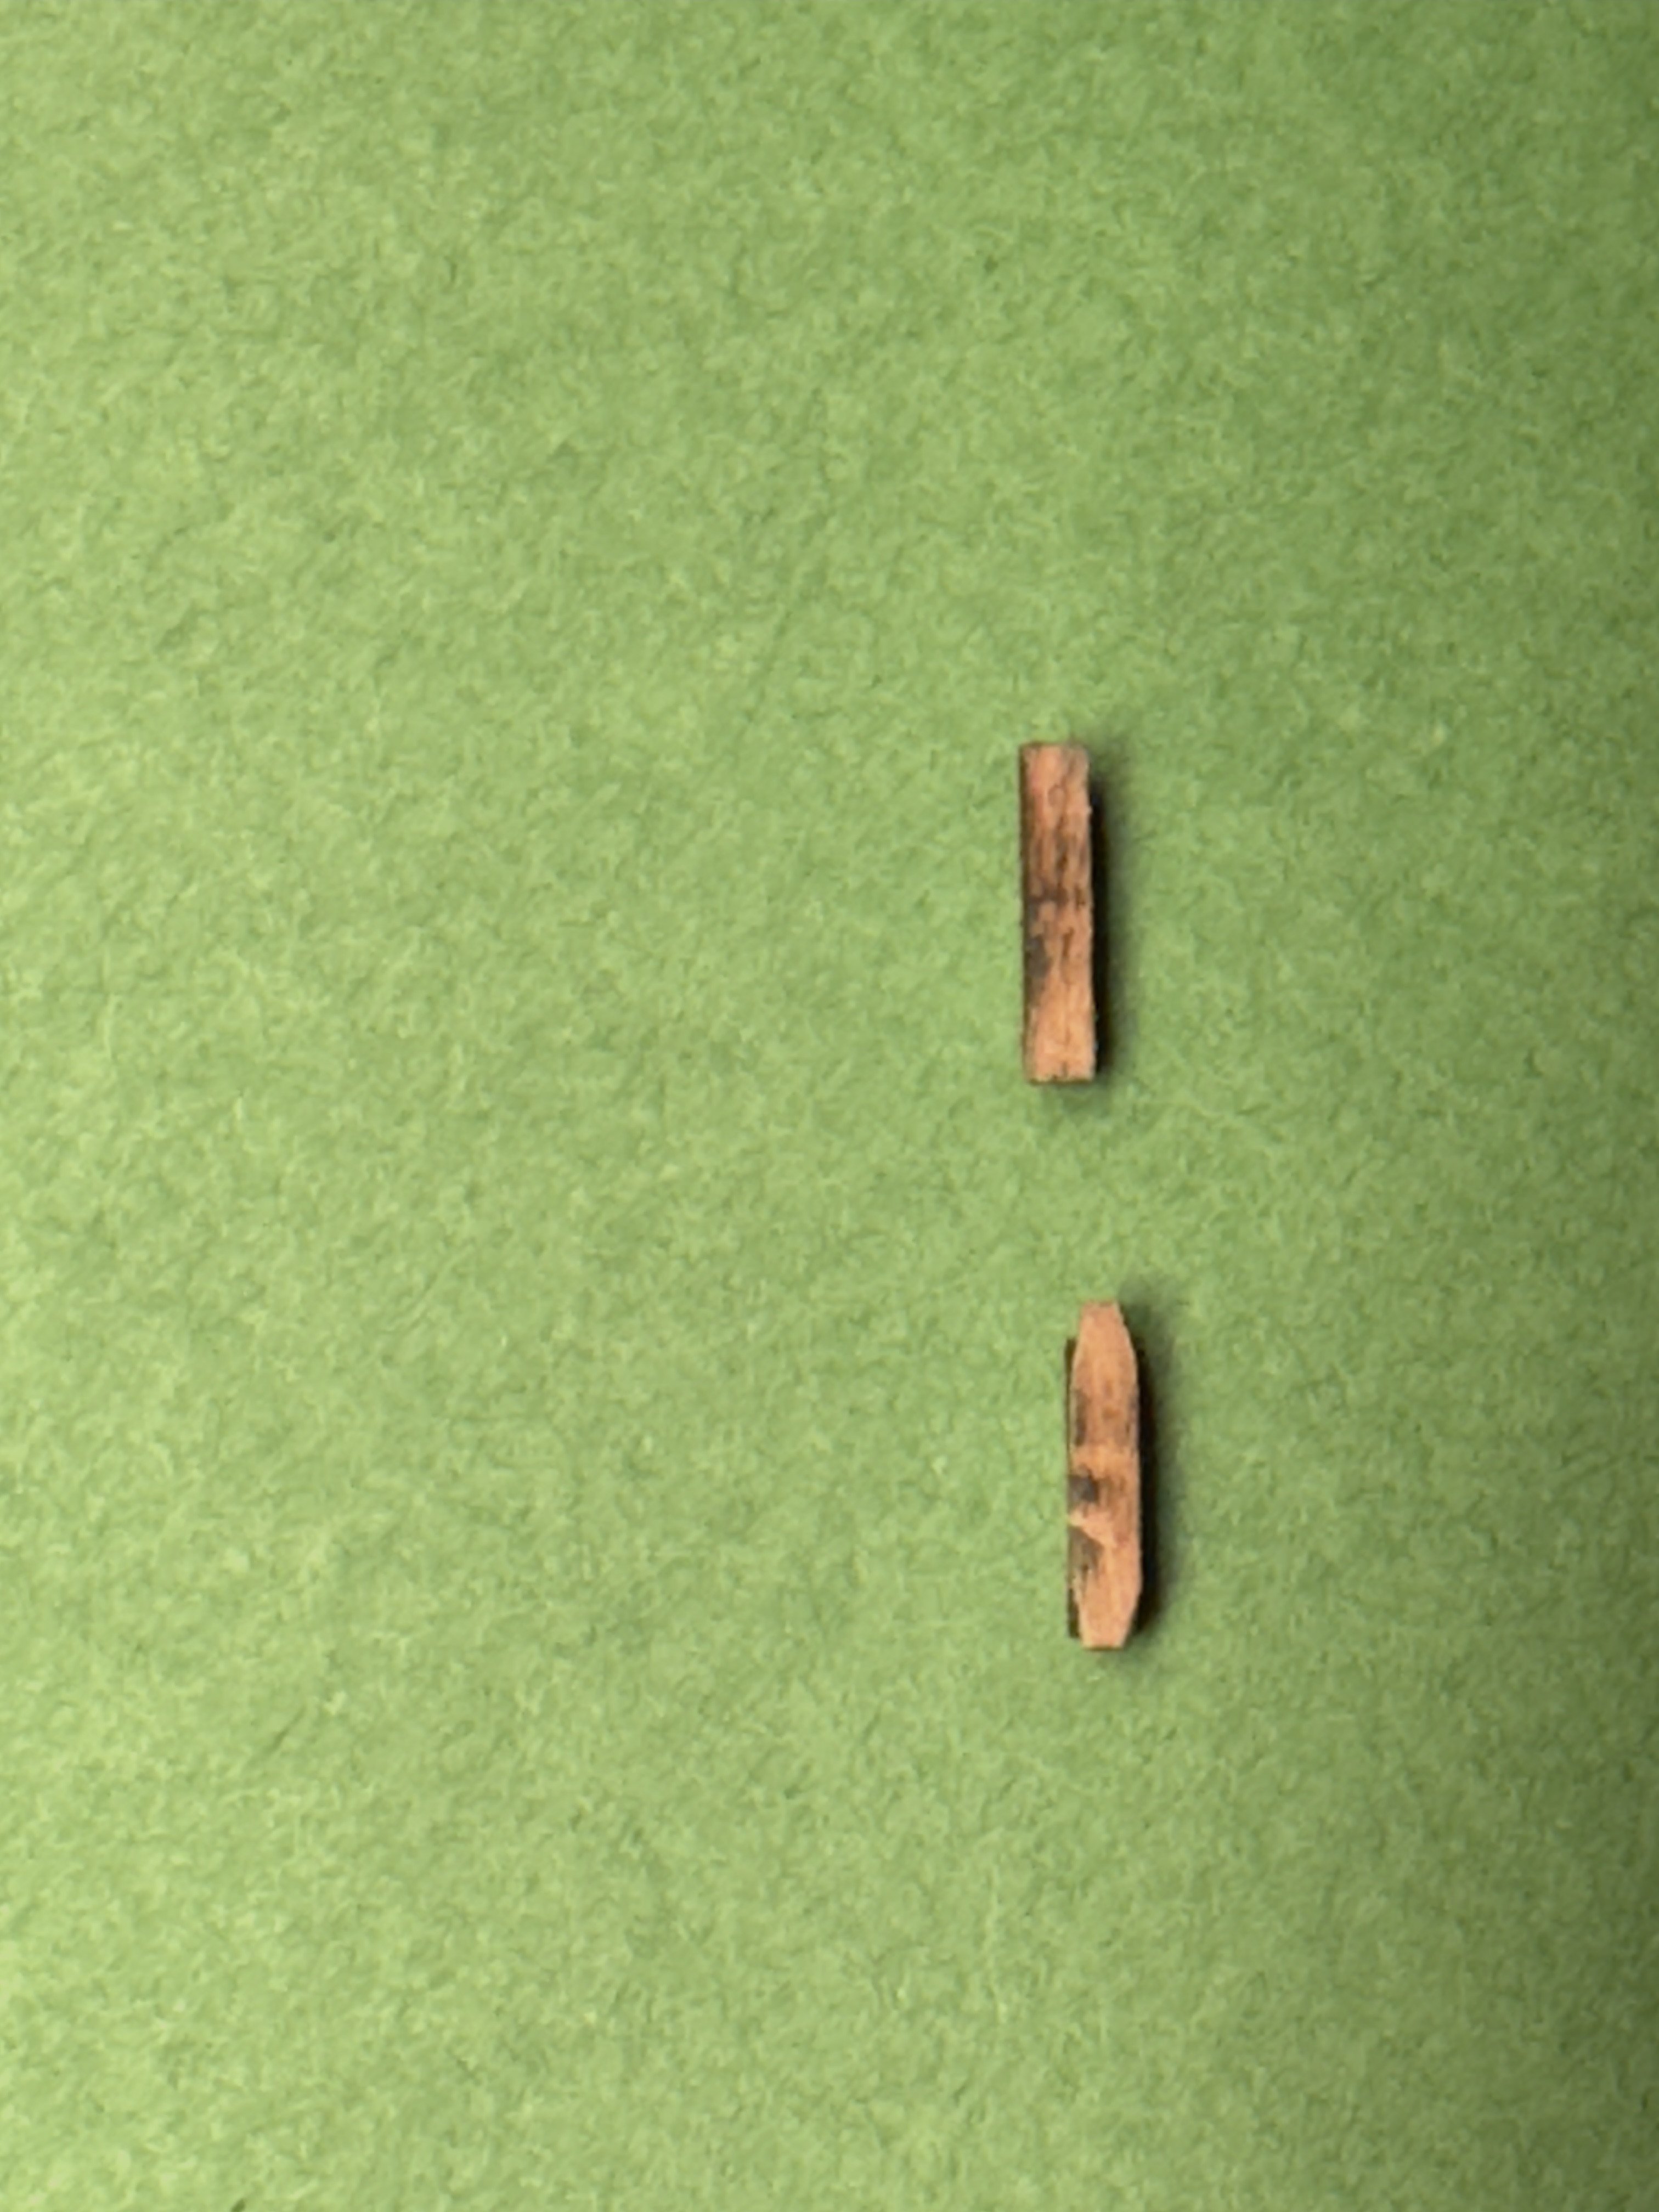
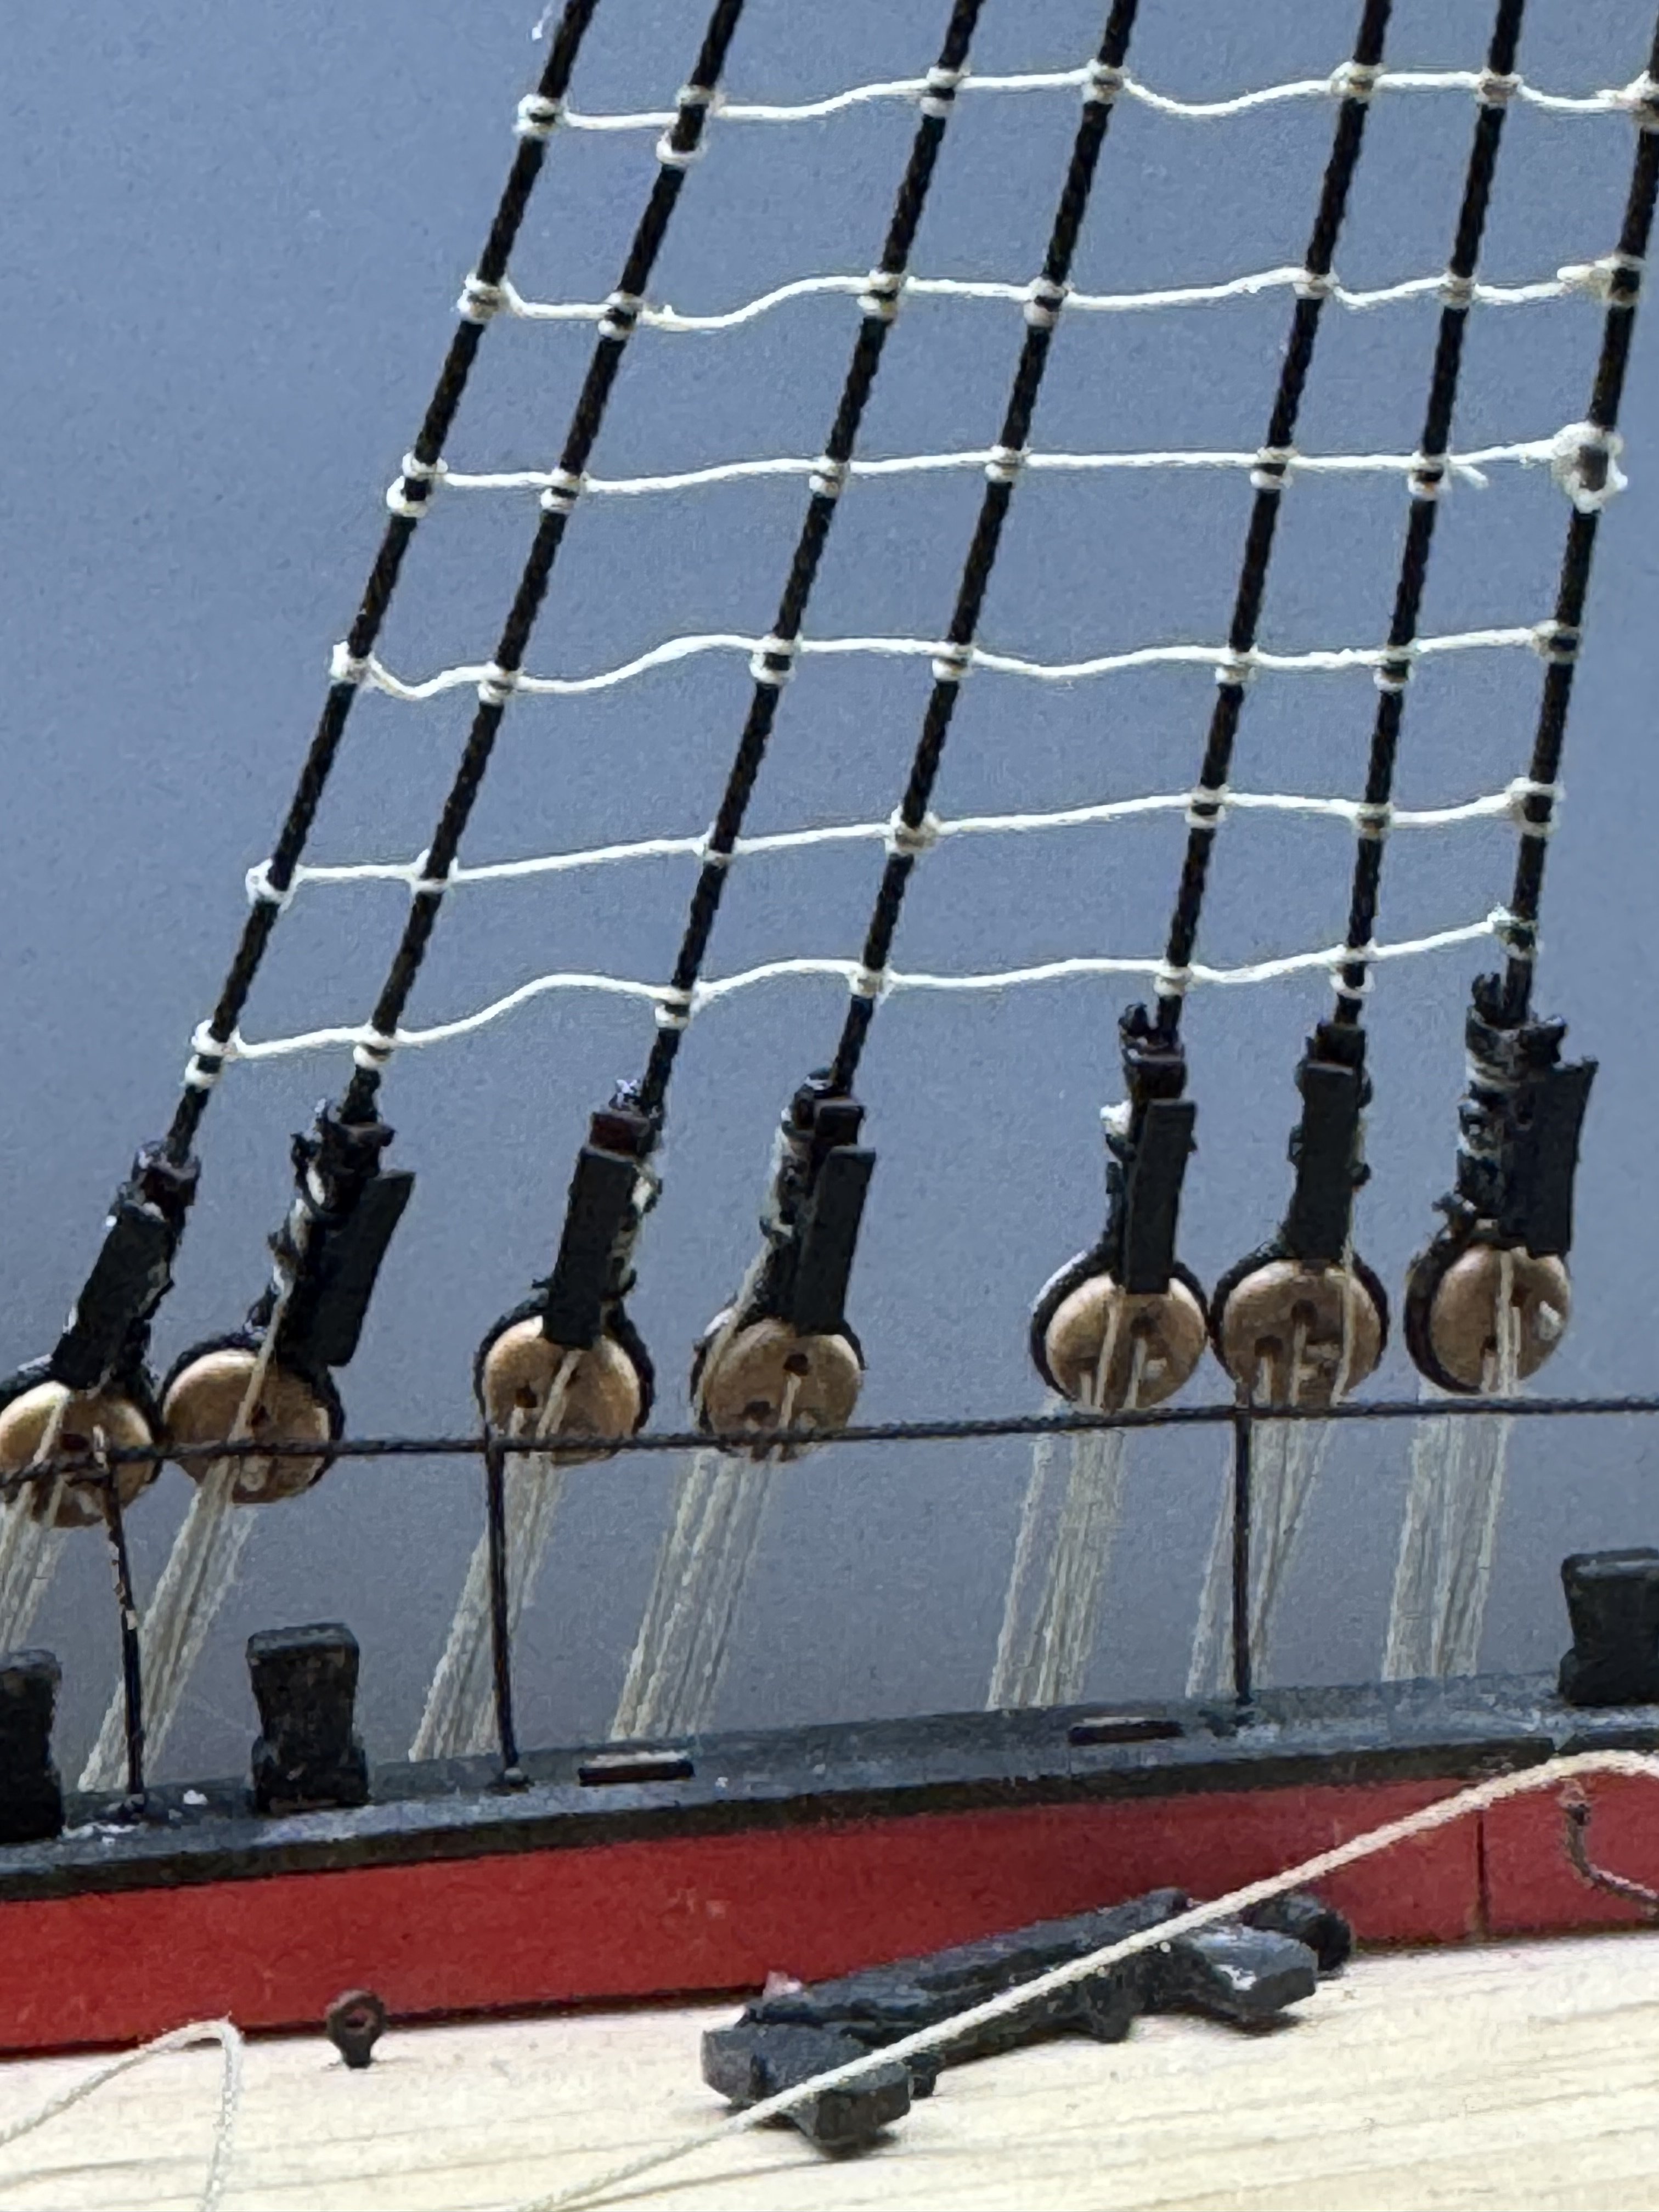
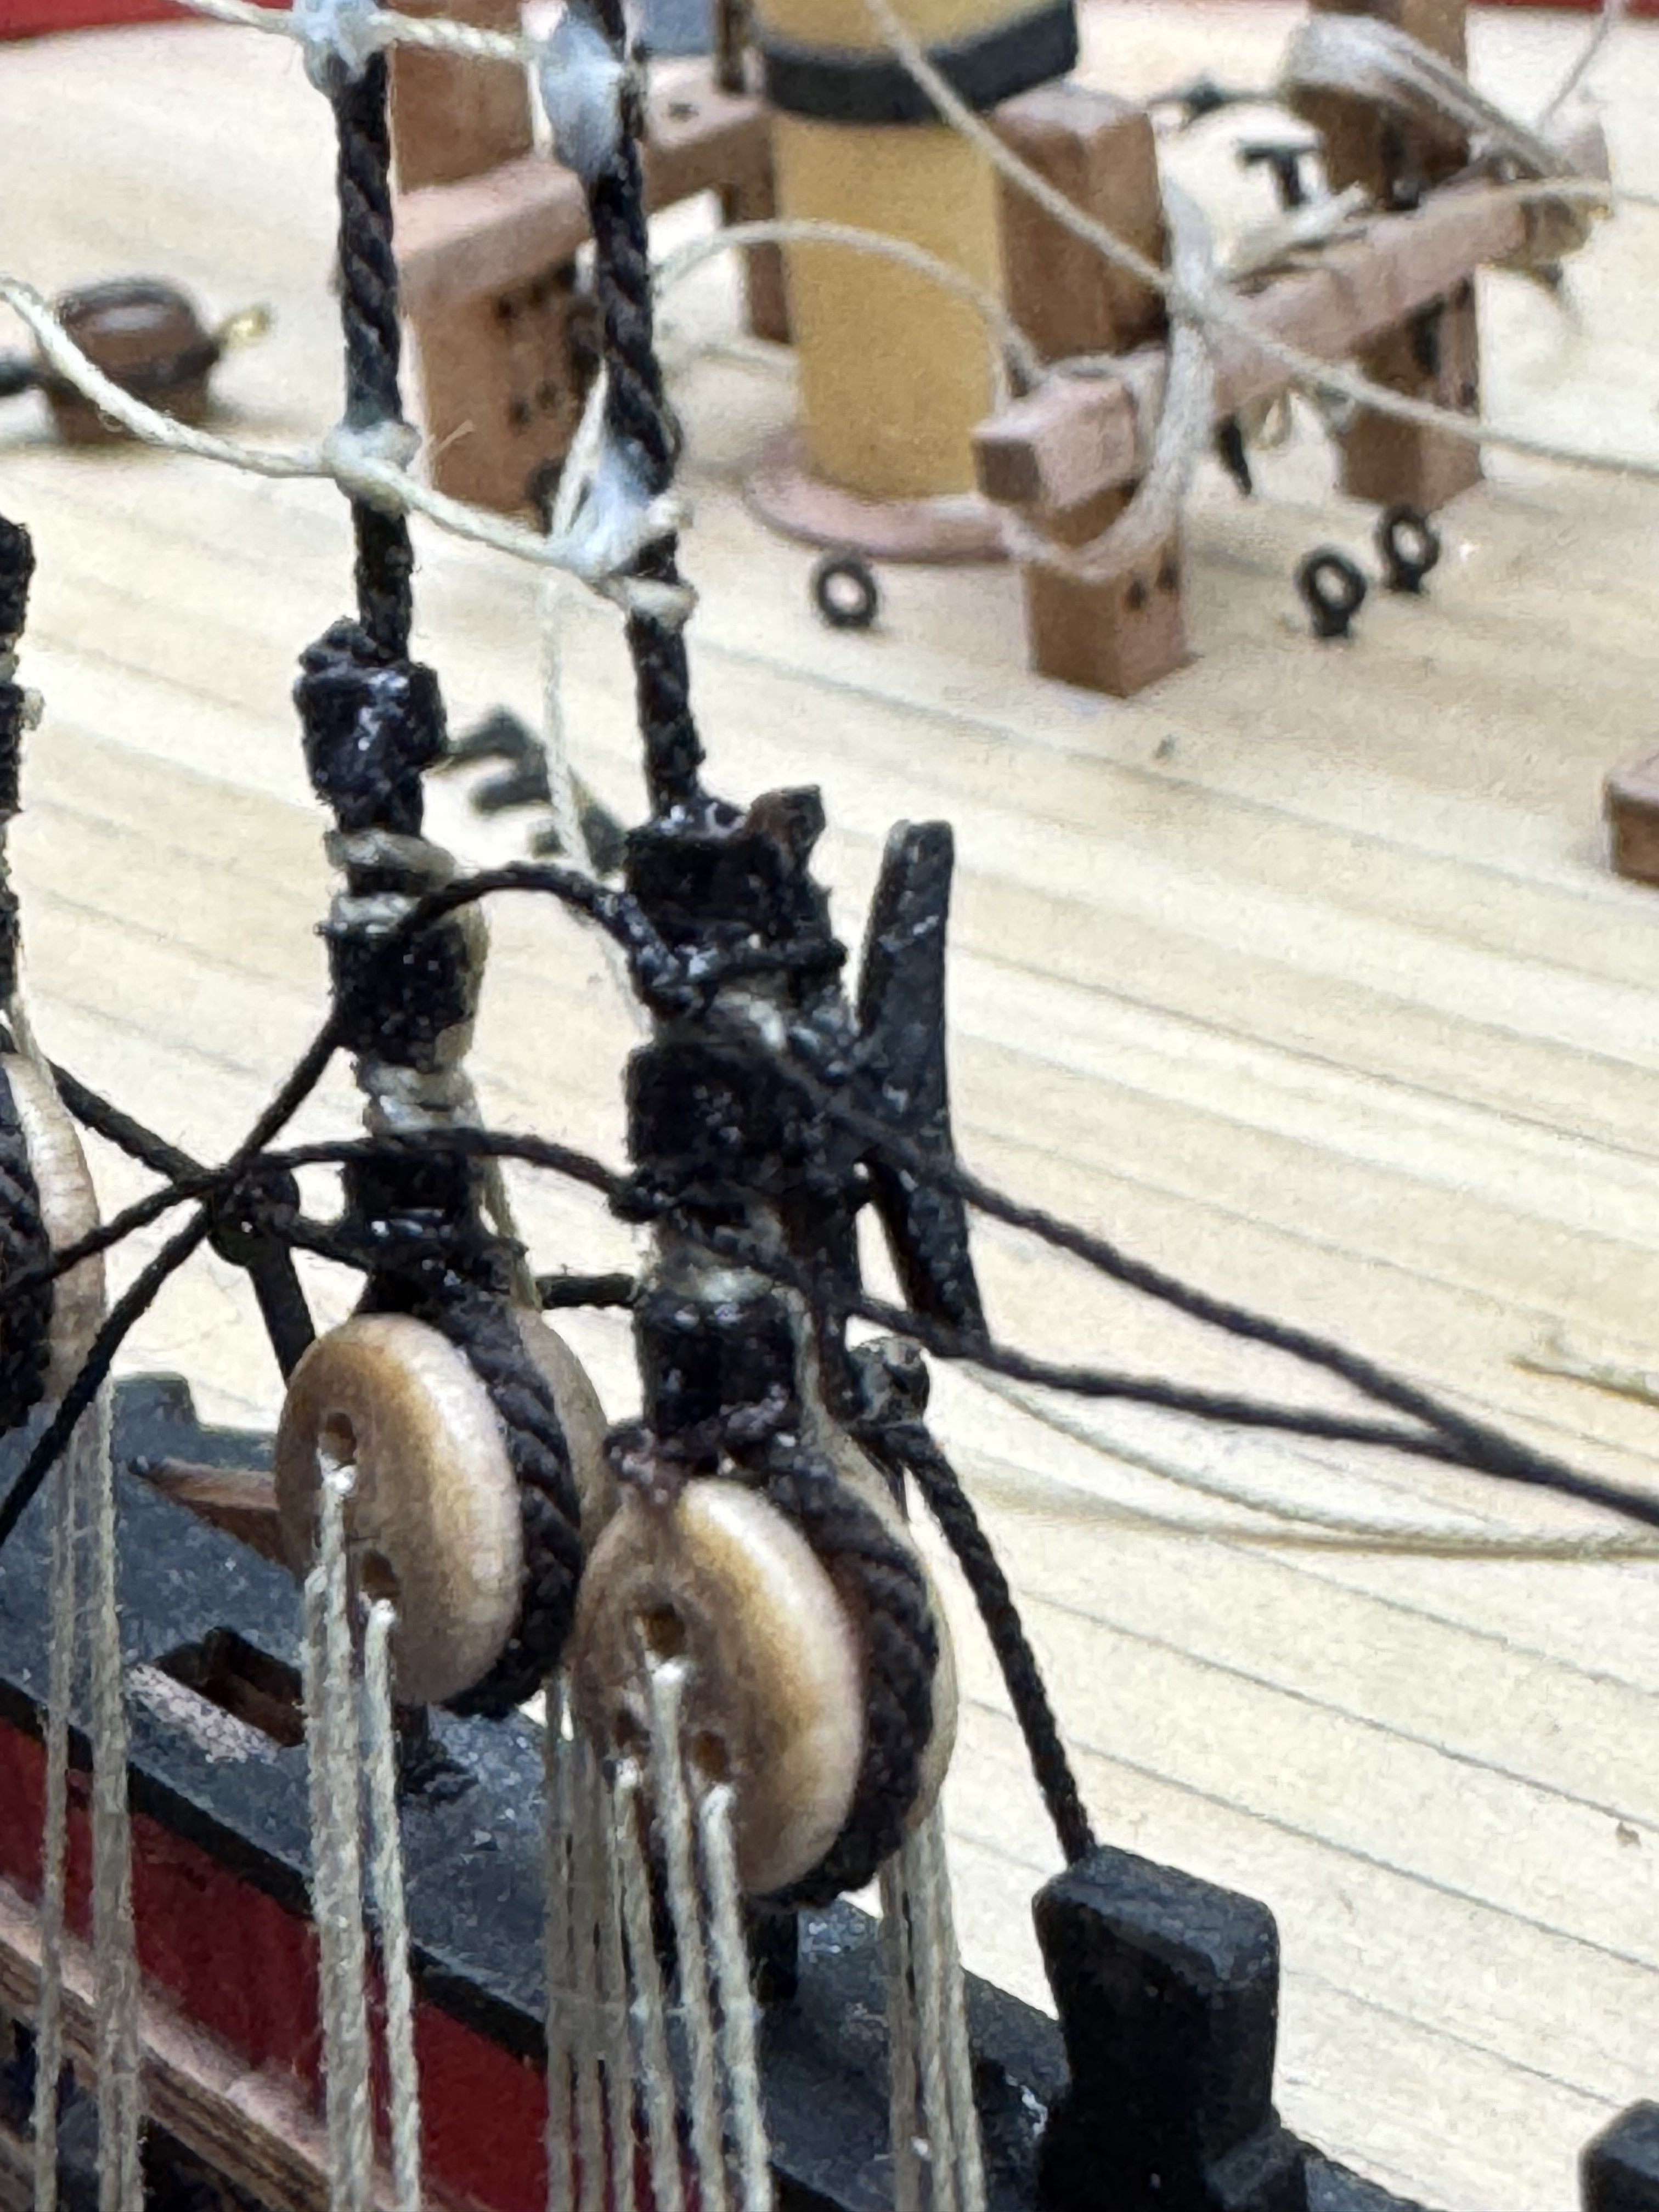
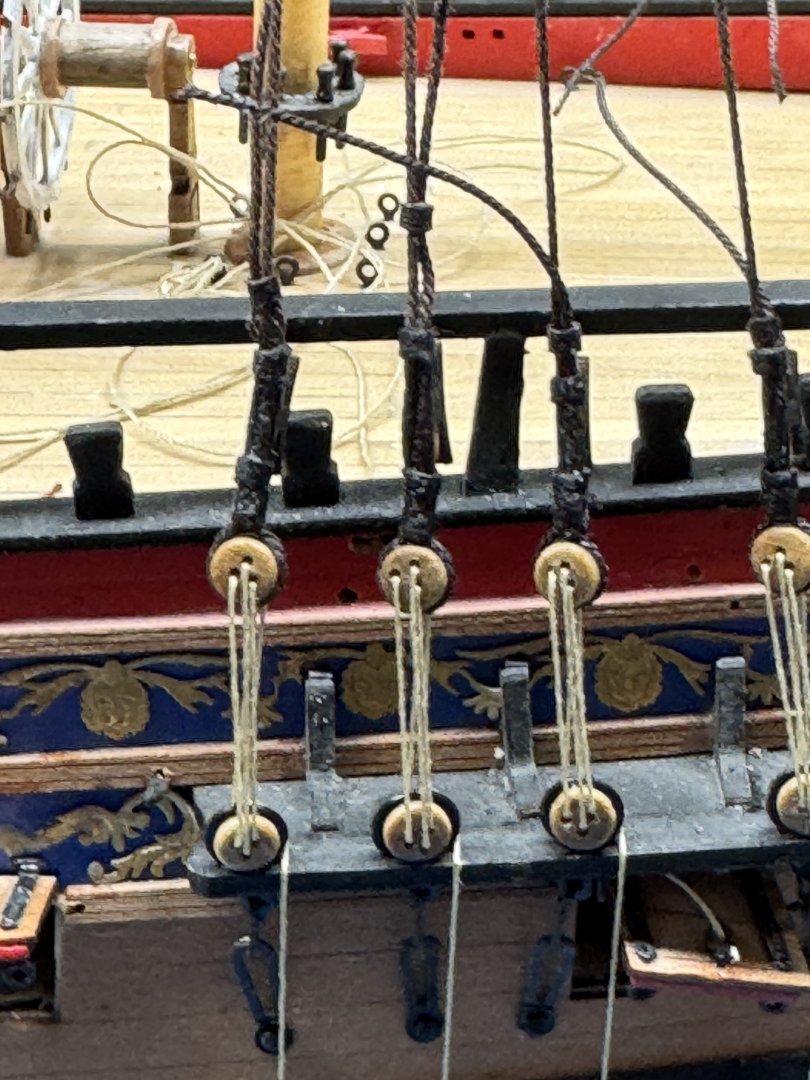
And now for the shroud cleats. This is my first model with this interesting "feature". I assume these replace the typical pin rails along the bulwarks but seem (to me) to produce a "forest" of line coils hanging down in the areas where men would be working - and hurrying (hopefully) to their "battle stations". That said I should have recognized that it would have been easier (I think) to install the shroud cleats when the upper deadeyes were attached to the shrouds. I would have used larger pre-made seizings for the upper two and seized both the bitter end of the shroud and the shroud cleat at the same time. As it is the shroud cleat does not have a smooth surface to attach to since the upper seizings stand off a bit from the shroud lines. At the moment I am inclined to glue the shroud cleat to whatever surface I can find and then add some .008" lashings. Hopefully this will be strong enough to support the tension that these cleats must care. Hopefully the ratlines will distribute the loan across the entire shroud set so the running rigging tension does n ot distort the shrouds. time will tell. Here is the first cleat on the fore shrouds. This one was probably the easiest since it has the least access obstructions.

- 422 replies
-
- 5
-
-
- Vanguard Models
- Sphinx
- (and 1 more)
-
Port side of Fore Mast ratlines "done". Not as disagreeable as I remembered but then this is only about 15% of the ratlines required. Hopefully I will get better with more "practice" as I see several places where the line should have been shorter. These are all clove hitches now that I have a detailed picture to go by. Somehow pictures (which I got from NRG) seem to help more than words. I am hoping the gentle curve of the forwardmost shroud is an optical illusion because of the camera angle.

- 422 replies
-
- 7
-
-
- Vanguard Models
- Sphinx
- (and 1 more)
-
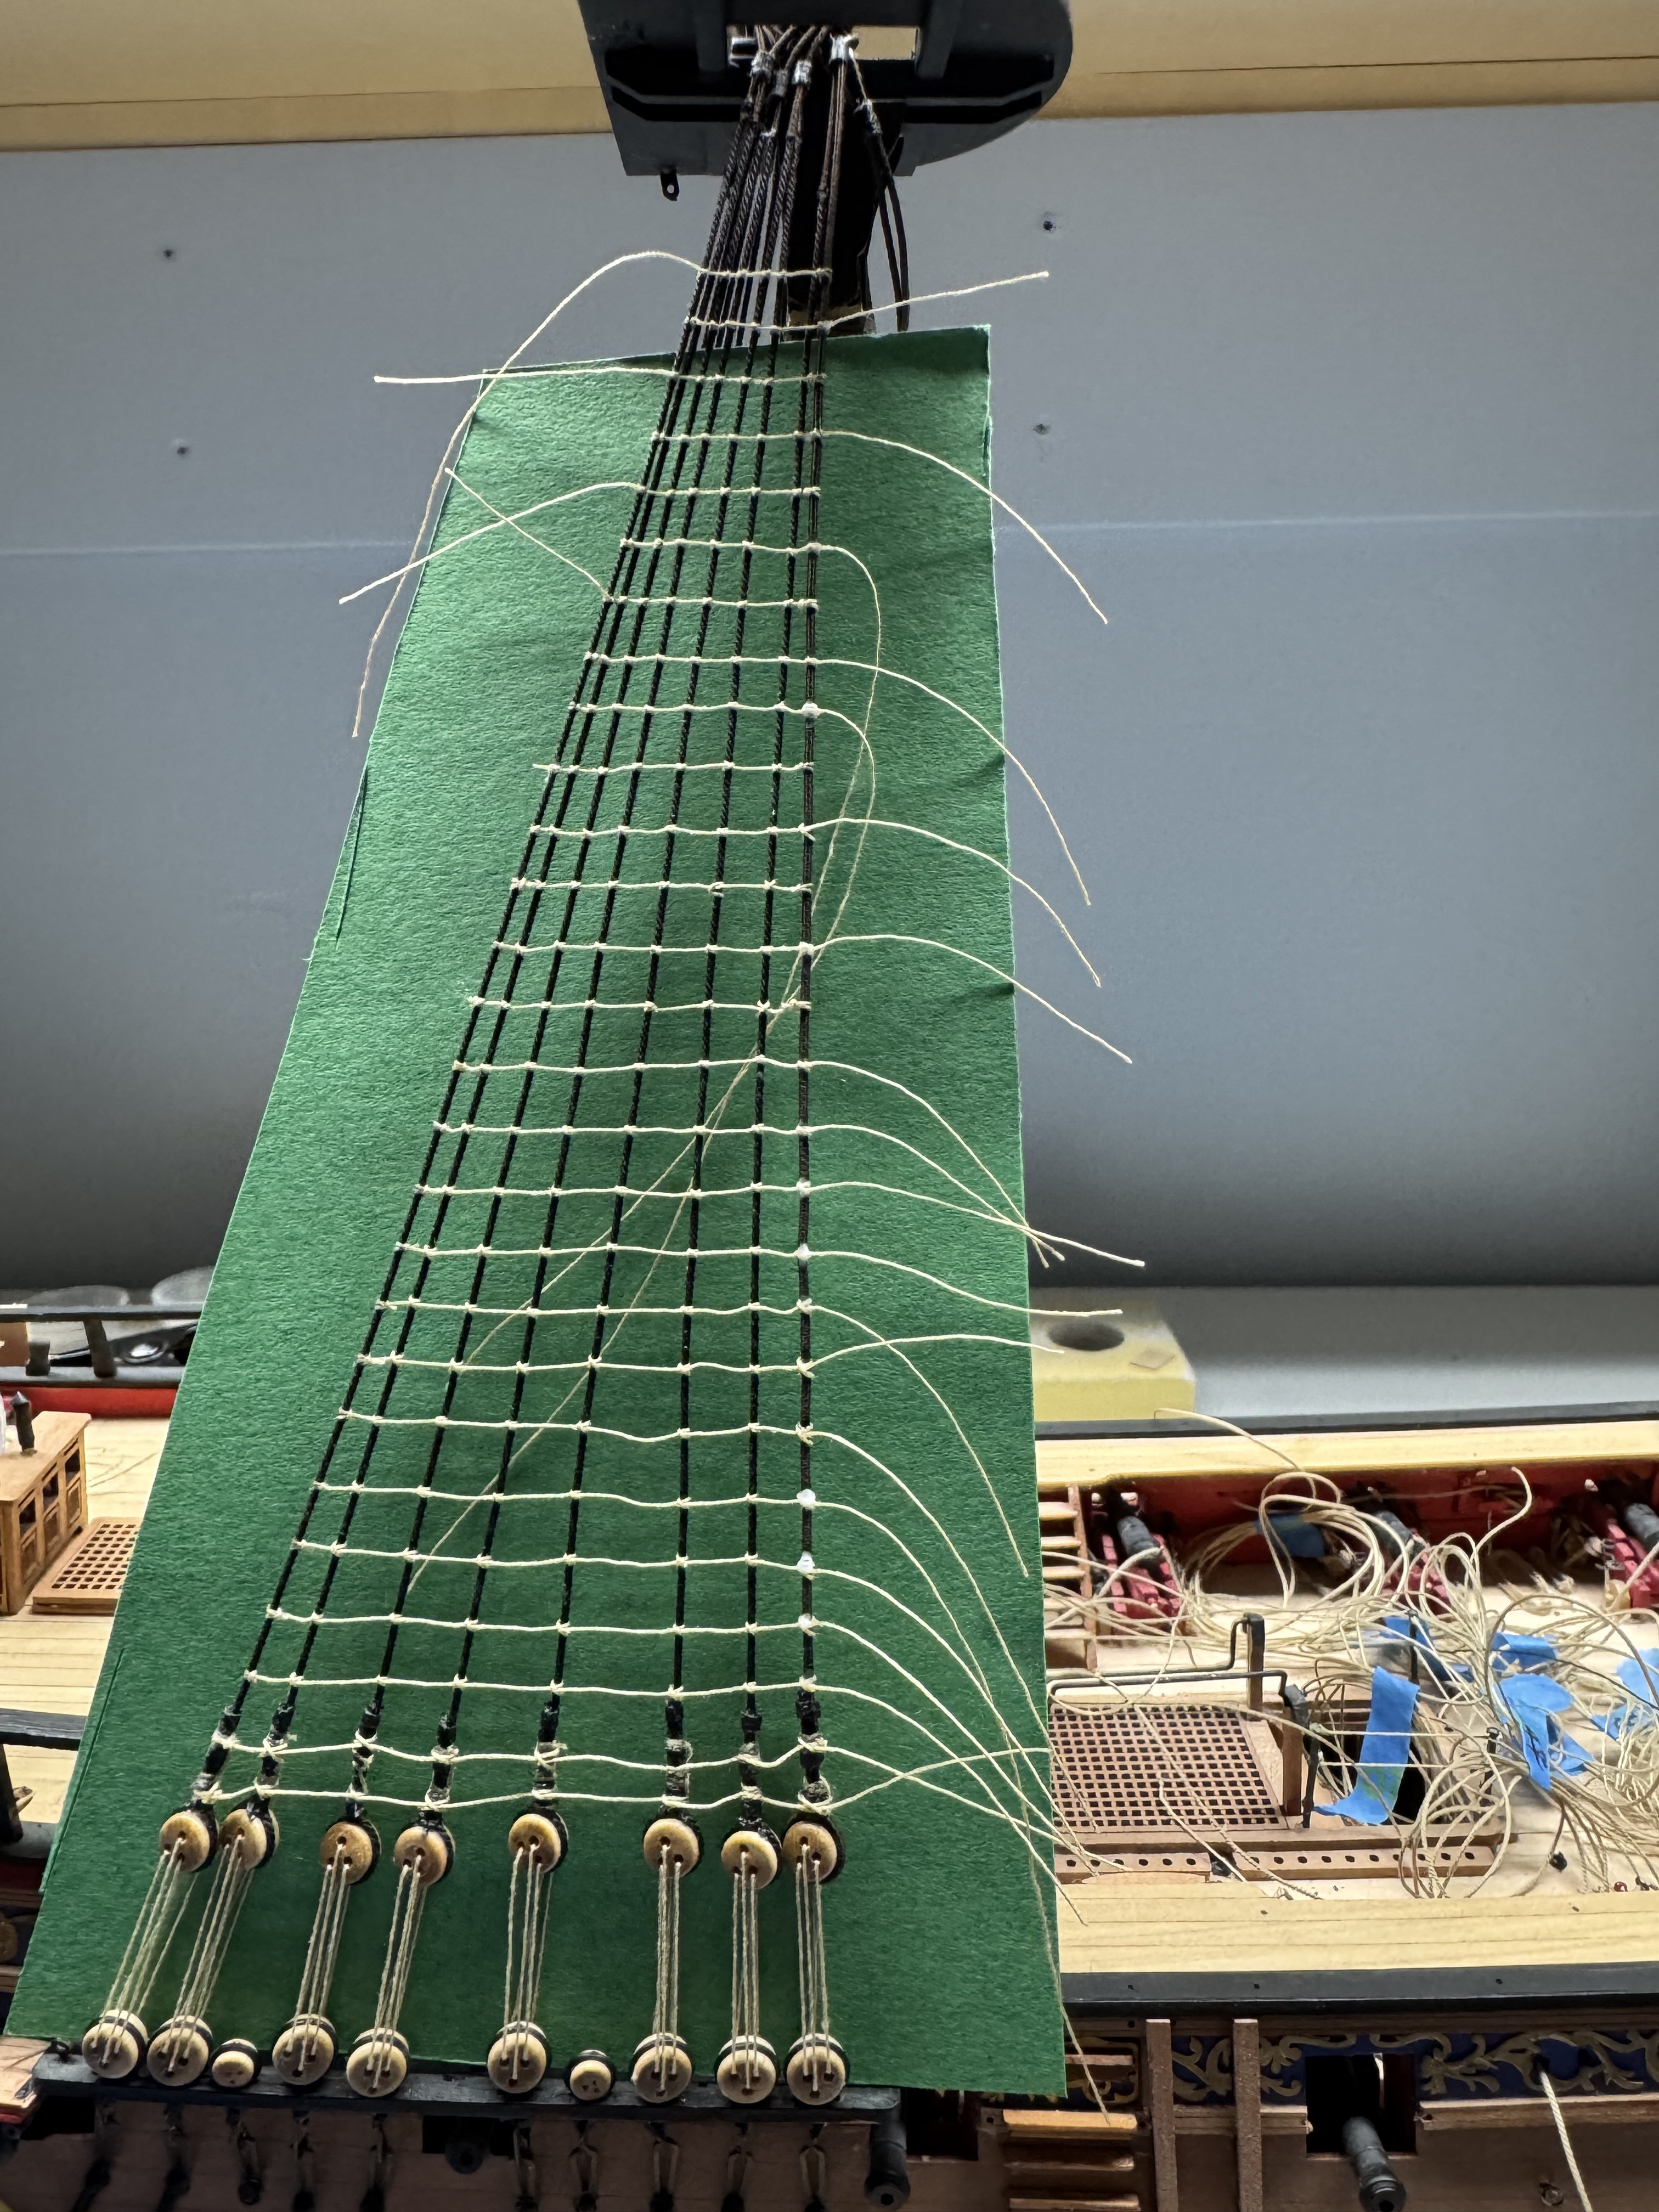
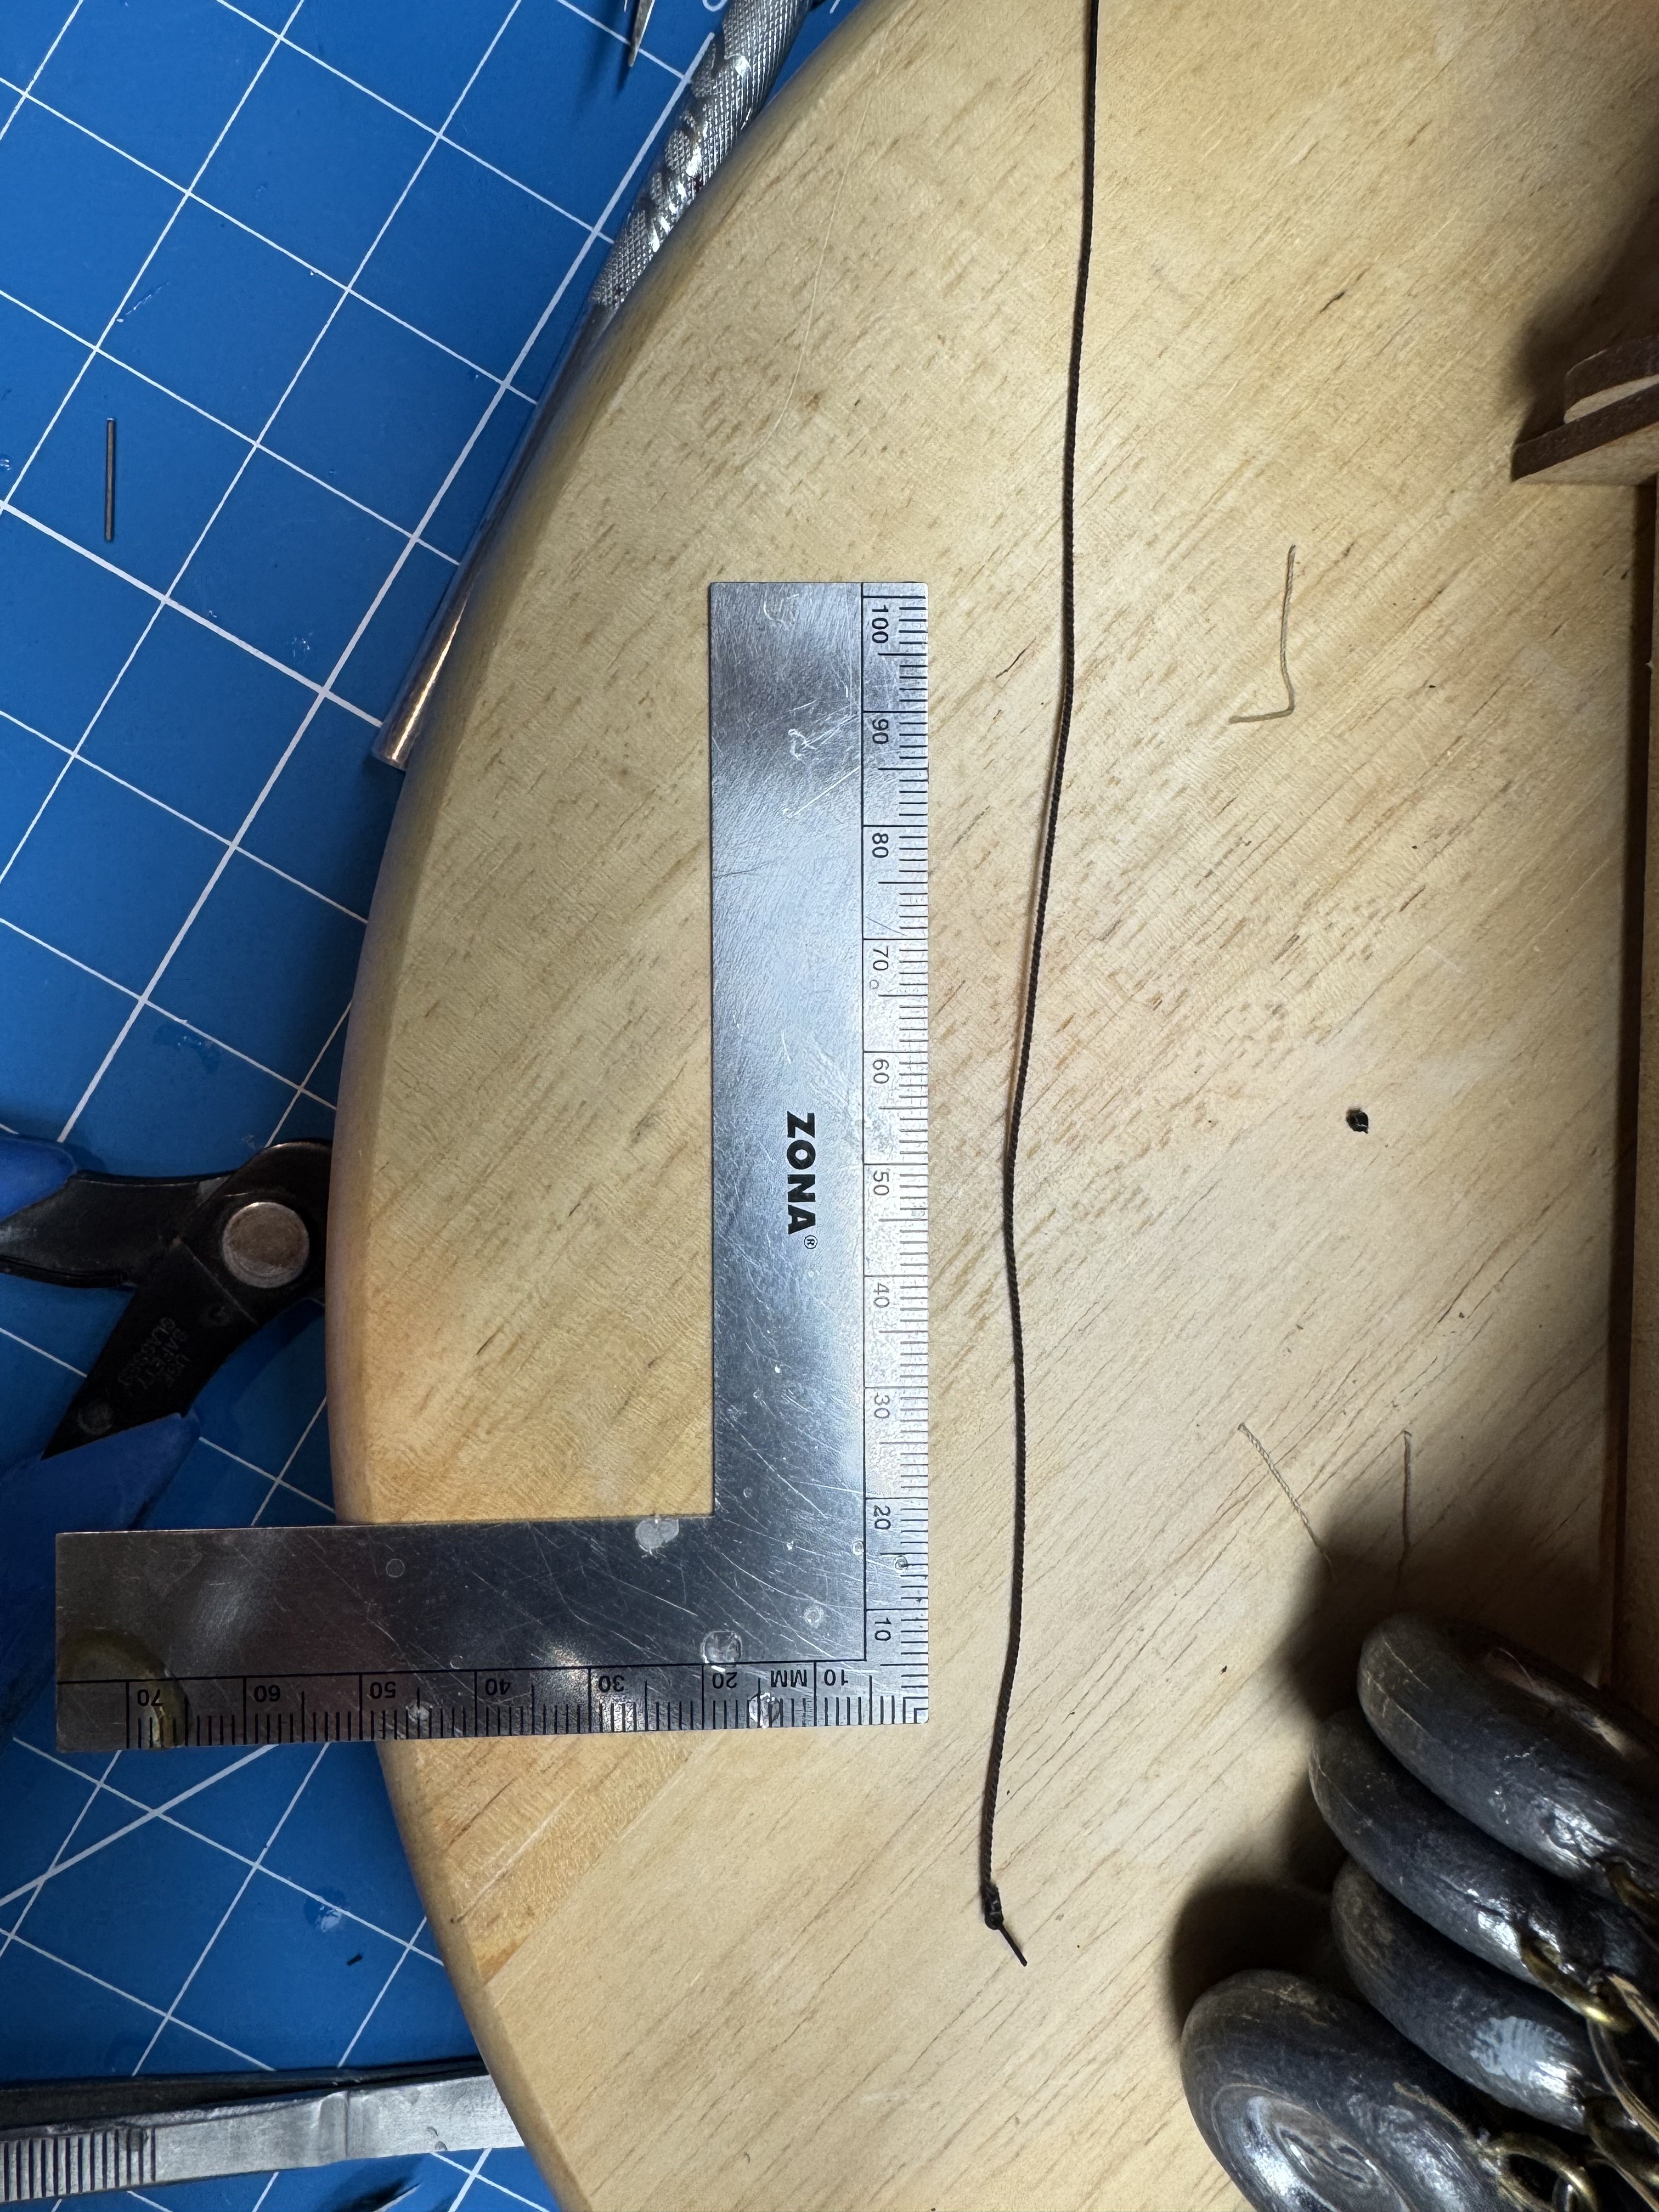
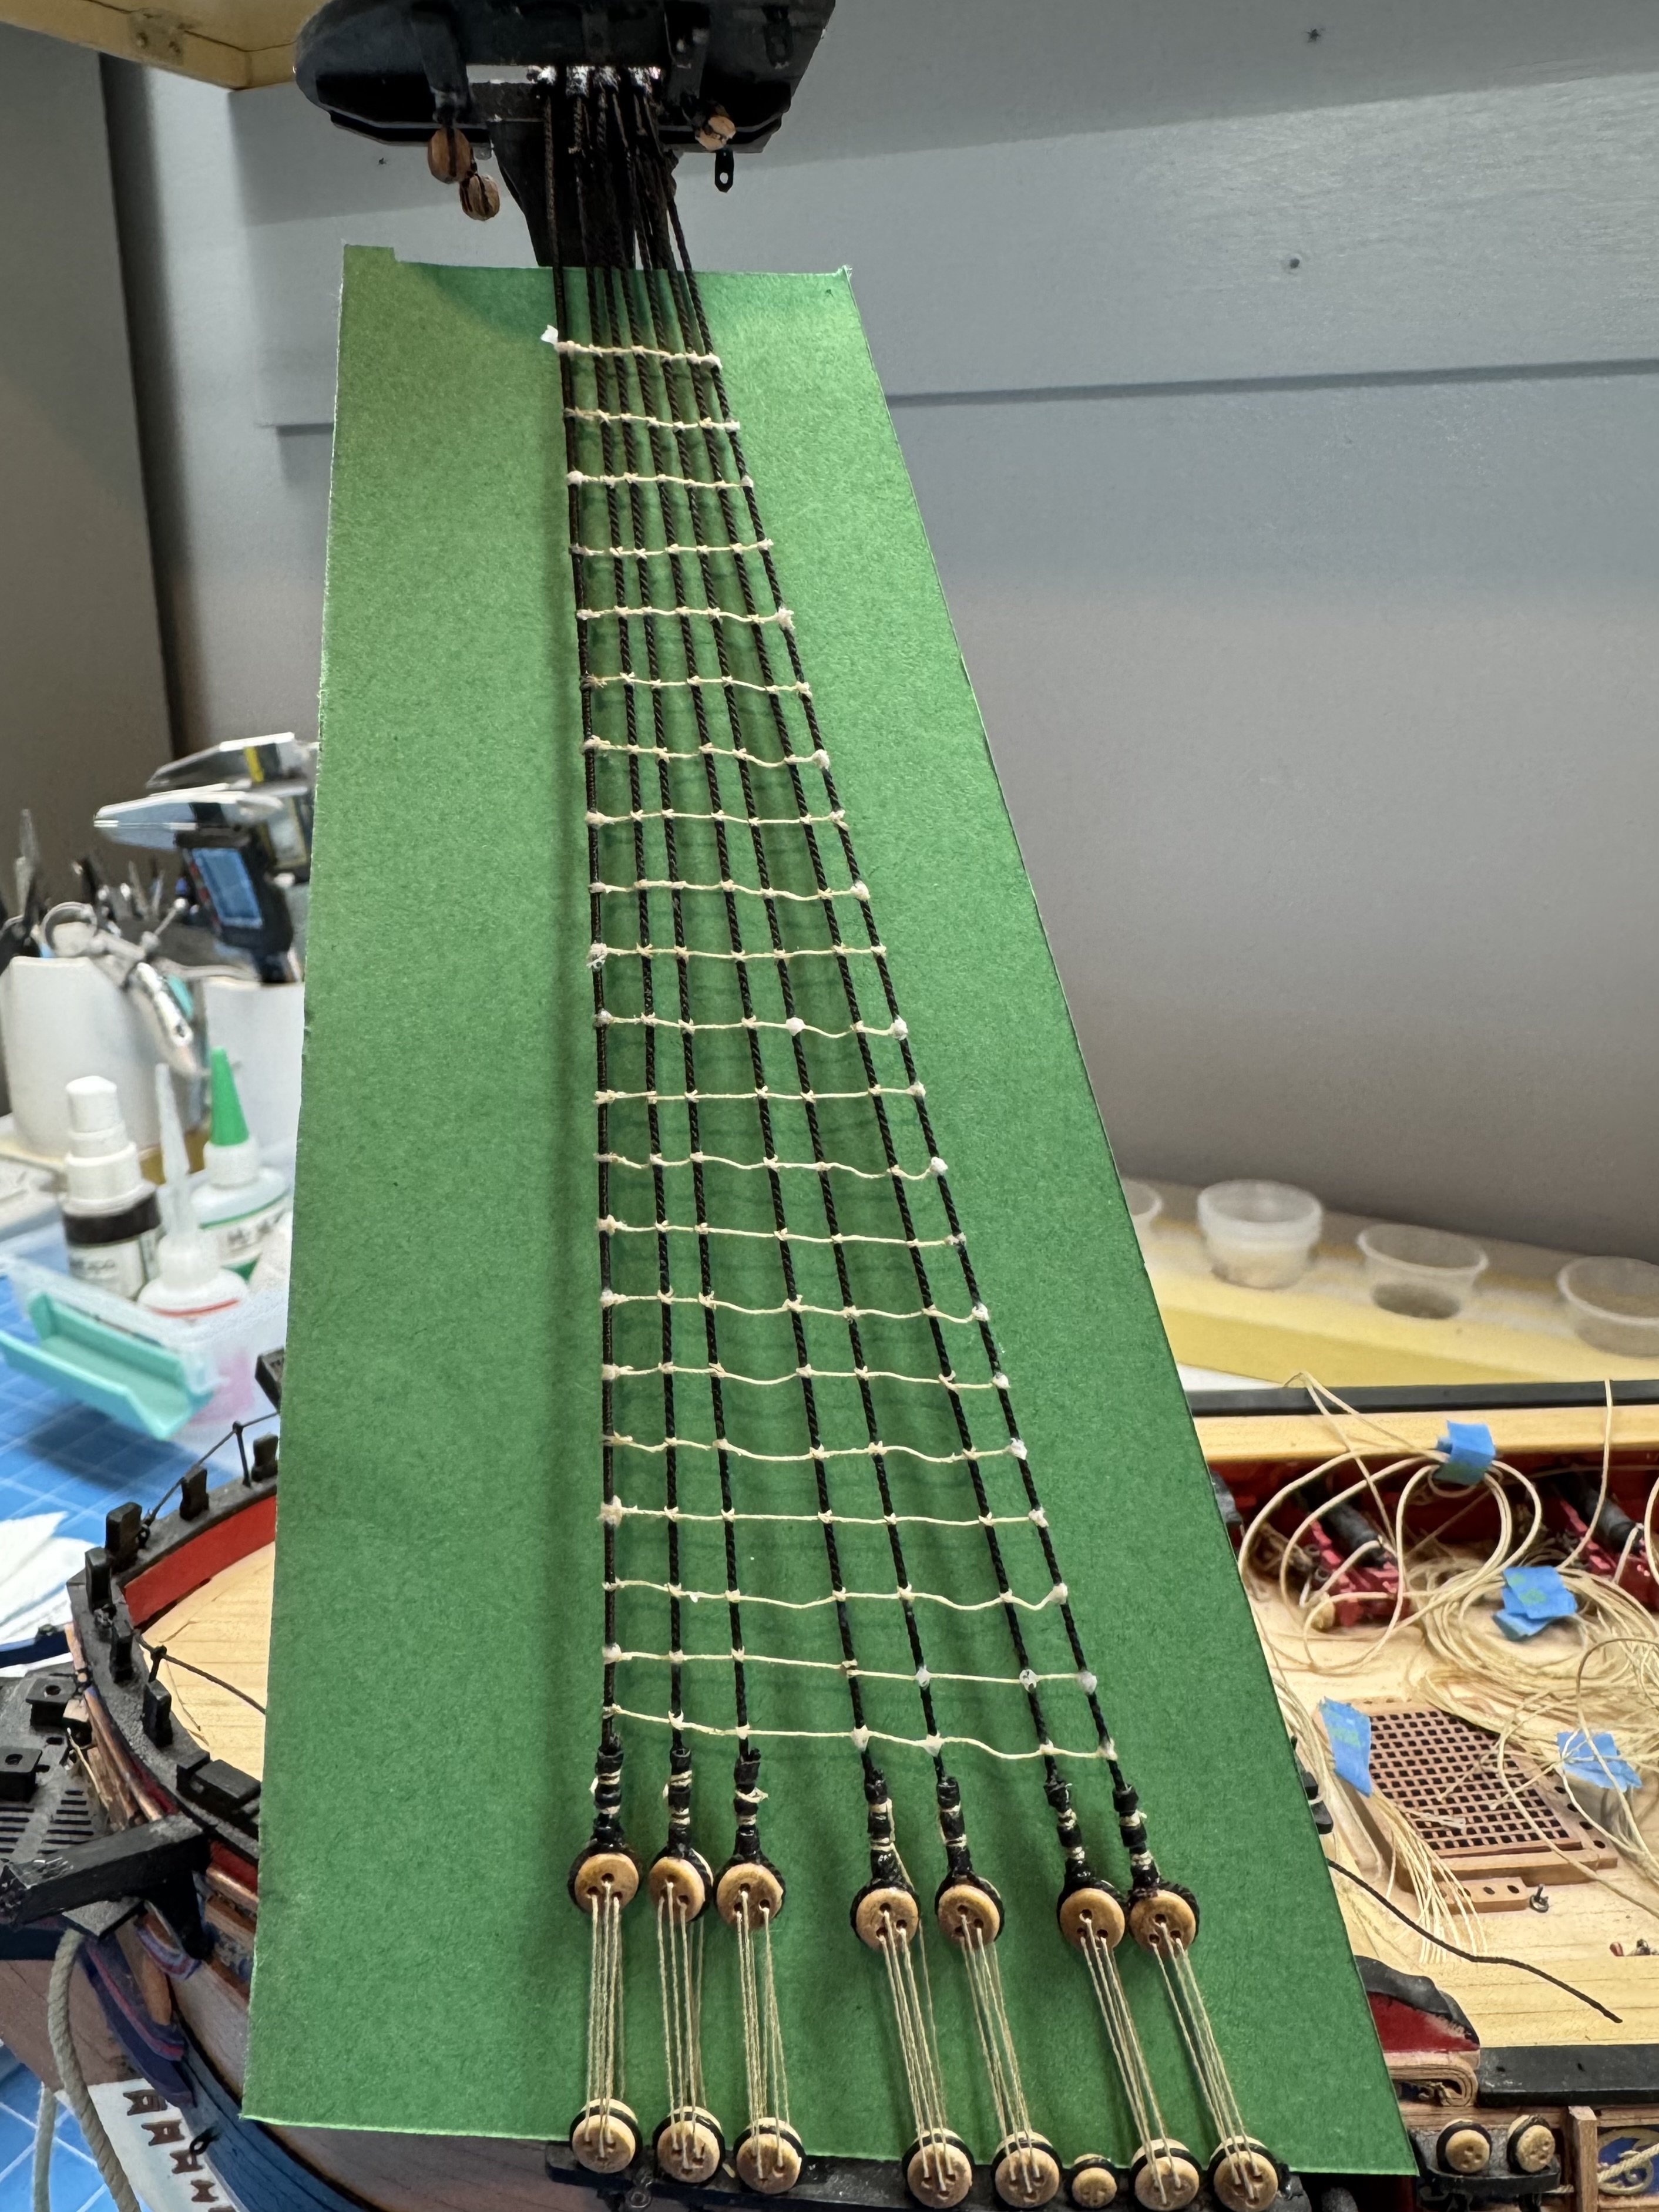
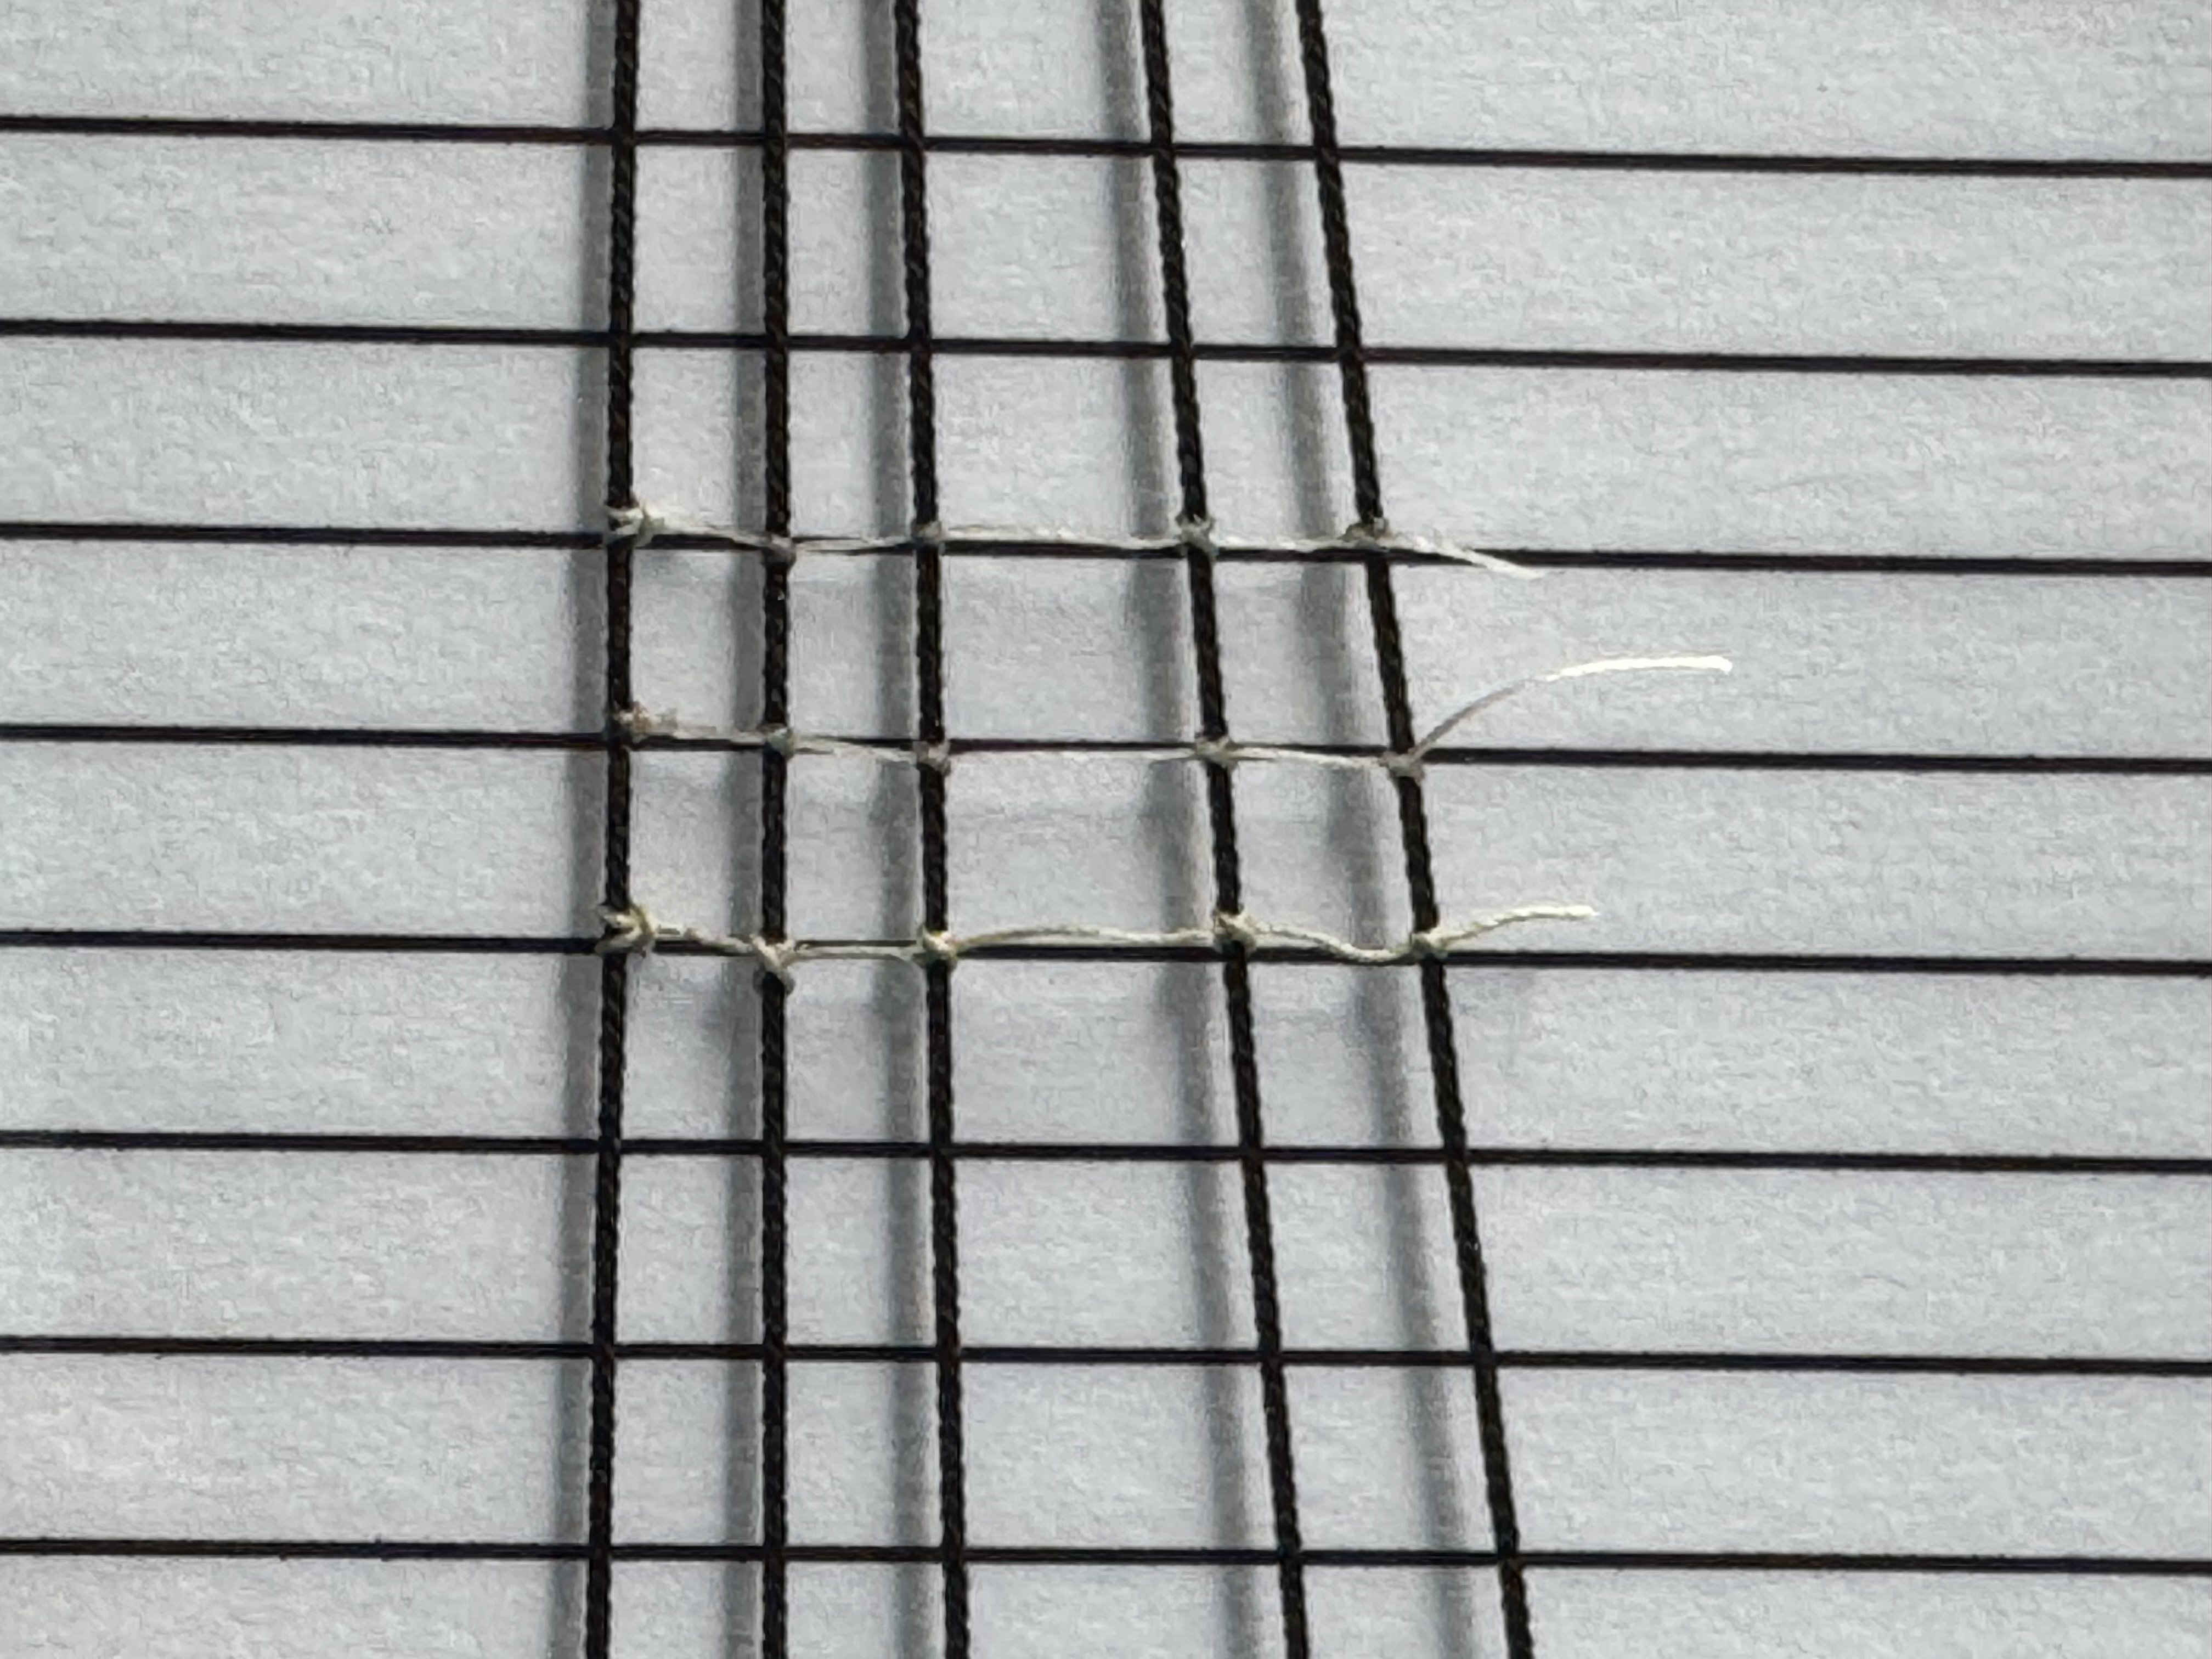
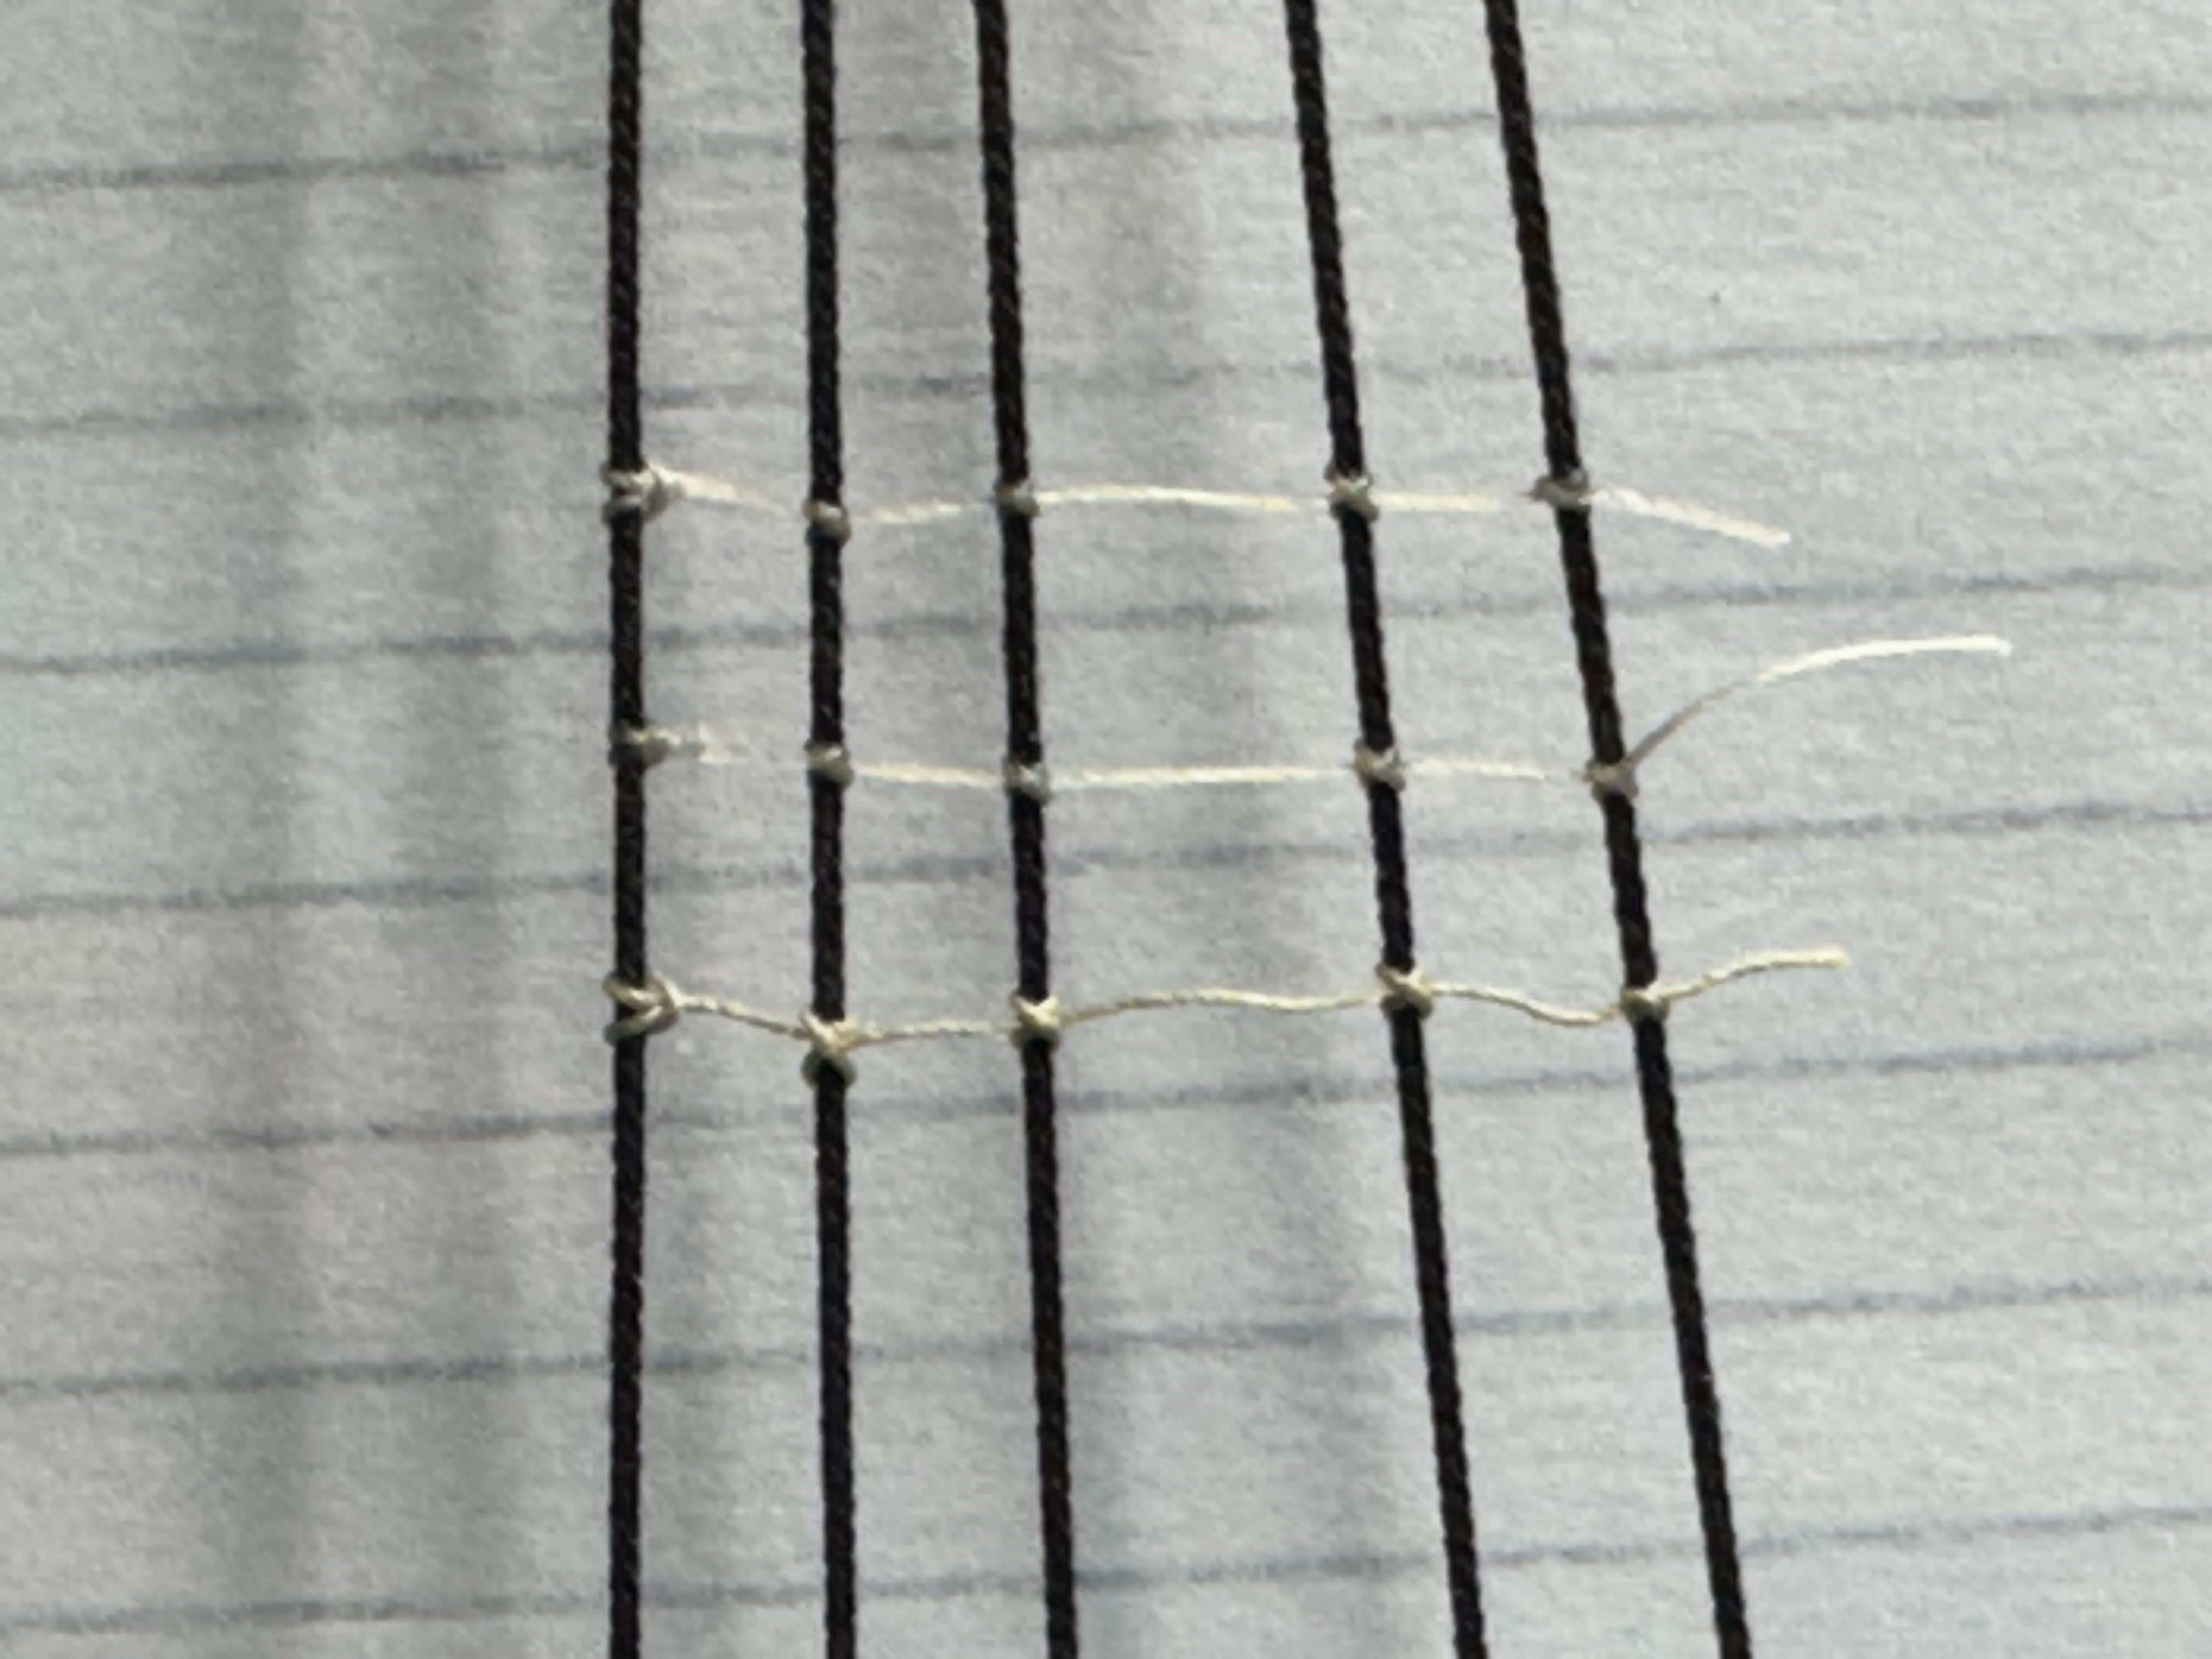
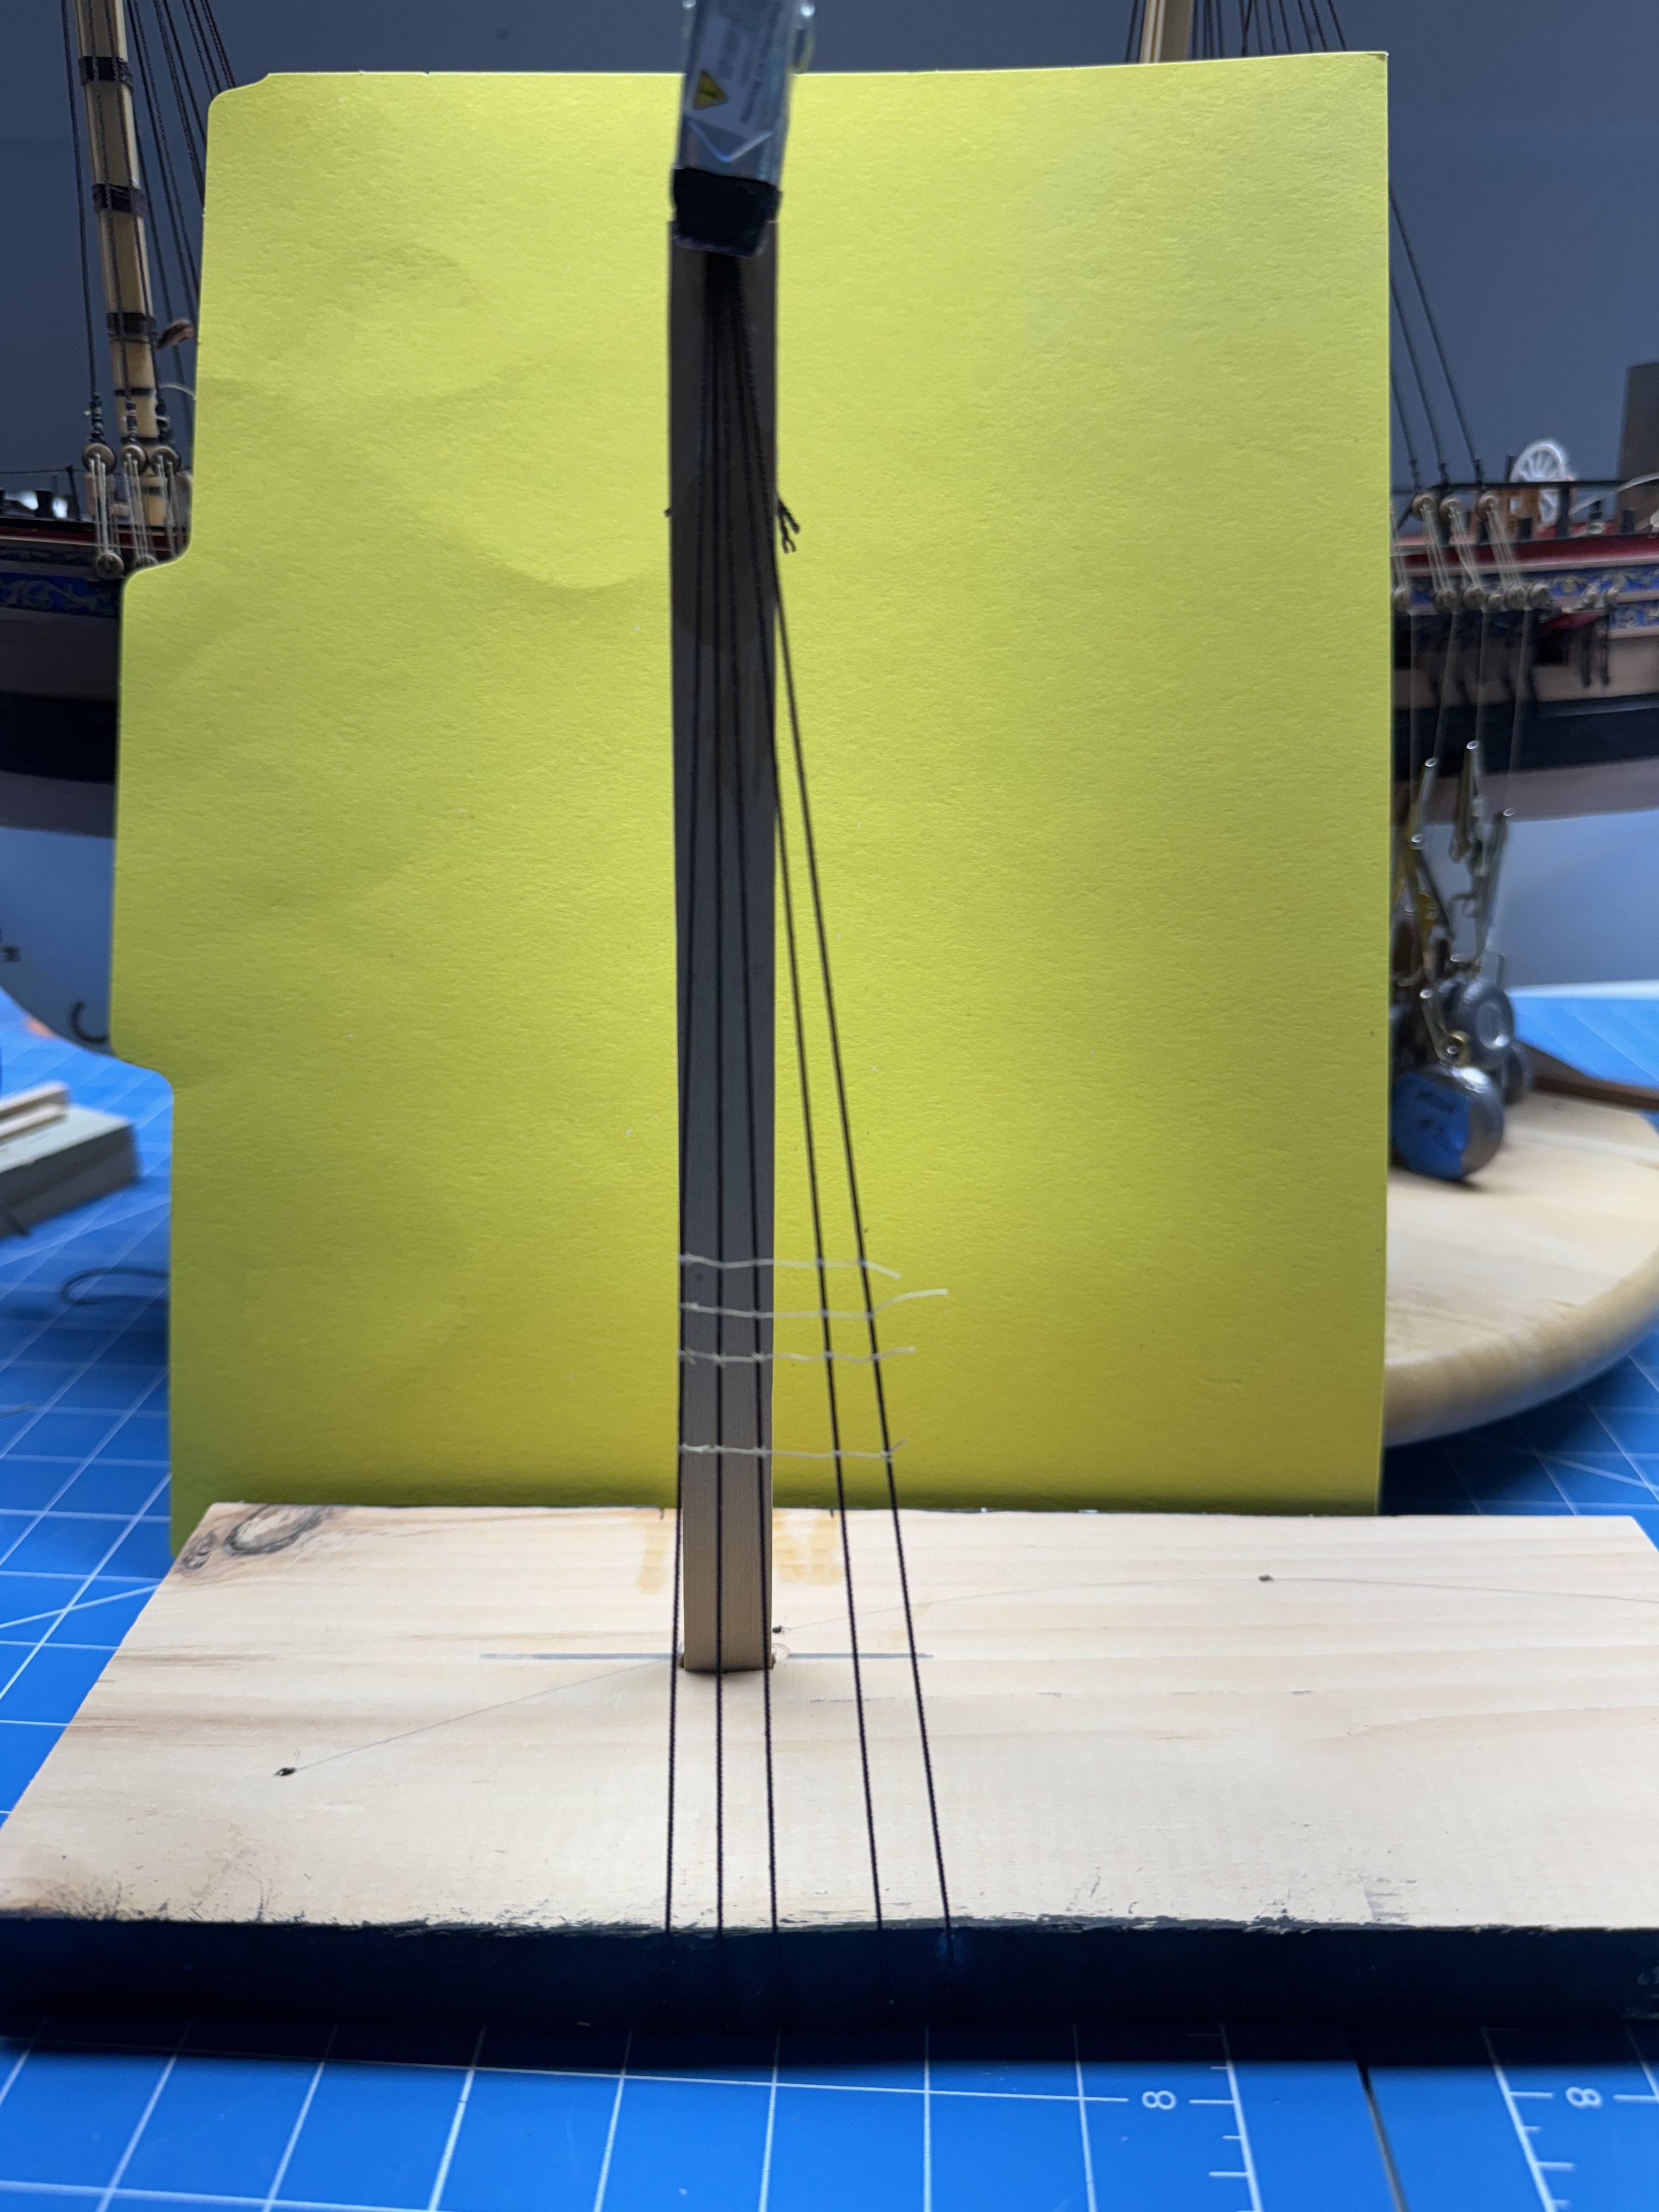
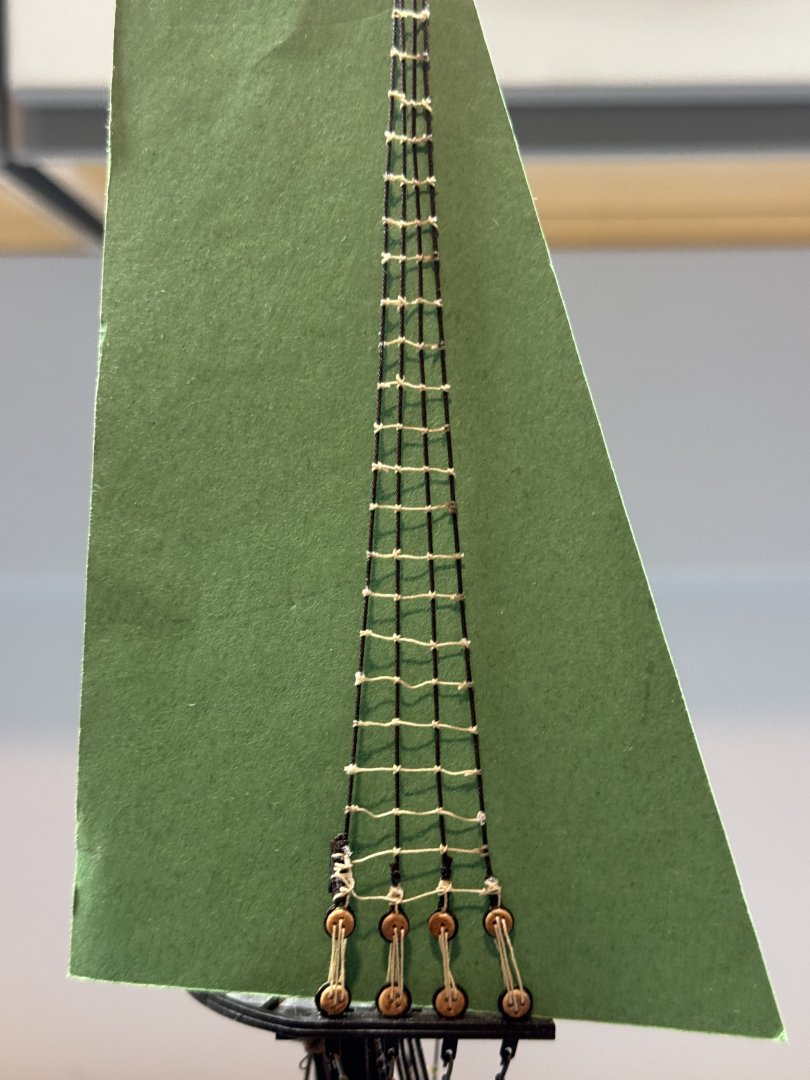
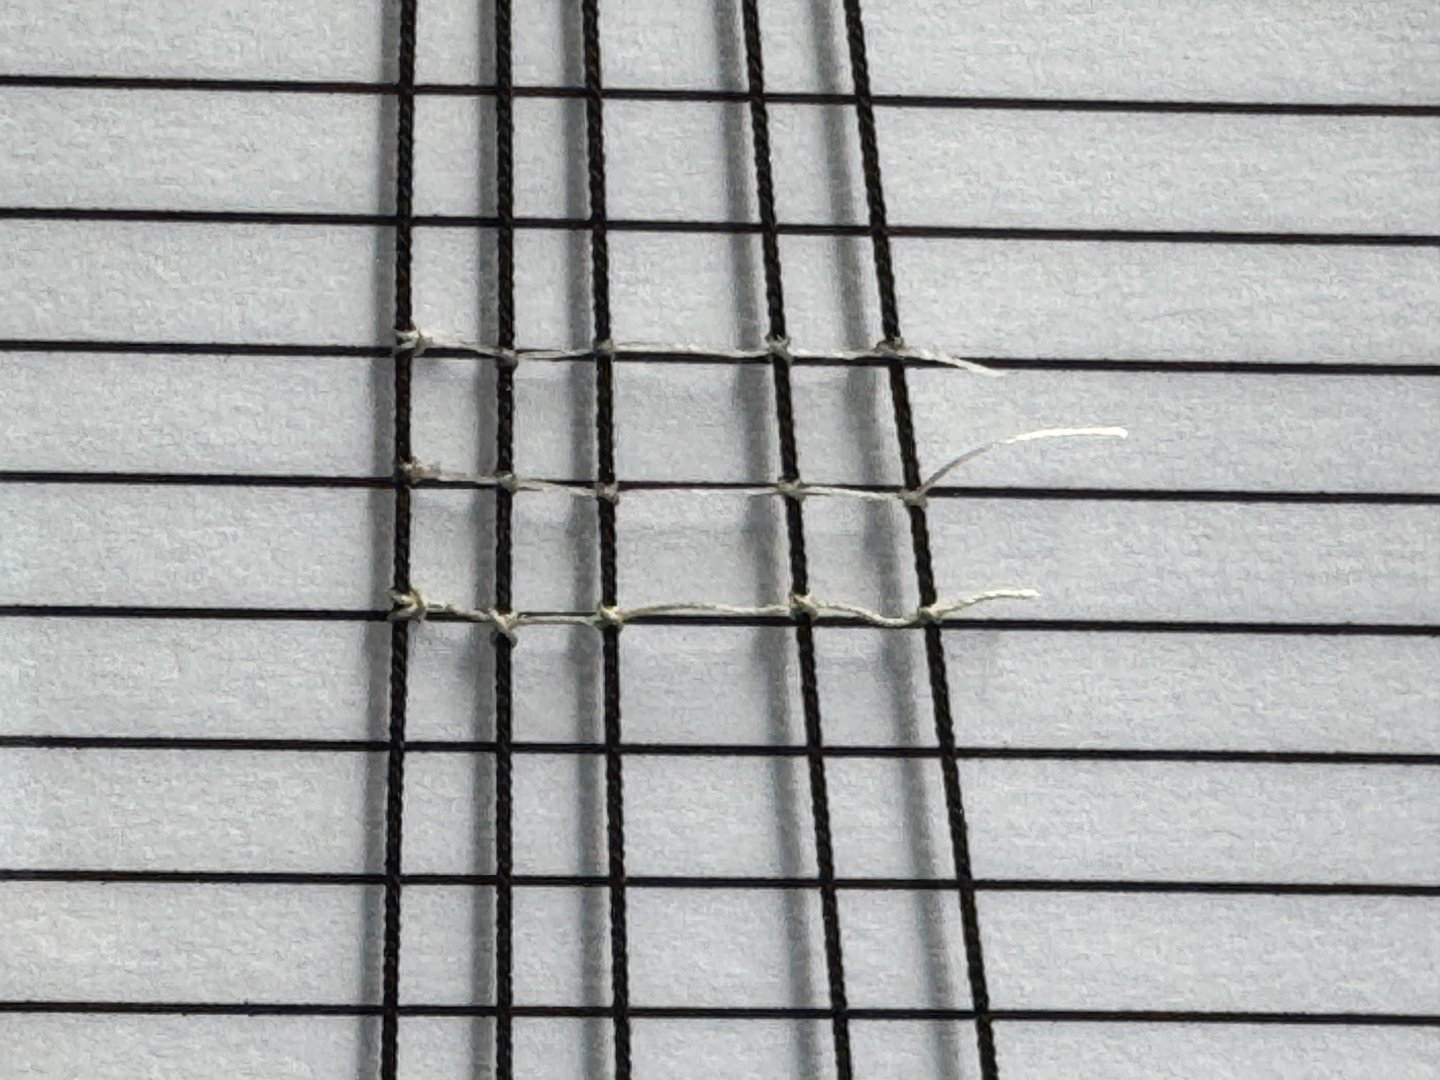
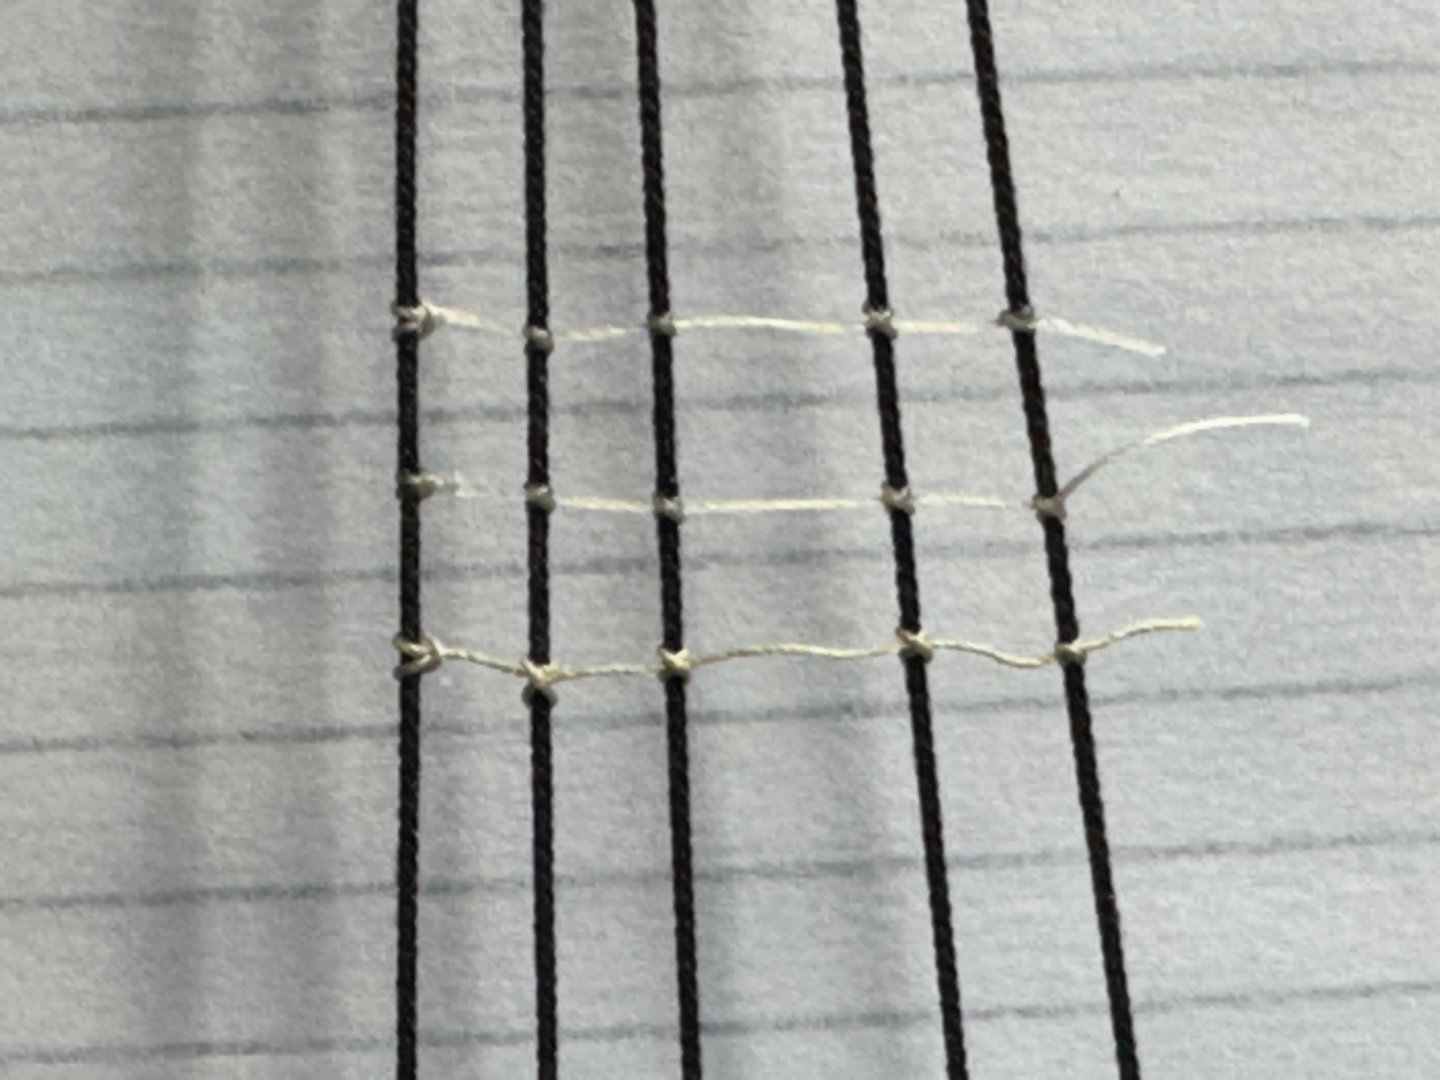
Knowing that ratlines are "in my future" and recognizing that it as heen 4-5 years since I had to rig ratlines like these I decided to "try before buying" as i am loath to mess up the shrouds that seem to have been so difficult for me to get "right". So I built a mock-up of the fore mast and the first five shrouds using the same shroud lines as on the model (no serving) to give me something to practice on. For some reason the cropped version of this photo will not upload so forgive the cluttered background. I used Gutermann Tera 60 Color 131 polyester thread to rig the ratlines. It is very close to the line provided in the kit but I feel more comfortable with 600m of line as I anticipate using it liberally. So I rigged three rows of ratlines on the mock-up. Here they are with the 6mm template behind. And with the template turned around Not too bad. However I noted that dilute PVA does not seem to hold very well with the polyester ratlines and polyester cotton (exact proportions unknown) shrouds. On the upper two ratlines I resorted to thin CA once I was sure I had the ratline where it was supposed to be. I am going to do a few more ratlines using the Syren .008" tan line for the ratlines to see if the dilute PVA will work any better. The line is thicker than the .1mm that is supposed to be in the kit but I measured the line diameter with the calipers (okay I am squeezing the line between the calipers but...) the Syren shows .0045" (considerably less than the advertised .008), the Gutermann that came with the kit measured .0035 and the Tera 60 Gutermann used here at .0040. So given that there isn't much difference in squeezed diameter I may go with the Syren simply becasue I have more experience using it.

- 422 replies
-
- 6
-
-
- Vanguard Models
- Sphinx
- (and 1 more)
-
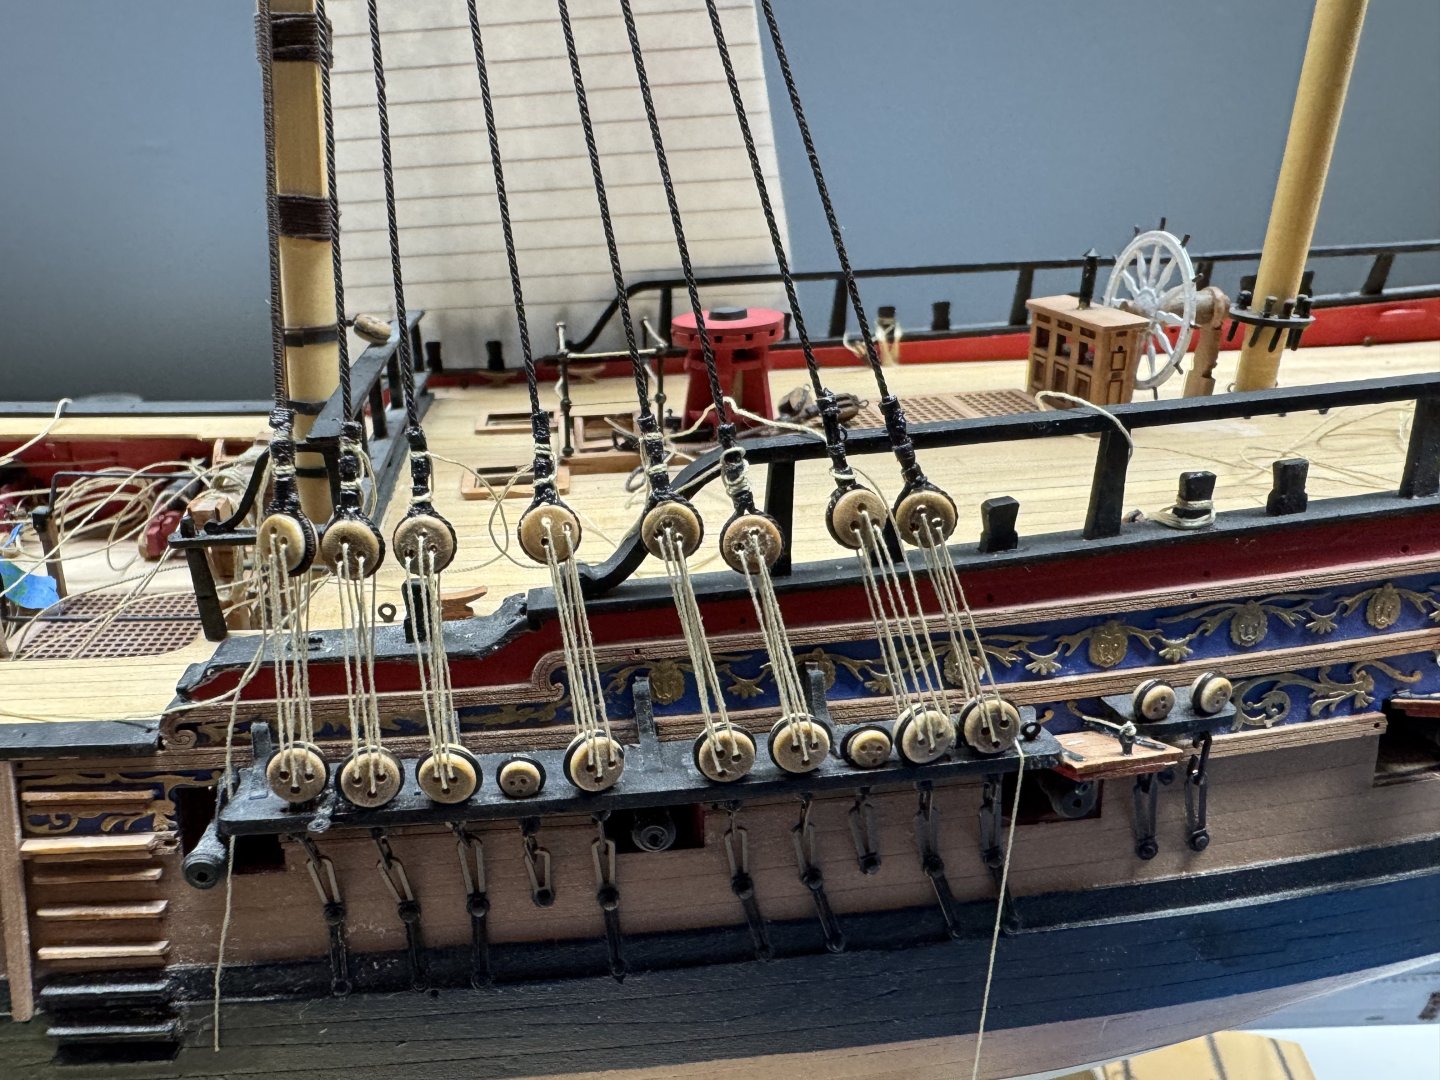
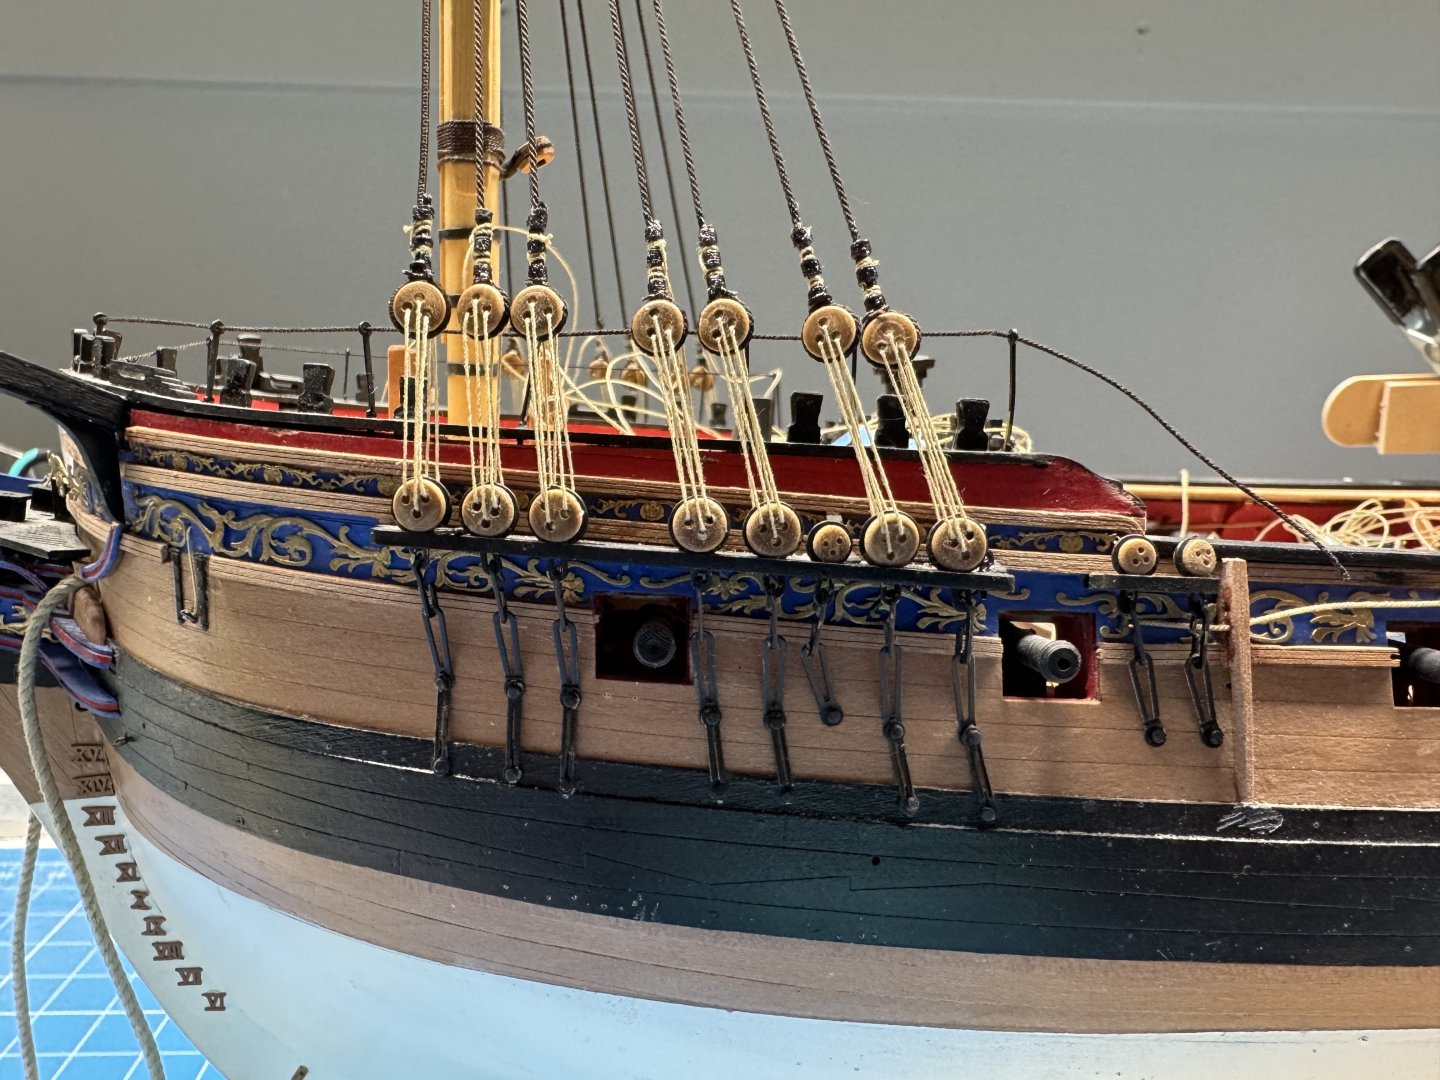
Fore Mast lower shrouds tied off and lanyards trimmed. It looks better than my first attempt. I think I got the upper deadeyes about as lined up as I am capable of. Main Mast is next. I am thinking about starting the ratlines before I move on much more on the Main so I am not faced with six sets of ratlines one after the other. ratlines are NOT my favorite activity.
- 422 replies
-
- 8
-
-
- Vanguard Models
- Sphinx
- (and 1 more)
-
For the main mast I decided to build two "jigs". Not much extra work as long as you decide you want two at the beginning. Same technique as on the fore mast although now I can move from side to side as I work fore to aft.

- 422 replies
-
- 9
-
-
- Vanguard Models
- Sphinx
- (and 1 more)
-
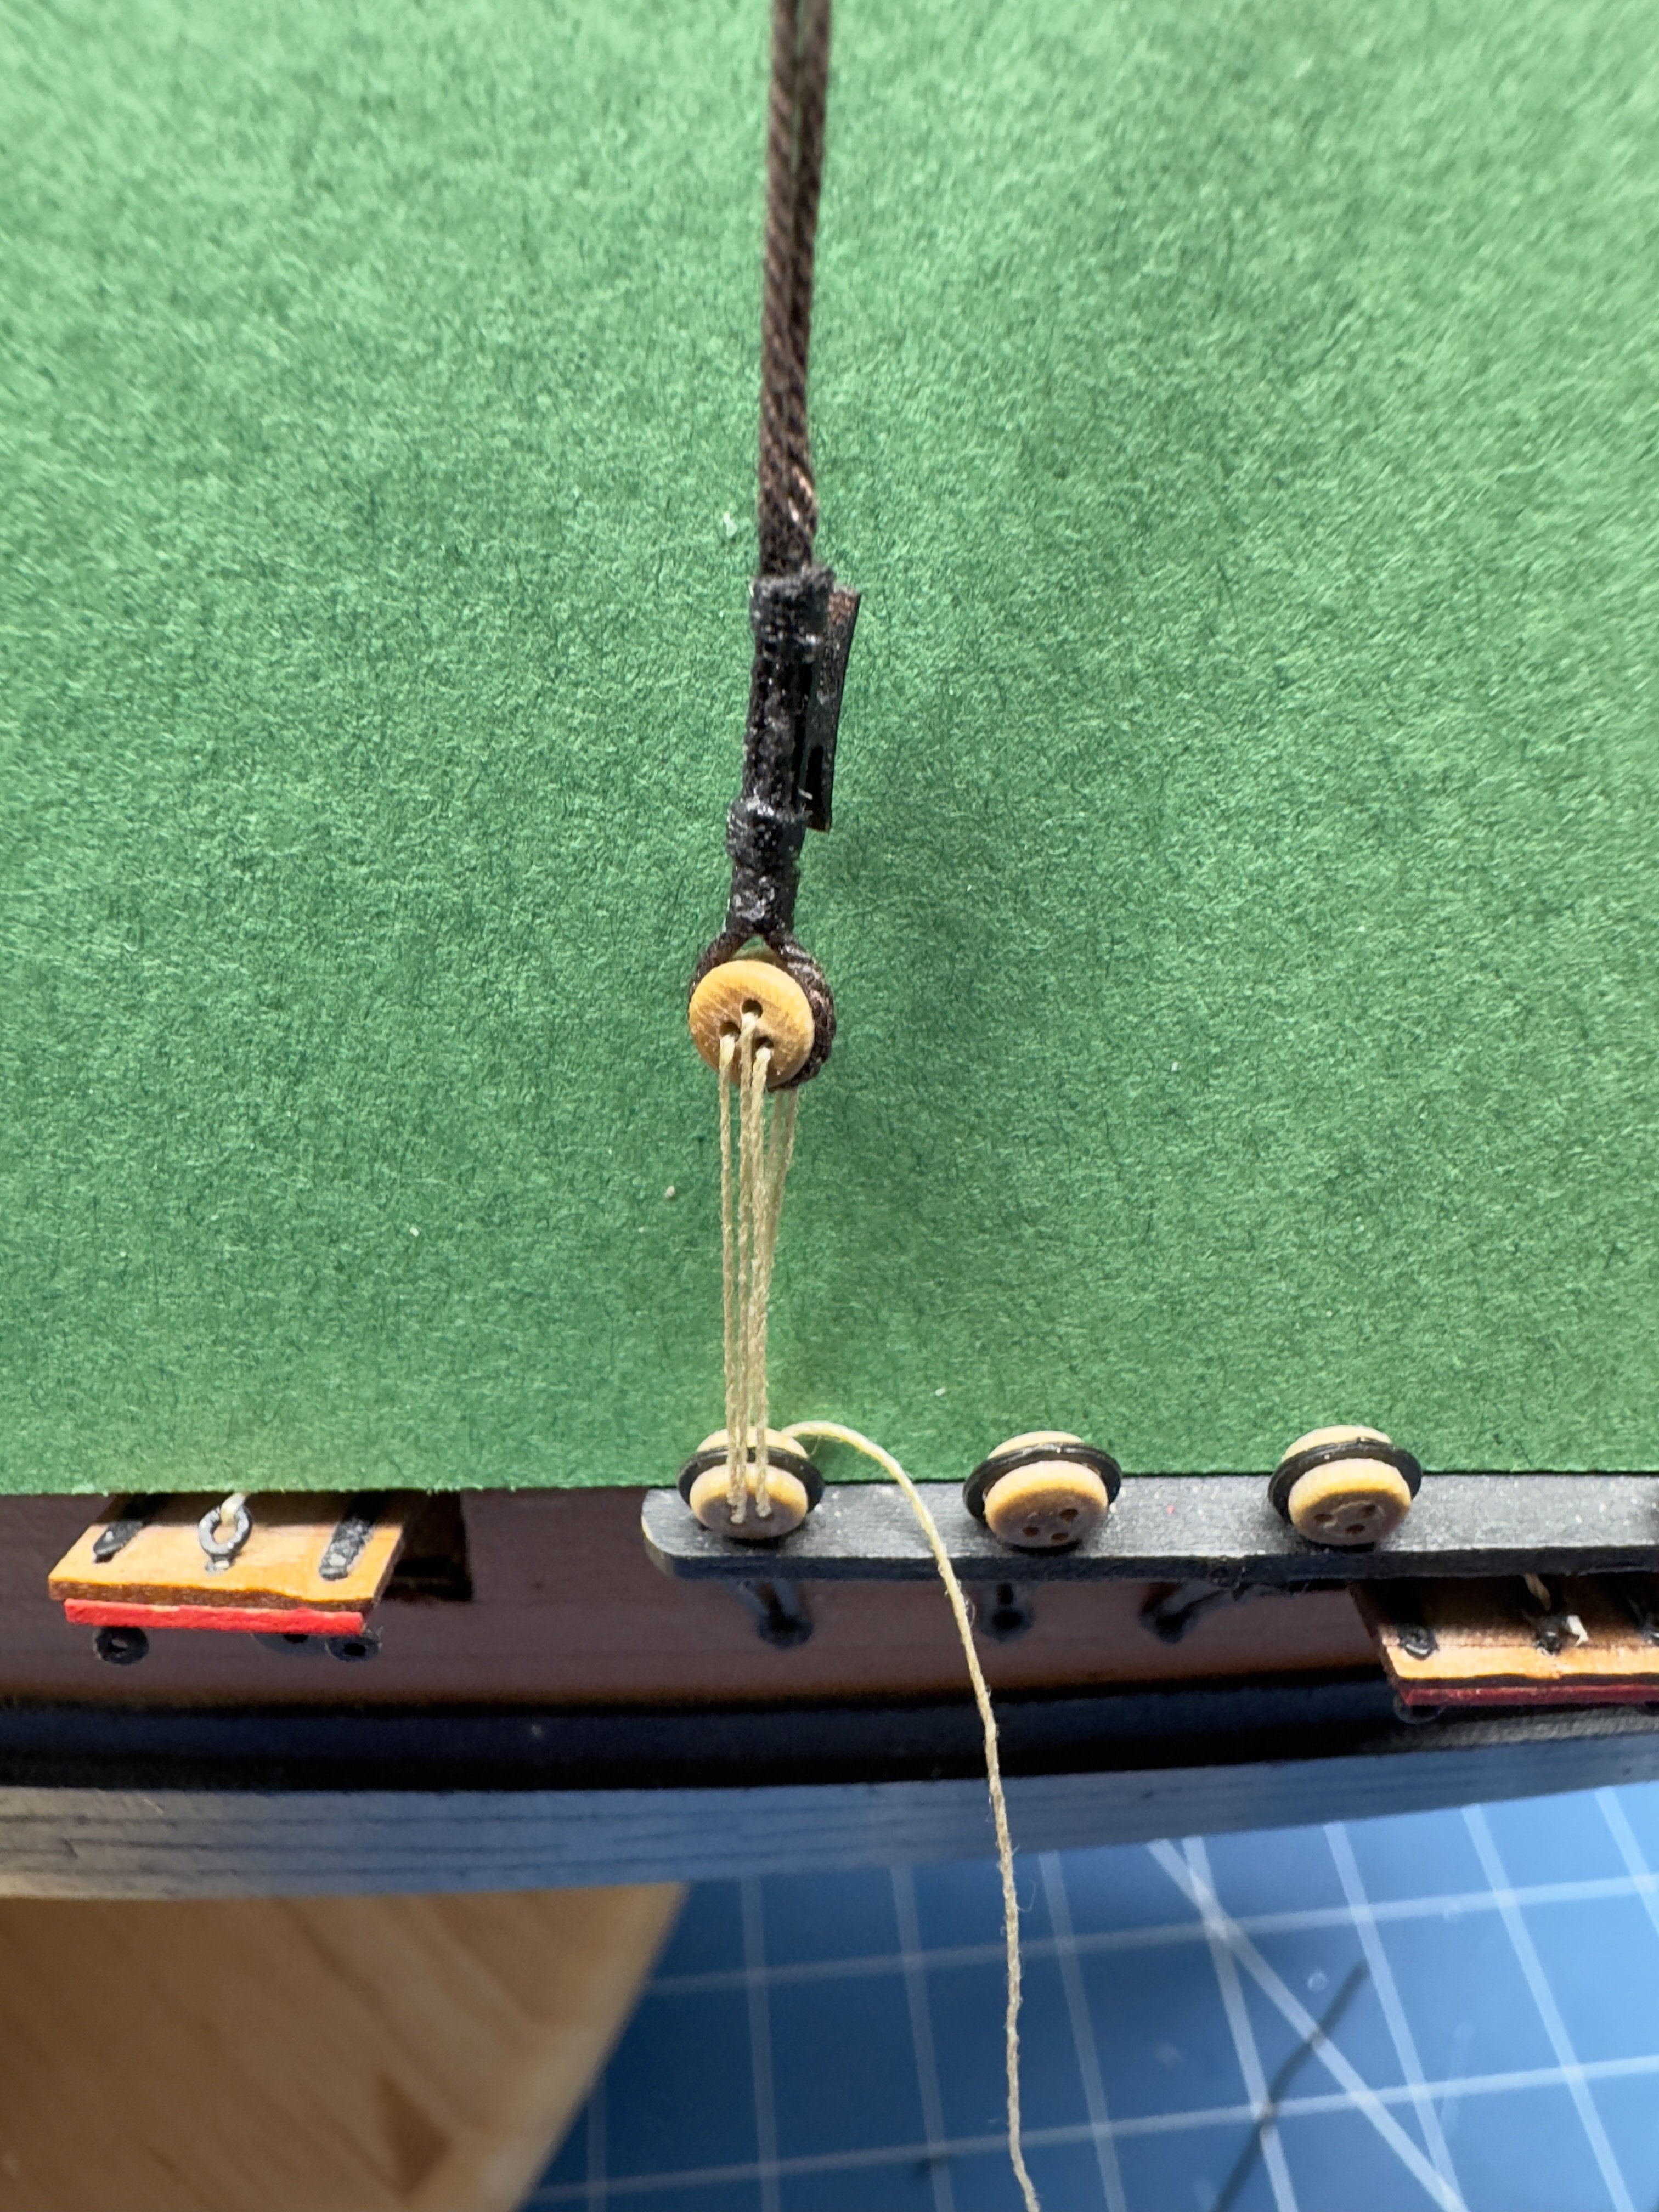
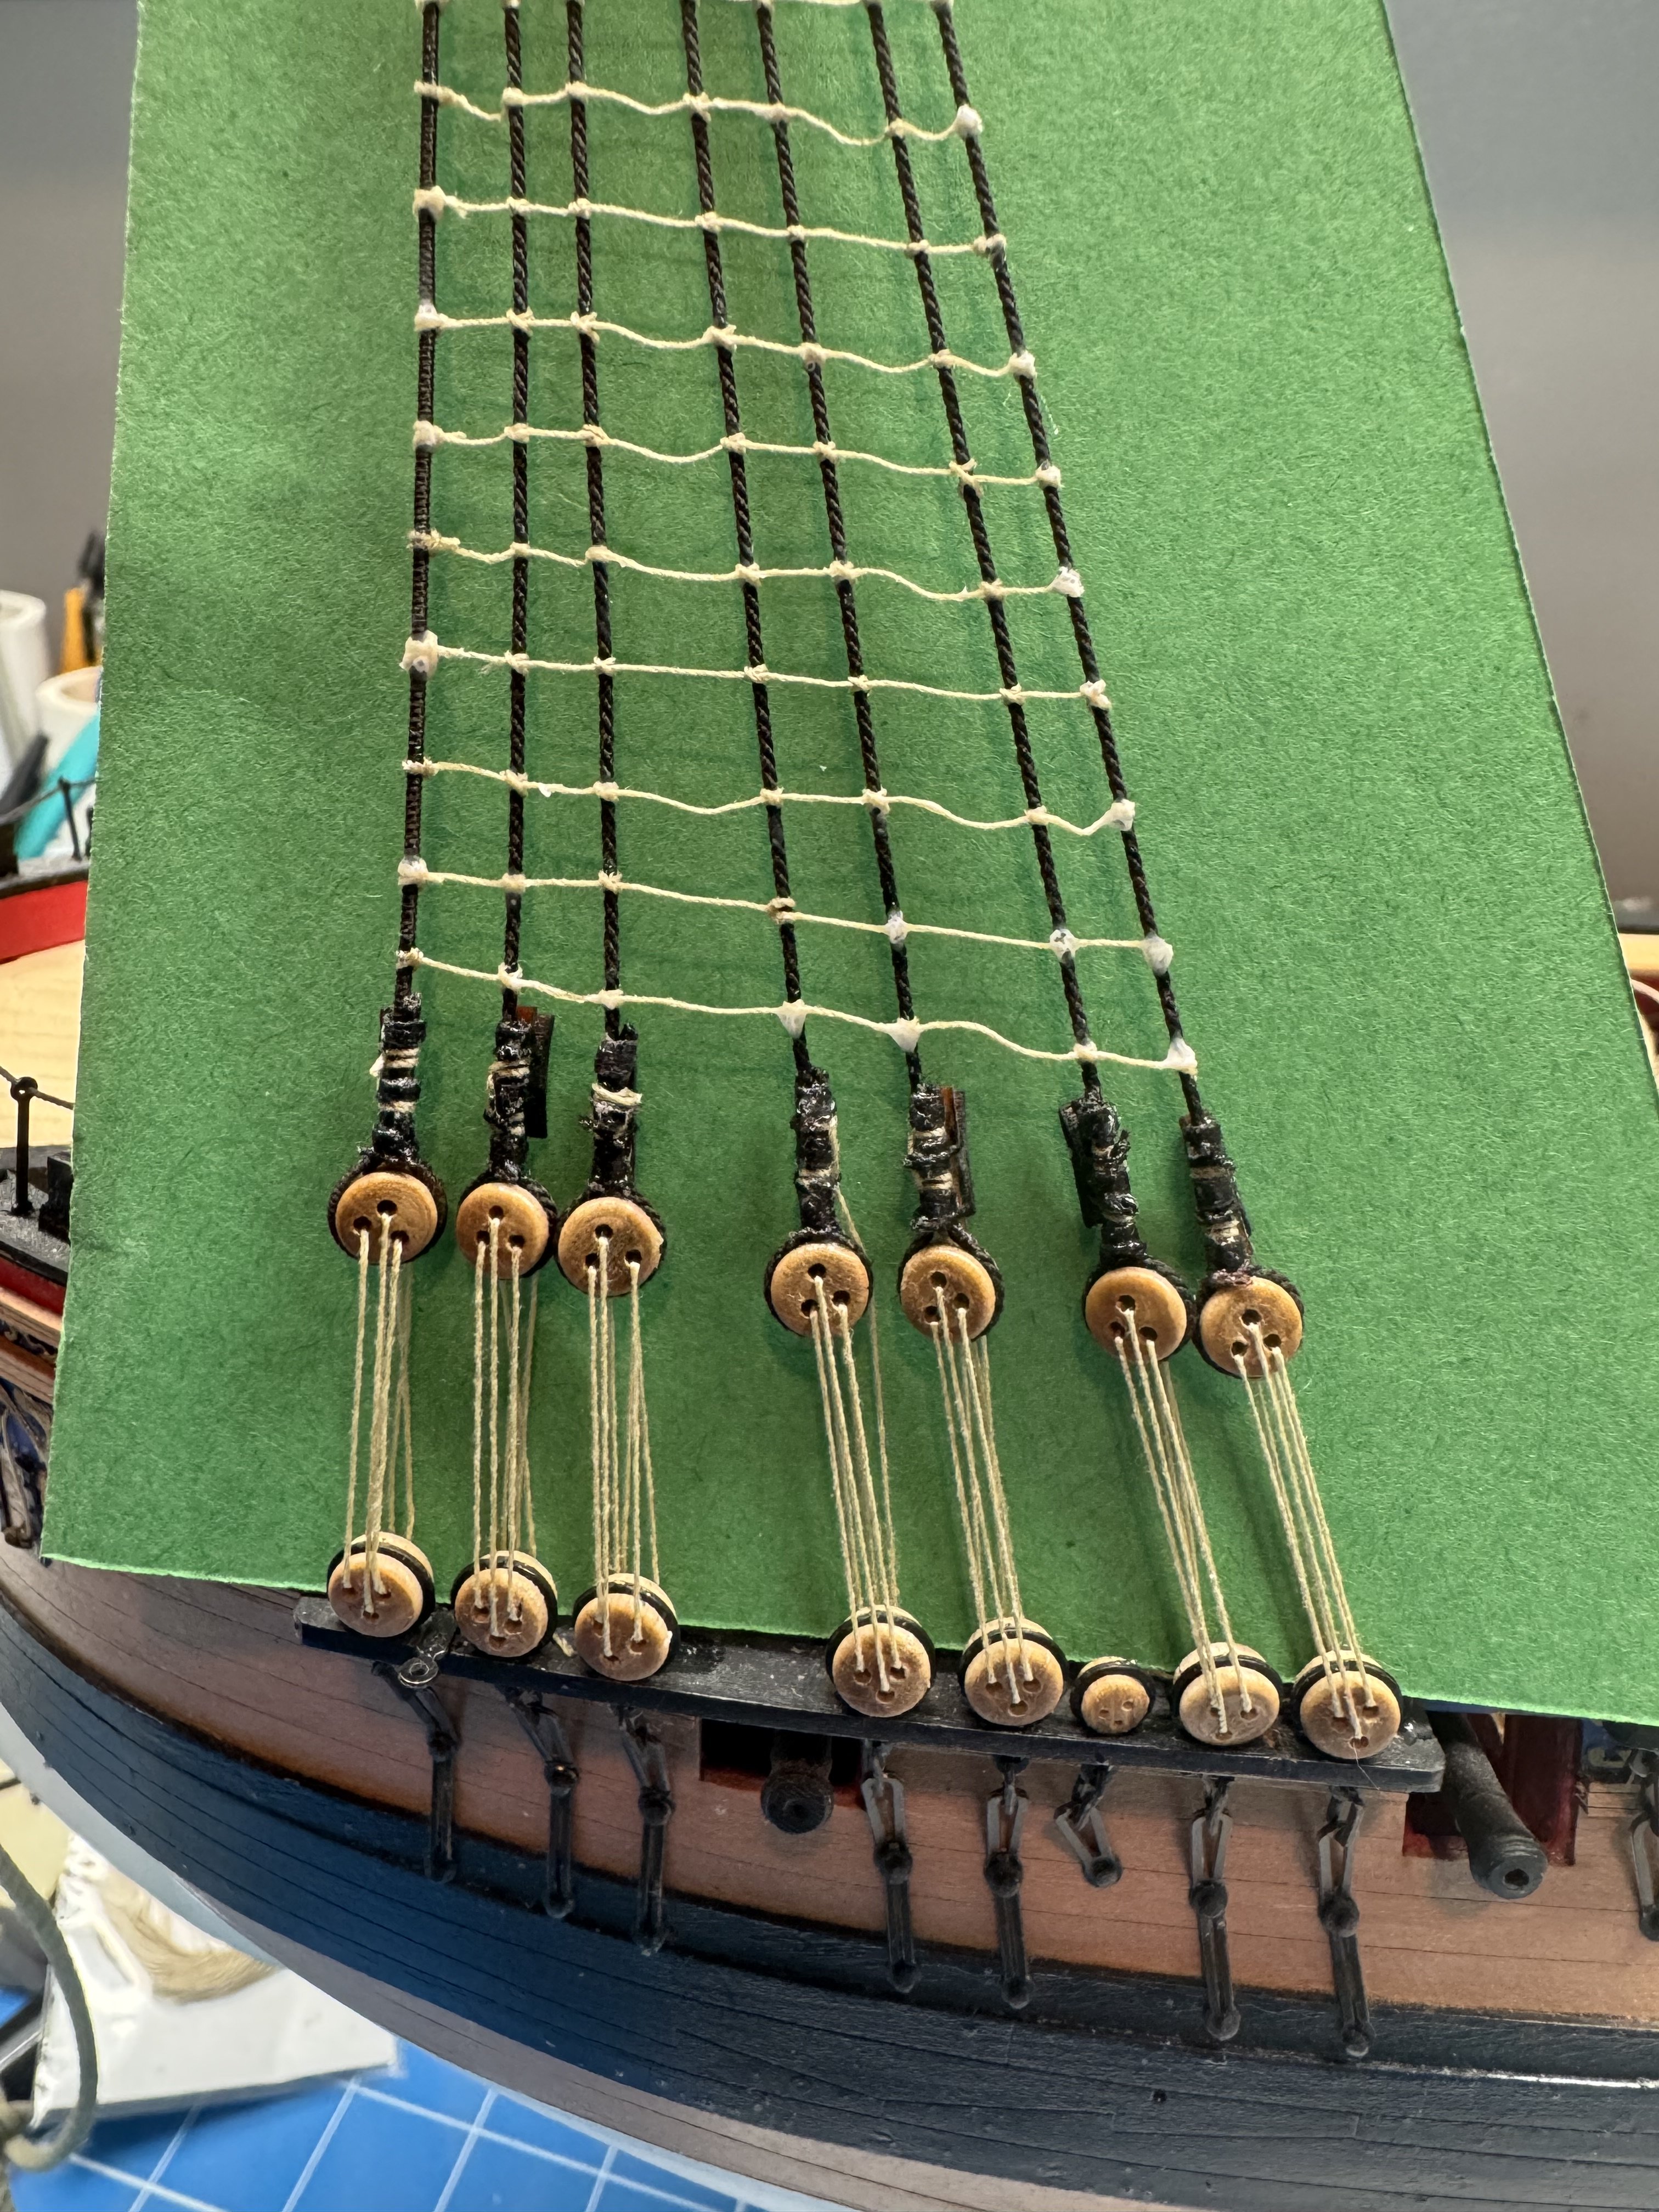
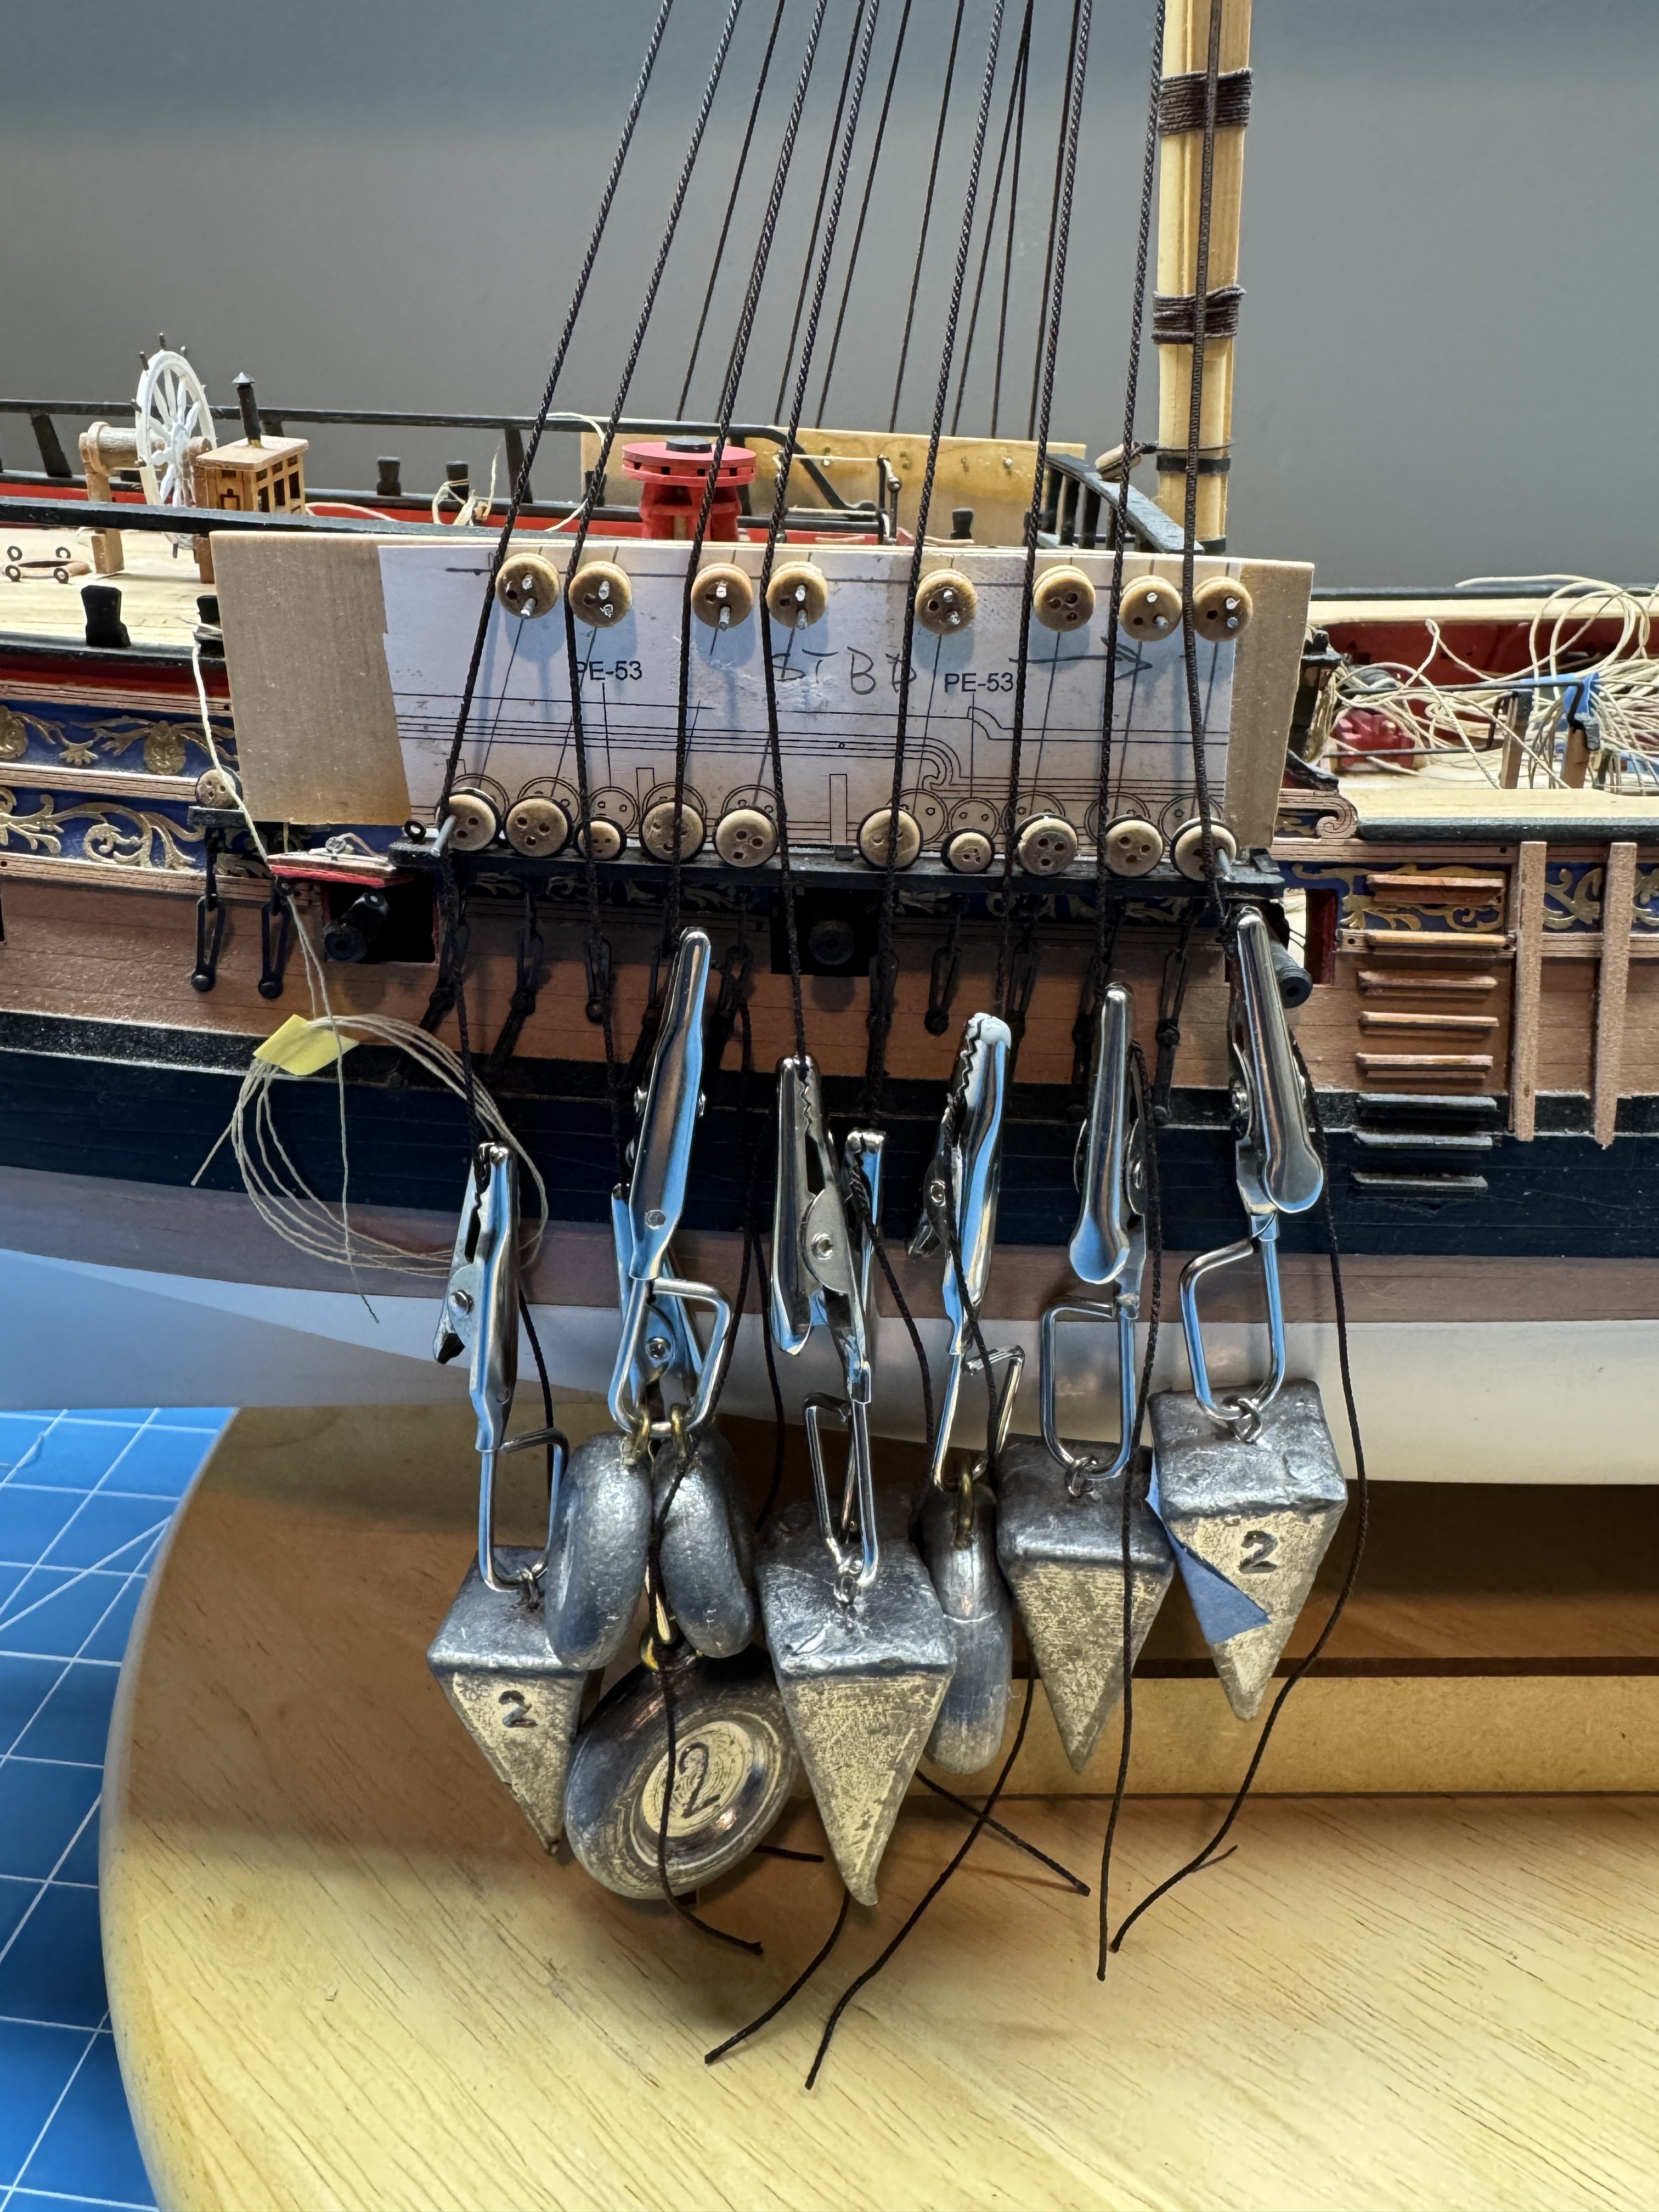
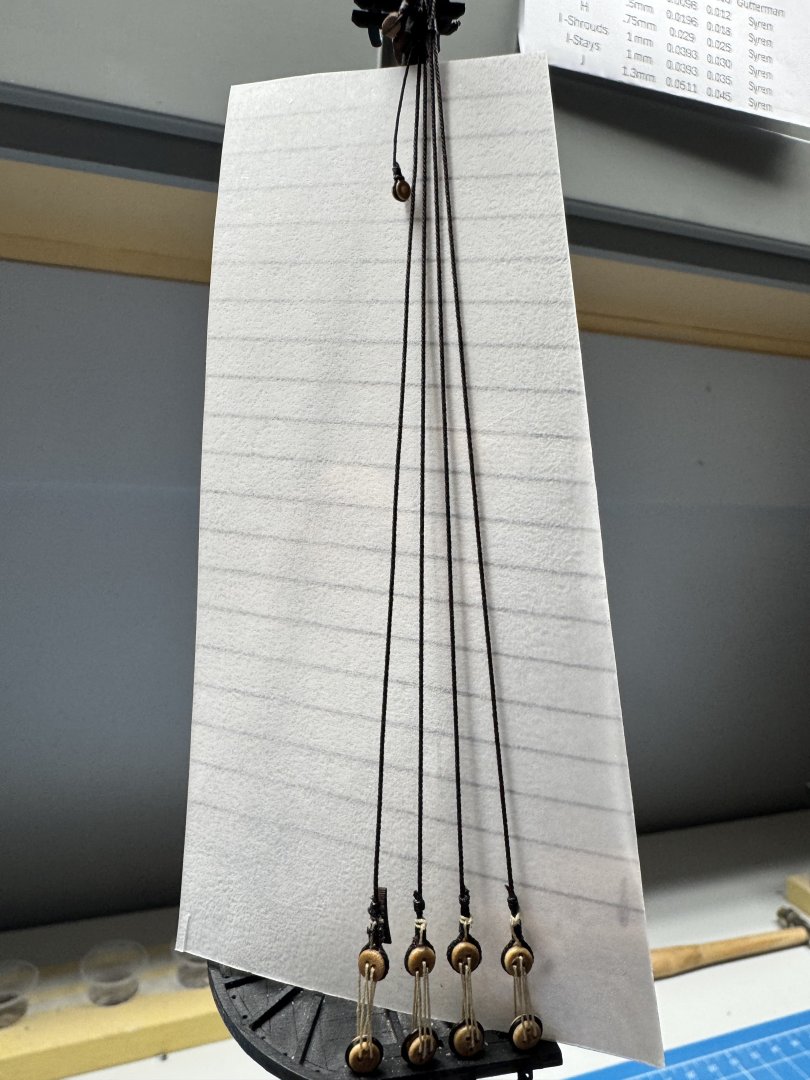
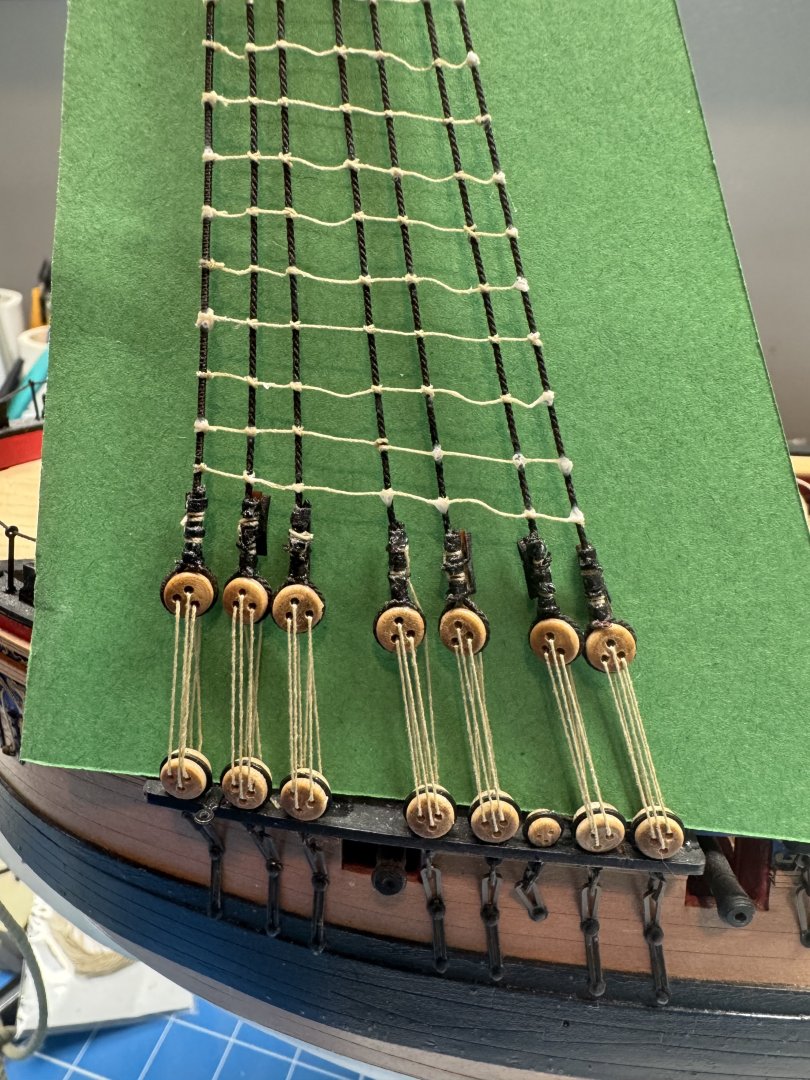
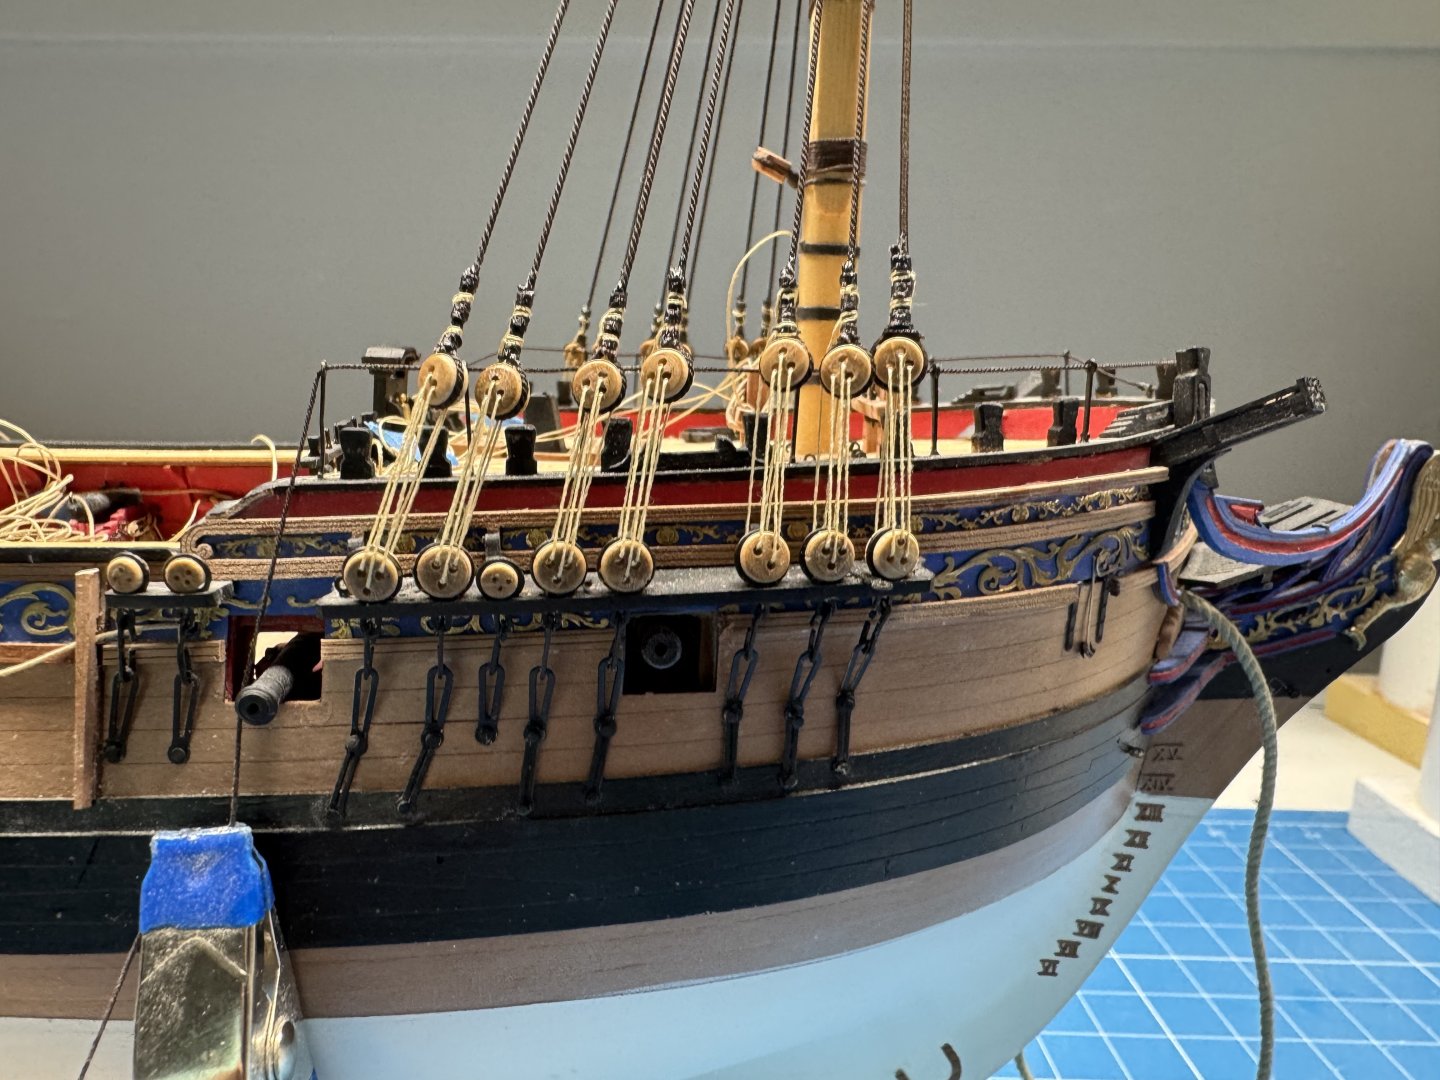
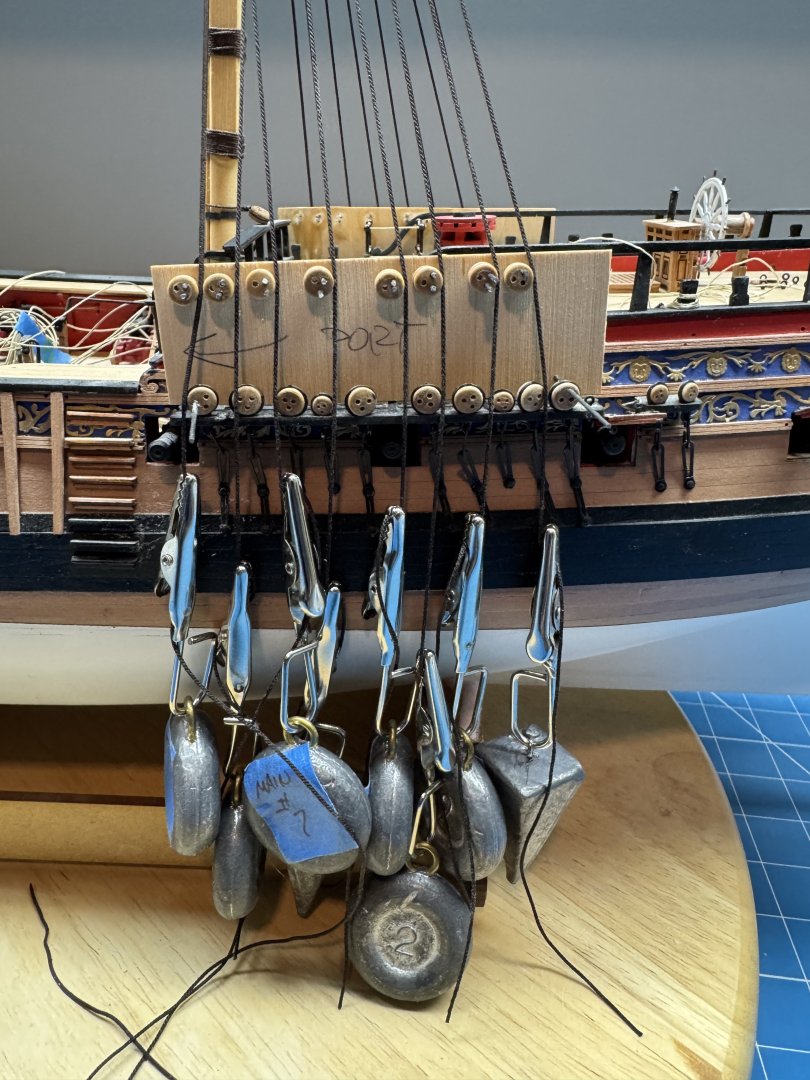
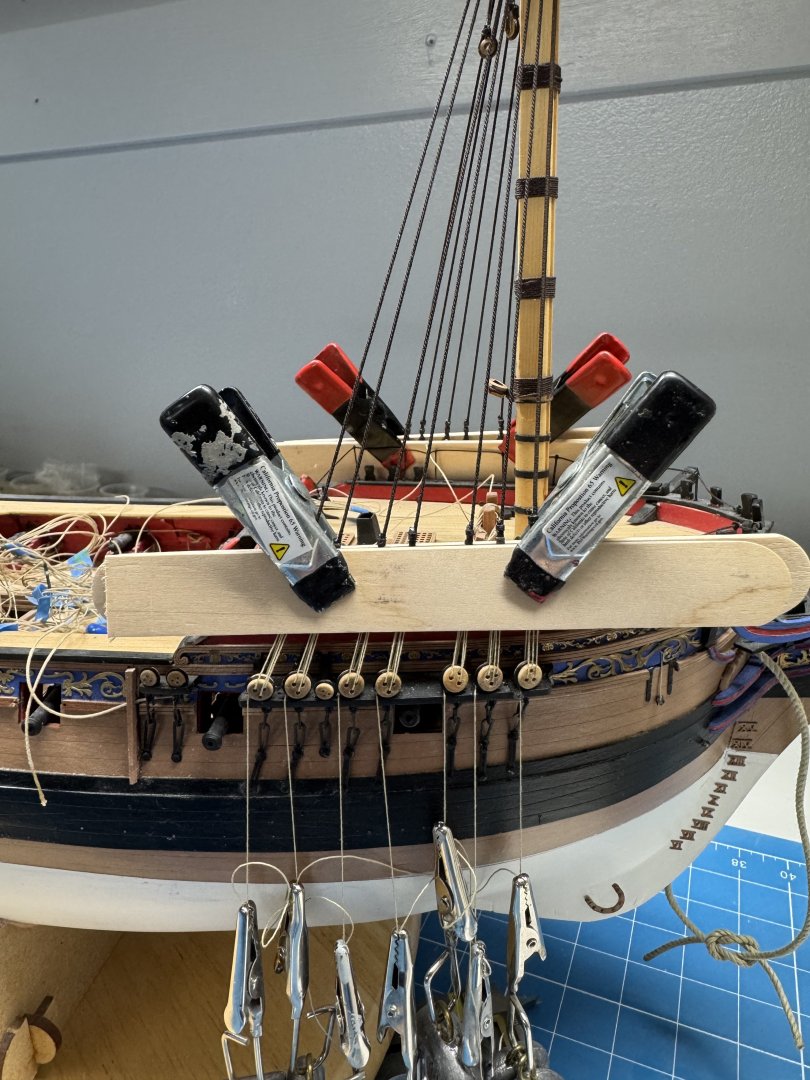
I got the fore mast lower shrouds lanyards rigged and the deadeyes came out reasonably even. I have not tied the lanyards off yet they are tensioned by weights hung on the lanyard end after it exits the last hole of the lower deadeye. You can't see that because they do not seem to want to line up with the lower deadeye - they want to twist with the forward edge moving outboard. Probably due to the twist in the shroud line. Not sure what, if anything I can do about that except try and remove as much of the twist as I can once the shrouds are in place on the mast. I an attempt to try and get some of the twist out I used tongue depressors on each side of the line of upper deadeyes than clamped them together. If I leave them like this while I work the shrouds/deadeyes on the other masts they may "take"but only time will tell. I may decide to rig a sheer pole to try and make them line up better.
- 422 replies
-
- 10
-
-
- Vanguard Models
- Sphinx
- (and 1 more)