HOLIDAY DONATION DRIVE - SUPPORT MSW - DO YOUR PART TO KEEP THIS GREAT FORUM GOING! (Only 13 donations so far - C'mon guys!)
×


cdrusn89
-
Posts
1,915 -
Joined
-
Last visited
Content Type
Profiles
Forums
Gallery
Events
Everything posted by cdrusn89
-
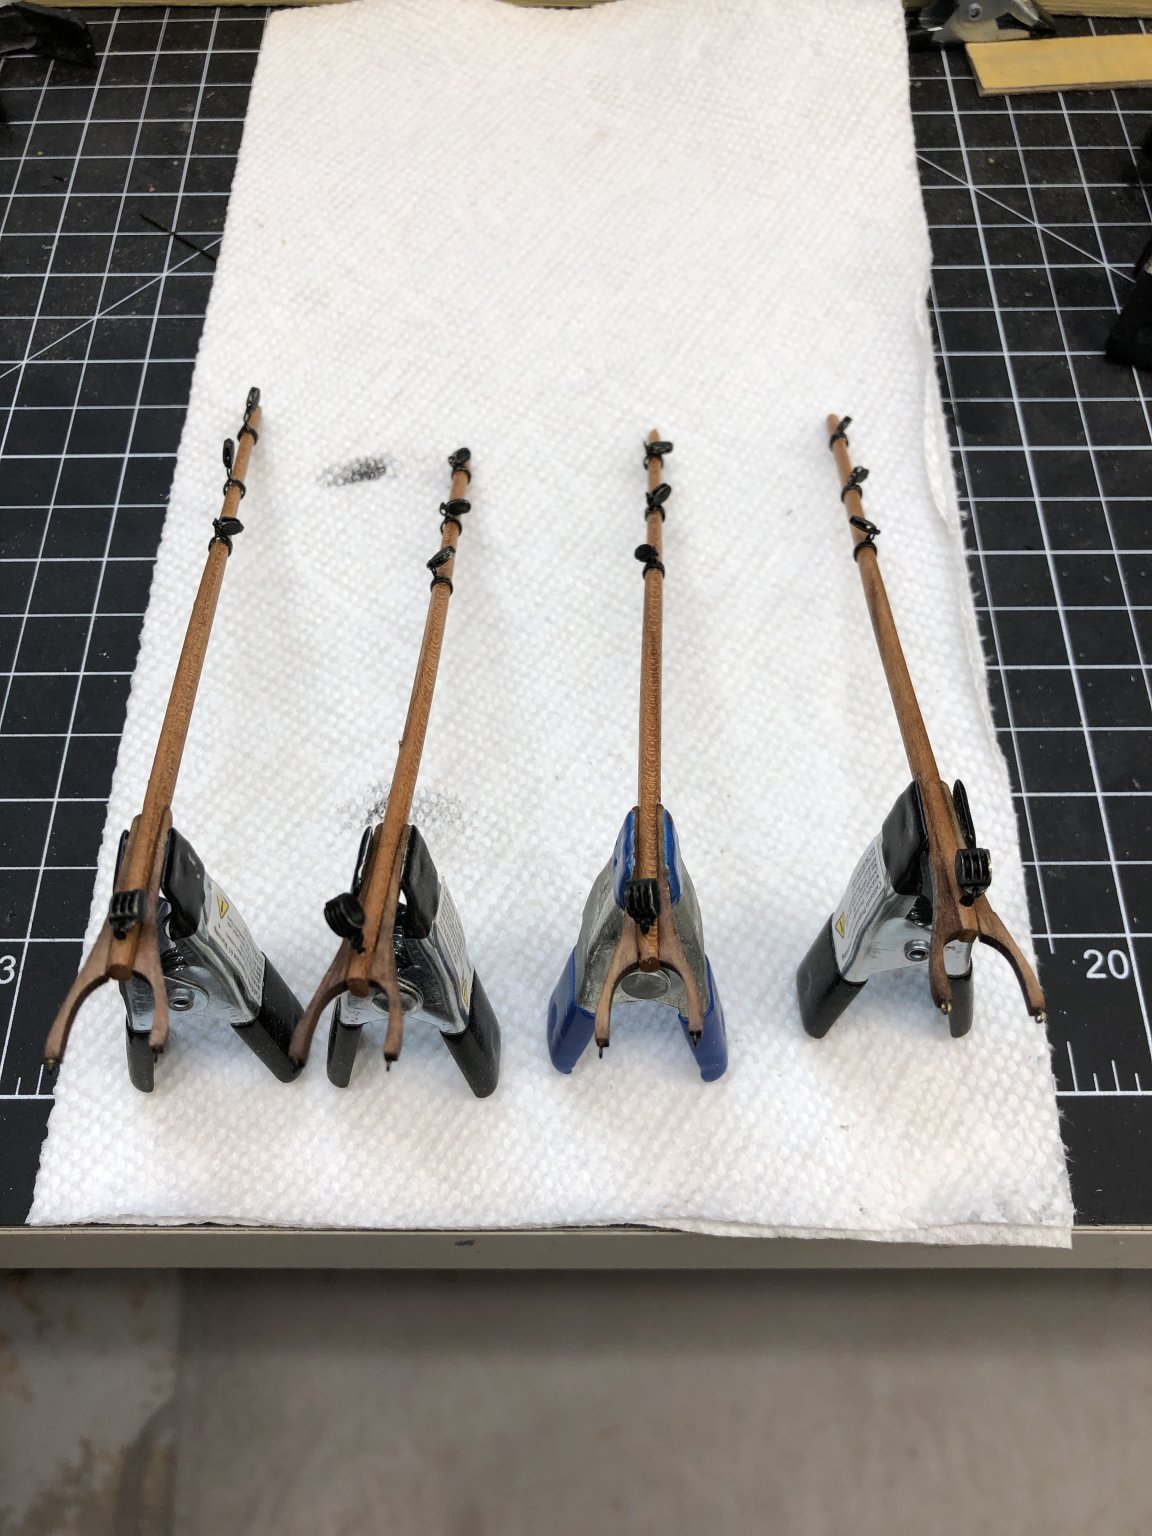
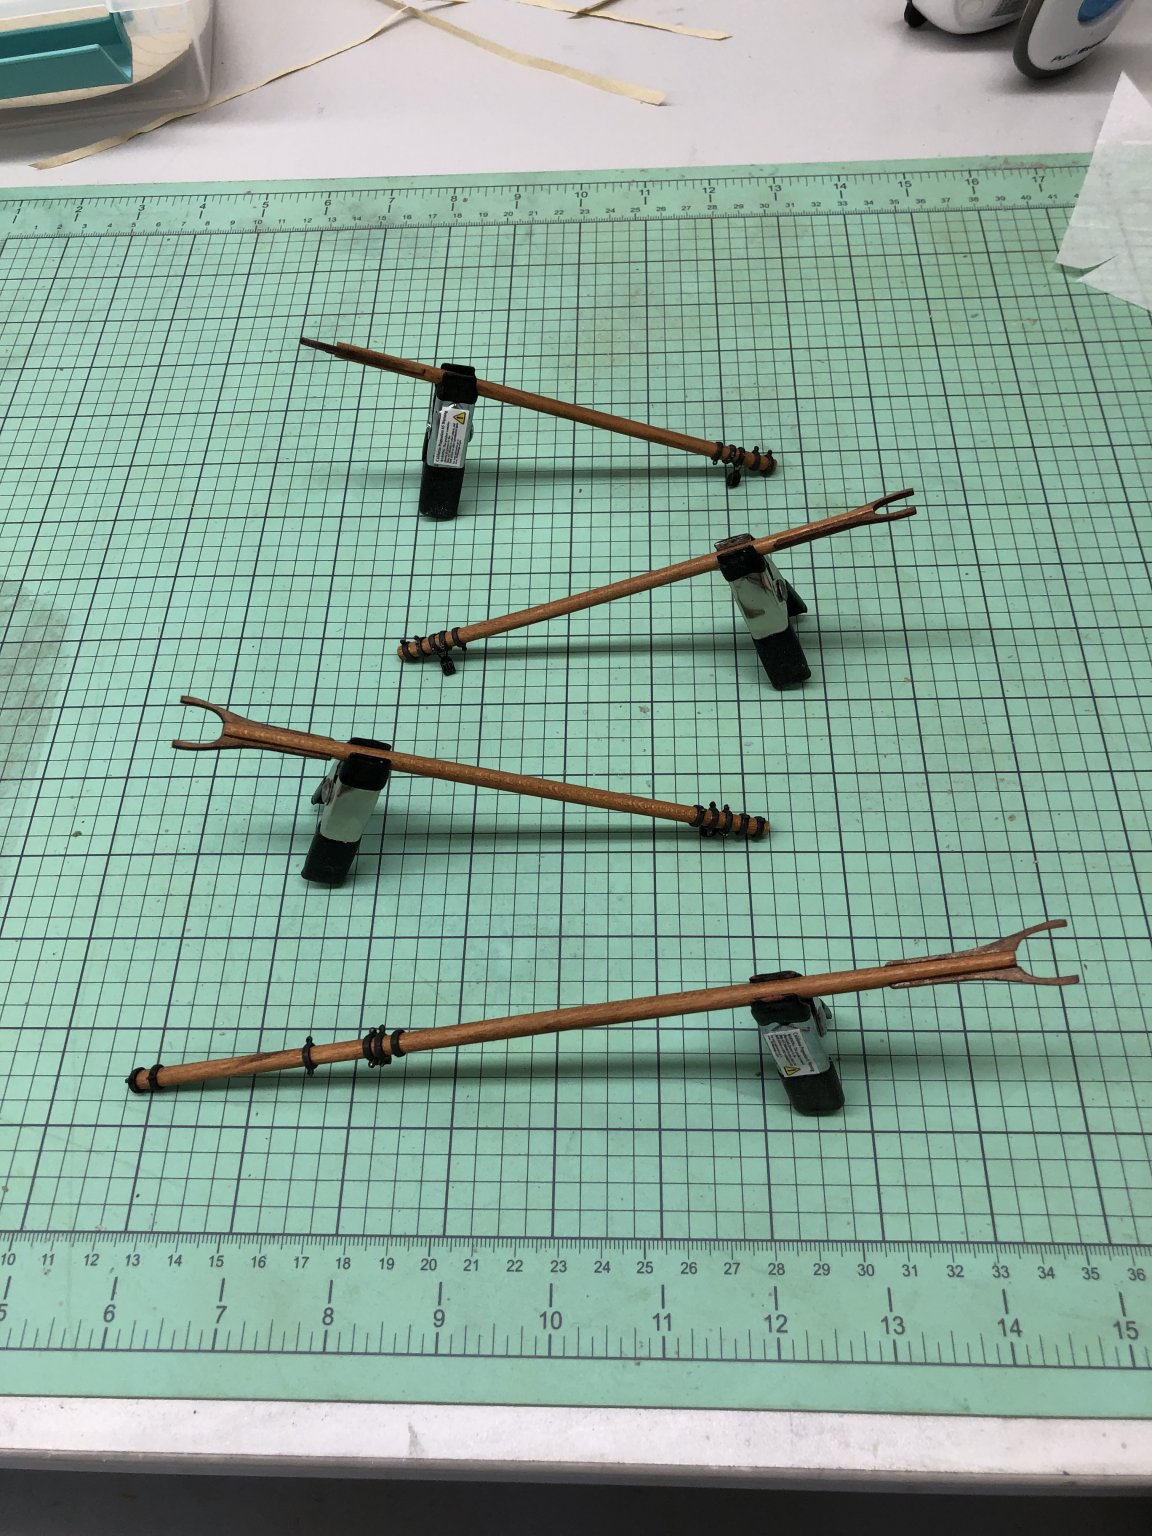
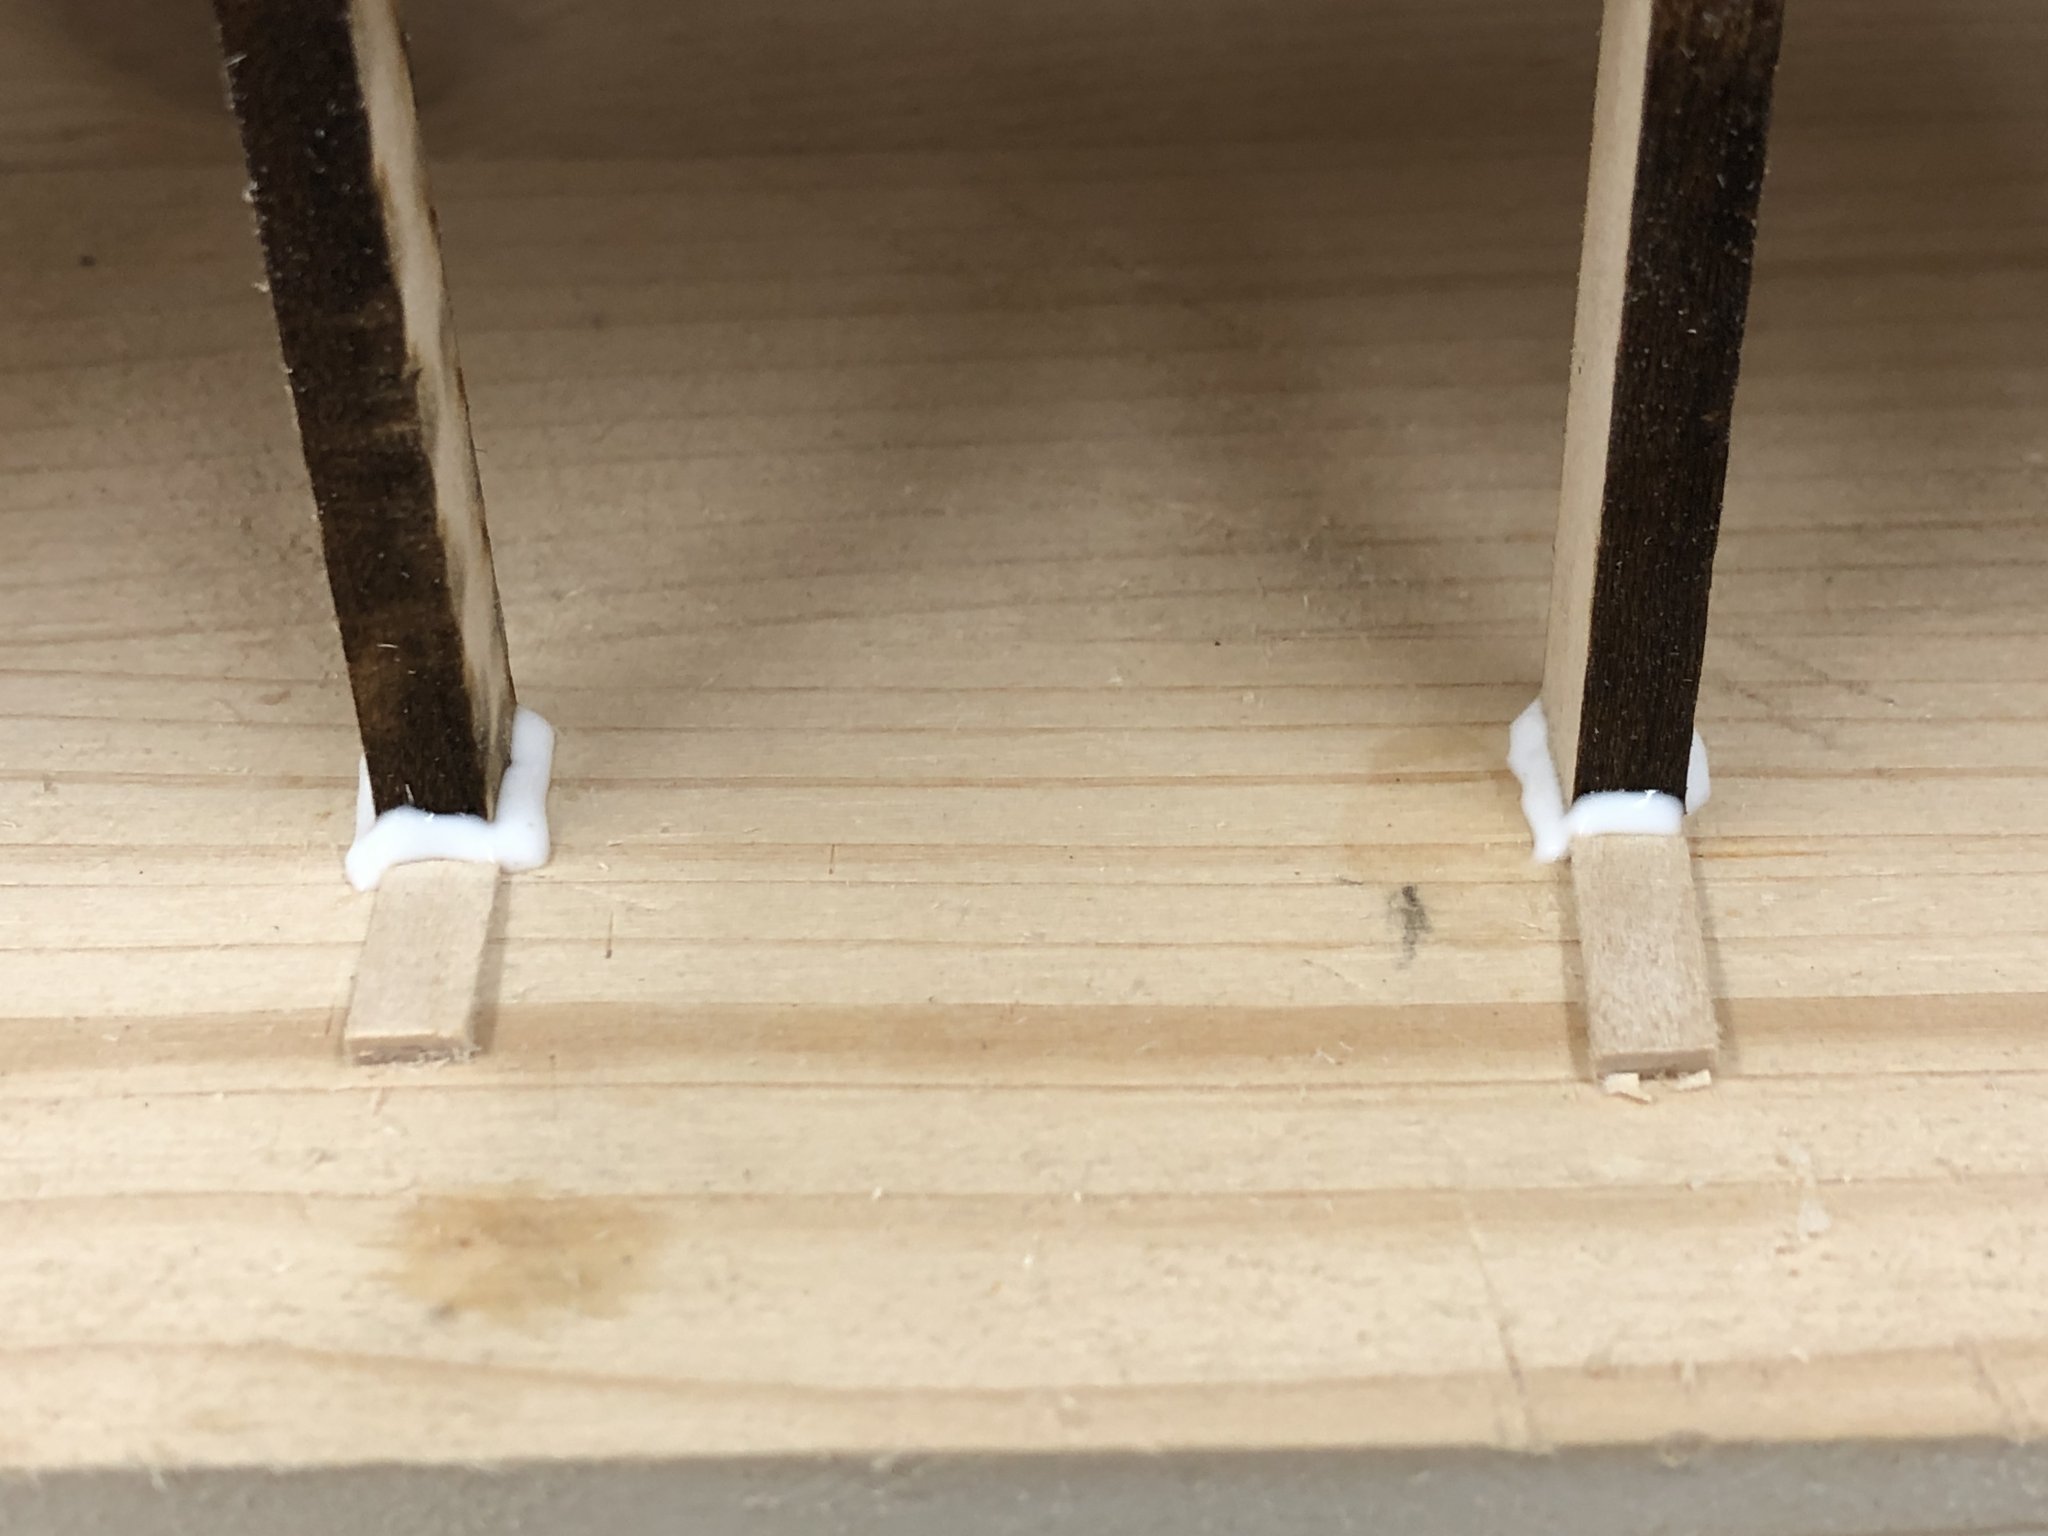
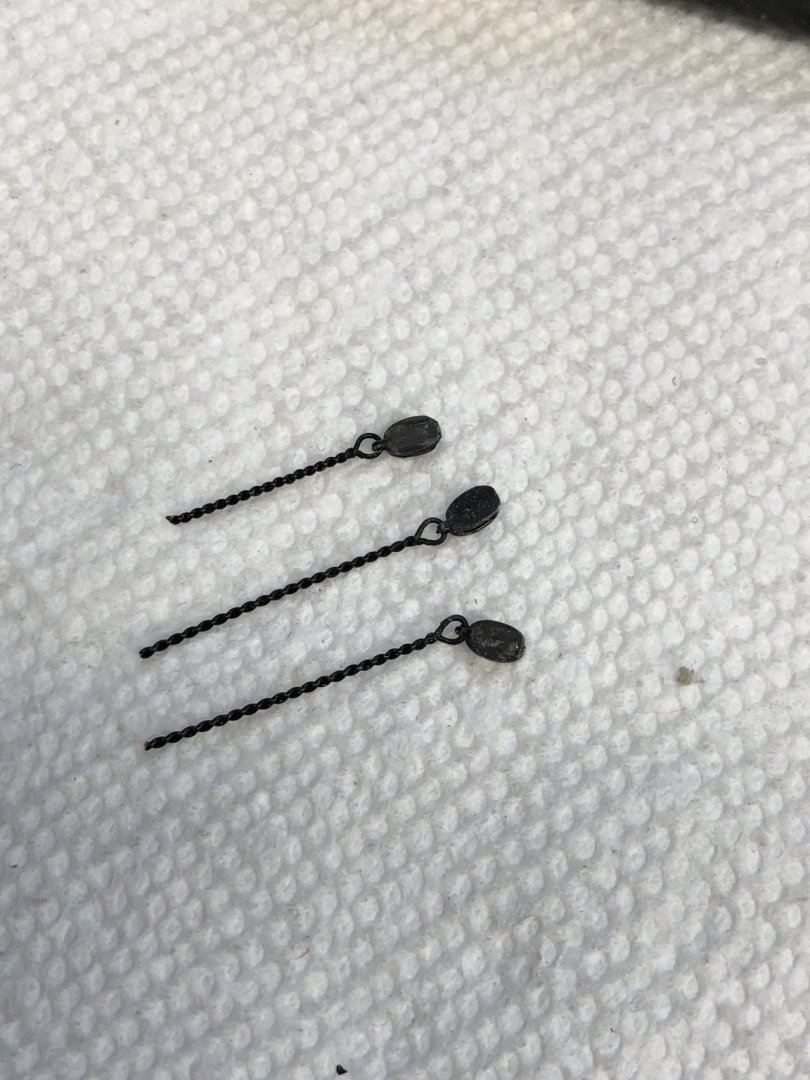
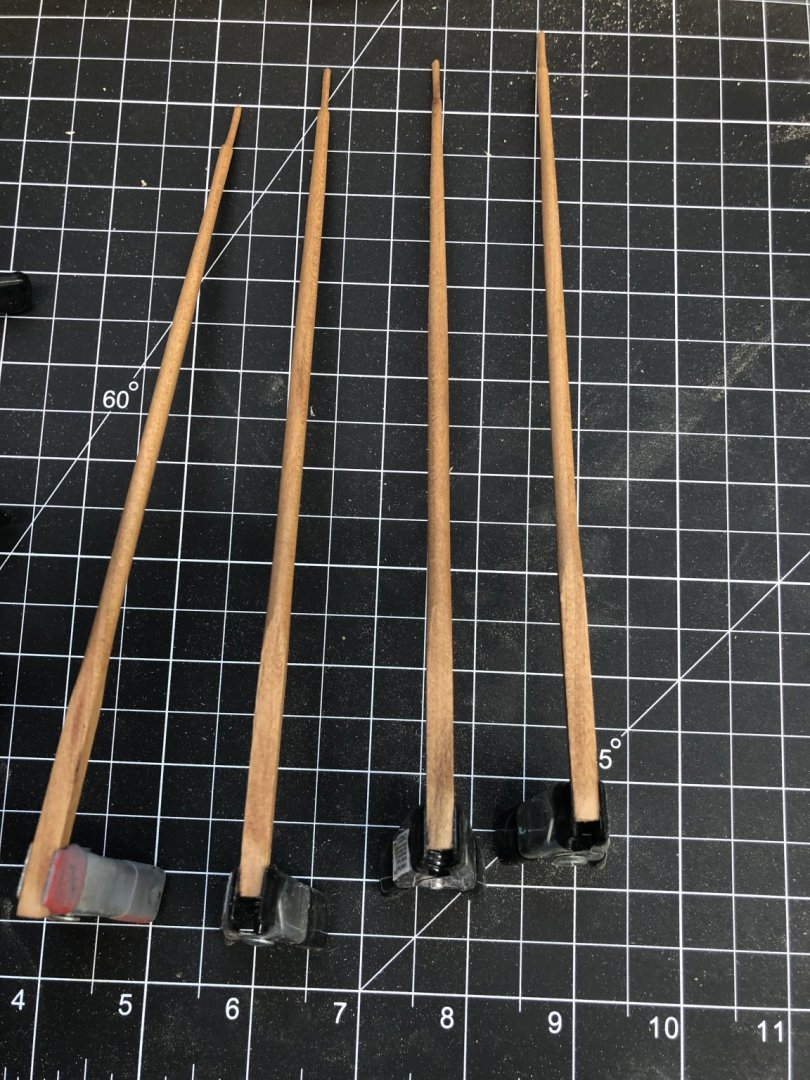
 I have also been working on getting the blocks cleaned up and the holes drilled both for the attachment point and in many cases the becket. It goes pretty slowly especially with the 1/8" blocks. I got the four triples for the throat halyards done and mounted on the gaffs. I have chosen not to put the topsail sheet block on the underside of the gaff since (at least in theory) I will have the gaffs down on top of the furled sails you would not be able to see it (or the sheet line running from the end of the gaff). Instead of using the 26ga wire provided to make the bails on the ends of the gaff (and boom) jaws I used 1/16" eyebolts. It seemed much easier than trying to make the little clips envisioned in the instructions. So here are the four gaffs ready (IMHO) for mounting.
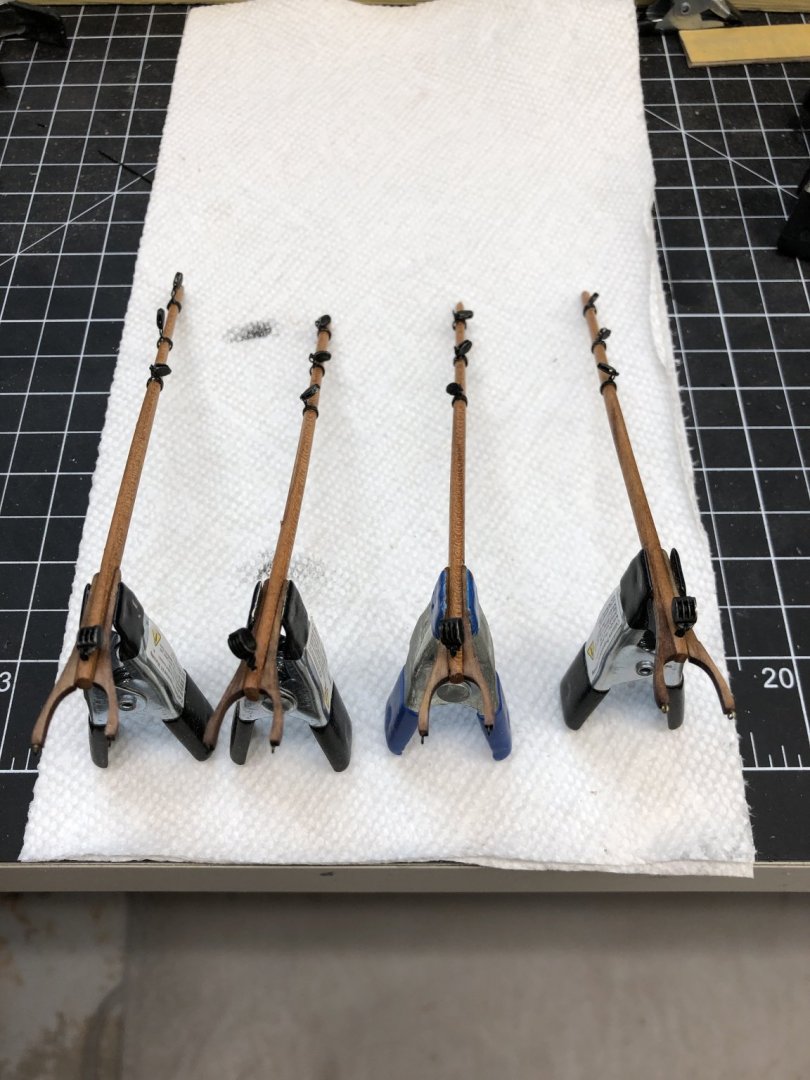
- 144 replies
-
- 7
-

-
- charles p notman
- finished
- (and 1 more)
-
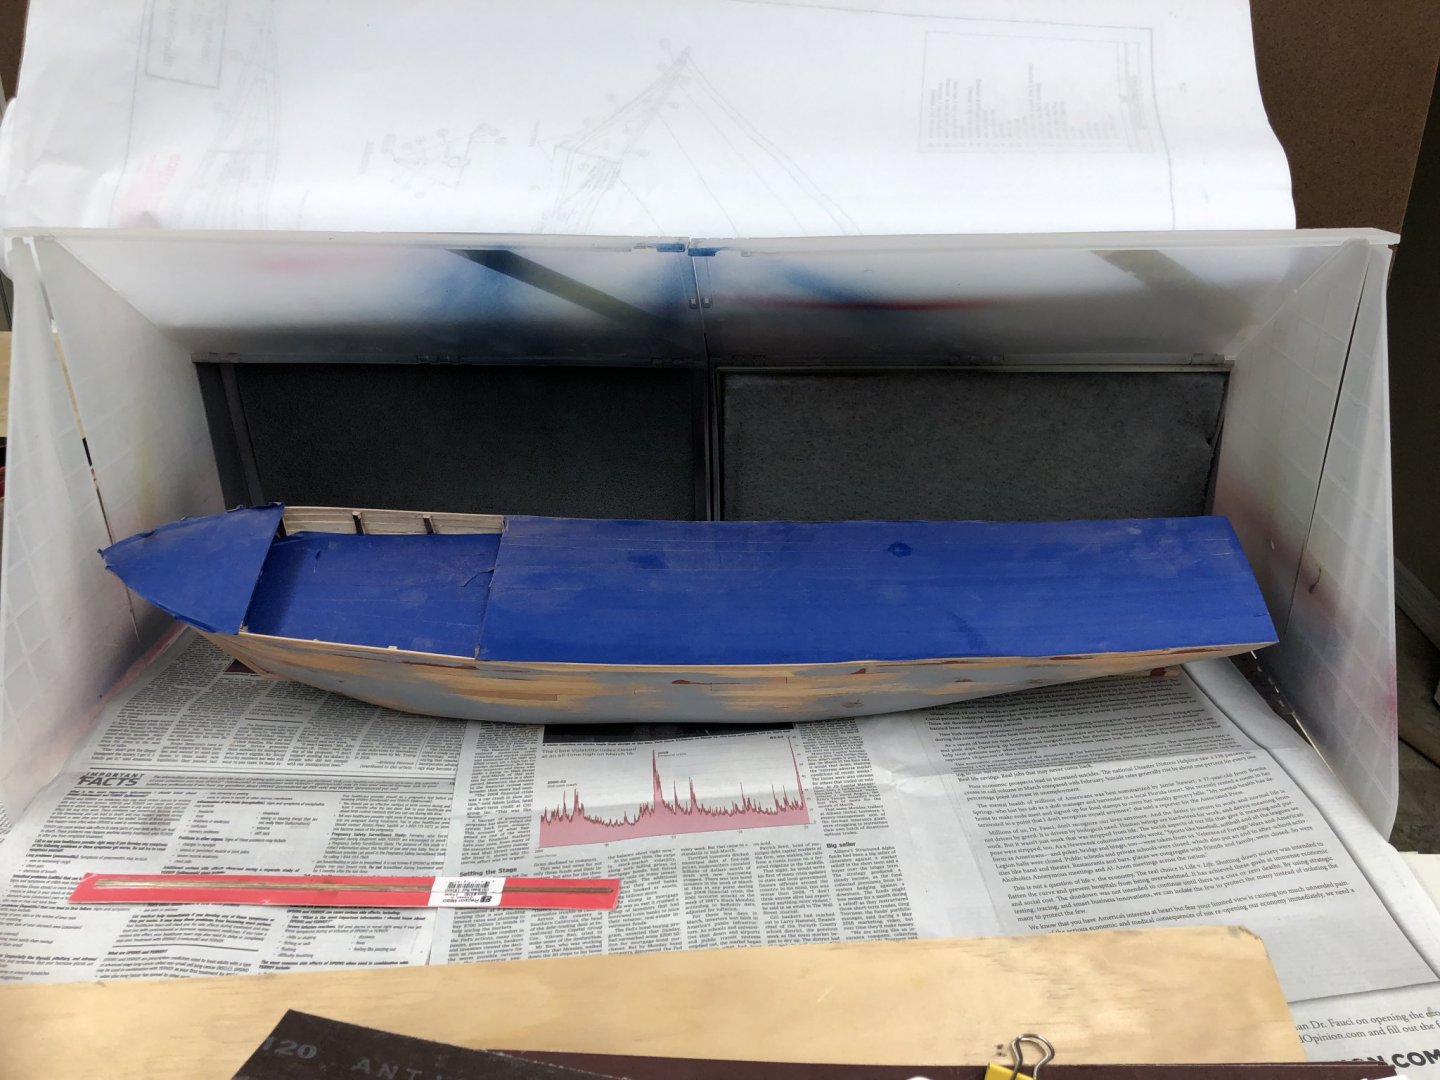
I have decided to deviate from the assembly instructions in order to try and get some of the painting done before all the coverboard and waterways are installed. I have picked out a dark blue (Badger Tug Deep Blue) and a light blue (Model Shipways Clipper Pearl Blue) for the hull and vertical parts of the deck furniture and bulwarks. I will also use the dark blue for the coverboard and trim on the hatches and other places where the instructions call for green. To make it easier (for me) to get clean lines I have painted the waterway and lock strakes on the main deck the dark blue and the bulwarks the light blue and will install the waterways after I get the main deck "varnished" (aka Wipe-on-Poly). I painted three pieces of the 1/16 X 1/16 stock the deep blue and will use this for the inboard most piece of the coverboard (once the poop and fo'c'sle decks are finished. this will make it easier to paint the coverboard without worrying (too much) about getting blue paint on the deck. Here is the hull with the waterway on the stbd side being glued in and the inner most portion of the coverboard being glued in on the port side.
- 144 replies
-
- 6
-
-
- charles p notman
- finished
- (and 1 more)
-
Thanks Nic - I'll get some tomorrow.
-
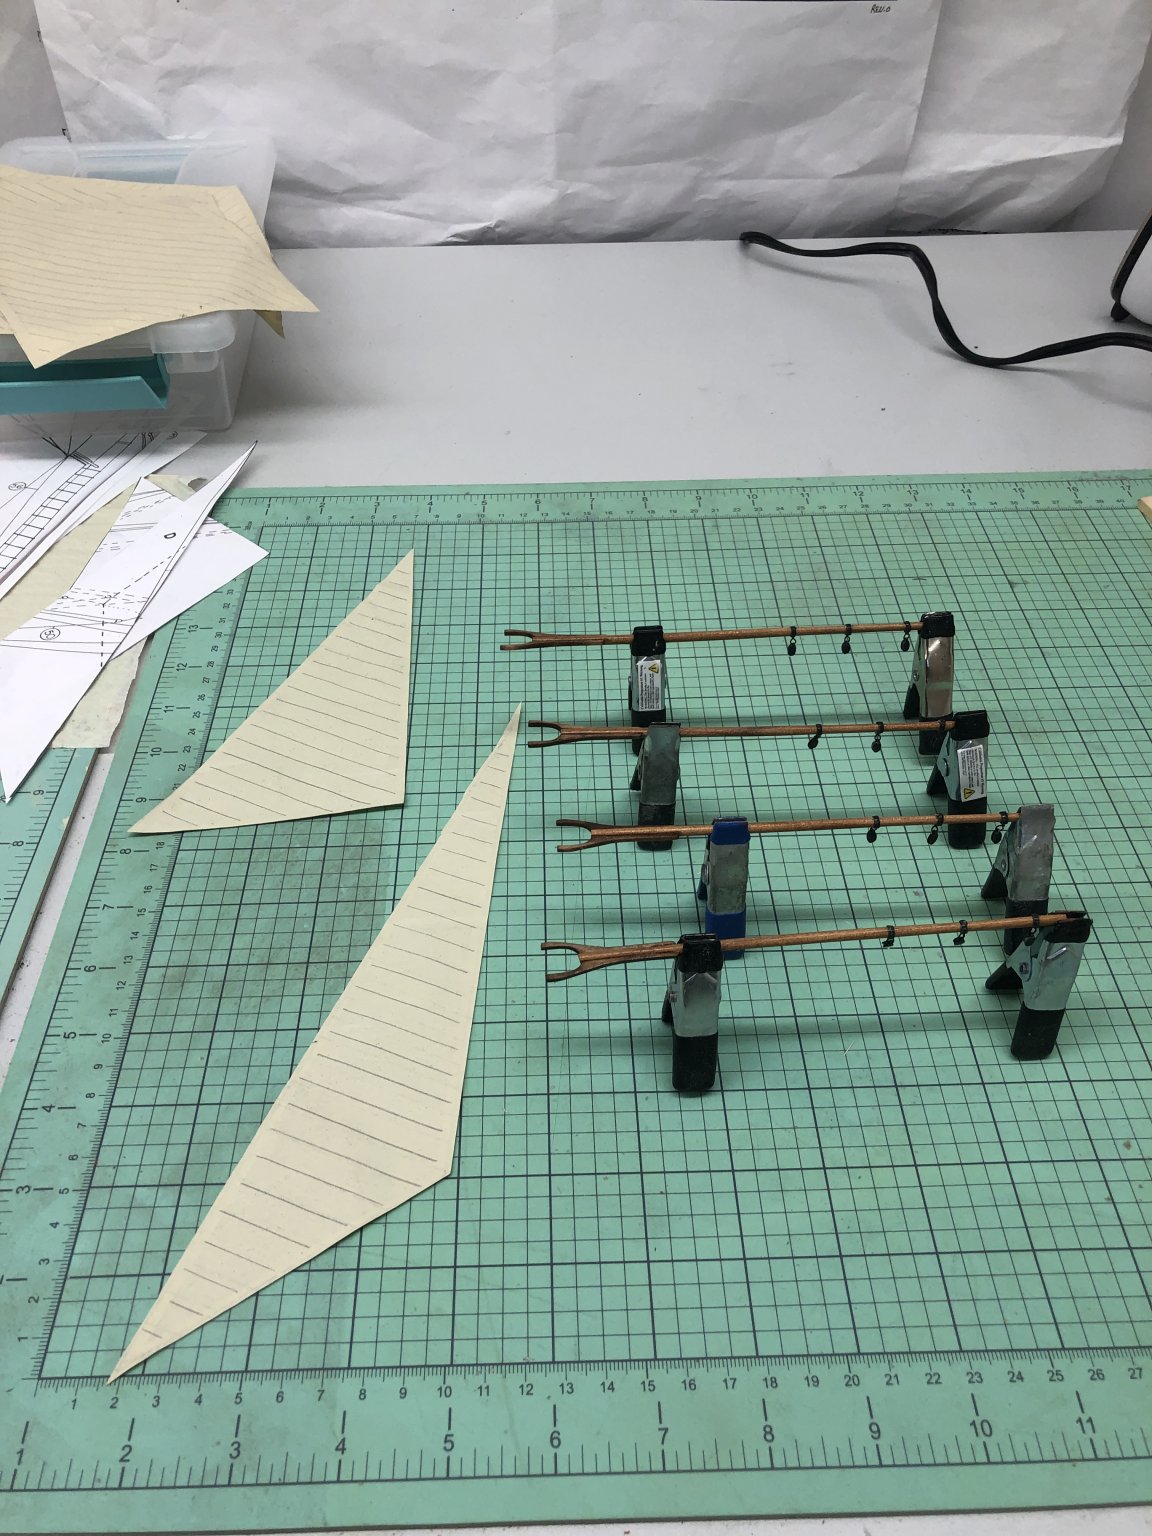
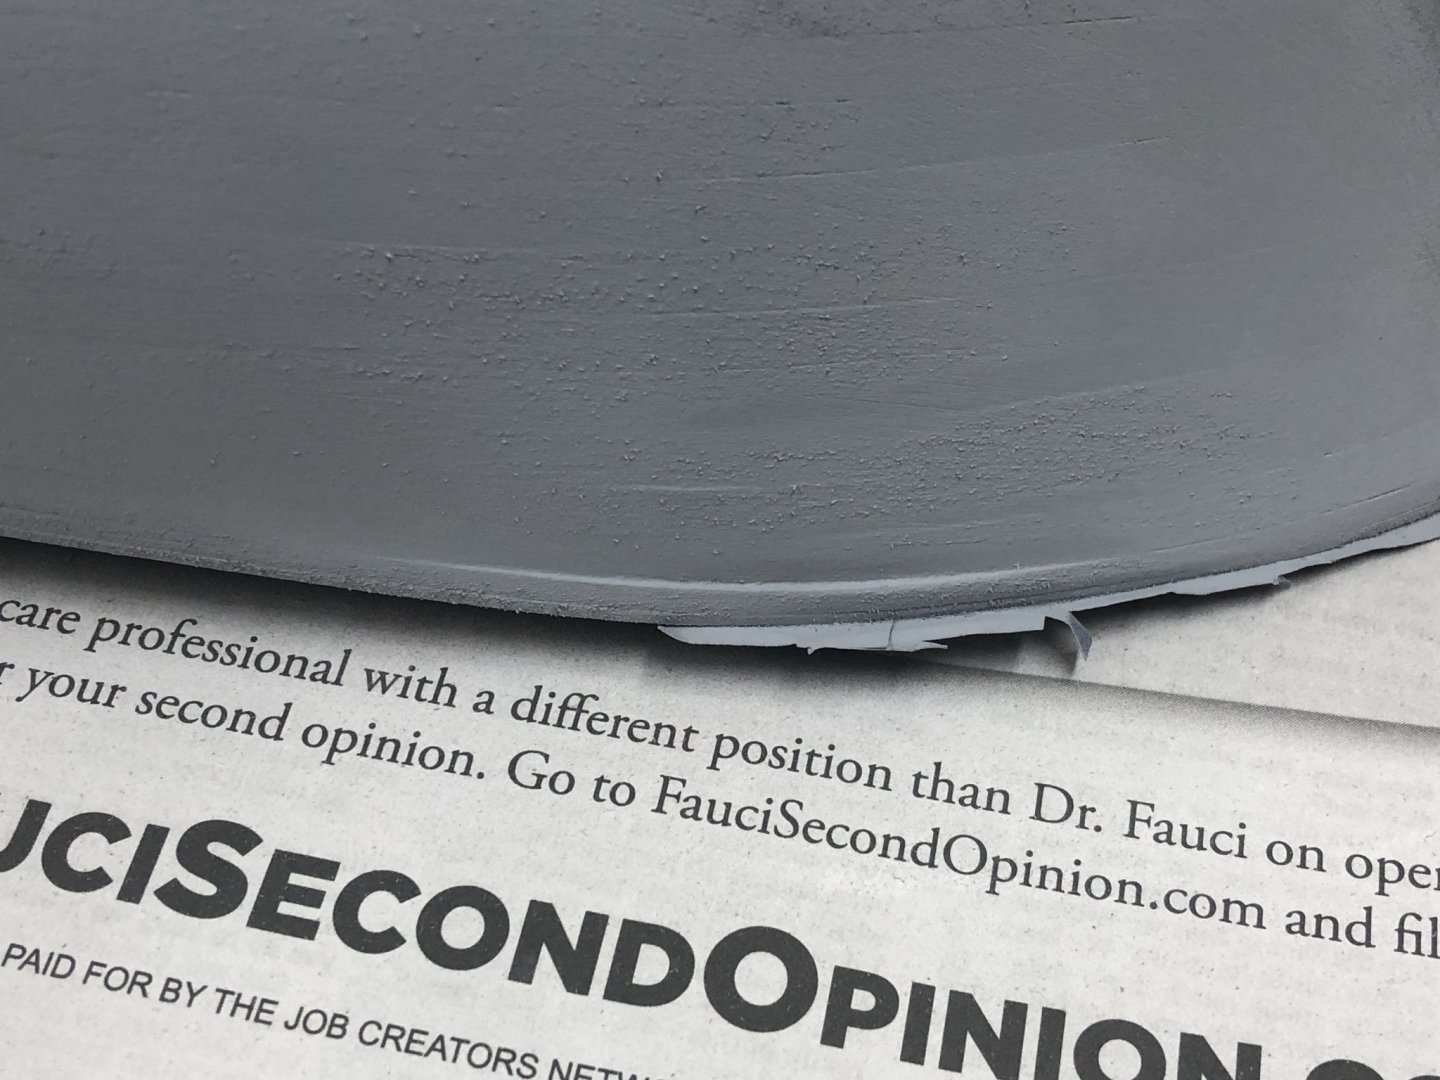
This coat of filler/primer looks pretty good except for one spot (see if you can guess where it is) where I was apparently too vigorous with the sanding and went all the way through the planking. Luckily it is in an area where I put the extra filler blocks so repair will not be as difficult as it would be without the backing material. I will fix that spot and the area near the deck where the planks are still mismatched. While the paint was drying (it is dry in about an hour) I managed to get the peak halyard blocks on the four gaffs. All I need now are the throat halyard blocks and the little bails and these are ready to have the sails attached. Also got the two head sails fabbed and the reinforcing panels attached.


- 144 replies
-
- 8
-
-
- charles p notman
- finished
- (and 1 more)
-
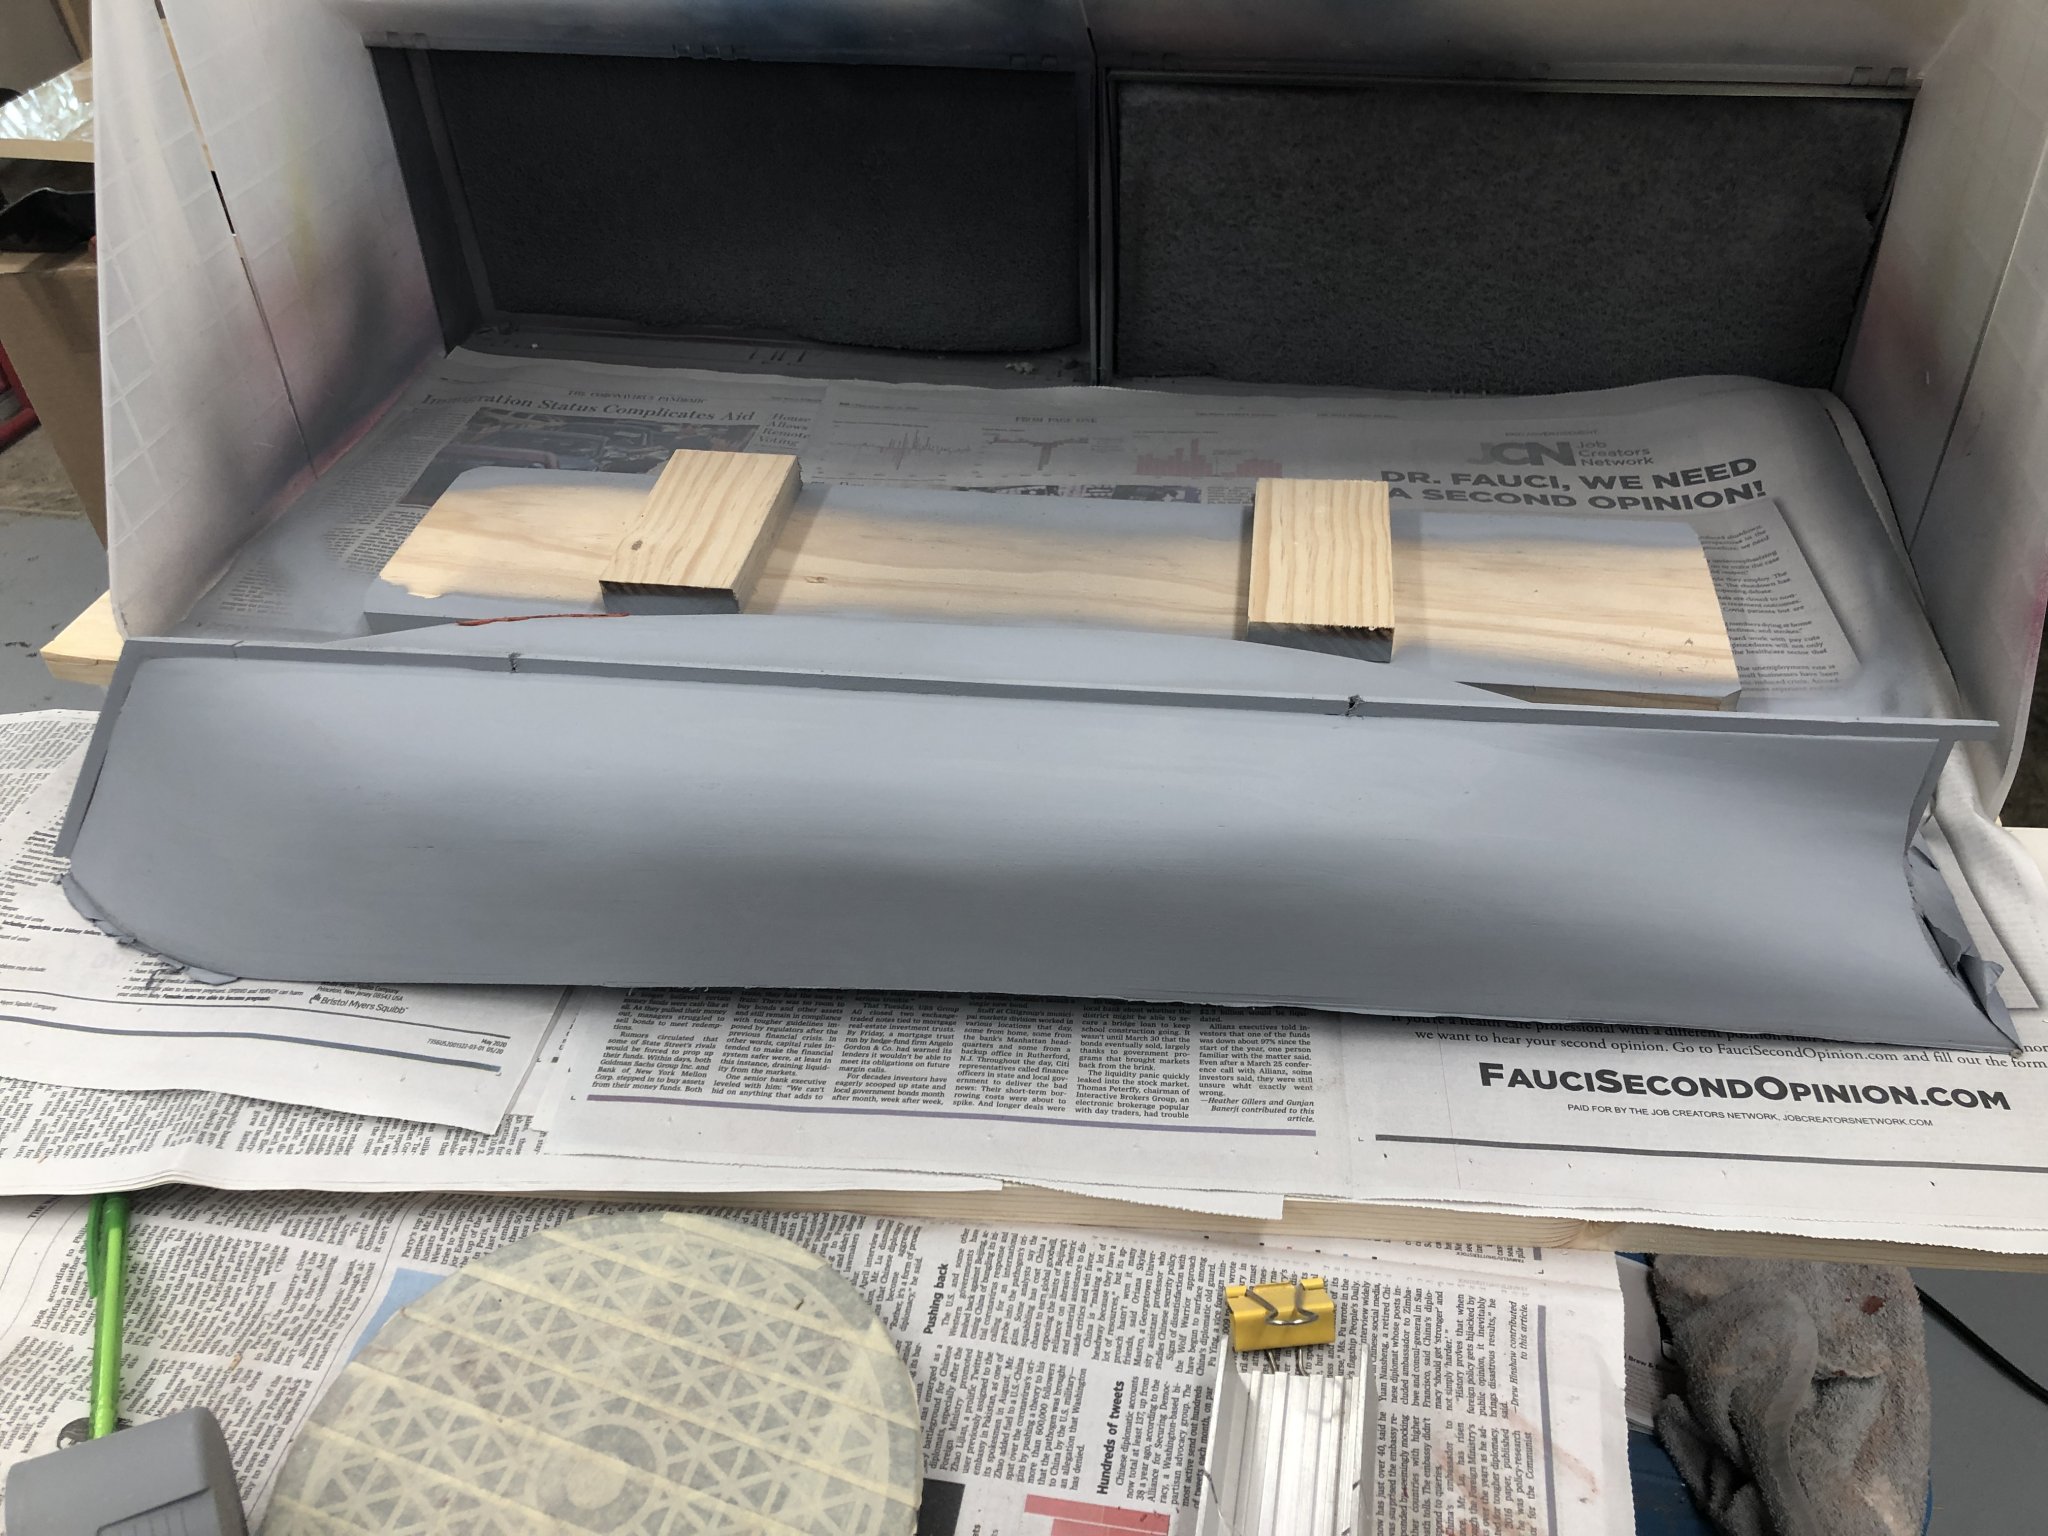
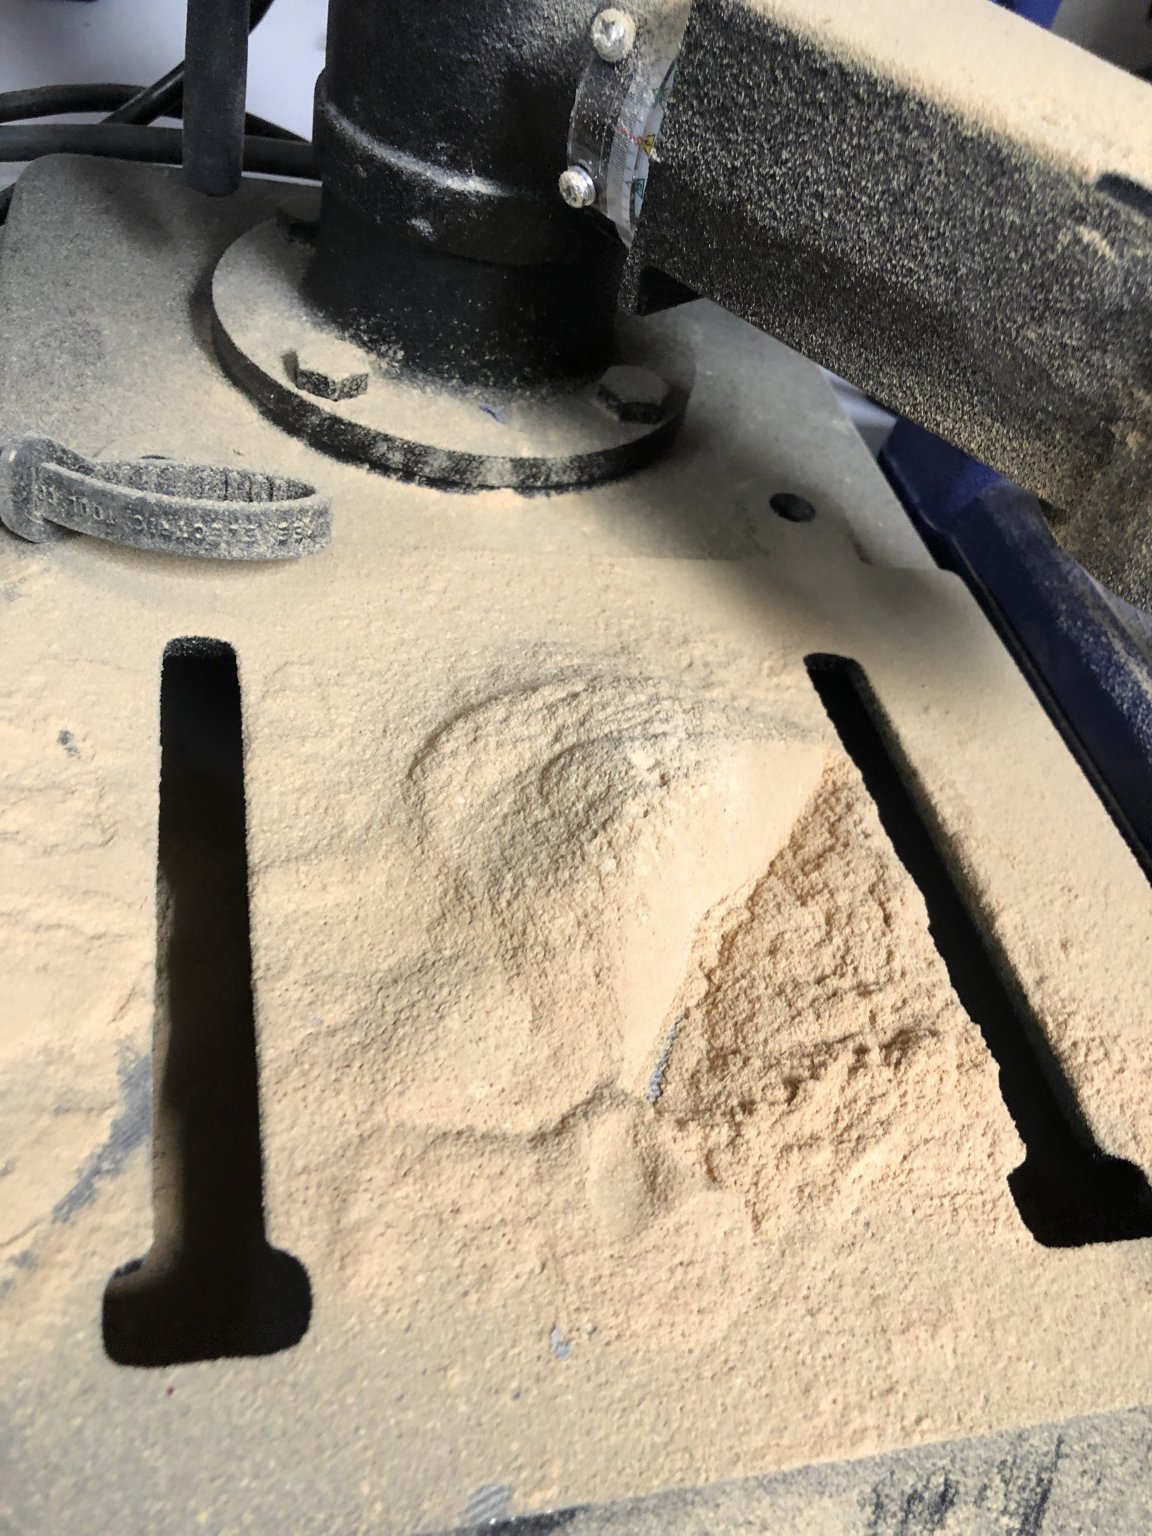
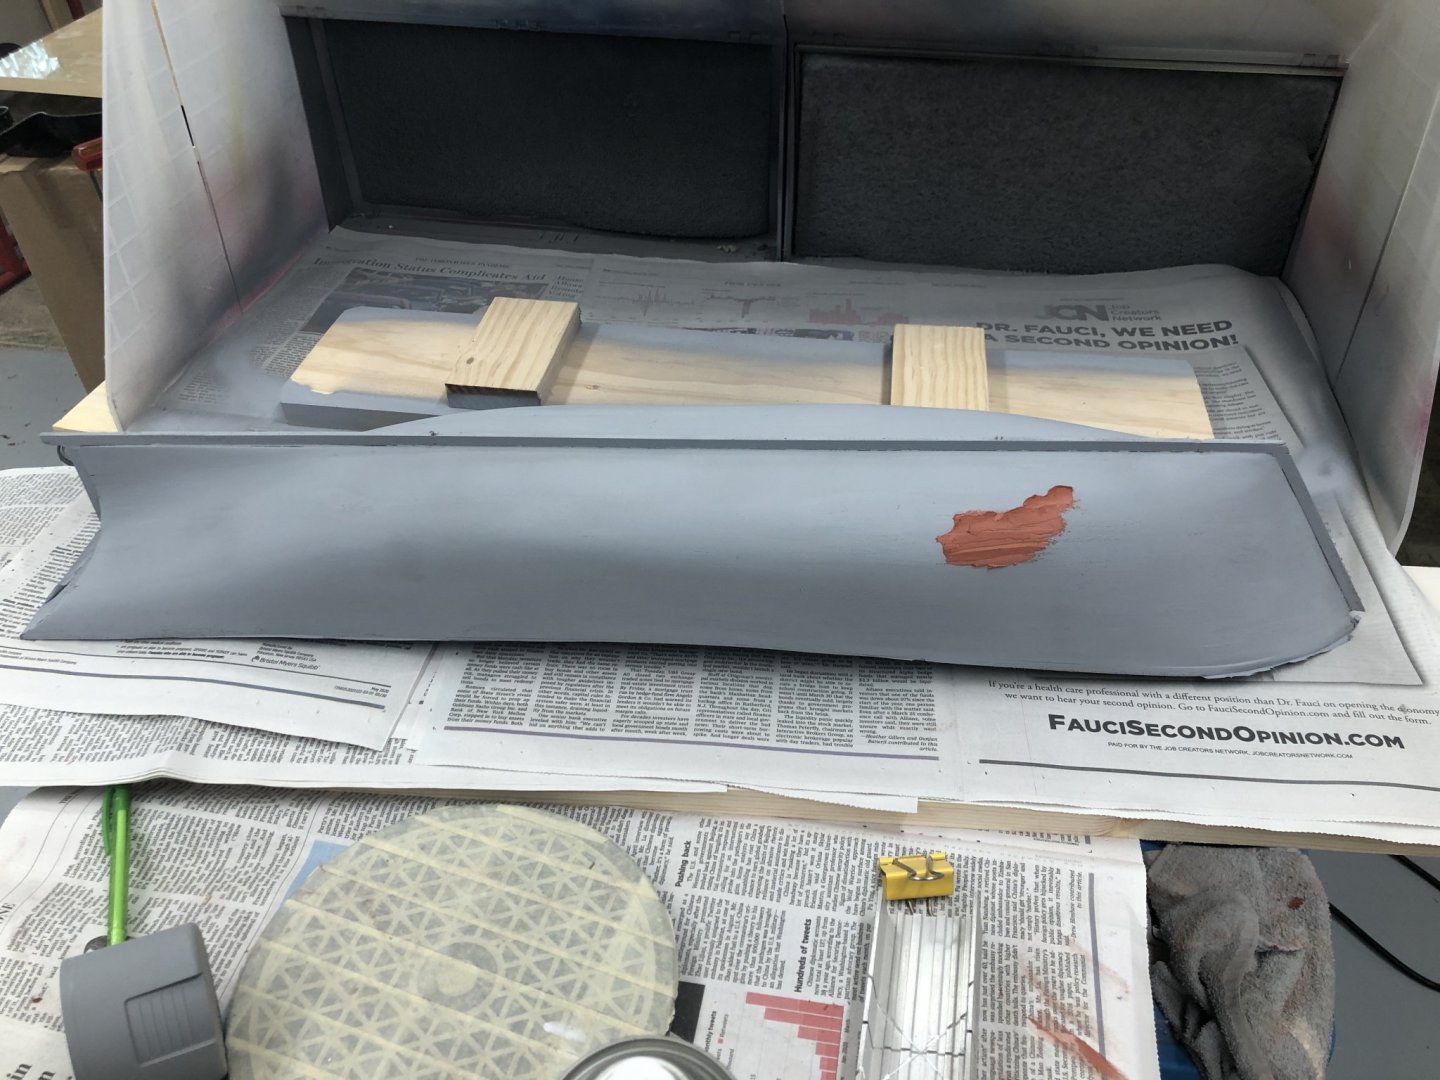
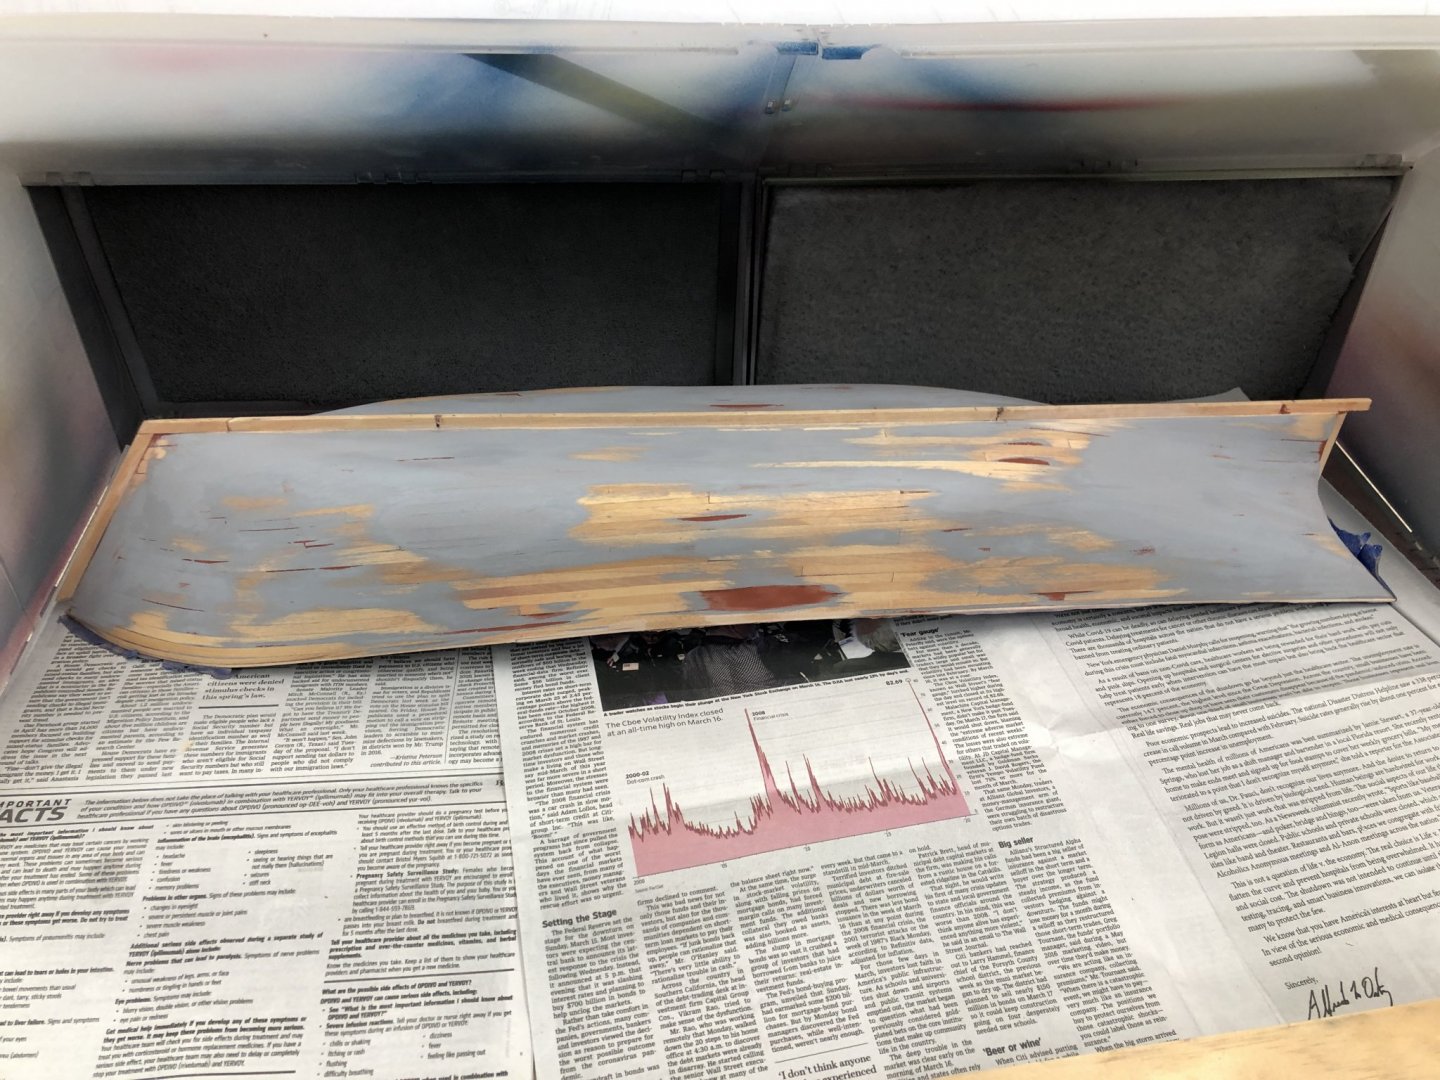
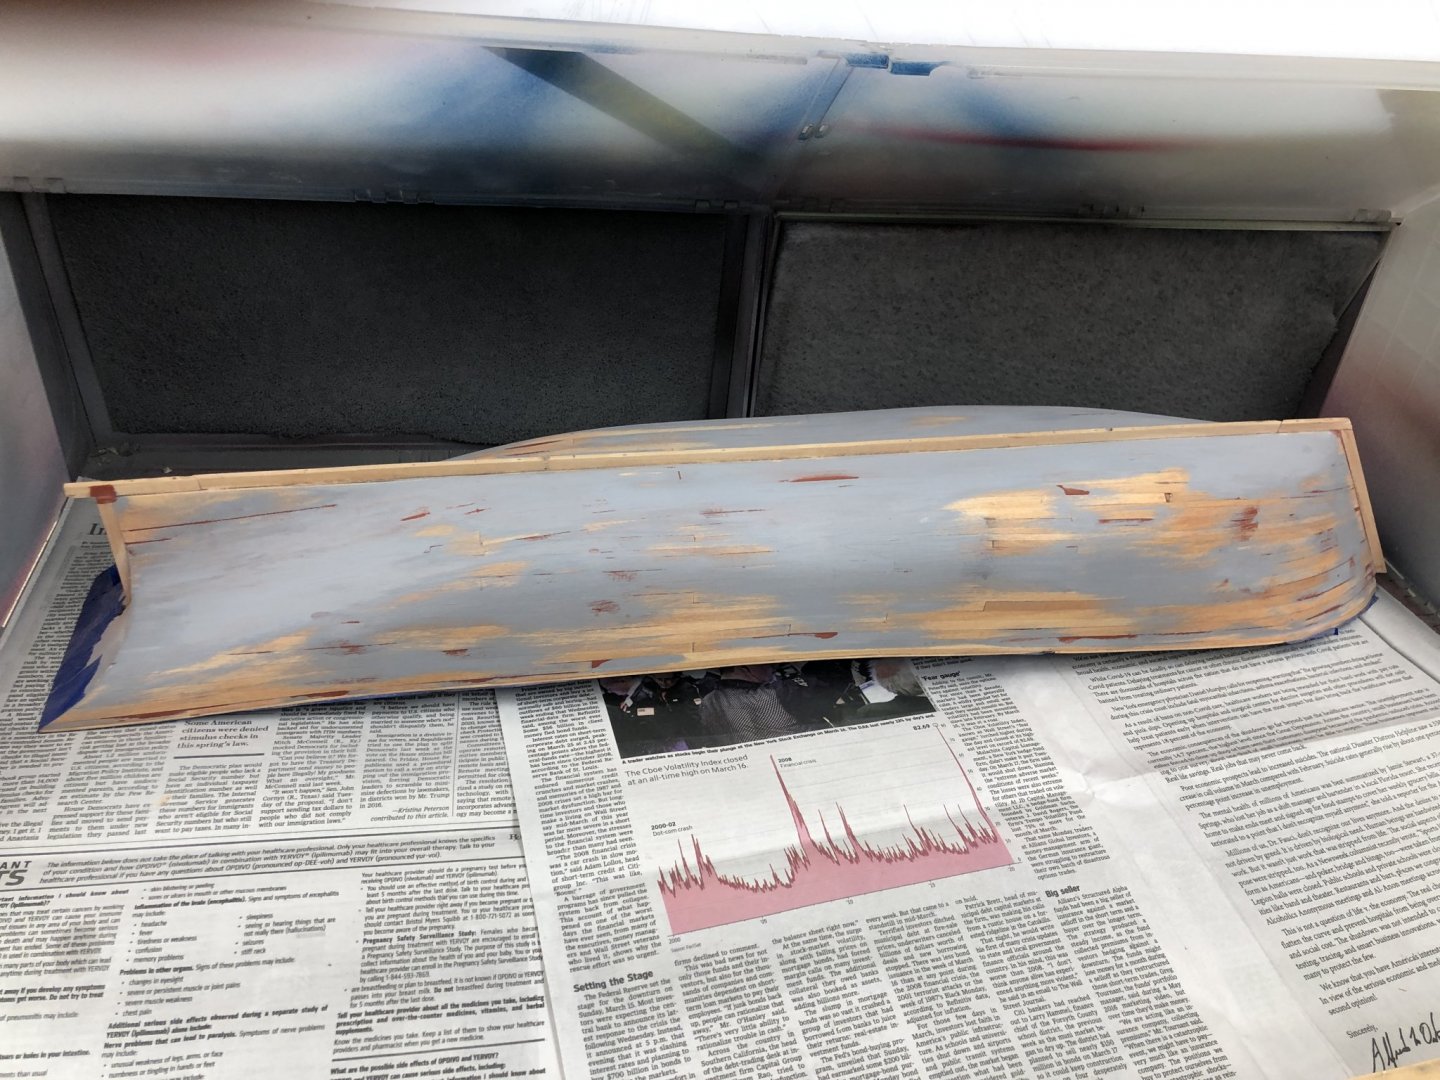
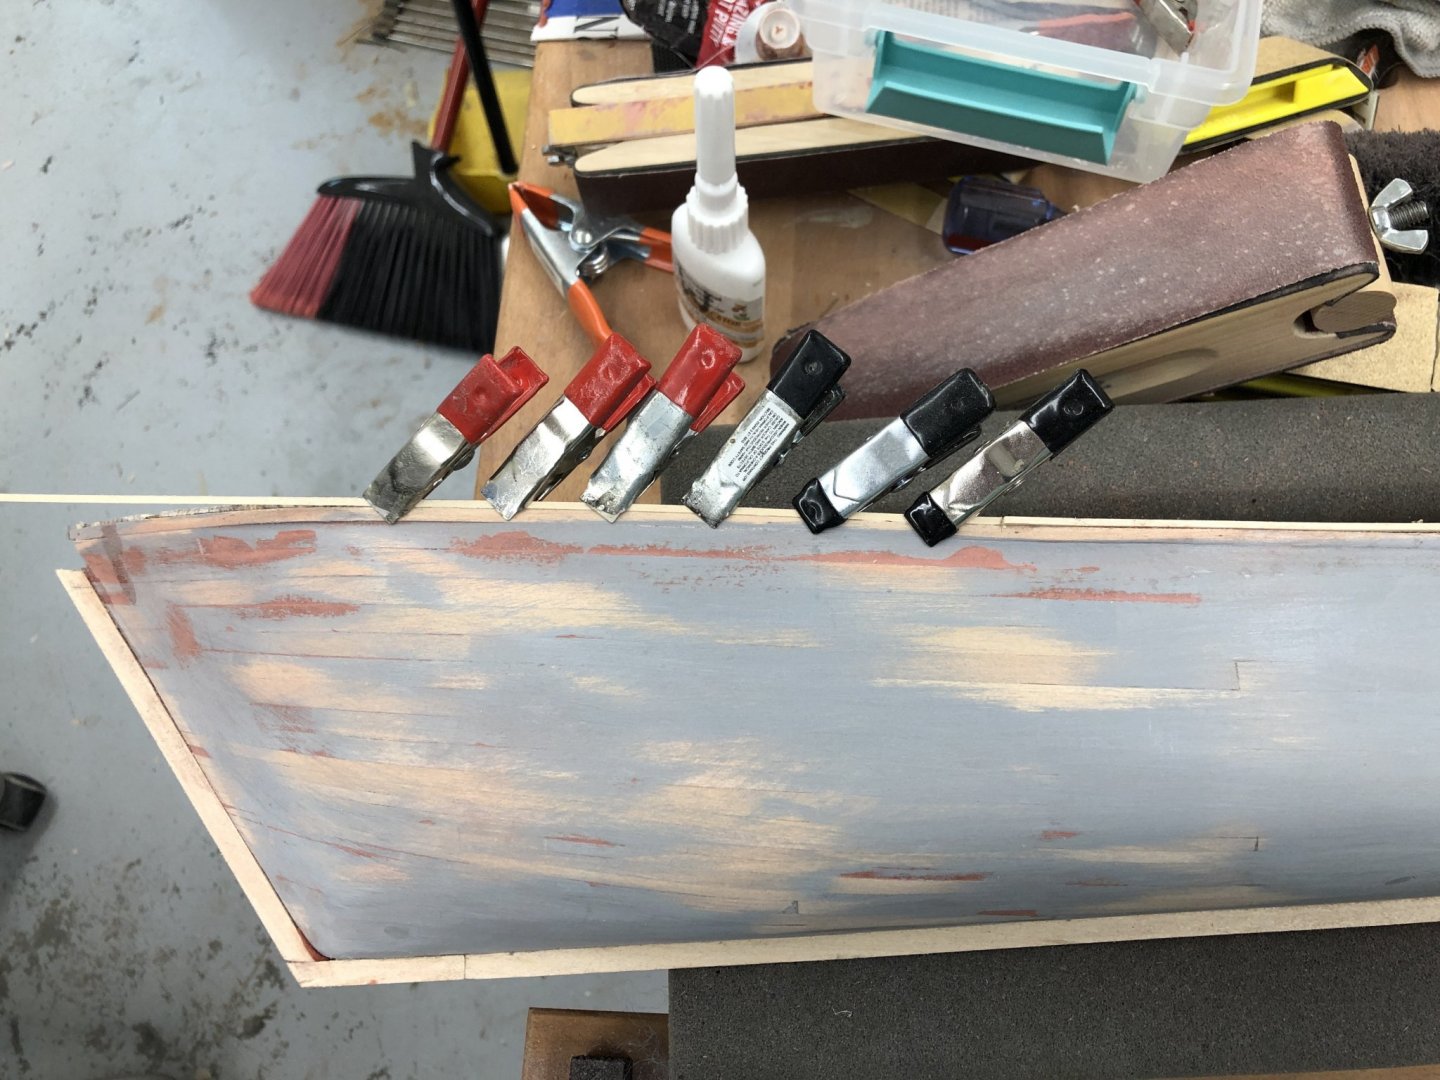
Continuing to work on the hull - three sets of Bondo so far but the number and size of the spots is going down. I have enough sanded off it is time for another coat of filler/primer. One thing of note is that the filler/primer really clogs up the sand paper. I ran through three sheets after the first coat. The Bondo does a pretty good job too but the filler/primer really clogs up the paper. One mistake (although it did not cost anything) from the first coat is that I now have the decks covered with masking tape. With the hull attached to the build board that was not possible on the first coat. Luckily none got on the deck but taking no chances this time. Here is the hull in the spray booth ready for another coat in the morning.
- 144 replies
-
- 5
-
-
- charles p notman
- finished
- (and 1 more)
-
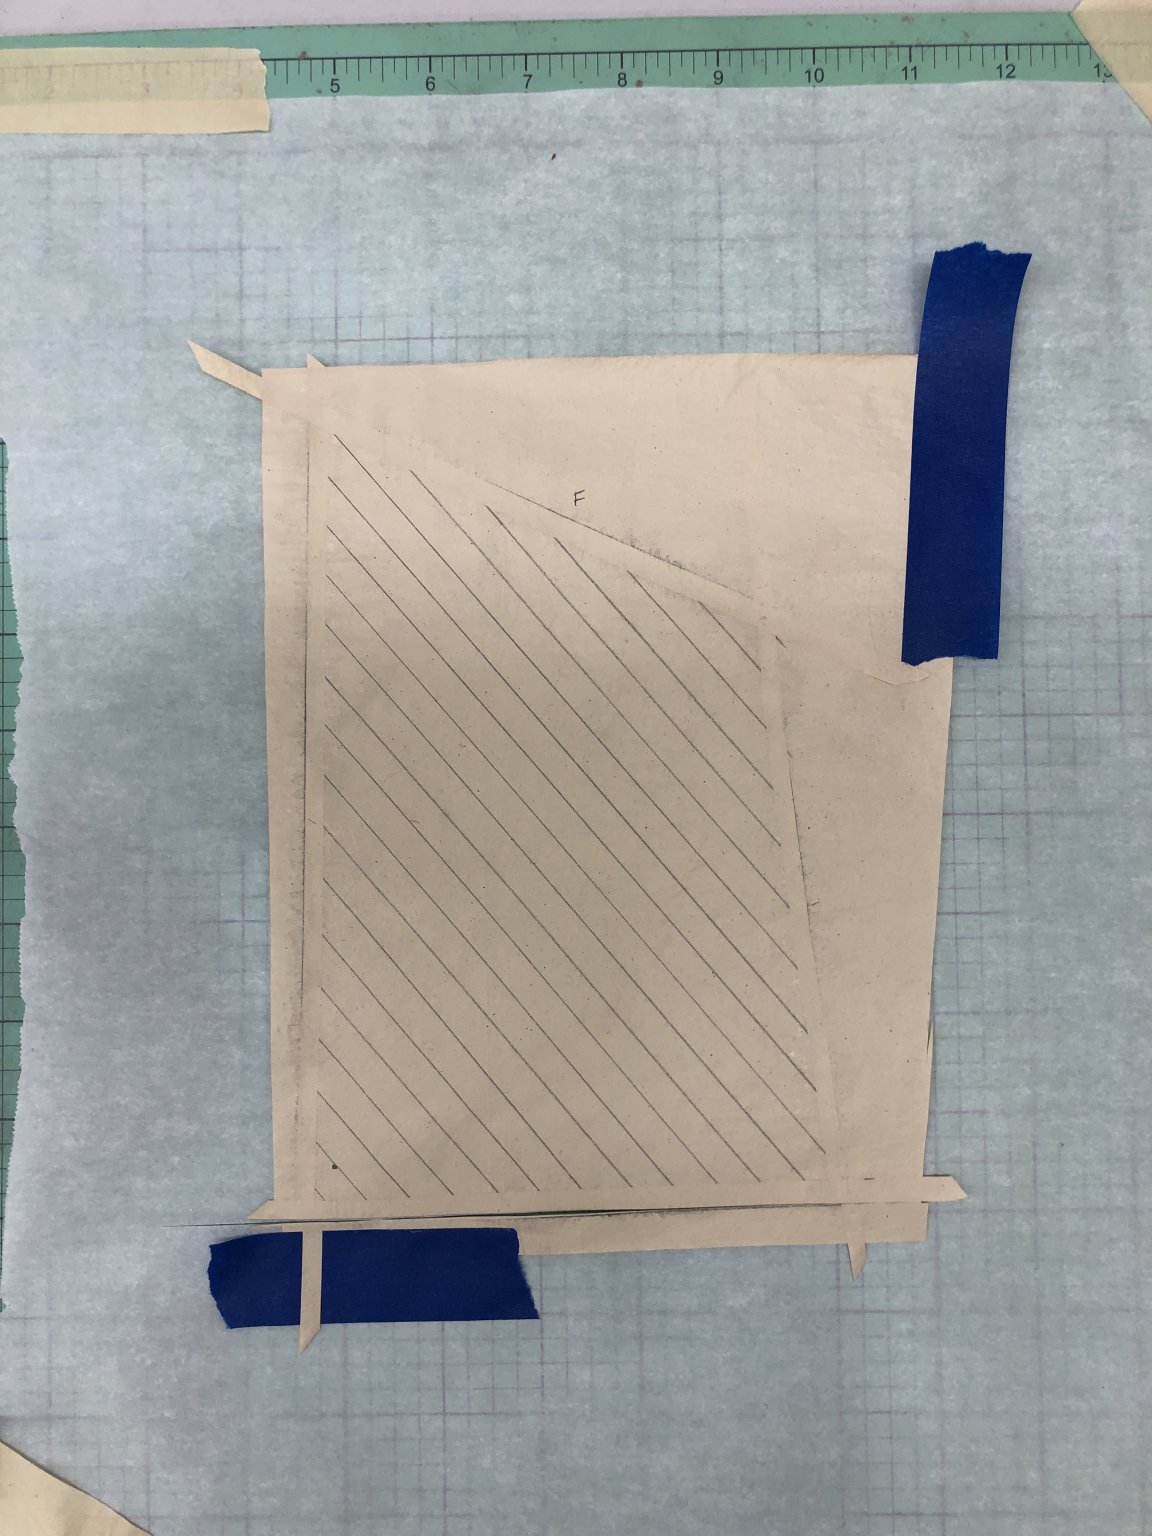
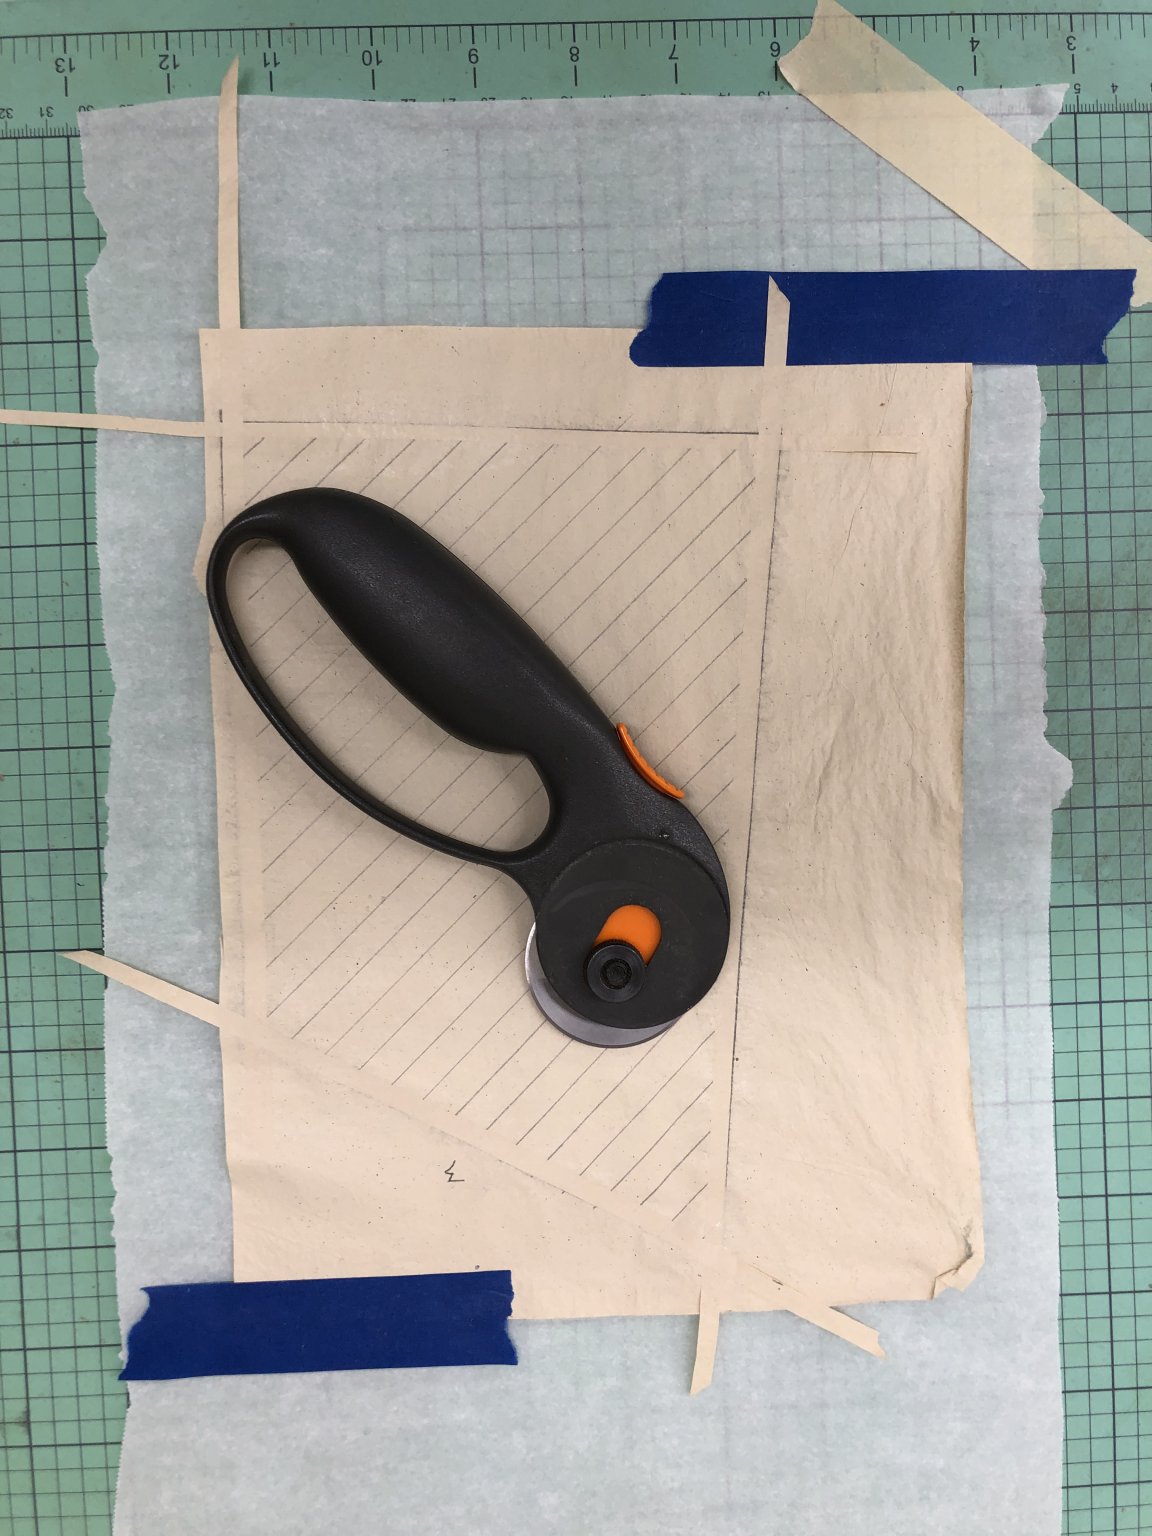
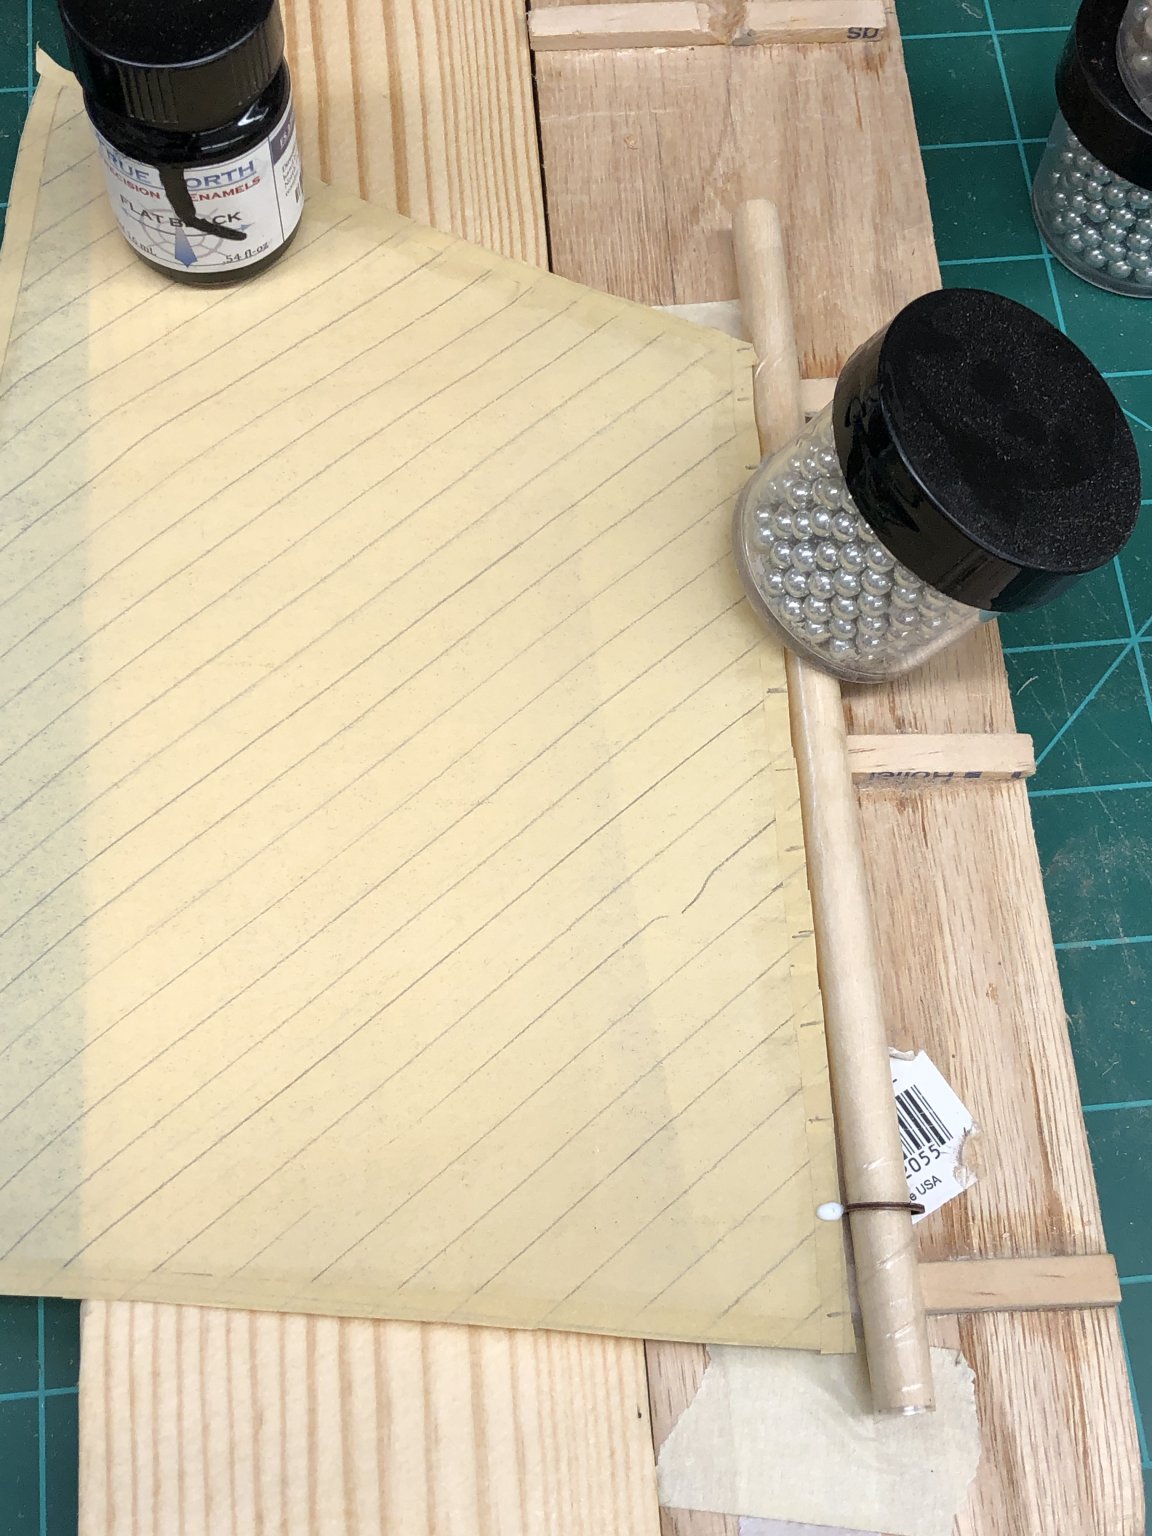
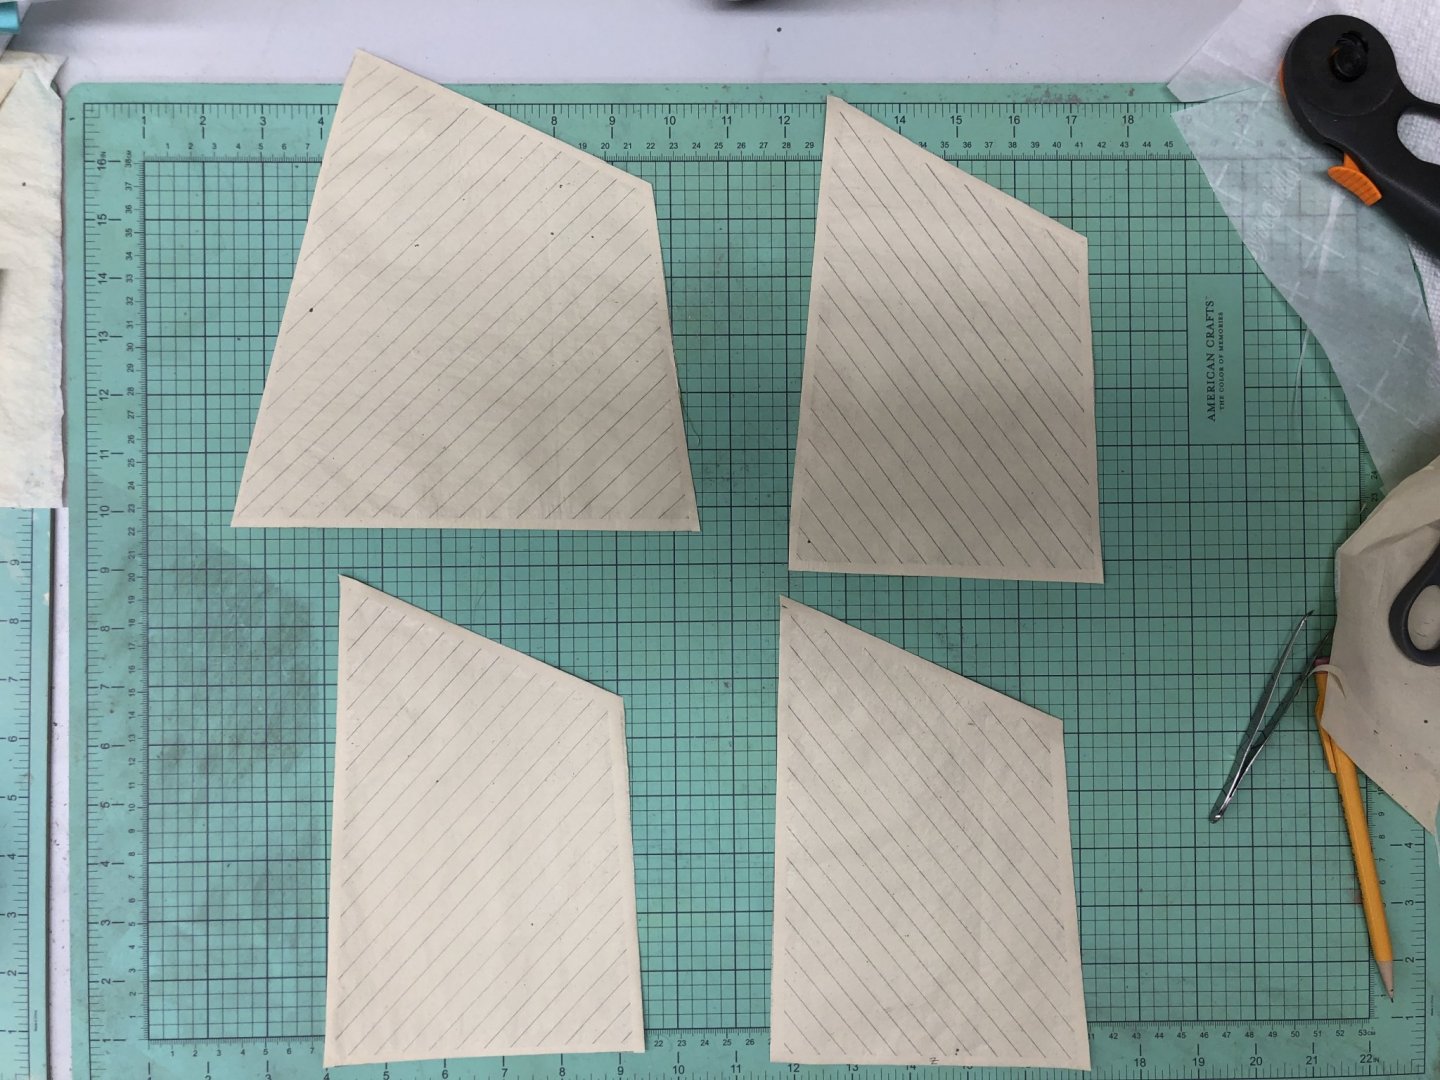
And there are always the sails. I am using the methodology from Tom Luria's You-Tube video using silkspan to make sails although I am only doing the furled version (so no reef points for instance). Since they aare to be furled I was not too careful about extraneous marks that occur when your cutting mat is not really clean and you forget to put some wax or parchment paper down over it. So here is the starting point after I use a 4H pencil to draw in the fabric seams. I have taped both the parchment paper to the mat and the sail to the parchment paper (as best I can). Here is the sail with the reinforcing at the edges in place. For cutting the thin strips for the reinforcing I used a rotary cutting (courtesy of my quilter girlfriend). It makes cutting thin pieces easier and straighter than using an Xacto knife which (at least when I use it) tends to push the fabric ahead of it and make a somewhat jagged cut. The rotary cutter does not seem tom have this issue so I use it for all the cutting on the sails. And here are the four mail sails reinforced and cut out. Now for the bolt ropes, mast hoops and grommet holes.

- 144 replies
-
- 6
-
-
- charles p notman
- finished
- (and 1 more)
-
Speaking of things to do while Bondo sets here are the booms with the irons (and sheet block) attached. Work on the bail beckets next.

- 144 replies
-
- 6
-
-
- charles p notman
- finished
- (and 1 more)
-
When I started the planking I left a 1/16" space at the top of the hull - I misread the instructions and thought that the top strake (that is supposed to fit in the notch in the bulkhead extensions) was one of the 1/16" wide pieces with the double bead rather than a "regular" 1/16" X 1/8" piece of planking. So I am in the process of adding a 1/16" X 1/16" piece at the top of the planking all around the hull. Here is the piece across the main deck on the port side. Another thing to do while the Bondo hardens.
- 144 replies
-
- 4
-
-
- charles p notman
- finished
- (and 1 more)
-
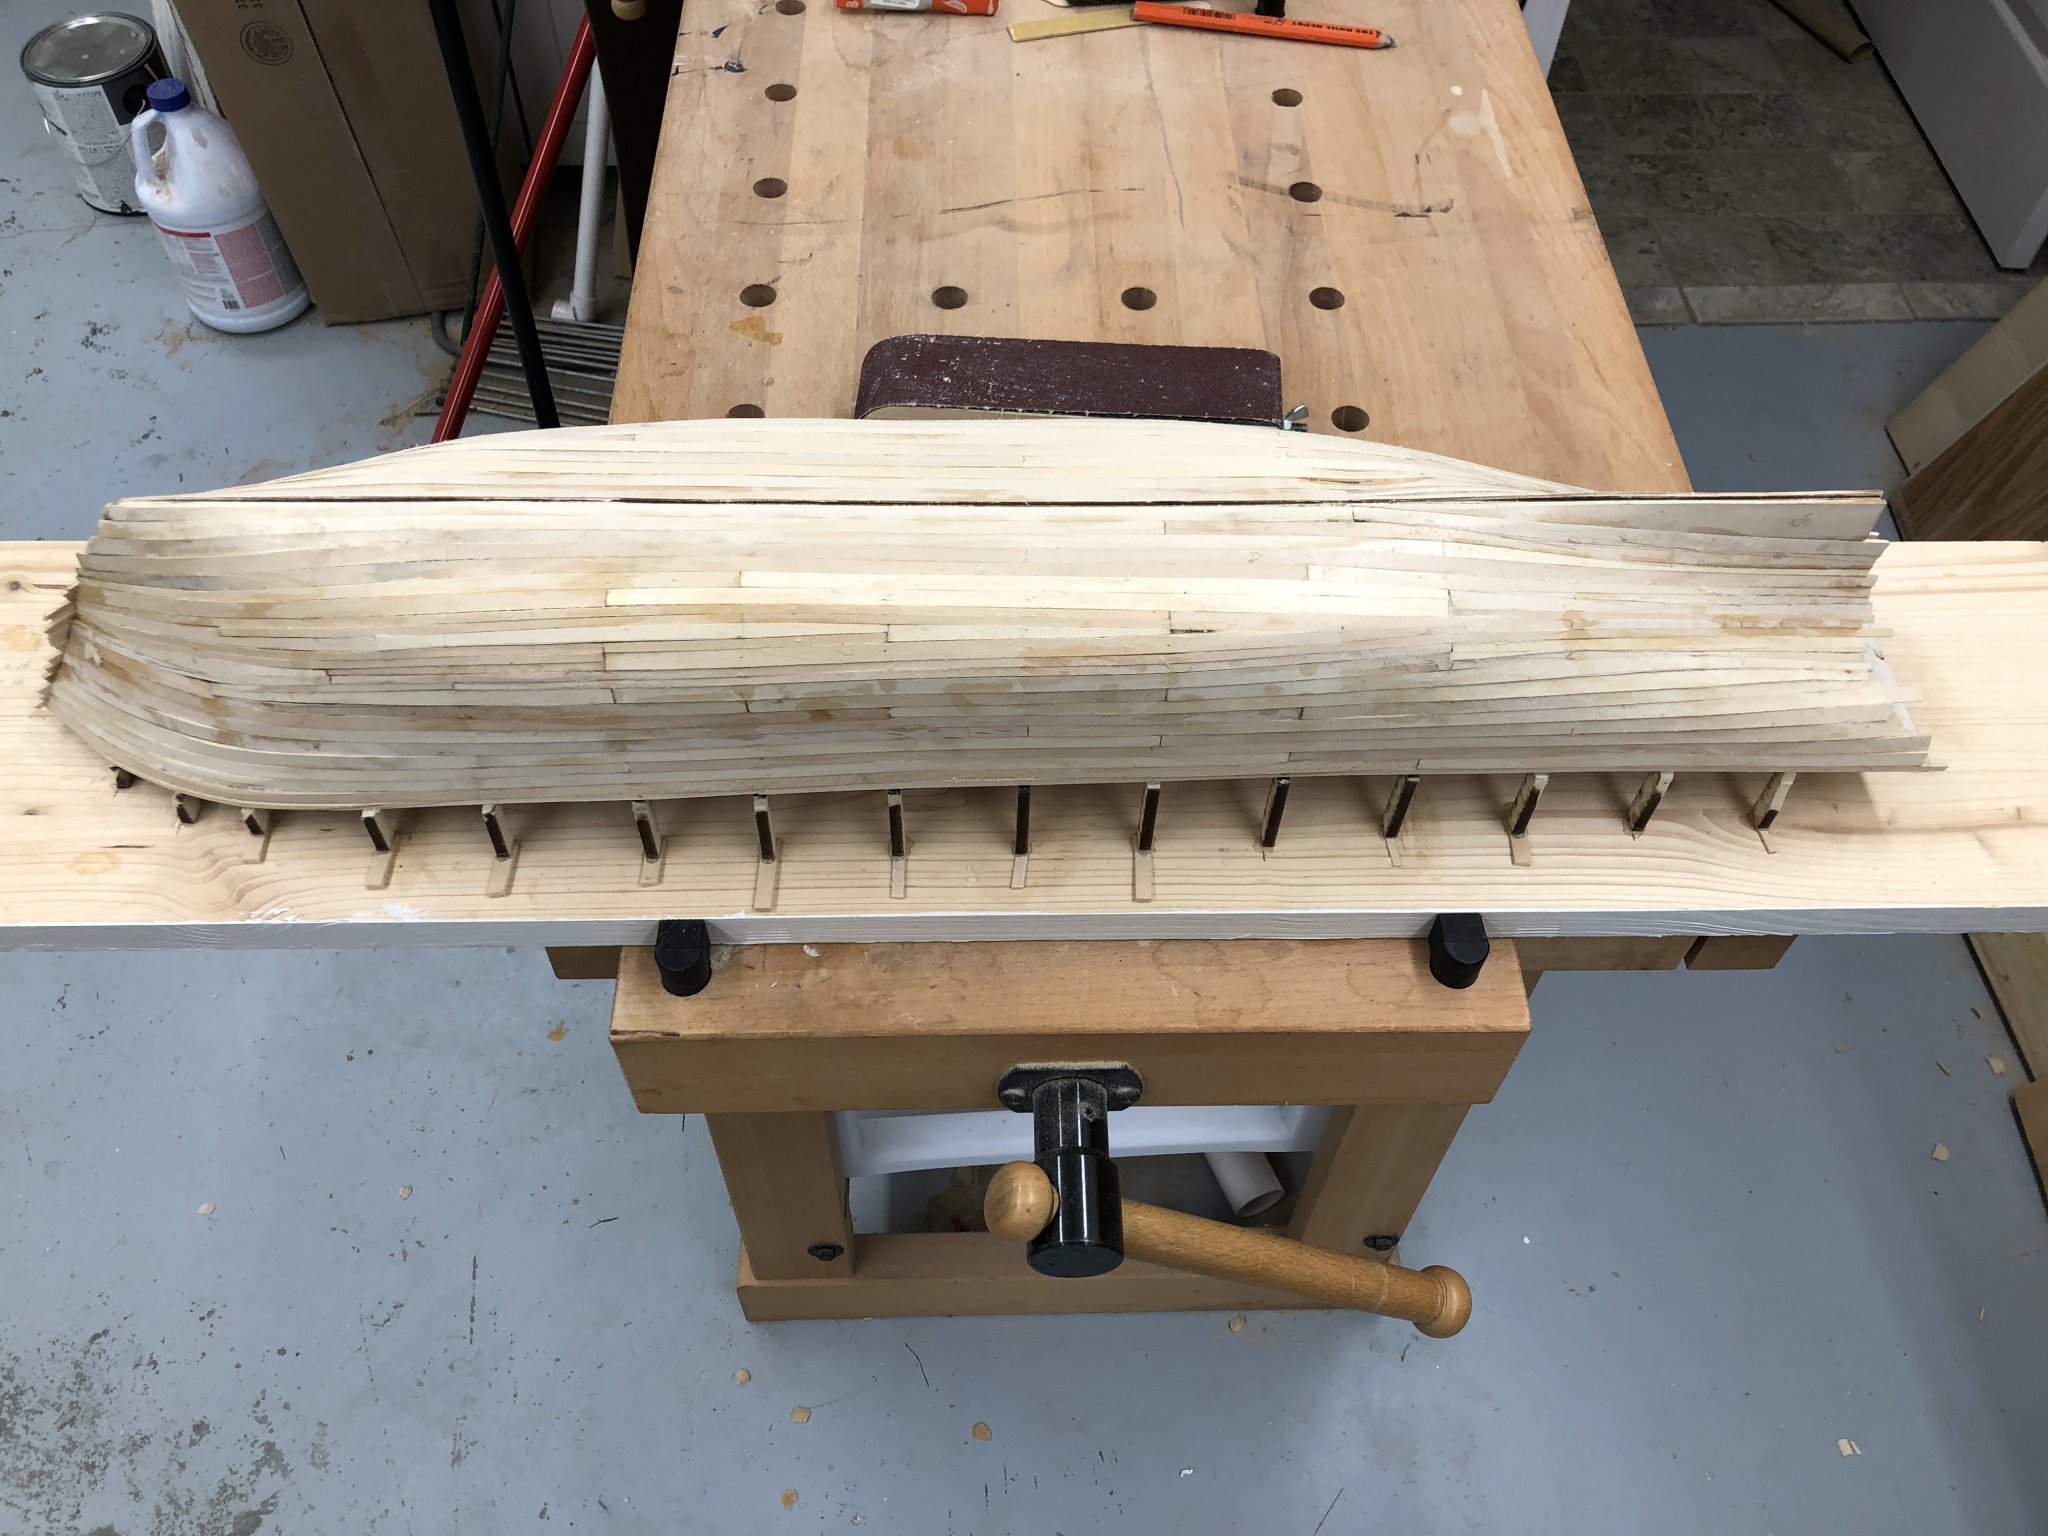
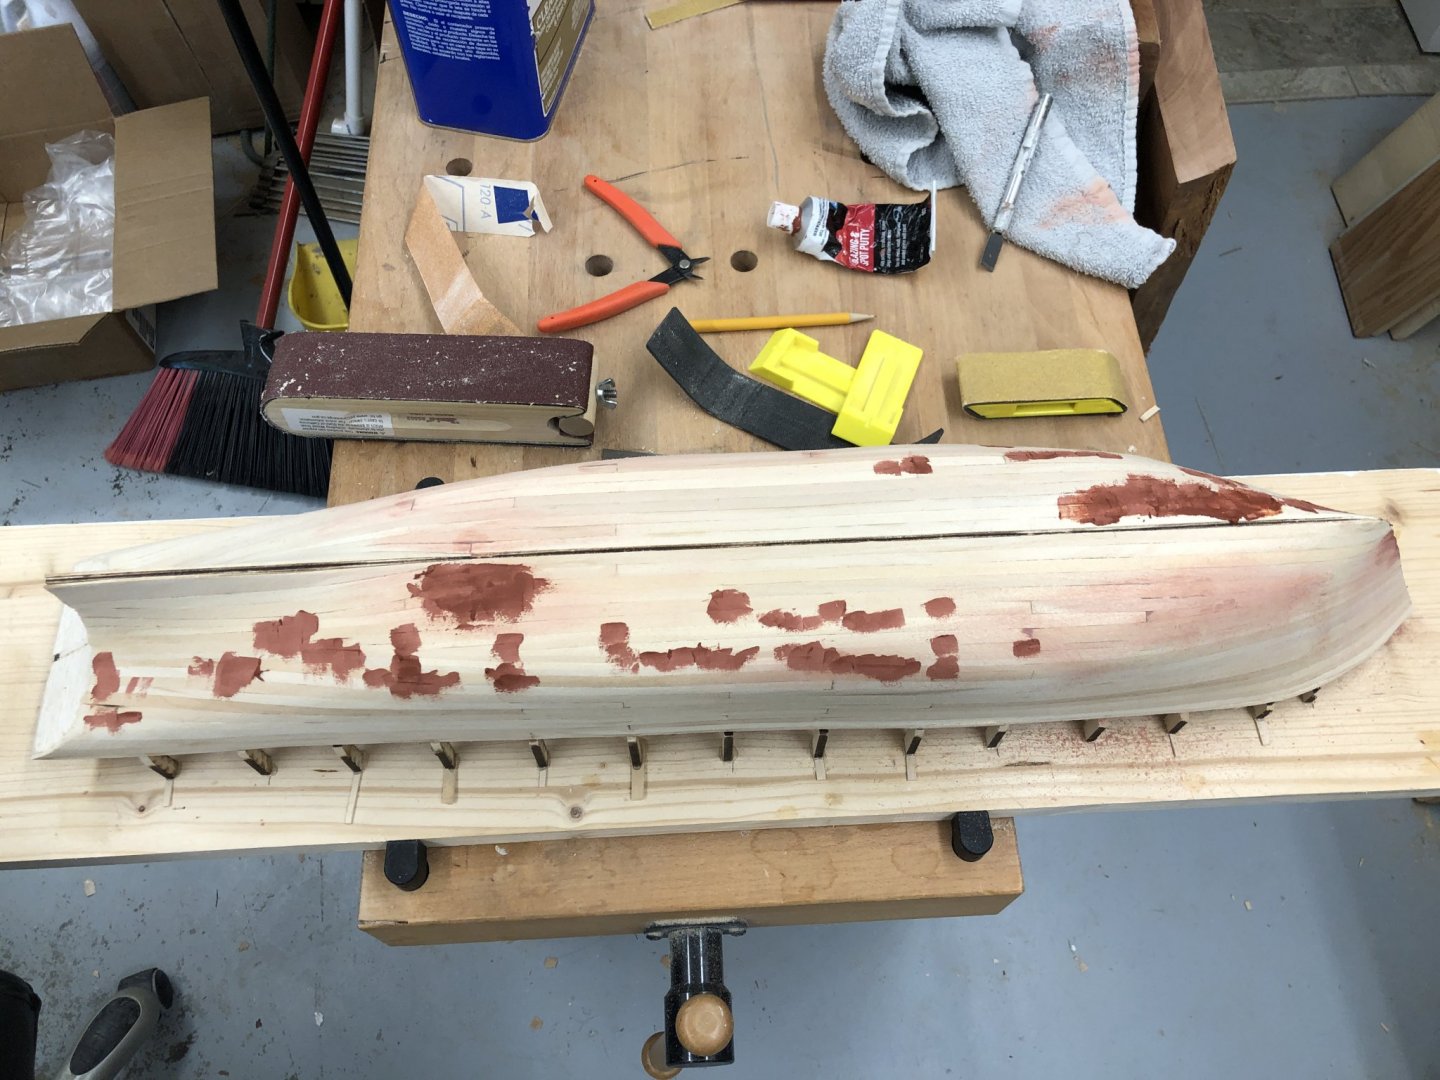
I decided to try and get the hull ready for the final sanding now rather than wait until just before the paint goes on. I hit the obvious spots with Bondo and will get some automotive filler/primer spray paint tomorrow. My experience with my model of Endeavour indicates that this product will show ALL the defects. Whether I manage to get them ALL corrected is another matter. I think I went through four or five cans of the filler/primer on that model before I was satisfied and even then there were spots that seemed immune to my corrective efforts. Anyway, where is the hull with the measles. While waiting for Bondo to dry I did manage to get all the spars stained and varnished. Here they are although the jib and staysail booms have not yet been cut from the pieces that were thinned down to 3/32". And I only broke one jaw in the process. Given their somewhat tender nature I consider that a victory.
- 144 replies
-
- 8
-
-
- charles p notman
- finished
- (and 1 more)
-
Starboard side given the same treatment. At a minimum there will have to be Bondo on the bow and in a "divot" on the bottom just forward of the start of the deadwood. I am sure once I get a good look there will be many other spots that require some kind of remedial action. Now back to the instructions for the next step.

- 144 replies
-
- 7
-
-
- charles p notman
- finished
- (and 1 more)
-
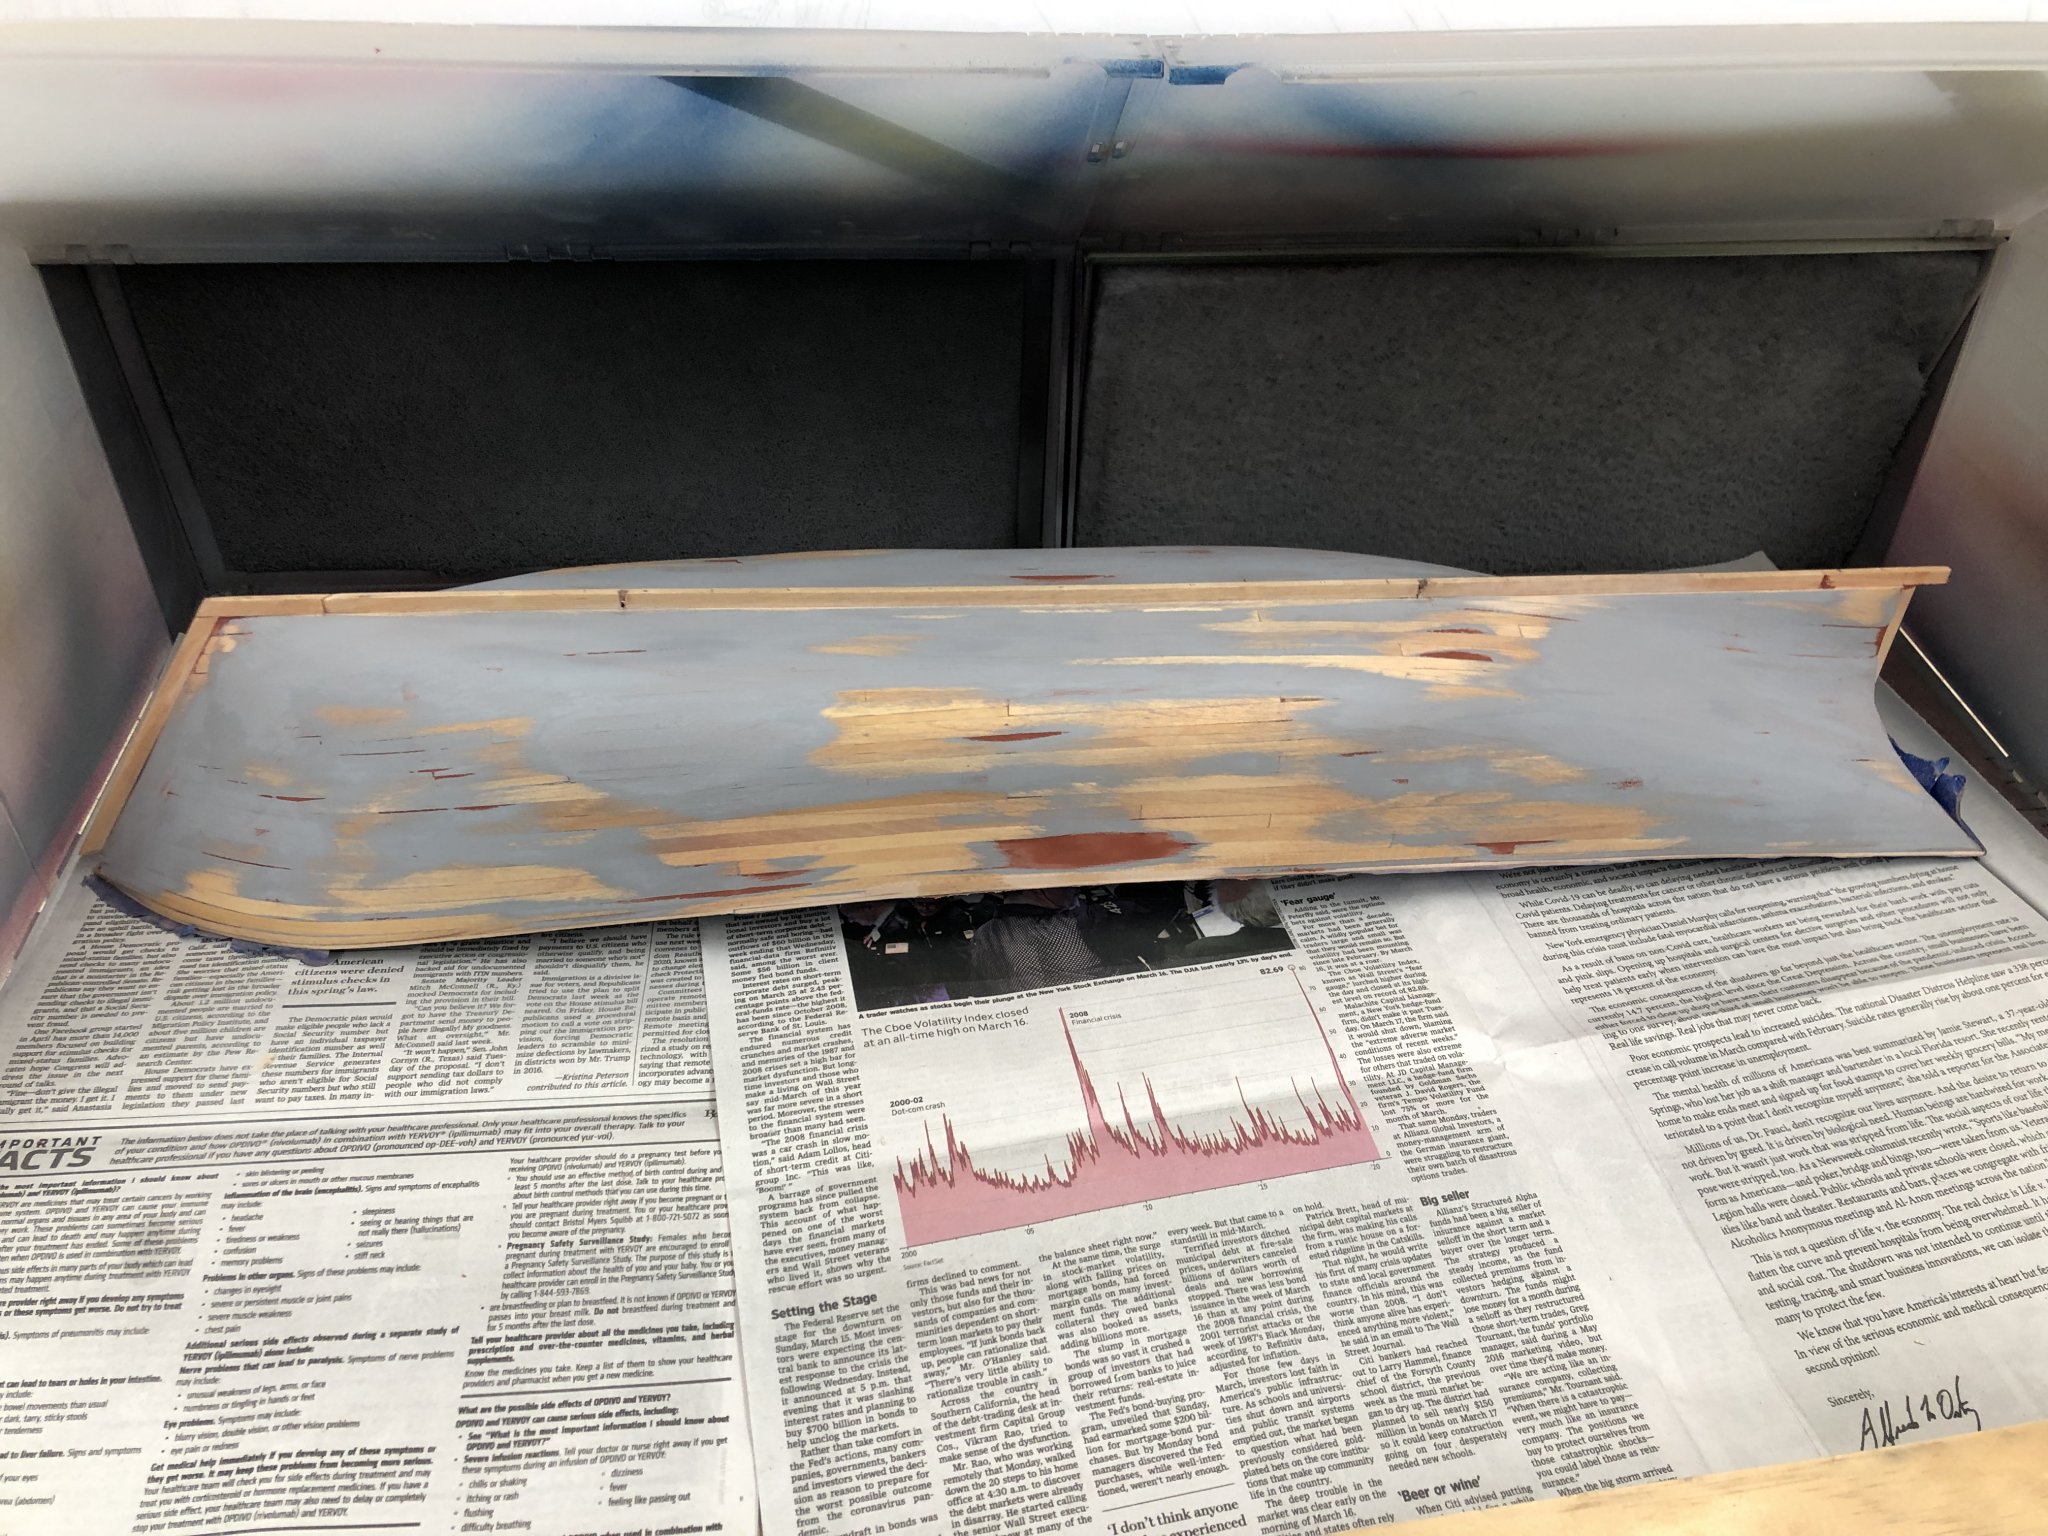
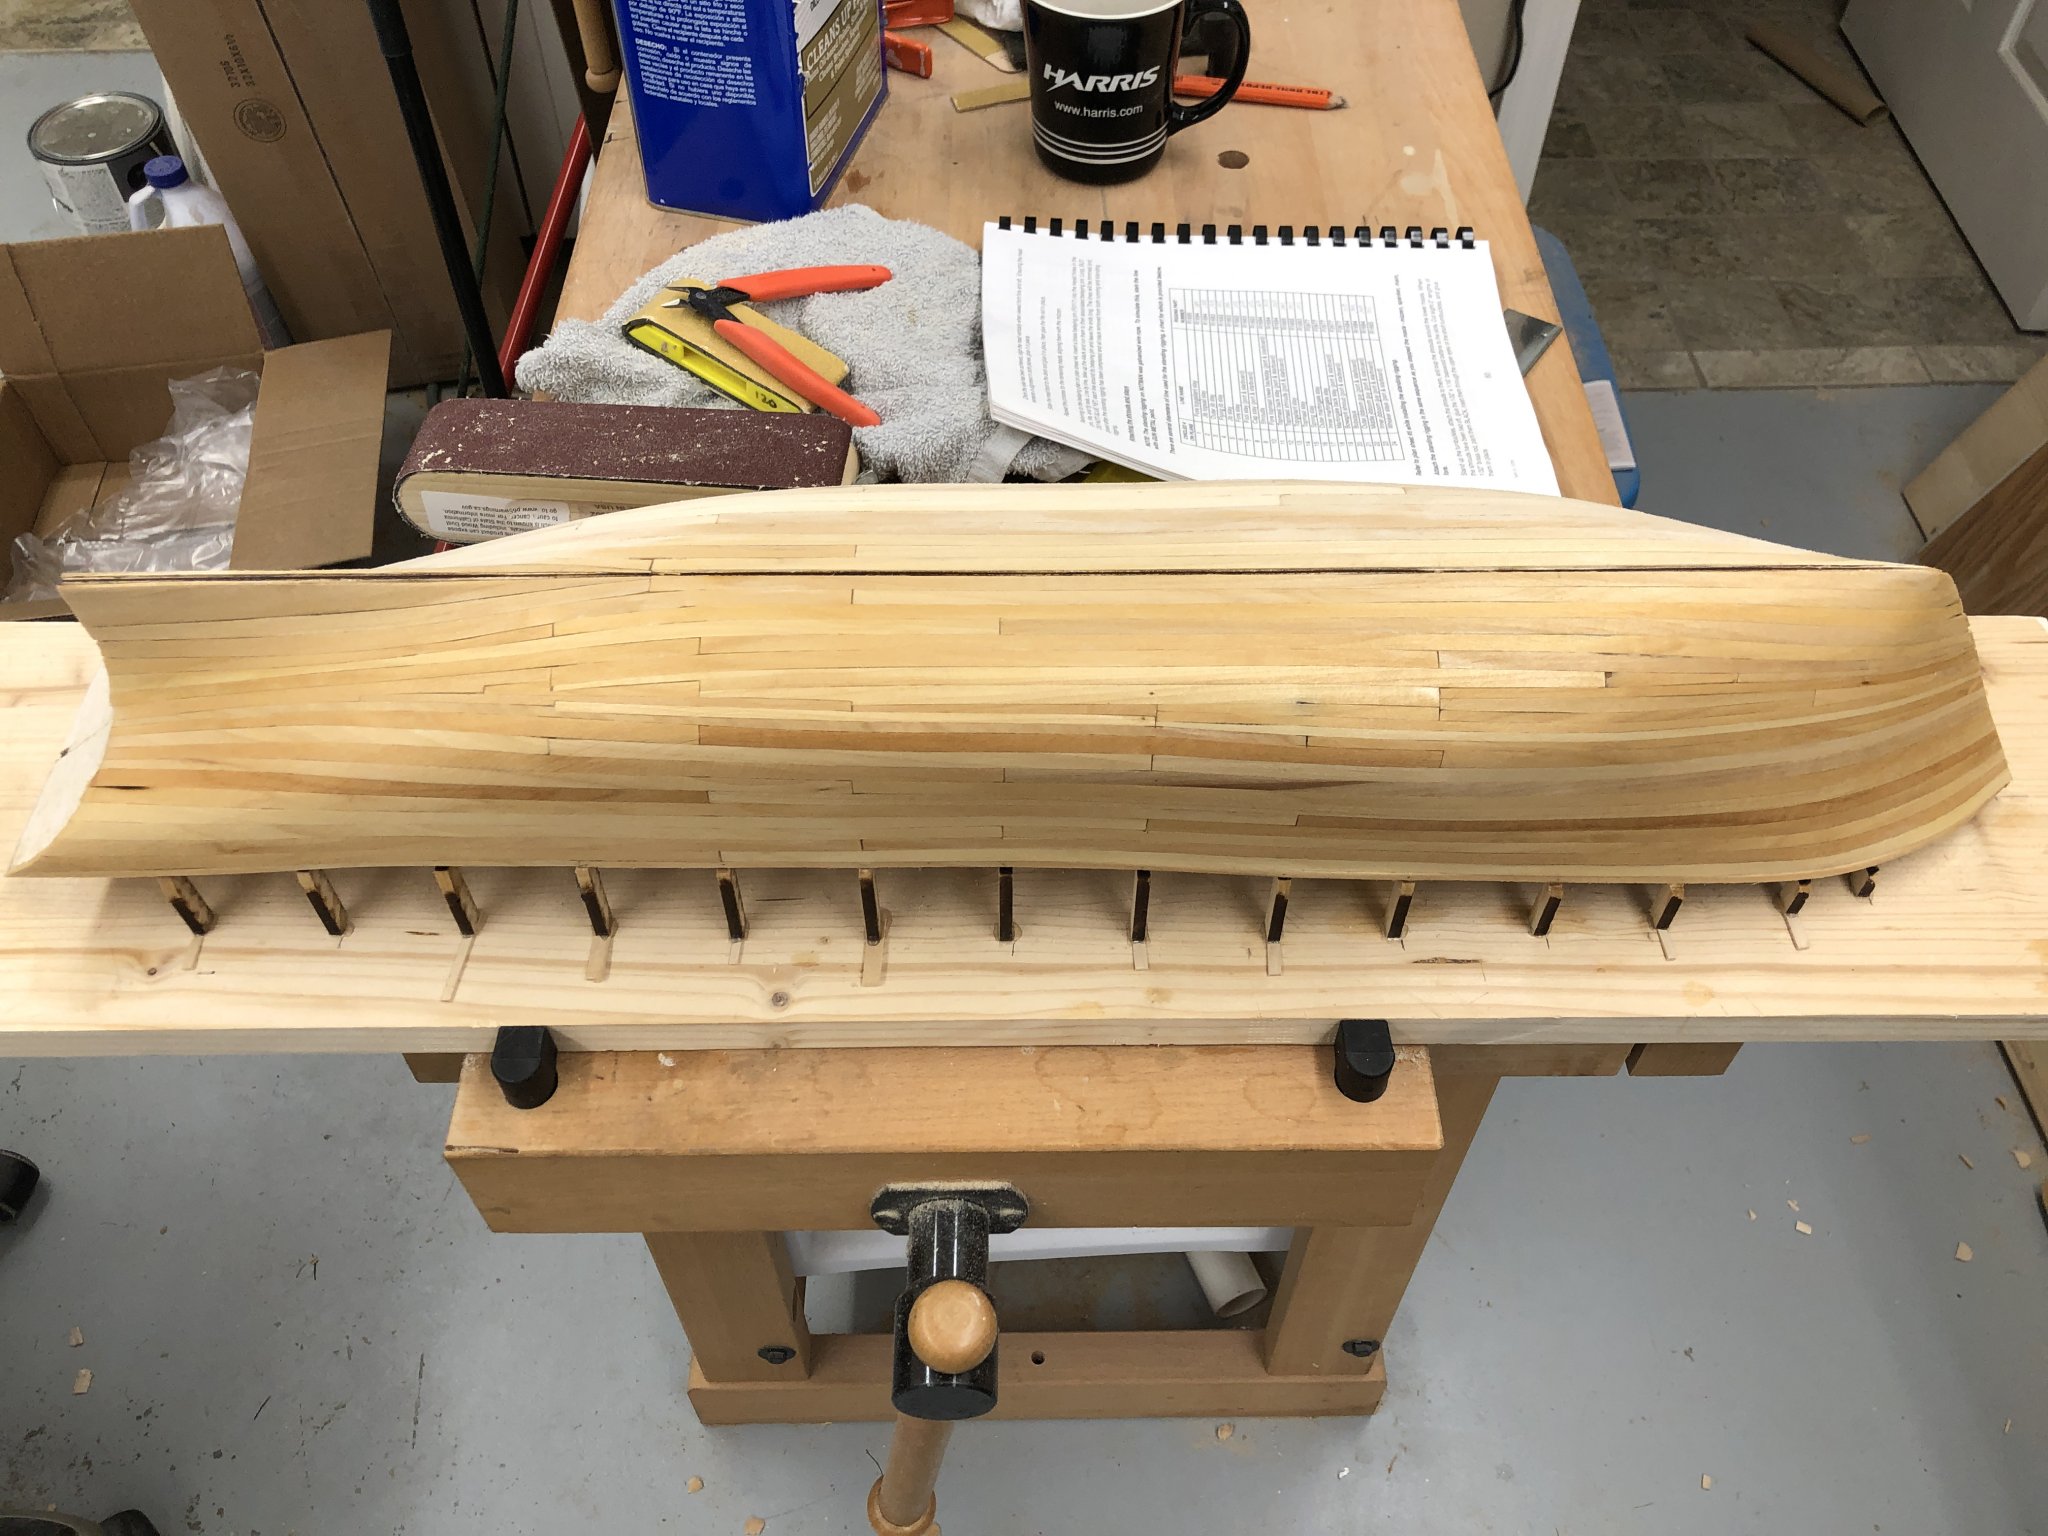
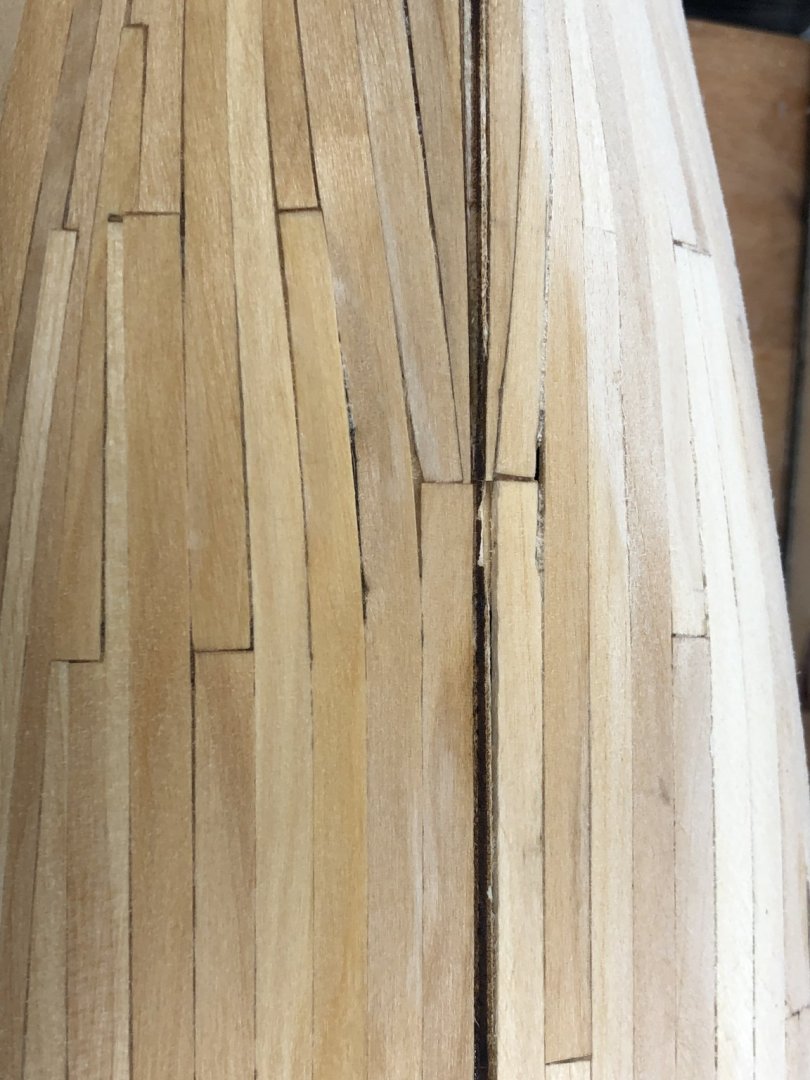
Hull planking completed (finally). Not my finest effort but good enough to support a second planking if I was going to leave the hull unpainted. As it is going to be painted it is certainly good enough to support a few spots of Bondo and several coats of automotive spray filler/primer before going to the finish coat(s). Speaking of which I have decided to paint the upper hull using Badger 16-435 Tug Deep Blue. I think I have accumulated 7 or 8 different blues to chose from and I like this one the best. It is not as dark and whatever I used on the BJ Latham and it will be easy to tell it is not black (like my Bluenose II). Here is the planked hull back in the vice for a rough sanding. Here is the port side after a first pass rough sanding an a mineral spirits wipe off.


- 144 replies
-
- 5
-
-
- charles p notman
- finished
- (and 1 more)
-
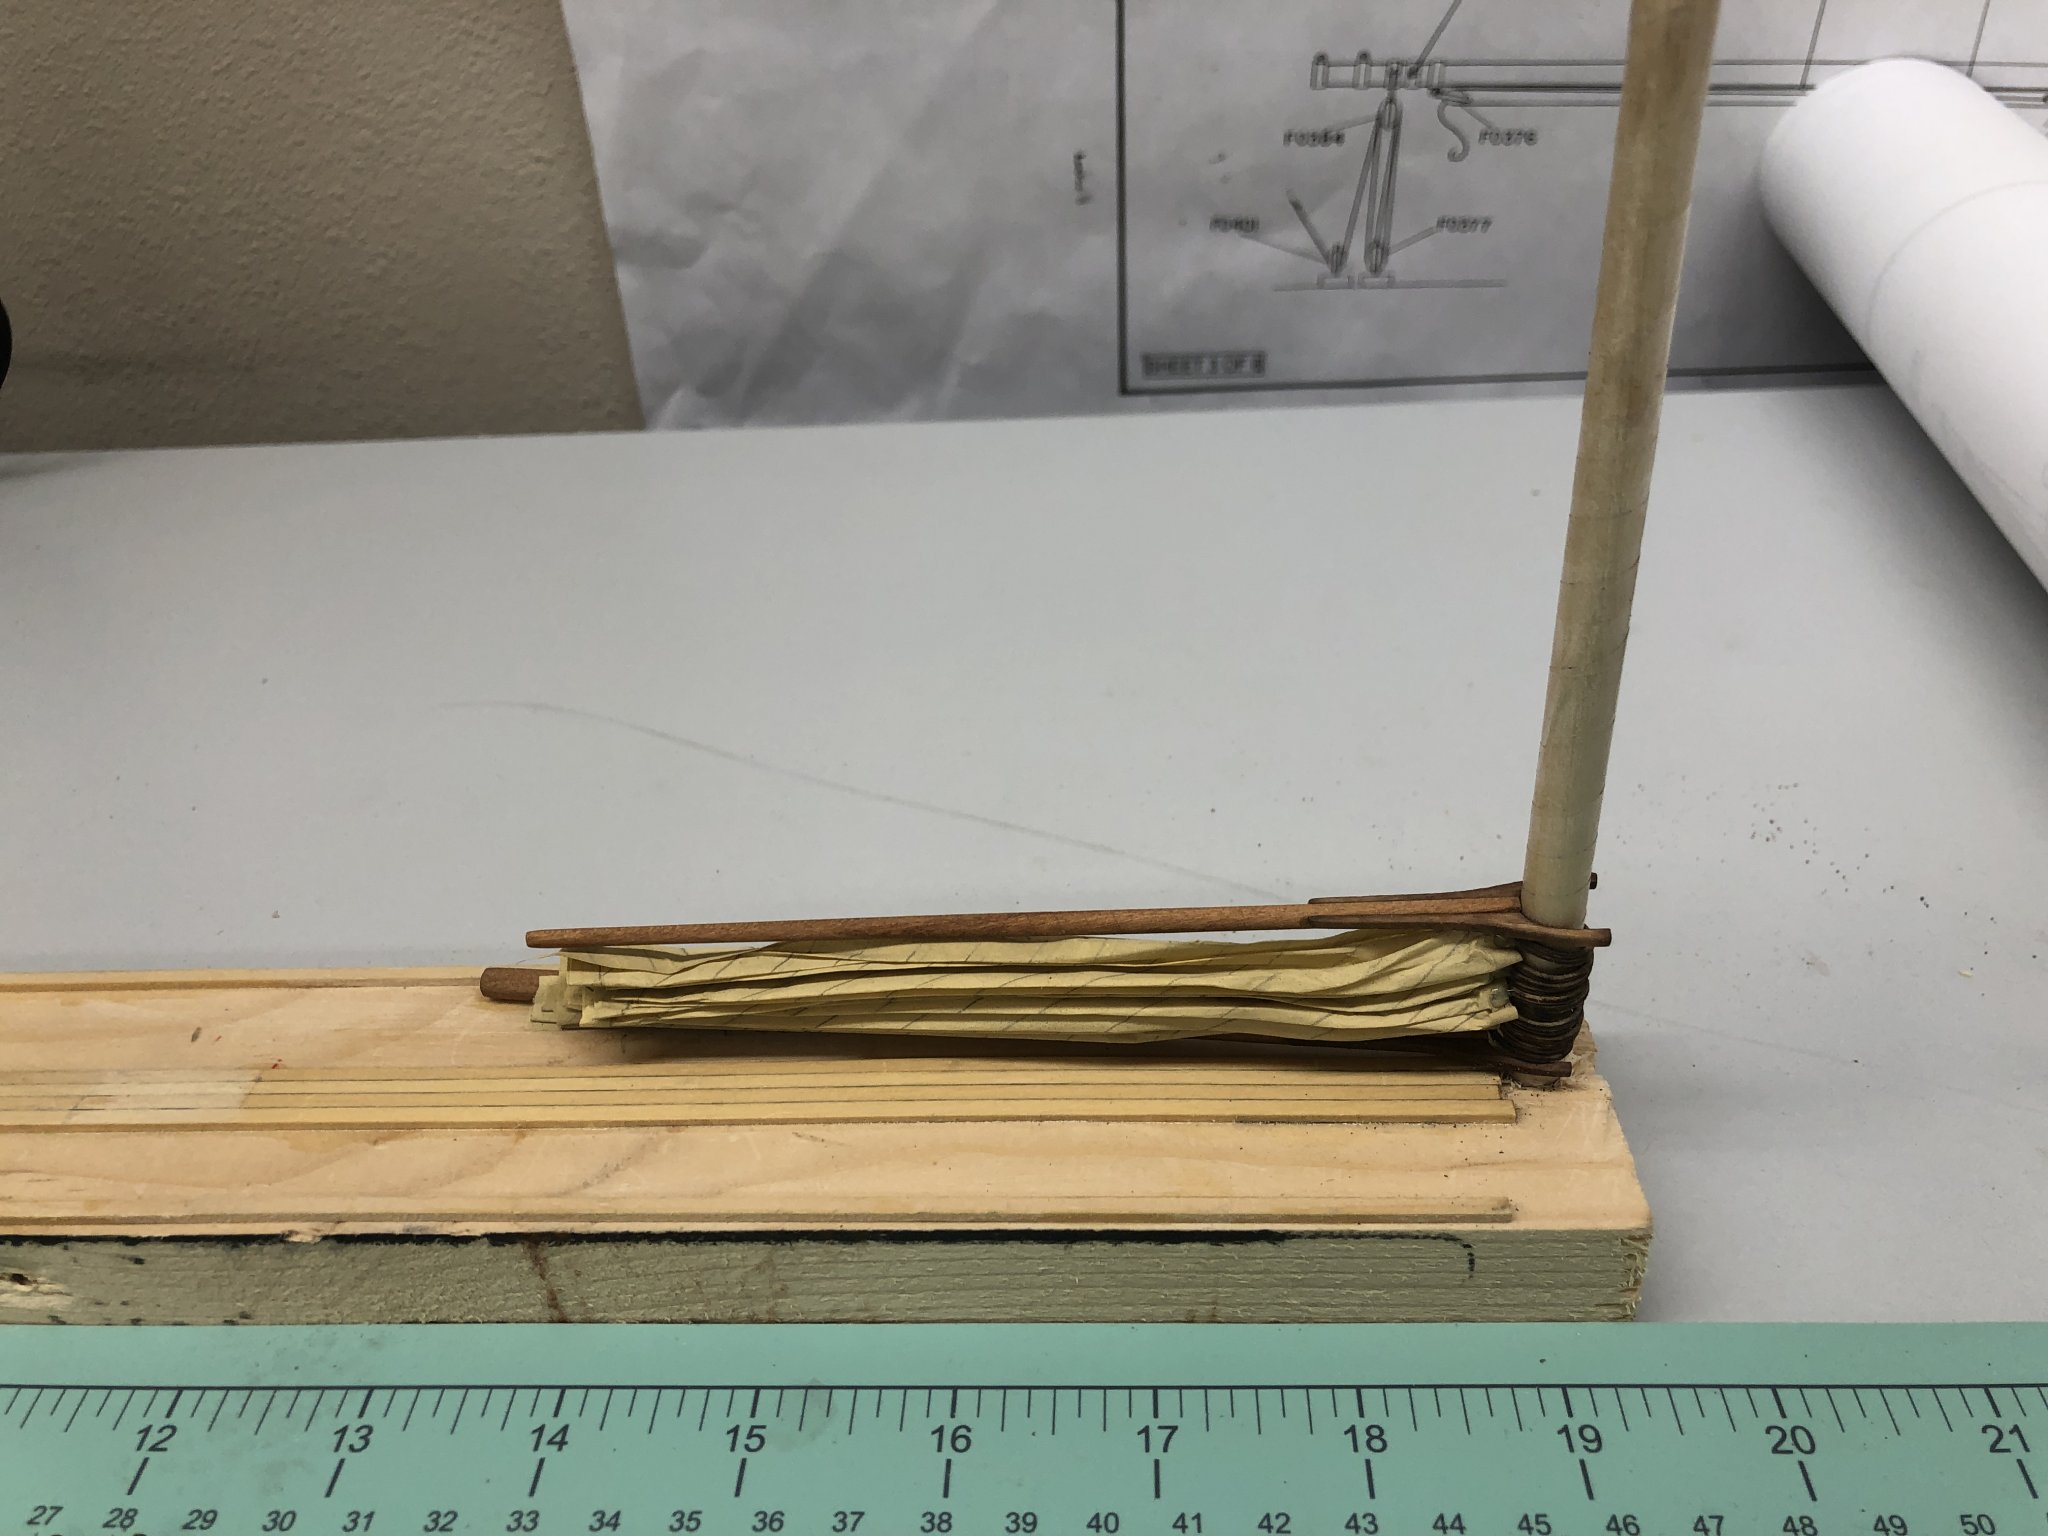
So I decided to put at least the Fore, Main, Mizzen and Spanker furled sails on the model (similar to what I did on the Gorham). I am considering adding furled sails for the jib and Fore Staysal also as they have a "boom" upon which they could be furled. For the Gorham I used some 7mm plastic mast hoops (sanded down to 1/32-1/64" vertical thickness) which included an attachment point (ring) where I used line to attach them to the sail. Unfortunately the plastic ones only come in 7mm (which are too small for the Notman's masts) and a larger size which is too big. So I searched for how to attach the mast hoops to the sail. The first issue was the mast hoops included with the kit. As I discovered on the Gorham, these are very fragile. Too fragile (IMHO) to survive the handling necessary to get them attached to a sail, on and off the mast (potentially several times) and furled down (also potentially several times). So I searched through my "extra" stuff and found other mast hoops which are both the correct size and considerably more sturdy (read horizontally thicker). Here are the kit provided and "extra" hoops - see if you can figure out which is which. So, this the mast hoops decision made I used some "sail cloth" left over from the Gorham to make a "test" sail. I decided to make it 6" tall instead of the 7+" called for in the sail plan and to use hoops every 1/2" (13 in total instead of the 15 called for in the instructions. The shorter sail will make for less materiel to furl down without materially affecting the appearance (IMHO). Fewer hoops reduces the size of the "pile" at the bottom of the mast. I did not include a bolt rope on the test sail because I wanted to see how the furling went without one. On Gorham it seemed that with the bolt rope glued to entire length of the sail made it more difficult to get the small furls between every hoop done. To attach the sail to the hoop I opted for the simple expedient of using a drop of white glue with the sail and a stand-in mast arranged so that the hoop, mast and sail were in the correct orientation. Here is what it looked like for the first hoop. This method worked admirably and I was able to get all 13 hoops attached and dried using this same "jig". The shine on the mast is Scotch Tape I applied to the mast in case the glue were to get on the mast - would not want the hoop glued to the mast. I set the mast/sail in a piece of wood and took a boom and gaff (which I have assembled but not yet varnished) to see how it might look. Not bad IMHO.


- 144 replies
-
- 6
-
-
- charles p notman
- finished
- (and 1 more)
-
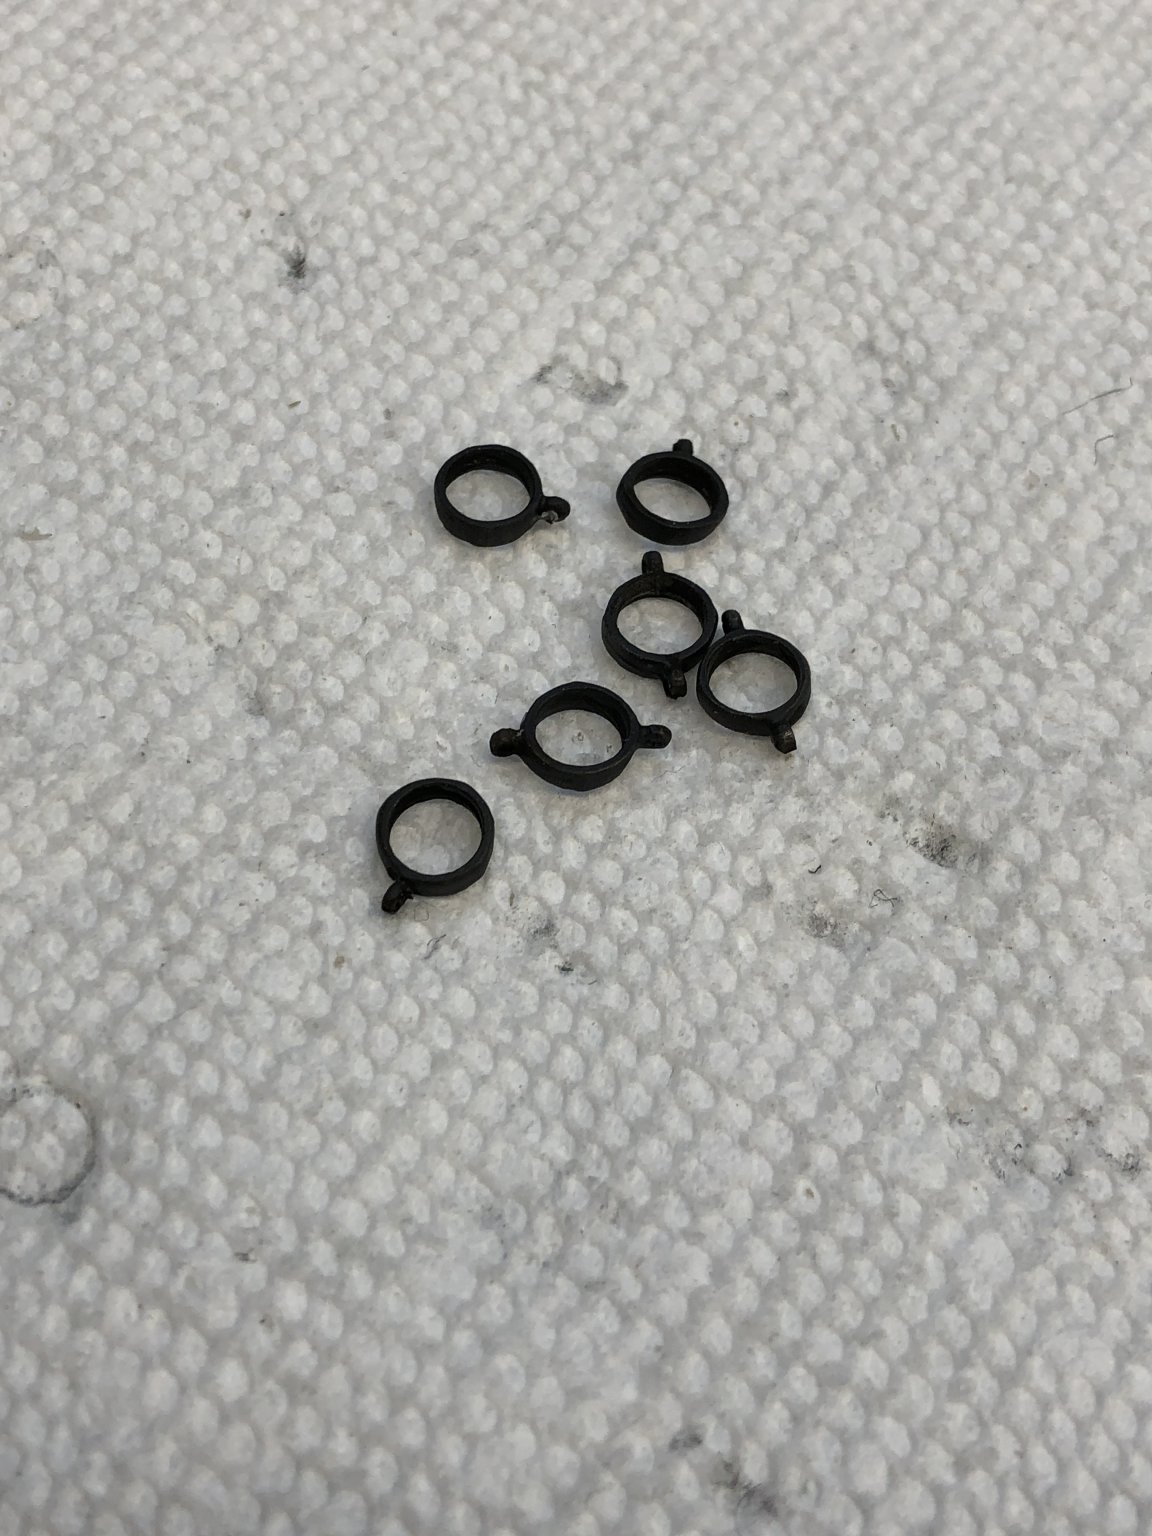
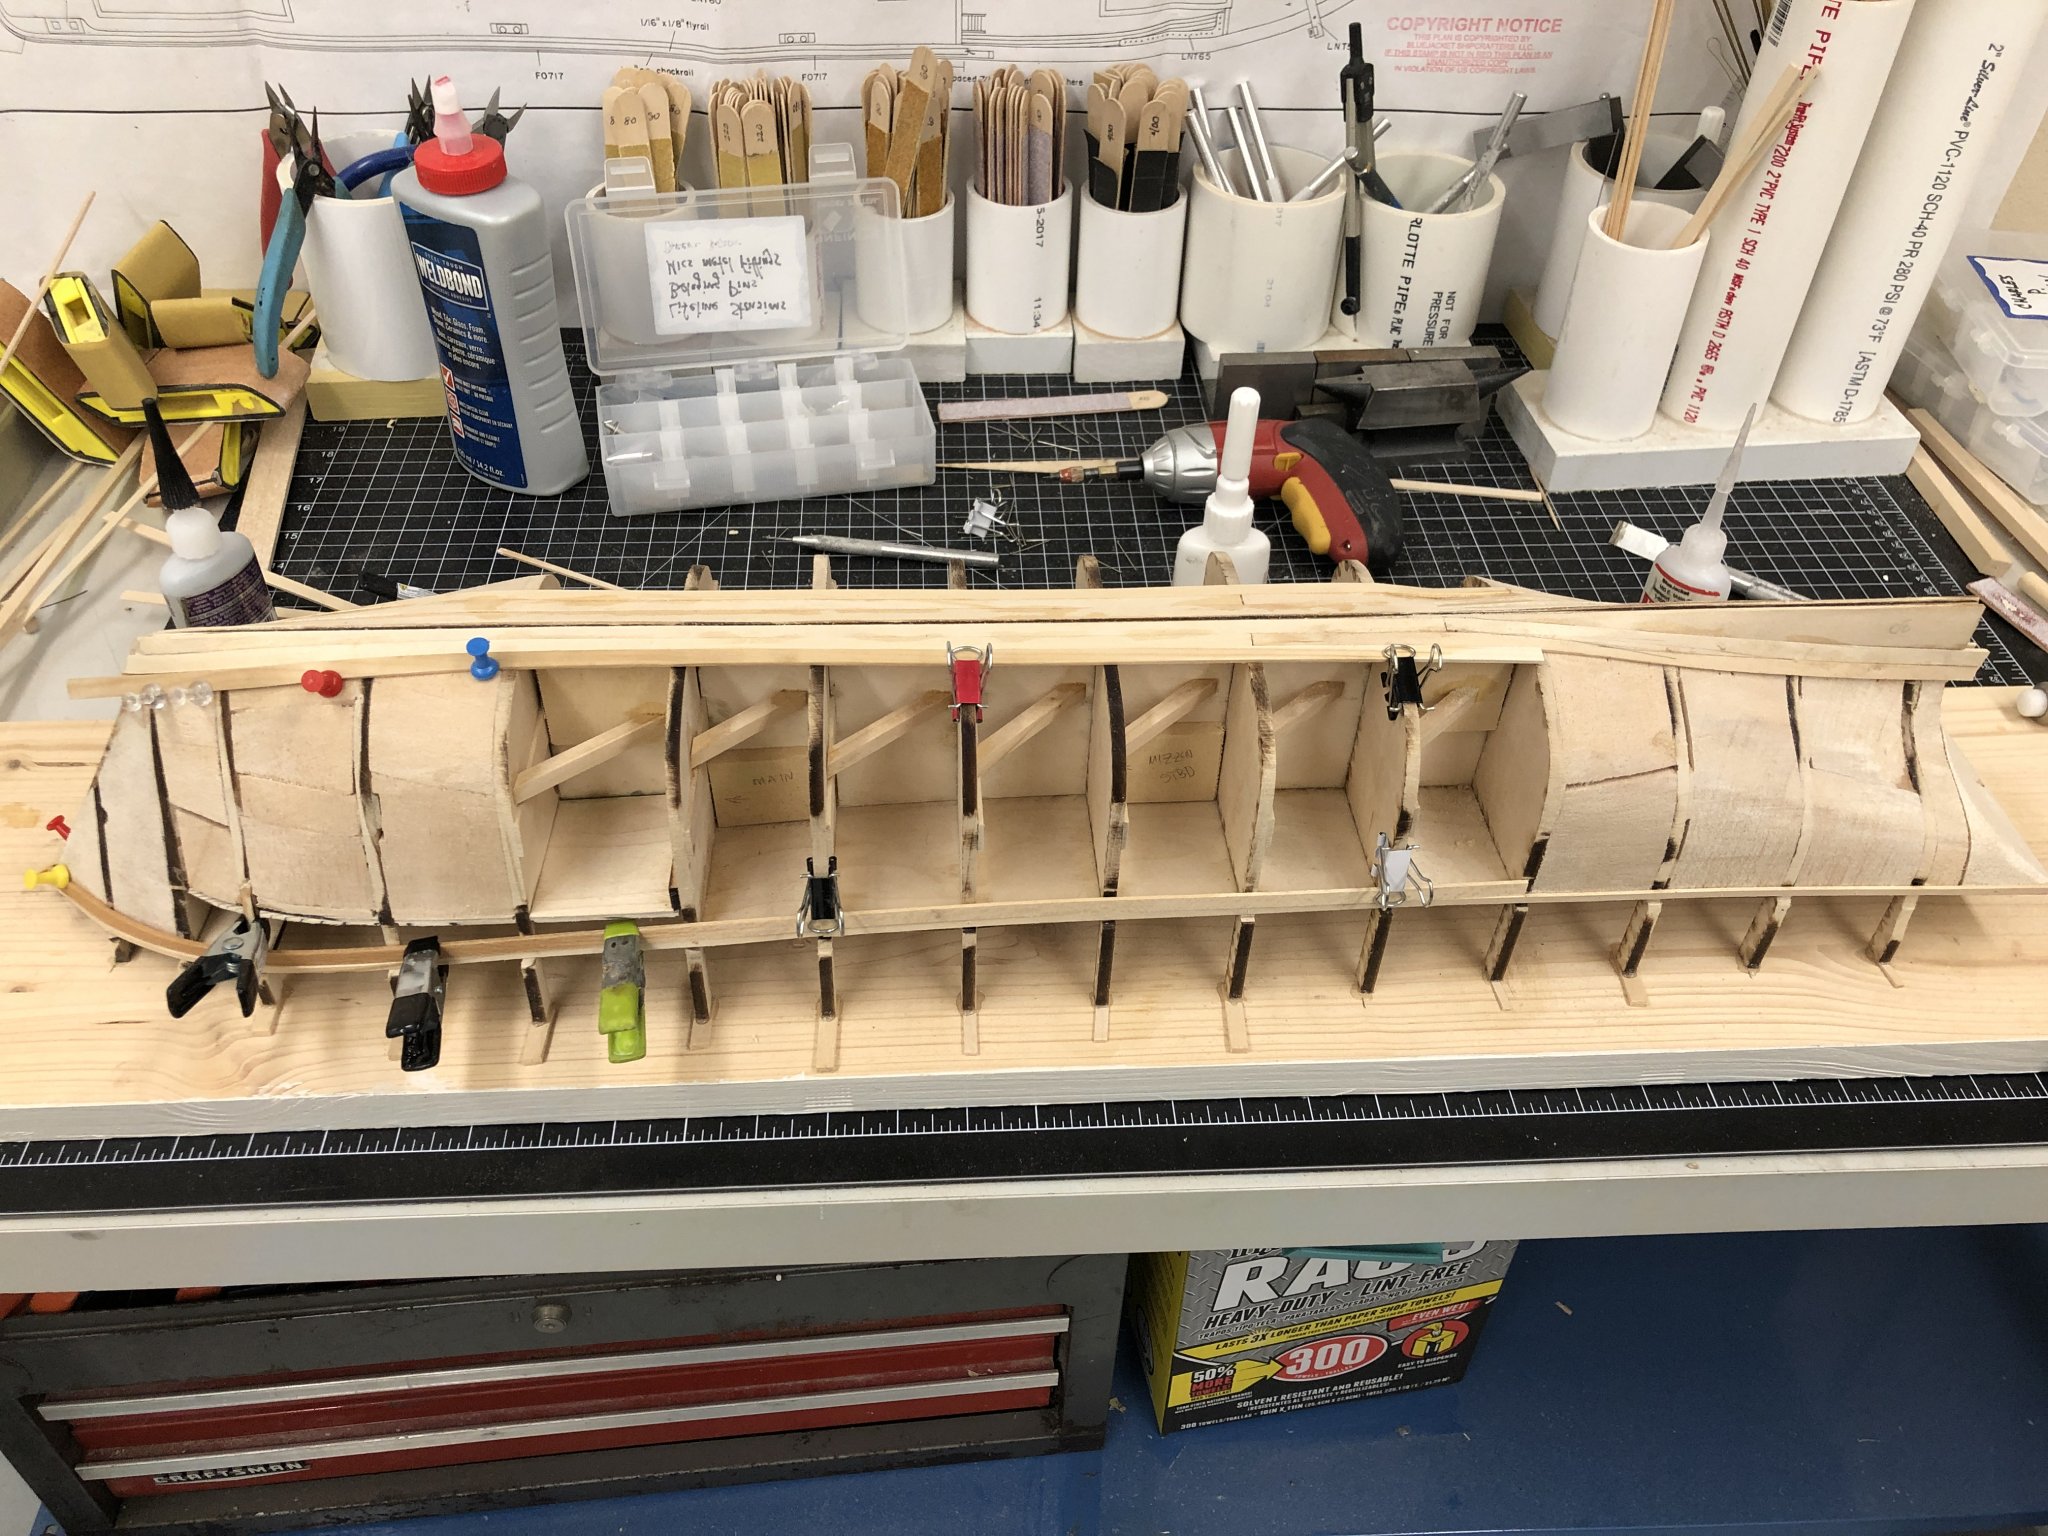
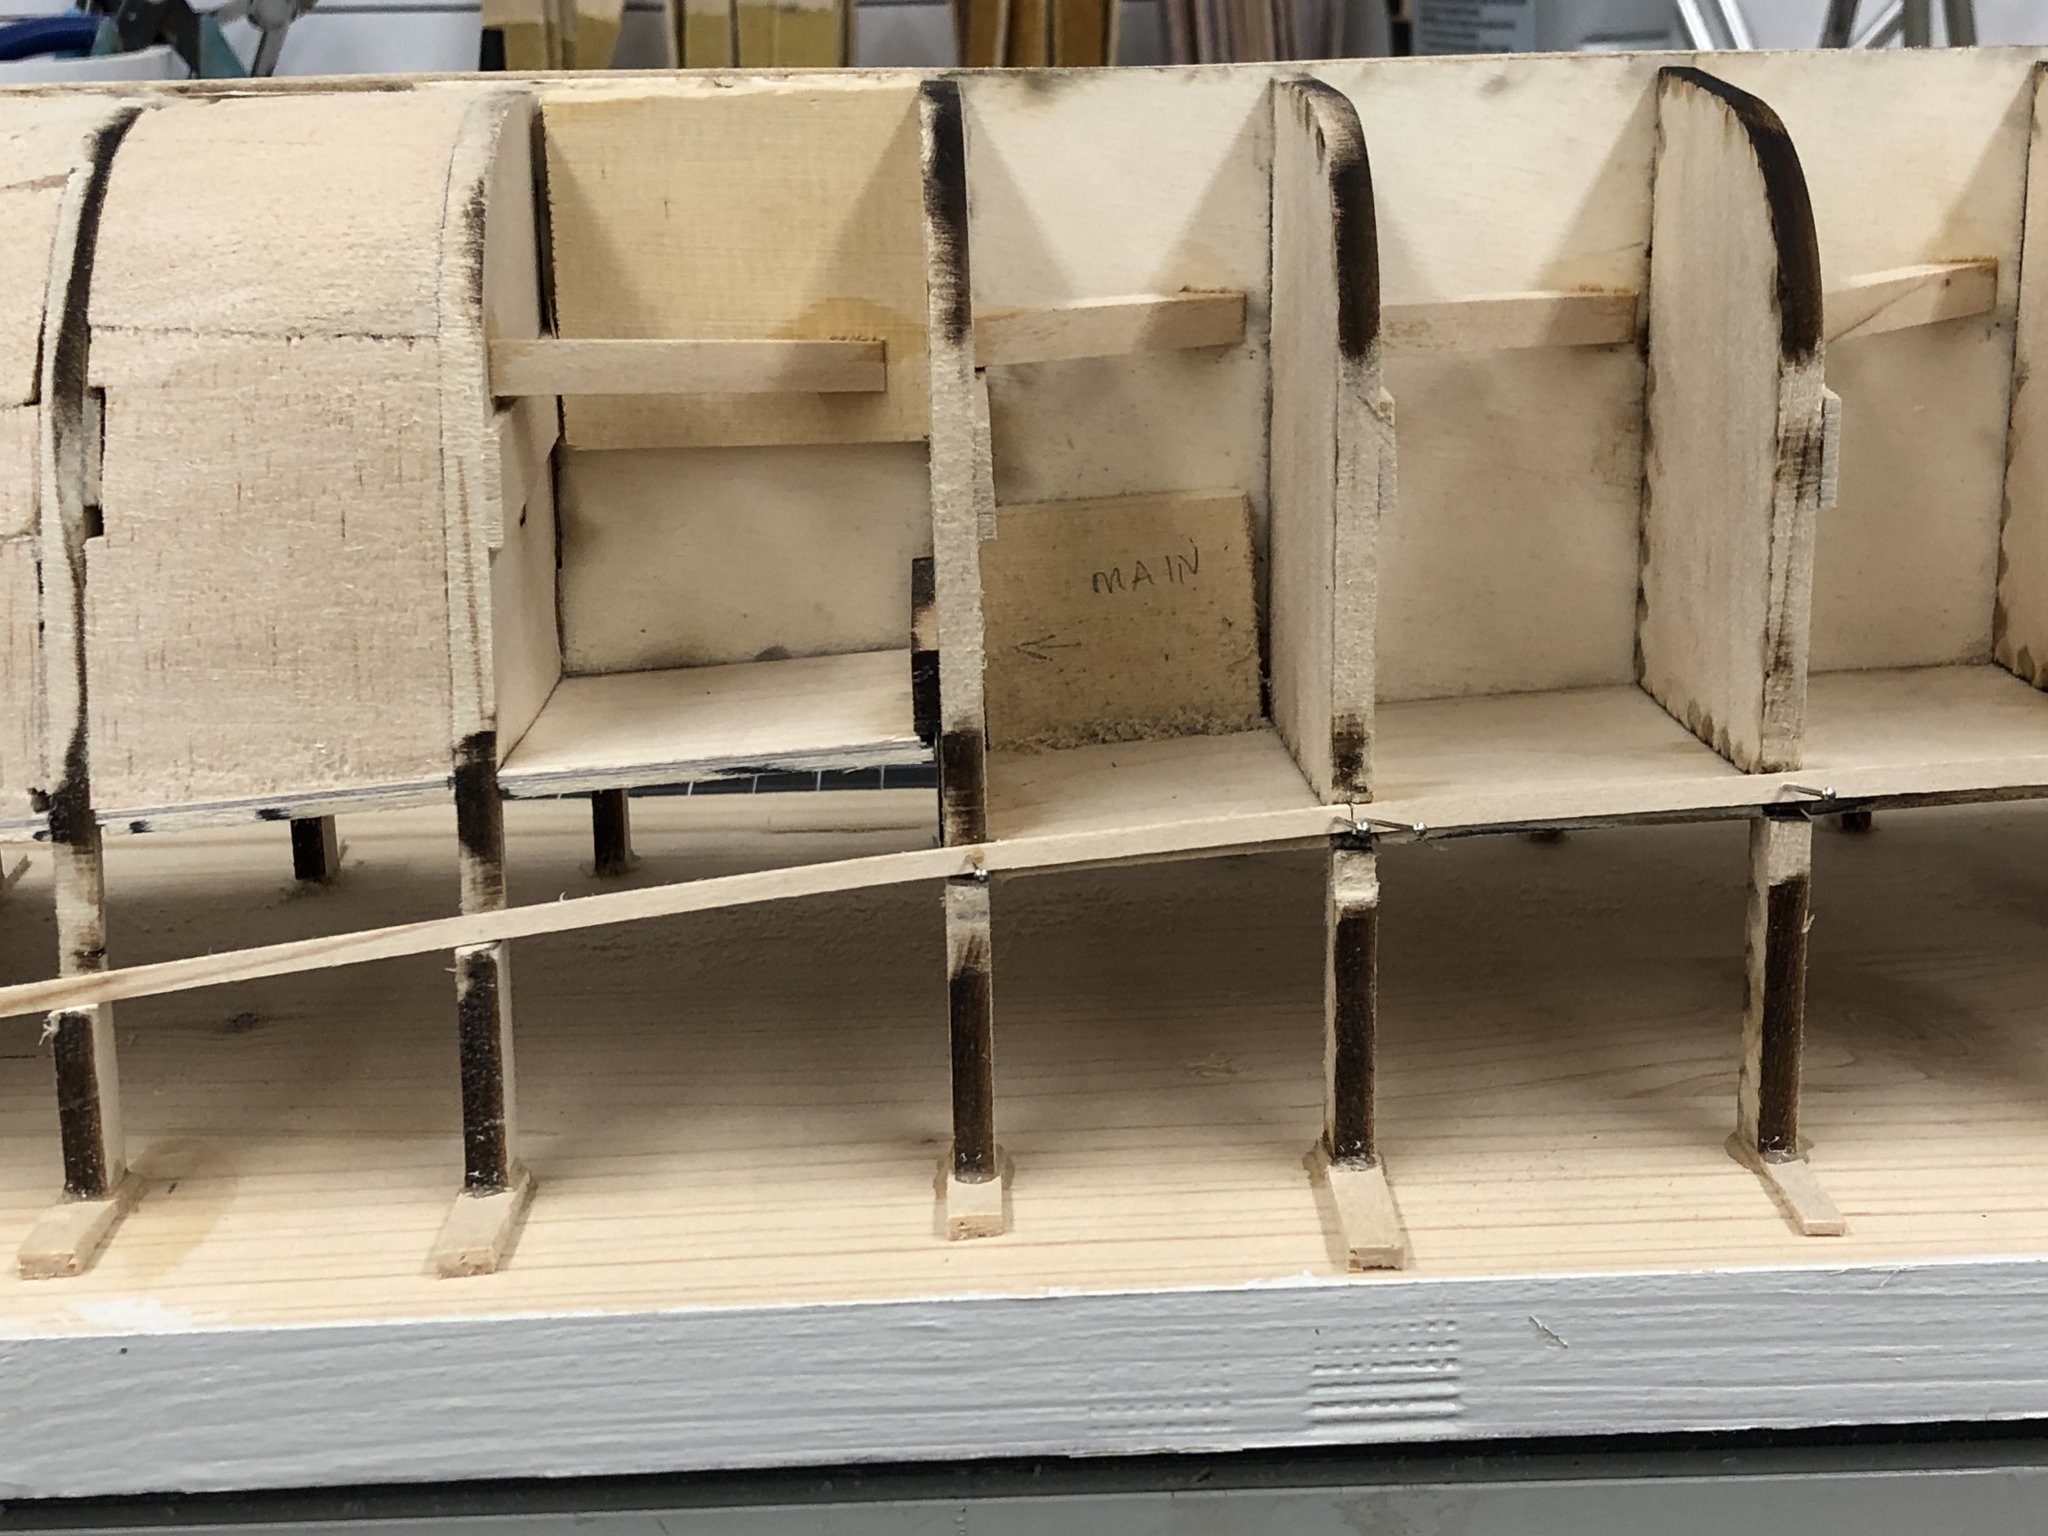
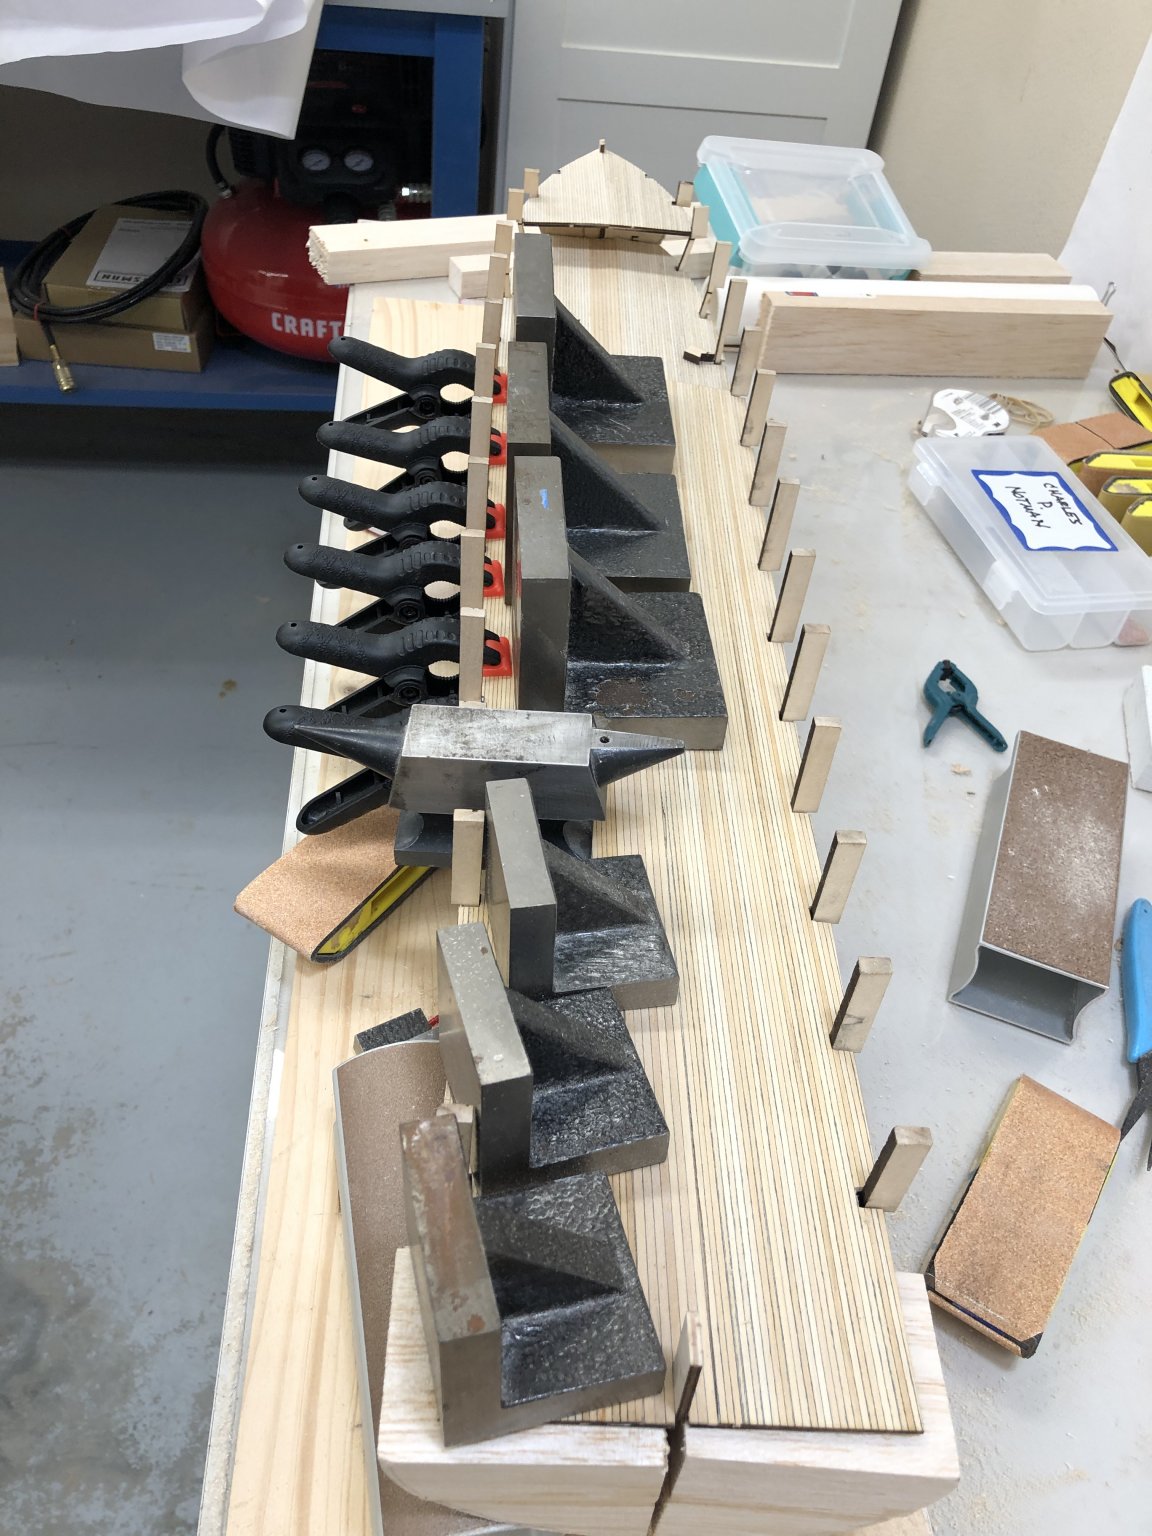
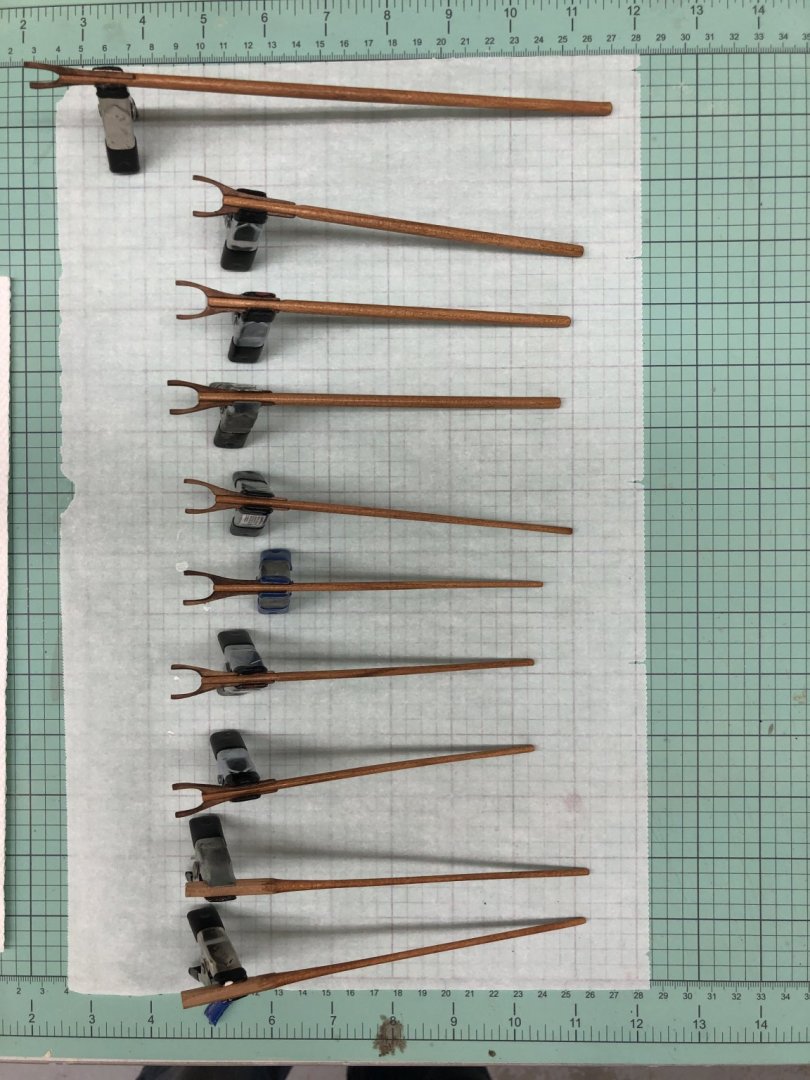
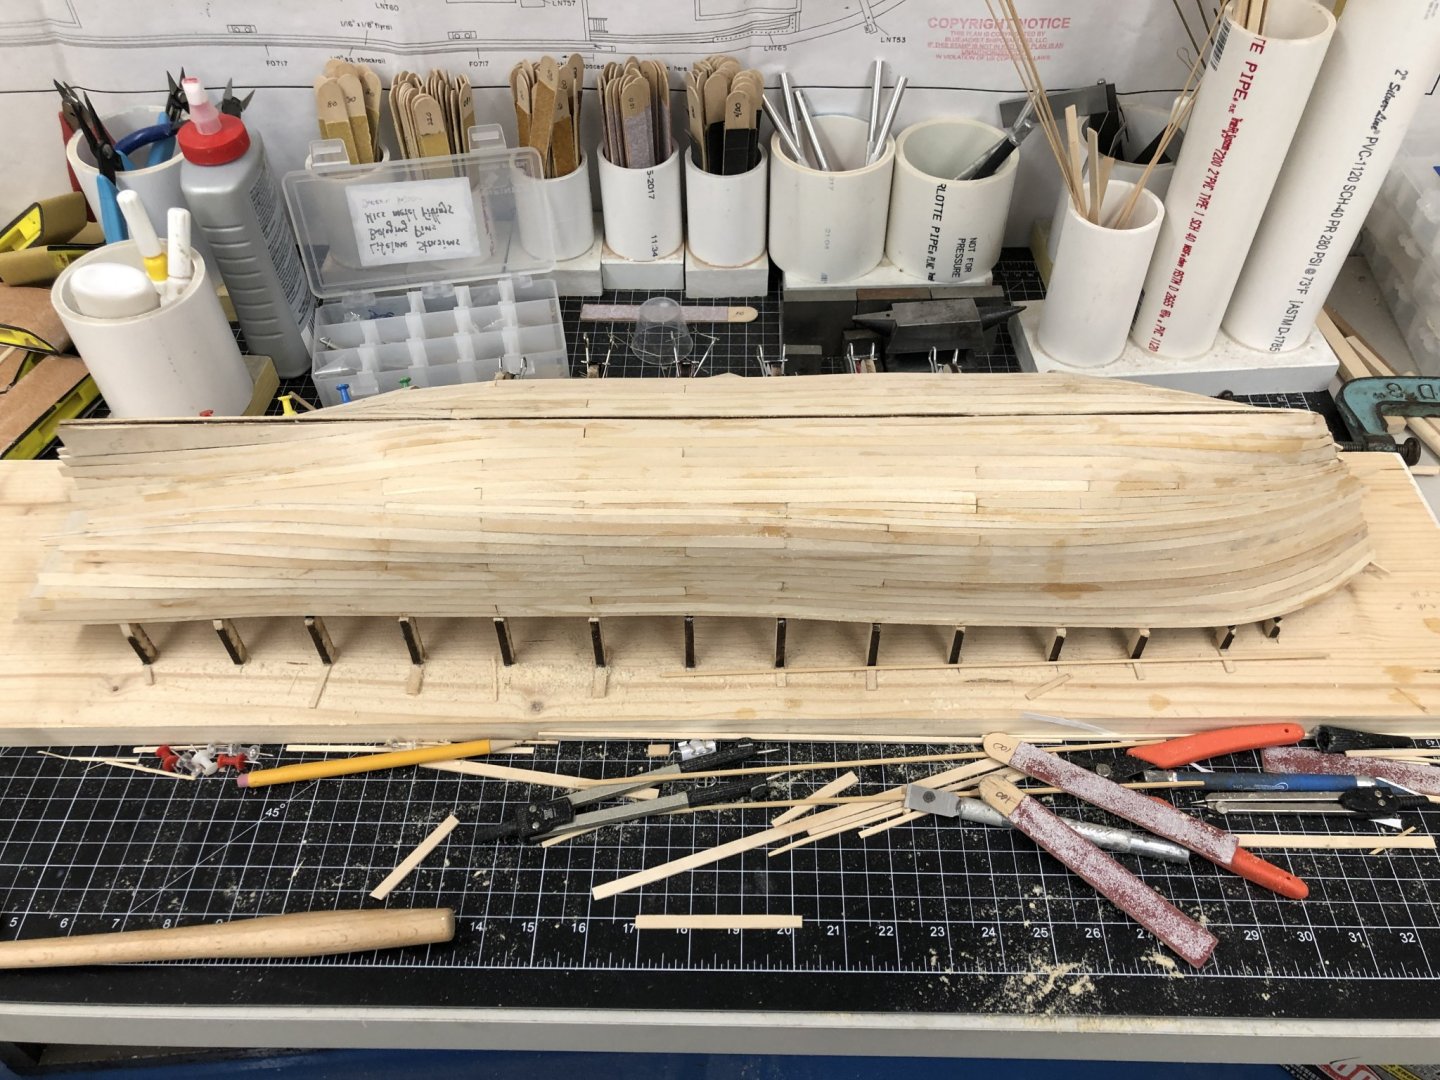
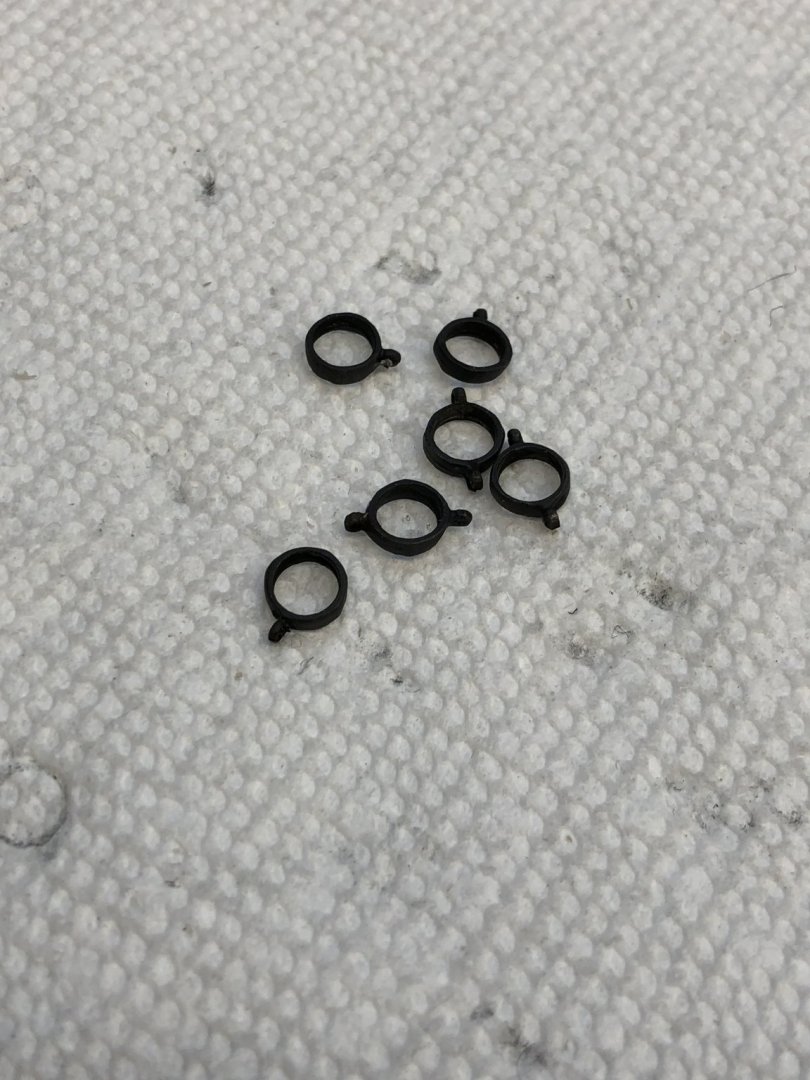
I am working several areas in parallel. I got all the bands for the booms cleaned up and darkened using the BlueJacket solution diluted 10:1 per their instructions. I put a coat of clear flat on each band to help keep the darkening in place. The bands for the gaffs presented a small problem. Using the 1/8" bands provided, and cutting off three of the four eyes yields a single eye with the opening parallel to the gaff. This is to be the location for a single 3/16" block (three on each gaff) but there does not appear to be any easy way to attach the block to the eye since both are "closed". That and getting the block oriented with the sheave shaft perpendicular to the gaff (which is what the drawings show) would require some intermediate fitting (very small split ring or similar). My solution was to remove all the eyes and then fabricate an eyebolt by twisting 28 gauge black wire with the block captured in the eye. I generally make my own eyebolts this way (without the block). This way there is no chance of the eyebolt pulling open when tensioning the rigging and it avoids some intermediate fitting. I will drill holes in the bands after they are glued to the gaff so I can insure they are all aligned correctly. I may have to use epoxy to glue the eyebolt/block to the gaff as 1/8" is not a lot of wood to grab with CA, although the rippled surface of the eyebolt would help. Here are the blocks and bands for the gaff and booms (these are for the Spanker boom) I also got the jib boom bands completed and mounted on the jib boom - so that is one spar "complete" (except for cutting to the final length). Note that all four eyes are present on all four bands. Although not shown on the drawings I am considering adding block to at least some of the upper eyes to lead the downhauls aft. All of the previous schooners I built had blocks at the foot of each head sail for the downhaul line. And I got one side of the hull planked. When I got to about six rows on the top and bottom of each side I concentrated on getting one side completed before moving to the other. Helped to see how things were going to work out. I also stopped adding rows on the keel side. If there were going to be "issues" with the planking I want them where they will not be as noticeable as they would if I worked evenly from the top and bottom. Here is the finished but not yet sanded port side.

- 144 replies
-
- 7
-
-
- charles p notman
- finished
- (and 1 more)
-
I ran into my first "problem". We actually it was my own fault - I depended on one drawing when there are two that contain useful info. I was preparing the Britannia bands for the jib boom. Based on the drawings of the jib boom on sheet 2 the bands (which come with four potential eyes (spaced every 90 degrees)) each band needs three eyes which will become the starting point for the jib booms guys, martingales etc. (although it looks like the ones on the under side of the outermost pair are not used based on sheet 4). So I dutifully cut off one of the eyes on each one and proceeded to trim them, drill the holes where necessary, and blacken and then touch them up with some flat black paint. Then while looking at sheet 6 (the sail plan) I see that the head sail downhauls use the top eye as fairleads to take the downhauls back to their belay points. So it appears that all four of the top eyes are used afterall. Good thing I had BlueJacket throw in some extras with my last order of blocks. On to planking - I have three rows at the "top" (aka moving down from the main rail) and four rows down from the keel on the stdb side and one less on the port side. I also got the top masts completed and stained (although they still must be shortened to their final length). WoP next and then on to the booms.
- 144 replies
-
- 5
-
-
- charles p notman
- finished
- (and 1 more)
-
I have been alternating between hull planking and mast work (when not doing "house" work). I have several rows done at the keel and one additional row at the sheer clamped on and drying on the stbd side - port side is similar with planking drying at "top and bottom". I think it will be a row or two more and I can dispense with the soaking and things should speed up. Here is the stbd side. On the masts I have been getting the top masts tapered. I decide to stop at 5/64s at the very top of the top masts. I fear 1/16 is going to be too easy to snap off sometime in the rigging process. I made the top section (the 5/64s part) a bit longer than required as I intend to use this to get the tops of all four masts to the same height after all is "said and done" before adding the "finals" with the flag halyards to the tops of each topmast. Here are two of the topmasts after tapering but before stain and WoP.

- 144 replies
-
- 4
-
-
- charles p notman
- finished
- (and 1 more)
-
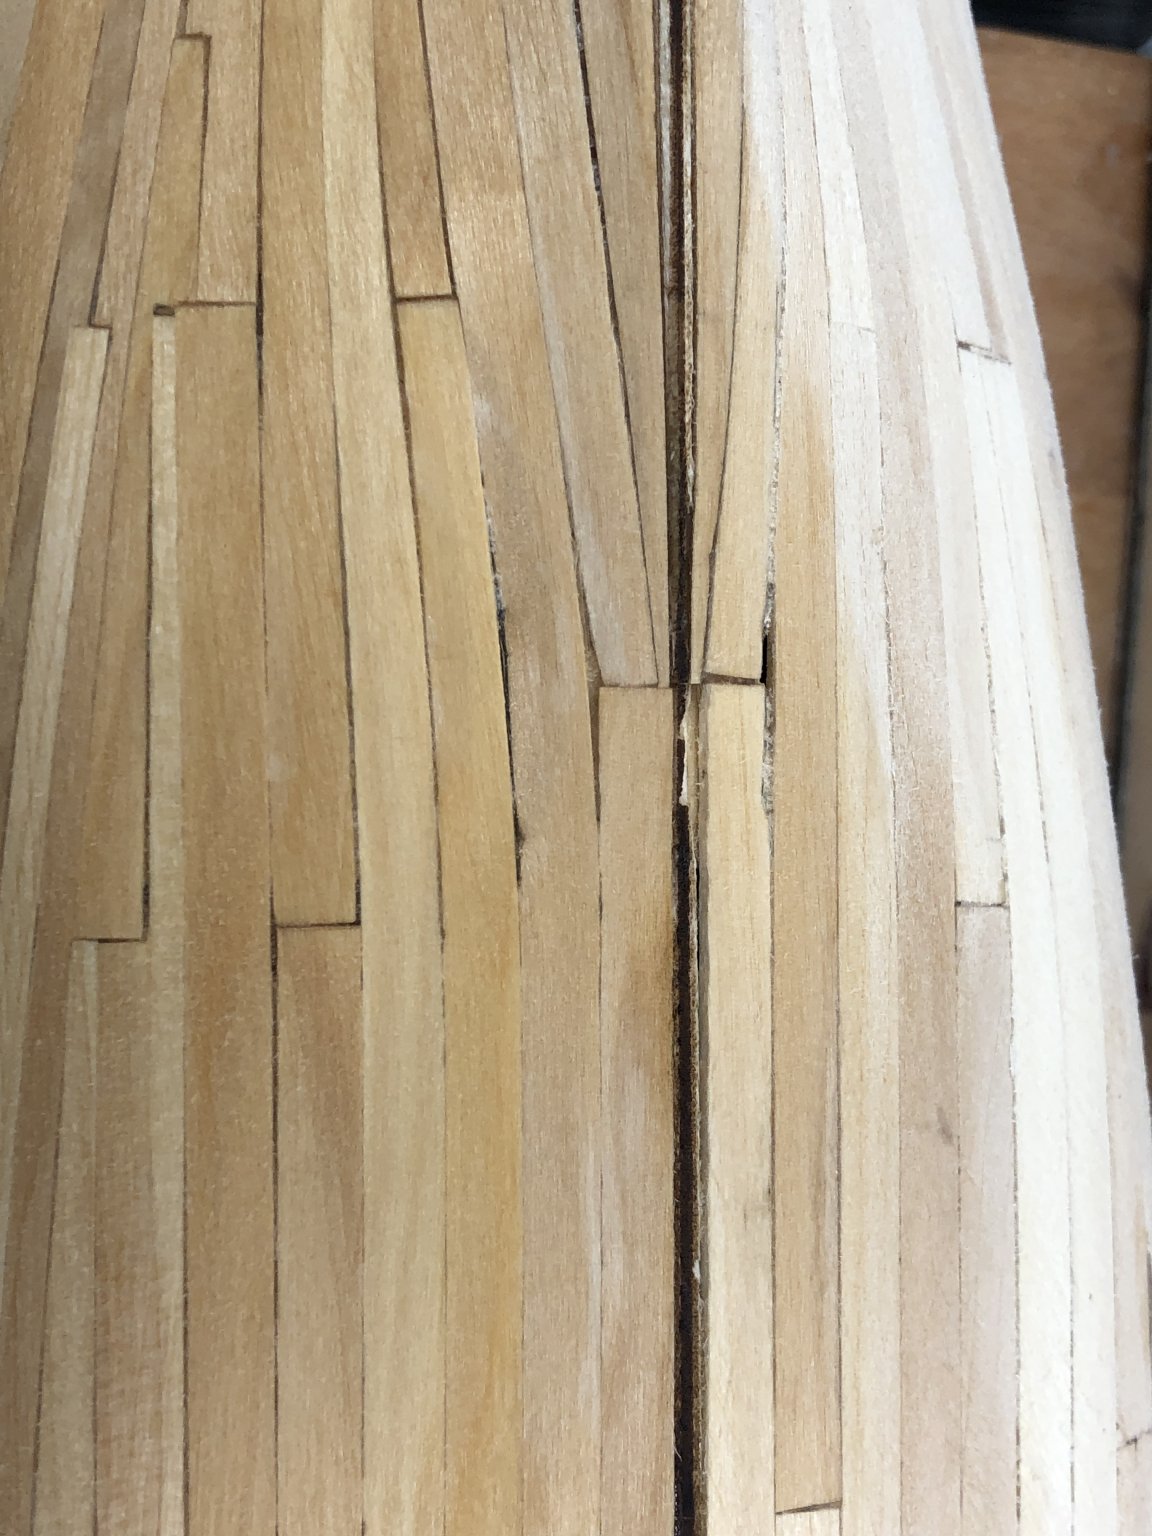
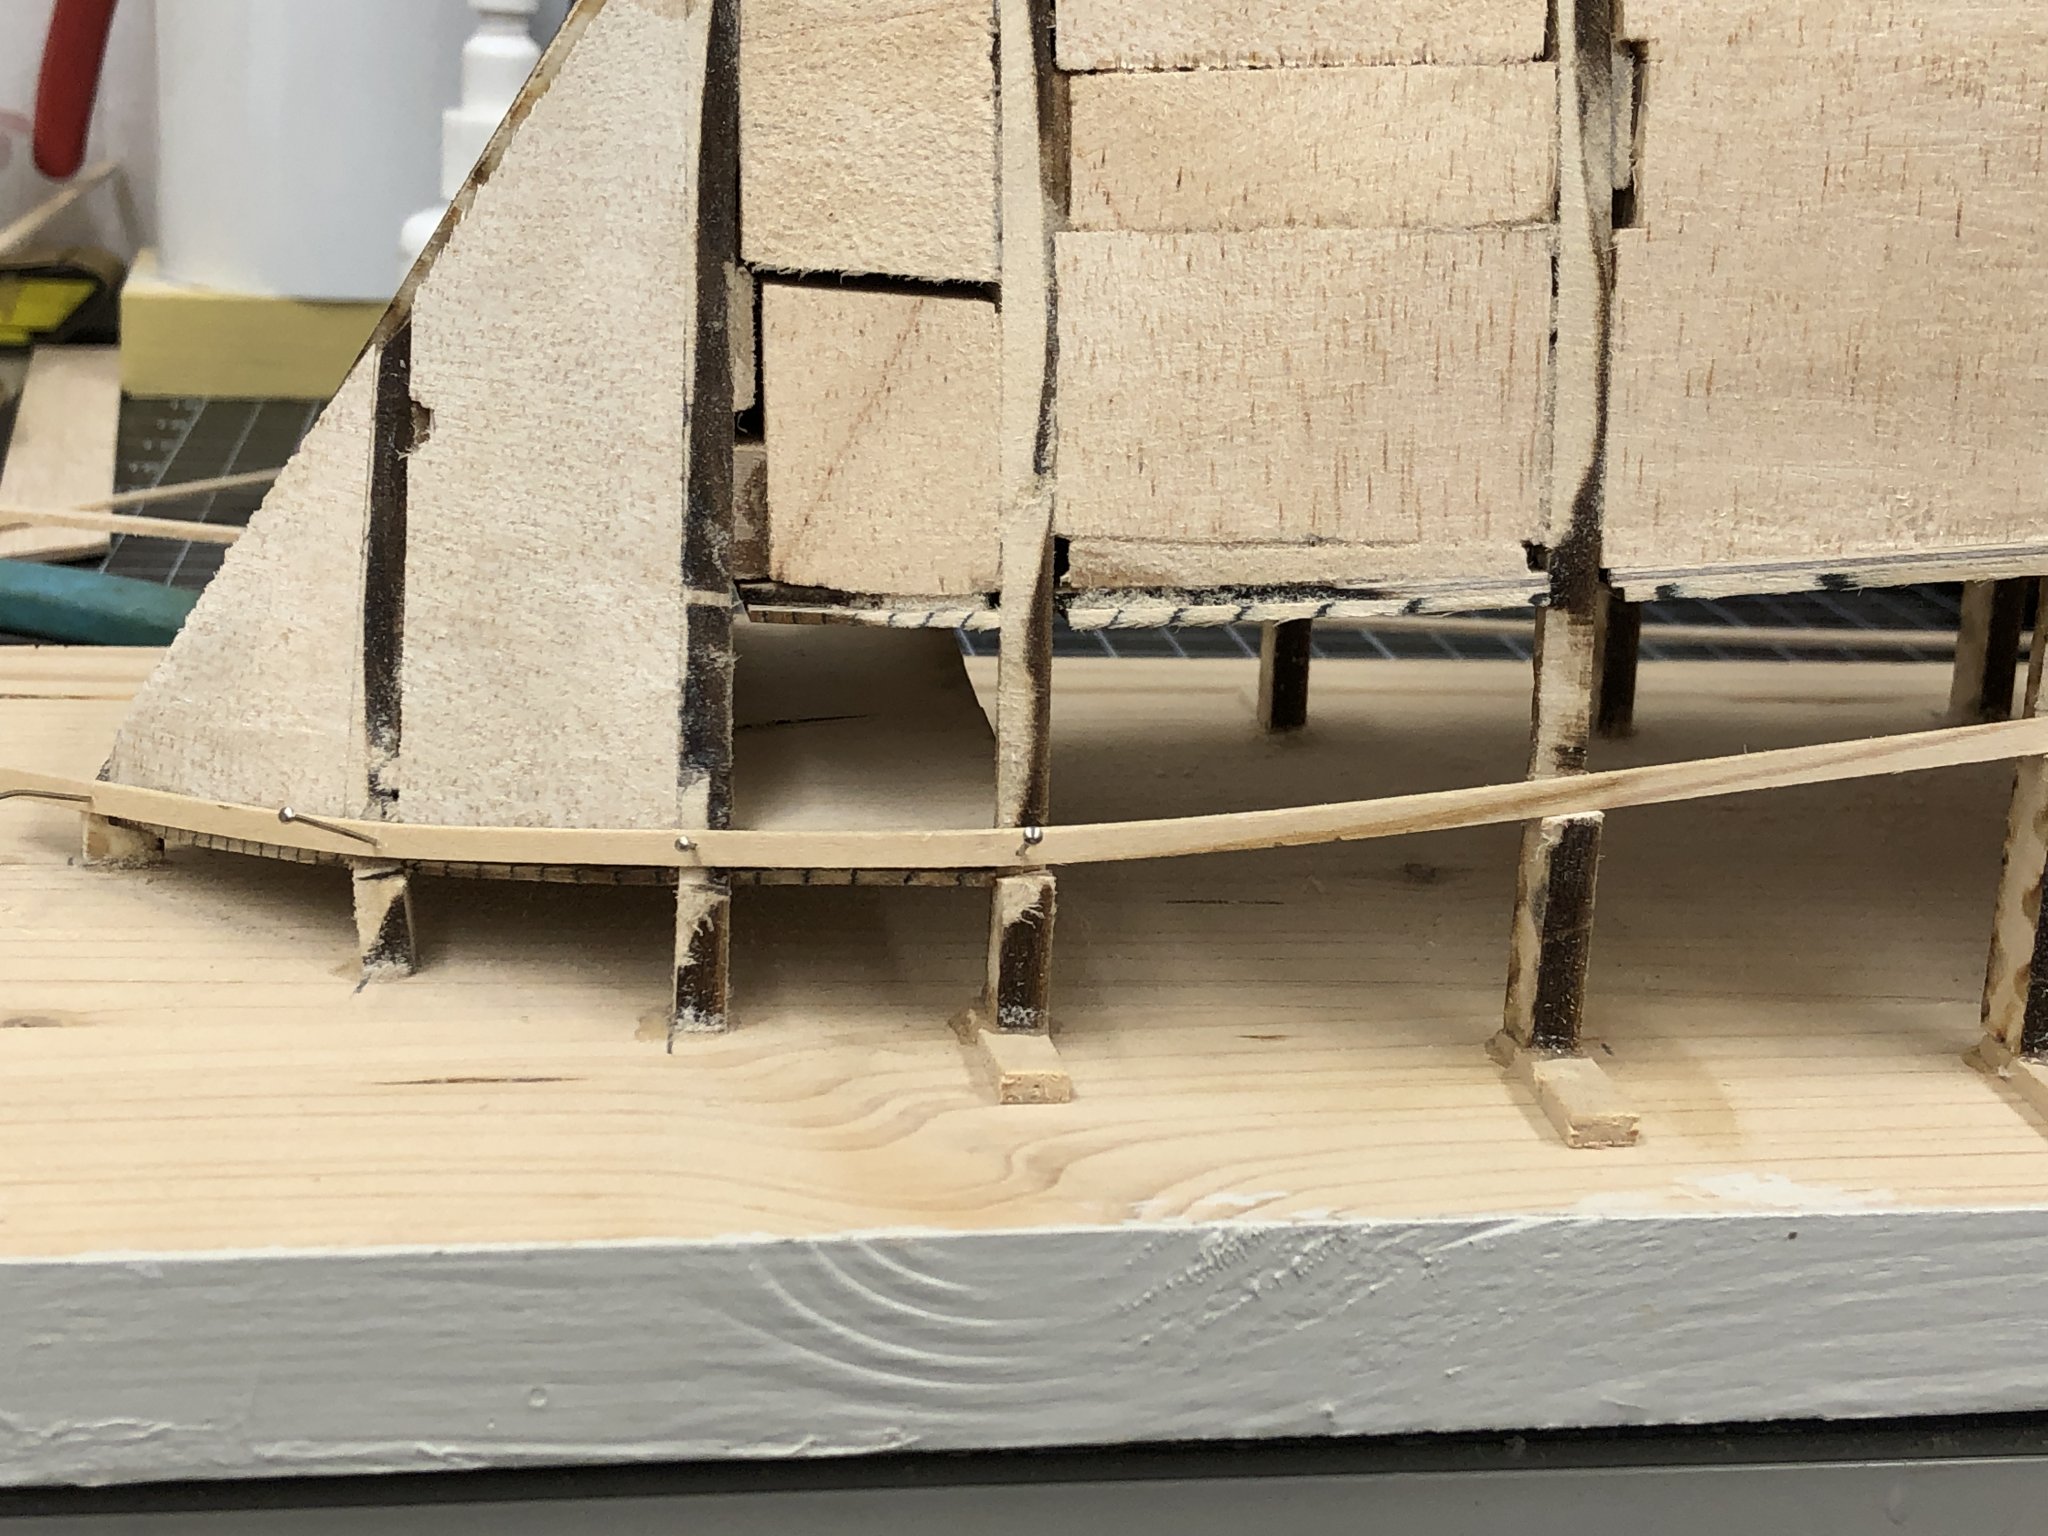
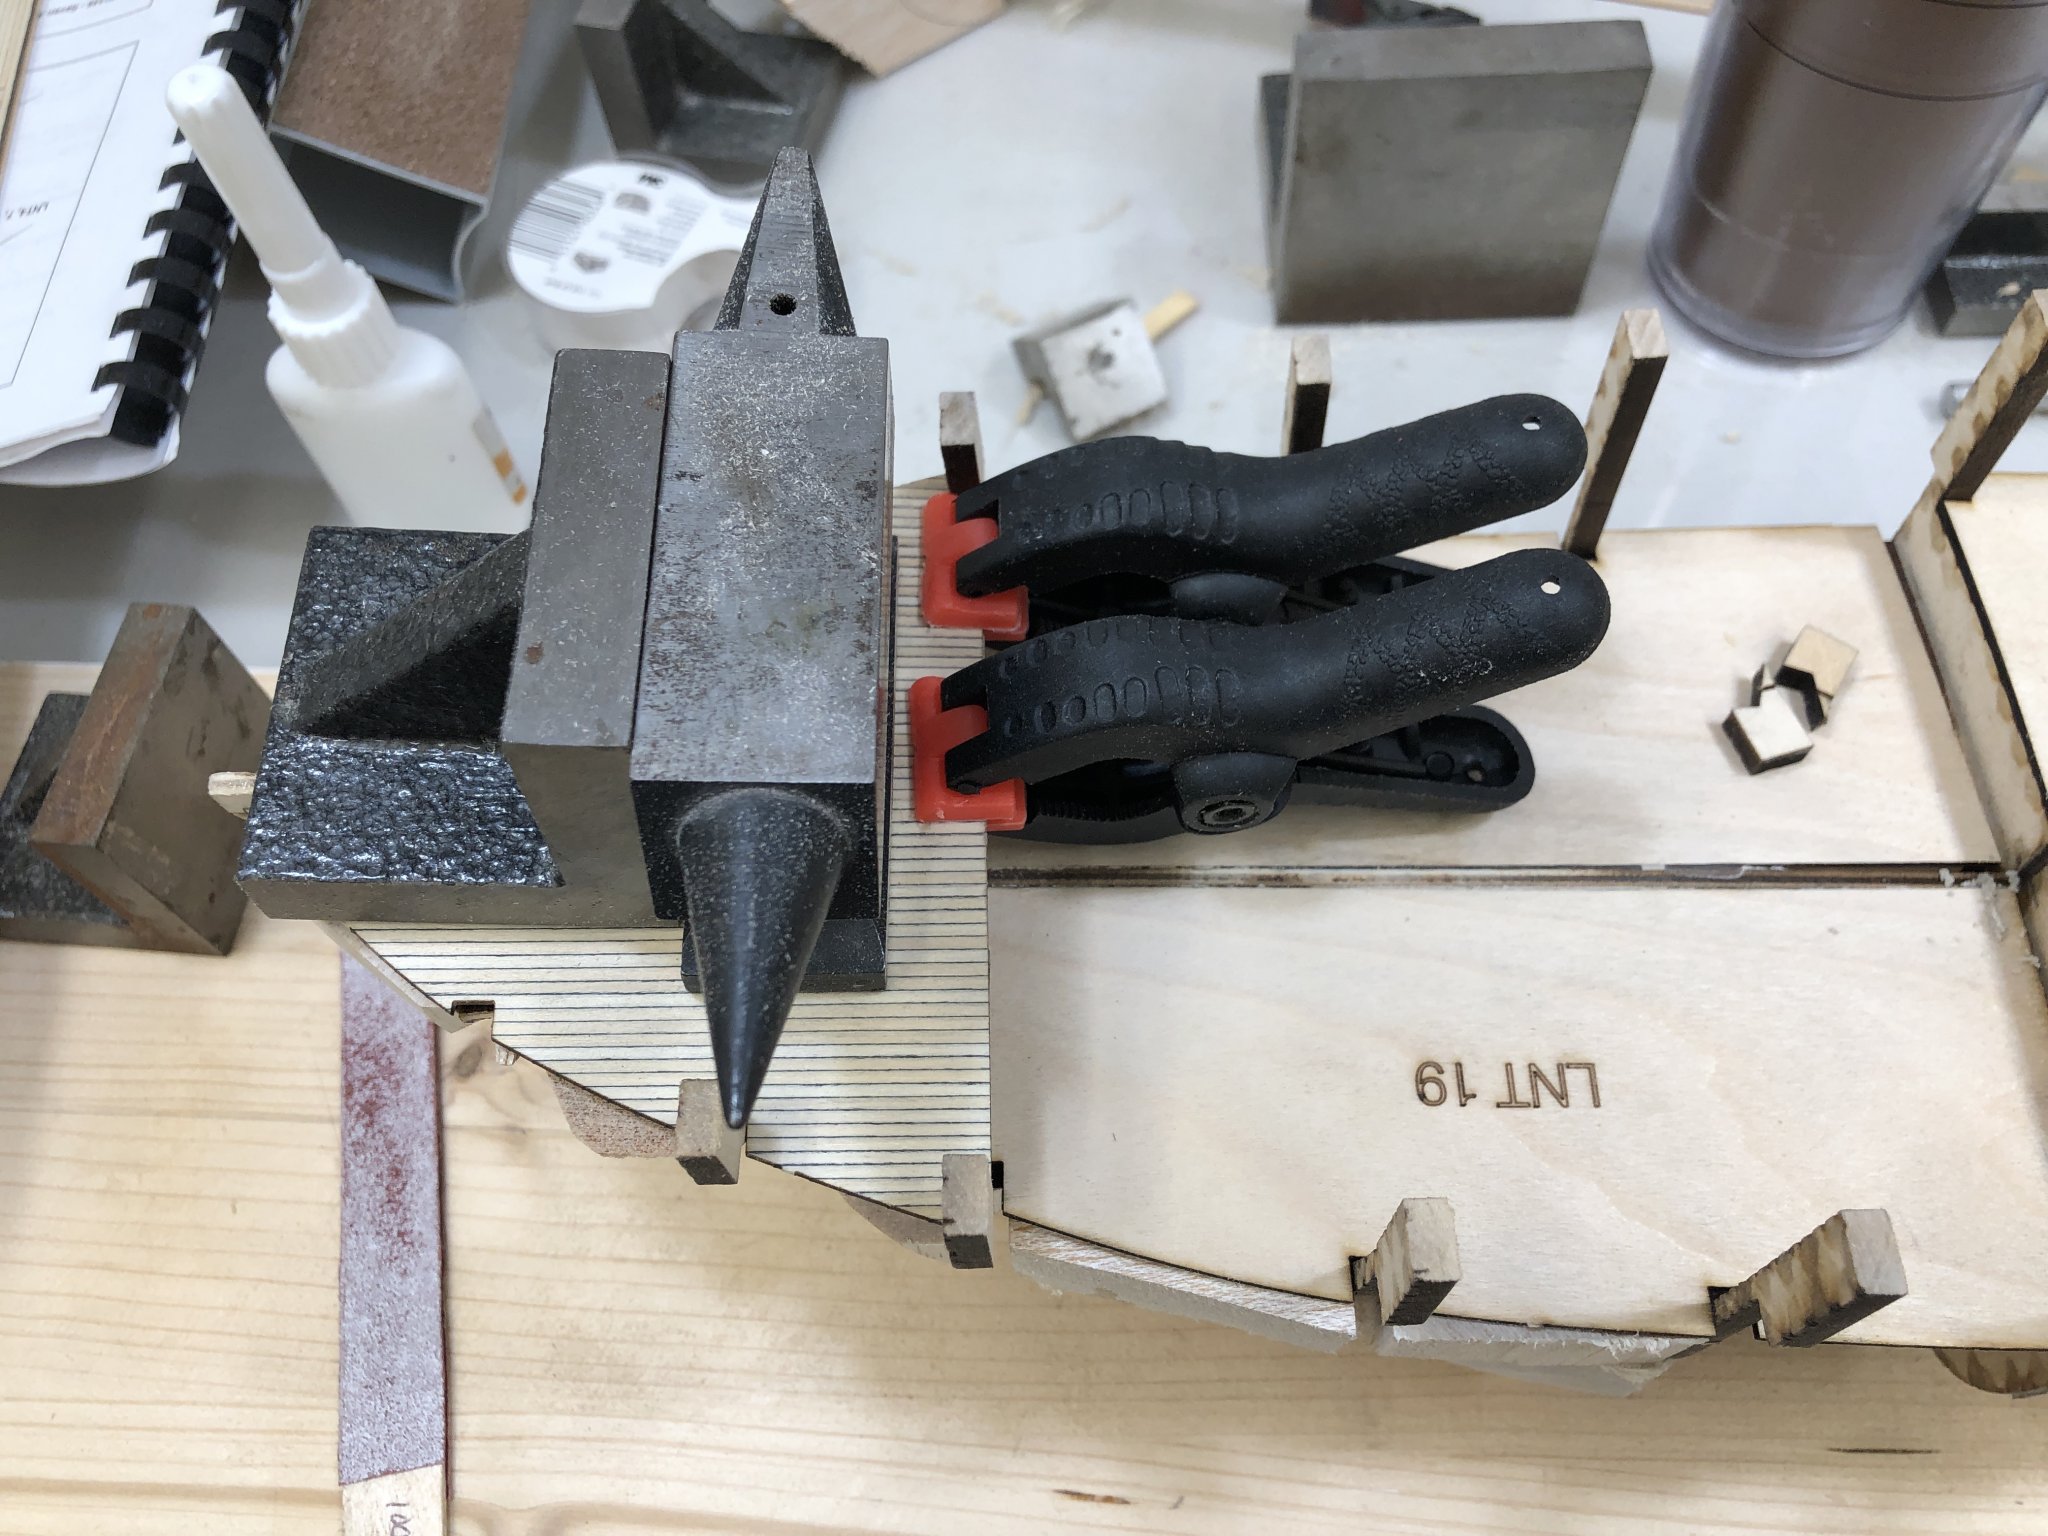
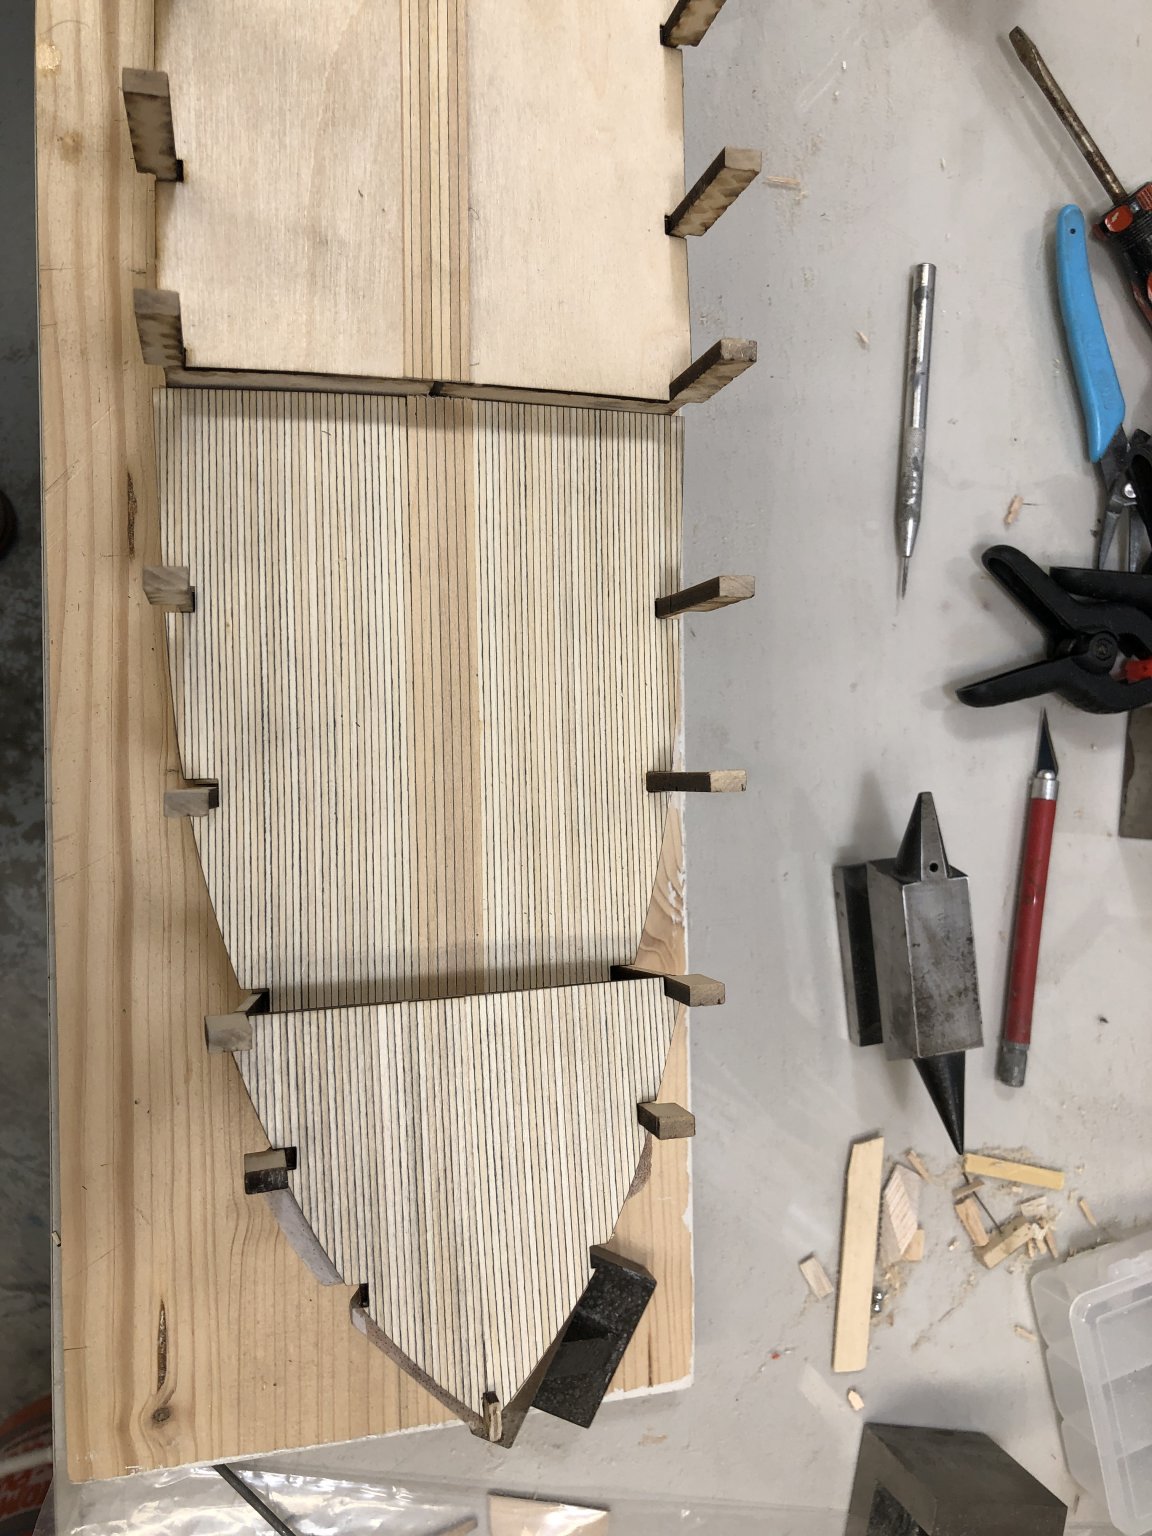
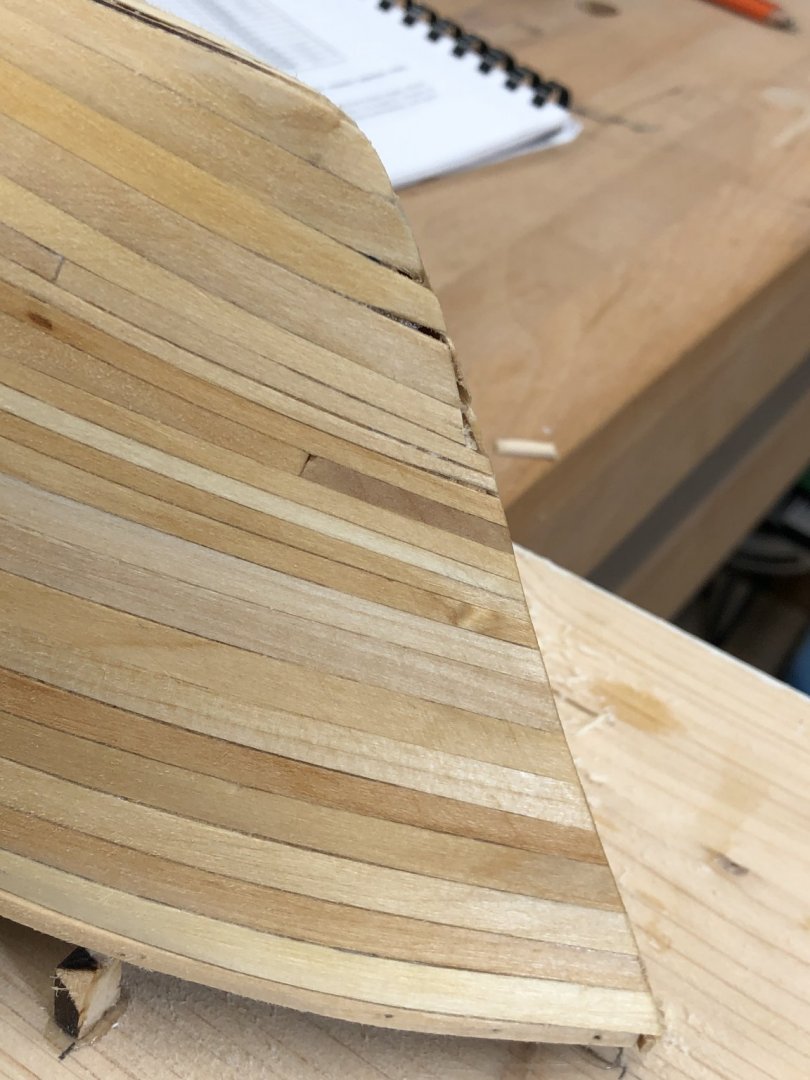
I tried the laser cut garboard strakes but could not get the forward set to work. I noticed that contrary to the instructions the prototype photos show the pointy end of the forward set about half way between bulkhead 7 and 8 (instructions say at centerline of BH 8). Even moving them forward did not yield a "satisfactory" result IMHO so I chose to just use the 1/4" wide planks for the forward garboard strakes. Here is what the first two planks at the bow look like. Attention will have to be paid to how the planks at the bow go together since they will be sanded flat to accept the stem. I also did not follow the instructions and add the sheer strakes before planking. They appear too fragile to survive the planking process, especially across the main deck where they are unsupported except for the bulkhead extensions. My solution was to pin (and then glue) a 1/8" wide plank with the bottom (hull is inverted) even with the subdeck, leaving the edge of the "real" deck open to later have the sheer strake installed after the hull is filled, sanded and ready (more or less) for paint. In the pictures of the prototype I could not see any evidence that the sheer strake was installed prior to the planking. Here are some pictures of the "sheer plank" pinned and glued on the starboard side. I had to "adjust" some of the bulkhead extension to permit a smooth flow of the sheer plank across the bulkhead extensions.


- 144 replies
-
- 5
-
-
- charles p notman
- finished
- (and 1 more)
-
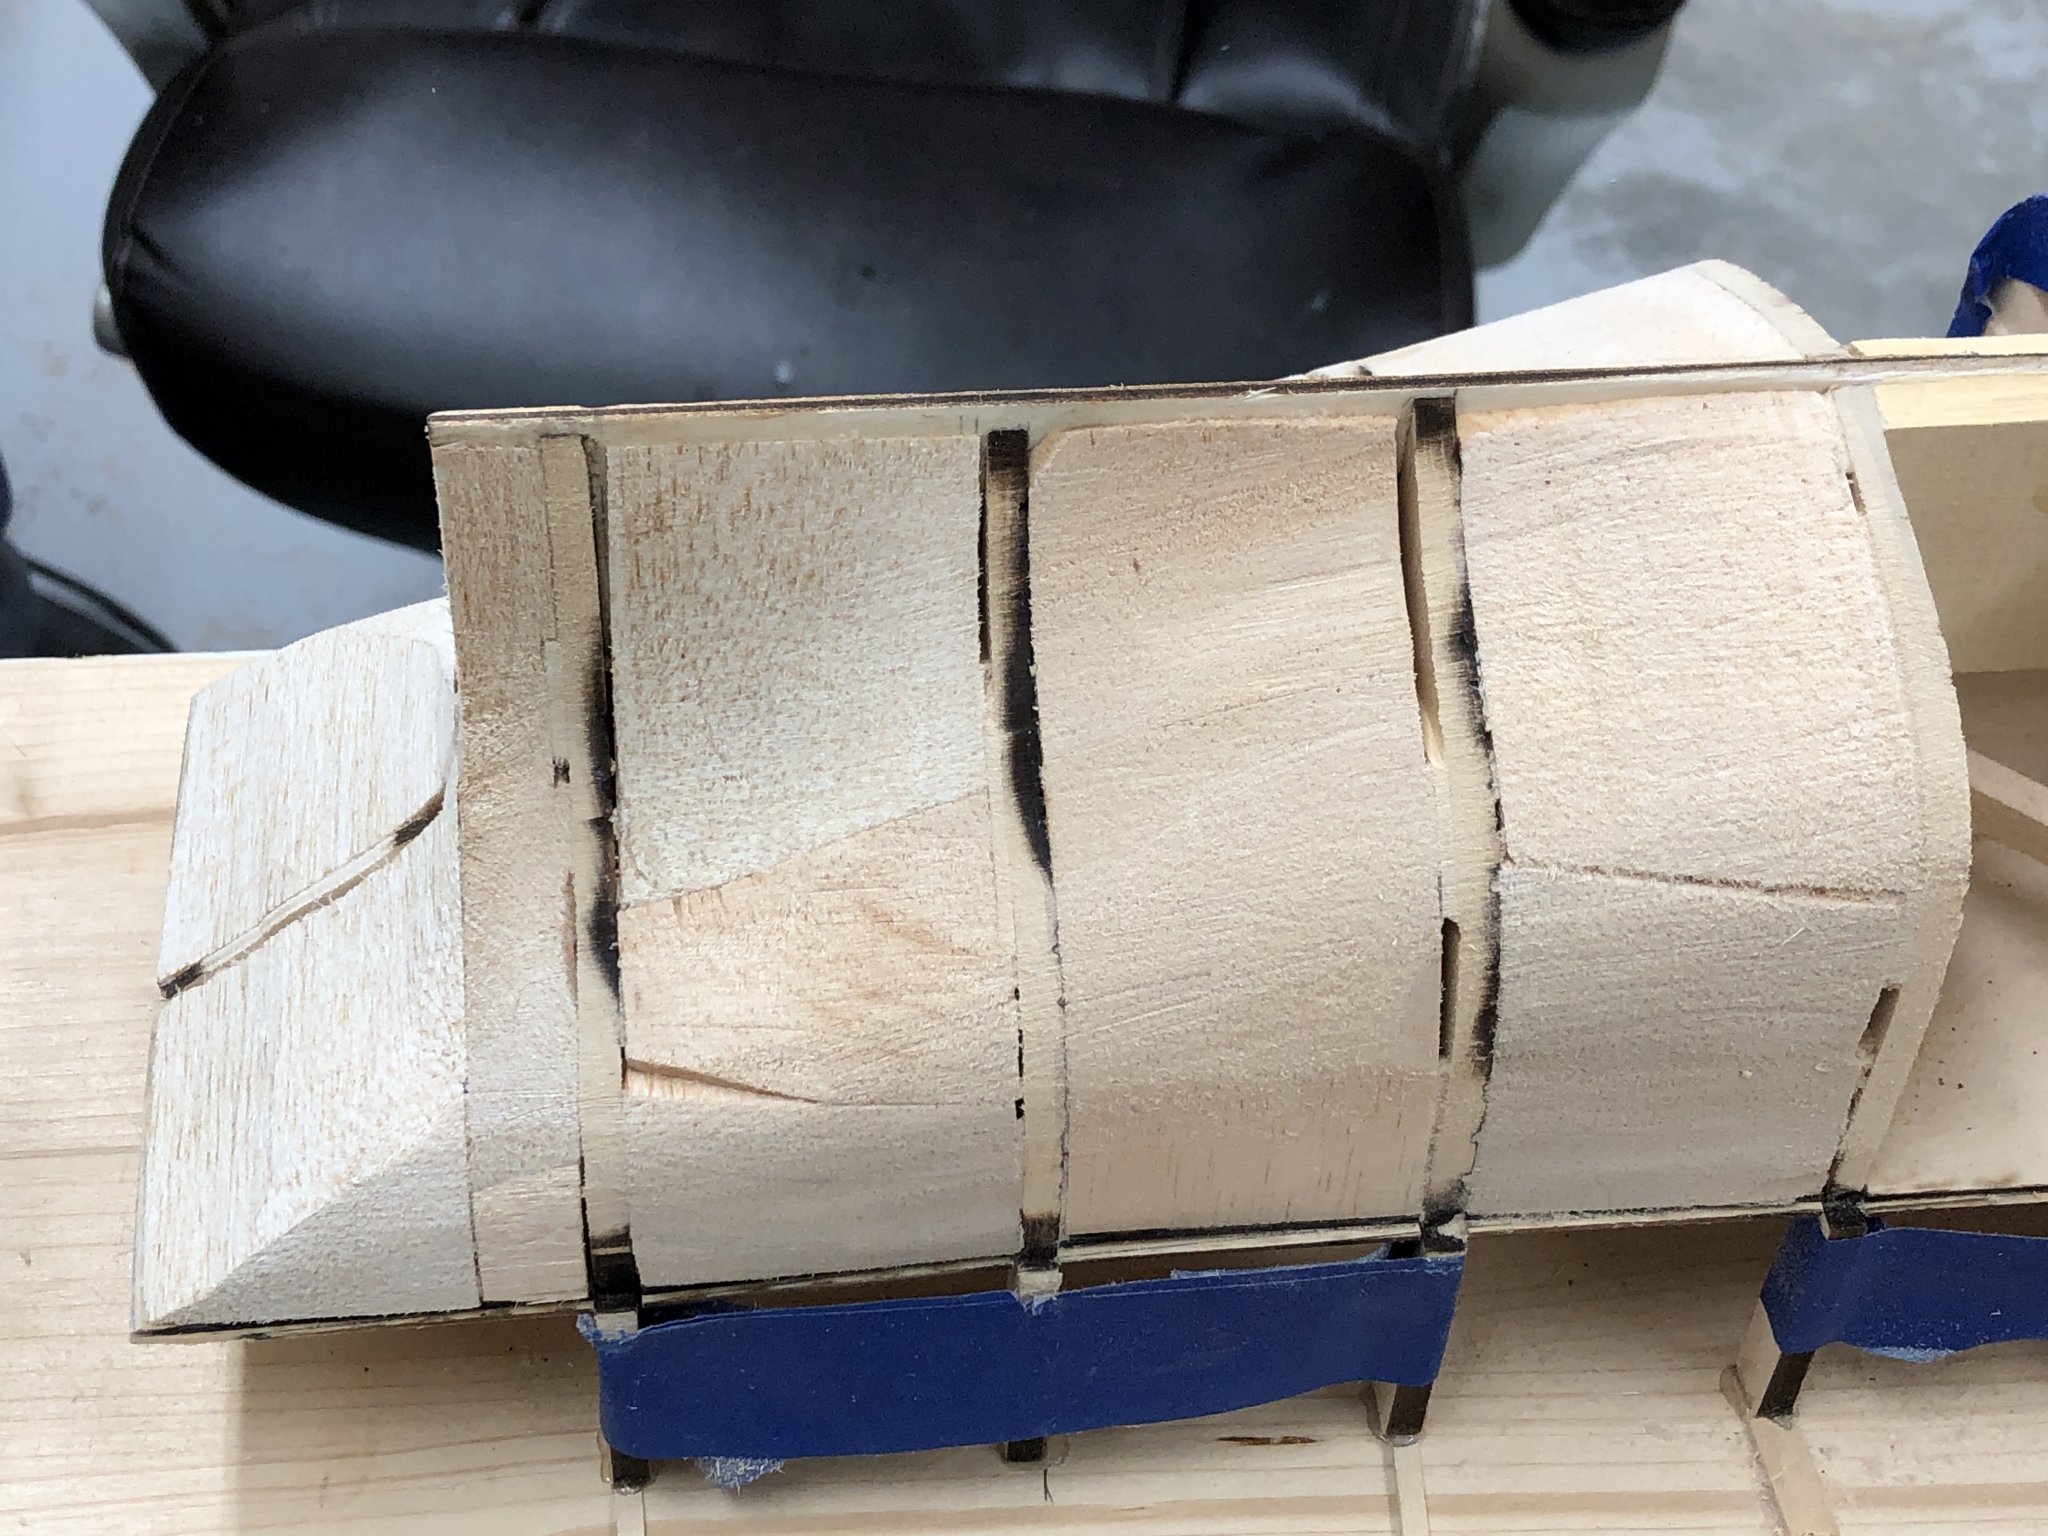
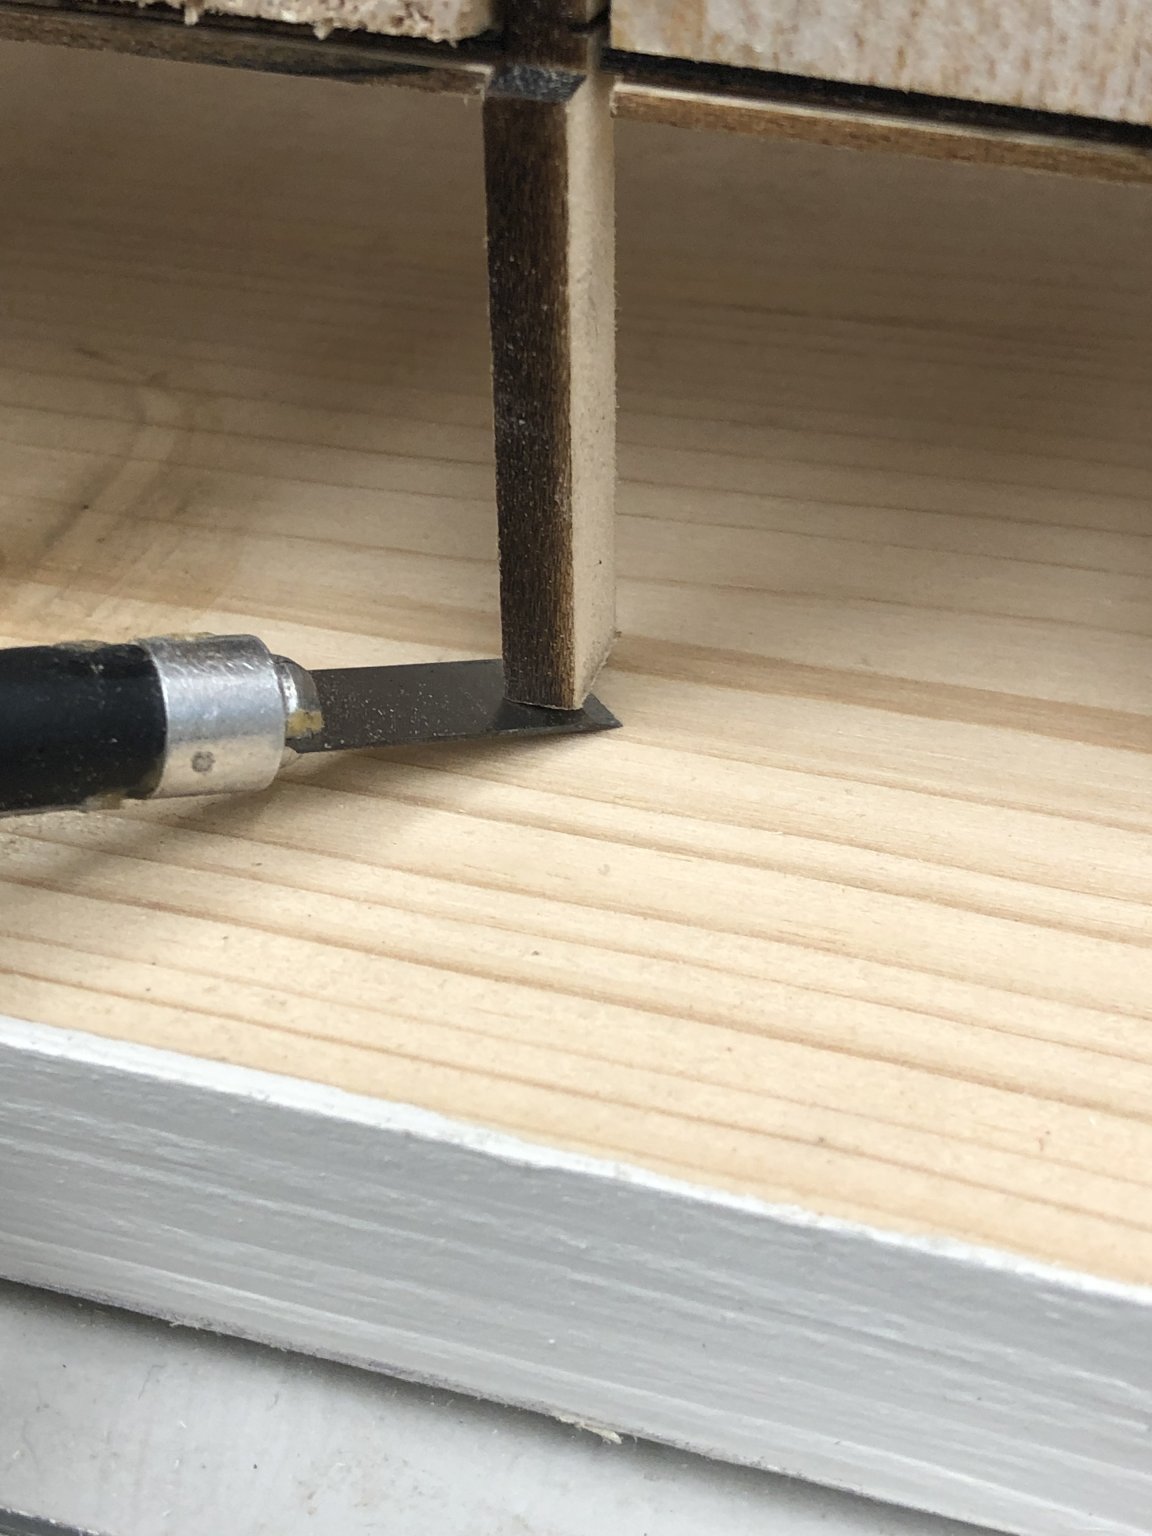
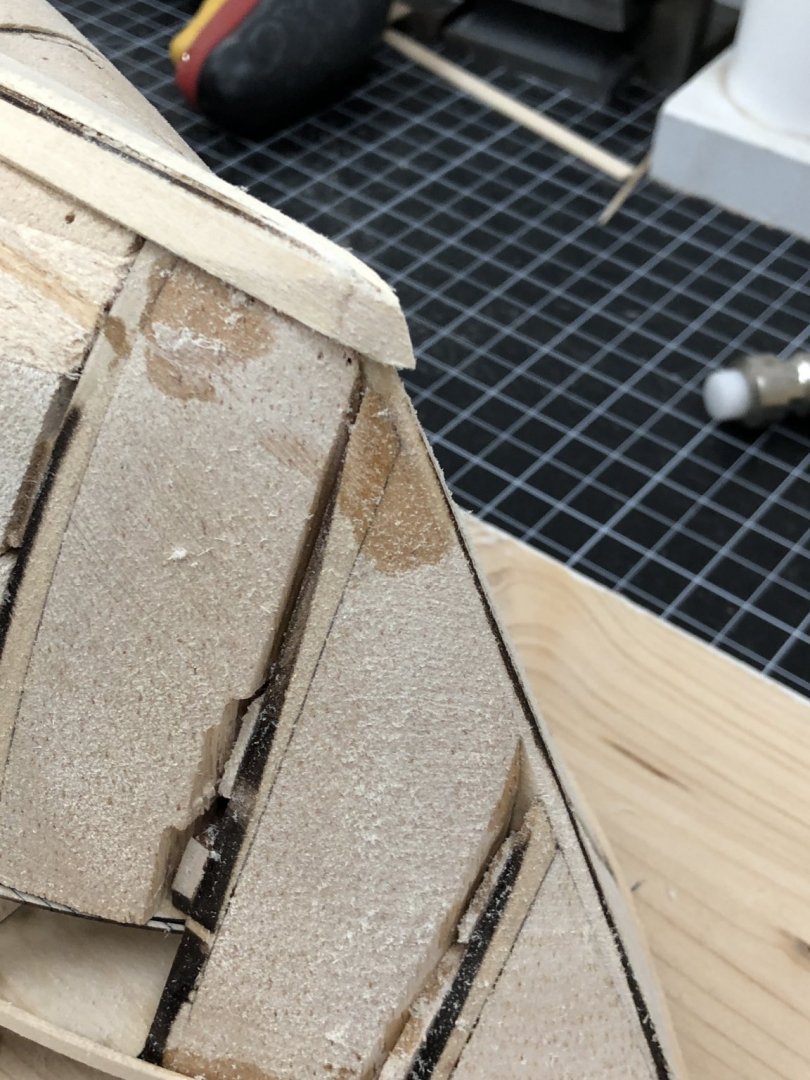
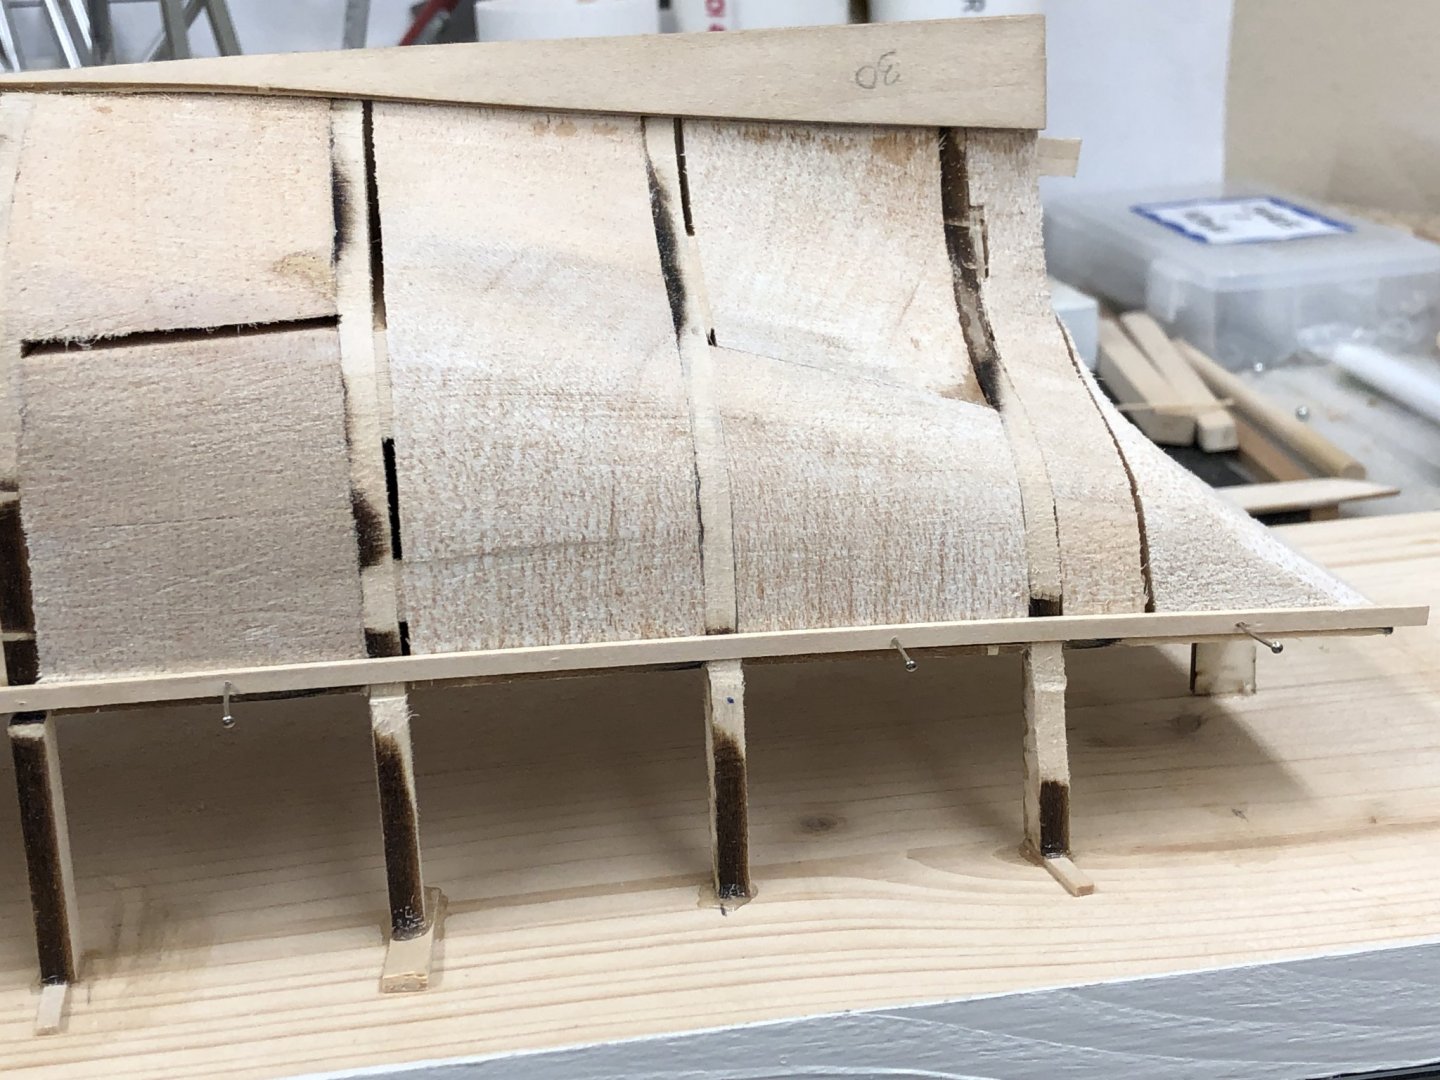
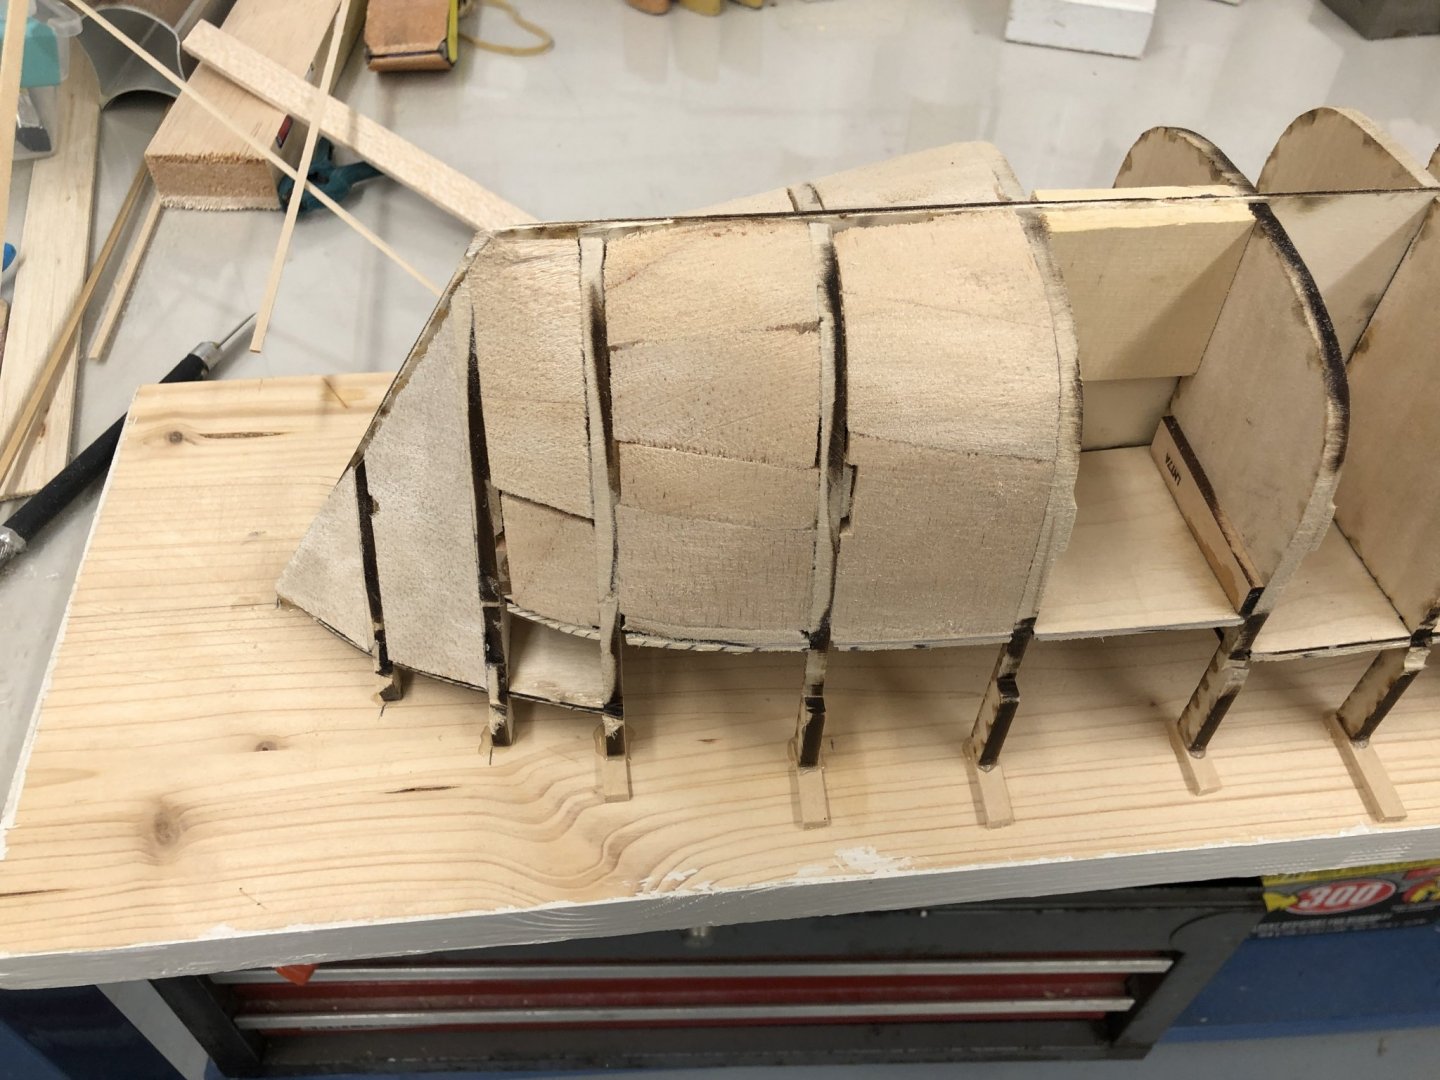
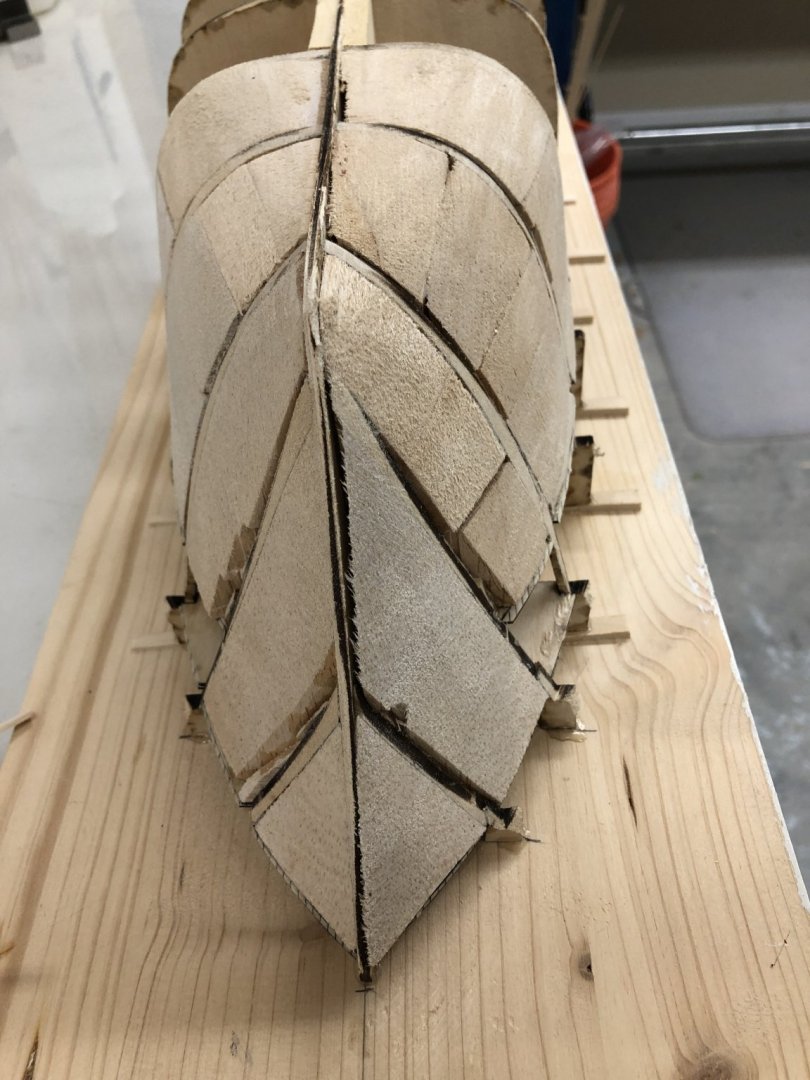
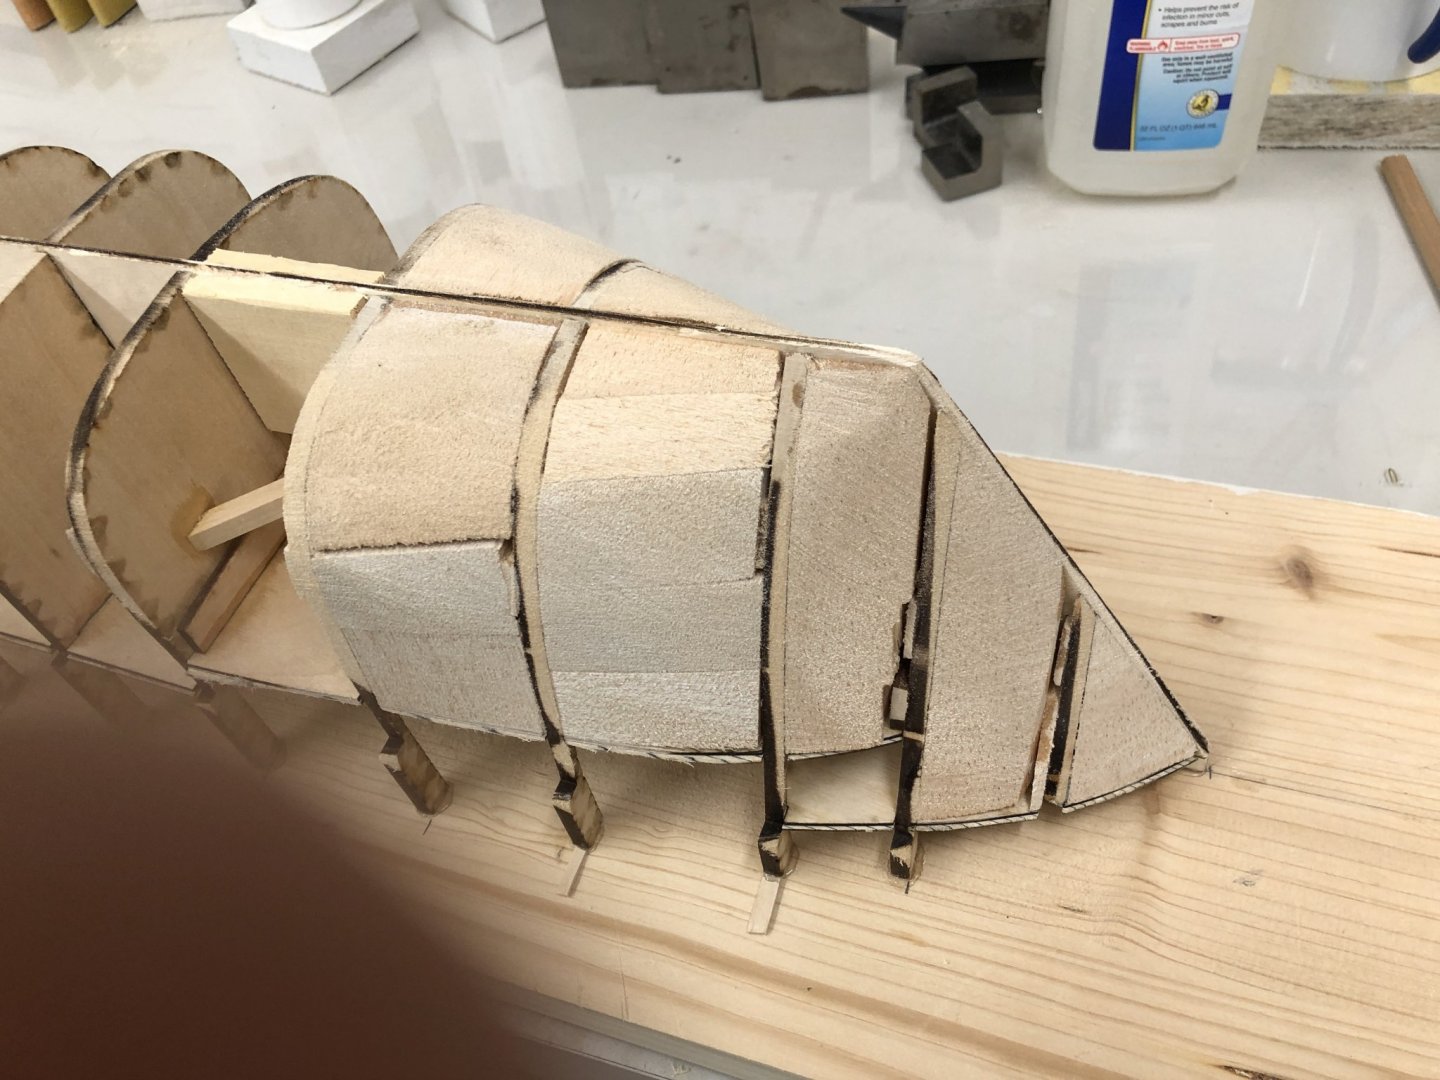
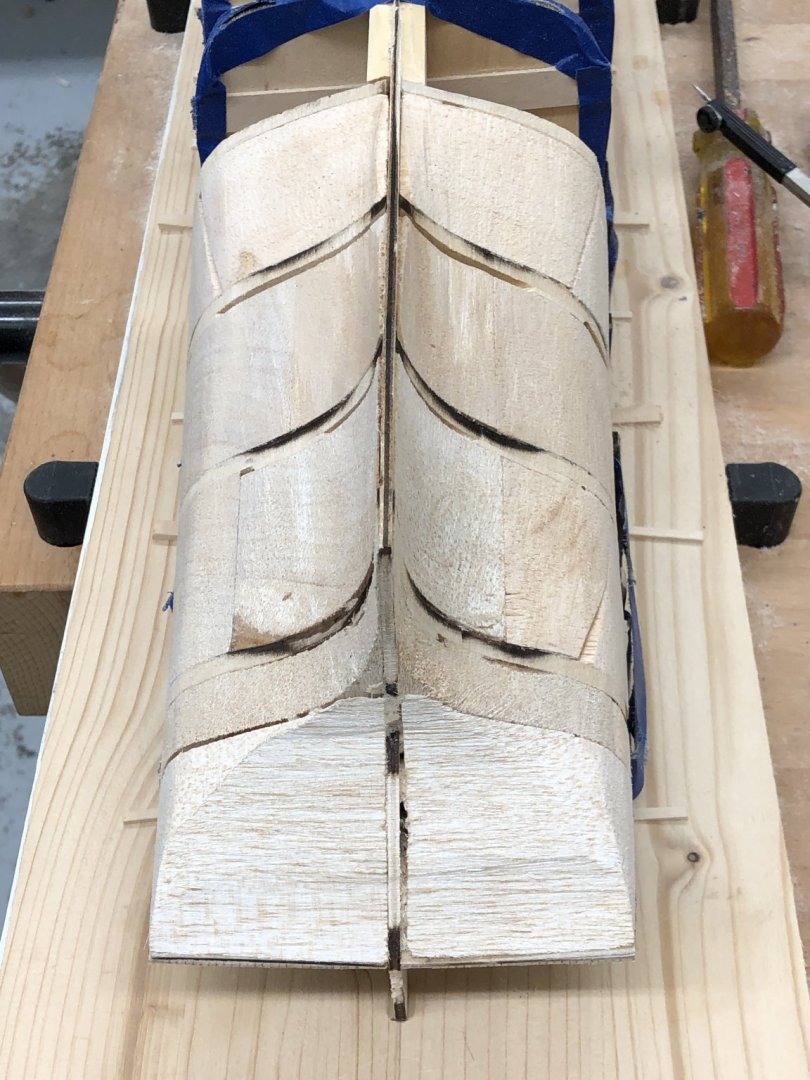
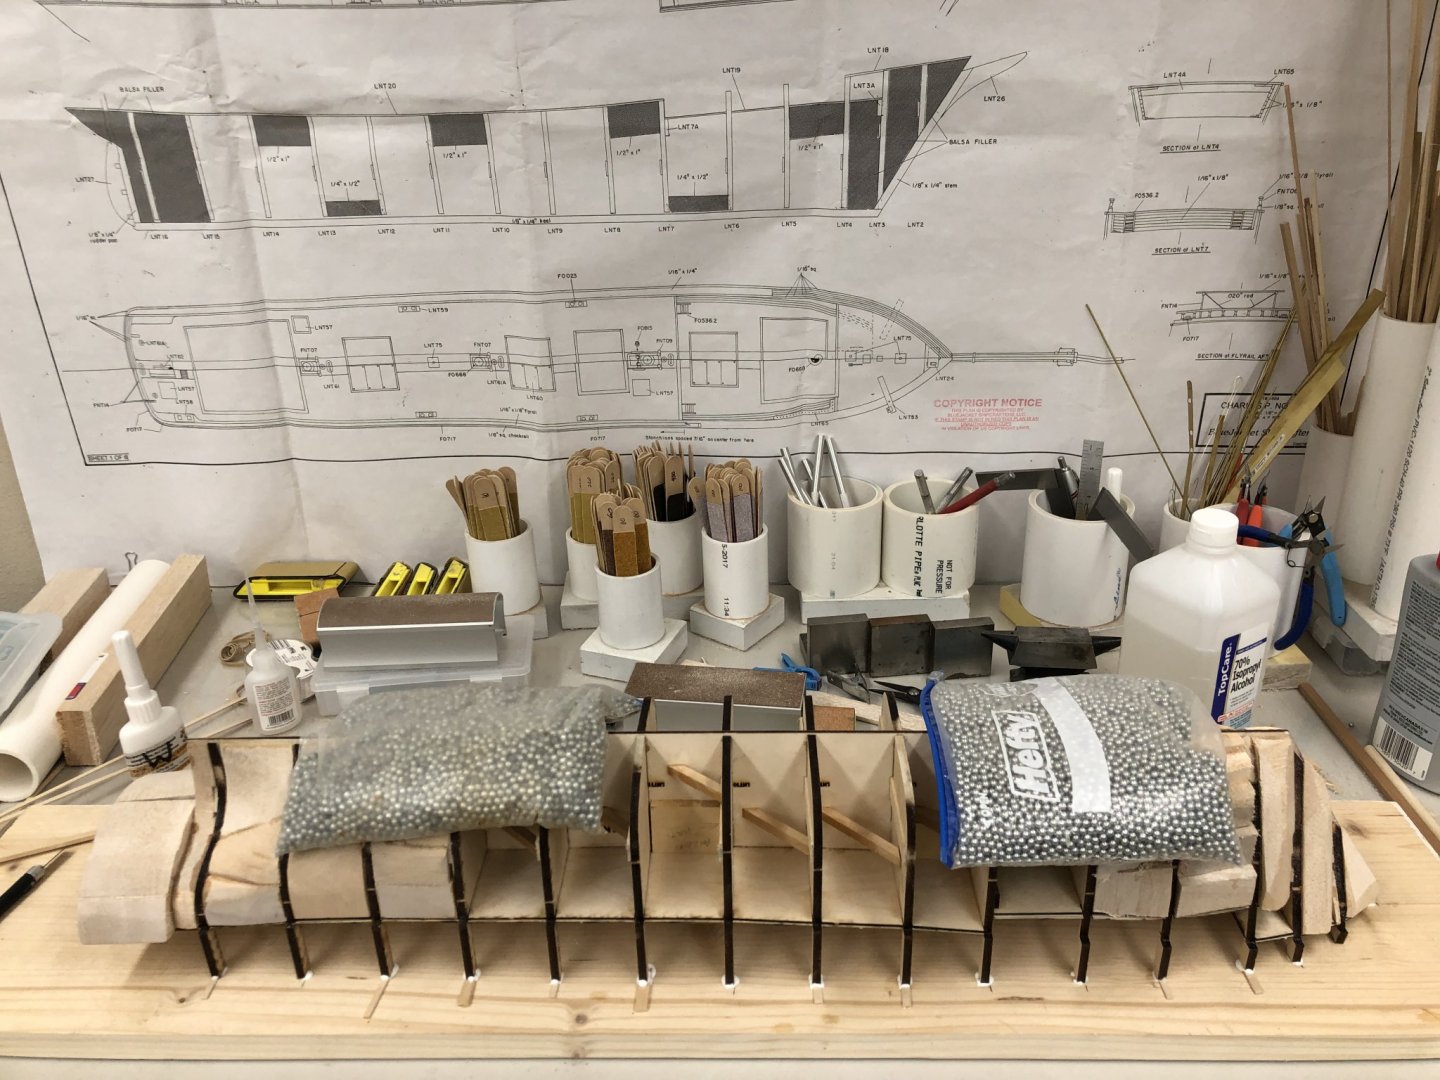
I finally got to the bow after a full day of "house" work. It was somewhat faster on the bow as I did not have to contend with the very undefined billet at the transom. So the fairing is done (and a masterful job if I do say so myself). I was able to draw on the experience fairing the Endeavour which had balsa everywhere and the hull was over 4' long so this seemed easy by comparison. On the center six bulkheads I really did little more than take the laser char off. Planking begins tomorrow (after more "house" work). Build board and hull have been returned to the "working" bench
- 144 replies
-
- 5
-
-
- charles p notman
- finished
- (and 1 more)
-
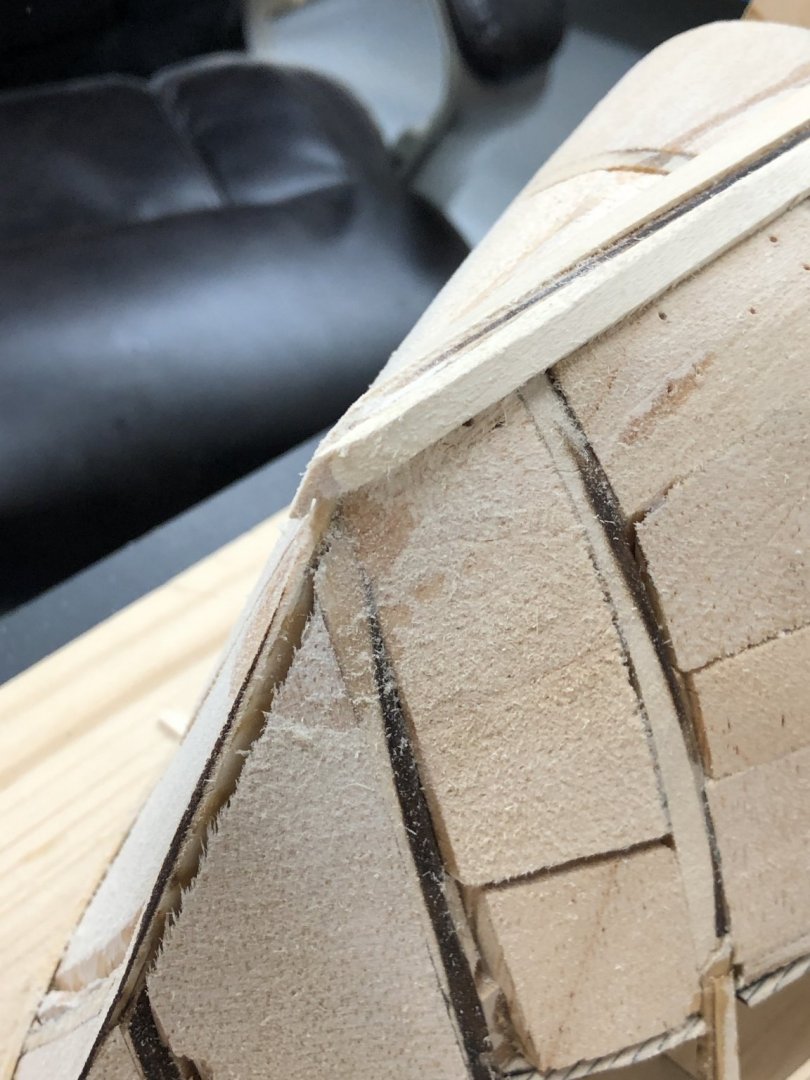
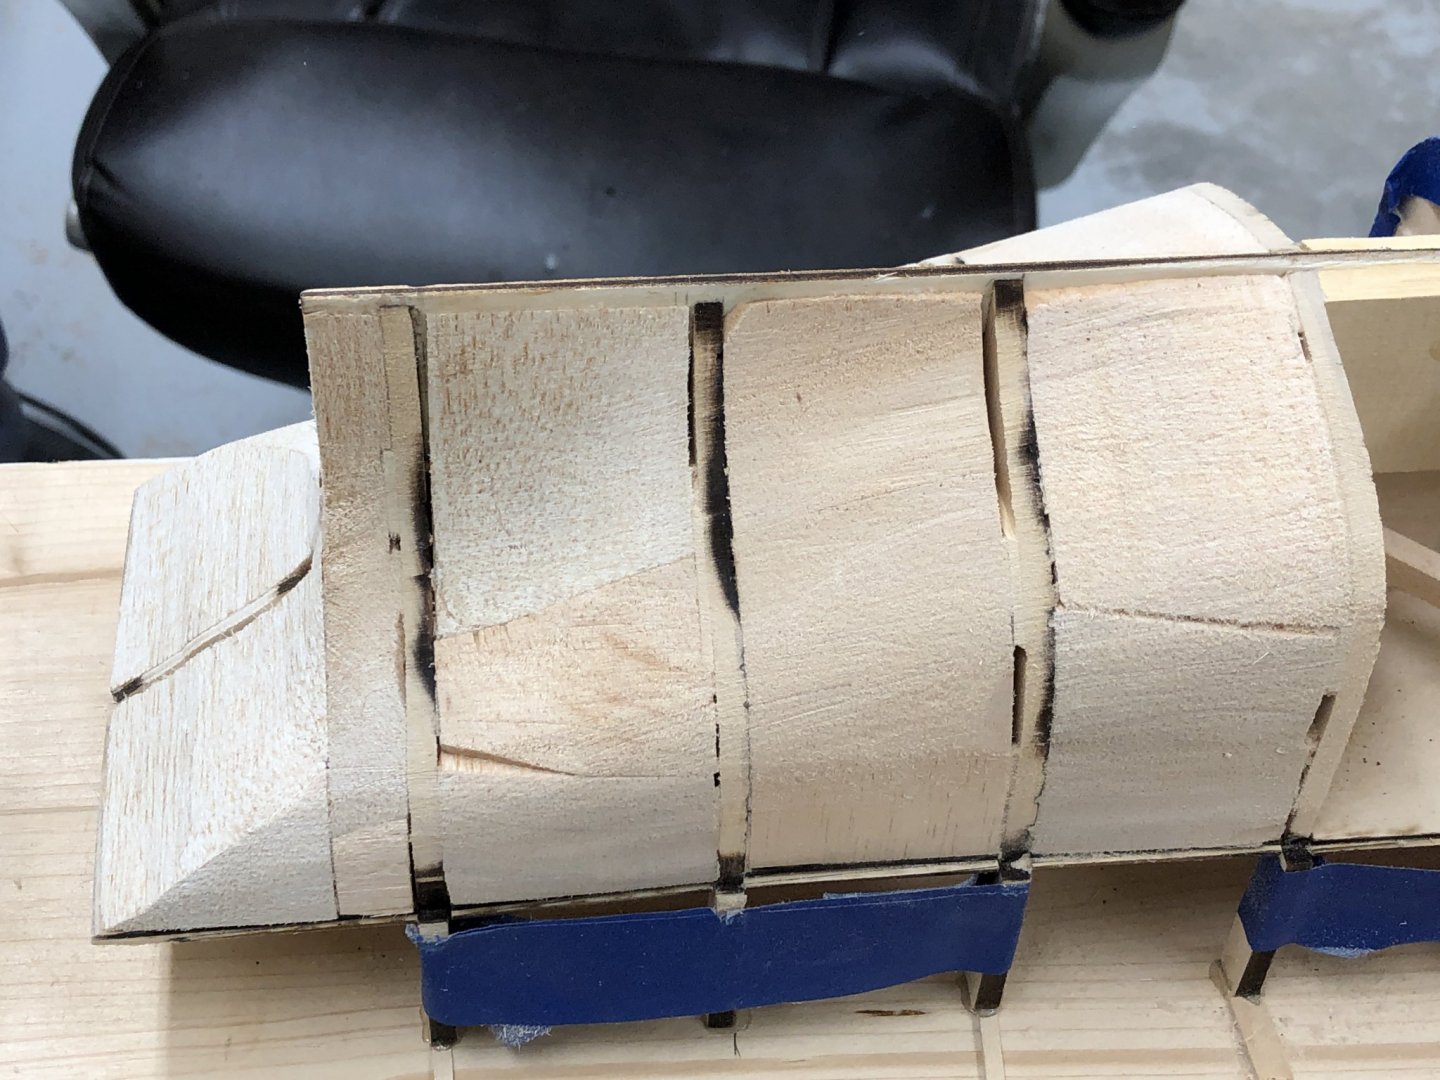
I cheated and started fairing the hull this evening after dinner. 3 hours later I think I have the stern in pretty good shape. I will tackle the bow tomorrow after a few "house" chores (like stringing wire from one end of the attic to the other. Best done early in the day in Florida. Here is how the stern looks and the overall "platform for this work - very stable.
- 144 replies
-
- 7
-
-
- charles p notman
- finished
- (and 1 more)
-
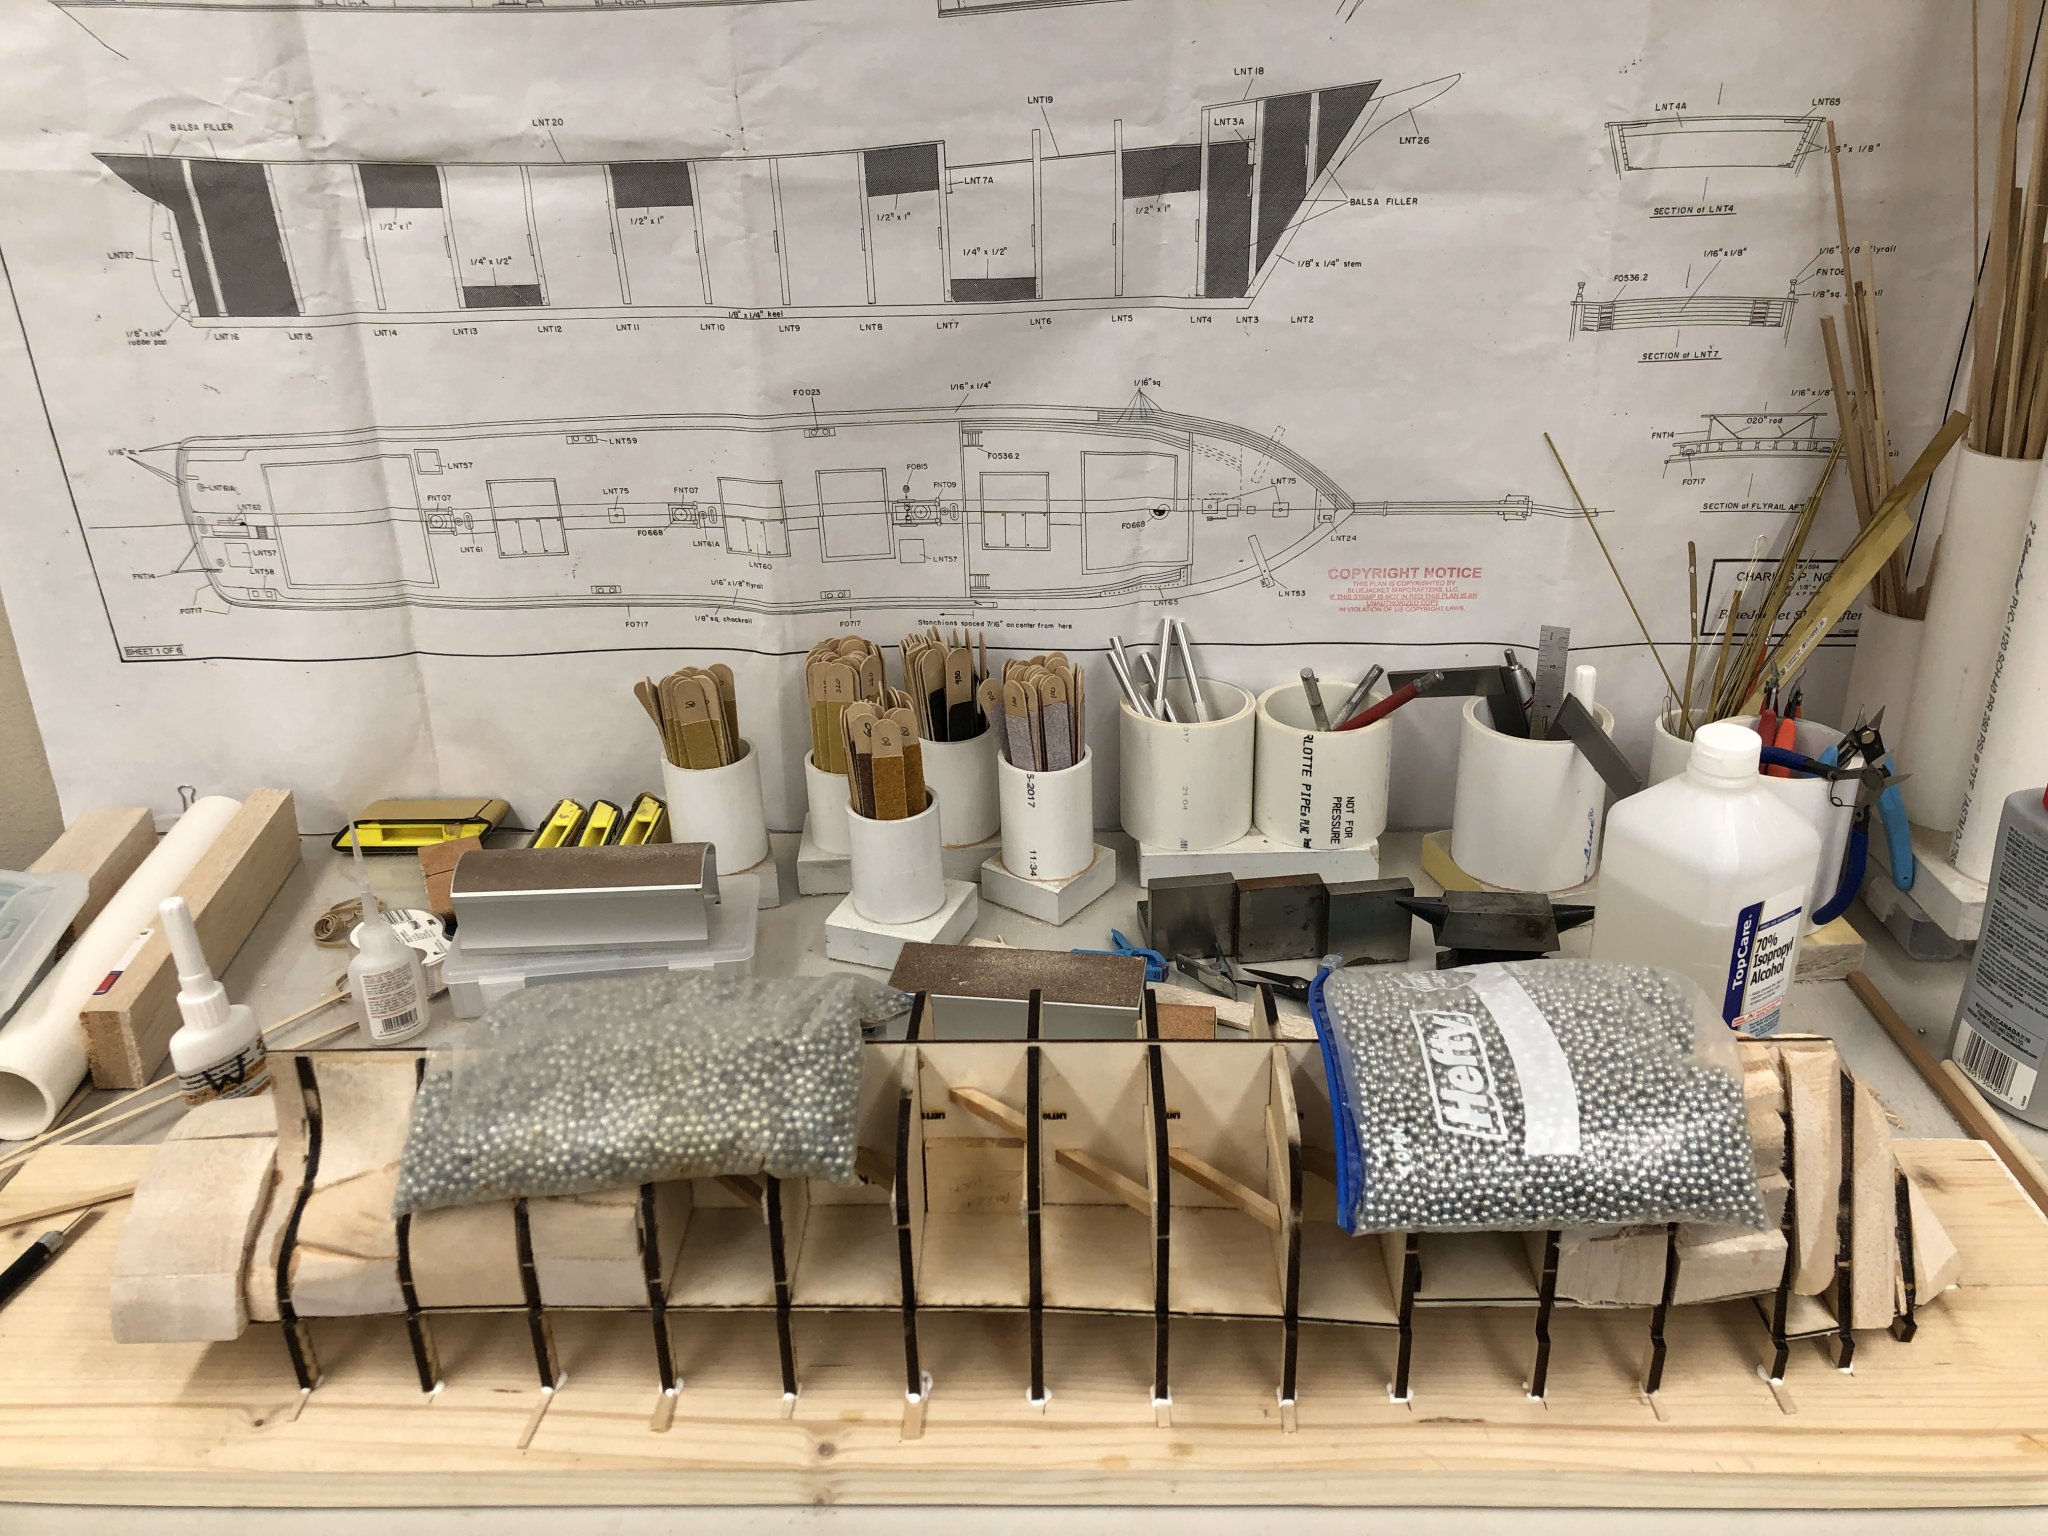
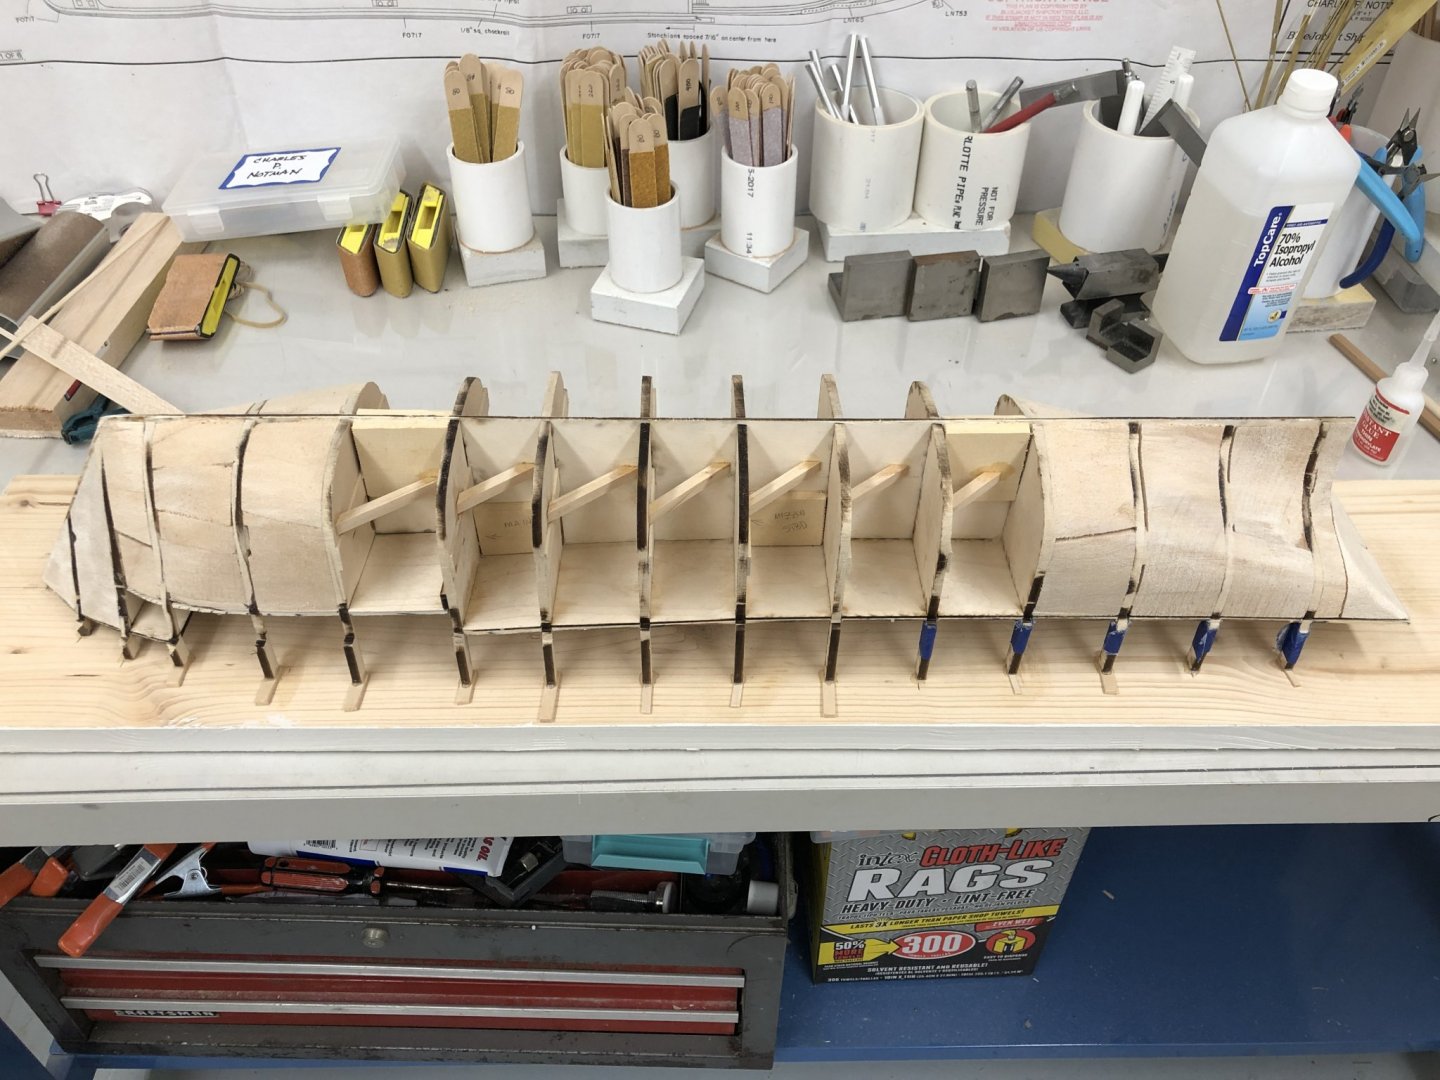
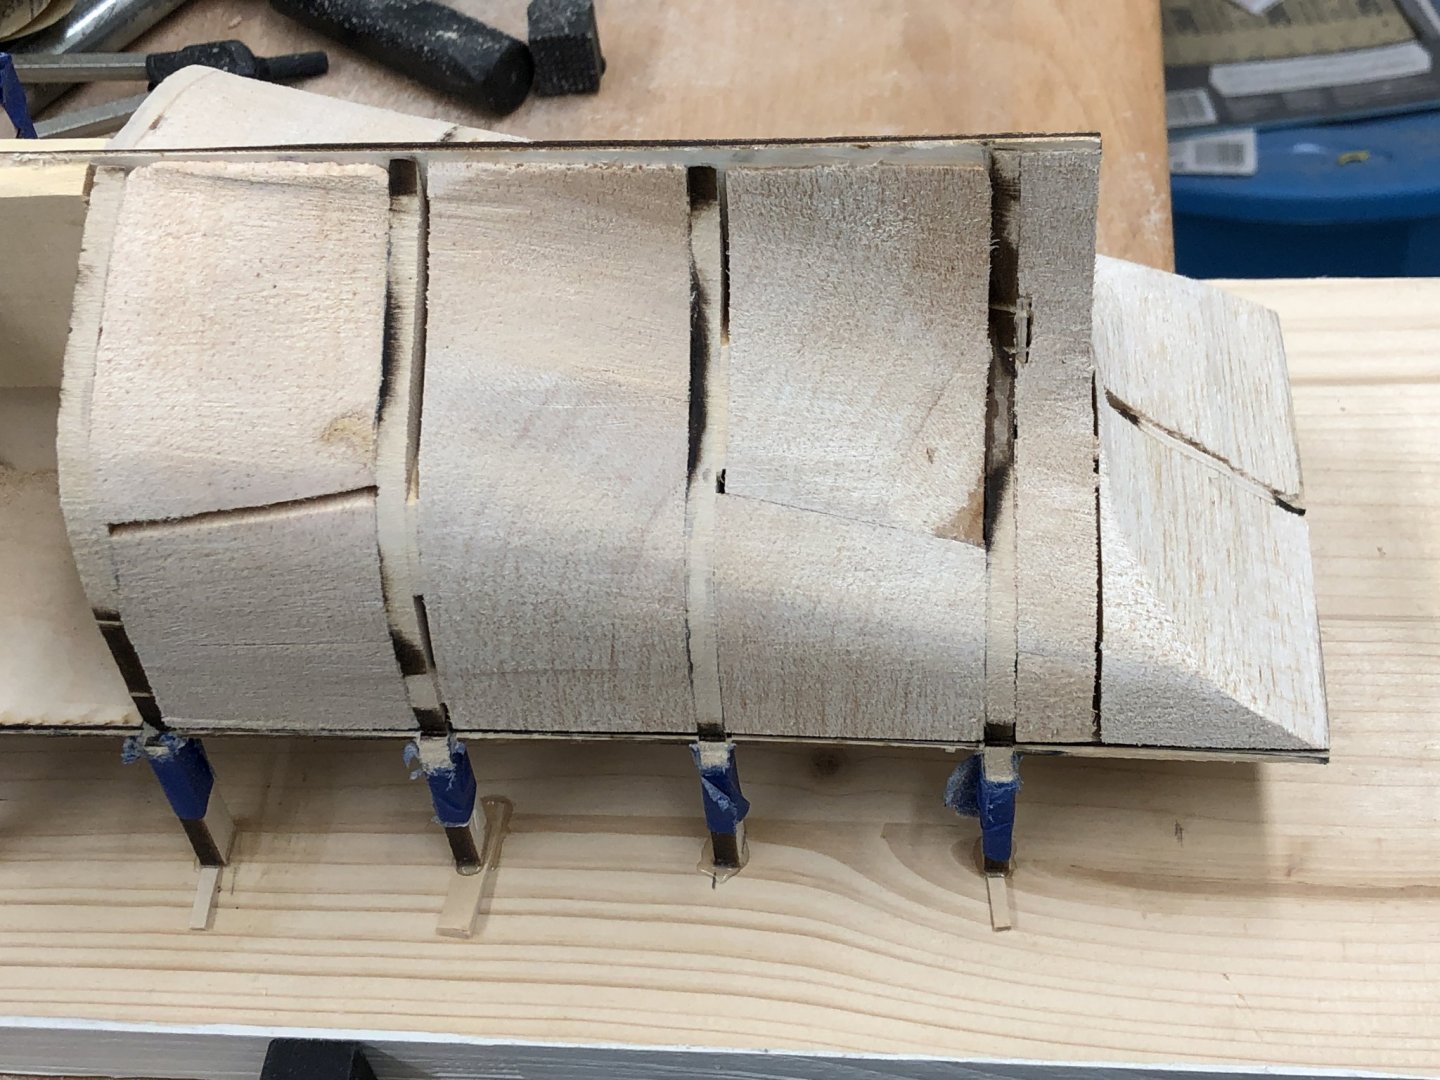
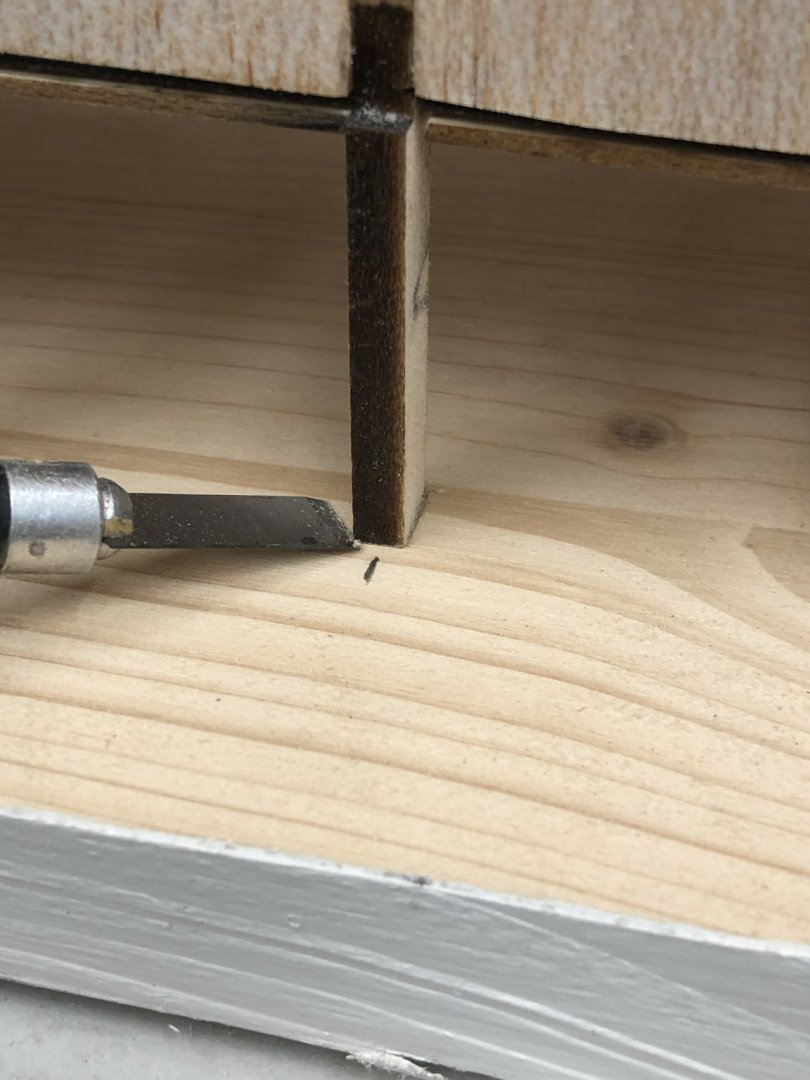
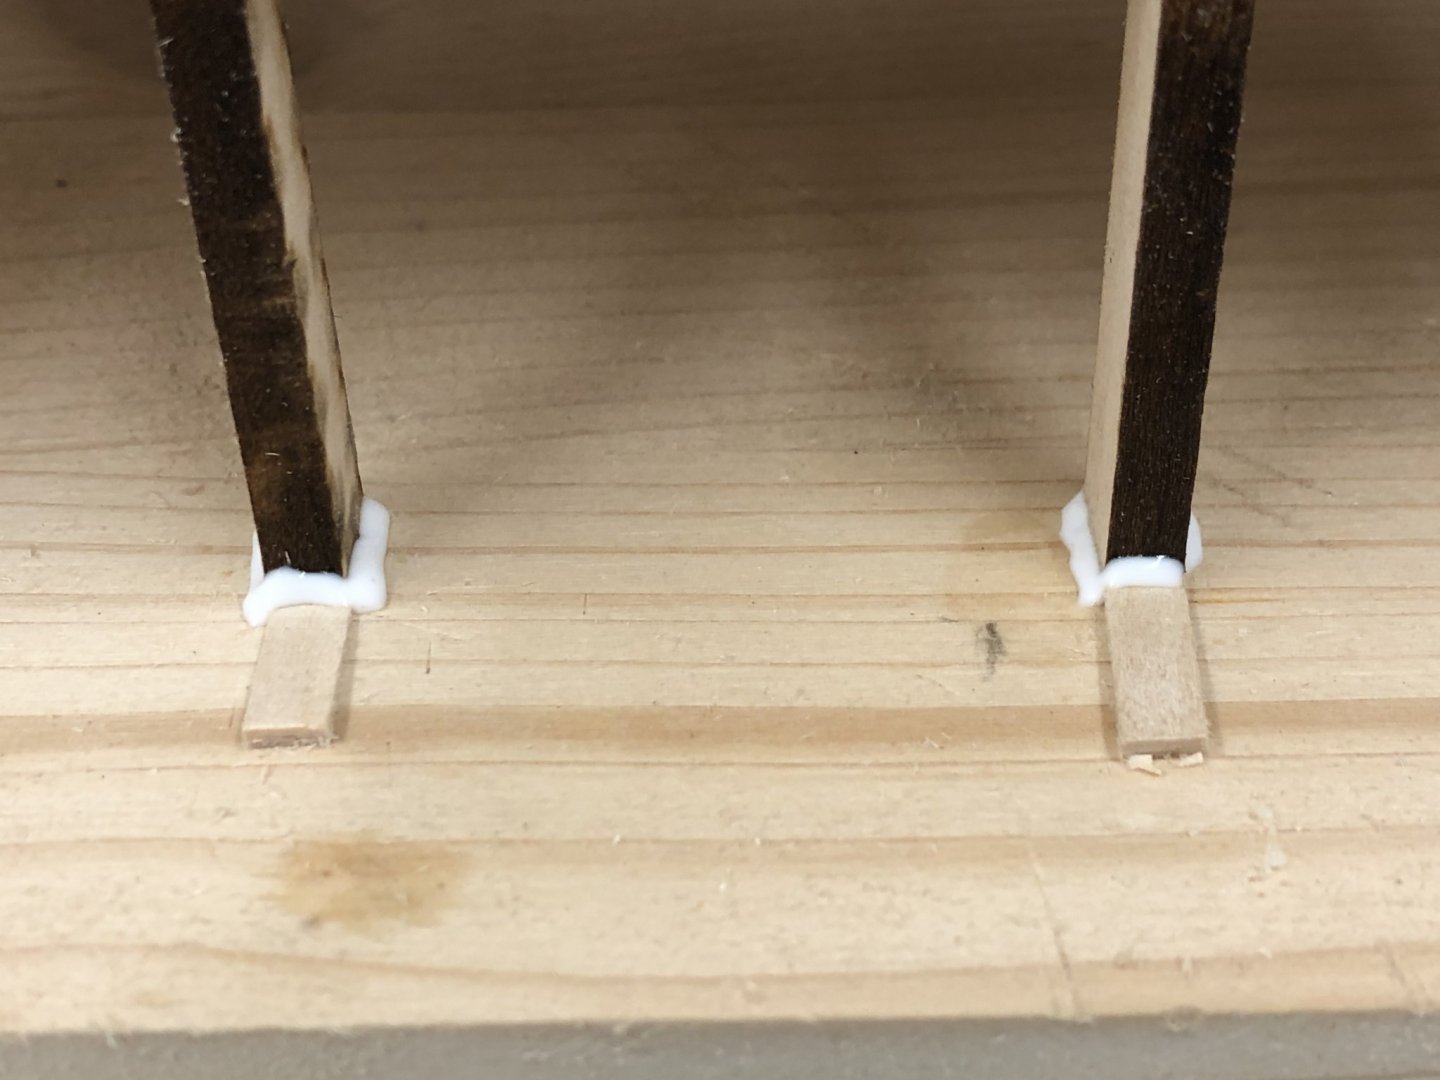
With the decking completed it is time to glue the hull to the build board. As might be expected, less than half of the bulkhead extensions touched the build board when the hull was inverted. I checked each one using an Xacto knife and marked those that were in contact. I put a dollop of glue on each one, inverted the hull, made sure it was straight on the build board and added weights (storage bags filled with BBs). Then went back (alternating sides to avoid putting any twist on the hull) and added shims and glue to all the bulkhead extensions that did not meet the build board. So here is the hull glued to the build board. I will let this set overnight to make sure all, the glue is set.

- 144 replies
-
- 4
-
-
- charles p notman
- finished
- (and 1 more)
-
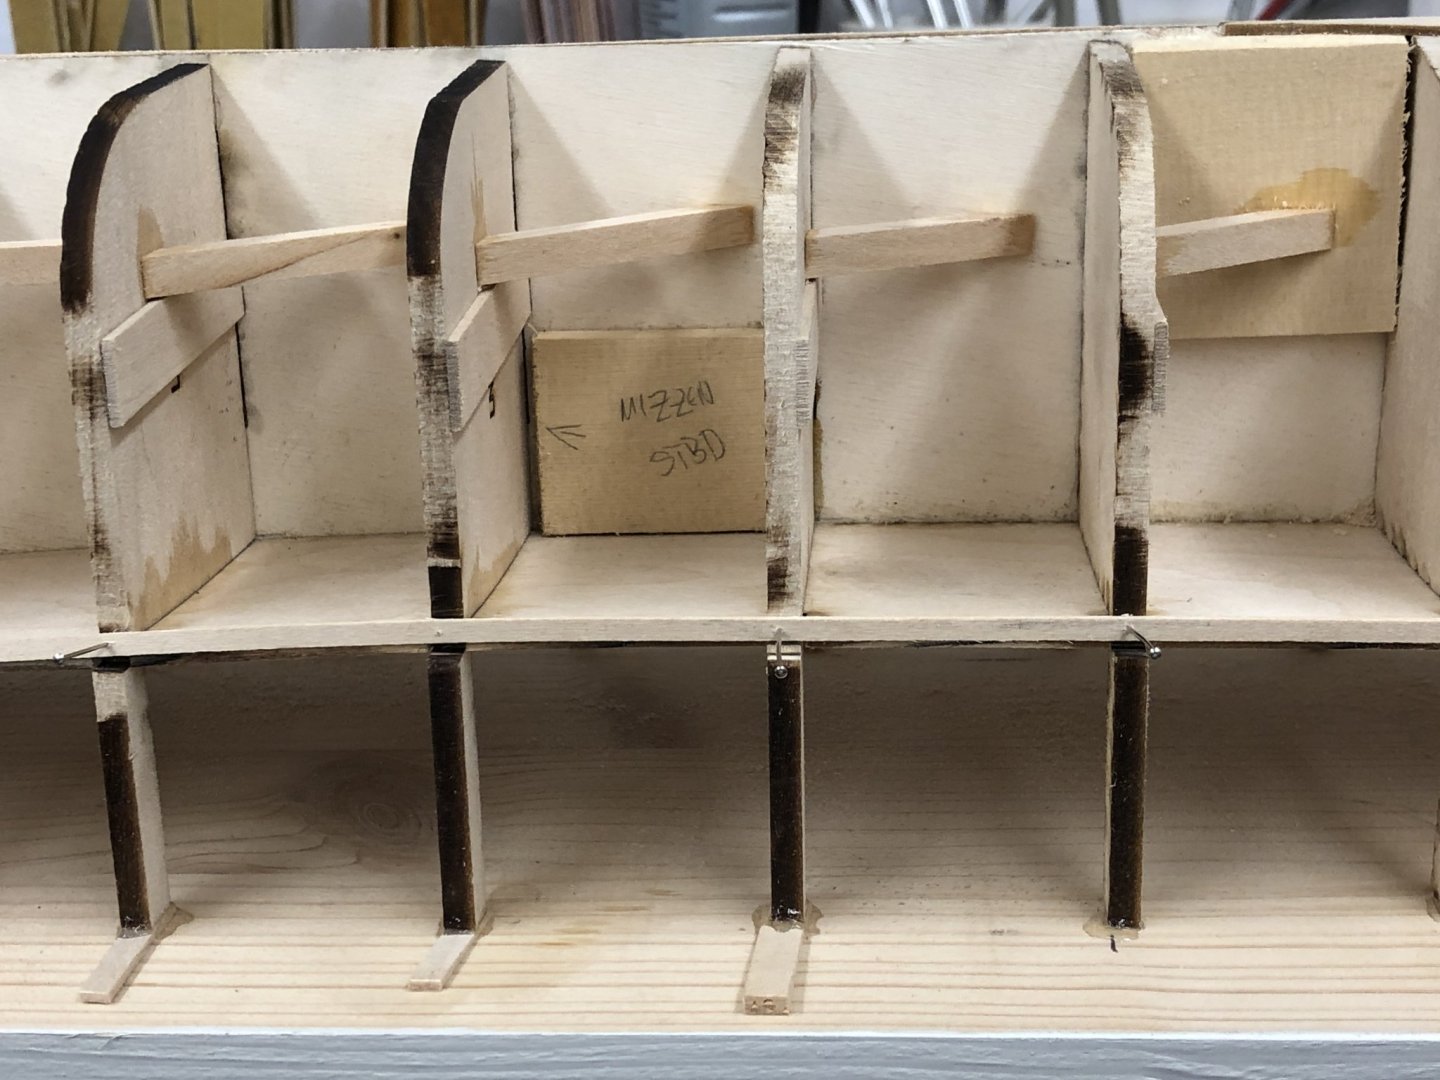
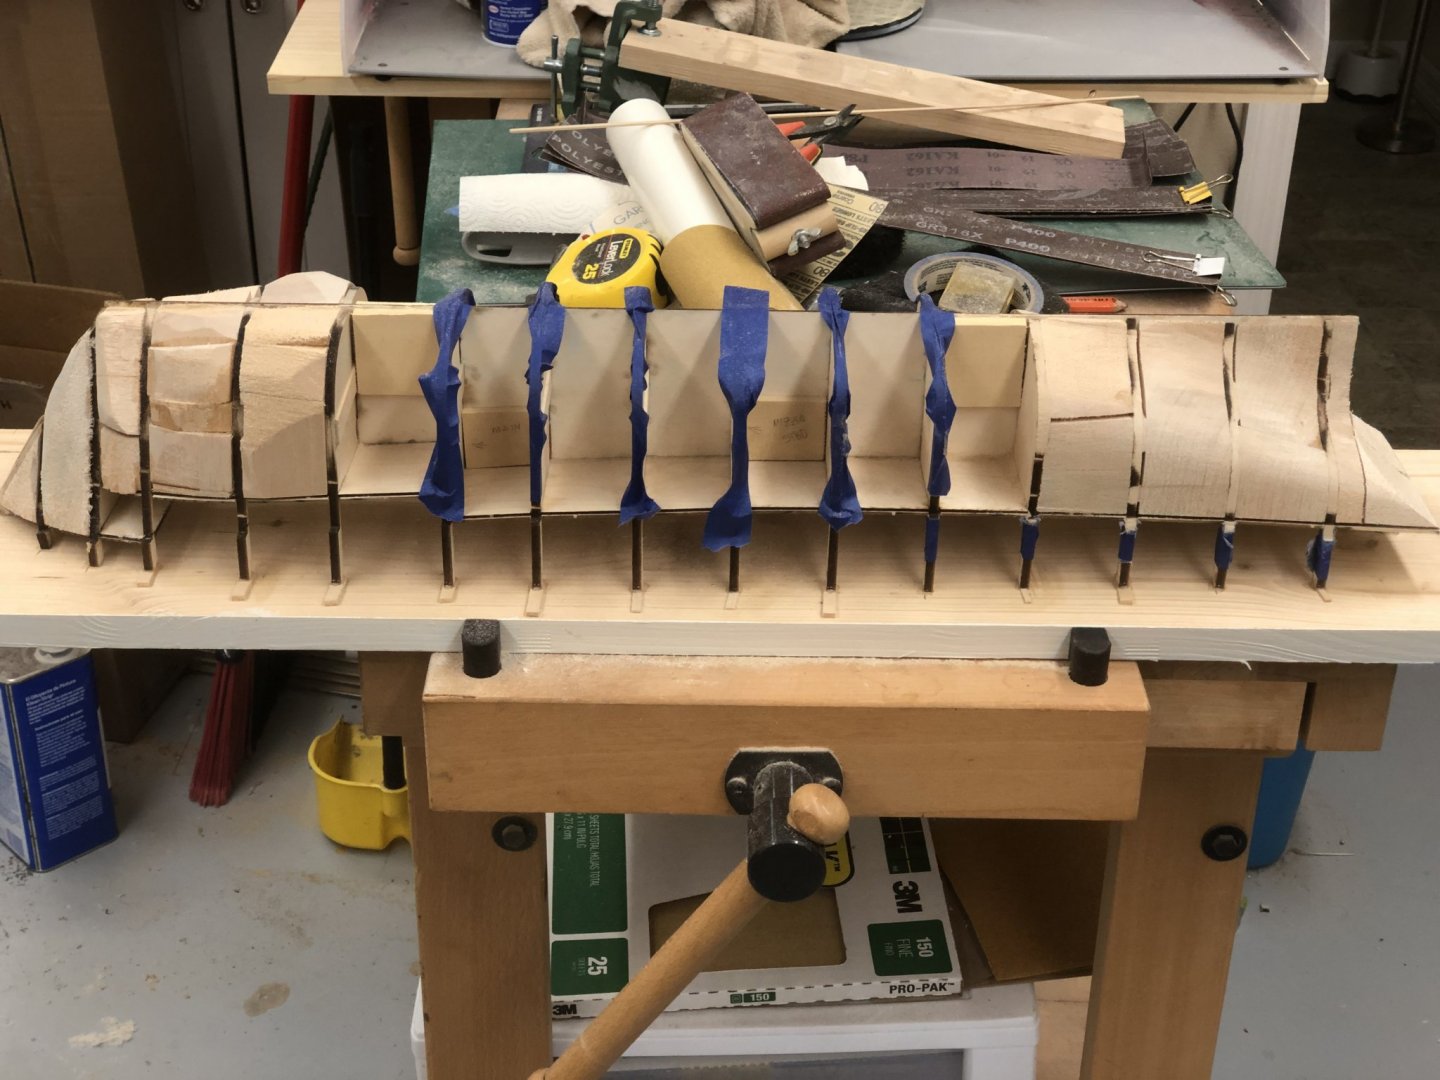
The replacement poop decking piece arrived today and I got both sections glued on. Tomorrow the hull gets turned over and glued to the build board and the fun really starts - fairing in the balsa fillers and the bulkheads. I did not try and take the laser char off the bulkheads as this gives a good indication if you have "touched" a particular bulkhead or not. I plan on putting masking tape over the center bulkheads while I fair the filler blocks so I do not inadvertently grind one down while trying to get a filler block fair. Here is the hull with the final piece of decking weighted down while the glue dries.

- 144 replies
-
- 5
-
-
- charles p notman
- finished
- (and 1 more)
-
Thanks Nic - I hope to keep exposure to sunlight to a minimum. Maybe I should ask for a "blue tint" to the glass in the case since most interior lights these days are LEDs which have considerably more "blue" in them than an incandescent.
-
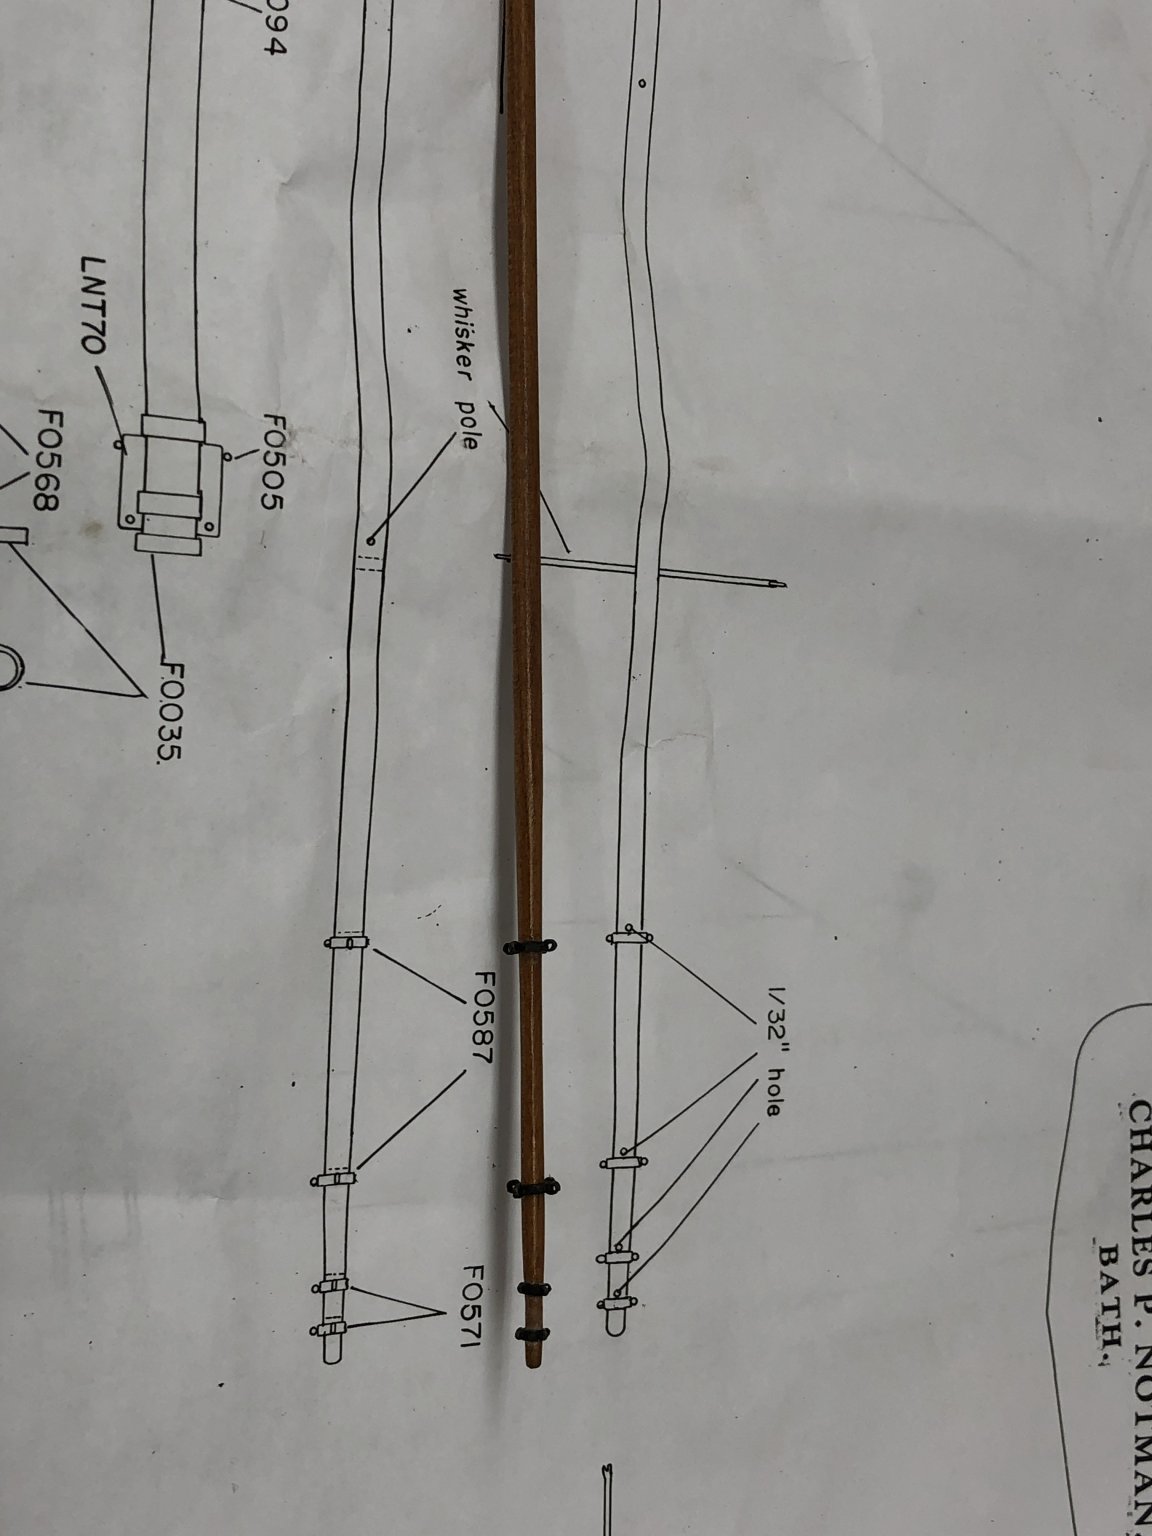
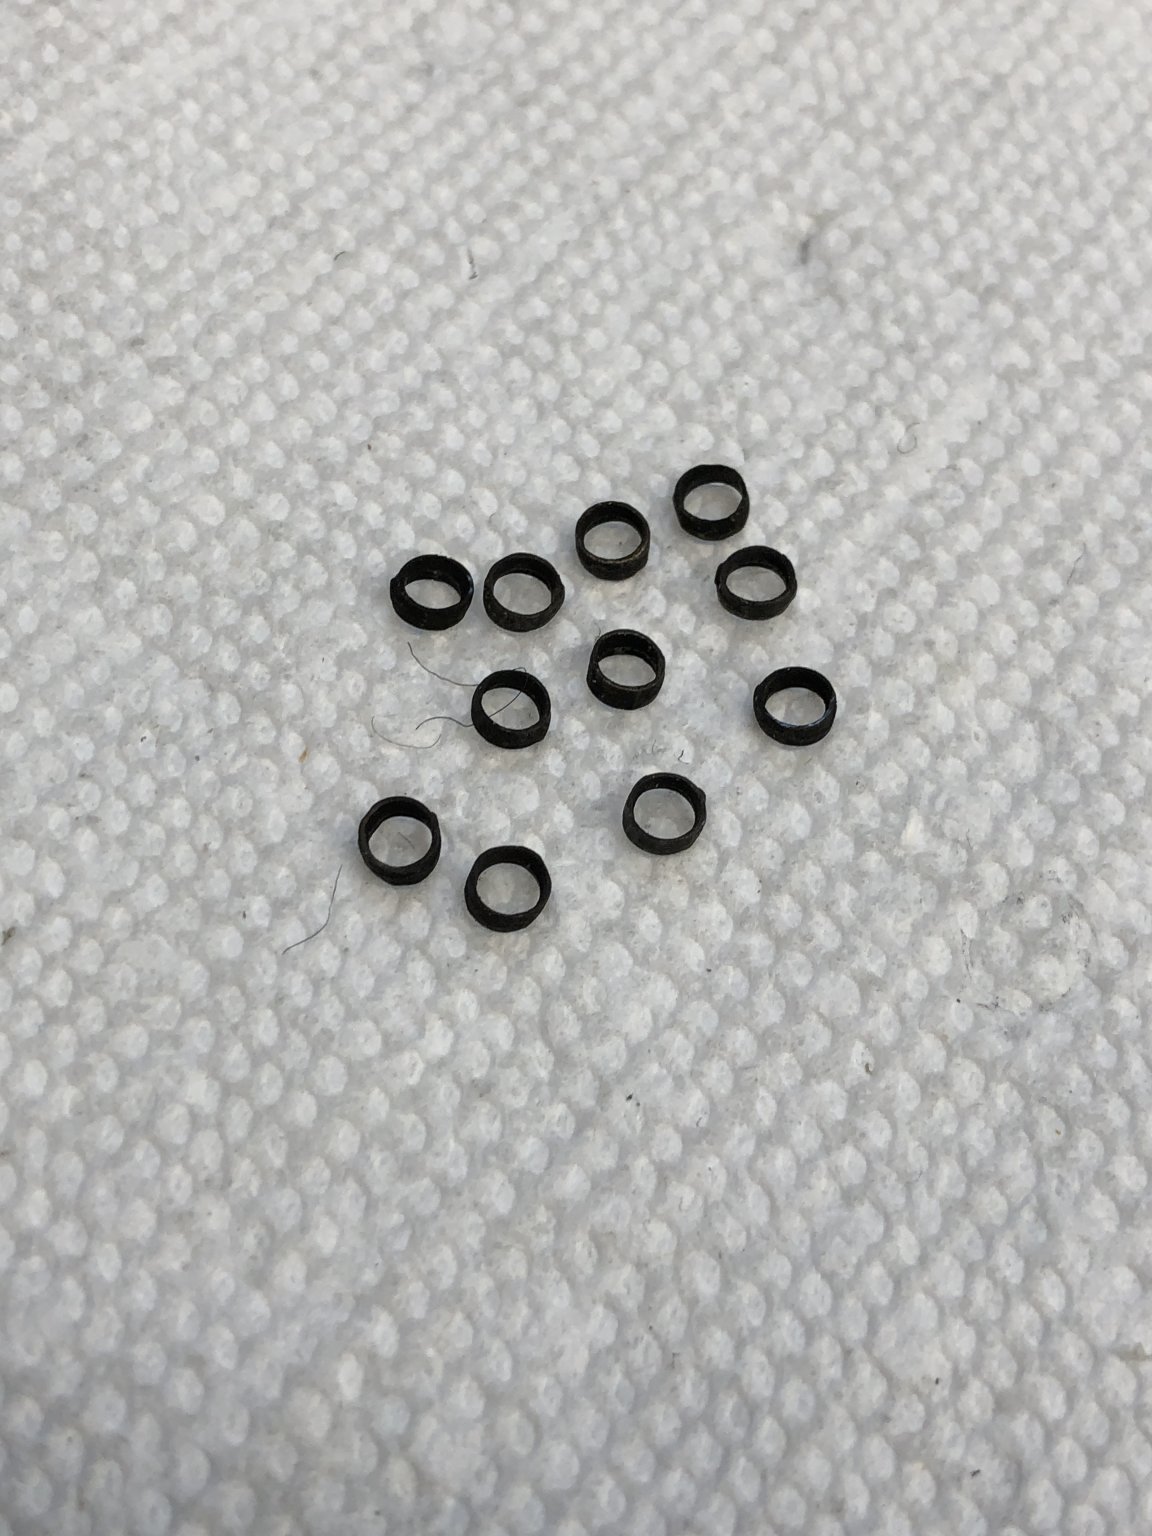
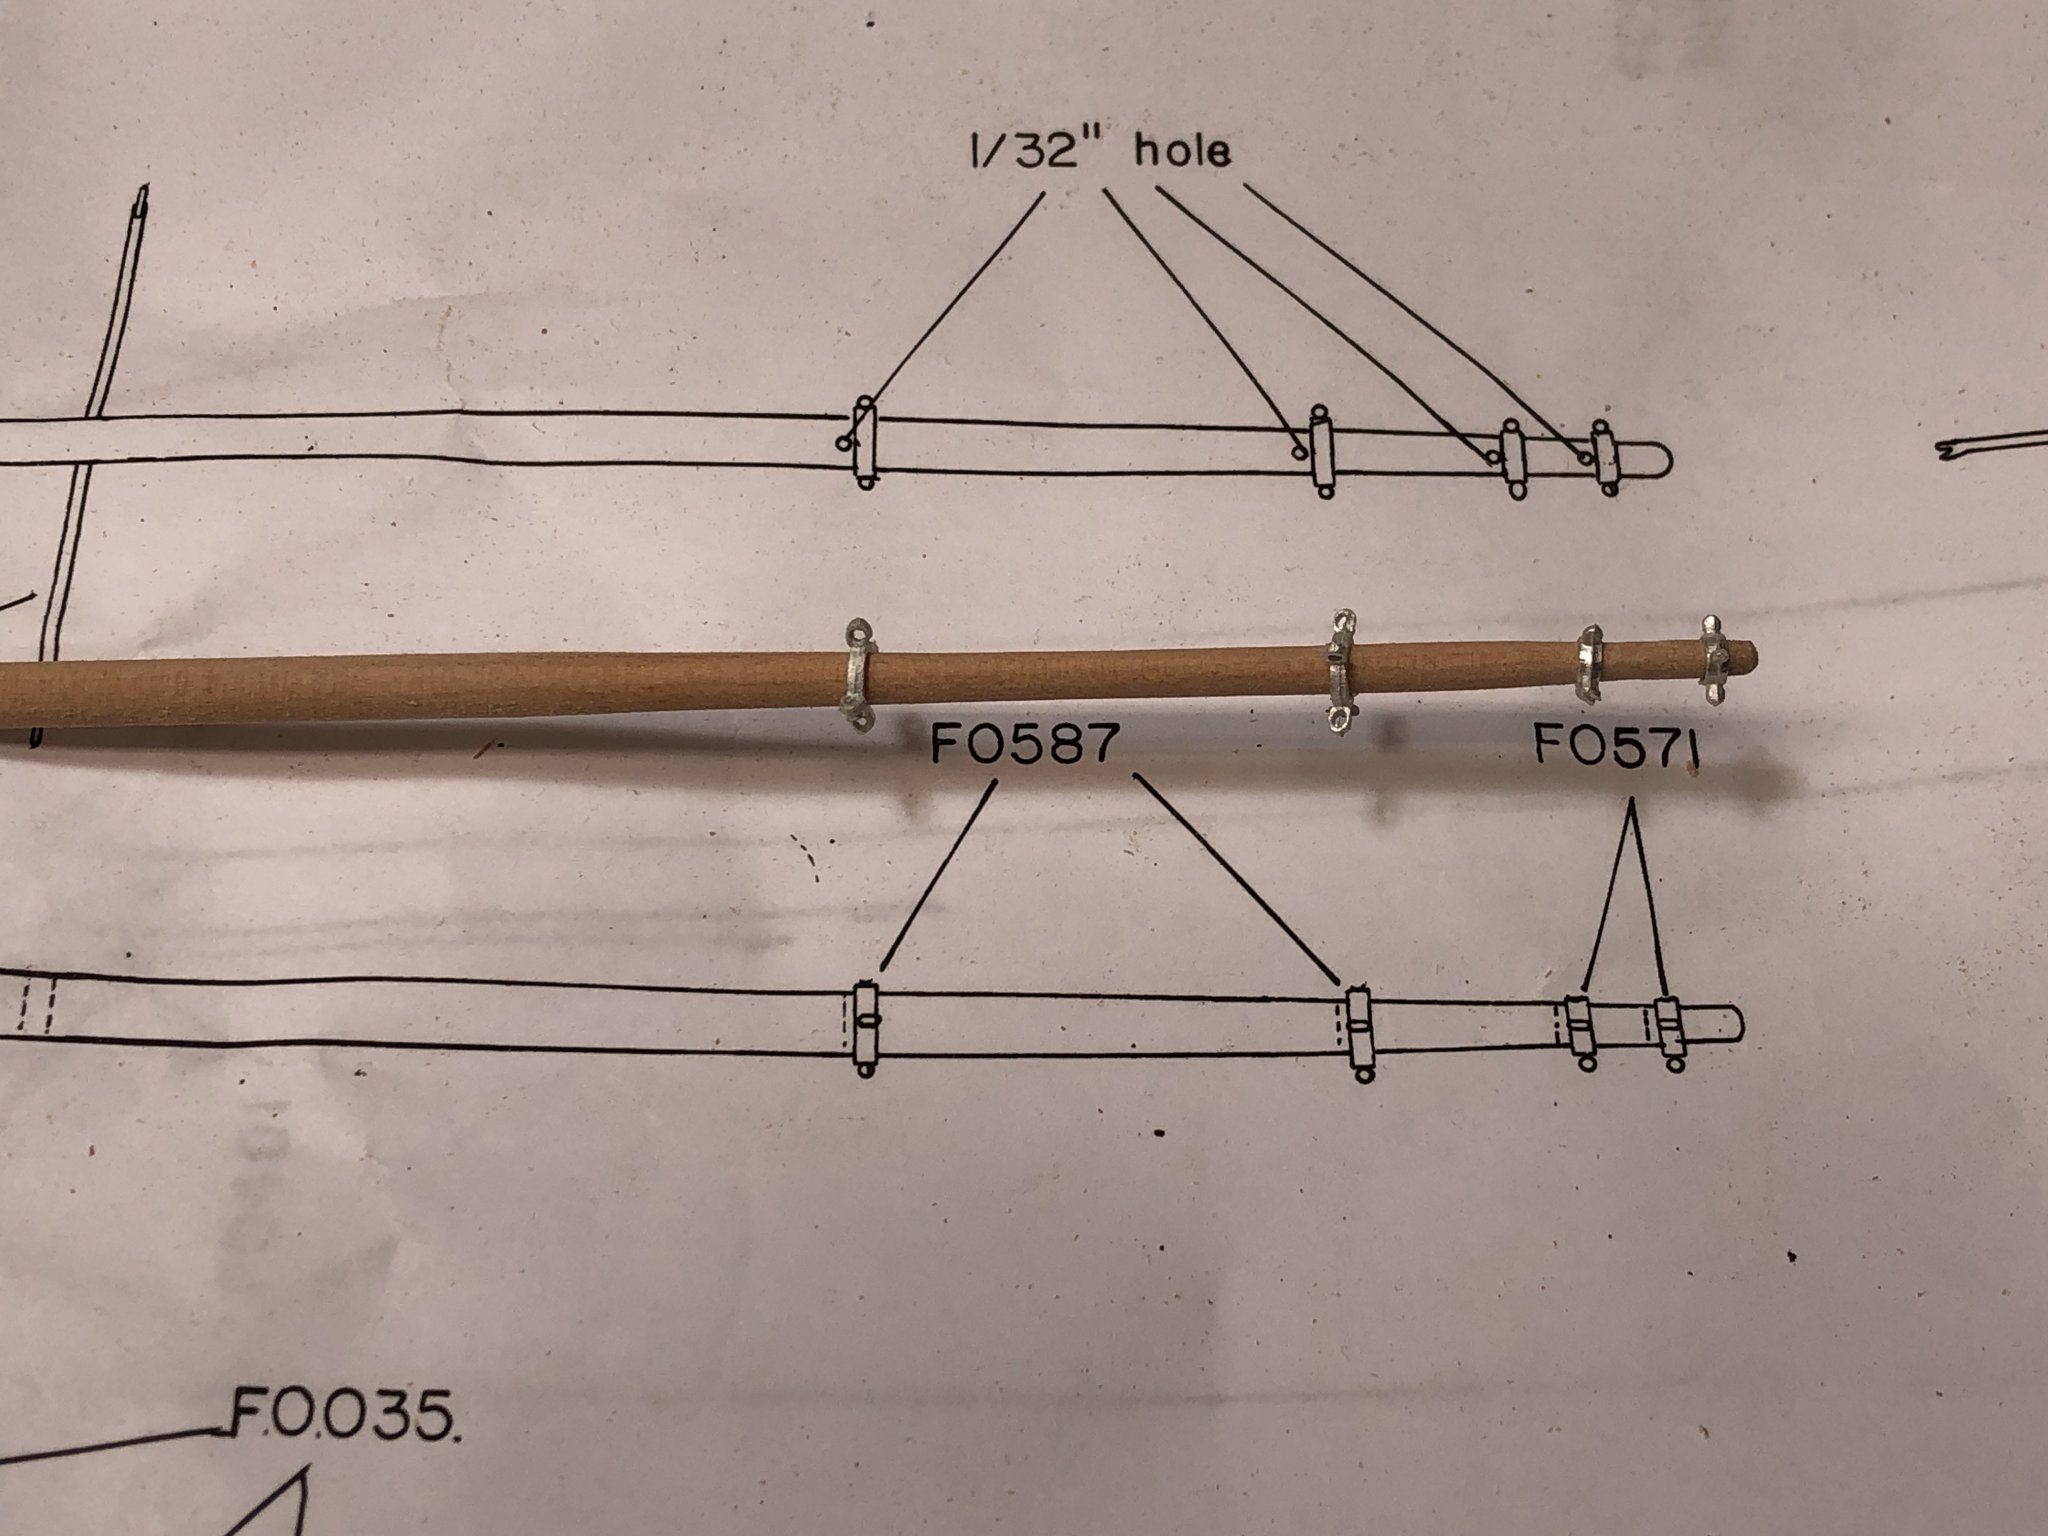
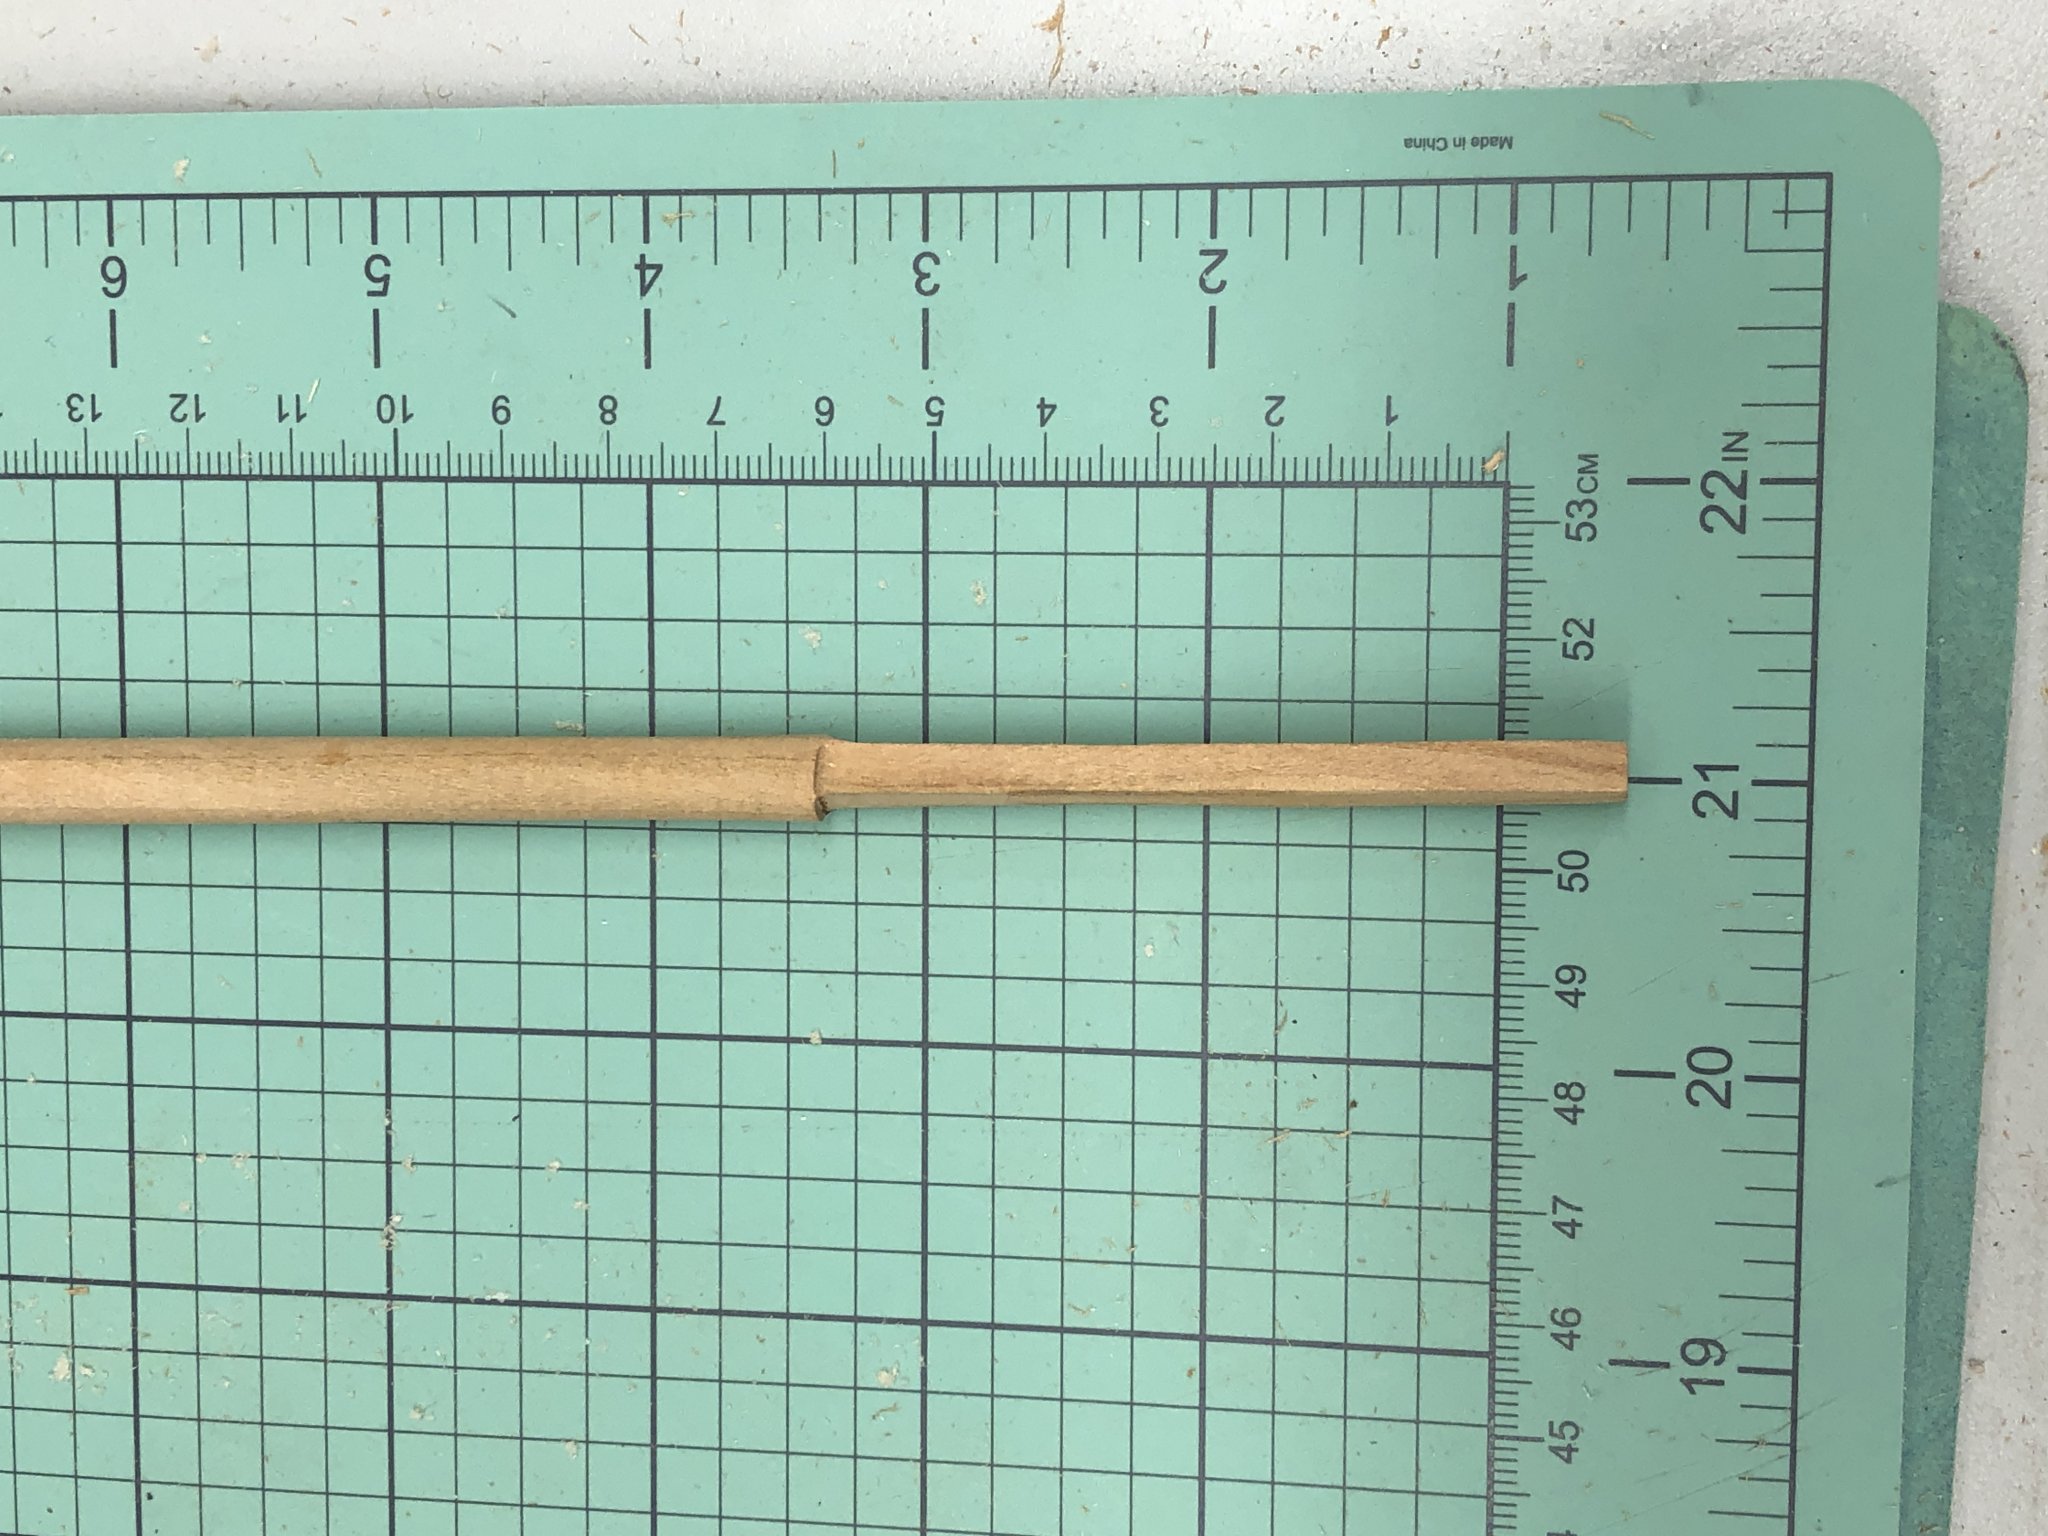
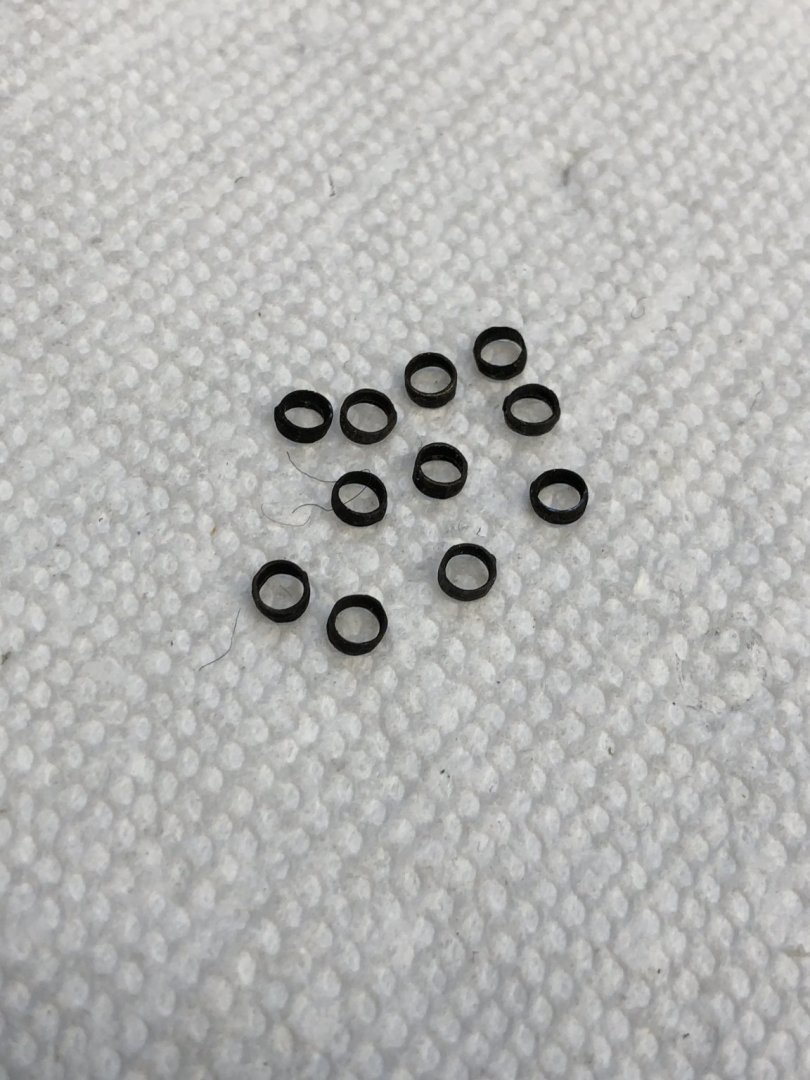
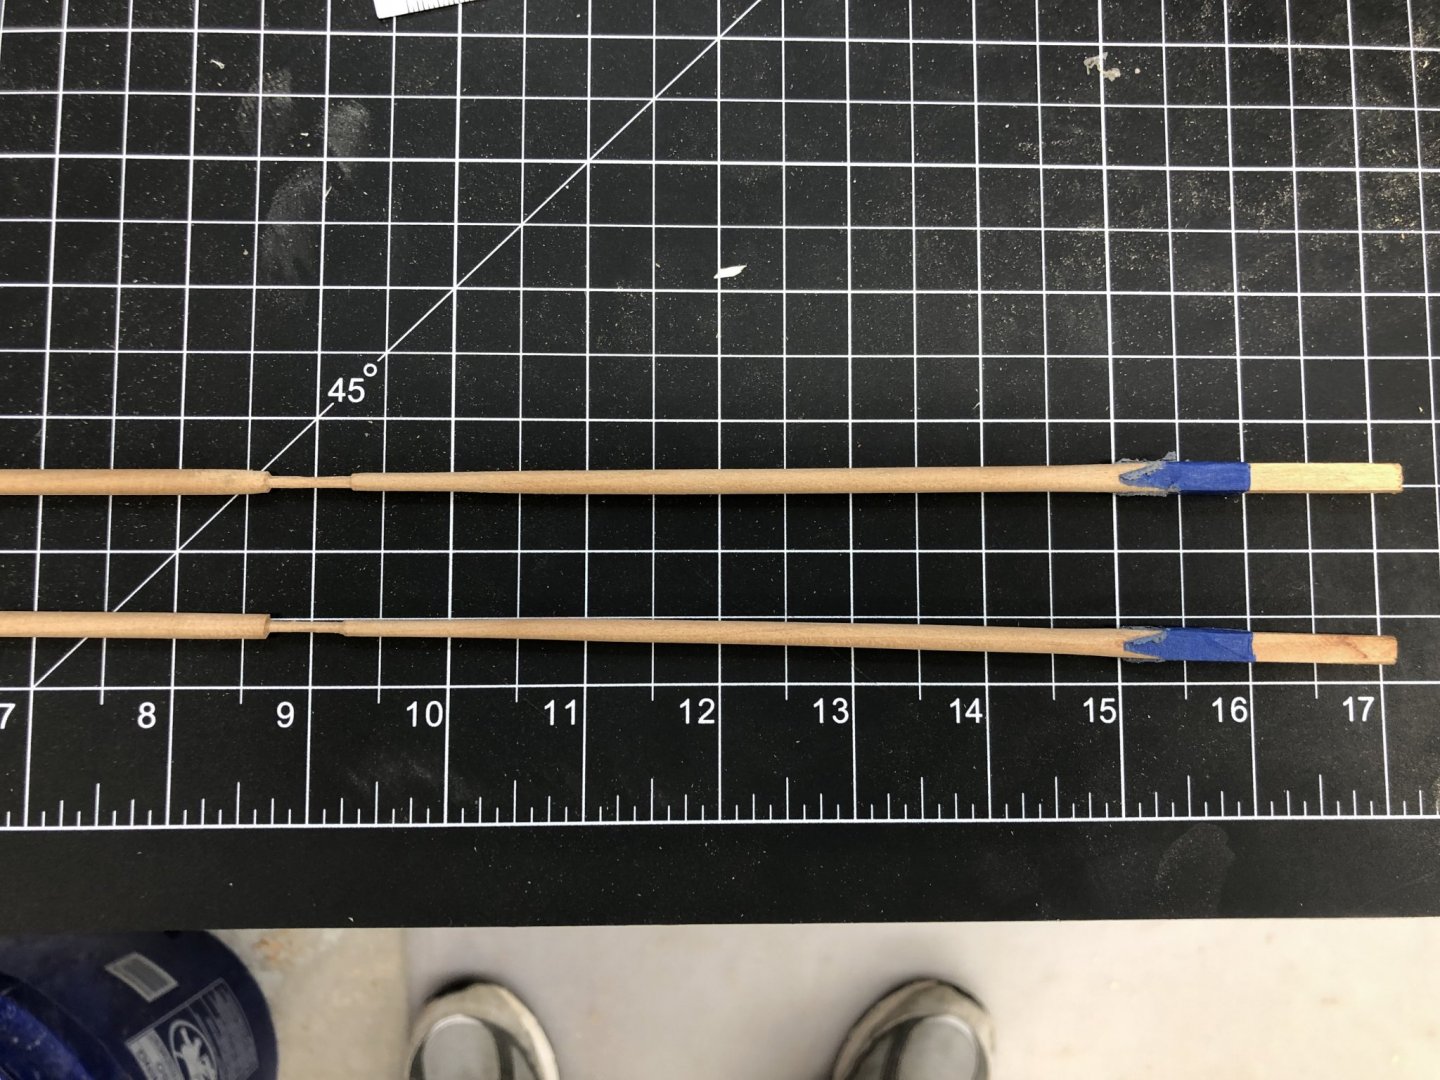
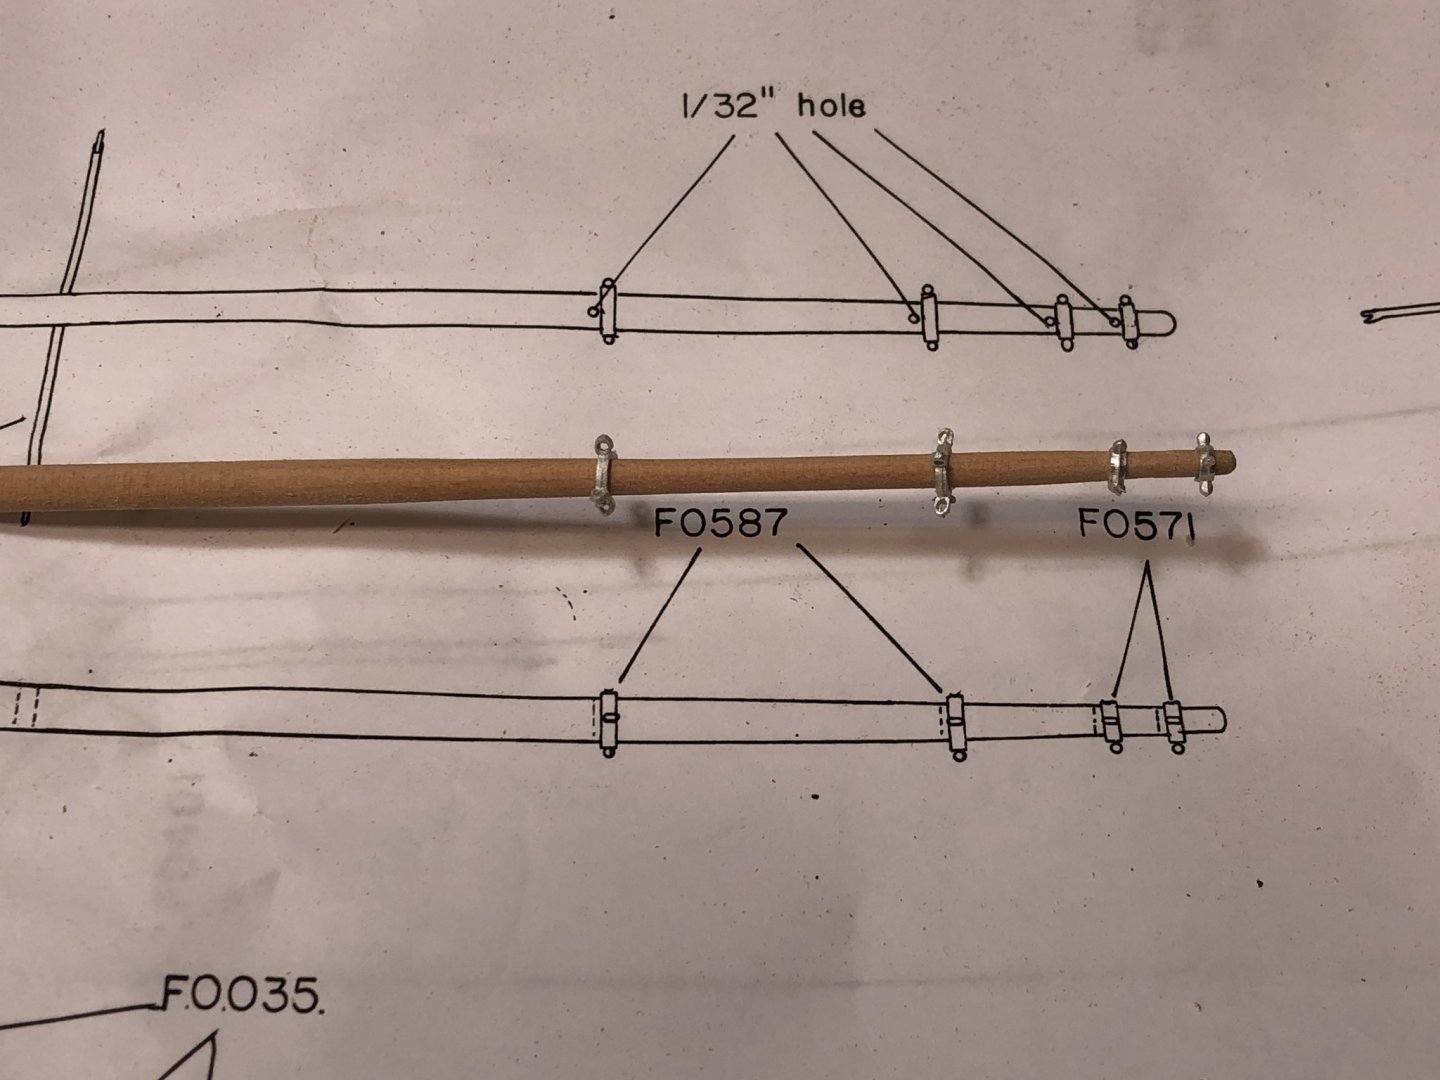
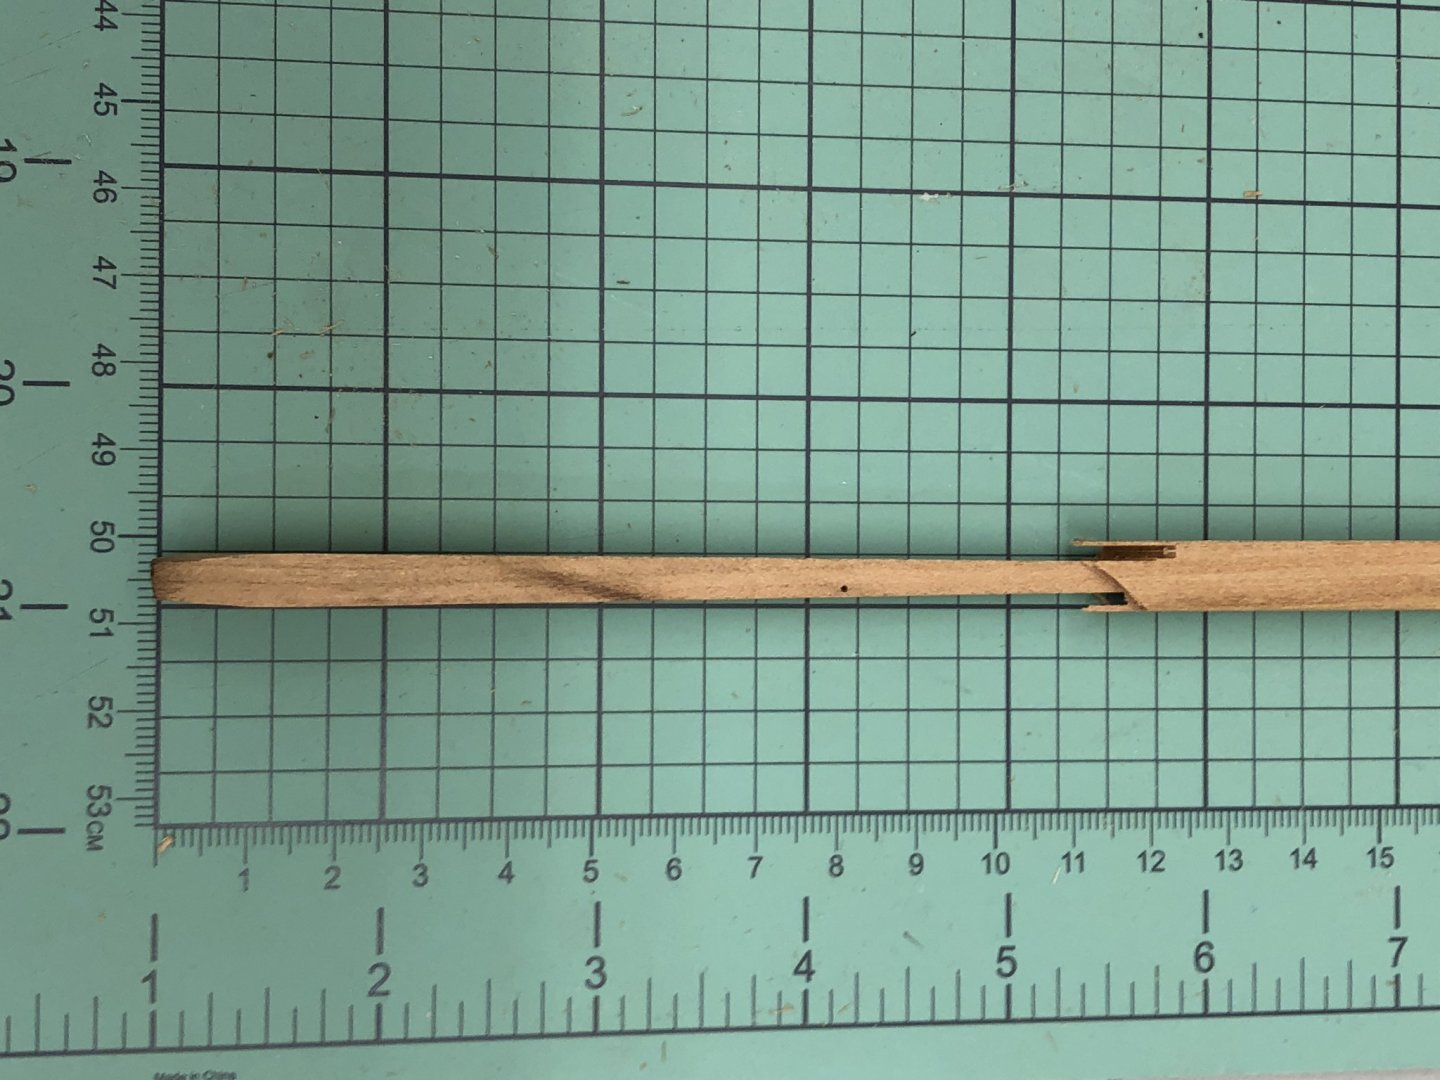
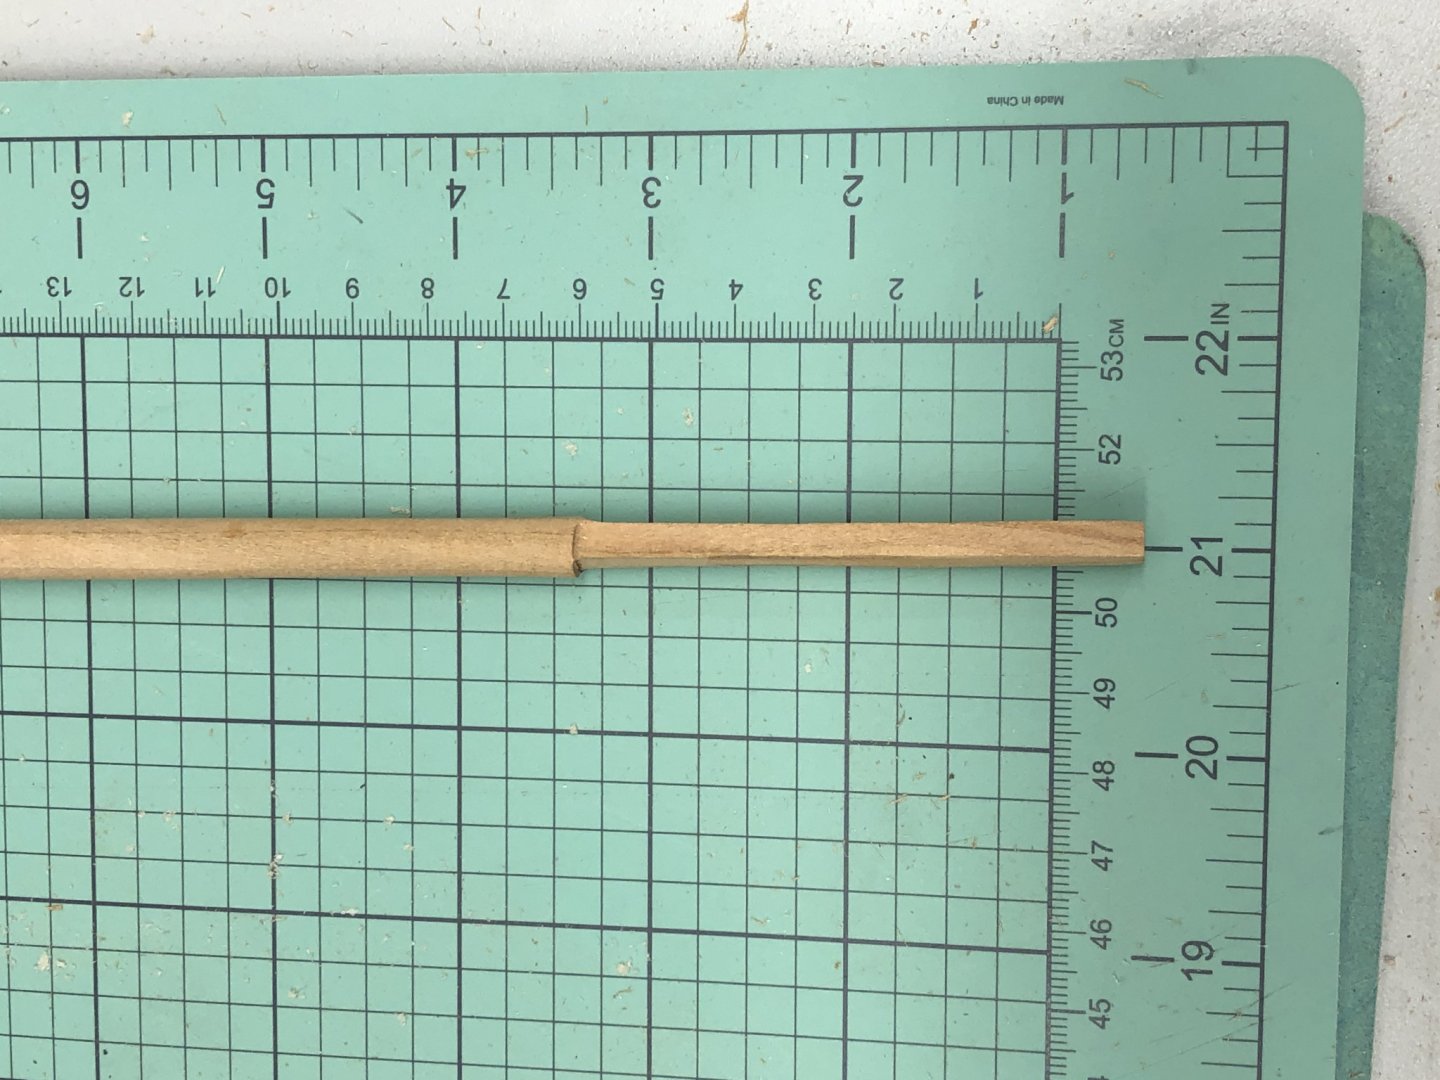
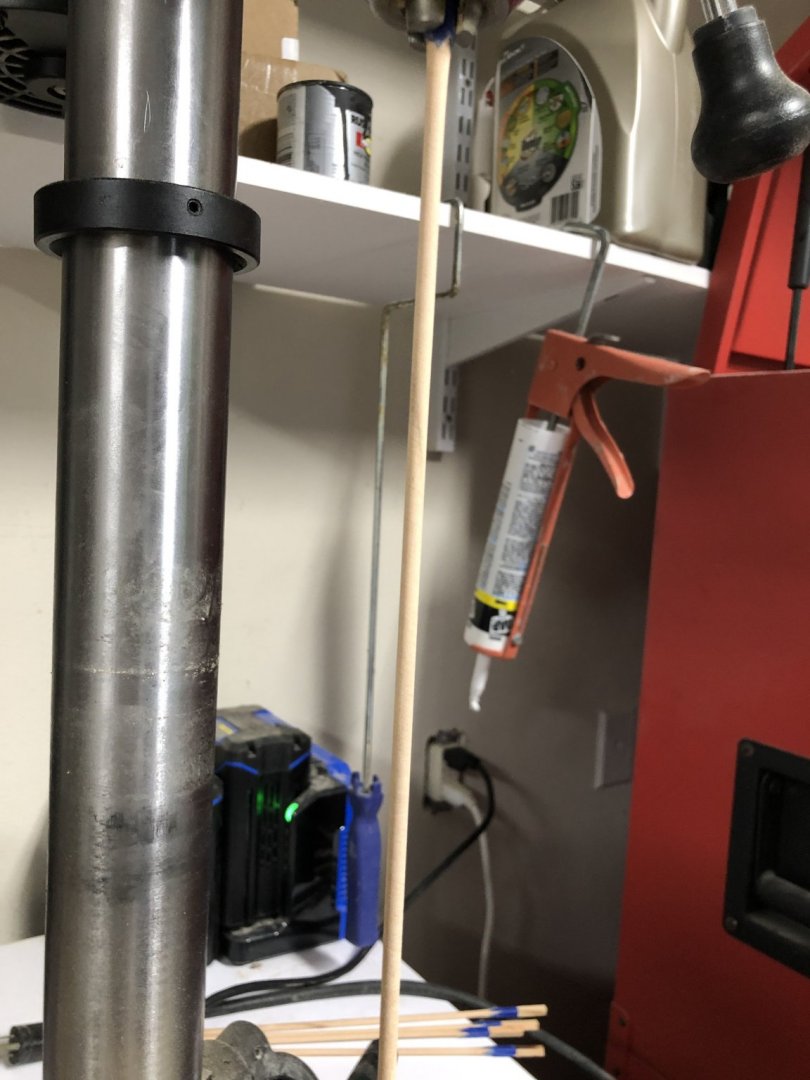
I took the 3/16" "dowel" that I created and used the four 'bands" that are speced on the drawing to shape the jib boom. The drawing shows that the two outermost bands are the same diameter (1/8") which the inner two are 5/32". That means, essentially no taper between each set of bands. Some what of a challenge especially if you tried to do it in a "power" environment. I chose to do it "manually" and here is what Im came up with. The only issue is the first of the larger bands - the spar is too small where it needs to be - not dramati ally but enough that it will take thick CA to glue it in place. Speaking of the smaller bands - there are a total of 16 provided for the jib boom and gaffs, and each has four "ports" which would support a line for some purpose. None of those holes are actually a hole. In most cases there is a "dimple" where the hole should be but each and every one has to be drilled out to be useful. So 16 X 4 = 48 holes; #75/76 size) that need to be drilled in very small, Britannia metal pieces. Luckily I have a MicroLux drill press which makes this somewhat easier. I cannot imagine the frustration for those who would have to resort to a pin vice to drill these out - hope for a really sharp #76 drill bit - but you will probably be disappointed.
- 144 replies
-
- 6
-
-
- charles p notman
- finished
- (and 1 more)
-
I had hoped that changing from basswood to Cherry would provide the needed "darkening" on the spars to replicate the brown paint wash of the prototype. Silly boy. I took a sample of the Cherry and put three coats of Wipe-on-Poly Satin on and still was not as deep a color as I wanted. So I resorted to staining the Cherry wood with Cherry stain (from MinWax). Here are the four lower masts, the bowsprit and the jib boom after staining but before the Wipe-on-Poly treatment.

- 144 replies
-
- 7
-
-
- charles p notman
- finished
- (and 1 more)
-
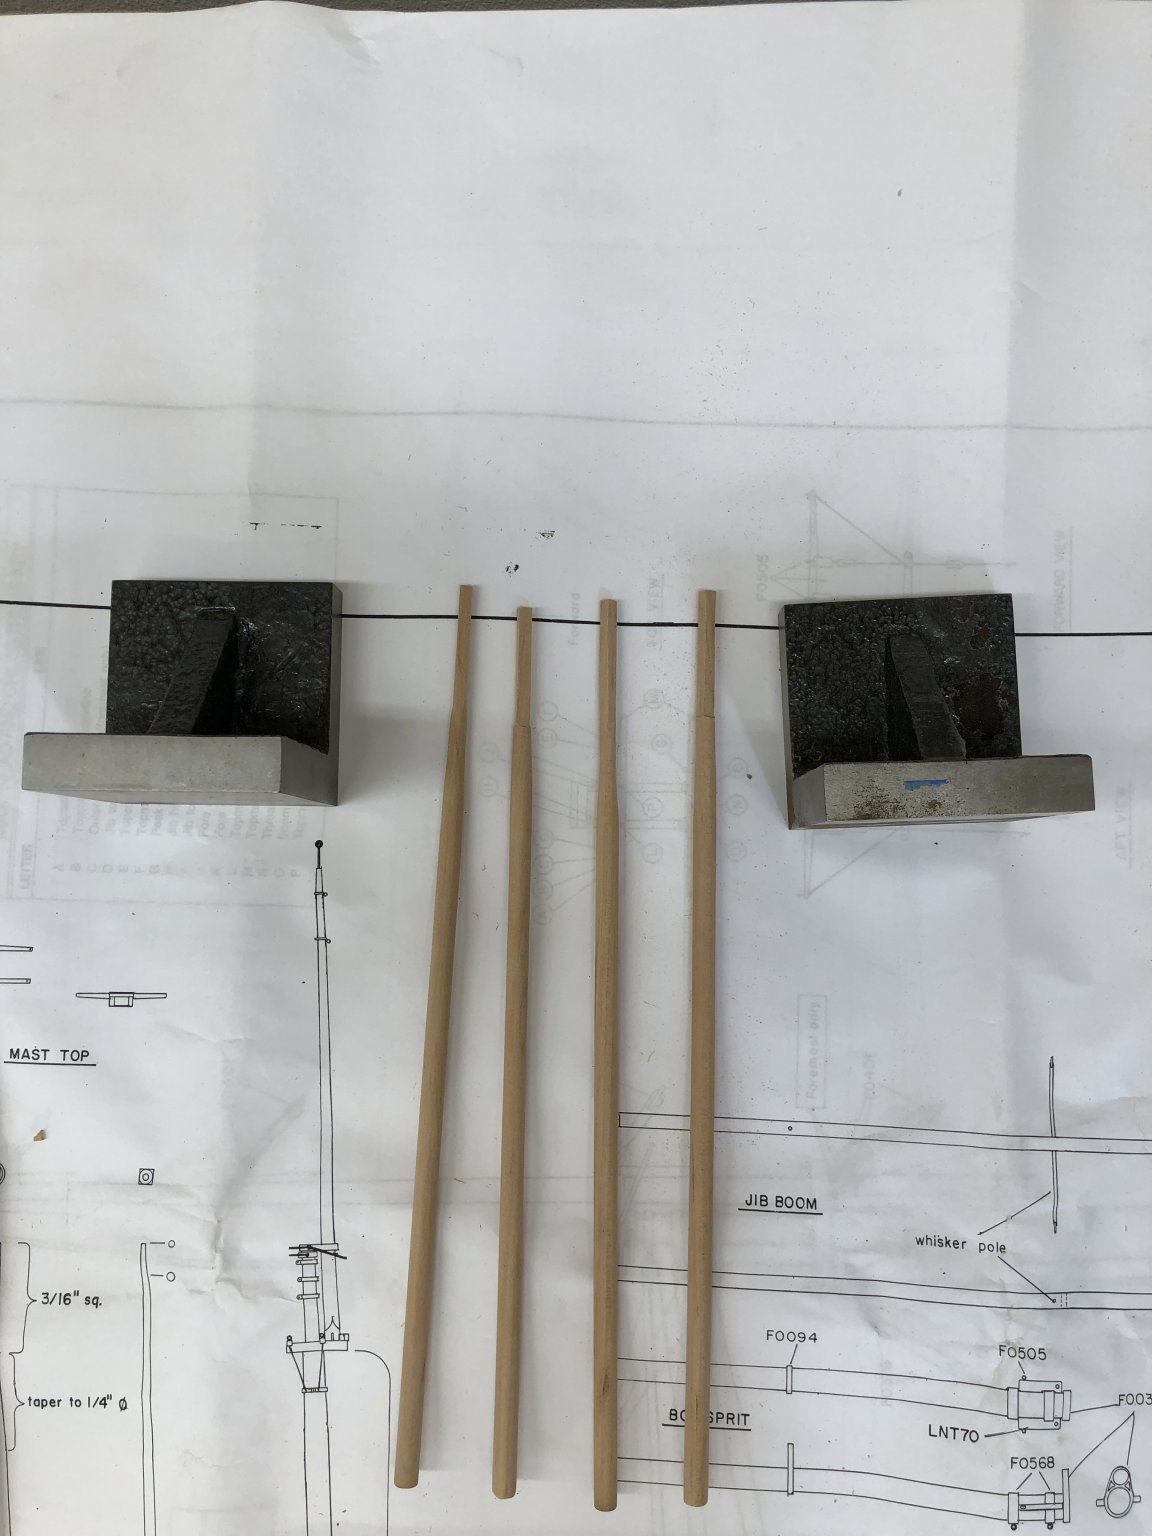
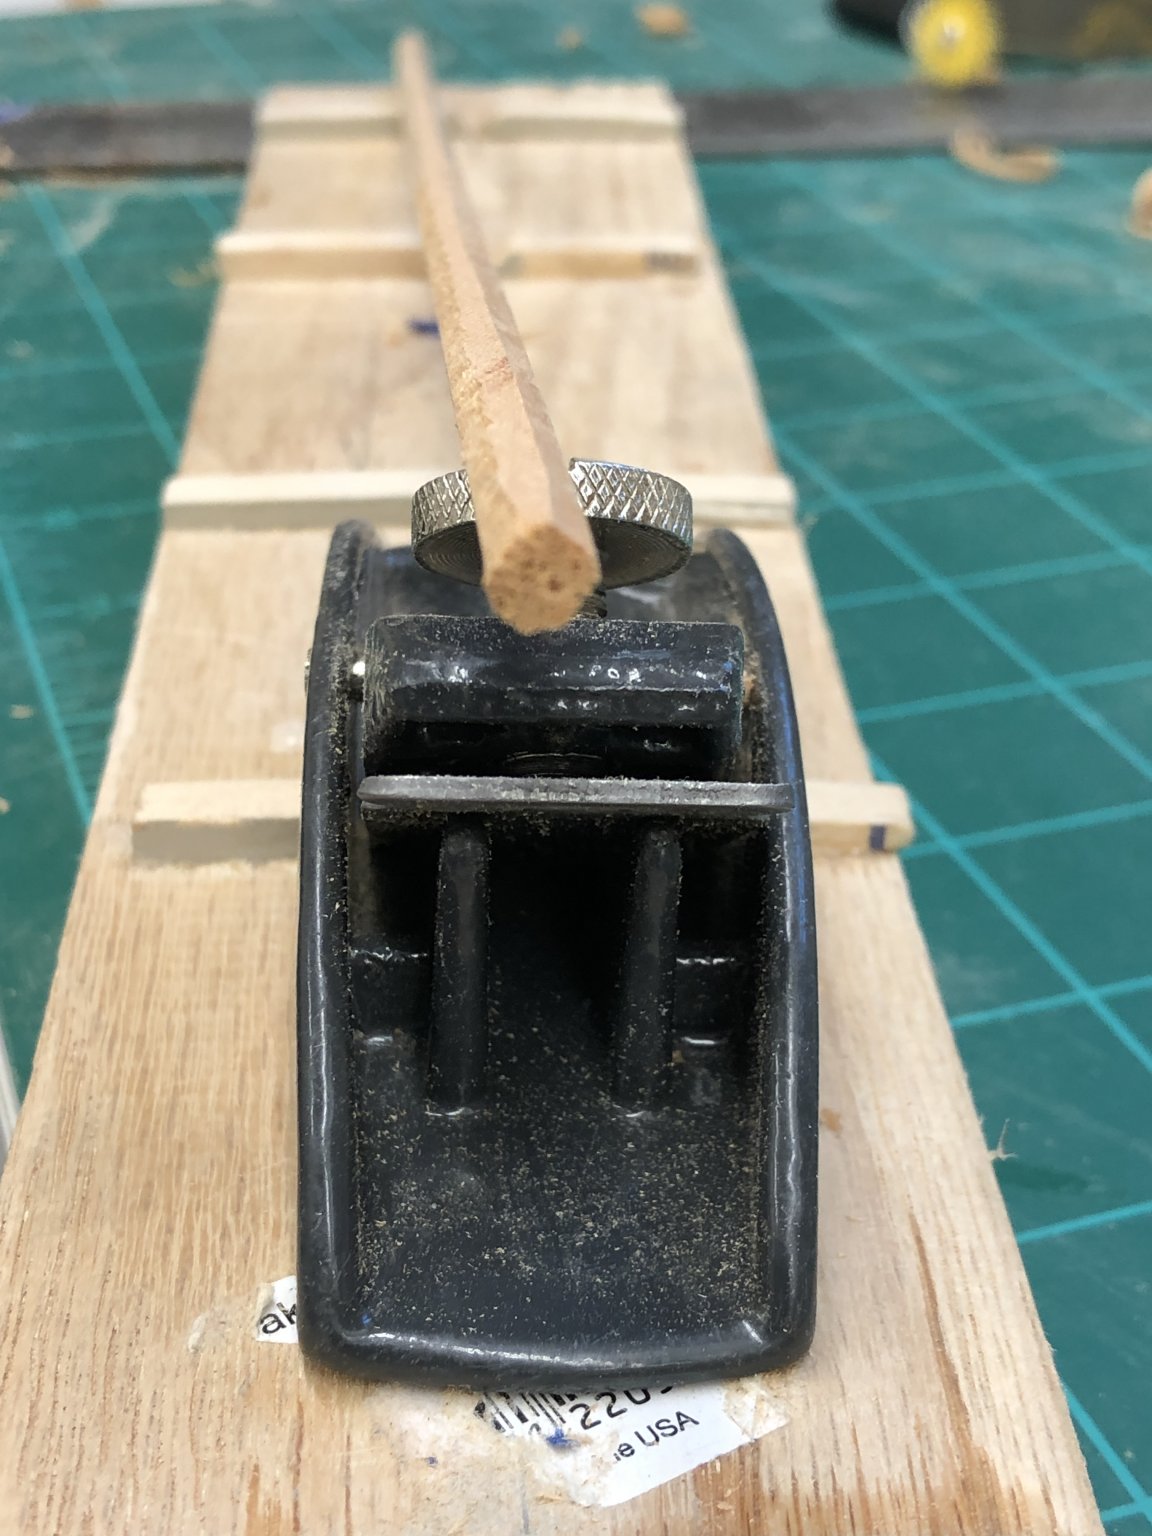
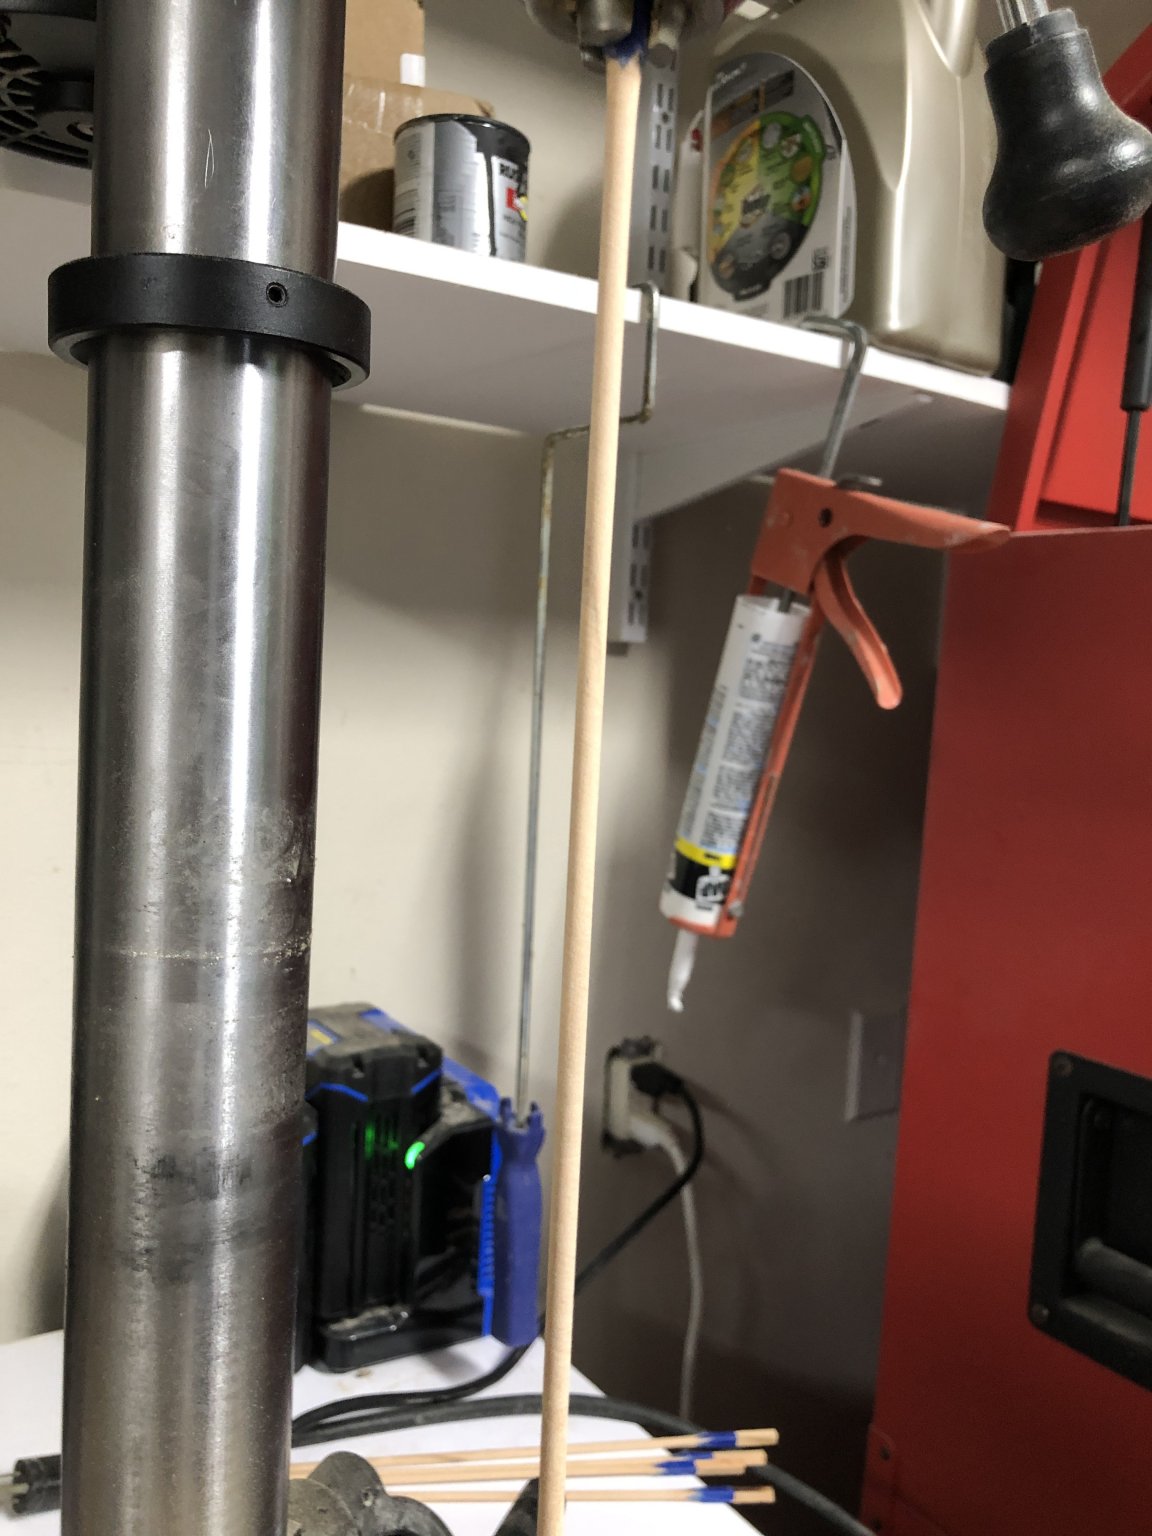
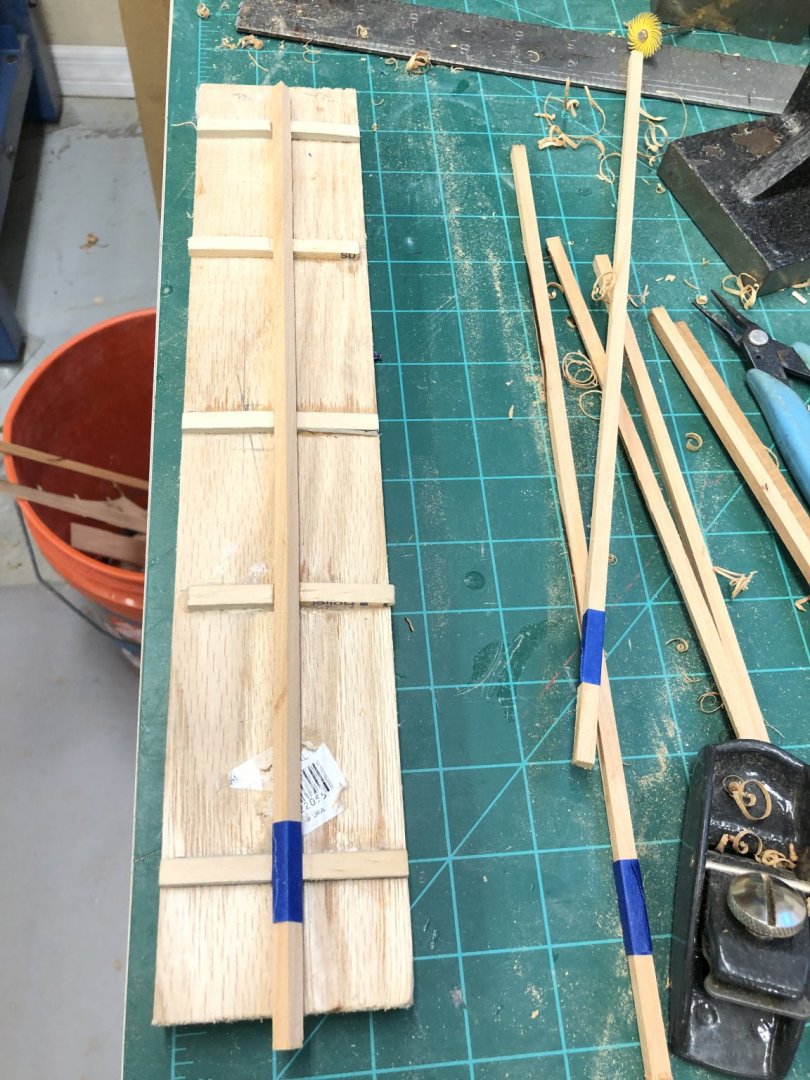
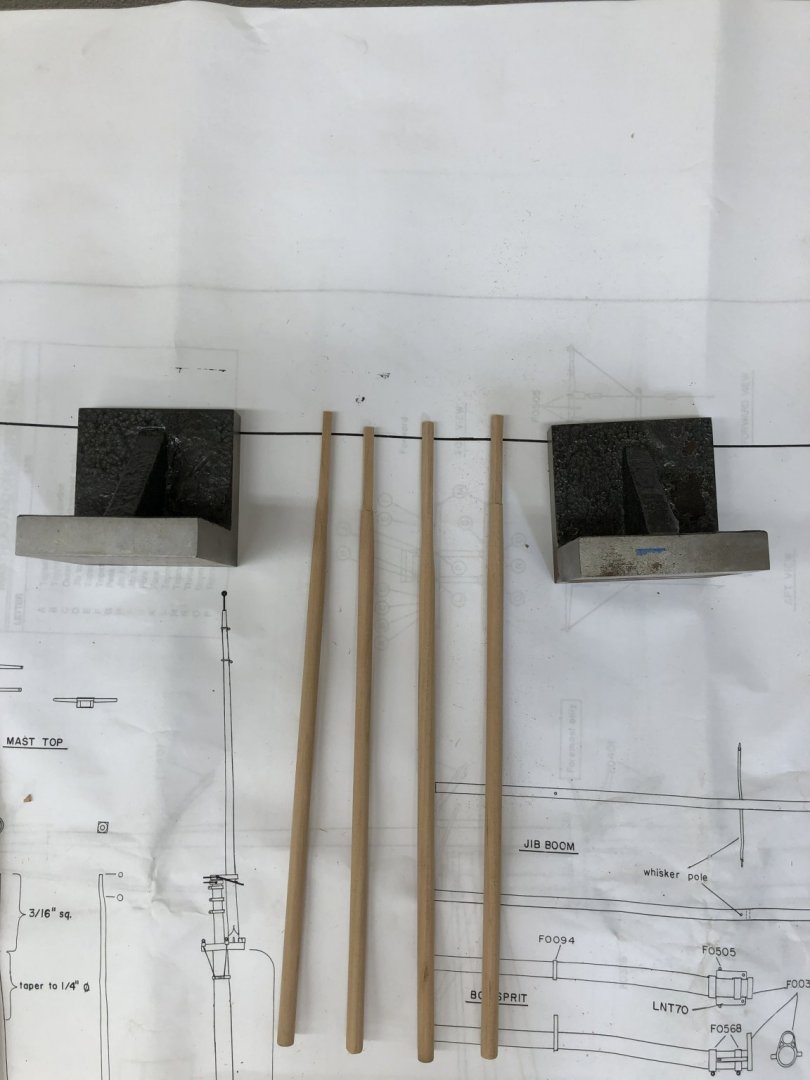
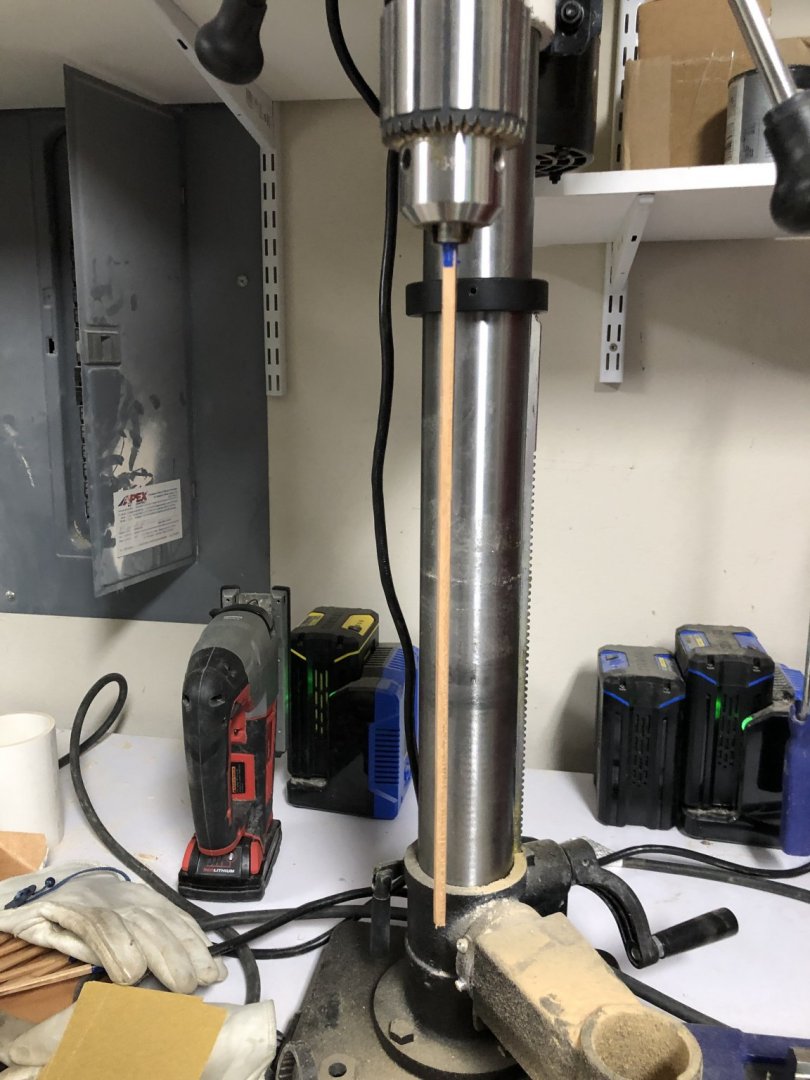
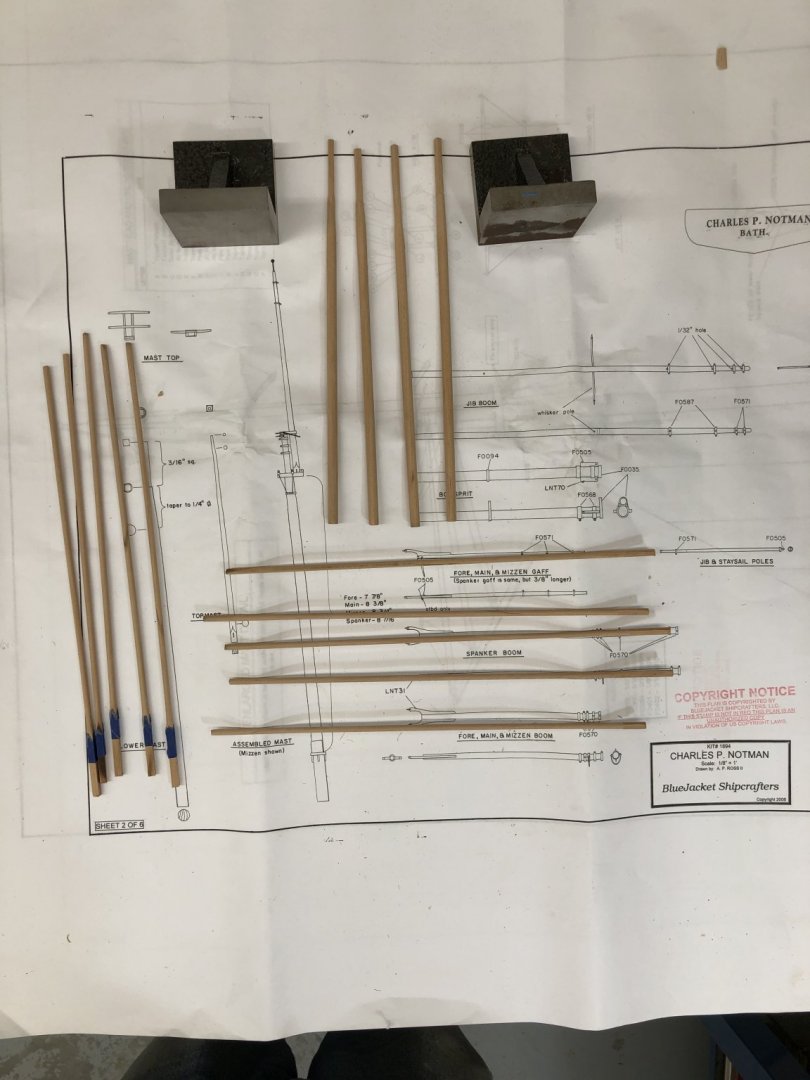
When I decided to do the lower masts in Cherry I had not looked ahead (carefully enough) to realize that all the spars are "painted brown - actually washed in diluted brown paint on the prototype. So, after getting the three lower masts completed I had to generate Cherry to provide the four topmasts, four booms and the jib boom (all starting with 3/16" material (dowels for the booms and jib boom and square for the topmasts). I have not yet addressed the gaffs which are 1/8". Since the lower masts are mostly 5/16" without taper but has a substantial 1/4" square section at the top (1 3/4" per the instructions, 1 1/2" on the drawings), I started by creating the round lower part from a square piece of Cherry that I used the thickness sander to get to 21/64" (the Byrnes thickness sander can get this accuracy - the thickness did not vary more 1/64" through the entire 12+ inch piece I fabed). I used a jig I made for fabbing the Niagara lower masts from Yellow Cedar - it is pictured below. I clamped it to the desk to keep it from moving and used a 3" block plane to take it from square to octagonal. Then I used my big Jet drill press as a poor man's lathe to smooth the octagonal to round and down to the 5/16" speced diameter. That leaves a still square section at the top that needs to be reduced from the nominal 21/64" square to 1/4" square (and in the center of the circular part). I had two ideas for doing this, one involved using the table saw (with micrometer adjustment) to carefully remove the required material. It would take four passes (once I got the rip fence in the right location), one for each face. This worked like a charm on the first two faces but section being cut lacked lateral support for the final two cuts and the square section looked a bit "off". Here is what this looked like. The part closest to the round section is close to the required 1/4" but it does have some taper and there is considerable "clean-up"at the transition to round. So I decided not to risk any more of my 5/16" round blanks going that route. My second method was to use the disc sander to take the square section down to 1/4". That is not without difficulties (getting the piece against the sander sufficiently evenly to get the same amount removed from the top and bottom of the face among them). I stopped with the disc sander a few 64s from 1/4" and used sanding sticks to get the rest of the way and try and get the sides to remain (or return) to square (as opposed to rhomboid). Here is what this looked like before the taper to the 5/16" round was done. I used the sanding sticks to taper from the 5/16" round to the 1/4" per the plans. This worked and I was able to fab four lower masts in a few hours. Here they are without any finish and not yet cut the lengths speced in the plans. With the lower masts taken care of (more or less) I moved on to the topmasts and booms (including the jib boom). I used the same technique as for the lower masts (but took more pictures). So here is one of the top masts (I have masking tape to mark the area that is to remain square on the jig and what it looks like after being made octagonal (more or less). The square end goes in the drill chuck and a certain amount of care is required to get it in straight. Since there is no support (or restraint) at the bottom I found it a good idea to lightly hold on to the bottom when starting the dill press. I used 1200 rpm and 80 grit sandpaper wrapped around the topmast and applied pressure with both thumbs and as many fingers I could bring to bear and slowly moved up and down the topmast. After doing it several times I figured out that it took five transits of the length of the top mast top get to 3/16" round. I then went over the topmast with a piece of 220 sandpaper and called it quits for now. Here are pictures of before and after (although it is hard to tell the difference). All Anyone need a pile of Cherry sawdust? I went through a similar process to generate the five pieces of 3/16" dowel needed for the four booms and the jib boom. I did not attempt to taper any of these while they were chucked in the drill press as I need to carefully study the taper requirements and the provided hardware (for booms and jib boom) to make sure I do not taper more than required to get the hardware to fit. I will probably just do that tapering by hand. Anyway, here are the Cherry spars as they stand at the moment (I made one spare top mast "just in case").


- 144 replies
-
- 8
-
-
- charles p notman
- finished
- (and 1 more)
-
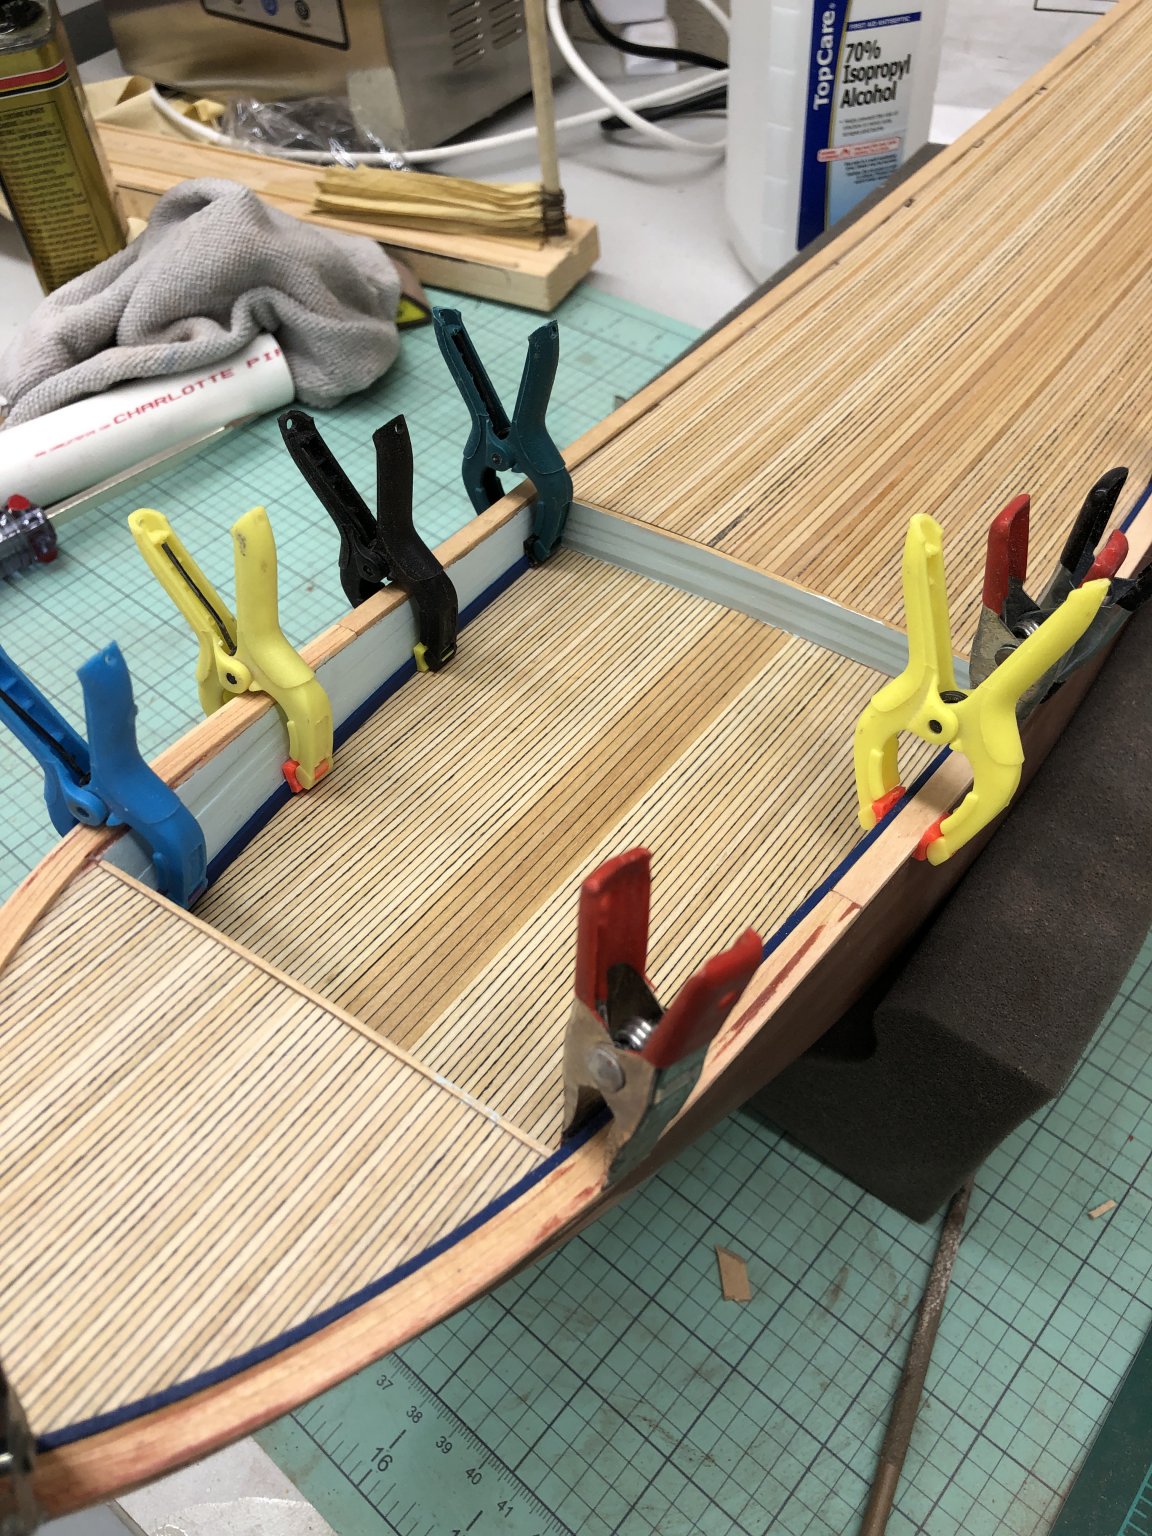
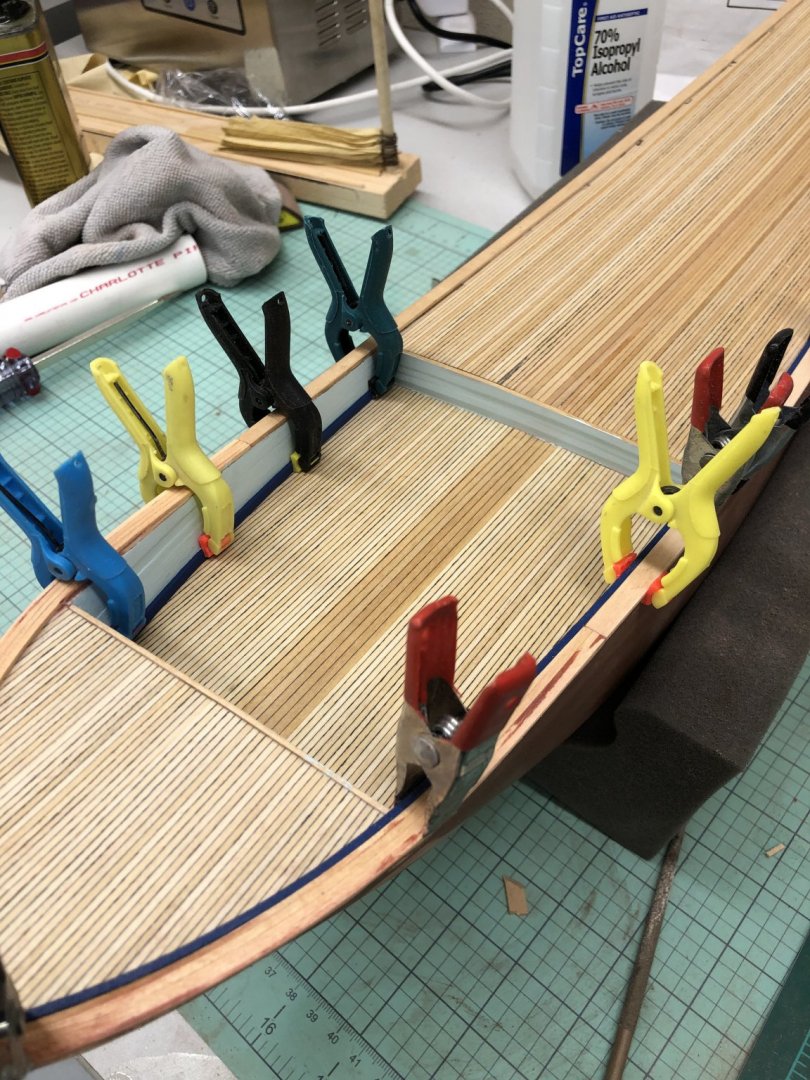
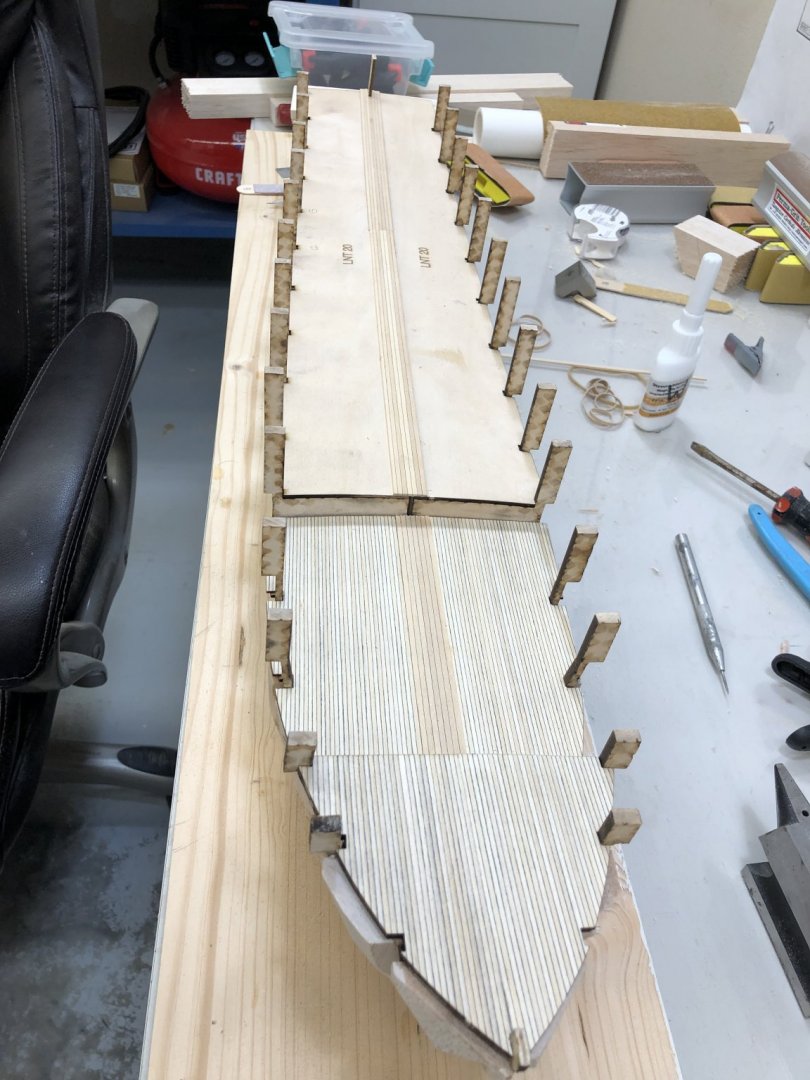
Next step, per the instructions is to put the prefabbed decking materiel on the decks (atop the subdecks). On the foredeck this is just the two laser cut pieces which are joined in the center (which will be largely invisible because the bowsprit will be directly above). Here is the stbd side foredeck planking being glued in place (port side is already down). However on the poop and main decks there is a strip of 3/32" wide planking that goes down the middle of each deck and then the laser cut pieces butt against this strip and continue to the deck edge. The 3/32" decking is supplied in 11" lengths and the seven plank wide strips are cut from this sheet. Given that the sheet is not long enough to cover the entire poop deck in one piece creates the question of where to make the joint which should be somewhere that will be covered by some piece of deck furniture as there is no realistic hope of getting two pieces of the planking to have similar enough coloring and spacing to not make a joint very noticeable. It turns out that there is a hatch that almost completely cover the centerline area between bulkheads 12 and 13 and that the 11" length is just long enough to extend from the front of the main deck back to between BH 12 and 13. So that is where the joint will be placed. So here are the center planks being weighted down while the glue sets. And, yes those are two bulkhead extensions that have broken off (the two forward most) laying on the main deck. With the foredeck planking completed I moved on to the main deck. It took some filing of the notches for the bulkhead extensions and the removal of one or two rows of planking but otherwise they installed without incident. Here is the fore and main decks with the planking in place. And here is the entire deck. I am not going to install the poop deck planking now as there was an issue with one of the pieces and BlueJacket is sending a replacement. I am going to wait until I have two good pieces before deciding which one goes where as they are interchangeable port and starboard. I (of course) want the best looking deck I can get short of planking it myself (although that thought did cross my mind).


- 144 replies
-
- 6
-
-
- charles p notman
- finished
- (and 1 more)