cdrusn89
-
Posts
1,934 -
Joined
-
Last visited
Content Type
Profiles
Forums
Gallery
Events
Everything posted by cdrusn89
-
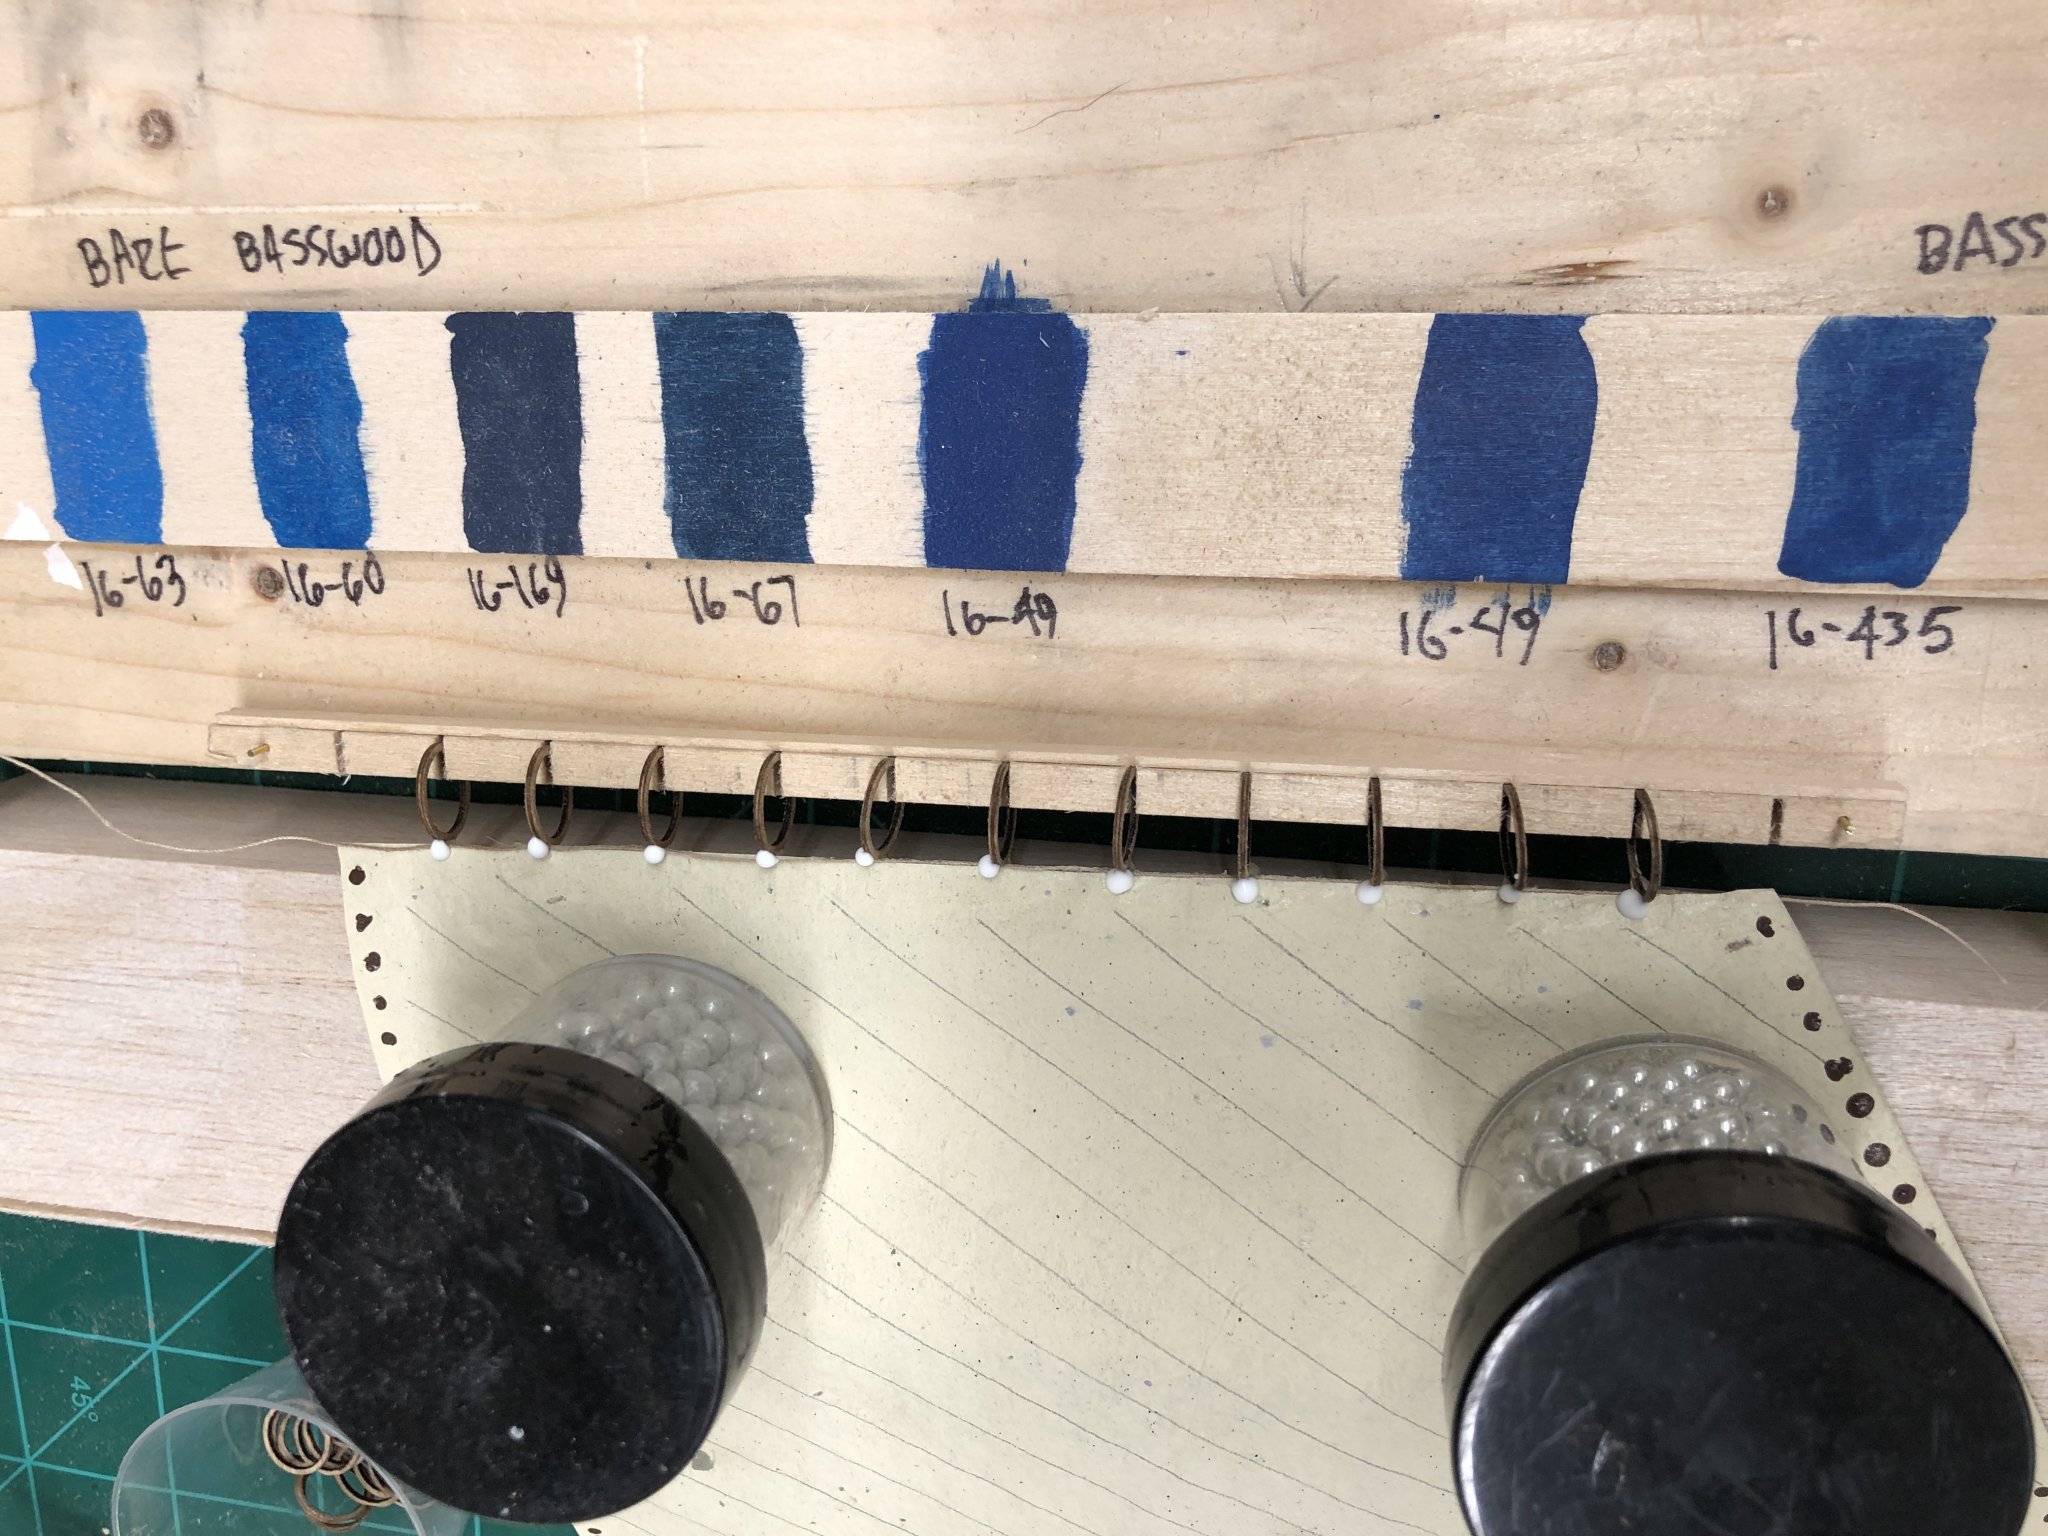
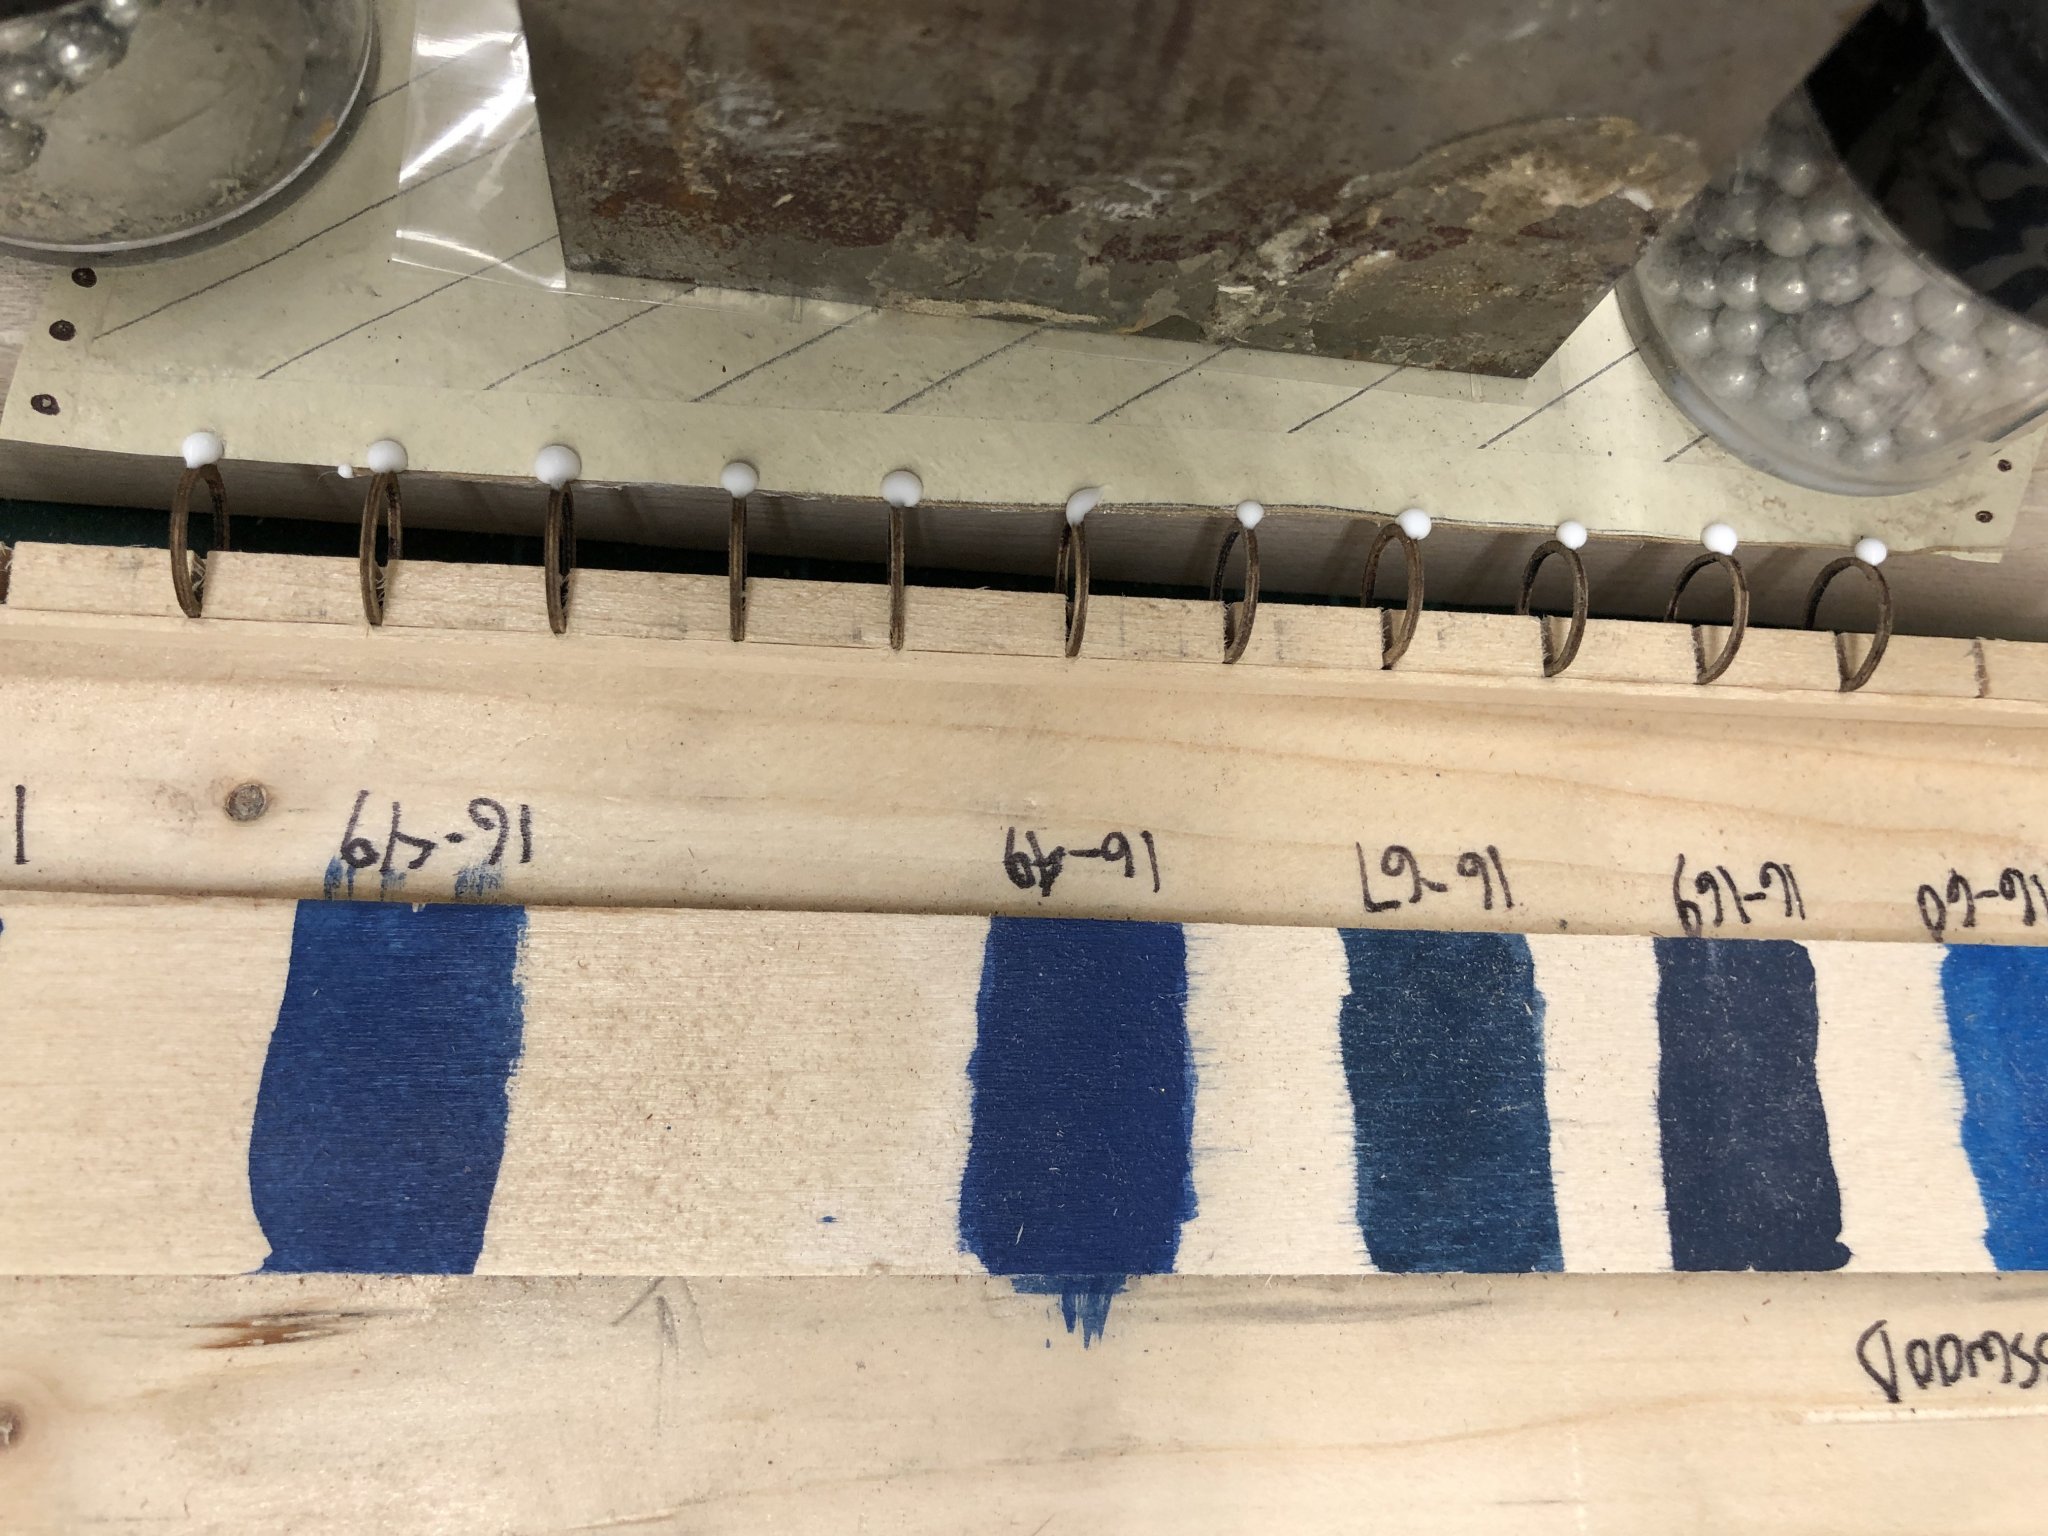
 Working on getting the main sail attached to the mast hoops and after that laced to the gaff and boom so I can get them on the completed (more or less) main mast. On the Gorham I used plastic mast hoops (painted and thinned down) which included a ring on the hoop that provided a ready way to attach the hoop to the sail. Those rings are not made in a size compatible with the Notman's mast so I decided to attach the hoops using a drop of glue (Weld Bond - it dries clear) on each side of the sail. To accomplish that I built a jig with slots cut every half inch to hold the hoops and used a conveniently sized piece of balsa to hold the sail against the hoops. Here is the jig with the sail and hoops with a drop on each hoop. The weights on the sail keep it pressed against the supporting balsa wood. The blue paint swaths were done early on when I was deciding on what colors to use on the model. Once the glue was dried I turned the sail over and reinserted to hoops into the slots and added another drop of glue on each. Once these are dry I will lace the sail to the boom and gaff, furl it down (gently) and put it on the main mast to see how things look. Hopefully the glue drops will be lost in the sail folds and made even harder to see because they will be "crystal clear" - it says so on the Weldbond glue container!)
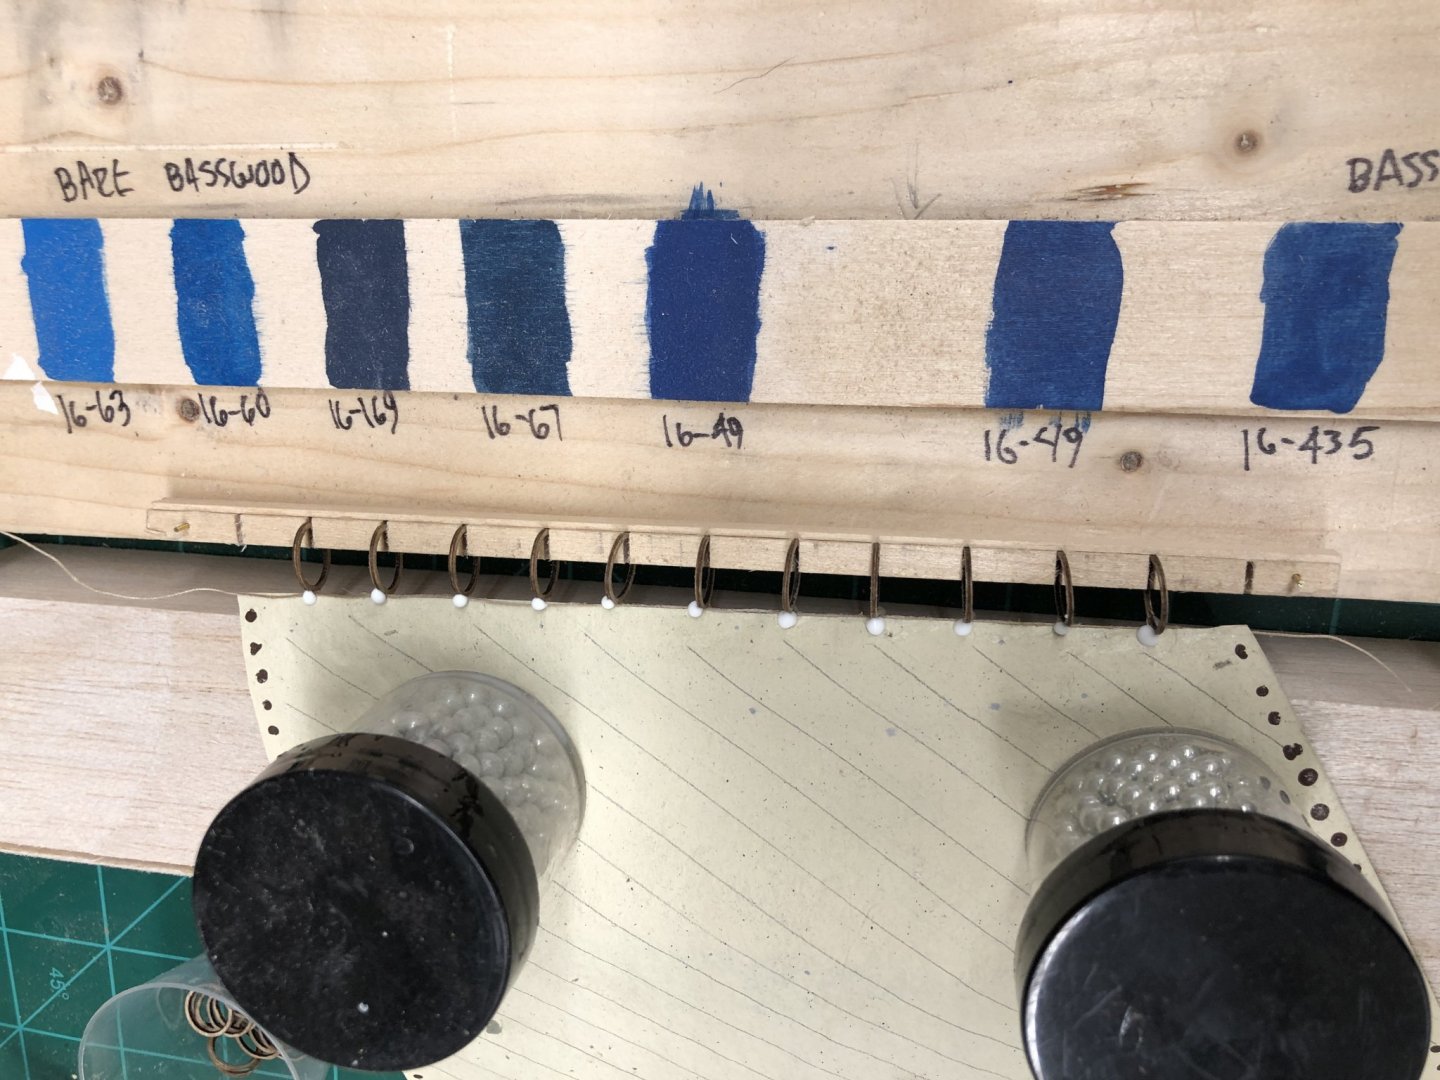

- 144 replies
-
- 5
-

-
- charles p notman
- finished
- (and 1 more)
-
That is how I will rig them although they will be furled so it won't be obvious how the are attached.
-
By the way Nic, I am starting on the Notman sails and the sail plan does not indicate how the sails are attached. I assume the fore, main, mizzen, spanker are laced to the booms and gaffs as on I did on the Gorham but I wondered about the jib and Fore staysail. They both have booms but are they laced to it or are these sails set "flying - only attached at the tack and clew?
-
Thanks Nic - Probably had a fair lead on the cat head somewhere to guide the fish tackle. I would think it would be hard to control where the anchor went without a gin pole or some other way to keep it close to the cat head without gouging the hull with a fluke.
-
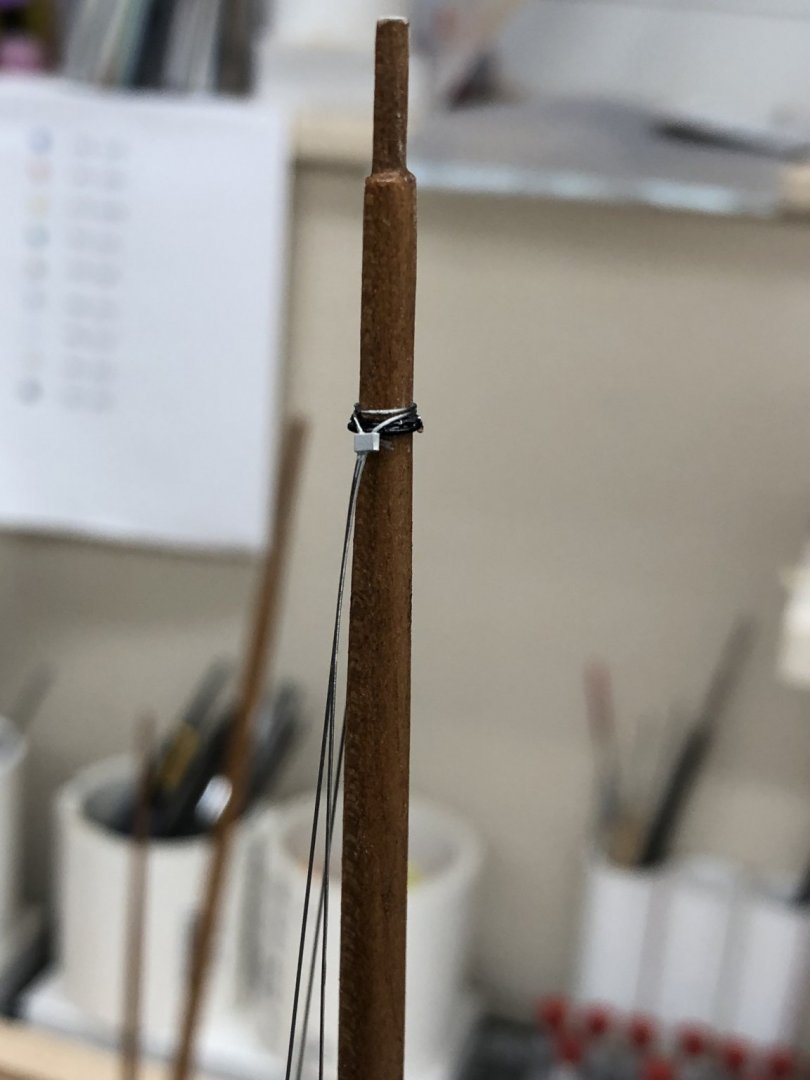
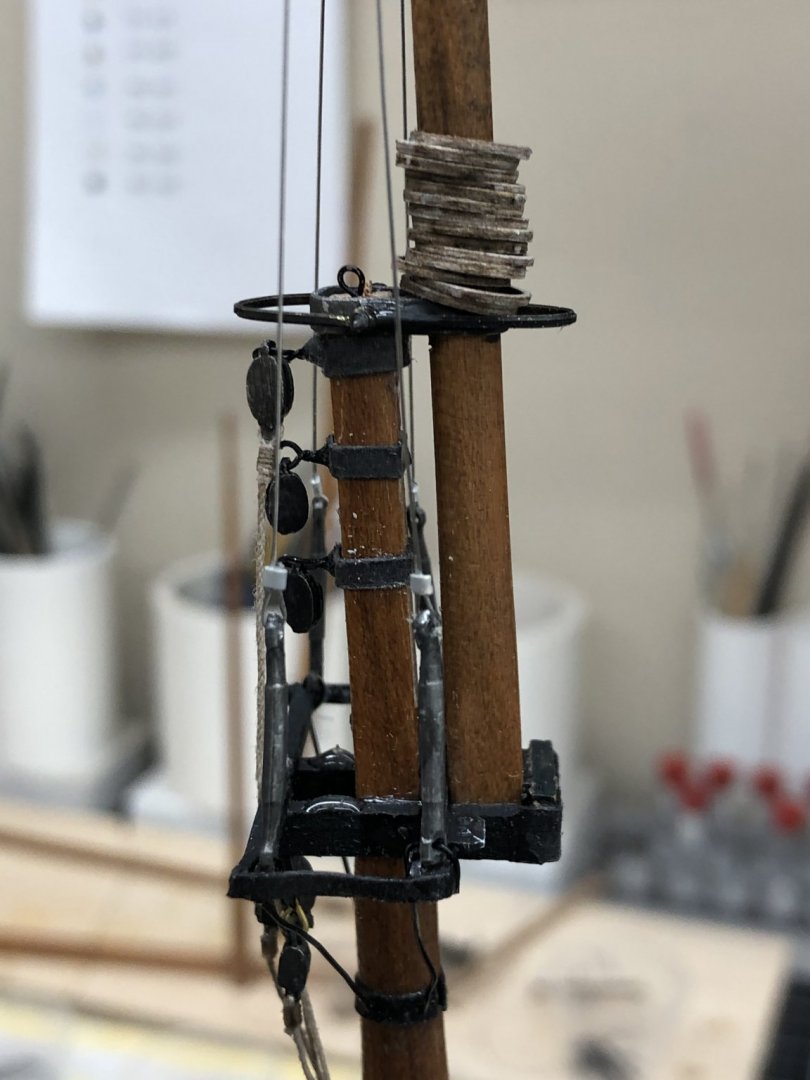
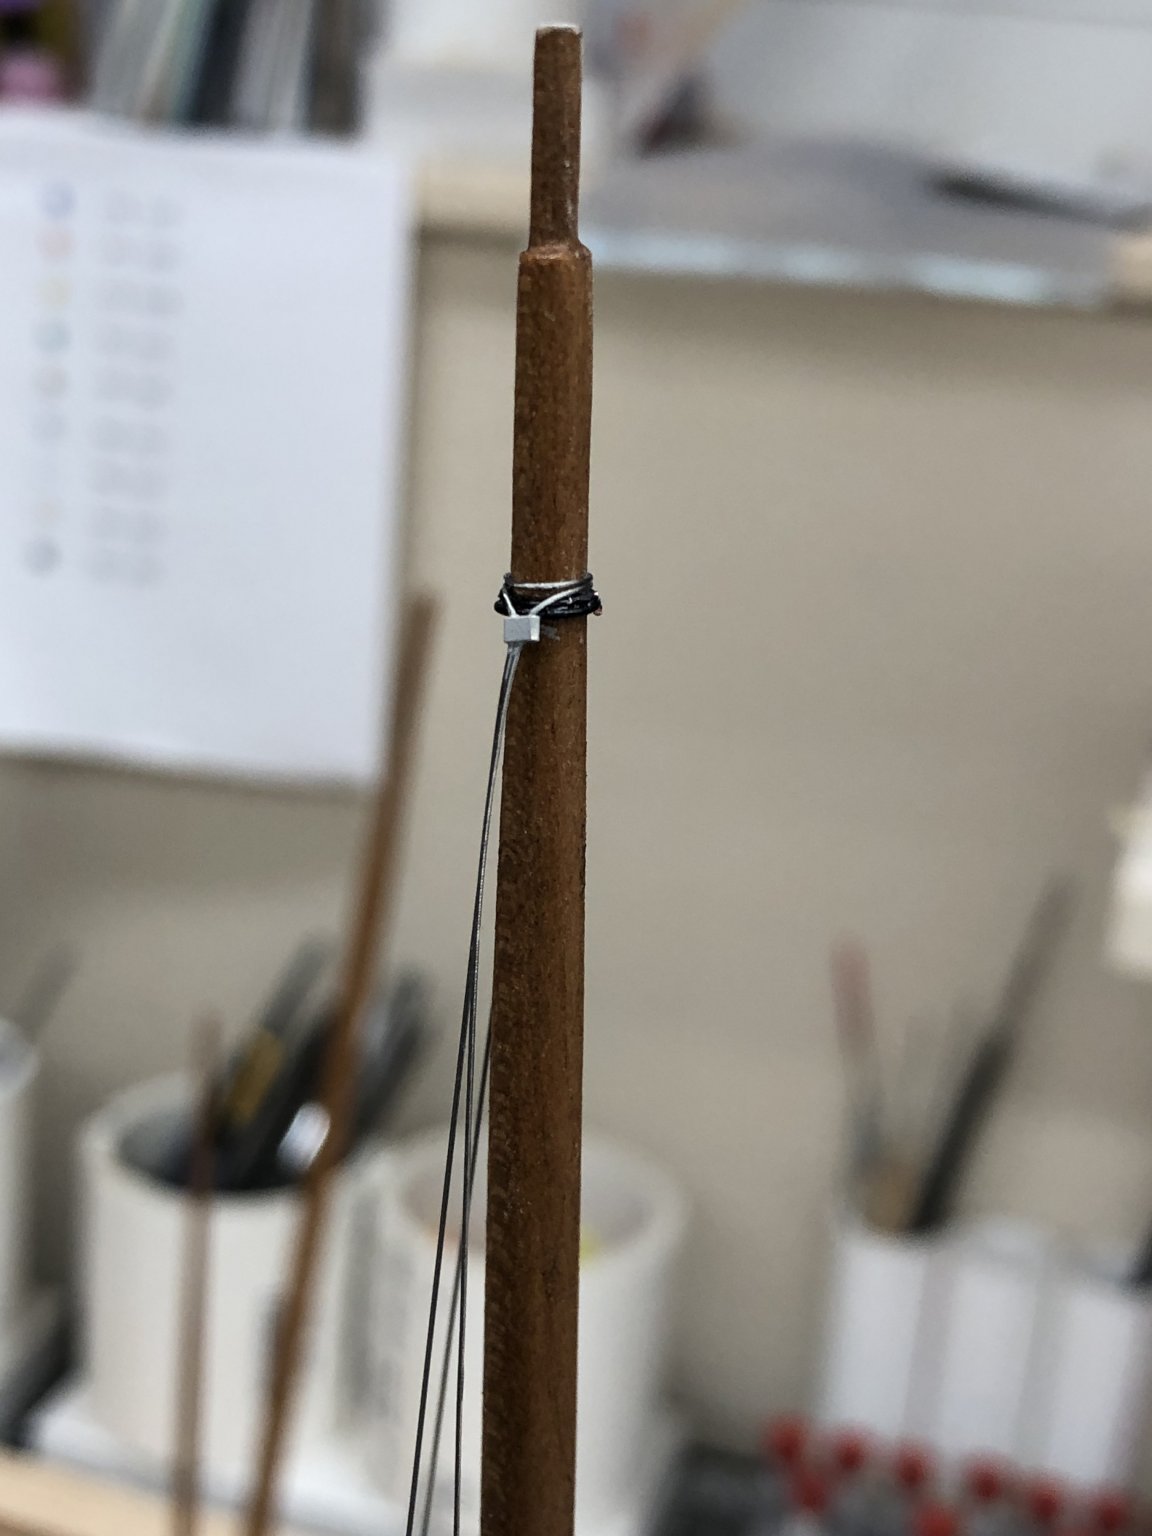
Added the cat heads to the hull. Which leads me to the question of how they would actually raise the anchor out of the water. Every model I have built so far had a tackle at the end of the cat head that was used to raise the anchor high enough to get the flukes lashed over the gunnel or otherwise secured. You certainly can't leave it hanging by the chain from the hawse hole. I am tempted to add a three part tackle to the end of the cat head (similar to what was on the Gorham) but can do that pretty much anytime before I have to rig the anchors. While working on the hull I added the bob stay and jib stay irons to the bow. I decided to not secure them (and trim the brass rods) until the stays are located to get them aligned with the stays. I used the BlueJacket brass blackener but managed to get them torn up during installation. Will have to touch up with paint "later" (after the chain is attached). I have gotten the main mast almost completed. I have to add the blocks for the topsail halyards and the backstays but am pretty close. The "new" thing here is I used Beadalon jewellery wire (0.010" 19 strand - silver) for the topmast shrouds. The wire is covered with a clear plastic covering but that does not seems noticeable (IMHO) unless you know it is there. I used the same stuff (although thicker sizes) for the standing rigging on the 1/35 scale Endeavour with creditable results (also IMHO). This is my first try with the 19 strand (Endeavour used 47 strand) and smaller size. I think .010 is as thin as it comes. I used the size 1 crimp tubes (although there is a size 0 which is on order but will not be here until mid-July). Here are two shots of the shrouds although you can see some of the other mast details.

- 144 replies
-
- 7
-
-
- charles p notman
- finished
- (and 1 more)
-
The Alfred should keep you busy for awhile. I finished the Niagara awhile back and swore off square riggers for awhile. I enjoy doing the rigging but after awhile on Niagara I started to feel like it would NEVER end; and that only had two masts.
- 144 replies
-
- 1
-
-
- charles p notman
- finished
- (and 1 more)
-
I looked at your build log for the USS Kirk. Very nice. I served on the Rathburne (FF 1057) mid 1976 to mid 1978. Good ship in spite of the 1200# steam plant.
-
Tim, I noticed that you built a model of the DD-824 (Basilone). I did my 1st Class Midshipmen cruise on the Basilone and served my first tour in the Navy on the DD-880 which was in the same squadron as the Basilone. Did you have some connection with her?
-
Tim, One of the "good" things about being retired is that you can treat your hobbies like a "job". My girlfriend is not crazy about that characterization - she thinks I should treat her like a job (unquestioning devotion/attention). Besides it is summer in Florida and too hot to do much outside.
-
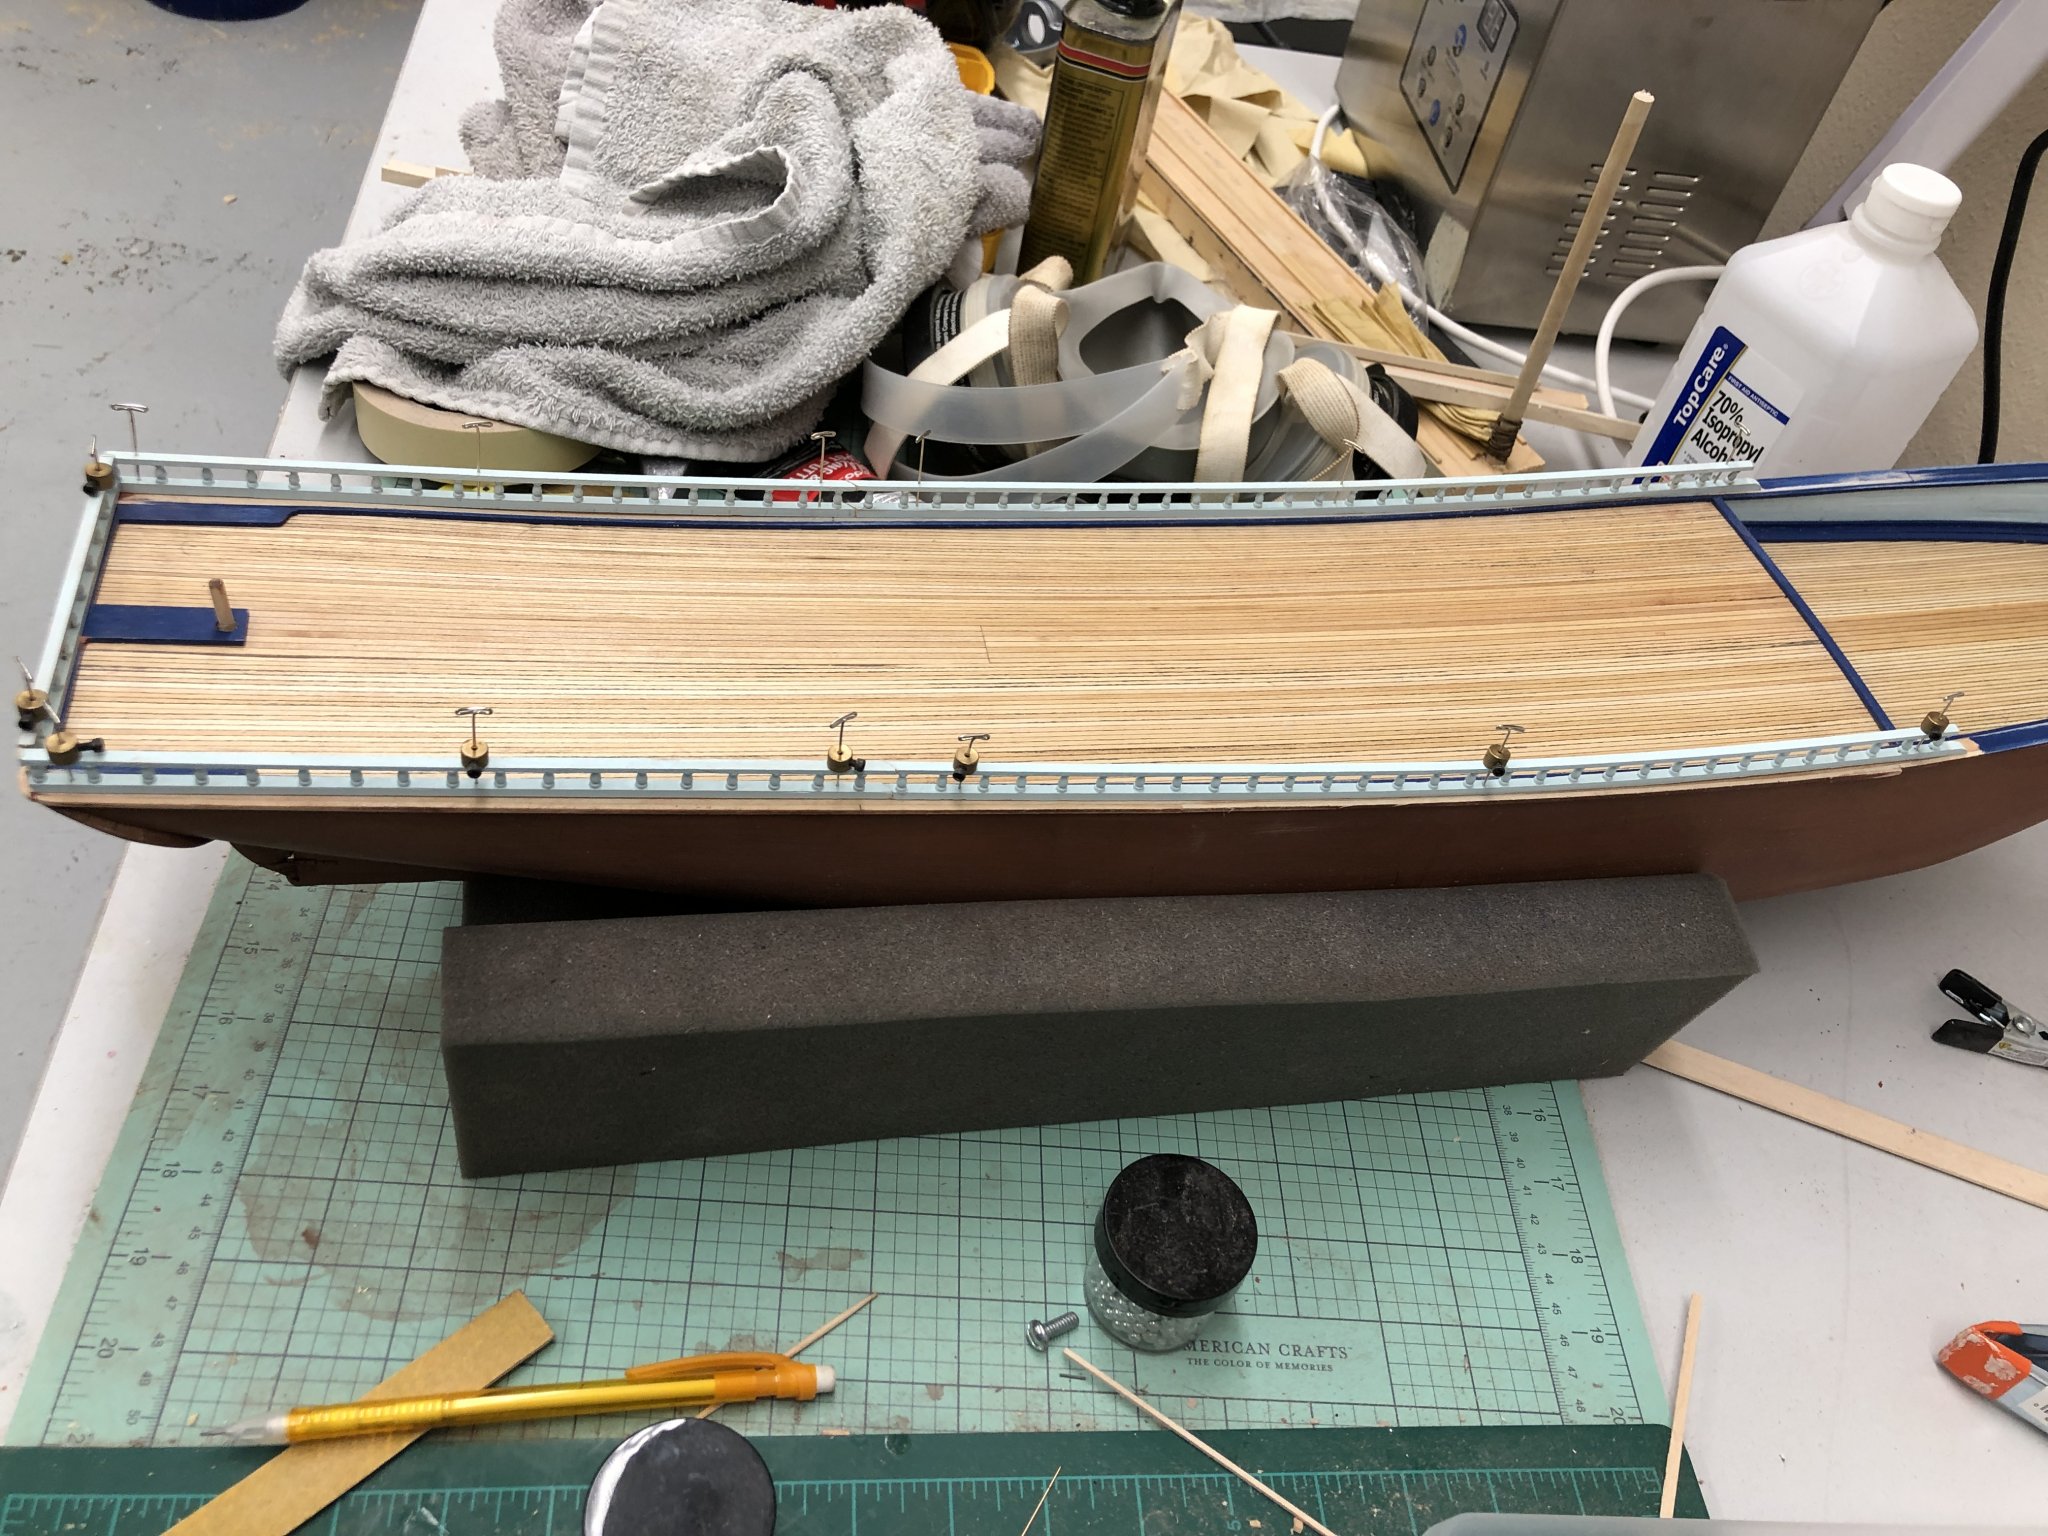
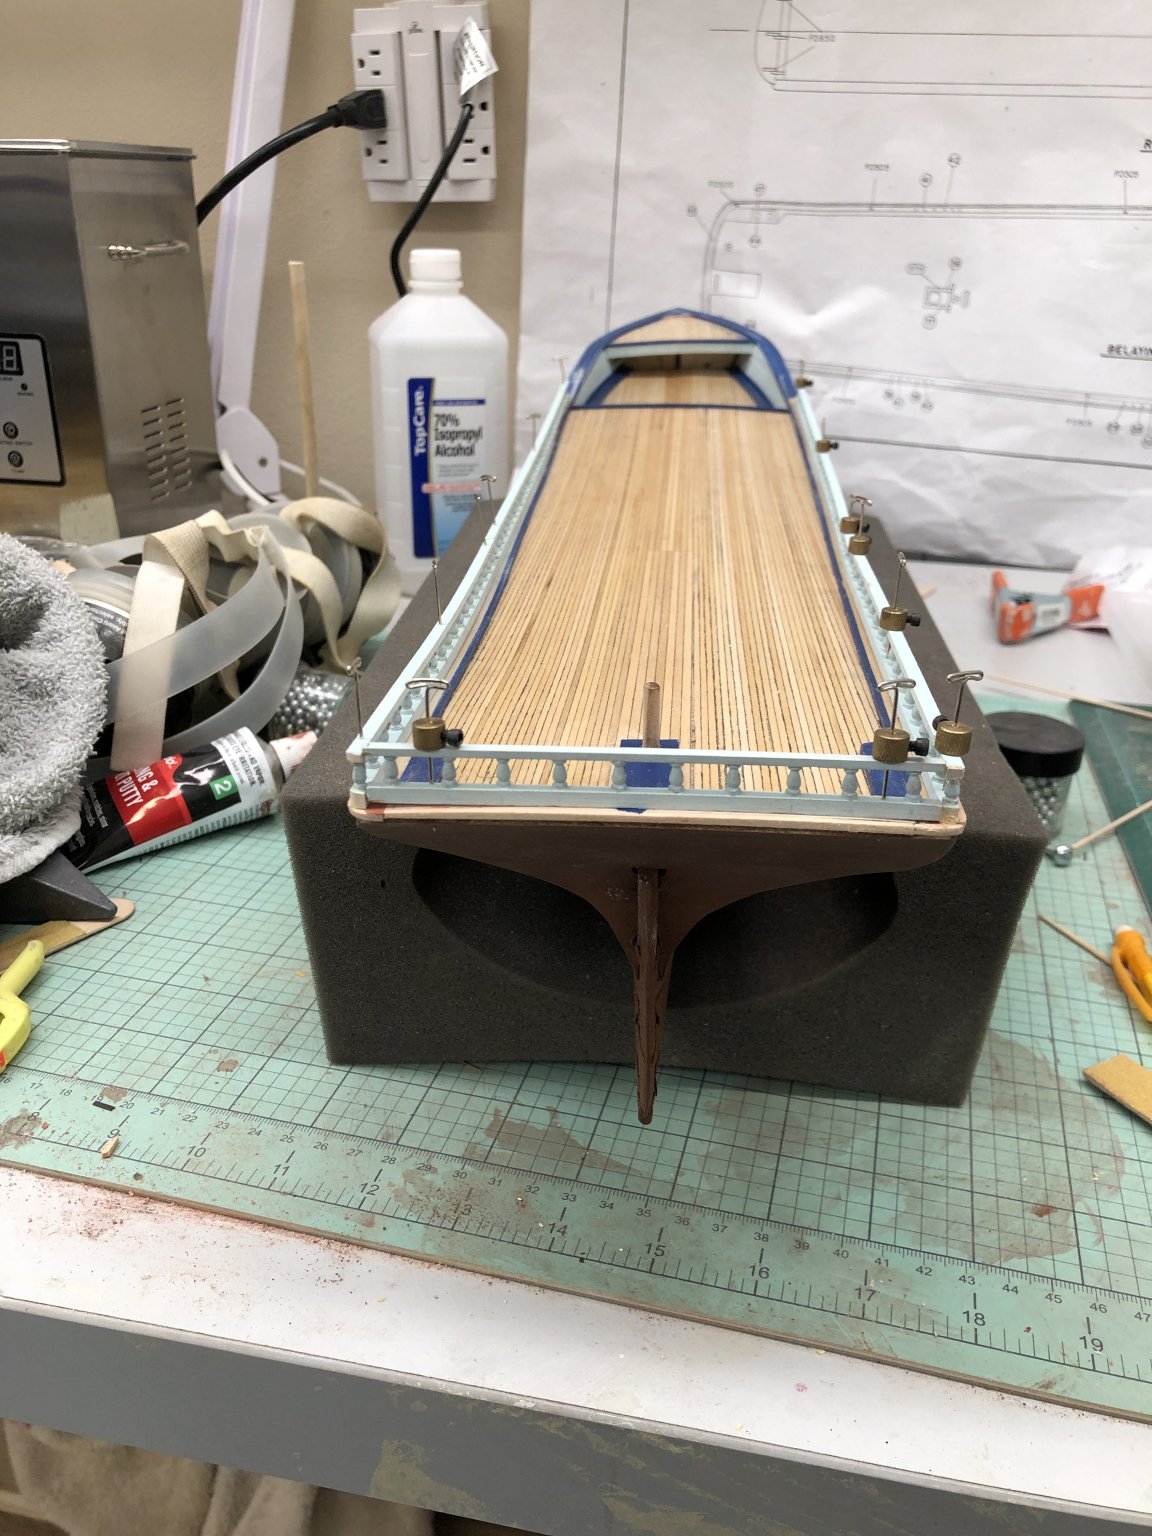
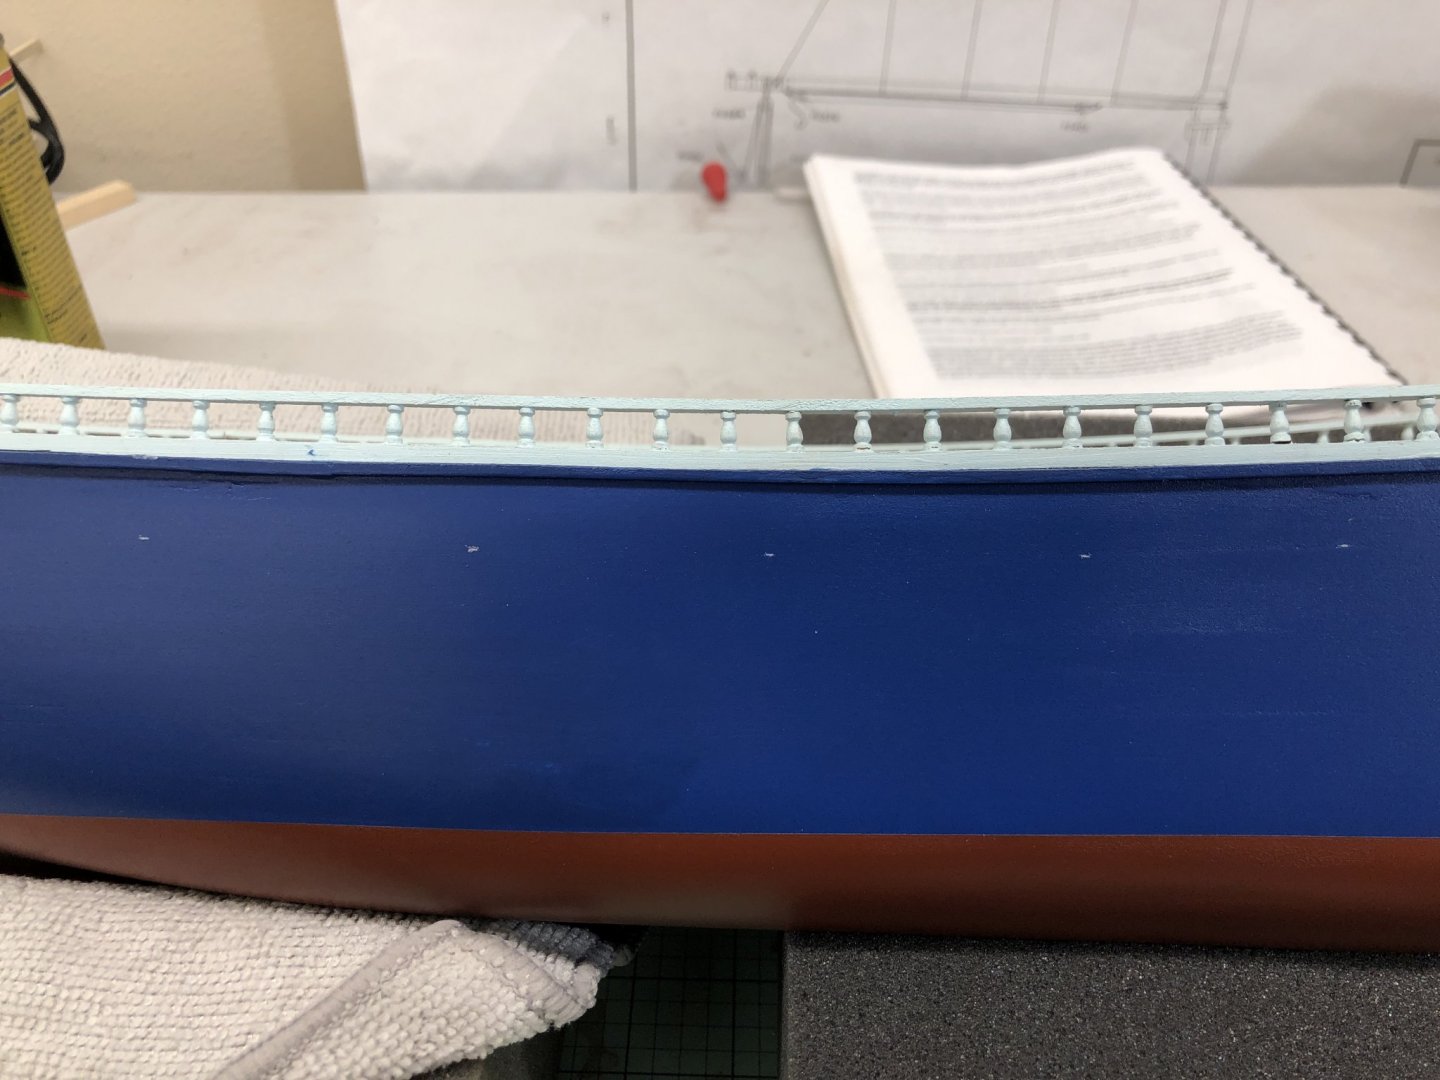
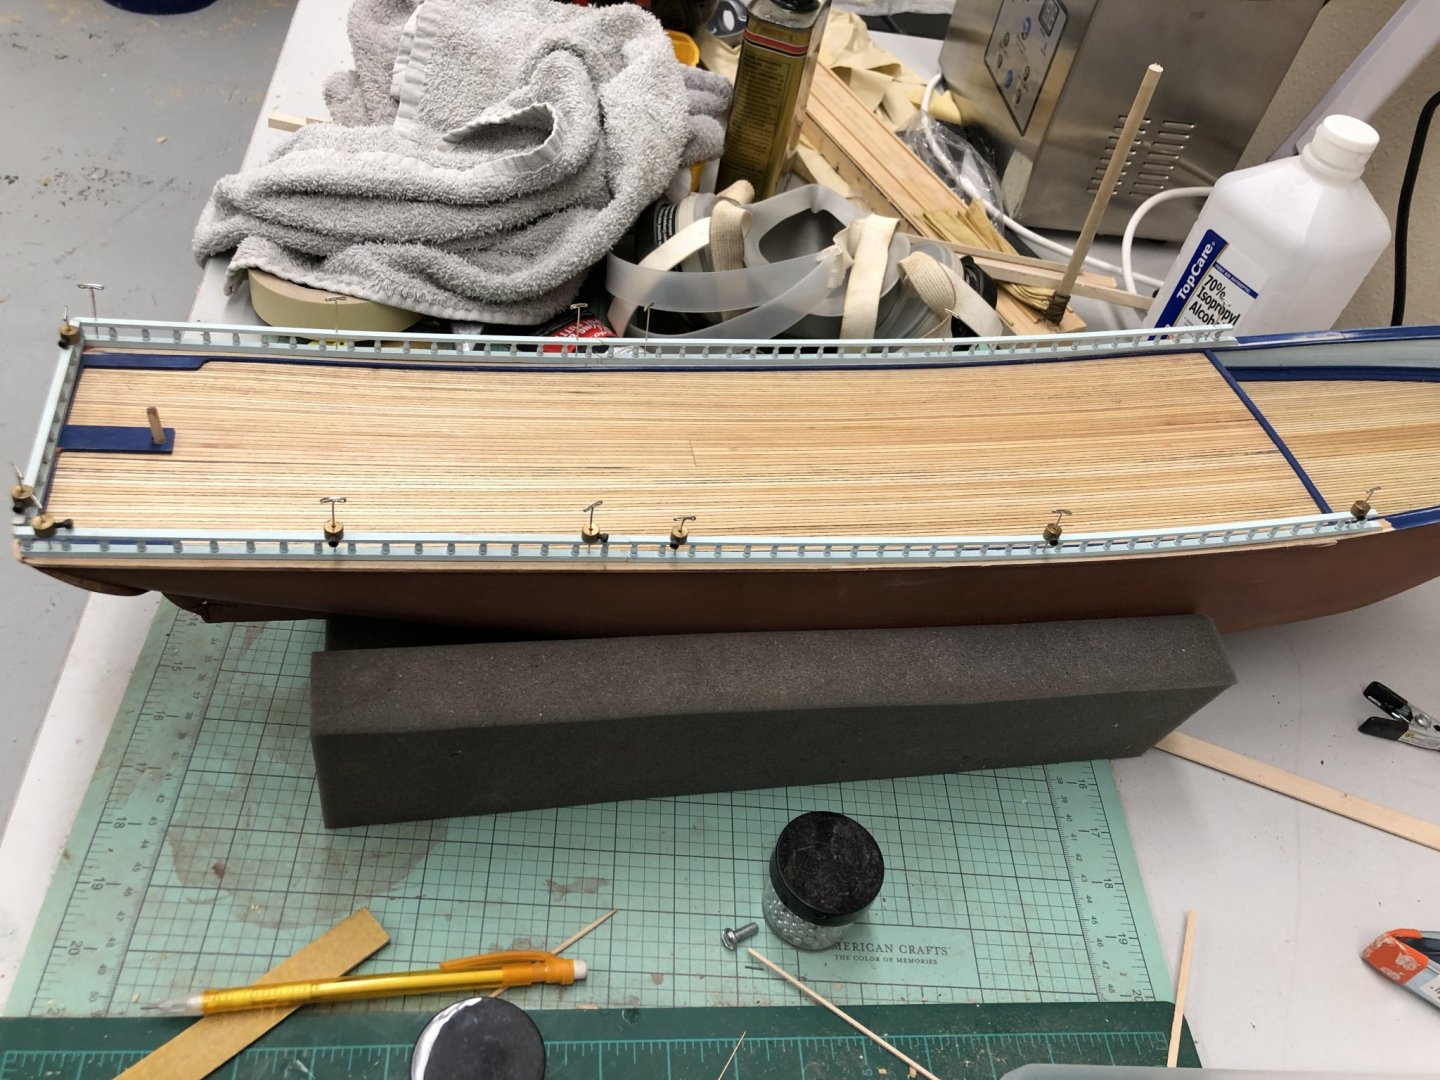
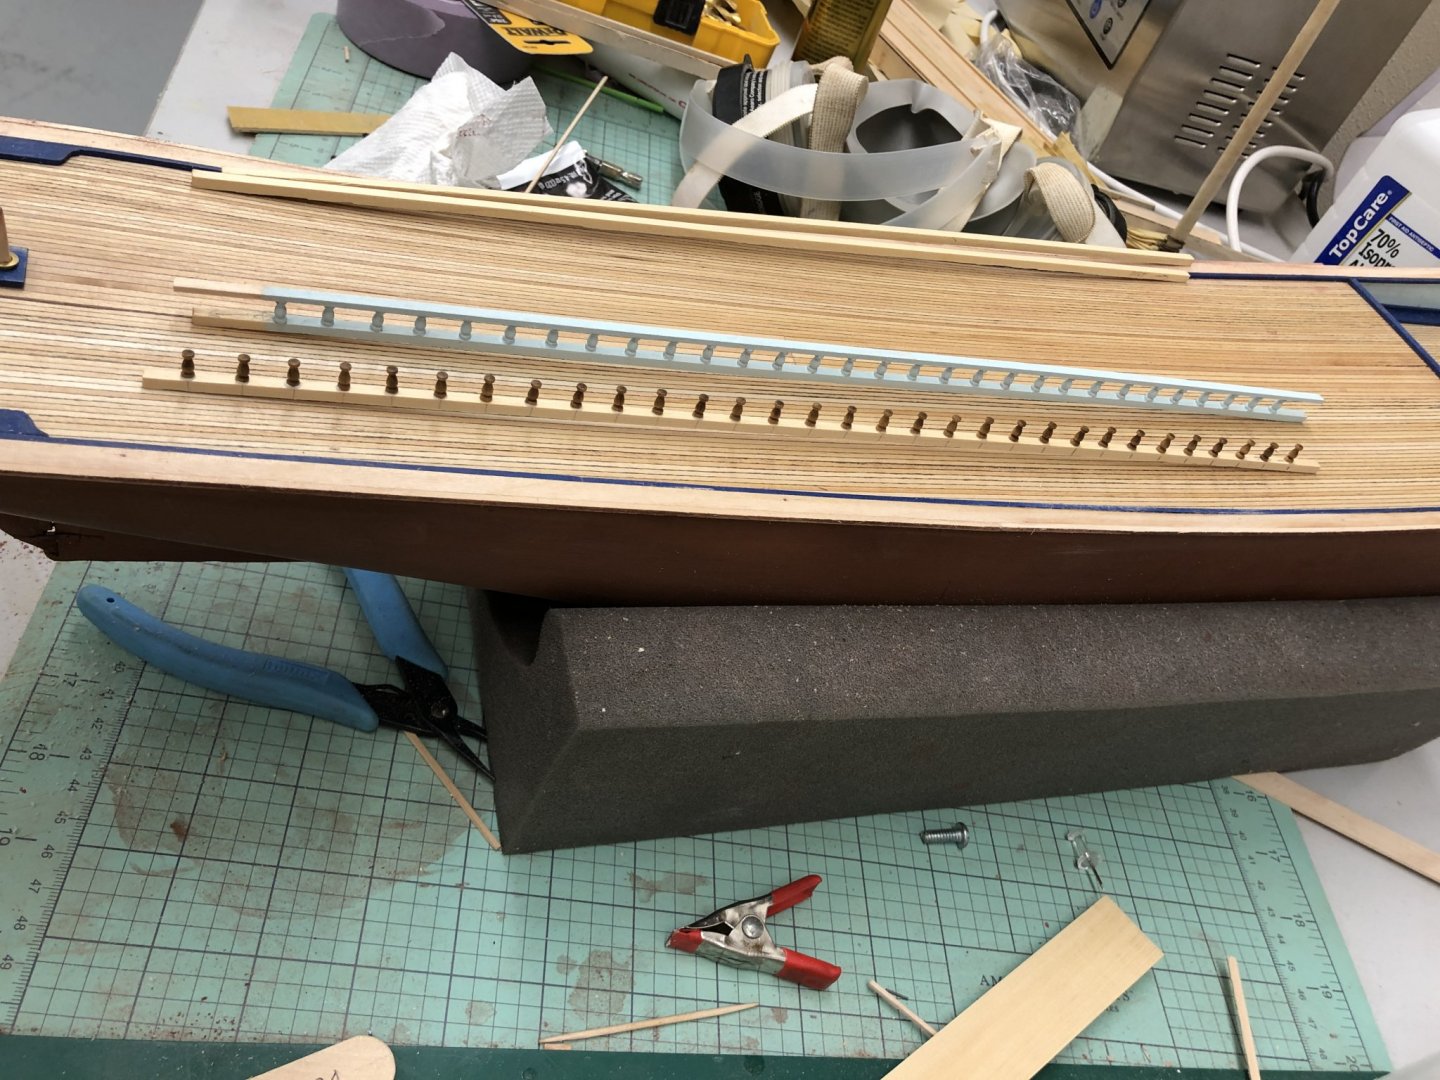
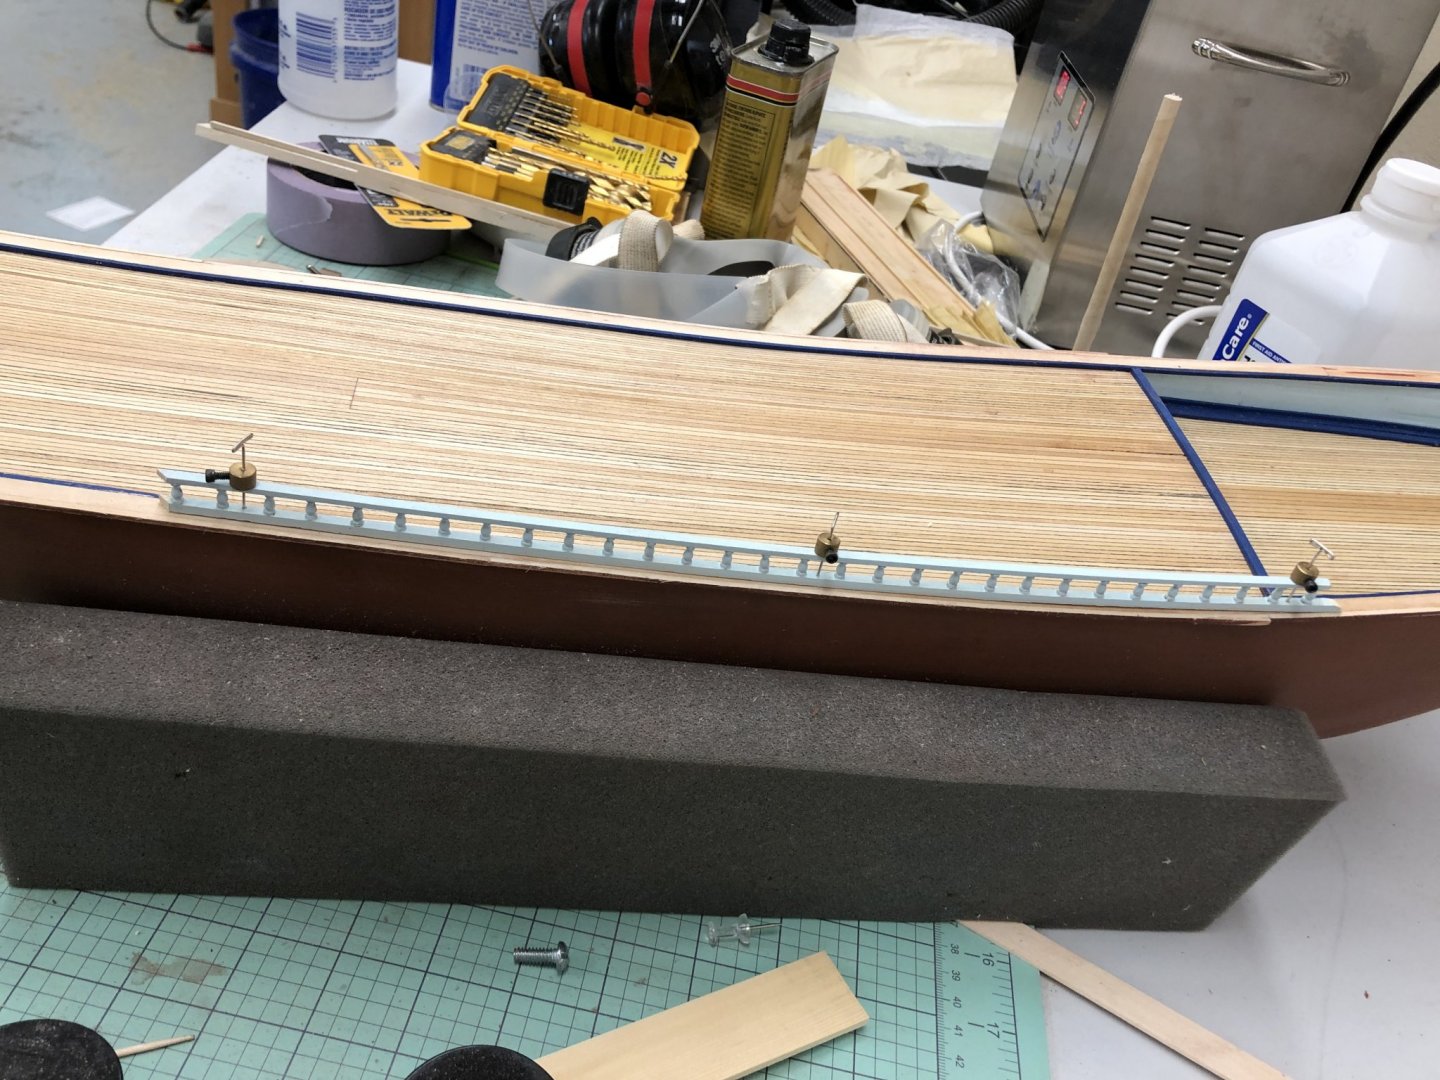
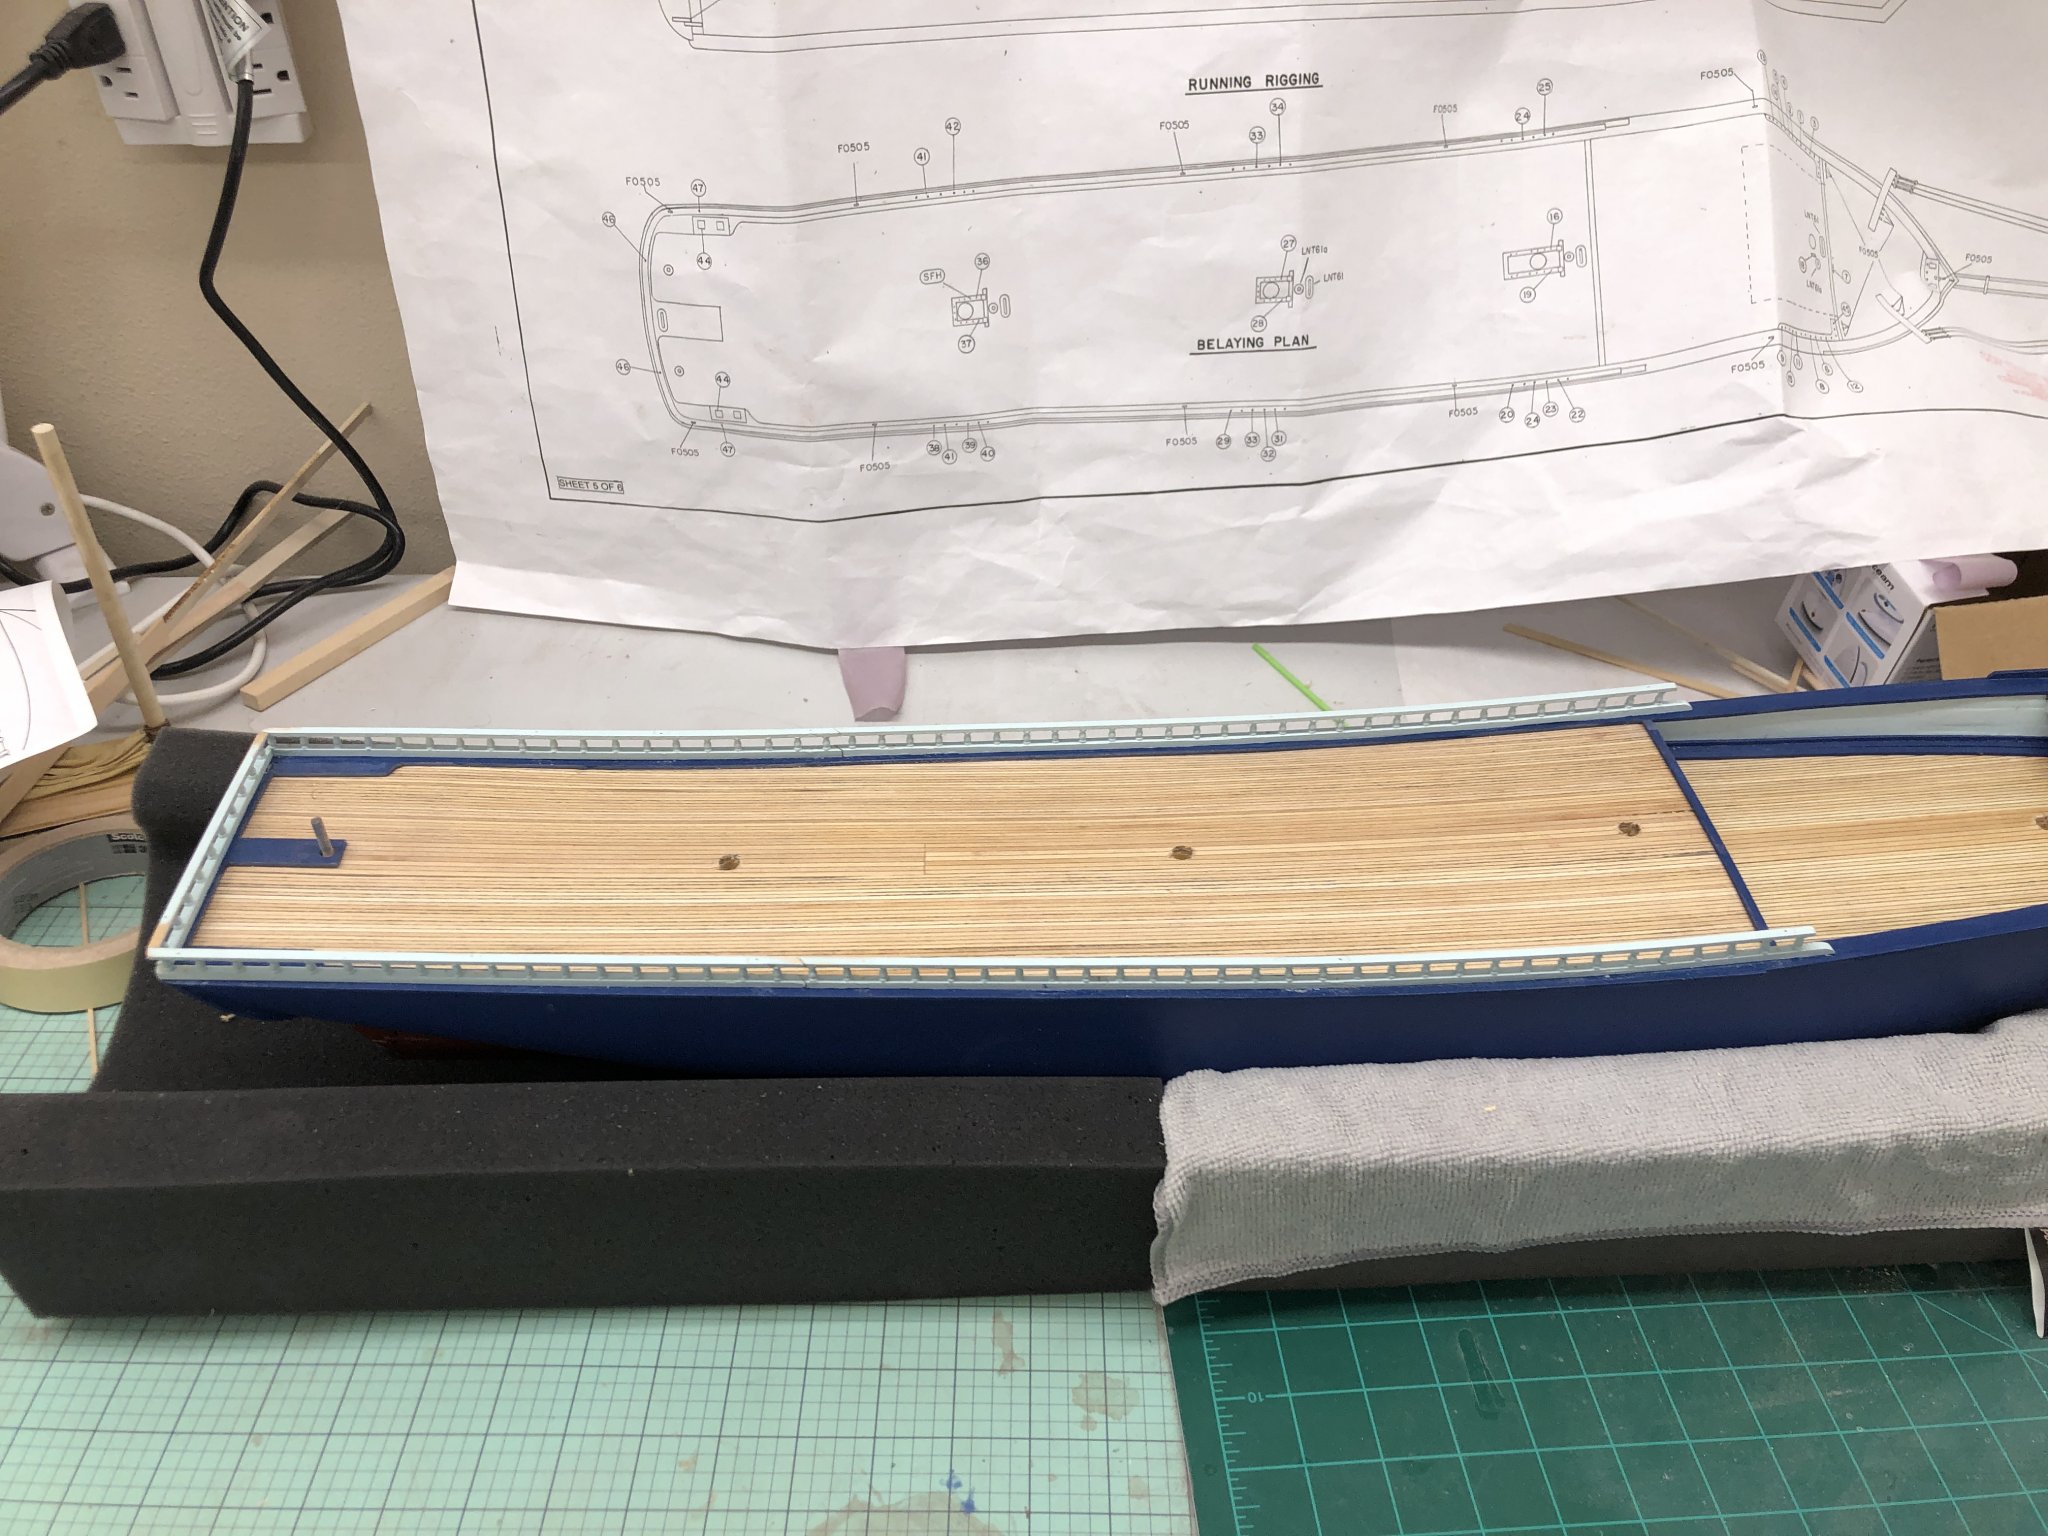
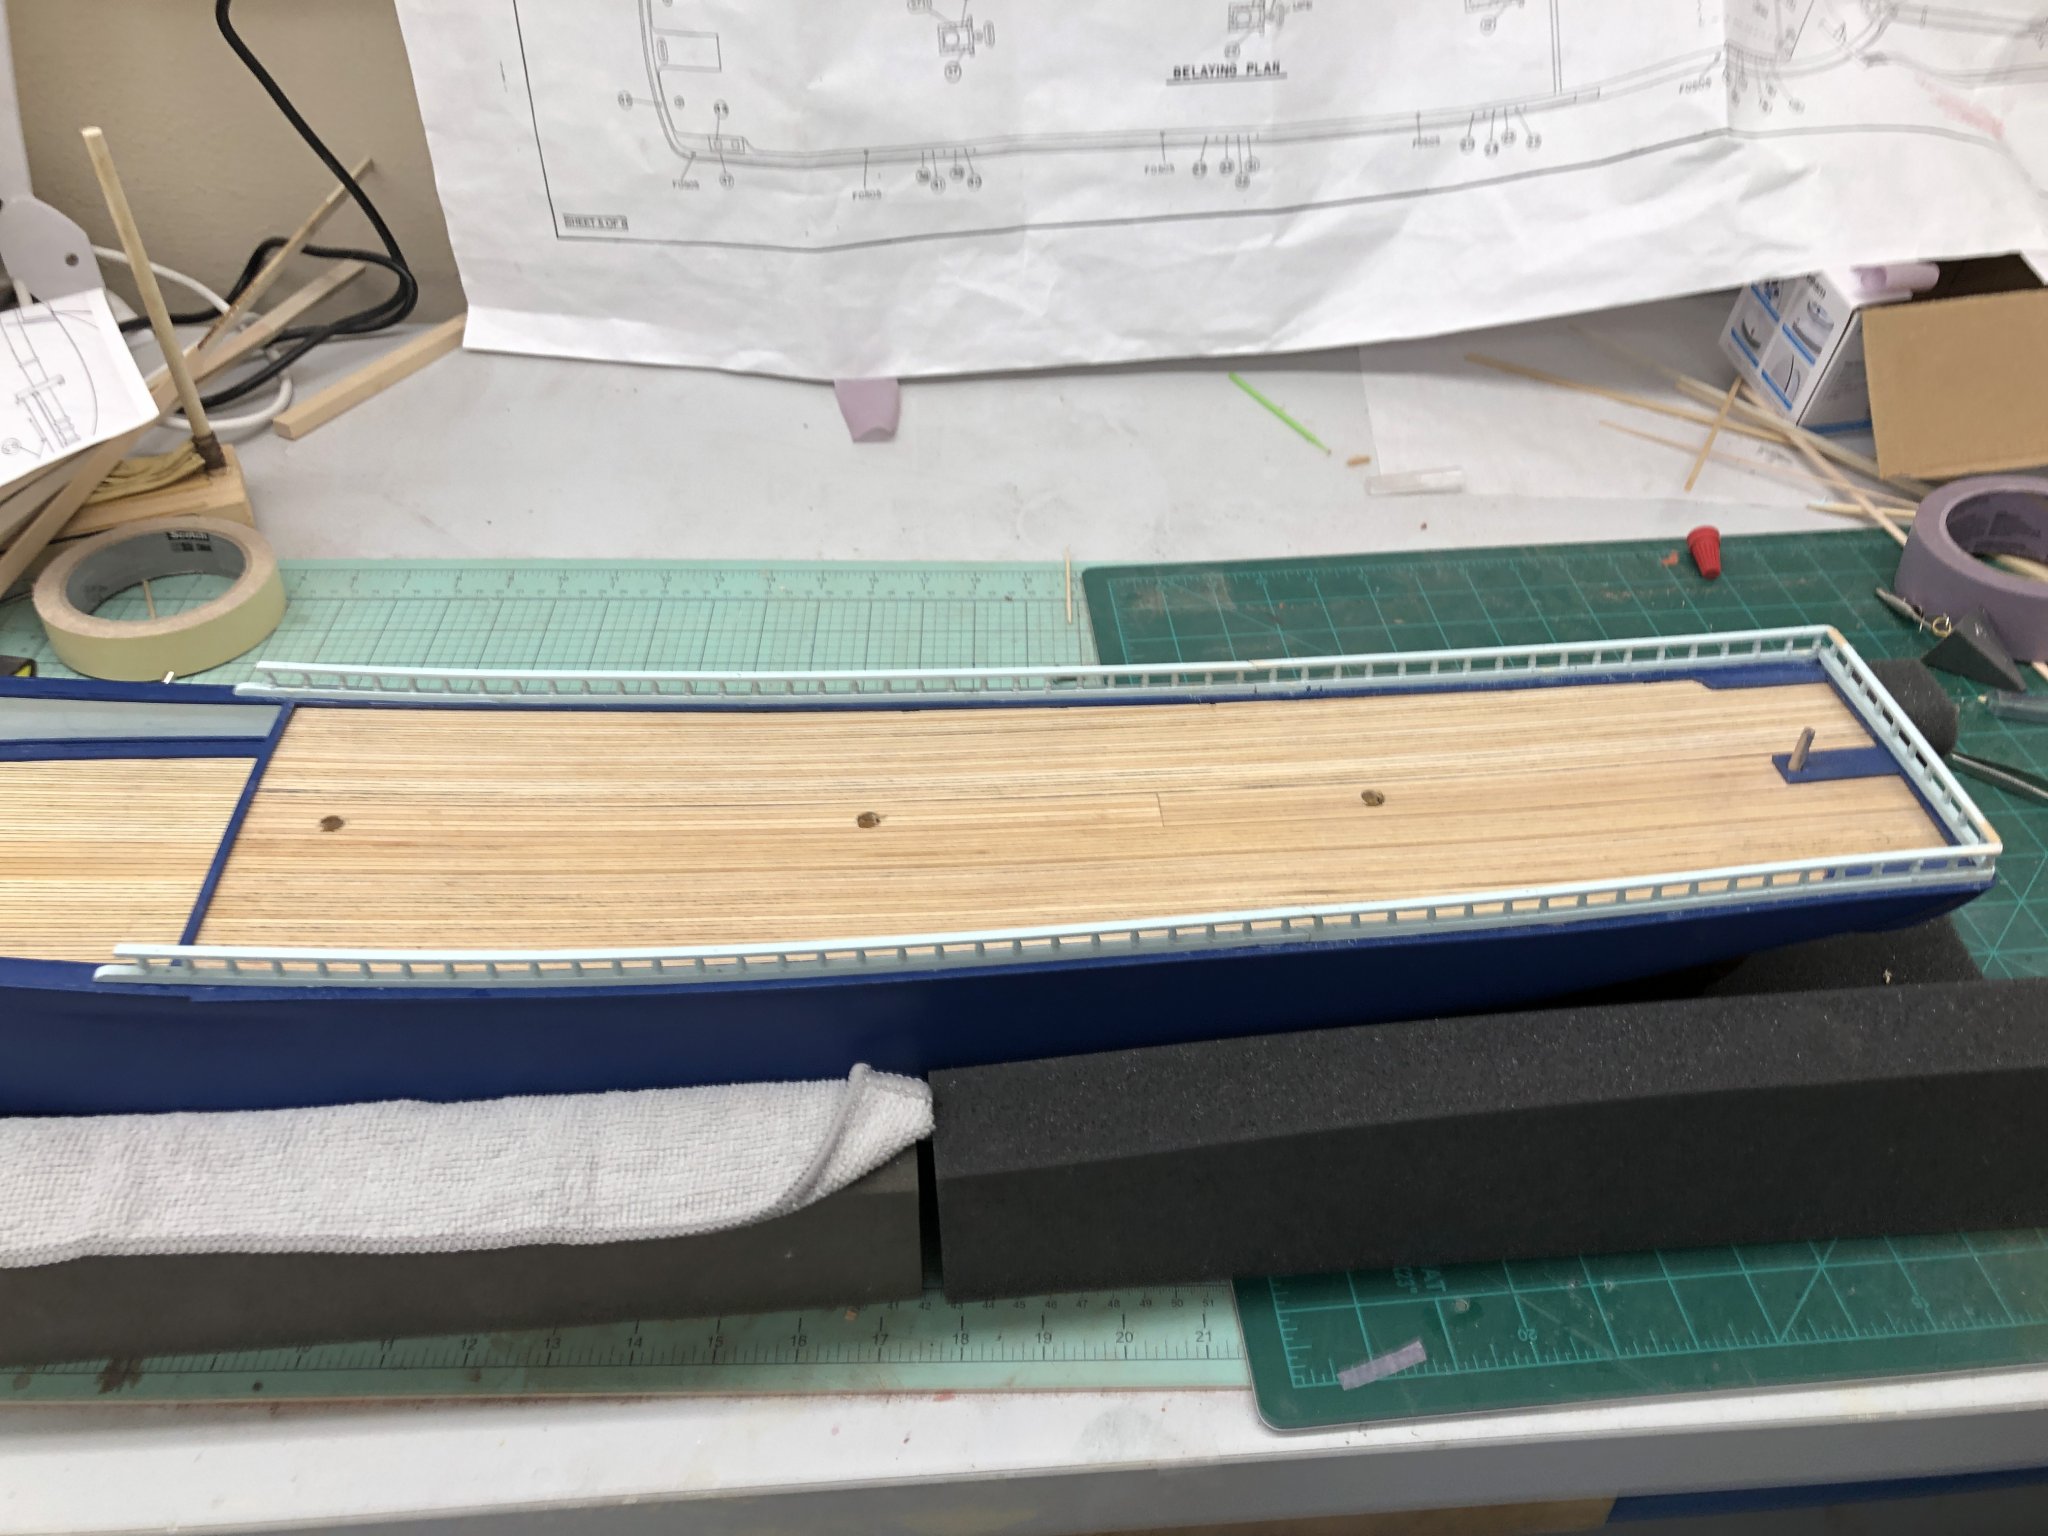
With the chock/fly rails done it is time for the sheer strip. The provided double bead trim piece is quite thin and care needs to be exercised to keep from bending it out of line while getting it attached. I measured the distance from the top of the deck edge to the sheer strip on the drawing and set my dividers to this distance. Then I measured down on the hull and made a horizontal scratch (enough to get through the blue paint about every three inches from bow to stern. Here is what a part of the stbd side showing the marks. I followed the instructions on the port side and drilled #76 holes in the bead every 3" and used the provided .020 brass rod to secure the bead to the hull. That worked well enough on the port side but the attachment spacing seemed too far to avoid getting the bead out of line (don't ask me how I know this) so for the stbd side I drilled them every 1.5". Here are the port and starboard sides. I still need to touch up the port side with the yellow paint to cover the brass but it came out pretty good.


- 144 replies
-
- 5
-
-
- charles p notman
- finished
- (and 1 more)
-
I finally got the chock/fly rail assemblies mounted on the hull. It took five separate sections as I decided that trying to fabricate each side as one piece was "a bridge too far". I also have to patch the holes I drilled for the pins I used to clamp it down to the deck, add the mooring chocks, fashion the and put on a final (hopefully) coat of paint. Here is the hull with the chock/fly rail in place


- 144 replies
-
- 6
-
-
- charles p notman
- finished
- (and 1 more)
-
Mike, Thanks - by the look of your current and past work I would say you are far from a landlubber.
-
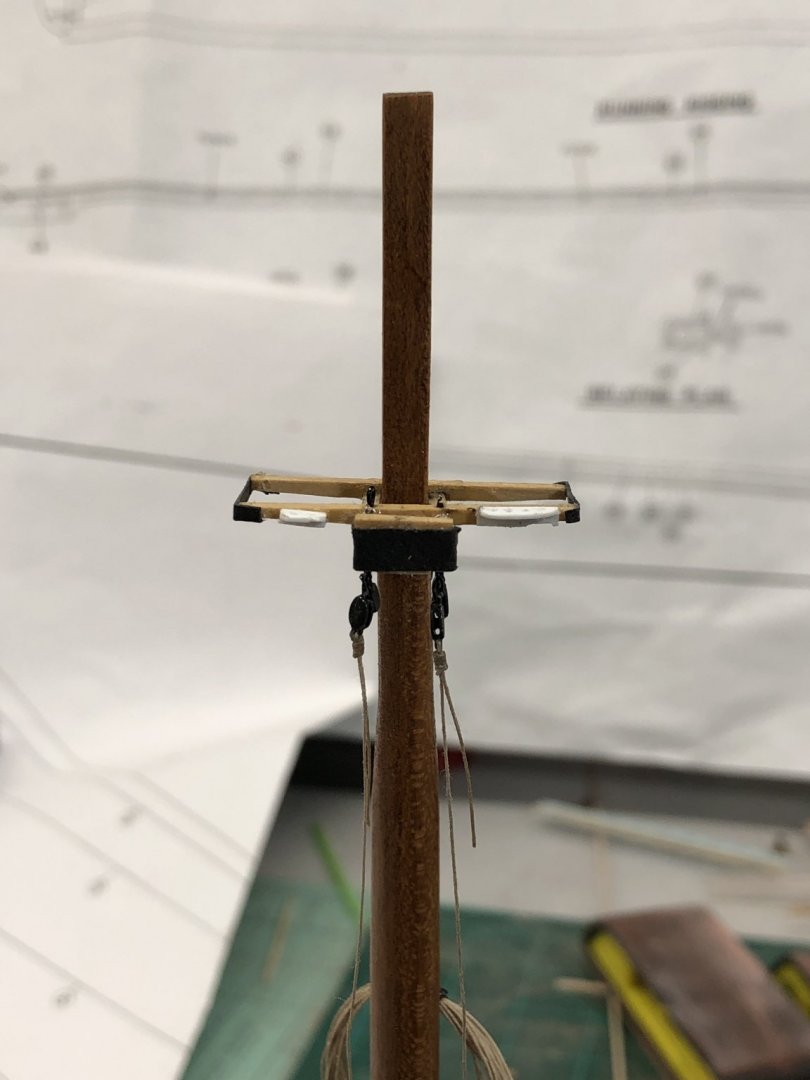
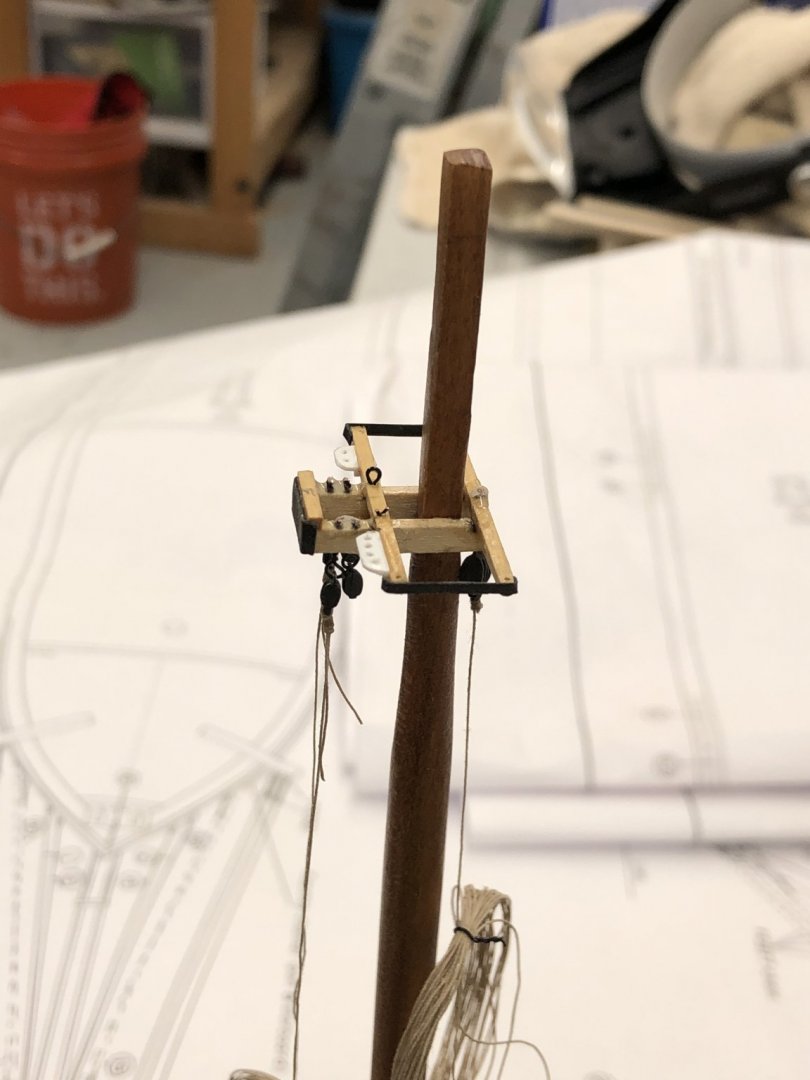
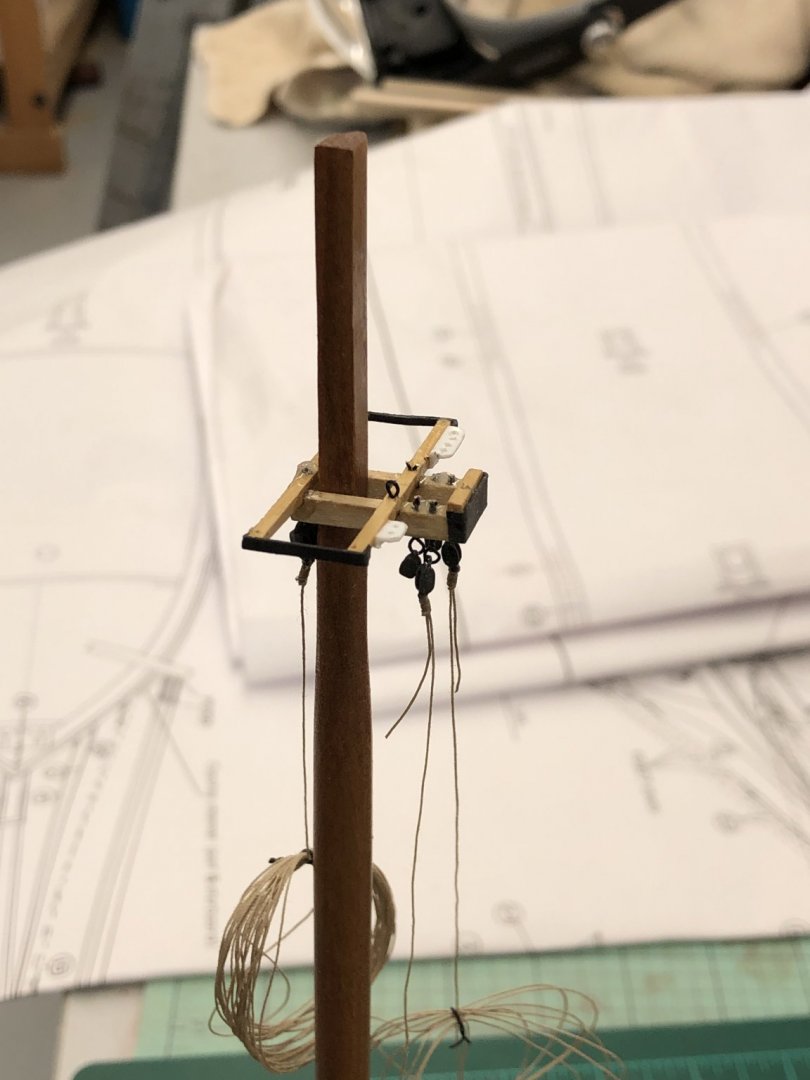
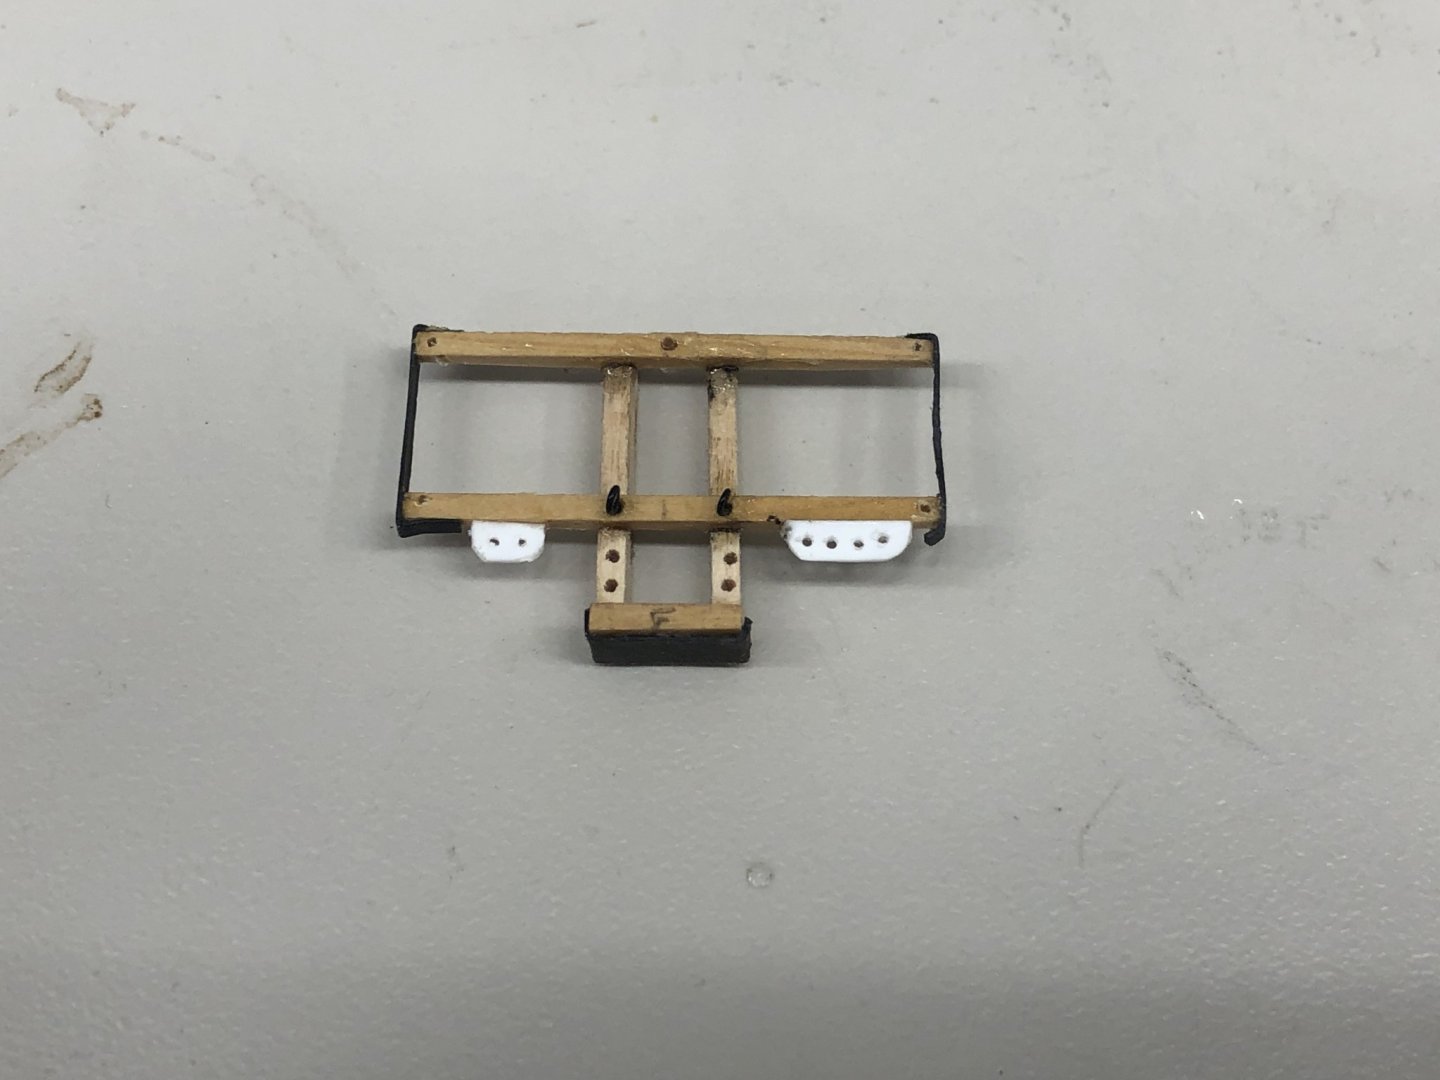
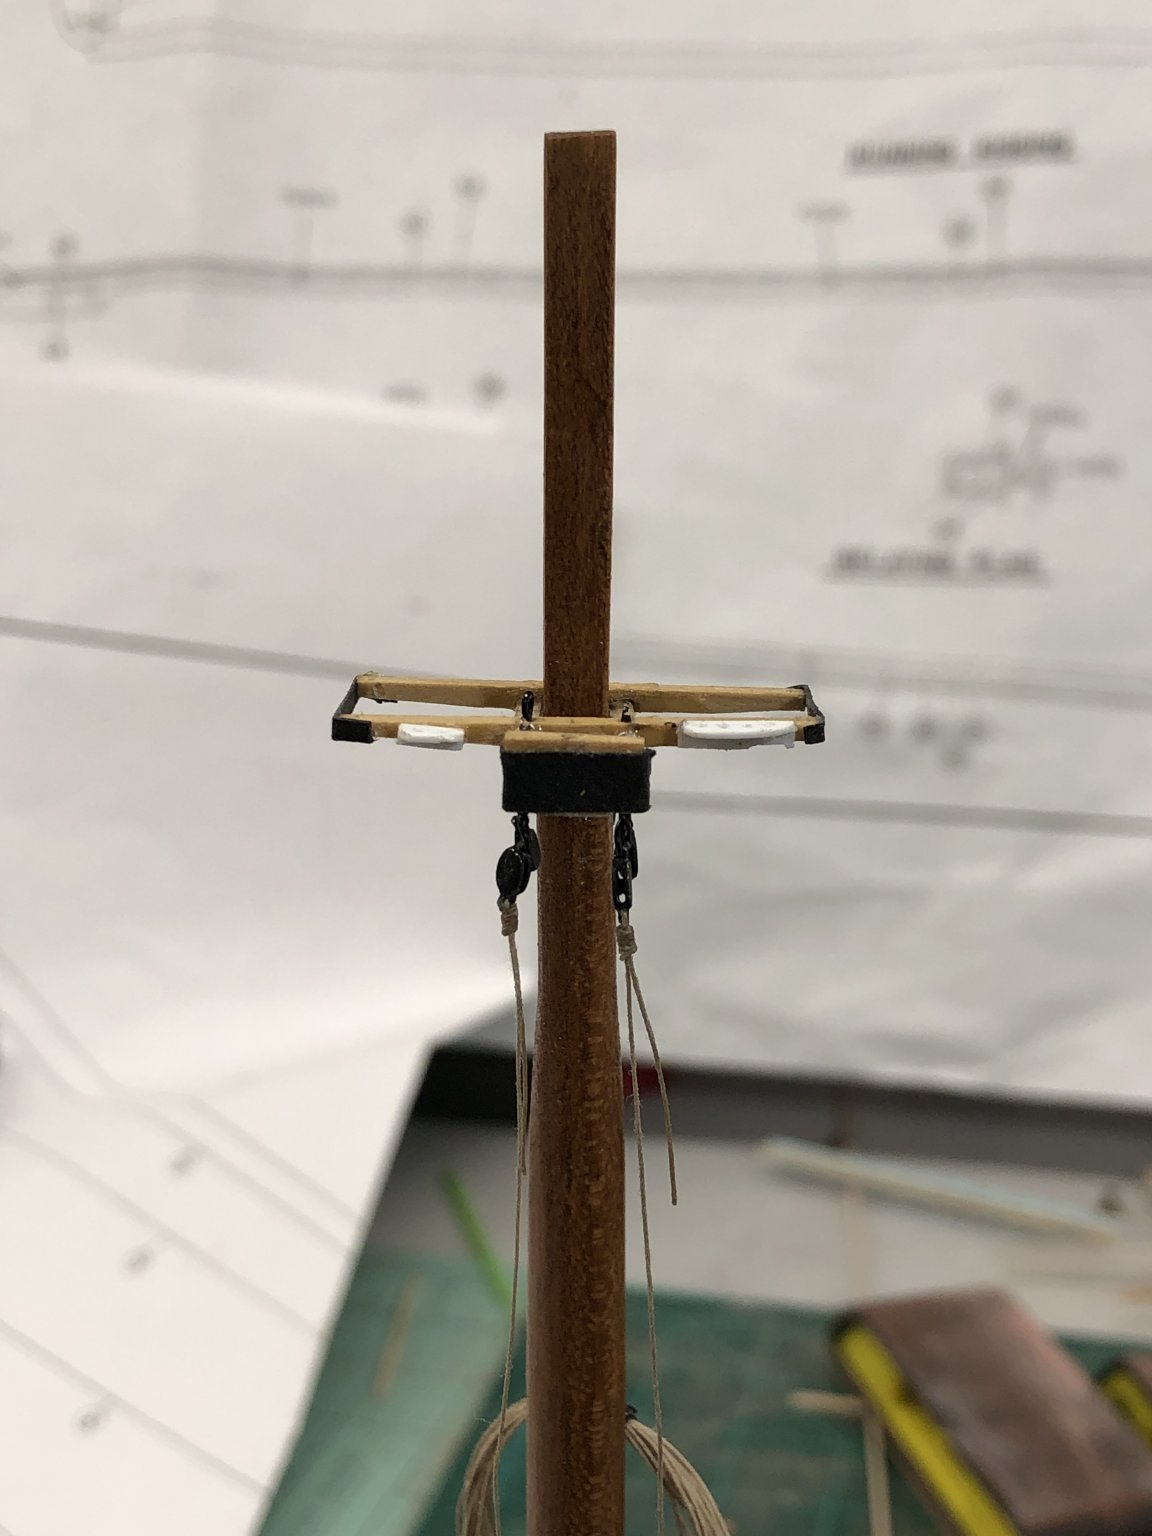
Hull has its final paint and clear flat applied. Next up for that is tom get the name on the forward chock rail and stern. I much appreciate that Bluejacket has gone to the dry transfers for these rather than decals. On the Fannie Gorham I made my own dry transfer after failing to get the decal on correctly. Here is the hull in the paint booth after the clear flat was applied. So while waiting for that to dry and between coats of the hull and bottom paint I worked on the trestle/cross trees for the fore mast (the most complex one). It took looking at the drawing several times before I got all the nuances down, but I think I got everything where it needs to be. Here is the basic structure. Instead of the polystyrene strips provided in the kit for the "barn door" and "guard irons" I used black laserboard. One less thing to paint and polystyrene does not take paint (at least acrylic paint) very easily in my limited experience. One thing to note for those building the Notman in the future. The two eyebolts on the top are for the topmast and top gallant stays (coming from the main mast). The instructions indicate to put pins in these locations while assembling the trestle/cross trees but it would be easier to put in the eyebolts rather than have to take the pins out first. I made the mistake of gluing the pins in but apparently did a pretty poor job of it as I had little difficulty getting them out. Since the upper throat halyard triple block has a becket and both the jib and fore staysail halyards have beckets I decided to go ahead and rig the lines to the beckets now rather after the trees are mounted on the masts. I still have the boom topping lift blocks to mount on the after side of the trestle trees. I am "on the fence" over whether or not to use fabricate the boom lift links as indicated in the instructions. I am thinking of just using eyebolts as I did with the other blocks. The boom lift links will orient the blocks with the sheave shaft aligned with the ship centerline unless I put another ring between the block and the lift link. The photo CD does not have any pictures that clearly show the aft side of one of the masts but the very last one does show the lines on one of the topping lifts twisted as if the two sets of blocks are not aligned in the same plane. Here it is: I want to avoid this and will probably just use eyebolts for the upper topping lift blocks. Anyway here is the mast top in its current state (prior to painting) dry fit on the lower fore mast. The ends of the lines at the beckets have yet to be trimmed up.I used epoxy to bond the eyebolts to the trestle trees. Hopefully the paint will make them lookm like bolt heads. And I just noticed that one of the upper eyebolts has lost it upper half. I need to figure out a fix for that before I worry about the topping lift blocks.


(2018_07_2316_35_27UTC).thumb.jpg.810c0aeb792ff580d4a7a717598292aa.jpg)
- 144 replies
-
- 6
-
-
- charles p notman
- finished
- (and 1 more)
-
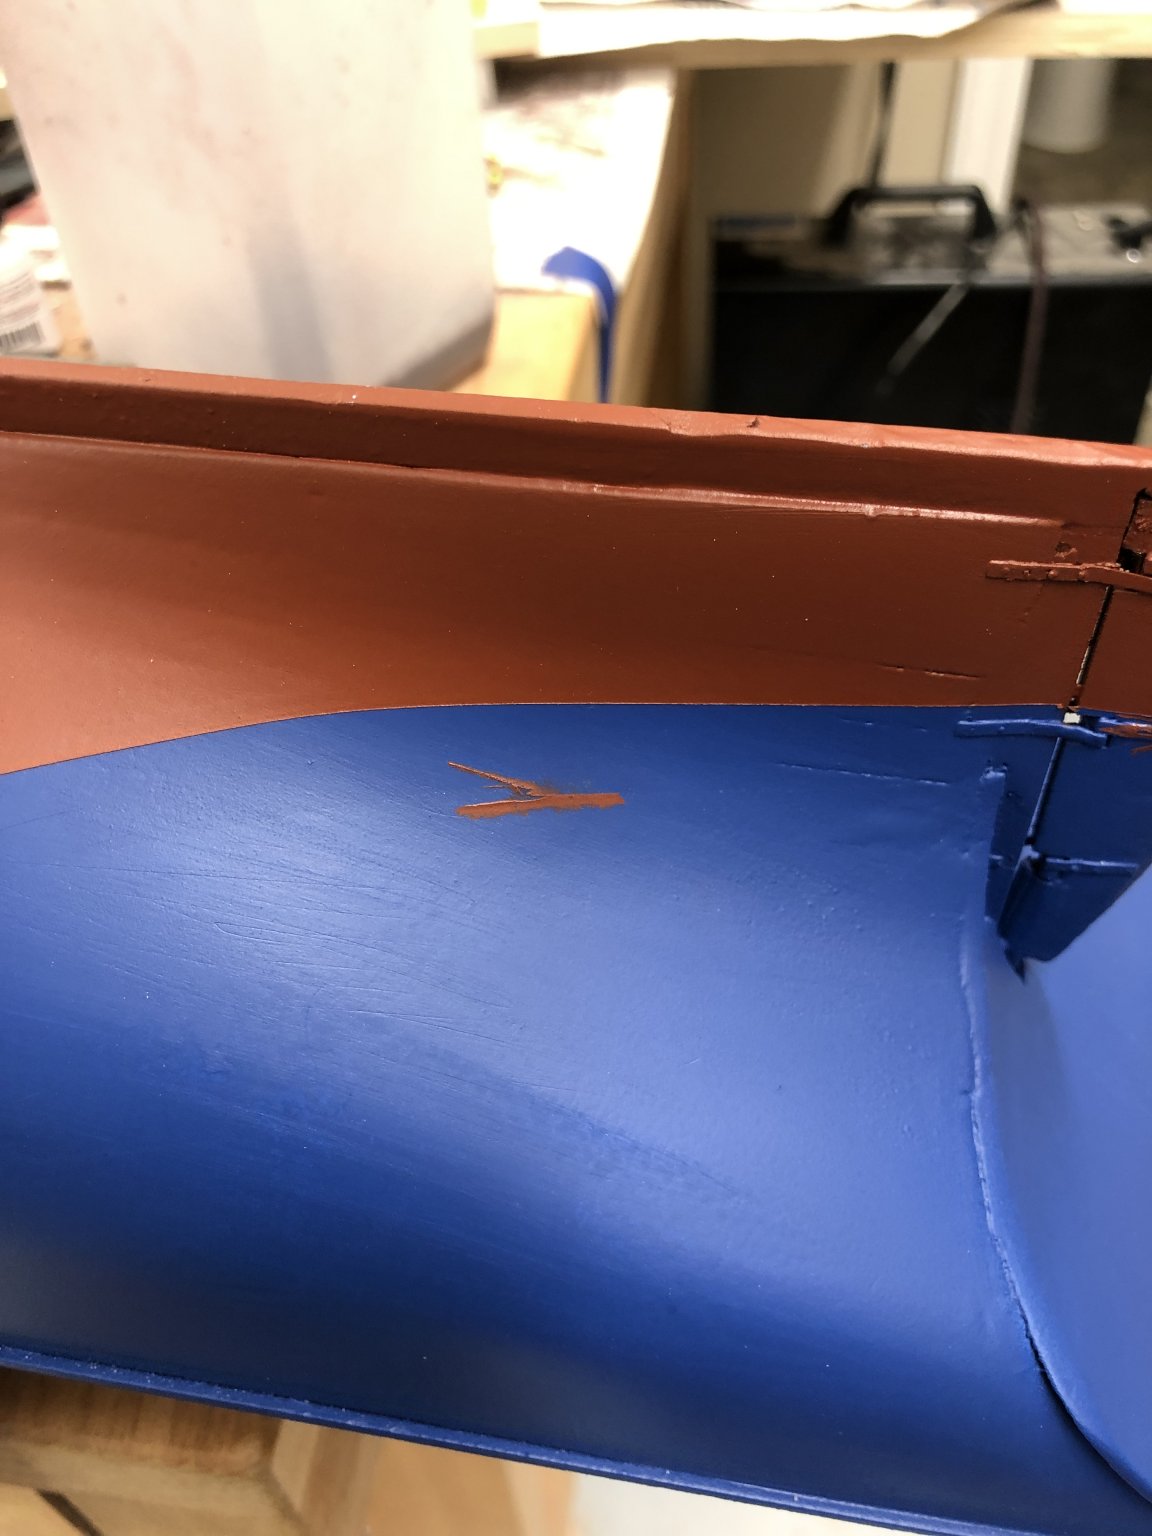
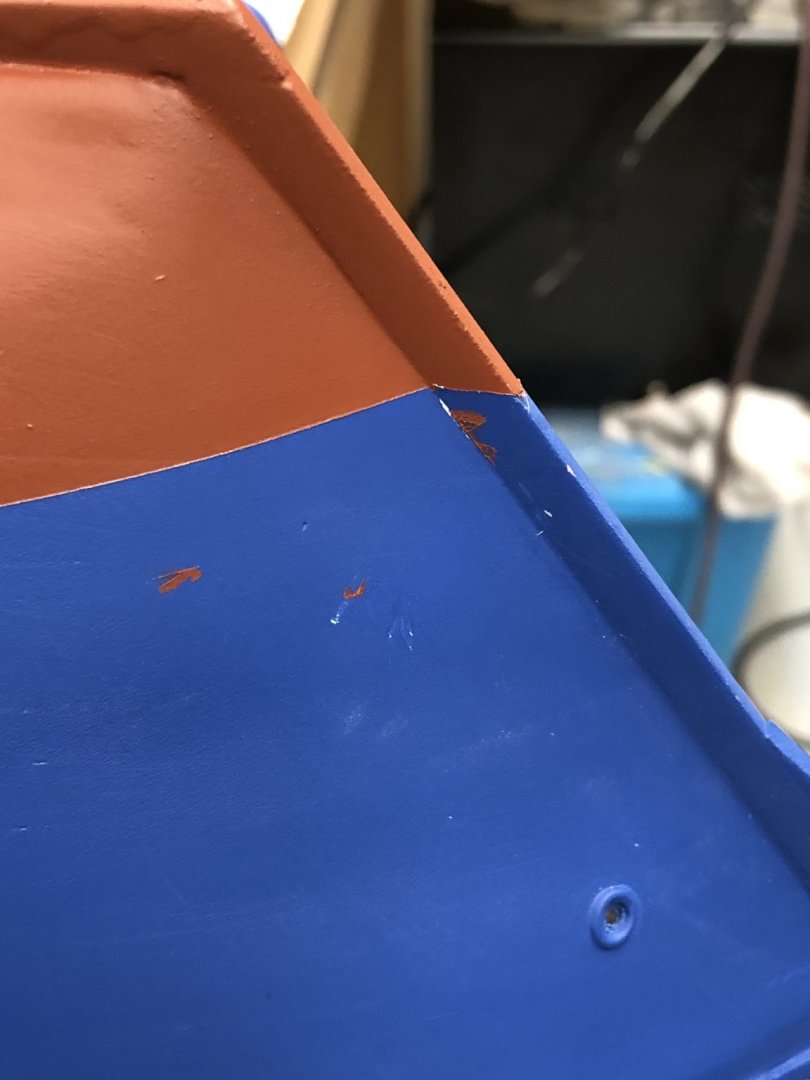
Two minor issues with my masking job, one at the bow and one near the stern. Touched up both prior to spraying the entire hull with a commercial spray of clear flat. Hopefully this will protect the hull during the handling going forward.

- 144 replies
-
- 6
-
-
- charles p notman
- finished
- (and 1 more)
-
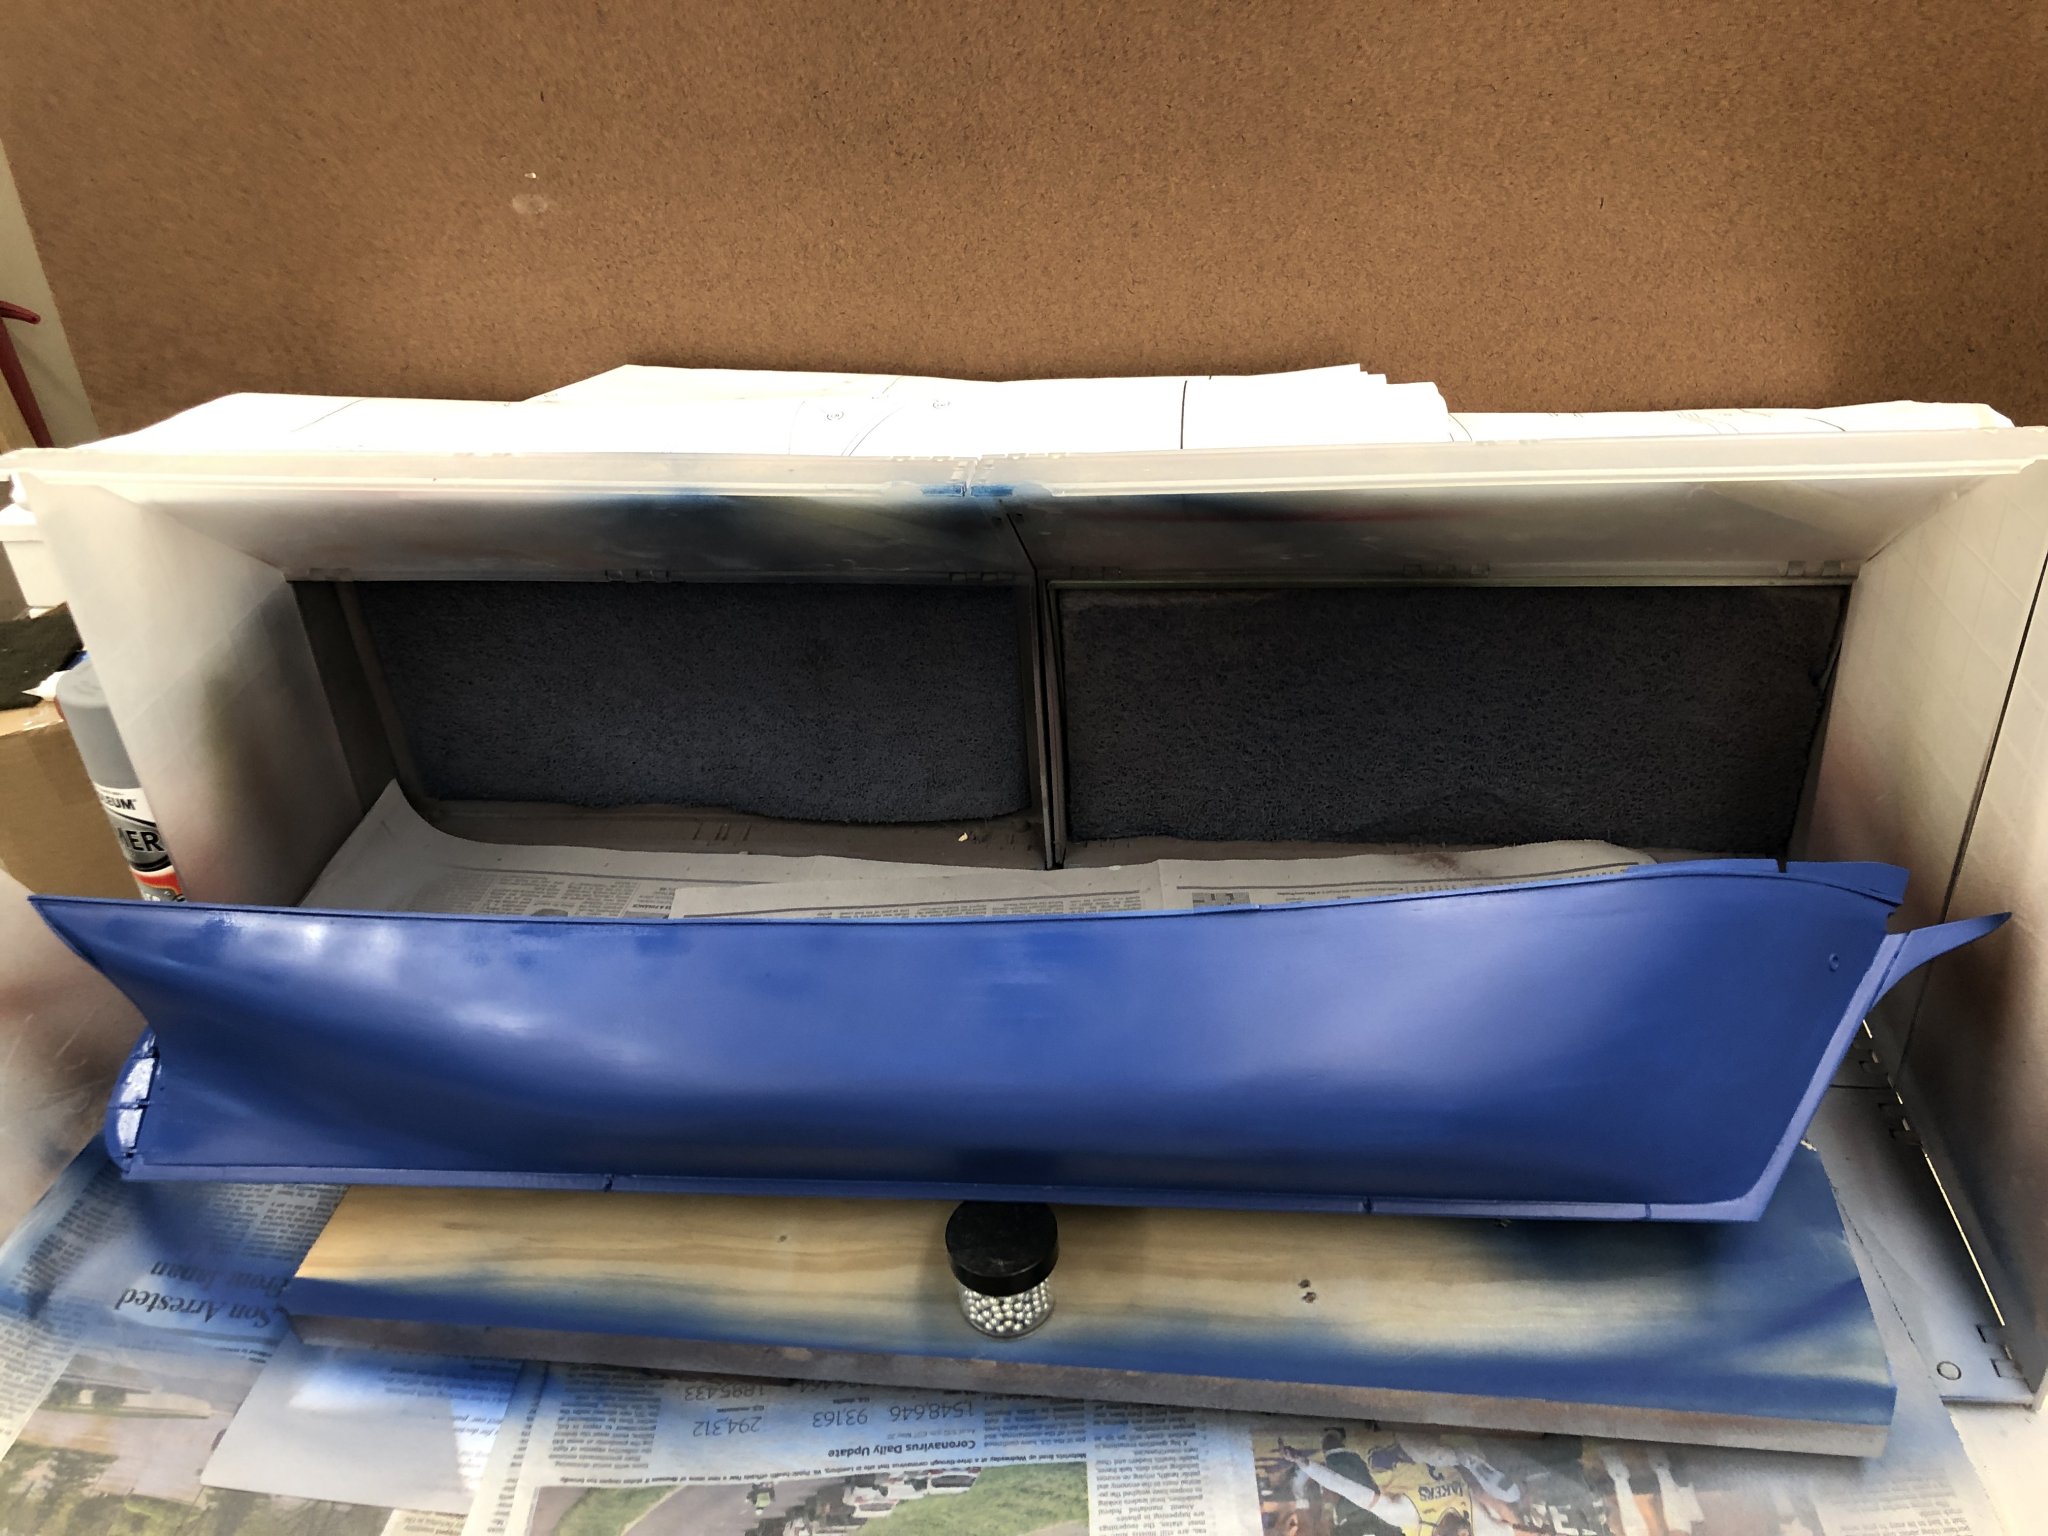
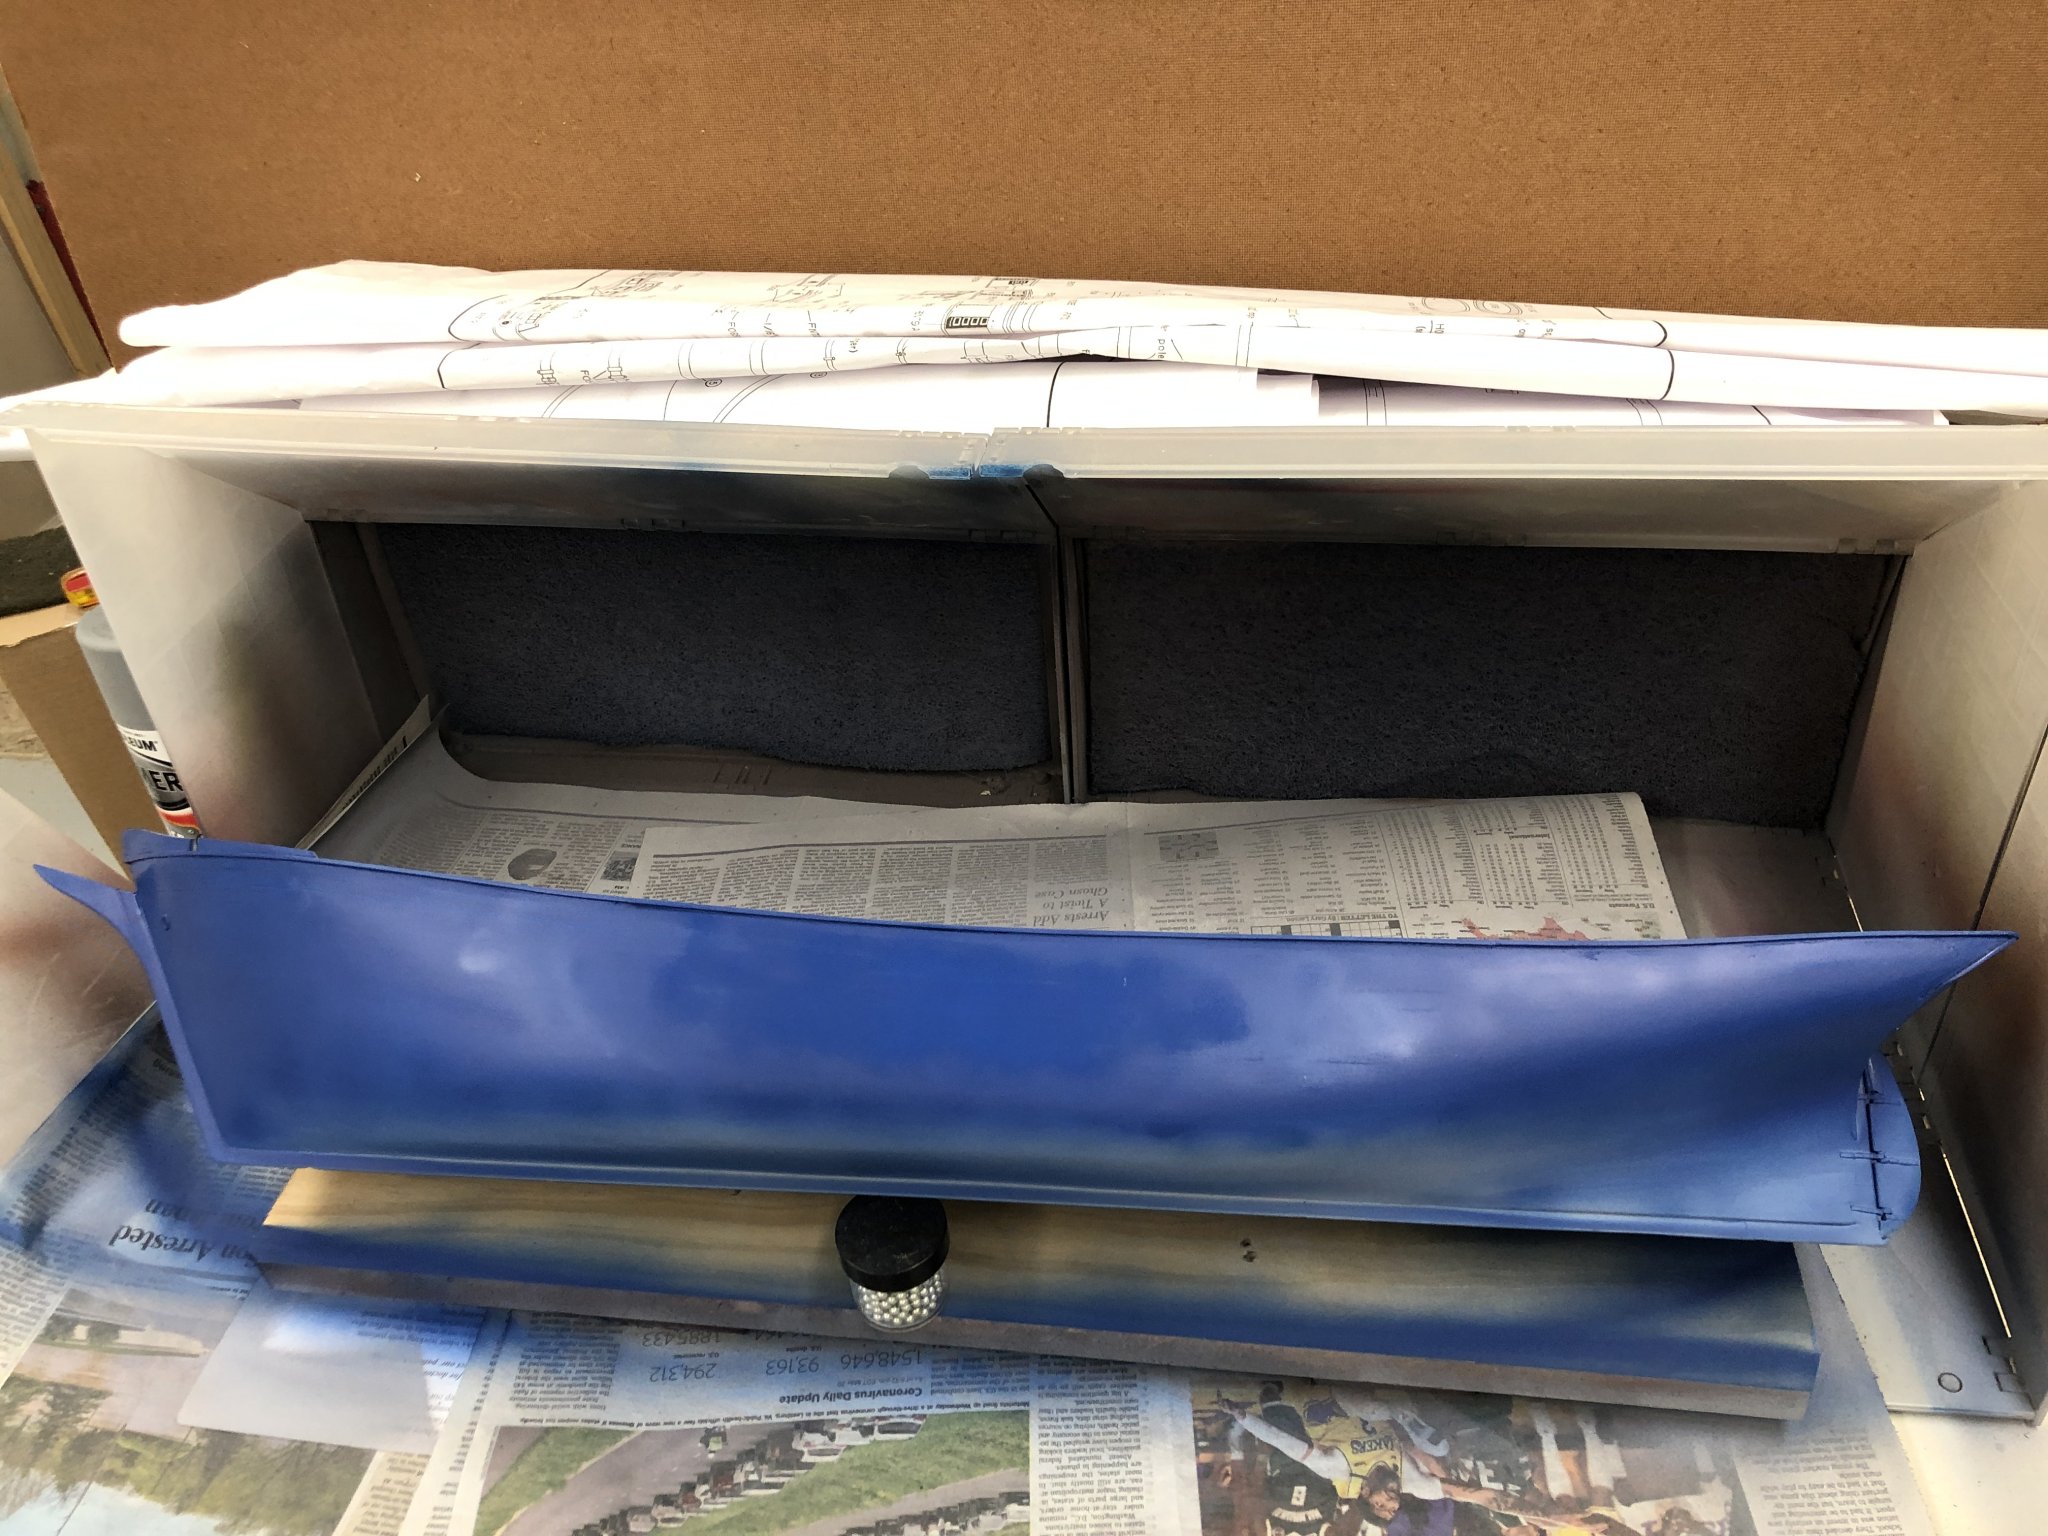
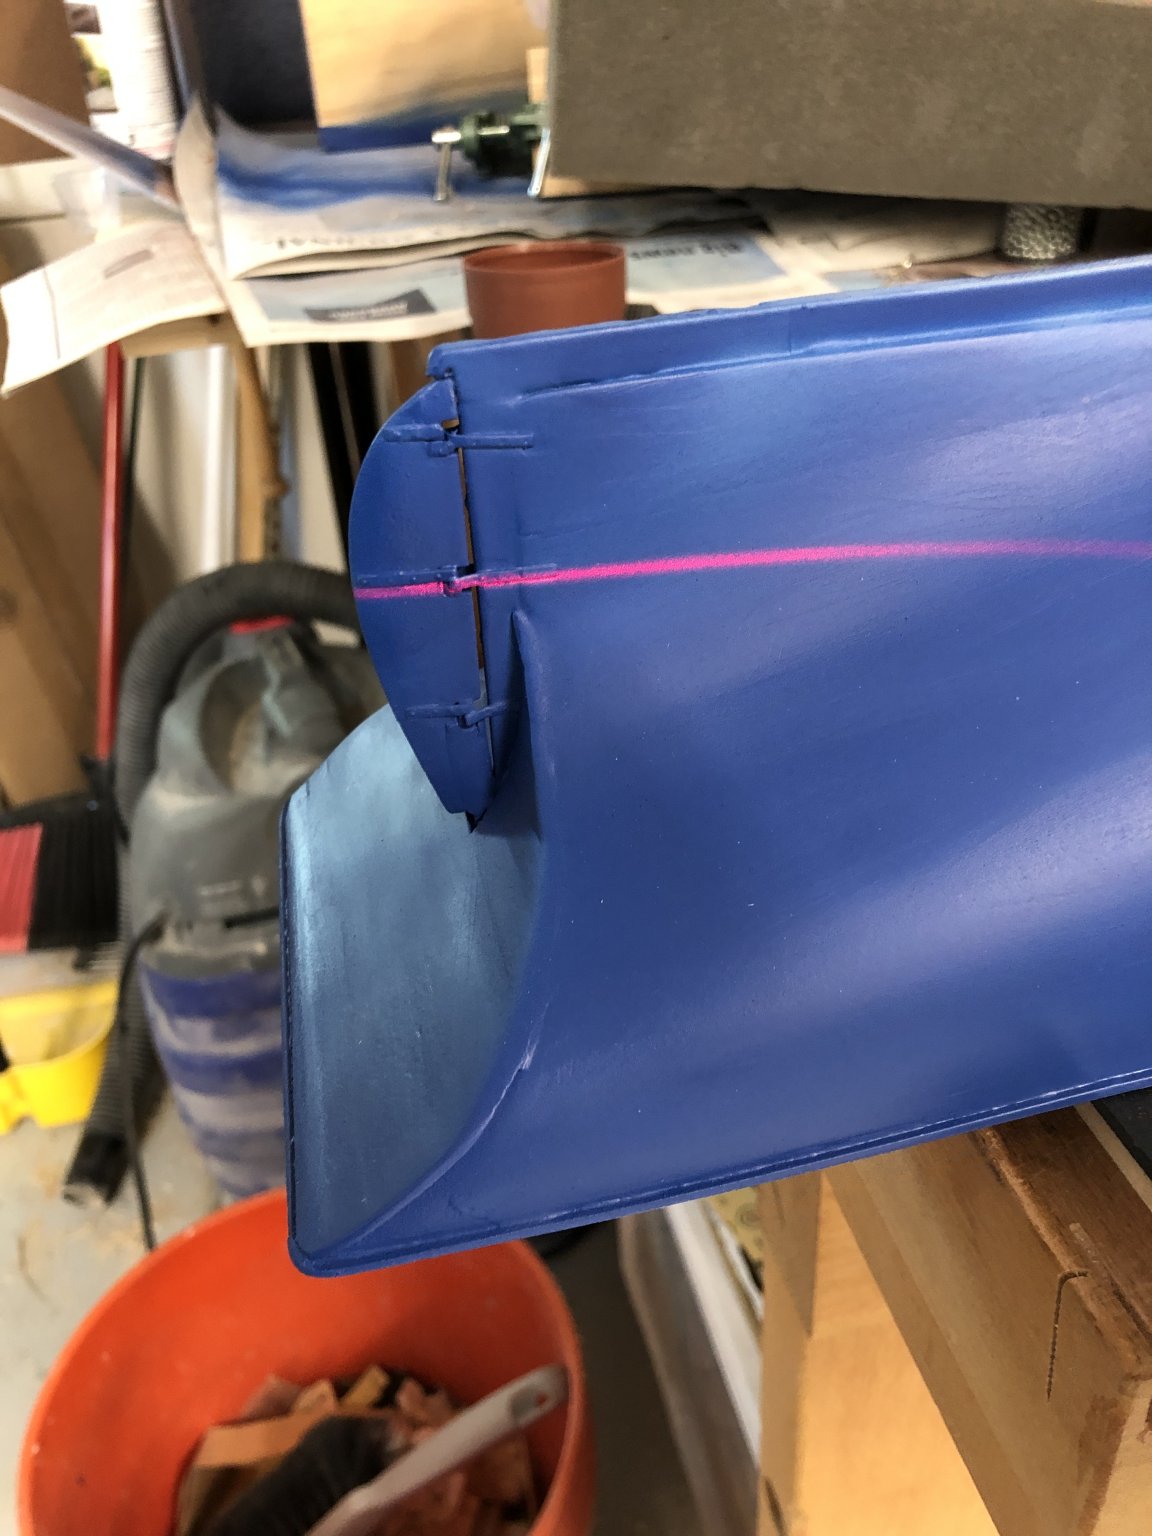
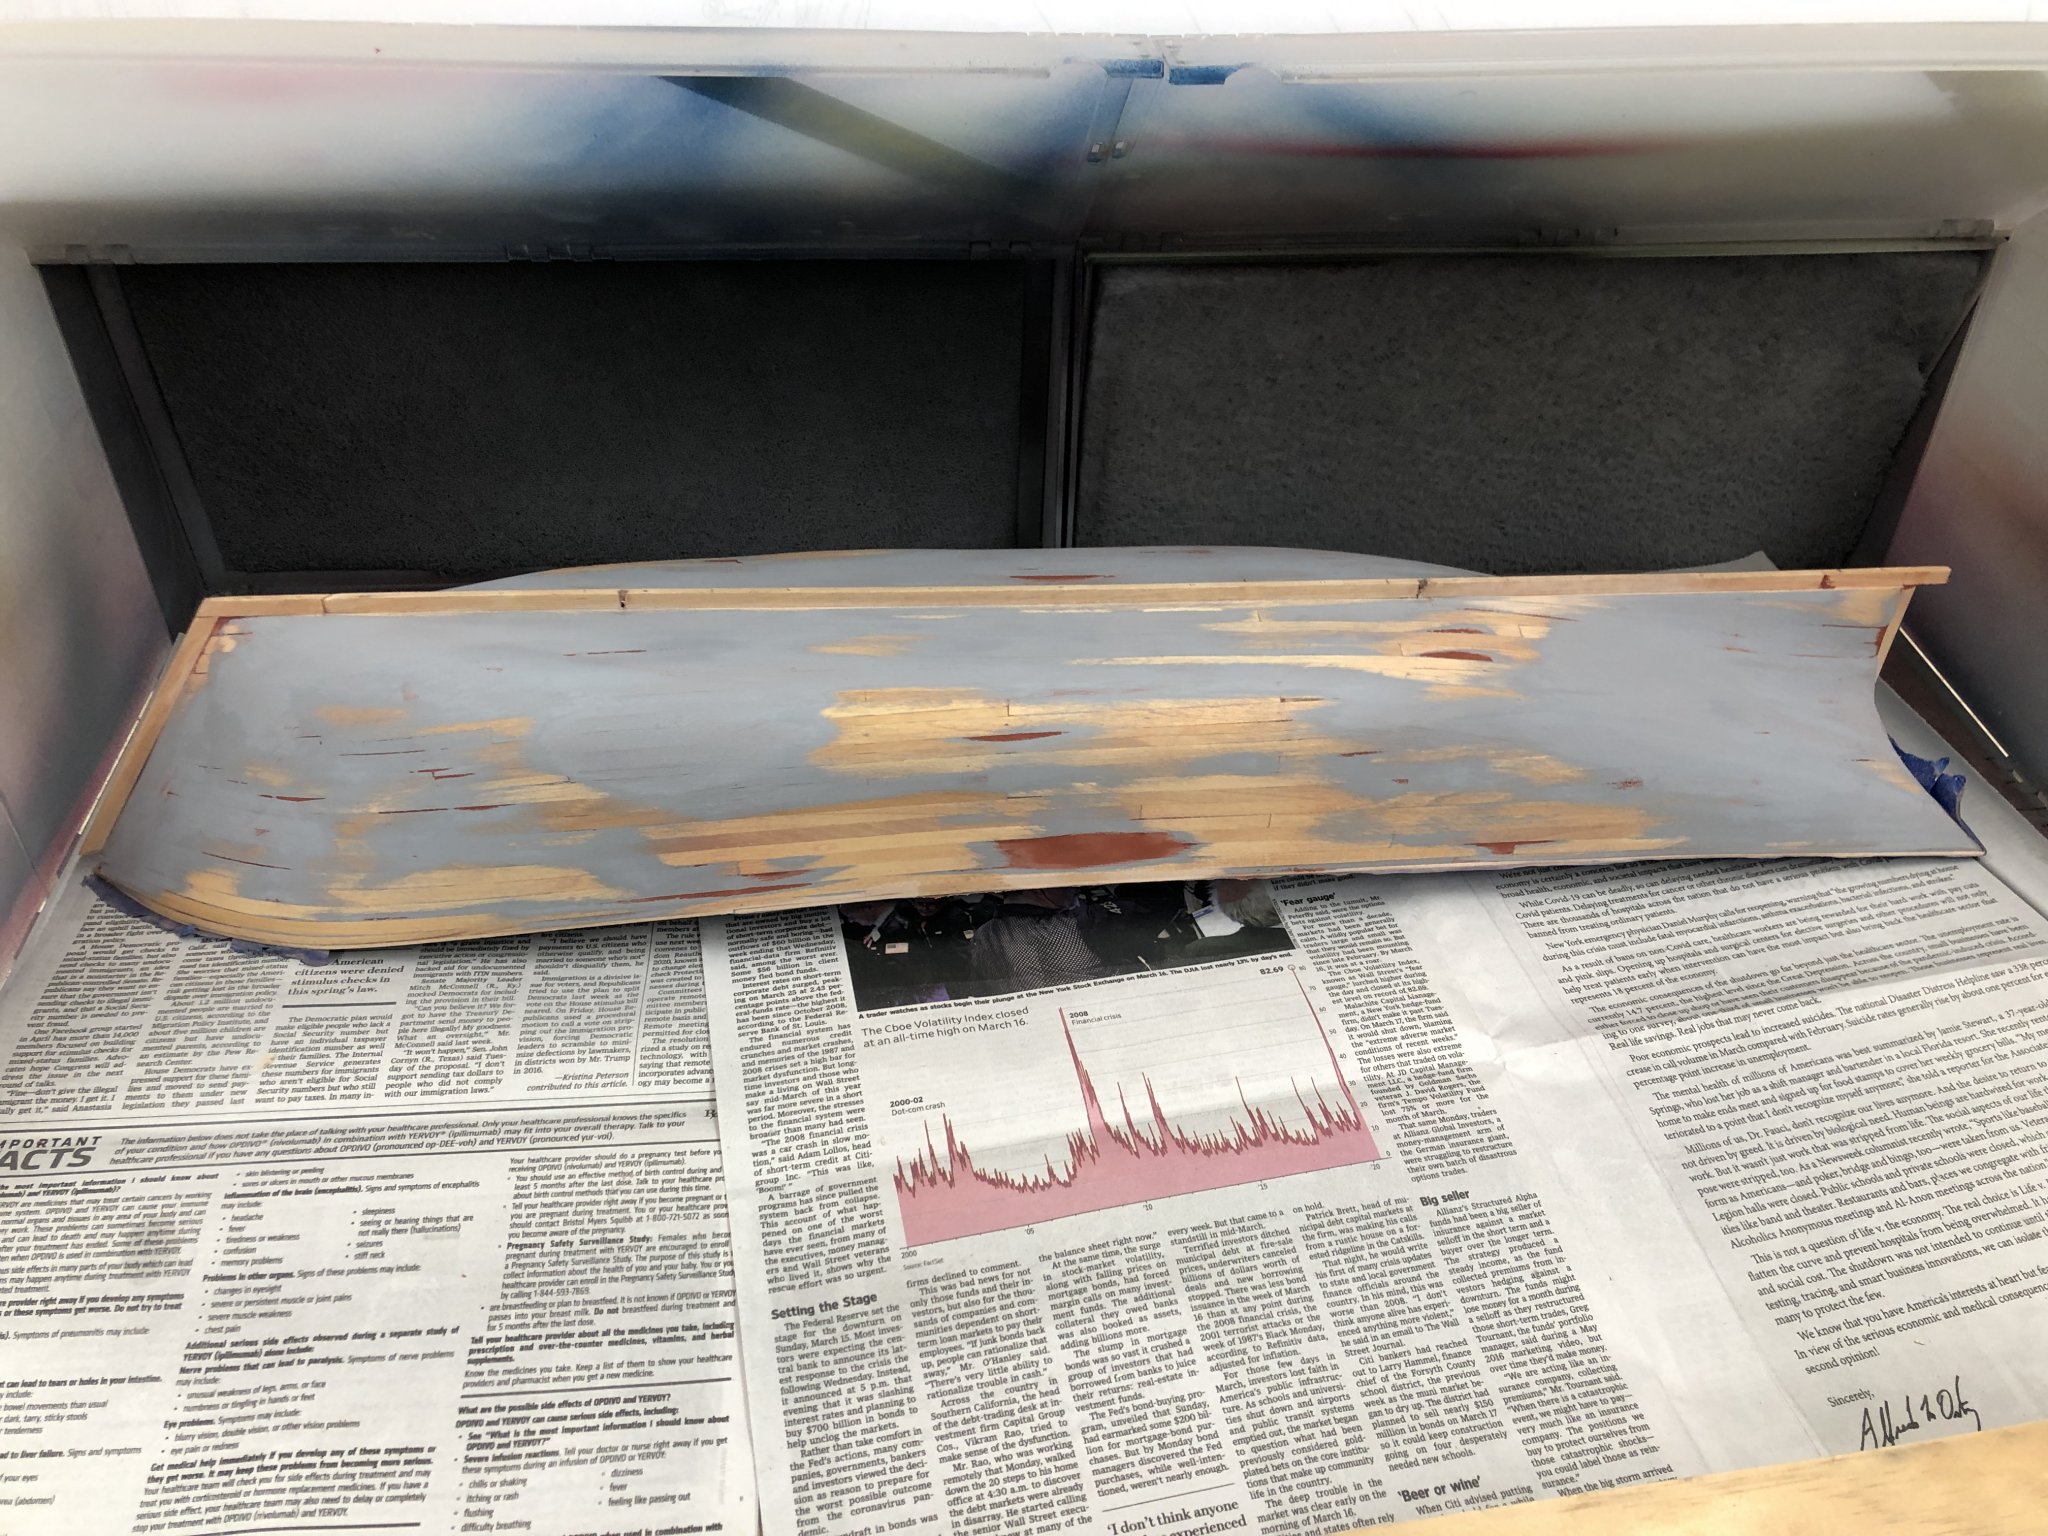
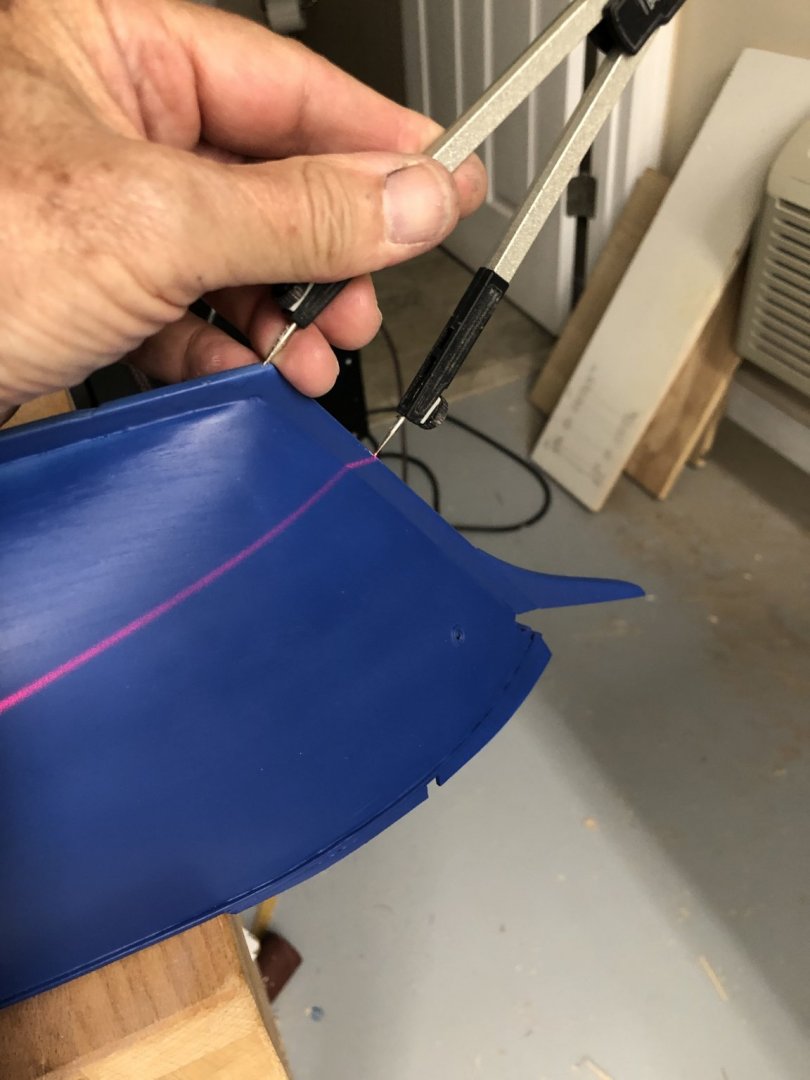
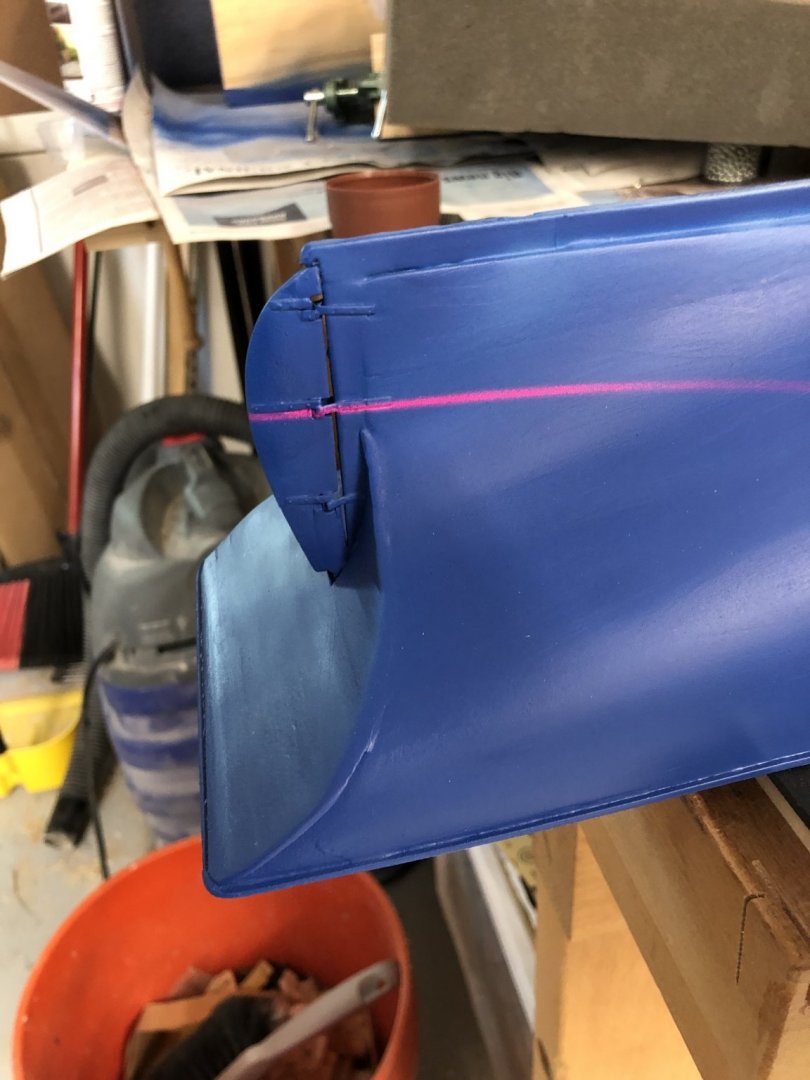
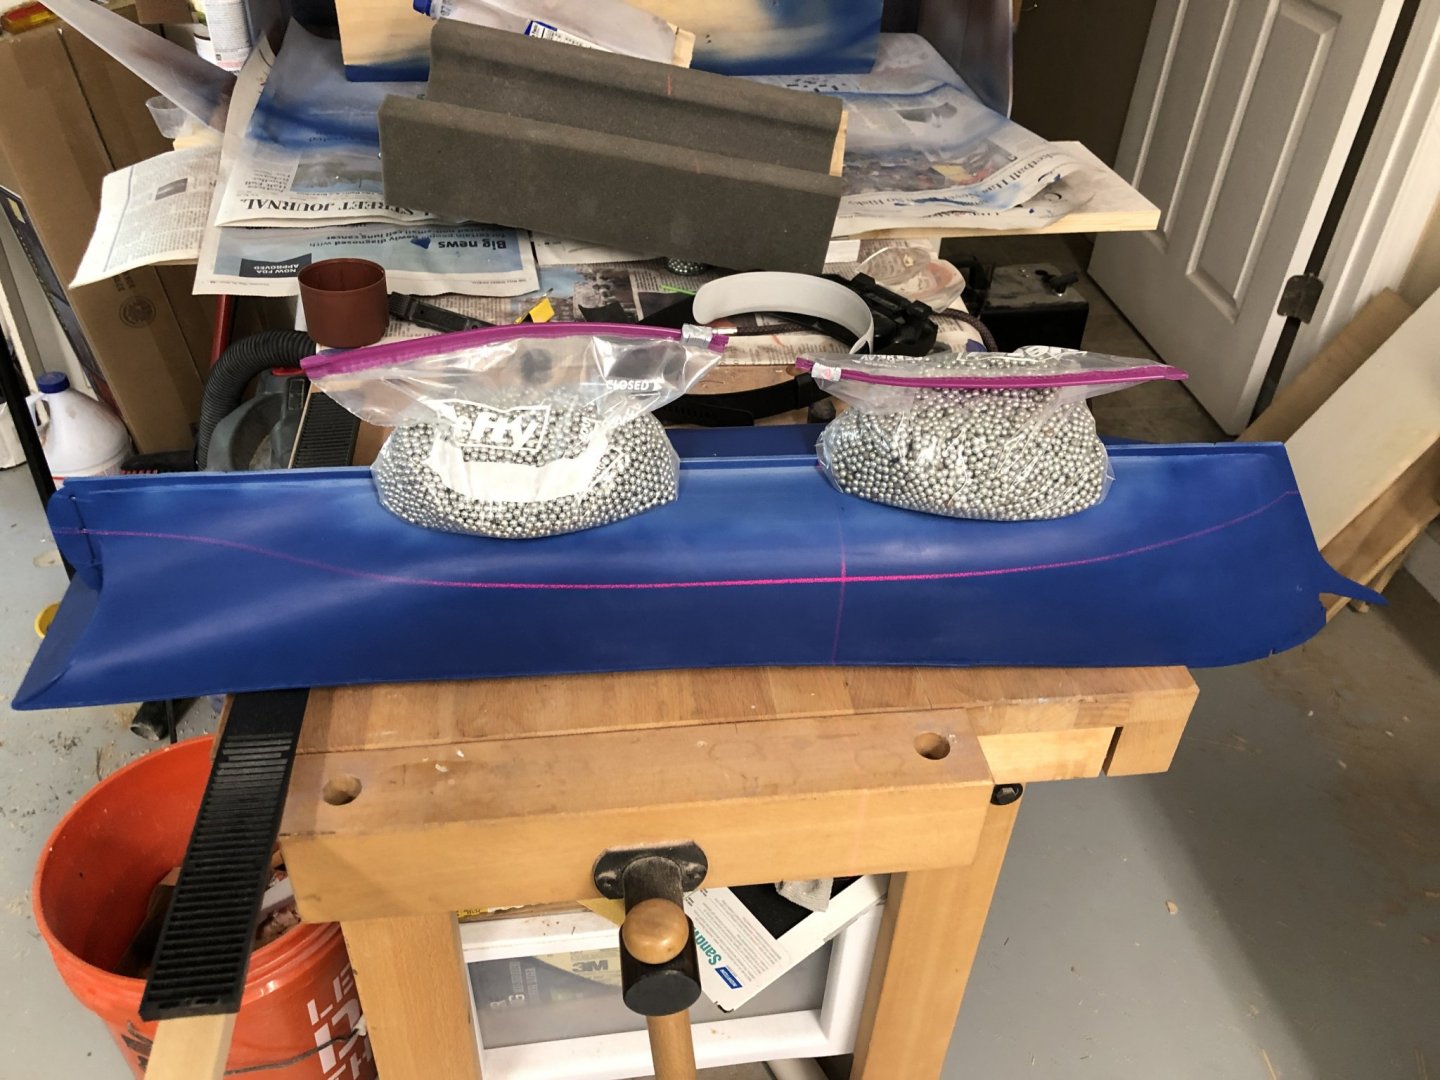
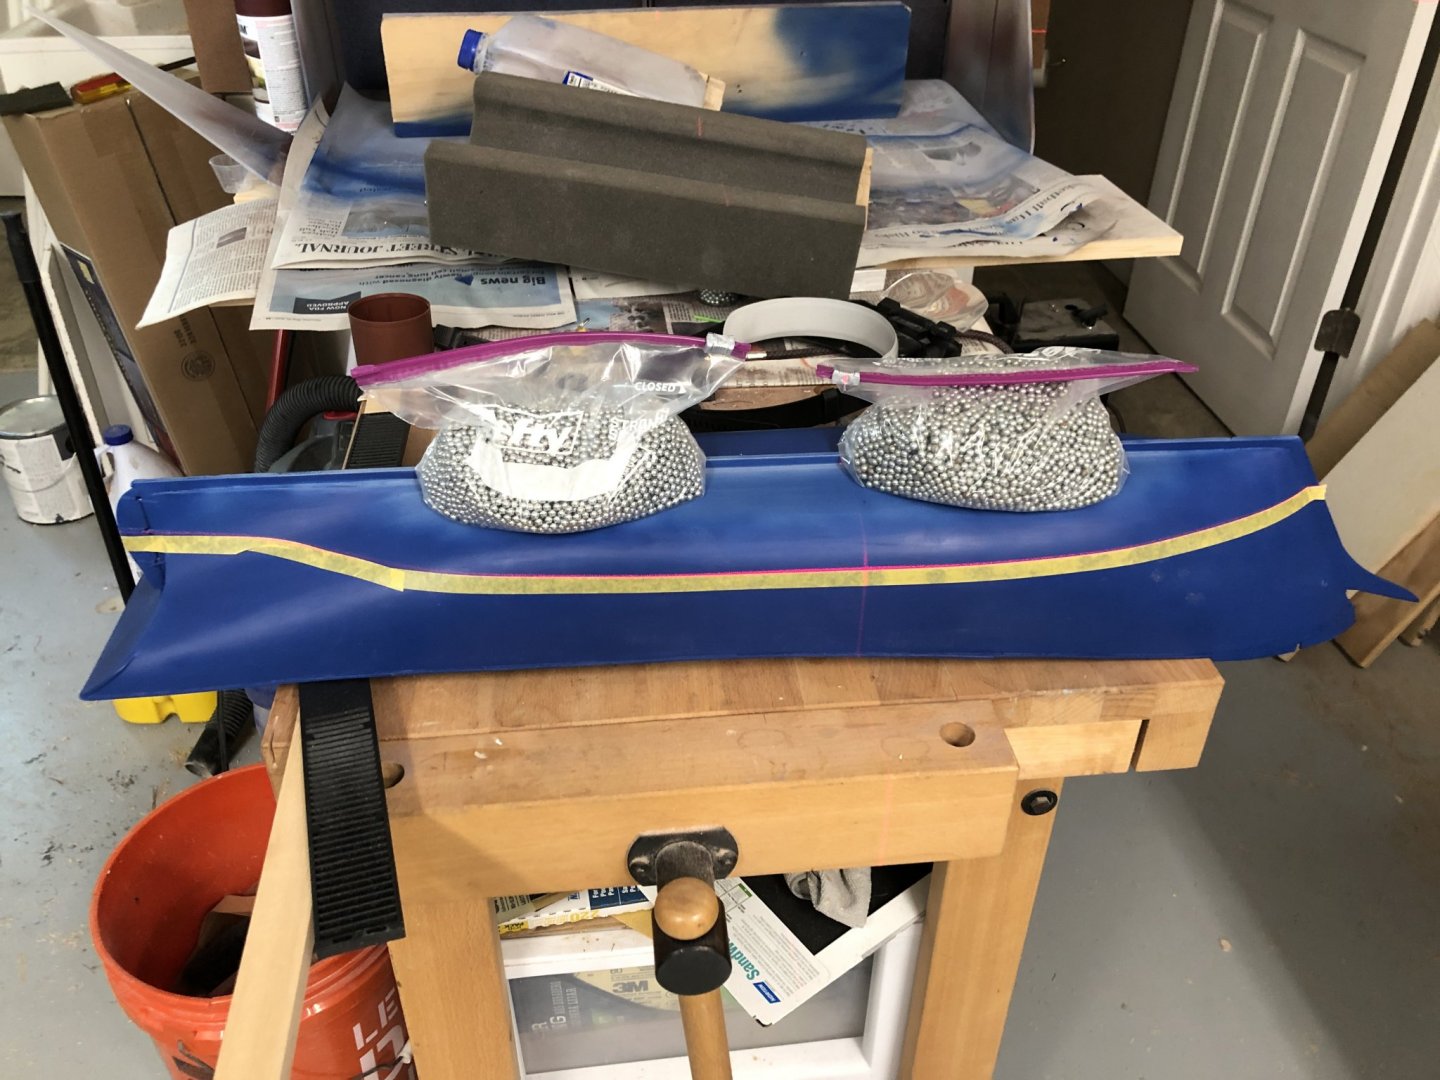
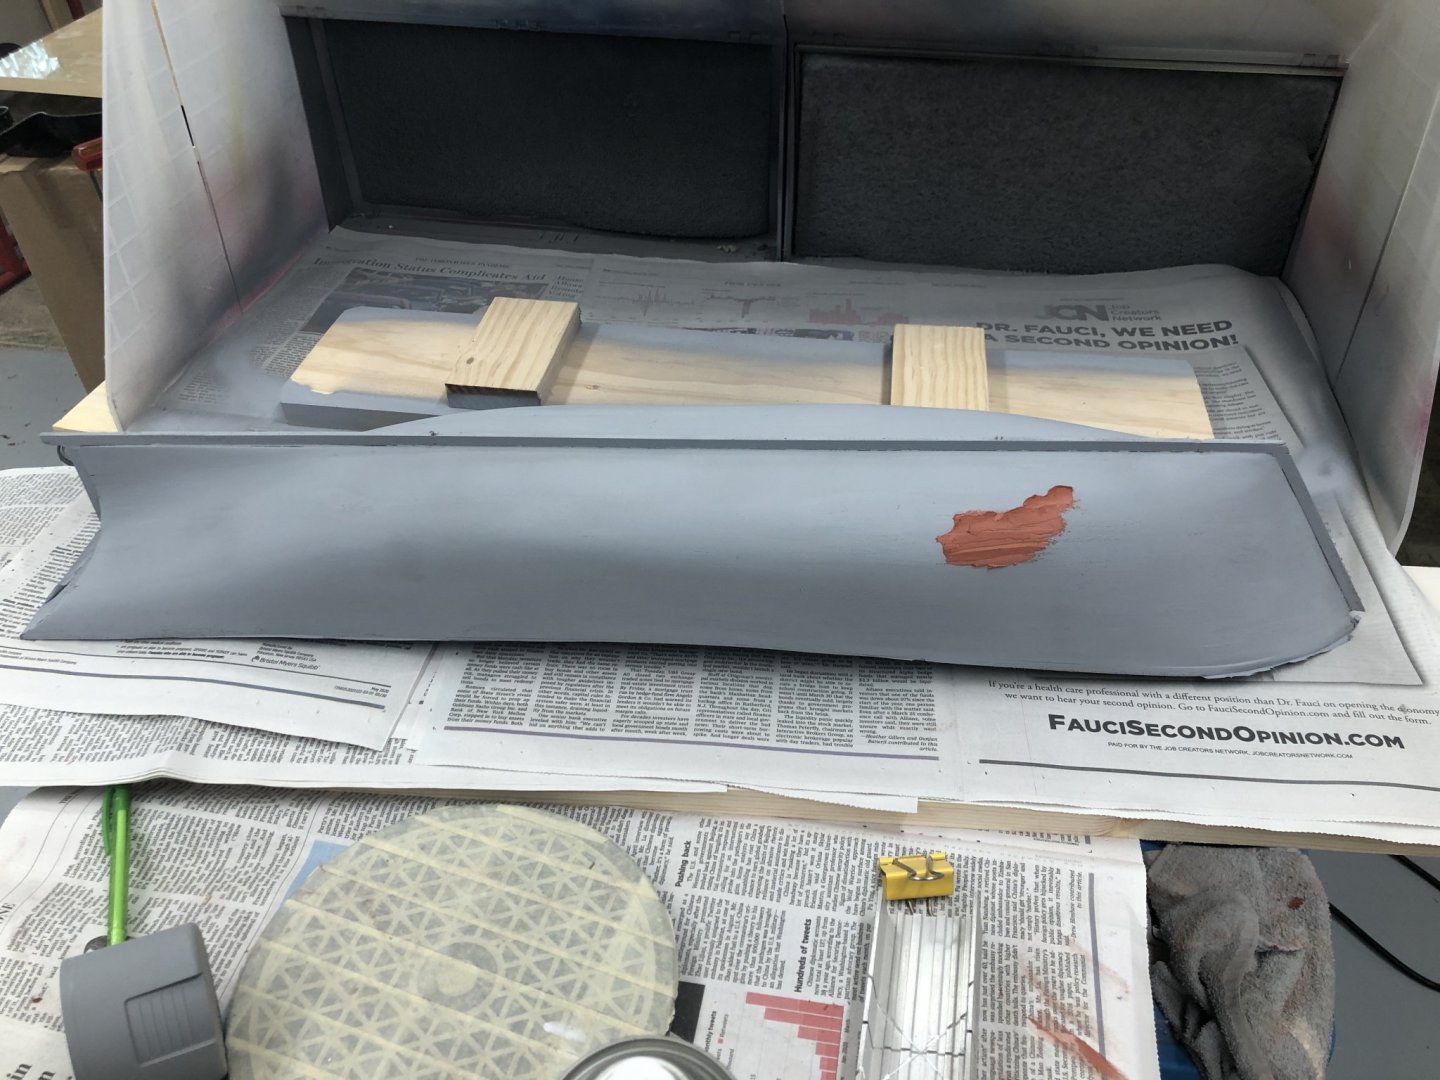
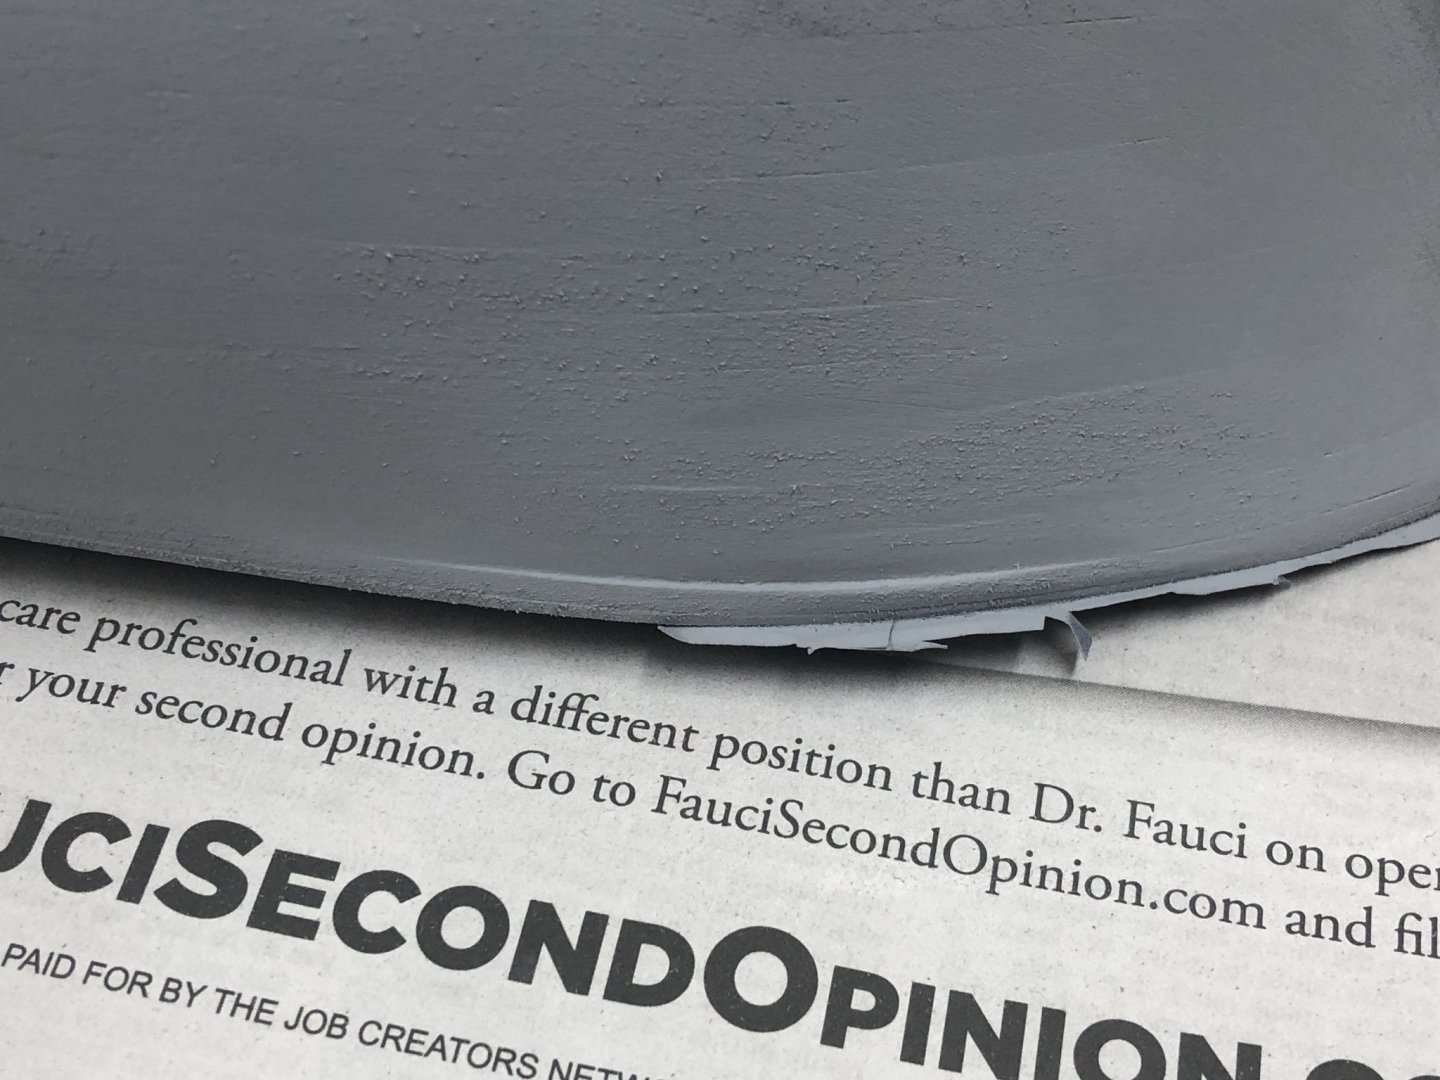
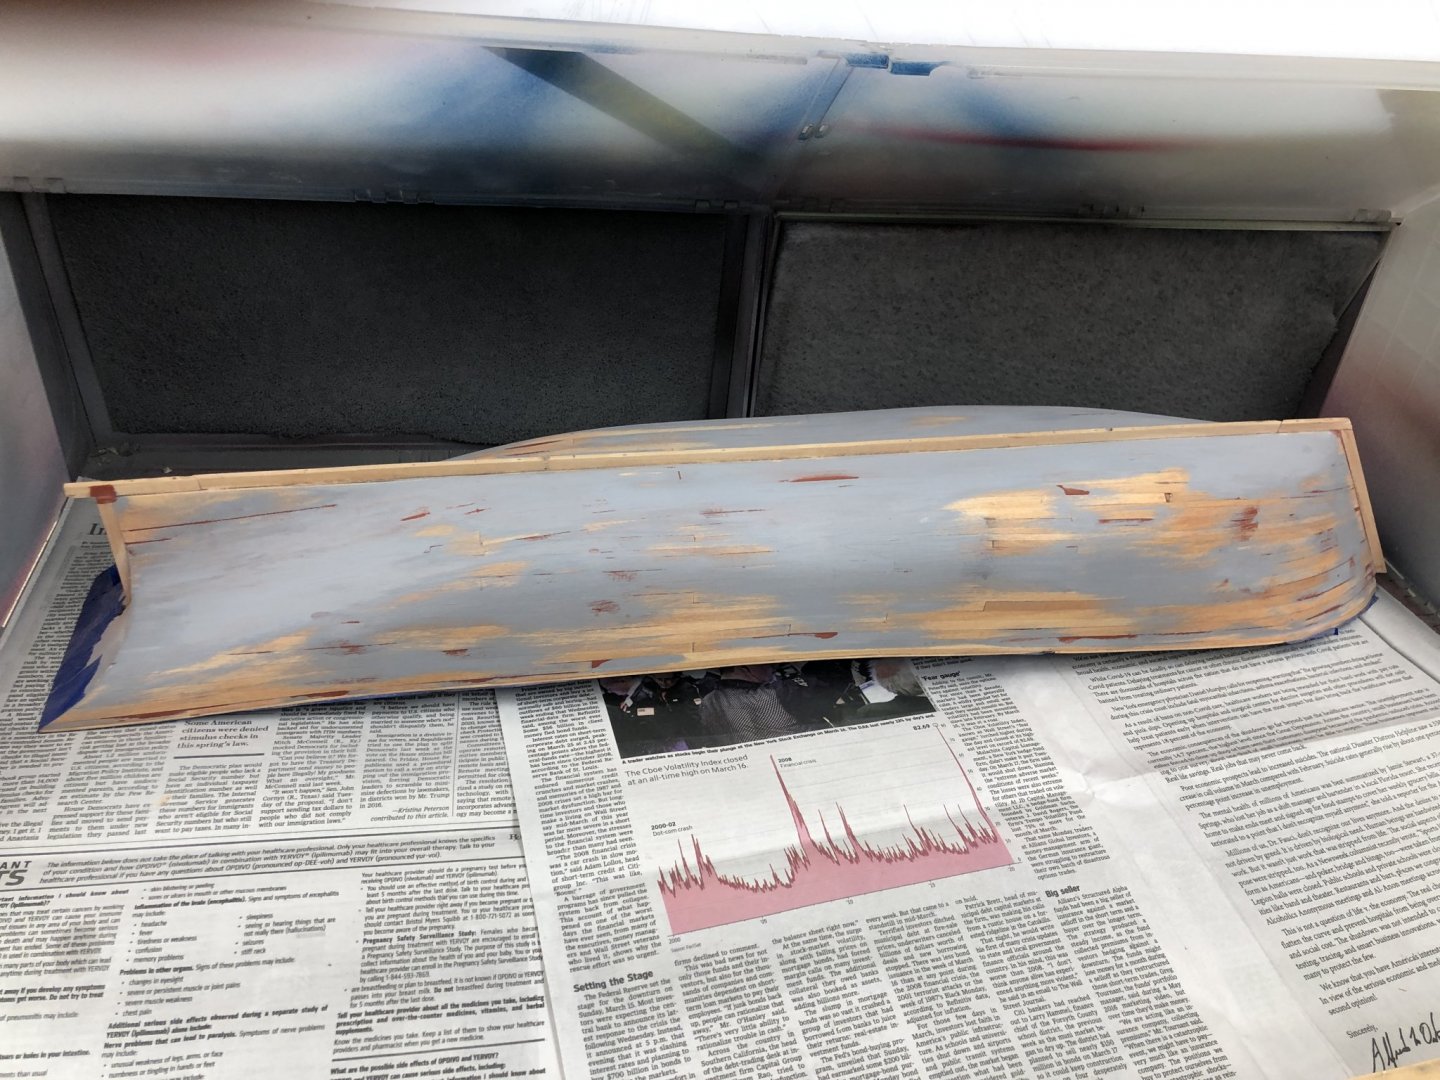
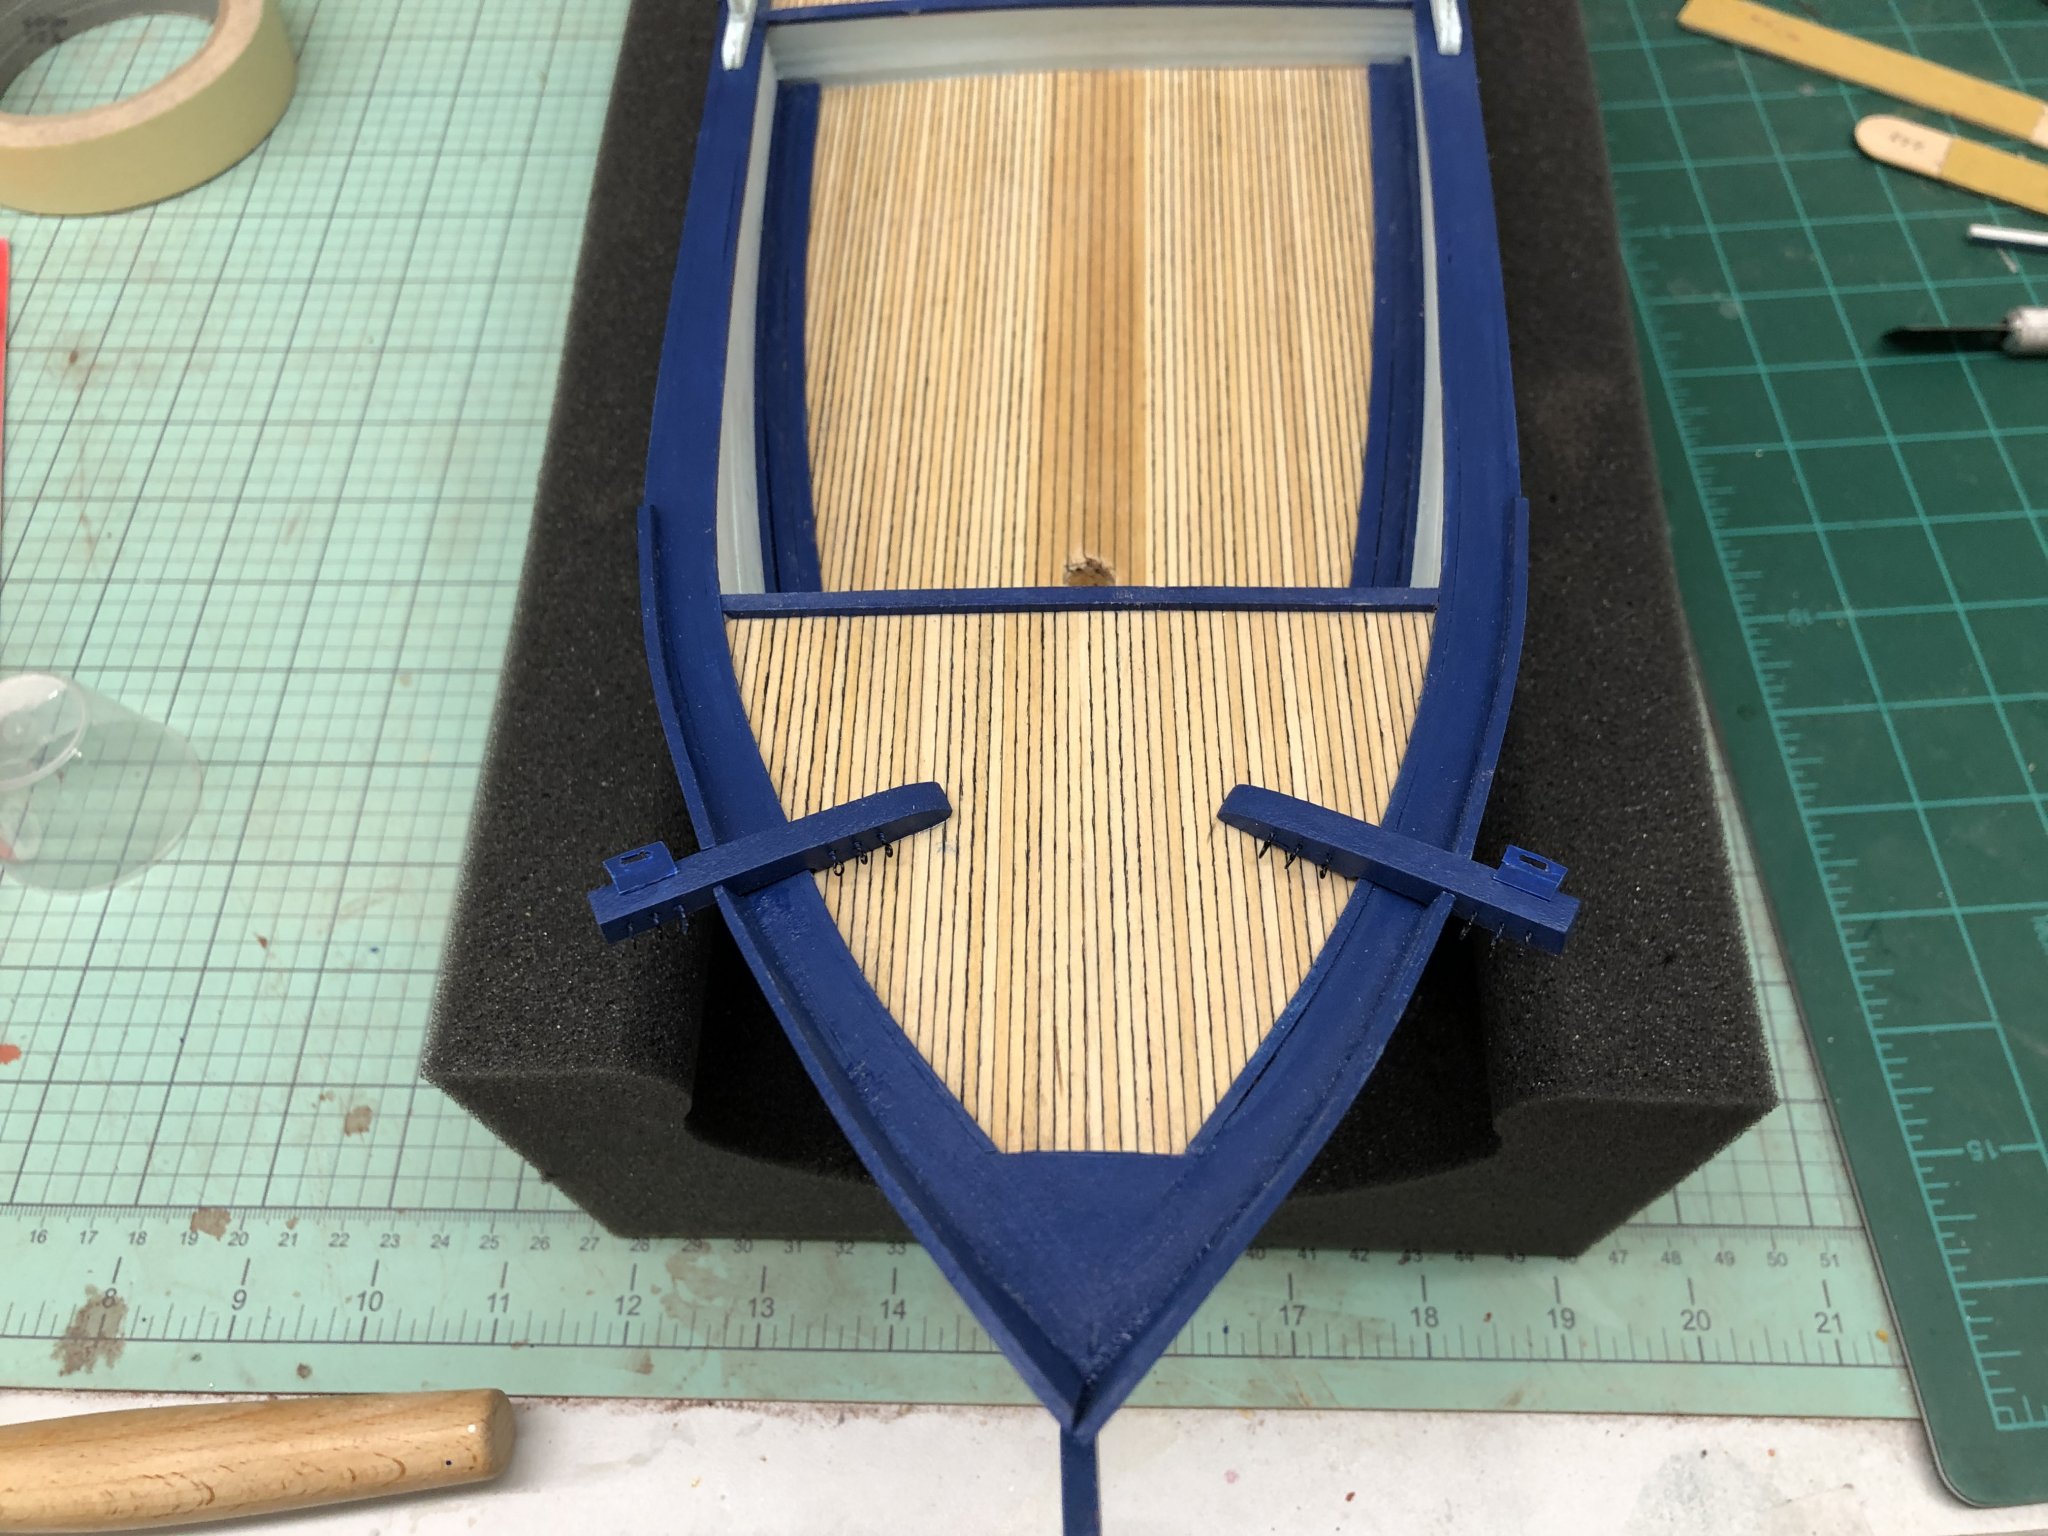
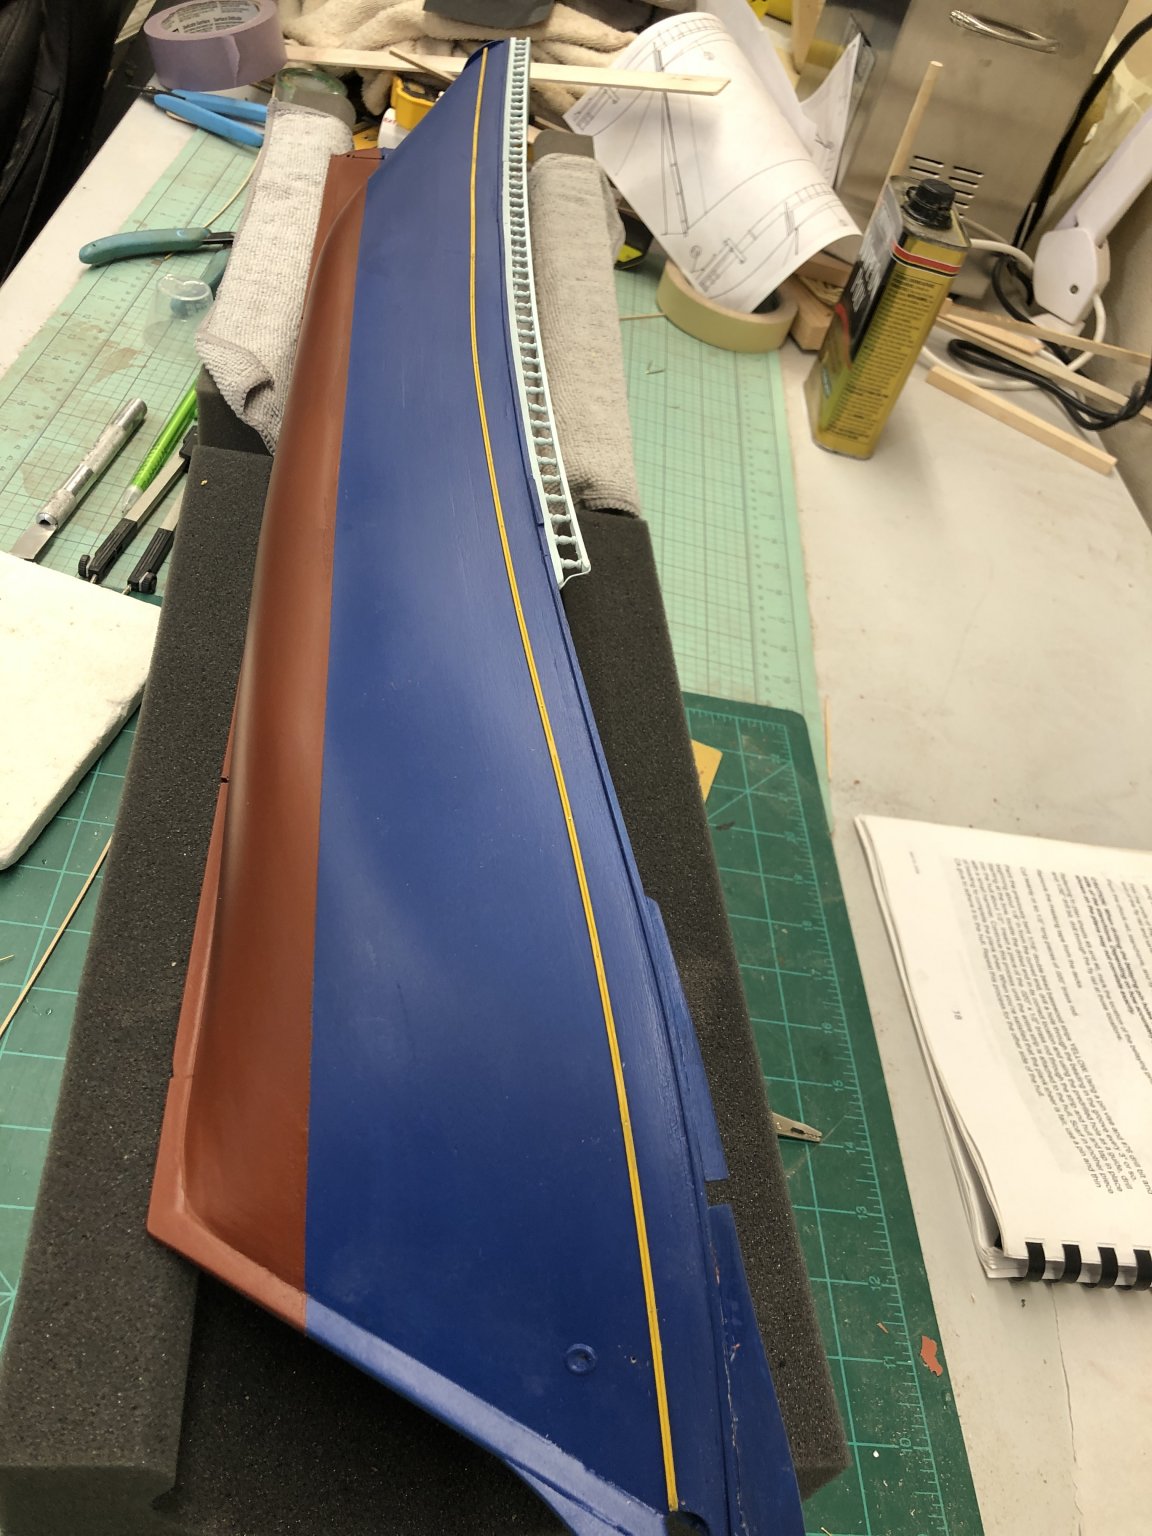
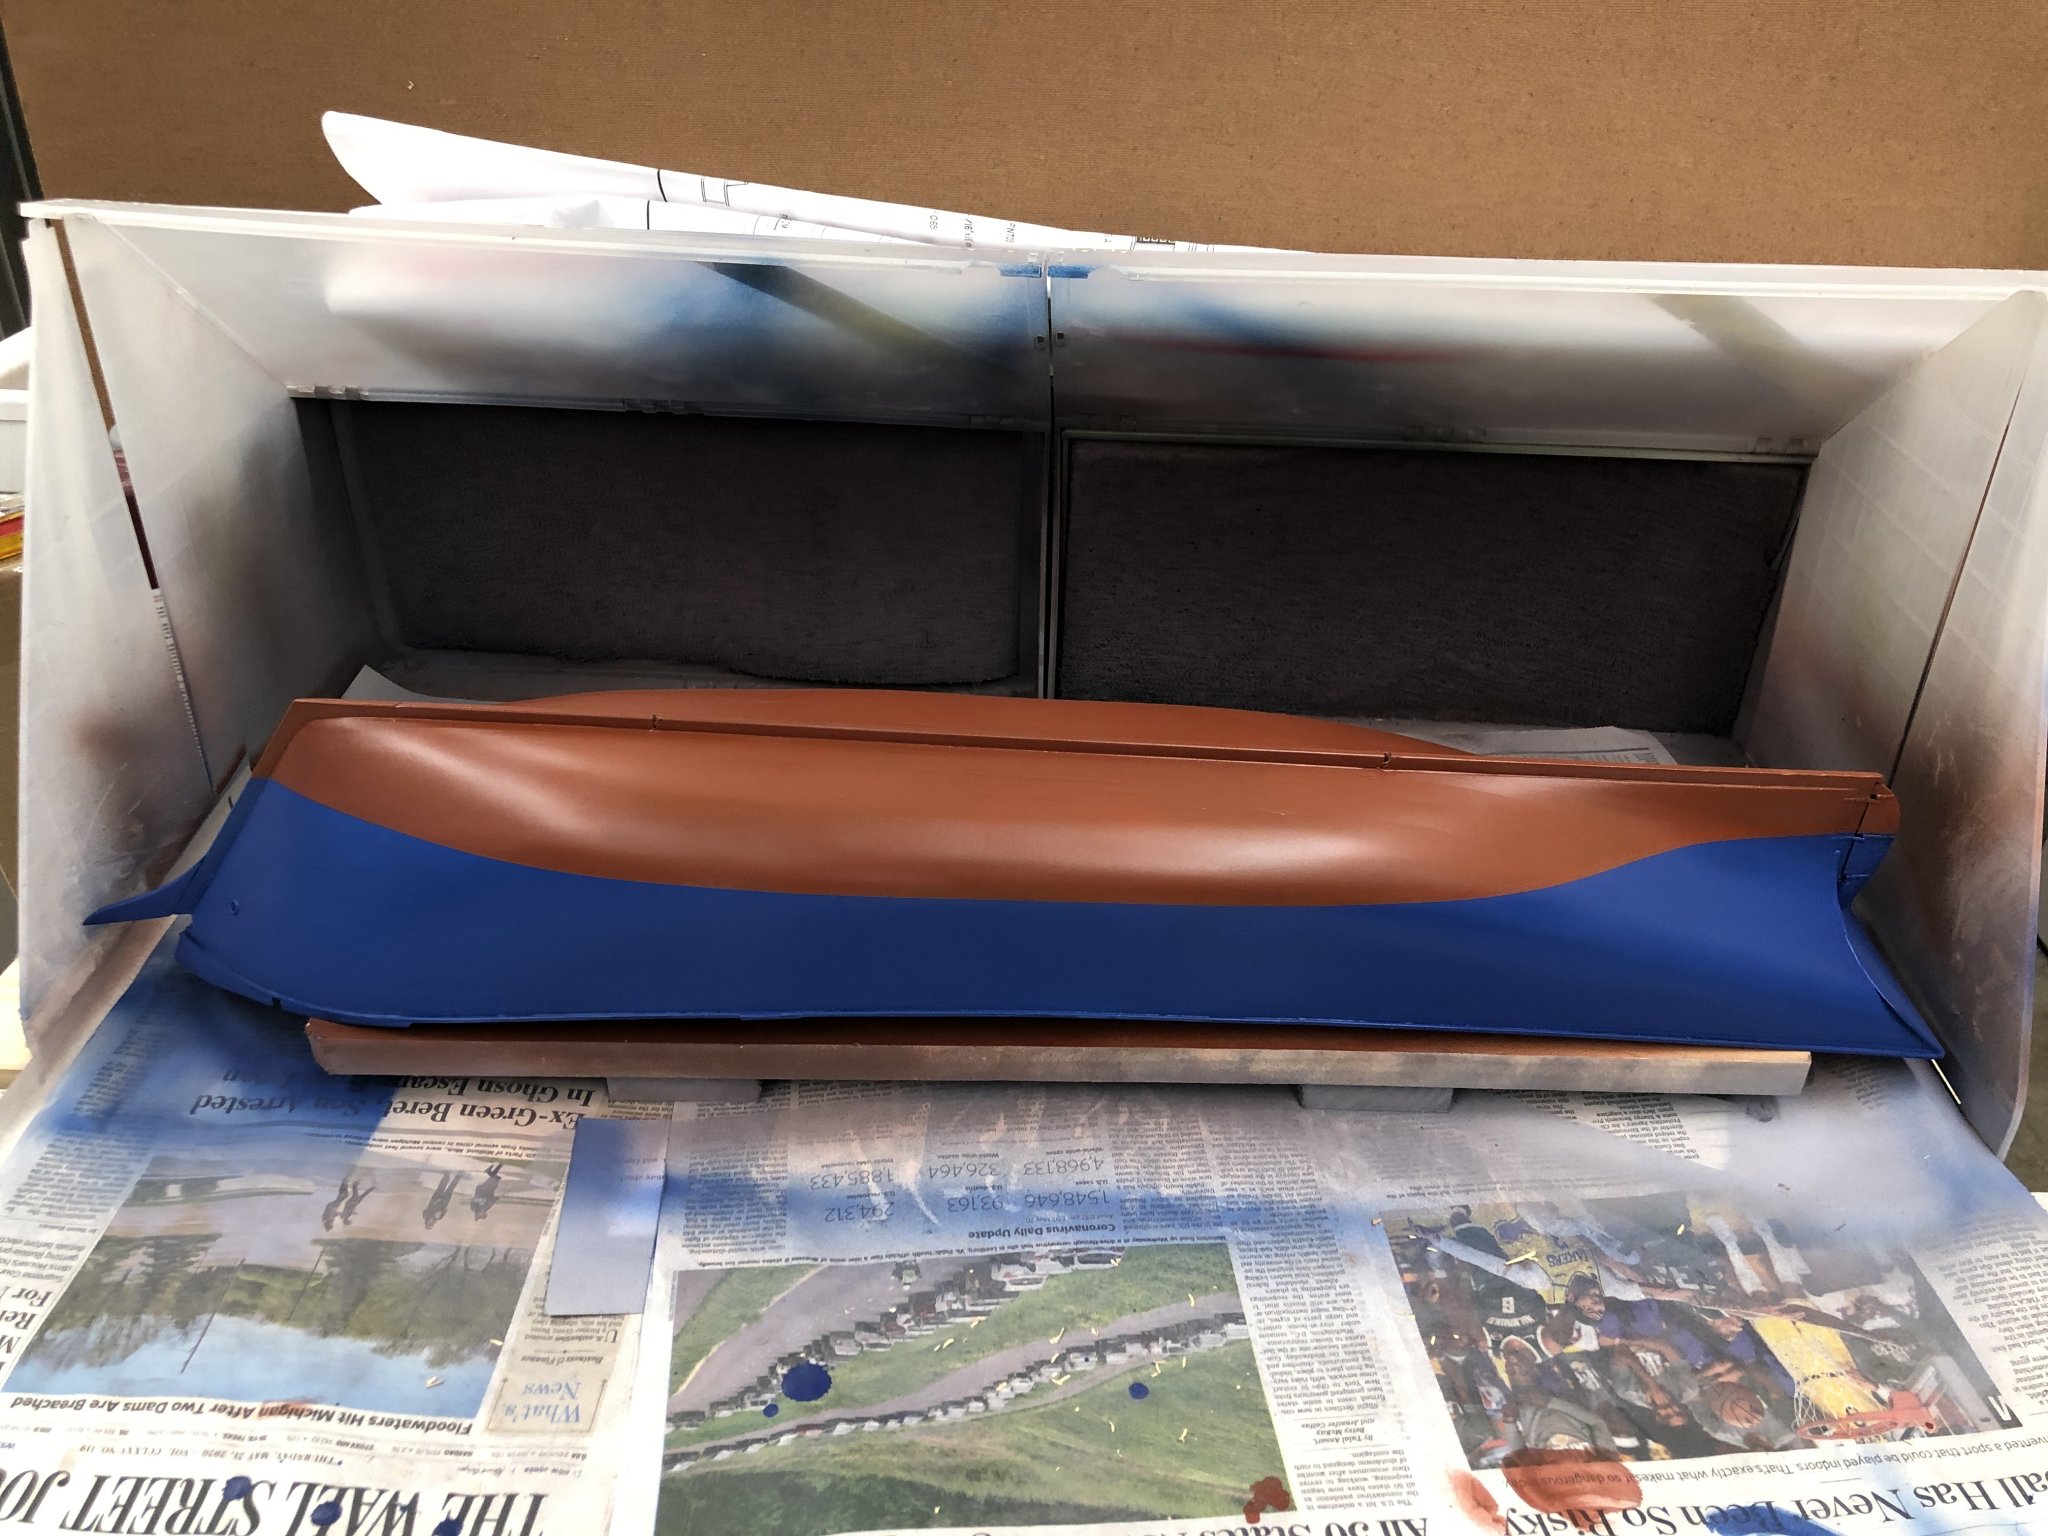
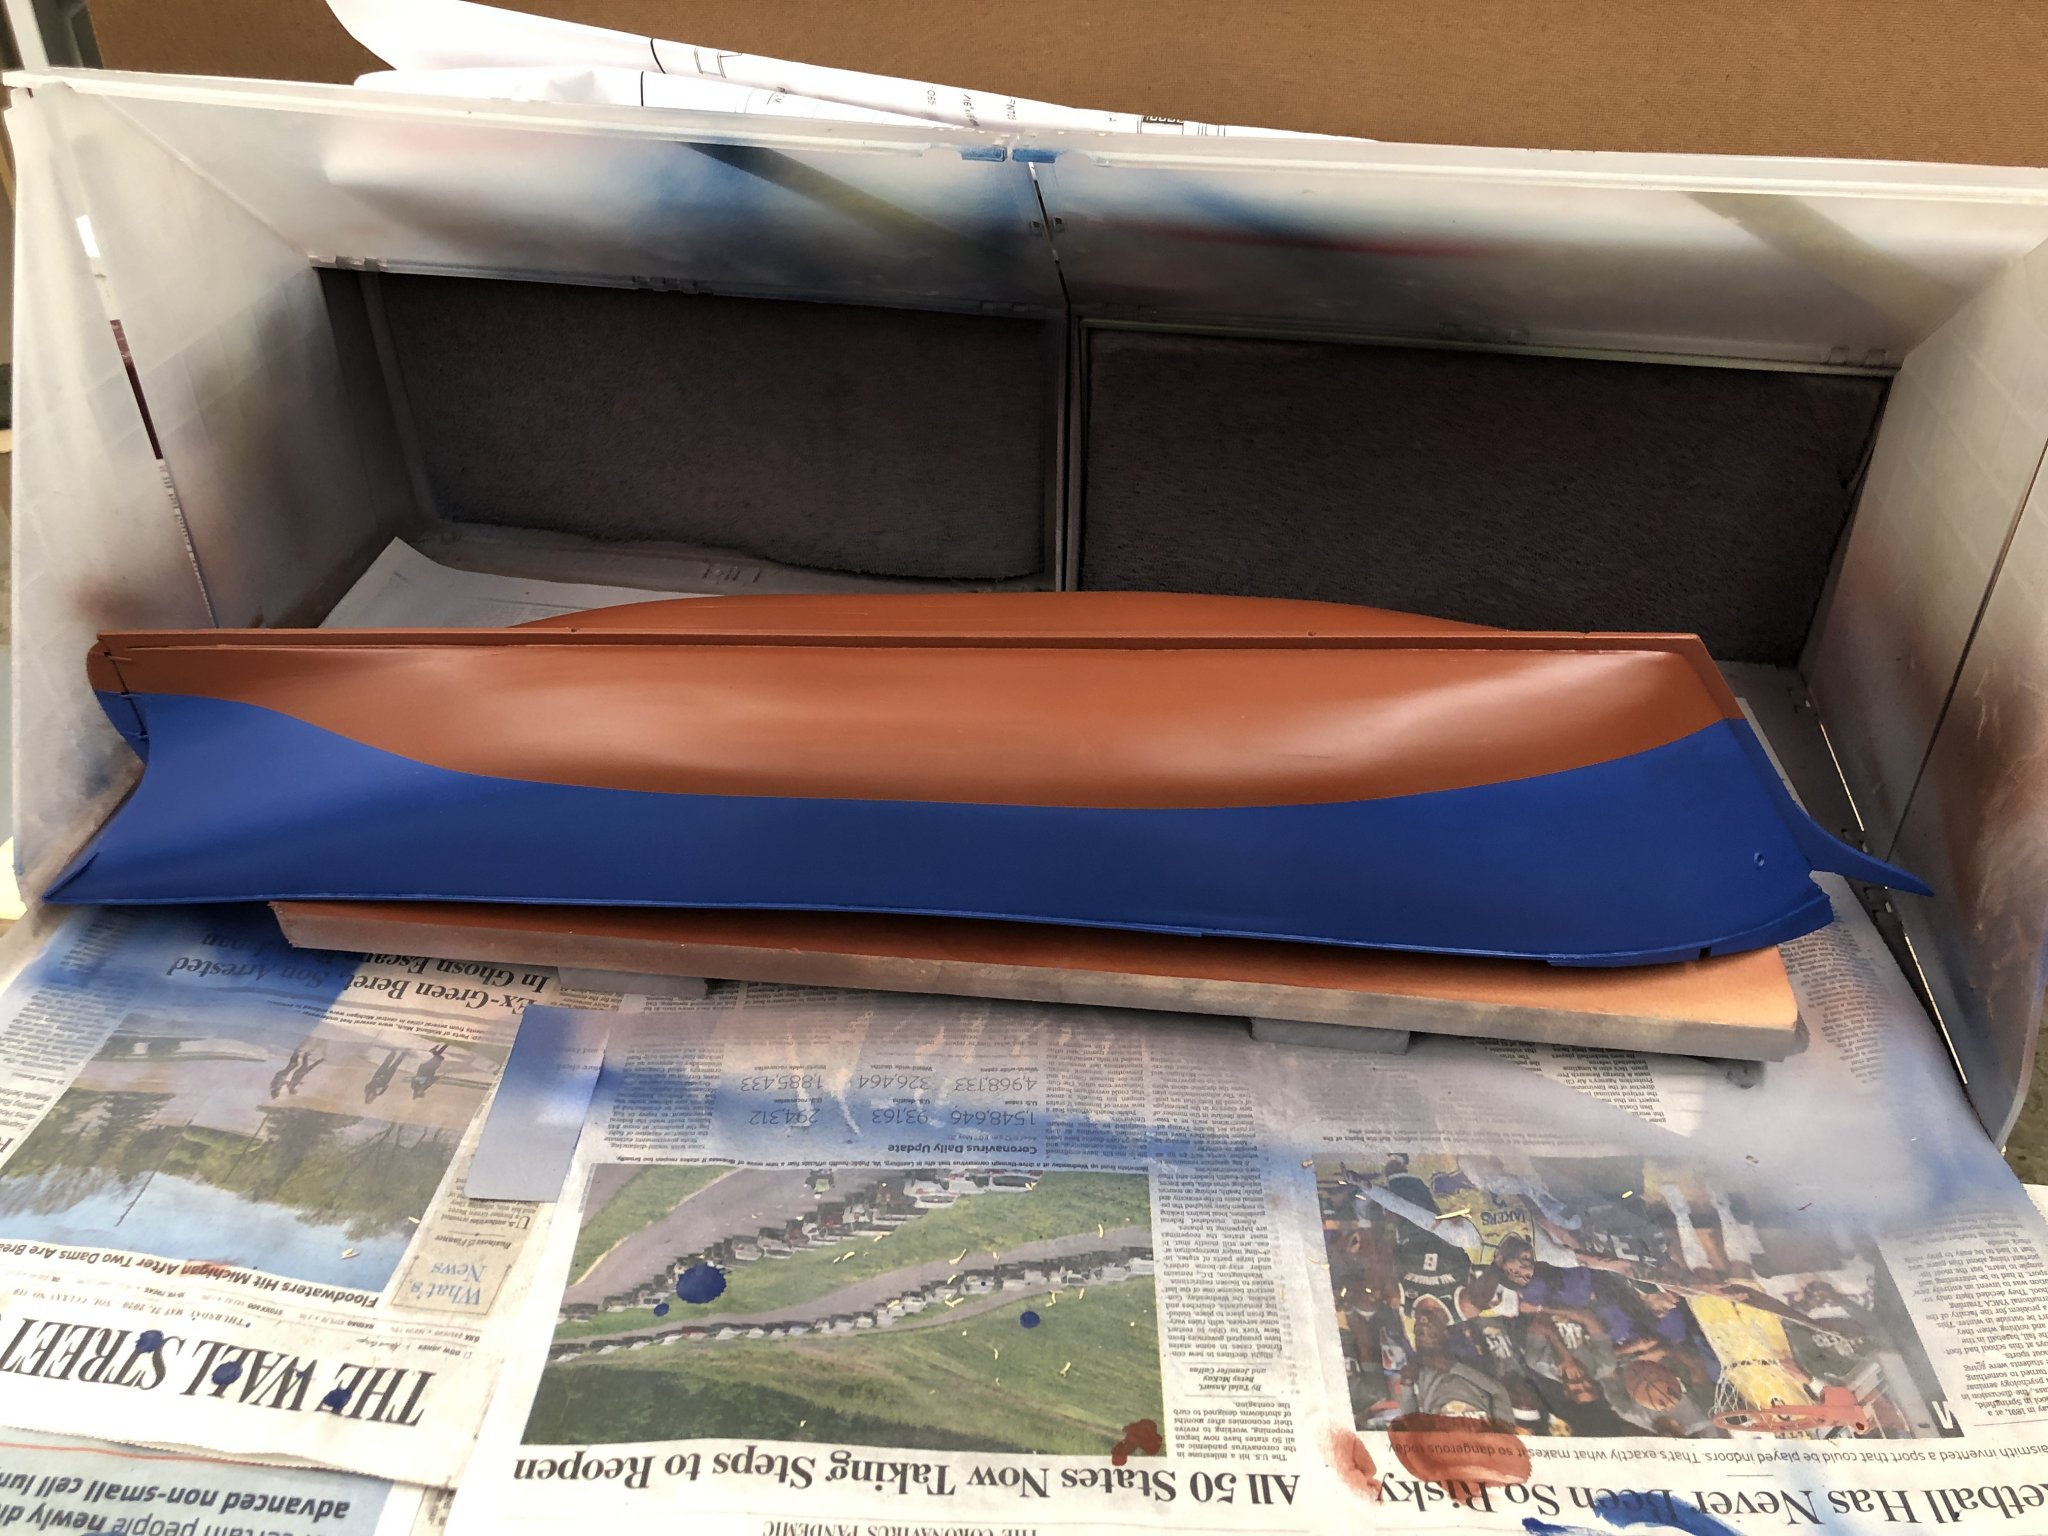
So I got the hull into the spray booth (just barely) and got the topsides painted in the Badger Tug Deep Blue. The blotchy look is due to the paint not drying everywhere at the same rate. It all looks "flat" when everything is dry. So now for the waterline and bottom paint. I ordered the Badger red bottom paint but have the Model Shipways 4814 Hull Cooper Red already so I decided to use that even though I have never tried to us MS paint in my airbrush. I thinned the paint a bit less than 1:1 with water and it seemed to go on and cover okay using the Paashe Talon airbrush with the TN-3 needle and associated fittings. For the waterline I set up my Bosch Gl50 laser level (I bought this to help get the chair rail in the hallways level throughout) to shine on the hull, which I stabilized using two quart bags filled with BBs. The black items are shims to adjust the orientation to get the waterline where it needs to be on the hull. I measured off the drawings how far up the stem the water is and used dividers to check that I had it correct. At the stern the drawings show the waterline to be just above the middle set of pintles. Once I the laser where it needed to be I used Tamiya masking tape to just the top part of the laser beam on the tape. Then I sprayed it with the MS4814.


- 144 replies
-
- 4
-
-
- charles p notman
- finished
- (and 1 more)
-
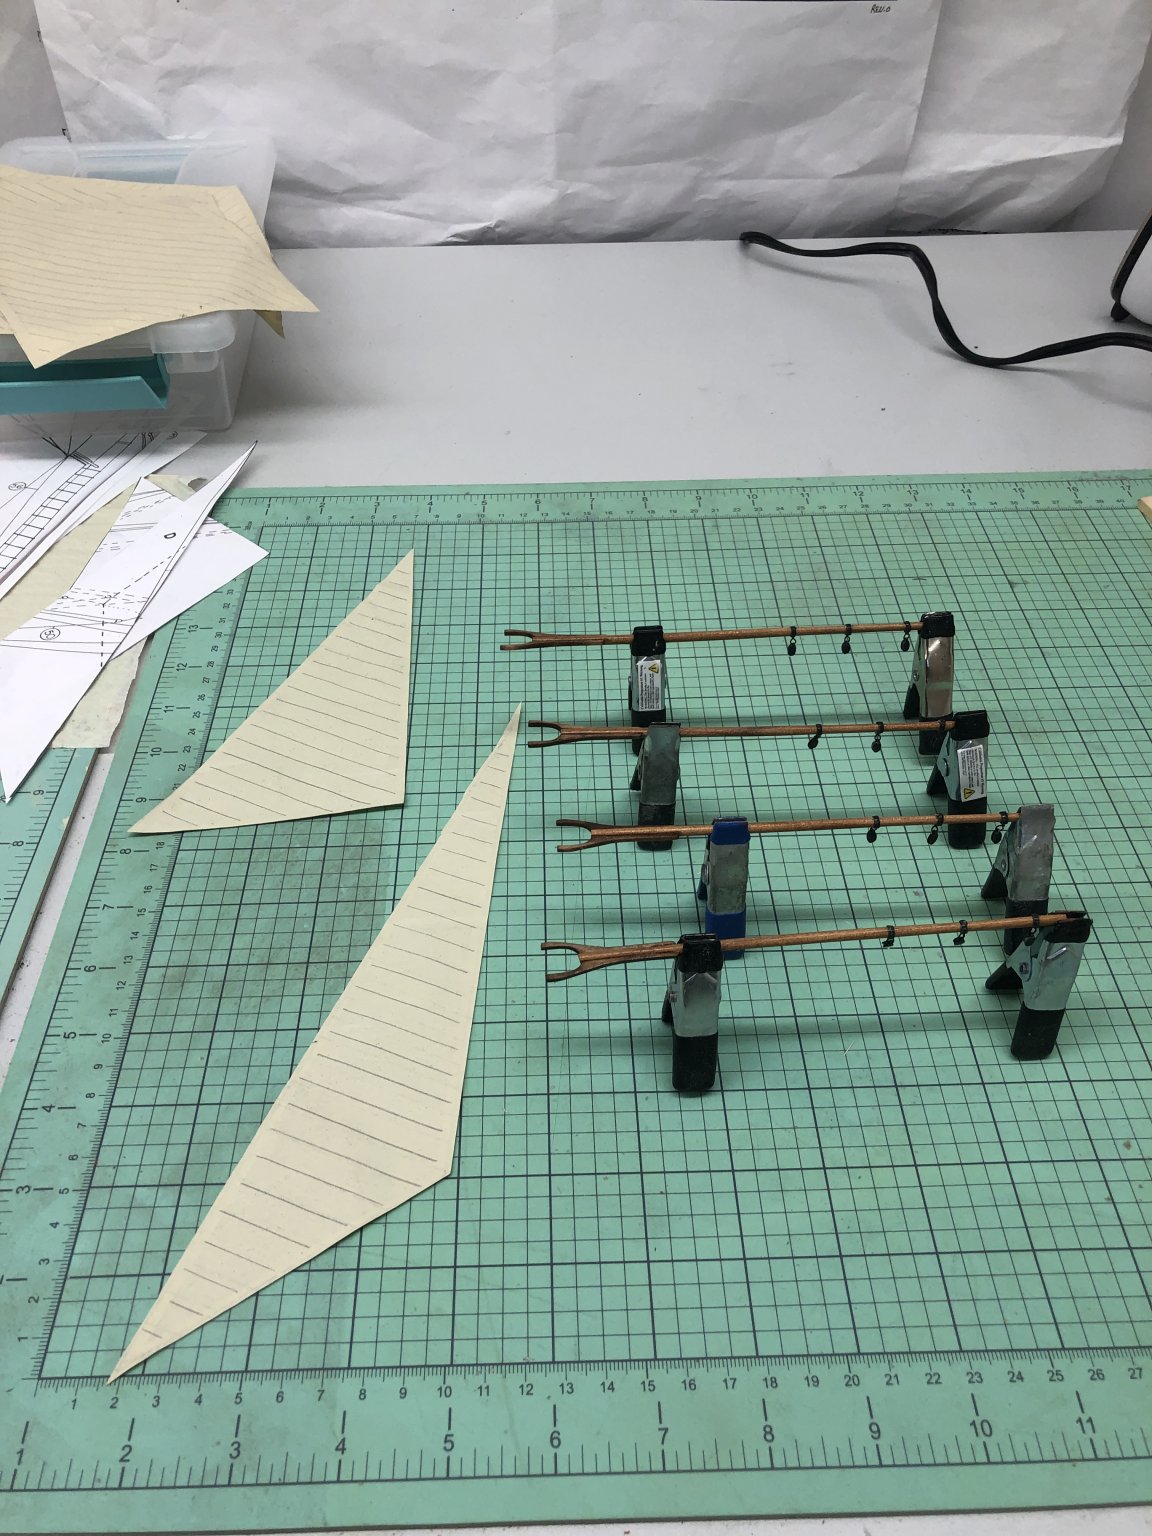
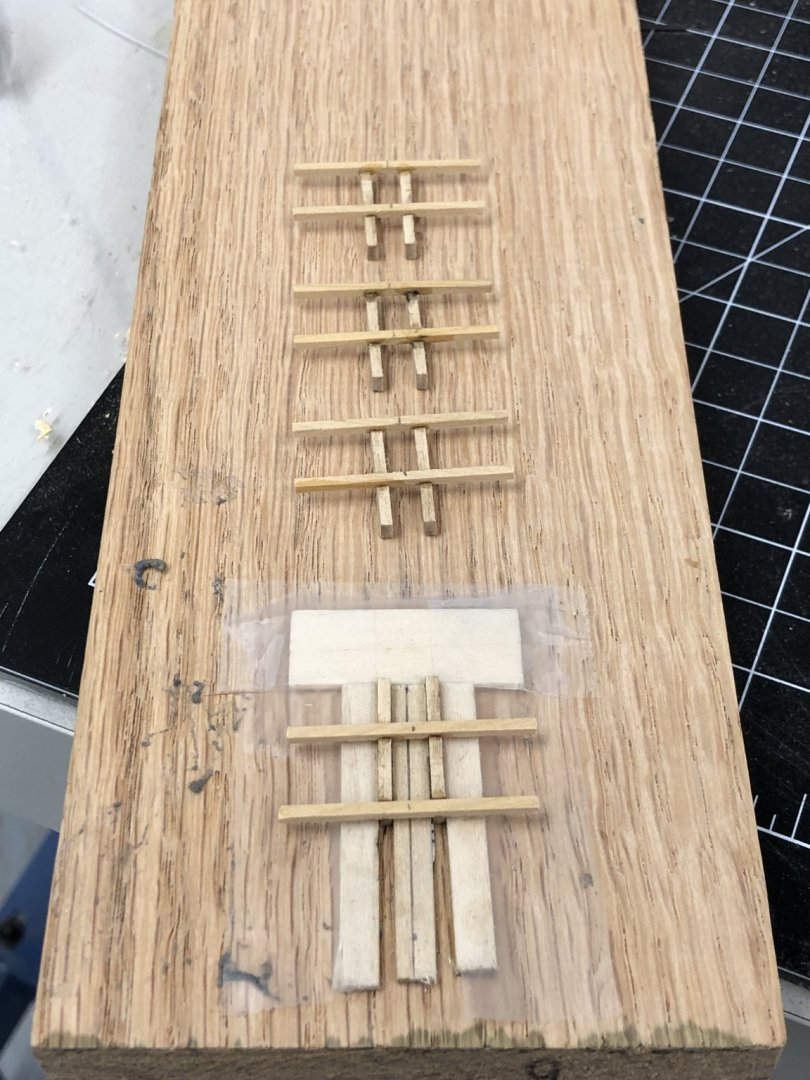
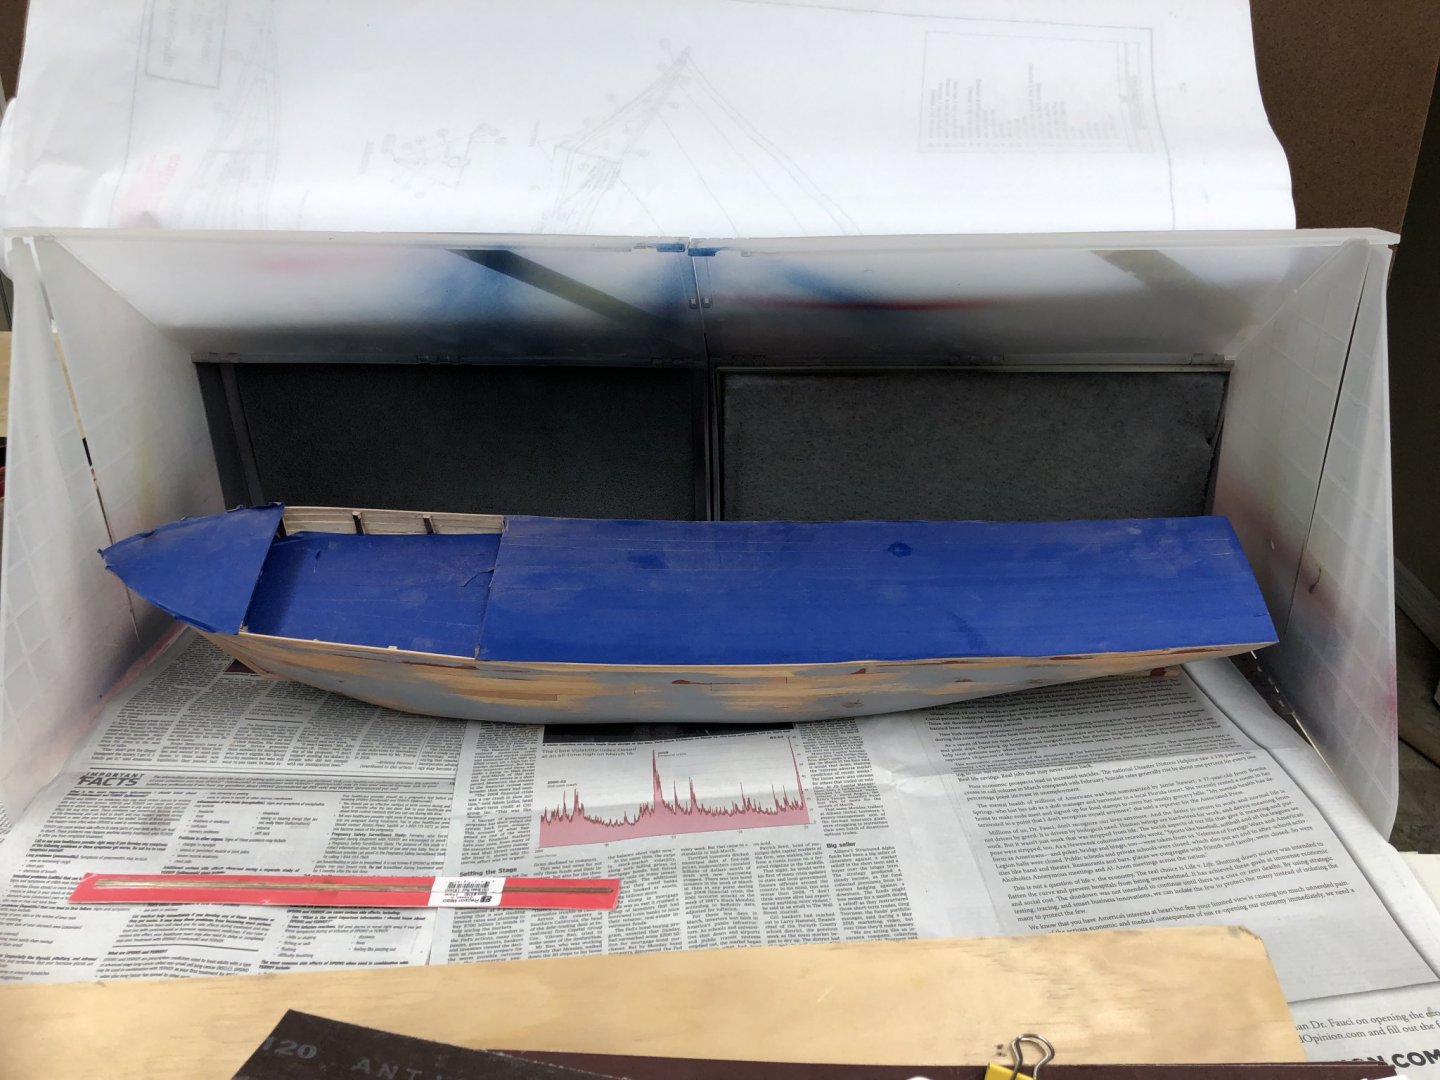
I finally got the hull "good enough" and into the paint booth. I used the Badger acrylic paint, thinned about 1:3 (3 parts paint, 1 water). It dries really fast so you can get several coats on in an afternoon. I am probably going to use a commercial spray paint (burgundy) for the bottom paint. I ordered some Badger paint of the correct color but it will not be here for a week or more. Here is the hull in the spray booth. I had to shift to an upright position to make sure I got the upper sides and chock rails done. Am considering putting a coat of clear flat on after the bottom paint as a measure of protection as the chain plates and channels must still be installed. Not to mention the bead rail on the shear and the trail boards and eyebolts on the bow. While waiting for the paint to dry I built the jig for the trestle/cross trees and did the first step of getting them assembled. Here is the jig and the four sets of trestle/cross trees. I added the center line on the jig and marked the centerline on the cross trees to help get them centered. I also put Scotch tape on to help keep the glue (thick CA) from causing problems.


- 144 replies
-
- 7
-
-
- charles p notman
- finished
- (and 1 more)
-
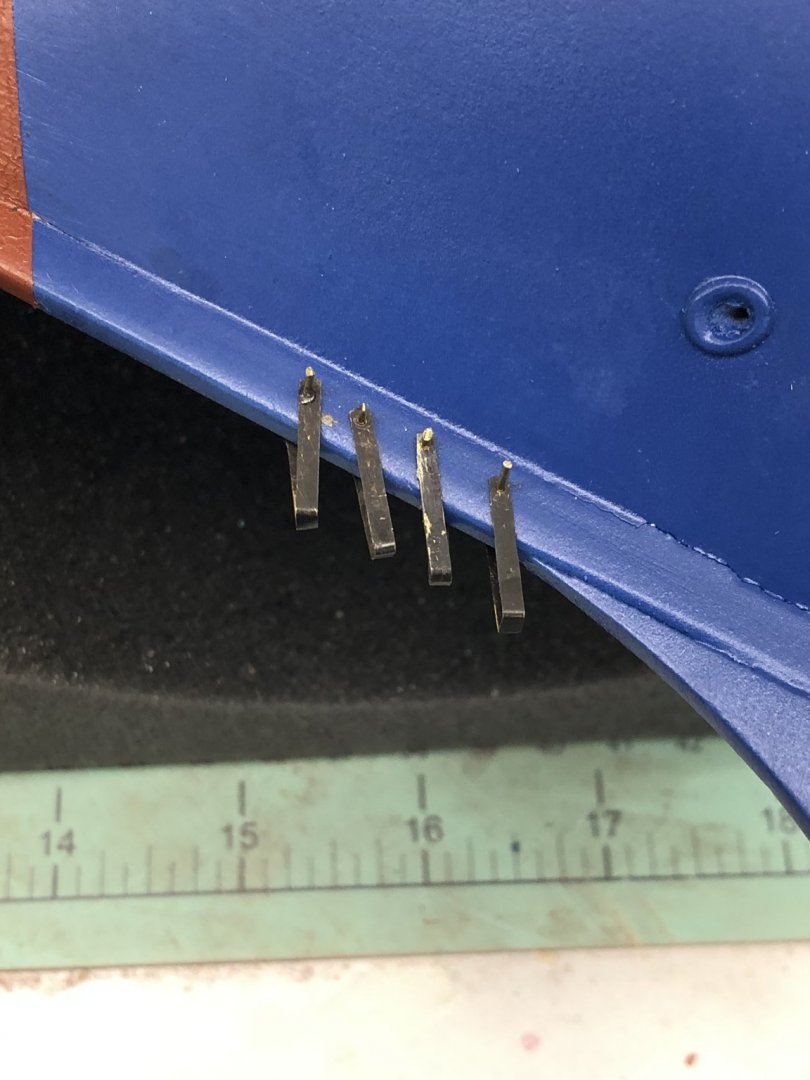
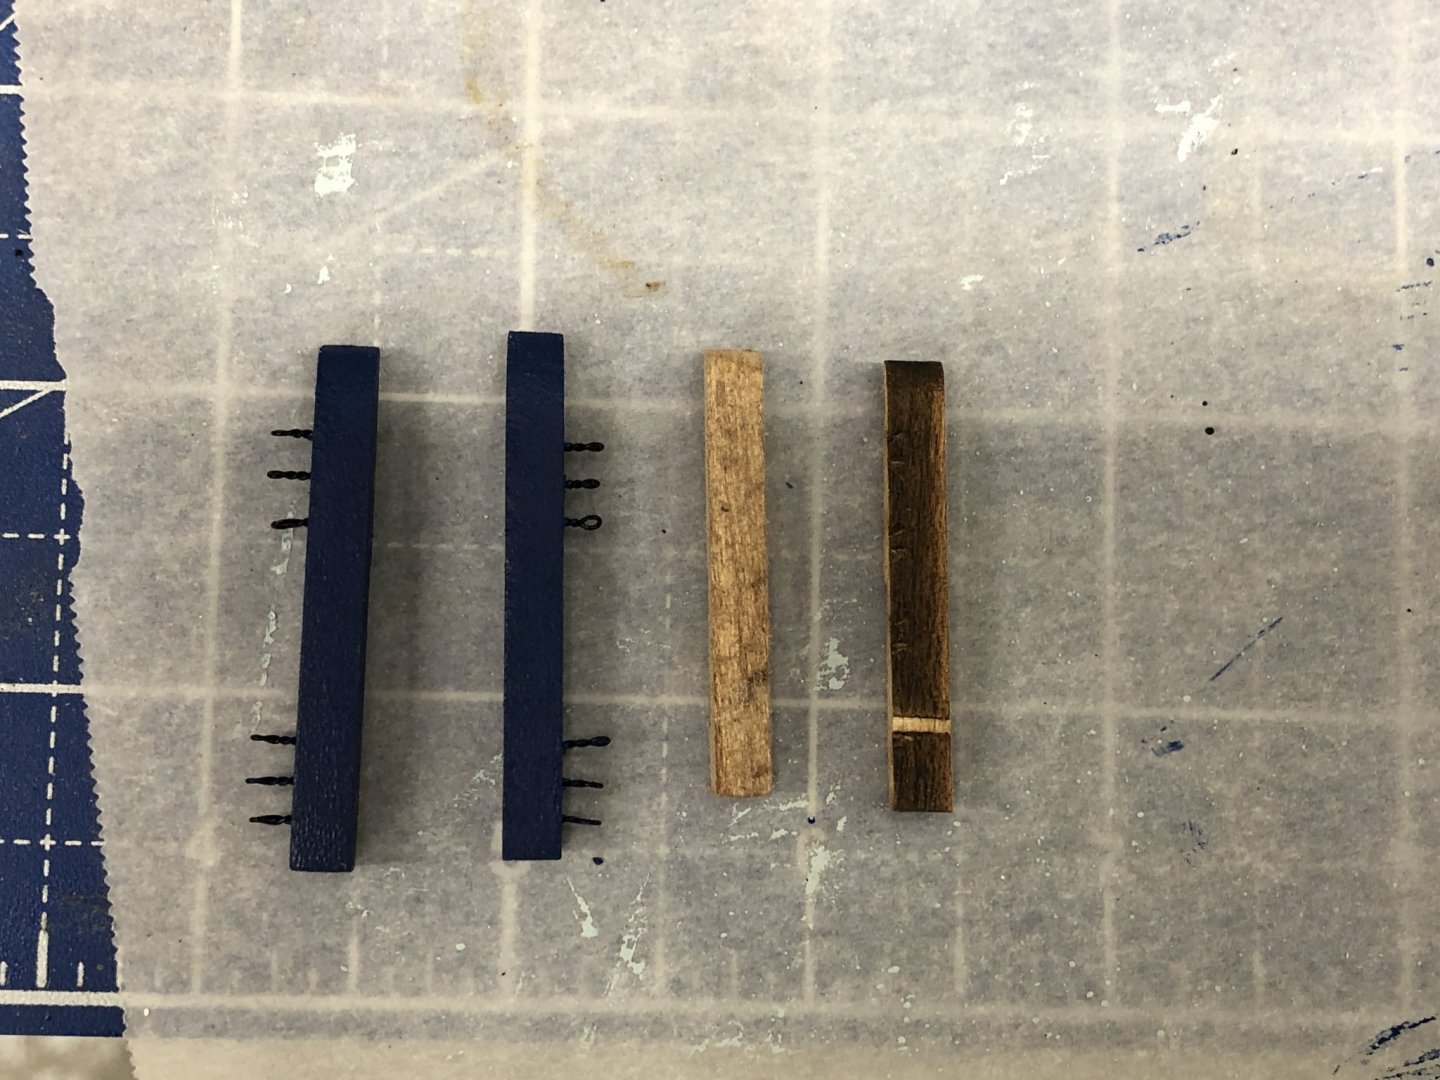
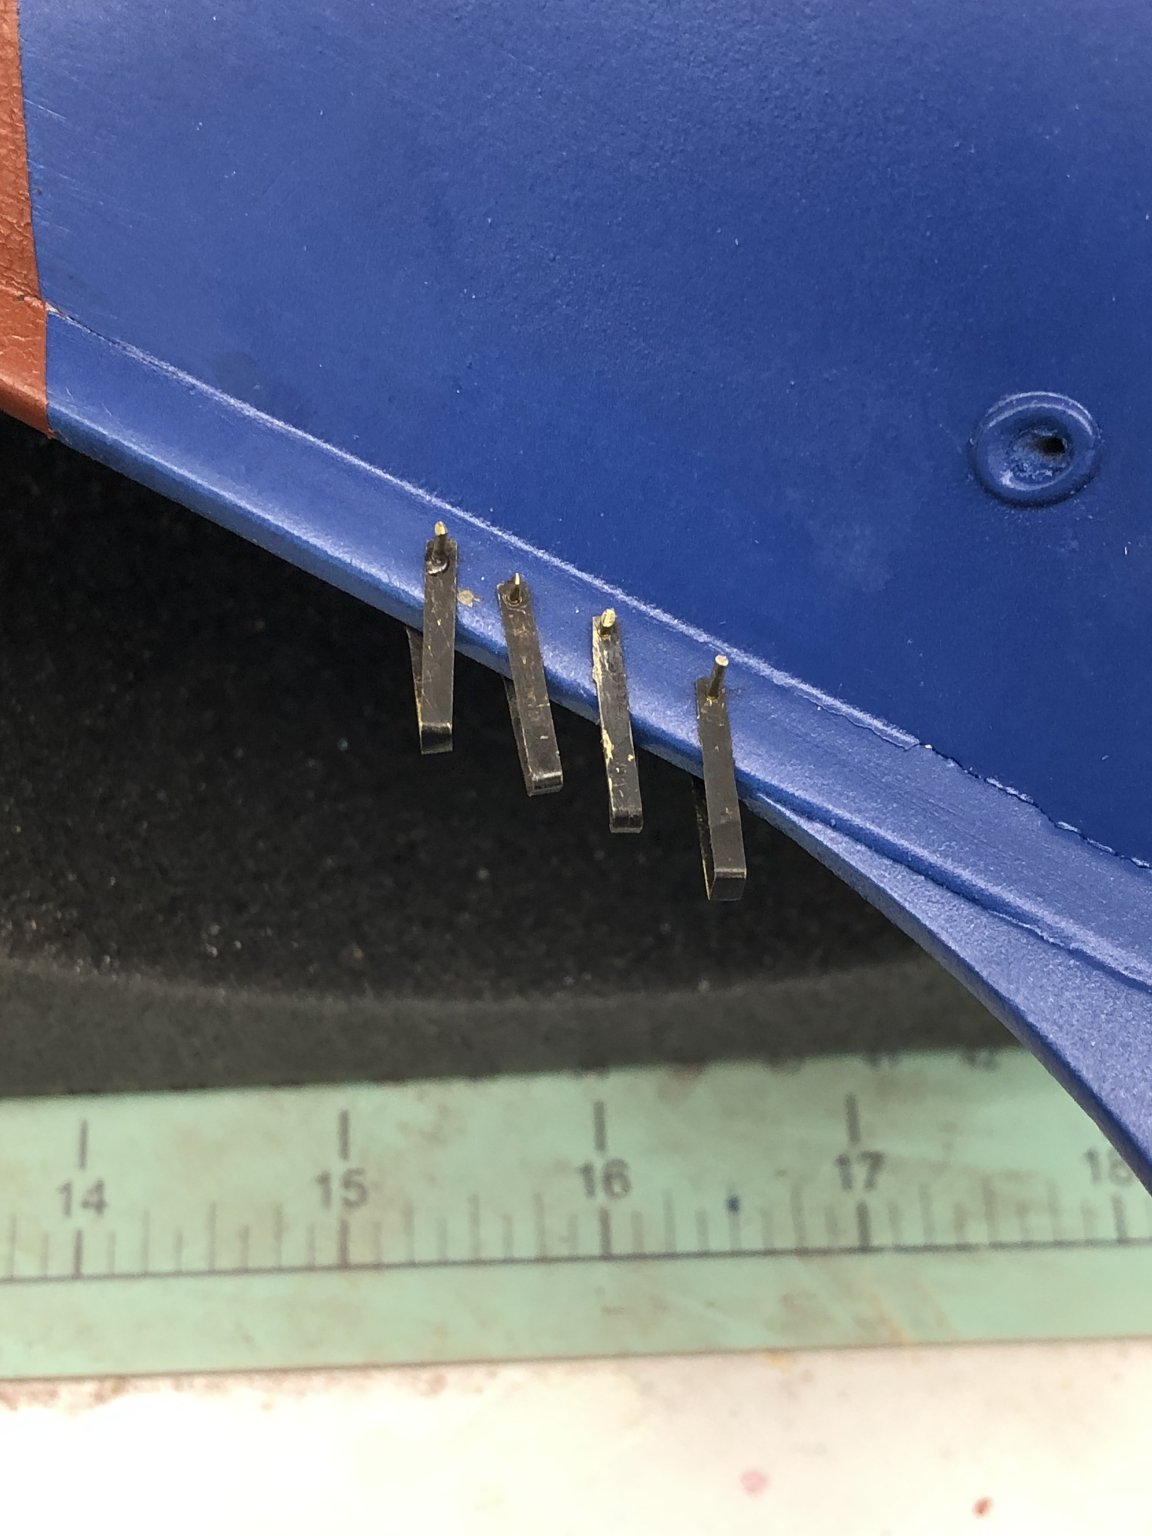
Following the instructions I added the forward chock rail sections on the forecastle. Then I got the cat heads off the carrier and made a test fit. For whatever reason the cat heads did not seem to stick out as far as the drawings show. I measured mine and they extend about 8.5mm beyond the hull planking. As best I can tell from the drawings this should be more like 11mm. Given that there are three eyebolts (which will have deadeyes attached later) on the outboard portion of the cat head I decided to use the extra wood on the carrier sheet to fashion new cat heads which will extend out further than the kit provided ones. I actually made them a little longer than the drawing shows to make getting the deadeyes attached and rigged a little easier. The kit provided piece is 19mm from the notch for the coverboard to the end, mine are 25mm. This is 3mm more than shown on the drawings but - "I am the captain". Here are the two sets of cat heads.
- 144 replies
-
- 5
-
-
- charles p notman
- finished
- (and 1 more)
-
Here is the chock/fly rail fitted to the coverboard. It needs another coat of paint and then I can paint the rest of the coverboard (leaving some bare wood where the chock rail will go). Once that is done I will tackle the items on the forward coverboard (cat heads, etc.). And of course there always seem to be more blocks that have to cleaned and painted/chemically blackened.


- 144 replies
-
- 8
-
-
- charles p notman
- finished
- (and 1 more)
-
I got another coat of filler/primer on the hull and fixed the few remaining spots - one last coat before we go with the final color (Tug Deep Blue from Badger). I decided to try and fabricate the chock/fly rail off the ship (using wooden pillars - from Model Expo I think) and get it painted without trying to mask off the coverboard. Using the wooden pillars presents the issue of how to get the assembly to not be slanted outboard. Since the deck has a good deal of camber (at least up forward). I finally figured out how to get the tilting table for the Byrnes table saw installed and cut a 10 degree camber (or maybe it is a champers) on the chock rail. This provides a modest inboard tilt at the stern and is more or less vertical at the forward end of the poop deck. I also am going to use the Clipper Blue for most of the vertical surfaces on the deck houses and the chock/fly rail. Here are one of the assemblies after a coat of paint and the lower portion of the rest of the stbd side. My one concern is getting the assembly glued to the deck since it will be substantially stiffer than just the pieces individually. I have some adjustable collars that fit onto pins which I think will address the issue. Here is the painted rail pressed down to the coverbaord as a test. Working on completing the stbd side then on to the port. I will not install these until I get the hull painted its final color.
- 144 replies
-
- 7
-
-
- charles p notman
- finished
- (and 1 more)
-
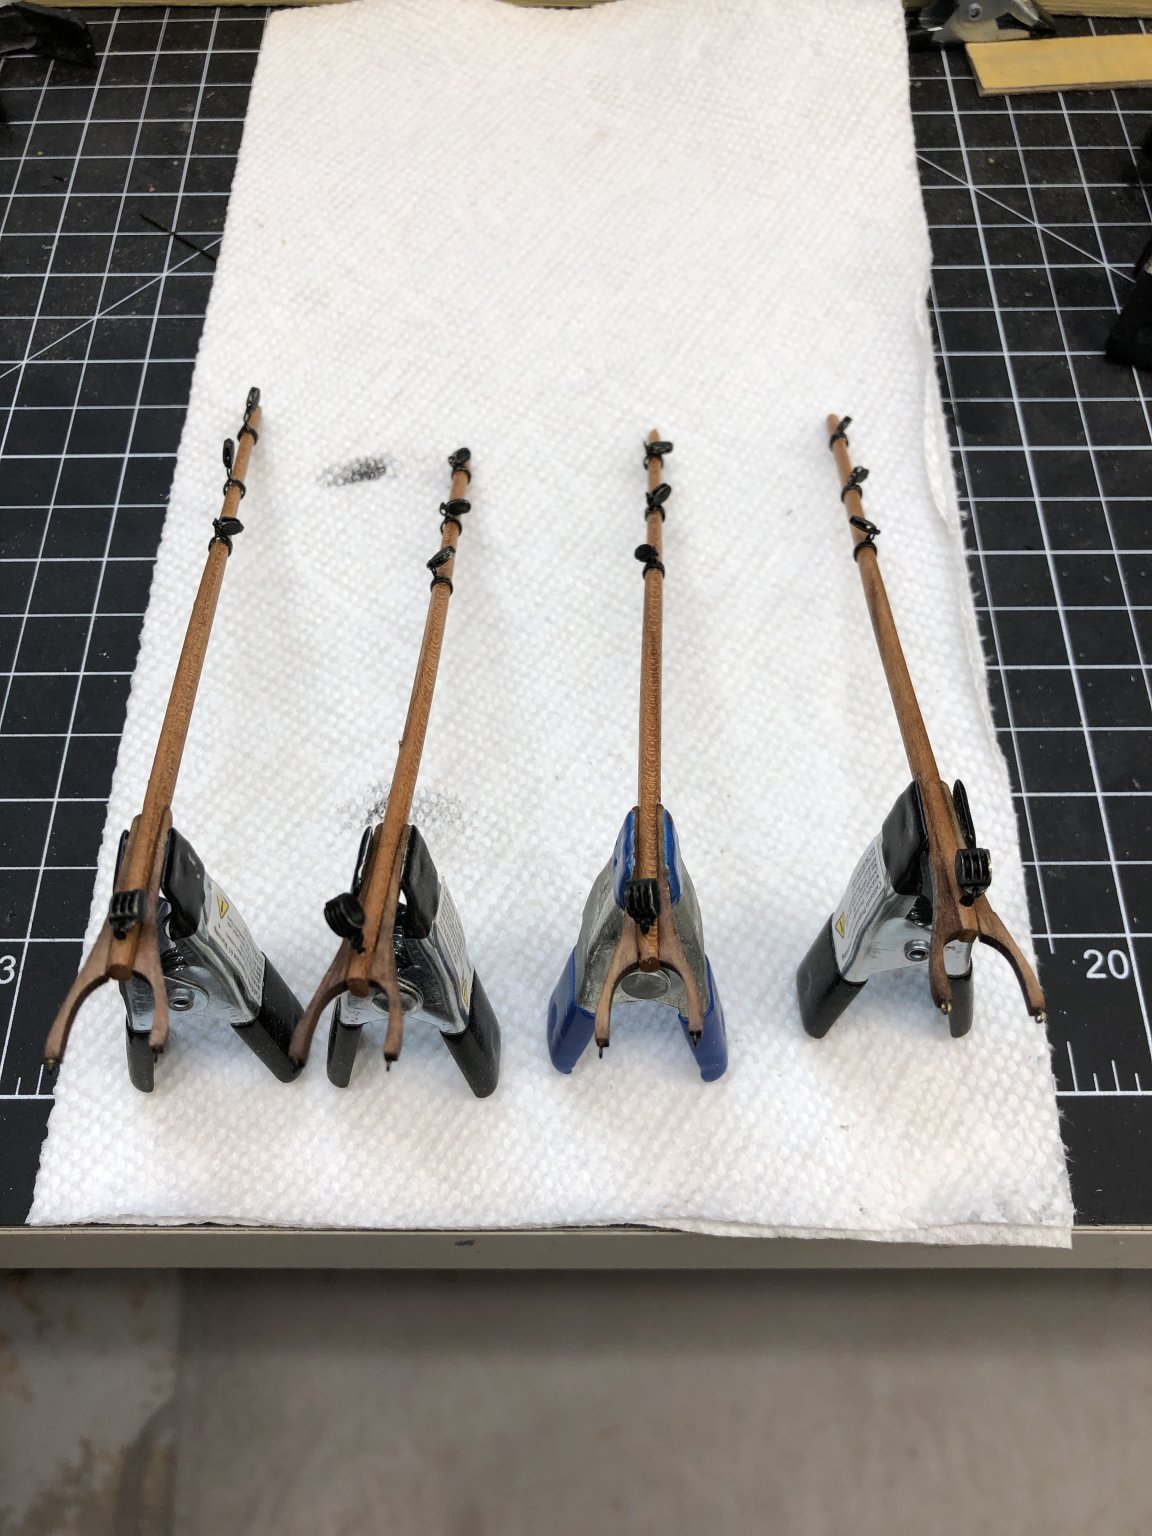
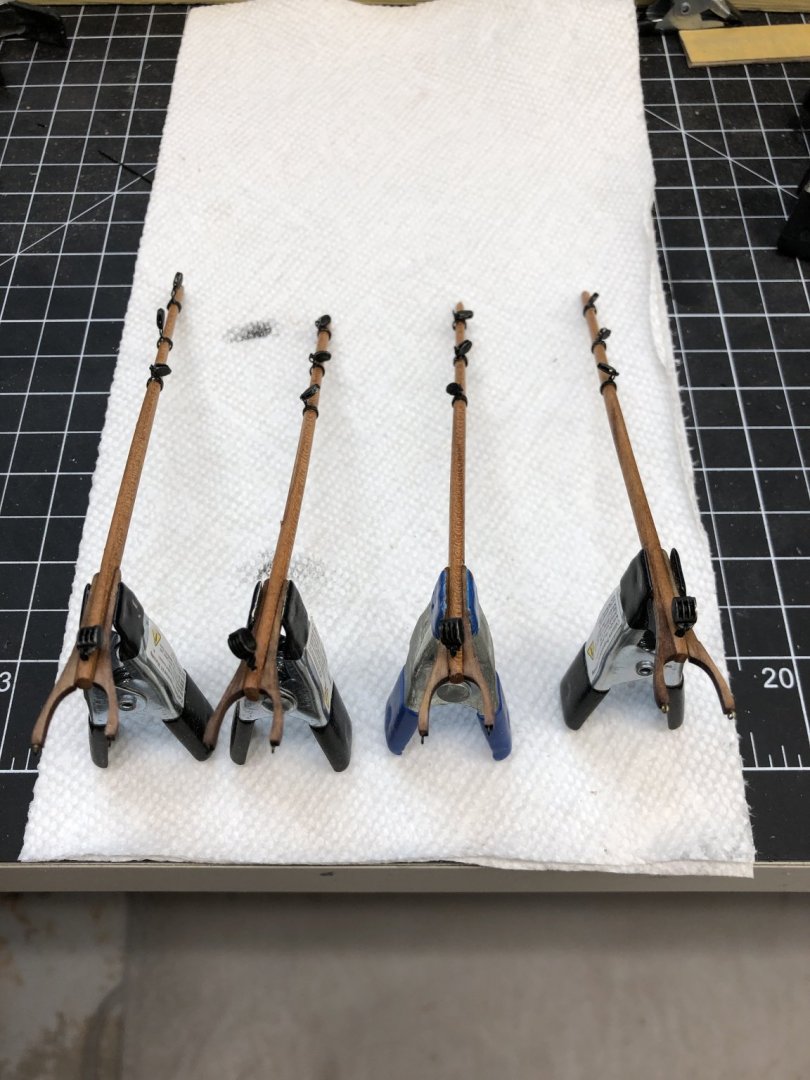
I have also been working on getting the blocks cleaned up and the holes drilled both for the attachment point and in many cases the becket. It goes pretty slowly especially with the 1/8" blocks. I got the four triples for the throat halyards done and mounted on the gaffs. I have chosen not to put the topsail sheet block on the underside of the gaff since (at least in theory) I will have the gaffs down on top of the furled sails you would not be able to see it (or the sheet line running from the end of the gaff). Instead of using the 26ga wire provided to make the bails on the ends of the gaff (and boom) jaws I used 1/16" eyebolts. It seemed much easier than trying to make the little clips envisioned in the instructions. So here are the four gaffs ready (IMHO) for mounting.
- 144 replies
-
- 7
-
-
- charles p notman
- finished
- (and 1 more)
-
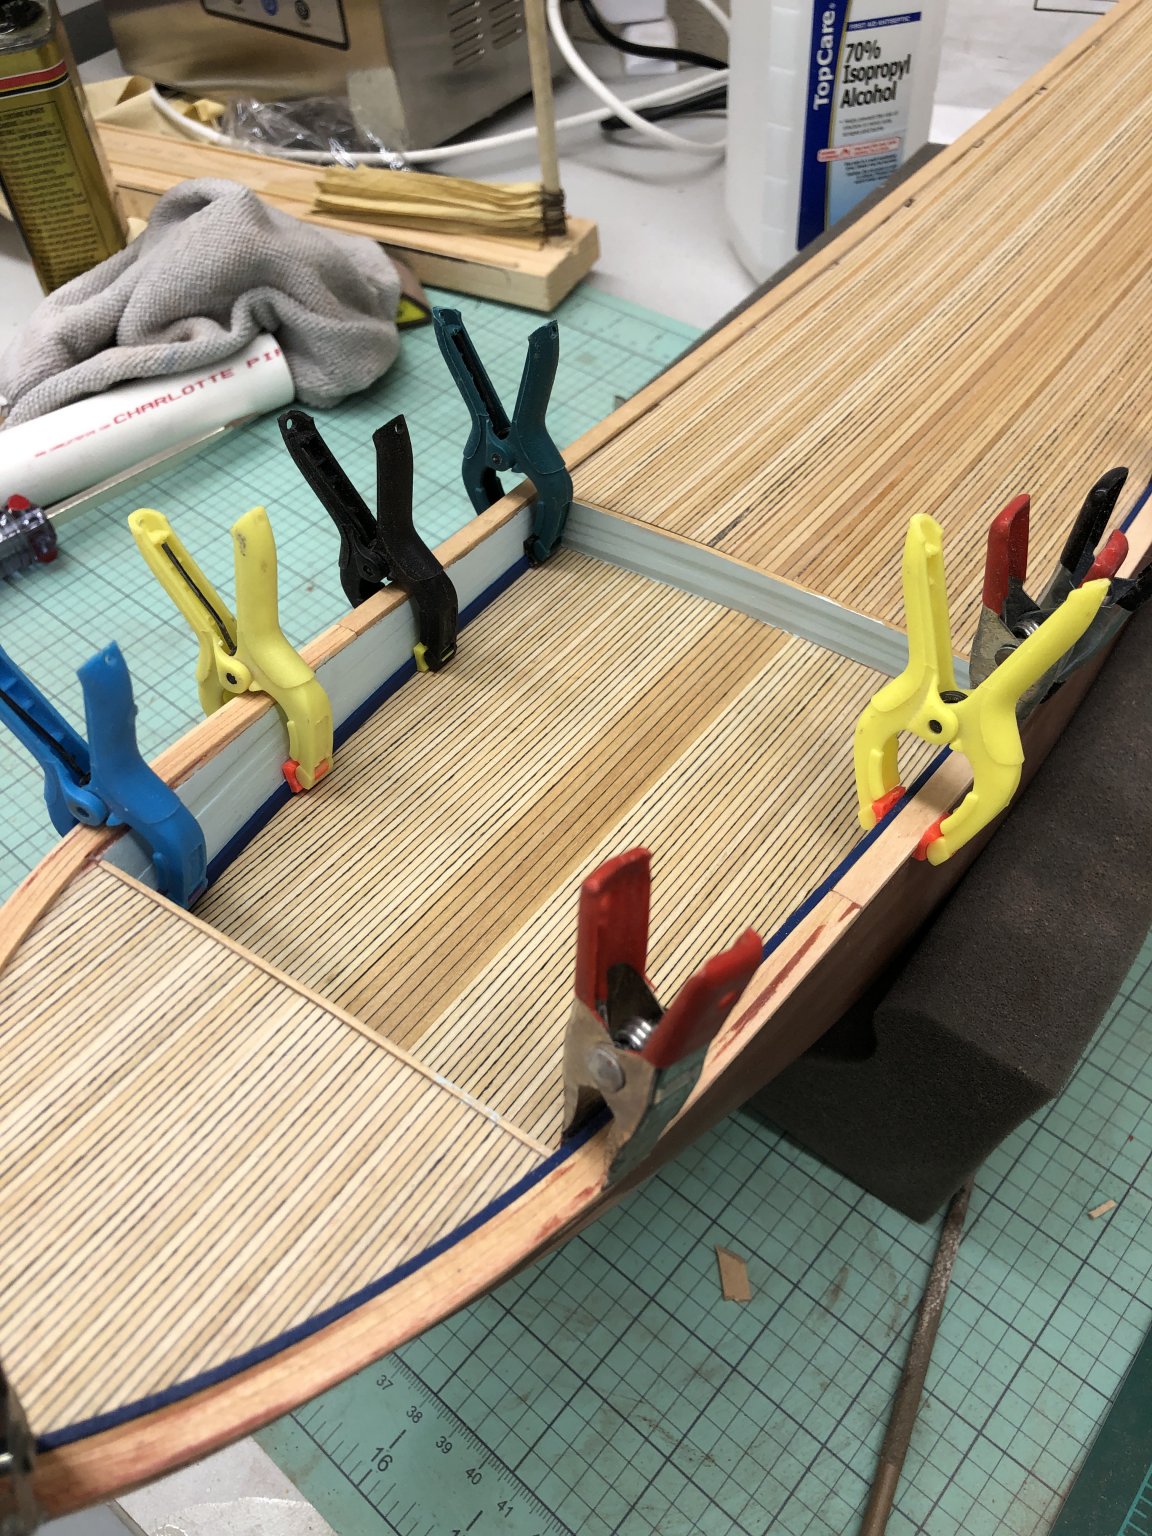
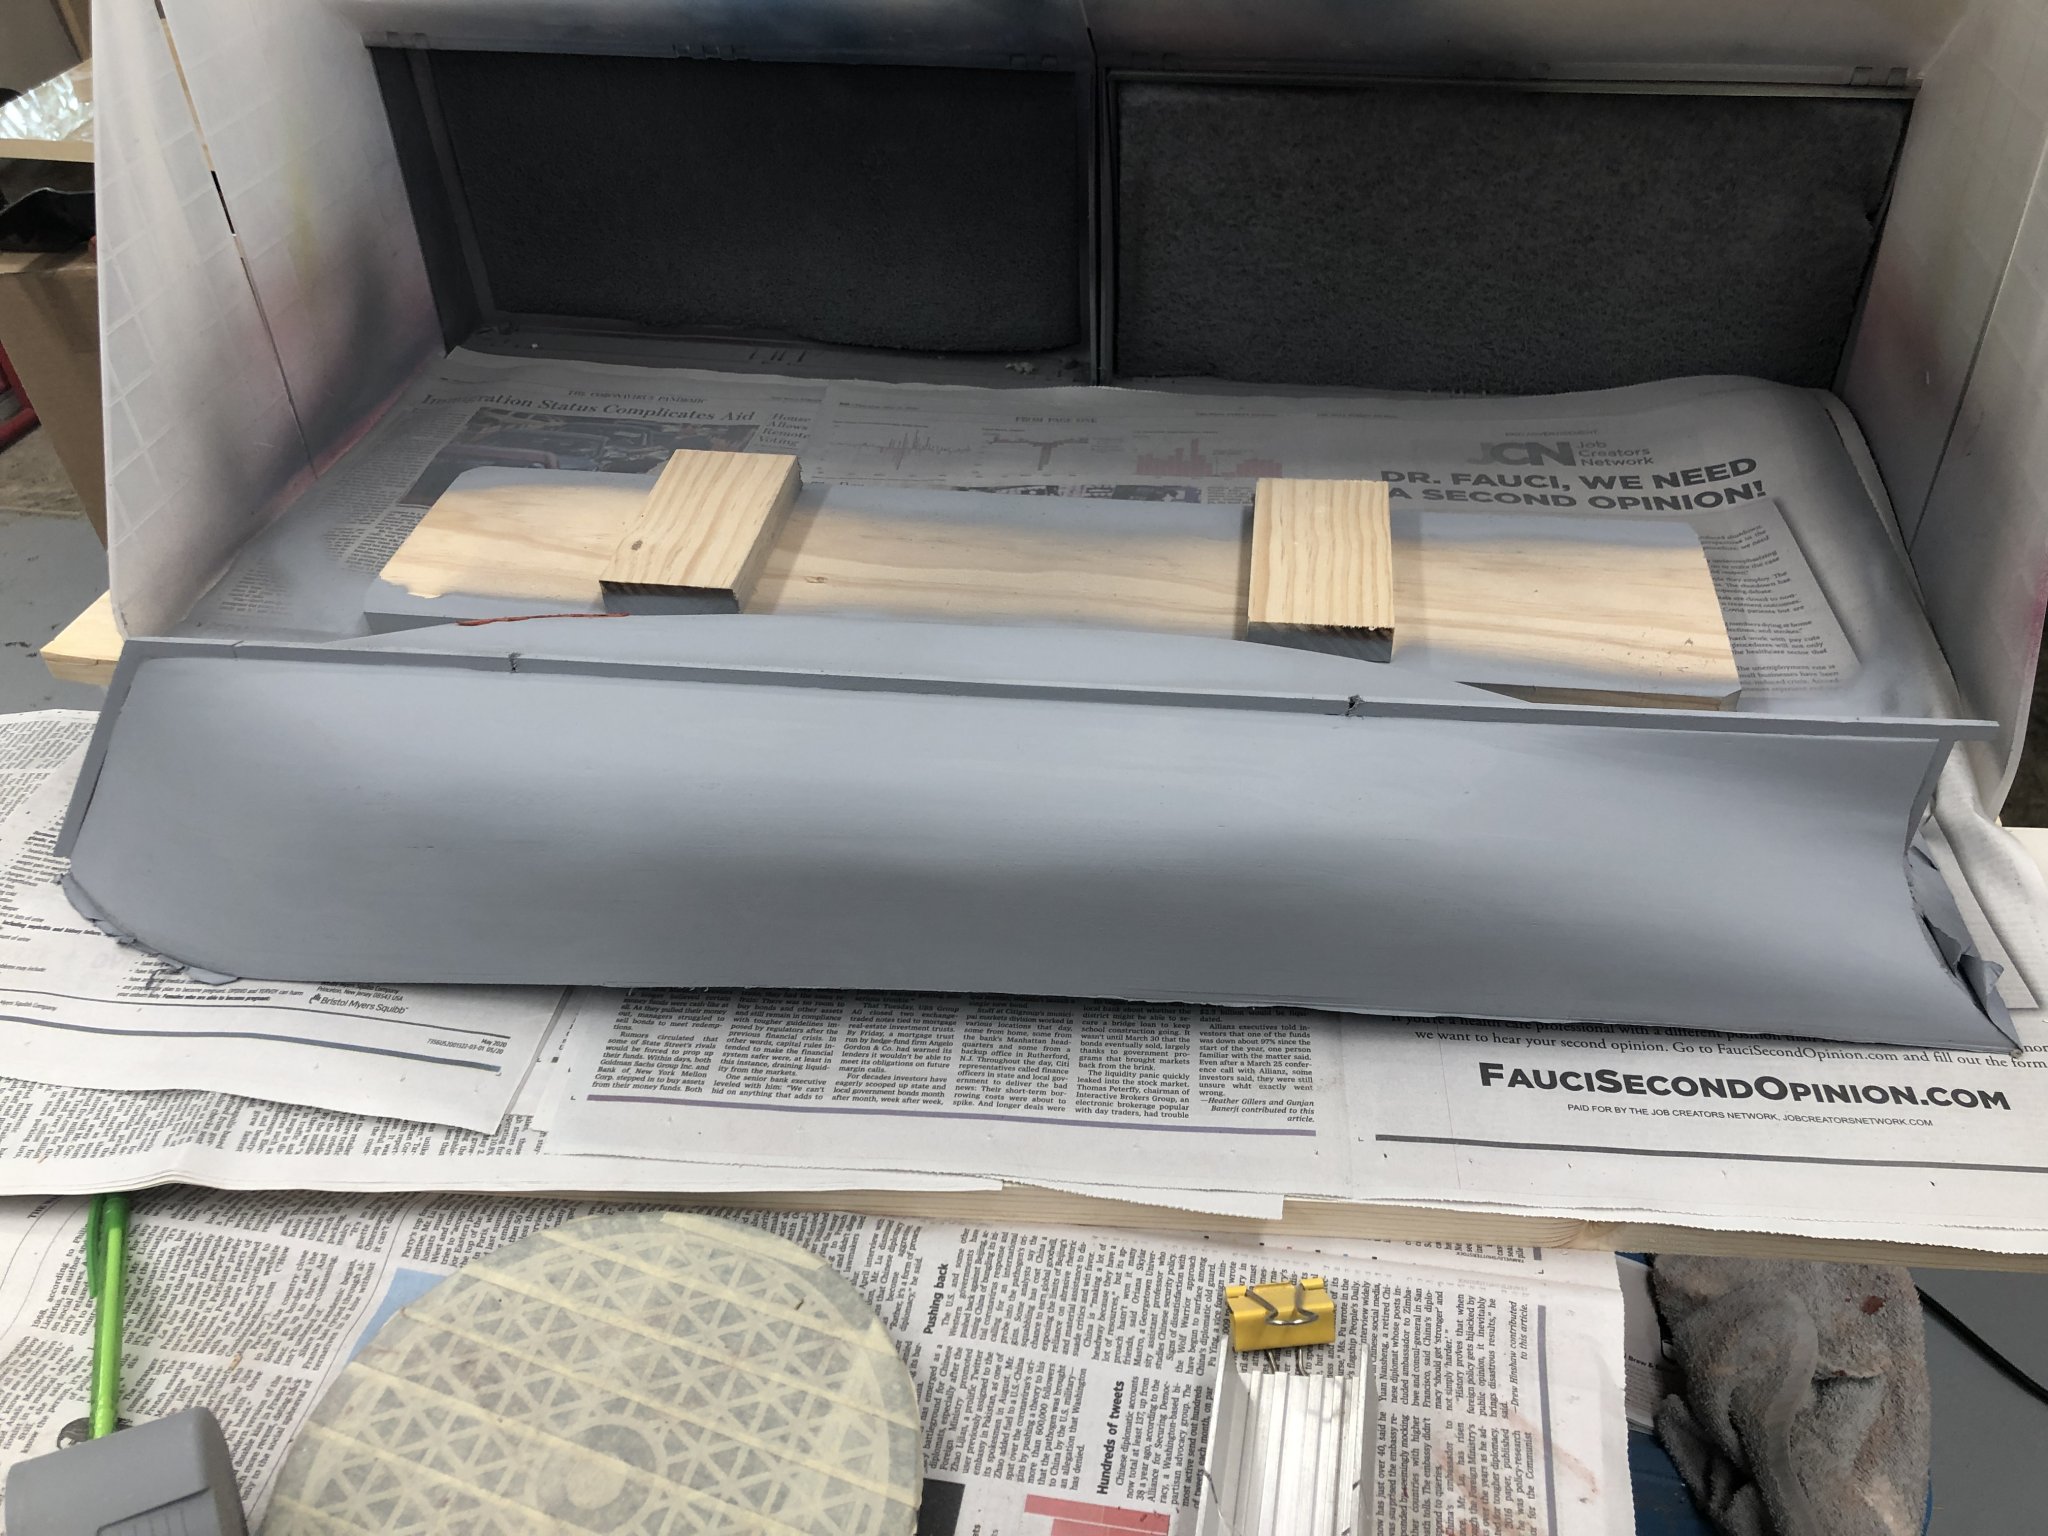
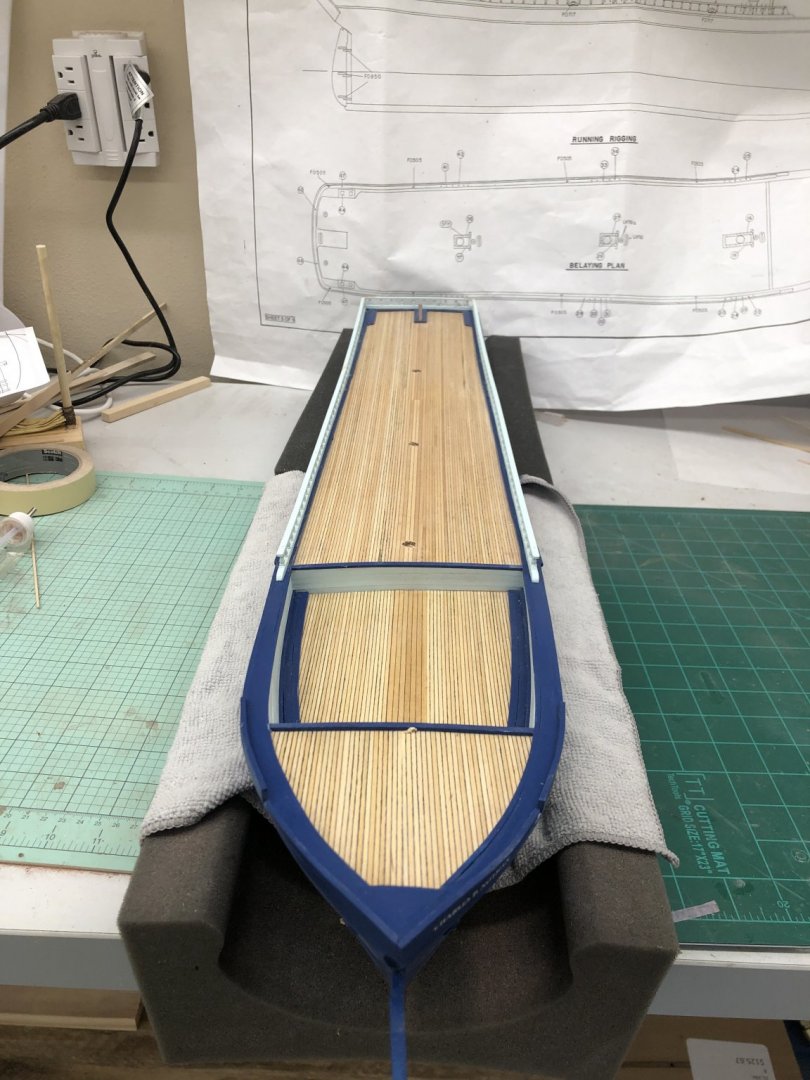
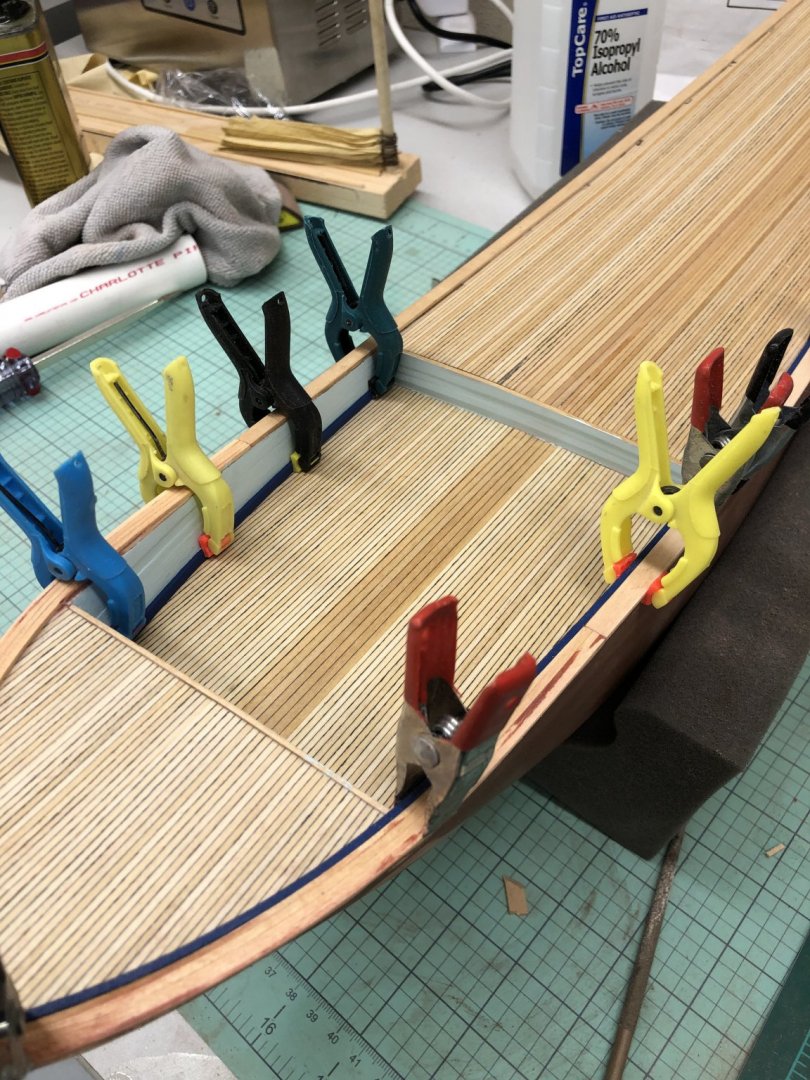
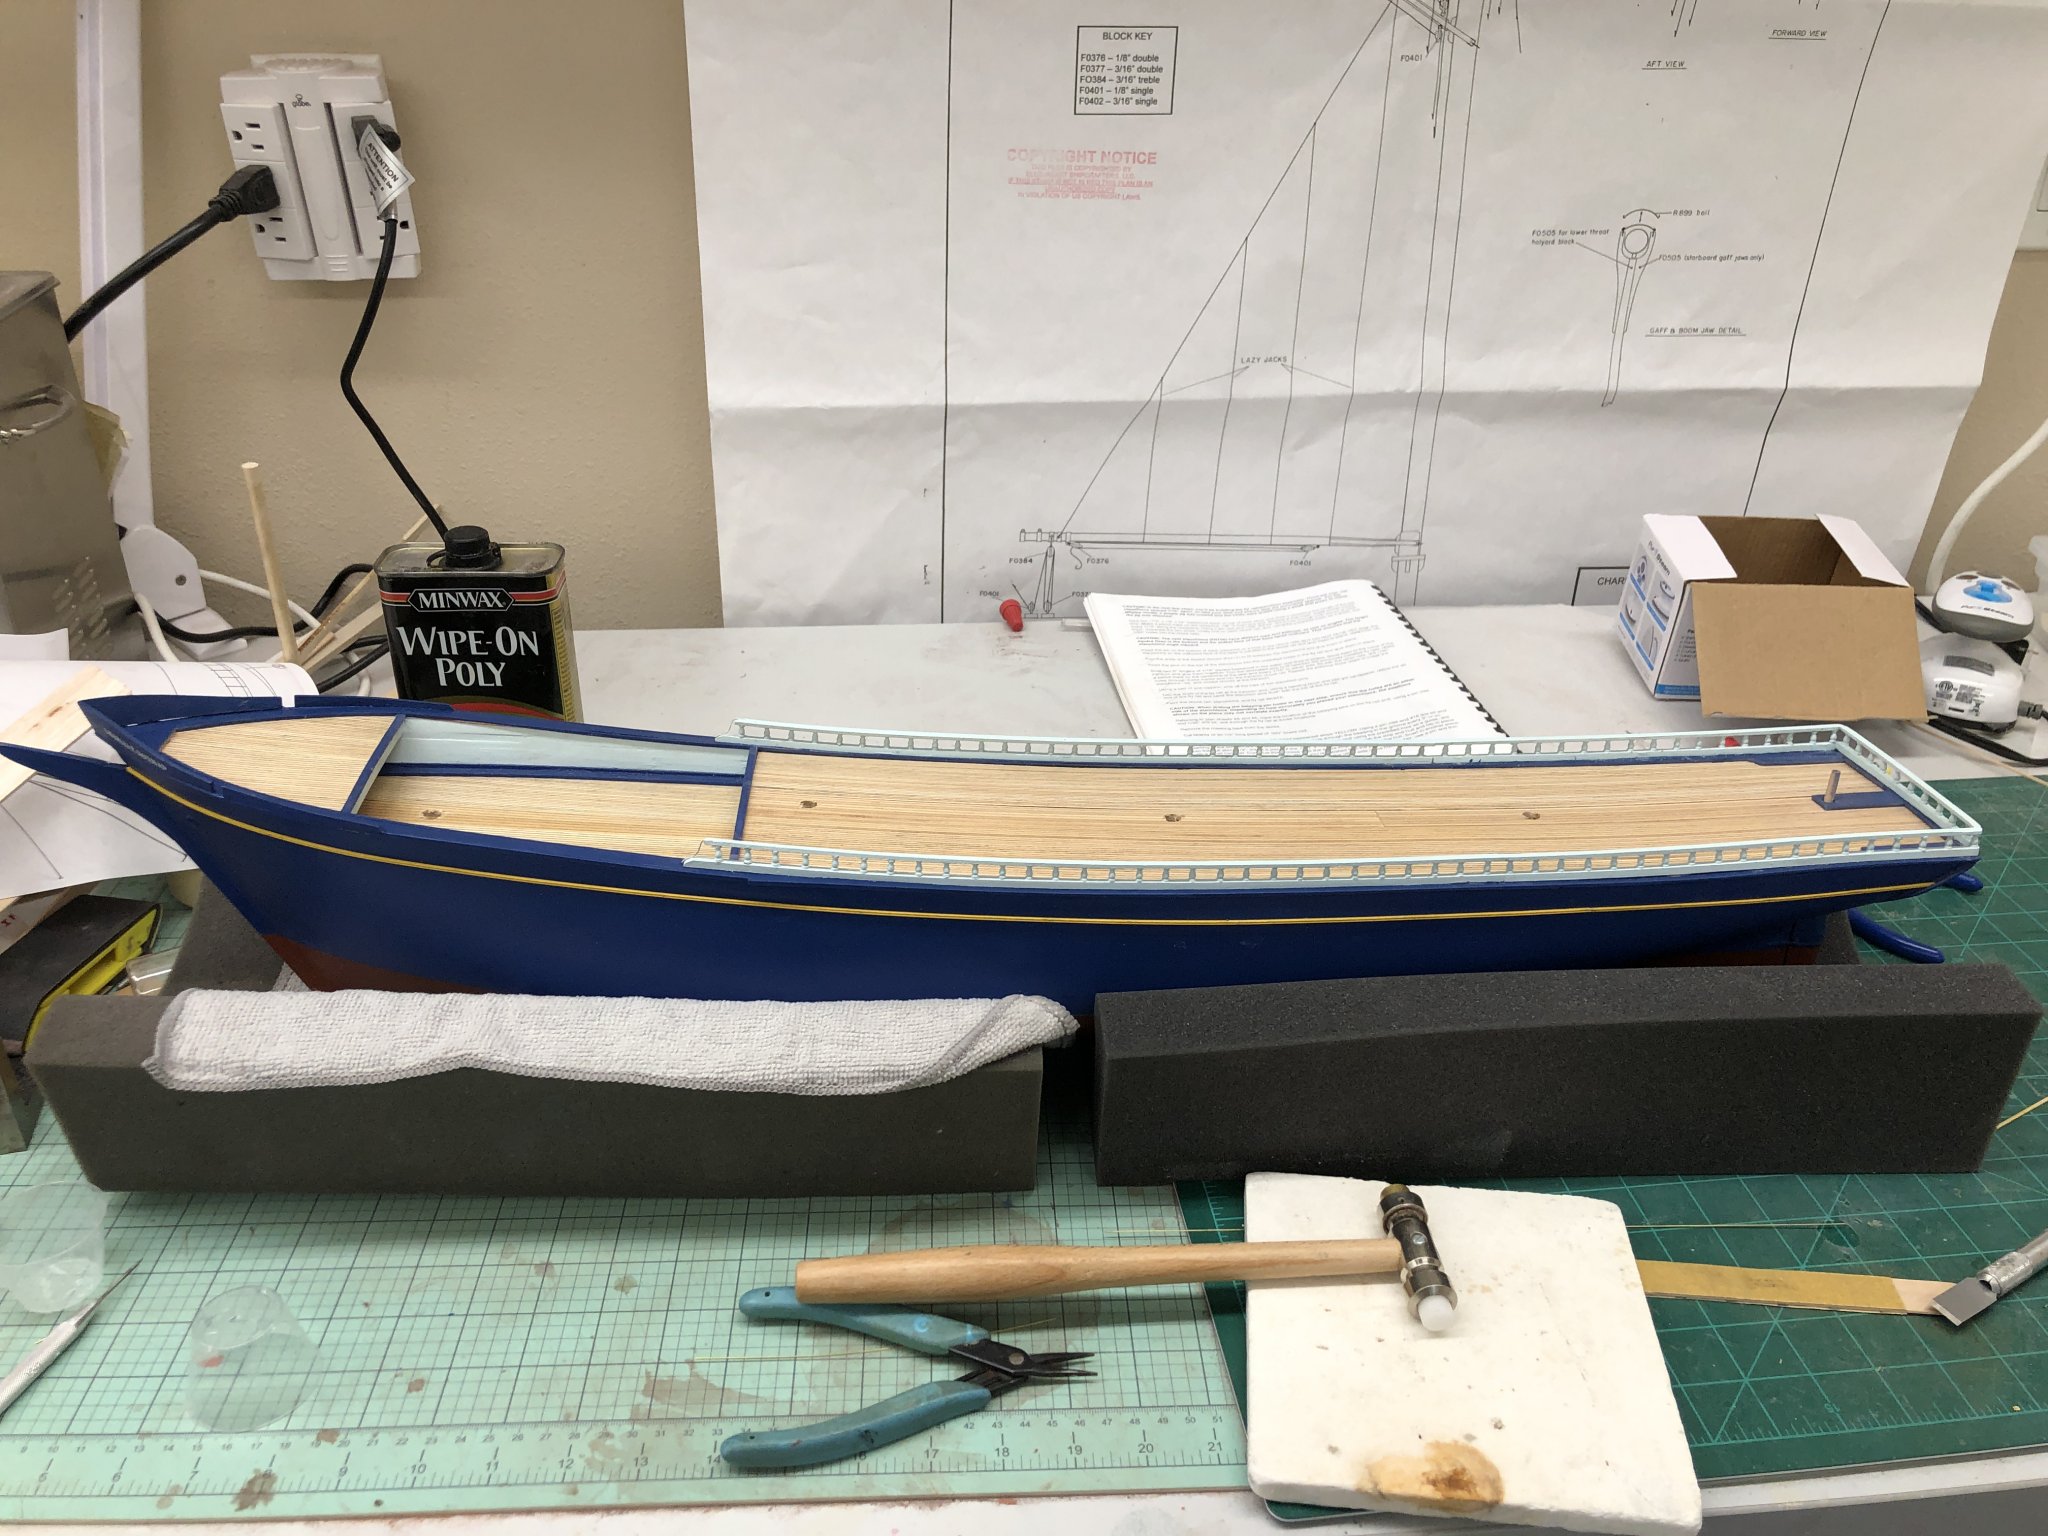
I have decided to deviate from the assembly instructions in order to try and get some of the painting done before all the coverboard and waterways are installed. I have picked out a dark blue (Badger Tug Deep Blue) and a light blue (Model Shipways Clipper Pearl Blue) for the hull and vertical parts of the deck furniture and bulwarks. I will also use the dark blue for the coverboard and trim on the hatches and other places where the instructions call for green. To make it easier (for me) to get clean lines I have painted the waterway and lock strakes on the main deck the dark blue and the bulwarks the light blue and will install the waterways after I get the main deck "varnished" (aka Wipe-on-Poly). I painted three pieces of the 1/16 X 1/16 stock the deep blue and will use this for the inboard most piece of the coverboard (once the poop and fo'c'sle decks are finished. this will make it easier to paint the coverboard without worrying (too much) about getting blue paint on the deck. Here is the hull with the waterway on the stbd side being glued in and the inner most portion of the coverboard being glued in on the port side.
- 144 replies
-
- 6
-
-
- charles p notman
- finished
- (and 1 more)
-
Thanks Nic - I'll get some tomorrow.
-
This coat of filler/primer looks pretty good except for one spot (see if you can guess where it is) where I was apparently too vigorous with the sanding and went all the way through the planking. Luckily it is in an area where I put the extra filler blocks so repair will not be as difficult as it would be without the backing material. I will fix that spot and the area near the deck where the planks are still mismatched. While the paint was drying (it is dry in about an hour) I managed to get the peak halyard blocks on the four gaffs. All I need now are the throat halyard blocks and the little bails and these are ready to have the sails attached. Also got the two head sails fabbed and the reinforcing panels attached.


- 144 replies
-
- 8
-
-
- charles p notman
- finished
- (and 1 more)
-
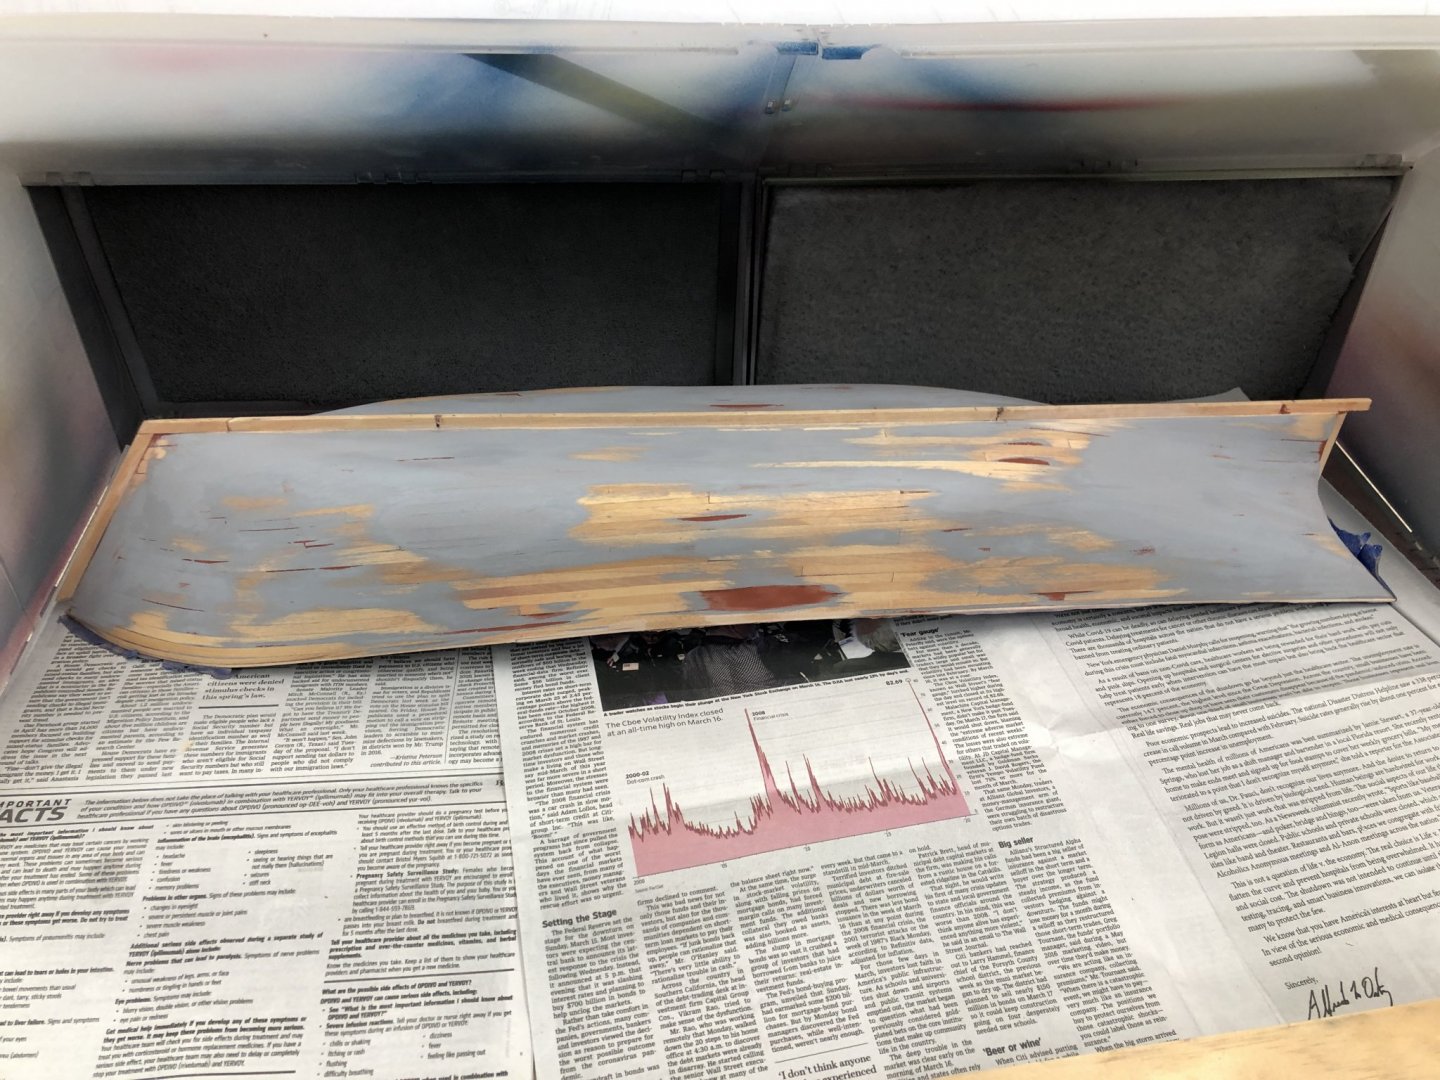
Continuing to work on the hull - three sets of Bondo so far but the number and size of the spots is going down. I have enough sanded off it is time for another coat of filler/primer. One thing of note is that the filler/primer really clogs up the sand paper. I ran through three sheets after the first coat. The Bondo does a pretty good job too but the filler/primer really clogs up the paper. One mistake (although it did not cost anything) from the first coat is that I now have the decks covered with masking tape. With the hull attached to the build board that was not possible on the first coat. Luckily none got on the deck but taking no chances this time. Here is the hull in the spray booth ready for another coat in the morning.
- 144 replies
-
- 5
-
-
- charles p notman
- finished
- (and 1 more)
-
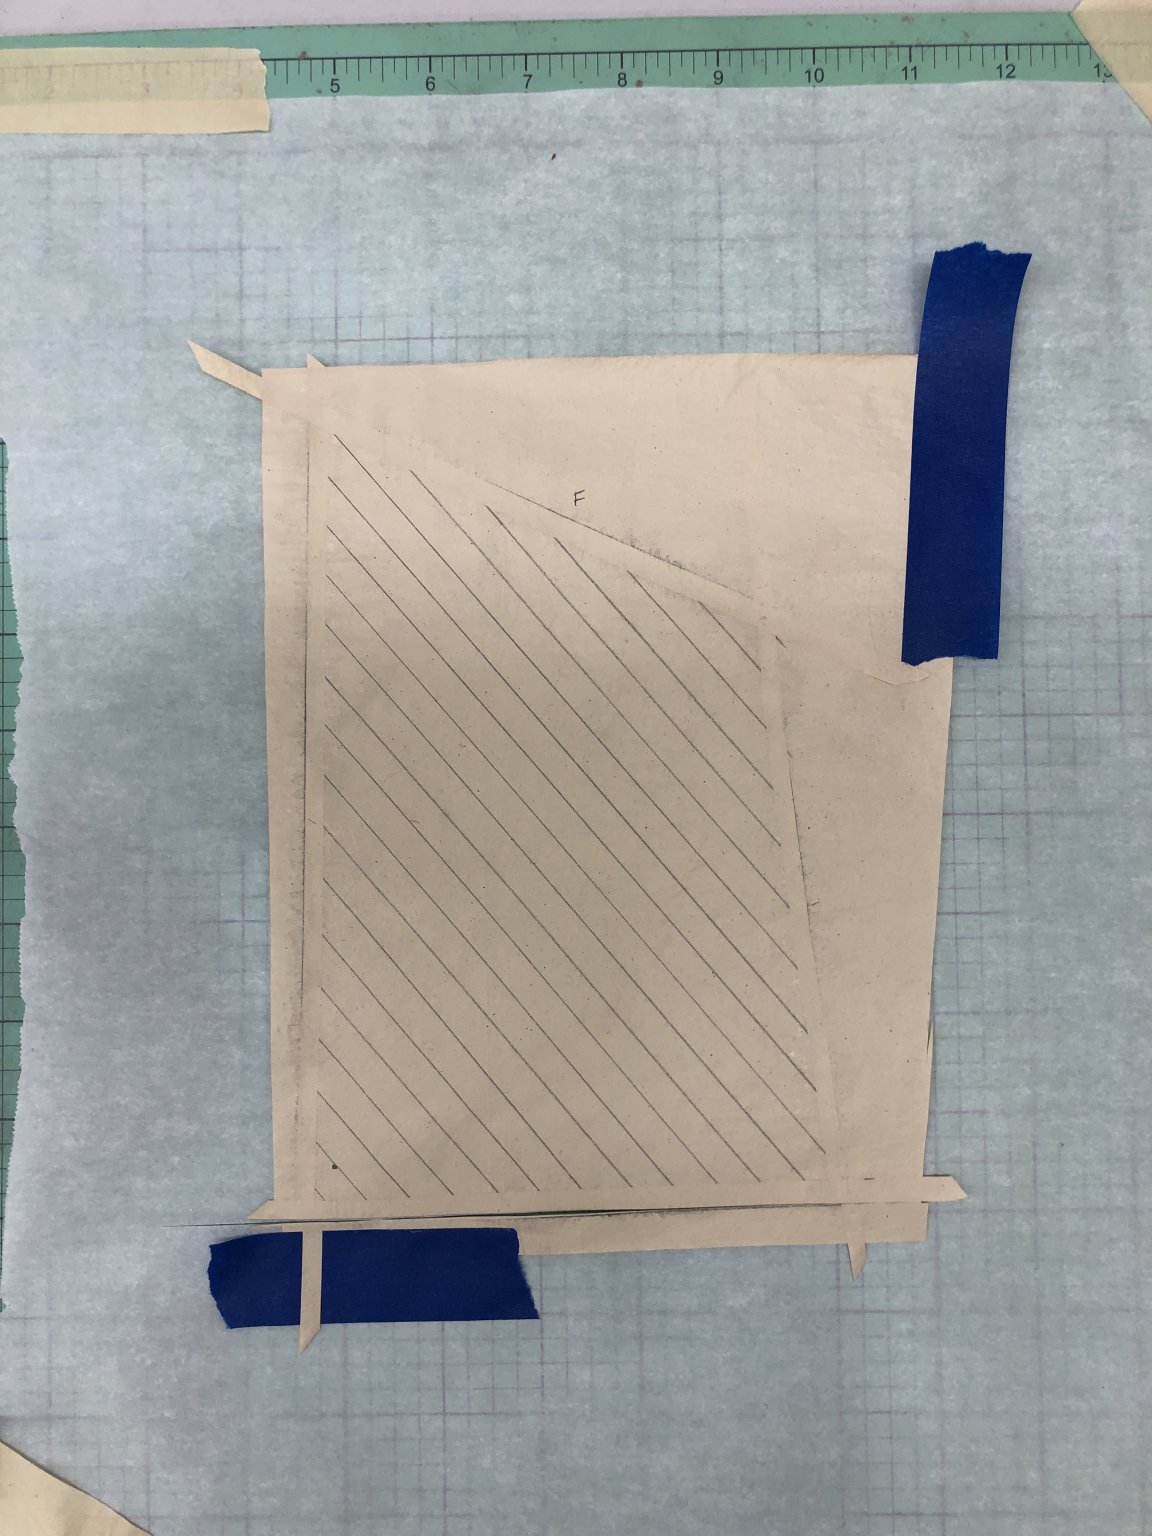
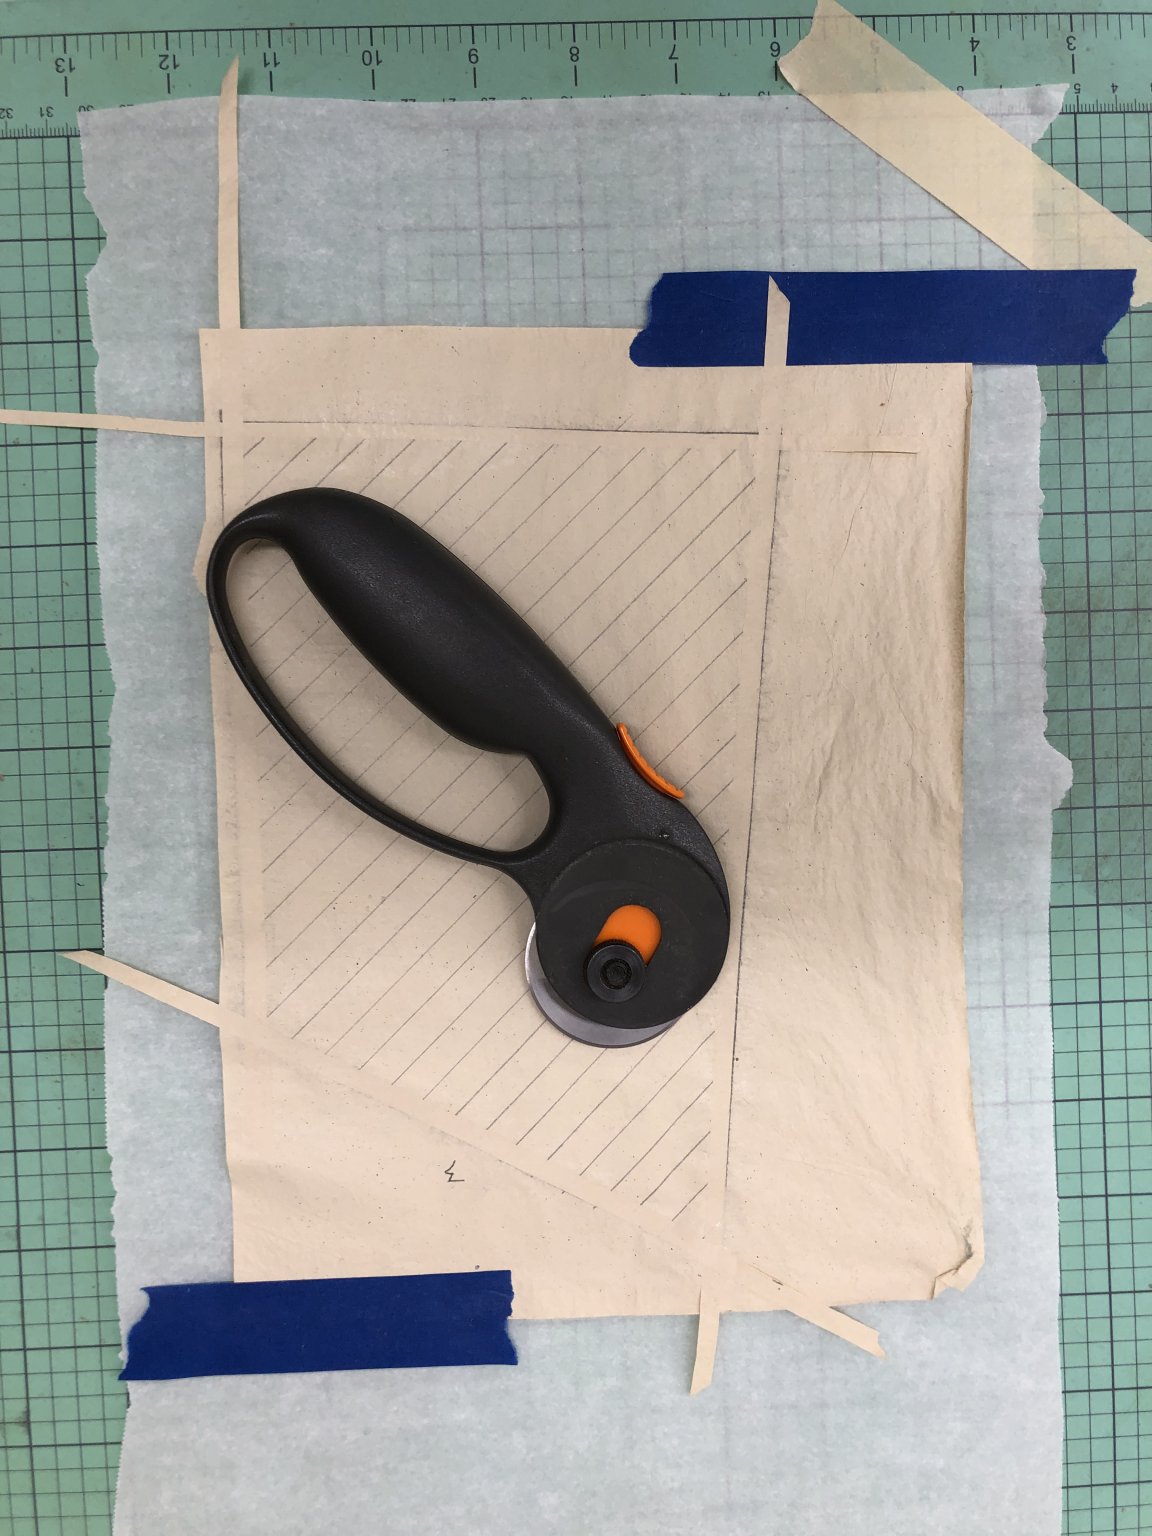
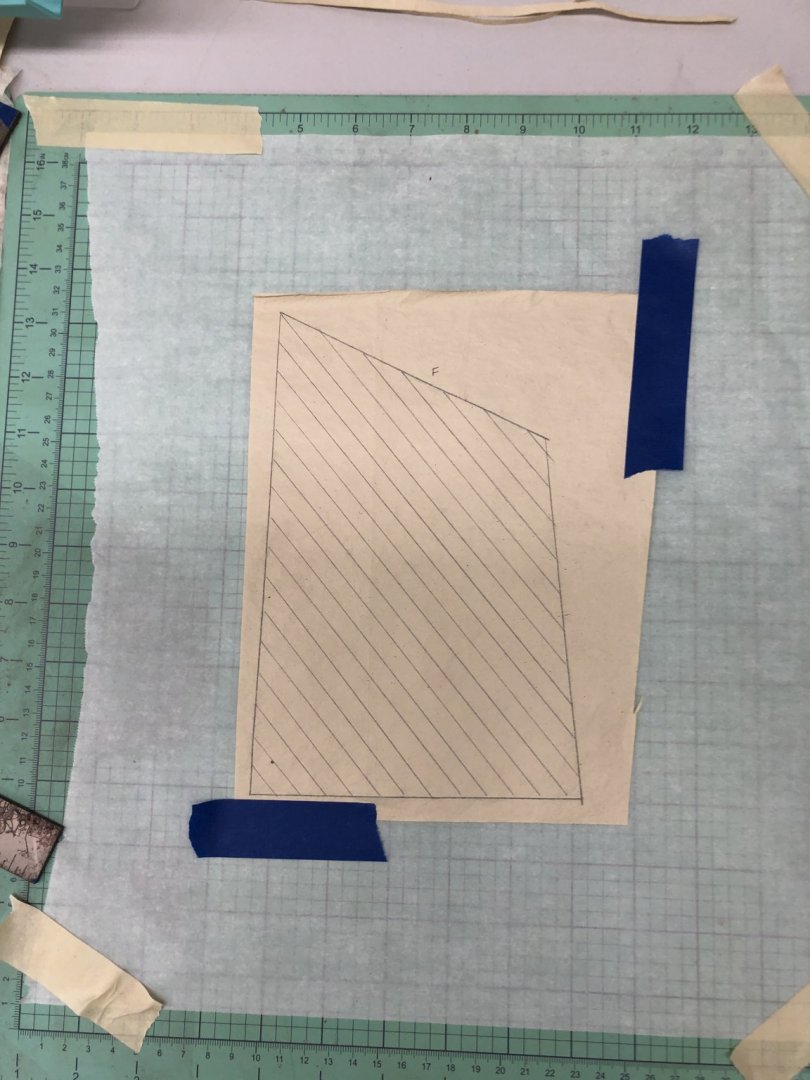
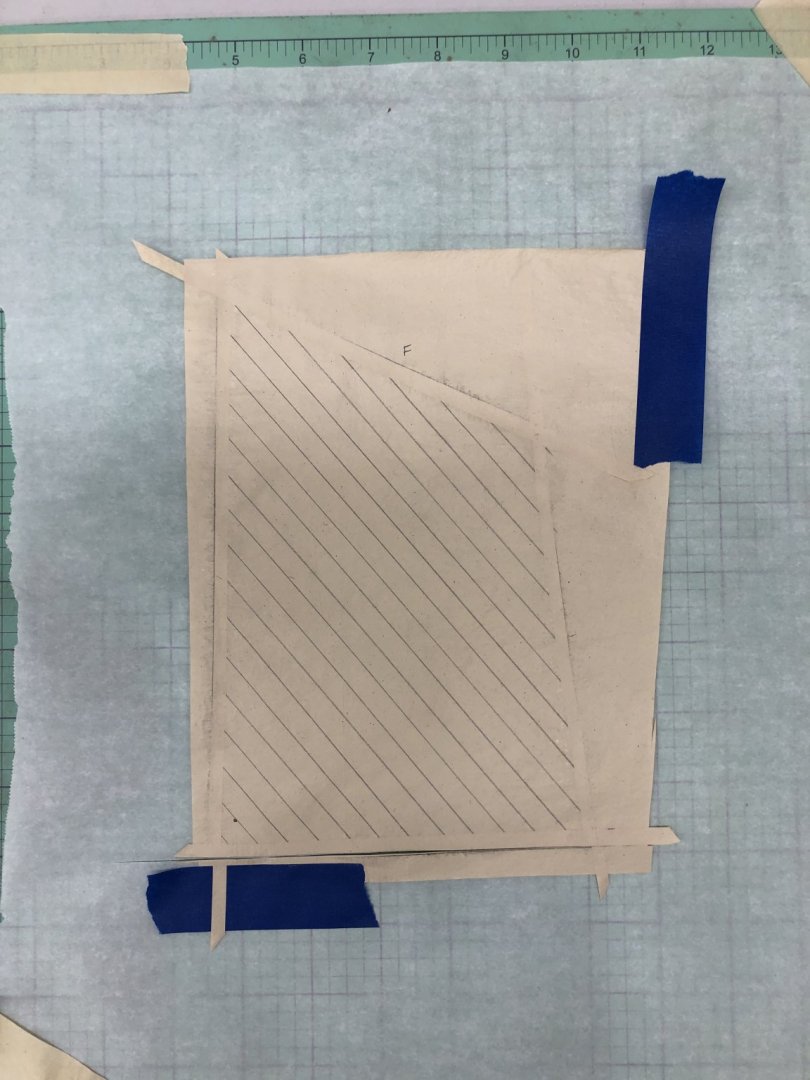
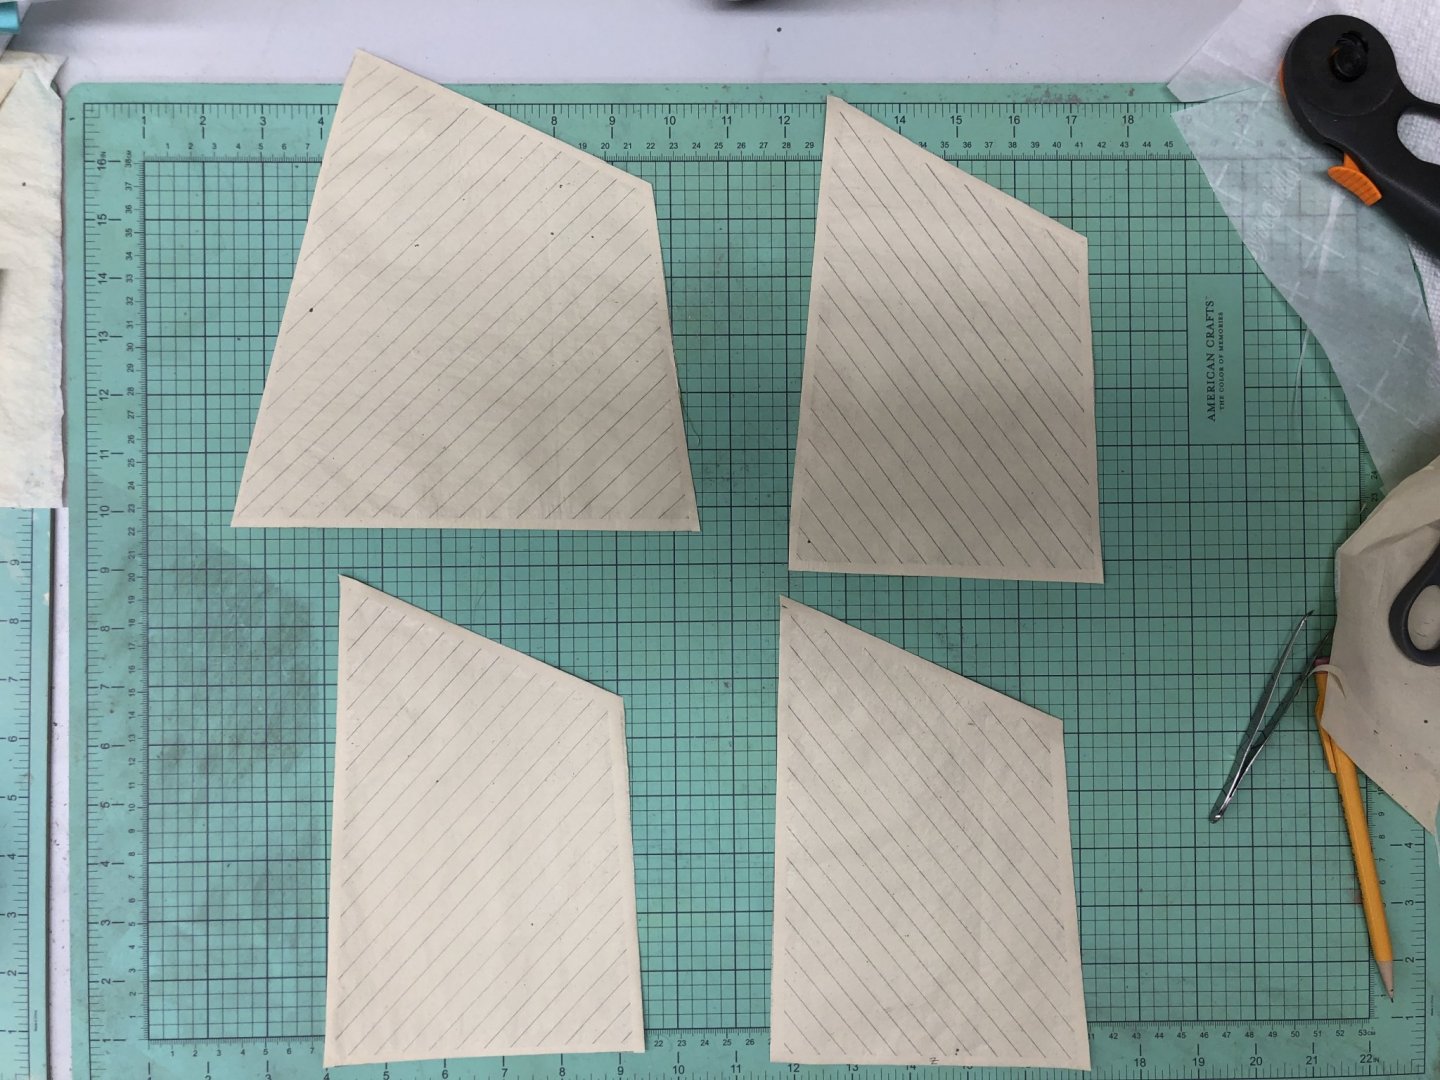
And there are always the sails. I am using the methodology from Tom Luria's You-Tube video using silkspan to make sails although I am only doing the furled version (so no reef points for instance). Since they aare to be furled I was not too careful about extraneous marks that occur when your cutting mat is not really clean and you forget to put some wax or parchment paper down over it. So here is the starting point after I use a 4H pencil to draw in the fabric seams. I have taped both the parchment paper to the mat and the sail to the parchment paper (as best I can). Here is the sail with the reinforcing at the edges in place. For cutting the thin strips for the reinforcing I used a rotary cutting (courtesy of my quilter girlfriend). It makes cutting thin pieces easier and straighter than using an Xacto knife which (at least when I use it) tends to push the fabric ahead of it and make a somewhat jagged cut. The rotary cutter does not seem tom have this issue so I use it for all the cutting on the sails. And here are the four mail sails reinforced and cut out. Now for the bolt ropes, mast hoops and grommet holes.

- 144 replies
-
- 6
-
-
- charles p notman
- finished
- (and 1 more)


(2018_07_2316_35_27UTC).jpg.2d2216b7d1d05e3fe4ea904c4fa8b7c2.jpg)