cdrusn89
-
Posts
1,933 -
Joined
-
Last visited
Content Type
Profiles
Forums
Gallery
Events
Everything posted by cdrusn89
-
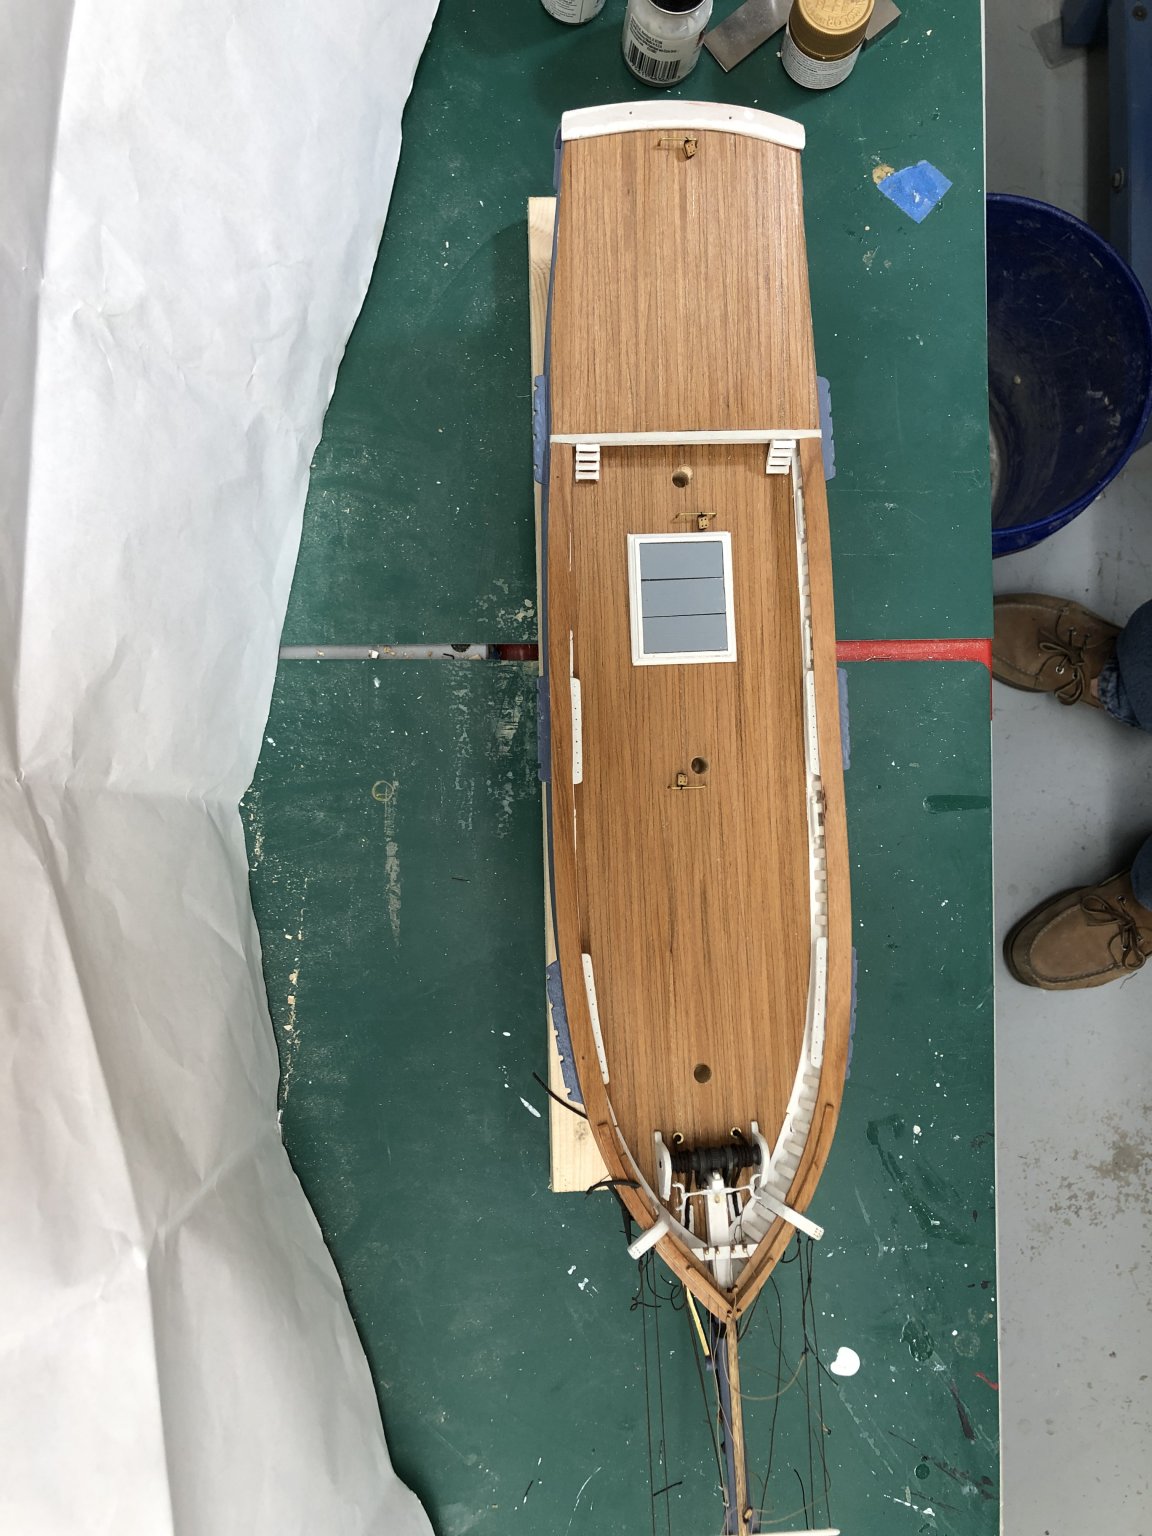
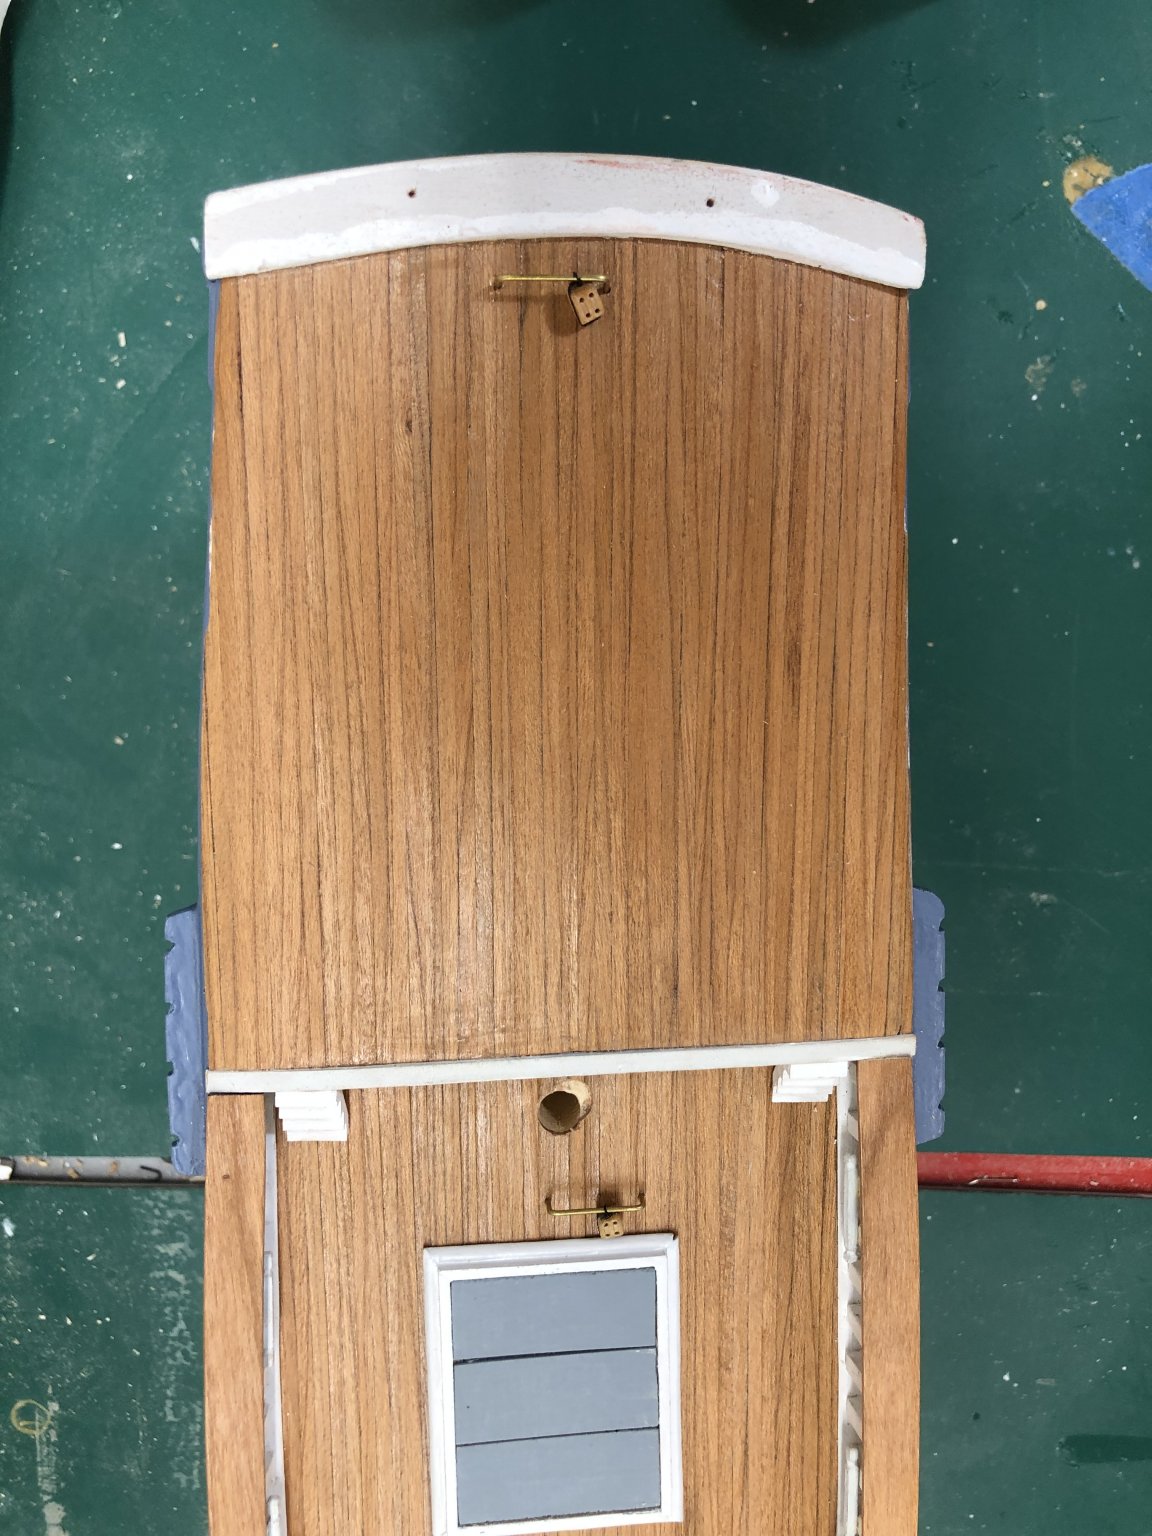
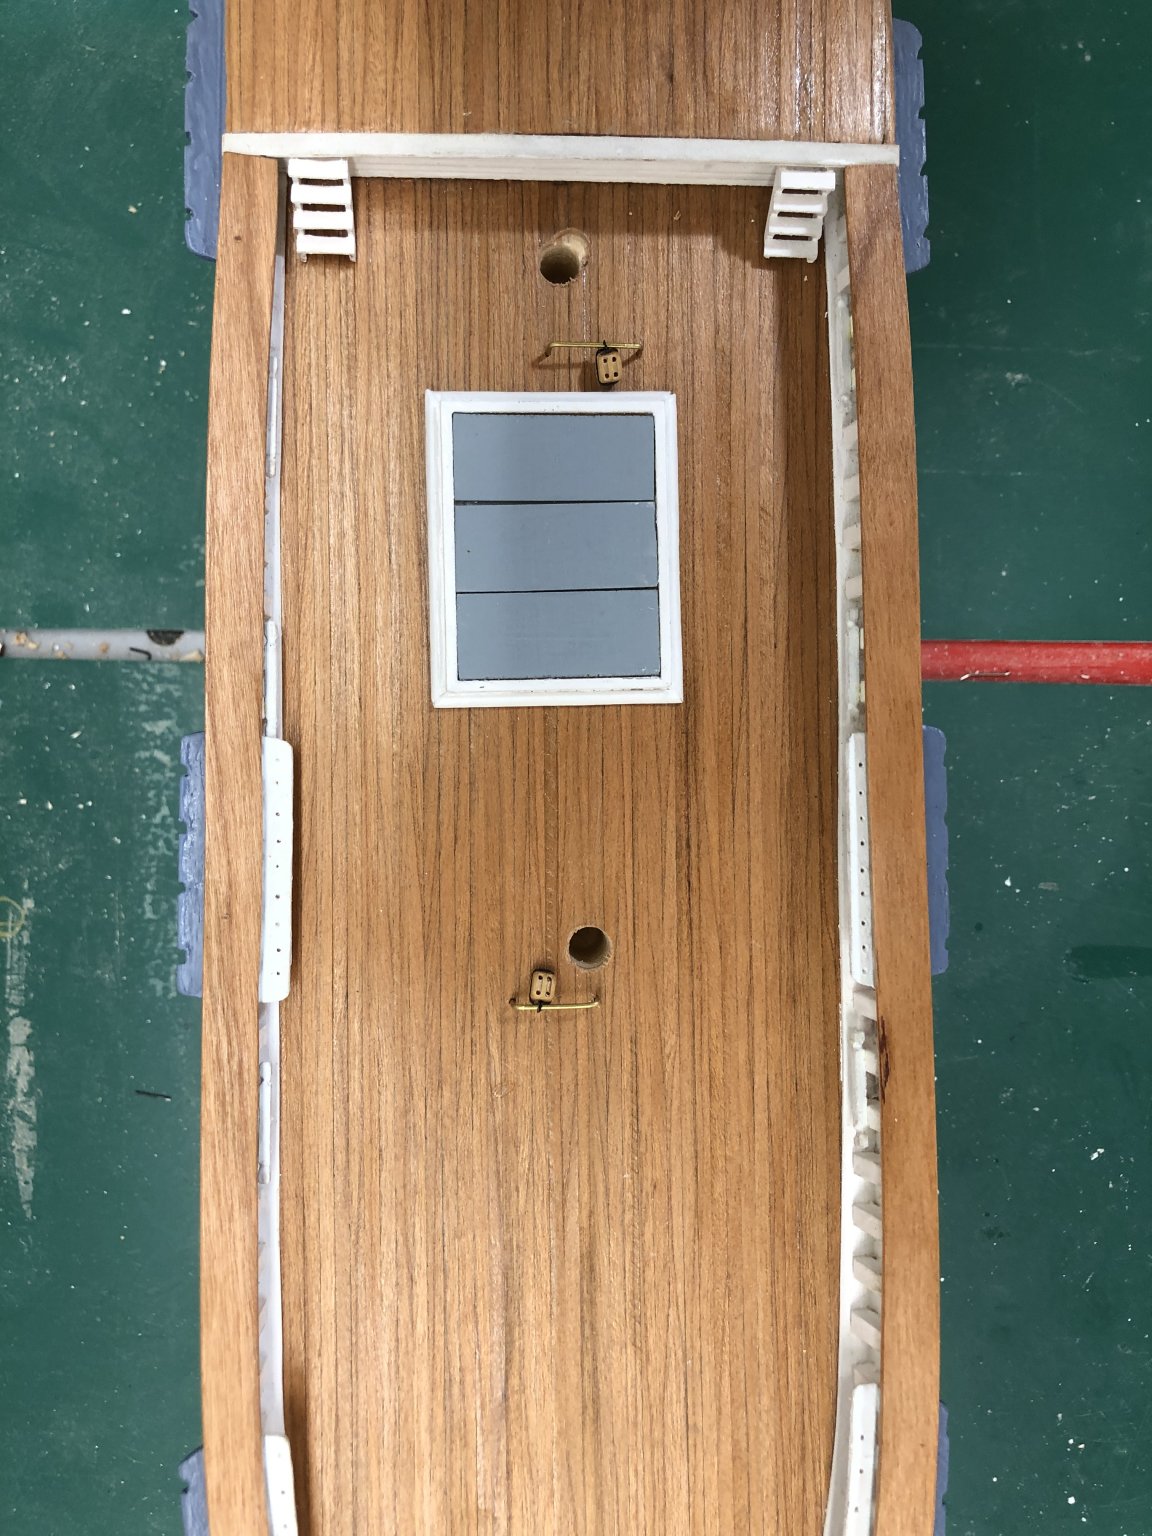
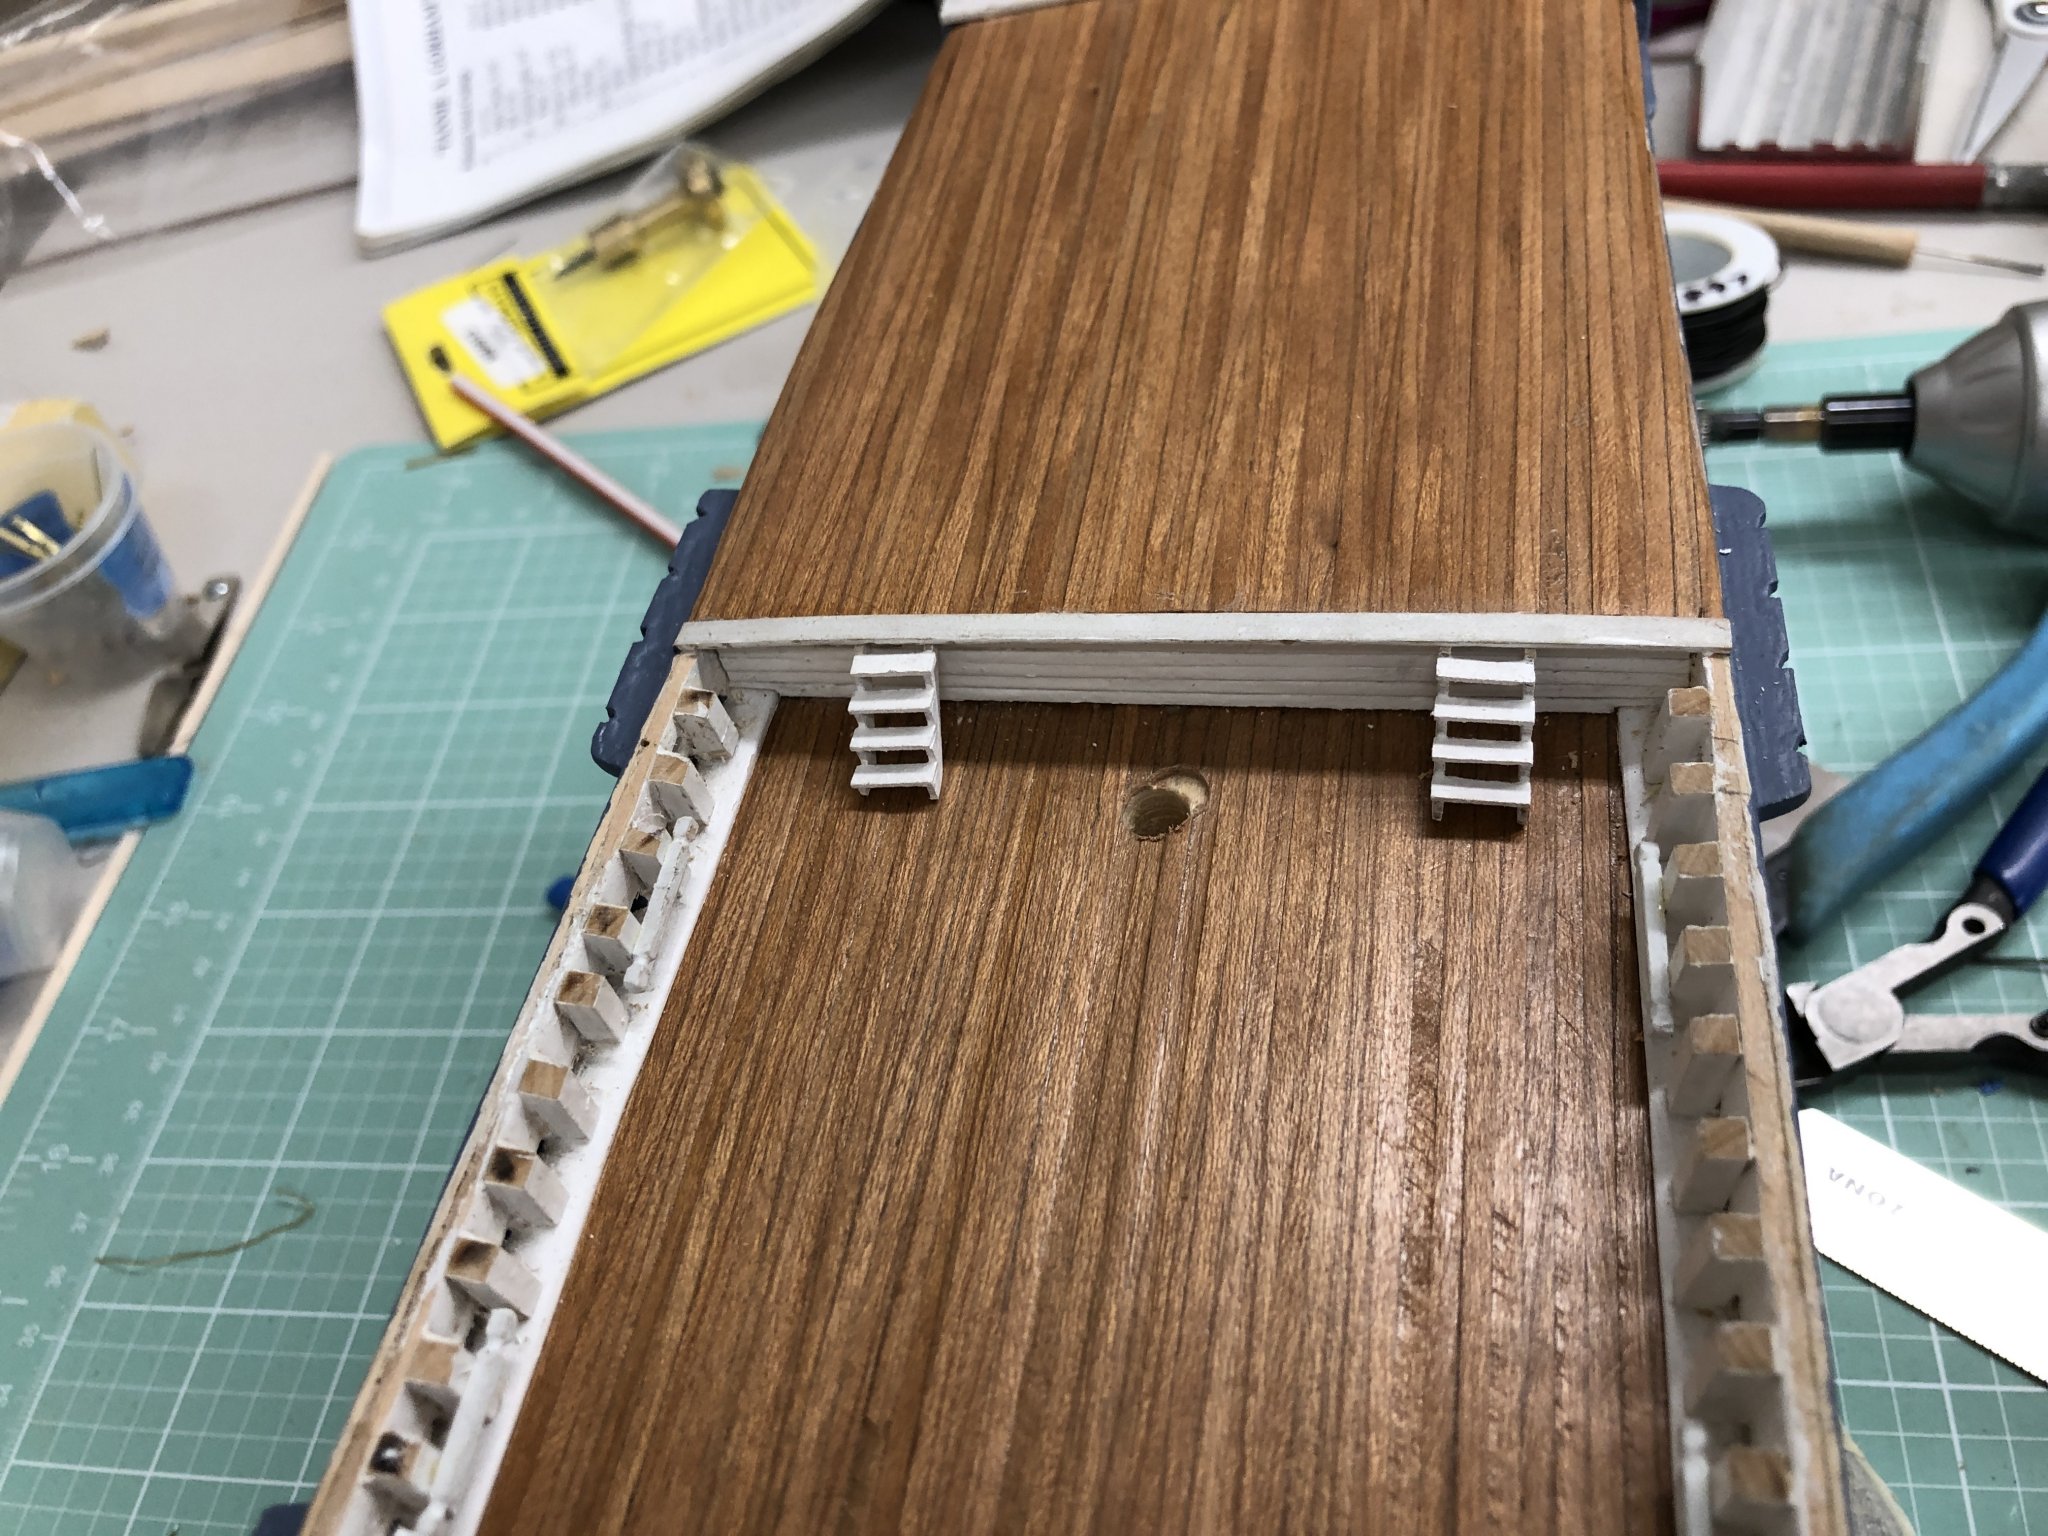
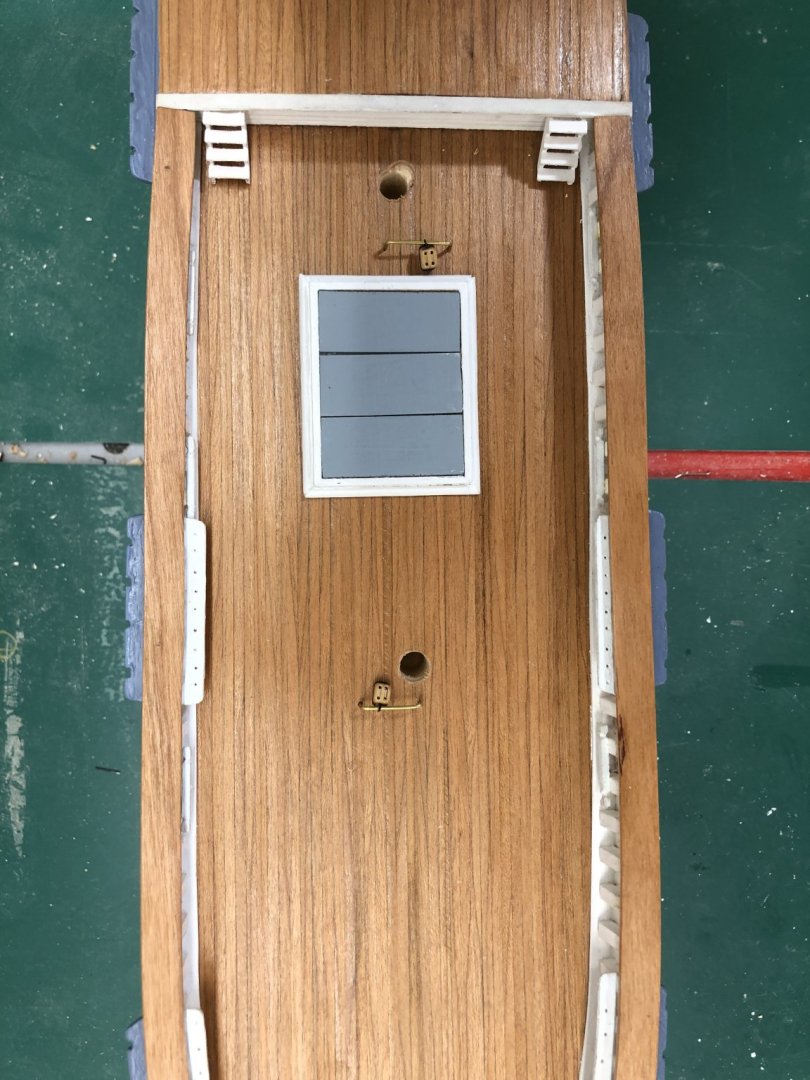
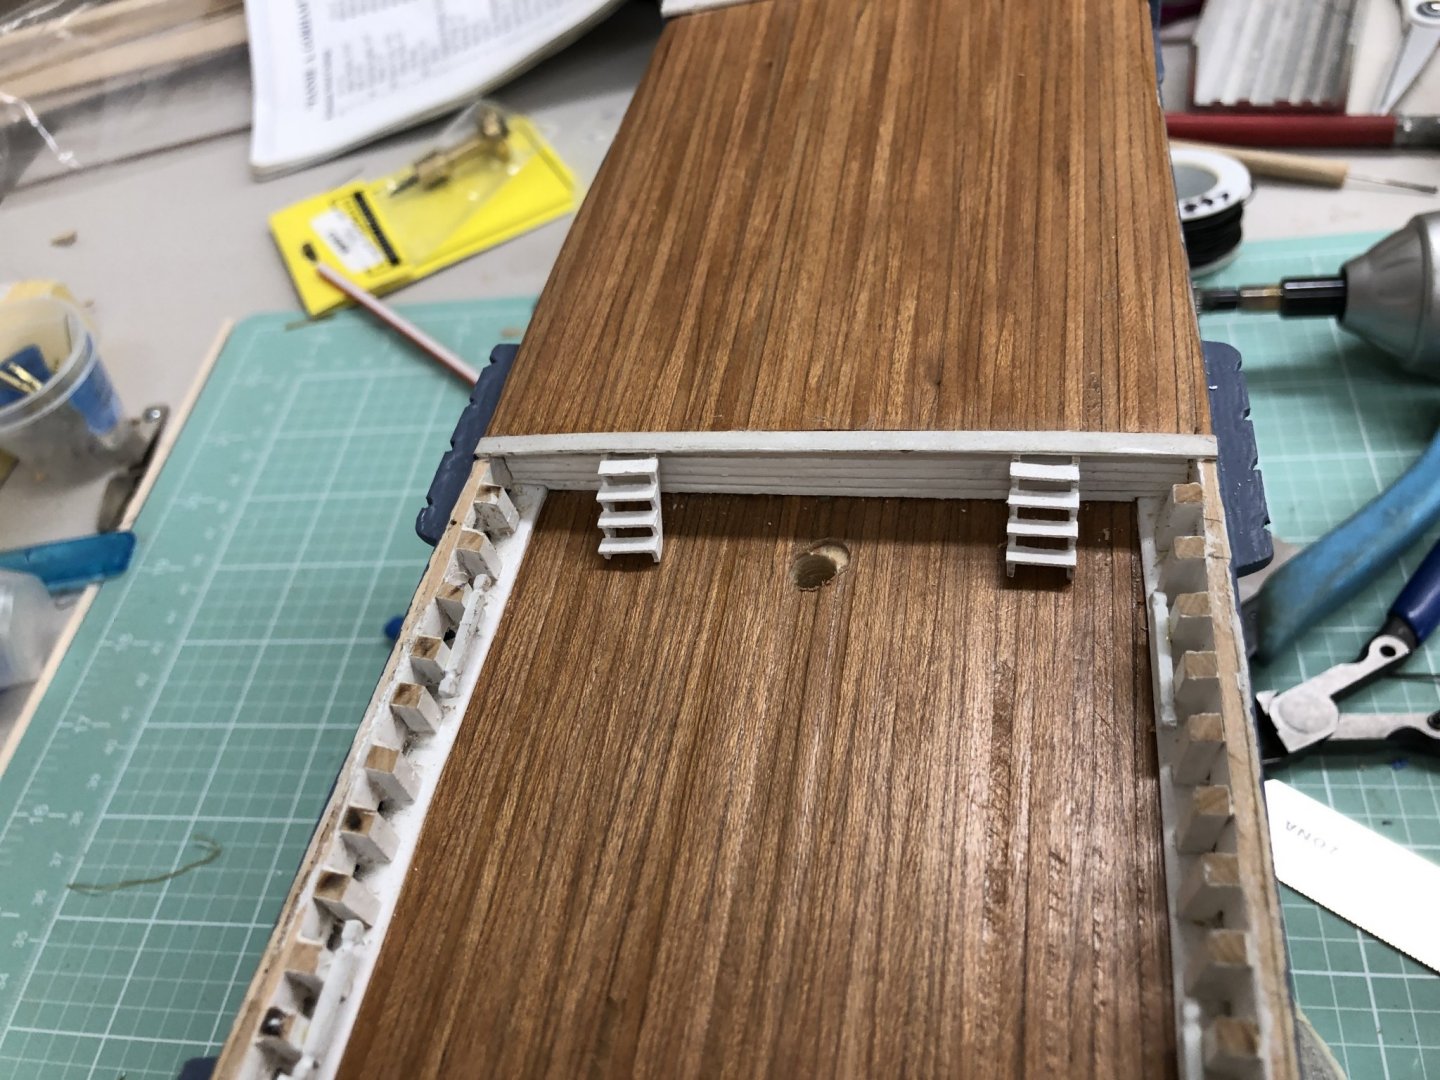
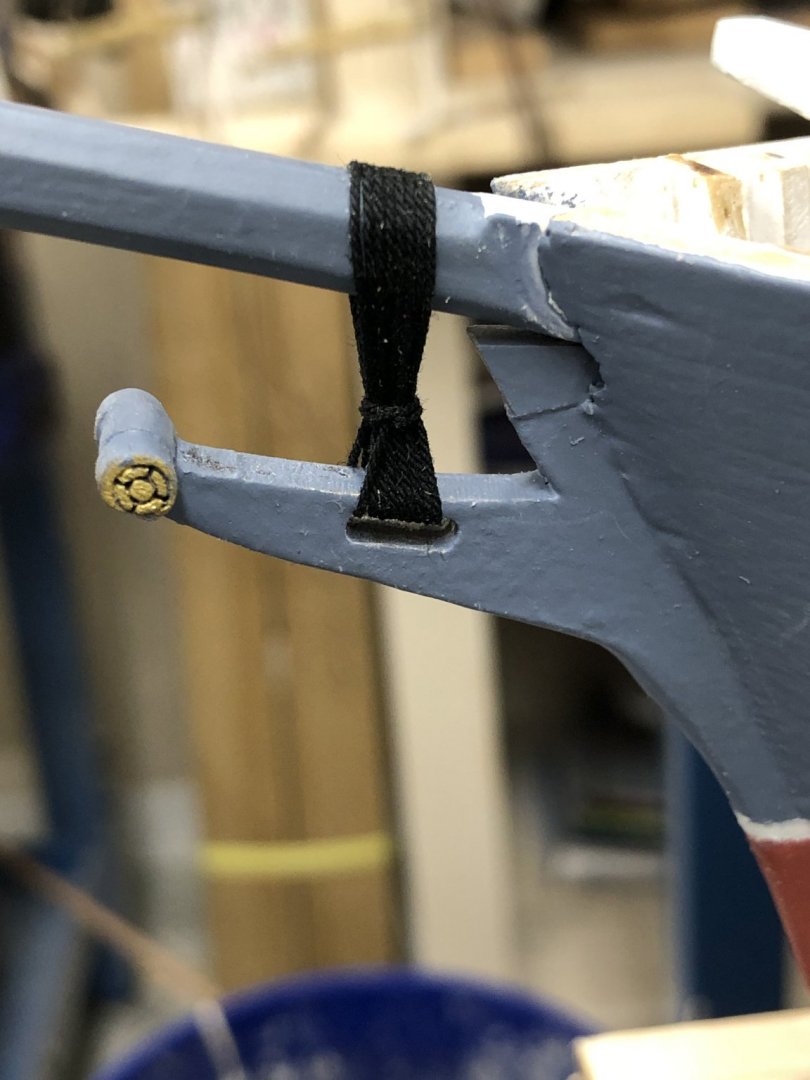
 I am continuing to add details and items previously built to the hull. I also redid the out Bobstay to get the gap between the deadeyes on both to be approximately the same. The lashings are still, not glued - just in case. I also added the anchor on the port side but not yet the cathead tackle. I am going to add that after the masts are up. As a note I managed to mess up the other anchor by gluing the cross bar on upside down (an error I also made on my Niagara). So I found a similar sized but not exact replacement. I should get it mounted today. I also got the main rails, main hatch, stairs and the sheet travelers with the attached blocks. I found that my versions of the forward hatch and deck house was too large by about 5mm. I think each was just a bit larger than the plans so there was essentially not room between the hatch, deck house and sheet traveler. Given the choice I (of course) am rebuilding the forward hatch to rectify the situation. Here are some shots of the deck as it stands now.


- 166 replies
-
- 1
-

-
- fannie a gorham
- finished
- (and 1 more)
-
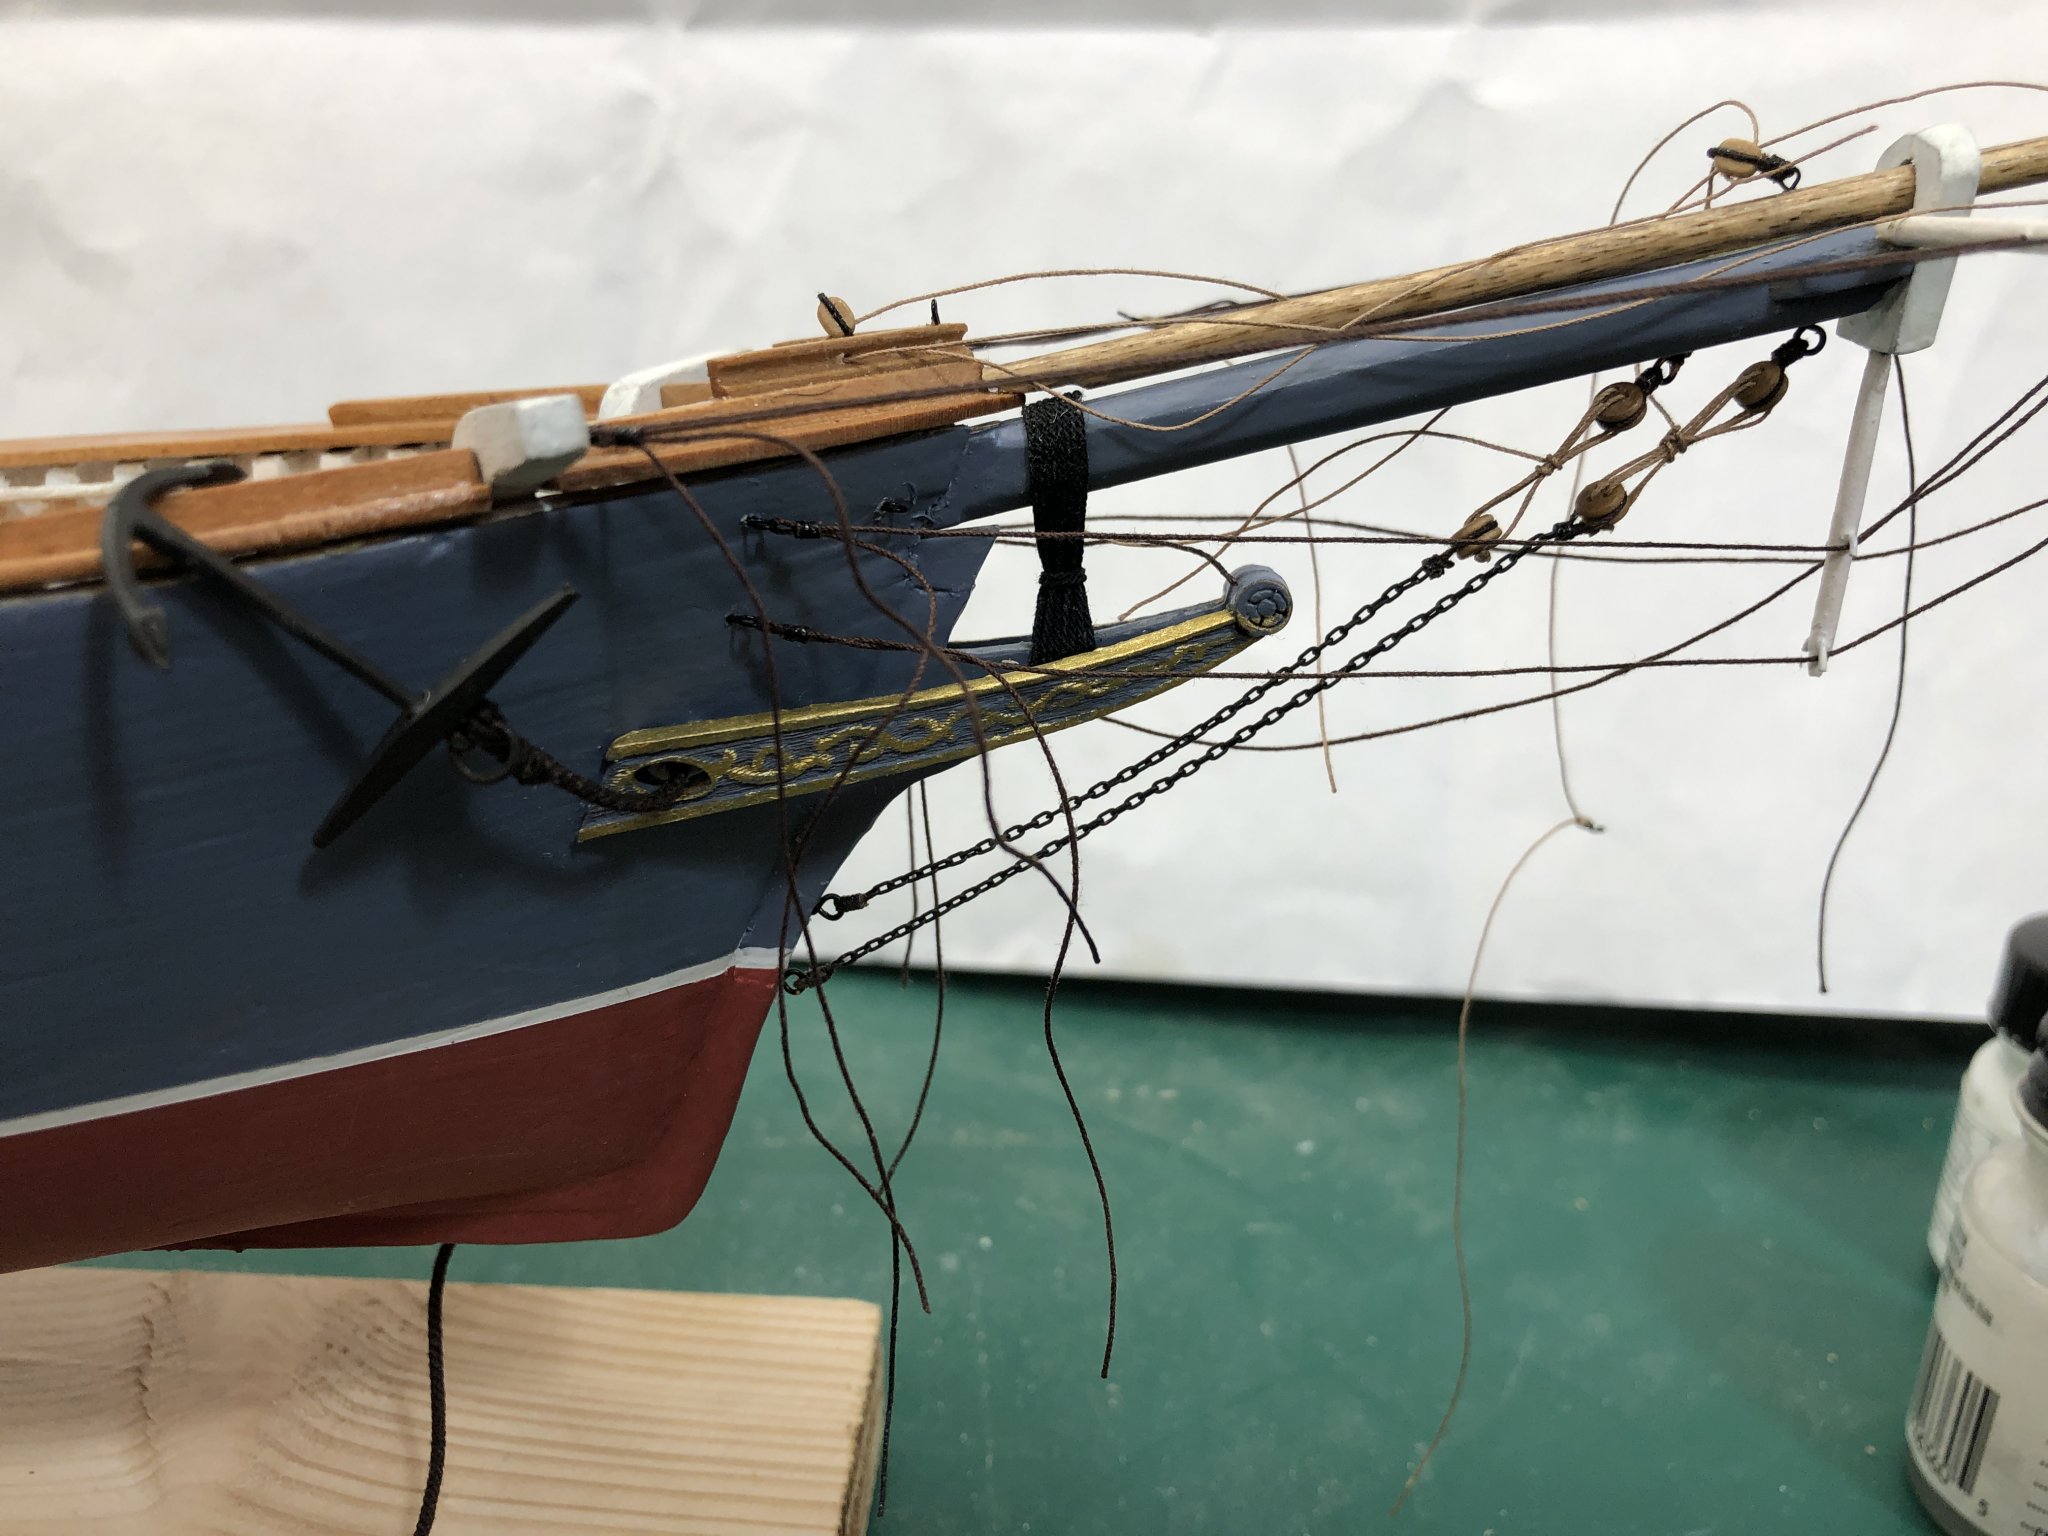
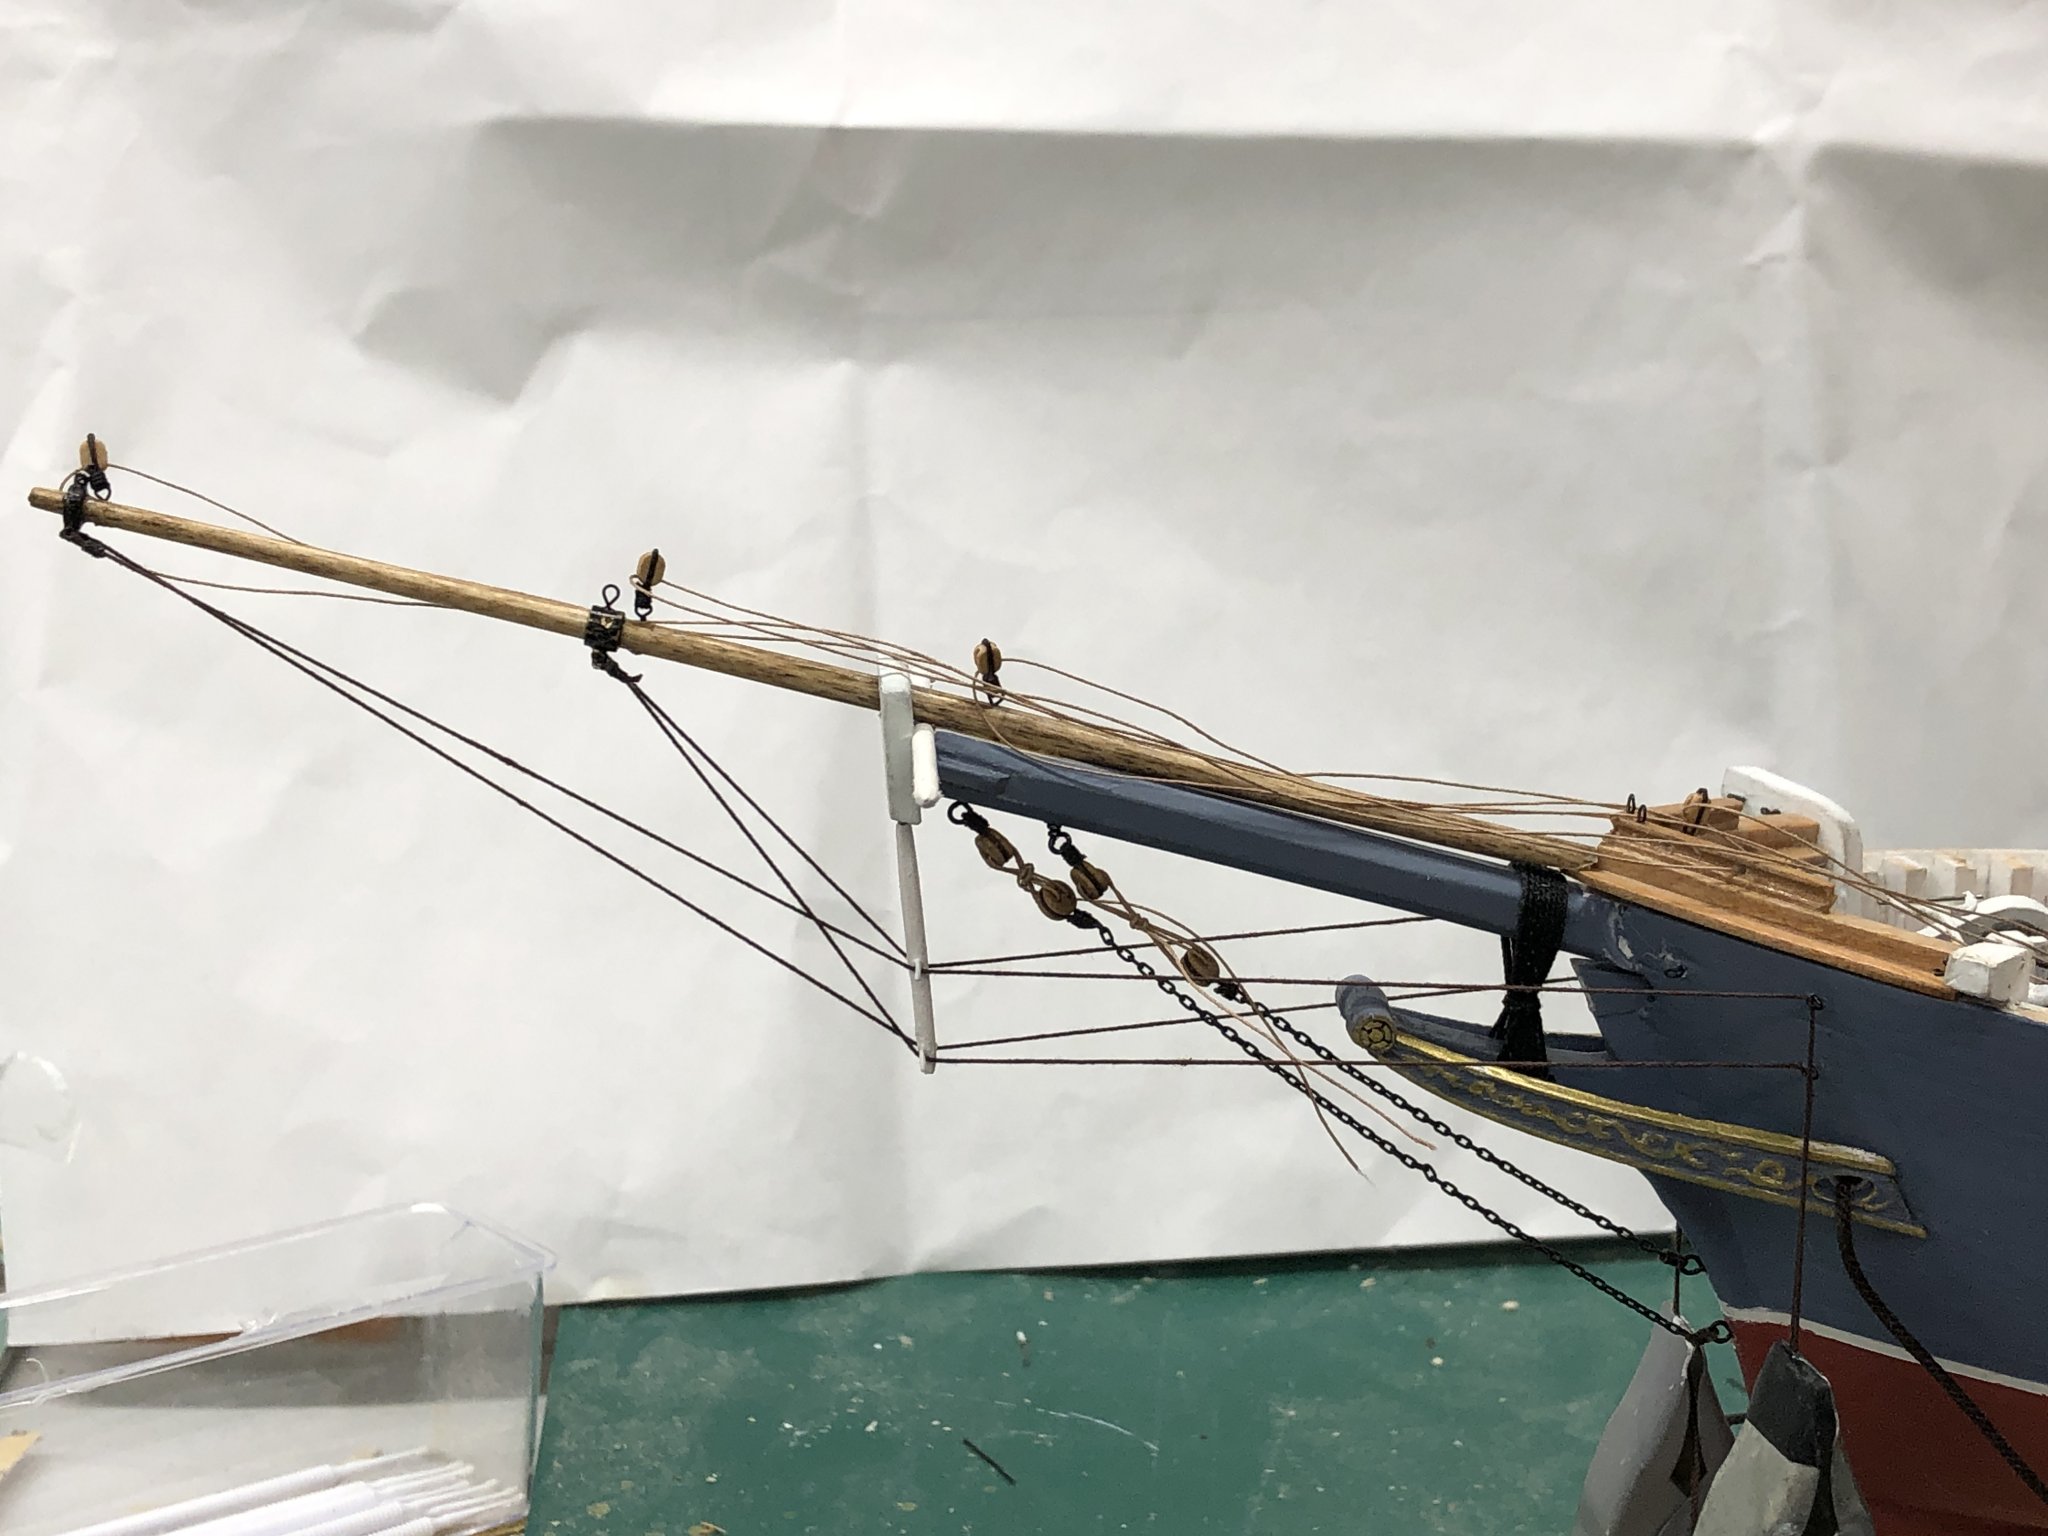
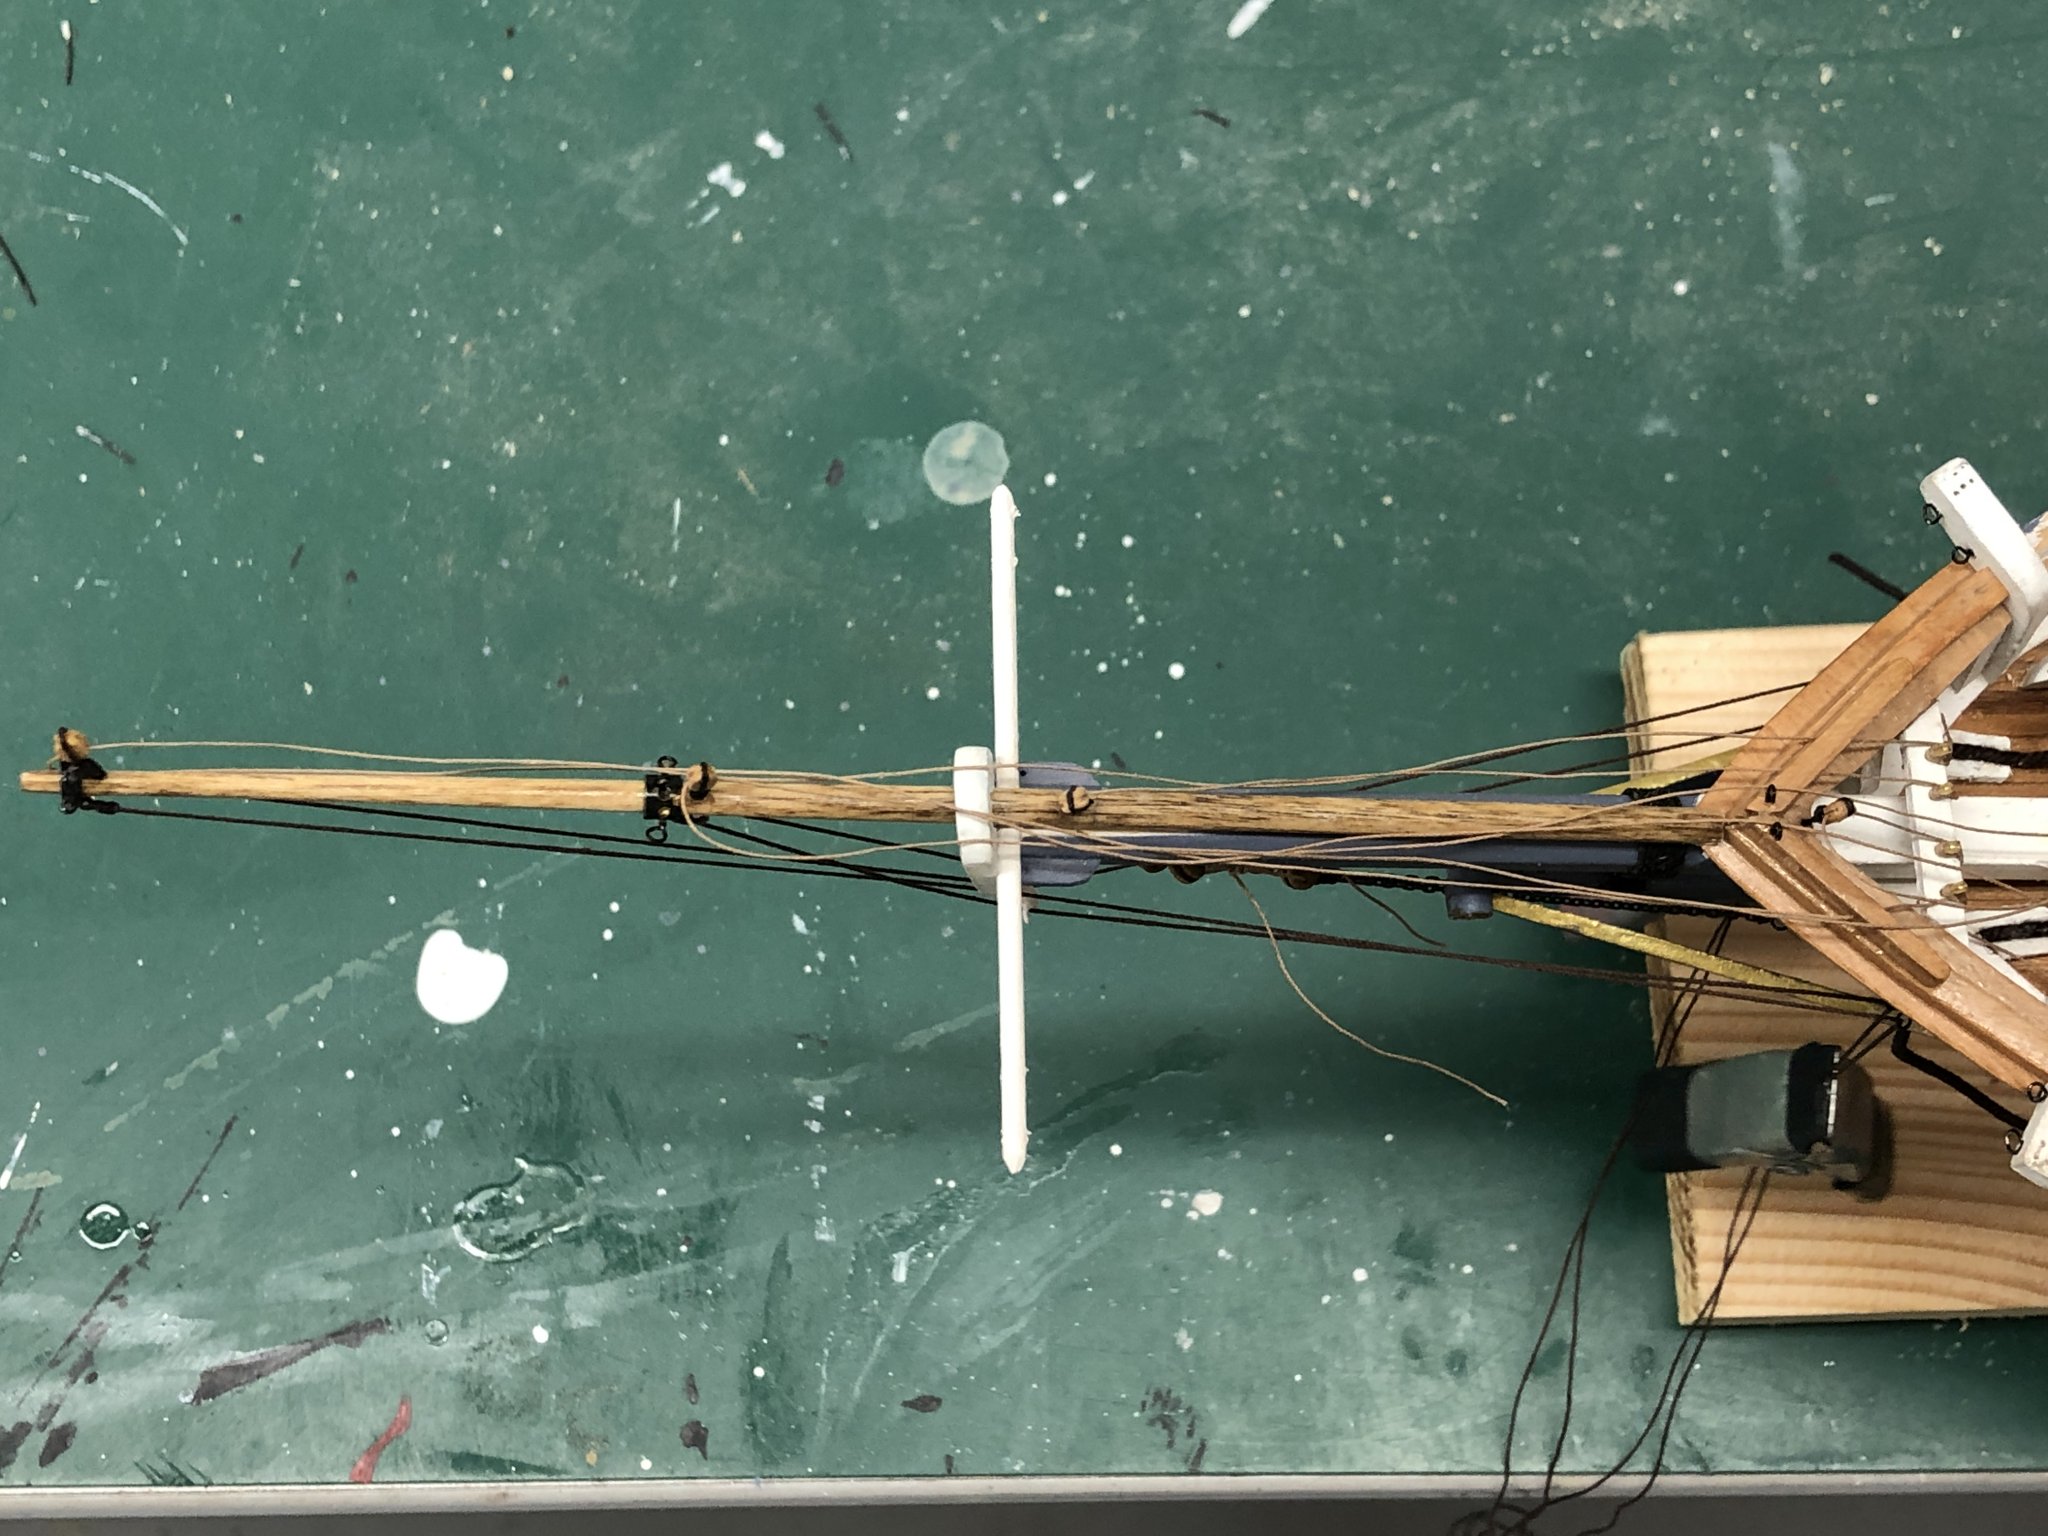
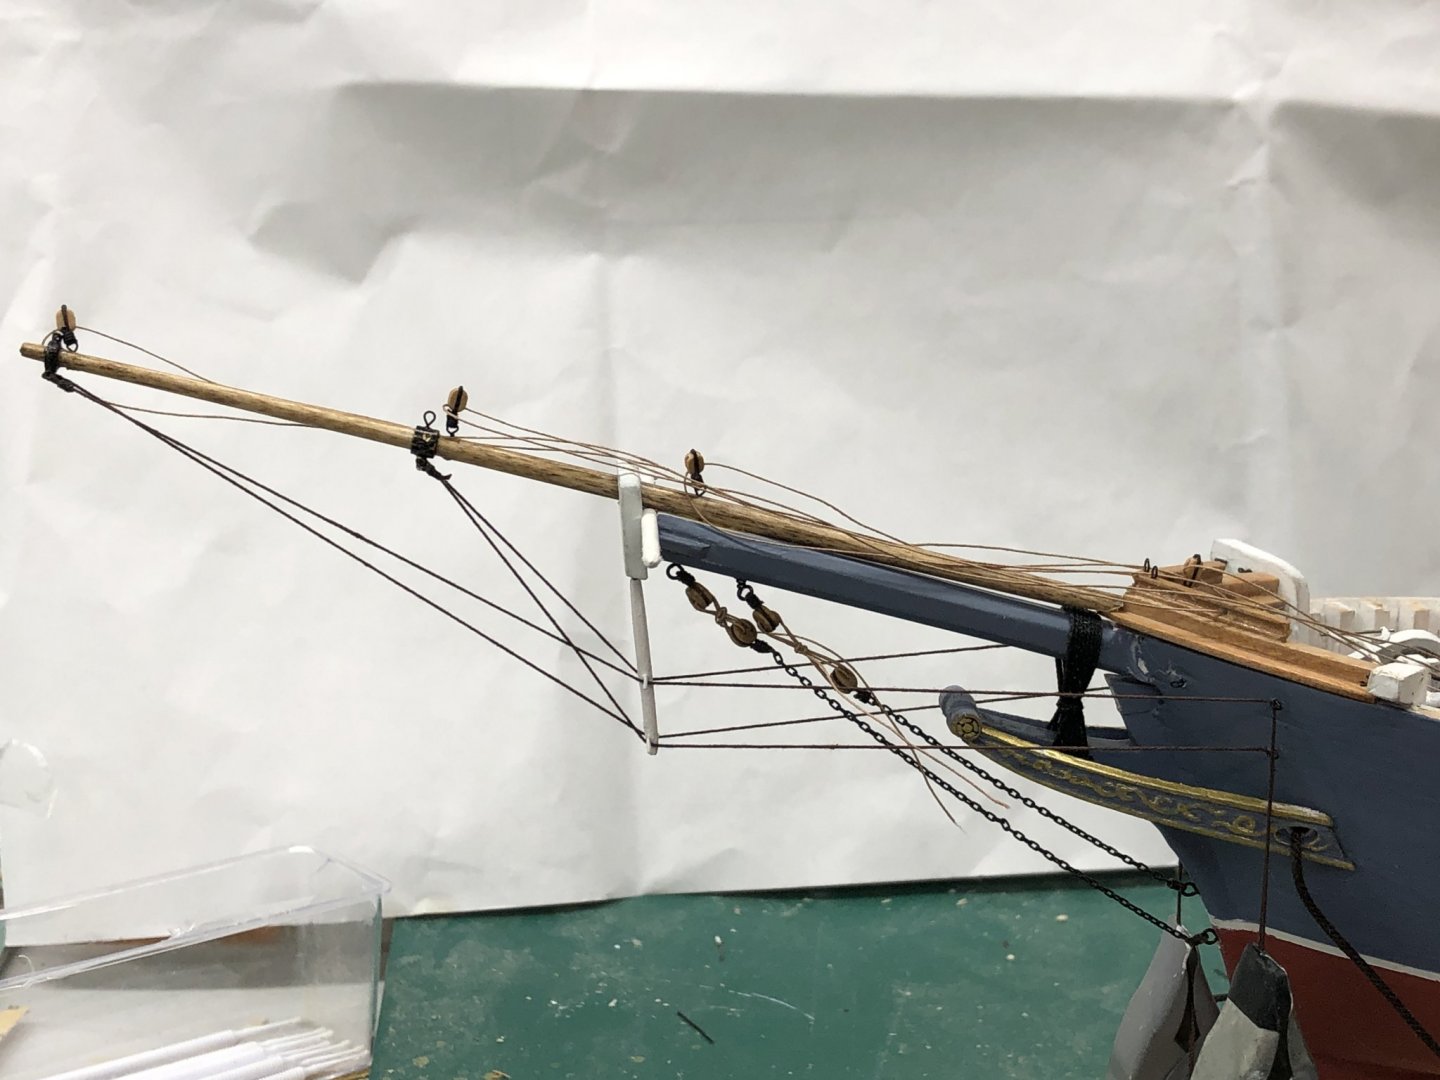
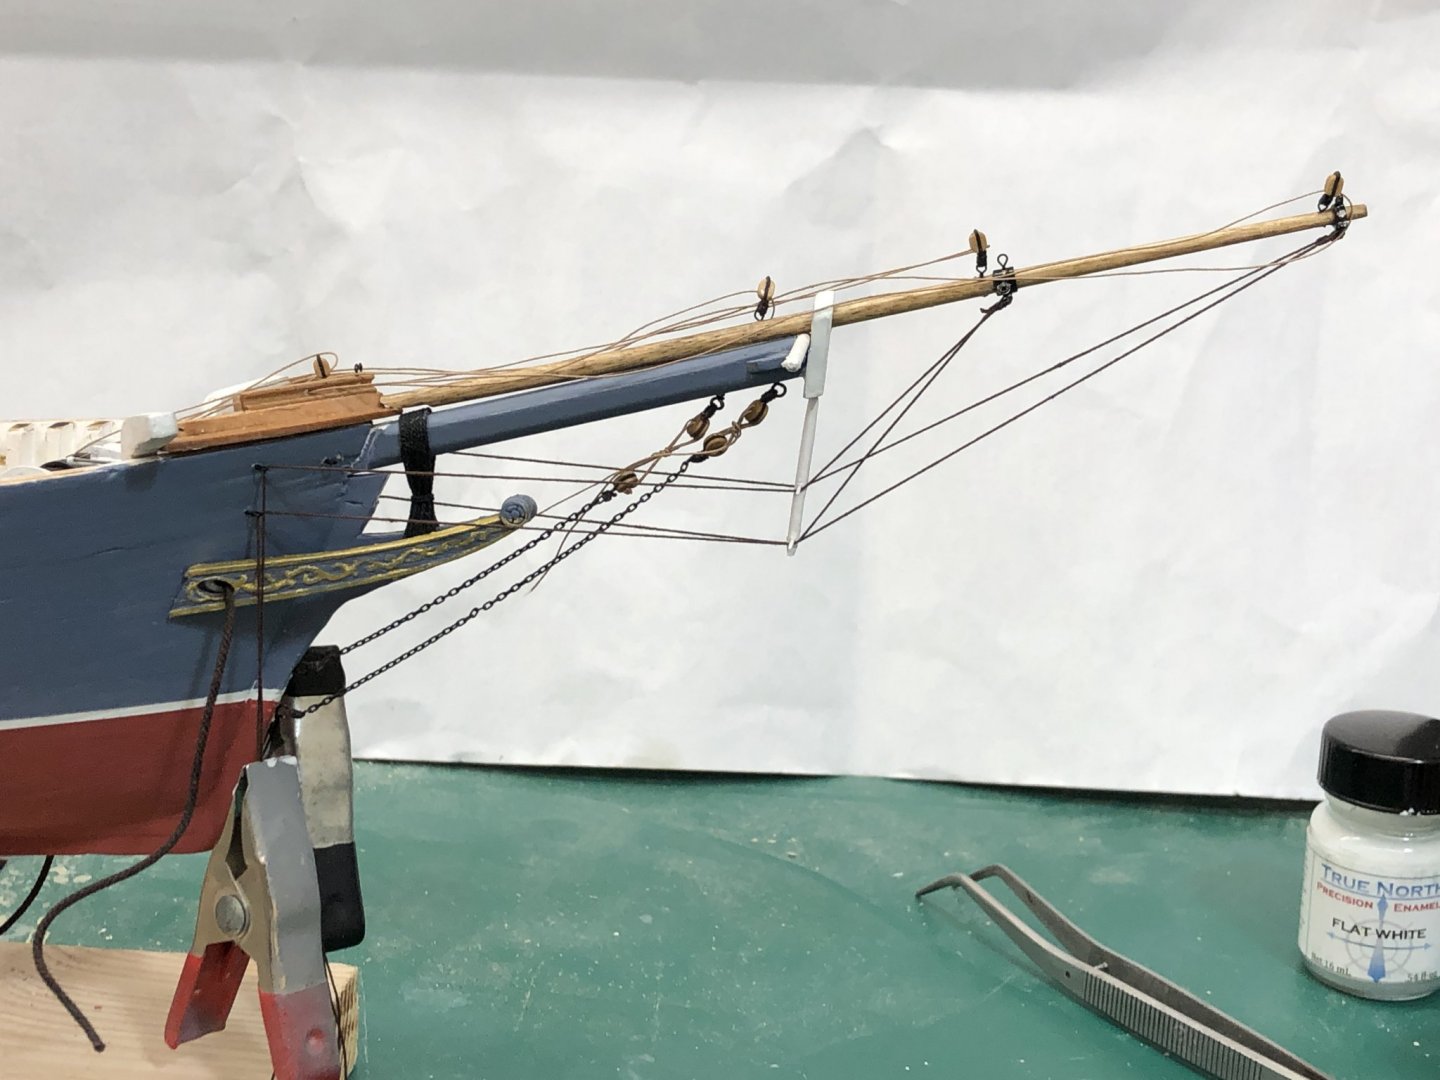
Having successfully (IMHO) installed the jib boom, spreader and dolphin striker on started working on the bowsprit and jib boom rigging. The bobstays were "interesting" to work on. I had to clamp the baseboard (and thus model) at about 45 degree angle to get access to install and rig the deadeyes. I got the outer chain a bit longer than the inner and may have to fix that but will consider that at a later date. I rigged the lanyards using Syren light brown line. They are n ot glued up as yet, just tired off loosely in case there need to be adjustments later. I got the jib boom lower guys attached and routed through the dolphin striker and eyebolts but have them tensioned by a clamp at the end of the lines not yet secured. I also mounted the four head sail downhaul blocks and ran the downhauls through the fairlead and through the blocks. FYI the fore staysail downhaul does not go through the fairlead since the forestay terminates on top of the fairlead as best I can tell from the drawing and thus the downhaul block is behind the fairlead - at least that is how it turned out on my version of the Fannie. I also broke out the stairs which I fabed what seems like months ago and dry fit them on the deck. I will glue these down when I add the hatches which will be after I get the jib boom guys that terminate on the cat heads in place and routed.

- 166 replies
-
- 1
-
-
- fannie a gorham
- finished
- (and 1 more)
-
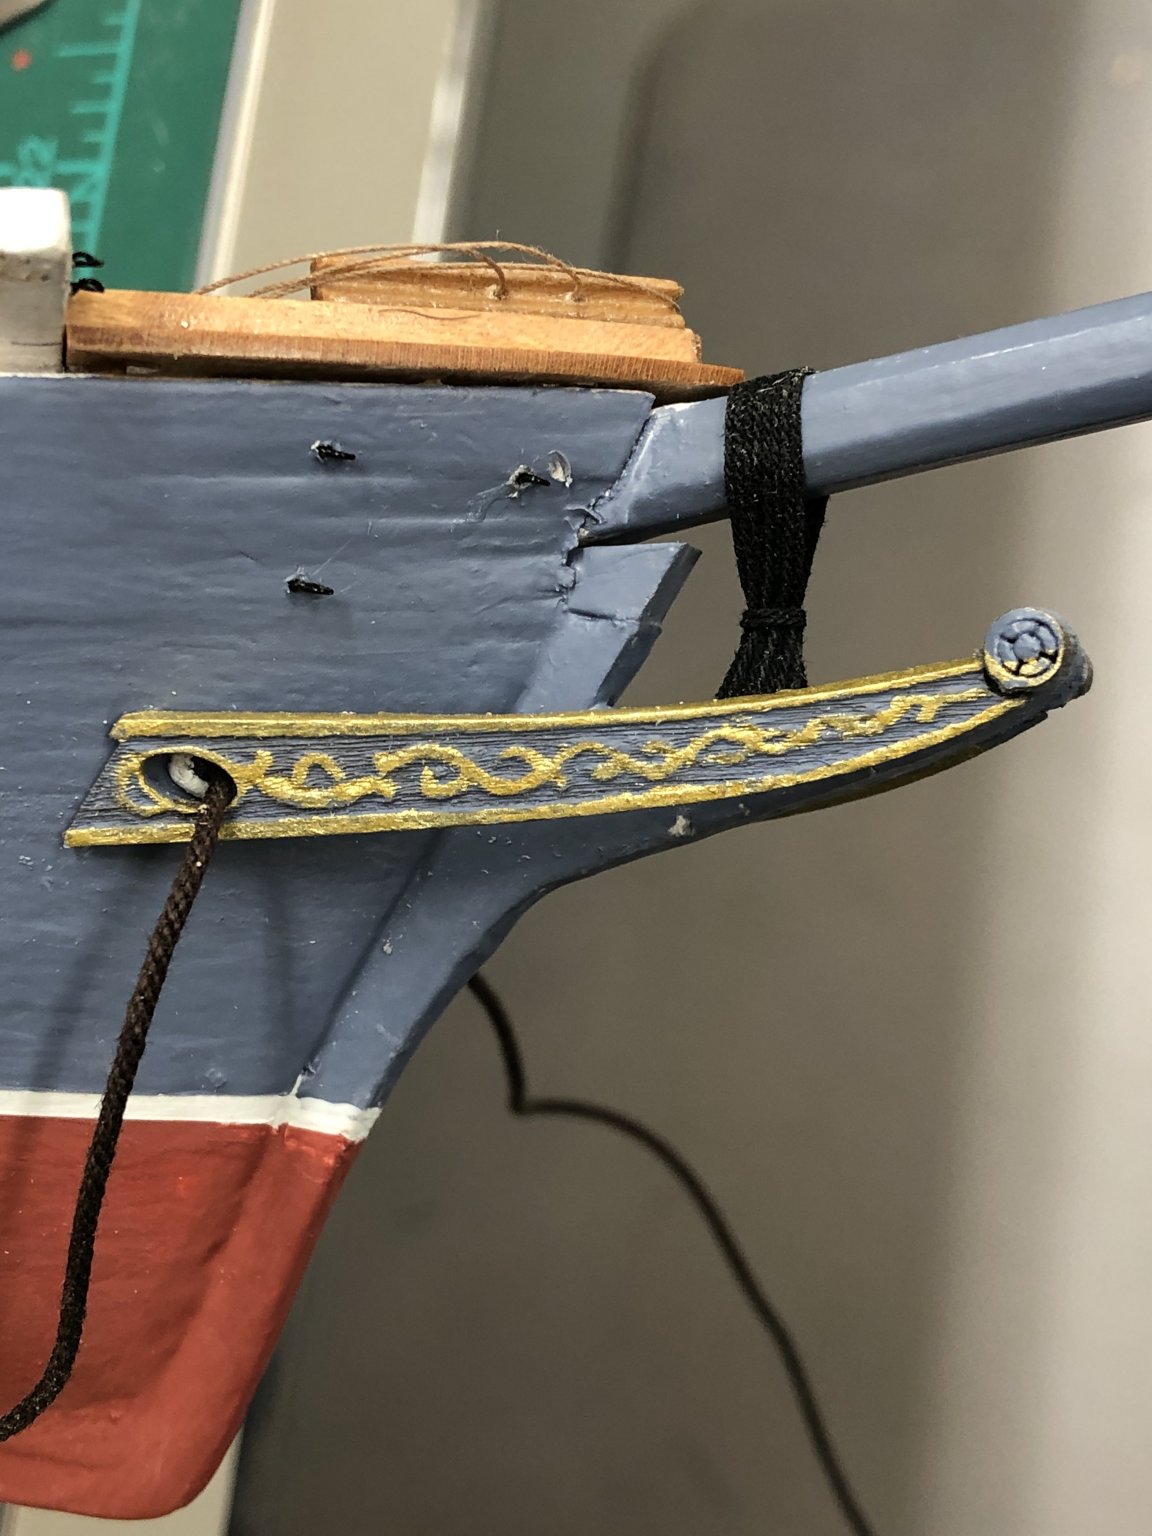
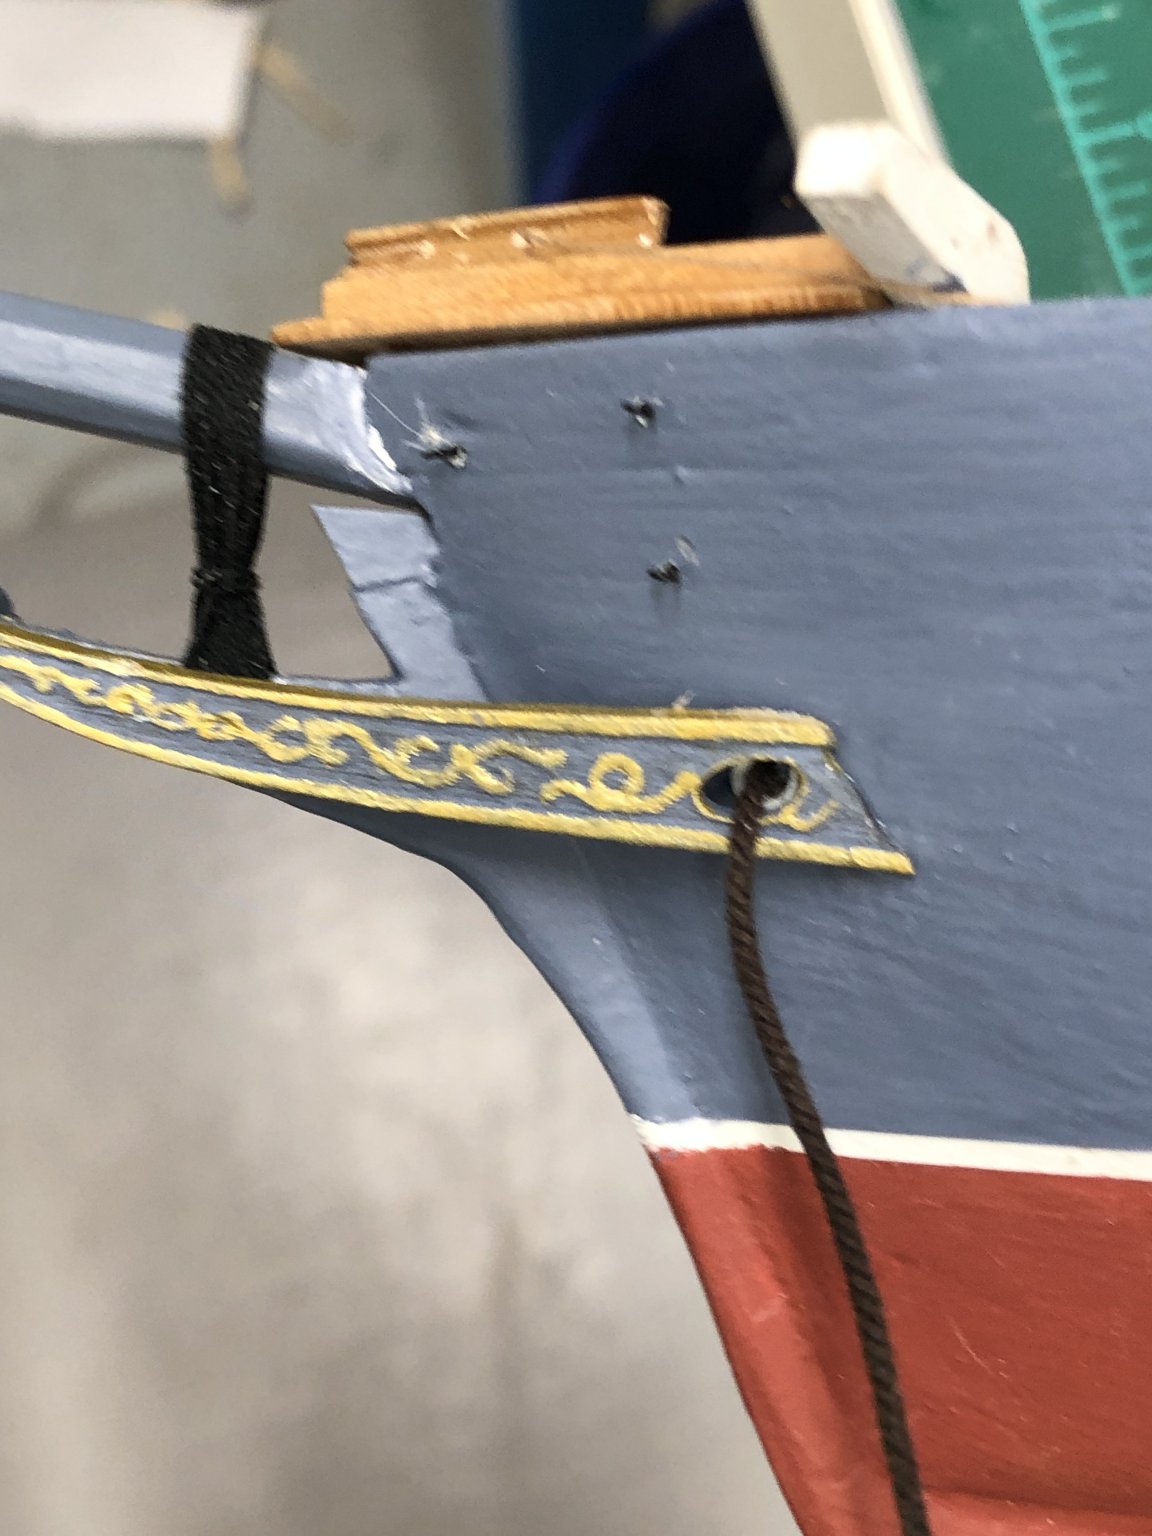
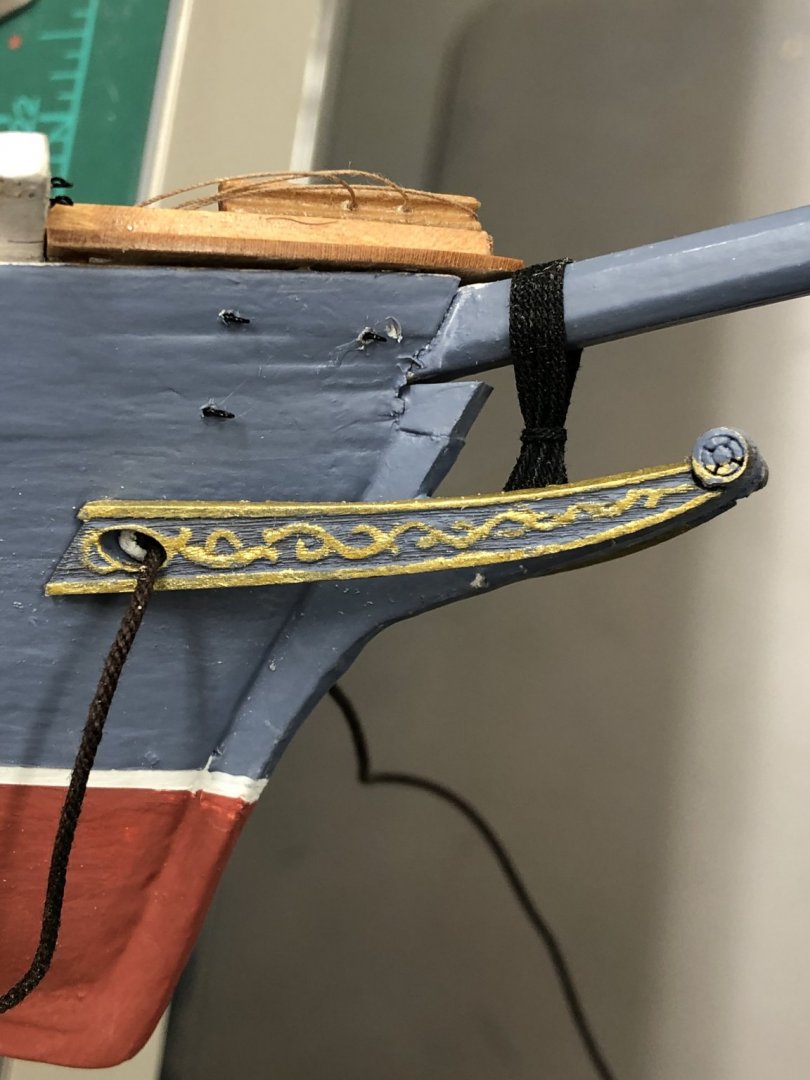
More details on the bow. I added the trail boards and the bow portion on the mail rail. Given the state of things at this point I decided to go ahead and belay the four head sail downhauls to the pins and lead them through the fairlead now. The will never be a time when there is less "stuff" in the way so as long as I keep the lines out of the way this should save some frustration later.


- 166 replies
-
- 1
-
-
- fannie a gorham
- finished
- (and 1 more)
-
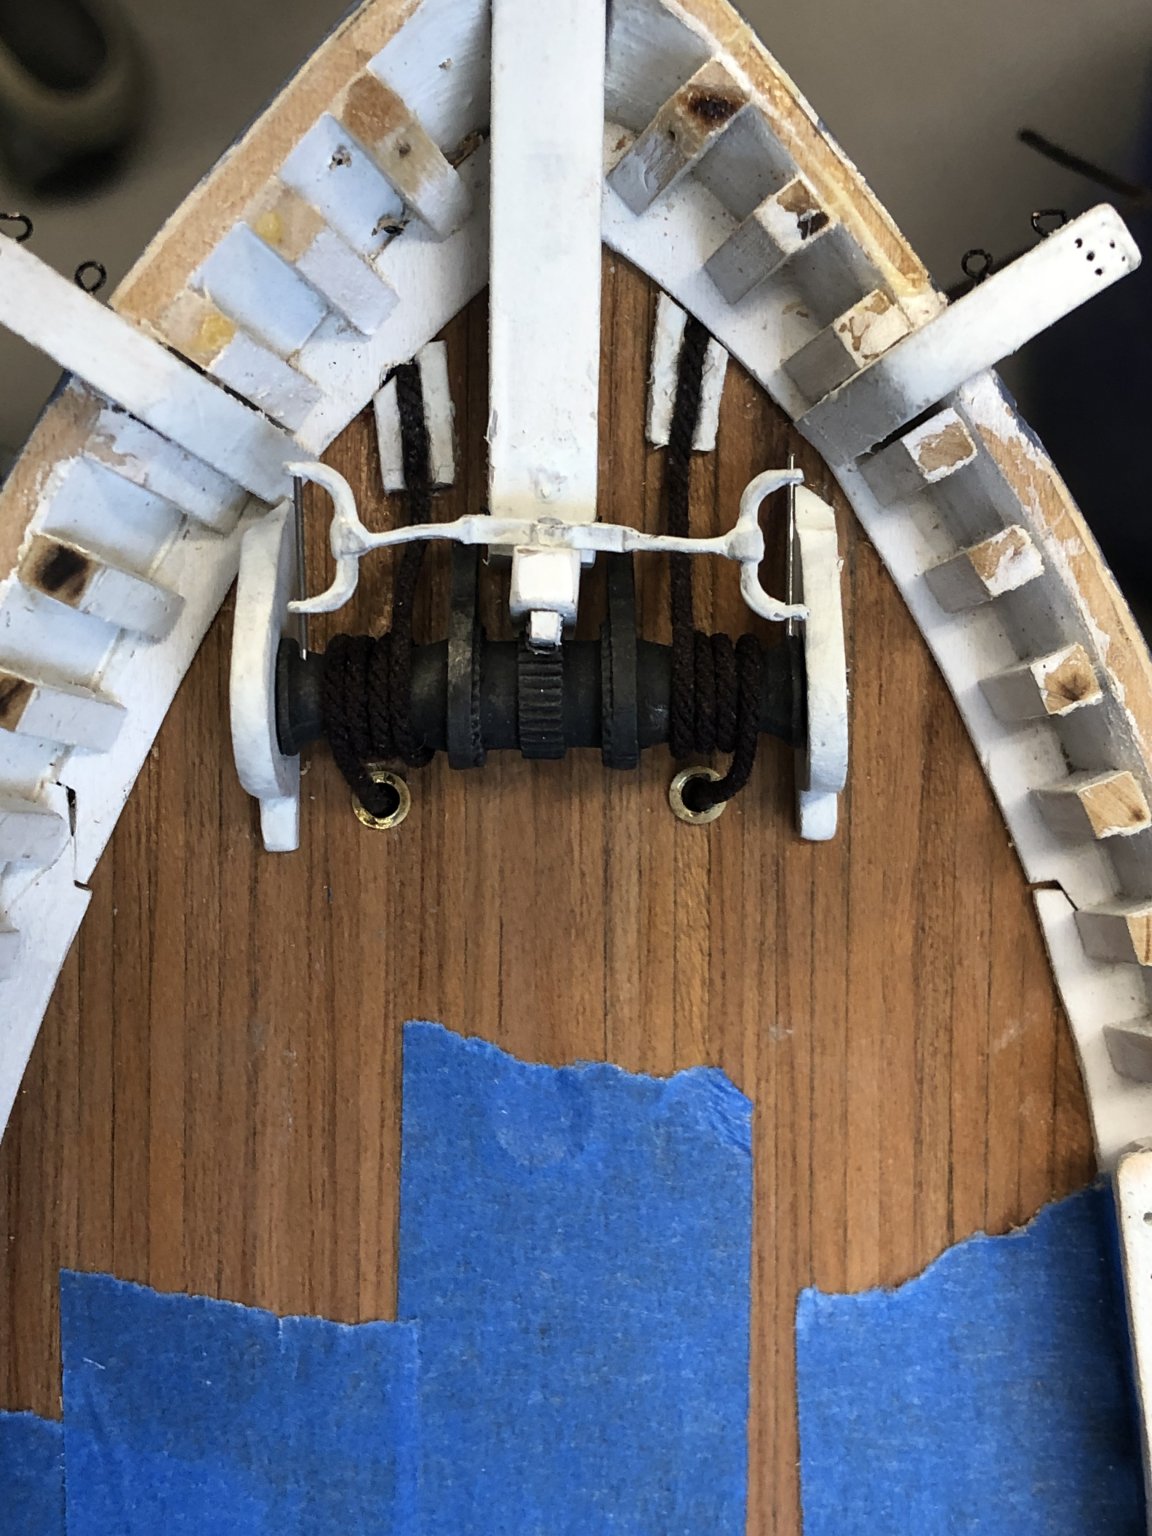
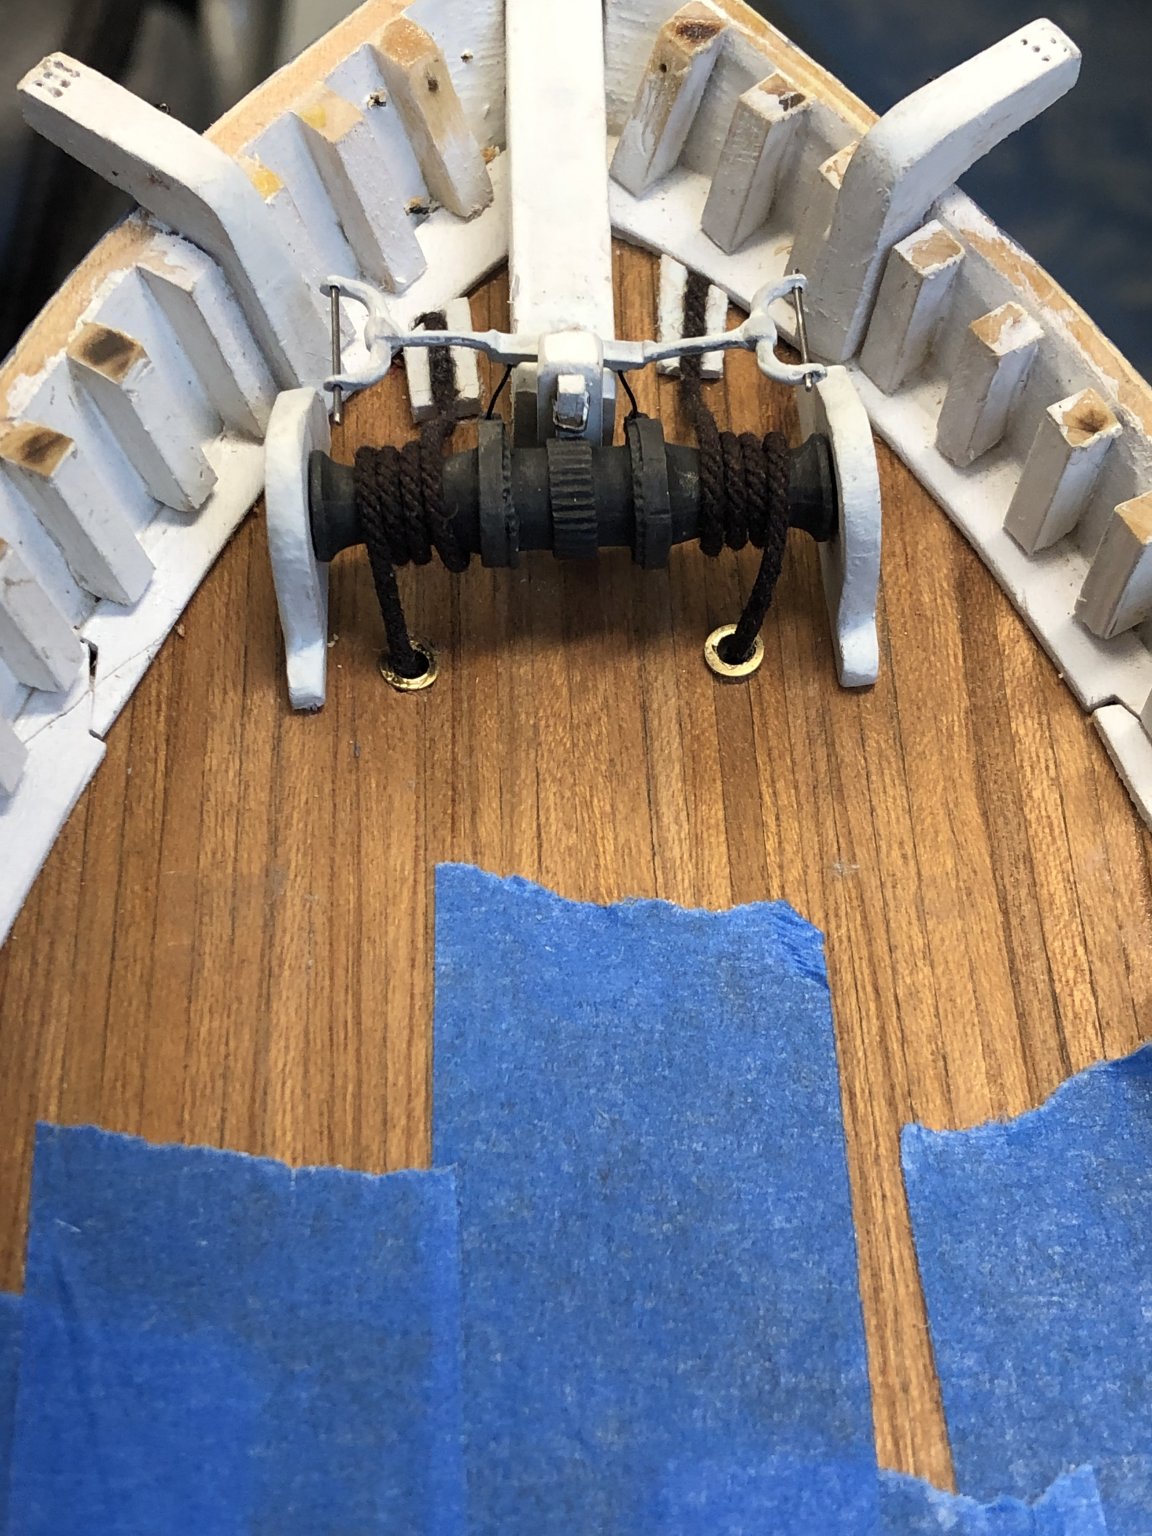
Adding more details to the fore deck. Anchor rode is now wrapped around the windlass, secured to the port to the cable tier and a protective guide is on the deck behind the exit port. Added the eyebolts for the Jib Boom guys and the jib stay.


- 166 replies
-
- 1
-
-
- fannie a gorham
- finished
- (and 1 more)
-
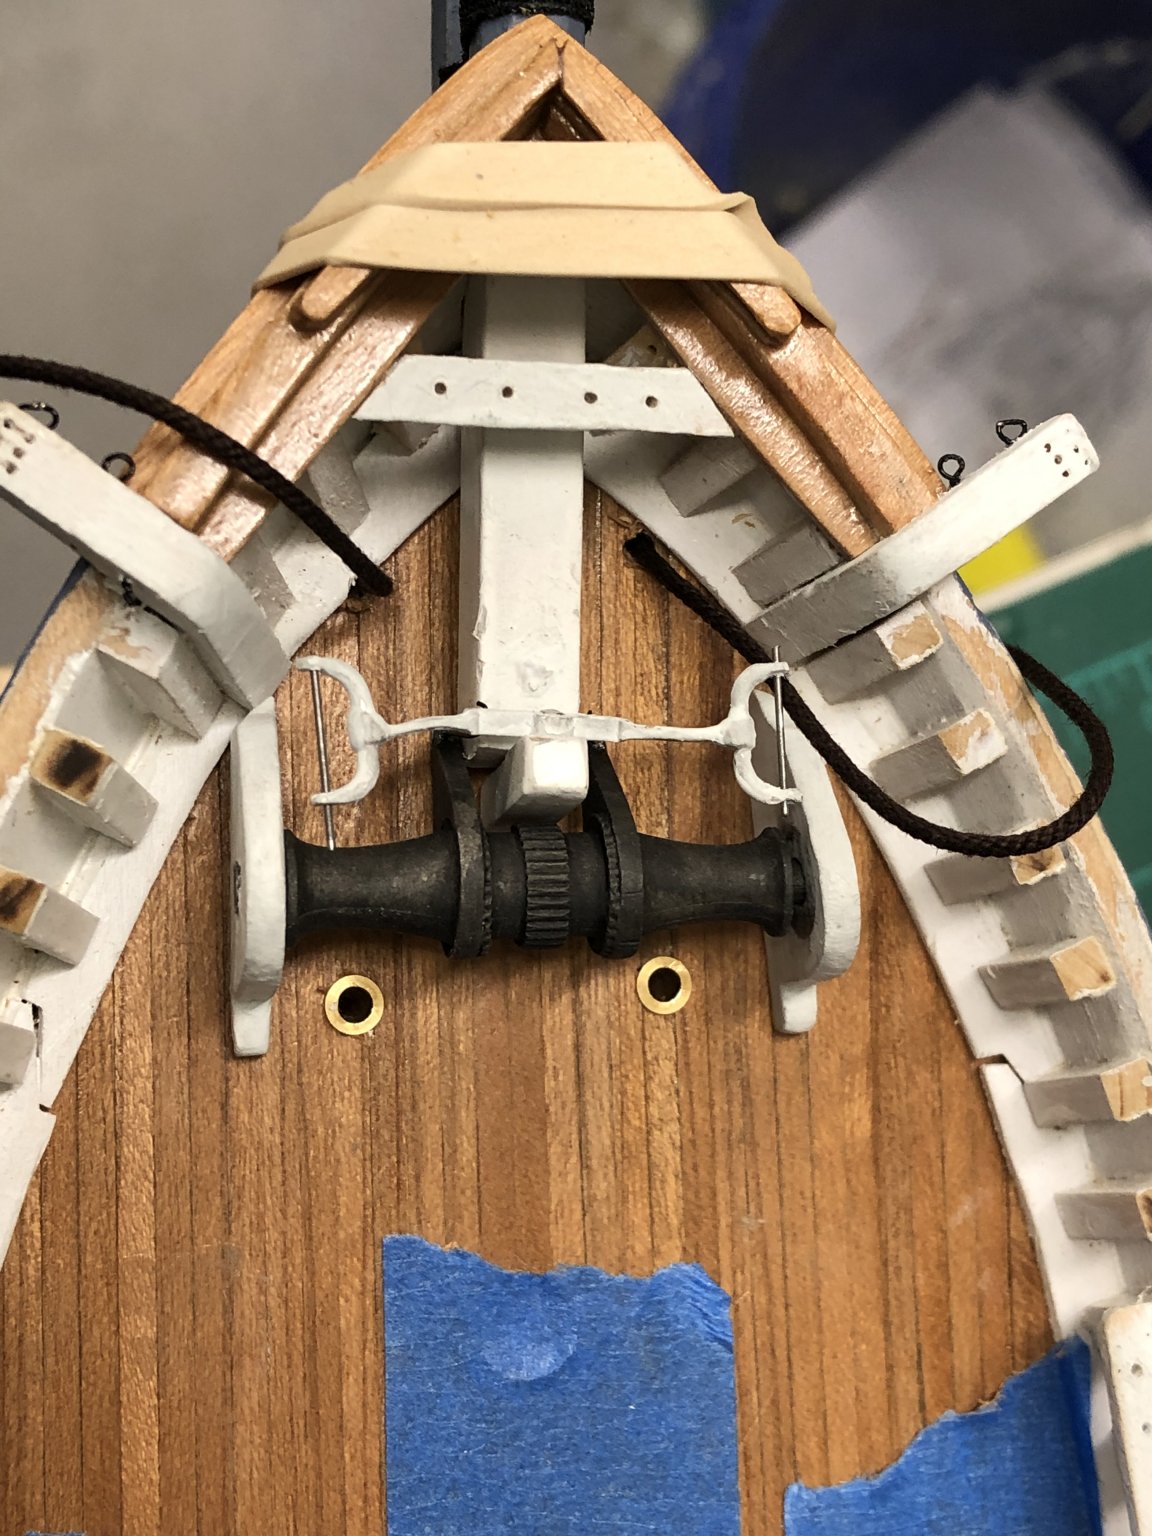
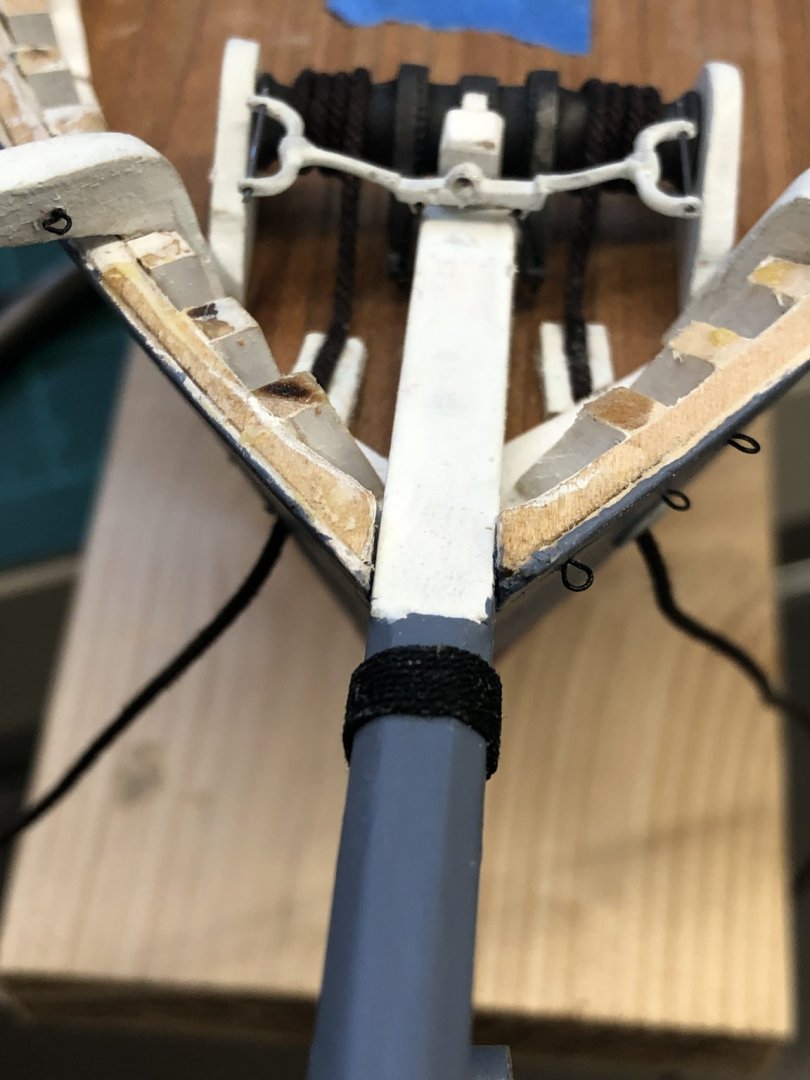
Picking up speed now. Got the gammoning on the bowsprit. Mounted the windlass, drilled out the hawse holes and installed the guides to take the anchor rode below. I am still a little mystified where the windlass operators would stand but this is pretty to the configuration shown in the plans. I also got the six cavils in stalled and the forward section of the main rail (and Buffalo rail and fairlead. FYI - the camera angle makes the misalignment oi the bow components look worse than it really is.

- 166 replies
-
- 1
-
-
- fannie a gorham
- finished
- (and 1 more)
-
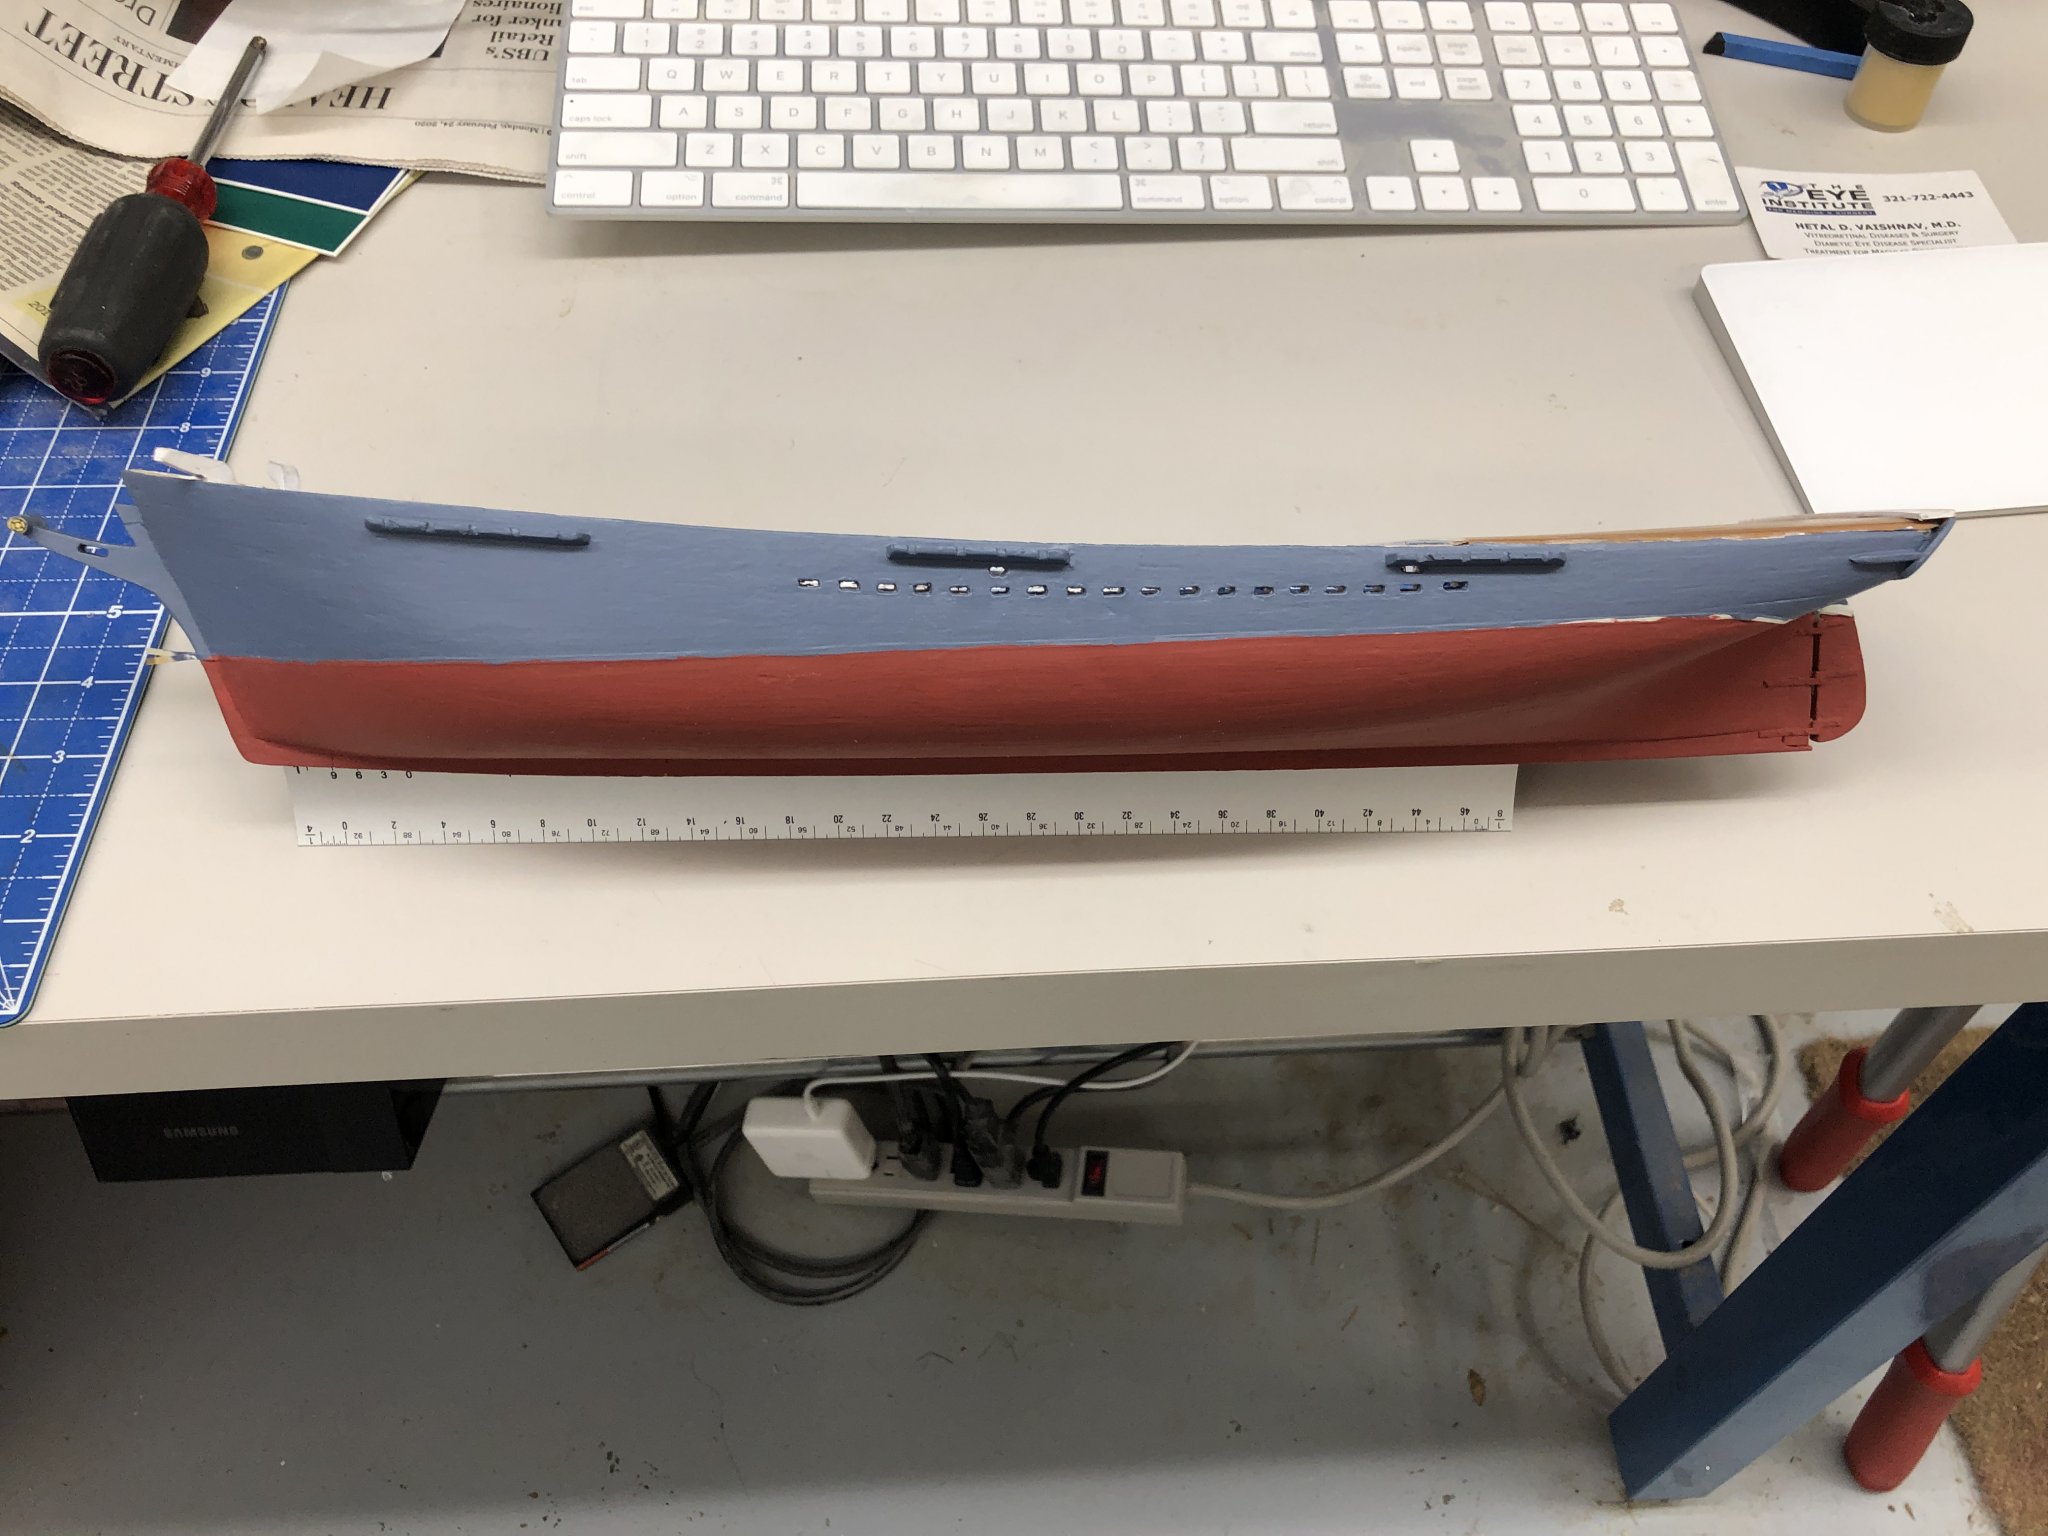
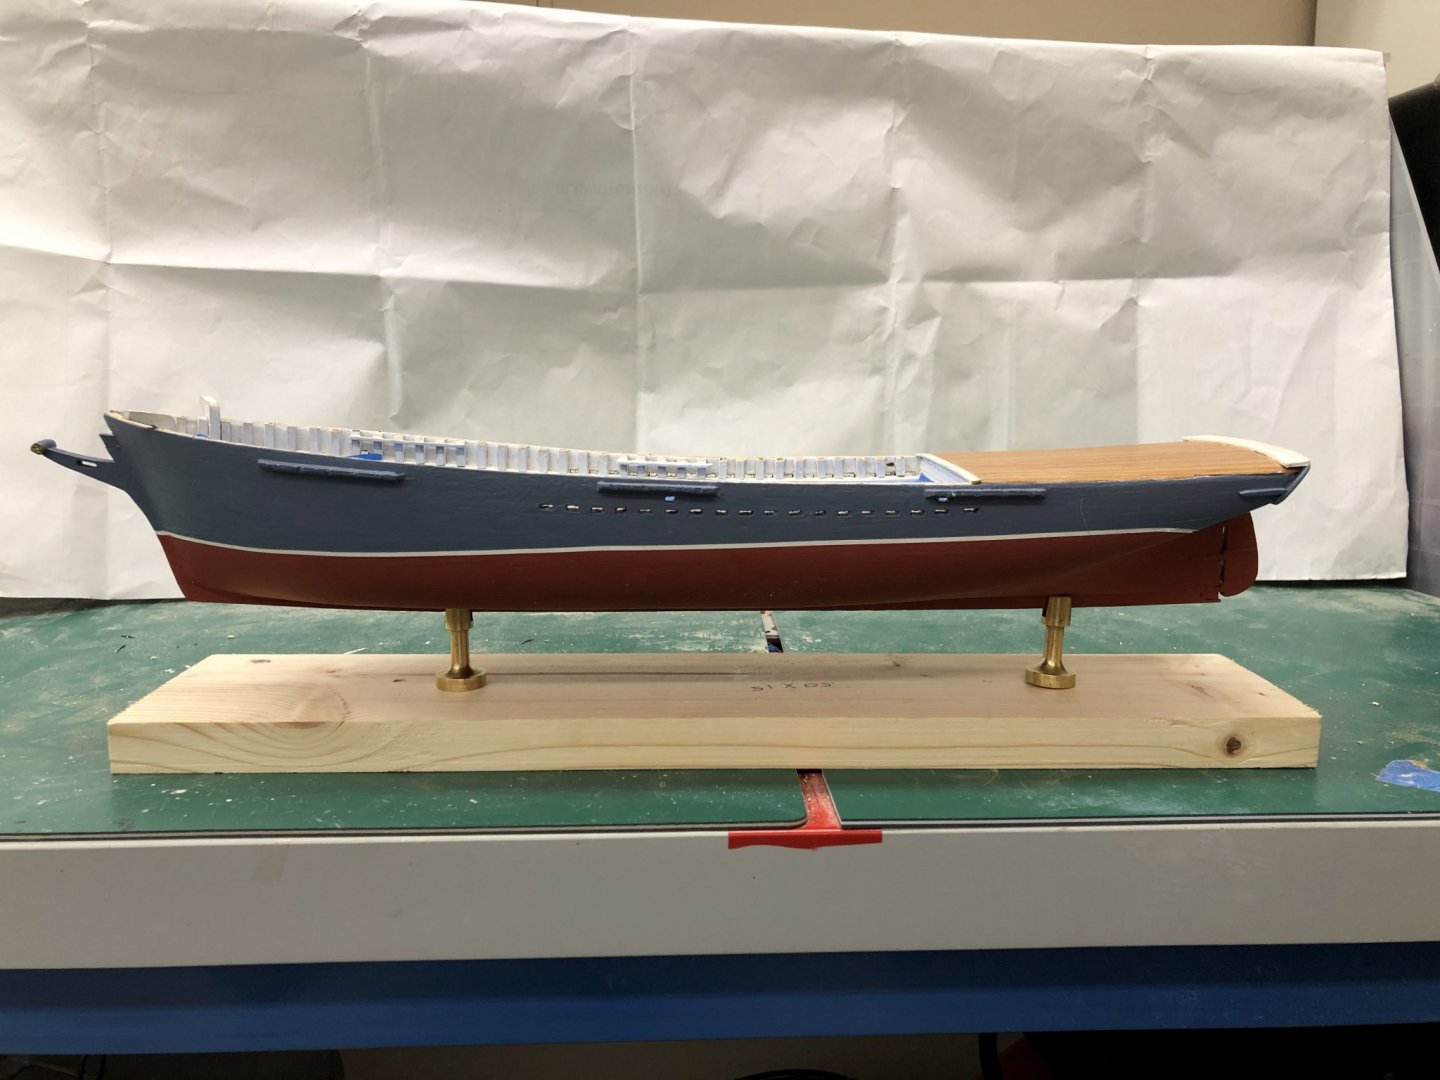
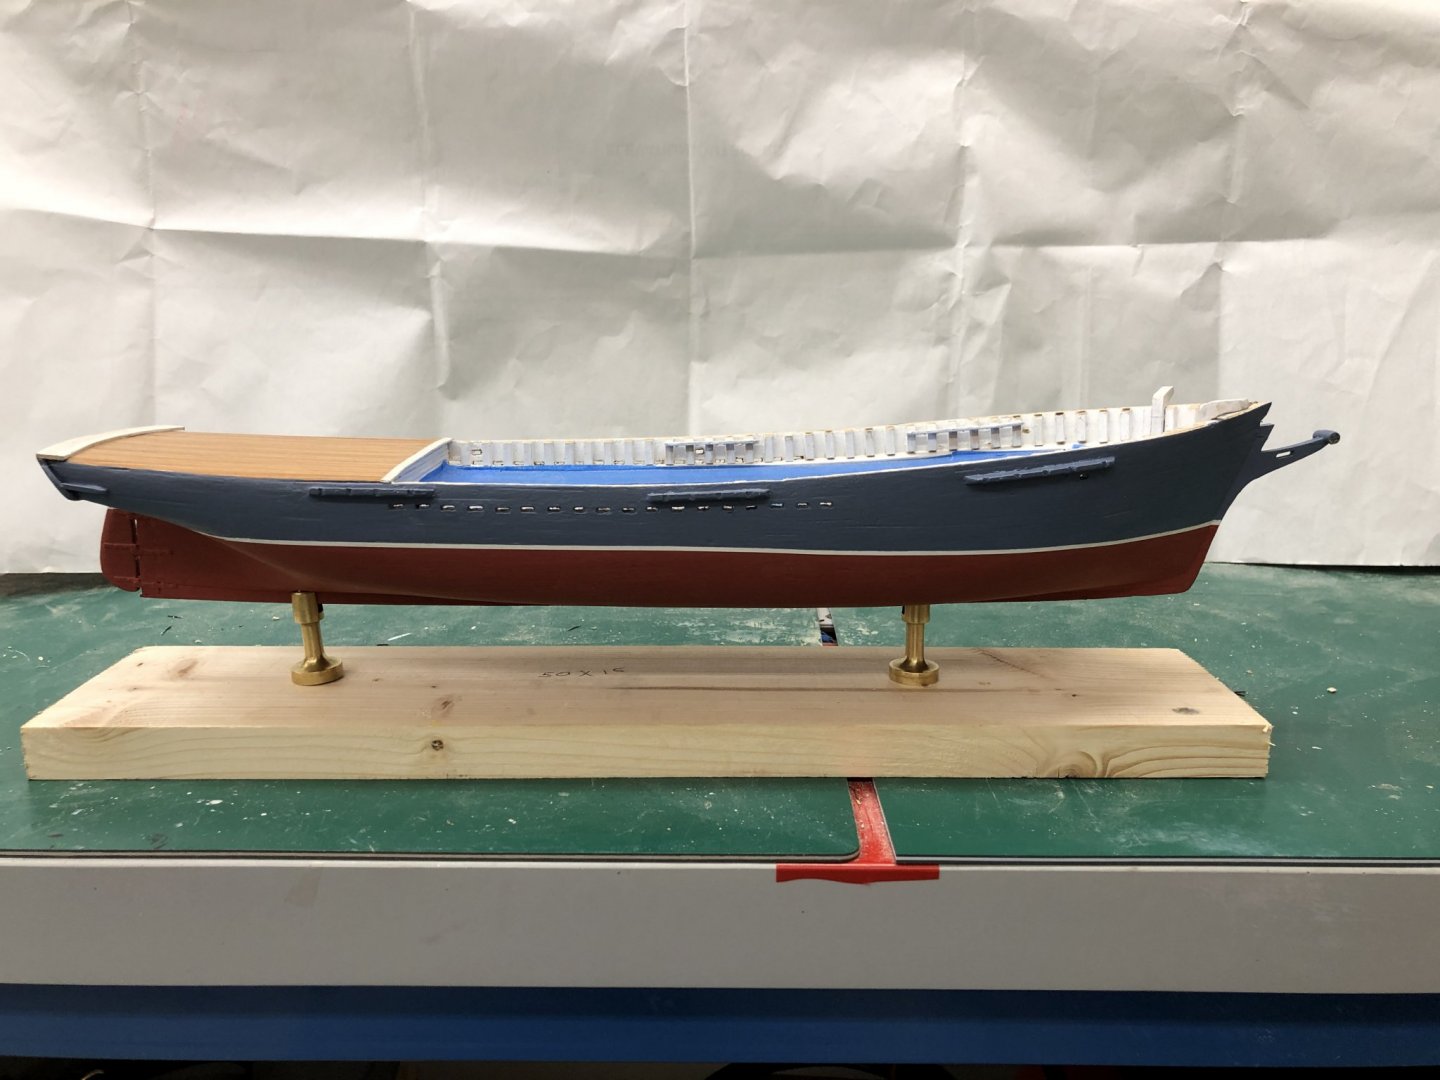
Stbd side is done and the masking tape removed. Similar to the port side there are small issues at the very bow and stern. Looking for my "really small" paint brushes. Here is the hull now mounted on the substitute display board. Working the bowsprit, Sampson post and windlass. Given the configuration up front it is hard to imagine two people standing up there and actually operating the windlass. But sailors have always been pretty amazing.
- 166 replies
-
- 1
-
-
- fannie a gorham
- finished
- (and 1 more)
-
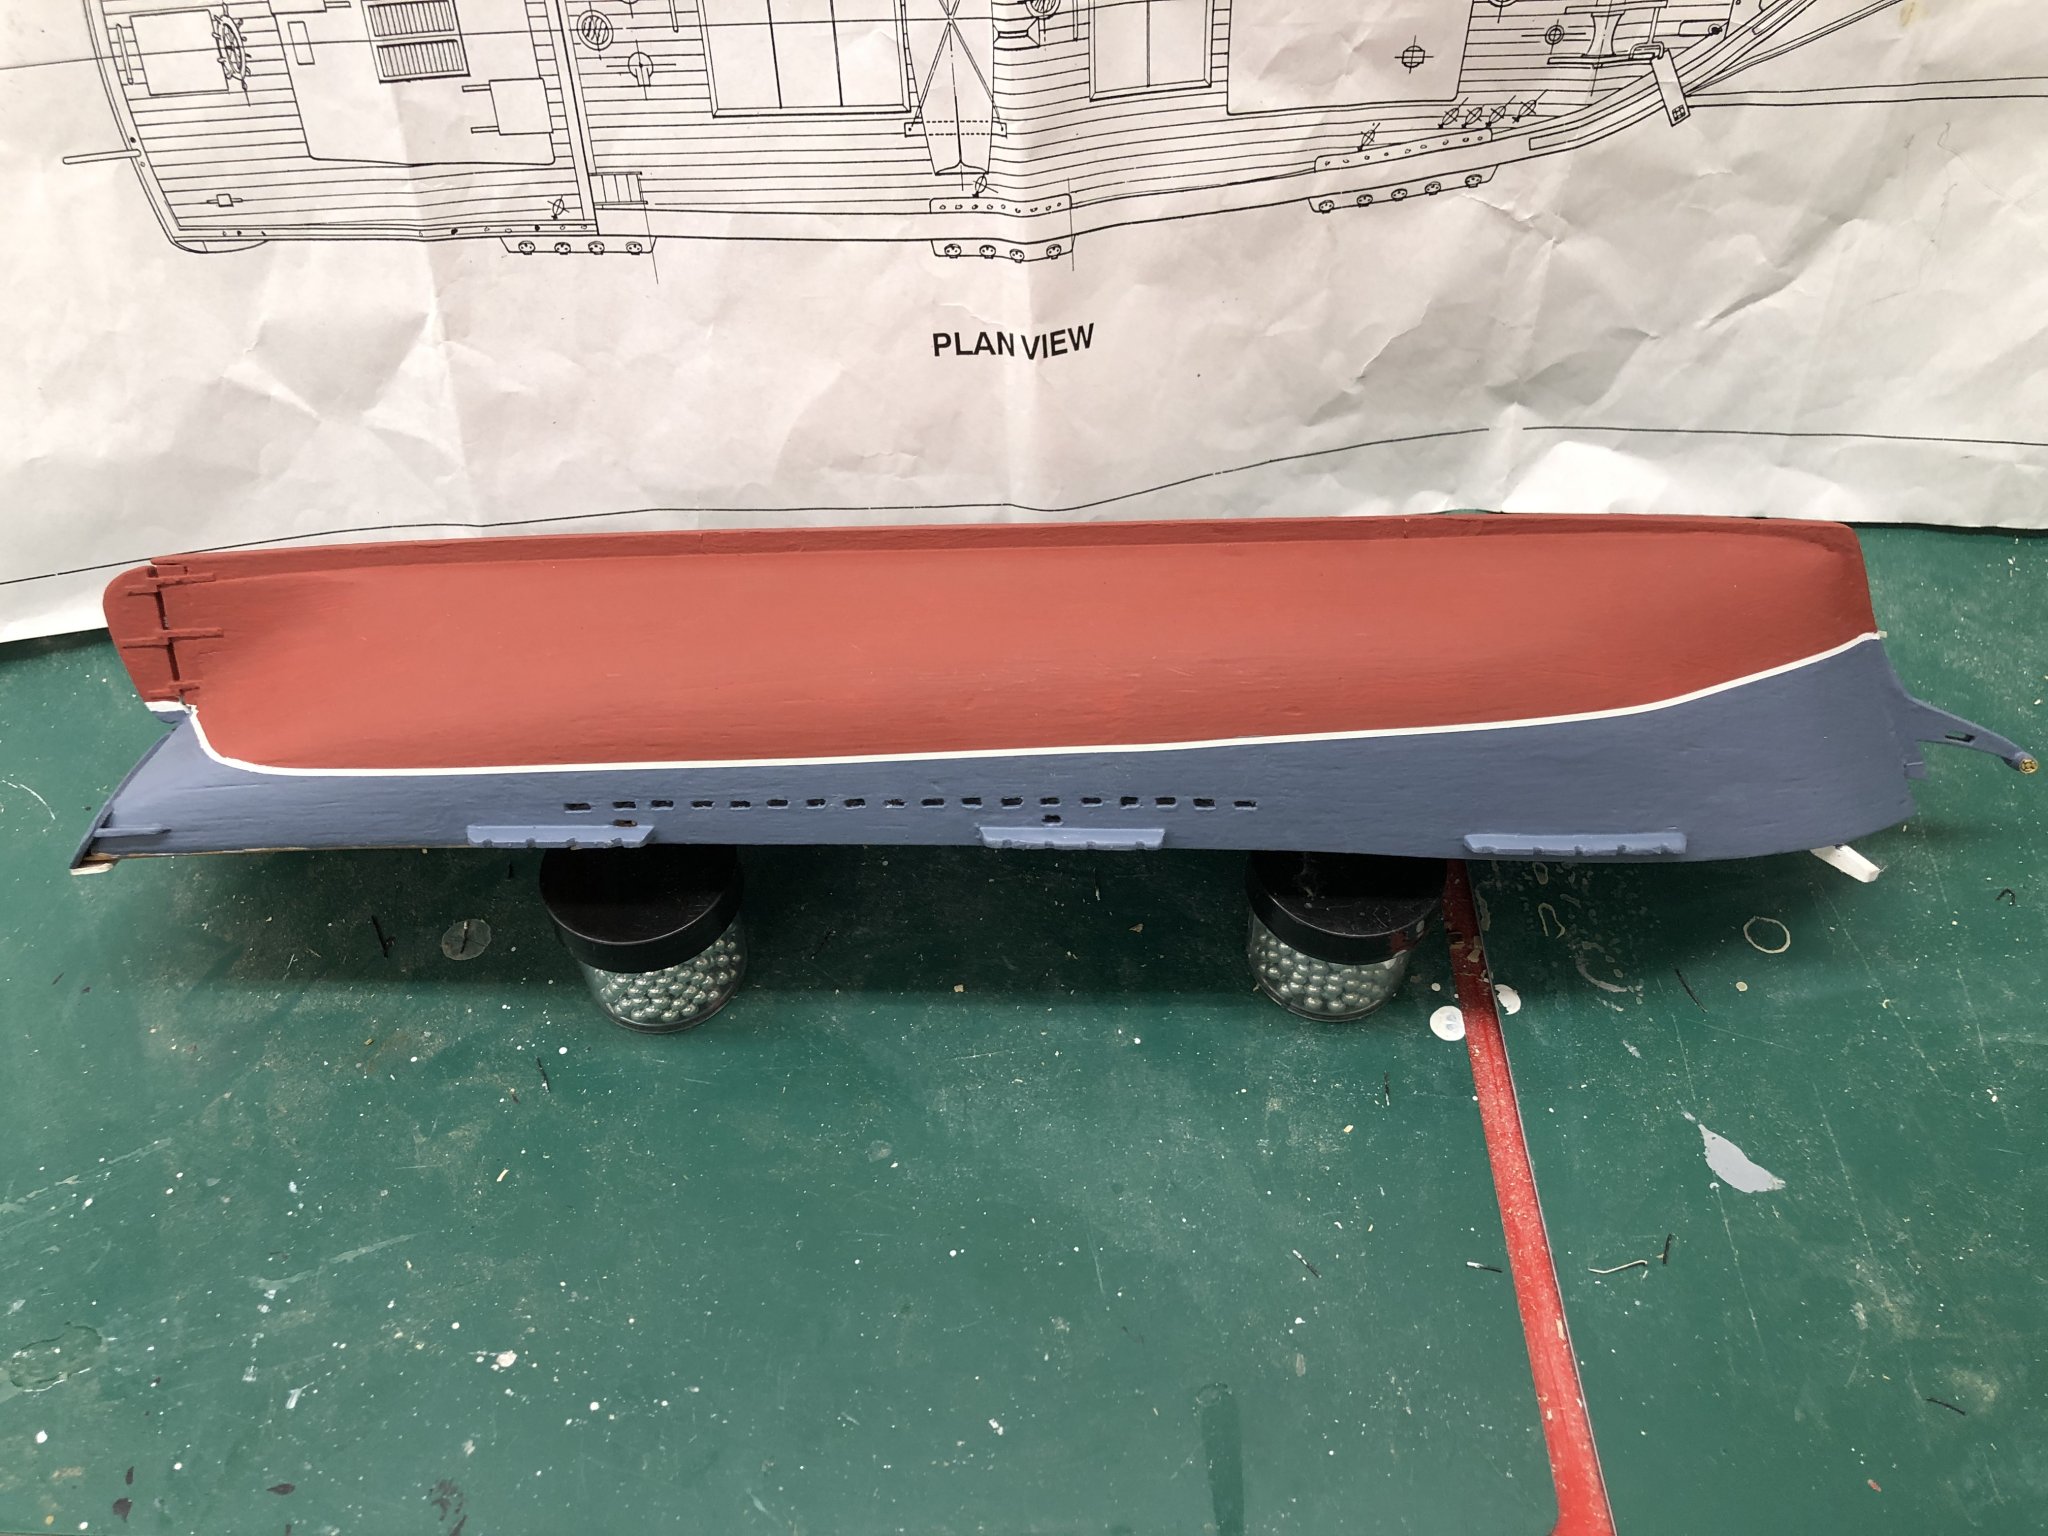
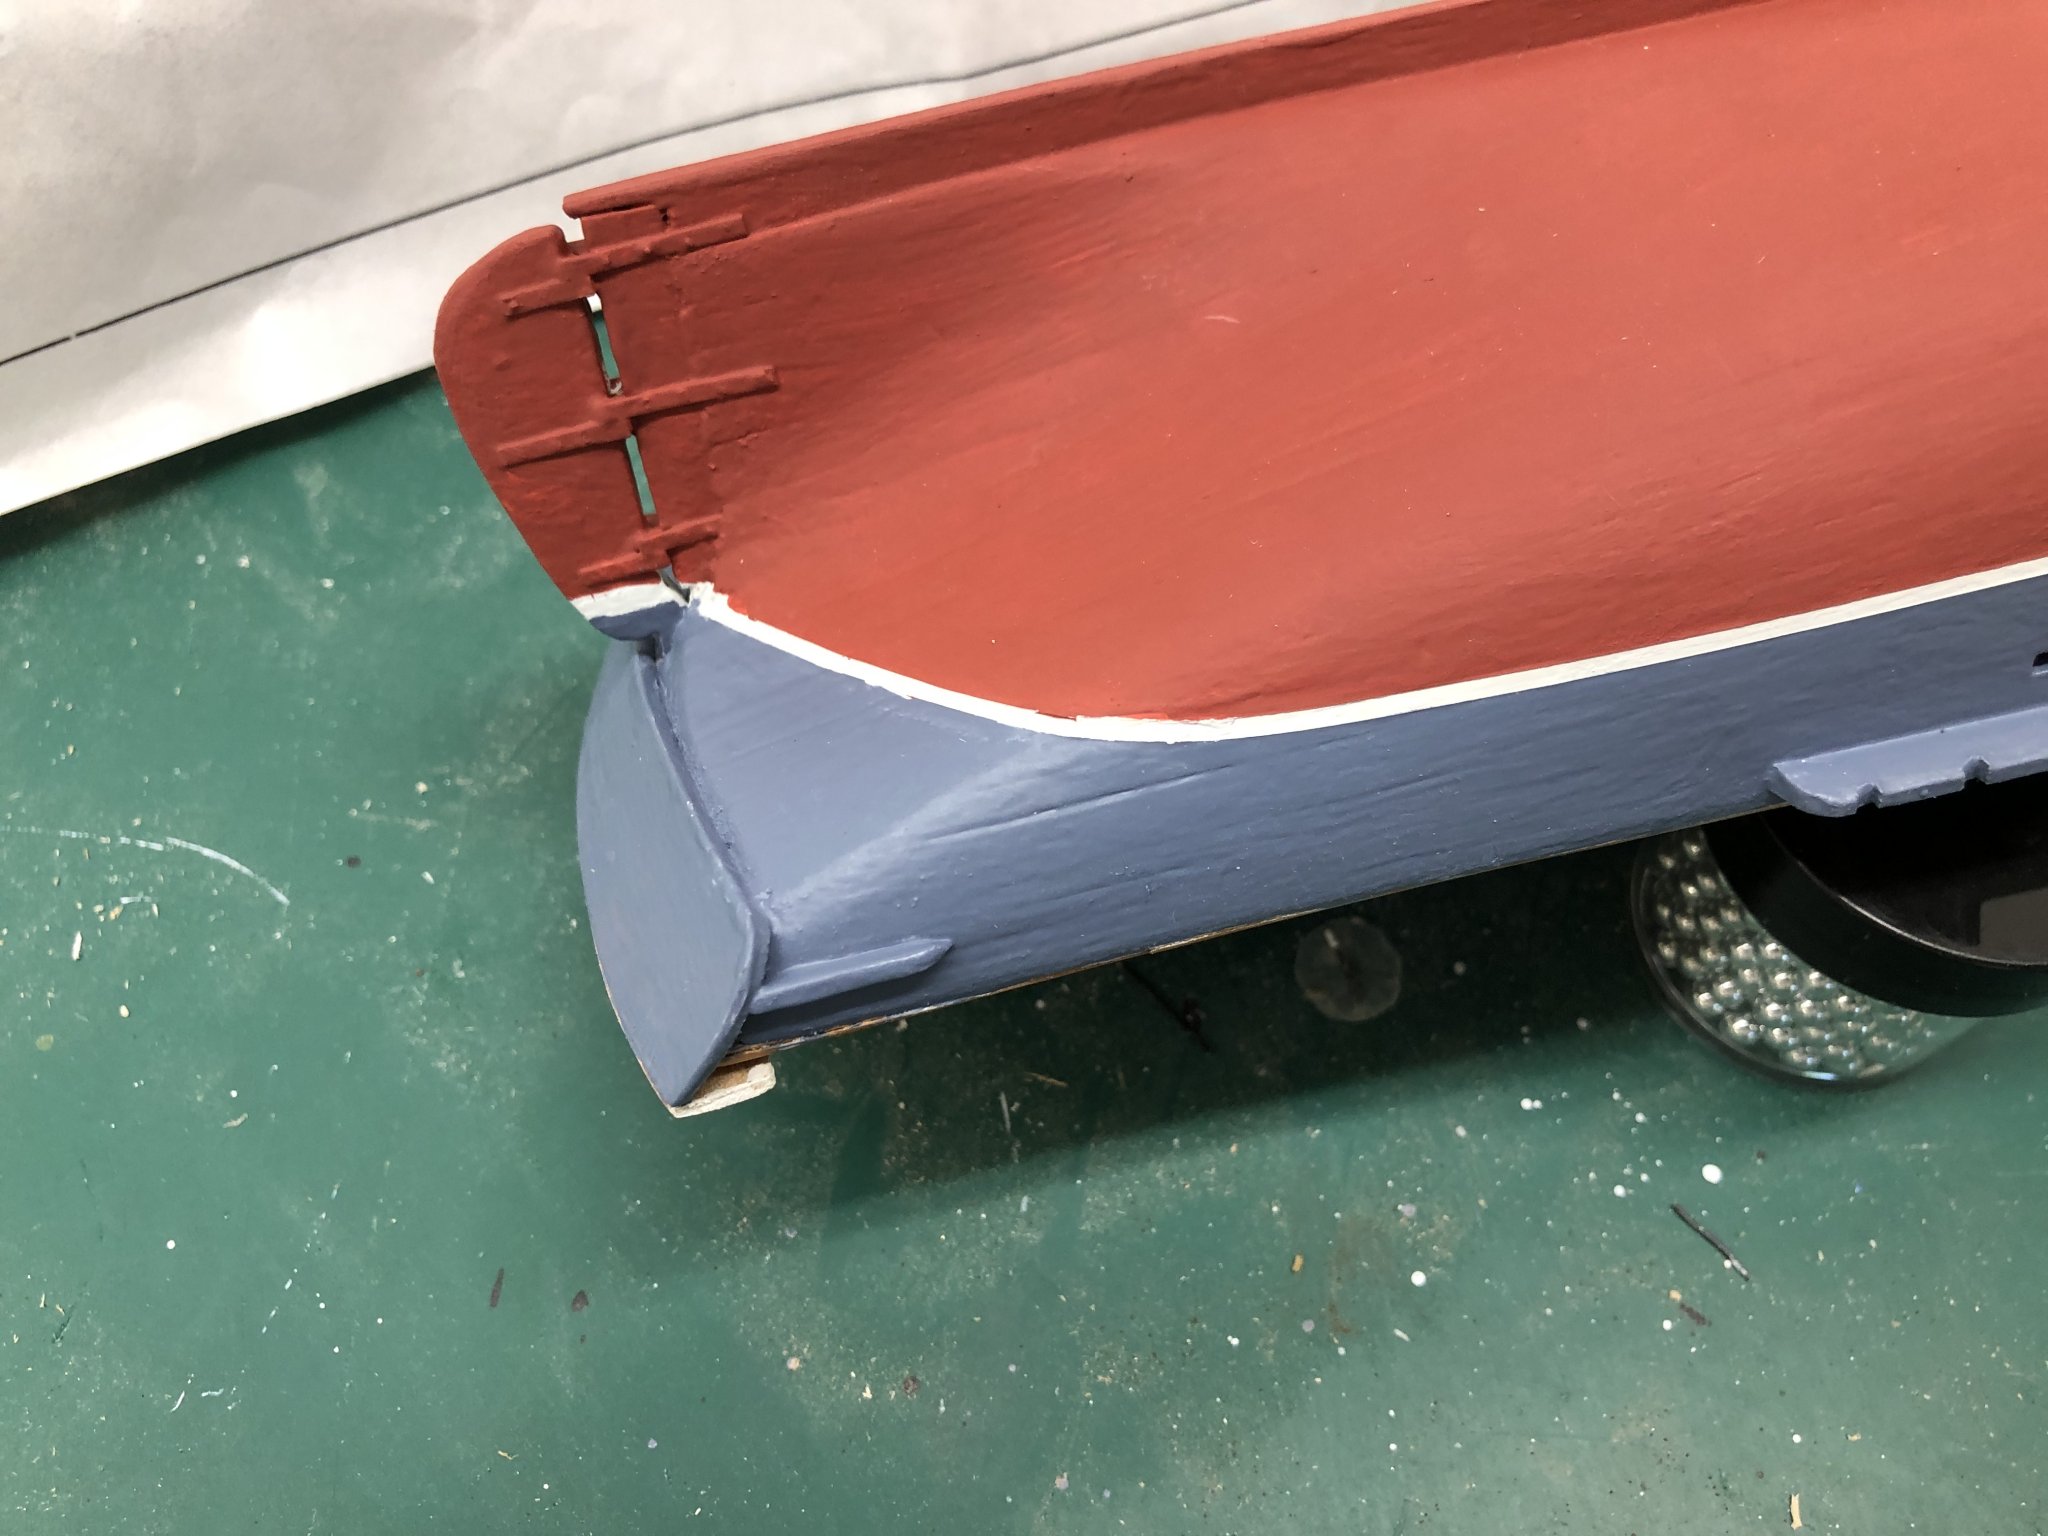
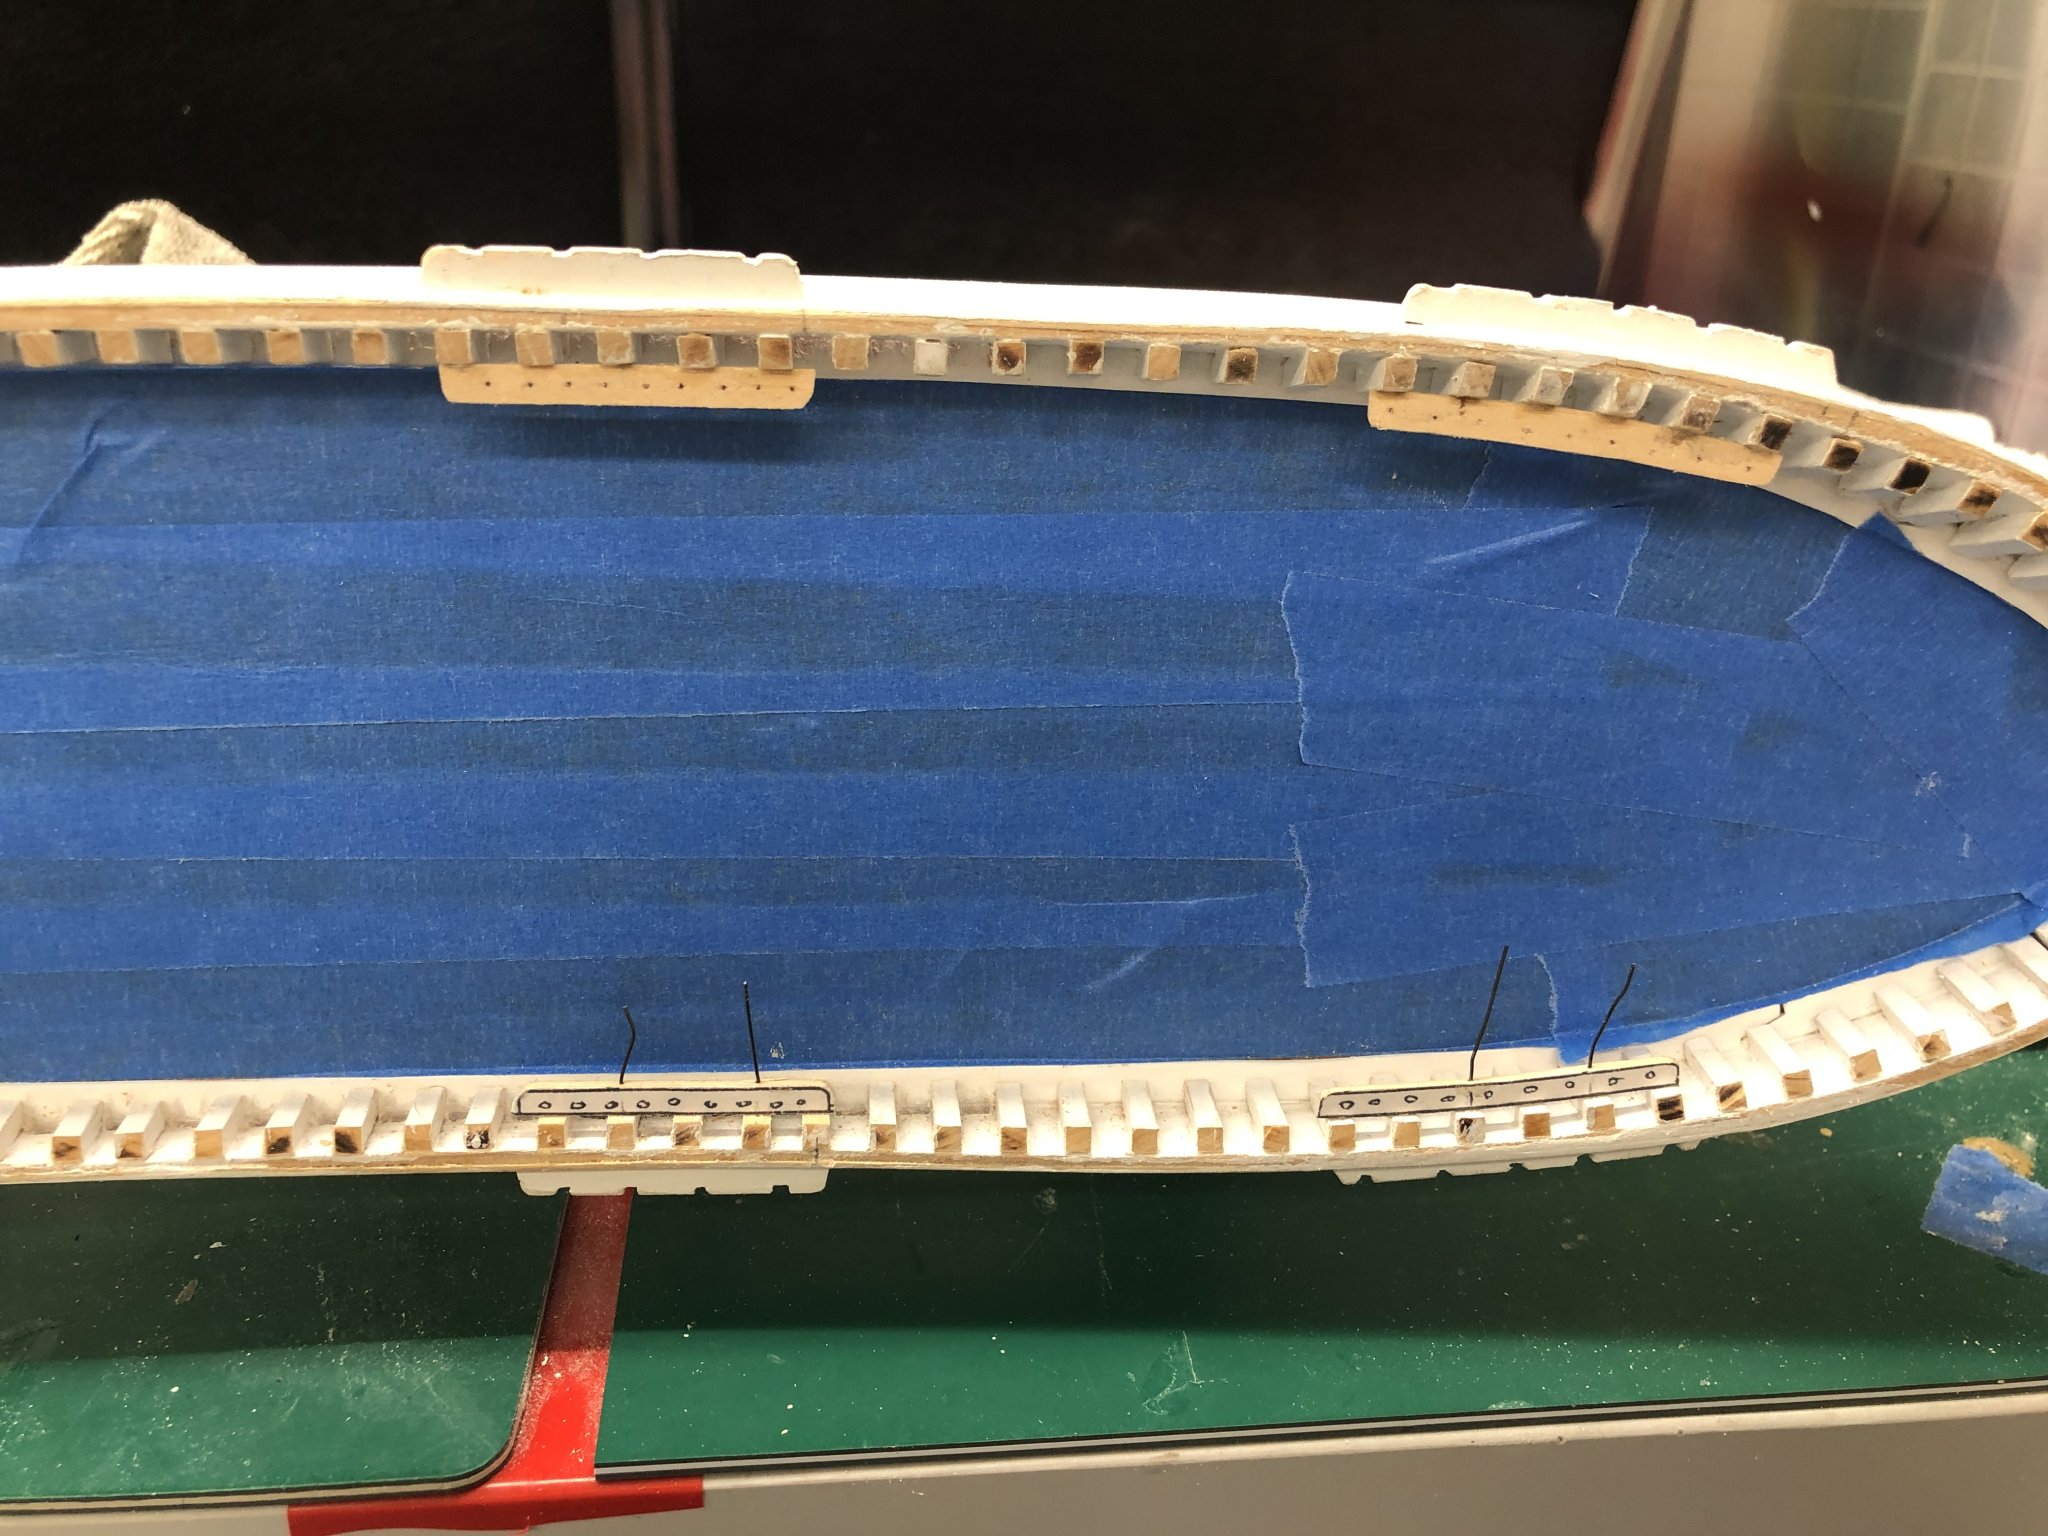
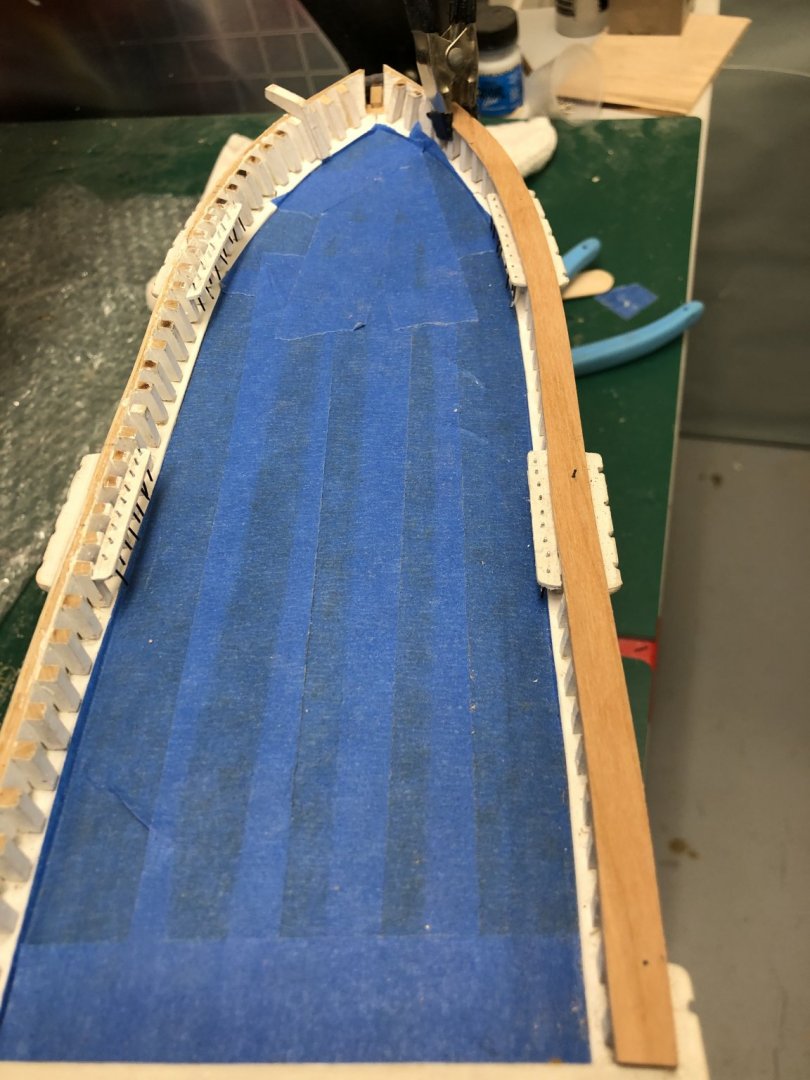
I got the port side painted above and below the waterline and pulled the masking tape off. Except at the very front and one spot where the waterline moves under the counter it came through sharp with no leaks. The "trick" from the NRG article was to paint the waterline both before and after applying the masking tape. That is, mark the waterline location and then paint on the line and either side enough to extend beyond the waterline width of this the color of the waterline (white in my case). Then apply the masking tape once the paint is dry - be sure it is dry to avoid the tape pulling up the paint. Once the tape is applied and burnished down paint the edges with the same color as the waterline. This way if any paints seeps under it is the same color. If you are spraying then mask off from the waterline tape whatever part you are not spraying and then repeat for the other part. I choose to brush paint this one - I have switched to enamel paint and have not tried that in my air brush yet and getting masks (really required with enamel paints, not so much with acrylics IMHO) to experiment with is well neigh impossible at the moment. So here is the port side and a close ups of the two areas where there was some leakage (after I made an initial attempt to touch them up).


- 166 replies
-
- 1
-
-
- fannie a gorham
- finished
- (and 1 more)
-
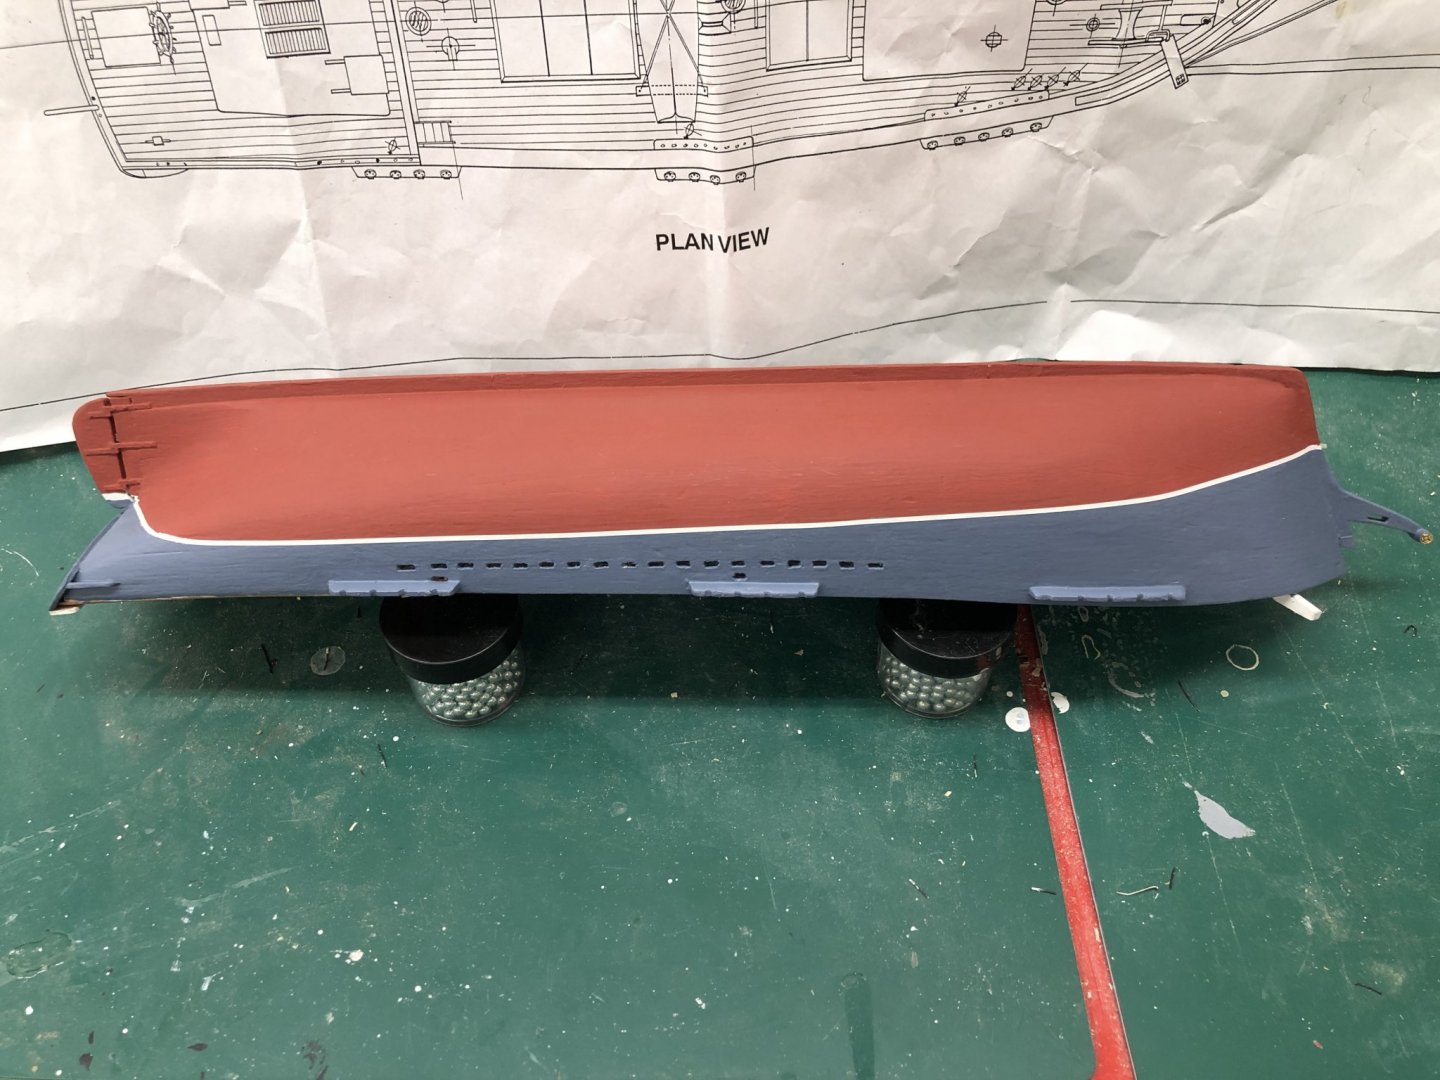
Getting the hull painted. I am trying a technique that was featured in the latest issue of the NRG pub for getting a waterline strip with only one application of masking tape. It will be a few more days before I see how that worked as I am waiting for the paint to dry overnight before adding the second coat. So it takes eight days to paint the top and bottom of both sides. Here is where we are at the moment - port side done top and bottom and starboard bottom done. While the paint dries I have been finishing the display board. Here it is after three coats of Wipe-on-Poly gloss. I used the Wipe-on-poly satin that I used on the deck for the cherry main rails. Here there are after two coats along with the bow section which now includes the forward pin rail. Once the hull is painted I will mount it on a "stand in" baseboard, install the main rail and then look to install the lower masts and bow sprit.


- 166 replies
-
- 1
-
-
- fannie a gorham
- finished
- (and 1 more)
-
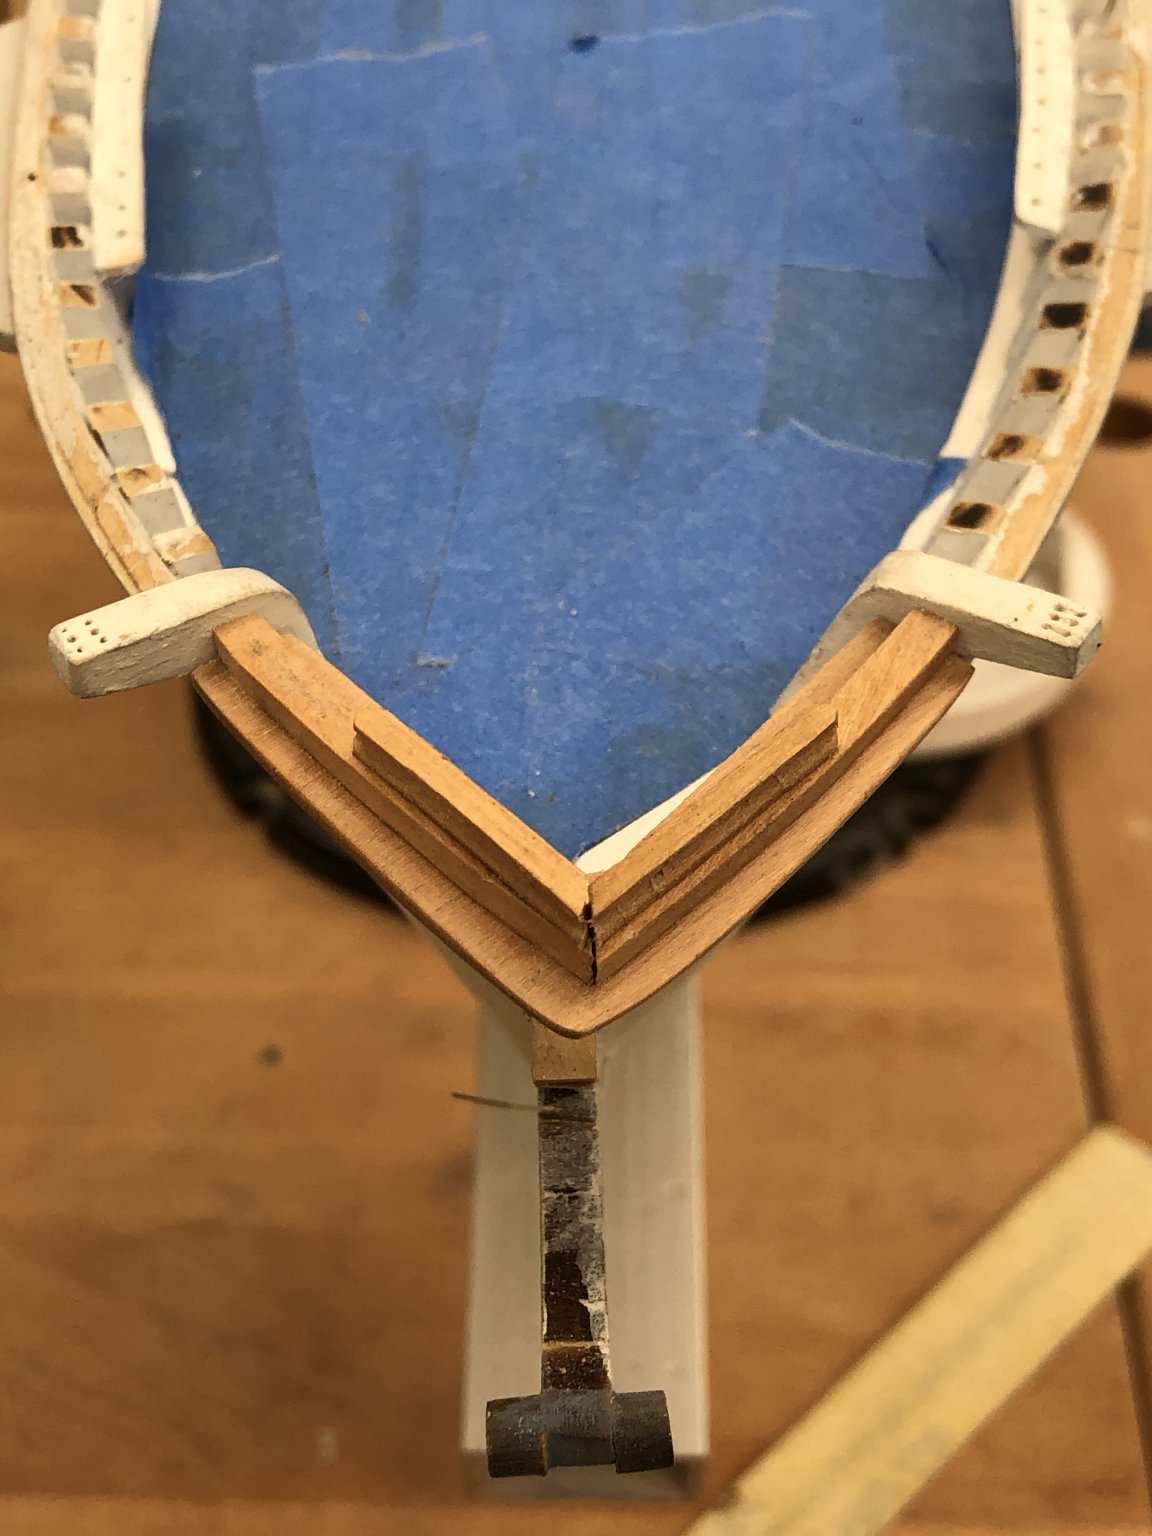
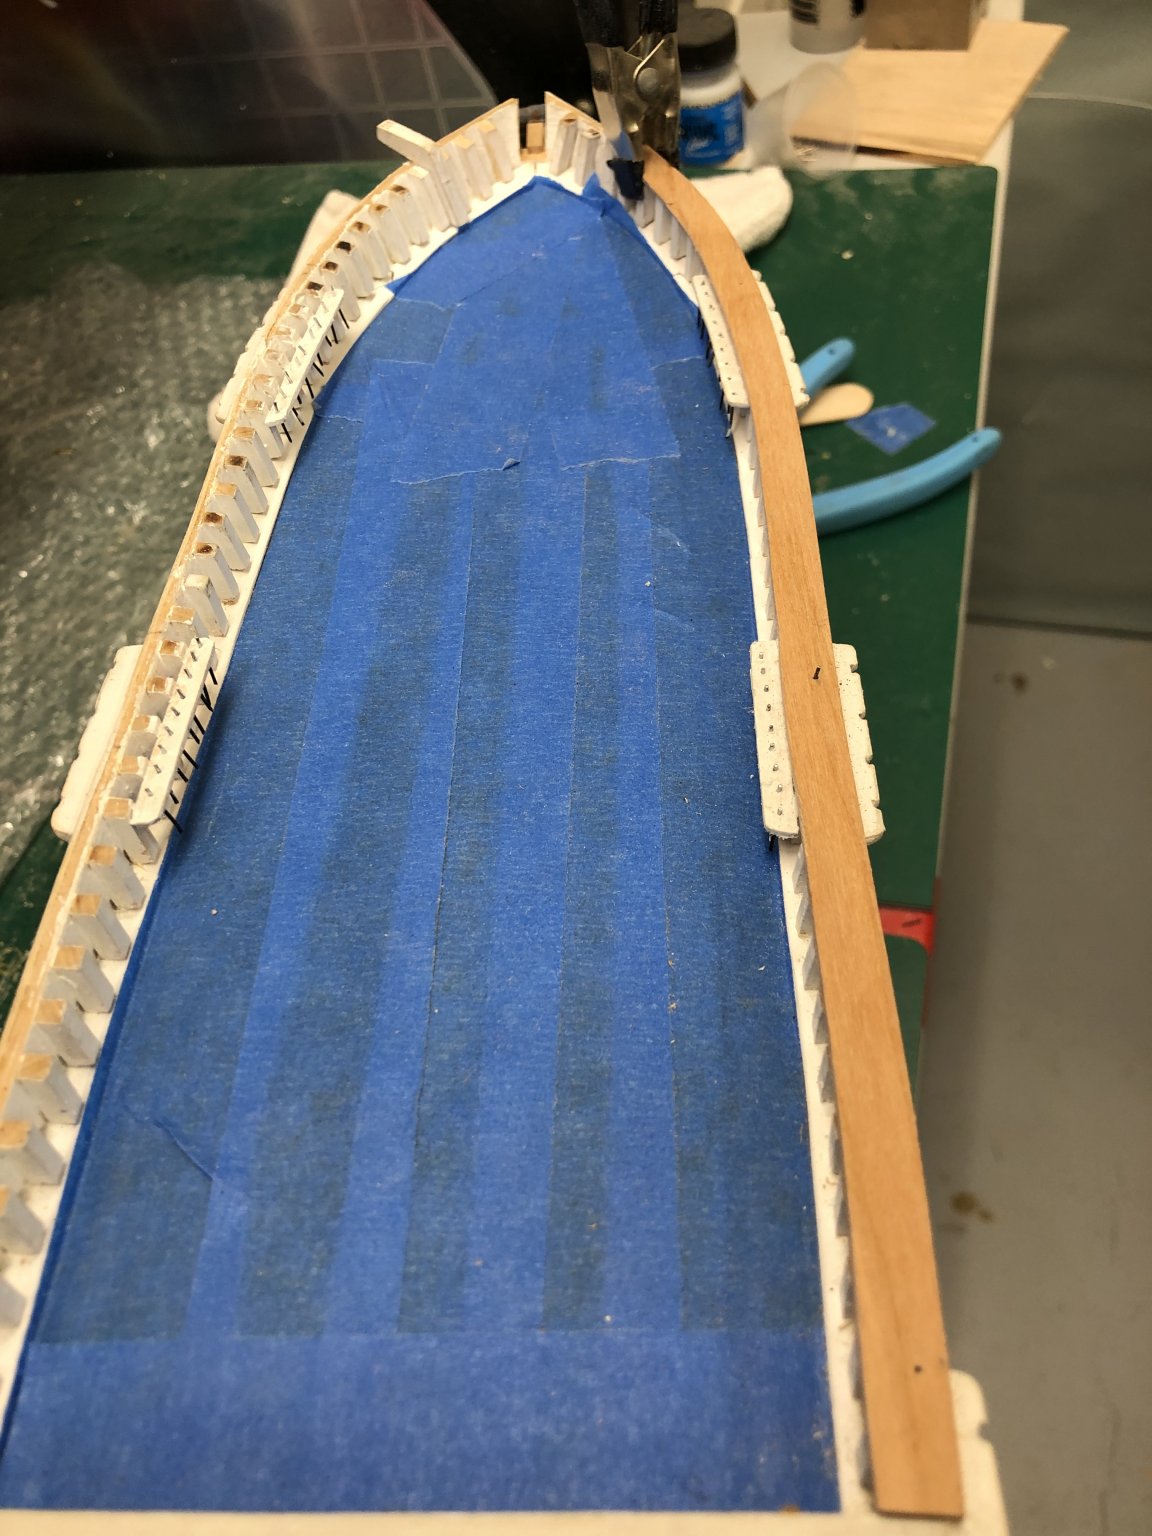
Here is the forward main rail, Buffalo rail and fairlead dry fit on the hull. Flat varnish finish next.

- 166 replies
-
- 1
-
-
- fannie a gorham
- finished
- (and 1 more)
-
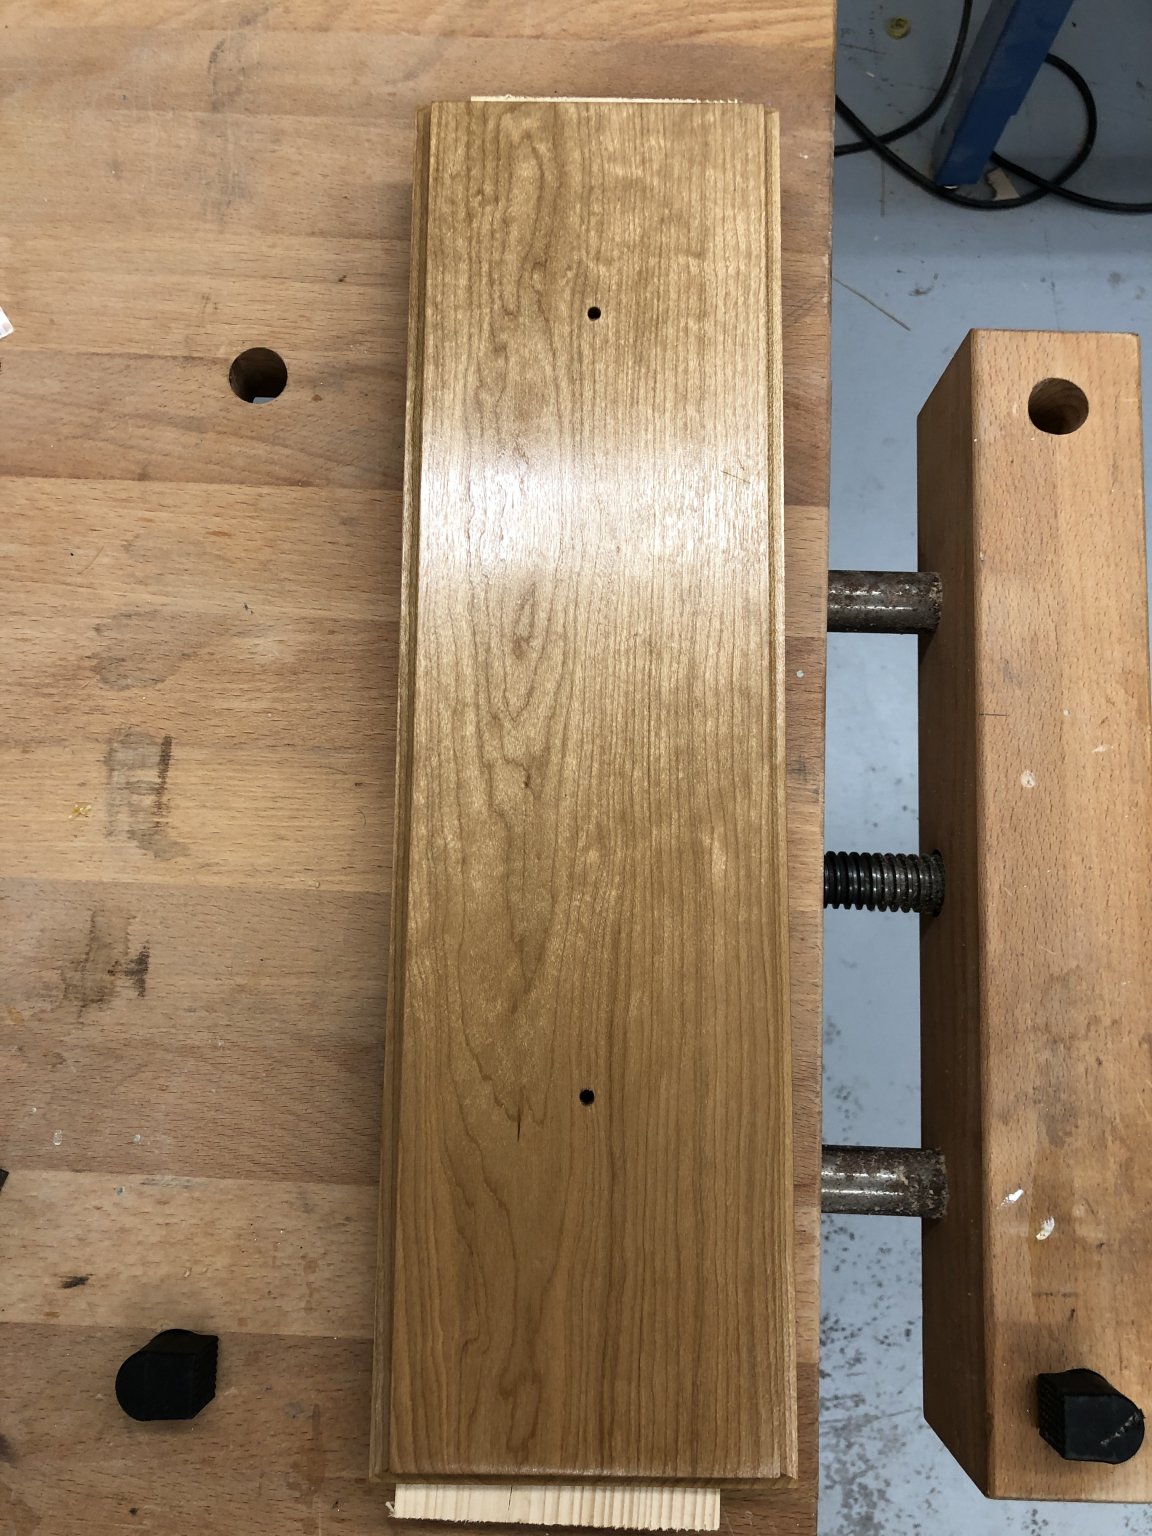
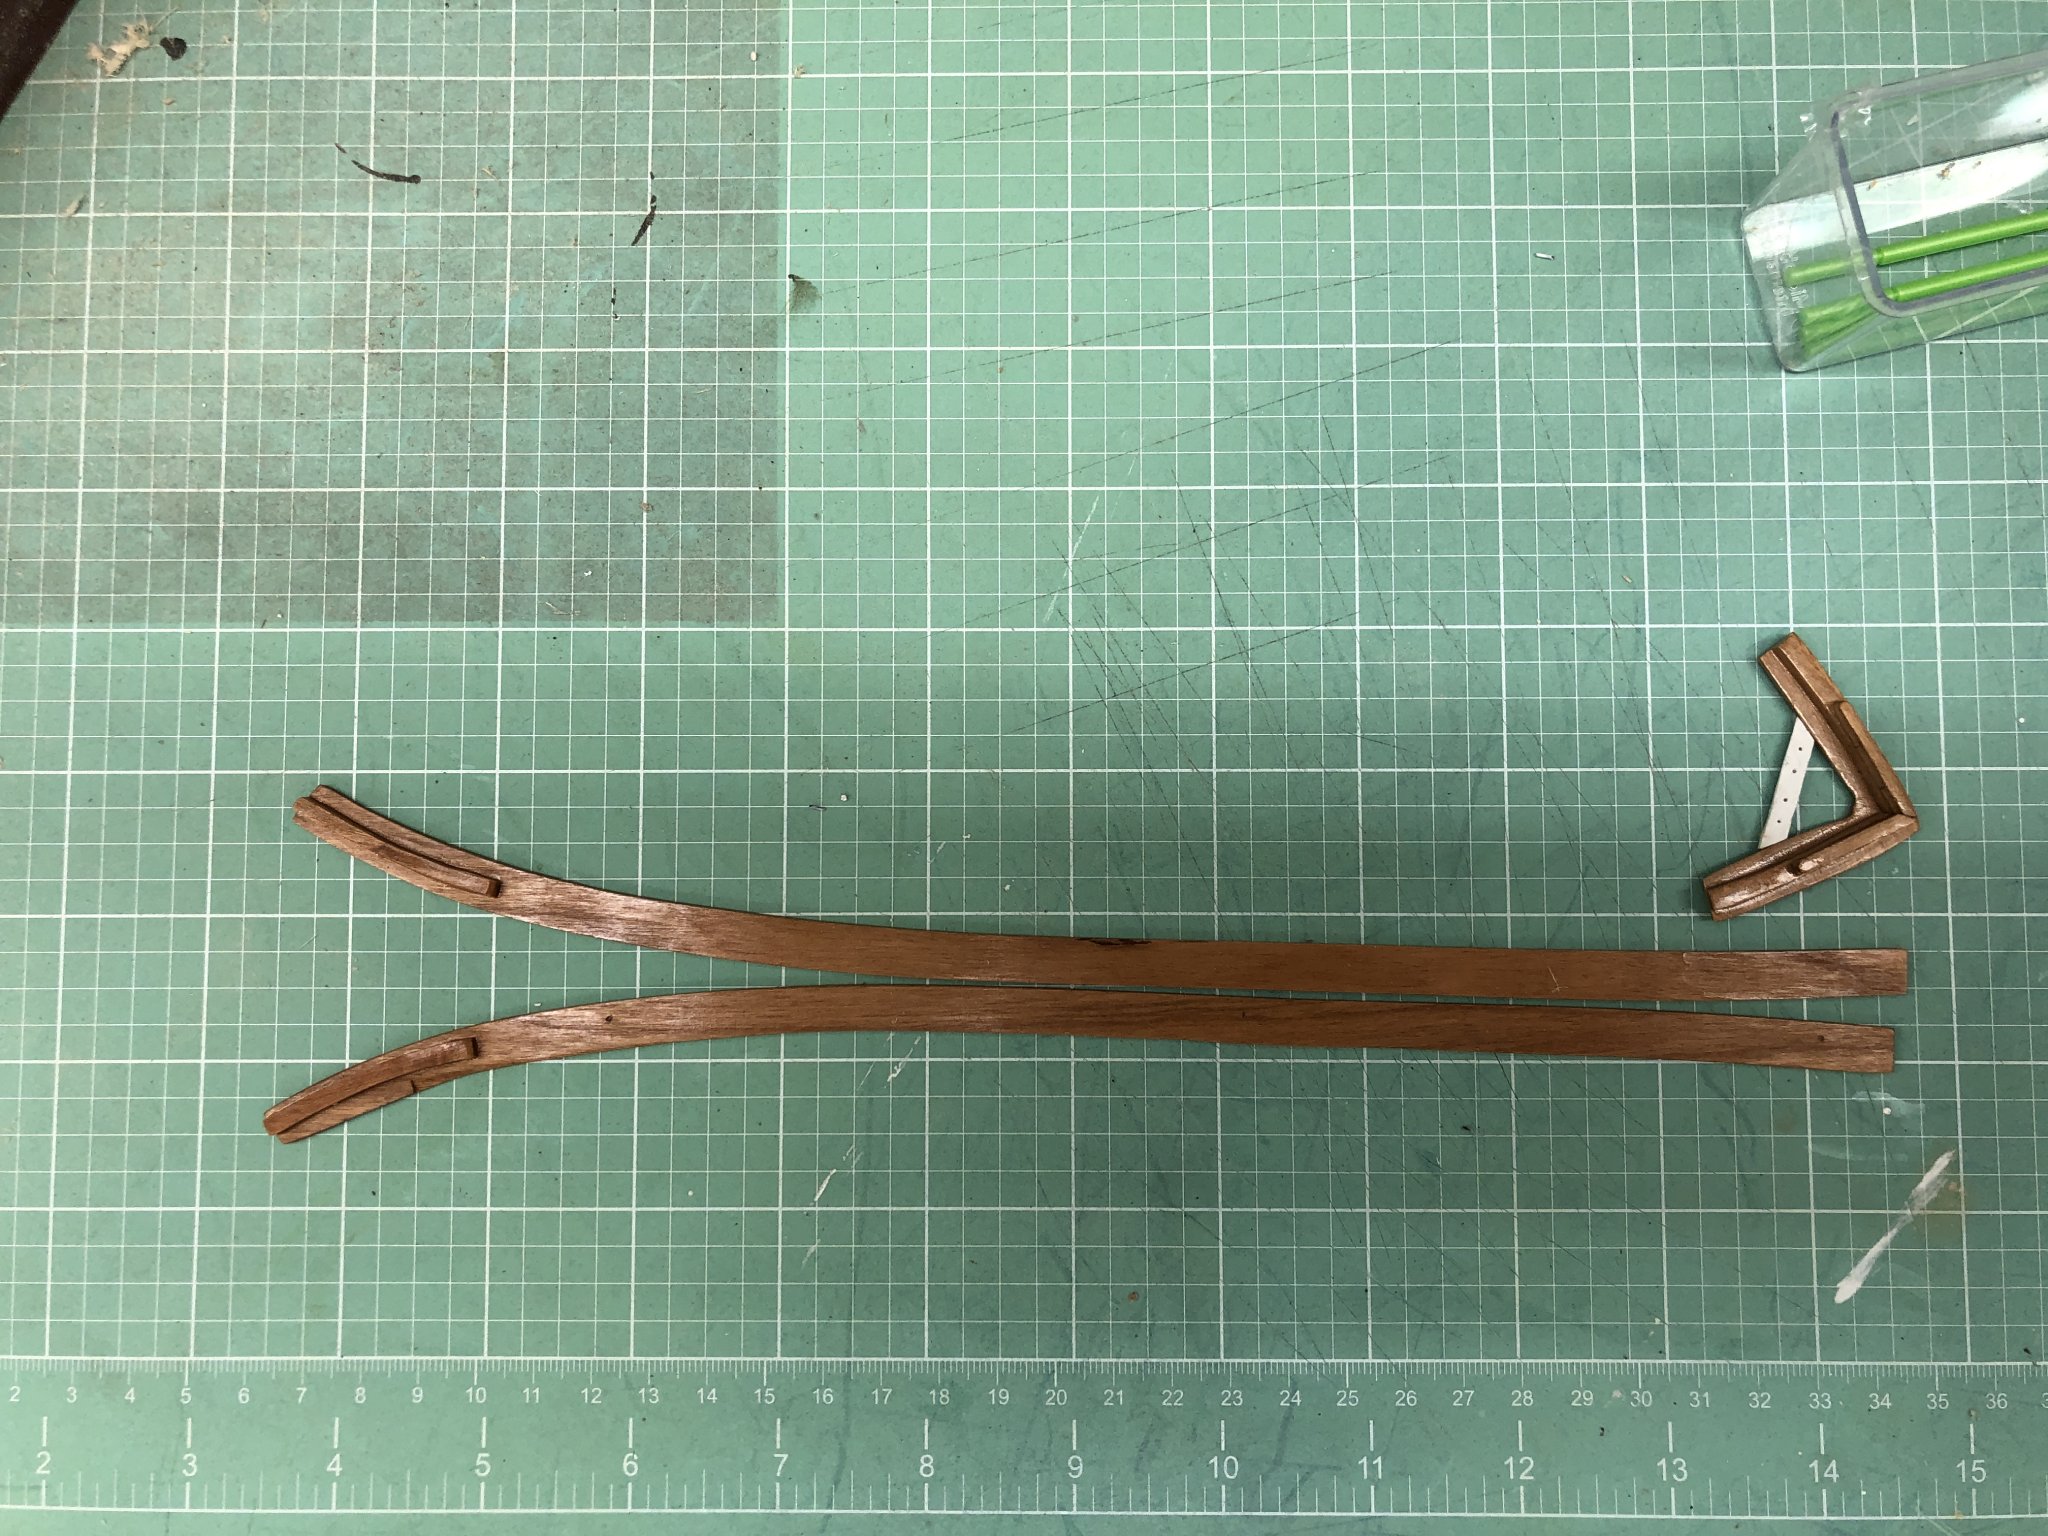
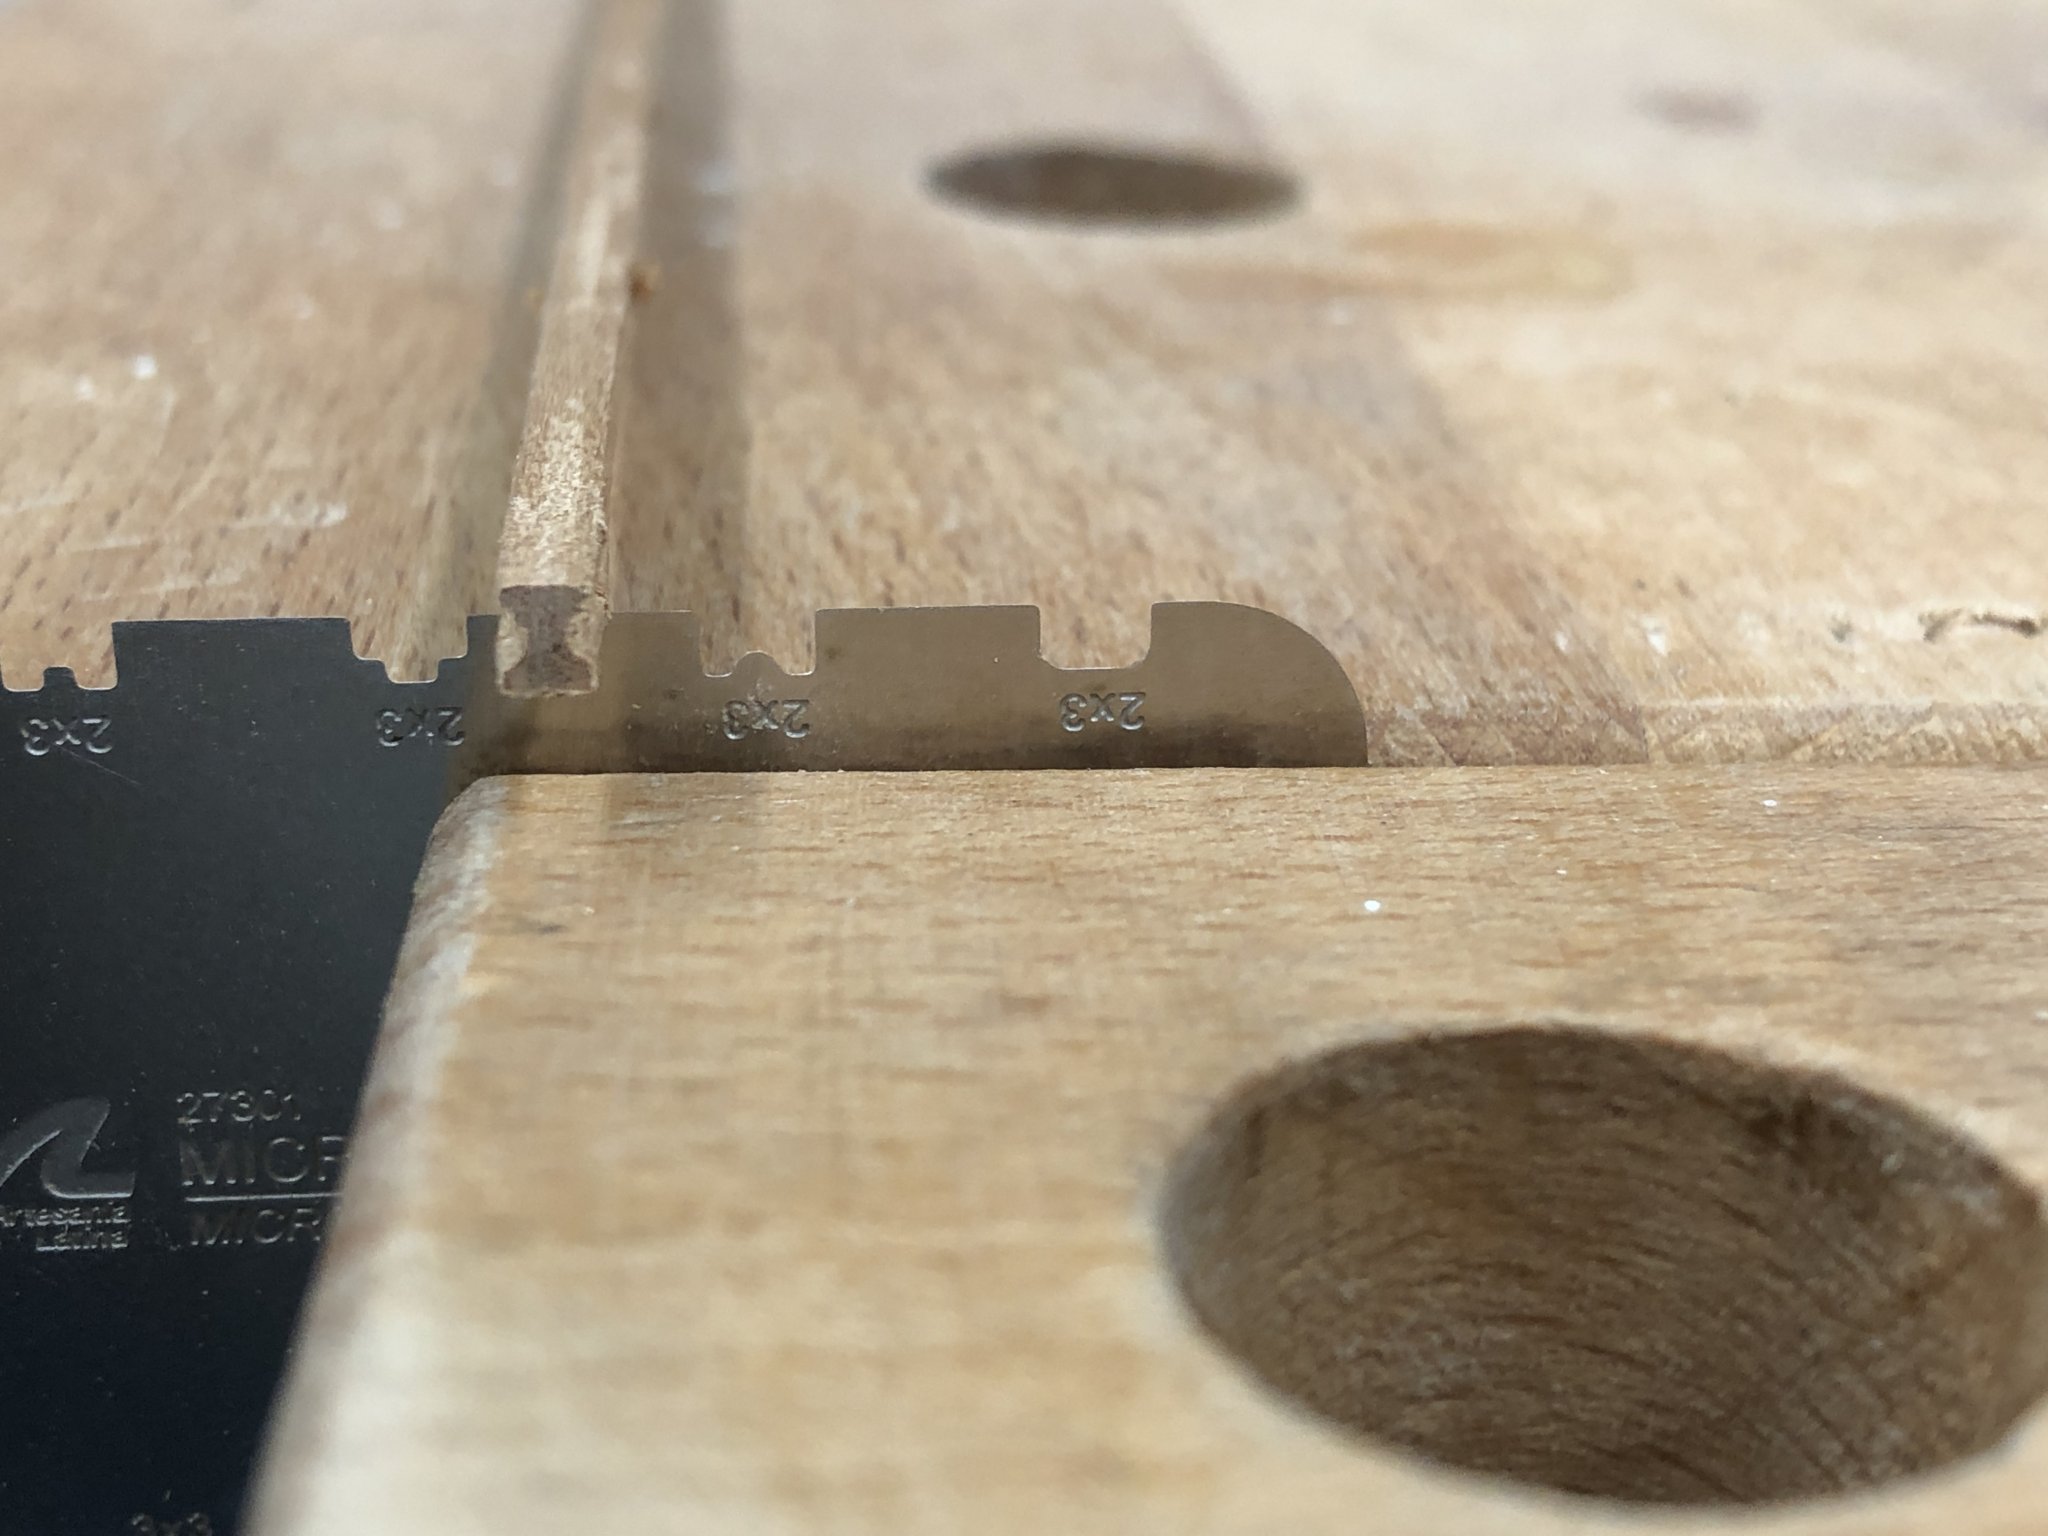
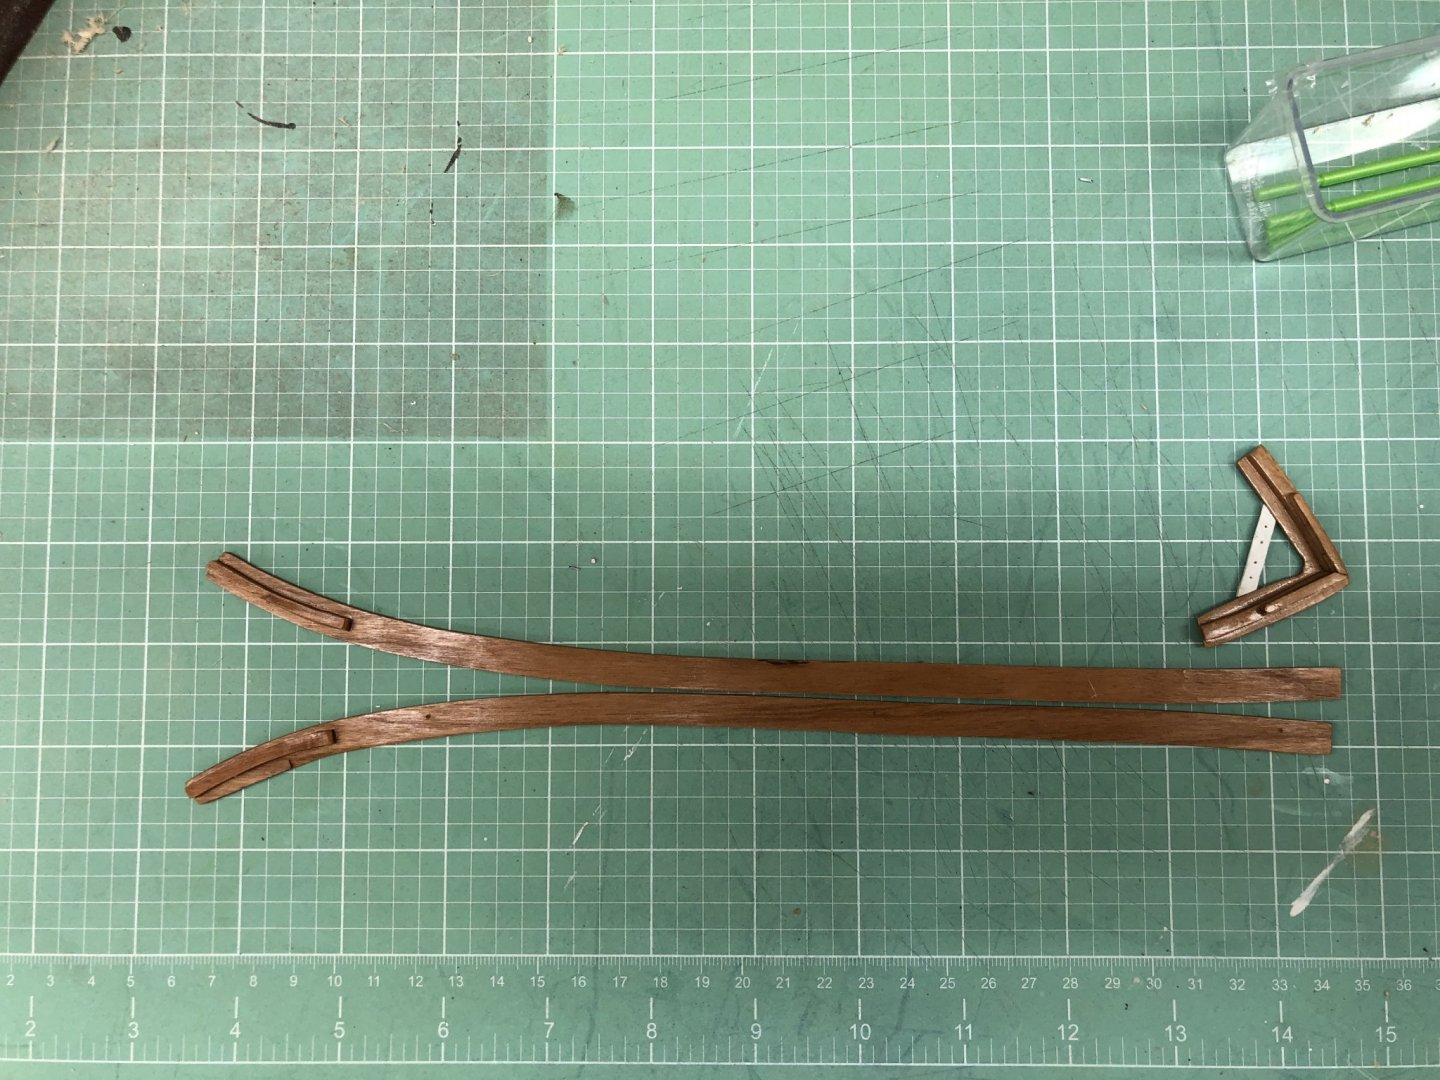
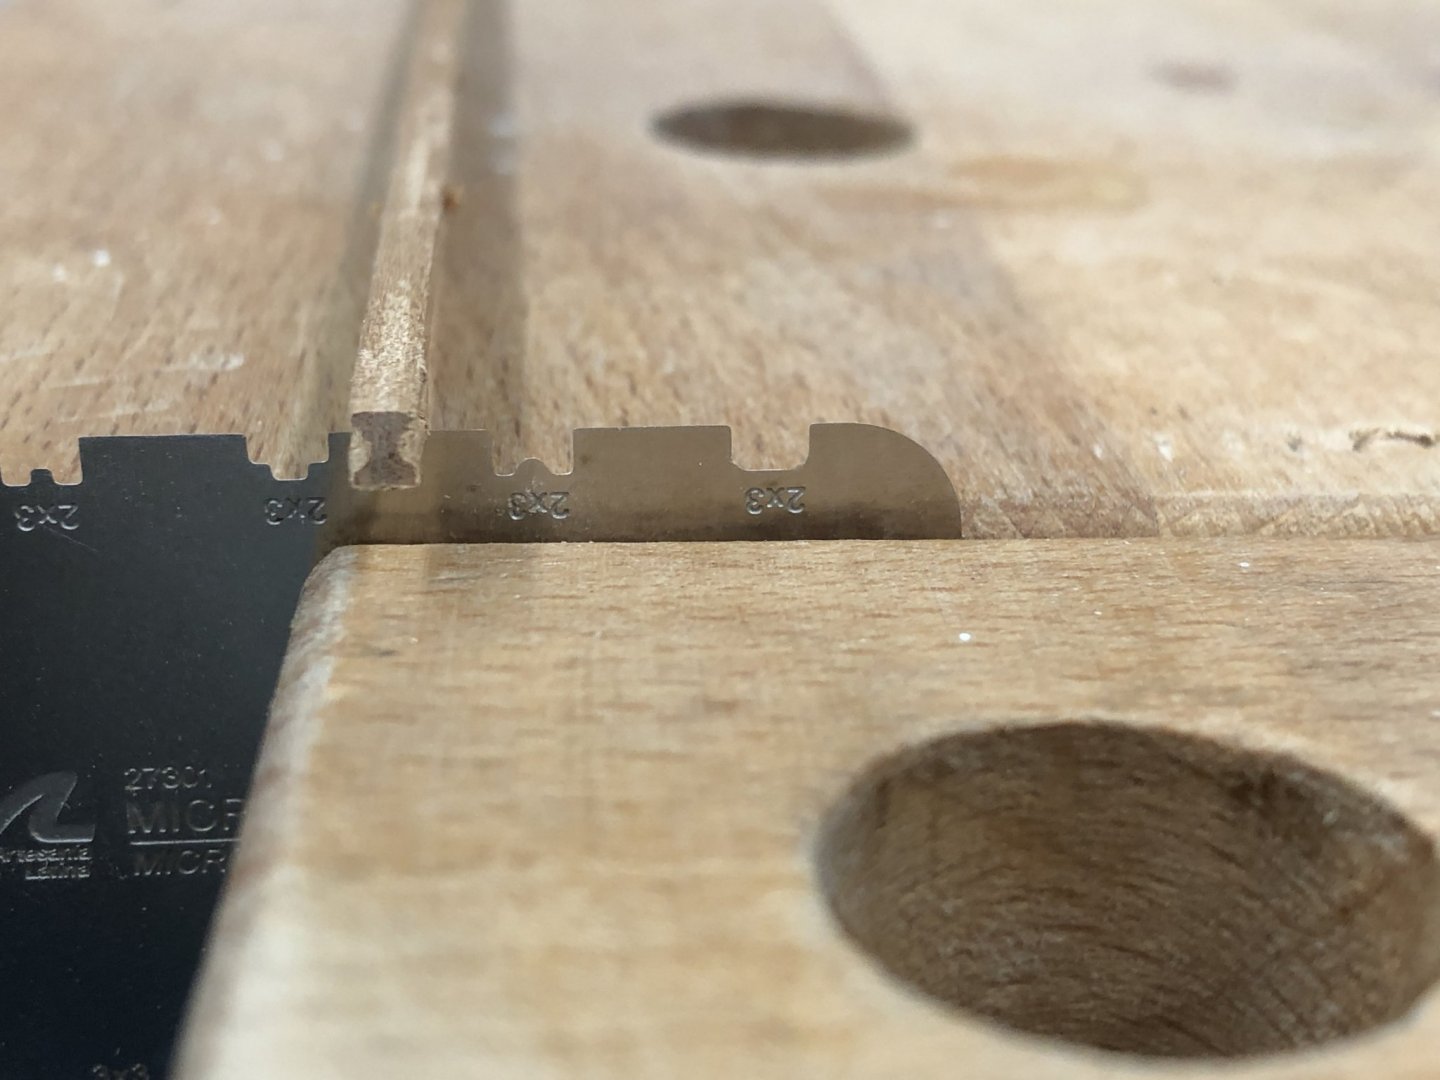
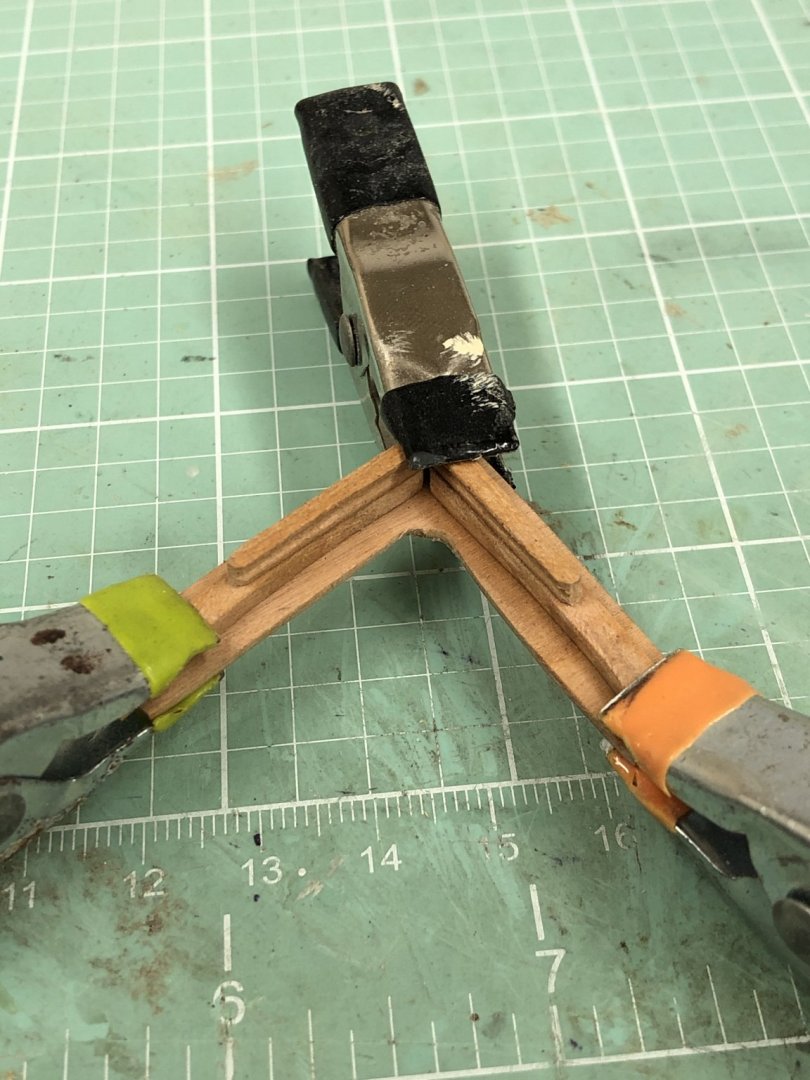
I used a molding "cutter" (from Artesania Latina) to create the fairlead piece at the bow. According to the sketch in the instructions this is a rounded "I Beam" shape. The dimensions of the Buffalo rail and this fairlead are somewhat in question as the are only shown on the full drawings (no details) which makes making errors of 1/16" not that hard to make. So I sort of just picked some dimensions based on what wood was in the kit. I cut the Buffalo rail some some 3/32" cherry that I had and took a piece of cherry down to 3mm to fit the cutter. Here is the cutter held in the wood vise with an end view of the piece that it produced. I had created the forward portion of the main rail and here are the Buffalo rail and fairlead being glued to that piece. I am going to varnish (flat) all these pieces prior to installation.
- 166 replies
-
- 1
-
-
- fannie a gorham
- finished
- (and 1 more)
-
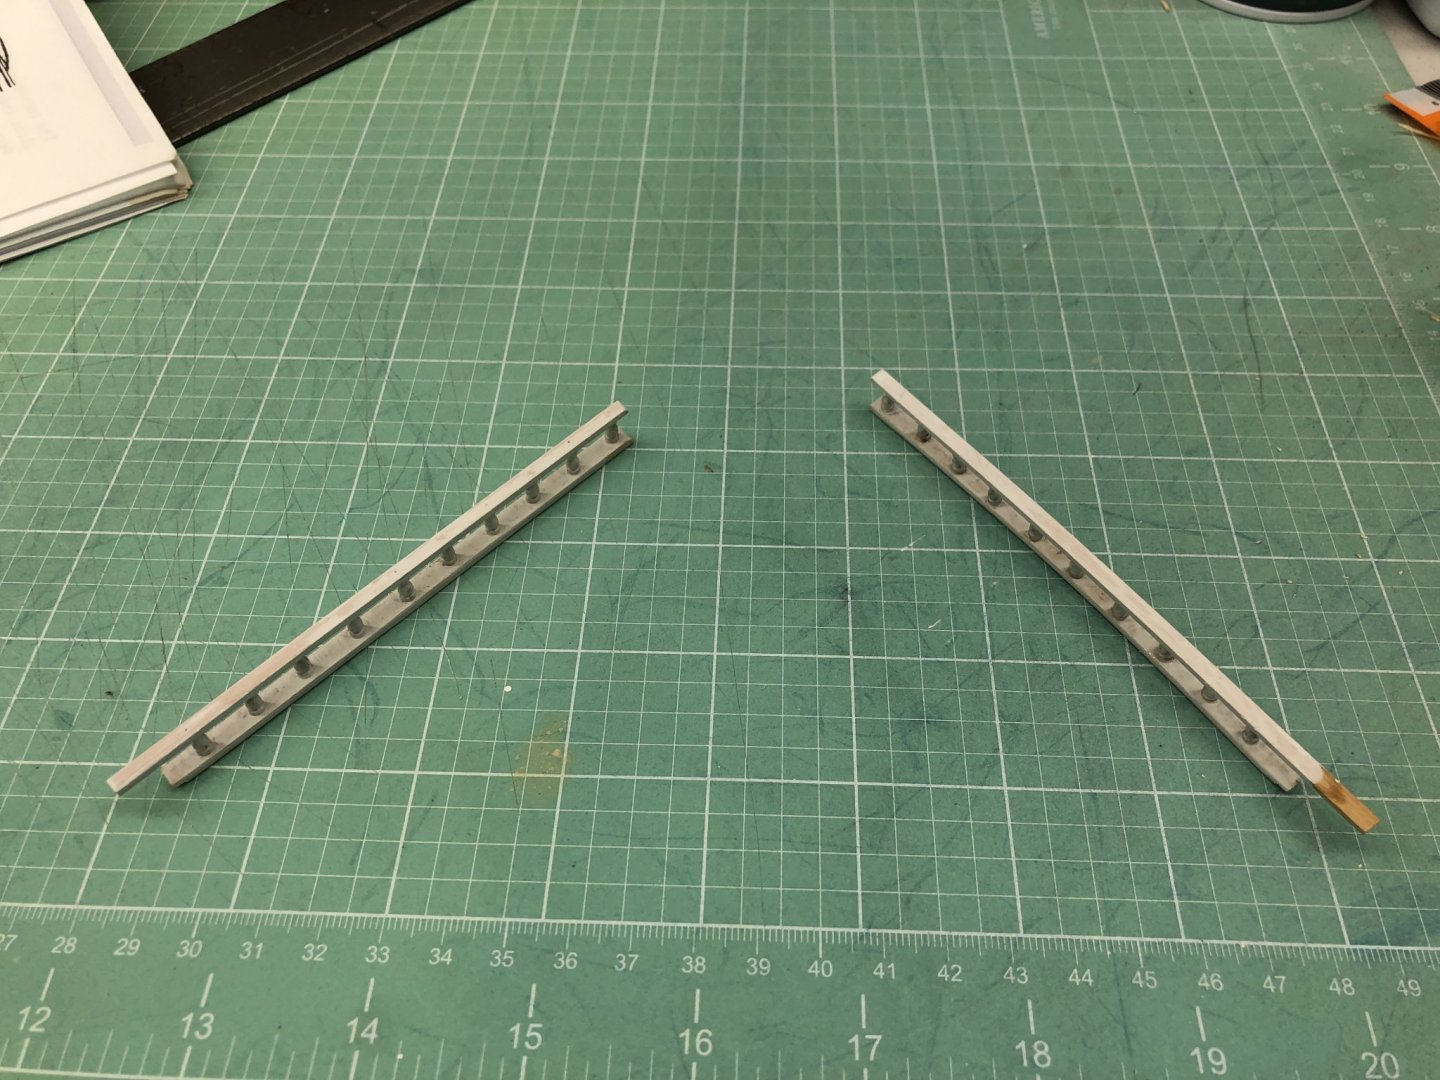
I decided to fashion the main rails before painting the hull as this will require the hull to be handled a good deal. I decided to fashion the main rail from cherry to match the deck material (plus I like to look of cherry). I used a 1/16" X 3" piece of cherry from Northeastern Scale Lumber which is enough to do both rails behind the cat heads. First I cut it into two 1 1/2" wide strips and marked the outer profile on the stbd side. Note to self - do this before adding the channels next time as getting a good line to follow where the channels were was not easy - I ended put having to fake it which was not too much of an issue for the main and mizzen channels which are very close to straight, but the fore took more time and repeated sessions of "sand and fit". With the outer profile complete I used a compass to mark the inner edge (8mm) after some careful measuring of the actual width of the hull/planking/bulwarks on the model. Here is the stbd side with both sides cut and fitted to the hull. The holes are where I used wire pins to make sure I got the rail back in the same spot after each "sand and fit" session. As it turns out the port side was an almost perfect copy of the stbd side which saved considerably of the sanding and fitting. Here is the stbd side before cutting the inside profile.
- 166 replies
-
- 1
-
-
- fannie a gorham
- finished
- (and 1 more)
-
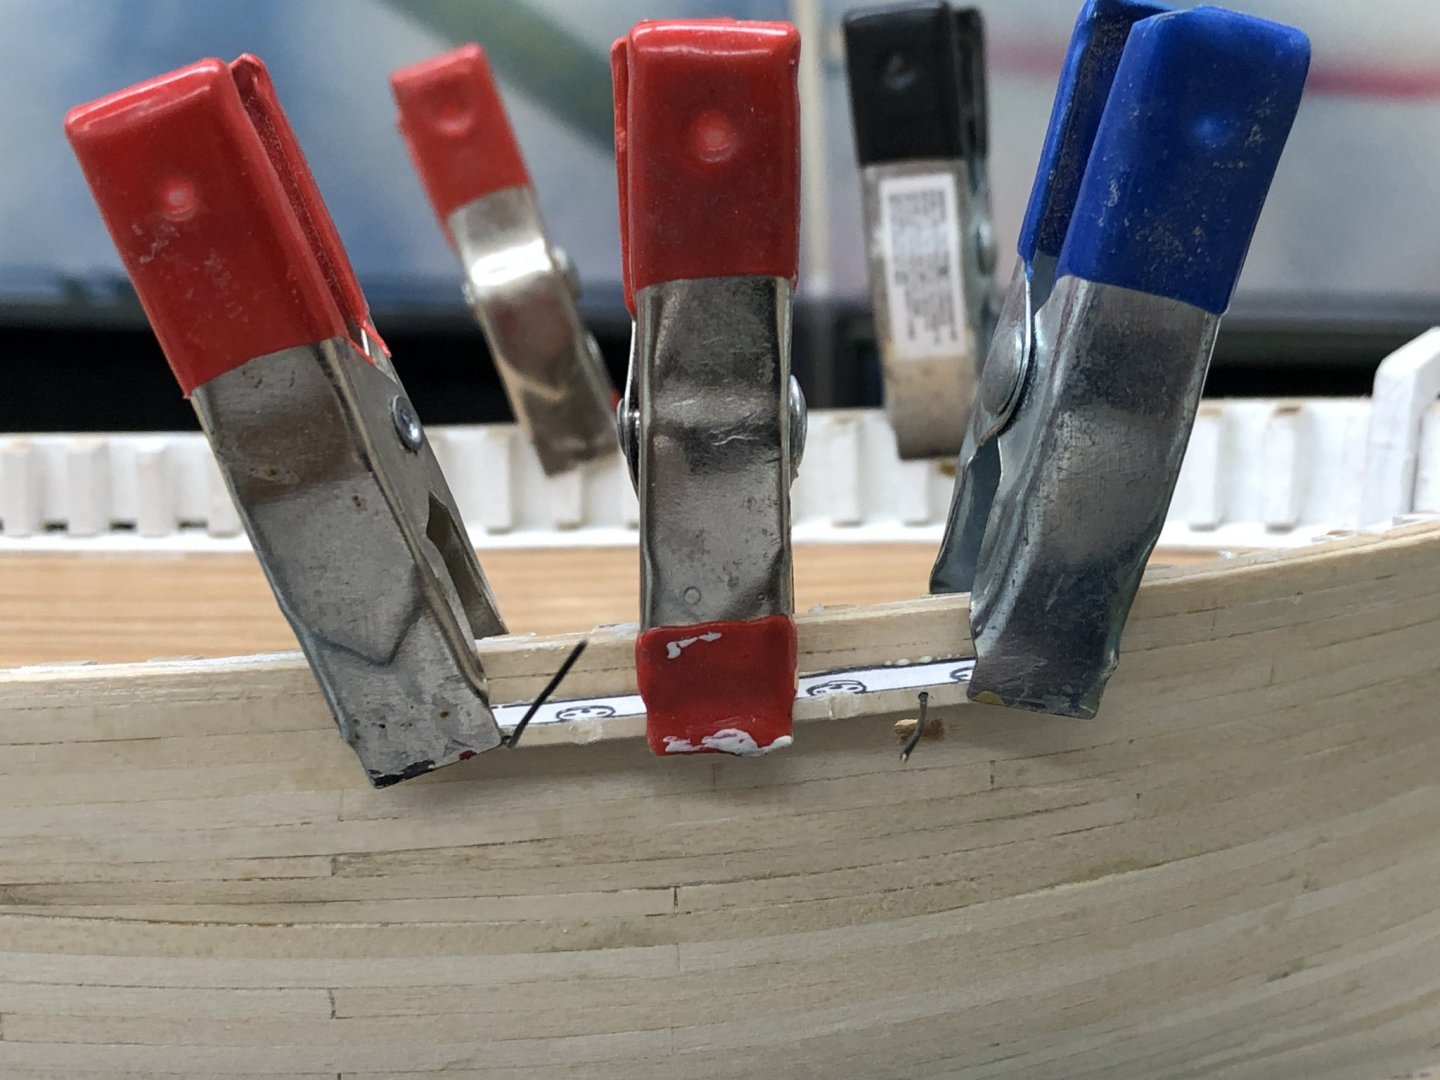
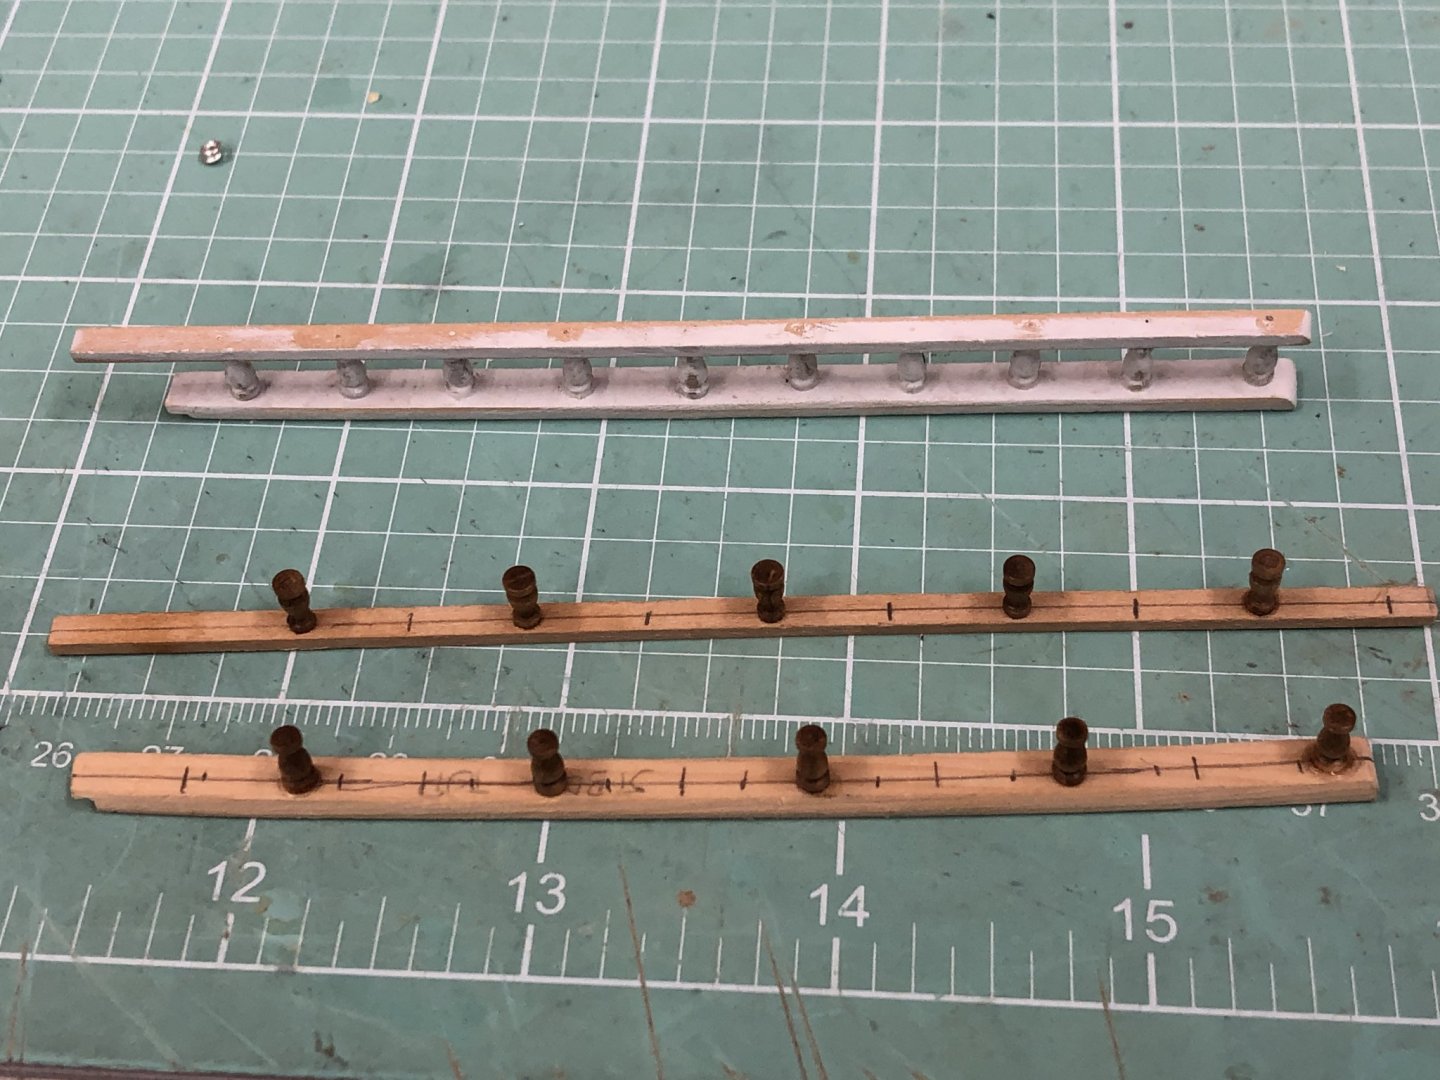
Working to get the pinrails installed before moving on to painting the hull. I sanded some 1/16 thick basswood to 3/64s as I am leery of using 1/32 stock for the pinrails. With holes ~5mm apart I think this would weaken the material sufficiently to run the risk of splitting the pinrail if a significant strain was put on one of the belaying pins. I also added two or three wire (.018") pins to help attach the rail to the bulwarks. Here re the port side pinrails in place and the stbd side being fitted.

- 166 replies
-
- 1
-
-
- fannie a gorham
- finished
- (and 1 more)
-
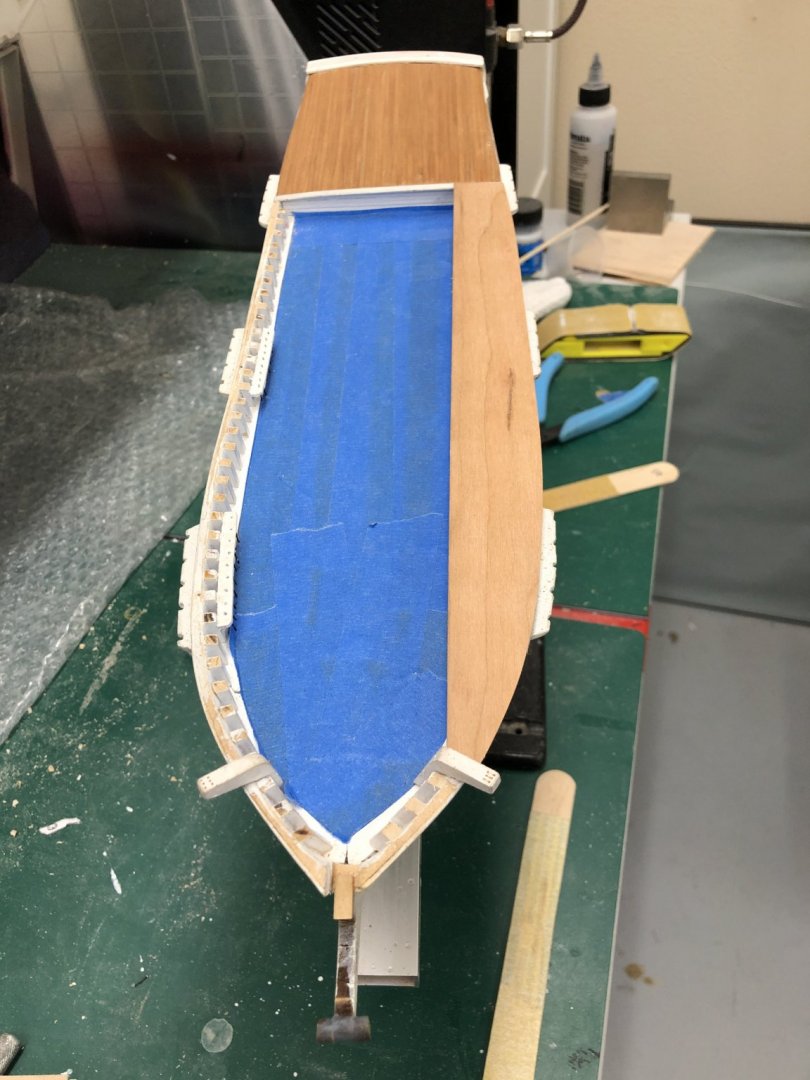
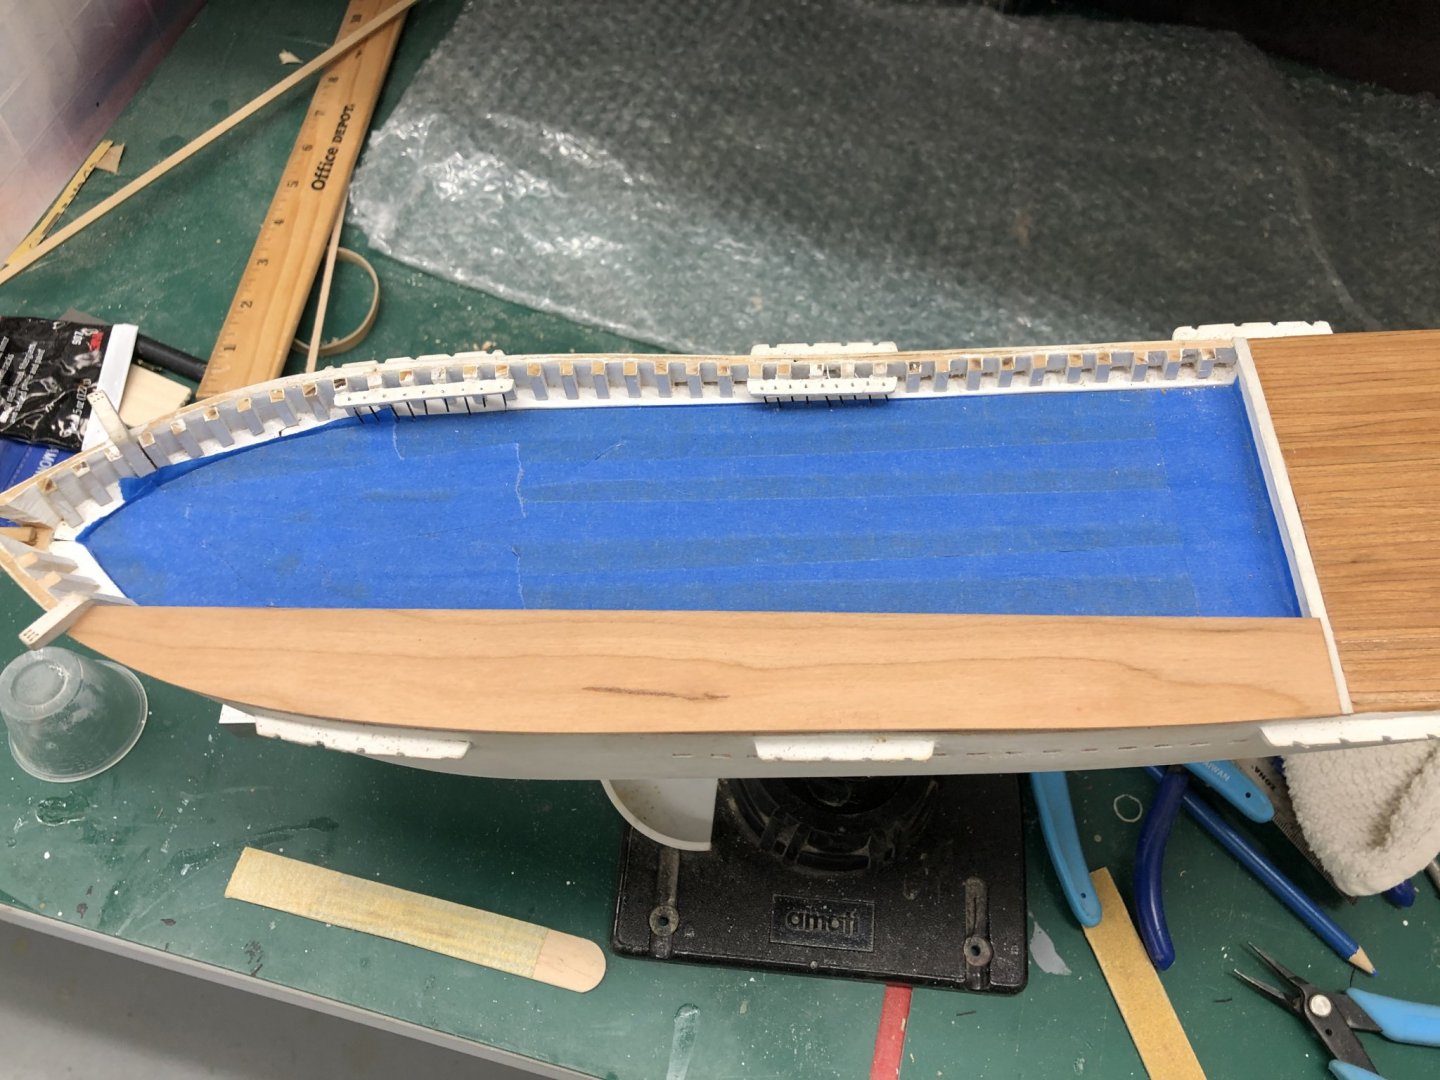
I have taken about a month off to get some outside projects completed before it gets "really hot". Now COVID-19 has provided the "perfect" excuse to isolate myself in the workshop and get the Fannie Gorham completed. I have redone the port side chain plates using 24ga annealed steel wire (instead of the thinner brass wire included with the kit). Working the starboard side now. I had planned to install the chain plates before painting the hull but have reconsidered that as the chain plates extend across the water line and painting the waterline with them in place looks like it would be very challenging. So I am going to paint the waterline (white with a darker gray above and the hull red below) before I install the chain plates. Having decided that I plan to paint the chain plates black so I do not have to try and manually paint the waterline on 26 chain plates. This also makes it possible to mount the masts before installing the chain plates which makes it easier to get them aligned with the shrouds. In addition I still have to build the windlass assembly, fab and install the main rail, buffalo and fairlead rails and the belaying pin racks.
- 166 replies
-
- 1
-
-
- fannie a gorham
- finished
- (and 1 more)
-
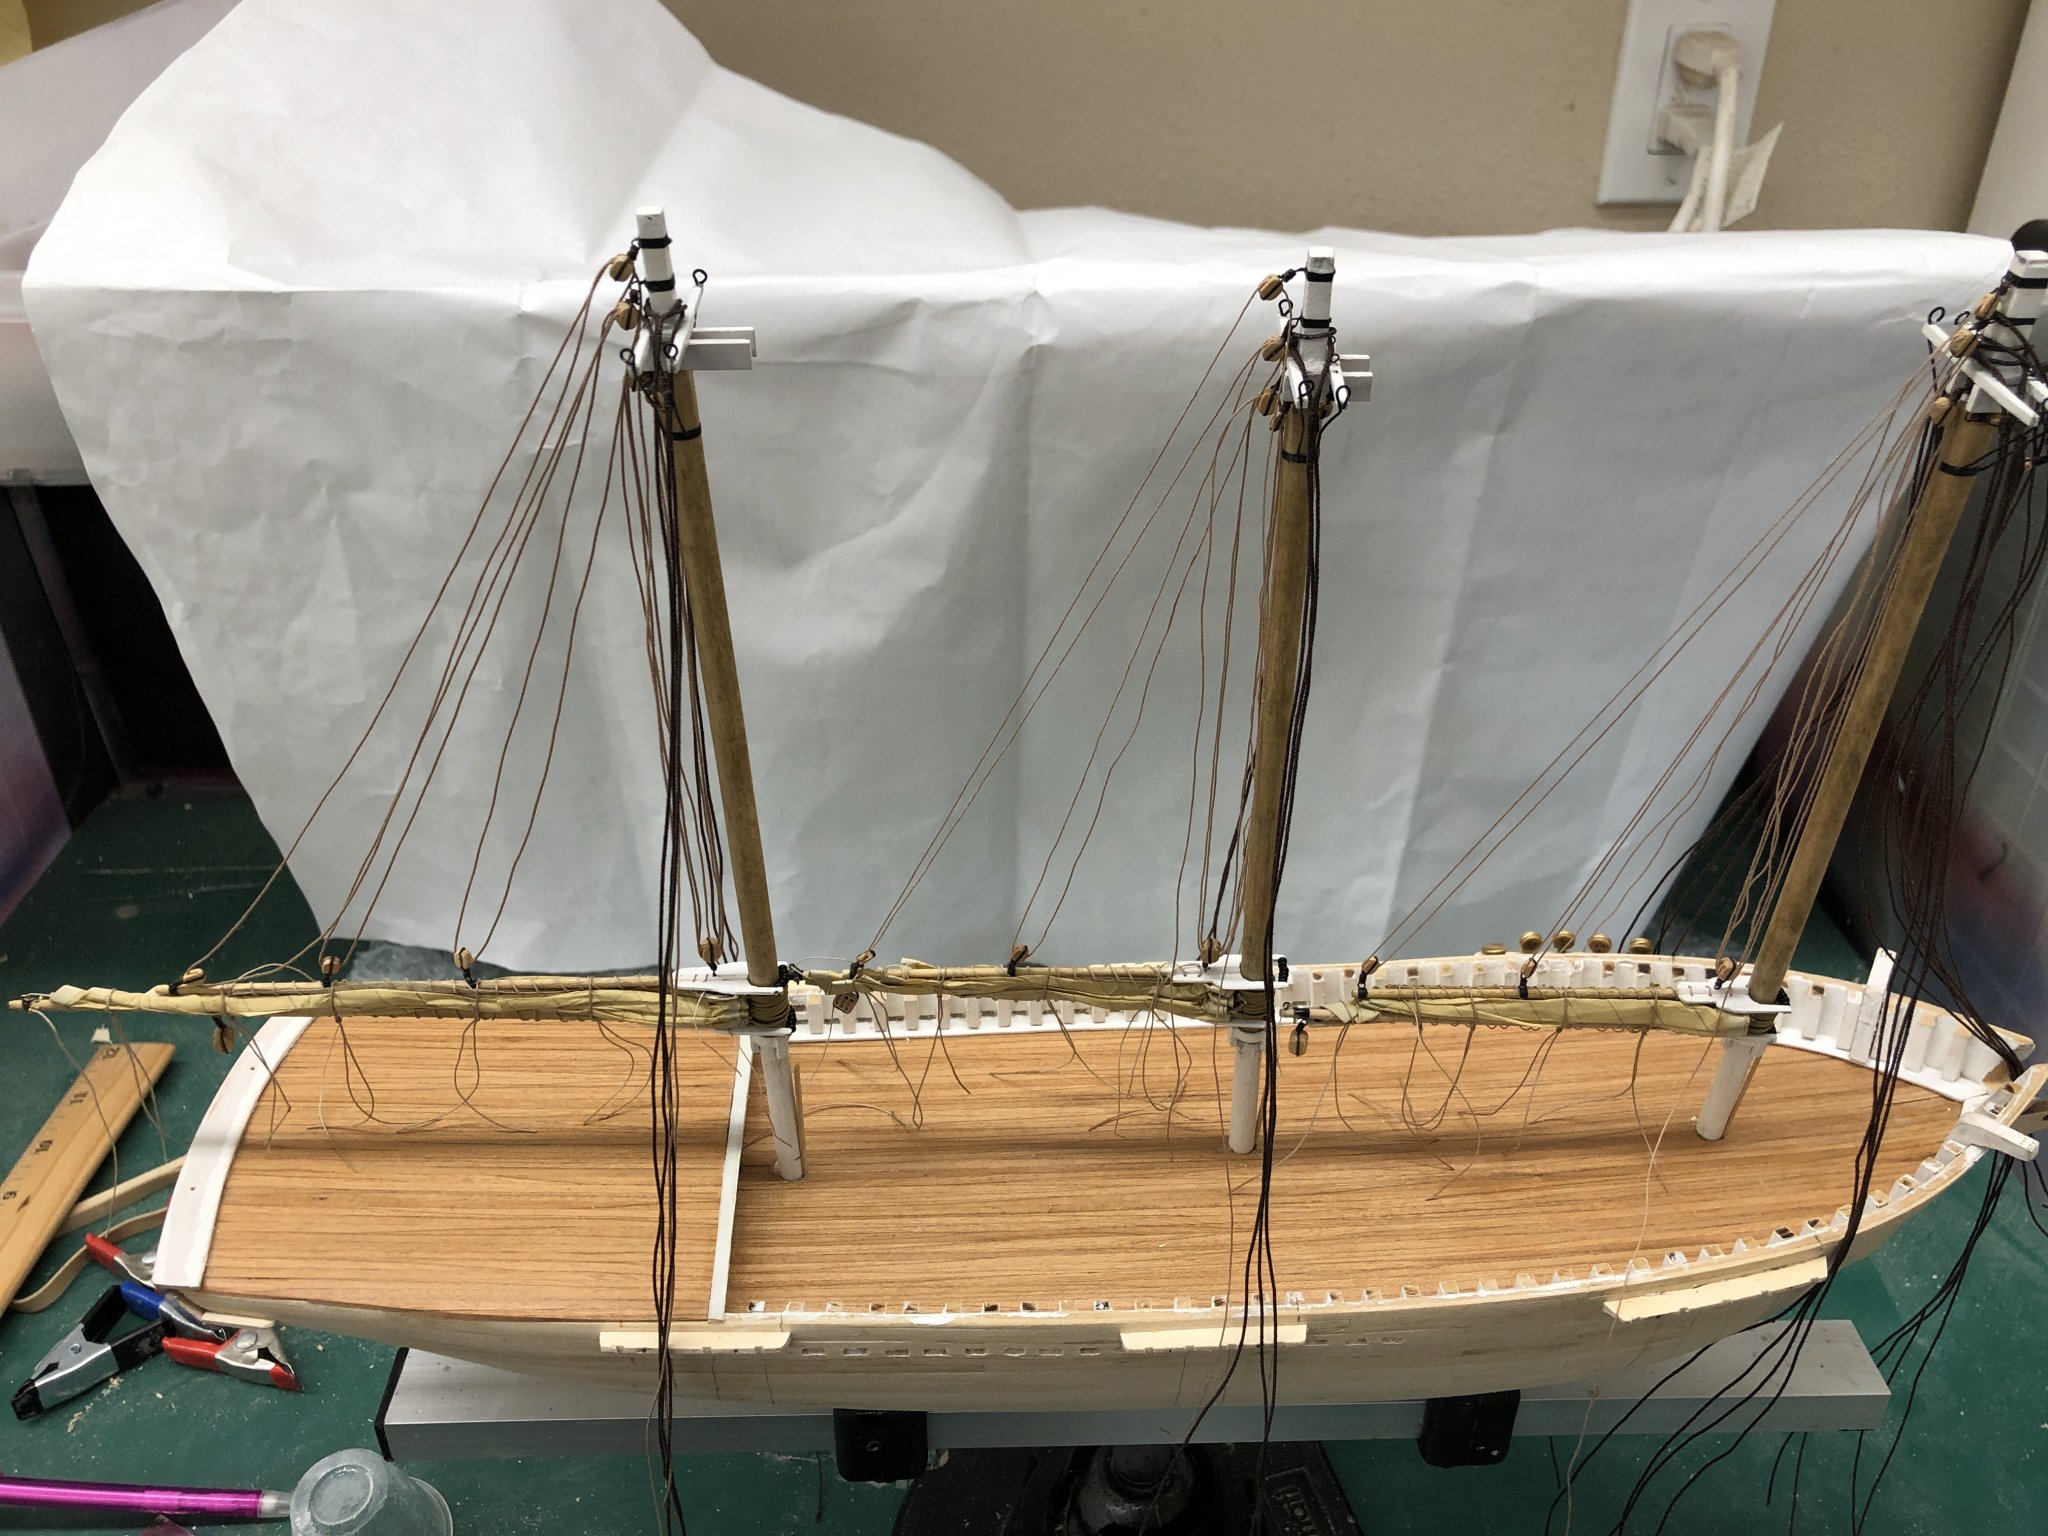
Back from cruise the highlight (at least for me was visiting the former Royal Navy Dockyard on Antigua. Many of the original buildings are still standing although most have been converted to support the tourists which are "thick as thieves" since there were four cruise ships in on the day we were there. Imagine 8000+ "tourists" descending on your local marina. Anyway I have all three lower sails completed, attached to the masts/gaff/boom and the peak and throat halyards (without the tackles) rigged. I used .018 Syren line for the mizzen mast halyards and .012 on the main and fore masts. The tackles will all use .008 line. I thought the heavier line on the mizzen was required since the gaff and sail are considerably larger than on the main/fore. Here is what things look like at this point. Need to trim up the gaskets and a few Irish pennants but I think these will serve. I am going to have to redo many of the chainplates. I measured and drilled the plates for the attachment pins based on the drawings but some of the holes are going to hit the scuppers. Obviously I should have figured out where the holes NEEDED to be, not where the drawing showed them. I am considering redoing all of them and using a single thickness of annealed steel wire instead of the double pass of the thinner brass wire. I was getting pretty good at fabing them so what course I take will probably depend on if I have enough brass stock.


- 166 replies
-
- 1
-
-
- fannie a gorham
- finished
- (and 1 more)
-
Going off line for two weeks - cruise to Southern Caribbean.
-
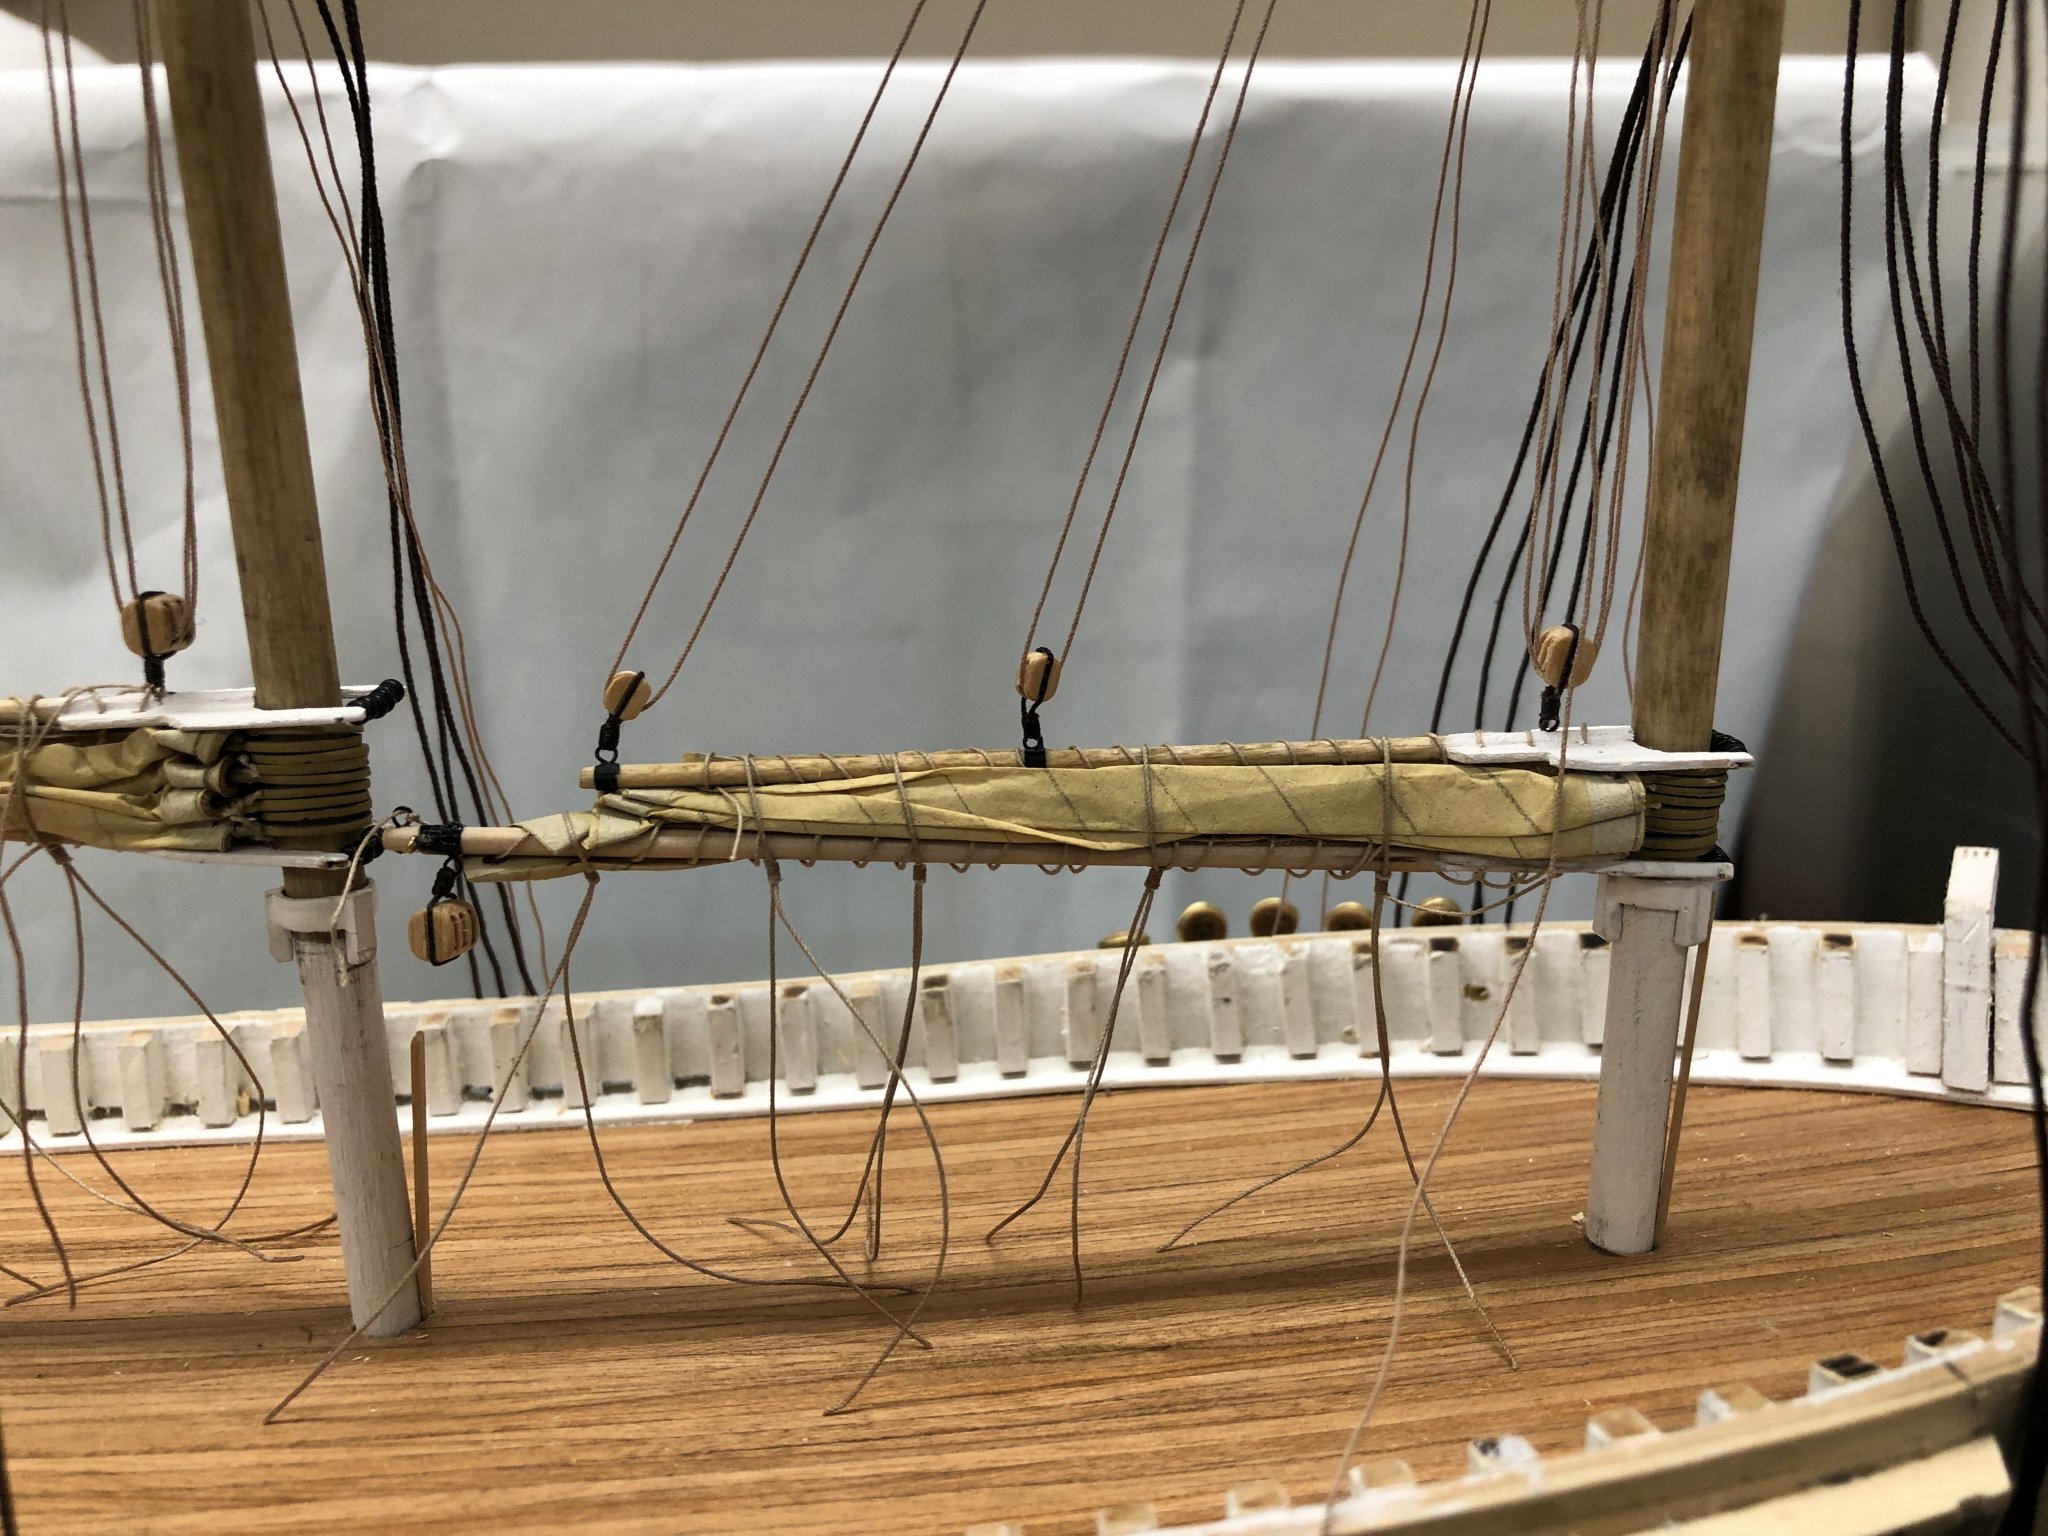
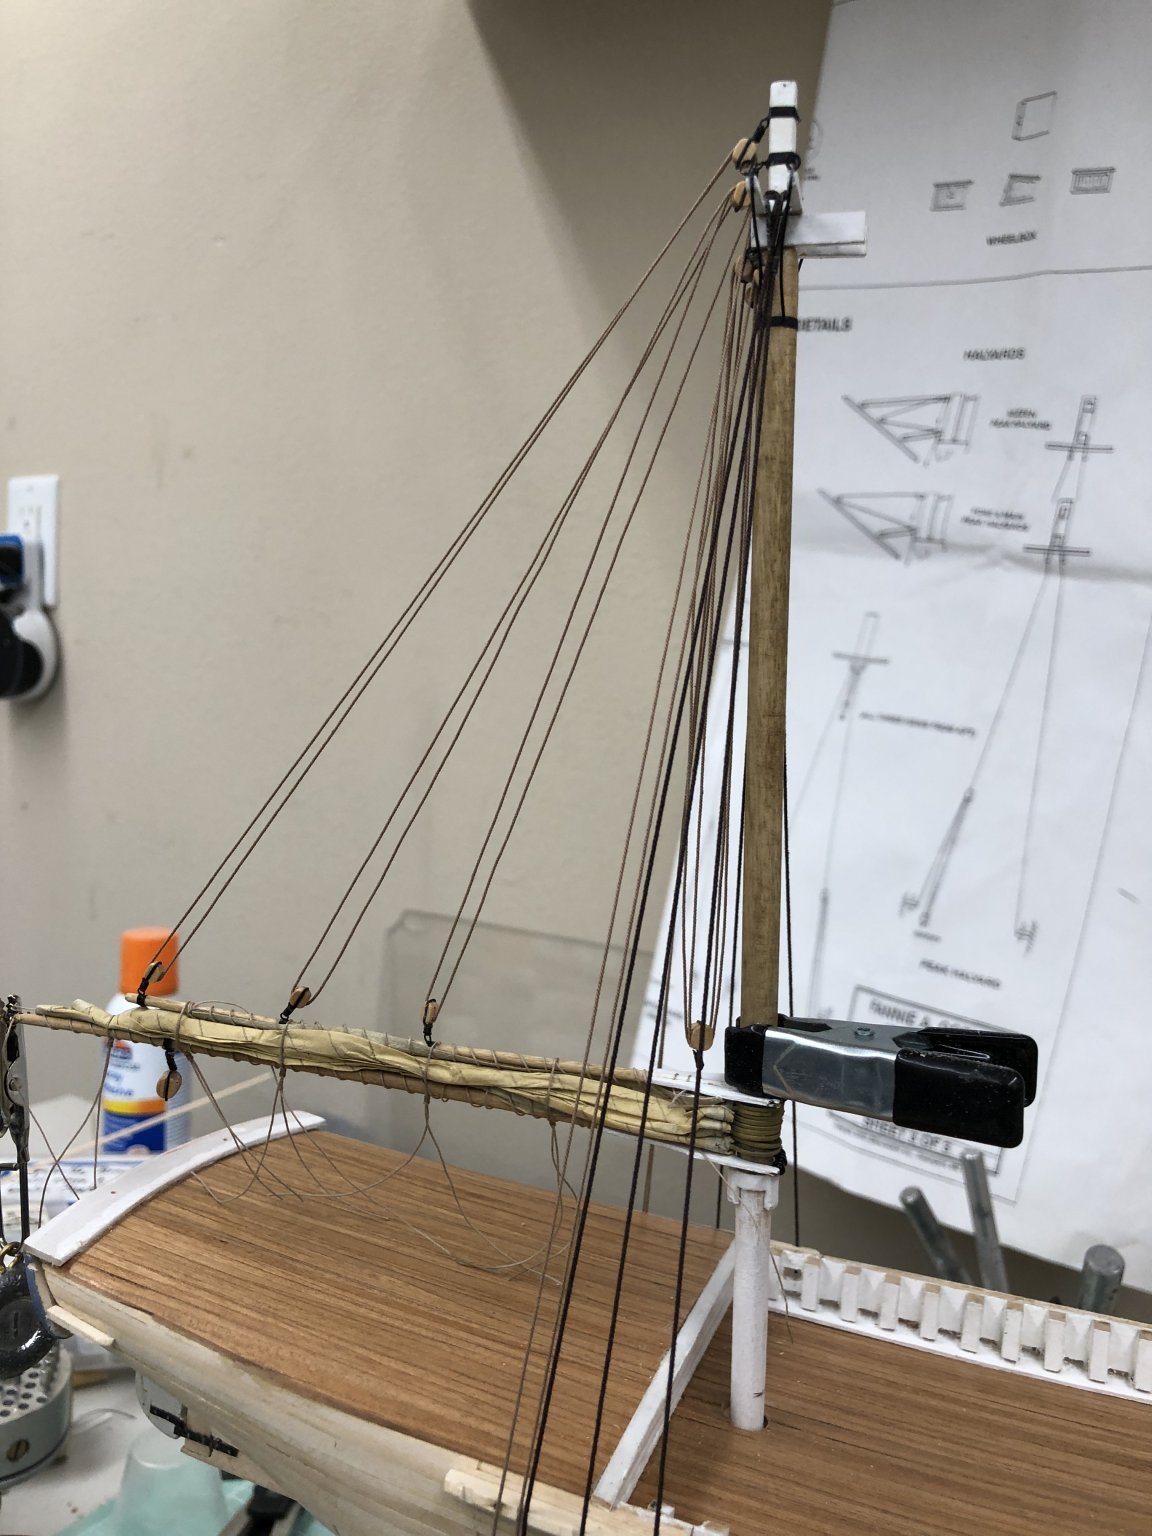
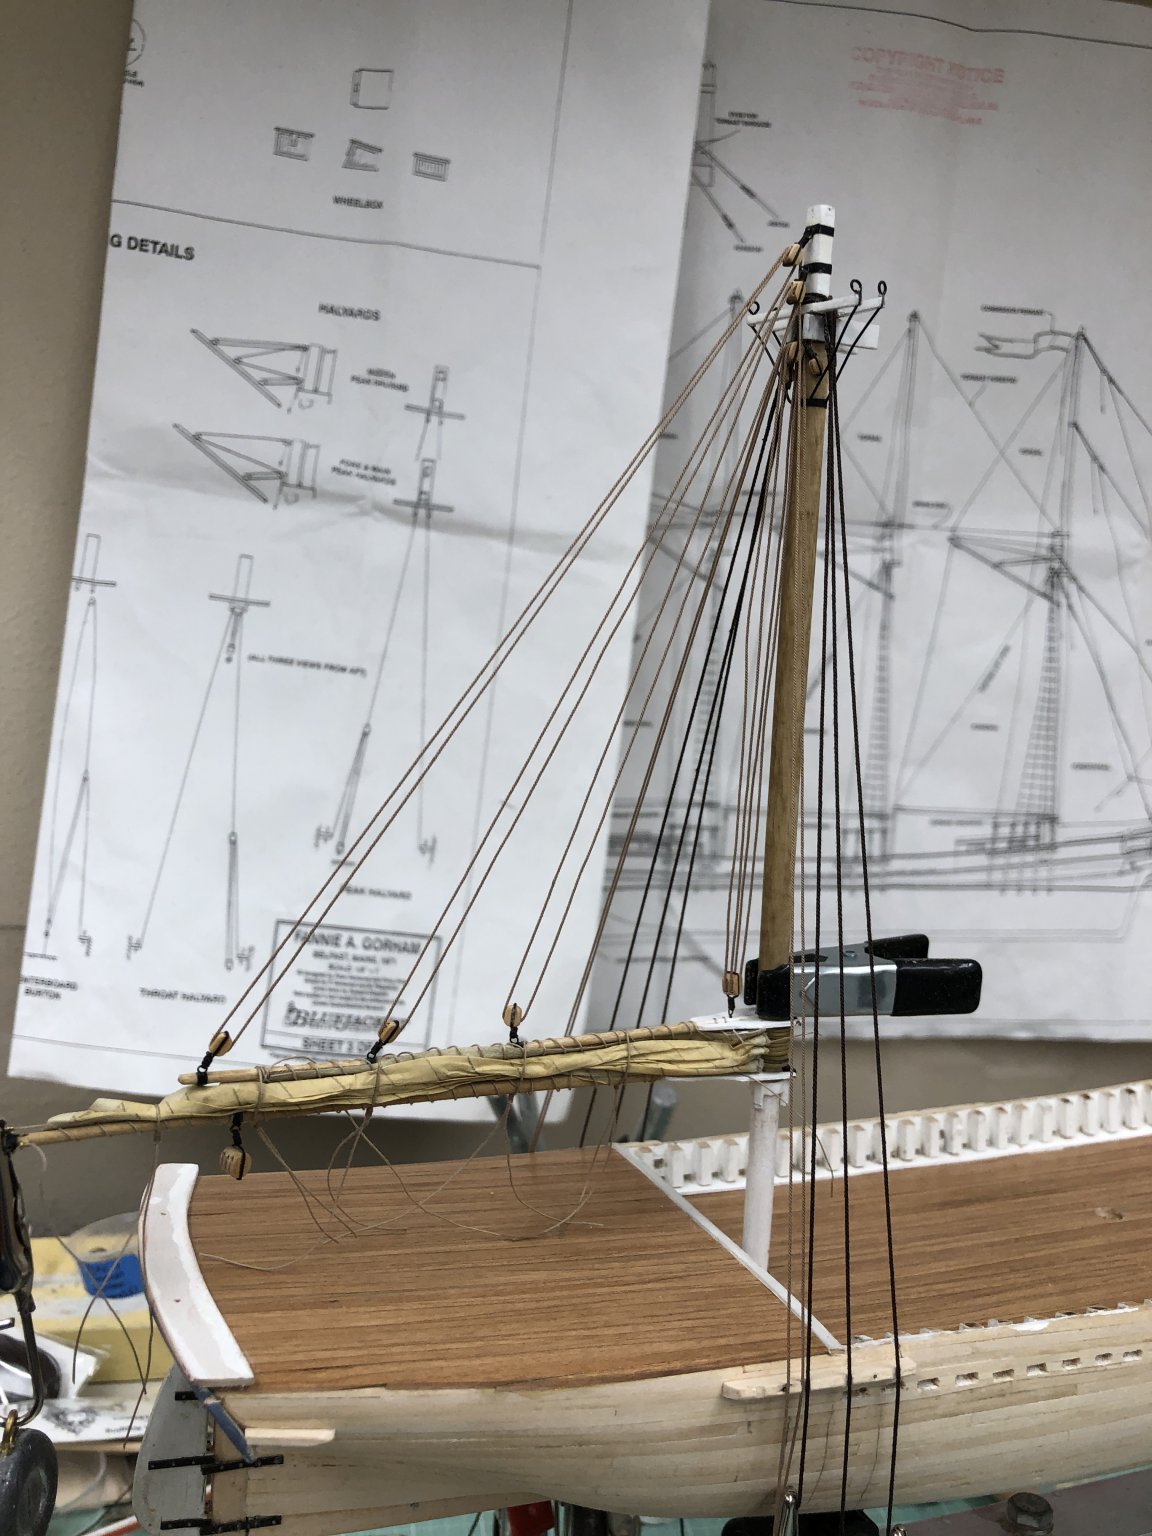
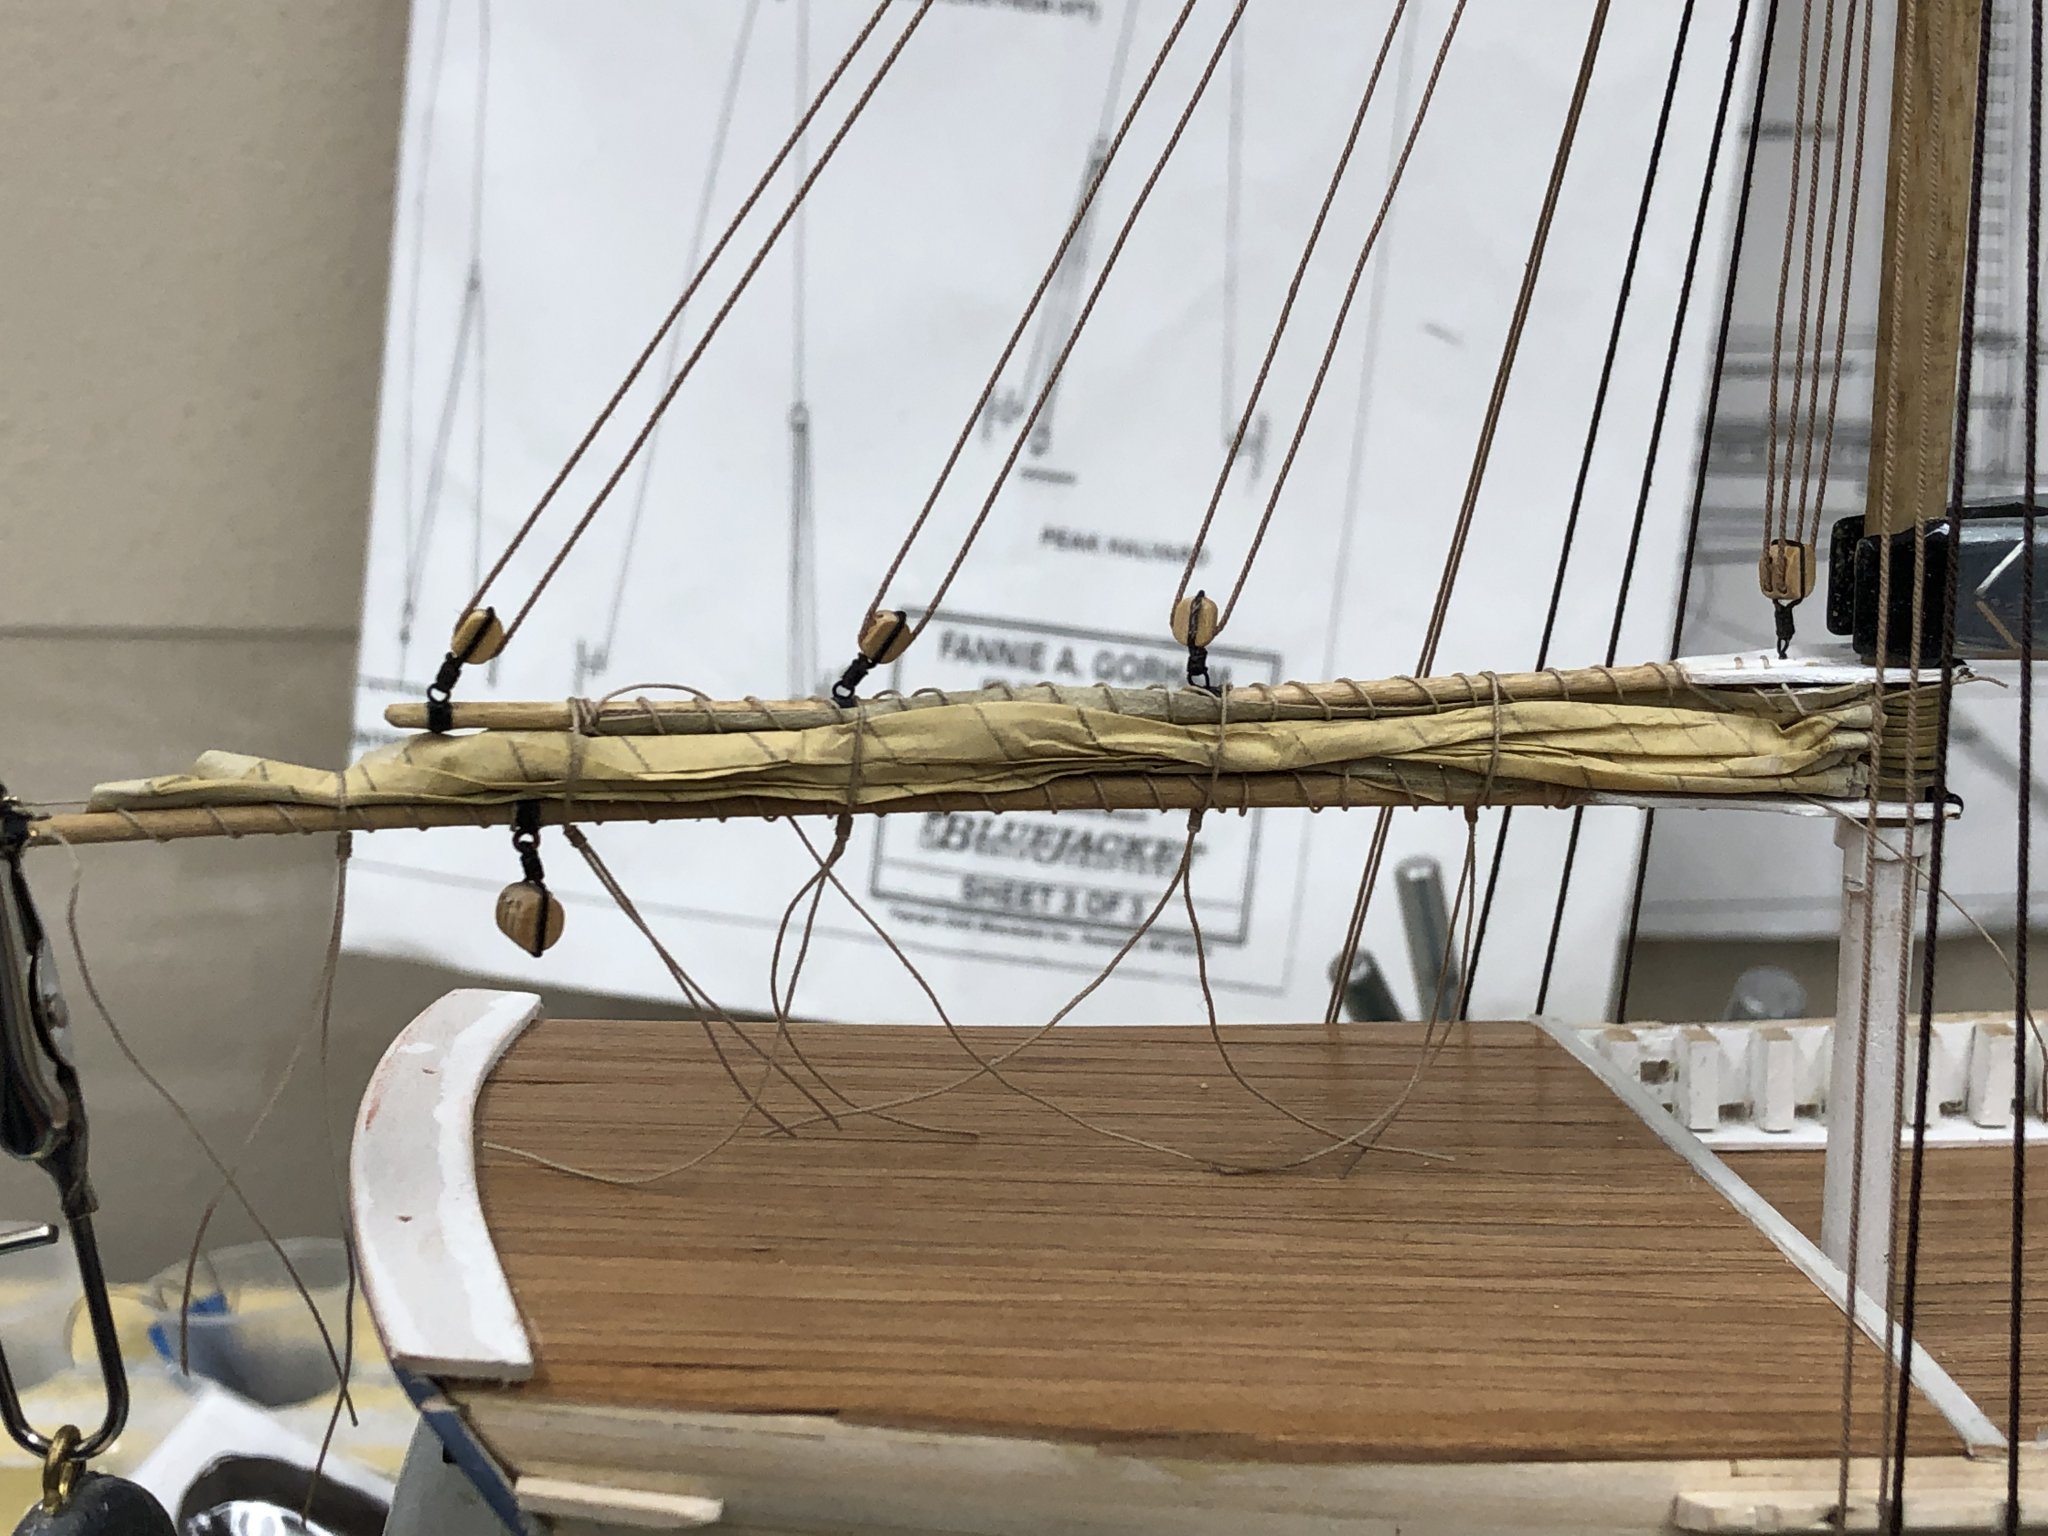
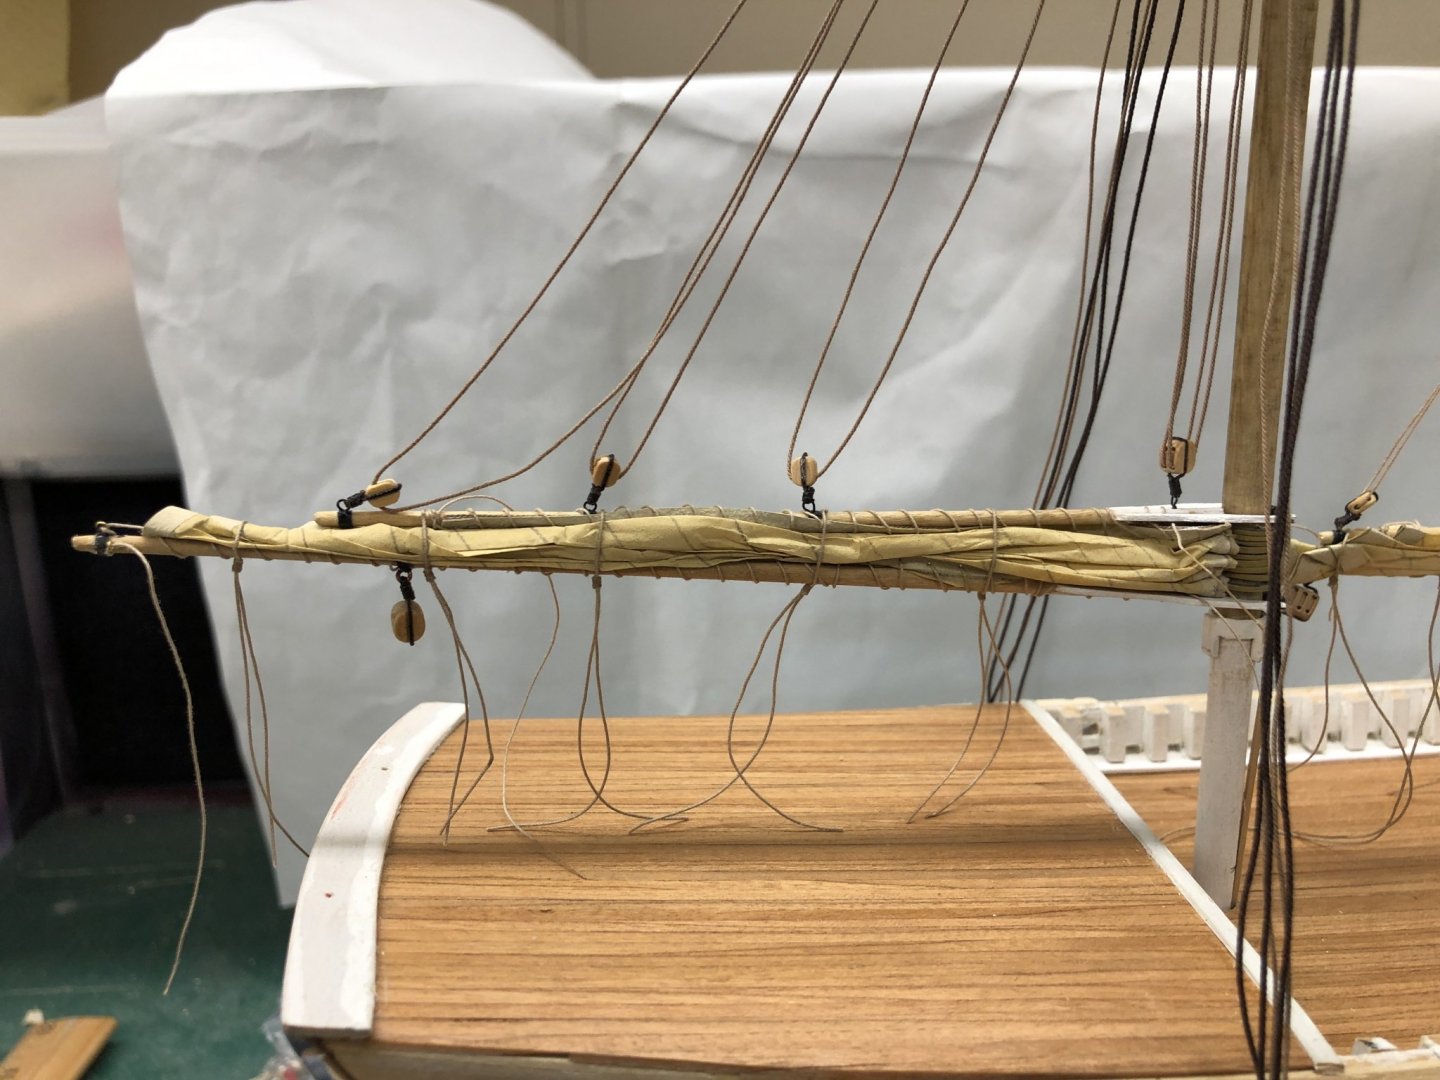
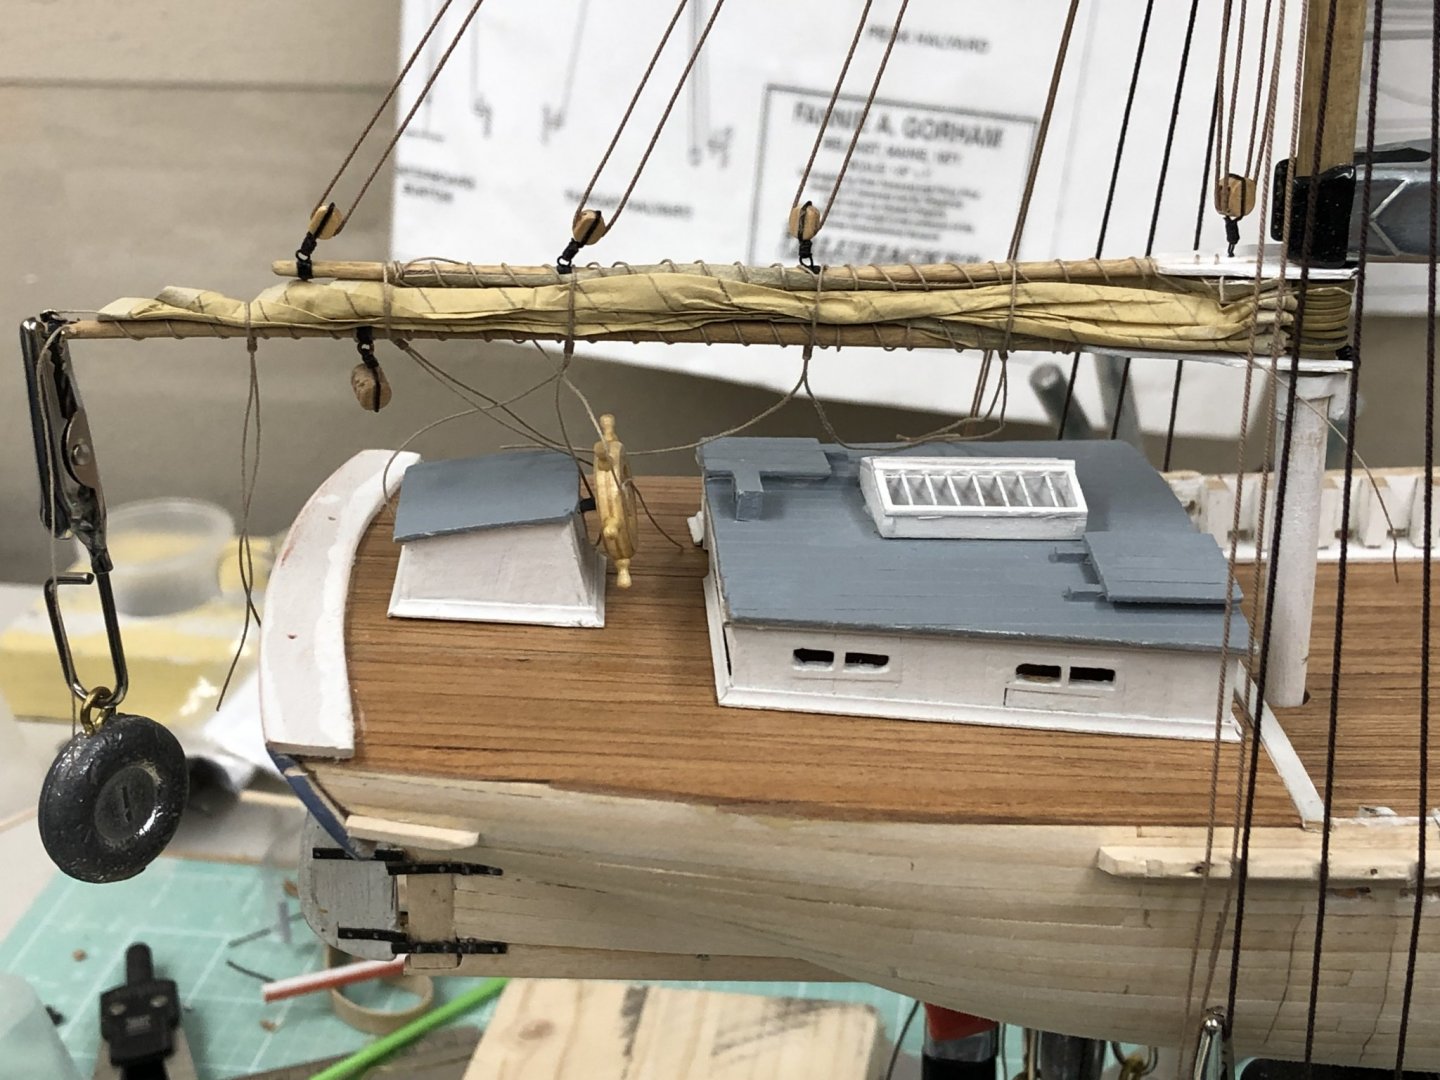
I got the mizzen sail lashed to the boom and gaff and the sail furled. It didn't look too bad so I decided to do a temporary install on the mast and the mast on the hull. To keep thing together I also rigged the peak and throat halyards. The clamp on the mast is to keep the sail assembly down on the boom rest. With the peak halyard rigged it wants to move up the mast. The weight on the end of the boom simulates the sheet tackle which (hopefully) will oppose the peak halyard and keep those lines taught. I set the wheel box and aft deck house on as well to check the lead for the sheet tackle. Not perfect but pretty close. I should mark the location of the boom traveler now so I can get it installed without the wheel box in place. I have to tighten up the gaskets and trim some loose ends but I think this looked pretty good and intend to do the main and foremasts in a similar fashion before they are installed. I will install the topmast and those shrouds after I get the lower part done. In fact I may wait until the masts are installed a nd the lower shrouds rigged before adding the top masts.


- 166 replies
-
- 2
-
-
- fannie a gorham
- finished
- (and 1 more)
-
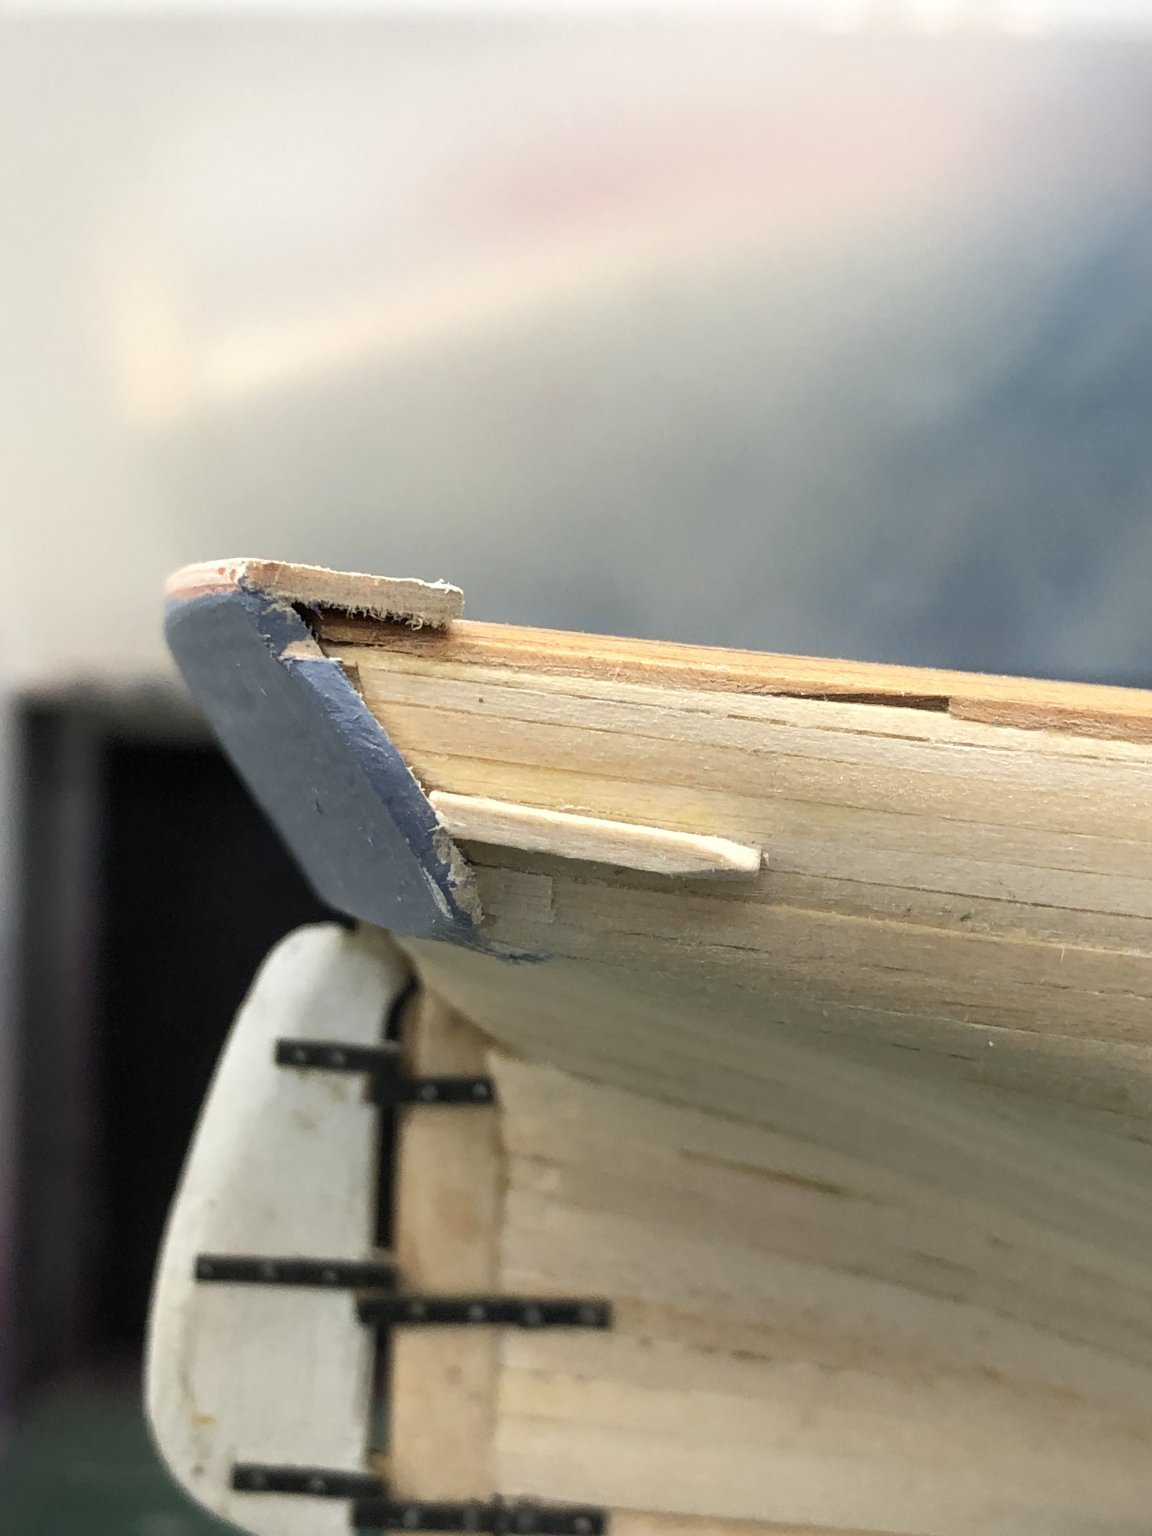
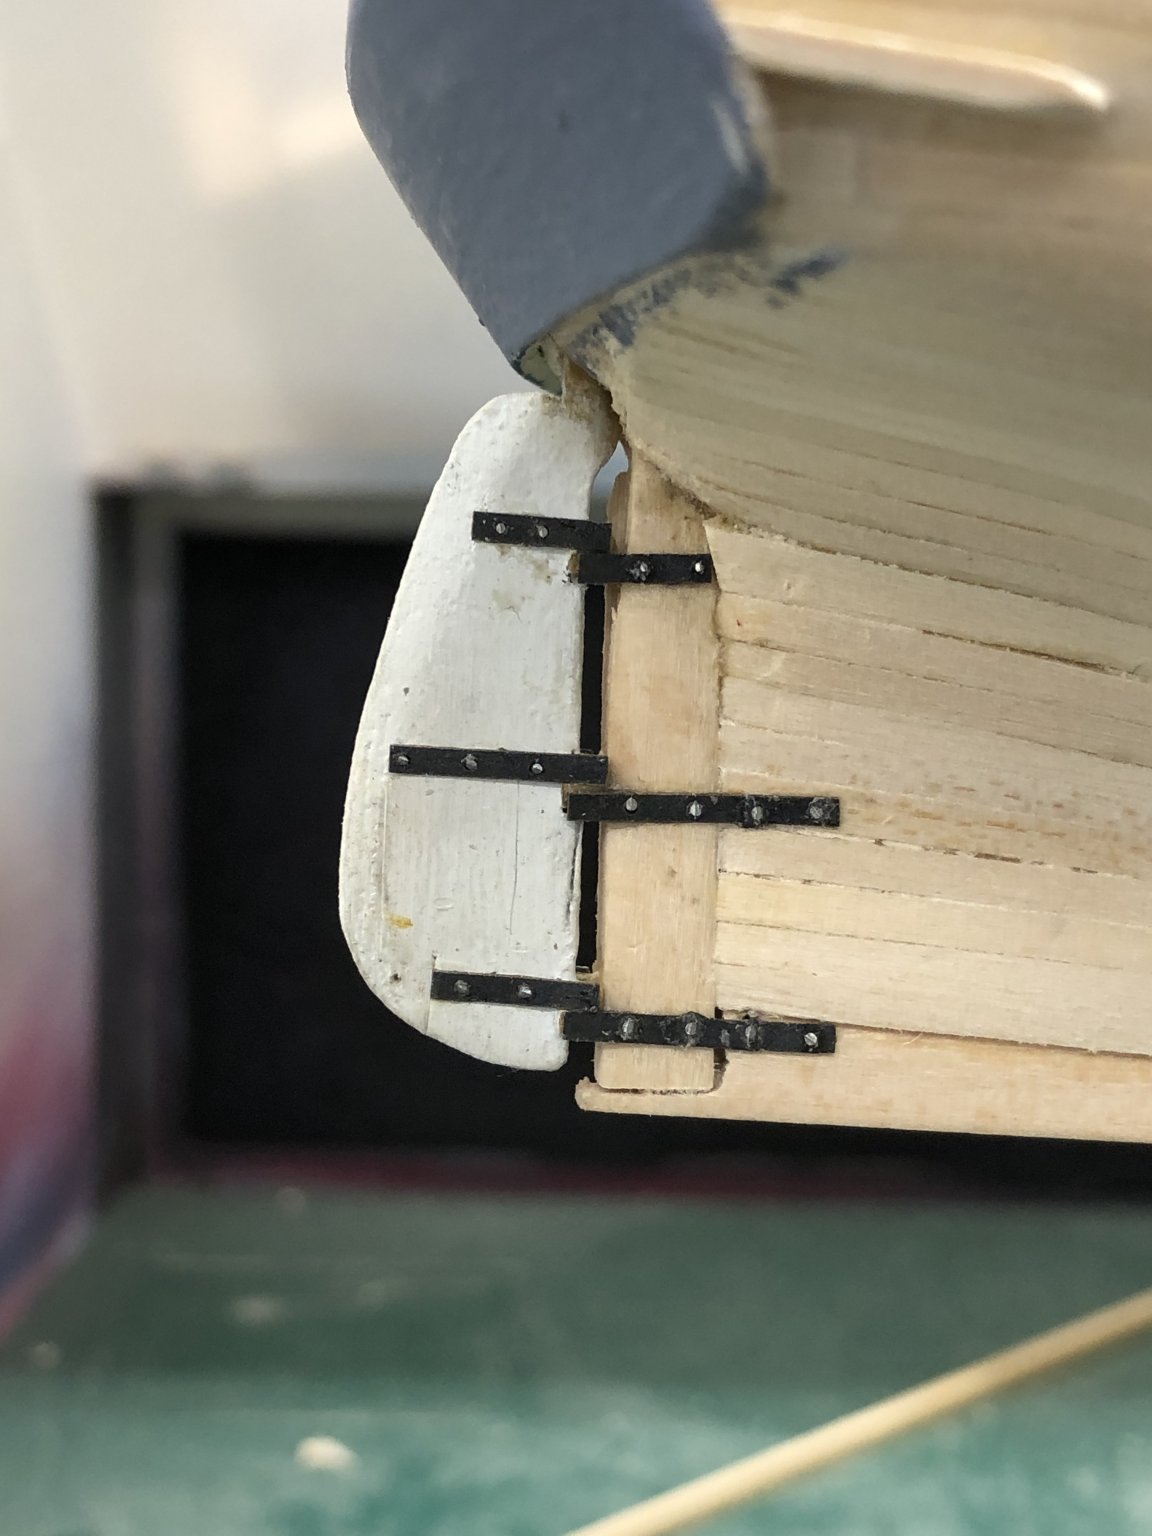
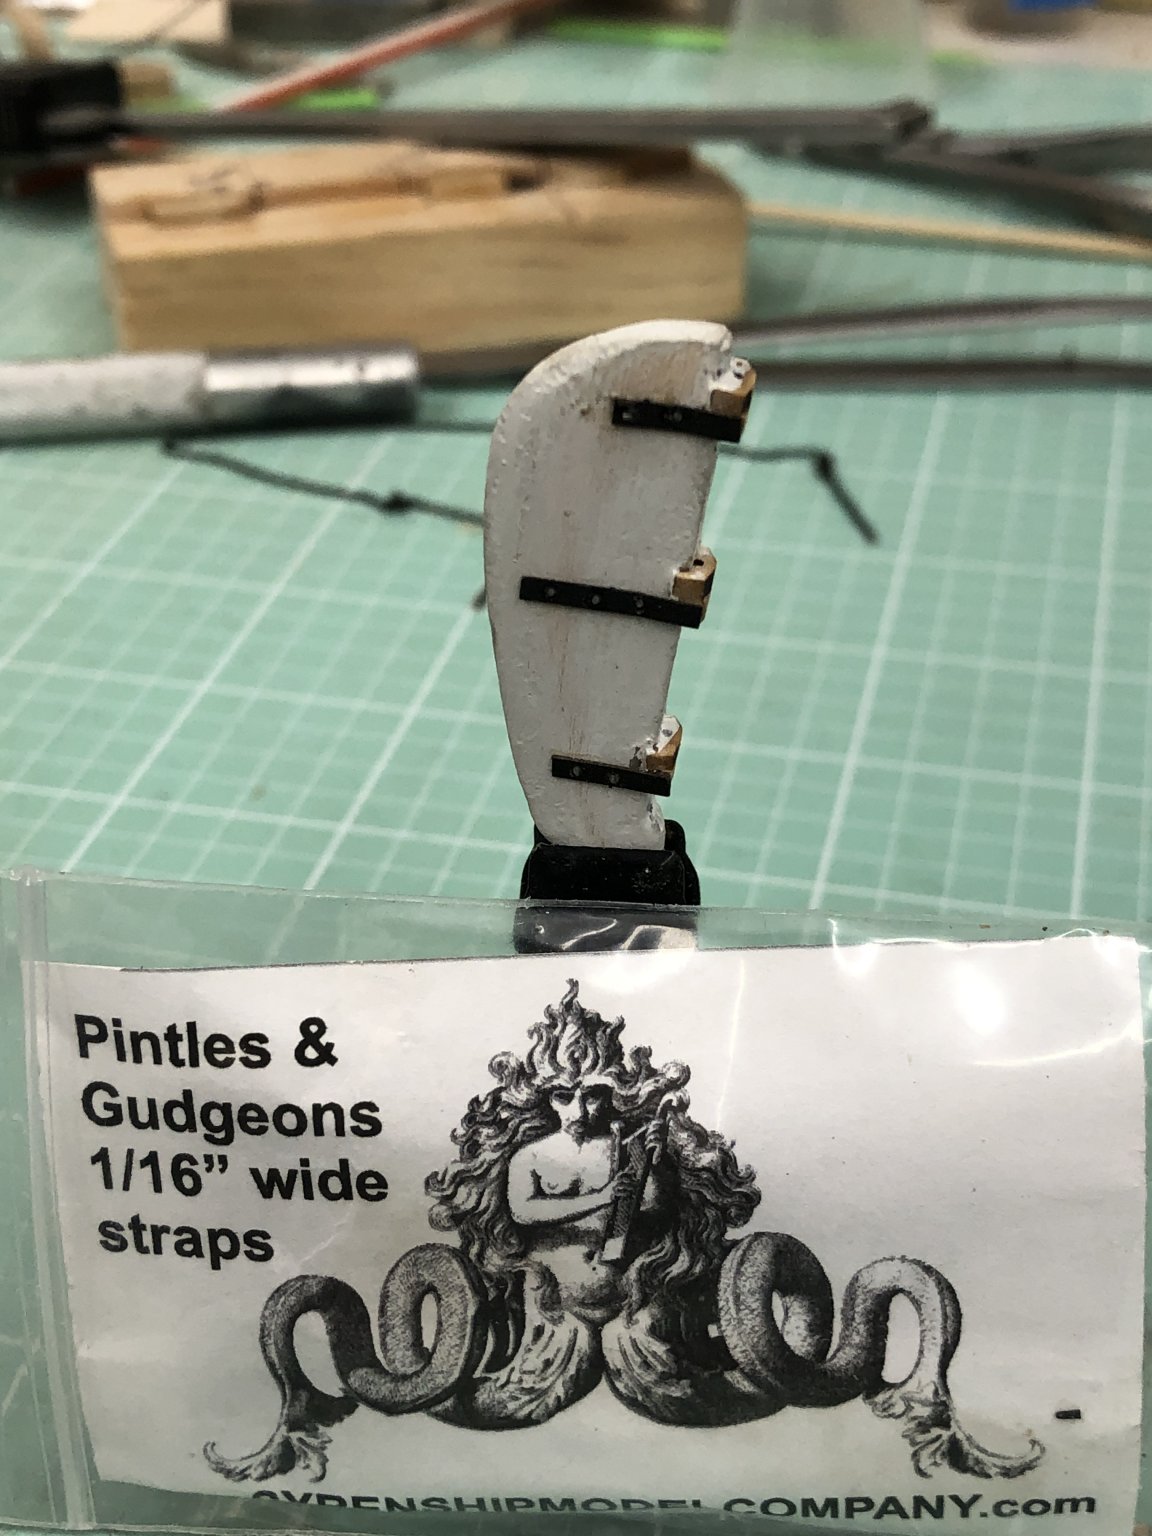
Still "fiddling around". Installed rudder (it was already primed)n and used the Syren provided wire to simulate the bolts holding the pintles and gudgeons onto the hull and rudder. These will all be painted to match the hull (gray and anti-fouling red). I also added the "fashion pieces" at the transom. The drawings show what appears to be a trim piece running the entire length of the hull at the same level as the deck but I see no mention of it in the instructions. Installation would have to wait until the chain plates are installed as the trim would have to be cut or notched to go around these.


- 166 replies
-
- 1
-
-
- fannie a gorham
- finished
- (and 1 more)
-
While waiting for the channels to dry I added the grommets (actually dark brown paint to simulate grommets) to the sails. I also added the bails/parrels to all the booms/gaffs. I thinned down the mast hoops again and settled on nine per mast. I measured the re-thinned and previous versions of the mast hoops. A stack of nine now measures 5/16" down from 7/16 for a stack of nine before the re-thinning. Only time will tell as I have to add the hoops and attach the sails to the yards before we see what the new version looks like.
- 166 replies
-
- 1
-
-
- fannie a gorham
- finished
- (and 1 more)
-
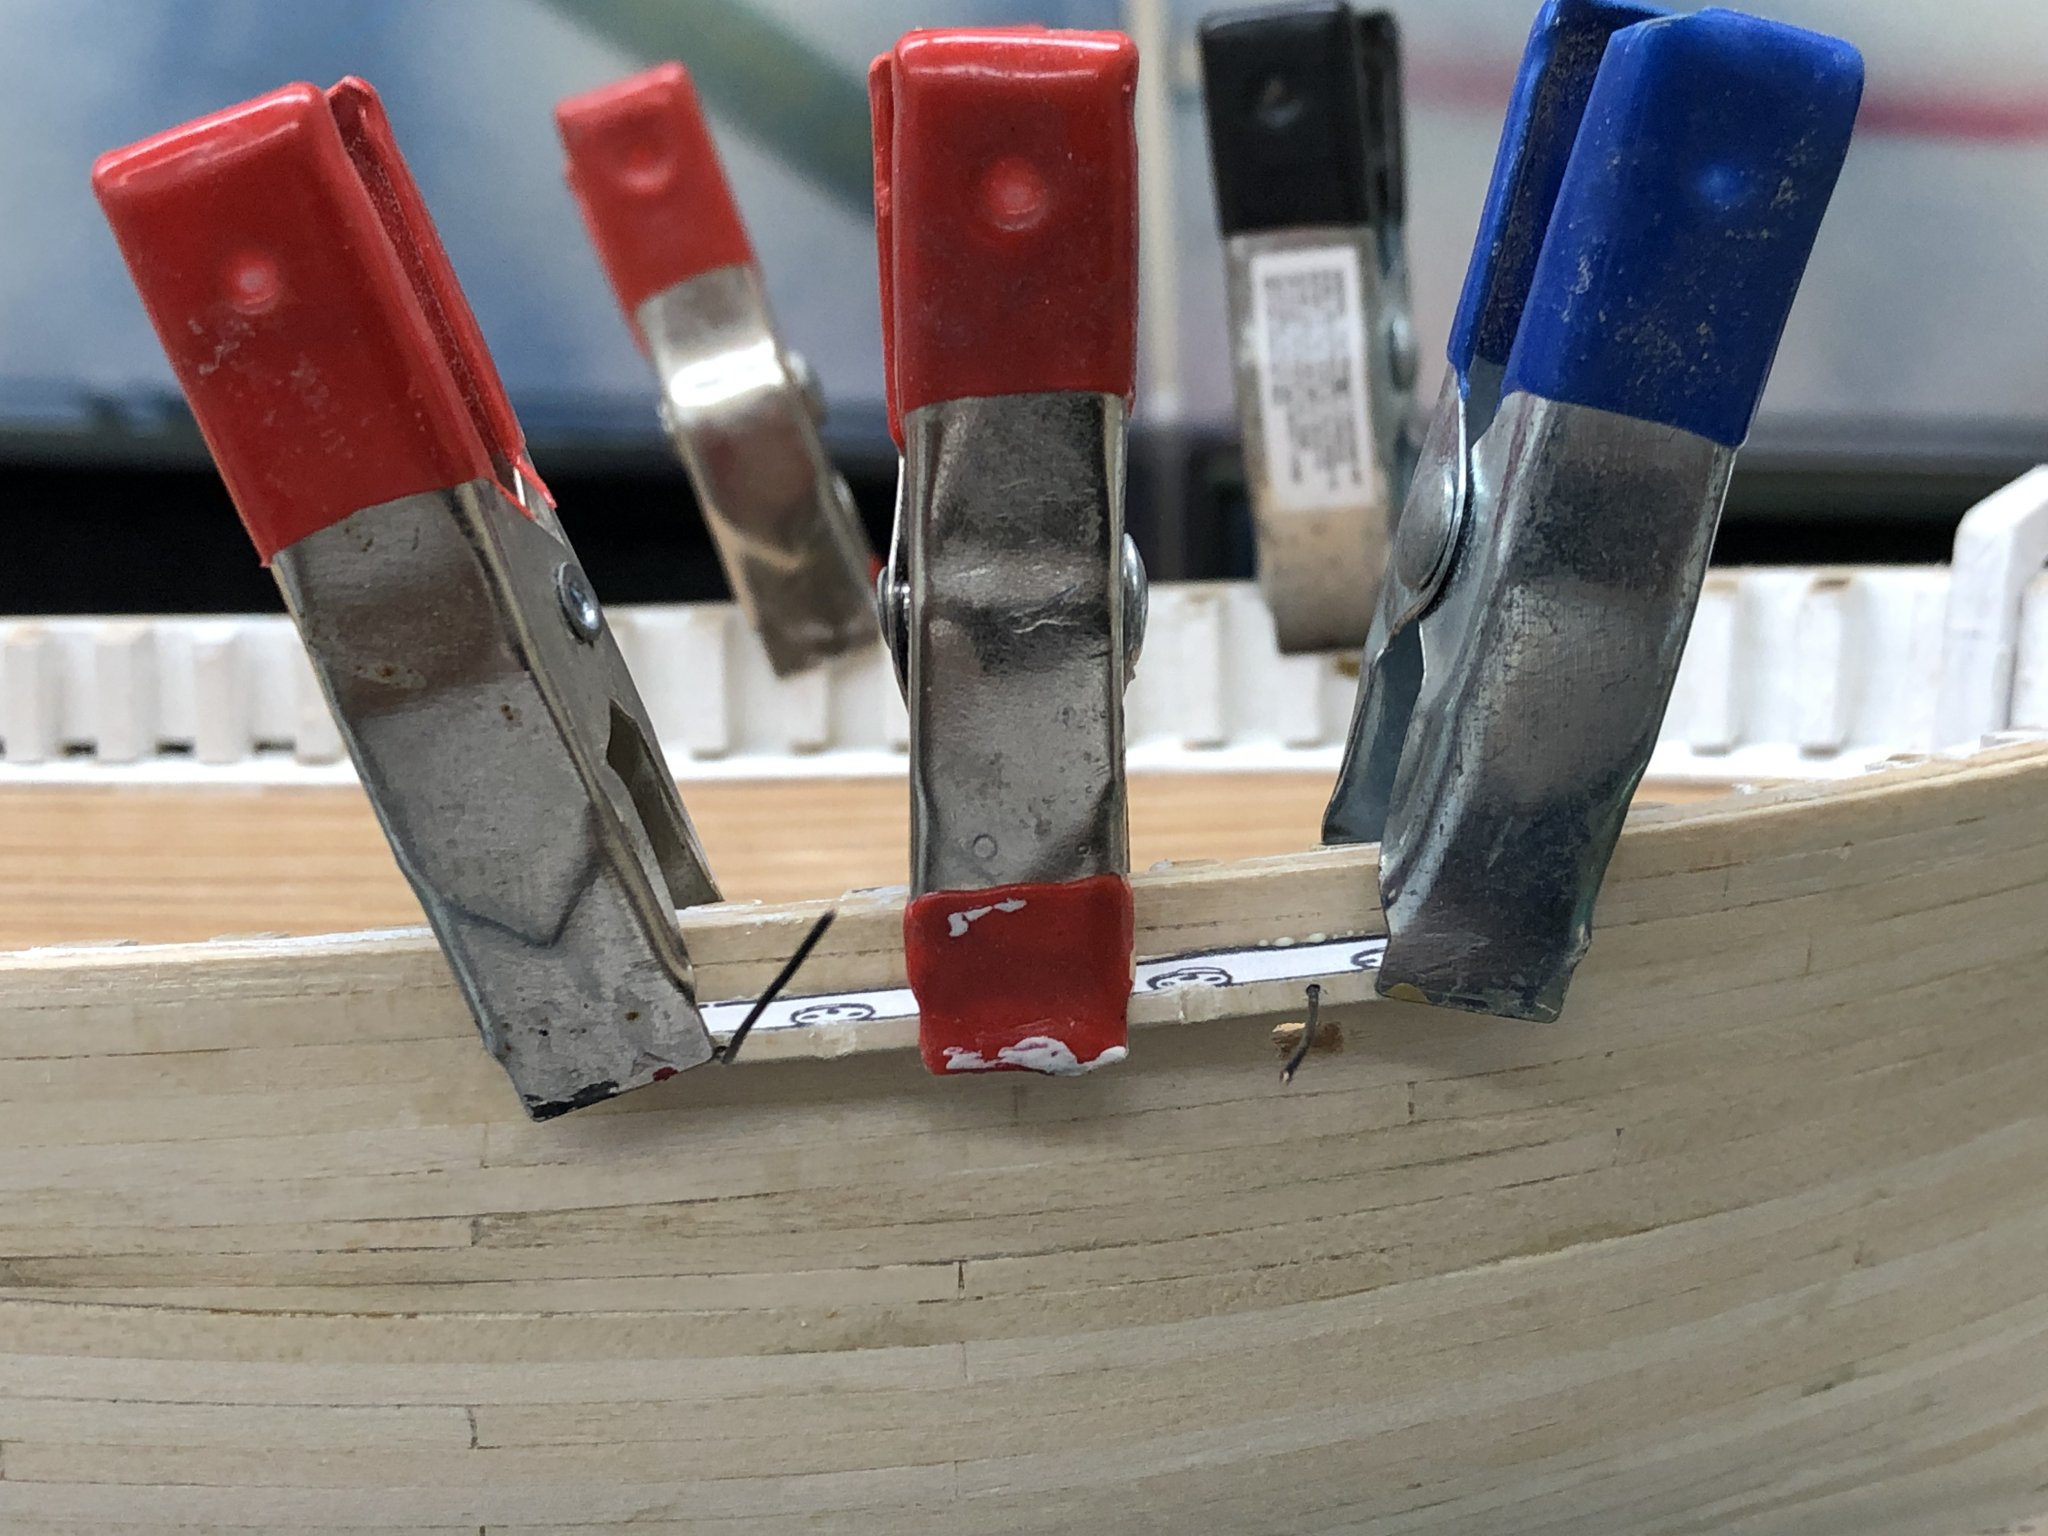
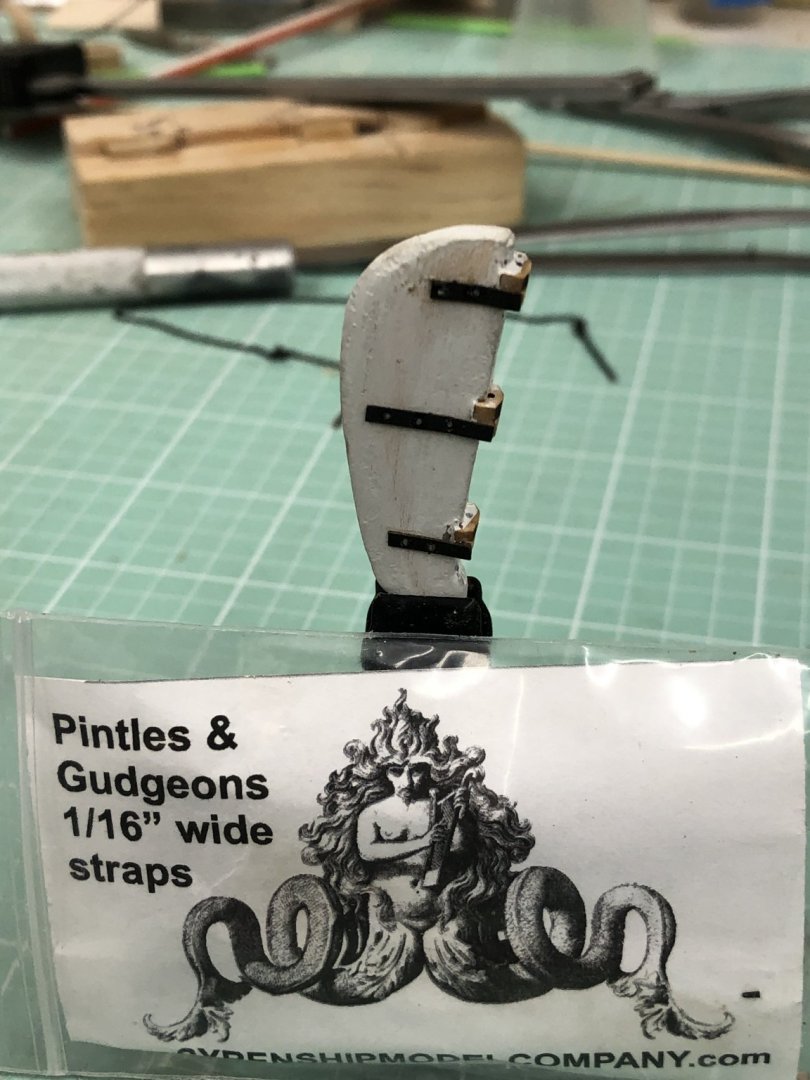
Decided to work the rudder which has already been primed. Added the wooden blocks for the pintles & gudgeons previously. Now adding the laser board strips that simulate the mountings to the rudder (and later to the hull). The thin laser board is more in scale than the Britannia metal provided in the kit and no need to make grooves in the rudder. Also mounted the Fore channels. Black wire used for location and additional strength. Would not be good to have a channel come loose during rigging.
- 166 replies
-
- 1
-
-
- fannie a gorham
- finished
- (and 1 more)
-
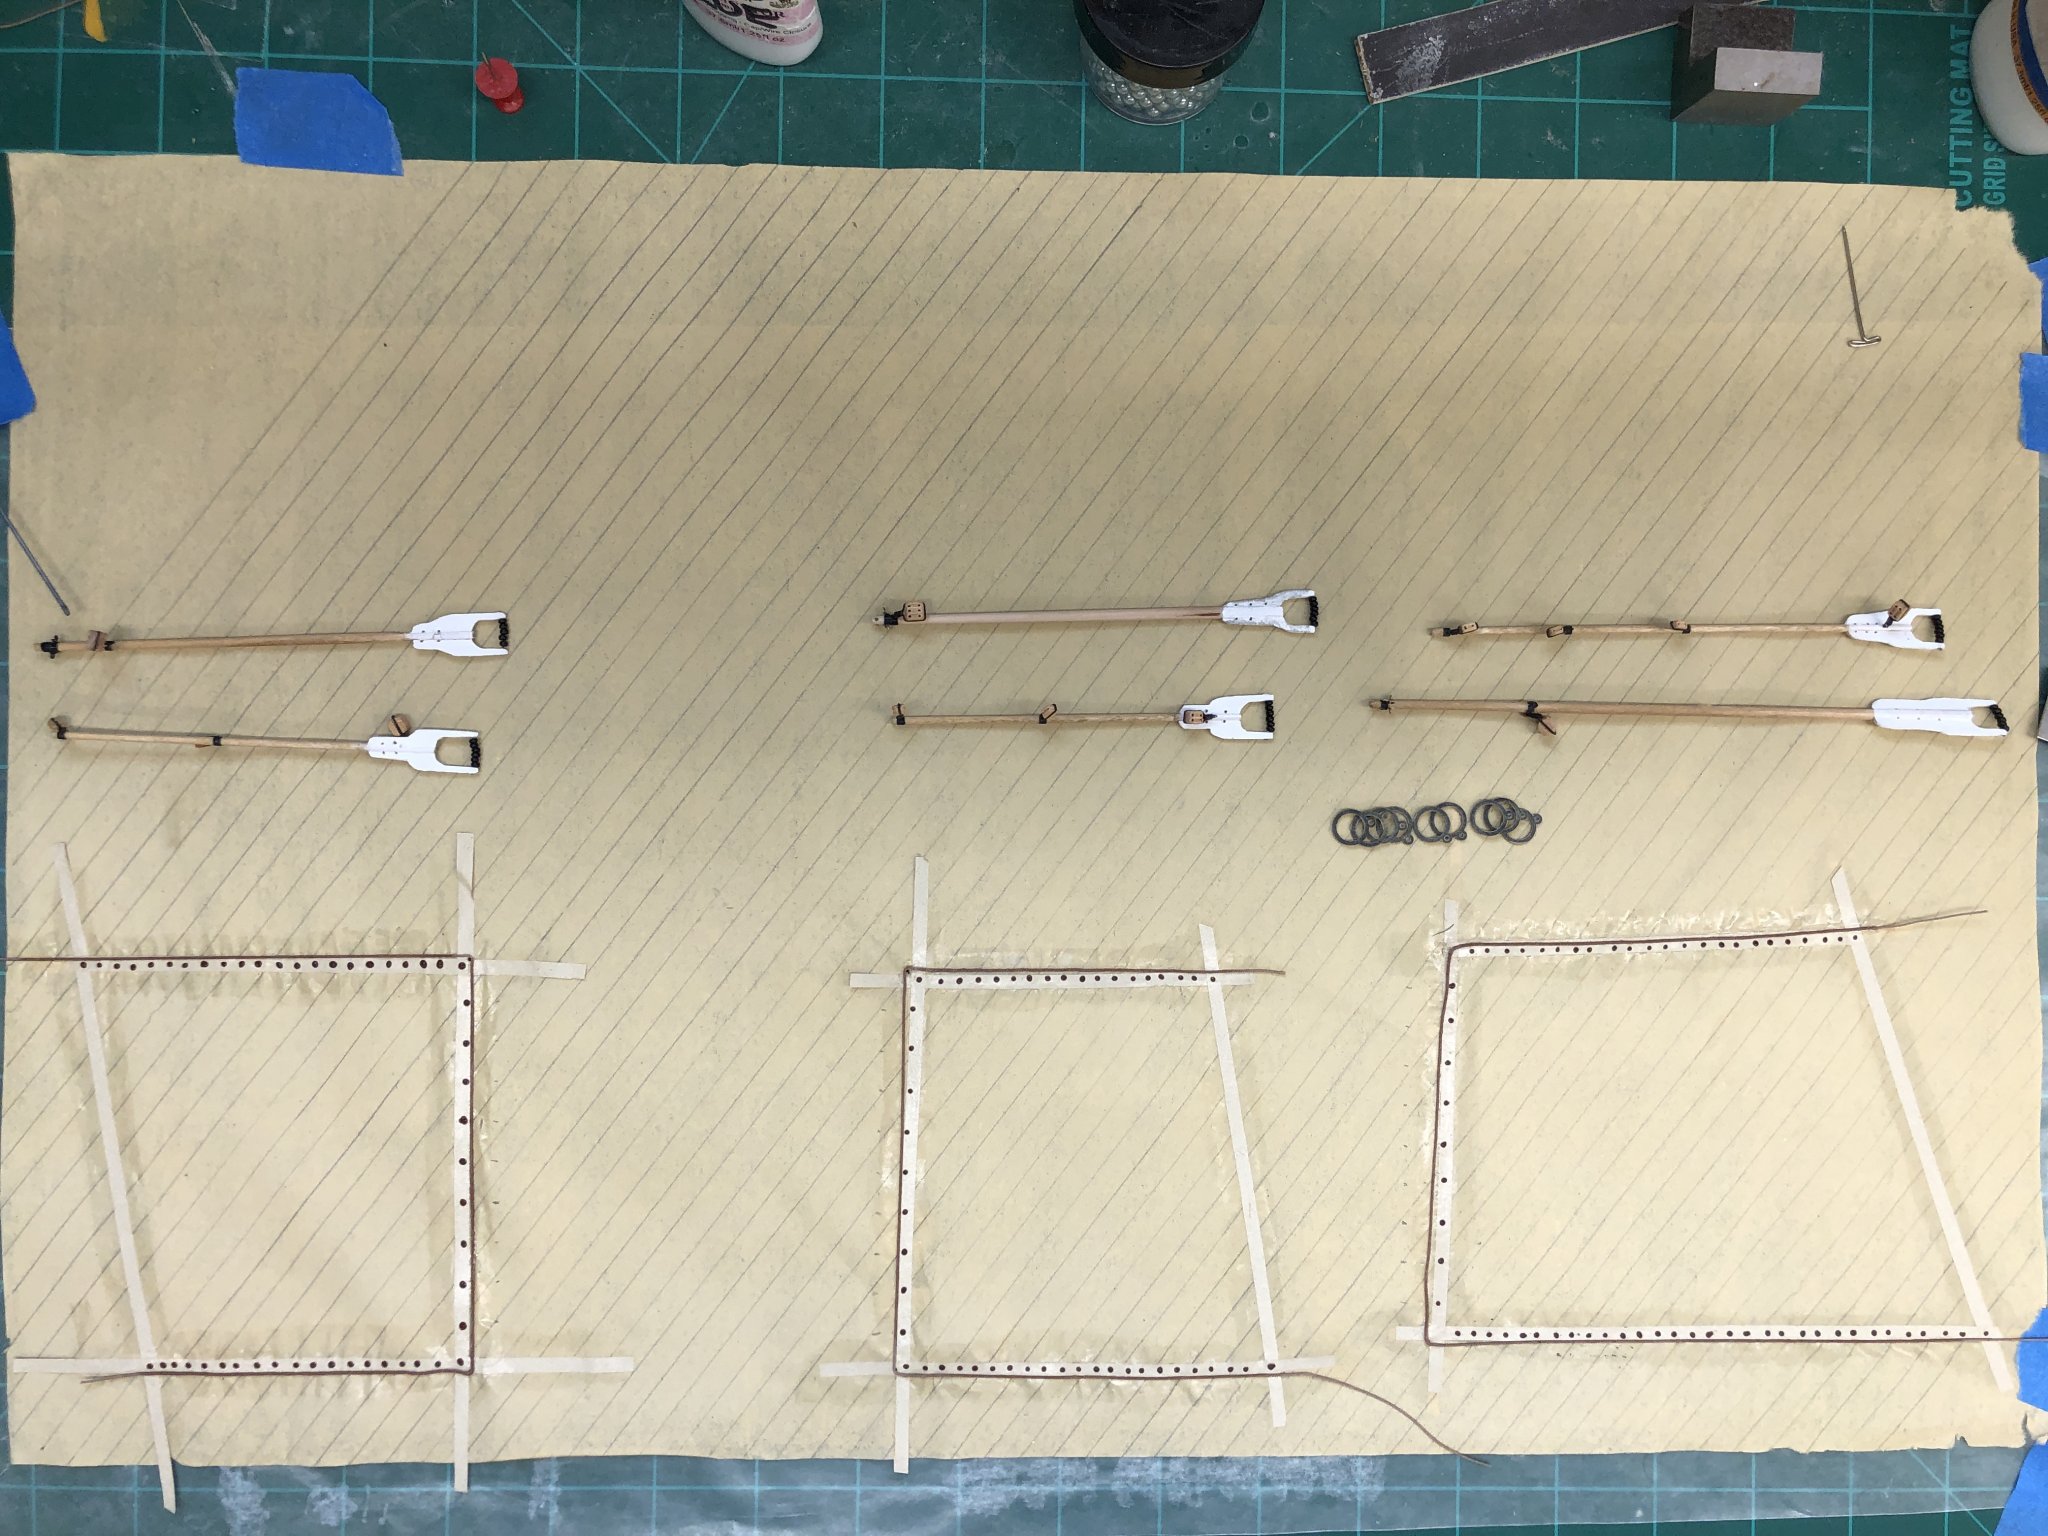
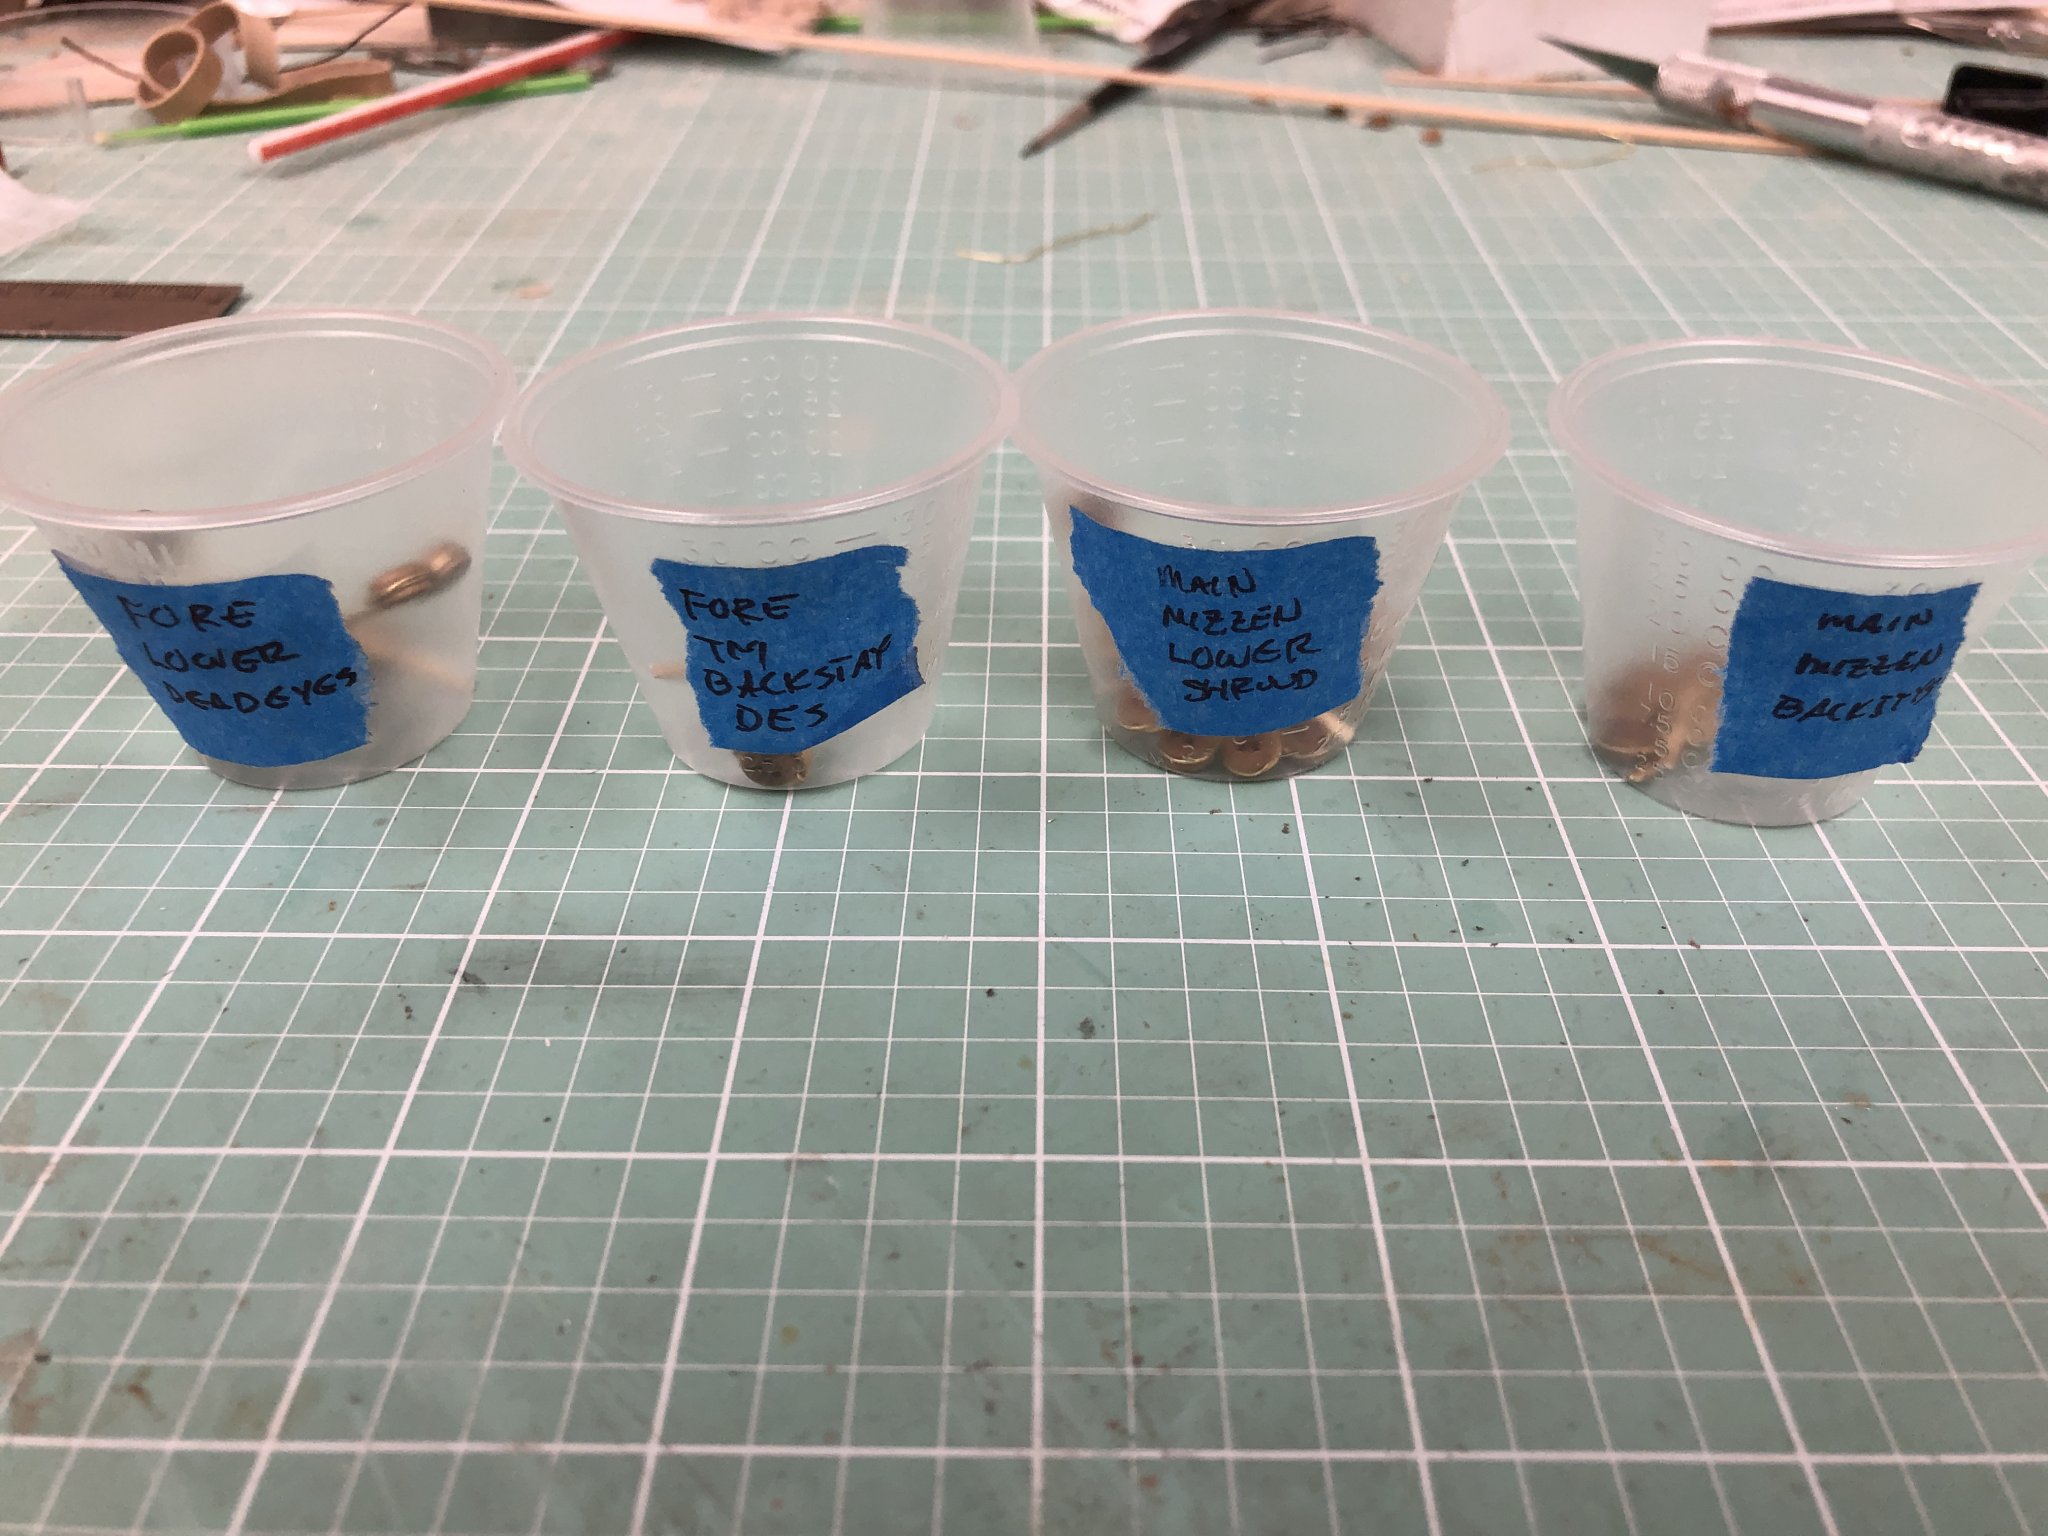
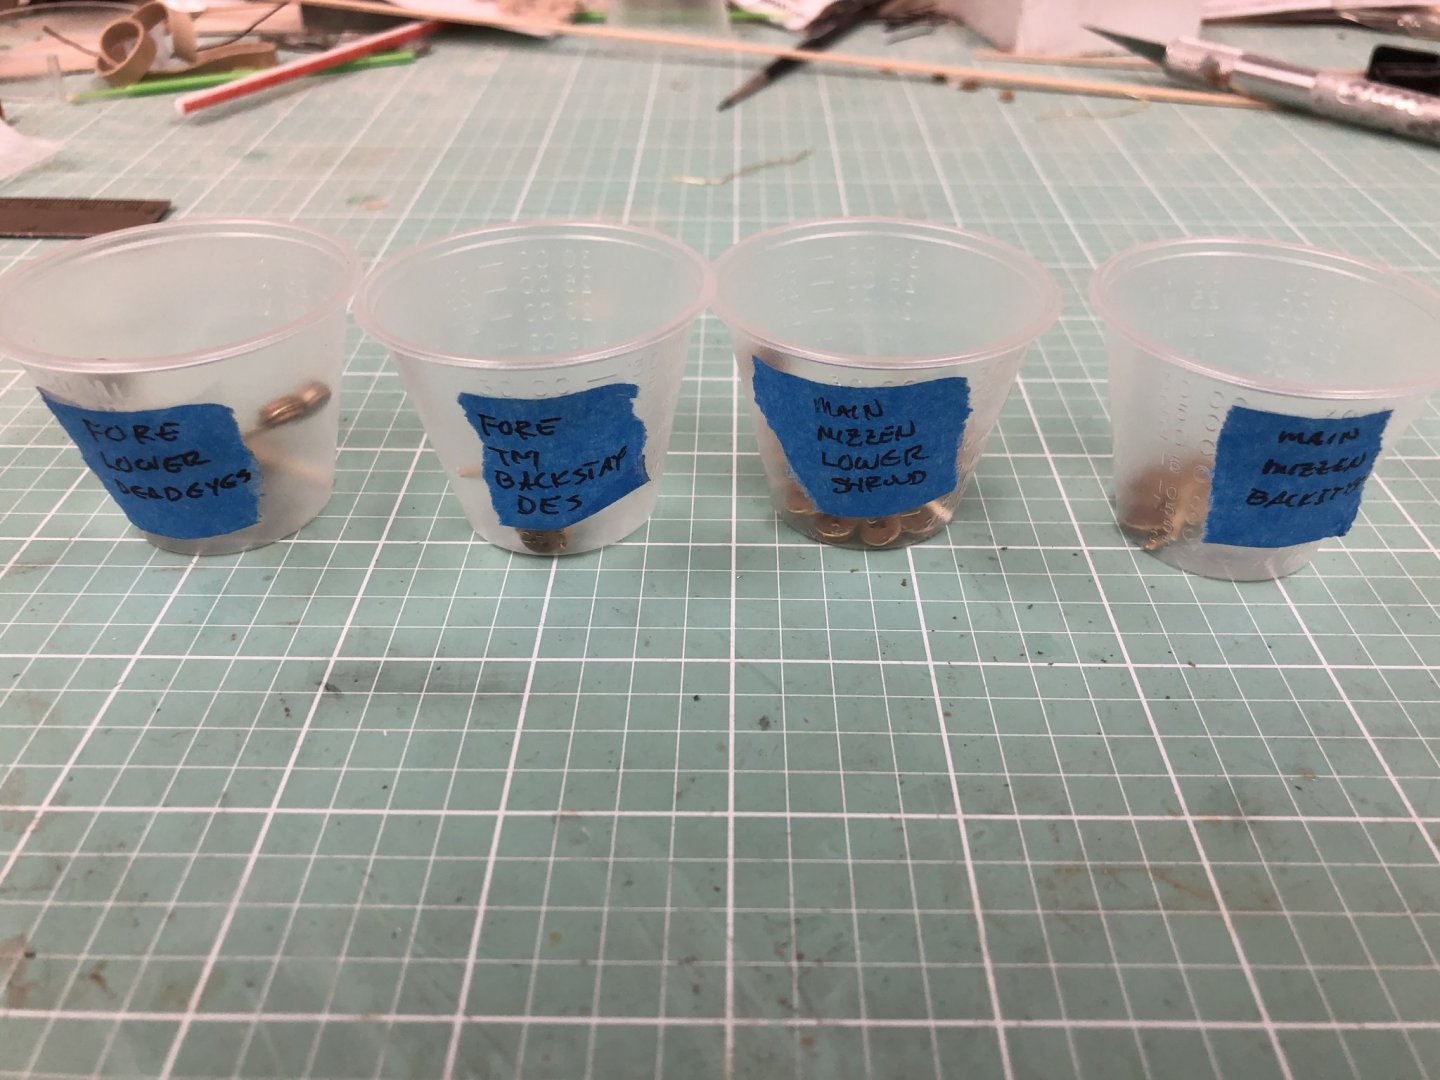
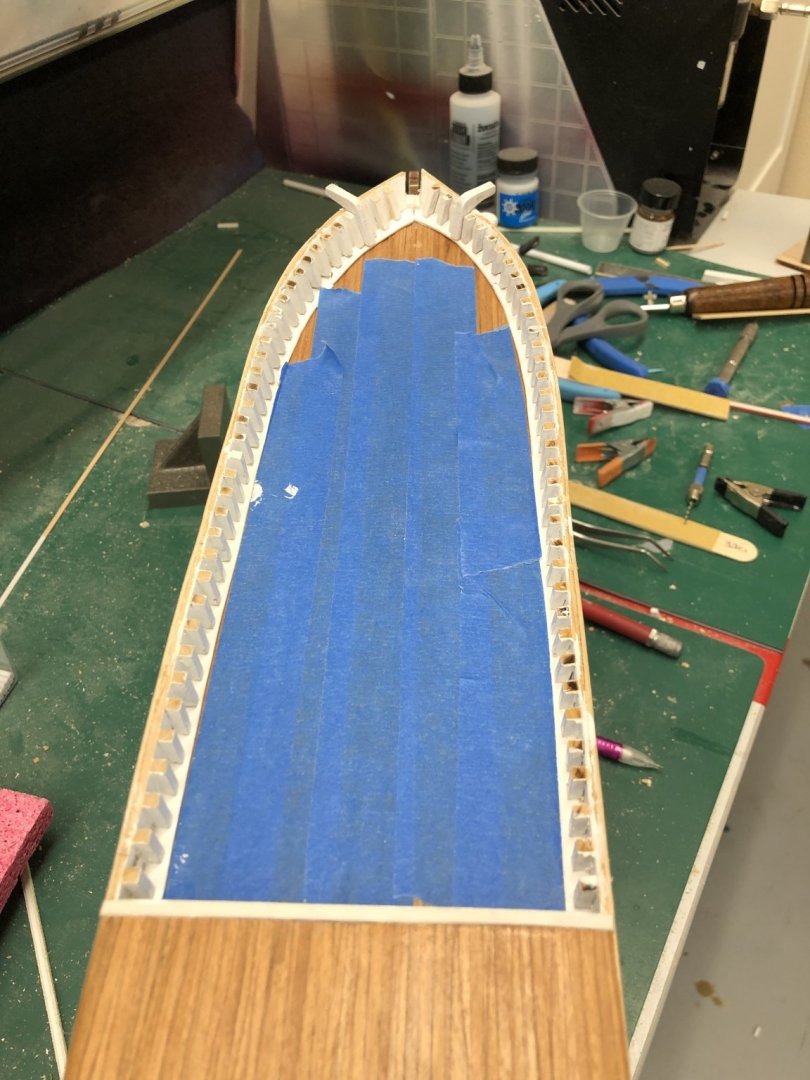
Continuing with the chain plates I tried one with the annealed steel wire (.023" - 24 gauge) and it works. Not enough better for me to redo the 26 I already have done in brass. I also did one in 24 gauge brass wire just to see if it is any different. Not much as far as I can tell. I drilled holes for the mountings (not sure what I will use, probably steel annealed wire) and messed up a couple with the hole far off center so I remade them with the thicker brass wire. Here are the 26 deadeyes and chain plates waiting for the channels to be finished. There are four distinct "flavors" - Fore lower, Fore backstays, Main/Mizzen lower and ,Main/Mizzen backstays.

- 166 replies
-
- 1
-
-
- fannie a gorham
- finished
- (and 1 more)
-
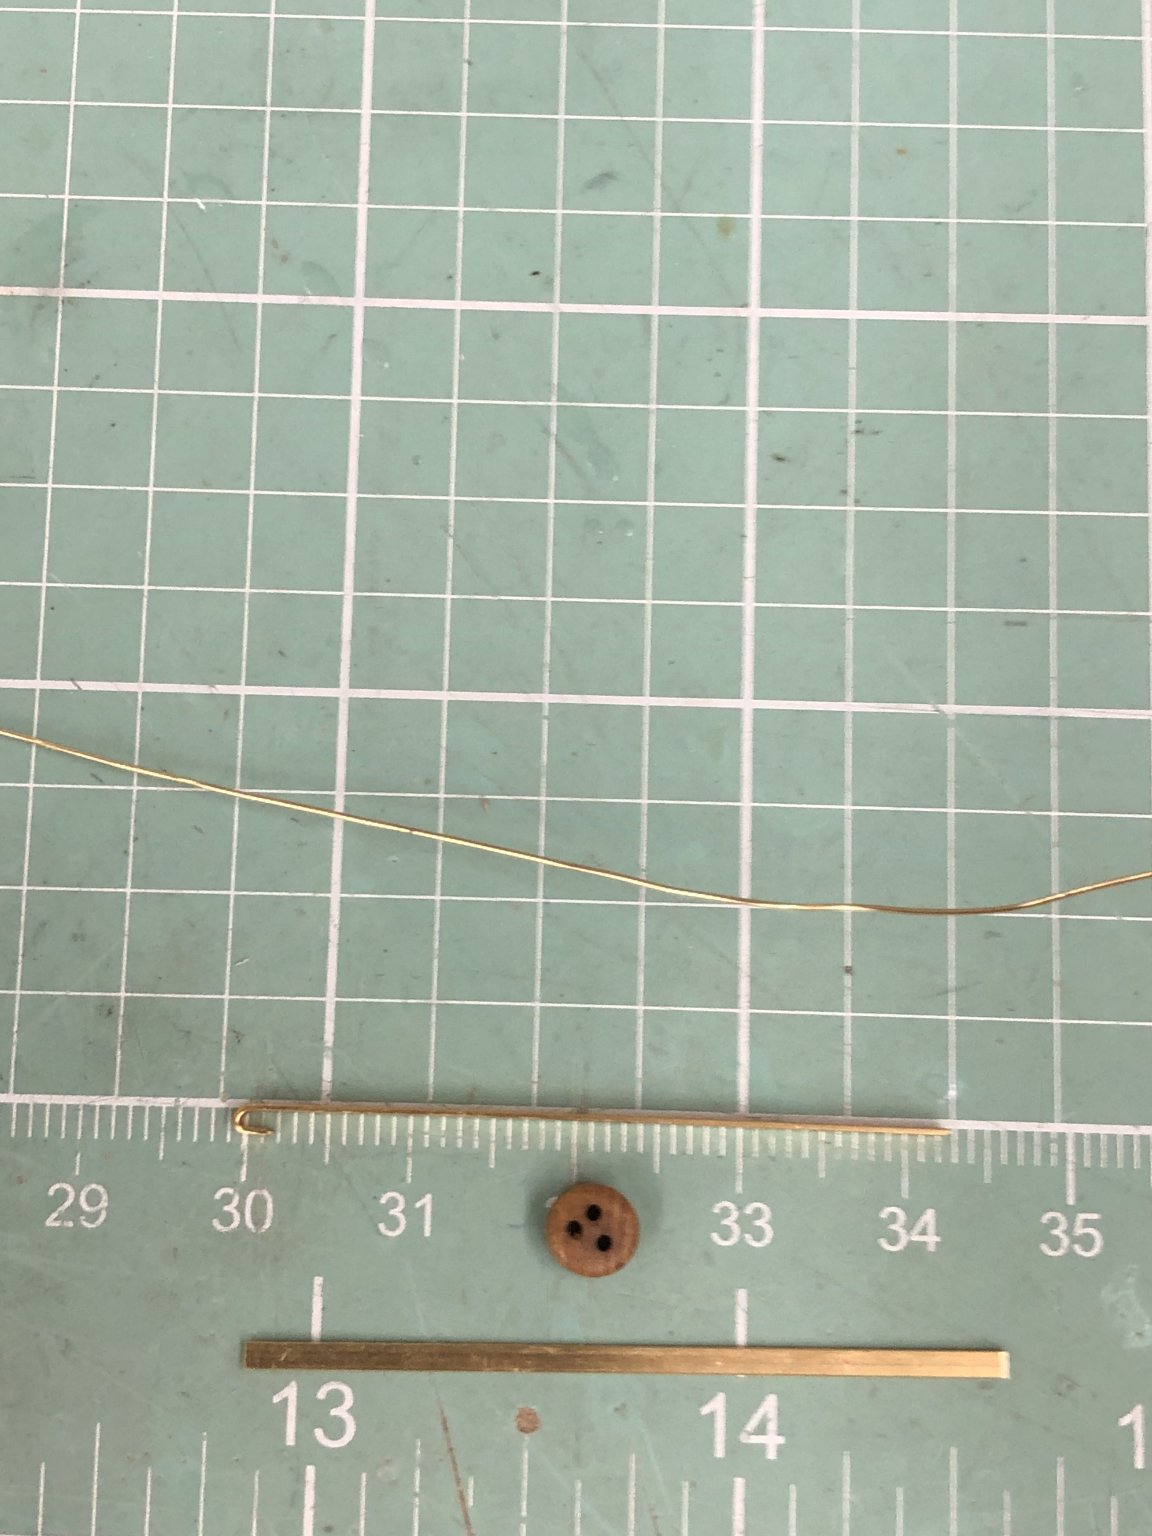
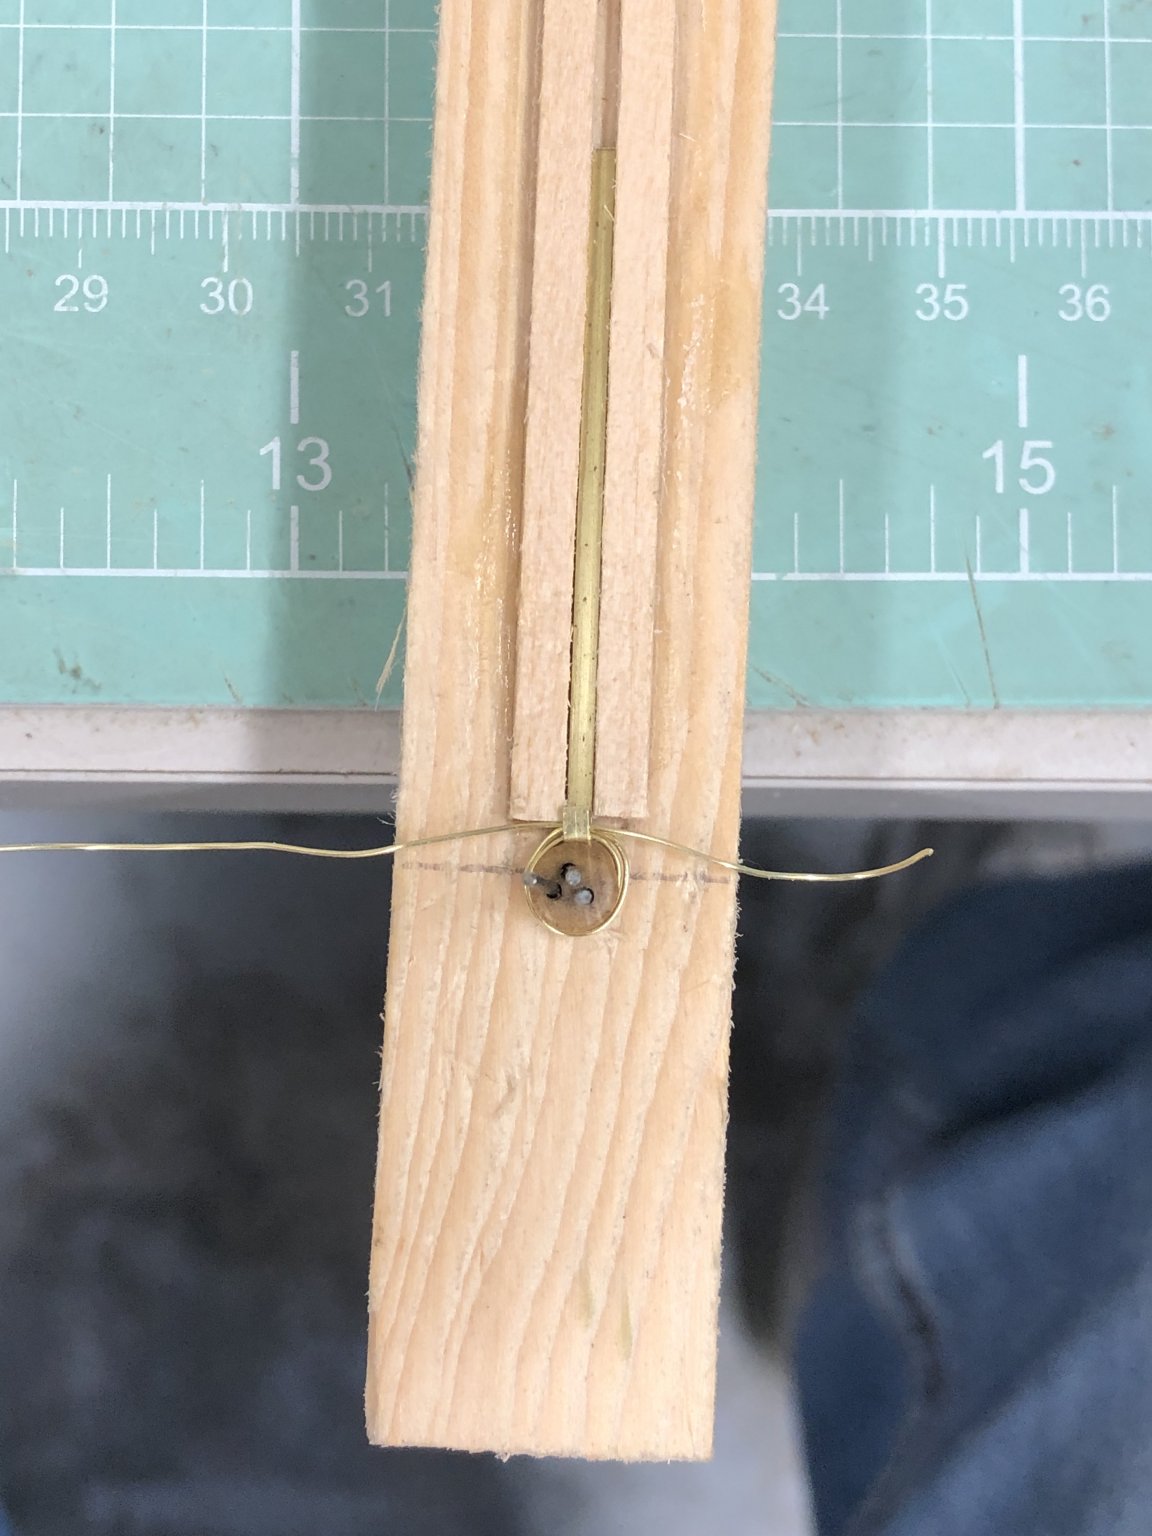
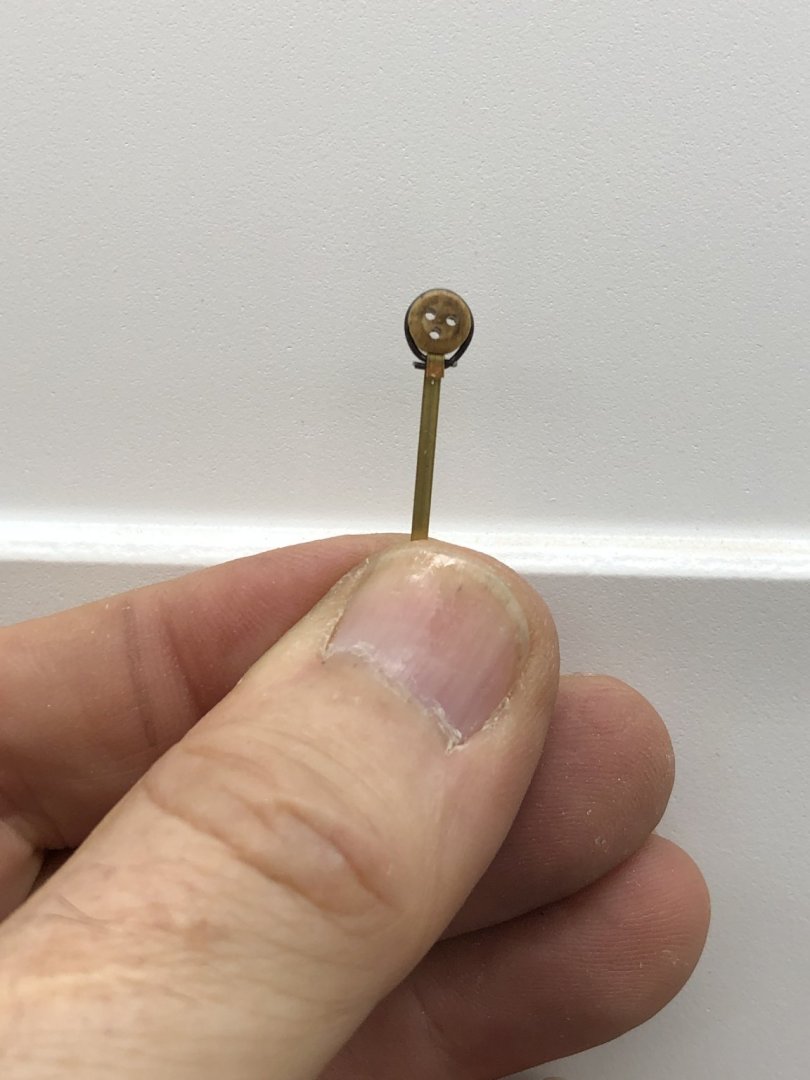
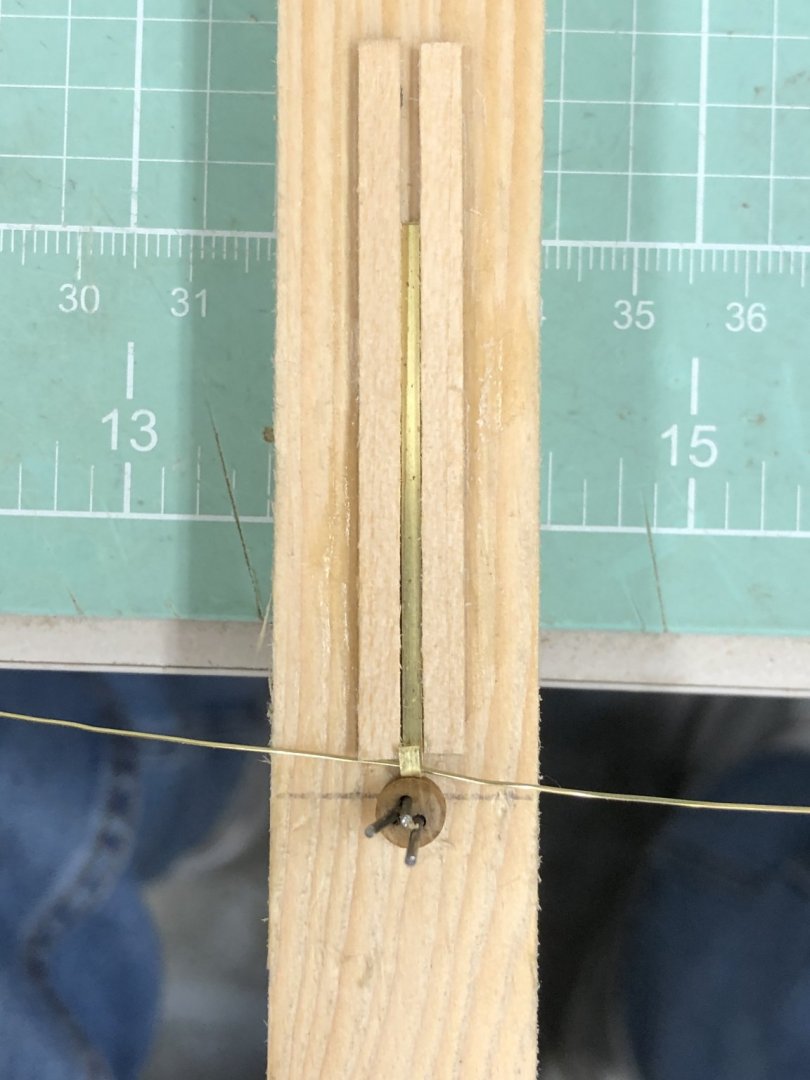
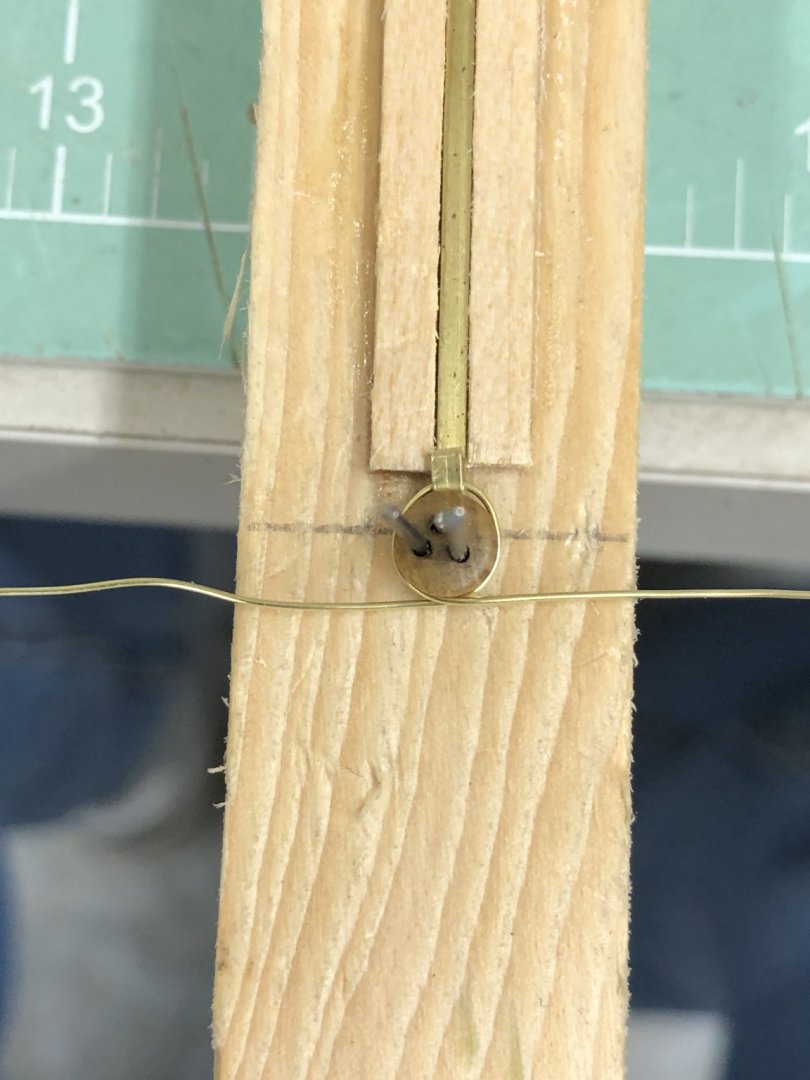
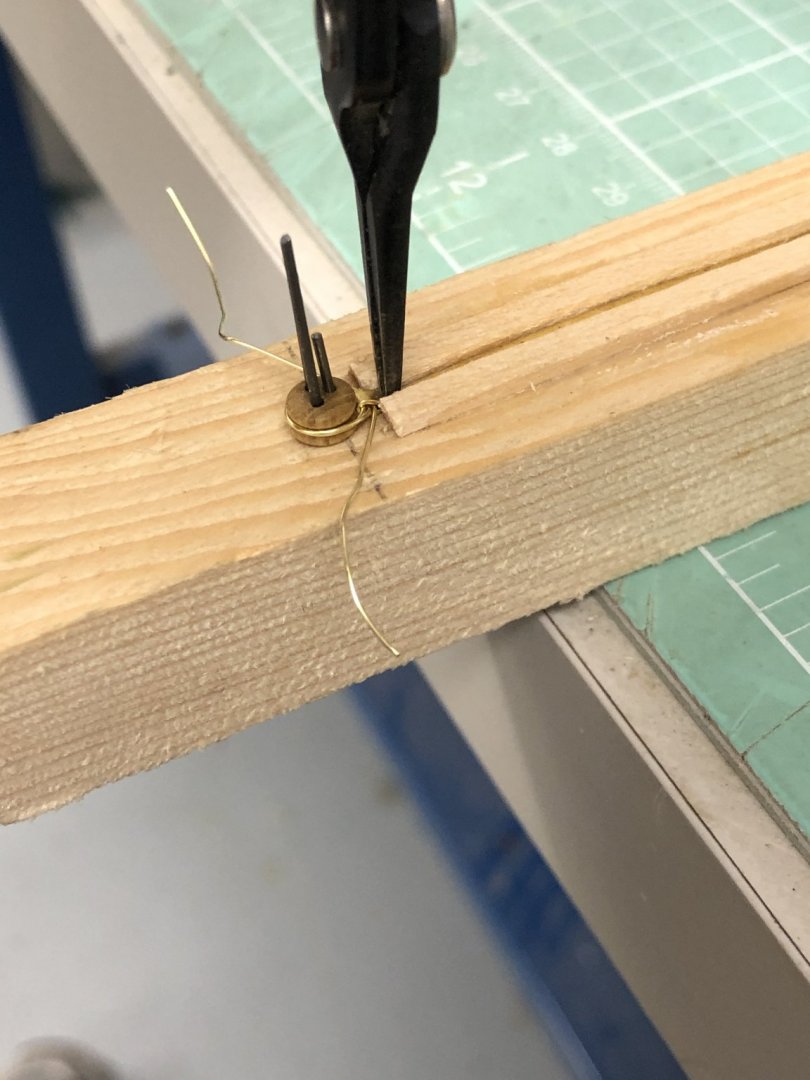
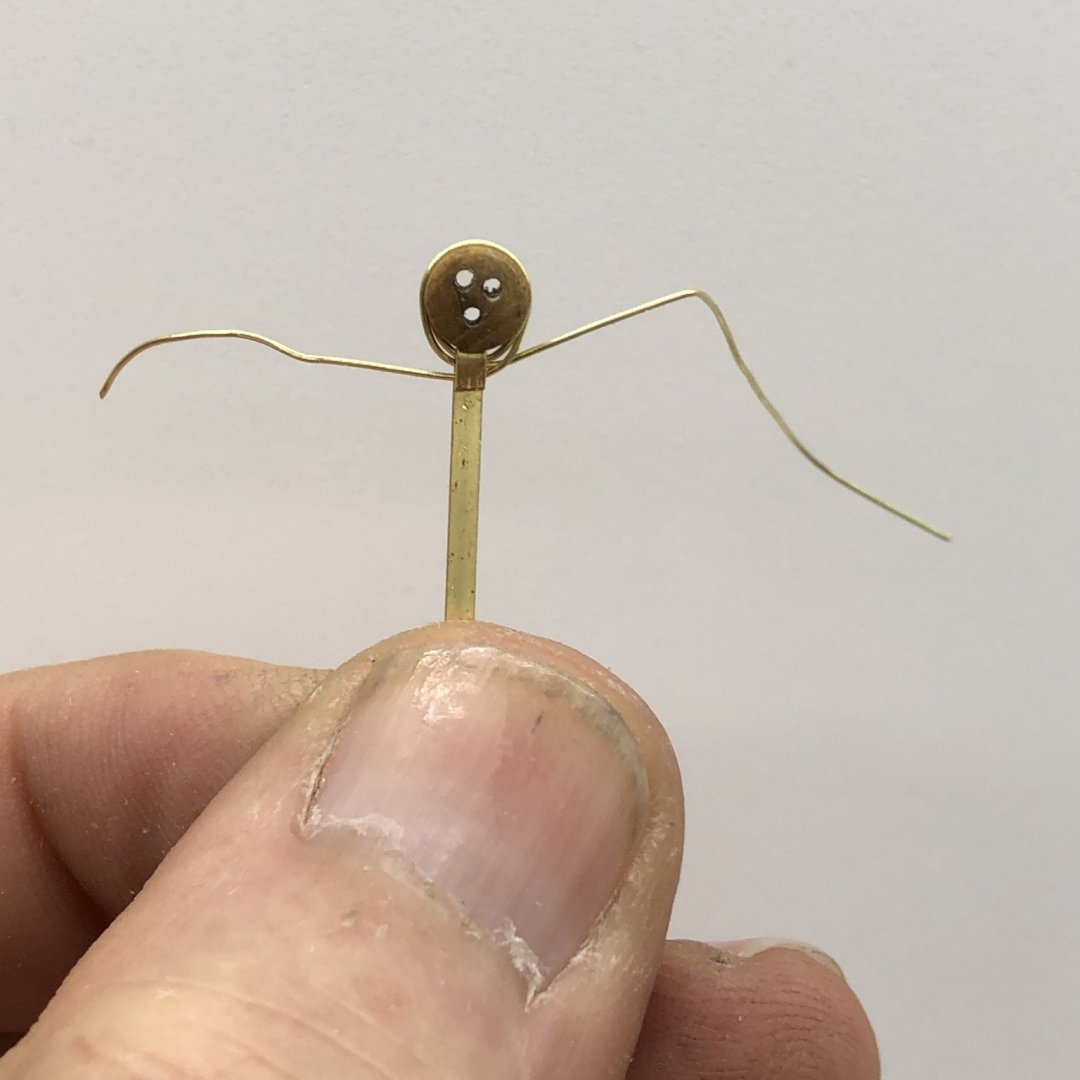
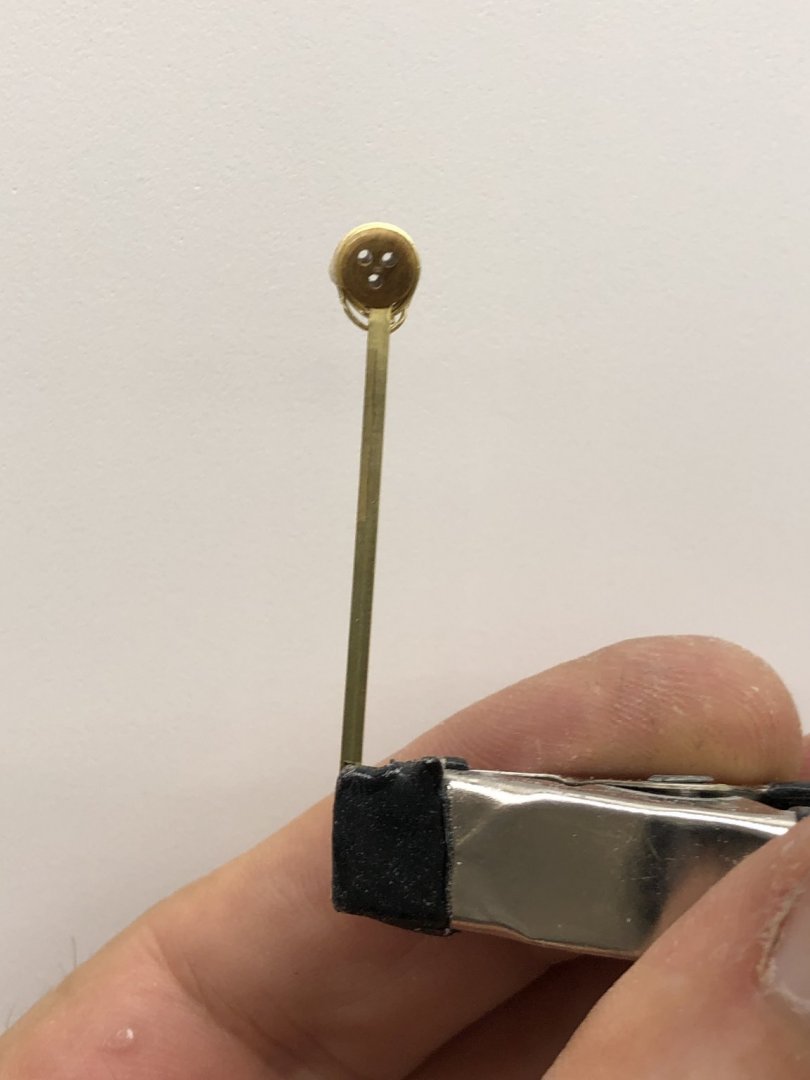
Given my lack of enthusiasm for Britannia metal fitting I decided to make my own chain plates. I looked through my brass "bucket" and found 4 each of 1/64" X 1/16" X 12" brass "bars". That and some 7/32" wooden deadeyes from Model Expo and the brass wire that came with the kit were the starting point. I cut the bar to 45mm lengths (size taken from drawings) and put a 2mm "hook" in one end. I built a jig to hold the deadeye and chain plate in close proximity. Three pins to hold the deadeye and two pieces of basswood to hold the chain plate. I made the pins for the deadeye three different lengths so I could get the deadeye on one pin at a time, twisting the deadeye to get the holes to align with the pins. Start the wire under the hook, wrap it around the deadeye, once, twice ending with two loops around the deadeye. I used a pair of pliers to hold each end and put as much pressure on the wire as I felt safe. I used the nose of one of the pliers to push the "hook" closed. Pull the assembly off the jig, trim the wire and use thick CA to sieze the wire and deadeye with the holes in the correct orientation (single hole down). Making all 20 required took about 20 minutes once I had the jig and process "perfected". Not perfect but serviceable. I will say the Model Expo deadeyes do not have the best hole arrangement. As you can see above the holes are not exactly centered on the wood. But, with the lanyards running across the face it would be hard to notice. I think if I had it to do over again I would use annealed steel wire instead of brass. Not because it is "better" just a different color. I am not sure what I will do about the brass color around the deadeyes (the chain plates will be painted to match the hull). Next step is to get the holes drilled in the chain plates and cut them to the final length.


- 166 replies
-
- 2
-
-
- fannie a gorham
- finished
- (and 1 more)
-
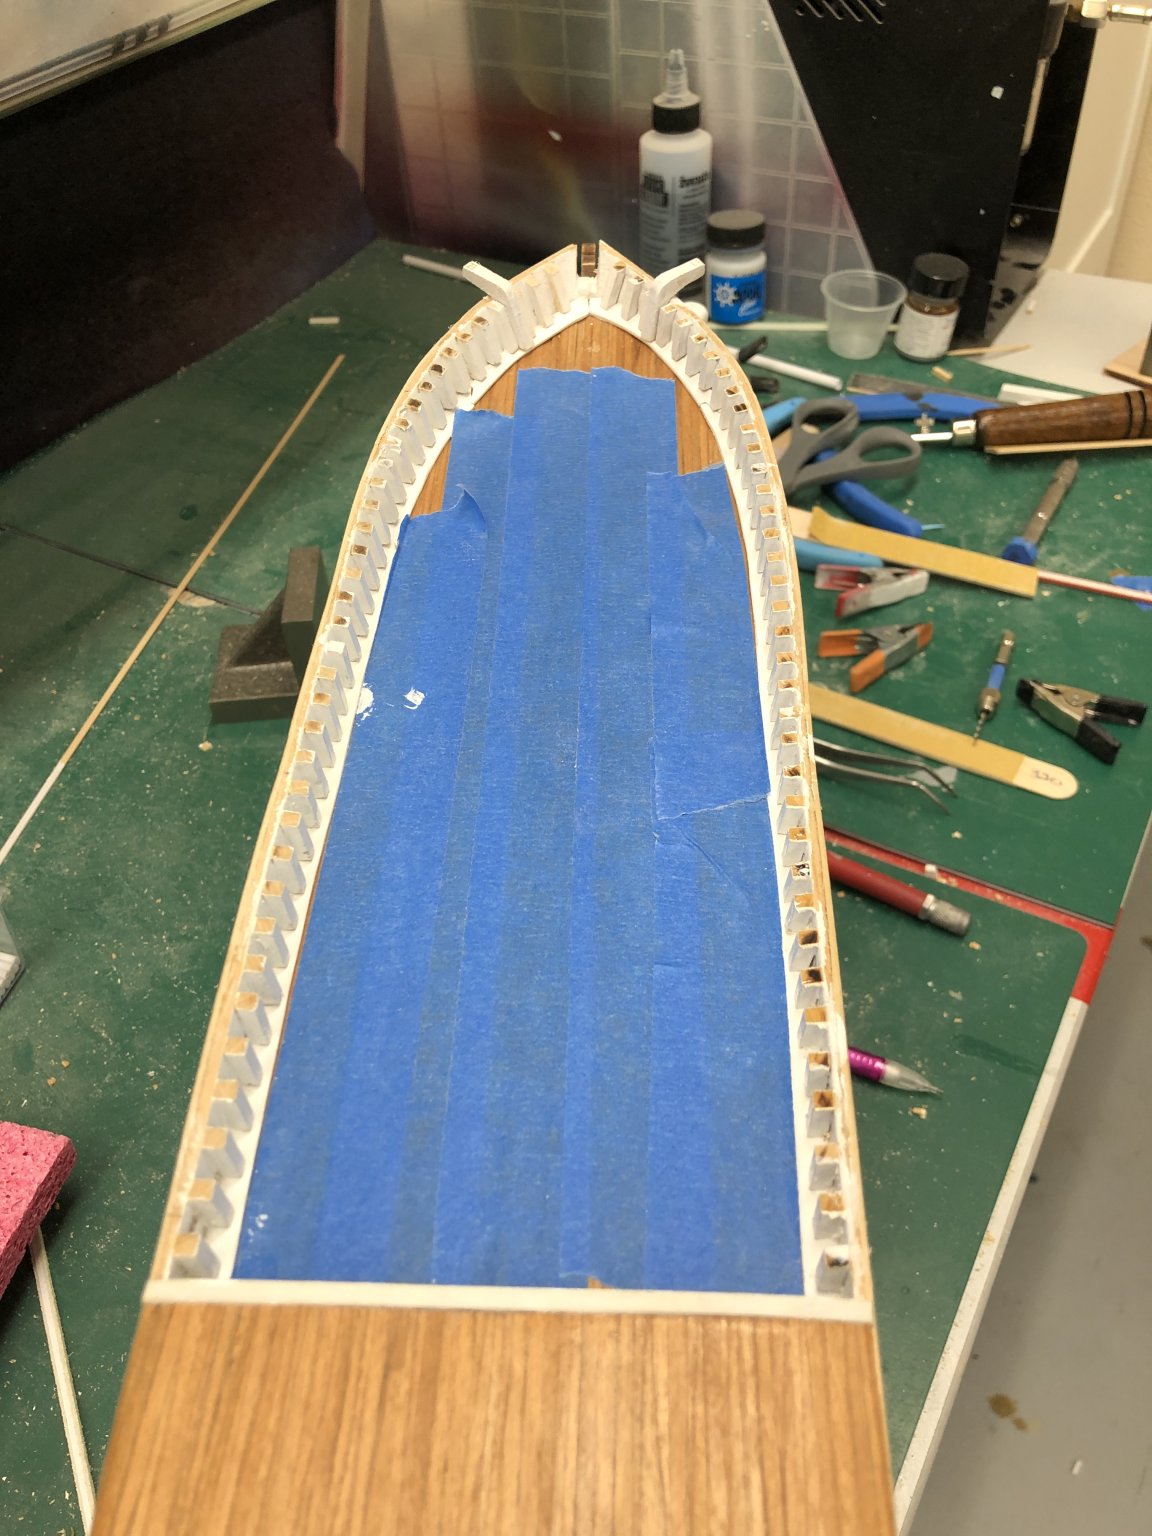
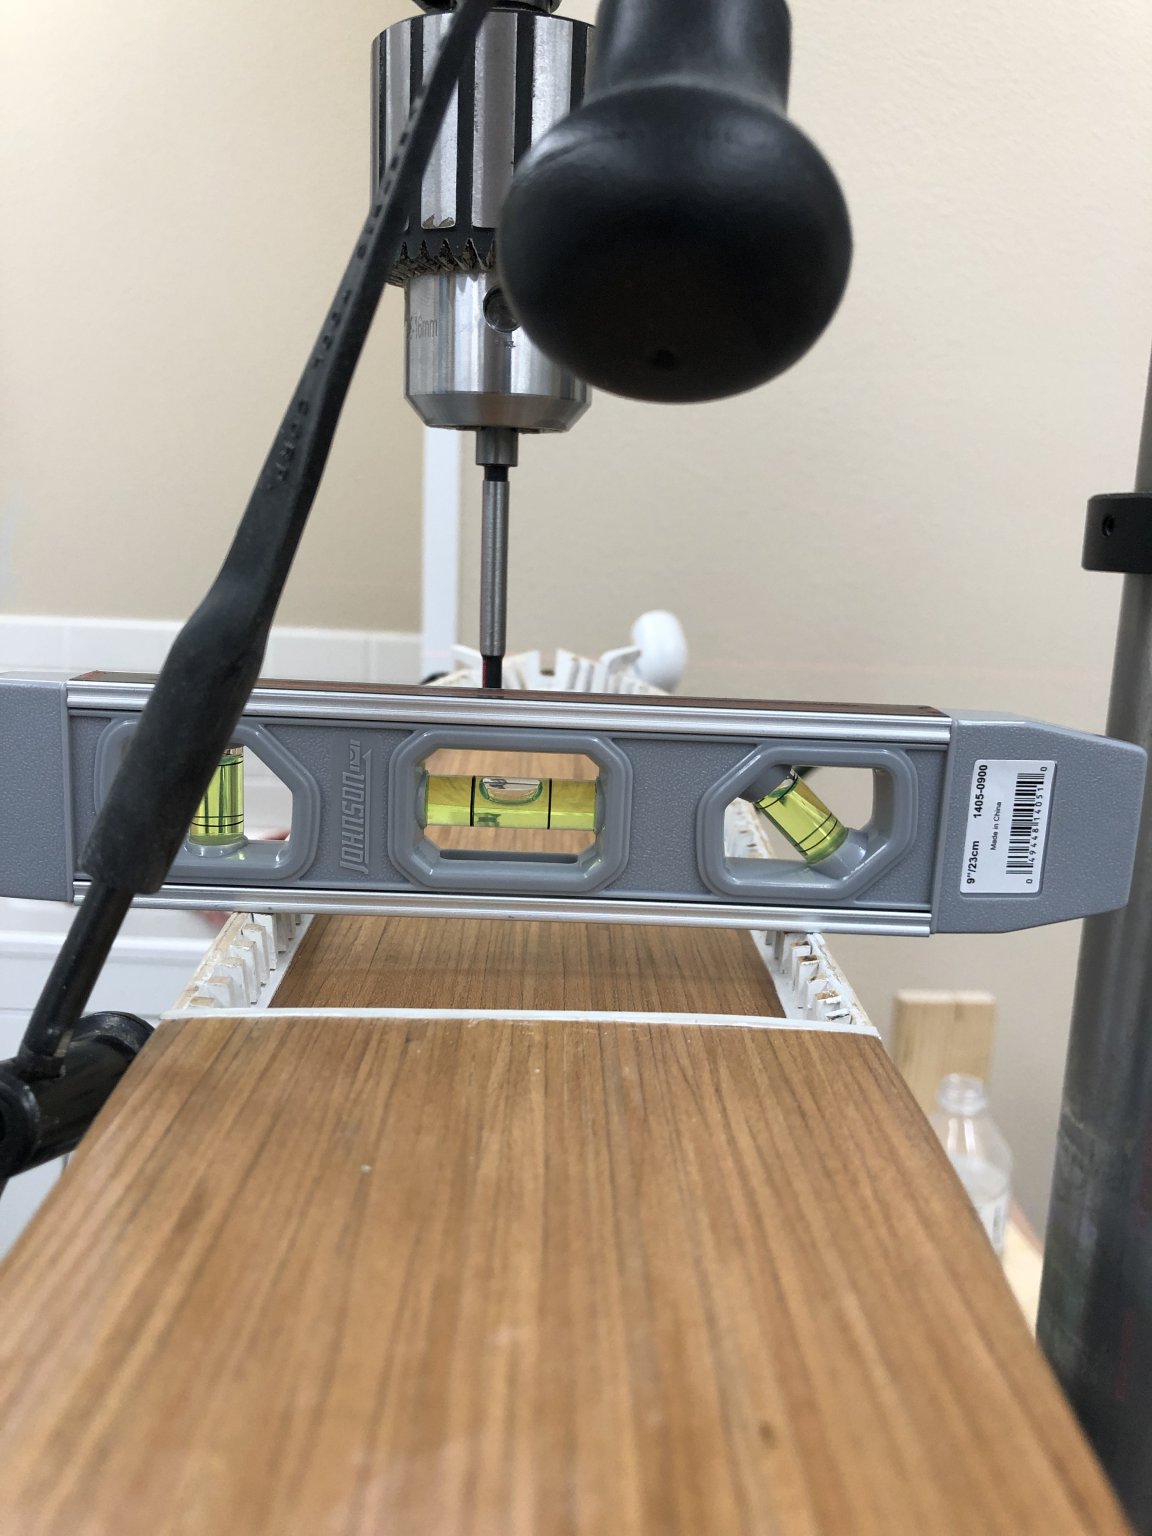
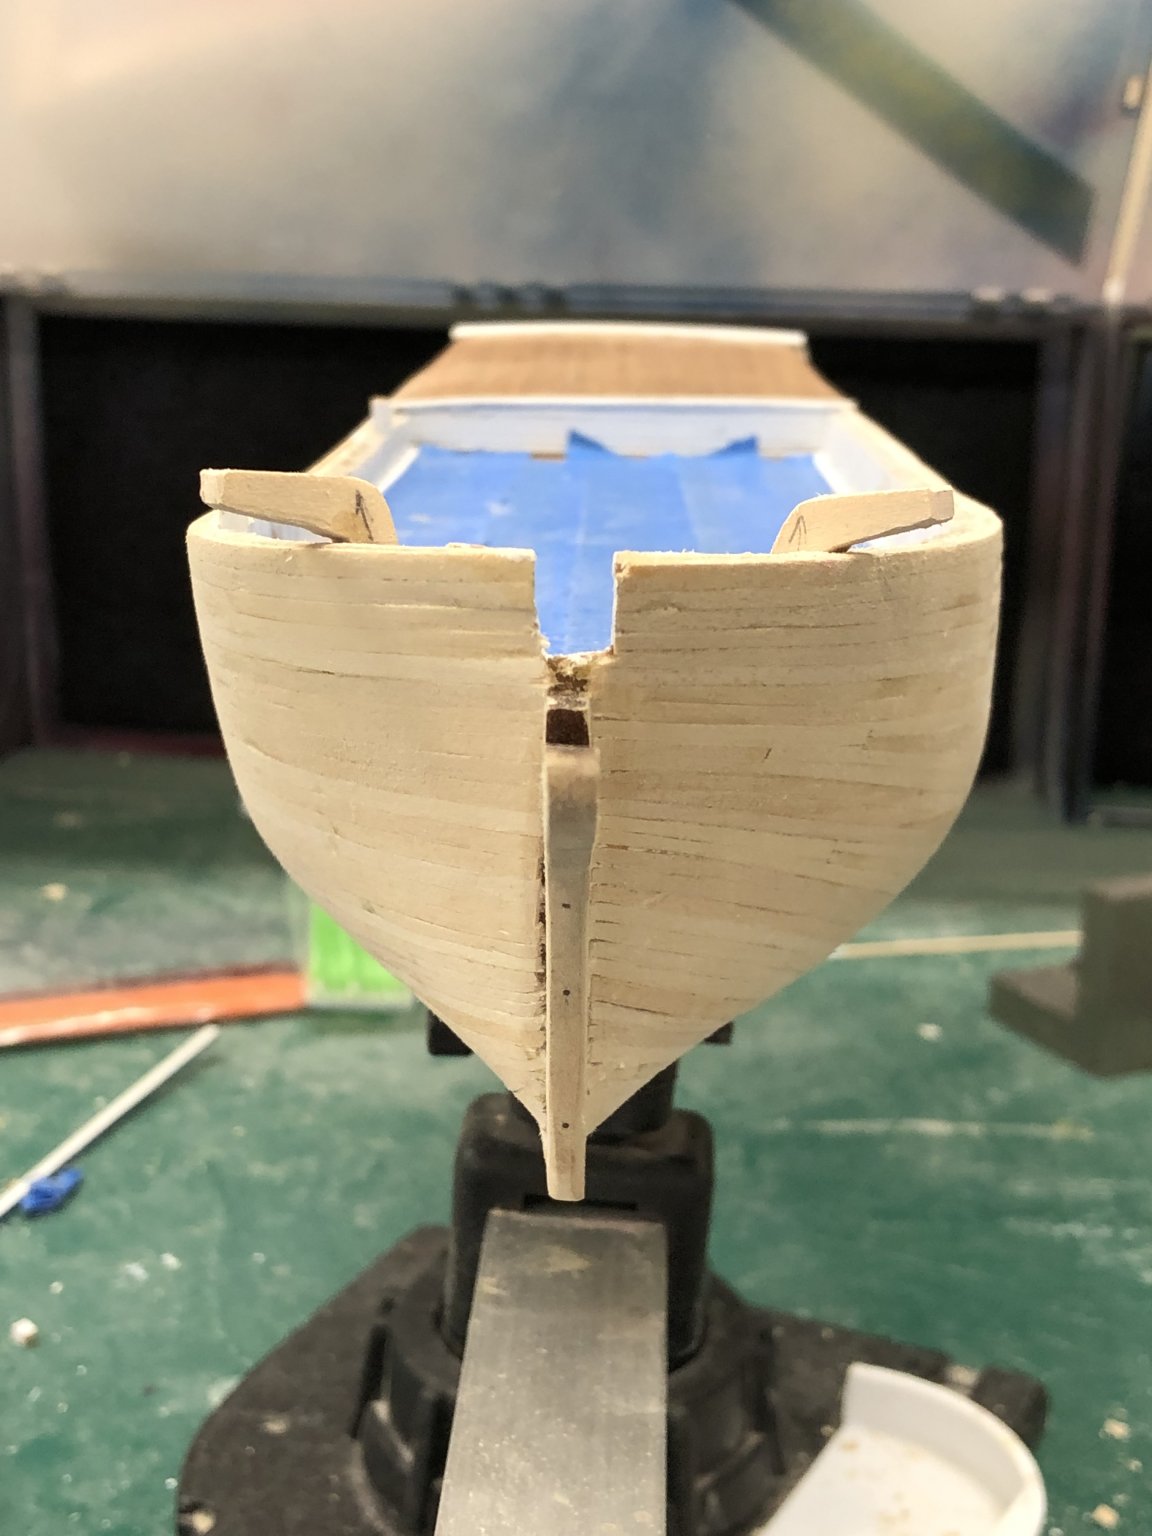
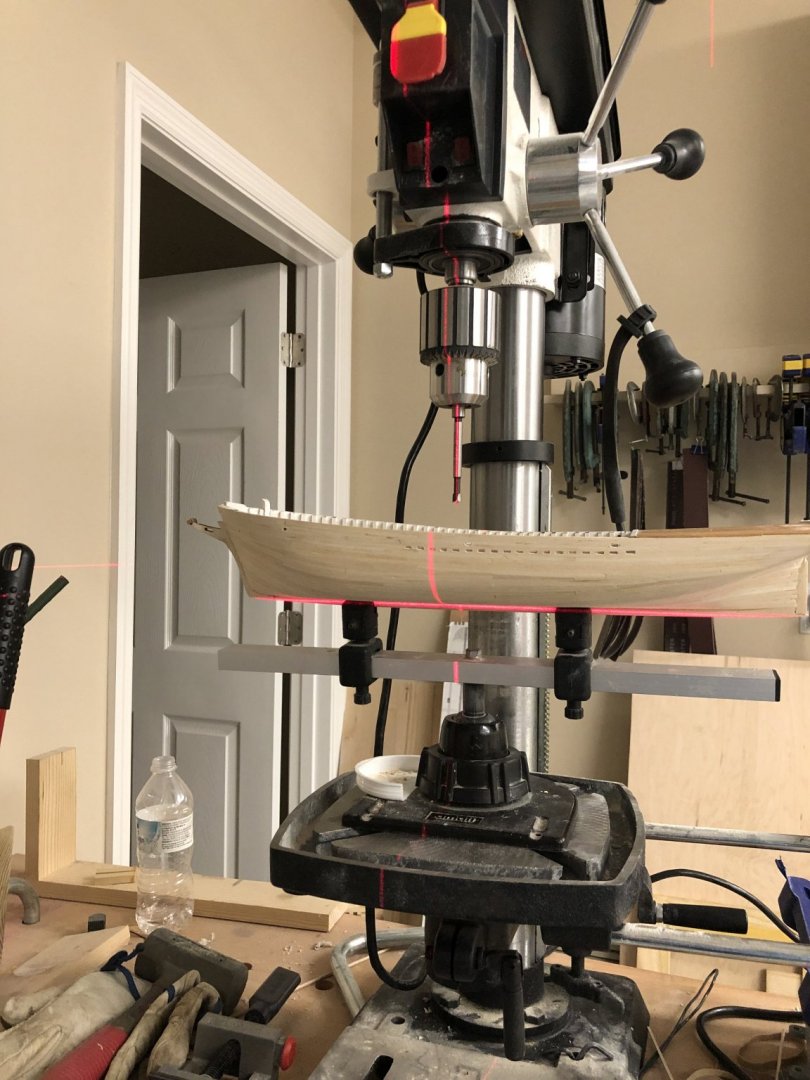
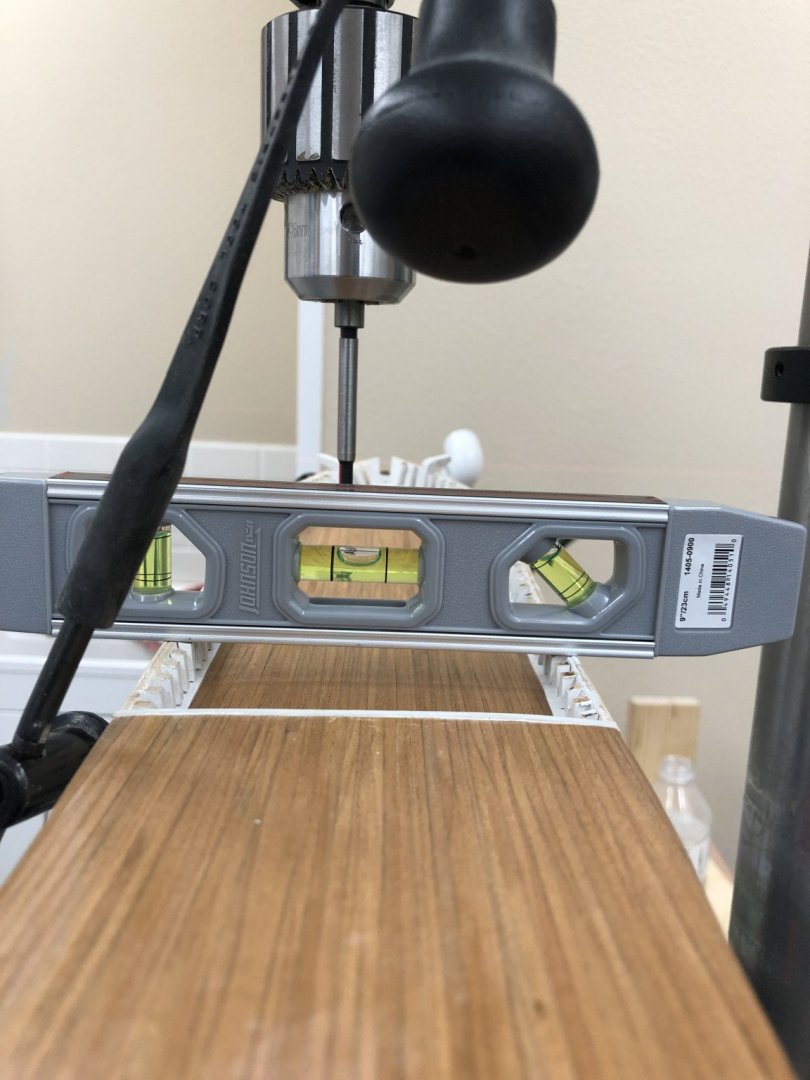
I have gotten to that point in the instructions where is recommends drilling the holes for the masts. I decided not to worry too much about the mast rake. at 1-3 degrees I am not sure i could tell. Hopefully I can adjust the rack with the rigging. I wanted to use a Forester bit to drill through the cherry decking material. I have had regular drill bits tear up planked areas. Since the smallest bit is 1/4" I used that to drill a few test holes in other material and the masts fit with no additional work and minimal "slop". I left the hull in the building jig and used a laser level on the keel to get the hull horizontal and a level across the hull in several places to get it vertical then drilled the holes in the pre-marked positions. I drilled the holes 1" deep and will cut the masts (they are 10" long overall now) to get the correct height above the deck.
- 166 replies
-
- 2
-
-
- fannie a gorham
- finished
- (and 1 more)
-
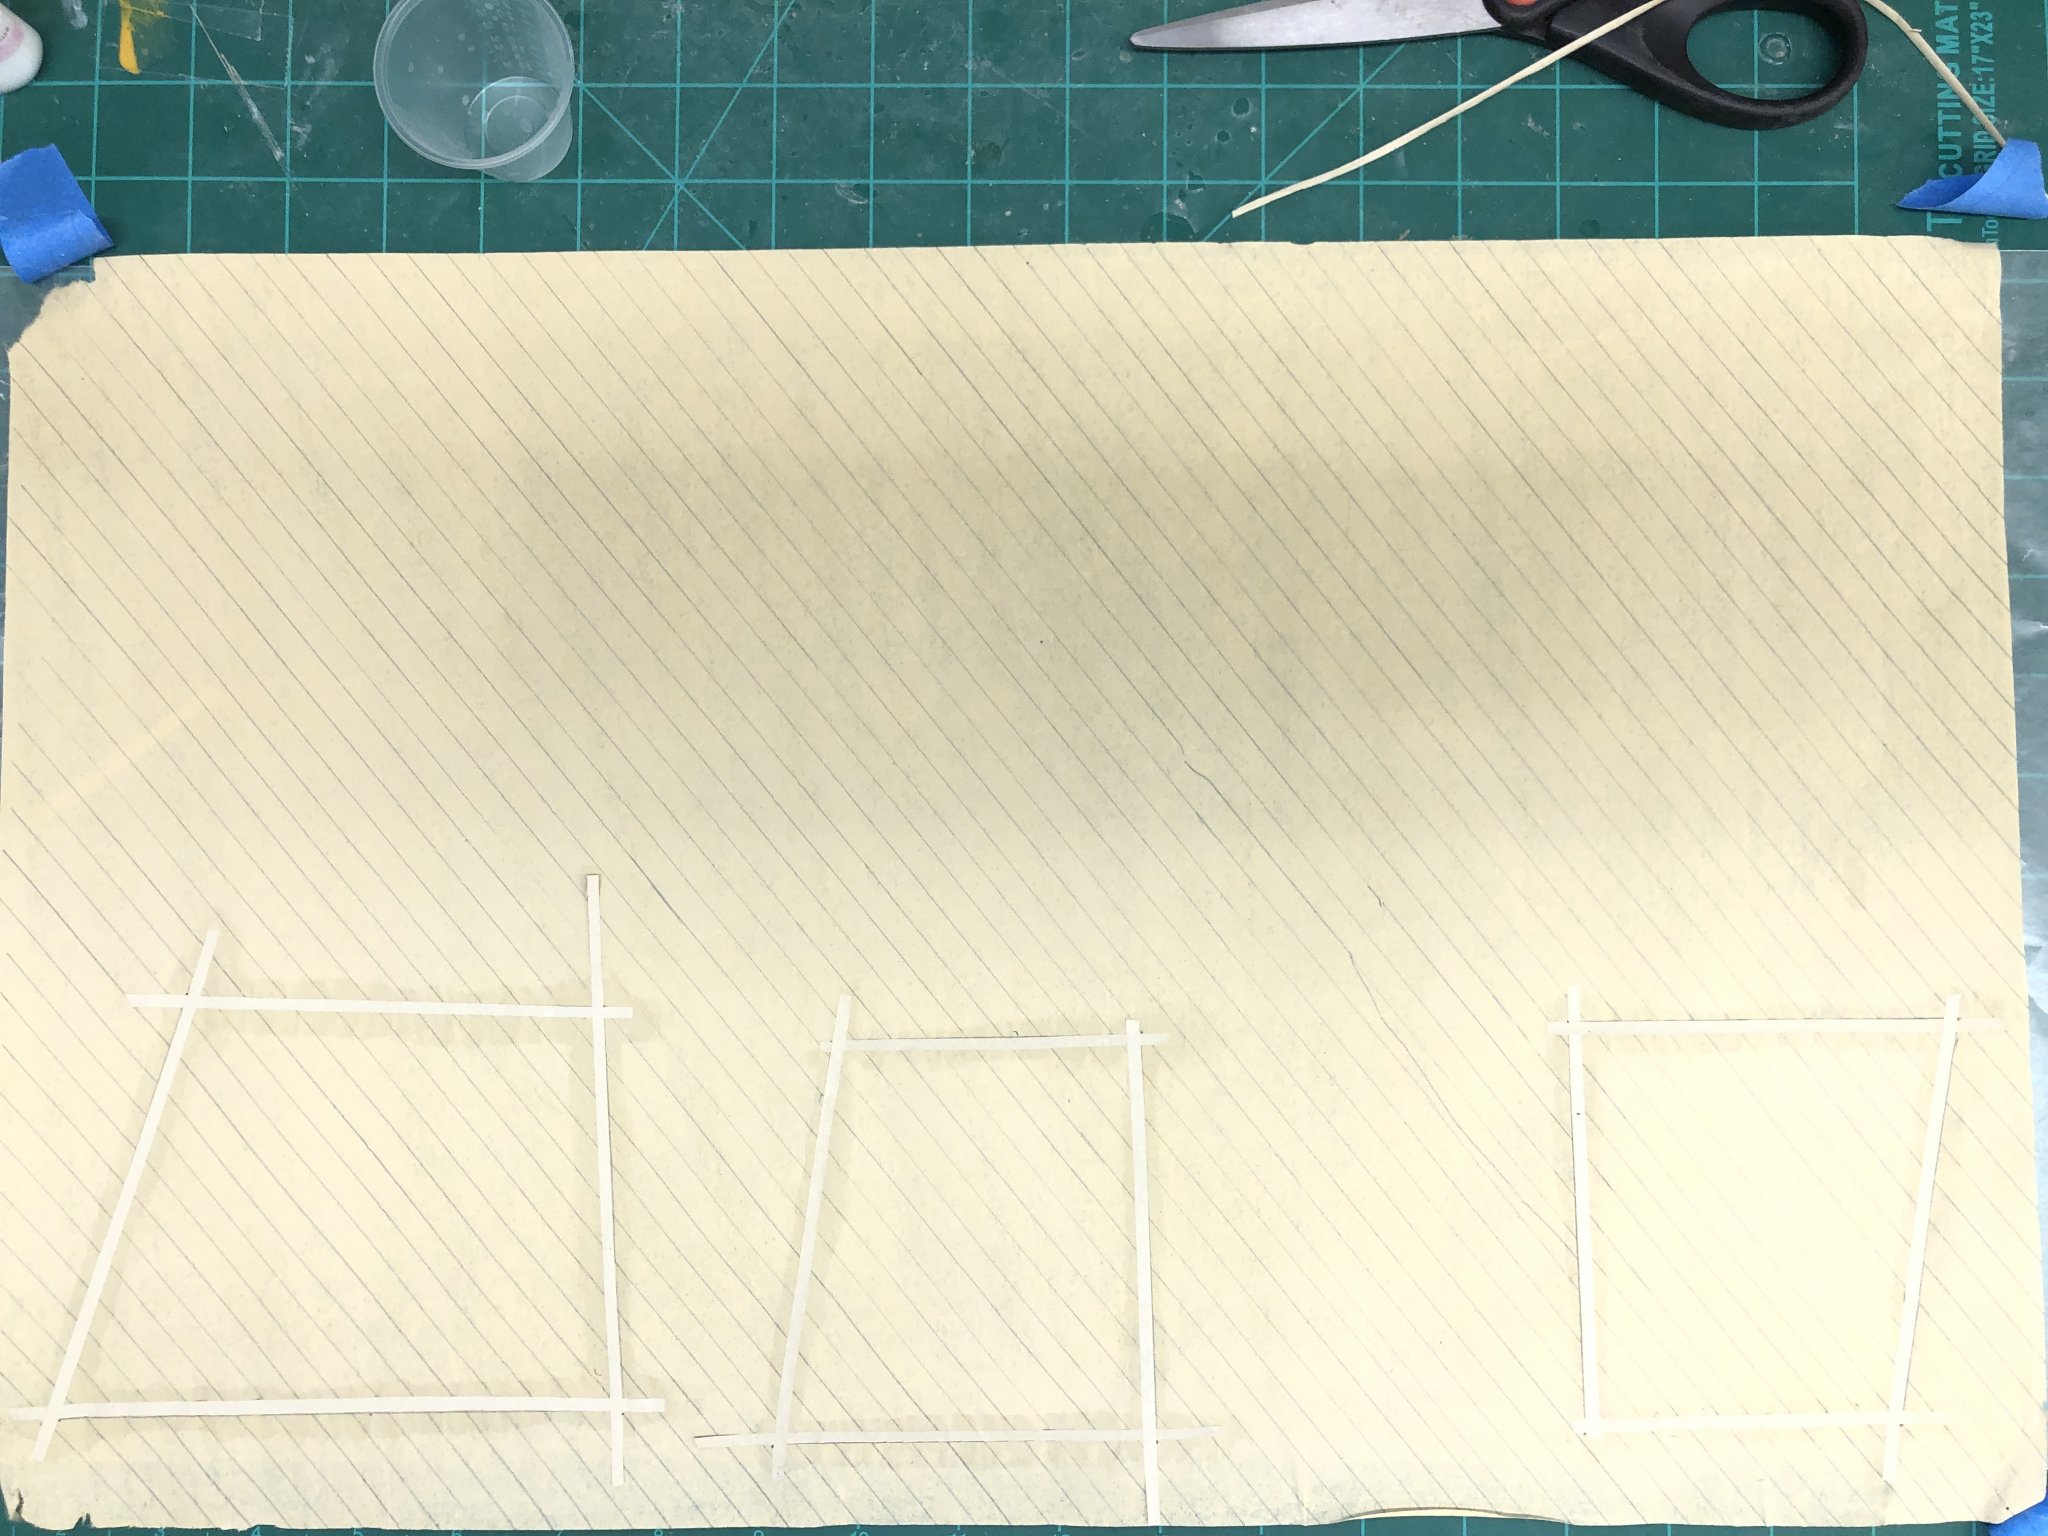
While the sails are drying I worked on the taffrails and cat heads. I glued the pillars to the top and bottom rails alternating (and paying attention to the pillars which are not symmetric vertically) between rails. Then it is relatively easy to assemble the top and bottom and get the pillars in the right spot. Have to pay particular attention tom getting the pillars glued on perpendicular to the rail. Here is the stbd rail before assembly and the port after priming and sanding. Here are both rails after priming. I kept the top rails long to allow some "slop" where they join the aft rail. I have to aft rail done and pinned it to the stern to get the bottom rails notched to meet the aft but for the top decided to leave that until the aft taffrail is actually glued in place. That would be a bad time to find out I mis-measured. After a couple of tries I got the cat heads in pretty good shape - now for the knees.

- 166 replies
-
- 1
-
-
- fannie a gorham
- finished
- (and 1 more)
-
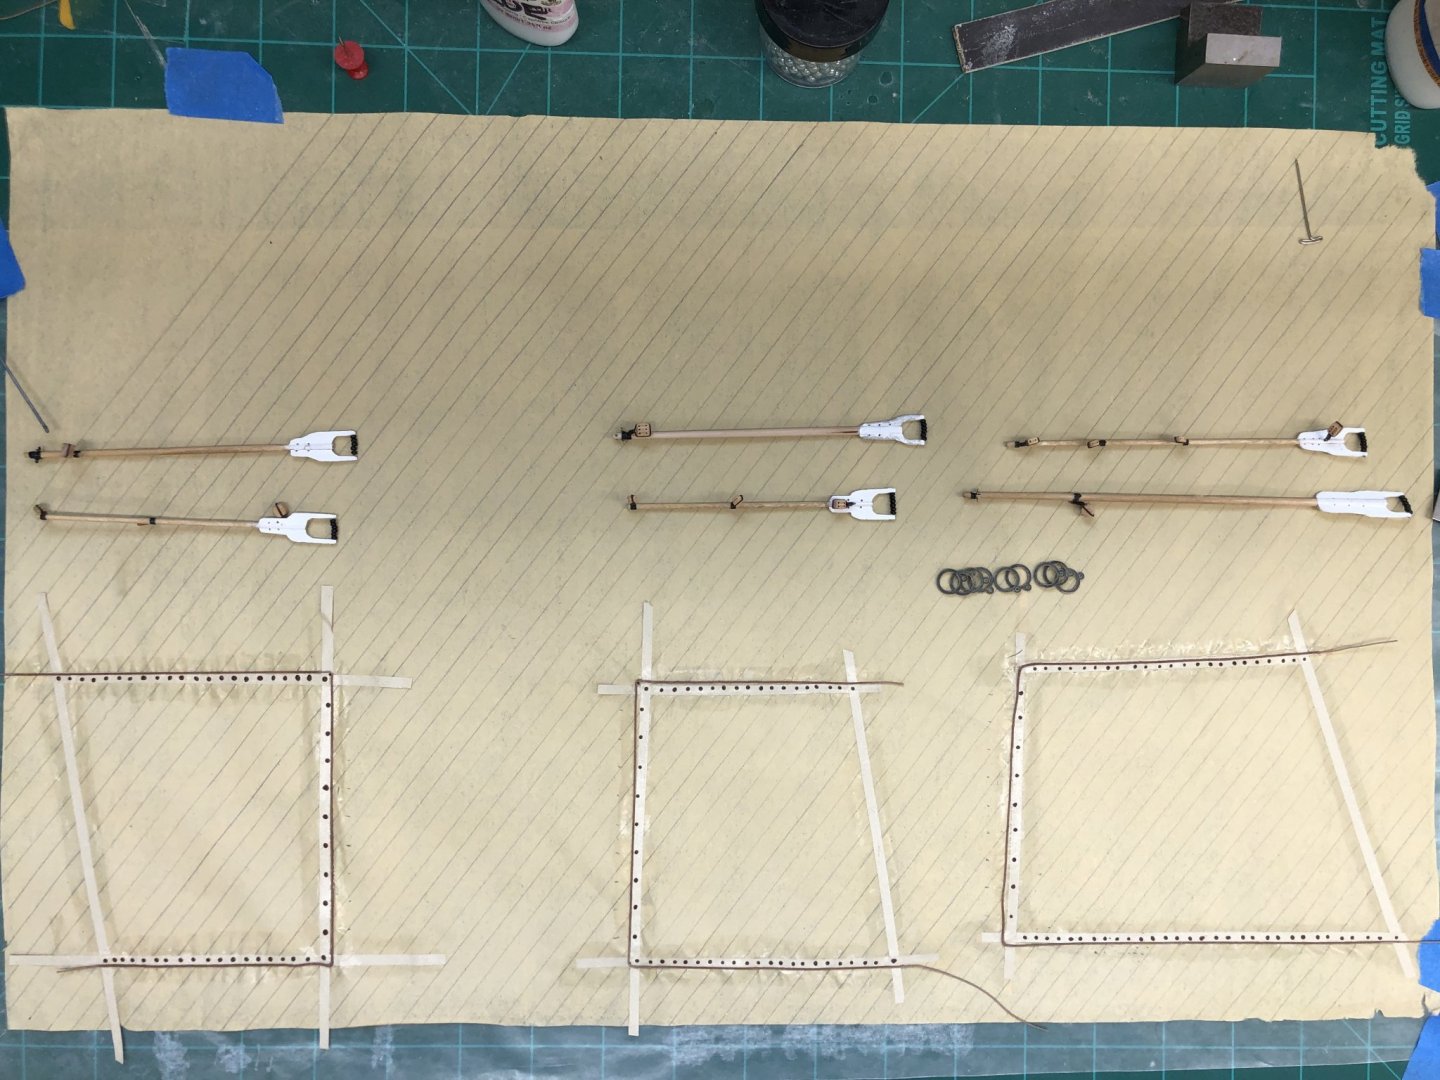
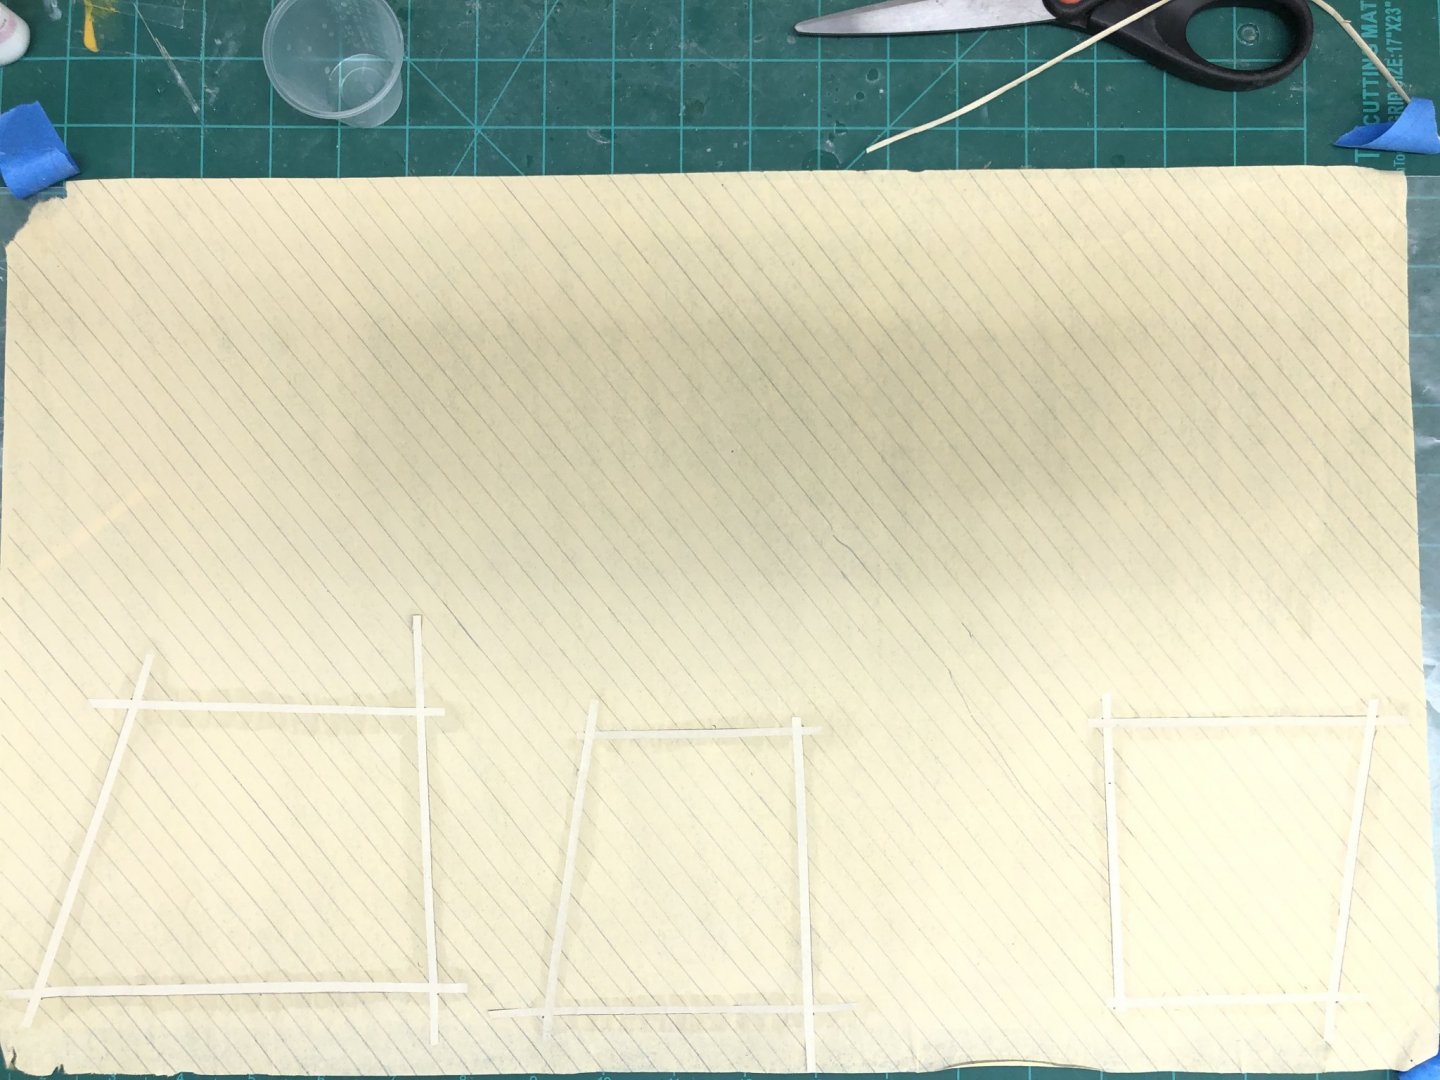
I took the decision to redo all the sails, with a reduced area and fewer hoops. Here are the three sails after lining for the seams and adding the reinforcing strips on one side.
- 166 replies
-
- 1
-
-
- fannie a gorham
- finished
- (and 1 more)