cdrusn89
-
Posts
1,923 -
Joined
-
Last visited
Content Type
Profiles
Forums
Gallery
Events
Everything posted by cdrusn89
-
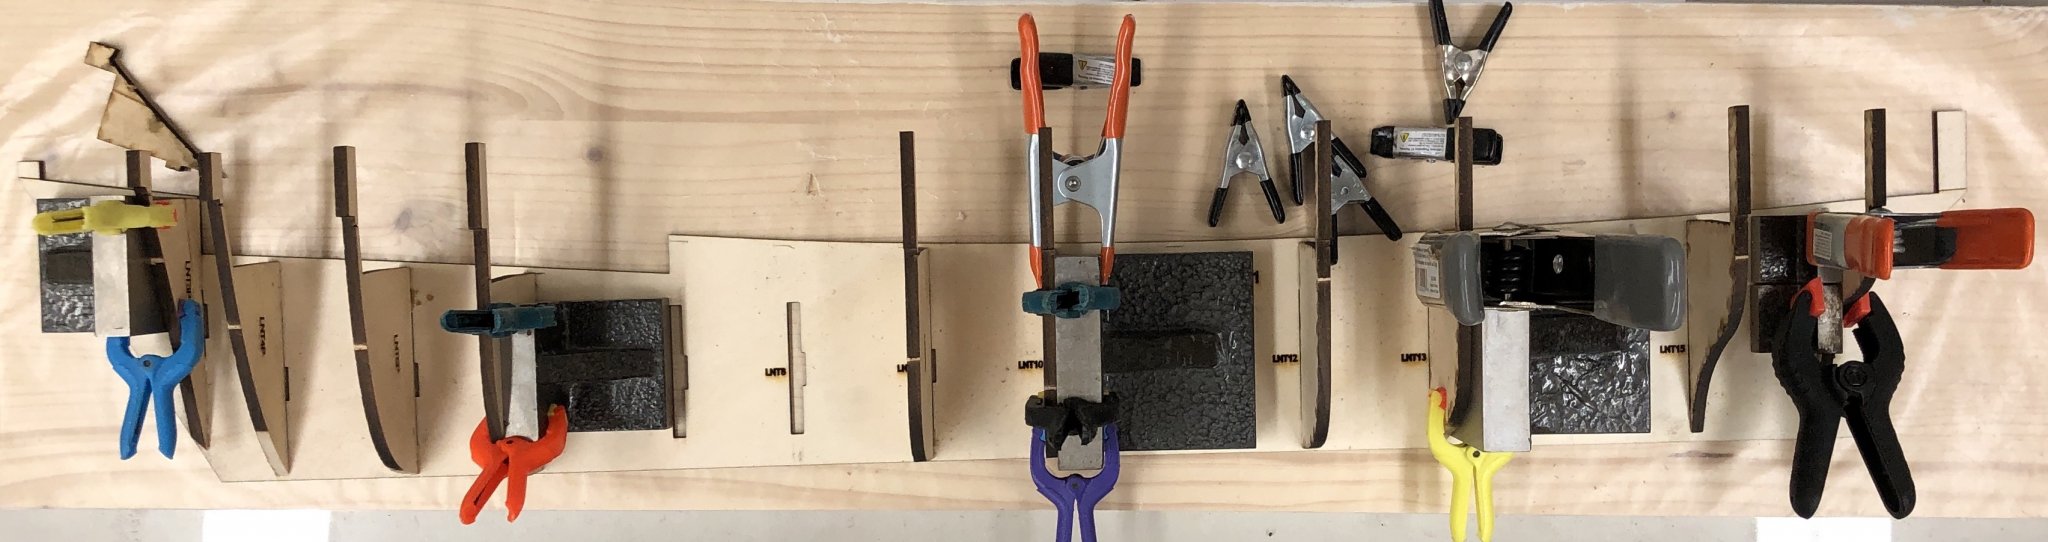
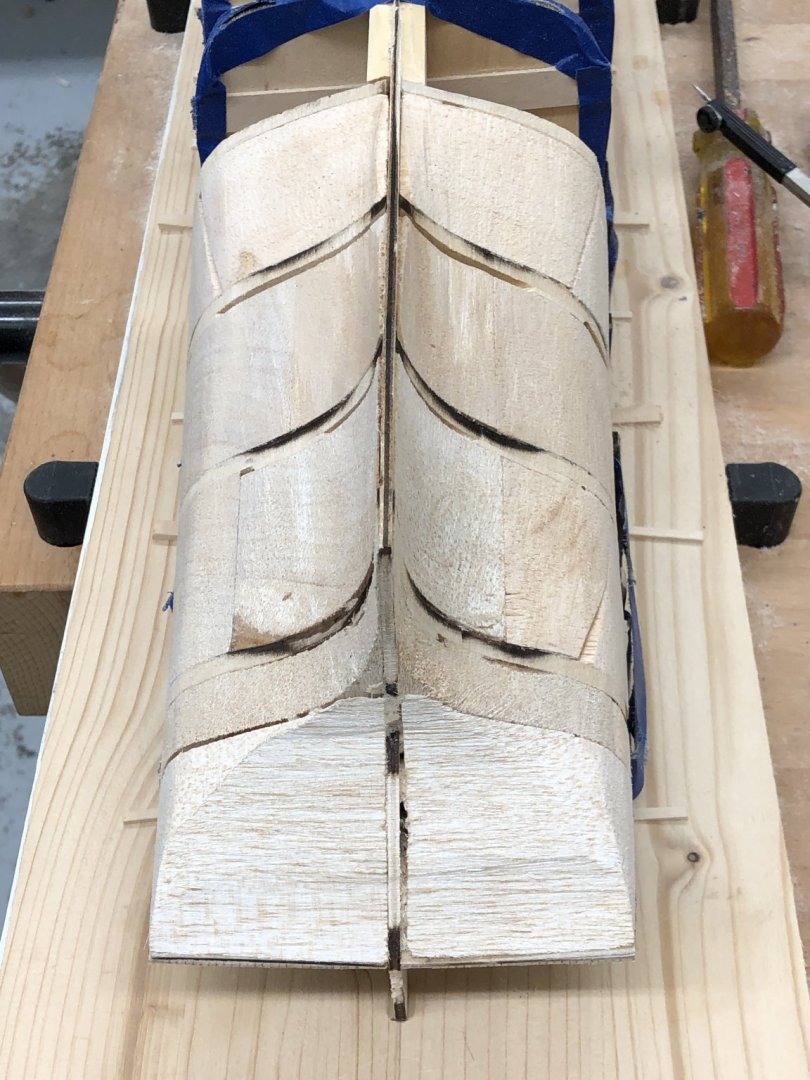
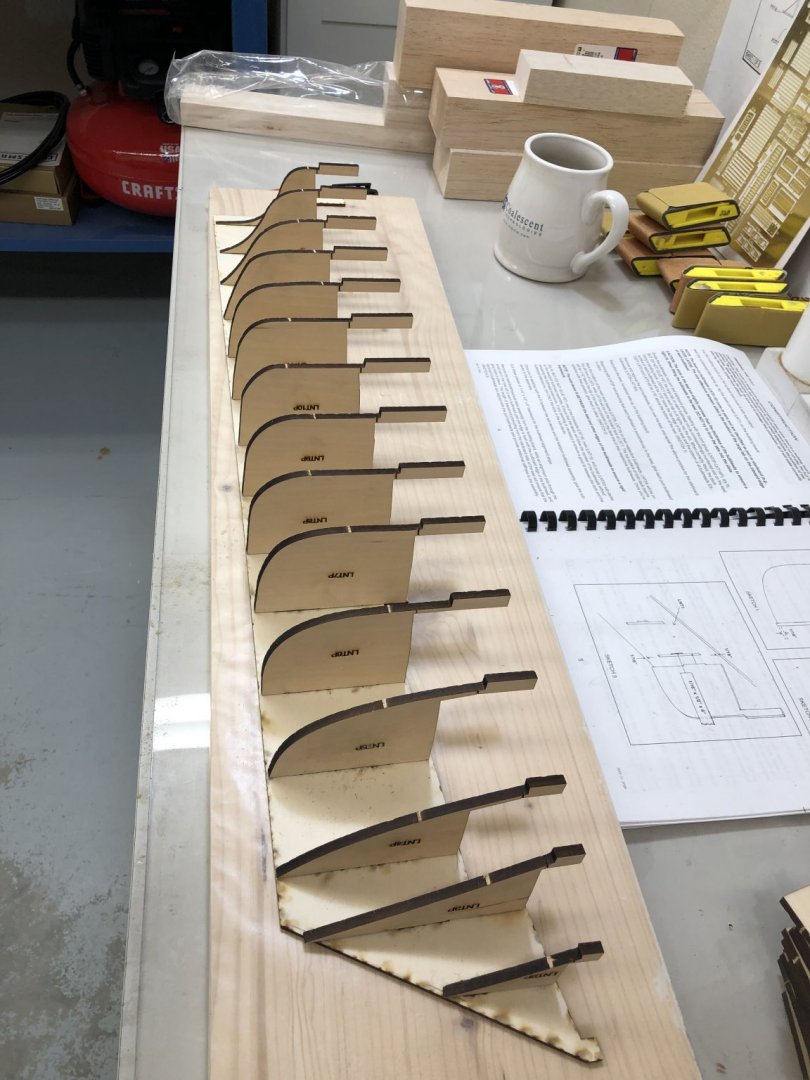
 I cheated and started fairing the hull this evening after dinner. 3 hours later I think I have the stern in pretty good shape. I will tackle the bow tomorrow after a few "house" chores (like stringing wire from one end of the attic to the other. Best done early in the day in Florida. Here is how the stern looks and the overall "platform for this work - very stable.
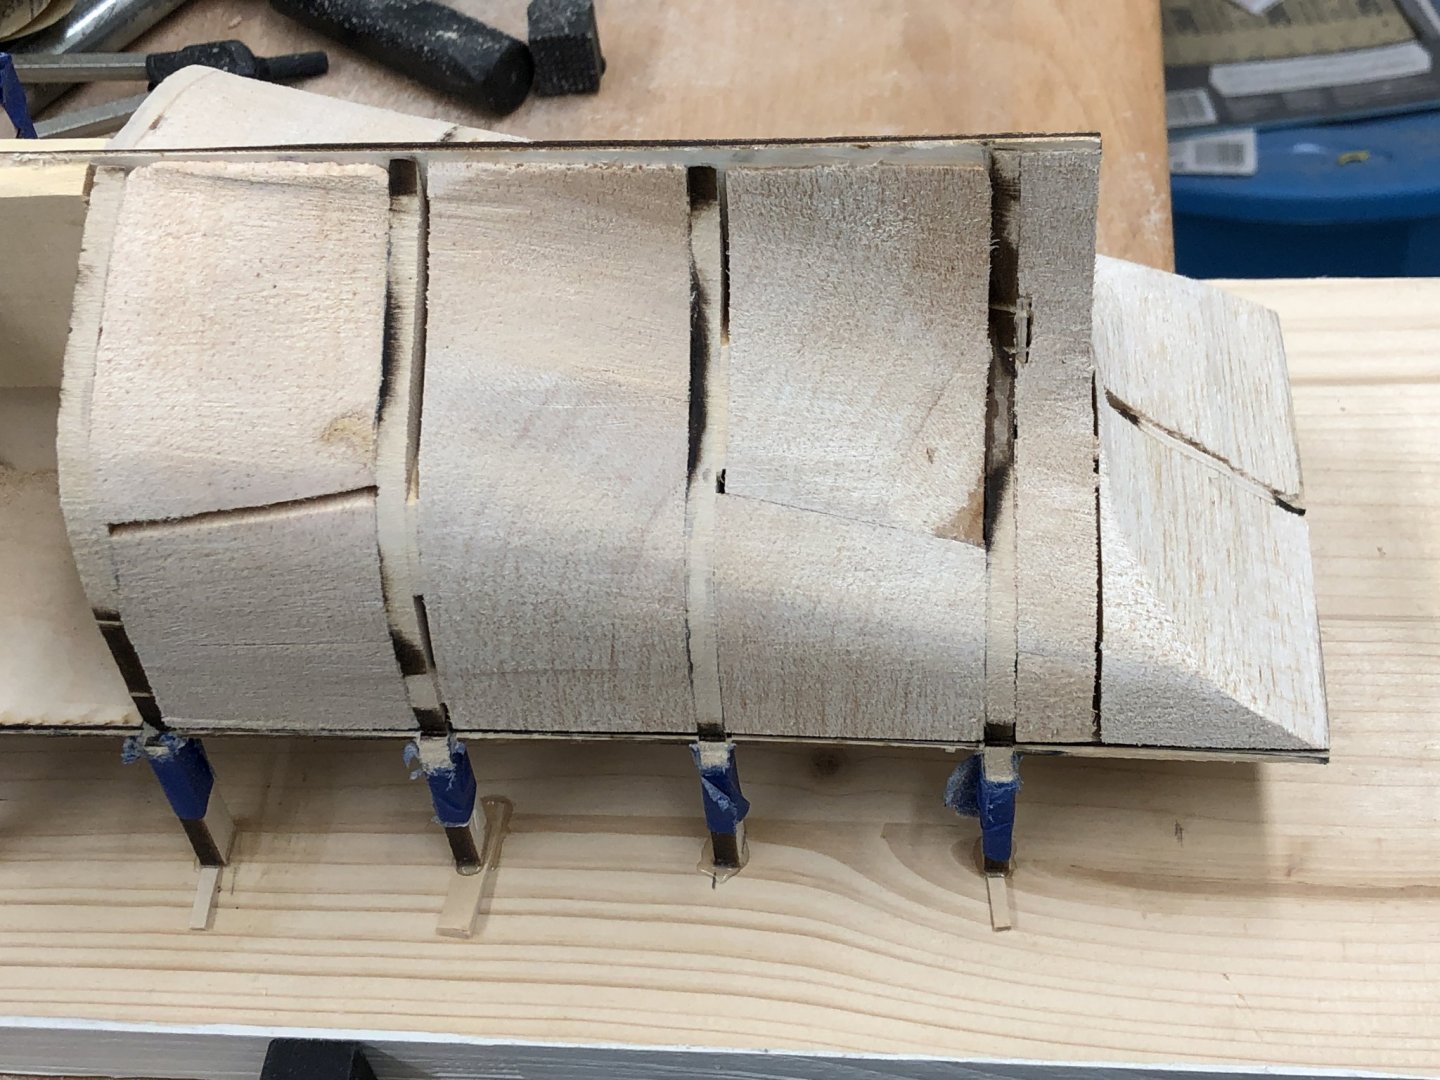
- 144 replies
-
- 7
-

-
- charles p notman
- finished
- (and 1 more)
-
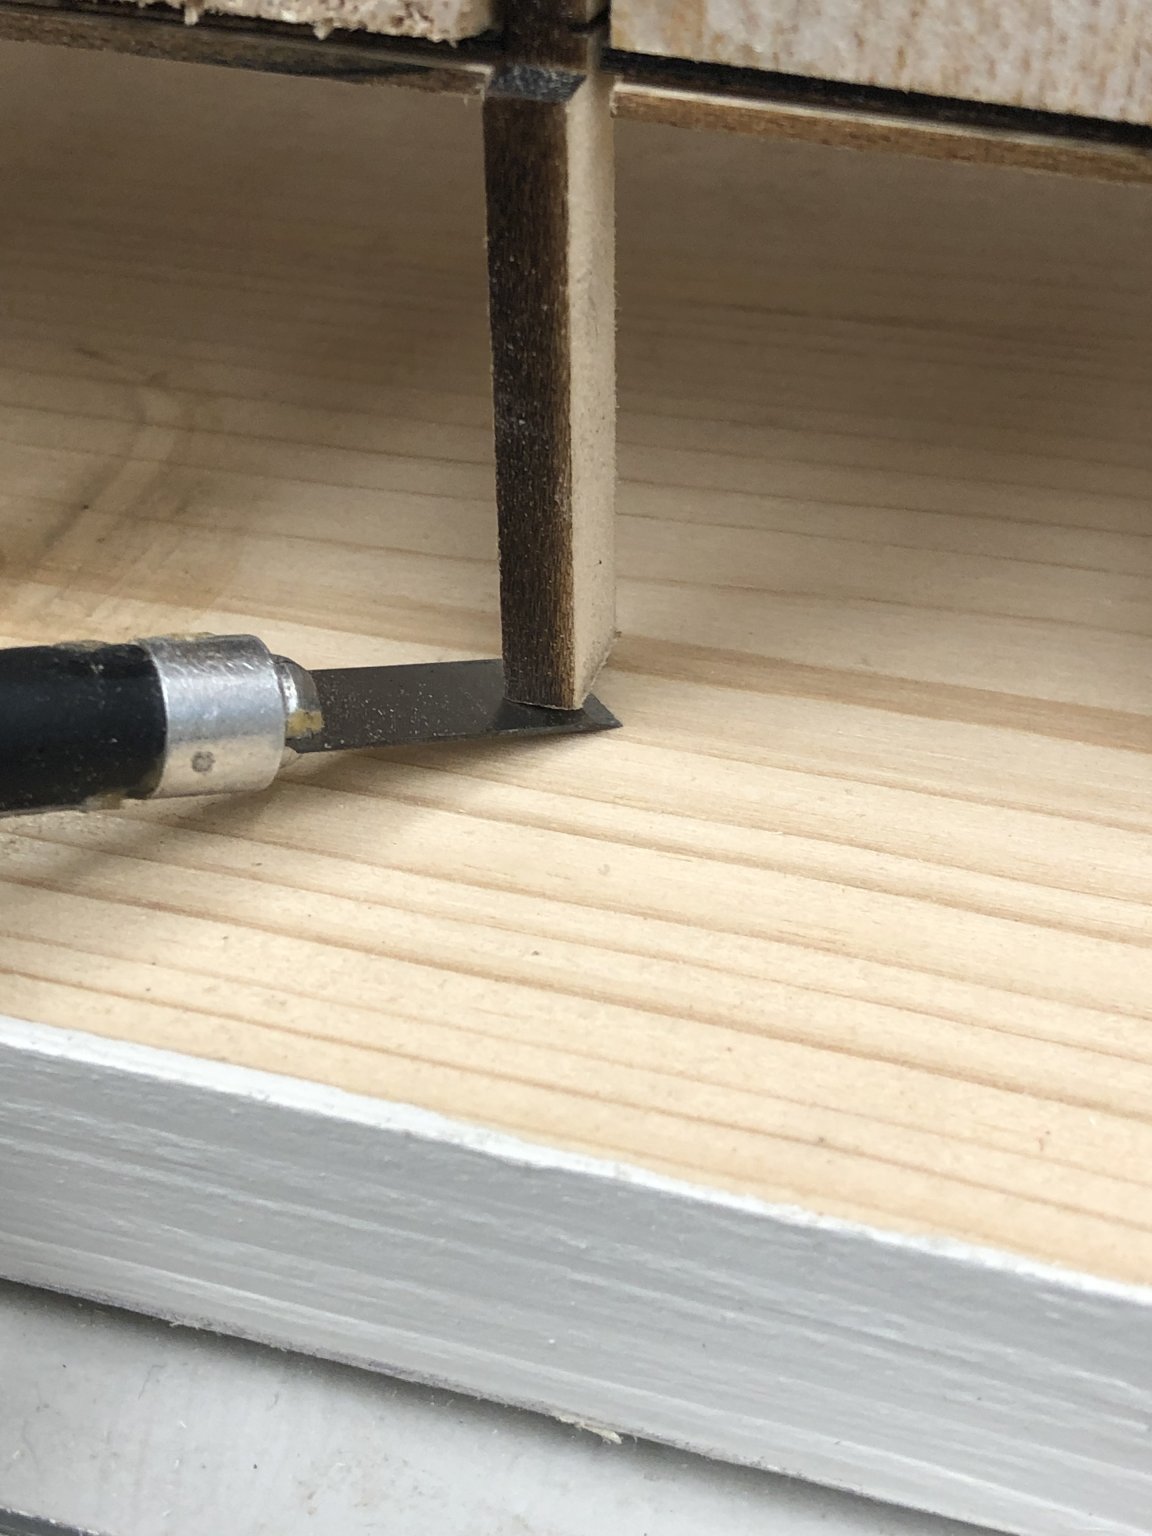
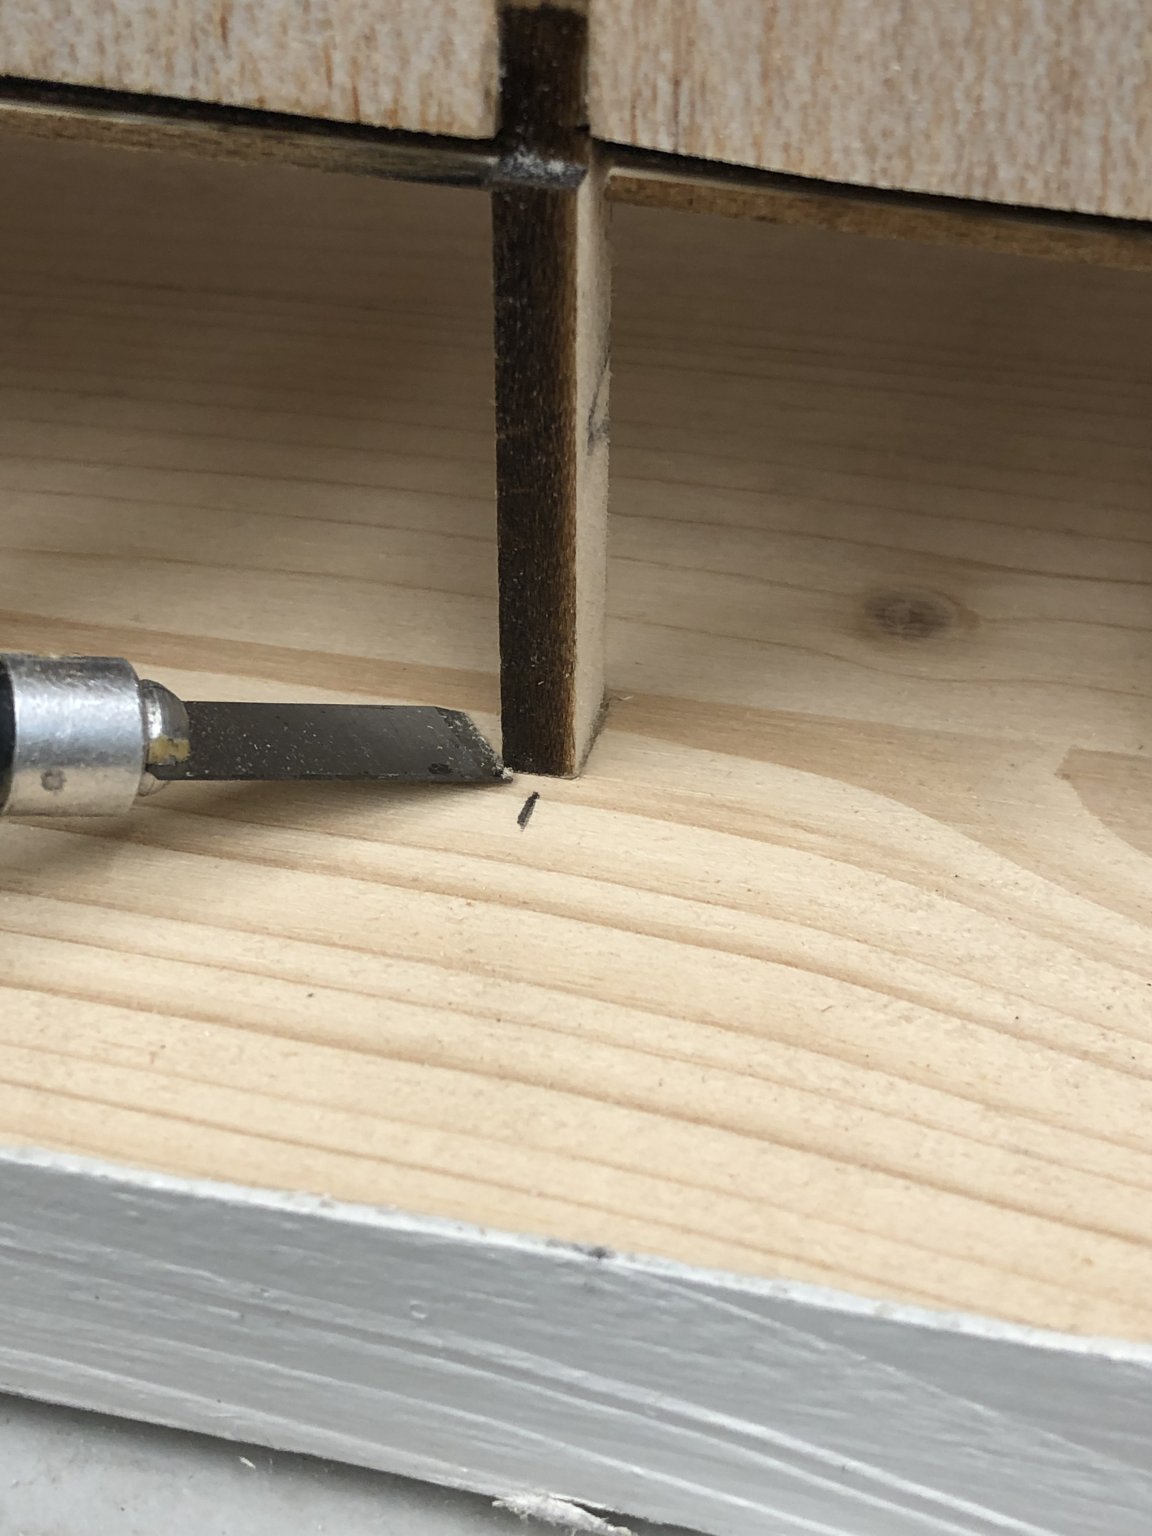
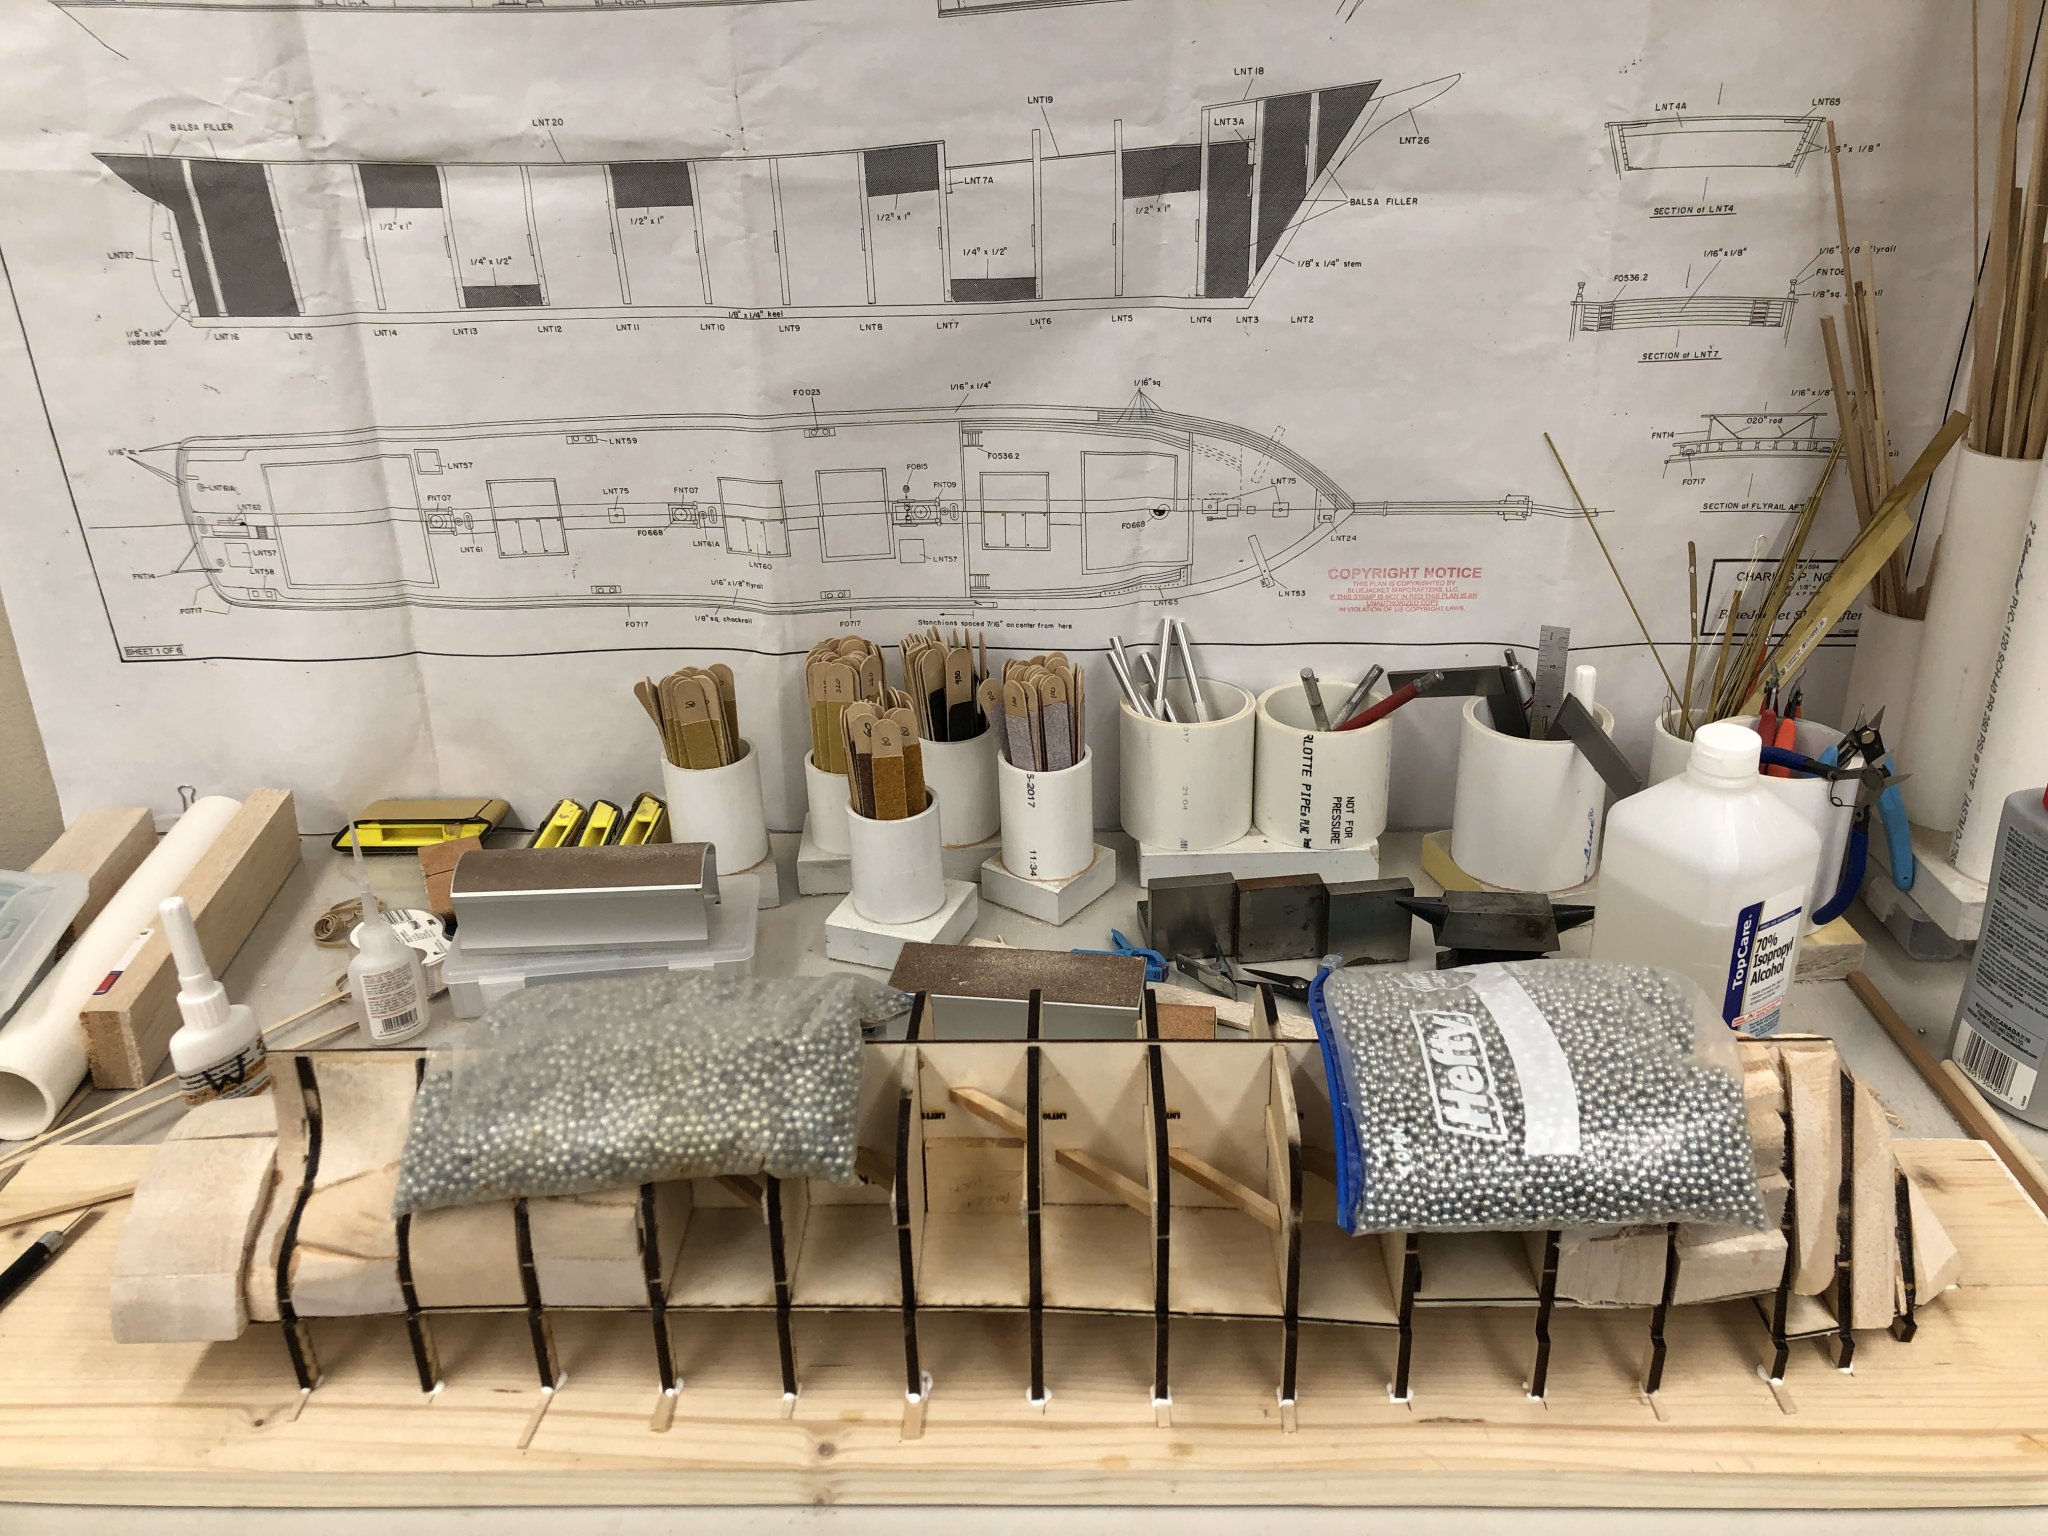
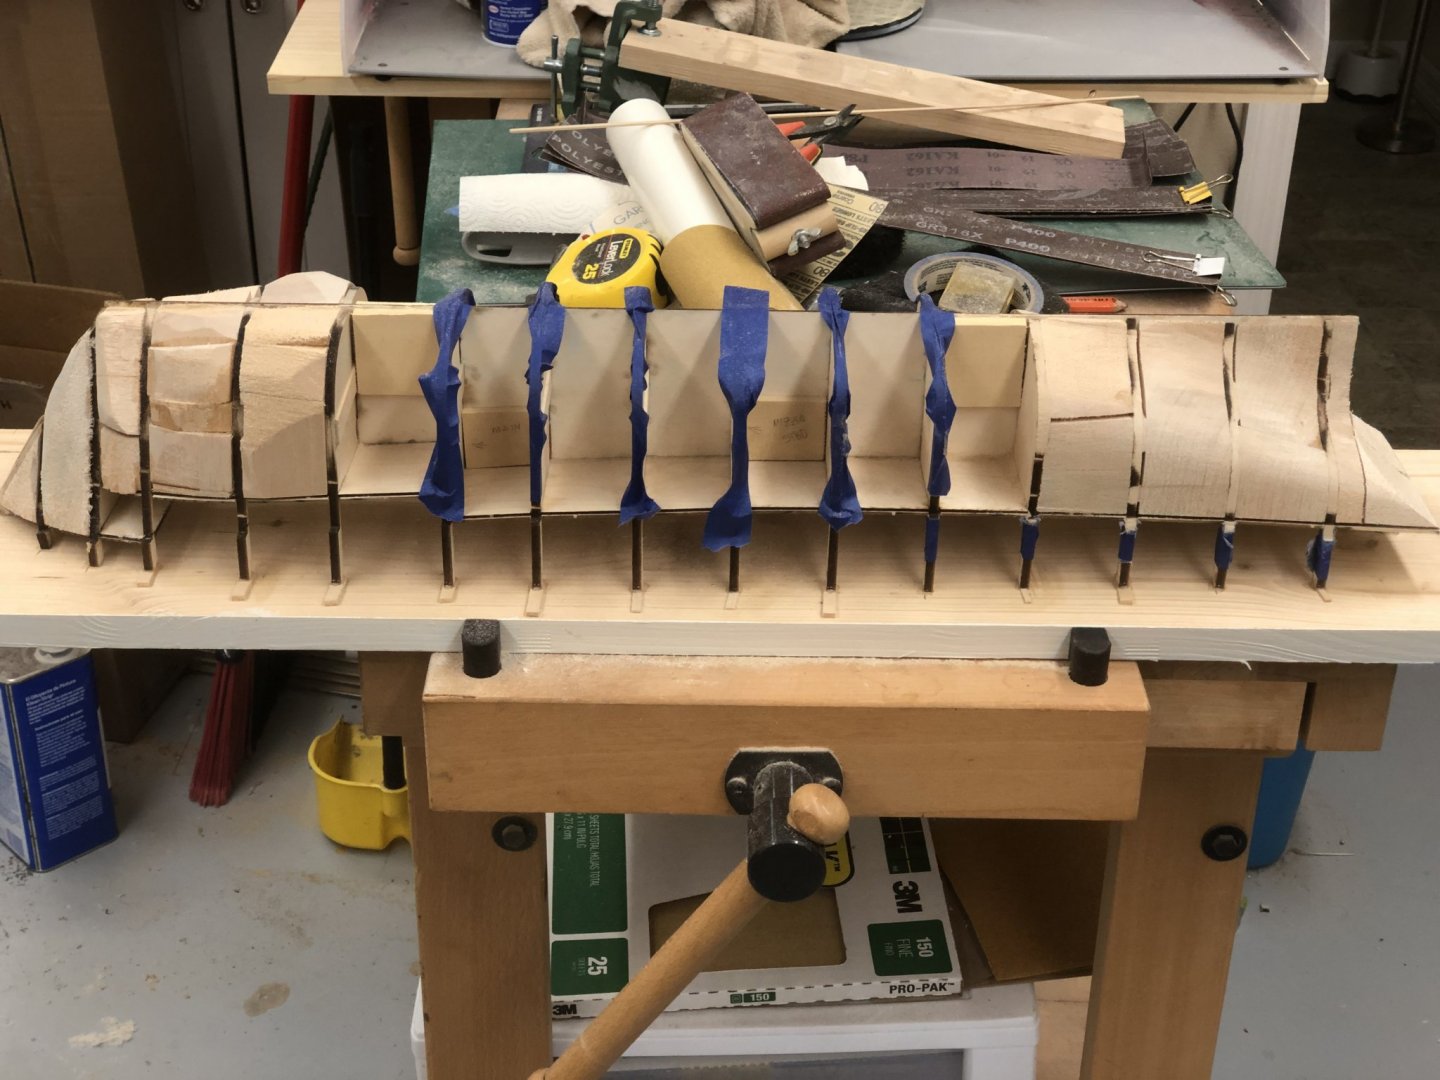
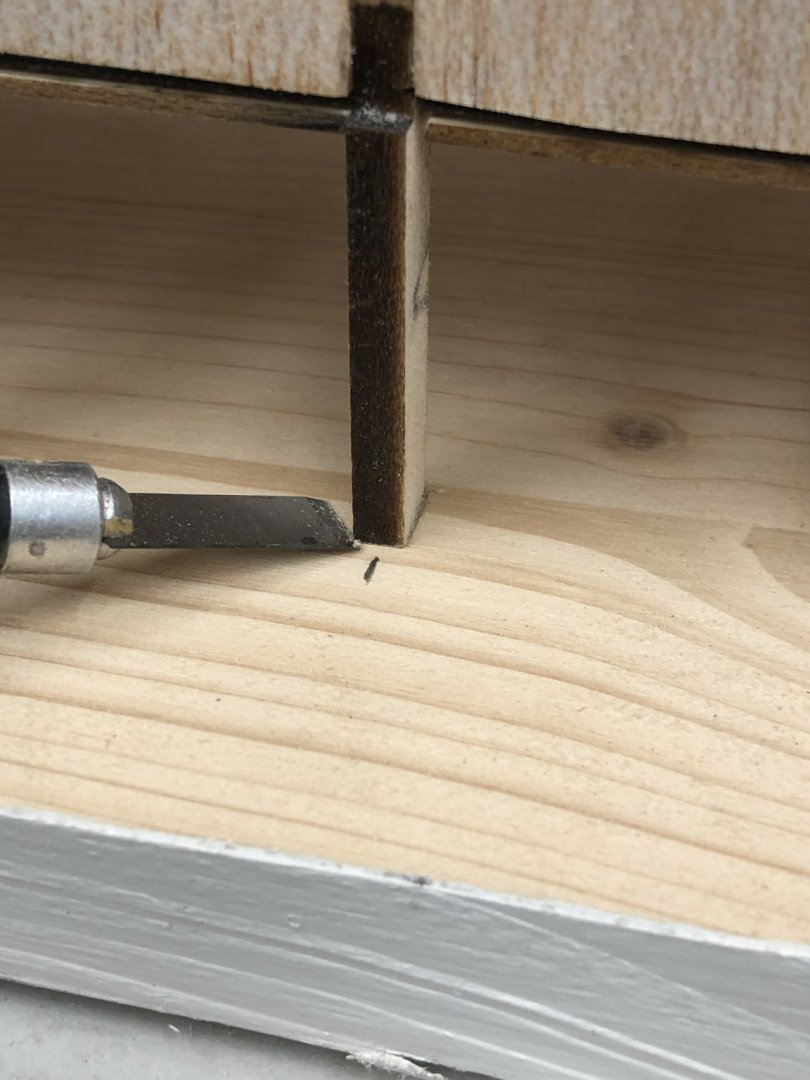
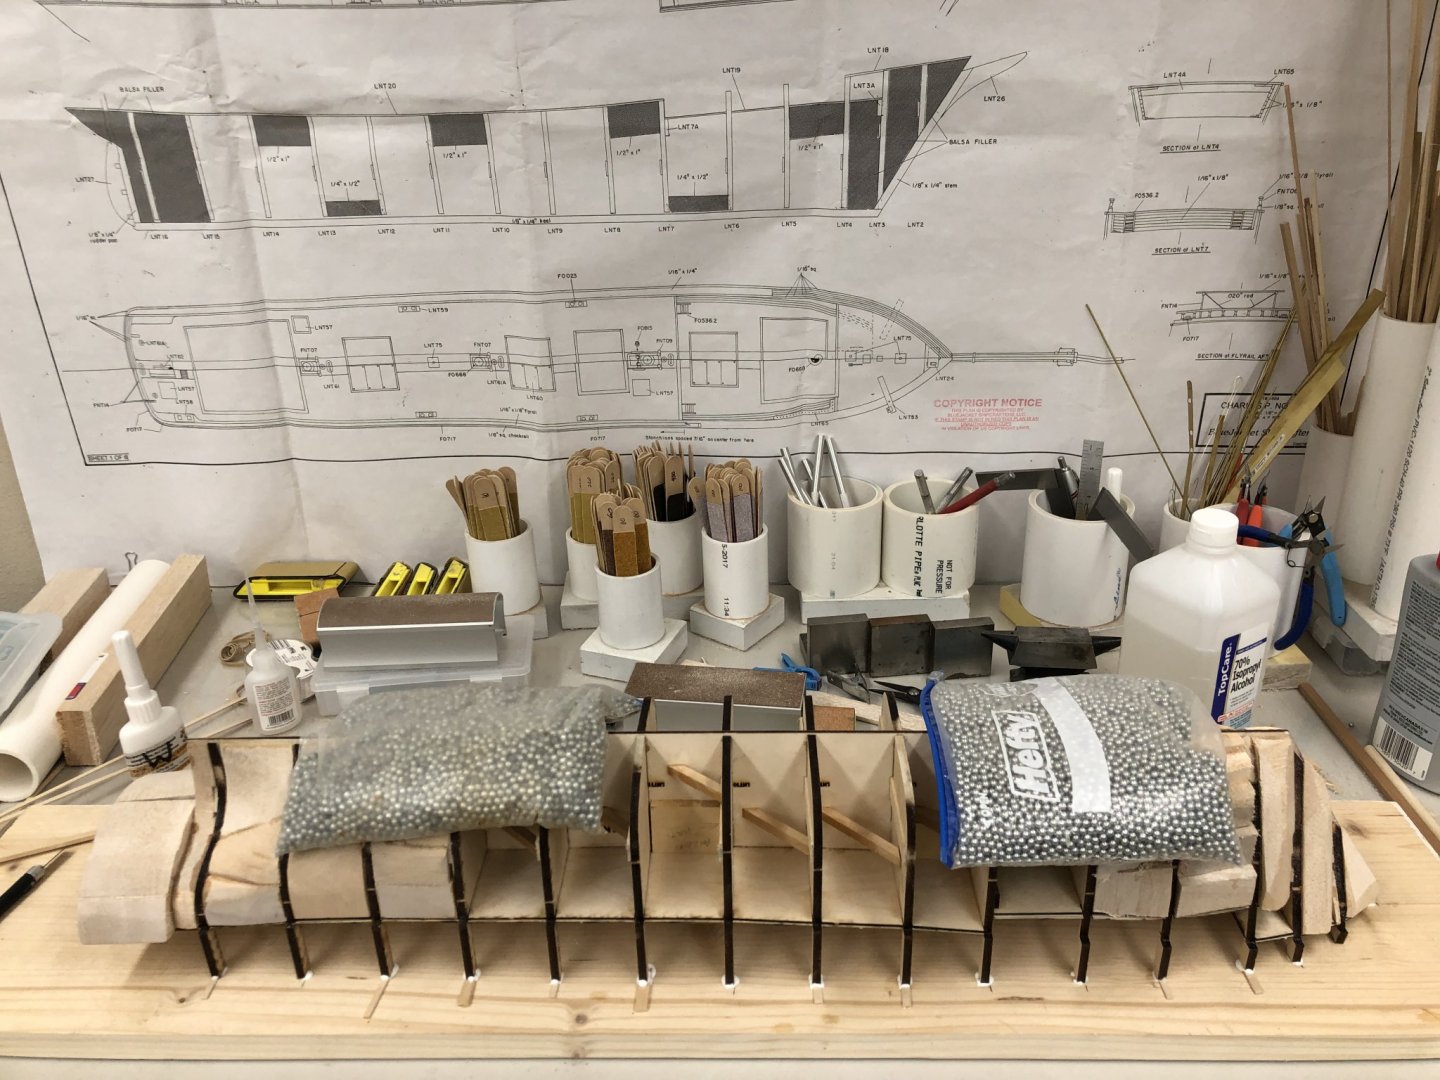
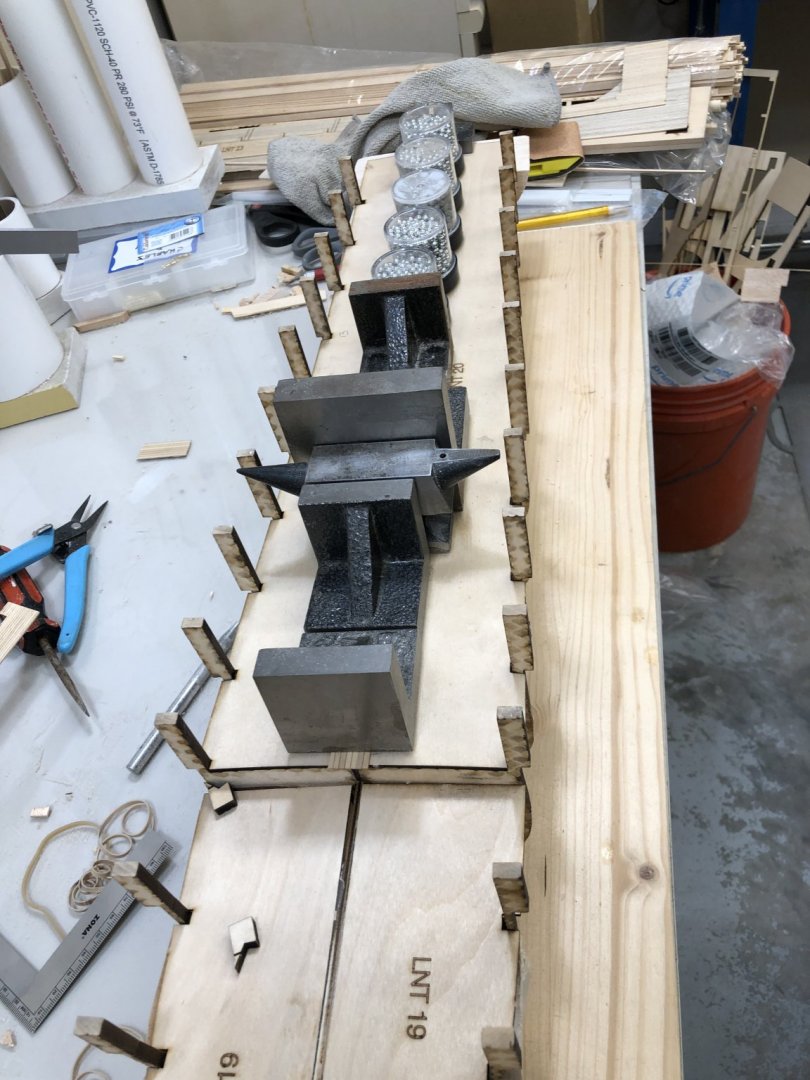
With the decking completed it is time to glue the hull to the build board. As might be expected, less than half of the bulkhead extensions touched the build board when the hull was inverted. I checked each one using an Xacto knife and marked those that were in contact. I put a dollop of glue on each one, inverted the hull, made sure it was straight on the build board and added weights (storage bags filled with BBs). Then went back (alternating sides to avoid putting any twist on the hull) and added shims and glue to all the bulkhead extensions that did not meet the build board. So here is the hull glued to the build board. I will let this set overnight to make sure all, the glue is set.

- 144 replies
-
- 4
-
-
- charles p notman
- finished
- (and 1 more)
-
The replacement poop decking piece arrived today and I got both sections glued on. Tomorrow the hull gets turned over and glued to the build board and the fun really starts - fairing in the balsa fillers and the bulkheads. I did not try and take the laser char off the bulkheads as this gives a good indication if you have "touched" a particular bulkhead or not. I plan on putting masking tape over the center bulkheads while I fair the filler blocks so I do not inadvertently grind one down while trying to get a filler block fair. Here is the hull with the final piece of decking weighted down while the glue dries.

- 144 replies
-
- 5
-
-
- charles p notman
- finished
- (and 1 more)
-
Thanks Nic - I hope to keep exposure to sunlight to a minimum. Maybe I should ask for a "blue tint" to the glass in the case since most interior lights these days are LEDs which have considerably more "blue" in them than an incandescent.
-
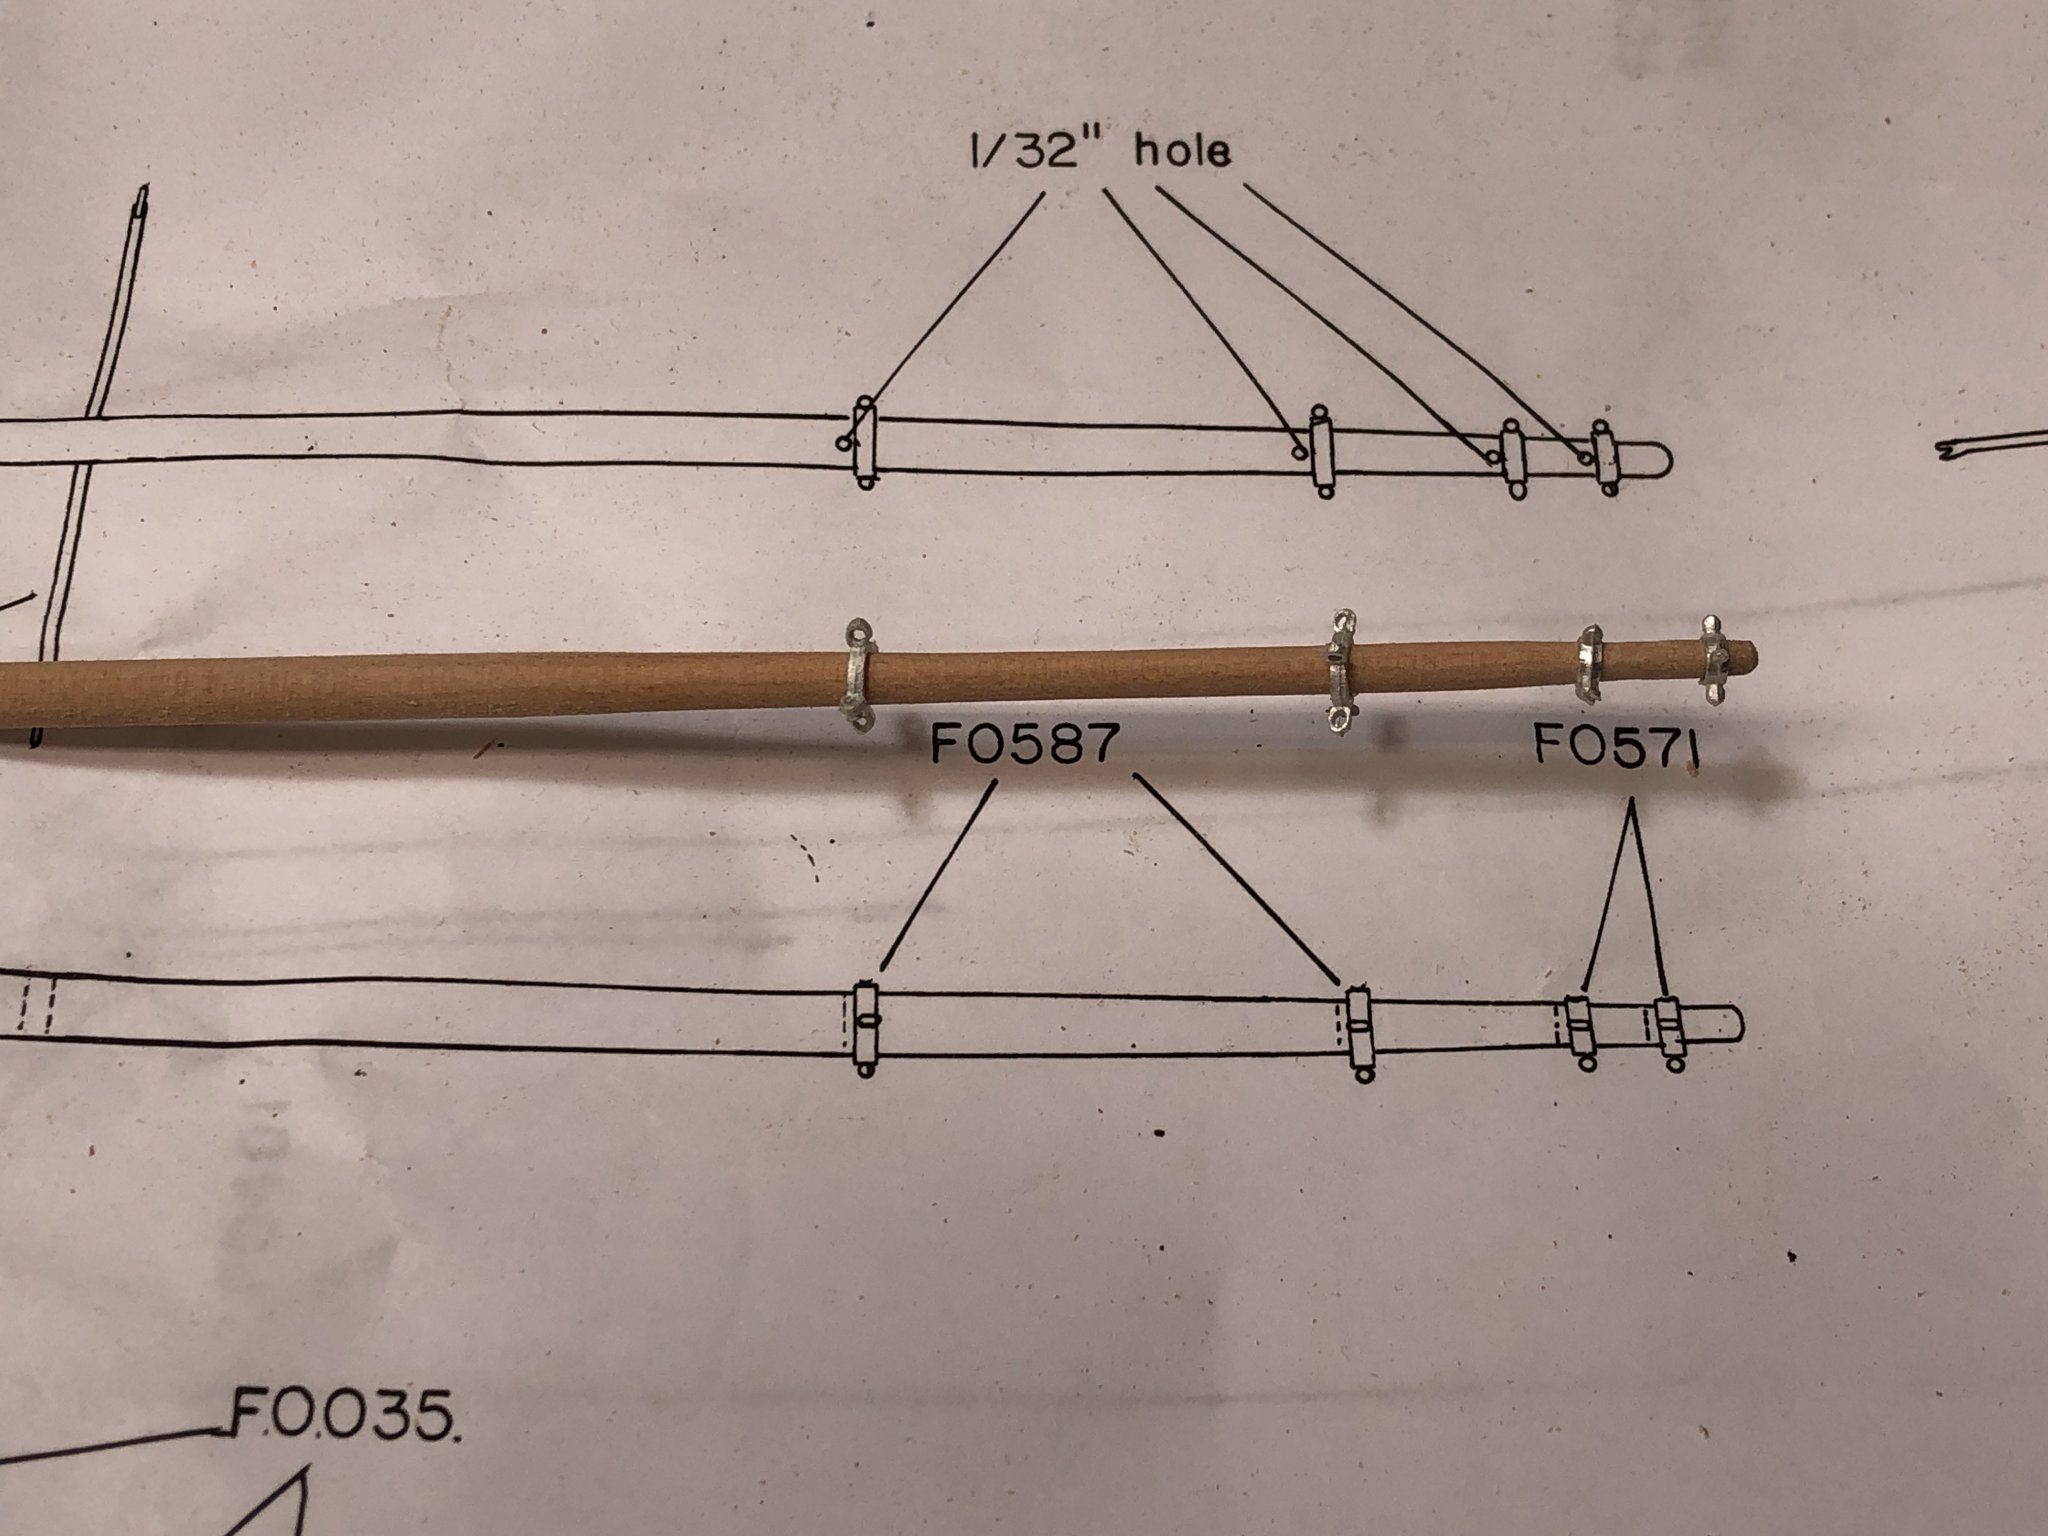
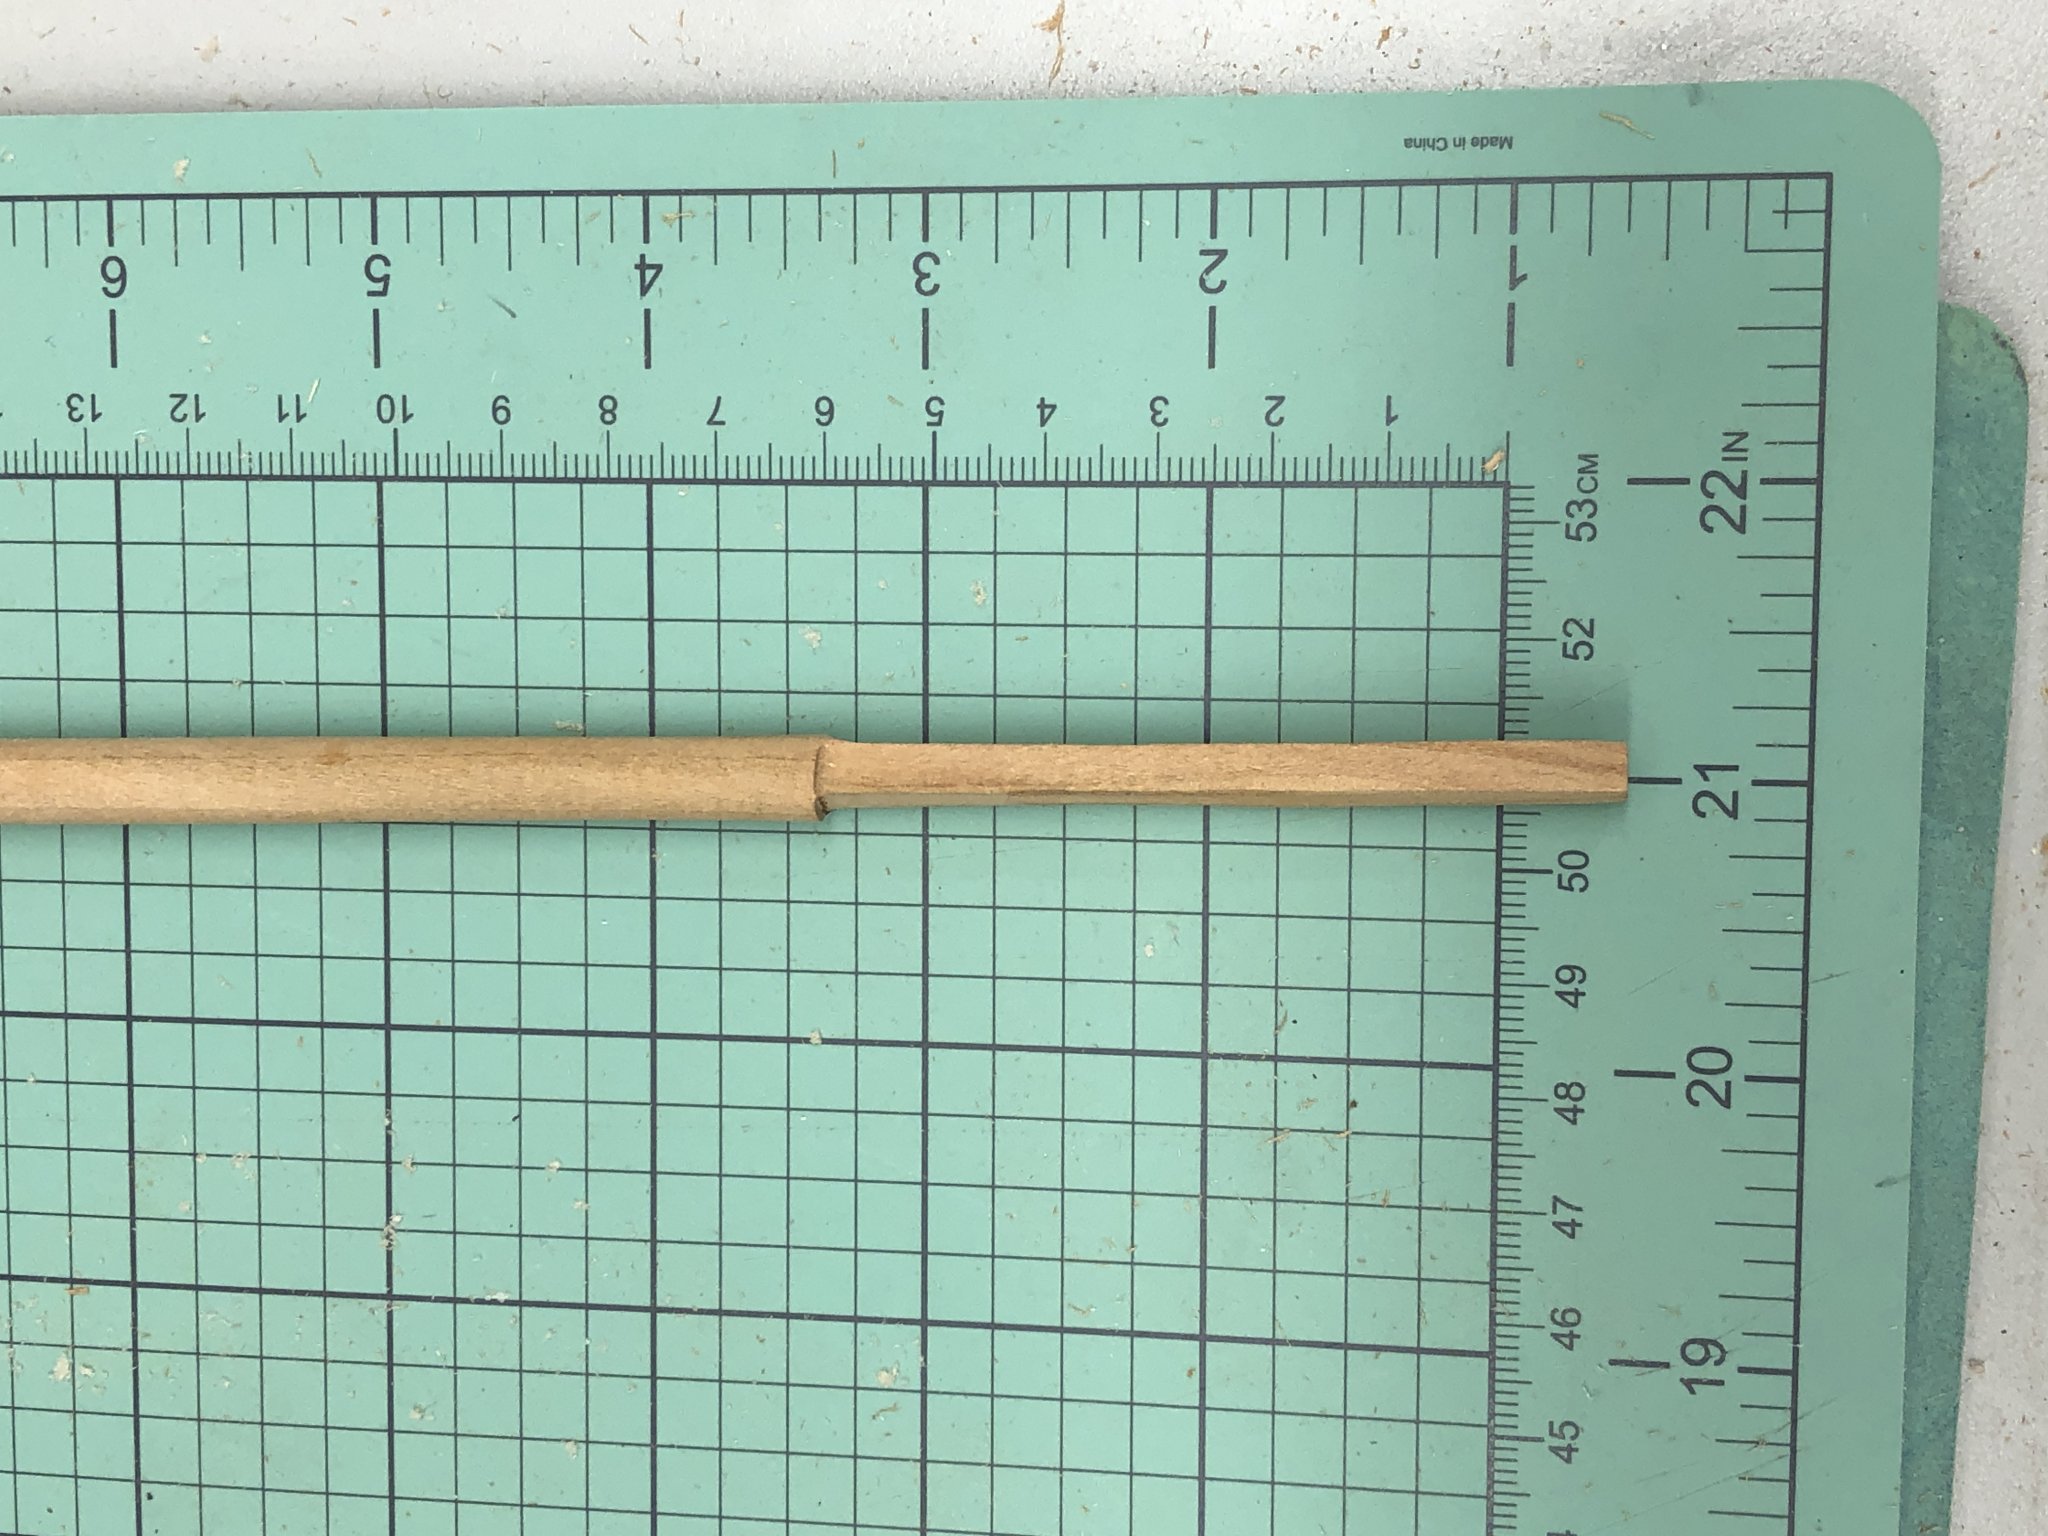
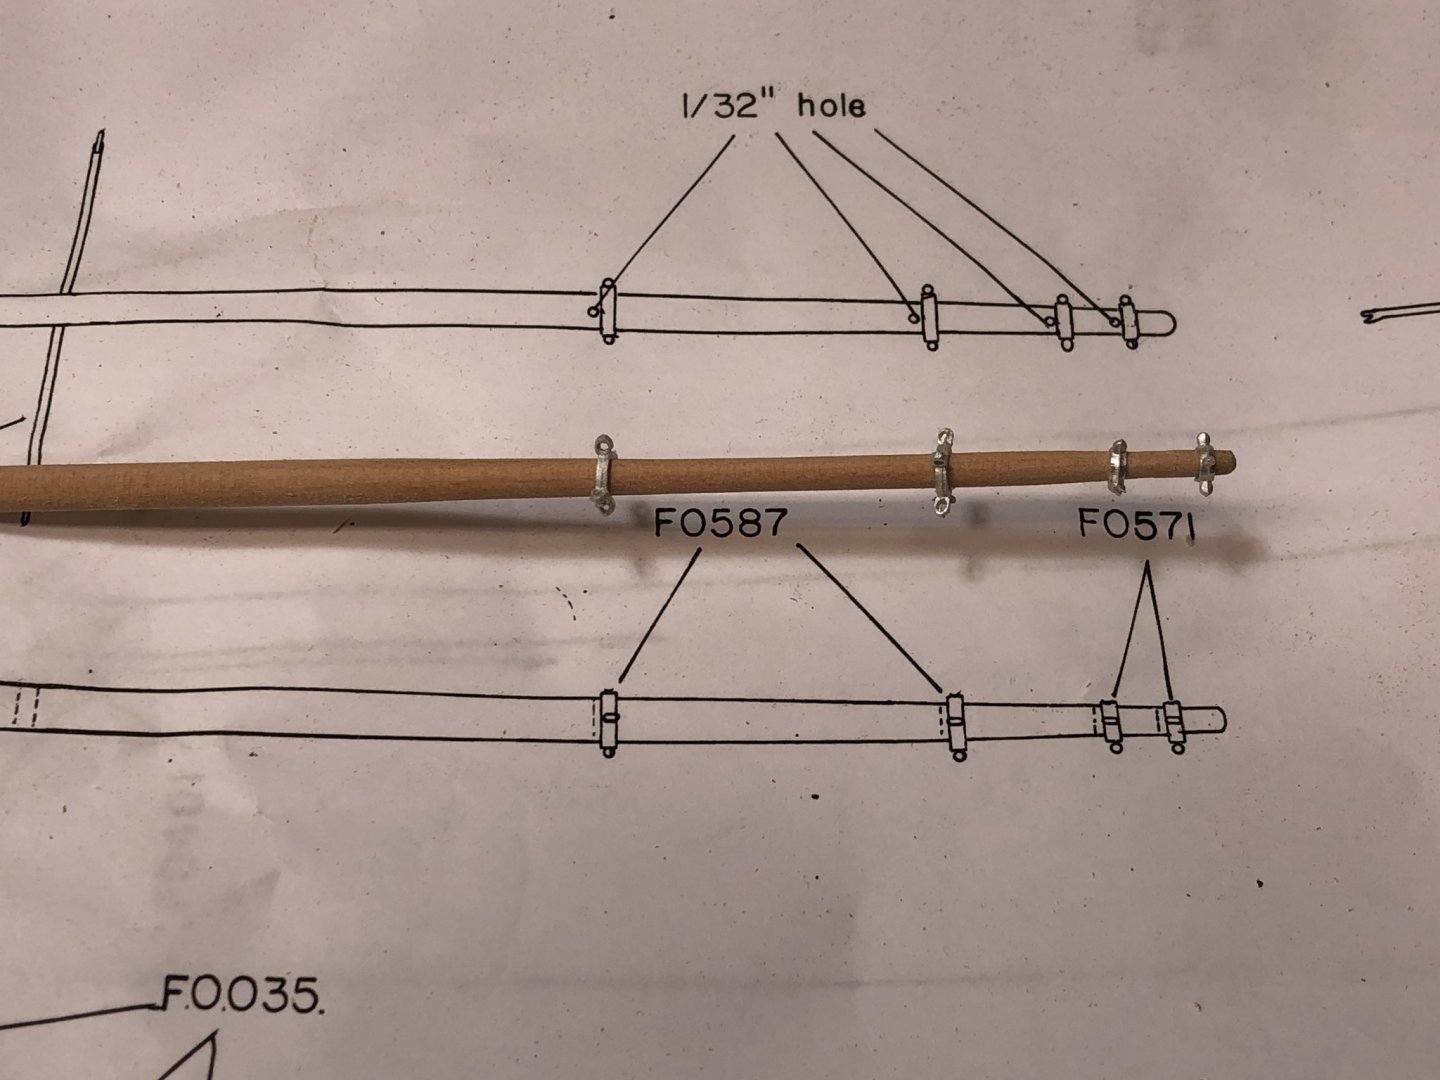
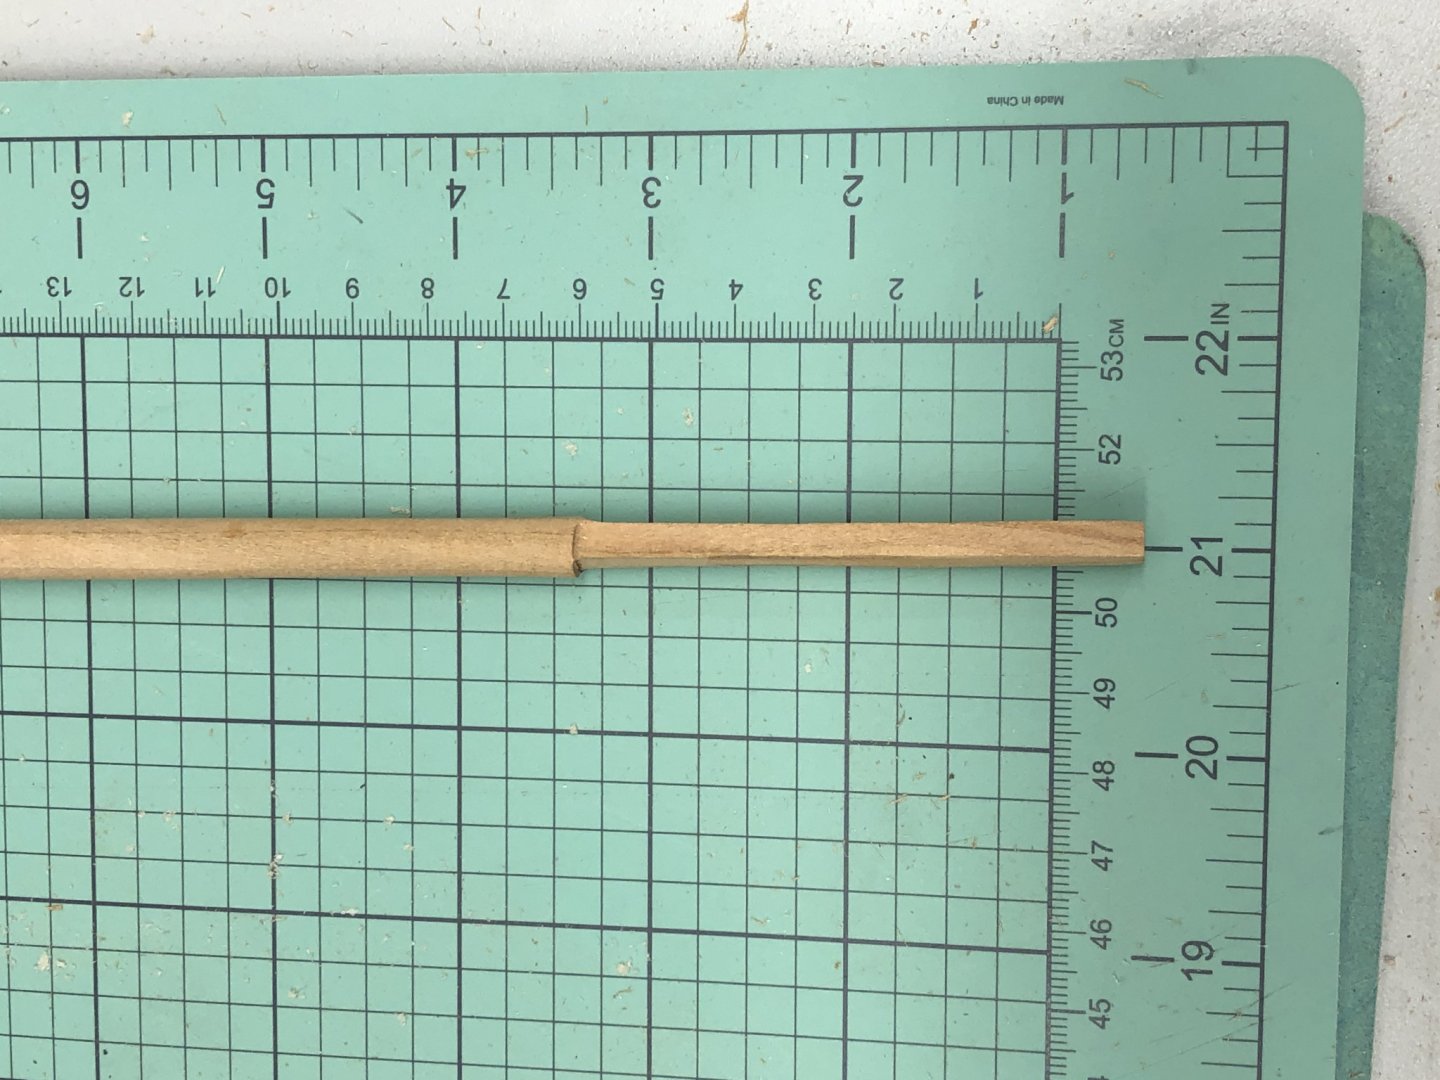
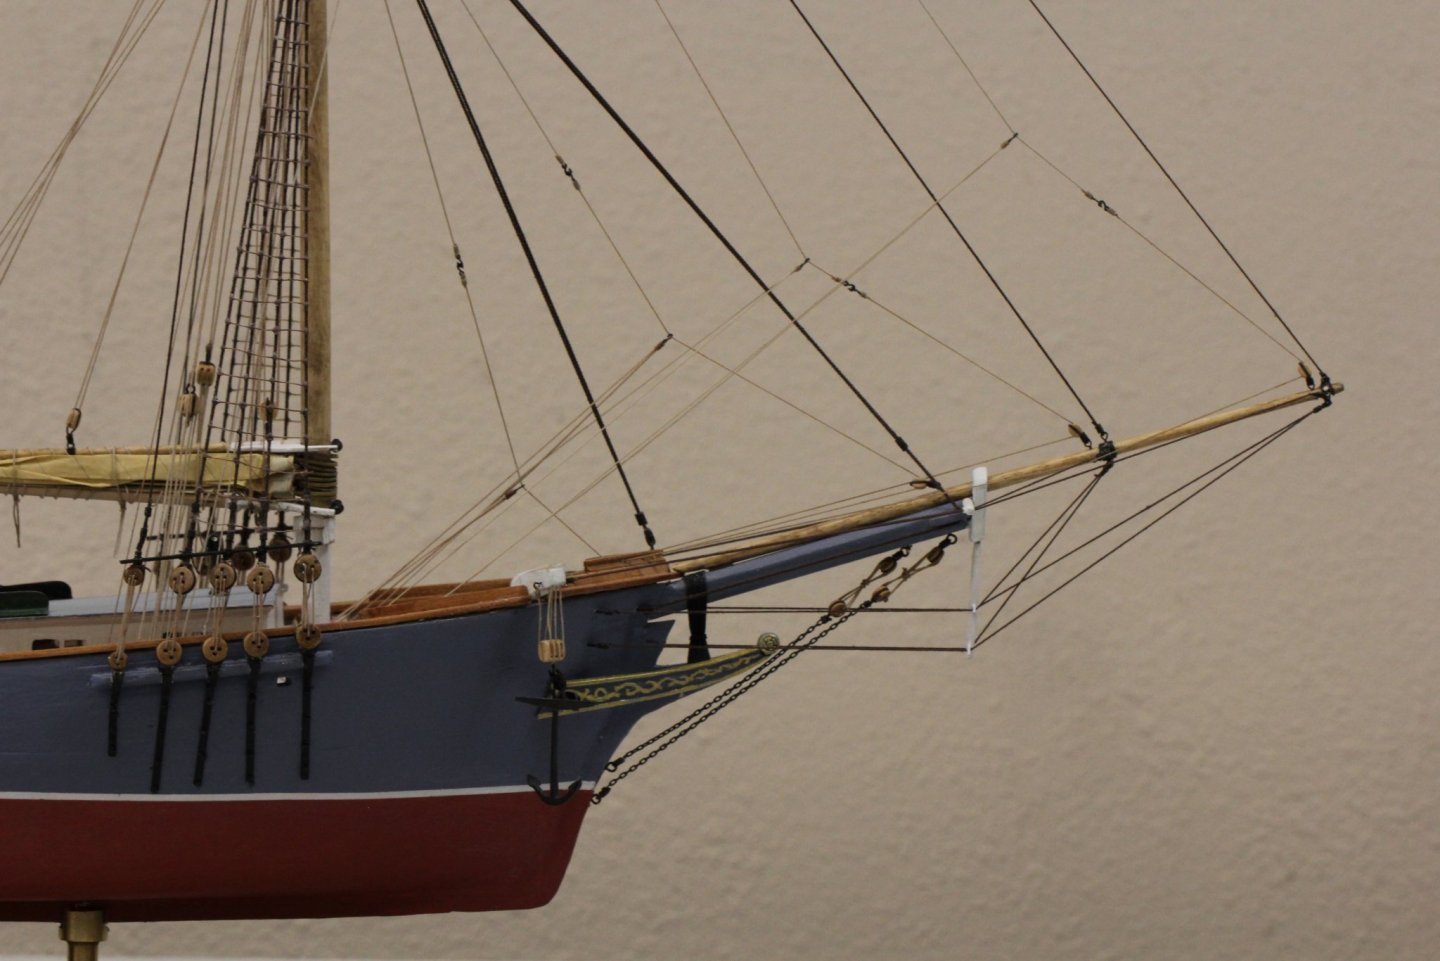
I took the 3/16" "dowel" that I created and used the four 'bands" that are speced on the drawing to shape the jib boom. The drawing shows that the two outermost bands are the same diameter (1/8") which the inner two are 5/32". That means, essentially no taper between each set of bands. Some what of a challenge especially if you tried to do it in a "power" environment. I chose to do it "manually" and here is what Im came up with. The only issue is the first of the larger bands - the spar is too small where it needs to be - not dramati ally but enough that it will take thick CA to glue it in place. Speaking of the smaller bands - there are a total of 16 provided for the jib boom and gaffs, and each has four "ports" which would support a line for some purpose. None of those holes are actually a hole. In most cases there is a "dimple" where the hole should be but each and every one has to be drilled out to be useful. So 16 X 4 = 48 holes; #75/76 size) that need to be drilled in very small, Britannia metal pieces. Luckily I have a MicroLux drill press which makes this somewhat easier. I cannot imagine the frustration for those who would have to resort to a pin vice to drill these out - hope for a really sharp #76 drill bit - but you will probably be disappointed.
- 144 replies
-
- 6
-
-
- charles p notman
- finished
- (and 1 more)
-
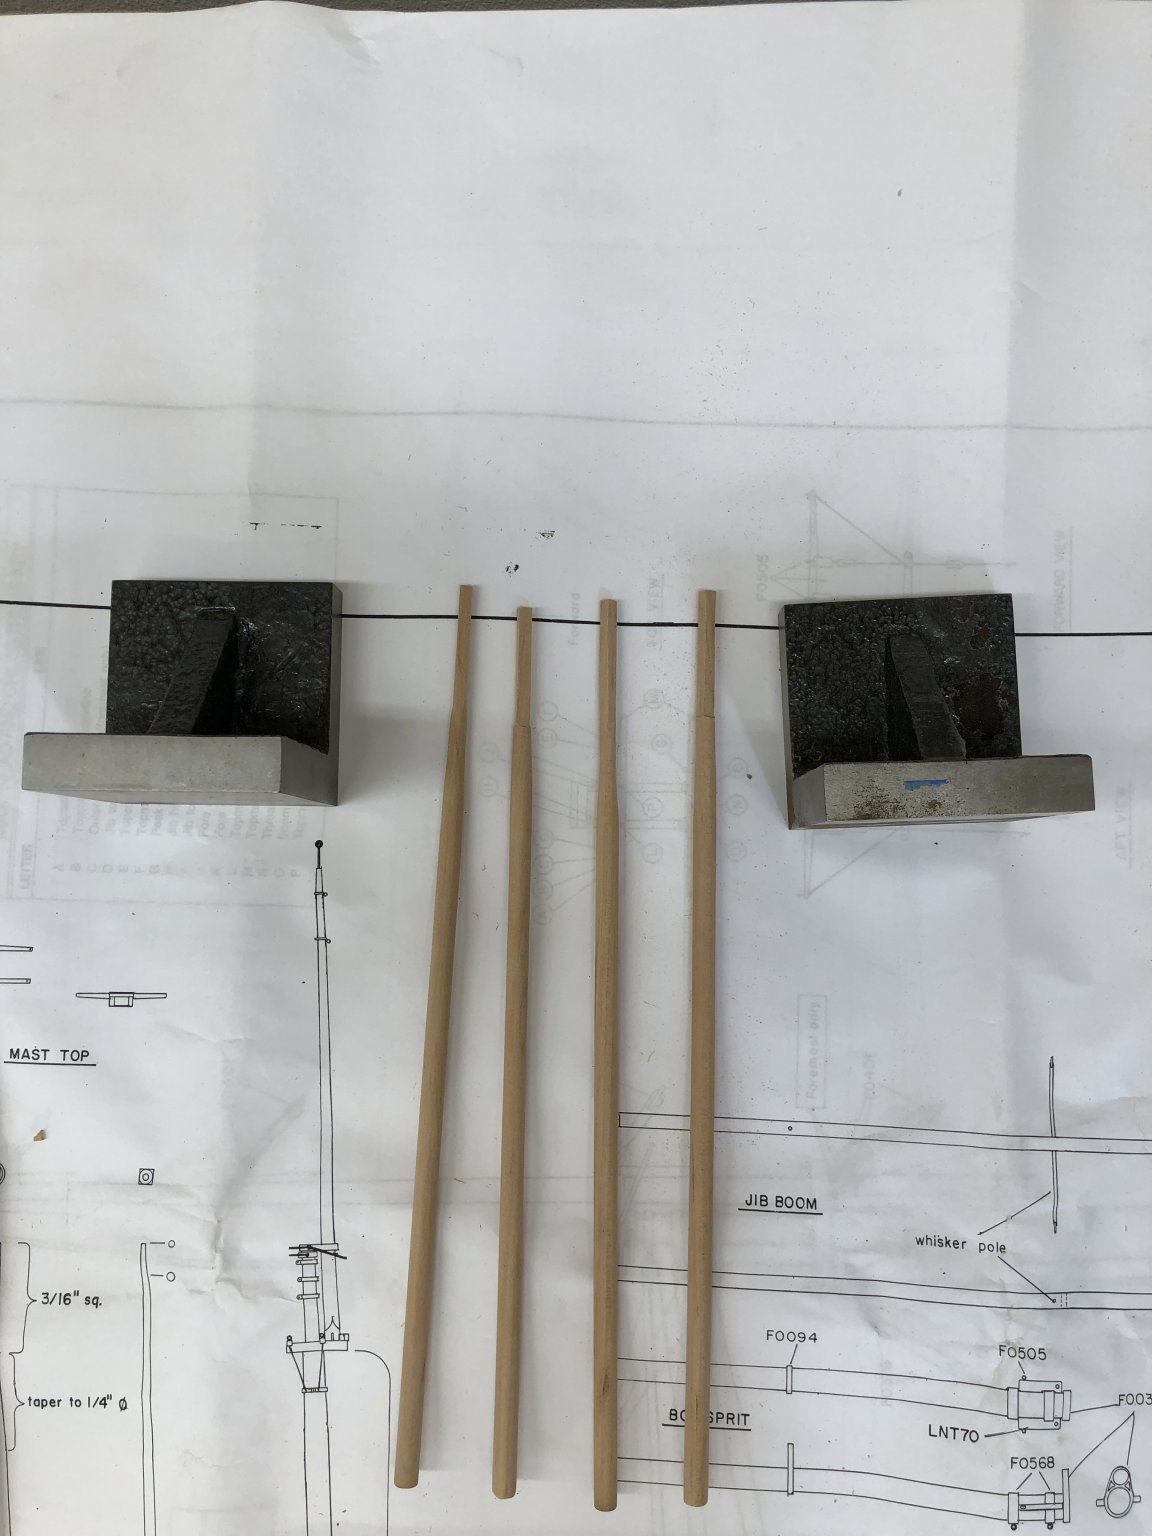
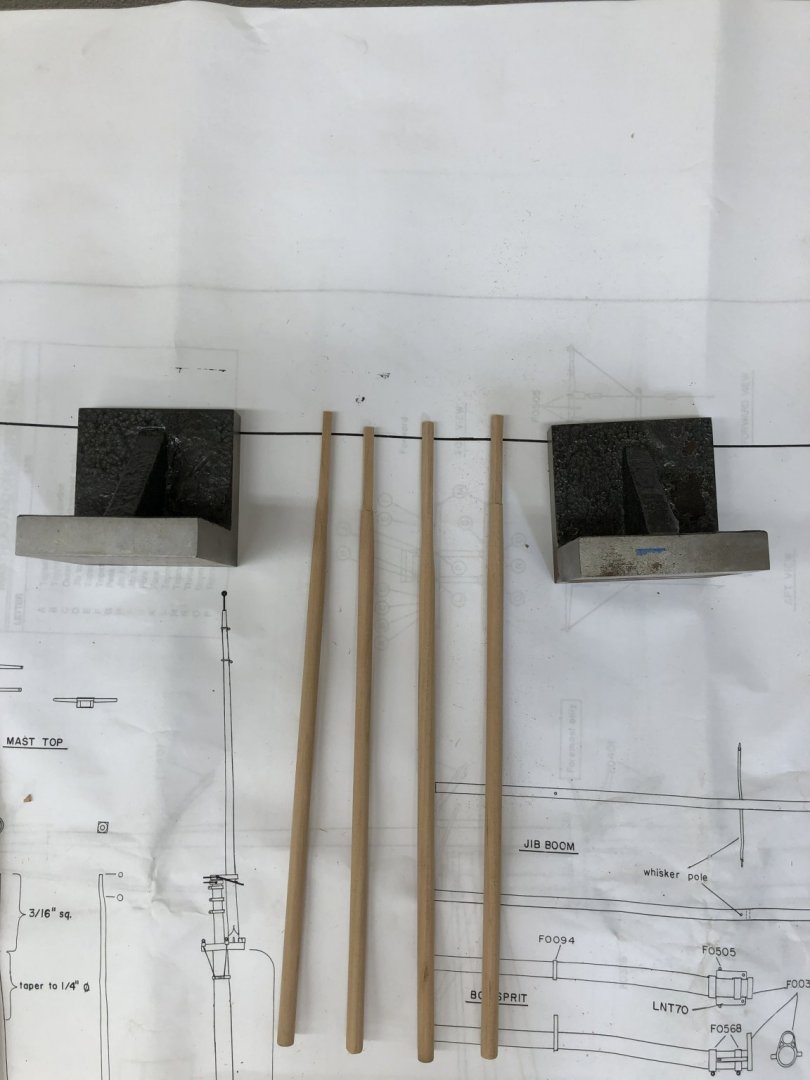
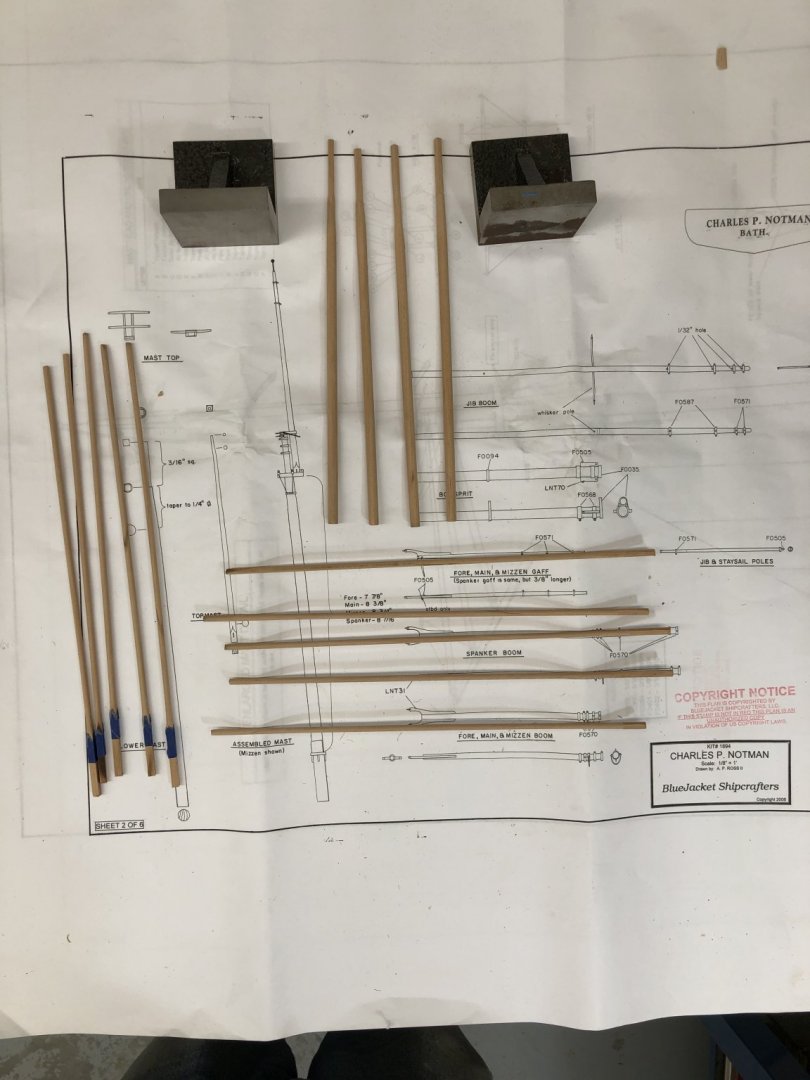
I had hoped that changing from basswood to Cherry would provide the needed "darkening" on the spars to replicate the brown paint wash of the prototype. Silly boy. I took a sample of the Cherry and put three coats of Wipe-on-Poly Satin on and still was not as deep a color as I wanted. So I resorted to staining the Cherry wood with Cherry stain (from MinWax). Here are the four lower masts, the bowsprit and the jib boom after staining but before the Wipe-on-Poly treatment.

- 144 replies
-
- 7
-
-
- charles p notman
- finished
- (and 1 more)
-
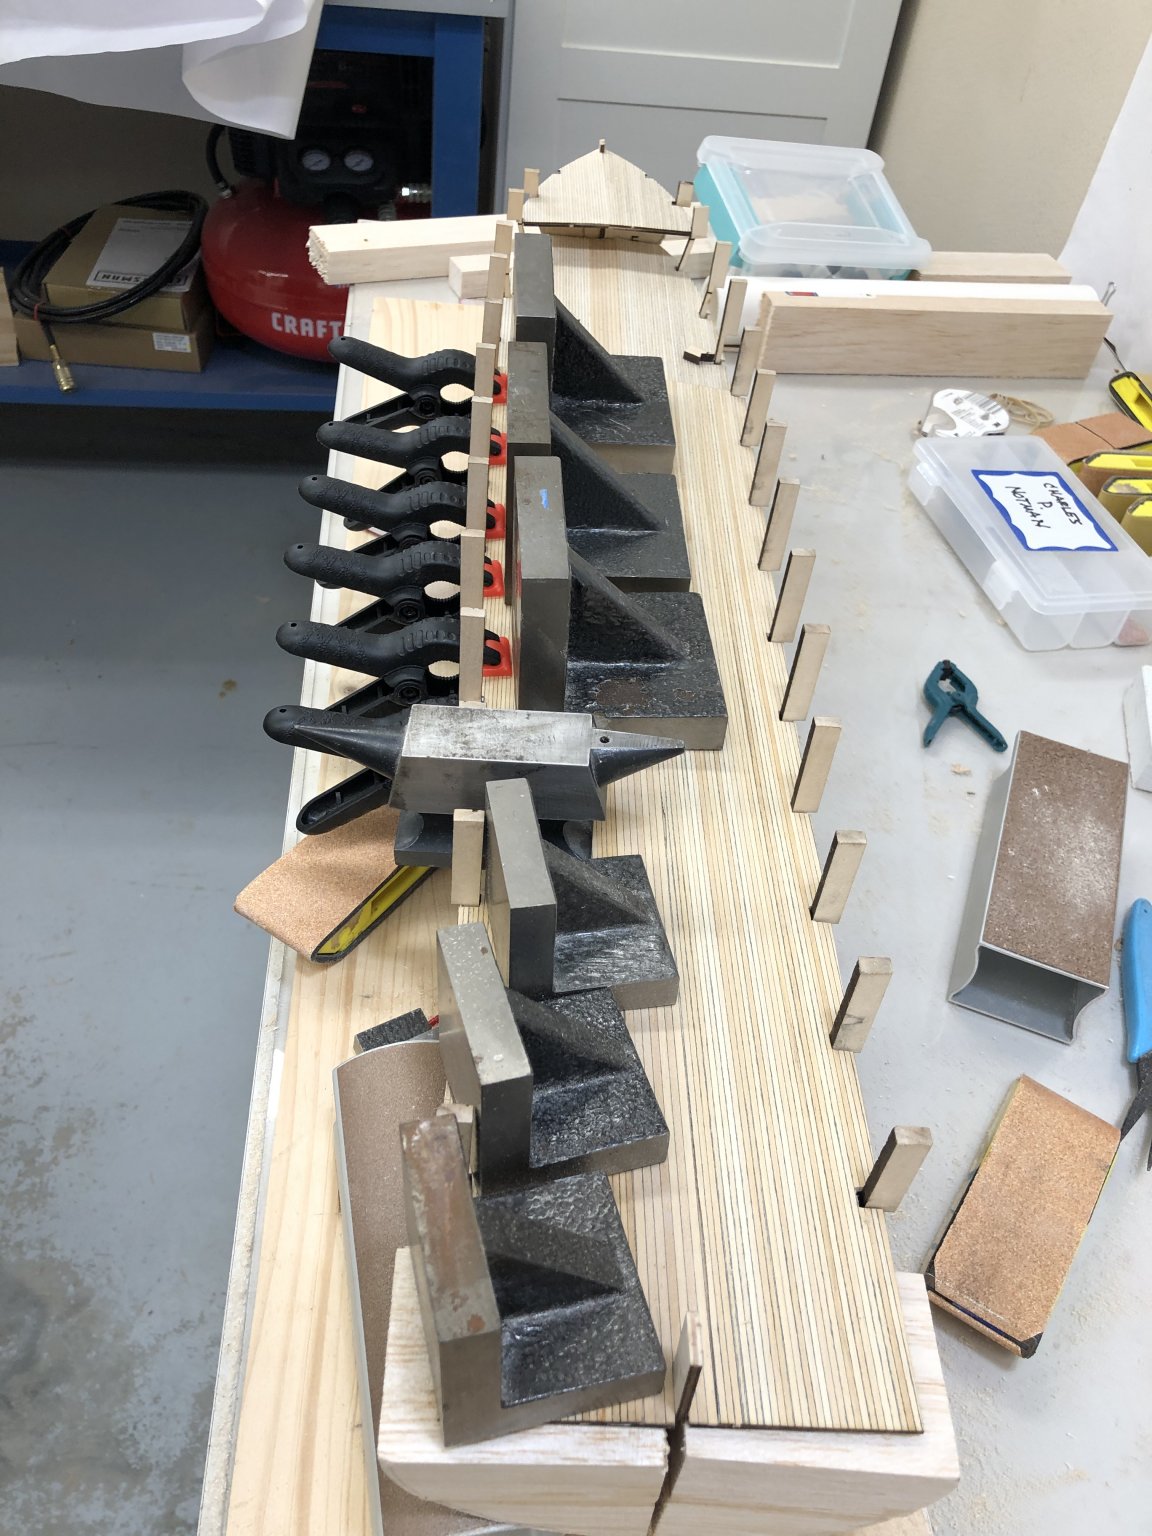
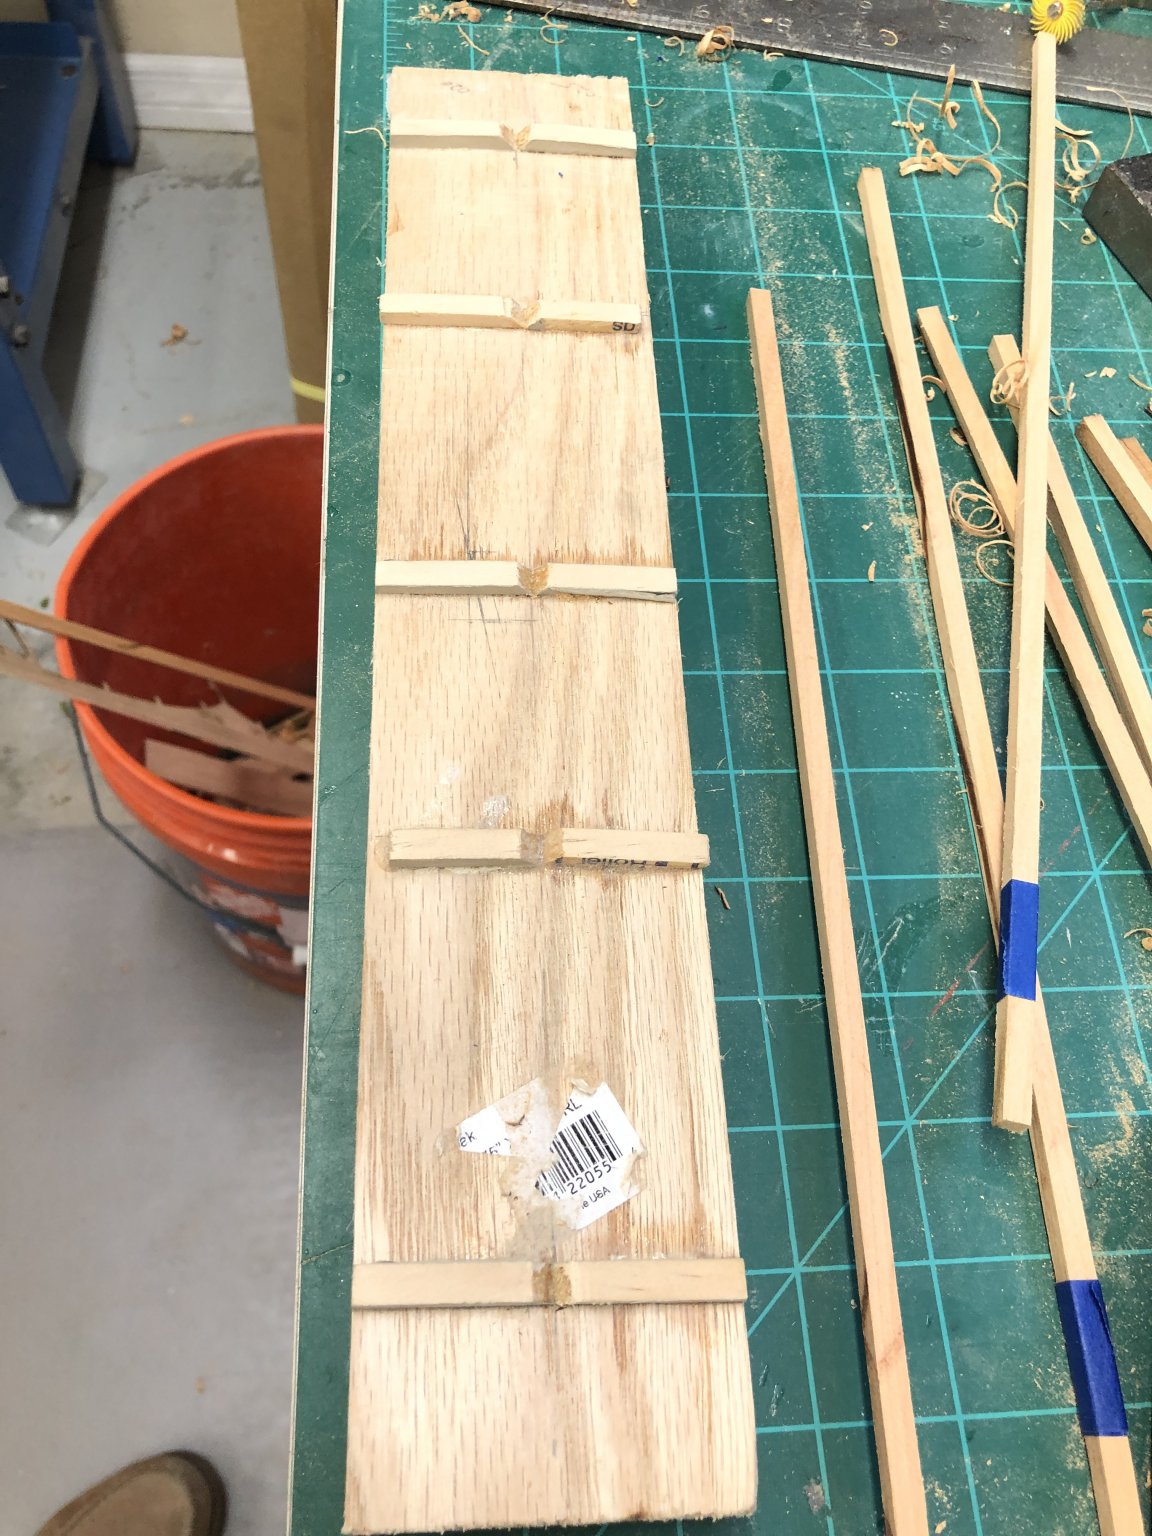
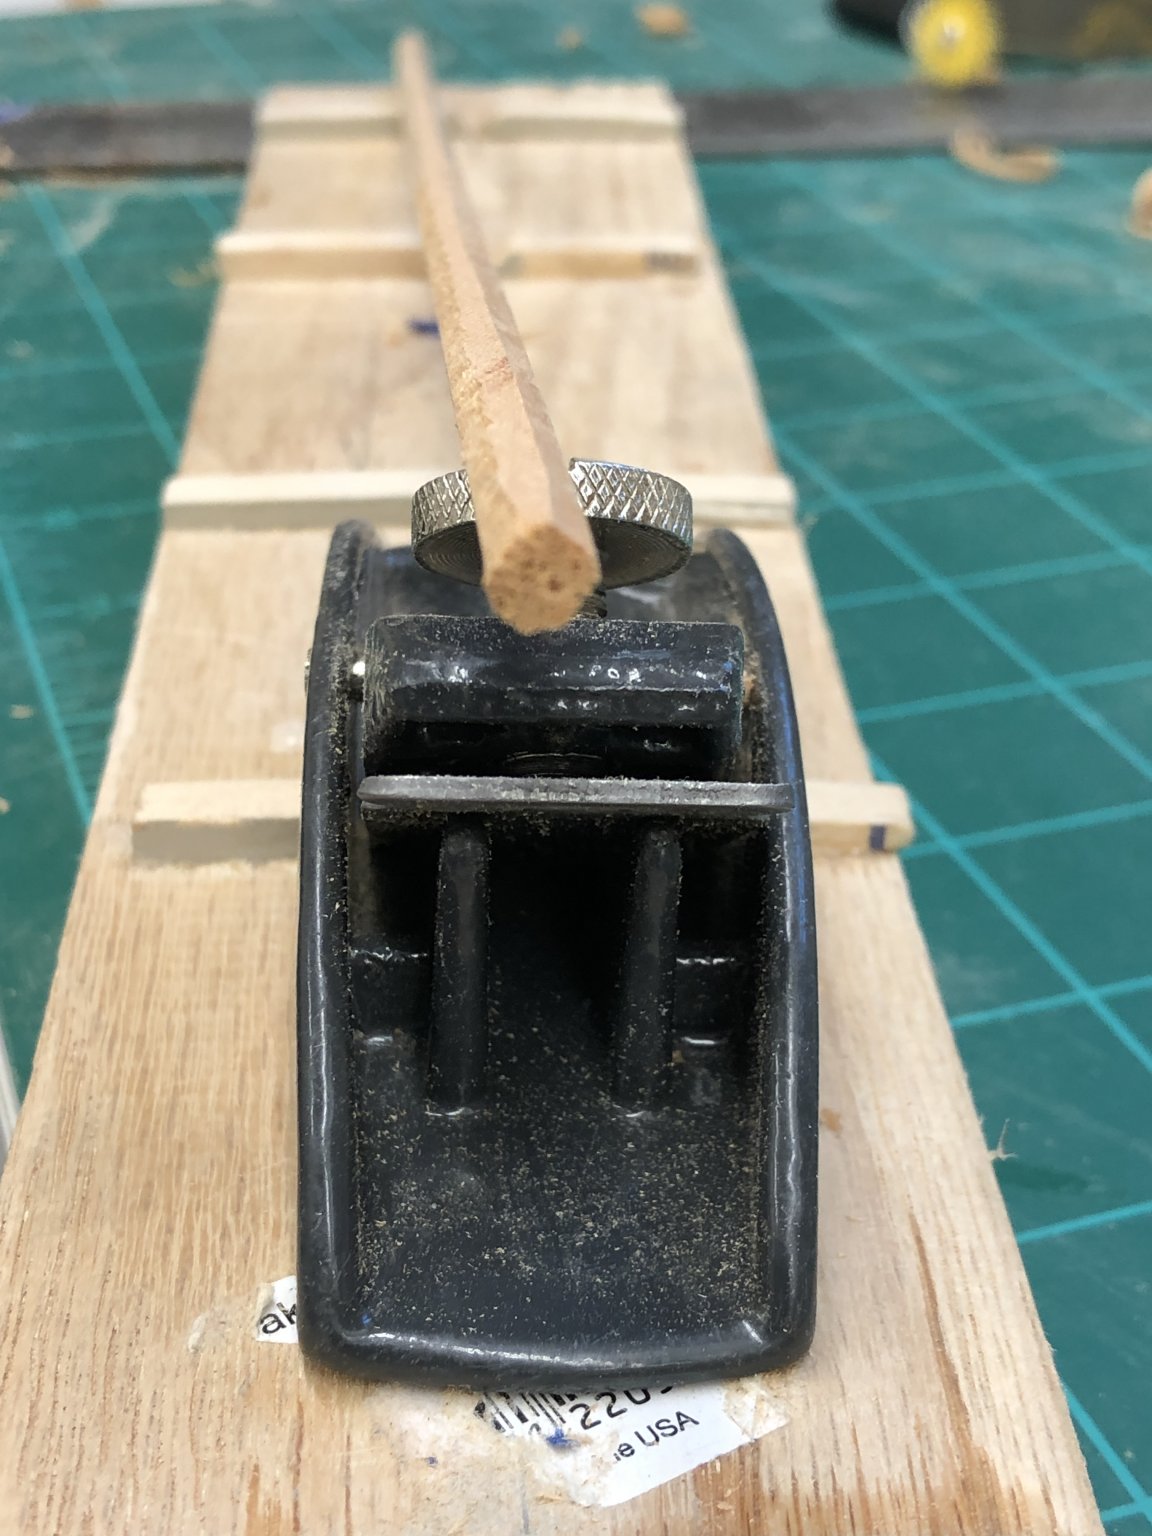
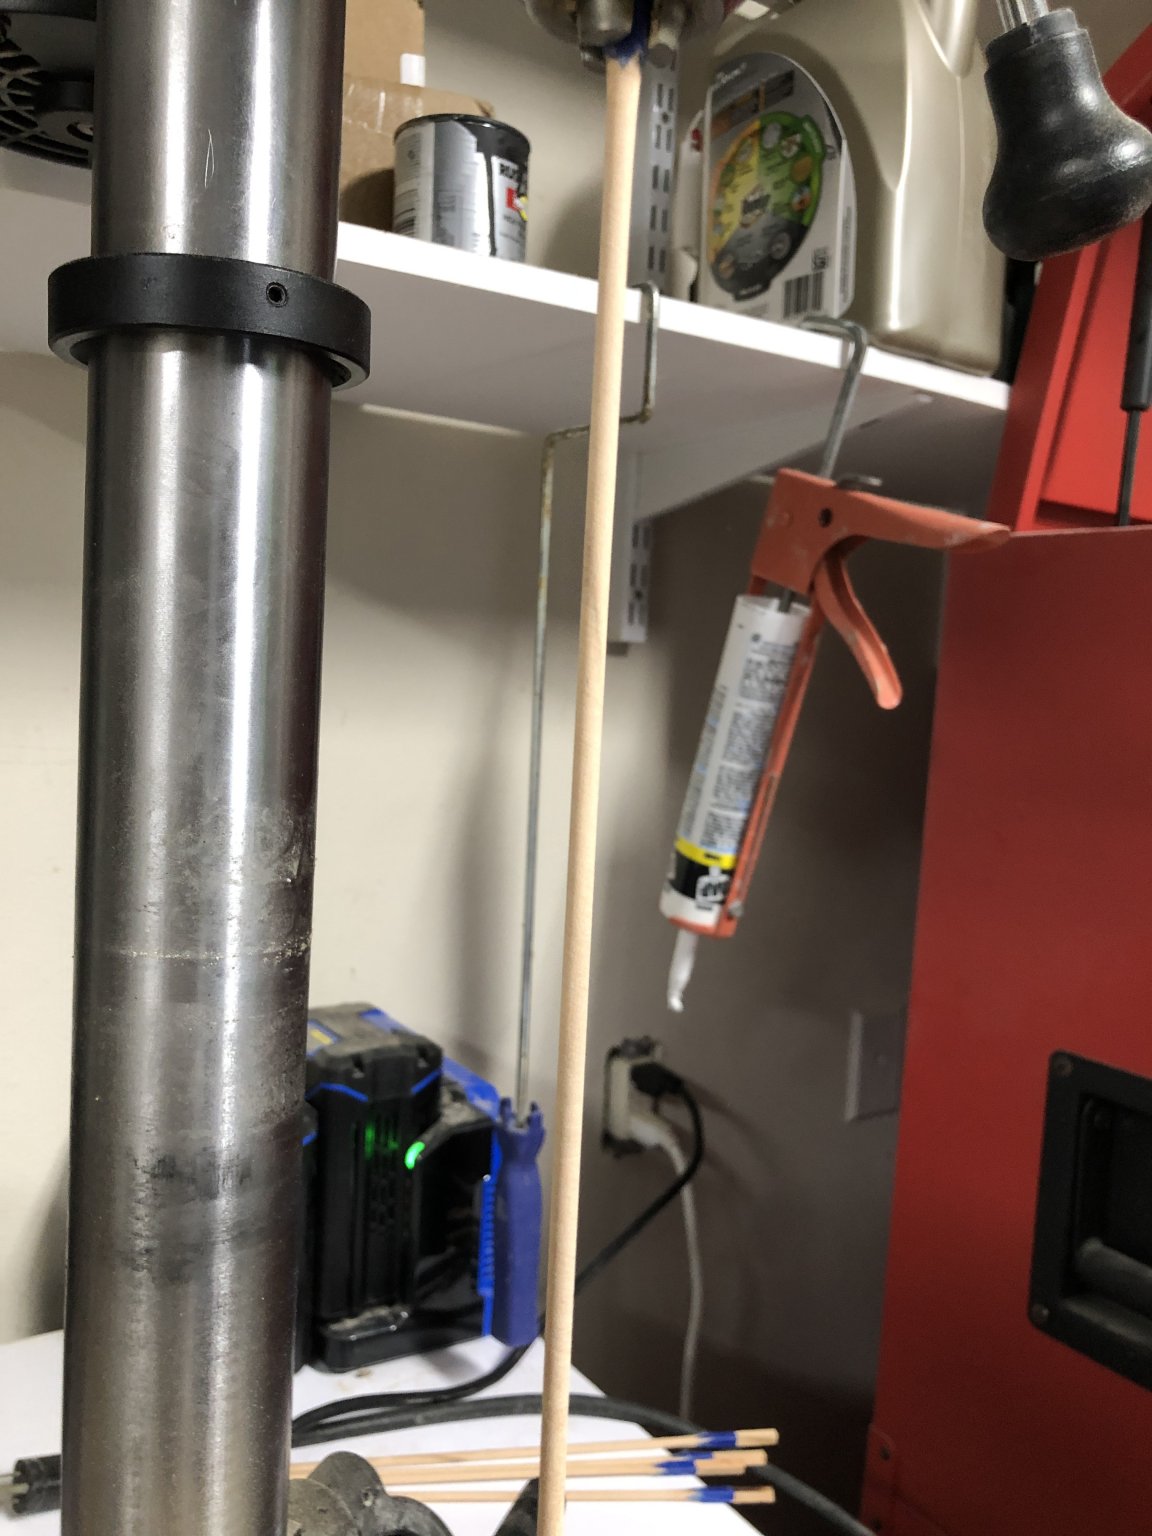
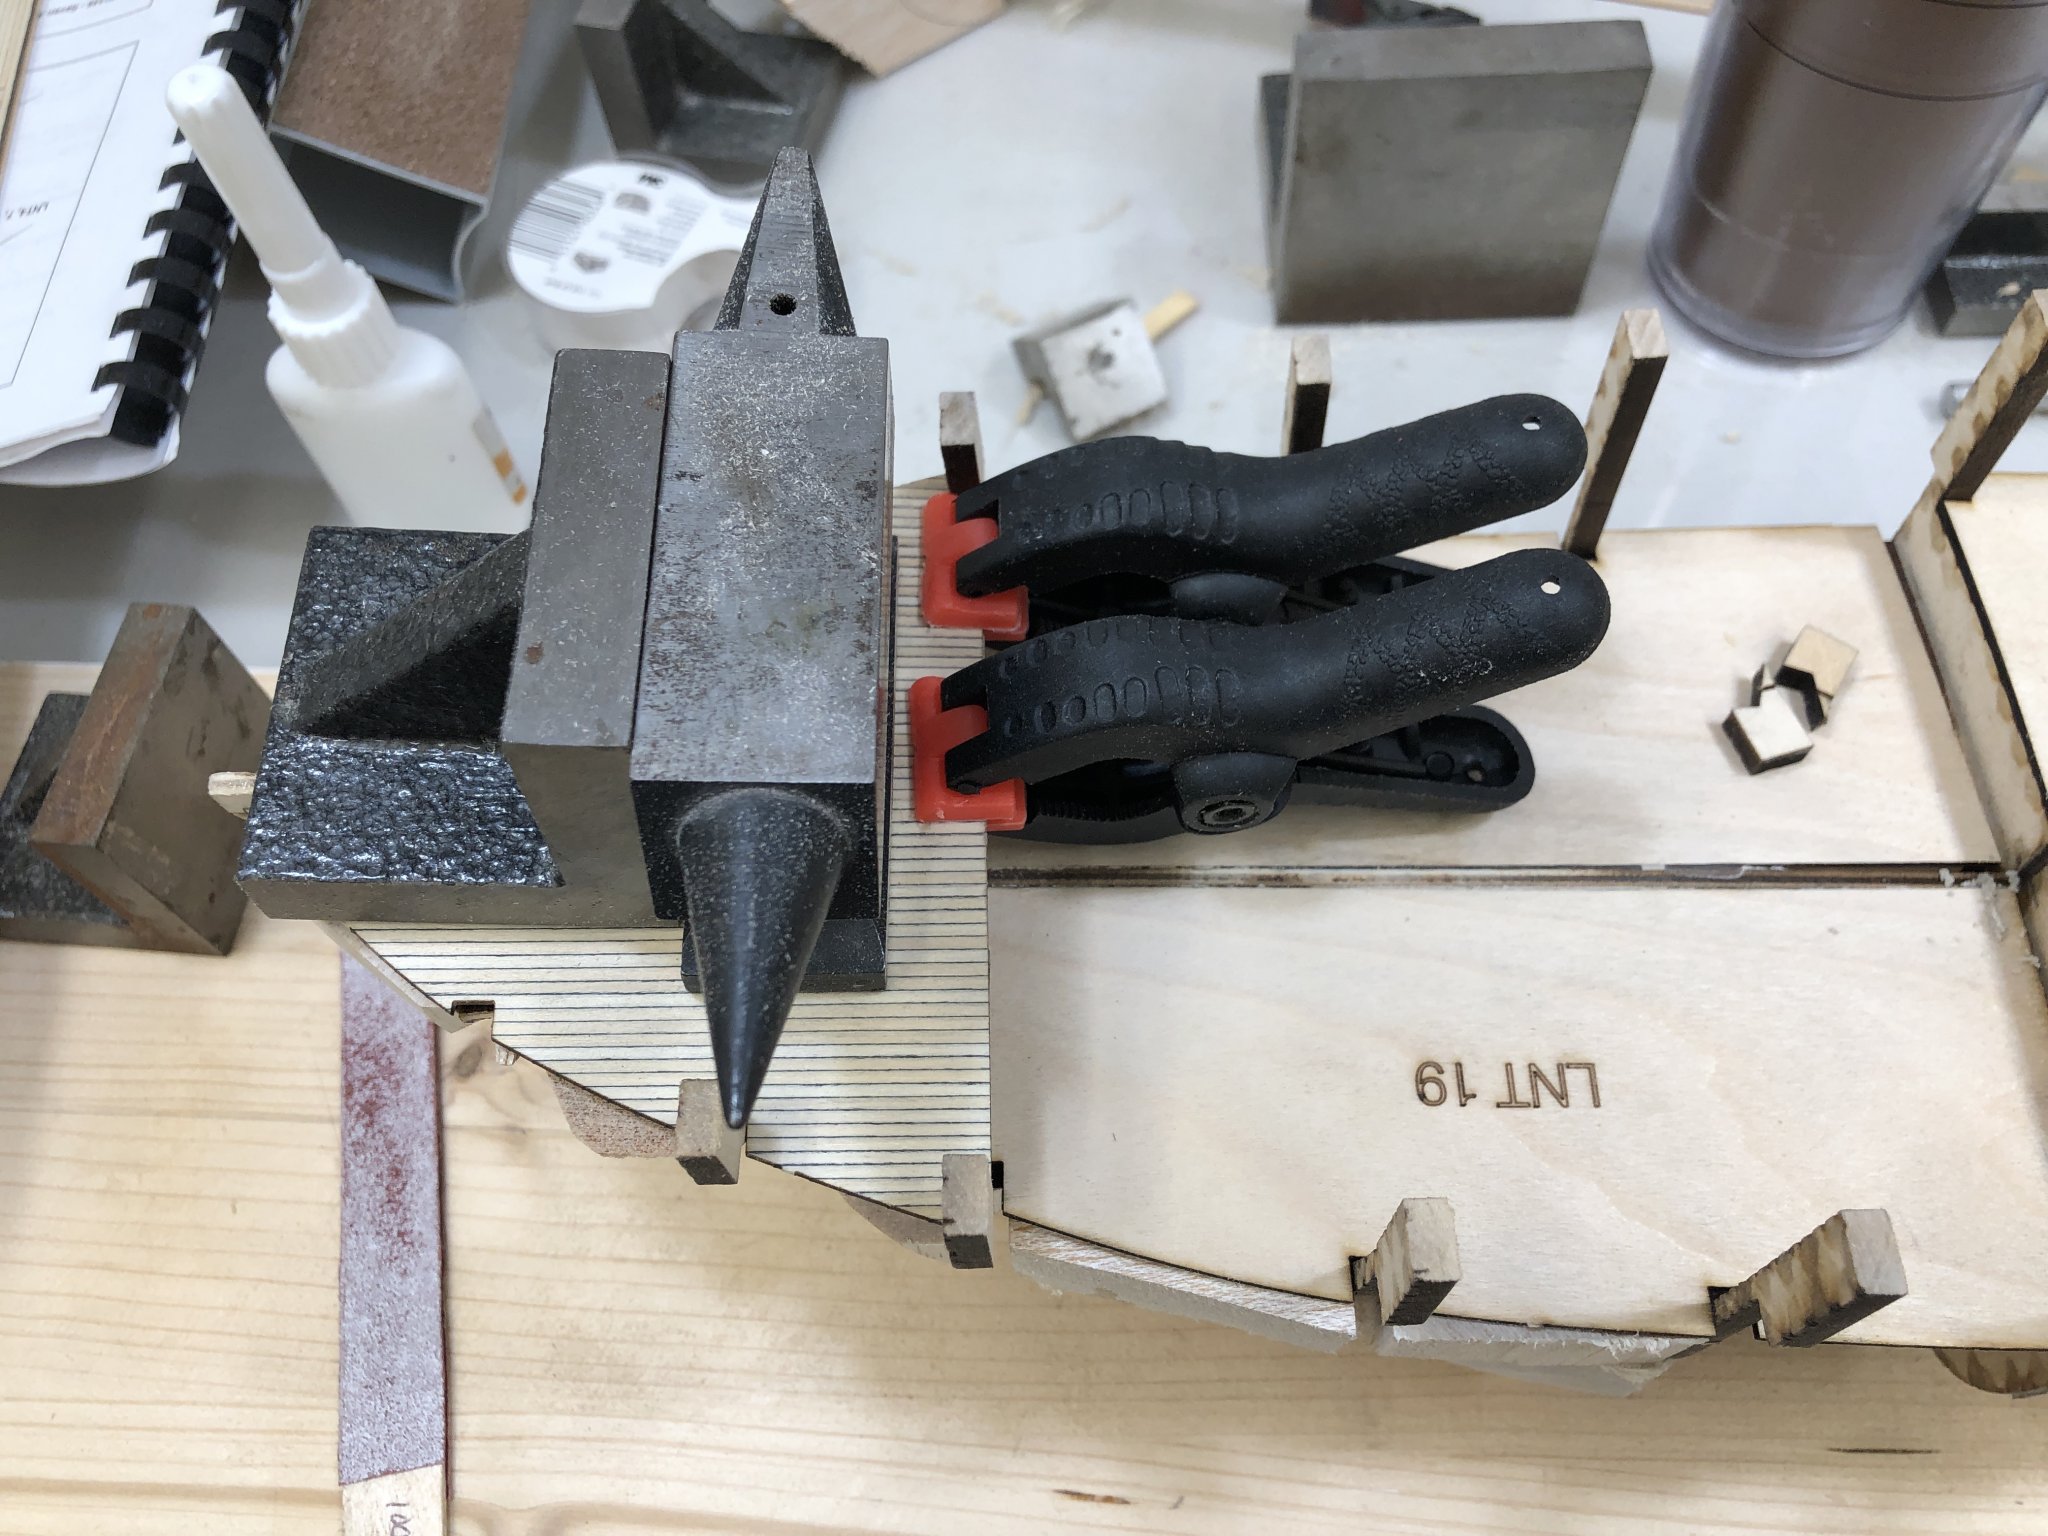
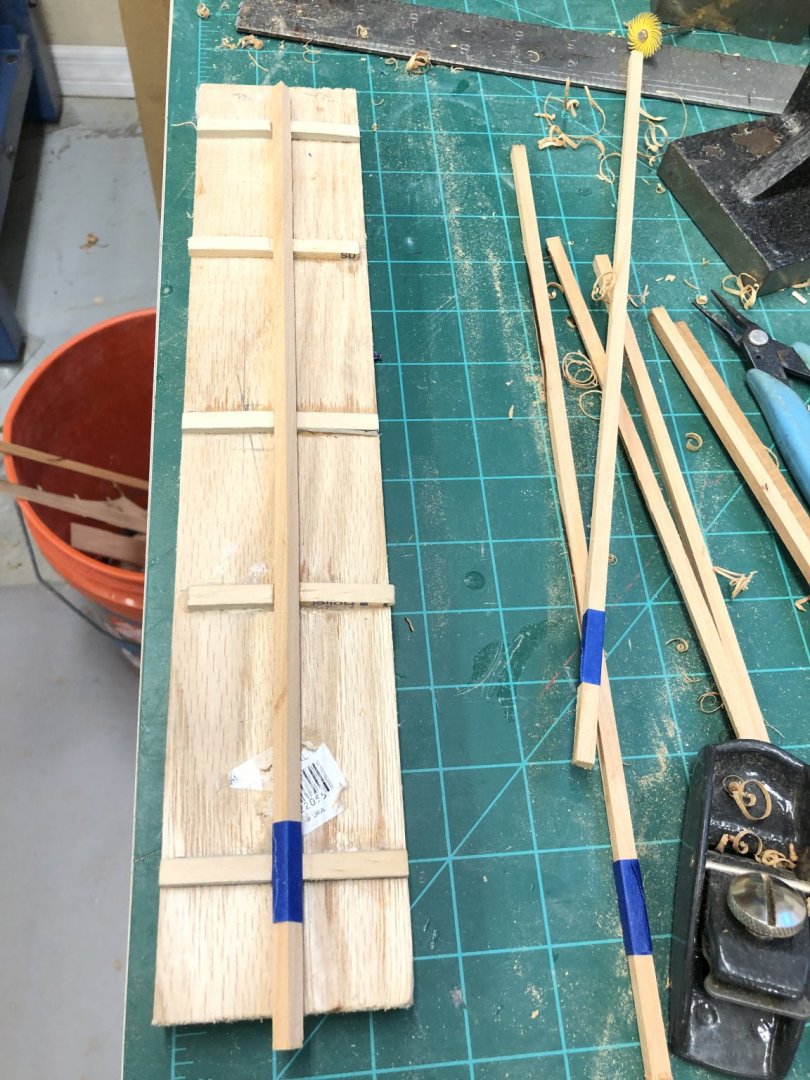
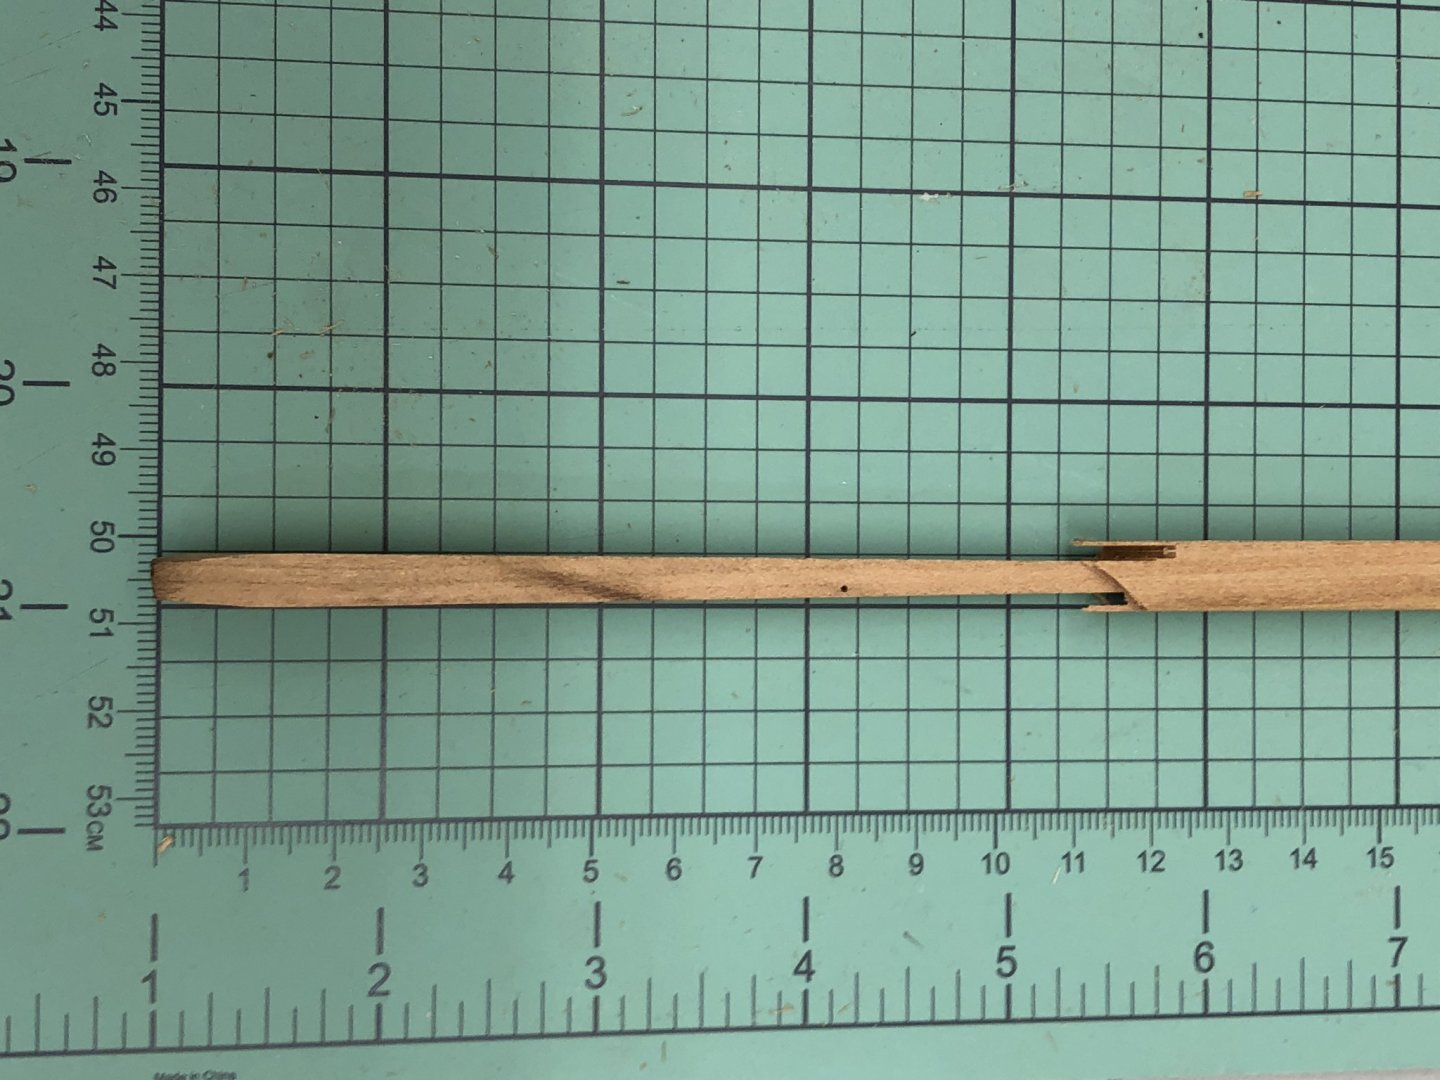
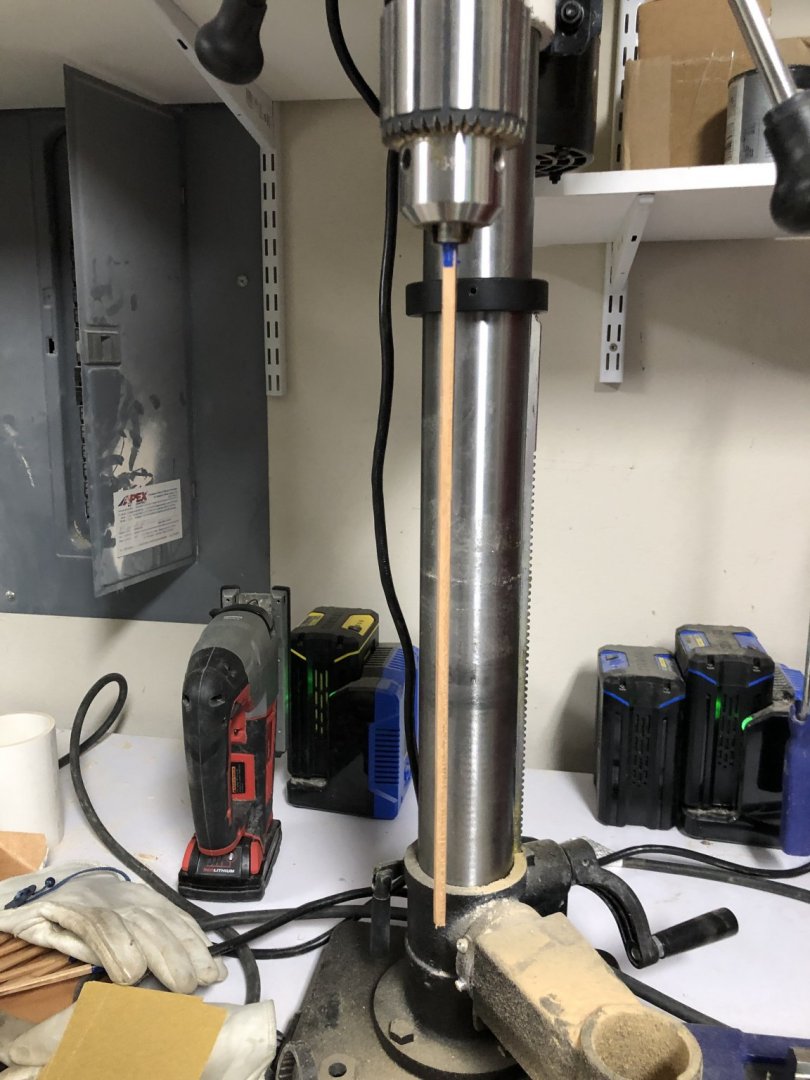
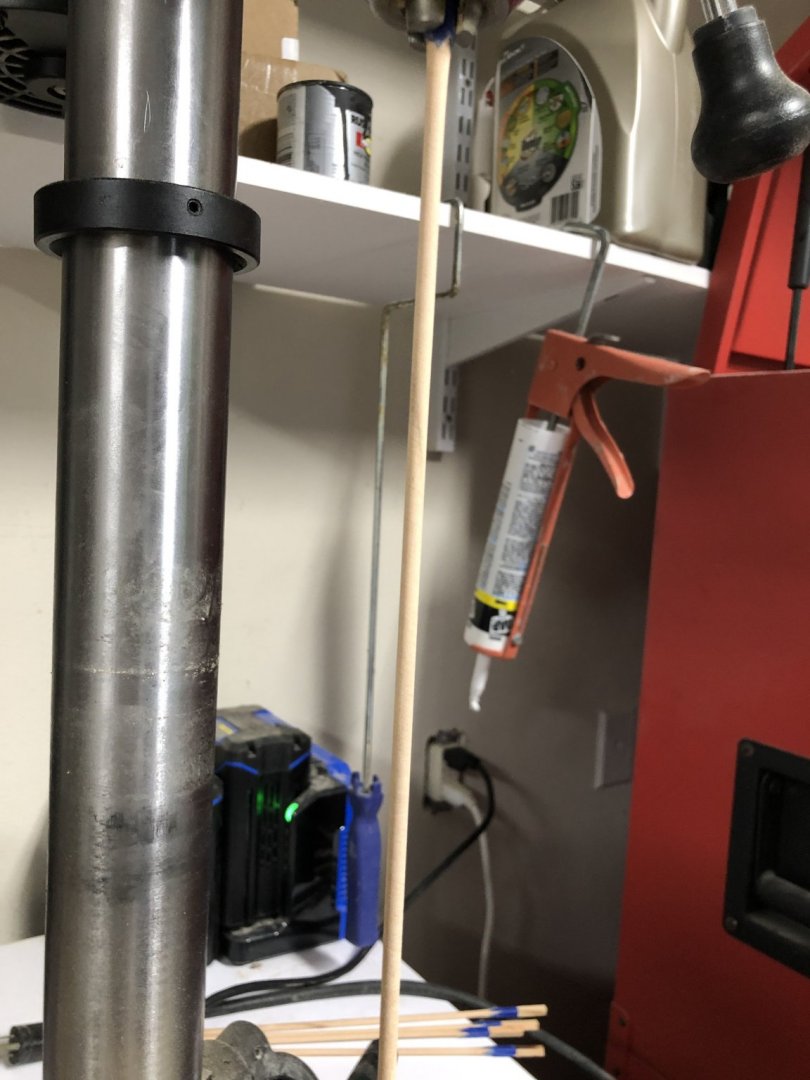
When I decided to do the lower masts in Cherry I had not looked ahead (carefully enough) to realize that all the spars are "painted brown - actually washed in diluted brown paint on the prototype. So, after getting the three lower masts completed I had to generate Cherry to provide the four topmasts, four booms and the jib boom (all starting with 3/16" material (dowels for the booms and jib boom and square for the topmasts). I have not yet addressed the gaffs which are 1/8". Since the lower masts are mostly 5/16" without taper but has a substantial 1/4" square section at the top (1 3/4" per the instructions, 1 1/2" on the drawings), I started by creating the round lower part from a square piece of Cherry that I used the thickness sander to get to 21/64" (the Byrnes thickness sander can get this accuracy - the thickness did not vary more 1/64" through the entire 12+ inch piece I fabed). I used a jig I made for fabbing the Niagara lower masts from Yellow Cedar - it is pictured below. I clamped it to the desk to keep it from moving and used a 3" block plane to take it from square to octagonal. Then I used my big Jet drill press as a poor man's lathe to smooth the octagonal to round and down to the 5/16" speced diameter. That leaves a still square section at the top that needs to be reduced from the nominal 21/64" square to 1/4" square (and in the center of the circular part). I had two ideas for doing this, one involved using the table saw (with micrometer adjustment) to carefully remove the required material. It would take four passes (once I got the rip fence in the right location), one for each face. This worked like a charm on the first two faces but section being cut lacked lateral support for the final two cuts and the square section looked a bit "off". Here is what this looked like. The part closest to the round section is close to the required 1/4" but it does have some taper and there is considerable "clean-up"at the transition to round. So I decided not to risk any more of my 5/16" round blanks going that route. My second method was to use the disc sander to take the square section down to 1/4". That is not without difficulties (getting the piece against the sander sufficiently evenly to get the same amount removed from the top and bottom of the face among them). I stopped with the disc sander a few 64s from 1/4" and used sanding sticks to get the rest of the way and try and get the sides to remain (or return) to square (as opposed to rhomboid). Here is what this looked like before the taper to the 5/16" round was done. I used the sanding sticks to taper from the 5/16" round to the 1/4" per the plans. This worked and I was able to fab four lower masts in a few hours. Here they are without any finish and not yet cut the lengths speced in the plans. With the lower masts taken care of (more or less) I moved on to the topmasts and booms (including the jib boom). I used the same technique as for the lower masts (but took more pictures). So here is one of the top masts (I have masking tape to mark the area that is to remain square on the jig and what it looks like after being made octagonal (more or less). The square end goes in the drill chuck and a certain amount of care is required to get it in straight. Since there is no support (or restraint) at the bottom I found it a good idea to lightly hold on to the bottom when starting the dill press. I used 1200 rpm and 80 grit sandpaper wrapped around the topmast and applied pressure with both thumbs and as many fingers I could bring to bear and slowly moved up and down the topmast. After doing it several times I figured out that it took five transits of the length of the top mast top get to 3/16" round. I then went over the topmast with a piece of 220 sandpaper and called it quits for now. Here are pictures of before and after (although it is hard to tell the difference). All Anyone need a pile of Cherry sawdust? I went through a similar process to generate the five pieces of 3/16" dowel needed for the four booms and the jib boom. I did not attempt to taper any of these while they were chucked in the drill press as I need to carefully study the taper requirements and the provided hardware (for booms and jib boom) to make sure I do not taper more than required to get the hardware to fit. I will probably just do that tapering by hand. Anyway, here are the Cherry spars as they stand at the moment (I made one spare top mast "just in case").


- 144 replies
-
- 8
-
-
- charles p notman
- finished
- (and 1 more)
-
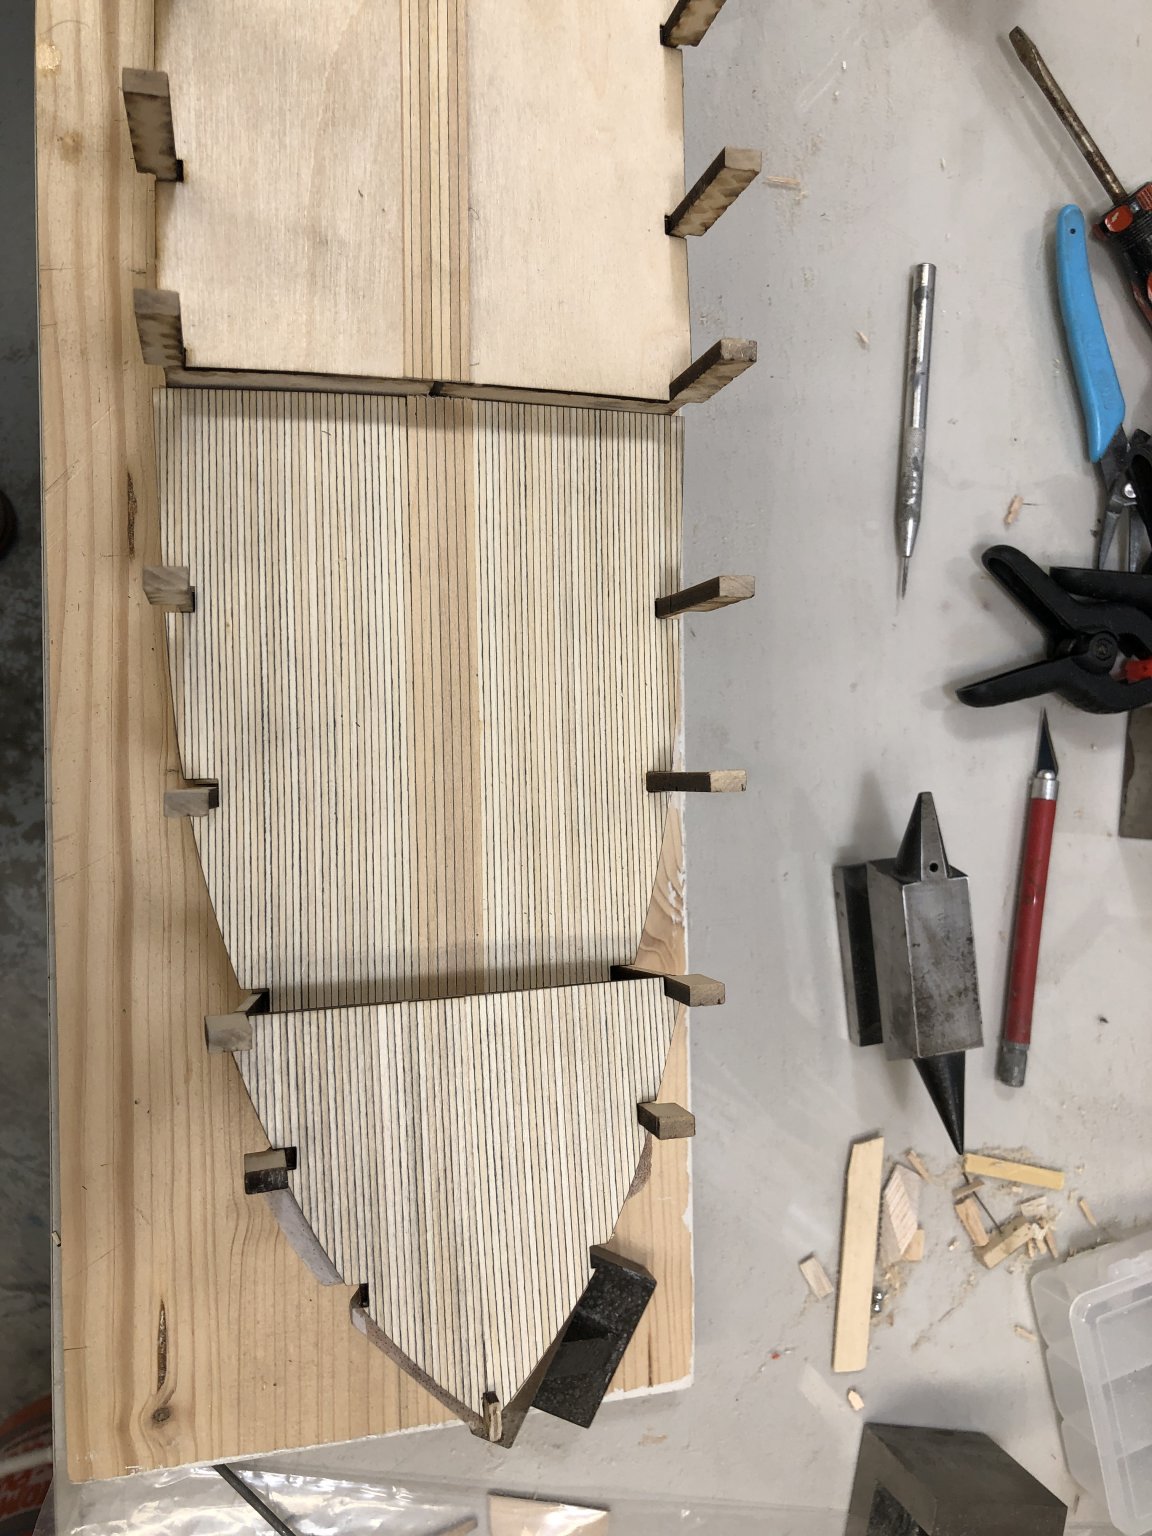
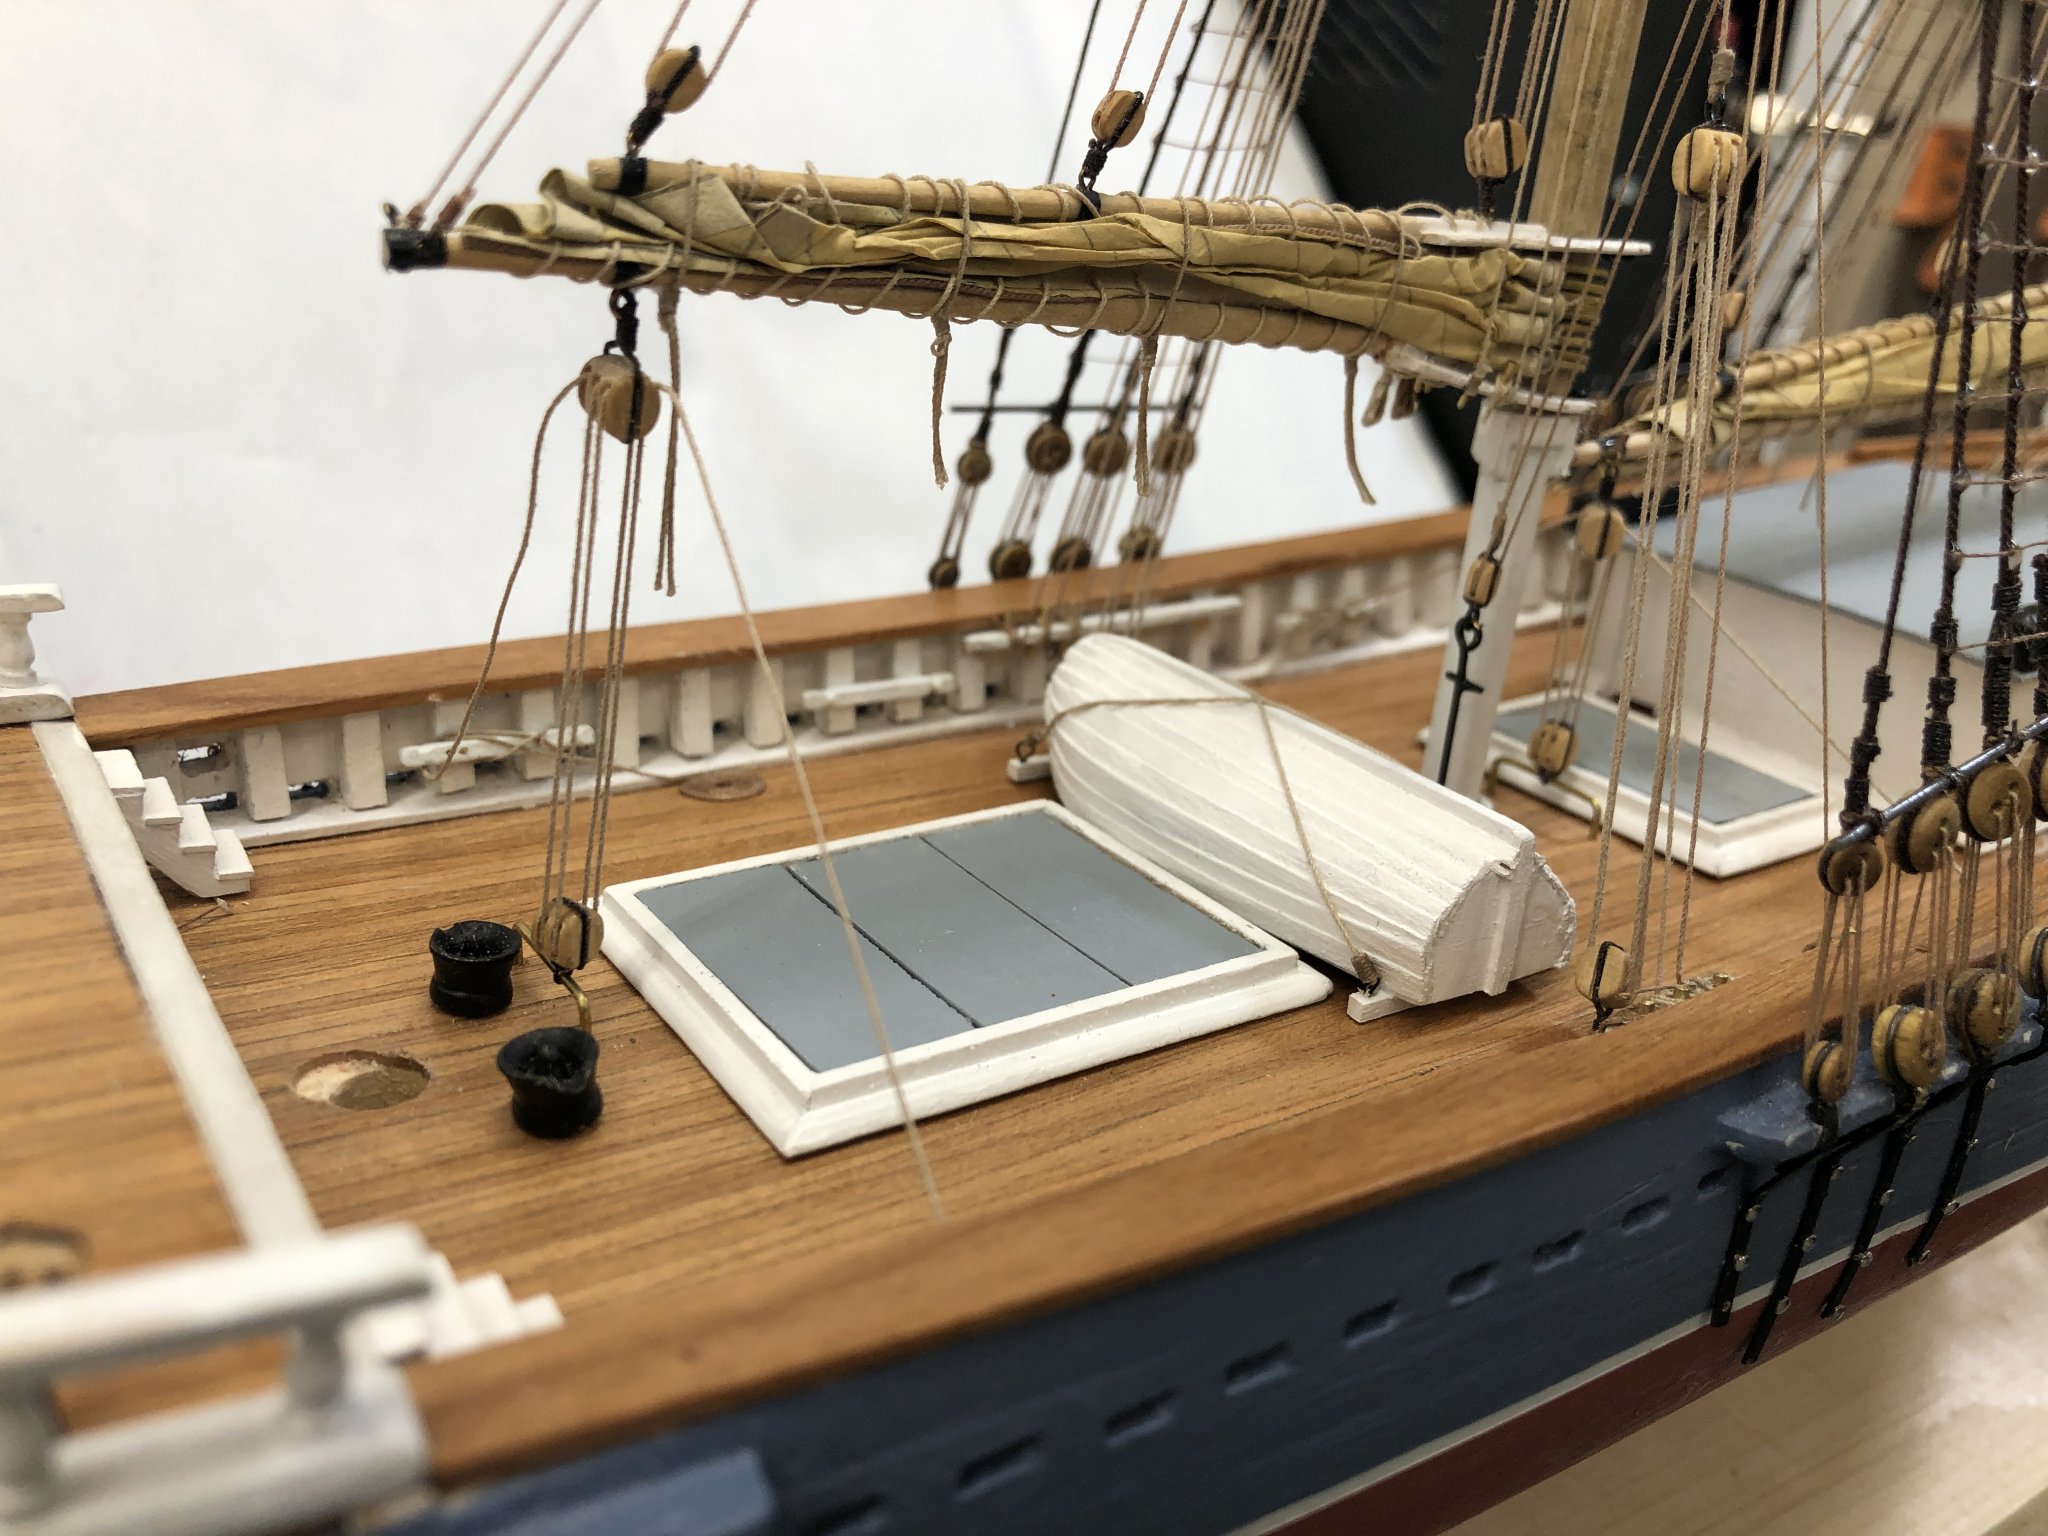
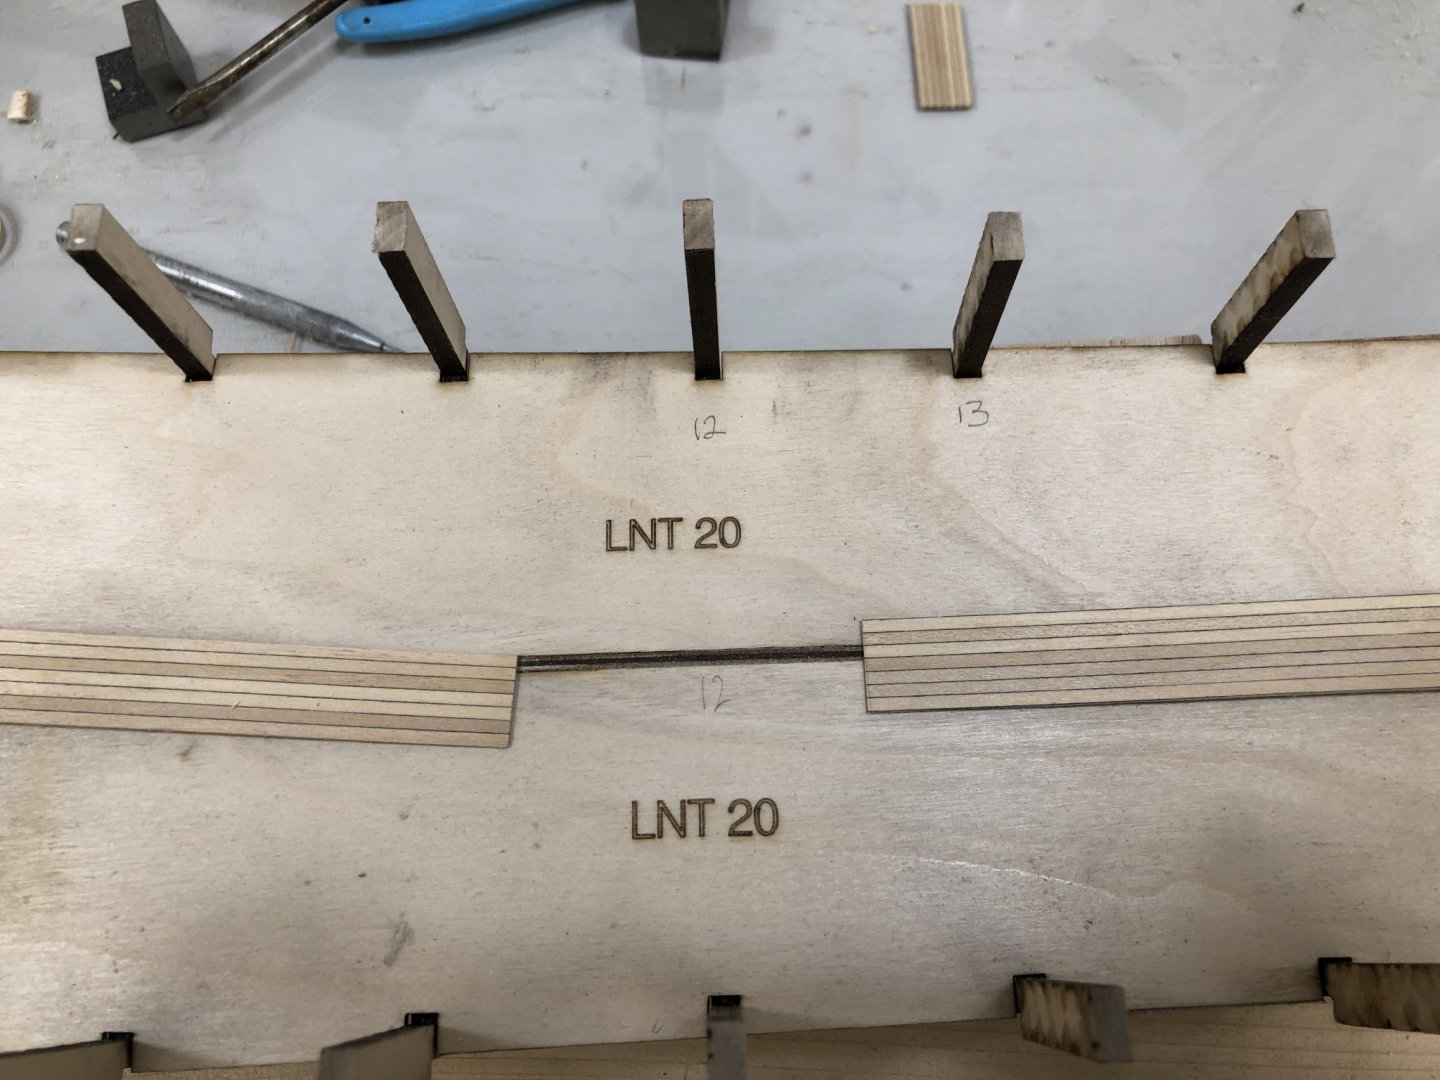
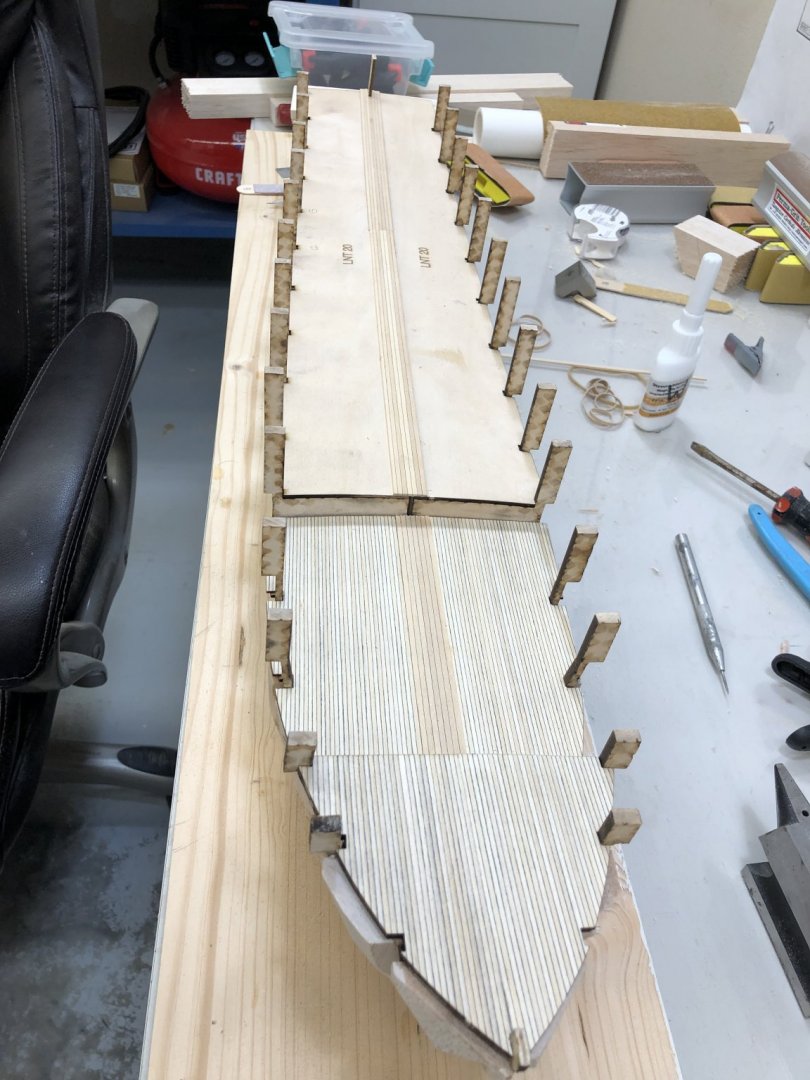
Next step, per the instructions is to put the prefabbed decking materiel on the decks (atop the subdecks). On the foredeck this is just the two laser cut pieces which are joined in the center (which will be largely invisible because the bowsprit will be directly above). Here is the stbd side foredeck planking being glued in place (port side is already down). However on the poop and main decks there is a strip of 3/32" wide planking that goes down the middle of each deck and then the laser cut pieces butt against this strip and continue to the deck edge. The 3/32" decking is supplied in 11" lengths and the seven plank wide strips are cut from this sheet. Given that the sheet is not long enough to cover the entire poop deck in one piece creates the question of where to make the joint which should be somewhere that will be covered by some piece of deck furniture as there is no realistic hope of getting two pieces of the planking to have similar enough coloring and spacing to not make a joint very noticeable. It turns out that there is a hatch that almost completely cover the centerline area between bulkheads 12 and 13 and that the 11" length is just long enough to extend from the front of the main deck back to between BH 12 and 13. So that is where the joint will be placed. So here are the center planks being weighted down while the glue sets. And, yes those are two bulkhead extensions that have broken off (the two forward most) laying on the main deck. With the foredeck planking completed I moved on to the main deck. It took some filing of the notches for the bulkhead extensions and the removal of one or two rows of planking but otherwise they installed without incident. Here is the fore and main decks with the planking in place. And here is the entire deck. I am not going to install the poop deck planking now as there was an issue with one of the pieces and BlueJacket is sending a replacement. I am going to wait until I have two good pieces before deciding which one goes where as they are interchangeable port and starboard. I (of course) want the best looking deck I can get short of planking it myself (although that thought did cross my mind).


- 144 replies
-
- 6
-
-
- charles p notman
- finished
- (and 1 more)
-
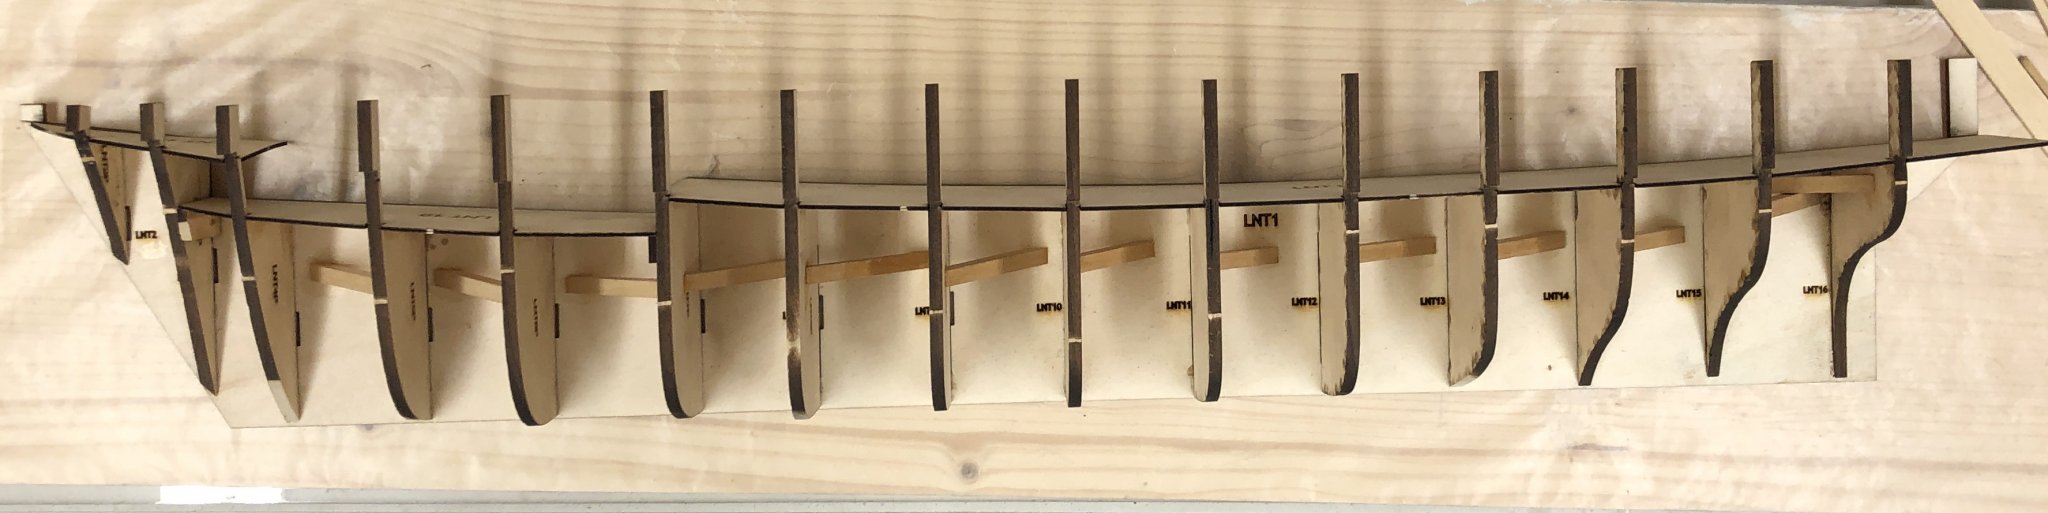
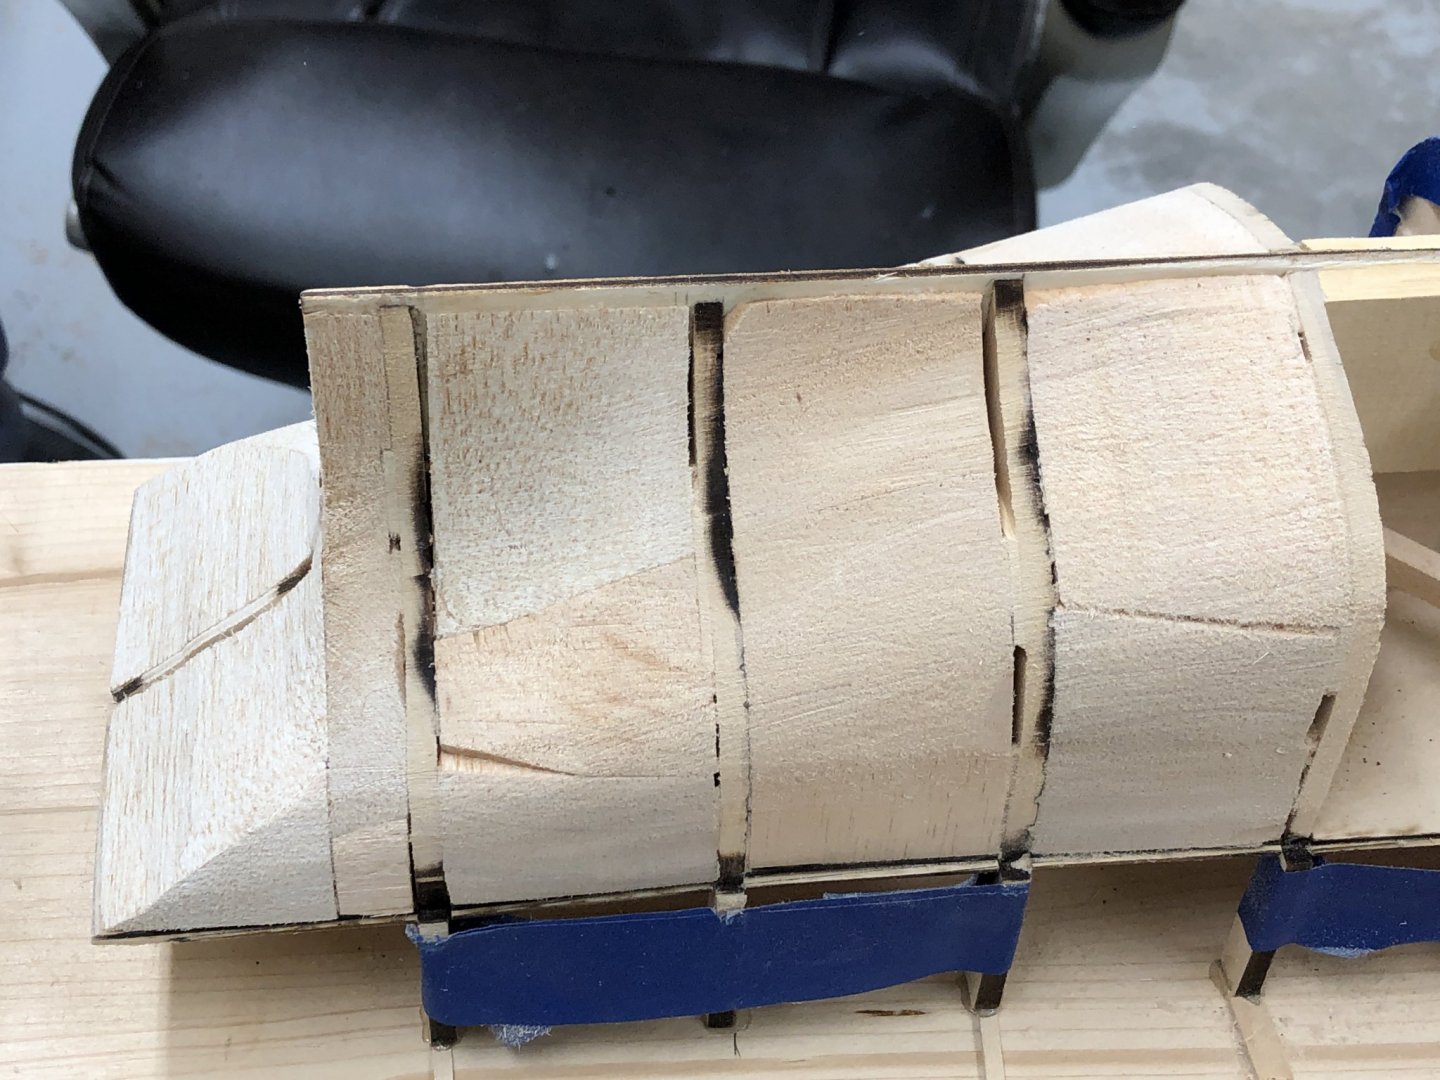
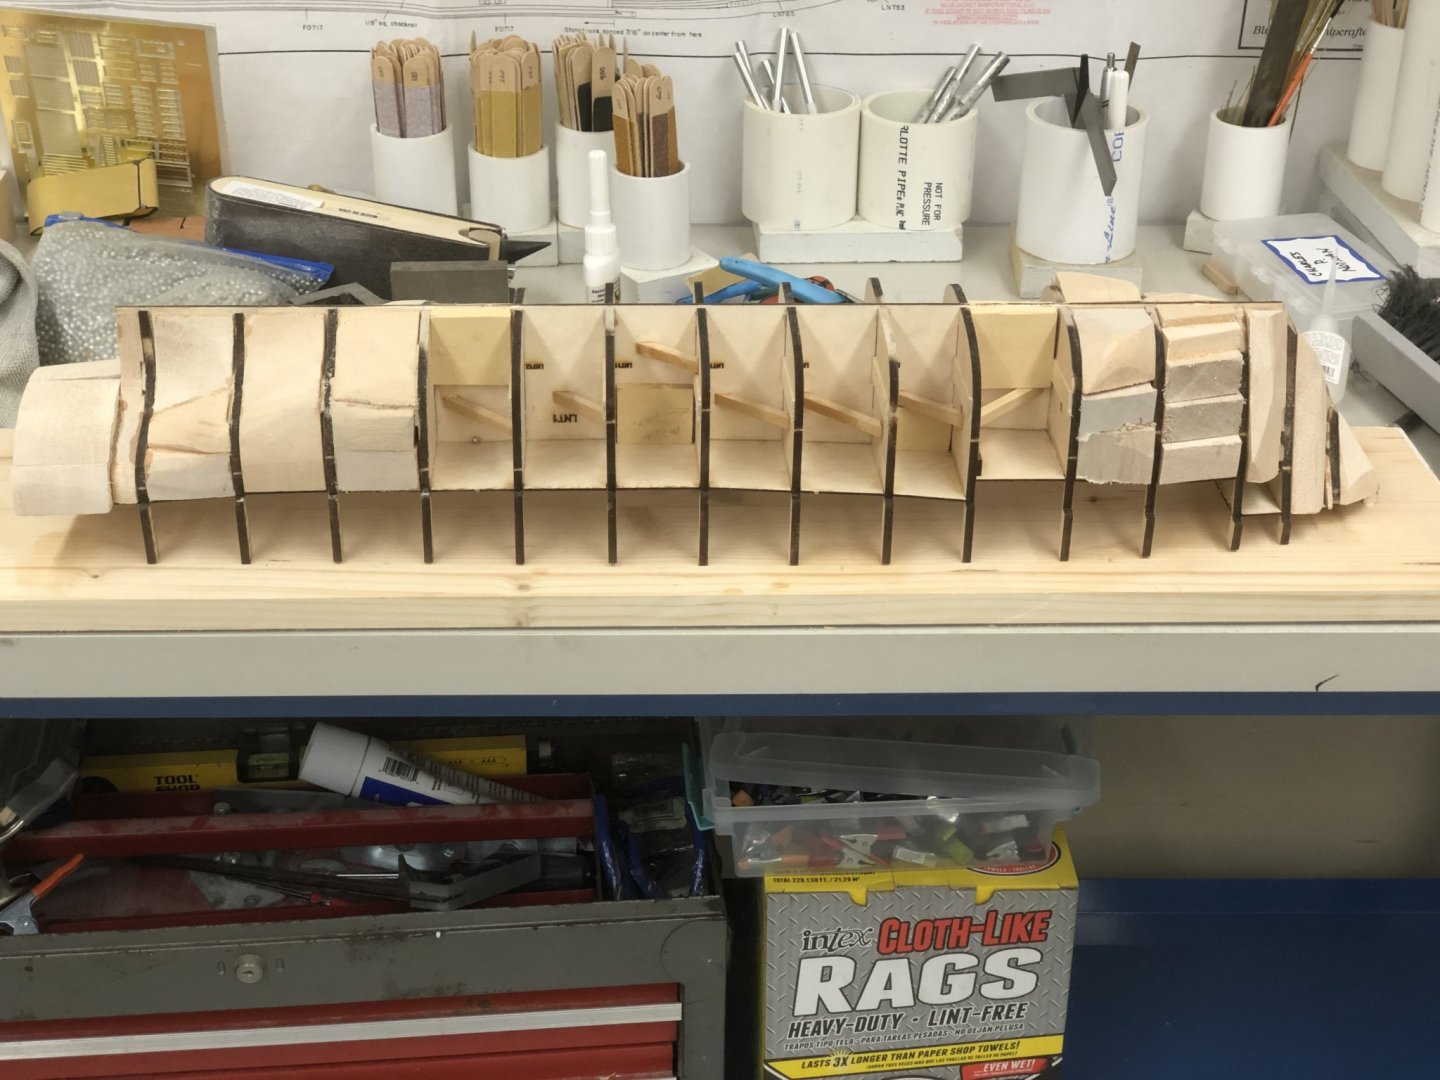
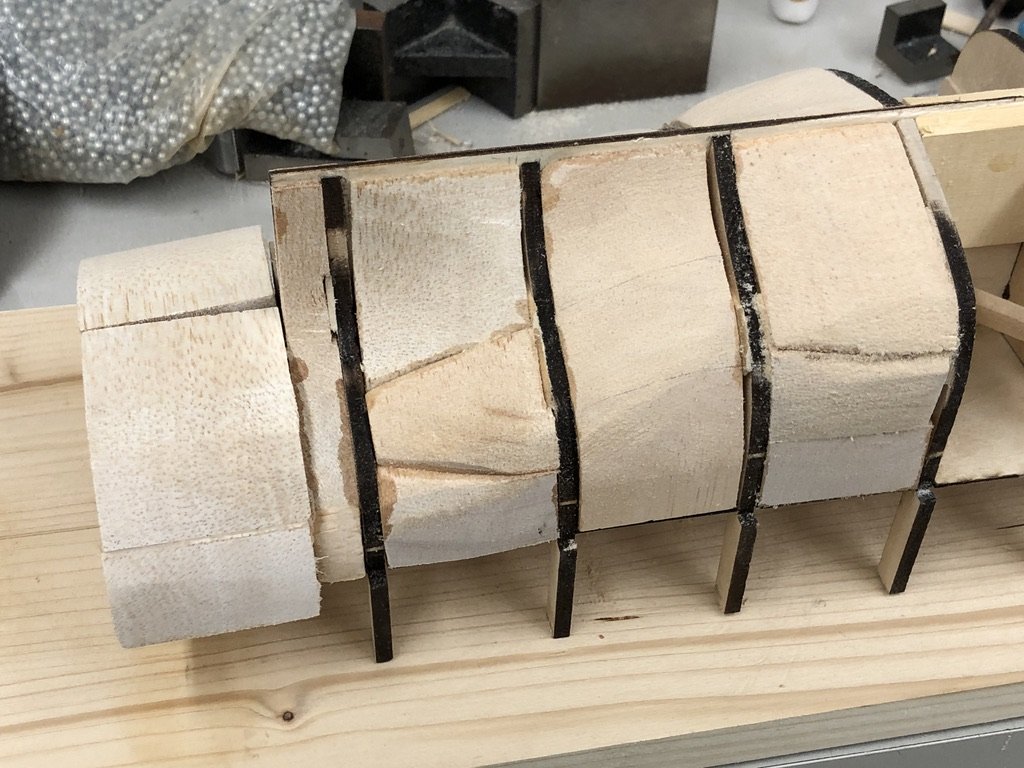
I got all the reinforcing done and added the filler blocks. The instructions and drawings show fillers in the first three "blocks" forward and the last two aft. Based on experience on the 1/35th scale Endeavour I did all the blocks from Bulkhead 6 to the bow and from Bulkhead 13 to the stern. I used the pictures in the Photo CD to get an idea of what the block at the very stern should look like. The instructions promise that this will be dealt with "later". On the Endeavour I filled in the entire hull with balsa (was advised to by others who had experience building her) and was tempted to do that here as well but the hull is not nearly as complex as the Endeavour so I opted to fill in from both ends until the hull sections were close to the same. Not the prettiest balsa filler job I ever did but 80 grit sandpaper can cut down balsa pretty quickly (I hope). So here she is with the hull structure complete and waiting for the decking to be installed before being glued to the build board.

- 144 replies
-
- 5
-
-
- charles p notman
- finished
- (and 1 more)
-
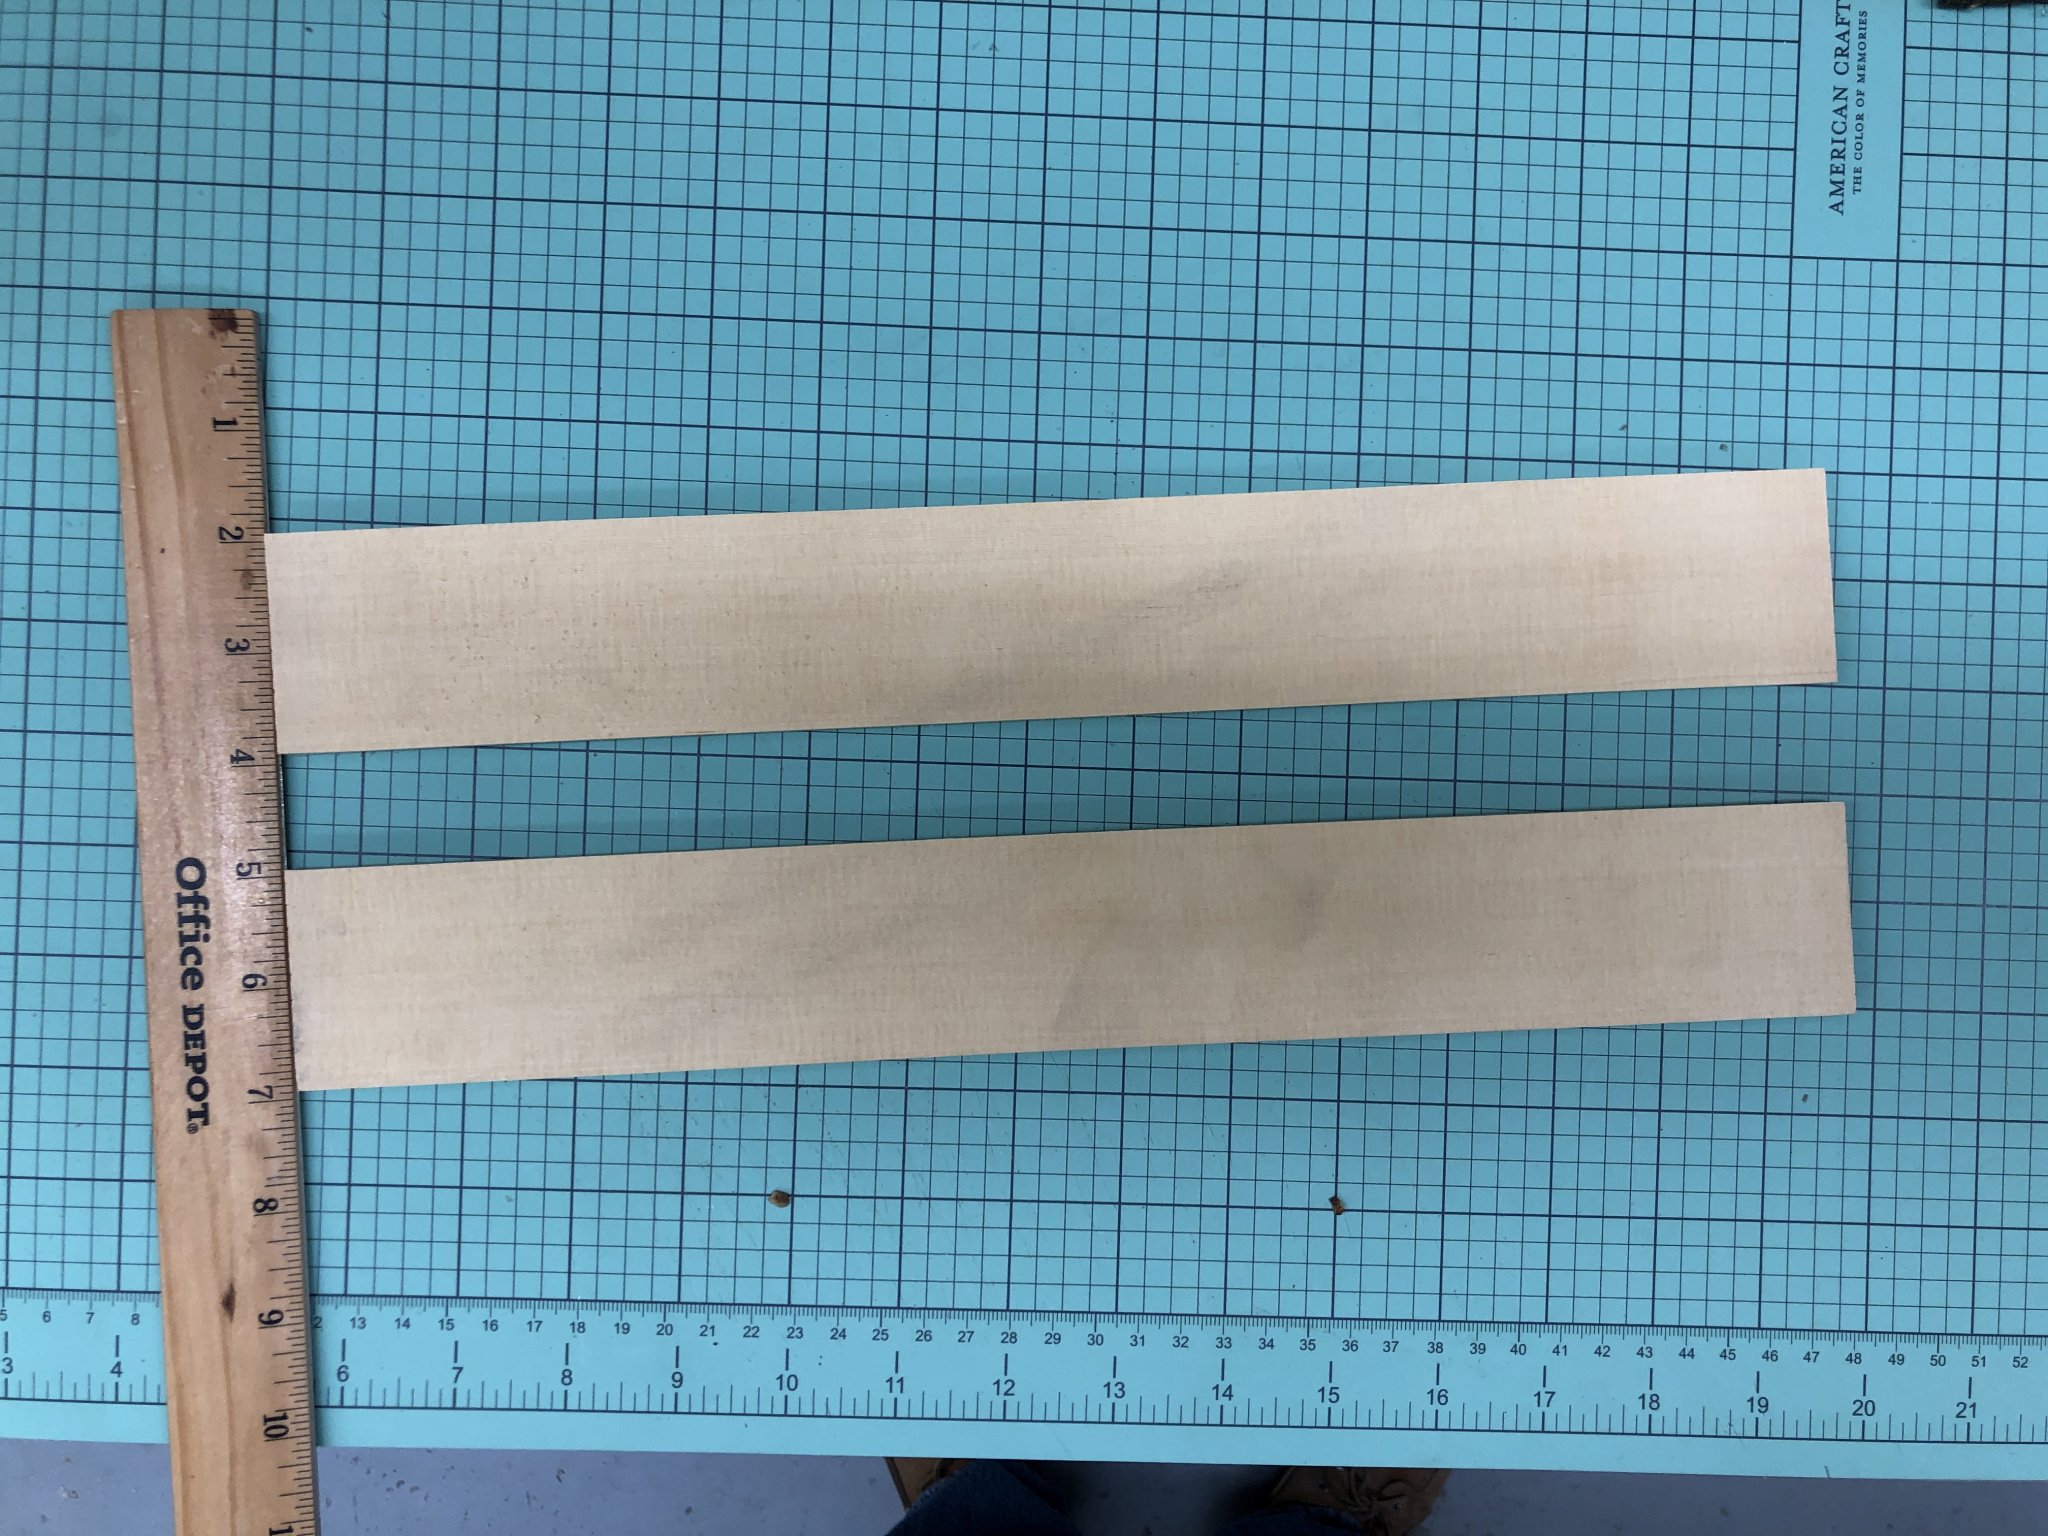
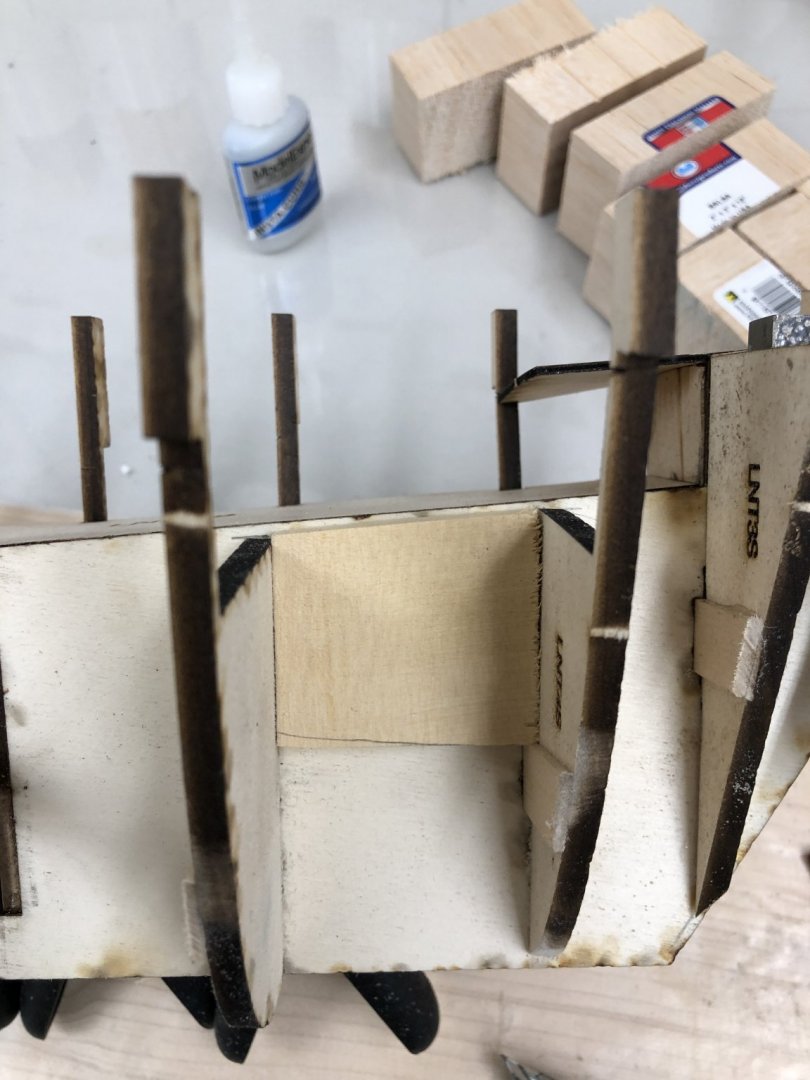
I started to cut the reinforcing pieces where the masts are stepped and found I was short one piece of the 1/2" X 1" basswood required. After looking around I found some 1/2" thick yellow cedar left over from something and I decided to use this instead of the basswood. I also decided to increase the size of the mast reinforcements to 1/2 X 2" so I cut two 15" strips which should be more than enough to do both side. Here are the two pieces and a dry fit of the fore mast one on the starboard side. Here is where we are Thursday night I have all the bulkheads installed with the last two drying. I still have to install the diagonal reinforcements on the starboard side. I also have the two forward subdecks installed and the port side main subdeck. Once the starboard main subdeck is installed it will be time to install the rest of the reinforcing pieces (top and bottom) and then work on the filler blocks. Here is the foredeck area (with some preliminary filler block work) and the two remaining bulkheads on the starboard side clamped up waiting for the glue to set.

- 144 replies
-
- 7
-
-
- charles p notman
- finished
- (and 1 more)
-
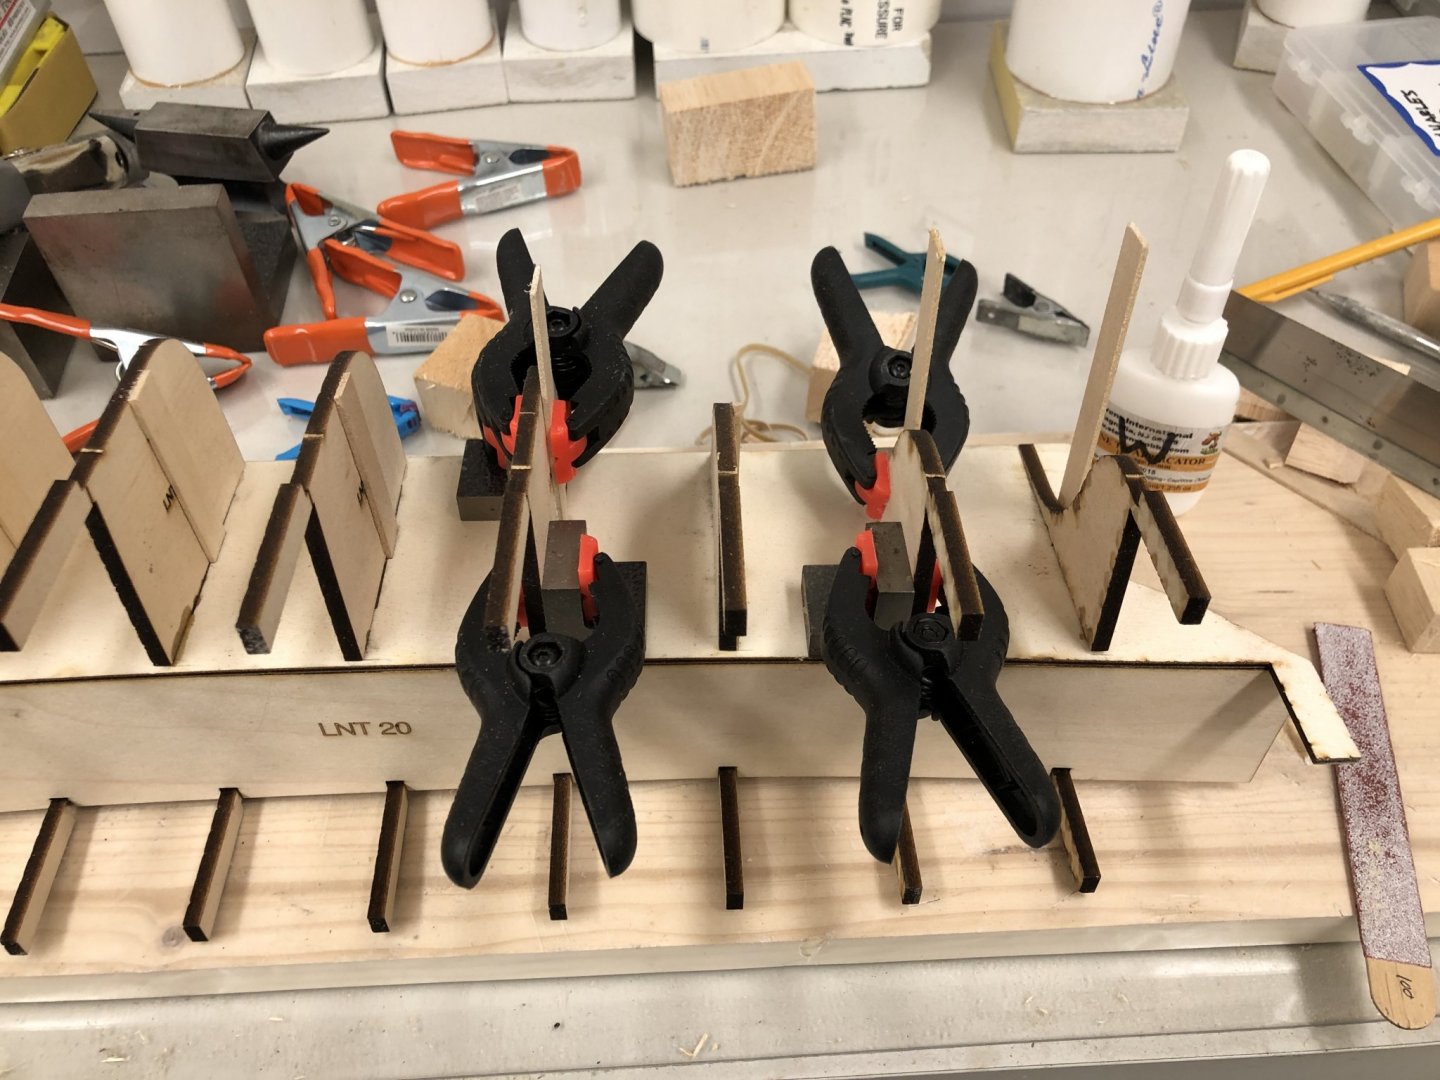
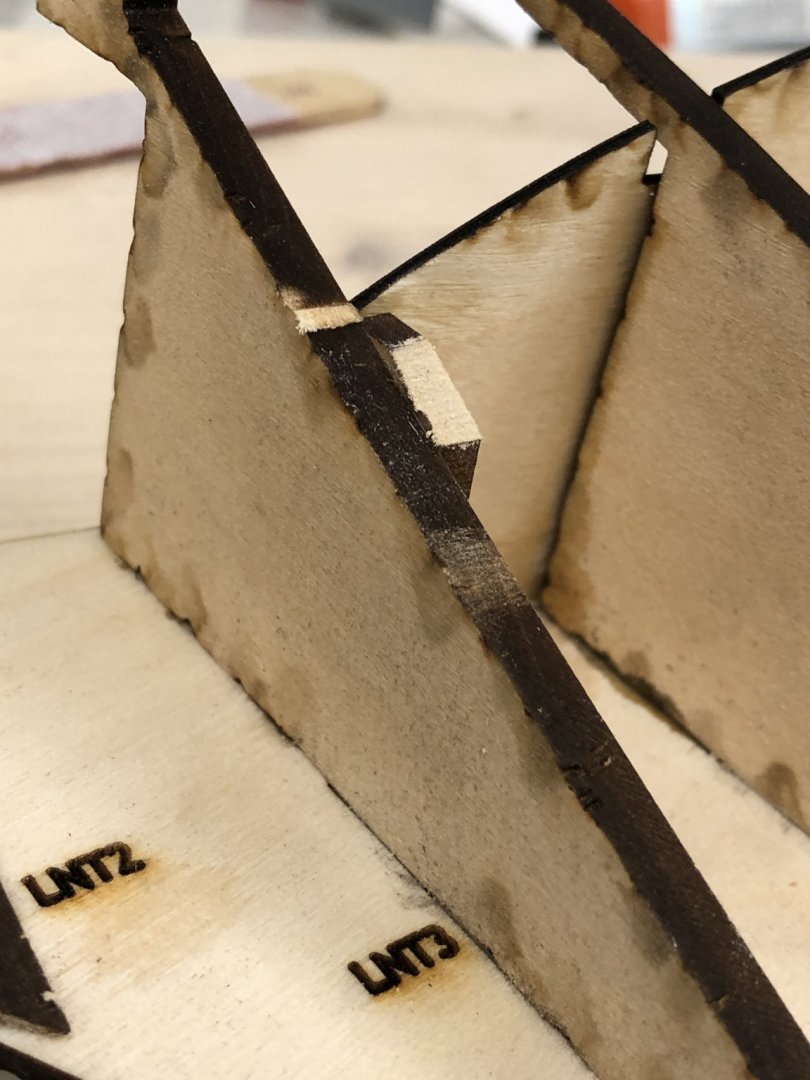
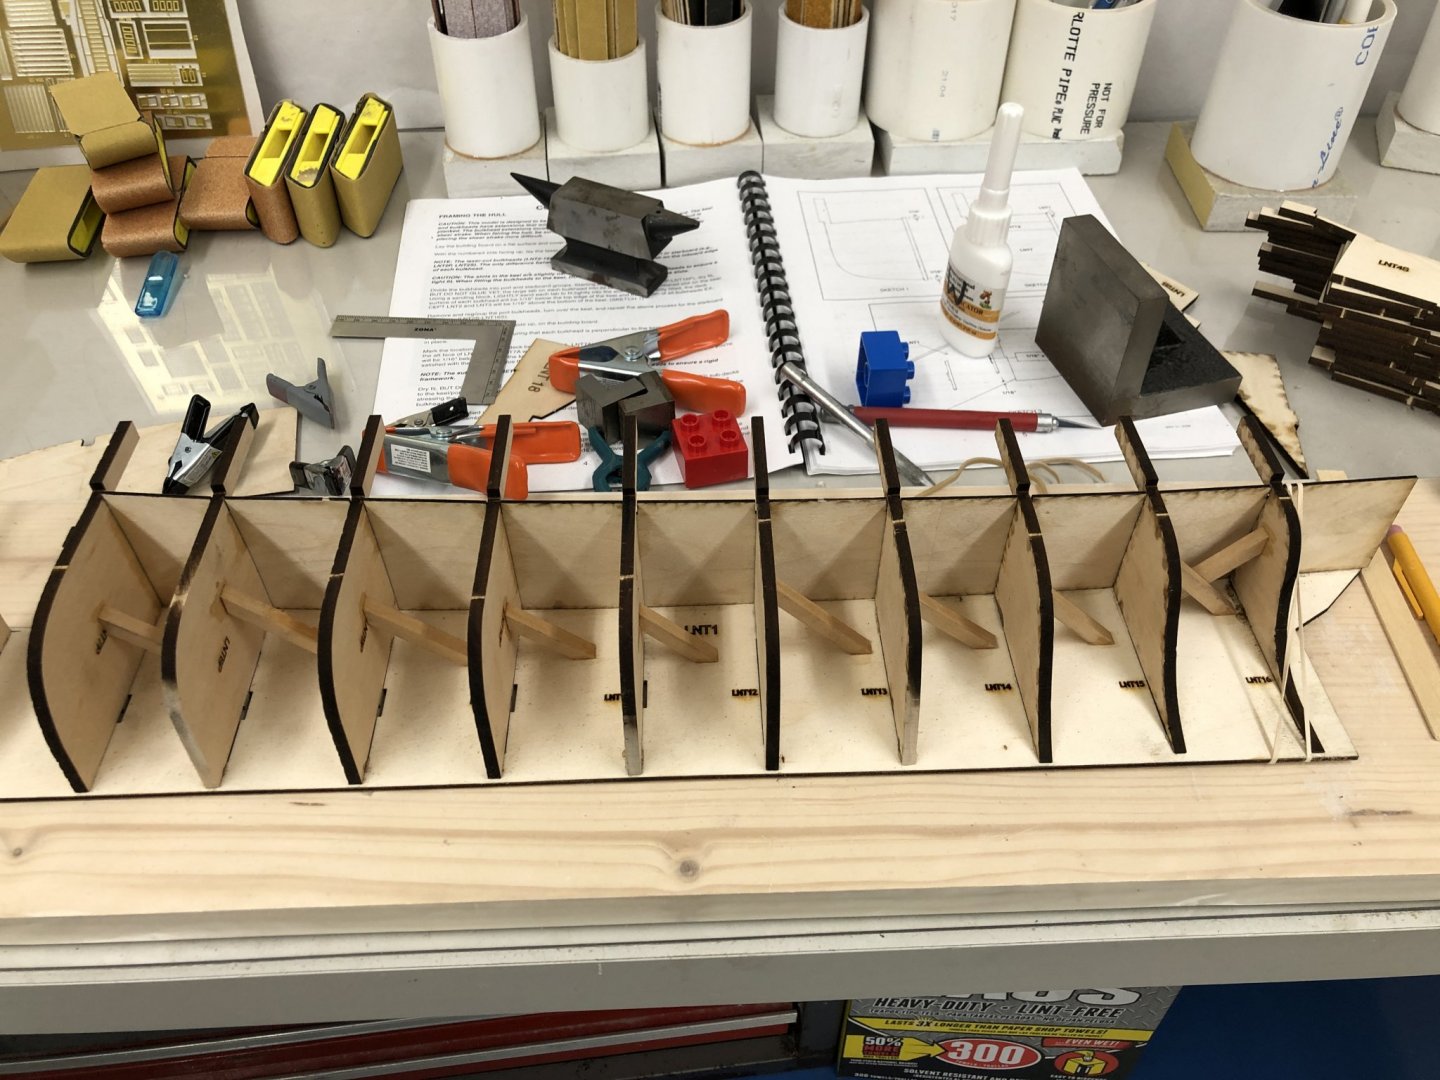
Continuing to build out the port side of the hull structure. Everything is pretty straightforward except the LTN3A piece which forms the deck beam at Bulkhead 3 (LTN 3) sticks out past the end of the bulkhead and has to be trimmed back. Here is the offending part installed and sanded down (some). There will be balsa fillers in this area so this is not the last thing that will have to be sanded down.. I used most every square "shape" I have to get the bulkheads glued in perpendicular to keel. It took several sizes of clamps due to the size of the "squaring blocks" and the size/shape of the bulkheads. Here is a shot of "work in progress". It has been my practice on past POB kits to add diagonal stiffeners between the bulkheads and the keel and I am continuing that practice on the Notman. You can see these stiffeners in the picture below. After I did these I decided it might be better to get the decking installed first before adding the rest of the stiffeners so that was the next step. I use thin CA to attach the stiffeners as this permits me to just hold the stiffener in place and hit it with the CA, hold for 5 seconds and that one is done. Here is the hull with the aft deck and stiffeners in place. And here is the port side ready to add the lateral stiffeners which will support getting the starboard side bulkheads on "square".


- 144 replies
-
- 6
-
-
- charles p notman
- finished
- (and 1 more)
-
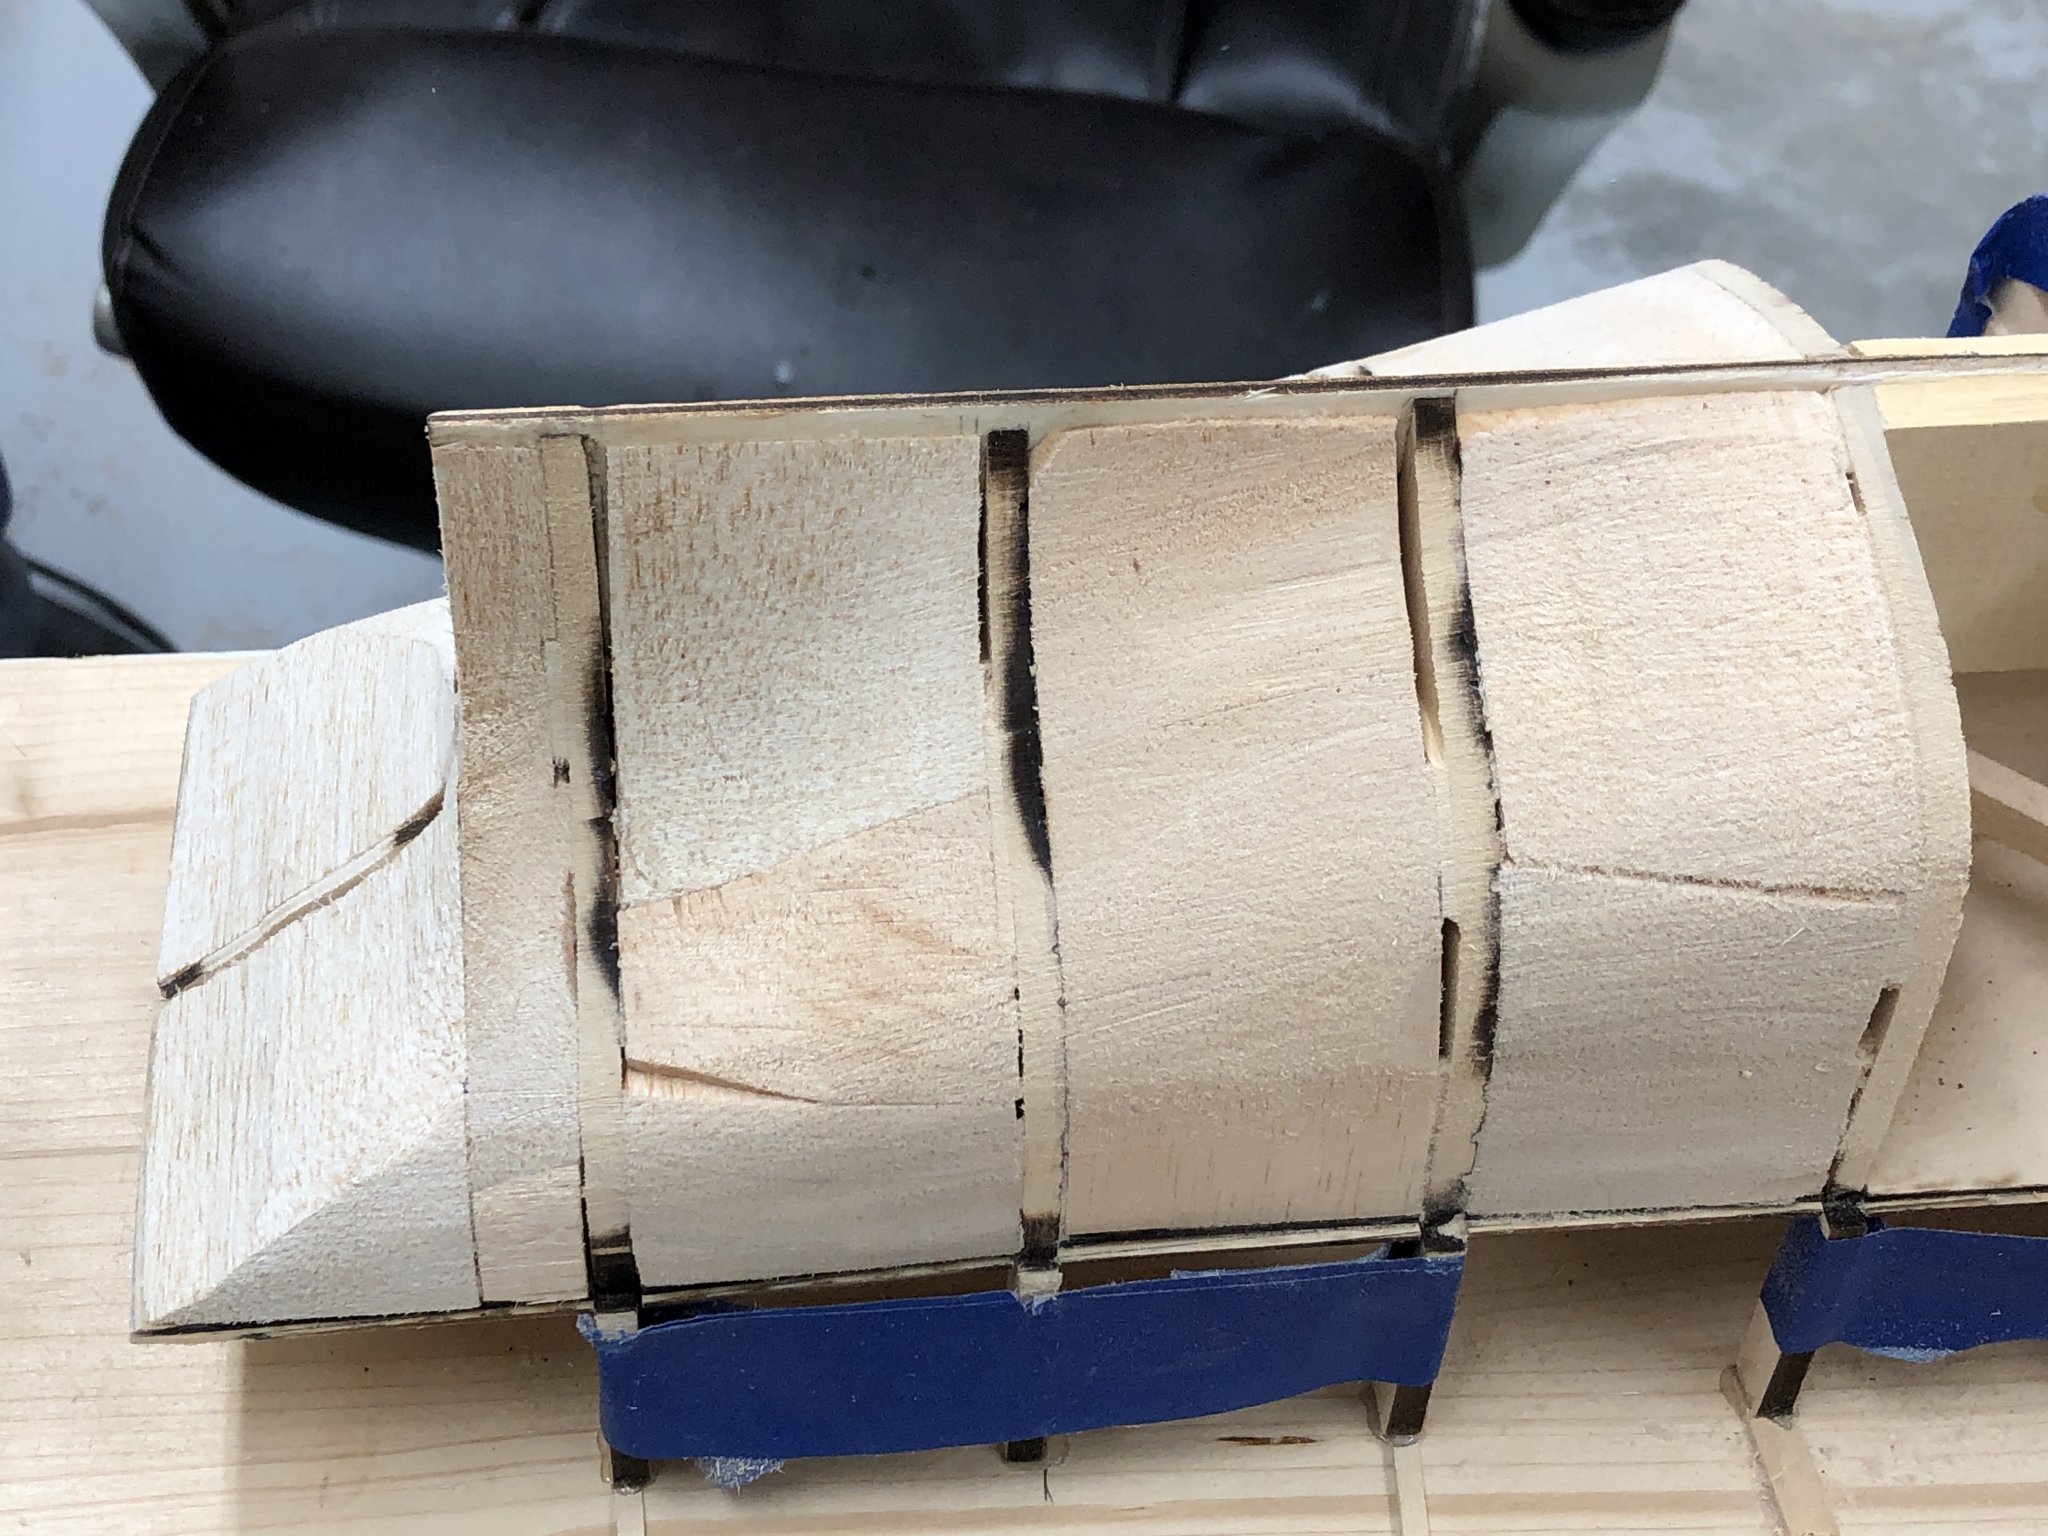
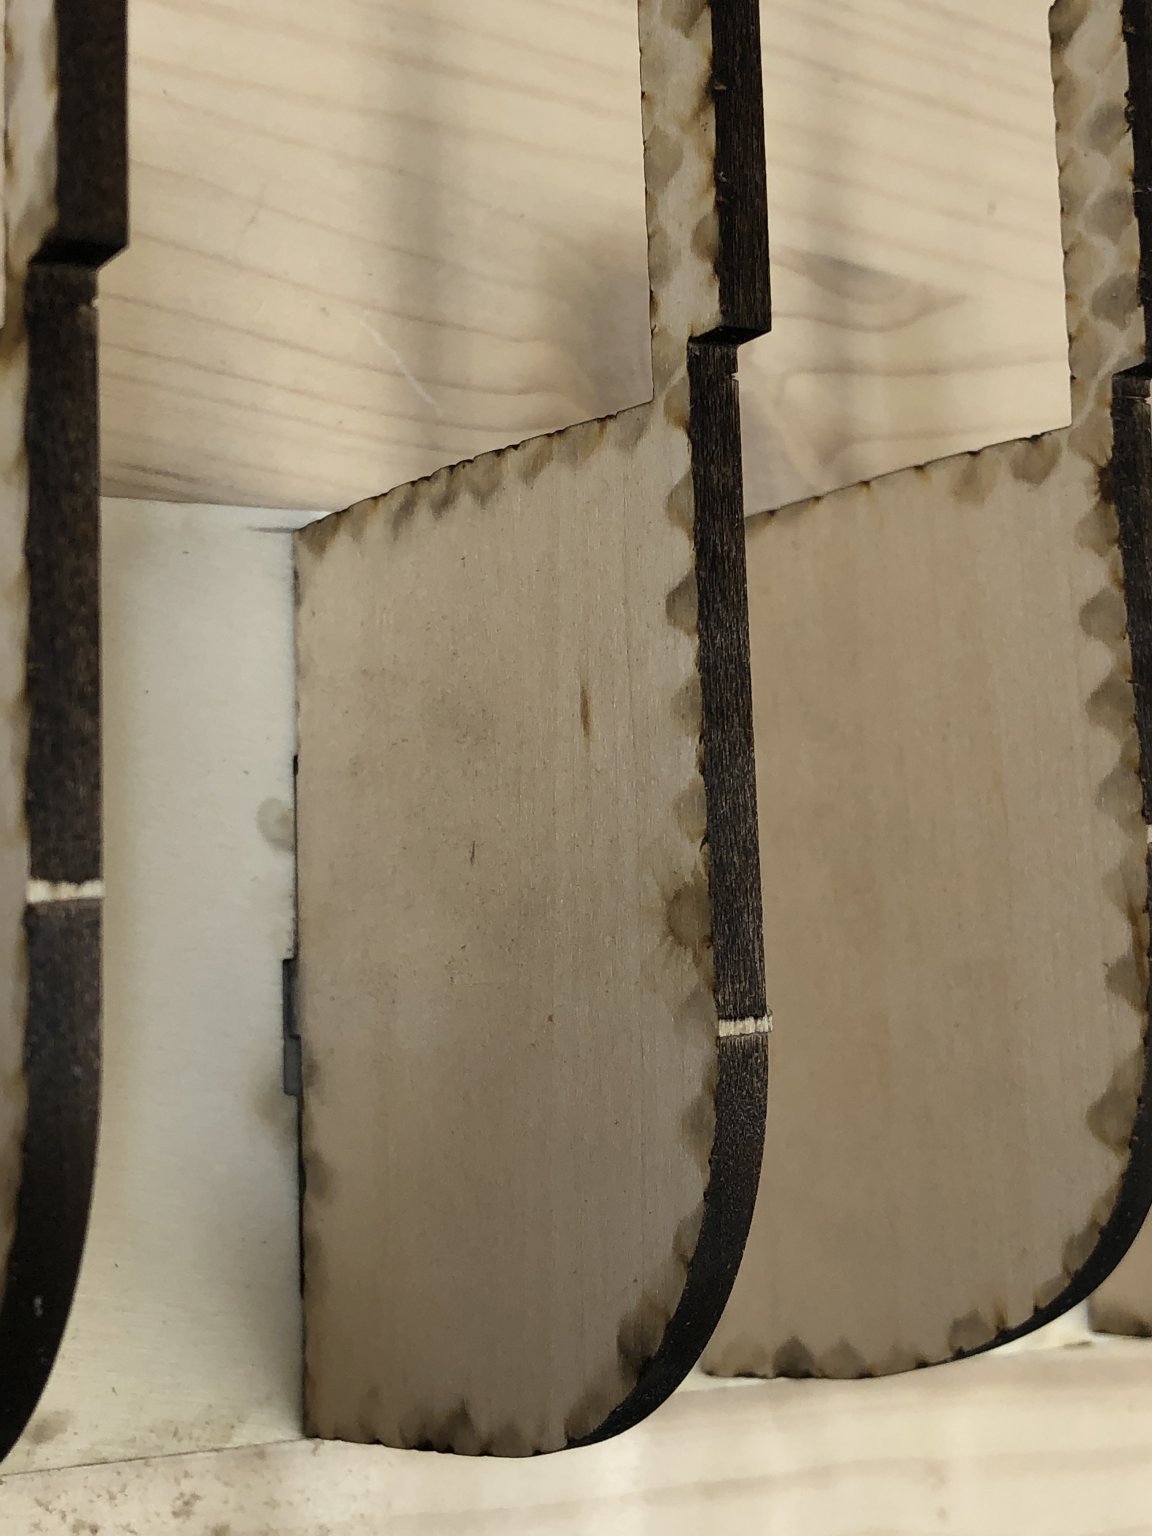
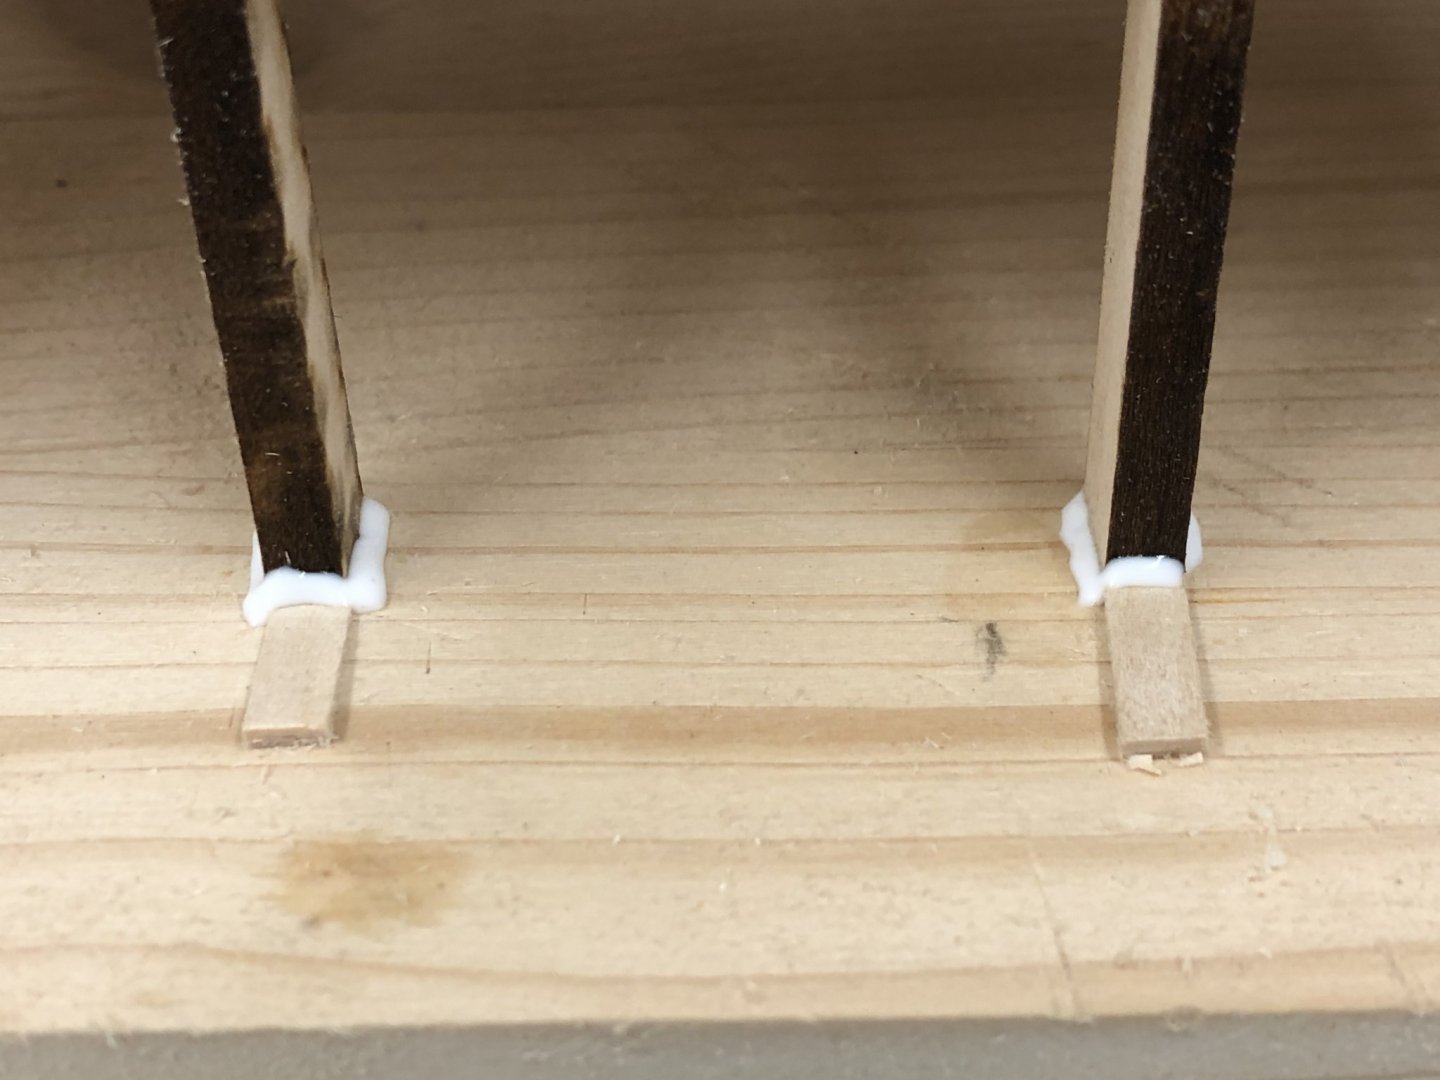
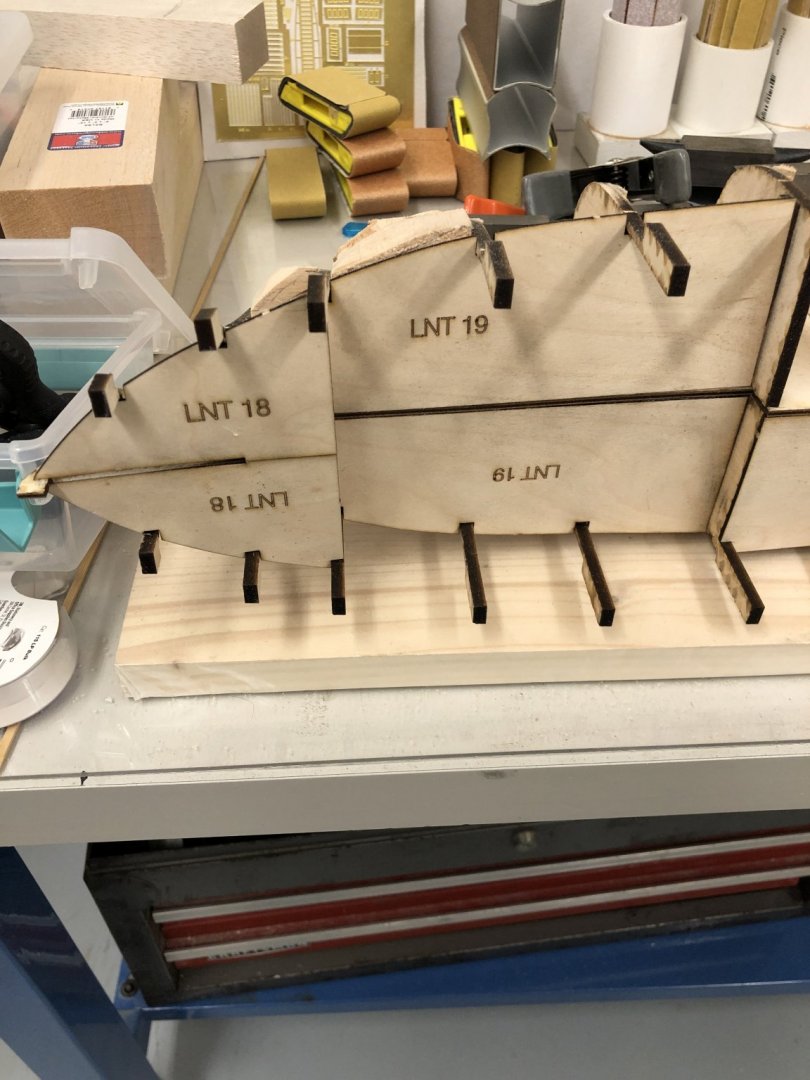
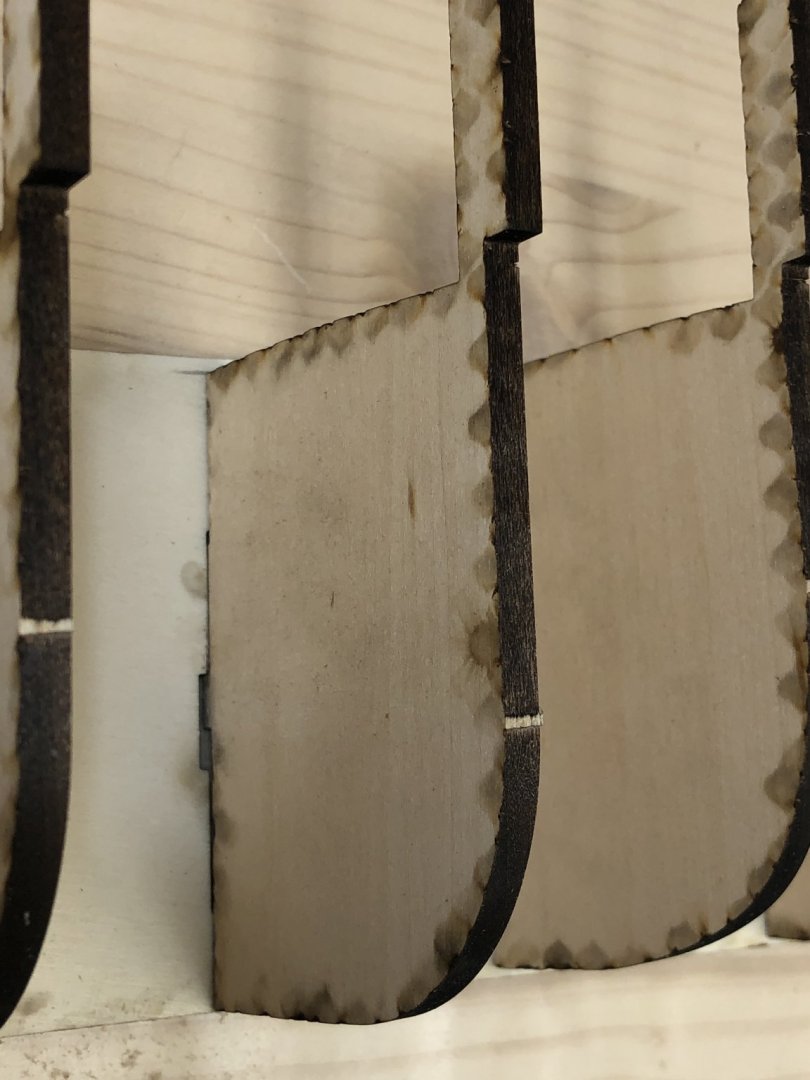
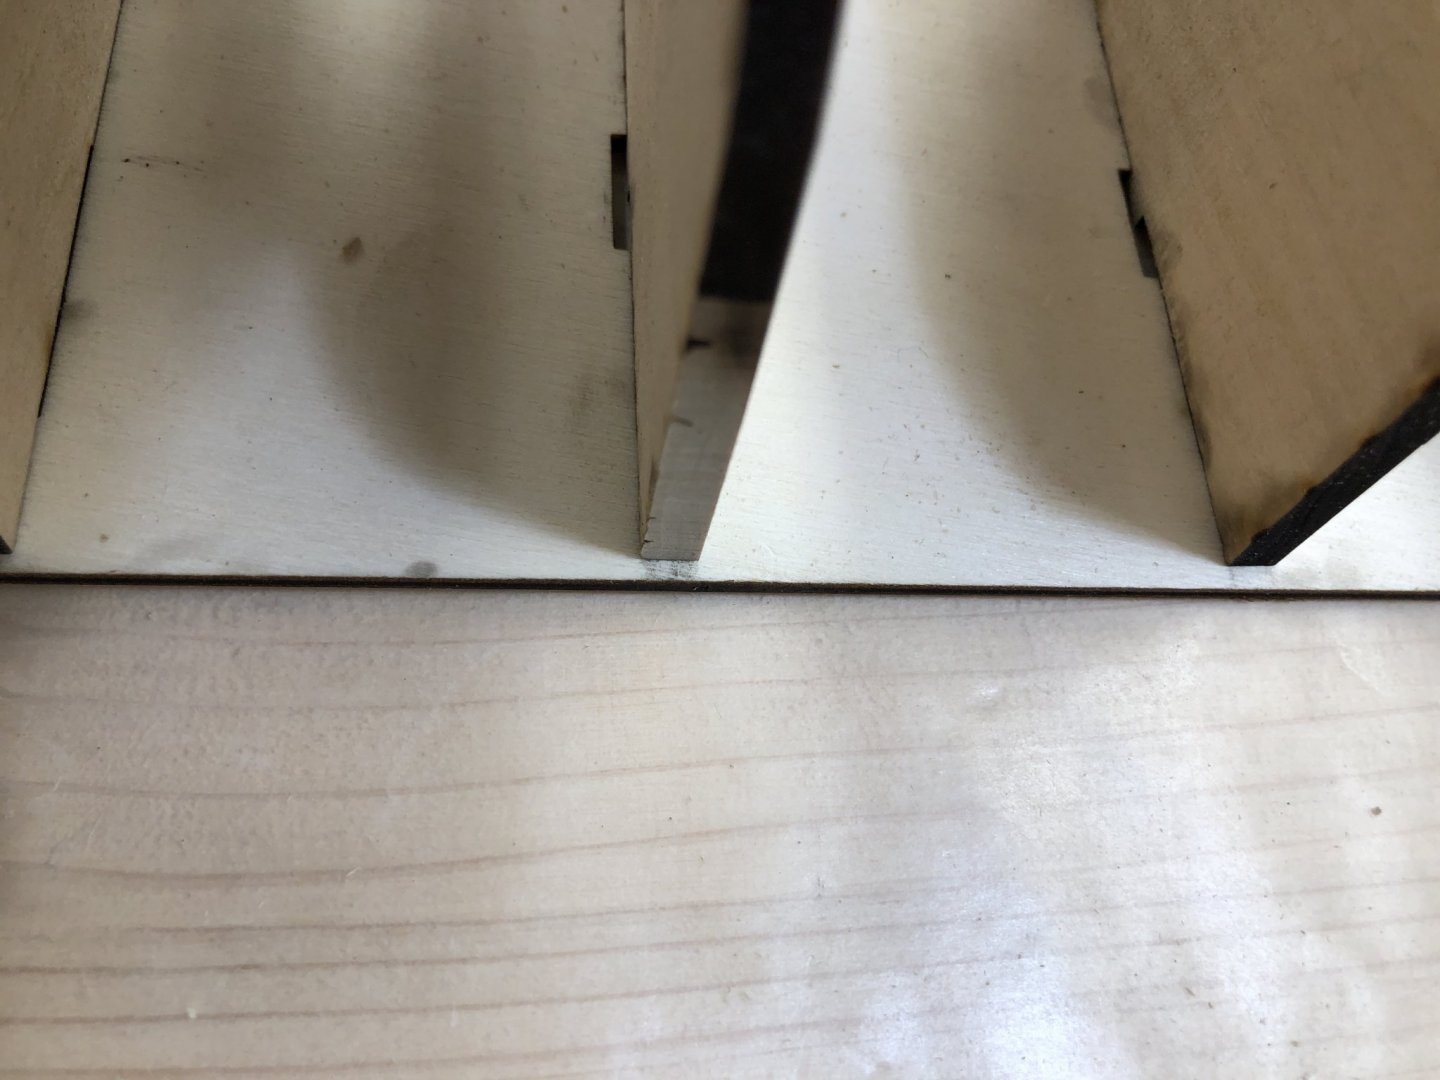
I had to adjust several of the port side bulkheads to get the required 1/16" clearance at the bottom having decided that getting the 1/16" at the top was the more important place. As can be seen a similar condition exists for the starboard bulkheads. I used the disk sander (with 220 grit) to very lightly take a bit off the bottom of the offending bulkheads with a 1/16" X 1/16" piece of boxwood clamped flush with the top of the keel to make sure I maintained the 1/16 clearance at the top. Here are a before and after of one of the bulkheads that was modified.
- 144 replies
-
- 6
-
-
- charles p notman
- finished
- (and 1 more)
-
Welcome aboard Moab. You asked for it - here is the part I haven't gotten to yet.
- 144 replies
-
- 6
-
-
- charles p notman
- finished
- (and 1 more)
-
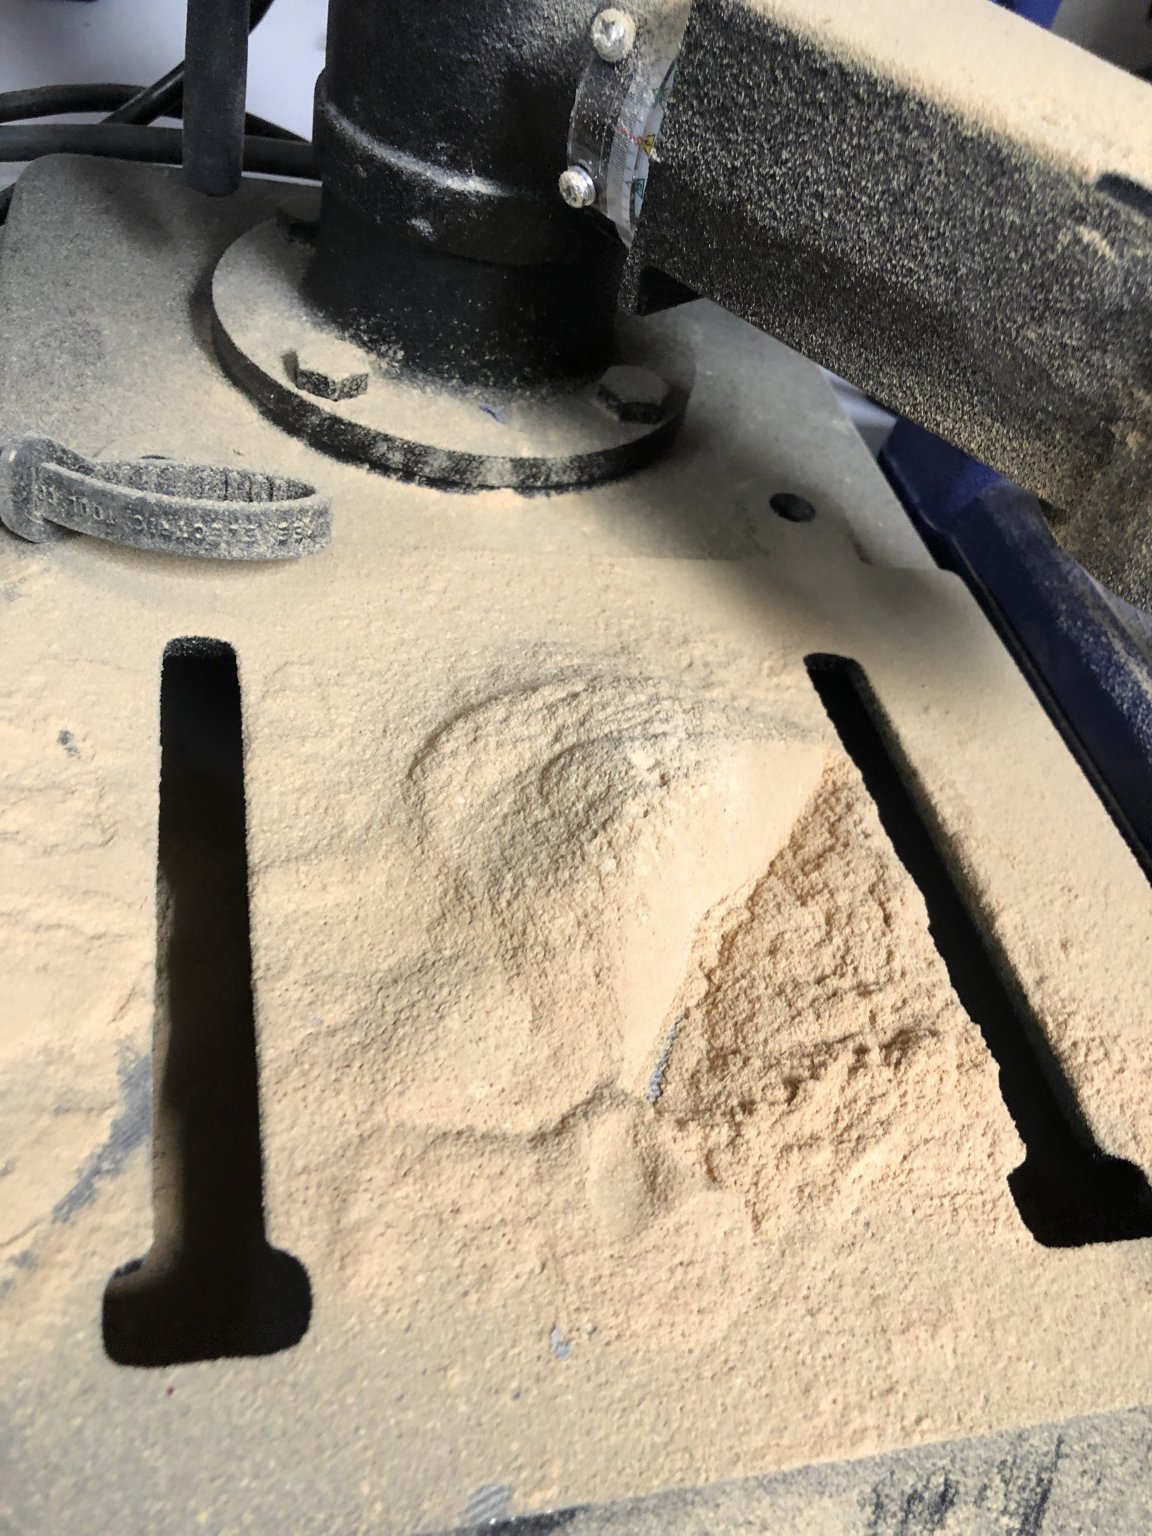
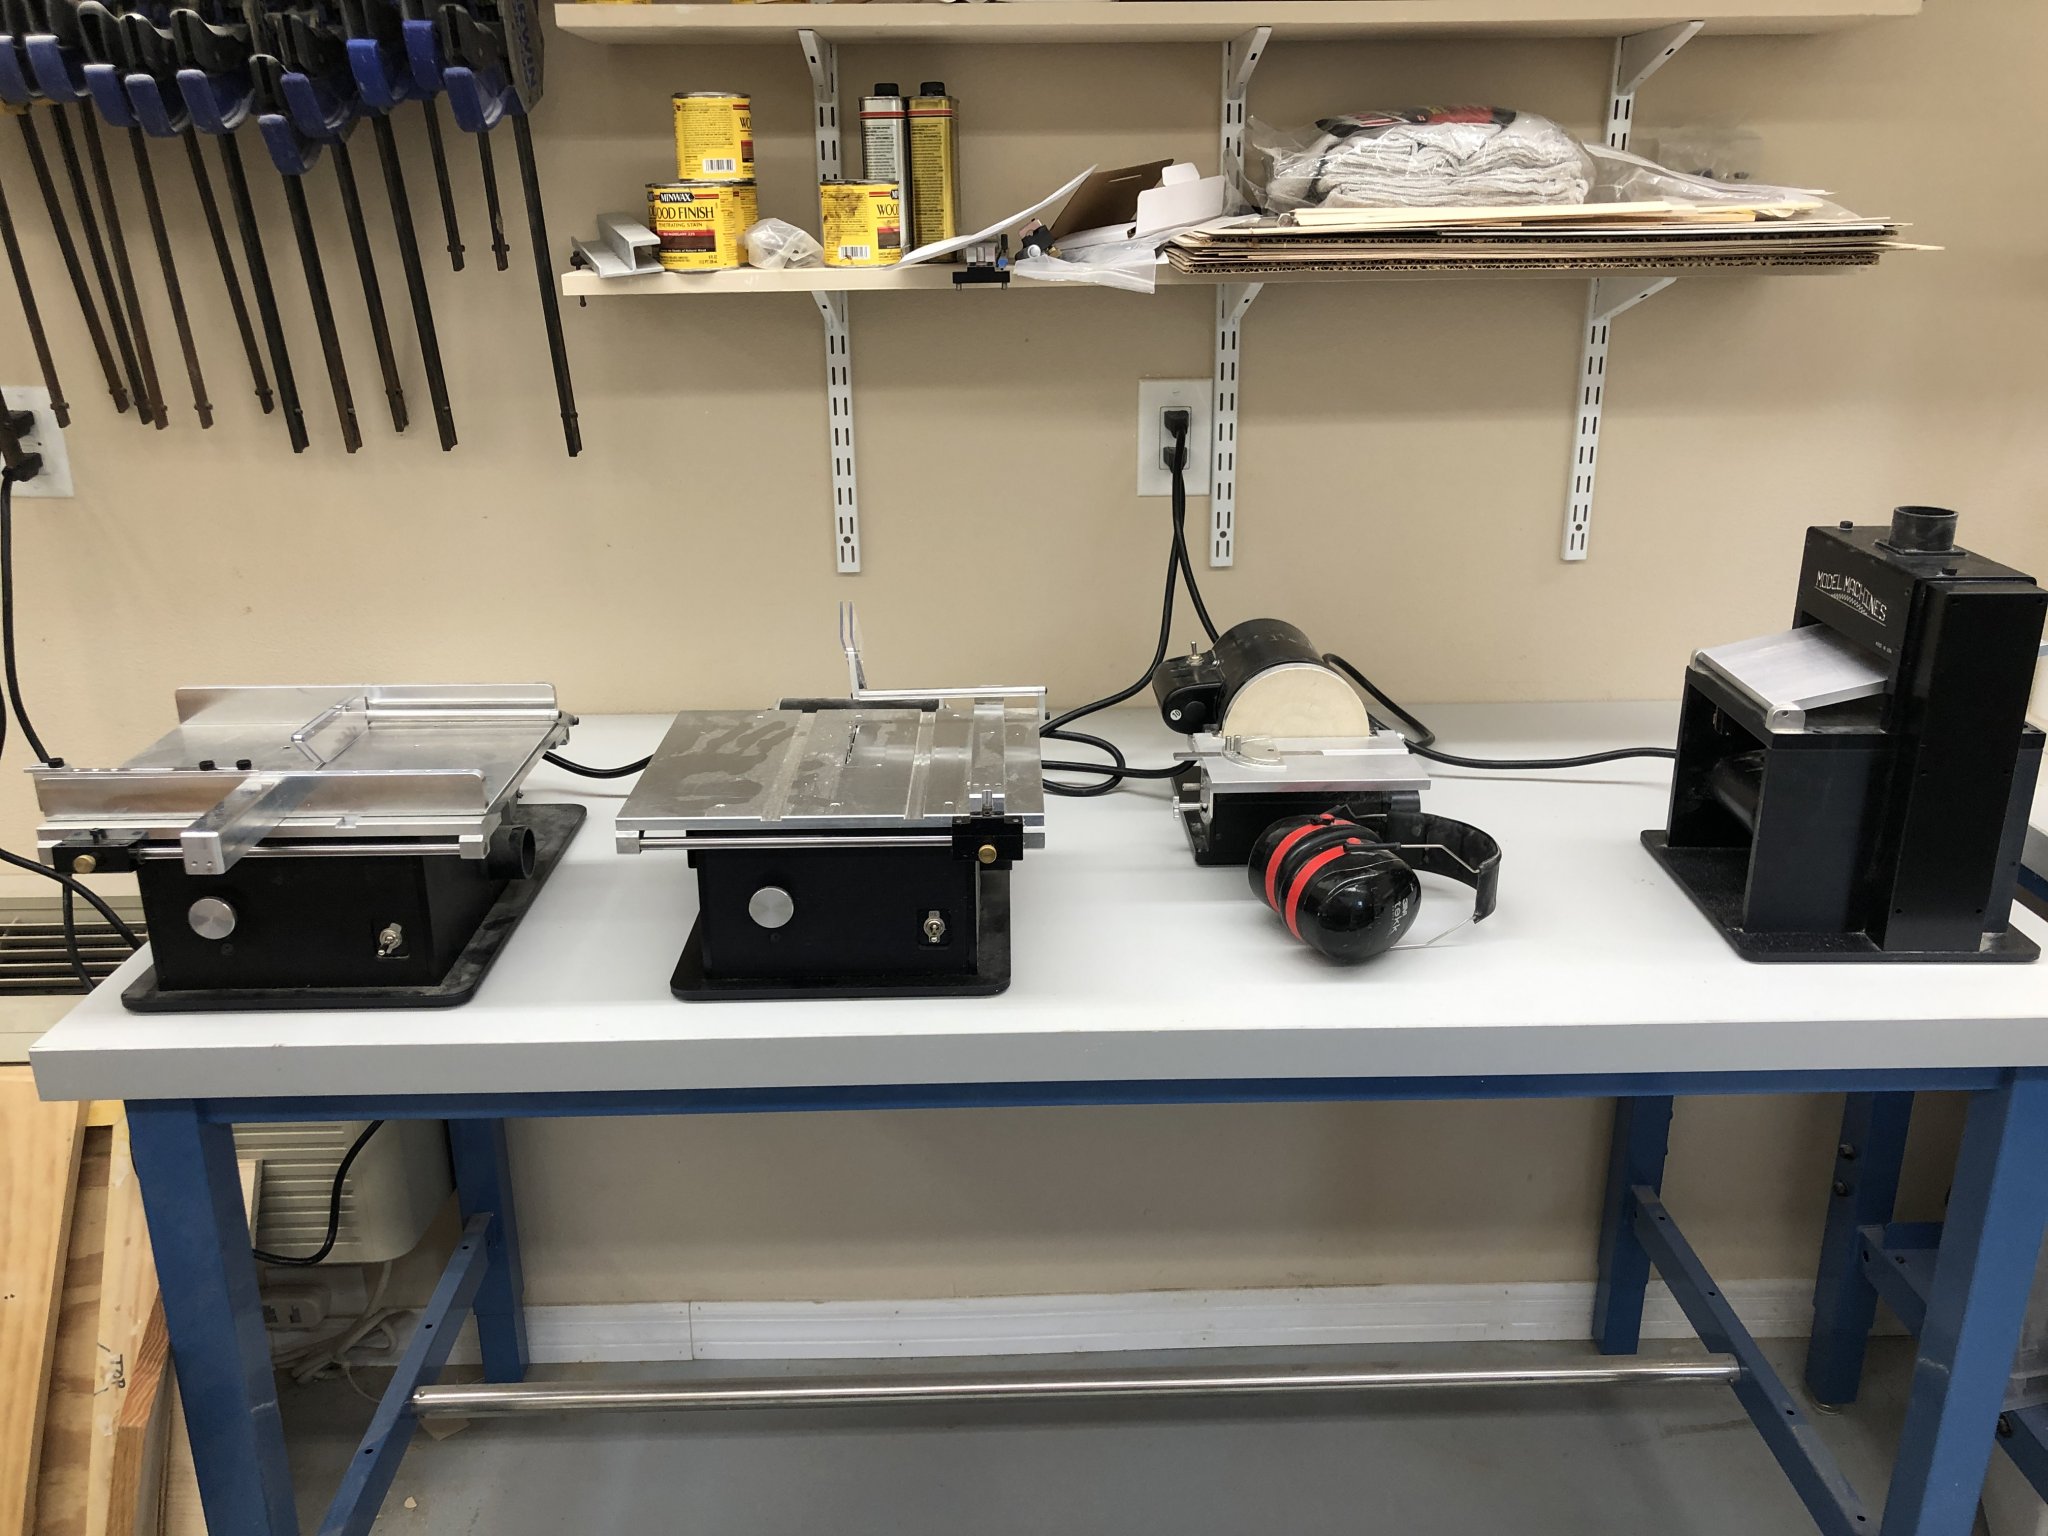
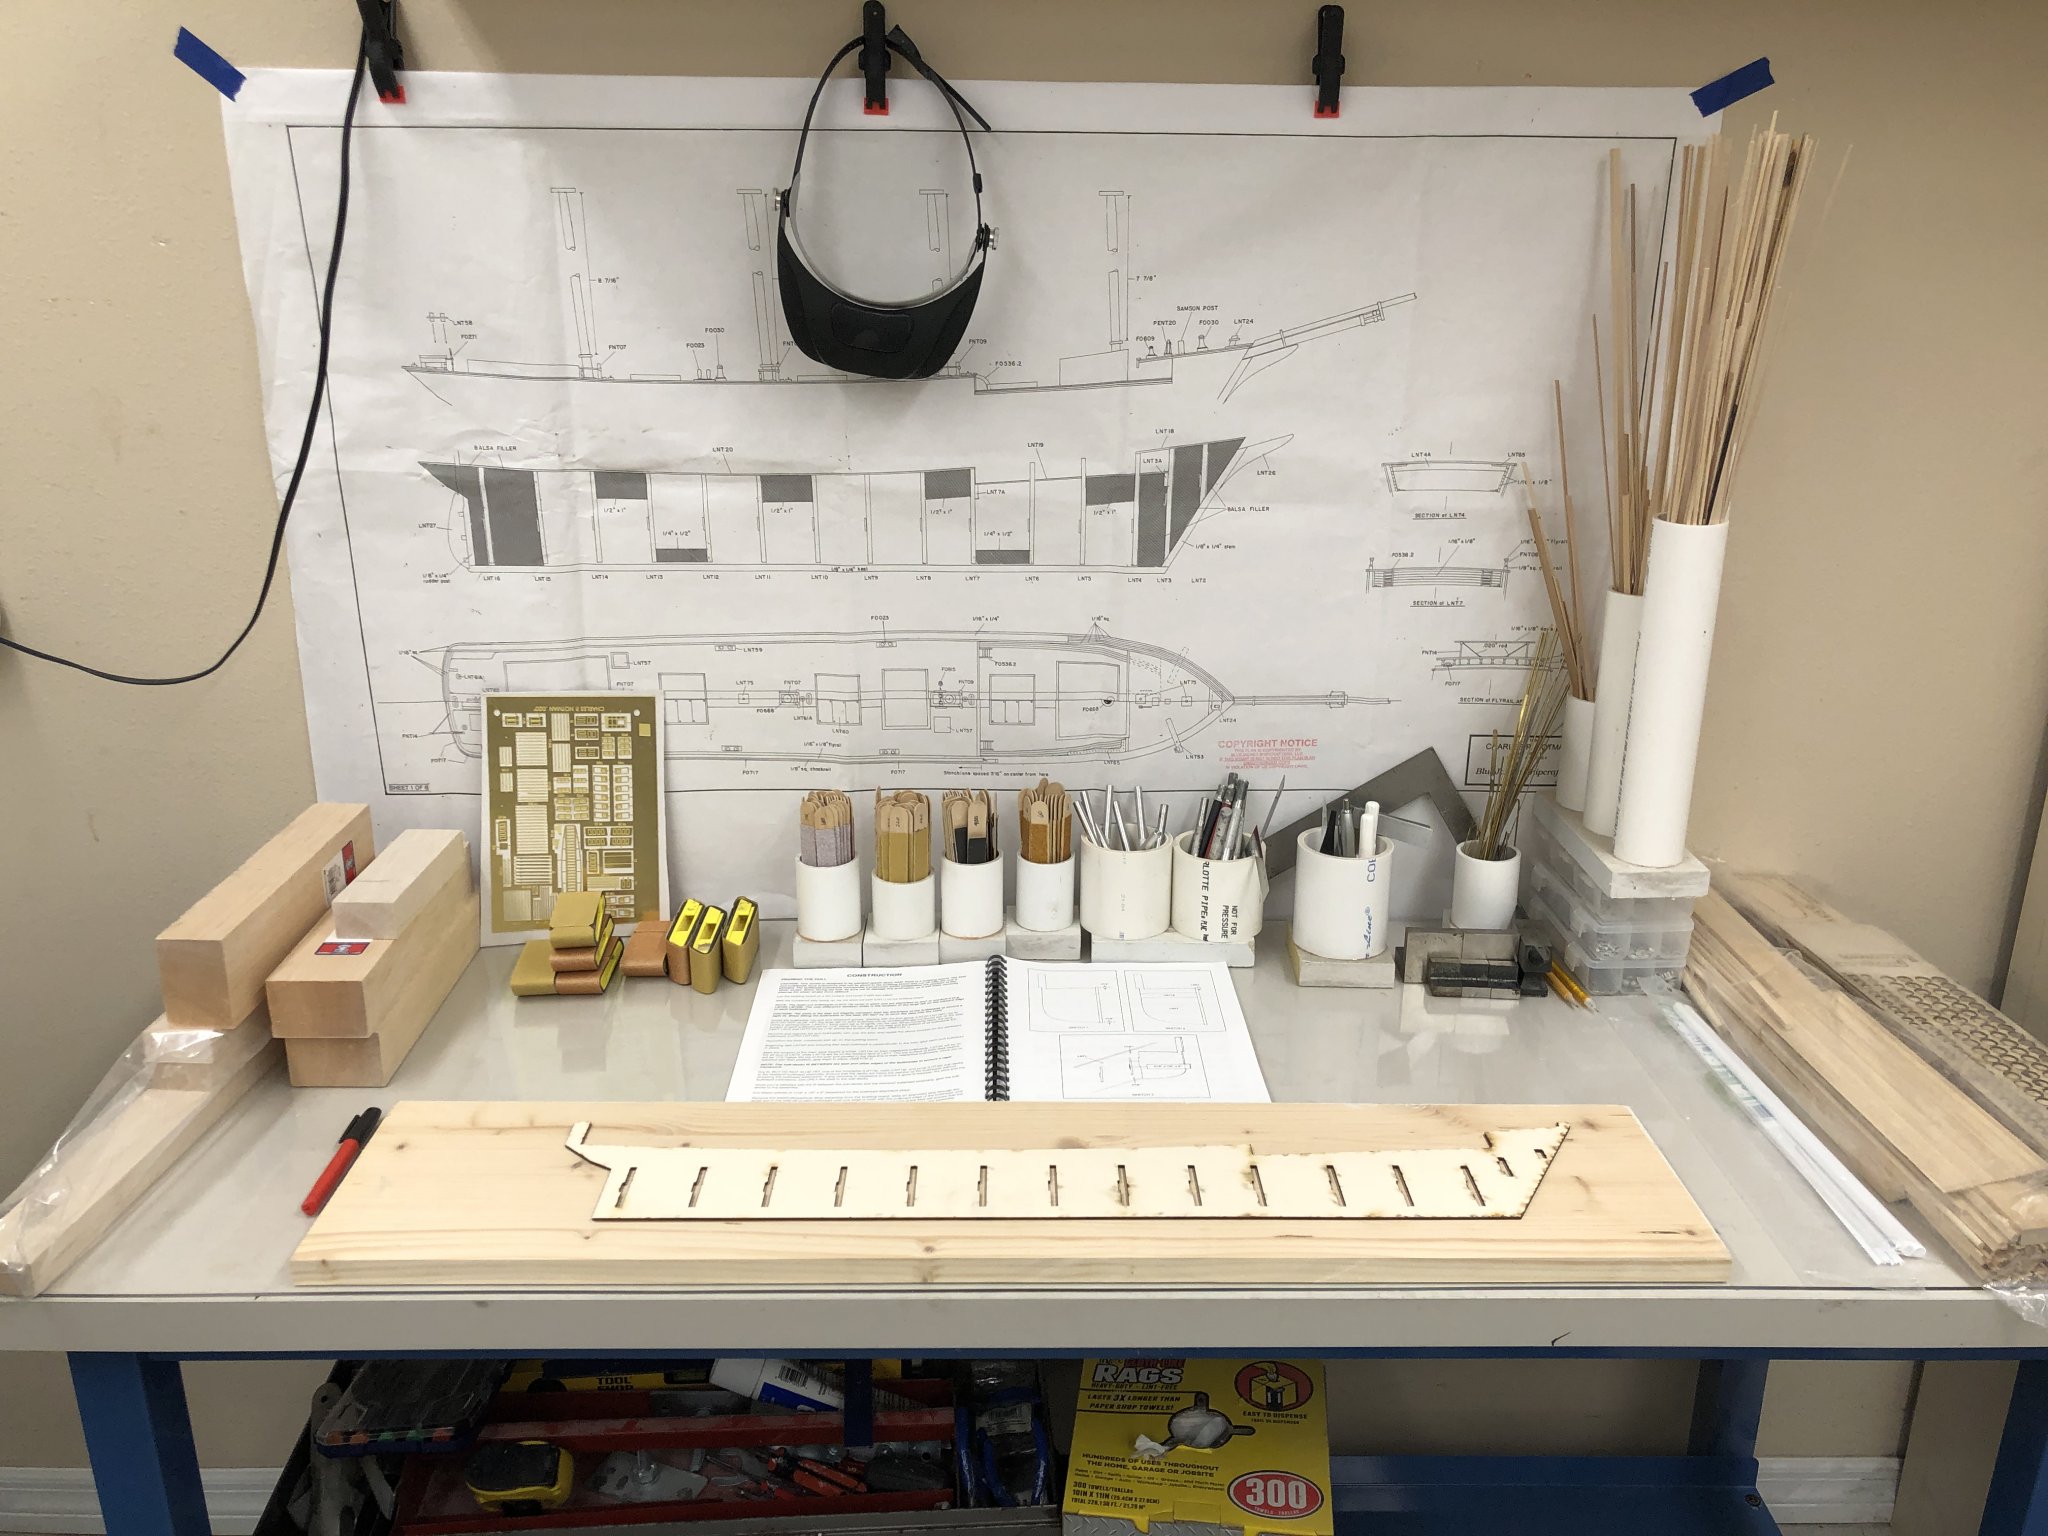
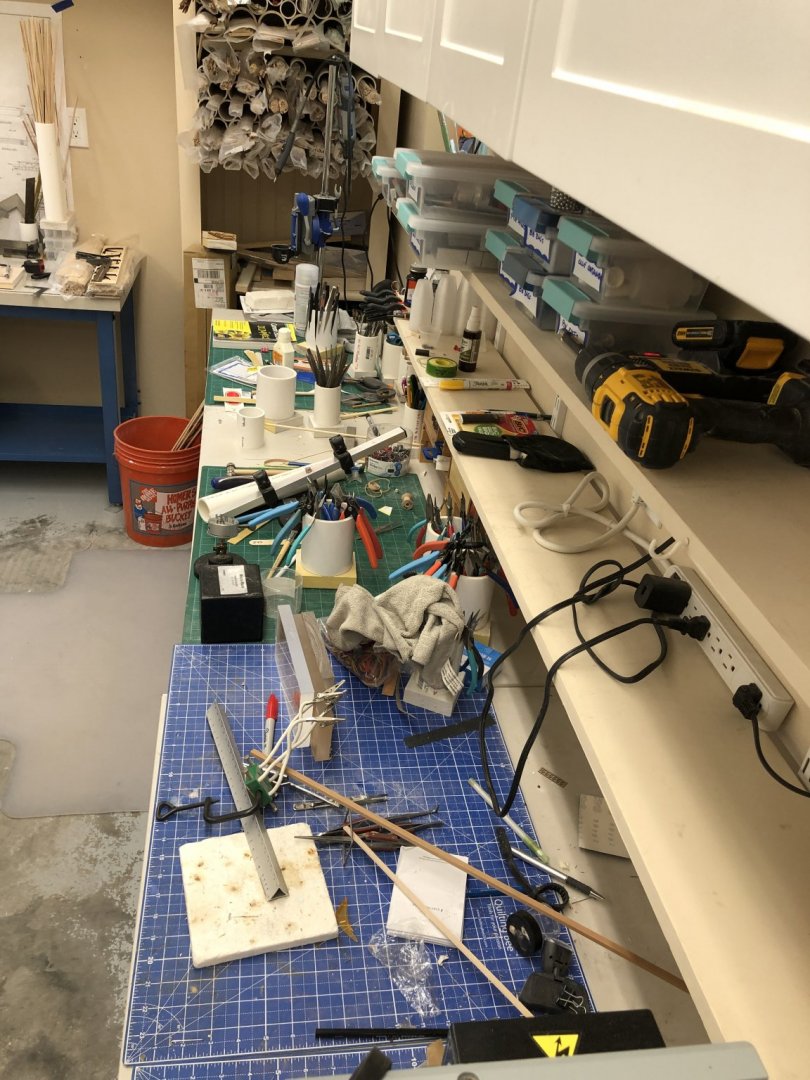
So I made up a bunch of new sanding sticks (I use tongue depressors), put new sheets on my sanding blocks, cut the building board and cleaned up my power tool table. So it is time to "start building". The rest of the cleaning can wait until I get "something" done.


- 144 replies
-
- 6
-
-
- charles p notman
- finished
- (and 1 more)
-
Jon - I have (and have read) "A Shipyard in Maine" and visited the Maine Maritime Museum last summer while on a road trip that got cut short by an impending (but eventually a non-event) hurricane. In my previous life I spent a good deal of time in Maine at BIW watching them build the Arleigh Burke (DDG 51). I actually considered trying to build the Notman at 1/48th but the model would be over 6' long and I had enough trouble finding a place for the 1/35th scale Endeavour I built last year and that is just over four feet long (but five feet high). I will try and do the model justice.
-
I got one end of the workshop cleaned and reconfigured to provide a good view of one sheet of the plans - in this case the profiles.should be useful when constructing the hull. I will work the other side tomorrow. You would think I would have the arrangement down after four kits built in this workshop but every time I seem to come up with "a better idea'. I am reminded of a quote from ADM Gorschkov (head of the Soviet Navy in the 1980's) that "better is the enemy of good enough".

- 144 replies
-
- 5
-
-
- charles p notman
- finished
- (and 1 more)
-
Chris, The level of detail and instructions are at a much higher level than on the Gorham. Vic told me the Gorham kit was developed in the 80's and the Notman in the early 2000's. I too am looking forward to seeing it come together.
-
Eduardo/John, Welcome aboard. It may be a few days before I actually get started on the Notman. The workshop is really a mess.
-
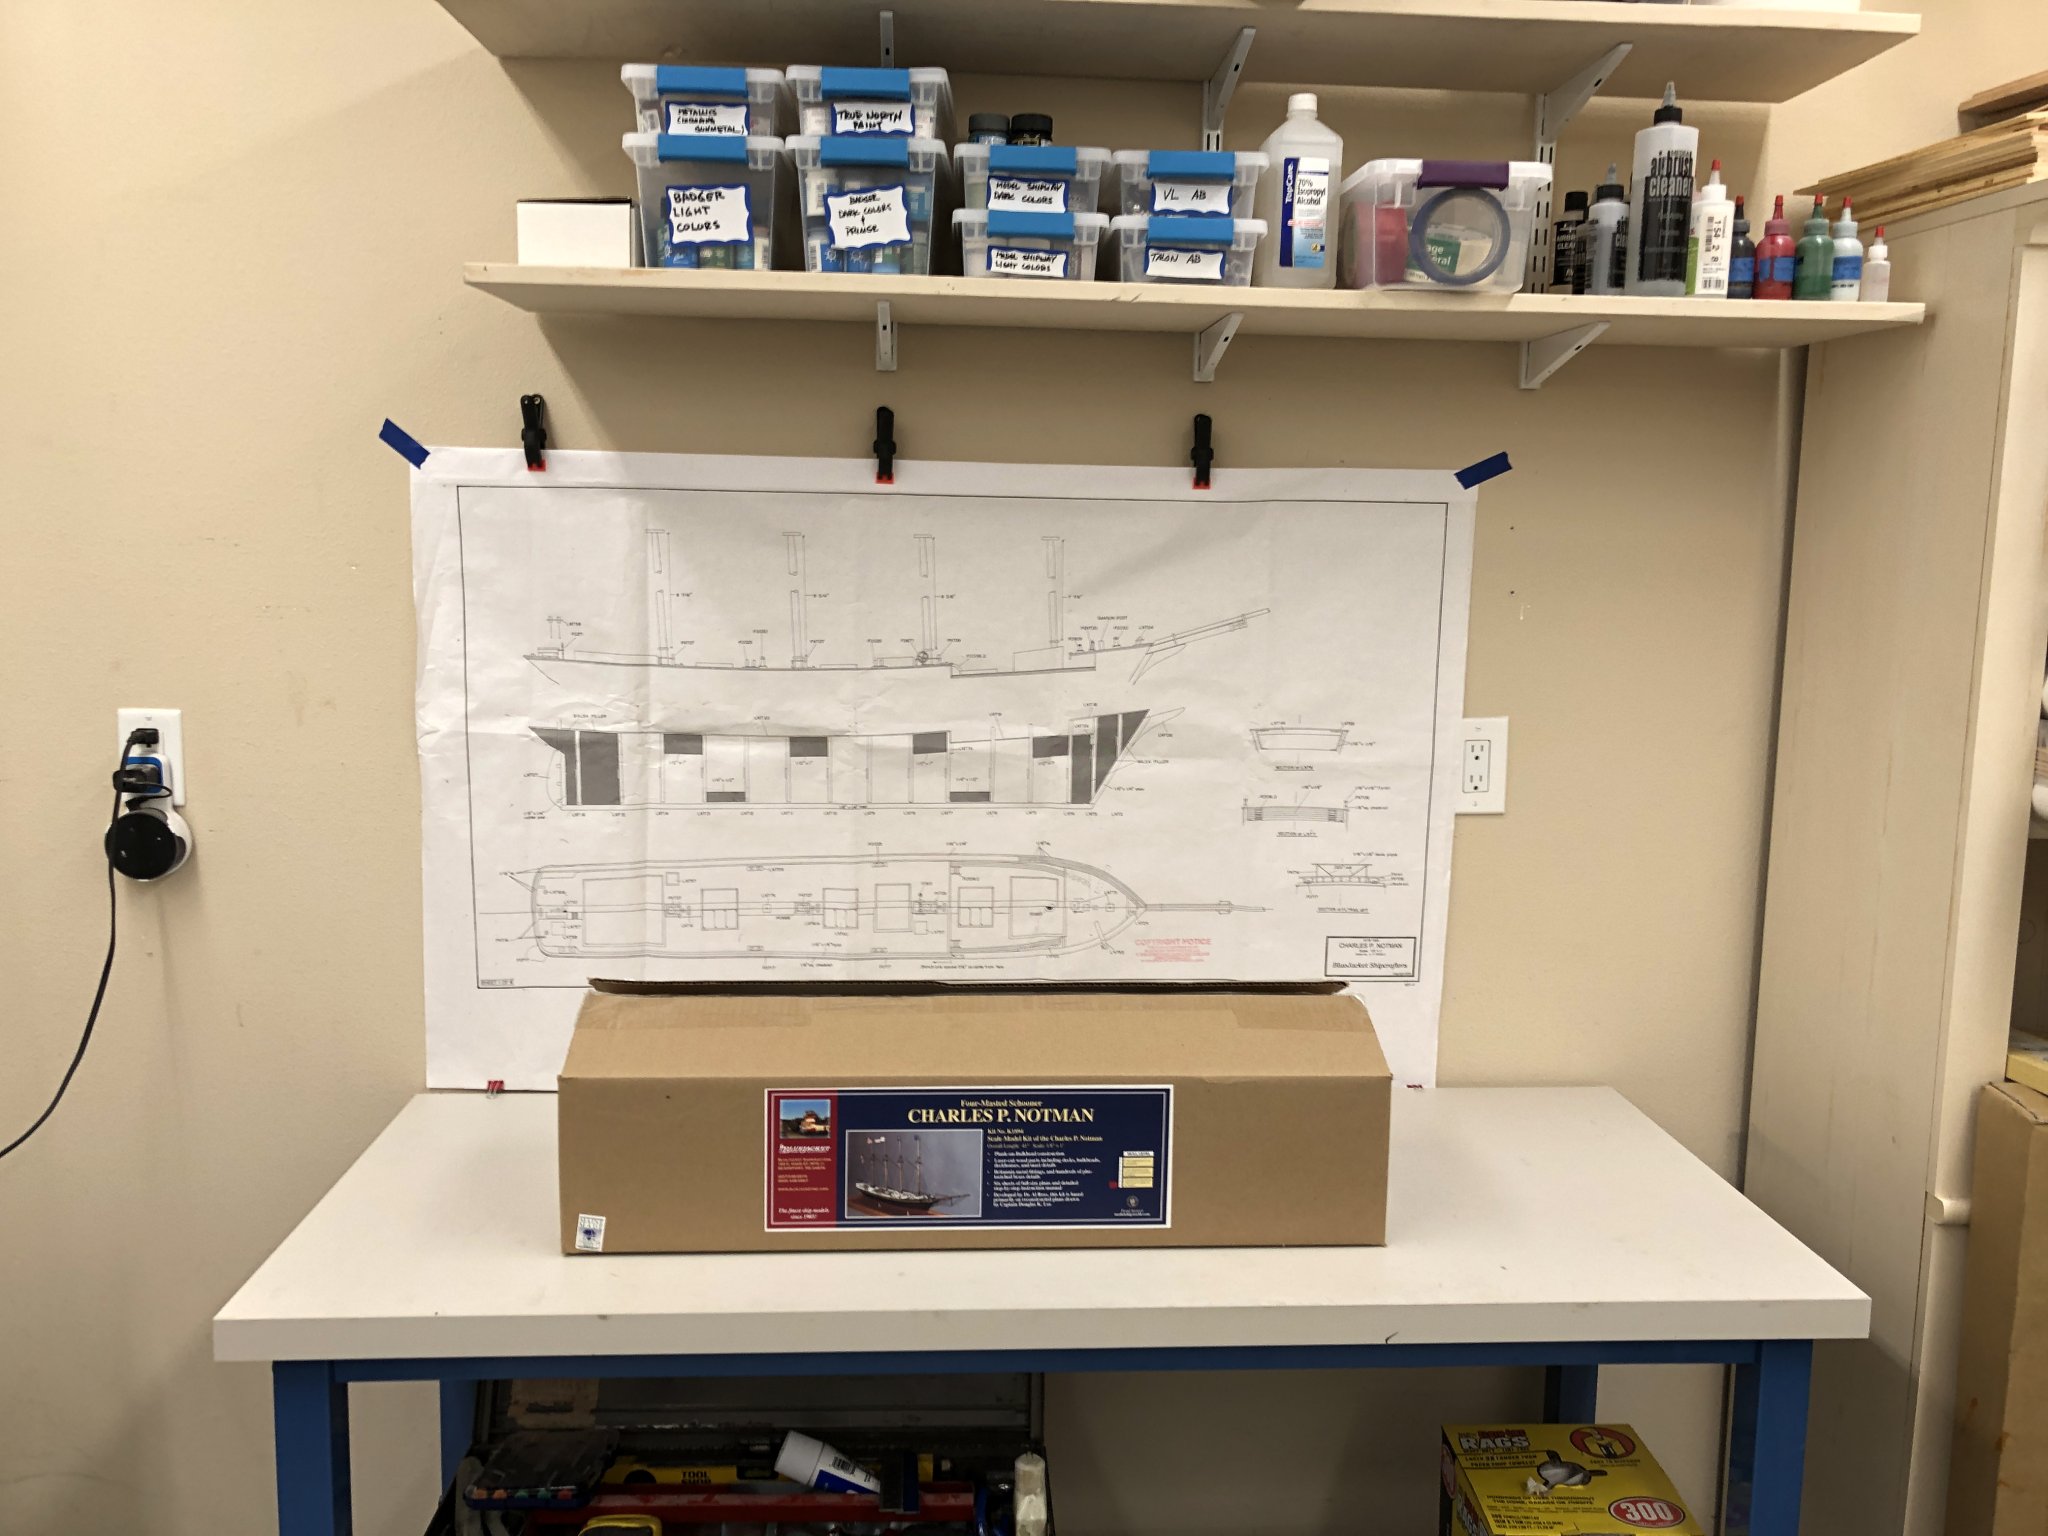
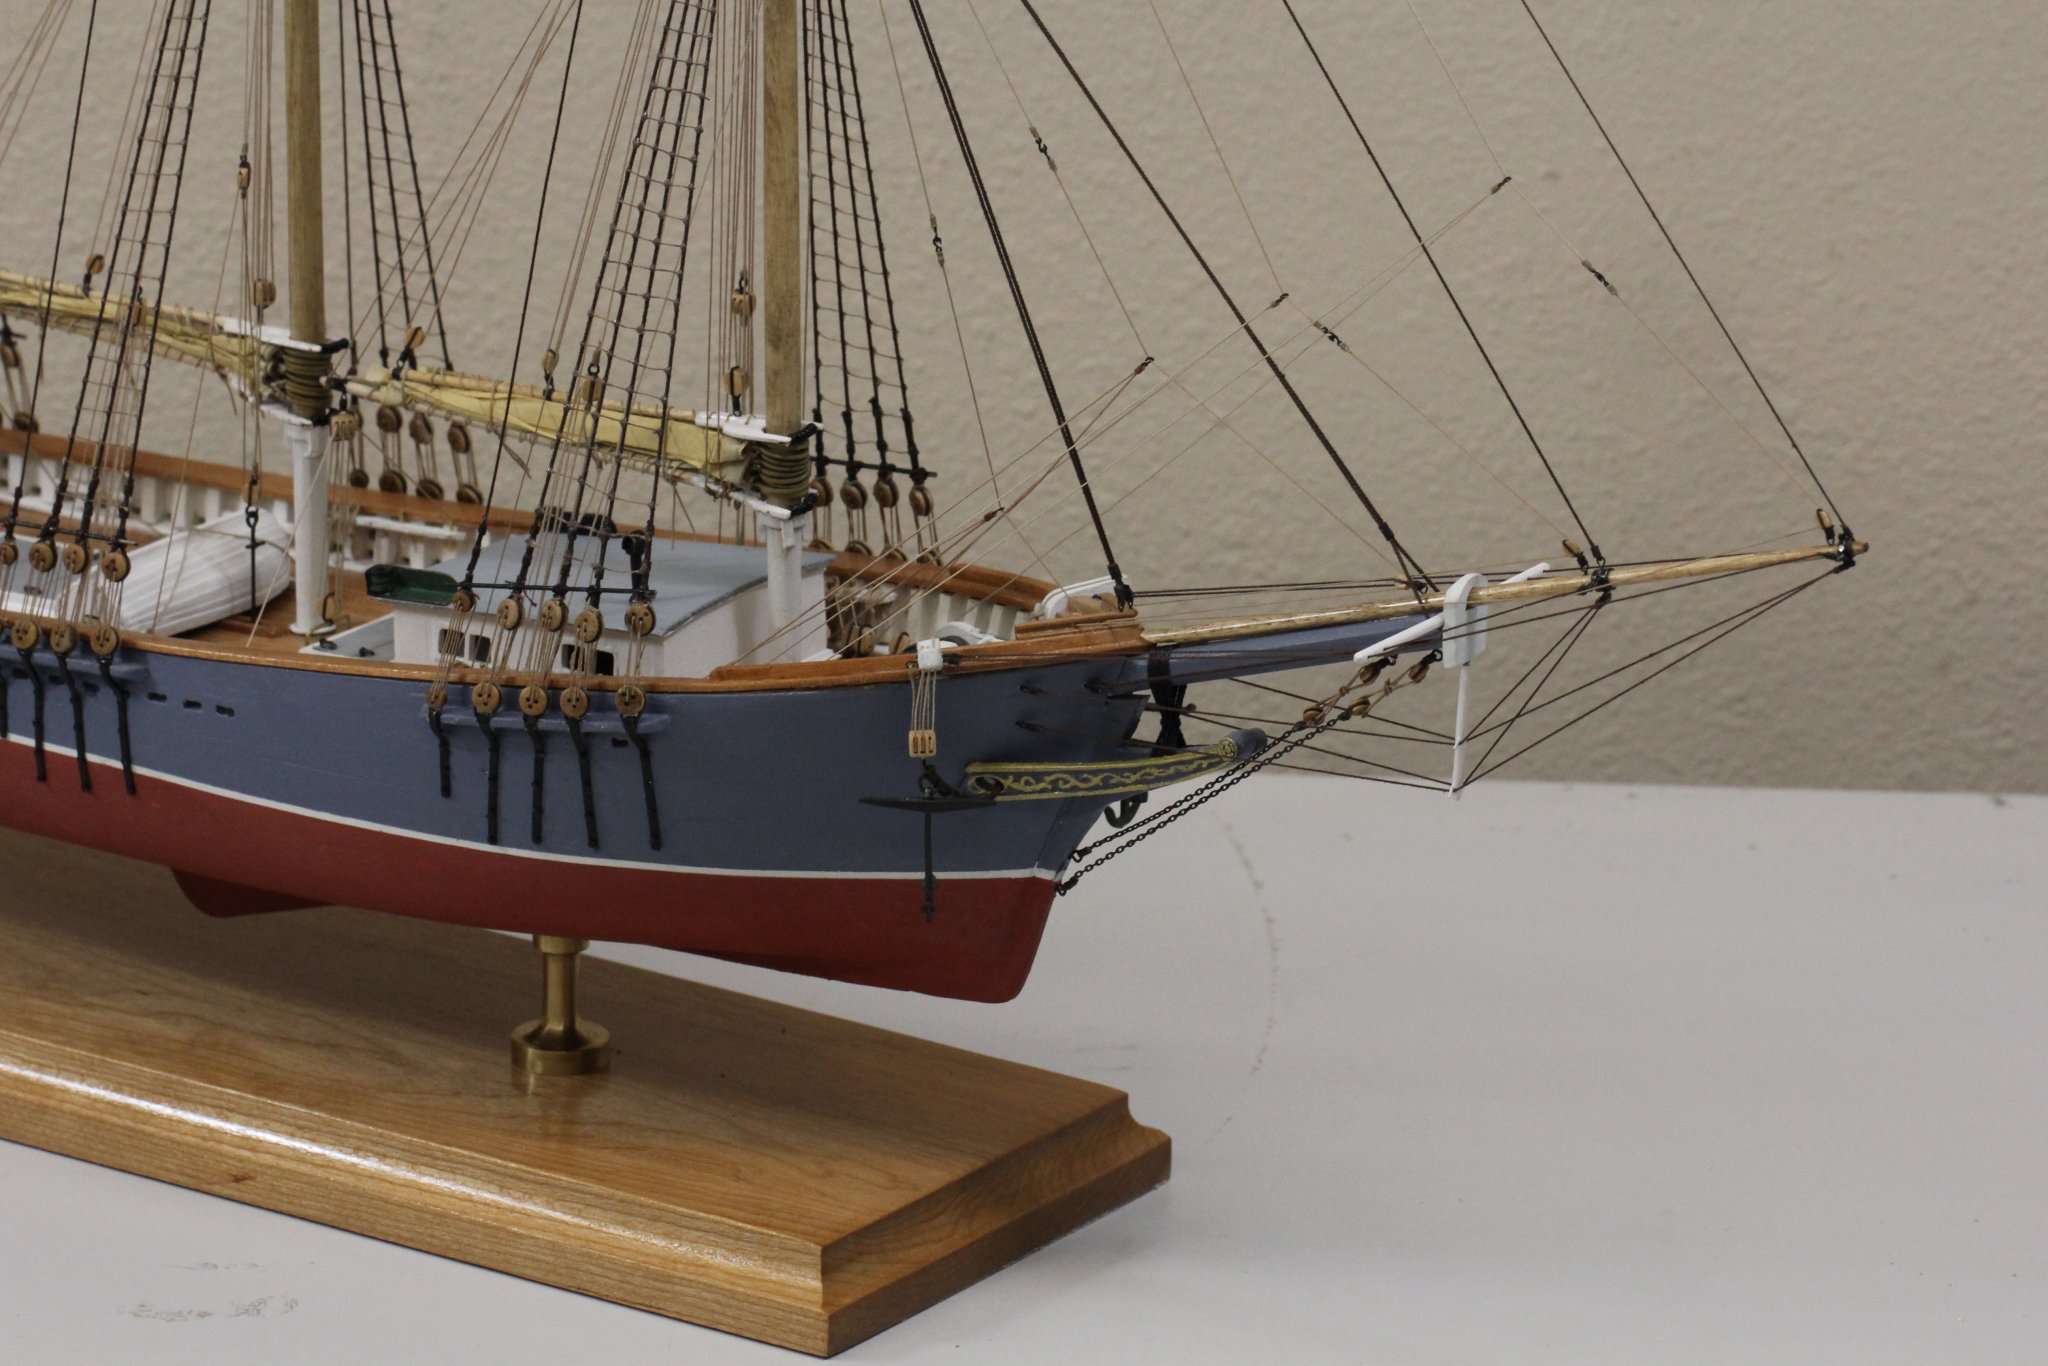
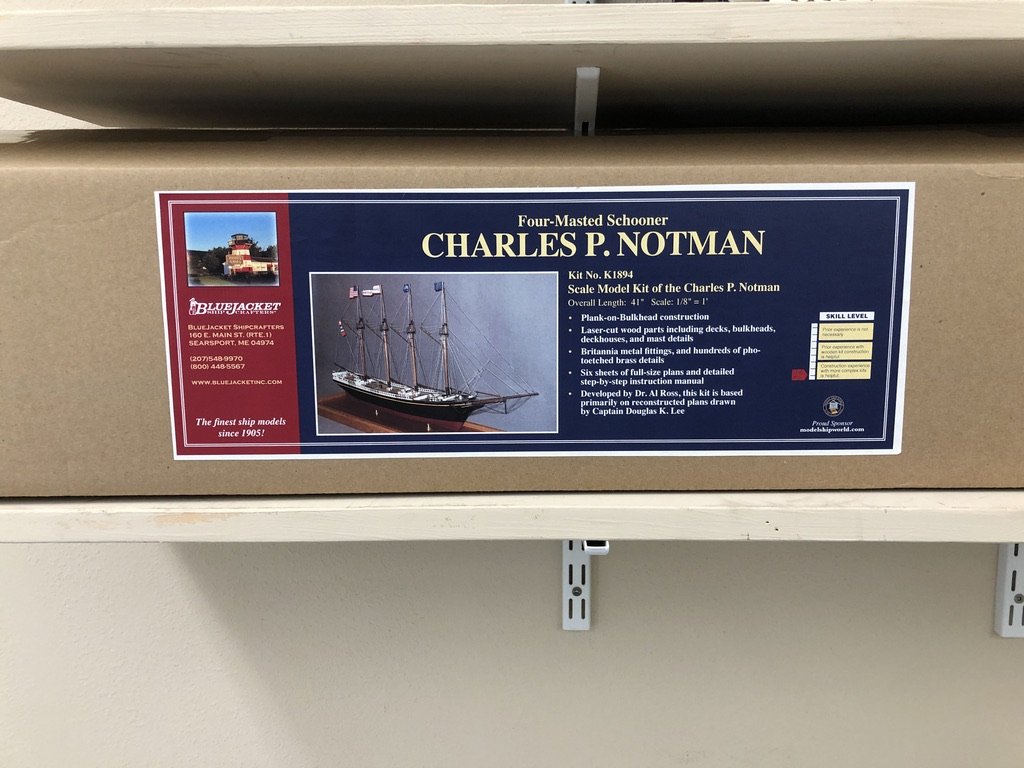
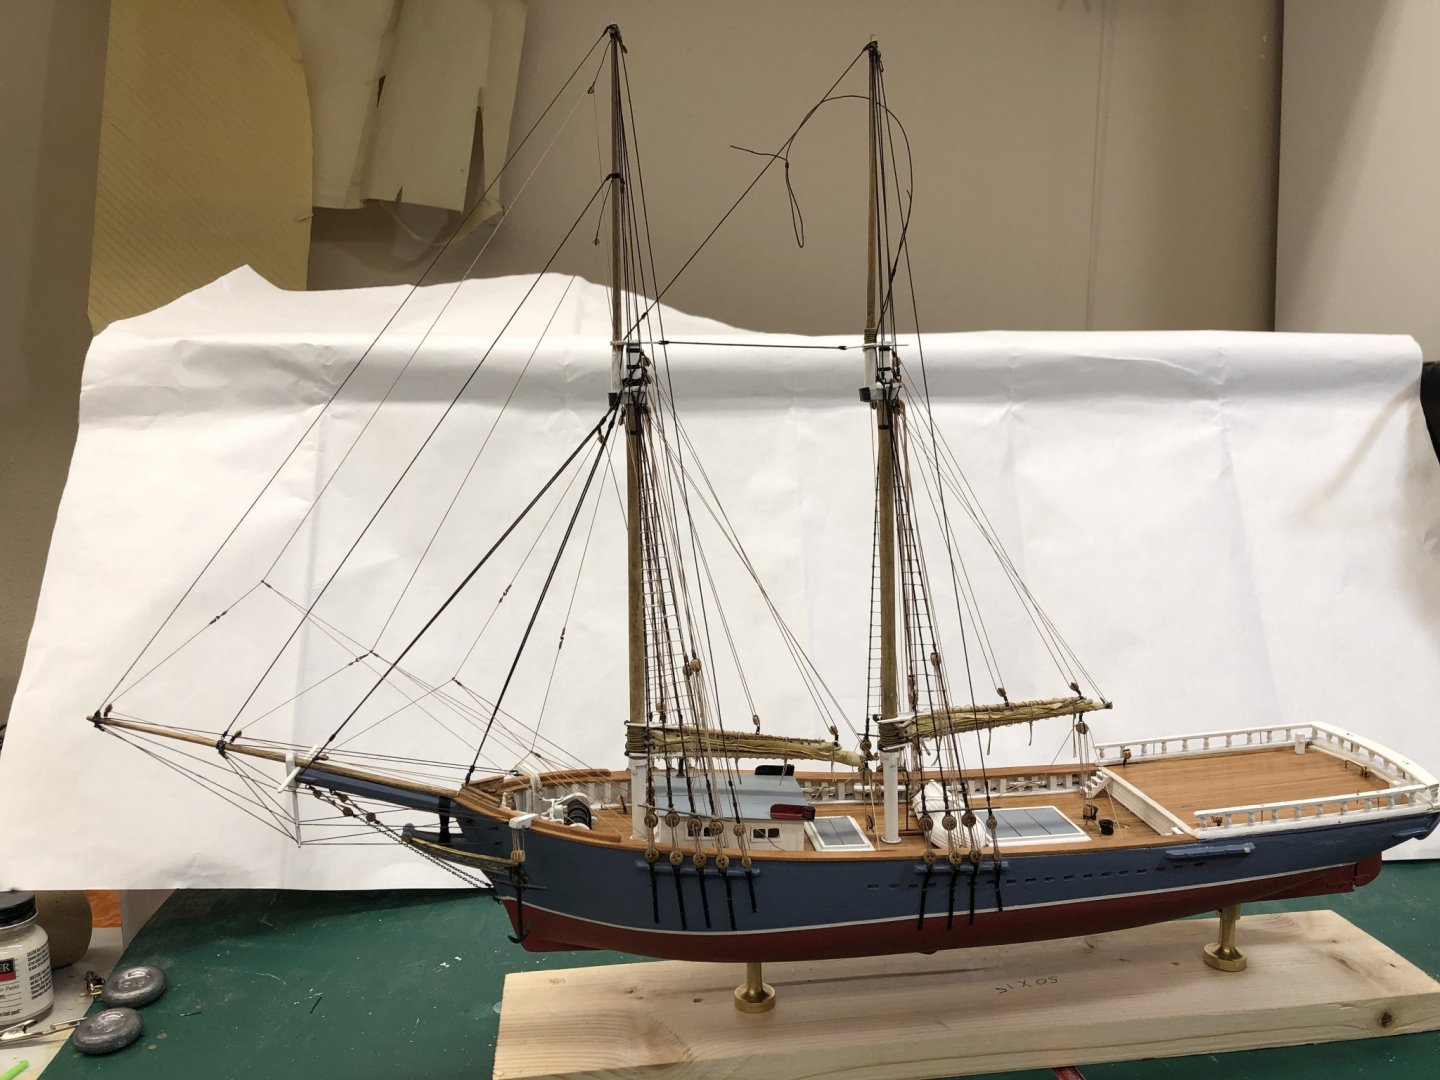
I finished the Fannie A. Gorham (three masted schooner) this morning and have the Charles P. Notman (4 masted schooner) ready to start but first need to clean up and reorganize the workshop. This kit will be a first for me as the Notman used galvanized wire for the standing rigging so no Black/Dark Brown thread during this build. Since the workbench is still a mess I will have to start with a picture of the box on the shelf. I did open it already and will take a look at the instructions and drawings when I get a spot cleaned off enough. It seems I must have taken out/used every tool, box, container and bottle in the course of building the Gorham. What a mess. Famous last words - "I will clean up and put things away as they are no longer needed - THIS TIME!"
- 144 replies
-
- 6
-
-
- charles p notman
- finished
- (and 1 more)
-
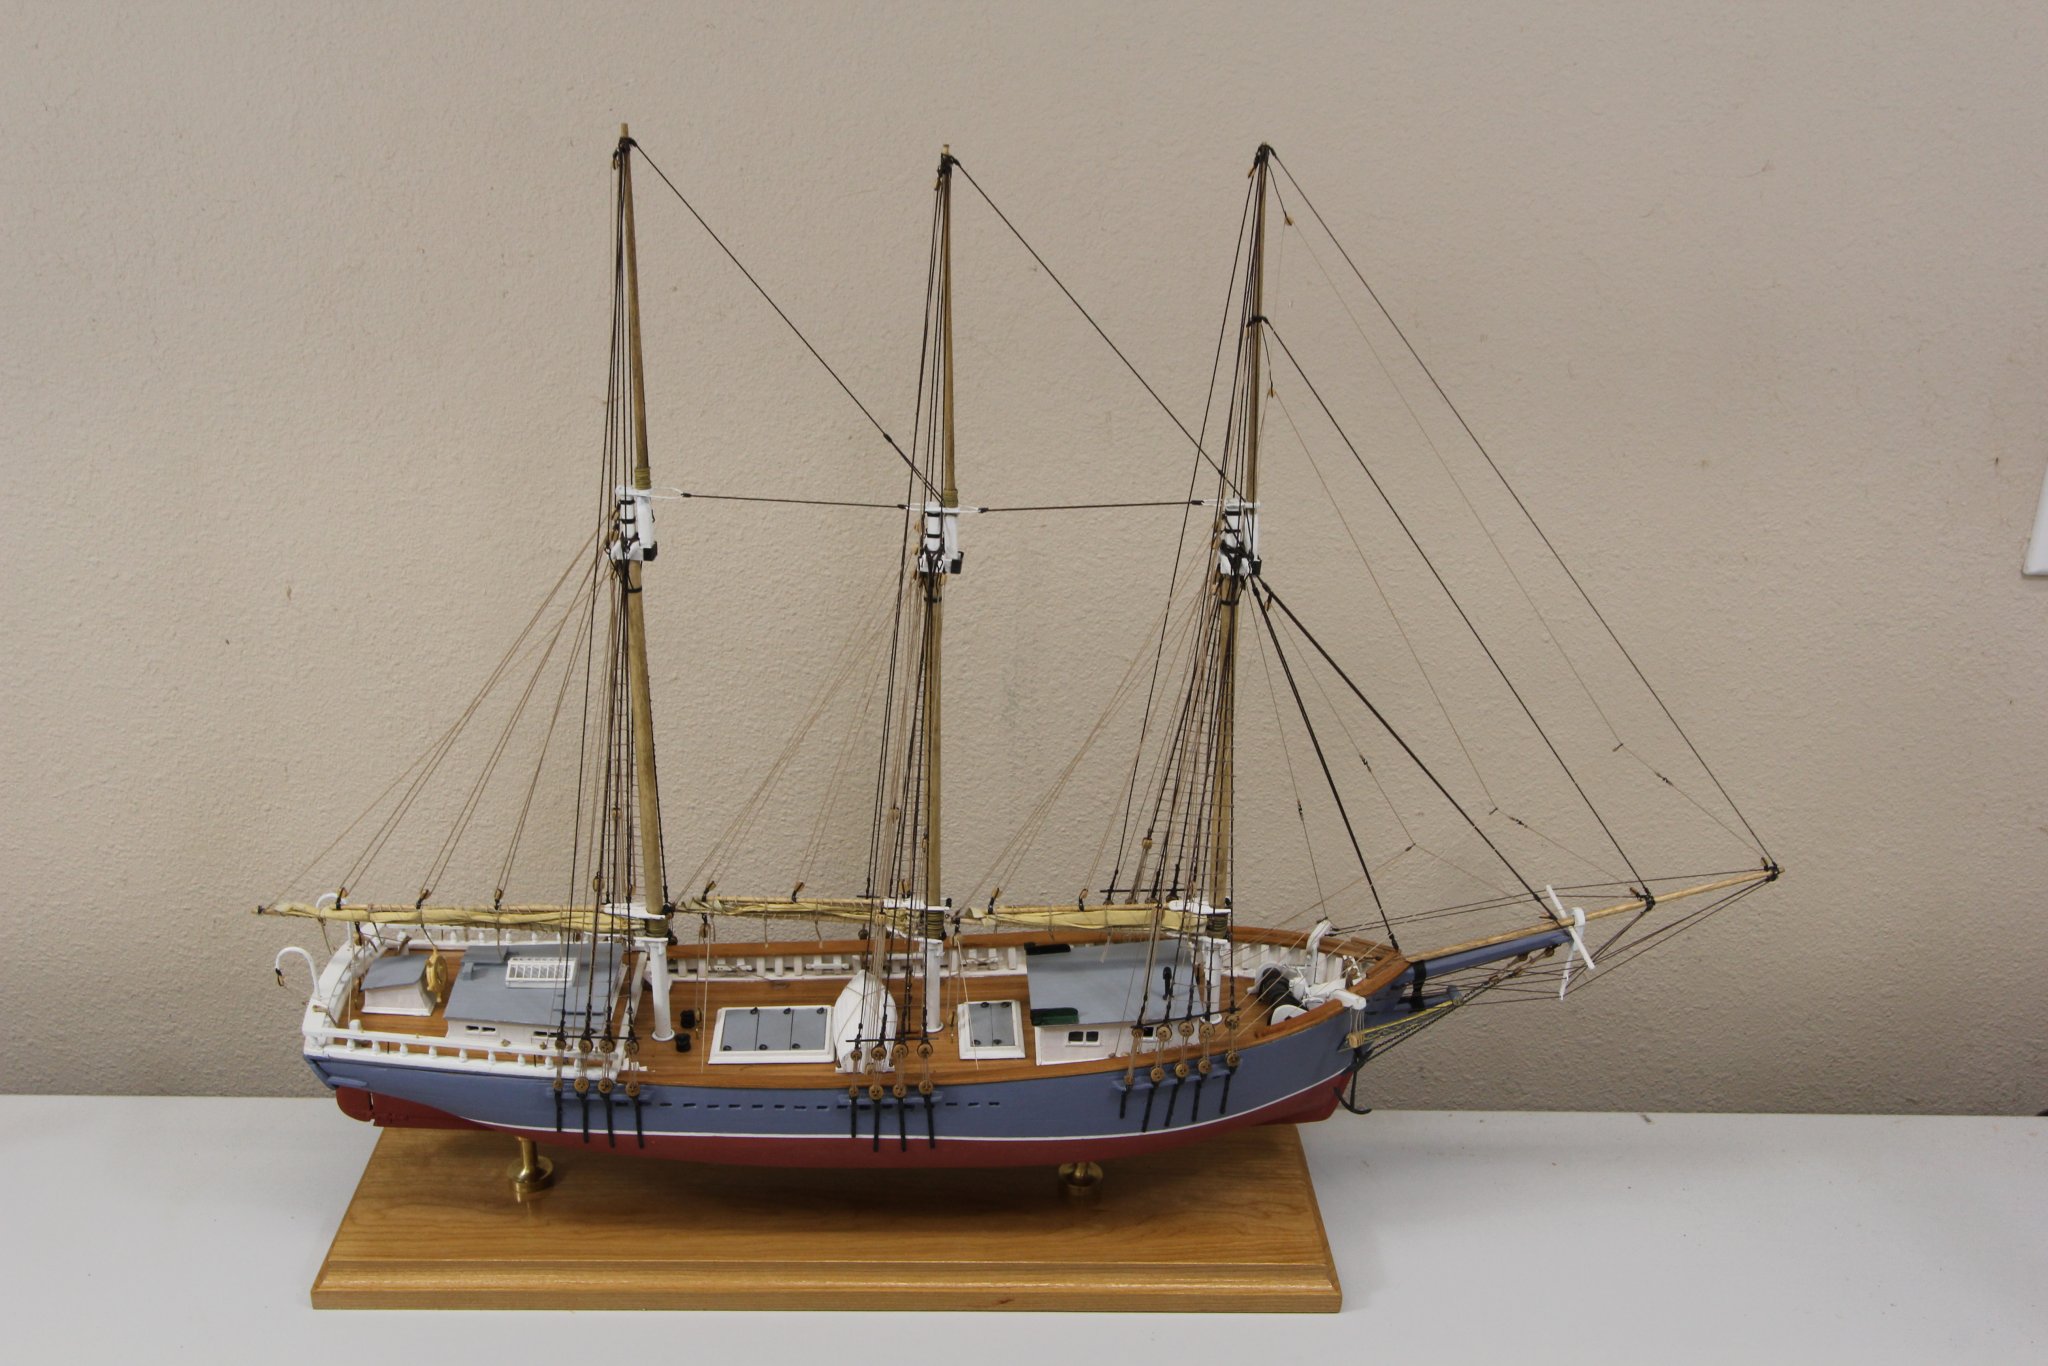
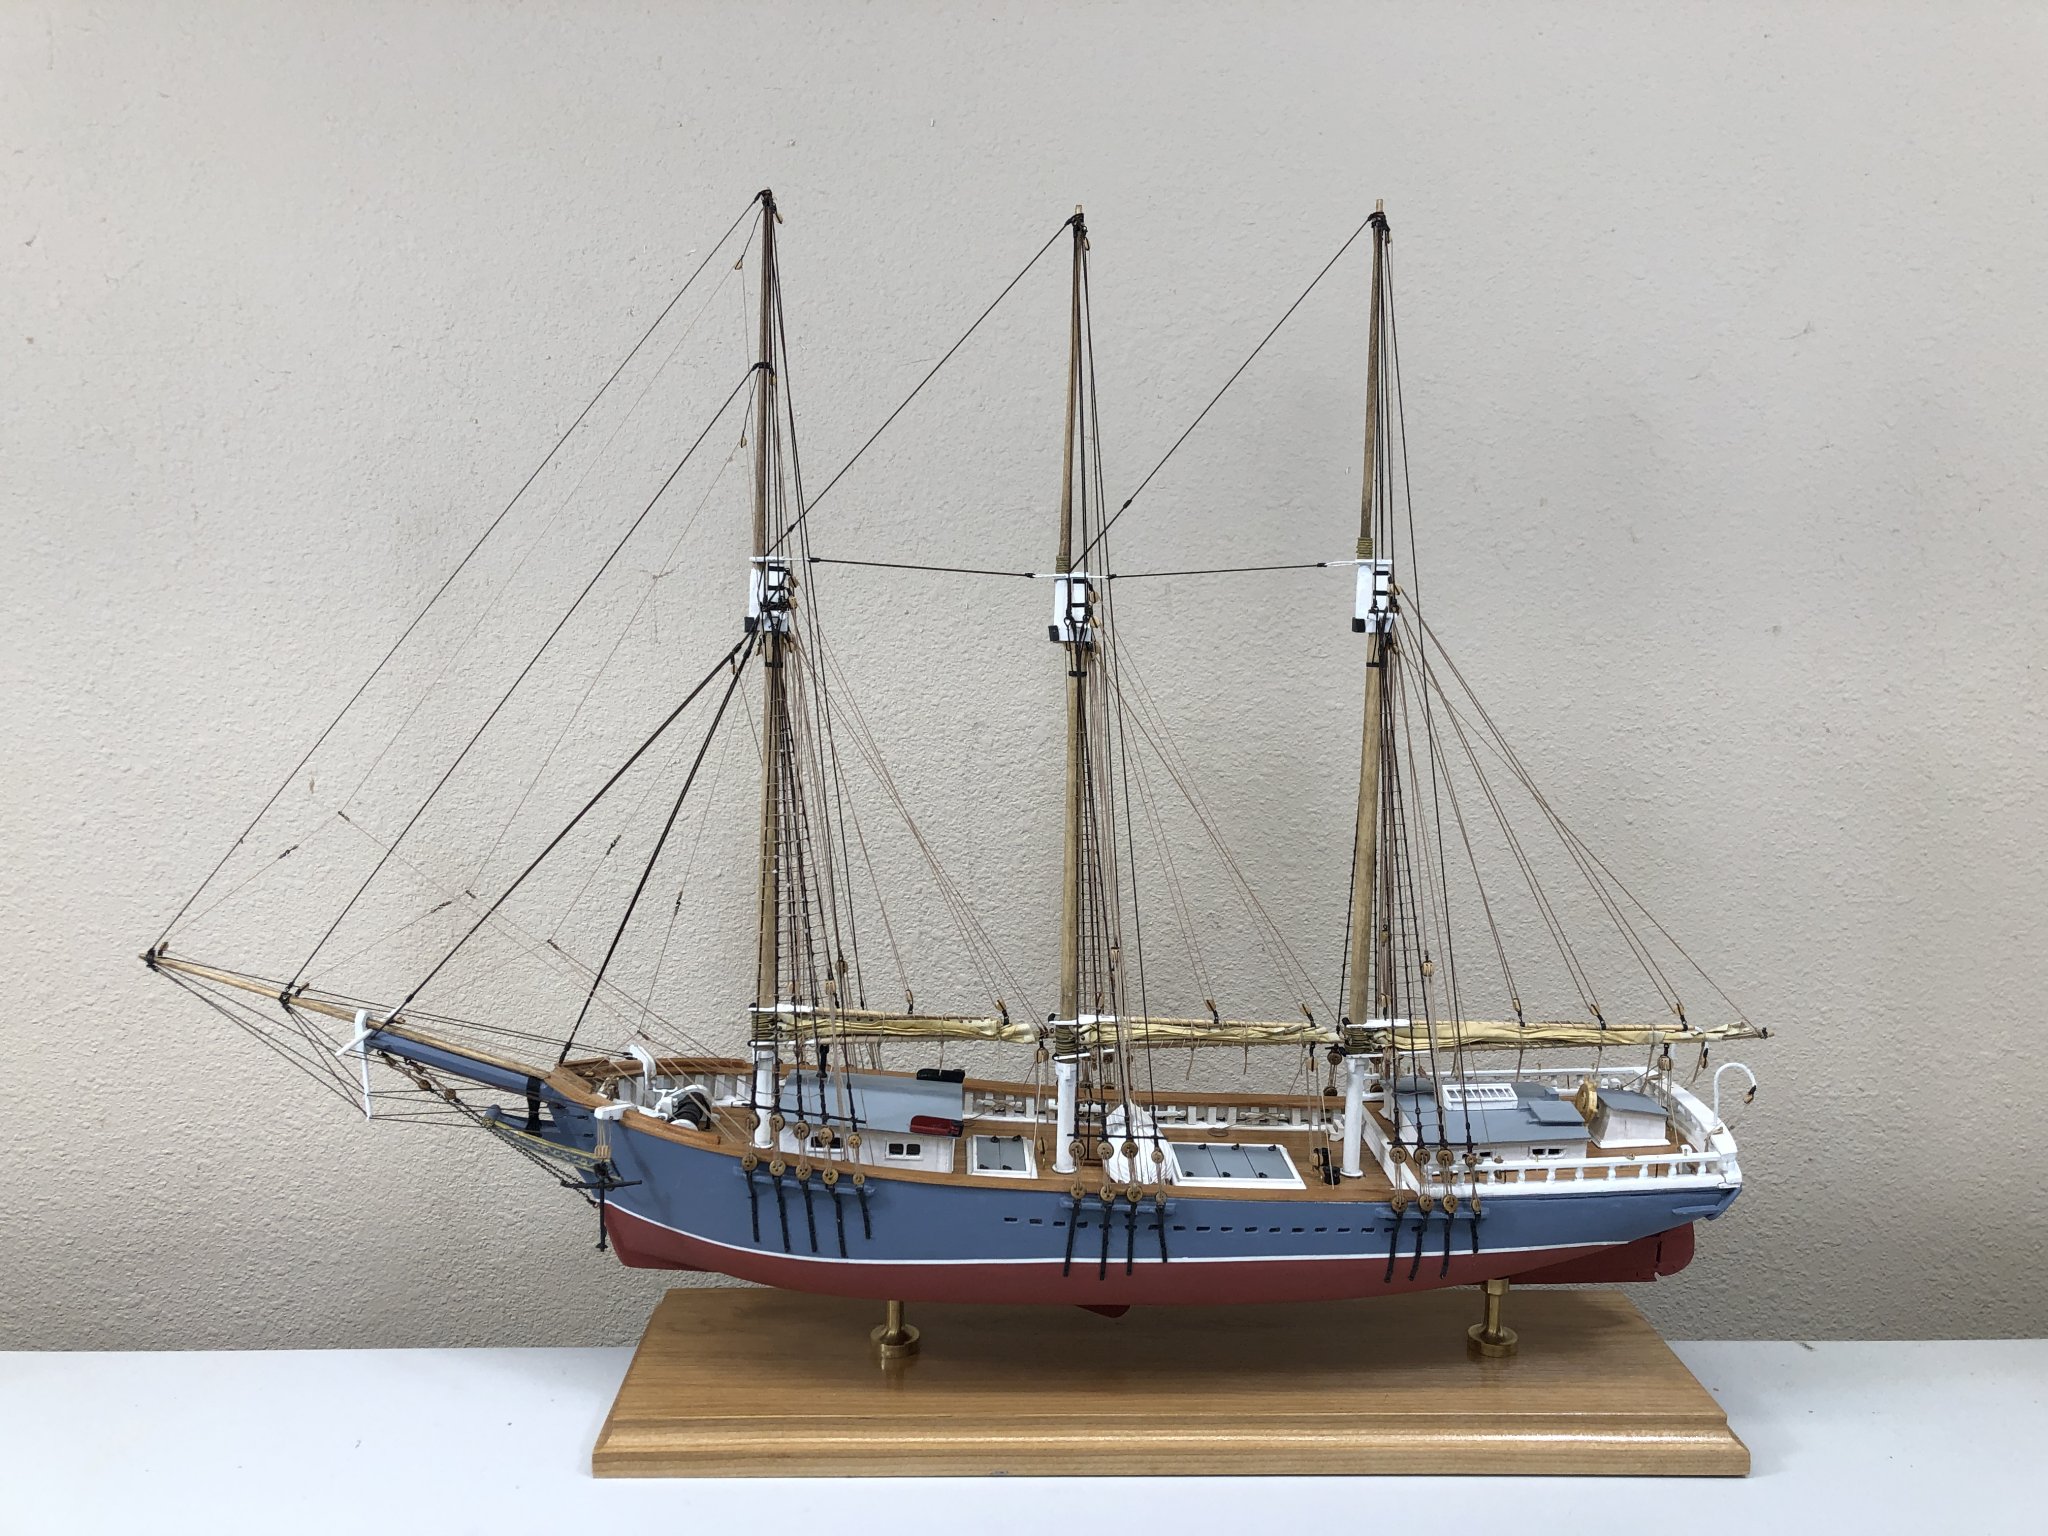
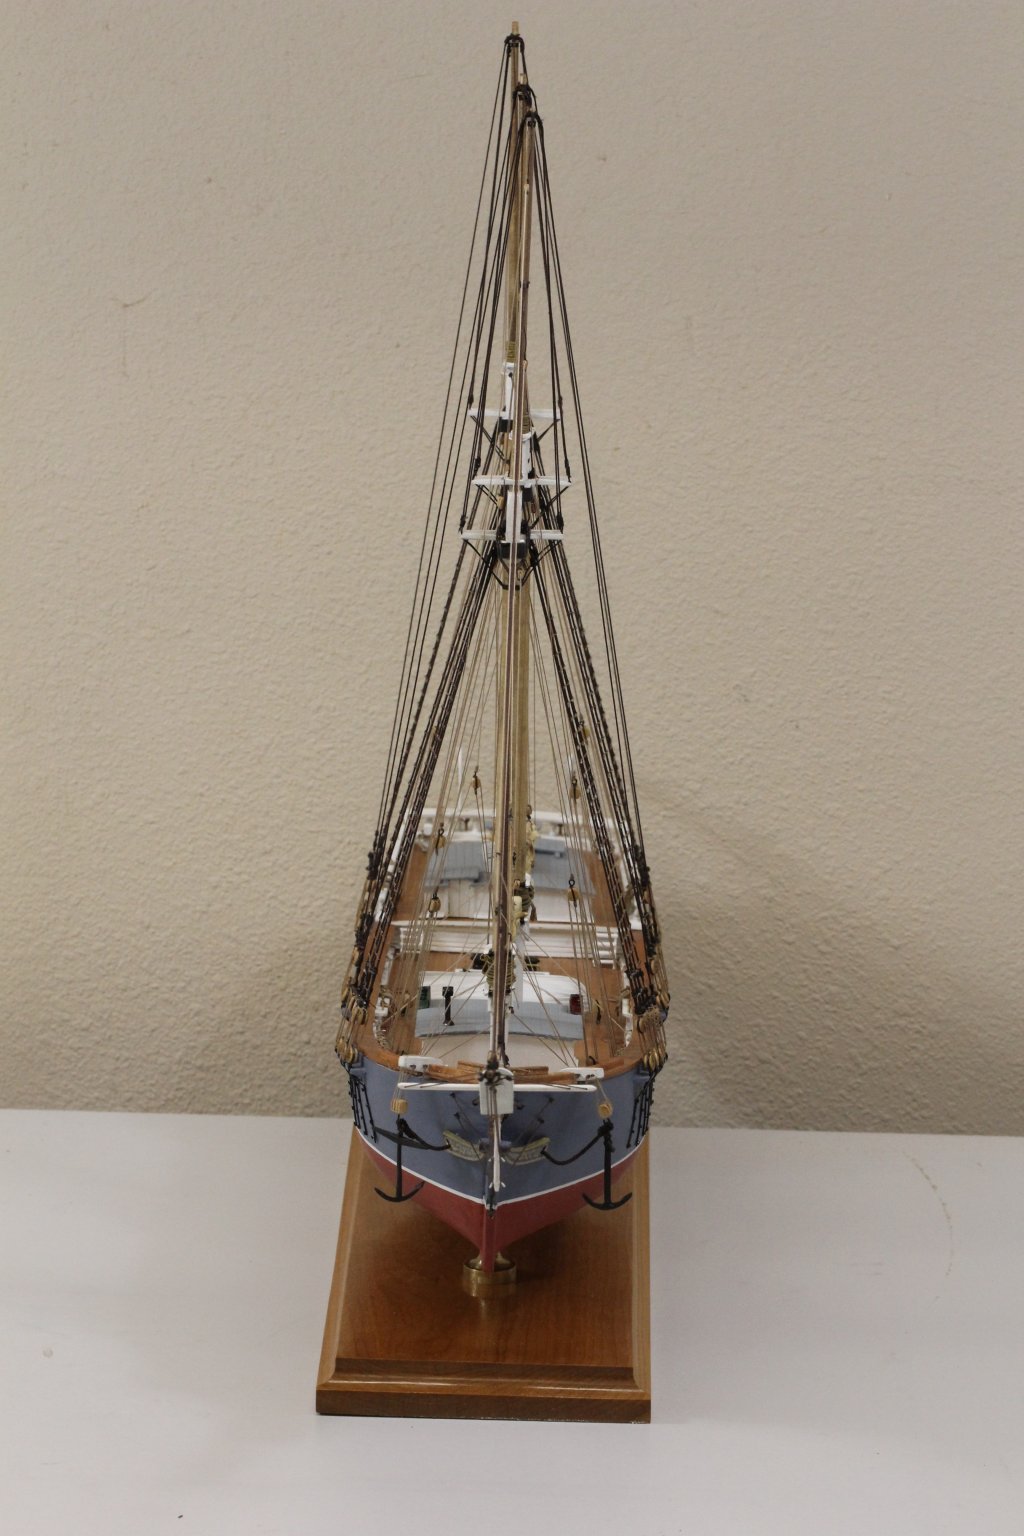
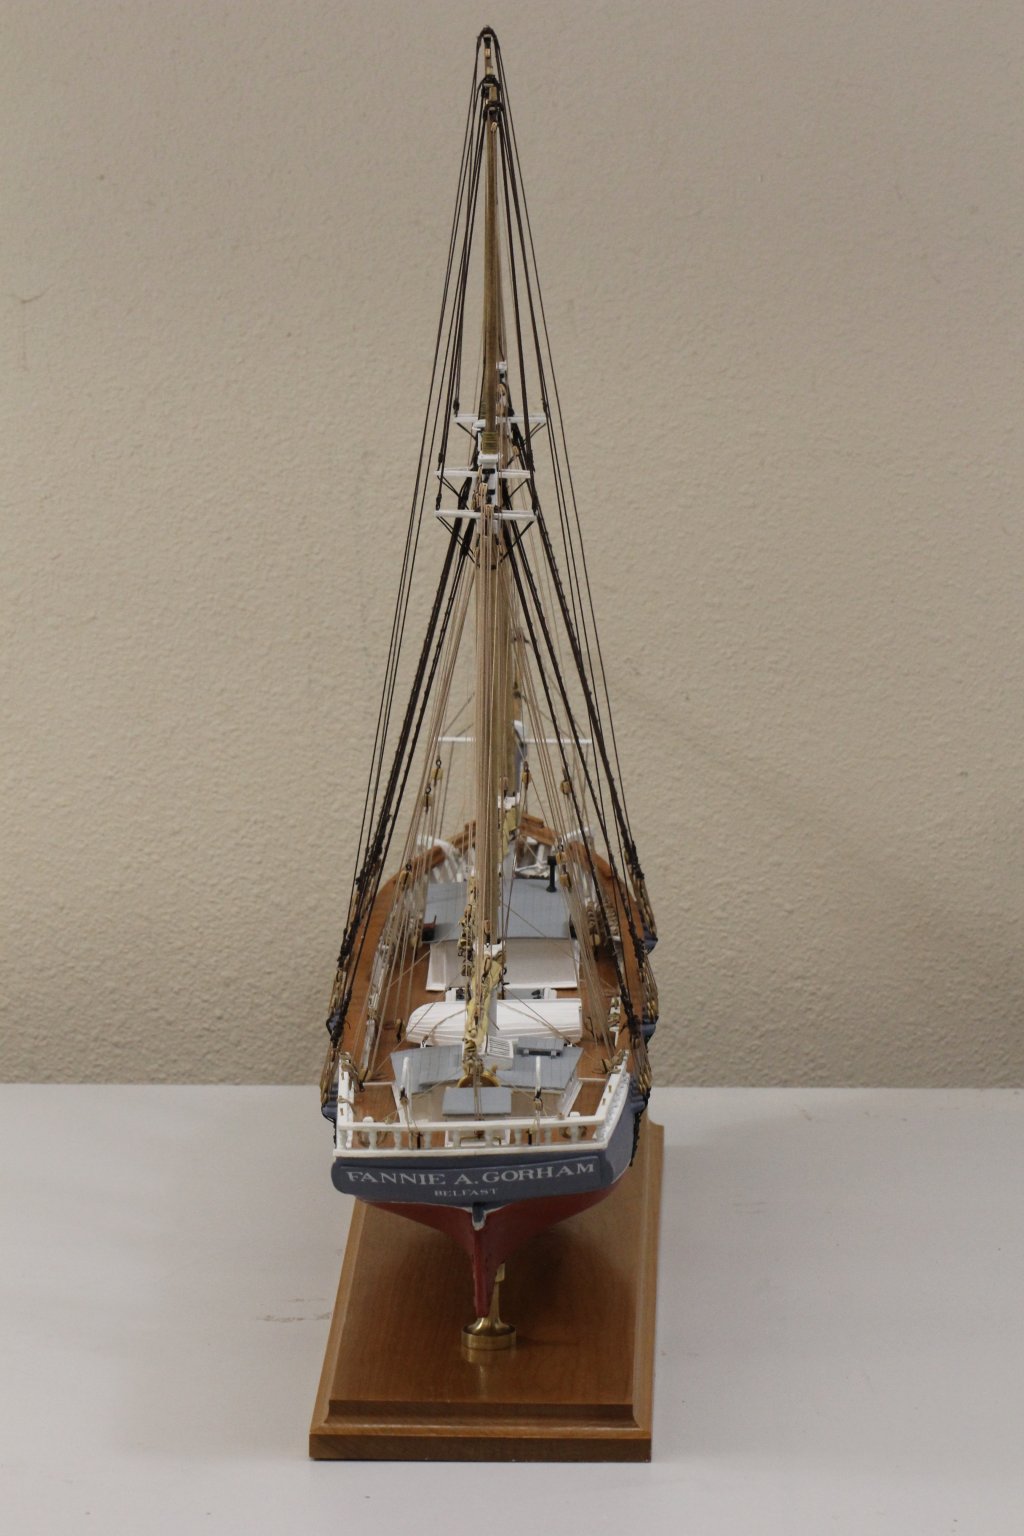
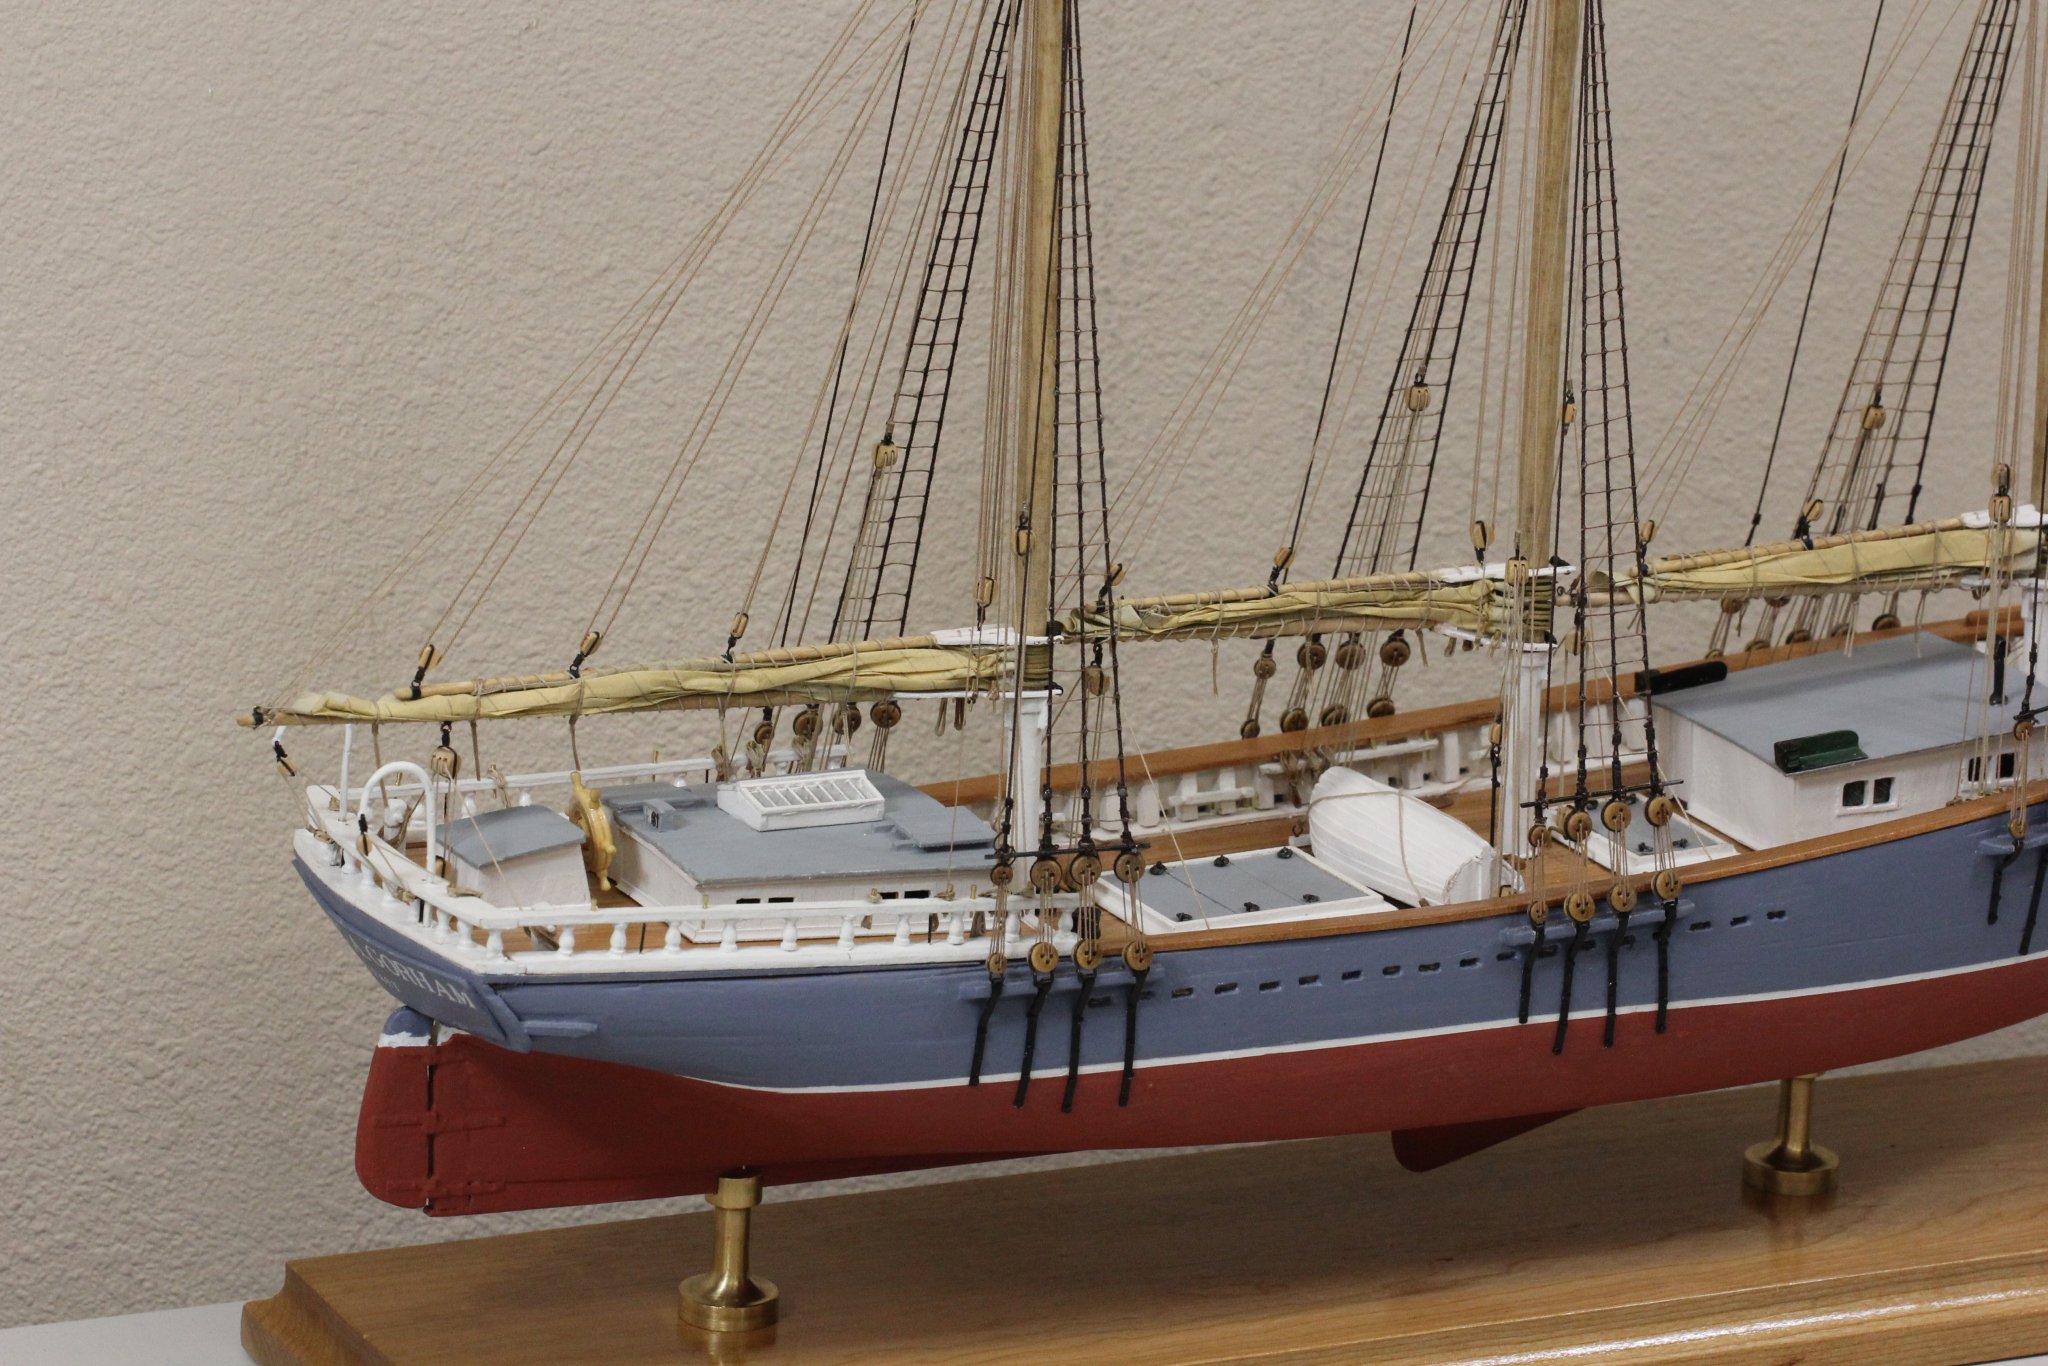
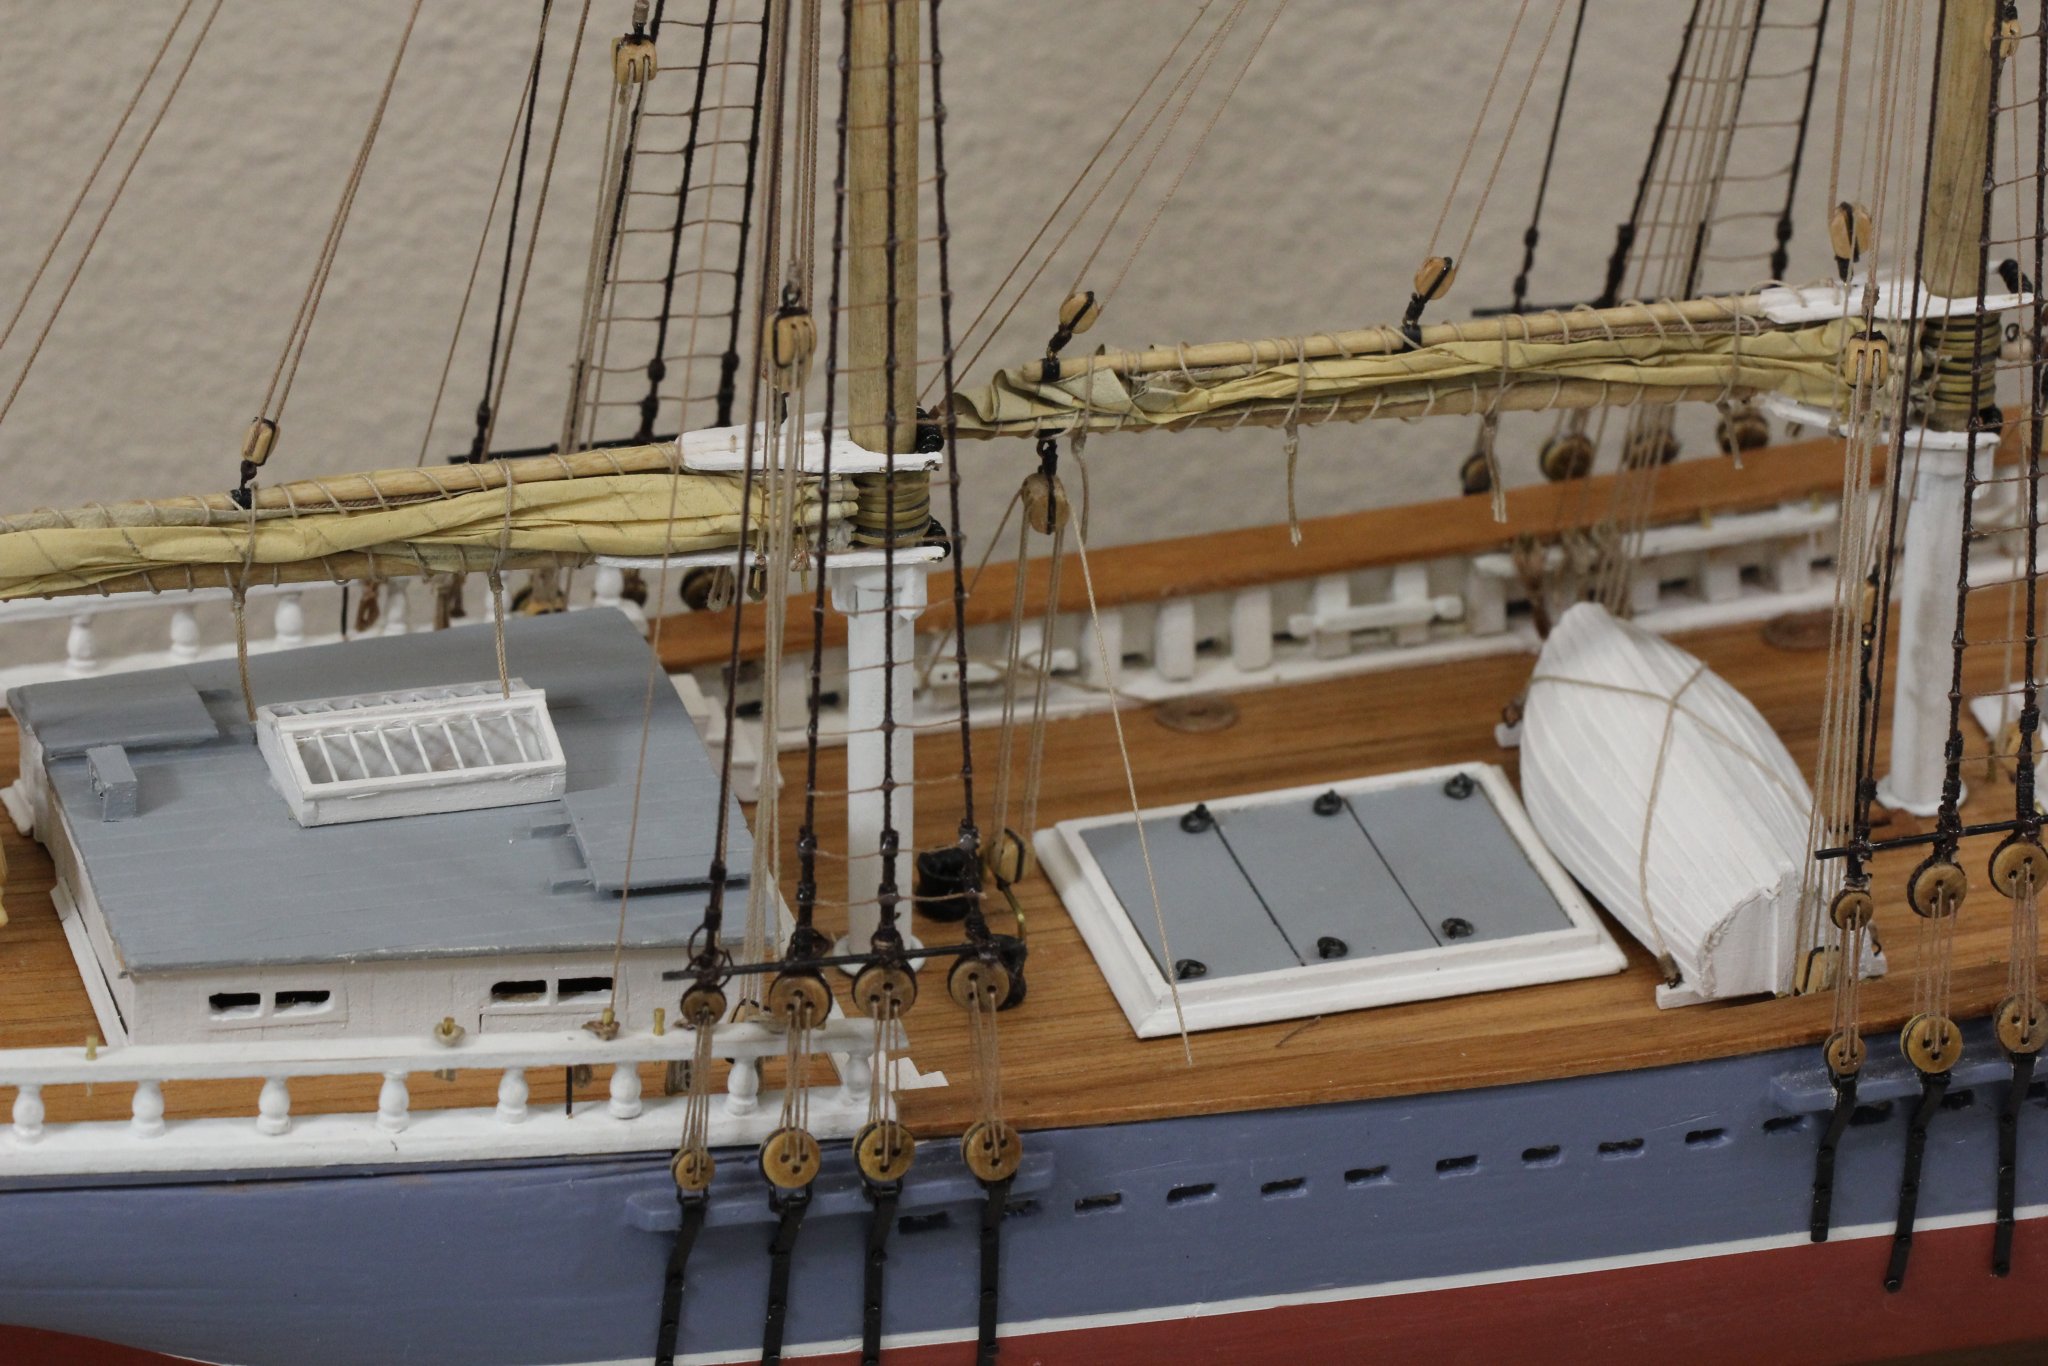
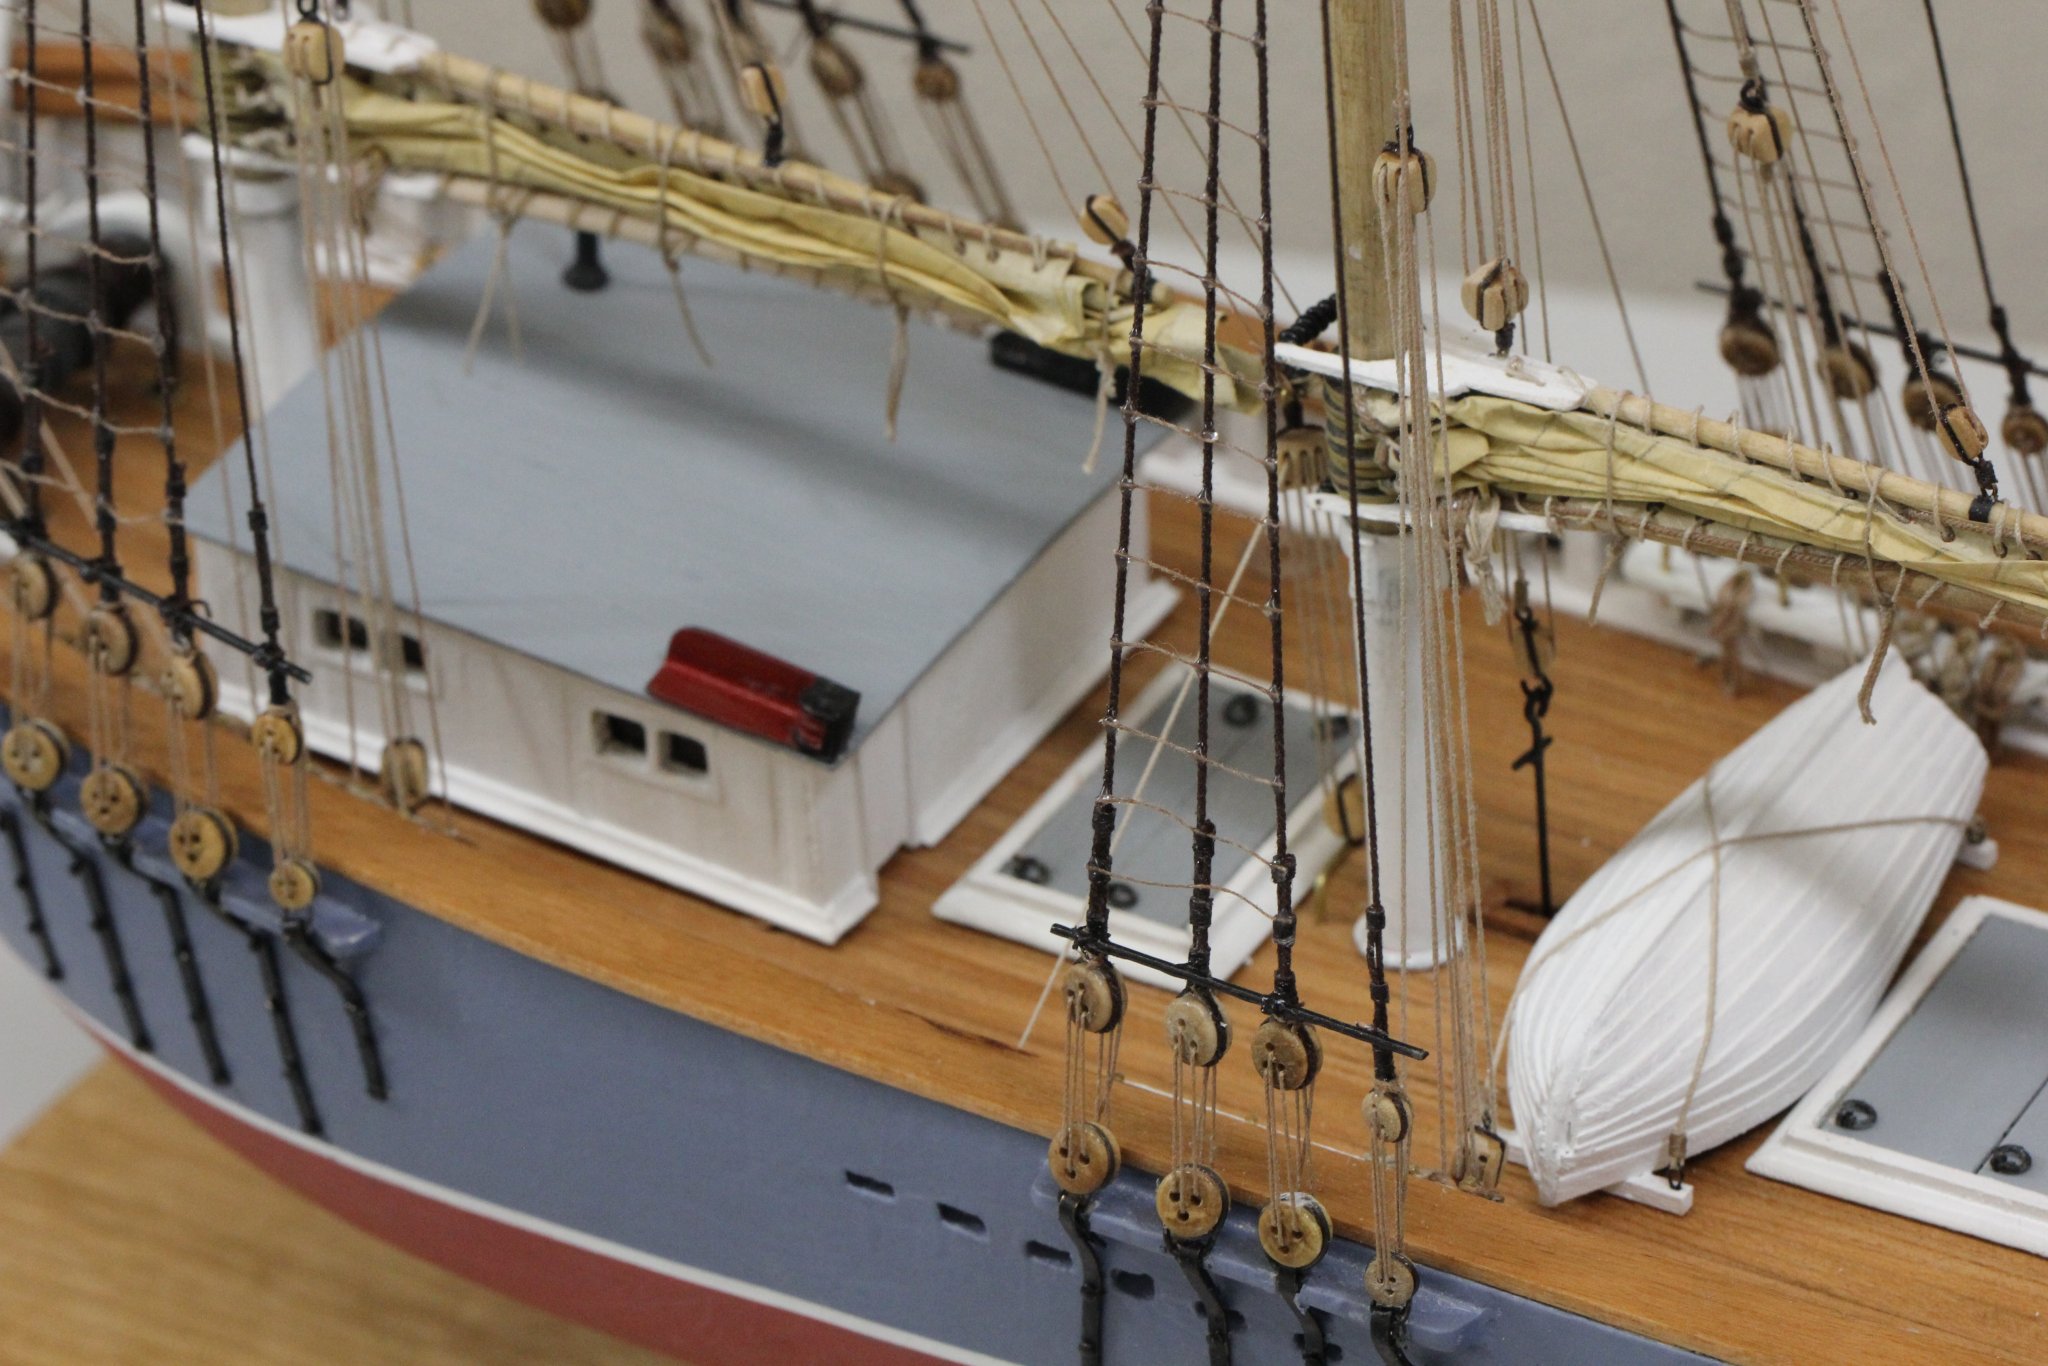
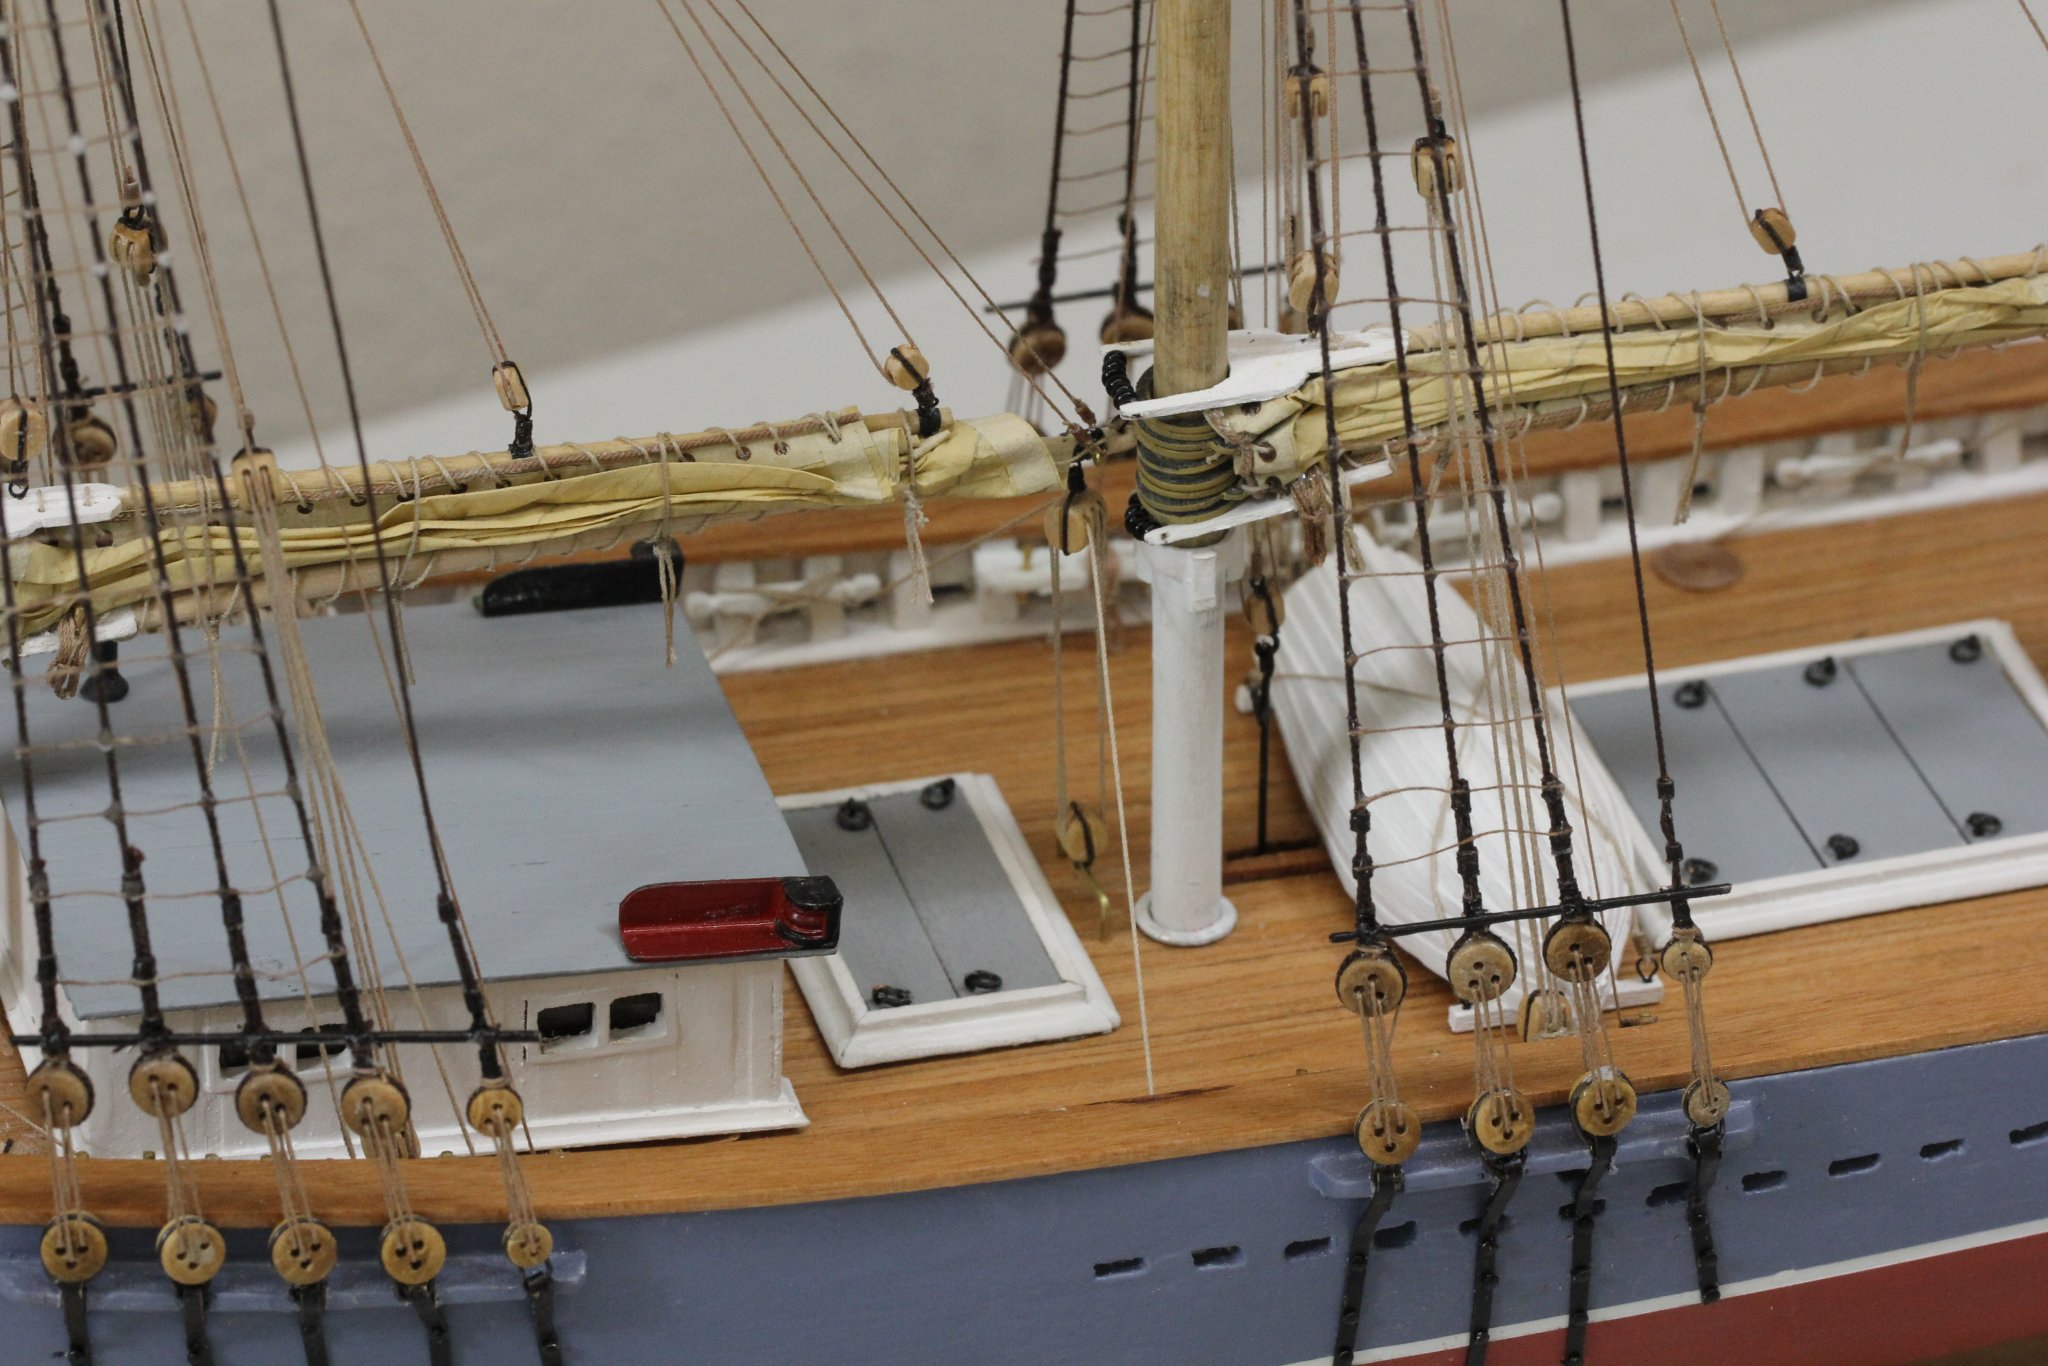
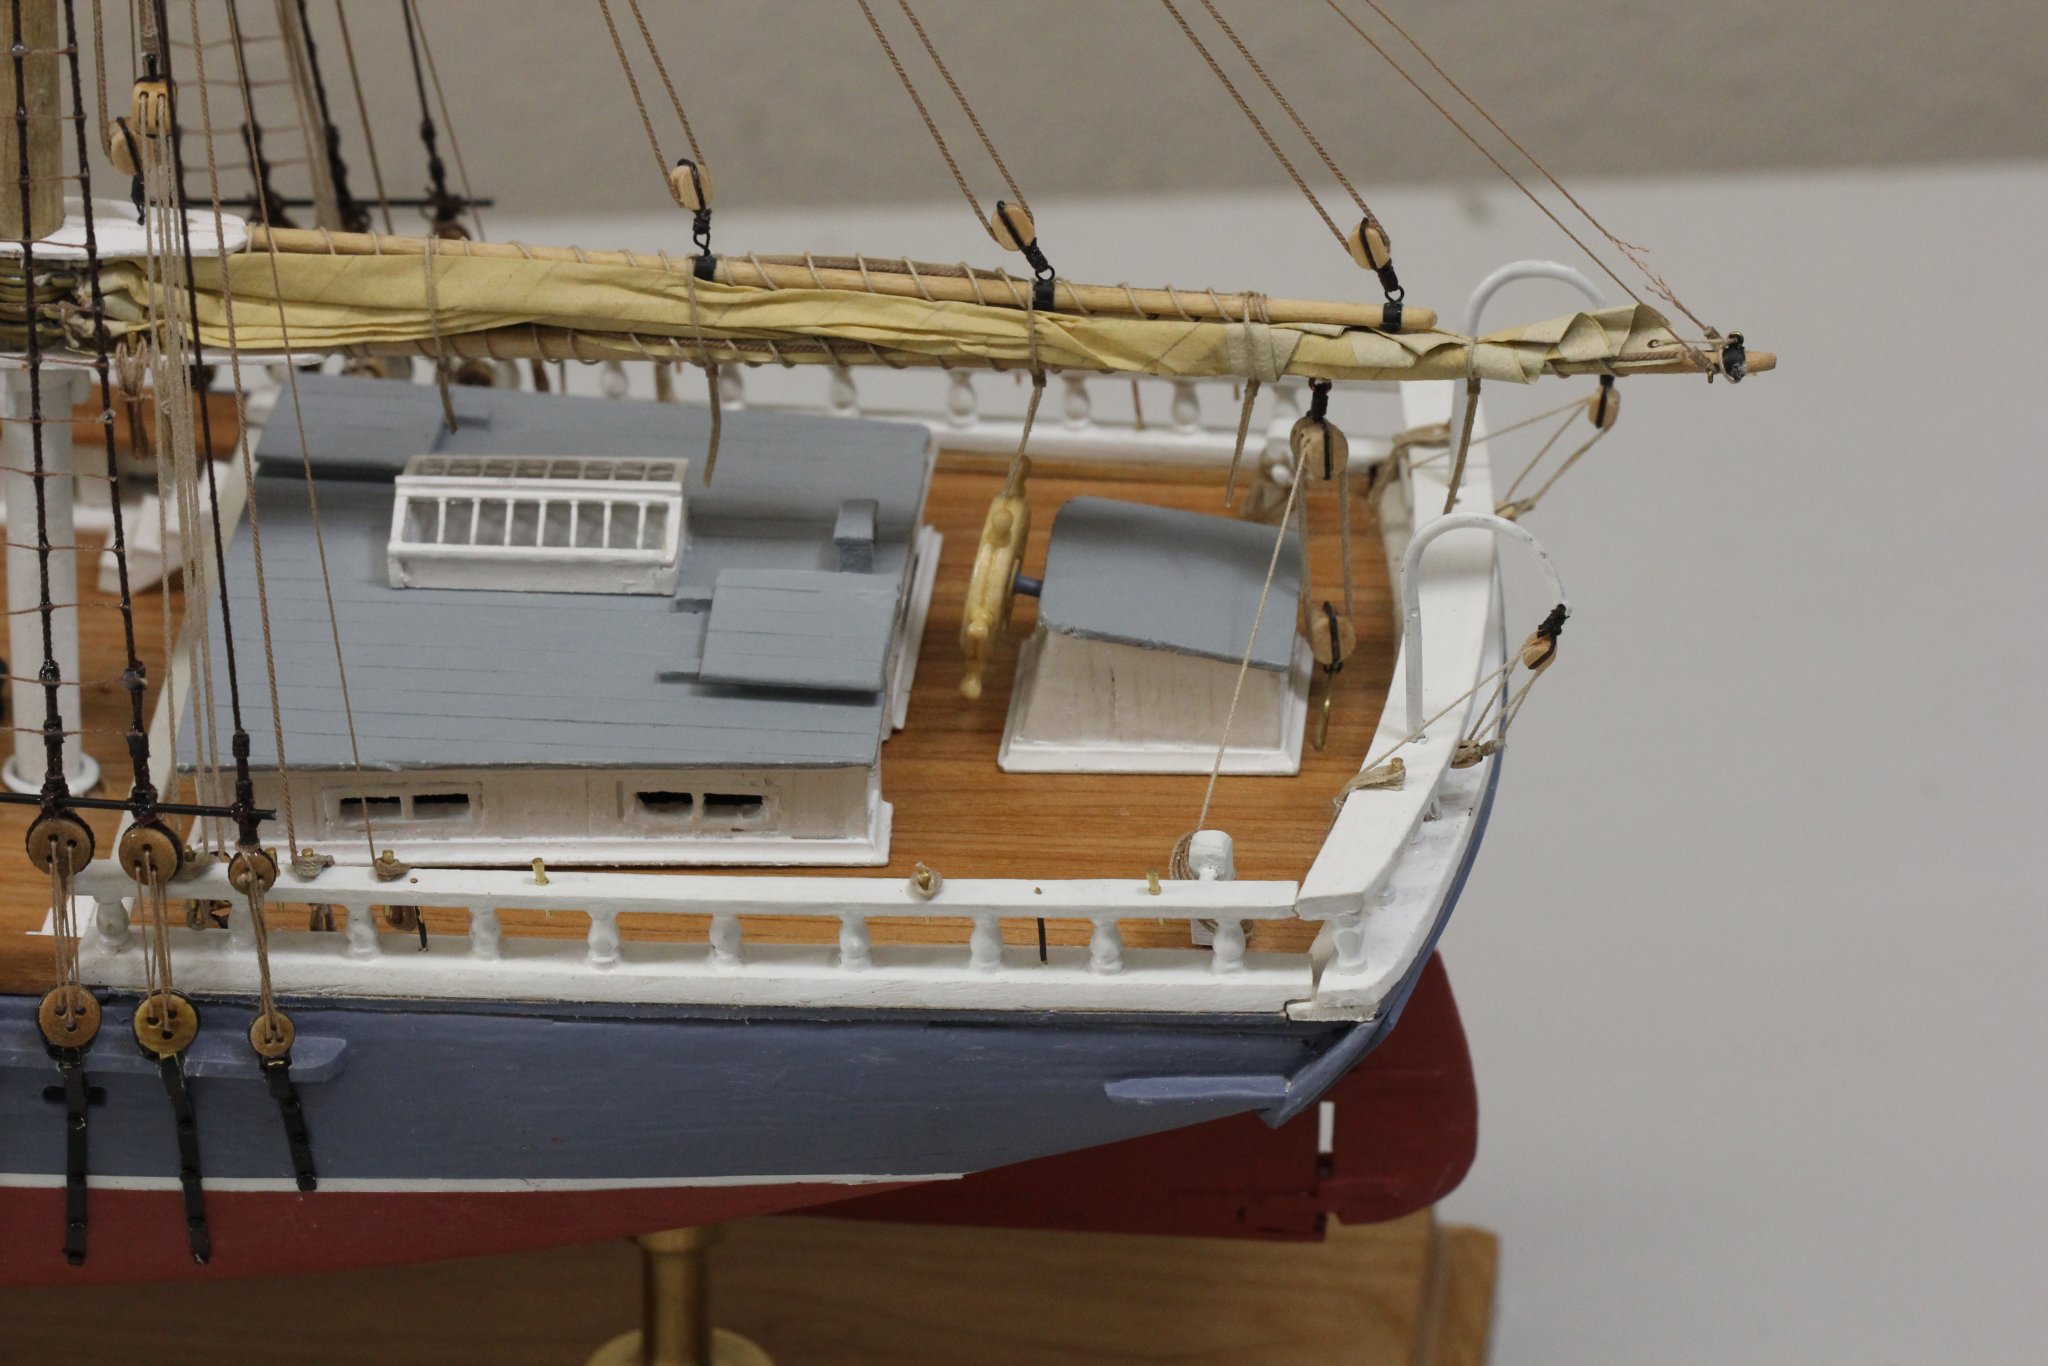
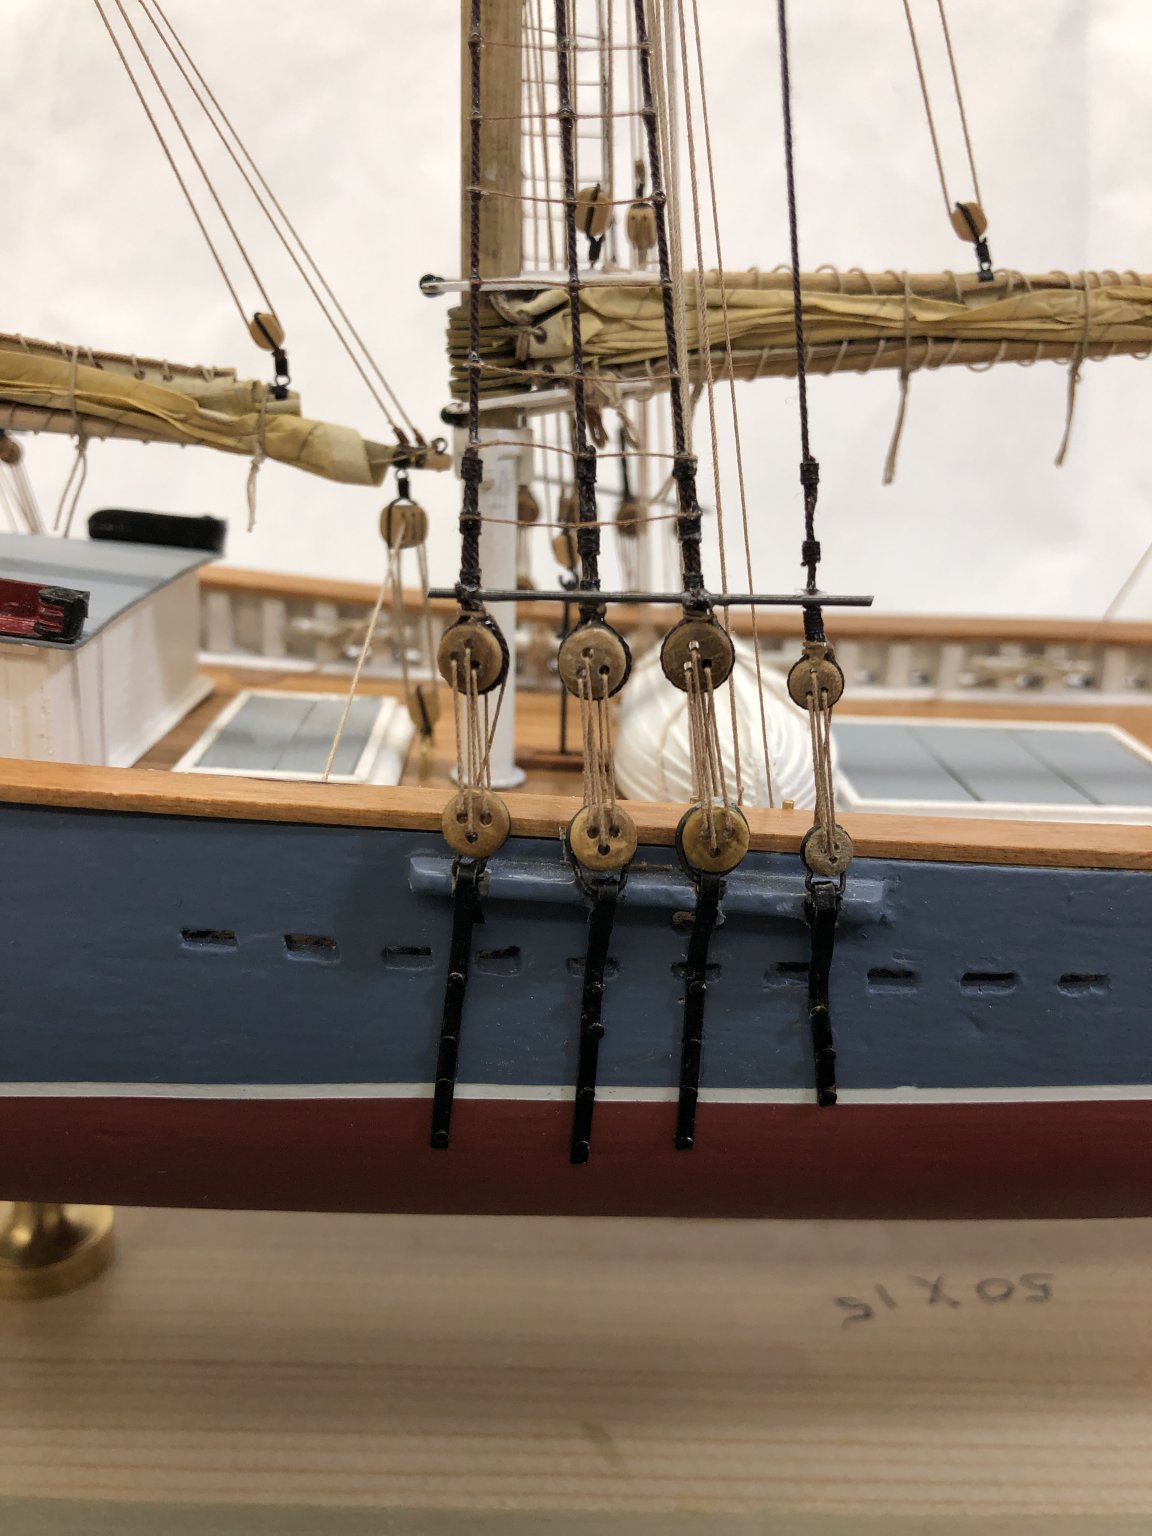
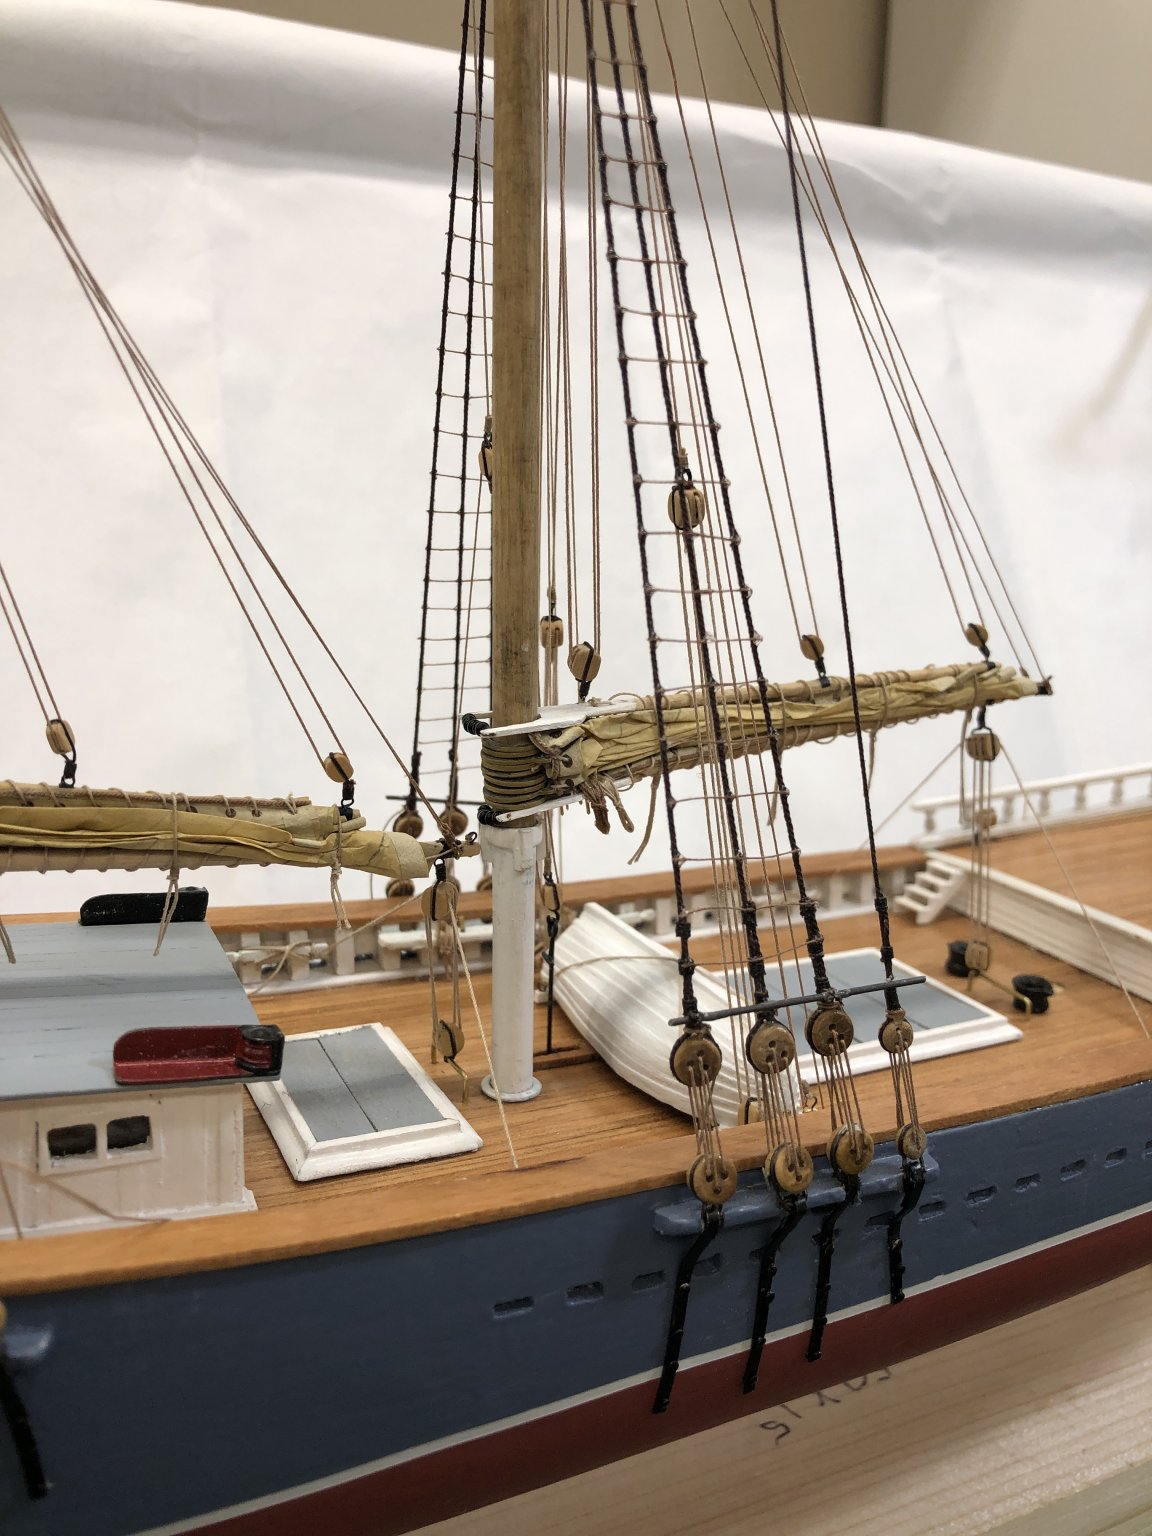
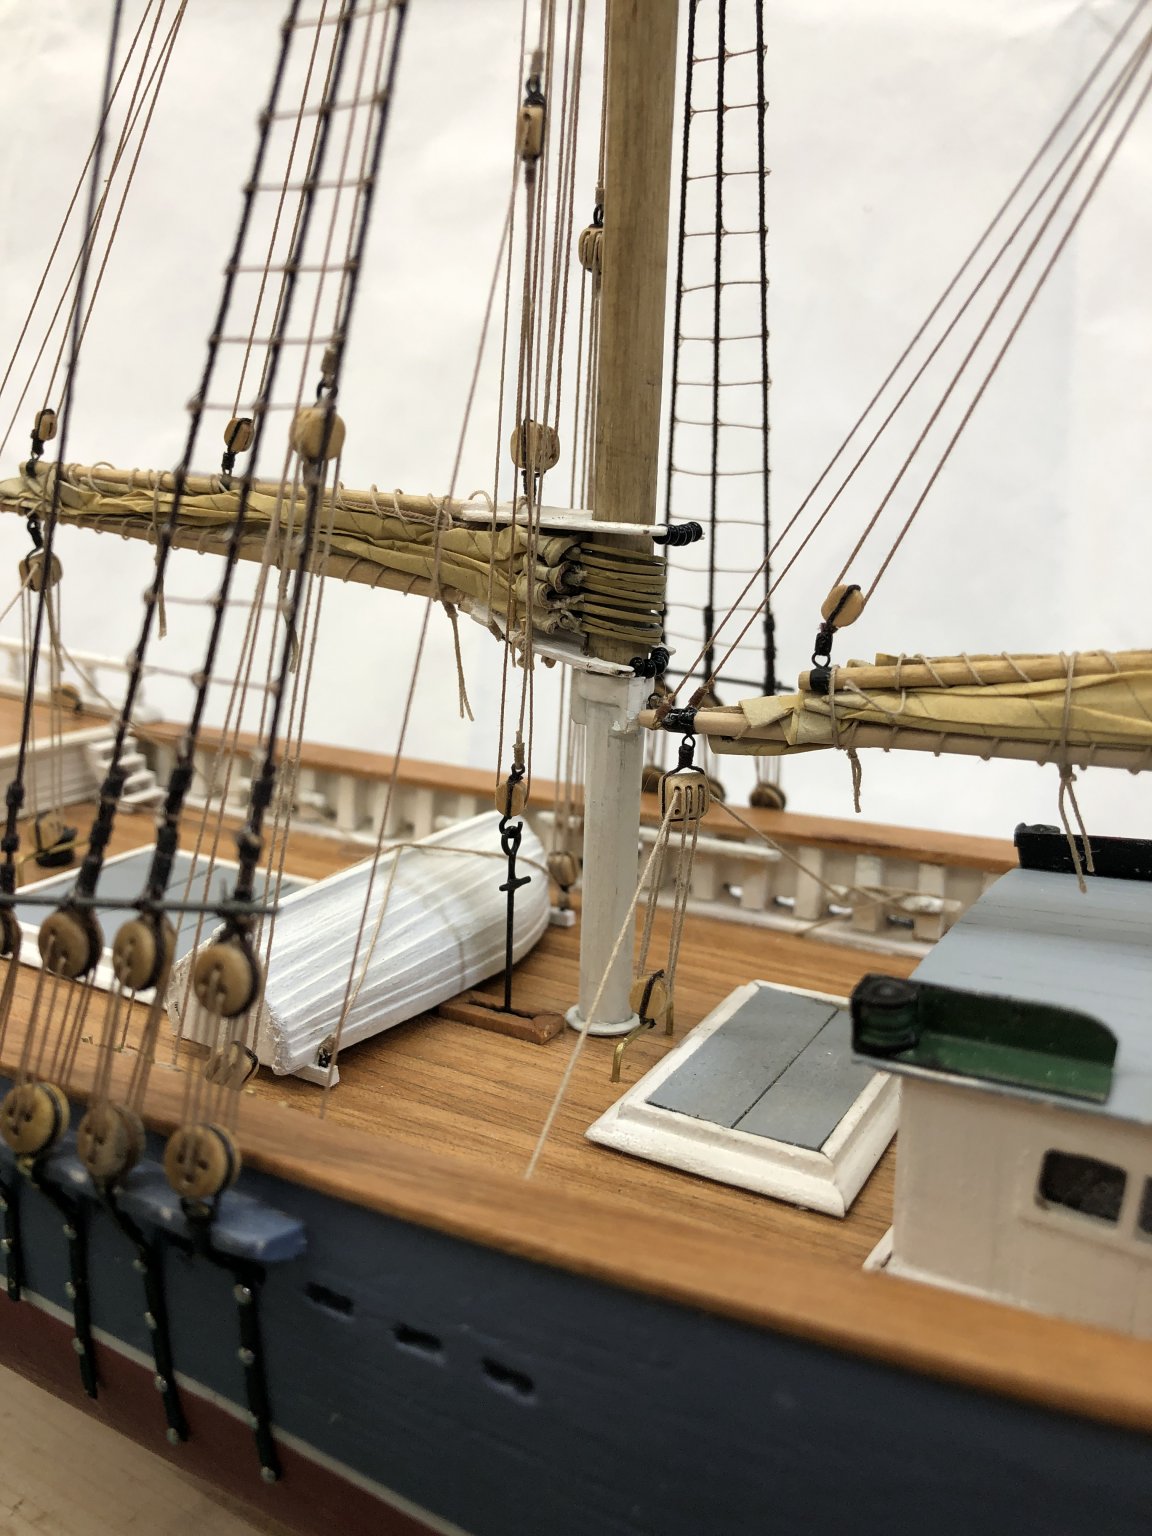
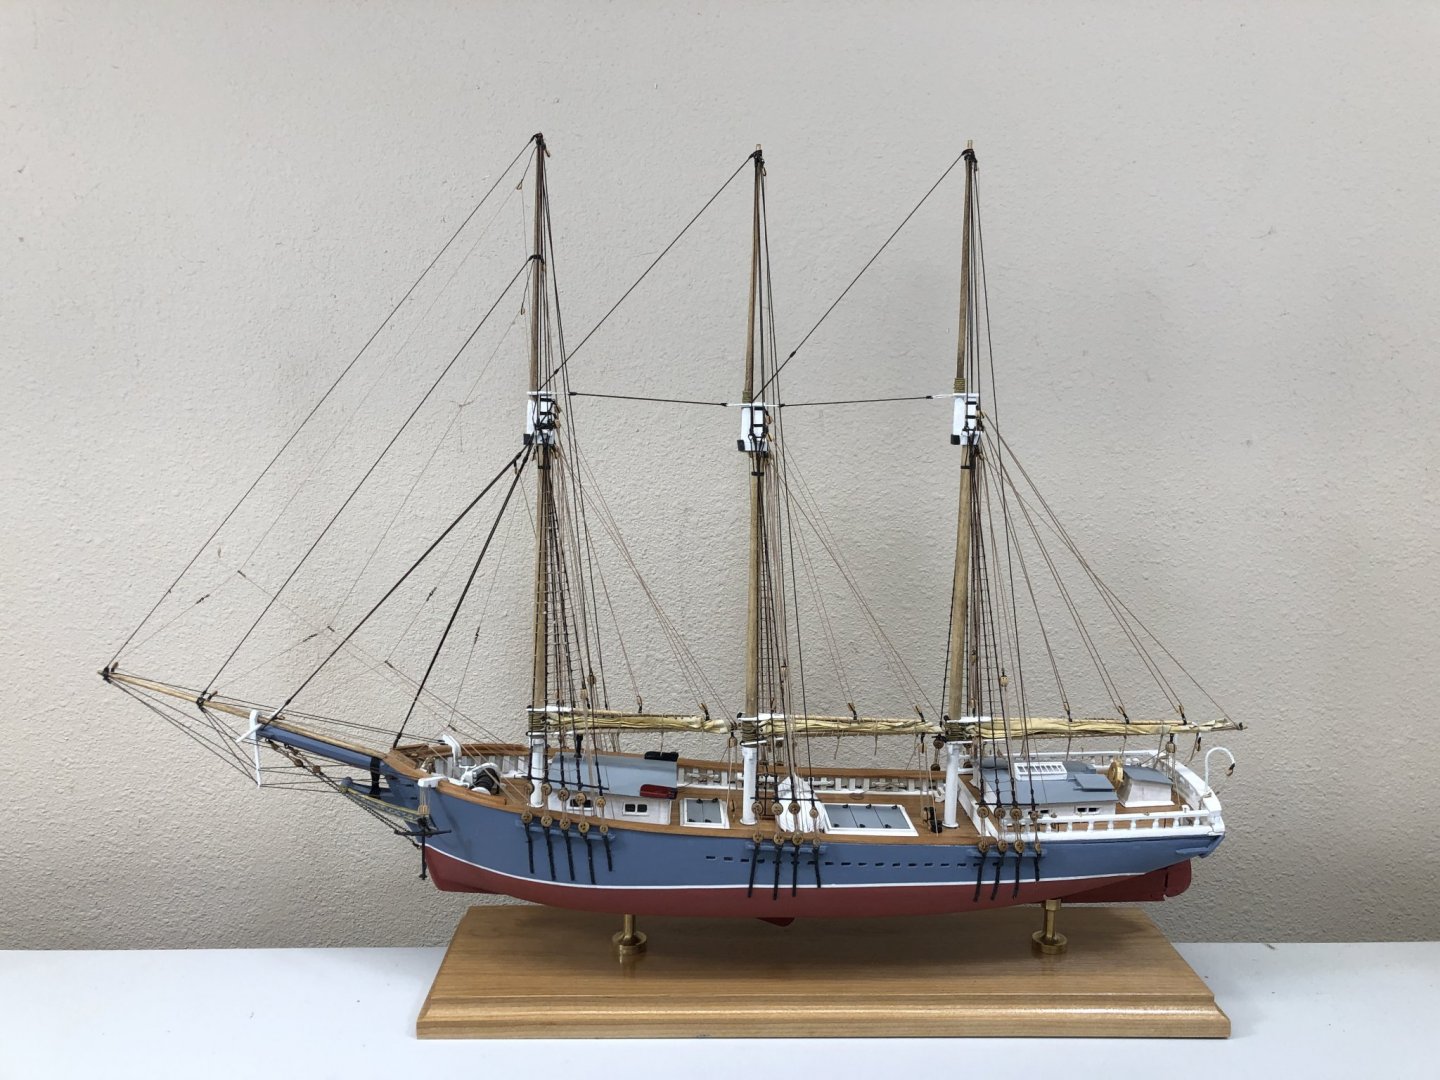
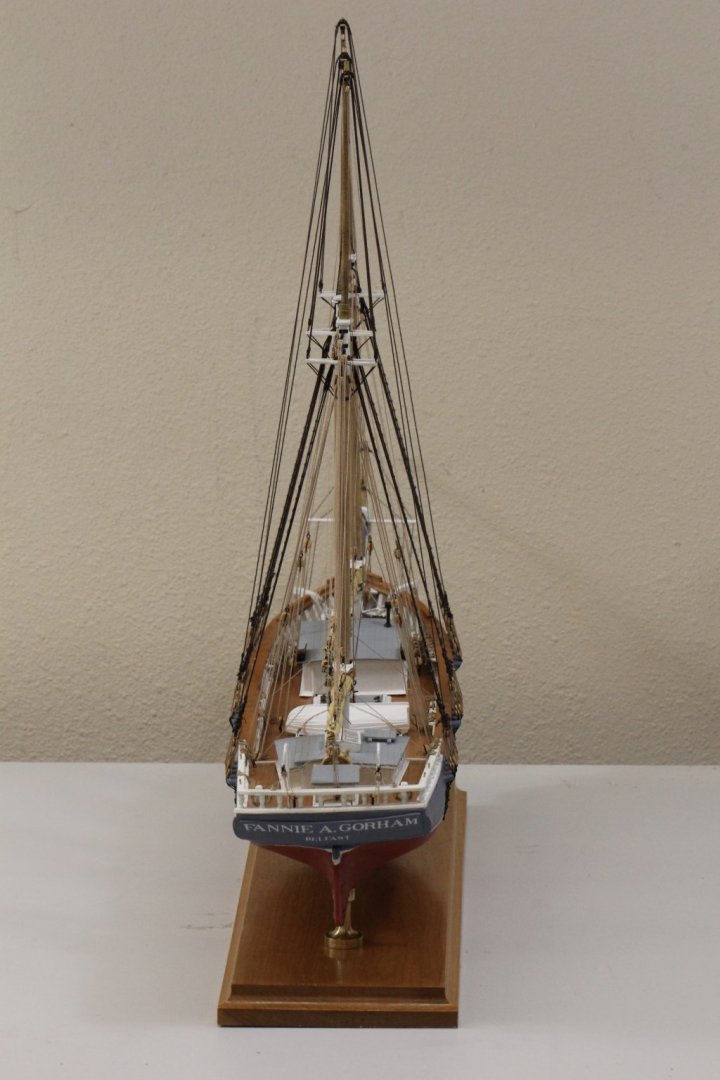
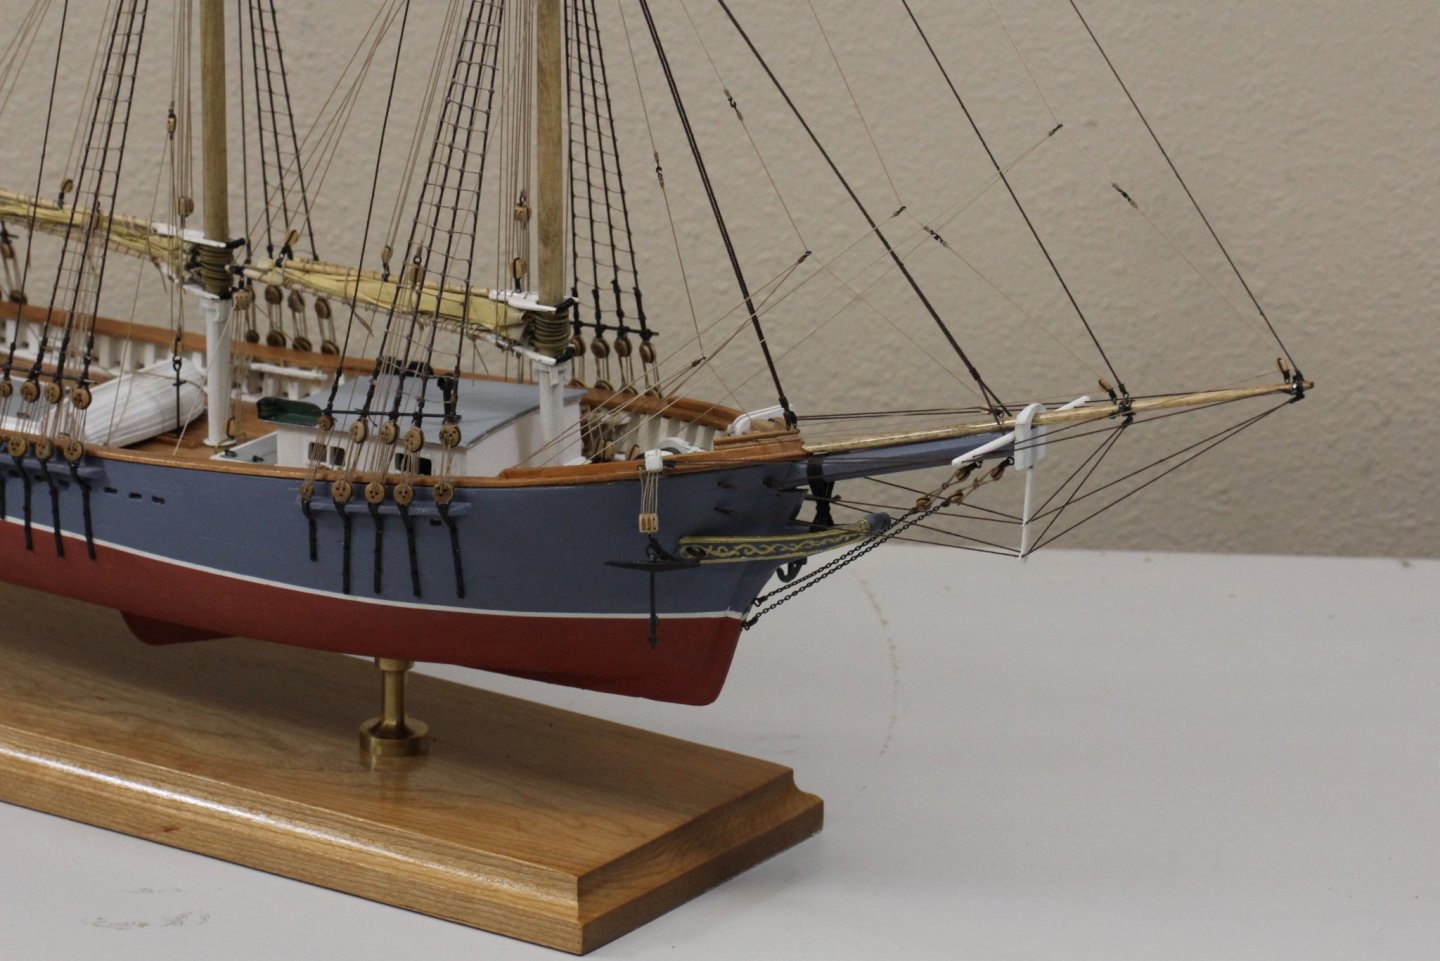
The Fannie A. Gorham model is complete! I think the "inverse rake" (leaning forward) that appears in some of the photos is caused by the Canon 10-22mm wide angle lens. I can't get back enough to use the 100mm macro lens. Compare the two photos below. The first was shoot with the Canon, the second with my iPhone 10. I think the second comes closer to the reality I see. So here some more pictures, more than anyone would really want to look at but since I took them here they are.


- 166 replies
-
- 3
-
-
- fannie a gorham
- finished
- (and 1 more)
-
Mizzen mast is aboard. Now for the chainplates, shrouds and topmast.
- 166 replies
-
- 1
-
-
- fannie a gorham
- finished
- (and 1 more)
-
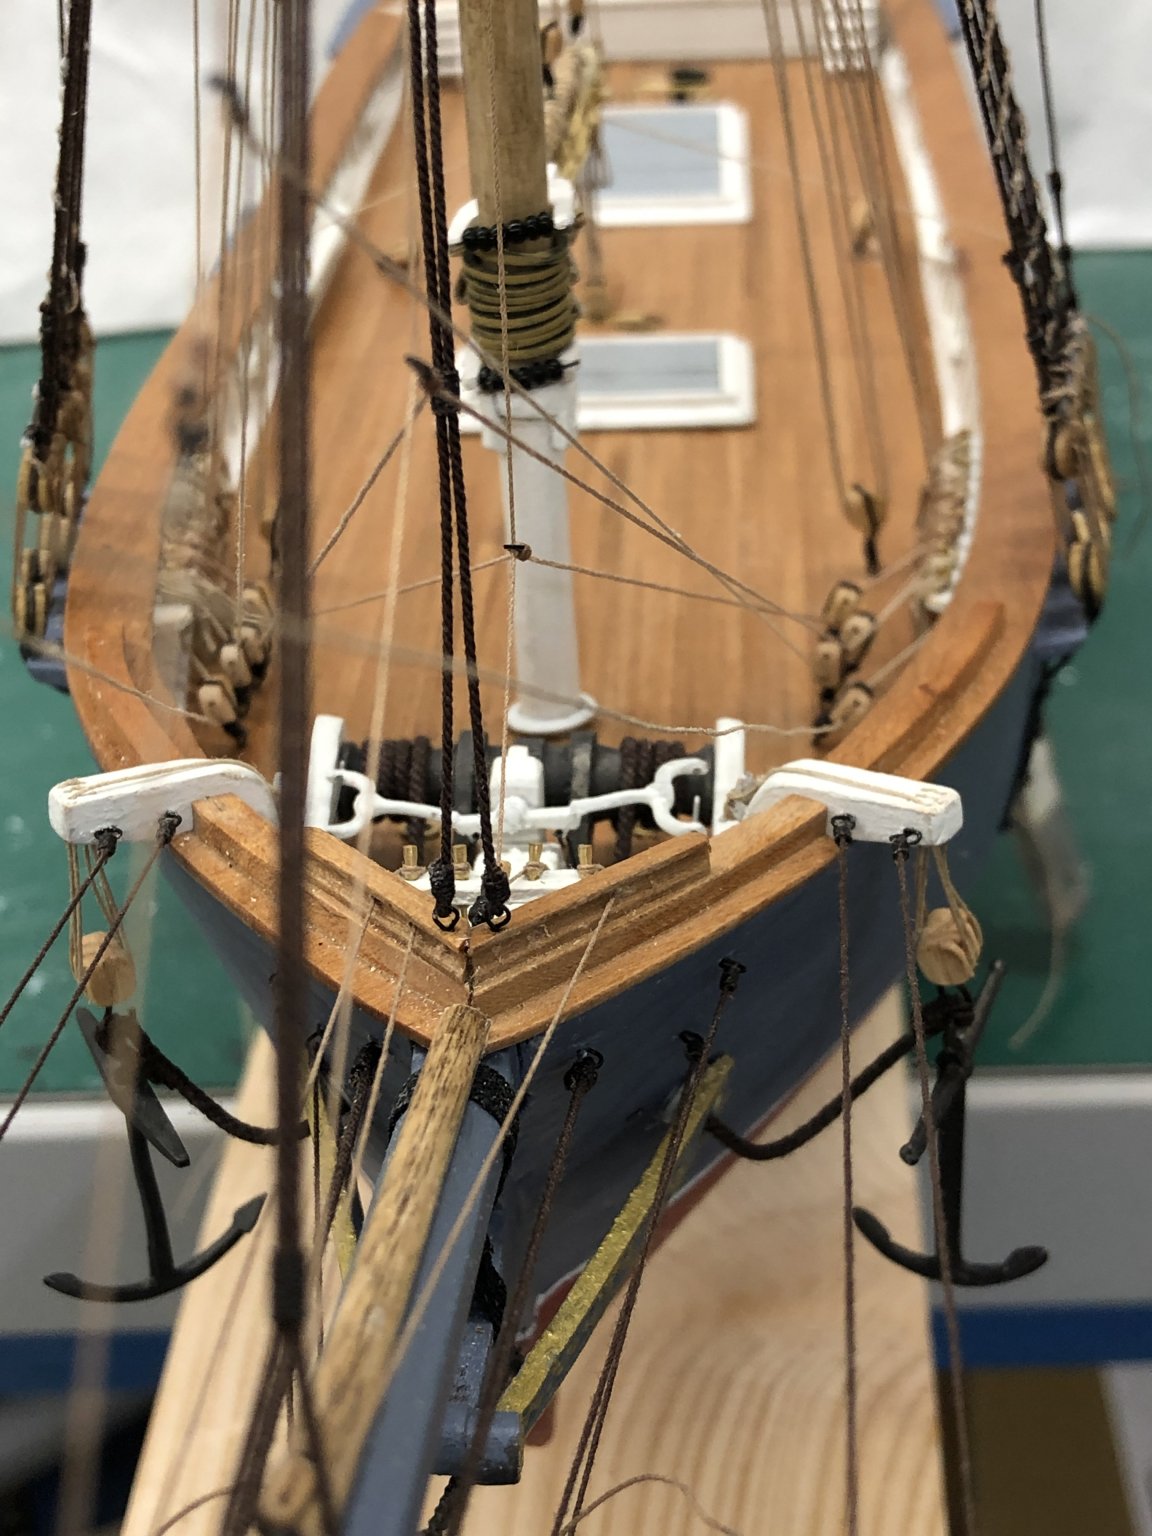
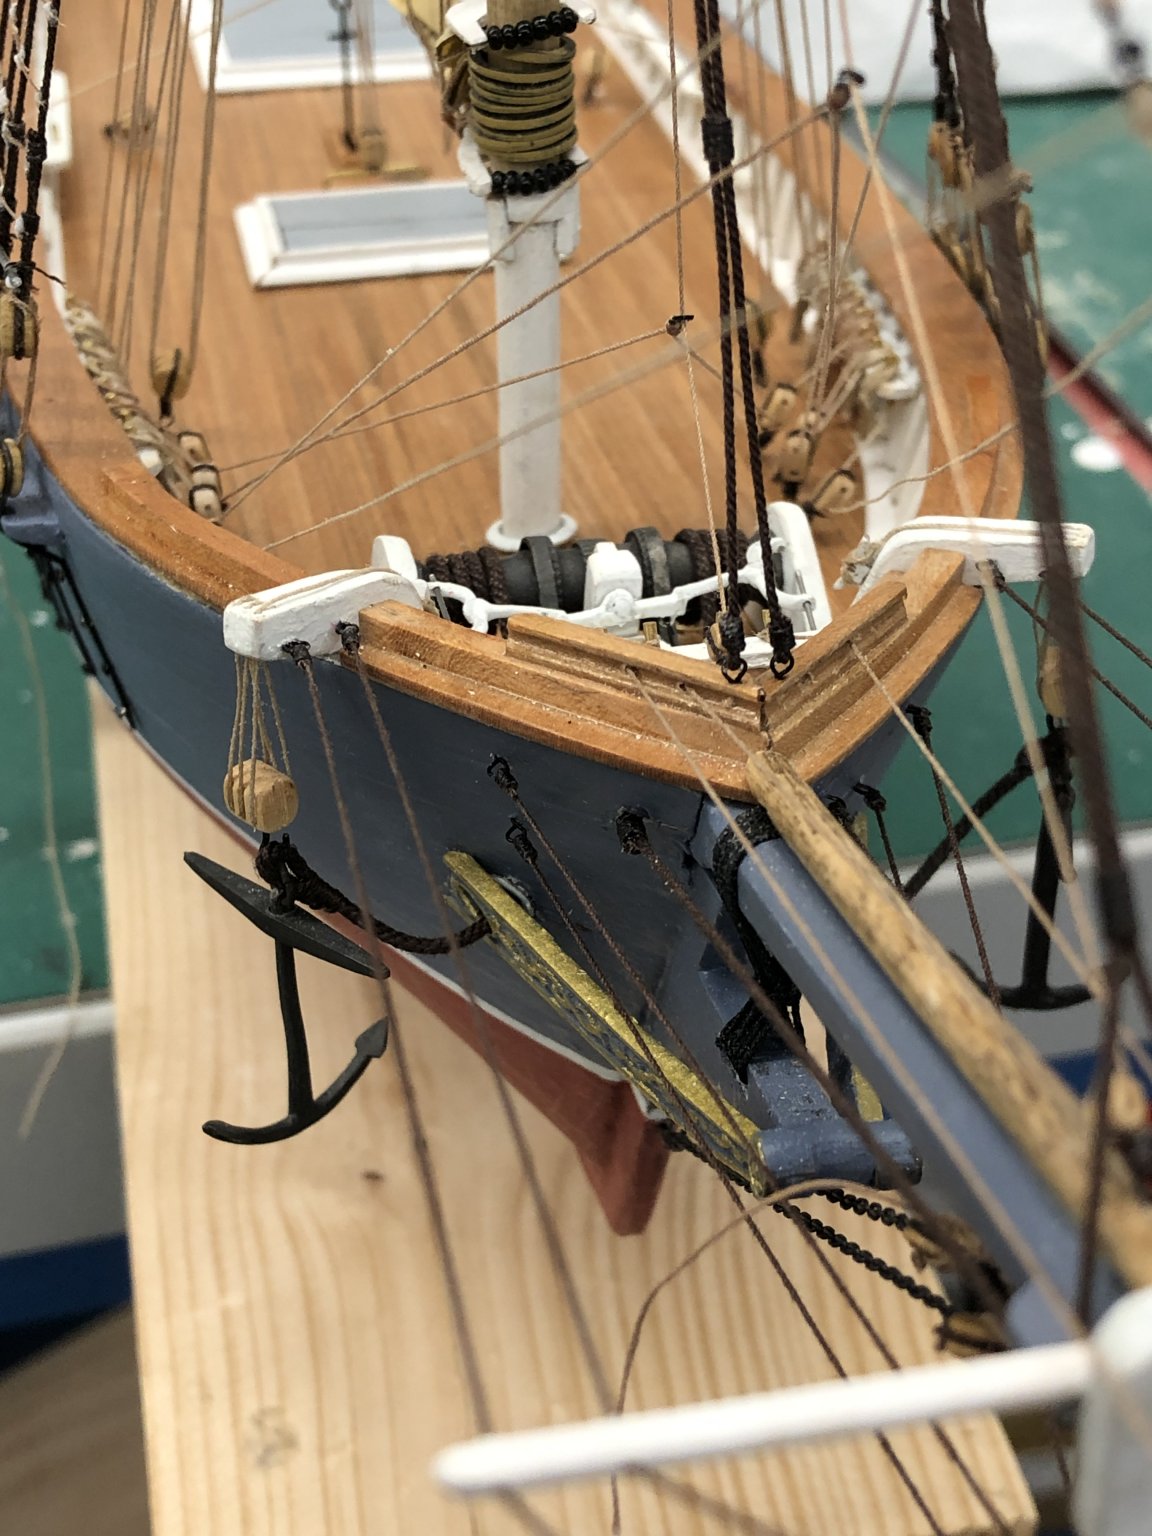
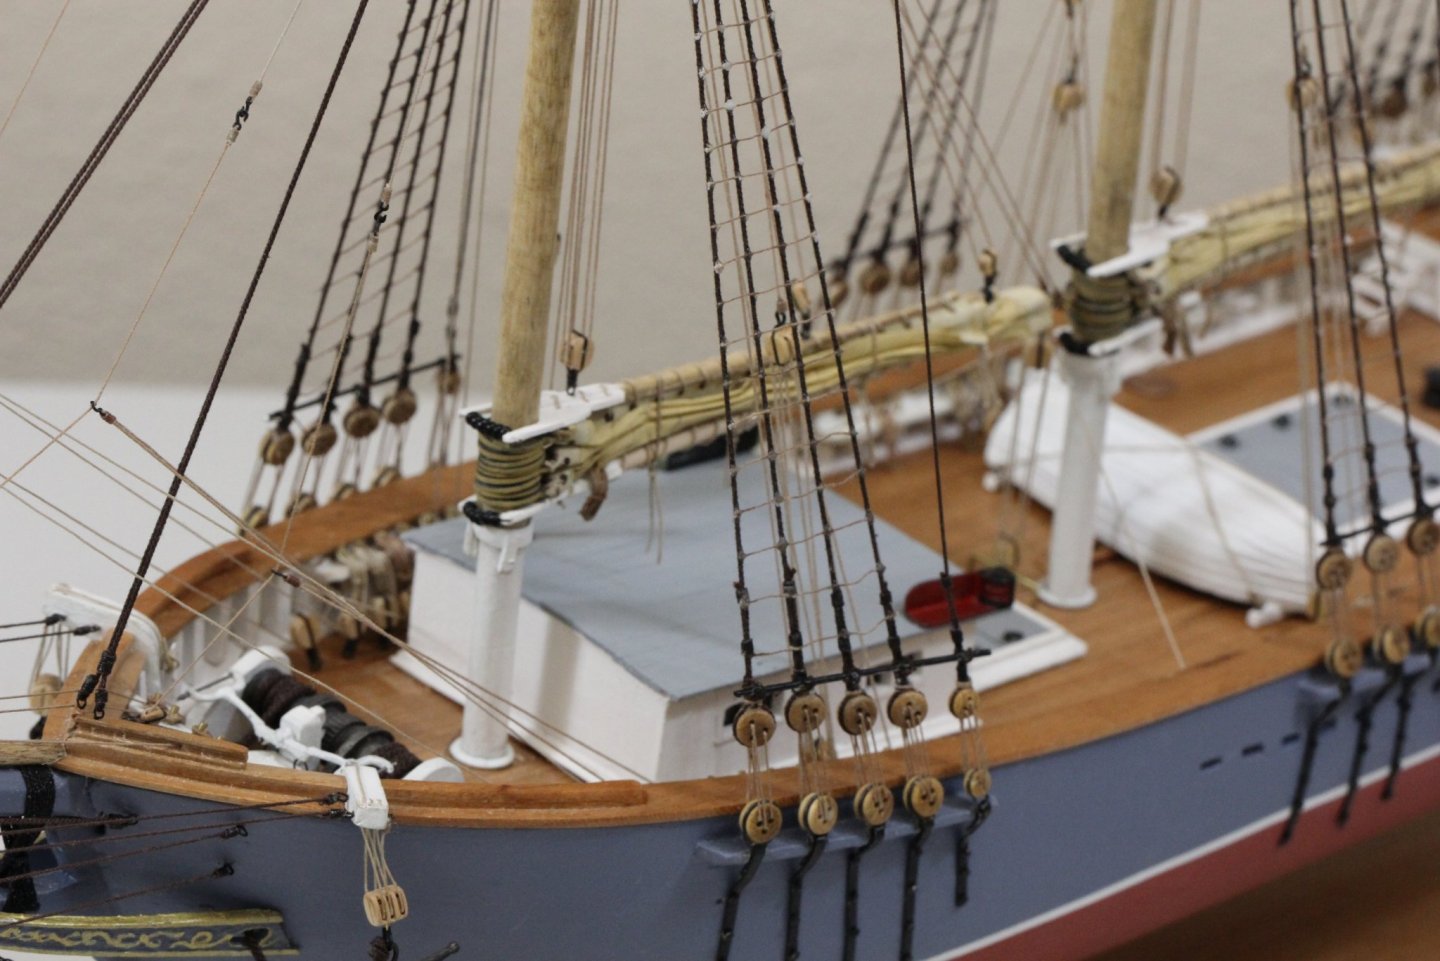
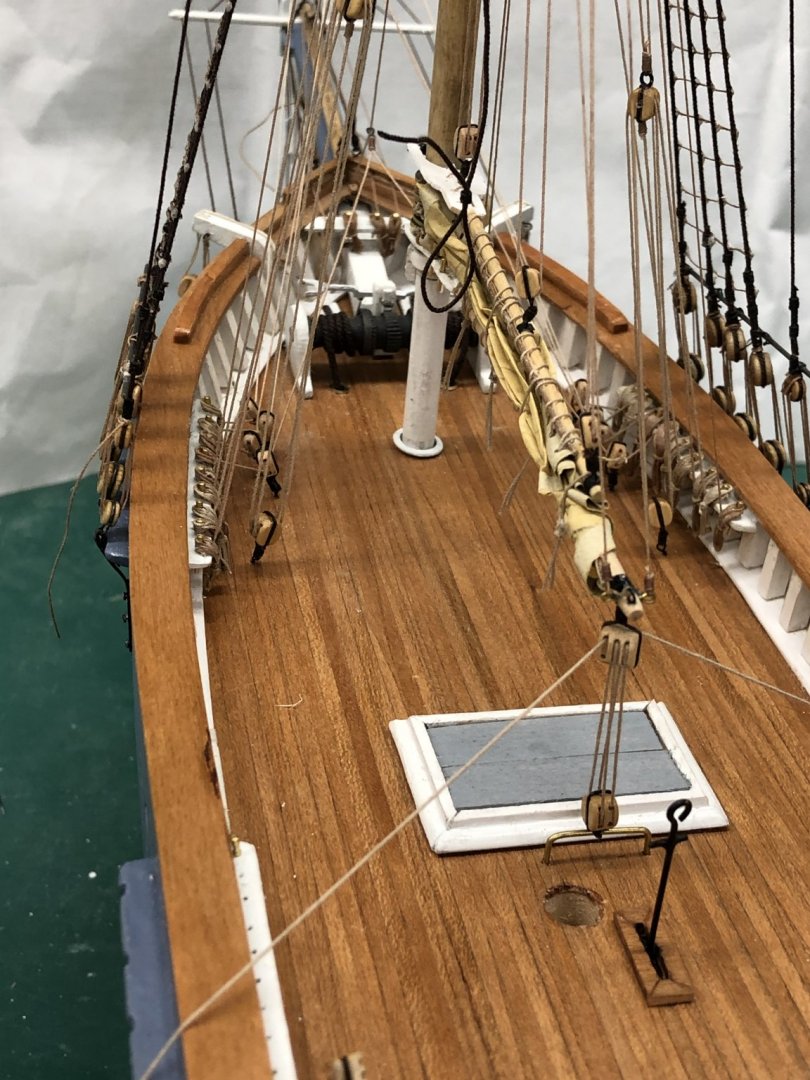
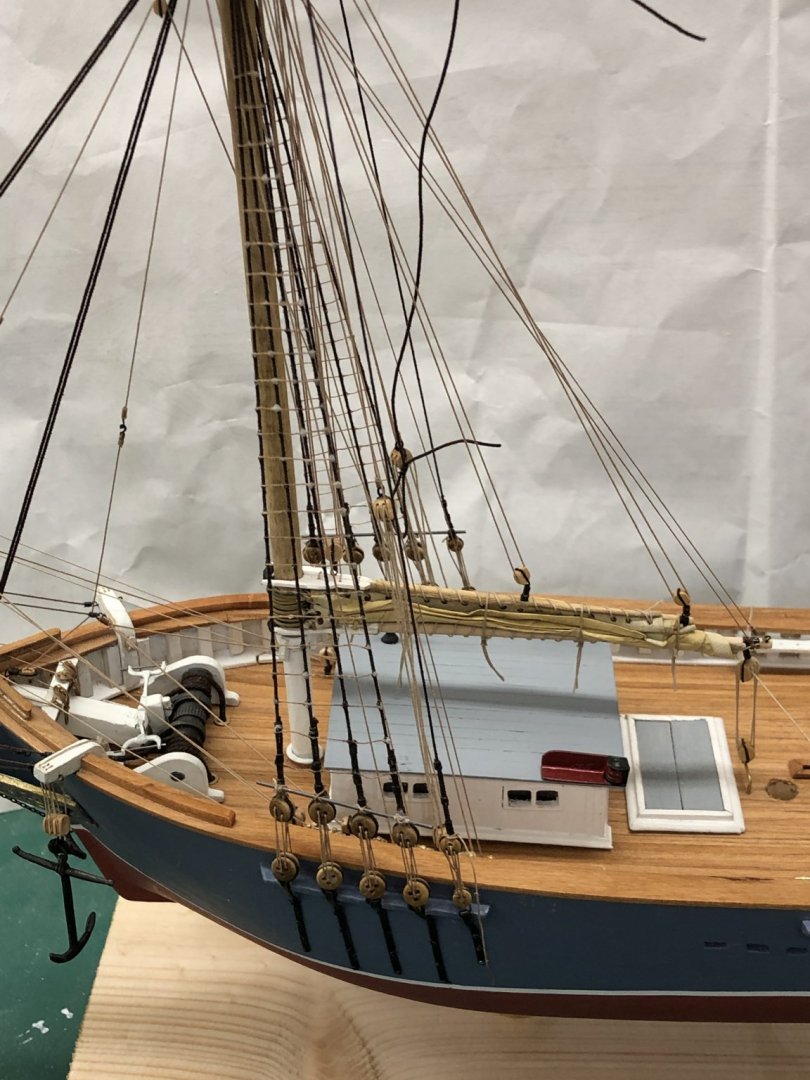
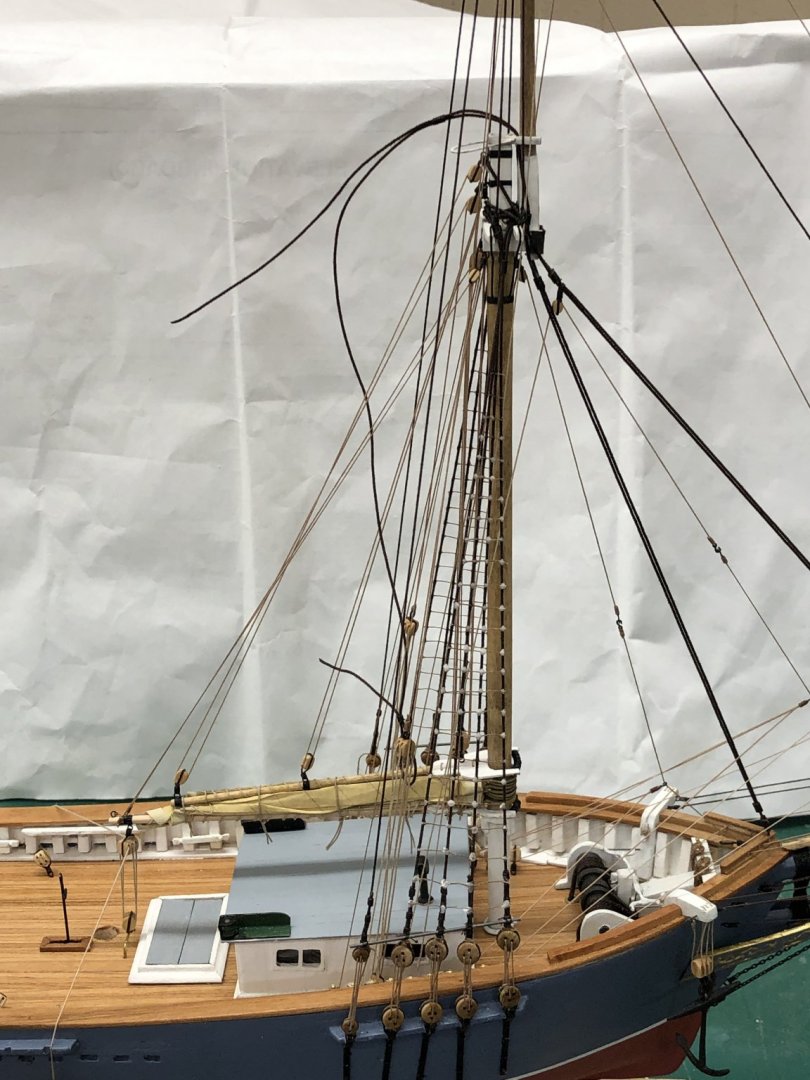
After what seemed like one difficulty after another (I pull the cavil off the bulkhead trying to get the boom tackle taught on both sides for example) I finally have the Main Mast onboard and all the standing and running rigging secured except for a rope coil for three which have been made up, and are drying "as we speak". So it will be on to the Mizzen tomorrow baring some catastrophe overnight. Here are so shots of the model with emphasis on the main mast area.


- 166 replies
-
- 1
-
-
- fannie a gorham
- finished
- (and 1 more)
-
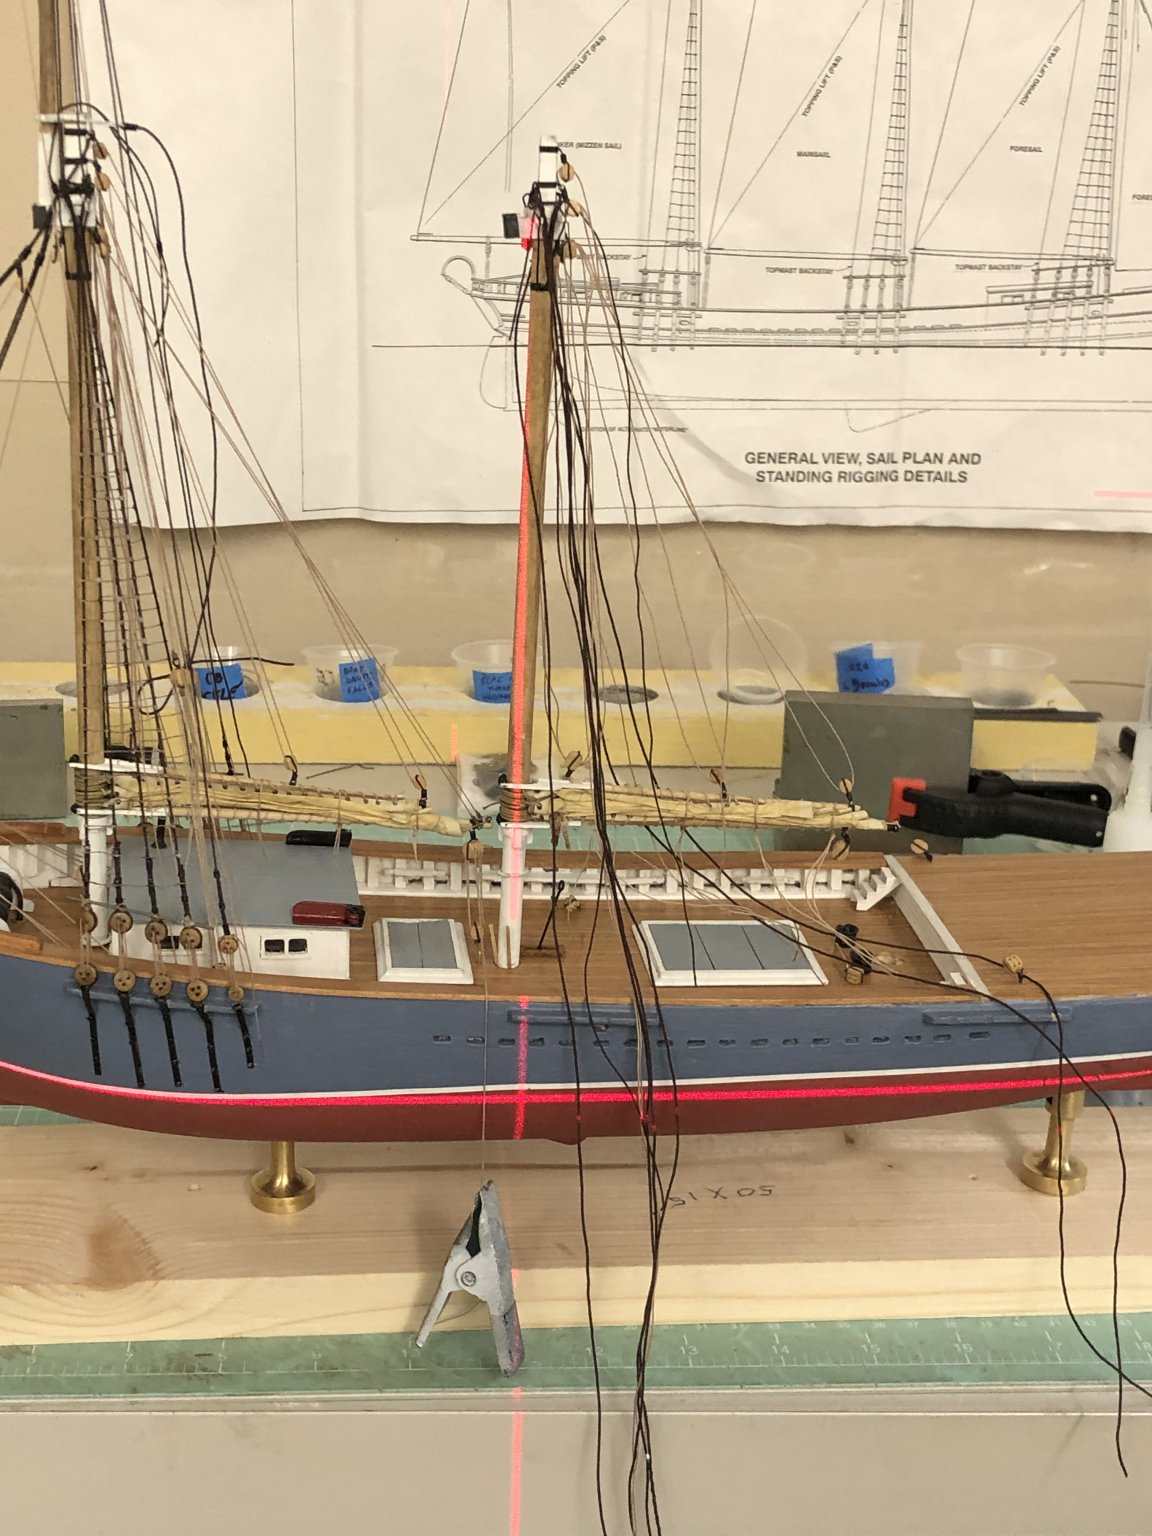
Main Mast has been stepped. I have the deadeyes attached to the shrouds on both sides but ran into some difficulty getting one of the chain plates to mount correctly. After considerable efforts I finally gave up and had to fab (and drill and paint) a new one. I did get all the running rigging "hung" and routed so once I get the shrouds straightened out and the ratlines done it will simply be a matter of sorting the lines out (no crossed lines hopefully) and getting them to the belay points. I ran out of the white PVA glue I had been using and was "forced" to shift to something else. I had several containers of various carpenter (aka yellow) glue in the cupboard but decided to start using a container of Weldbond "universal adhesive". I remember from somewhere (one of Bob Hunt's practicums I think) that Weldbond is soluble in rubbing alcohol which turned out to save the day when I somehow (inattention to detail again I suspect) glued the deadeye to one of the shrouds at the wrong place. Since I had used Weldbond to connect the deadeye and the line, as well as the seizing to the line in was a matter of soaking the offending deadeye in rubbing alcohol for 15 minutes or so and then pulling the seizing and line away from the deadeye. Some wiping with an alcohol soaked rag and waiting 30 minutes to make sure all the alcohol had evaporated and everything was ready for reattaching the deadeye in the correct location. I will continue with the Weldbond for all the deadeyes on the mizzen. Anyway, here is what the "good" side of the Main Mast looks like at this point. Sorry for the rats nest but all the running rigging is there as well as the ends of the shrouds which have not been cut off yet.
- 166 replies
-
- 1
-
-
- fannie a gorham
- finished
- (and 1 more)
-
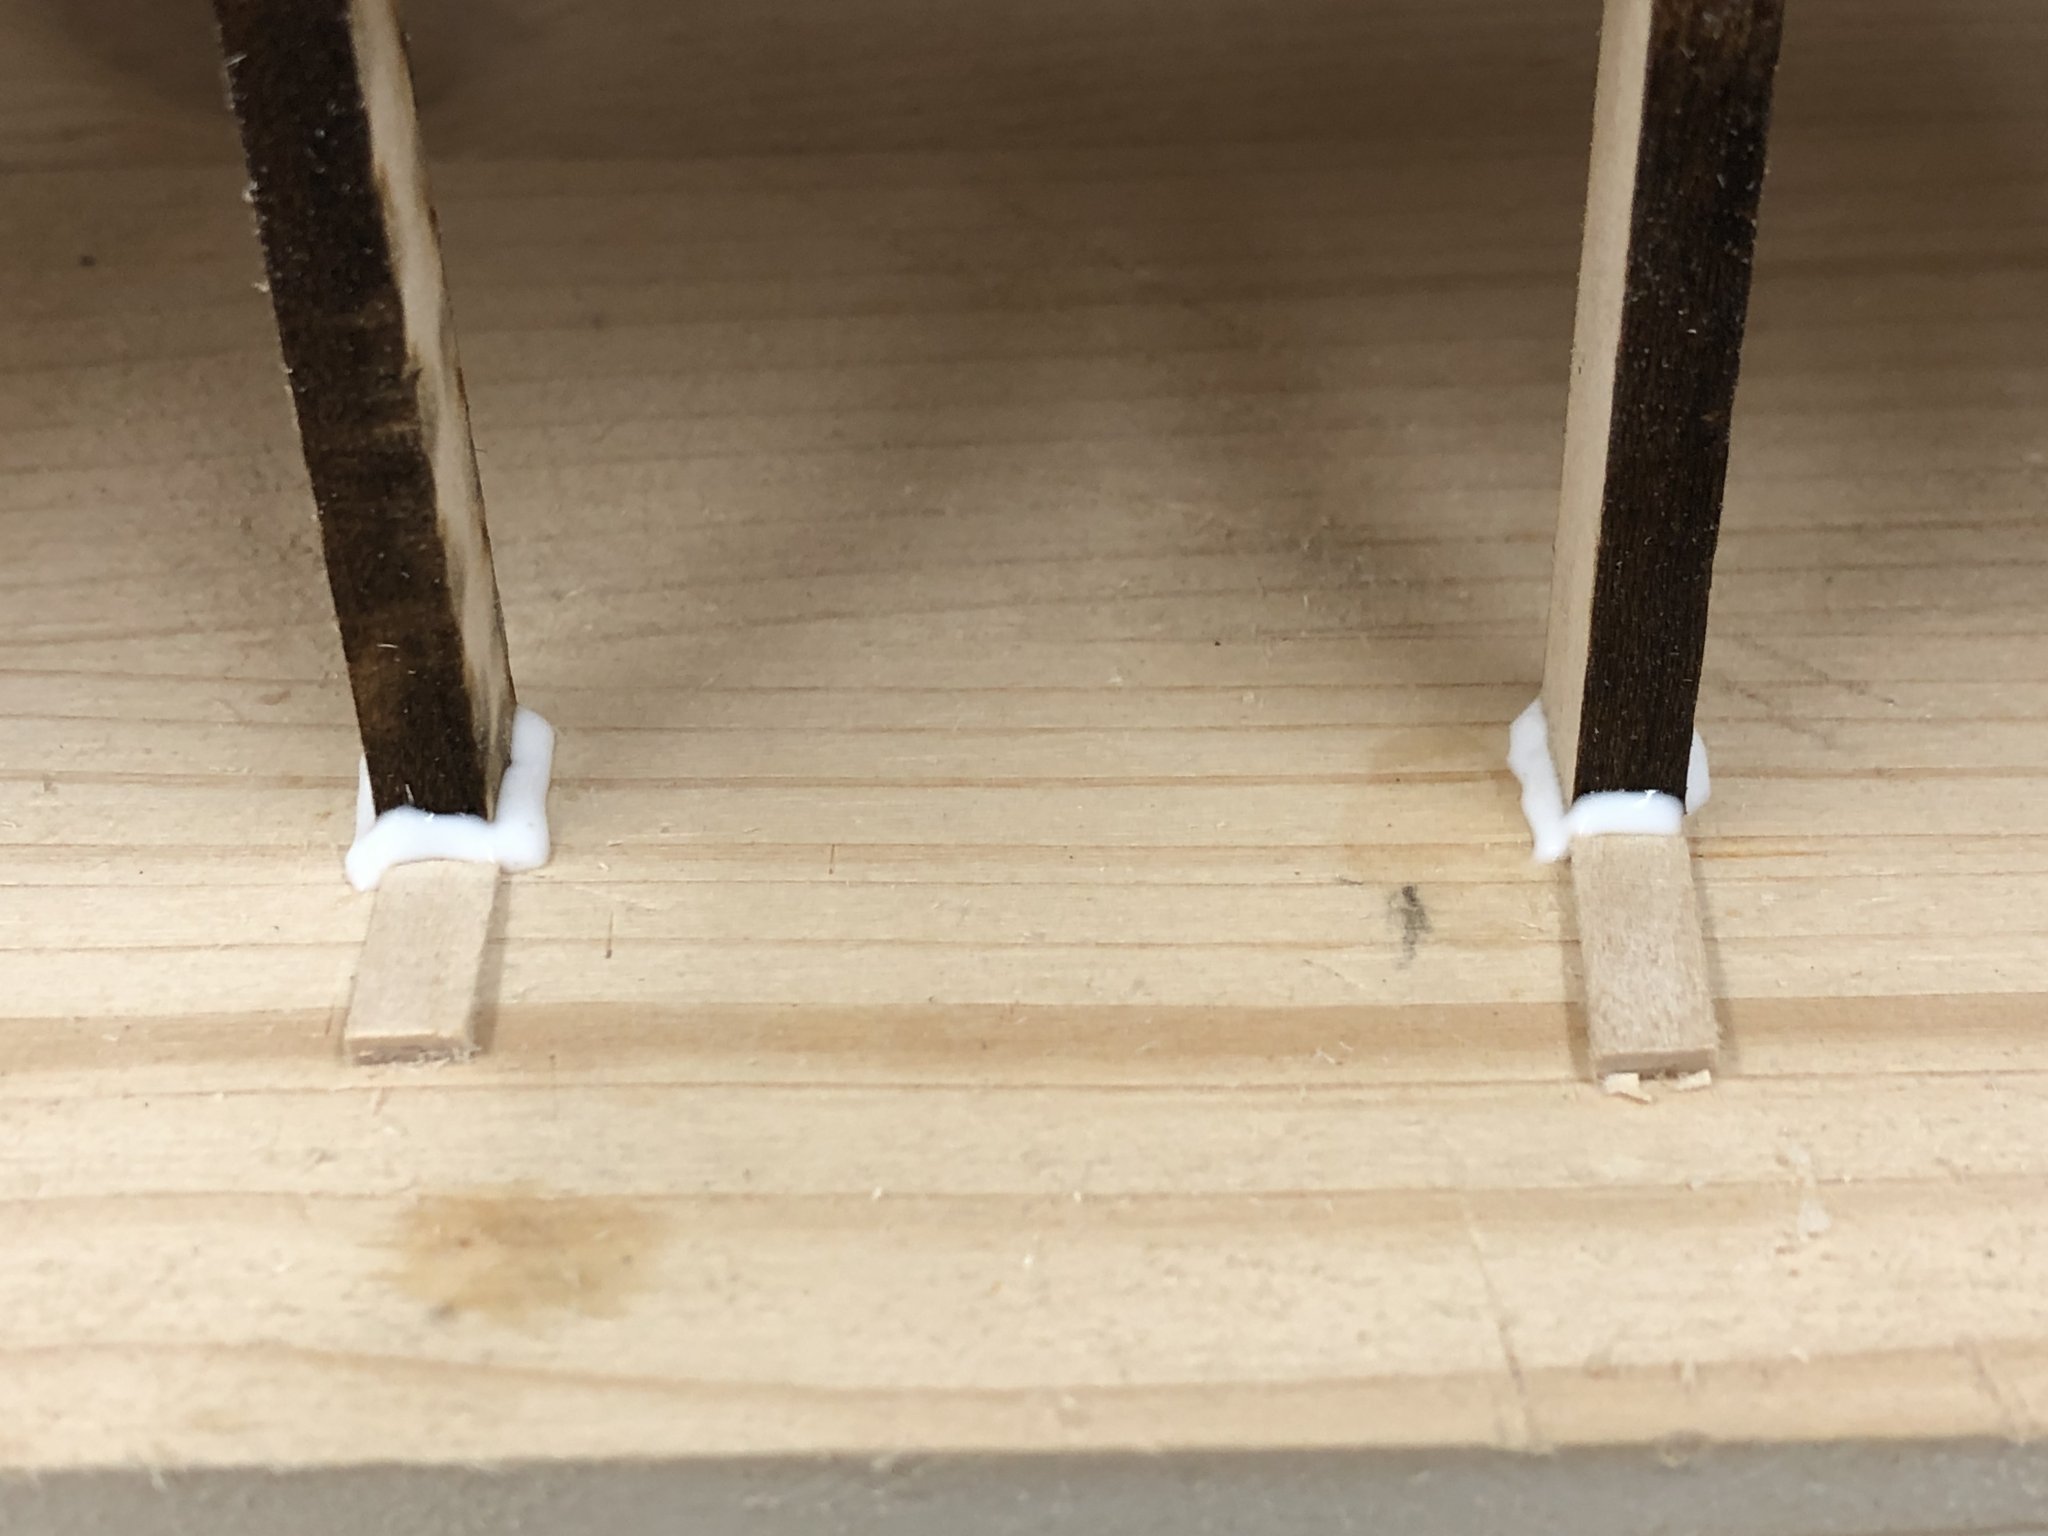
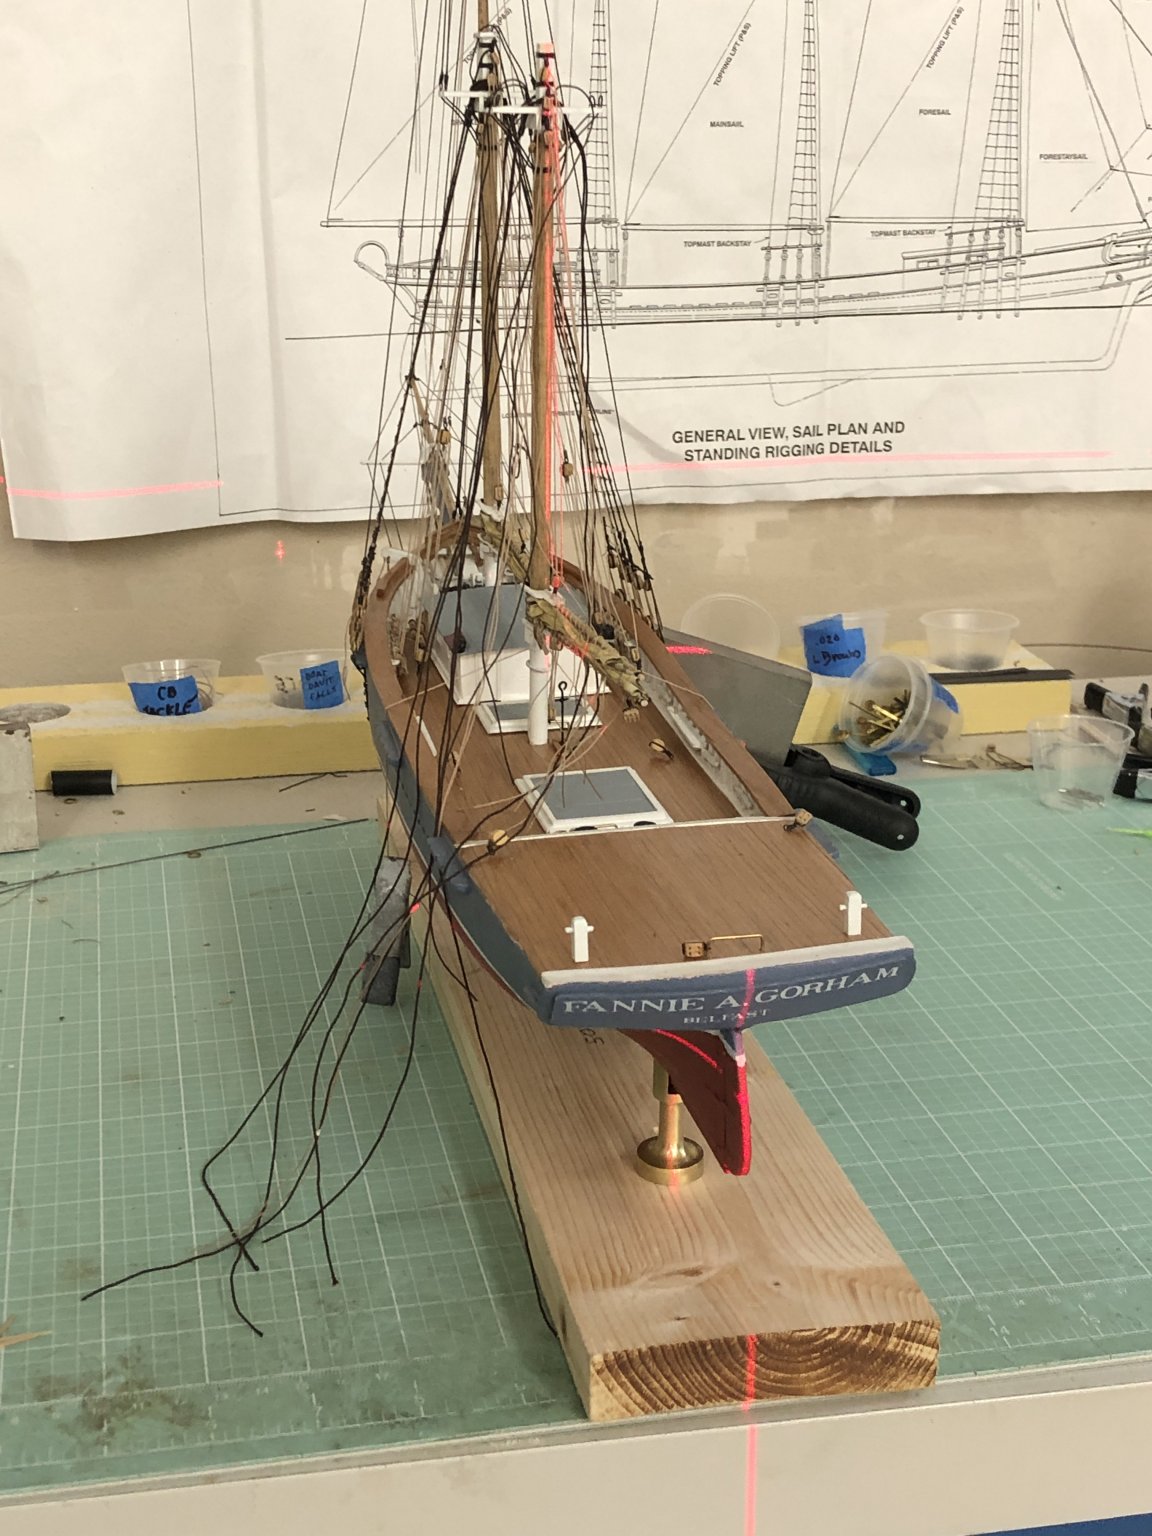
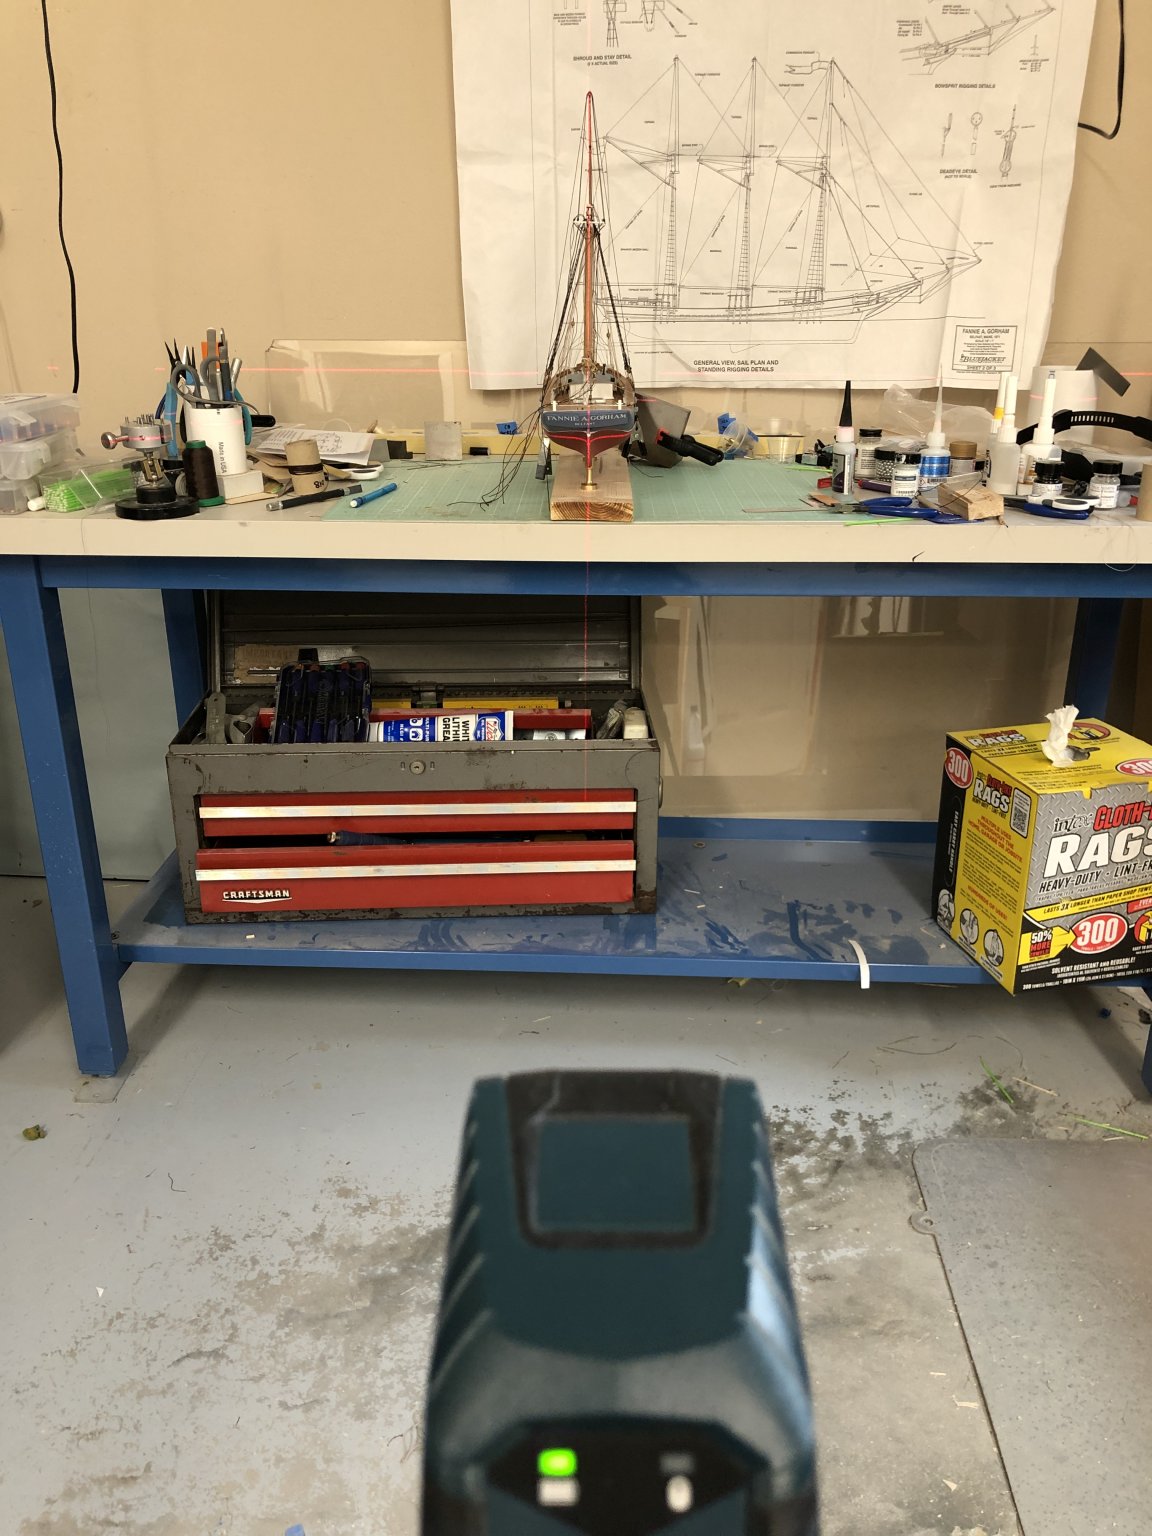
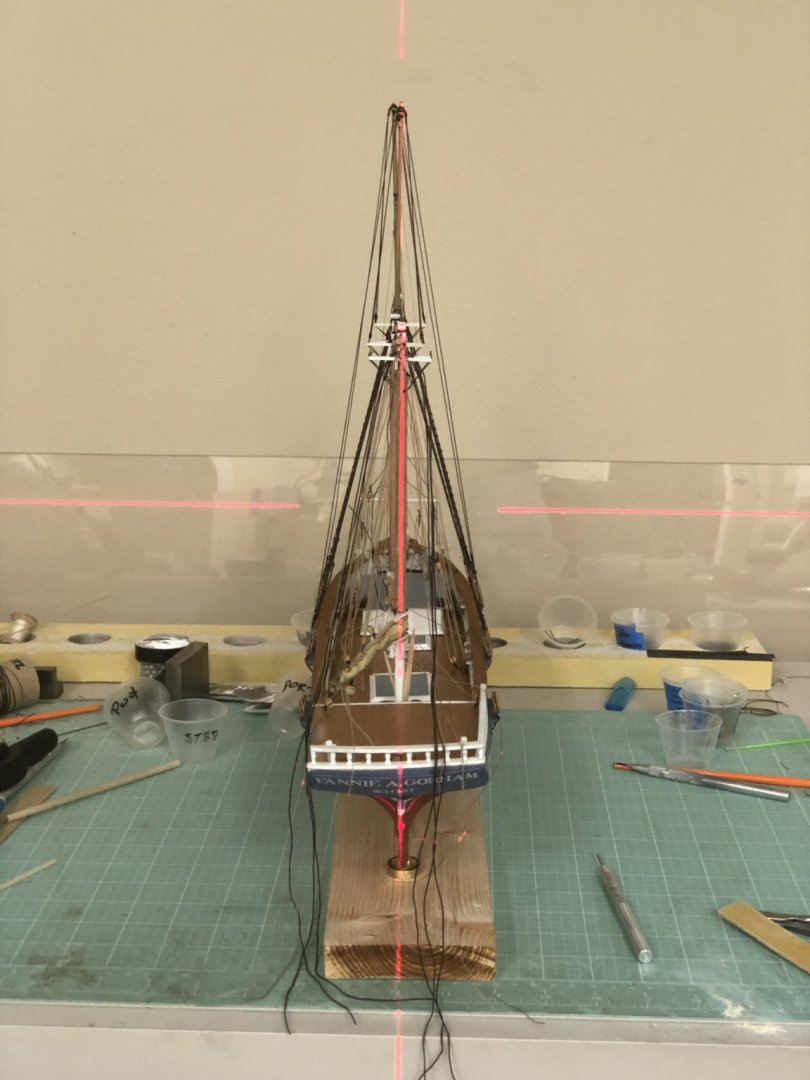
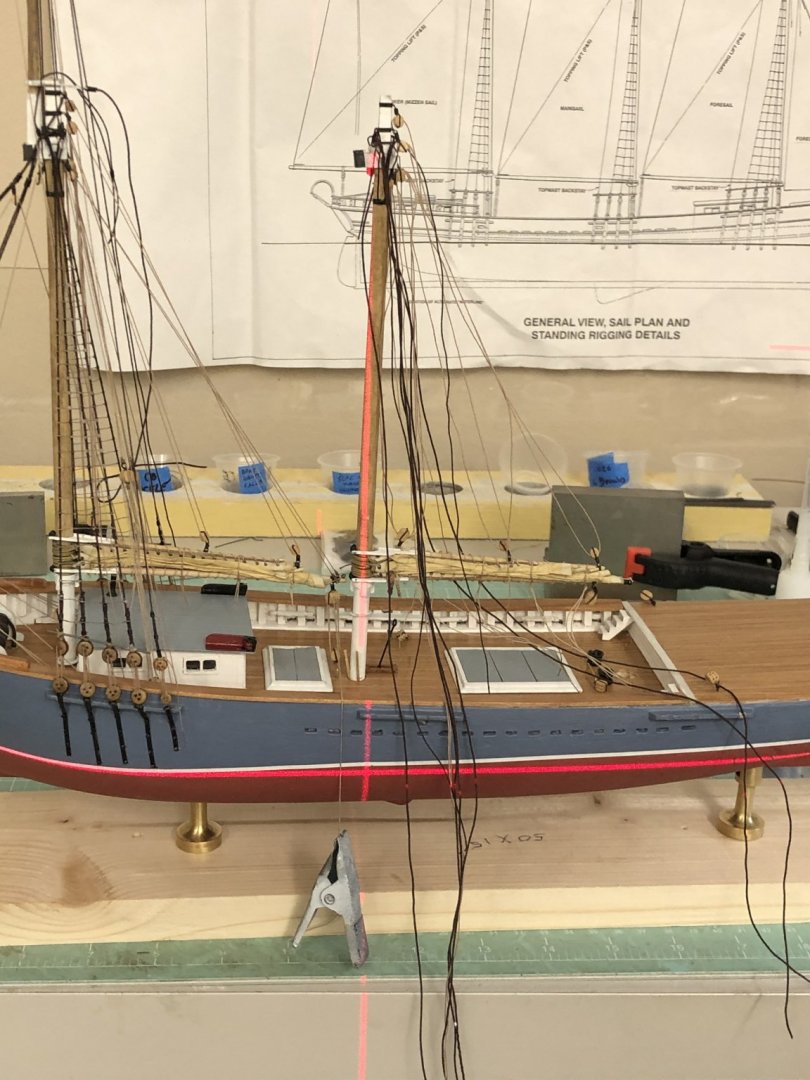
It is time to step the Main Mast. Unlike the Fore mast this time I took the time and cleaned up some of the things I had to do on the Fore while it was onboard. I tightened up and secured the gaskets holding the sail in place (and holding the gaff to the boom against the pull of the peak halyard), put a pin in the boom jaw to hold the boom down against the pull of the throat halyard, installed rope coils on the jaw belaying pins for the topsail tack and sheet, installed the gate the would hold the topmast and made sure the topmast follows the lower mast (not leaning back or forward). Here is my setup for checking the mast alignment (and my messy workbench). I turned the model around , although the main mast is offset to port from the fore there is enough "stuff" in the way that I think this works better. I checked both "roll and pitch" and the roll was okay but I toned down the pitch (rake) - trying to not make it noticeably more than the fore. I added wedges at the mast base to keep this alignment and will pull them out assuming I can keep this alignment through the rigging process. If I still need them I will add a drop of glue and cut them off at the deck - the mast coat should hid them.


- 166 replies
-
- 2
-
-
- fannie a gorham
- finished
- (and 1 more)
-
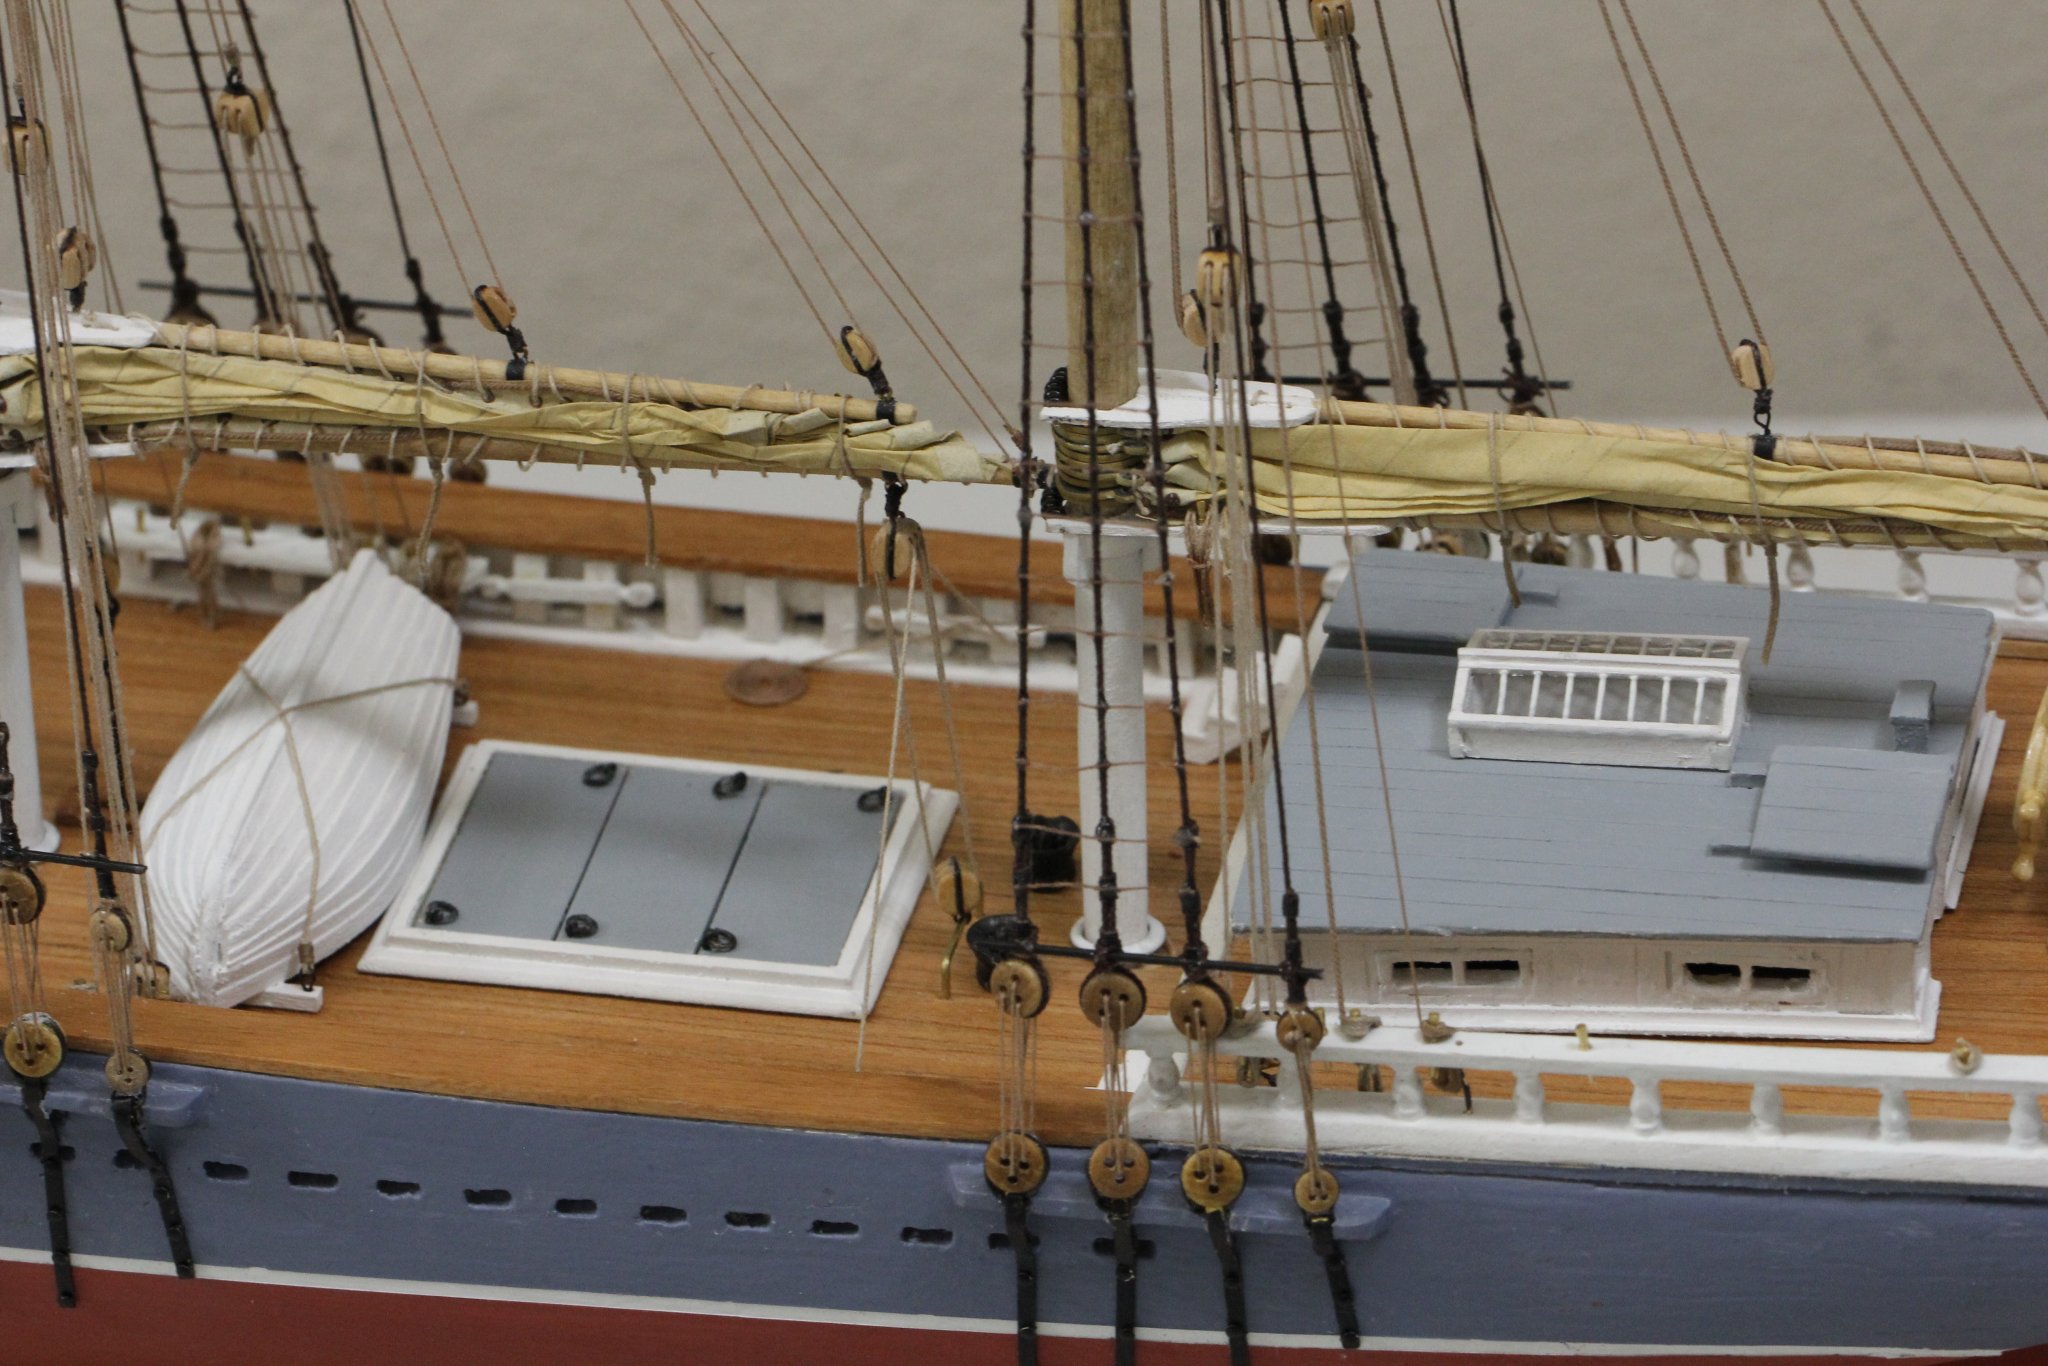
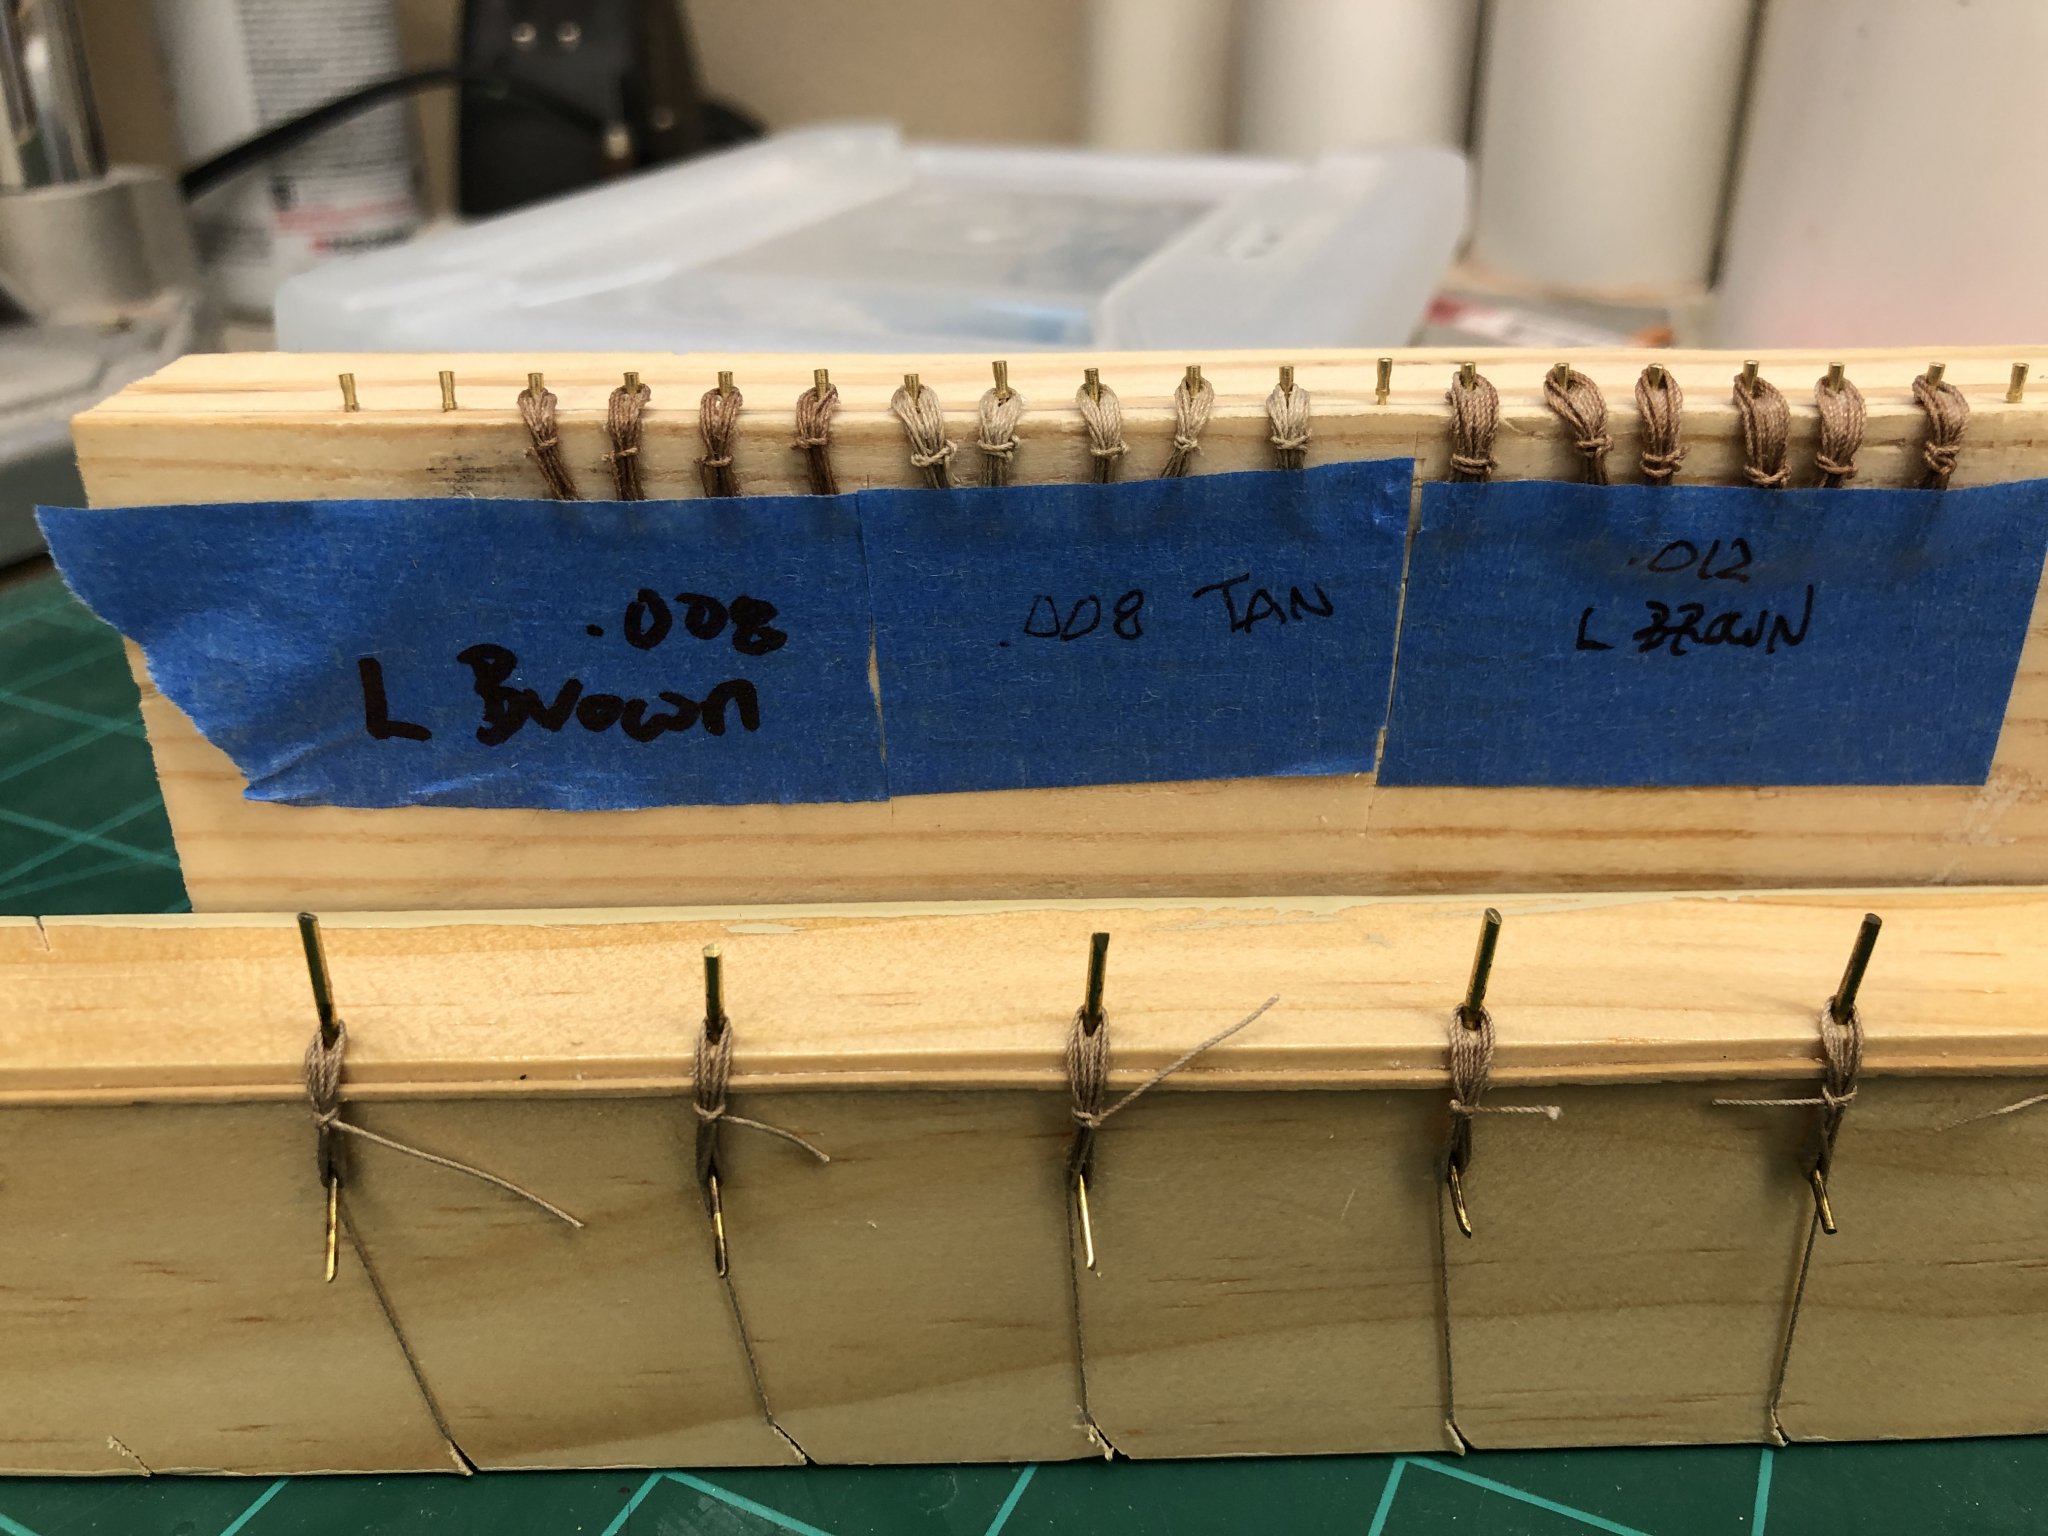
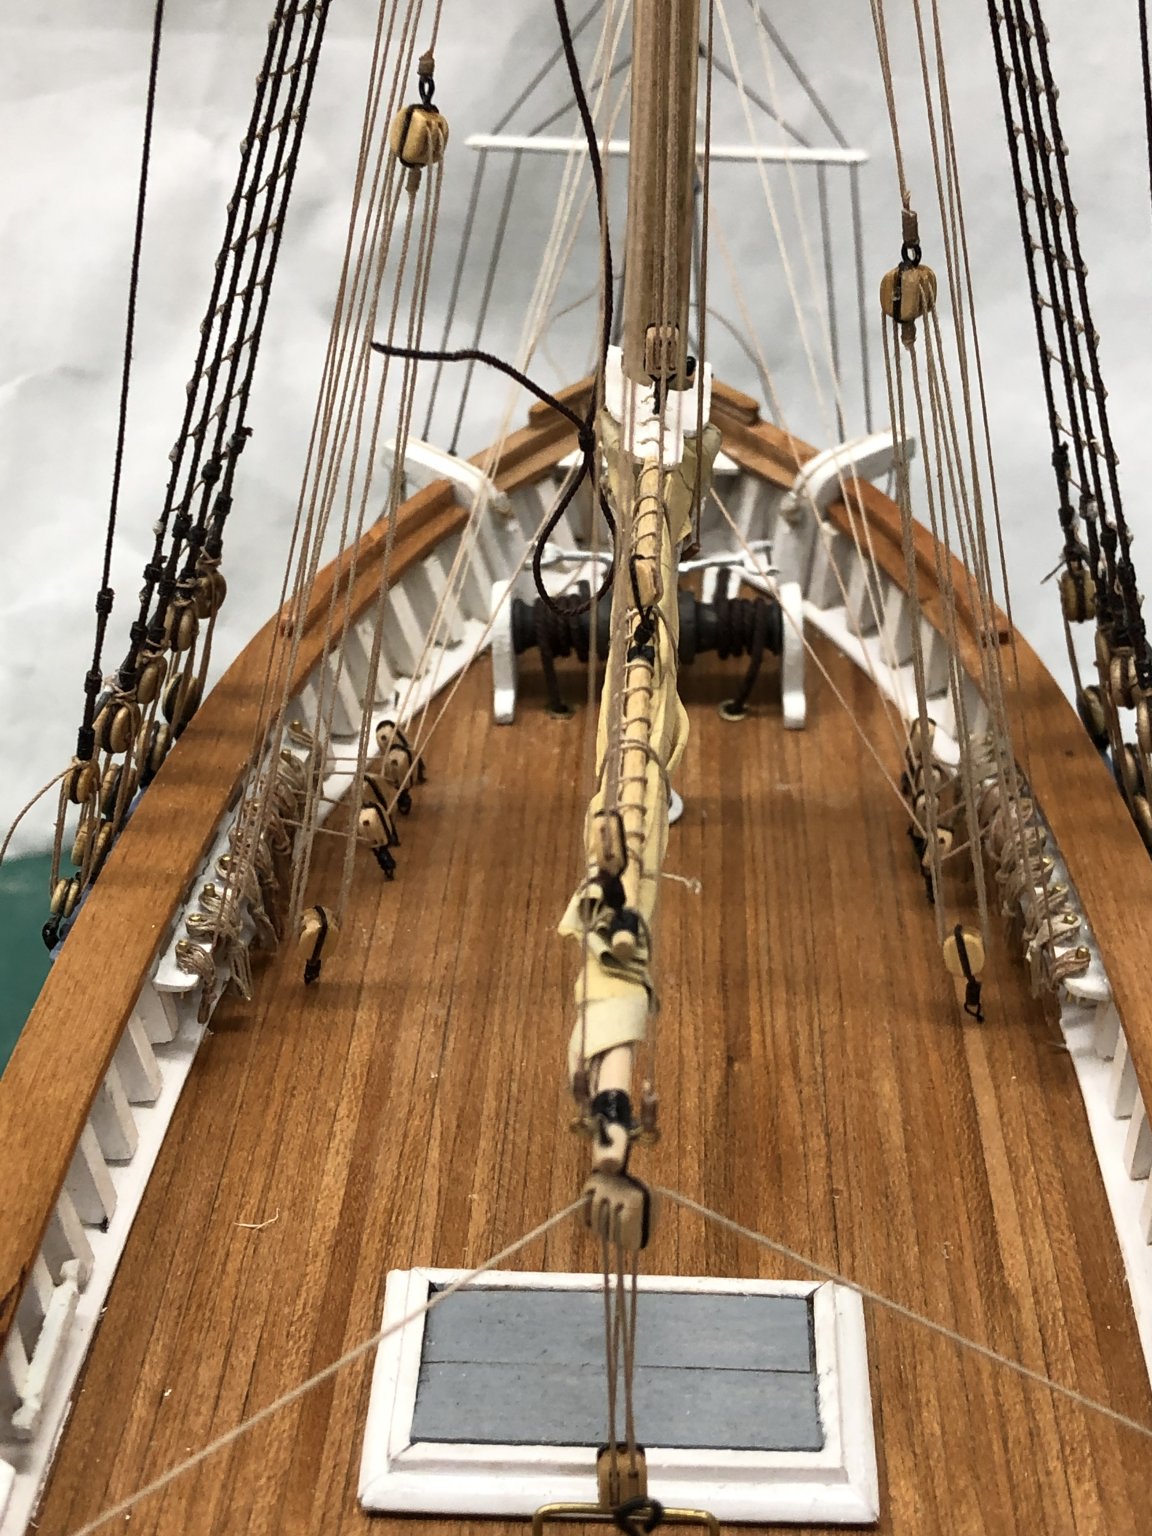
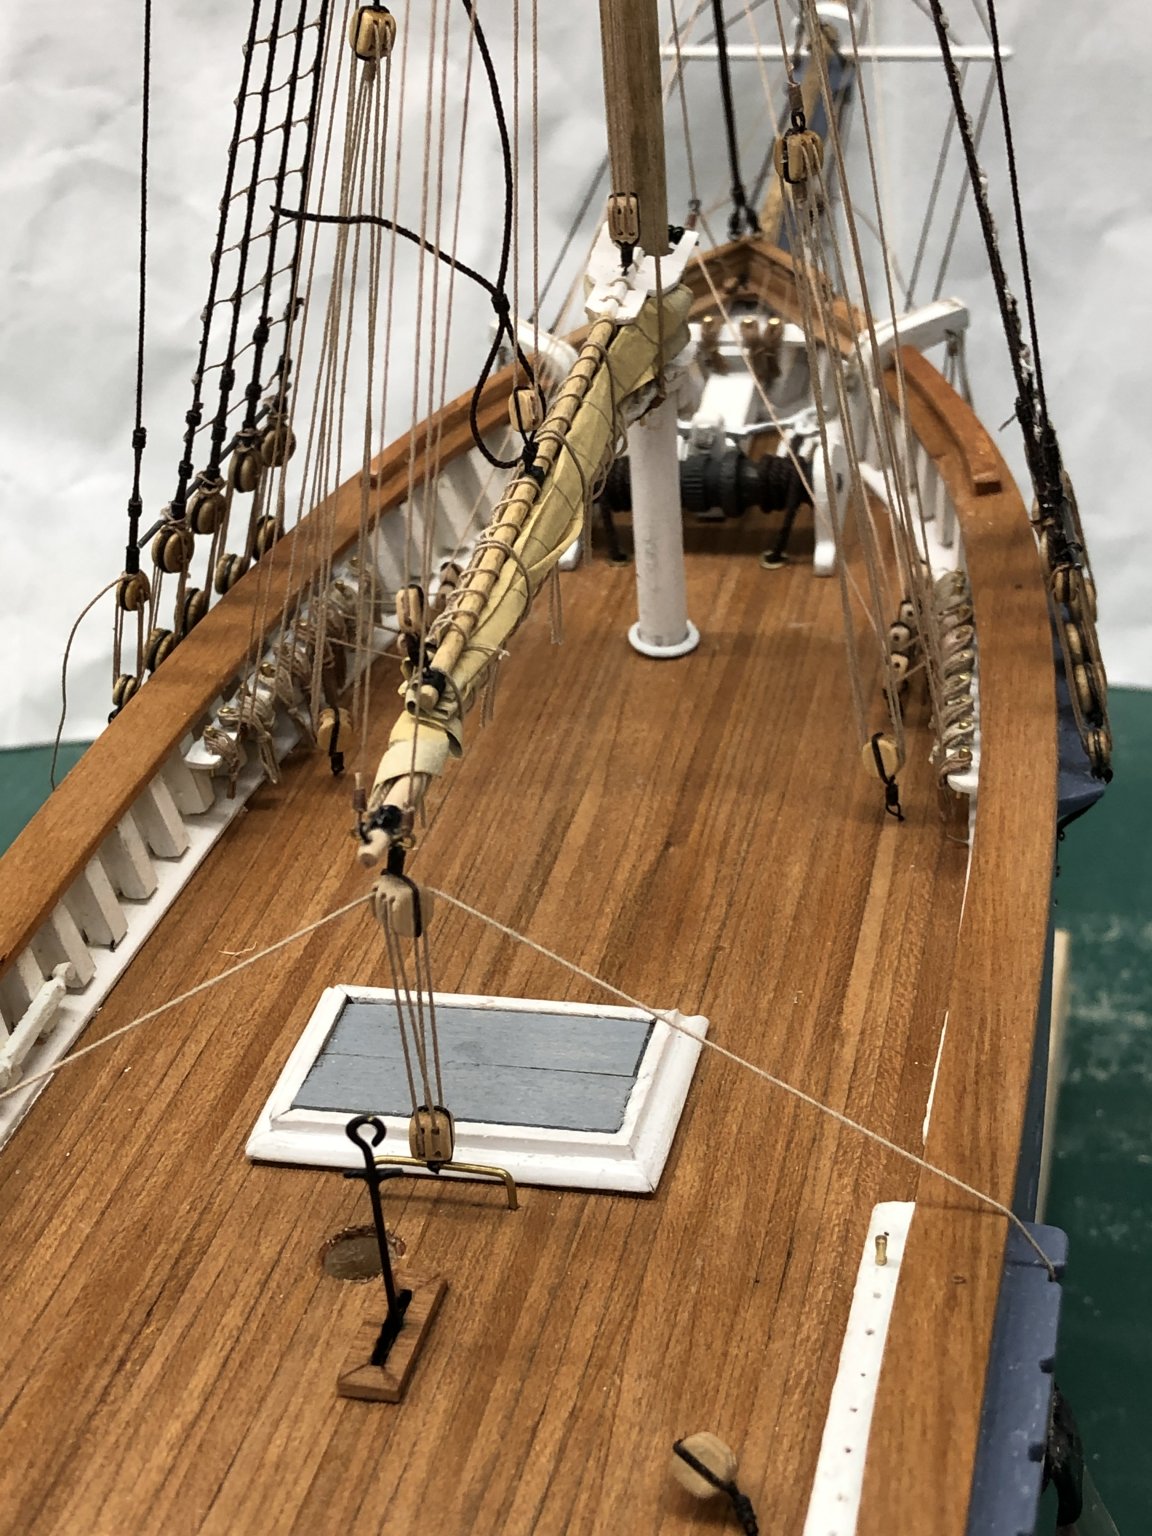
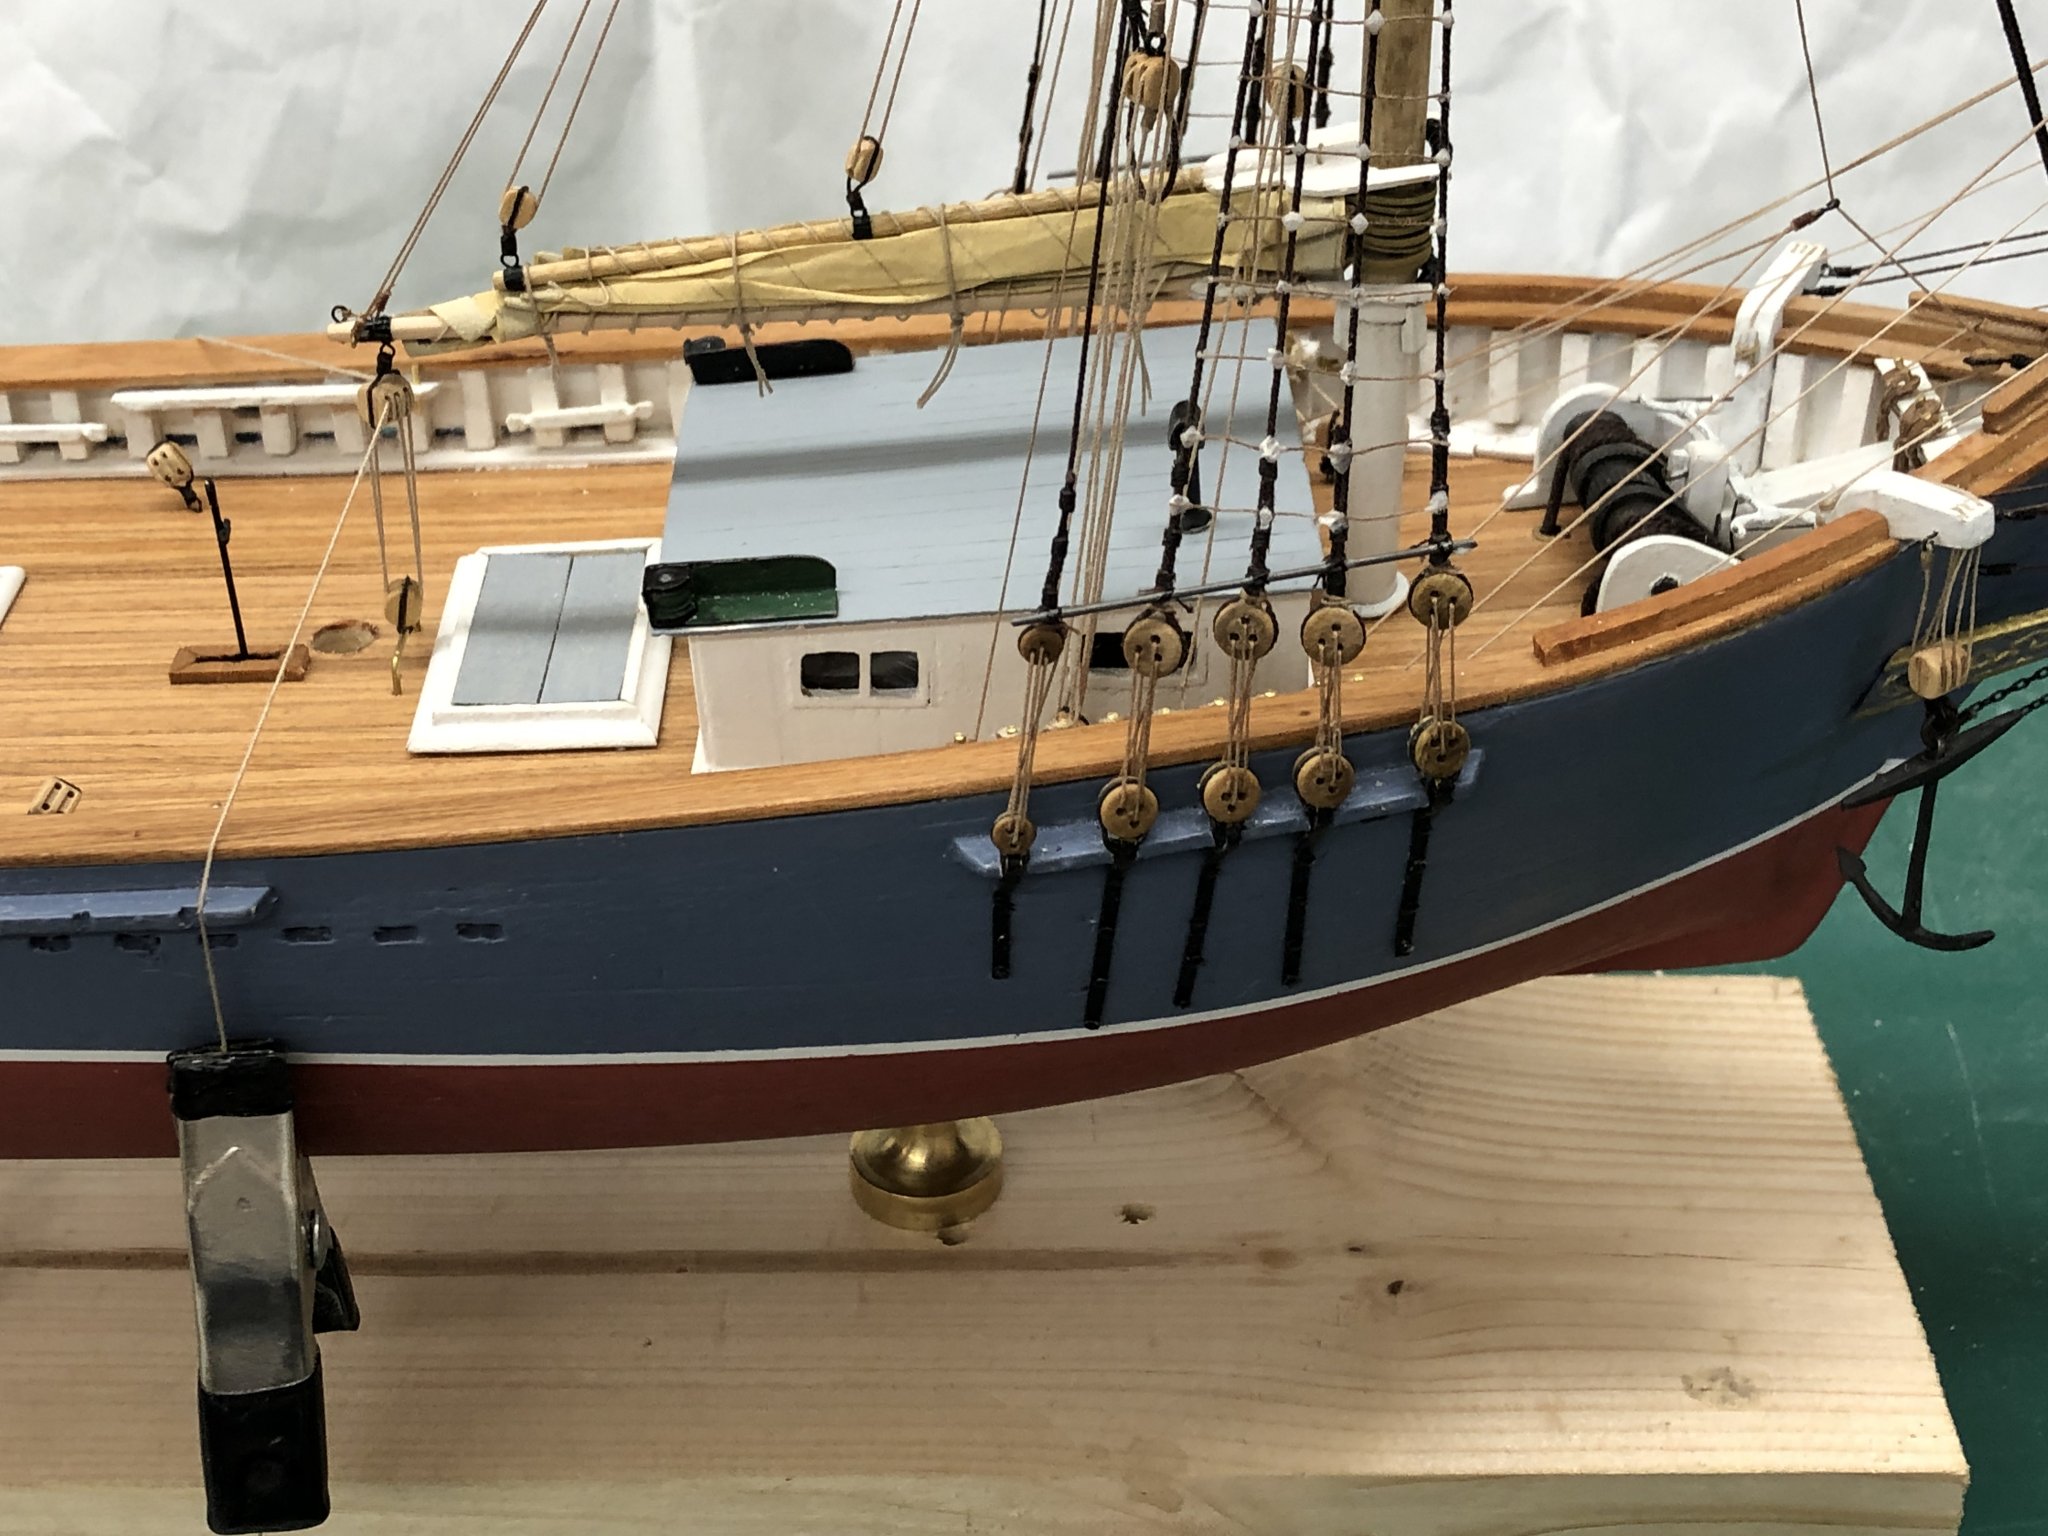
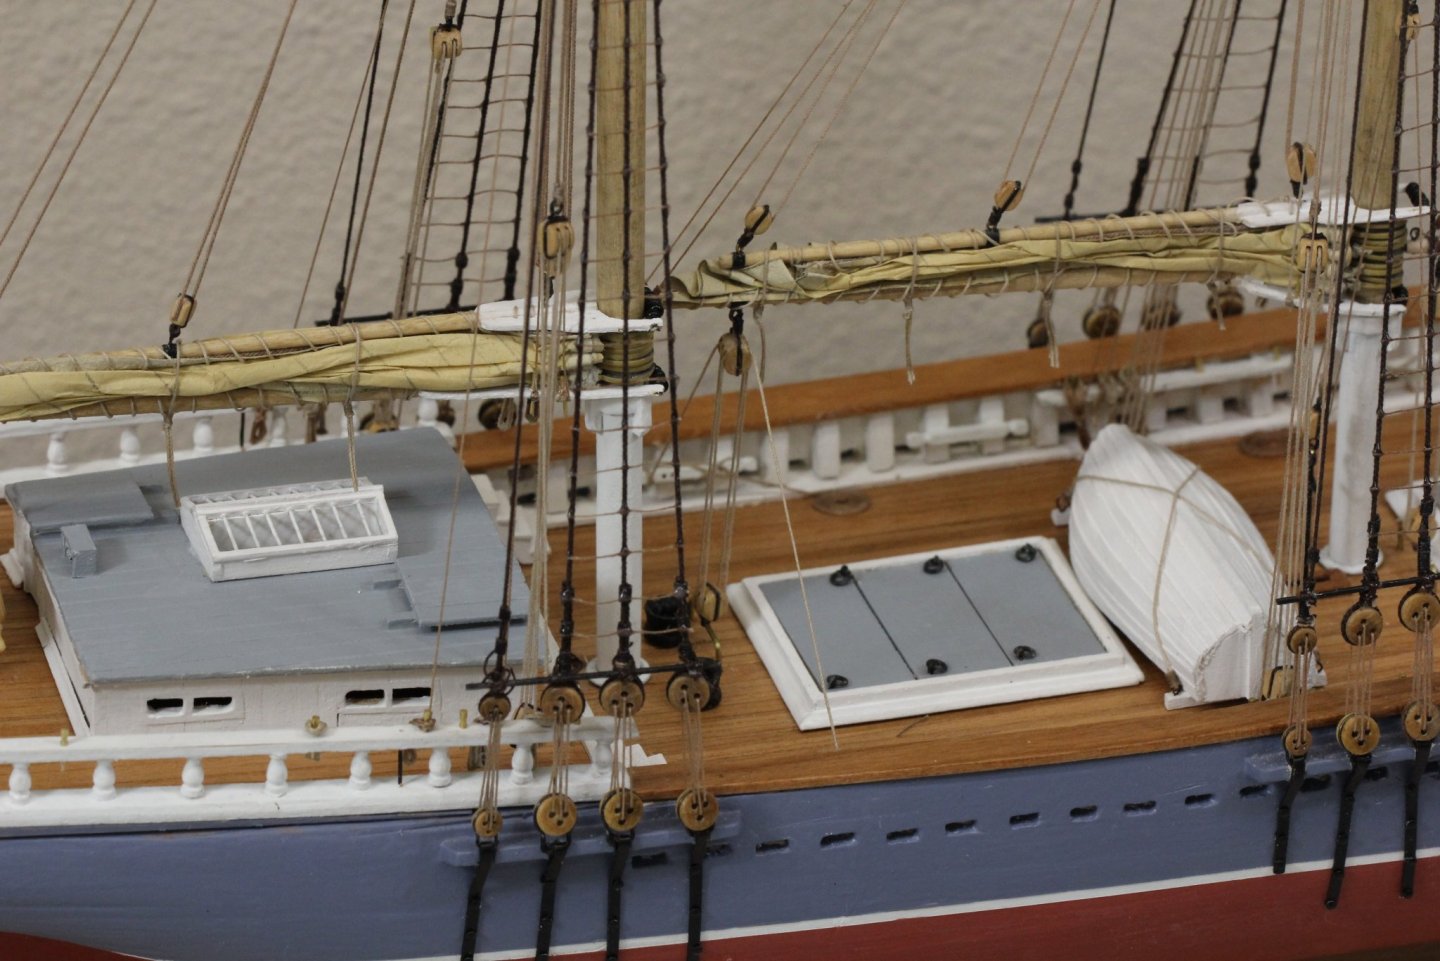
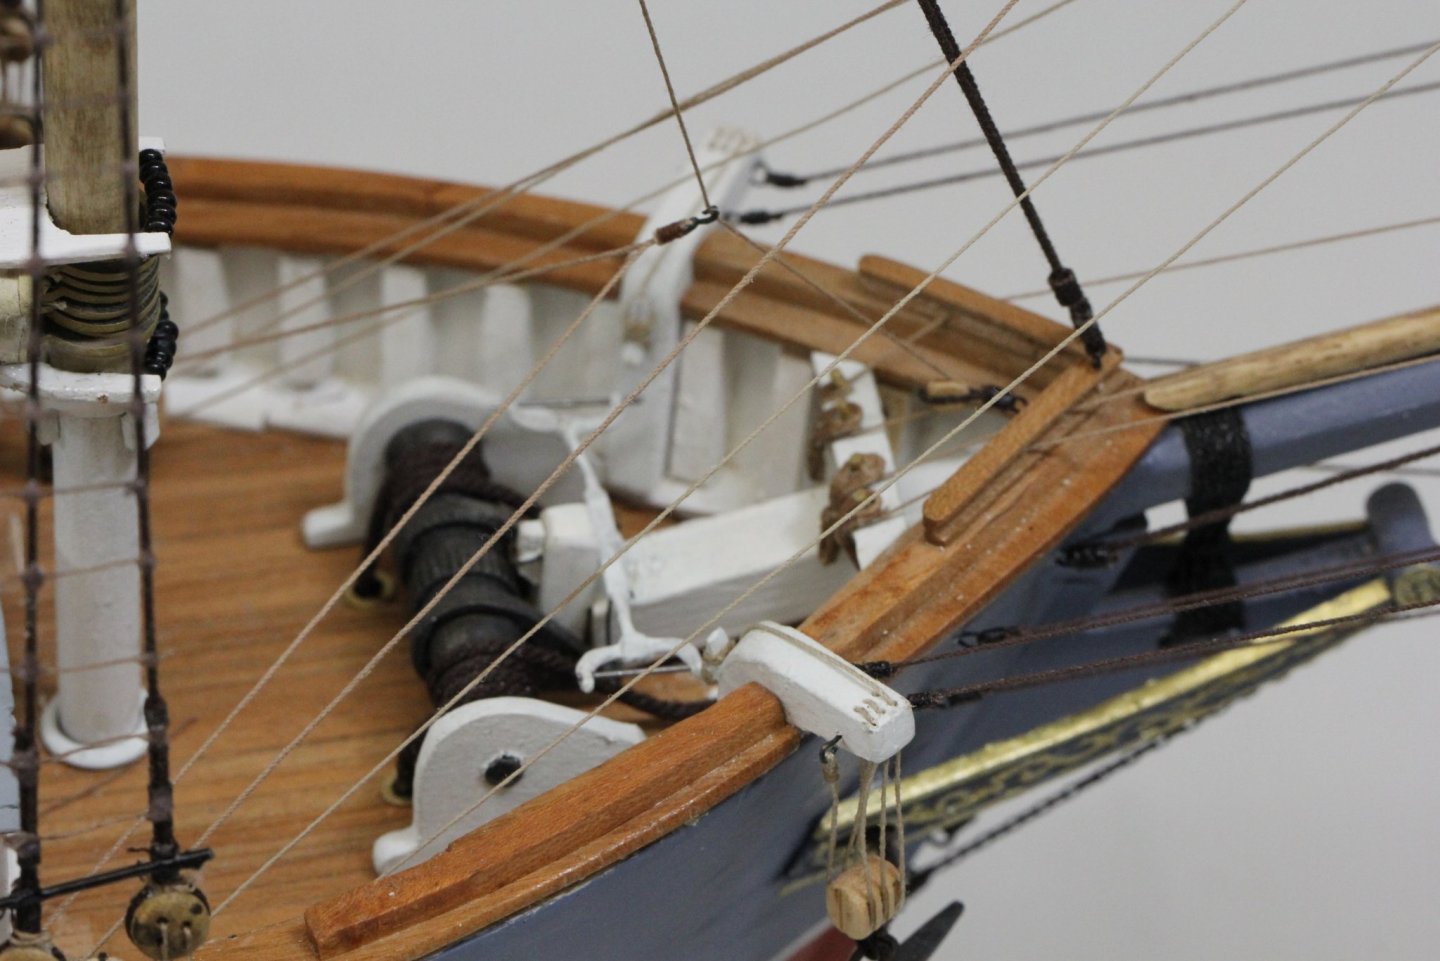
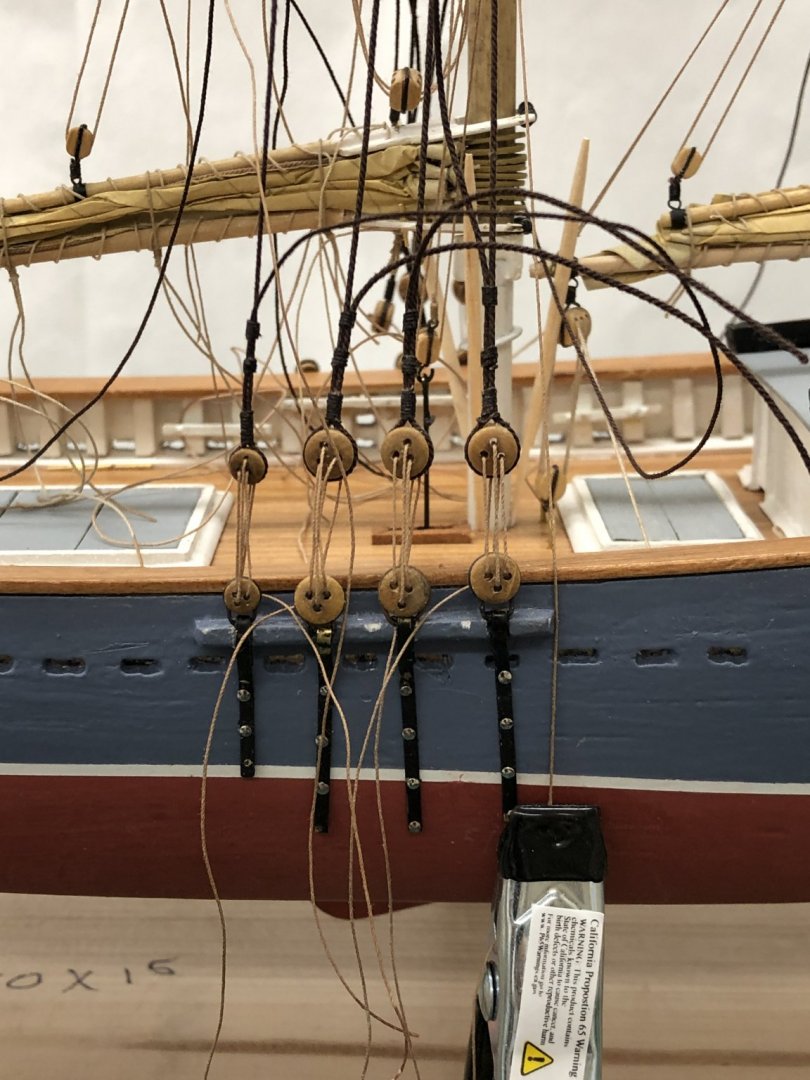
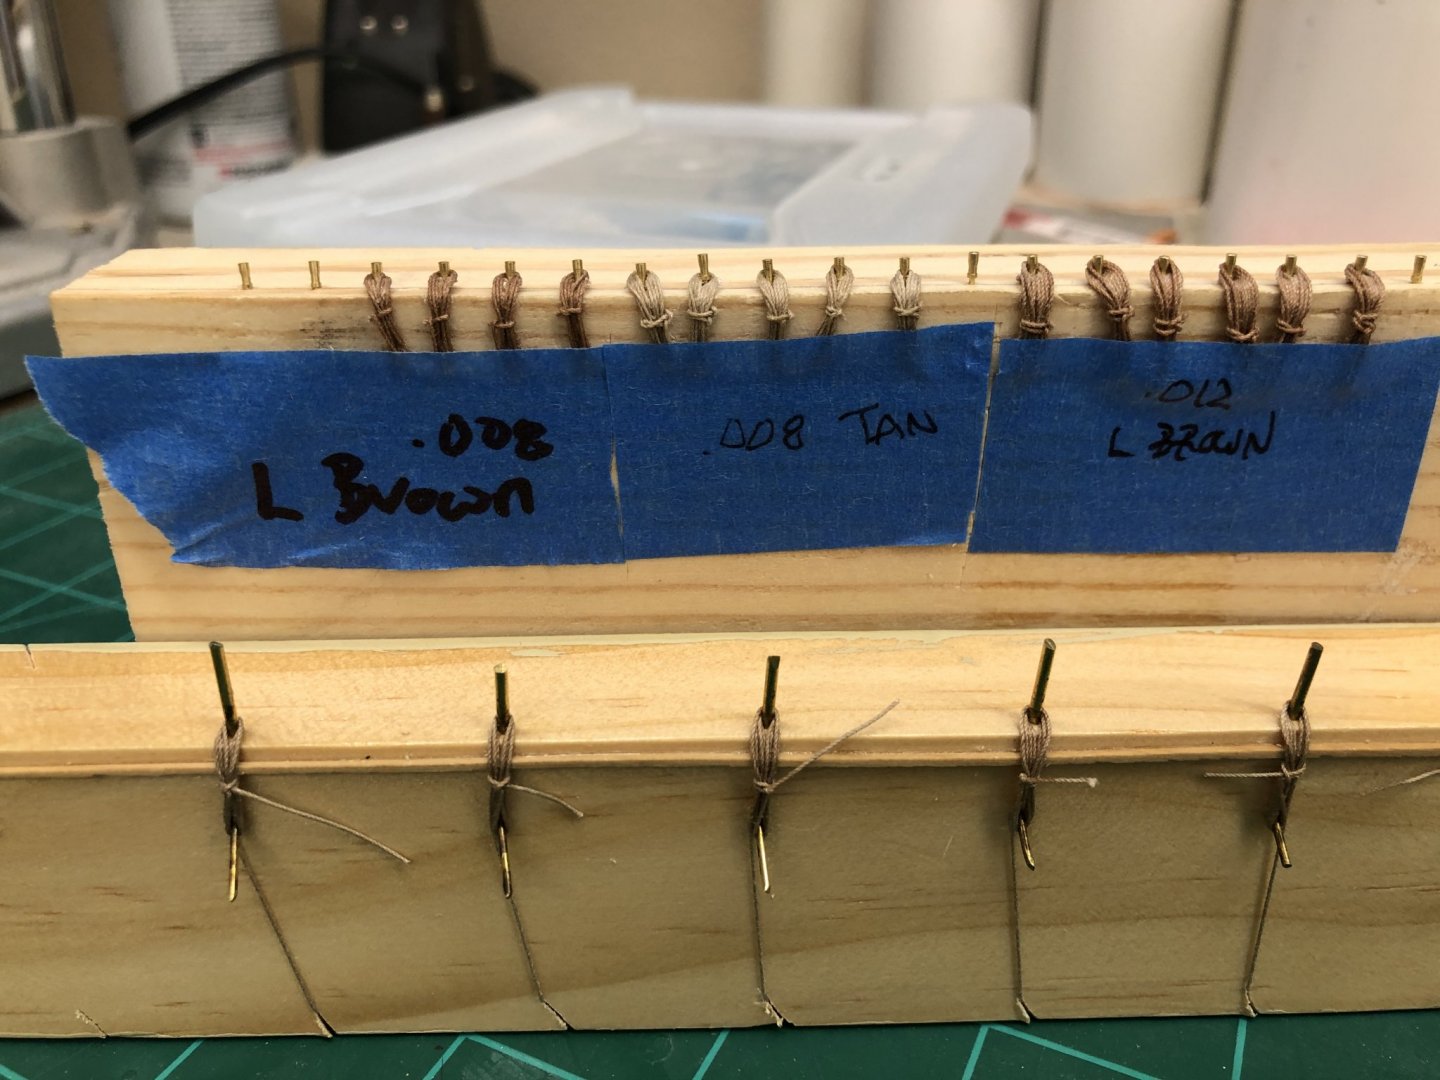
I am declaring the forward third of the Gorham complete (pending a bit of touch up). I got the rope coils on all of the belaying pins used, except the topsail halyard which is on the boom jaw and since the other end is also at that level there would not be much line left. Speaking of rope coils here is my jig of creating them and storing them until needed. I have a spreadsheet which lists all the rigging lines and lays out the color and size of the line (as well as all the other tackle (blocks, eyebolts etc.) needed. I use the spreadsheet to match the belaying pins with the size and color of line used for that particular line. Over the years I have used a multitude of jigs for creating rope coils of belaying pins. Because this is my first model at 1/8" scale I had to build new ones as all my existing ones would make coils too large to fit the relatively tiny belaying pins at this scale. So here are some shots of the model, first without the deck house and then with (although it is not yet permanently attached.


- 166 replies
-
- 2
-
-
- fannie a gorham
- finished
- (and 1 more)