cdrusn89
-
Posts
1,923 -
Joined
-
Last visited
Content Type
Profiles
Forums
Gallery
Events
Everything posted by cdrusn89
-
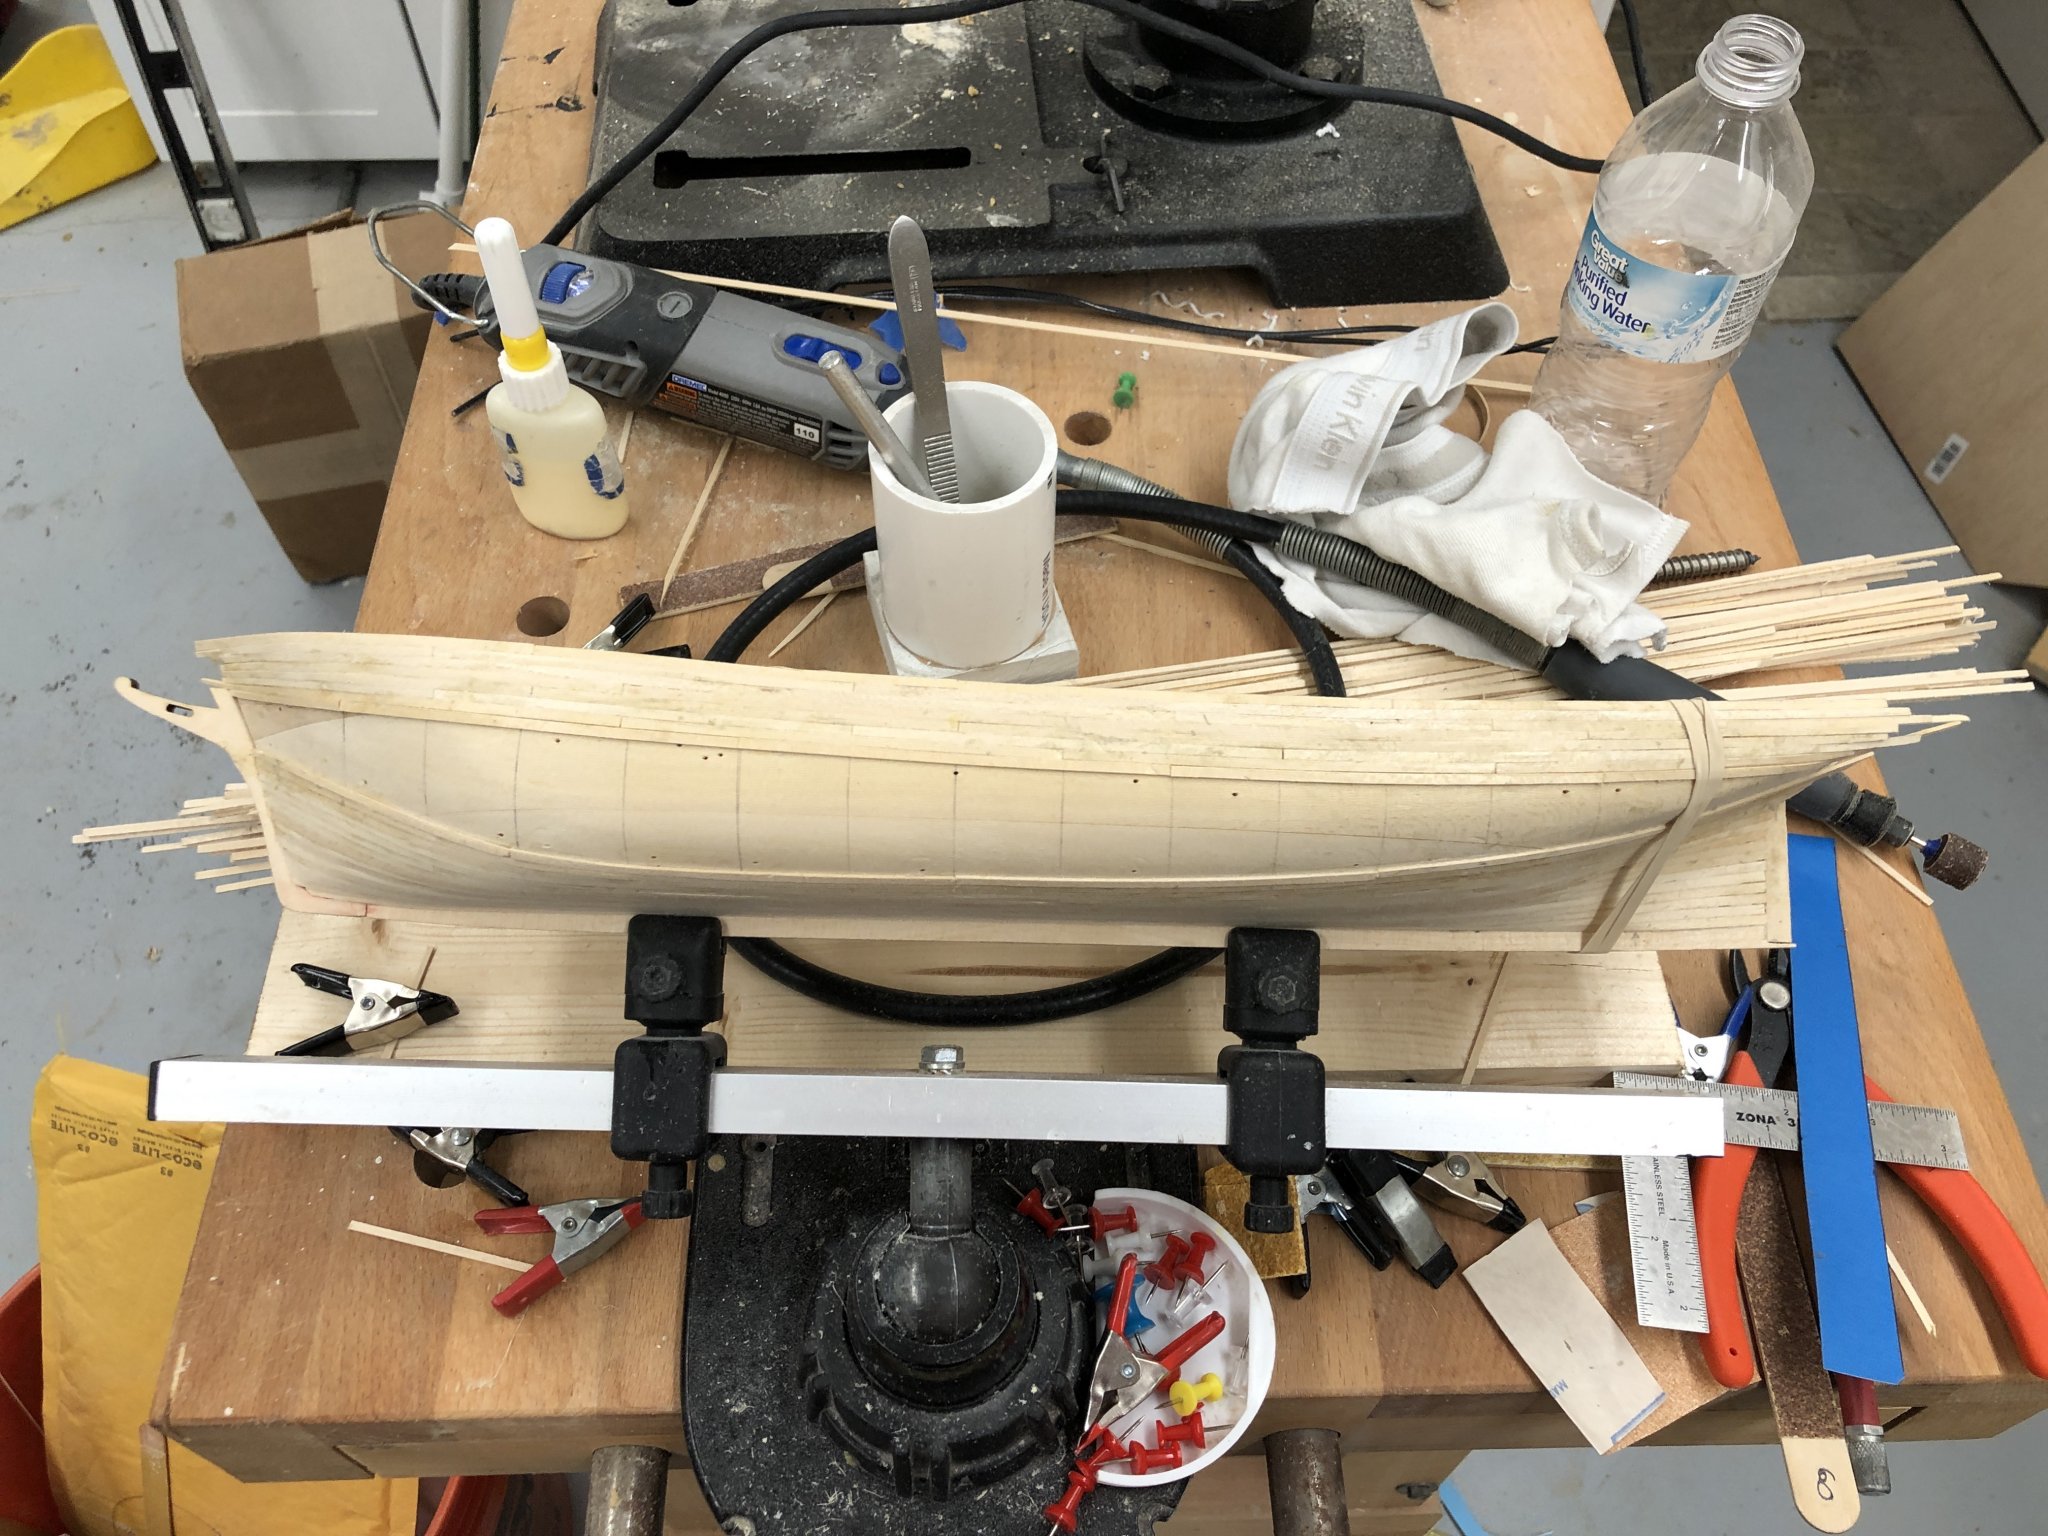
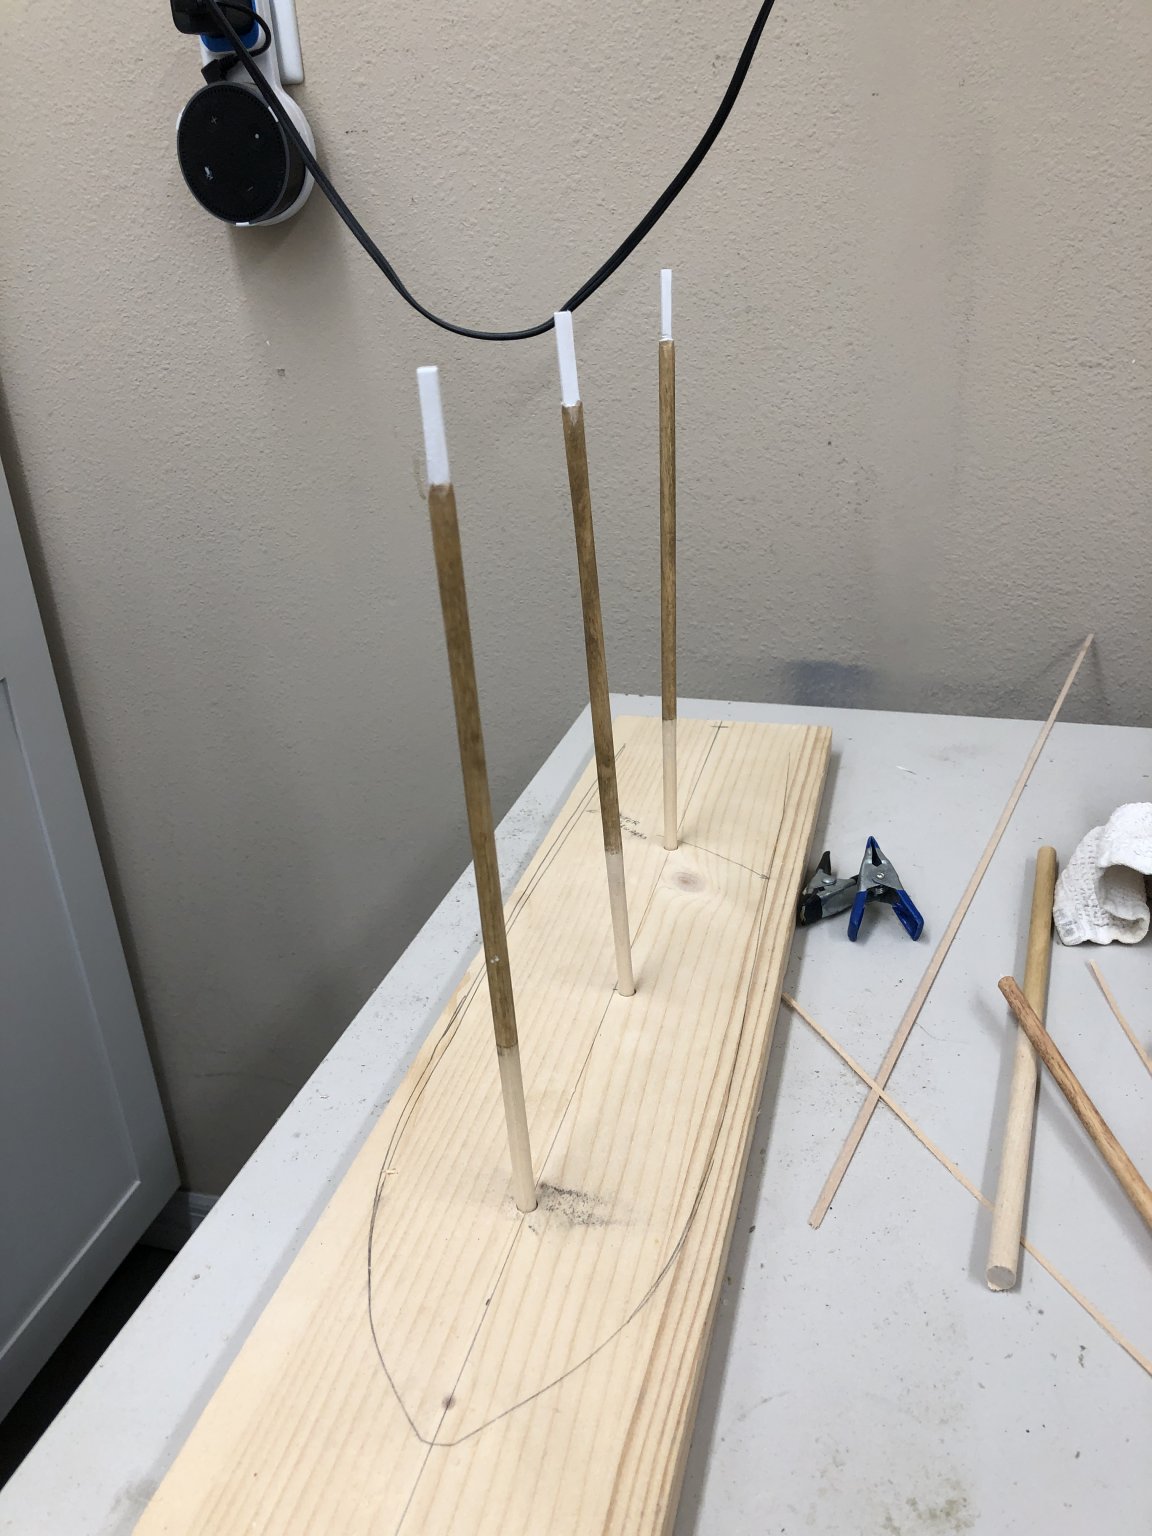
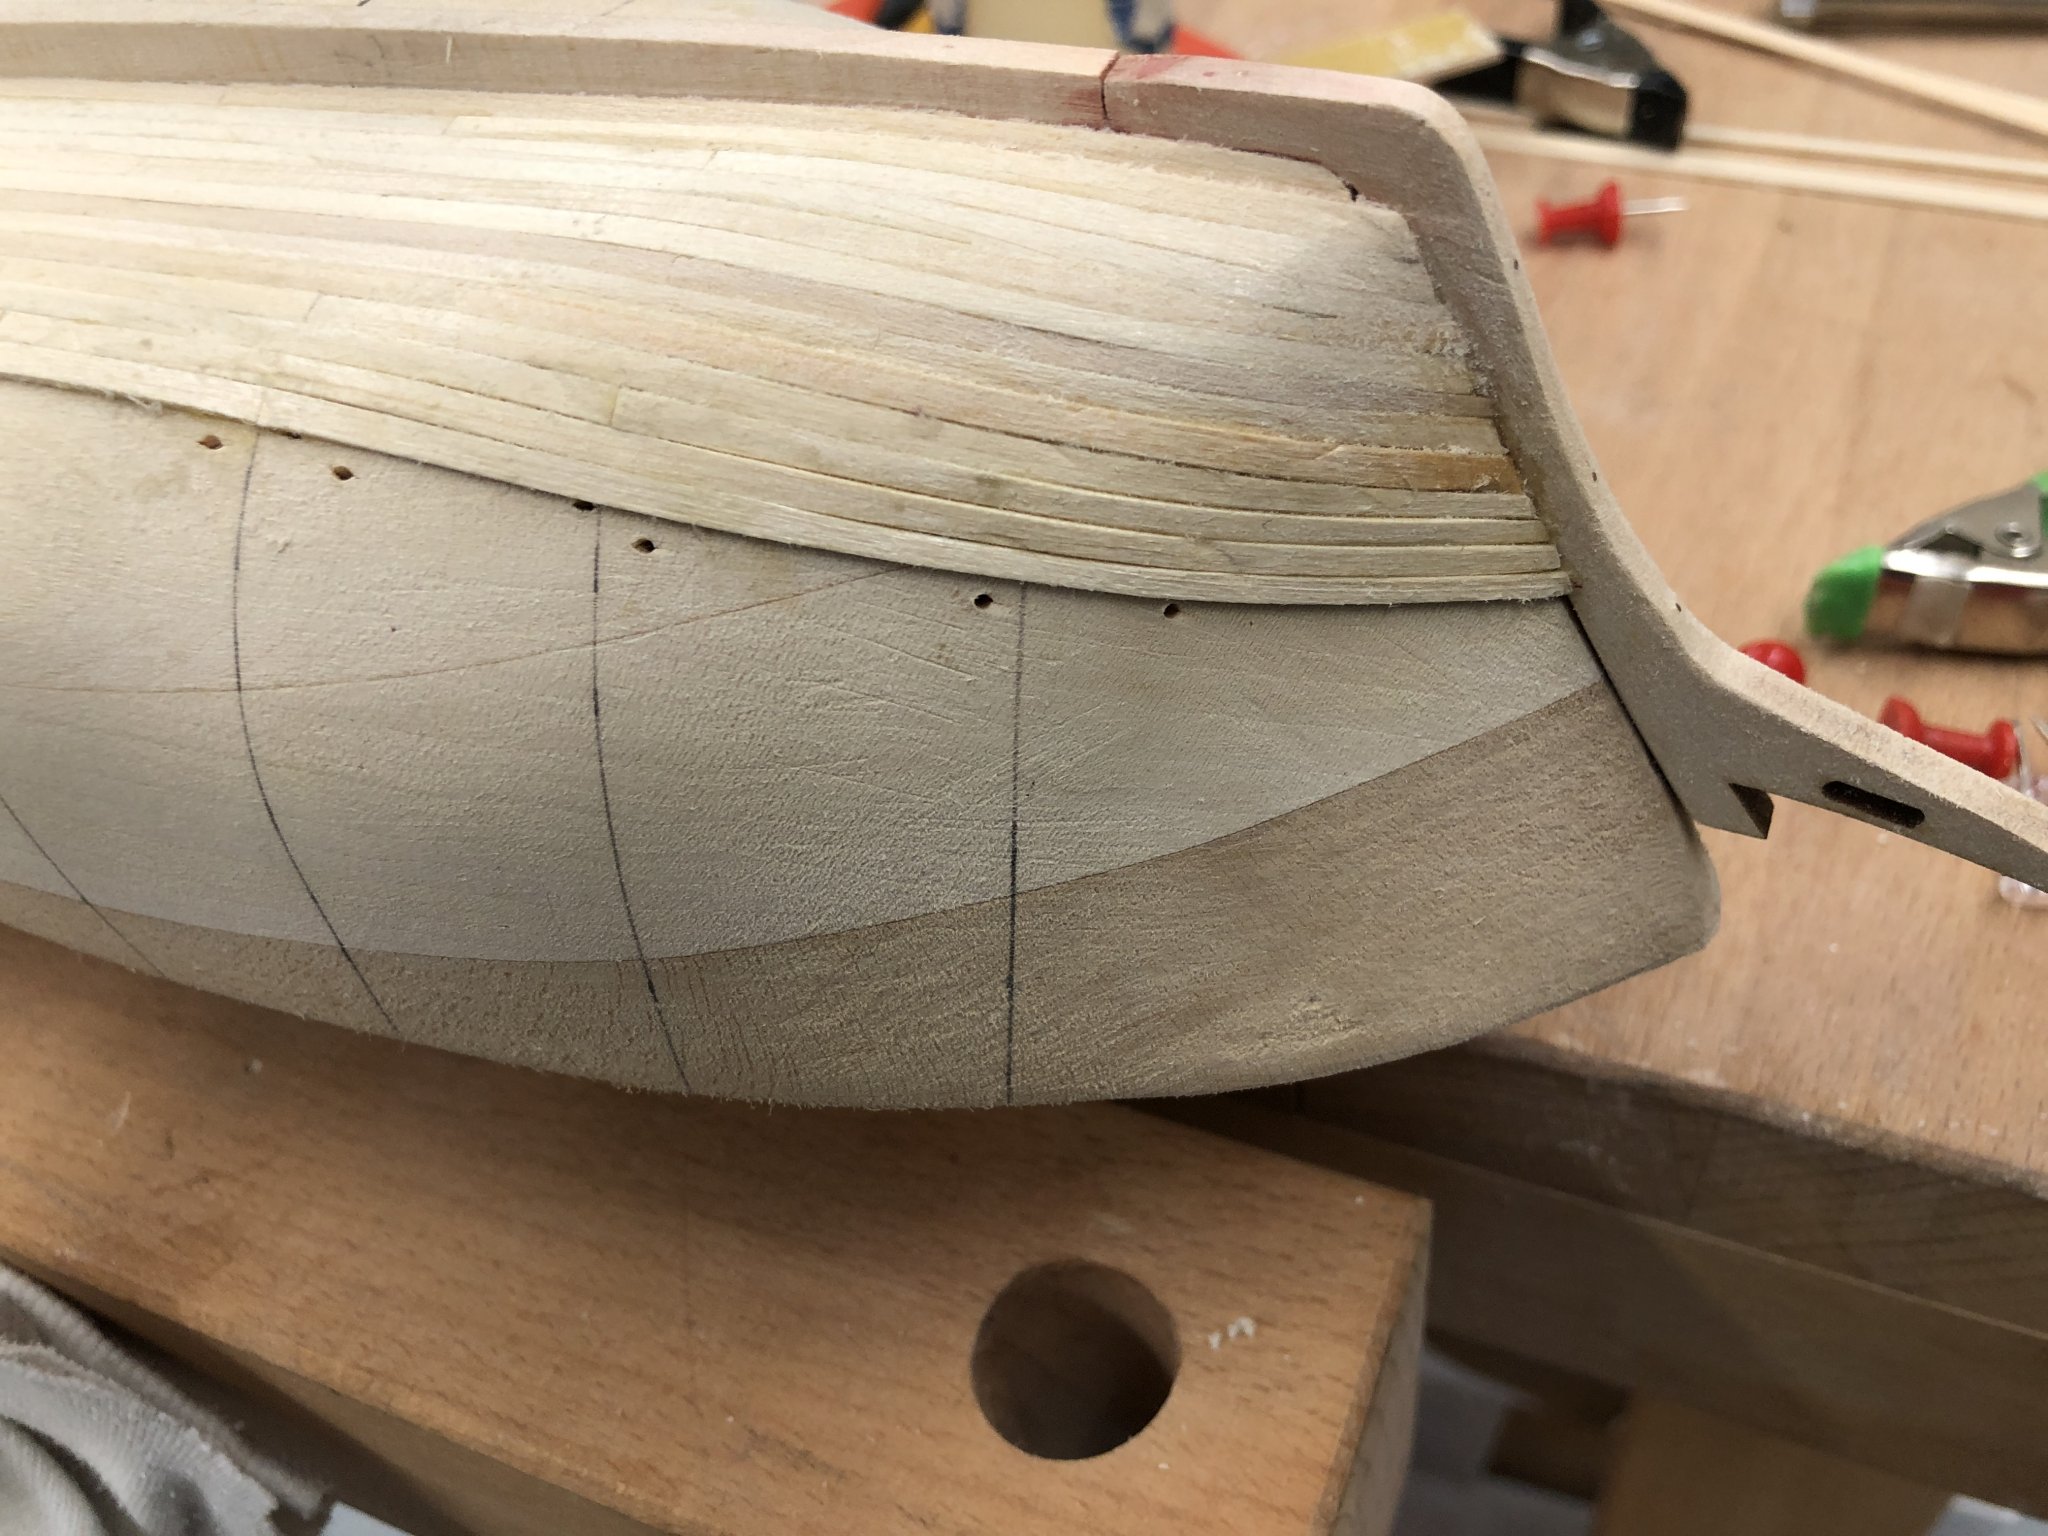
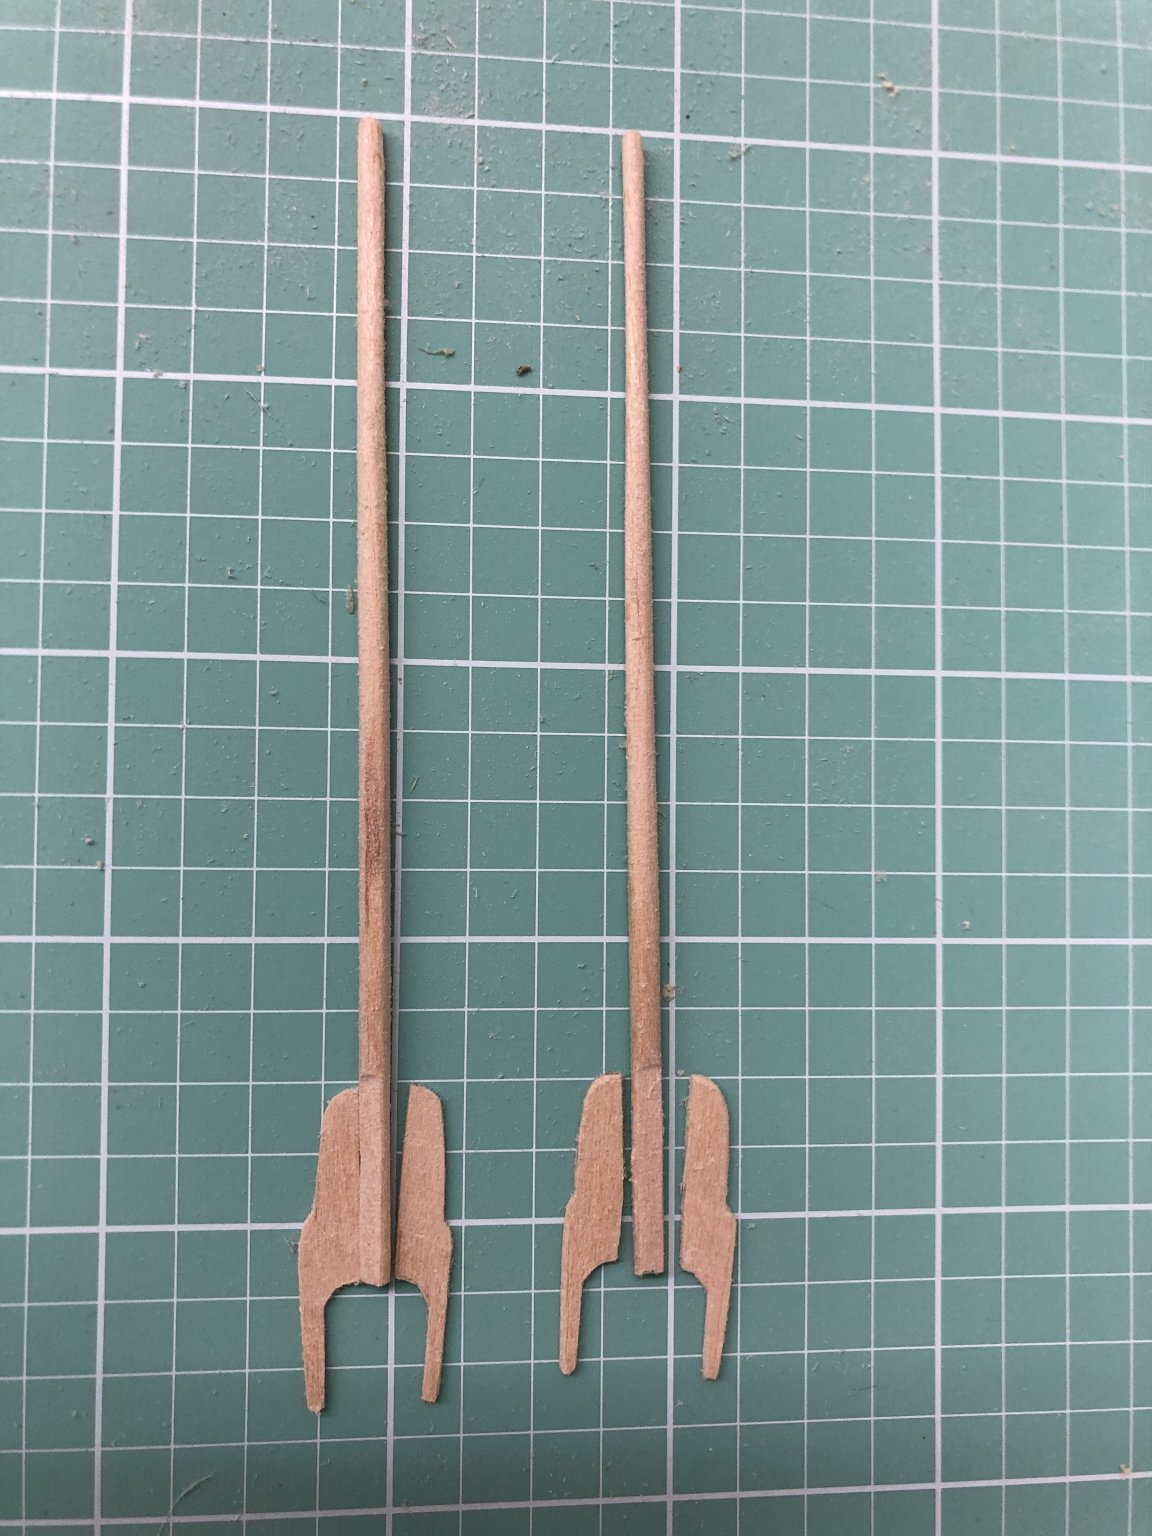
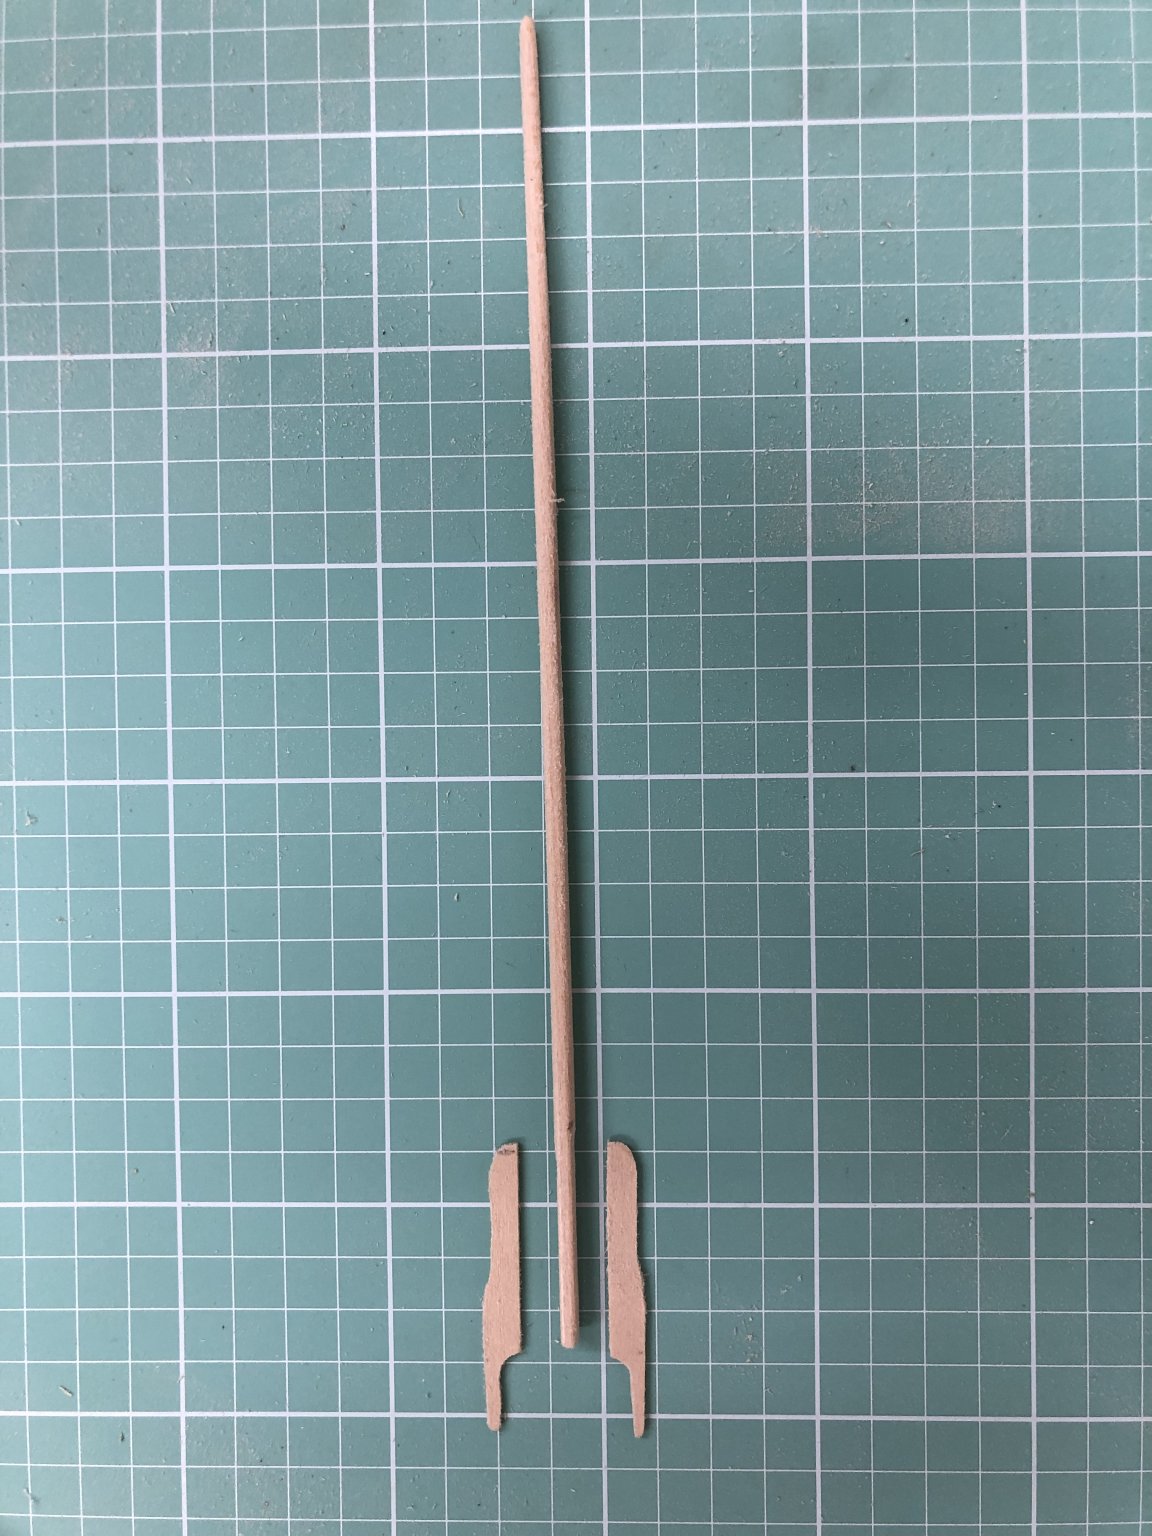
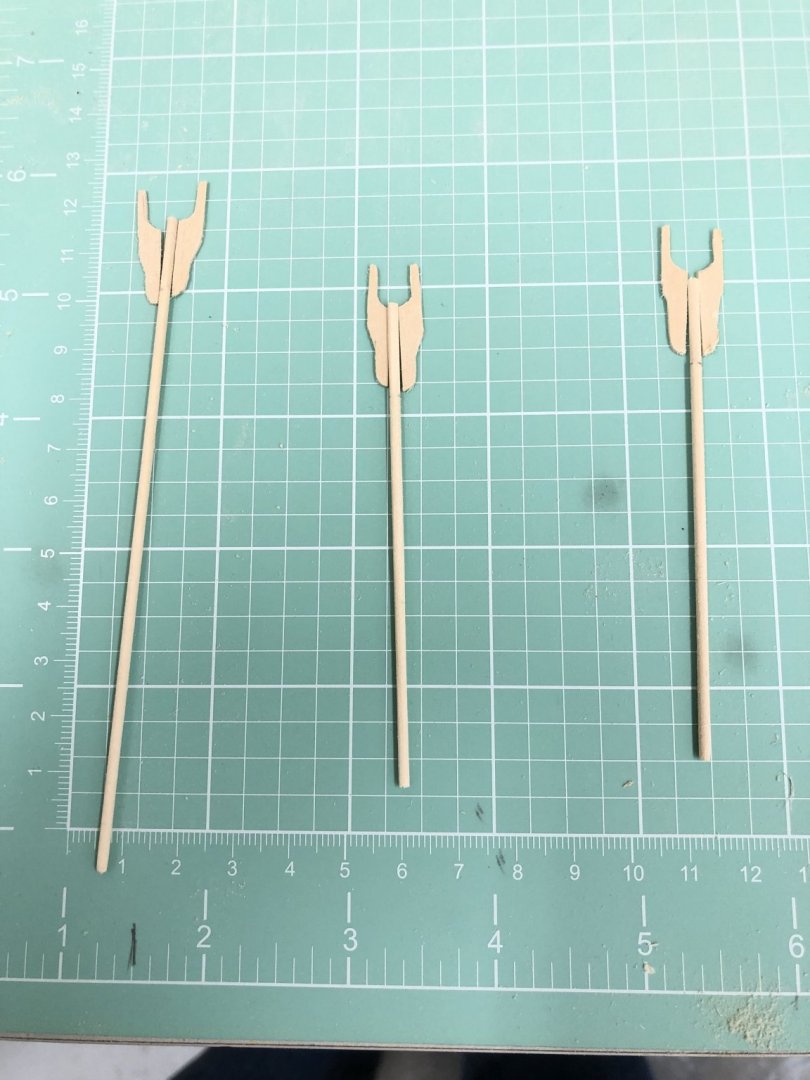
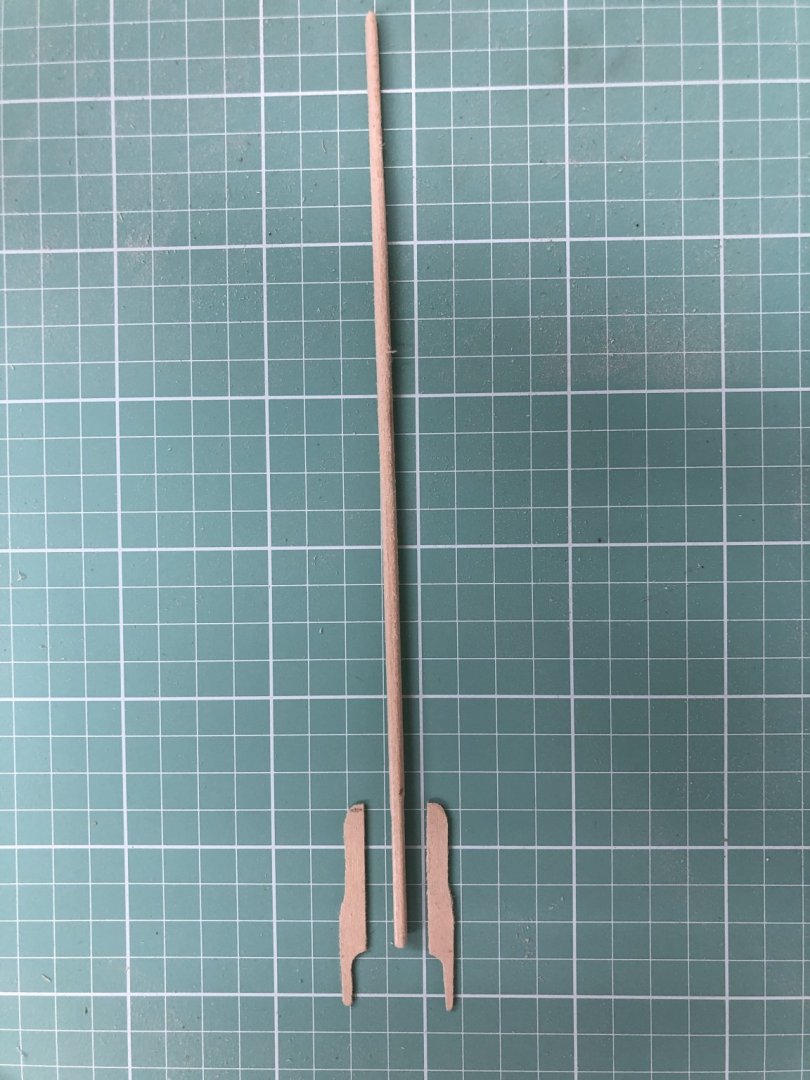
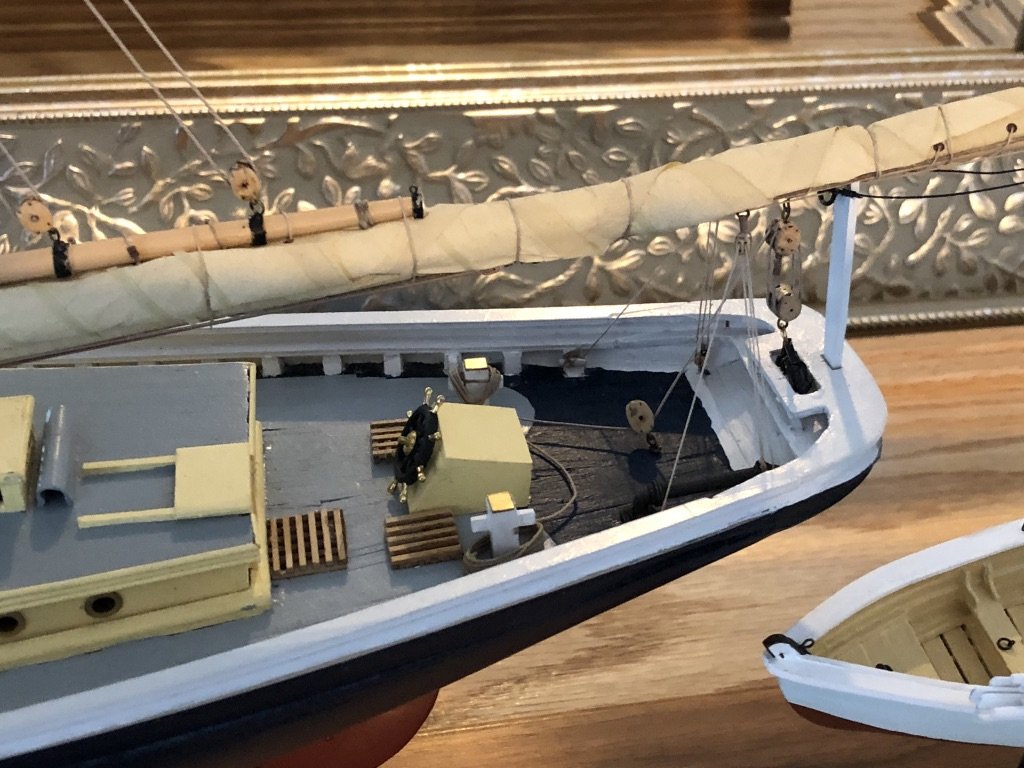
 By my calculations I have 10-11 more rows of planking to go at the widest point. I need to figure out what to do about the "smile" that has developed near the bow. I have been tapering the planks toward the bow since the second or third row but it appears I am going to have to do somethning else pretty soon. In other news I have the three lower masts on a build board to facilitate getting them outfitted and I finished the stirs, painted them white and cut out one set to see how it looked.


- 166 replies
-
- 3
-

-
- fannie a gorham
- finished
- (and 1 more)
-
While waiting for glue to dry I decided to make up a spreadsheet for the rigging starting with the standing rigging. The kit provides three sizes of black line for the standing rigging. Per the instructions "the heaviest line is used for the lower standing rigging (between the hull and mastheads) and the medium is used between the mastheads and for all topmast rigging." To me that would mean the heaviest (presumably .035 or .045 but it is not marked or indicated in the parts list) would be for the lower shrouds and the Forestay and Jibstay (which both go from the Fore Masthead to the hull or Bowsprit. However, the instructions specific to the Forestay and Jibstay say that these are doubled .025 line and the instructions for the lower shrouds also call out .025 line. The kit provides 30' of the heaviest black line (more than any other size) but if the .025 is used for the lower shrouds, and Forestay and Jibstay (and presumably for the rest of the stays which go between the topmasts and either the hull or lower mast tops) then where exactly is the "heaviest" black line used? I have not built a kit at 1/96 scale before. But .025 line (I assume this is the diameter - when I measure with my digital calipers it is close to .025) would be ~ 2.5" or a bit more than 6" circumference. The Niagara kit I recently finished called for .035 line for the lower shrouds which at the 1/64th scale would be 5" circumference. That would seem to mean that the heaviest line provided in the kit would not have a home, except possibly for the anchors (although the kit provides 2' of .050 anchor cable). I think I will specify .025 for the lower shrouds and the doubled Forestay and Jibstay but use .018 for the upper shrouds and the other stays in my spreadsheet. All in all not a easy to understand rigging plan and I am somewhat confused about what size line is used where. The only part really clear is that the smallest black line is for deadeye lanyards and ratlines. As an additional point, although the kit provides two sizes of running rigging line I do not see anywhere where a particular size line is specified.
-
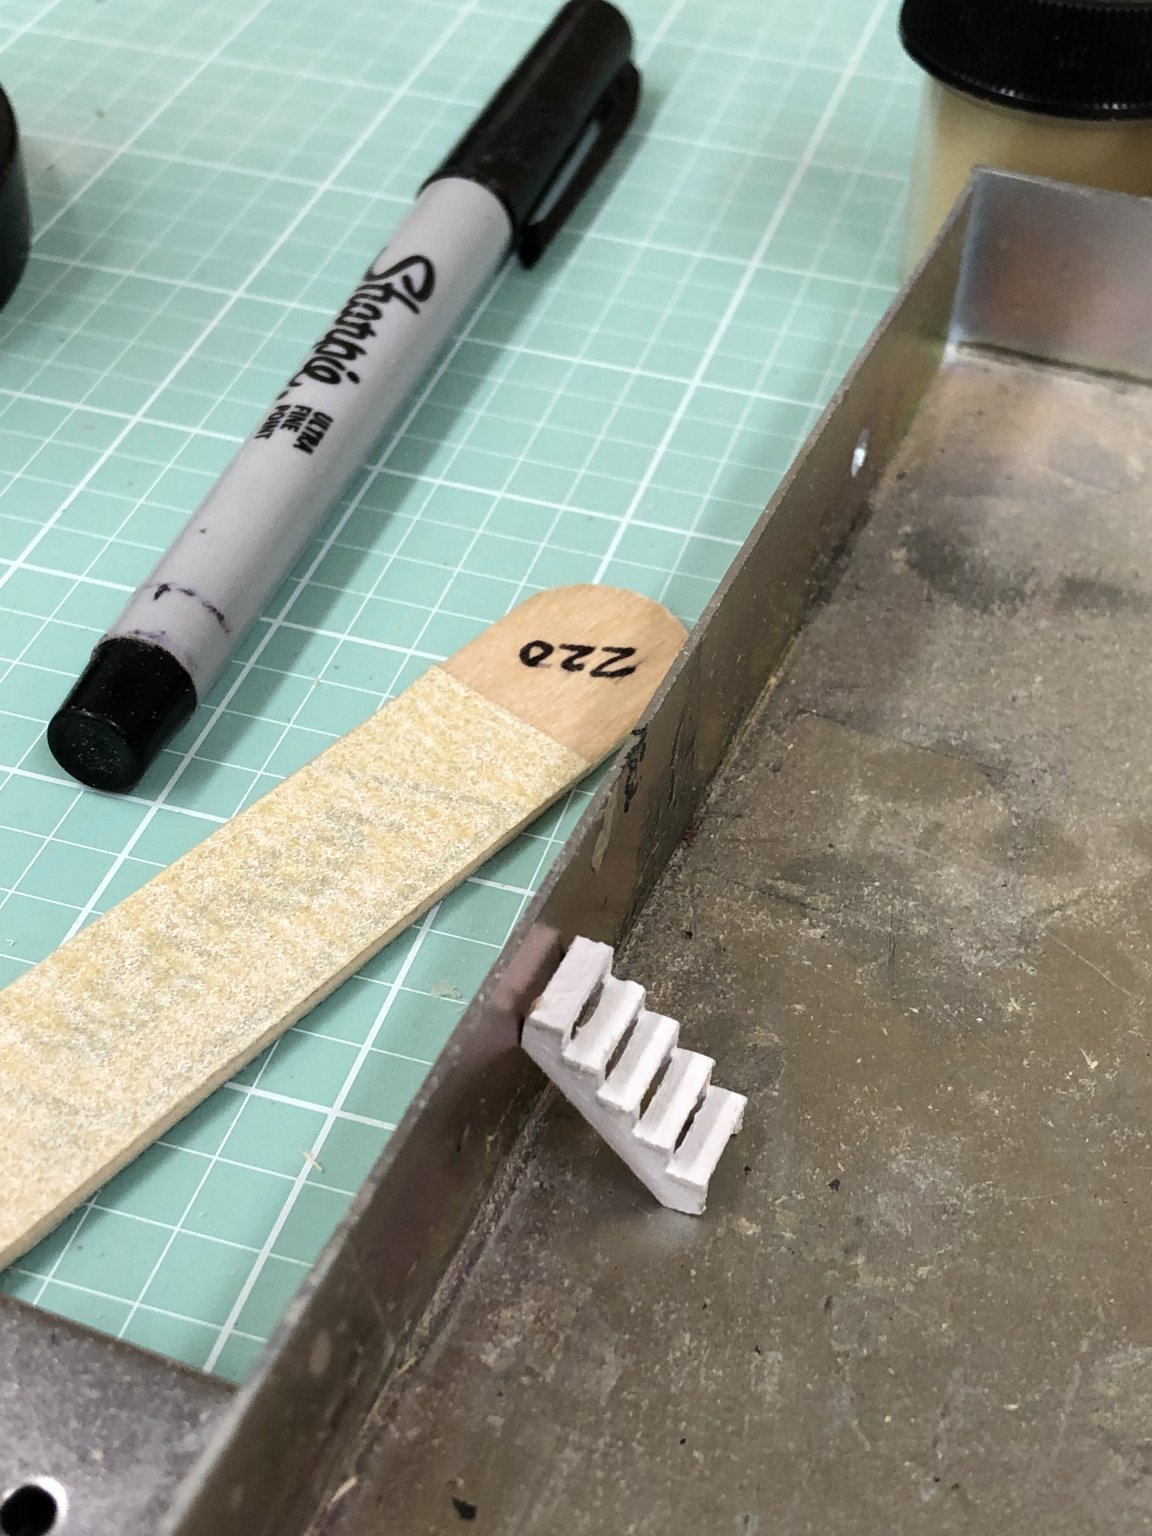
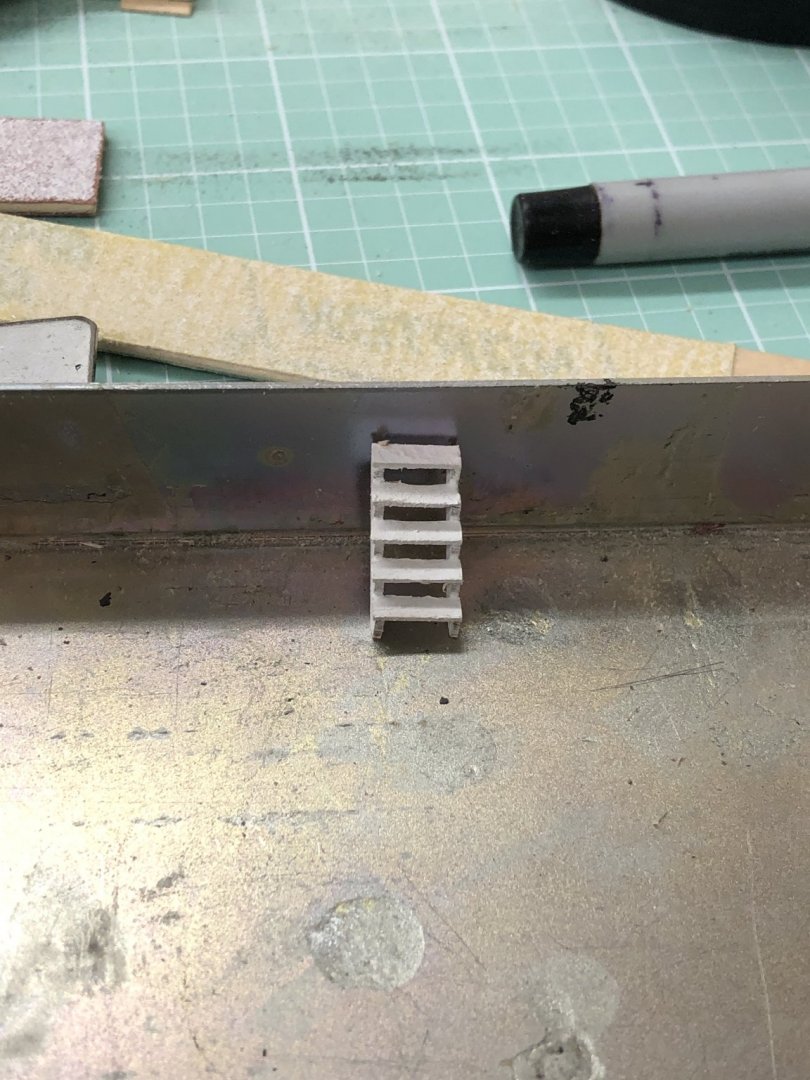
I looked at the Britannia stairs that came with the kit (you are supposed to cut the one set in half to get a set for each side leading up to the Quarterdeck). I was not too impressed and I have never had much luck getting Britannia to take paint well (probably my lack of proper preparation). So while I was getting the plywood for Plan B for the Bulwarks (Northeastern Scale Lumber) I got some HO scale (1/87) stair treads. They turn out to be close enough for me to at least try to assemble a set. So here are the treads set up in my "deck furniture" fixture. The treads are hull planking thinned down to .020" which is still probably too thick (~ 2" at scale) but any thinner and it is difficult to get it through the thickness sander without breaking.

- 166 replies
-
- 3
-
-
- fannie a gorham
- finished
- (and 1 more)
-
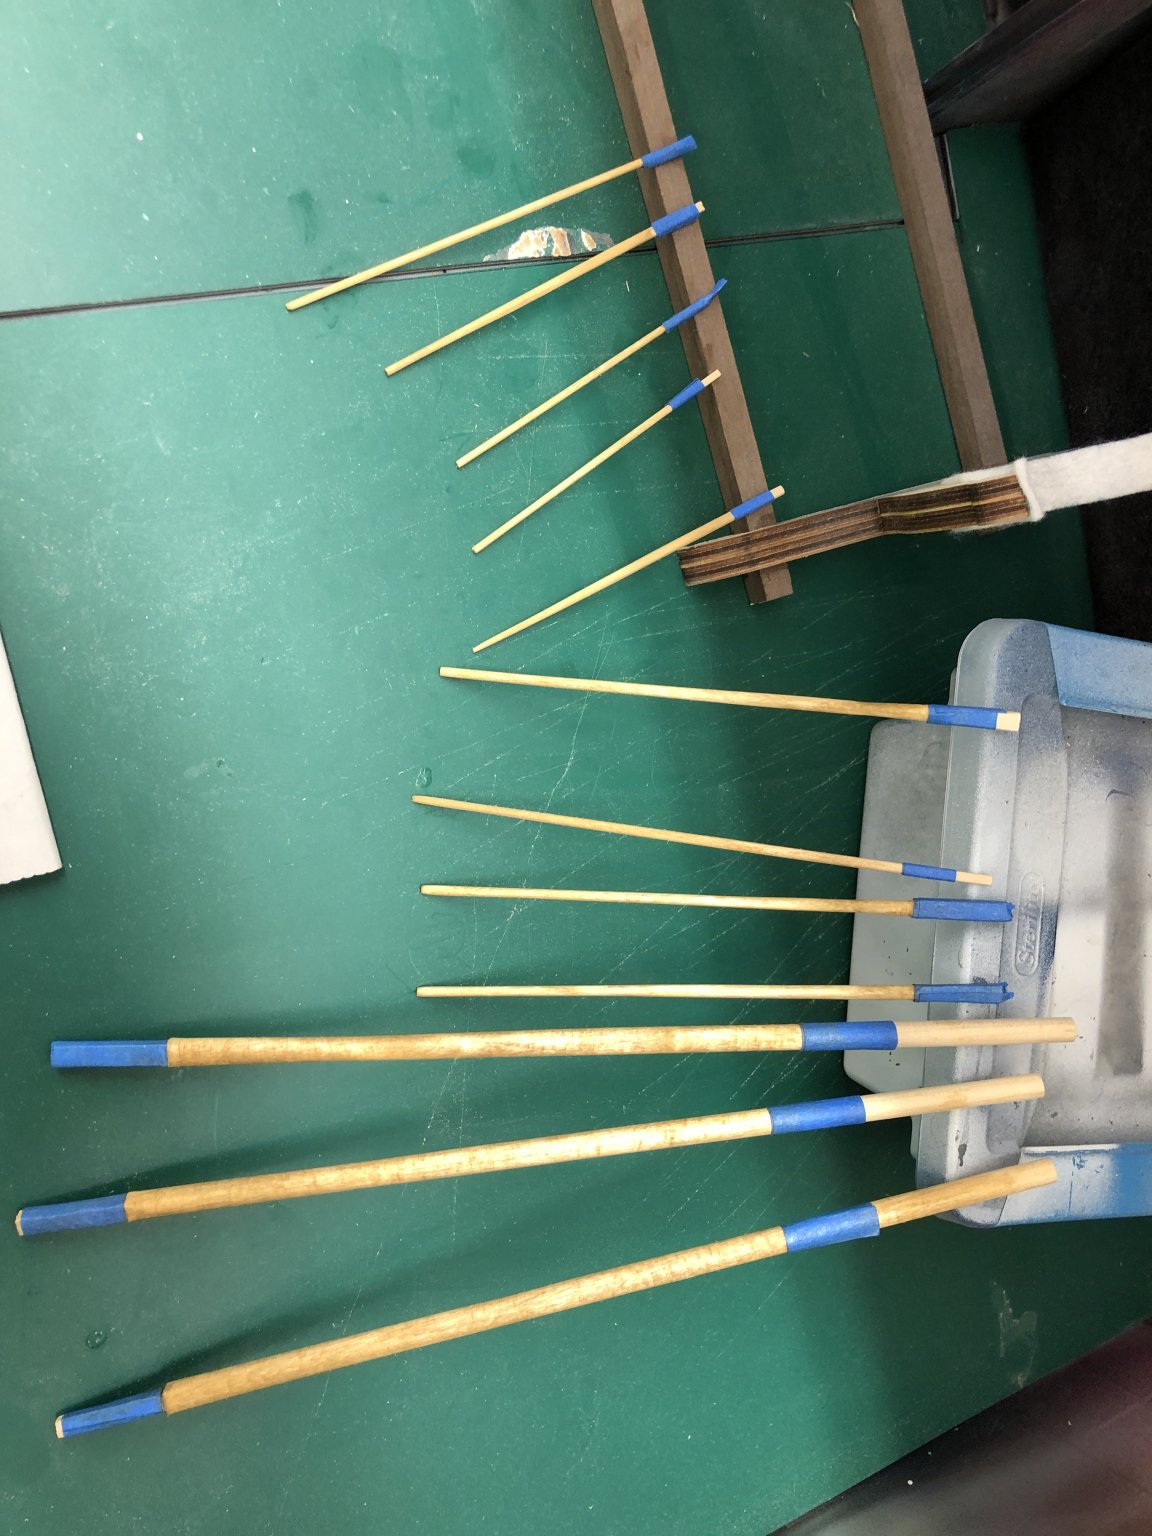
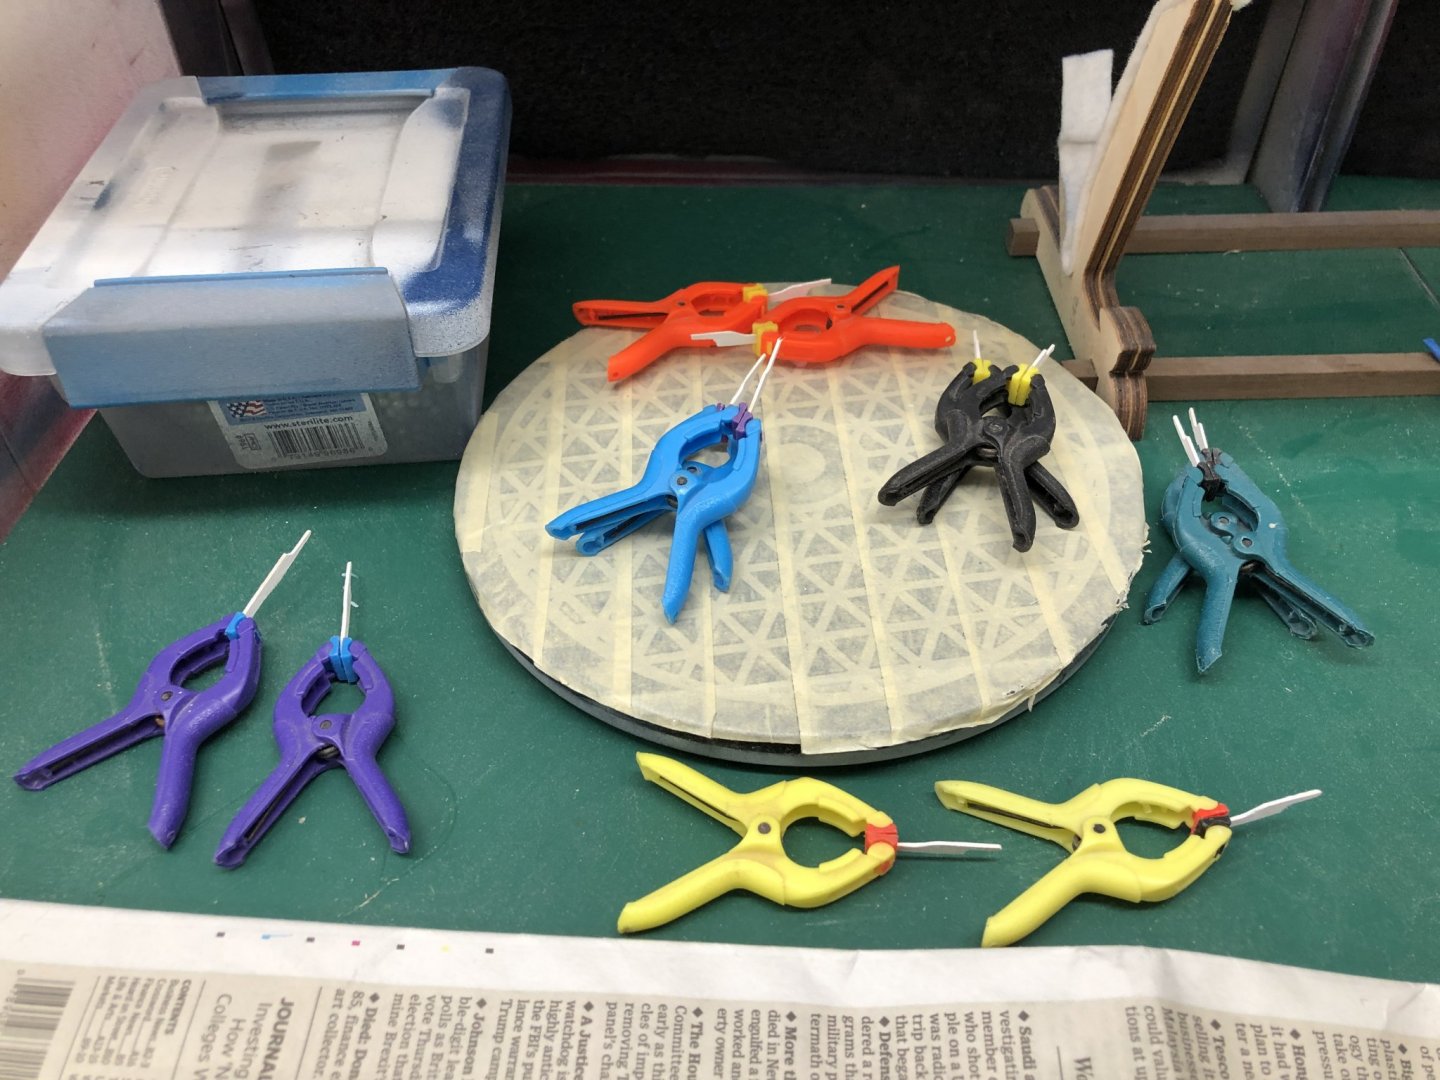
After a somewhat fruitless search of my inventory of stains I finally found the Fruitwood (Min-Wax) that i decided tom use for spars. I also painted the six sets of jaws for the booms and gaffs. I will assemble the jaws/booms-gaffs and then paint the white parts of the booms and gaffs. I am on the fence about the parrels. My preference would be to rig them as I assemble the booms/gaffs and then remember to get them on the masts BEFORE the masts go onboard. That would be the easy way (as long as you remember). I am considering adding silkspan sails (furled) as I did on by B.J. Latham kit. That means essentially putting the boom/gaff/sail "assembly" on board as the lower masts are installed. Time (and two subsequent ship models) has dimmed my memory of that process so at the moment it is a desire rather than a "going to do". I have to remember to look for the frame I used on the Latham, it should be plenty big for these three sails. So here are the spars and jaws drying. They were hand painted, too small to go to the trouble to break out the air brush. The stain isn't as blotchy as it looks in the picture. I think the light is reflecting off the still wet stain causing that look.

- 166 replies
-
- 2
-
-
- fannie a gorham
- finished
- (and 1 more)
-
I got the gaffs finished so next stop is the stain and paint desk.
- 166 replies
-
- 1
-
-
- fannie a gorham
- finished
- (and 1 more)
-
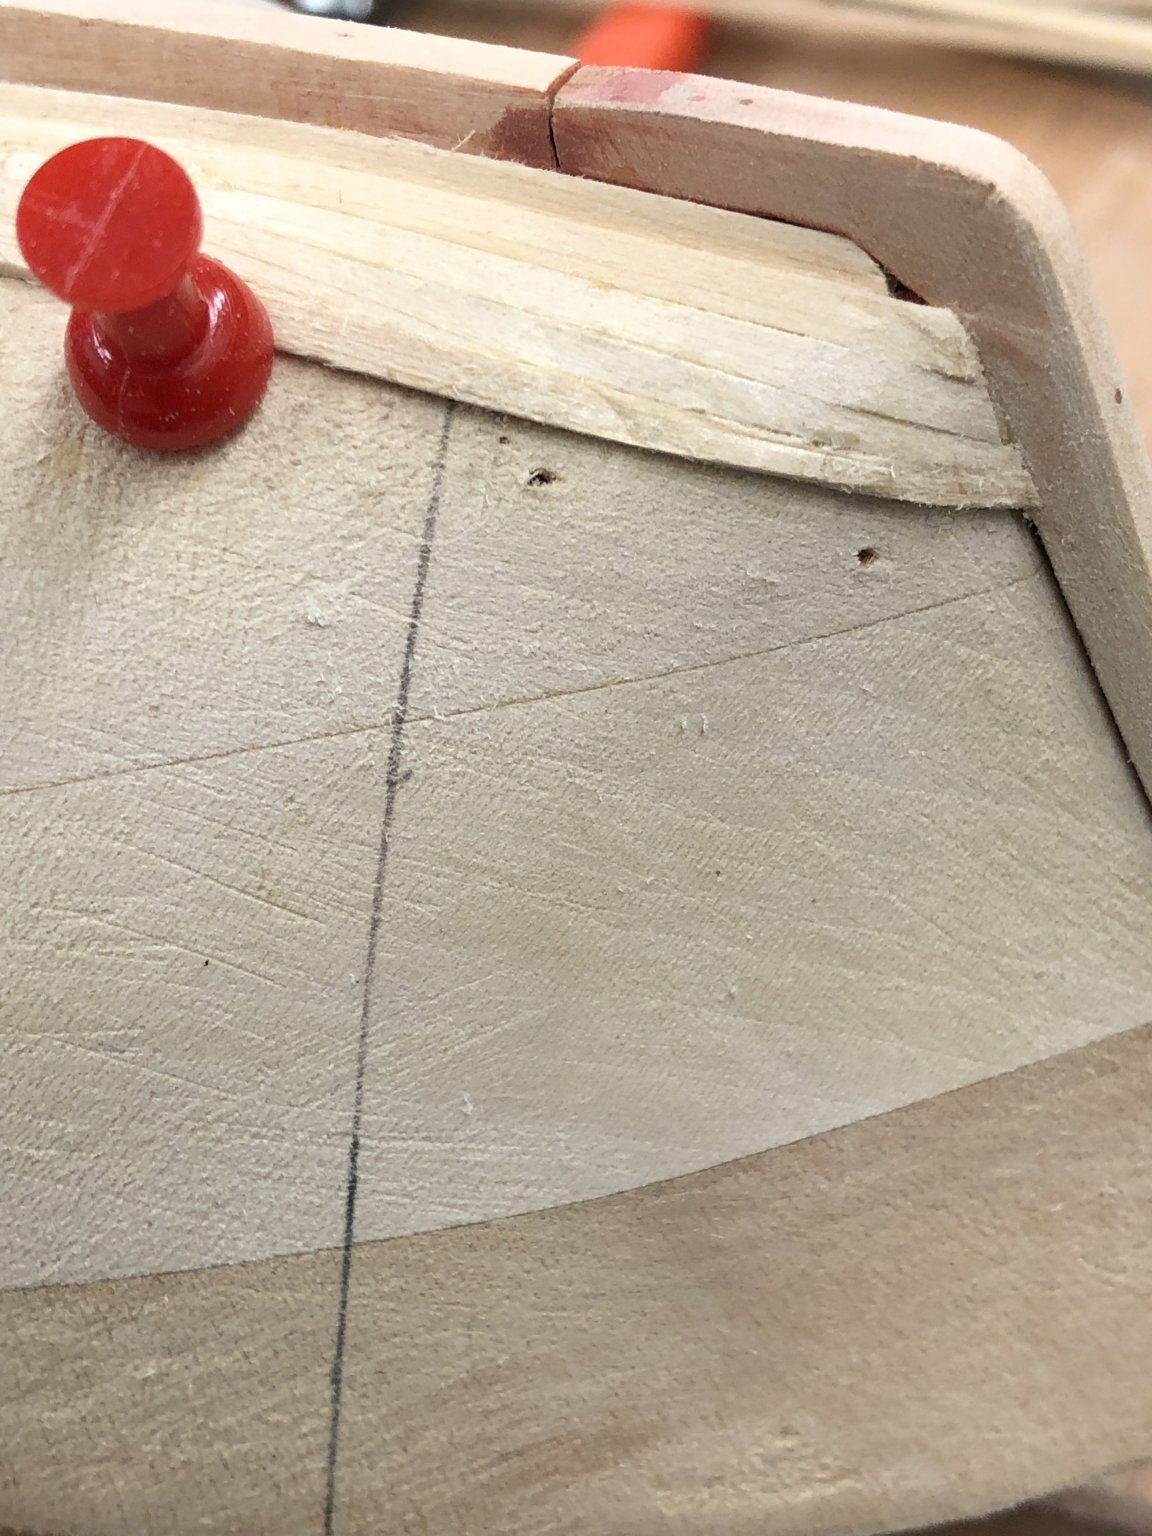
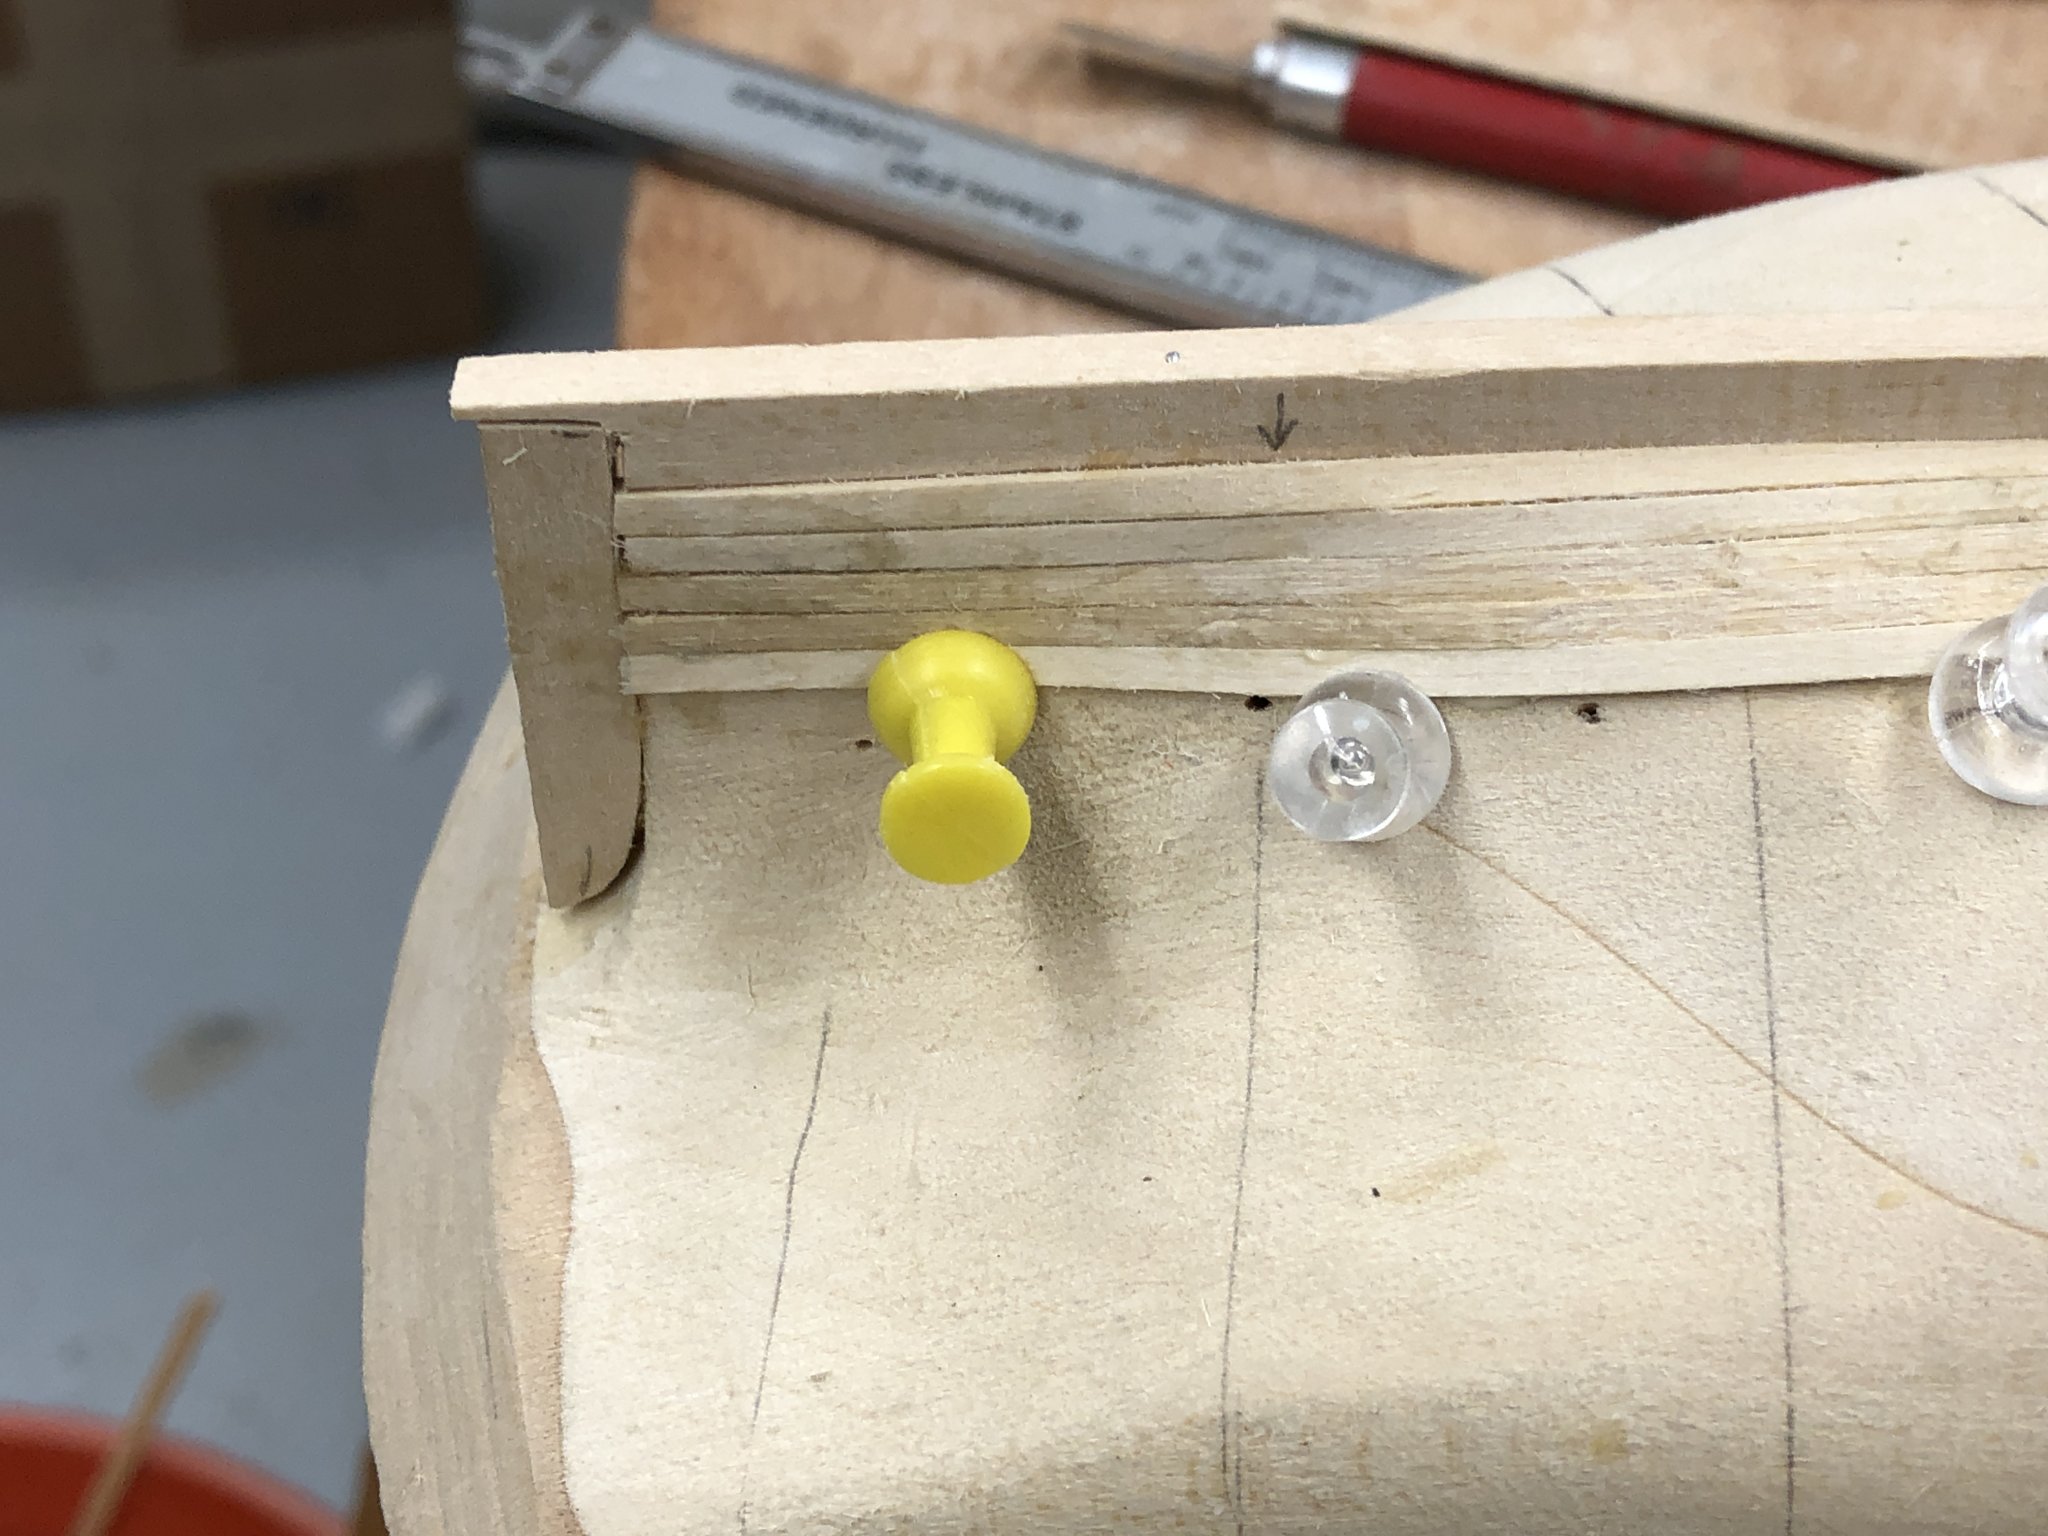
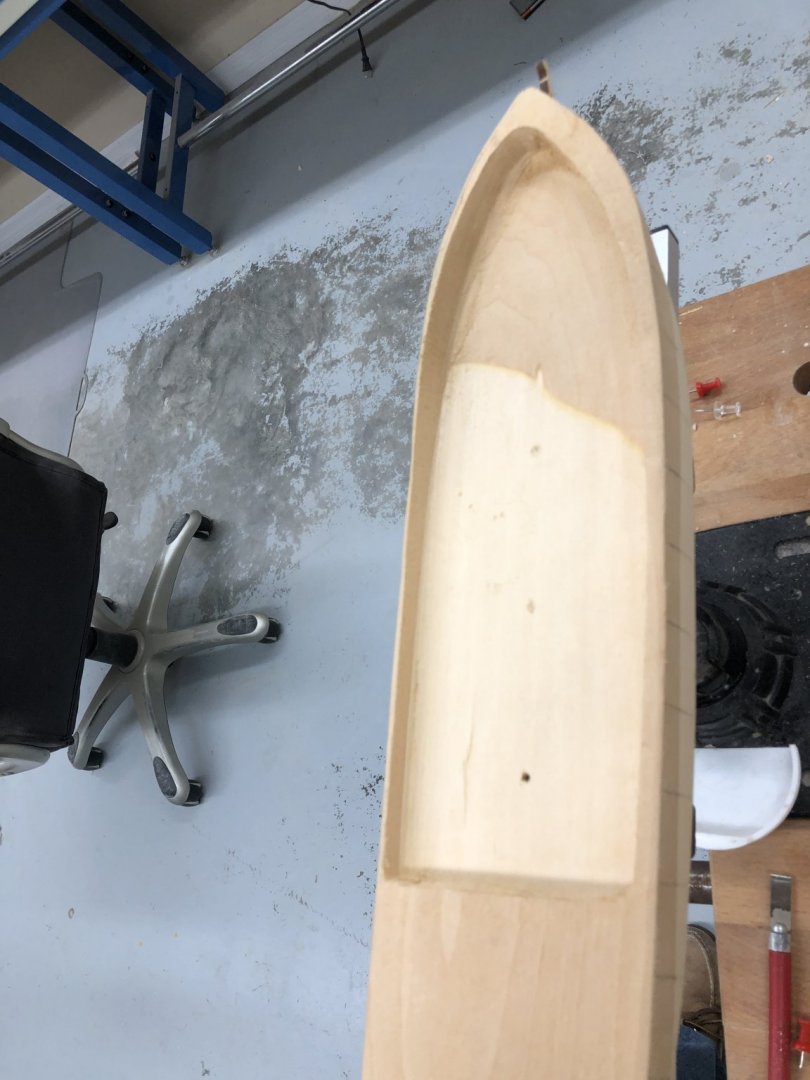
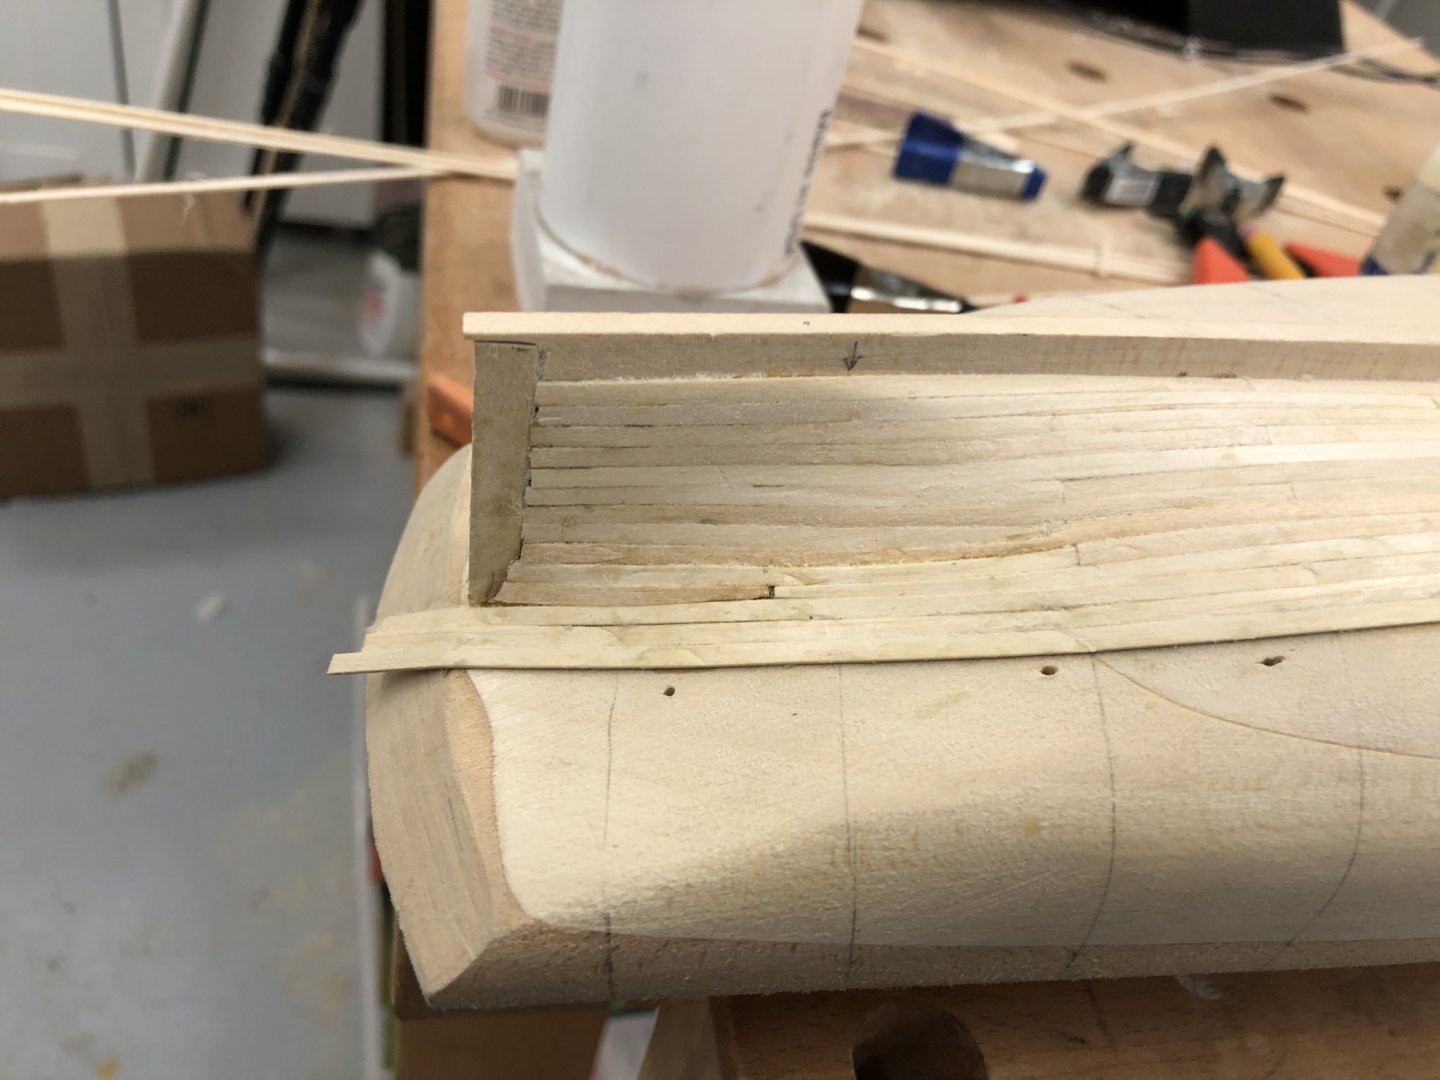
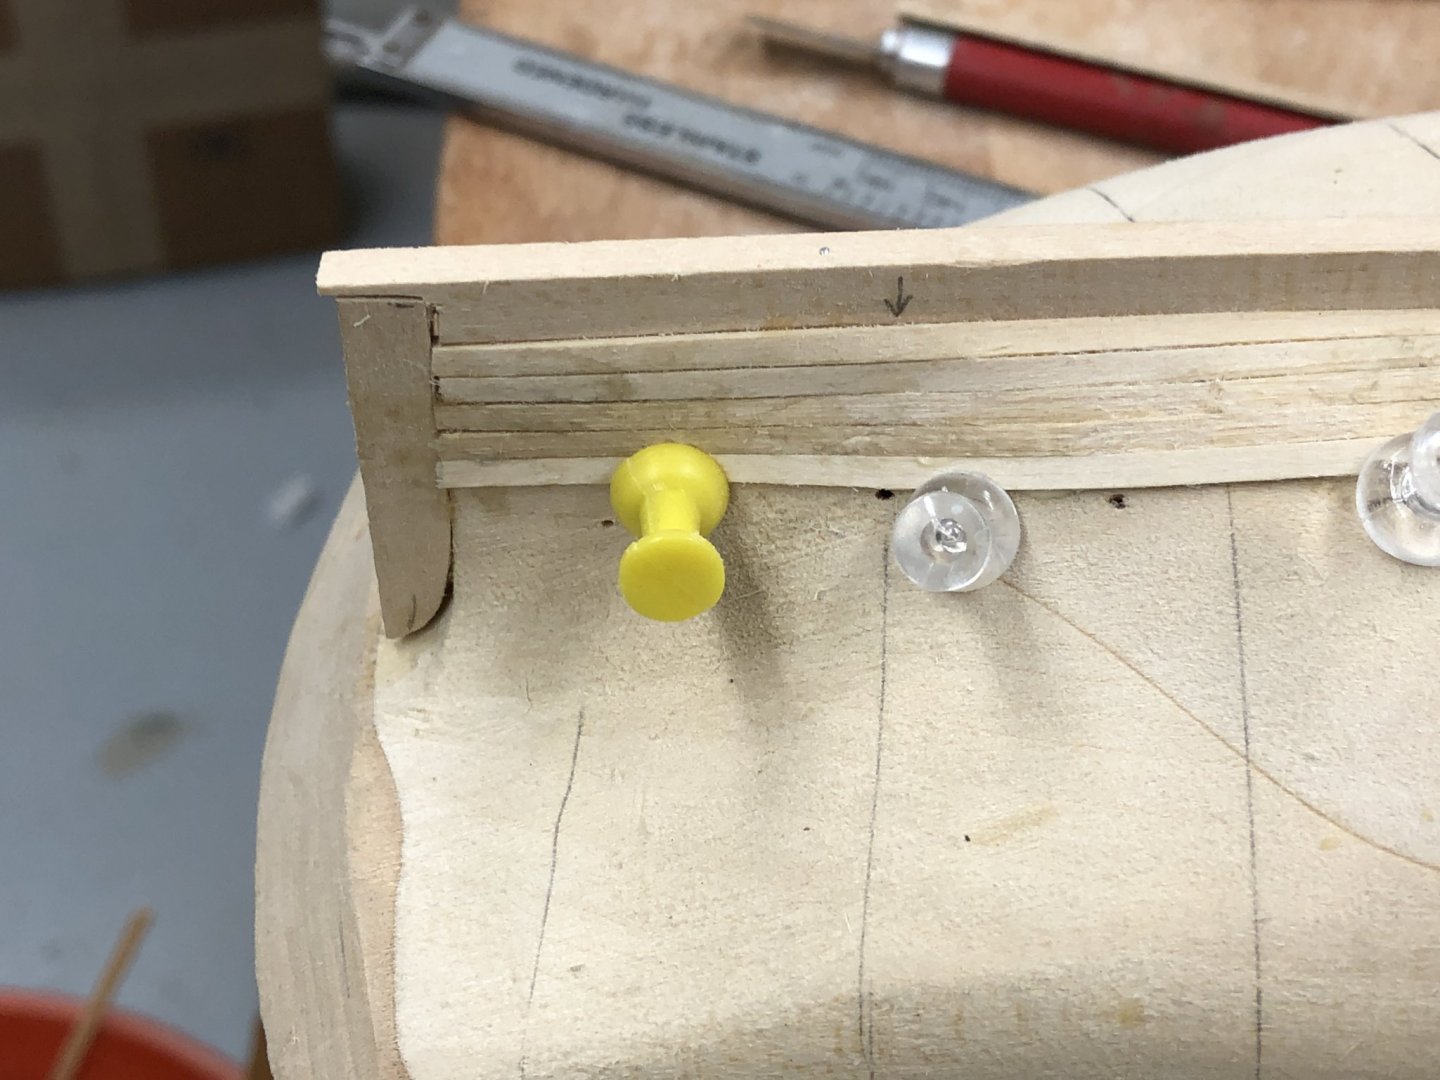
I got tired of planking so I decided to see if I could thin the bulwarks down to something acceptable. Part of the rationale for this is my concern that the planking is going to require some "finesse" and it would be better if that was executed somewhere other than at the bulwarks for all to see. Much better (IMHO) to have that occur in some less obvious place. To start planking at the bulwarks so the two bands can "meet in the middle" I need to decide how to handle the bulwarks, at least for the port side although doing something different on each side is a last resort if something really ugly were to happen. So I started with the Dremel sanding drum and Xacto knife and got the "easy part" (where it is relatively straight down to an 1/8". I decided not to go any further in that area as at 1/16" it would be relatively easy to break a piece off with an unfortunate movement. I will take another crack at the bow area, where the material is still quite thick tomorrow and then start planking from the bulwarks down.
- 166 replies
-
- 2
-
-
- fannie a gorham
- finished
- (and 1 more)
-
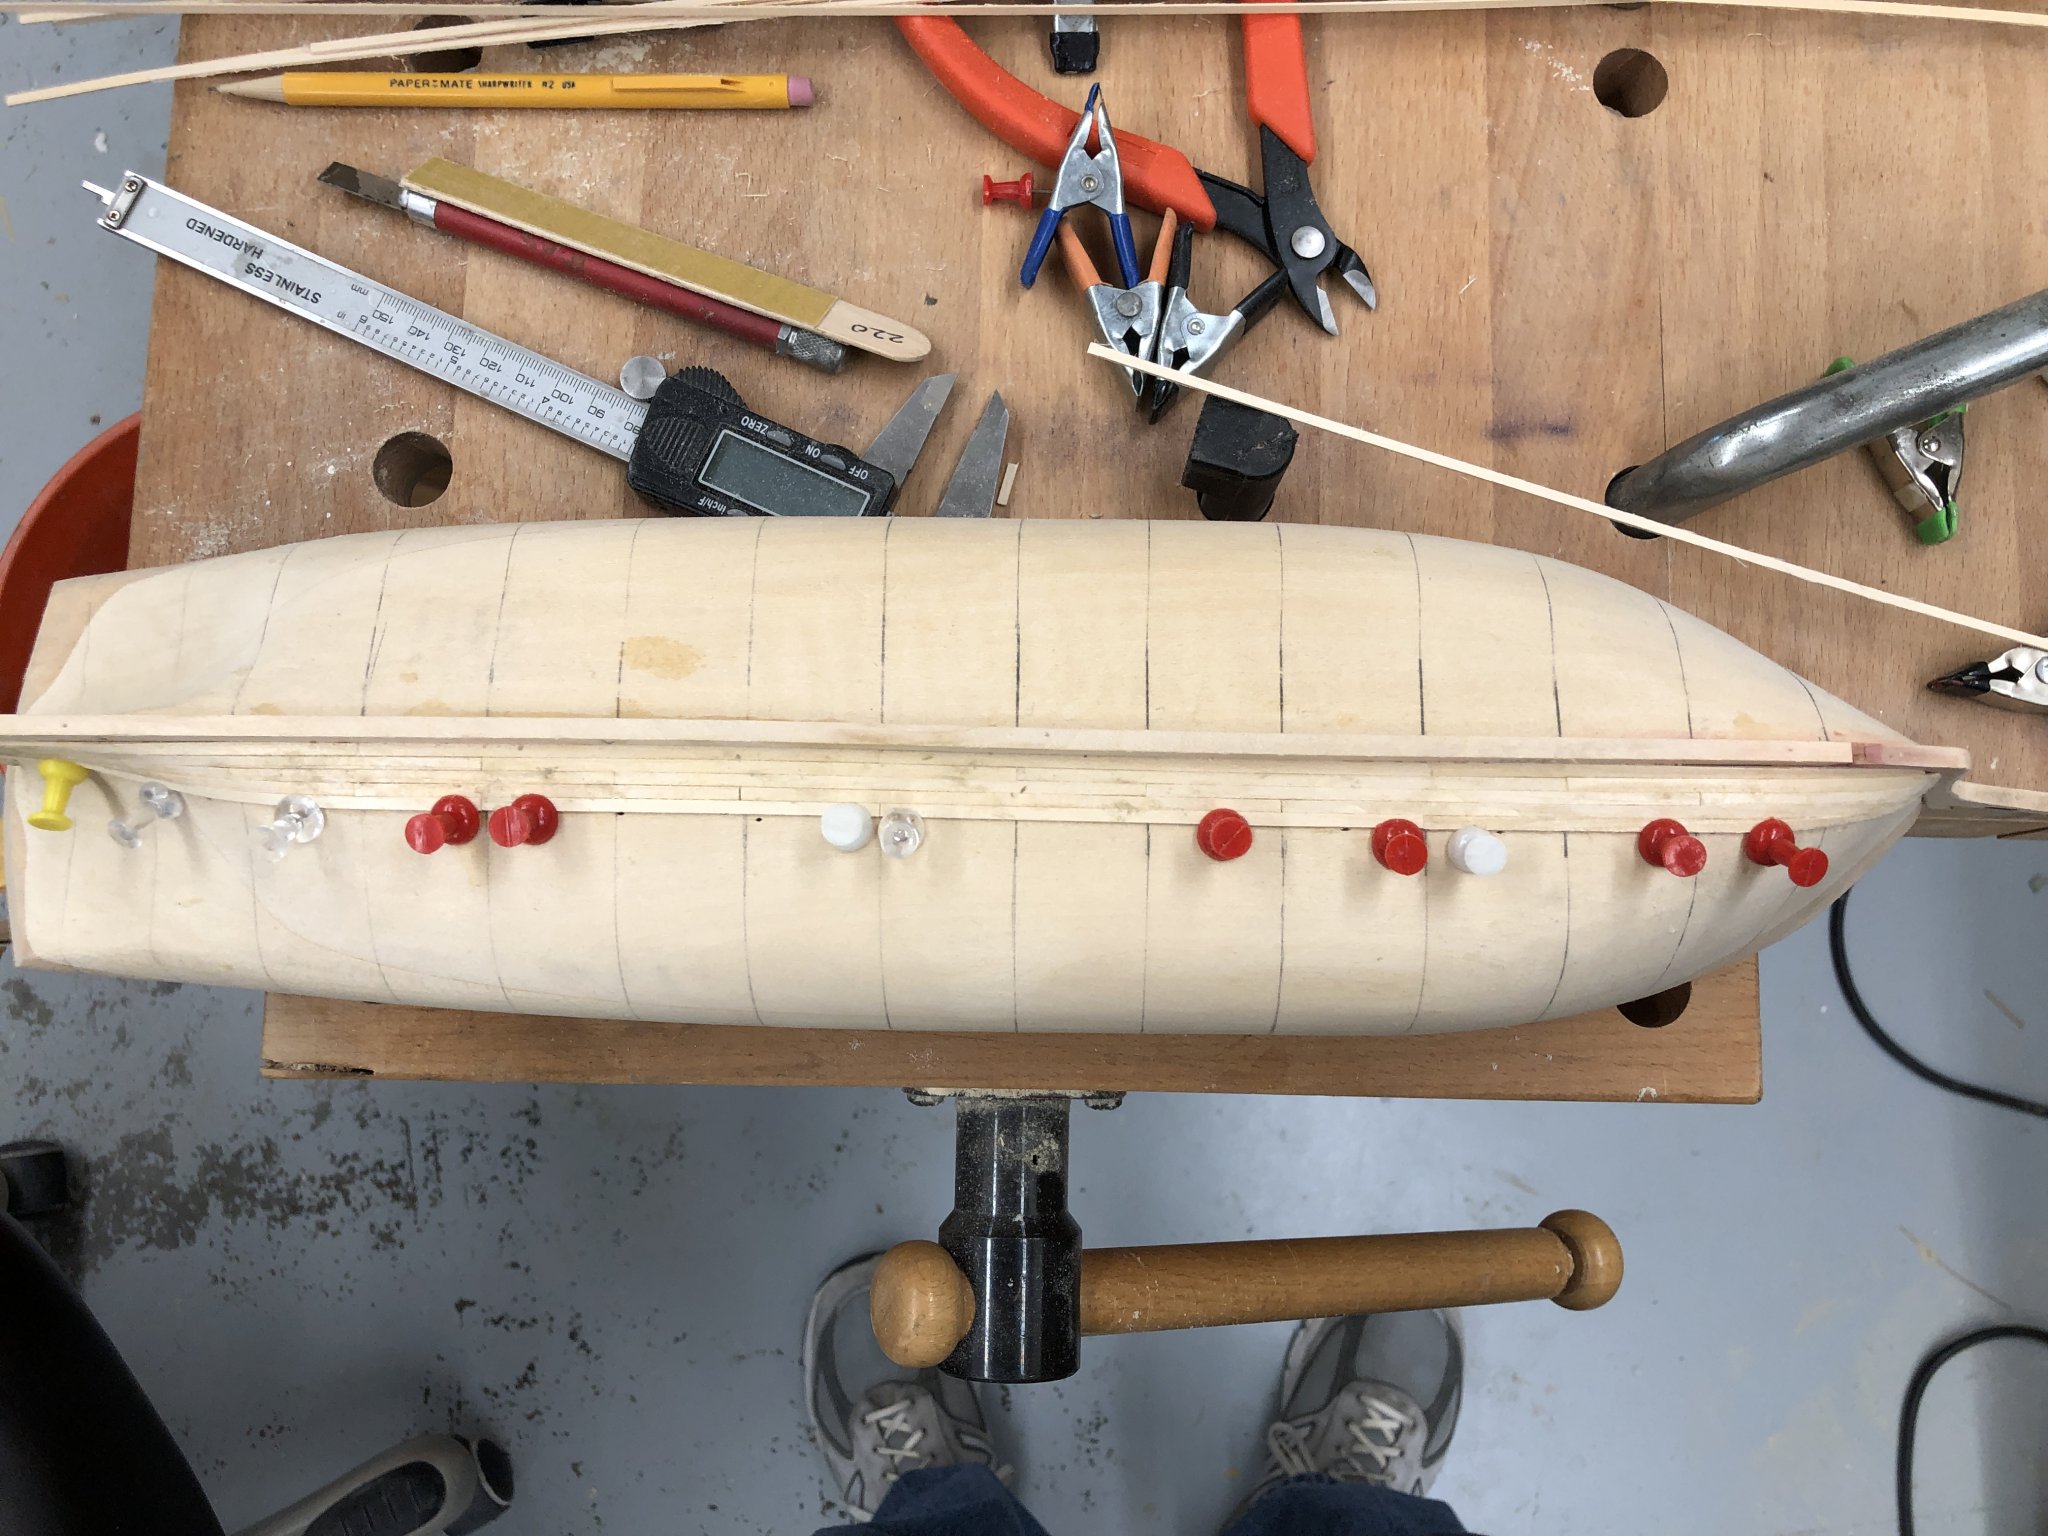
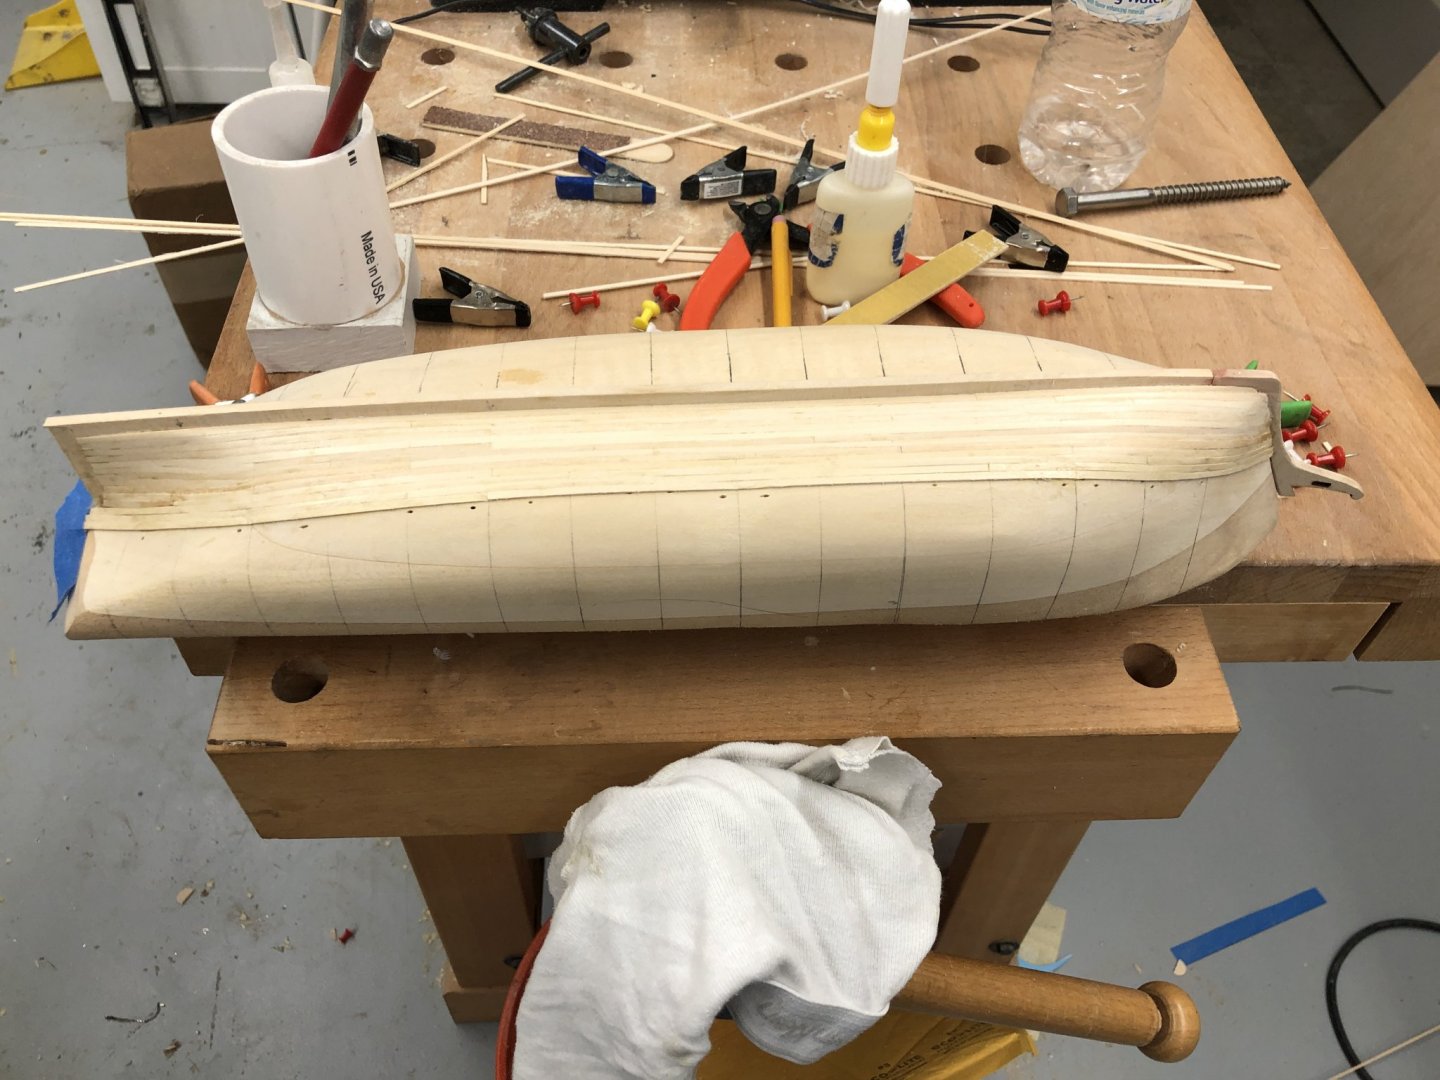
Got 13 rows of planking done and here is what it looks like. I am taking a "wait and see" approach to planking. I have been tapering the planks at the bow and added one stealer (not very elegantly) at the stern but beyond that have just been laying one row after another. At the moment it doesn't look like "disaster is around the corner" but with planking you never know. Anyway here is what it looks like at this point. I also managed to get the main and Fore booms fabed. On to the gaffs now.


- 166 replies
-
- 4
-
-
- fannie a gorham
- finished
- (and 1 more)
-
Between rows of planking I got the Mizzen boom and boom jaws fabed. Waiting until I have all the spars fabed before I stain them. Will give all the spars a final finish sand with 220/320 grit before staining. Plan on using Min-Wax "Natural" as the stain.
- 166 replies
-
- 1
-
-
- fannie a gorham
- finished
- (and 1 more)
-
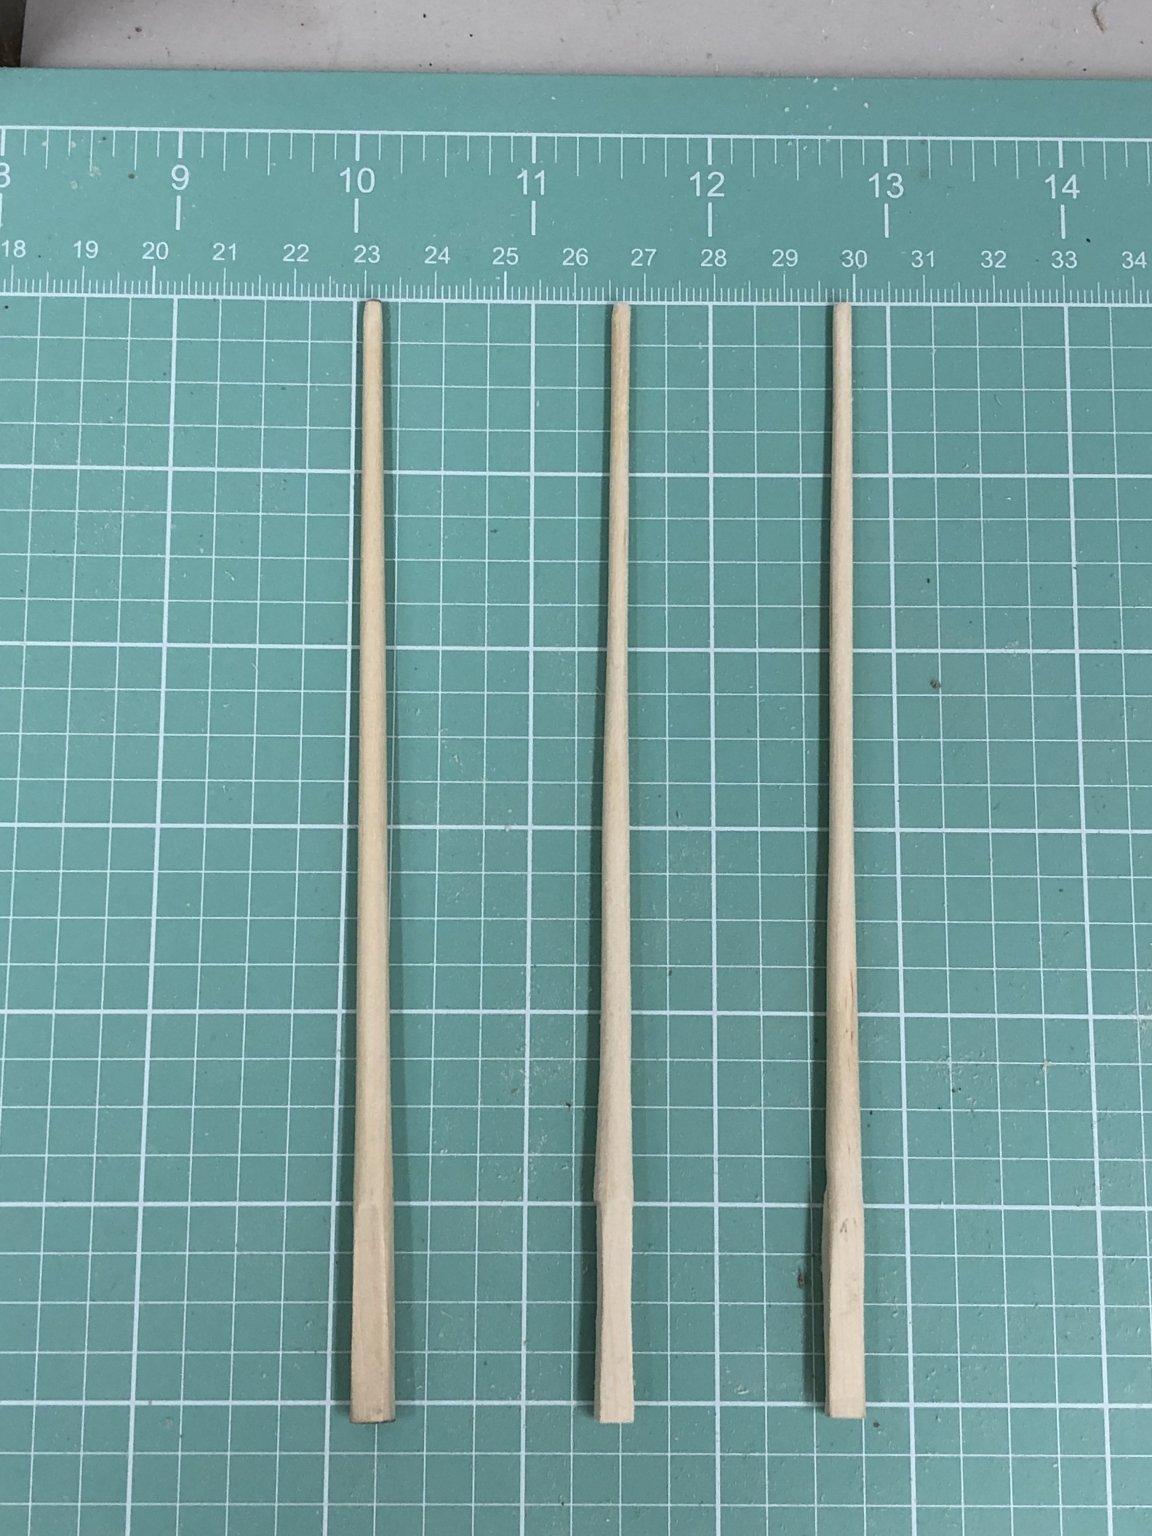
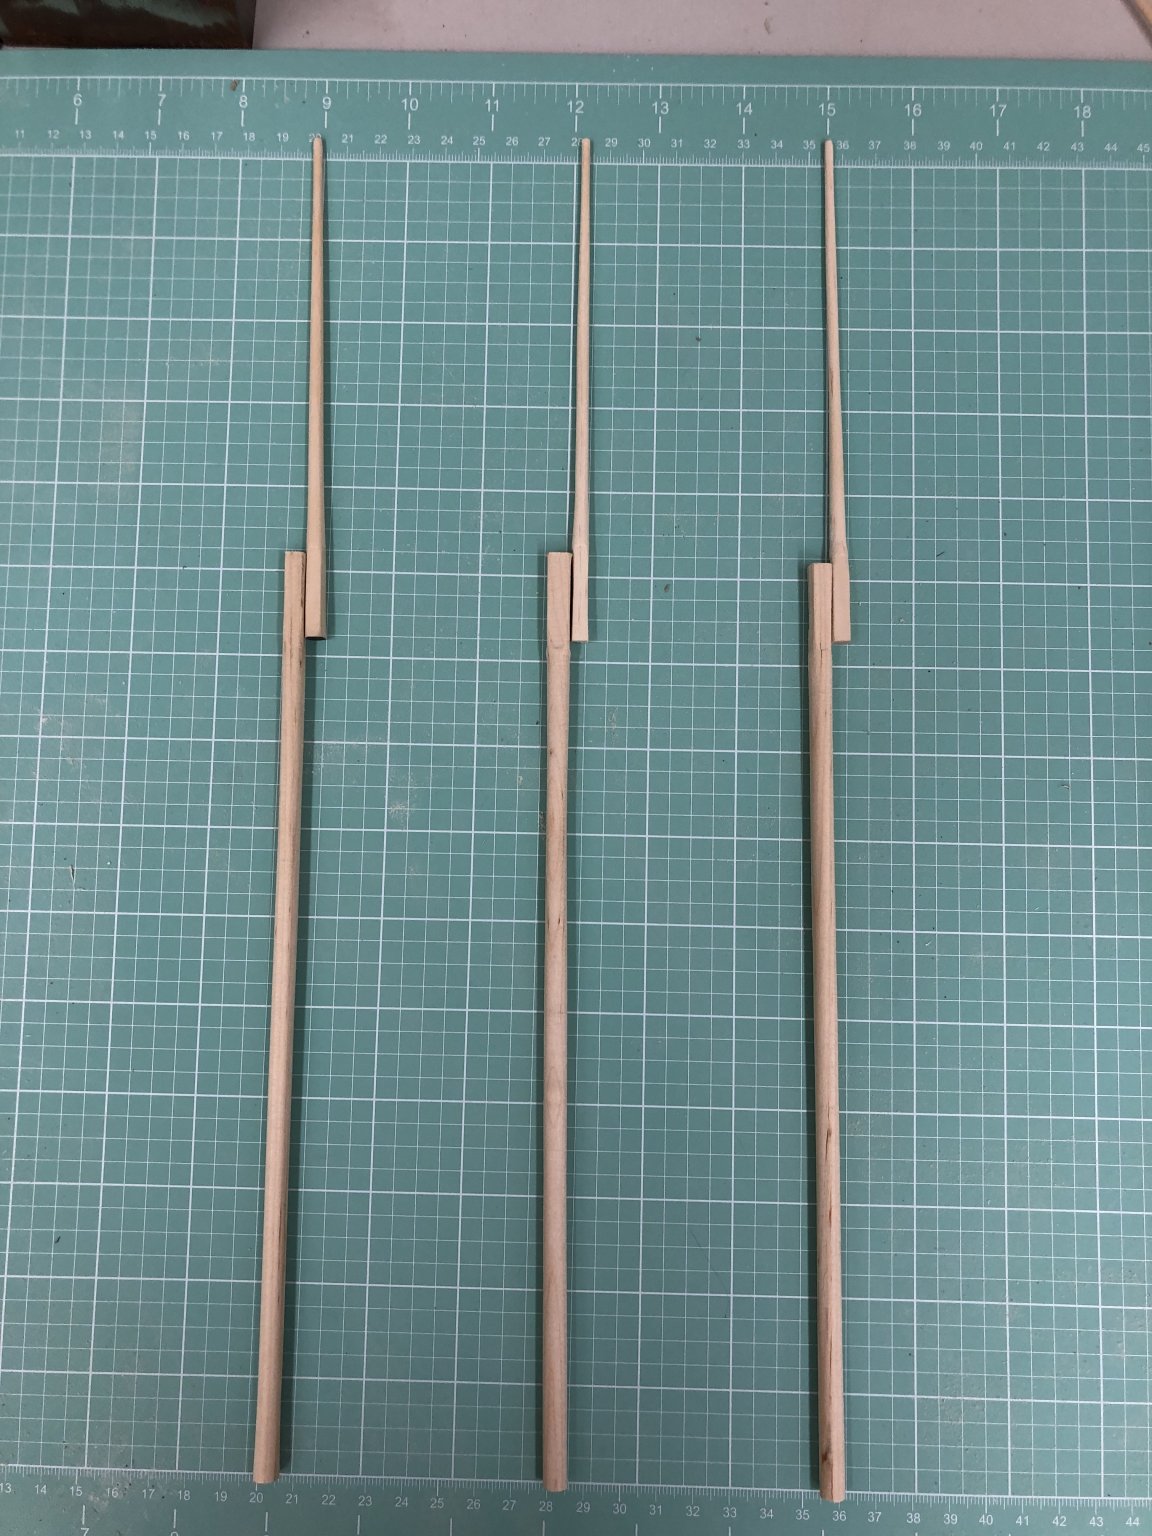
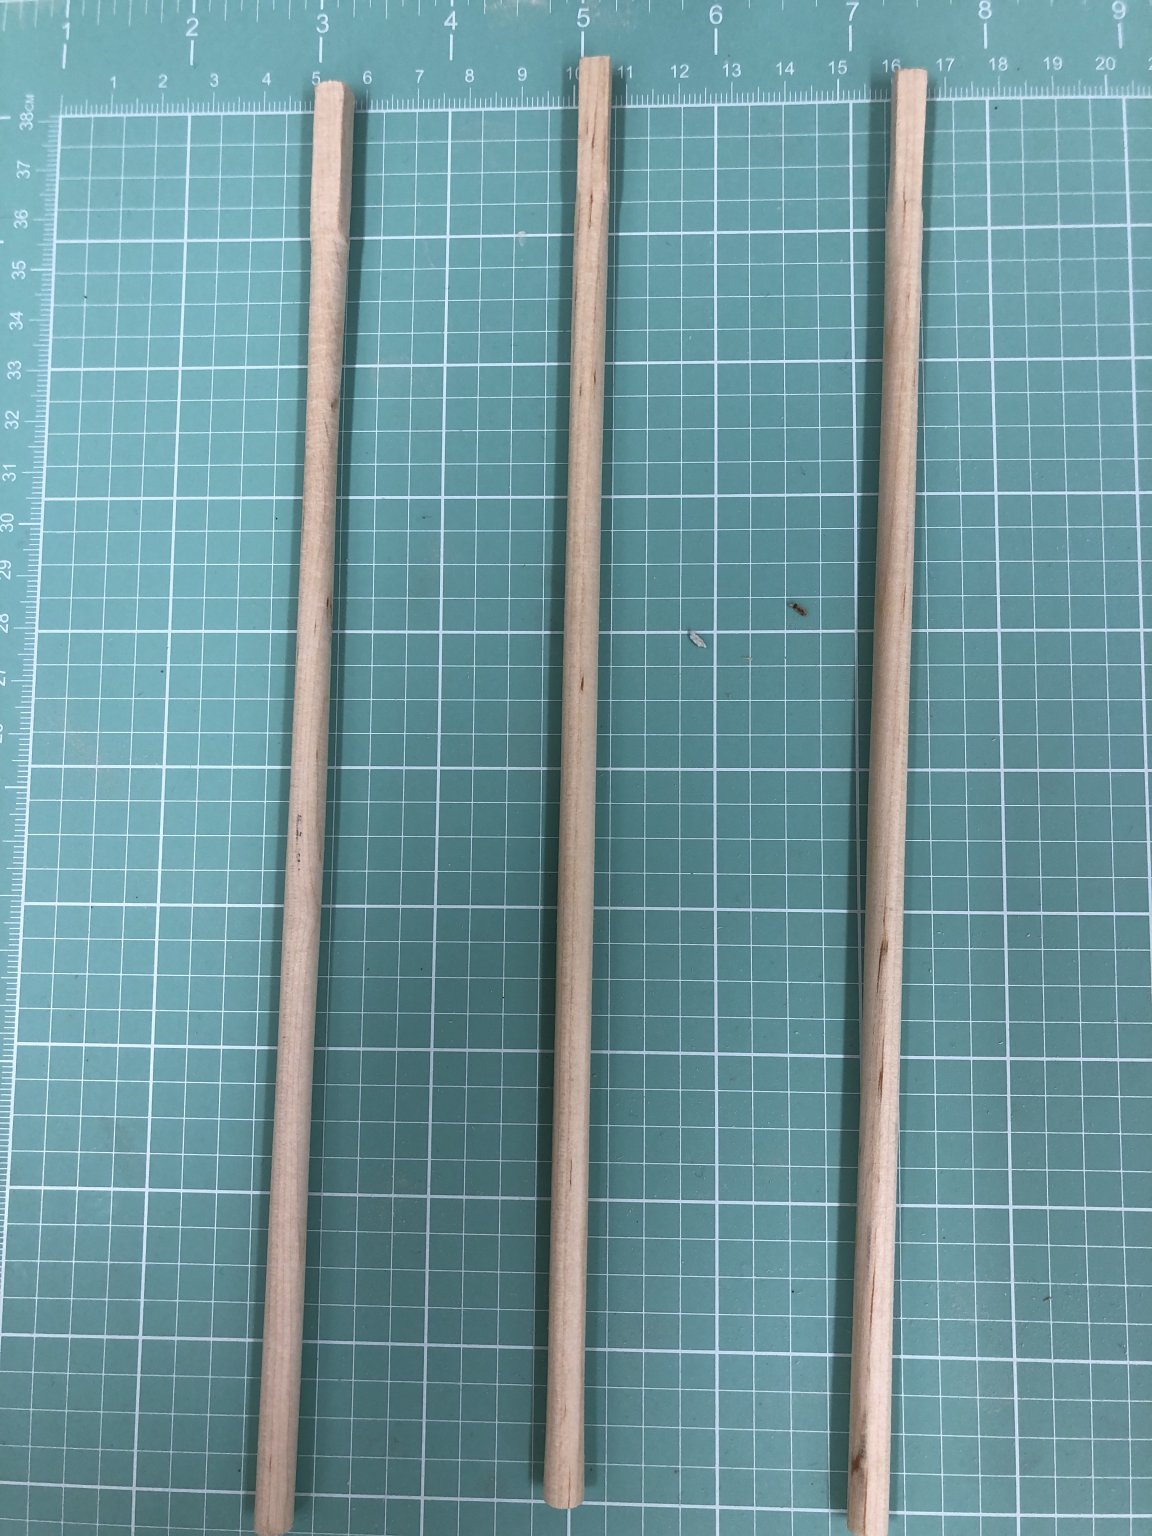
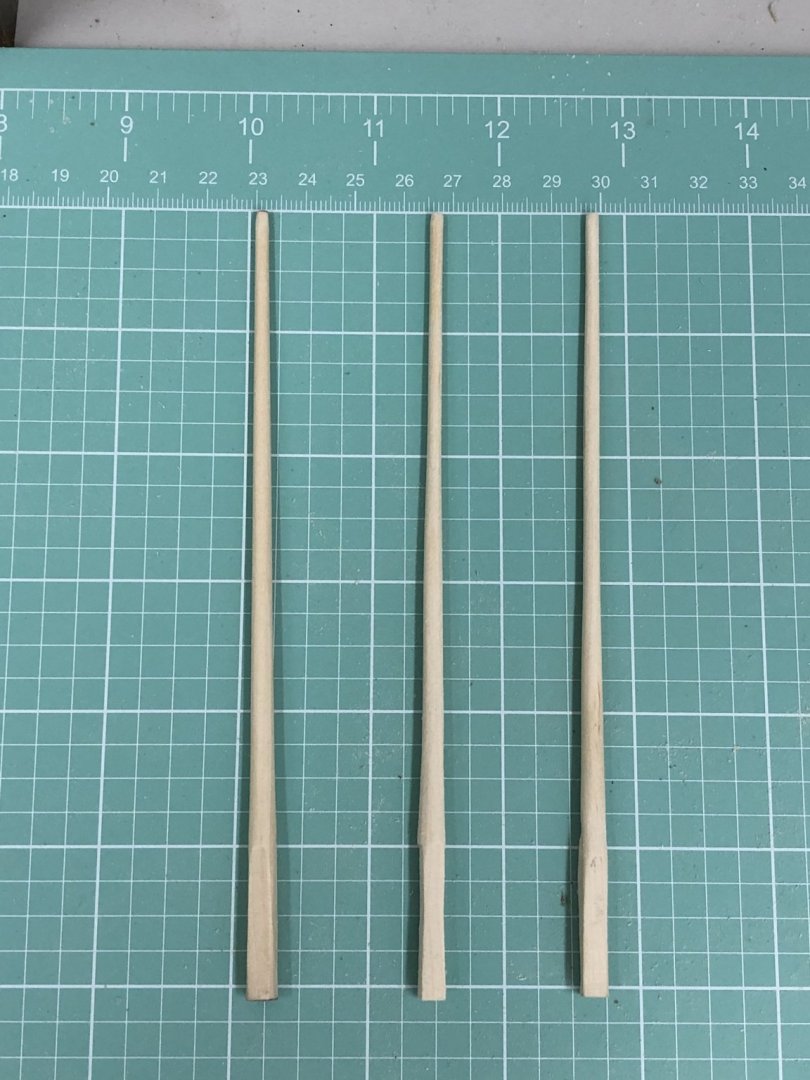
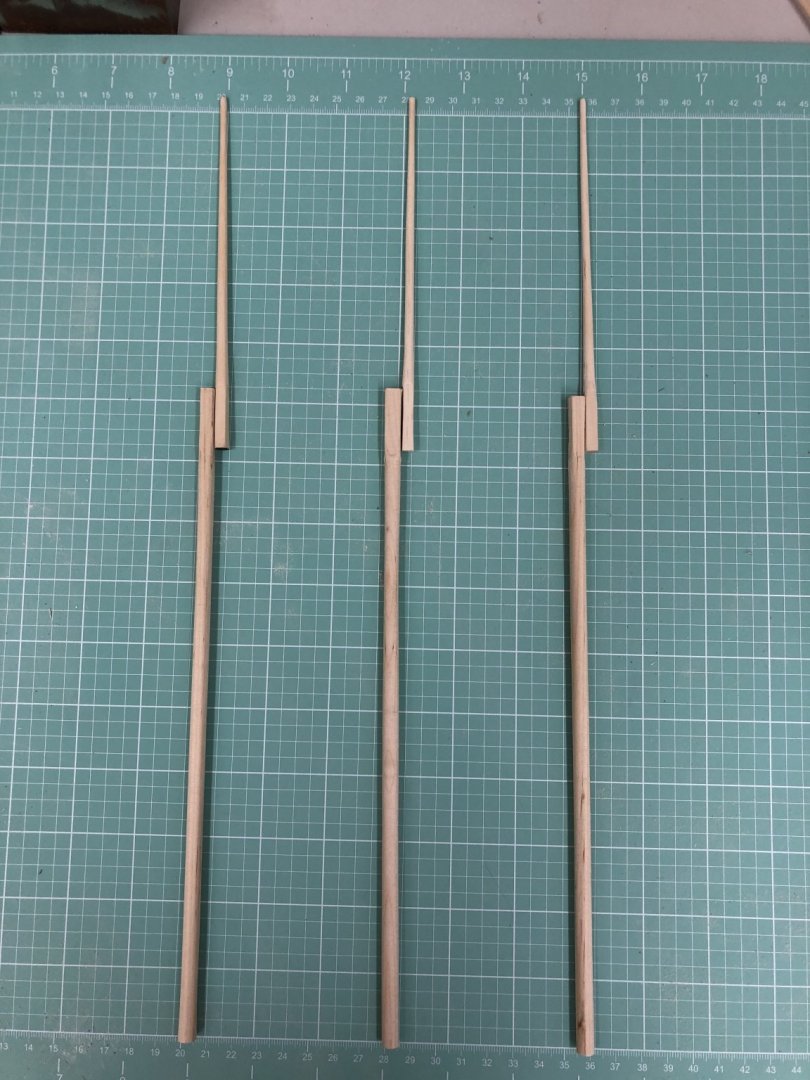
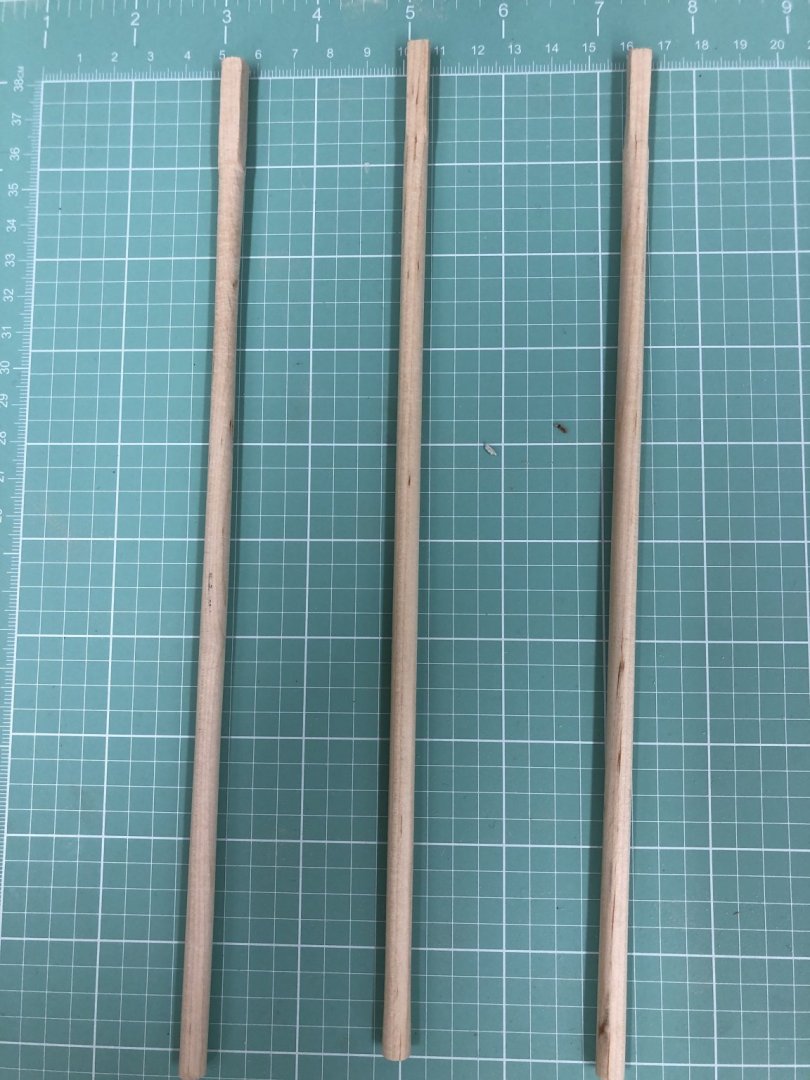
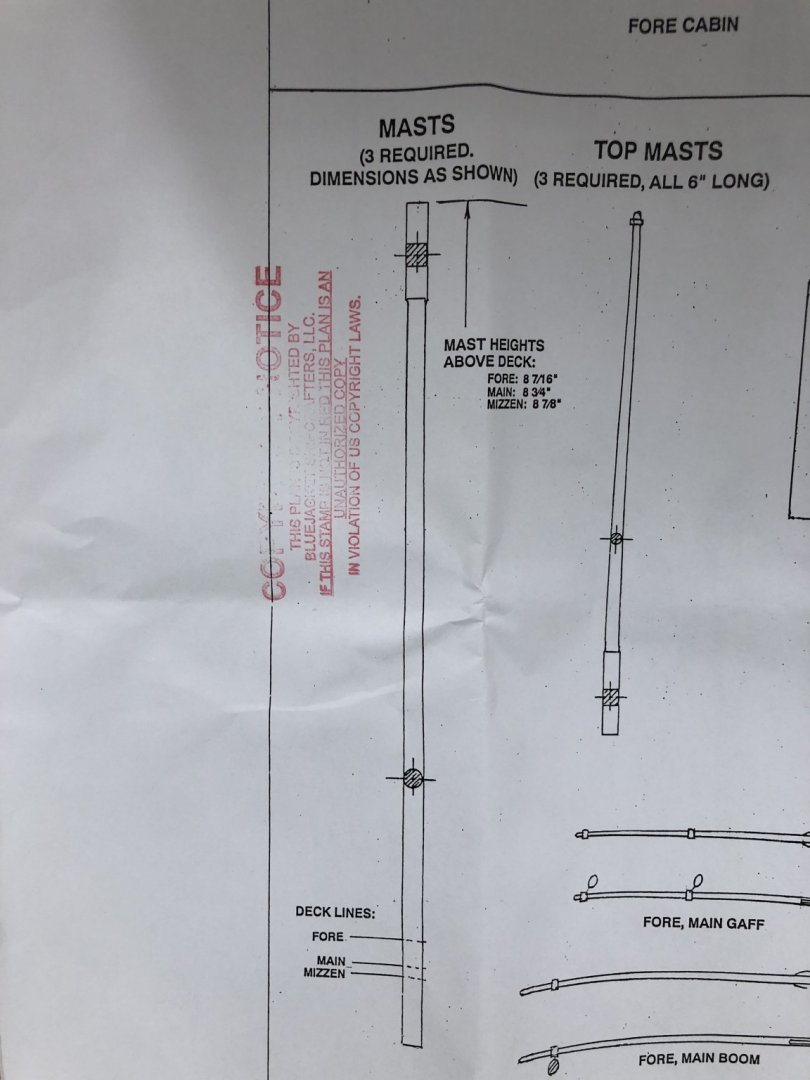
After determining that the kit provided topmast dowels were a size too small to match the drawings I used the kit's lower mast dowels to make the top masts. It meant removing a good deal of material since the provided lower mast dowels were 1/4"" (0.25") and the topmasts taper to ~ 0.1". First I had to square off one end to get one inch of 3/16" square section then taper down to about 0.1" in the five remaining inches of the topmast. Since the topmast tapers to such a small dimension I was about to use my drill press for only about half of the tapering. The rest had to be done by hand to avoid breakage. Luckily I got all three completed the first time. Here are the three topmasts and then the tree sets of masts.
- 166 replies
-
- 2
-
-
- fannie a gorham
- finished
- (and 1 more)
-
Got five rows of planking on one side. Plan is to complete the planking up to just below the bulwarks - then either thin out the bulwarks or cut them off and install the timberheads with the 1/16" plywood bulwarks extending over the hull by 1/32" to meet with the planking below. No problem, right? Hmmmm. So her is what five rows looks like. Push pins come in very handy!


- 166 replies
-
- 3
-
-
- fannie a gorham
- finished
- (and 1 more)
-
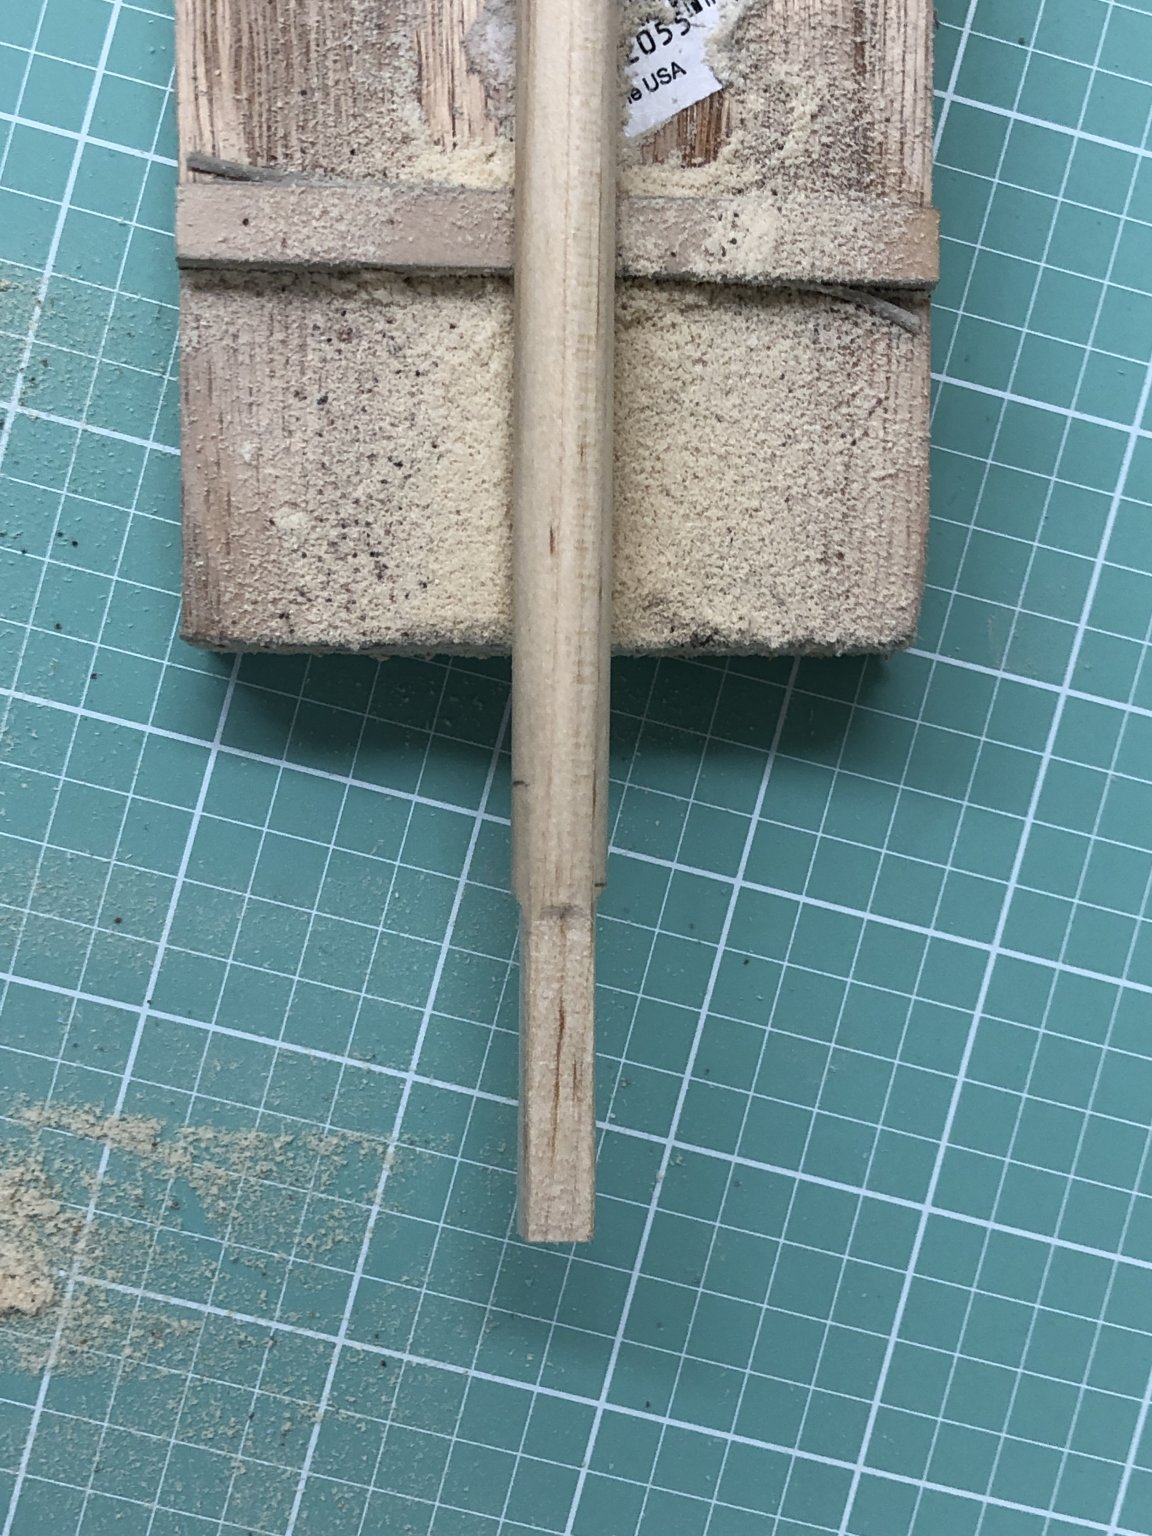
Between rows of planking I fabricated the three lower masts from the 5/16" dowel from the Niagara kit. I also confirmed that a similar problem exists with the top masts - i.e. a 3/16" square section on a 3/16" dowel. I this case I will use the 1/4" dowels from this kit to fabricate the top masts. Unlike the lower mast these are tapered. May have to resort to hand sanding as the wood is getting pretty thin to be supported on only one end.
- 166 replies
-
- 2
-
-
- fannie a gorham
- finished
- (and 1 more)
-
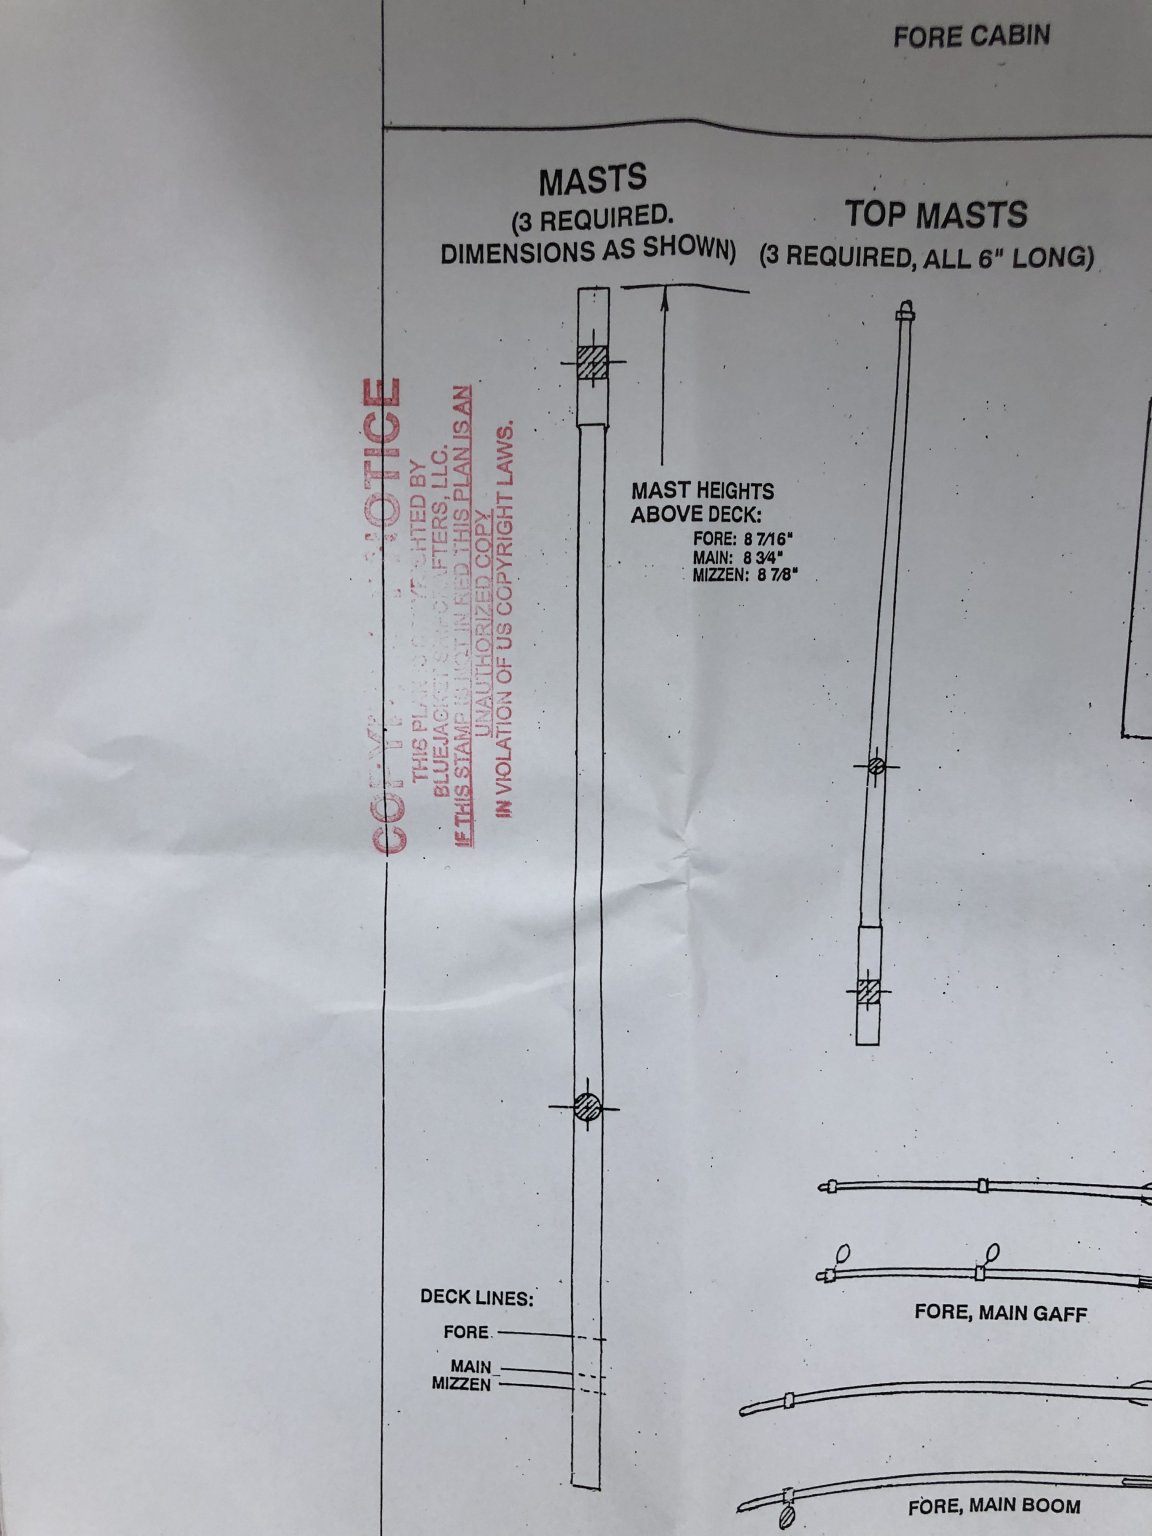
While waiting for glue to dry on the hull planking I started to look at the masts. The kit supplies 1/4" dowels (not particularly straight ones) for the lower masts. But the drawing shows a 1/4" square section about 1" long at the top of each mast where the top mast attaches. I am thinking it is going to be hard to get a 1/4" square section out of a 1/4" dowel. I thought about just cutting 1" sections from the 1/4" X 1/4" piece provided for the bowsprit and joining that to the dowel but could not come up with a satisfactory way to join them that would be strong and easy to get straight. So I looked through my supply of excess material and found 5/16" dowels that I think were part of the Niagara kit (I used Alaskan cedar for the masts on my Niagara). I managed to make a square section on the end and now will hopefully use my poor man's lathe (drill press) to reduce the 5/16" to 1/4". It appears (although I have not done any detailed measurements) that a similar problem may exist for the top masts.

- 166 replies
-
- 2
-
-
- fannie a gorham
- finished
- (and 1 more)
-
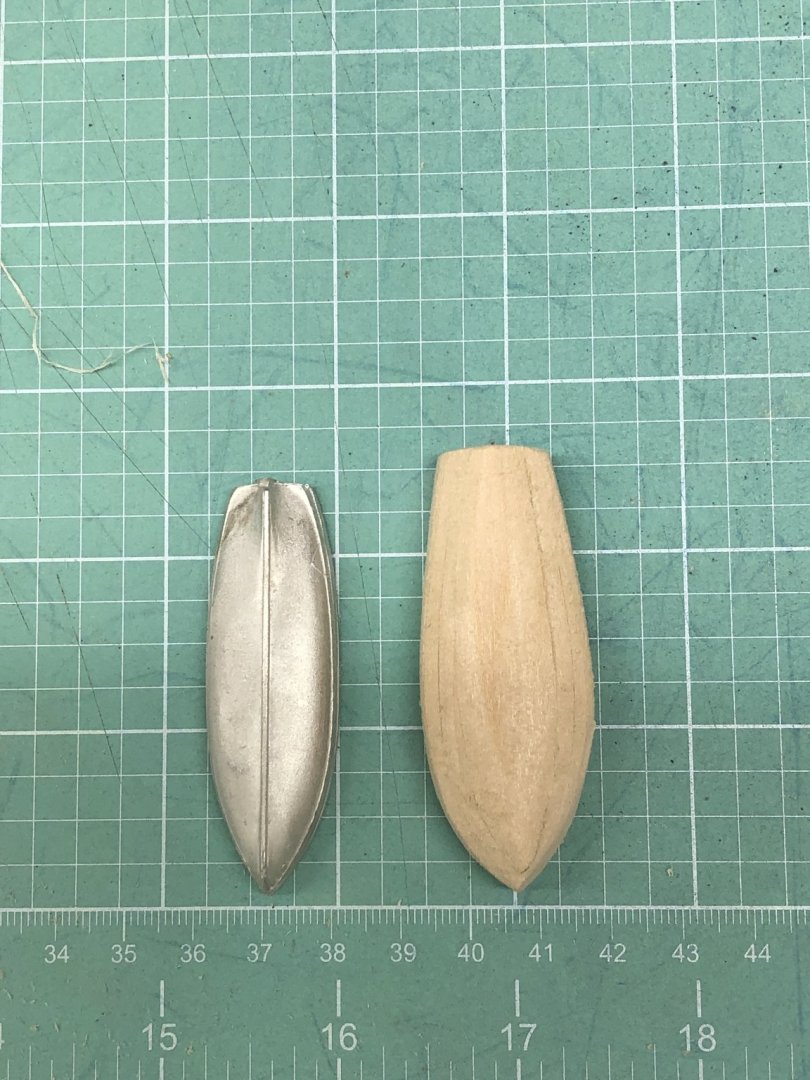
I had previously mentioned that I was not crazy about the metal boat (carried on deck or in davits) that was supplied with them kit. So I looked around and Model Shipways has ship's boat kits in three sizes. I chose the one closest to the size of the metal one, ordered it and put it together. I have decided that it will be stored on deck inverted so I do not have to worry about the interior details (I got my fill of that doing the three boats that are part of the Niagara kit). So here are the two boats side by side (although the M/S boat does not have the keel/stem/stern post yet so it will be a little longer than in the picture. I checked the drawing and there appears to be enough room to still get fore and aft around the somewhat longer boat. I may have to make the main hatch a bit less extensive fore and aft as the additional width of the M/S boat may interfere with the centerboard mechanism. I can't make the m/S boat much narrower without sanding through the shell. Also giving some thought to getting some really thin planks and trying to give it a clinker look.
- 166 replies
-
- 3
-
-
- fannie a gorham
- finished
- (and 1 more)
-
You are certainly welcome Mark. In preparation for planking I had to fix the "notch" in the stern, fashion and attach the stern post, attach the stem piece and the keel. Clearly I "mis-adjusted" the bow in my zeal to match the templates so some wood filler is in order up front. The notch that fits under the rudder is really small. Some putty looks like it might be useful here as well after the planking is done.


- 166 replies
-
- 2
-
-
- fannie a gorham
- finished
- (and 1 more)
-
After a brief panic when I realized that the templates I was using for the hull were from the "reduced" plans sheet I redid them using the hull sections on the "real" drawings (the one that matches the hull perfectly as Nic showed in his post) and actually they showed I had more material to remove. So I did that and believe that subject to one m ore check at the bow I have the hull sanded down to a reasonable match with the plans. I finished off with 400 grit sandpaper and wiped it down with paint thinner. Now it is decision time. To plank or not to plank and remove bulwarks or not. I am leaning to removing the bulwarks if for no other reason that trying to cut out the scuppers without tearing up the bulwarks. If I use 1/16" plywood I will have less fear of splitting the wood trying to make the scuppers (and there are 15 opportunities for disaster on each side). That and removing the bulwarks makes getting the camber on the fore deck much easier.


- 166 replies
-
- 7
-
-
- fannie a gorham
- finished
- (and 1 more)
-
Tim - on my Endeavour sails I used cotton material I bought at Hobby Lobby. On the cardboard "tubes" that the fabric comes on there is a "weight" number - I bought the white fabric with the lowest weight number (about 200 if I remember correctly). I "painted" one side with 50/50 white glue (Elmer's)/water after stretching it on a wooden frame. If you want sails a different color (like tan) I would add some acrylic paint to the glue/water mix (although I have not tried this - coloring silkspan with acrylic paint/water mix works fine). Even thin fabric is out of scale but at 1/35 it looks a whole lot better than at 1/96. I used Syren .018 tan line for the bolt rope but I enclosed the rope in a 3/8" wide fold of fabric at the edge. If the bolt rope has to be visible I would use matt media (Michael's) or white glue to attach it. My experience with silkspan was for sails that were furled (see below) and it works great in that application as almost any fabric is going to be too bulky to look realistic if furled.
- 90 replies
-
- 3
-
-
- finished
- Midwest Products
- (and 1 more)
-
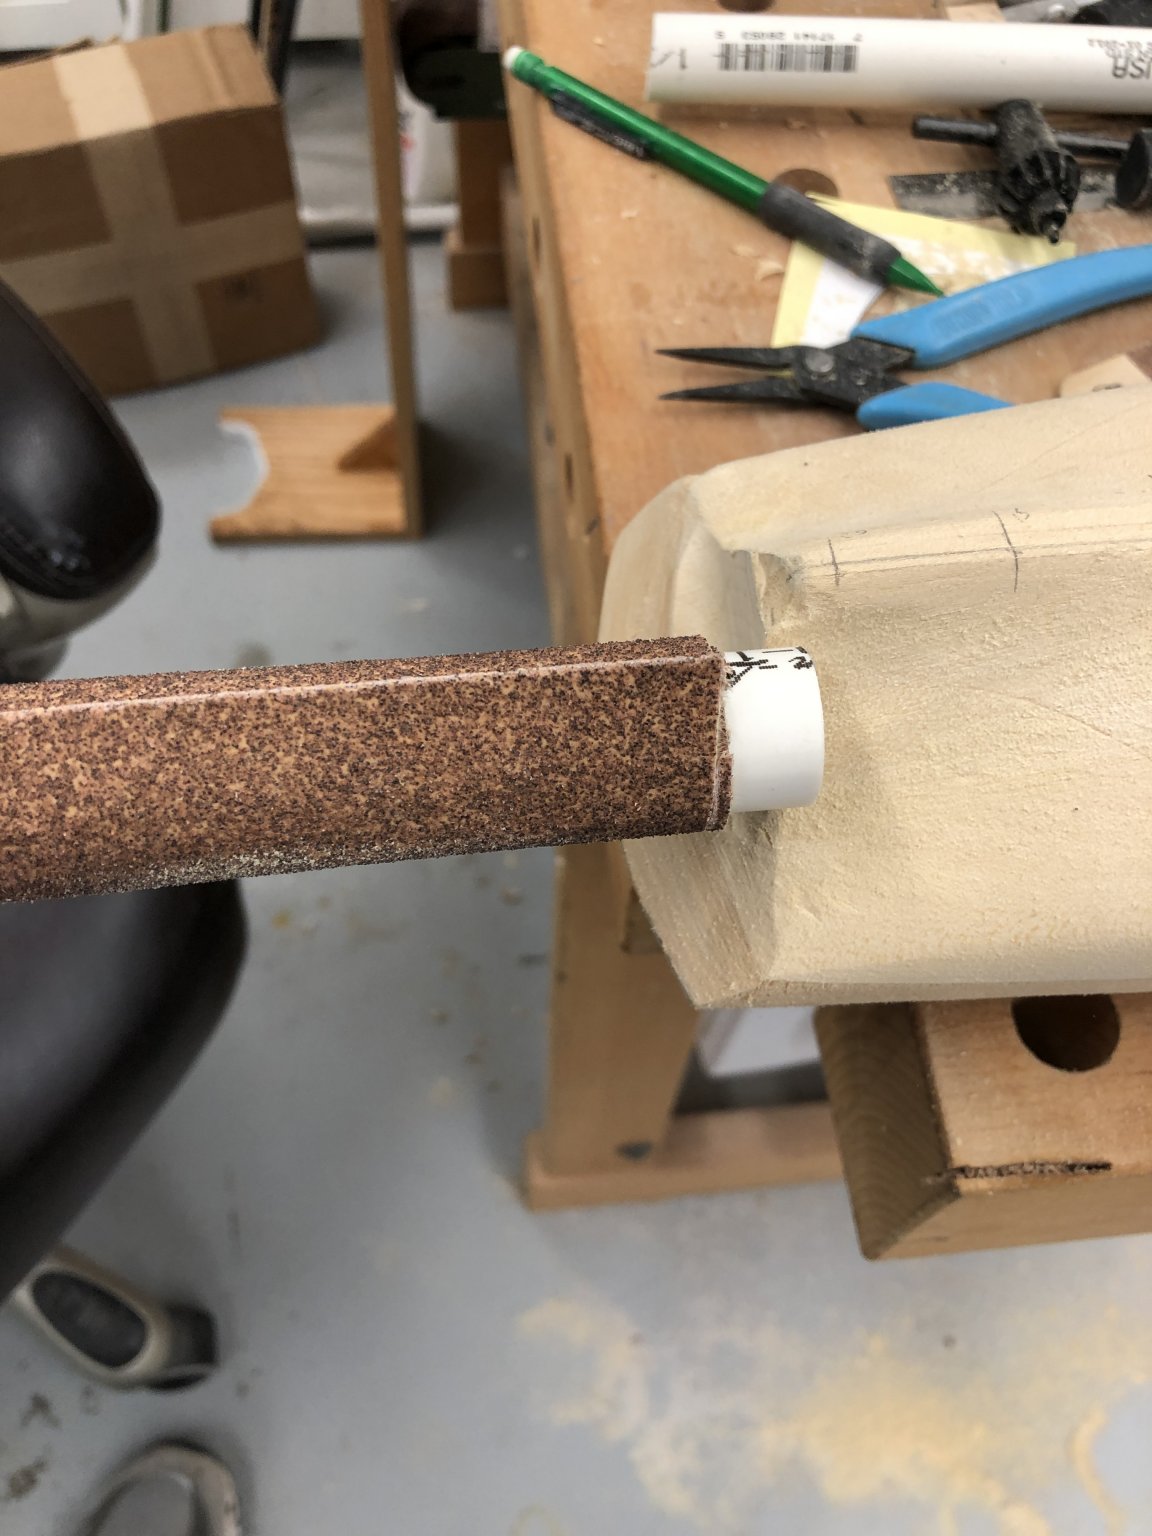
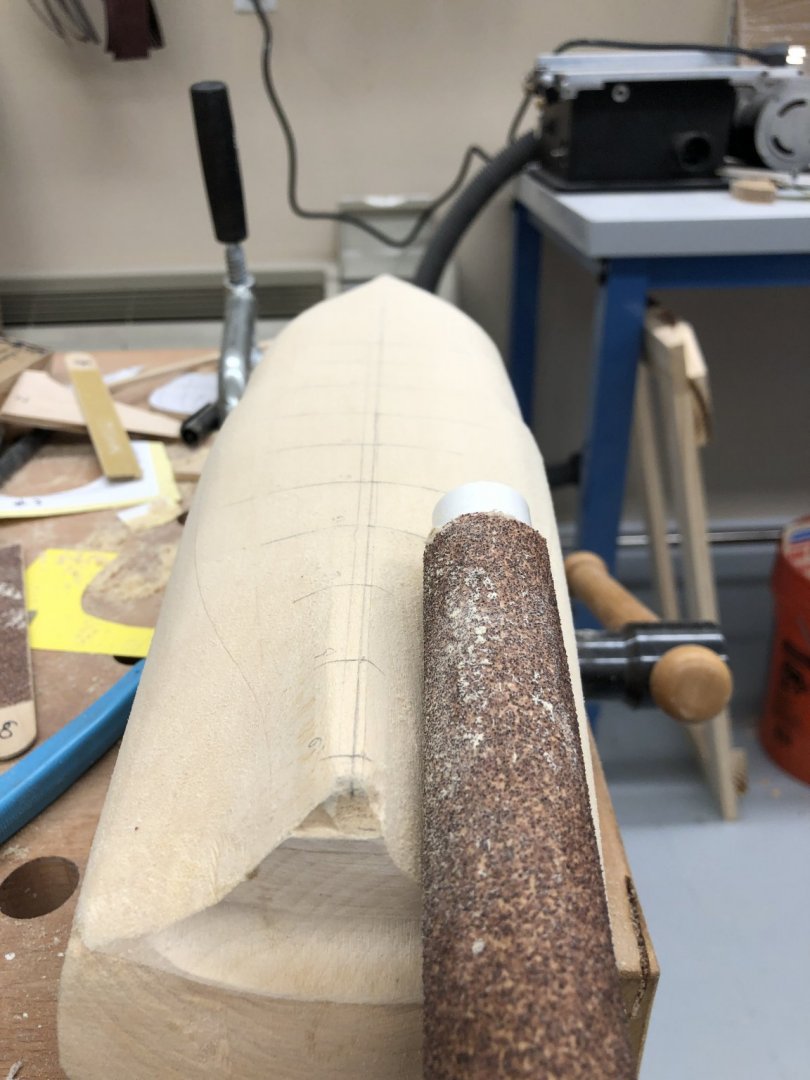
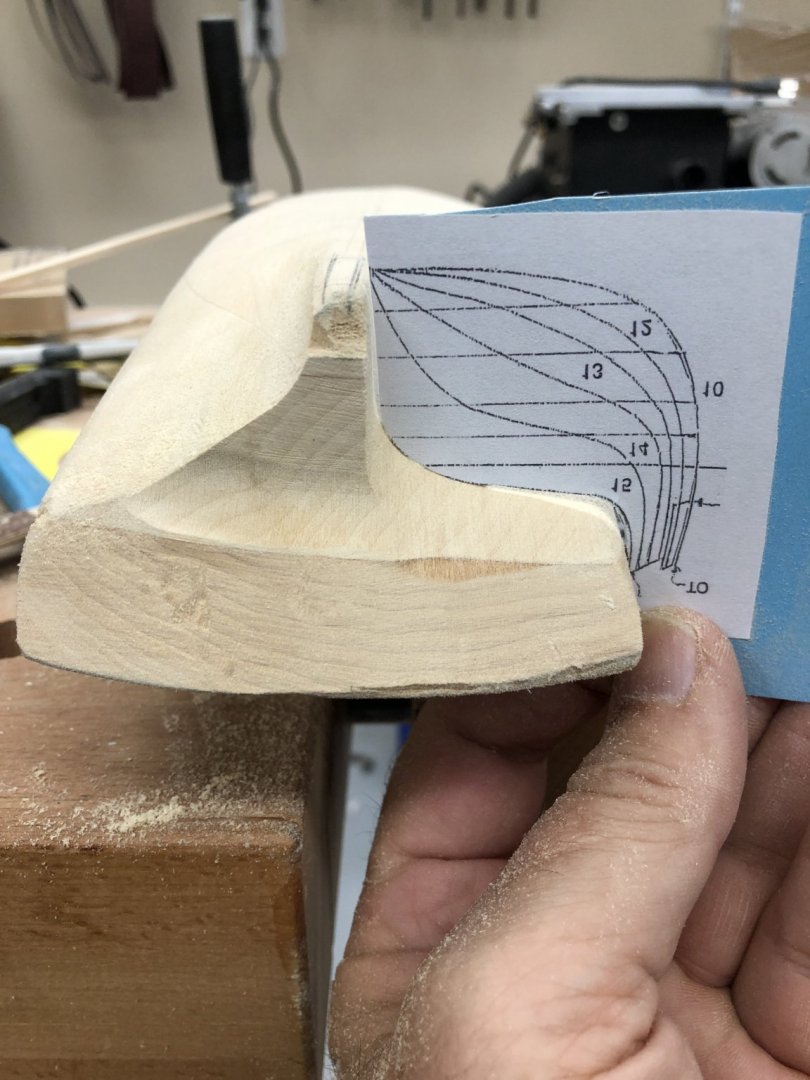
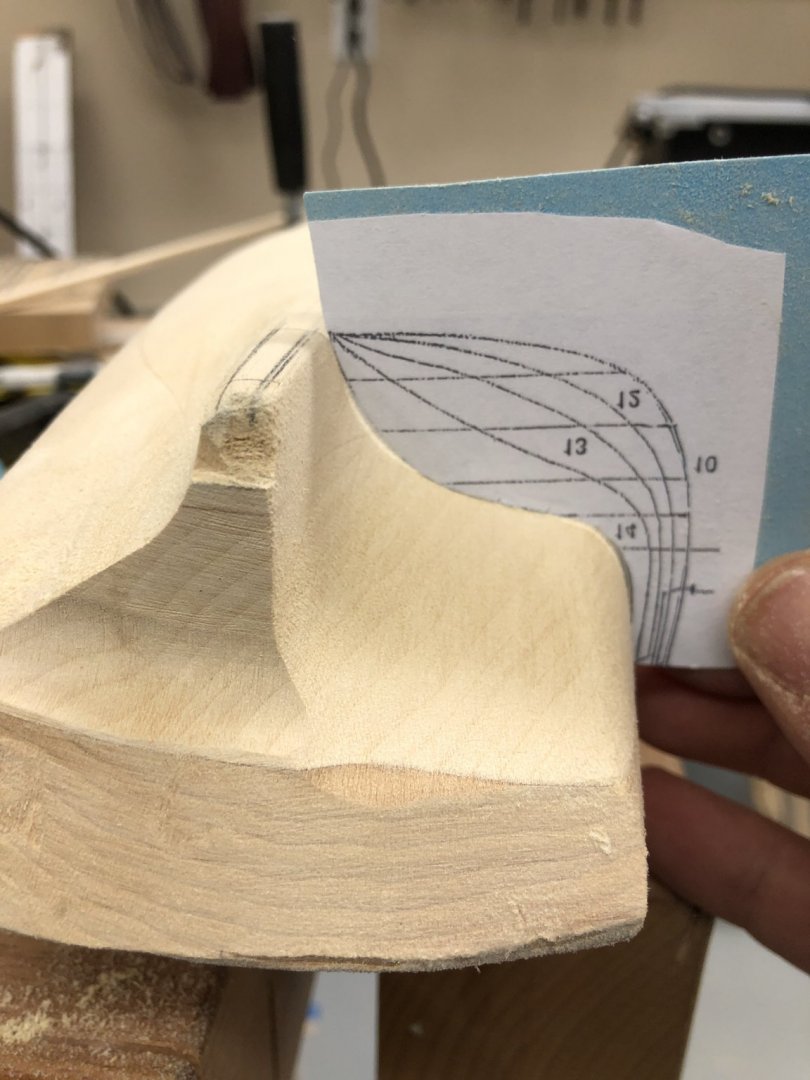
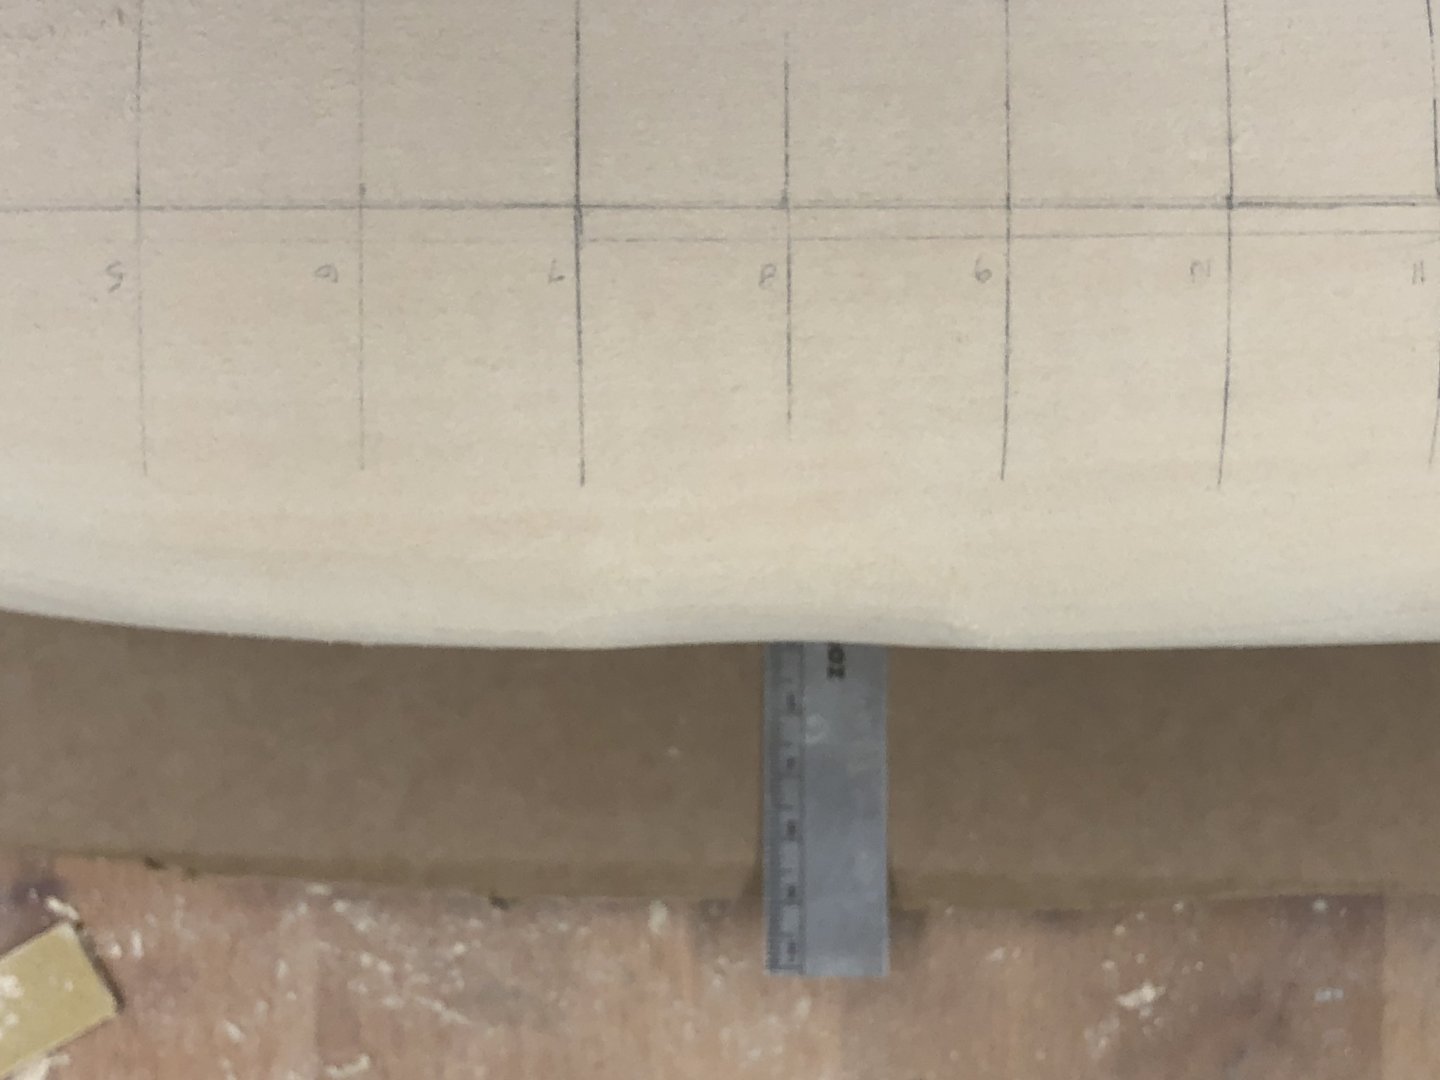
Rather than continue aft from station 8 I decided tom start at the stern and work forward. It appears that there is na good deal, of material, that has to be removed at stations 15 and 16. Based on my experience with Endeavour which had significant curves leading to the fin keel I used a piece of plastic pipe (1/2" in this case, larger on Endeavour) and 60mgrit sandpaper wrapped around it to remove the area along side of the skeg. I got stations 15 and 16 pretty close on the port side and in the picture below you can see how mach material has to be removed. This side was all done with sandpaper and elbow grease. Now that I can see what it should look like I am going tom use my Dremel tool with the 120 grit sanding drum on the flexible drive to get closer to the final configuration before I resort to sandpaper. You might notice that in forming station 16 I seem to have gotten part of the transom "mis-shaped". The kit includes a laser cut piece that becomes the transom so I think this area will be covered and not be a problem. I will be more careful on the starboard side.


- 166 replies
-
- 4
-
-
- fannie a gorham
- finished
- (and 1 more)
-
Phil - thanks we have both within a few miles. I will check them out. I have serious doubts about my ability to turn out 30 wooden pillars in a consistent enough manner to look presentable - especially at this small size (I measured the Britannia ones, they are 4.7mm tall excluding the locating pins so at 6mm I will need to trim them down a bit).
- 166 replies
-
- 2
-
-
- fannie a gorham
- finished
- (and 1 more)
-
Thinking some more about planking over the solid hull. When I did Endeavour I essentially planked over a solid hull as I filled the spaces between the bulkheads with balsa wood and then sanded the balsa down fair with the bulkheads. It was easier than the typical plank on bulkhead planking since you could use push pins to hold the planks to the balsa at almost any point where it was required. Of course that was at 1/35 scale and the objective was a hull without the planks showing. The full scale Endeavour had a metal hull. For Fannie I guess I could use 3/32" wide planks - 9" at scale if I did the math correctly which is a pretty reasonable width for ship, side planking. Or so I have been lead to believe by the books on the subject I have. I do not have enough 3/32 X 1/32 basswood (or any other variety of wood for that matter) so I will either have to mill it myself or buy it. I have yellow cedar that I got from Syren for the Endeavour deck that I could mill to that size. Anyone have experience with using Alaskan yellow cedar for hull planking? I finished it with Min-Wax on Endeavour, how does it take paint?
- 166 replies
-
- 3
-
-
- fannie a gorham
- finished
- (and 1 more)
-
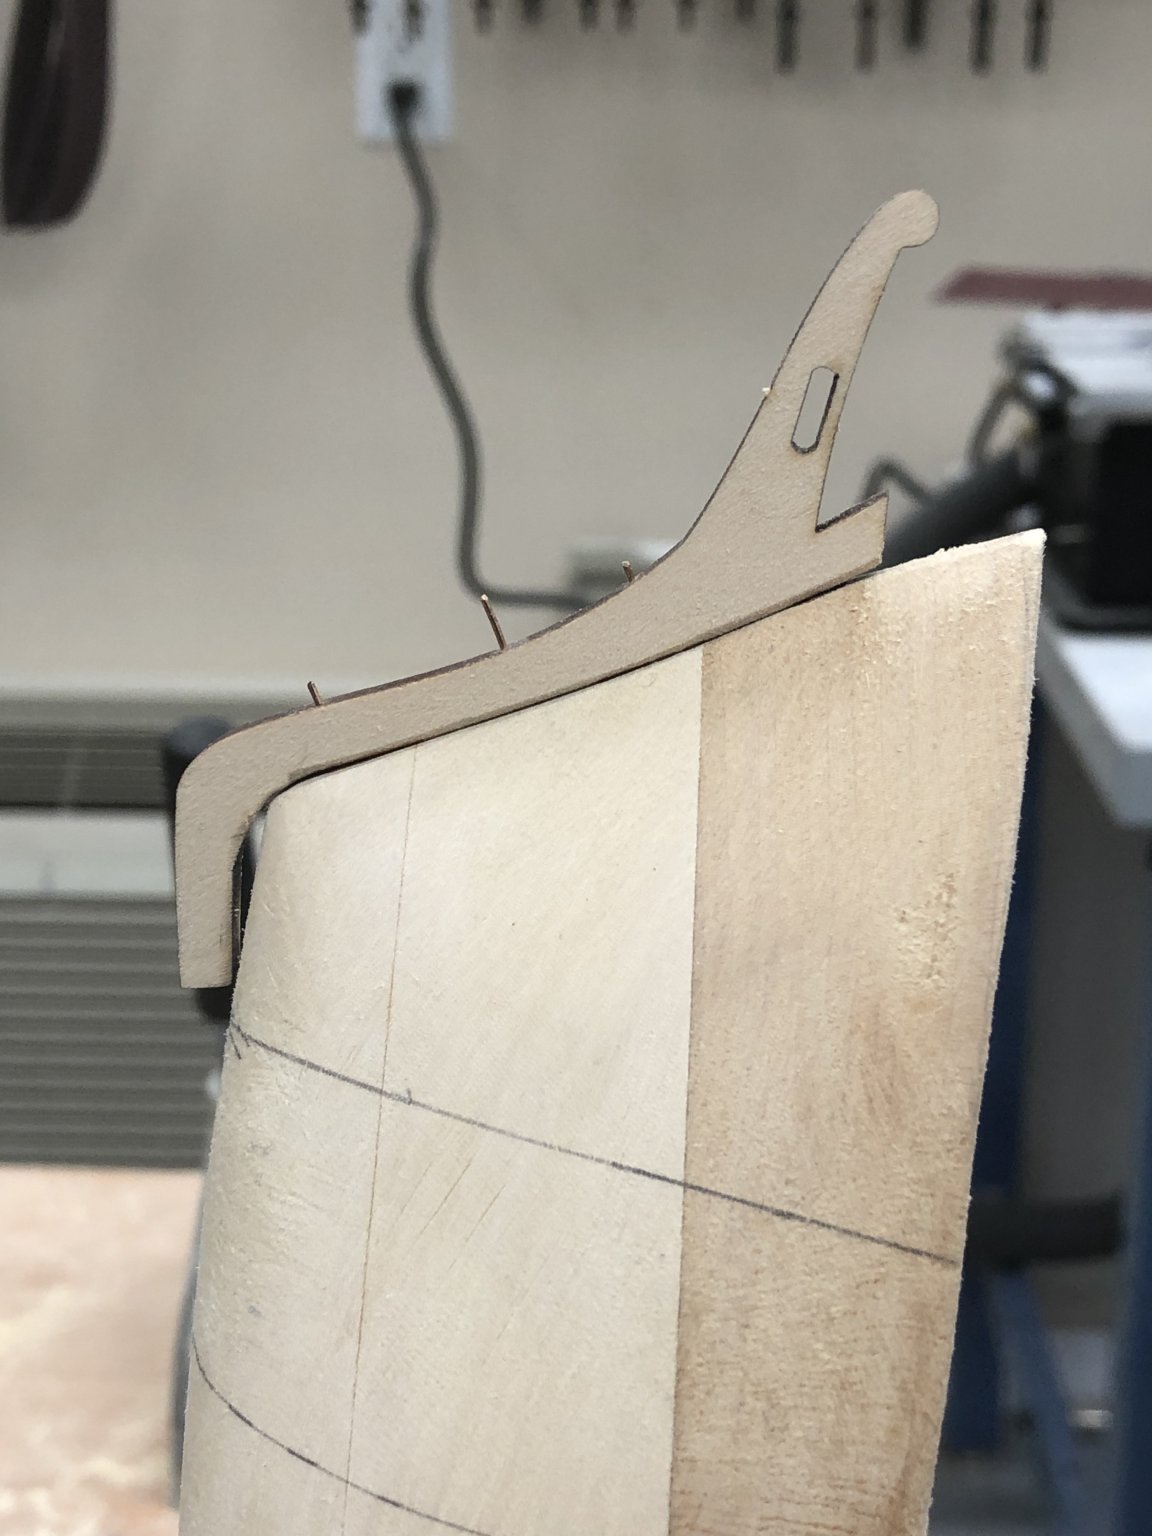
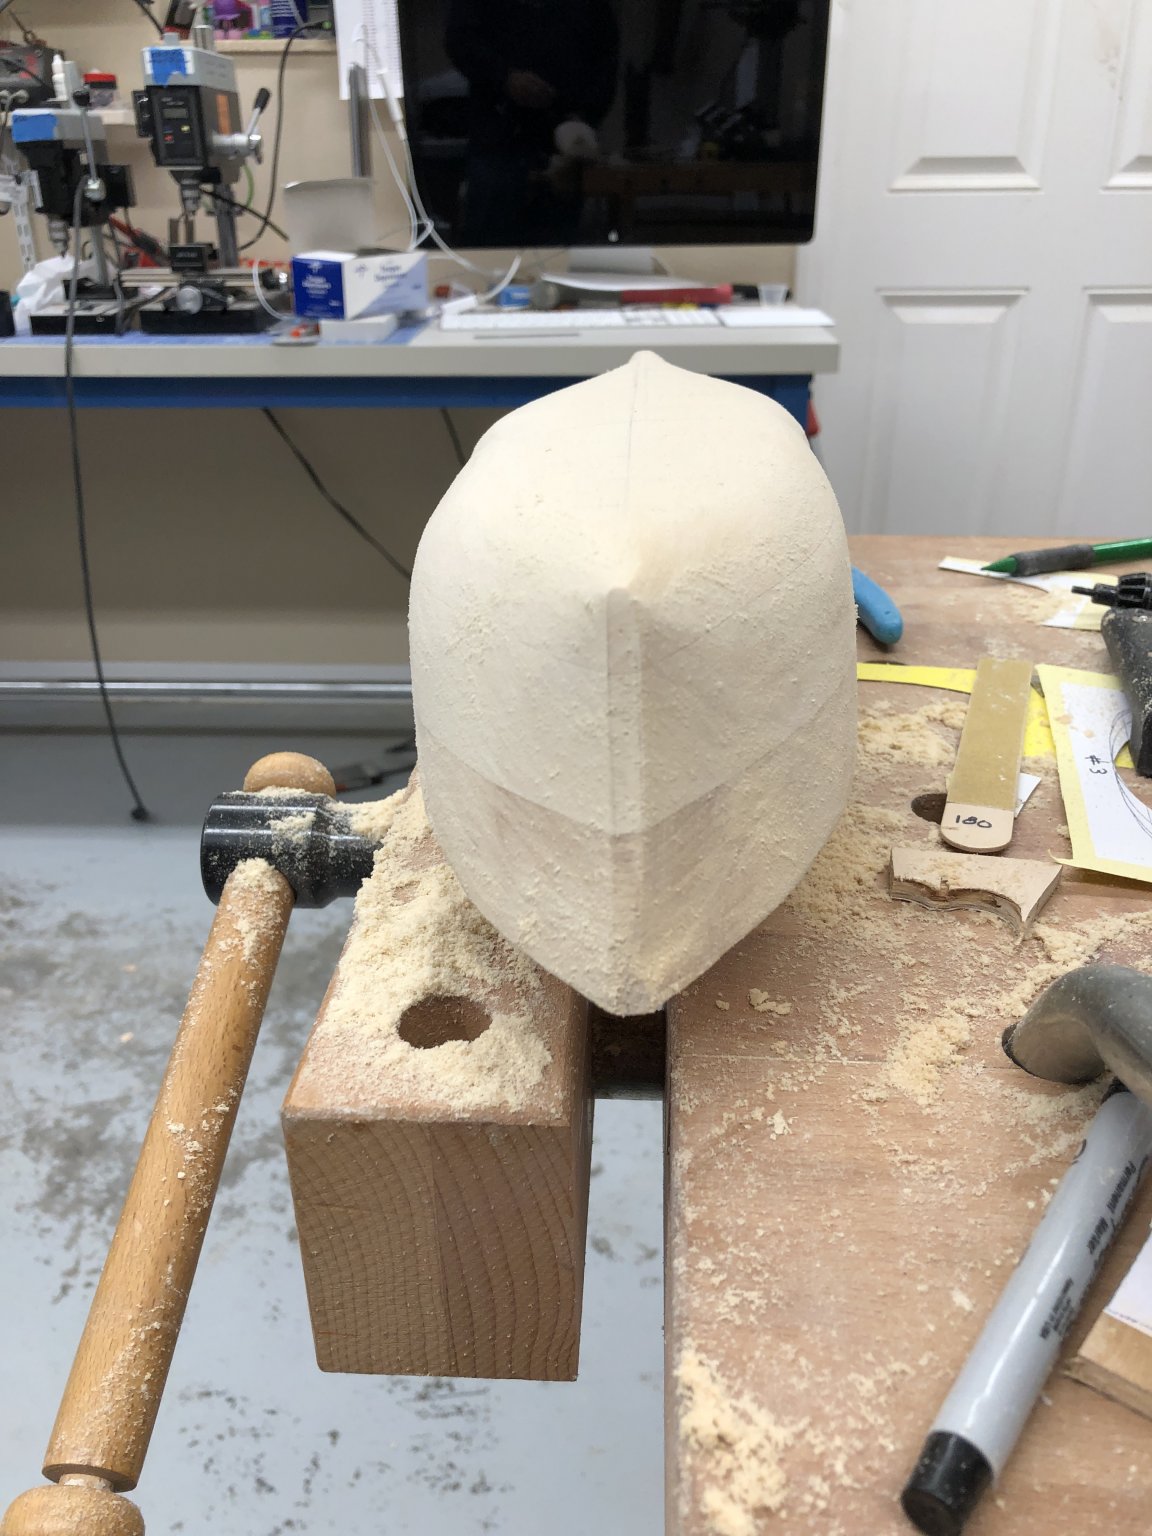
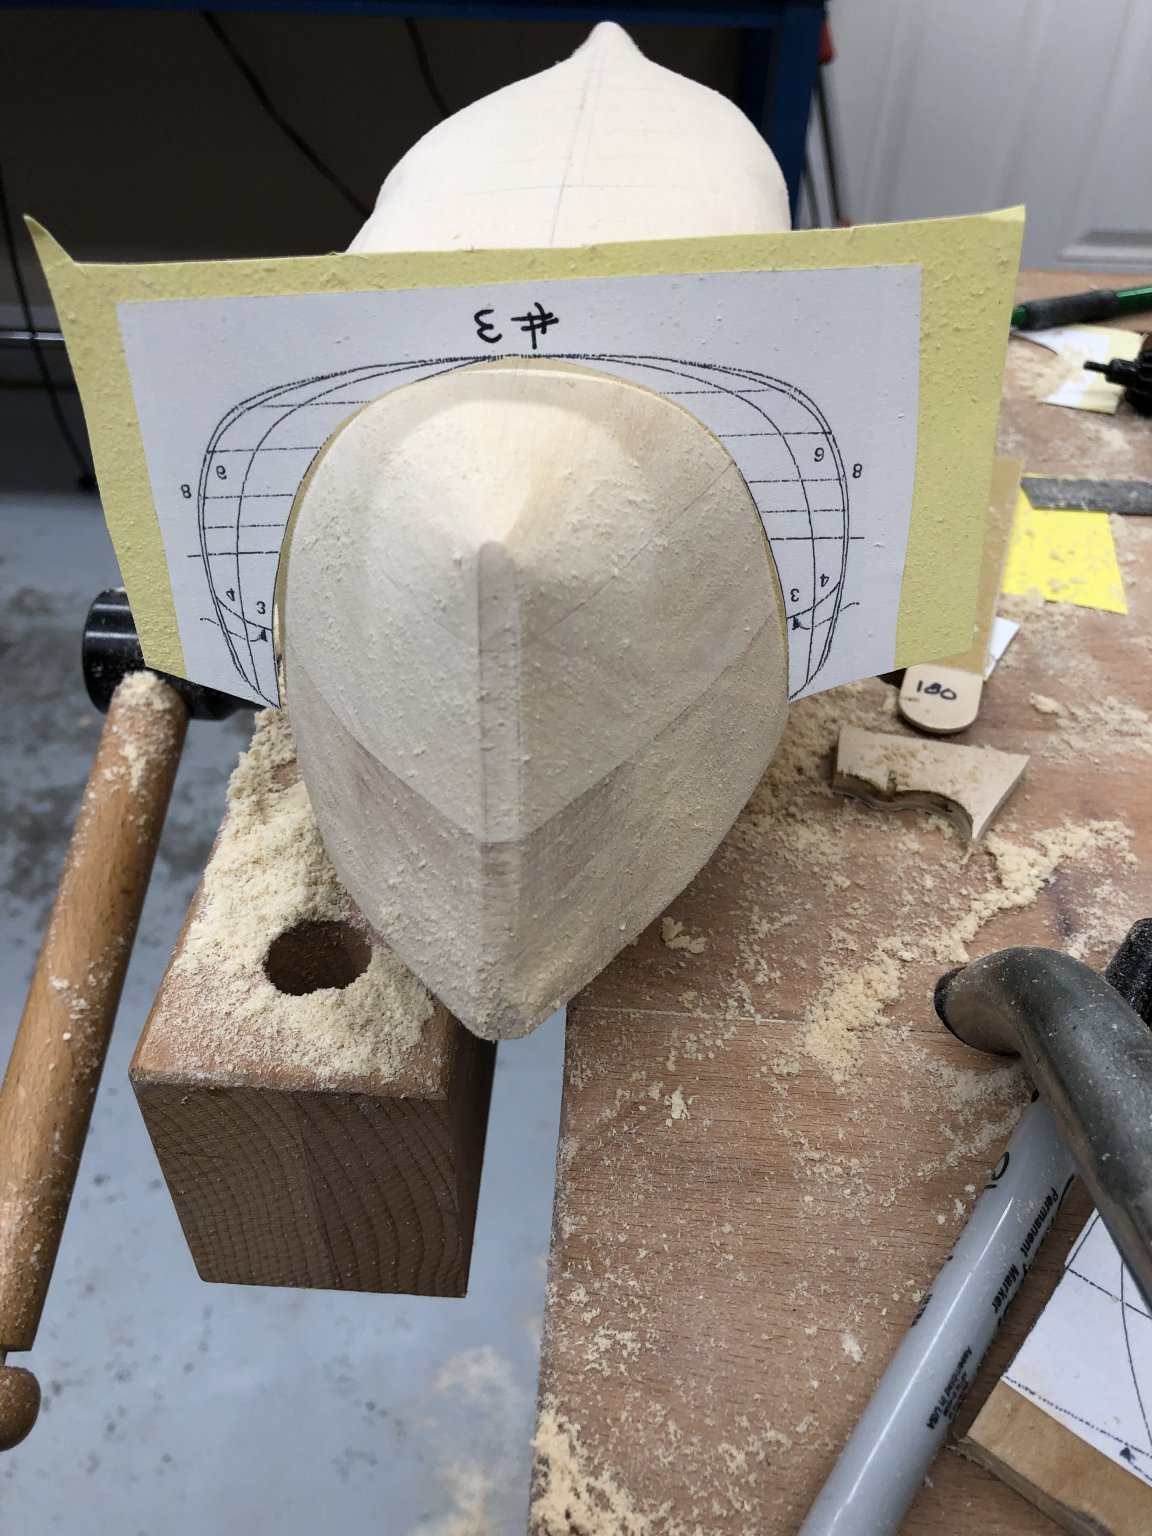
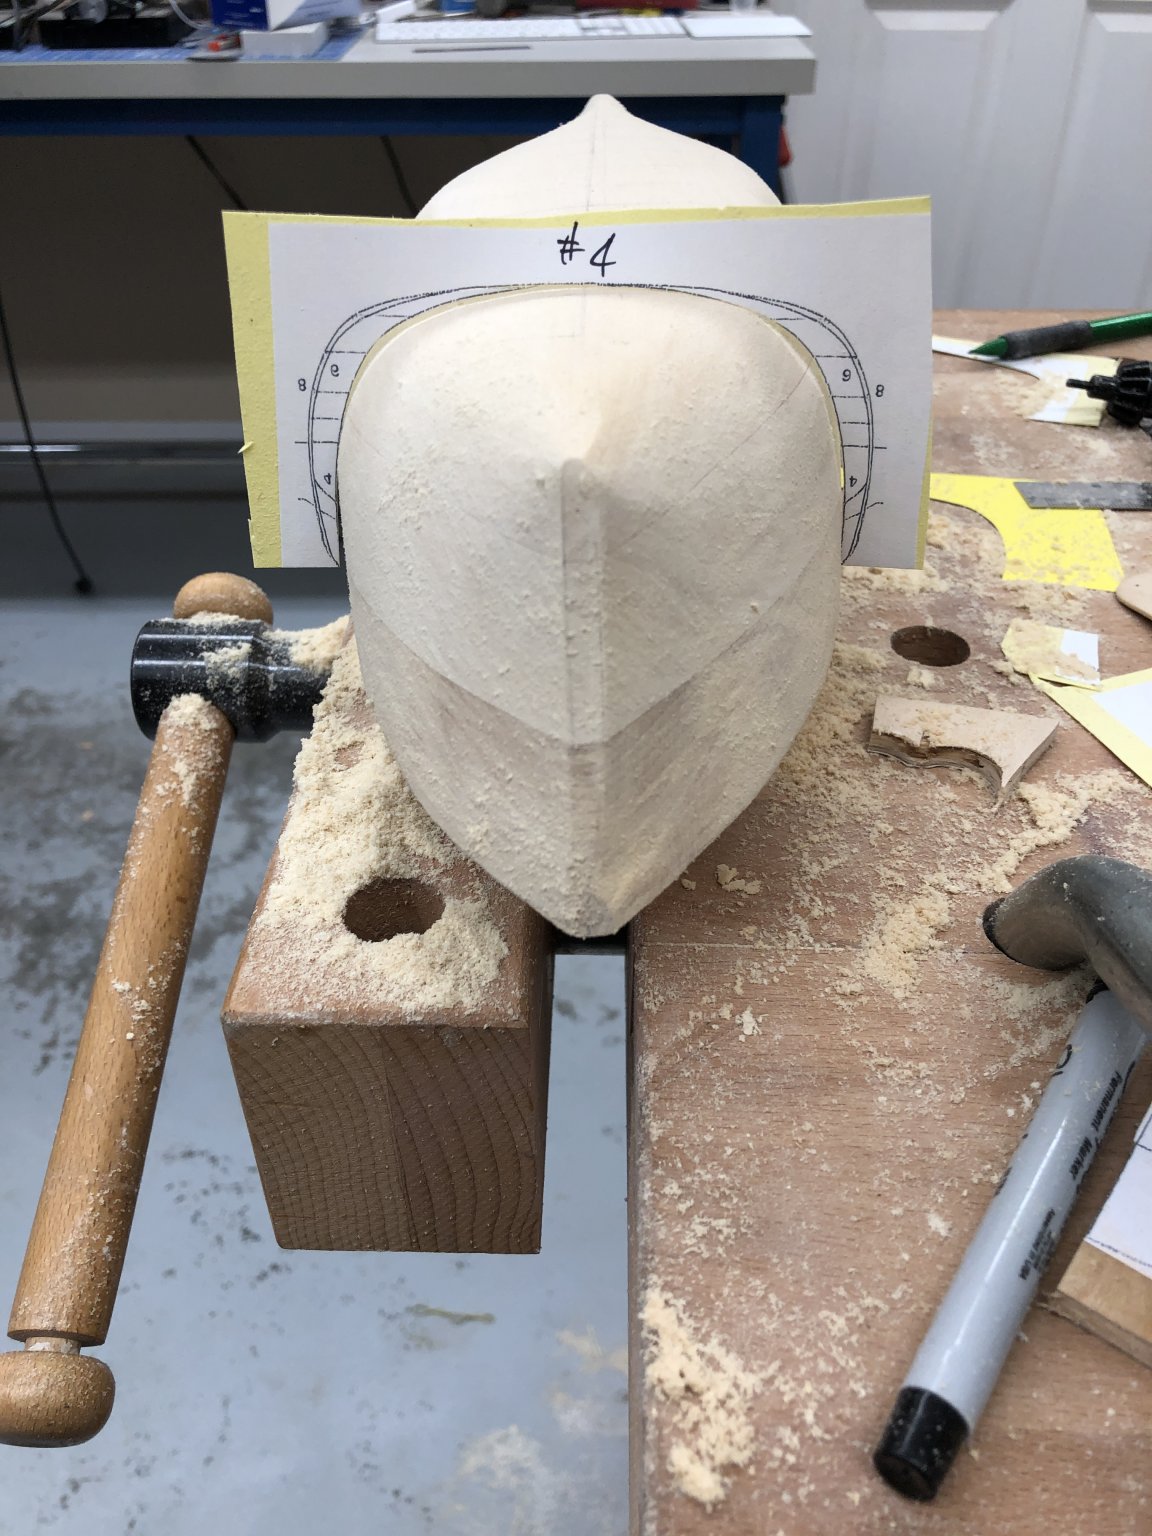
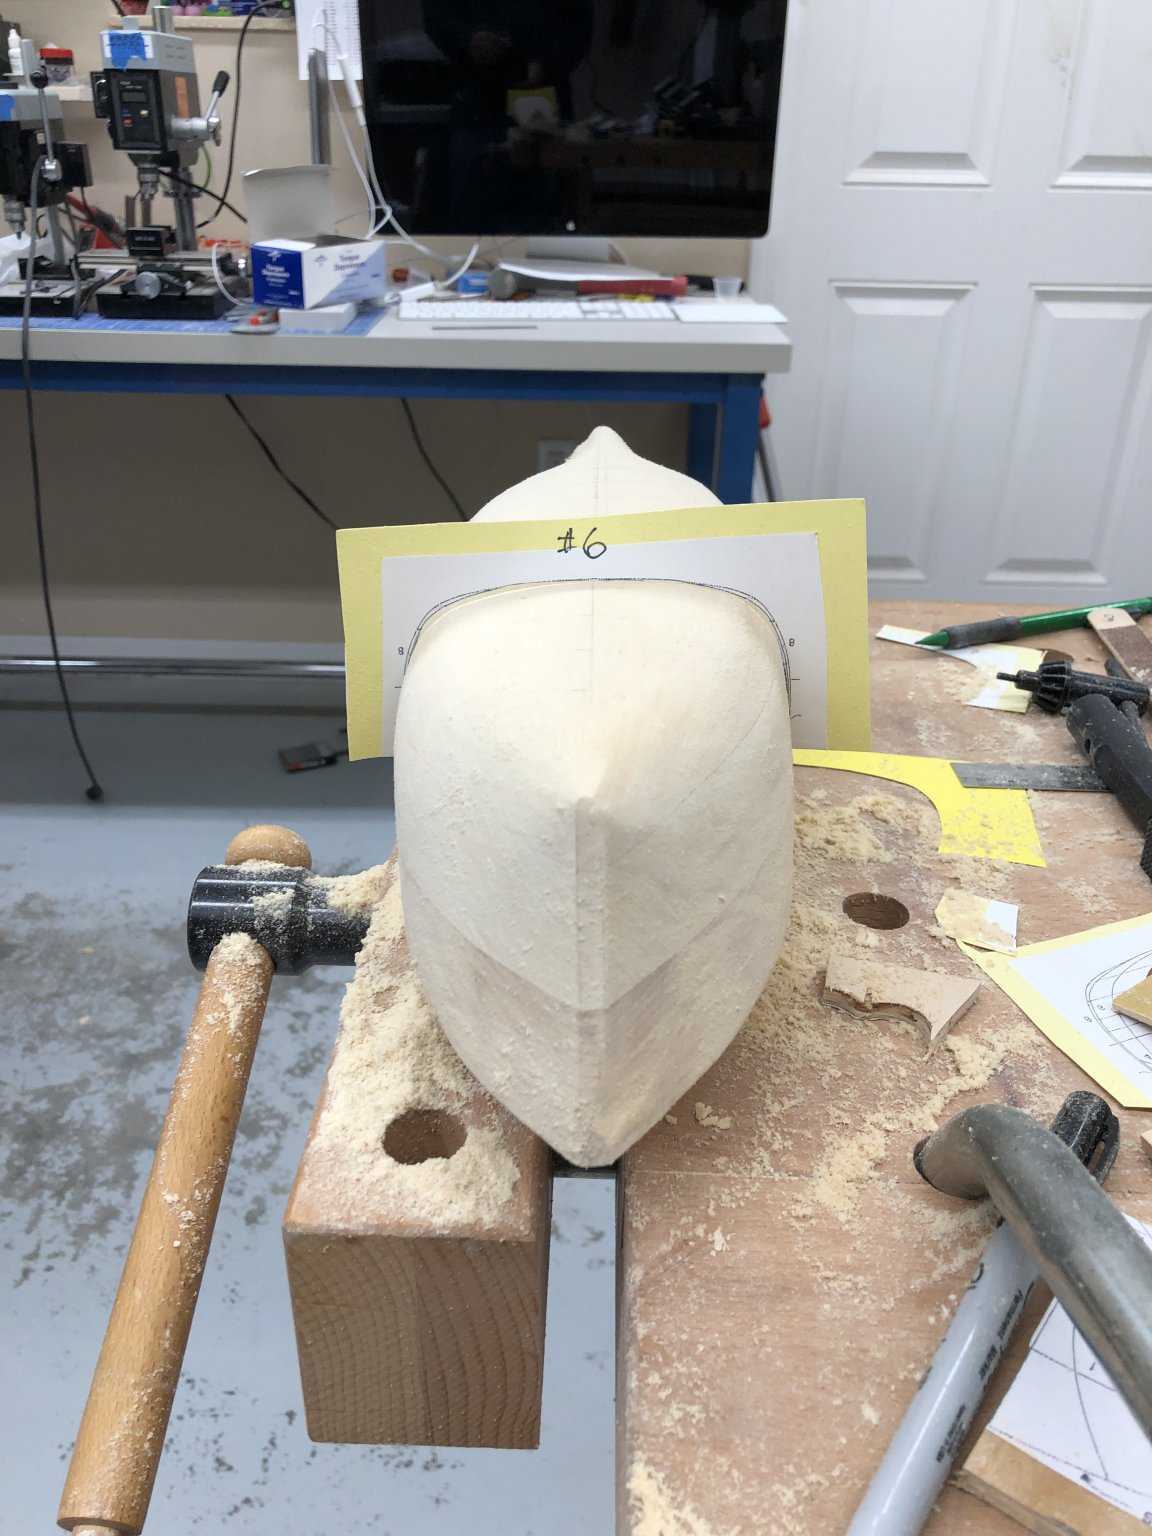
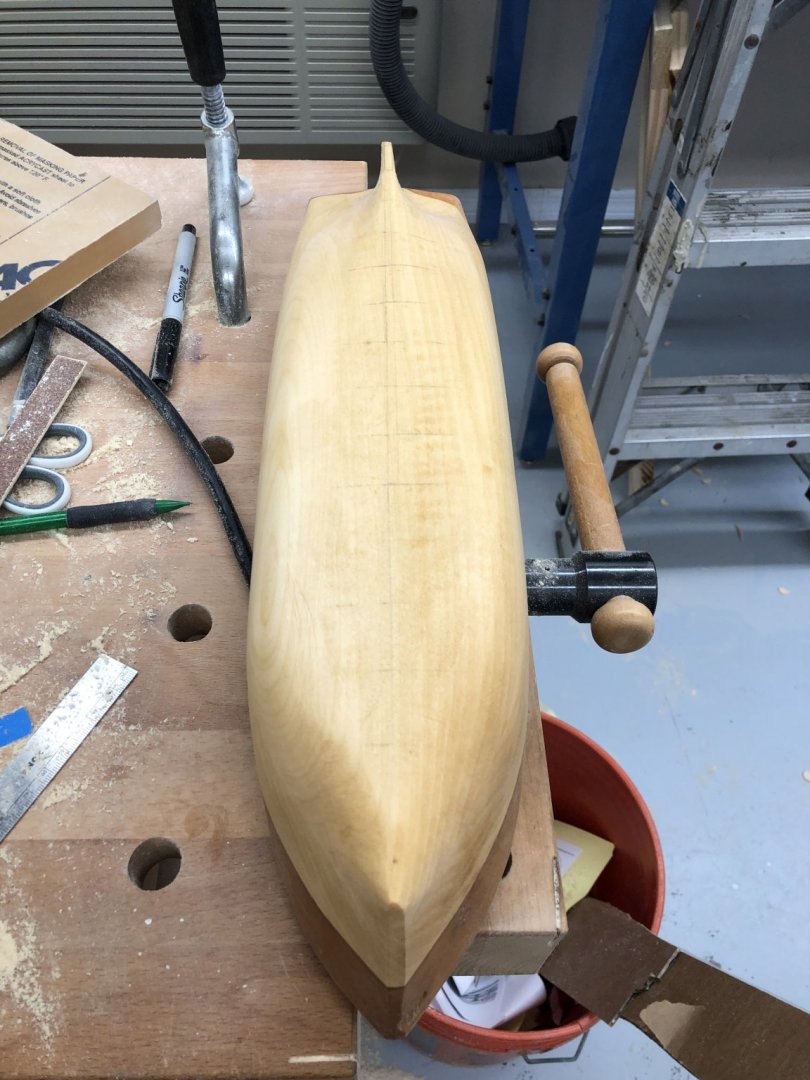
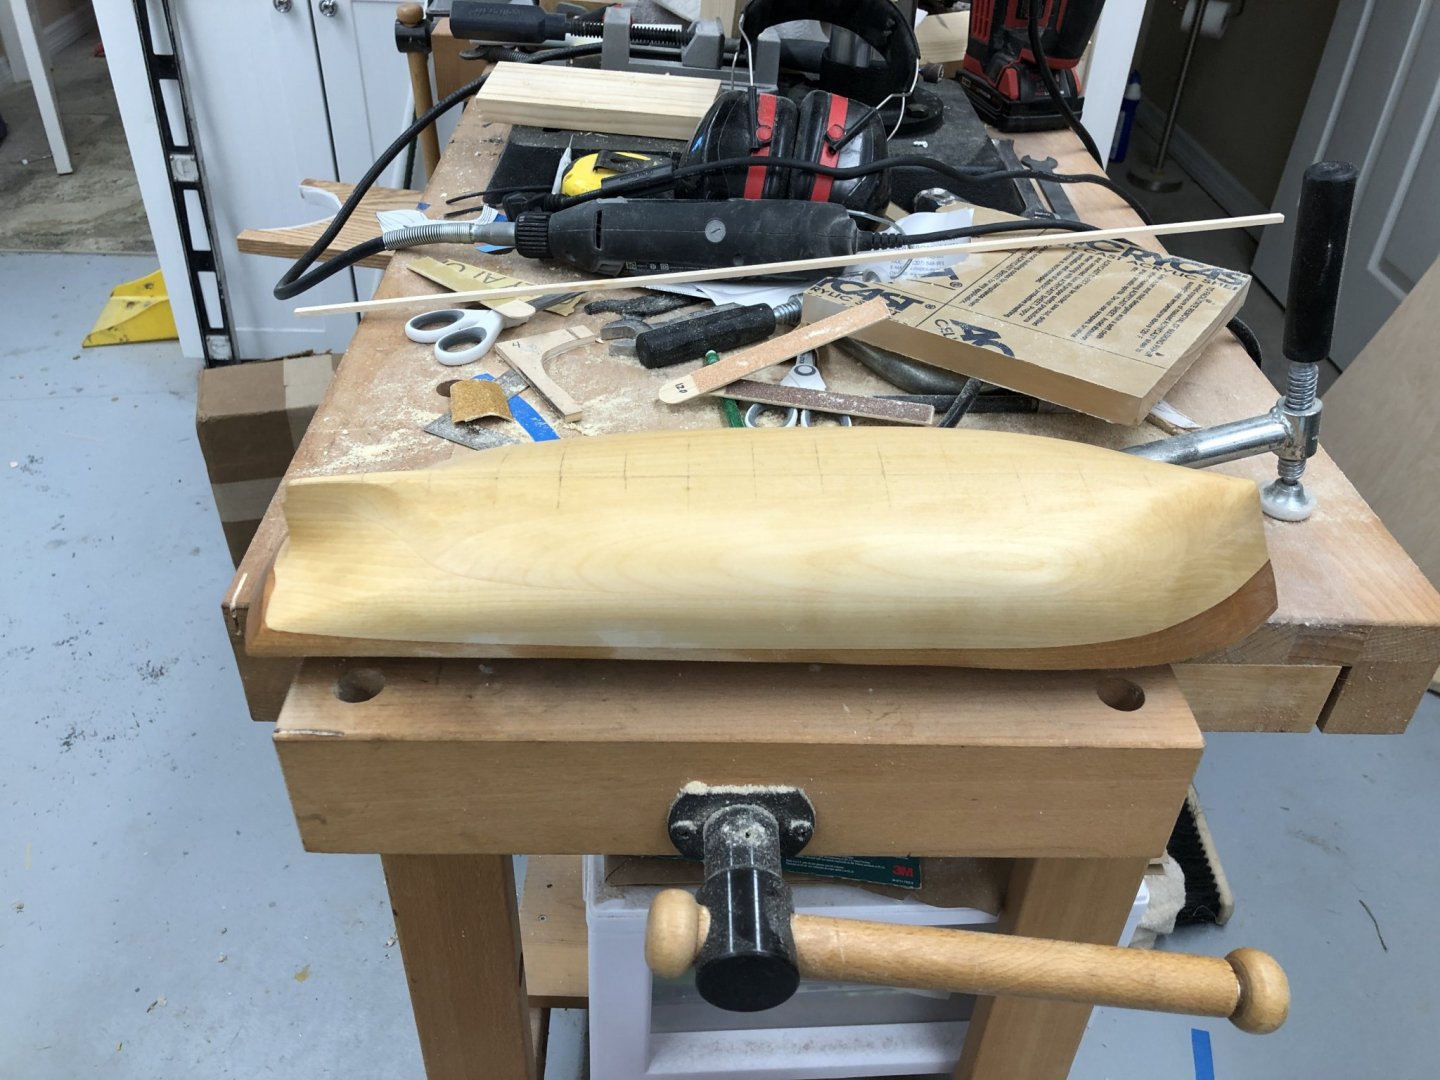
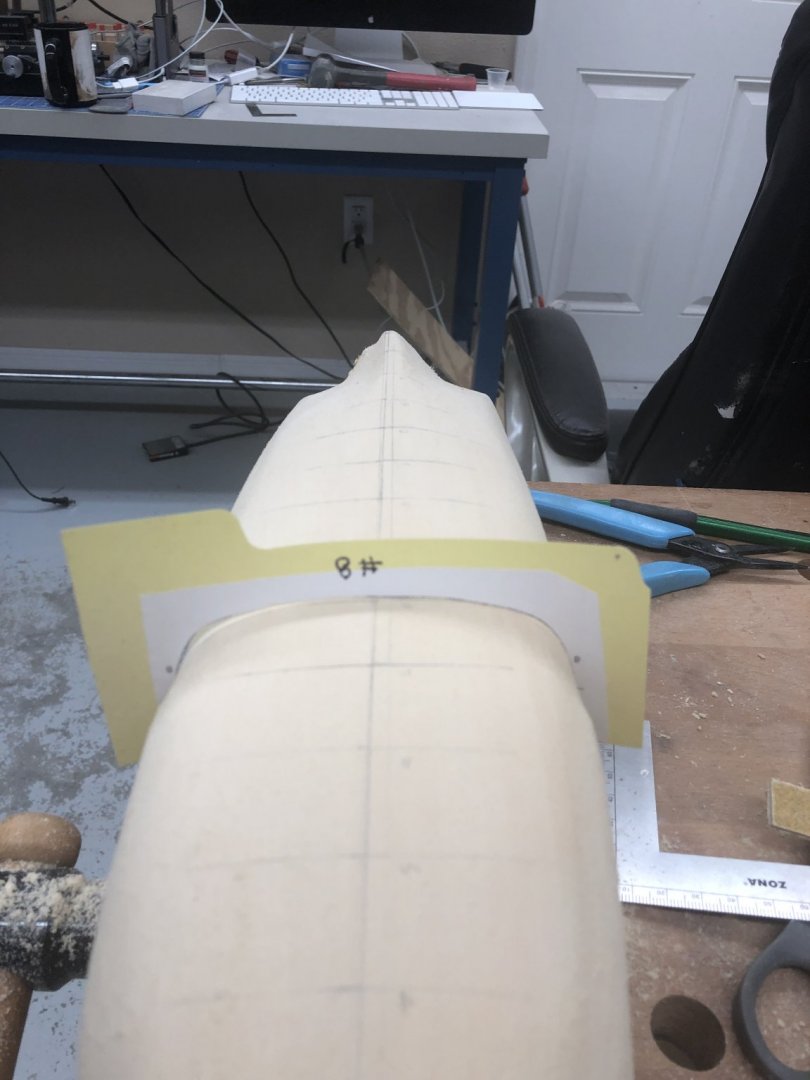
I worked most of the day on the hull fwd (stations 1 - 8). I believe I got it pretty close. There will still be some "overall" sanding with 120, 220 and 320 grits once I am satisfied that the hull is "close" to the templates. Here are some overall shots and with templates 3,4 and 6 in place. Template 8 was in yesterday's post. Now more fun with the stern stations. Still considering planking the hull and cutting off the bulwarks. I ordered some Caldercraft 6mm wooden pillars. I am not real crazy about the Britannia metal ones in the kit. I have never had much luck getting them to look good painted. When I have used Britannia fittings I blackened them but that would not look so good in quarterdeck railing.


- 166 replies
-
- 6
-
-
- fannie a gorham
- finished
- (and 1 more)
-
Thanks Nic - I had to check every time before I printed something as my printer defaults to "scale to fit paper". I made three copies of the hull sections before I noticed they did not "look right". I am taking Chris Coyle's advise and "fudging it".
- 166 replies
-
- 2
-
-
- fannie a gorham
- finished
- (and 1 more)
-
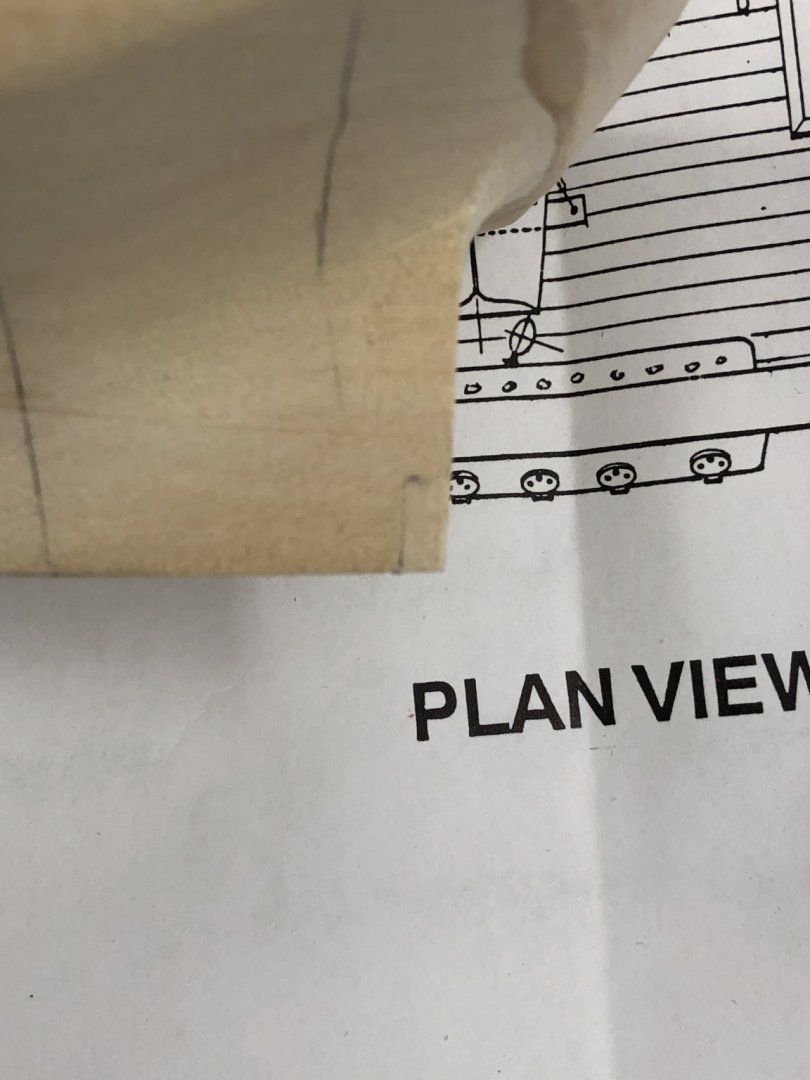
Mark - the file folder works okay, especially where the tumble home makes the template narrower at the bulwark then at the deck. Easier to get onto the hull than something stiffer. In a perfect world I would have these and a half set (just one side so getting it on the hull is no problem) in something stiffer, like 1/16 plywood.
-
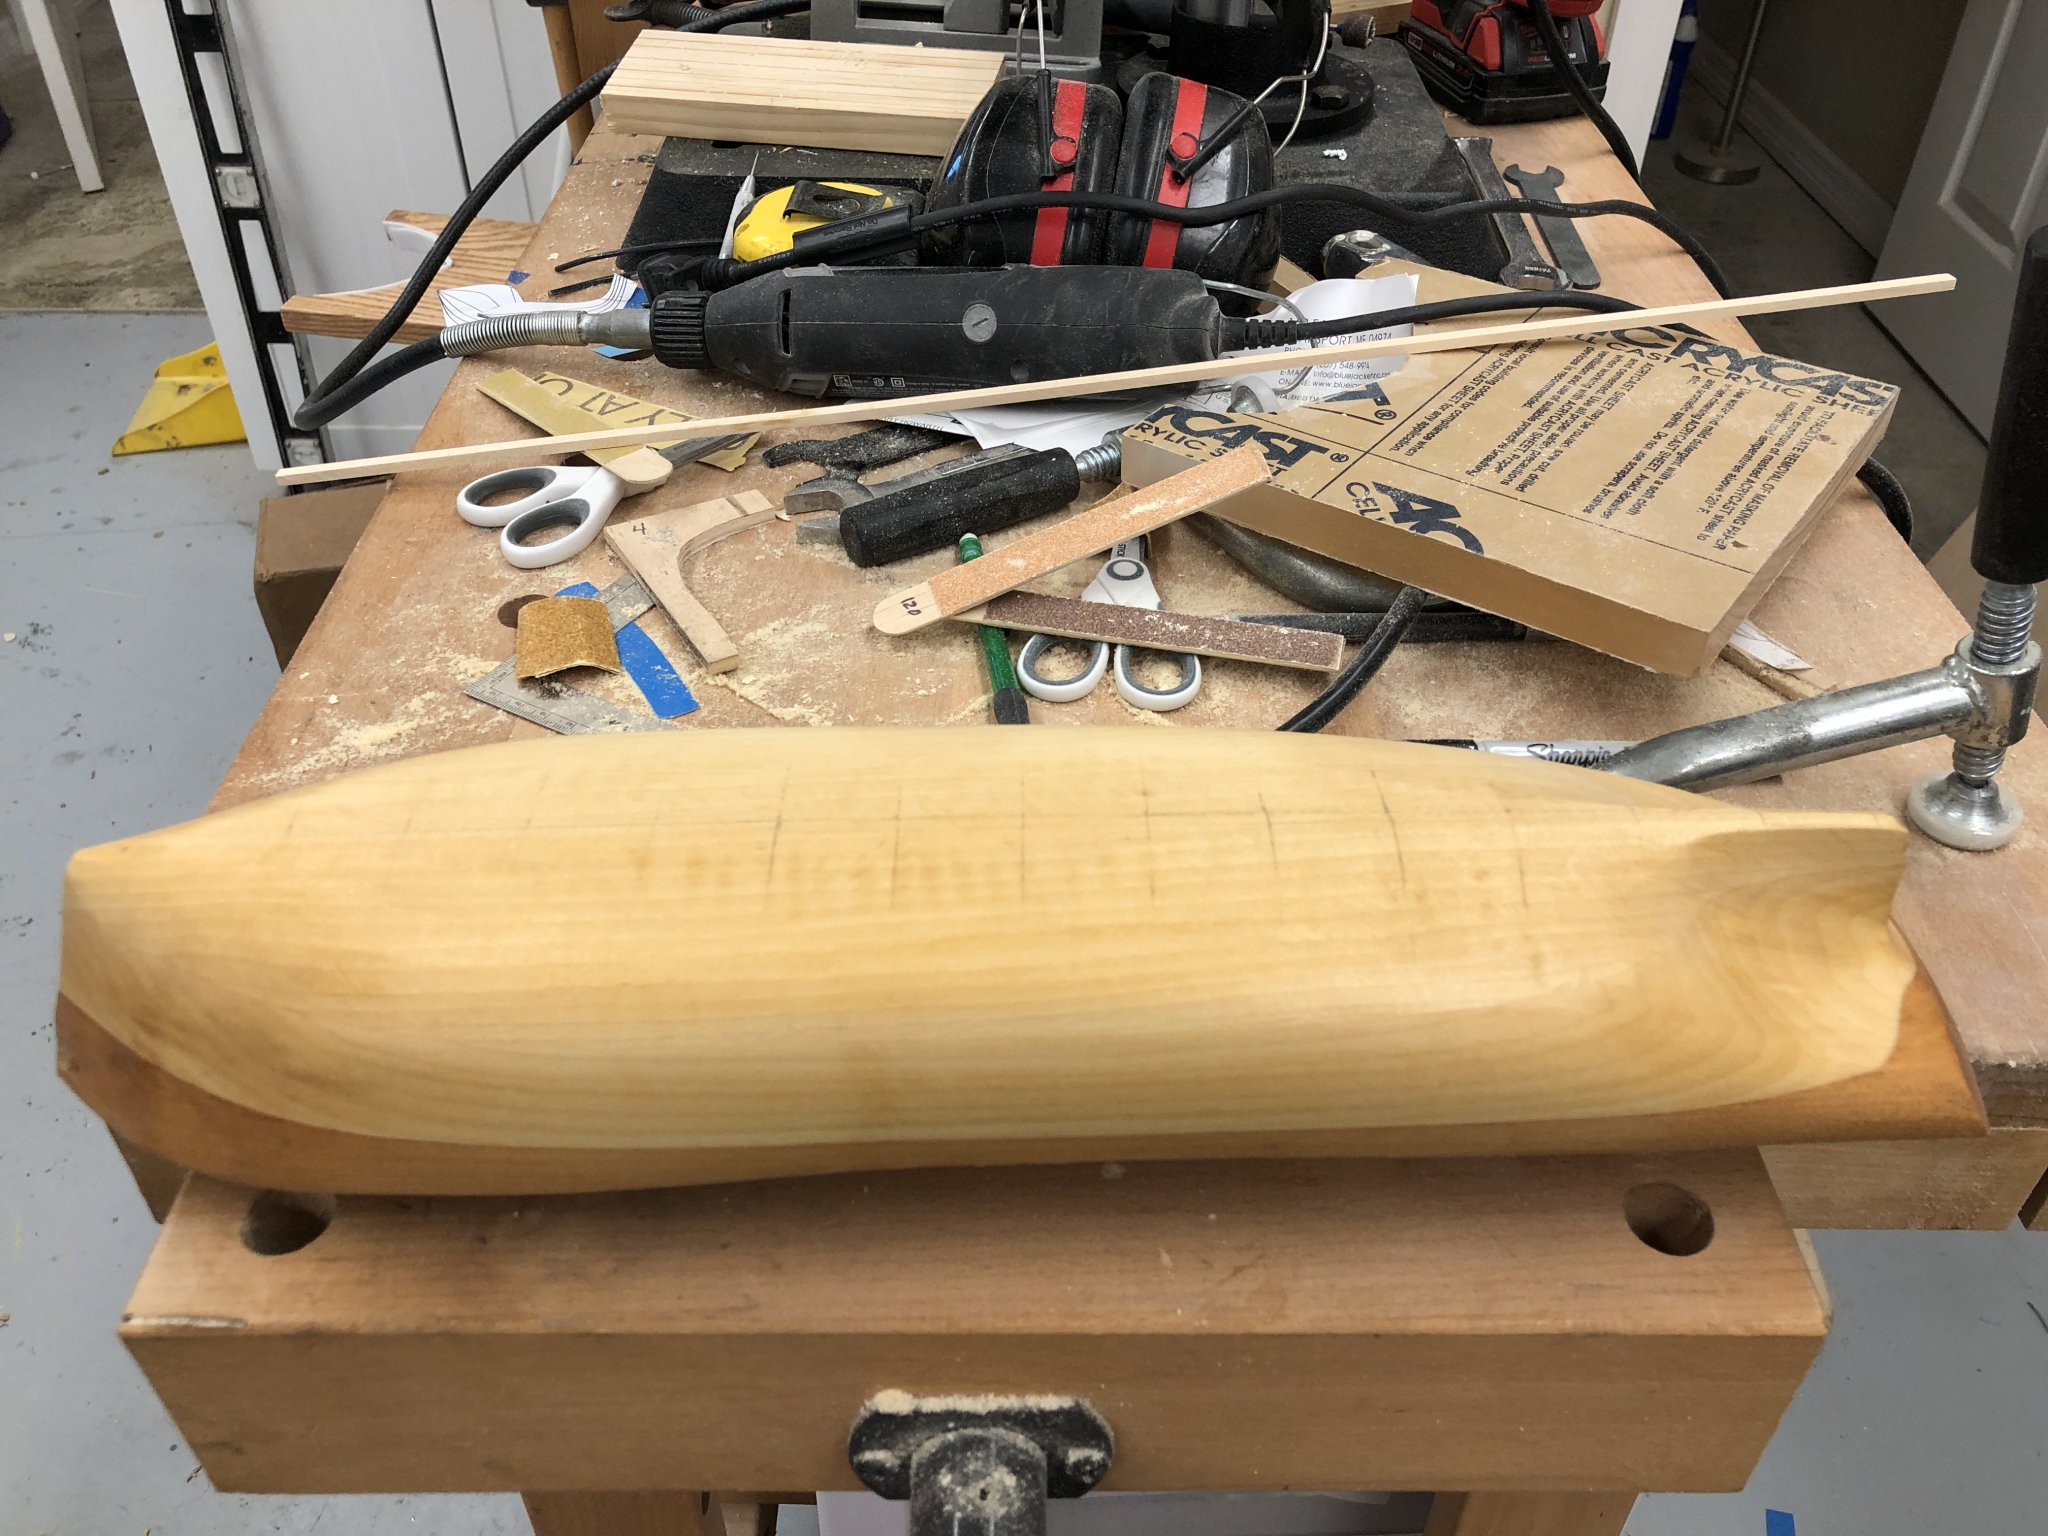
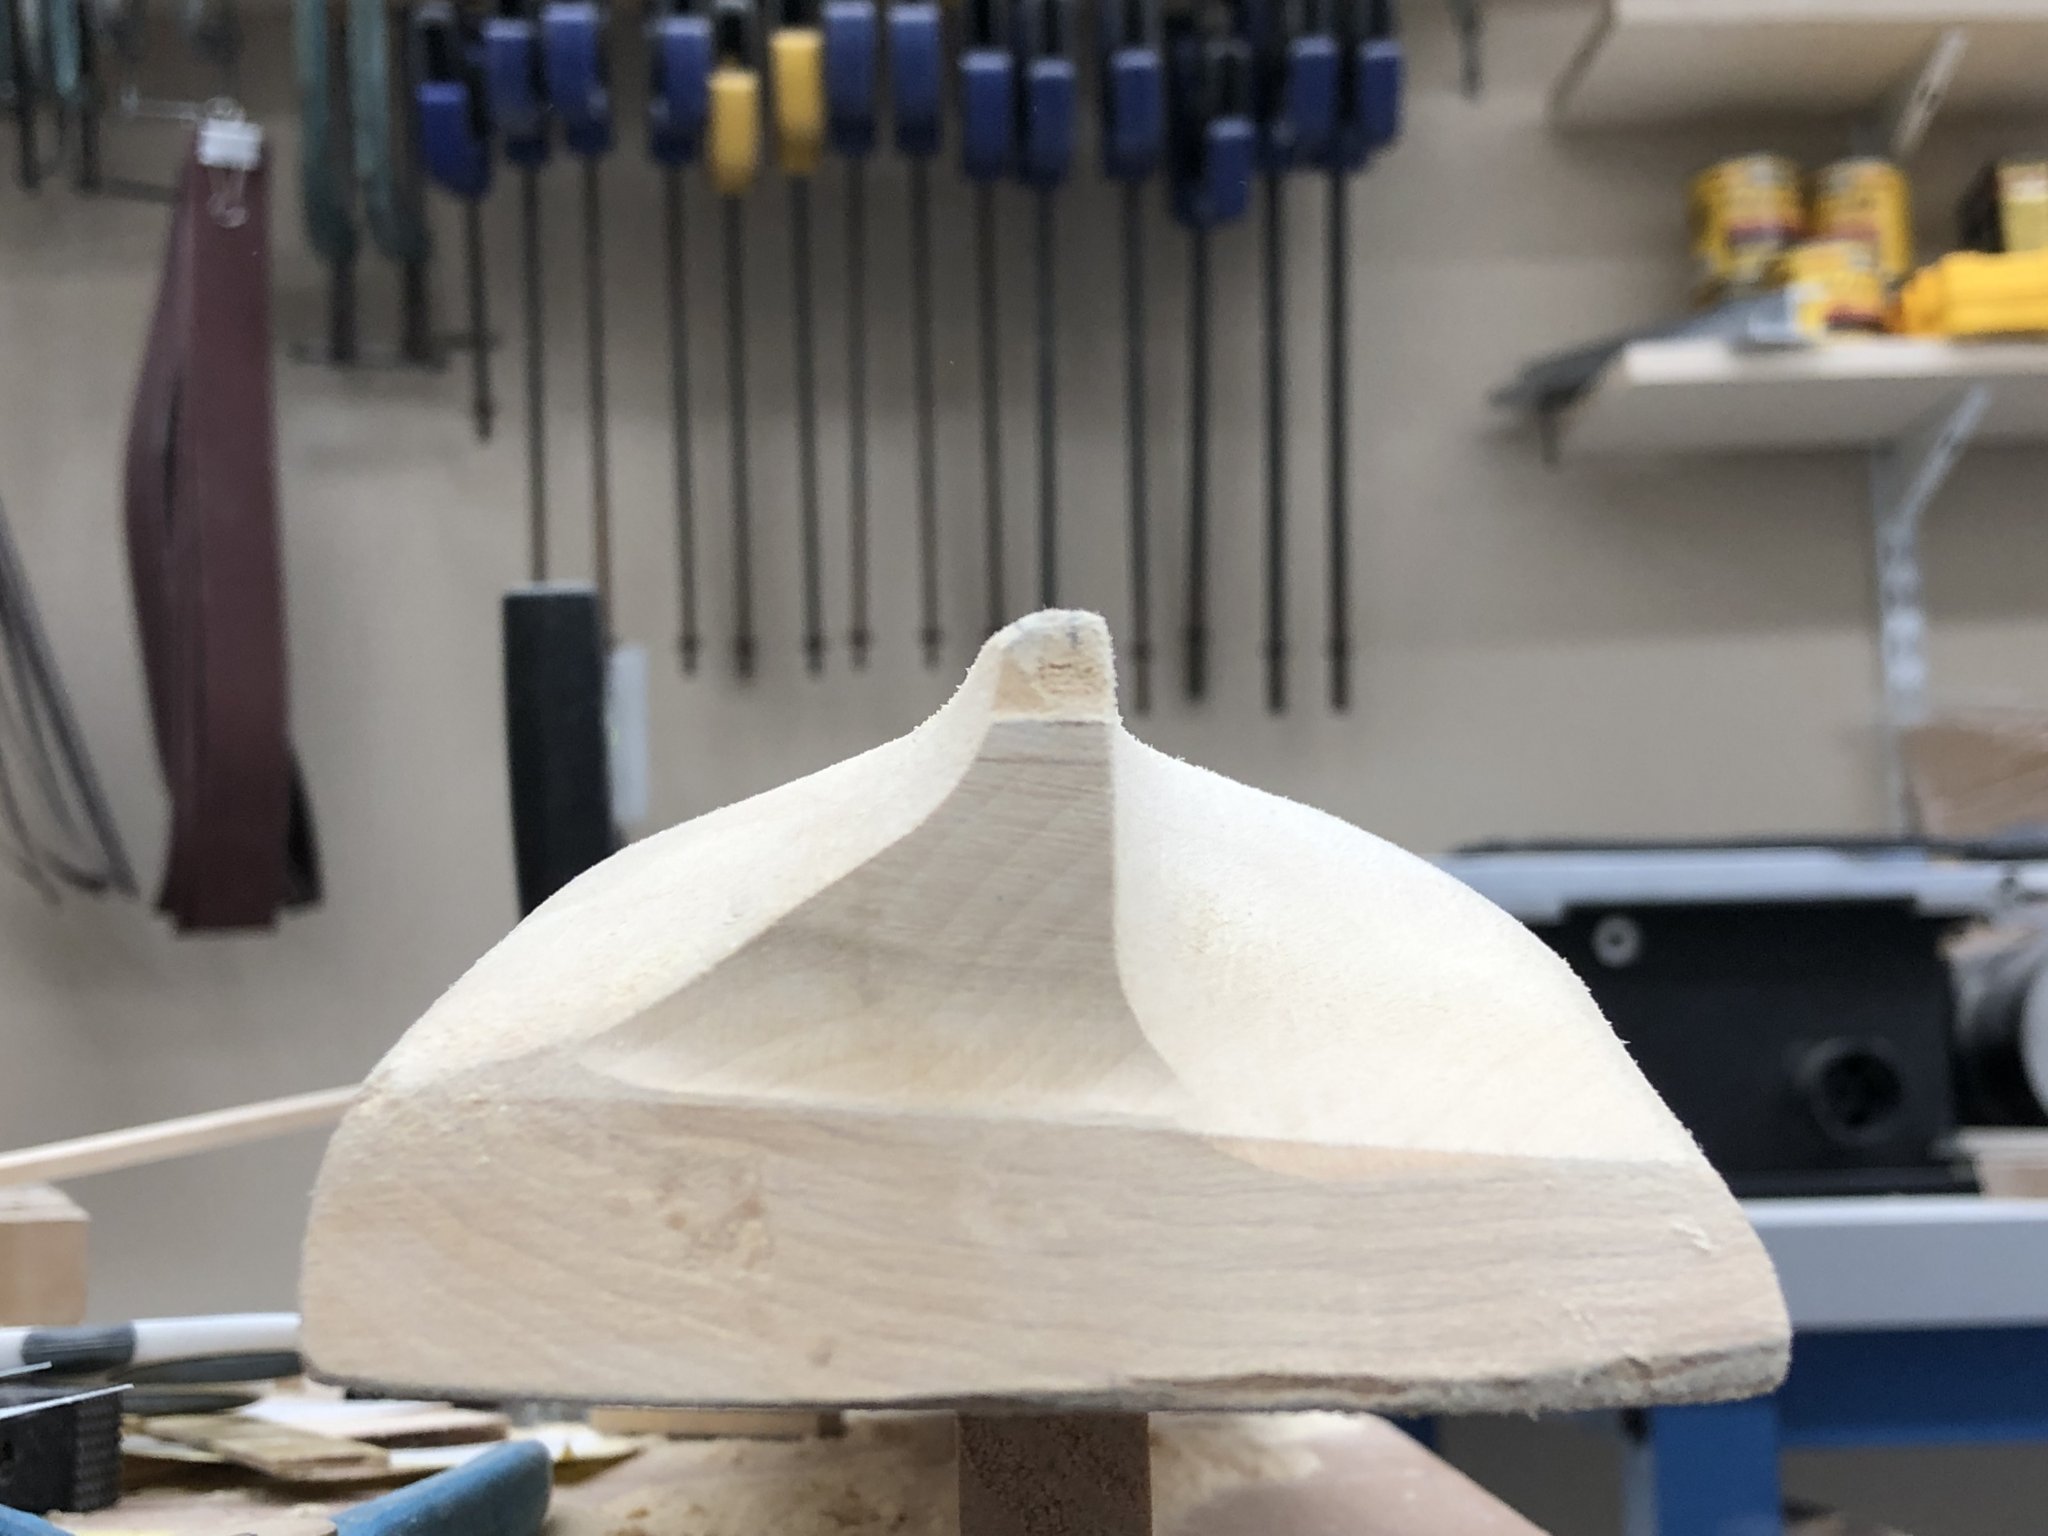
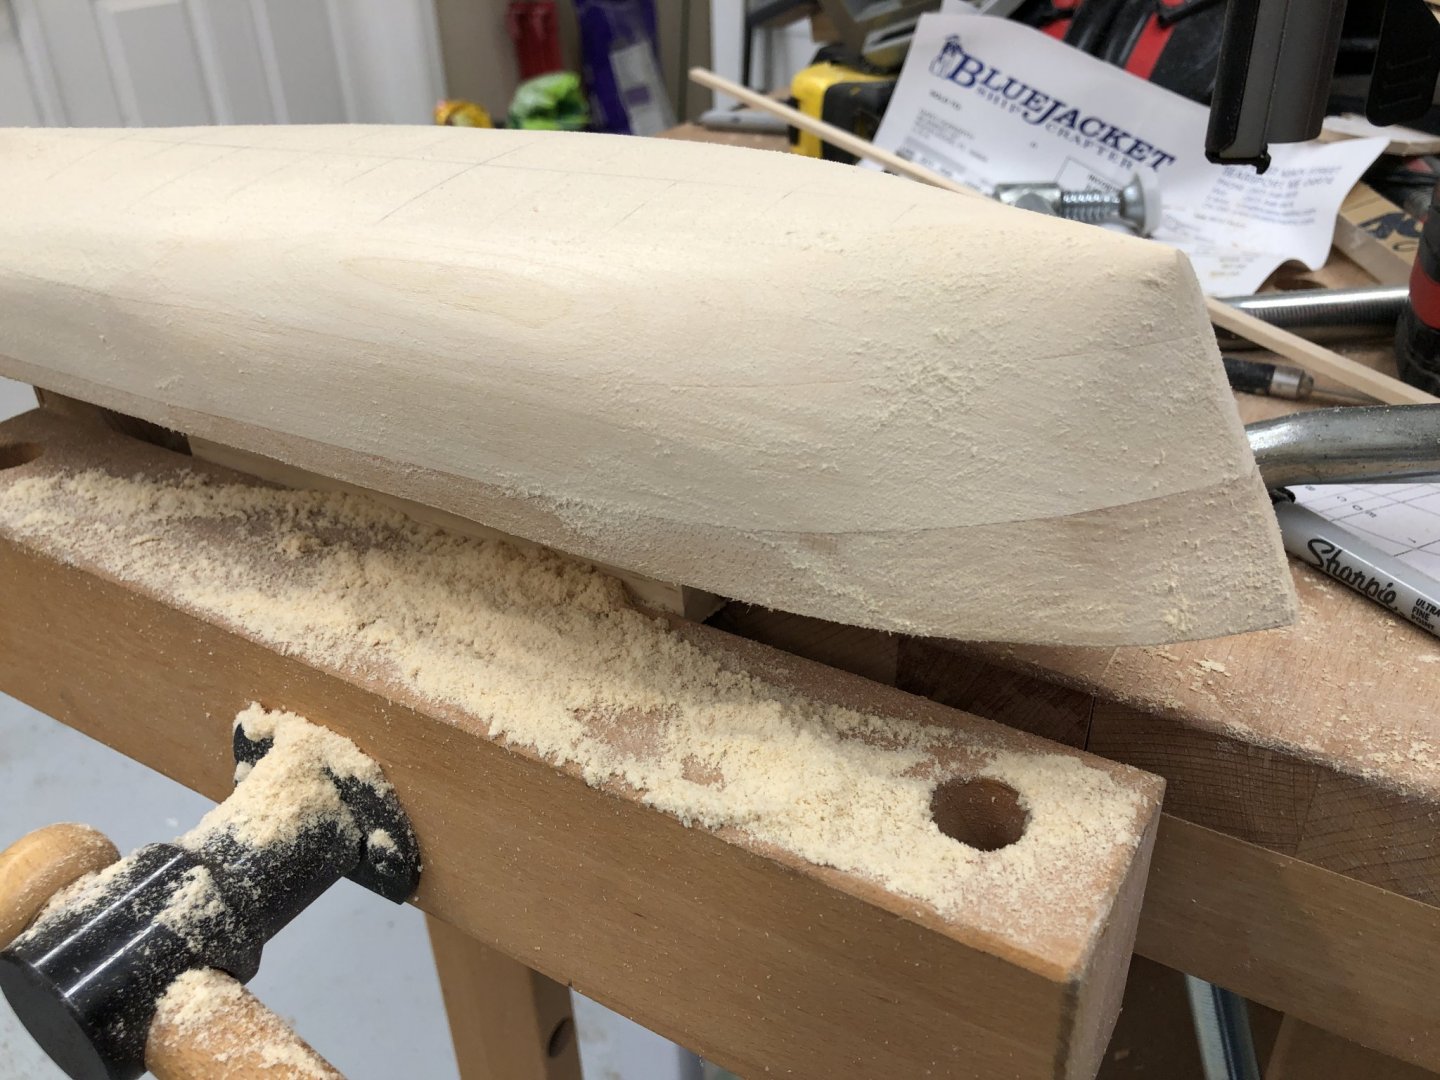
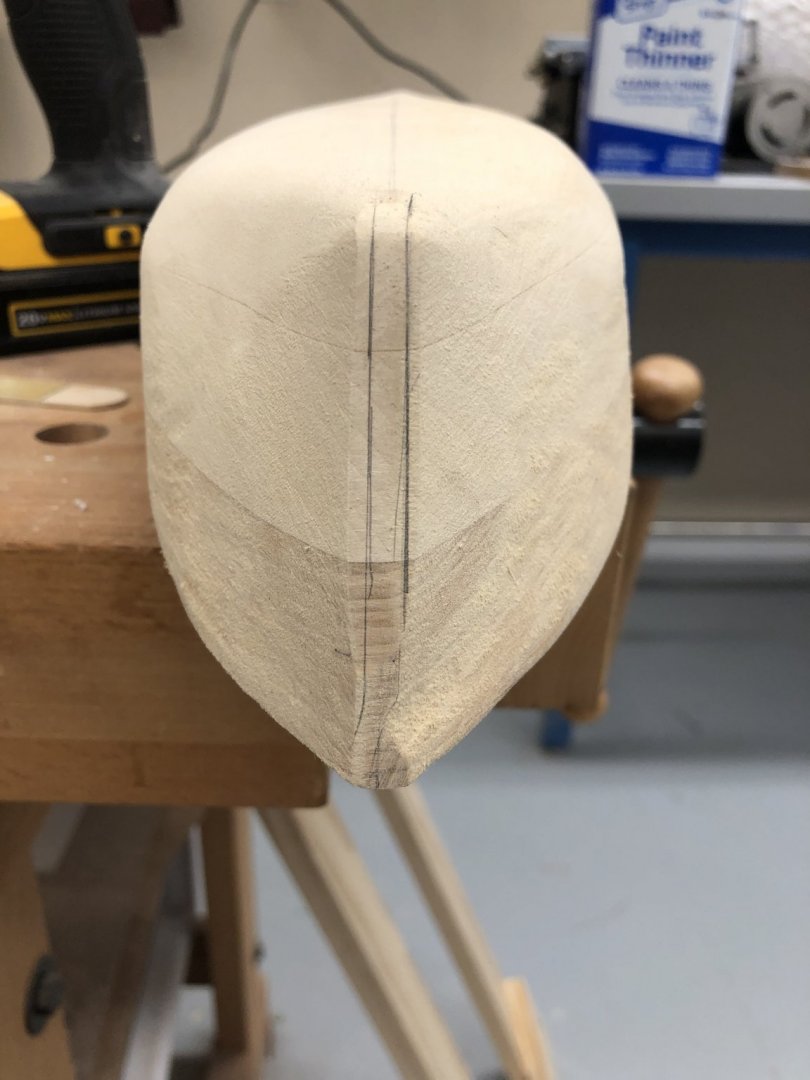
Once I got the bow more or less finished I followed the instructions and moved on to Station 8 - amidships, the extreme beam according to the hull sections. I got it pretty close (see below) and here is an idea of how much material was removed. My guess is 3-4mm (~0.1"). I am going to leave some material in excess of the templates since there will clearly be somem "ovewrall" hull sanding to be done when the templating is finished. Moving on to stations 9 and 7
- 166 replies
-
- 3
-
-
- fannie a gorham
- finished
- (and 1 more)
-
Mark - house guests are gone and the cleaning crew finished up so there is n o reason not to "get to work". Besides it is going to be cold here tonight, like 45 - Brrrrrr. Chris - I certainly do not intend to sand 3/4" off the hull. When I get the stern and bow shaped correctly I will measure again (although I doubt there will be much change).
- 166 replies
-
- 2
-
-
- fannie a gorham
- finished
- (and 1 more)
-
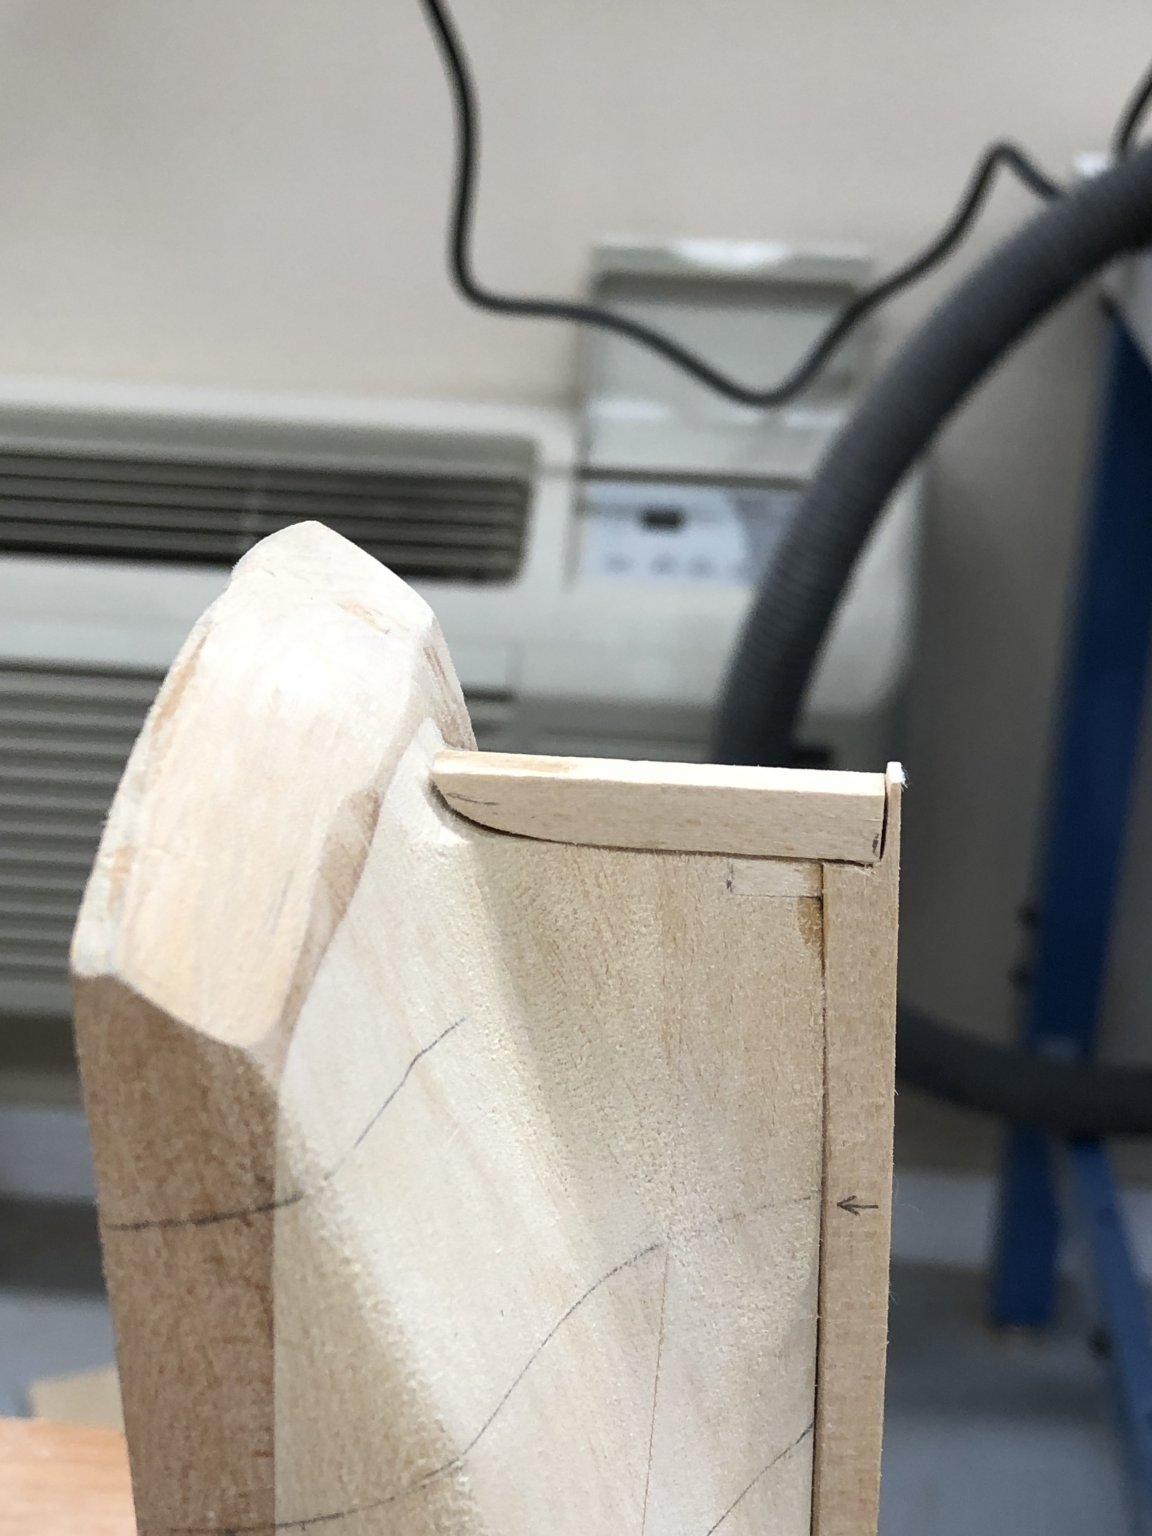
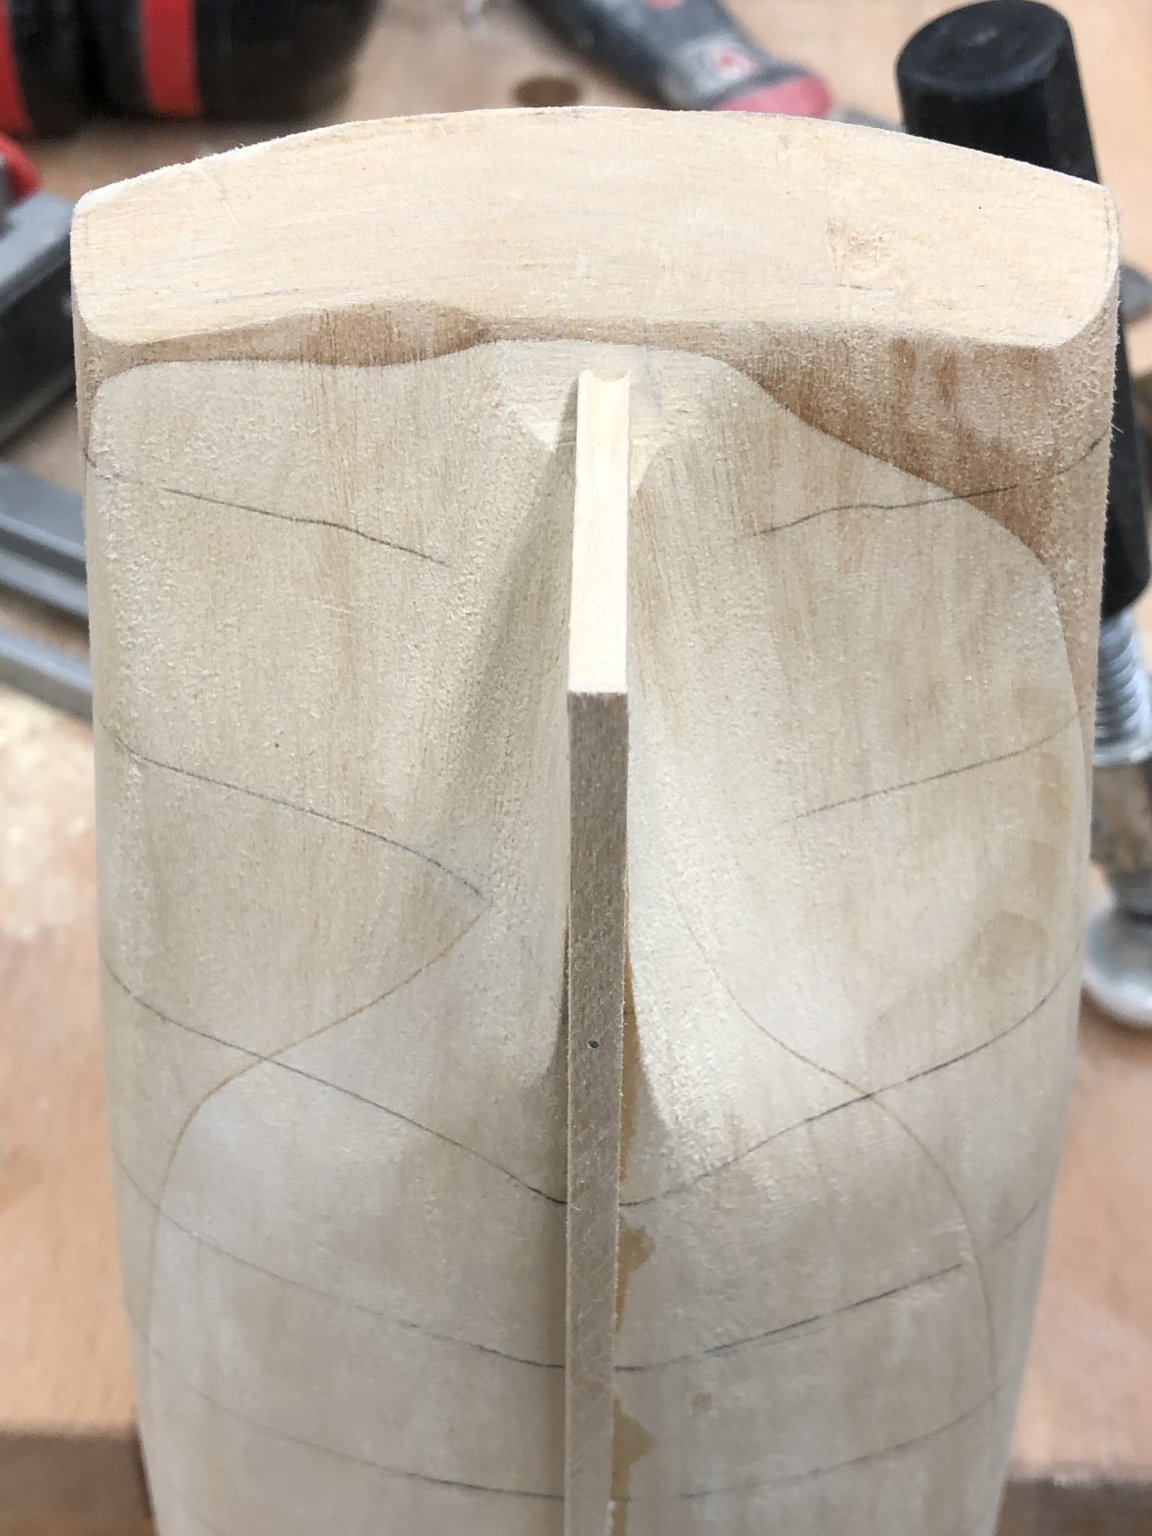
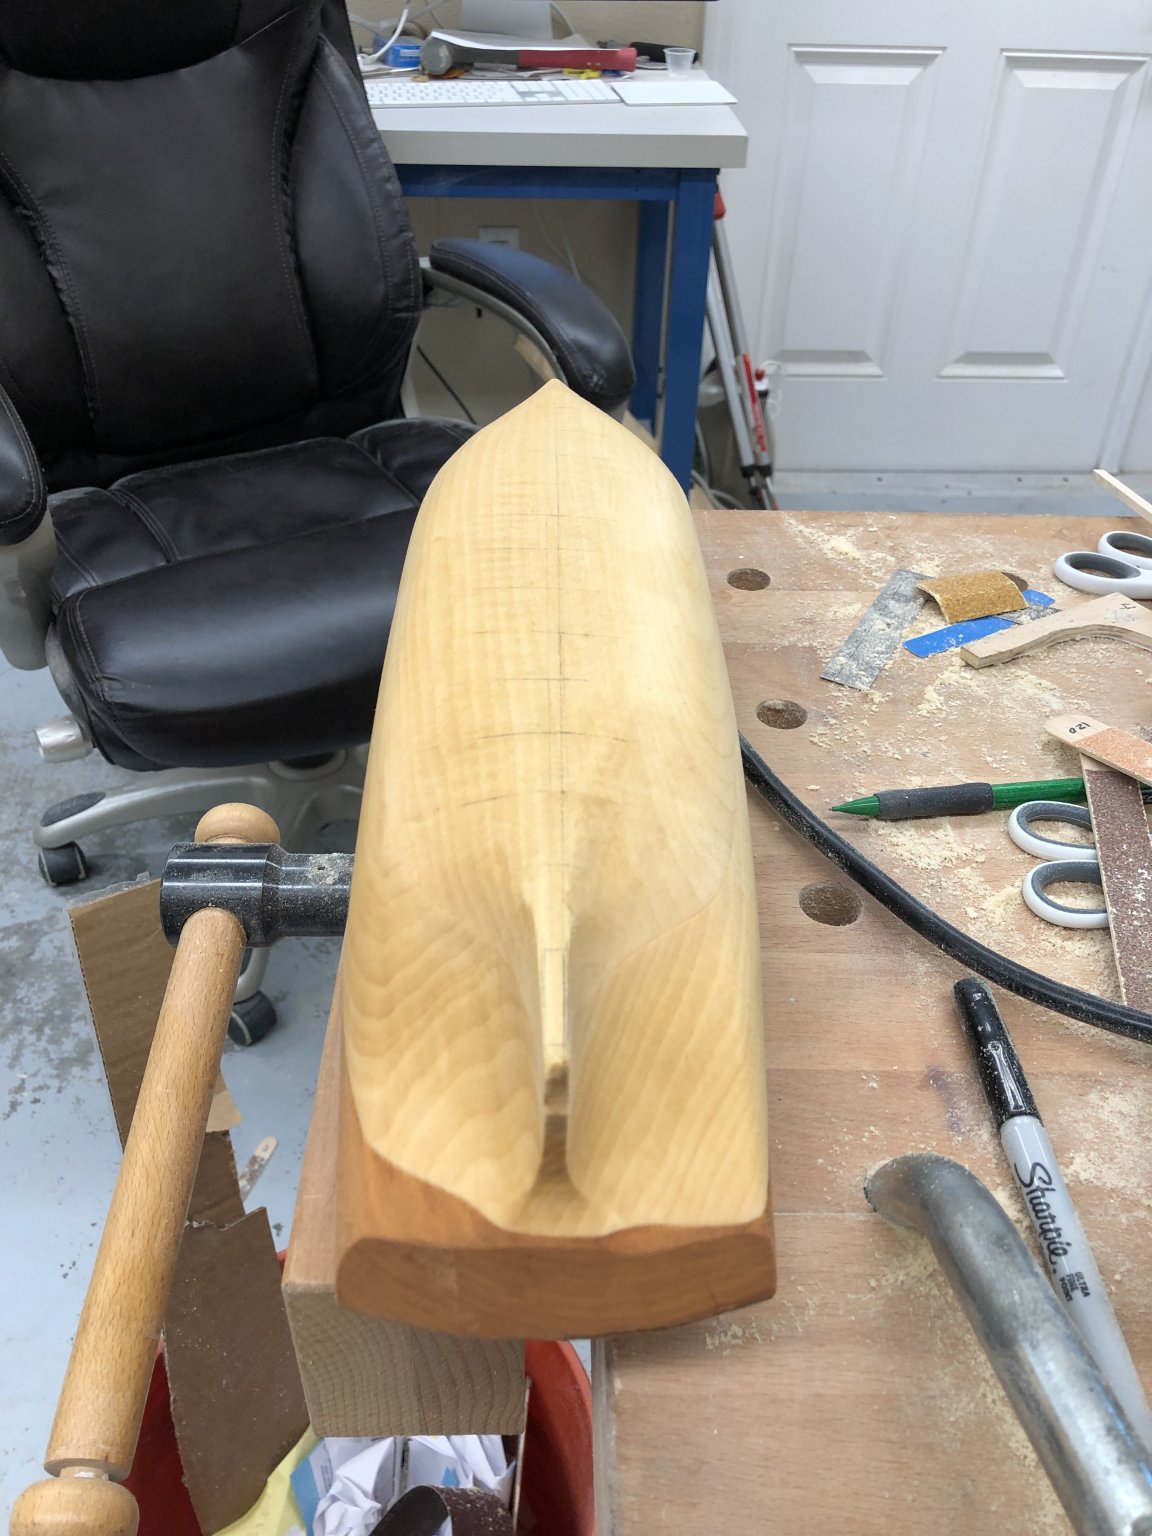
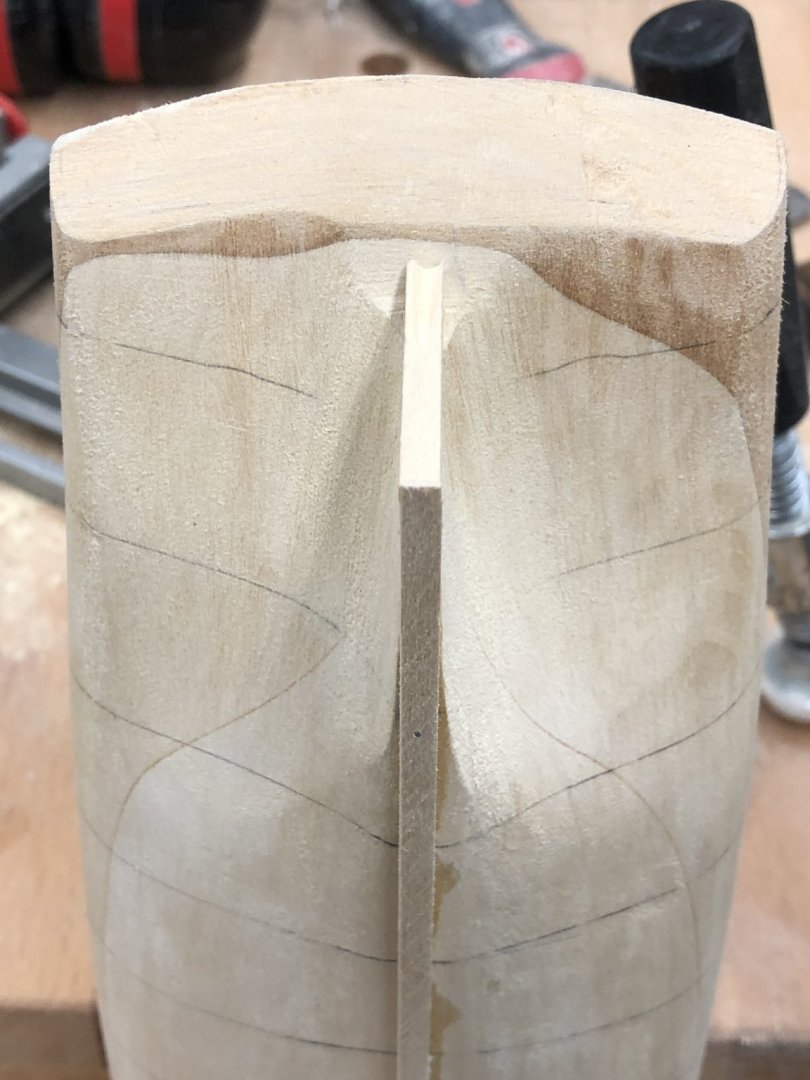
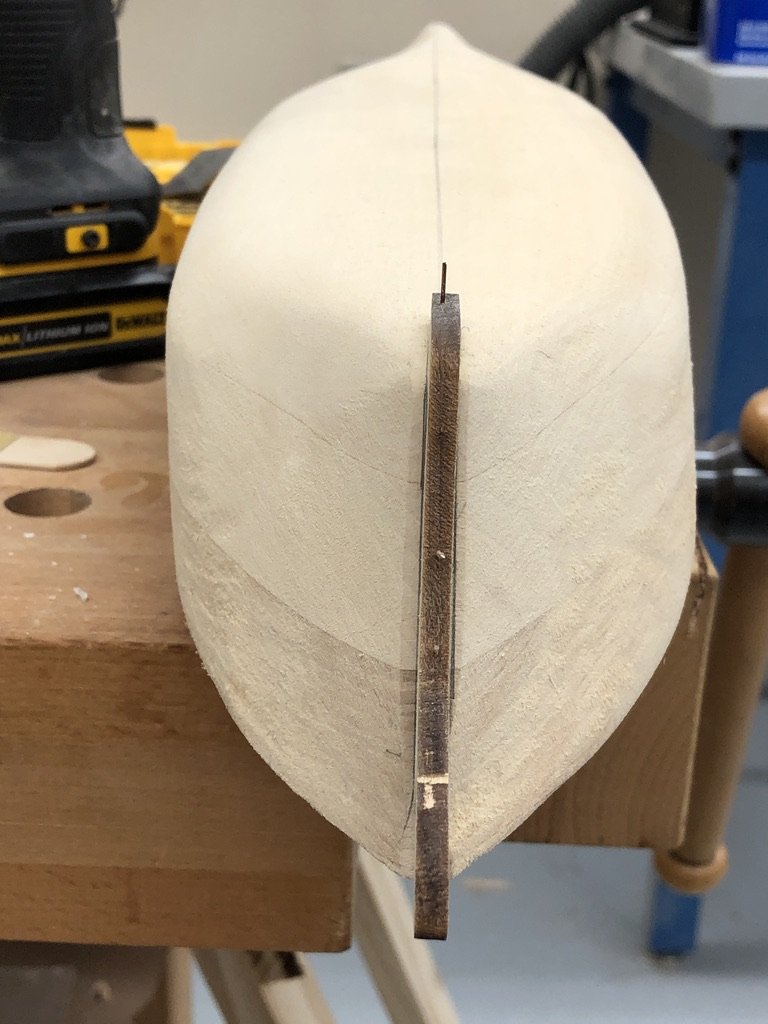
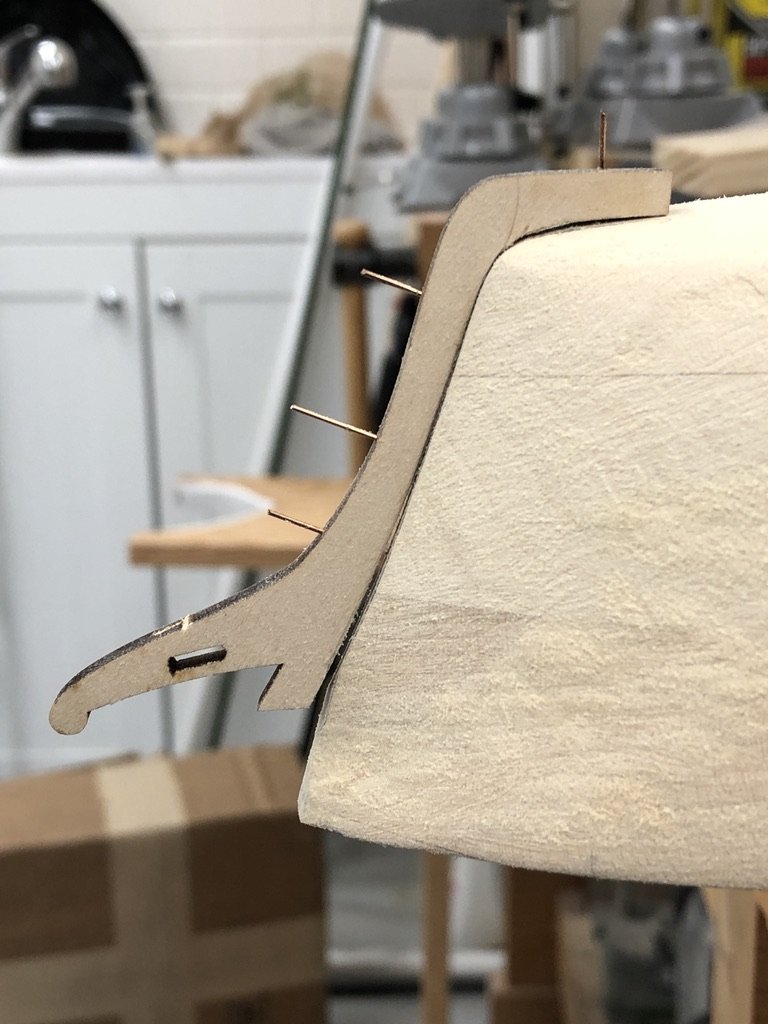
I got tired of working the stern (which appears to need a lot of work) and switched to the bow. Along the way I took the instructions advice and screwed a 7" piece of 1 X 3 into the hull so I could clamp it in the wood working vice. I got the stem piece from the kit and used it as the template for the bow. Does not make any sense to use anything else (assuming I don't break it somehow). First I used the Byrnes disk sander to get the bow to a straight line below the bulwarks then used a 60 grit sanding sticks for the "heavy lifting" and a 180 grit when I got close. When I had the profile correct I drilled a set of .024" holes in the stem and put pieces of .020 phosphor-bronze wire in the holes to hold it in place while I traced the edges on the hull. Next task is to bring the hull edges to the pencil marks so they form the hull/keel joint. I may put a little taper on the hull side of the stem to serve as a rabbit if I decide to plank the hull over the solid. It will not be much as I plan on using 1/32 thick planking if I go that route.
- 166 replies
-
- 2
-
-
- fannie a gorham
- finished
- (and 1 more)