cdrusn89
-
Posts
1,915 -
Joined
-
Last visited
Content Type
Profiles
Forums
Gallery
Events
Everything posted by cdrusn89
-
 Completed work on the sprintsail yard prior to mounting on bowsprit. Considering all the "yard work" coming up I built a little jig to hold the yards securely while adding foot ropes and the various block that have a home on the yards. I added the yard lift tackle to the bowsprit as well. Hopefully I will not regret having those lift lines "hanging around" while I add the jibboom and FJB.
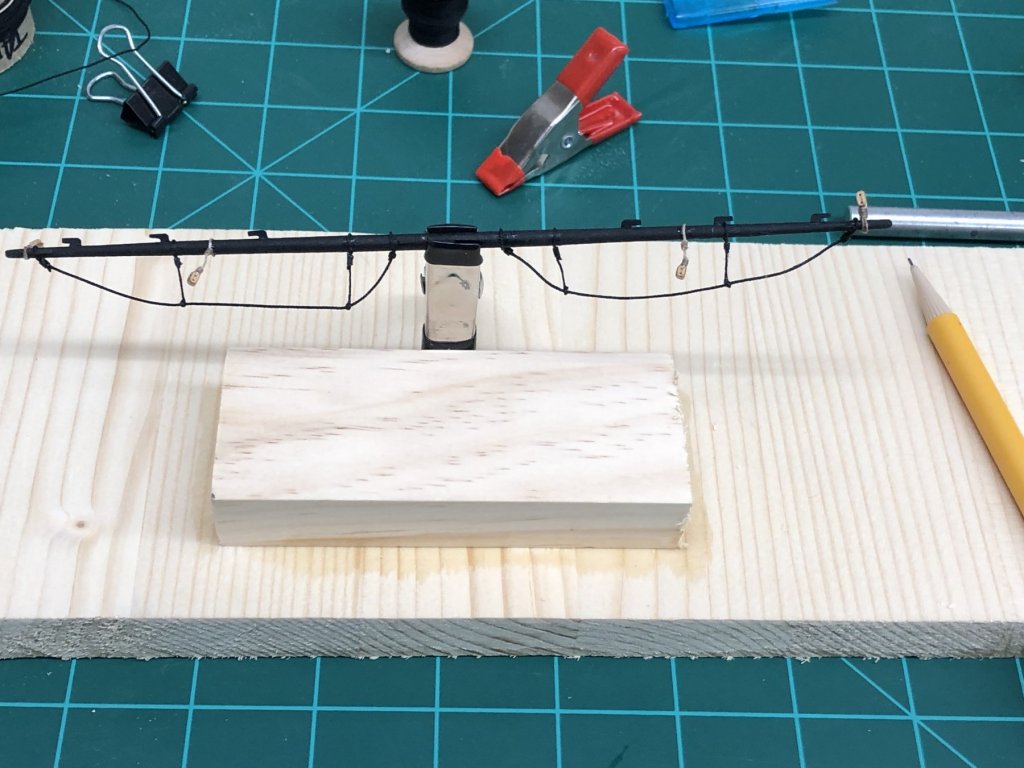
- 367 replies
-
- 1
-

-
- model shipways
- niagara
- (and 1 more)
-
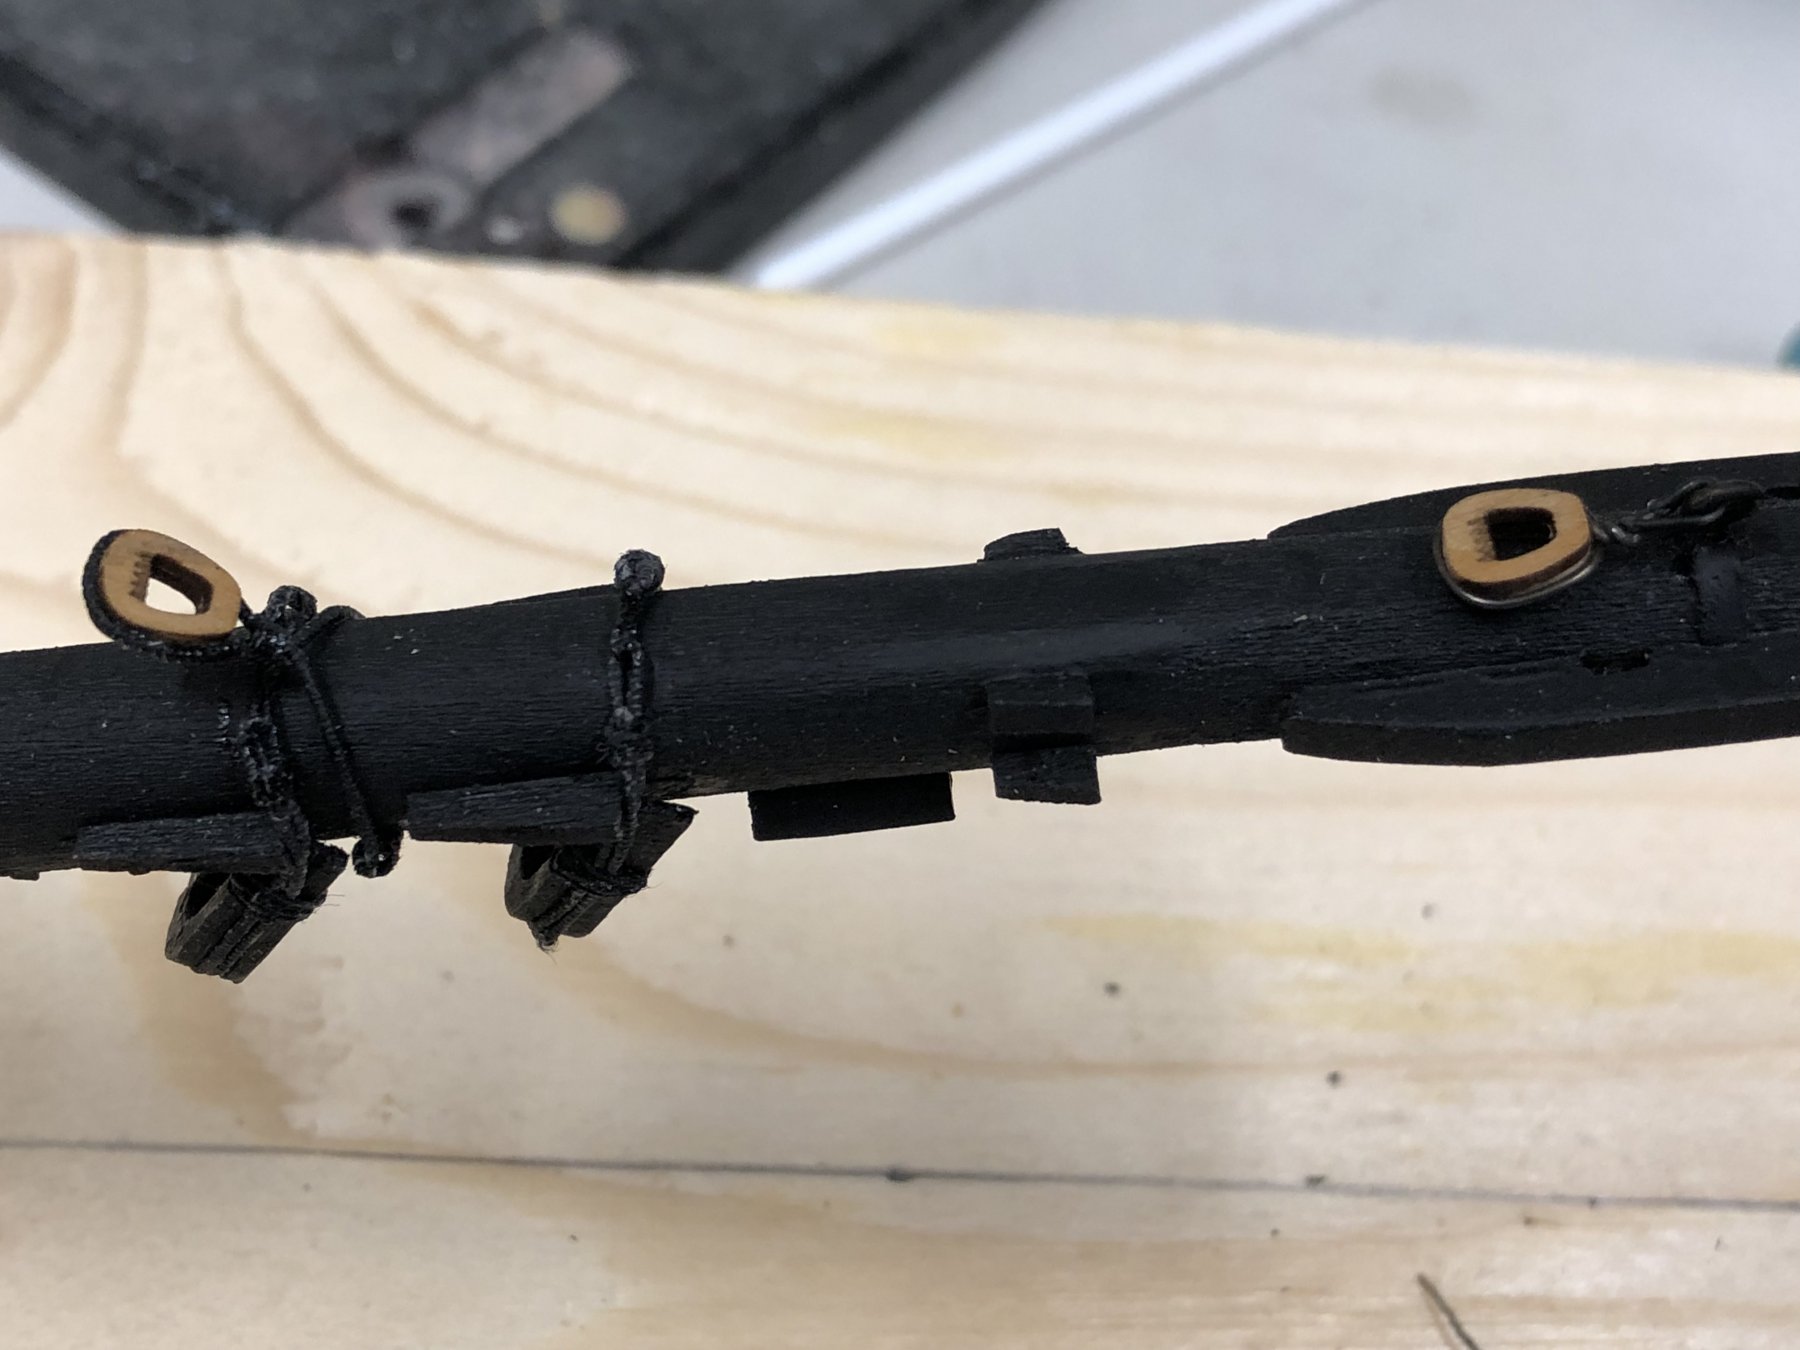
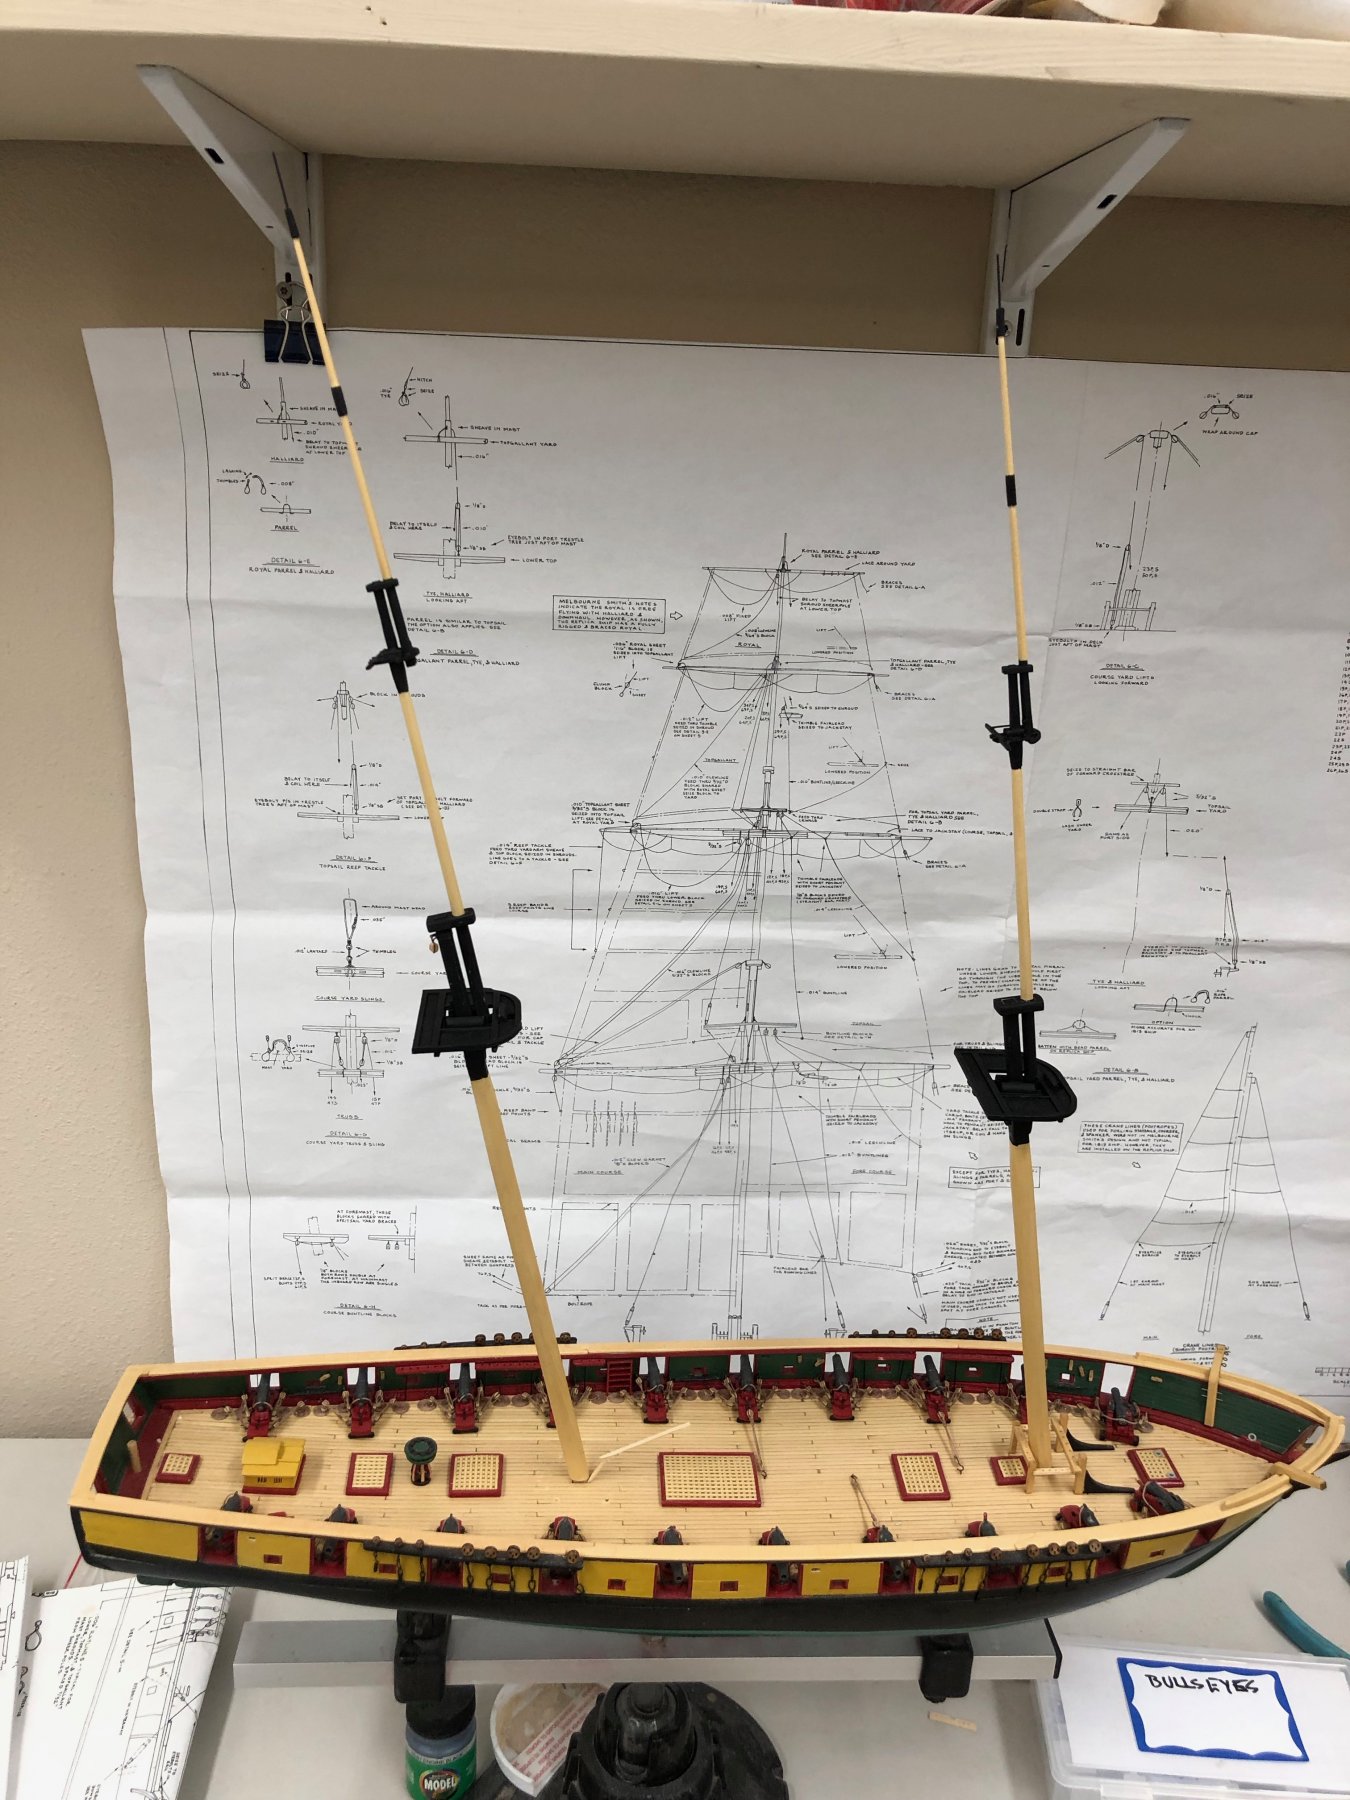
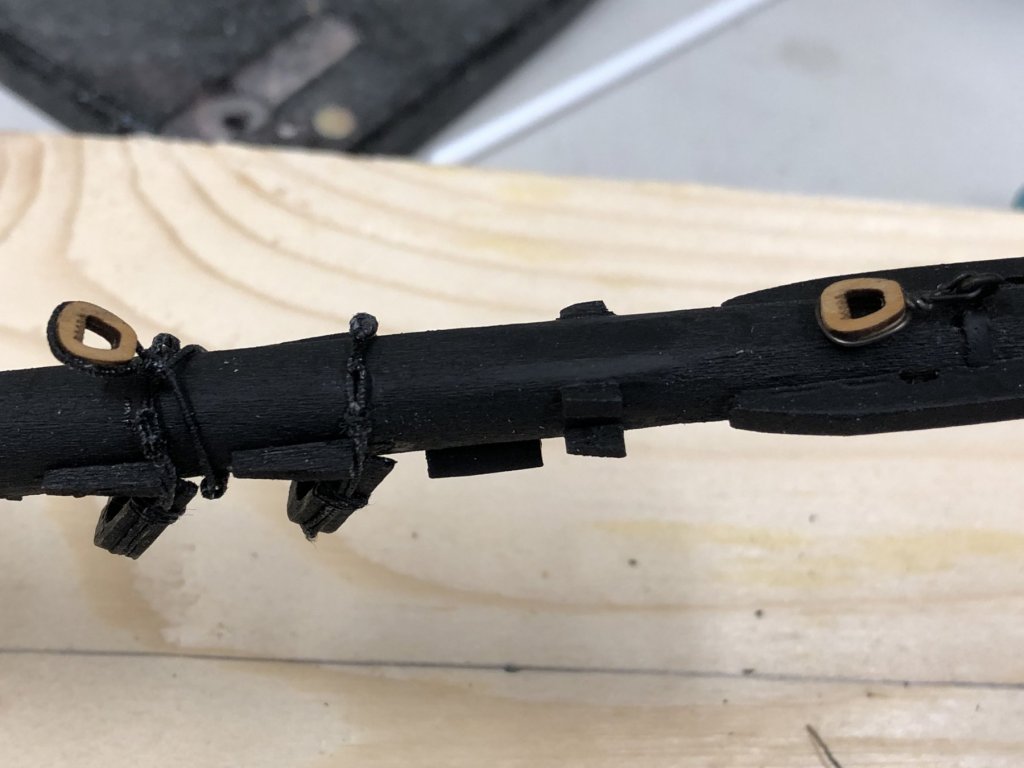
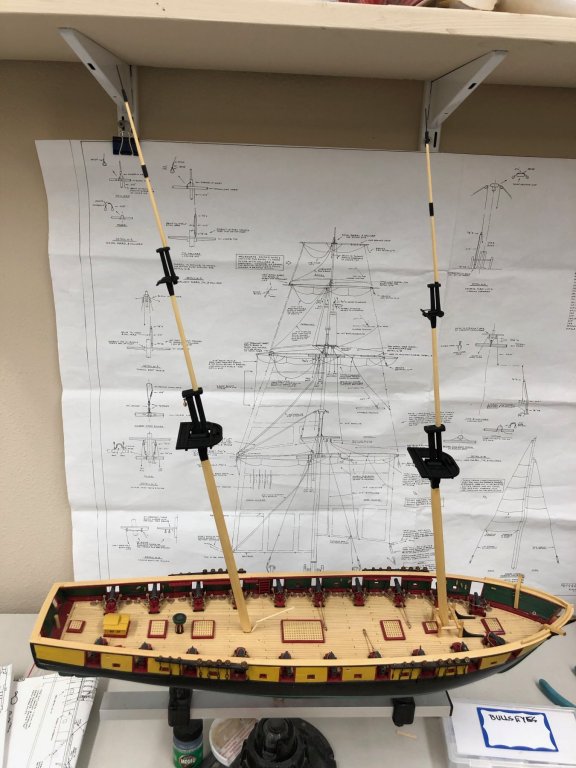
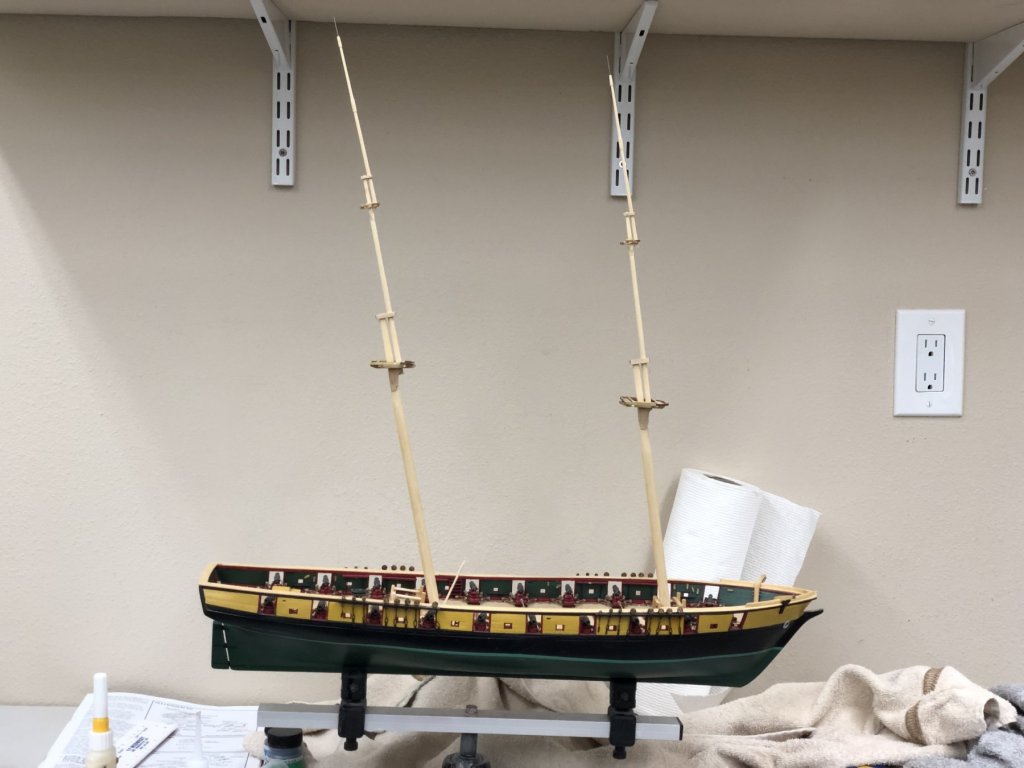
Slowly working off the various things that attach to the bowsprit before attaching the jibboom. Here are the hearts for the bobstays. I used the Syren 5.5mm hearts instead of the 1/8" called for in the plans but I though the Syren hearts were too thick so I glued the outer two pieces together and filed a groove in that. I think it looks okay if not exactly "in accordance with the plans". As you can see I also got the Fore Stay Preventer hearts. Got the Bowsprit shroud collar attached too. I (finally) read the note on the plans about the footrope for the Sprintsail yard (not show on the drawing of the sprintsail yard, nor is the note on that sheet). So I am now preparing tom put a footrope on the spintsail yard before it gets attached to the bowsprit. Since the spintsail yard sling goes right behind the jibboom I think it probably goes on before the jibboom. Paint is dry on the masts and I could not resist a dry fit. I also finally got around to hanging the plans up where I can see them I have the sail plan going to the immediate left of this one.
- 367 replies
-
- 1
-
-
- model shipways
- niagara
- (and 1 more)
-
Tom, Clearly there would have to have been some way to get the anchor rode through the hatch. Maybe they only had the anchors connected to the rode "as needed" although Lake Erie is shallow enough most places that anchoring would have been at least possible. I am not sure what would happen on my version in heavy weather probably disconnect the anchors (not very useful in heavy weather) and put the solid hatch as you have it over the grating. You could just leave the anchor rode off the model or just run them to the hawse and not worry about it beyond that.
-
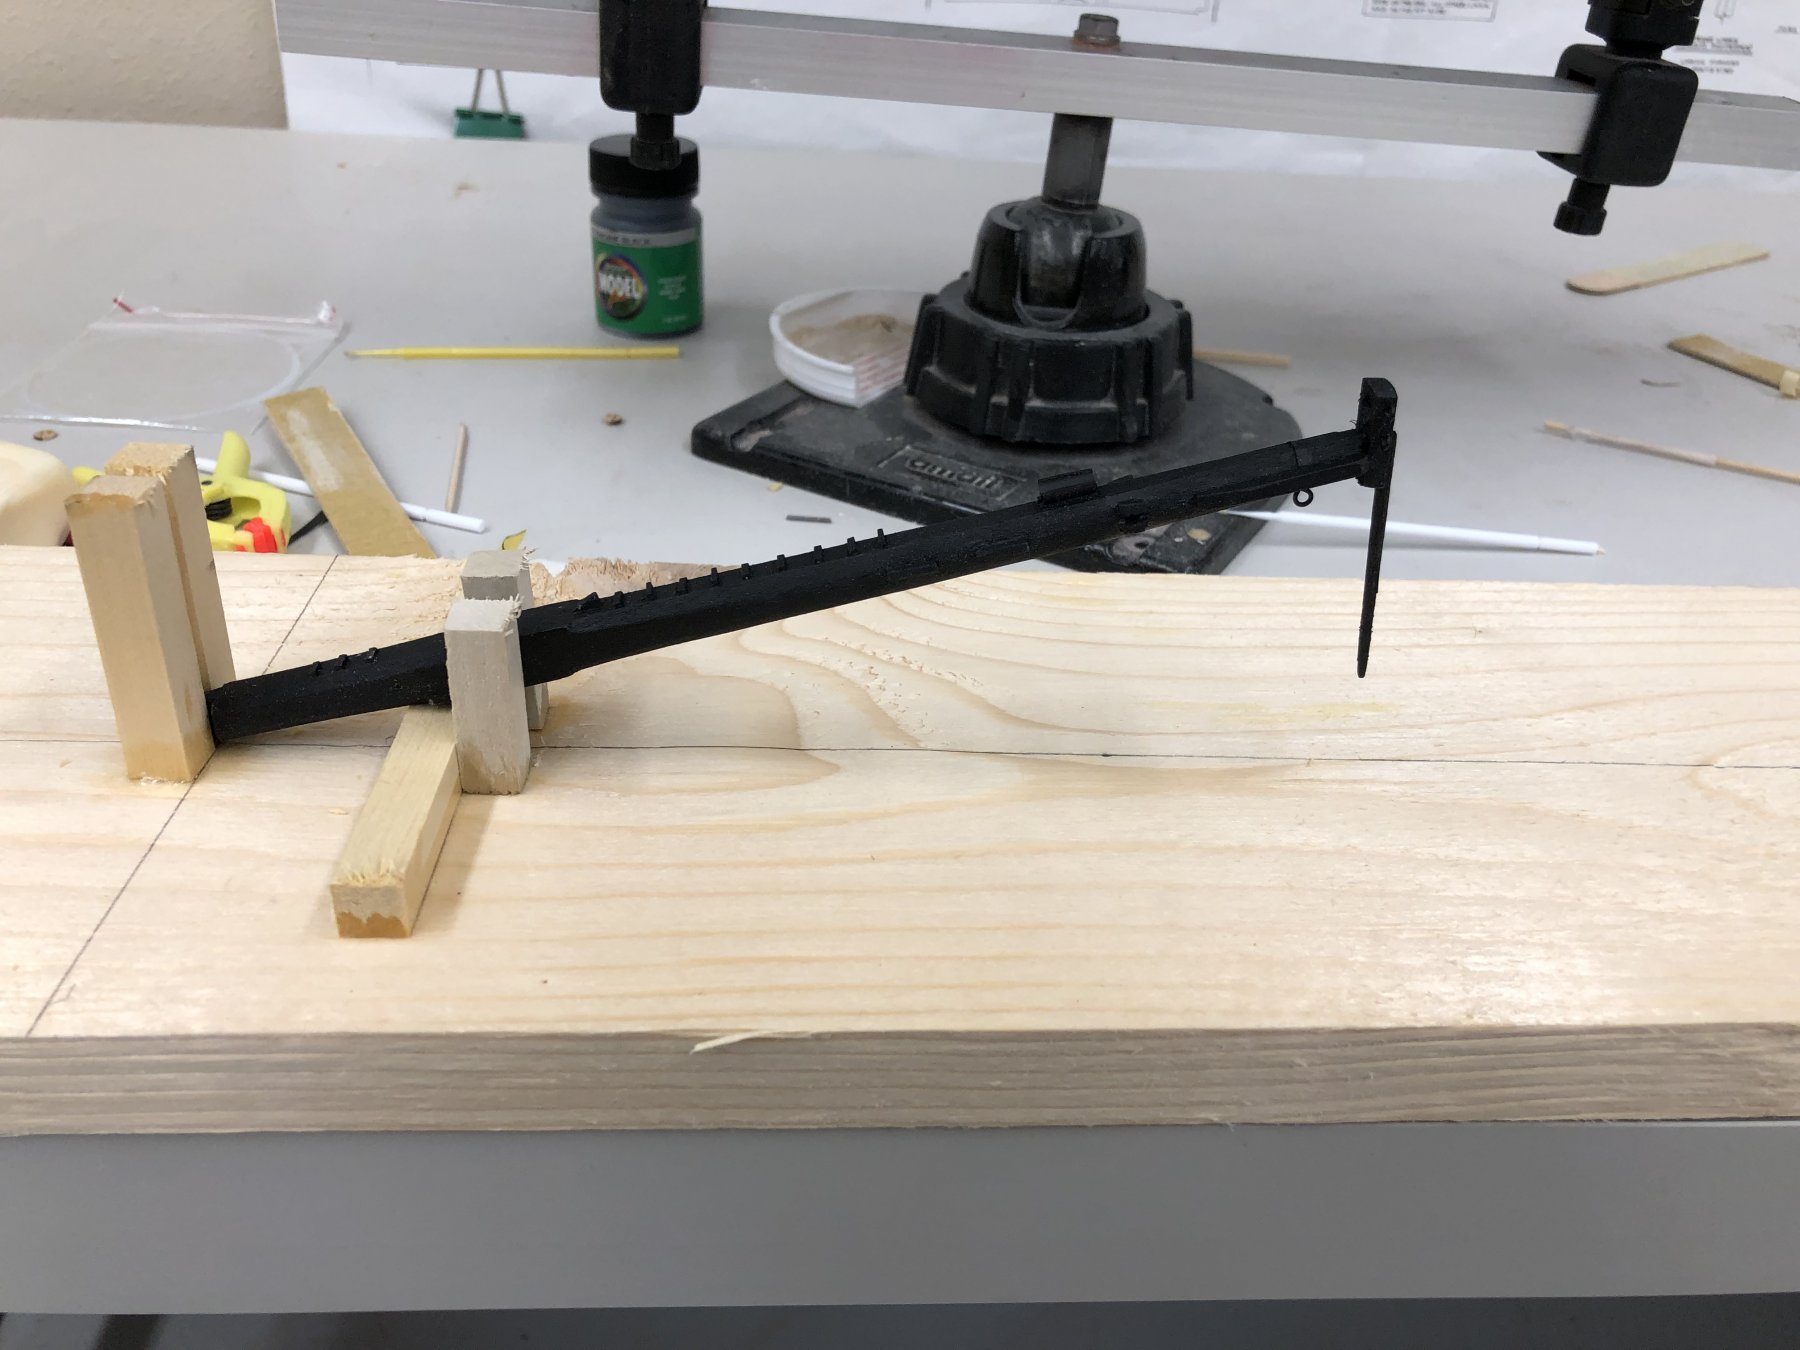
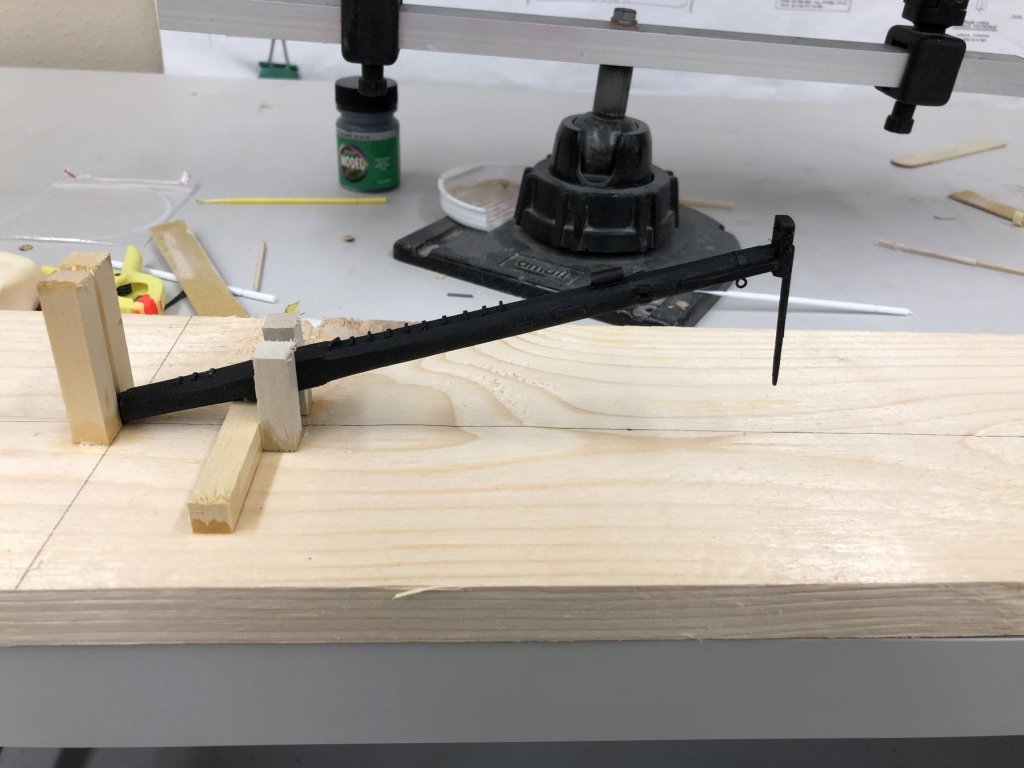
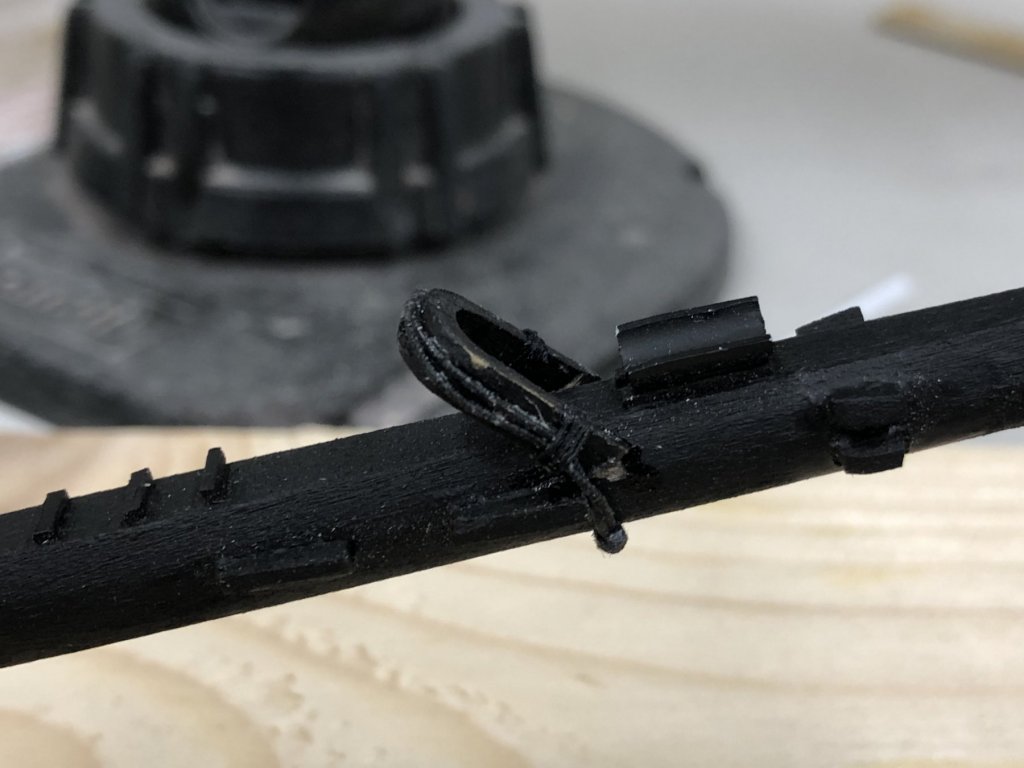
I decided to work on the bowsprit while waiting for the paint to dry on the masts. I built a jig to hold the bowsprit while I work on assembling and doing what rigging I can before it going on the ship. I read on one of the build logs that you should get as much of the fitting on the bowsprit before adding the jibboom and FJB so I started with the Forestay heart. I decided (not sure why, maybe I needed to see some return on the Syren Serving Machine I bought last year) to serve the lines that secure the heart to the bowsprit. The serving machine works as advertised and it only took 15 or 20 minutes to get two pieces of .025 line served with 80 WT thread. I did have to add a collar in the tube where the thread passes through to the crank to keep the line from abrading and eventually failing. That is the good news. The bad news is that I have a hard time noticing that the line is served, even when I know that it is. Am wondering if the effort to serve all the shrouds and stays, or even just the ends is worth the time and effort. Once you start on the shrouds you are pretty much committed -like pig at breakfast. So here is the bowsprit jig and the Fore Stay heart. The heart is only attached (for now) by the bridle. It needs to adapt to the correct angle when the Fore Stay is rigged. Yes, it needs some paint touch-up, all in good time. And the jig works for accessing the underside of the bowsprit too.
- 367 replies
-
- 2
-
-
- model shipways
- niagara
- (and 1 more)
-
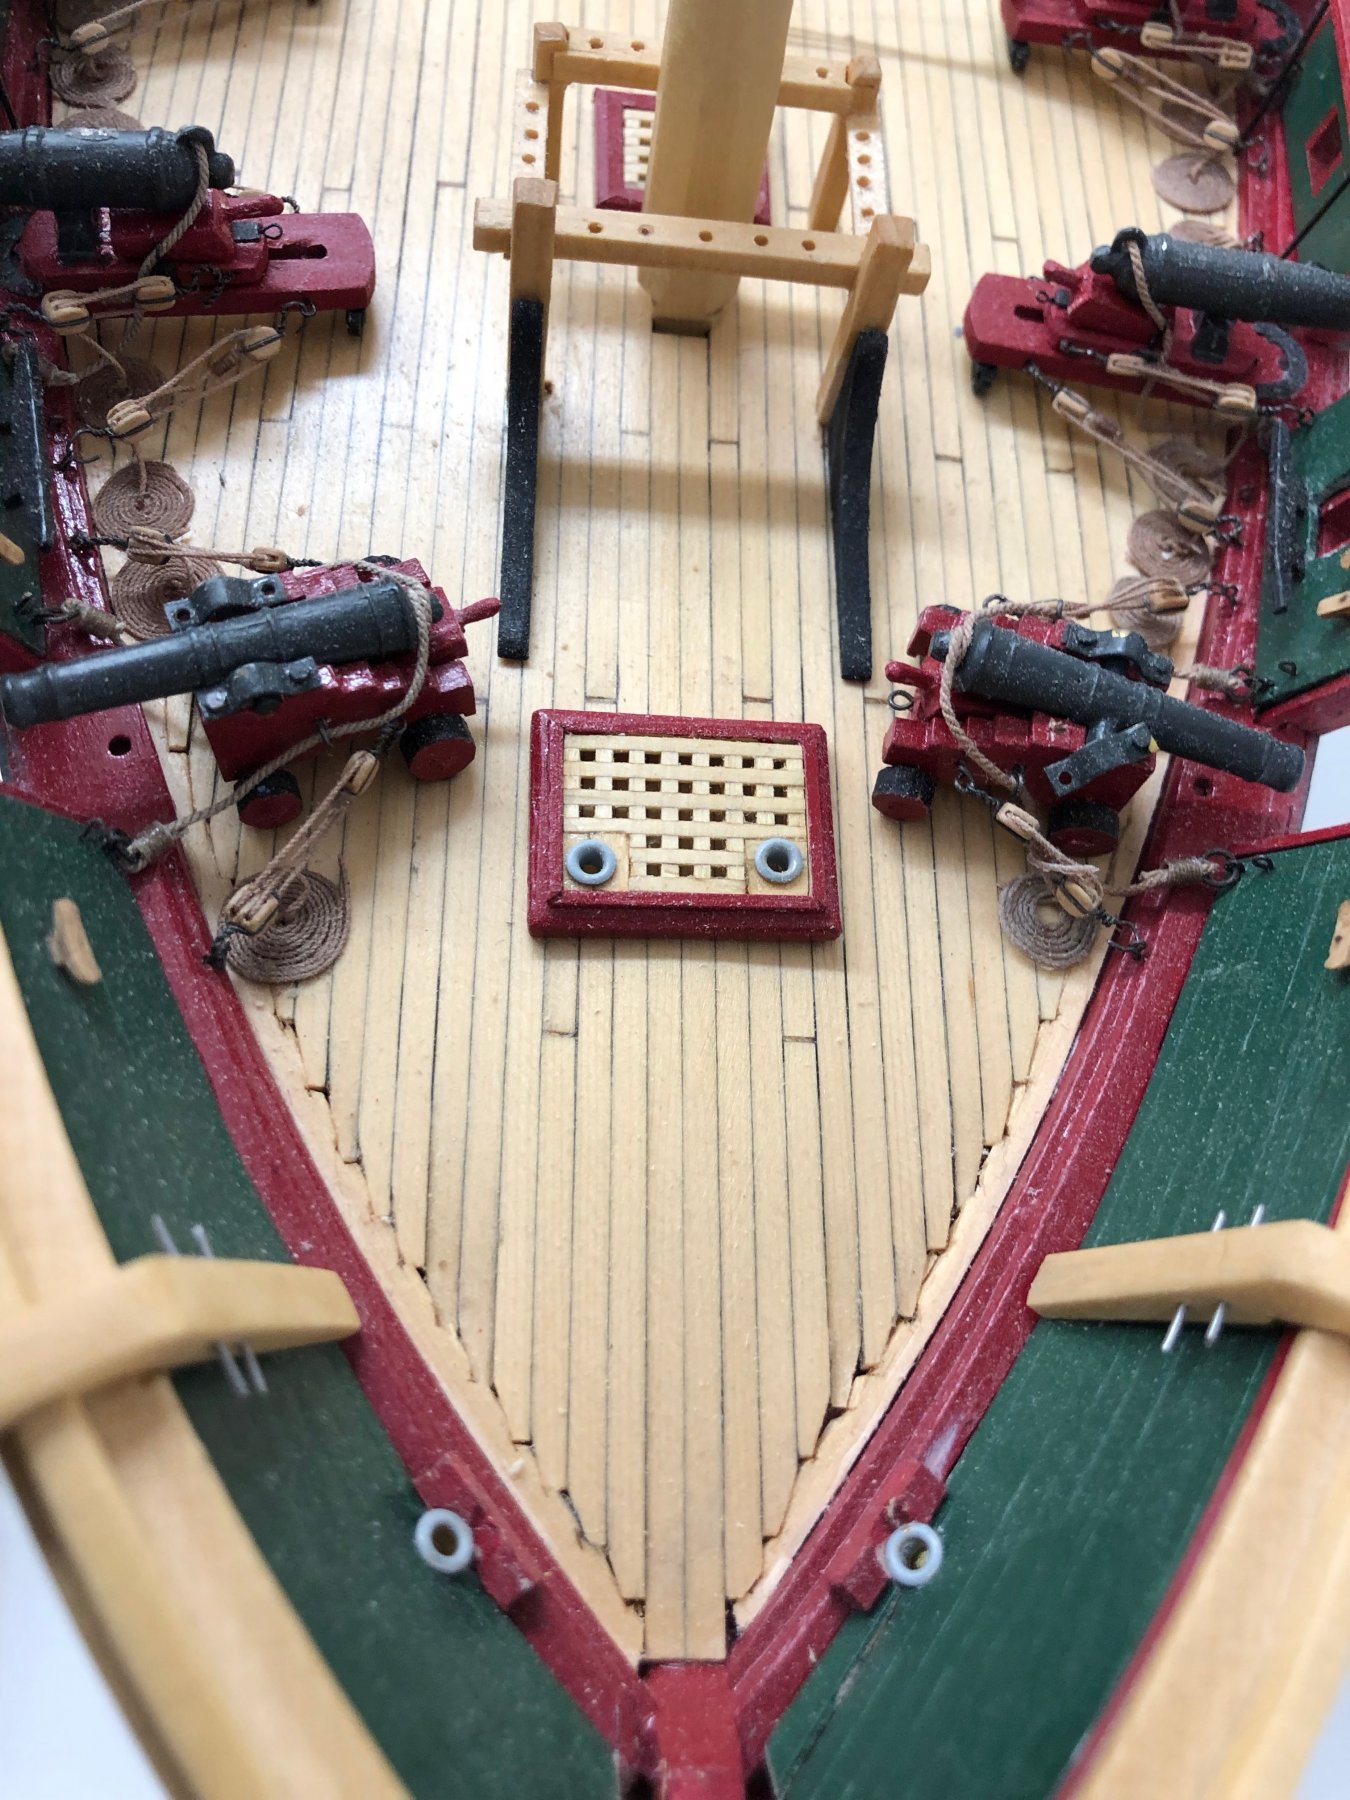
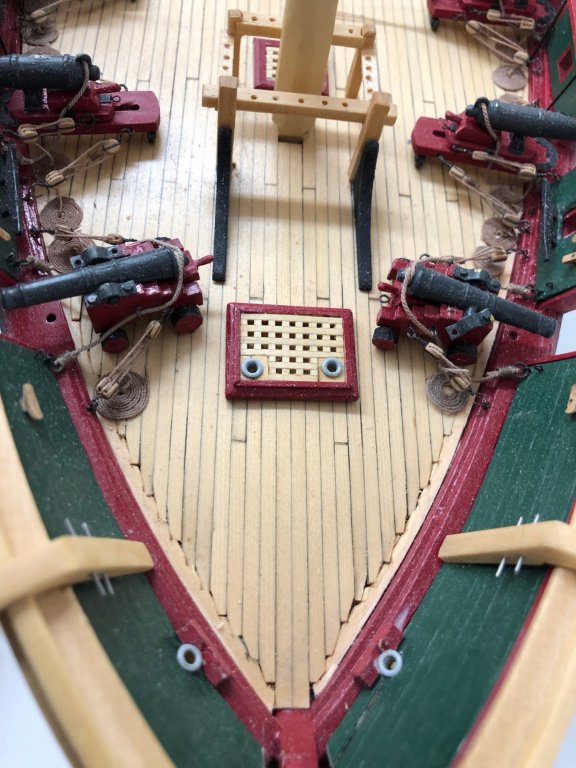
Tom, I think the anchor rode went into the fwd hatch. It would have cluttered up the deck too much running all the way back to the main hatch IMHO. Here is what I did. The hawse and these are painted gray to simulate the lead that was likely used to reduce abrasion to the anchor cables as they were handled.
-
Mike, The kit instructions show either method (interlocked as you suggest or the way Tom did them) but prefers the way Tom did it as it produces a thinner grating. I used Syren grating on my Niagara in yellow cedar to match the deck which I did in yellow cedar too.
-
Mike,
-
Tom - welcome aboard. I was beginning to think ship modelers were pretty scarce this side of Florida. They seems to have an active community on the other side (at least in and about Tampa) but I have not found anything on this side. Would be great to get together sometime.
-
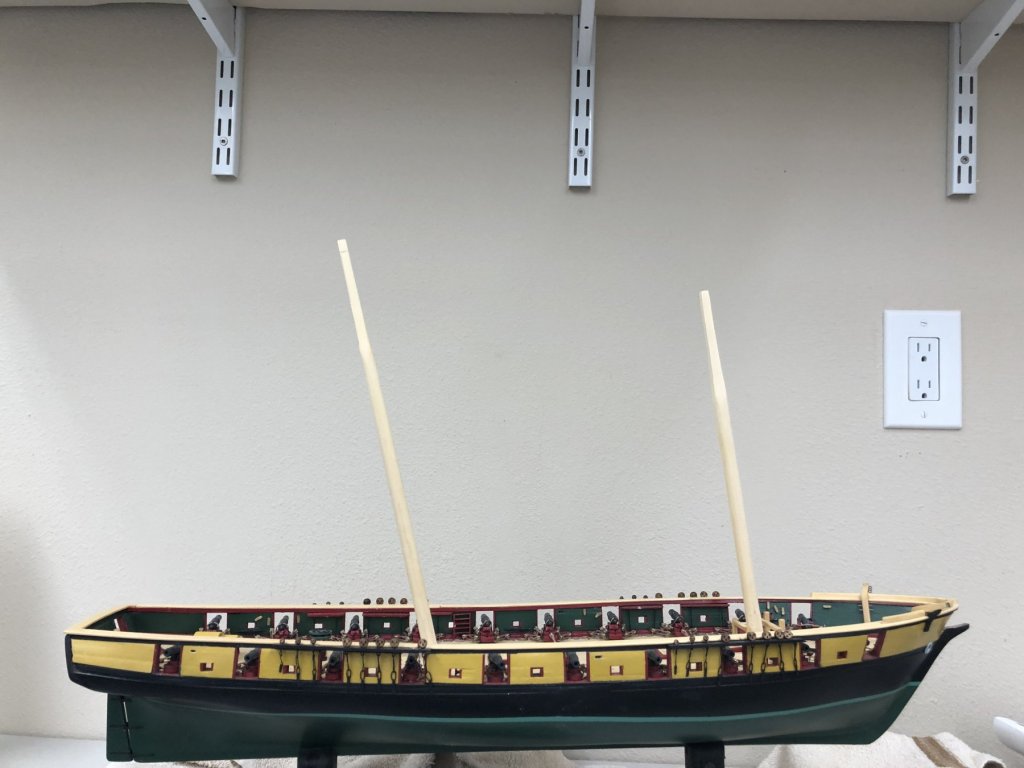
Thanks Jim - Note the toothpick stuck in the base of the main mast to get it to line up with the centerline. Should have been more careful forming the tab that fits into the hull.
-
Tom, Burton pendants - they are shown in the plans (sheet 5, very top left hand corner) and in the period rigging book I have (Rigging Period Ship Models by Lennarth Petersson) but they appear to just hang there (along with the top mast shrouds although the book shows them at the top of the lower masts also). I can't see anywhere in the plans where something is attached to them. If they really just hang there I will probably not include them. There is sooooo much rigging here I am looking for way to simplify things. Any thoughts?
-
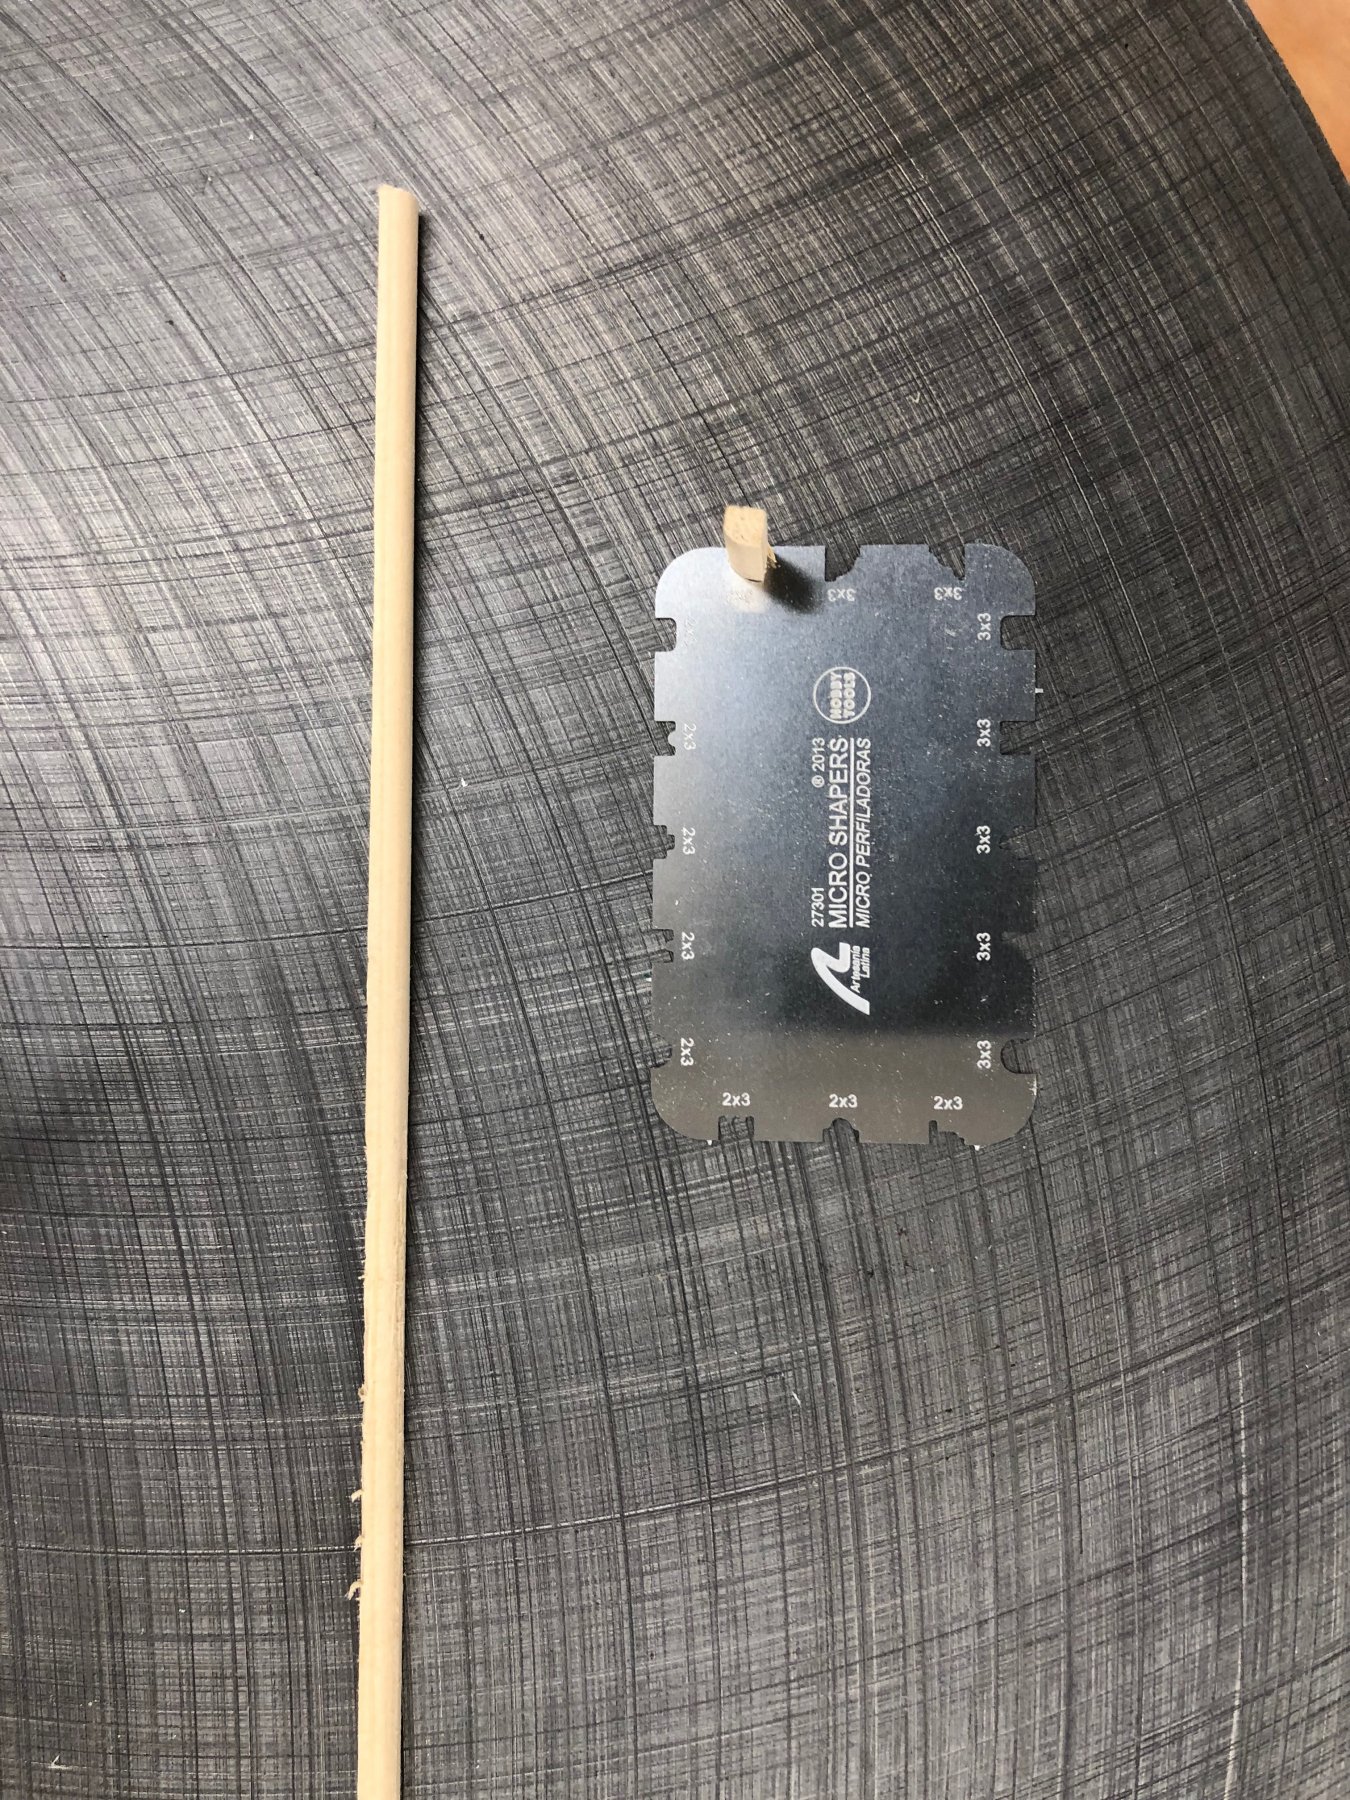
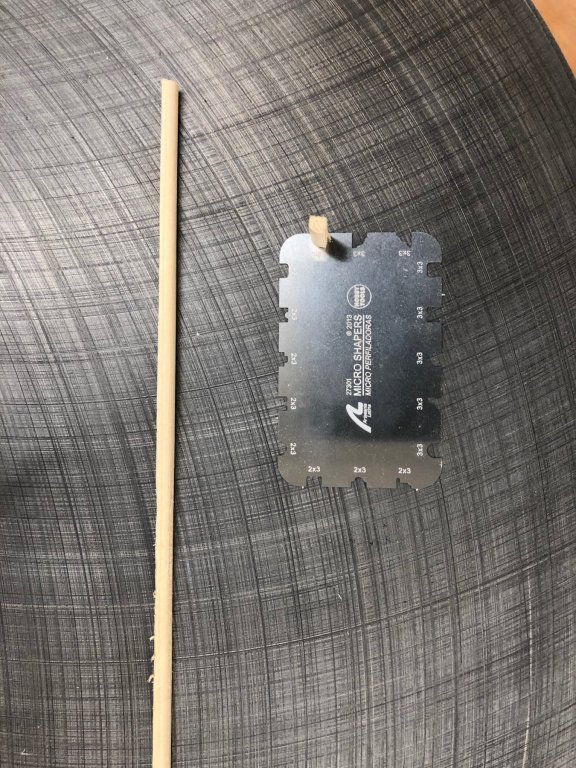
I continued working the upper masts. It took six tries to get two acceptable royal/top gallant masts. They get pretty fragile if you thin them down per the plans (don't ask me how I know). I am sticking with using .032 wire for the extreme upper section. Once they are painted it will look okay (I hope - not really interested in try to make any more masts. I dry fit all the masts to see how they look all together and I am impressed with how tall they are. I am going to see the replica this summer - should be quite the sight. I also got a chance to use the molding cutters I got from Artesania Latina for Christmas. I used it to cut the quarter round needed for the bolsters on the mast platforms. I used 1/8" X 1/8" stock and the quarter round 3 X 3 (millimeters I assume) cutter. Came out pretty good but I am sure there is a technique to this that I have not yet mastered. More practice required before tackling anything more complex. Should be great for adding a little spice to deck furniture. Speaking of sights - I got to sail on the James Craig (1874 iron hulled, three masted barque) through Sydney harbour (as the Aussies spell it) and out into "The Great Southern Ocean (aka South Pacific) in early December. Quite a sight with four sails set on the fore mast, three on the main, spanker, two jibs and two staysails. An all volunteer effort with the paying passengers lending a hand where necessary to get the sails raised and set.

- 367 replies
-
- 2
-
-
- model shipways
- niagara
- (and 1 more)
-
Nice and warm here in Florida too - low 60s now, high of 80 tomorrow😎
-
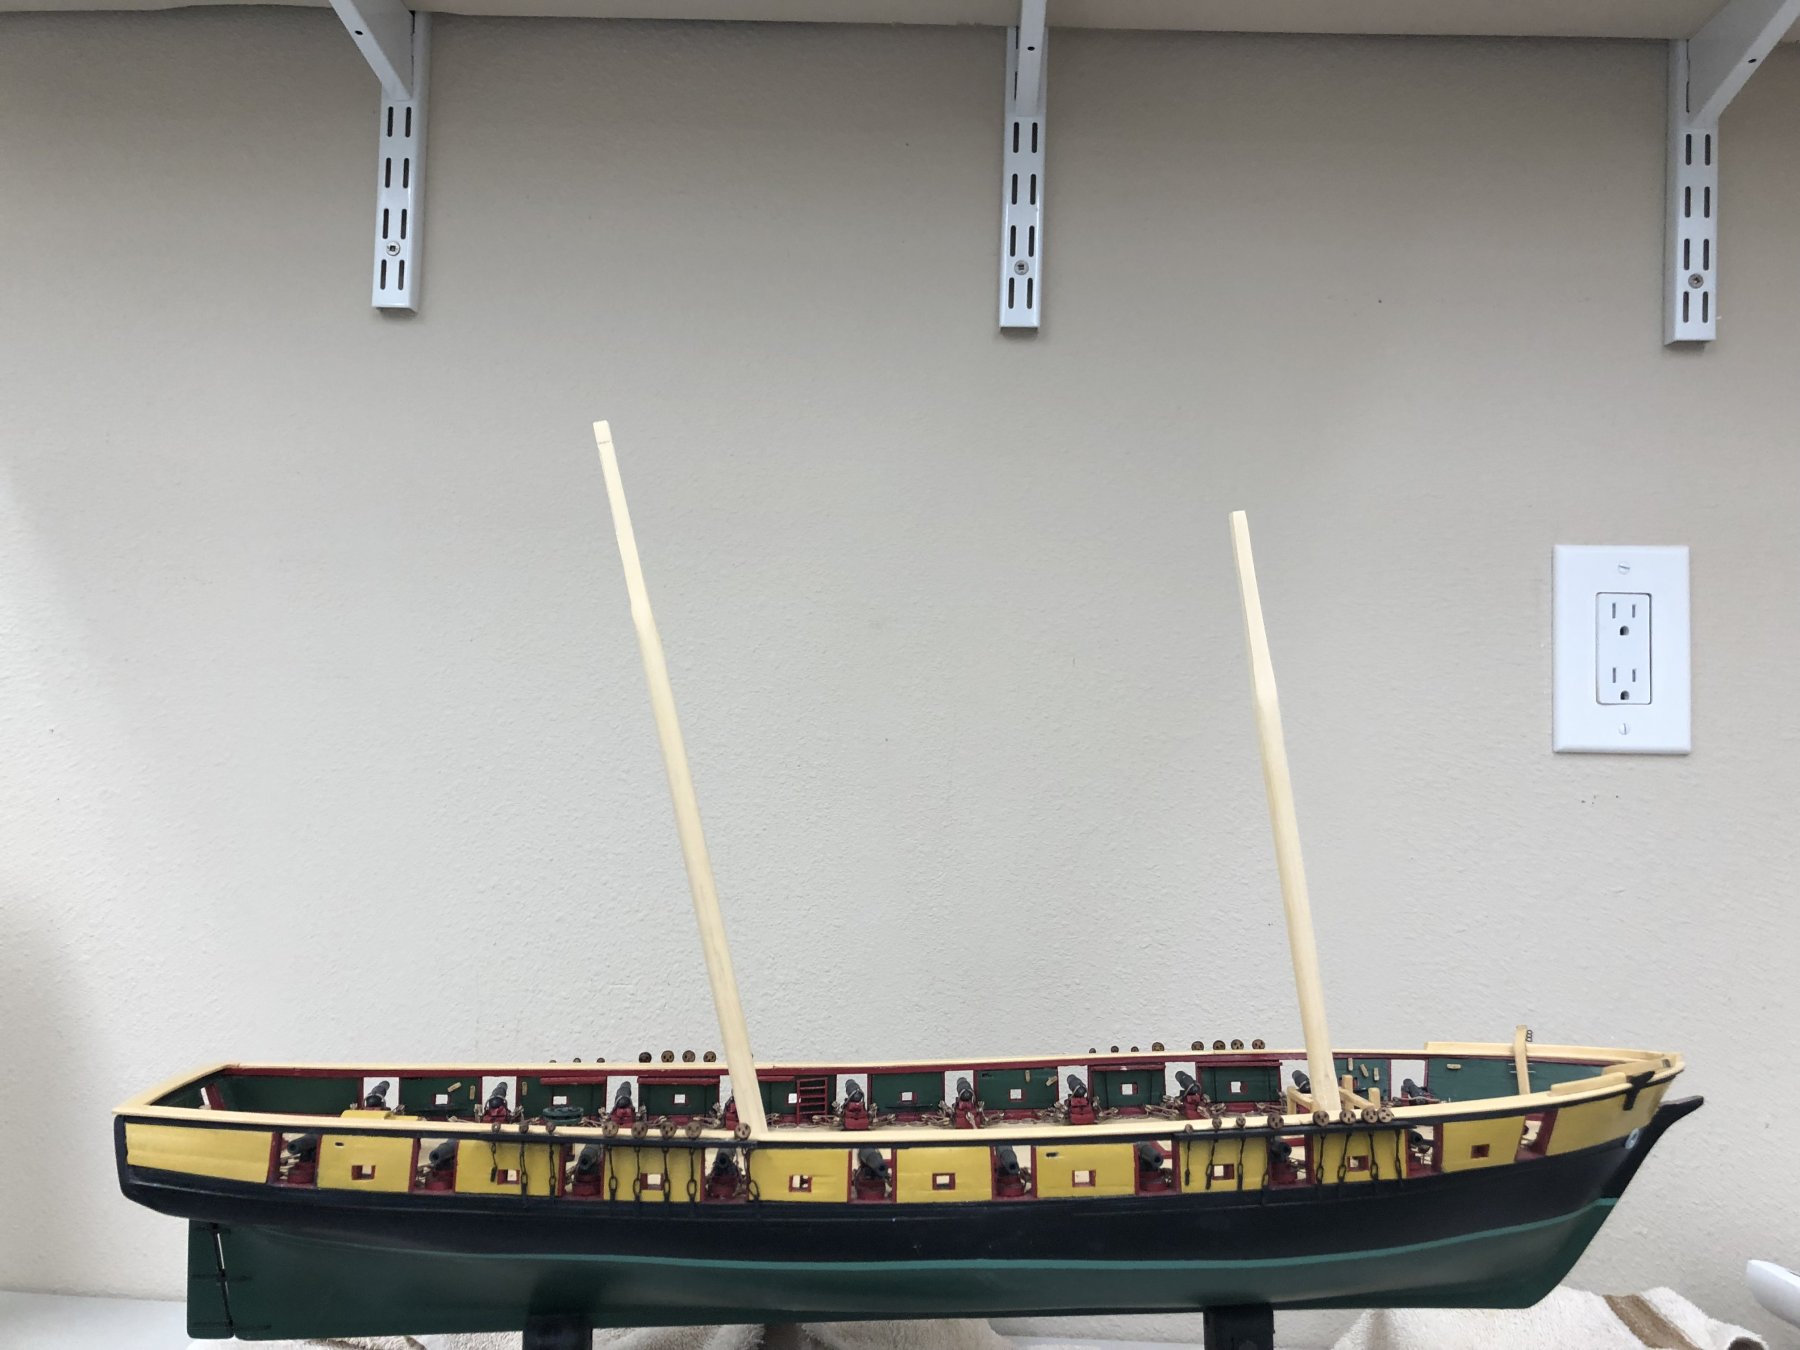
Working to get all the components completed before heading back to paint shop. Still have to fabricate the fore top gallant and spanker mast but could not resist trying a dry fit of the main mast components. I used a piece of .032 music wire for the very top of the main top gallant mast. Trying to taper the wood to 1/32" (and keep it centered) was more than my lathe-less workshop can manage. It will all be painted black anyway so aside from there being no taper to that very short section I doubt anyone will be the wiser.

- 367 replies
-
- 4
-
-
- model shipways
- niagara
- (and 1 more)
-
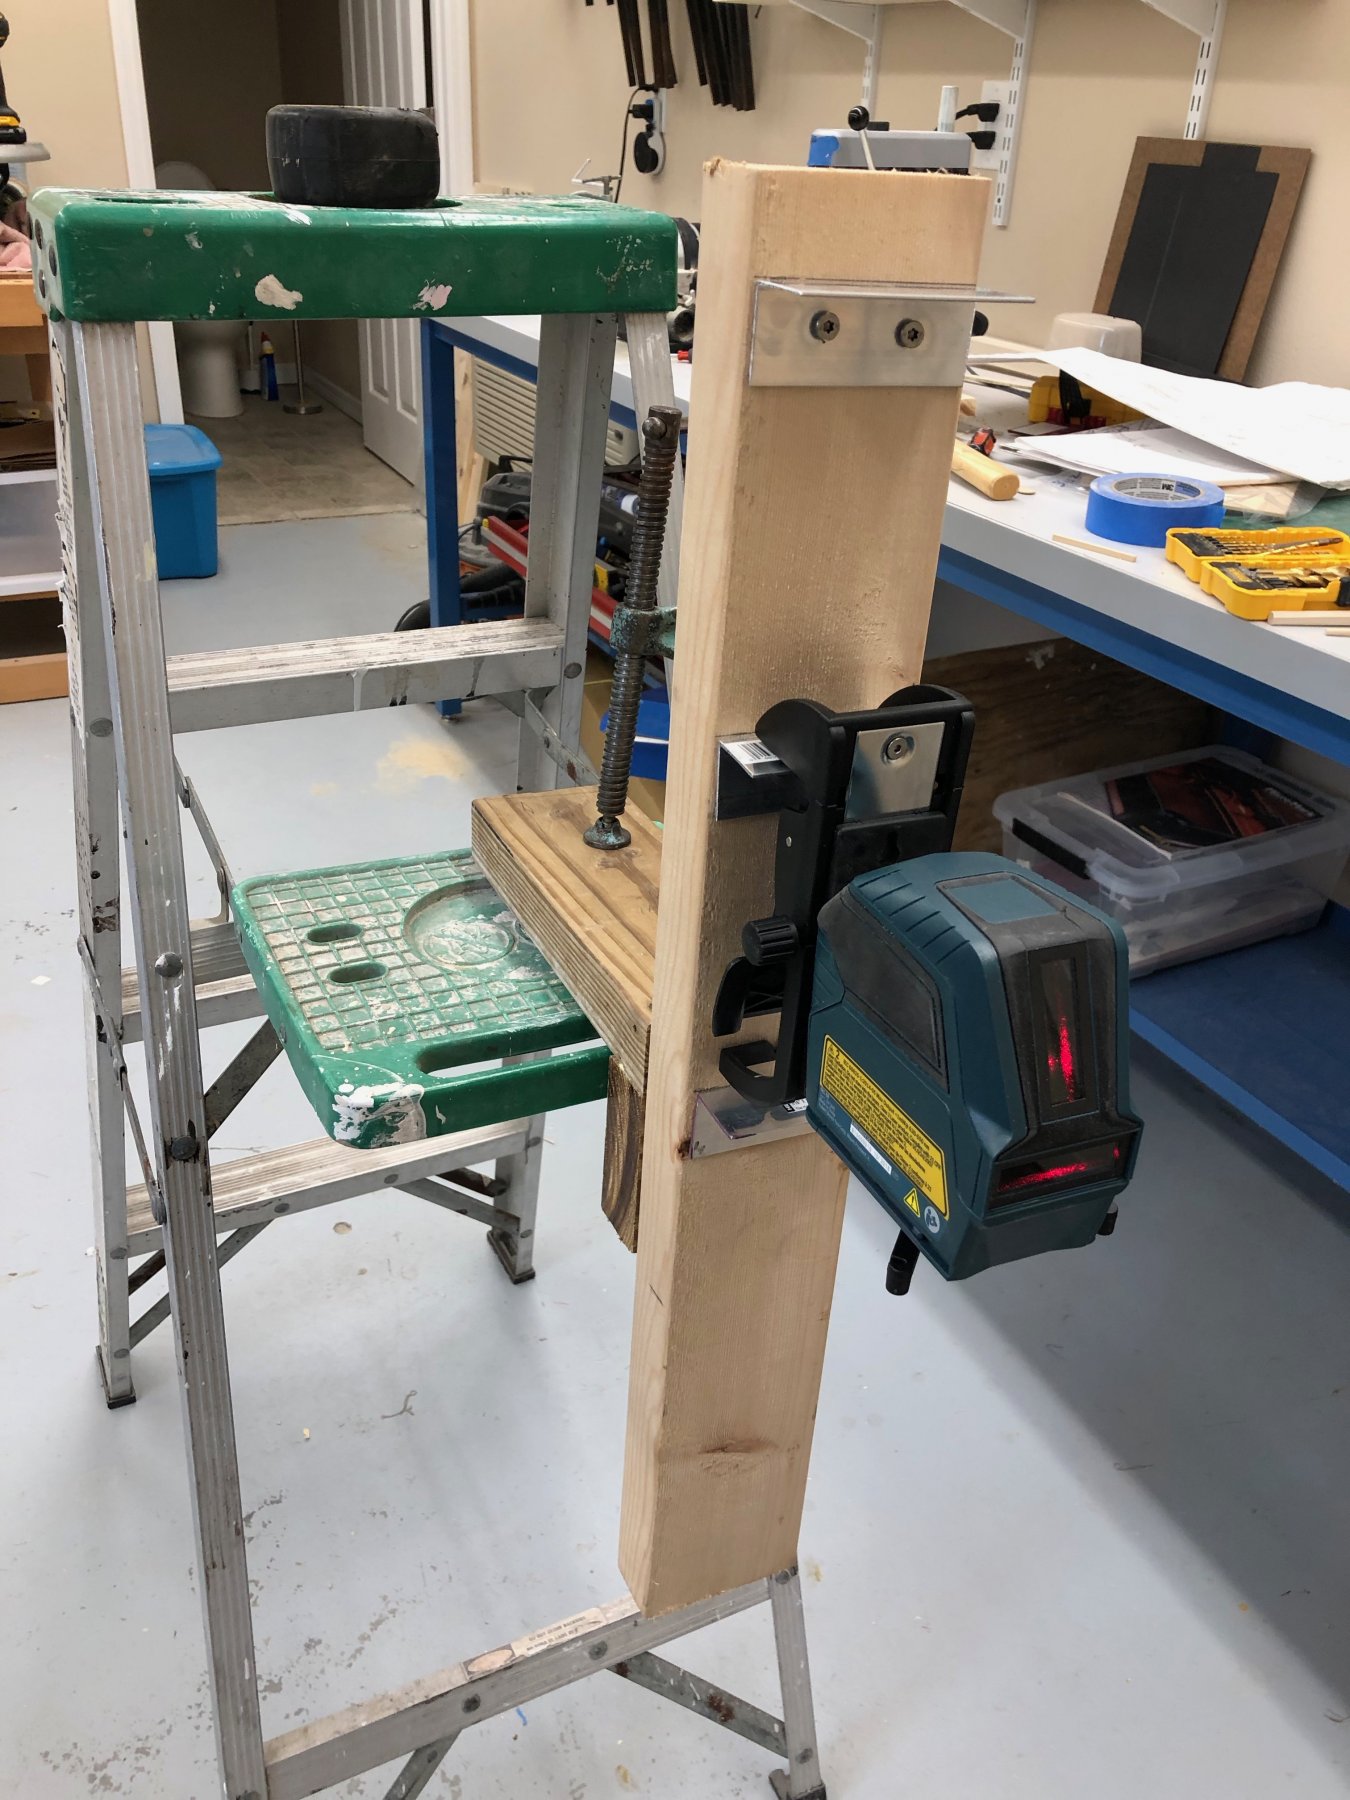
I built the below to provide an adjustable support for the laser. It comes with a mount that allows about 3" of adjustment with a clamp that fits anything less than about 1/2" in width. The aluminum angles are what the laser clamps to and then I can use the mounts adjustment to get the lines where I need them. I use the step ladder so I can get the laser as close as I can to where it is needed since the beam is a little less than an 1/8" wide at five feet.

- 367 replies
-
- 1
-
-
- model shipways
- niagara
- (and 1 more)
-
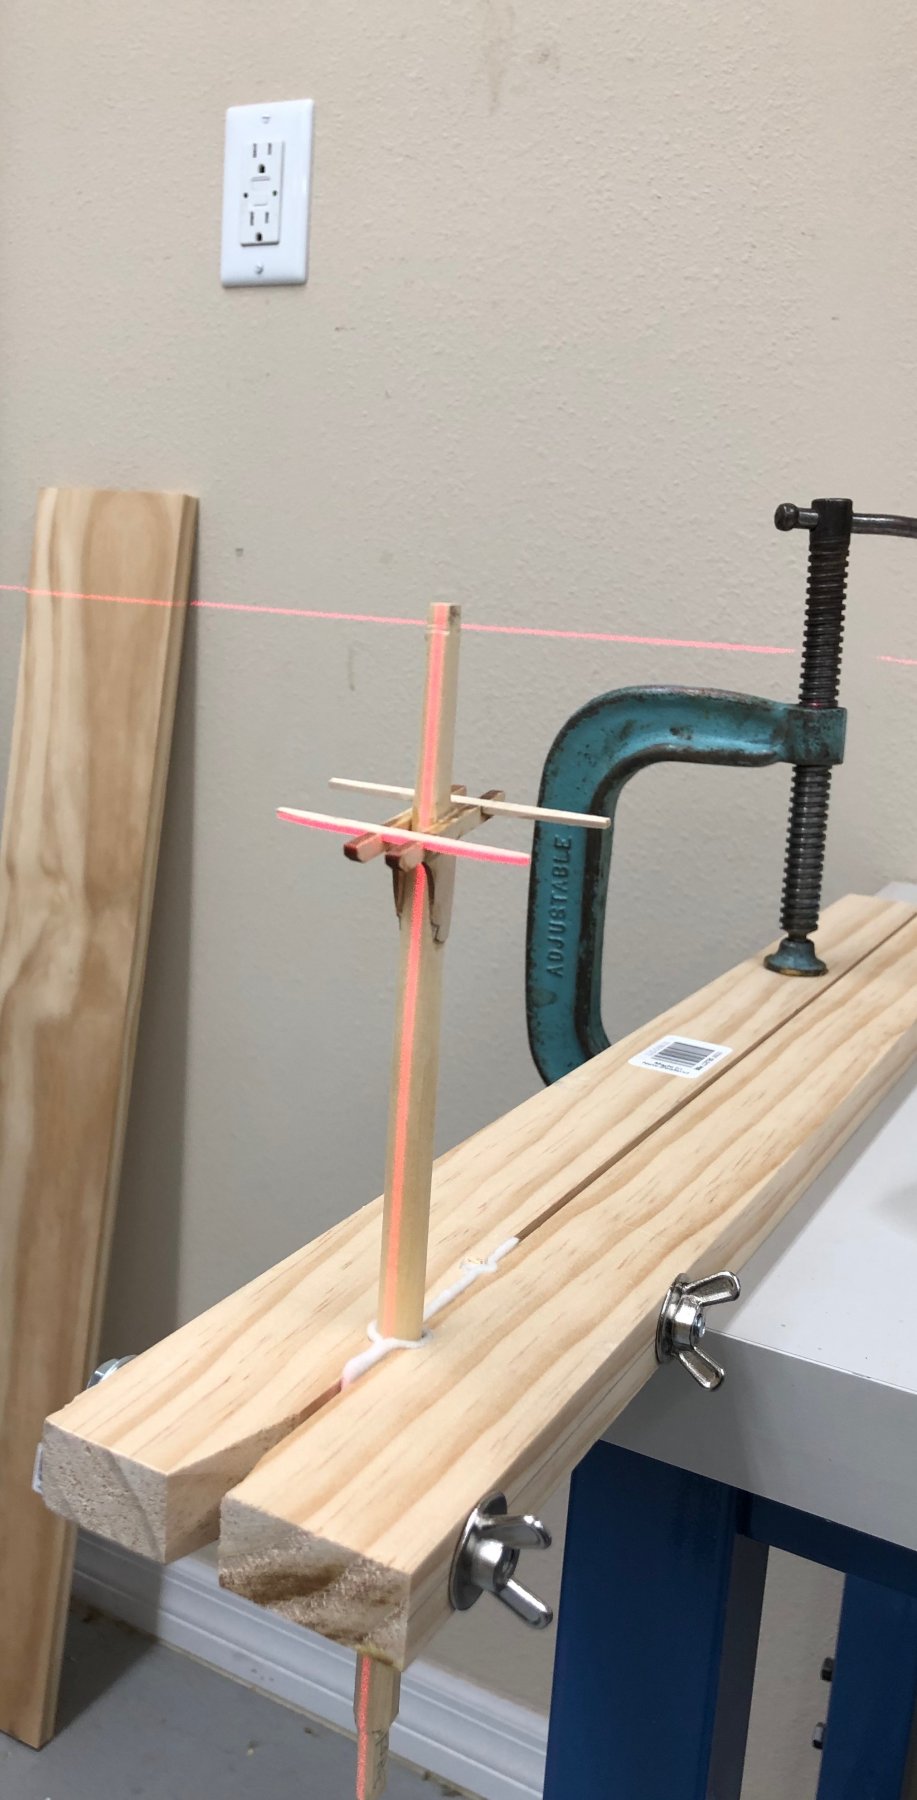
I was looking for a way to "ensure" accurate alignment of the masts and cross trees, at least in one dimension so I came up with this. I had always wanted a laser level for various interior home projects so HQ approved the purchase on that basis. What HQ doesn't know won't hurt them (or me hopefully). Anyway, here is the laser level in use to get the fore mast cross trees perpendicular to the mast. I think this will also come in handy when it is time to install the masts at least in the athwart ship direction. I cobbled together the mast holder as I did not have a satisfactory way to hold them - this makes it easy to adjust up and down and the laser ensures that it is vertical. I sort of have to depend on measuring to get the mast rack and hounds at the correct angle. That piece of board against to wall is going to be my new mounting board. The Amati vice has served its purpose.

- 367 replies
-
- 1
-
-
- model shipways
- niagara
- (and 1 more)
-
I redid one of the anchors and the other will be done shortly. The basics for both masts are now complete. Working the fore mast chocks, cross trees and trestle trees. Trying to keep everything aligned is considerably frustrating. Considering buying a laser level/cross level to help.

- 367 replies
-
- 3
-
-
- model shipways
- niagara
- (and 1 more)
-
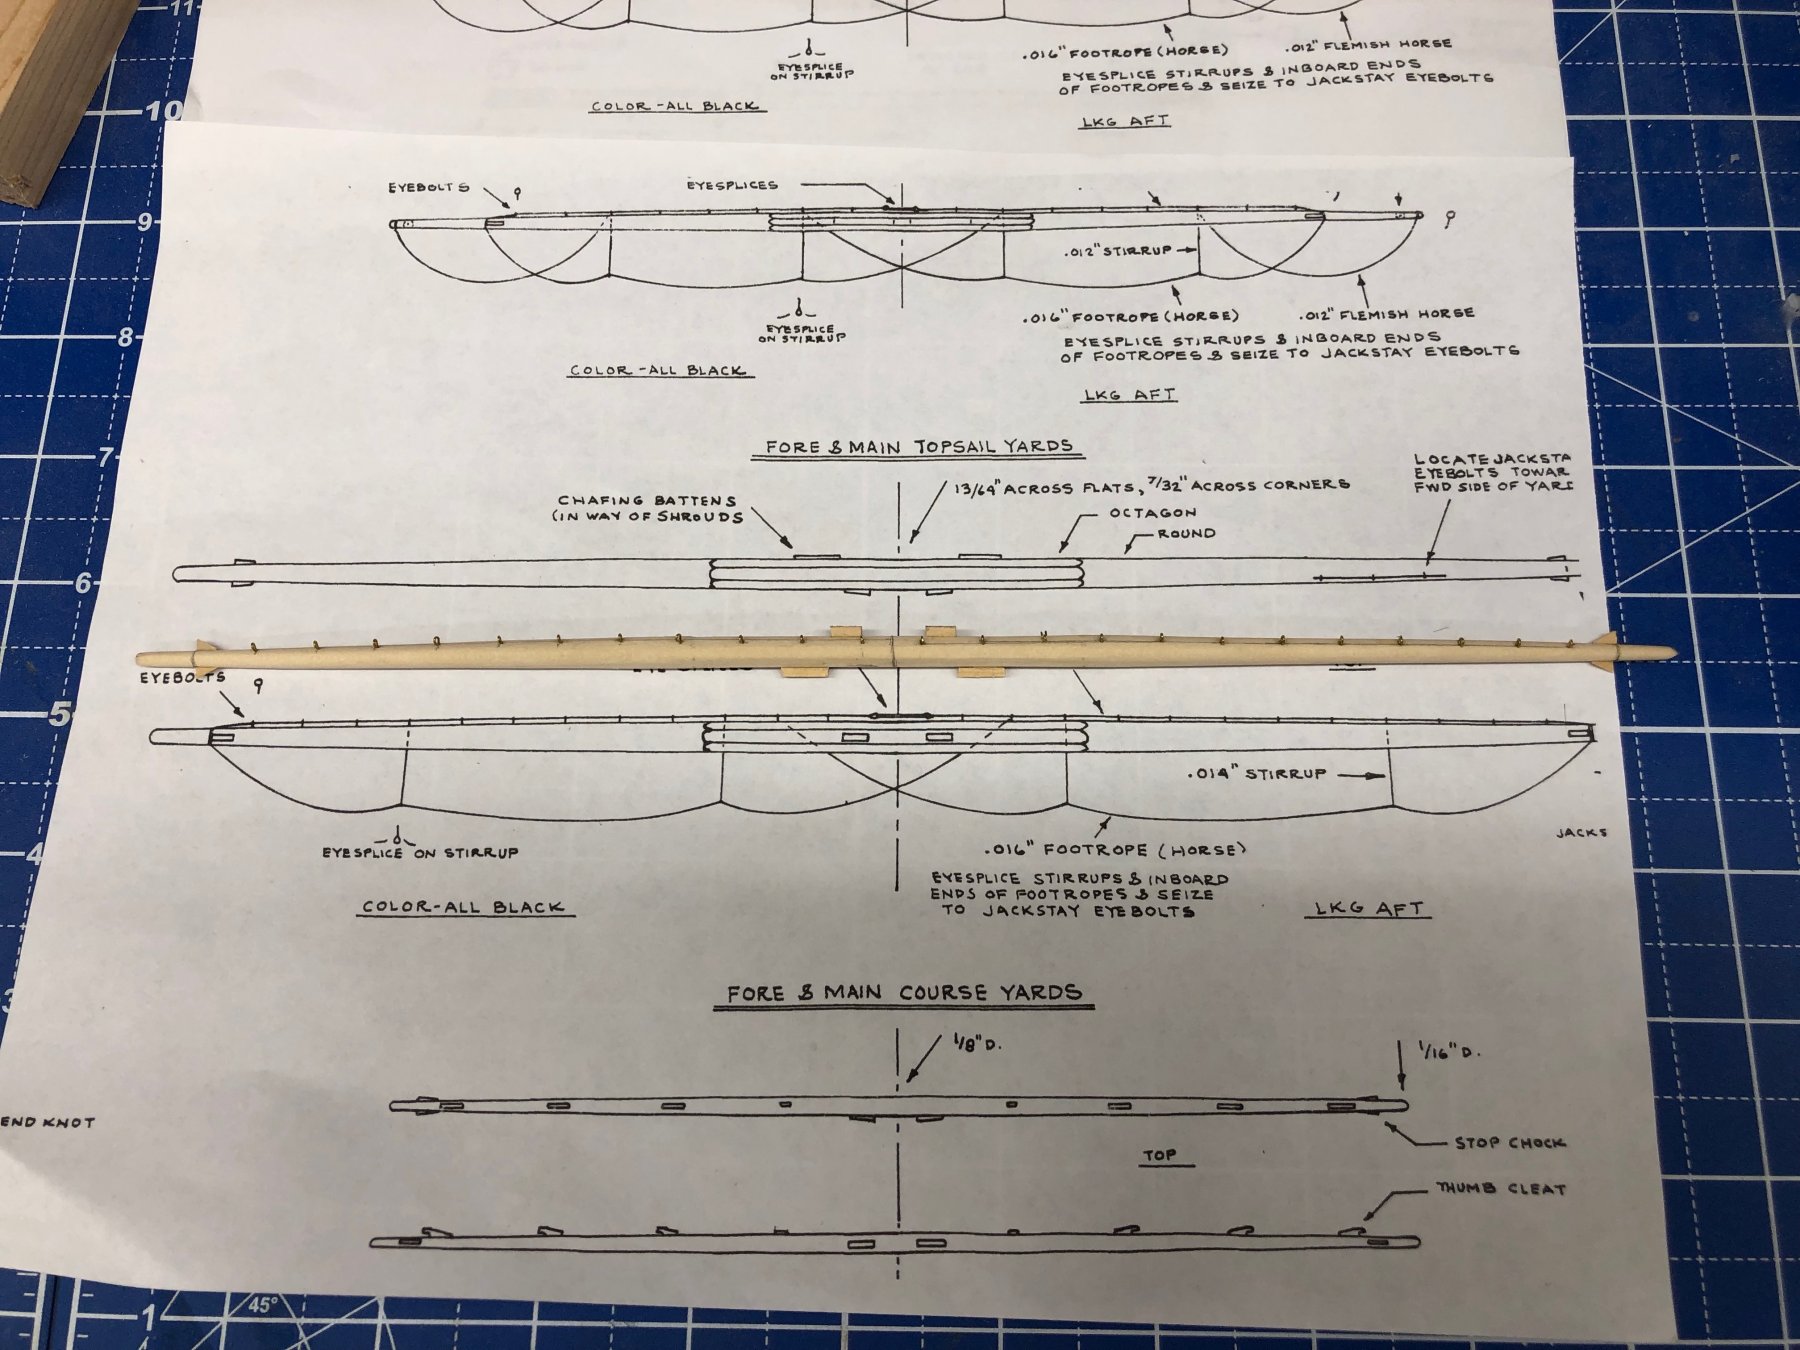
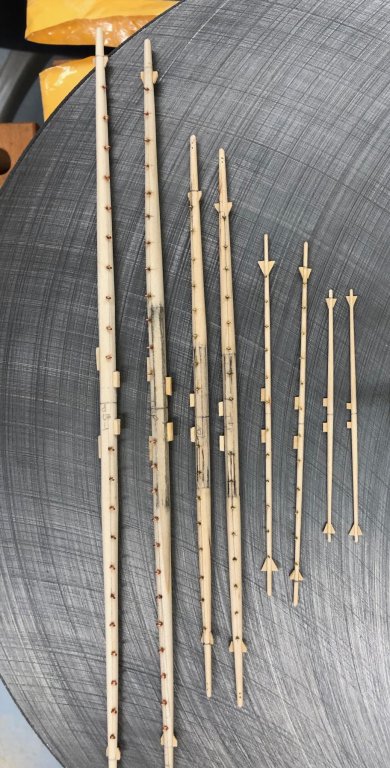
Got the yards and boom/gaff and bowsprit out of the paint booth with only one missing eyebolt on a top gallant yard. I also remembered the dolphin striker so I fabbed that (remembering to drill the holes BEFORE tapering) and got that attached and painted as well. Trying to decide how to proceed with the bowsprit. Am thinking of building a jig to hold the bowsprit as it will be on the ship and add the jib booms and sprintsail yard and as much of the rigging as possible before I attach it to the hull. I think the jib booms would make to inviting a target for a shirt sleeve to have it on the hull any longer than absolutely necessary. Worked on the fore and main masts, fabricating from the 3/8" X 3/8" yellow cedar. Not as hard as I thought. Getting the center portion round was pretty easy, keeping the top part square while taking off as much as 5/32" on each side was not so easy. The main is done and I cut the tab so I could do a test fit on the hull and found that I had mounted the main fife rail too close to the mast and the spanker mast will not fit. It's what In get for installing the fife rail before the mast - won't make that mistake again. Destroyed the existing fife rail getting it up from the deck so I am back in deck furniture mode for awhile.


- 367 replies
-
- 3
-
-
- model shipways
- niagara
- (and 1 more)
-
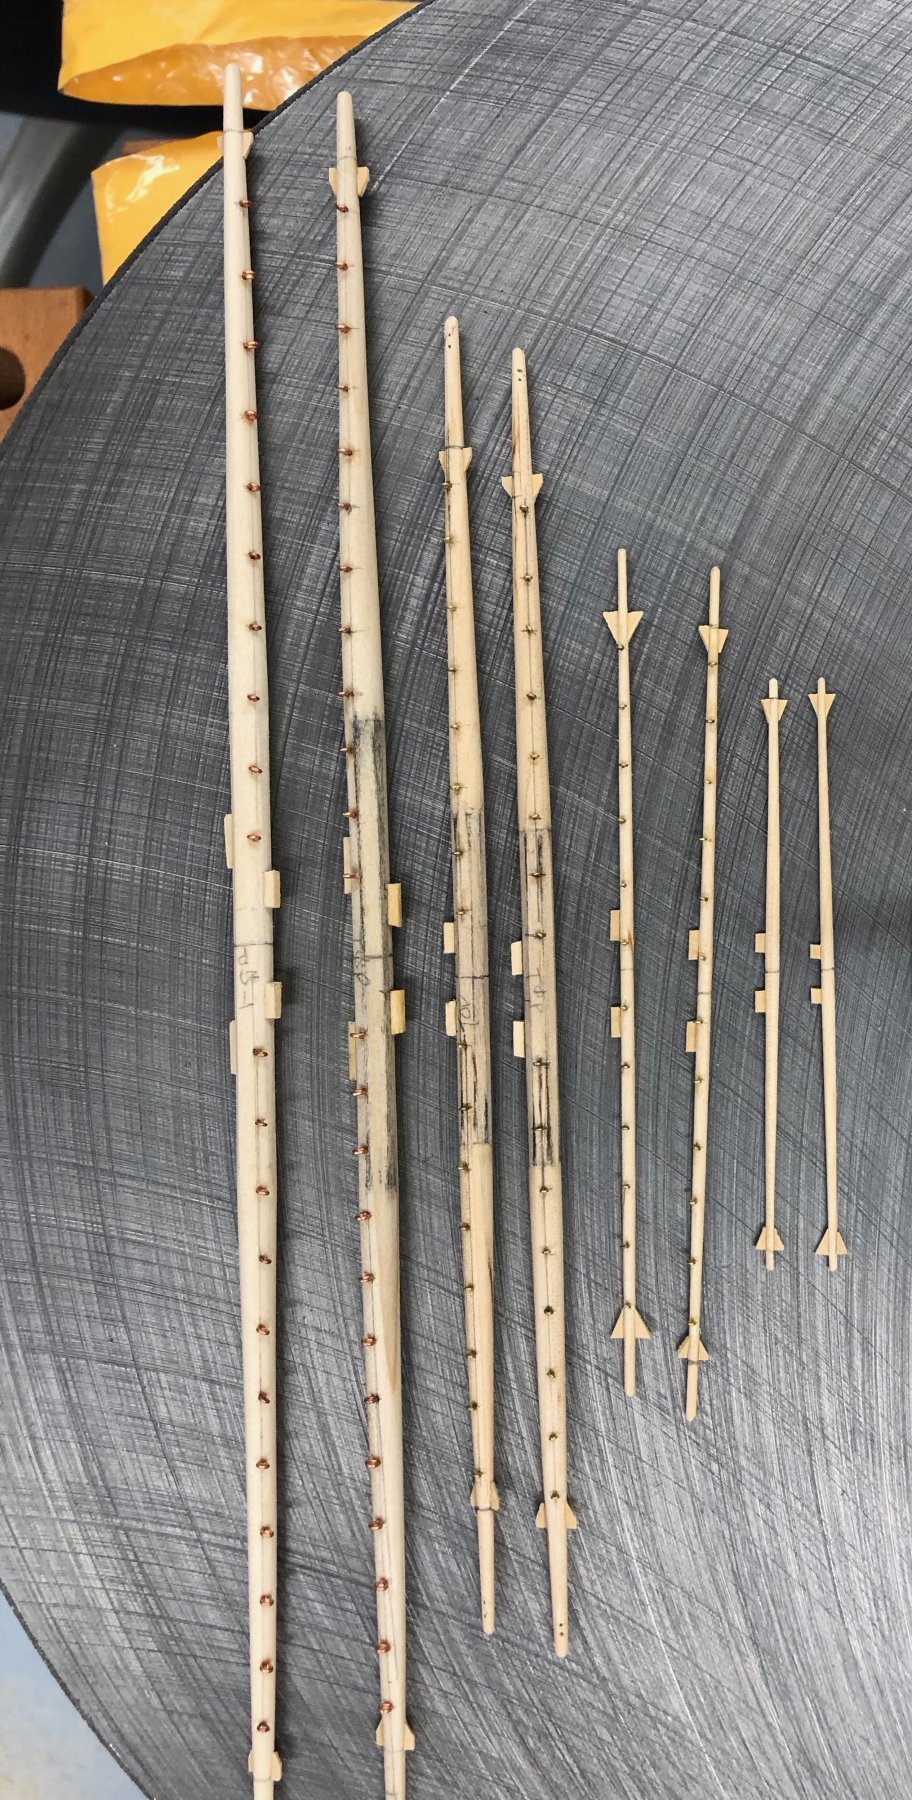
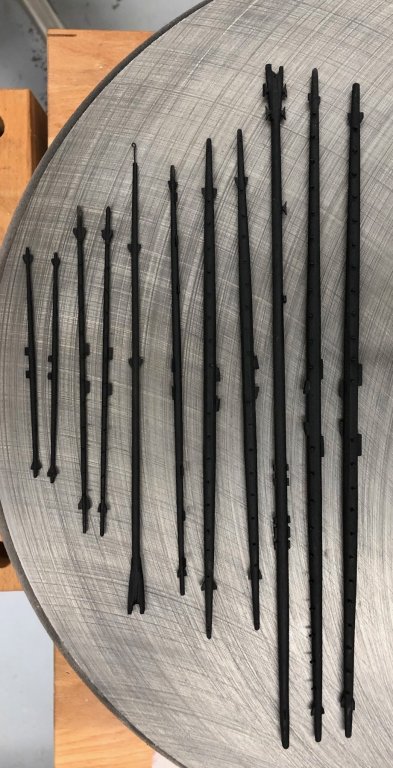
Finished up the details on the yards and Spanker boom/gaff (except for trimming up some of the line "stoppers"). Now to the paint booth for these and on to fabricating the masts. The black you see on some of them was artists charcoal which i rubbed on the section that was to be 8-sided to make it easier to see how much wood was taken off. I learned on the first one that gauging when you have filed/sanded enough was not that easy. They will all be painted black so I was not worried about getting all the smudges removed. Also drilling holes for the eyebolts on the Top Gallant yards proved more difficult than I had thought. I should have drilled the holes before I tapered the dowel not after. I had to build a jig to hold the tapered dowel steady under the drill press and still I did not get all the holes exactly as I wanted them. I got the needed wood from Syren yesterday so now to figure out how to make the octagon and round and square and tapered masts.
- 367 replies
-
- 5
-
-
- model shipways
- niagara
- (and 1 more)
-
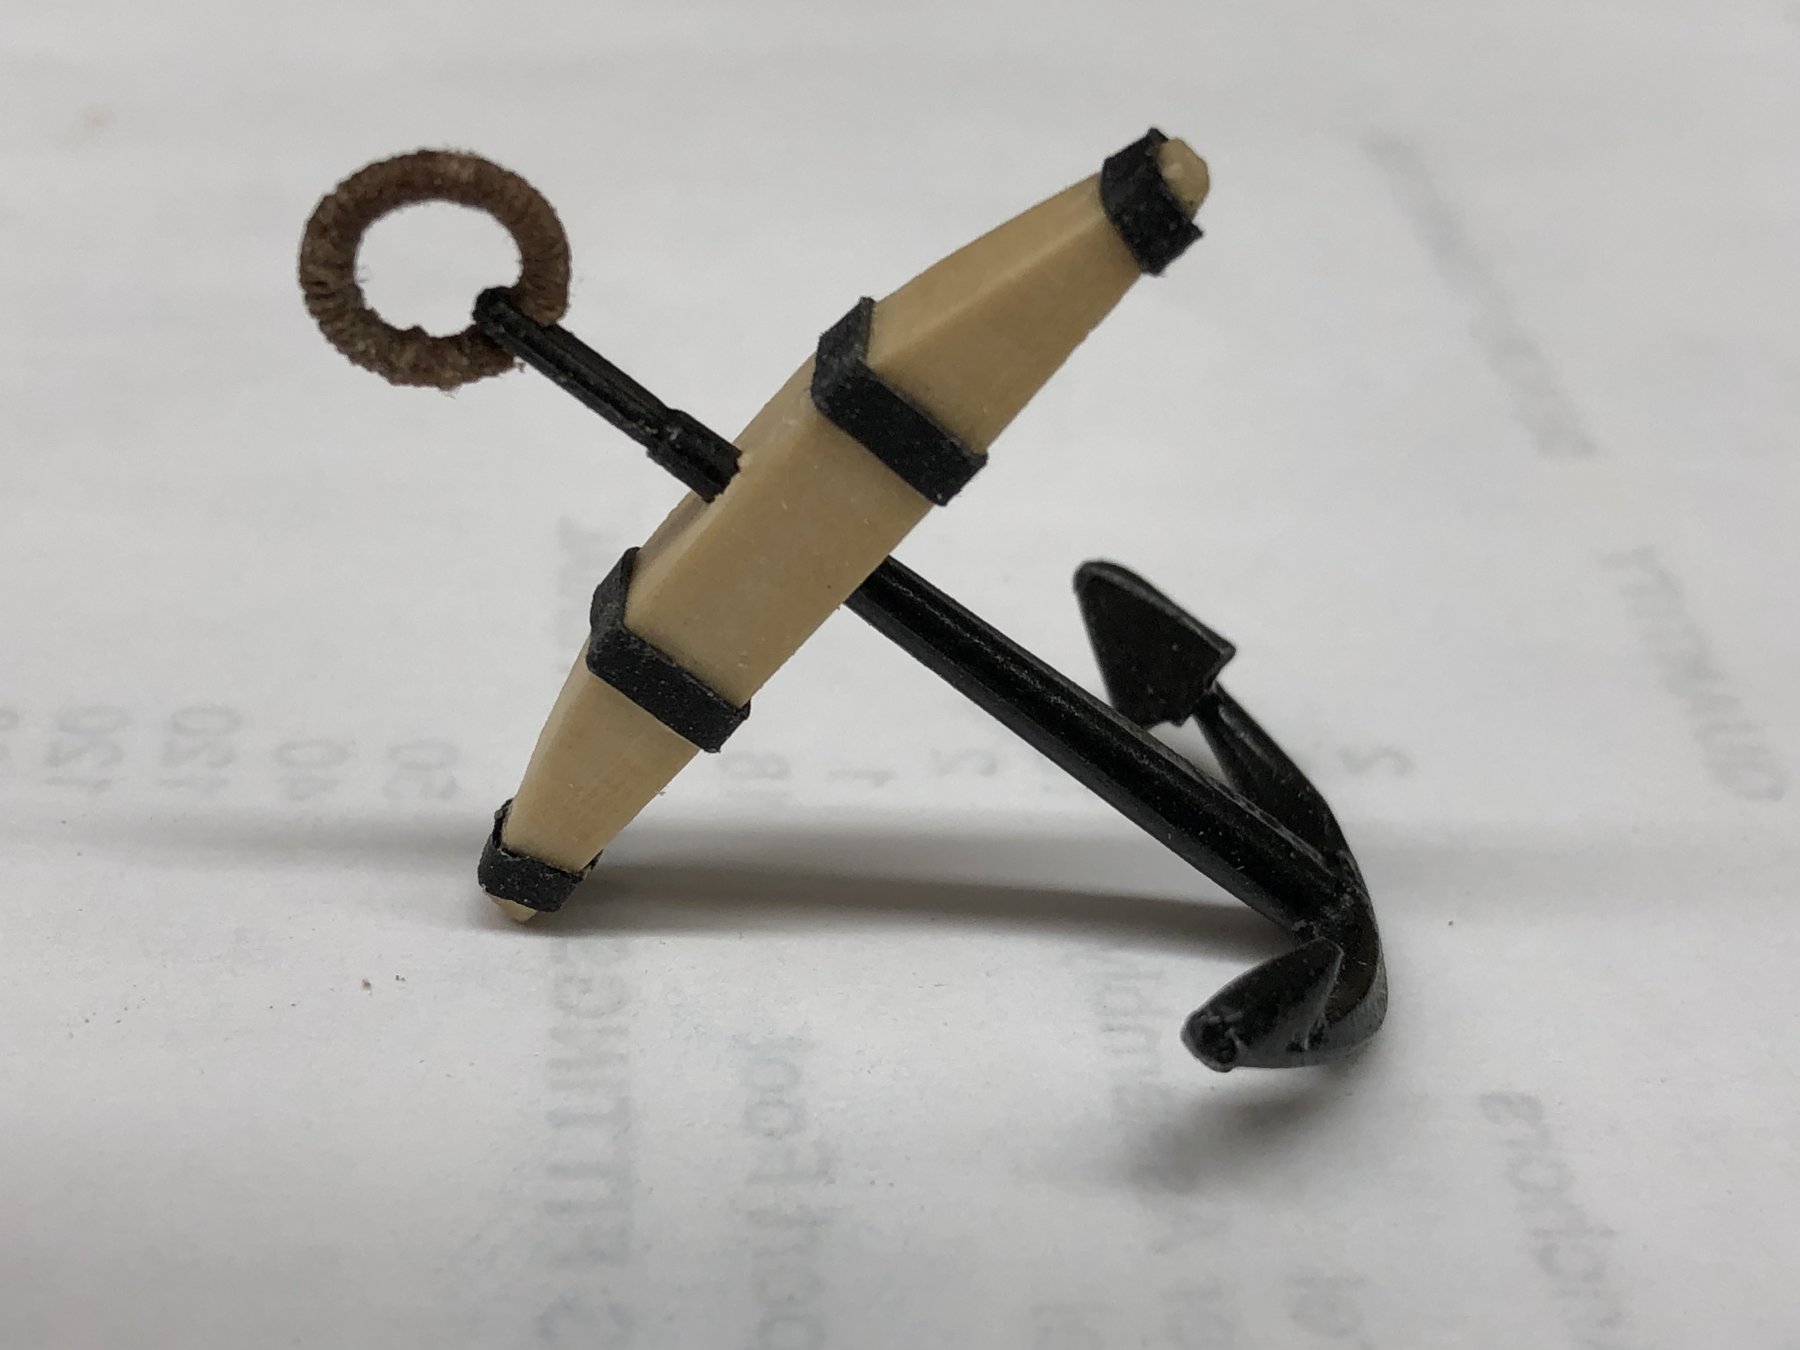
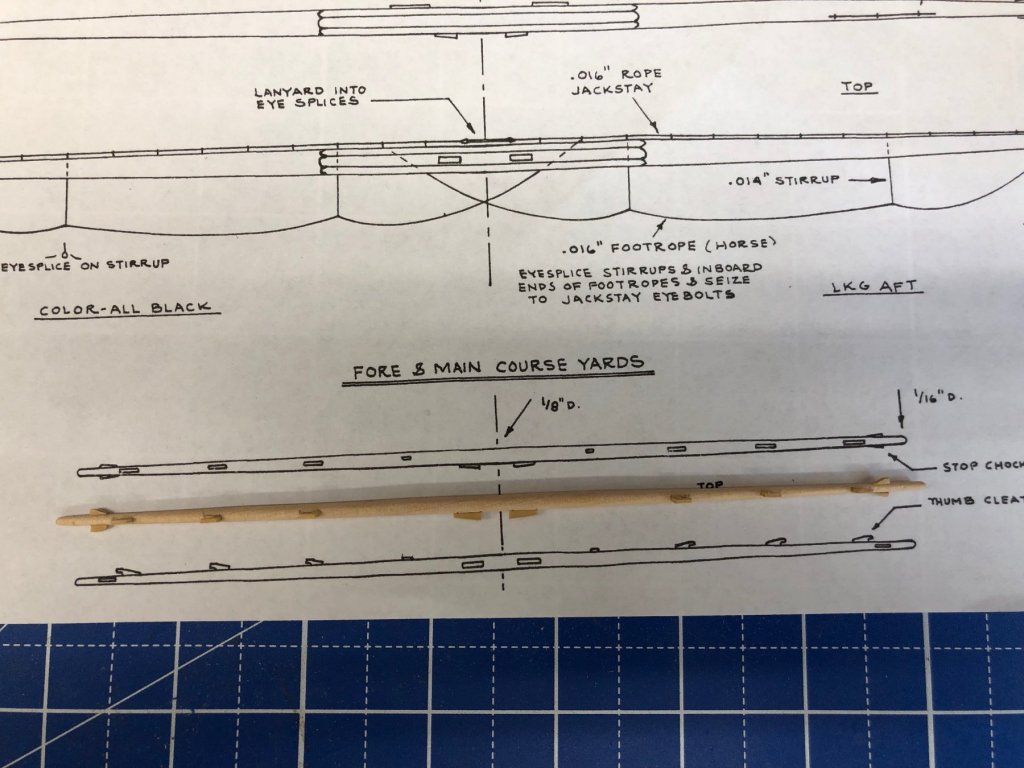
Steve, Thanks, I will flip the stock turned over. It is not attached to the shaft at the moment. Might have to redo part of the serving on the ring. I am not sure what processed me to do that - must have seen a picture somewhere. It turned out to be more work than I thought. Might just go back to the plain ring. I spent the day sanding dowels into yards and the gaff and boom for the Spanker. The only thing I managed to complete is the main course yard - here it is ready for paint.

- 367 replies
-
- 3
-
-
- model shipways
- niagara
- (and 1 more)
-
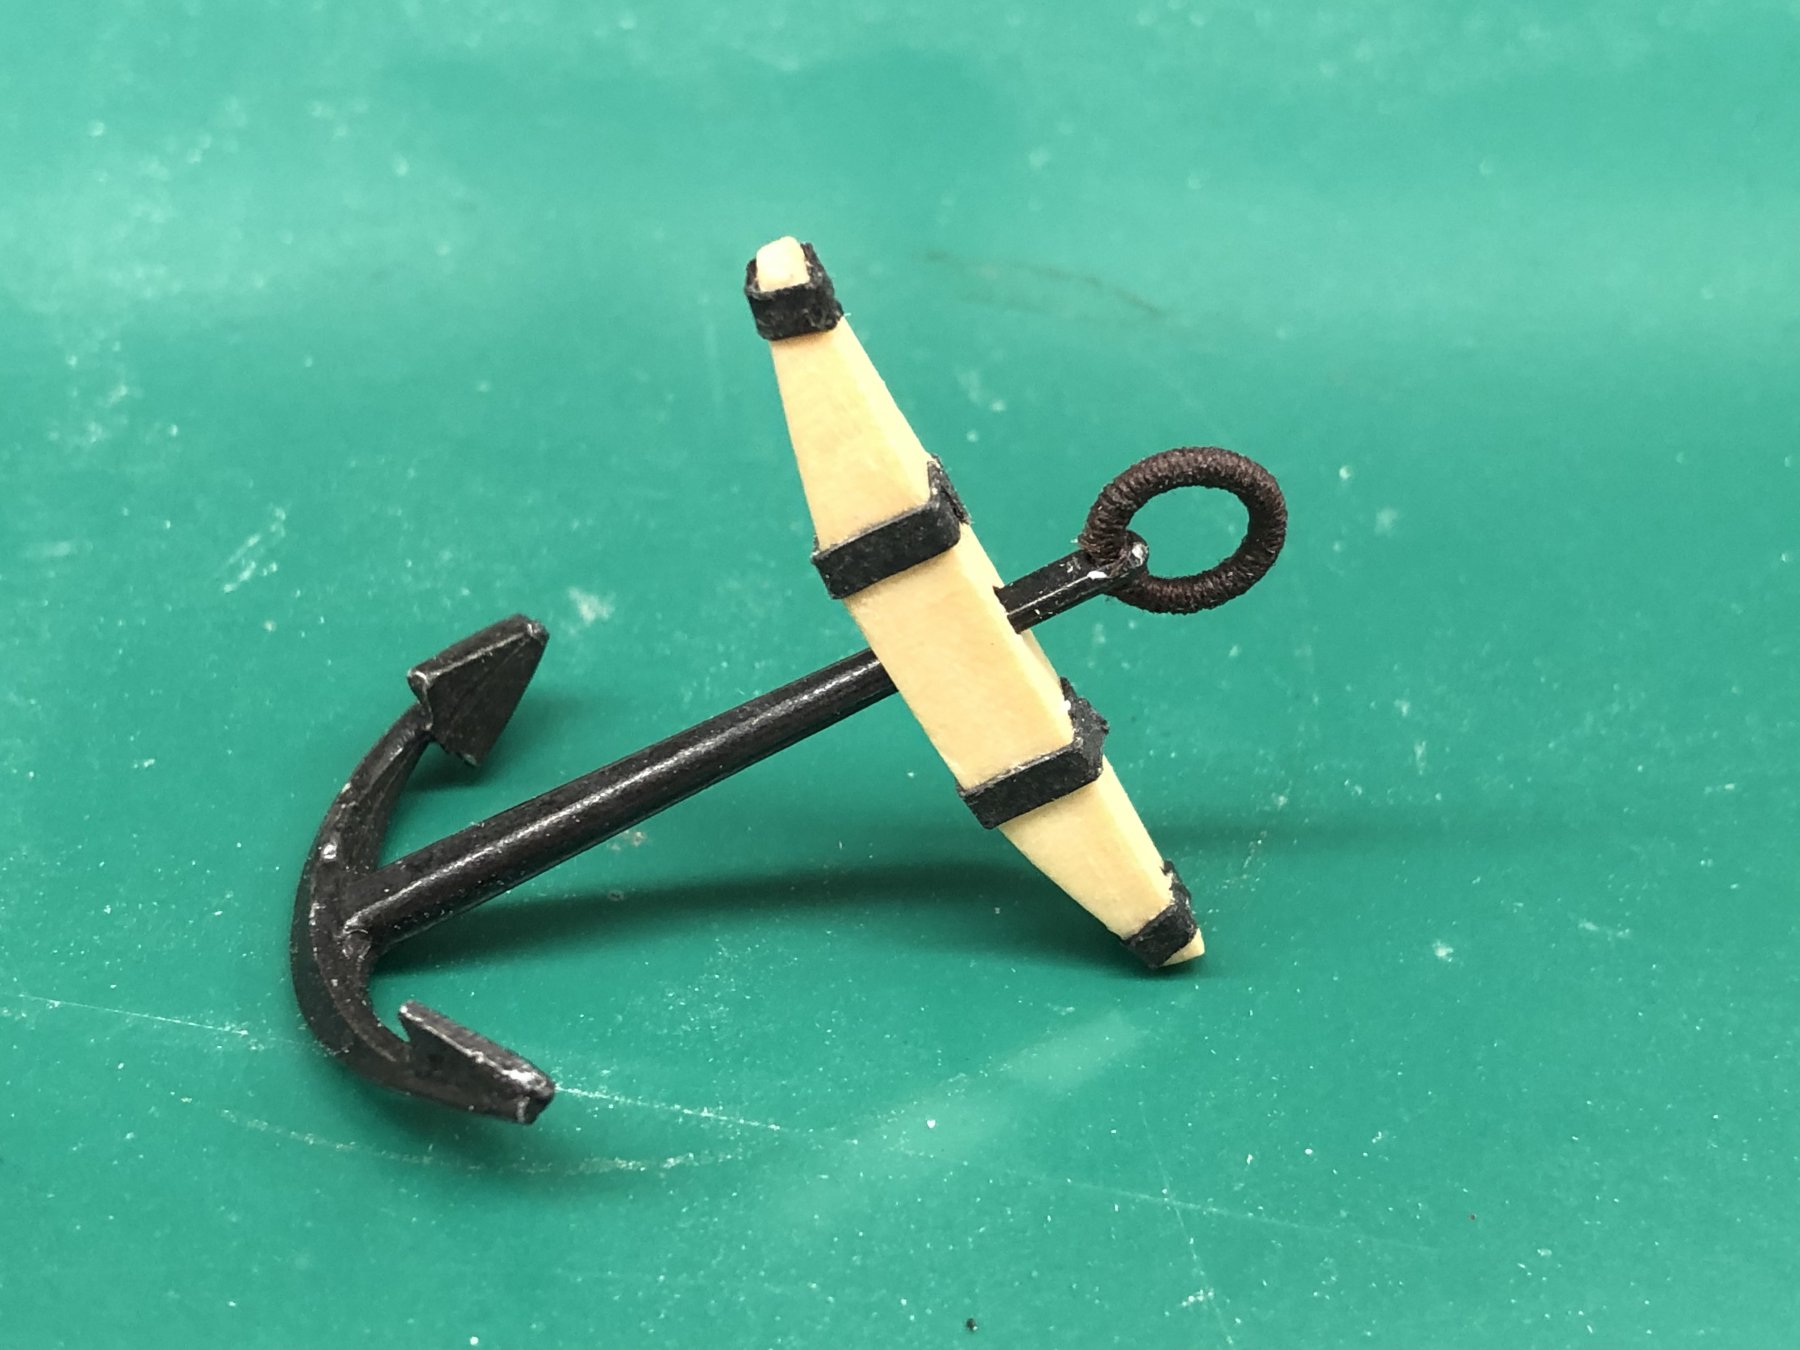
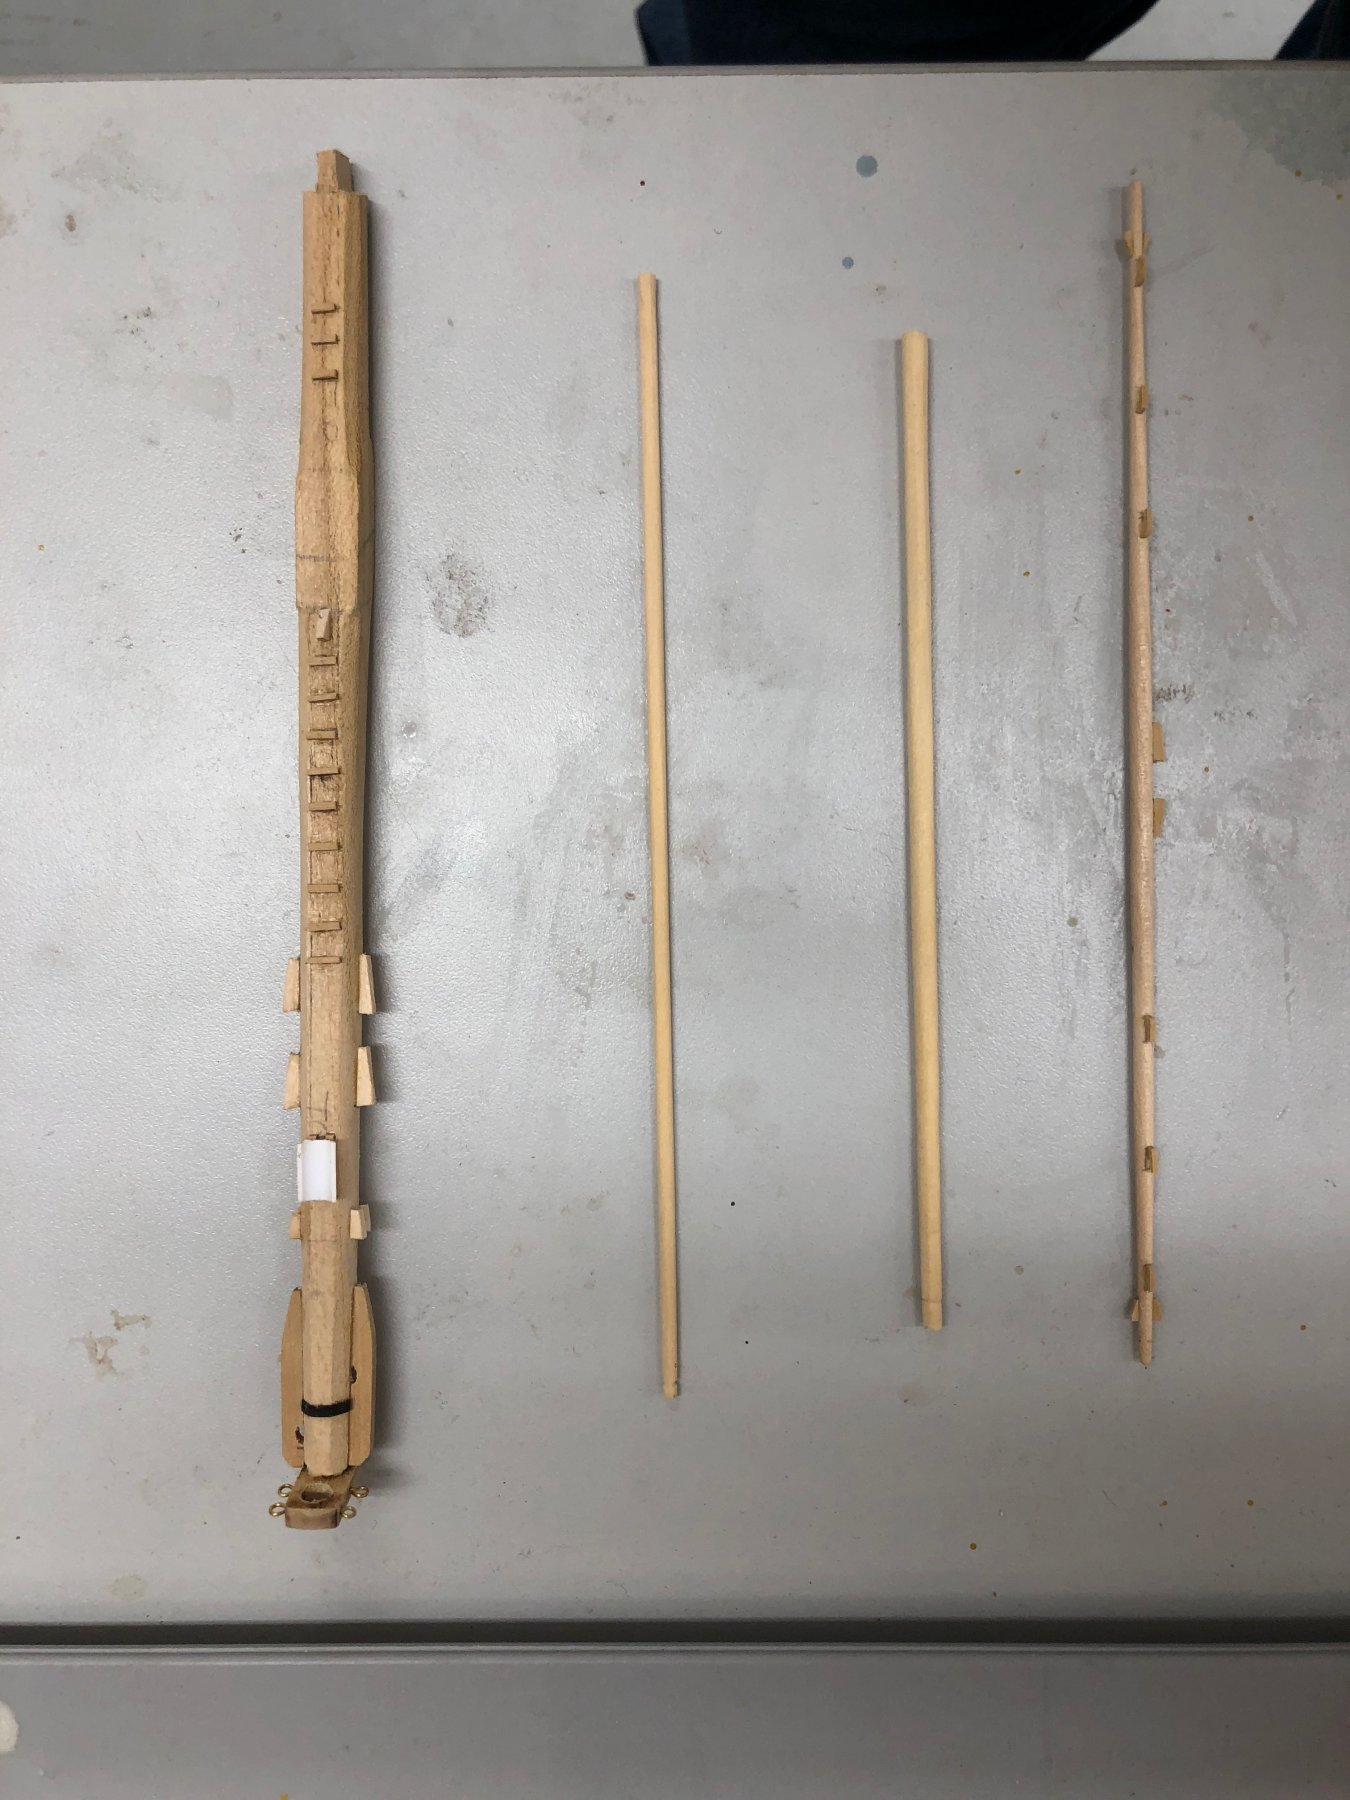
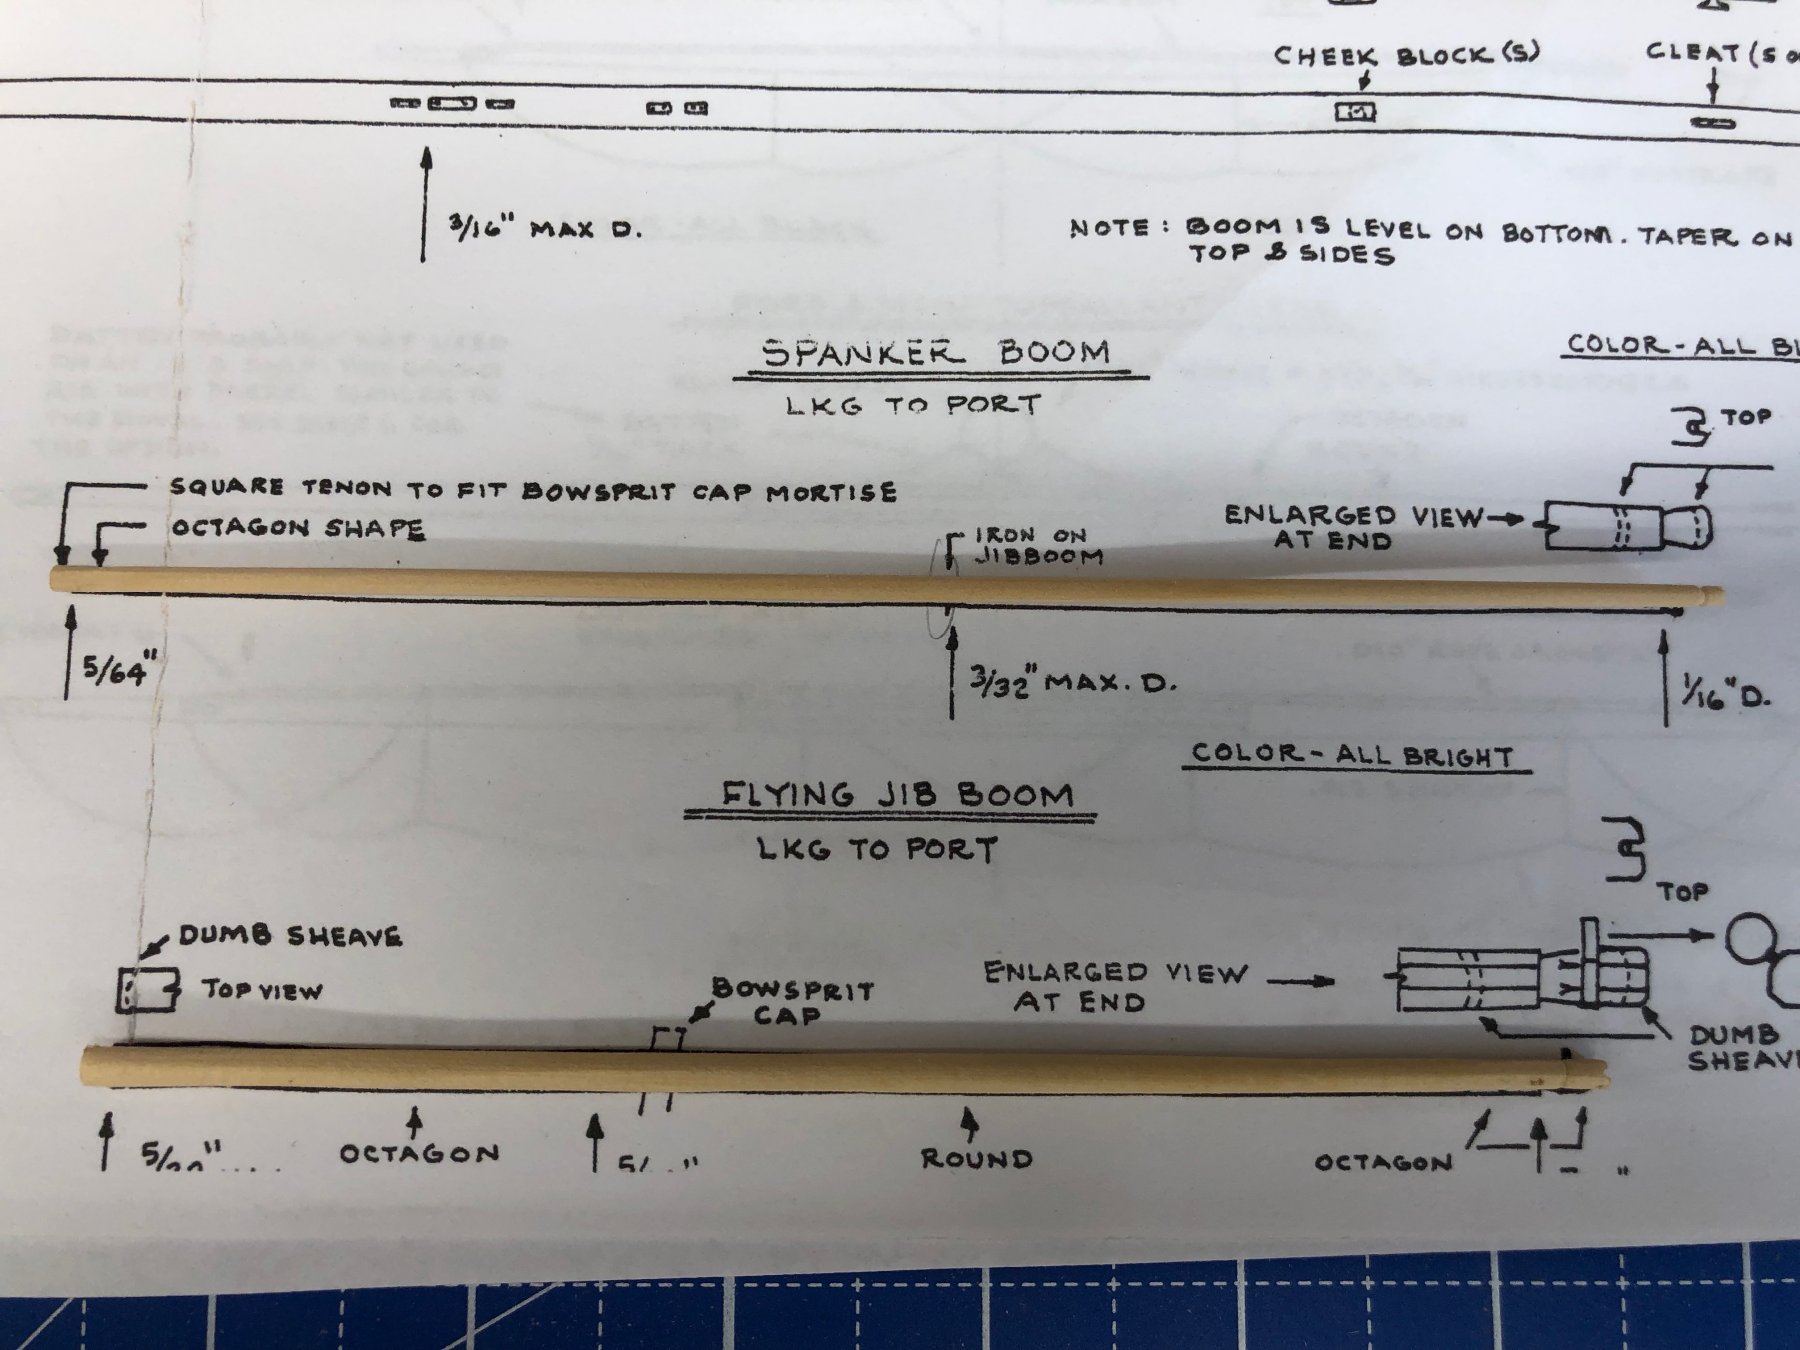
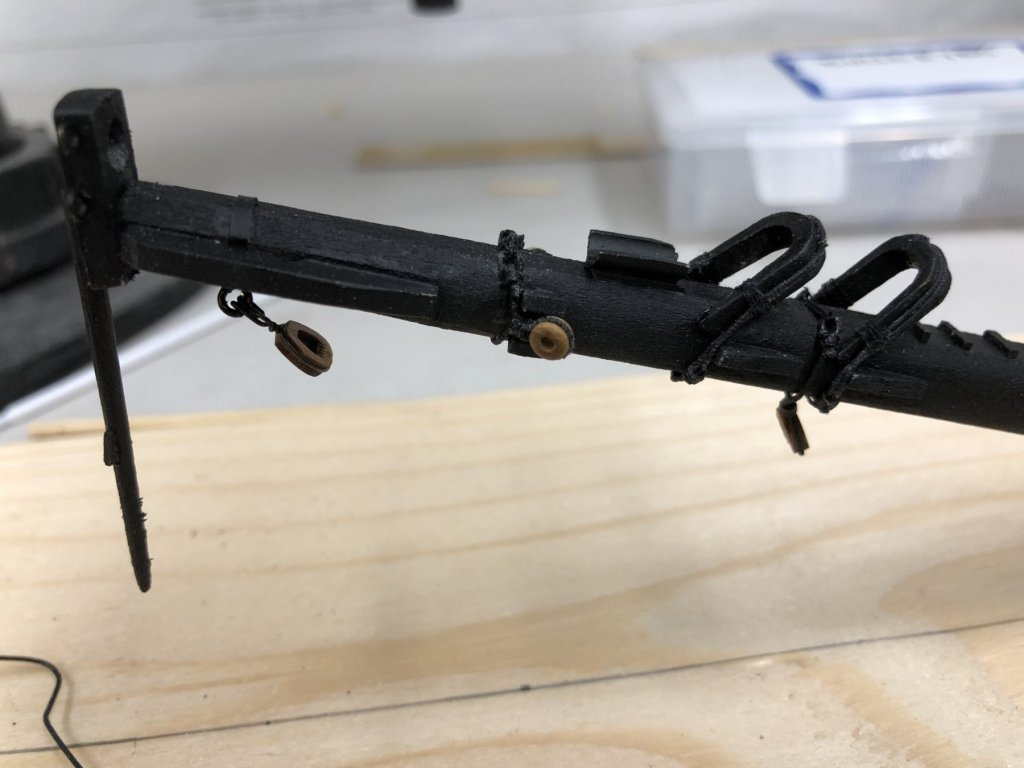
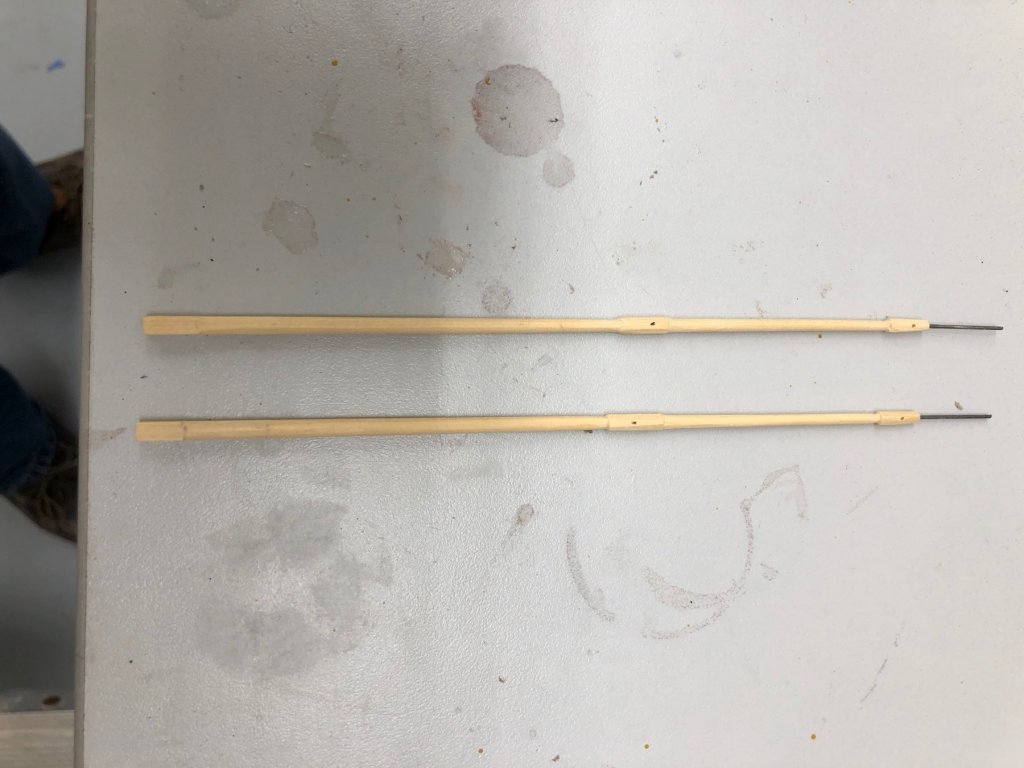
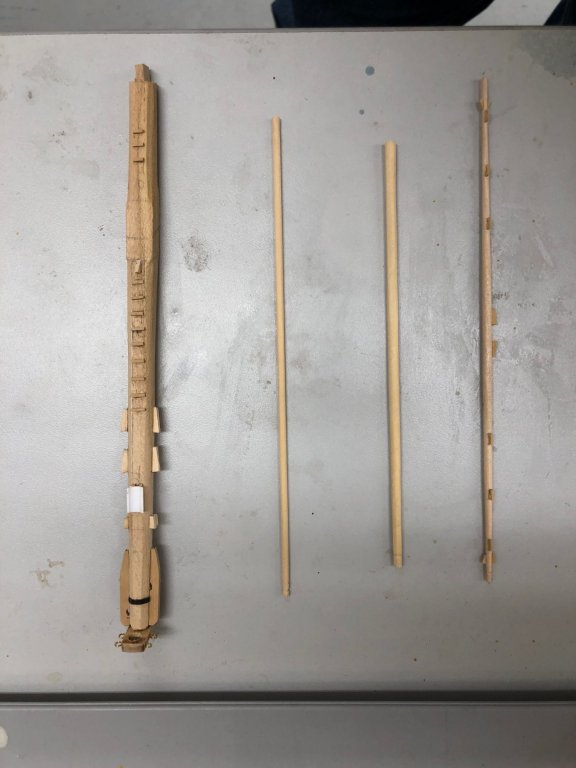
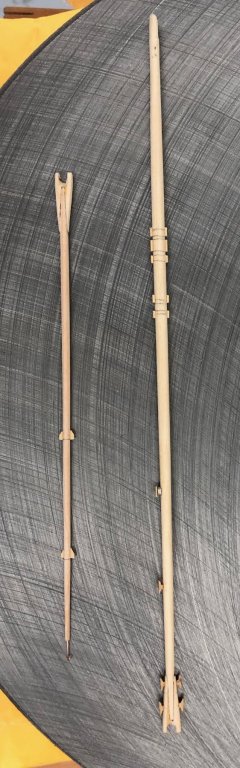
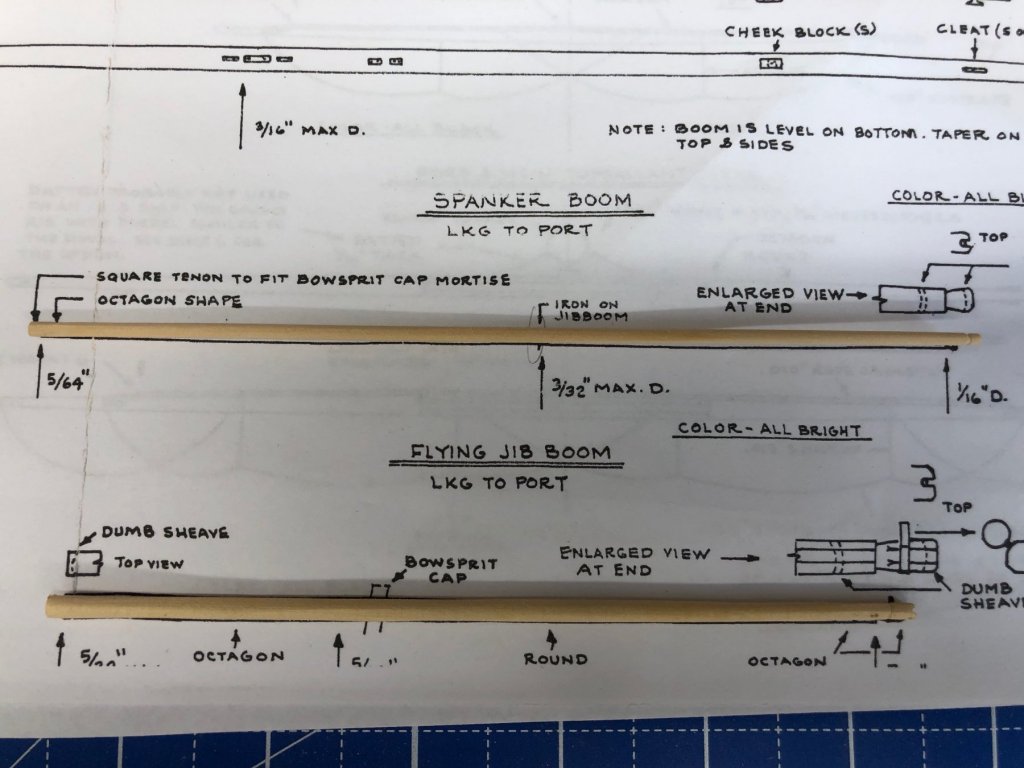
With the bowsprit complete (except for paint) I focused today on getting the rest of the bowsprit pieces finished. In keeping with my desire to have all, of the "bright" wood Alaskan Cedar I fashioned the jib and flying jib booms from square section material as described (more or less) in the kit instructions, leaving those portions 8-sided that were called out in the plans, although they had to be reduced in cross section to match to taper of the spars. I also used a piece of polystyrene tubing to make the flying jib boom iron - two slices glued together with CA. The tubing was 7/32 but had to be reamed out with a #32 drill bit to fit over the jib boom. I was on a roll so I built the sprint sail yard as well but since this is painted I used the kit provided dowel as the starting point. I also decided some time ago to substitute Corel anchors (part A39) for the kit provided ones. I substituted cedar for the provided stock material and used laserboard for the iron straps. I think this one looks better than the kit one.

- 367 replies
-
- 4
-
-
- model shipways
- niagara
- (and 1 more)
-
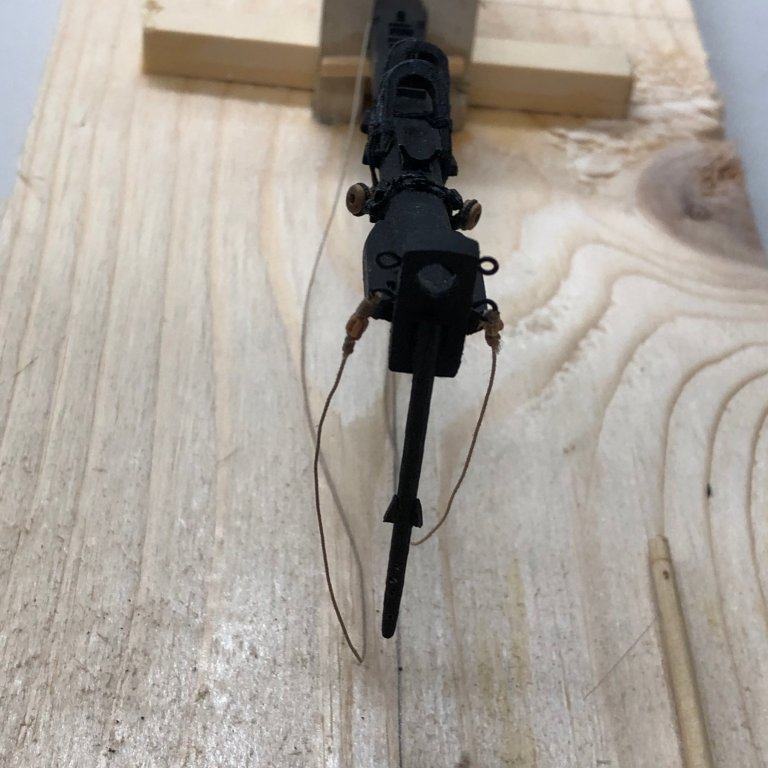
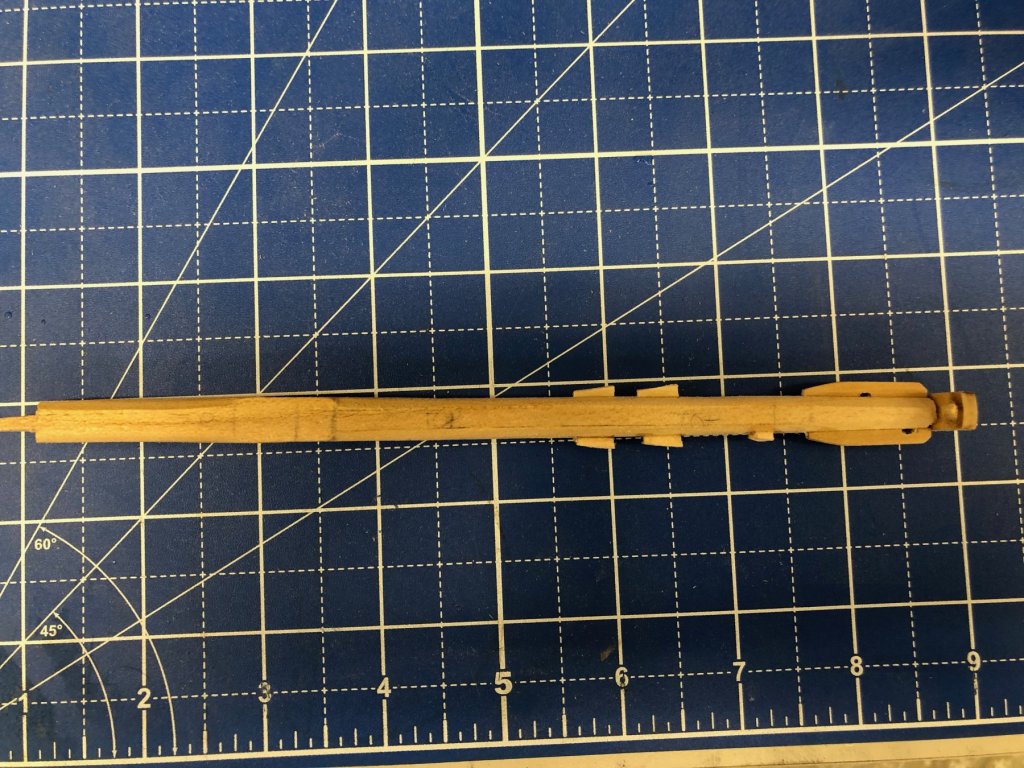
Except for the two cleats which will go on after the bowsprit is in place (which I have facilitated by drilling locating holes in the bowsprit and corresponding pins in the wooden cleats this hopefully will not be too big a struggle assuming I remember to put the cleats on AFTER inserting the bowsprit though the hull and BEFORE securing it - time will tell) I believe In have all of the fittings required installed. I made the jib boom saddle out of a piece of polystyrene tube cut lengthwise with a scrap of 1/16 x 1/16 wood on either side (hence it is white). I simulated the bobstay wye iron with black laser board (aka thick paper) and an eyebolt. Next is paint and working the jib and flying jib booms. I am going to try to make them out of square section yellow cedar to try and keep all the "bright" wood in yellow cedar. I have not previously tried to make something square round but I seemed to manage on the bowsprit. We will see how that goes.

- 367 replies
-
- 3
-
-
- model shipways
- niagara
- (and 1 more)
-
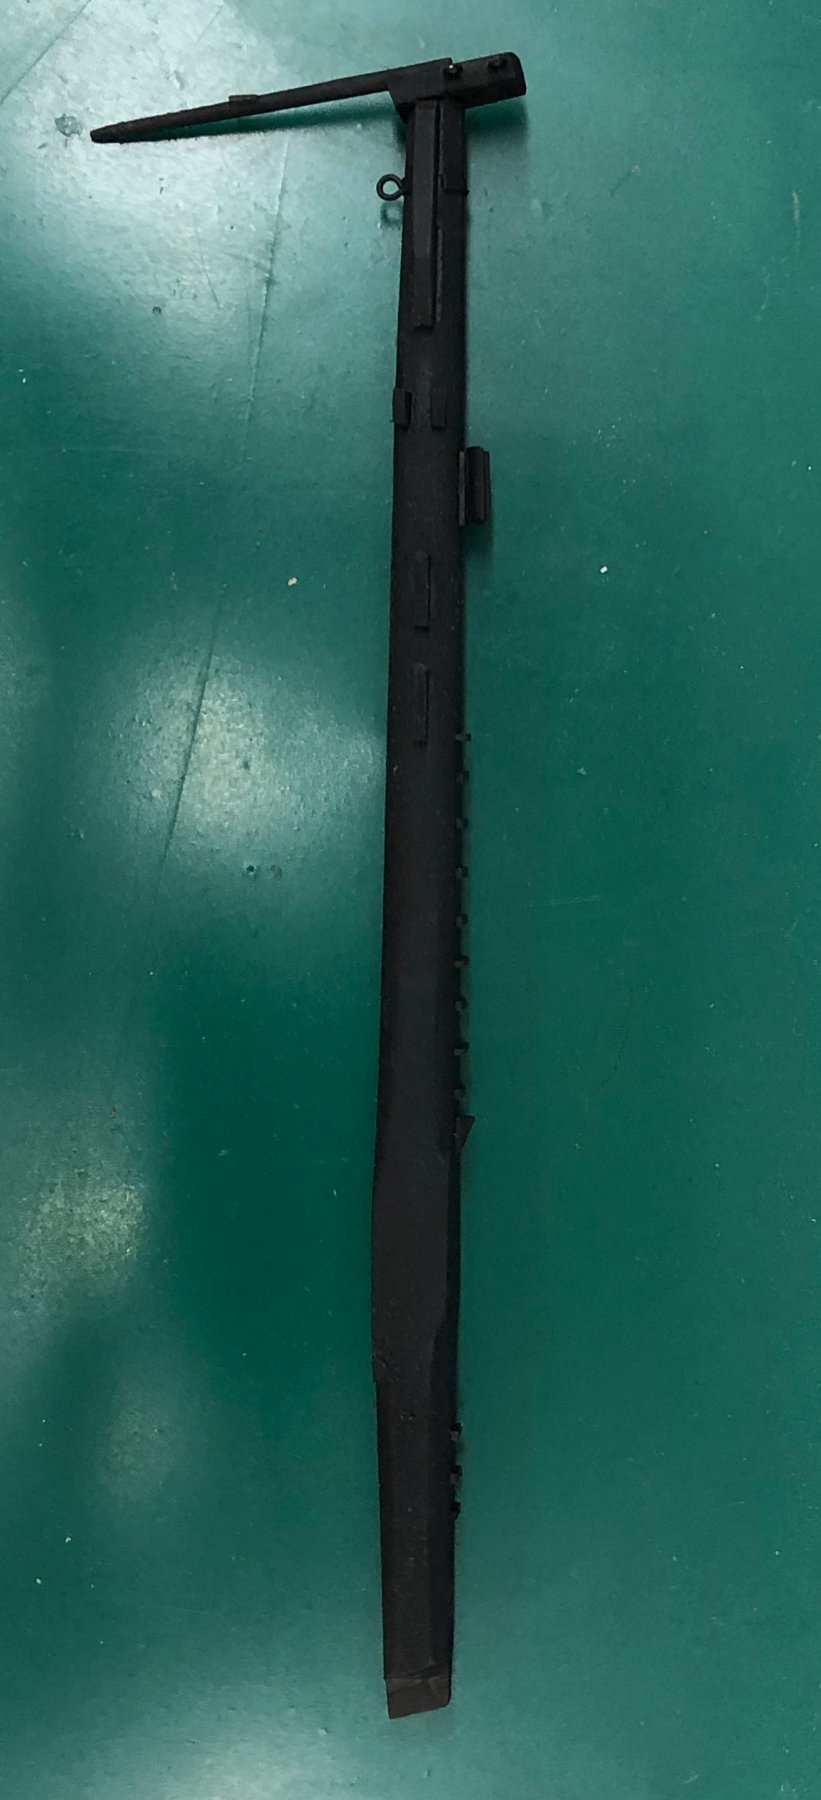
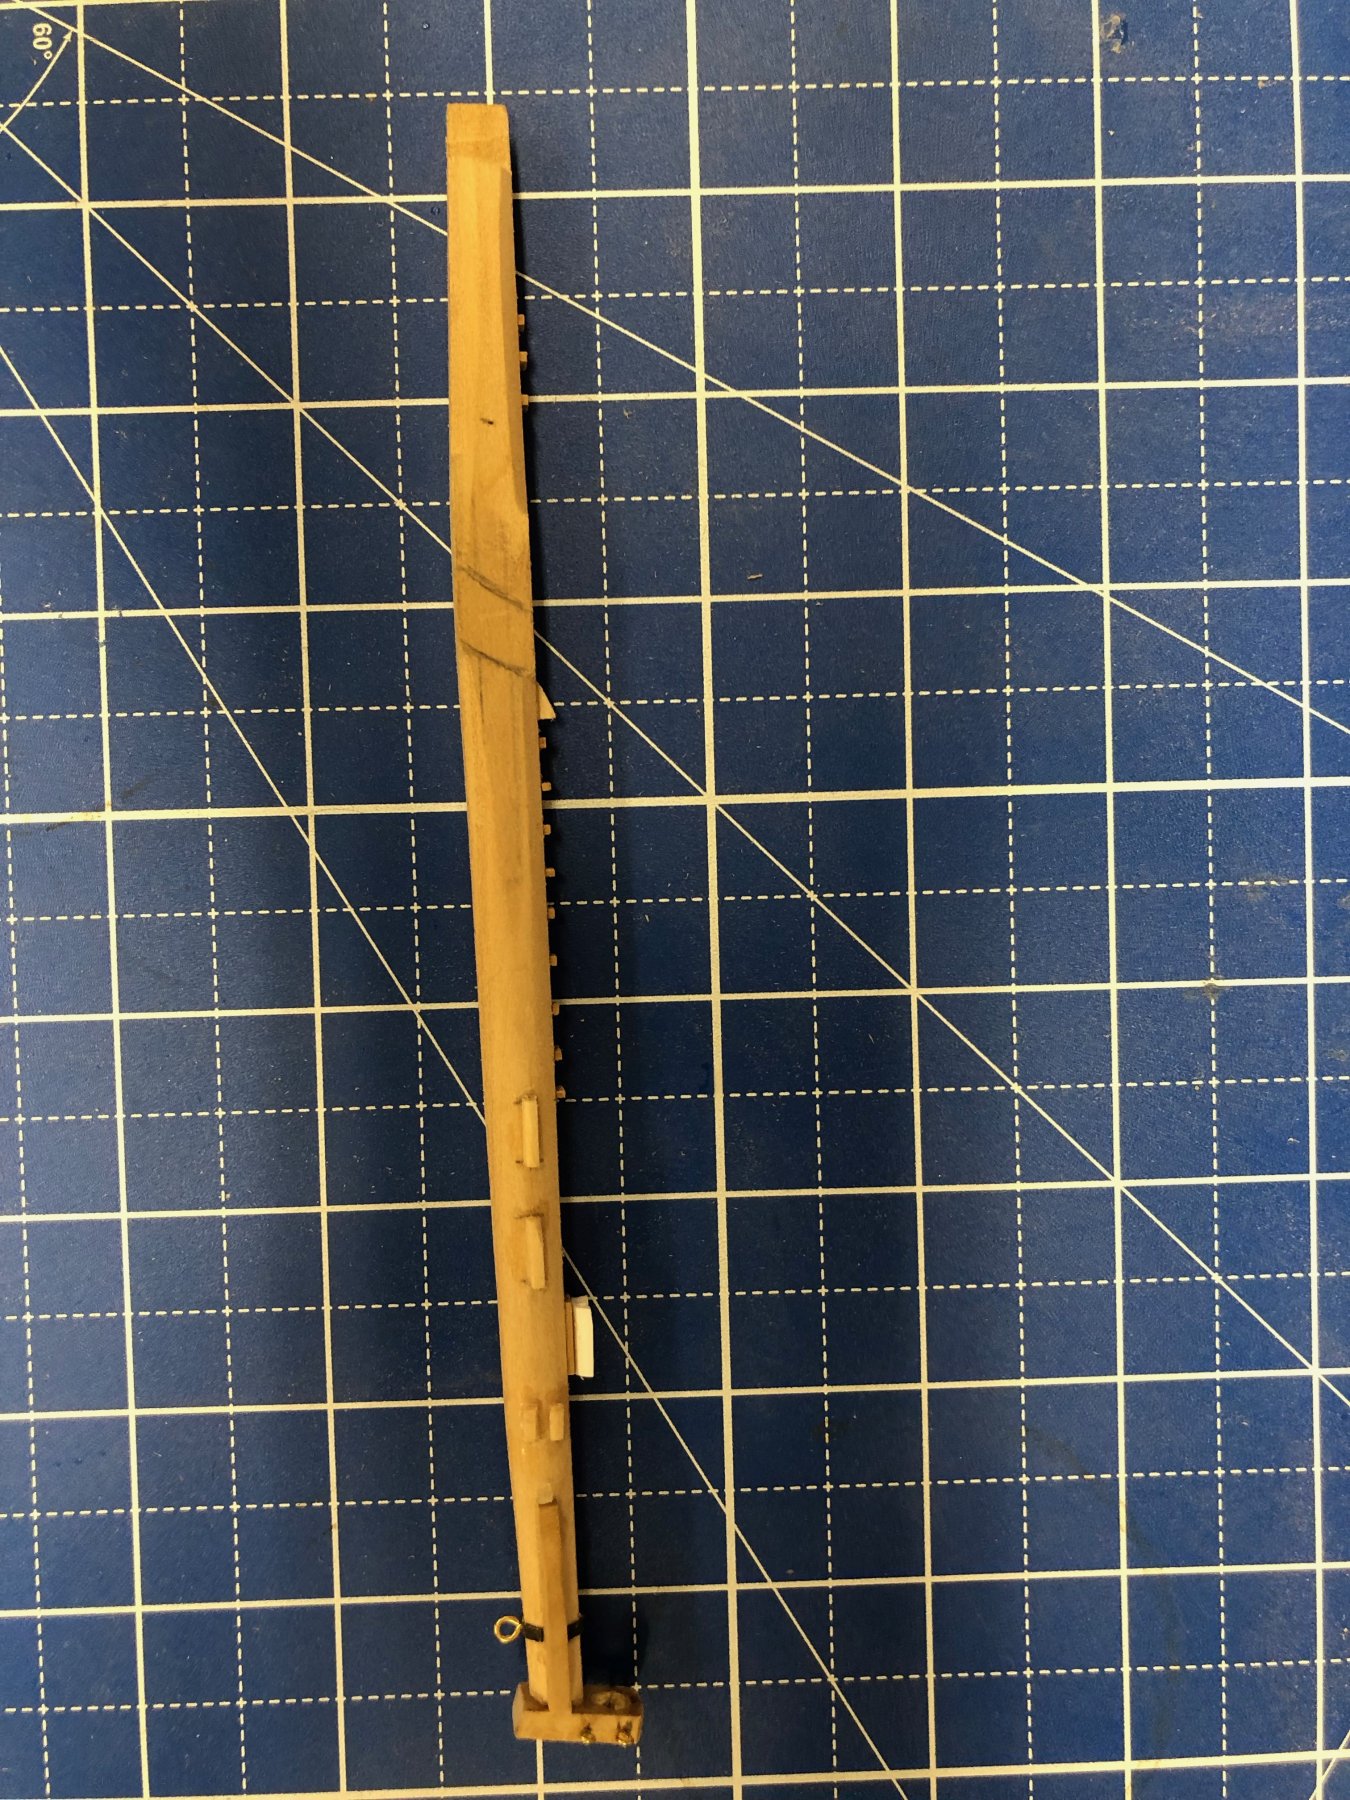
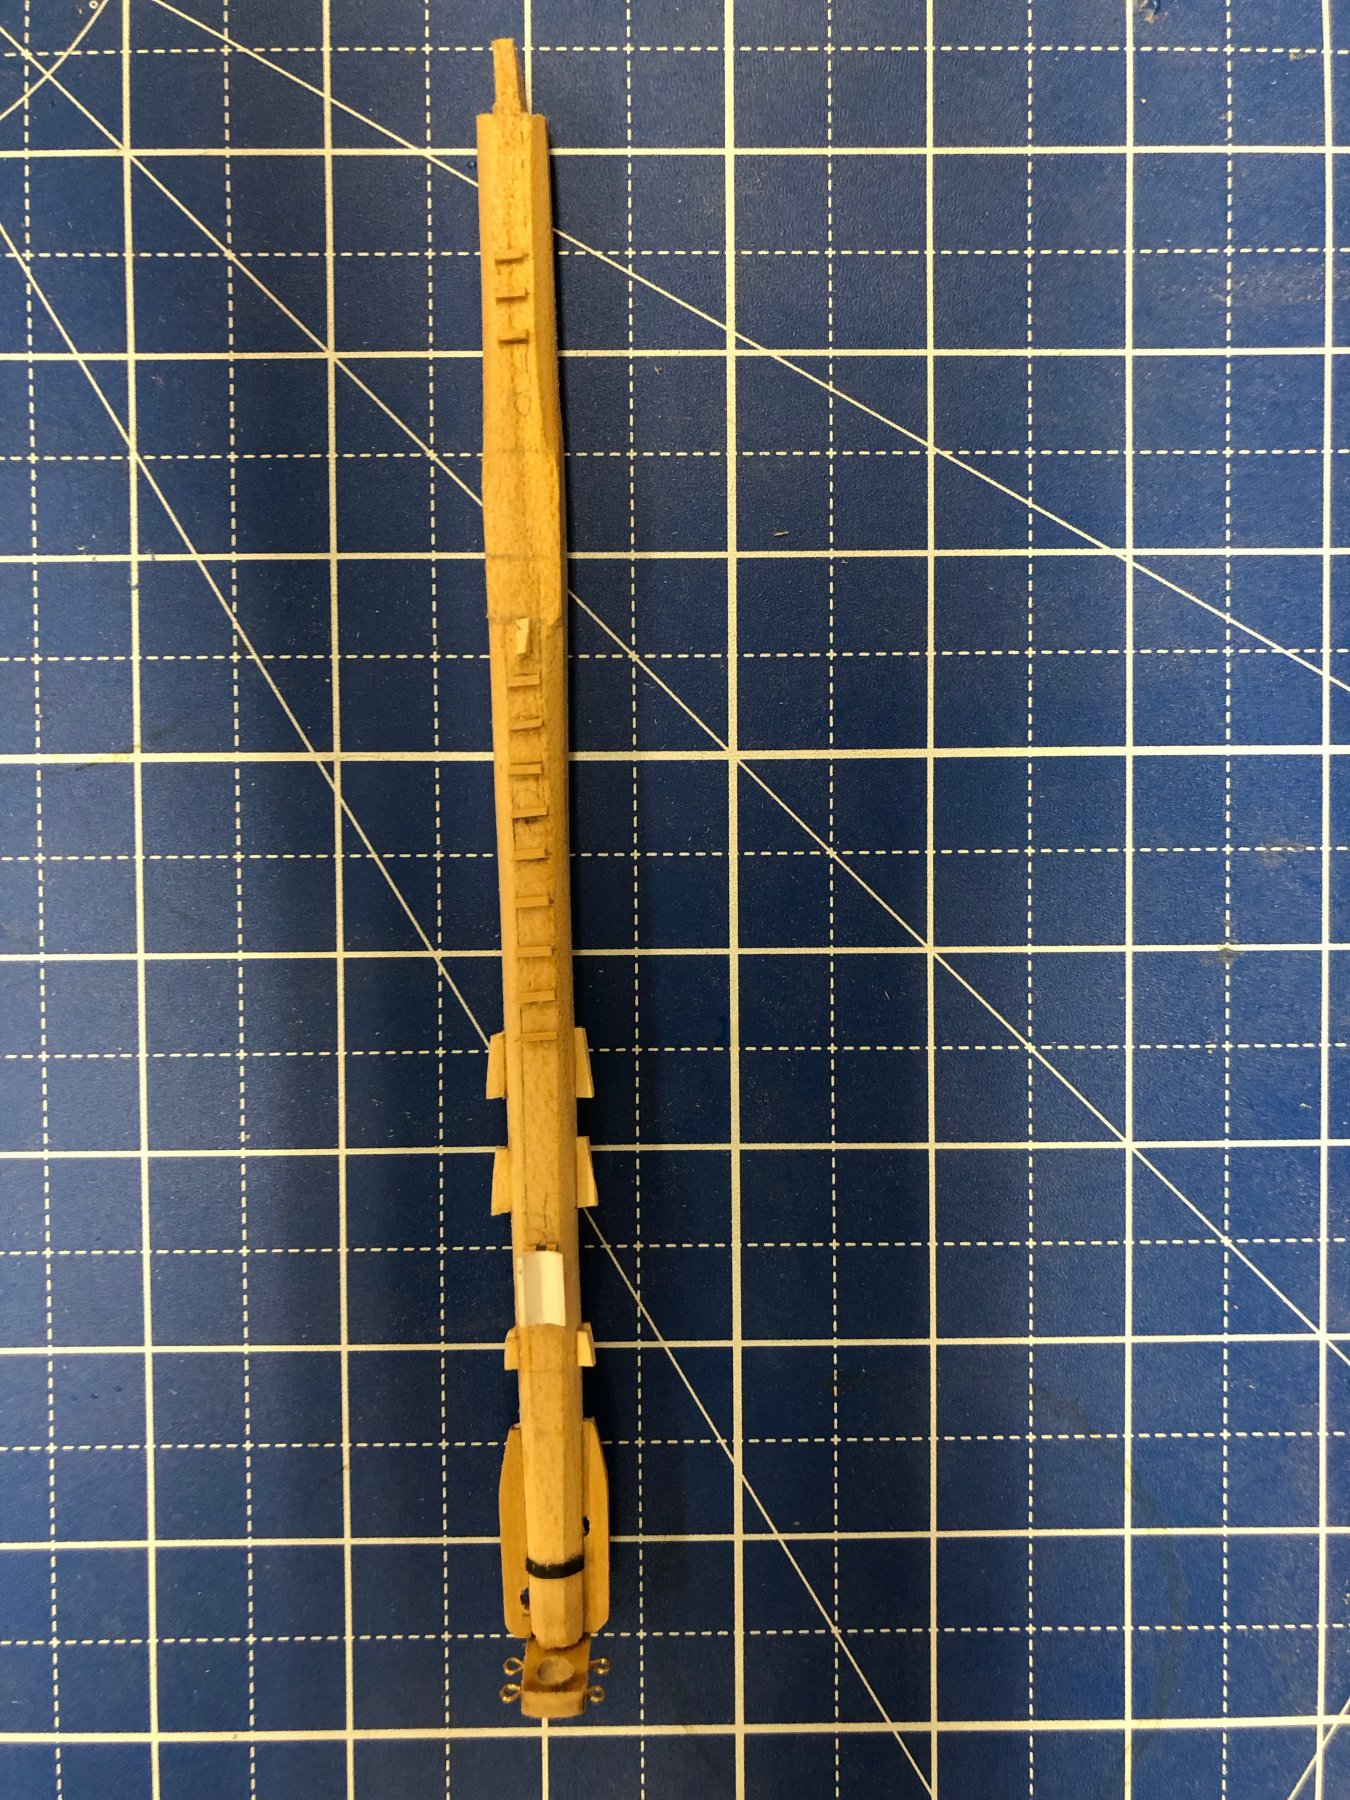
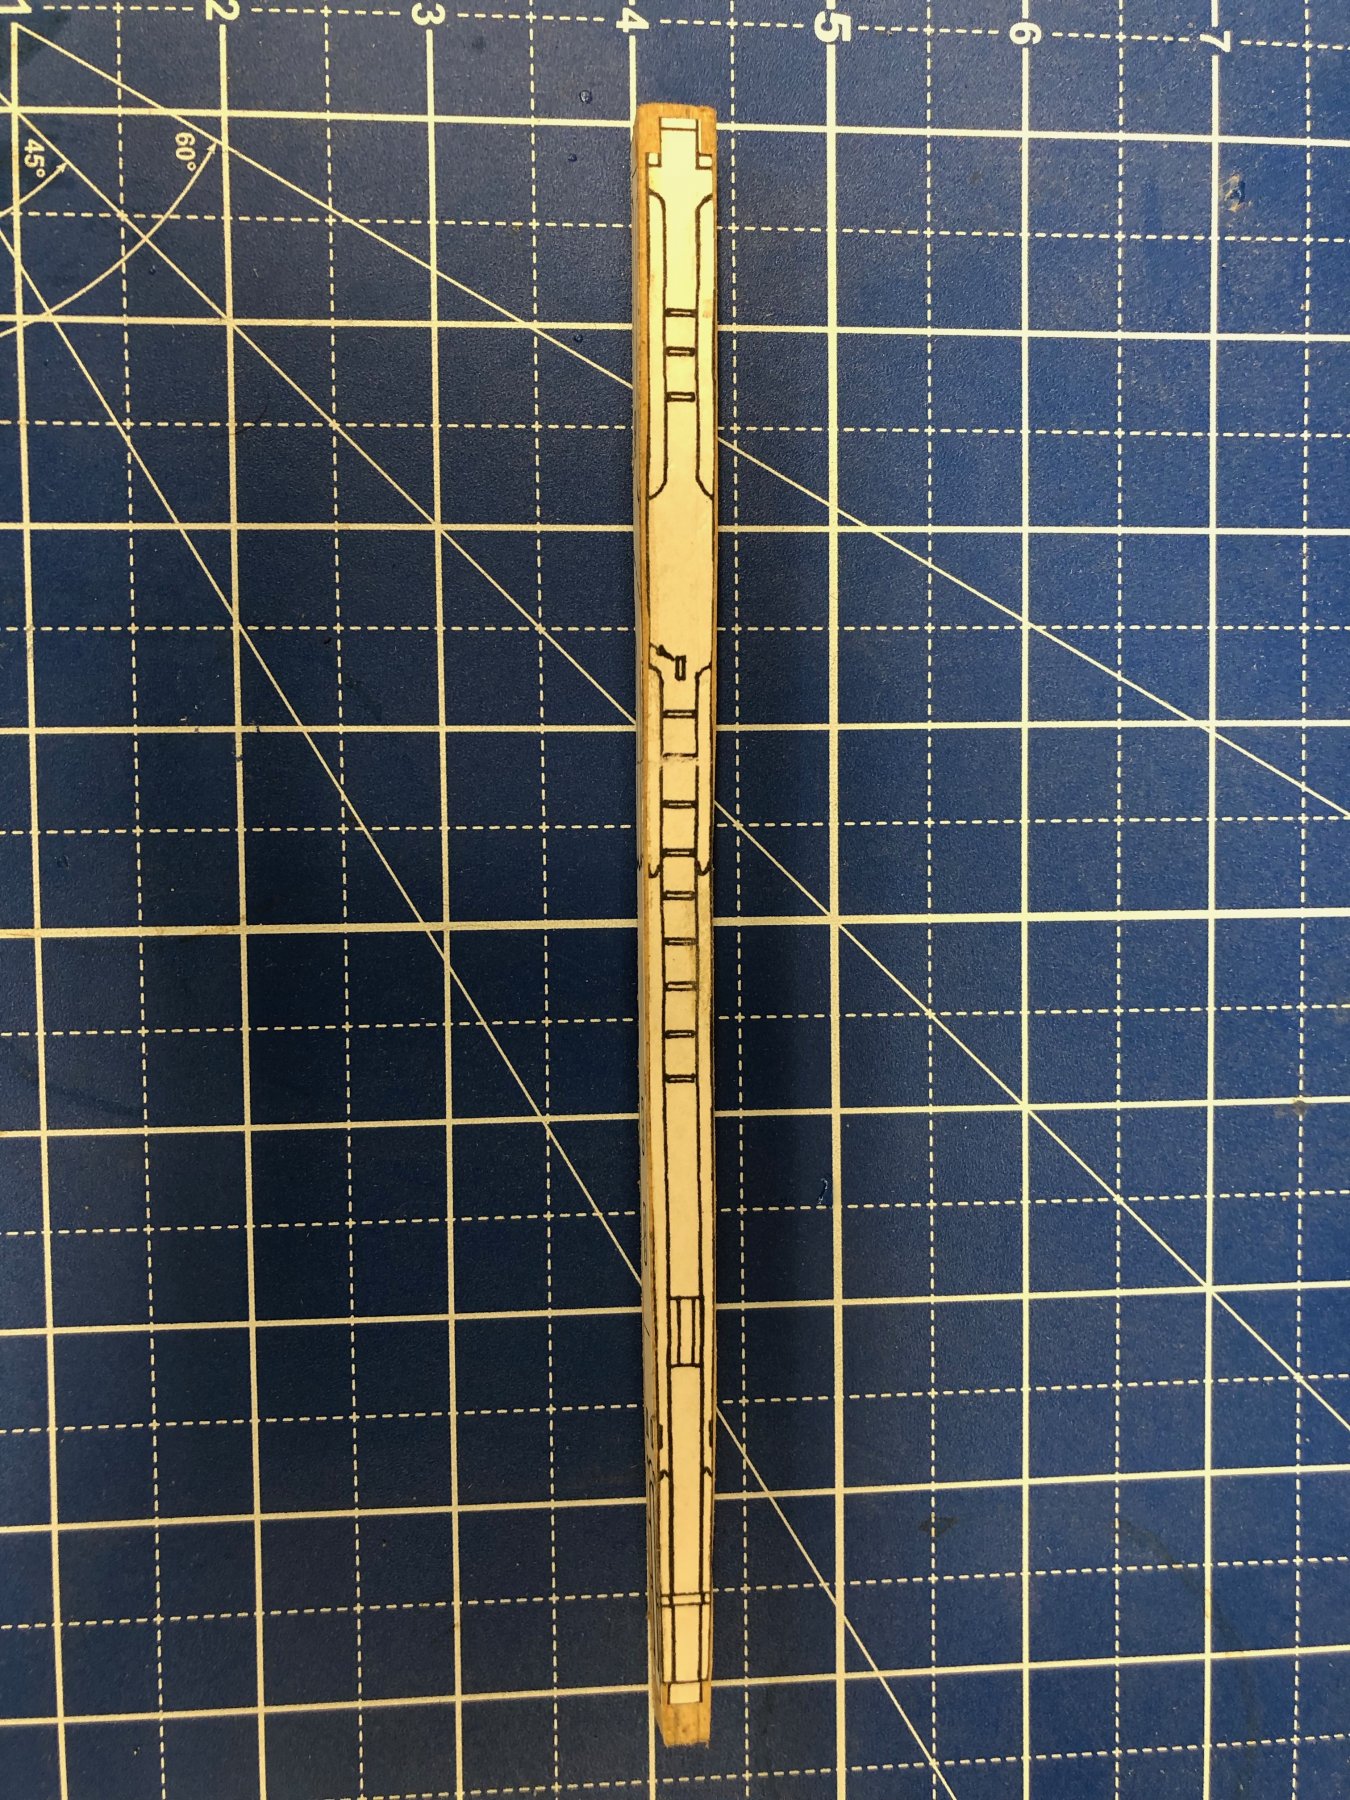
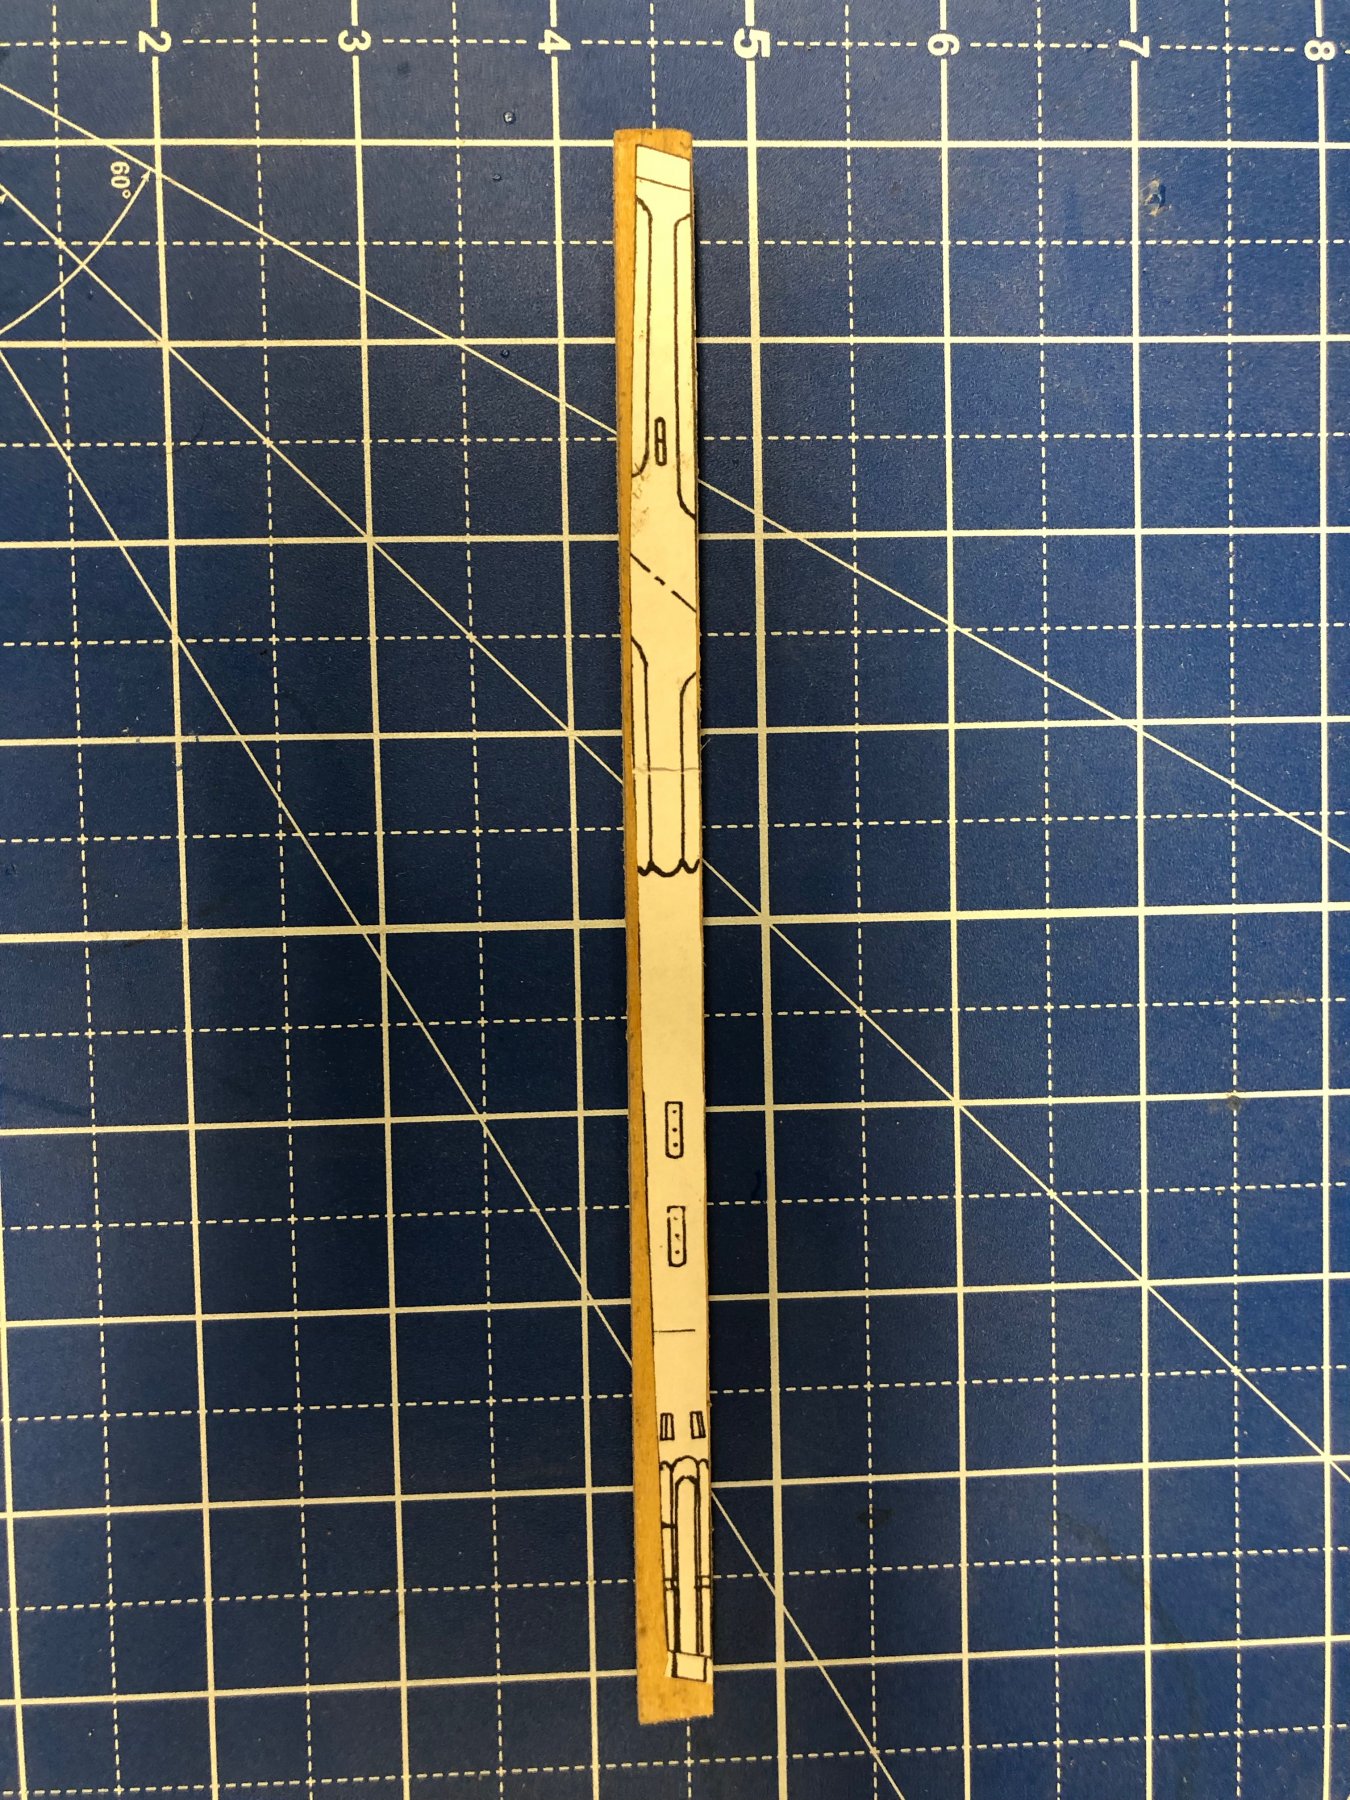
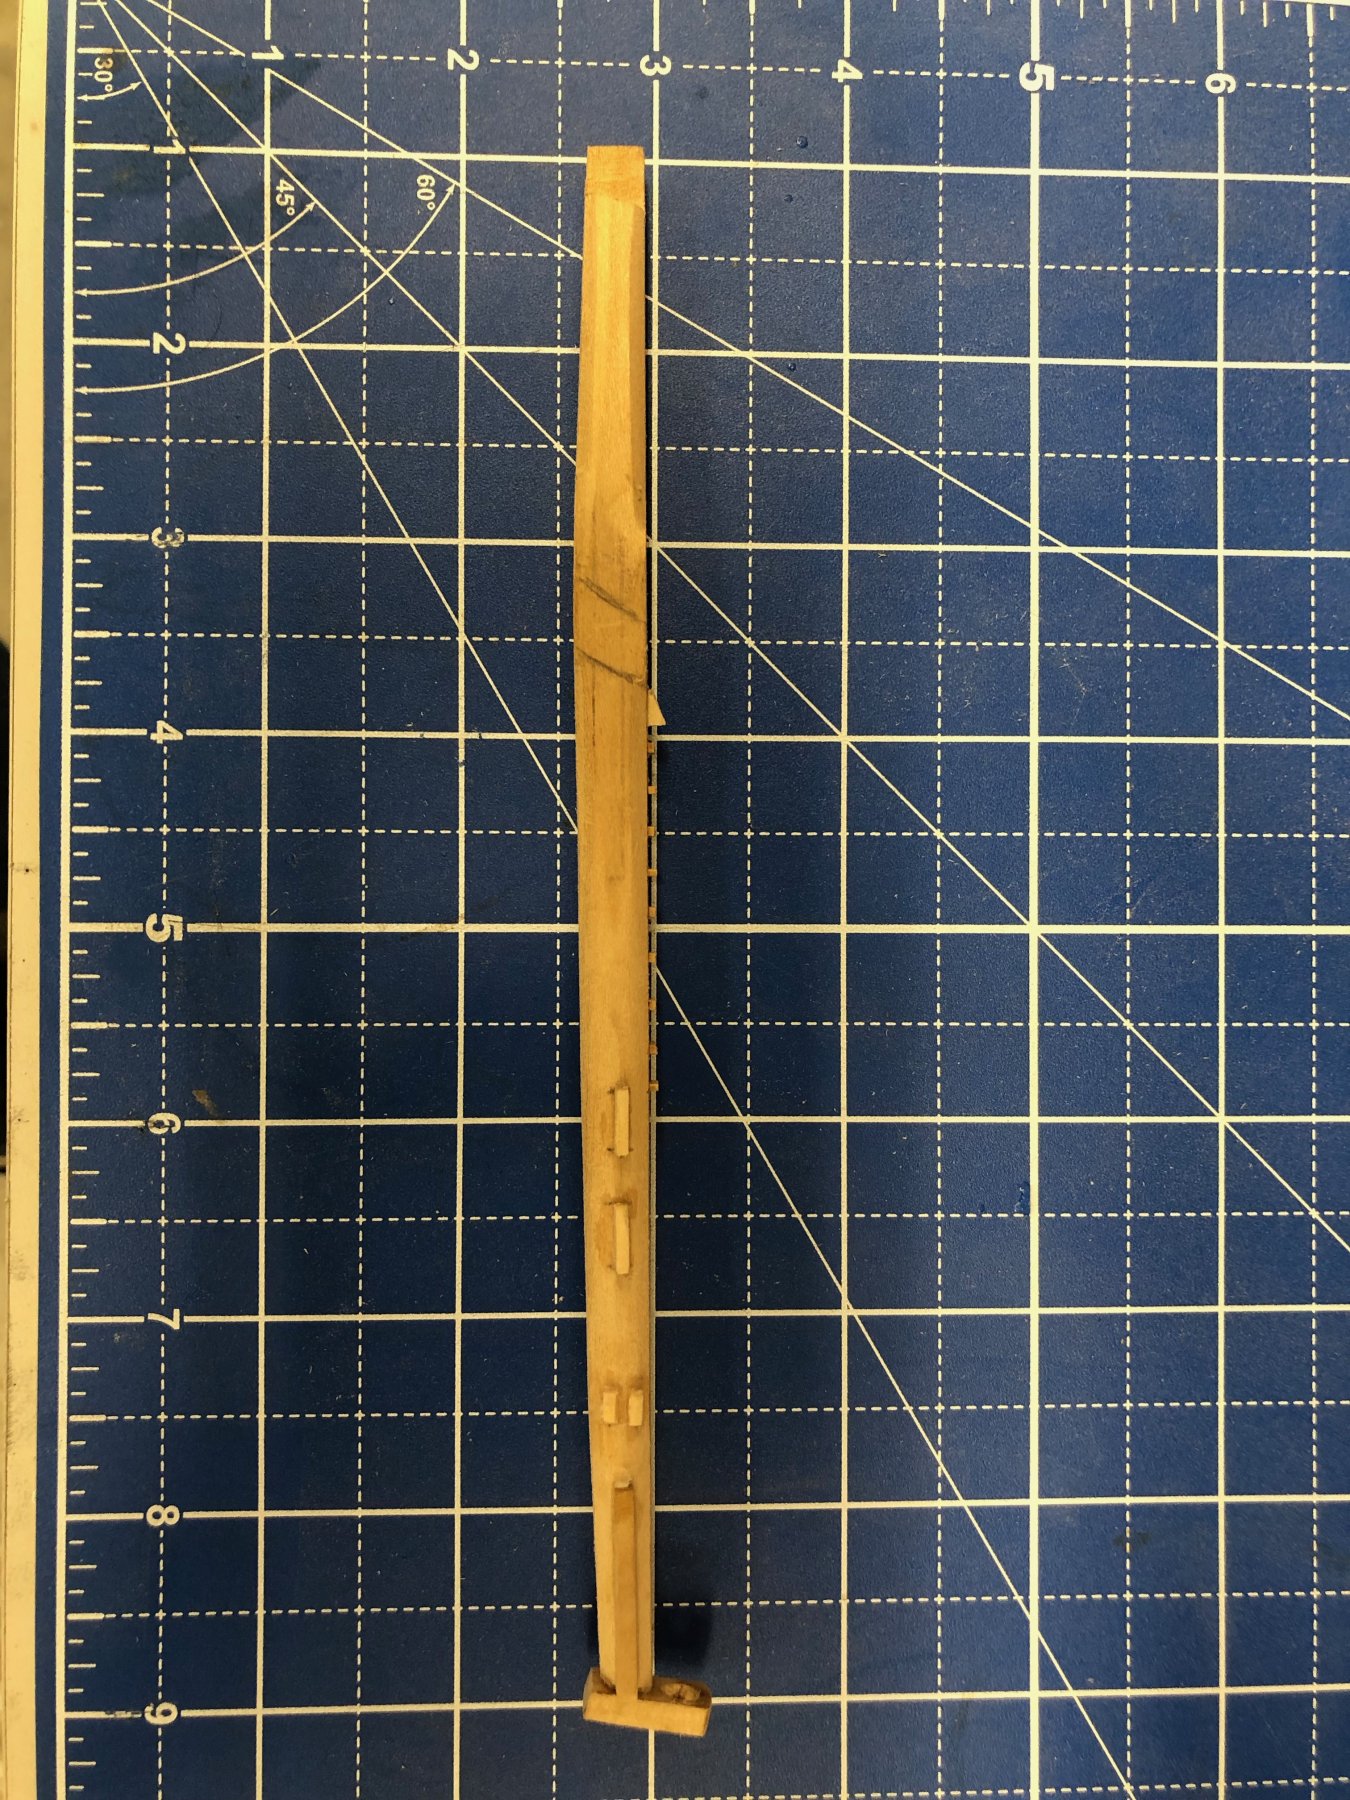
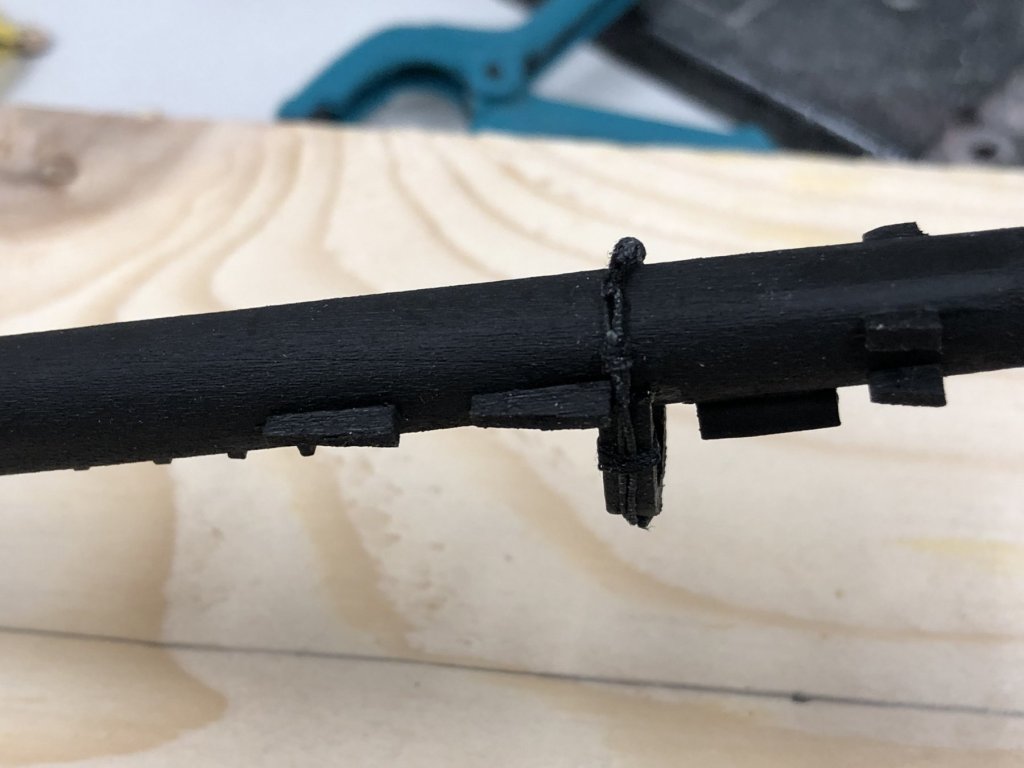
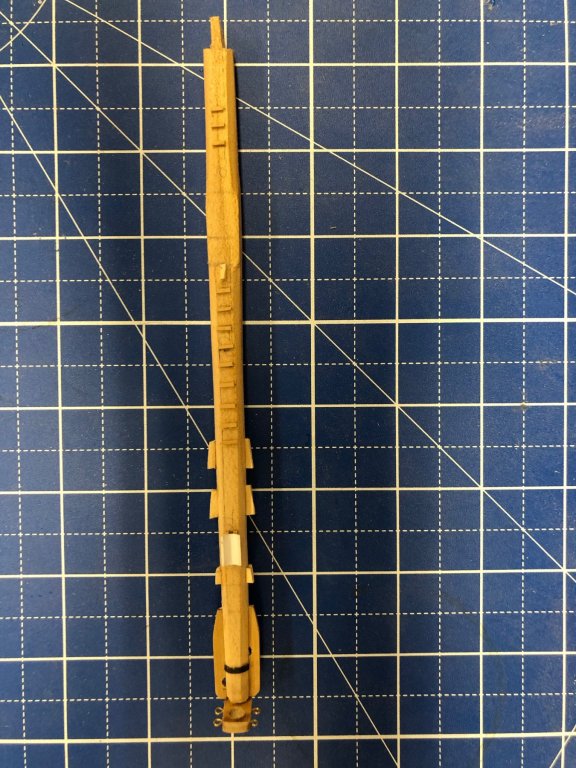
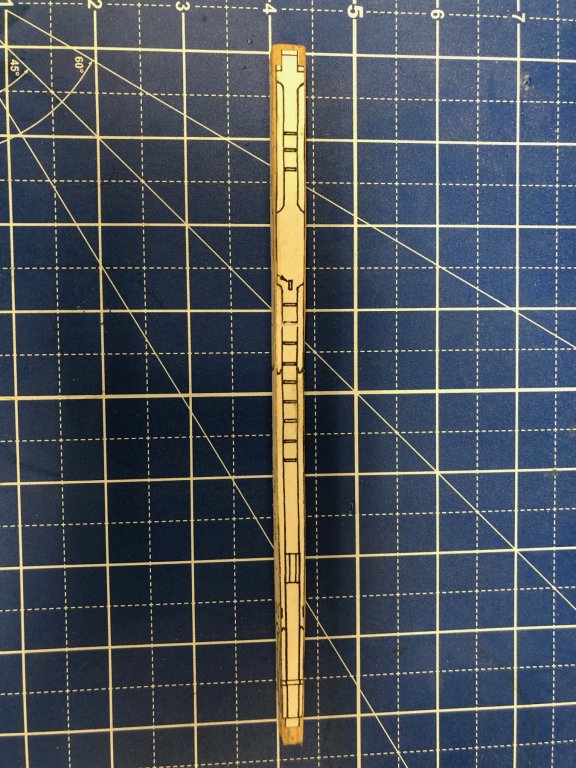
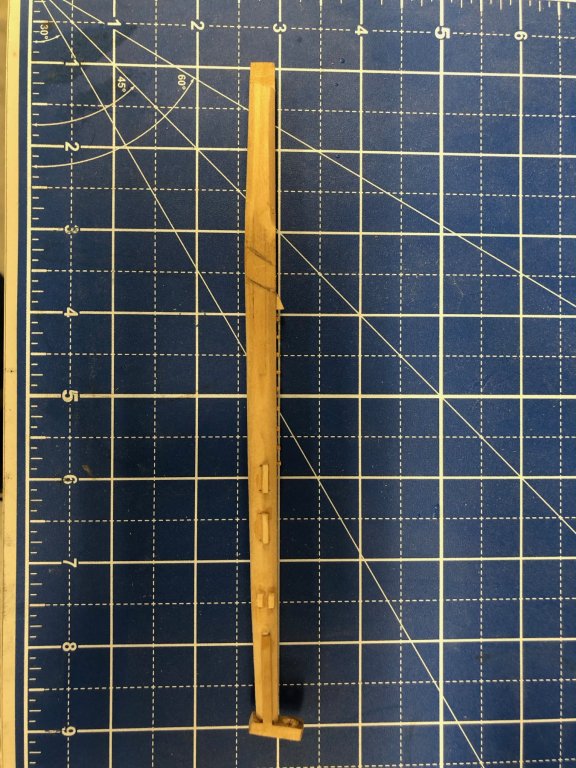
After two false starts (one the starting piece was too short, (where did that short piece of 3/8 X 3/8 come from?) and one where I made the entire piece 8-sided before noticing that the part that goes through the hull remains square) I decided to cut out the top and side views of the bowsprit and glue them on the correct piece of 3/8 X 3/8 kit stock (it will all be painted black so no reason to use something else). I used the disk sander to adjust the profile on the bottom and both sides and then marked and sanded to 8-sided those portions fore and aft of the hull insertion point. Then I rounded the section (except the top) aft of the bees and forward of the hull insertion. Using the disk sander to get closer to the final shape was the right moved. I did all 8-sided one by hand all the way from 3/8 X 3/8 square. Tapering an 8-sided piece of wood (but not the top) too more time and effort than I had imagined. Here are the before and afters - I still have a few pieces to add to the bowsprit but you get the idea.

- 367 replies
-
- 1
-
-
- model shipways
- niagara
- (and 1 more)
-
Shipyard has reopened. Working on anchors and the bowsprit but iPhone camera is acting up so no pictures until I figure out the problem. I'll bet Apple tech support is swamped with folks with new phones for Christmas.
-
Thanks, got it, but I am going to have to make that upper hole round so the jib boom will pass through. I don't see anything in the plans to indicate that the jib boom is other than round or octagonal cross-section.
-
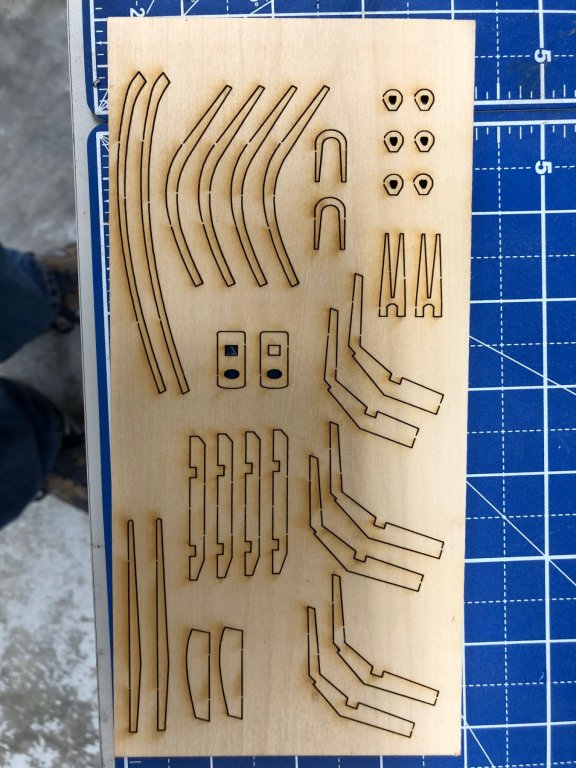
Tom, Have you found the bowsprit cap? The parts list says it is on the sheet pictured below but those are the mast caps for the top mast sections and I can't find the bowsprit cap anywhere else on the laser cut sheets.