HOLIDAY DONATION DRIVE - SUPPORT MSW - DO YOUR PART TO KEEP THIS GREAT FORUM GOING! (Only 75 donations so far out of 49,000 members - C'mon guys!)
×


cdrusn89
-
Posts
1,915 -
Joined
-
Last visited
Content Type
Profiles
Forums
Gallery
Events
Everything posted by cdrusn89
-
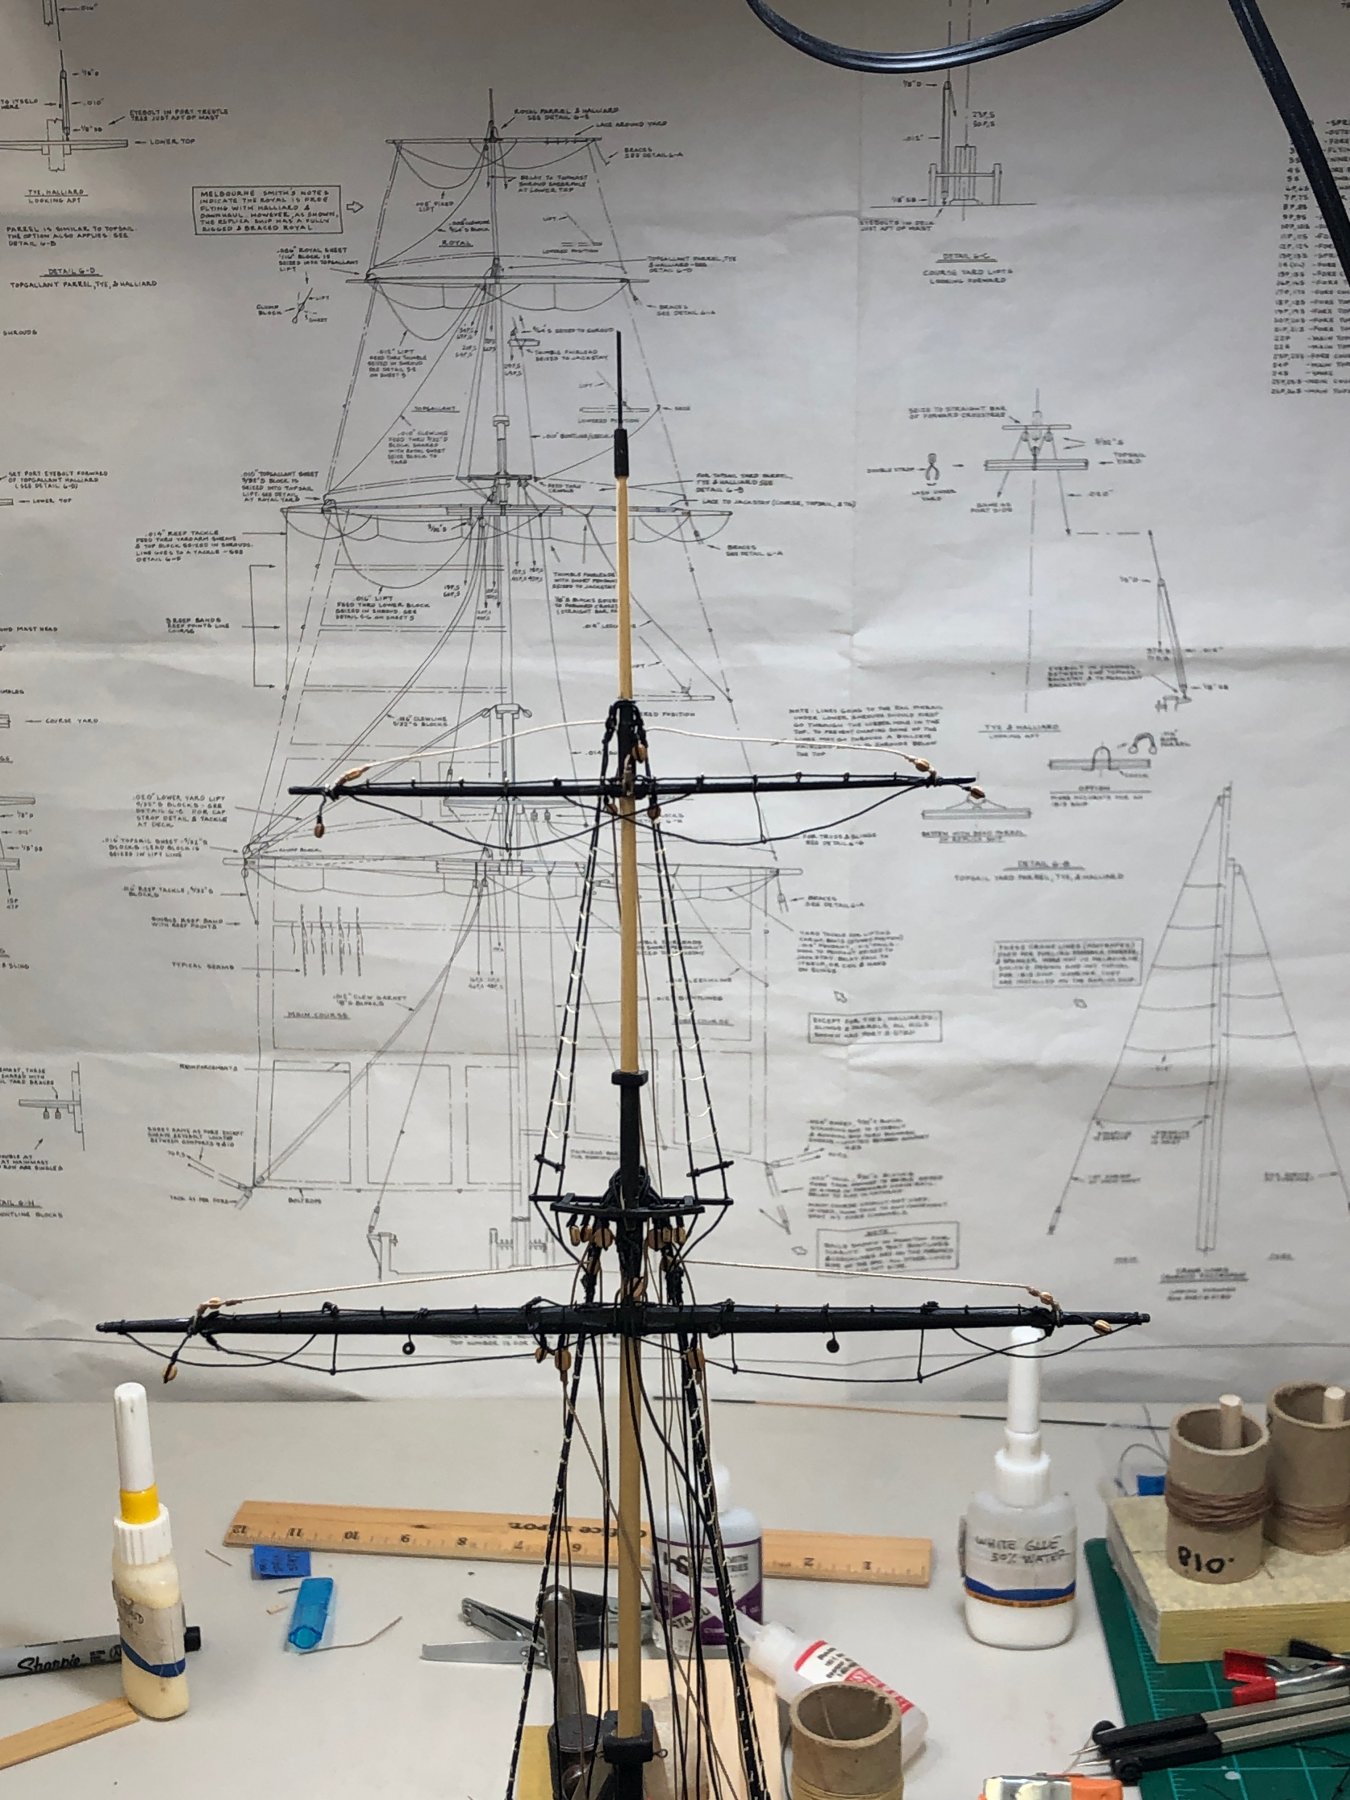
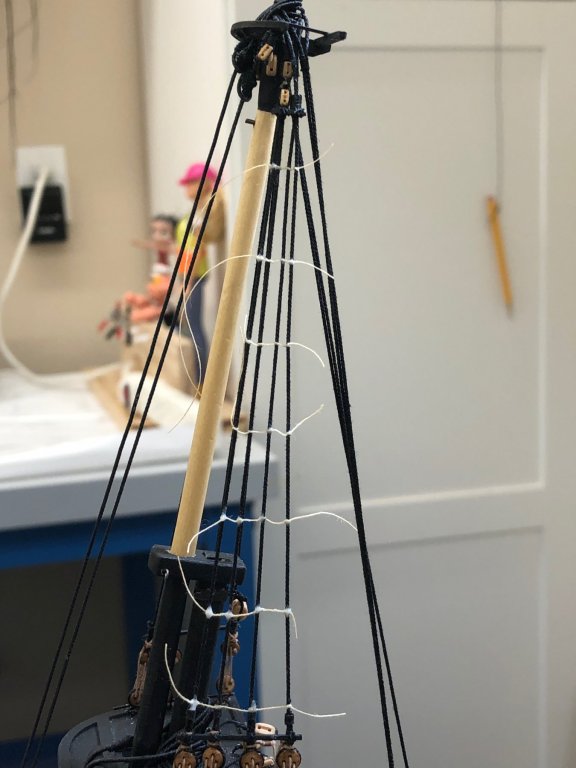
 Since I had to redo the Main Royal yard a bit after yesterday's "incident" I took the opportunity to make the fixed lift exactly the correct length. Originally I had just sort of guessed at it when I was outfitting the yard. I am working on the parrel now and will have this in place today. Then on to the Main Course".
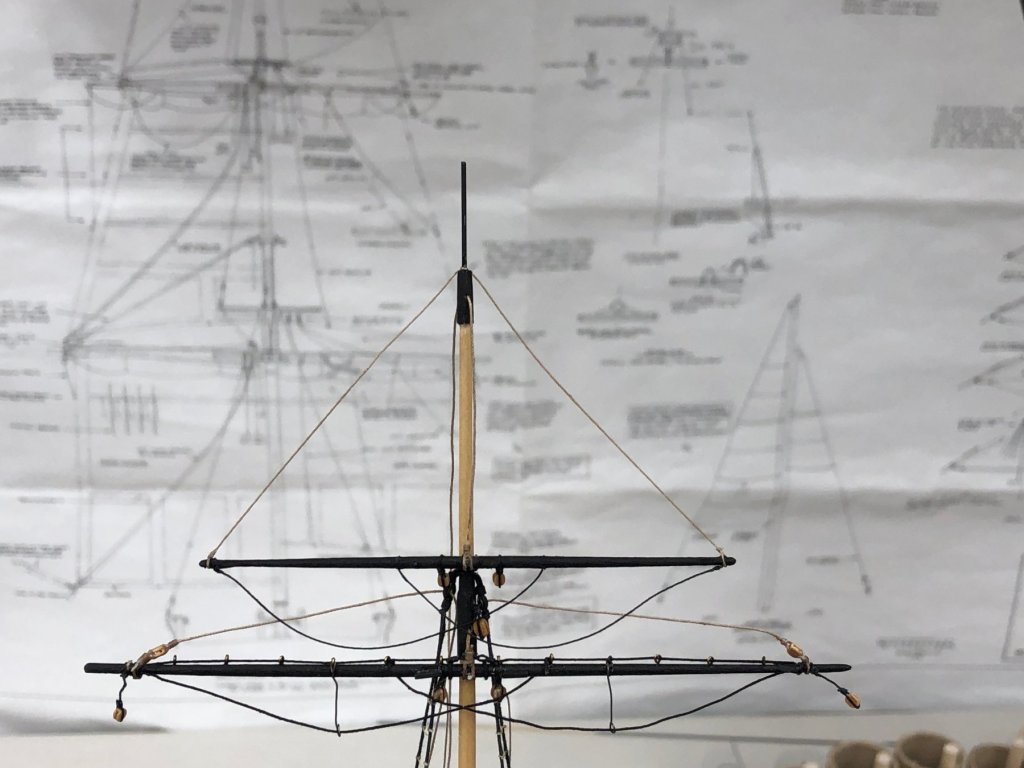
- 367 replies
-
- 3
-

-
- model shipways
- niagara
- (and 1 more)
-
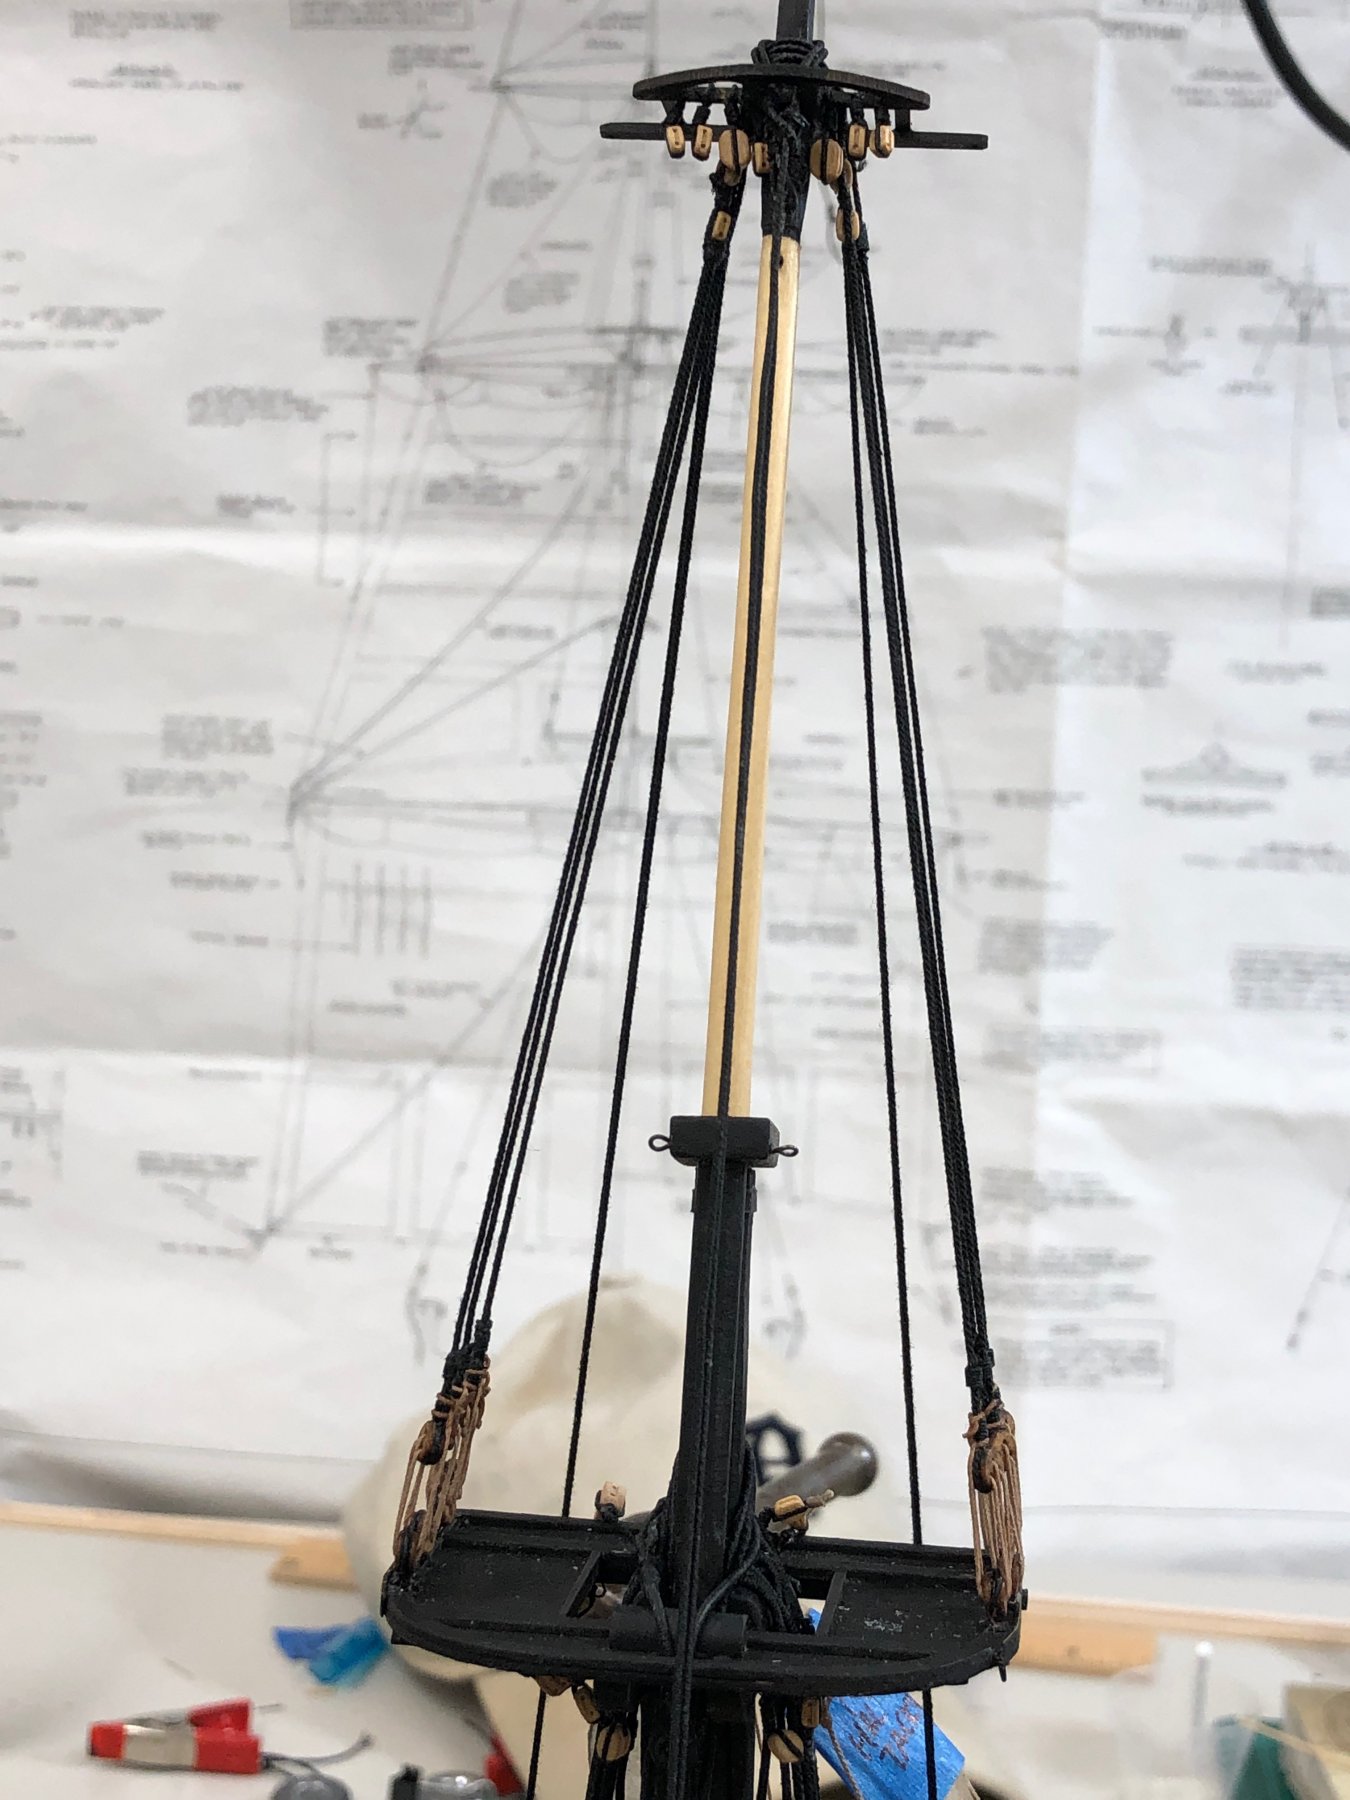
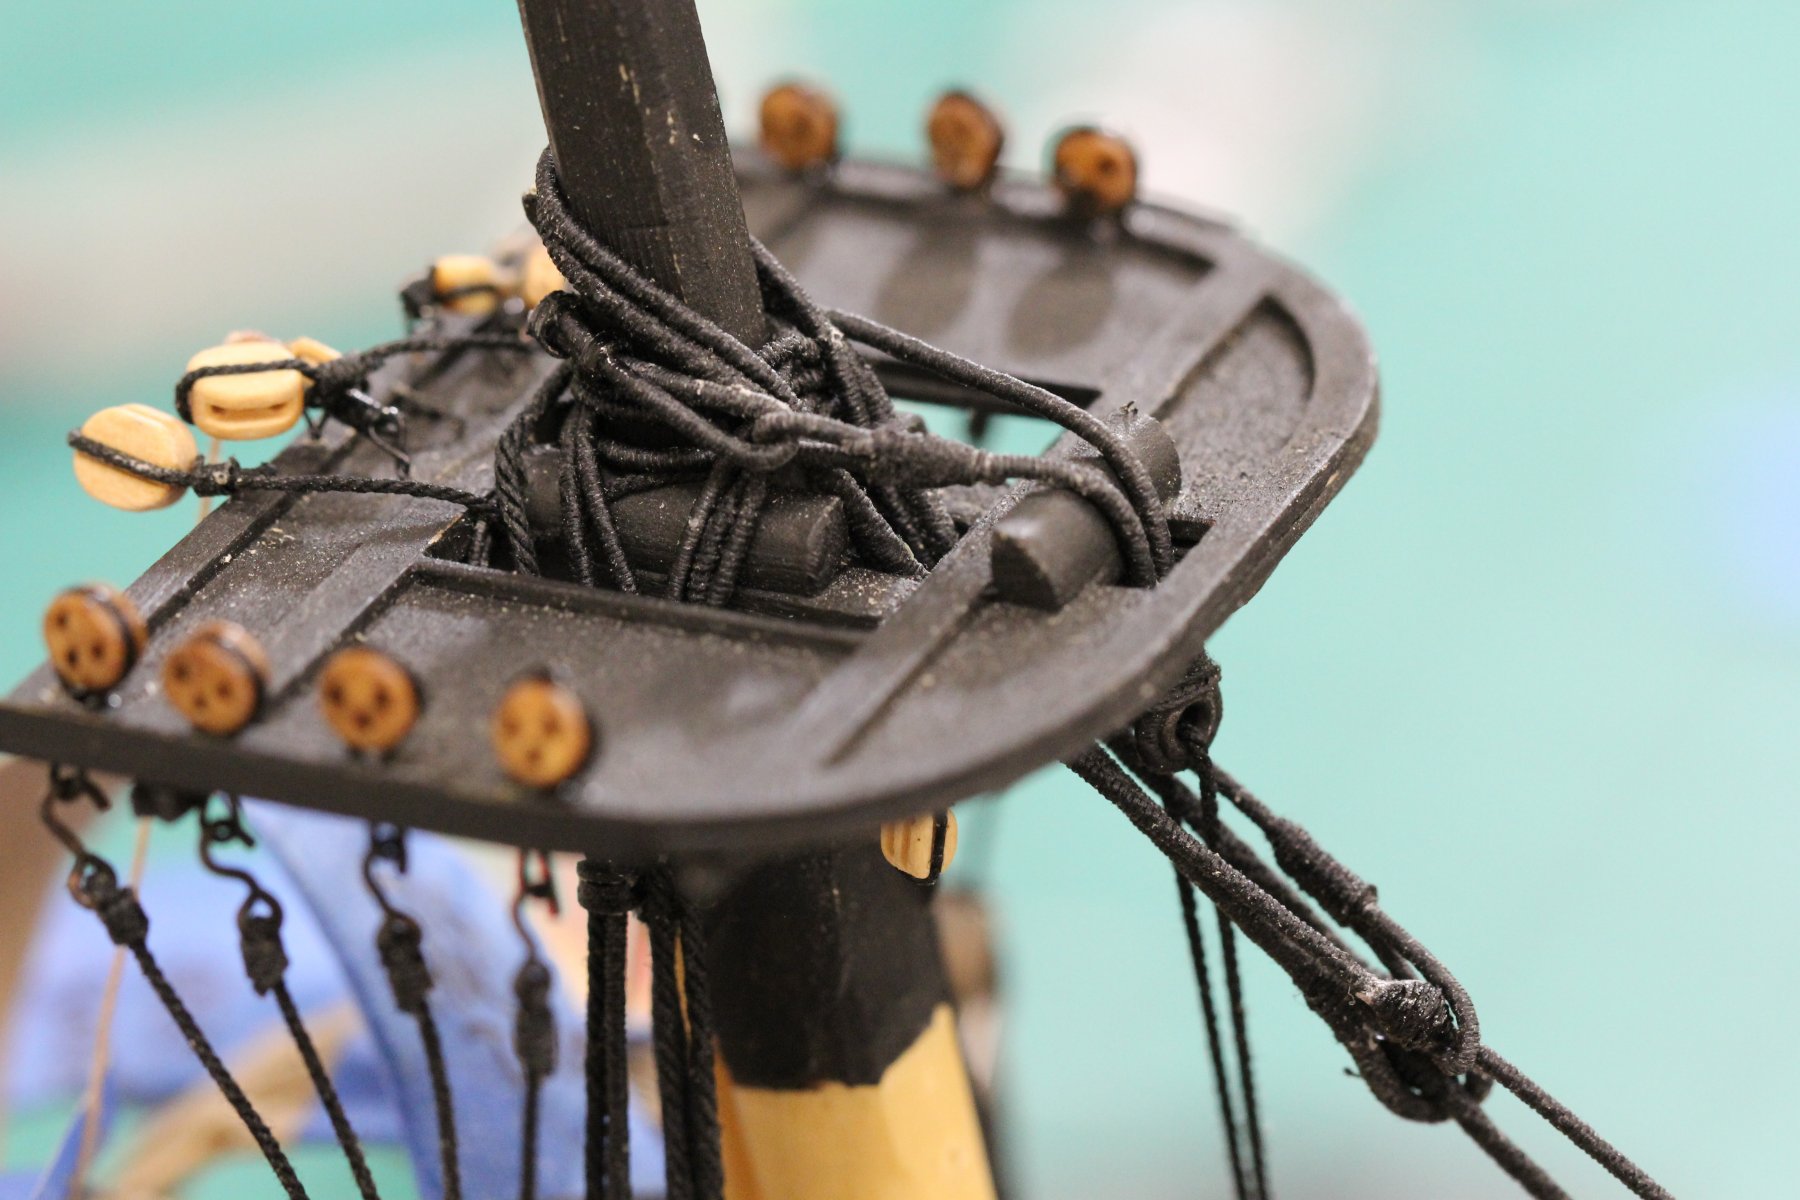
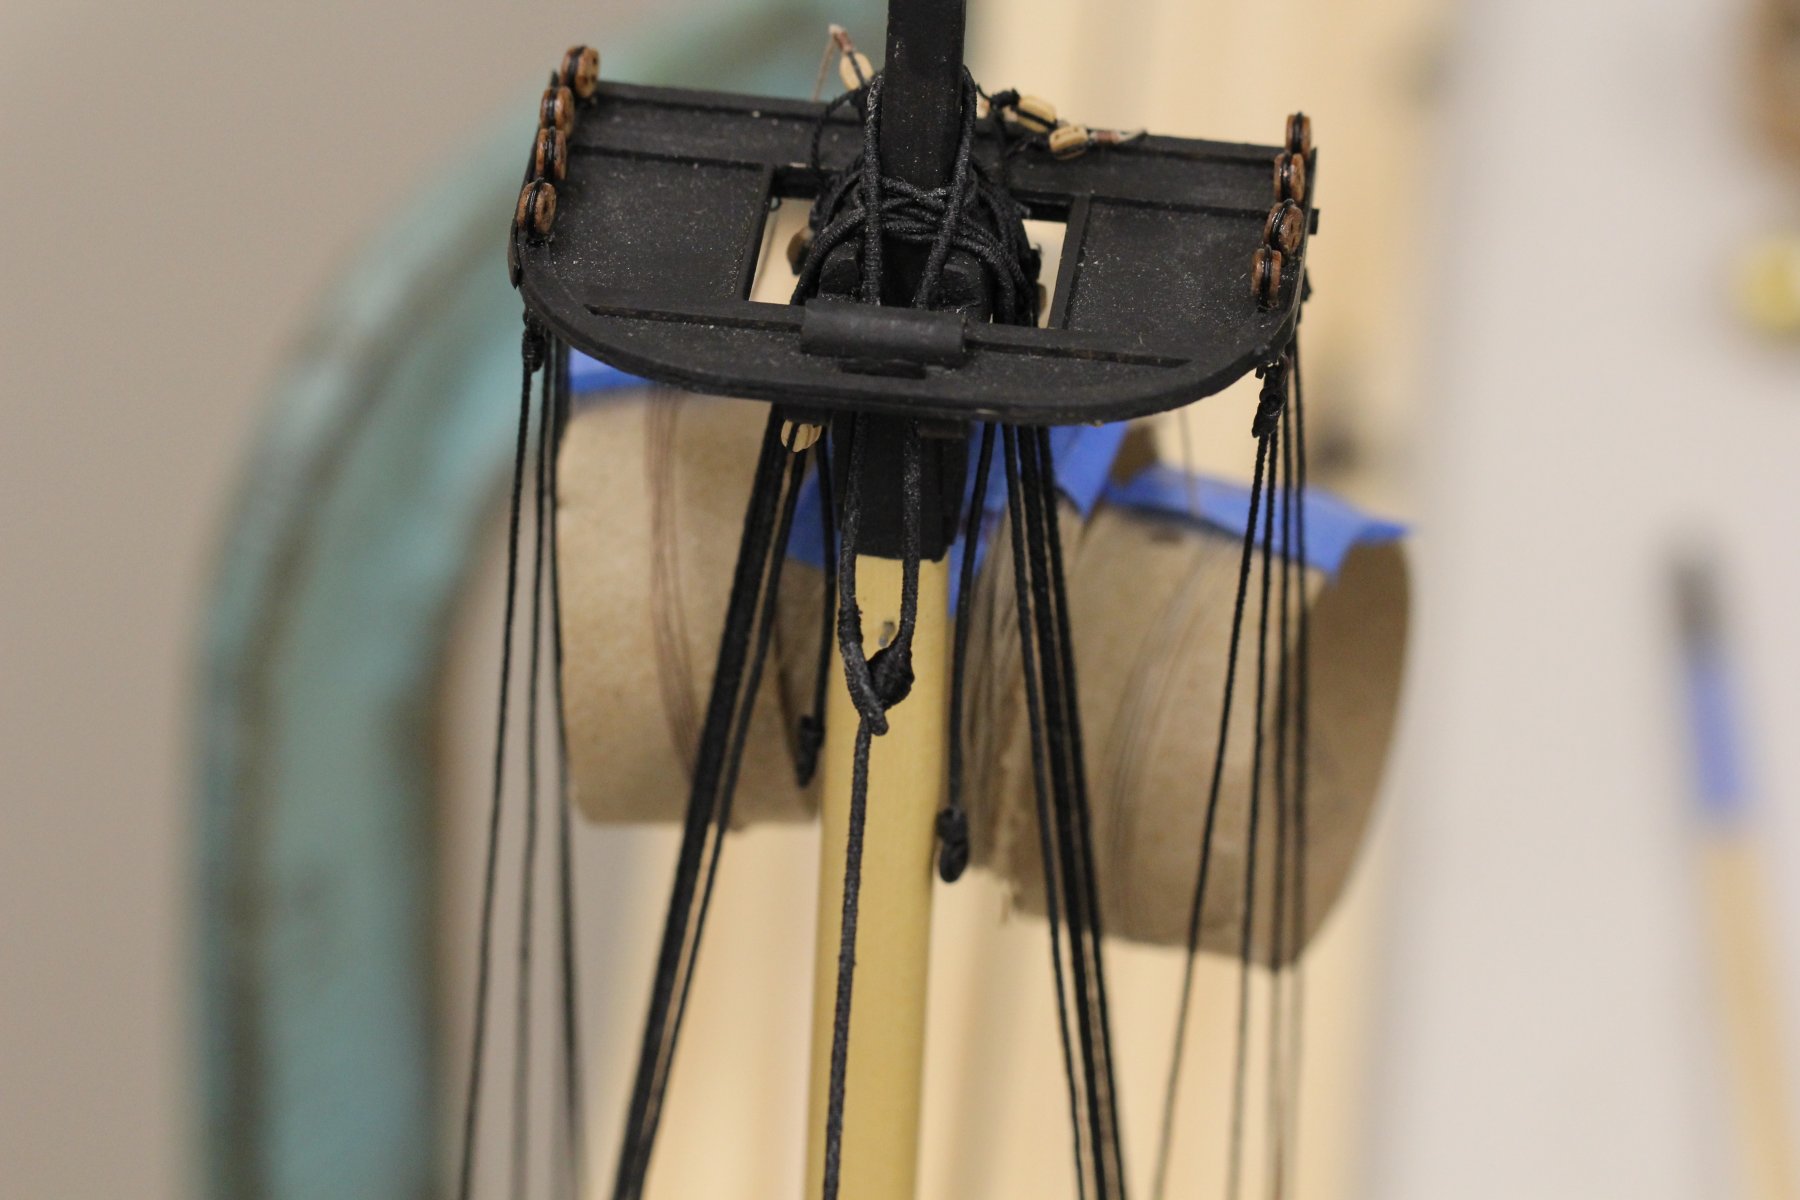
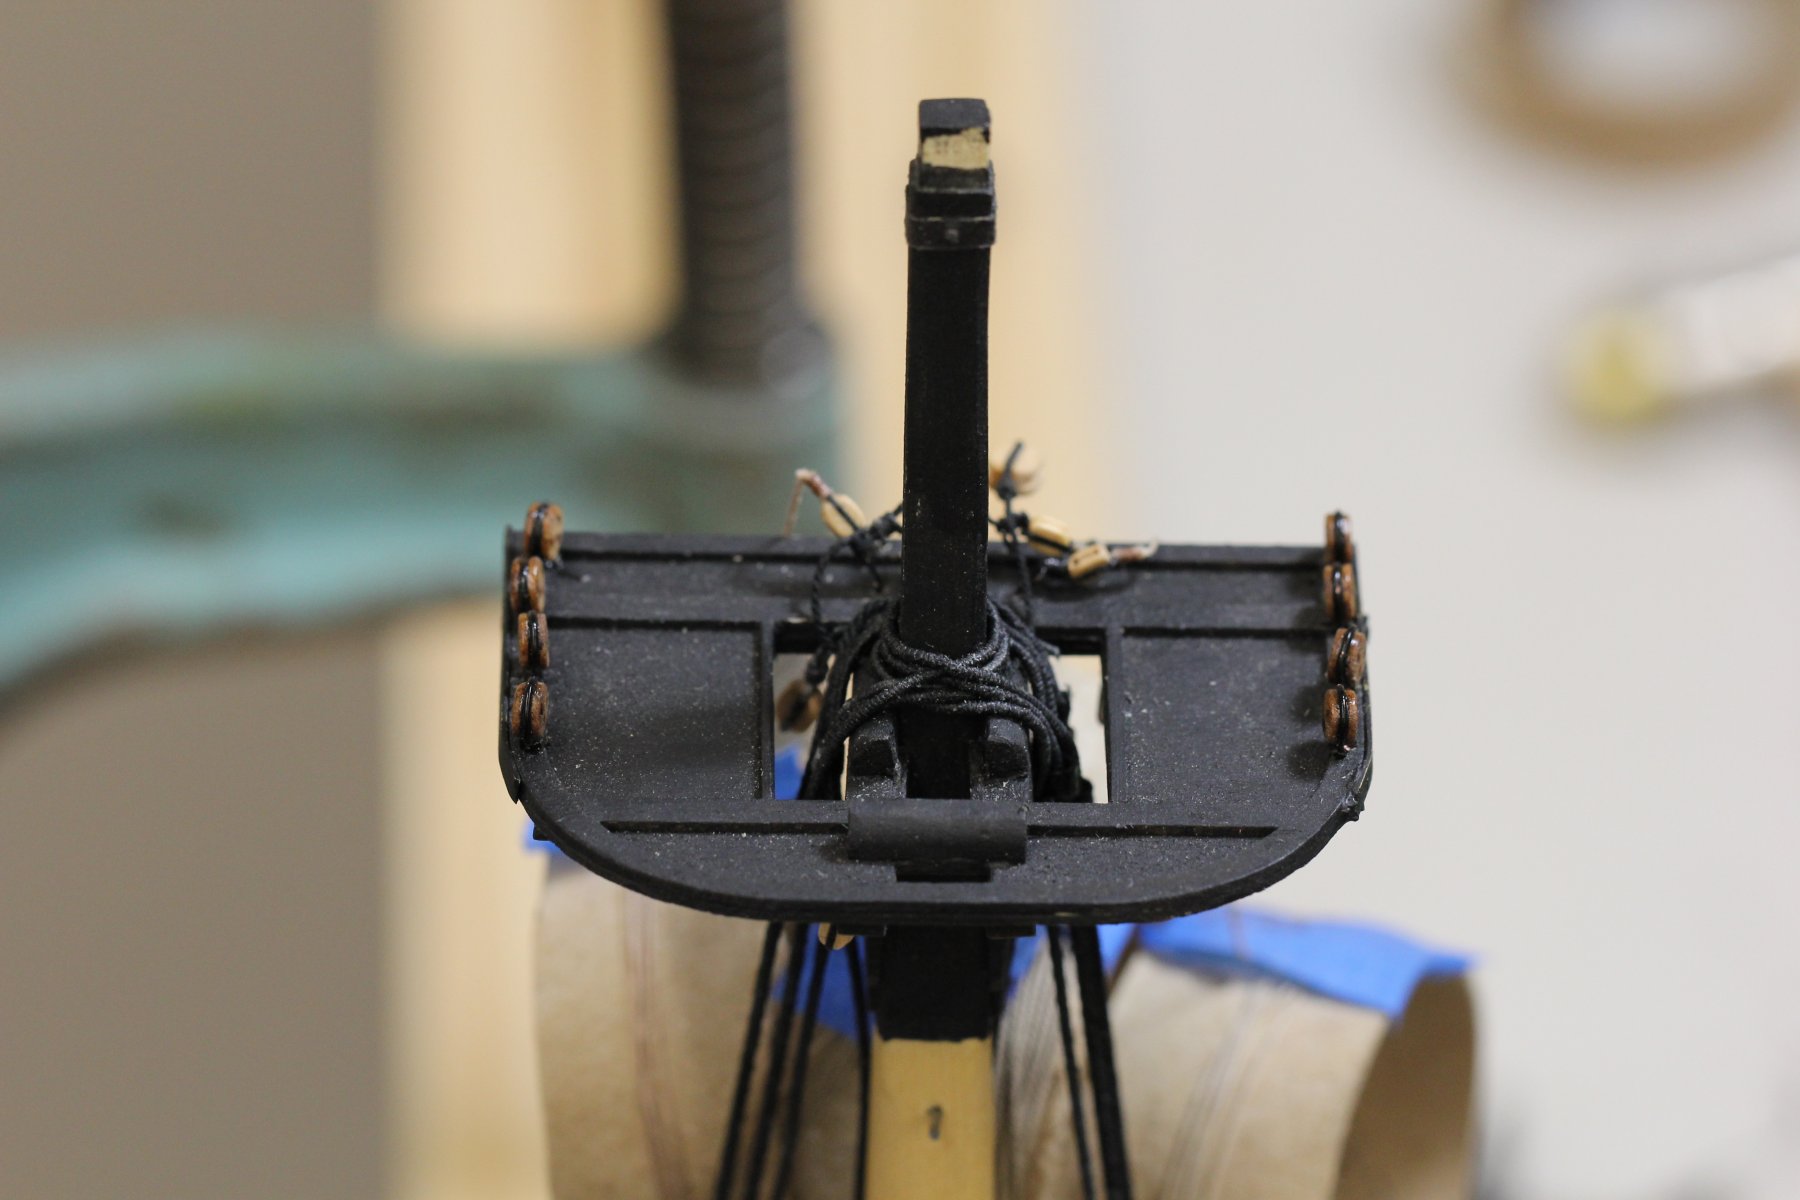
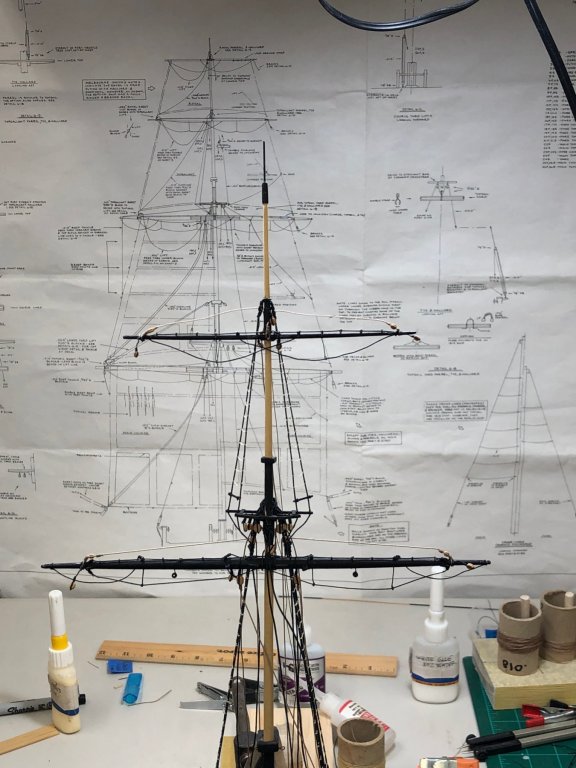
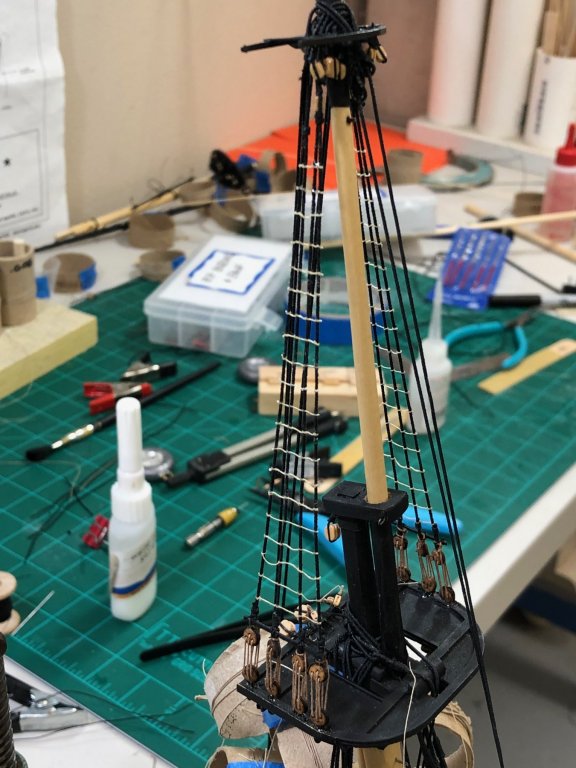
Tragedy strikes on the first day of year two of my Niagara build. While tensioning the TG yard halyard the TG mast broke at sheave (aka hole) where the halyard passes through the mast. Must have been a weak point in the wood - I was not pulling that hard. Anyway I was too distraught to take any pictures. Since the TG masts are the same both Main and Fore, I got the Fore one and was able - so far - to get it in place. I will have to adjust the TG shrouds and remount the Royal and TG yards but I think the real issue I making another TG mast. I am not sure I have the right size yellow cedar (all the masts were made from square section yellow cedar left). Once I get the main mast back where I was I will have to take a look. So here is the Main Mast with the Top Gallant and Top Sail yards in place. The Royal yard is going to need some additional repairs before it can go back on the mast. Nothing a few hours at the workbench won't fix but that delays the Course yard and building the new Fore Top Gallant mast a bit more.
- 367 replies
-
- 3
-
-
- model shipways
- niagara
- (and 1 more)
-
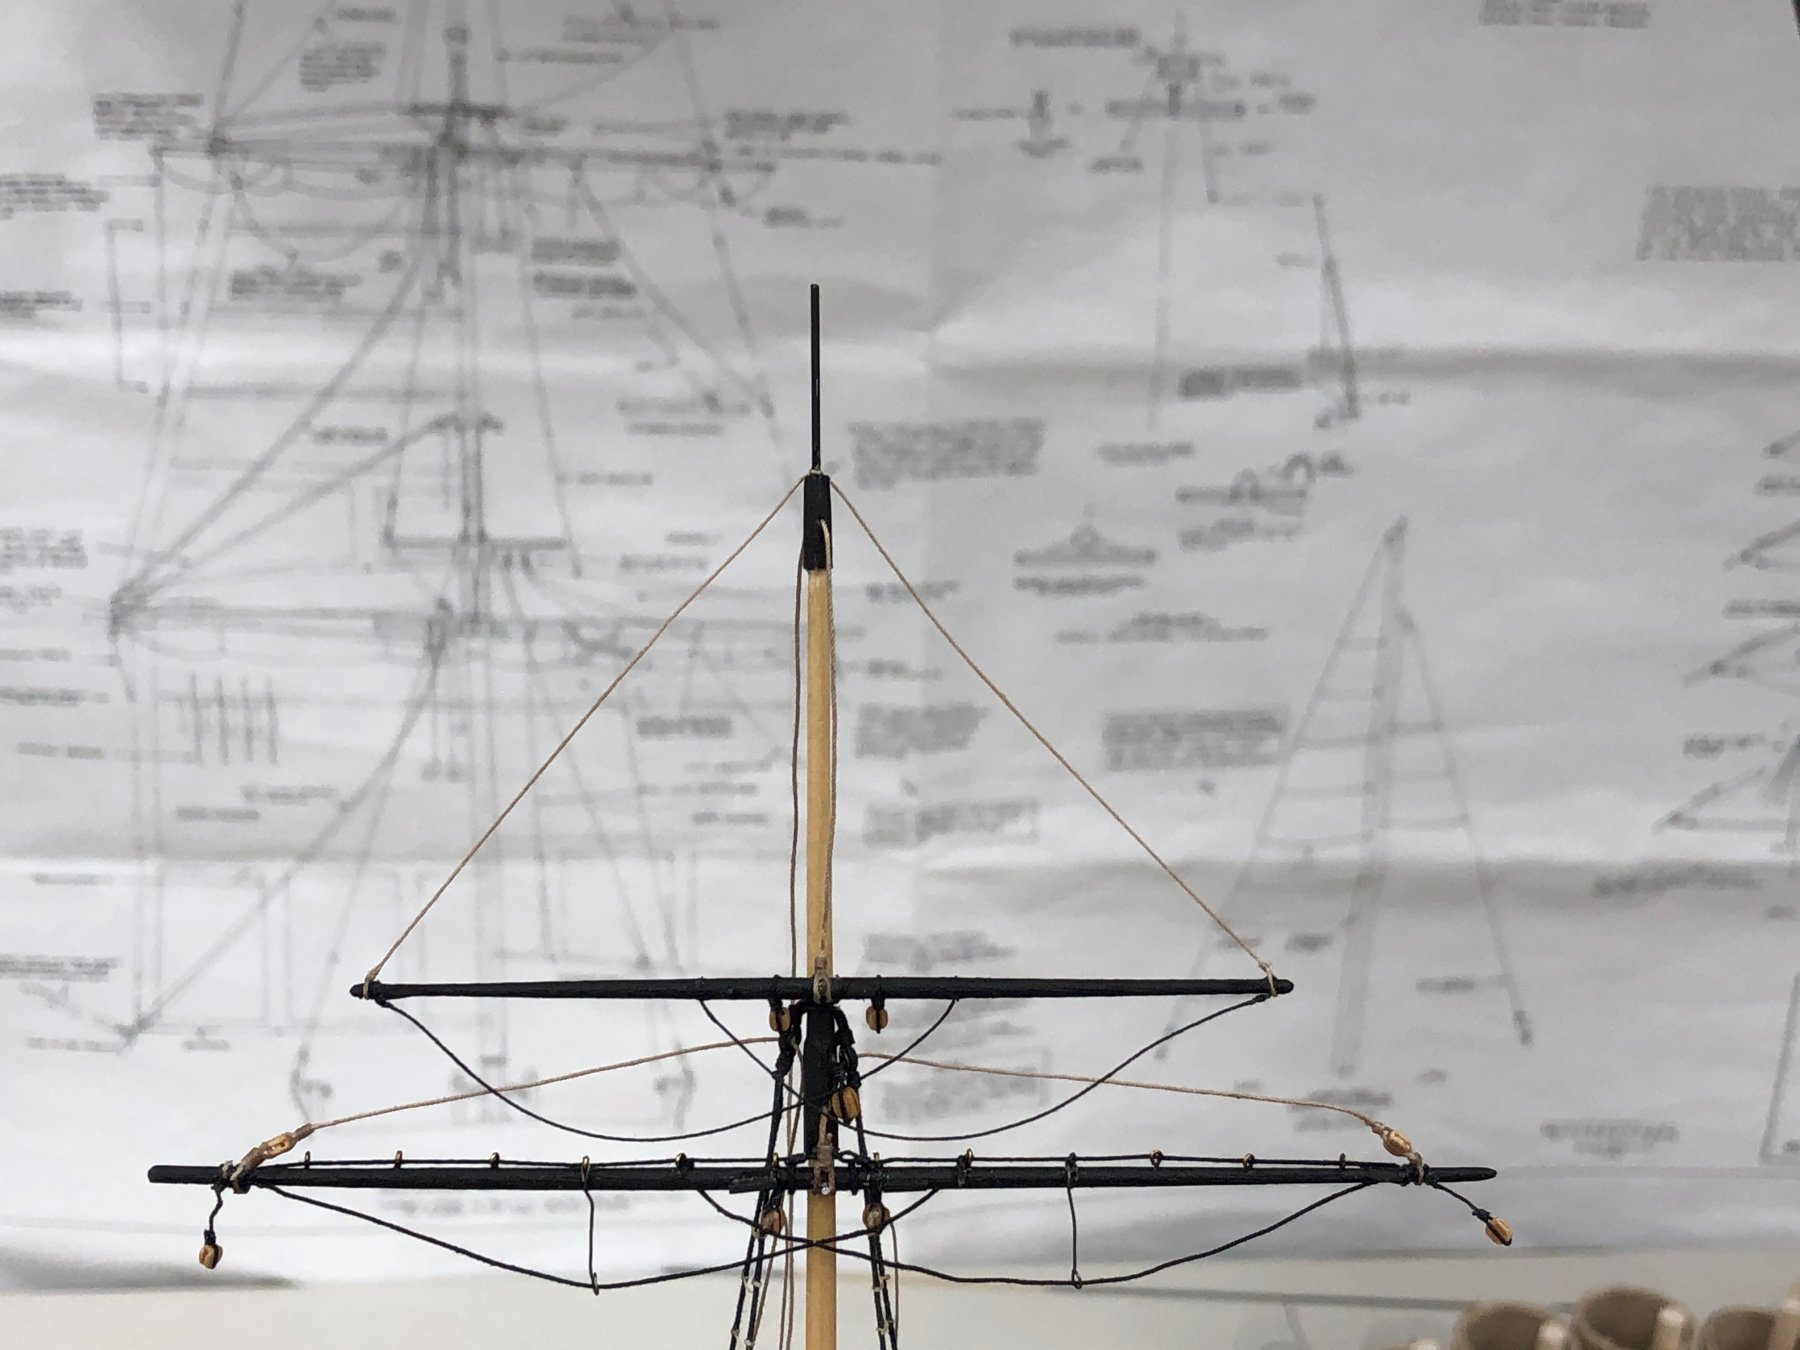
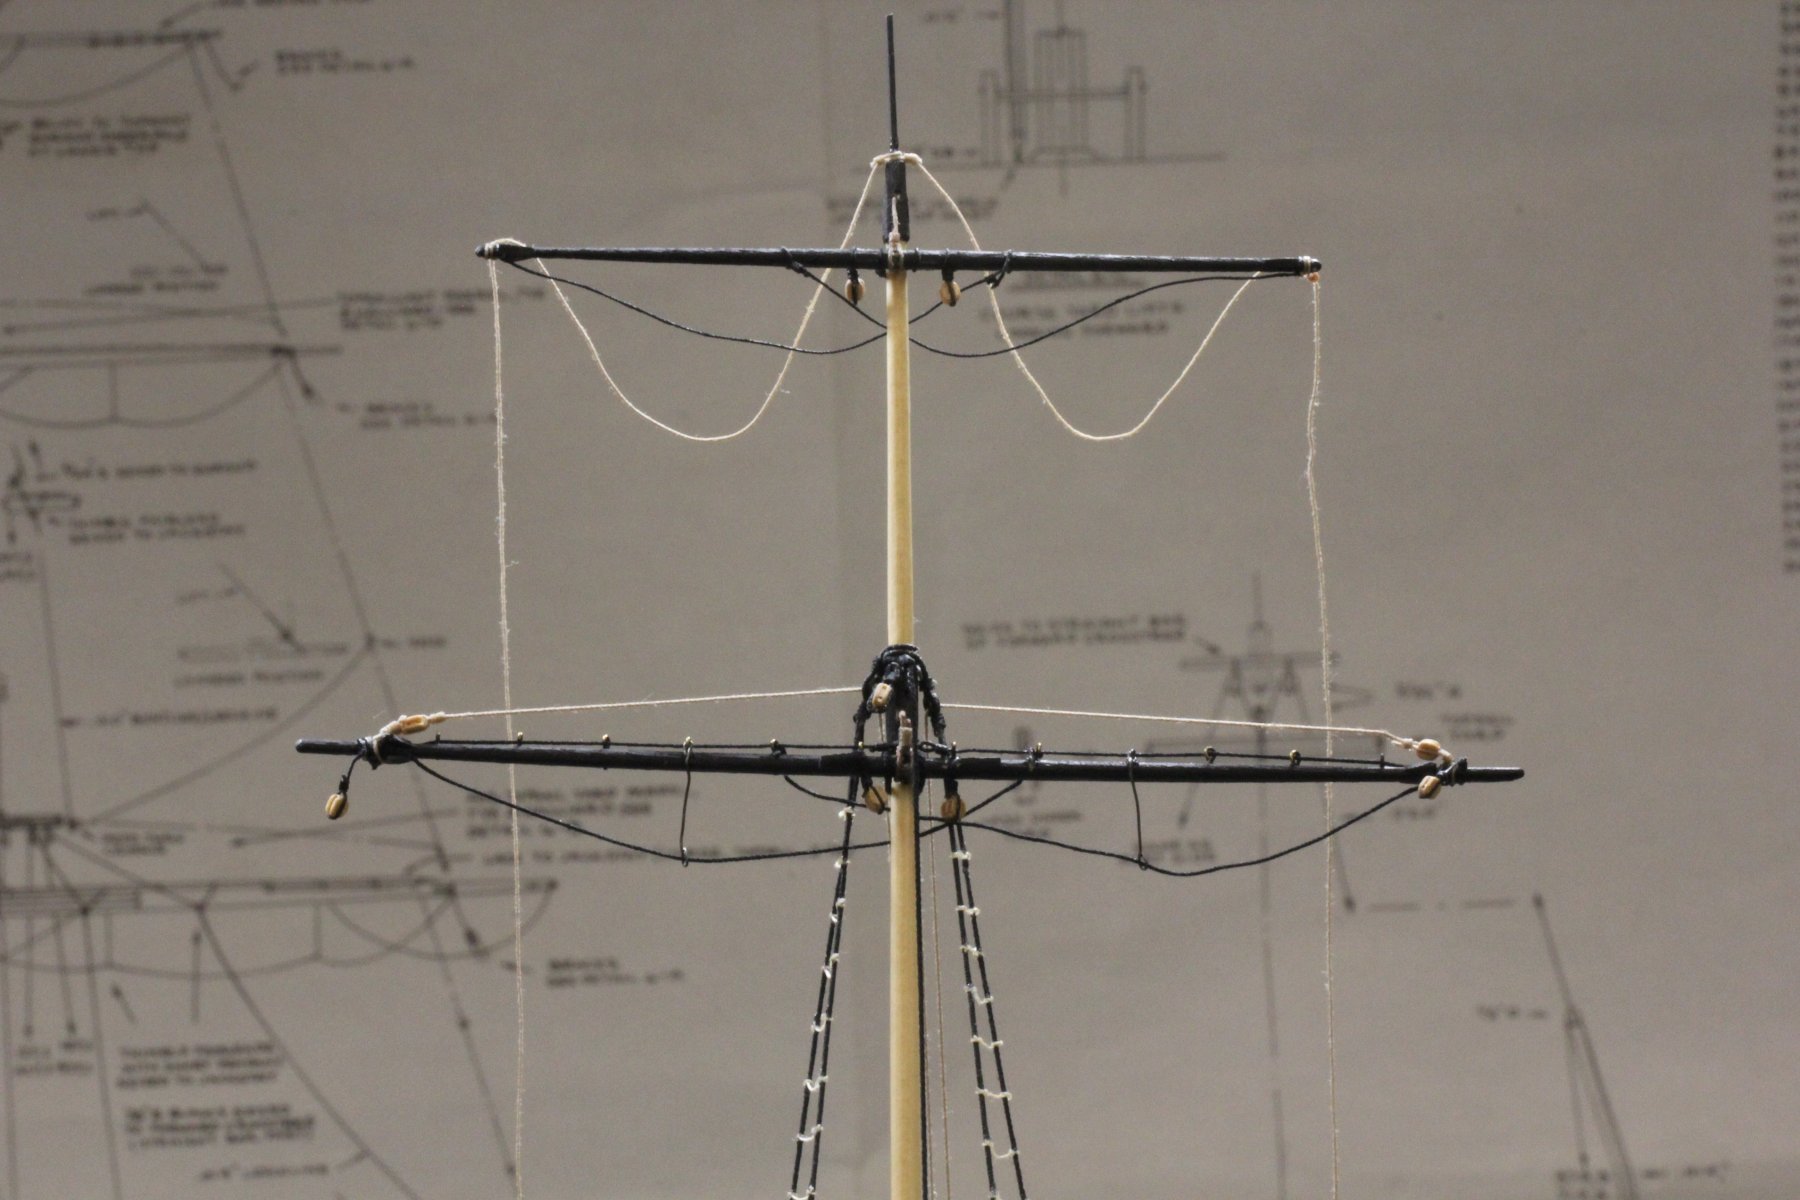
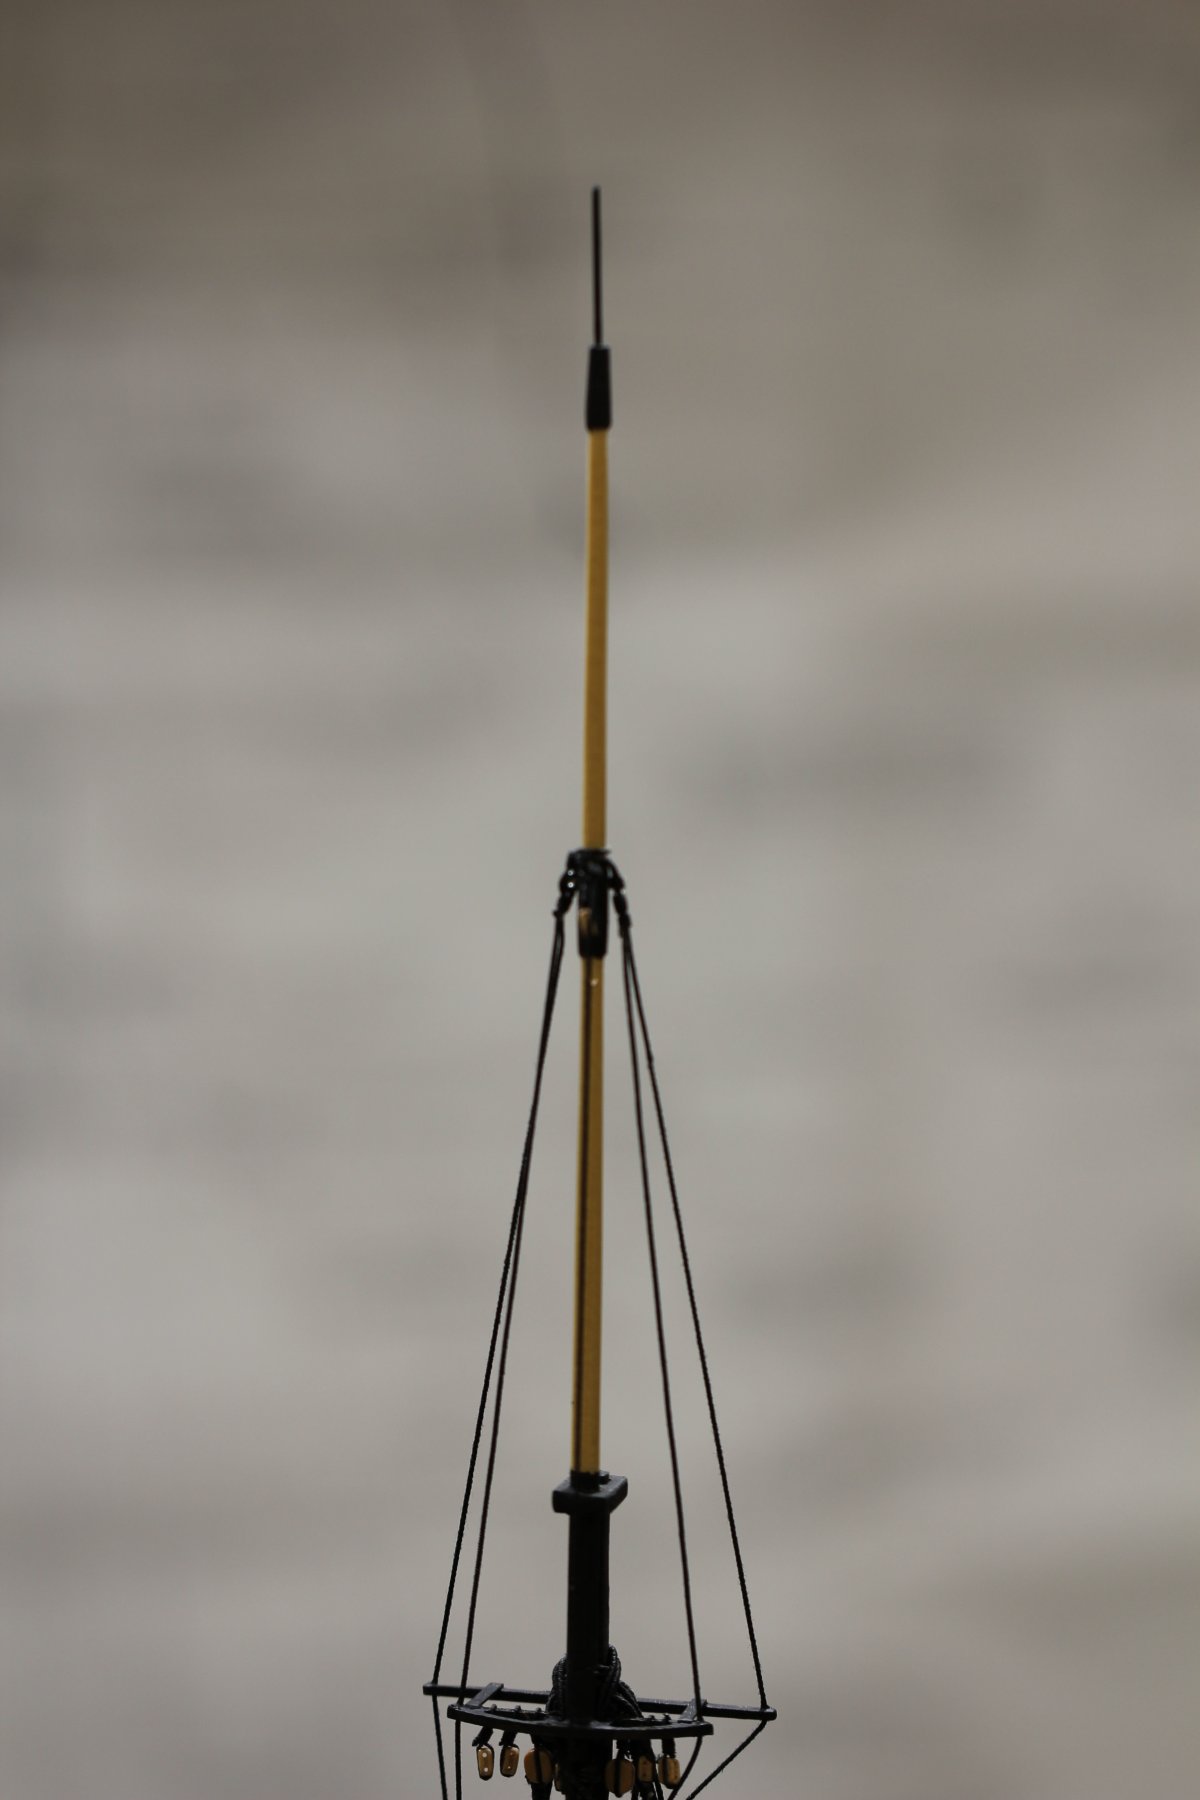
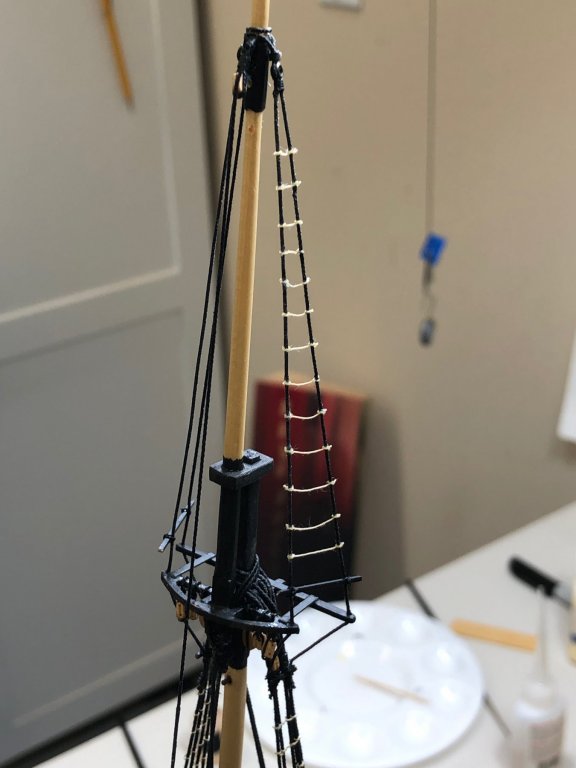
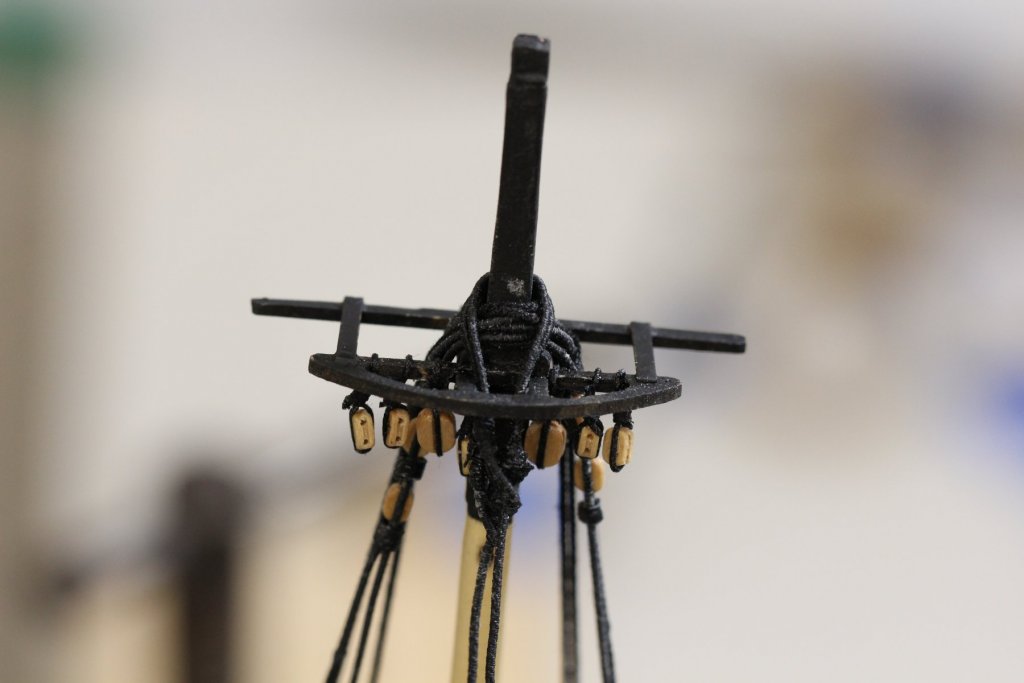
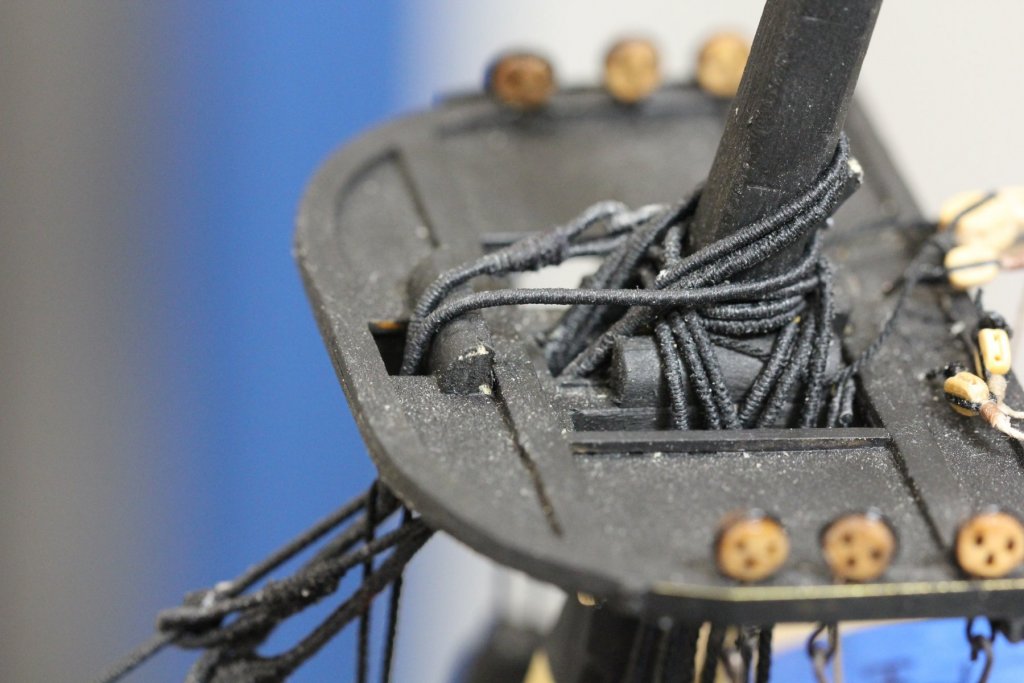
So today was the first yard arm day. I got the Royal and Top Gallant yards mounted on the main mast. Here are the two yards as installed. The lines running from the Royal yard are the brace lines - probably could have left those off (similar to the Royal back stays). Another for the "lessons learned" file.
- 367 replies
-
- 3
-
-
- model shipways
- niagara
- (and 1 more)
-
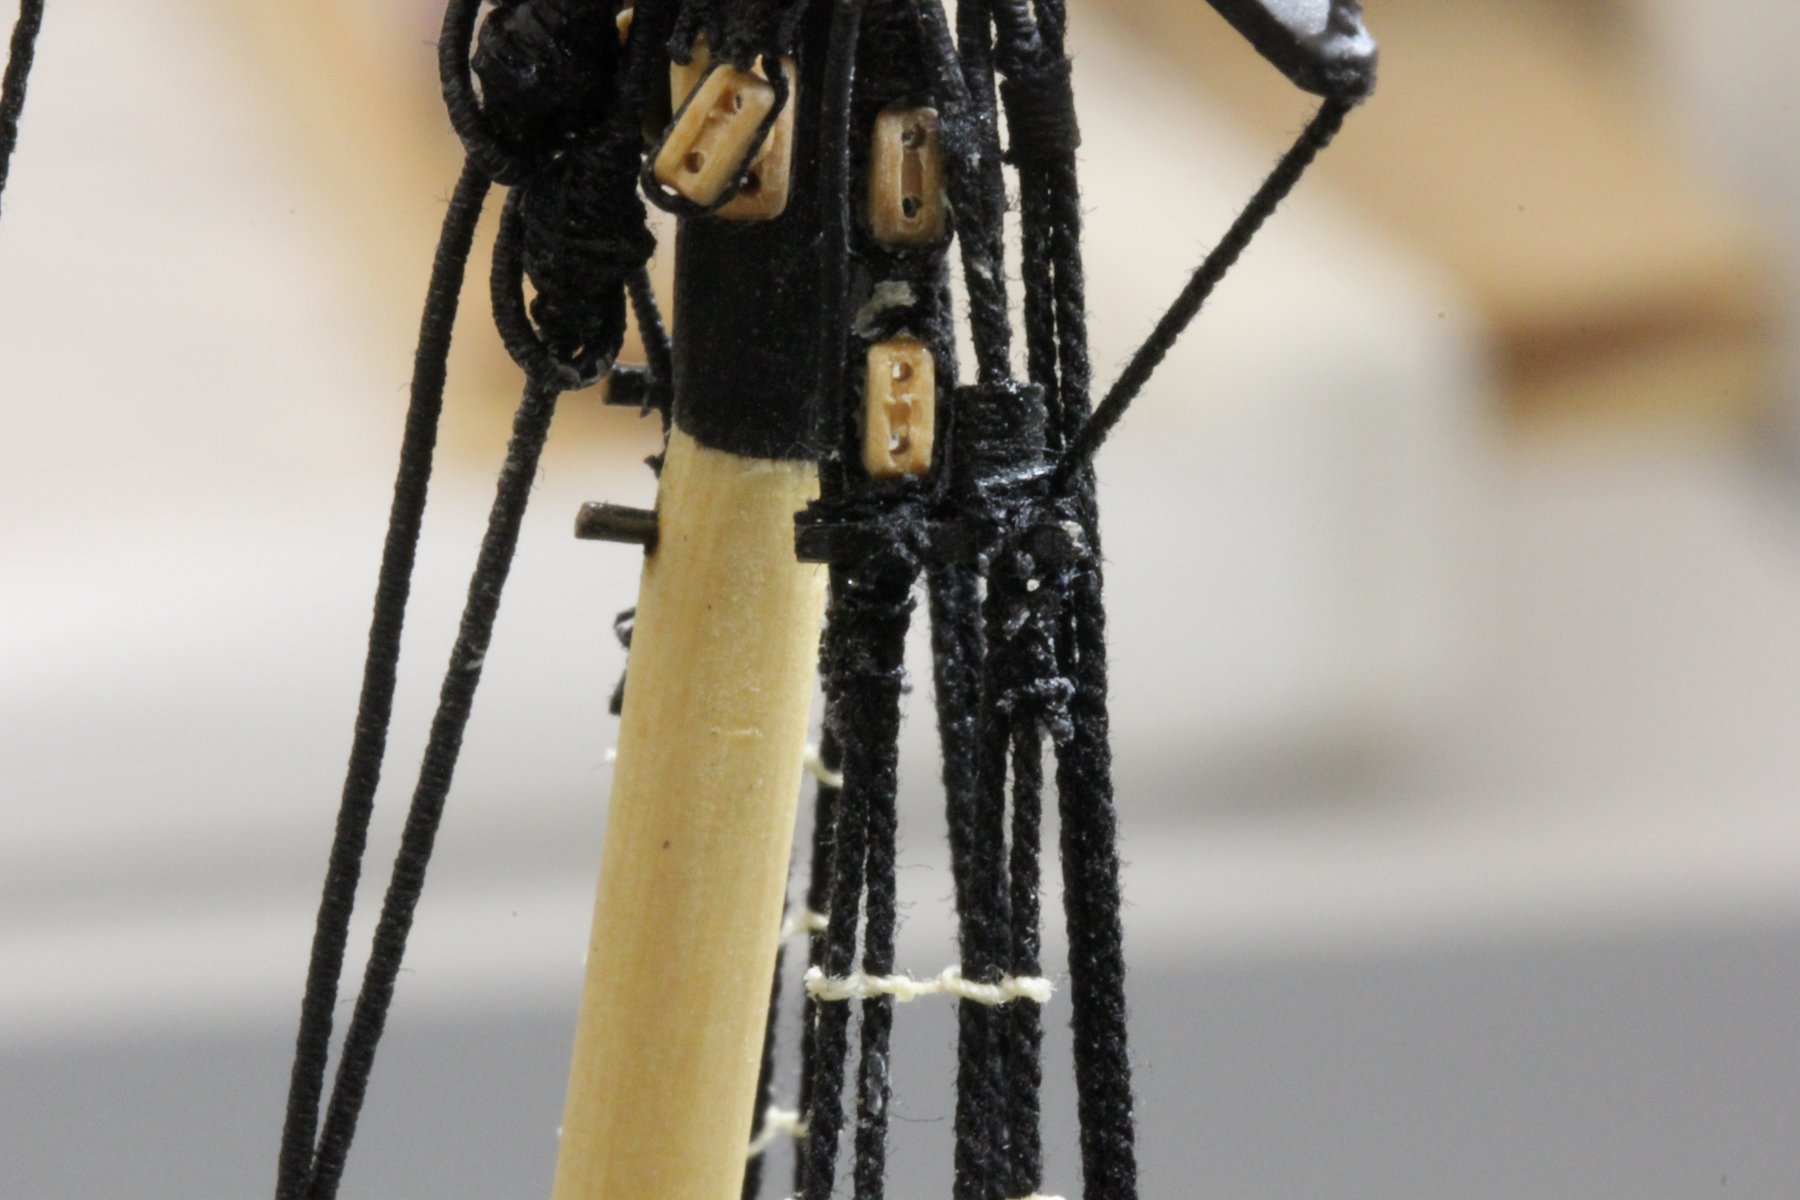
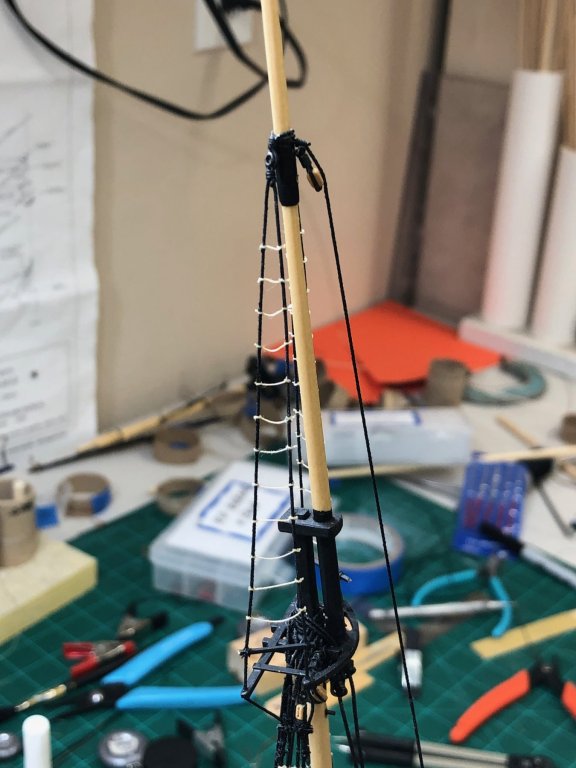
It is amazing what you can find out when you actually "READ the MANUAL" as I just did for my Canon EOS 60D. Turns out fixing the depth of field issues was not that hard. Just need to know how to control the lens aperture - which now I do. So here is a picture of the aft TG shroud going behind the sheer pole and secured to the Top Mast shroud. Yea, I need to clean up the glue residue. Considering using "India Ink" to attempt to darken/dull the line. The 50/50 water/white glue mix and the CA can make it appear shiny or lighter than it should.

- 367 replies
-
- 2
-
-
- model shipways
- niagara
- (and 1 more)
-
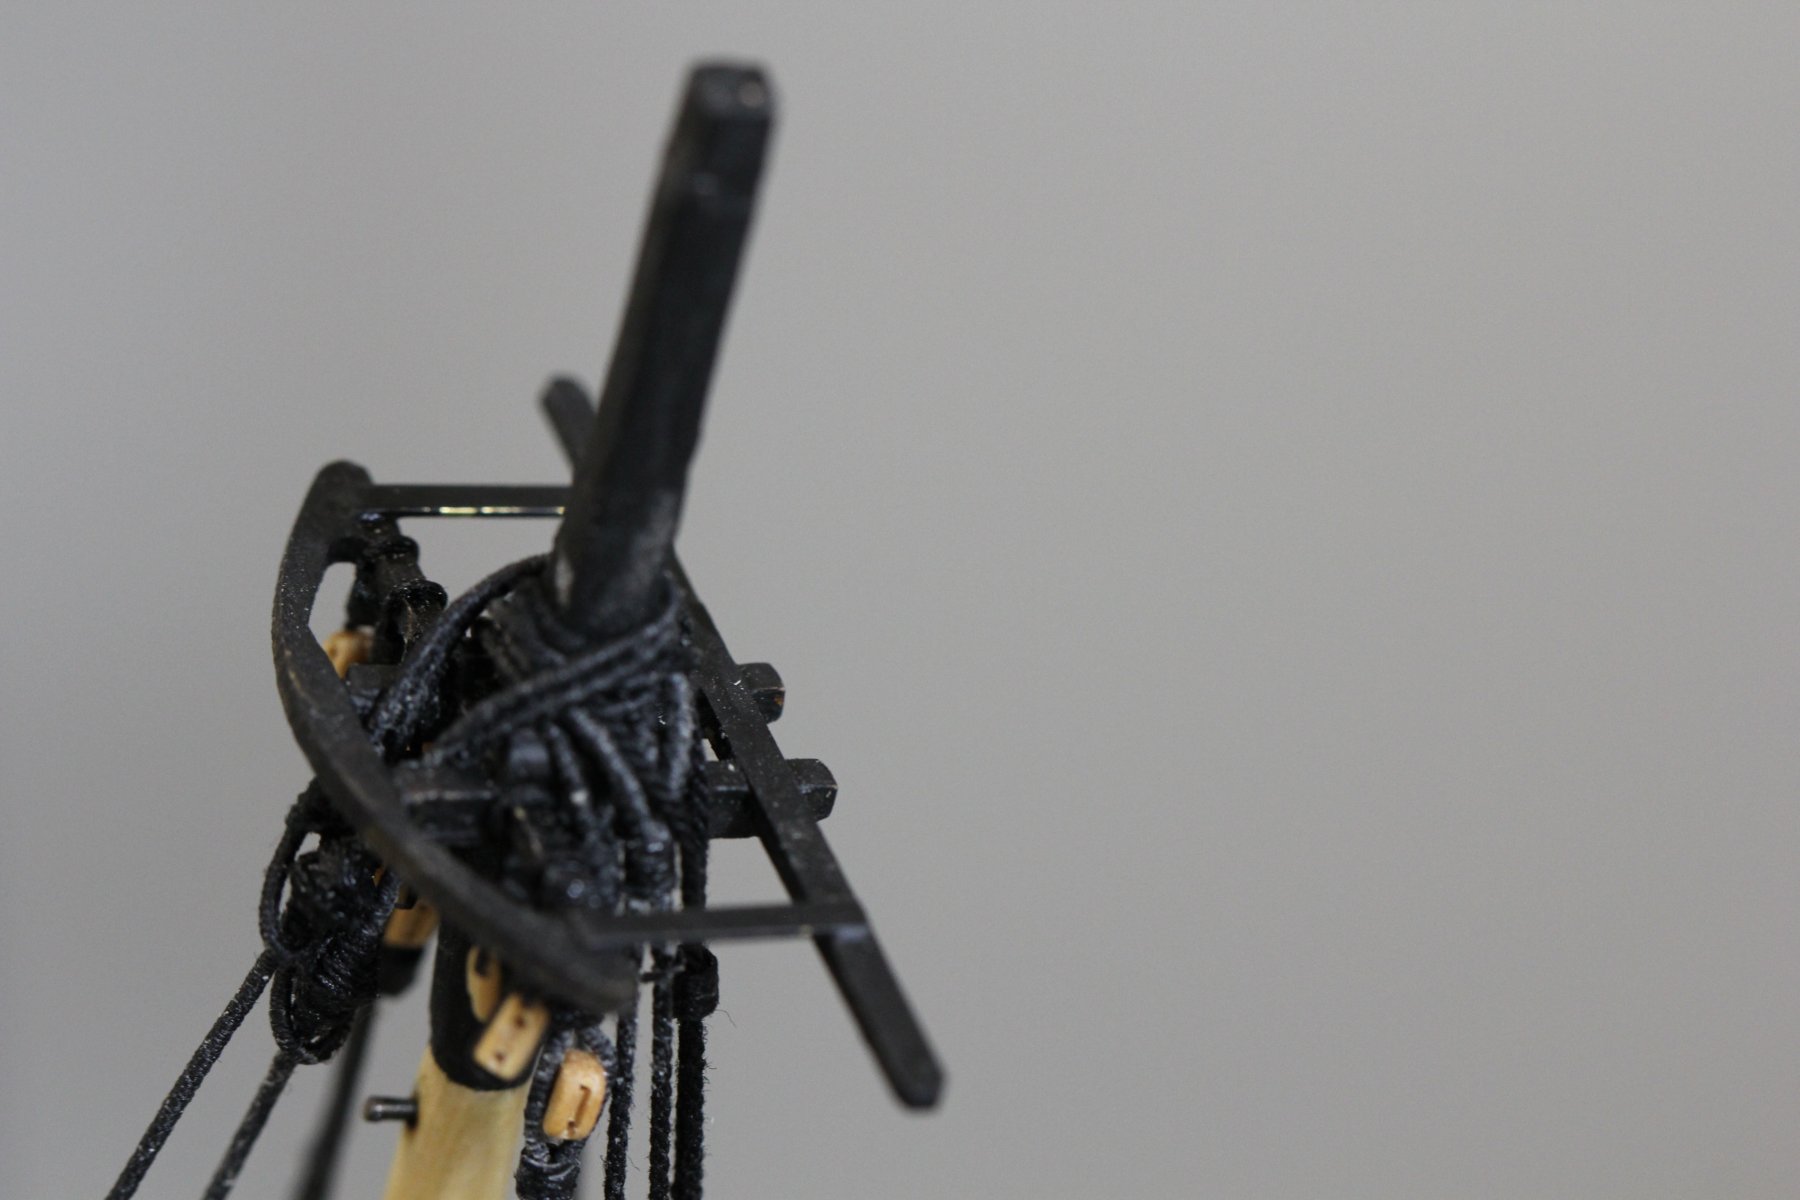
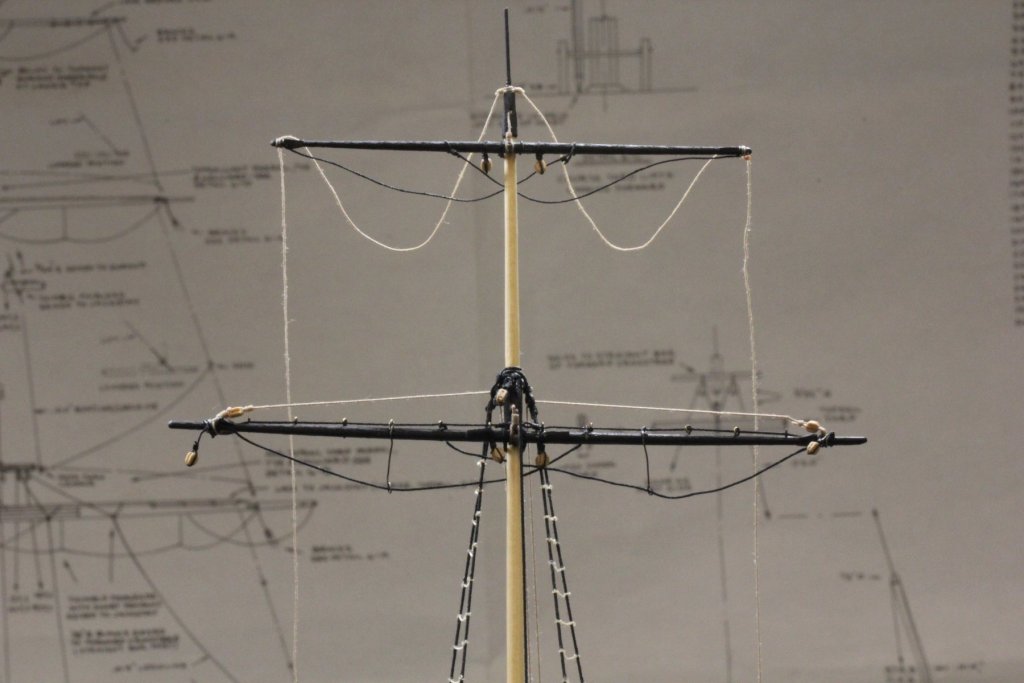
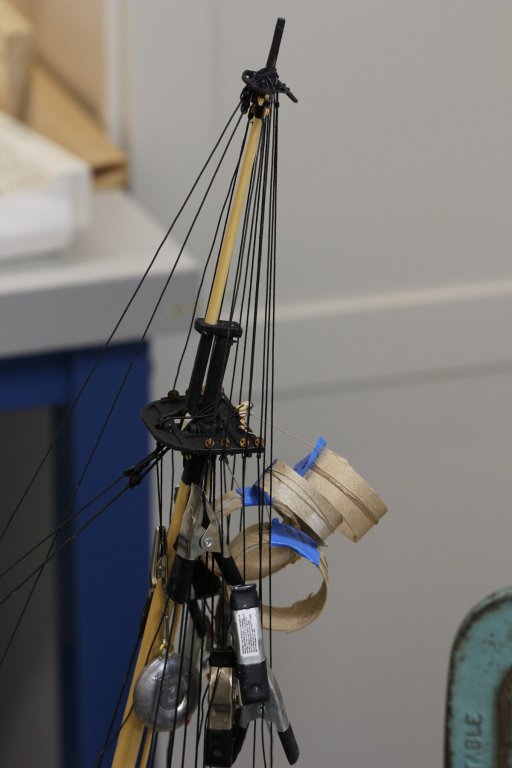
On to the Top Gallant mast. Sandwiched the mast into the hole on the upper top and just as with the Top Mast there was not enough room with the stays passing through so I decided on the Fore Mast I will put a place holder for the Top Gallant mast on place before I rig the stays. Maybe there is a way to route them around the mast rather than through where the mast should be. So I got the sanding sticks out and put a taper on both side of the bottom 1/2" of the Top Gallant mast so it would wedge itself into the space provided. I drilled holes (or actually redrilled the holes that I put there in the mast top assembly process - they got filled with paint) in the spreaders for the Top Gallant shrouds. I ran the shrouds through the holes and put a 2oz weight on each one and left them while I ate lunch. When I came back I put a spot of m edium CA where each shroud met the spreader and then took a nap. That fixed the shrouds above the spreaders. I put the small sheer pole at the very top of the Top mast Shrouds, just below the lower block entrained between the first two shrouds. The plans say the TG shroud goes around the pole and then is tied off to the Top Mast shrouds. There is not enough room and the loop around the pole IMHO would look really out of scale. So as a compromise I ran the shroud behind the pole and then tied it off along the Top Mast shroud. A picture would be worth a thousand words but I am having a hard time getting a good. I just got the Canon EOS 60D for Dummies book. Hopefully I can figure out what I am doing wrong. Anyway I got the TG shrouds tied off, the TG sheer poles and the ratlines done on both sides. I guess it will be time to start mounting yard arms tomorrow!

- 367 replies
-
- 3
-
-
- model shipways
- niagara
- (and 1 more)
-
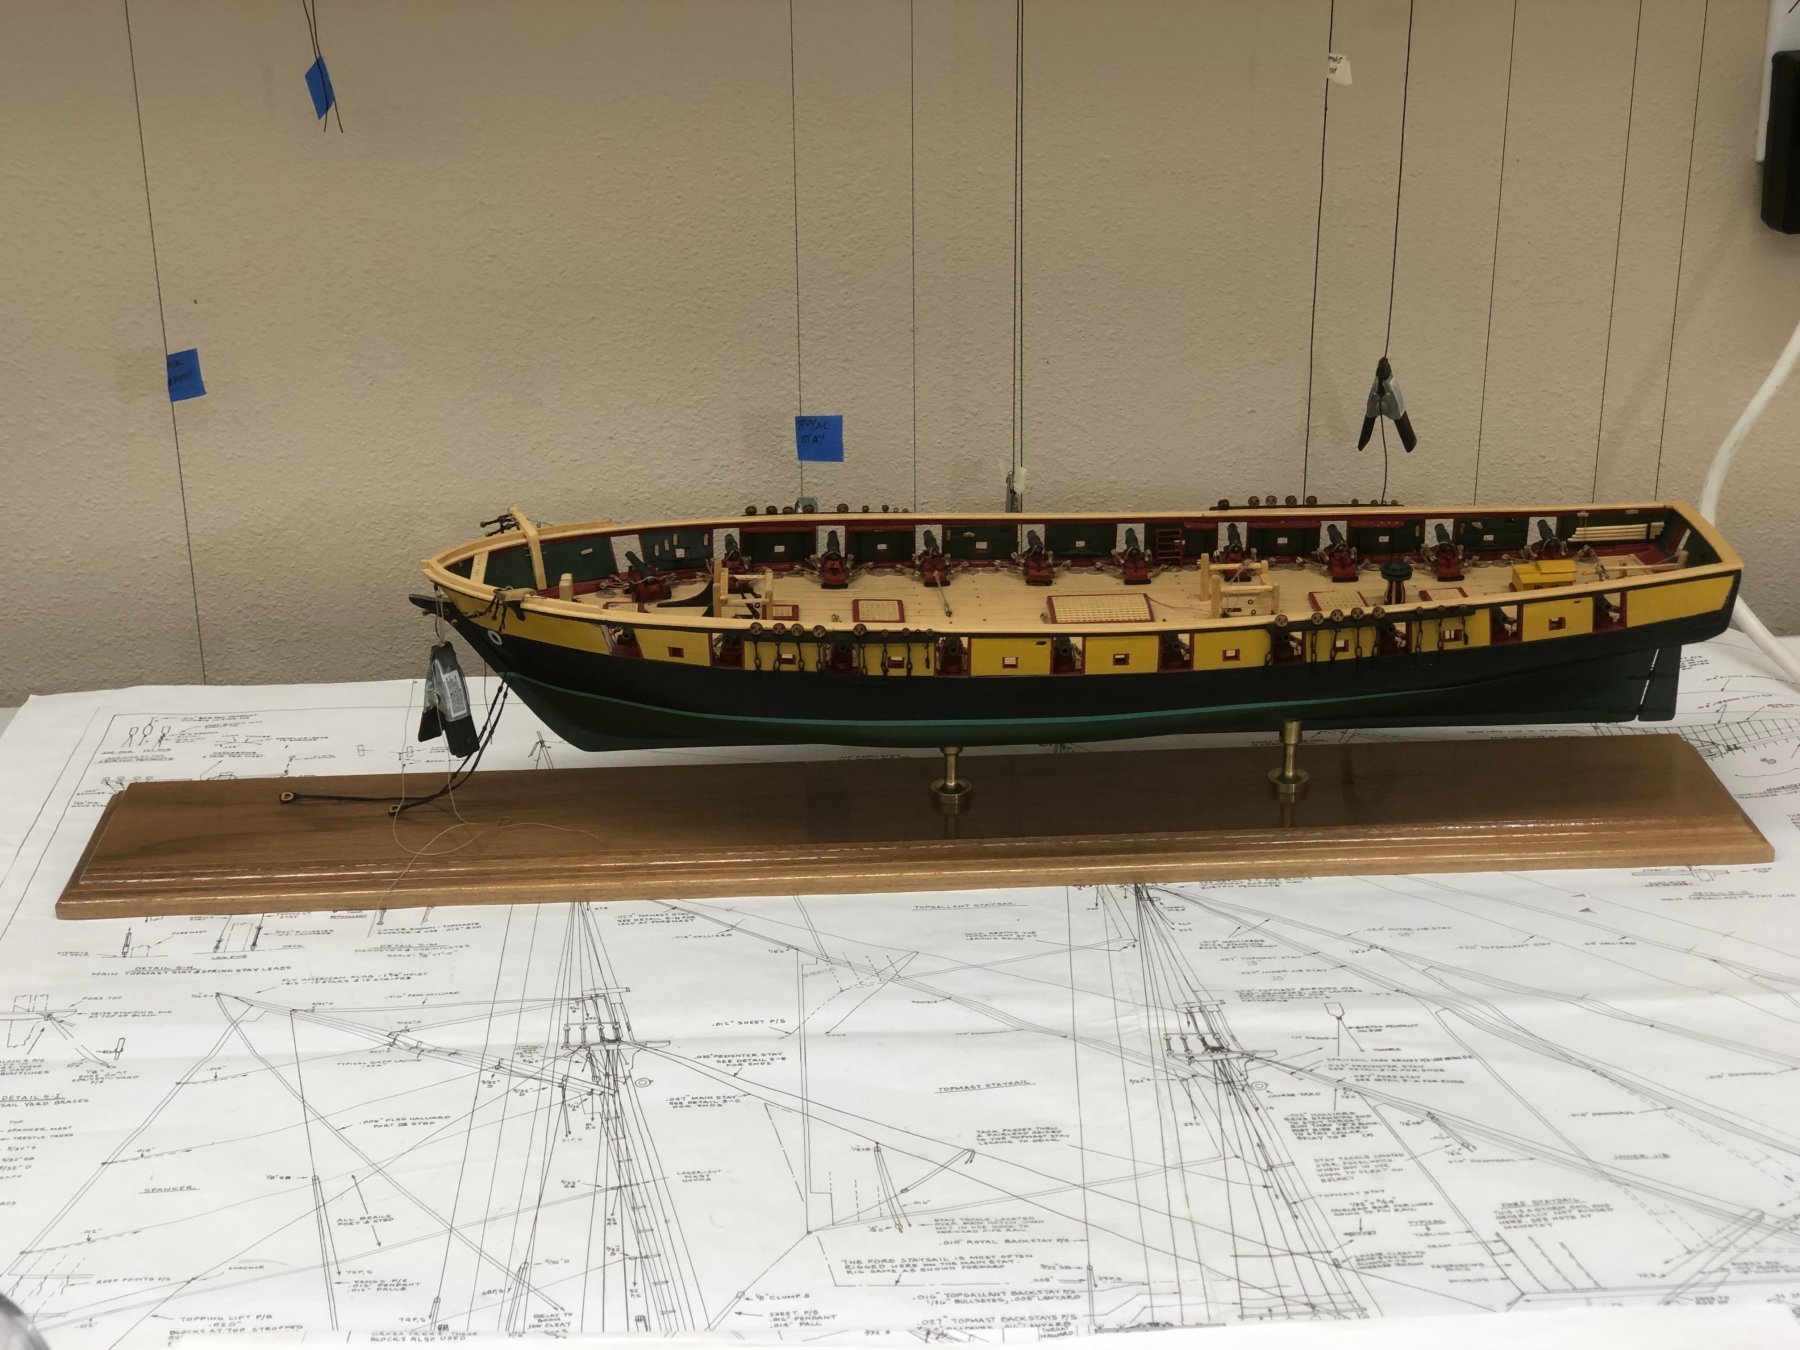
The hull was feeling neglected since I have been working on the masts so I put five coats of Wipe-on-Poly gloss on the display base and moved tom hull from the Amati holder to the display base. Once I get ready to work on the hull again I am going to cover the base in wrapping paper to keep from messing it up while doing the final rigging and such.

- 367 replies
-
- 3
-
-
- model shipways
- niagara
- (and 1 more)
-
Steve, Sorry I forgot that using the tab key (at least in IOS 12) is the same as "Return". Anyway, thanks for the tip. I will certainly try this when I get to that point. I was able to get both sides of the Main Top Mast shroud ratlines completed using the overhand knot method. Because the overhand knot is not as secure (in MHO) you have to be more careful about moving the shrouds out of alignment pulling on the ratlines. I had to redo several of the every third ones as I got to them. I am not yet convinced this is easier in the long run. However, the lower shrouds will be my first experience with more than four shrouds (as the top mast was my first experience with more than three - I was a schooner kit builder (Smuggler, Bluenose, Pride of Baltimore and Benjamin Latham) before Niagara. So now on to the Top Gallant mast and since there is not much to do there (one stay and the Top Gallant Back Stays - I will leave the Royal Stay and Royal Back Stays until later as there is nothing to be gained by rigging them now (aka, nothing in the way later). I did notice that there seems to be a divergence between the fwd and aft set of shrouds (on both sides). Because of the two blocks between the first and second shrouds, the point where they diverge to their respective deadeyes is lower than it would be absent the blocks. I intentionally moved the junction of the aft pair to be approximately where the fwd set was. However, this did not eliminate the divergence (just lessened it somewhat I think). Because I took the pictures below from in front of the mast the division is not distinct in the photos. I will get a better shot tomorrow when I have the Top Gallant ratlines done (hopefully).

- 367 replies
-
- 3
-
-
- model shipways
- niagara
- (and 1 more)
-
In my previous builds I struggled with ratlines using the recommended (at least it was recommenced in the places I looked) clove hitches. I could never seem to consistently get the tension between the stays correct. Frank Mastini ("Ship Modeling Simplified") suggests using overhand knots instead of clove hitches. He contends that clove hitches look out of scale and are hard to tie. So this time I am using overhand knots. It took we a few sets to get them consistently tied correctly and it is easier to get the inter-shroud spacing correct. I decided to first do every third ratline and built a wooden stick three times the plan recommended 7/32" between ratlines (a scale 14"). My plan is to do every third one on one side and hit them with the 50/50 glue/water then do the every third one on the other side and return to the first side to finish. The glue should have set up enough to help keep from squeezing the shrouds together. Here is the port side with every third ratline rigged and glued but not trimmed.
- 367 replies
-
- 4
-
-
- model shipways
- niagara
- (and 1 more)
-
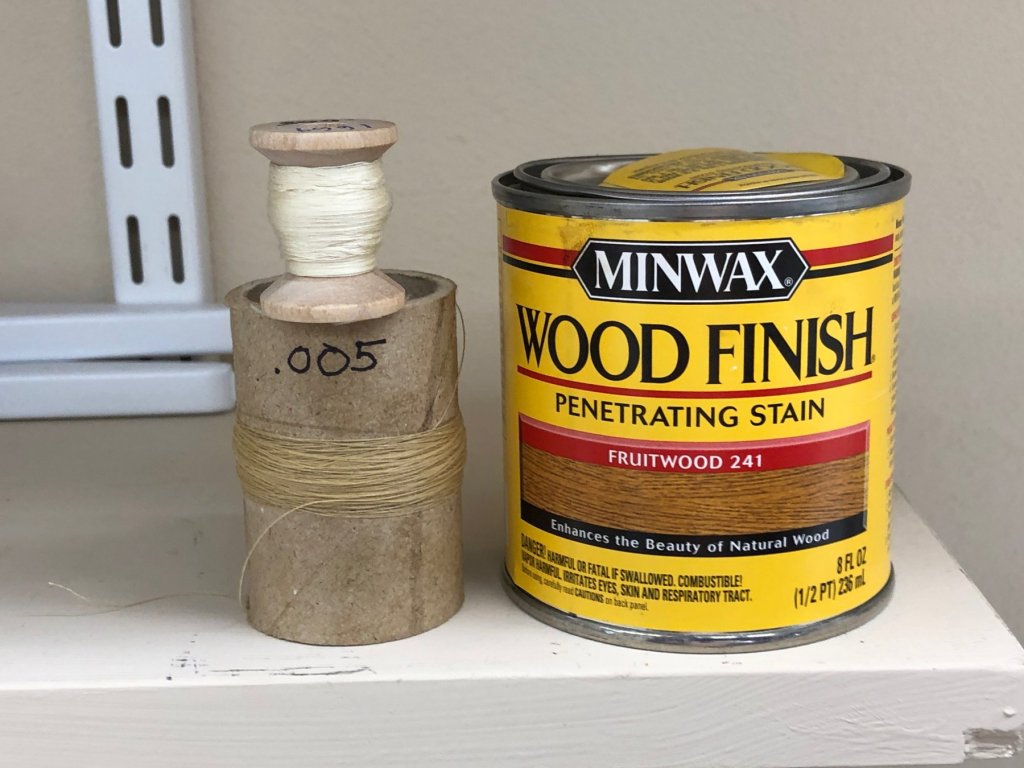
With one set of shrouds done it is time to start thinking about ratlines. Both sets of upper shrouds will have the ratlines rigged before the yards are attached so I looked to see what I had to use for ratlines. On previous models I have used black .005" thread from Bliuejackets but for Niagara decided to go with tan. I have seen it done both ways and am not sure what is "correct" but I am the Captain so... Anyway, Bluejackets also sells their .005 linen thread in white, and it is really light - lighter than I want to use here so after some searching around I found some Minwax Fruitwood wood stain that I put onto a sponge and then ran the nearly white line through by pressing it into the sponge with my finger. Here is how it looks before on the spool from Bluejackets and after rolled onto a toilet paper tube. Not the tan from Syren but not white either.
- 367 replies
-
- 3
-
-
- model shipways
- niagara
- (and 1 more)
-
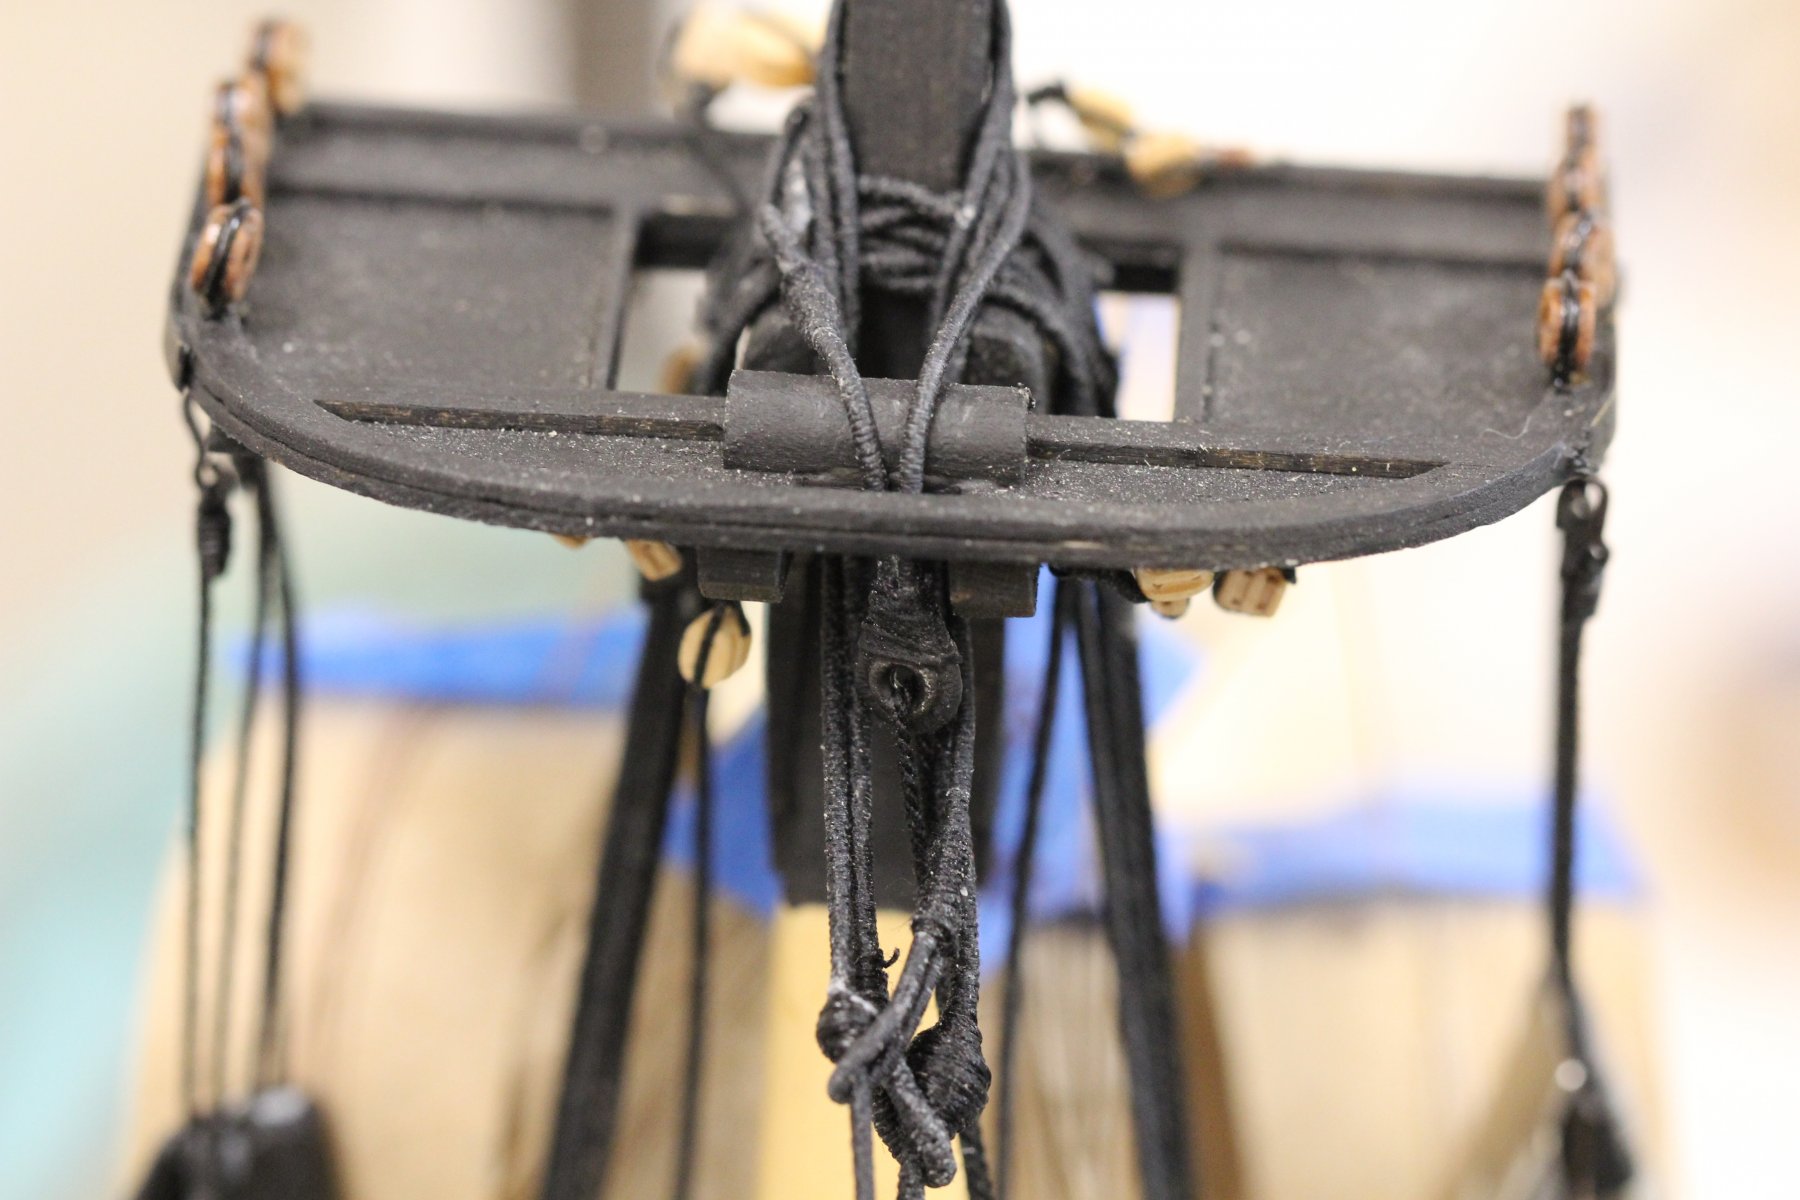
After the little debacle with two of the Top Mast deadeyes I finally got things straightened out (at least to my satisfaction which is getting somewhat low as I approach the one year anniversary of this build in a few more days (June 6th). So, I got the lanyards rigged on both sides and can now move on to the Top Gallant mast at then the yards. I have given the process going forward some thought and now think perhaps I will not mount the course yard before the mast is stepped. Since the lower shrouds and ratlines are going to have to be done after the mast is stepped I think the course yard will be too tempting a target for errant tools, arms, fingers while those tasks are being accomplished. I may change my mind as I get closer to having to make that decision but for now I think I will wait to install the course yard until after the lower shrouds and ratlines are done. So herfe are the shots of the Main Top Mast lanyards. My spacing jig worked except in one case where the deadeye was not down far enough. I am not sure what happened on that one but I was glad I had not permanently glued the deadeye to the shroud.

- 367 replies
-
- 1
-
-
- model shipways
- niagara
- (and 1 more)
-
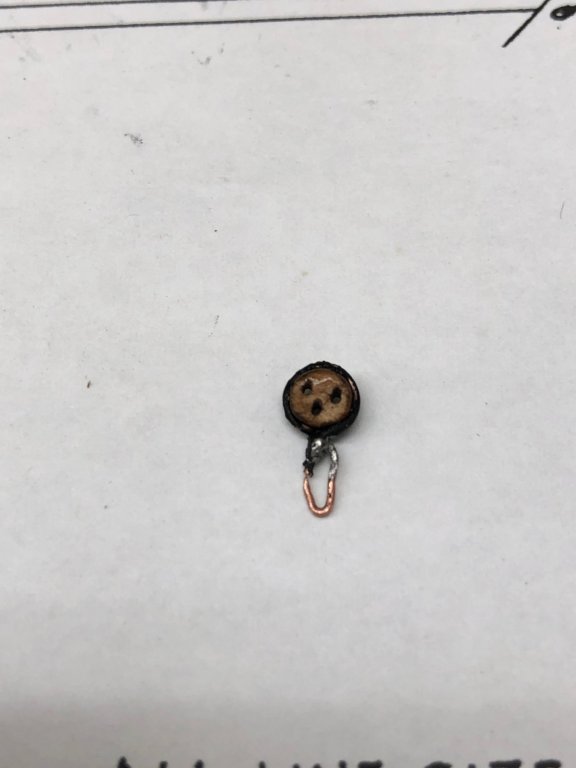
One step forward and one step back. While working on the Top Mast shroud lanyards it became obvious that the blackened copper wire I mused to strop the deadeyes is too small (at least on some of them) because when I tried to tension the lanyard the wire strop on the deadeye started to "unwind". When I put the deadeyes in to main (and fore) top I took the easy way out and did solder or otherwise join the wire into a continuous loop (of sorts). I left a small gap in the wire just below where the strop passes through the top to form the eye on the bottom for the futtock shrouds. When I tension the lanyard, the deadeye starts to rotate (to the left) and bend the strop up away from the top. This has happened twice out of three lanyards. I have tried soldering the blacked (actually it is painted) copper wire without success. I have some phosphor bronze wire (.020") which I tried to use but it was too stiff. I annealed some (heated to red hot then let cool) and made what I think is a better strop which IS soldered together at the bottom although my first attempt I did not get the "eye" at the bottom closed completely. I have another piece of wire that has been annealed and is being chemically blackened for my next attempt. So here is the one lanyard that is done and my first attempt at a new deadeye strop.
- 367 replies
-
- 2
-
-
- model shipways
- niagara
- (and 1 more)
-
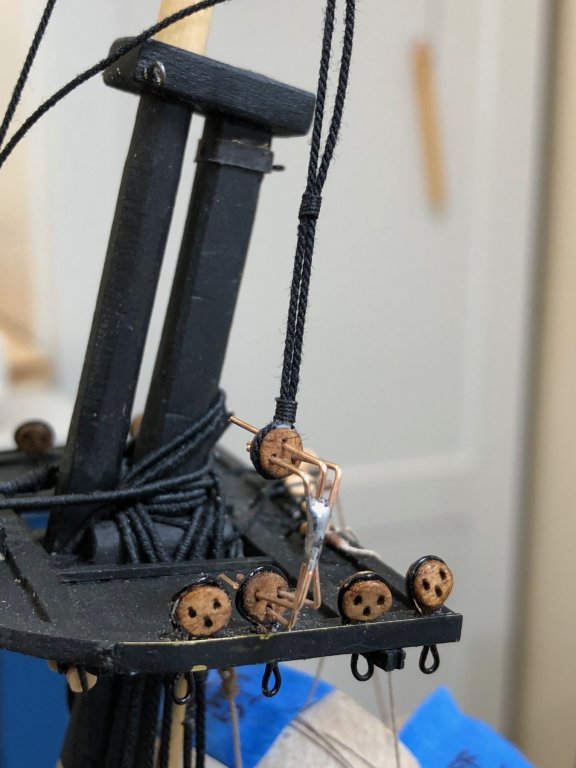
While trying to rig the deadeyes on the top mast I discovered that I really needed some way to hold the upper deadeye while I get the shroud configured to the correct length (and still keep the deadeye in the correct orientation (i.e. center hole at the top). I have tried several ways to do this but none have proved satisfactory. Since this model has 16 Top Mast deadeyes that need to be rigged (not to mention 28 lower shrouds/backstay) I thought it time to give it another try. In Frank Mastini's "Ship Modeling Simplified" he uses a "U" shaped wire between the center holes. The center holes stays on the top due to the tension in the shroud. I tried without much success. Its probably just me, old hands, losing dexterity, etc. So I took that idea to the extreme and built a jig with three "U"s soldered together. I took a couple of tries to get the spacing correct and to get the wires cut to the correct length - the three wires at each end are different lengths to make it easier to get them into the deadeye. Don't ask me how I know this. Anyway here is a picture of the jig holding a deadeye while the shroud is attached. I guess the proof is when I rig the lanyards and the deadeyes all come out in a horizontal line. Maybe tomorrow. Or the next day.
- 367 replies
-
- 2
-
-
- model shipways
- niagara
- (and 1 more)
-
Once I had the Top Mast shrouds in place I noticed that the blocks that are part of the fwd set did not fall in the same place on both sides. Further investigation (after removing all the Top Mast standing rigging) showed a fairly significant difference in distance from the center of the port shroud to the first block compared to the stbd side. I decided to redo both the forward sets to make them more identical than they are at this point. Not sure how I missed this when I made the shrouds but I did. Checked the fwd set and they are much better.
-
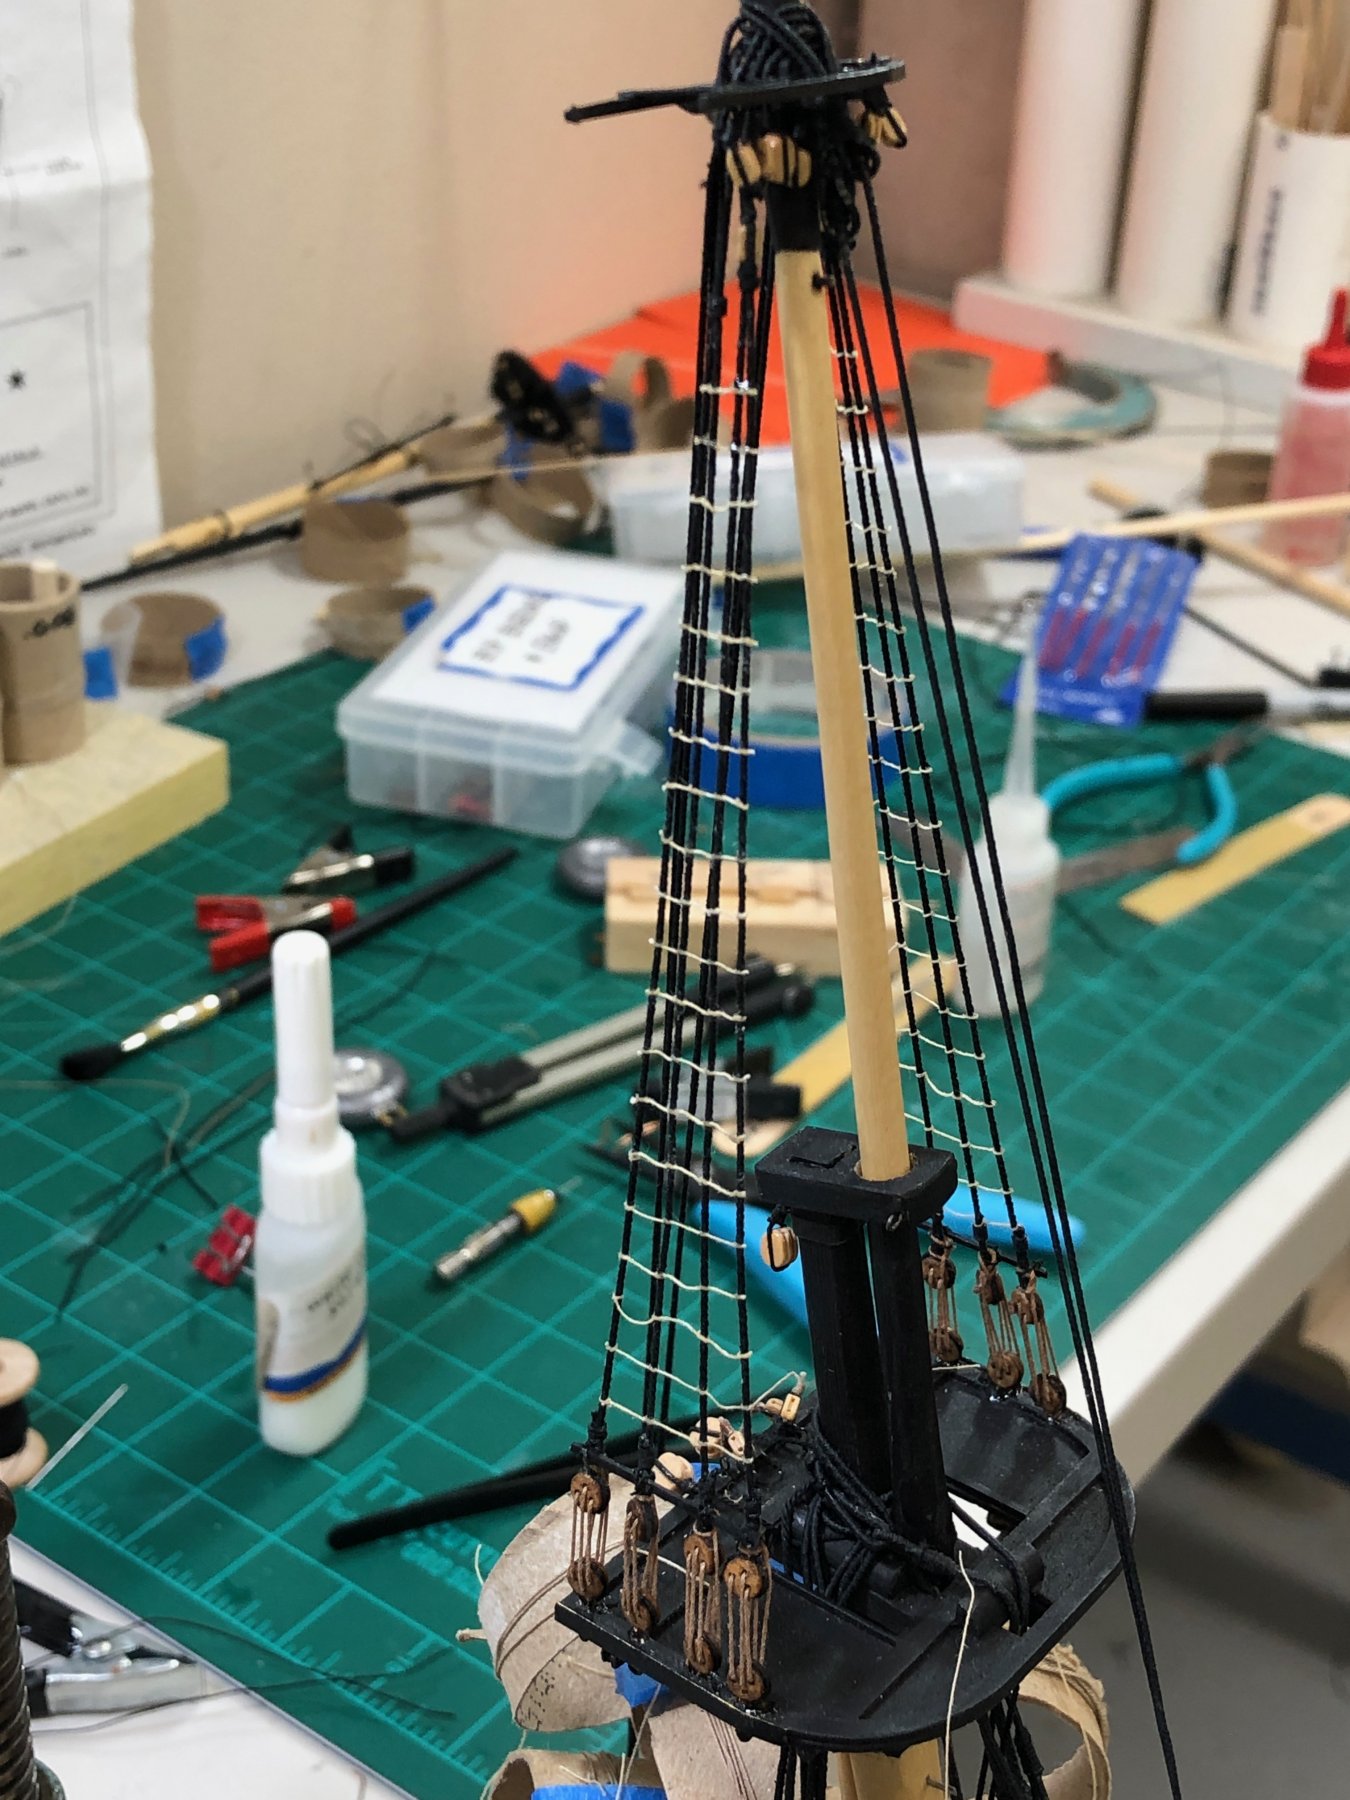
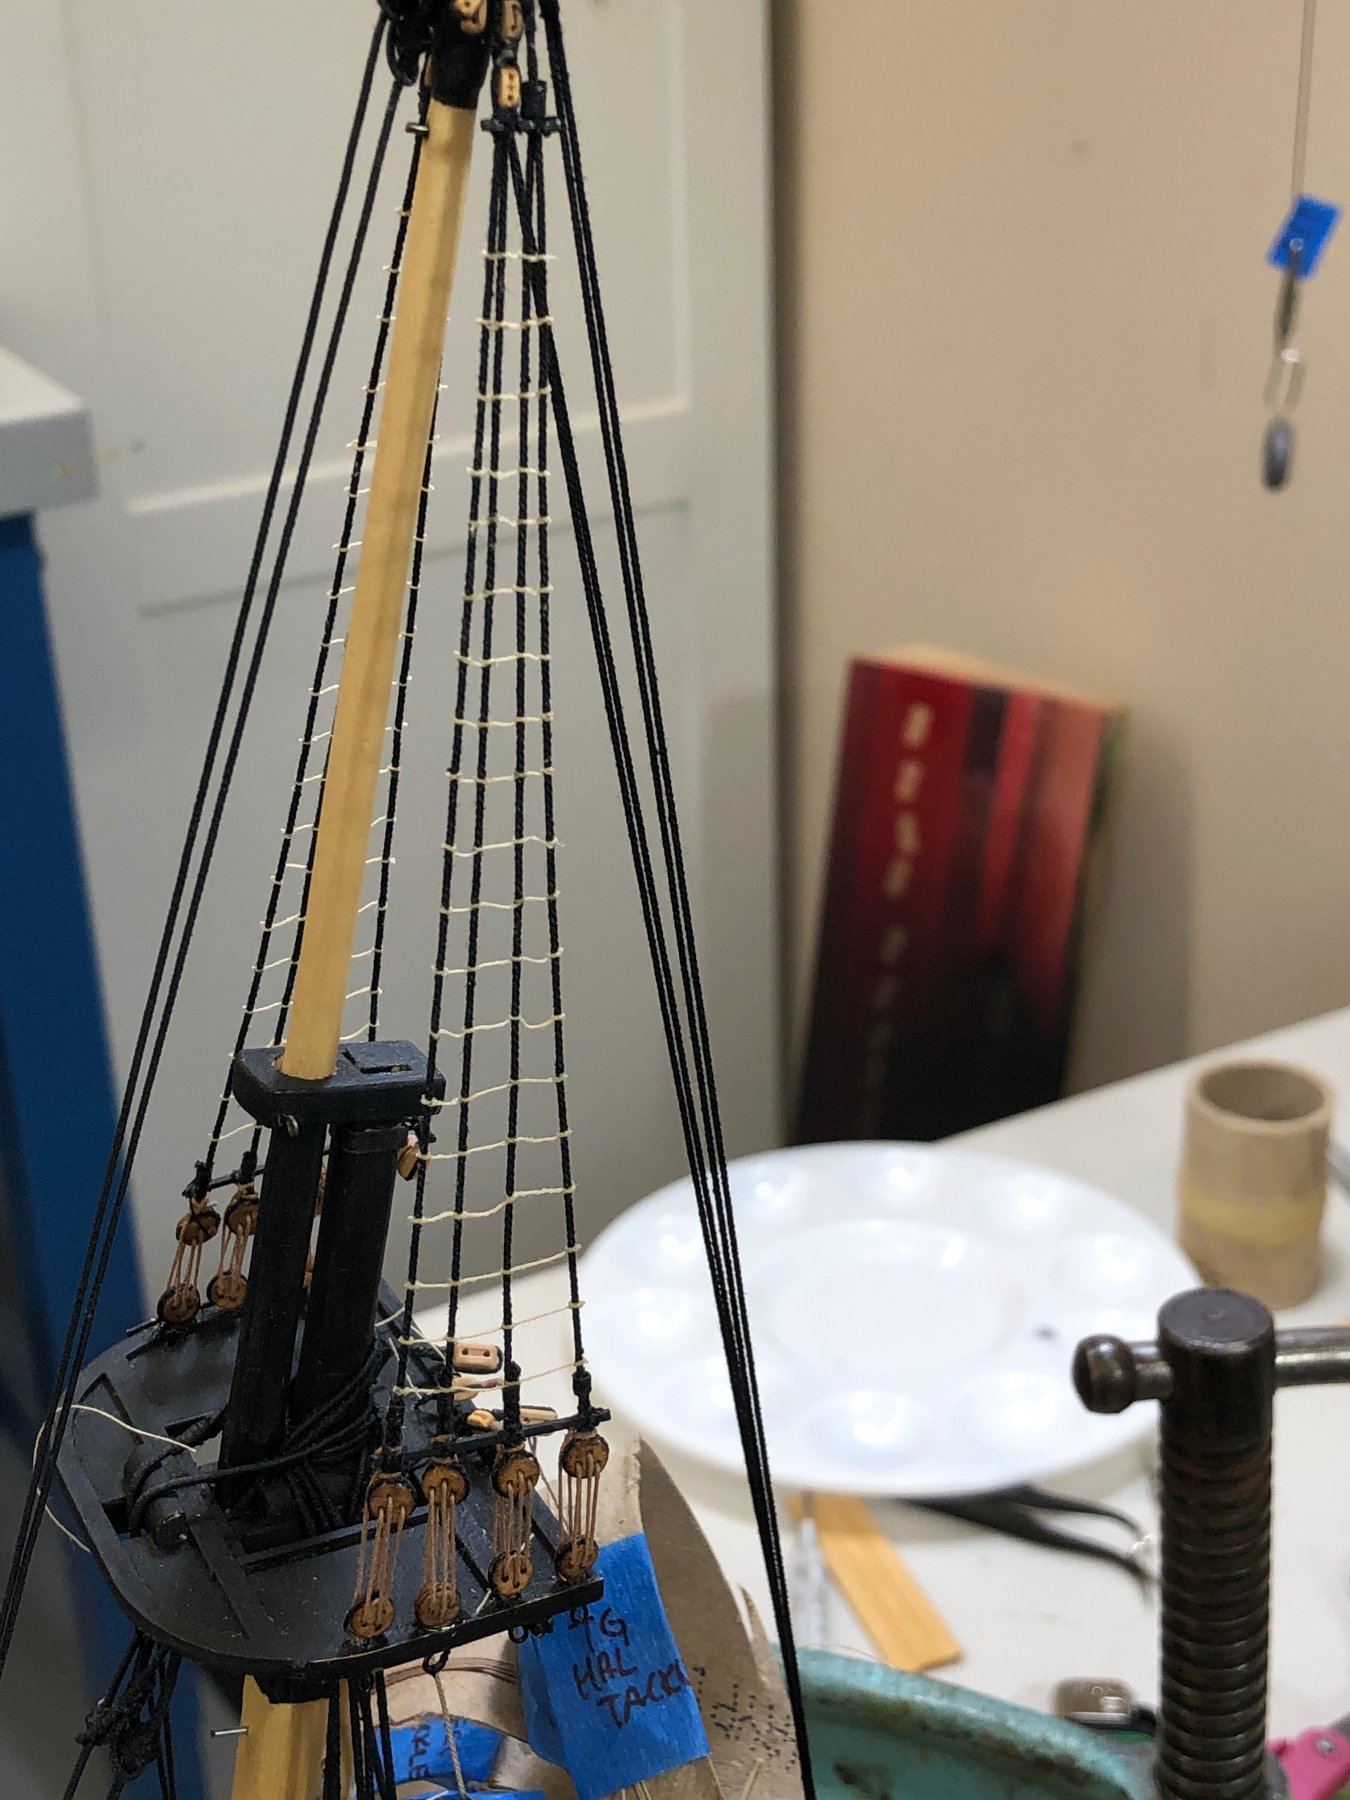
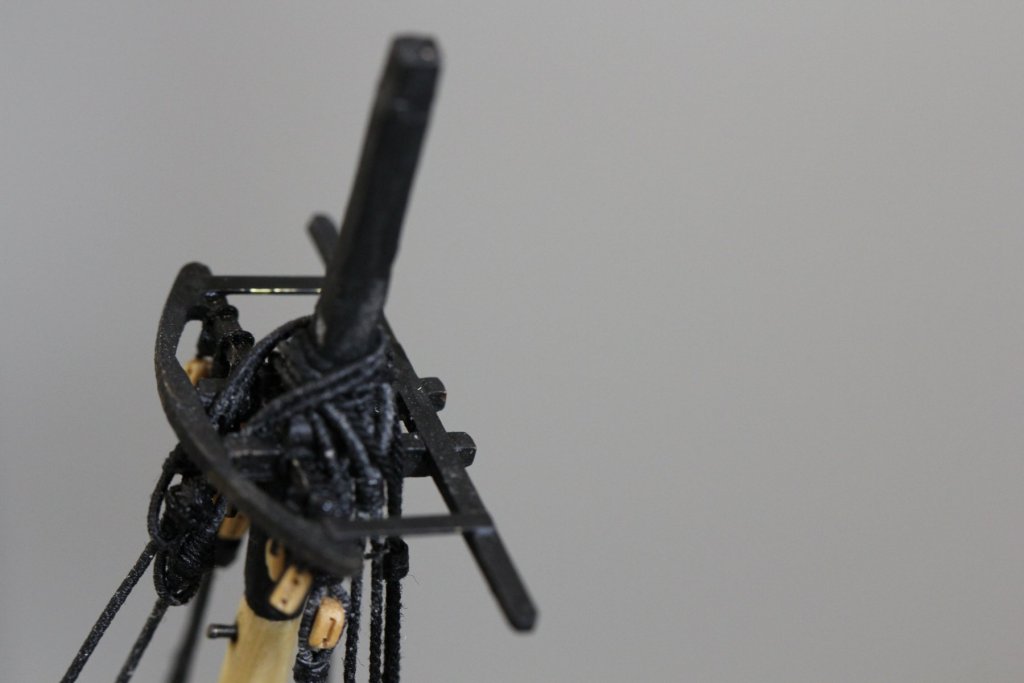
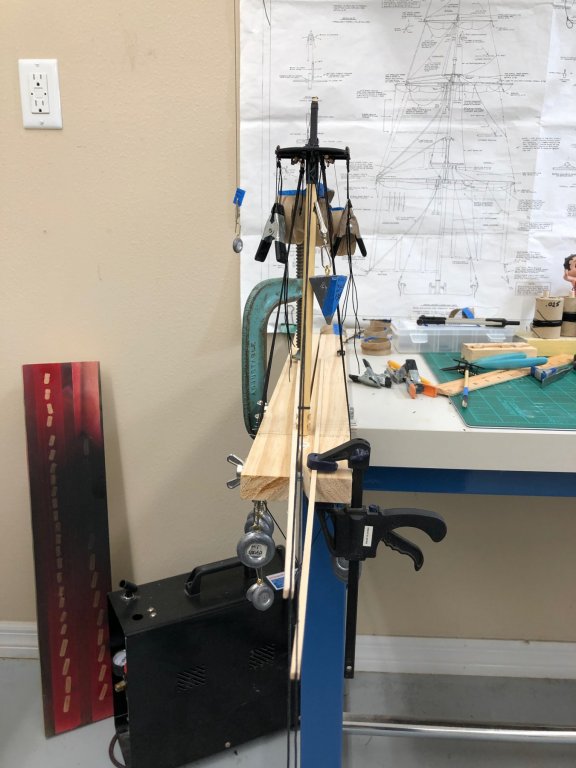
So, with the lower mast as complete as I can get it for now, I moved on to the Main Top Mast. Two pairs of shrouds on each side (total four shrouds per side) plus two Top Mast Back Stays per side makes things pretty crowded. Add in the Spring and Top Mast Stay and you have a real crowd. I assembled the Top Mast apart from the lower mast and then moved it over. It looks like a real mess but I think everything is accounted for. To get the Top Mast to fit in the hole in the Main Top, I had to taper the lower part of the Top Mast. If you look closely you can where the paint is missing at the bottom of the top mast. I will have to do something similar for the Top Gallant mast. I am not sure there is any wood-to-wood contact between the top mast and the lower top. Once all the shrouds are connected it probably won't make much difference although getting the masts aligned correctly and glued that way would be nice before I try and pull them out of alignment by tensioning the shrouds and stays when the masts are mounted onboard.

- 367 replies
-
- 4
-
-
- model shipways
- niagara
- (and 1 more)
-
I got the new Main Preventer Stay completed and installed and then got the Course Yard Sling on. I am not sure whether the Course Yard Sling goes above the Stays (which have a chock to position them) or under them. For now it is under, atop the shrouds. I collected the futtock shrouds on each side and put a single clip on each set. As promised here are two shots of the main Mast in the Jig with all the lower "items" set in place.


- 367 replies
-
- 4
-
-
- model shipways
- niagara
- (and 1 more)
-
Rick - I am interested. How about $240 (US) total including shipping? Gary Howarth Rockledge, Florida
-
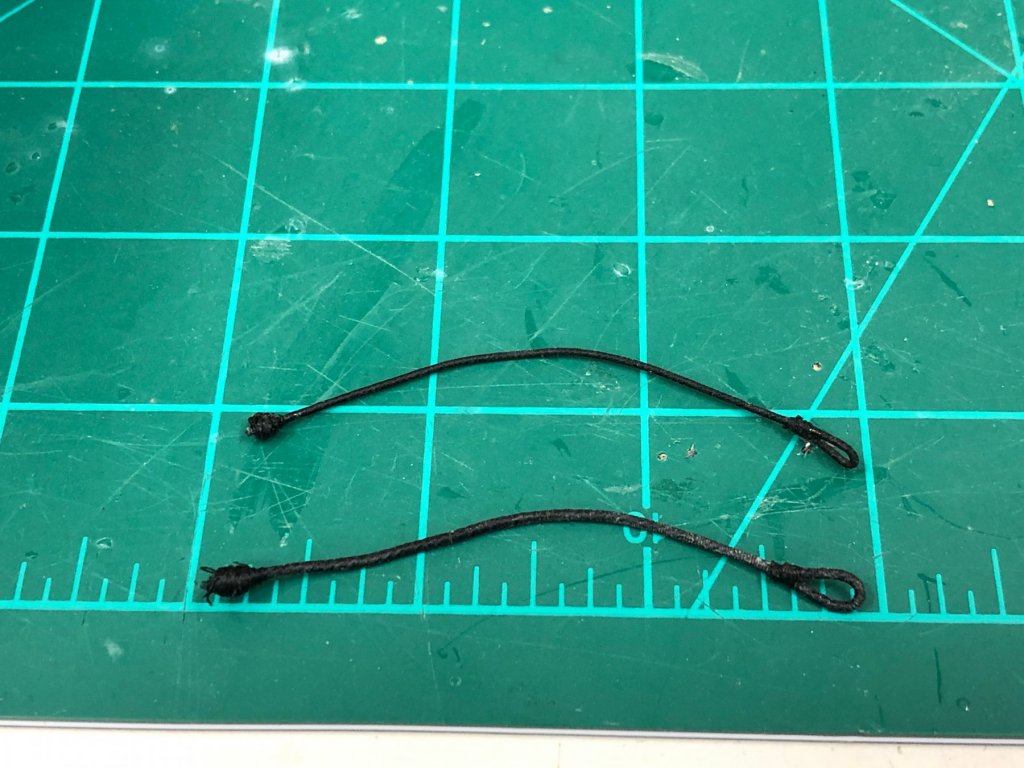
This morning I served a new length of .035m Syren black to become the new Main Preventer Stay, cut the old eye and mouse off the Main Stay and redid them with the appropriate 4" between eye and mouse (thanks to 6Ohiocav for the measurement). I have to wait for the new Preventer Stay to dry and stretch out the kinks from the serving machine but I did get a test fit of the Main Stay. For reference here are the offending eyes and mice from the Main and Main Preventer Stays. I clamped an extension on my mast jig to get the proper angle for the Main and Main Preventer Stays. I will get a picture of the entire jig when I get the Main Preventer Stay rigged. I also have the futtock shrouds hanging from their eyebolts to see how they will look. Obviously they will be much shorter. I will probably leave them off un til I need them. Since they are attached by hooks it should be easy (relatively speaking) to add them on when the lower shrouds are secvured - which will be quite a while yet.

- 367 replies
-
- 2
-
-
- model shipways
- niagara
- (and 1 more)
-
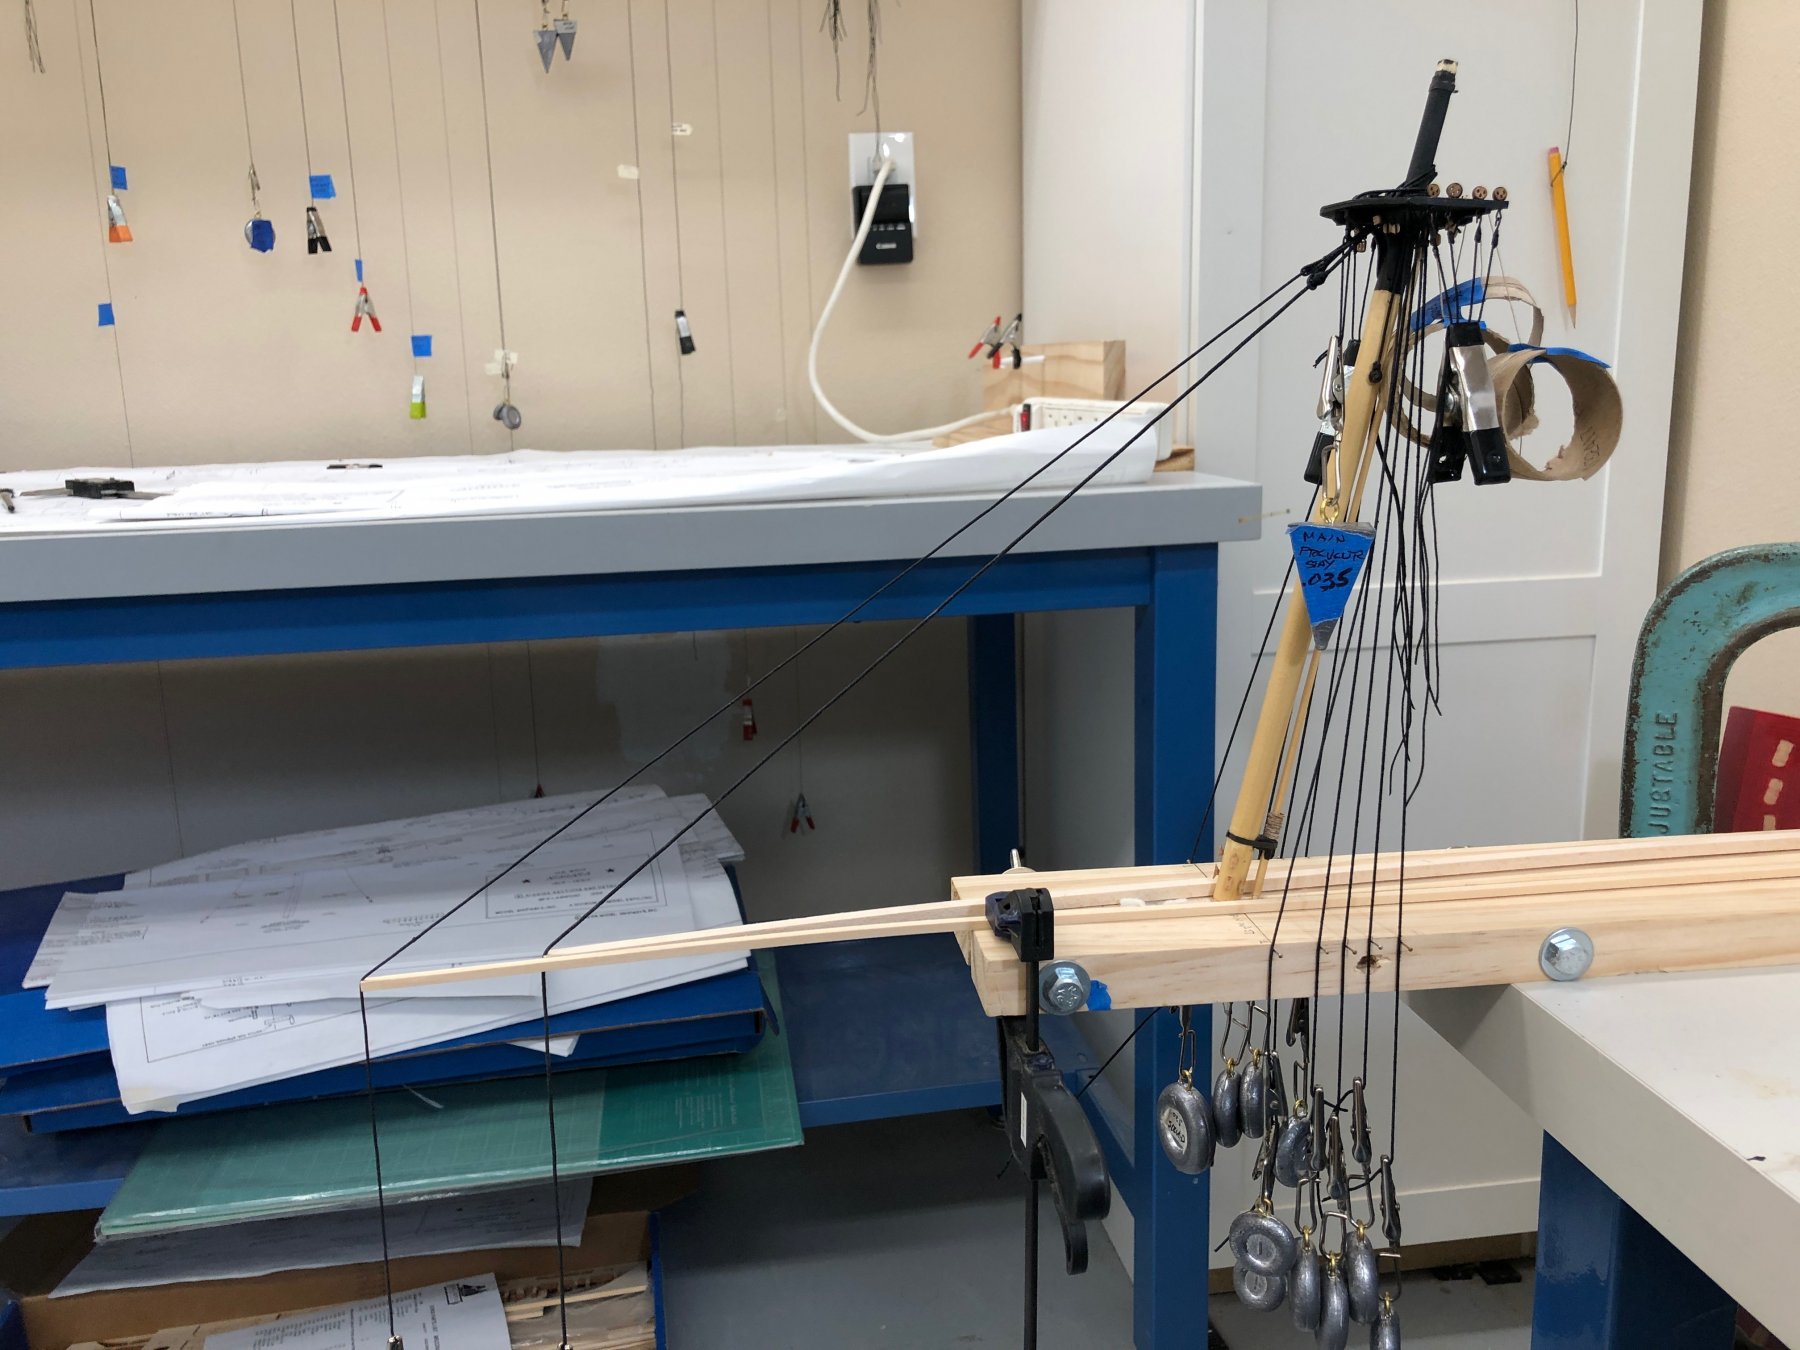
I finally ran out of patience and decided I could probably spend the rest of the summer avoiding starting the mast assembly so I decided to start now and catch the things I haven't so far as I go along. And sure enough I found a mistake before I got too far. I am trying to more or less follow the assembly sequence described in Frank Mastini's "Ship Modeling Simplified" which builds the masts and yards as completely as possible before installing them on the hull. To facilitate this I built a simple jig to hold a mast (it works for either) at the proper rack while it is "outfitted". I started with the main mast. There are nine items that need to go around the upper part of the lower mast before the mast cap goes on. There are six sets of shrouds (three each side), the Main Stay, Main Preventer Stay and the Course yard Sling. I fitted the shrouds in the specified sequence and using small nails to simulate the attachment points at the channels weighted each shroud line to check how they lay. I need to do some rearranging to get them to lie more neatly but it seems a pretty good start. I added the Main and Preventer Stays and when I tried to add the Course Yard Sling it became obvious that the point where the Stay's loop around the mast closes (the eye and "mouse") needs to be further away from the mast to allow the Course Yard Sling to meet up with the course yard without the lanyard having to go on one side of the stay rather than between the two parts before they rejoin. Luckily I made the Main Stay way longer than necessary so cutting off the offending part and redoing it is not a really big deal. For the Preventer Stay I need to serve up some more .035 line - and I thought I was done with line serving on this one. I am pretty sure I am going to have a similar problem on the Fore mast so I am going to make enough for both.


- 367 replies
-
- 4
-
-
- model shipways
- niagara
- (and 1 more)
-
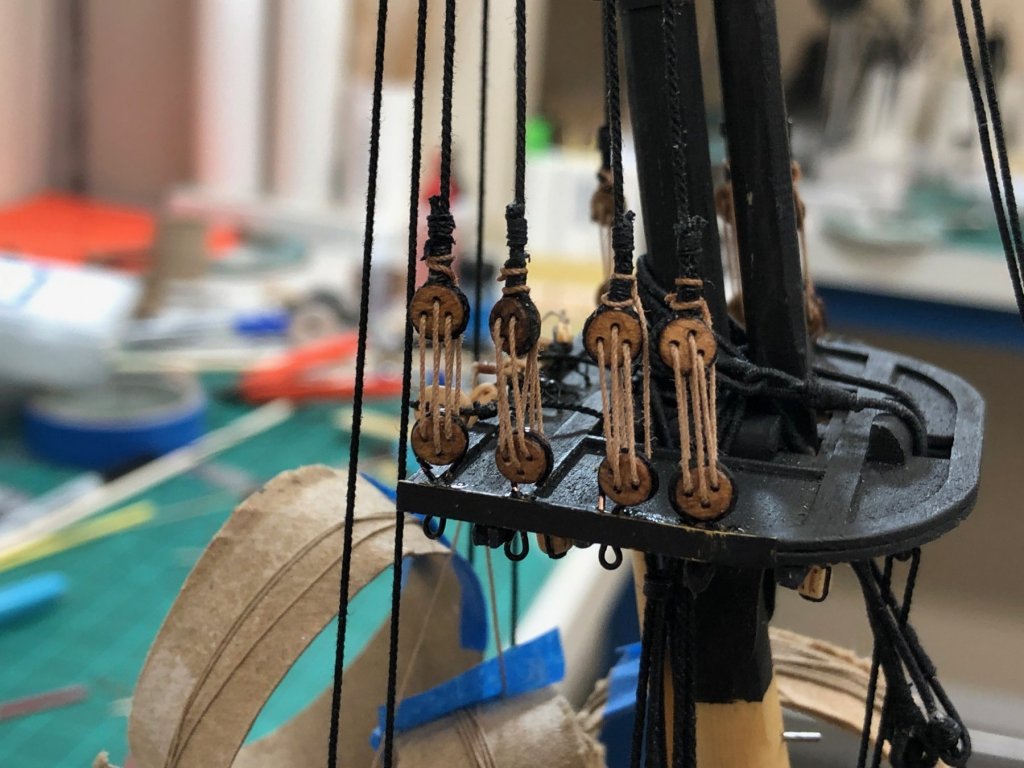
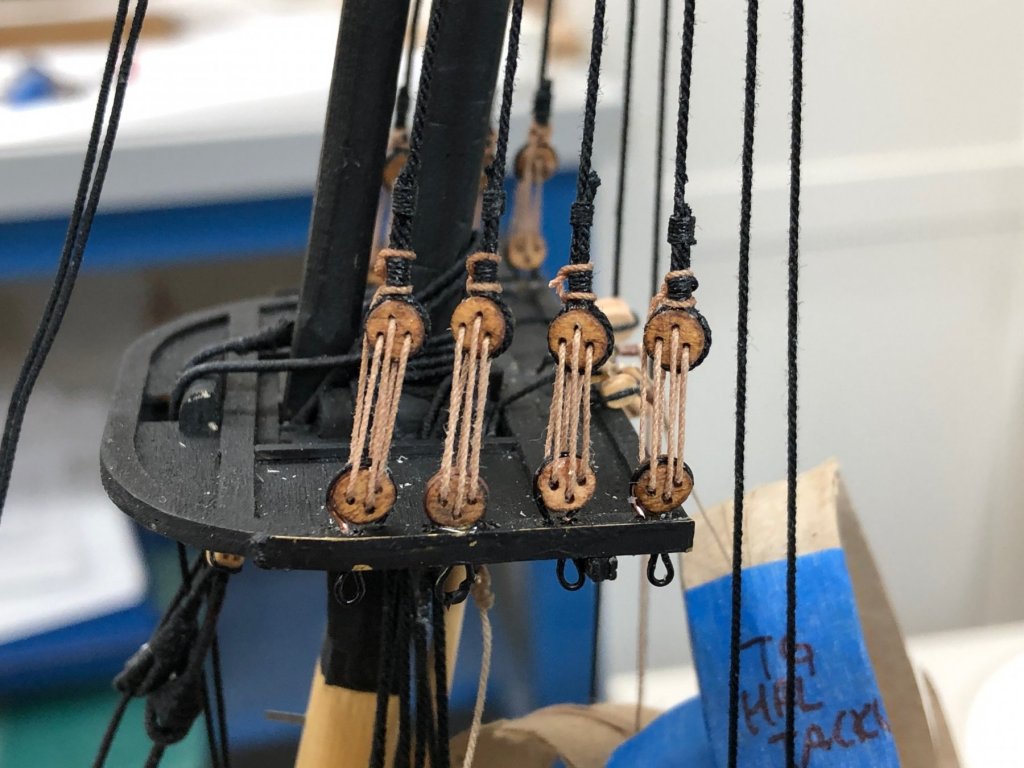
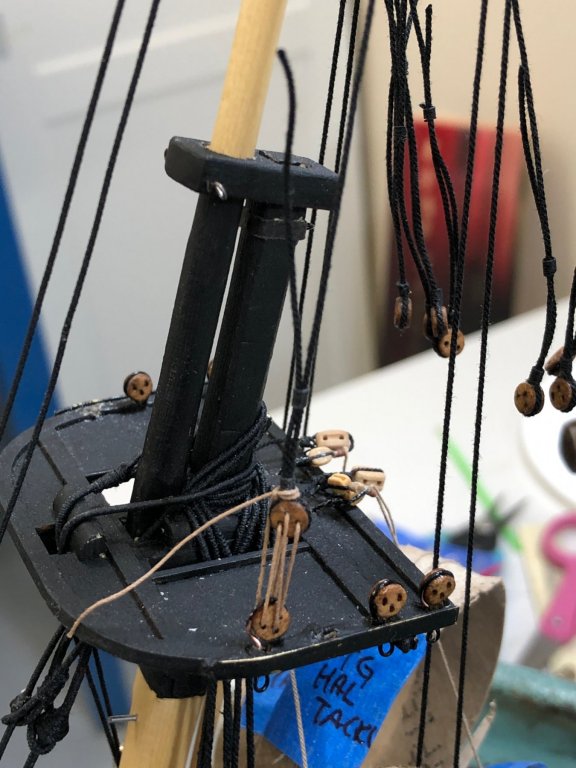
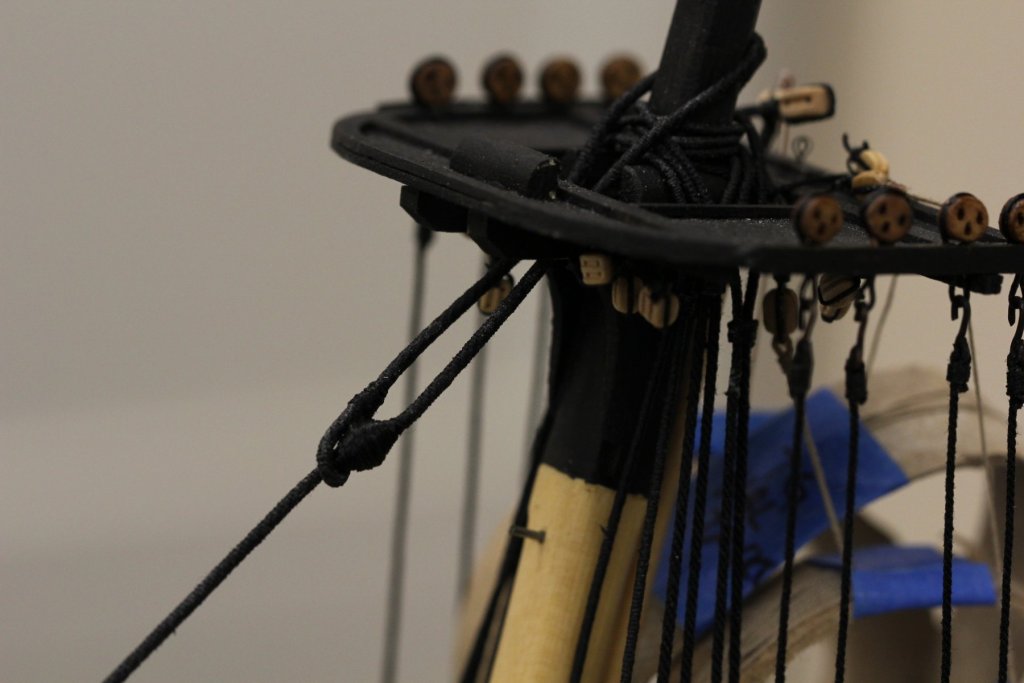
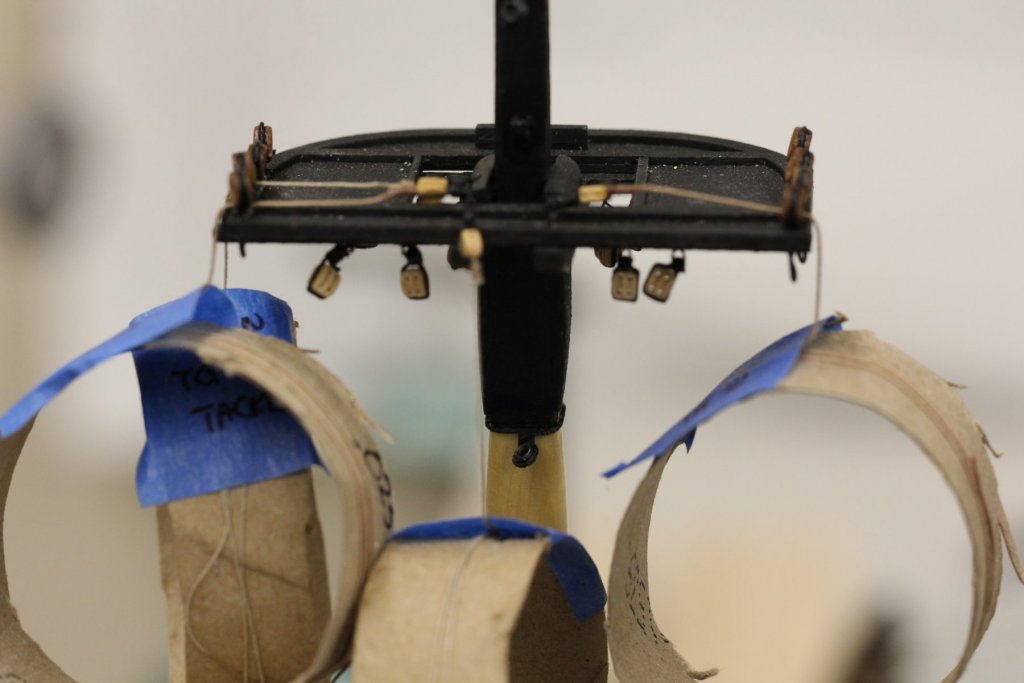
I keep finding more things that I should (at least I think I should) get done now rather than later. Case in point are the reef lines and Top Gallant Halyard tackle on both masts, plus the falls for the Main Royal and Top Gallant stays which are also on the Fore Top. I got four out of five done on the fore mast before the other half decided that was enough shipyard work for today. I will work the last one on the fore mast (royal stay tackle) and the main mast tomorrow. Who knows what other things I may discover tomorrow. Also, here is the latest version of the Niagara Rigging Spreadsheet. FYI - disregard the colors shading, that is an internal measure for me to keepm track of what is already in place on the model. Niagara Rigging - for distribution.xlsx
- 367 replies
-
- 4
-
-
- model shipways
- niagara
- (and 1 more)
-
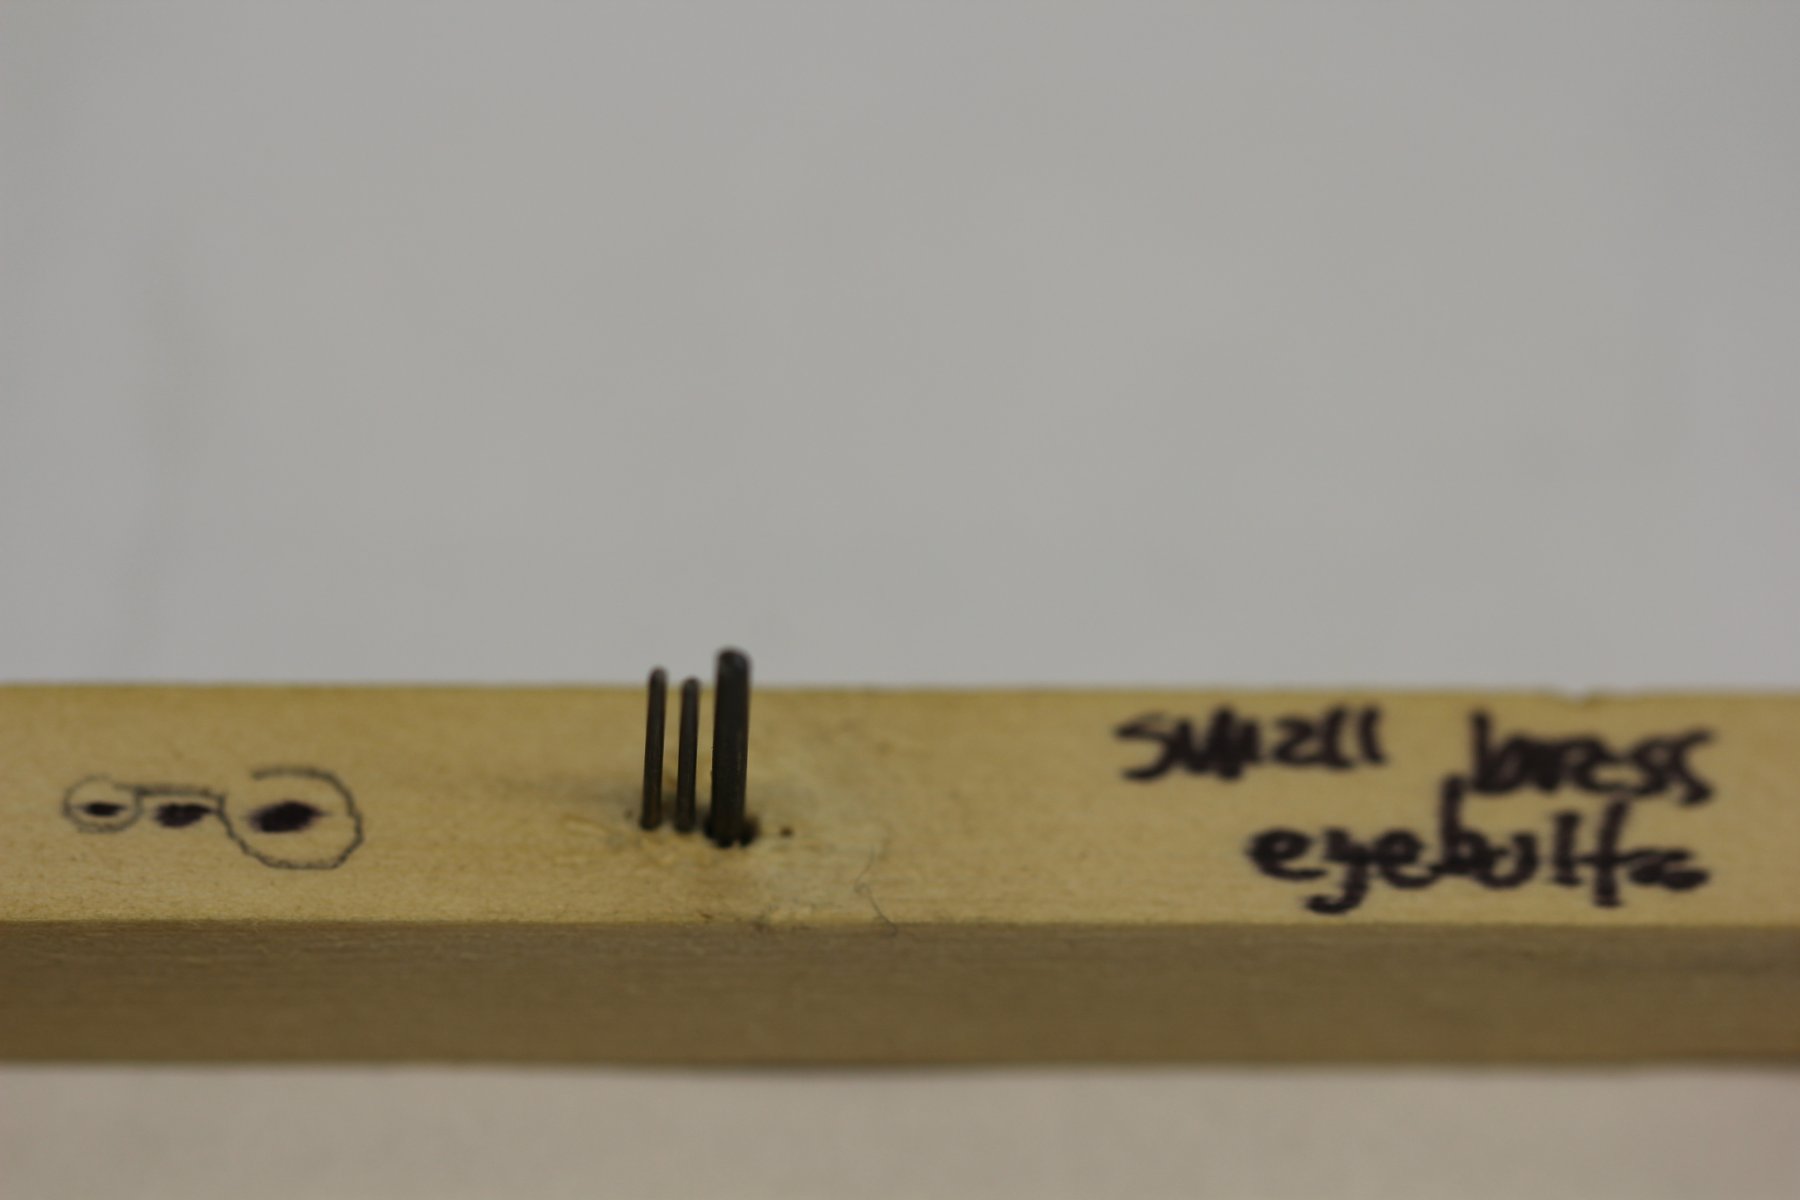
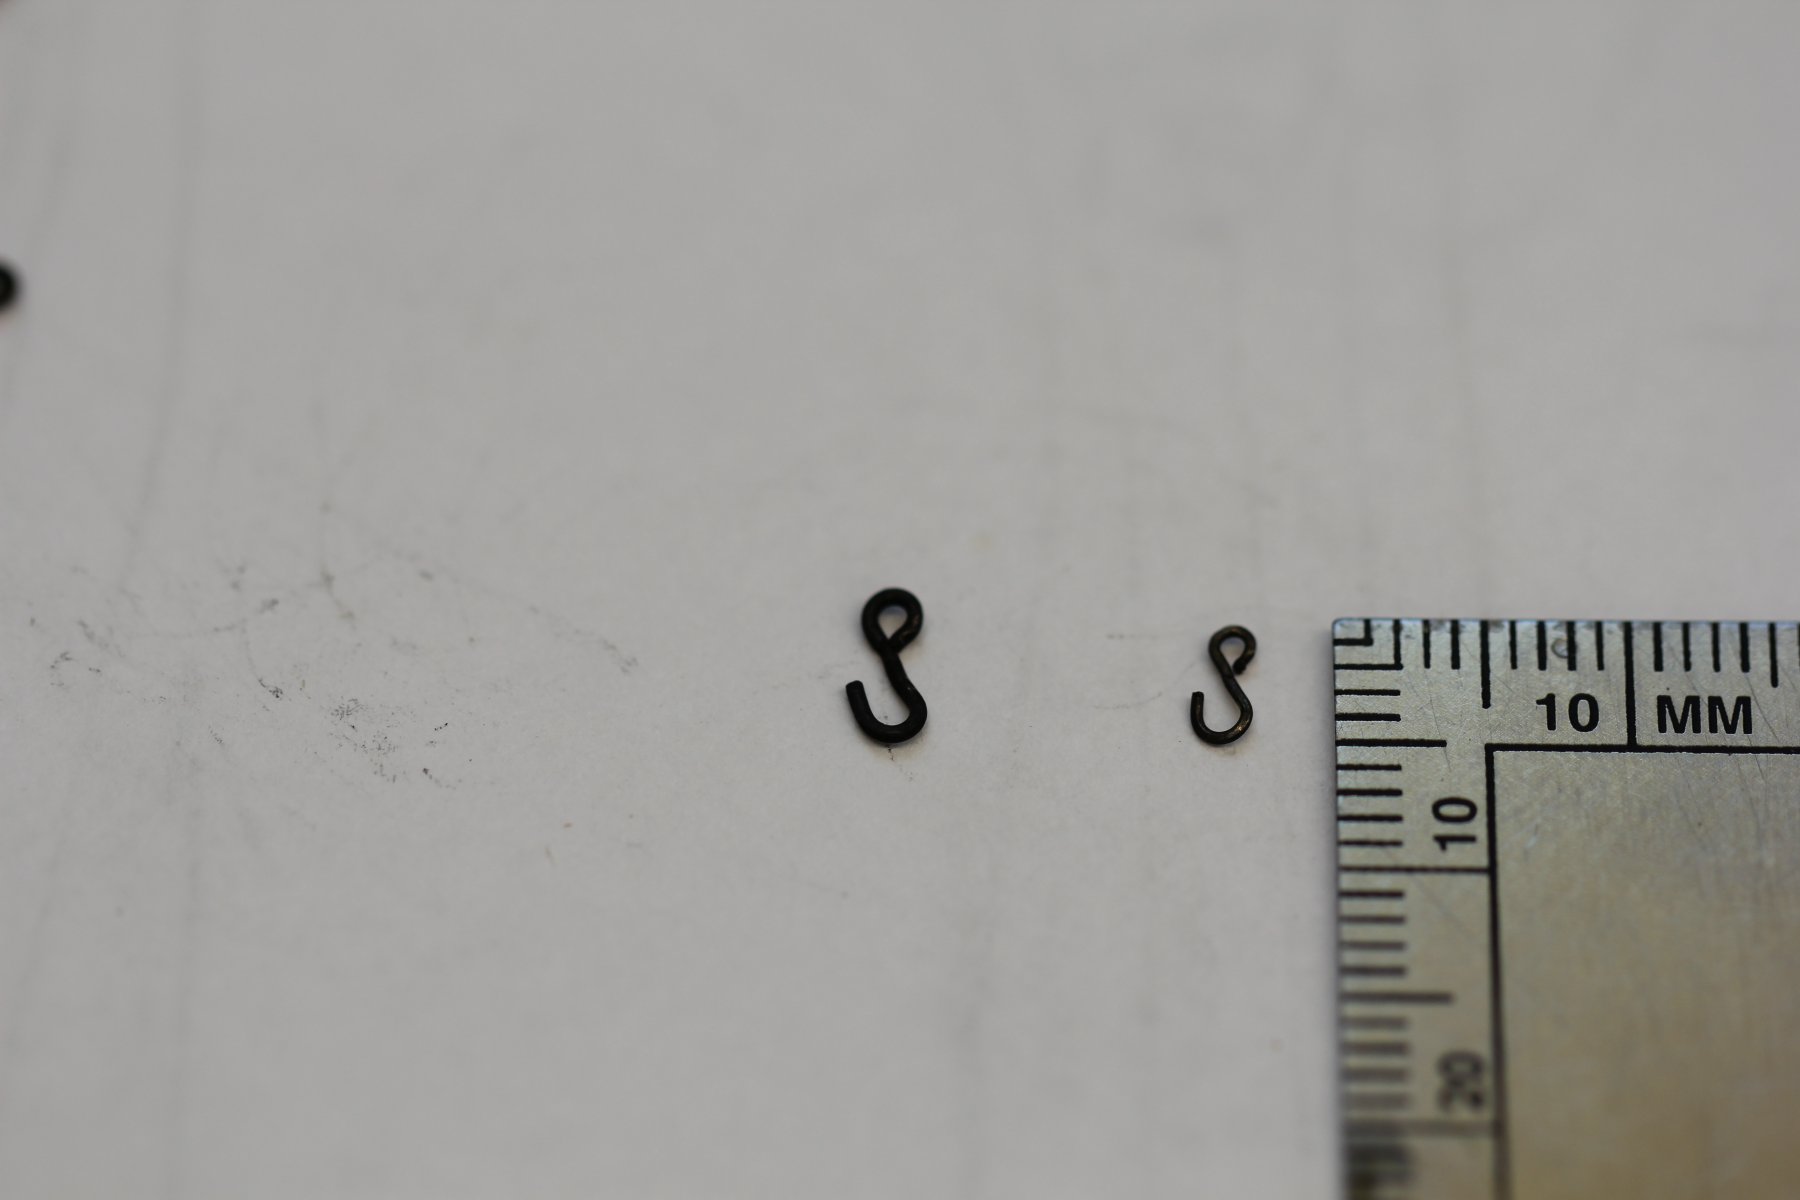
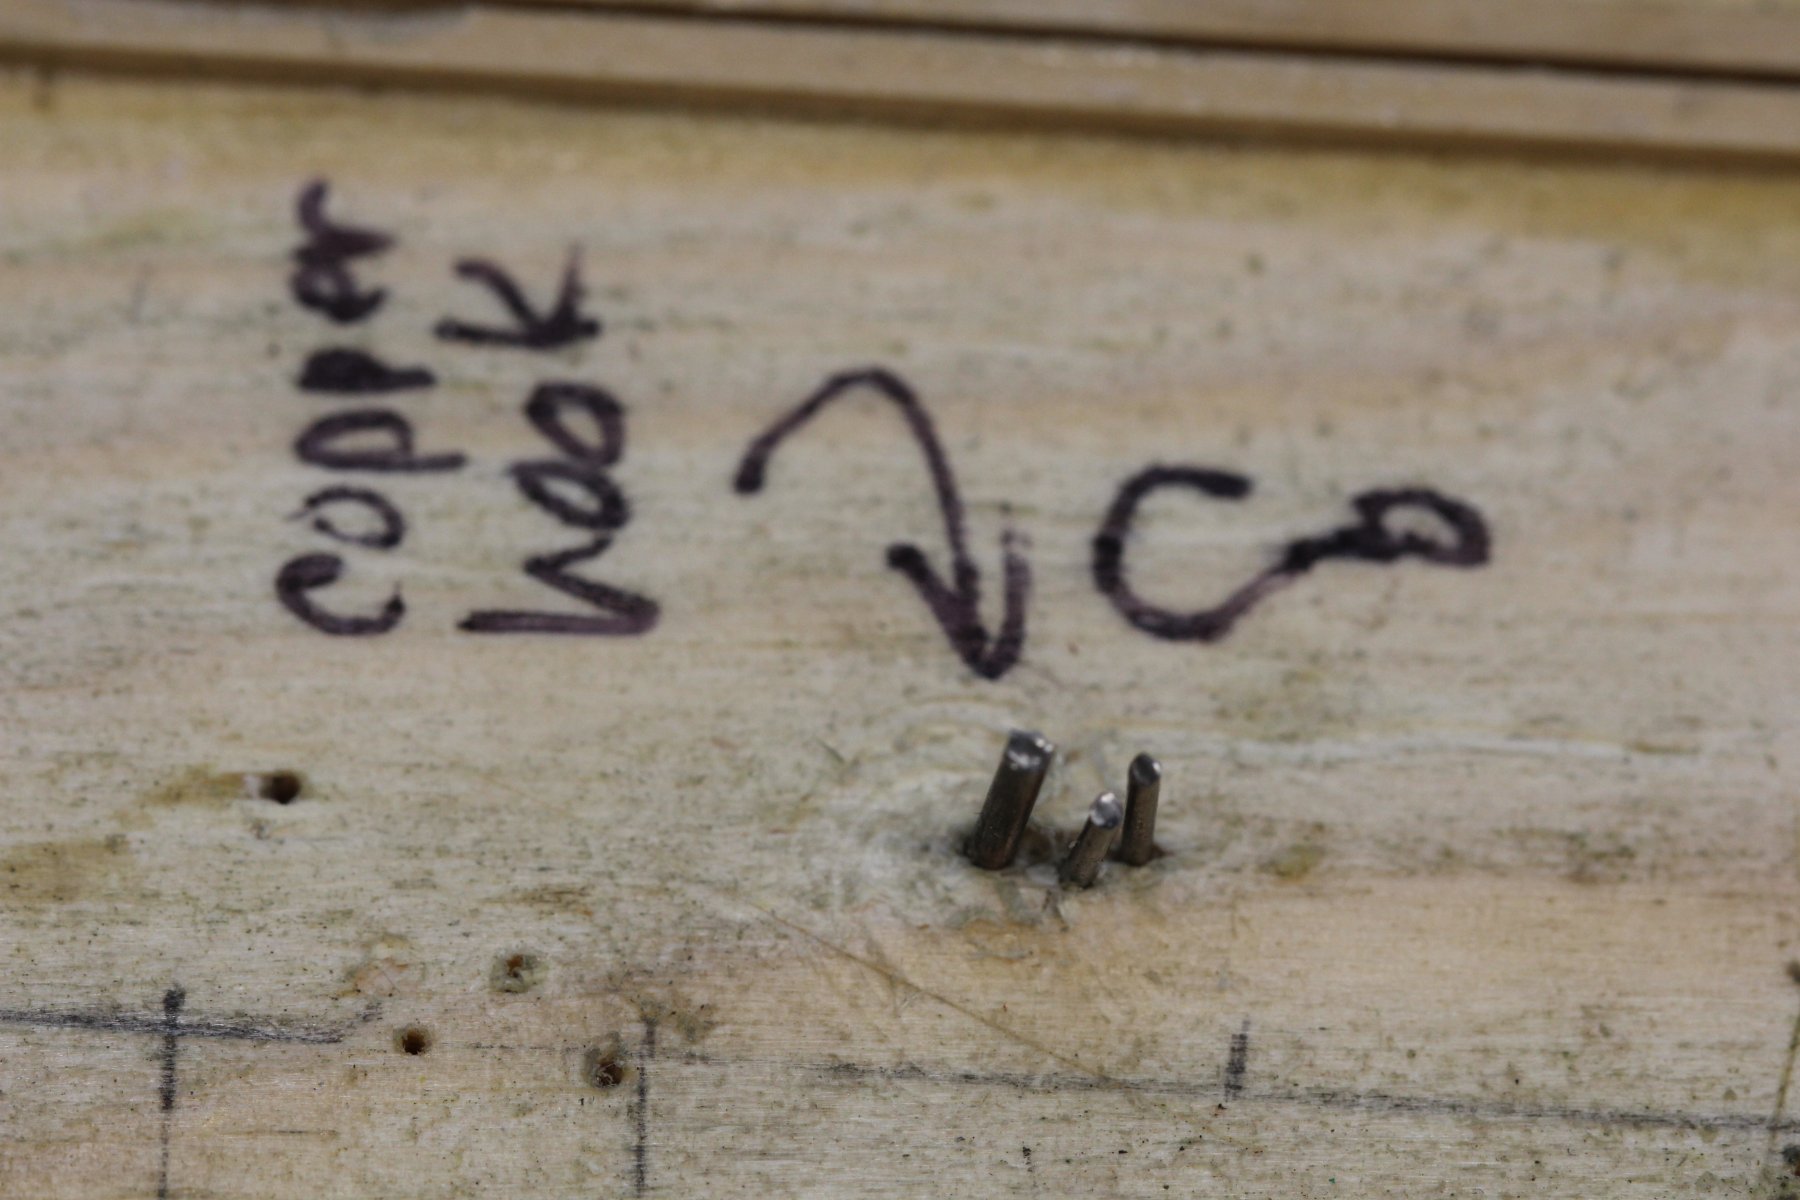
Cruise was great, grandson high school graduation was long and hot (outdoors in late May in Florida) but now back to "real" work in the ship yard. Still working off some additional items that will be easier to do (I hope) before mast assembly begins. I built two jigs to turn commercial eyebolts into hooks. One uses 3/32 copper eyebolts and the other 1/16" brass eyebolts. The copper ones came from Billings Boats (I think) the brass one from Model Expo. The hooks are for the futtock shrouds and from the plans should be about 4mm long which would make them about 10" at scale (please check my math here). The jigs use piano wire, .025" and .047" to form the hooks. They are then blackened using Brass Black. Although the smaller ones are closer to scale I am going to use the larger ones for the futtock shrouds. The line is .025 (.023 in plans) and the smaller hooks look too small with that size line (doubled for the eye). I will use the smaller ones for hooking the head sail halliards and downhauls together and for the sheet lines.

- 367 replies
-
- 3
-
-
- model shipways
- niagara
- (and 1 more)
-
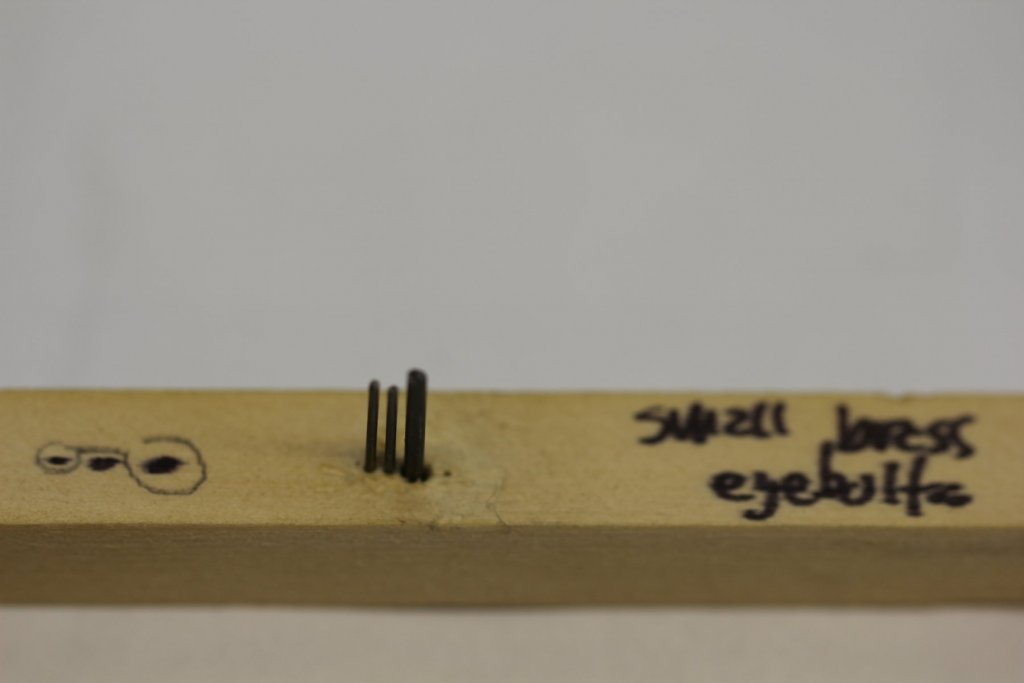
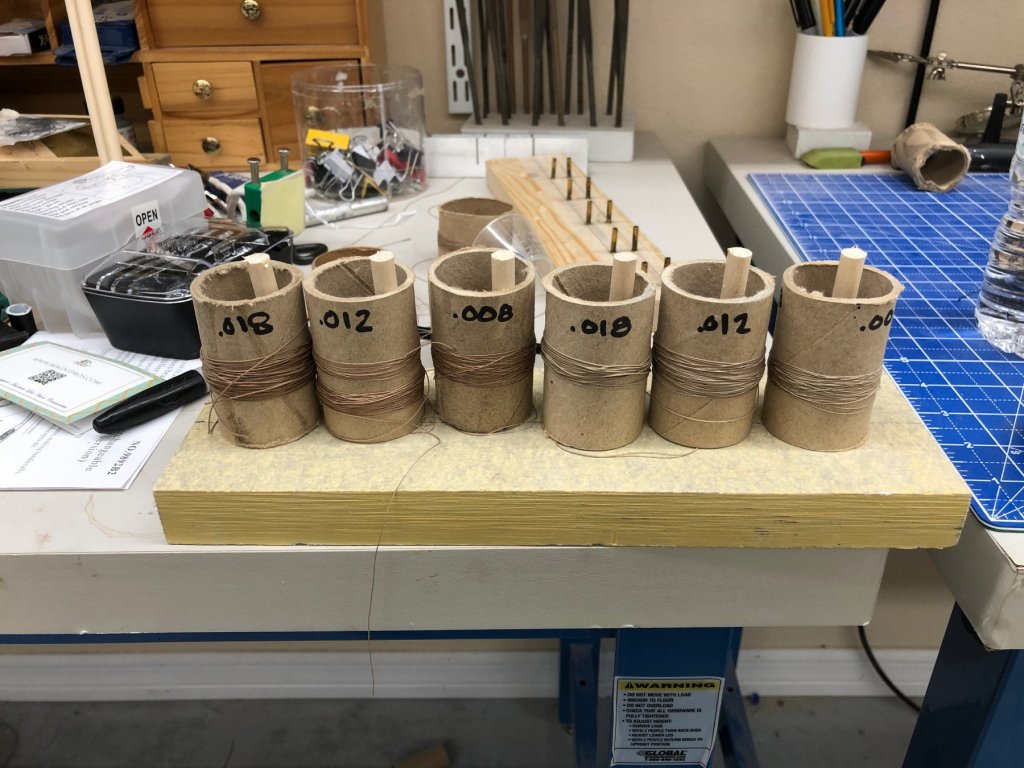
I got tired of having to look around for the correct size/color of line (these are Syren tan and light brown) as I previously had a working "spool" (aka a short piece of toilet/wrapping paper tube) of each somewhere on my workbench. These tubes are of heavier gauge cardboard from where I can't remember - just glad I saved it. Now at least they are all in the same place. For the base I used a scrap of Hariplank trim that was left over from something. It is much heavier than conventional wood of this size (and in this case free to the shipbuilder) so it doesn't move when you pull on one of the "spools" of line. I added the last four eyebolts for the Topsail Halyard and the next step is to assemble the masts. But that will have to wait until next Friday as we leave for a four night cruise tomorrow and there is "stuff" that needs to be done before we can leave.
- 367 replies
-
- 2
-
-
- model shipways
- niagara
- (and 1 more)
-
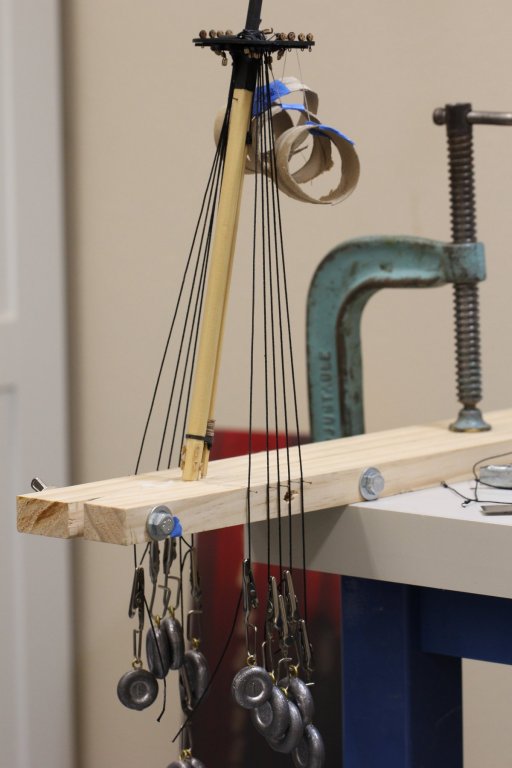
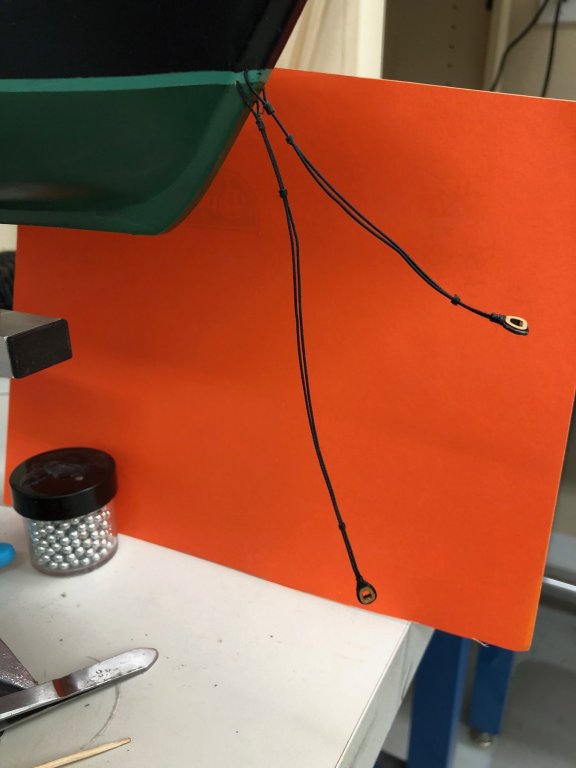
Continuing to work off the to do list before starting assembly of the masts. Added eyebolts for the course yard lifts and Spring Stay and Top Mast Stay bullseyes. Installed the tackle for the Flying Jib and Top Gallant Stays to the eyebolts in the bow that I put in yesterday. These tackle call for fiddle blocks on the stay end. Not knowing of a source for fiddle blocks this small (the blocks on the other end are 3/32) I improvised by sanding one end of both a 3/32 S and an 1/8 S flat and glued the together. Making the flat square with the blocks on something at small was somewhat of a challenge (I think I went through 10 blocks before I got three satisfactory sets - you can sand too much). You can't see the fiddle blocks very well in teh picture, they are being held by the clamps. I installed the bullseyes I made over the past few days to the respective eyebolts on the bow and behind the Fore Mast. I am working on building the tackles for the Course Lifts and the Royal, Top Gallant and Top Sail halyards. Once that is done I think I have everything ready to start assembling the masts and yards.


- 367 replies
-
- 5
-
-
- model shipways
- niagara
- (and 1 more)
-
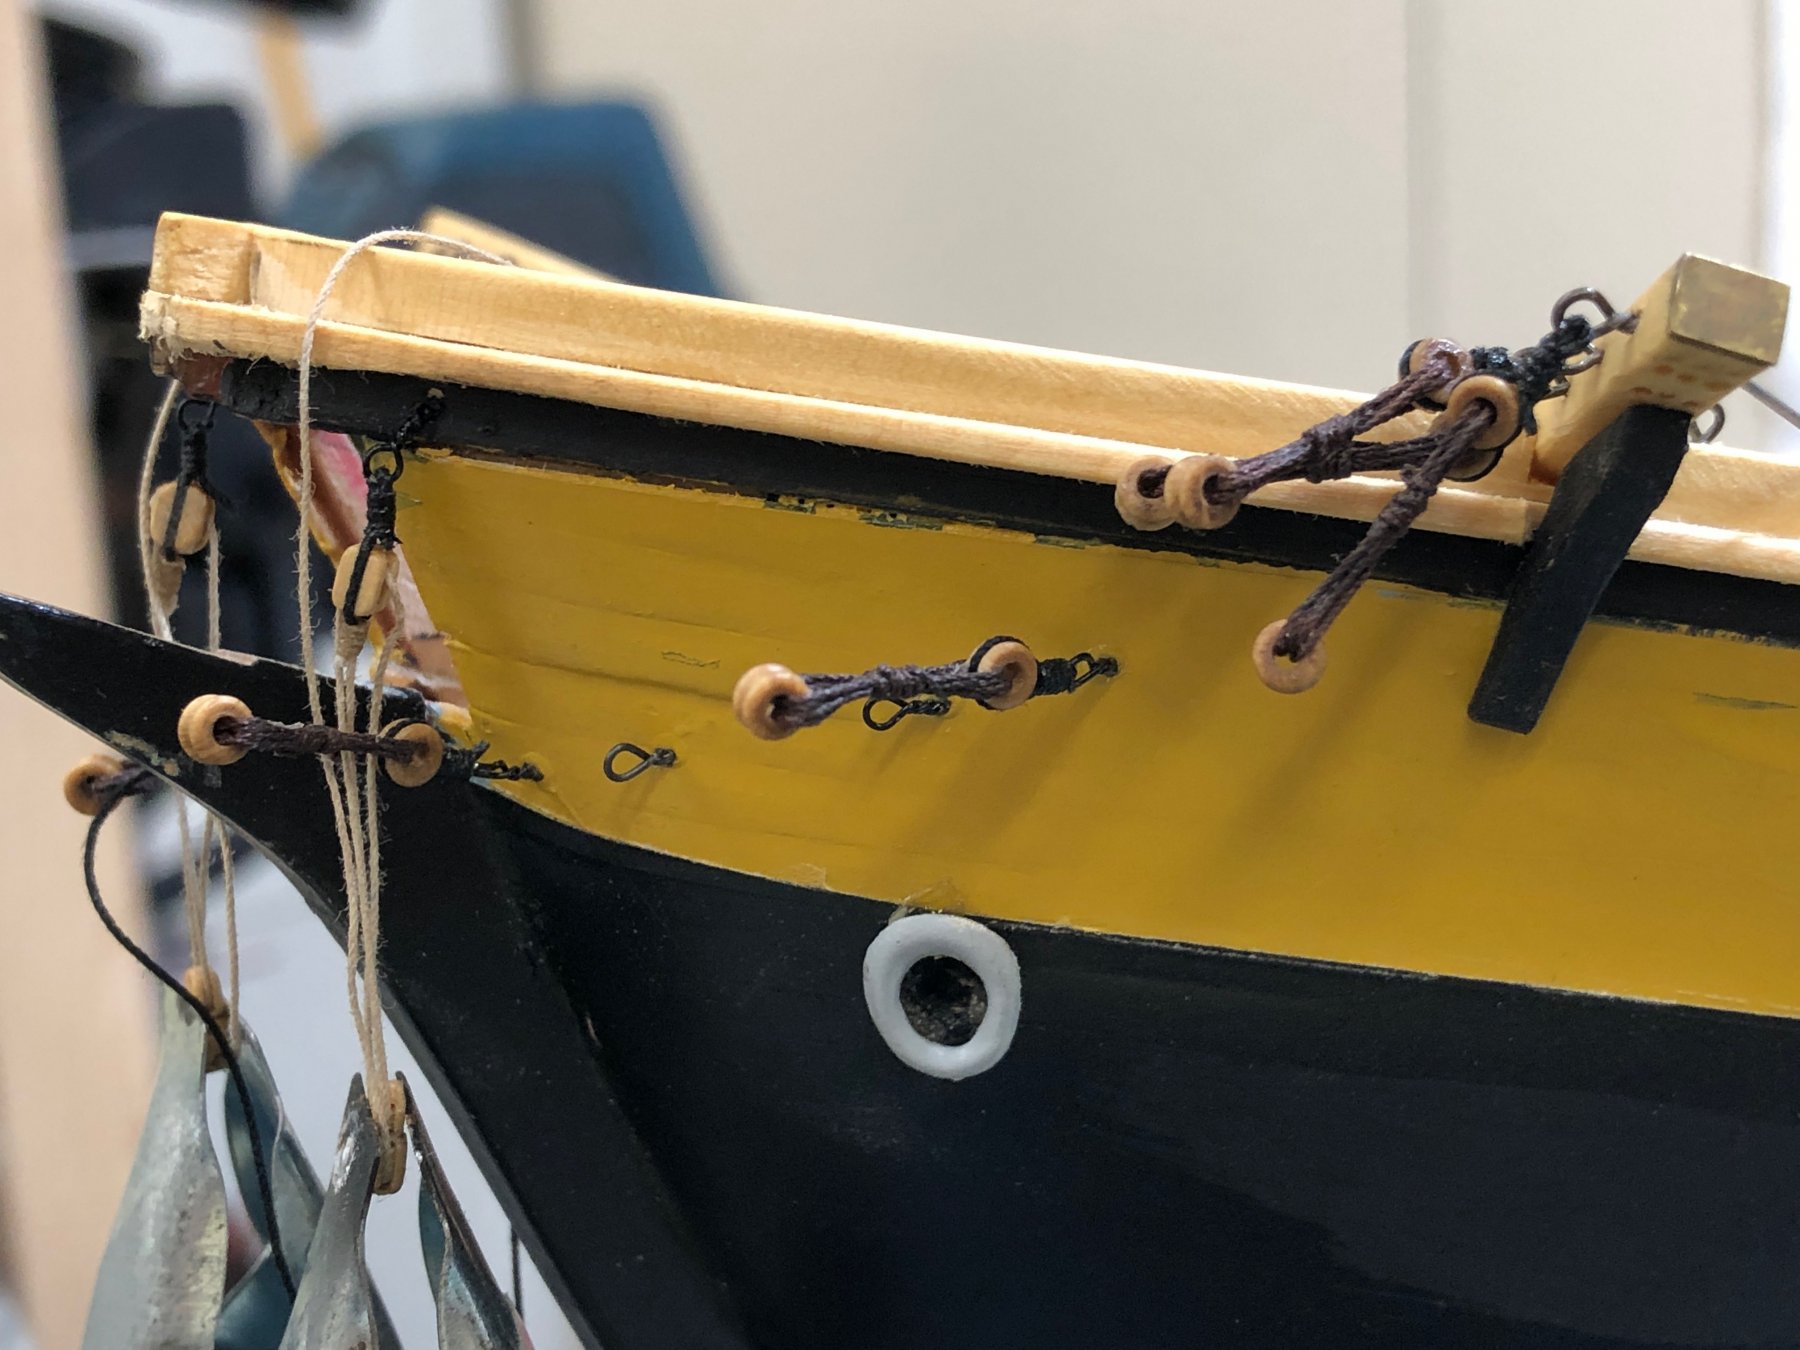
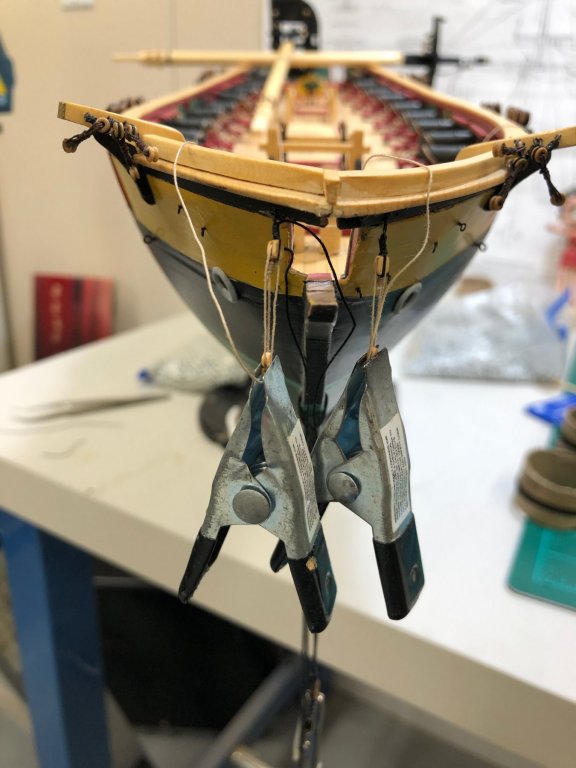
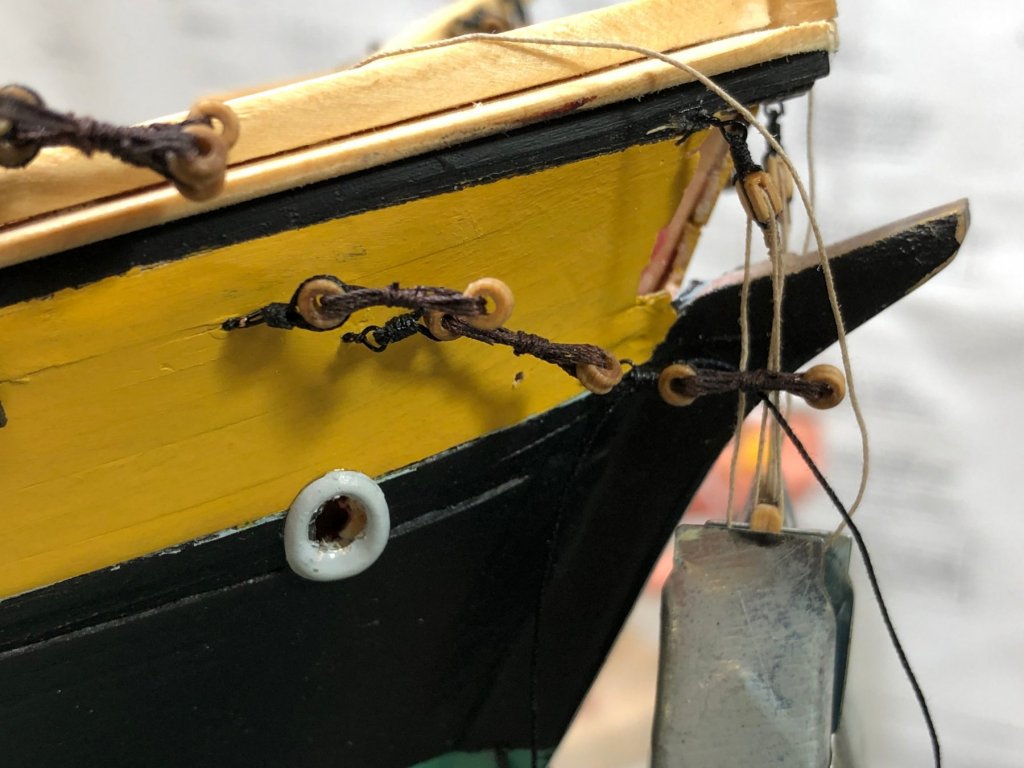
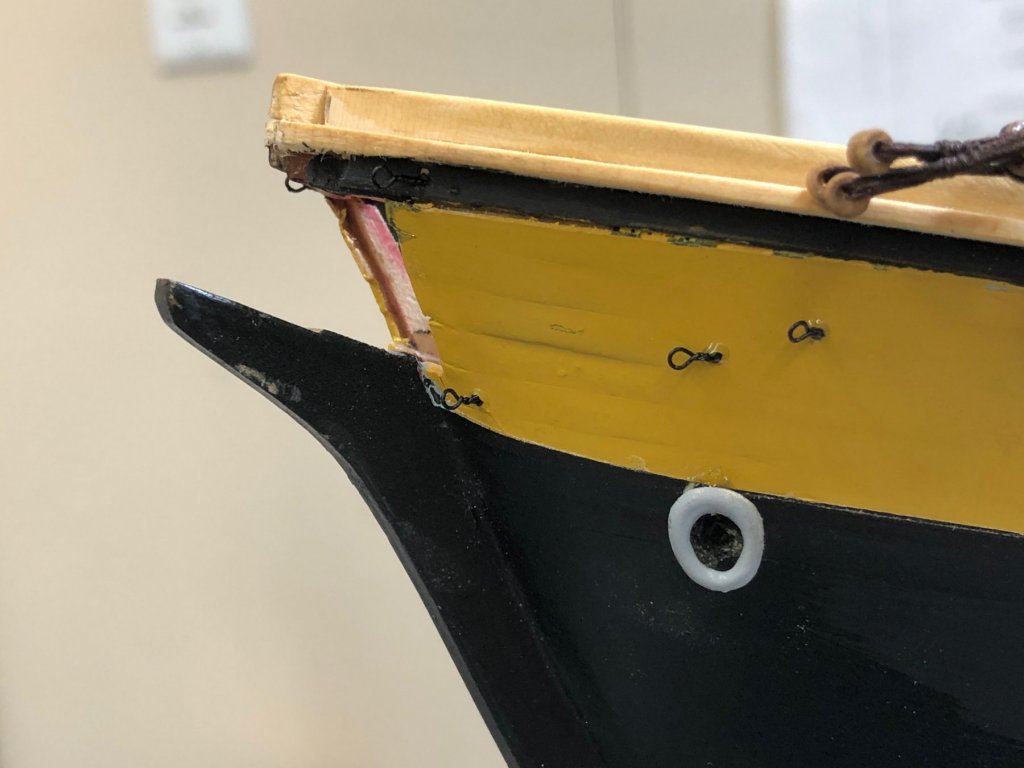
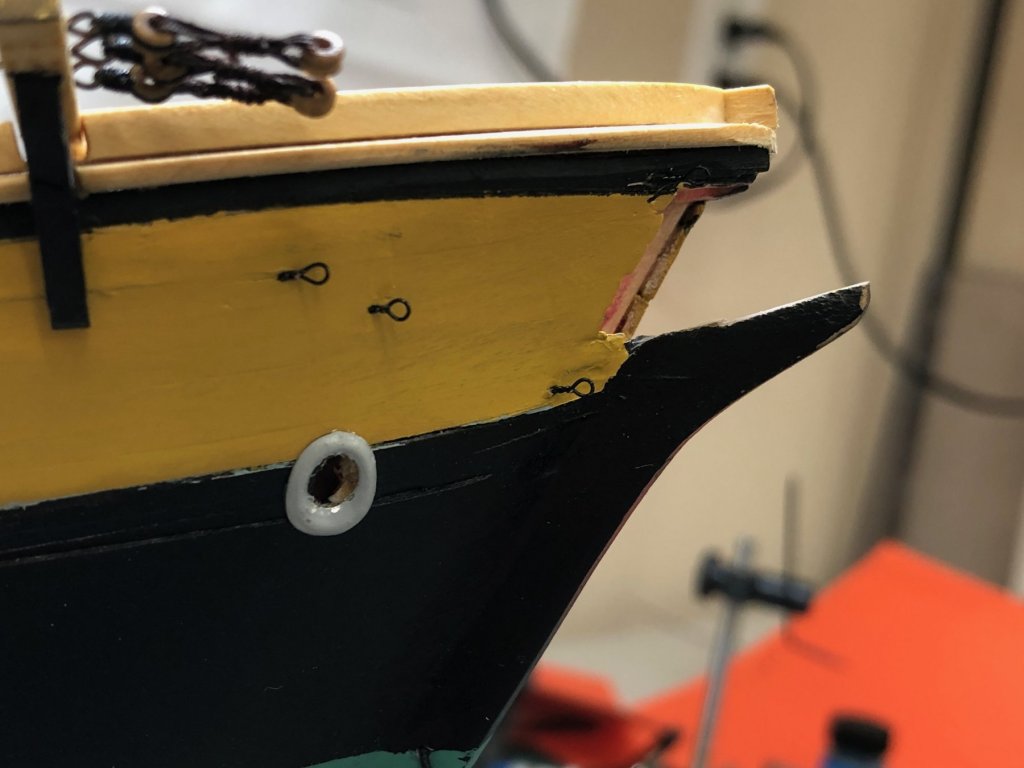
Finished rigging the bobstays to the hull. Used served .025 line instead of the .031 called for in the instructions. Not sure these lines were served but since they would see lots of wave action and they were vital to the structural integrity of the bowsprit I decided to use the served .025 as an approximation of the .031 shown in the plans. Utilized Syren 5.5mm closed hearts instead of the kit supplied items. Also installed the four eyebolts (on each side) that terminate the Inner Jib stay, Fore Mast Stay, Jib Boom Martingale back ropes and the Flying Jib Boom Martingale backropes.
- 367 replies
-
- 3
-
-
- model shipways
- niagara
- (and 1 more)
-
Tom/Christos, I am making some changes to my version - so far mostly adding additional "items" to the various lines so I can get an accurate count of how many of the various blocks I need to build. I some cases I only show, for instance one S 1/8 when there should be two (one port and one starboard for instance). I will post an updated version when I get closer (which should be soon) to starting to assemble the masts/yards. I would also add that the line/block/deadeye/bullseye sizes are what I intend to use, not necessarily what are called for in the plans. I typically only use Syren line so am limited to the .008. .012, .018, .025, .035, .045 sizes that are available there. Just trying for "full disclosure". My lawyer made me do it.