HOLIDAY DONATION DRIVE - SUPPORT MSW - DO YOUR PART TO KEEP THIS GREAT FORUM GOING! (Only 20 donations so far - C'mon guys!)
×


cdrusn89
-
Posts
1,915 -
Joined
-
Last visited
Content Type
Profiles
Forums
Gallery
Events
Everything posted by cdrusn89
-
 Tom, Not sure what happened above but you probably need the spanker boom topping lift to hold the boom end unless you are going to add a boom rest support. With the boom sheet pulling the boom down you will need something to counteract that. I am restarting work on my Niagara after a 6 week hiatus while on a vacation (and working down the "please do" list). I am a little behind you - have the hull, guns and deck furniture pretty much complete but have not done anything on the bowsprit, masts or yards yet.
 -
Tom.
-
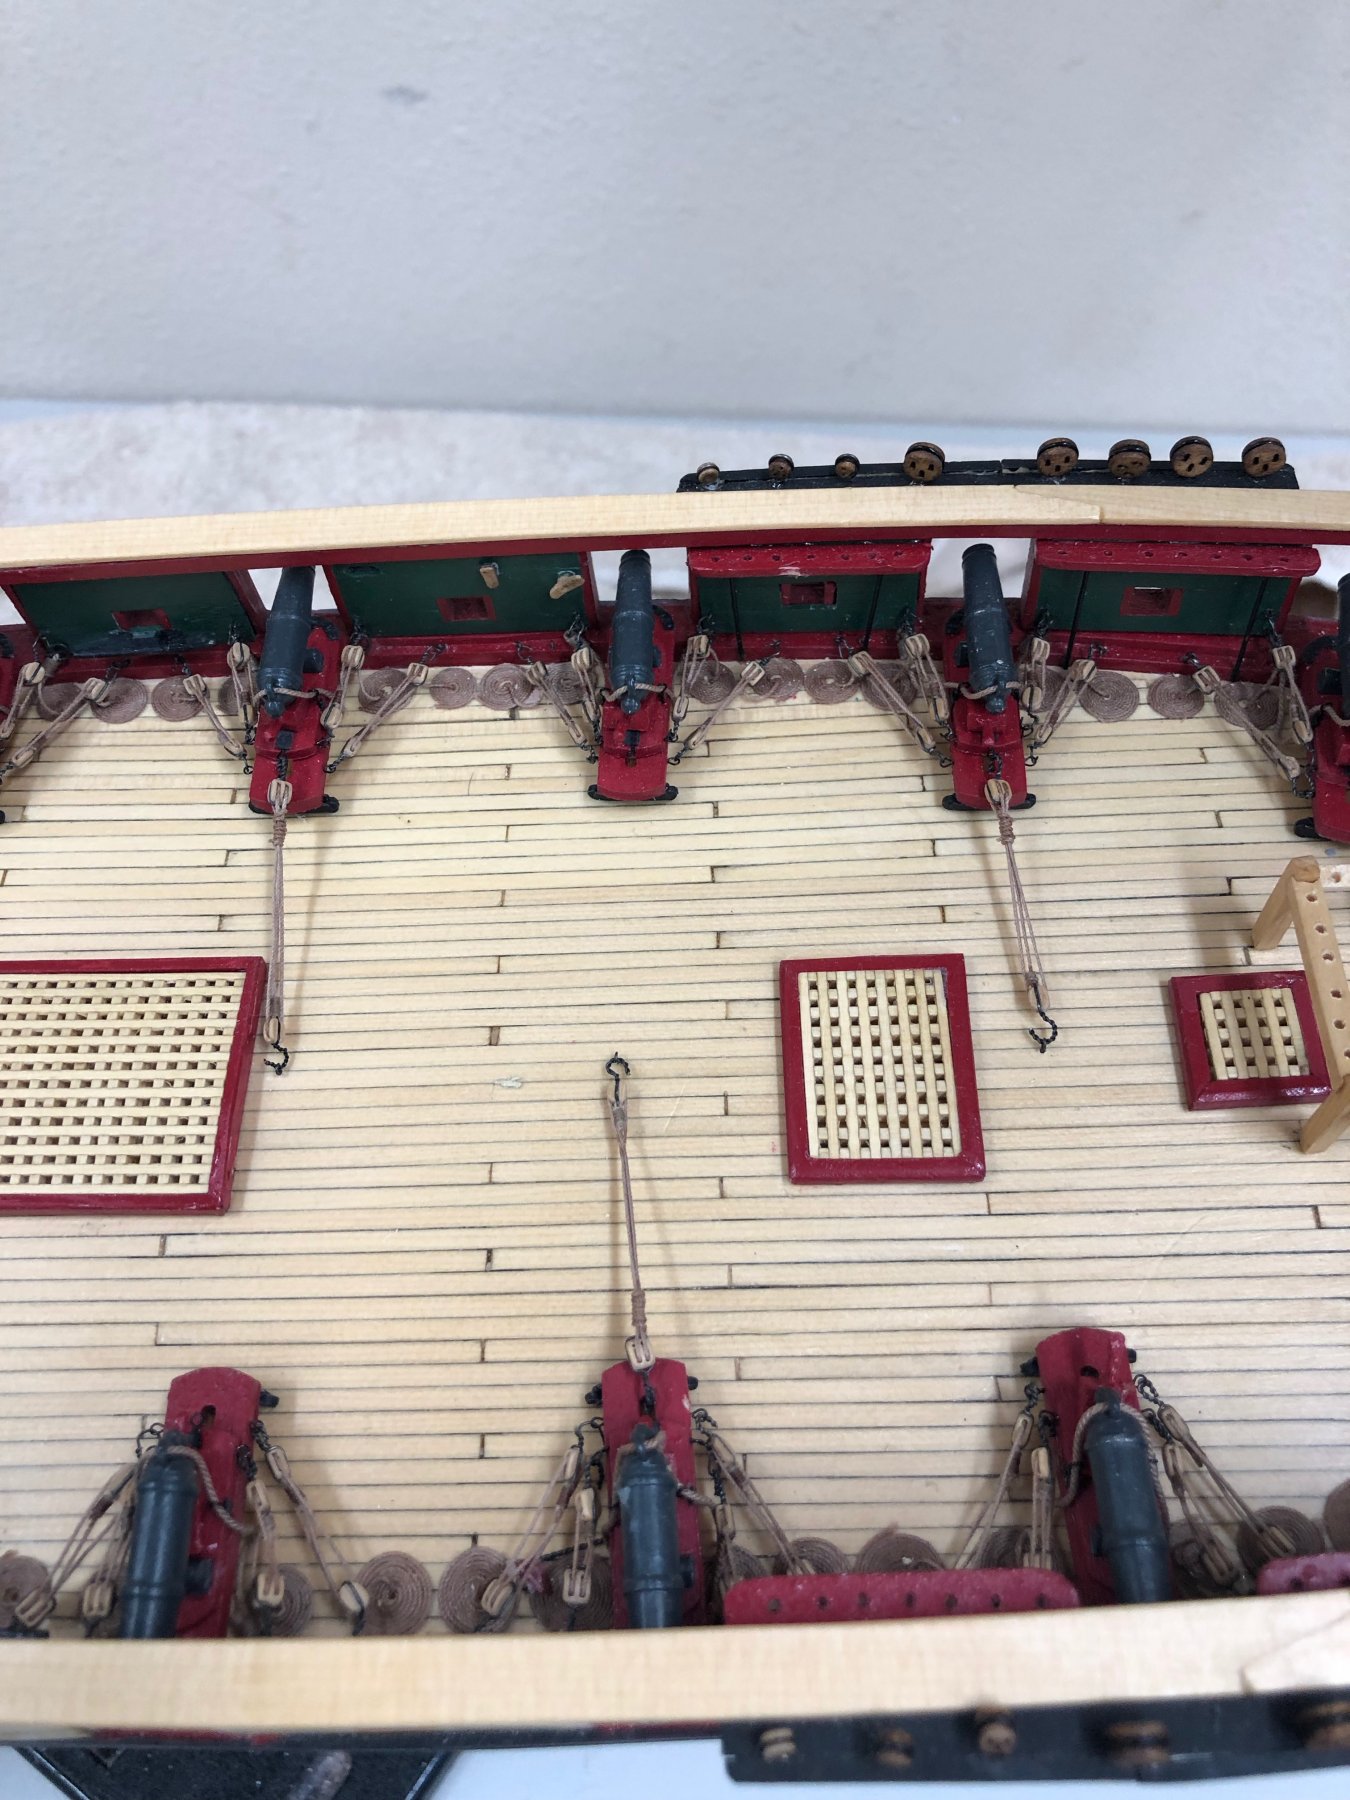
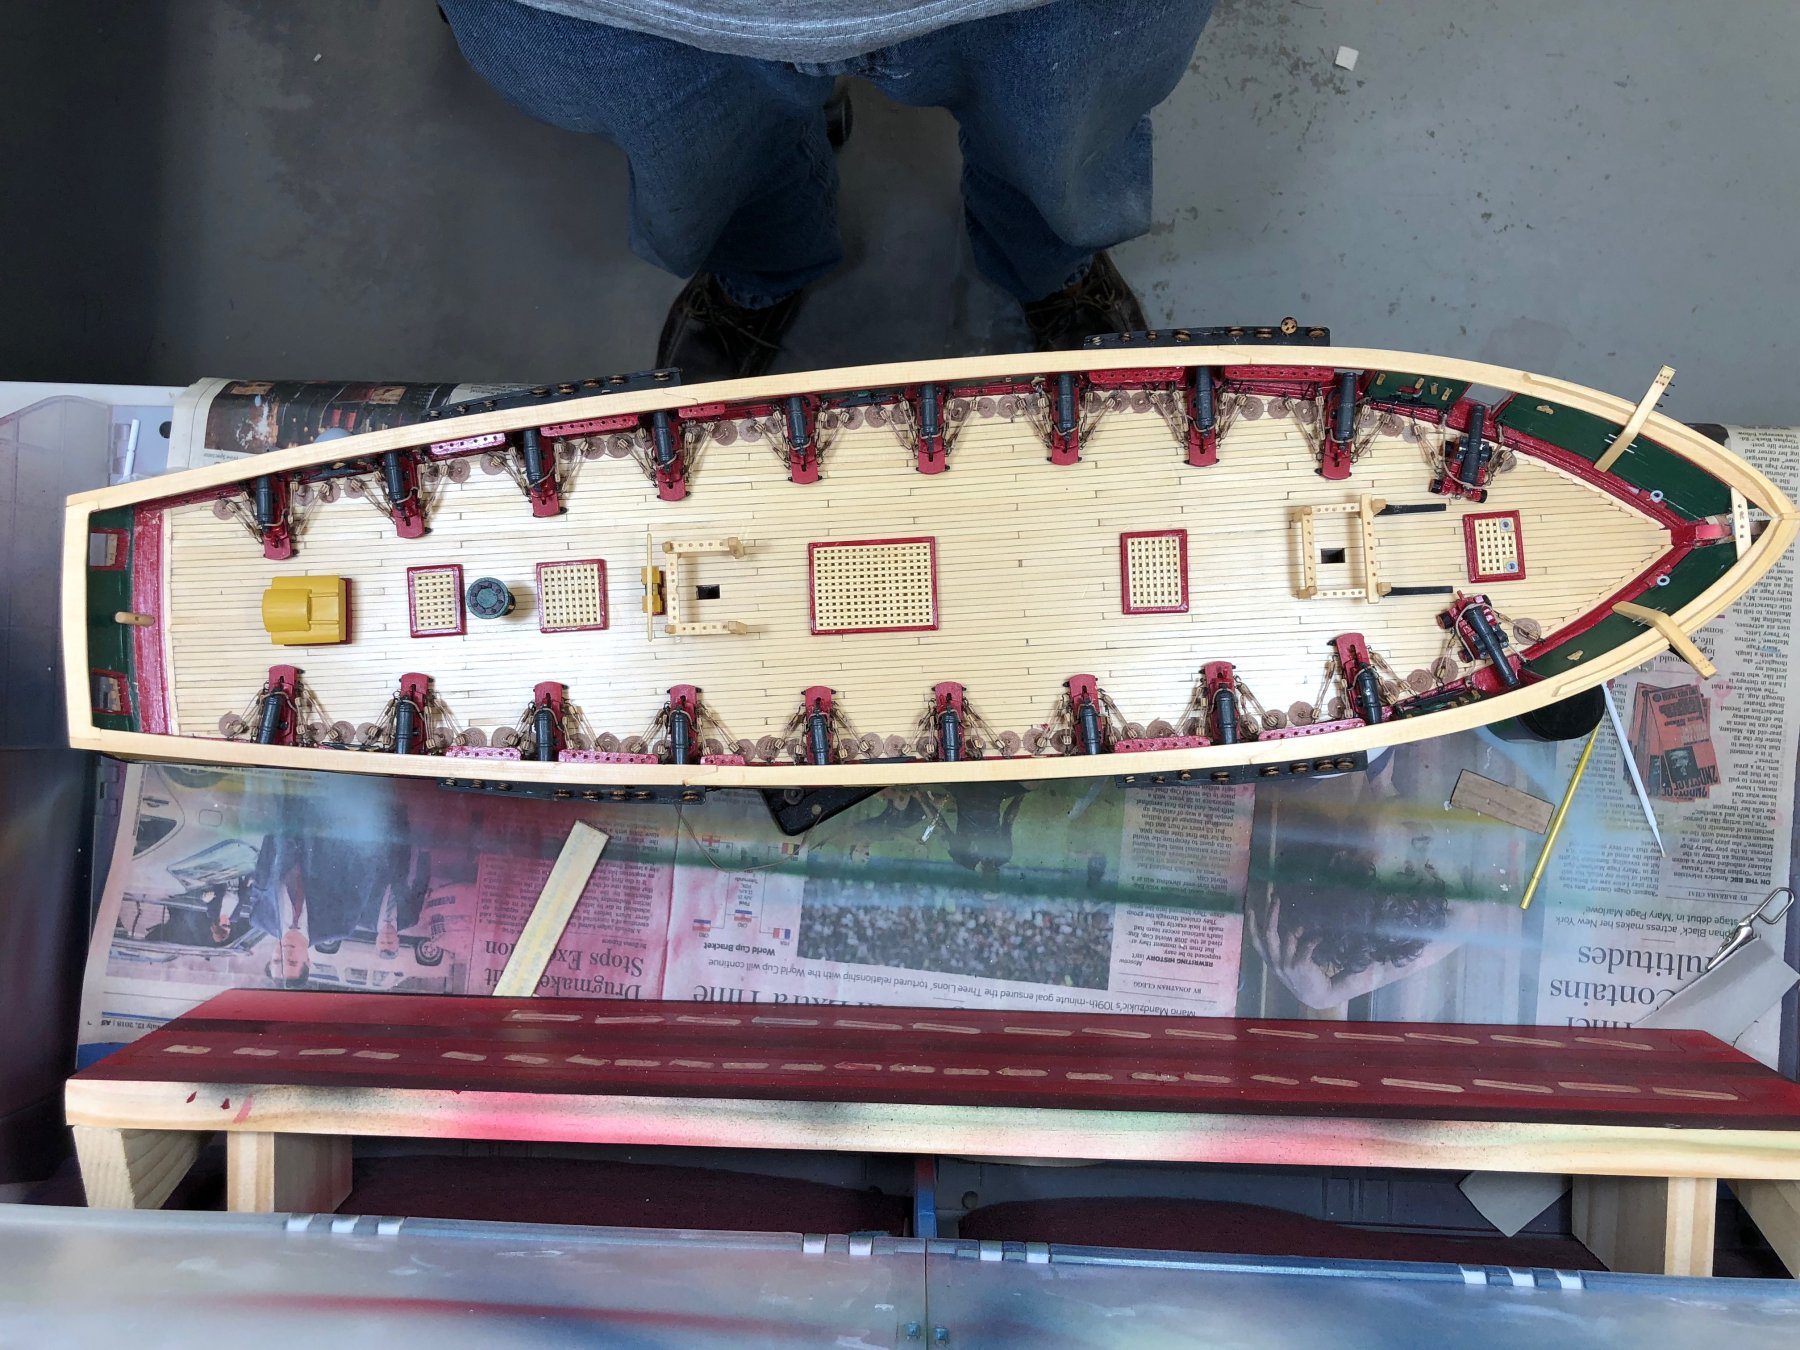
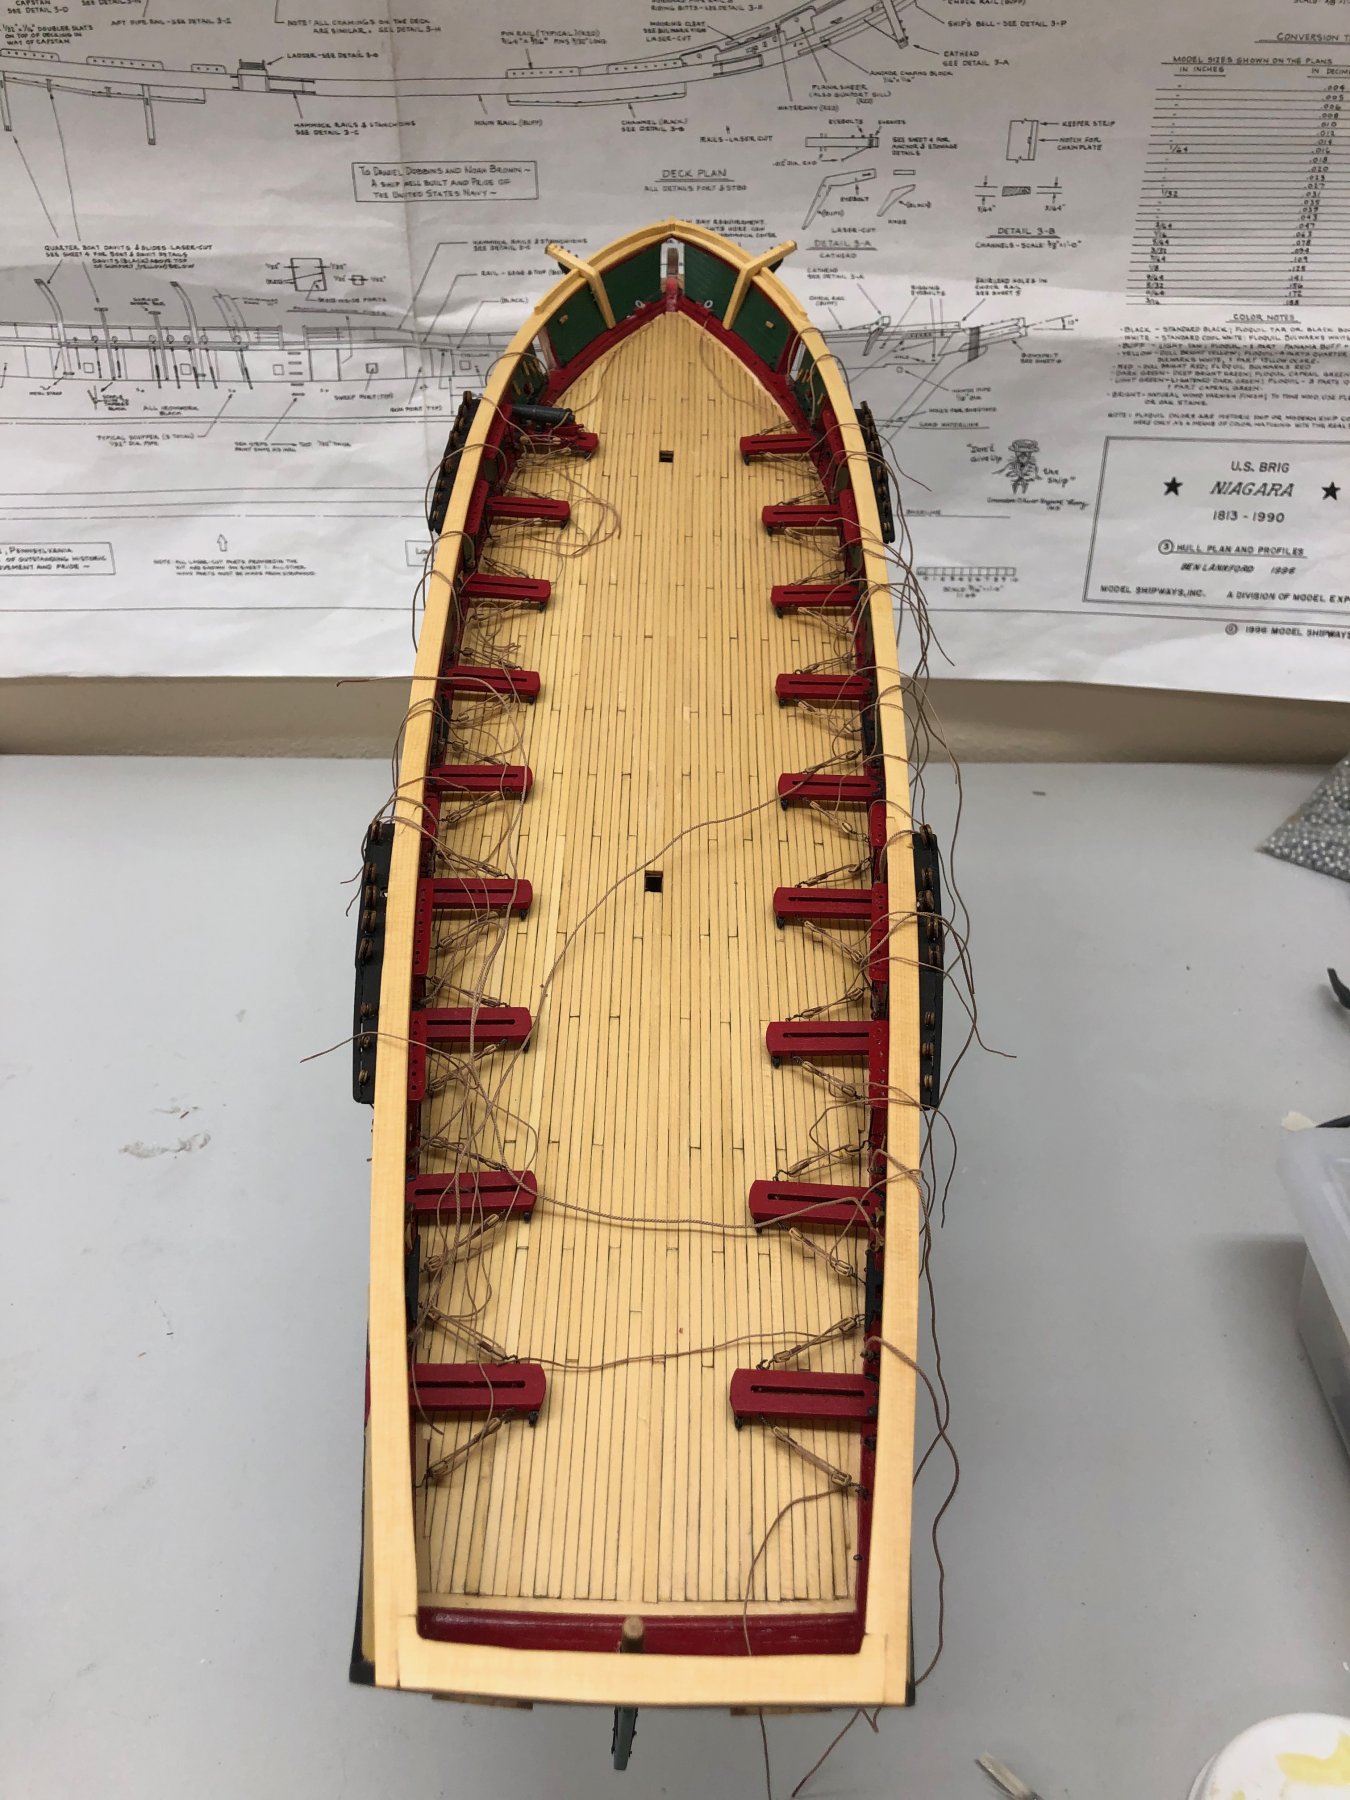
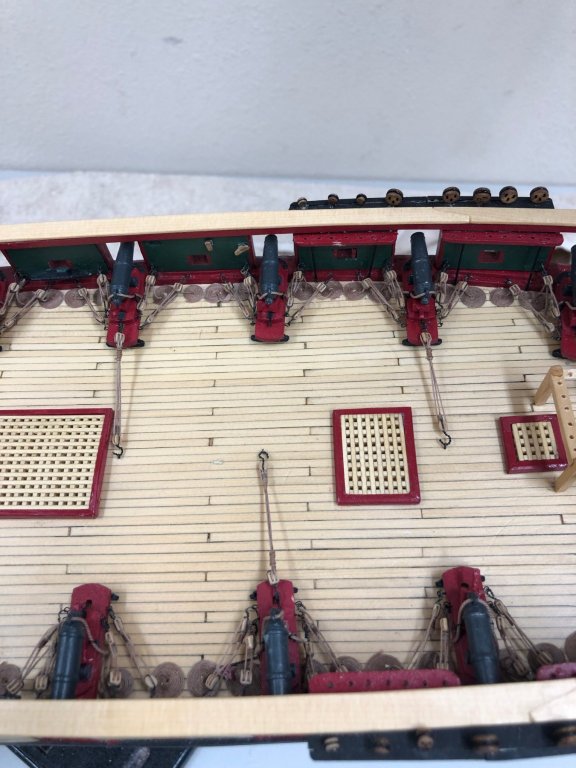
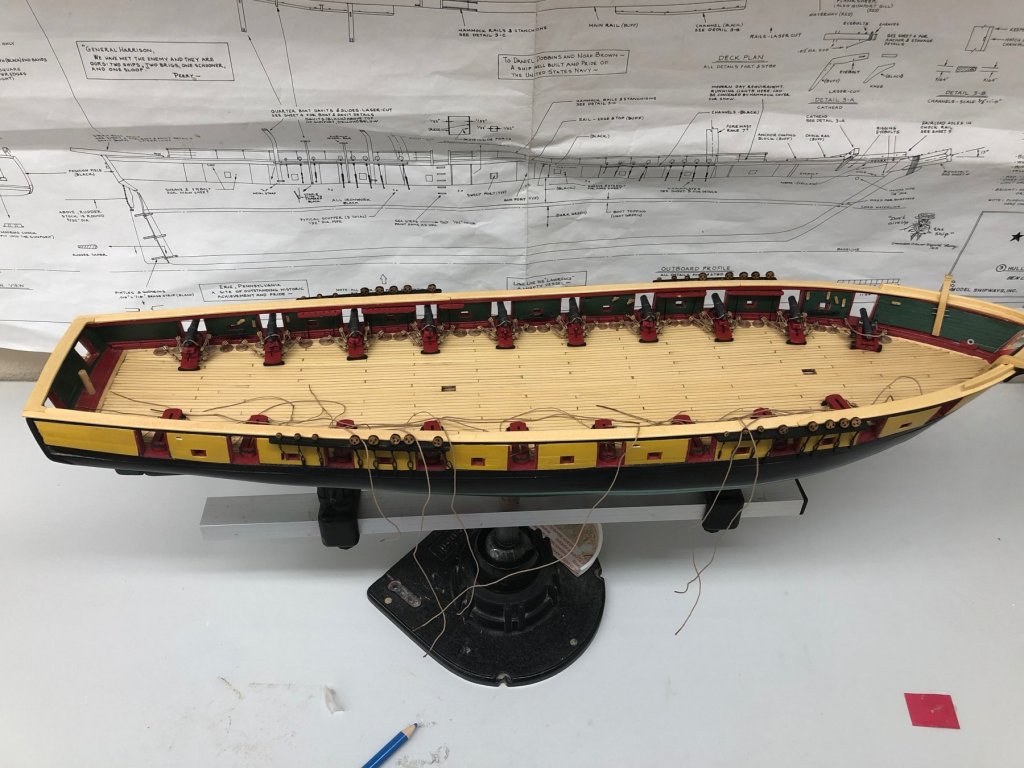
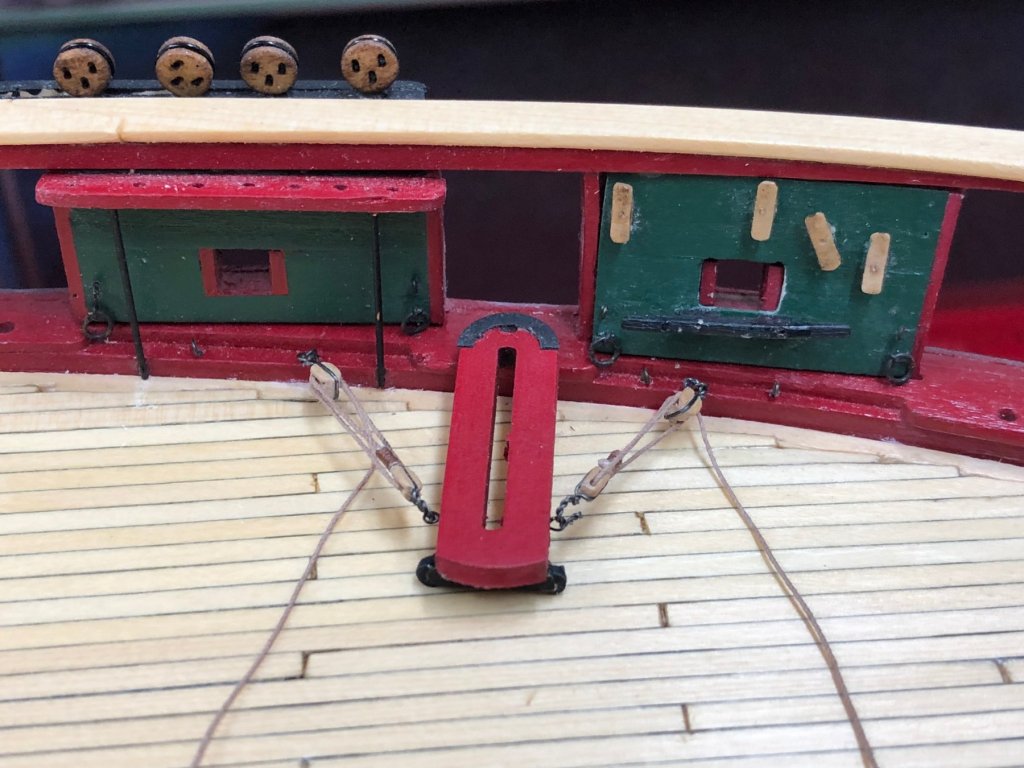
Based on the discussion on this site I decided to put eyebolts for the in-haul tackle on the centerline so they could serve the guns on both sides. I did three of them. Clearly these would not be rigged until needed as they would be very much in way for any kind of sail handling evolution. I am considering just putting in the eyebolts and hang the tackle over the gun, or in the fore and main pin rails. I am closing up the shipyard until January to take some time off for the holidays (HQ has a very, very long "to do" list). I think I am at a good place to stop with the hull essentially complete. So I cleaned up the mess and stray pieces of wood, wire, line etc. and will cover the hull to keep the dust collection to a minimum. I will be thinking of how to tackle the masts, yards and bowsprit but taking no action until next year. Happy Thanksgiving. Merry Christmas and Happy New Years to all those following the build. I really appreciate the "Likes" and comments, assistance.
- 367 replies
-
- 5
-

-
- model shipways
- niagara
- (and 1 more)
-
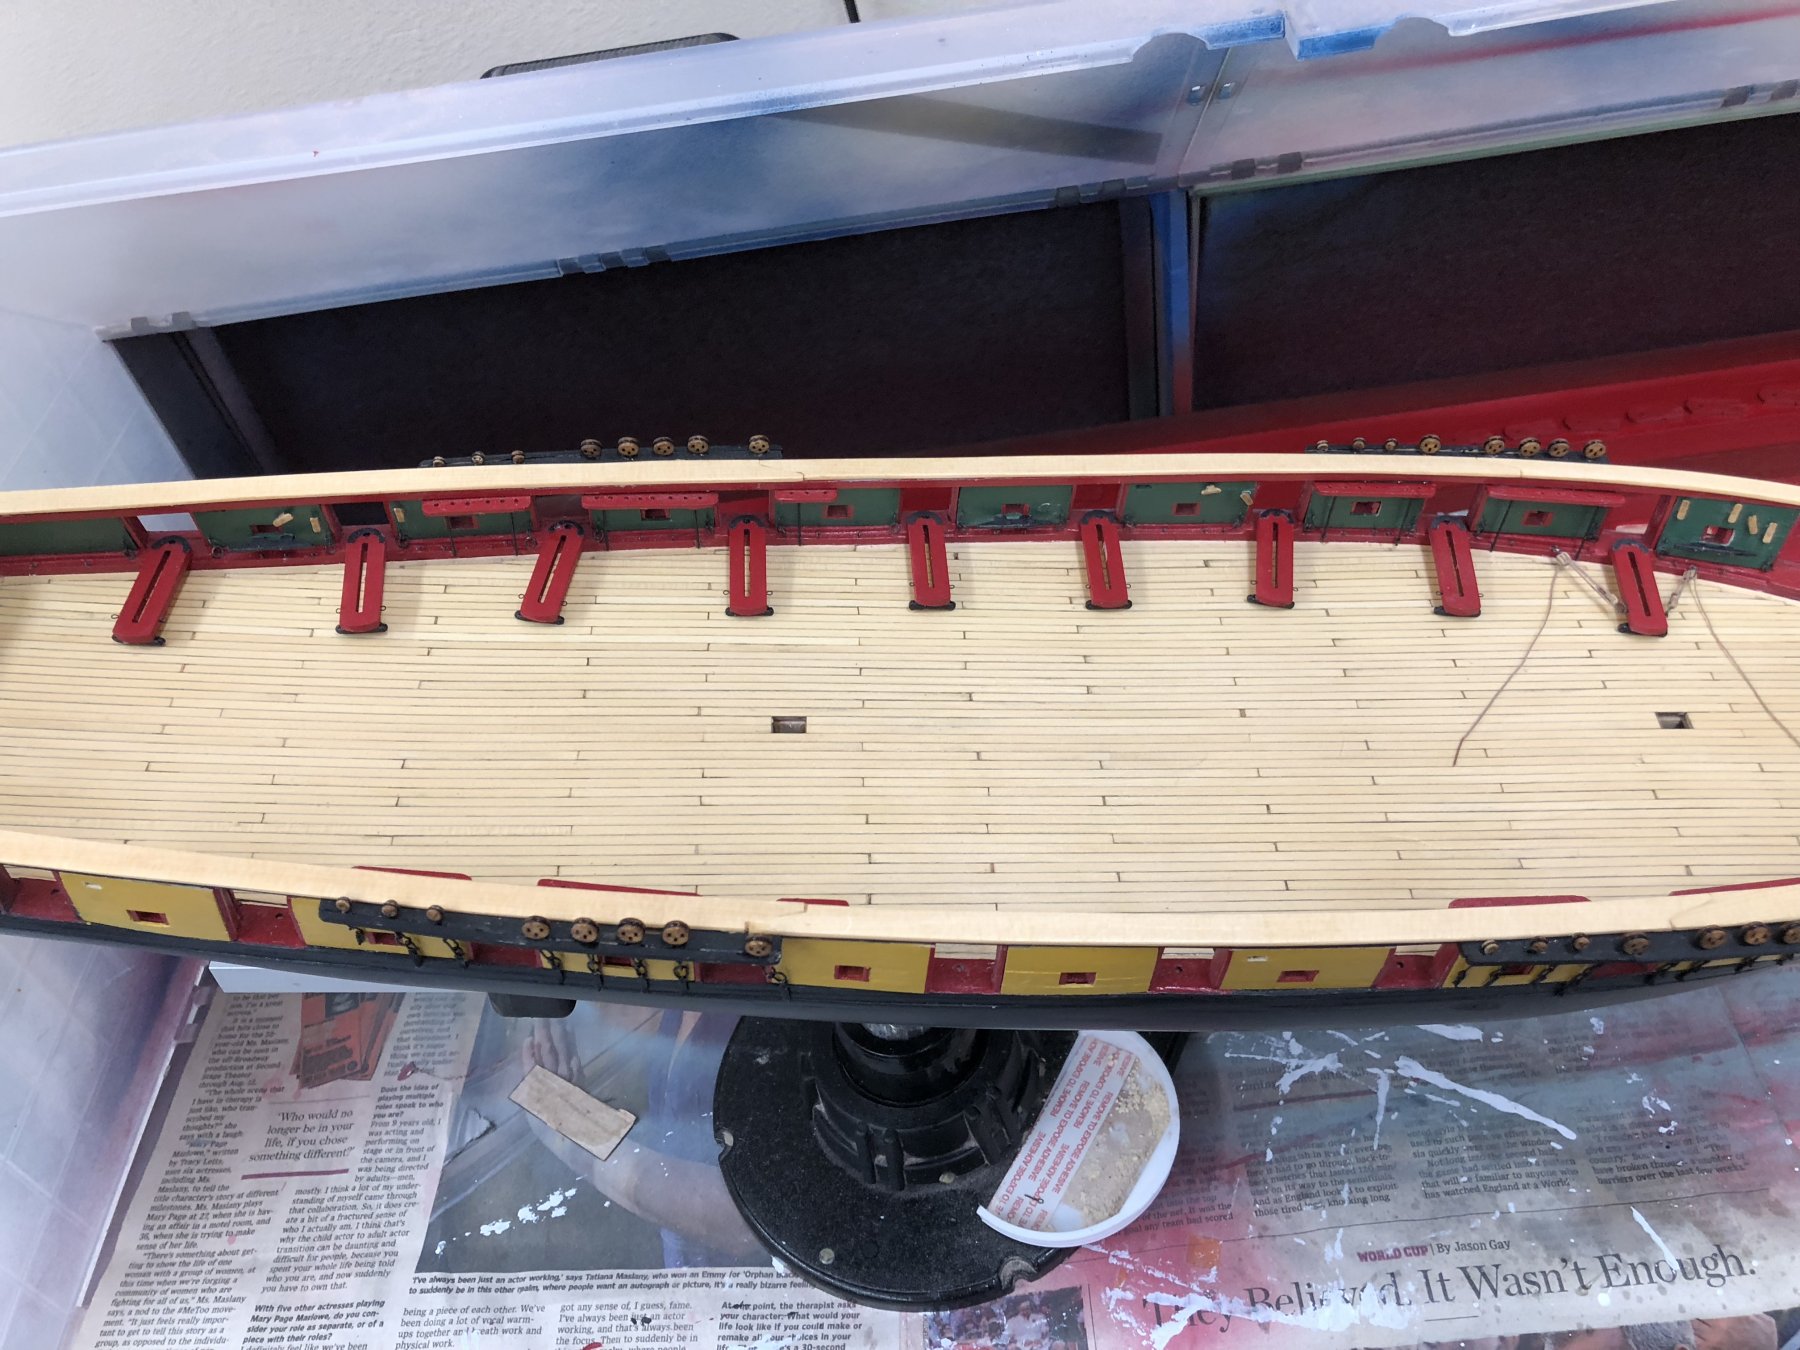
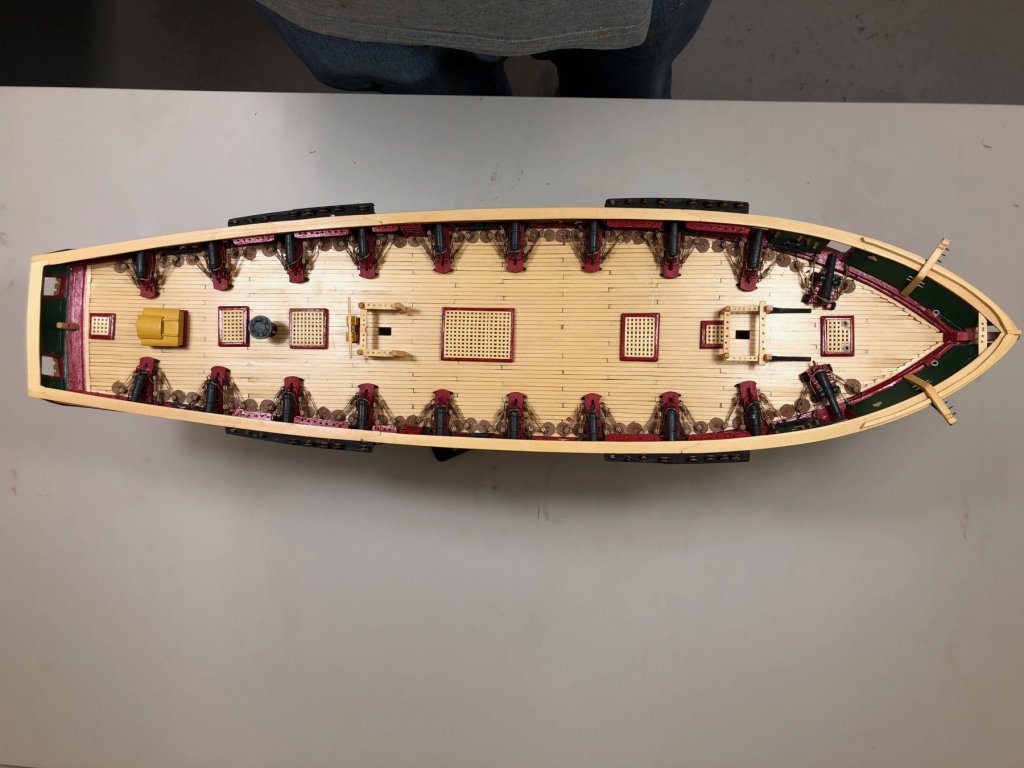
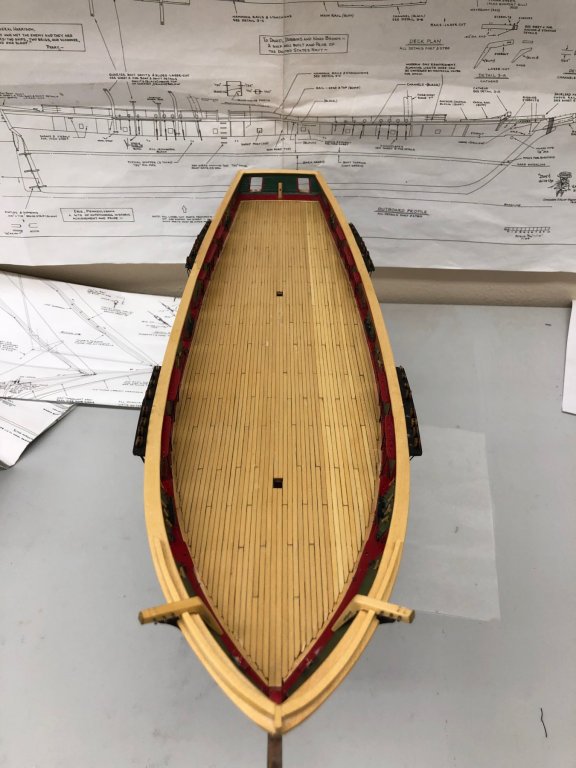
This time I really do have all the hatches installed. I noticed after the last post that the two small hatches (galley and lazaret) were missing. I had to do a bit of paint touch-up on them and forgot when I was taking the pictures. So here is the deck (including the boarding ladders (although they are hard to see) and ALL the hatches this time.
- 367 replies
-
- 6
-
-
- model shipways
- niagara
- (and 1 more)
-
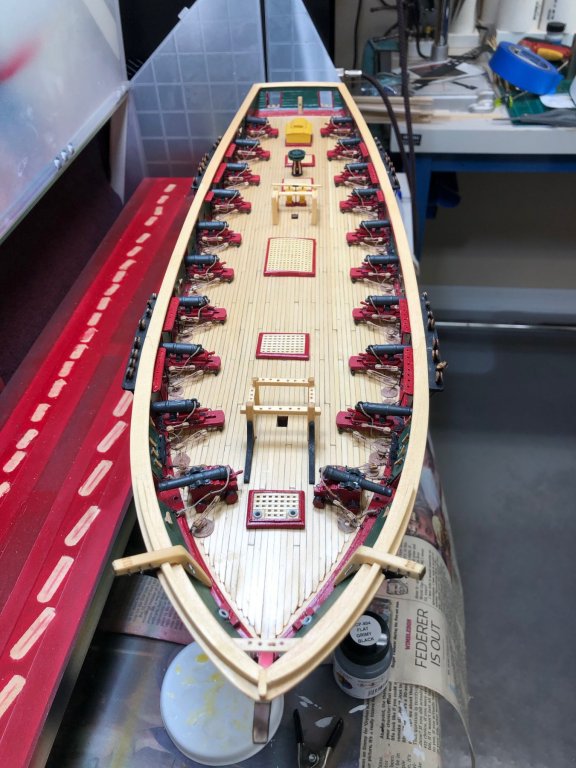
Thanks Jim 😉 Worked to get the deck furniture mounted (except the galley smokestack - too inviting a target for subsequent damage; will install later). Also built the fore pin rack and boarding ladders. Pin rack is installed, boarding ladders are being painted. As I mentioned way back when, I did not build the Captains skylight or salon skylight because of the interference with operating the capstan. So, the grates fore and aft of the capstan are the salon and Captain's skylights (gratings) while the companionway has been moved aft to where the Captain's skylight is on the plans. Will install the boarding ladders and touch up the paint and then it is "mast and yard time".

- 367 replies
-
- 3
-
-
- model shipways
- niagara
- (and 1 more)
-
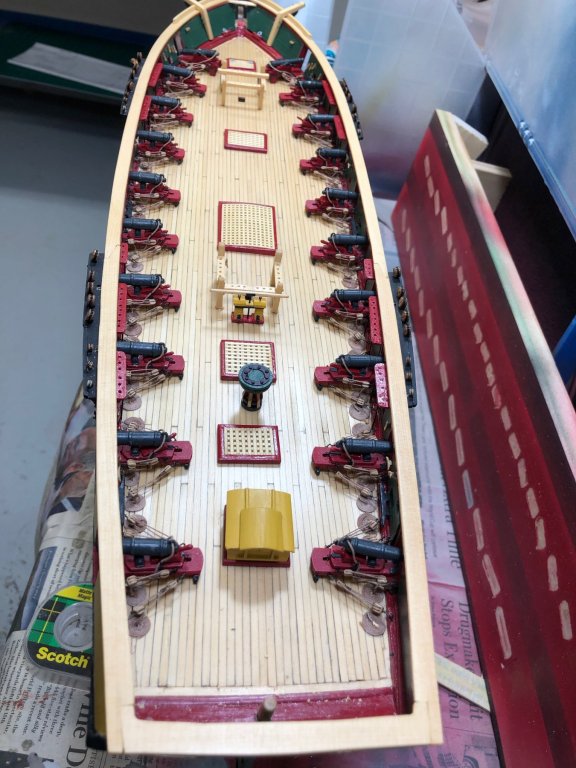
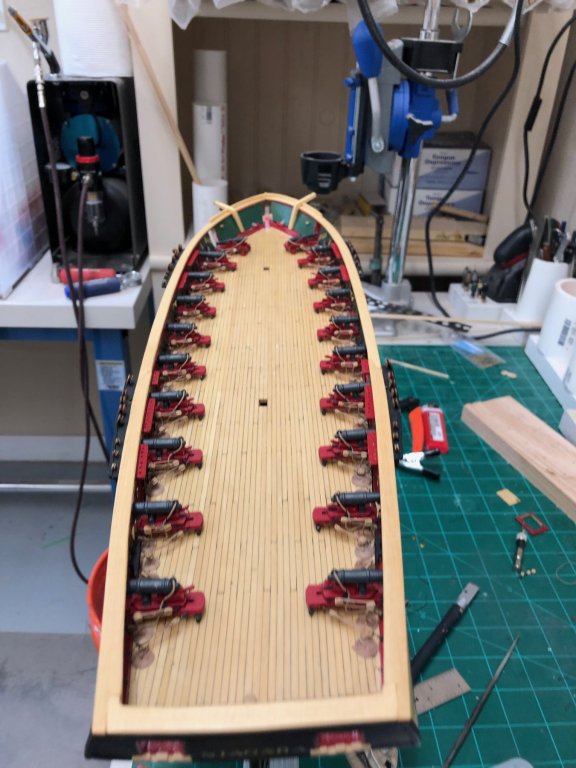
The Guns are DONE! (Except for the in-haul tackle which I have made up but will not install the eyebolts until the deck furniture etc. is installed.) Based on discussion on this forum I probably will only have an in-haul tackle and eyebolt for each pair of guns. I have some clean up and a few small items yet to fabricate (ladders and sea steps come to mind immediately but I am sure there are others) and I have to get the deck furniture installed so I can get started on the masts, yards and bowsprit.
- 367 replies
-
- 3
-
-
- model shipways
- niagara
- (and 1 more)
-
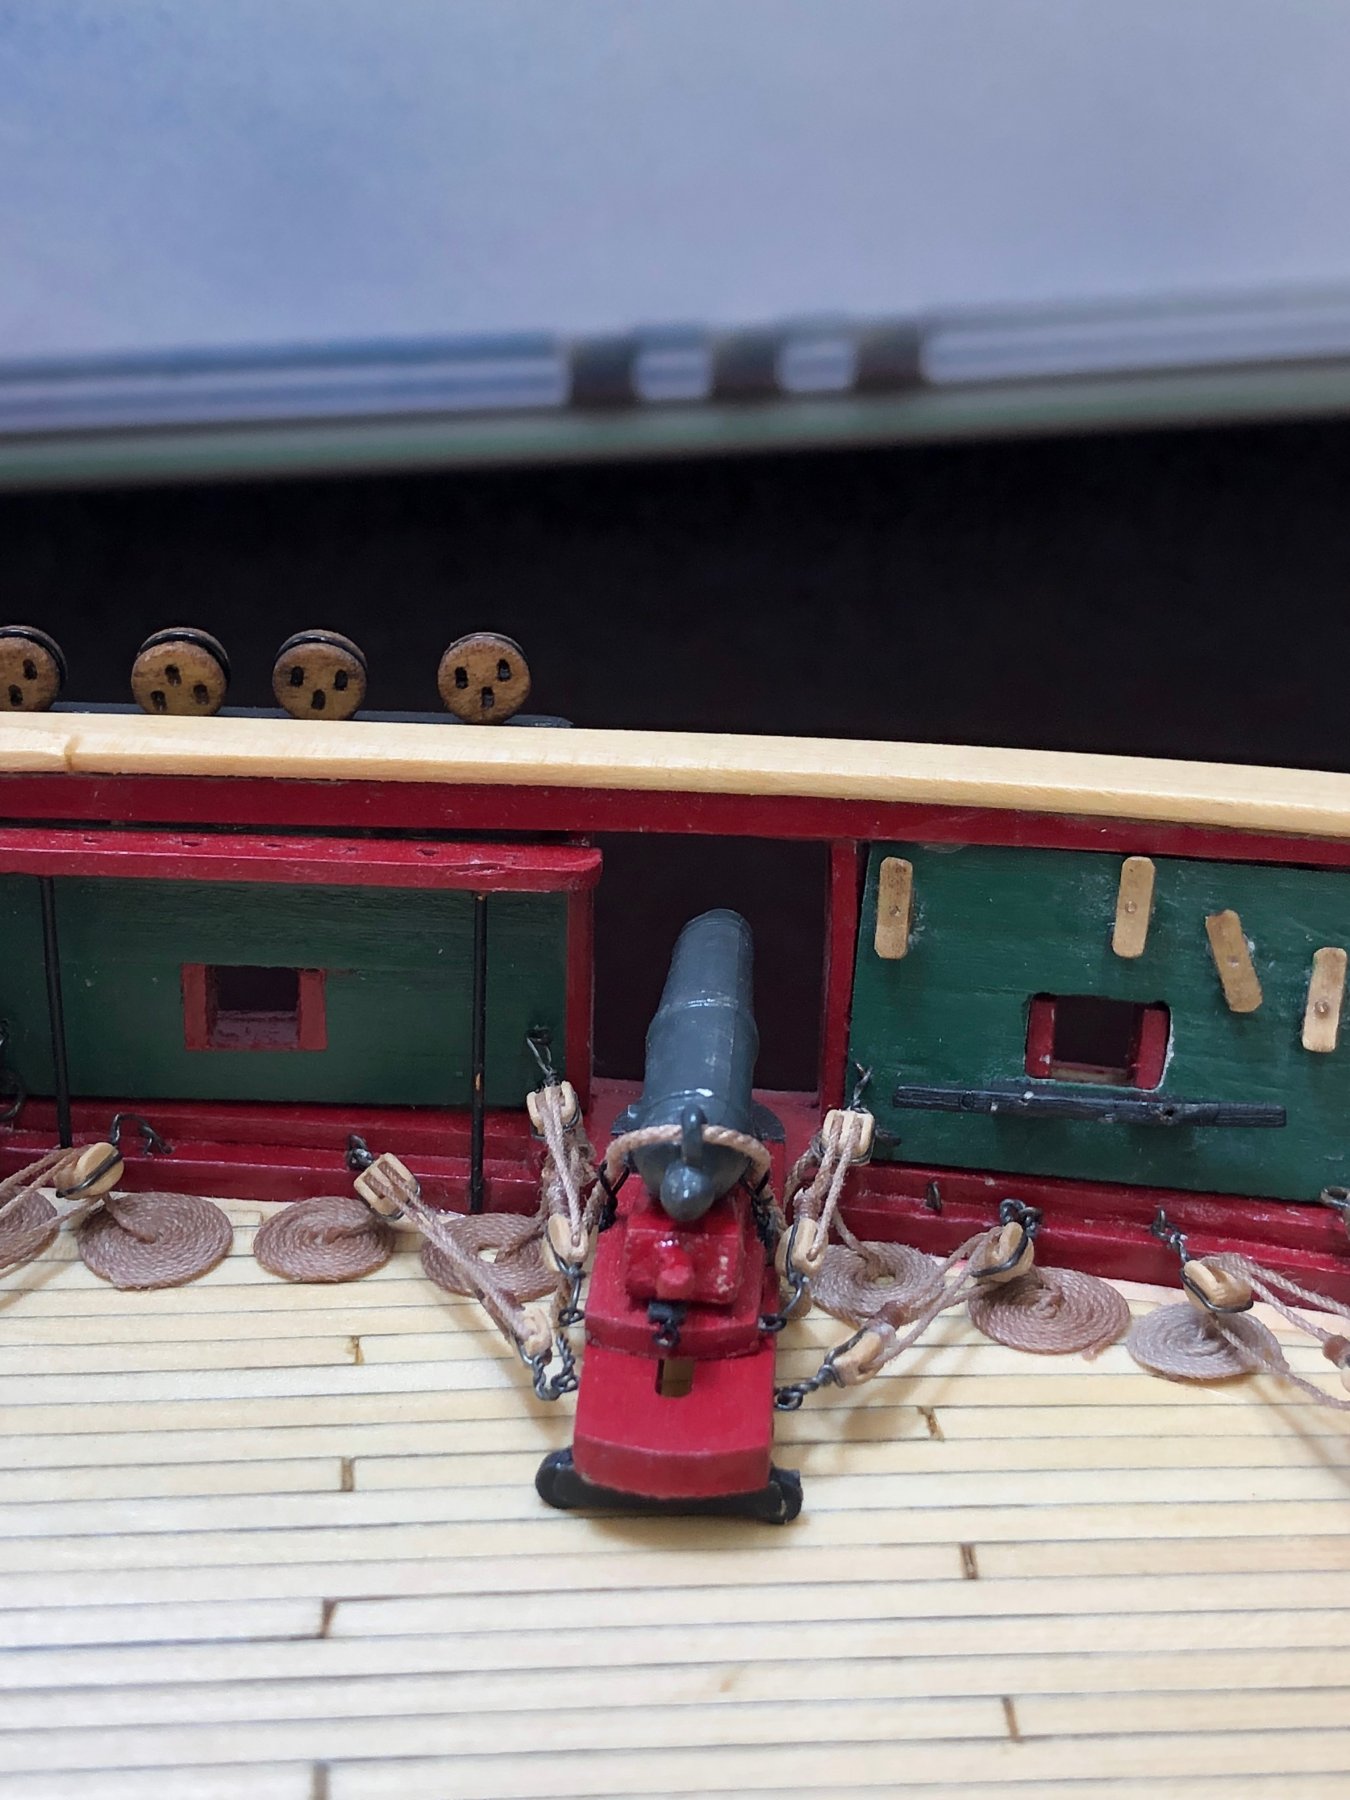
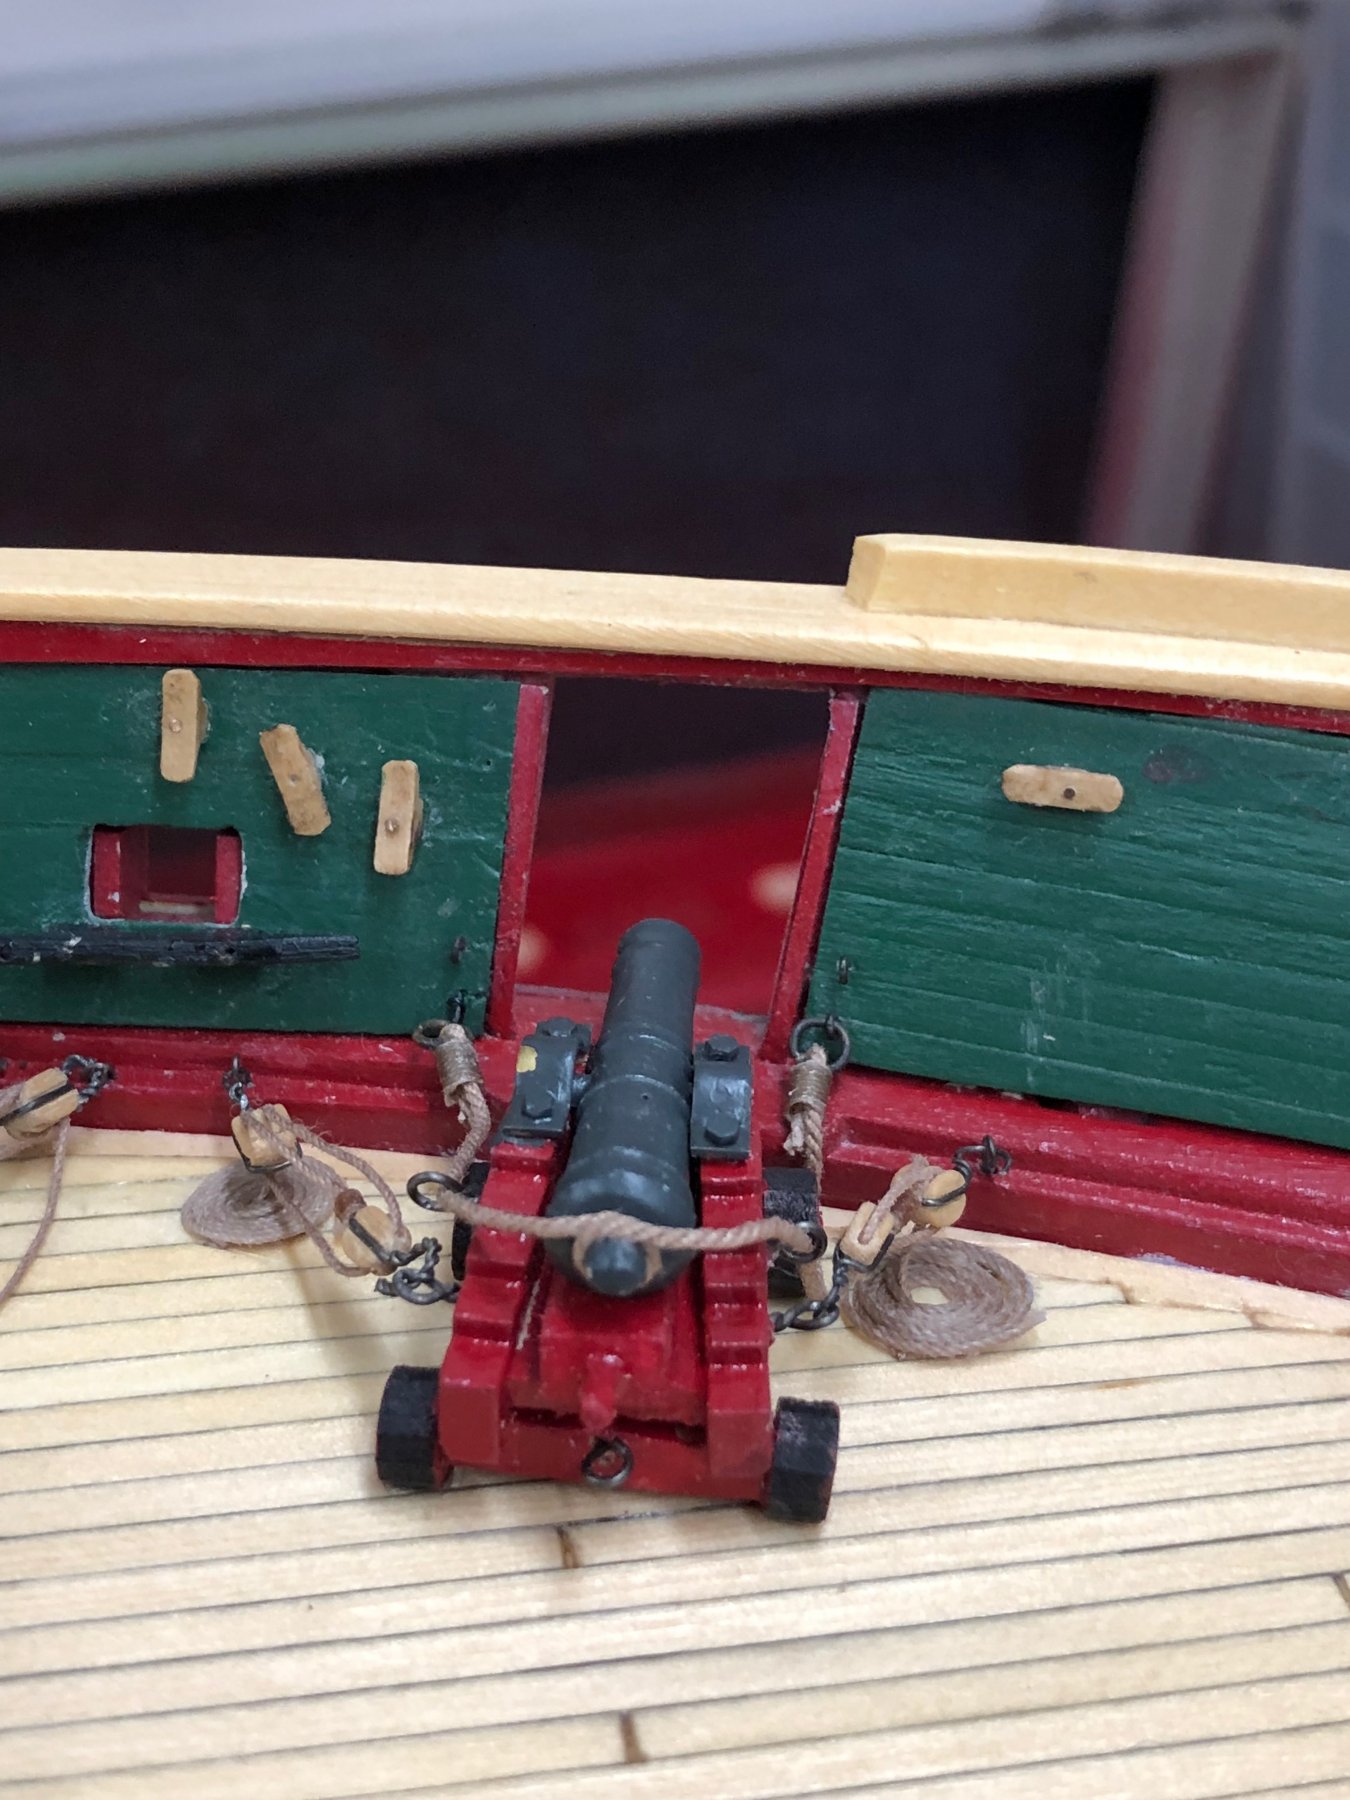
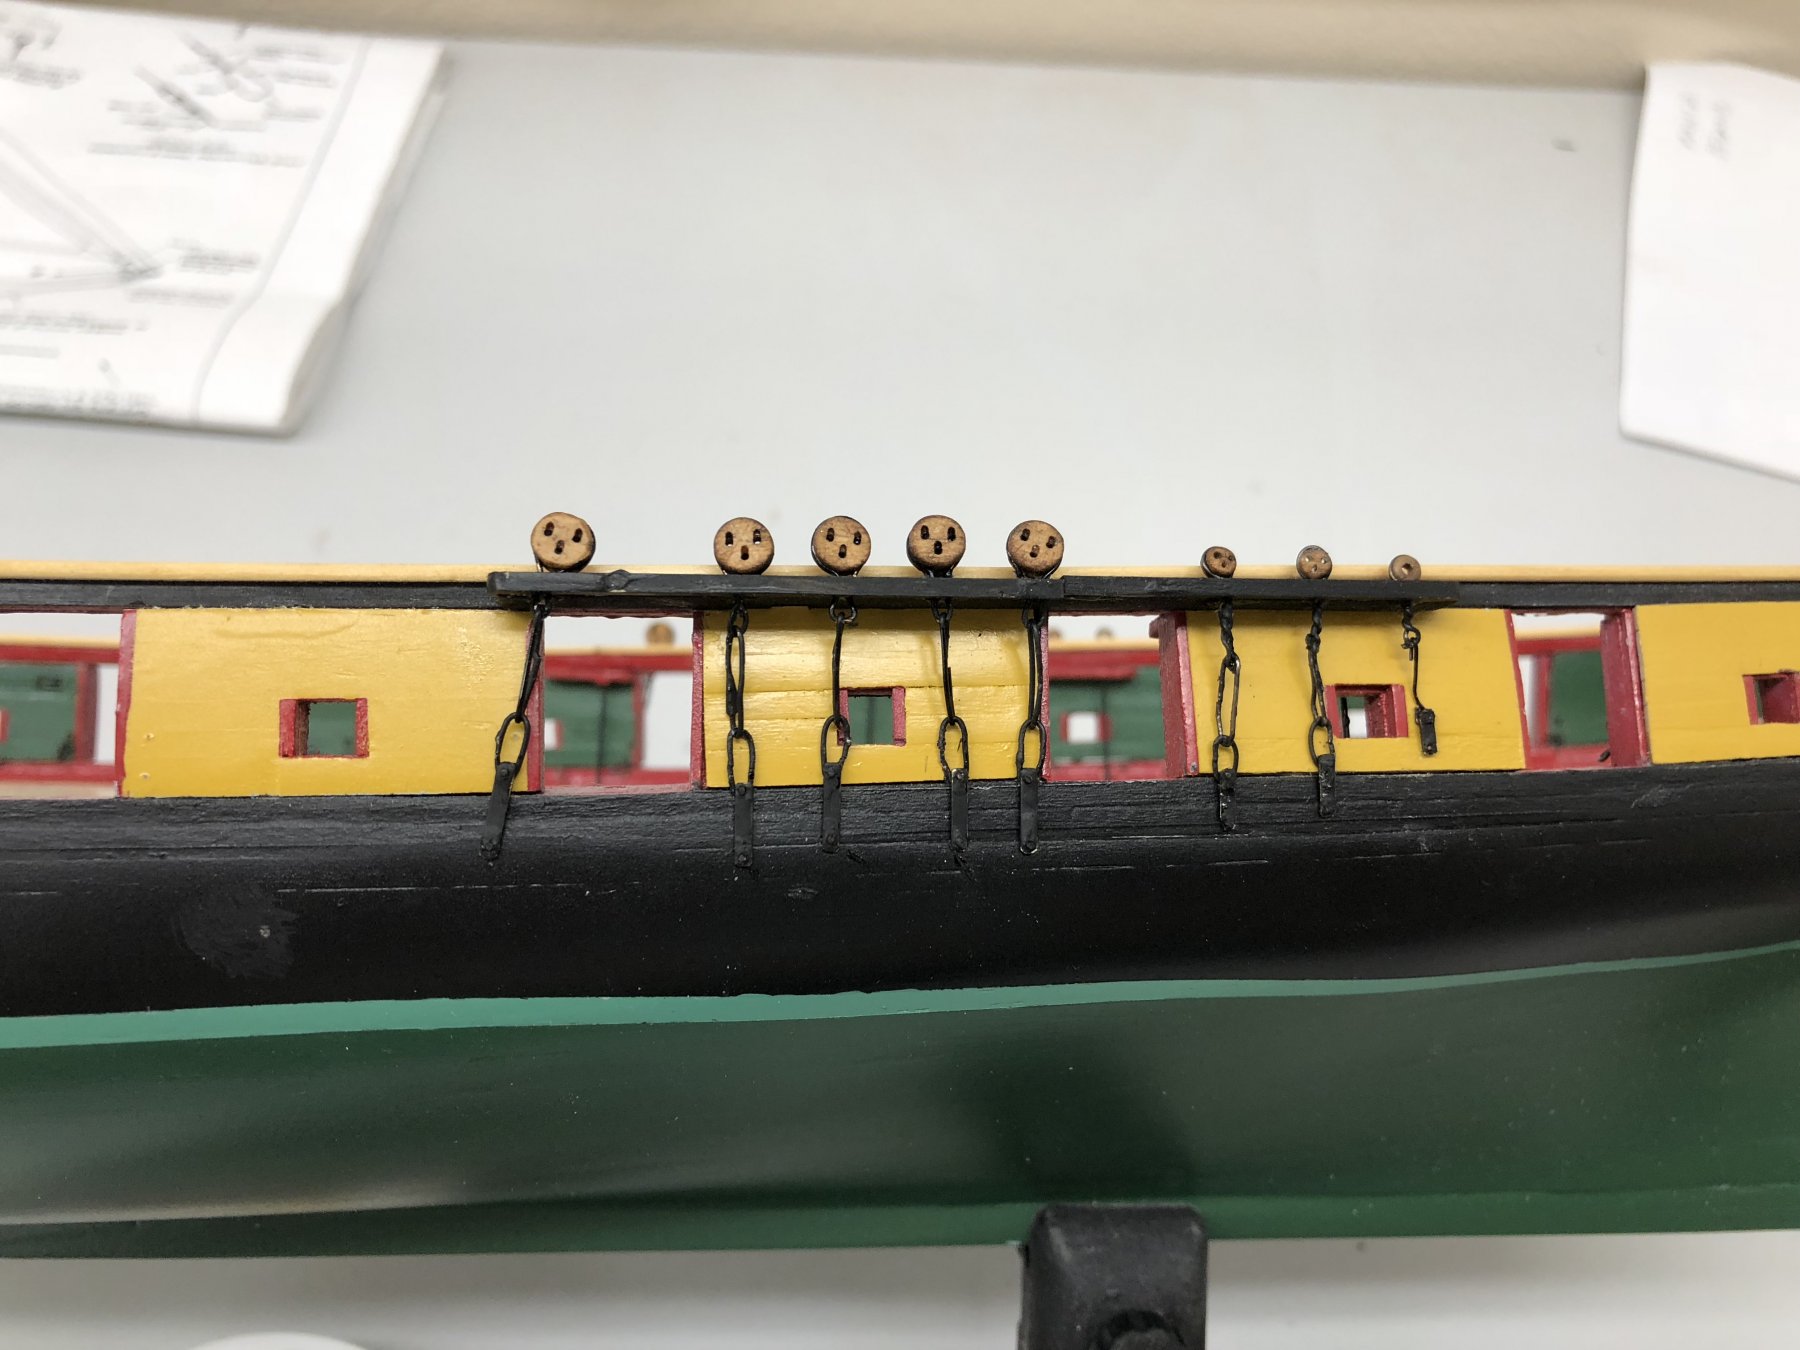
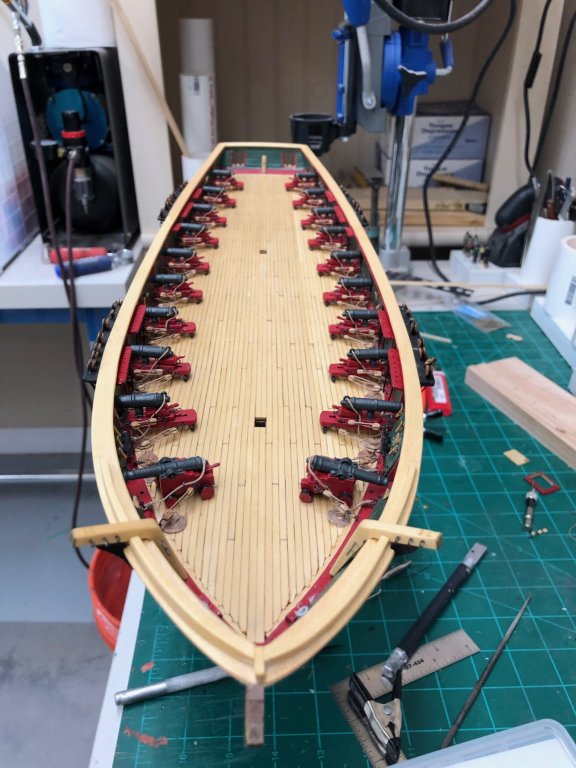
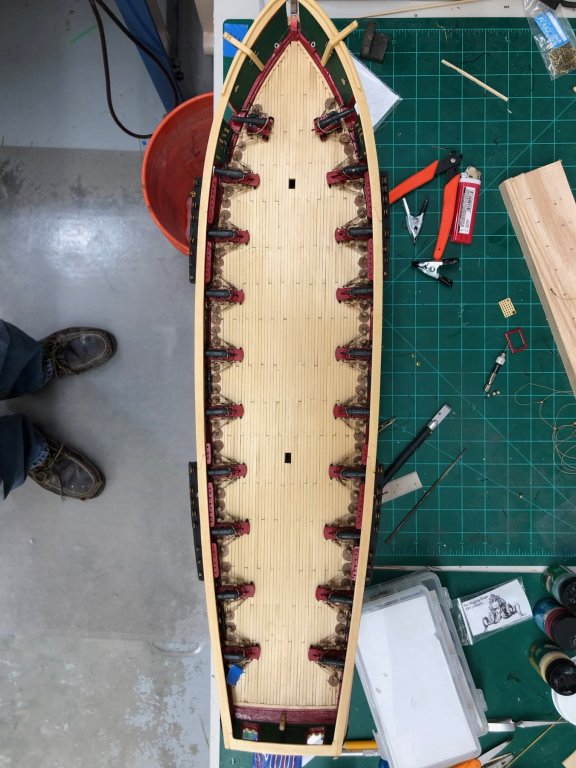
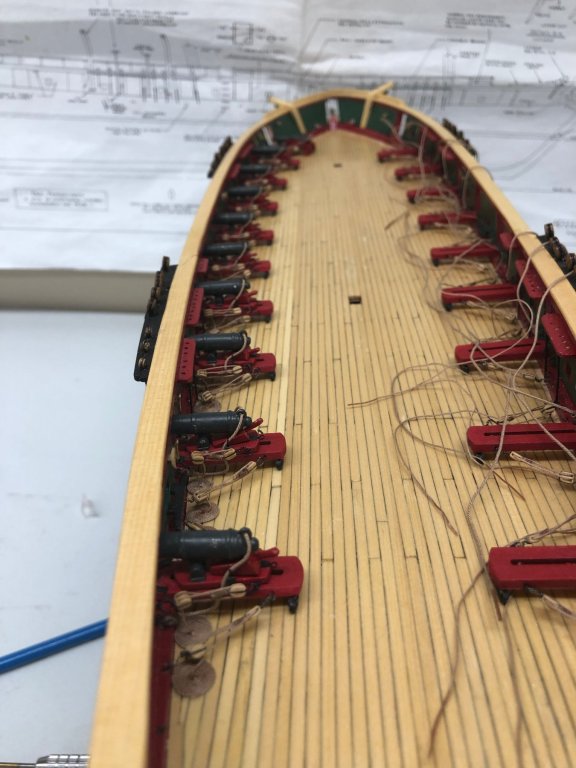
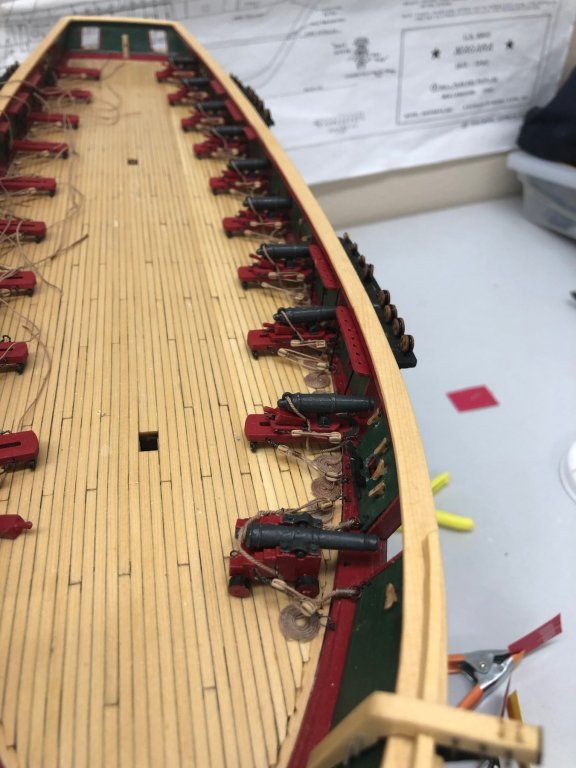
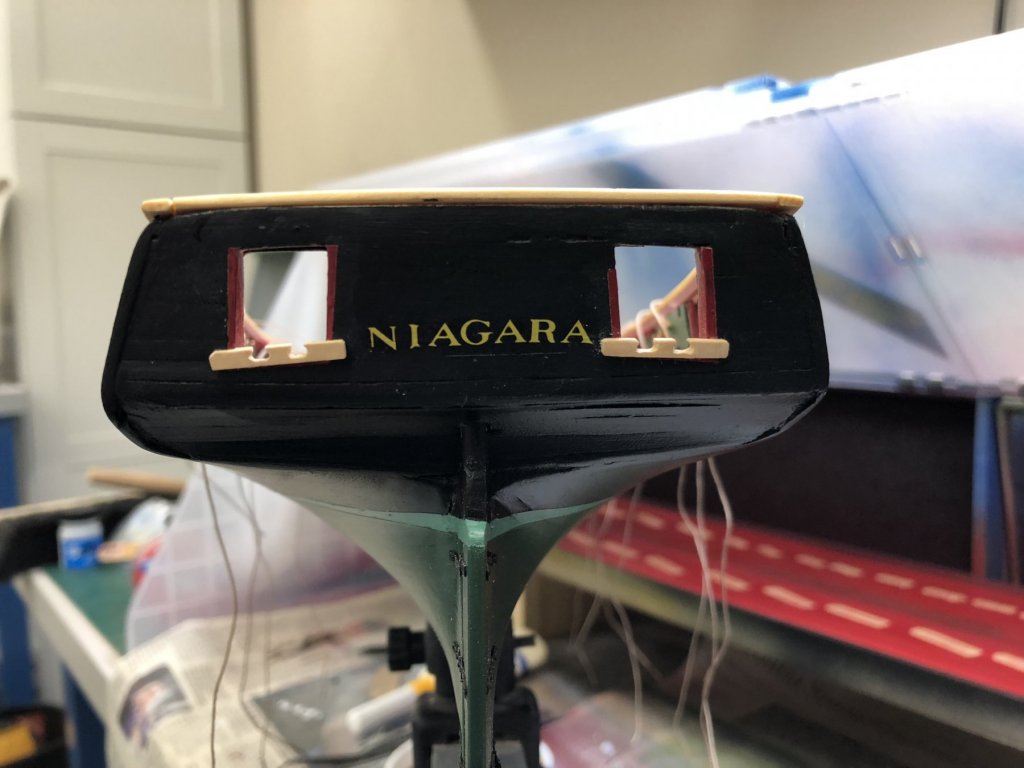
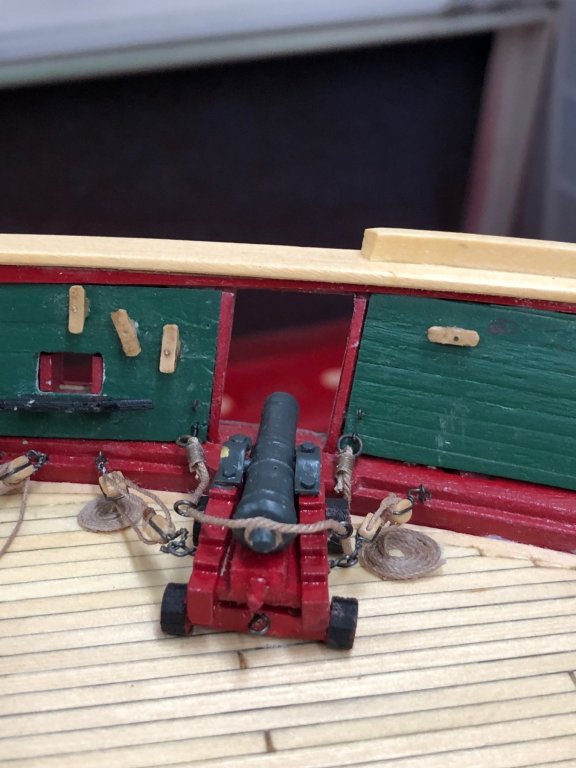
Got the port side cannons mounted, tackles installed, rope coils down and tackle ends connected to the coils. It took much longer than I had estimated. It takes a good deal of concentration and dexterity to get those small hooks onto the even smaller eyebolts. I am glad I mounted the eyebolts while installing the bulwarks. I am not sure I would have had the dexterity to mount them at this point. I noticed more than a few places where the paint on the carronades has been chipped off but think I will wait a bit more before trying to touch them up. I fear there will be more opportunities for this kind of damage. I got the yellow lettering from Woodland Scenics and got the name on the stern. I may have to try and redo the "N" - bottom part of left leg is missing. I think I will leave the bow lettering until after the armament is finished. Those are going to be pretty small letters following the plans. May have to think about how to meet the intent if not the letter of the plans. On to the starboard side!
- 367 replies
-
- 5
-
-
- model shipways
- niagara
- (and 1 more)
-
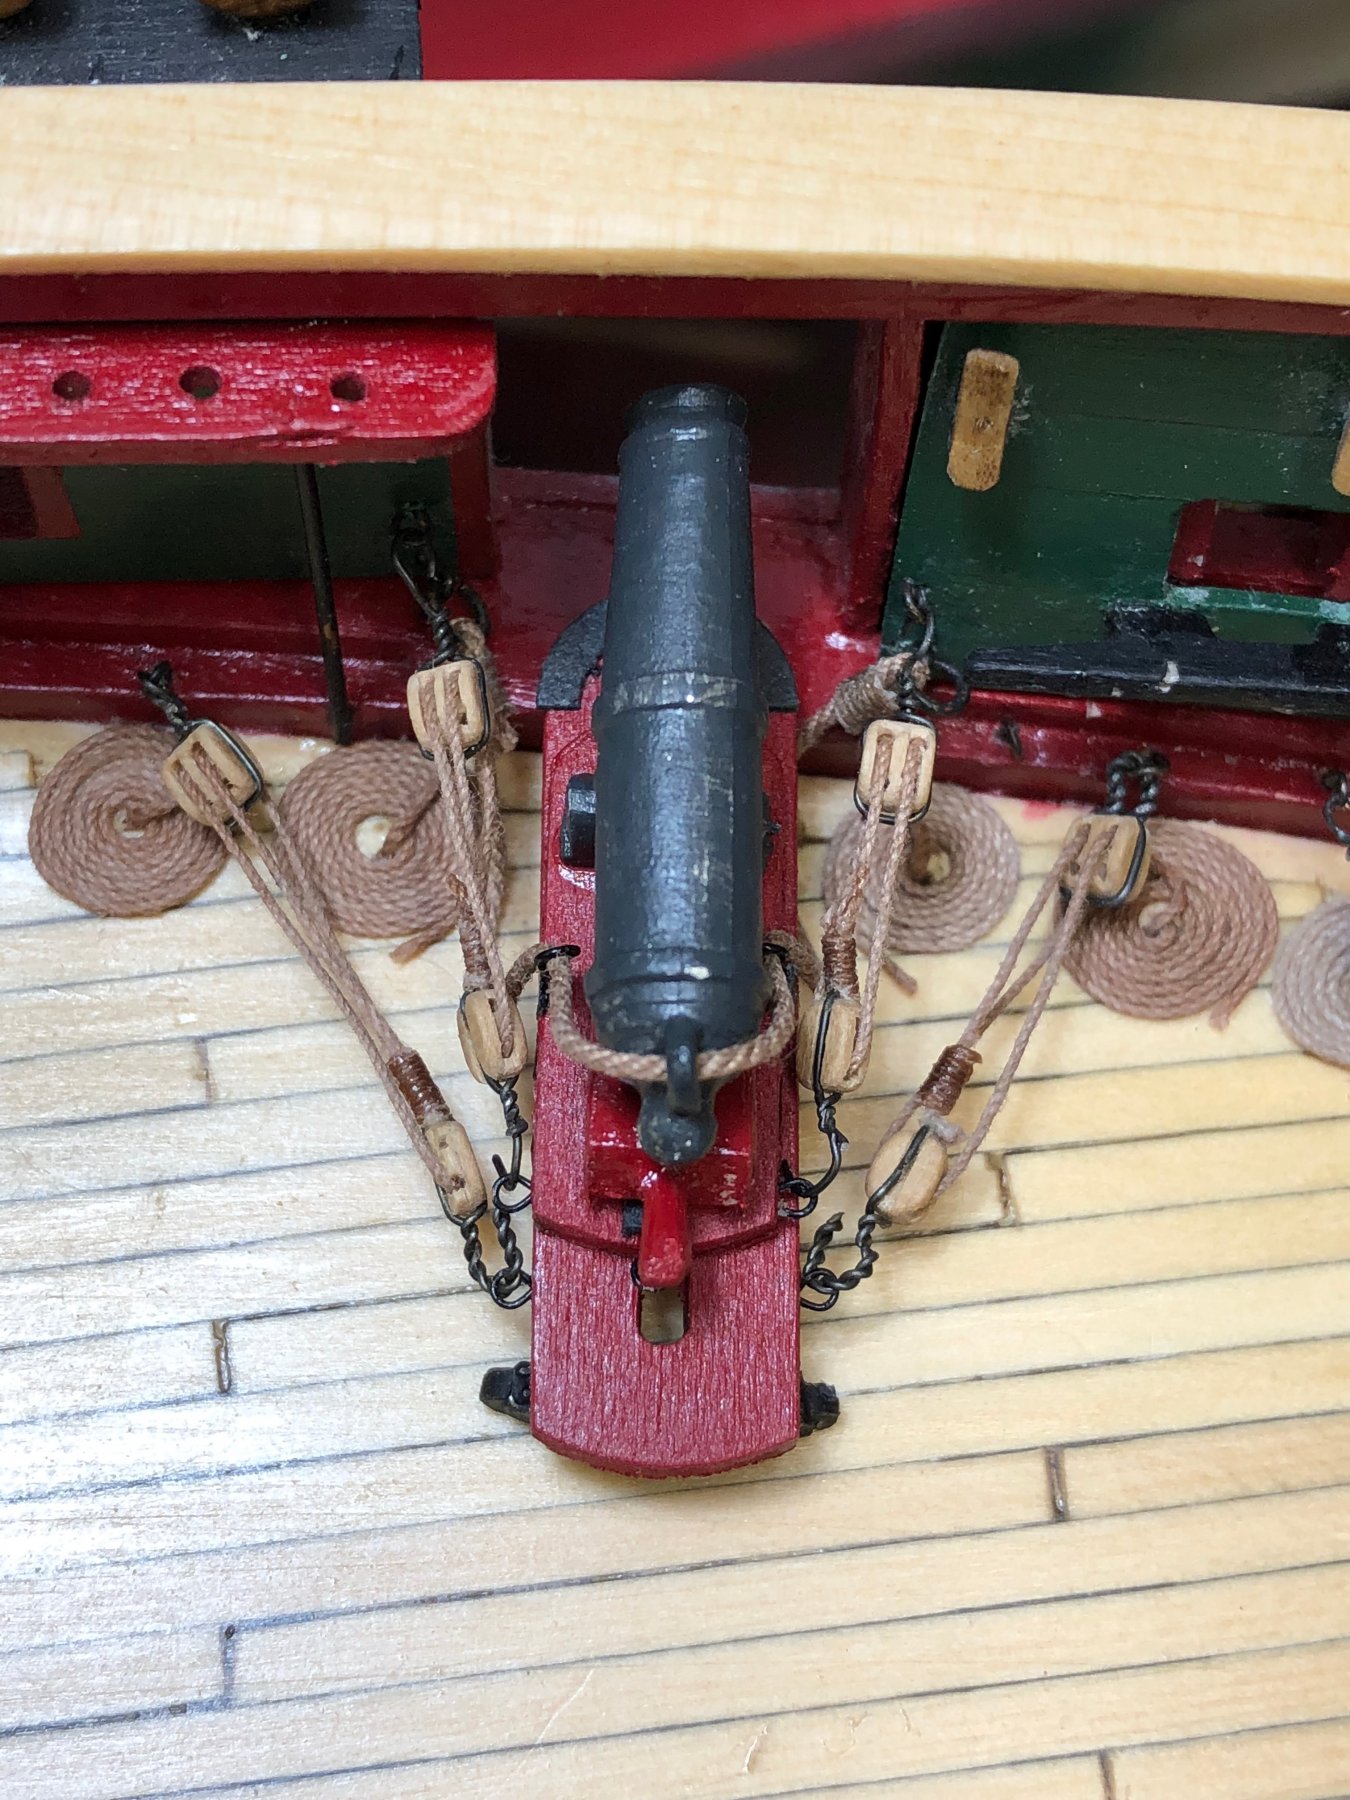
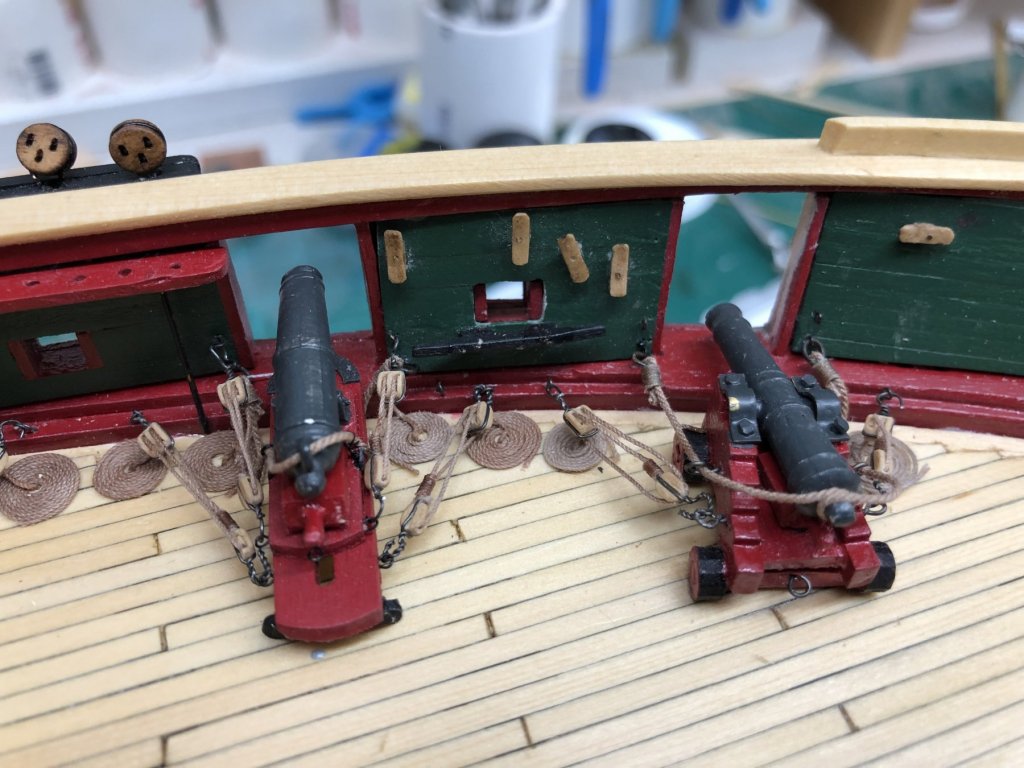
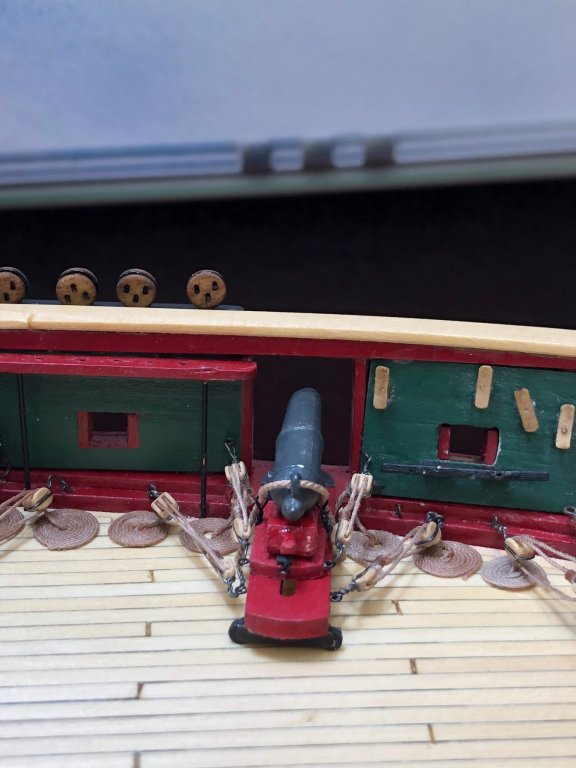
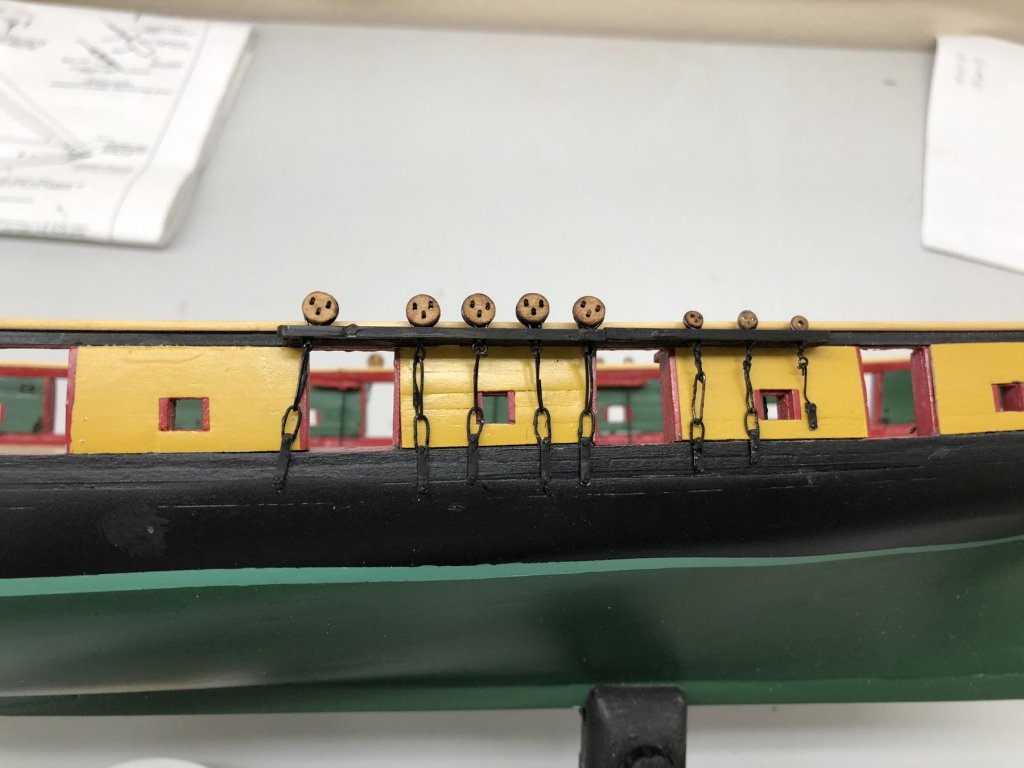
Working to install and rig the carronades on the port side (still need to make up some 1/8" singles w/beckets for the stbd side - waiting for Monday Night Football). Here is the first one completed. The rope coils are all up against the bulwark based on how I rigged the tackles. The plans show the double blocks on the bulwarks so they are hauled from inboard. While the coils can be placed pretty much anywhere (and in real life they were probably not routinely stored in coils on deck - too wet) I wanted them out of the way as much as possible so keeping them close to the bulwark seemed easiest and makes for more direct lead from the blocks to the coils. Still working to get the tackles to "lie correctly" that is with the sheaves more or less vertical but sometimes they will just not cooperate. I need to pay more attention to how the hooks and eyebolts are orientated before hanging the tackles.

- 367 replies
-
- 4
-
-
- model shipways
- niagara
- (and 1 more)
-
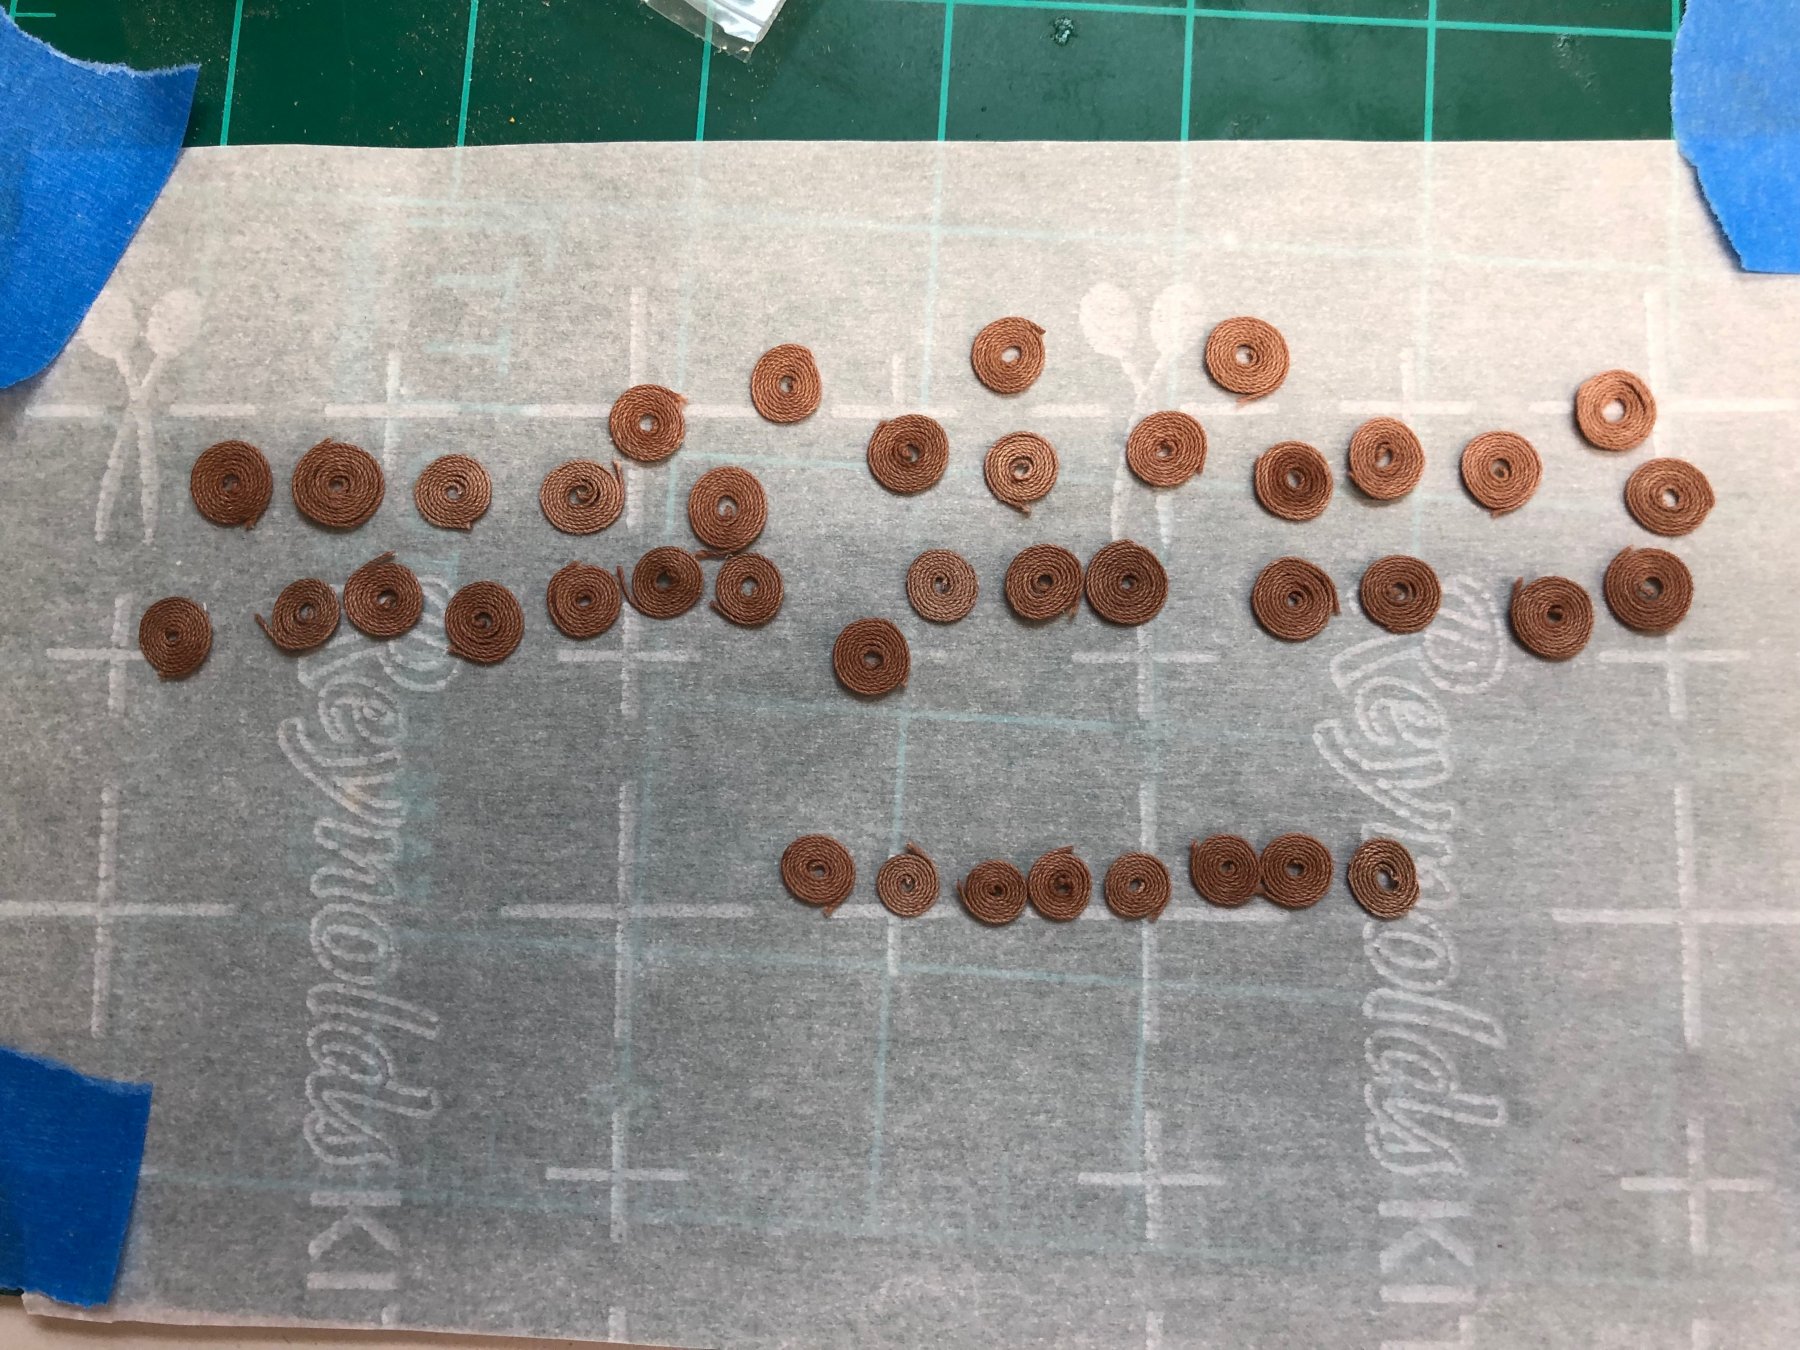
Turn the carrier over and using an Xacto flat blade, slide it under the coil. (I generally did this from two or three sides). Then lift the coil off the carrier. Here are the 40 or so that will be used for the train tackles. I tried to keep the size consistent but even using a constant number of loops (not that easy to do by the way, at least for me) keeping a consistent pressure and avoiding small gaps between coils causes some variation is size.


- 367 replies
-
- 3
-
-
- model shipways
- niagara
- (and 1 more)
-
I did the 50/50 glue/water treatment twice, letting the carrier/coil dry overnight after each application. To remove the coil, turn it over and using a new or very sharp blade cut the line as close to the hole as possible.

- 367 replies
-
- 1
-
-
- model shipways
- niagara
- (and 1 more)
-
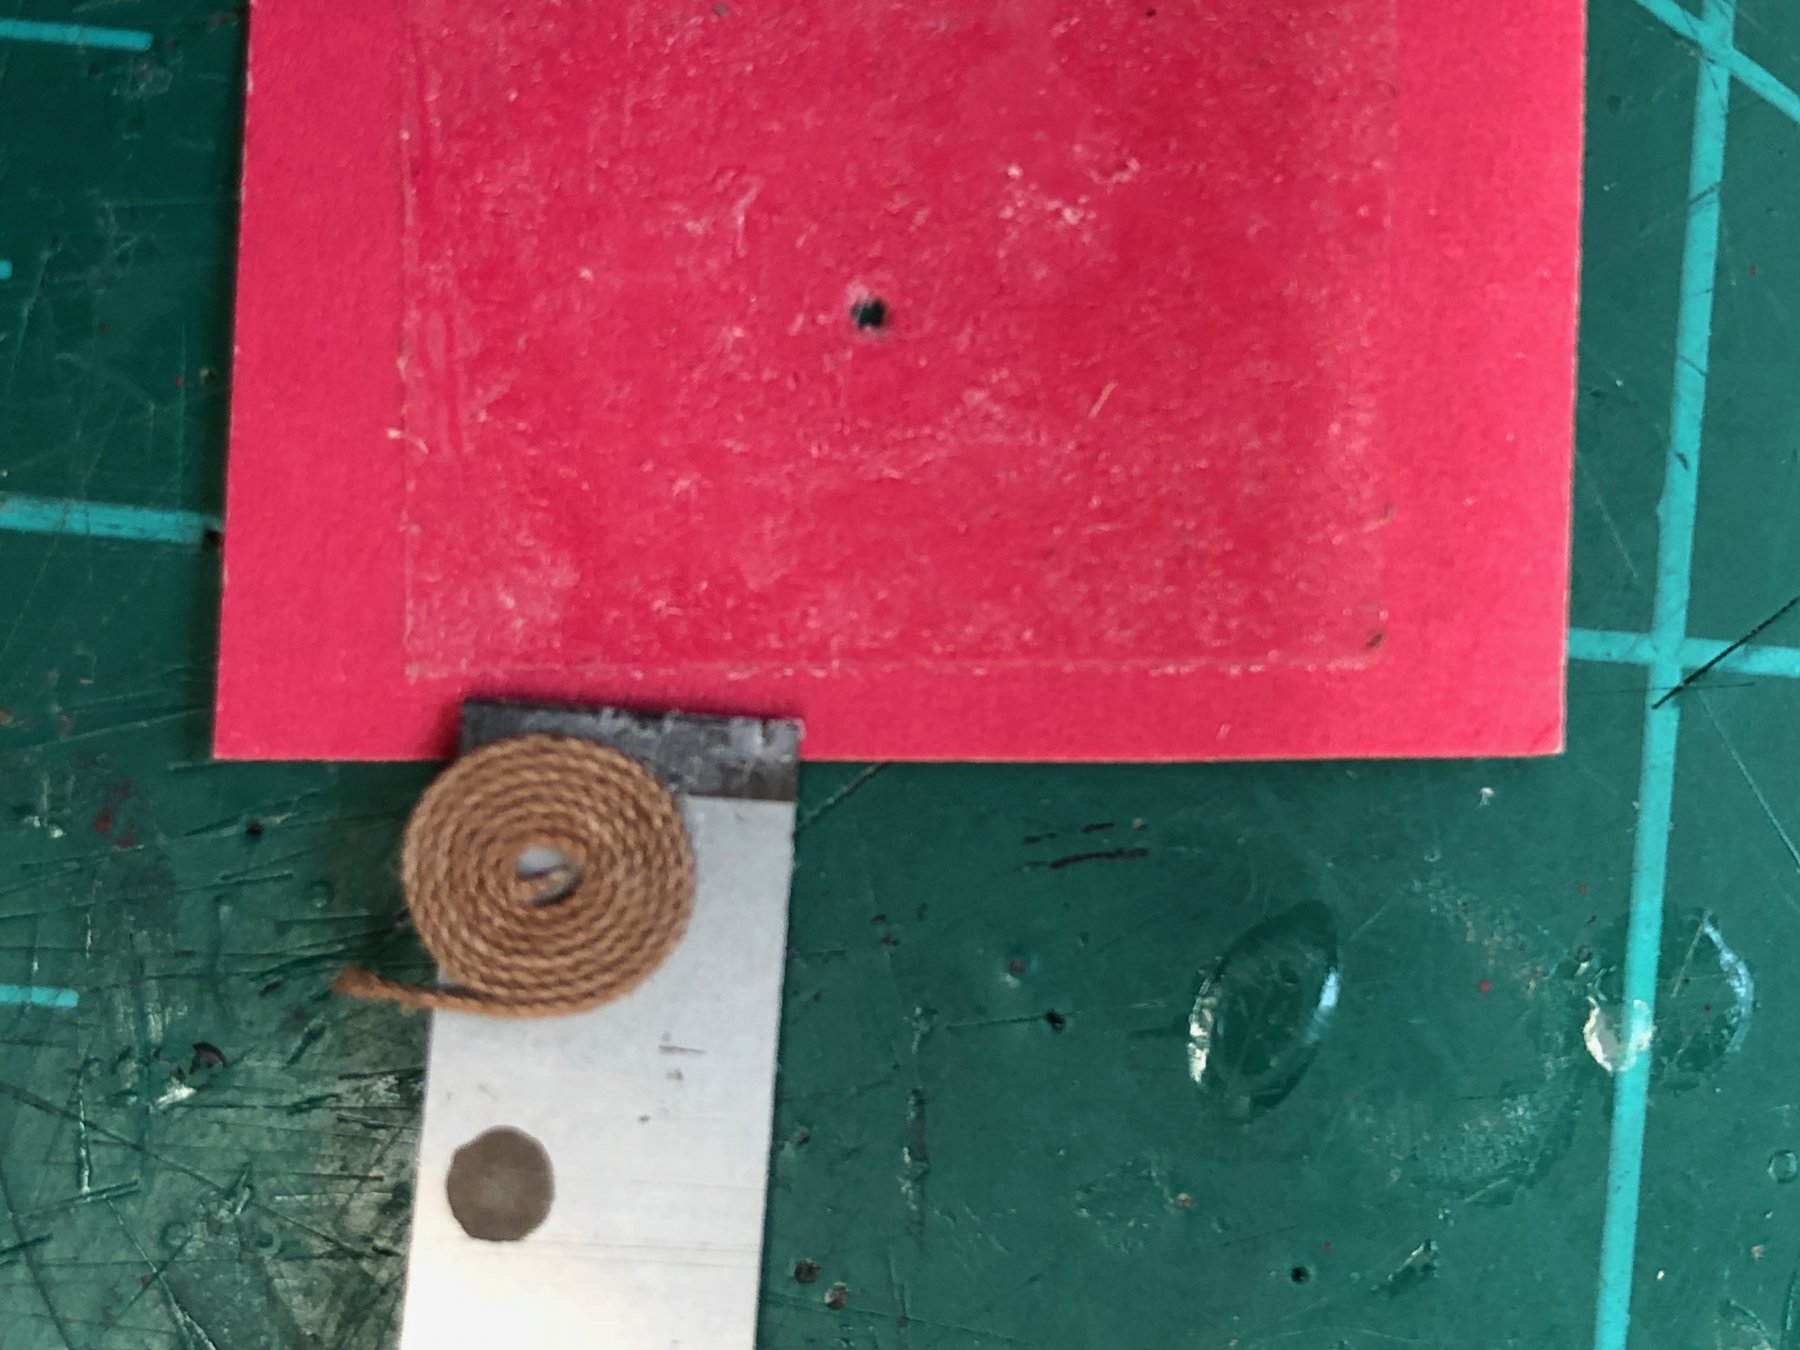
Using a pointed object form a small loop at or near the hole and press the line in the sticky tape. Work your way around this initial loop, pressing the line into the sticky tape and against the existing line. I did 8-9 times around, cut the line as near the carrier as possible and then pressed the end up against the existing coil. Sometimes it would stick, other times not. Using 50/50 white glue/water, I put a drop on the center of the coil and worked the glue/water mix into the coil with an old paint brush, let it sit for a minute or two, blotted up the excess glue/water, put the carrier in a clamp and set it on workbench to dry. Having both sides of the carrier exposed to the air helps it dry on both sides which will be important later.

- 367 replies
-
- 1
-
-
- model shipways
- niagara
- (and 1 more)
-
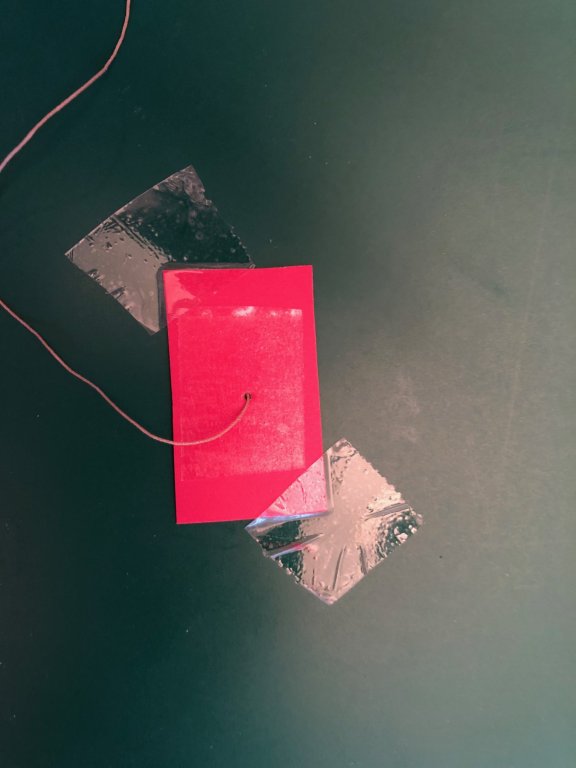
Speaking of rope coils - here is how I made mine. I started with a piece of file folder as a carrier with double sided tape (I used 3/4" wide tape) and a hole in the center. I used the same 0.012" Light Brown Syren line as the gun tackles so hopefully there will be no big color mismatch a piece about 3" long. Pass the line through the hole and tape down to the back side of the carrier. I taped this down to my work pad.
-
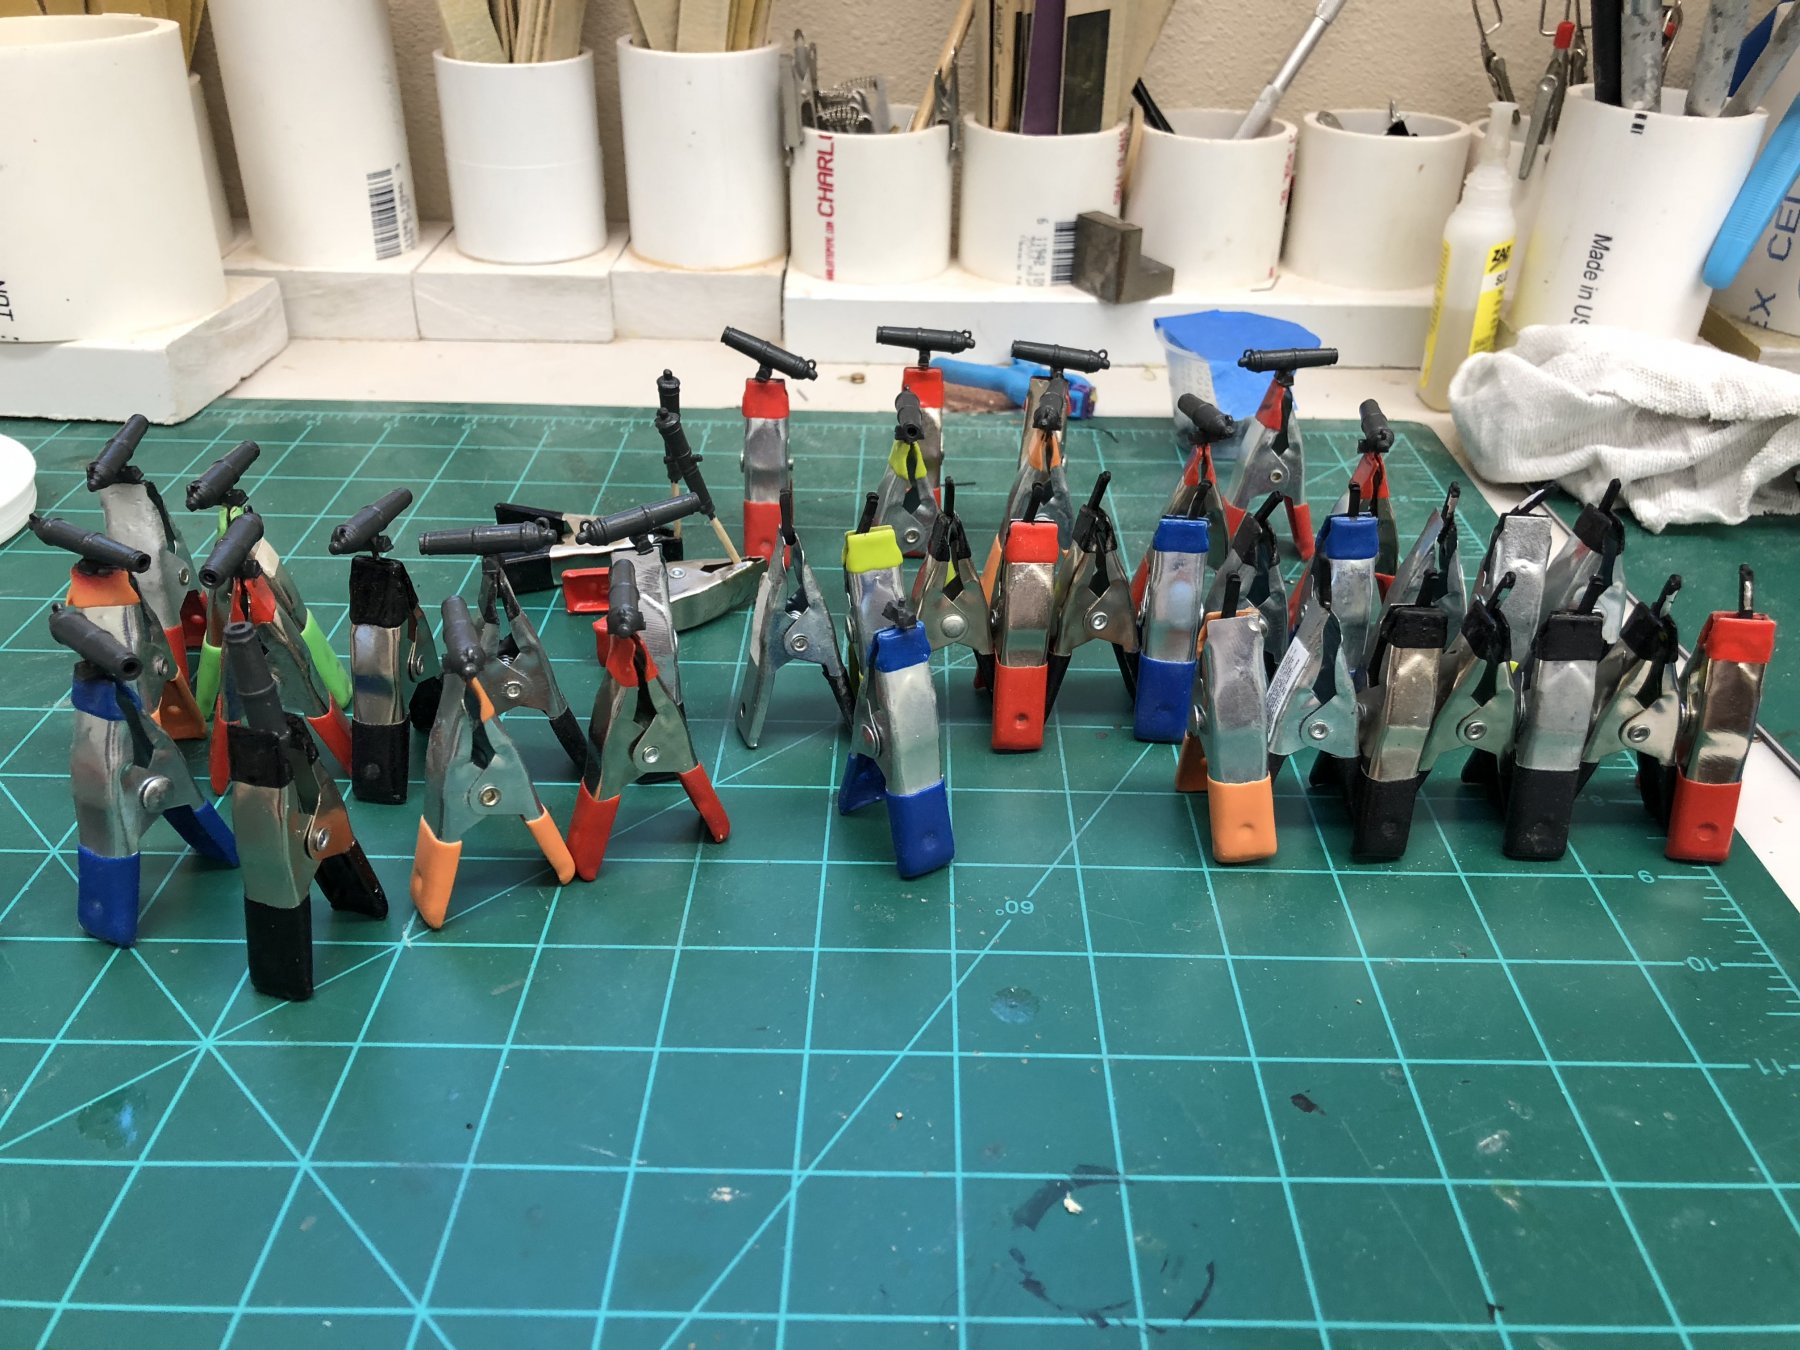
Rope coil making is a good past time for "watching" football. You can catch the replays when something impactful happens. During the early game today I made 28 coils. Picture shows them drying after the first application of 50/50 white glue/H2O. At this rate I should have the 80 or so needed by the time Sunday Night Football is over. And I though stropping blocks was a pain.

- 367 replies
-
- 3
-
-
- model shipways
- niagara
- (and 1 more)
-
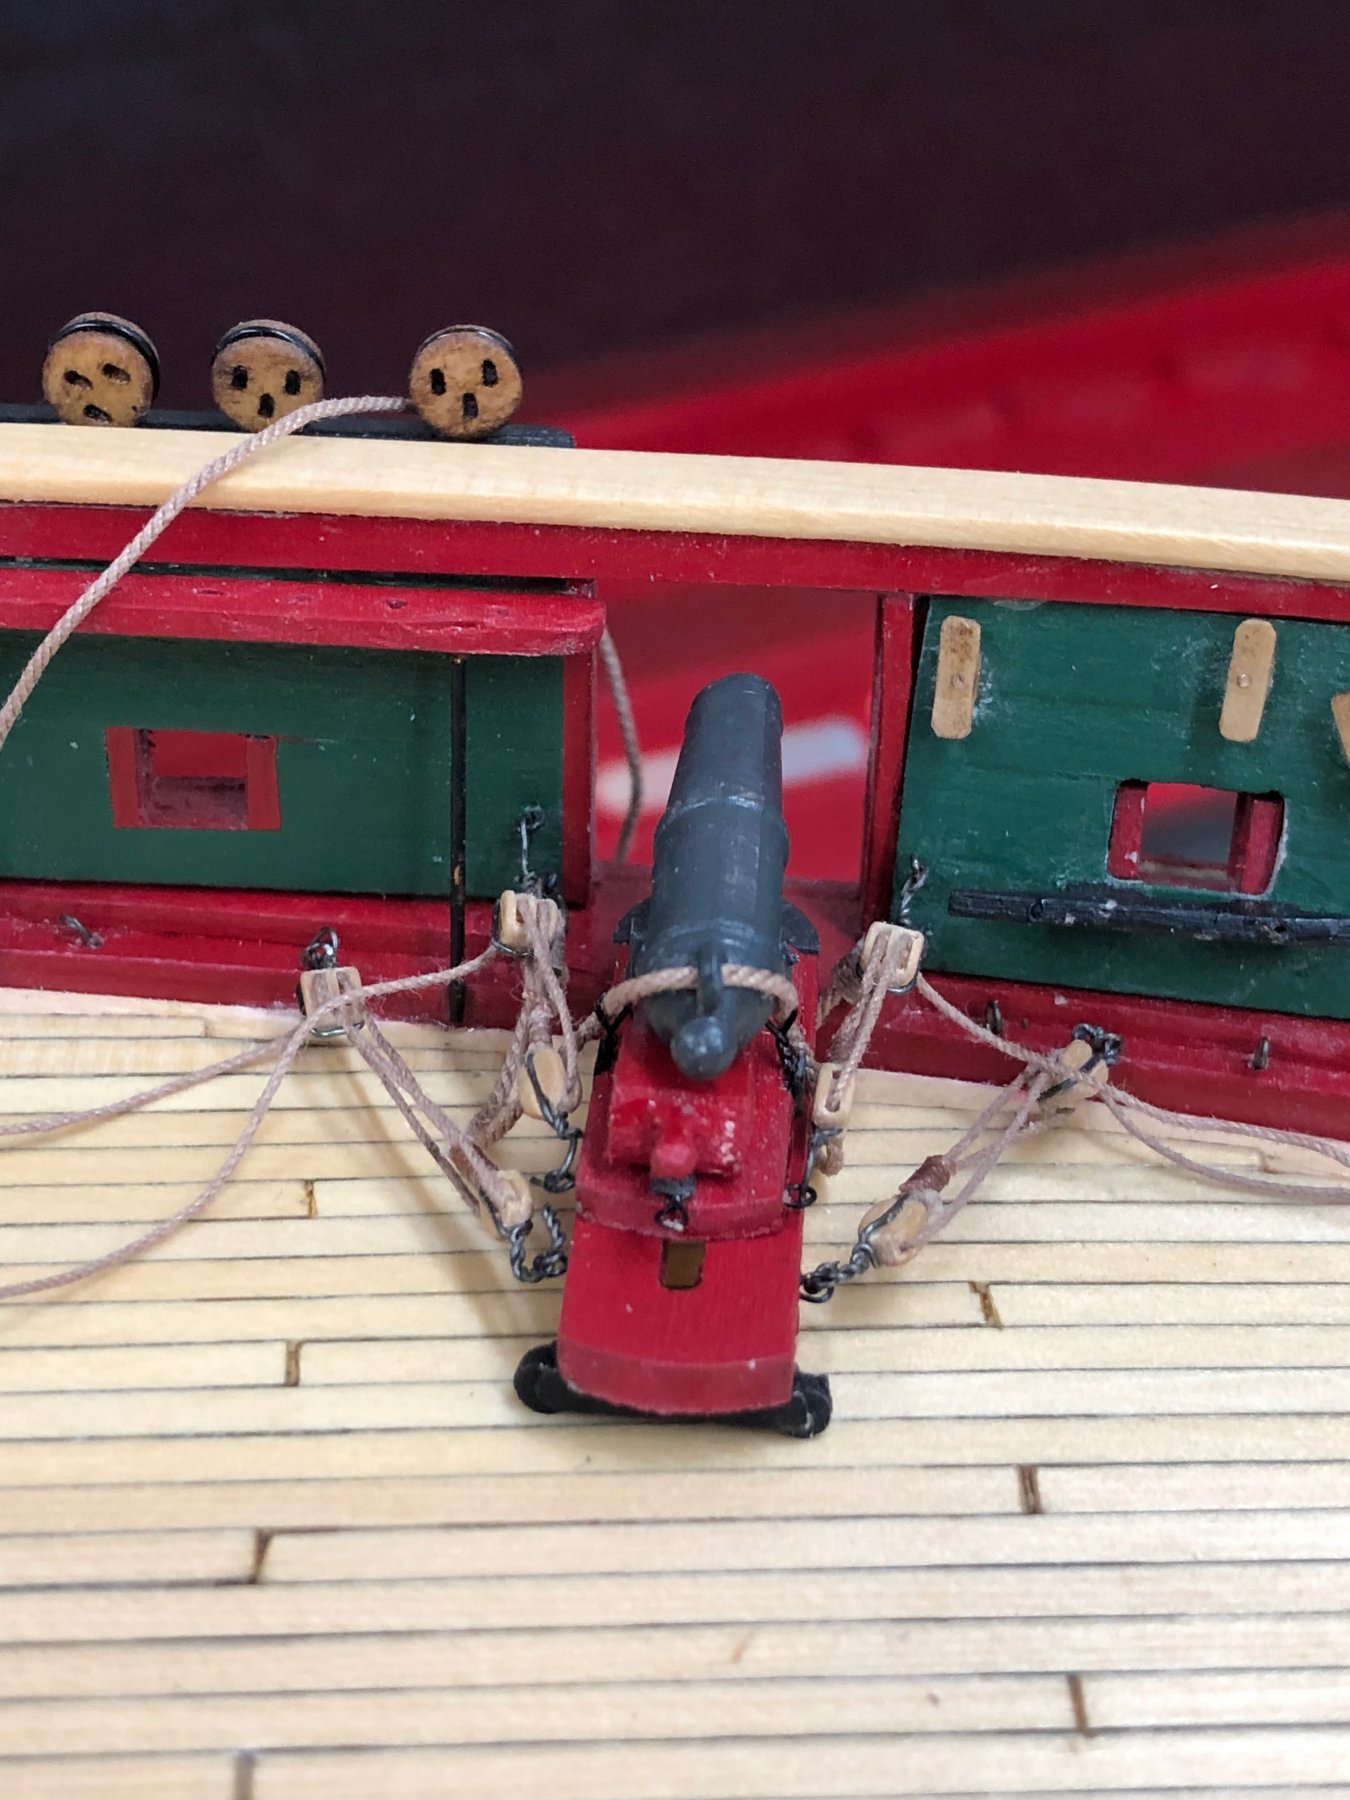
I got the port side long gun mounted, the breech and in-haul tackles attached and the rope coils glued on deck. Except for some paint touch up, I think this one is "Done". Trying to make the rope coils was a challenge. I reviewed the topic on the site and finally was able to make the "double-sided tape" method work, at least so far. It is pretty slow, it takes about 5 minutes from start to 50-50 glue for each coil.
- 367 replies
-
- 2
-
-
- model shipways
- niagara
- (and 1 more)
-
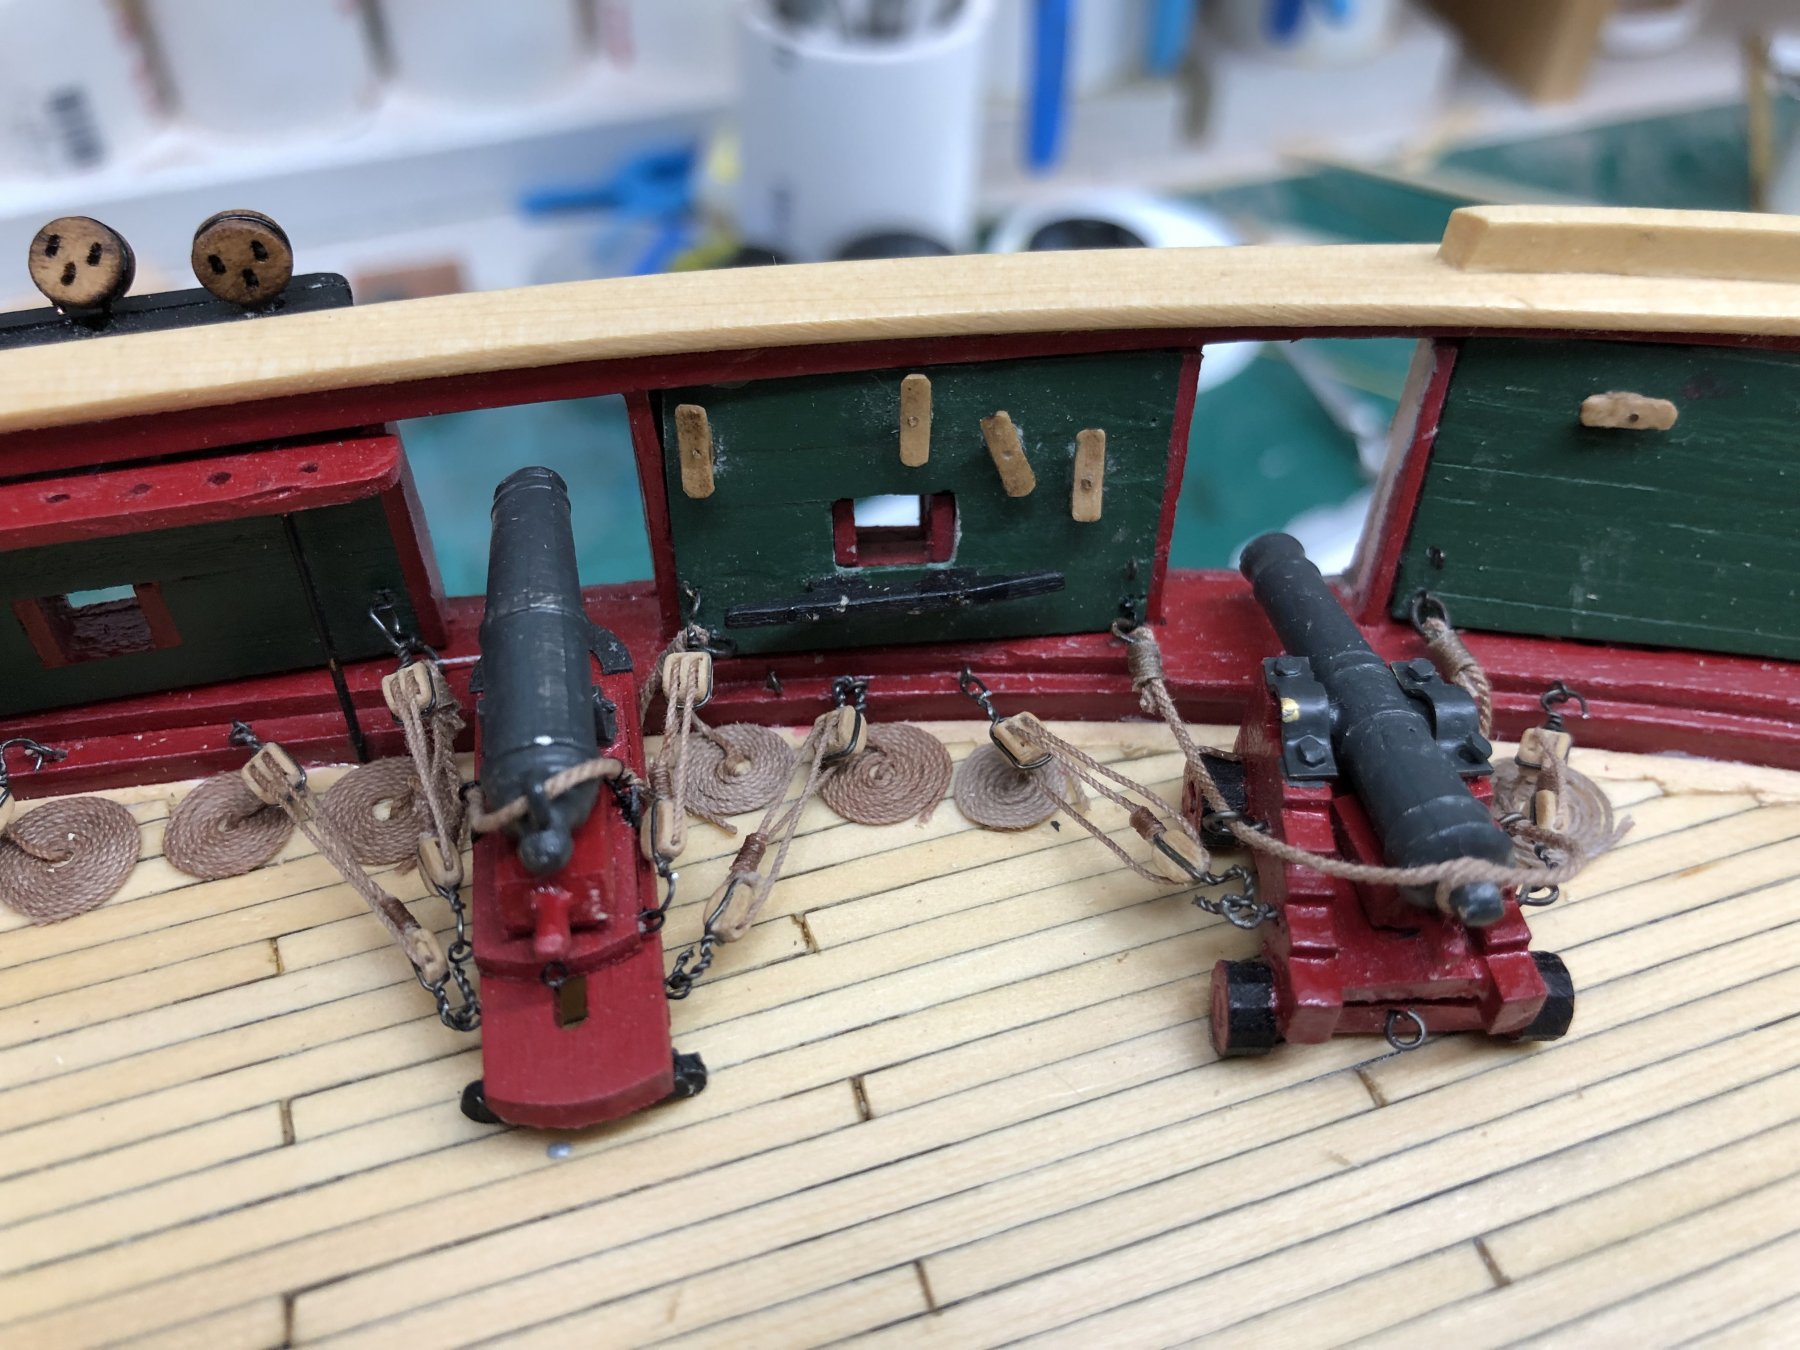
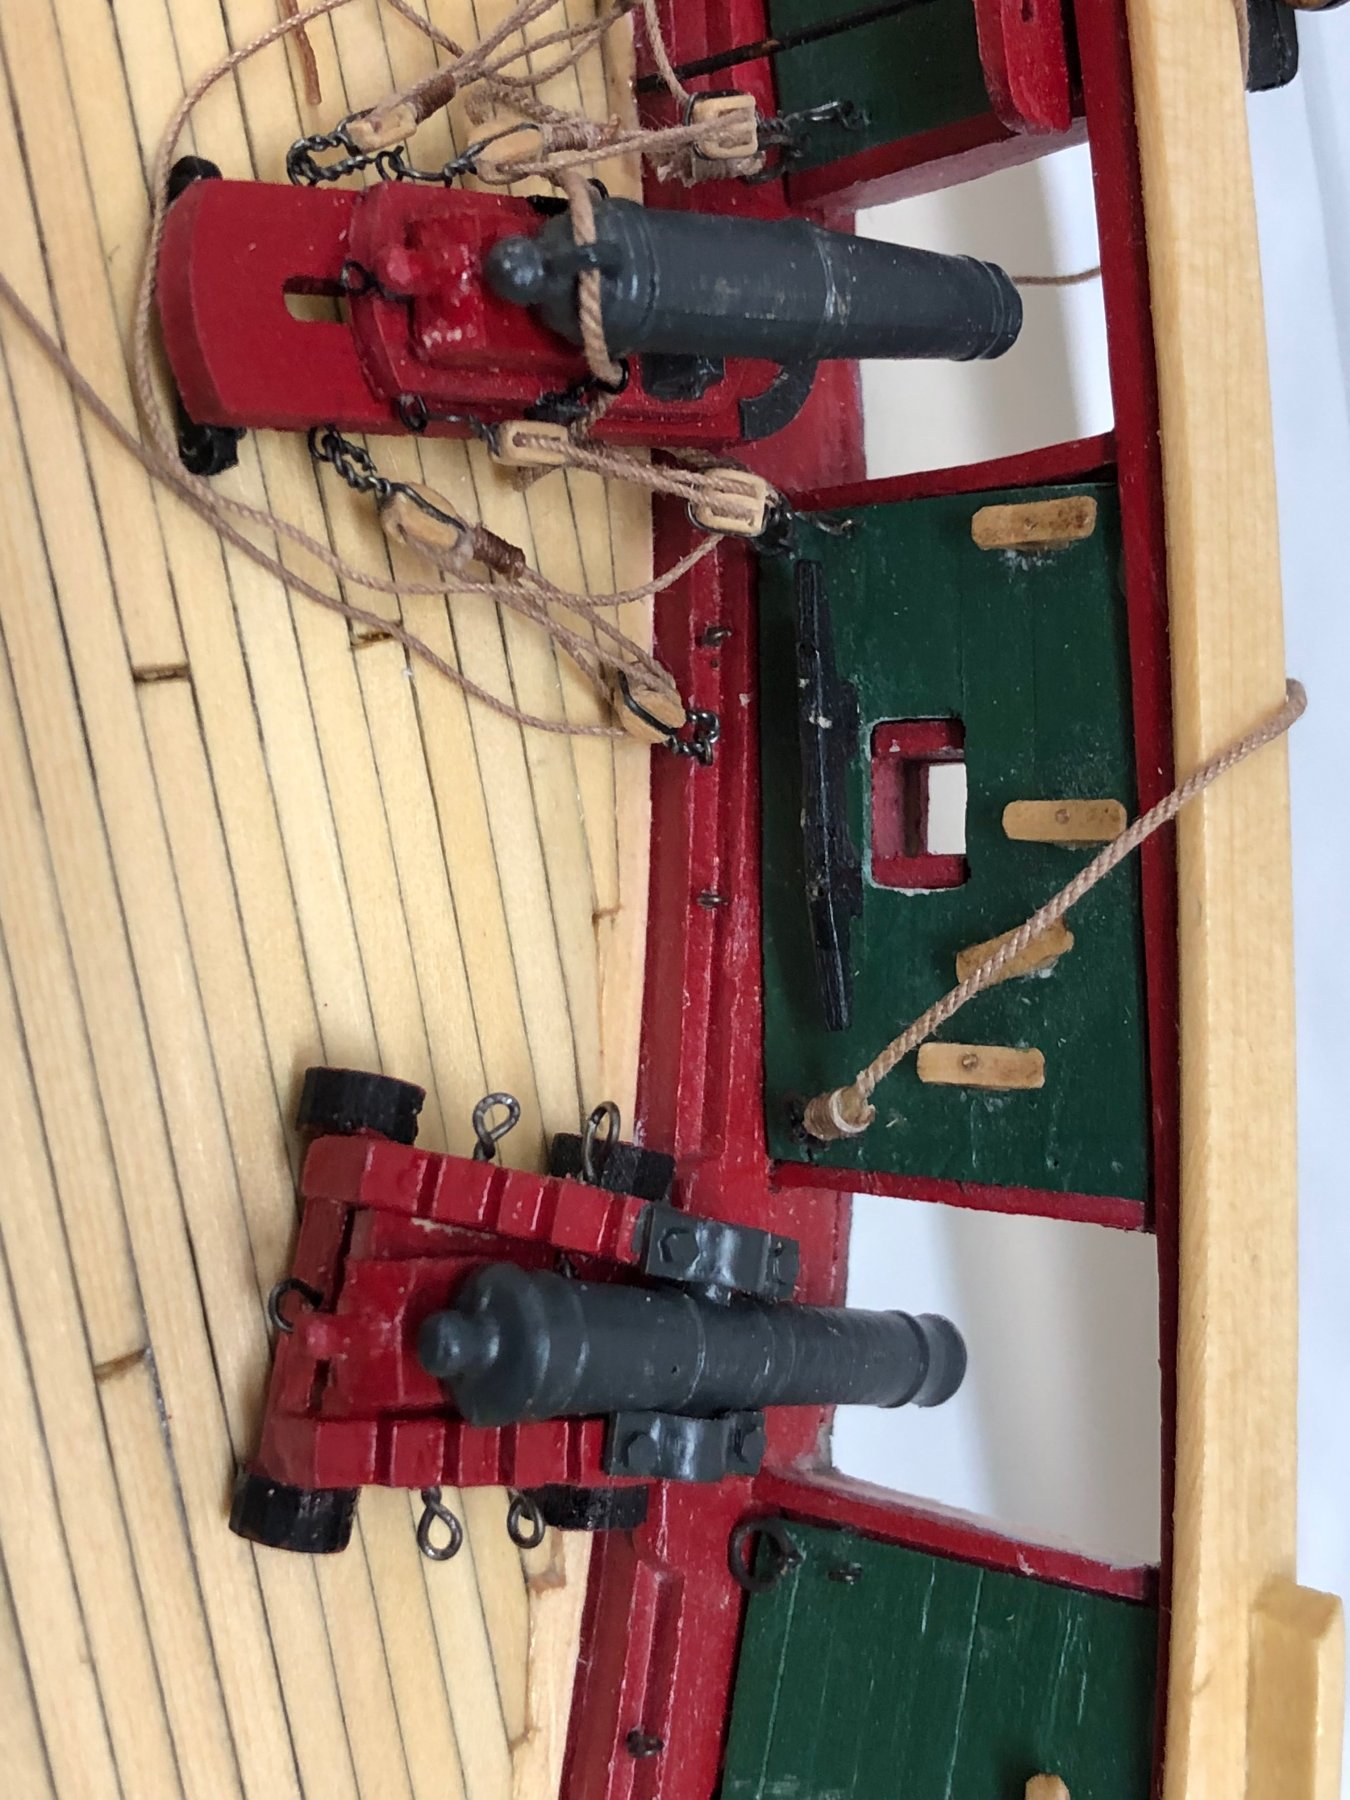
All seventeen of the carronades have been mounted to their skids and the associated hardware installed. I need to make up the gun tackles (40 more sets of 1/8" single with becket and 1/8" double blocks) so I can get these secured to their platforms. Here is the port side long gun next to the already mounted carronade. Have to make up the tackles along with those of the carronades. Still working on assembly of the stbd side long gun. (I know the gun looks somewhat "out of square" but that is caused by the camera. The gun is pretty well square.

- 367 replies
-
- 3
-
-
- model shipways
- niagara
- (and 1 more)
-
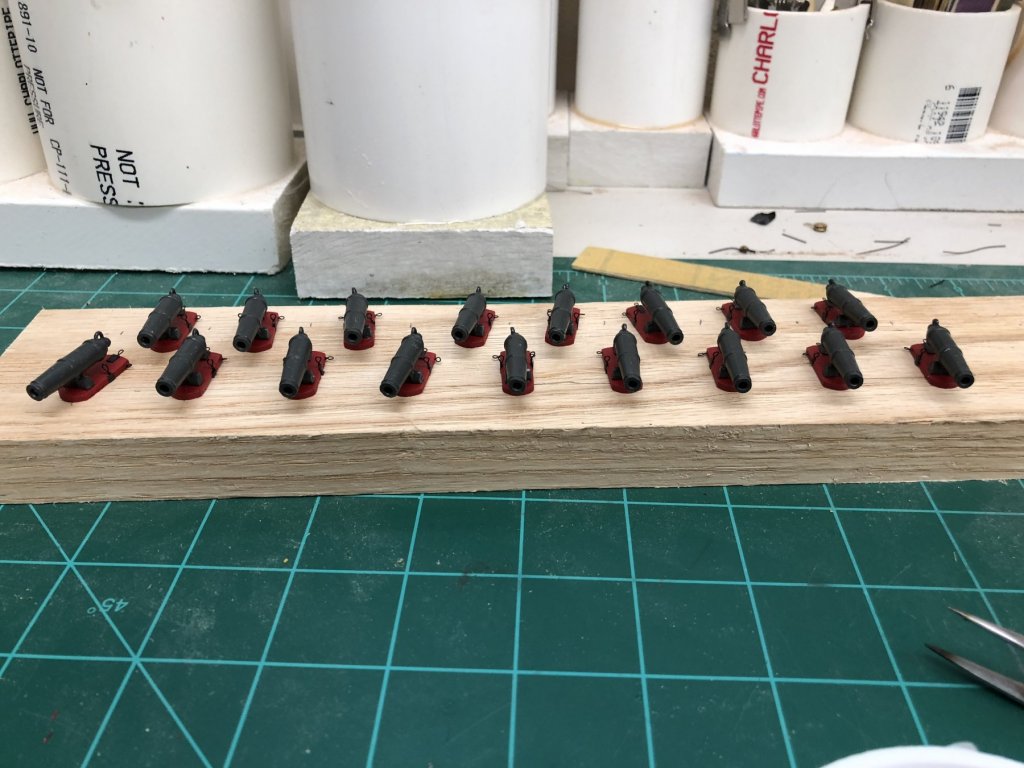
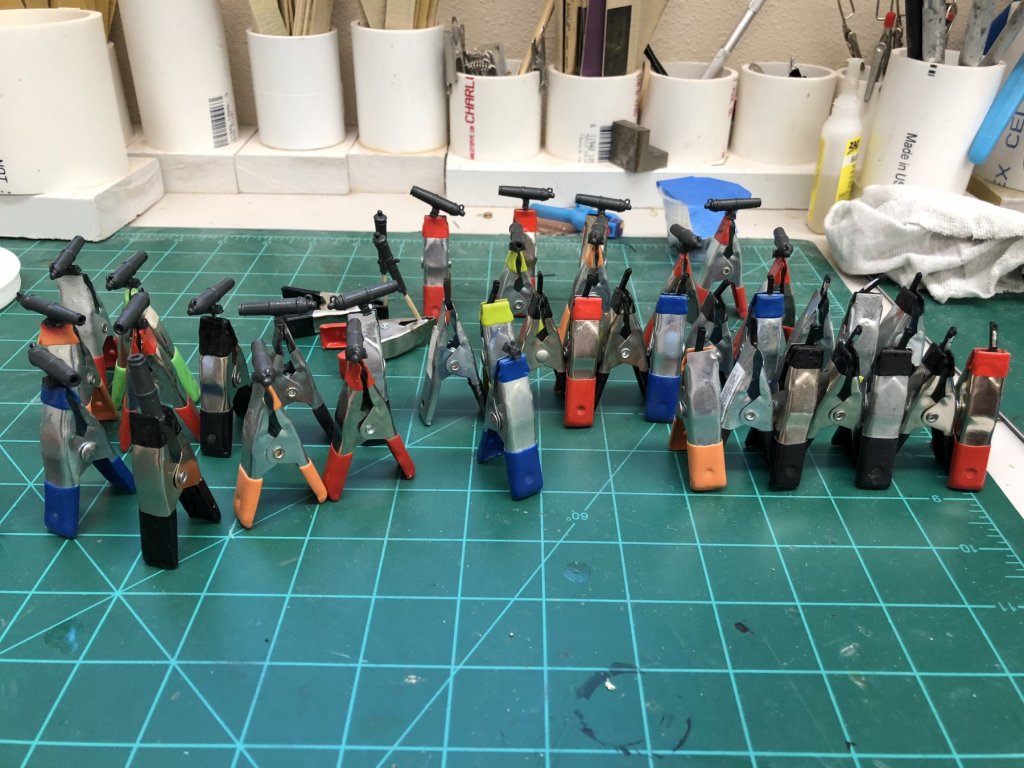
Six of the seventeen (the "test case" is already competed and mounted) remaining carronades are ready and waiting. Hopefully I can get the other eleven done tomorrow and hopefully get the carronades done over the weekend. Still have not started on the second long gun but have done the touch up on the one that is finished. Pictures tomorrow (hopefully).

- 367 replies
-
- 3
-
-
- model shipways
- niagara
- (and 1 more)
-
Completed installation of all the carronade platforms and their associated train tackles. Also secured one side of the breech tackle while there was no gun in the way. Working to assemble the guns onto their sliding bases and install the various eyebolts and backing plates. I got one of the long guns assembled but the paint job took a beating and it needs some touch-up before it is installed. Working on a better assemby method for the other one.

- 367 replies
-
- 1
-
-
- model shipways
- niagara
- (and 1 more)
-
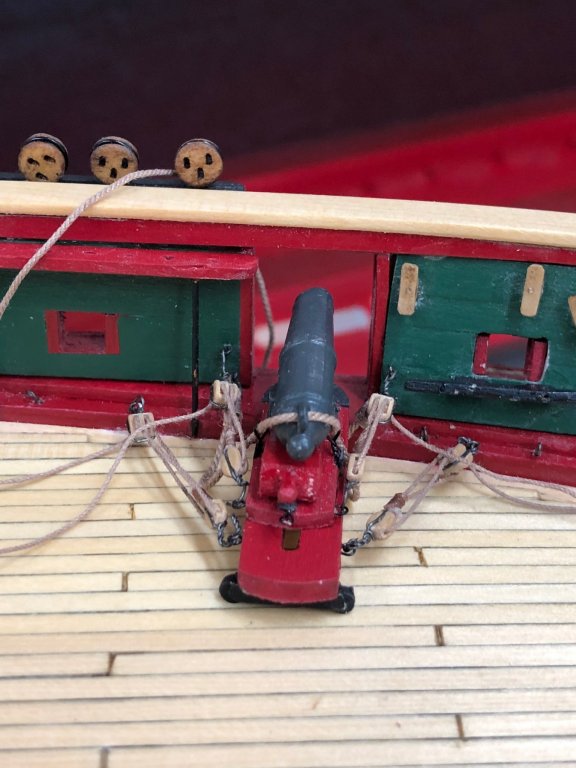
As a test of my assembly and installation technique, while waiting for the stbd side platforms glue to dry I installed a complete carronade on the port side forward. Everything went pretty much as expected and I can now proceed with the other SEVENTEEN. Having some difficulty getting the long gun carriages to follow the drawing - the sides taper to follow the taper of the gun. One side wants to be straight and other has all the taper. Working on potential solution. Here is the one completed carronade (except for the rope coils - not sure when I will get to those.
- 367 replies
-
- 4
-
-
- model shipways
- niagara
- (and 1 more)
-
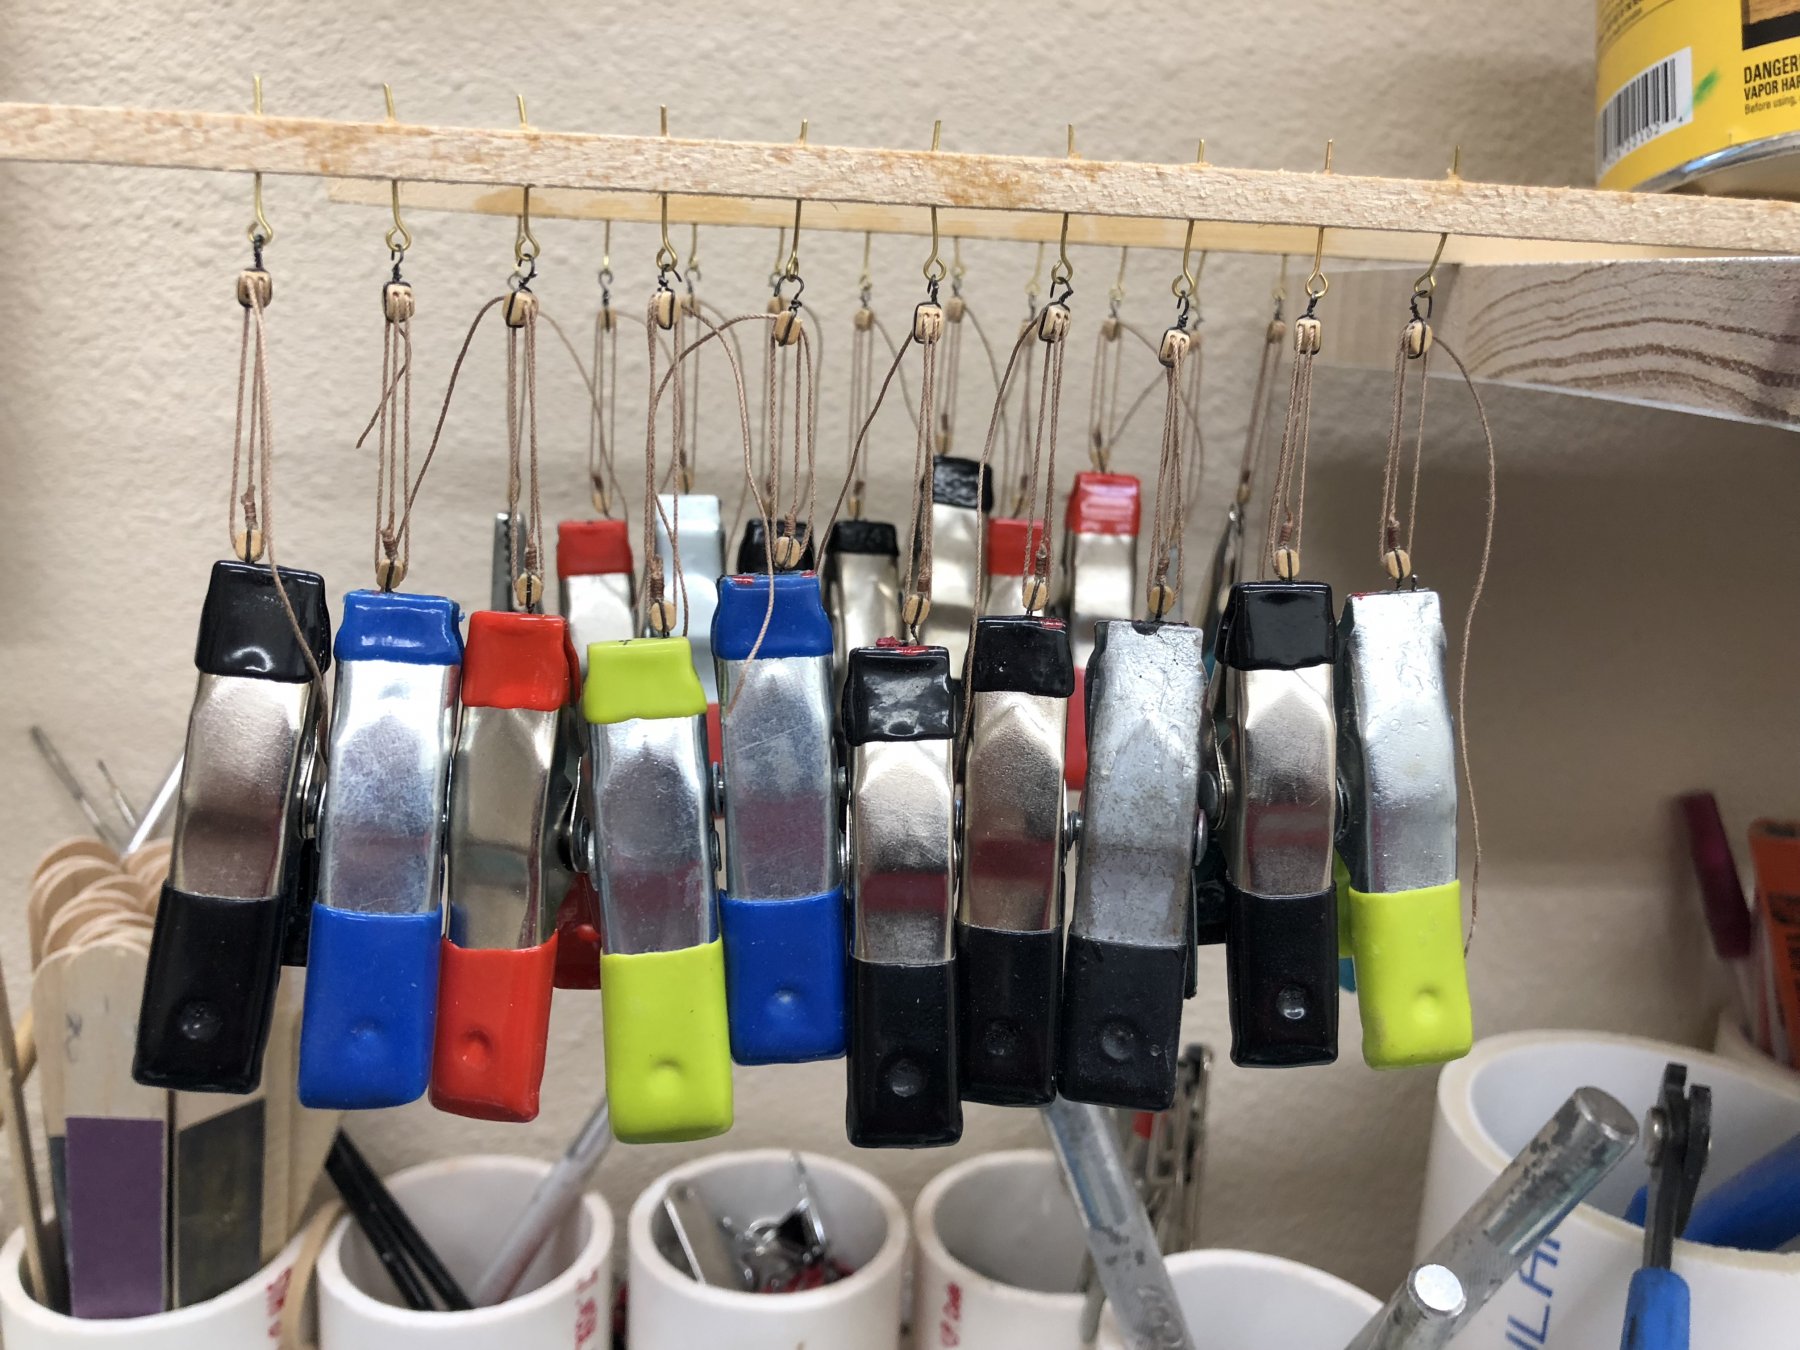
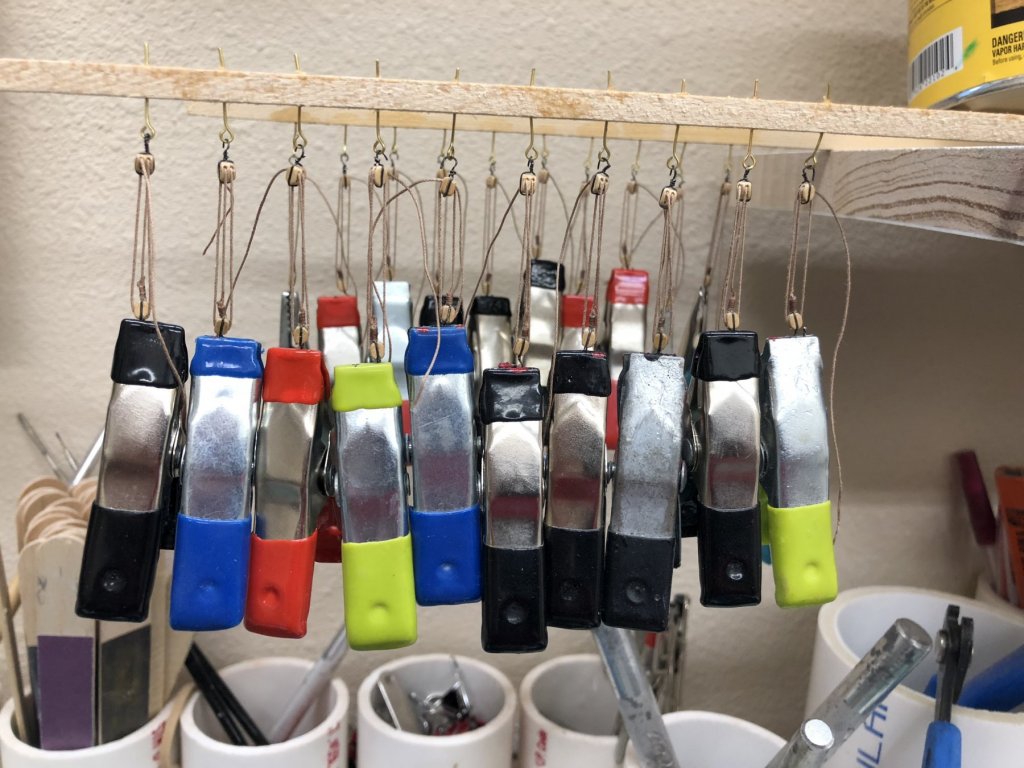
I got all the quoins fabbed and am waiting for the paint to dry. Worked on the train tackles and the carronade platforms. I got all the port side carronade platforms outfitted and ready for installation. I spent most of my time "Pre-rigging" the train tackles. I had such a hard time with the one I did "on the fly" that I wanted to make sure they were all rigged in the same manner. For my tackles, the hook opening on the blocks should be on the bottom and the line should enter the top of the double block, the bottom of the single block and back in the top of the double so the exiting line is coming from the lower side of the double block. I rigged up twenty sets and have them hanging from eyebolts over the workbench. (see photo below). I plan on leaving them there overnight so (hopefully) they will not want to get all twisted up when I install them. One question for those who have been here before - did you glue the platforms down to the waterway and/or deck before you rigged the tackles of wait until you had everything secured?

- 367 replies
-
- 4
-
-
- model shipways
- niagara
- (and 1 more)
-
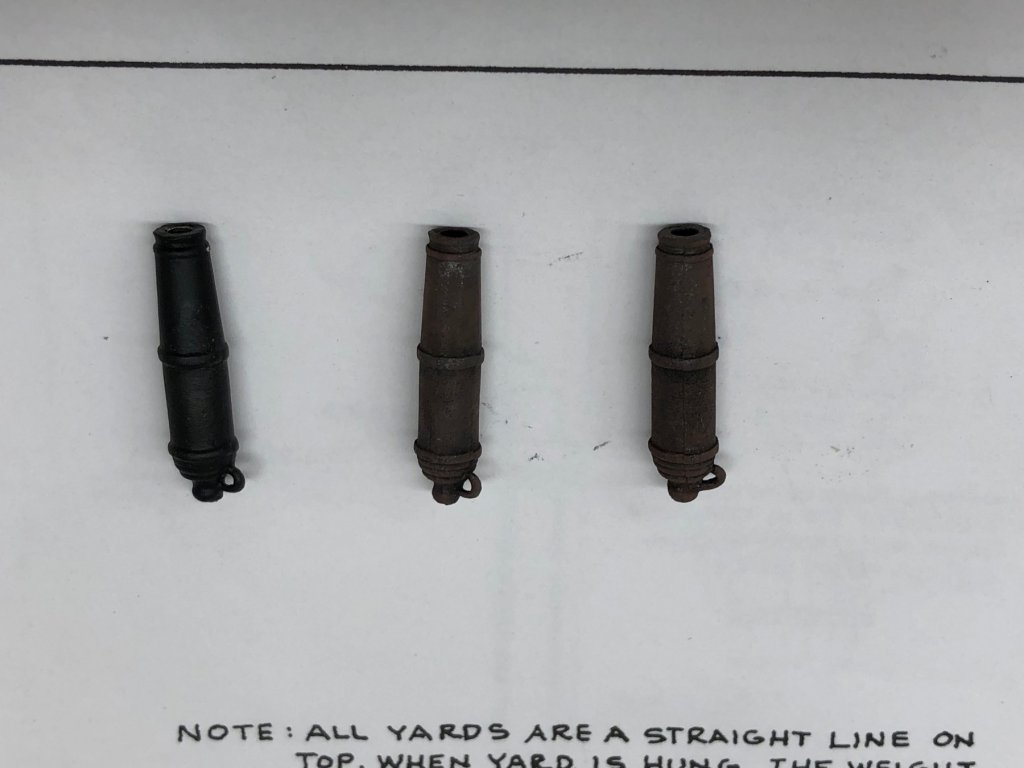
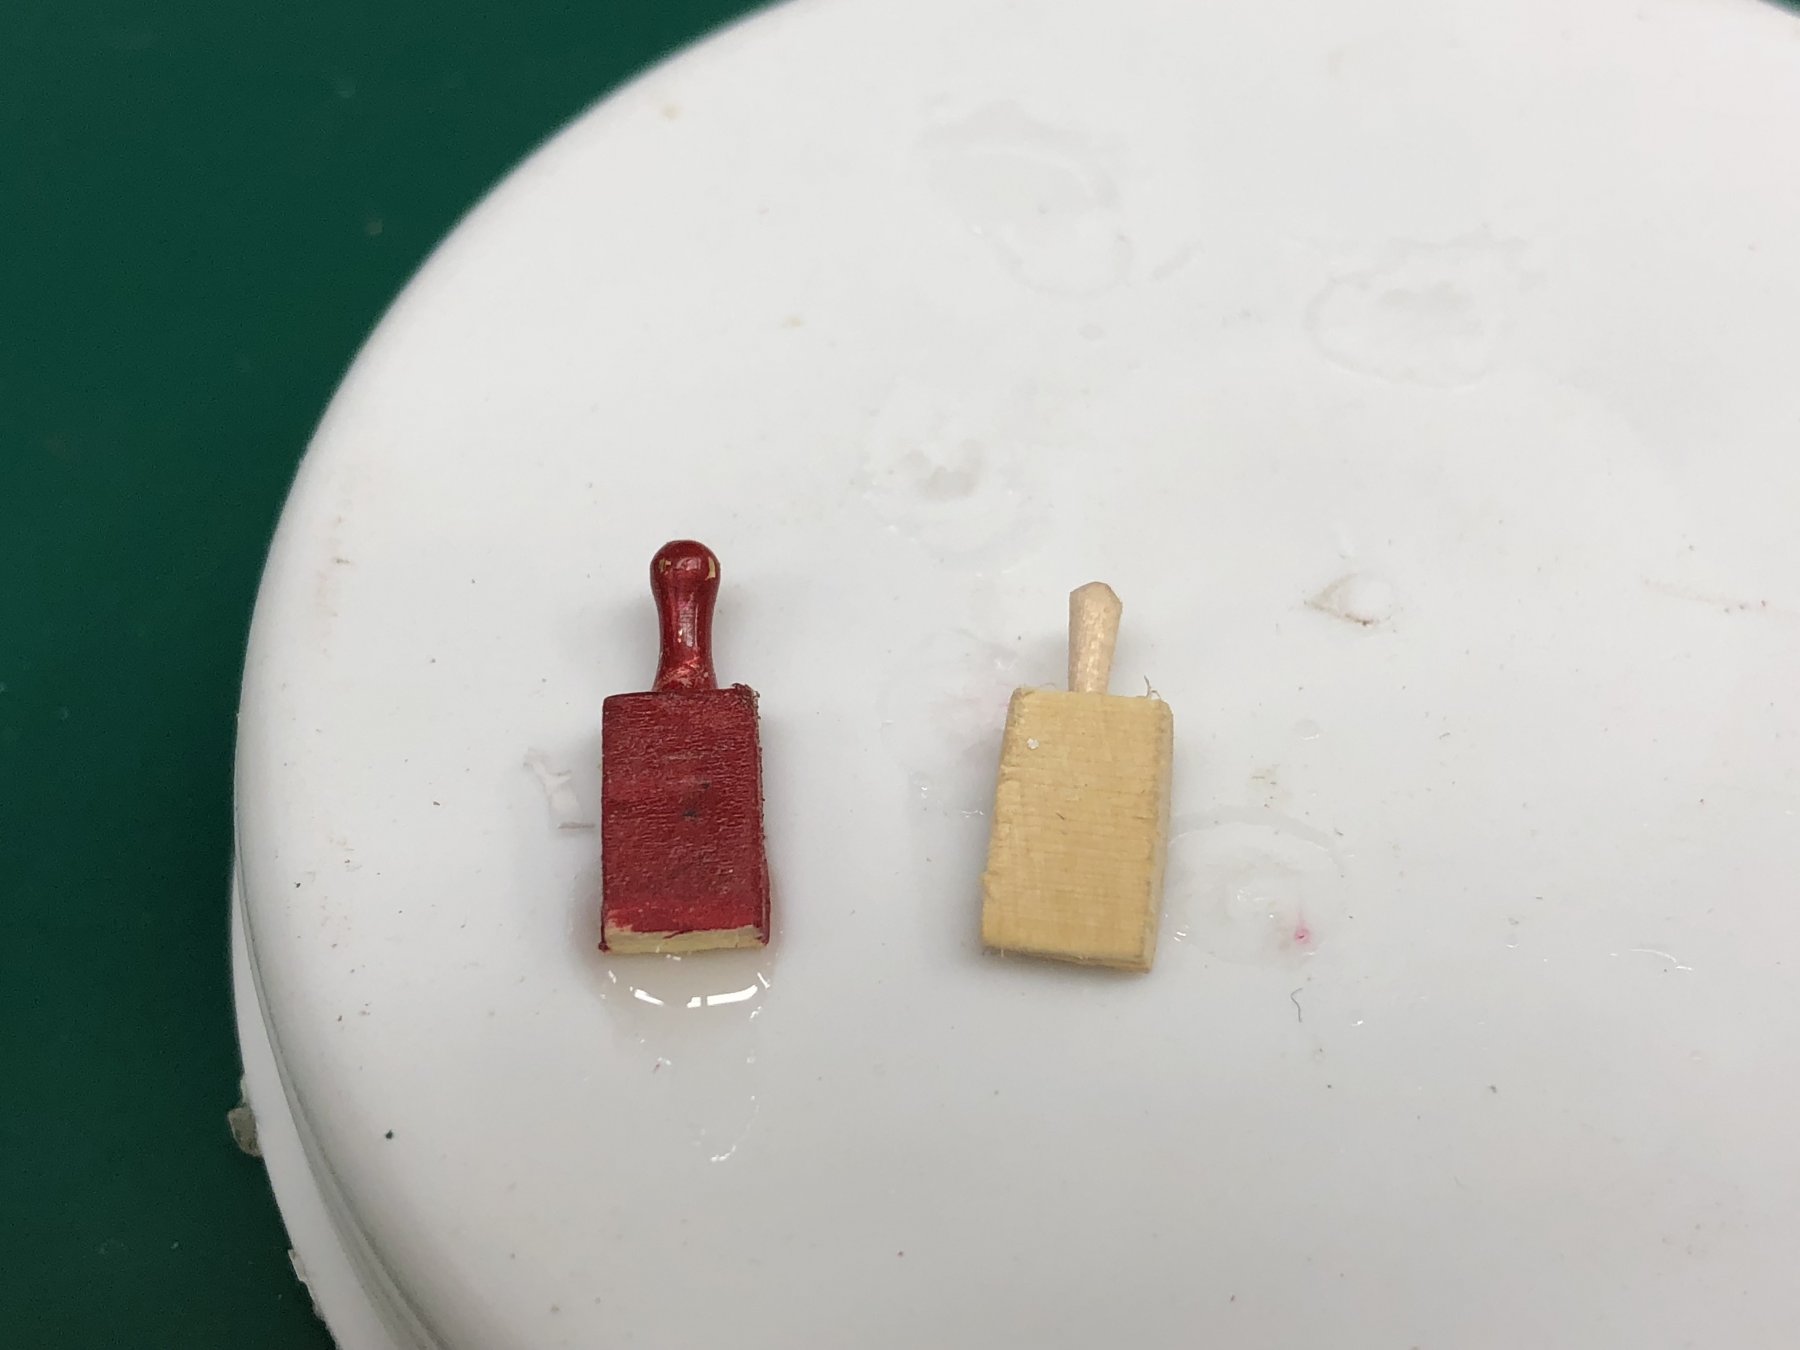
After what seemed like hours of struggle I finally got the first carronade platform in place and rigged. My intention is to rig all the platforms first and then add the guns. To make sure everything was going to fit I did assemble one gun and check fit it. That is when I realized that I had not made any of the quoins yet. I had intended to use the kit supplied belaying pins as the quoin handle but the hole required was so big it tended to split the wood so I cut the pin off and just used the handle. I got one assembled and painted but when installed on the gun the handle was way out of scale. My solution was to first drill a small, shallow hole (#72) in the quoin face then then make a larger (#62) but still fairly shallow hole and CA the end of a round toothpick in the hole and then cut and sand the toothpick to serve as the handle. You can see the difference in the picture below. I had to glue the one with the belaying pin down as the pin weighs much more than the wood part.

- 367 replies
-
- 4
-
-
- model shipways
- niagara
- (and 1 more)
-
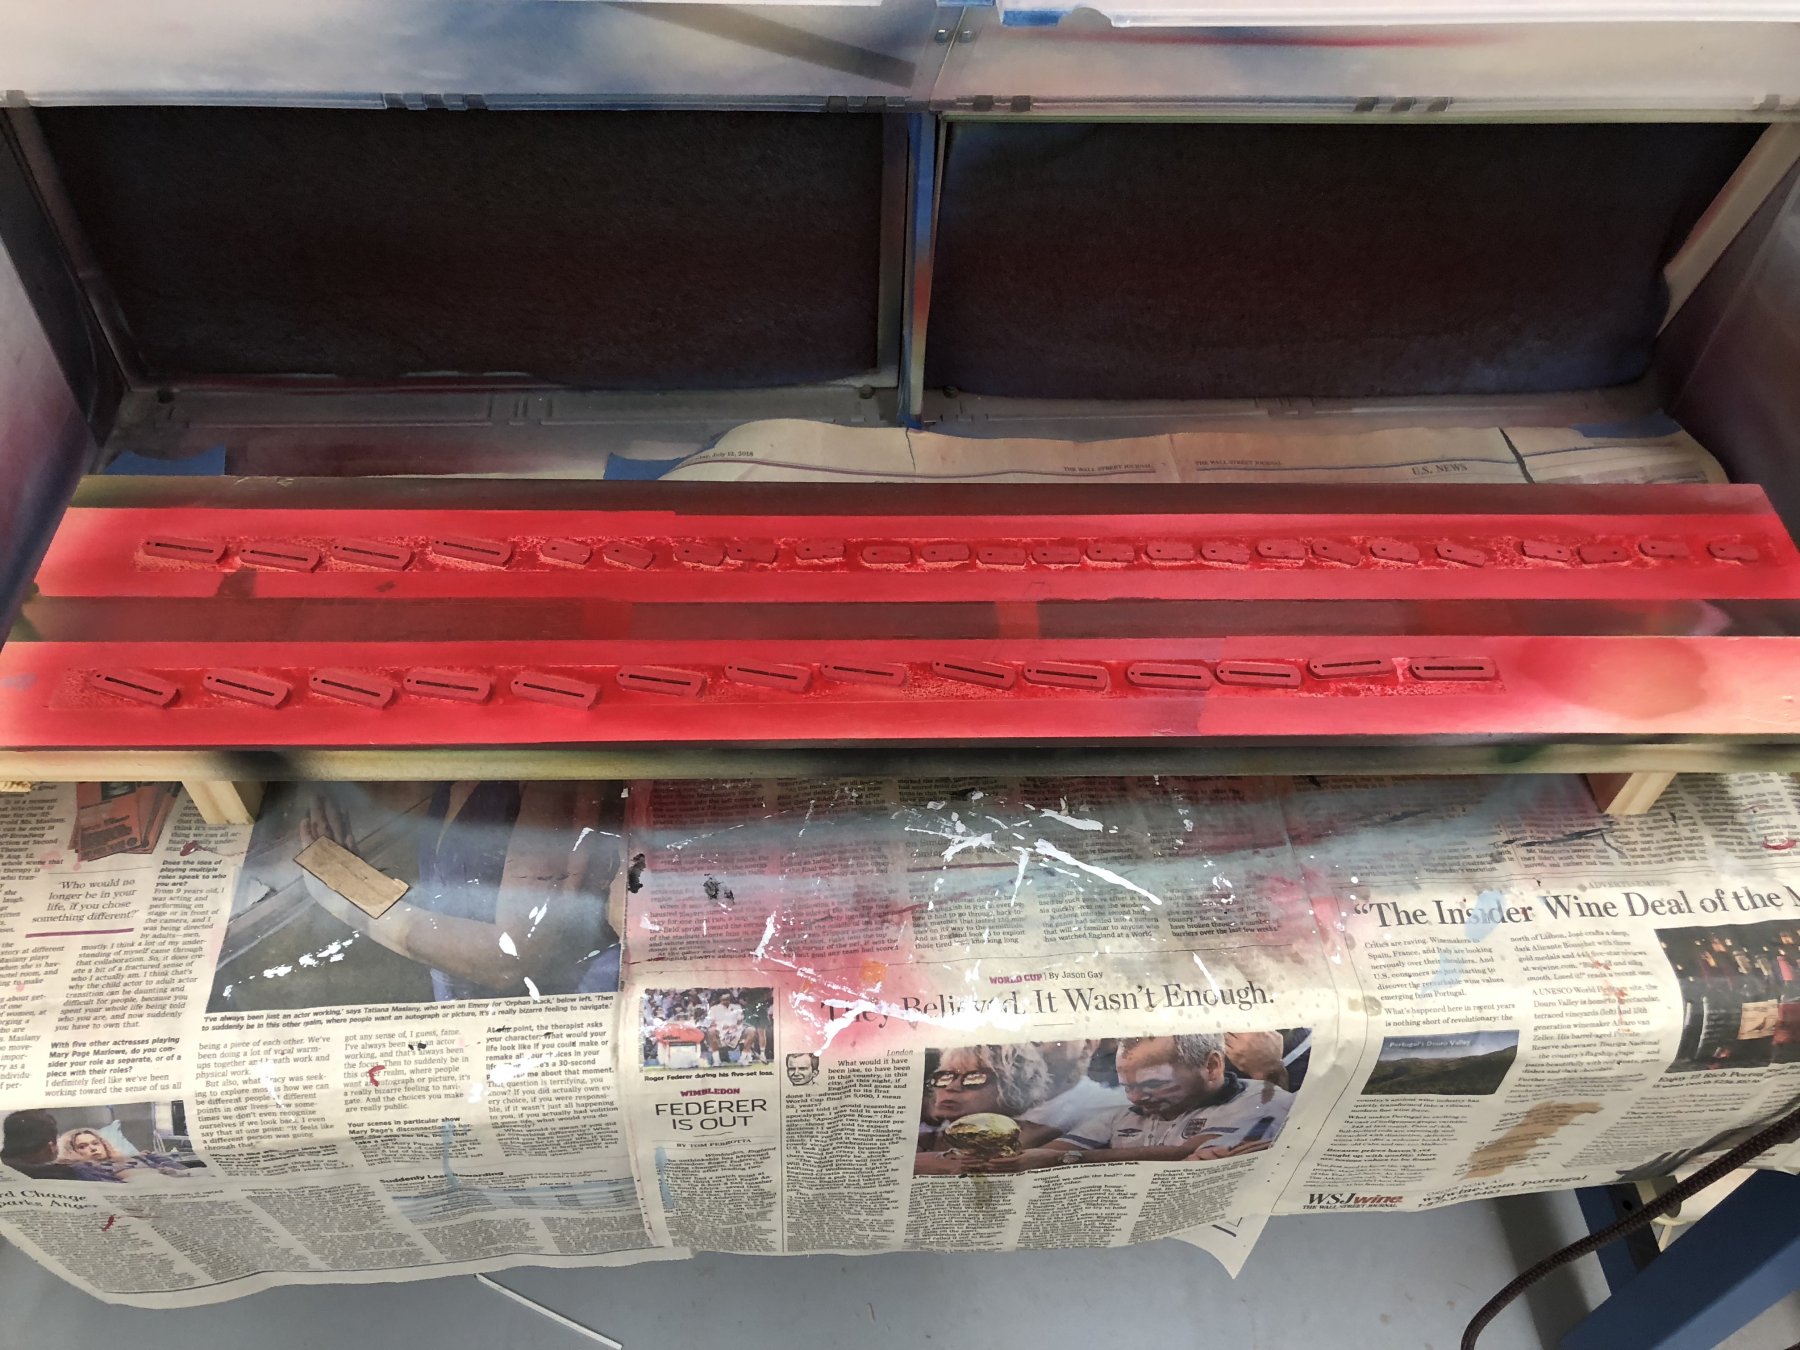
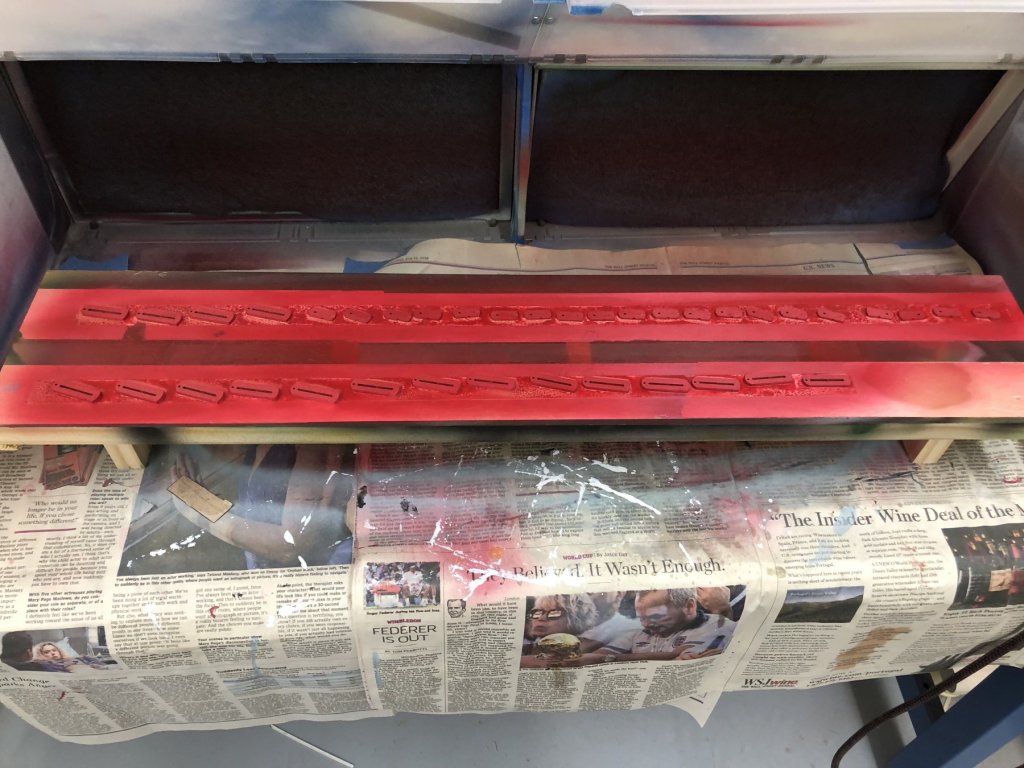
Working on setting up a production line for the carronades. Have all the carronades themselves painted (a "Dirty black" according to the bottle - looks like gray to me) with the mounting lug epoxied to the barrel. Painted all the rear "wheels" flat black and sprayed all the wood pieces red. Probably need to make some more eyebolts as each carronade needs seven (two gun tackle, two train tackle, two breech line and one outhaul tackle).
- 367 replies
-
- 2
-
-
- model shipways
- niagara
- (and 1 more)
-
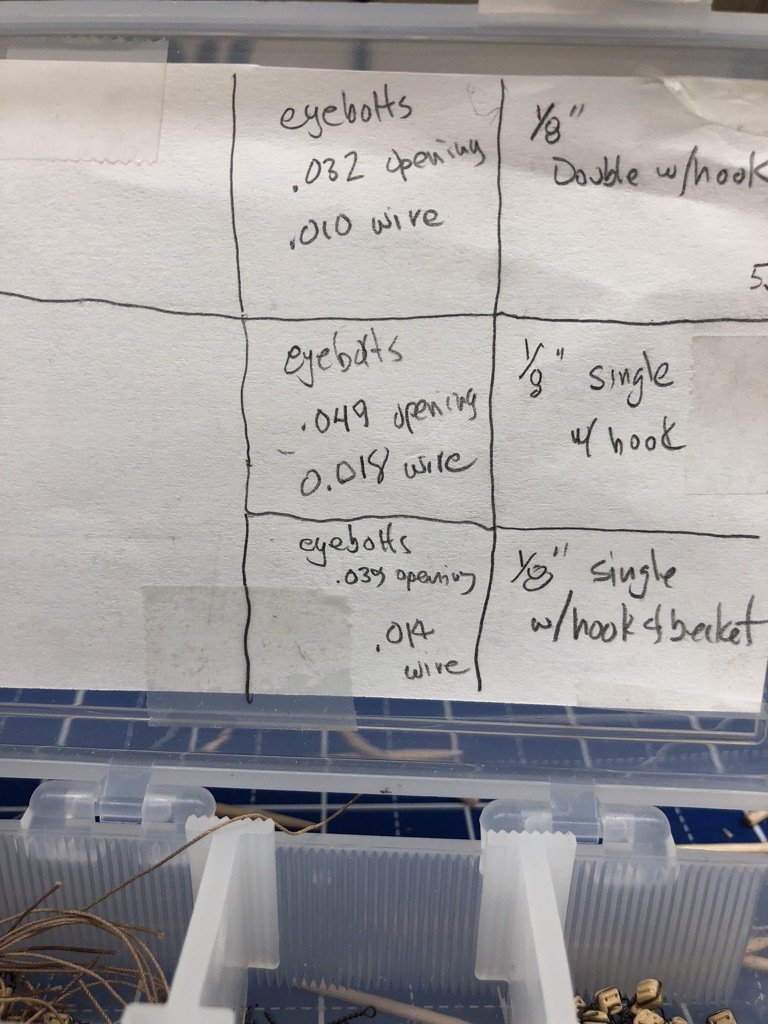
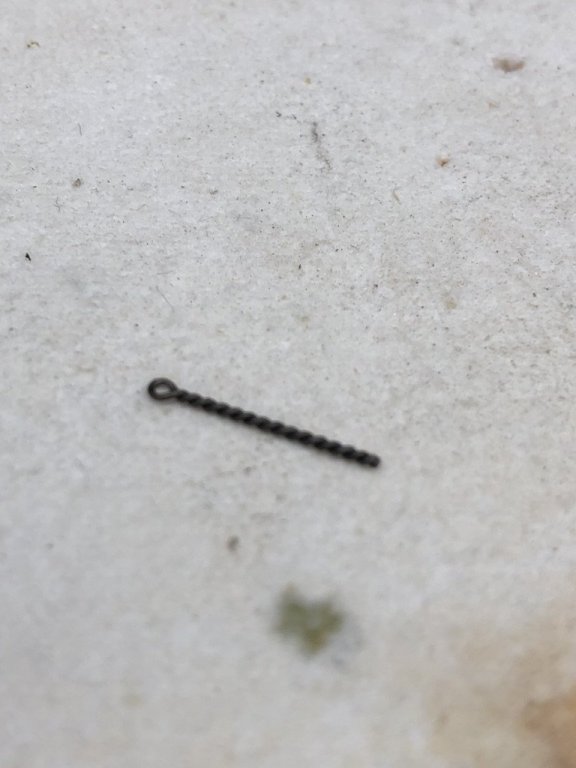
Bigcreek, As you can see below I used three different sizes of wire for eyebolts. The ones in the picture are with .010 (aka 34 gauge) annealed steel wire. I used a piece of piano wire in the sizes noted to size the eye opening. I twisted up a bunch while watching football.

- 367 replies
-
- 1
-
-
- model shipways
- niagara
- (and 1 more)
-
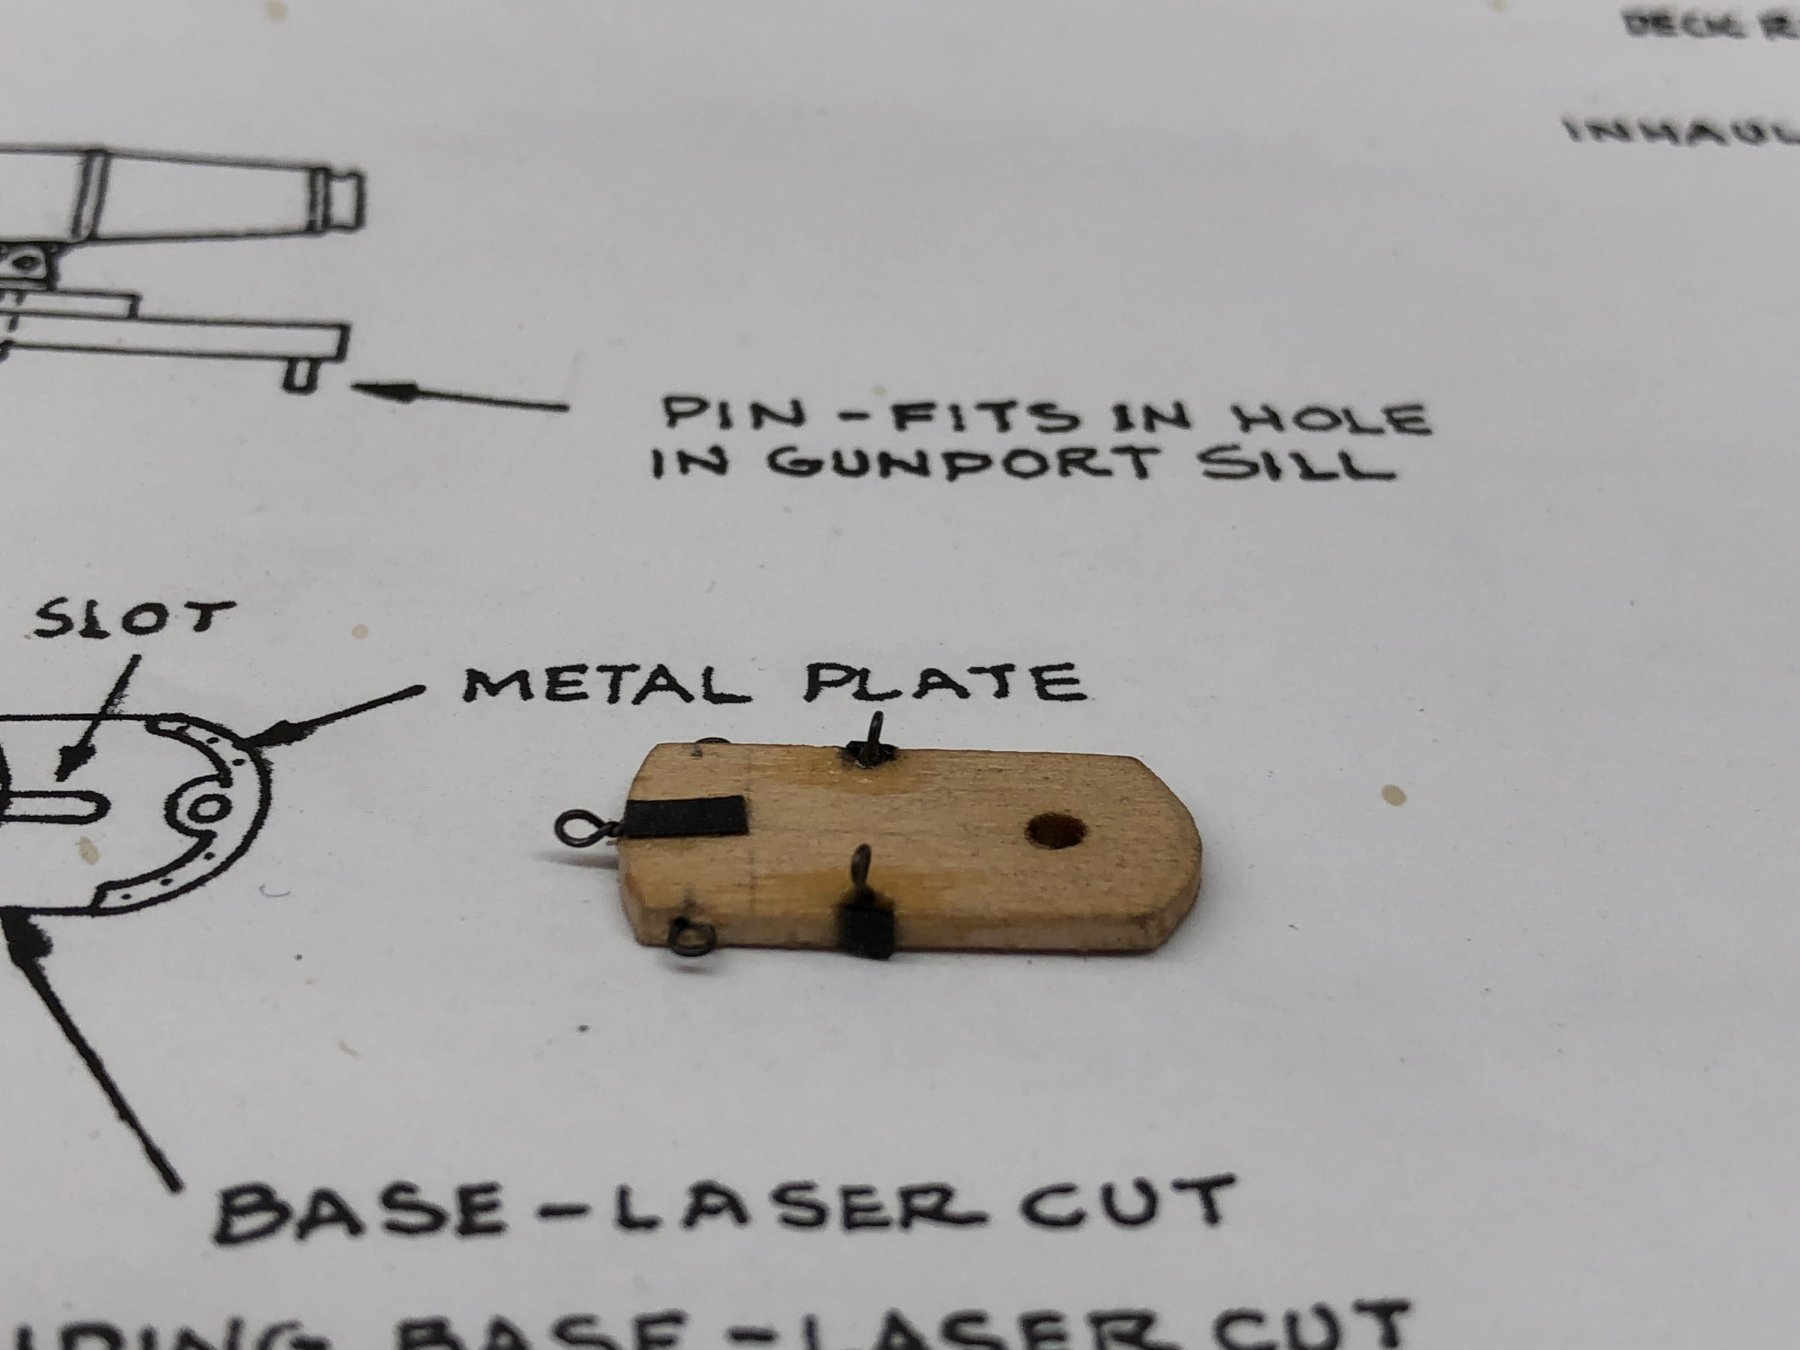
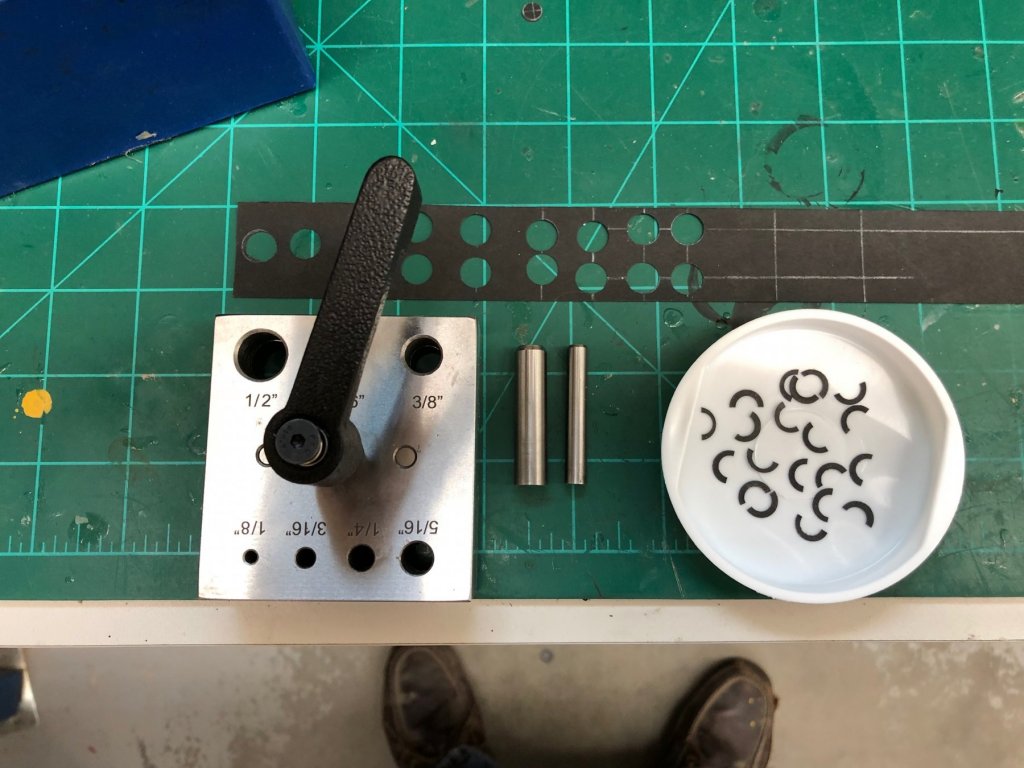
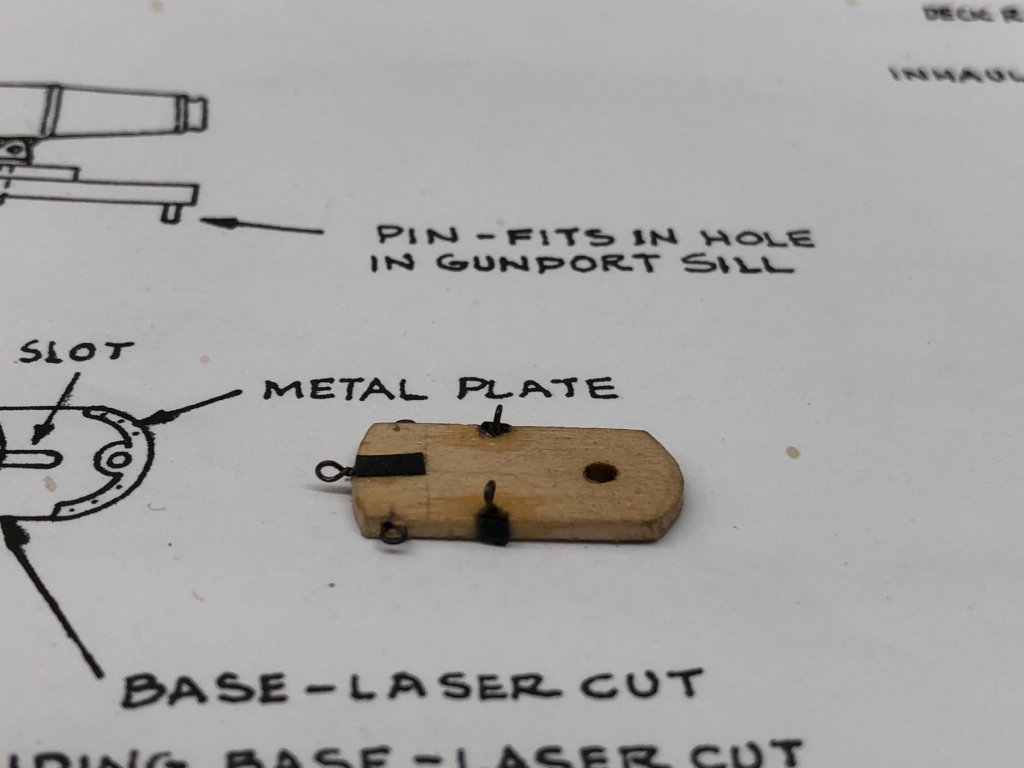
With the hull mostly complete I started putting together the pieces needed to build the carronade platforms. I am not much of a metal worker so the curved plates at the front of the platform were enough to convince me to "find another way". I got some "Laserboard" from a vendor in Arkansas that is 0.011" thick and black in color. Now to make it fit the carronade platform. I used a metal punch to cut a 1/4" hole in the laserboard and then carefully positioned the small hole in the center of the 3/8" punch hole. Not that easy as the surface where the two halves of the punch join is at least a 1/4" deep inside what is really a pretty dark hole. Even with my magnifiers and dedicated light it was a challenge (not always met). I "cheated" and drew some registration lines and an outline of the 3/8" hole using a white pencil but even with that I made a few rings that were pretty obviously not centered. I think I made twelve sets (each ring produces two semi-circular pieces so covers two carronades) to get 18 acceptable pieces. Pictured below is the "production line" for these pieces. I also took one of the platforms and built a prototype of what the eighteen would look like to see if my idea of using the laserboard would here as well. The two gun tackle eyebolts were easy. For the inhaul eye plate and bolt I carefully filed a slot in the rear of the platform (after marking how long the plate should be). The grove was deep enough to make the eyebolt flush with the top of the platform. I cut a very small piece of the laserboard and used a very small drop of medium CA to glue it over the eyebolt. Seems to look okay so I located and installed the breech line plates and eyebolts in a similar fashion except here I filed a flat groove as wide as the laserboard and then used a small triangular file to put a "v" inside the flat groove to hold the eyebolt. I figured out it was much easier to use a much longer piece of the laserboard and then cut the excess off after the CA dried rather then trying to maneuver a very small piece into a pretty specific location and orientation. Pictured below is the prototype. Now all I have to do is eighteen more after I get the platforms painted.
- 367 replies
-
- 2
-
-
- model shipways
- niagara
- (and 1 more)
-
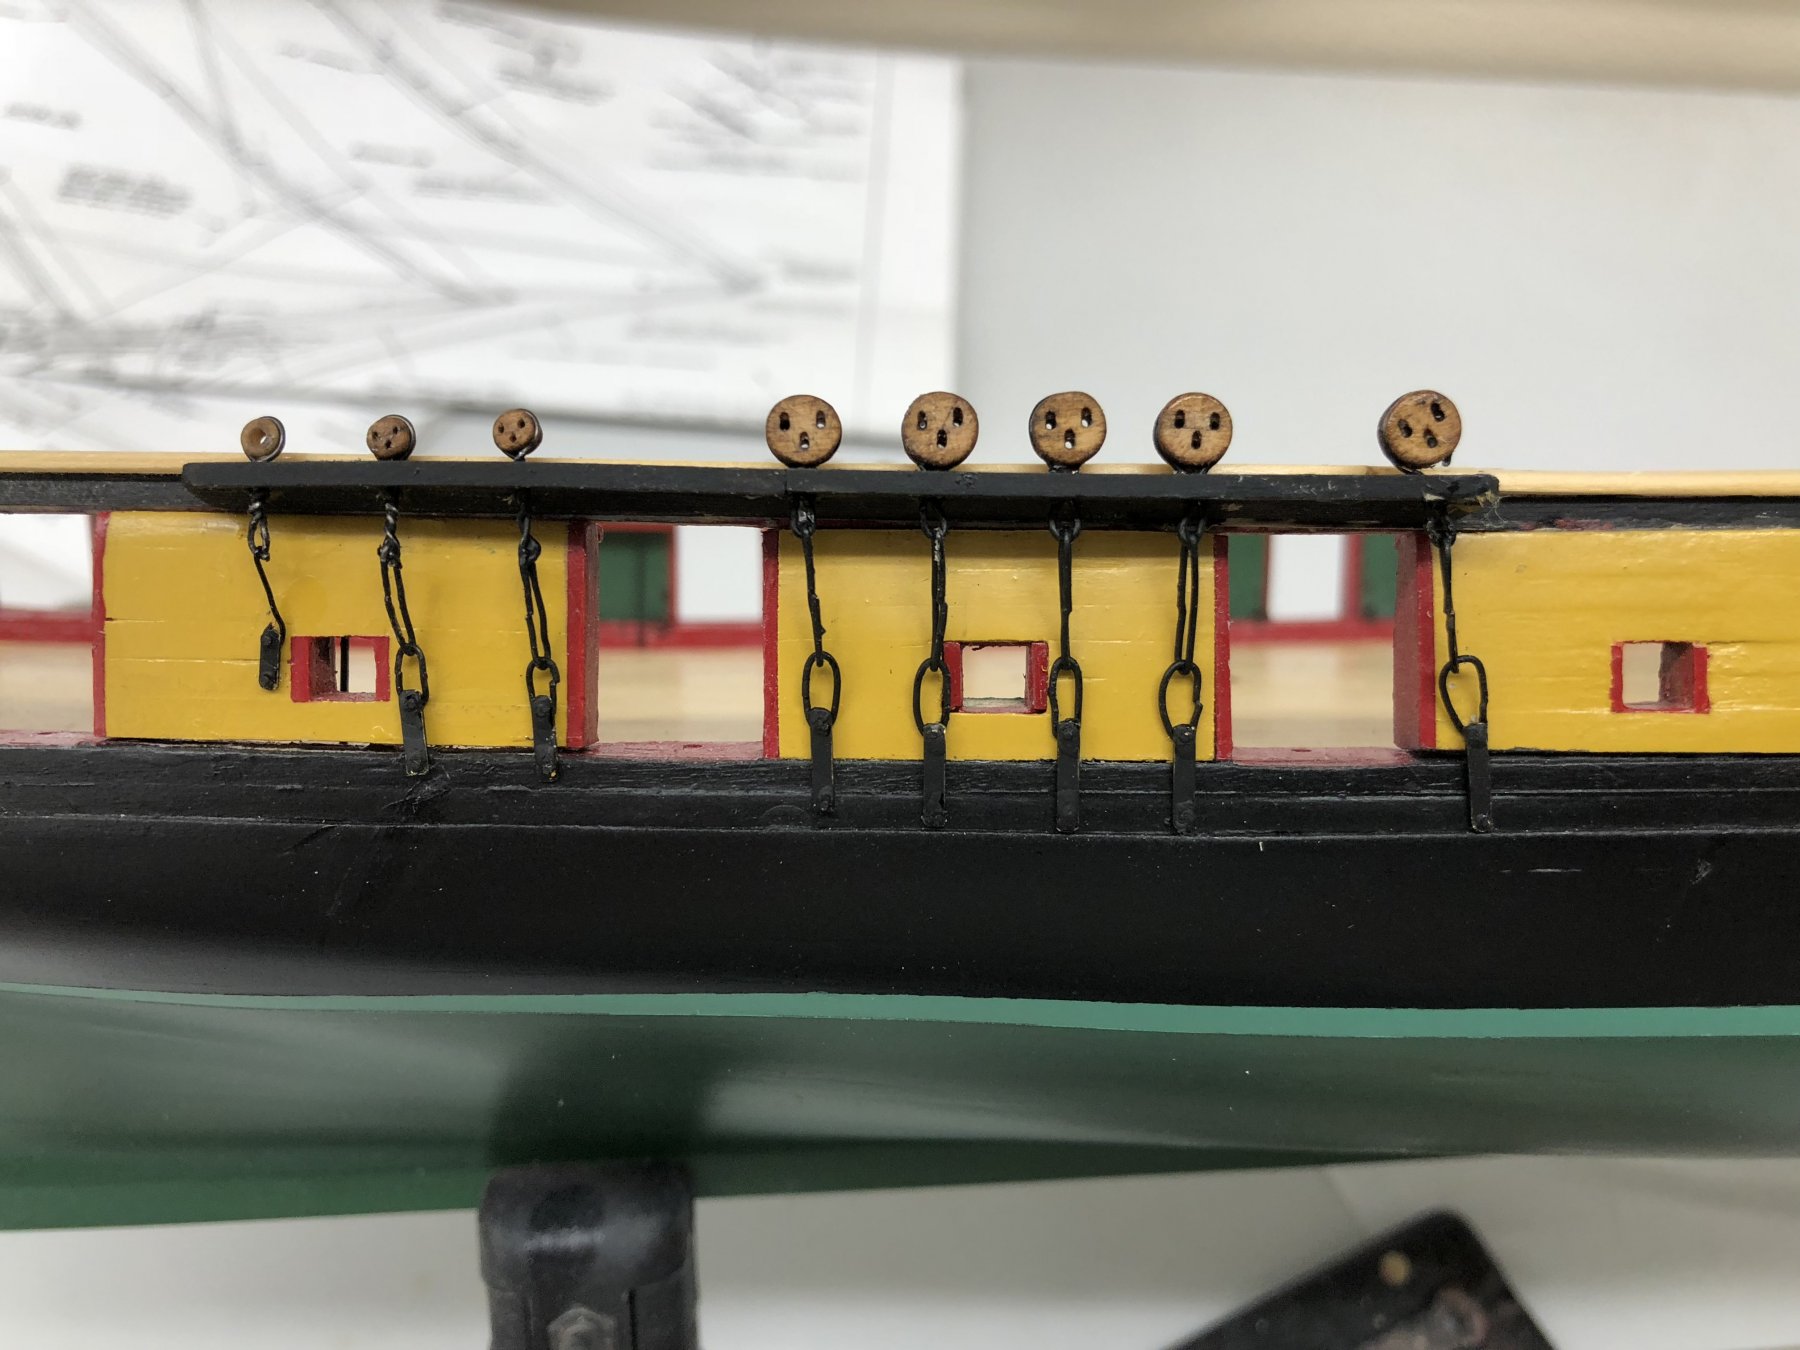
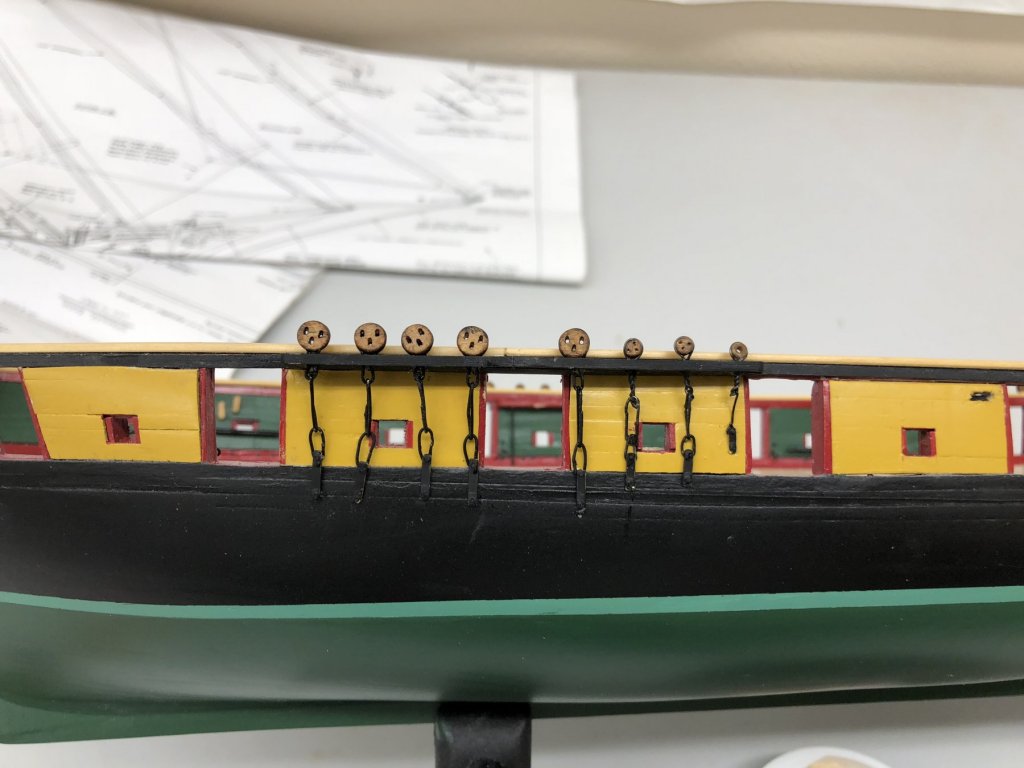
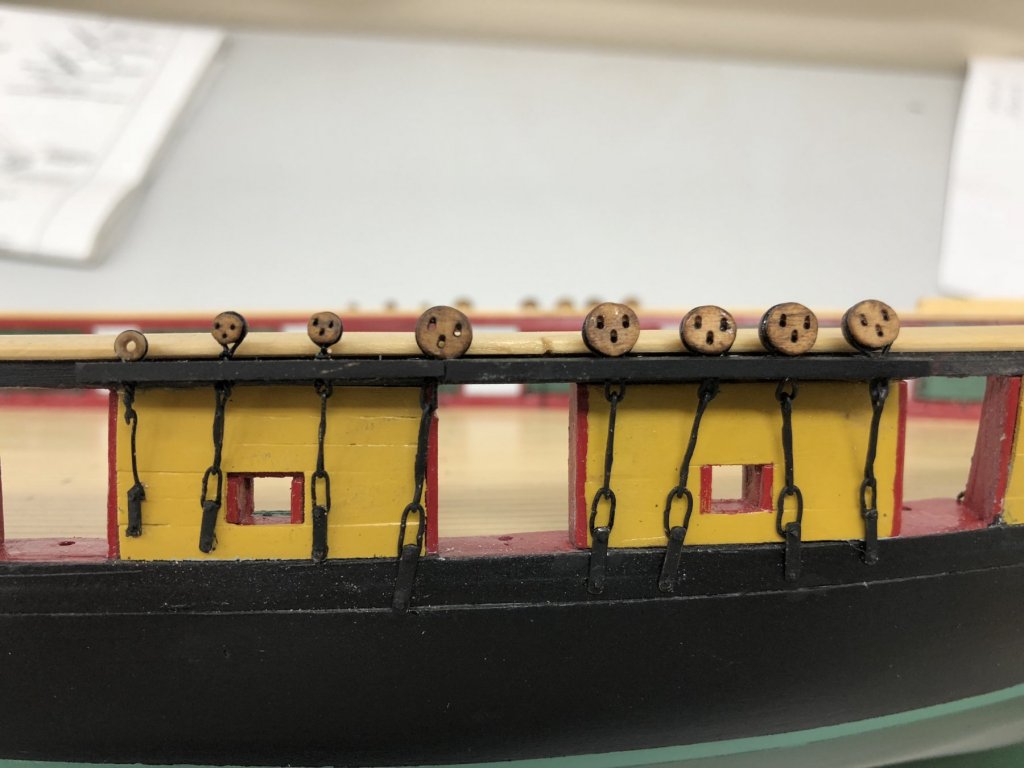
Channels are complete. Did not get the chainplates as even on the hull as I would have liked but... Have to add some additional eyebolts for the bowsprit stays, etc. but the hull and deck furniture are essentially compete. Moving on to the armament now. Think I will paint the guns, probably use a "dirty Black" which looks more like grey on the guns but seems more realistic than just flat black. I tried the pewter blackening agents but they come out more brown than black or grey. Working on the carriages and setting up a "production line" for the various things (eyebolts, metal strips, etc.) that need to be added to each carriage.

- 367 replies
-
- 2
-
-
- model shipways
- niagara
- (and 1 more)
-
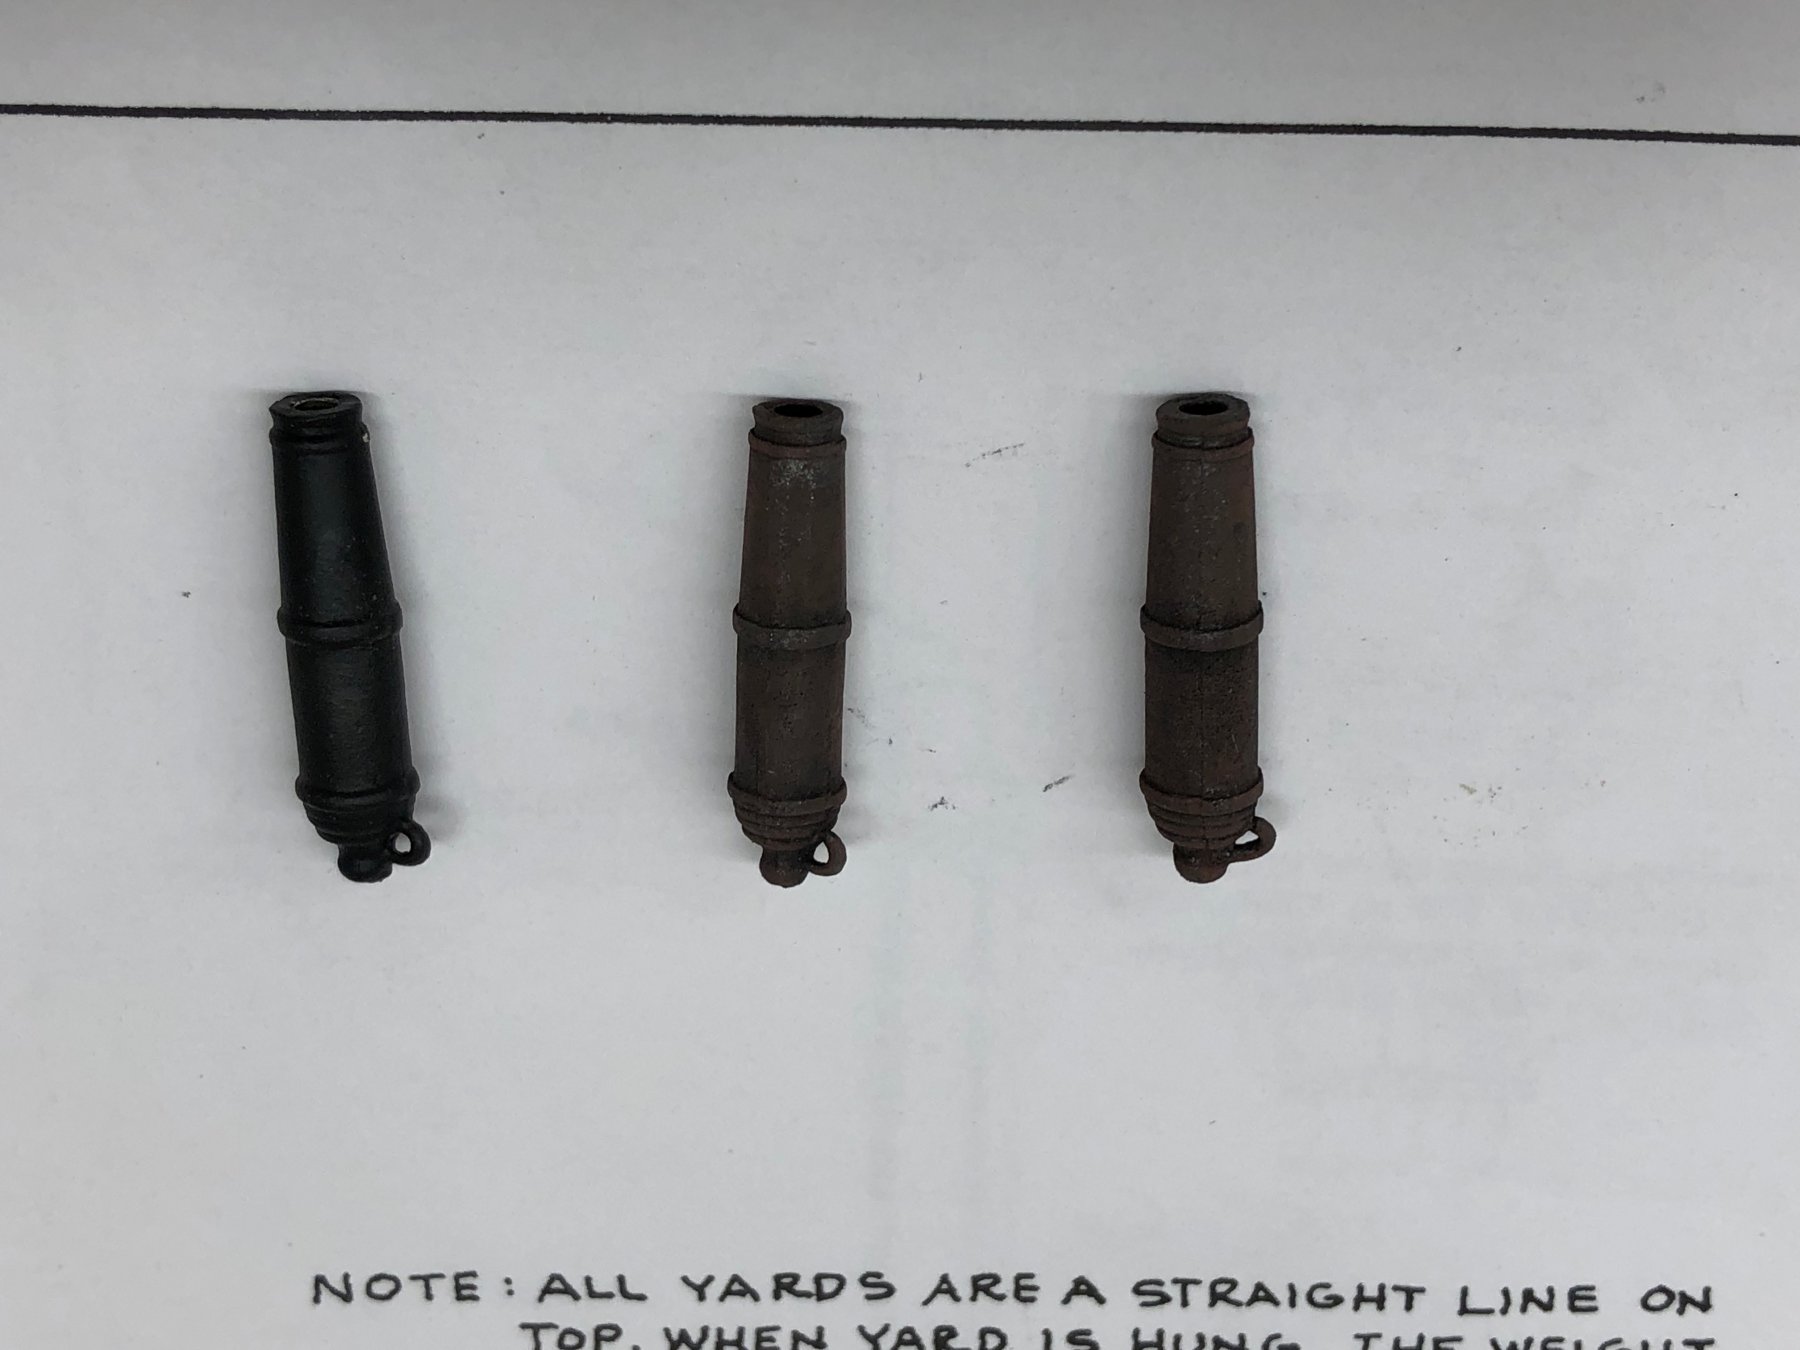
While waiting for various glues and paints to dry I took a crack at the Britannia metal cannonades to see what would work for getting them darkened. I have a blackening solution for pewter/Britannia from both JAX and Bluejackets. I cleaned three of then cannonades and did one in each solution and painted one with flat black paint. Both the ones done using the solution (two times through at full strength for 5 minutes) came out on the brownish side of black while of course the paint is actually black. It is really hard to tell in the picture (the painted one is on the left). There is nothing to choose between the two solutions as far as I can tell but using the solution allows the texture of the metal to show some where the paint covers all that up. I am going to try doing the solution three times to see if I can get a darker color and if so will go that way. I might try thinning the paint so as a fall back.