
a49kid
-
Posts
41 -
Joined
-
Last visited
-
 Tossedman reacted to a post in a topic:
African Queen by a49kid - Billing Boats - 1:12 - RADIO
Tossedman reacted to a post in a topic:
African Queen by a49kid - Billing Boats - 1:12 - RADIO
-
Canute reacted to a post in a topic:
African Queen by a49kid - Billing Boats - 1:12 - RADIO
-
Canute reacted to a post in a topic:
African Queen by a49kid - Billing Boats - 1:12 - RADIO
-
Canute reacted to a post in a topic:
African Queen by a49kid - Billing Boats - 1:12 - RADIO
-
Canute reacted to a post in a topic:
African Queen by a49kid - Billing Boats - 1:12 - RADIO
-
Canute reacted to a post in a topic:
African Queen by a49kid - Billing Boats - 1:12 - RADIO
-
Canute reacted to a post in a topic:
African Queen by a49kid - Billing Boats - 1:12 - RADIO
-
Canute reacted to a post in a topic:
African Queen by a49kid - Billing Boats - 1:12 - RADIO
-
Canute reacted to a post in a topic:
African Queen by a49kid - Billing Boats - 1:12 - RADIO
-
Canute reacted to a post in a topic:
African Queen by a49kid - Billing Boats - 1:12 - RADIO
-
a49kid reacted to a post in a topic:
African Queen by gjdale (Grant) - Billing Boats (modified) - Scale 1:12 - RADIO - Live Steam
-
a49kid reacted to a post in a topic:
The Shipyard at Foss' Landing (Diorama) by gjdale (Grant) - FINISHED - SierraWest - Scale 1:87 (HO)
-
 Hi guys, and yes I also have a Build Thread on ‘Ships of Scale’. That is a very active Forum, and they send me notification emails every day. They are taking up a lot of my time, almost too much, can’t get any building done. And every time I come here, it takes me 10 minutes to find my Thread, maybe at 74 I’m just getting forgetful on the procedure here. Anyway I can’t spend time Posting on two forums, so I may have to end this Build Thread of the African Queen here. But will stay as a member and check on other builds here.
-
 a49kid reacted to a post in a topic:
Hannah by gjdale (Grant) - FINISHED - Amati - 1:300 - BOTTLE
a49kid reacted to a post in a topic:
Hannah by gjdale (Grant) - FINISHED - Amati - 1:300 - BOTTLE
-
a49kid reacted to a post in a topic:
Hannah by gjdale (Grant) - FINISHED - Amati - 1:300 - BOTTLE
-
a49kid reacted to a post in a topic:
Hannah by gjdale (Grant) - FINISHED - Amati - 1:300 - BOTTLE
-
a49kid reacted to a post in a topic:
Hannah by gjdale (Grant) - FINISHED - Amati - 1:300 - BOTTLE
-
a49kid reacted to a post in a topic:
The Shipyard at Foss' Landing (Diorama) by gjdale (Grant) - FINISHED - SierraWest - Scale 1:87 (HO)
-
Hi Grant, I just Love your Diorama here, you are a true Artist and Craftsman. What scale is this, and all the little 'accessories' everywhere, did you buy them on the Net. Ha Ha, just noticed, yea the heading Text, 1:87 or HO ..............:)
-
a49kid reacted to a post in a topic:
The Shipyard at Foss' Landing (Diorama) by gjdale (Grant) - FINISHED - SierraWest - Scale 1:87 (HO)
-
a49kid reacted to a post in a topic:
The Shipyard at Foss' Landing (Diorama) by gjdale (Grant) - FINISHED - SierraWest - Scale 1:87 (HO)
-
a49kid reacted to a post in a topic:
The Shipyard at Foss' Landing (Diorama) by gjdale (Grant) - FINISHED - SierraWest - Scale 1:87 (HO)
-
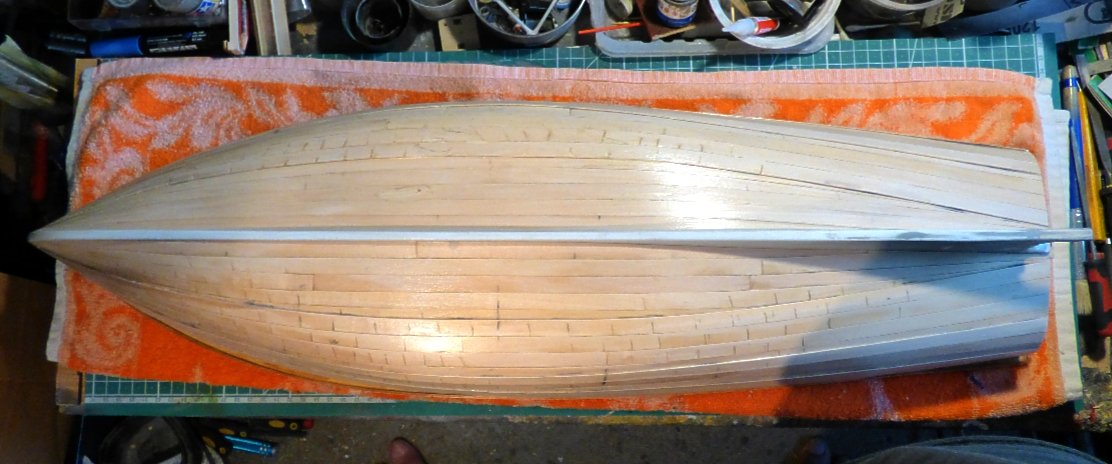
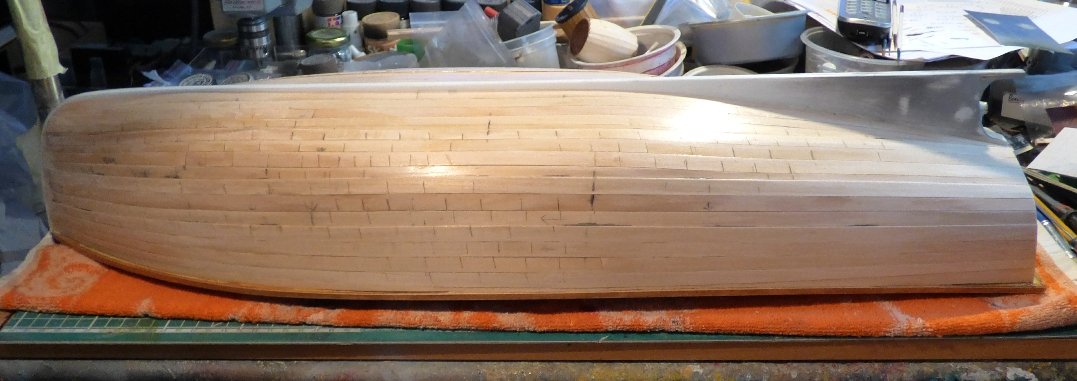
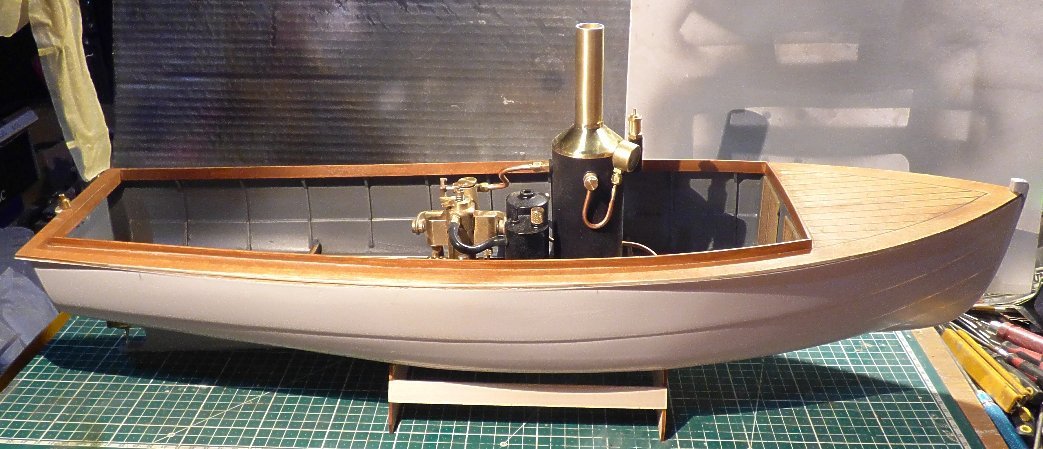
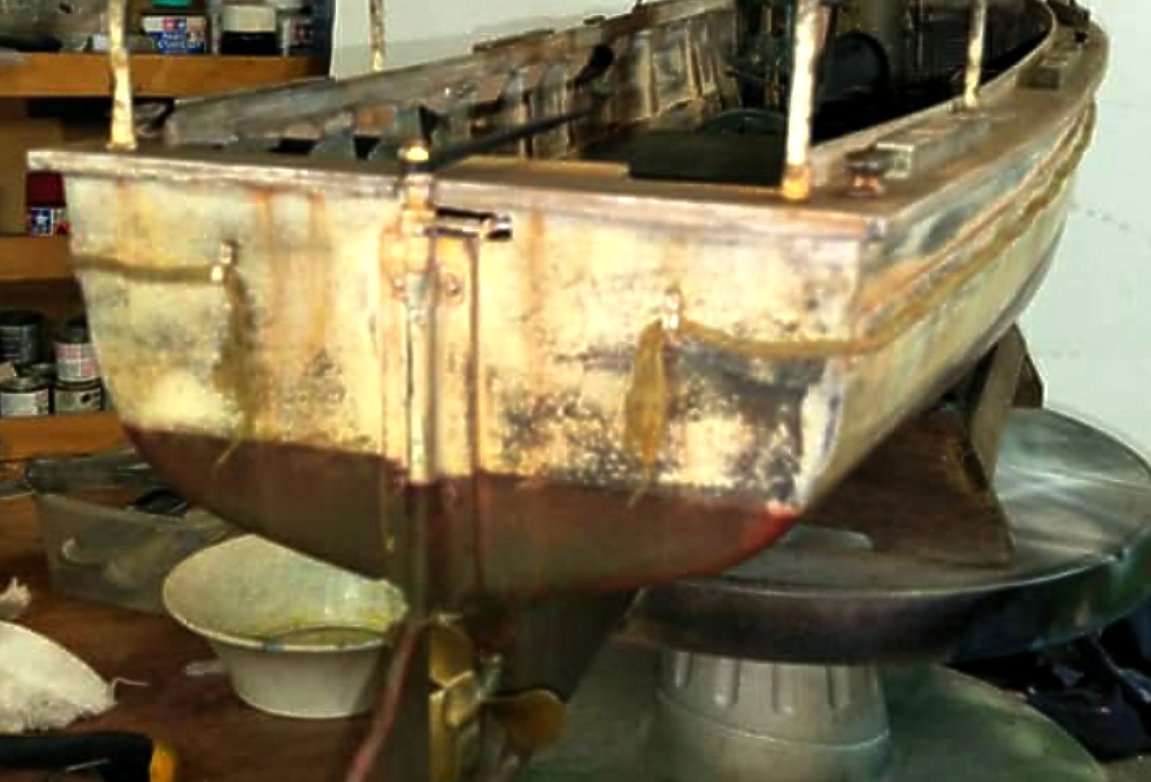
Yes continuing on with this build of the Billings African Queen, on a Very Cluttered bench......... As I have discussed above, this was a steel hull boat, but I have decided to timber plank over the plastic vacuum formed hull. I guess most smaller boats of that time were timber hulls anyway. I’m using 0.5 x 10 mm strips, and this is the first time I have done ship planking. so a big learning curve ……..lol But I’m probably not doing it in the correct or normal way. But at least all my planks go the full length of the hull. No ‘fill in’ bits here, whatever you guys call those bits. And yes I tapered the planks fore and aft. And as the planks also need to curve / bend up and down, I came up with my own solution for that. I cut thru the 10mm planks about 7mm, on the opposite edge to that that needs to curve up. But we still had the one full length plank. And yes this leaves gaps that need to be filled, the wider ones with wood filler, and the very close ones just fill with the Sand & Seal. Yes this method would be unsightly if the hull was going to be stained, But as this is going to be painted, all these expansion cuts will not be seen. It has been filled and 2 coats of sealer on it here. Will then Grey Primer it, and I suspect more imperfections will new show up, so a little more filler and primer.
- 31 replies
-
- 6
-
-
- African Queen
- Billing Boats
- (and 2 more)
-
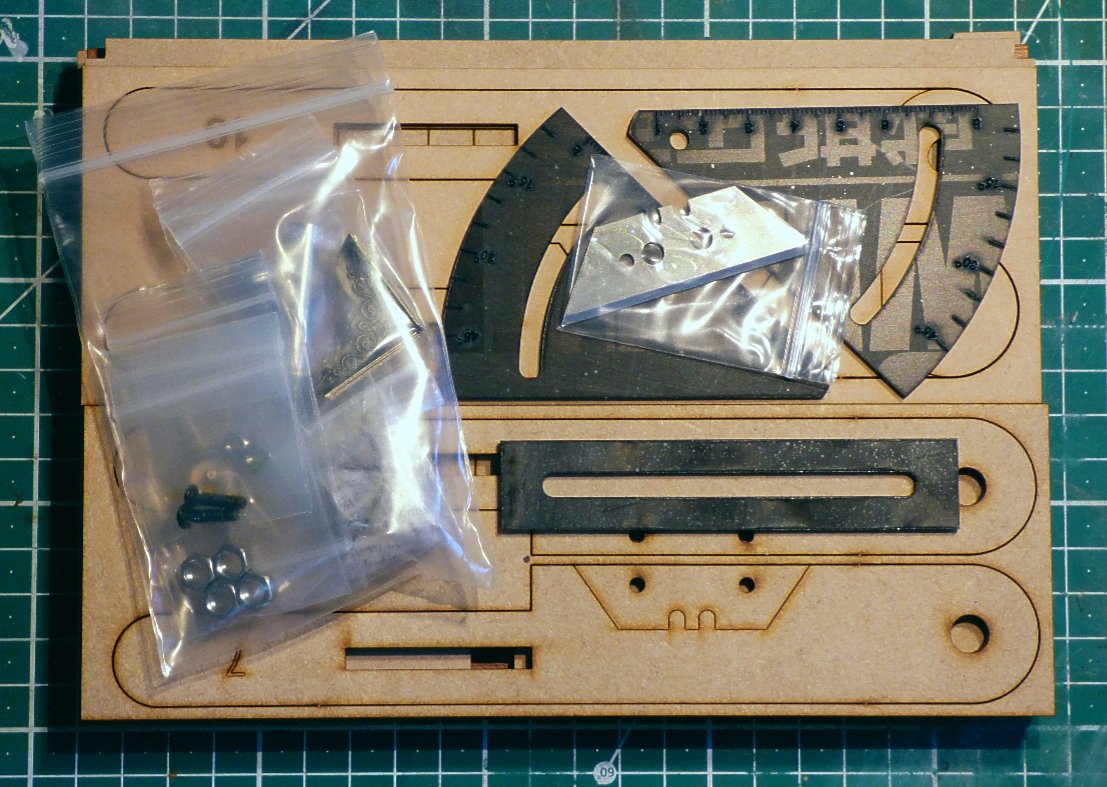
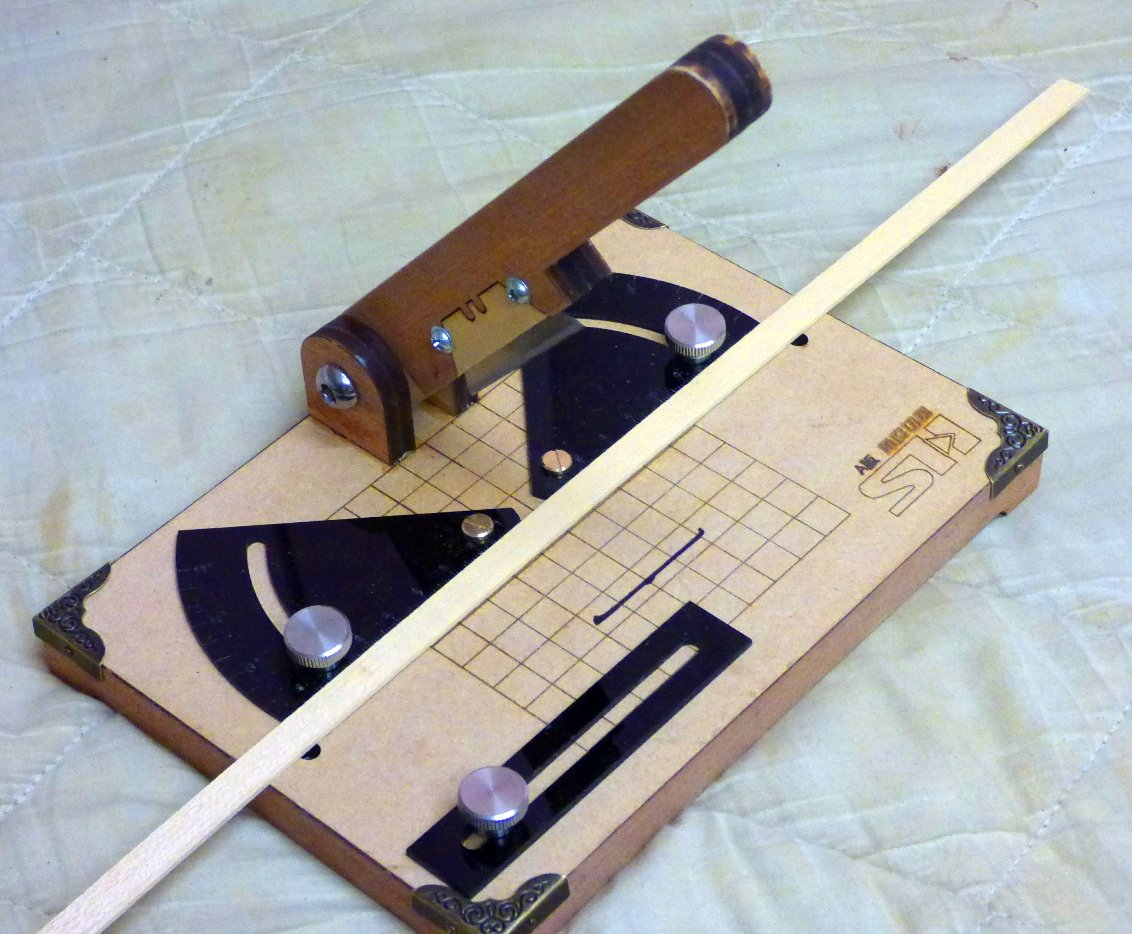
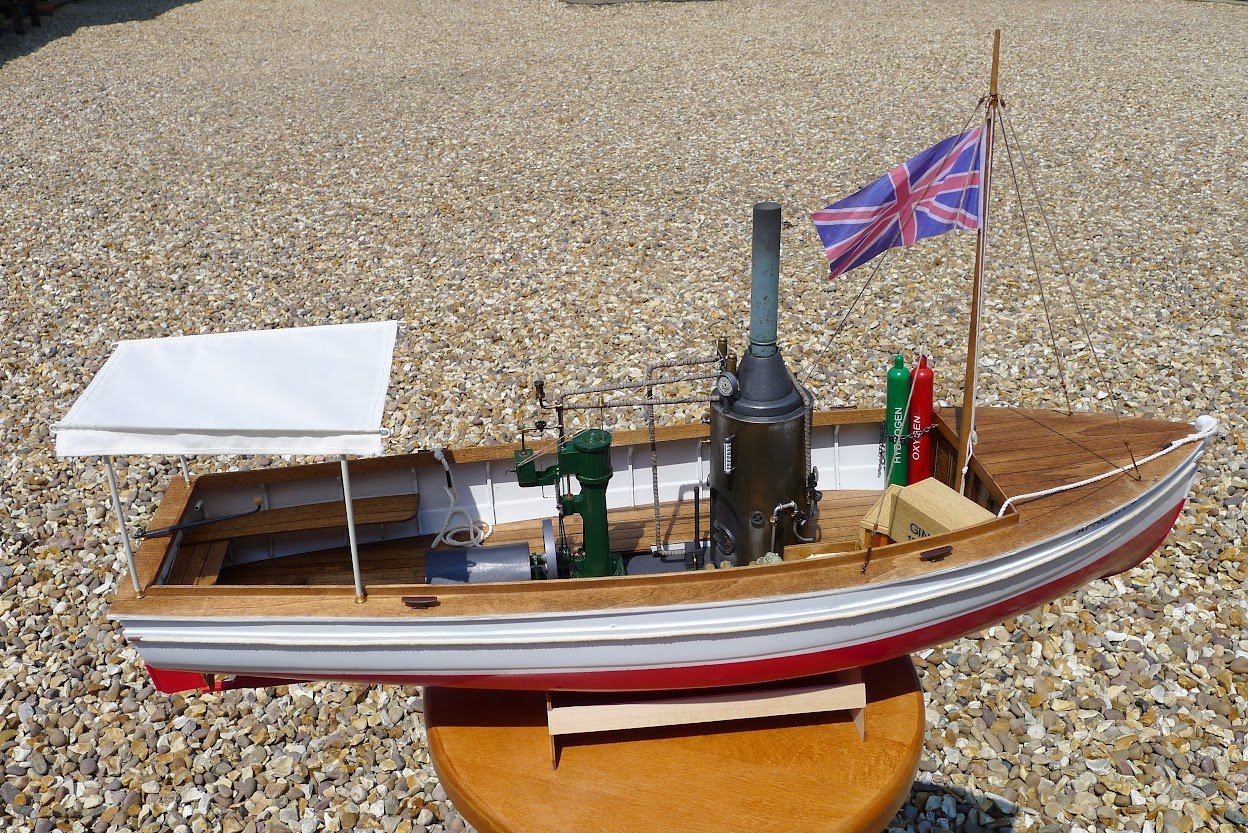
Hi Guys, and Grant, it may seem like I haven’t been doing much boat building lately, but actually I have been. But I have taken a short rest from the filling, sanding, sealing, primer and top coat on the Queens hull. Yes I’ve been making the Drink / Gin crates, 4 of them. And all the ‘planking’ on them. It is quite a time consuming exercise. Currently waiting on some more bottles for them, will post photos when all complete. And I must say I love my cut off tool I bought a couple of weeks ago. A wooden kit you assemble, but I changed the kit blade to a UK Stanley one, it is much sharper. And for the crates, you set the stop and then cut the strip wood to all exactly the same length that you want. And the precise cutting is very very fast.
- 31 replies
-
- 6
-
-
- African Queen
- Billing Boats
- (and 2 more)
-
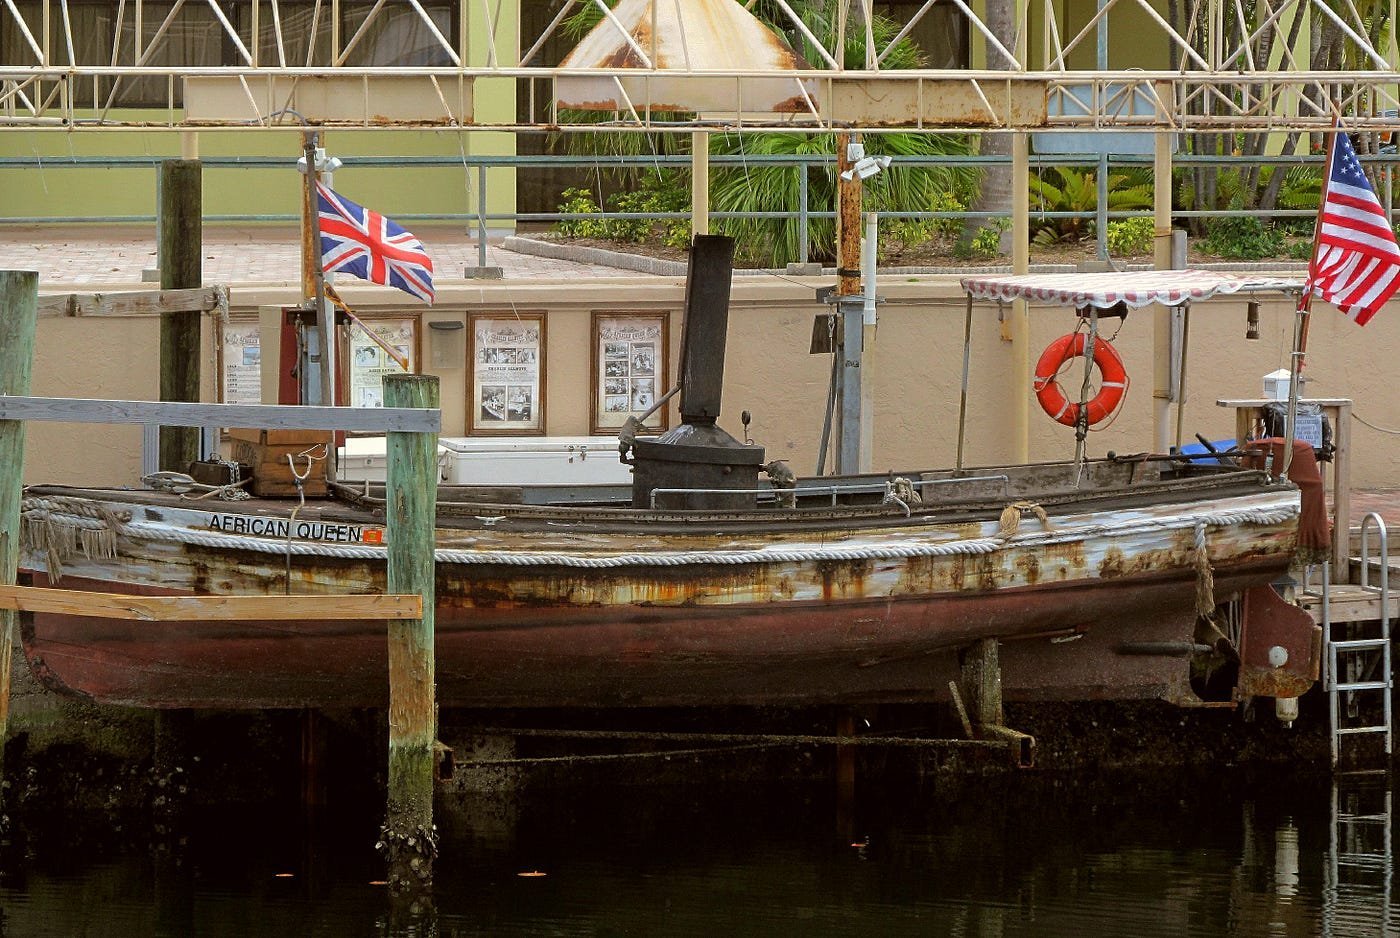
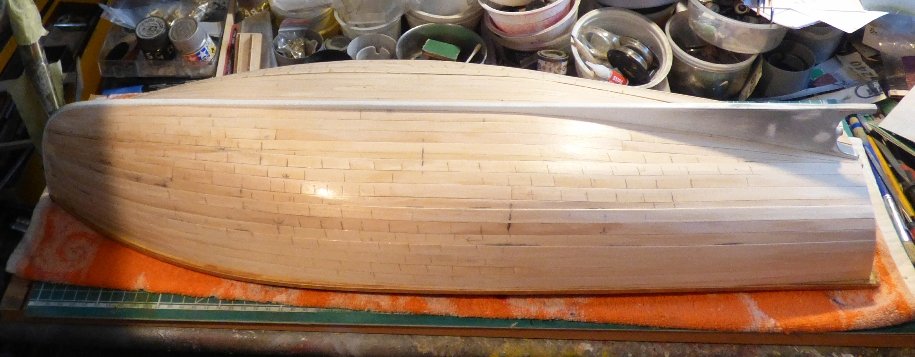
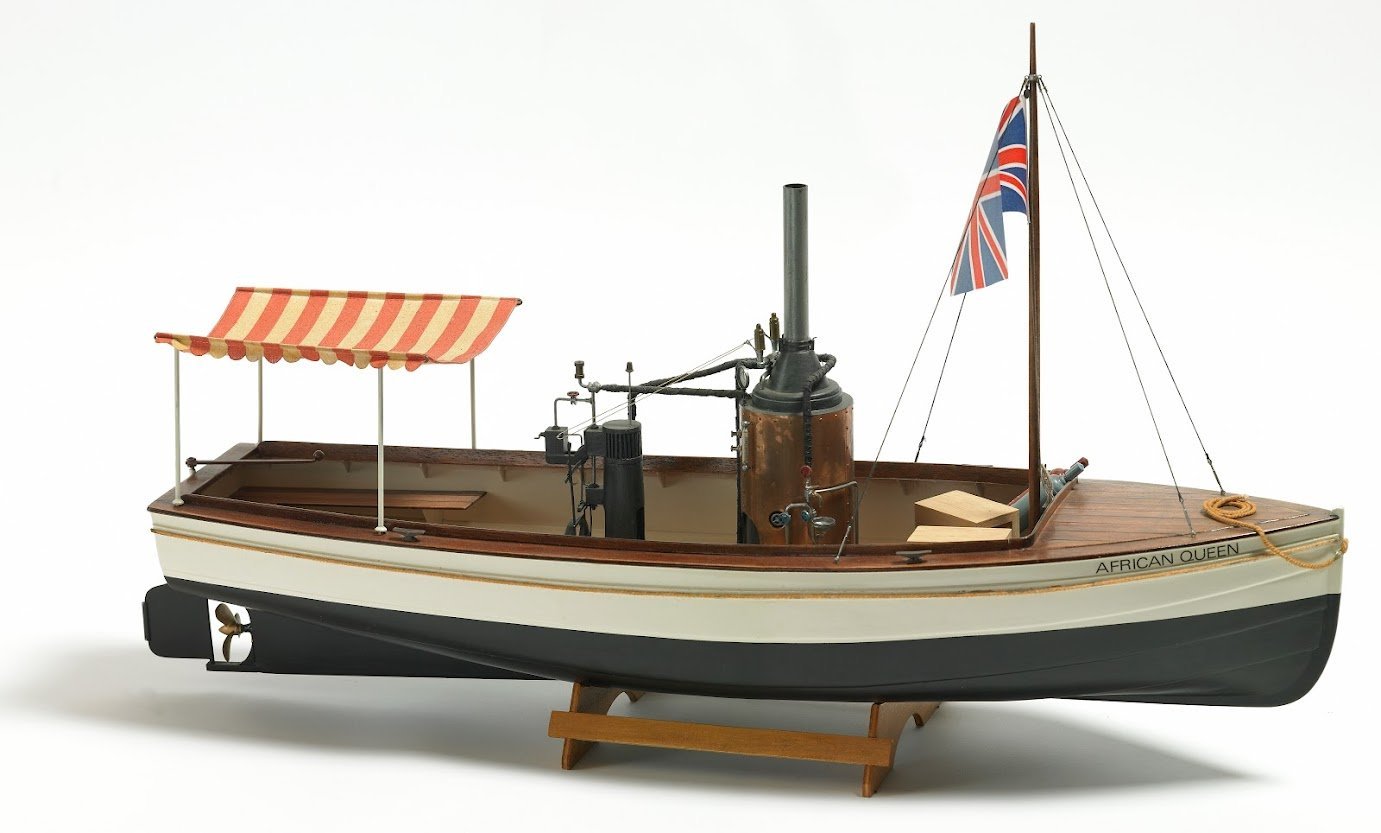
Finished the hull planking, and that was quite a job for a first time planker. I’m using 0.5 x 10mm strip over the plastic hull. I figured boats of that size and at that time would be timber boats. I’m now in the process of filling and sanding, and then sealer, primer and top coat, I hope you will still be able to tell it is timber planked. And I don’t care if mine is not true to the original, I would rather have a timber hull than a plastic one. I’m using this Wood Sealer, and I’m liking it. Made in the UK. But I don’t think this would be suitable for stained timber hulls. Some information on the African Queen. It was a 30-foot boat built of sheet steel in the United Kingdom, for the British East Africa Railway for service in Africa, on the Victoria Nile and Lake Albert and used from 1912 to 1968. It was originally named the L.S. Livingston, and had a diesel engine. In the movie the steam engine was just a prop.
.jpg.3d5b9353cfed27bc7b9ae76a2c79f07e.jpg)
- 31 replies
-
- 3
-
-
- African Queen
- Billing Boats
- (and 2 more)
-
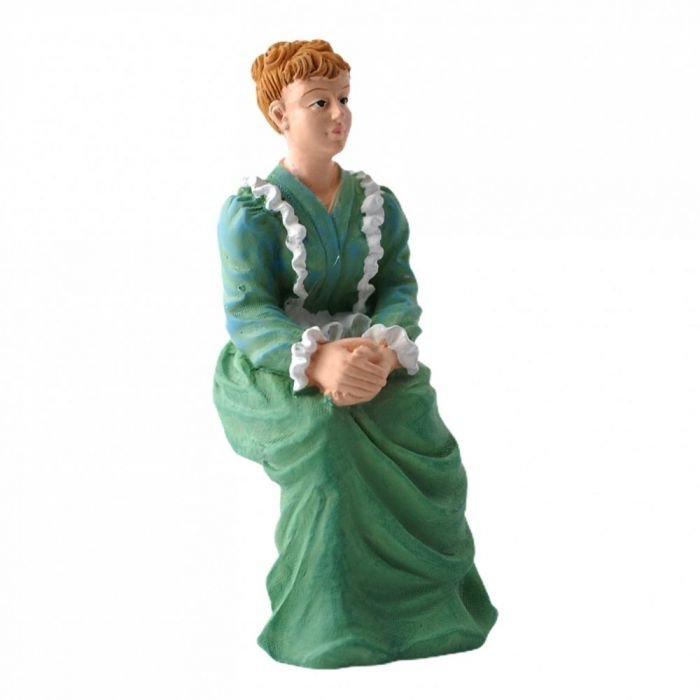
Two places that sell 1:12 figures, ETSY, Melody Jane Doll House and Minimum World, Search Dolls House Figures. I wanted 2 seated figures. Very nicely painted resin molded figures, but then I modified them with my Dremell, and re painted them. So they don't look like the figures here now. I will cut and rotate Charlies arm / hand to have it on the tiller. And I have to make a big hat for Rose. Sorry no pics yet, still working on them


- 31 replies
-
- 3
-
-
- African Queen
- Billing Boats
- (and 2 more)
-
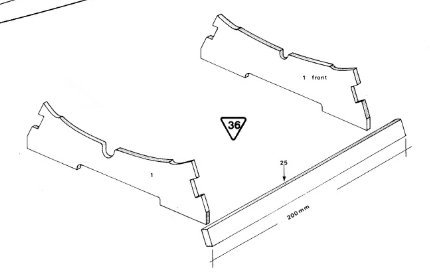
Another thing that has now annoyed me about the building instructions. They could be clearer, and more detailed drawings re the build. Yes this is only a small thing, but I would have liked to have made the stand as Billings had intended. With the joining timber going a little beyond the hull support pieces. And others have made the same mistake as me.
- 31 replies
-
- 6
-
-
-
- African Queen
- Billing Boats
- (and 2 more)
-
And don't forget to set the burner flame, and then tighten the grub screw ............
- 31 replies
-
- 3
-
-
- African Queen
- Billing Boats
- (and 2 more)
-
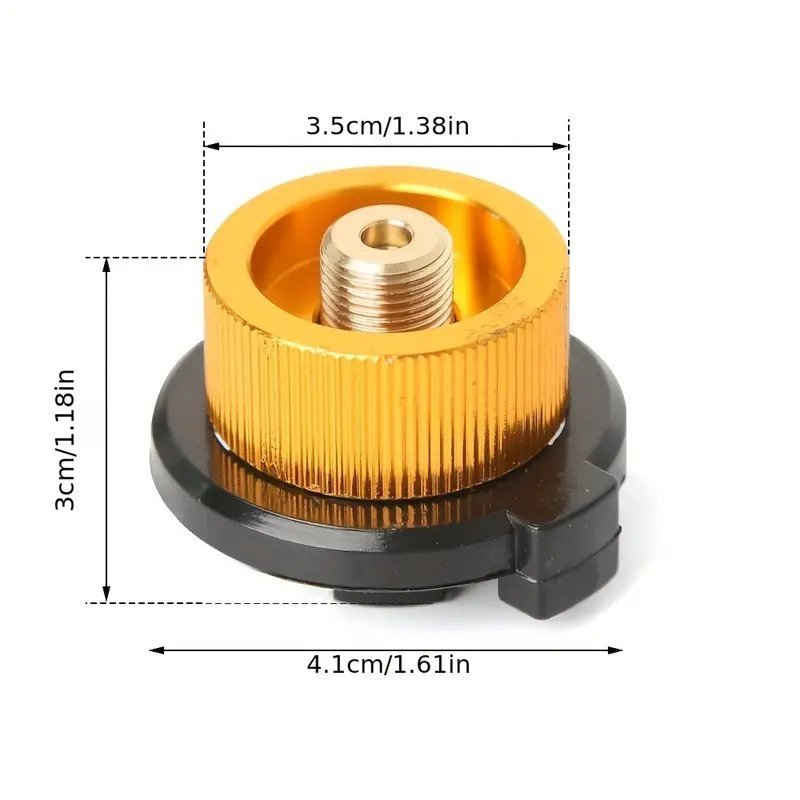
The Orange Adapter https://www.temu.com/ul/kuiper/un9.html?subj=goods-un&_bg_fs=1&_p_jump_id=894&_x_vst_scene=adg&goods_id=601099519685652&sku_id=17592229766684&adg_ctx=a-539583dc~c-18cda522~f-16258fa8&_x_ads_sub_channel=shopping&_p_rfs=1&_x_ns_prz_type=-1&_x_ns_sku_id=17592229766684&mrk_rec=1&_x_ads_channel=google&_x_gmc_account=710728018&_x_login_type=Google&_x_ads_account=2720833615&_x_ads_set=20878039836&_x_ads_id=157413511615&_x_ads_creative_id=685403347863&_x_ns_source=g&_x_ns_gclid=Cj0KCQjw2a6wBhCVARIsABPeH1snBh29I3AaBVYdpJN3fDjeaiFyjVpJb5BiXlT_u2SuRx-EUbpcPHMaAipqEALw_wcB&_x_ns_placement=&_x_ns_match_type=&_x_ns_ad_position=&_x_ns_product_id=710728018-17592229766684&_x_ns_target=&_x_ns_devicemodel=&_x_ns_wbraid=Cj4KCAjwtqmwBhBaEi4AF3g-M1SIddboT18bRk8ybYWFEoQasfKcXf4aHH4jyZ7pirs3kfi3cIFjmK_xGgJNwA&_x_ns_gbraid=0AAAAAo4mICH5hIaDH_7j0LdJpXuNnvO_R&_x_ns_targetid=pla-2087125886601&gad_source=1&gclid=Cj0KCQjw2a6wBhCVARIsABPeH1snBh29I3AaBVYdpJN3fDjeaiFyjVpJb5BiXlT_u2SuRx-EUbpcPHMaAipqEALw_wcB&is_back=1
- 31 replies
-
- 3
-
-
- African Queen
- Billing Boats
- (and 2 more)
-
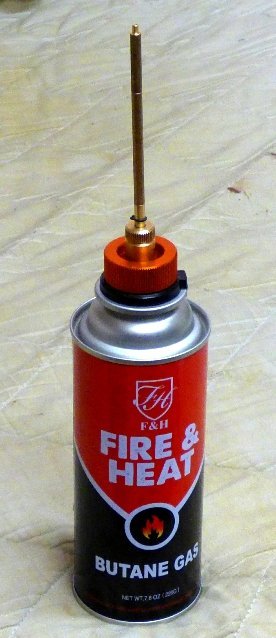
The Refill Cans https://www.superbuys.com.au/4pc-butane-gas-cartridge-8oz-227g?gad_source=1&gclid=Cj0KCQjw2a6wBhCVARIsABPeH1tB2My3q7JvNvnaRRz2_H7HY1Uaml-ebw978fq8hVLHs_32mC0xTjEaAvsqEALw_wcB
- 31 replies
-
- 3
-
-
- African Queen
- Billing Boats
- (and 2 more)
-
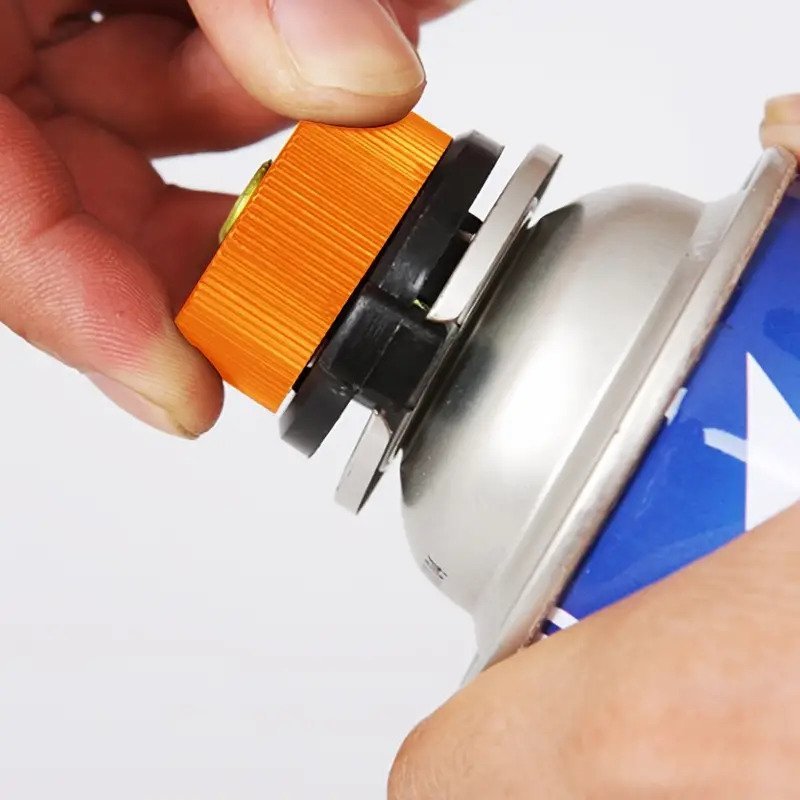
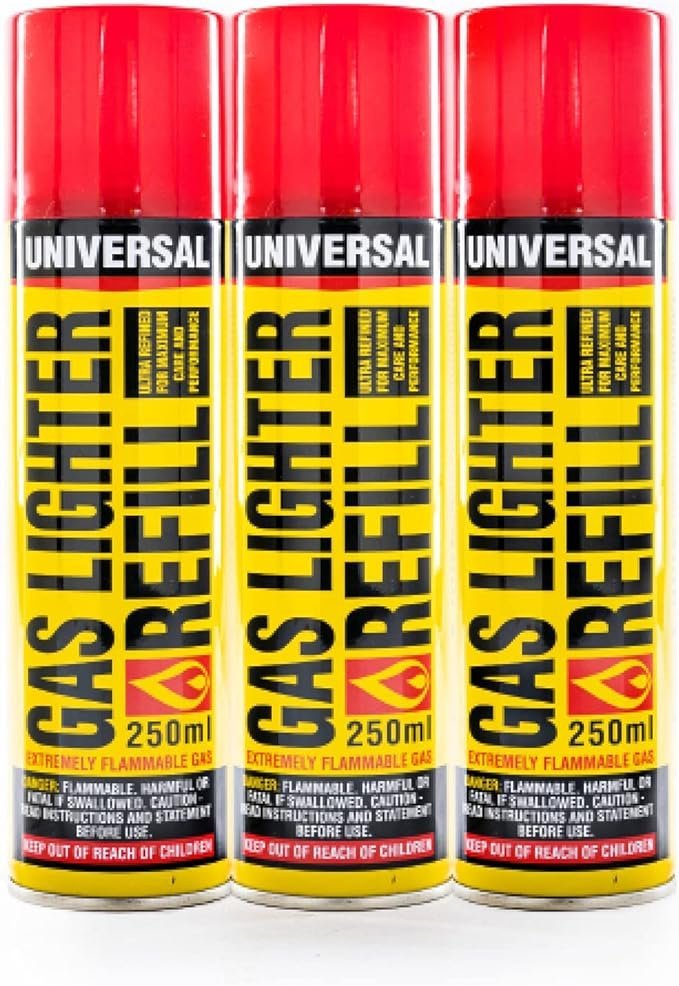
Hi Grant, a bit of info re the Steam Plant, or do the kids call it ‘Heads Up’ Now to fire up the steam boiler, it uses Butane Gas. But you cannot fill it’s gas tank with a normal Refill gas can, a copper pipe is in the way. In the engine box the guy has supplied a 100mm brass extension tube with a screw fitting. Now you screw that pipe onto this orange adapter fitting. Then this adapter twists onto the filler can. But you need a special can, and it took me some time searching to find one. Come from Sydney, can’t buy OS as it’s “Dangerous Goods”. The Universal cans don’t work, and the red plastic nozzle is too long.
- 31 replies
-
- 4
-
-
- African Queen
- Billing Boats
- (and 2 more)
-
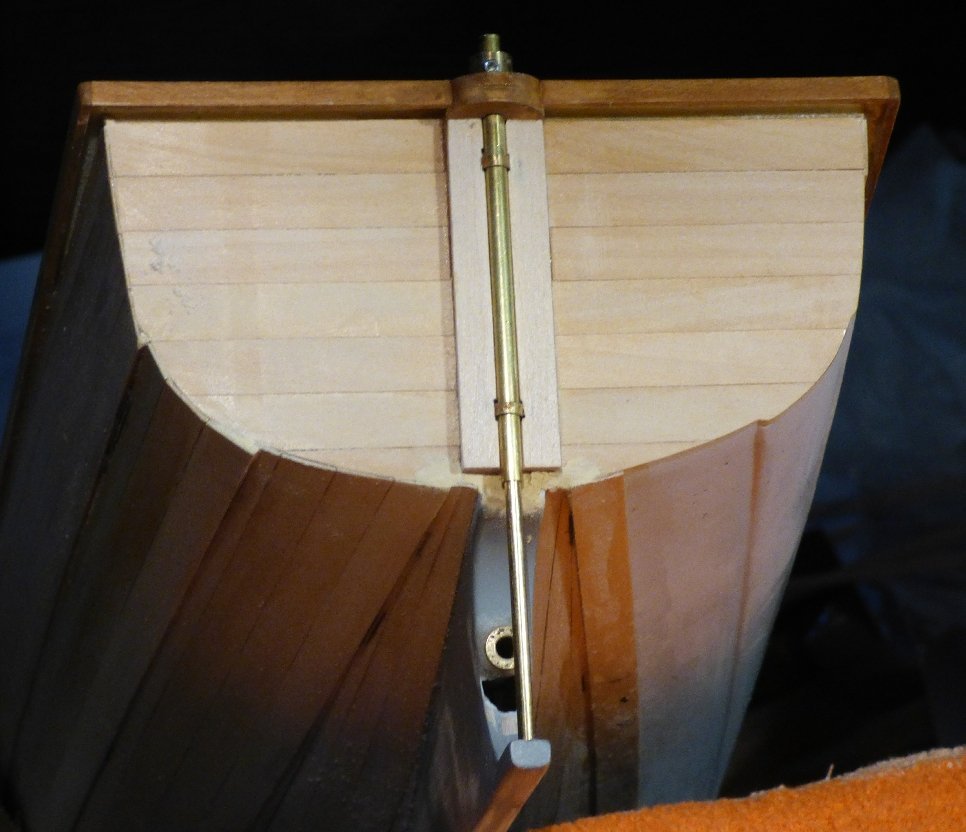
A few days ago I added a bit to the rear of the boat, (is that the stern), actually for the rudder. Put a reinforcing board on for the rudder tubing, but I slightly mucked up. I should have added the hull planking before I glued on the board. But much too hard to redo it all now re the tube locating at the bottom and at the top, where I have added a half round piece. So I have just added a bit more timber either side of the tubing, it will all look good after a little filler and it is painted And another builder was thinking like me and has done the same thing. And he is very much into realism with his weathering……………

- 31 replies
-
- 8
-
-
-
- African Queen
- Billing Boats
- (and 2 more)
-
Hi Todd, go the the start of this Thread, and read down, and a Lot of your questions will be answered. Including for the Steam Plant............#4034 And I have some 1:12 figures here, Dremmel modified and re painted, but I have now discovered that a guy is making some very good Humphrey and Katherine 3D figures
- 31 replies
-
- 6
-
-

-
- African Queen
- Billing Boats
- (and 2 more)