
Scottish Guy
-
Posts
382 -
Joined
-
Last visited
Content Type
Profiles
Forums
Gallery
Events
Everything posted by Scottish Guy
-
 Hi Keith, thank you for the comment. I´m still thinking about another try to fix the first build or at least giving it a go to fix it, even if it might end up in a total loss. I will try to find a container / basin large enough to fit the entire hull into it, then I have to find enough acetone to cover up the entire hull. I know it will end up with tons of sanding, still considering if I might just try to finish the build without dismantling the hull but just proceed with the build. Micha
- 145 replies
-
- 2
-

-
- Roar Ege
- Billing Boats
- (and 2 more)
-
Hi Paul and thank you, it´s nice to see that you guys would like to see my second approach. Micha
- 145 replies
-
- 4
-
-
- Roar Ege
- Billing Boats
- (and 2 more)
-
Hi Glen, thank you for the message. Still thinking if I might give the first build a go but not sure yet. I definitely learnt a lot of this build lol and I hope I will find a proper way for the second build. Thank you for your support and thank you that you would like my second approach. Micha
- 145 replies
-
- 3
-
-
- Roar Ege
- Billing Boats
- (and 2 more)
-
Hi Simon, if asked to be honest I would say, I don´t like the outside of the hull and I don´t like the inside of the hull lol... I don´t like it at all. When I can find a way to take the planks off again I will do so. I got a hint from @Keith Black by using acetone to de-glue the planks. Will try to find a proper way to do so (large basin and loads of acetone) and sink the hull into it. Not sure if I maybe just should try to fix the ship in the state as it is and finish it by knowing it will never get to a point that I might like it and then start over with the second kit. Micha
- 145 replies
-
- 3
-
-
- Roar Ege
- Billing Boats
- (and 2 more)
-
Welcome Lohengrin, nice to have you aboard here at MSW. A warm welcome from Scotland. Micha
-
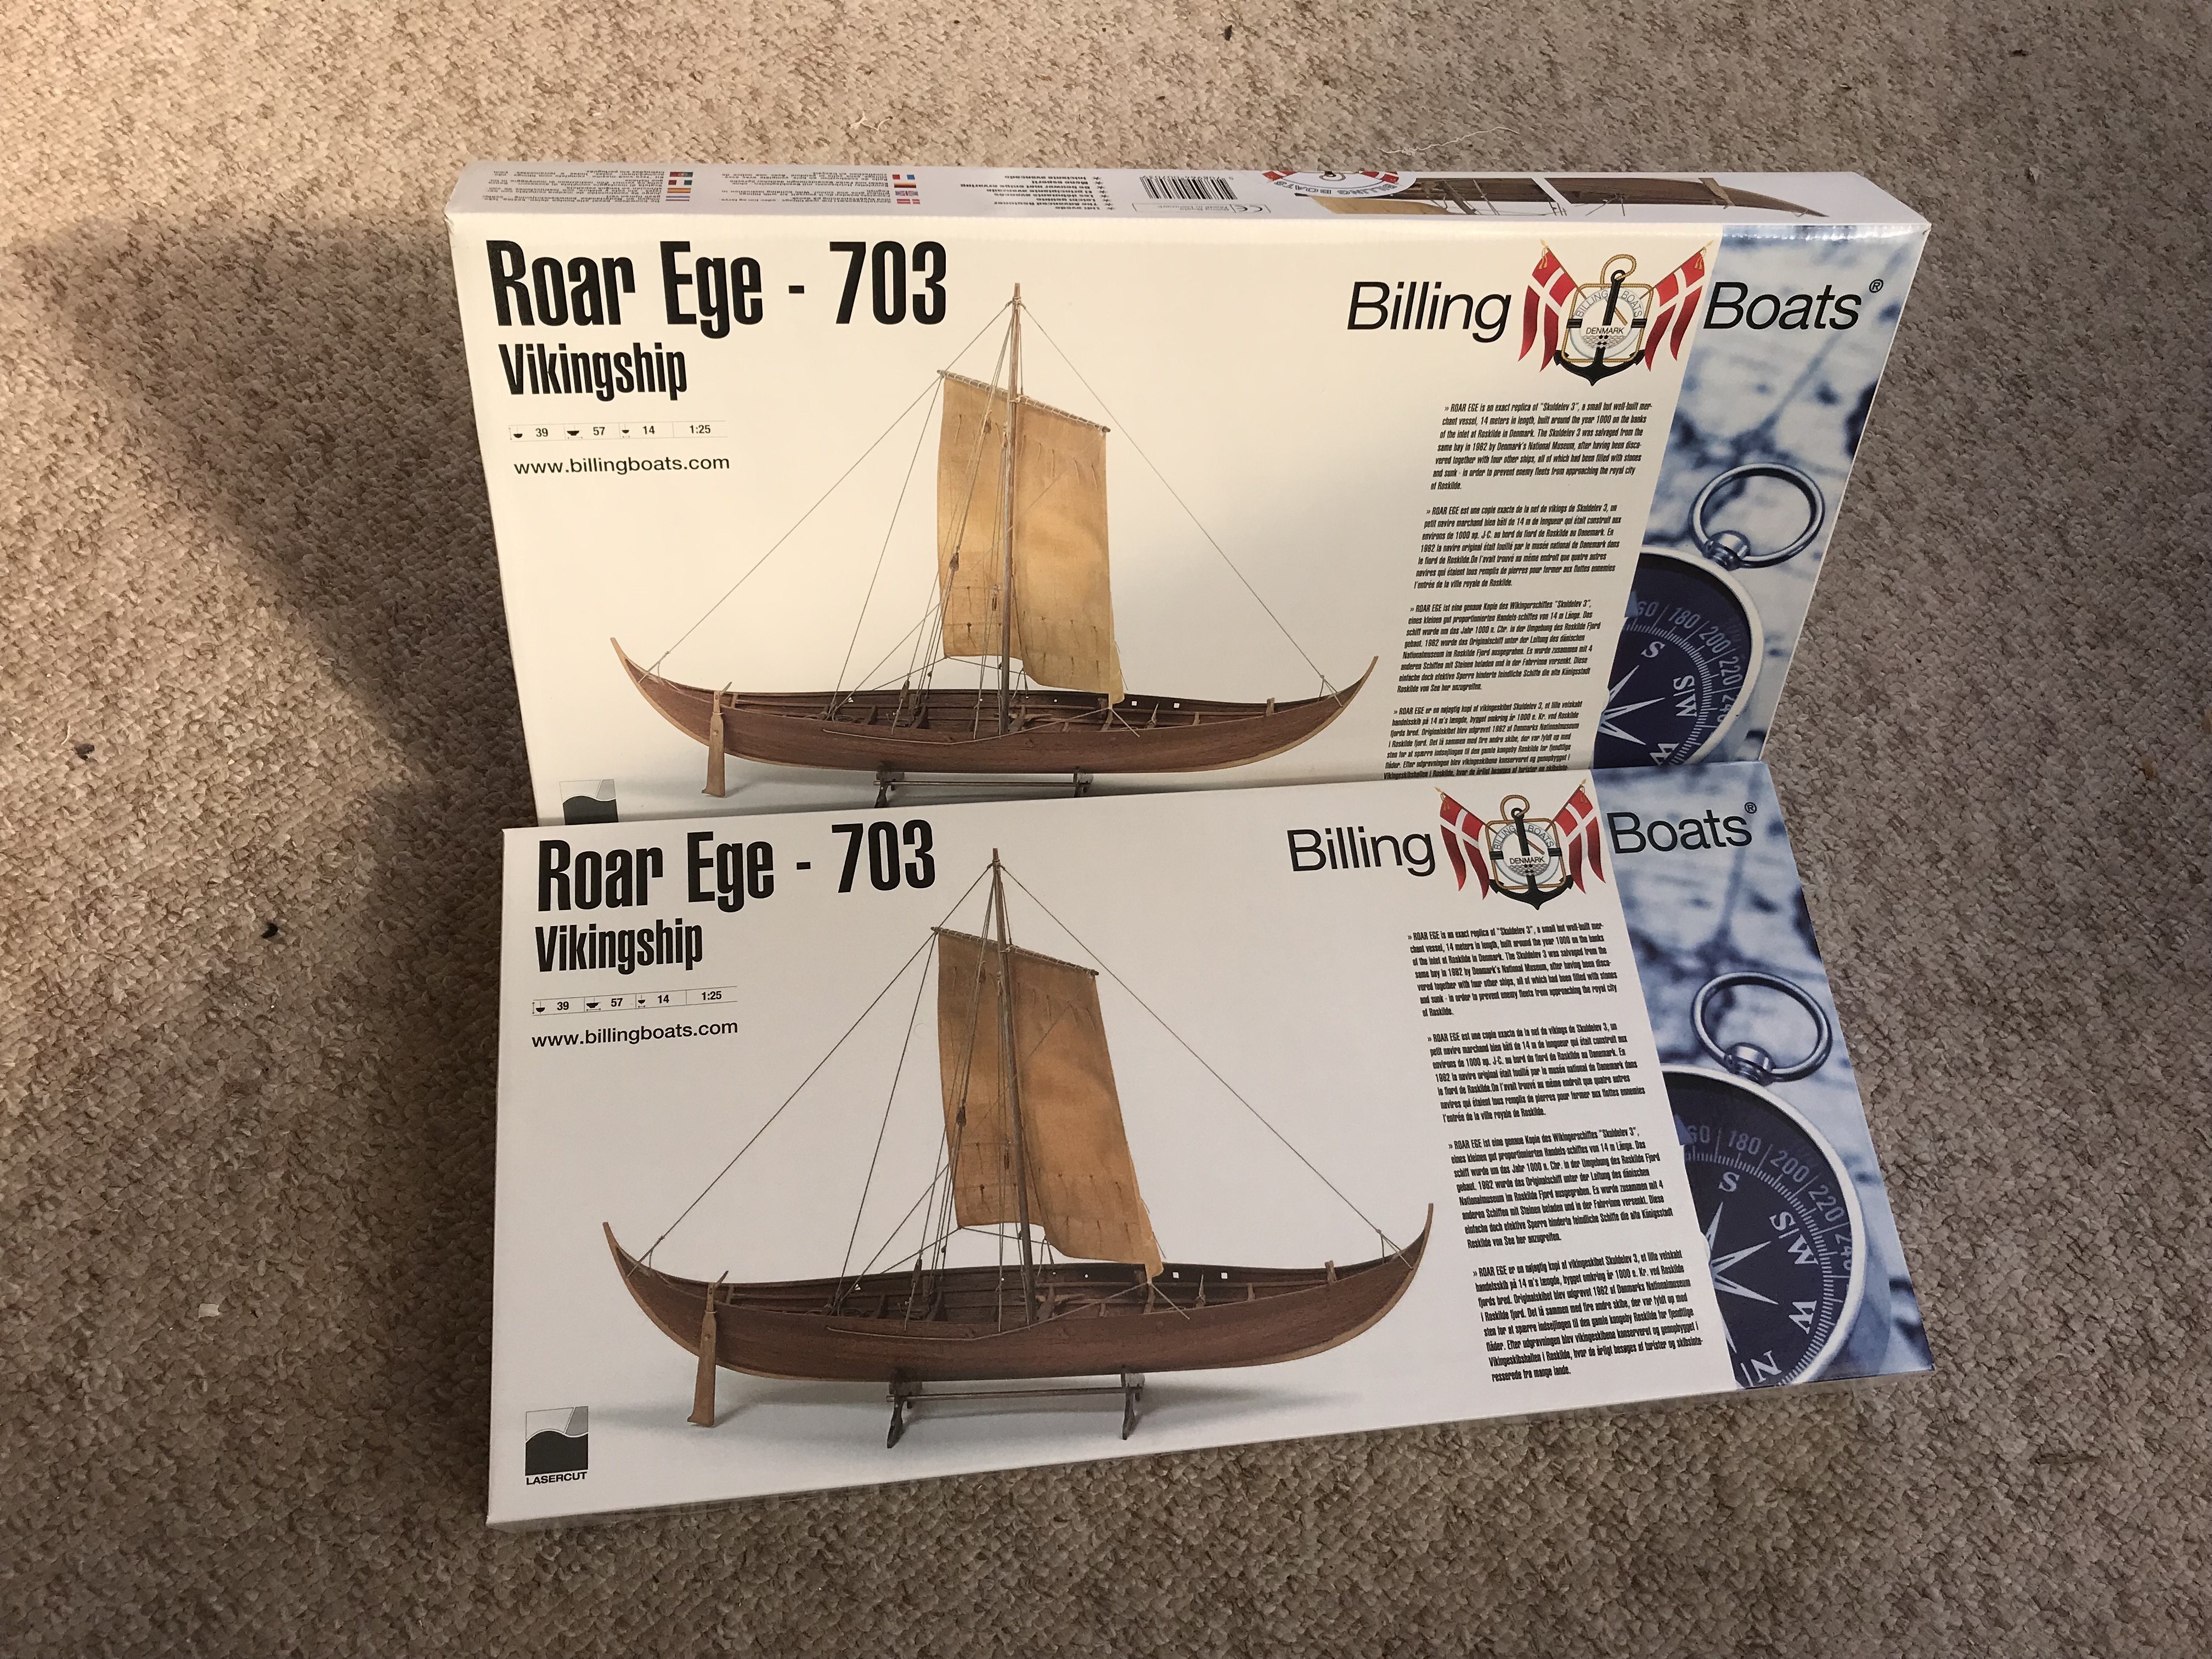
* Chapter Eight * The Twins or What shall I do with the 2nd kit? like I mentioned before, I ordered a 2nd kit of the Roar Ege (703) from Billing Boats. Don’t know yet how proceed in general, my idea was to build the second kit an alternative way and try to finish the first kit “somehow” to a level it can be displayed, even with its faults and flaws. I would like to do the second build as a practical study and lesson for future builders so they don’t have to go though the same mistakes I went through. Also to keep them happy and not getting frustrated with the build. Let’s be honest, the instructions and manual prided by BB is a waste of paper, instructional garbage, the materials used by BB are cheap, flimsy and garbage but the idea behind that ship is great. So I want to help others not making my mistakes and try to give them a leading line to enjoy their builds. I would appreciate if you guys could give some ideas or advise if my approach will be ok and successful or even appreciated or if I just should leave it and build my second kit quiet and calm by myself? Micha

- 145 replies
-
- 6
-
-
- Roar Ege
- Billing Boats
- (and 2 more)
-
New member and brand new (Paper) modeller!
Scottish Guy replied to Marcel1981's topic in New member Introductions
Welcome aboard here at MSW Marcel, enjoy the "scene" Micha -
Hi Johnny, thank you for your very detailed and acurate answer . No need for an apology. I agree, the Roar Ege is a bit different since the keel and ribs are not covered like with the Oseberg. SO everything is visible on the Roar Ege. An interesting approach with the additional ribs. I agree that the (when reading the instructions more than once and taking time to let this kauderwelsh sink in) half build way might be good. On the other hand I think the full build, which I did acciendtially is much easier and when performed acurate and with more calmness much more efficient. Also I´m thinking by using a proper jig, I ordered the Hobbyzone Professional Jig, so the keel and frame can be kept in a straight line so there should be no warping or bending of the keel. Also I think maybe a better approach would be to use not only the "bulkheads" which will be removed anyway, but also to glue in the ribs to give the planks later on a proper shape. The advantage would be that the ribs have the notches where I can place the planks properly but the "bulkheads" don´t have any notches. I also could nail the planks into the ribs to keep them in place and I could do both sides the same time, so the build will be more equal and "mirrored" if that makes sense. Micha
- 145 replies
-
- 5
-
-
- Roar Ege
- Billing Boats
- (and 2 more)
-
Hi Paul, not sure if I completely understand your approach but somehow it makes sense. The longer I think about it, it starts making sense just not sure how to perform the action. Micha
- 145 replies
-
- 3
-
-
- Roar Ege
- Billing Boats
- (and 2 more)
-
Hi Keith, thank you for your answer. I was thinking the same but can´t think of a save and proper way to remove the planks of the ship again. I´m scared they will break since they are pretty flimsy. Also I´m not sure if they not will break on the stem / stern since there is the most glue. I used CA (super glue) for the planking. Yeah, it´s more like an experiement, so I can maybe build them beside each other, giving others the opportunity to learn by my mistakes and finding the way to do it a save and acurate way. I mentioned it once before, I like a good challenge and that is a challenge but I also want to have ONE Roar Ege on my shelf lol so yes, I wish I could finish one at least. It always will be fun Micha
- 145 replies
-
- 4
-
-
- Roar Ege
- Billing Boats
- (and 2 more)
-
Build Log Name Change
Scottish Guy replied to Keith Black's topic in How to use the MSW forum - **NO MODELING CONTENT**
With the high amount of LOGs I can understand that Chris doesn´t have the time to give a feedback to all changed LOG titles but on the other hand, would it have been me I would have liked a short feedback on why the title was changed. Especially when I made a mistake by naming the title in a name that doesn´t match the regulations. If the name change is, like in your particular case, because of some historical reasons I think a short feedback would be appreciated. Not sure if I should say that but that is just my humble thoughts on that. Micha -
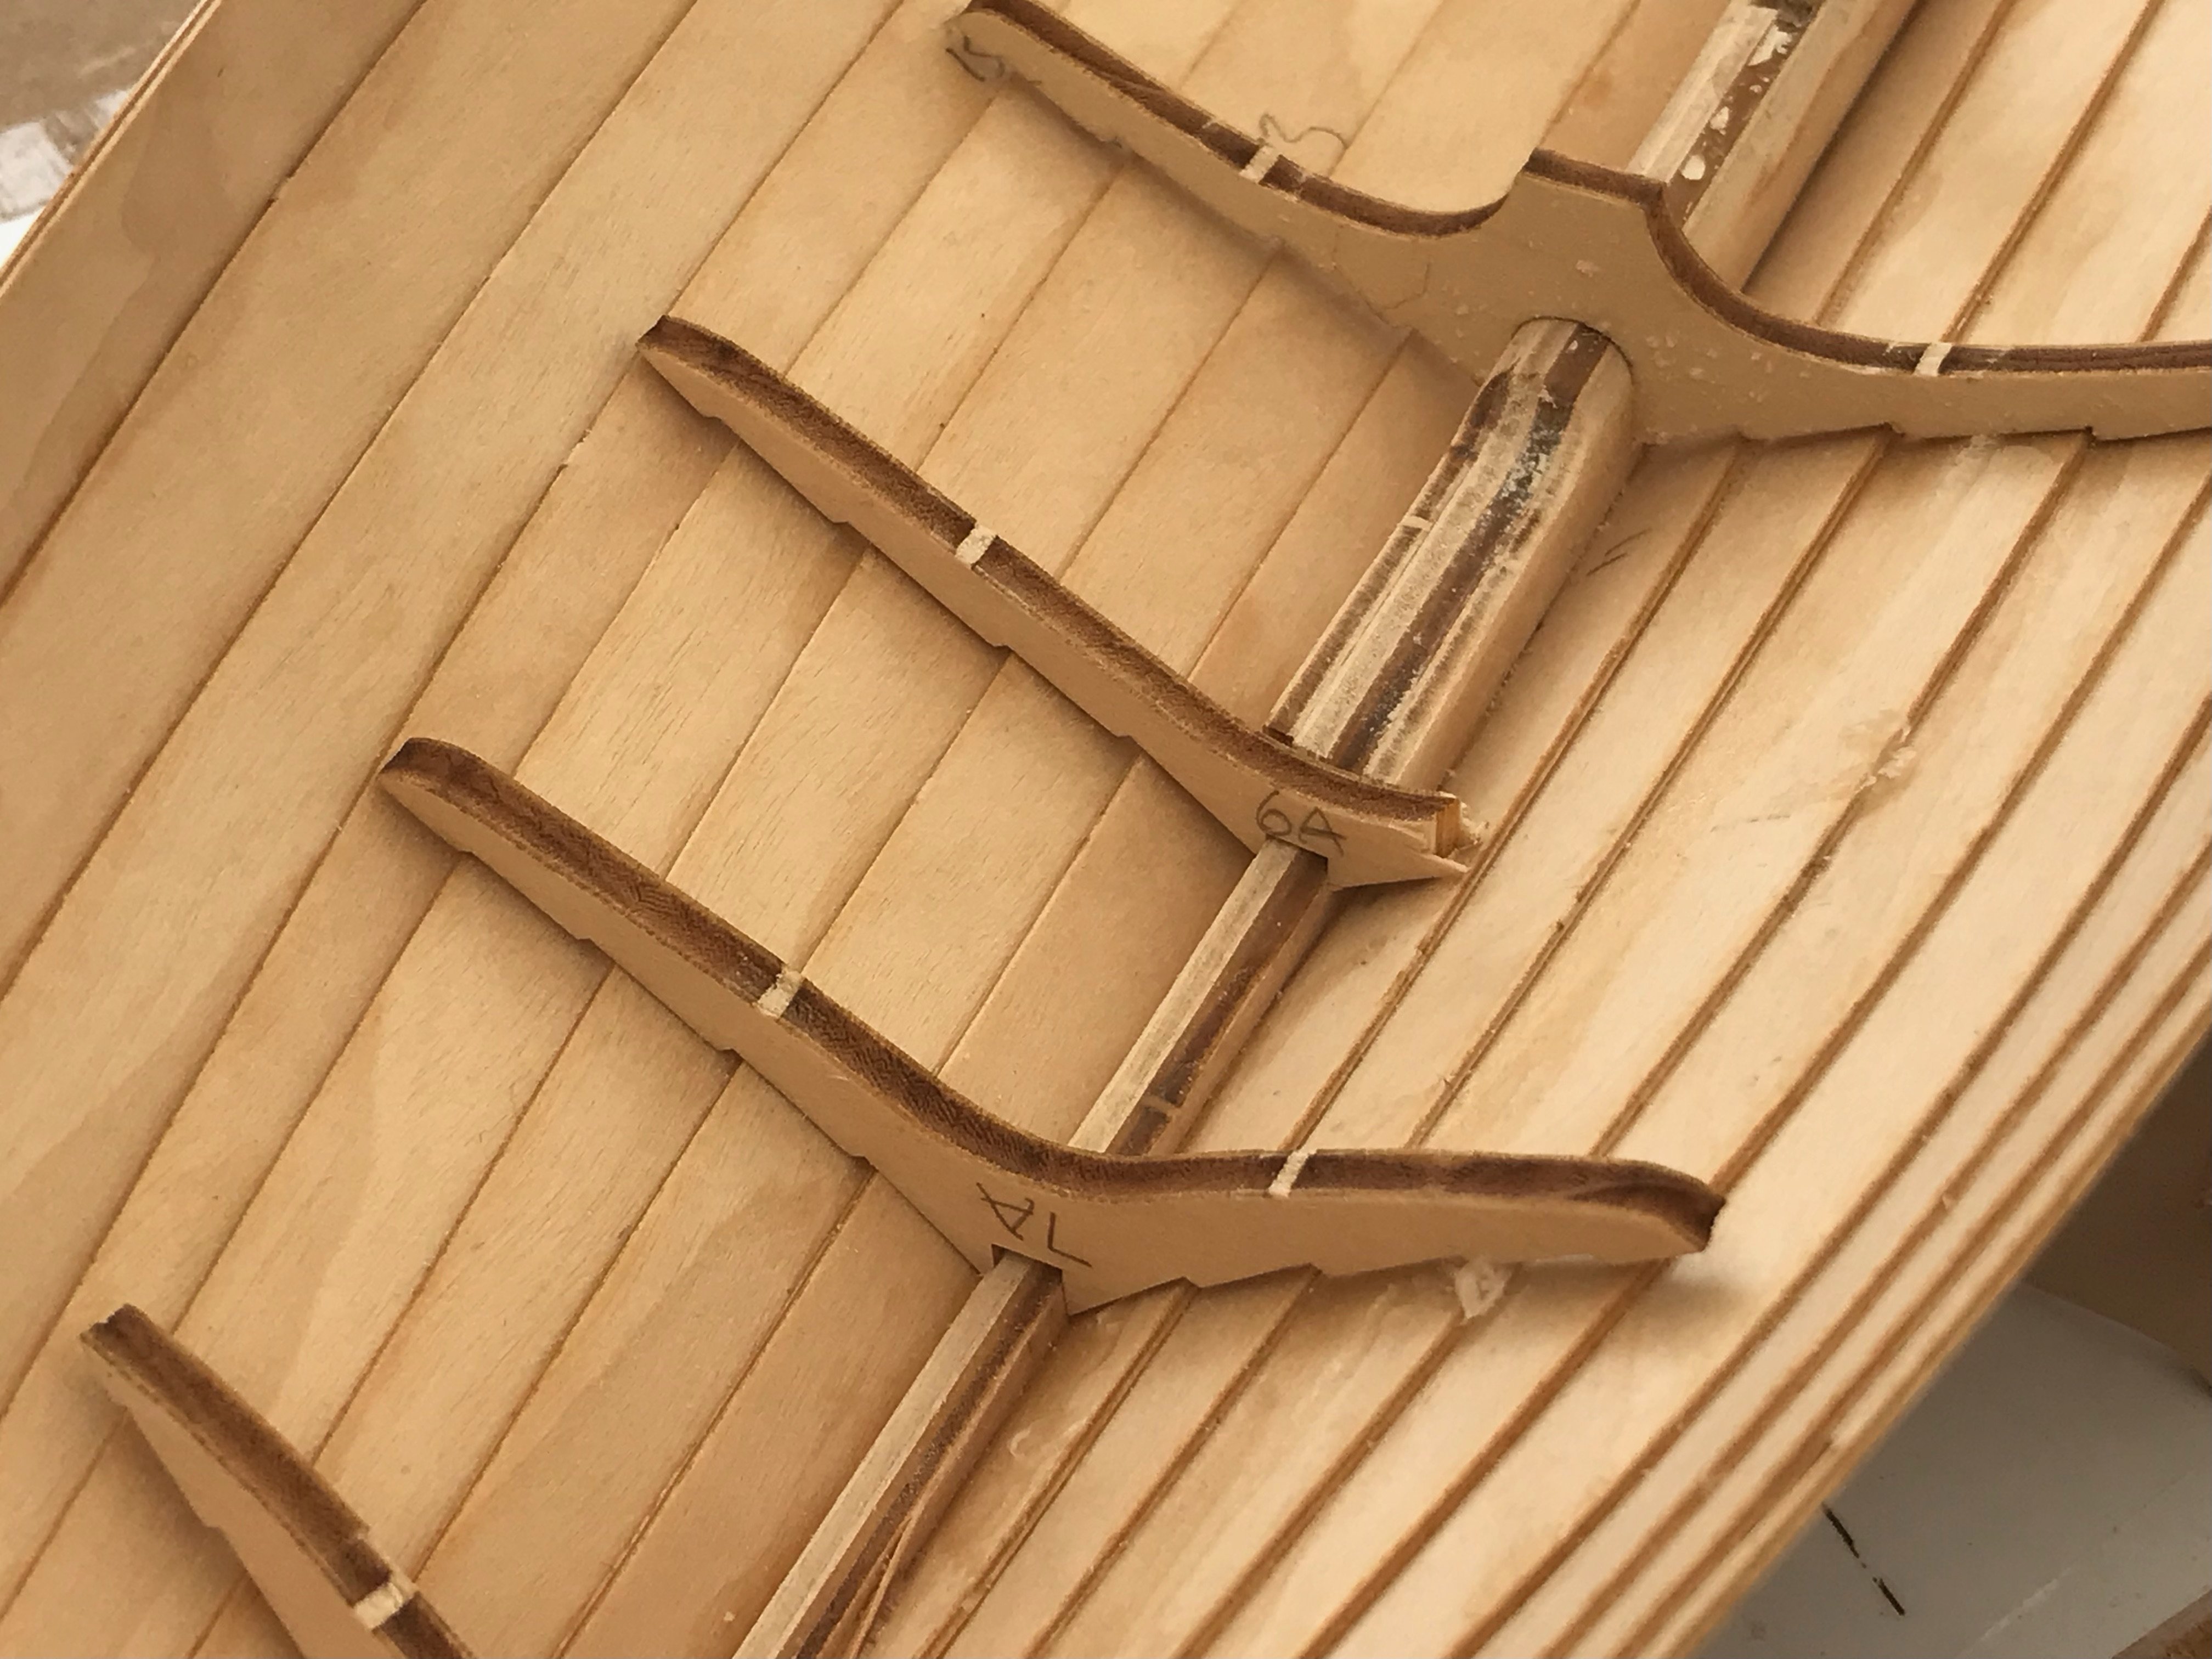
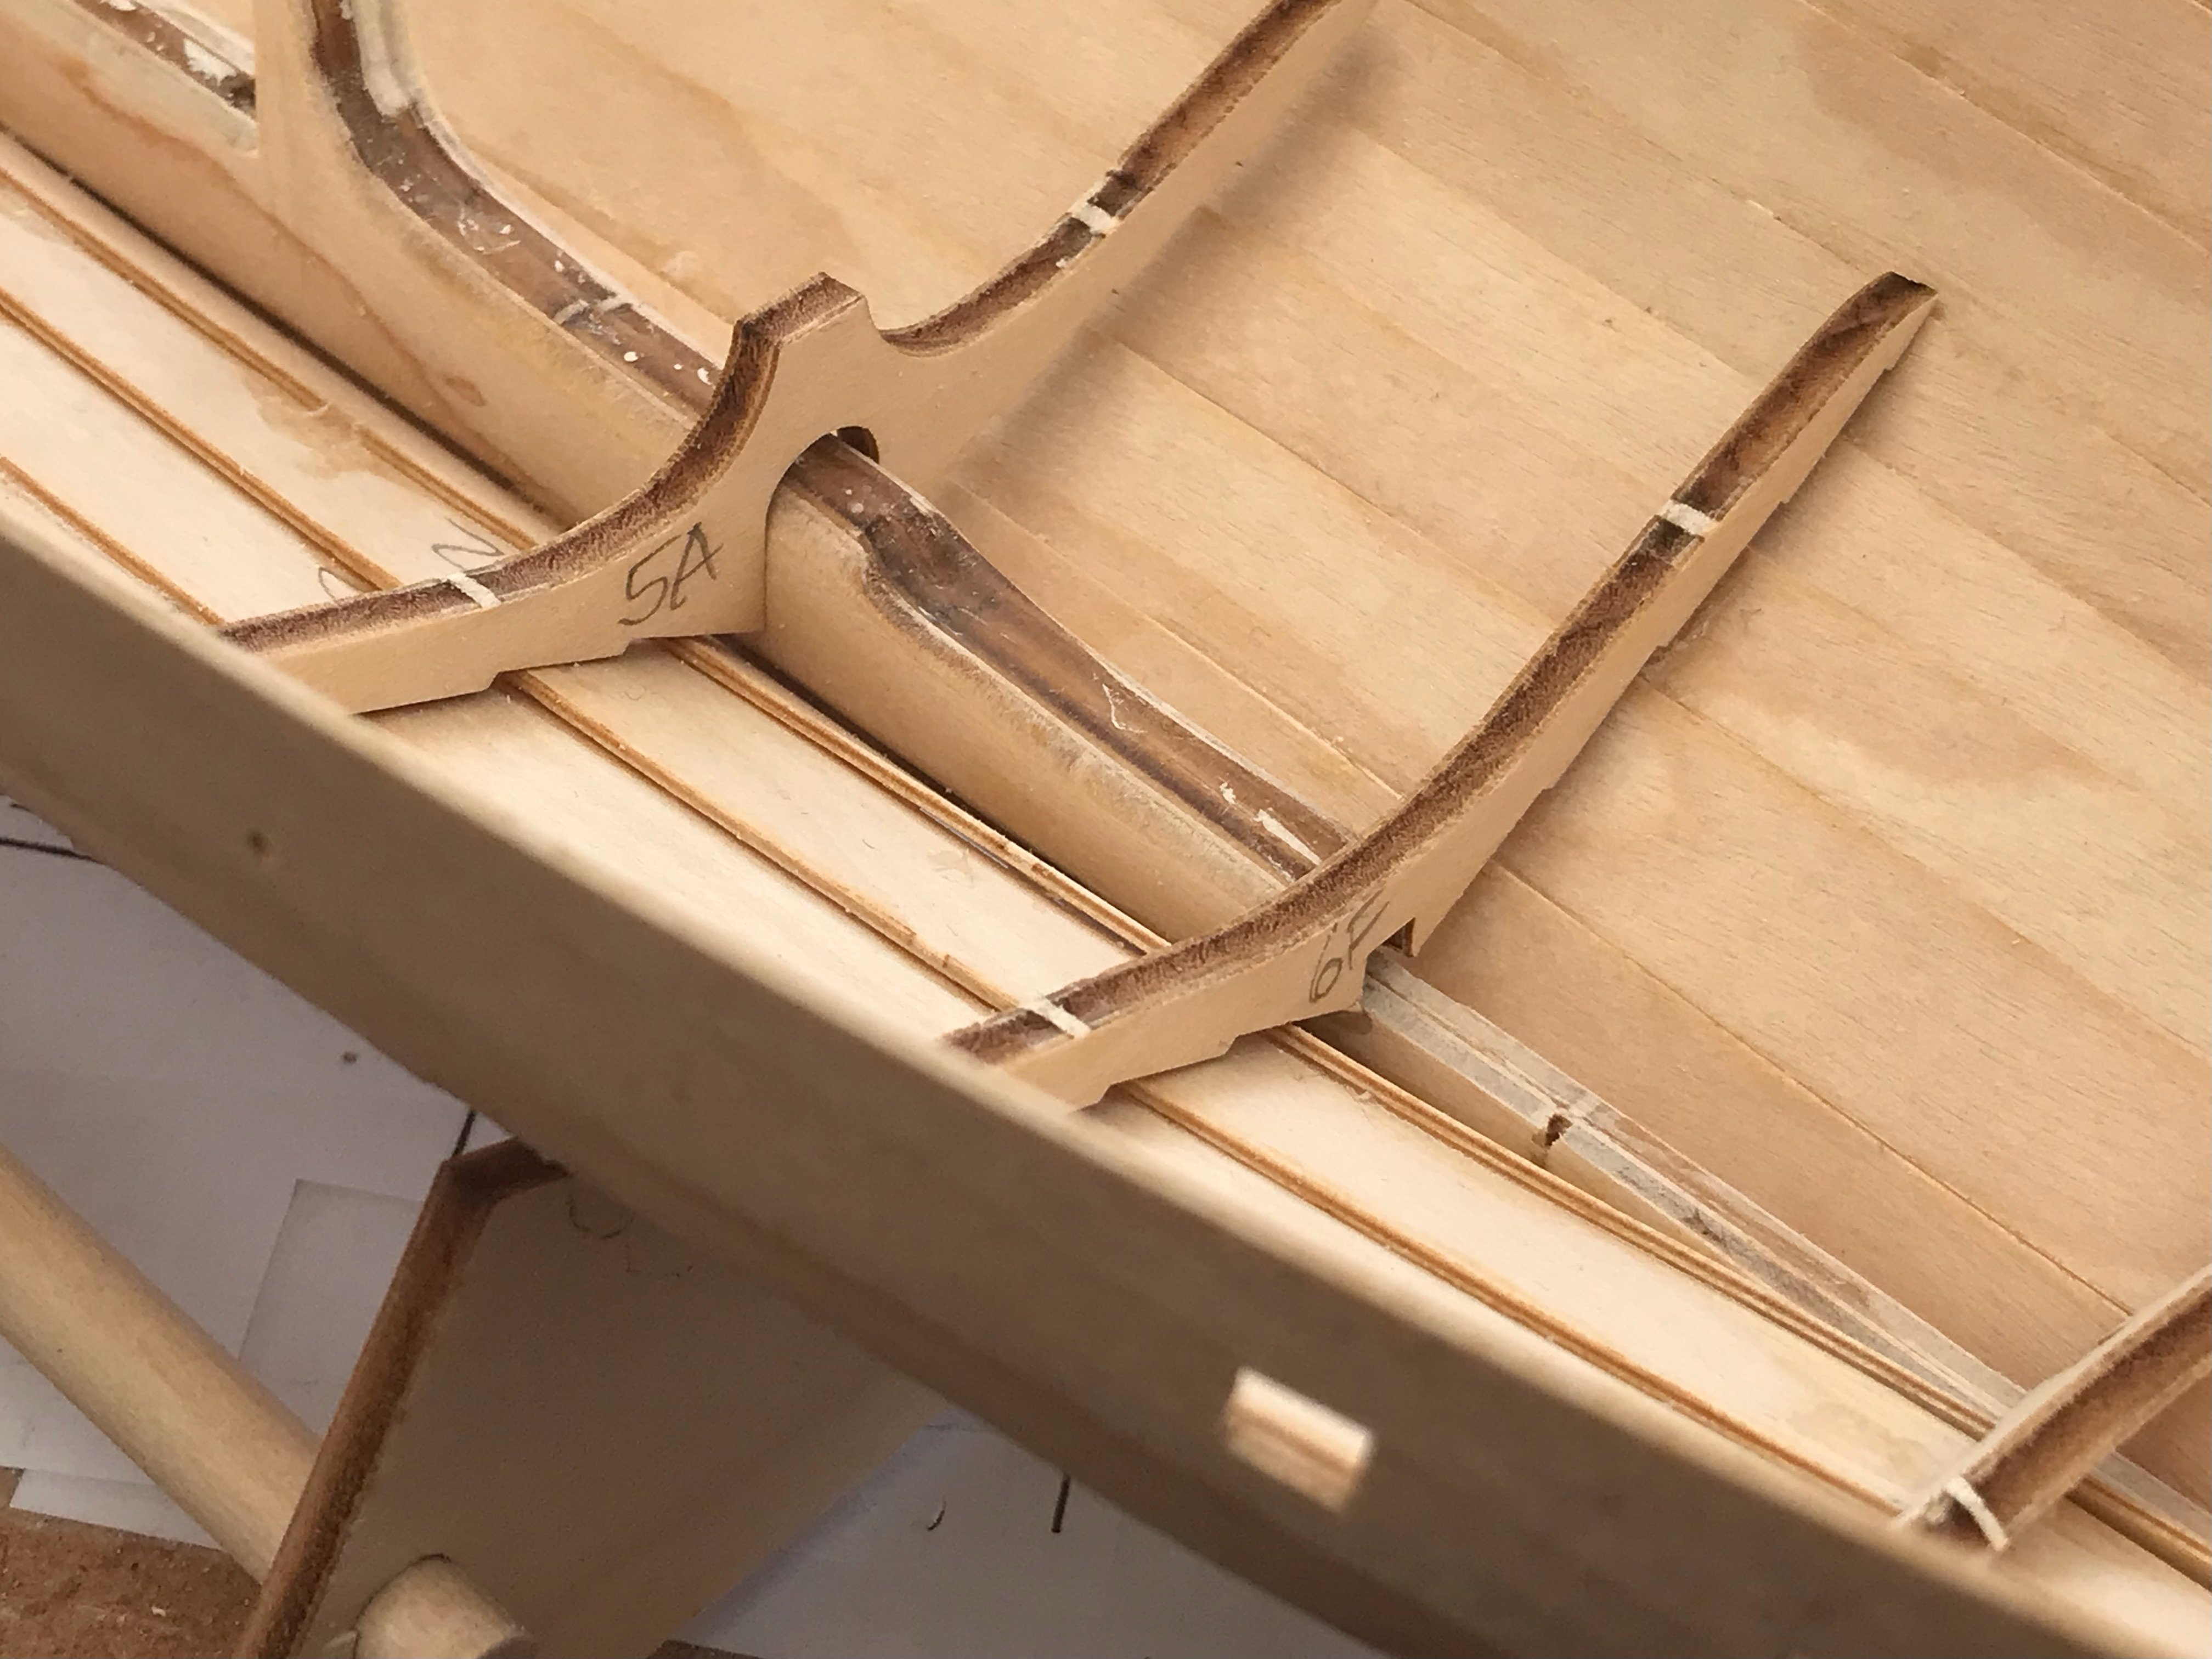
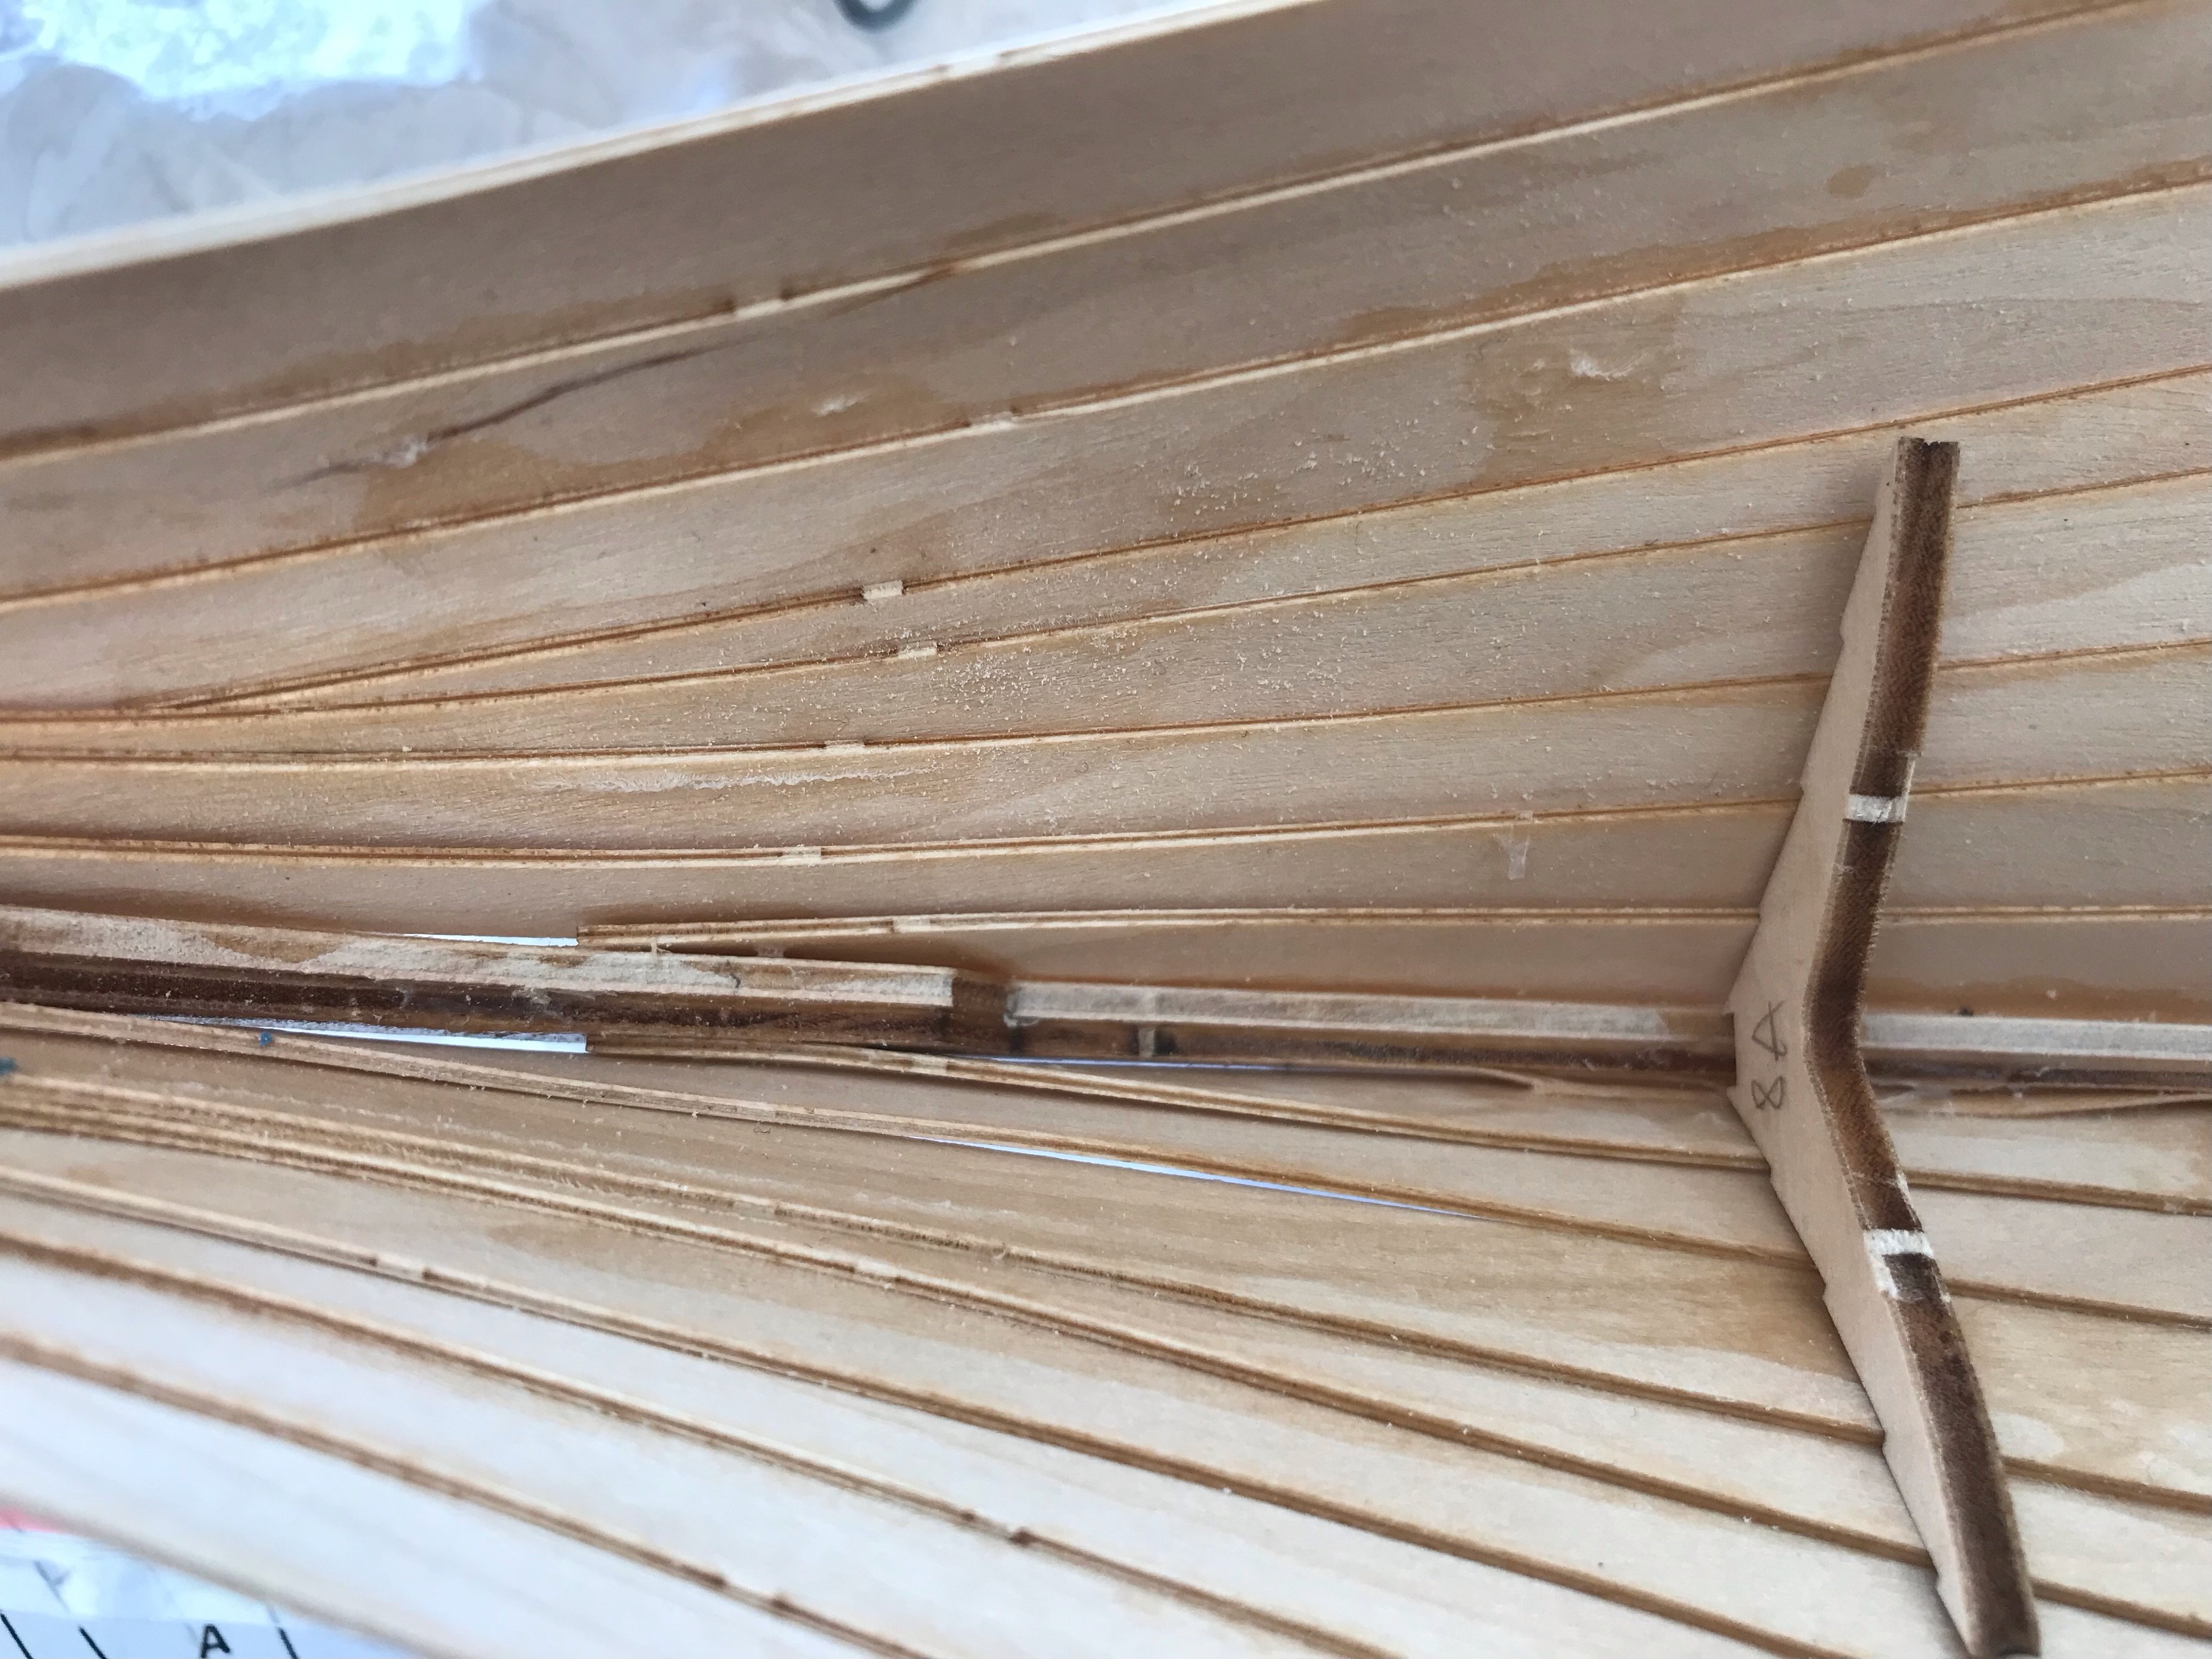
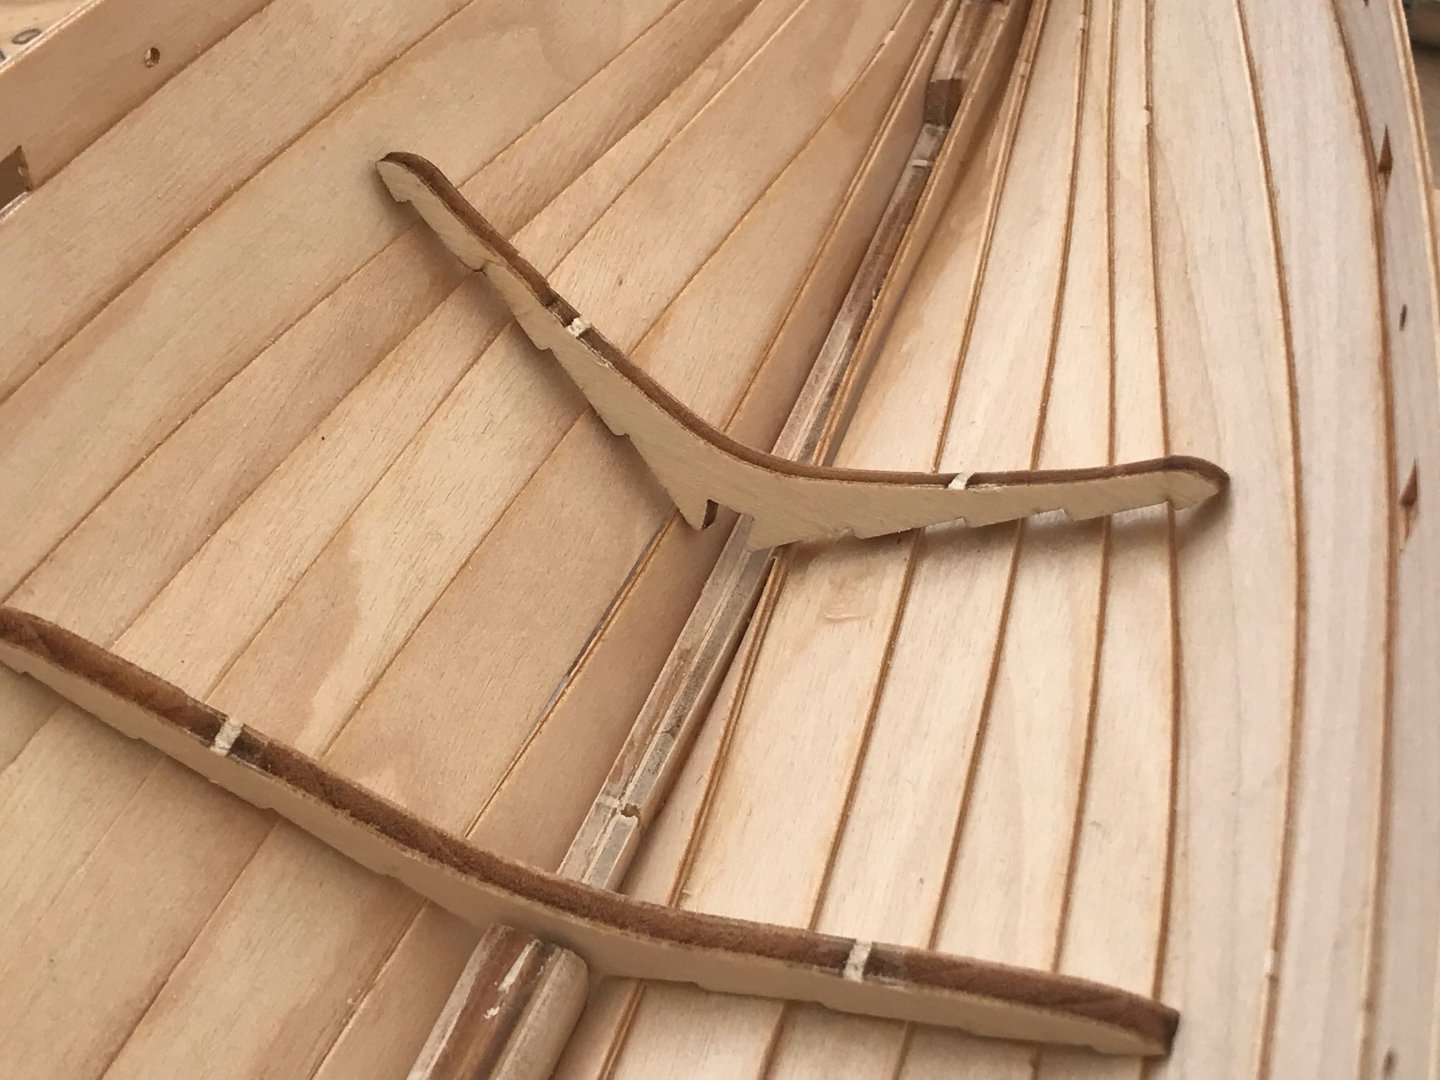
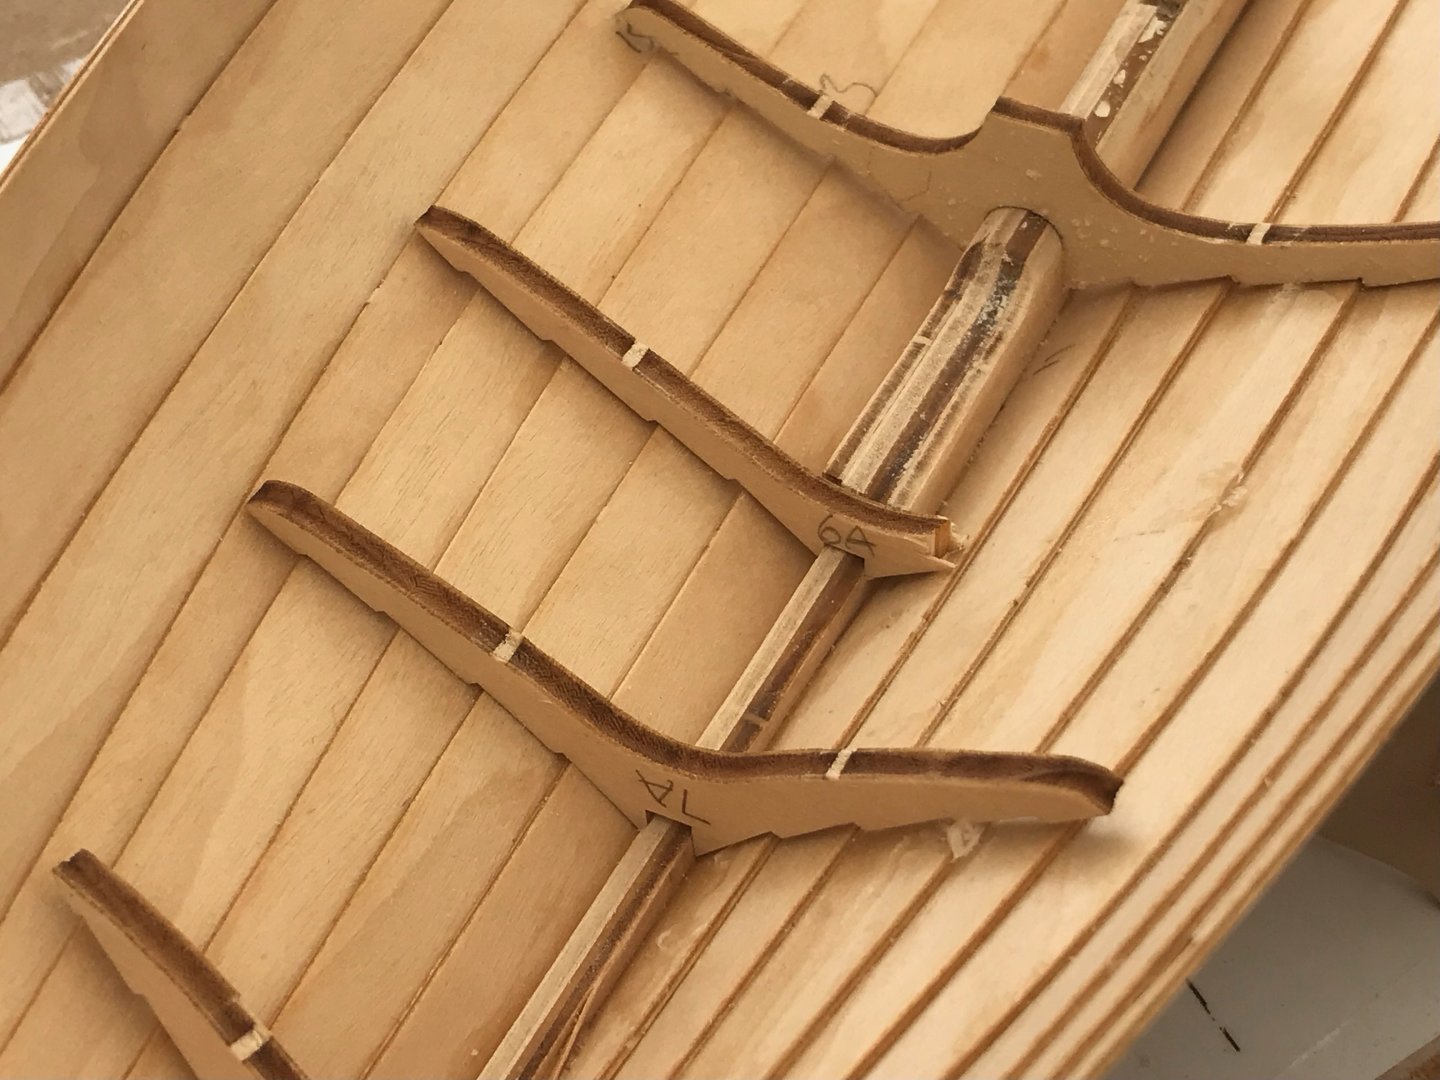
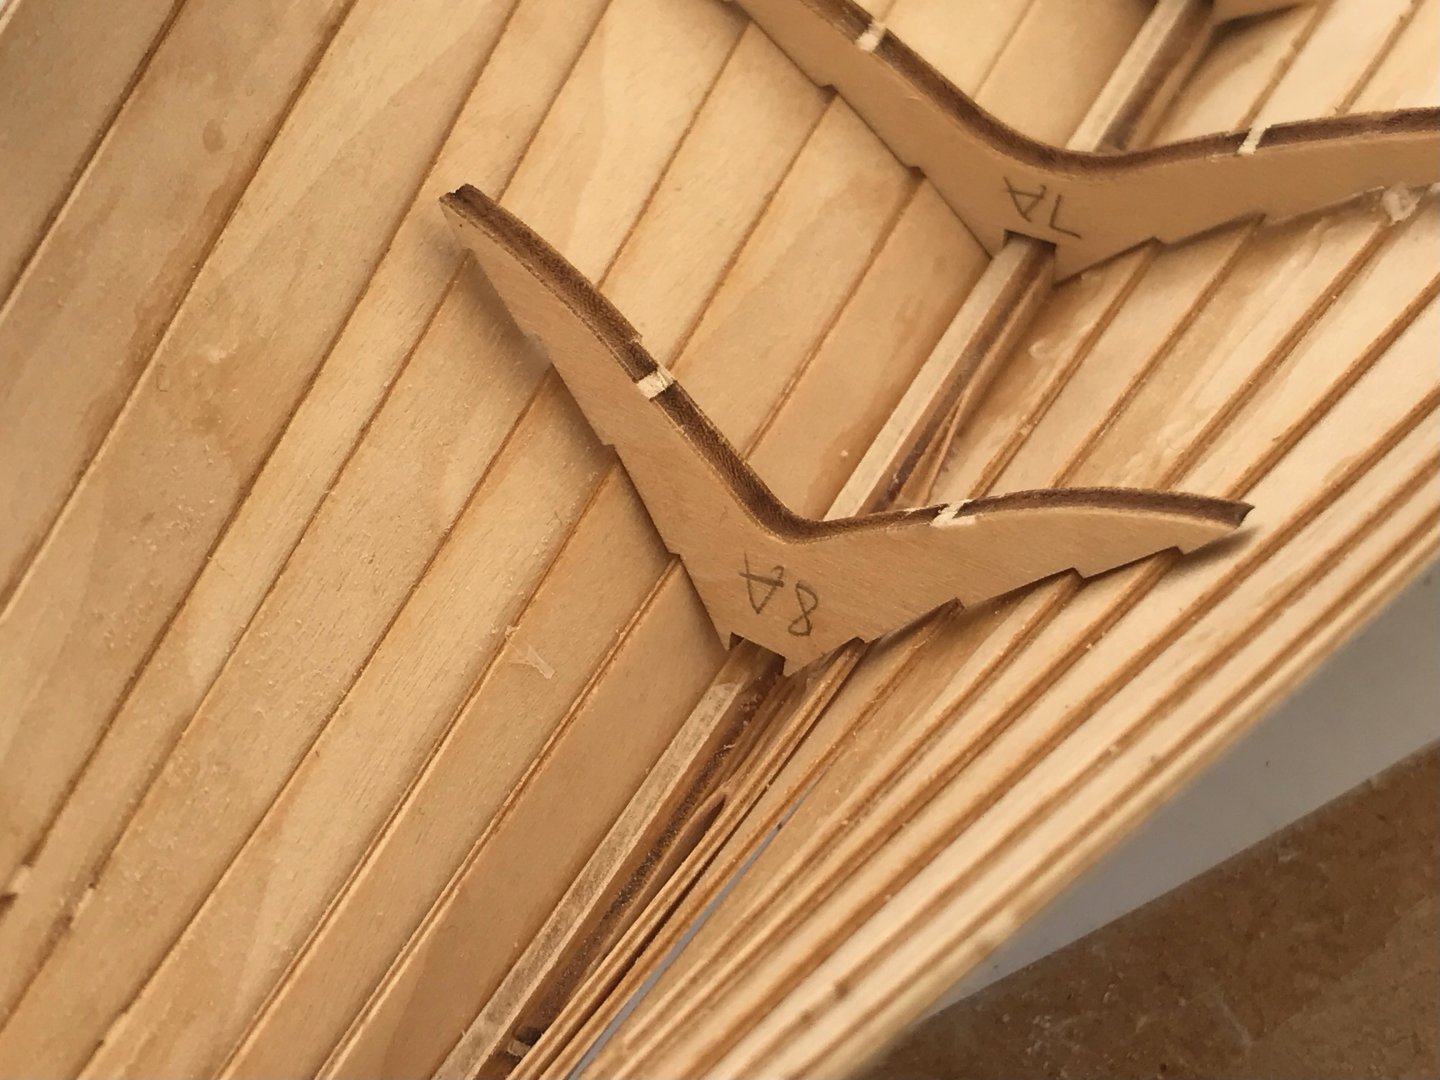
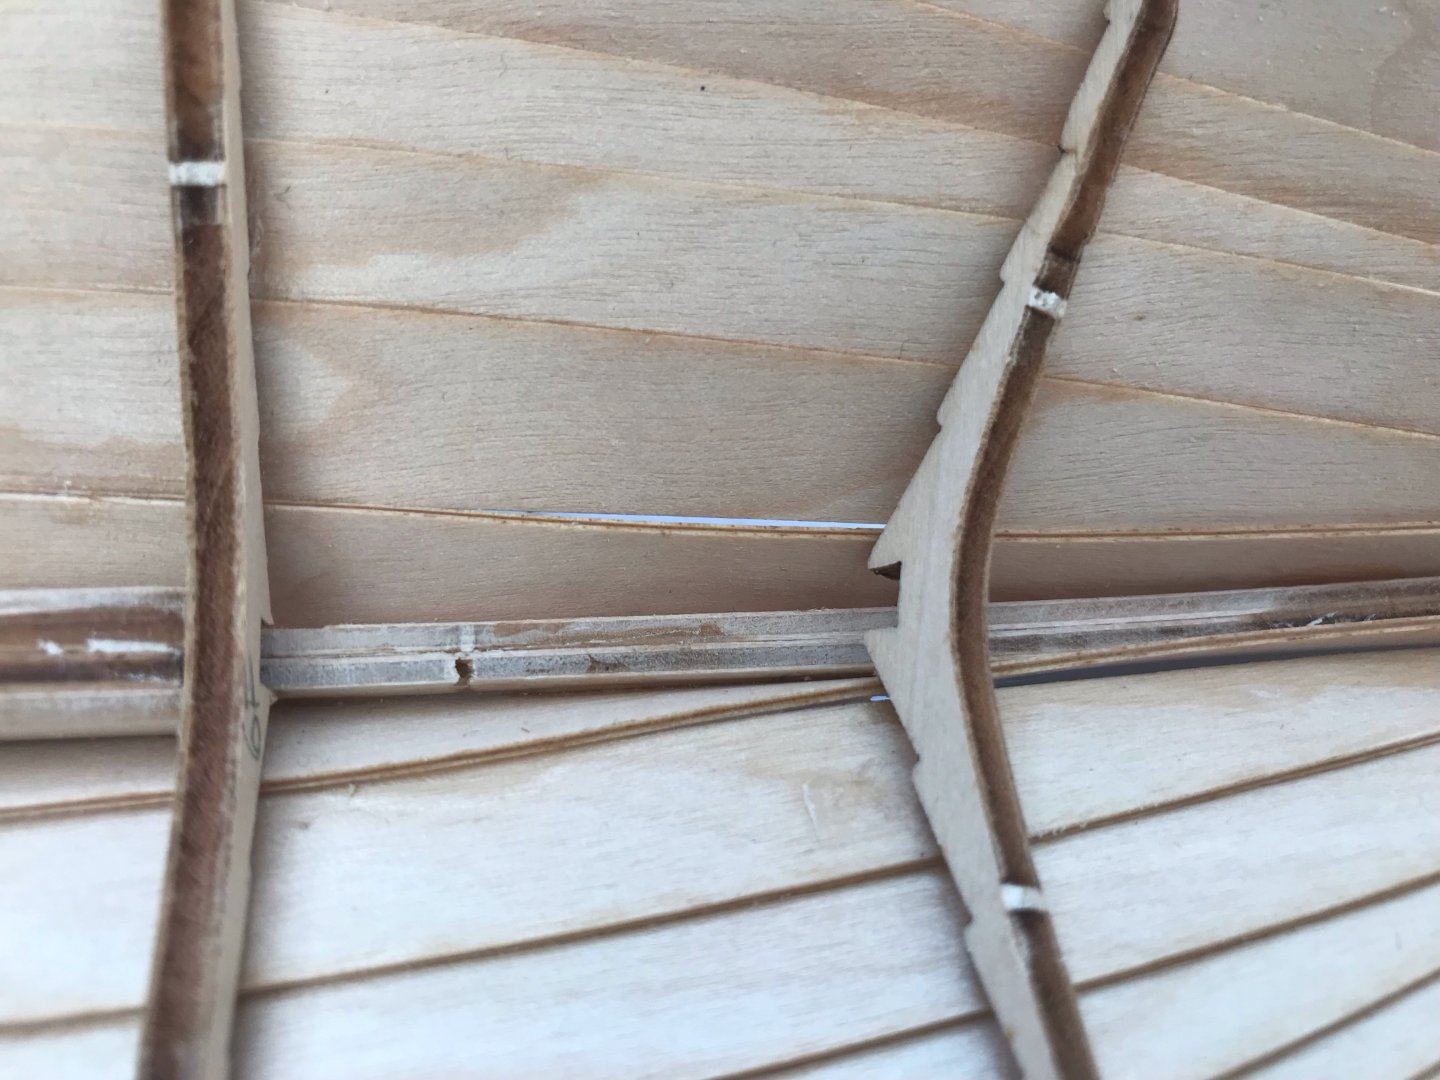
* Chapter Seven * The Fail or How to save the messed up built? Hi all, I´m not sure how to go further with the build. My job took away some of my time in the last few weeks, now I got back some spare time, the build is dried and I tried to put the ribs in place... but that looks really tough since messed up the planking. Unfortunately the planking doesn´t sit correctly so I can´t put the rib in place. I can´t even stick it onto the keel because there is not enough space between the planks and the keel to place the rib. Also it is visible that the ribs don´t even touch the planks, therefore I couldn´t connect (glue) the planks to the ribs or the opposite way around. I´m wondering if I just should glue the ribs in place even if they don´t touch / connect to the planks? By trying to place rib 6A into place one of the sides just broke off The space problem exists on both sides of the ship, here to see that it also doesn´t give enough space for rib 8A to be set in place because there is not enough space between the planks and the keel. In both directions I barely can set the ribs in place, also the keel is at some spots to thick so I can´t slide the ribs in place without breaking them. A close look at part 6F and 7F, it´s easily to see that part 7F won´t fit in place and you can see the gaps in the planking itself but also the missing space between the keel and the planking. Here you can see as well the not properly attached and glued planking on the opposite side of the ship. Also gaos between the planks which shouldn´t be. The planking hasn´t been done properly so I messed up the entire build. I have to admit that I´m clueless what to do. I´m honest, I ordered another set of the Roar Ege to try another approach of the build or just to check what I could have done different. I might even create another LOG to show a complete different approach for further builds by other builders. But right now I don´t know if the build can be saved or if it is a piece of garbage ready for the bin? I would like to save the build, maybe I can try to de-glue the planking and attach them different, more acurate? I hope you guys can give me some advise, especially if you agree with me to "de-glue" the planking. Micha


- 145 replies
-
- 5
-
-
- Roar Ege
- Billing Boats
- (and 2 more)
-
Hello from South West of England.
Scottish Guy replied to Missile-Monkey's topic in New member Introductions
Hello MM and welcome aboard here at MSW . Greetings down to England from Scotland. Micha -
Welcome aboard here at MSW Micha
-
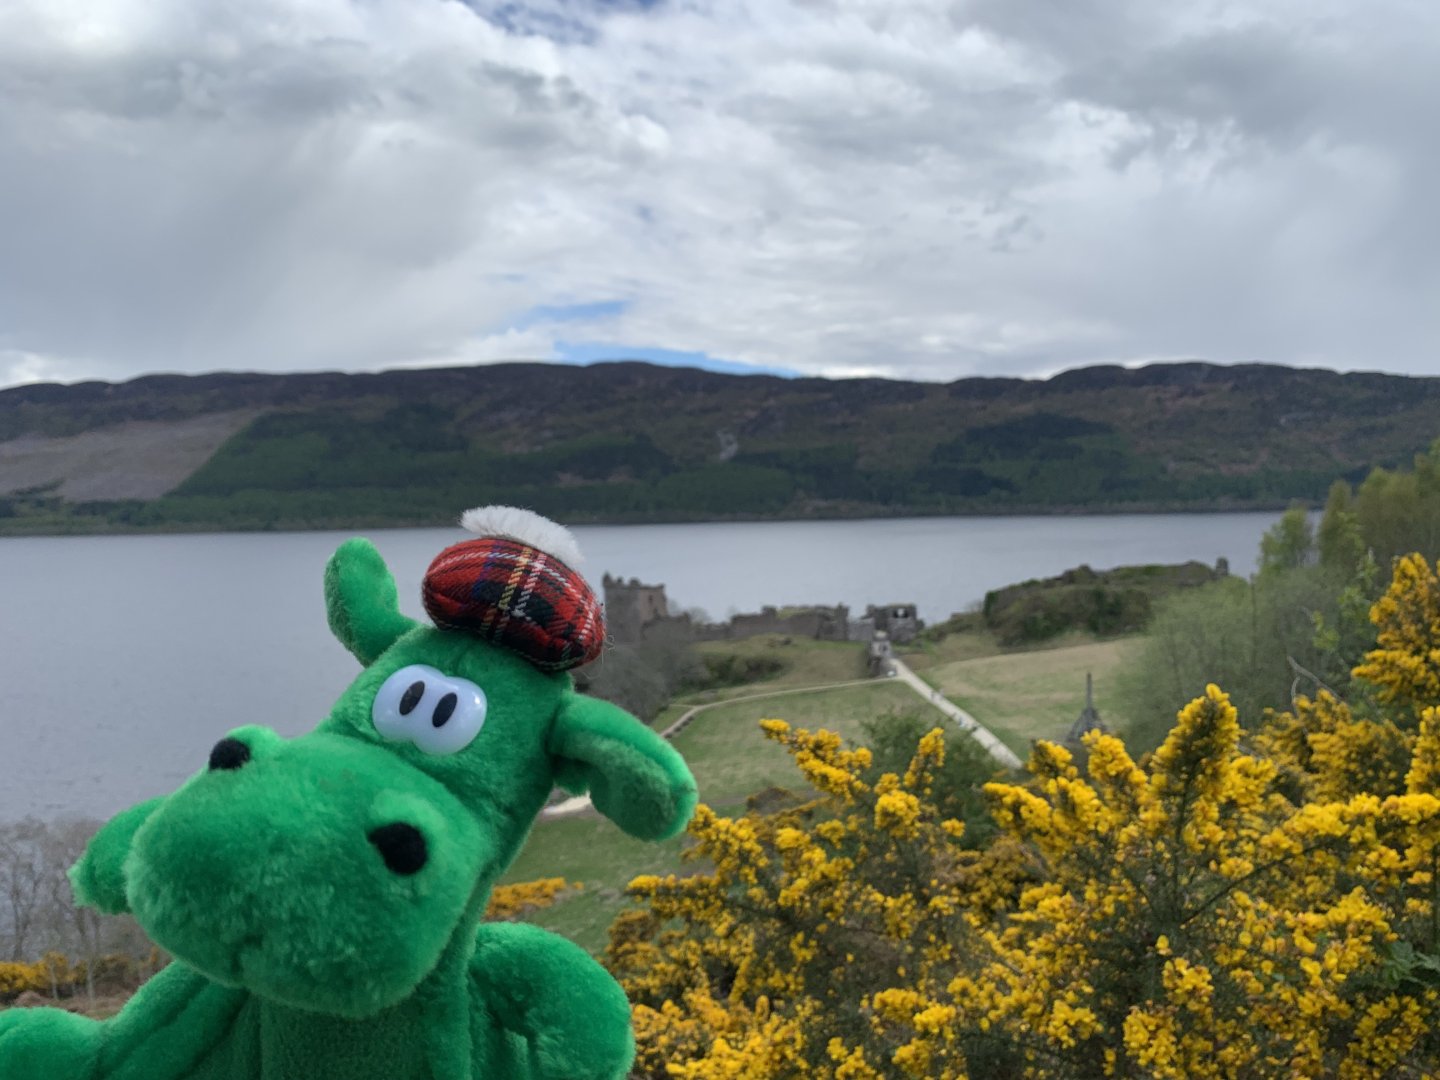
I live not far from Inverness and unfortunately I never got to see auld Nessie , can´t get drunk enough to see her lol... or in the wild (with Urquhardt Castle, Loch Ness)... Micha

-
Hi Simon, can hear you. I hate the work I´m doing (painting the fence). Other garden work is fine but painting a fence? Unfortunately it has to be done because the last three years it hasn´t been done Micha
- 145 replies
-
- 3
-
-
- Roar Ege
- Billing Boats
- (and 2 more)
-
Is the Sergal Thermopylae (791) kit any good?
Scottish Guy replied to Scottish Guy's topic in Wood ship model kits
Hi Johnny, that is my biggest issue. The scale, the plastic kit (Revell) comes in 1:96, a size I really like, the Sergal come in 1:124 which is compared to the plastic kit quiete small. I like the models bigger because my hands are having issues with small things (thanks to arthritis). I noticed that in the LOG here, I think it is the one from Popeye. I like the way the ship is done. I´m a bit torn if I should go with the plastic kit or the wooden kit. I like the wooden kit stuff but I don´t like the size. Maybe get the plans and do a wooden scratch build in 1:96? Micha -
Is the Sergal Thermopylae (791) kit any good?
Scottish Guy replied to Scottish Guy's topic in Wood ship model kits
Hi Phil, why did I expect something like that lol... I might buy them and maybe the Maritime Museum Aberdeen has some plans and combining them might be a good base to start that model. I´m tending to the wooden model since plastic is nice but I have already the 1959 Cutty Sark in plastic, think a wooden model would be agreat opportunity. Micha -
Is the Sergal Thermopylae (791) kit any good?
Scottish Guy replied to Scottish Guy's topic in Wood ship model kits
Hi Dave, you are correct, Aberdeen is roughly a 2 hrs drive. Maybe it is really worth to visit the museum. Maybe they even can supply some proper plans, which would be amazing tbh. Will give it a go soon, we wanted to visit Aberdeen anyway in three weeks, so maybe that will be the time to visit the museum. Micha -
Is the Sergal Thermopylae (791) kit any good?
Scottish Guy replied to Scottish Guy's topic in Wood ship model kits
Thank you Patrick for the answer. Unfortunately I noticed too that there is not much of information about the Thermopylae. I don´t understand why because she´s pretty close to the Cutty Sark by look and shape. I love both ships even if the Cutty Sark is much more known. The price seems to be pretty reasonable to me especially since the bundle is made out of two ships, the Thermopylae and the Cutty Sark "LePicolle" in 1:200 scale. On the other hand I can get a Revell Thermopylae in 1:96 (plastic kit). Torn between the plastic kit (1:96) and the wooden Sergal kit (1:124). Micha -
Hi folks, just a wee update. I didn´t give up on the project, it´s just a wee break because of my return to work and the garden (that´s the unfortnate circumstance when having a bungalow with front- and back garden. But I will come back and finish the ship for sure. I don´t give up guys, don´t worry... Micha
- 145 replies
-
- 5
-
-
- Roar Ege
- Billing Boats
- (and 2 more)
-
Hi Brent and welcome here on MSW, great to have you aboard. Micha
-
Dear fellow model builders, unfortunately I can´t find much about the Thermopylae at all, seems to be a not so well liked model. Also there is not much about the Sergal kit except that it seems to be a... "difficult" kit to build that seemed to have cast some frustration on some builders. I like the Thermopylae as I love the Cutty Sark. I have the opportunity to buy the Sergal Thermopylae (791) and the Mantua Cutty Sark "LePicolle" (612) as a bundle for around GBP 100. Both are wooden kits and both are of interest for me. Questions are... are these kits worth the money and are they doable or should I, as a not yet very experienced wooden builder, keep my hands of both of them? Micha
-
Hello Ralf, welcome aboard here on MSW. All the best from Scotland. Hallo Ralf, willkommen hier auf MSW. DIe besten Grüsse aus Schottland. Micha