
HOLIDAY DONATION DRIVE - SUPPORT MSW - DO YOUR PART TO KEEP THIS GREAT FORUM GOING! (Only 68 donations so far out of 49,000 members - Can we at least get 100? C'mon guys!)
×


Scottish Guy
-
Posts
382 -
Joined
-
Last visited
Content Type
Profiles
Forums
Gallery
Events
Everything posted by Scottish Guy
-

Flag with ship name reversed on one side?
Scottish Guy replied to daschc01's topic in Masting, rigging and sails
I´m not a specialist on this topic but if logical and honest, it wouldn´t make sense to write the name backwards on the pennant. I think it´s hard already to read a pennant from far distances but then even backwards would make it even harder. Also people had issues with reading in that times. I saw some penannts of naval marine ships (for a Commodore) which shows a mirrored image of the port side on the starboard side. Which makes sense because they have a ver strange shape and putting it the opposite way around on the starboard side doesn´t make any sense. Left: Flag for the Vice Admiral White Squadron (1805-1864) │ Right: Flag of the Vice Admiral White Squadron flying on a Mast Unfortunately the newer flags (pennants) look different to the older ones... Left: Pennant of the Royal NavyFlying │Right: Pennant of the Commodore of the Fleet Royal Navy AS you can see in the right picture this is taken from the starboard side view and the pennant shows exactly the same just morrored. I think this is attributed to the way how flags are made (at least nowadays). They are not multi-layered so it would shine through anyway. Which would explan why the name in this case of the "Atlantic" makes sense, the name shines through and maybe got just some stitches on the starboard side. But it wouldn´t make sense since it would be much harder to read. The question here would be more likely if name pennants have been as dual layer flags (with two layers sewn together with the name in the right - readable - direction). With military flags stating a rank or country it definitely doesn´t make sense because it could falsify the identity by reading or aknowledging the country wrong. My humble opinion about it, I also couldn´t find much about pennants with names on it, most likely military penannats stating a rank or which ship has the high ranking officer on board. Micha

-
Hi Peter, looks good so far. May I ask why you not tokk the parts out of the cast / sprue? In the past as I was doing plastic models (most likely space ships) I always cut the parts out of the cast, trimming them and painted (sprayed with an airbrush gun) the parts. I think it´s easier than fixing the cuts / trimmings after the parts are painted. But that is just my humble opinion. Would be interesting to read other opinions about it. Micha
-
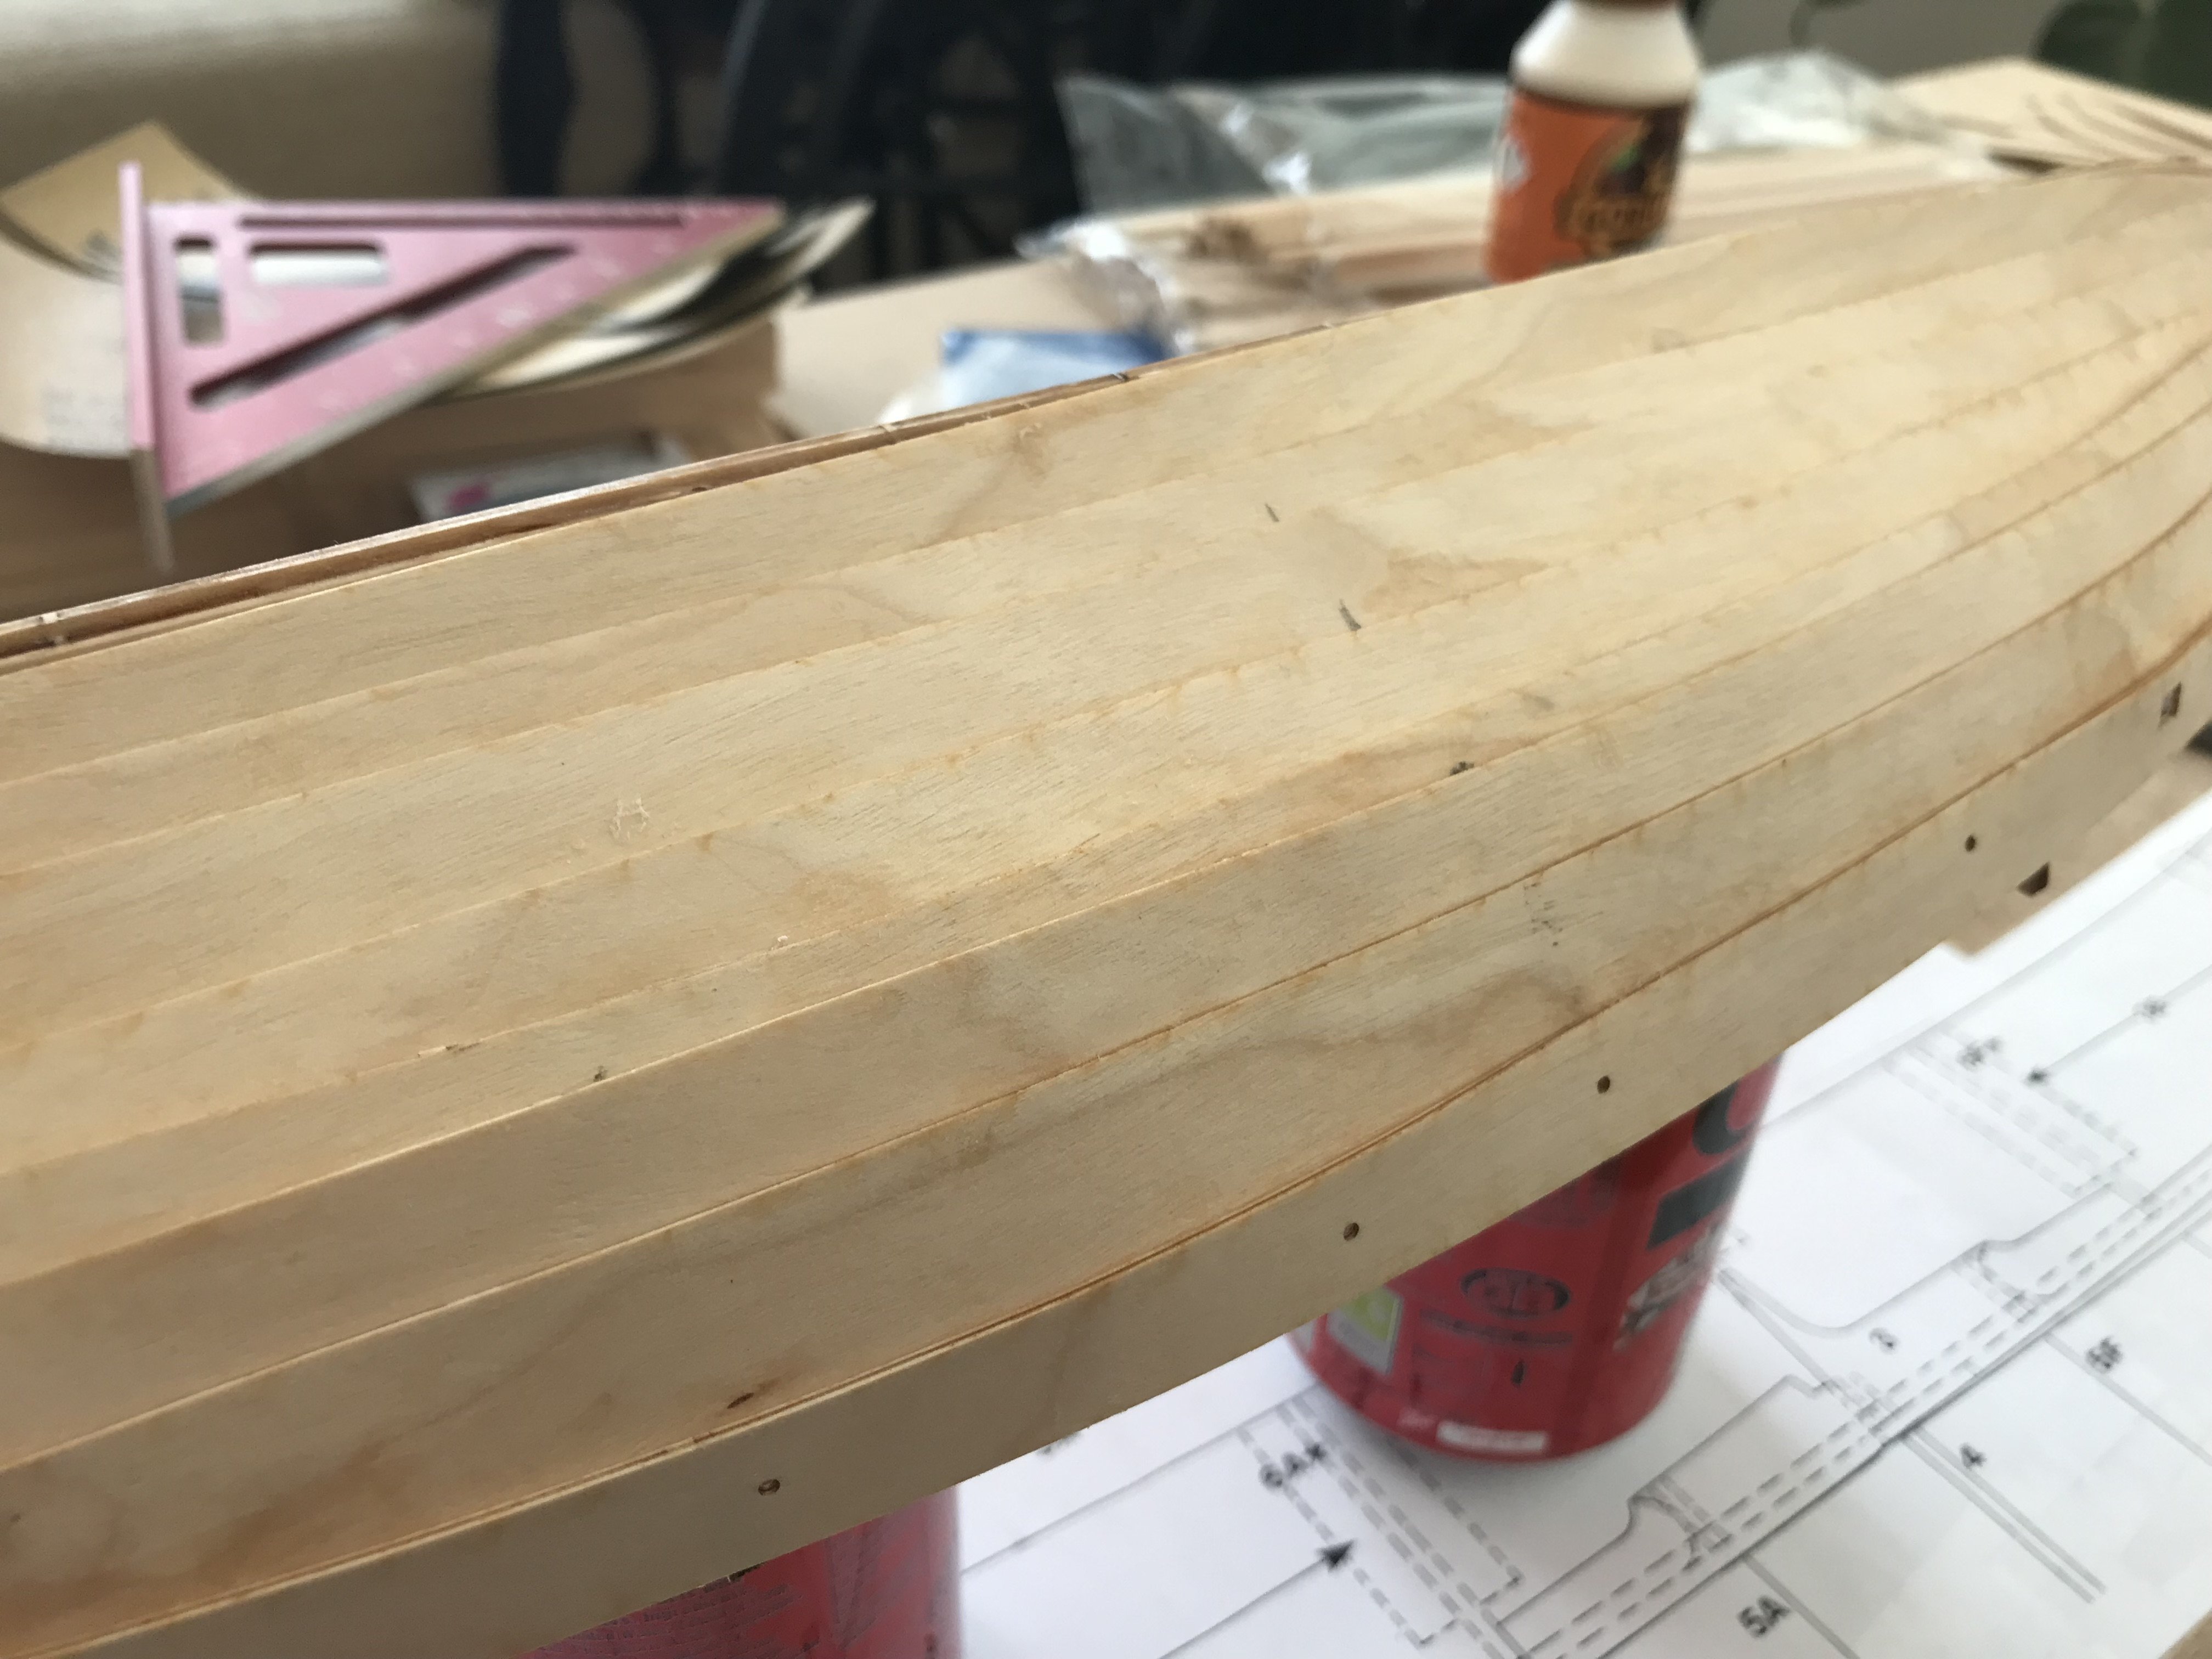
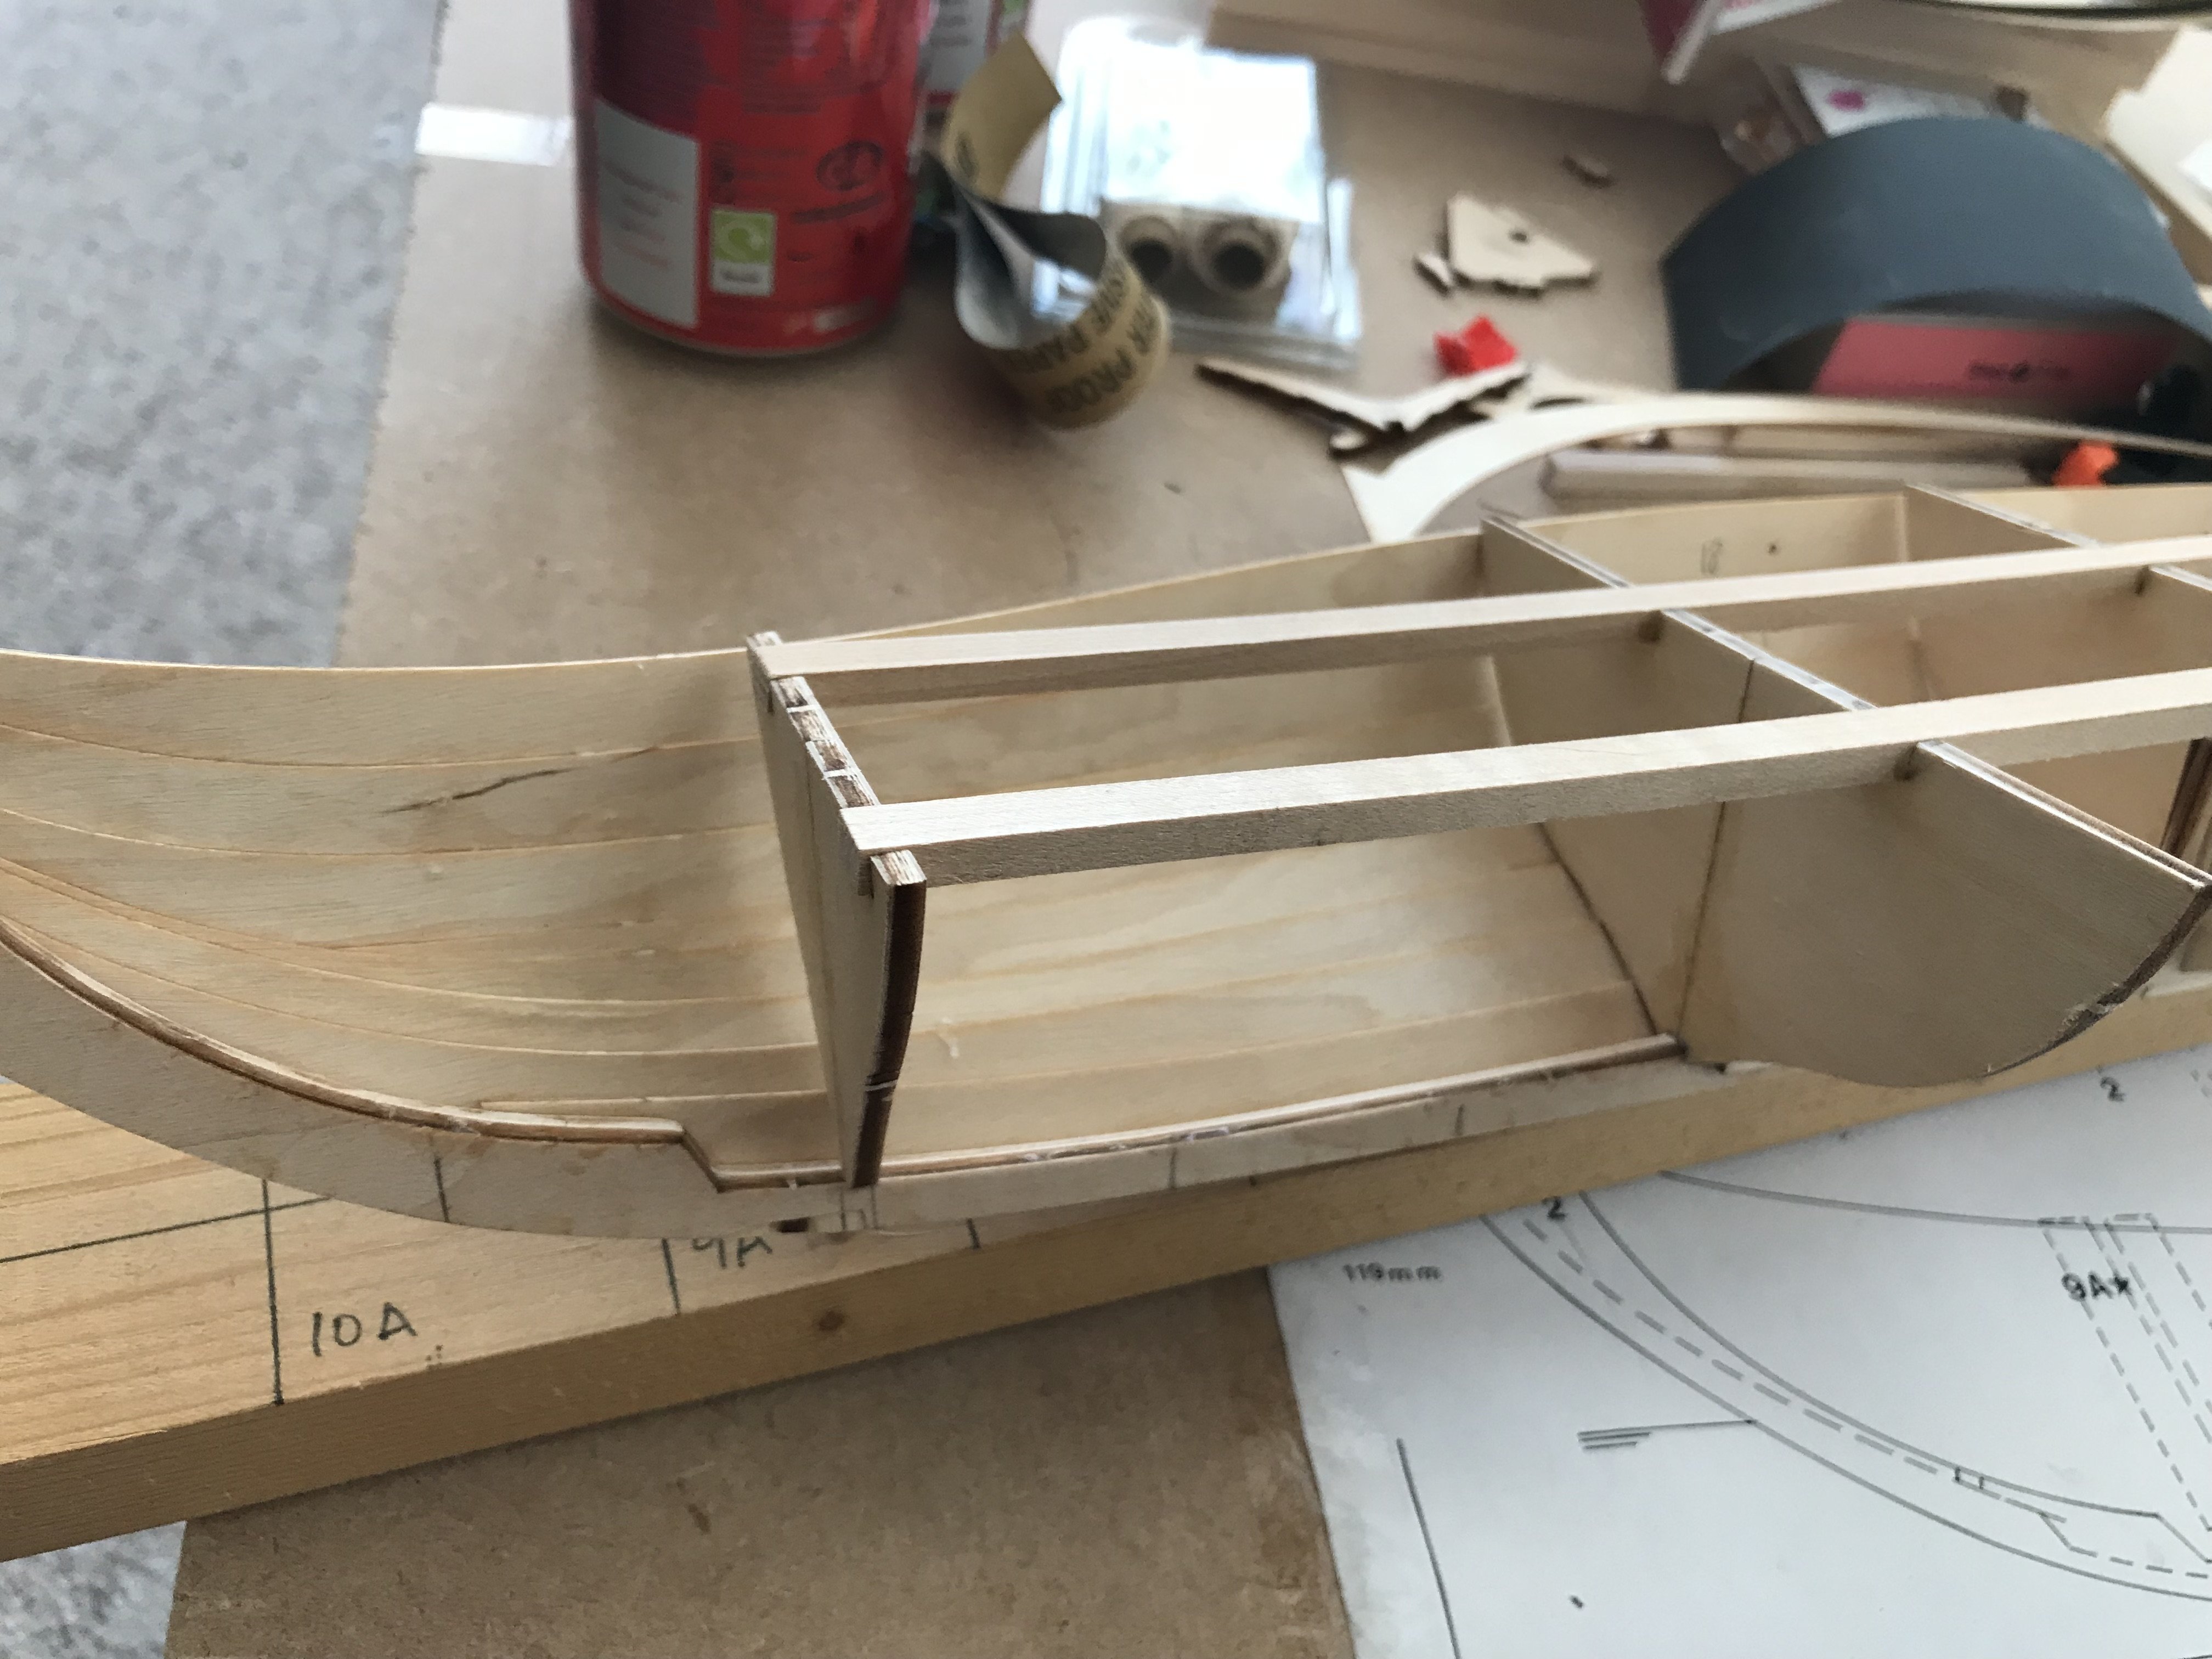
* Chapter Four * The Orgy of Super Glue or How to do the Port Side and then start with Starboard Side Hello my fellow model builder, here we have now finished one side (I think it should be port). I started now with the second side (should be therefore starboard) I hope since I’m not yet sure where the bow and where the stern is (have to check the instructions again) but I’m certain that I’m correct with my sides. Here some closer looks to the planking (stern)… Center part of the hull… and the bow… Much closer look to the bow and how the planks came together. Also a look inside the ship from stern… to the Center of the ship (mast support)… to the bow… Unfortunately do my planks not end up equally so I have to sand it nicely up. Also some of the planks are warping badly and the glue seems not to do a proper job… Starting in starboard with the planking… trying to align them properly with the mirrored plank (part 11) on the port side. Micha


- 146 replies
-
- 8
-

-
- Roar Ege
- Billing Boats
- (and 2 more)
-
I think we all want to become friends with her 🤣 Micha
-
I gave up on VPN since Disney+ stopped ESPN and took away the NCAA football games of me. Can´t see the point in paying for a service I don´t need or not use anymore. I was using Cyberghost for more than 6 yrs, to watch the NCAA football games of my favorite team. Unfortunately Disney (owner of ESPN) stopped the service last year here in Europe. Therefore I can´t watch any games since then, so there was no need for me anymore to use a VPN host since I don´t use streaming services and especially not foreign streaming services. Micha
-
Thank you for the additional information. Will wait till the book arrives. Maybe I can contact the author and he is even willing to share information that is not written in the book or has plans to share. Micha
-
Hello Harvey, thank you for your suggestion, that´s exactly the only book I could find. I ordered one (just don´t know how long it will take to be delivered to Europe) but what I read about it, it doesn´t quiet give me the plans of the boats / ships. It more describes how the boats where made. I will give it a go, but I look more for books or plans that I could utilise to create a scratch build for one of those boats / ships. Micha
-
The size of the picture was 20kb so not the biggest size at all. All pages took ages (roughly 40-55 seconds). The picture in my LOG was 2.1mb. So different sizes and that`s why I checked with iPad and laptop, both didn´t work. I also checked three browsers now, Safari (iPad and iMac) and Firefox and MS Edge, all with the same results. My broadband speed as well has been checked with the network provider app and my physical tester (I`m a Service Delivery Engineer for the national telecommunications provider). There was no fault found. Line tested ok, broadband speed is ok and within parameters. So I don´t know, maybe it´s the connection between the countries (don´t know where the server is located that hosts the forum software). But I checked it again, at least the response time of the forum is back to normal. Don´t know yet about the picture upload. Upload also works now again. Above you can see the error code (server error: -200). Micha

-
Hi everyone, I tried a couple of times today to upload pictures to my LOG, every try just failed with an error code 200. I tried it from my iPad and from my computer (laptop). Every single try just failed. Is it just me or is there a known issue with the forum at the moment? Also seems the forum / homepage very slow, responding to commands (like opening a thread or editing) is very slow and takes a long time to respond, twice I got timed out already. Micha
-
I noticed that ^^ and I see that there are always around 180-200 people are online, but when you check the names that post, reply or like posts, I always see the same names 😂 that’s why I said there are not many on here. The others are sneaky readers hehe 😛… I’m fine with that, I noticed that there are some folks here I really start to like, waiting for their answers and looking forward to their posts, even about ships that are not on my radar because of the time, type or just not my style of boat / ship but I like reading your guys content, ideas or advises and soaking in your experience and knowledge (which will help for my own models and builds as well)… so, thank you folks for that Micha
-
* Sideline * The 1:20 Skuldelev or How I would have guessed the proper Way to do it Today I got the Billing Boats kit No. 456 called “The Skukdelev Ships” in the scale 1:20. I can’t find when this was launched or distributed but it seems quite a long time ago. The set seems complete (when I check the content of the box with the manual. The approach to build it is complete different to the one from the Roar Ege (but most like my approach of the Riar Ege 😂). However, I paid GBP 30.00 for the set since the seller couldn’t get rid of the set and just wanted it off the shelf. So I took it. I won’t build the kit before the Roar Ege is finished and maybe hit even before murph scratch build is finished. But yeah, a nice kit to have on my shelf now. Looking forward to it. Micha
.thumb.jpeg.c4ecd10b293508a43bed03c336966cf4.jpeg)
- 146 replies
-
- 5
-
-
- Roar Ege
- Billing Boats
- (and 2 more)
-
I´m wondering if someone knows about some books or plans of japanese ships of the Azushi-Momoyama period (which was between 1568 to 1603) and the early Edo period (1603-1700). Unfortunately during the Edo period Japan started to isolate themselves again so there might not be much (at least not in a foreign language but Japanese - which I can´t read). I´m mostly interested in fishing and merchant vessel and galleys but also in traditional Japanese sail boats. From the Edo period I know that the English and Portuguese took influence on Japanese boat / ship building. That´s why I´m more interested in the traditional Japanese boats and ships. I can´t find much about those, only some vague plans and one book (about model building but not about historical backgrounds or traditional boat / ship building). Micha
-
Garage workshop
Scottish Guy replied to Frank Burroughs's topic in Modeling tools and Workshop Equipment
I definitely wouldn´t store finished models in the cold garage. I would keep them in a dry and temperated area. Not heated but temperated above zero. Like I stated before, I would keep wood anyways in a temperated space, not heated maybe but like I said, above zero at least so they don´t get moistured by the damp and steam. Micha -
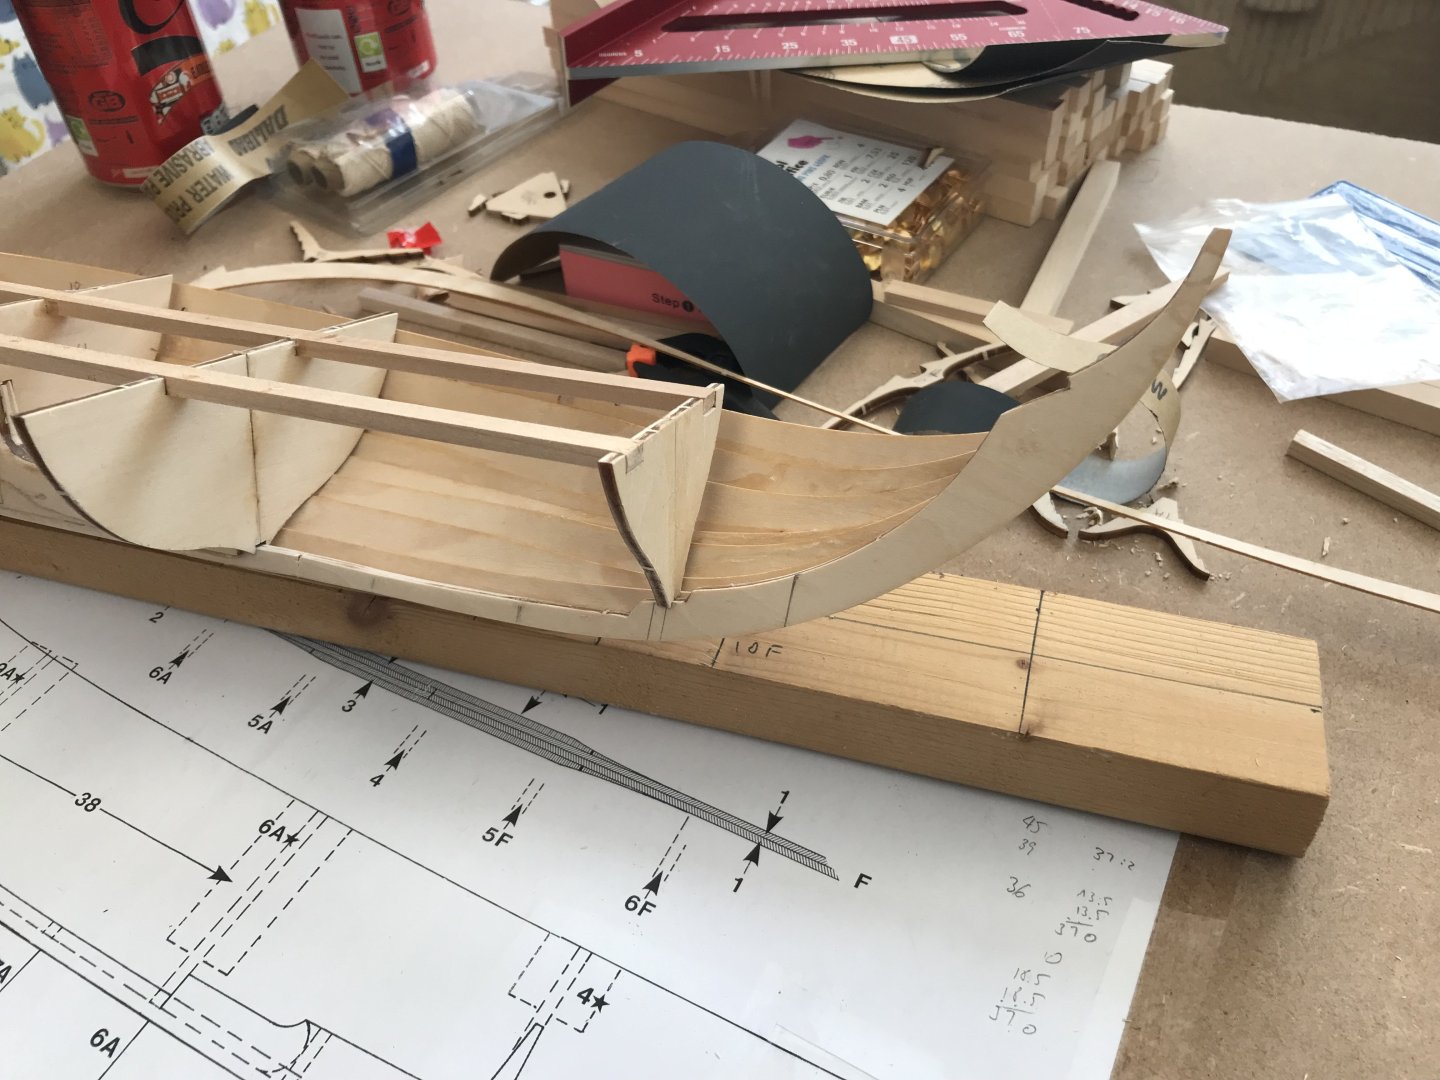
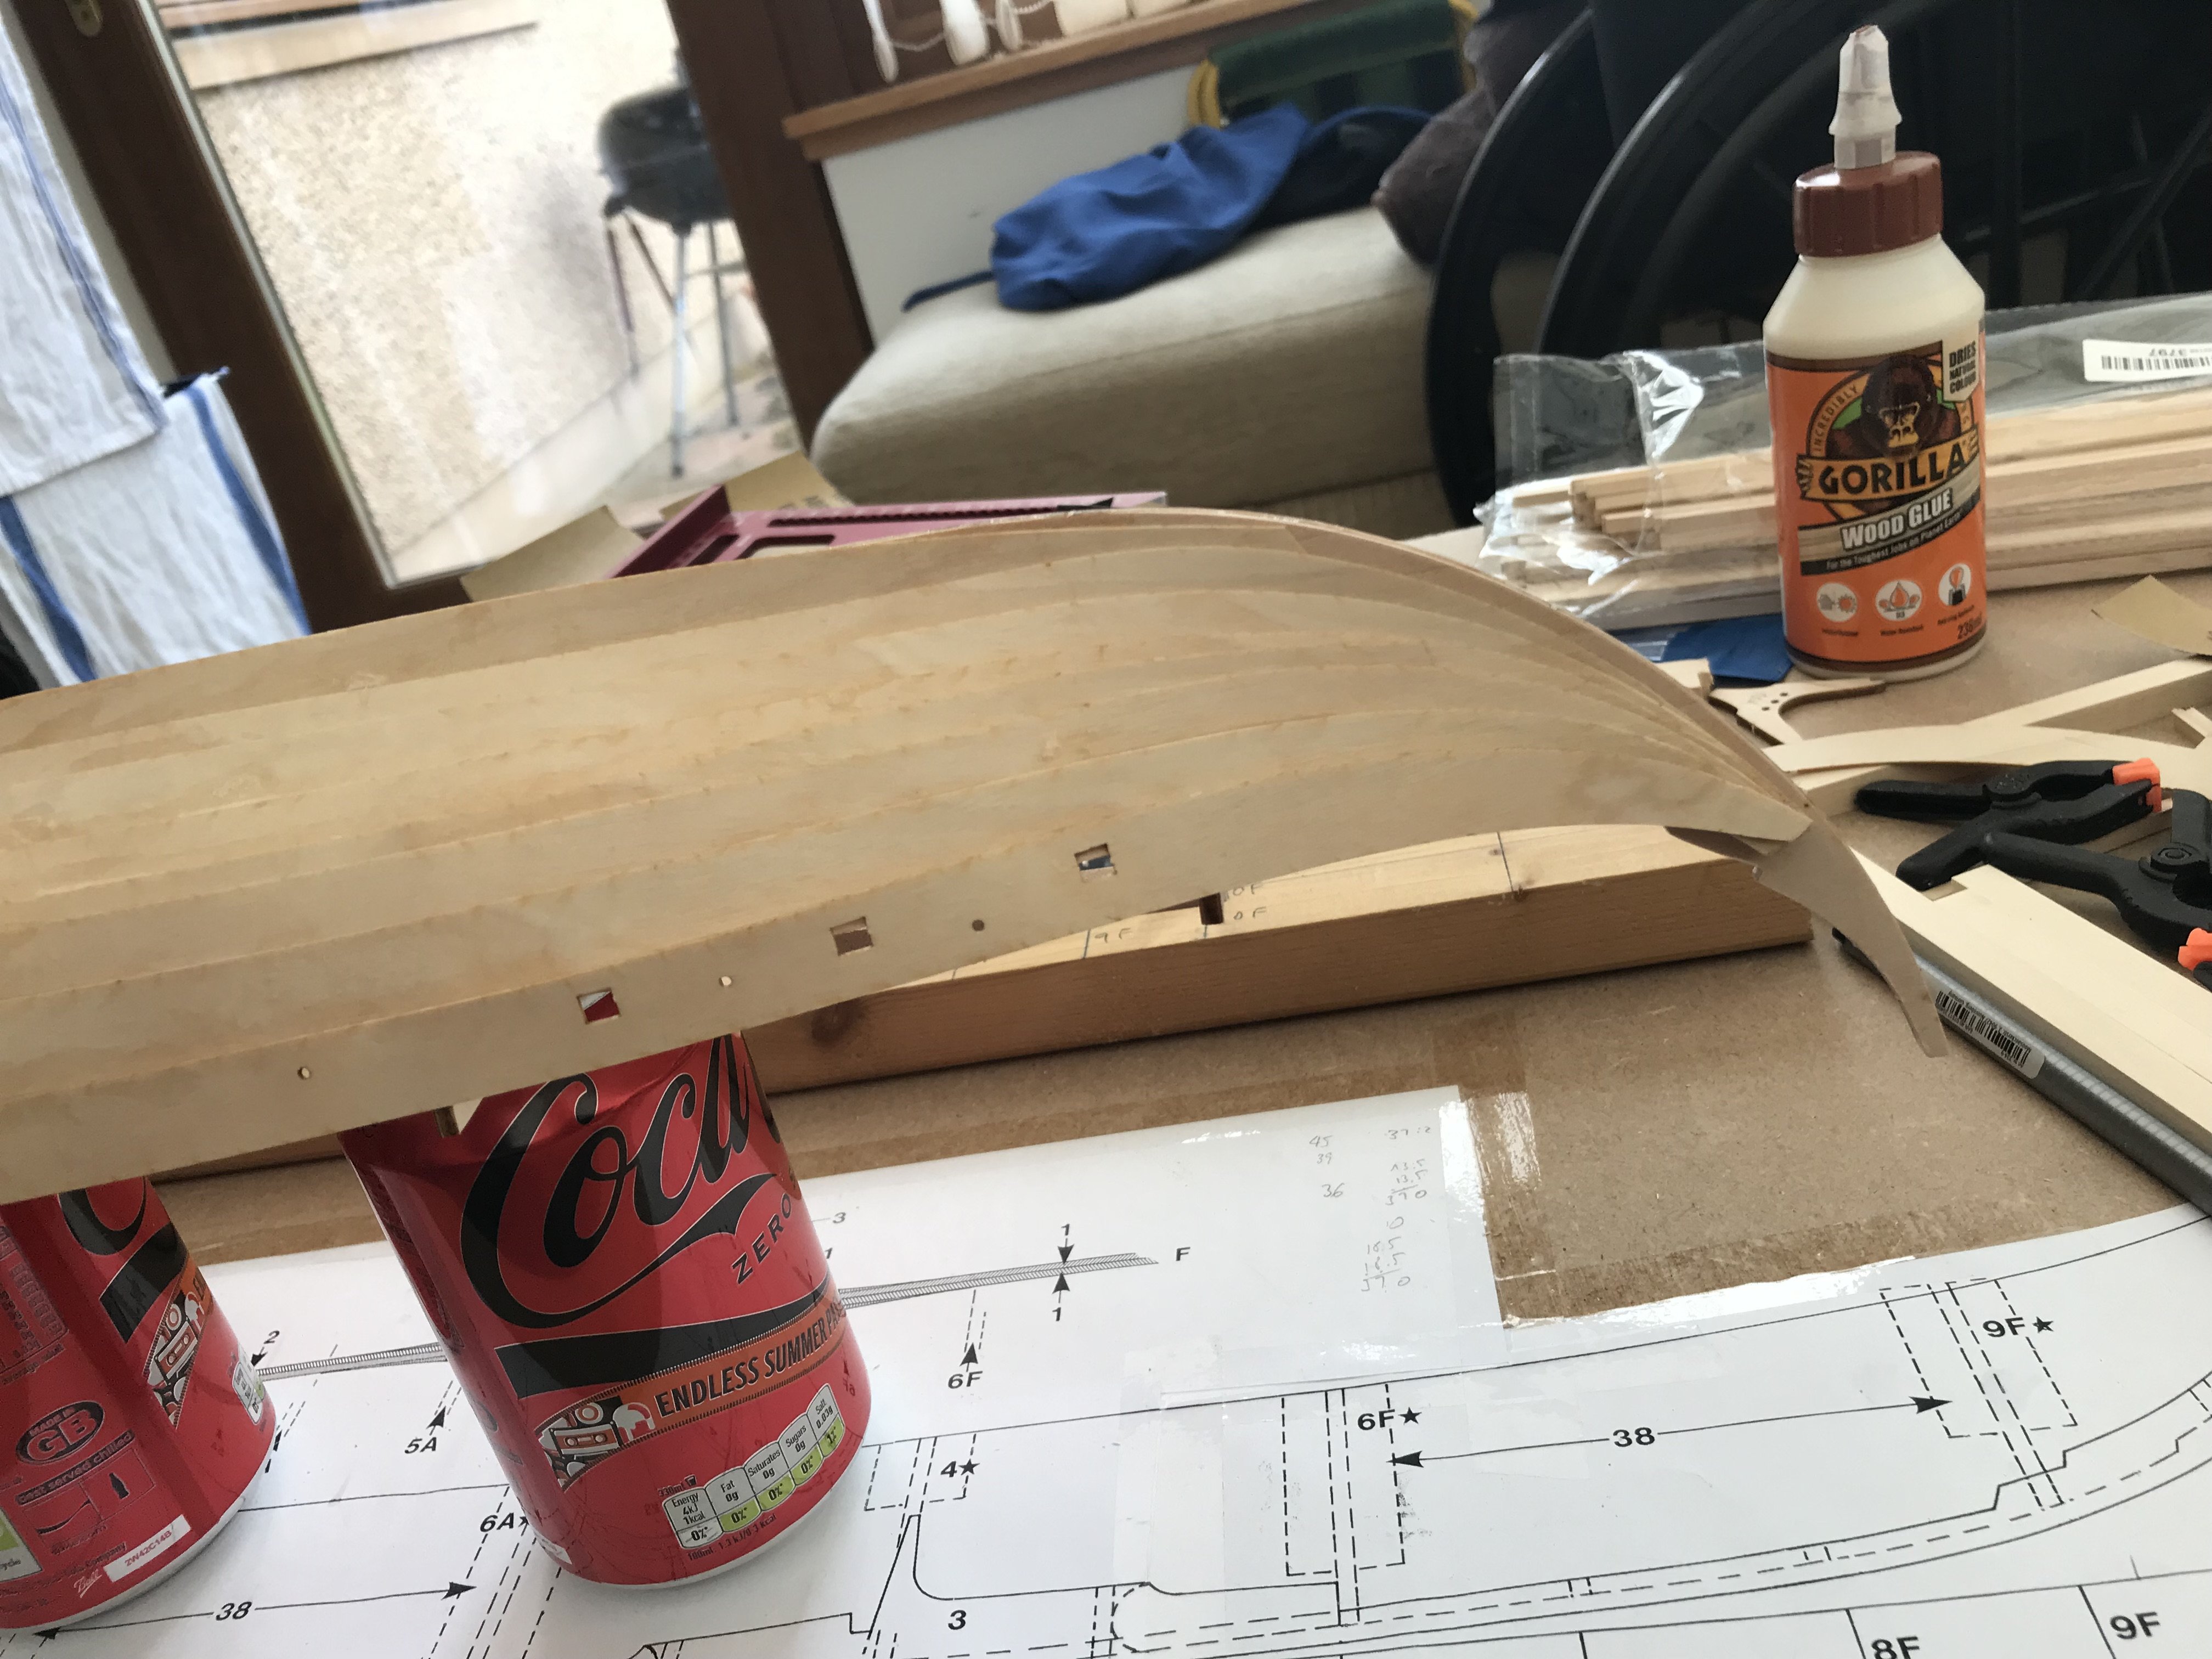
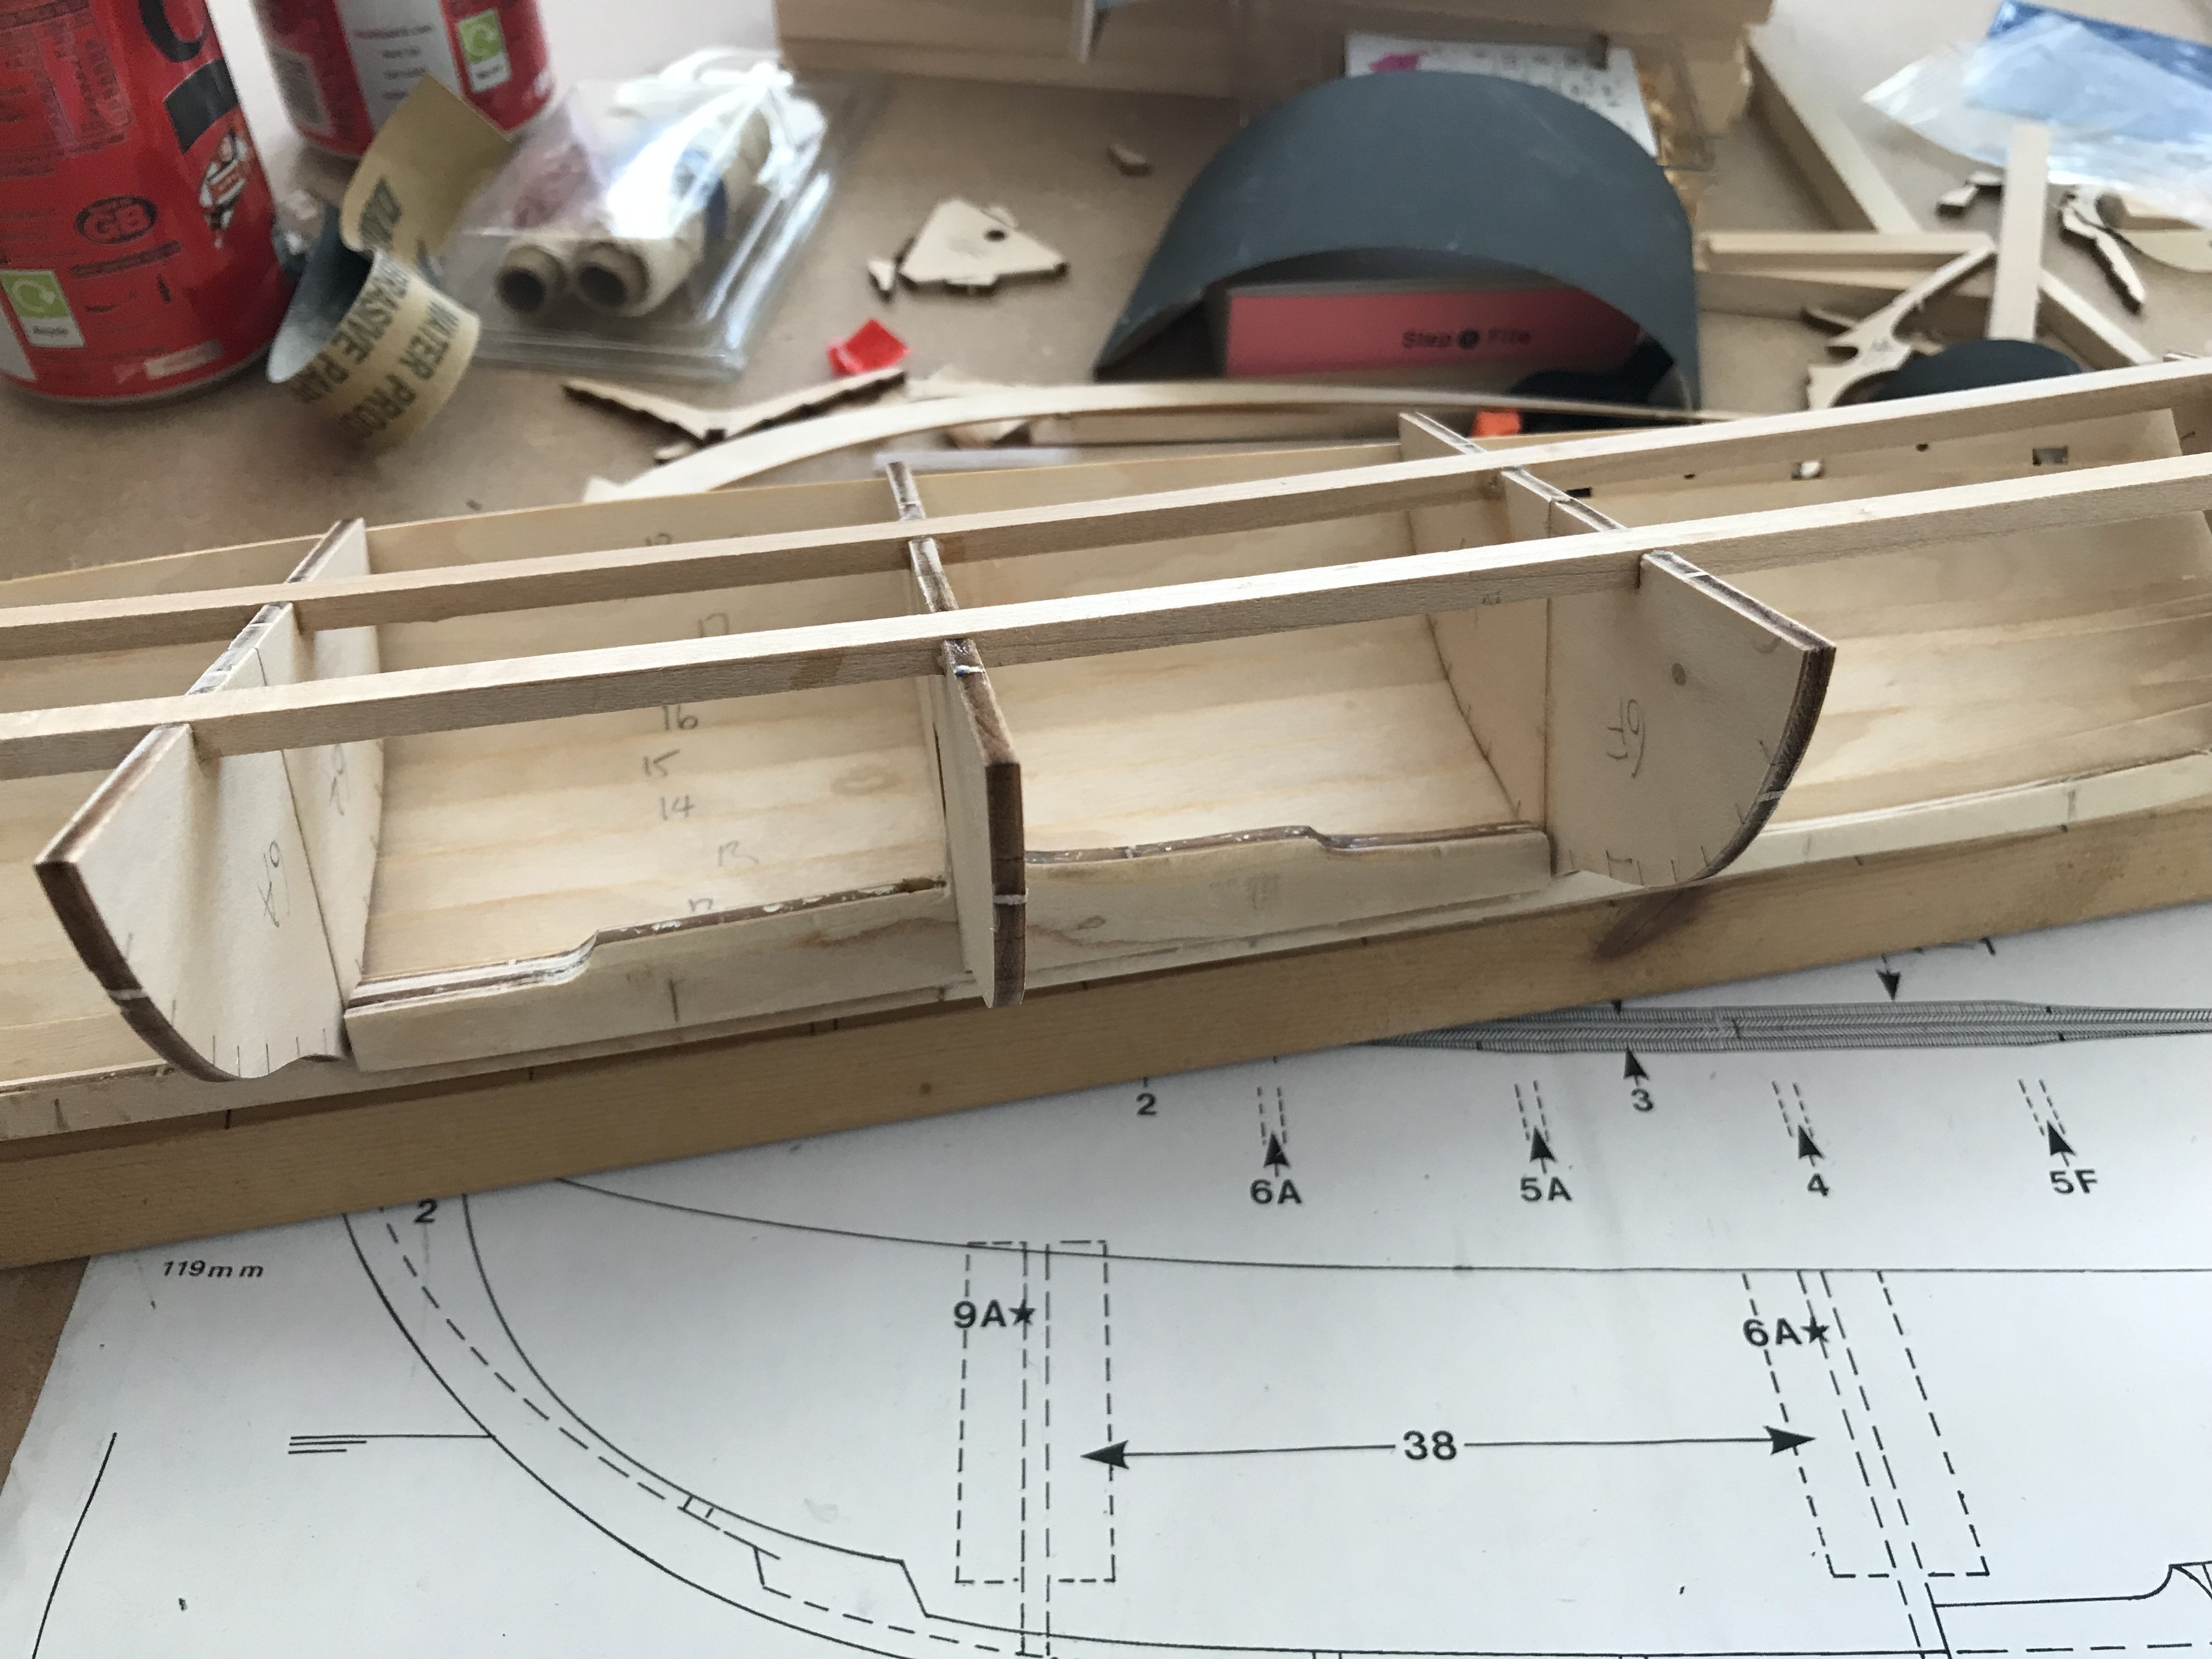
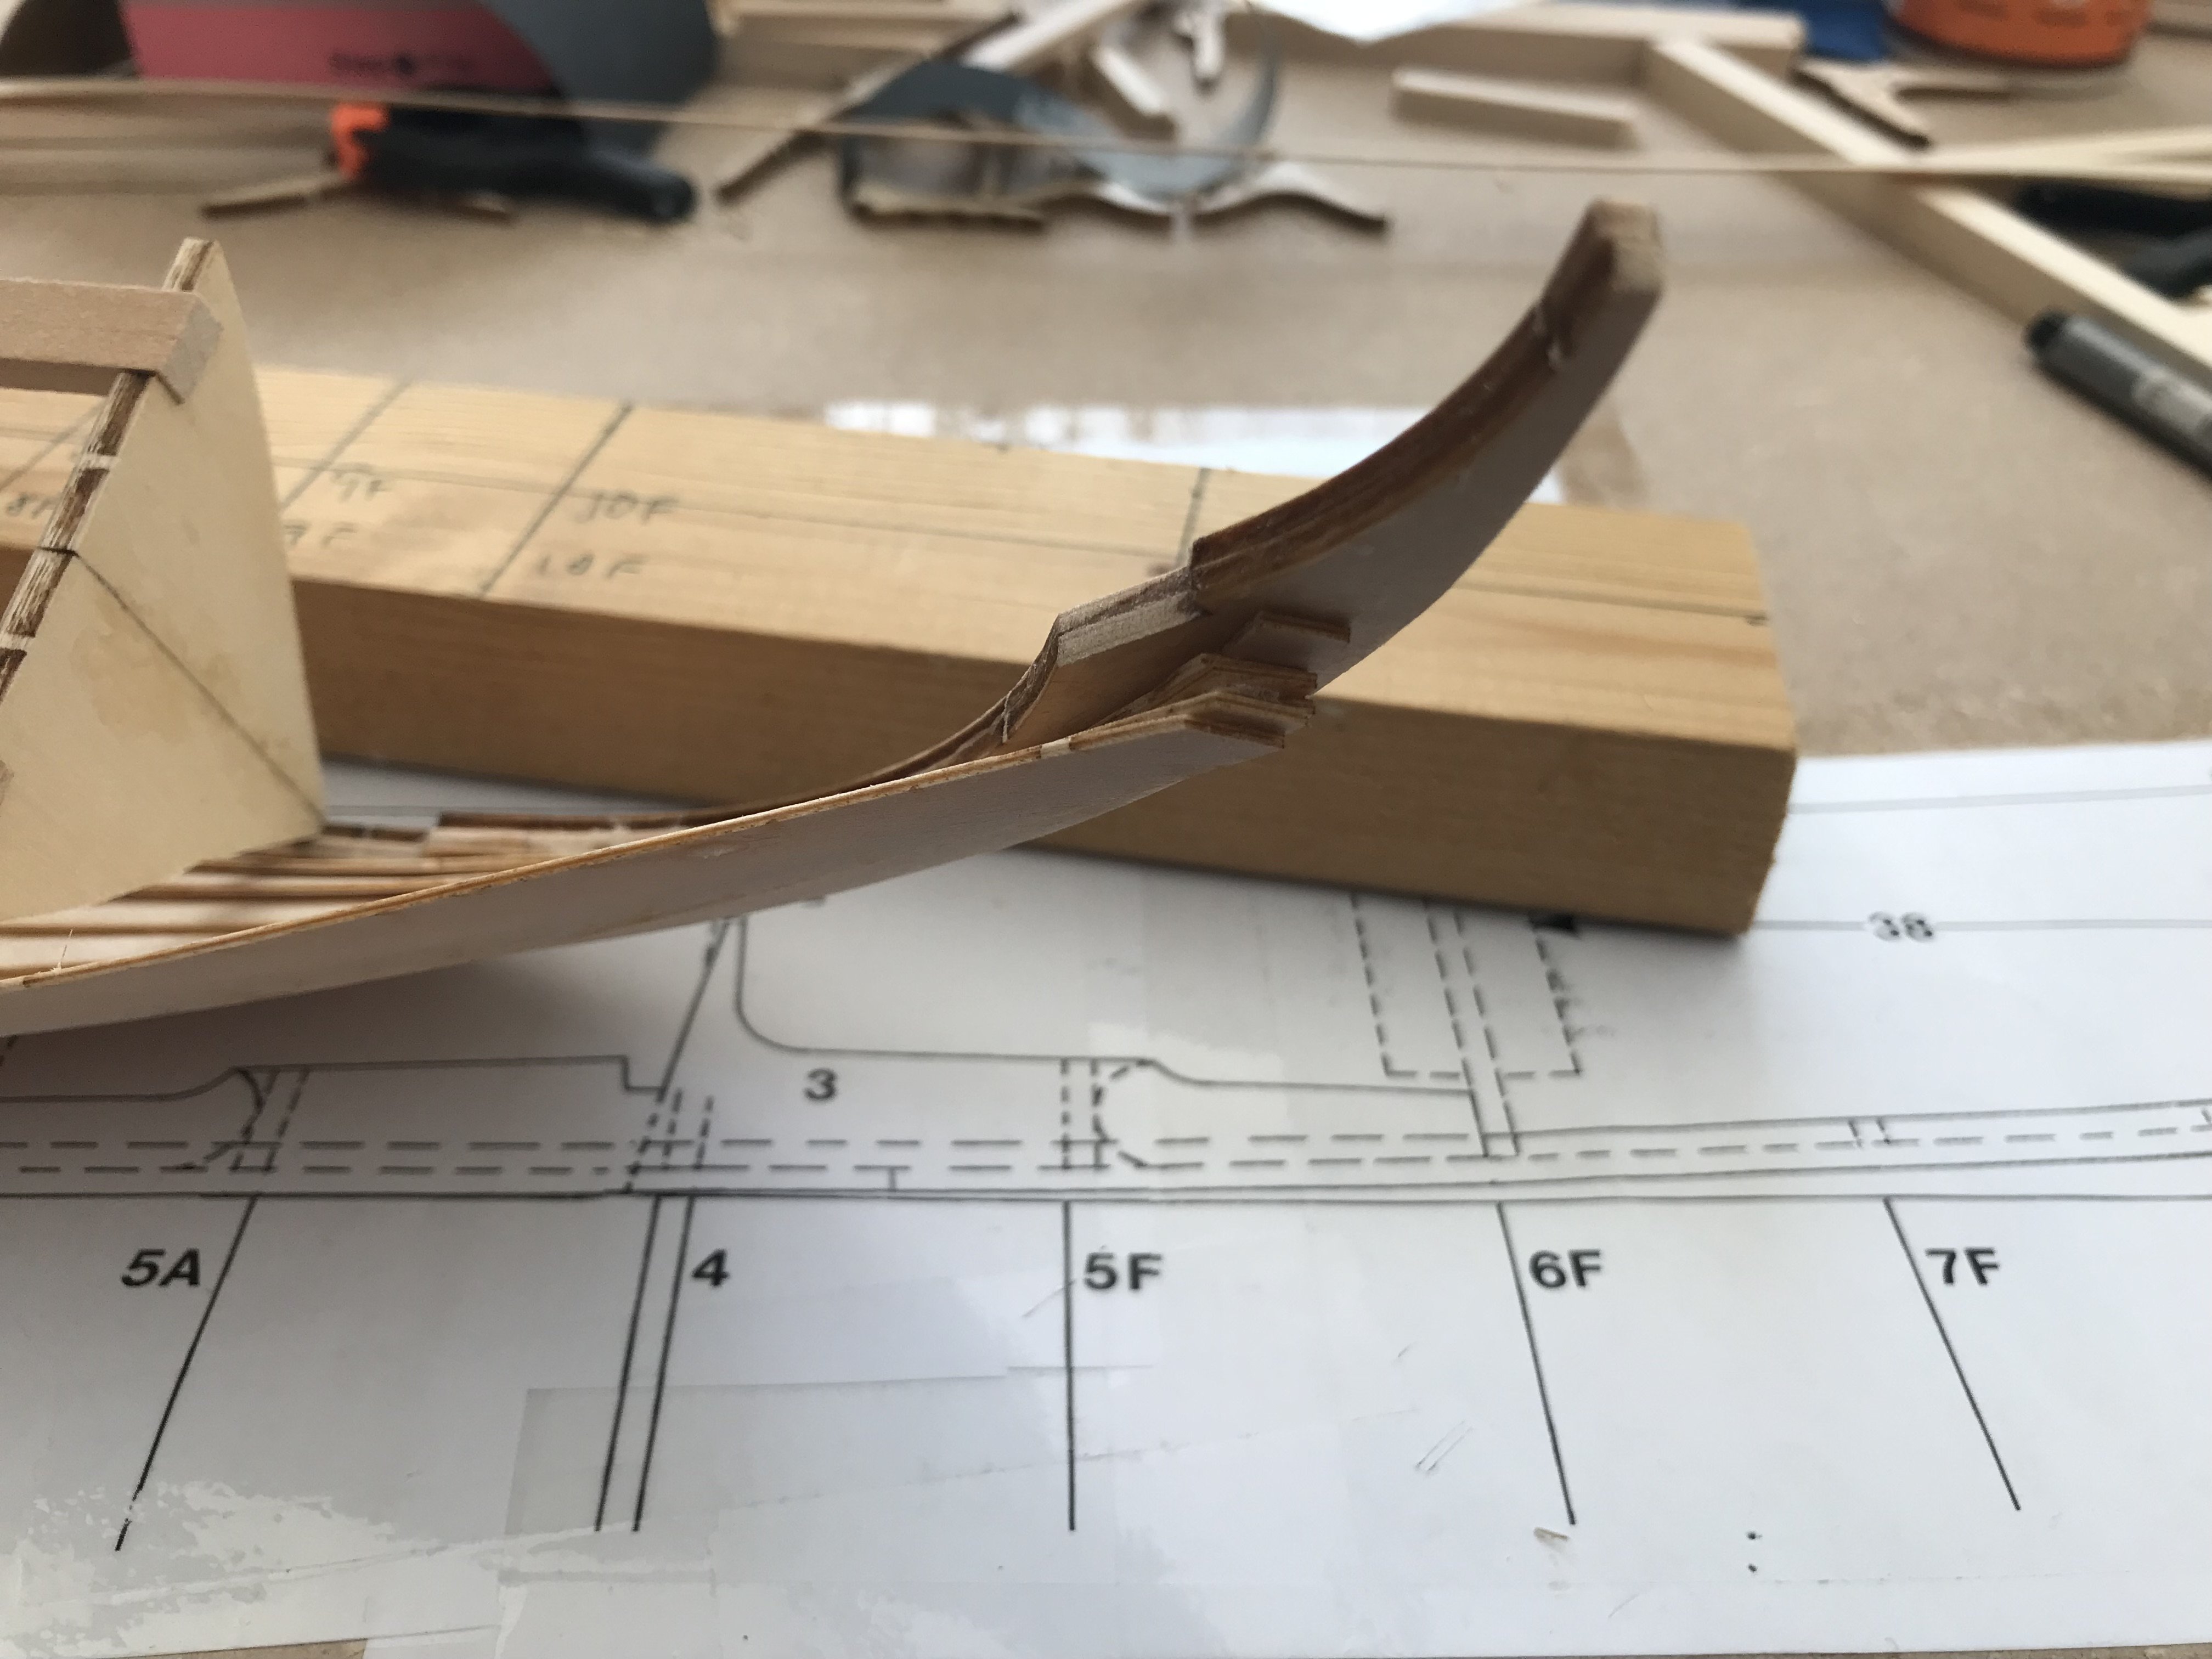
Thank you Paul, will give it a go later today. I hope they don´t have their own mind - I would hate that, but yeah, will check it out and maybe attach the bigger ones like 7A / 7F and 5A / 5F. Might give the planking even a bit more stability, it´s a bit wobly between the molds. Micha
- 146 replies
-
- 4
-
-
- Roar Ege
- Billing Boats
- (and 2 more)
-
Sounds like a really good way to do it as well Allan. Thank you for that idea. I mean, I did it a few times with other wood working stuff but never thought about the tiny stuff to do it with a scalpel for example. Micha
-
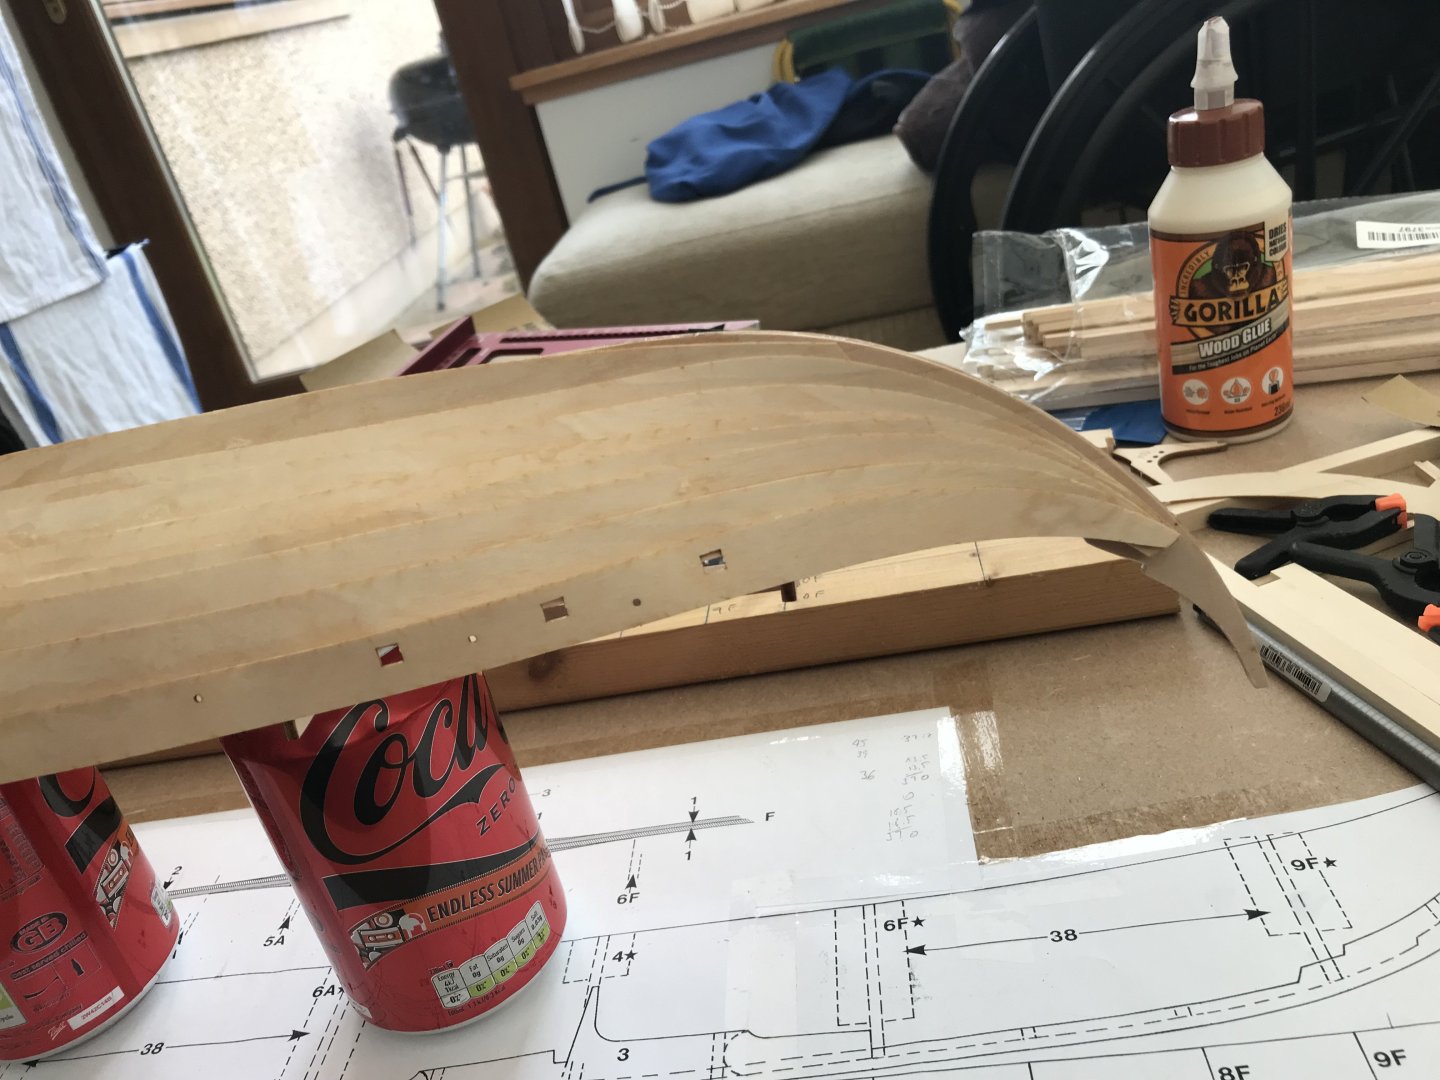
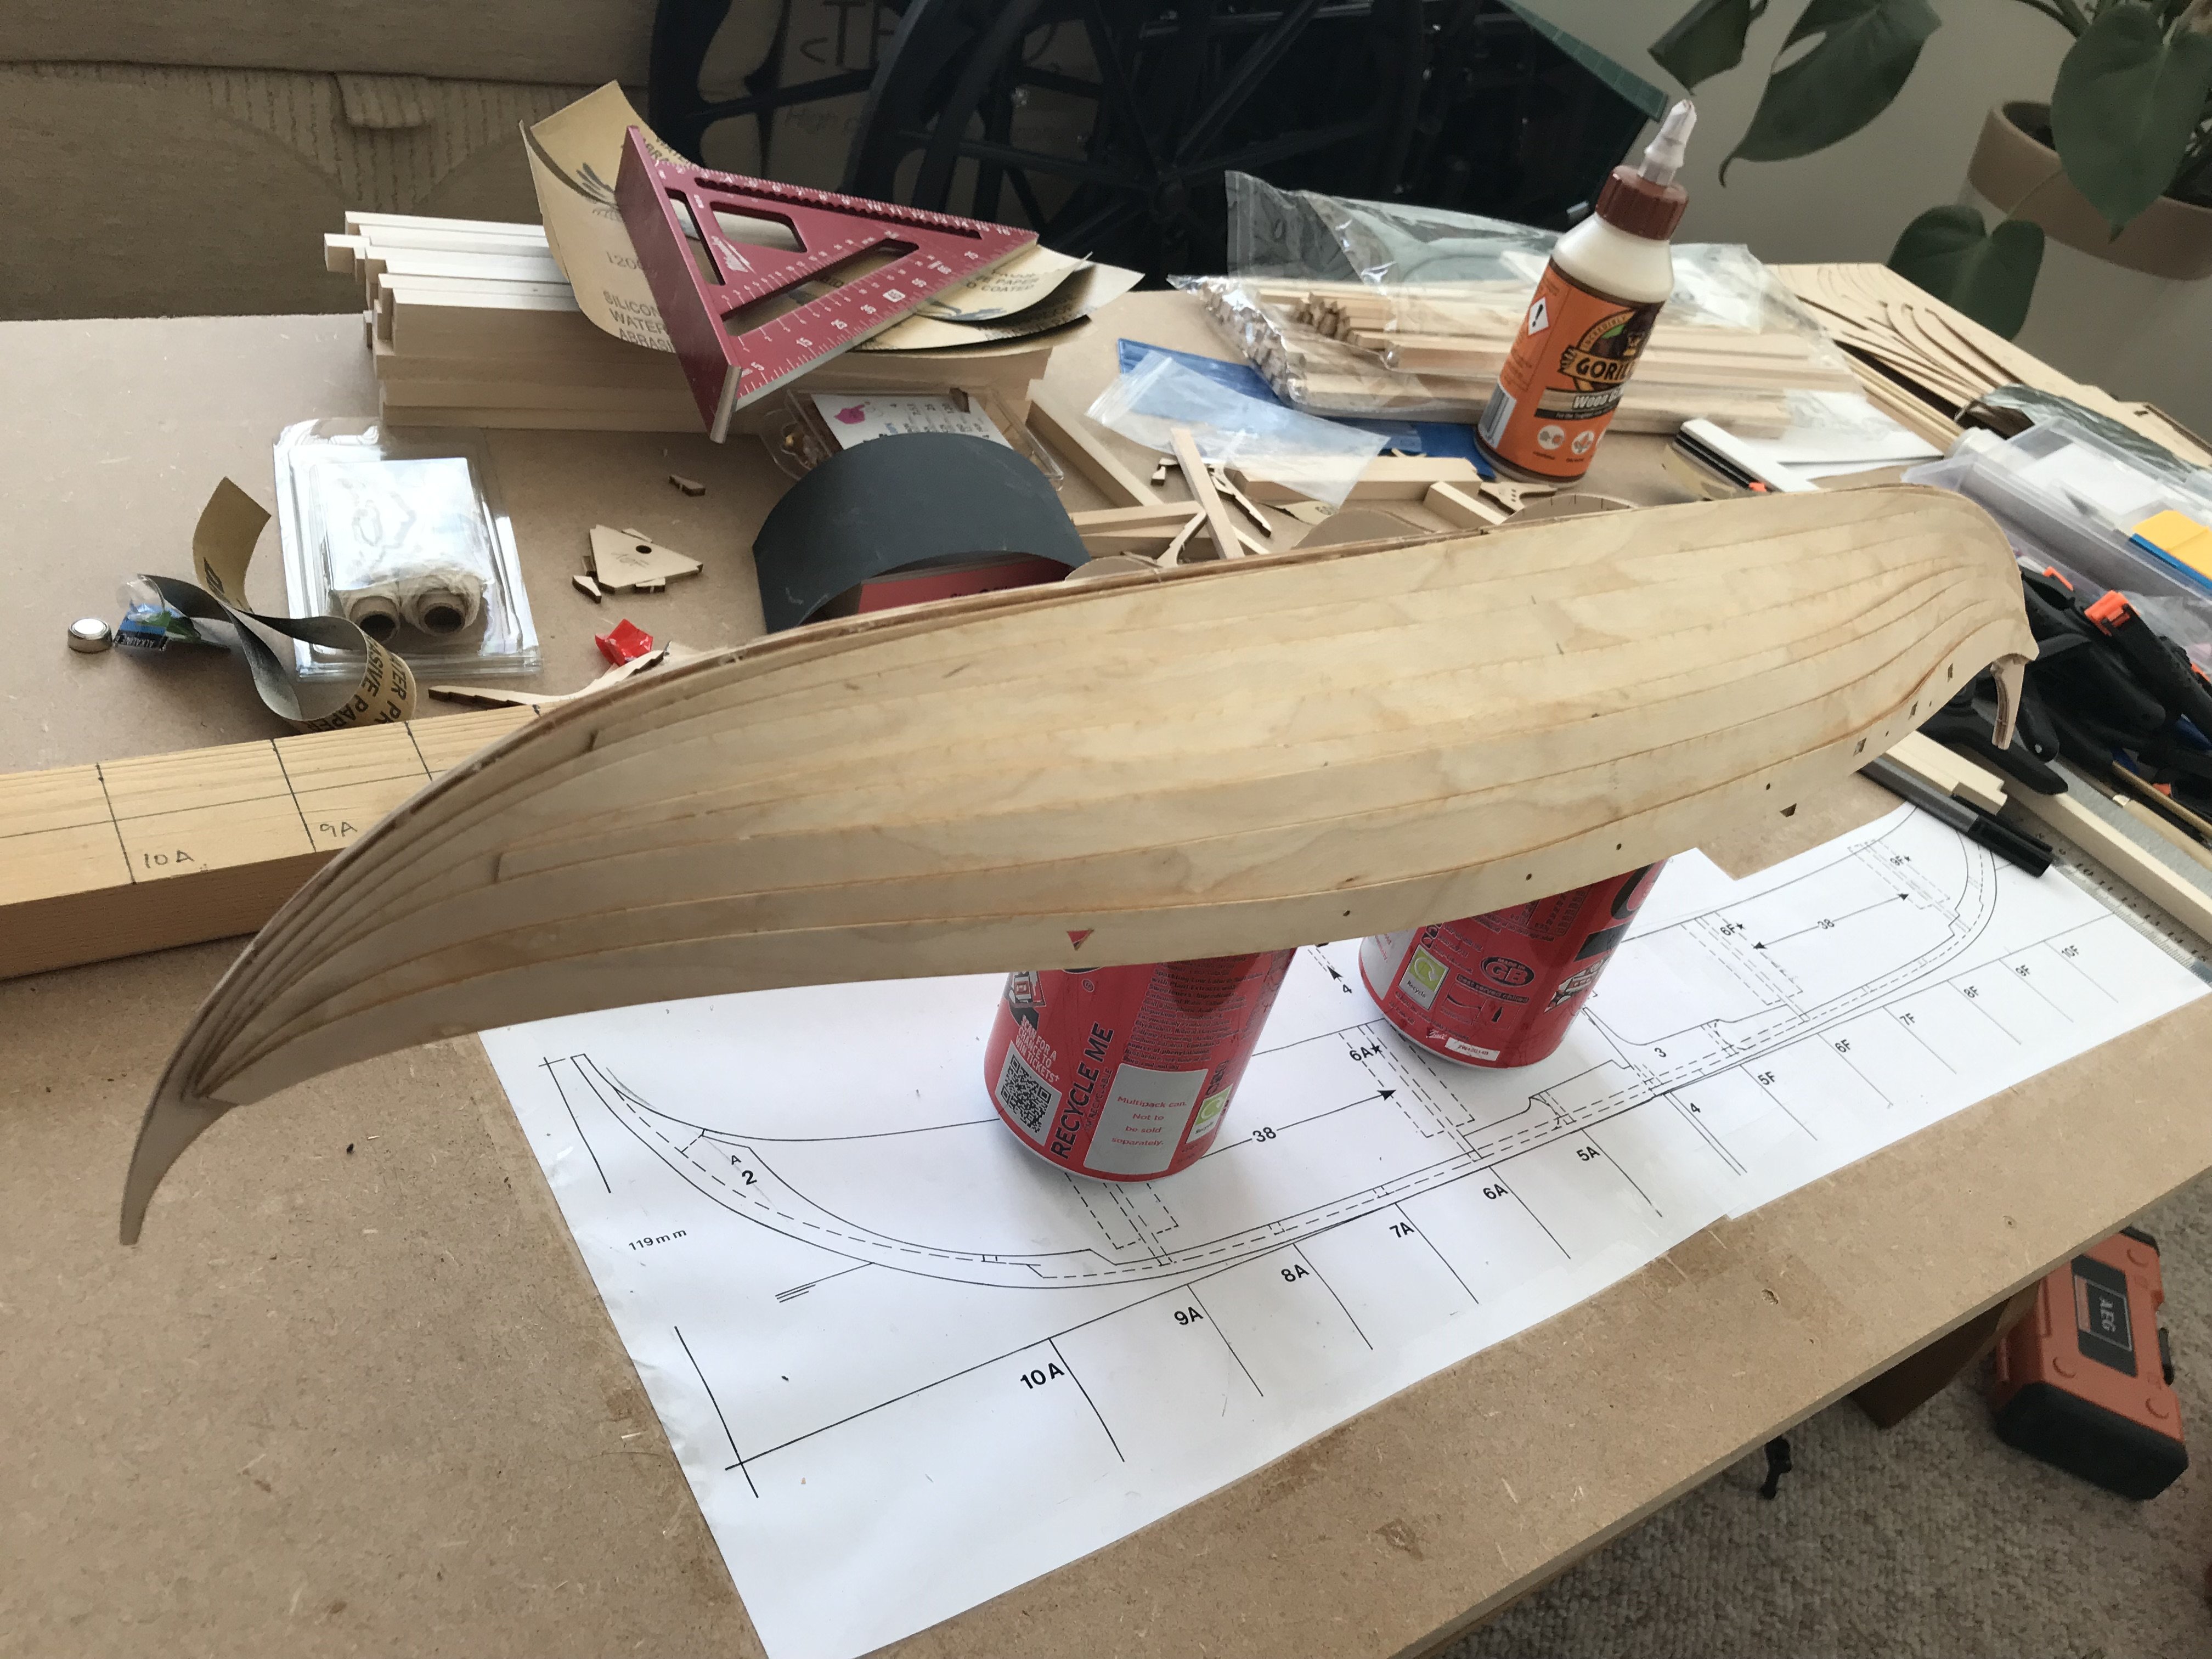
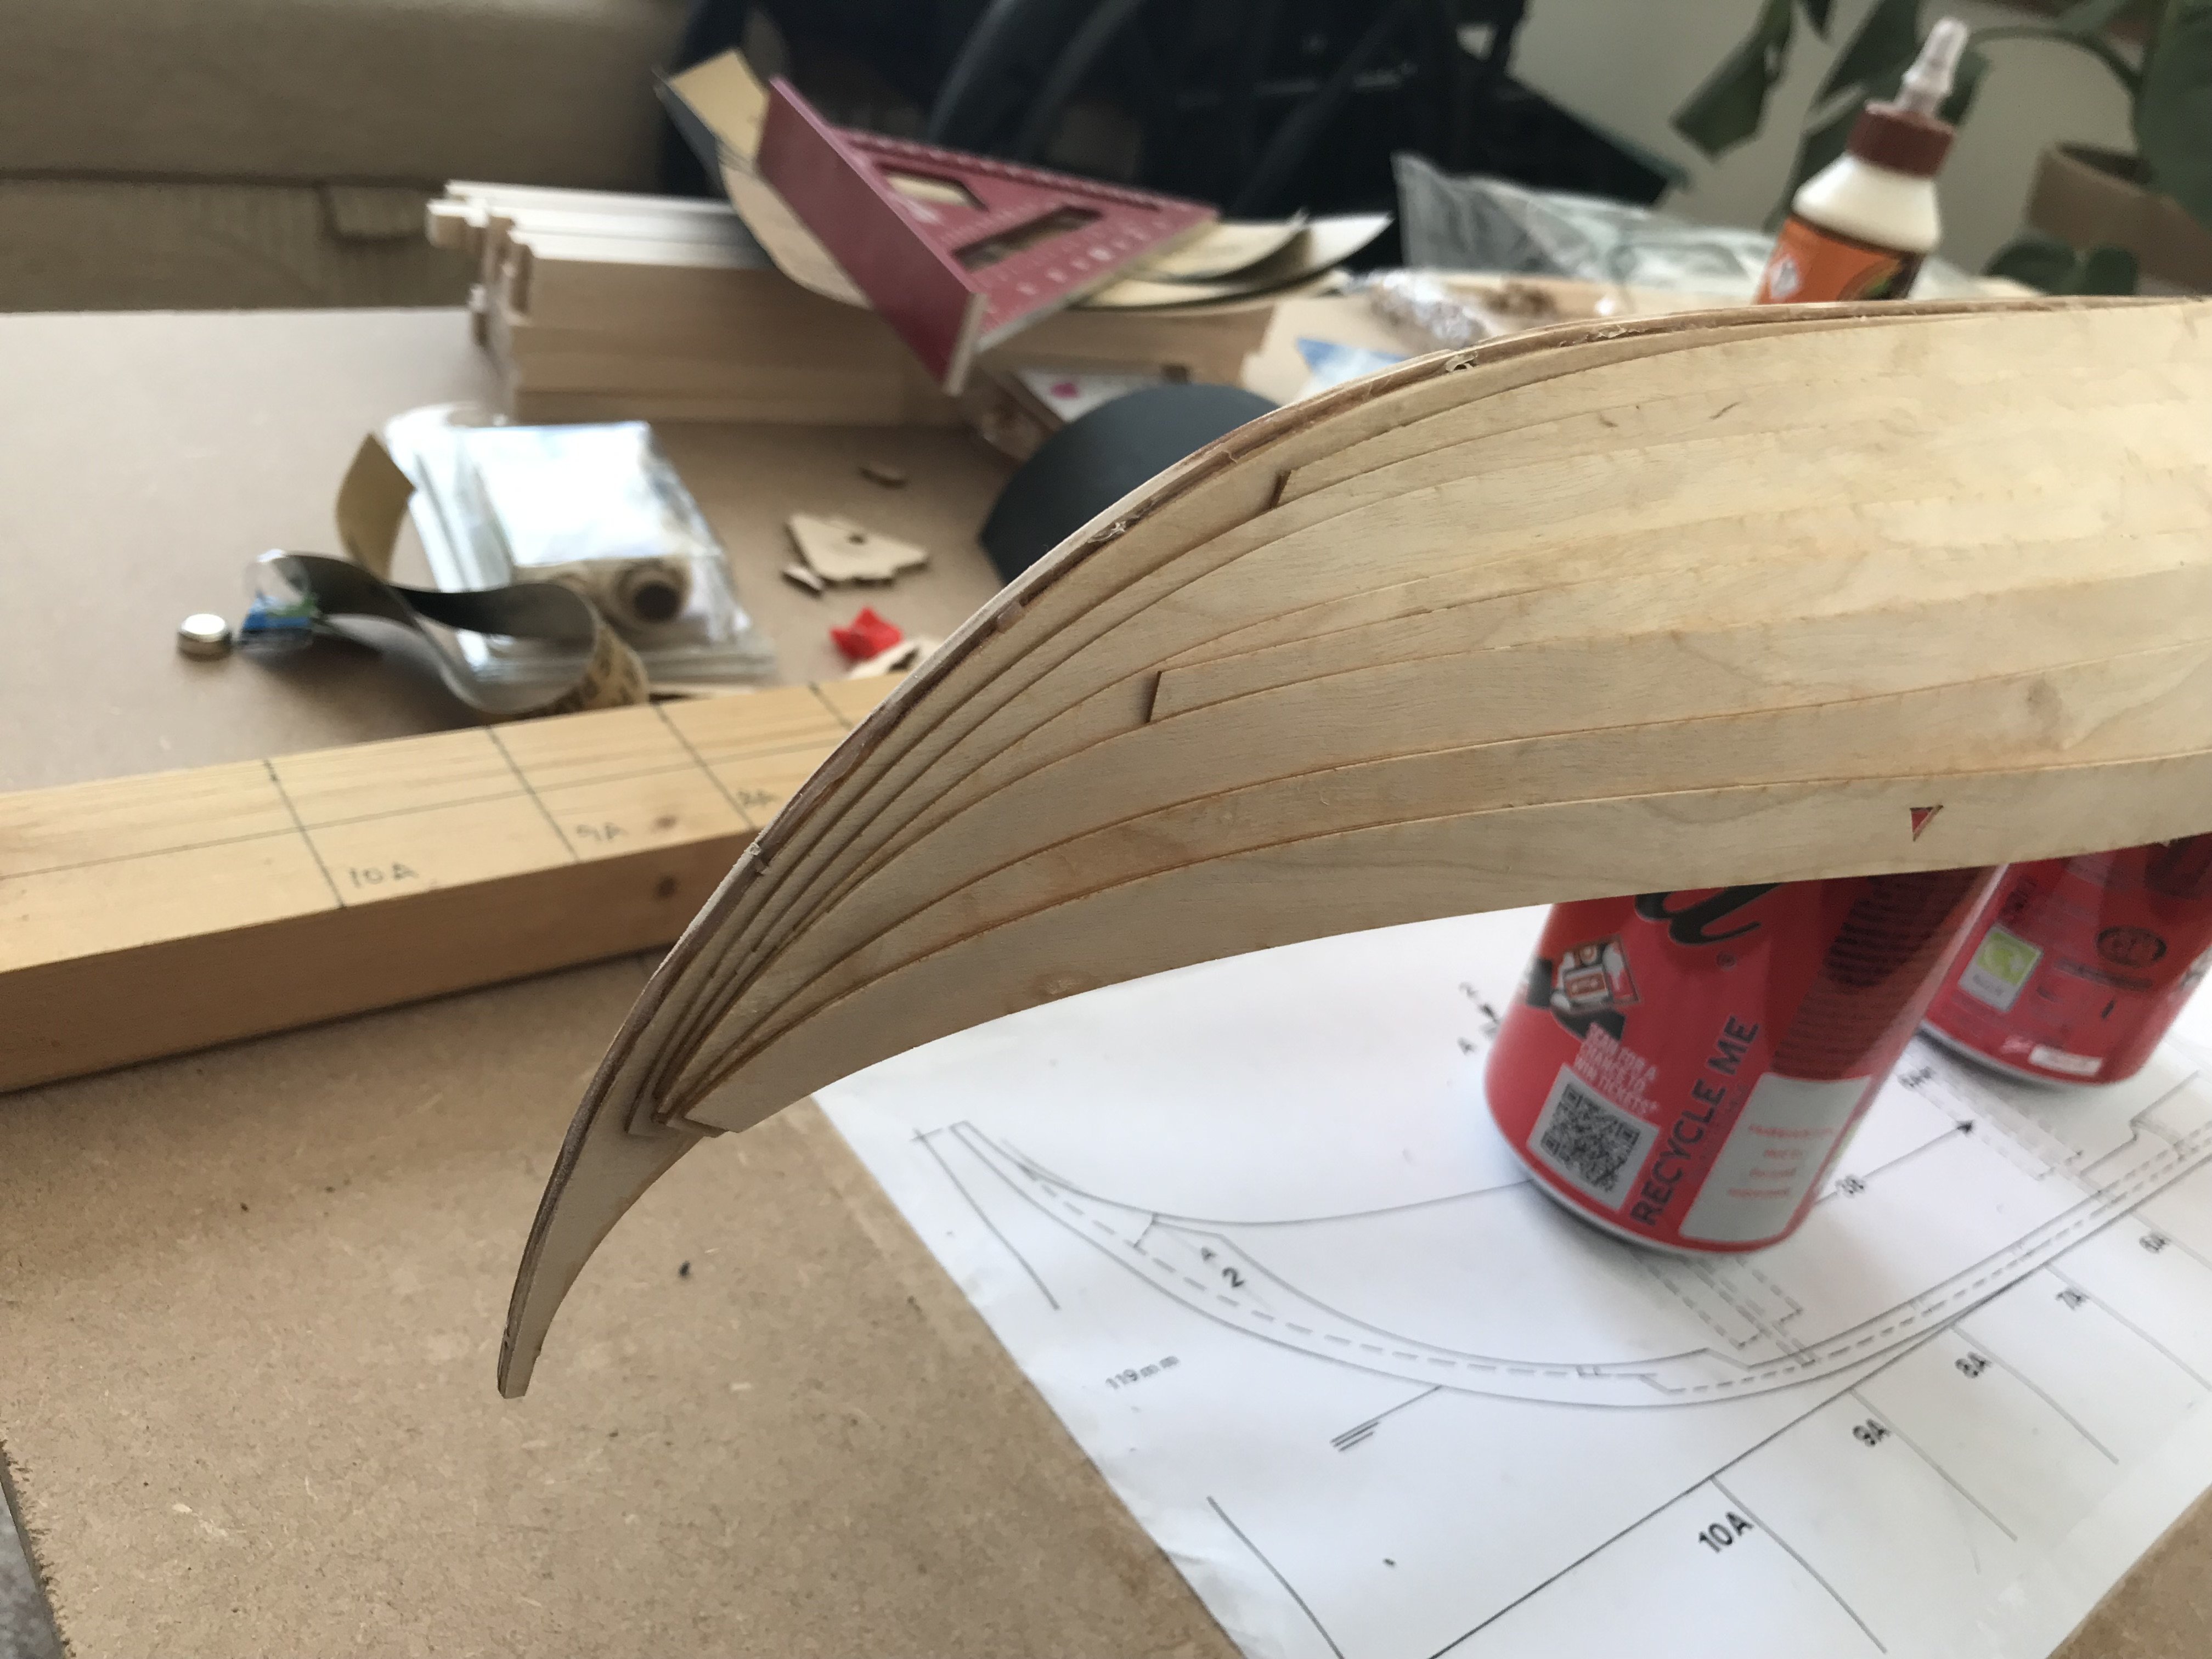
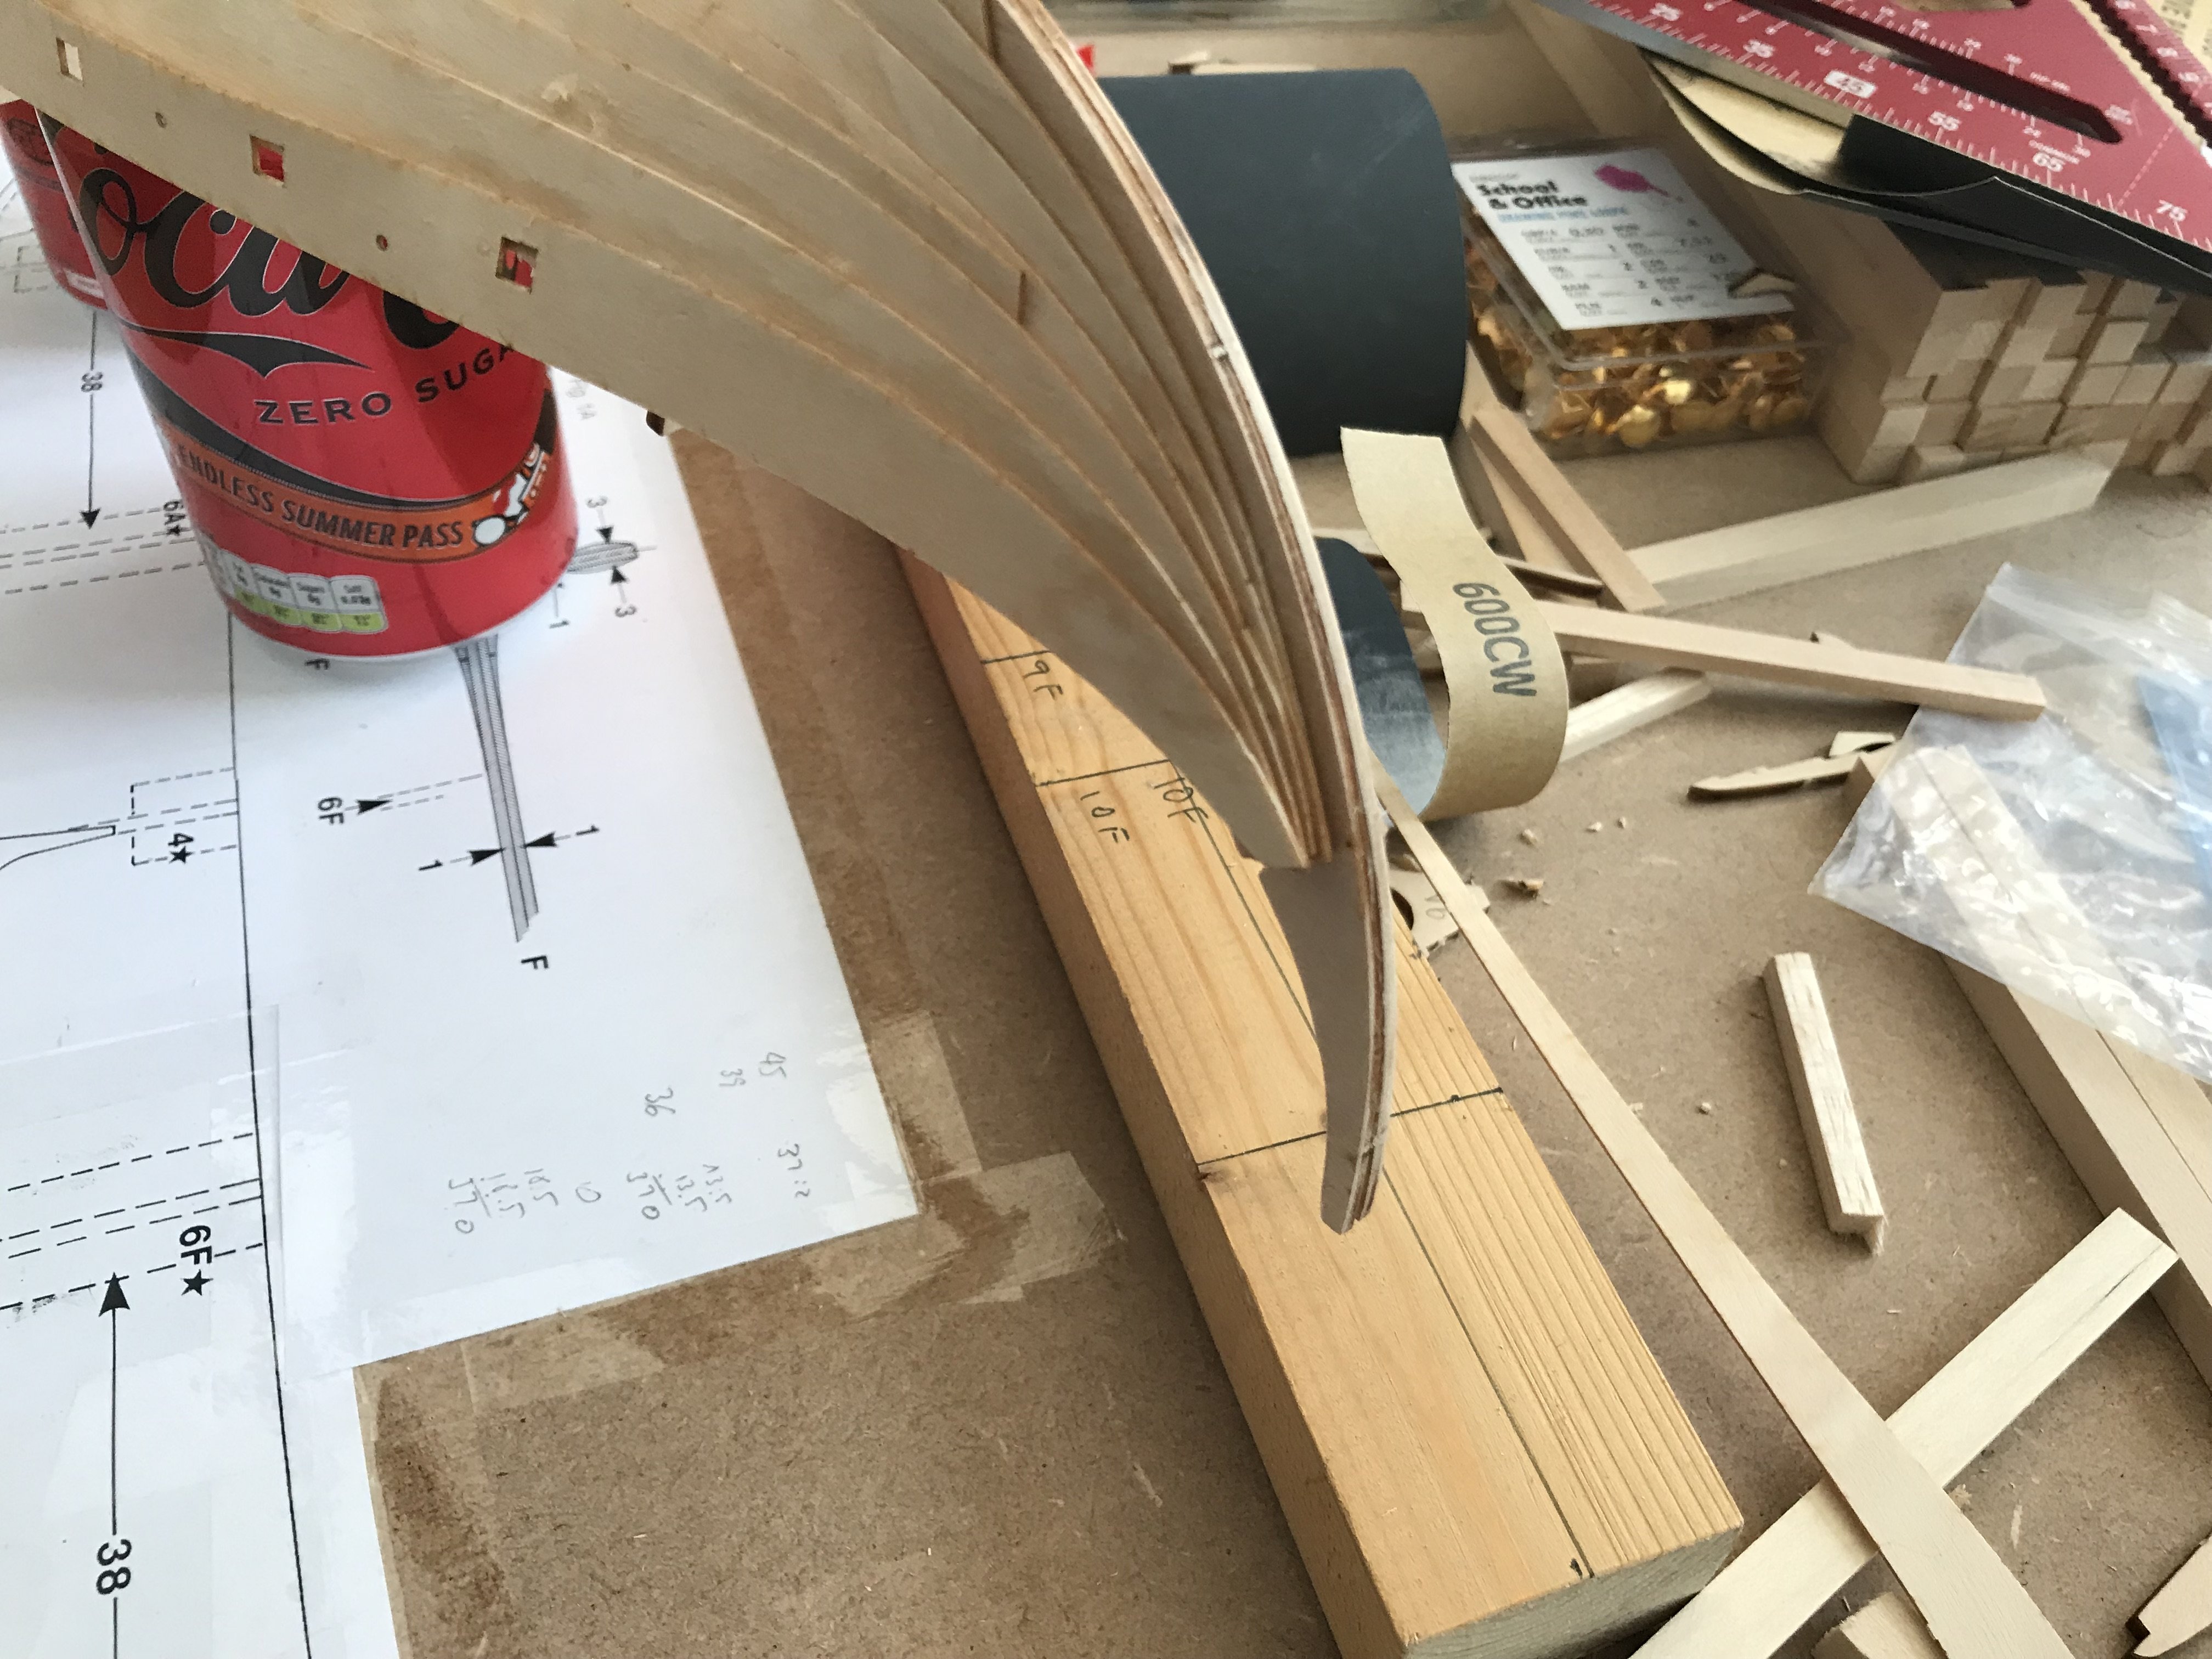
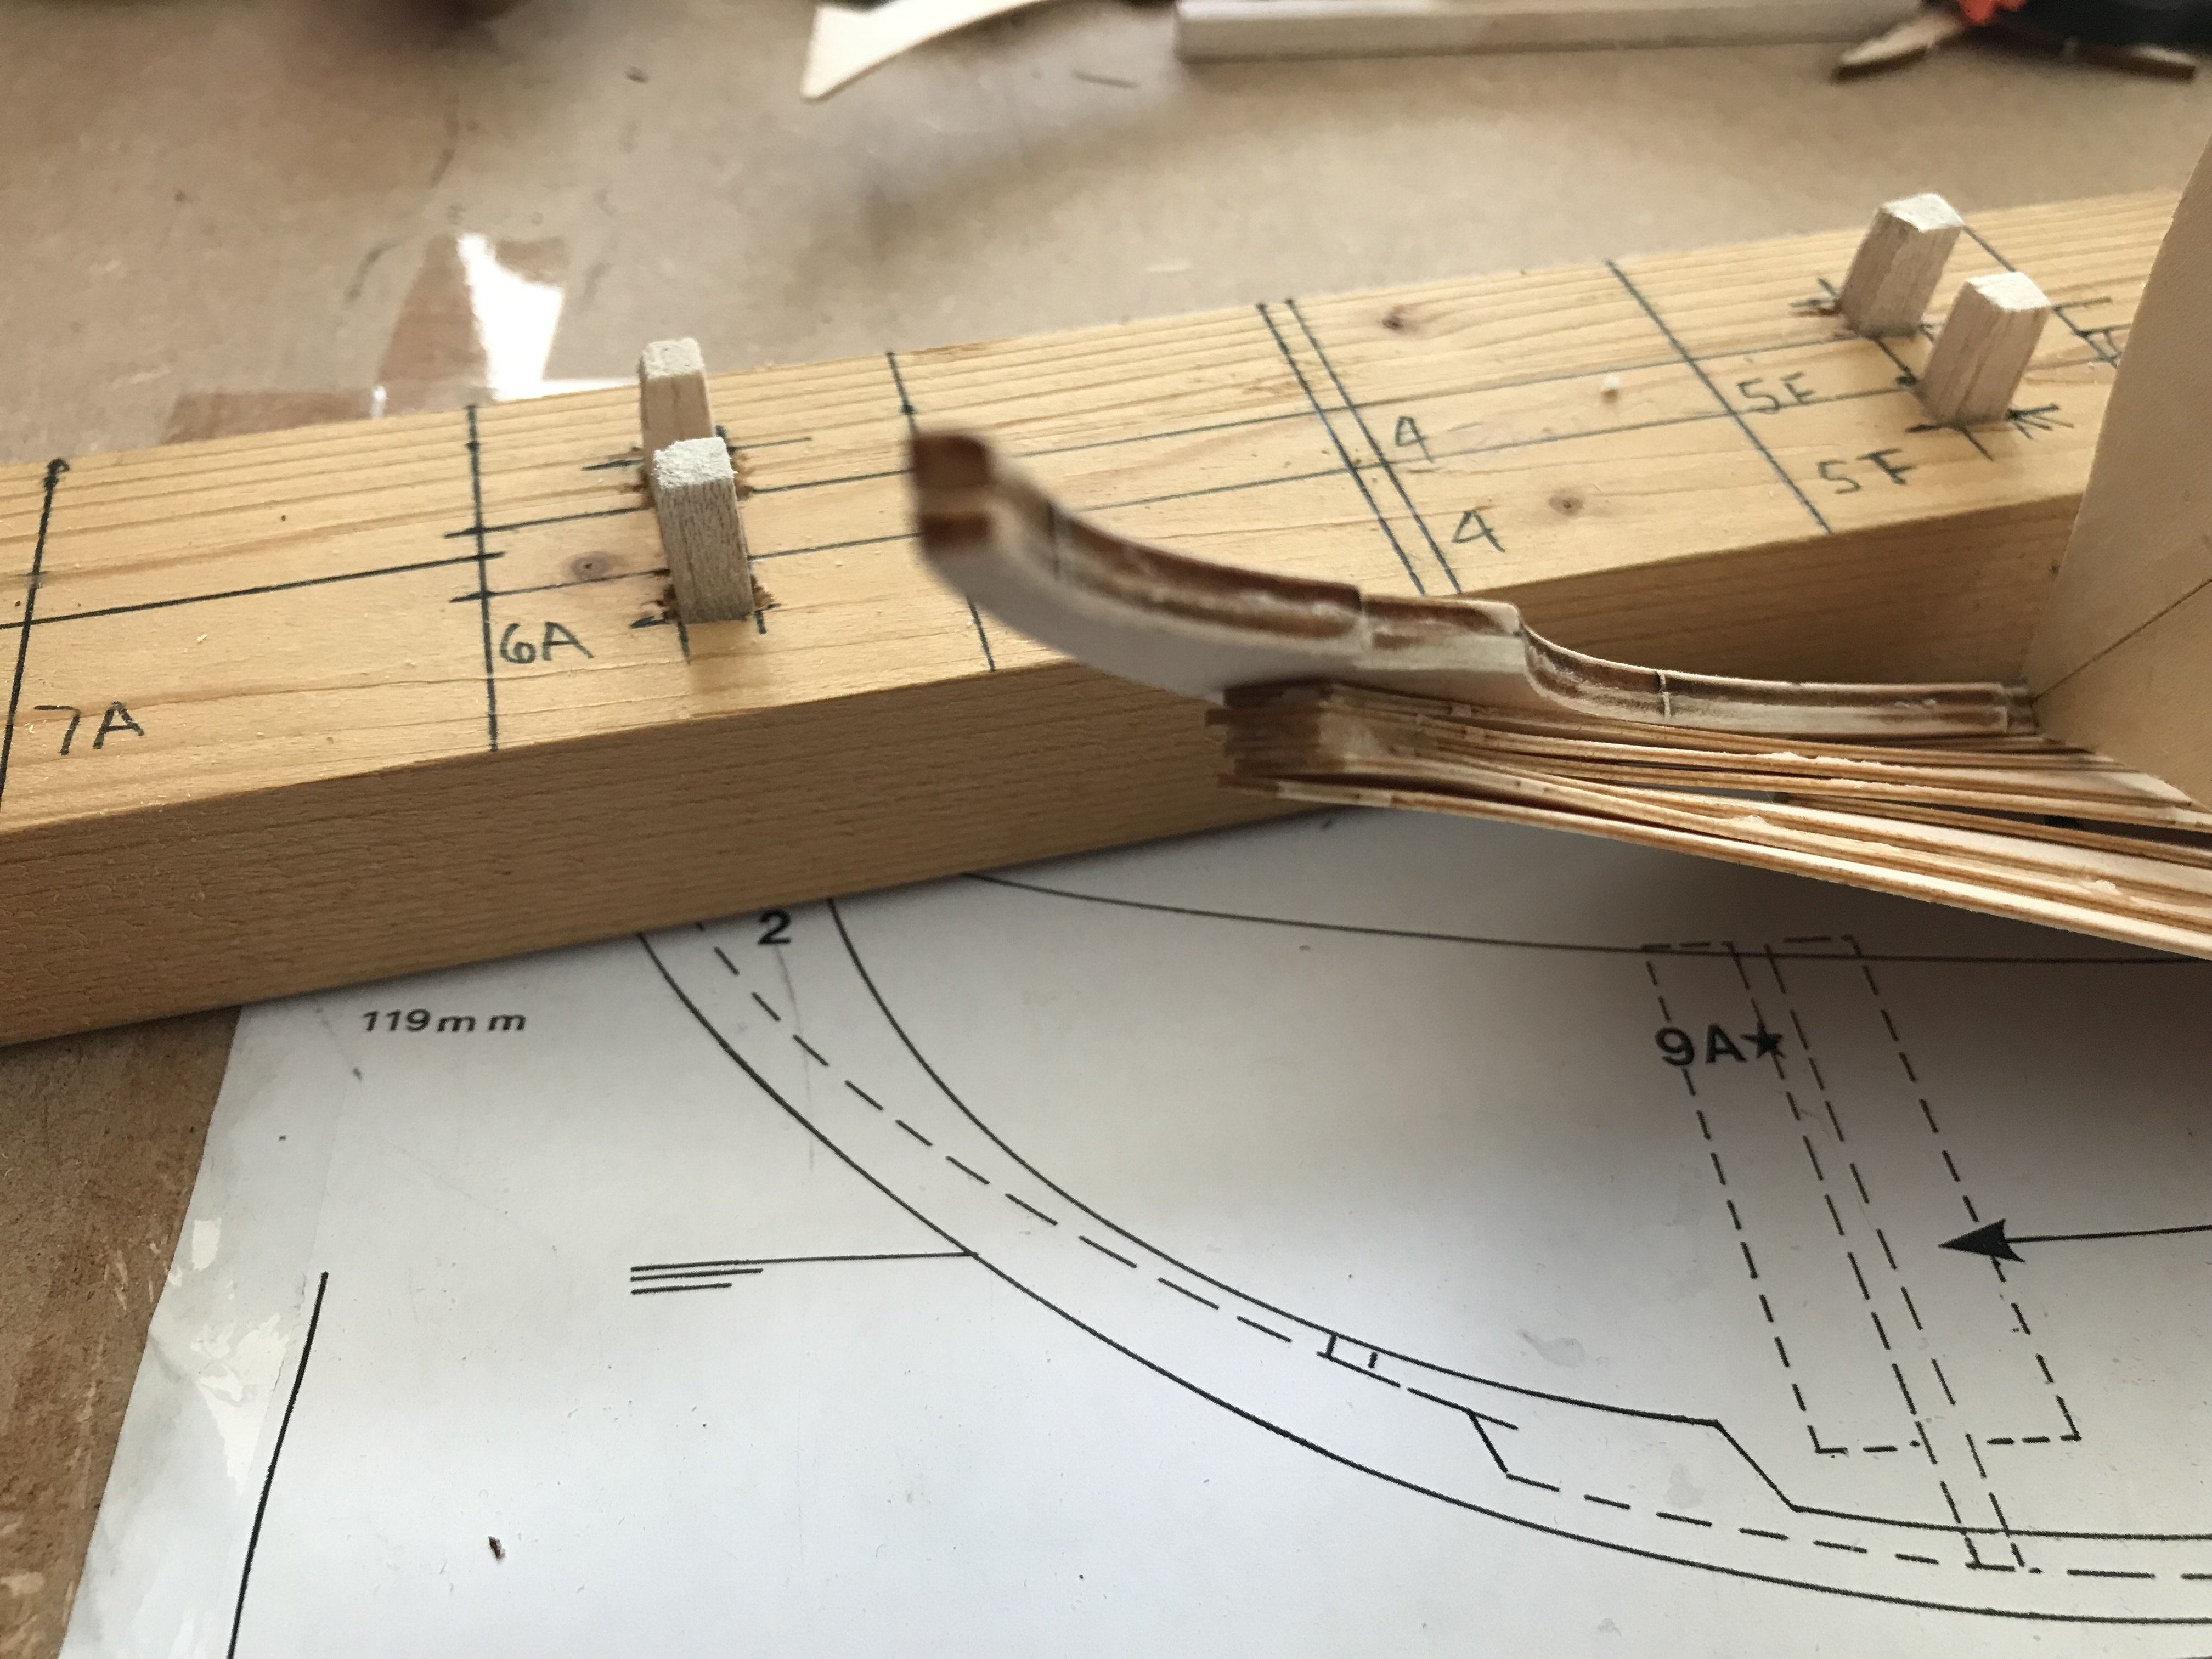
* Chapter Four * The Planking is my Crux or How a Plan might not work out Since I couldn’t make out a proper jig for upside down frame (spine with the molds) I misused two cans of my preferred beverage (hope everyone will forgive me, especially the manufacturer of the drink). I´m not sure why Billing Boats has chosen this strange way to put the planks onto the sheets the way they did but it doesn’t make sense to me and a proper description how to put the planks on is not existing at all. There is no understandable reason why all planks except one are put on the sheets in the same way around, except the first (starting plank which immediately is attached to the spine) is the opposite way around. So I cut it out, turned it around and glued it to the frame (even if I’m not sure it’s the right way around now), at least the end quoted as F is now glued to the end of the spine stated with the F. The next plank is the way round it’s quoted in the plan, F to F and A to A. Which somehow make the first plank looking a bit odd. Don’t know, I just go on right now. I would appreciate if someone notices a fault or wrong doing to mention it to me so I might be still able to change it now before it’s way to late to change anything. Thank you guys for being my eyes here ^^ Micha

- 146 replies
-
- 5
-
-
- Roar Ege
- Billing Boats
- (and 2 more)
-
Thank you Frank, still a bit reluctant to buy the 1959 kit, maybe I try to make an offer. I´m still torn between plastic and wood. I would prefer wood but the plastic model seems also convenient. Micha
-
I still have thr 1959 kit in the queque but I´m also still reluctant since the seller says the kit would be complete even if the pictures say it is not. Therefore I think the GBP 89.00 / USD 110.00 he asks for are a bit high since I have a 2021 kit (with receipt) for GBP 65.00 / USD 81.00 which is complete but the box is badly dented and ragged on one corner. I really don´t know if I not just save up and buy a wooden model instead. How do you think is the quality of the hull. Folks told me the quality even after that long time is amazing but the accuracy of the model details itself are a bit weird? Have to correct myself, mine is the Revell Cutty Sark 1:96 not the Alabama... but the age and that it is one of the first injection moulds for the model (Revell just launched the 1:96 in 1959). Micha
-
I use a nail fail (the flexible ones) for things like that. I cut them out, lay them flat onto a surface and gentle use the nail fail to file things like the oars (or in my case the small ribs). You need to fix the oar very firm with your hand at the spot where you intent to file. Otherwise use sanding sticks (they come most likely in a sortiment of different grits) because they are very flexible themselves so you can´t put too much force in smaller things or they just break. But that´s how I do smaller things, gentle, with patience and always a firm grip on the spot you want to file down. Keith idea also sounsd very good, to try to shape them already while they are still in sheet. Micha
-
Good morning David. Told you, one of the best and amazing looking Cutty Sarks I´ve ever seen. Just stunning and well done. Micha
- 114 replies
-
- 1
-
-
- Cutty Sark
- plastic
- (and 4 more)
-
WOW... I´m speechless and impressed. Sorry for the late response, I´m back to work after six month being home because of an injury. So my build will be slow down now a bit... but really impressive, really. Micha
-
I received today “Plank-on-Frame Models” Vol.1 and 2 by H.A. Underhill. The dust cover looks a bit rotten but the books itself are still in a good condition. It’s the 4th print from 1968 (same age as me lol) and they were only GBP 7.90 both together. I think that’s a fair price. I hope they will become a good source of knowledge and inspiration. Micha

-
I store bigger prints always in paper shipping tubes (can´t afford one of the drawer units for A1 prints like architects have). Is a good way to store them and to protect them. Folded plans often get damaged because of the kinks where it is folded, rolled into a tube this can´t happen and they last longer. Micha


.jpeg.457f8e8b42a6313984a11208155b9f36.jpeg)

