FifeModels
-
Posts
528 -
Joined
-
Last visited


-
 Paul White reacted to a post in a topic:
HMS Victory by FifeModels - Artesania Latina - Scale 1/84 - Anatomy Version
Paul White reacted to a post in a topic:
HMS Victory by FifeModels - Artesania Latina - Scale 1/84 - Anatomy Version
-
Paul White reacted to a post in a topic:
HMS Victory by FifeModels - Artesania Latina - Scale 1/84 - Anatomy Version
-
Paul White reacted to a post in a topic:
HMS Victory by FifeModels - Artesania Latina - Scale 1/84 - Anatomy Version
-
Paul White reacted to a post in a topic:
HMS Victory by FifeModels - Artesania Latina - Scale 1/84 - Anatomy Version
-
Paul White reacted to a post in a topic:
HMS Victory by FifeModels - Artesania Latina - Scale 1/84 - Anatomy Version
-
Paul White reacted to a post in a topic:
HMS Victory by FifeModels - Artesania Latina - Scale 1/84 - Anatomy Version
-
Paul White reacted to a post in a topic:
1:84 HMS Victory Trafalgar 1805 – ANATOMY Version - Artesania Latina
-
CoastieGeorge reacted to a post in a topic:
HMS Victory by FifeModels - Artesania Latina - Scale 1/84 - Anatomy Version
-
JeffT reacted to a post in a topic:
HMS Victory by FifeModels - Artesania Latina - Scale 1/84 - Anatomy Version
-
brunnels reacted to a post in a topic:
HMS Victory by FifeModels - Artesania Latina - Scale 1/84 - Anatomy Version
-
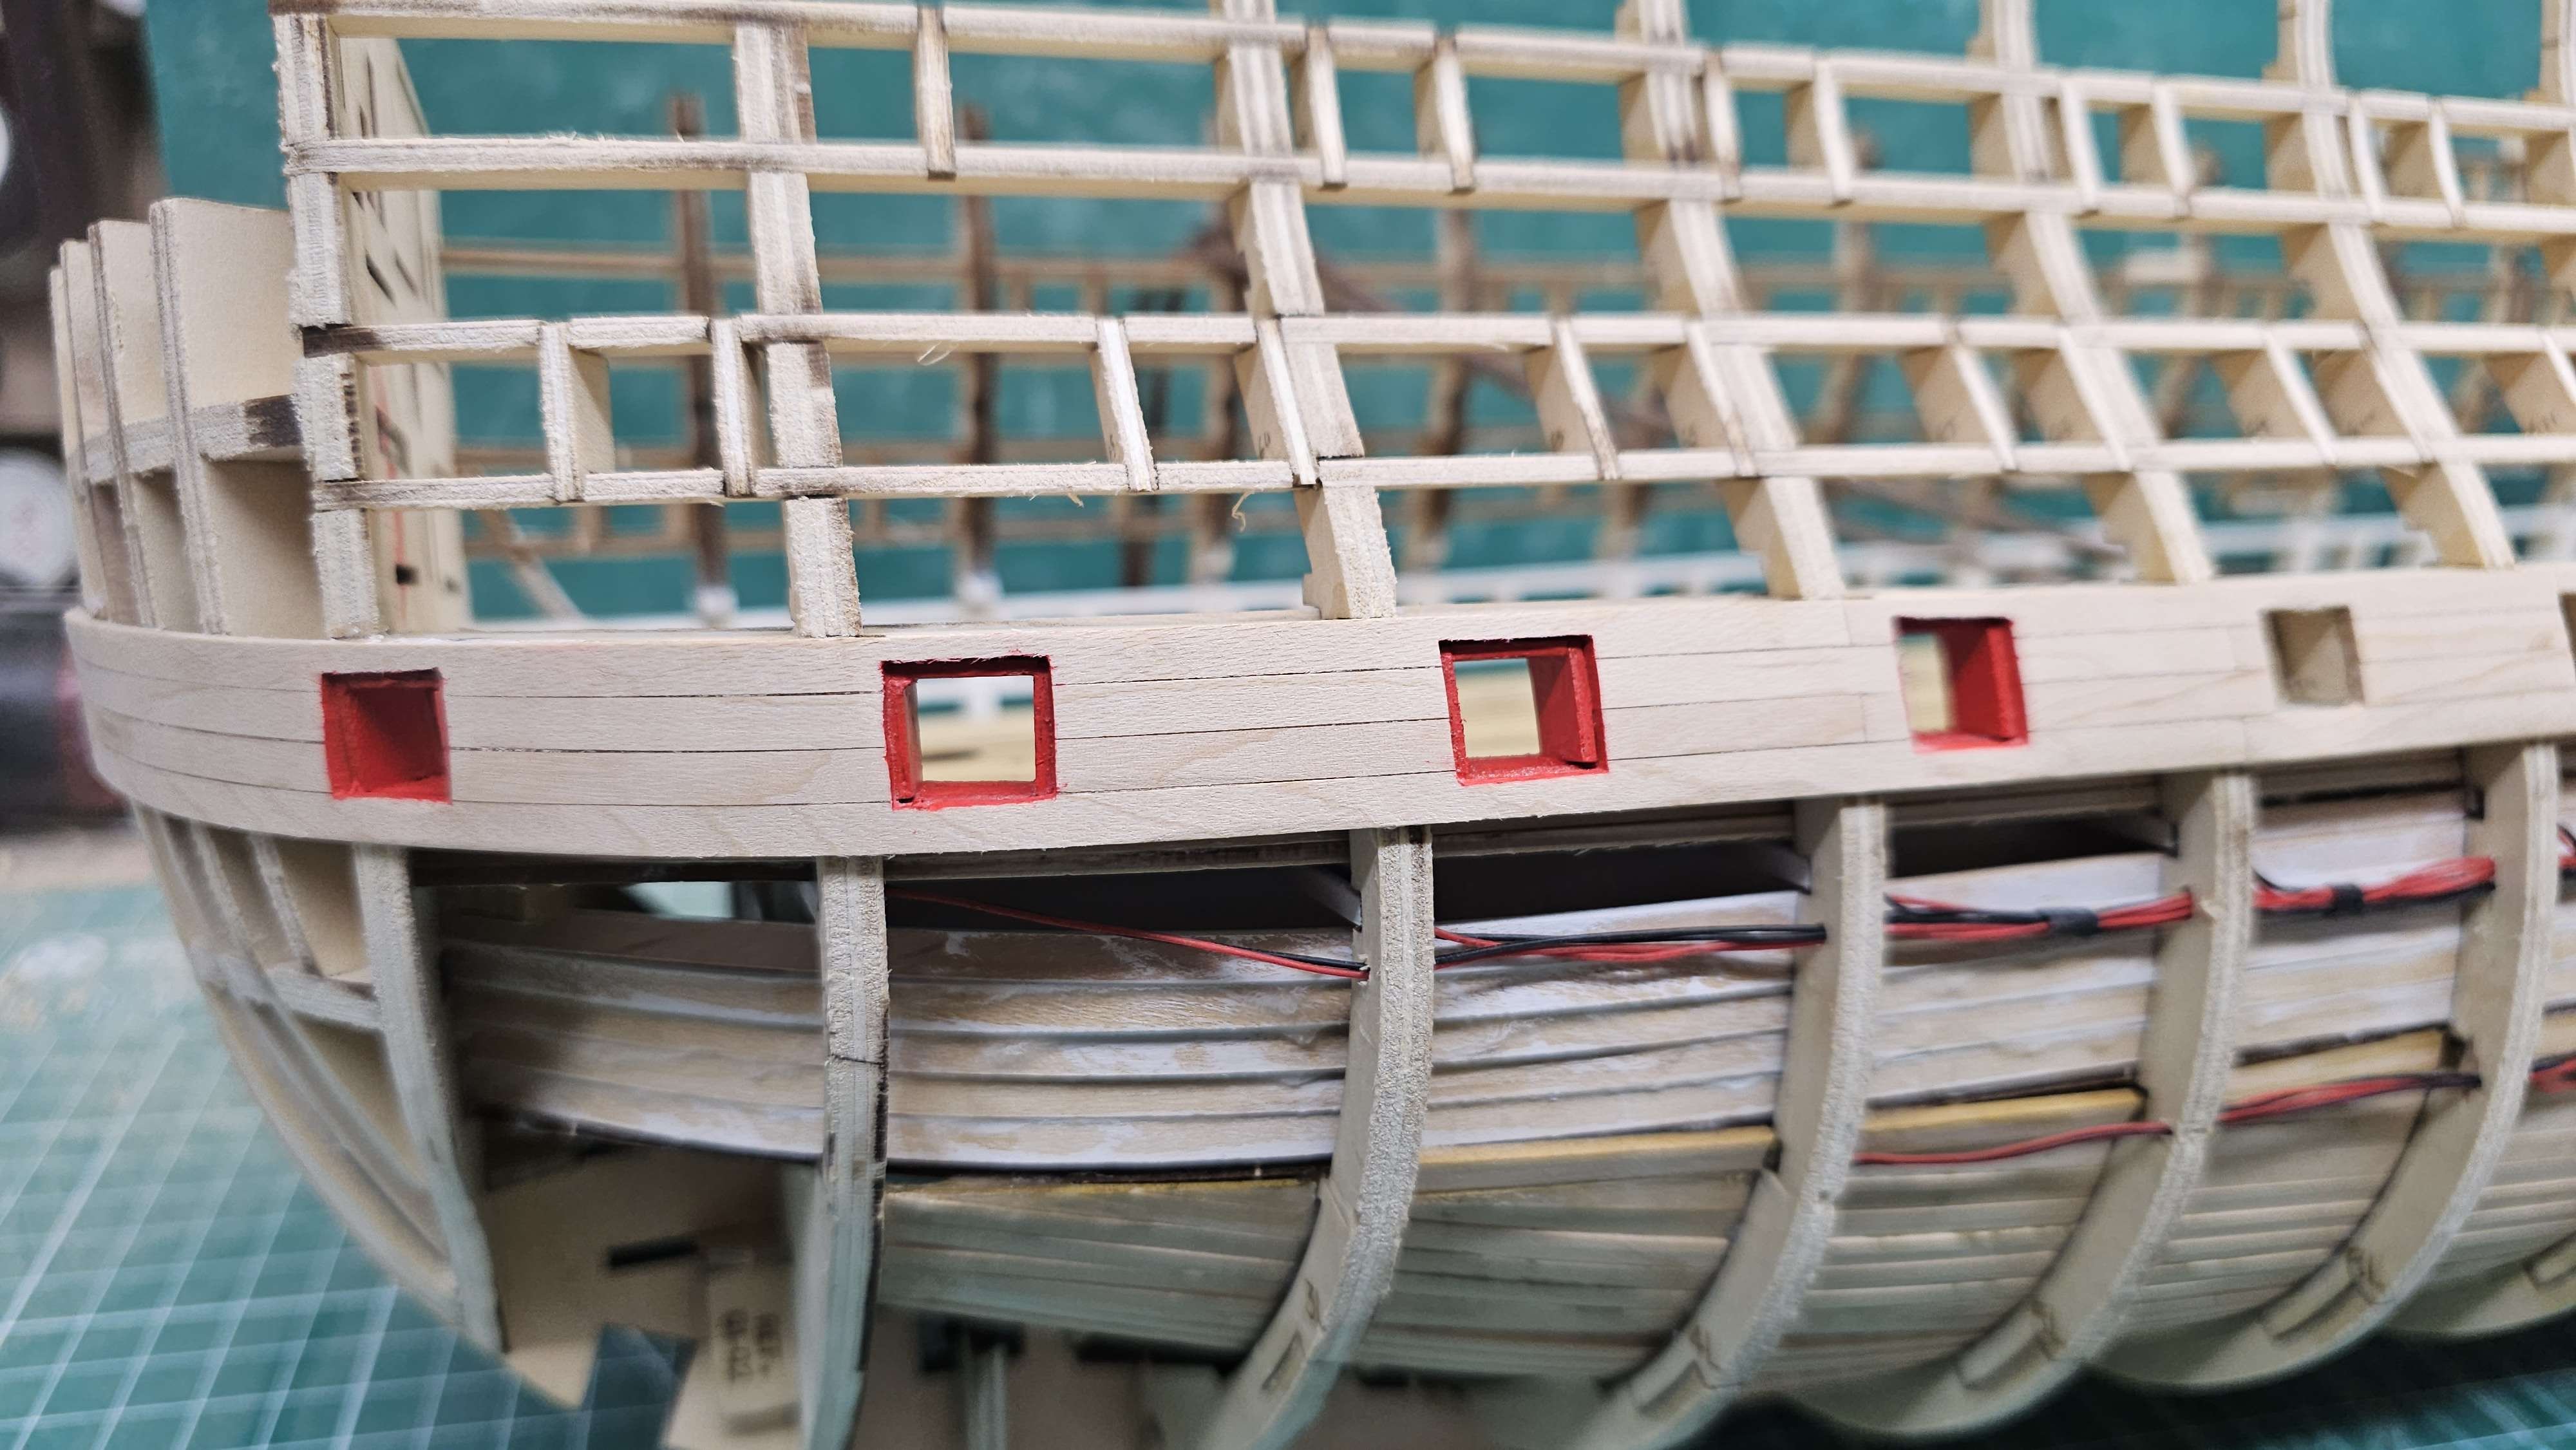
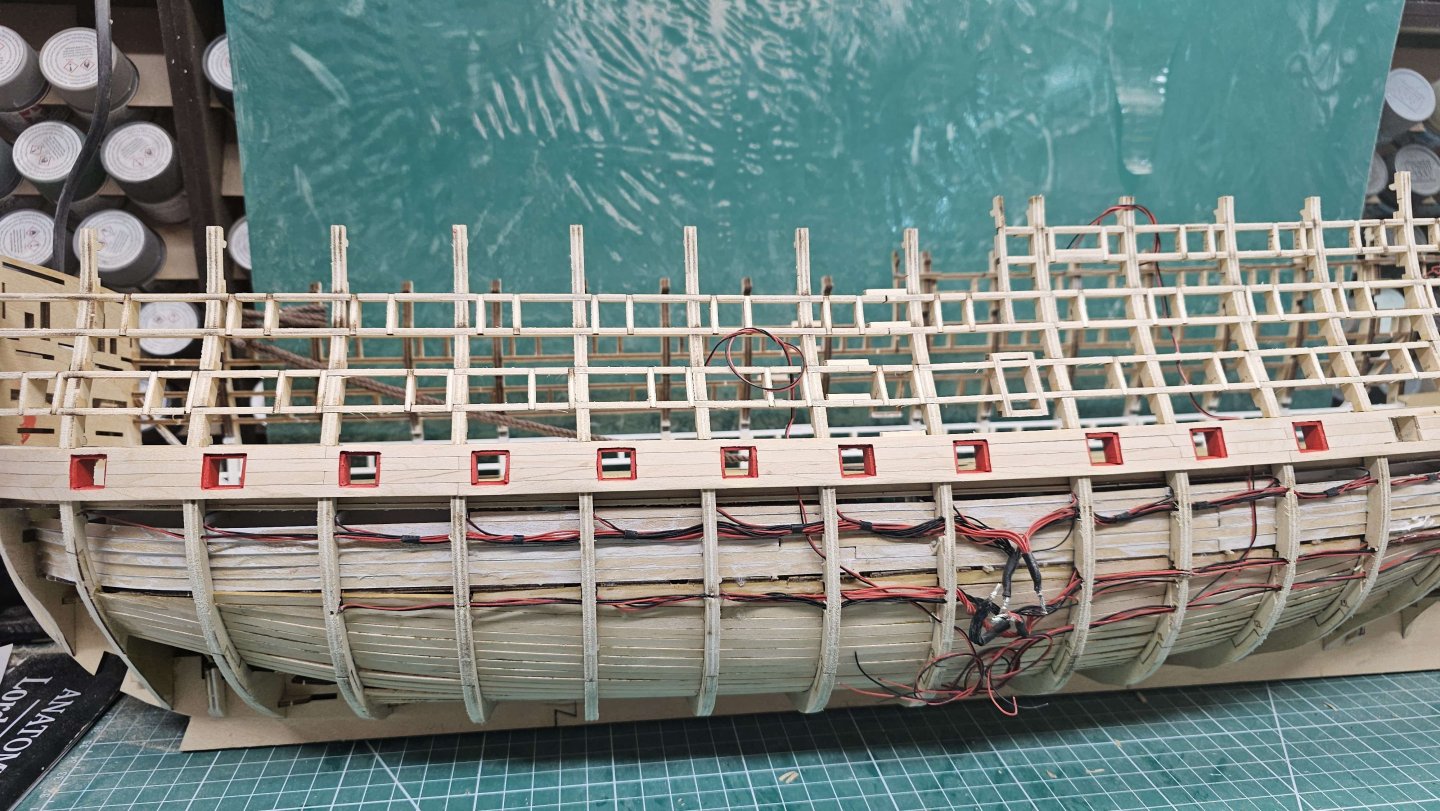
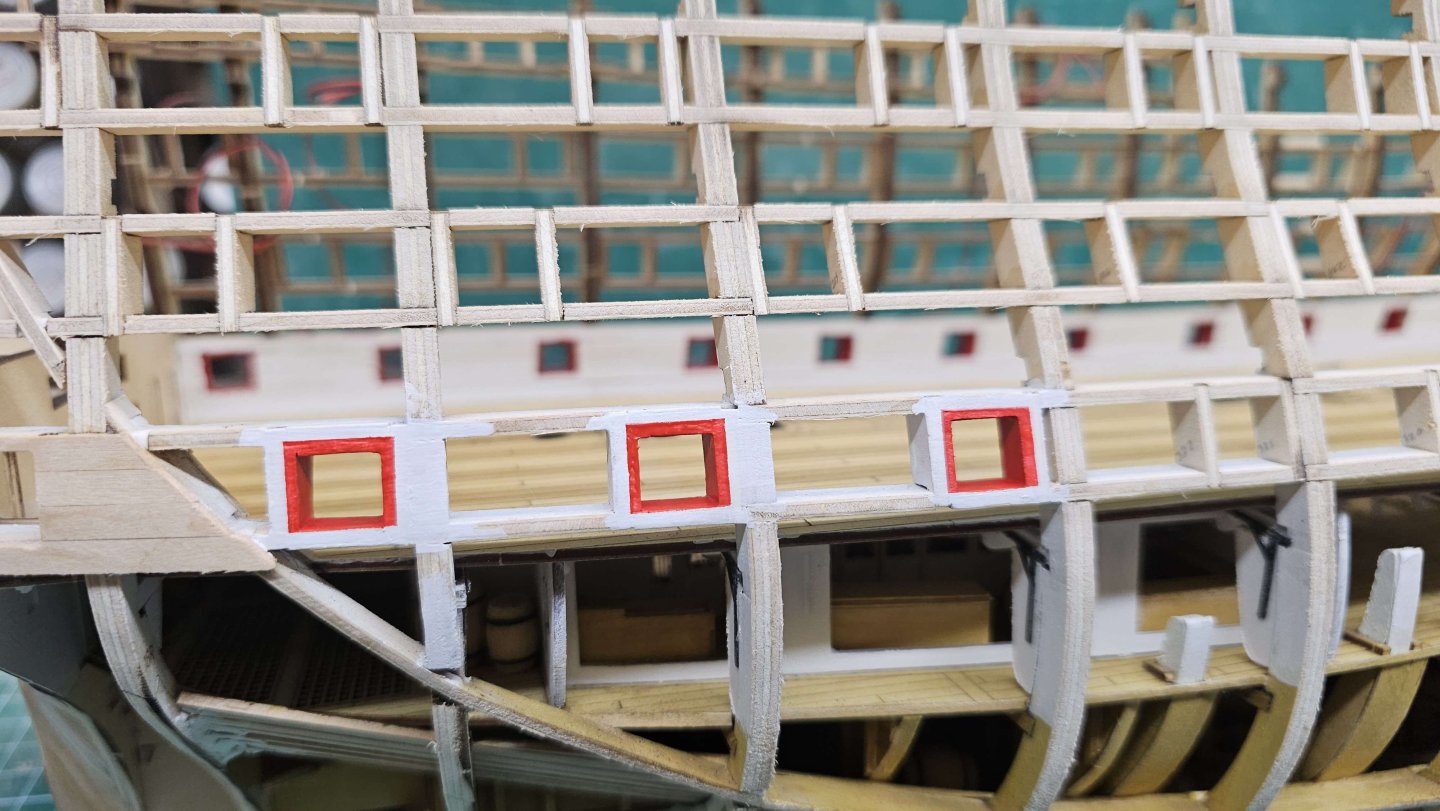
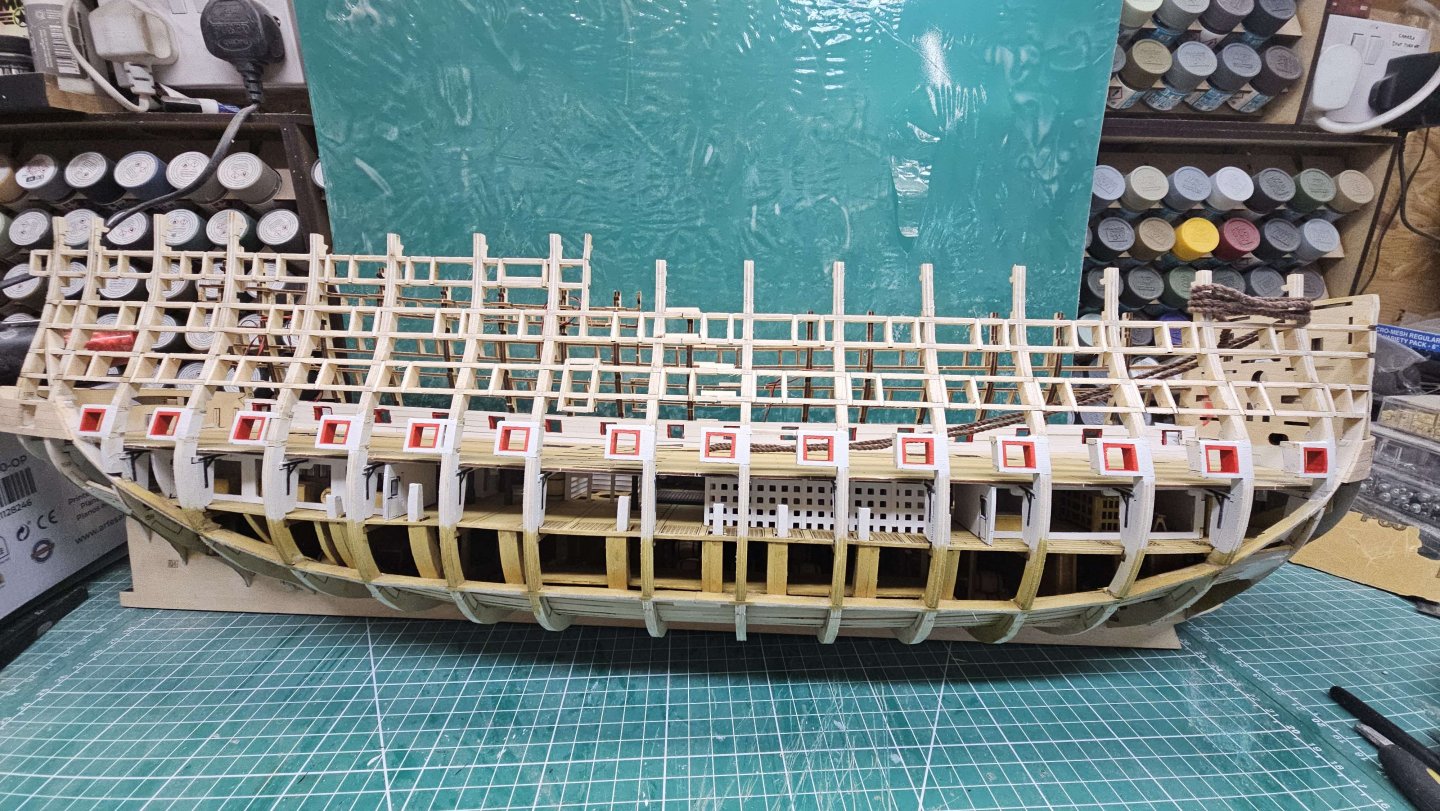
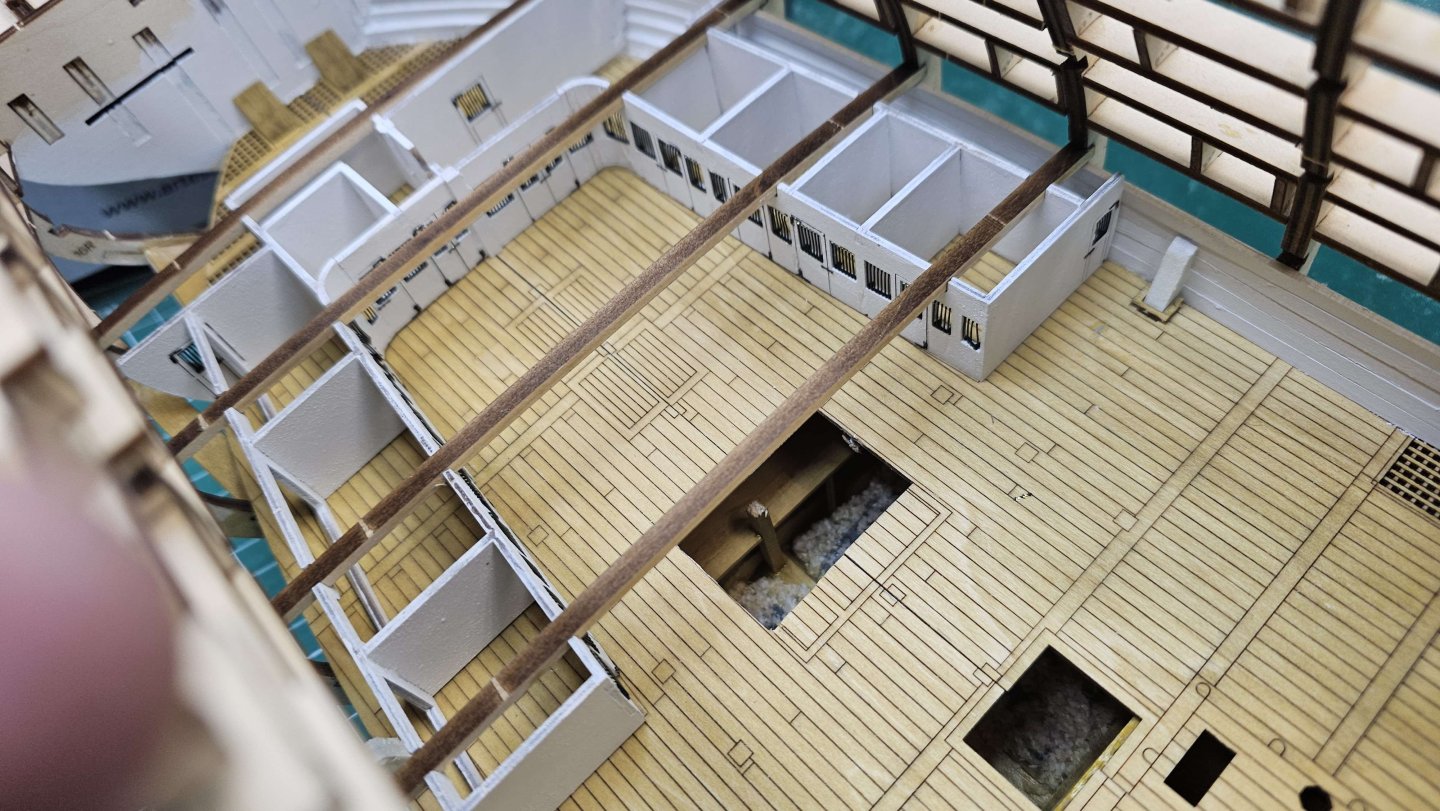
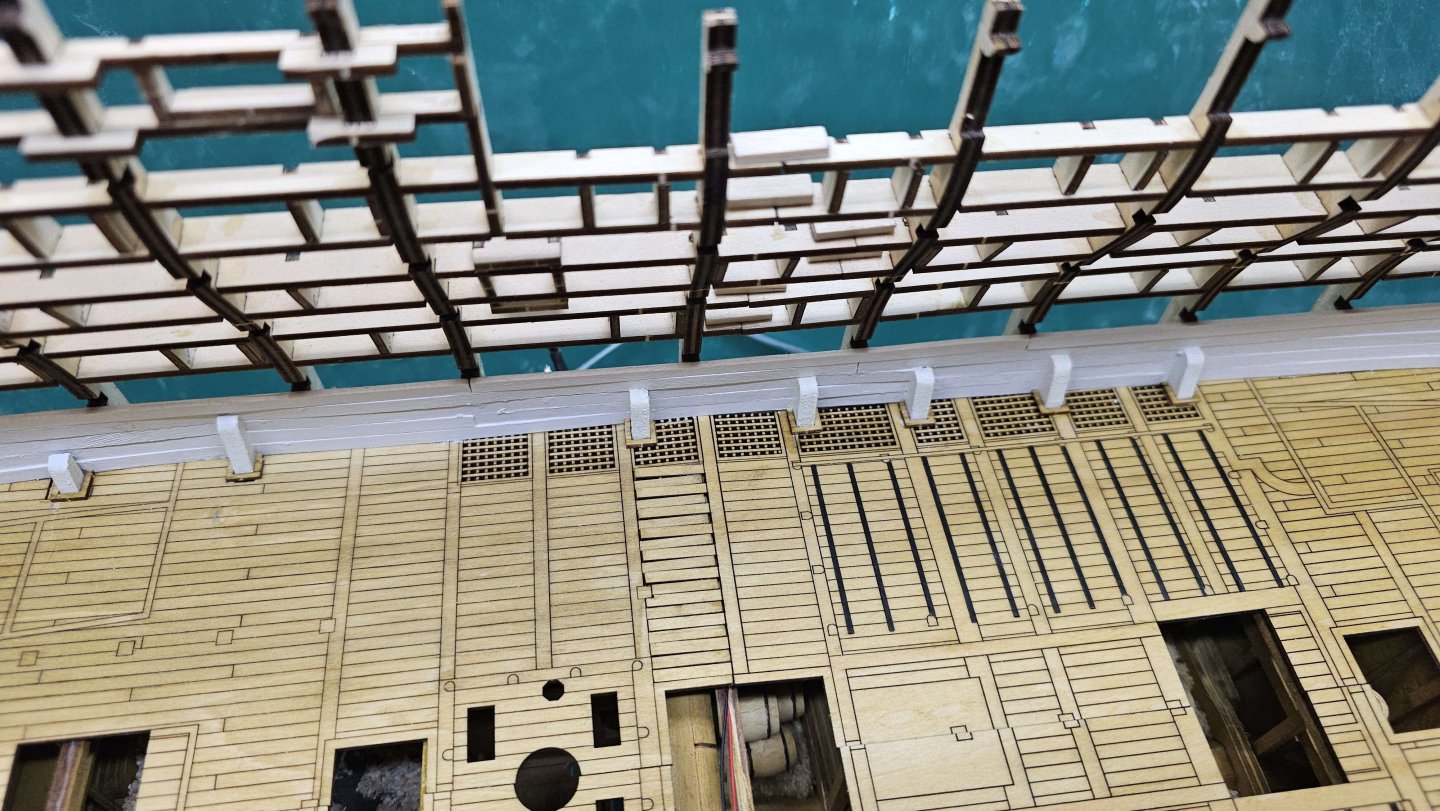
 Video #17 Complete Lining of the gun ports is done. Not the neatest works, insides were difficult to paint due to access, but by the time it's finished will be very difficult to see.
-
Yeh she will be fully rigged.
-
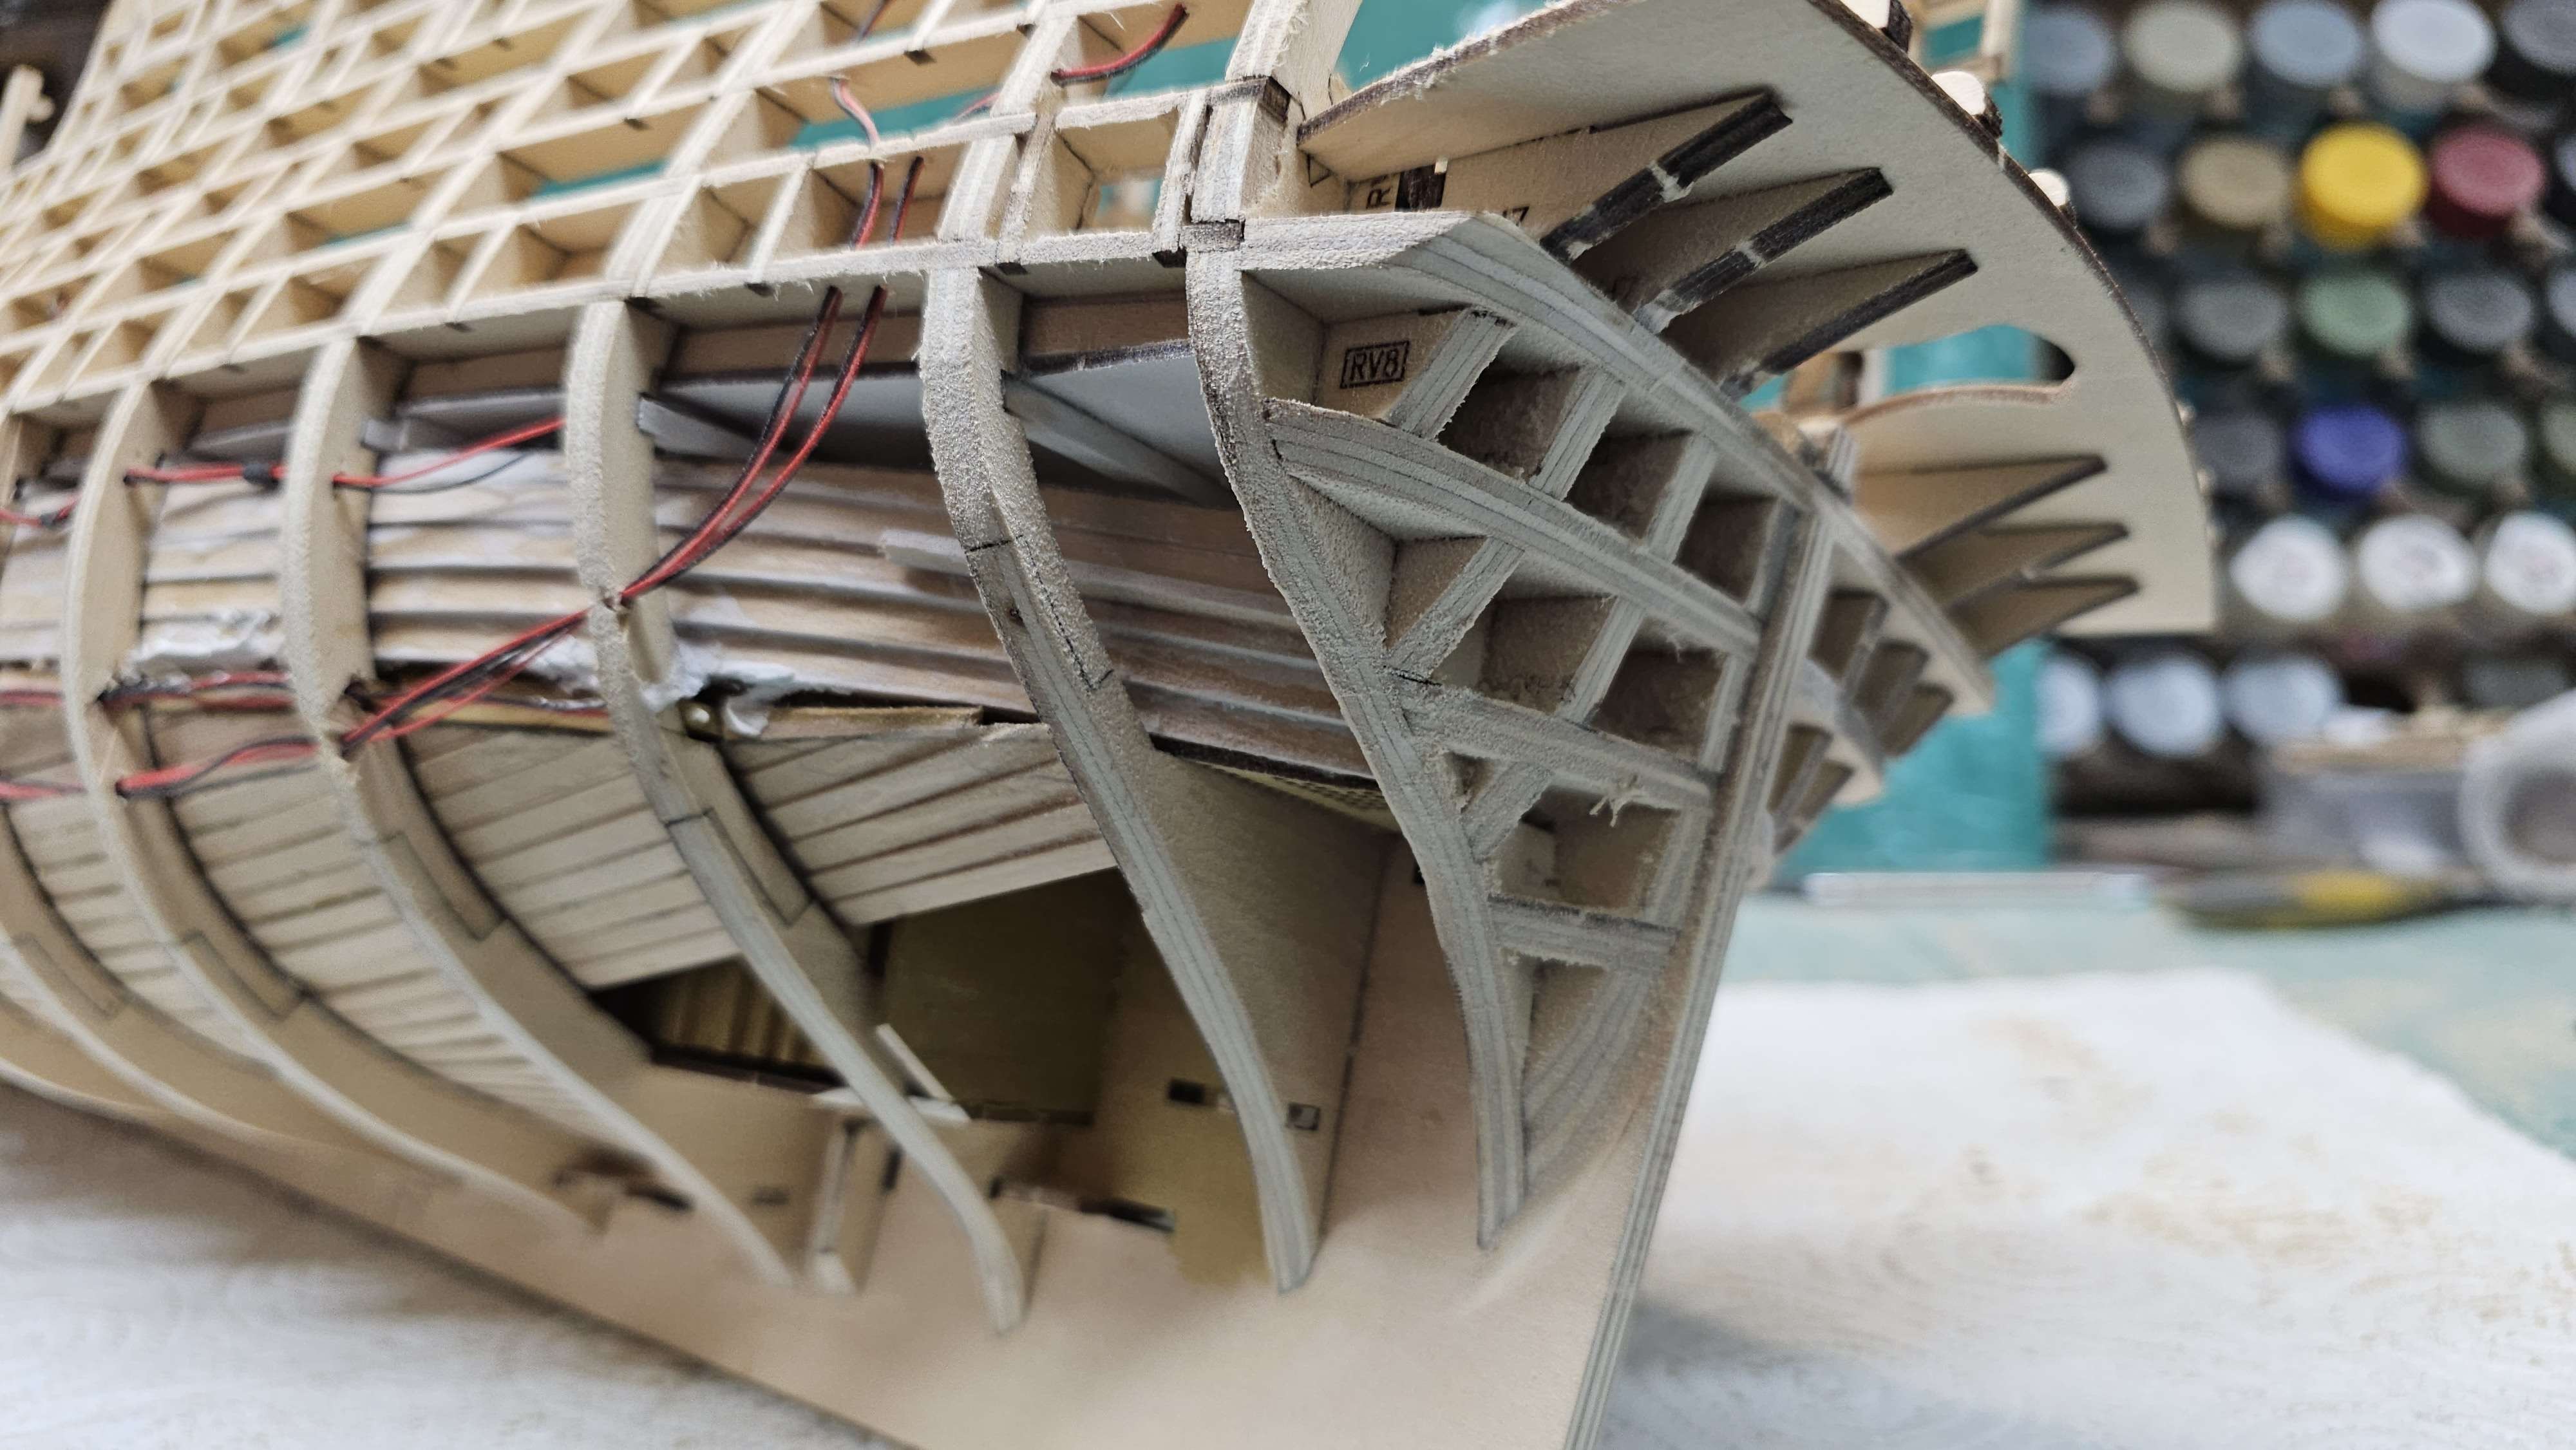
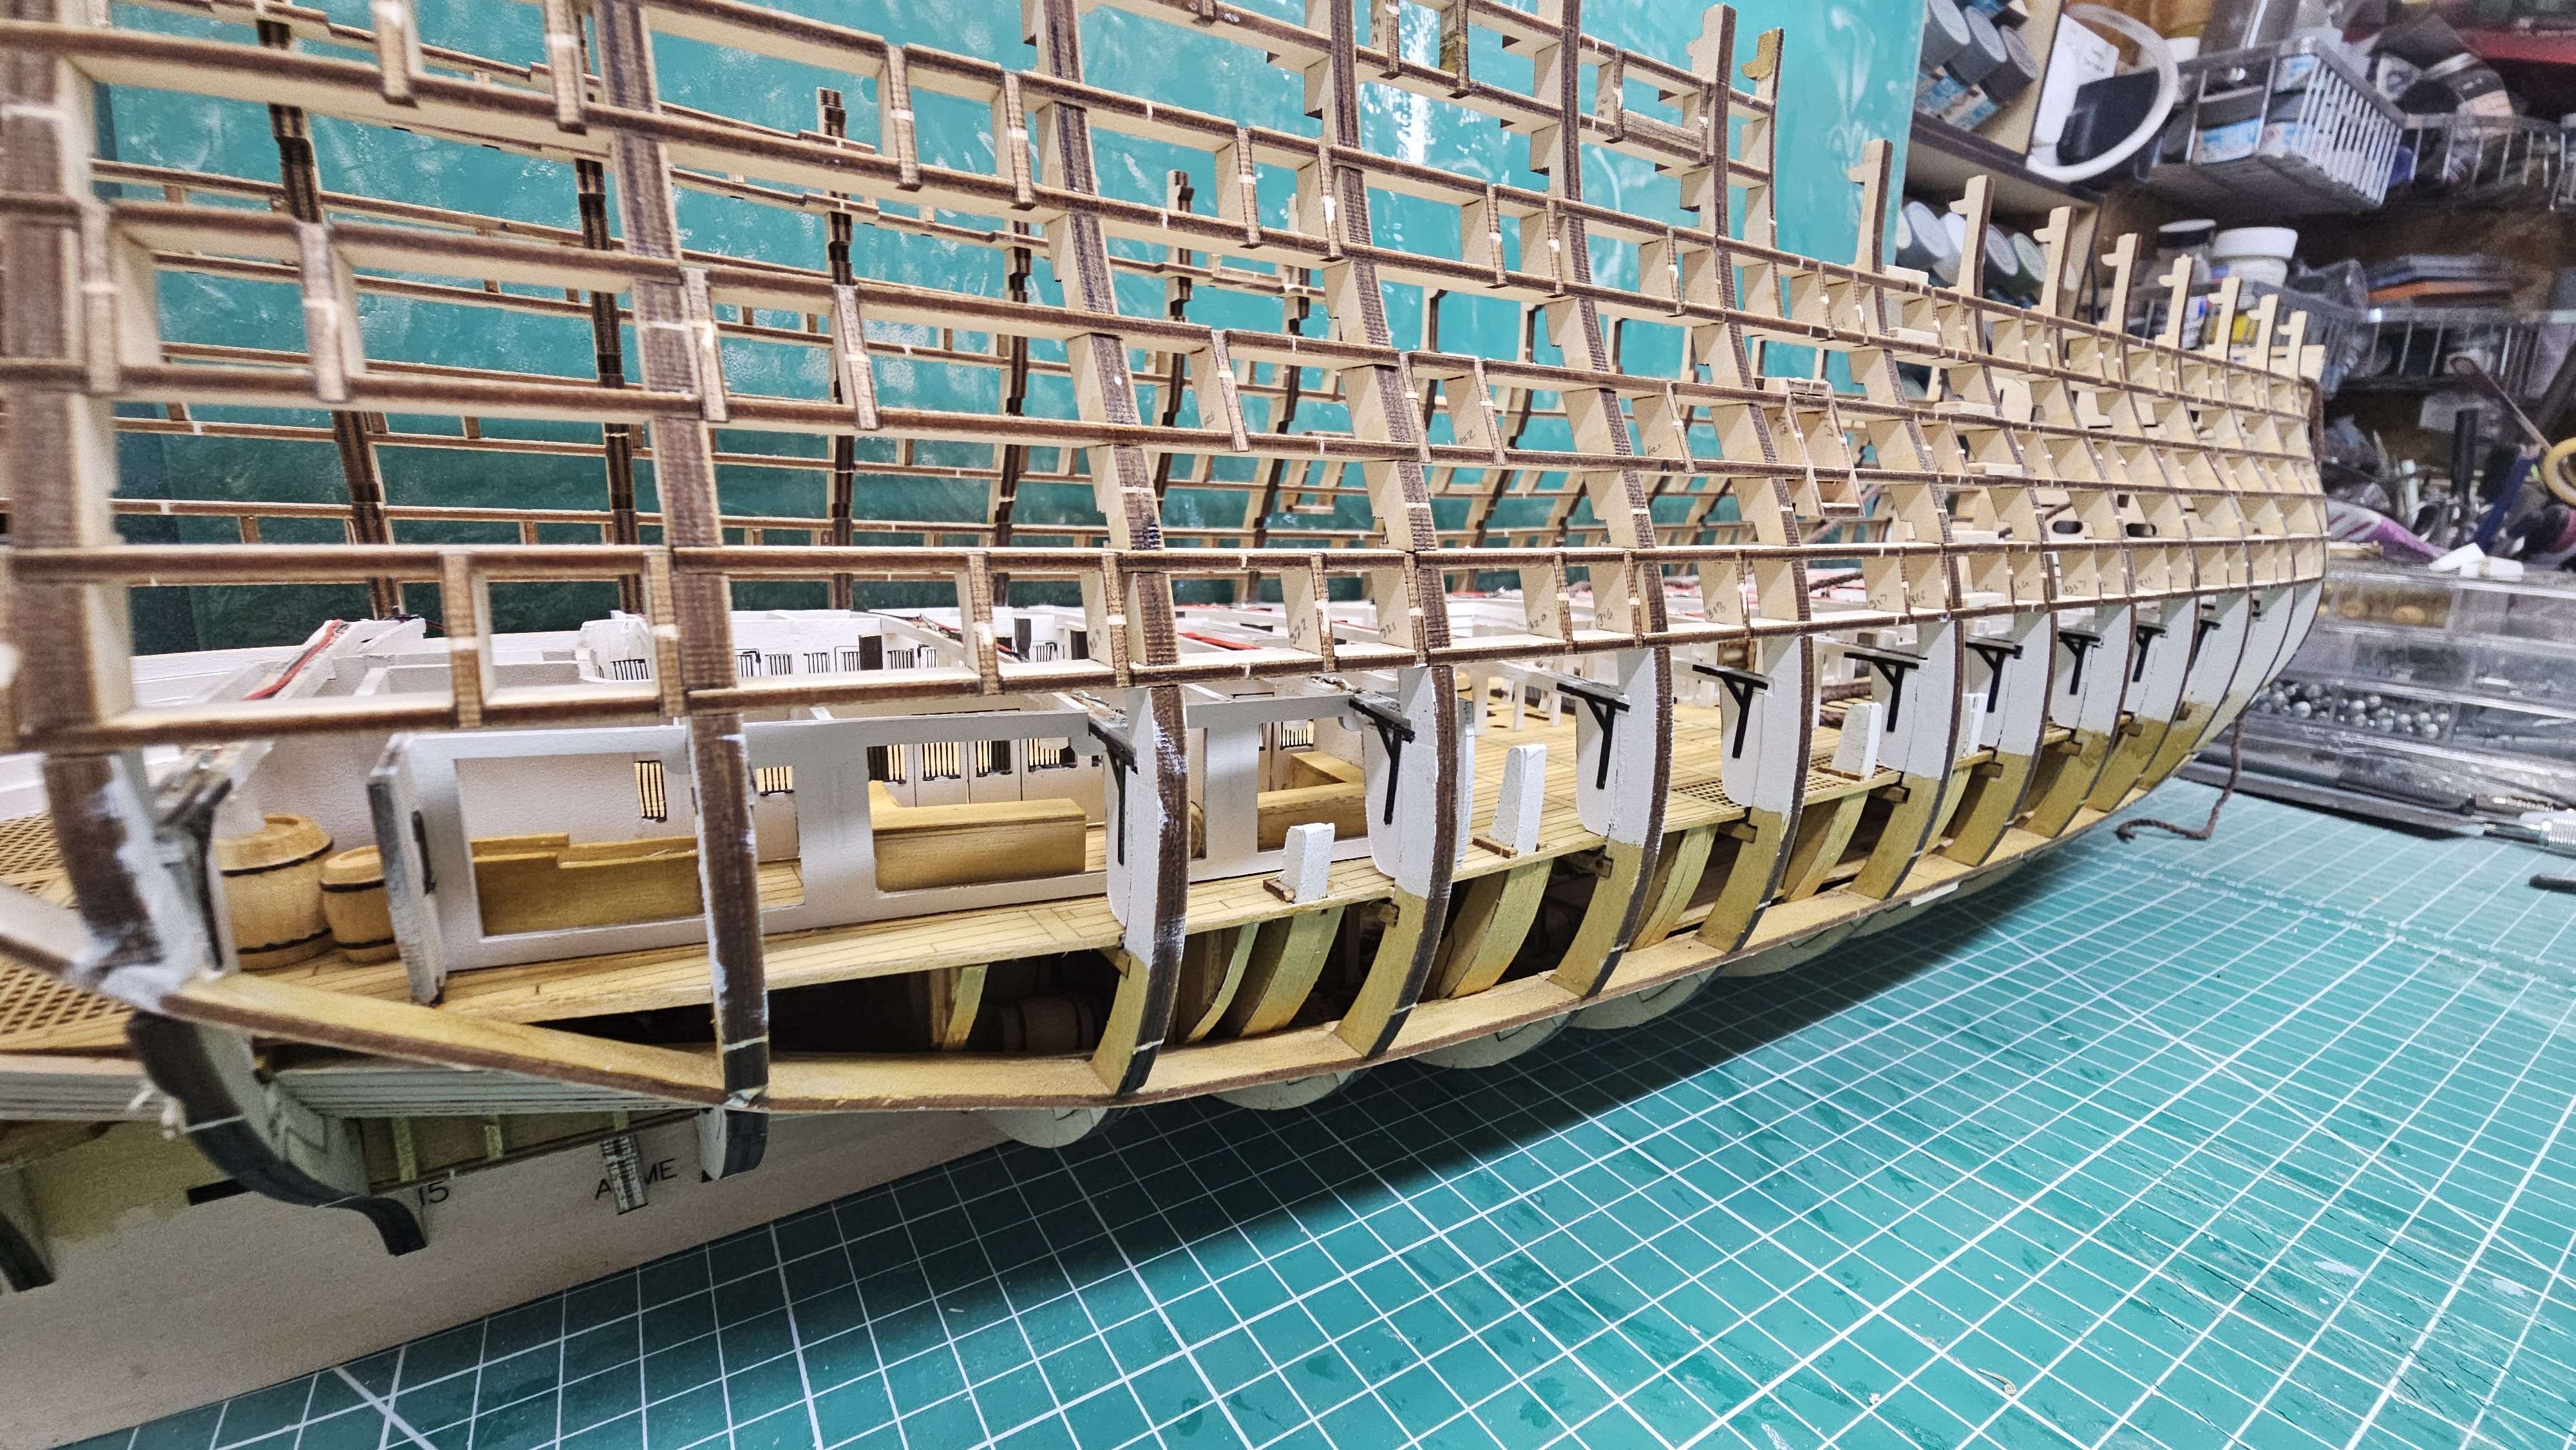
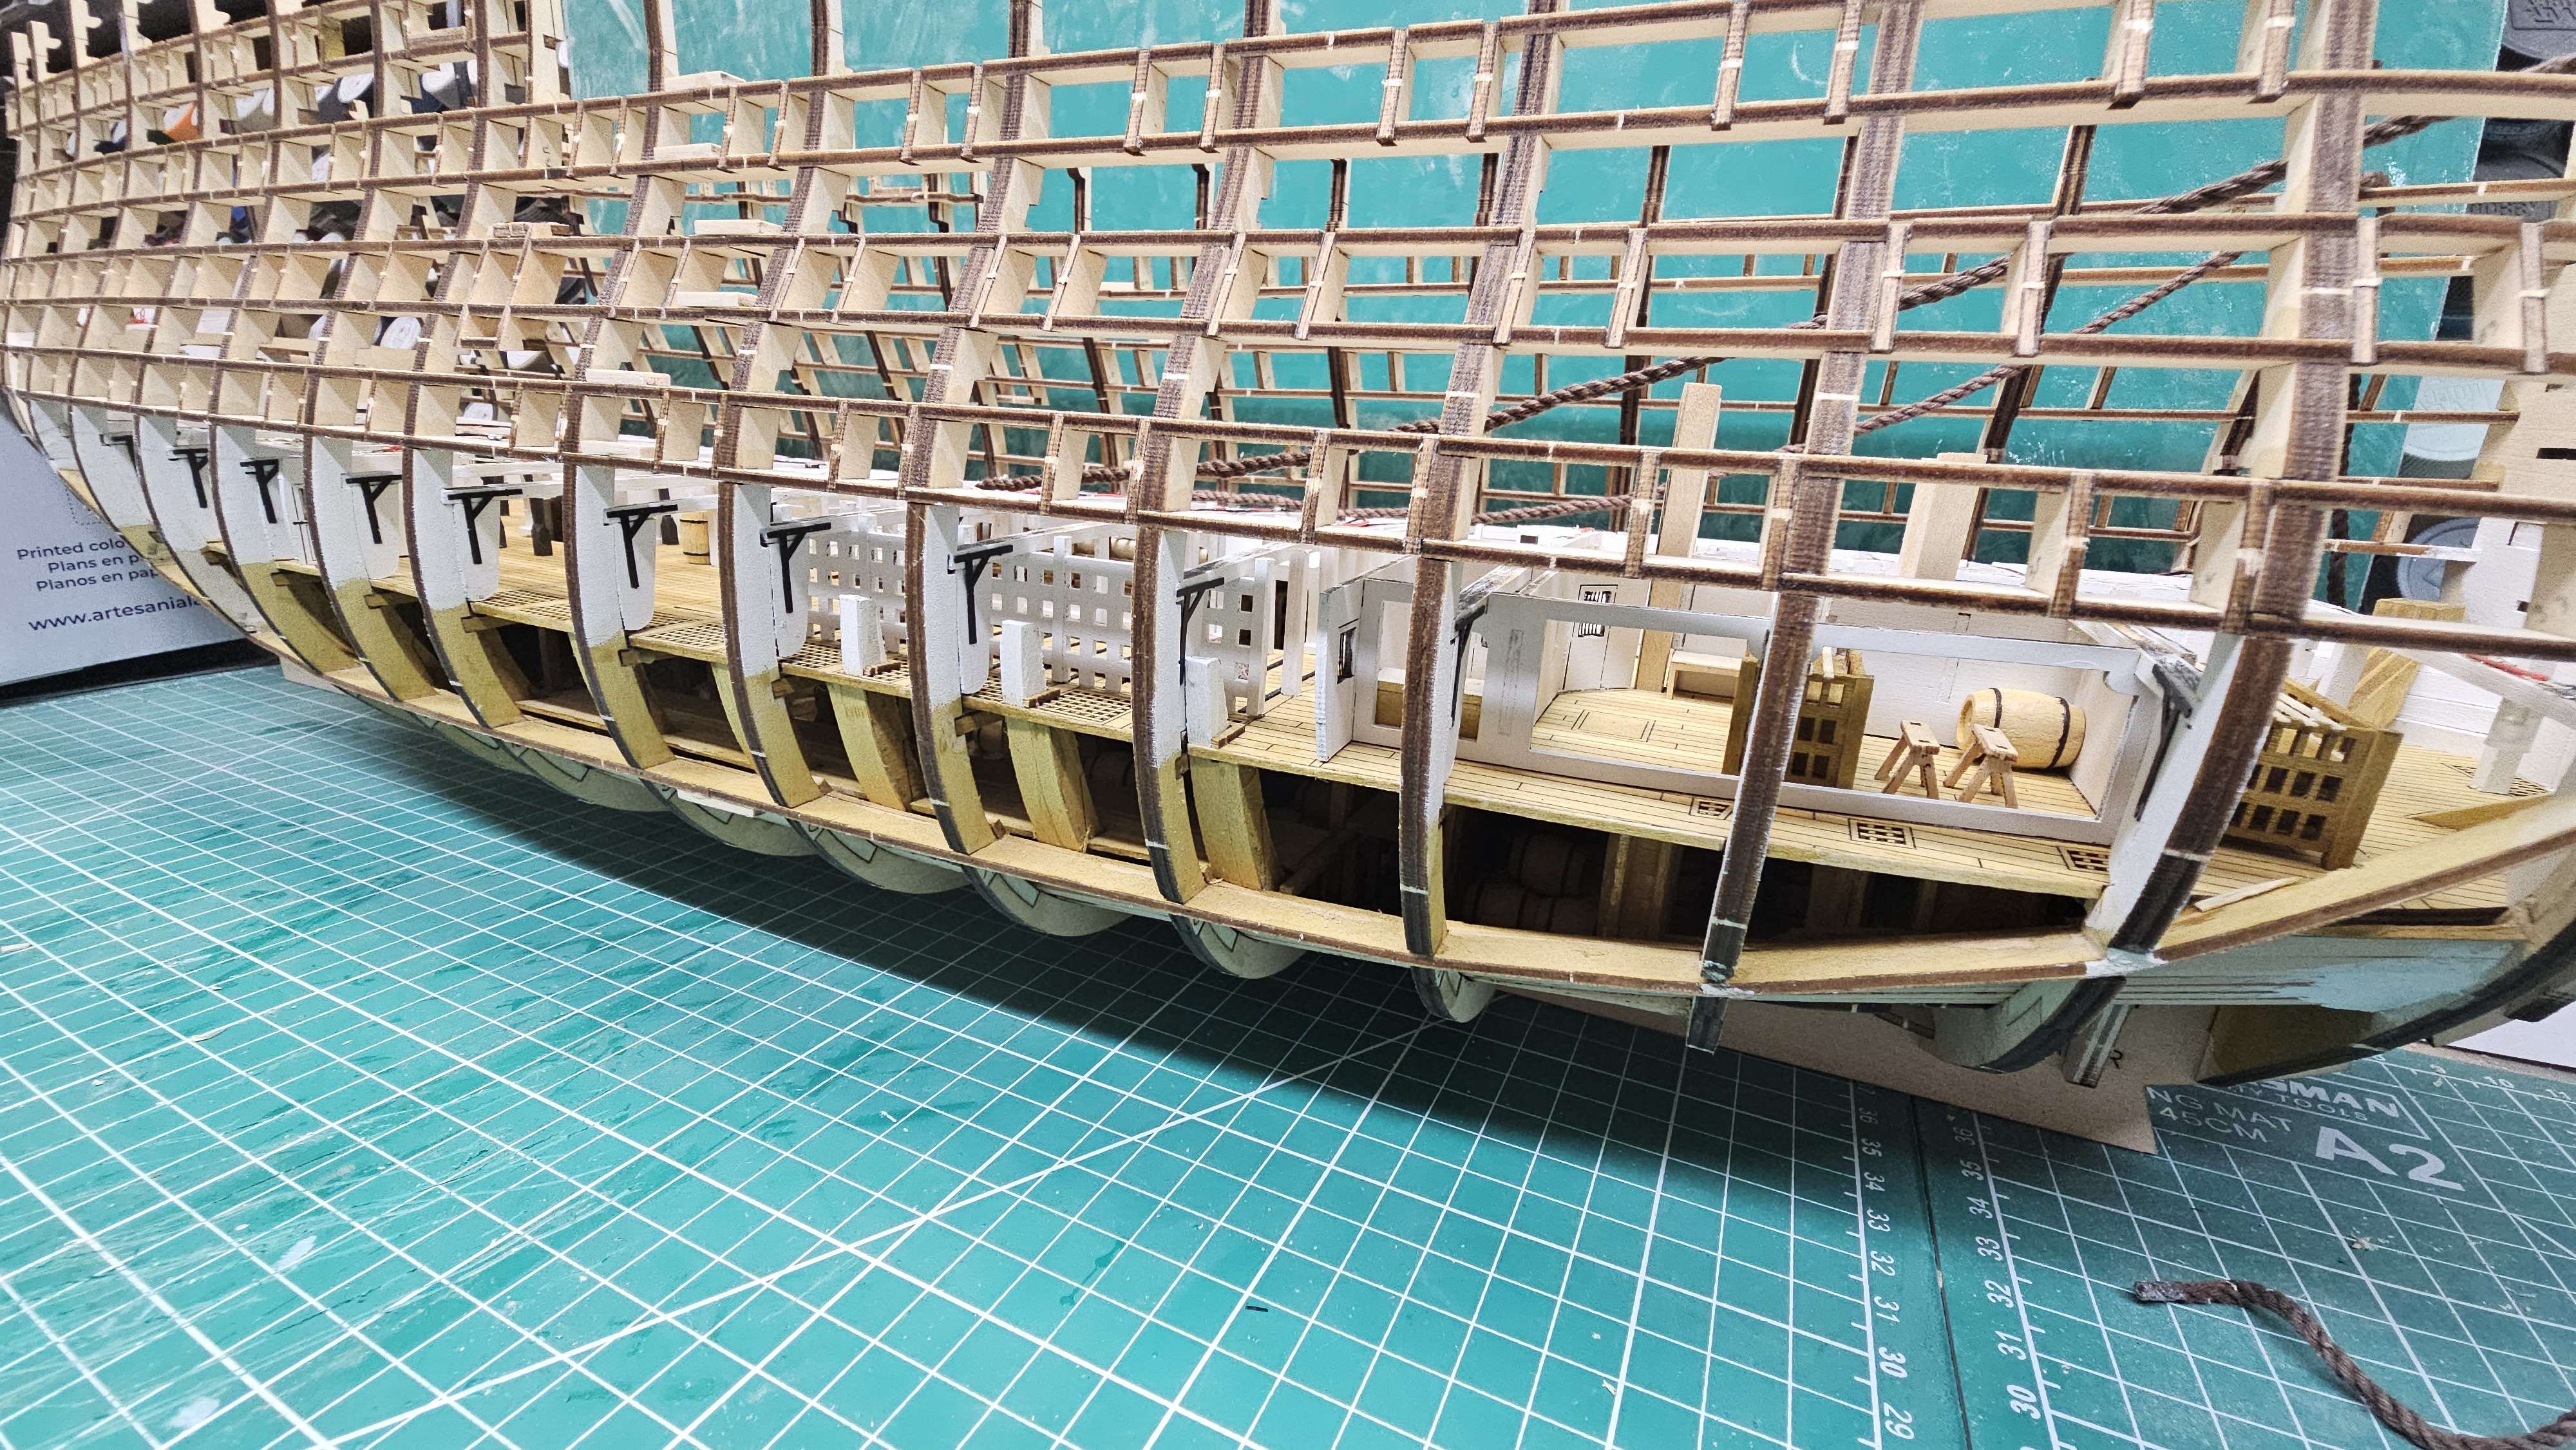
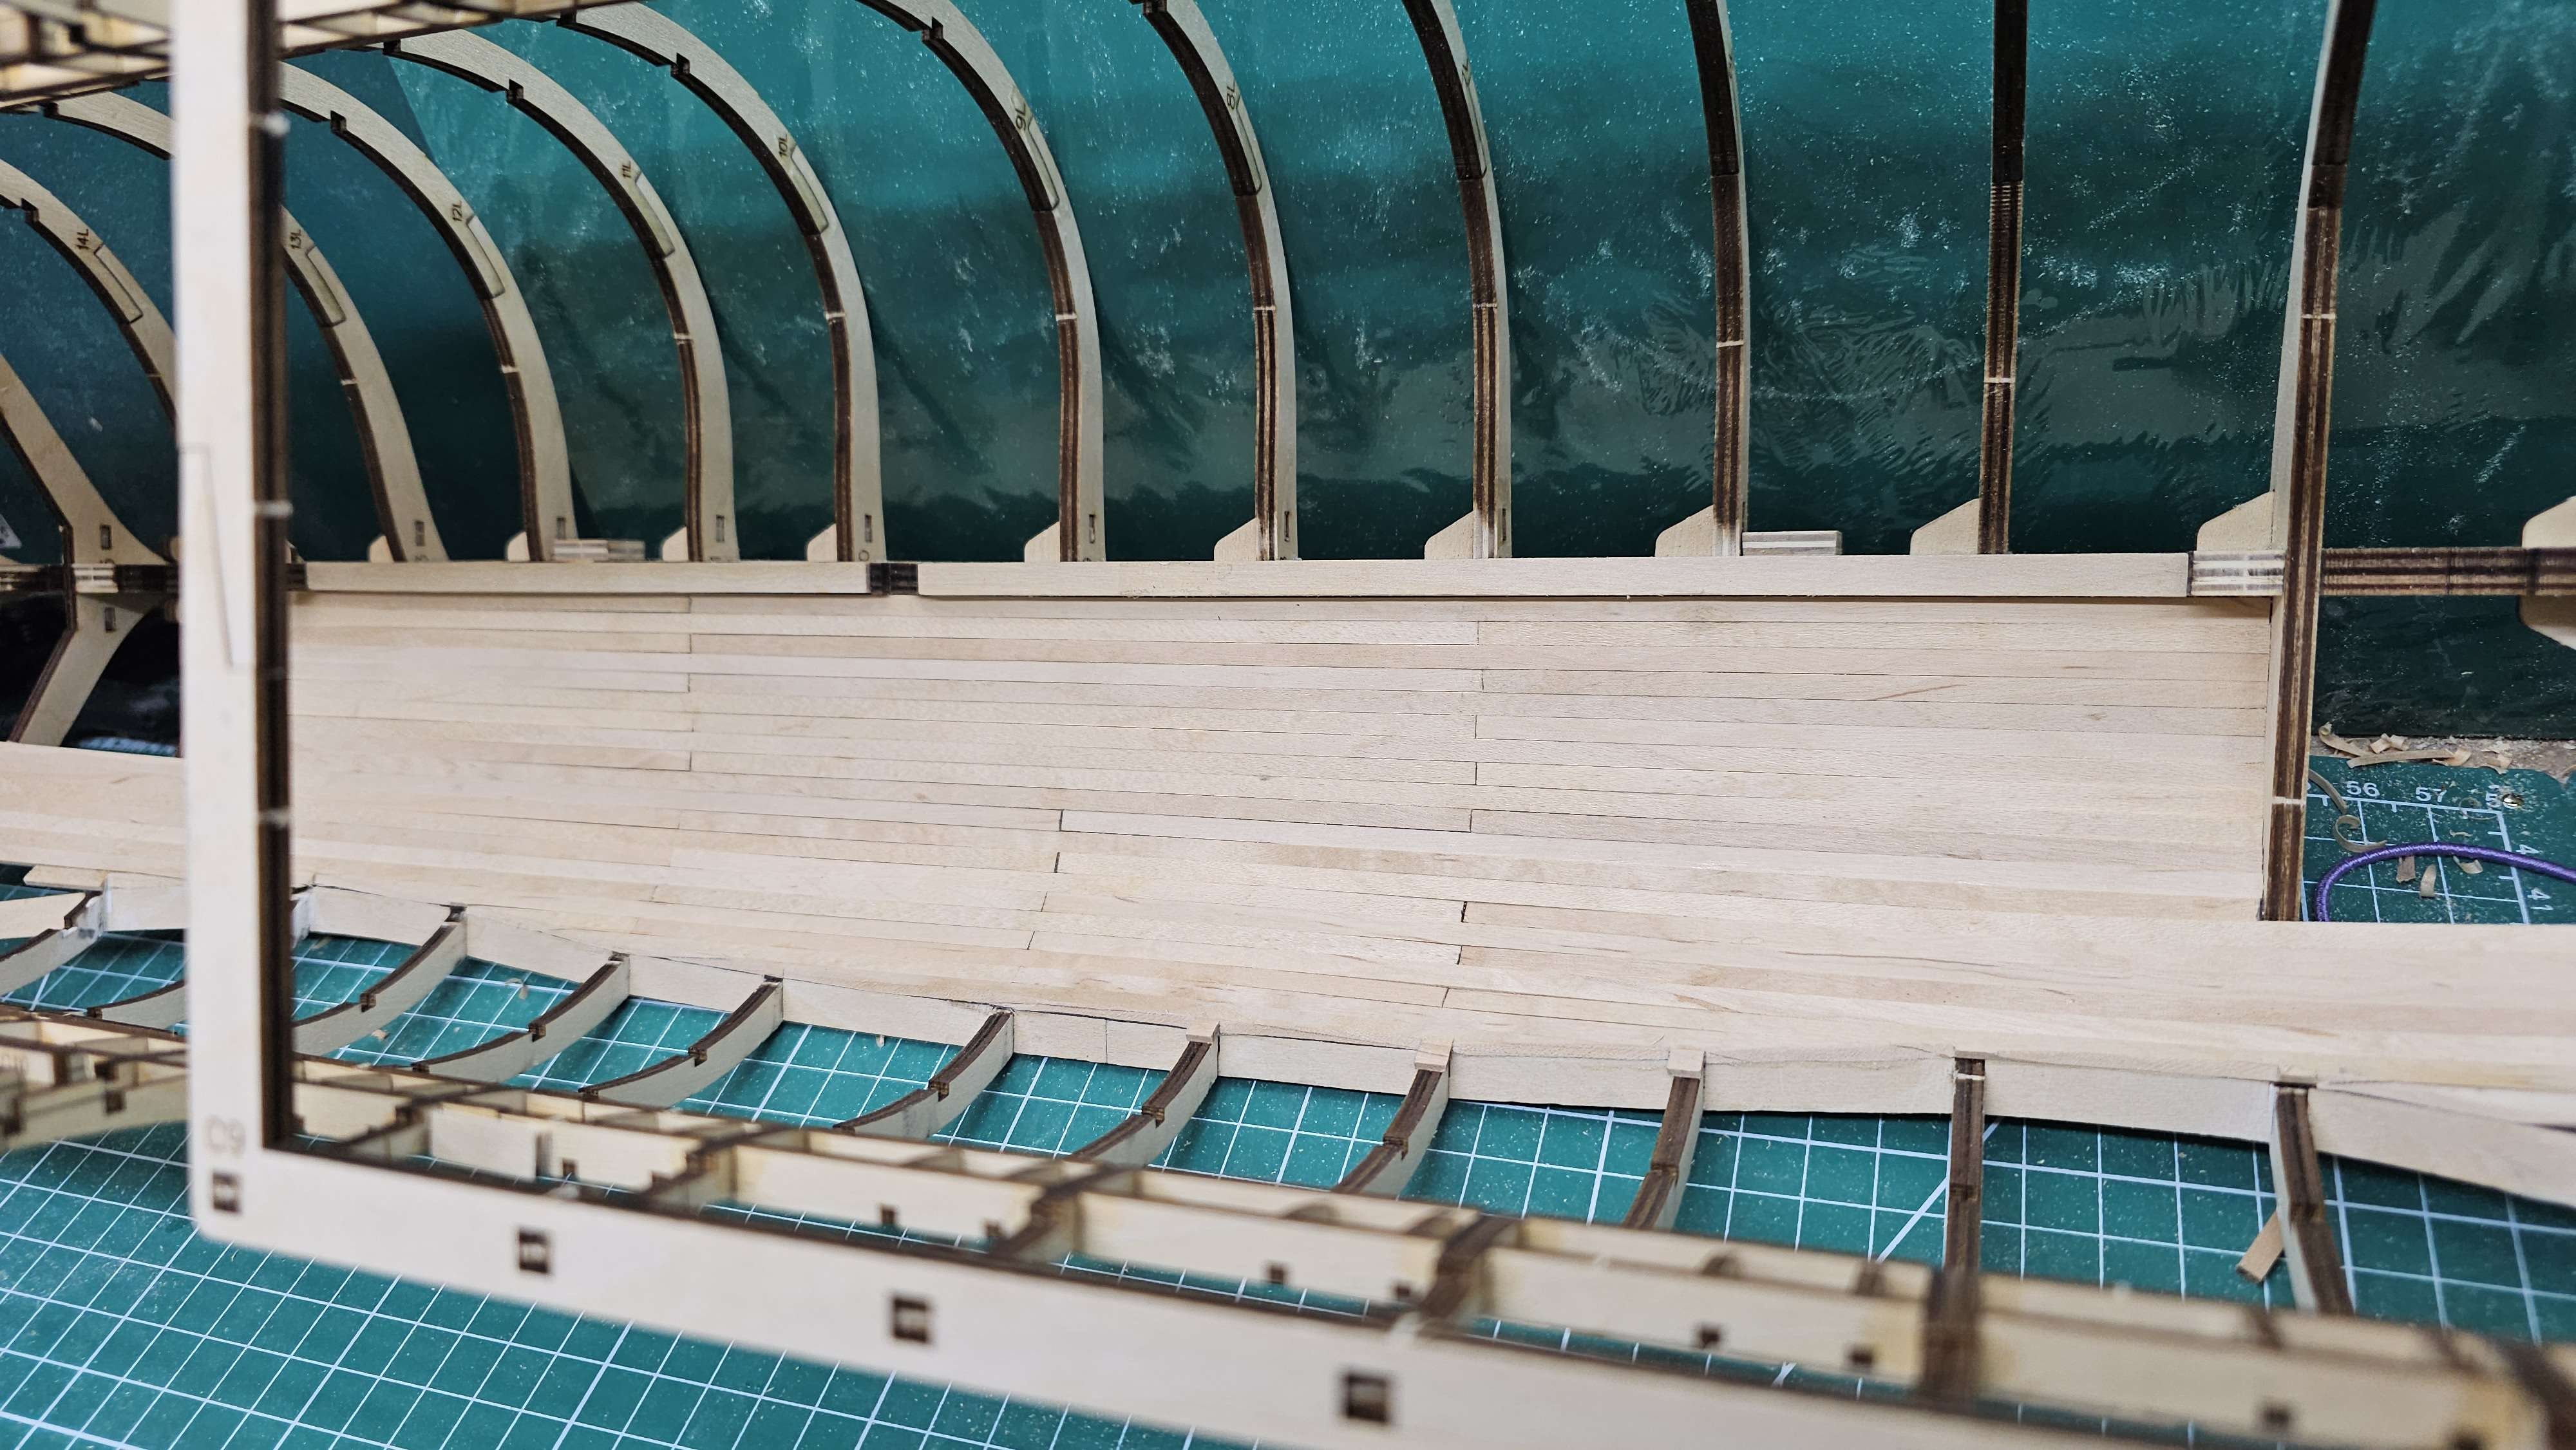
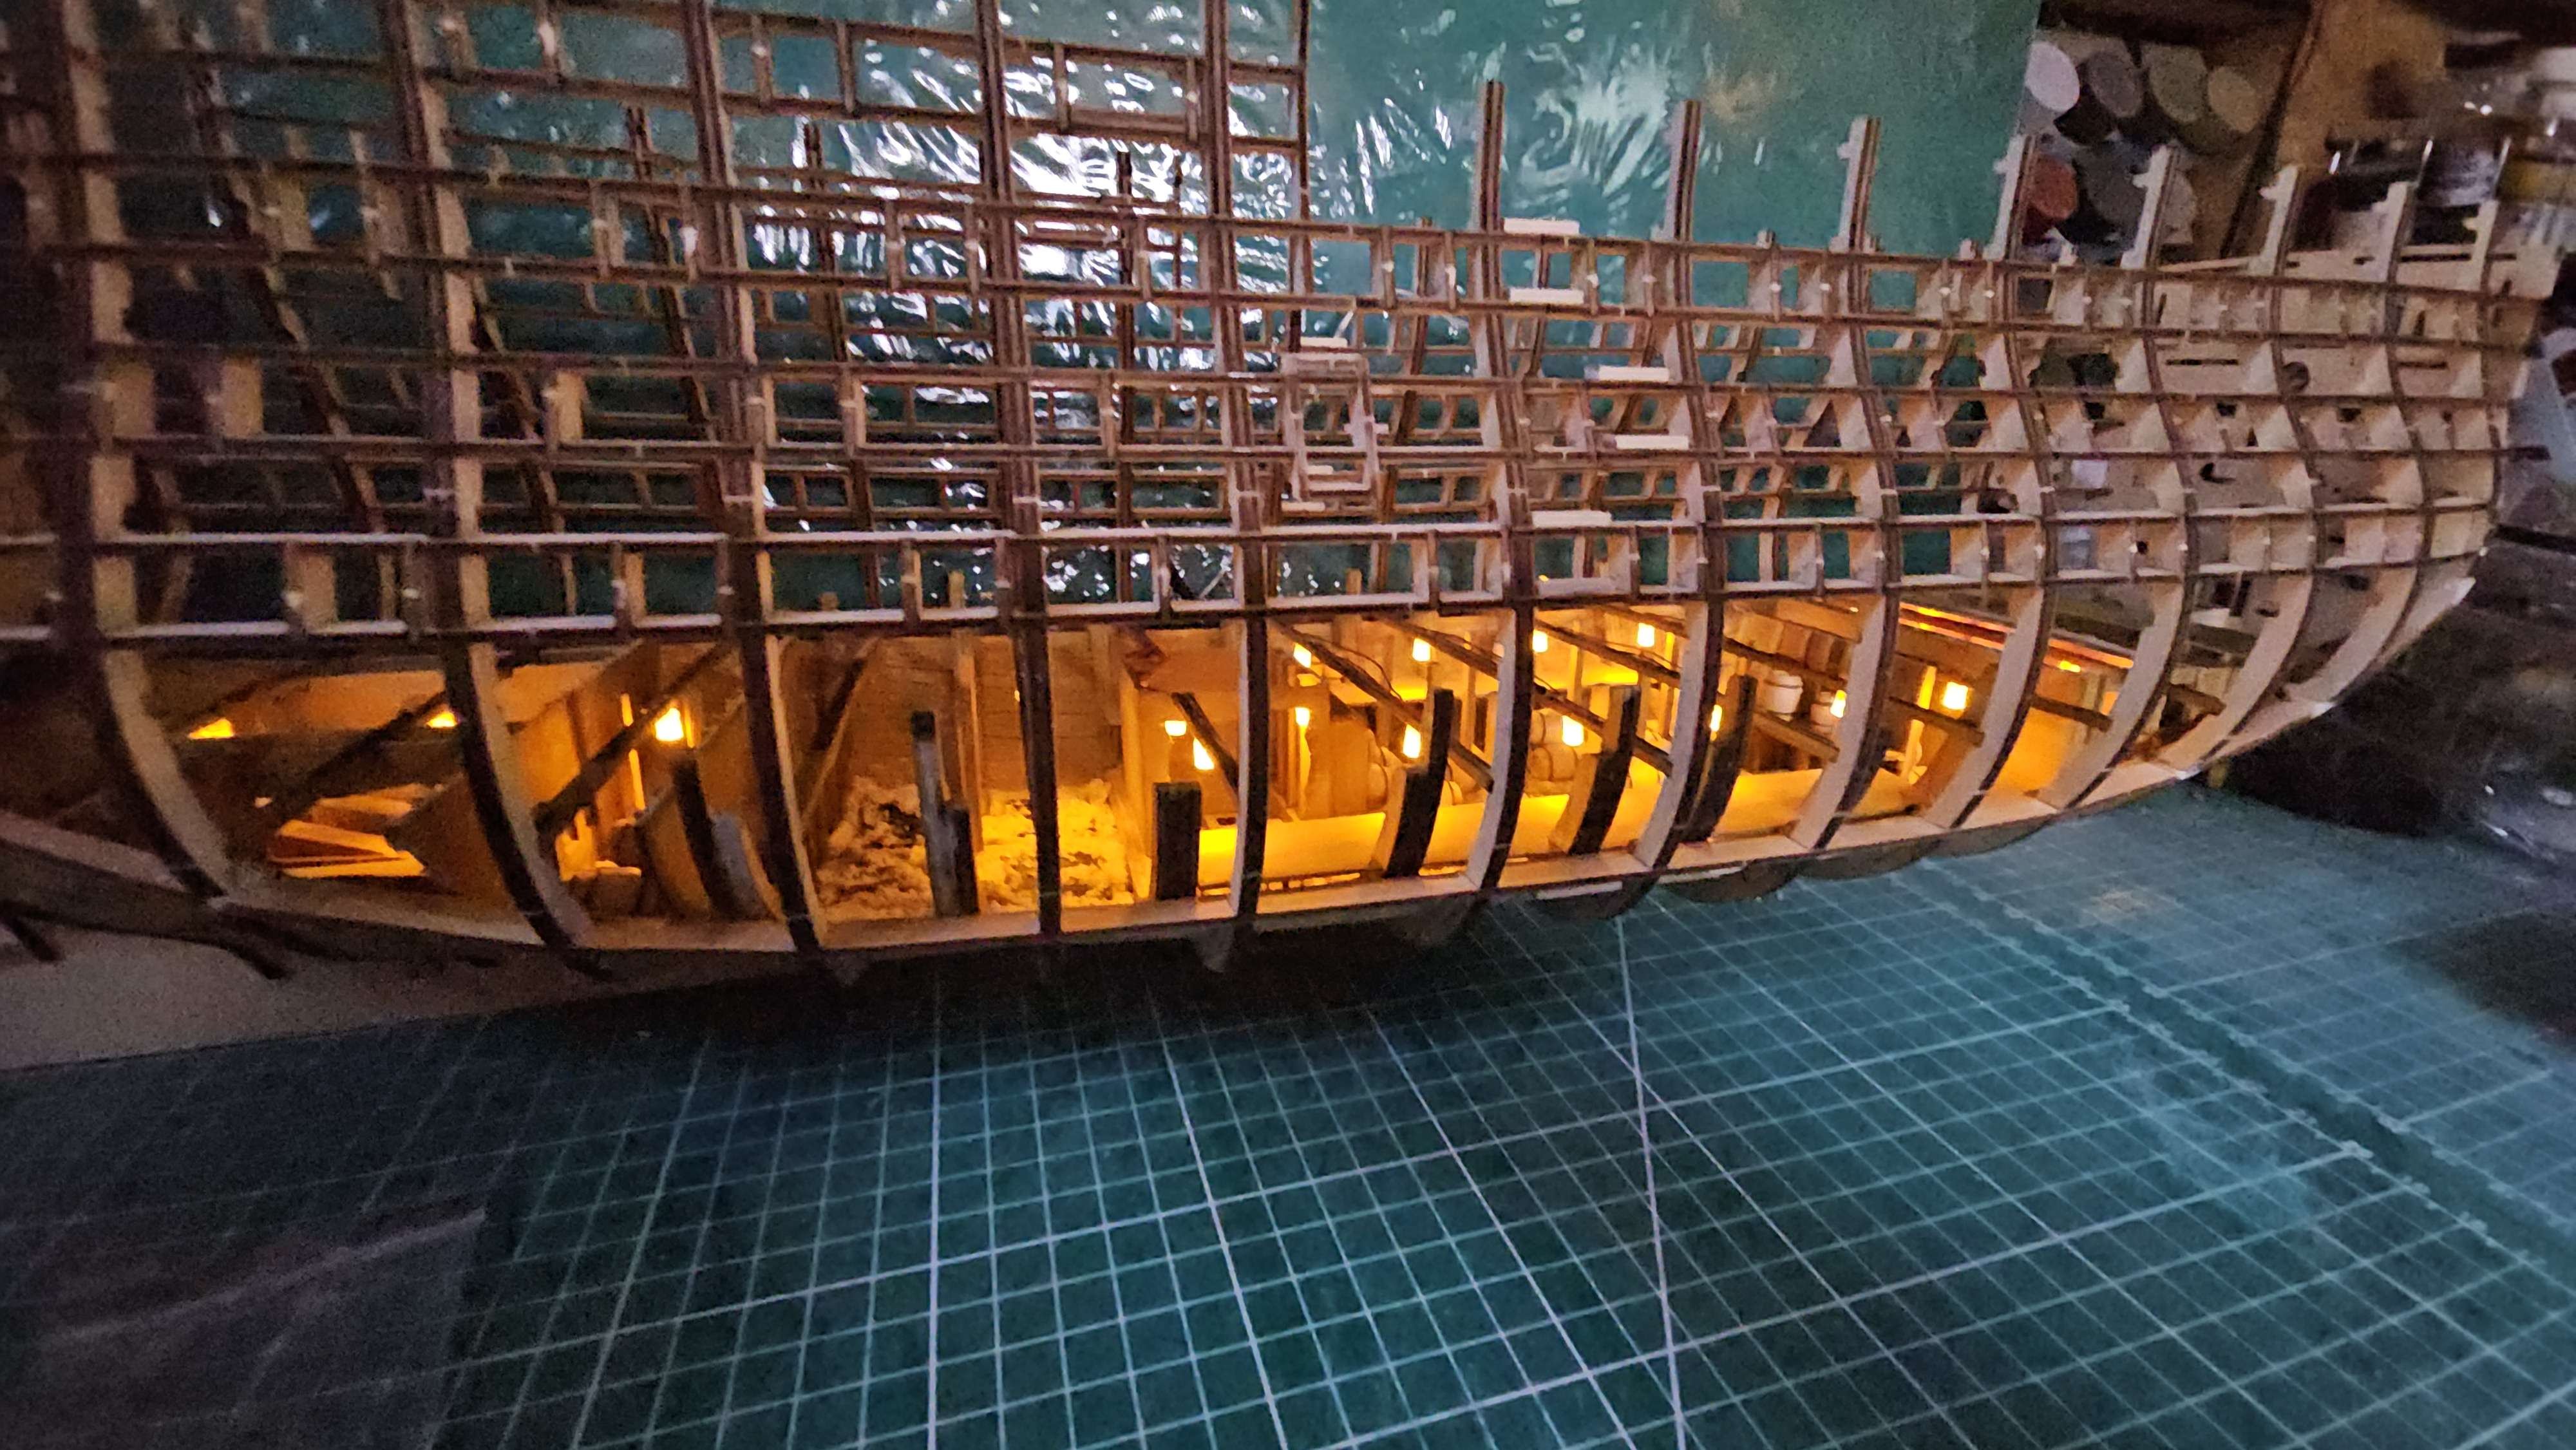
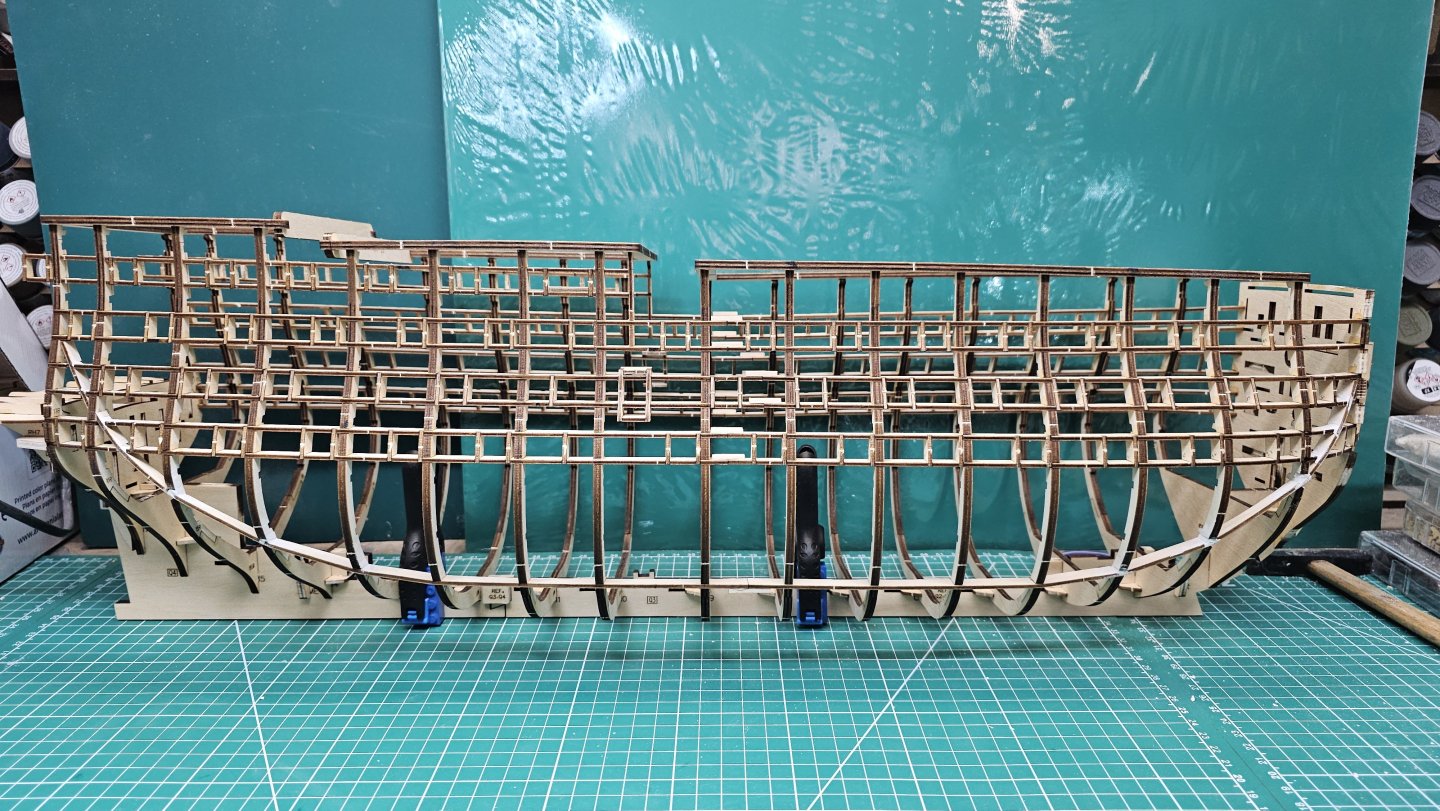
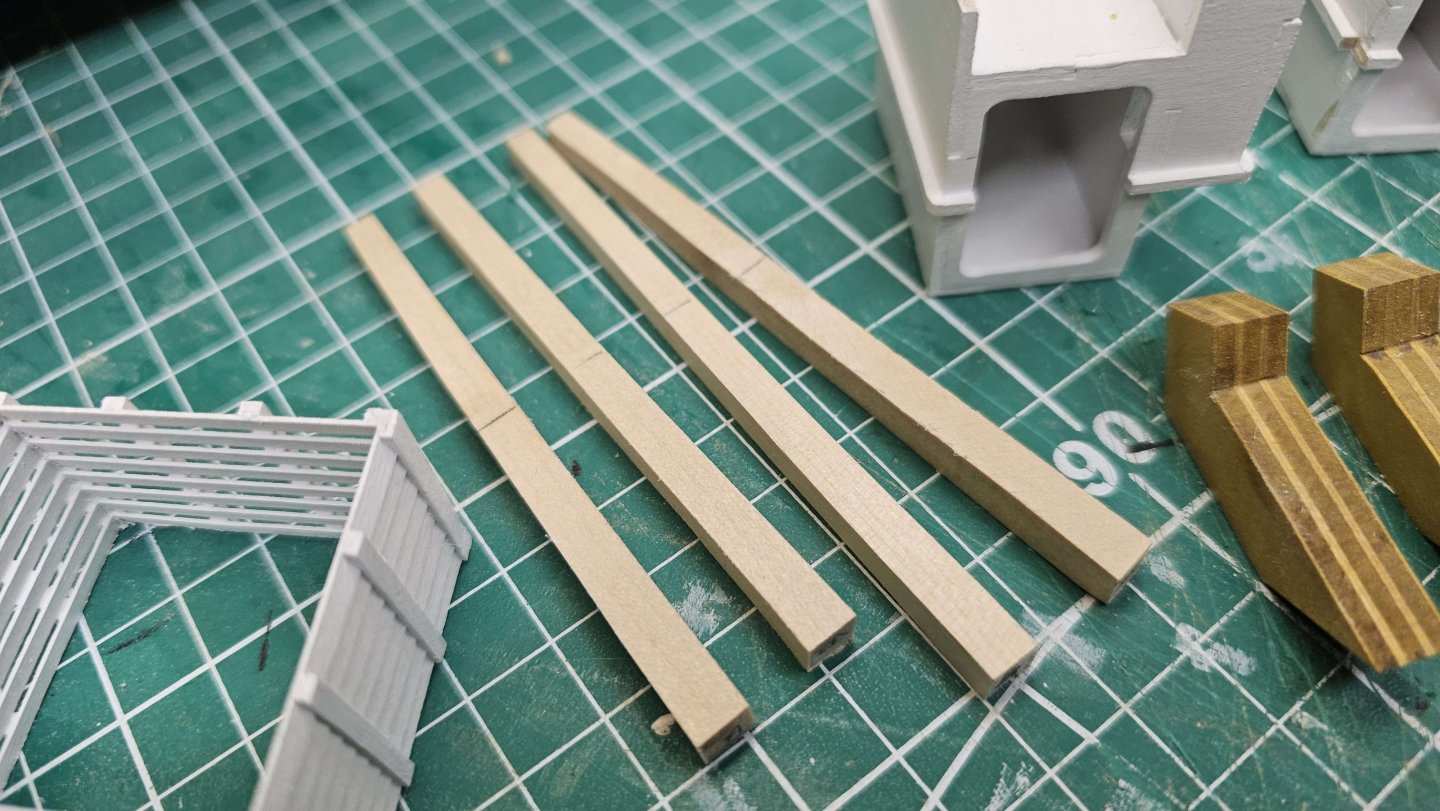
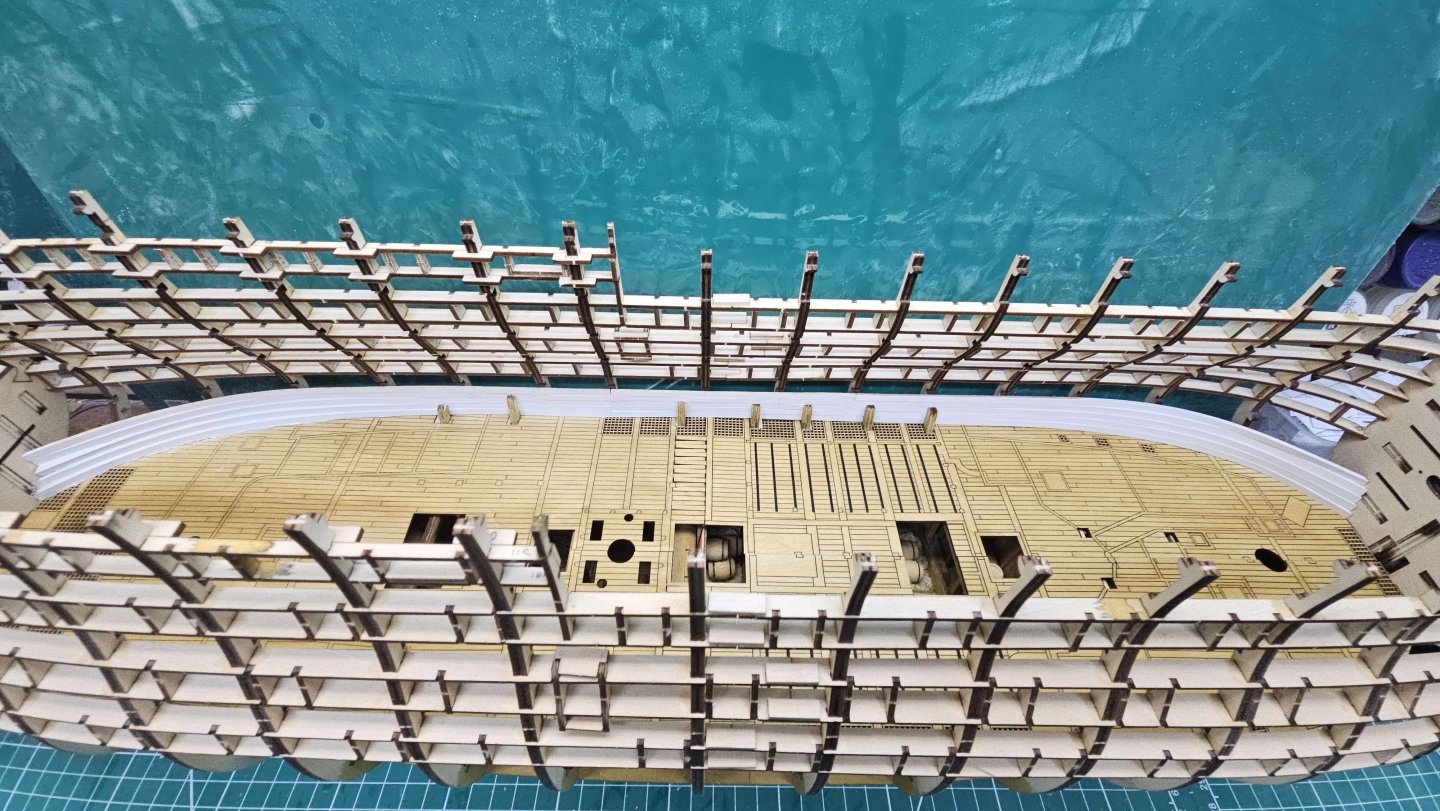
Video #16 Complete Hull frames are now faired ready for planking. Was probably the easiest one I've done to date. I used an orbital mouse sander to do the bulk of the work, and switched to a Dremel with the EZ-Clic sanding disc for the stern area and anywhere close to the keel. Then the first 4 layers of hull planking on each side. The wood supplied is amazingly pliable. I've not had to use a single plank bending method anywhere on this build yet.


-
FifeModels reacted to a post in a topic:
HMS Victory by FifeModels - Artesania Latina - Scale 1/84 - Anatomy Version
-
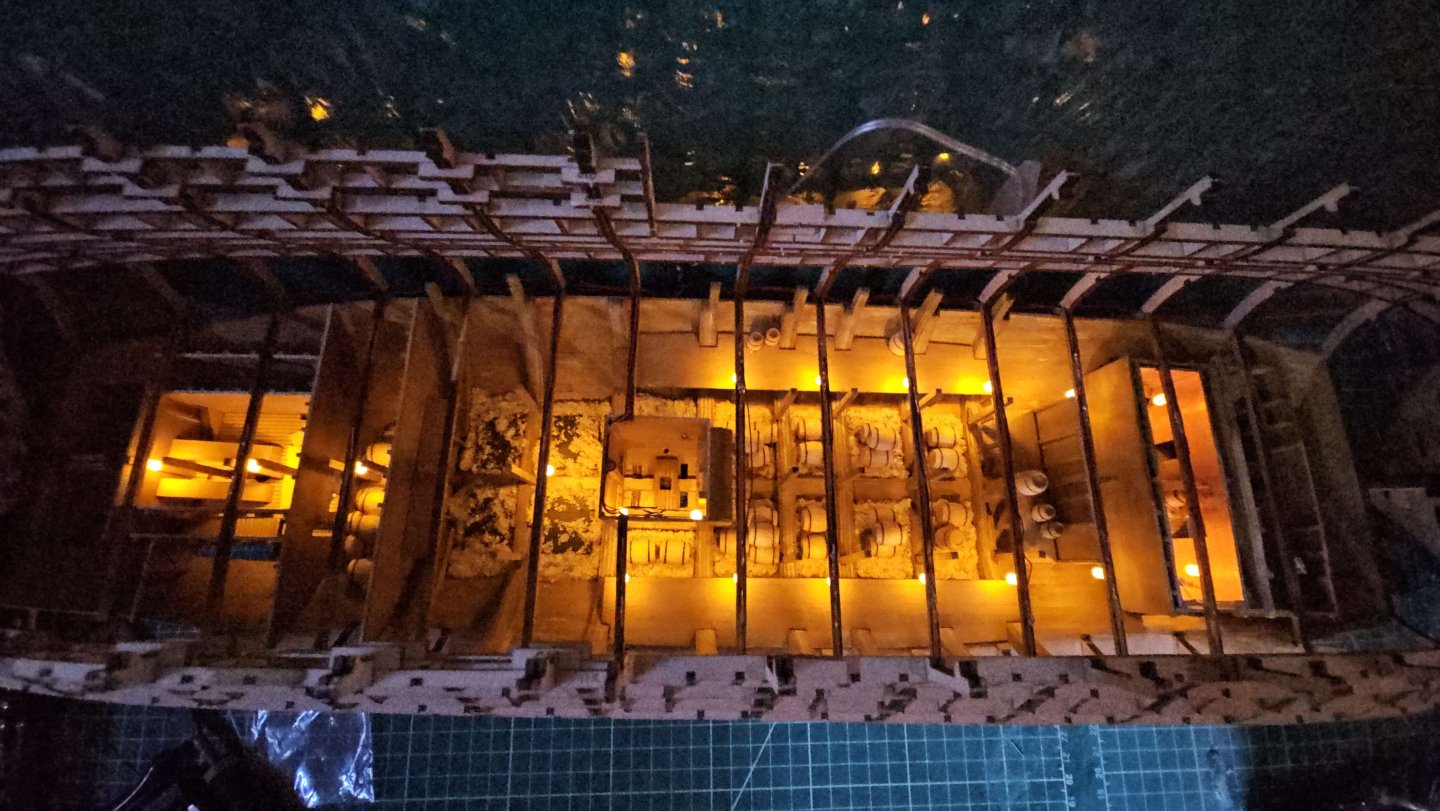
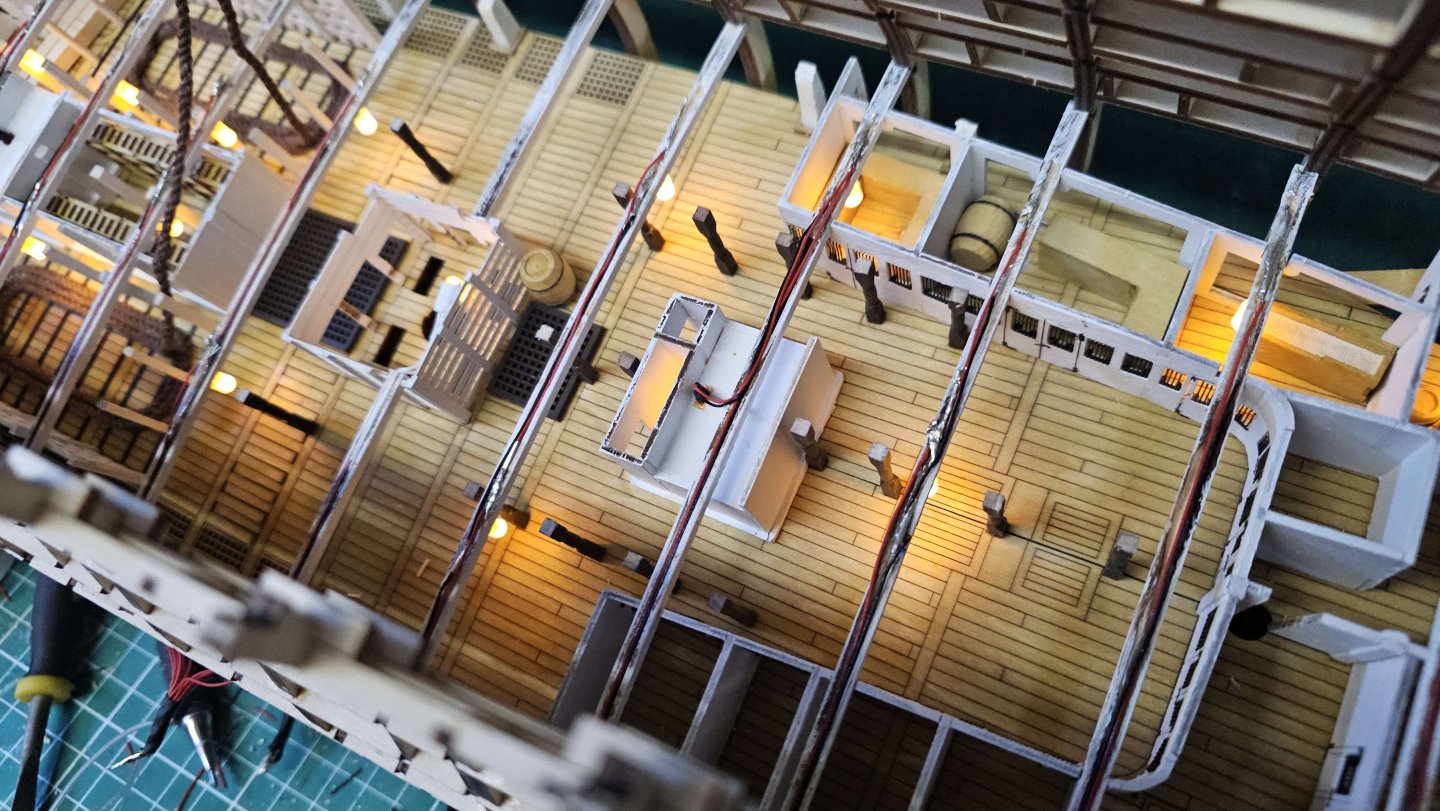
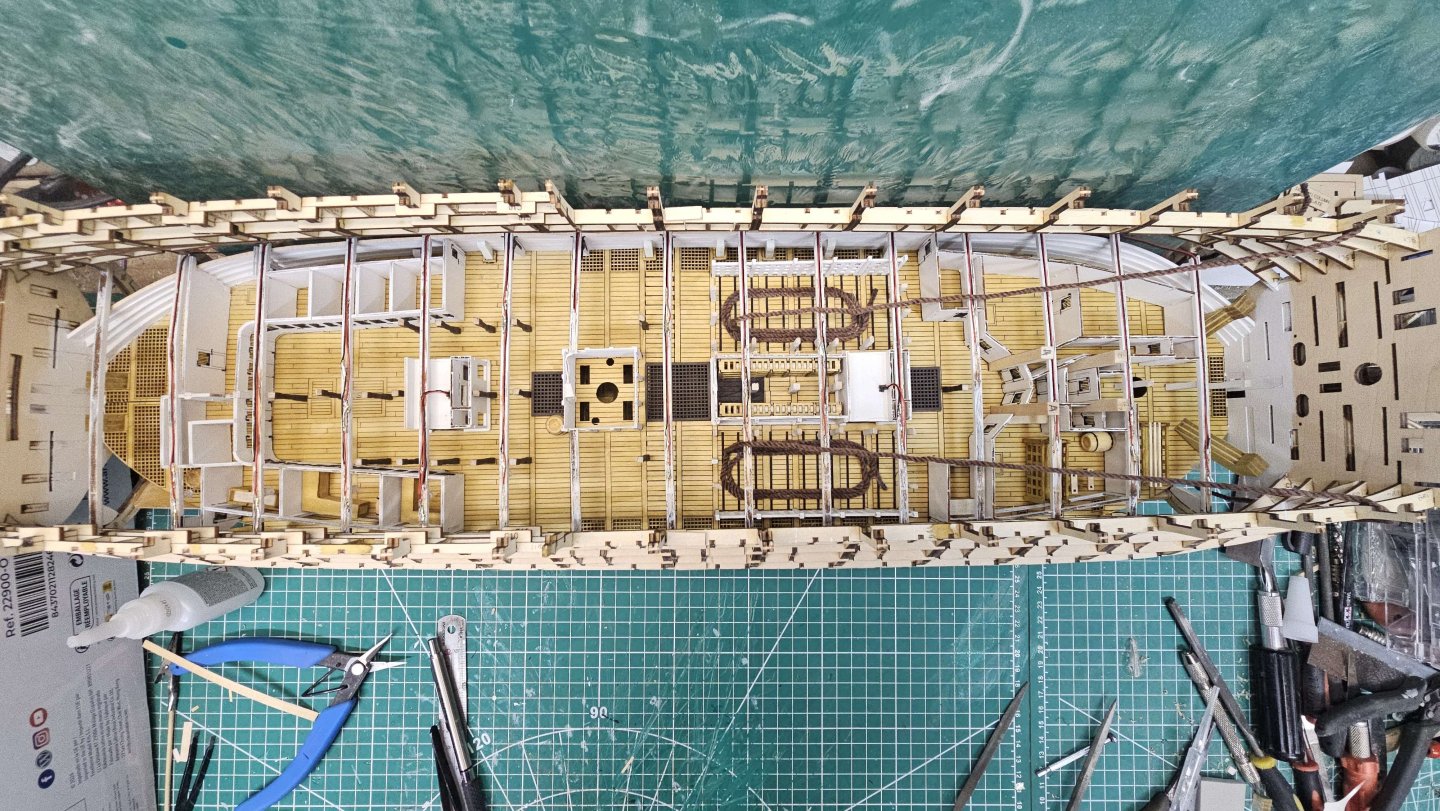
Video #15 Complete Pretty simple, planking/painting the inner sides of the lowest gundeck, and fitting some cable to each deck in prep.


-
Video #14 Complete 105.mp4


-
Oh I am sure it can. But knowing my luck/life/experience I would just destroy it trying.
-
Because unlike most builds there is no internal structure to support or add strength to the ribs.

-
FifeModels reacted to a post in a topic:
HMS Victory by FifeModels - Artesania Latina - Scale 1/84 - Anatomy Version
-
FifeModels reacted to a post in a topic:
HMS Victory by FifeModels - Artesania Latina - Scale 1/84 - Anatomy Version
-
I have the same concern. I really dislike working on any internals prior to fairing the ribs, but with this build it's unavoidable. Any dust ingress I will probably deal with via my airbrush after fairing is finished. Dealing with any after sanding the planking is going to be a bit trickier...
-
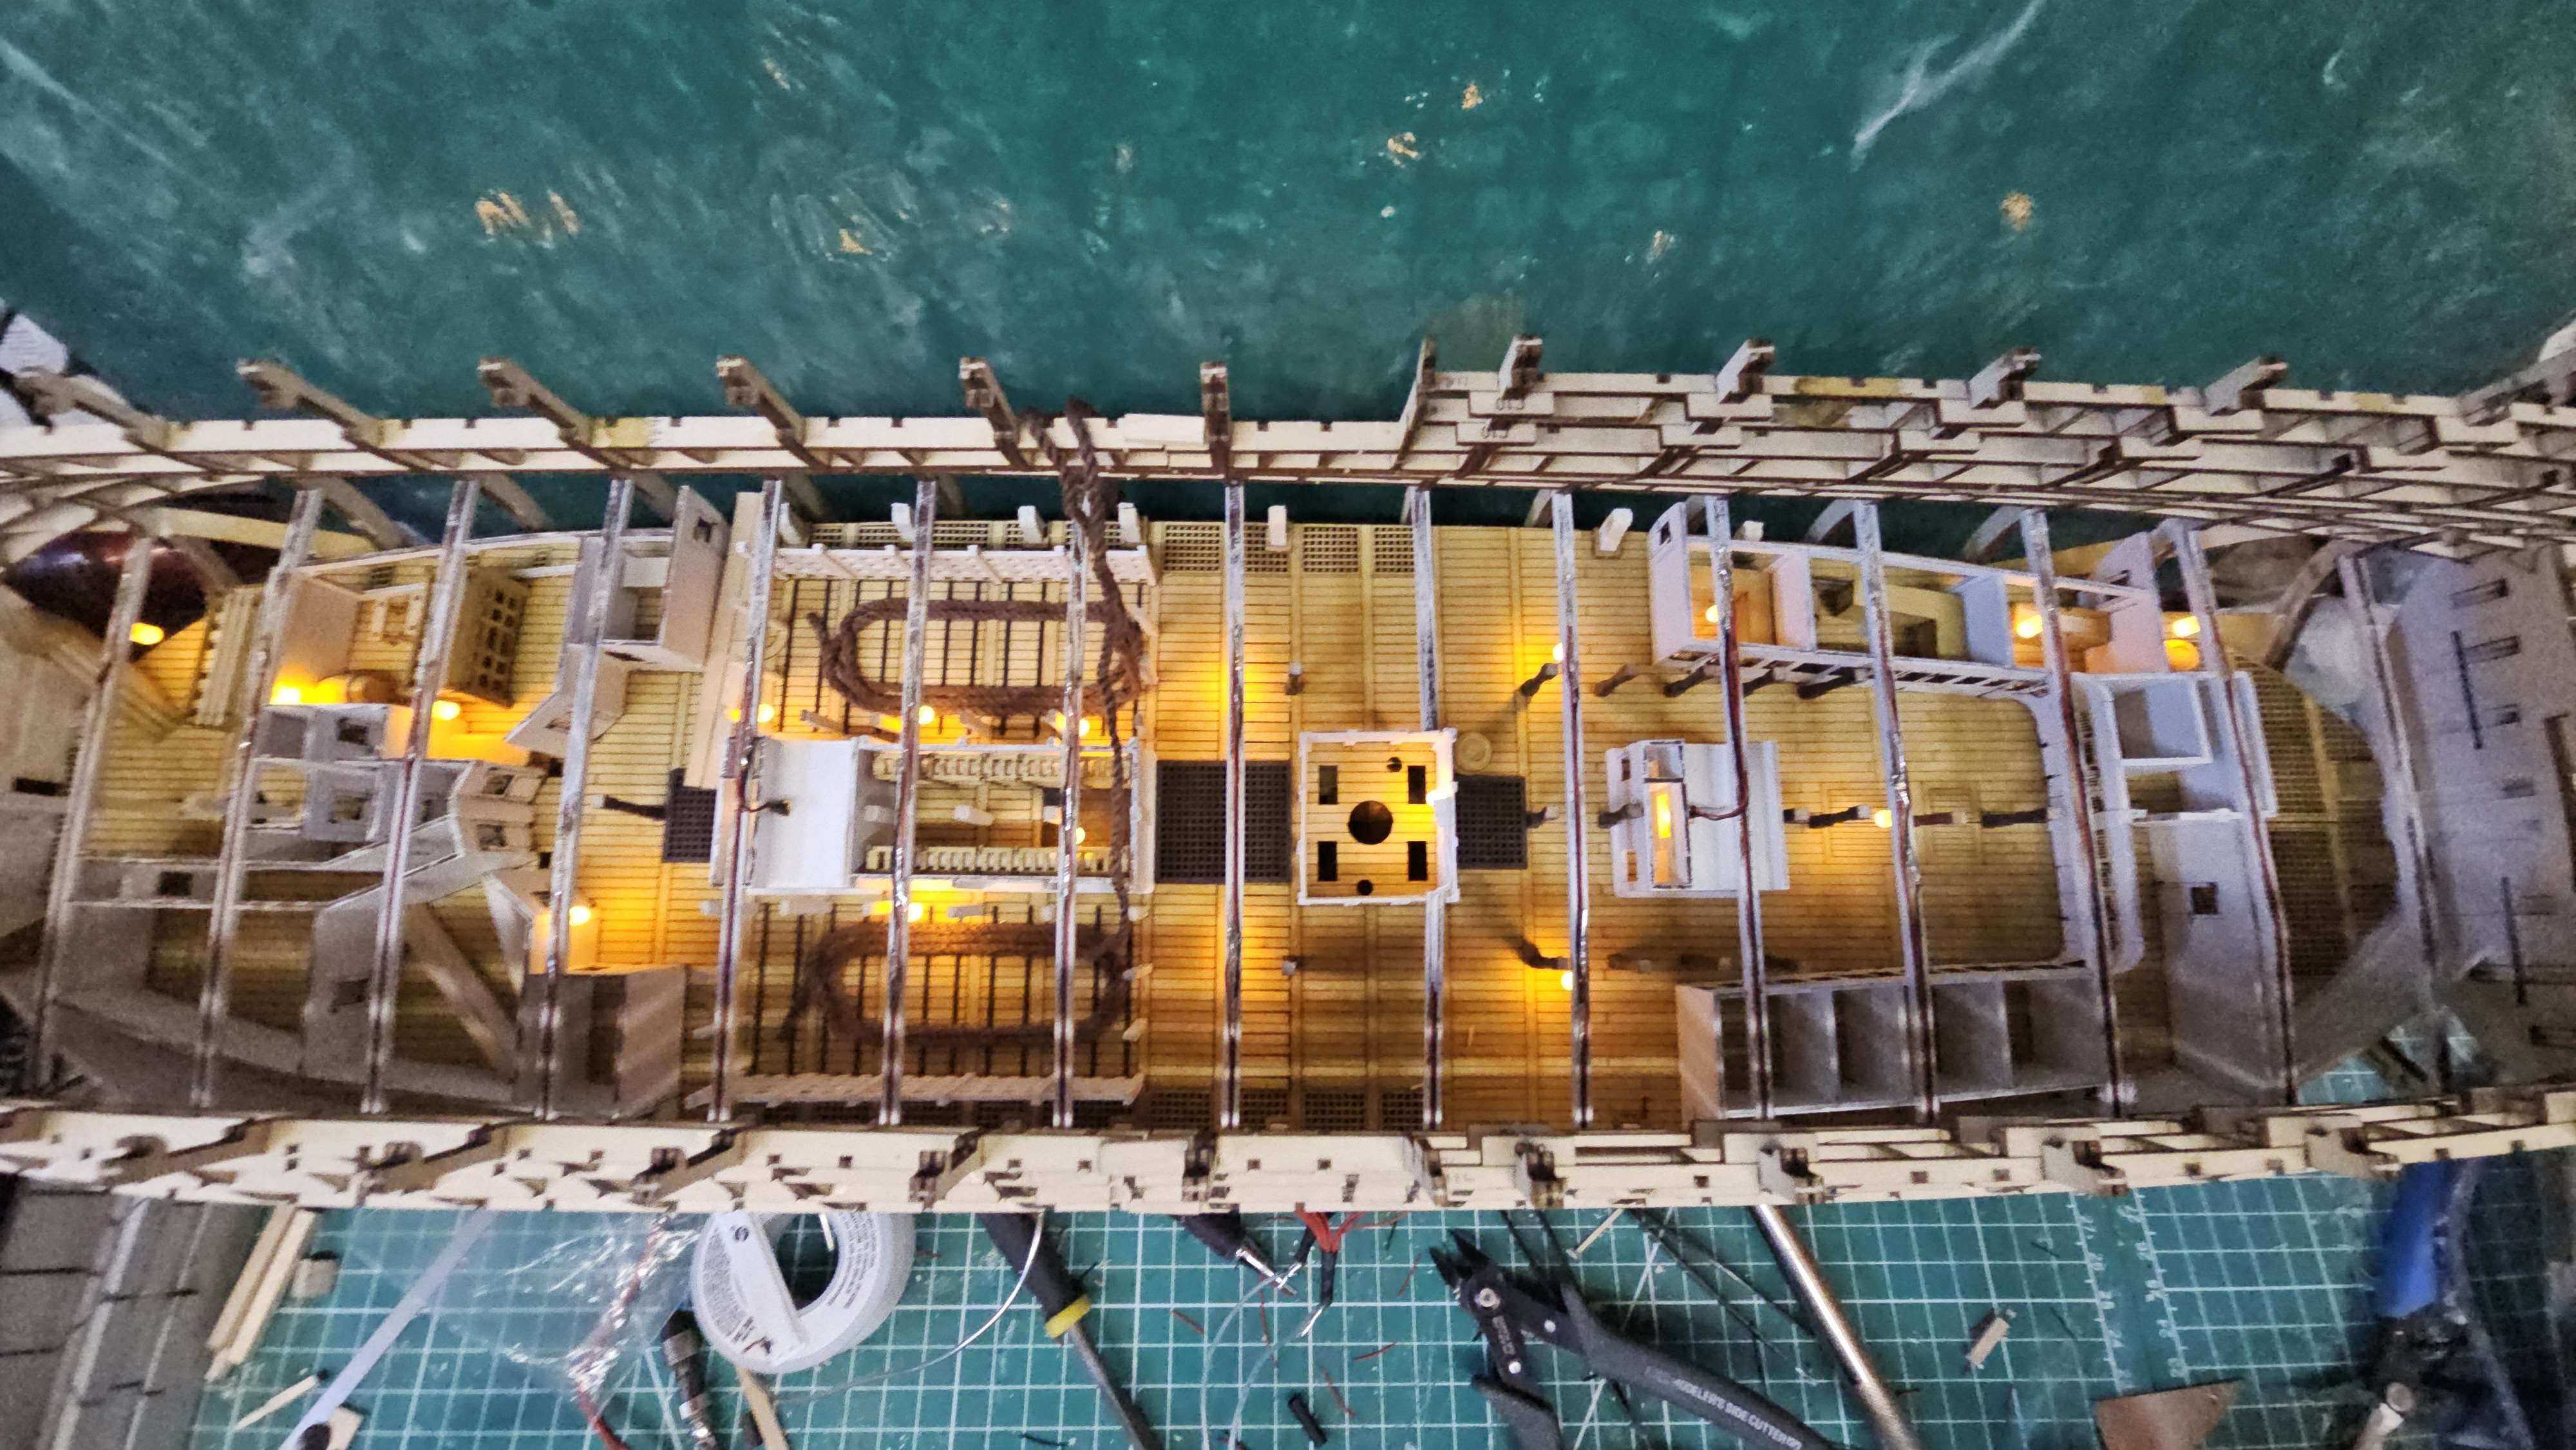
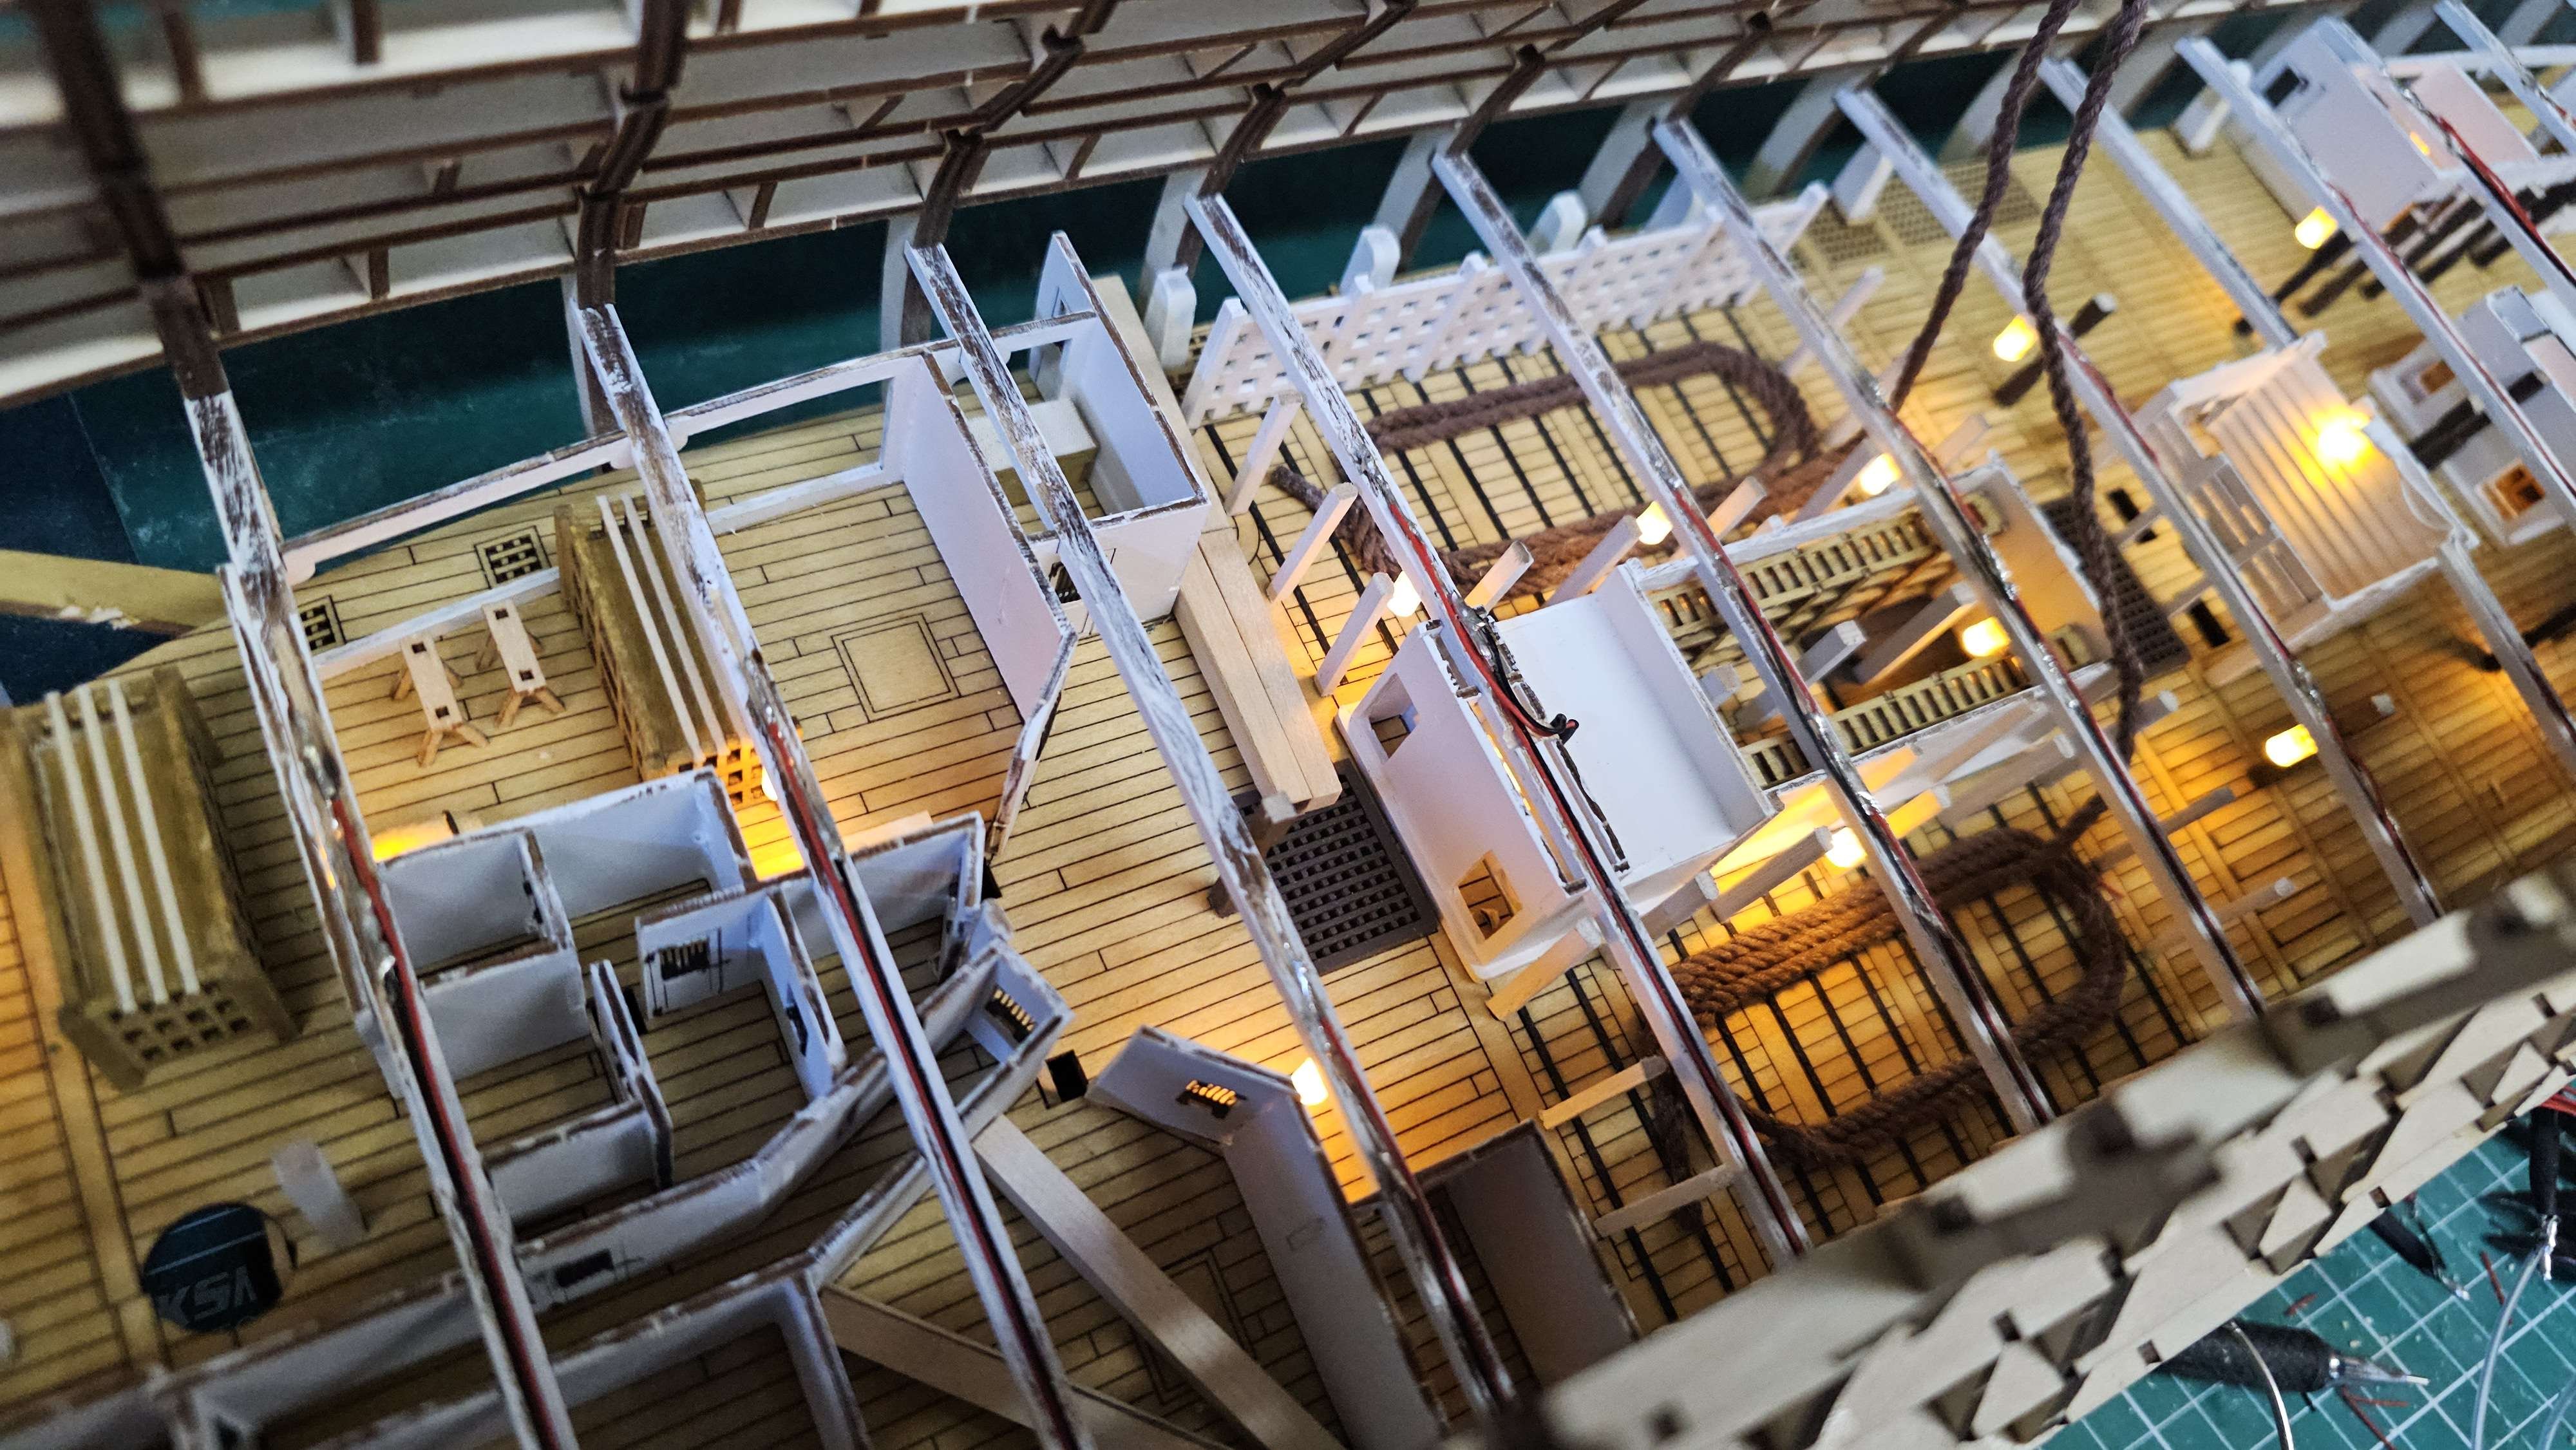
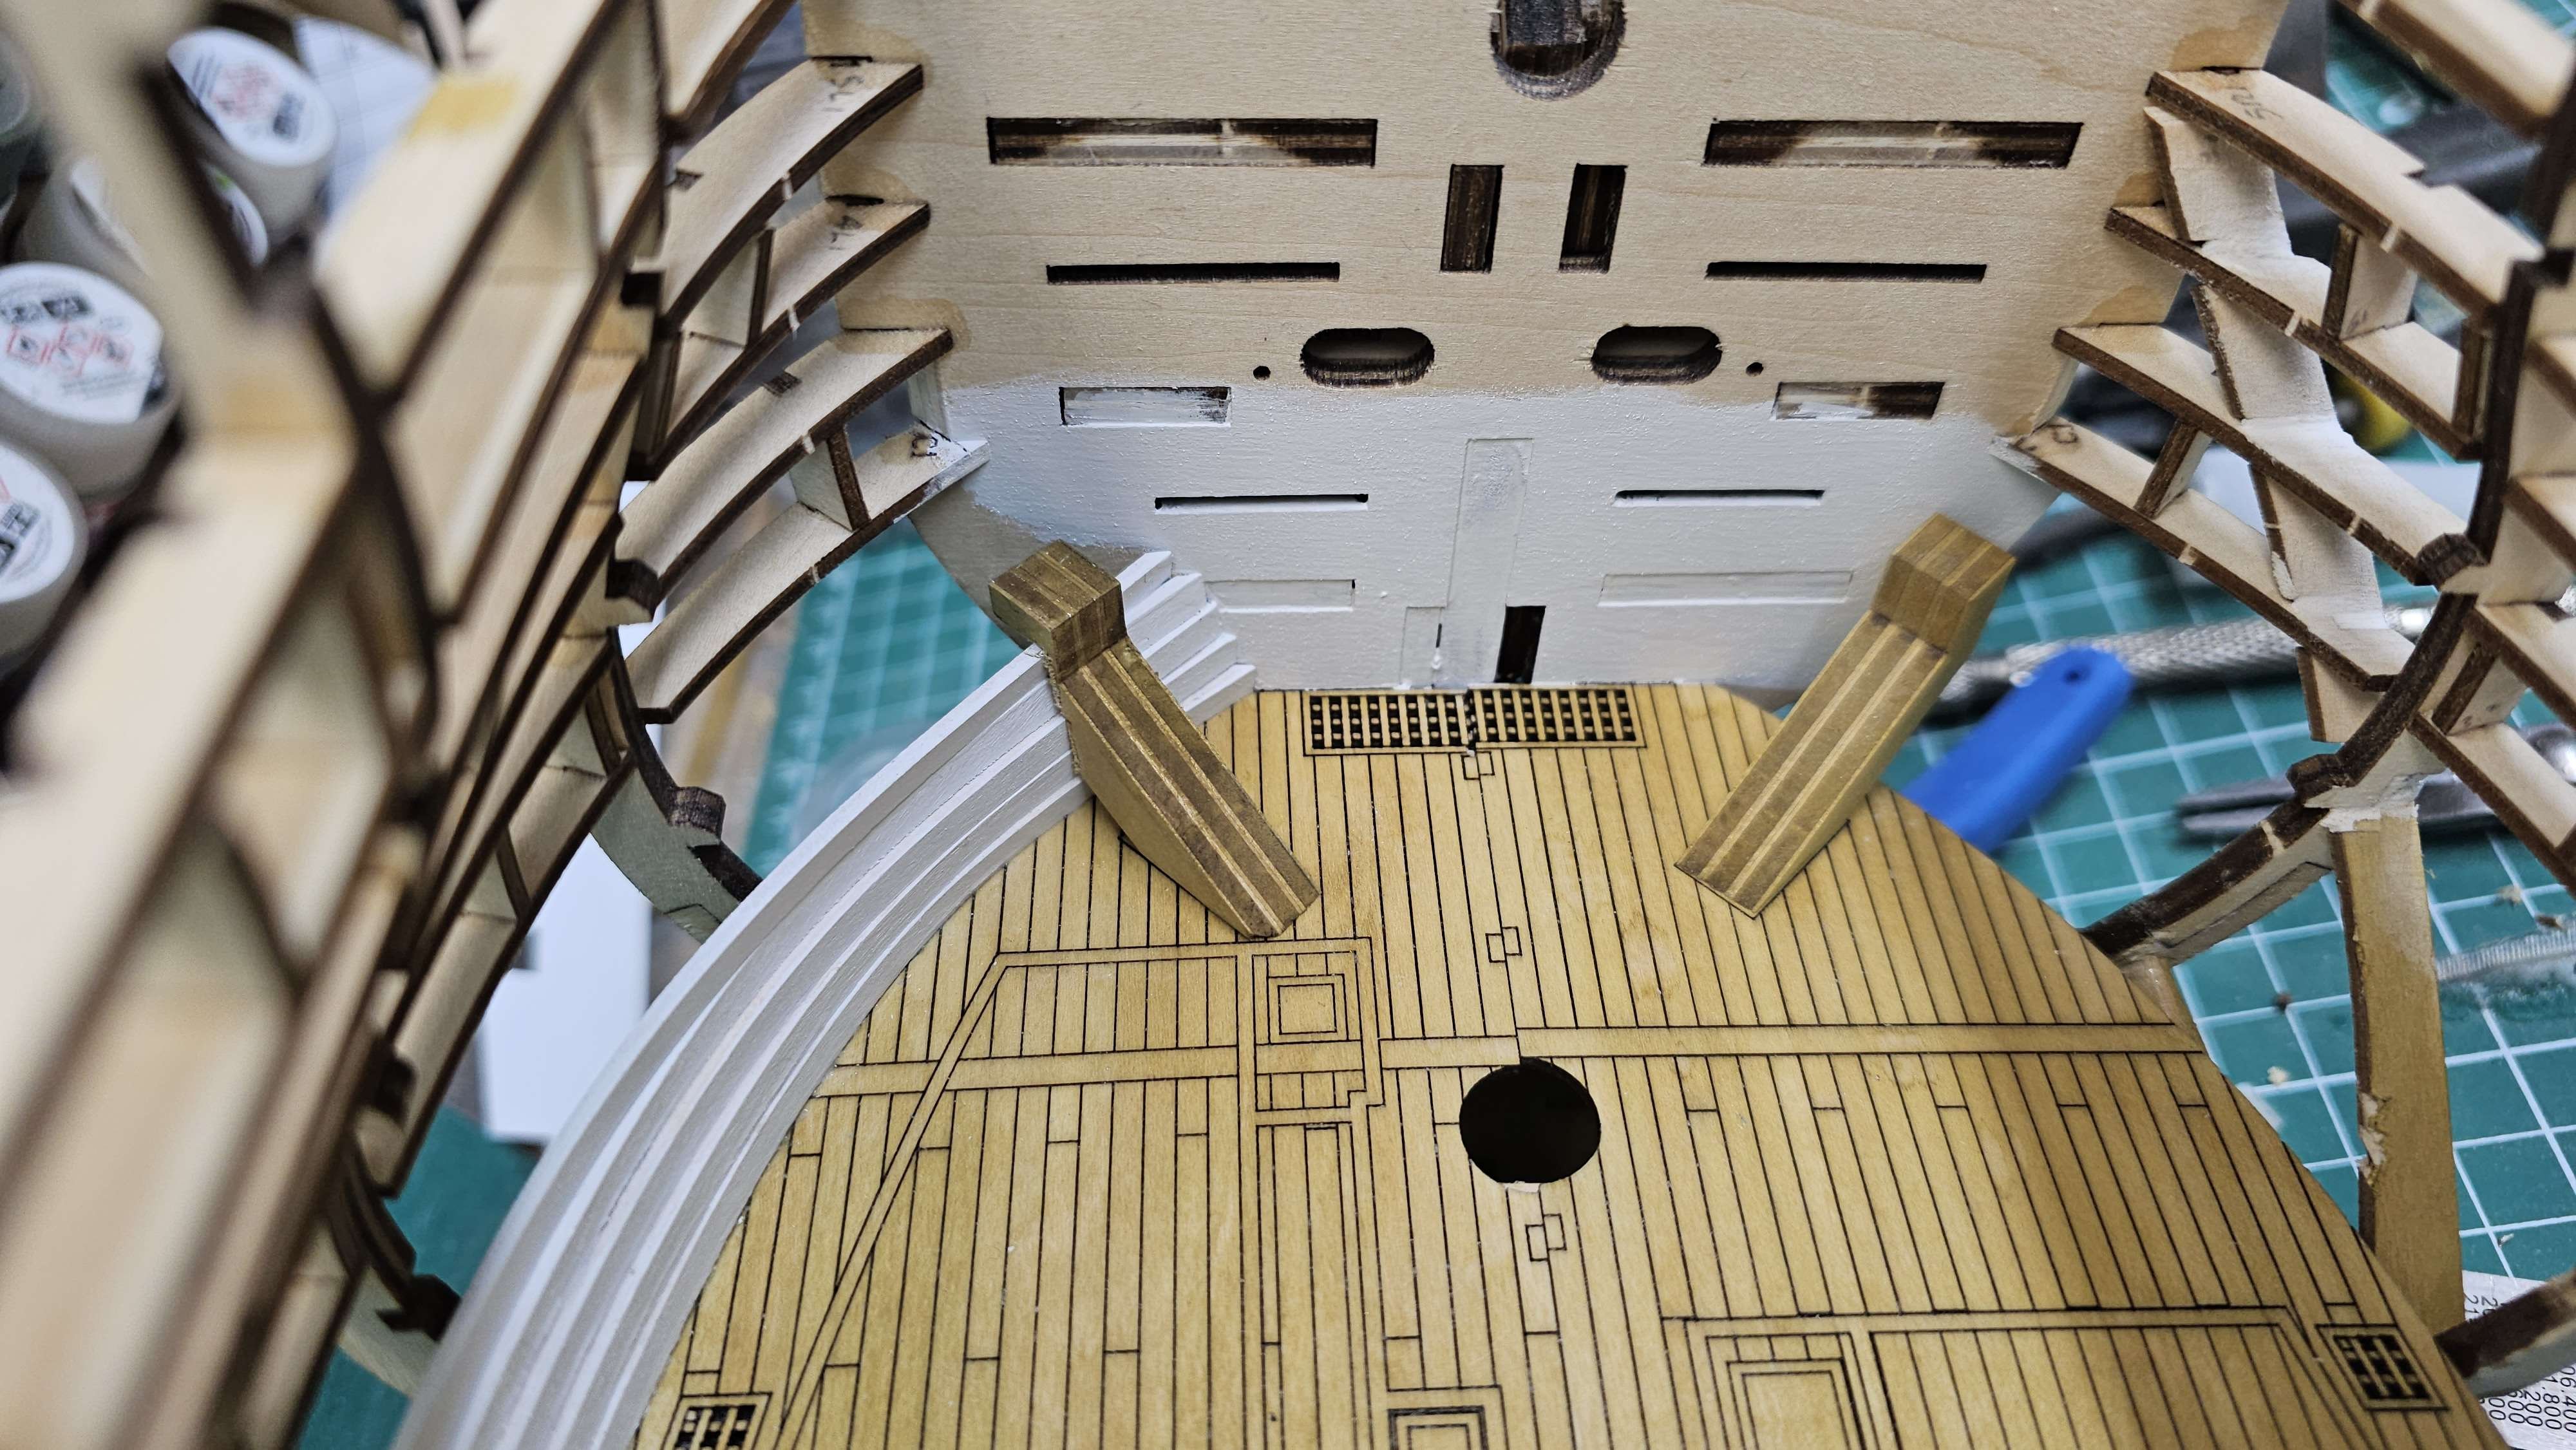
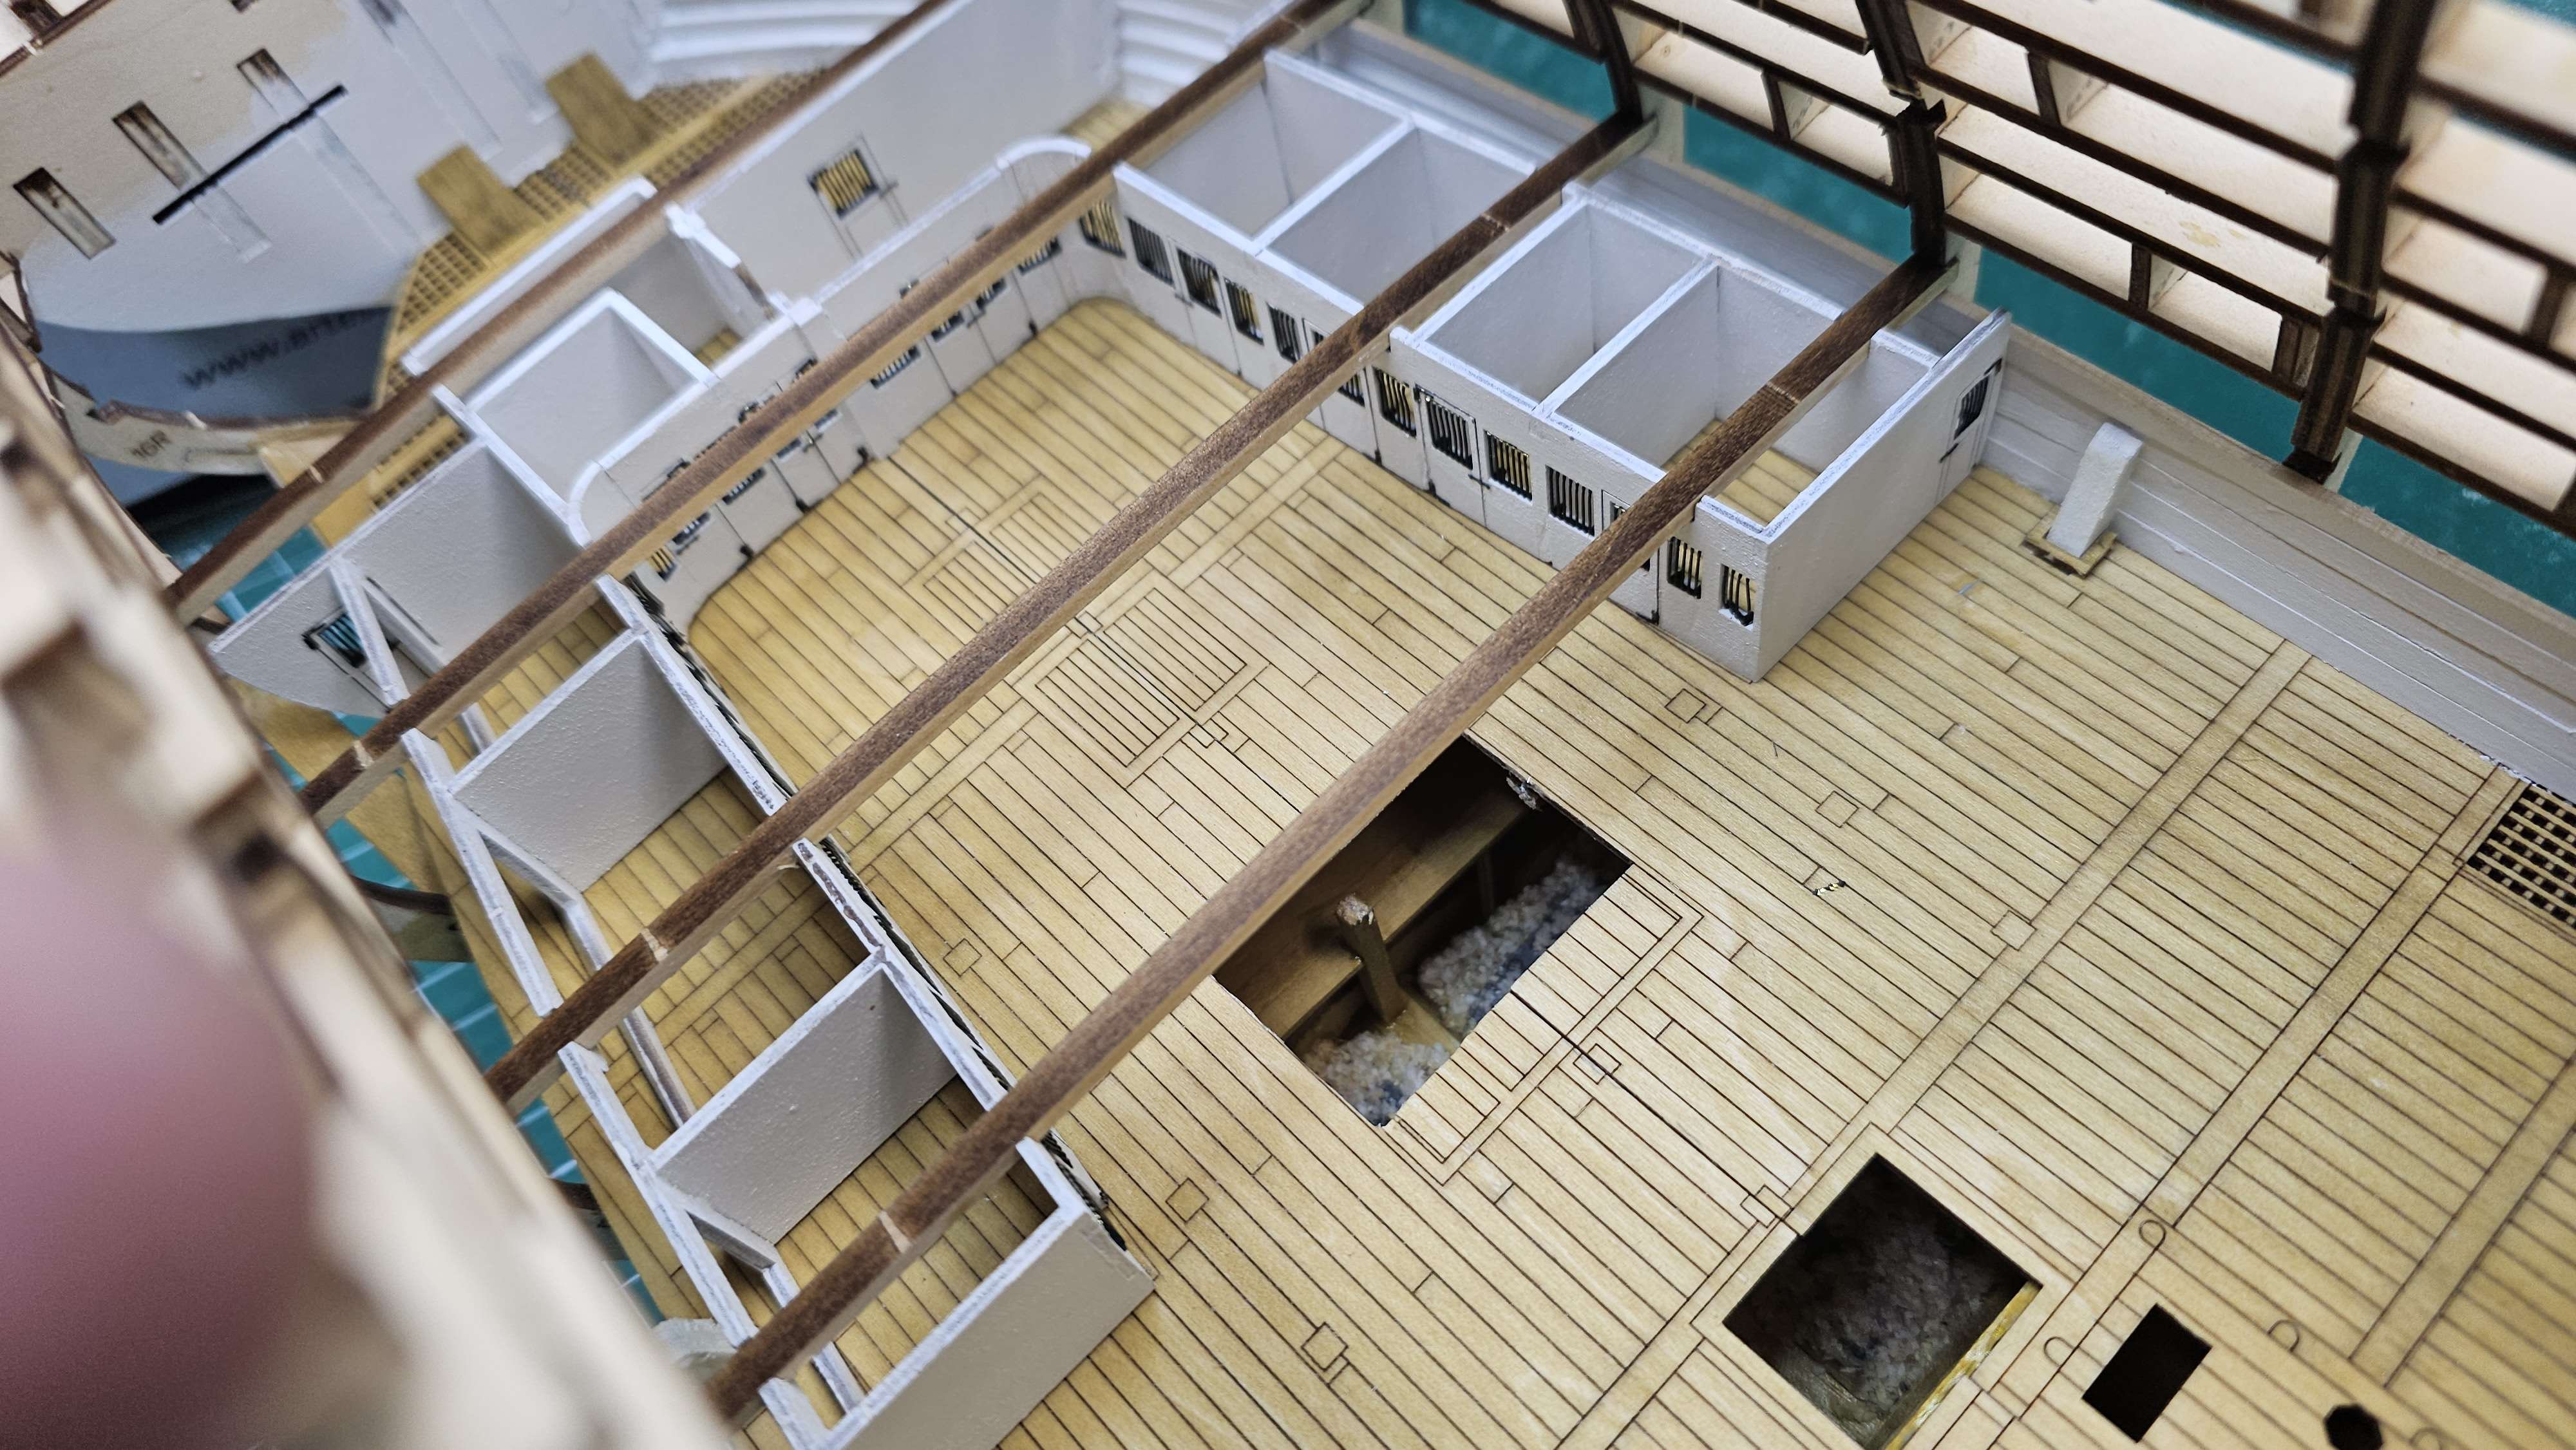
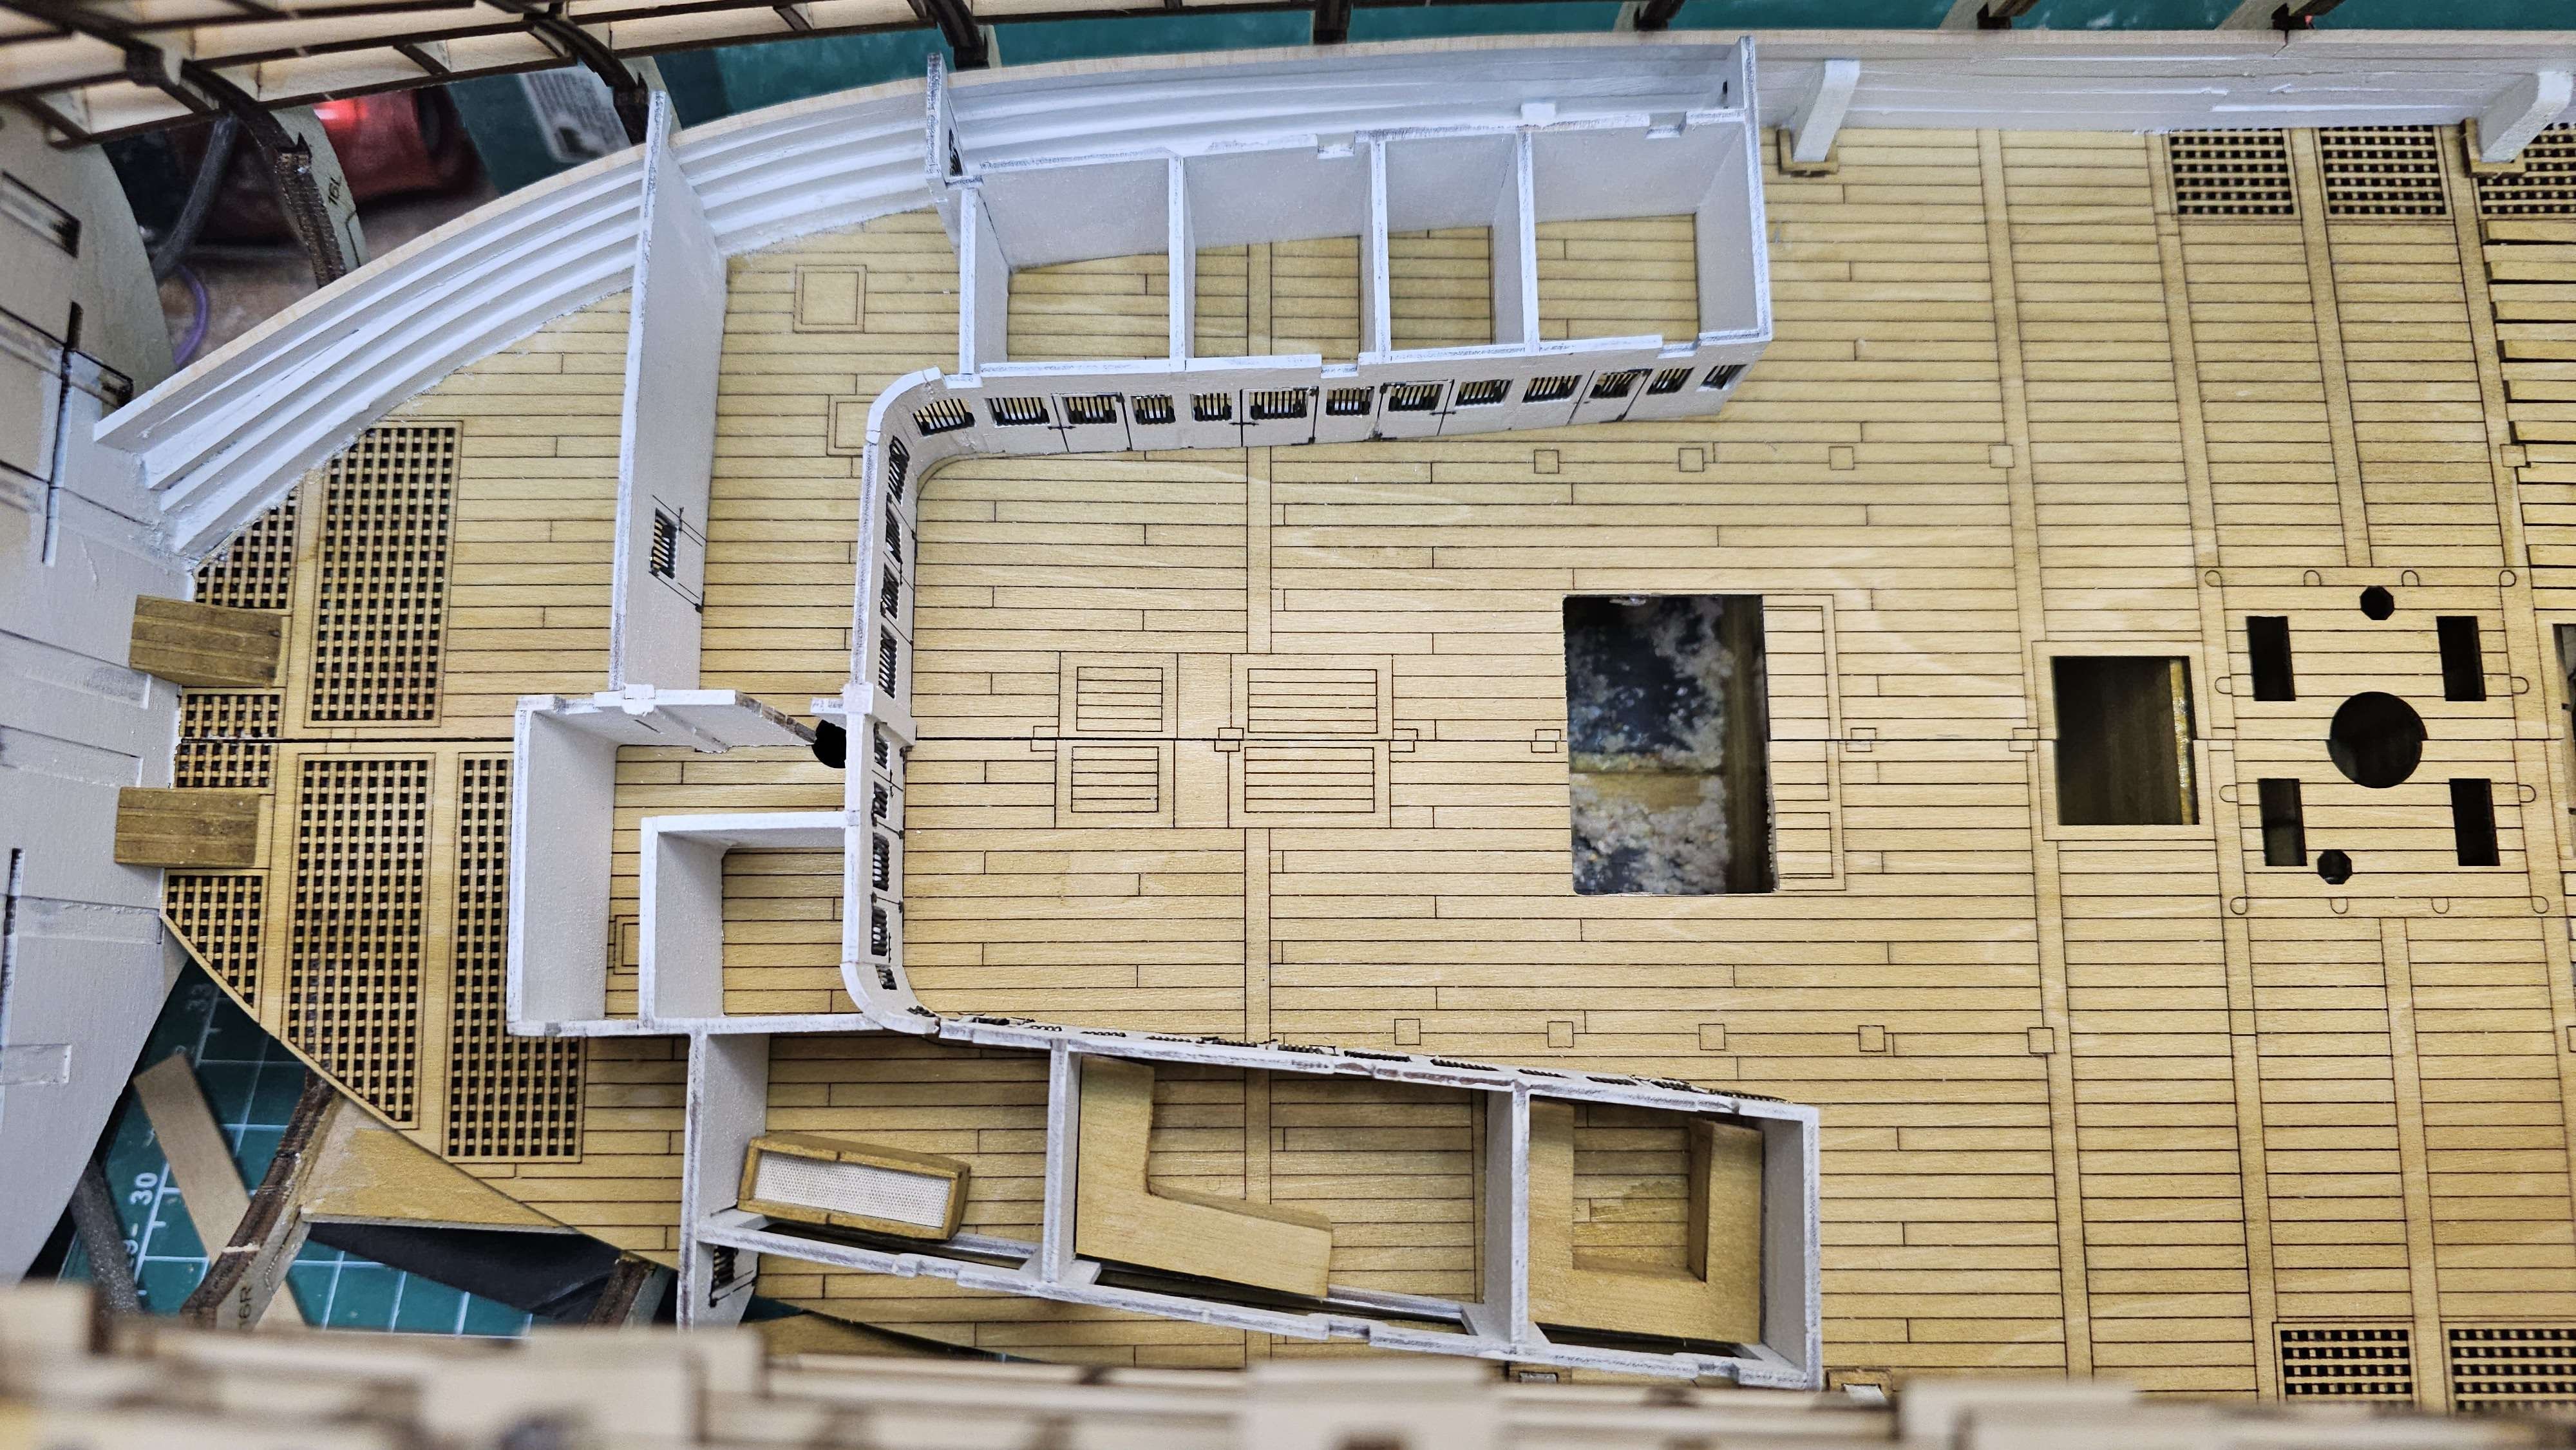
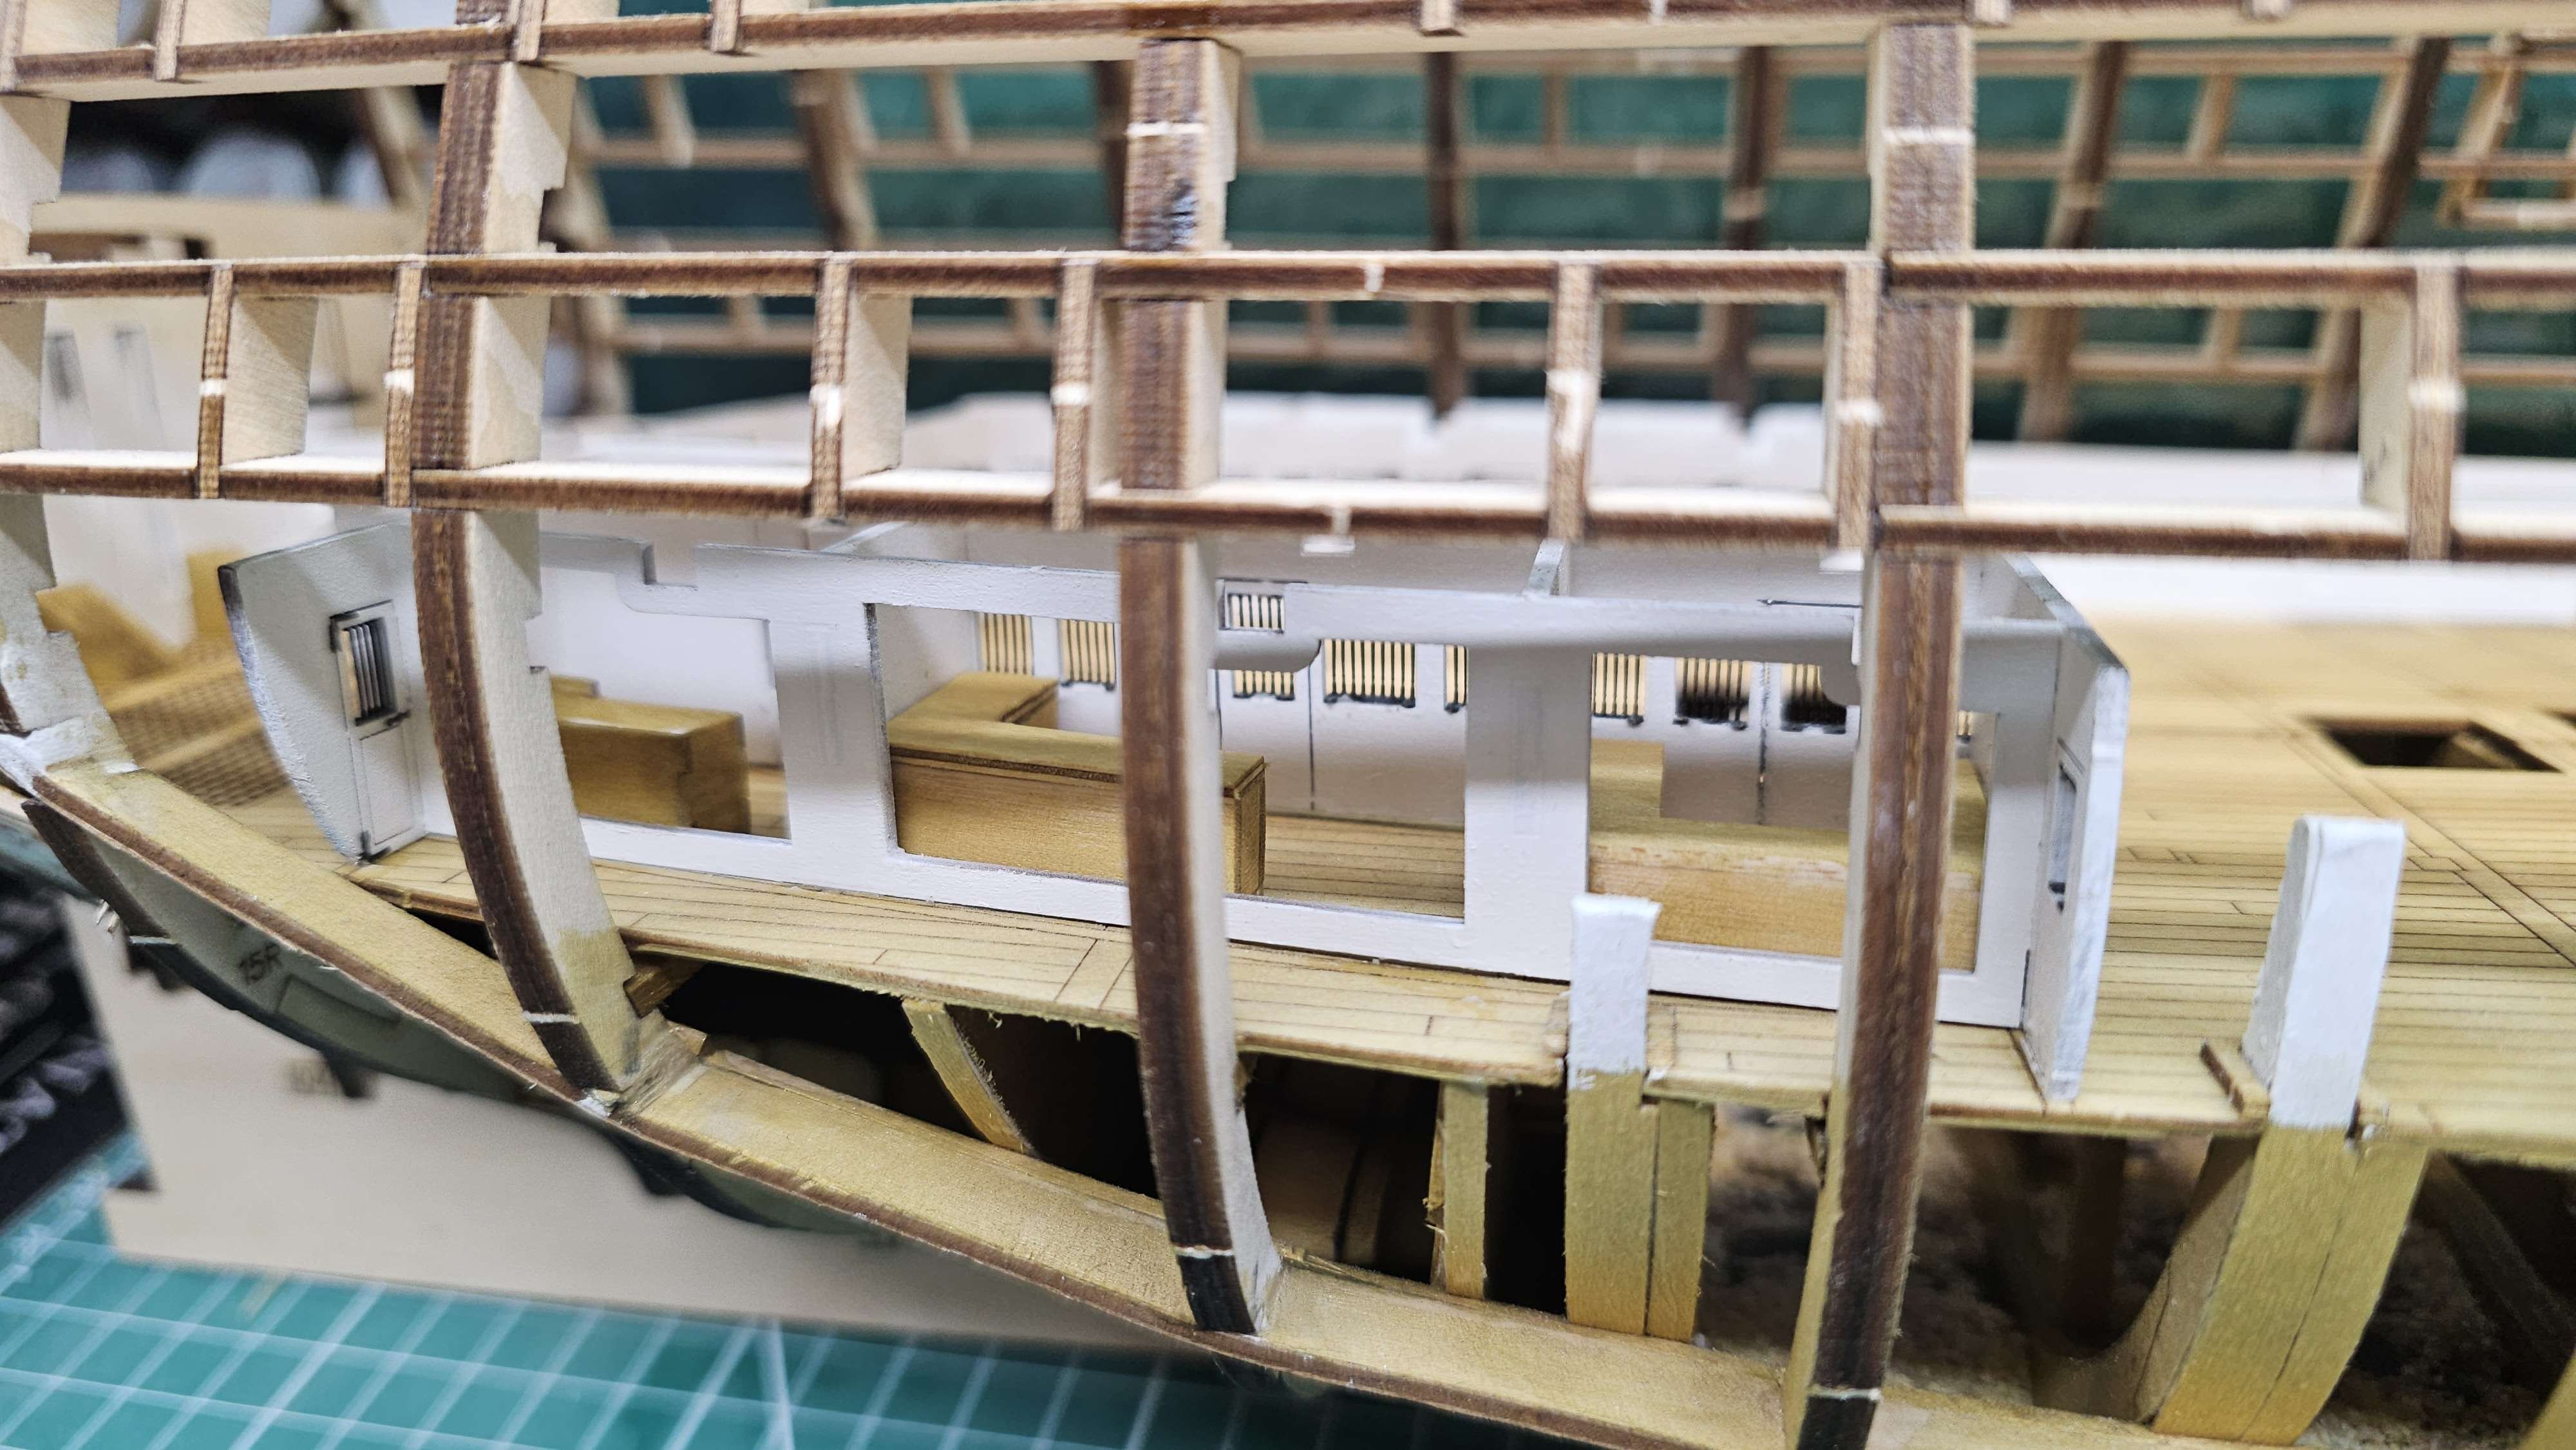
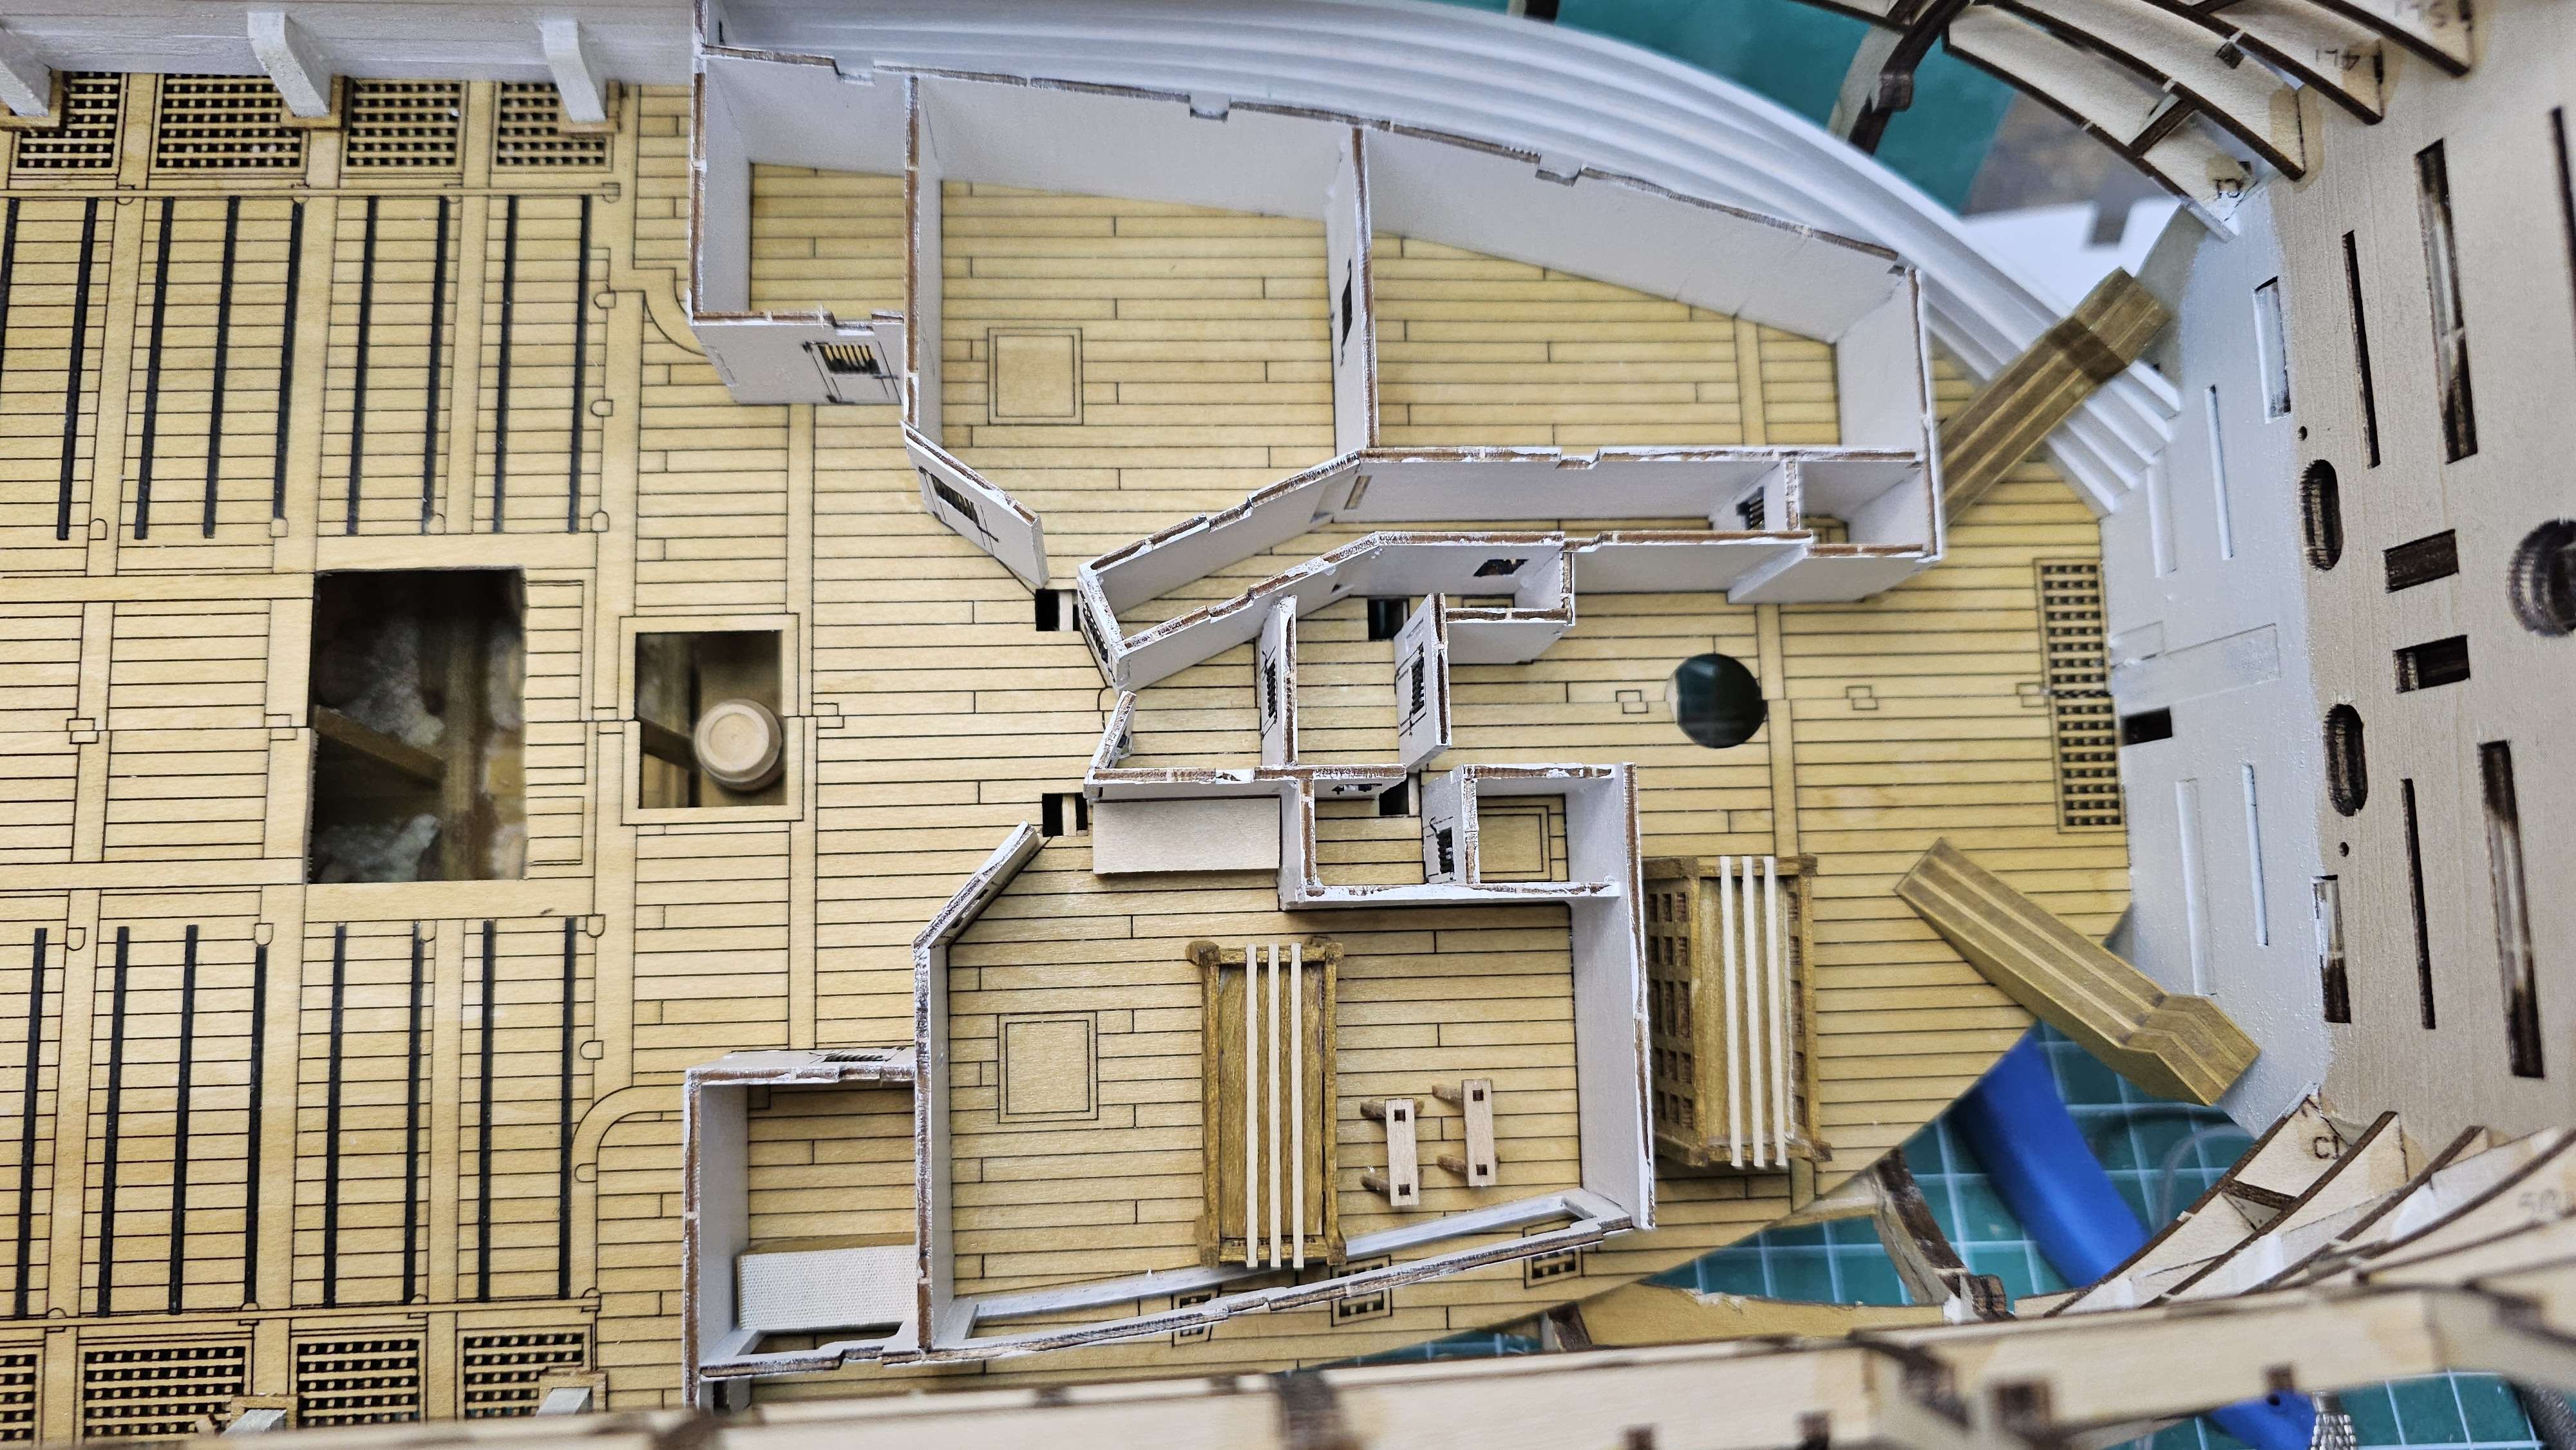
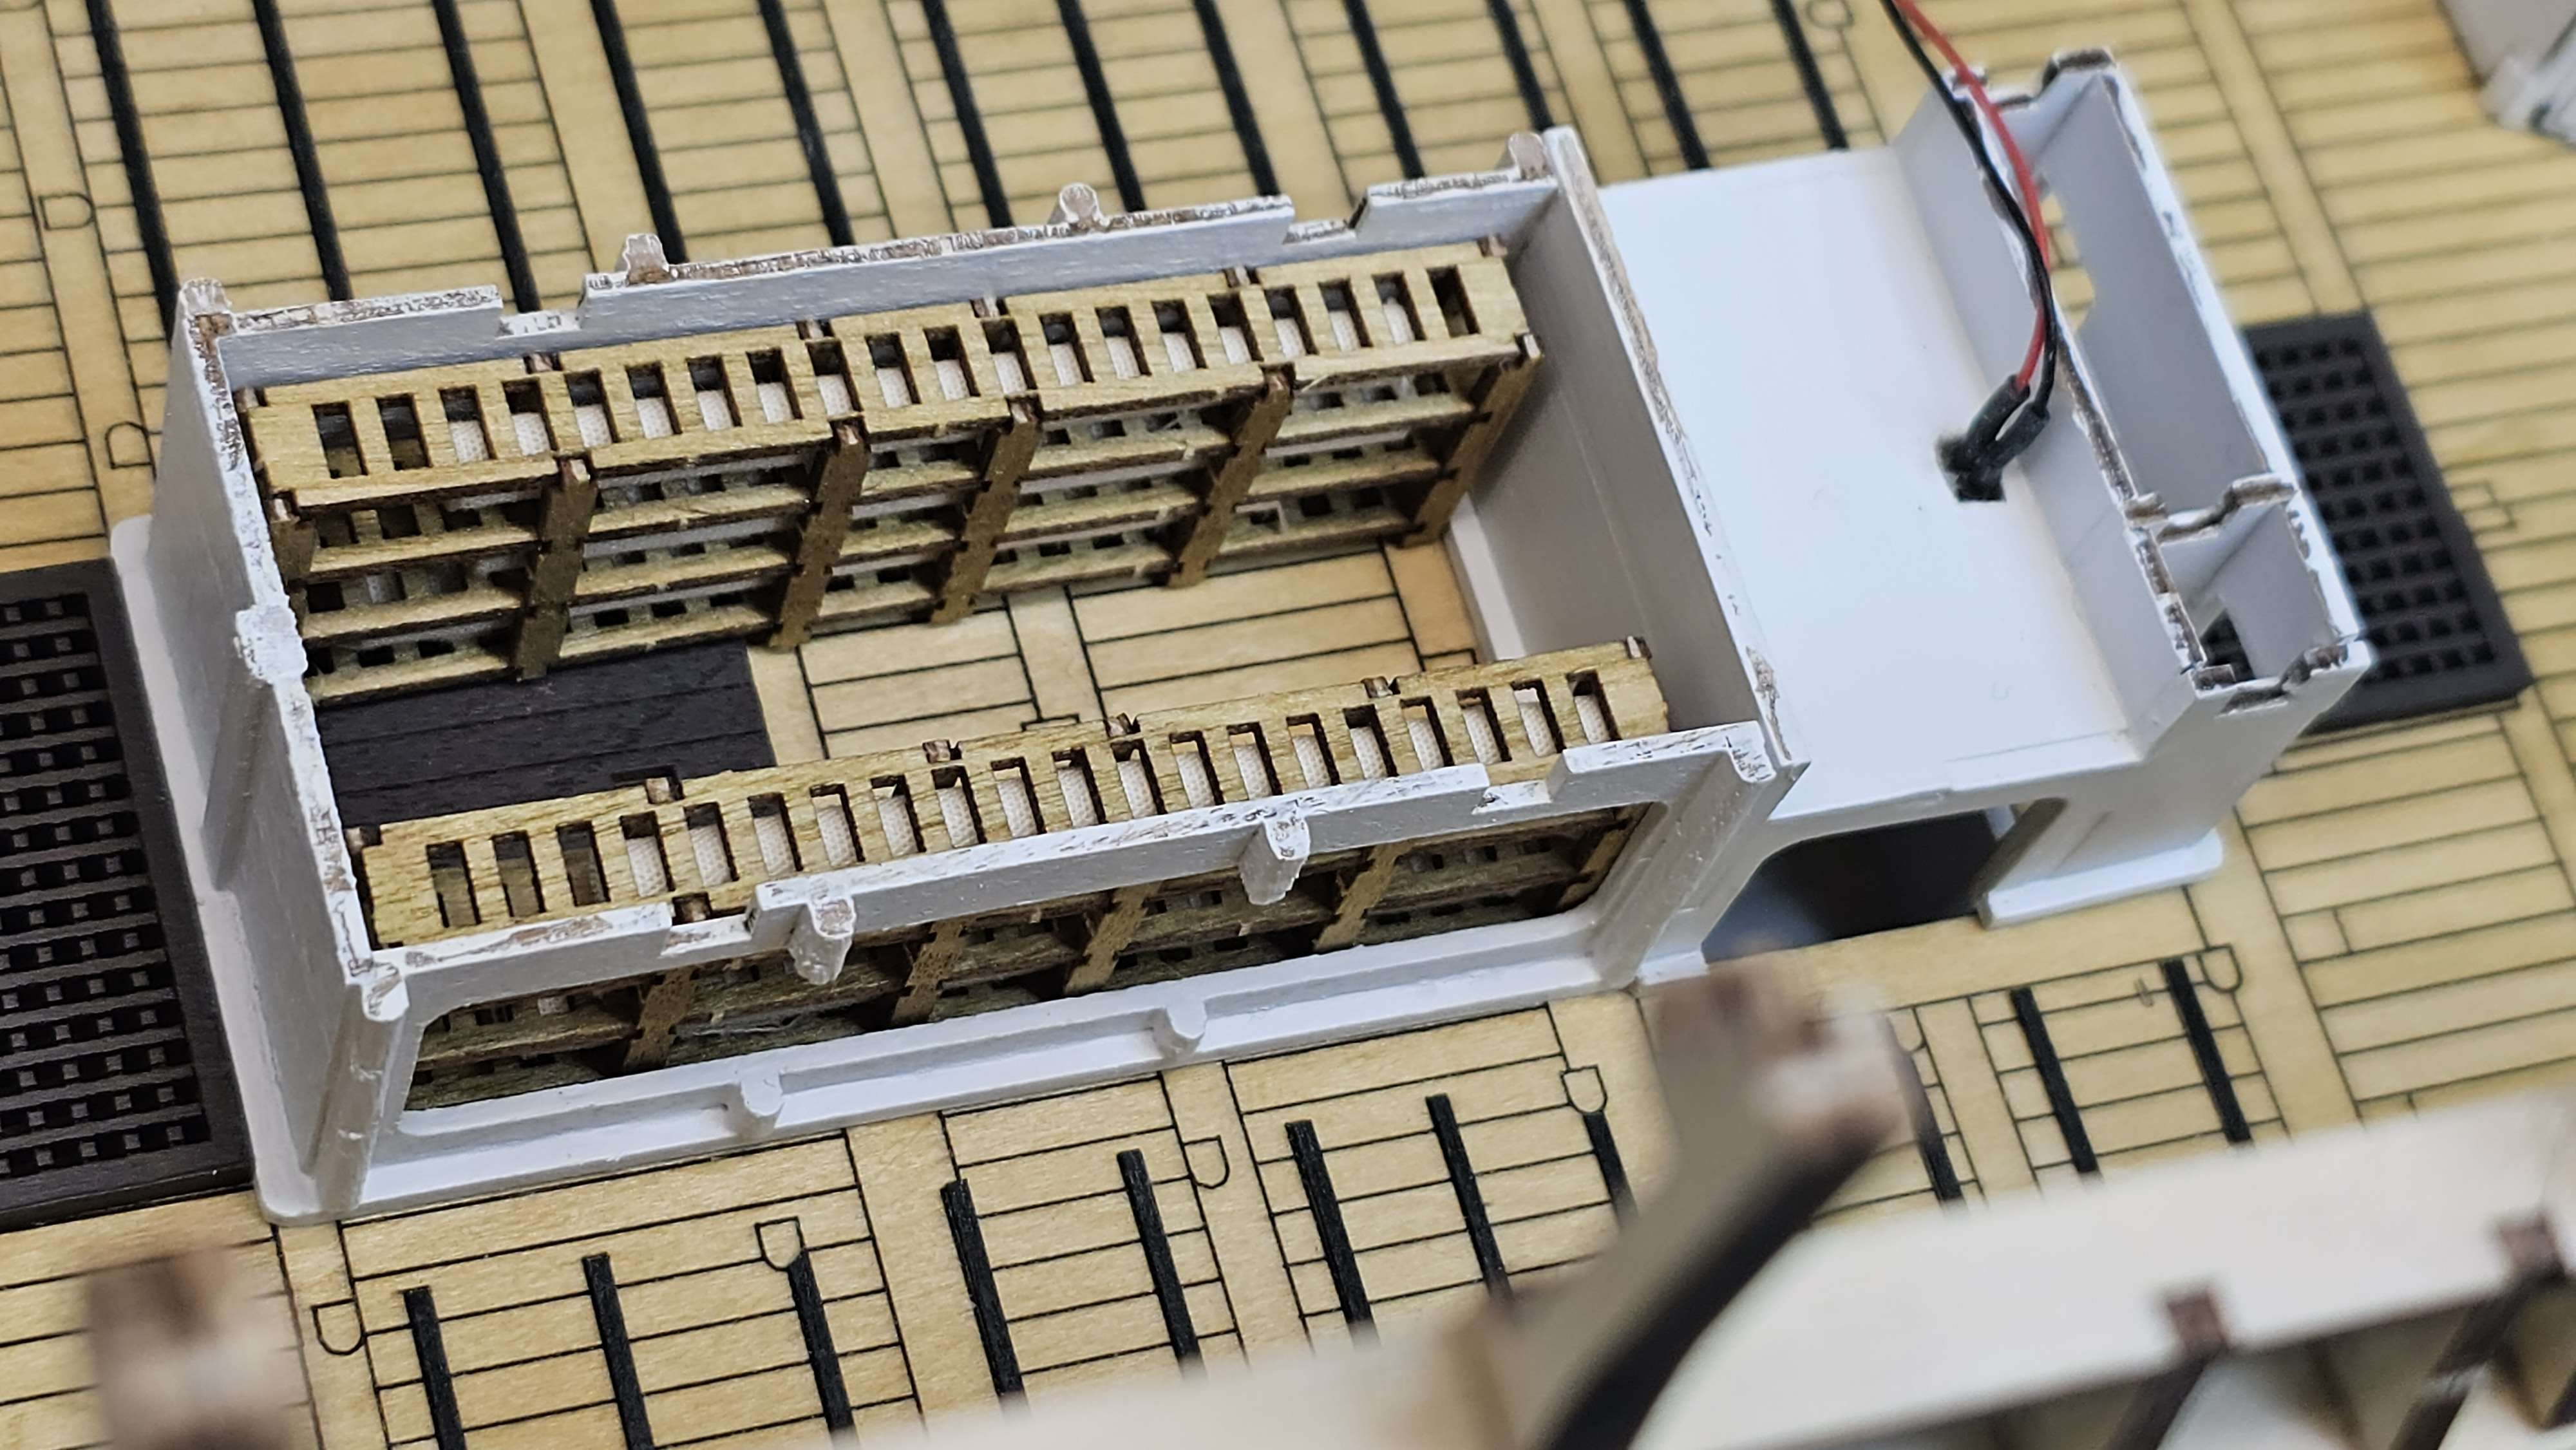
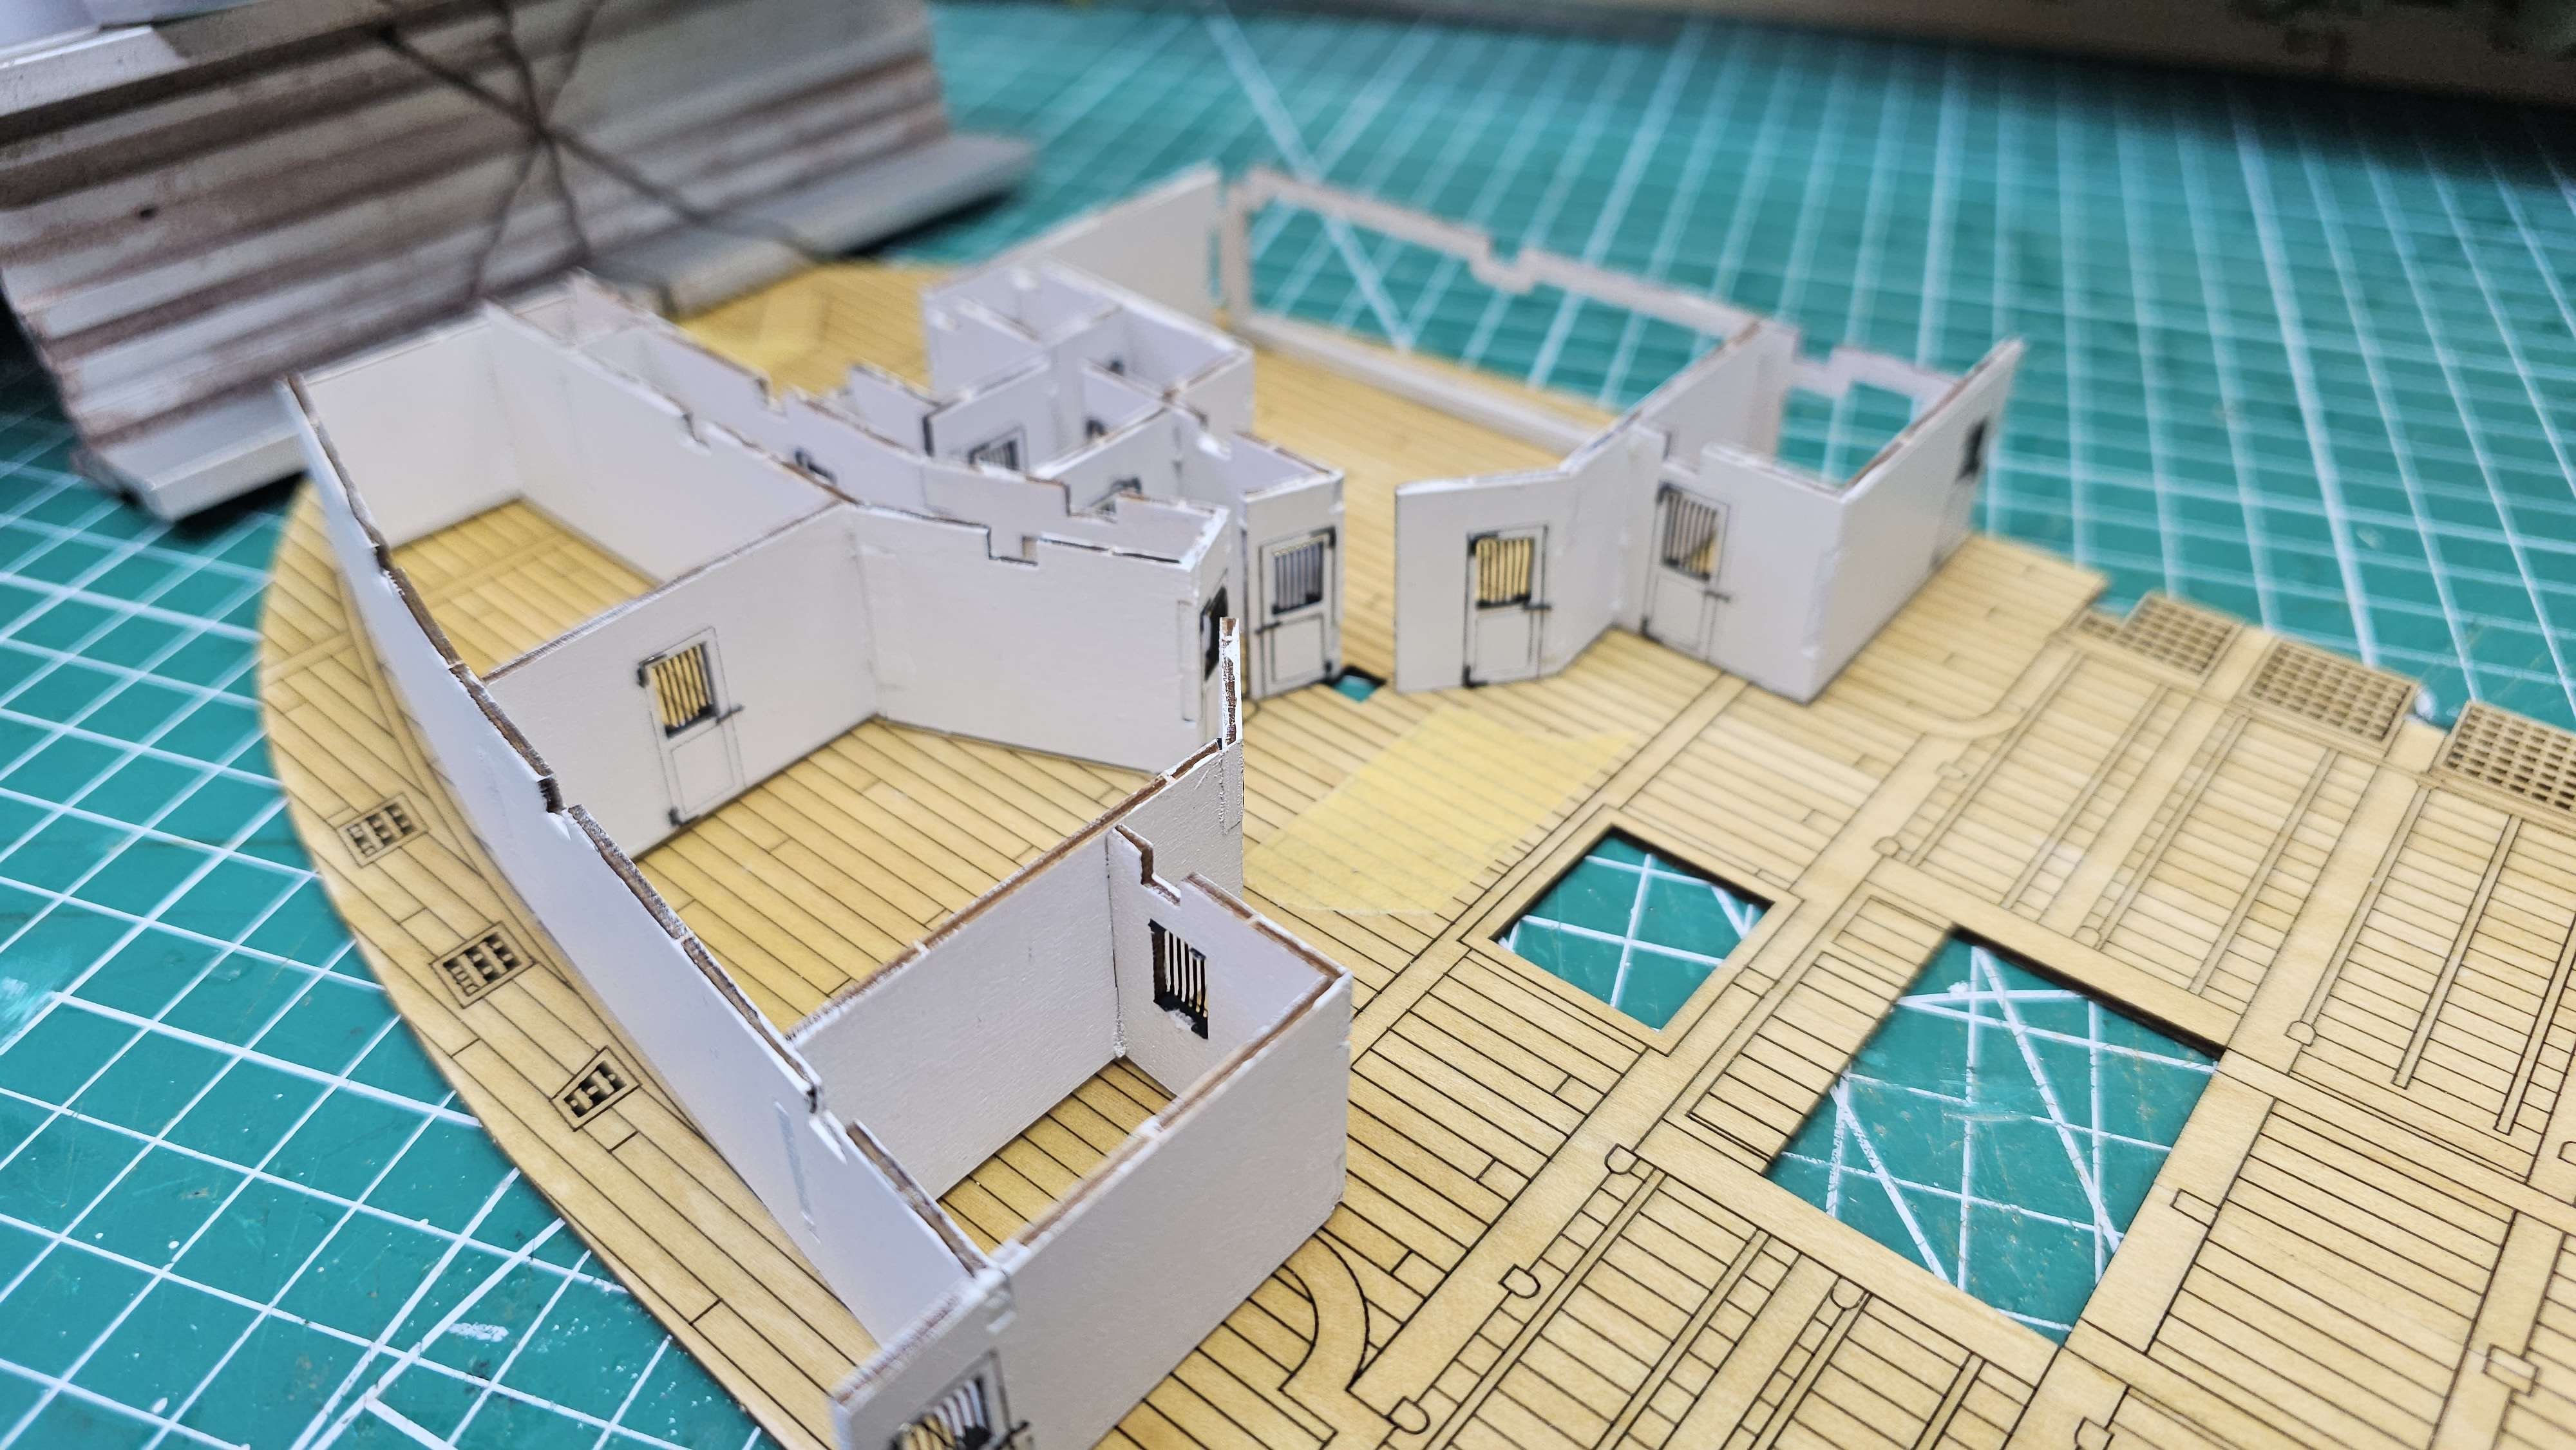
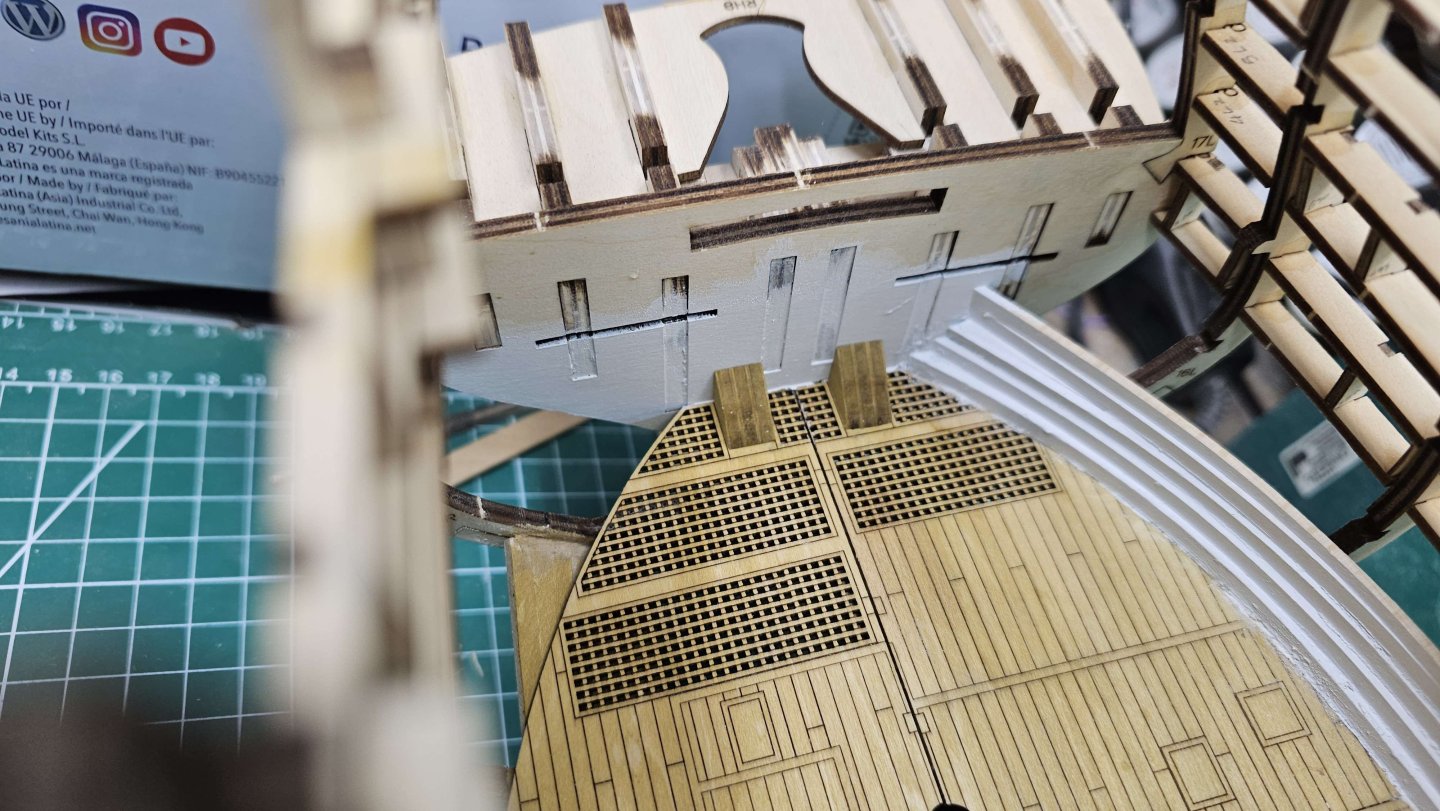
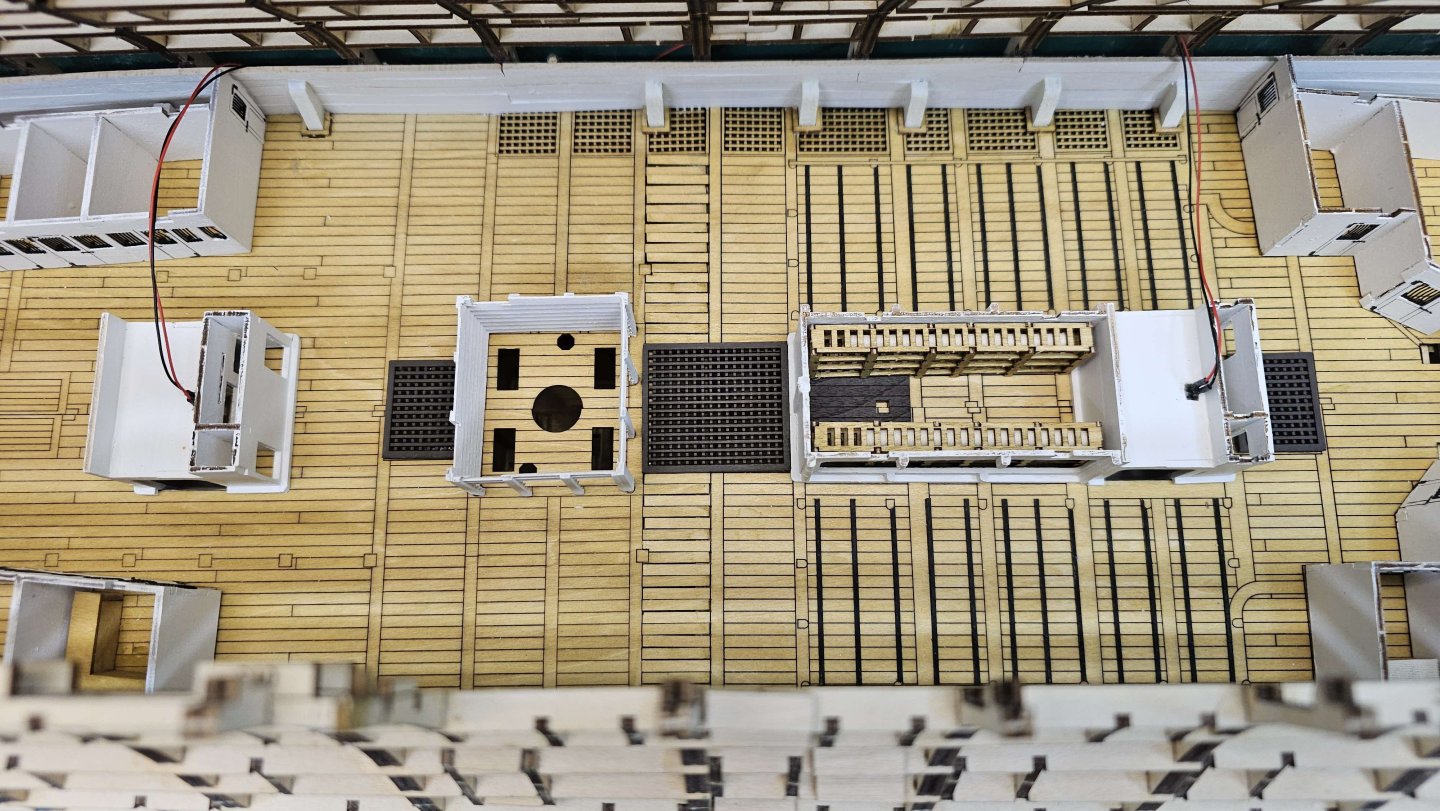
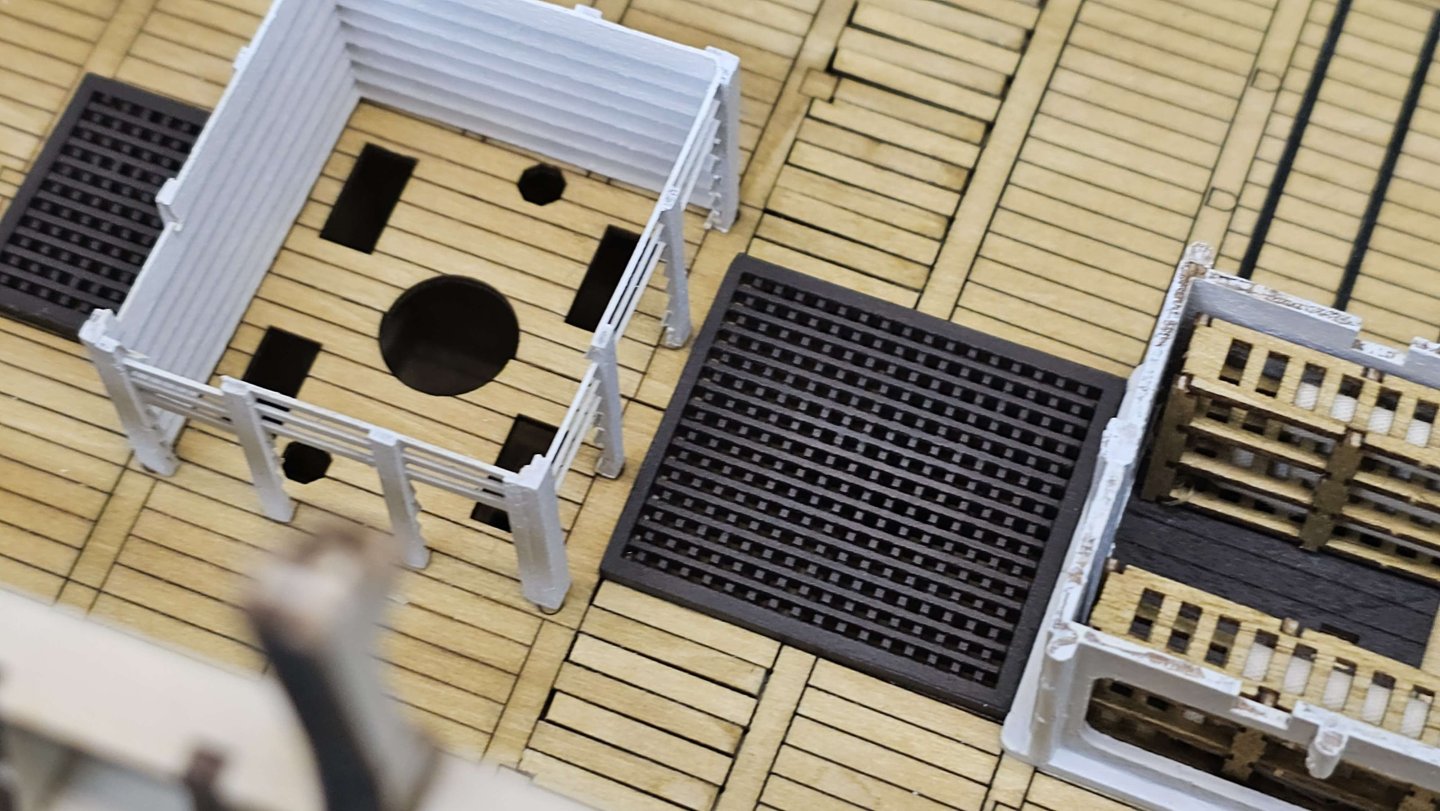
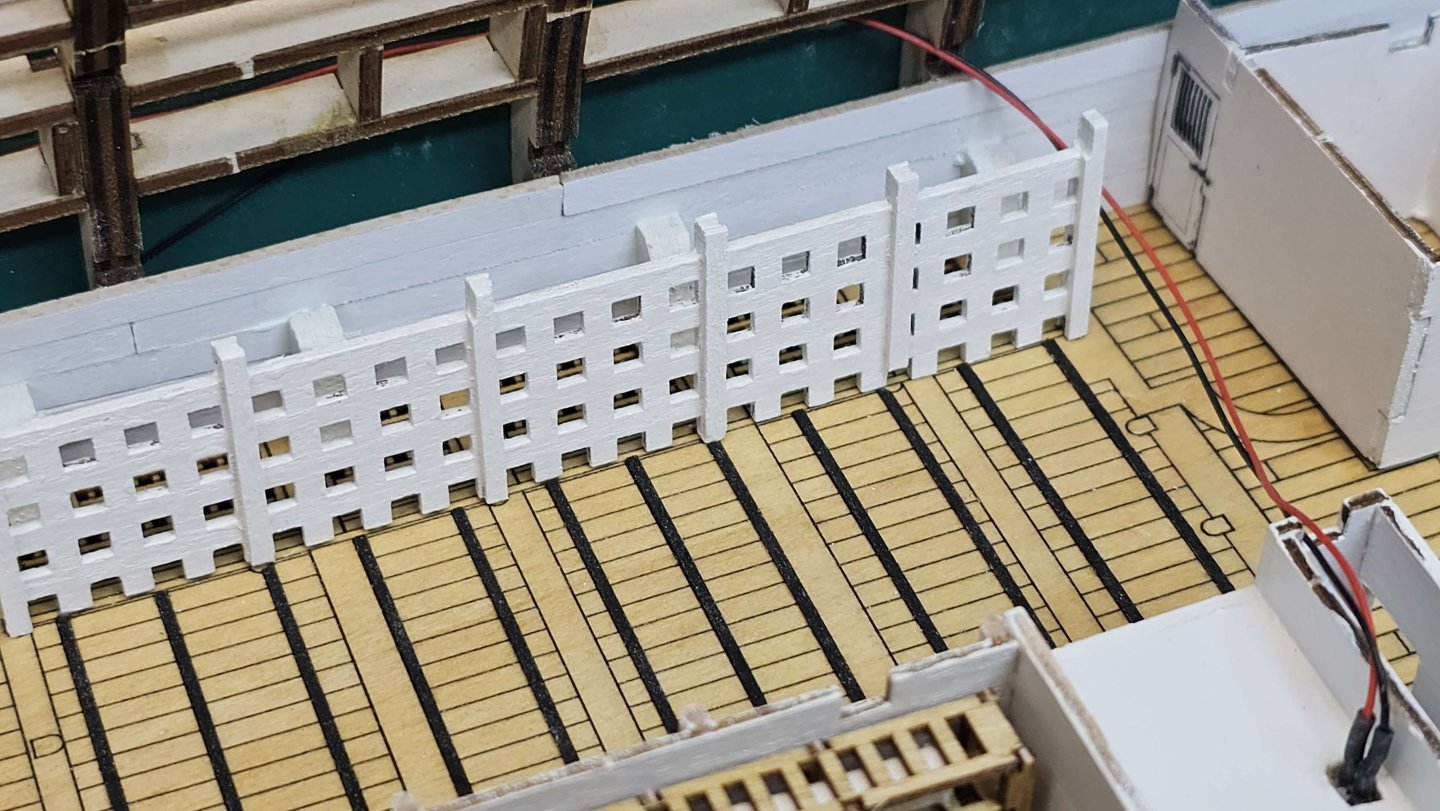
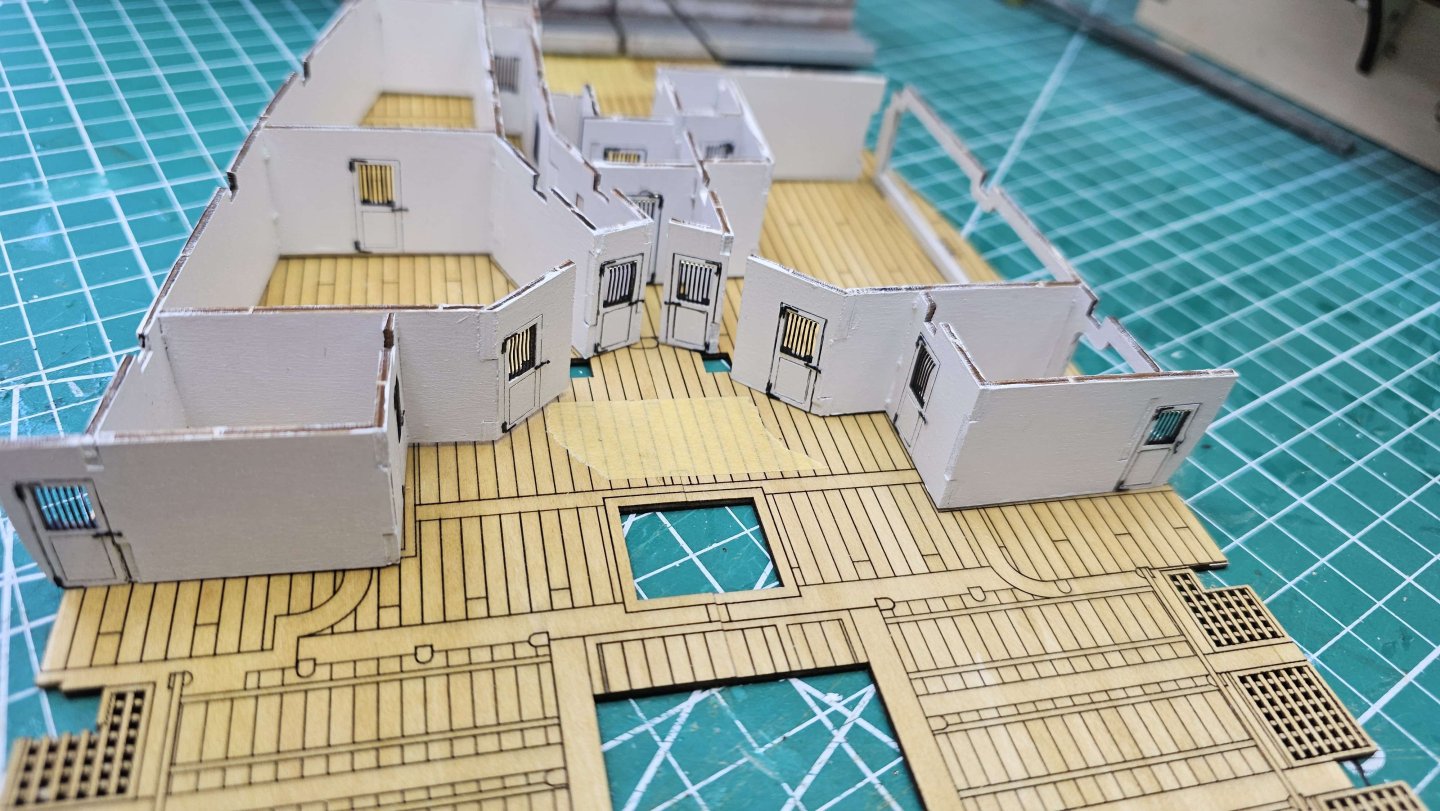
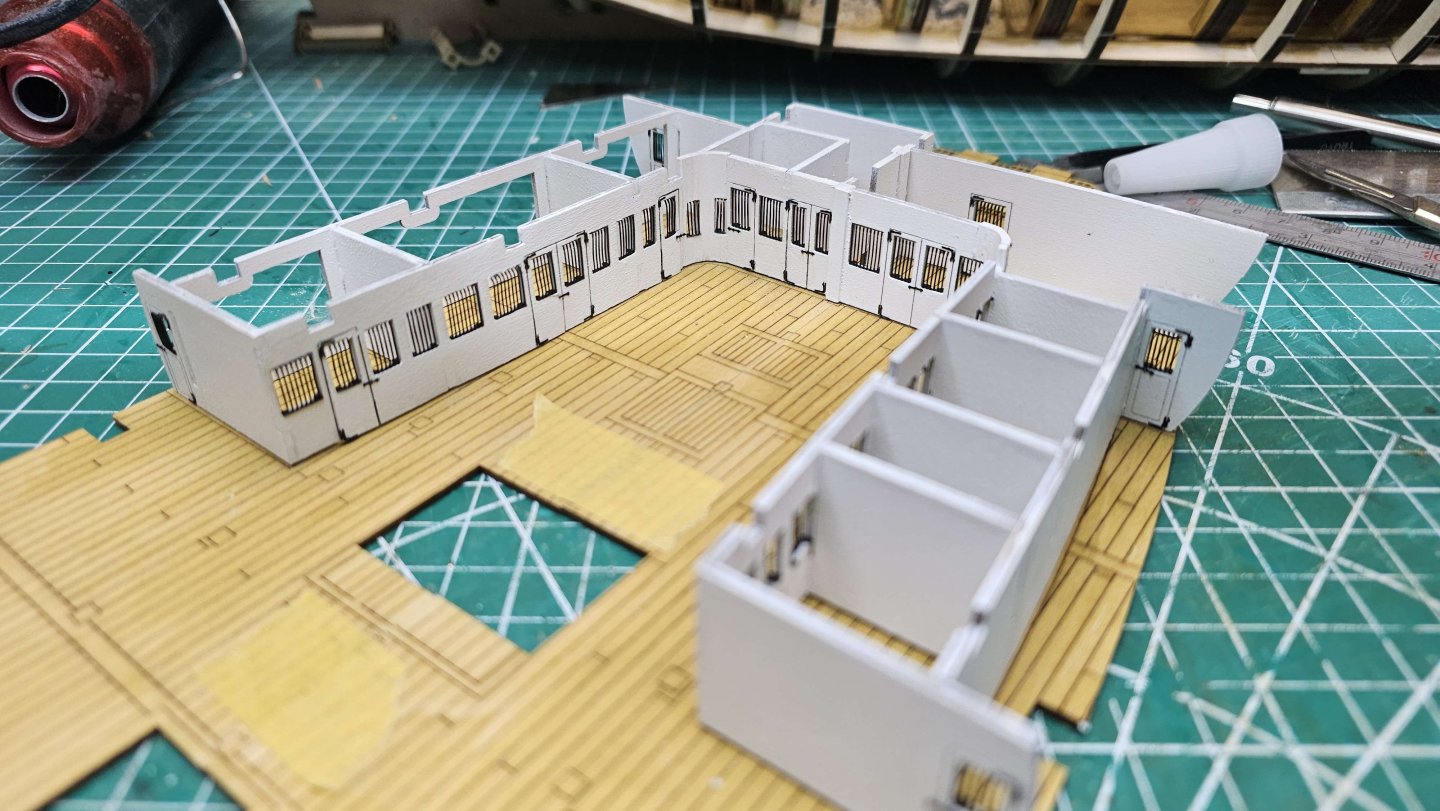
Video #12 Complete Video 12 was fairly straight forward. Mostly just fitting the items built in the previous video. Fitting the compartments was much easier than I thought it would be. I did have to adjust the stern wall to fit as I clearly didn't get the wall in the correct position, and the same with the beam at the bow.


-
Nor me. No idea where I am going to put this when it's finished haha Thanks
-
Video #11 Complete Video 11 was mostly just building some of the internals. I will have a problem with the 4 vertical beams at the bow, as the lower compartment wasn't in the right position, but I will address that as and when.


-
Video #10 Complete Video 10 is done. Stern section didn't come out as well as I'd hoped as it was quite tricky to get the slope correct. I had to use some creative licence in the end.
-
 FifeModels reacted to a post in a topic:
HMS Victory by FifeModels - Artesania Latina - Scale 1/84 - Anatomy Version
FifeModels reacted to a post in a topic:
HMS Victory by FifeModels - Artesania Latina - Scale 1/84 - Anatomy Version
-
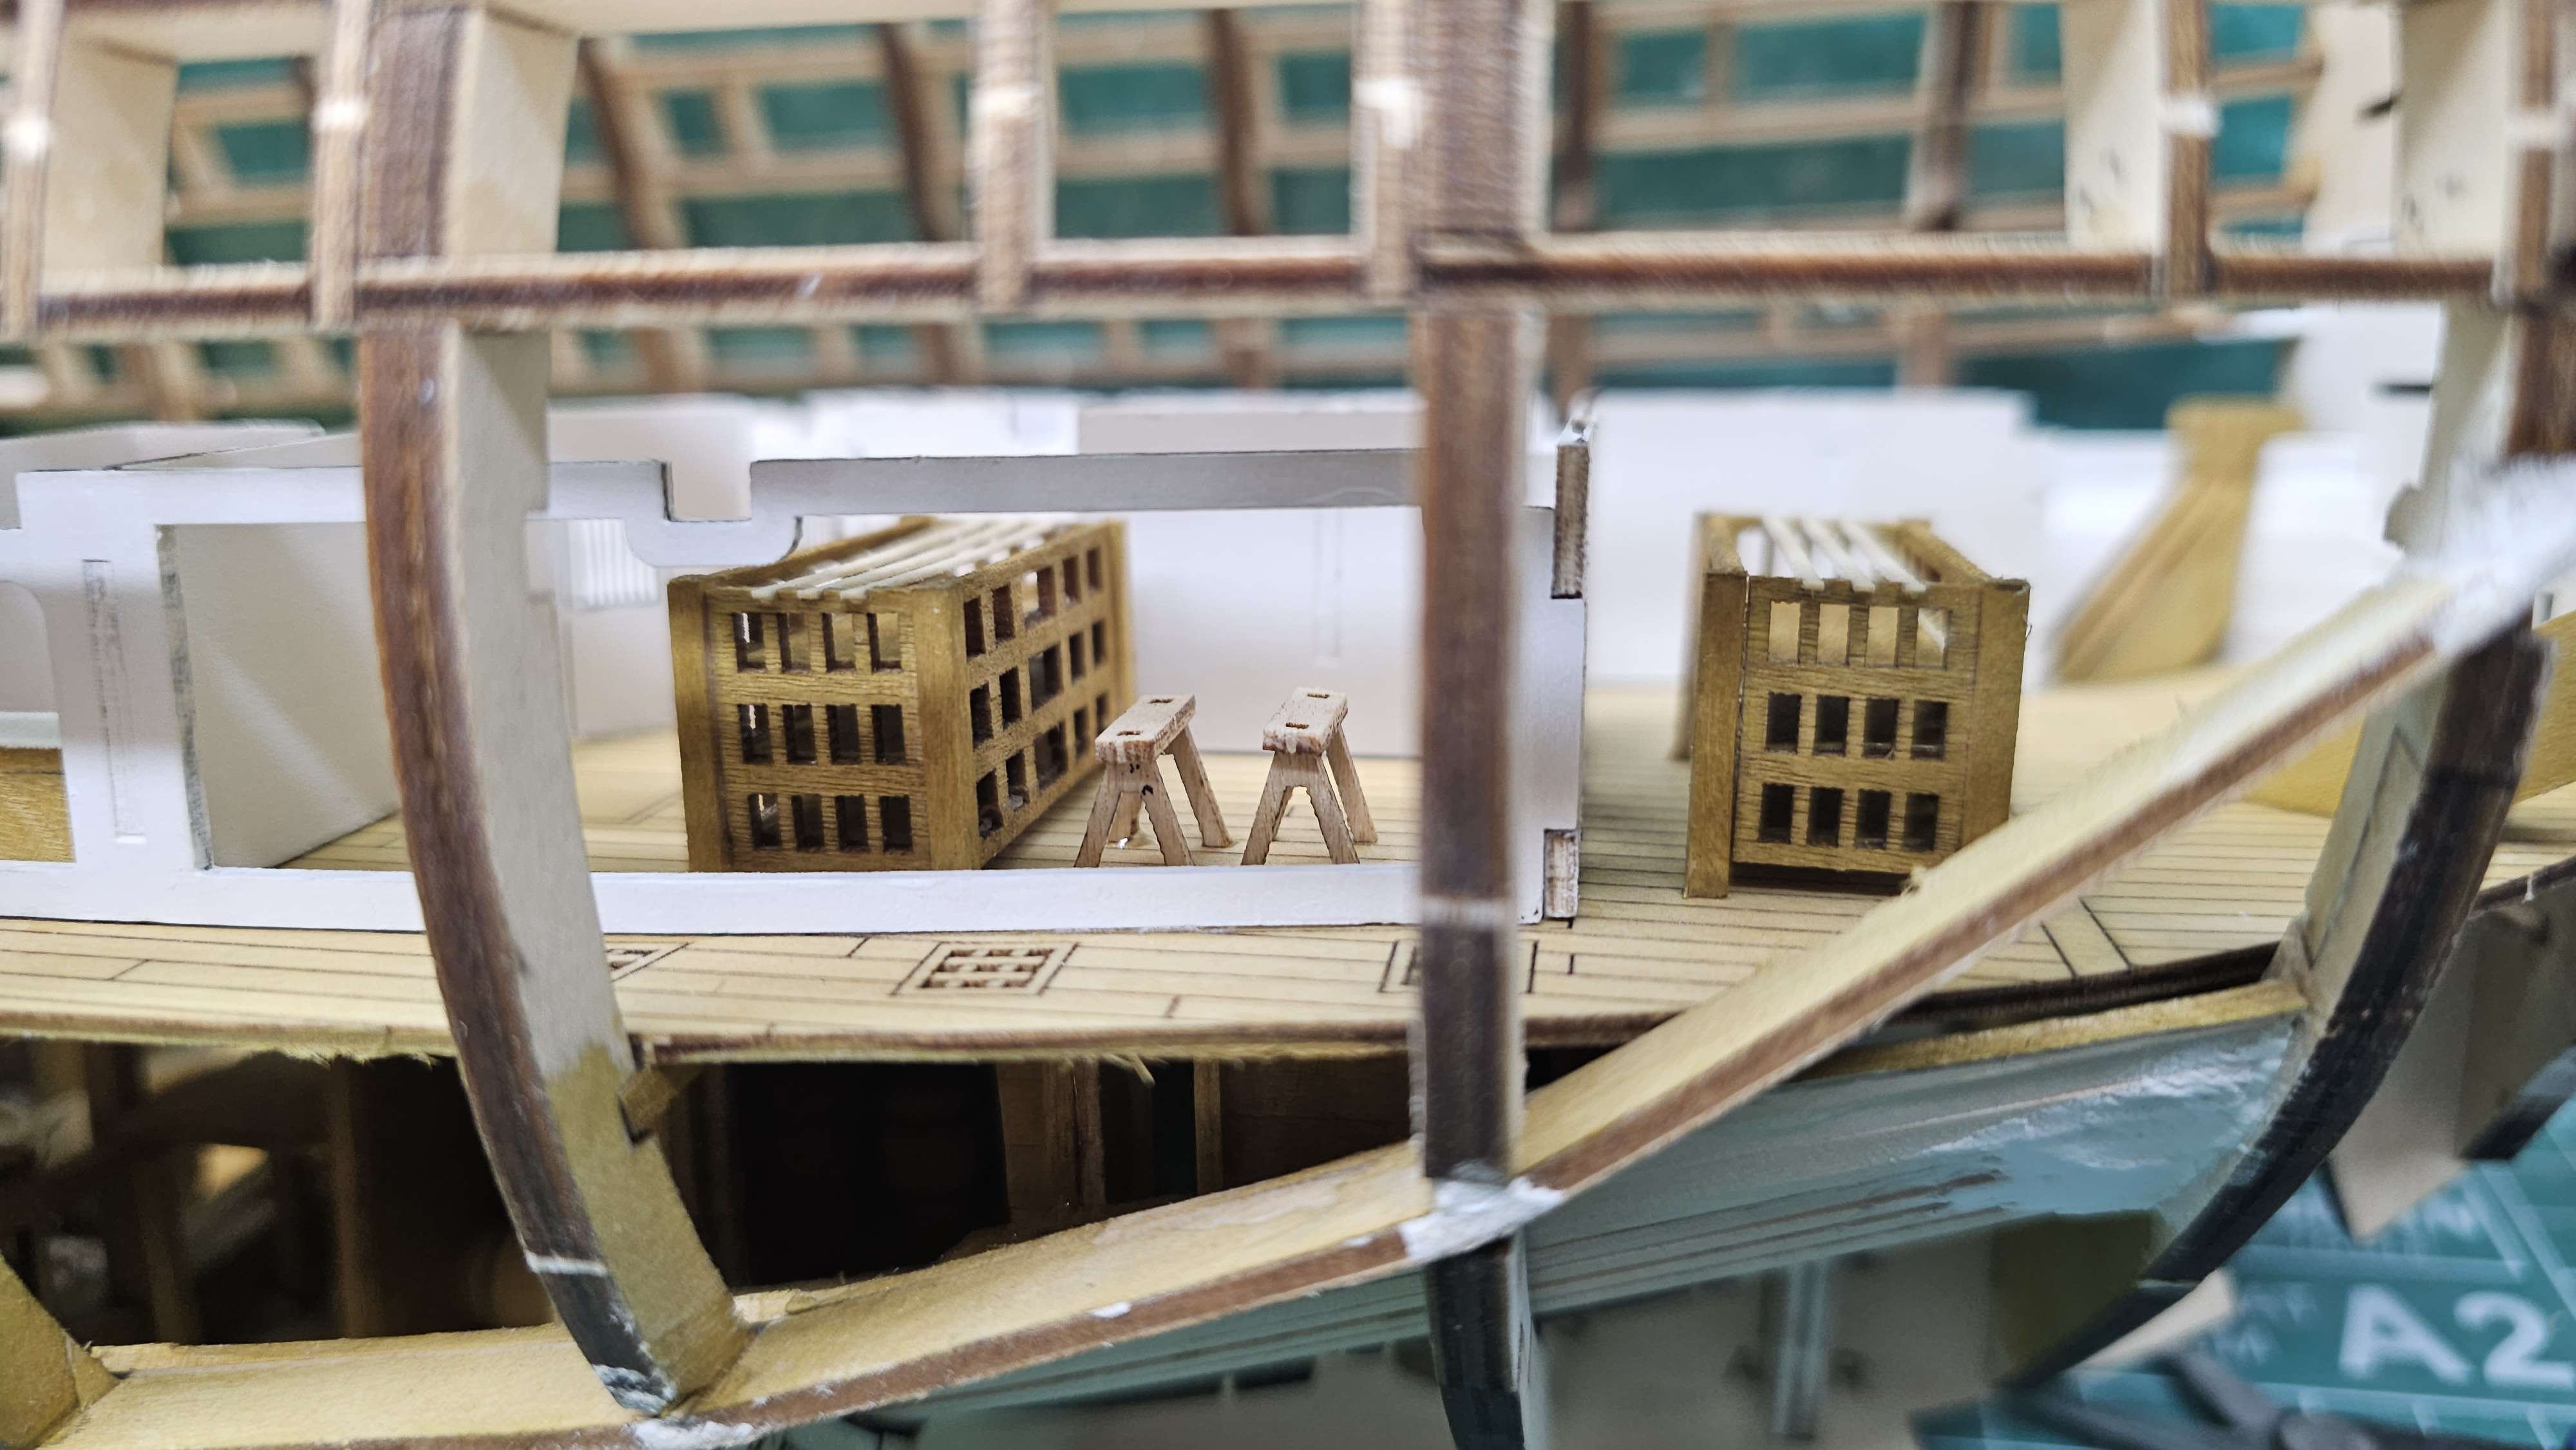
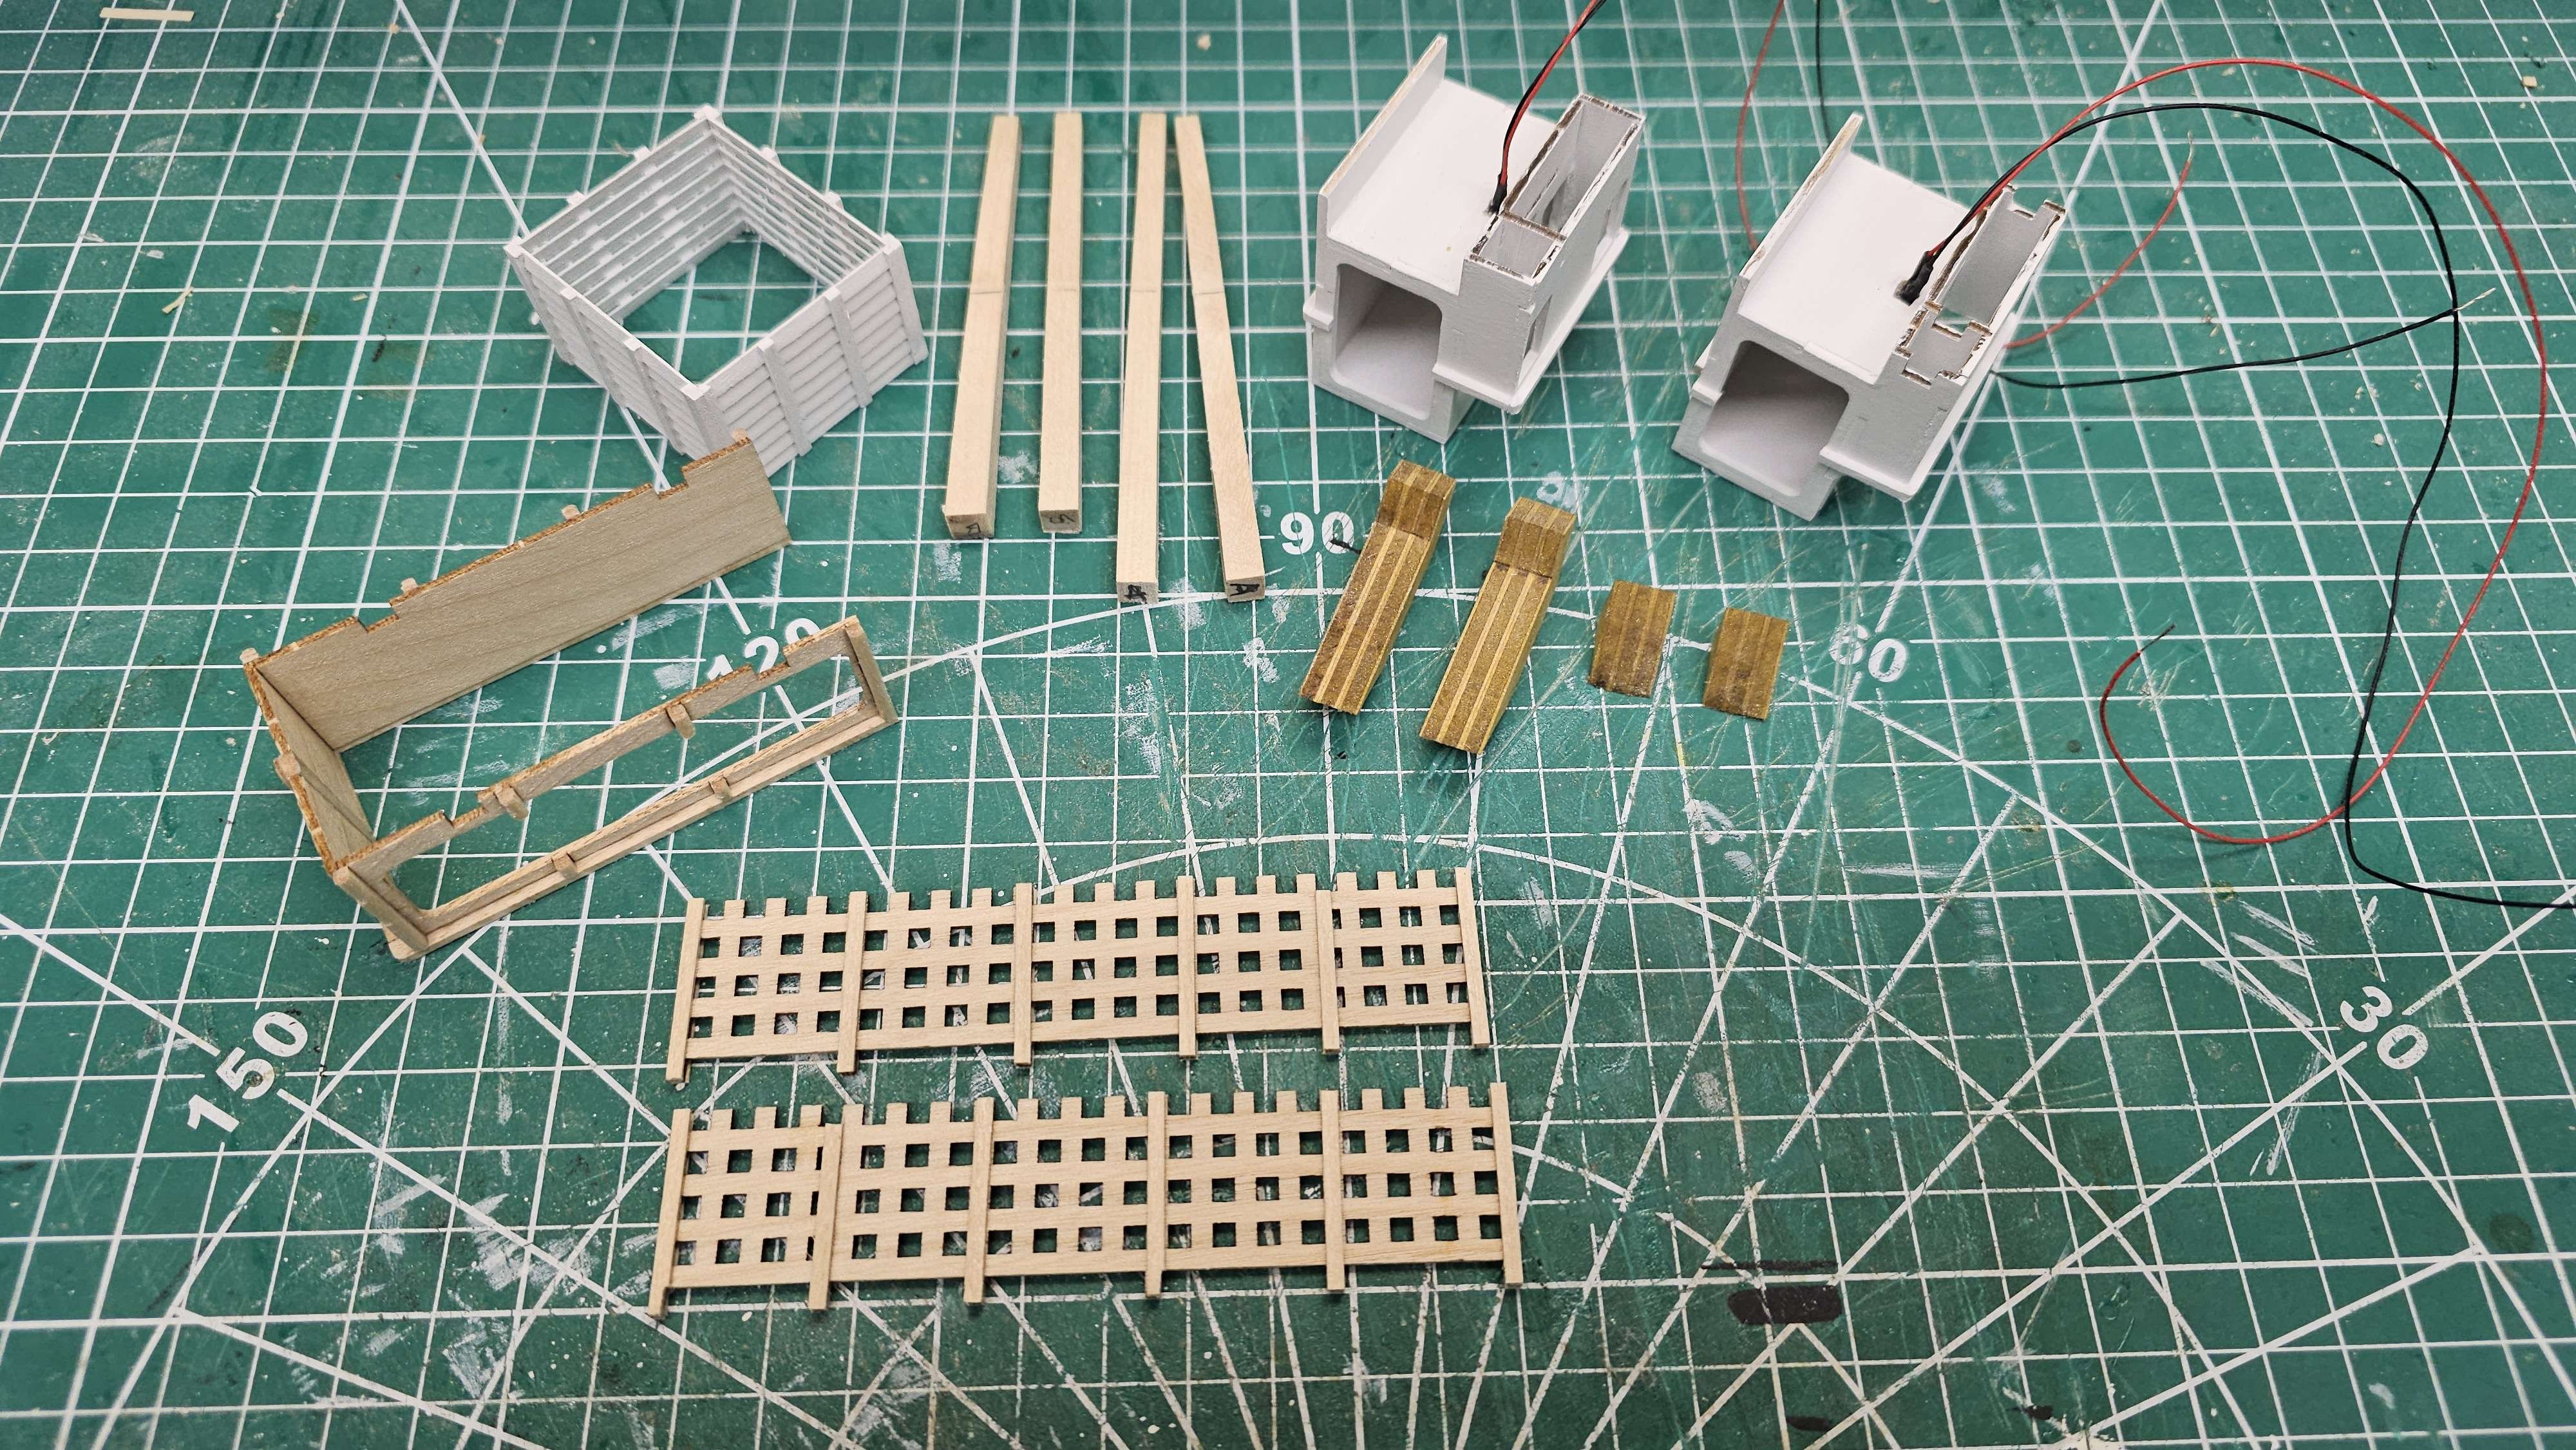
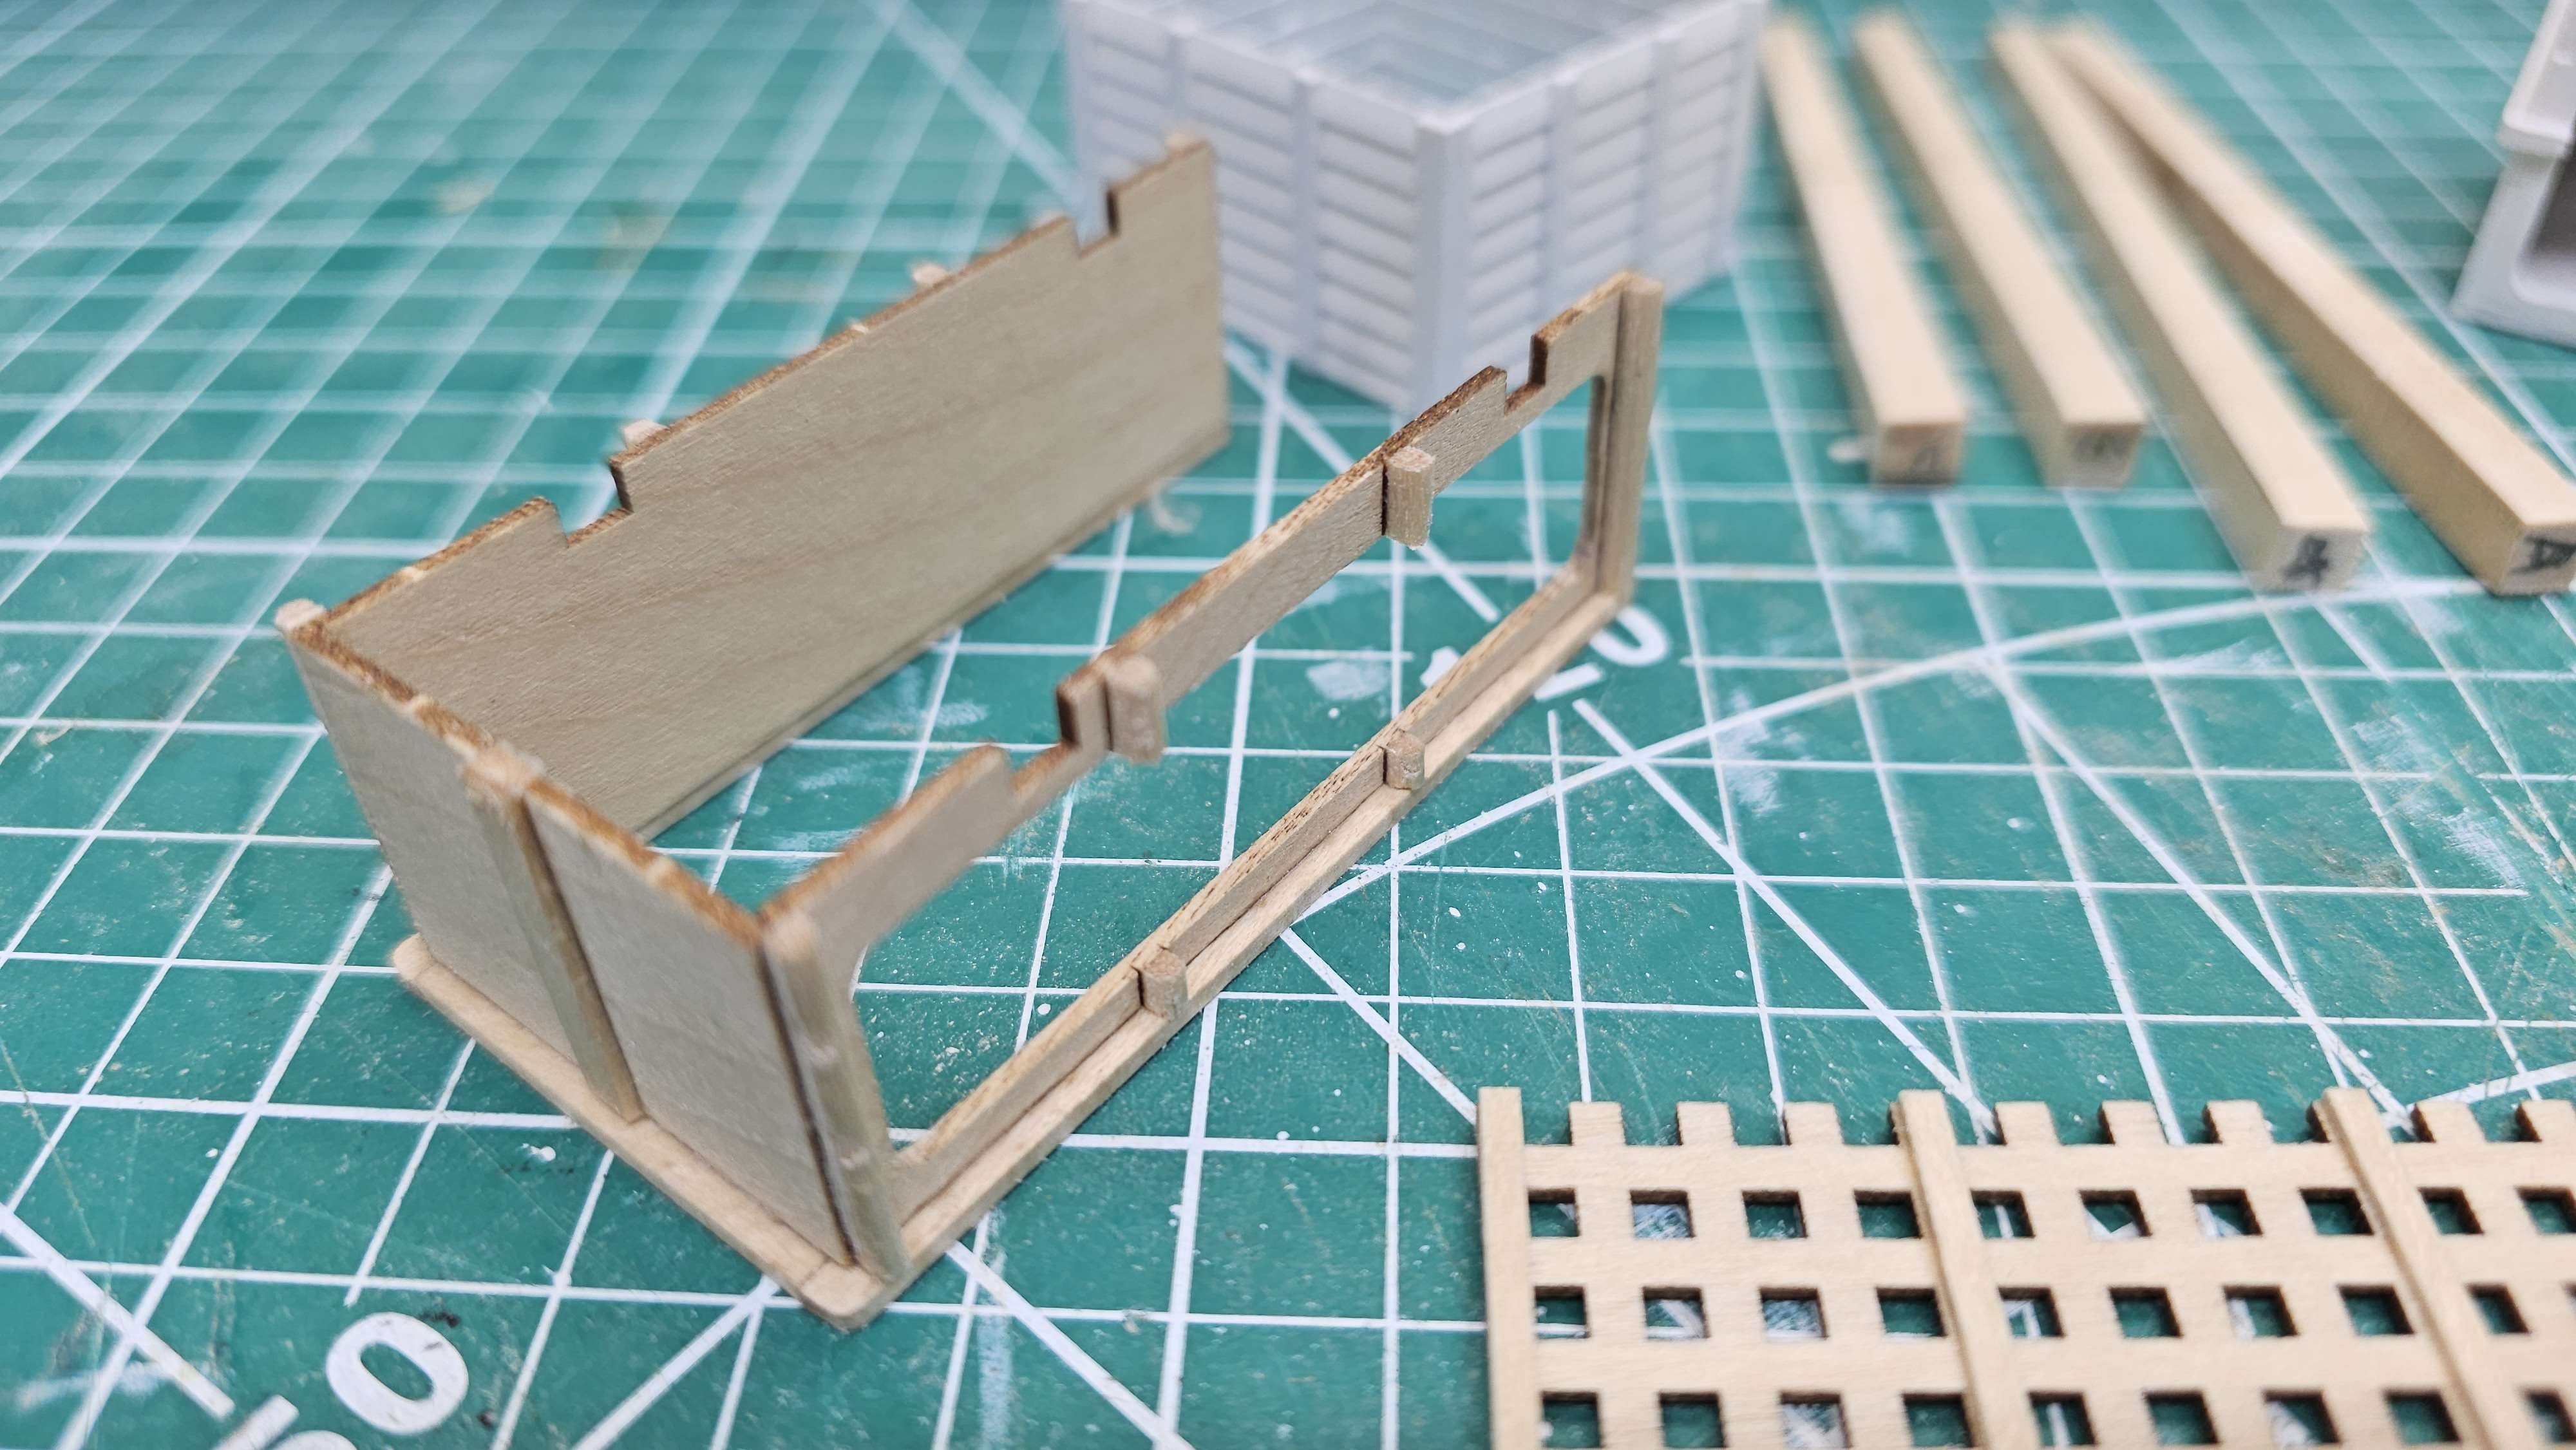
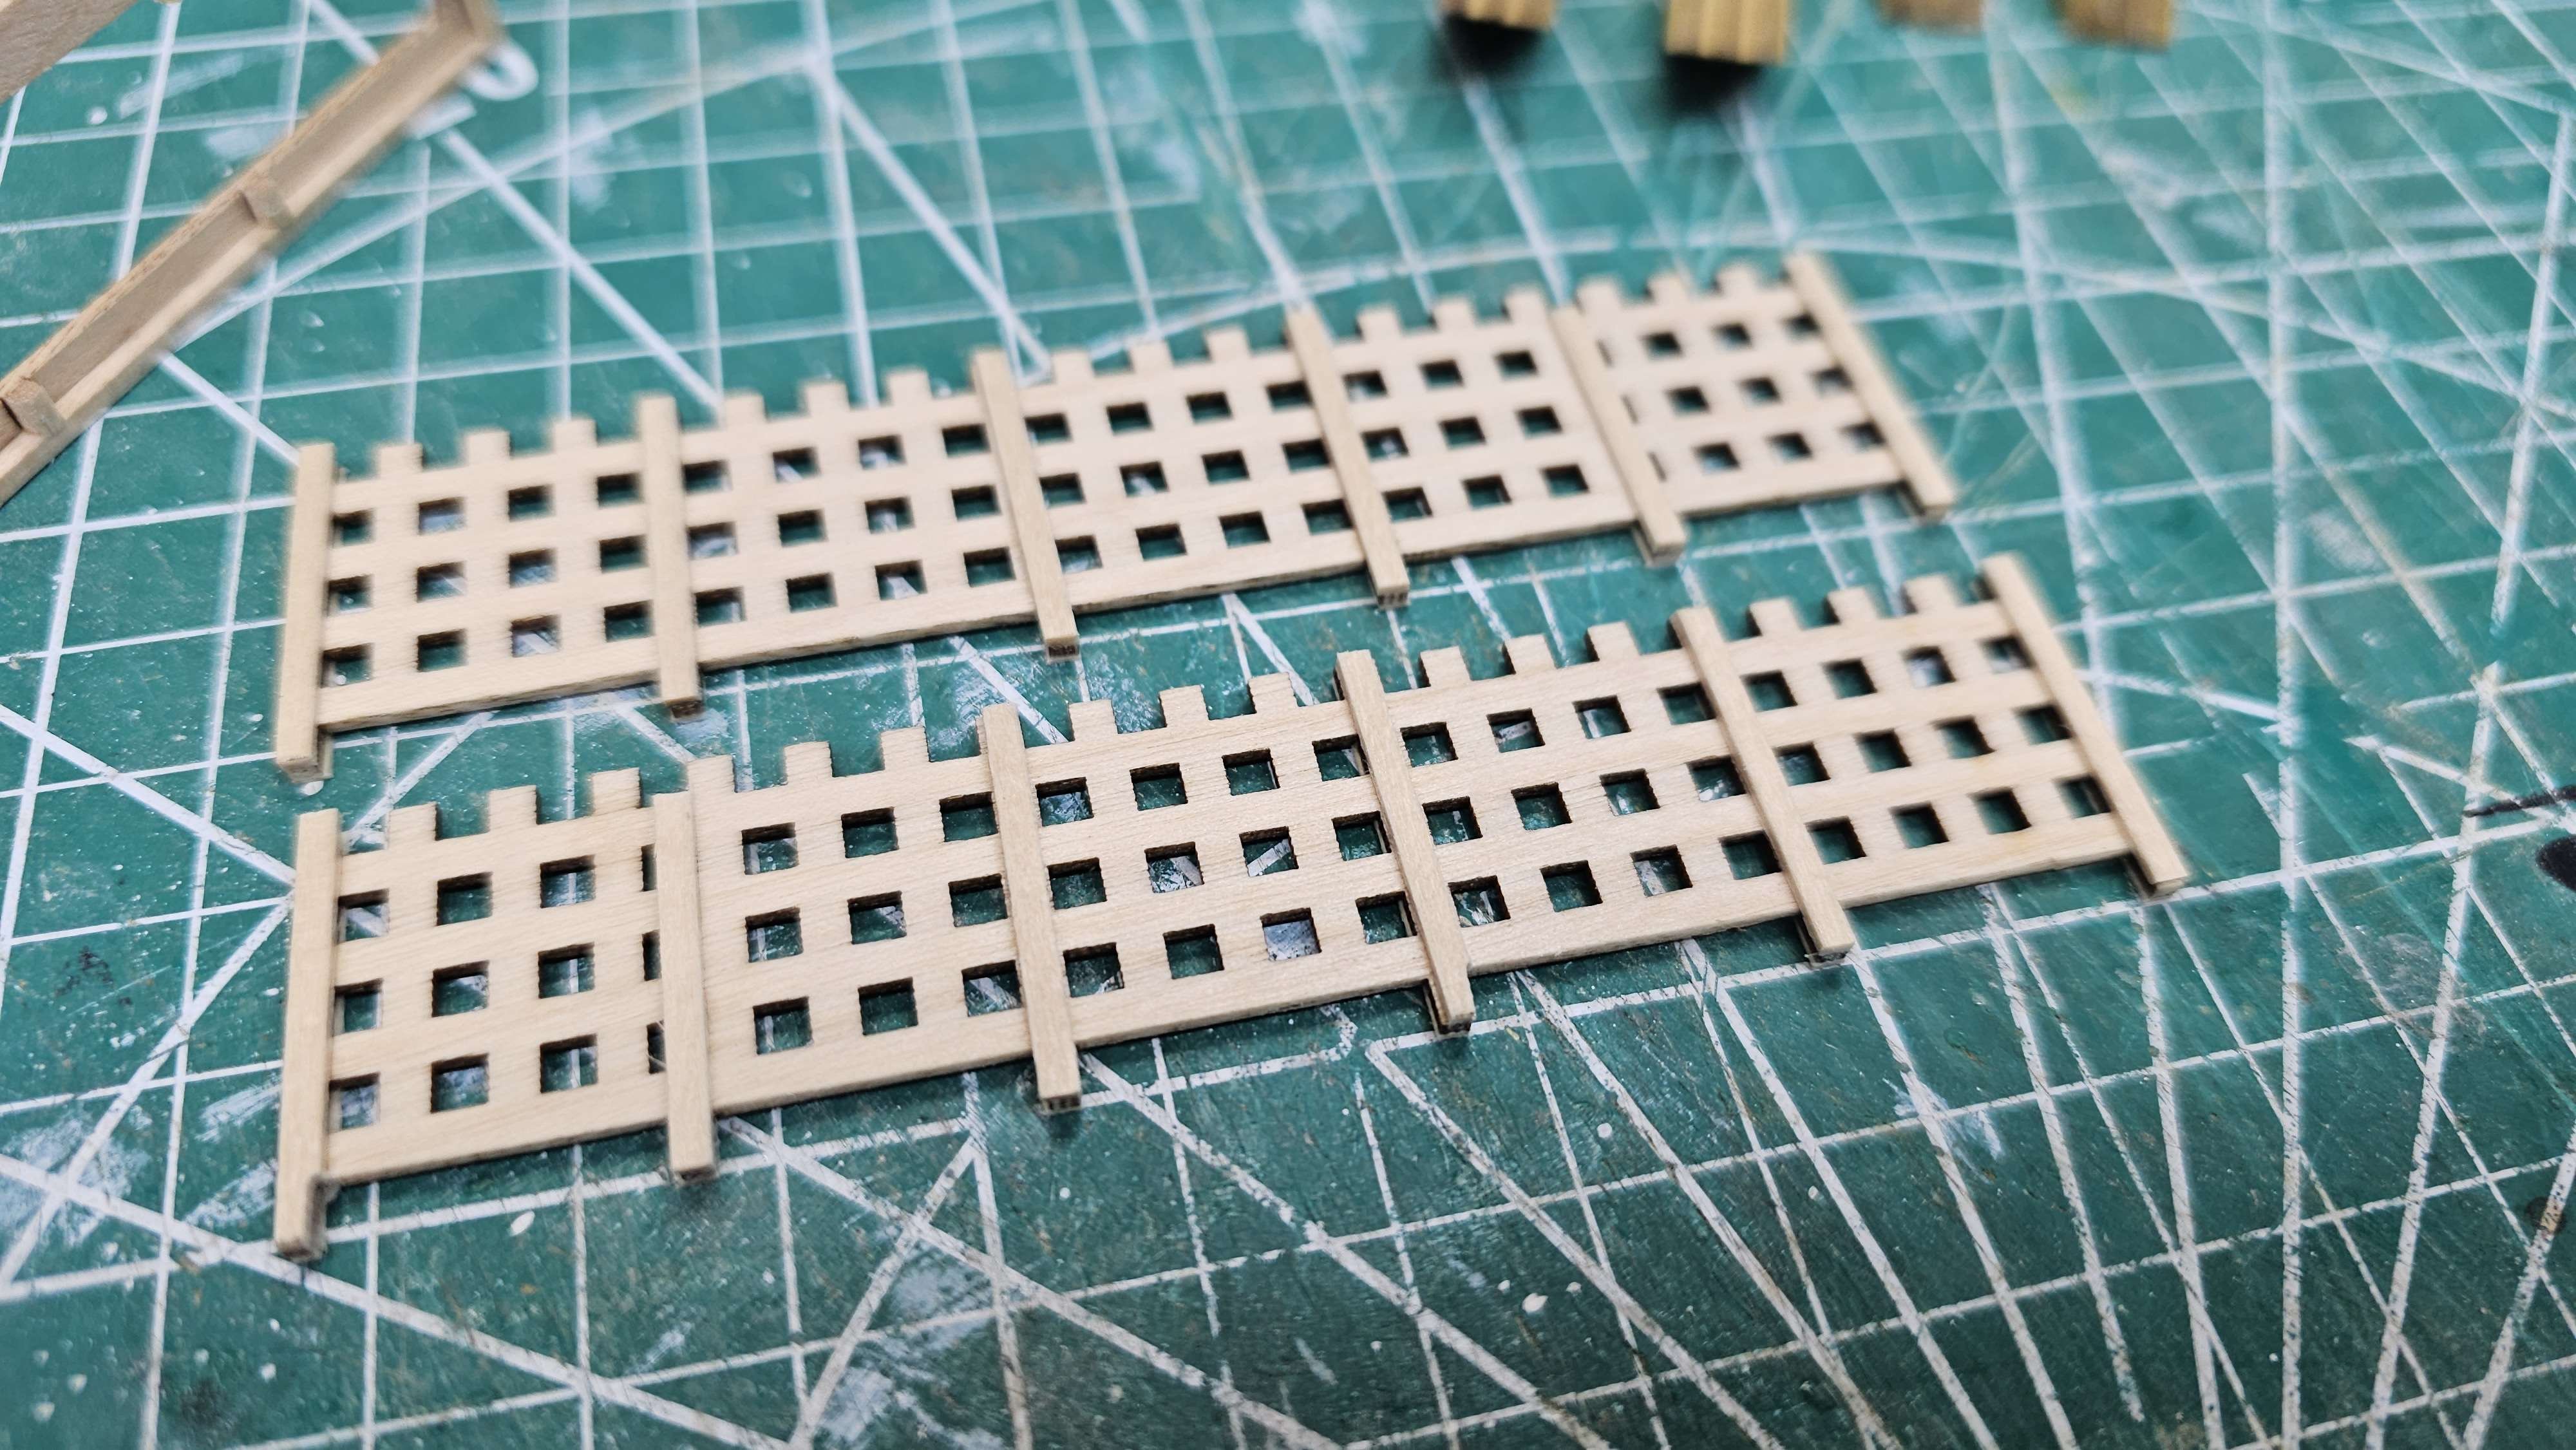
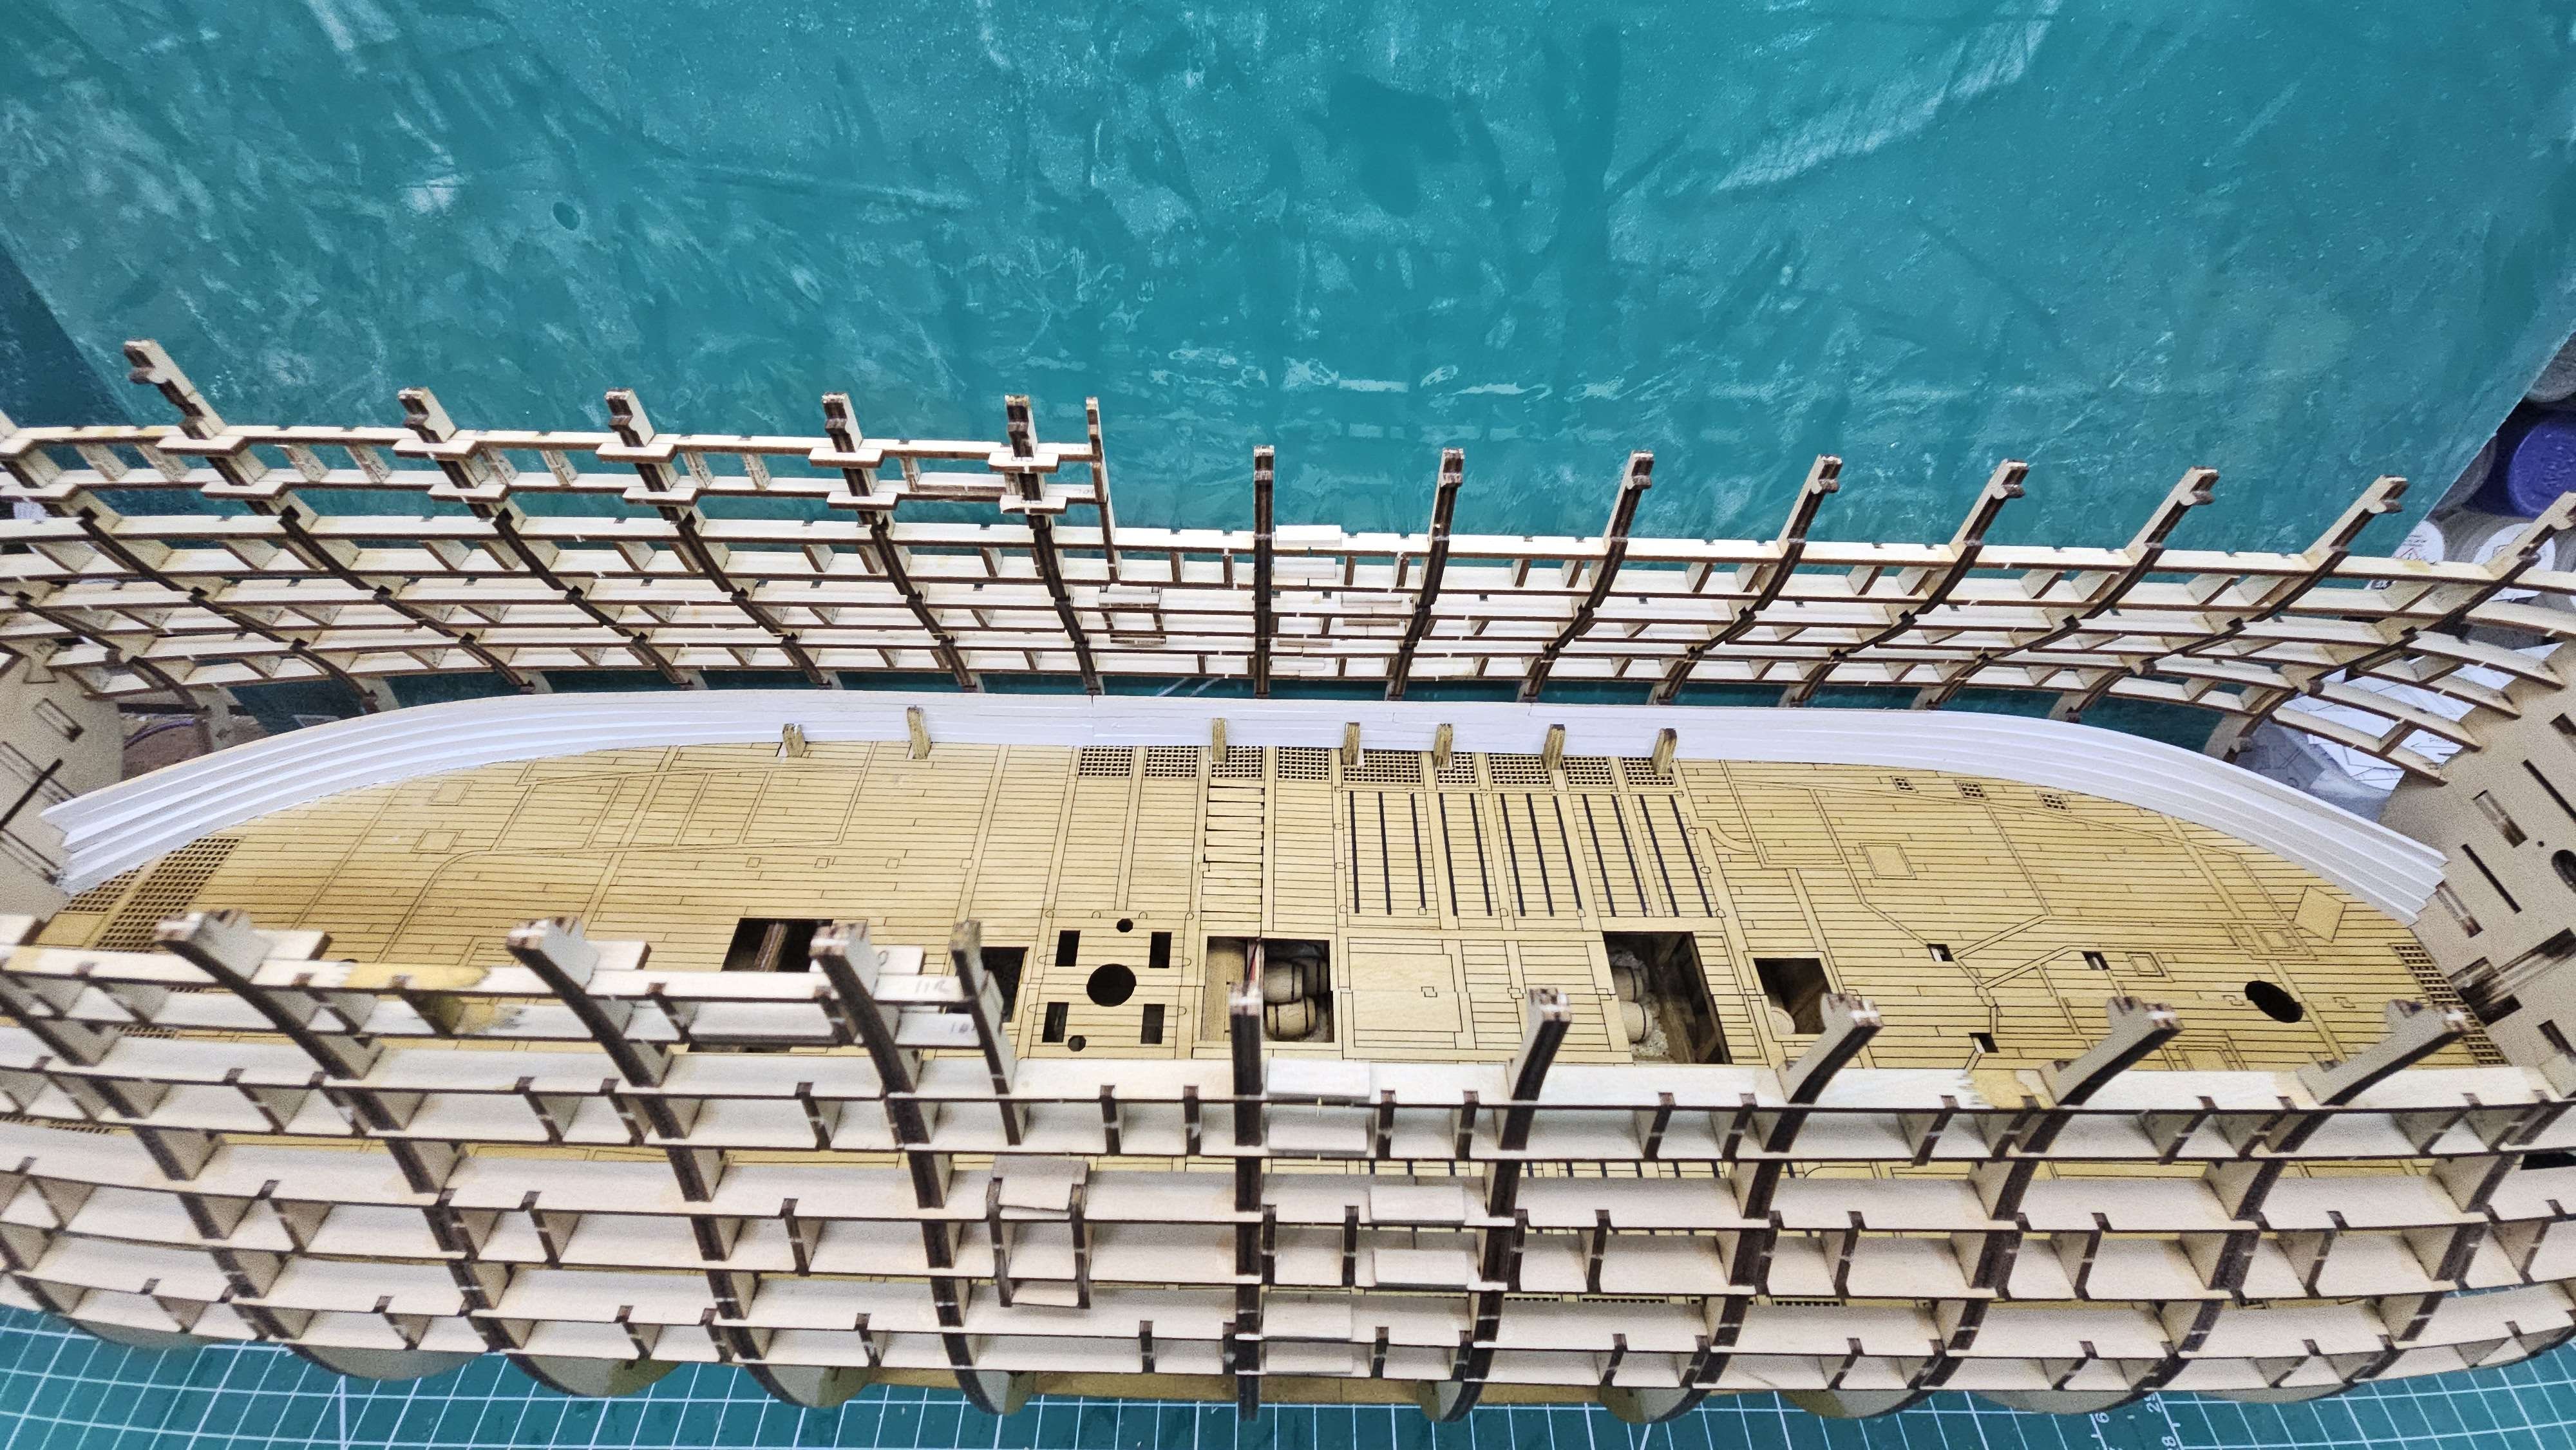
Video #9 Complete Video 9 is done. Foward compartments. They are still in 3 separate sections at the moment as it made it easier to build this way. They will get joined when installing in the hull.

-
Video #8 Complete Video 8 is done. Stern compartments. Not fantastic but given it will be very hard to see it will do. For the bow compartment I may paint the parts on the fret first, I think I will get a smoother finish.

-
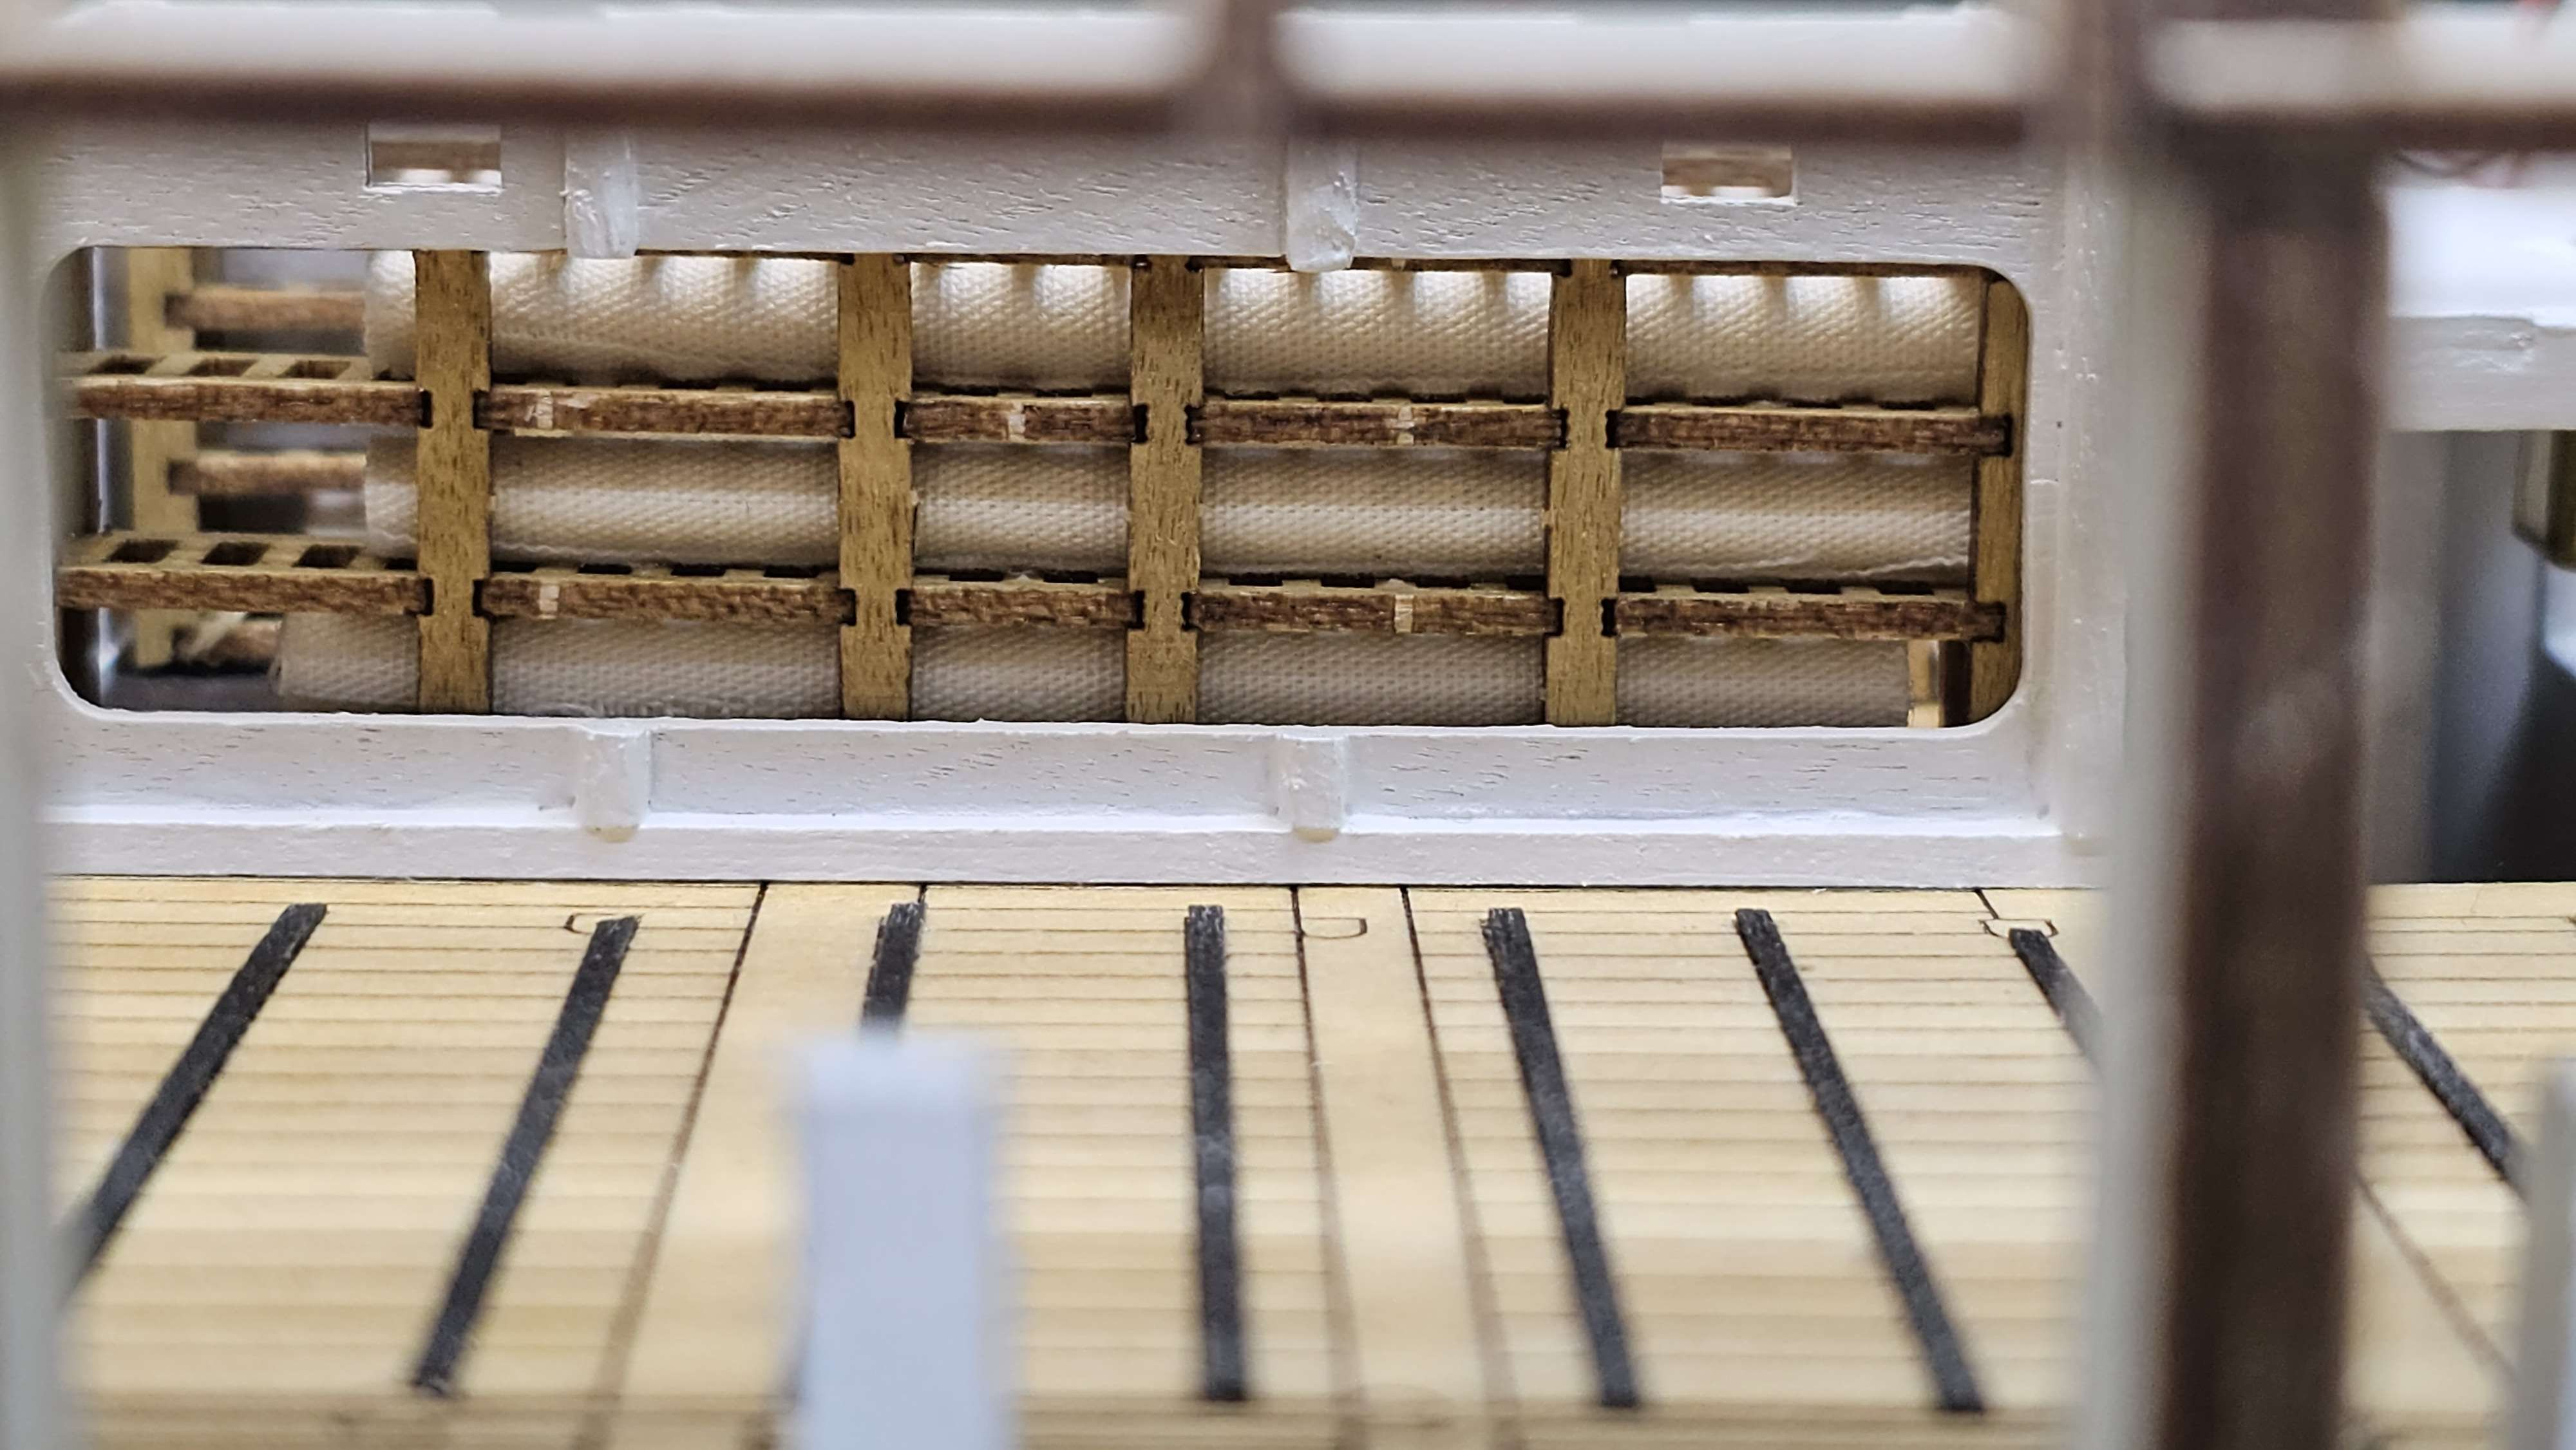
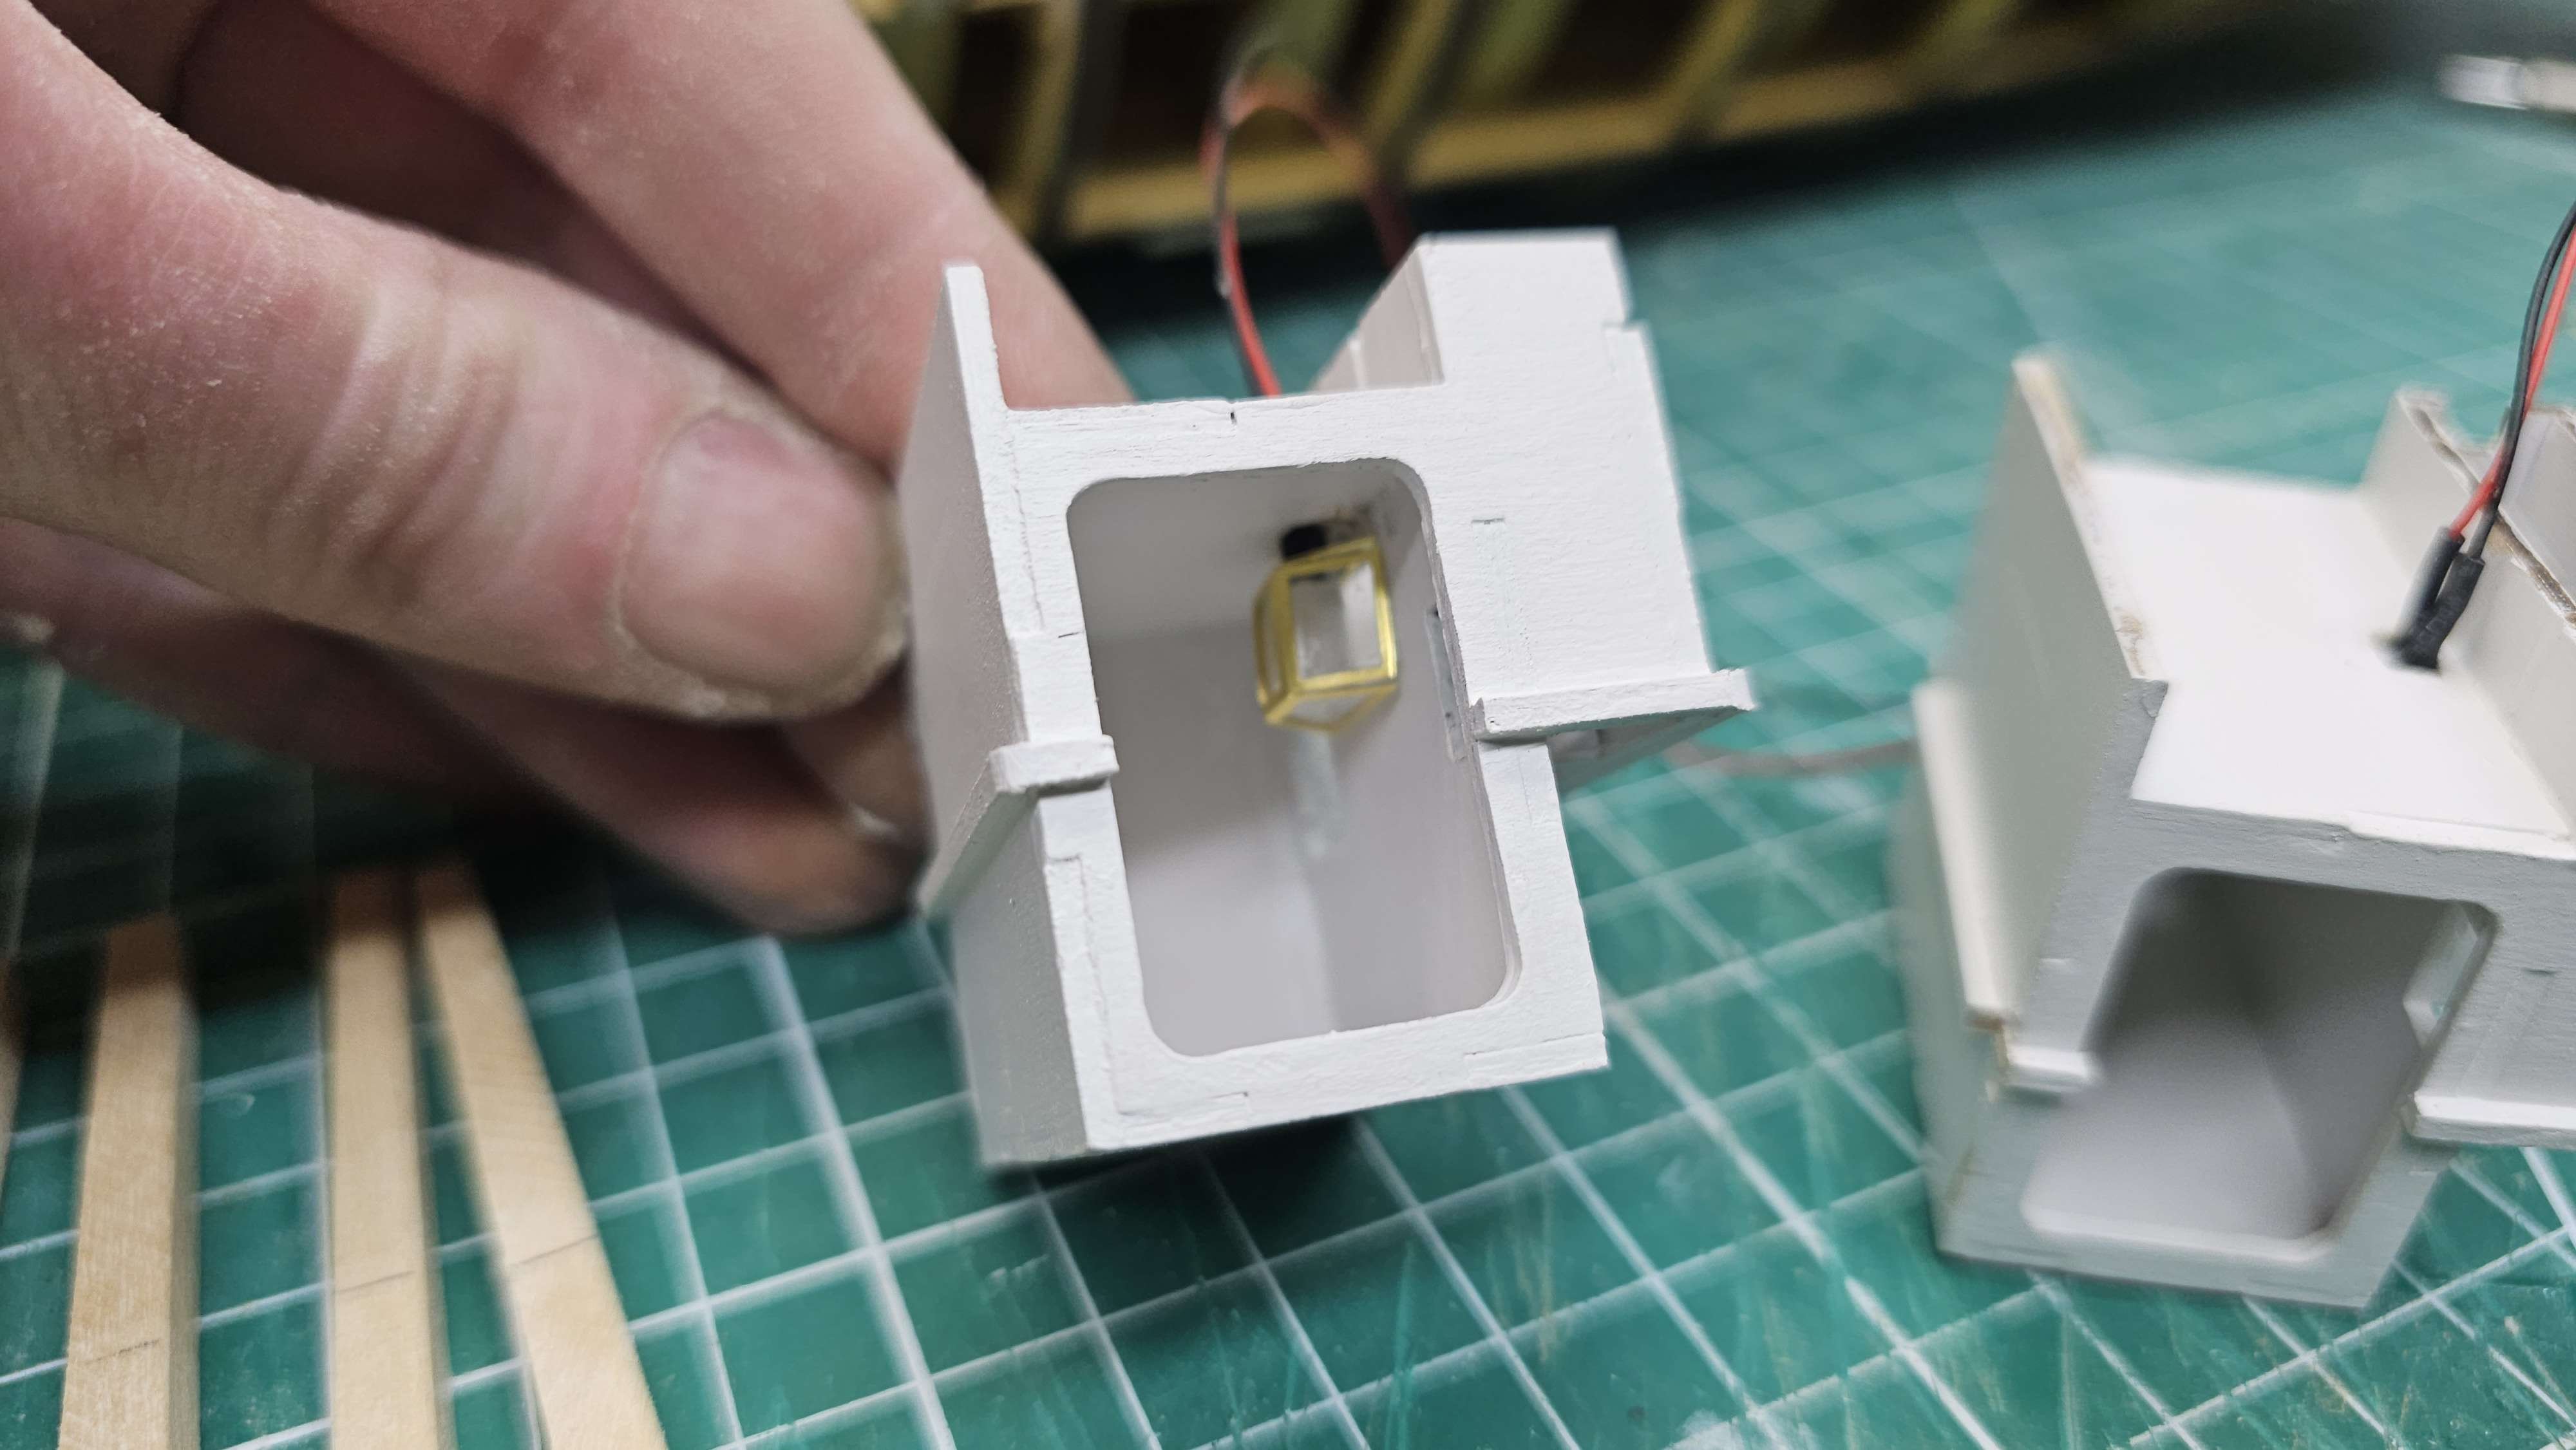
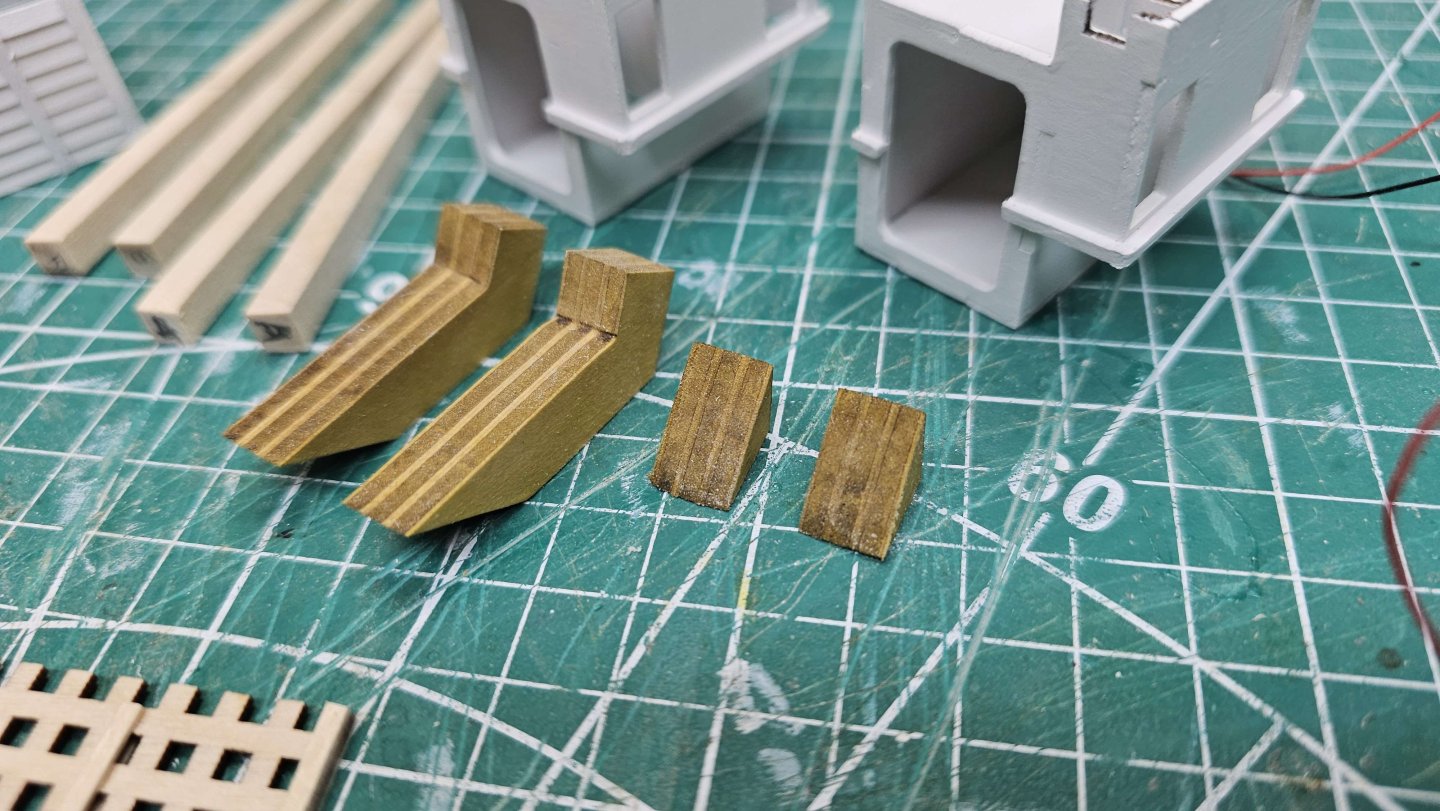
Video #7 Complete And video 7 is done. Pretty straight forward this one. The wood for the beams is quite soft so the tool for making a groove works really well, but even if you don't have that, the pointed end of a needle file will work just as well. In hindsight I would have piggybacked the wiring into the next set and so on just as with the upper decks, just so you don't end up with as many wires. I didn't paint the frame for the lanterns as my hands weren't cooperating the last few days. 066.mp4