HOLIDAY DONATION DRIVE - SUPPORT MSW - DO YOUR PART TO KEEP THIS GREAT FORUM GOING! (Only 13 donations so far - C'mon guys!)
×


jim_smits
-
Posts
653 -
Joined
-
Last visited
Content Type
Profiles
Forums
Gallery
Events
Everything posted by jim_smits
-
 Will echo that. There was something complete about having the capping rail in place. Good stuff Jason!
 -
Hi Jason I had exactly the same issues with the capping rail. Main thing to be careful with is to make sure it doesn't overhang inside too much otherwise your pin rails will not fit with the belaying pins in. I would also recommend permanently pinning as I didn't trust the glue to hold the lateral strain. Keep it up though!
-
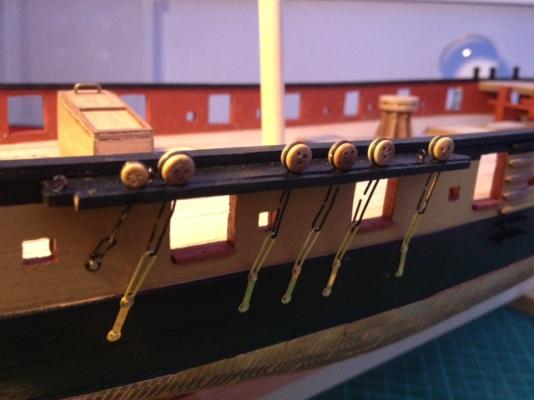
Quick update. I have now managed to fit all the channels, with their associated chain assemblies. It is now that I am very glad that I spent the time ensuring that the main wale was placed correctly, to ensure the chainplates fitted in the right place. I am now finishing off the hull detail now. Touching up paint on the chain assemblies, adding eyelets in the correct places, adding the last few pin rails, a final touch up of the paint job and then a further layer or two of varnish to protect everything. Really nice adding the detail and seeing the hull come alive! After that I have 16 carronades to assemble, rig and fit. Joy! Got to say that the supplied carronades were not very good quality castings, and if the cost of buying turned brass replacements wasnt so high I might have gone down that route. I will add some images in the next few days once everything has been polished off....
-
I was thinking that with my snake build - it is a touch crowded down that end of the deck........
-
Looking good Jason!
-
Hobbits with muskets perhaps....?!
-
Minor update. Aft platform ladders successfully fitted. Slight squeeze but got them in ok!
-
Hi Ian, In answer to your question, this is my first ship build. I used to make and paint model armies from Games Workshop when I was a kid and also made model space kits fairly recently so my 'eye is in' so to speak. I think the best thing is to take your time, quadruple check everything before you commit to glueing and read as many build logs as you can to take on board hints and tips. And thanks! Jim
-
Time for an update! Continuing to install the channels and chain assemblies. Not been too bad going, but it is fiddly and definately requires patience and an ordered approach. Painted the channels, tapped holes for pins to attach to the hull, added eyelets to appropriate positions and painted. Added the strops to the deadeyes; the strops needed to be stretched to be able to fit them around the deadeyes. I then used a pair of pliers to pinch the strops closed again and a dab of cyano to seal shut. I threaded the chain links through the strops and laid strop and link onto the gaps in the channels. I then closed the channels with a length of 2mm x 2mm walnut. The assembled channels were glued into the tapped holes in the hulls. I could then add the remained of the chain and the chain plates to the hull. I put a temporary mast in place and used a length of thread to simulate the stays to get an approximation of the direction of the chain plates. They were then tappped and pinned in place. So far completed the starboard side and the main channel on the port side. Still need to do final painting touch up on the chain assemblies. Also attached pin rails to the starboard bulwark. The pins are pretty much touching the bulwark cap, but there is enough give to still be able to belay a line. Accentuates the difficulty in getting the capping rail correct! Also adding the various eyelets and holes for rigging as I go. Finally had a mishap when i nudged the rudder and broke the tiller arm. Given it was already rigged in and the rear platform in place, this created a really difficult issue in fixing it. I decided to glue the top edge of the tiller arm to the platform support beam. I figured this was the best result available and doesn't look too abvious at first glance.... I have now glued the rudder in place.


-
Looking good Jason! I have to concur that rigging up the tiller arm and wheel was a touch fiddly! Keep it up!
-
Wow! Promotion party at mine 8pm!
-
Quick update. Bits and pieces completed this week. Main item being the main channel, deadeyes, strops, chain links and chain plates. To say it was a fiddly job would be an understatement, but I did get better as I went along. Main lesson learned is to link the chain link and deaad eye strop before glueing the channel together, as linking through the tiniest of gaps afterwards was a pain! I have made sure that the channels were pinned into place to provide stabiliaty and will repeat for the other channels and pin rails to be attached to the bulwark. The addition of detail is really starting to bring the model to life now.
-
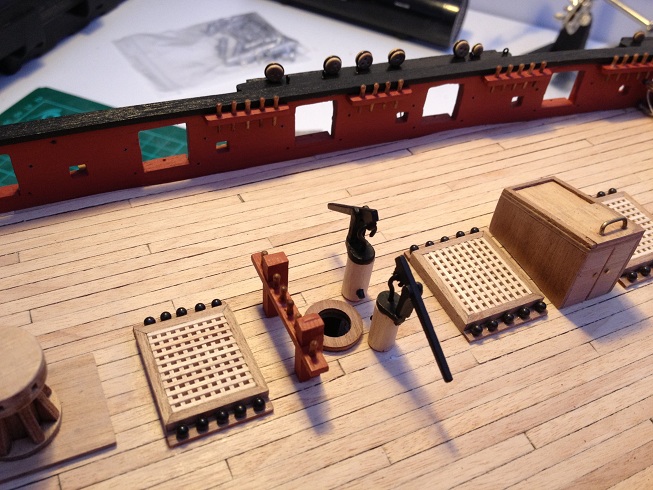
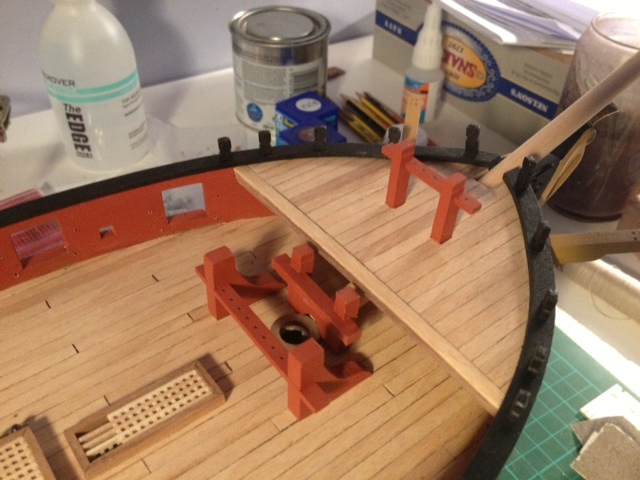
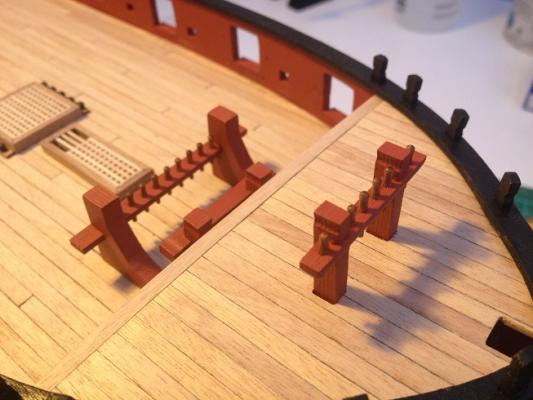
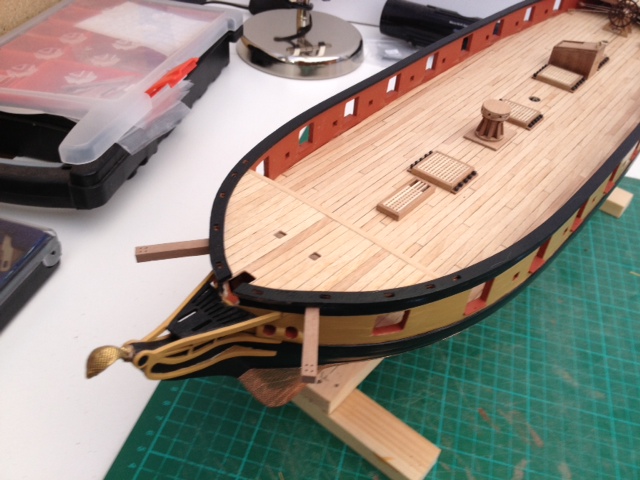
Slight issue over the weekend.... I went to fit the brackets for the catheads and realised the fit was totally wrong. This would be due to the fact that I have fitted the catheads incorrectly with the beam sitting horizontally, whereas of course it should be seated with the beam rising slightly upwards. I think what I have done is fitted the catheads by using the bottom edge sitting flush with deck as a guide. I should have really had the inboard part of the beam sat flush to the bulwark. This would have required some sanding down to fit the deck properly. Should have been obvious looking at the side plans. A touch annoyed with myself. I have VERY carefully cut away the cat heads and removed the interior portions. I then scratch built a beam, and fitted the brackets and the subsequently fitted into place. It is next to impossible to see that the interior portion is effectly missing and the assembly is now as secure as I can make it. As it wont have to take any actual strain, I am not too worried. Lesson learned. Check, check and triple check all plans and future fitting requirements....... On a positive note.... Have now started fitting the pin heads on the deck and the bow spirit bracket. Starting to come together. Also added one side of steps to the hull. Nice and fiddly that, and contrary to the plans they do not fit nicely between the oar port and the gun port....... Next step the channels and bulwark pin rails and associated parts.
-
Also we both only tiled the front edge and the rear of the rudder. The bottom of the keel was left untiled. Beef has fitted a nice false keel which I will also do at some point.
-
Both Beef and myself used a small flat file. Just file down over the edge of the tile. The pressure will roll the edge of the tile over slightly whilst the file removes the excess material. You should end up with a nice finish. Just be sure to use small gentle strokes.
-
To be honest I just went with the 0.25mm thread as indicated by the instructions.
-
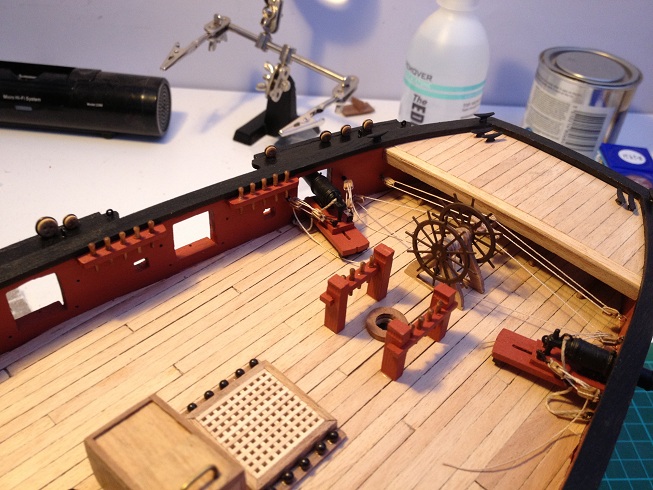
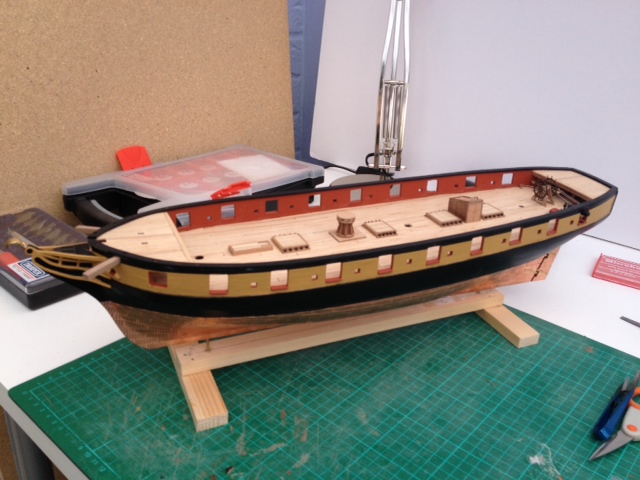
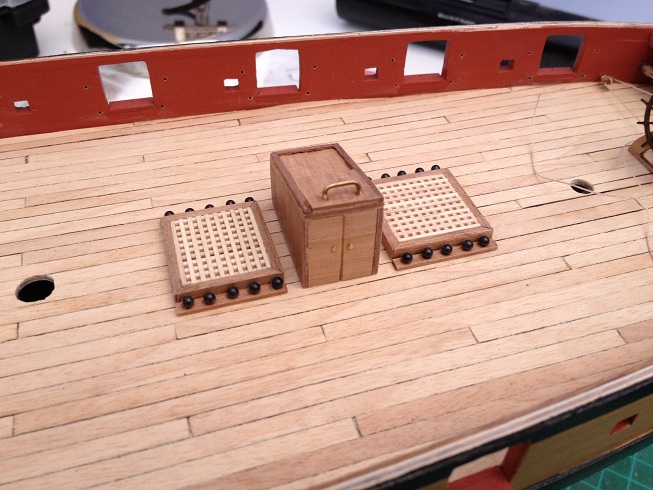
Quick update. Managed to get the fore and aft platforms placed. Fore platform needed steaming and reshaping slightly as it was a bit bowed and wouldnt sit flush to the top of the bulwarks. Other than that no real issues other than ensuring a good fit. After that I managed to get the capping rails all fitted. Did initial fitting by tapping holes and lightly pinning in place, gradually shaping the rail to fit the shape of the hull properly. Subsequently removed the rail and painted black. Pins were then tapped back through the existing holes and used as a guide to glue the rail in place. The pins were then carefully tapped flush to the rail and the punched slightly below the surface. A little filler was used to cover the holes and repainted in black to leave a nice smooth surface.
-
Hi Jason, Thanks for the compliment and now the obligitary answers ;-) : 1) I did buy extras - 3mm singles and 3mm doubles. Although I think 2mm may have been a more realistic size 2) The hooks are Caldercraft brass etched - also extras purchased with the extra tackle blocks 3) I am only rigging the rear pair so that I can sort out fitting the ladders to the rear platform as space is such a premium. I will then move onto the capping rails. If you like I will image each stage of the rigging of the other carronade so that you can get a feel of what I did. Hope this helps!
-
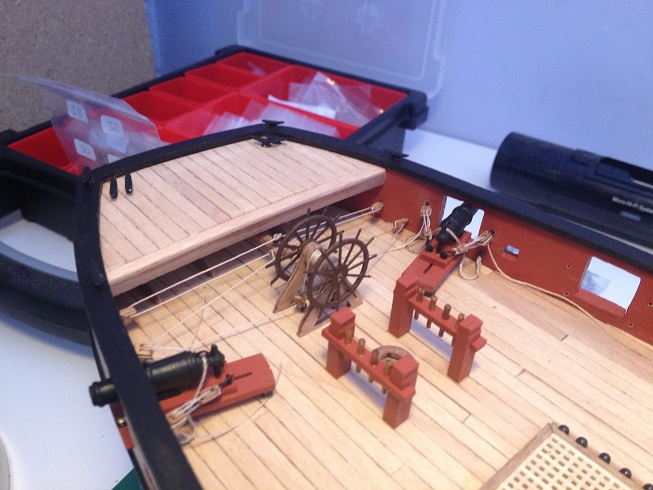
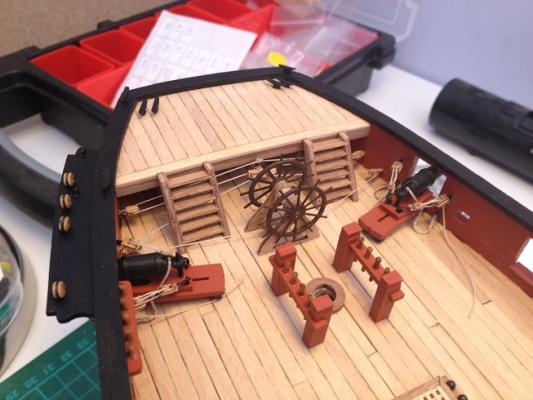
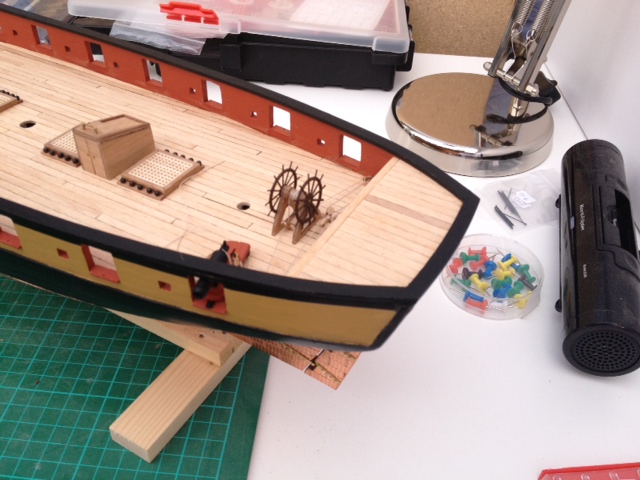
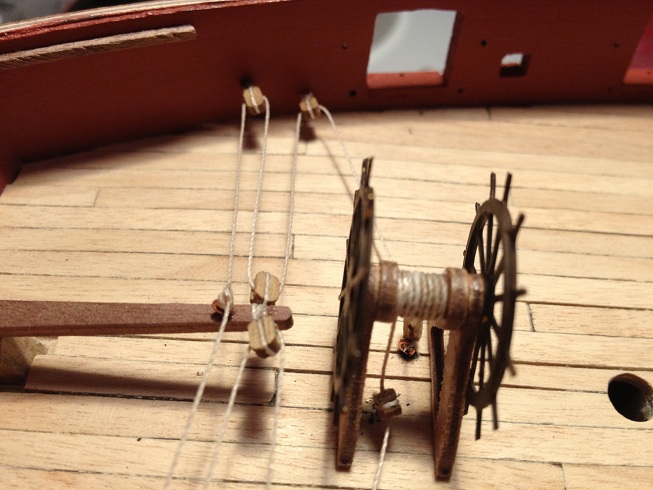
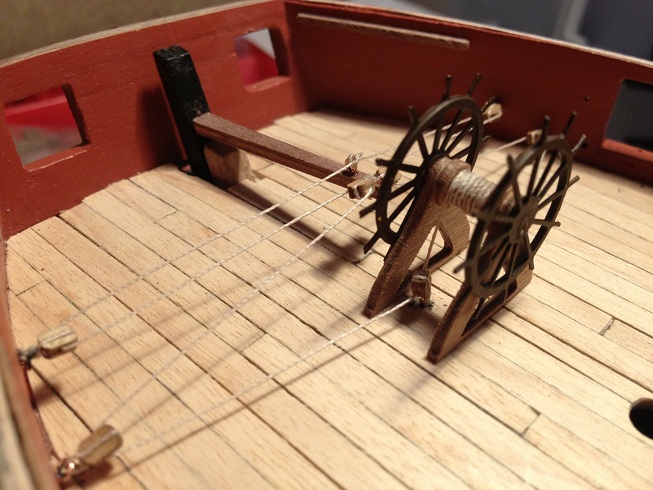
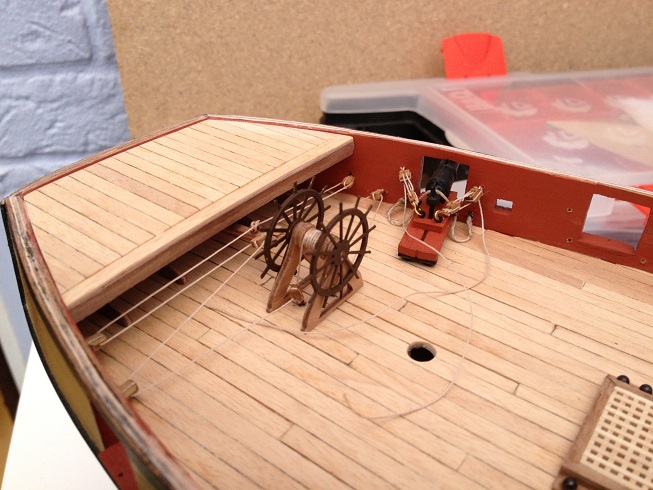
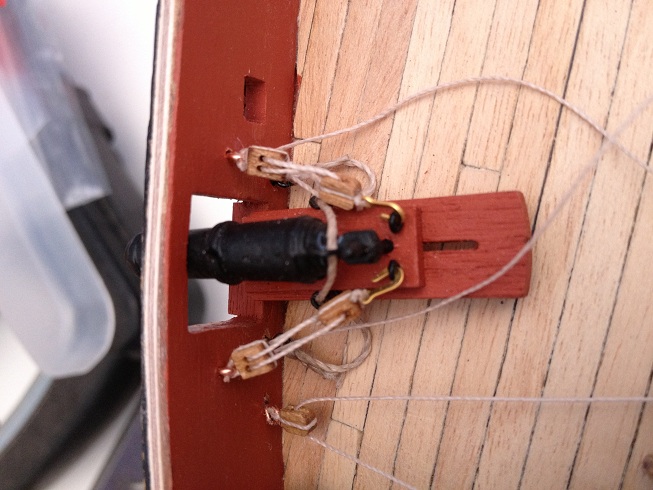
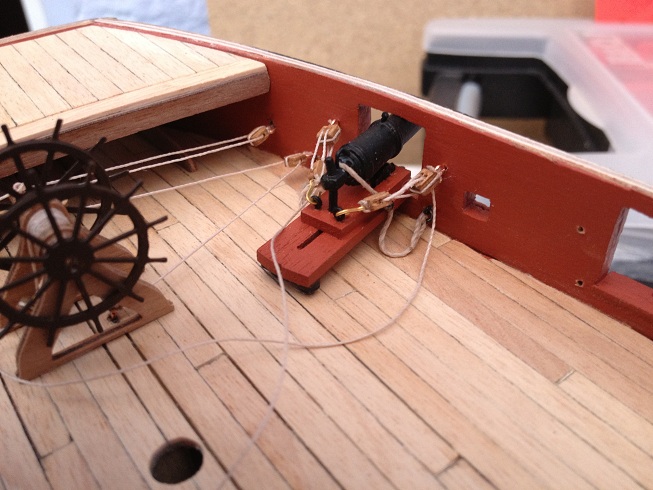
Hi all, Slow but steady progress made over the last couple of days. I have now completed the wheel and tiller rigging. Pretty happy with it although i'm not convinced that the ladders to the rear platform will fit easily but I am working on some positioning changes. I have glued the rear platform in place and I have managed to rig up one of the Carronades. Taken me most of today to rig up one carronade. Breaching rope and also a set of tackle have been rigged up. Need to touch up the eyepins and hooks and then thats the first carronade complete. Only 17 more to go......
-
Hi Jason, I have made a single ladder and went with the instructions at 14mm. The whole area is a touch crowded and I am only just able to squeeze in the steering rigging, the ladders and the rear carronades. Albeit with a slight rearrangement of where the ladders physically sit. Havent glued in place yet as I need to construct and extra carronade and rig it up. I'll updated my log tomorrow as I have the day off work. Hopefully will be able get the whole area sorted by the end of the day. That Cruizer looks great. Interested in copying the davits to add a couple of ships boats in as well. Jim
-
Presumably the smaller front port is still left clear and the first of the nine larger ports is fitted with the chase guns?
-
Cheers Jason. That makes sense with the rigging next to the wheel. Have made a start on tapping the eyepins. As for the platforms, I wasn't concerned with a slight gap to the bulwark as this would be covered by the capping rail anyway.
-
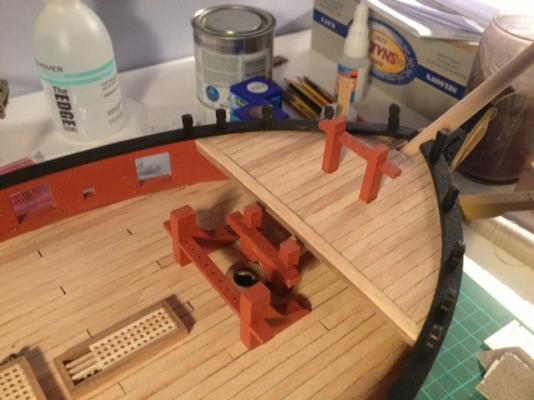
Not a huge amount of progress over the weekend due to being summoned to spend Mothers Day back in Coventry. However, I have managed to finish off both sides of gunport sills, and drilled tap points for the Carronade rigging into the Bulwarks. The catheads have now been installed and need a slight bit of touch up with filler. I have also cut and filled to shape the Bowspirit to help dry fitting against deck and through the platform and bulwarks. Fairly large gap here, presumable needs filling? Next steps are to fit the platforms. Before I do this I think I will probably need to install the rudder tiller, wheel and the rigging between the two. The majority of the rigging diagram seems clear enough but I admit that I am puzzled by the presence of the two tackle blocks next to the wheel. What function do they perform and how are they rigged? From what I can see they look to be suspended with no attachment and the riggind thread passing straight through. I presume I am being a bit special and missing something here?
-
I used a pair of fine scissors to cut the plates to shape. Any protrusions I used a flat blade needle file and small careful strokes....
-
I figure I will fit the pinrails after the capping rail. I figure it will probably be easier that way round to ensure a good finish the capping rail ie filling any gaps and painting touch ups. As for position I hadnt checked that quite yet. I need to have a look ahead. I think my order of build now is to fit catheads in place, rig up the wheel and tiller, fit the platforms and then add the capping rail. Hopefully not missing anything drastic? I can then start adding steps, and drill holes to starting pinning the various rails onto the inner and outer hull. build starting to get nice and interesting. I liked your False Keel, might have a go at replicating.