HOLIDAY DONATION DRIVE - SUPPORT MSW - DO YOUR PART TO KEEP THIS GREAT FORUM GOING! (Only 13 donations so far - C'mon guys!)
×


jim_smits
-
Posts
653 -
Joined
-
Last visited
Content Type
Profiles
Forums
Gallery
Events
Everything posted by jim_smits
-
 Looks fantastic there. Great detailing in the carronades. Putting me to shame.....!!
- 800 replies
-
- 1
-

-
- snake
- caldercraft
- (and 1 more)
-
Welcome back mate! Hope you had a good time. Manage to visit Portsmouth docks? Missus and myself went about a month or two ago. Victory had most of the masts and the spars down for repair. Shame really, sort of loses the effect. Yeah, not far from myself at all. Went to University in Bath. Lovely city. Hope the dockyard is salvageable, be good to see your build up again!
-
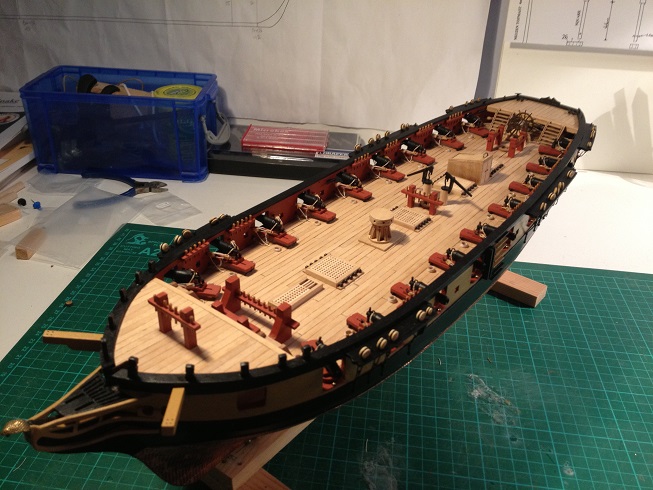
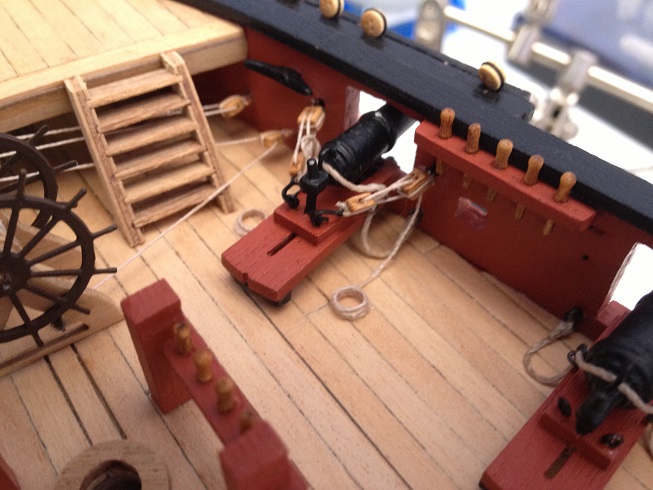
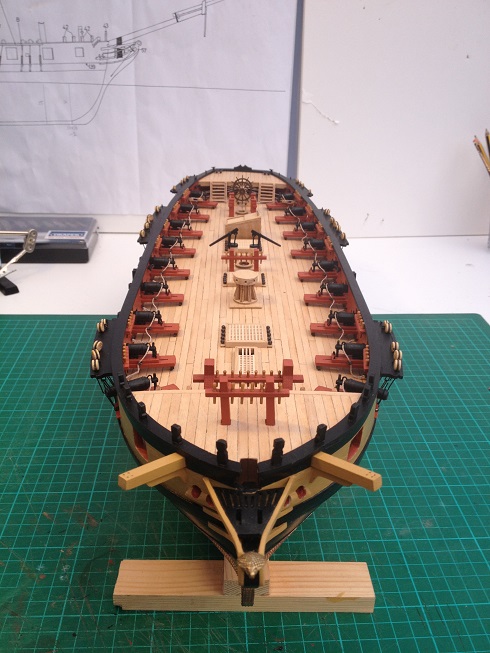
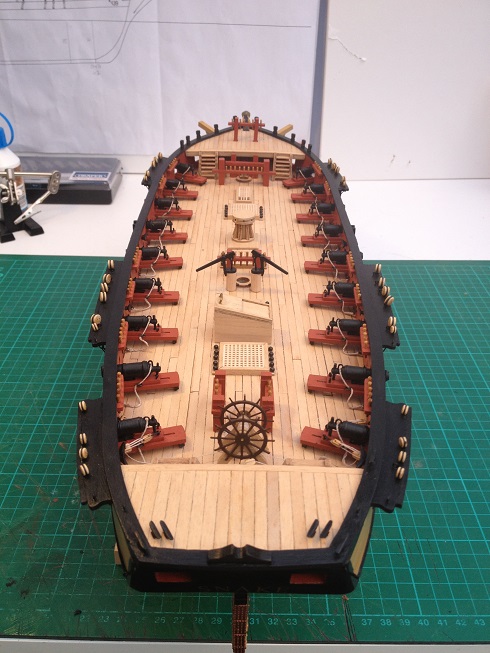
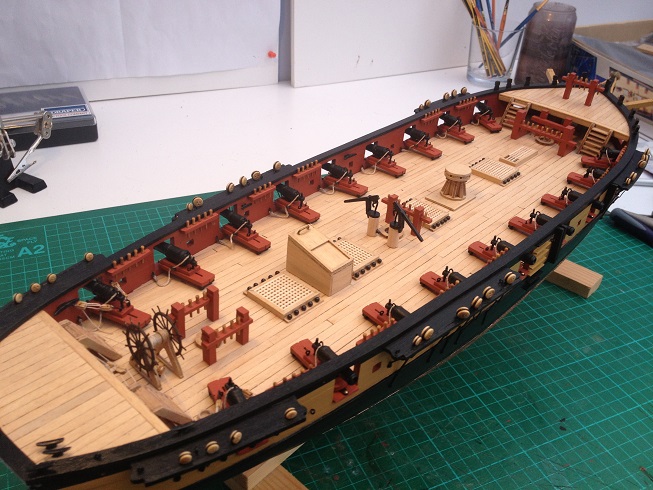
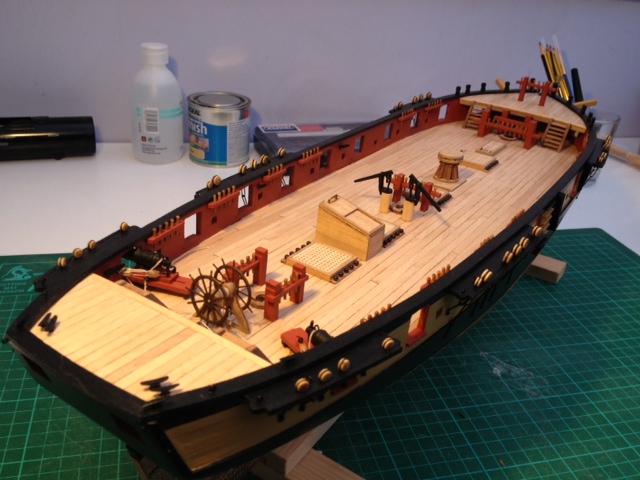
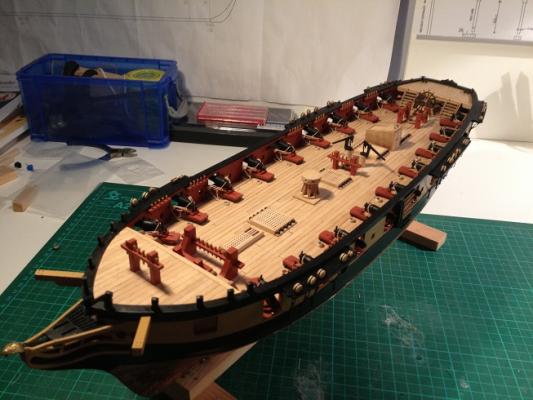
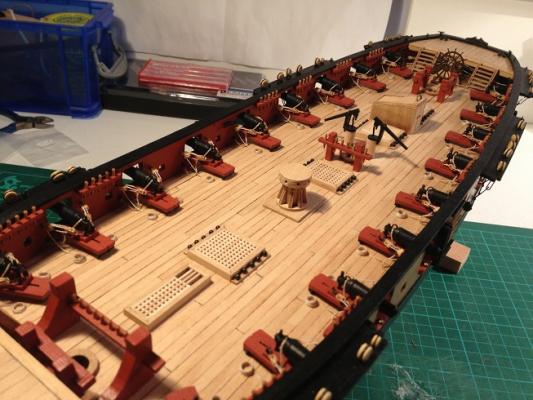
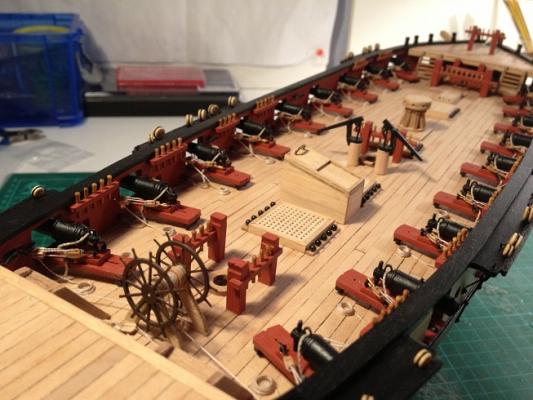
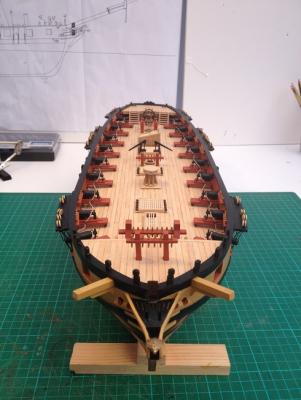
All carronades have been installed and I have finished adding rope coils to the ends of the trailing ropes from the sets of tackle. I still have to touch up some of the hooks and there are now bits and pieces over the hull that need a little attention but I can now think about turning my attention to masts and rigging. I am trying to decide whether to add the anchors or not. I figure that they could be added towards the end and would just end up in the way otherwise. Any general thoughts in this area? Anyway, here are some pics of the build thus far....
-
Progress so far. Tackle assembled and added to one sides worth of carronades. Need to touch up the metalwork, and some of the rope coils still need to be added.
- 412 replies
-
- 1
-
-
- snake
- caldercraft
- (and 1 more)
-
I can see a response from Dubz but no question from yourself?
-
Hi Pete, Yes the rope is glued to the deck and the coil is made separately and placed over the end of the rope and glued down. The rope seems to be unaffected by the PVA as it dries very translucent. Colour is still consistent with the unglued rope section. Hope this helps Jim
-
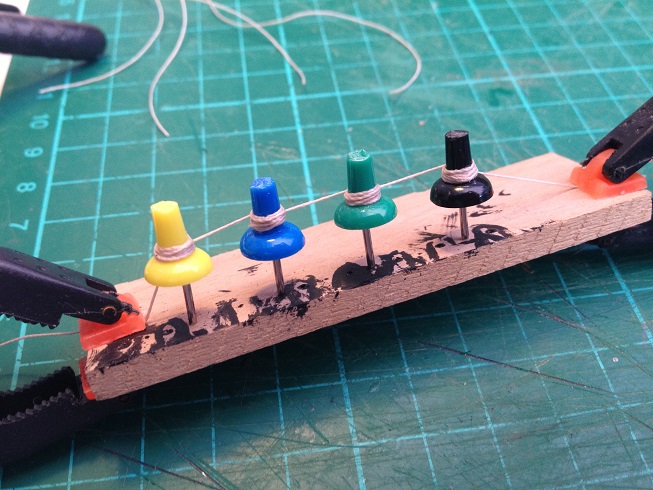
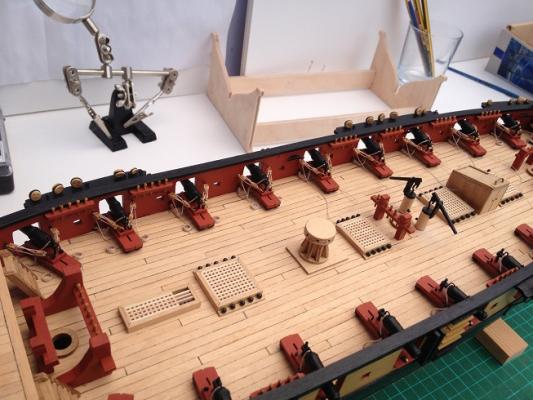
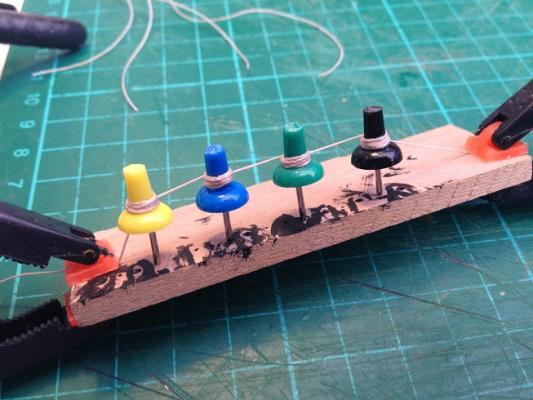
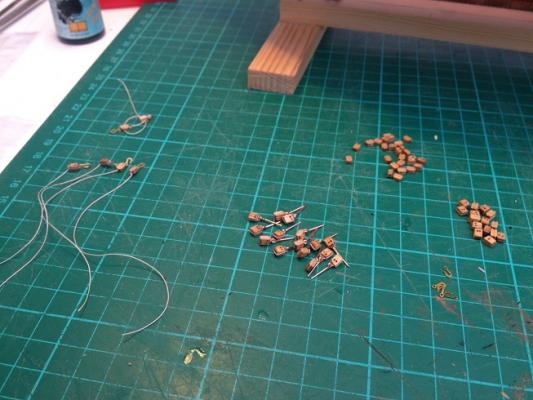
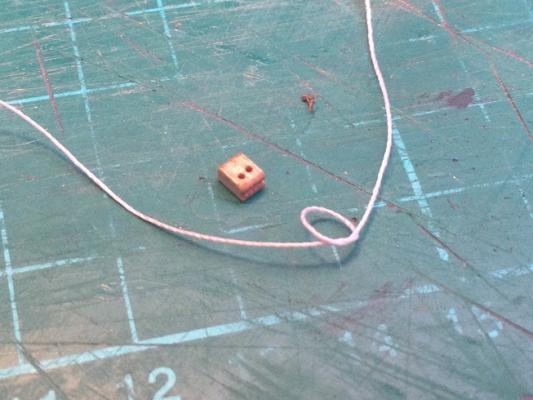
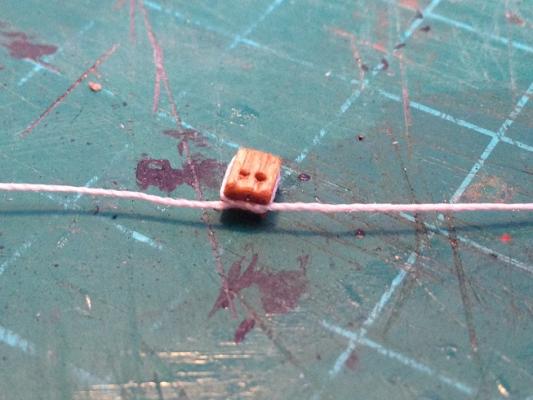
Still working away producing tackle and now also creating rope coils for the deck. Created a little rig to produce four coils at a go using board pins, rigging thread and a bit of pva watered down. Just got to keep grinding away until it's all done.

- 412 replies
-
- 2
-
-
- snake
- caldercraft
- (and 1 more)
-
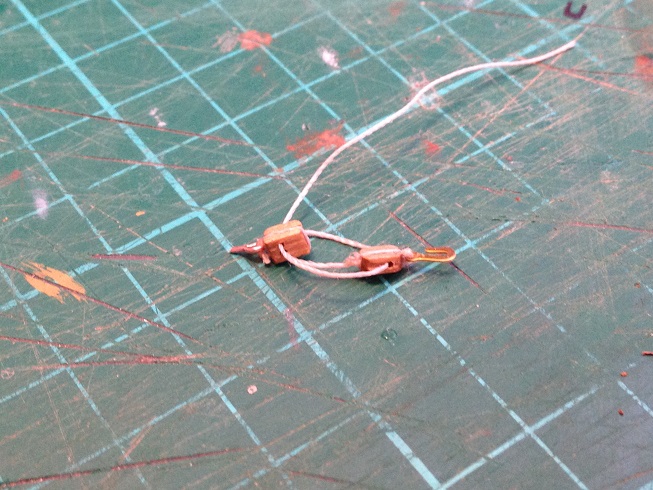
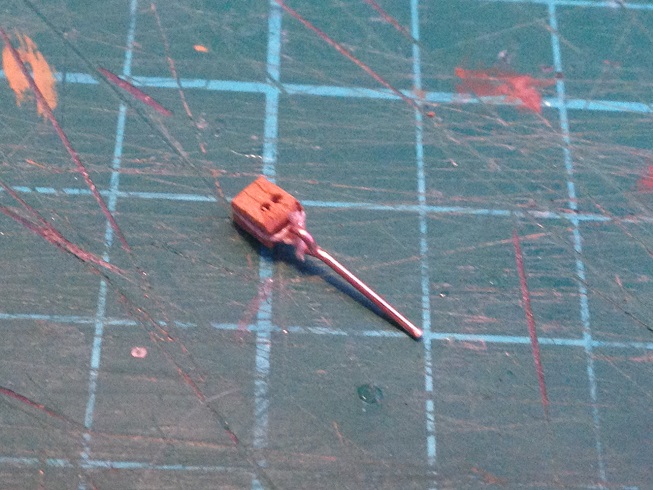
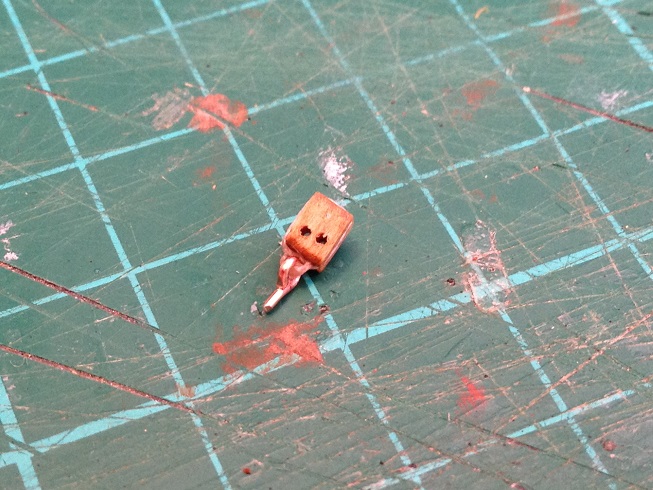
I tried to paint the pin and hook before rigging the thread but found the paint just rubbed off anyway.
-
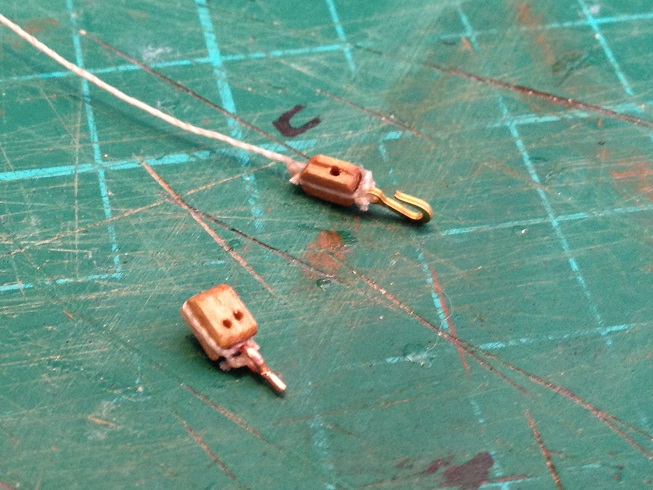
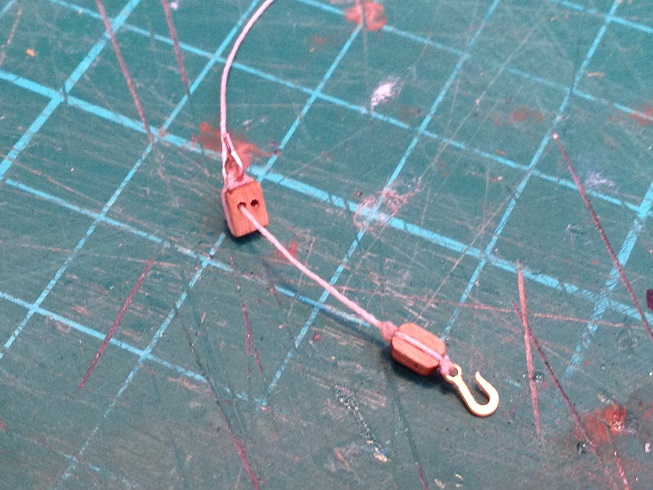
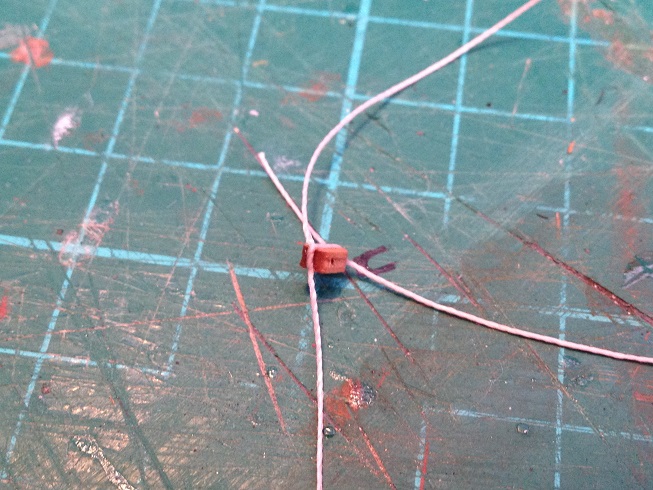
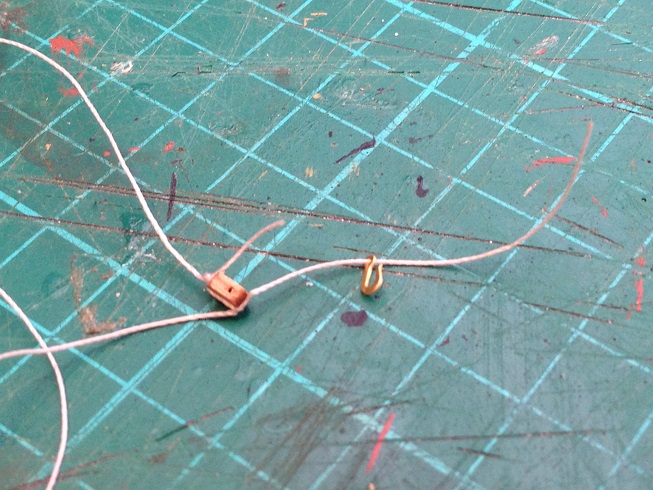
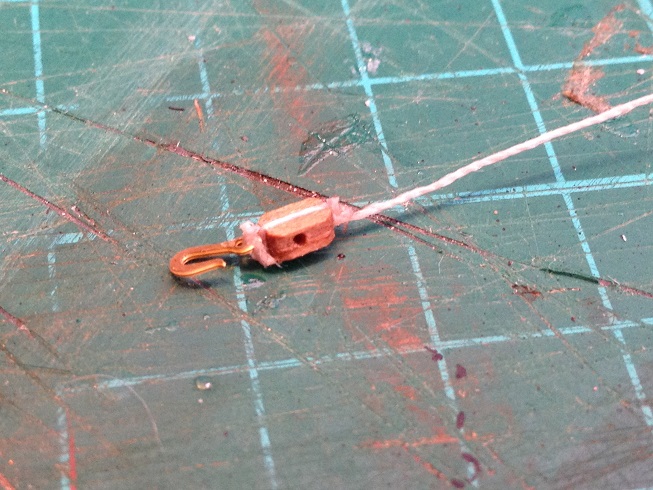
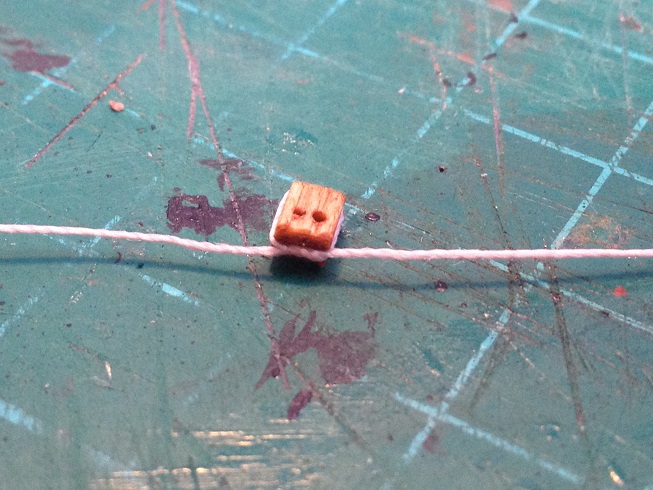
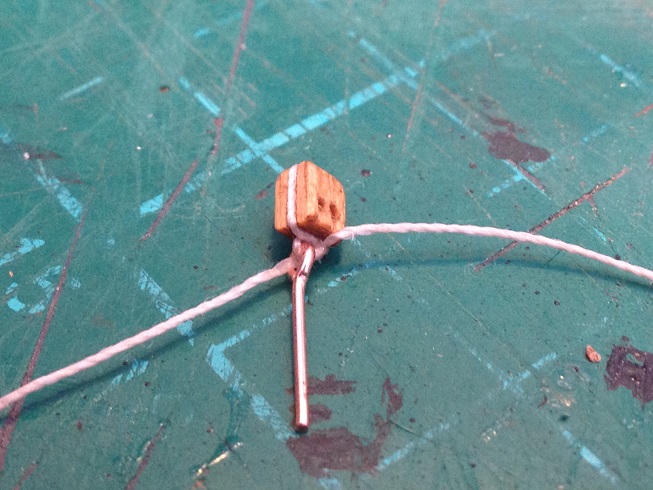
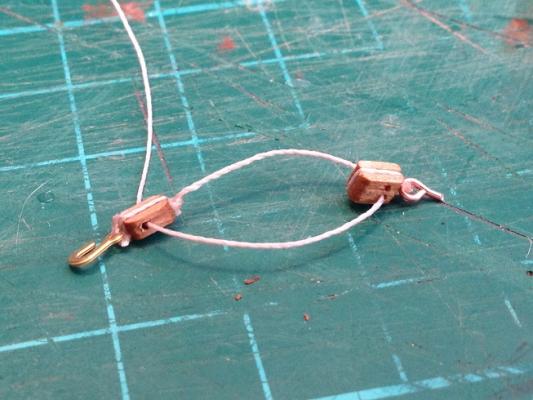
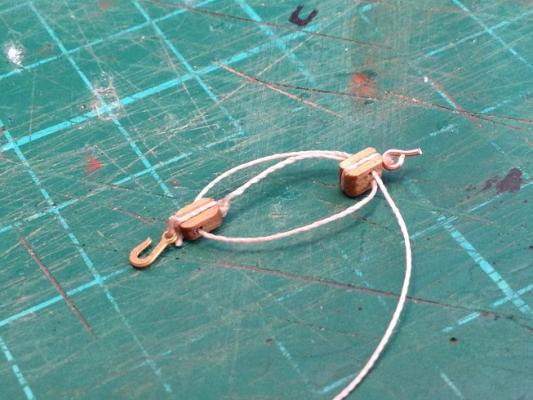
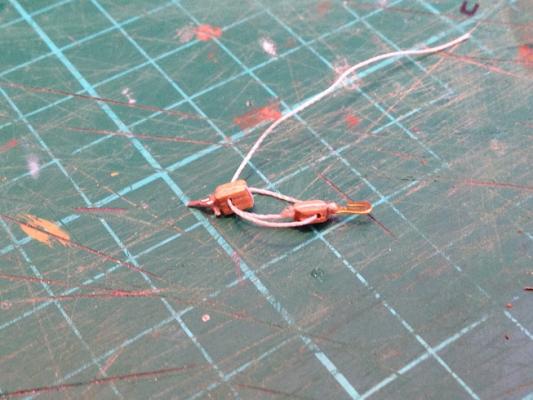
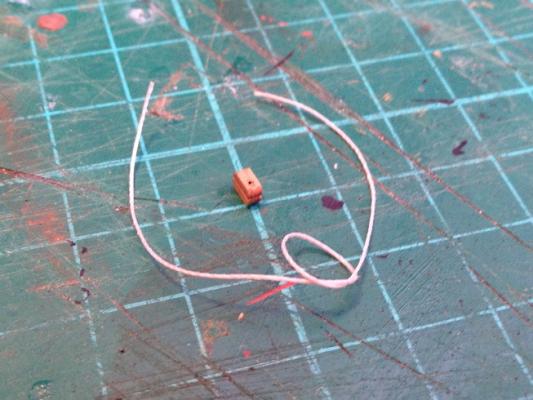
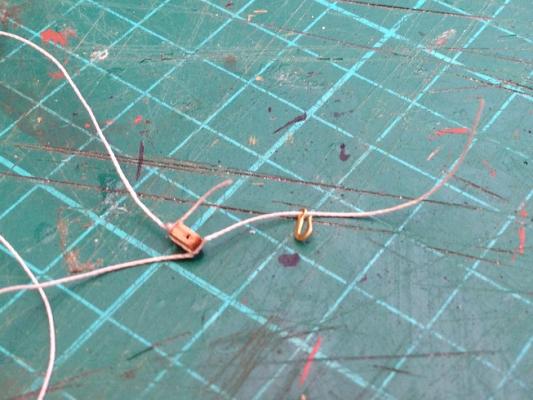
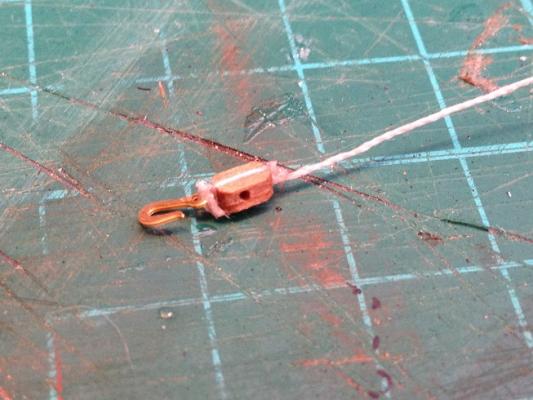
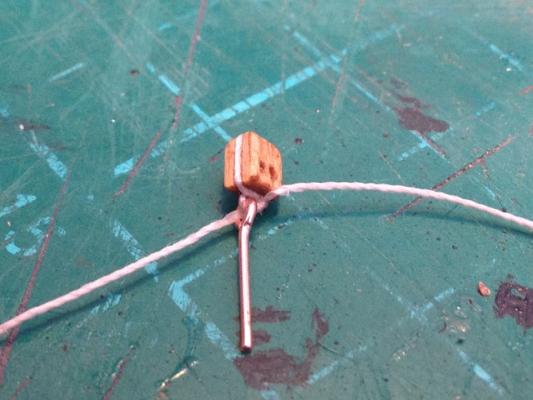
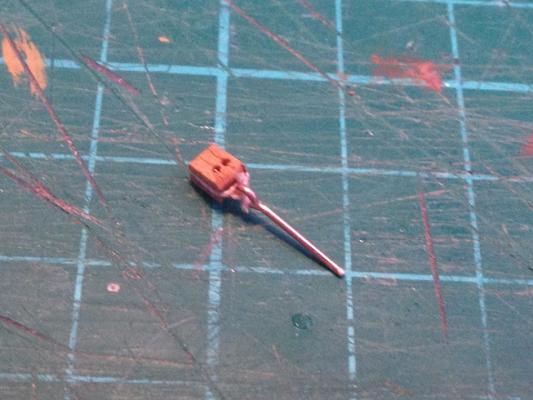
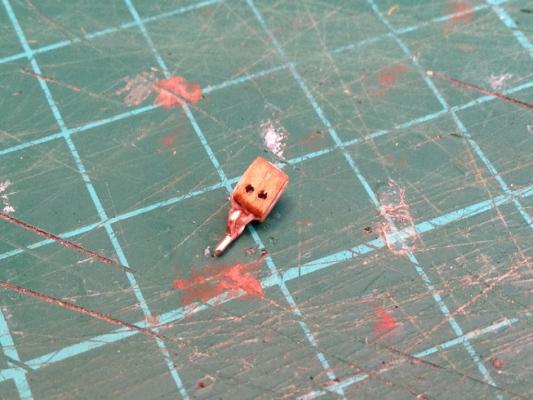
Link the pair of blocks to create the pulley system: I now have a double block and eyepin, and a single block and hook. Thread the length of rigging thread through one of the holes in the double block. Thread back through the hole in the single block. Thread through the remaining hole in the double block. Tighten the thread to the correct length required. The eyepin and hook can then be painted black. Finally, the eyepin is glued into a hole in the bulwark and the hook is hooked over a eyepin glued to the carronade base. Repeat another 35 times......!


- 412 replies
-
- 2
-
-
- snake
- caldercraft
- (and 1 more)
-
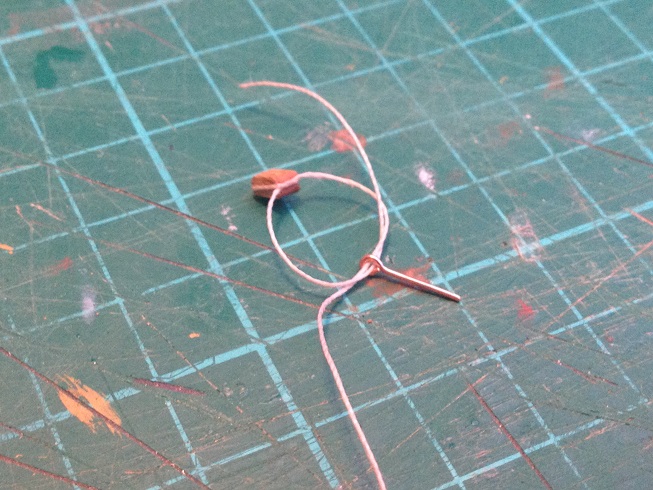
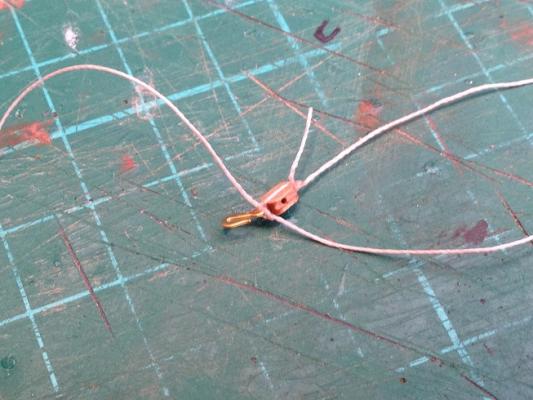
Second, the single block and hook: 6-8cm of 0.25mm rigging thread. Tie a half knot. Semi-tighten the knot over the single block with the knot closest to single hole. Cut another length of 0.25mm rigging thread about 10cm long. Thread about 1cm through the loop on the block opposite the knot. Tighten the knot fully and dab cyano to seal. Thread one of the loose ends of the knot (not the additional length of thread) through a rigging hook. Tie a half knot with both loose ends and tighten. Dab cyano on the knot on either side of the hook. Trim off the loose ends as close to the hook as possible. This leaves the additional length thread. This will be threaded through the two blocks to create the pulley system.

-
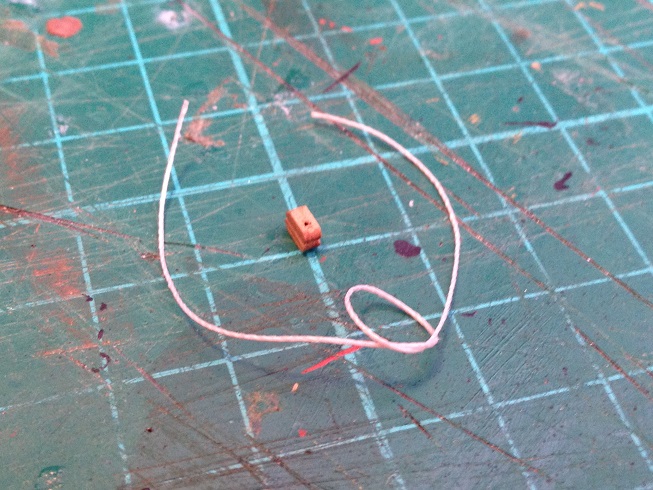
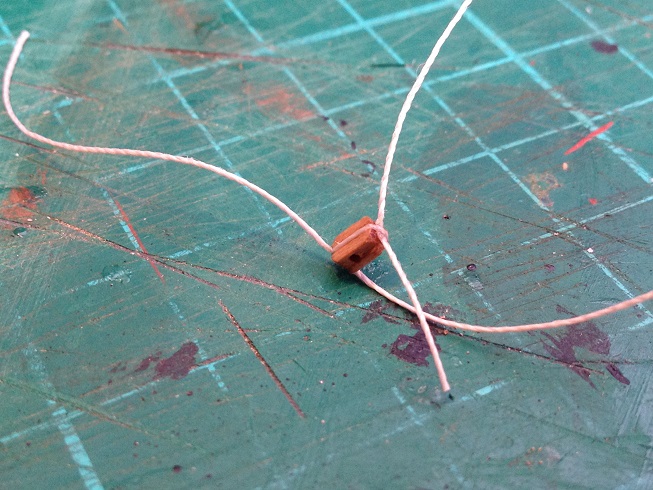
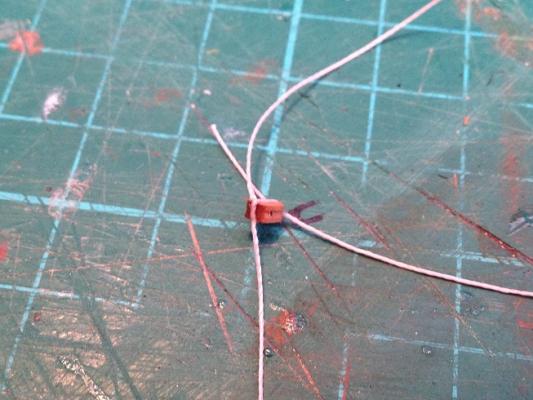
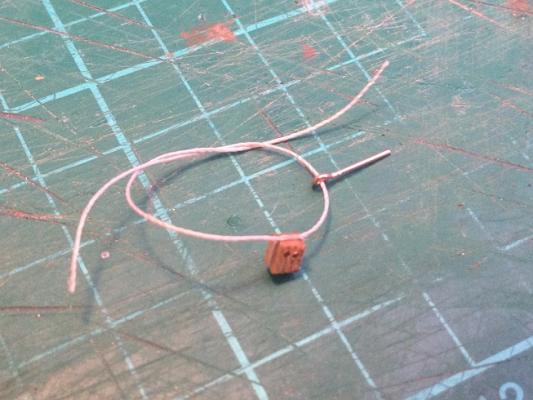
Busy making all the tackle and rigging for my carronades so here is a demo of each set of block and tackle used. Two sets are required for each carronade. There are three steps: Double block and eyepin Single block and hook Link the pair First off, the double block and eyepin: Using 0.25mm rigging thread, cut a length of 6 - 8cm. I prefer slightly longer as I find it easier to manipulate. Tie a half knot. Tighten over the double block, with the knot closest to the double holes. Dab a little cyano on the knot to seal it shut. I use a little length of planking cut to a point to apply. Thread one of the loose ends through an eyepin. Tie a half knot and then thread the other loose end through the eyepin. Tighten the knot and again dab a little cyano on the knot on both sides of the eyepin. Trim the loose ends as close to the knot as possible. The cyano will hold the knot shut. Using pliers cut the eyepin down to leave around 2-3mm length to be slotted into bulwarks once the entire assembly is complete.

-
No worries! I am collecting photos of the process. Hopefully them posted up tomorrow evening.
-
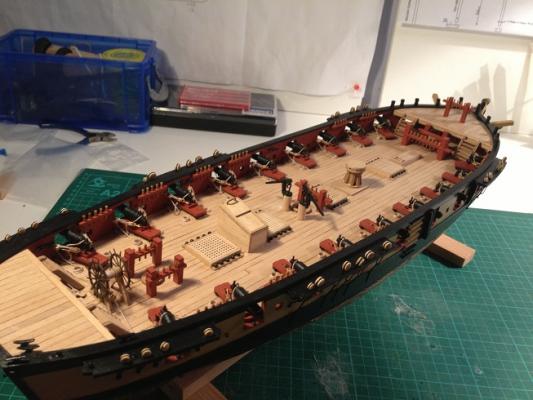
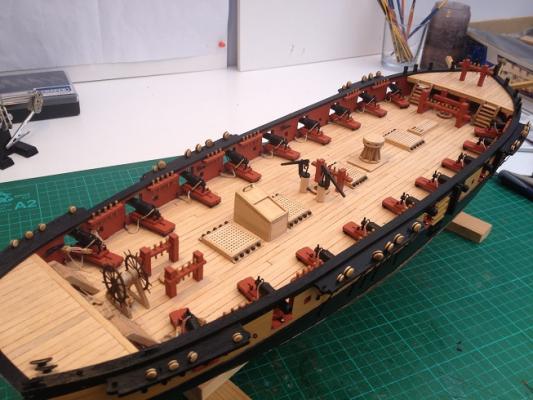
Carronades all installed! Deck really starting to look the part now. I just need to touch up little areas. The mounting pins will need to be fixed properly to the sills and painted. The breaching ropes are going to be fixed to the deck and weighted down with a bit of watered down PVA glue. After that I need to take on the tackle for the carronades. I had already rigged up the first two Carronades and had been asked about the process so I will follow up with some images of the stages I am following. Watch this space!

- 412 replies
-
- 4
-
-
- snake
- caldercraft
- (and 1 more)
-
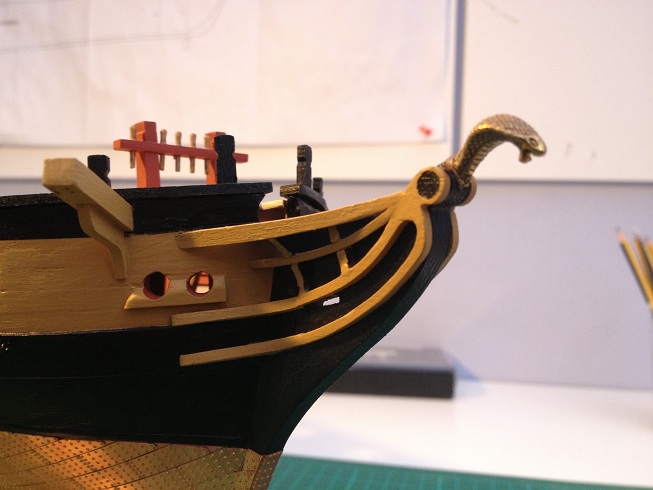
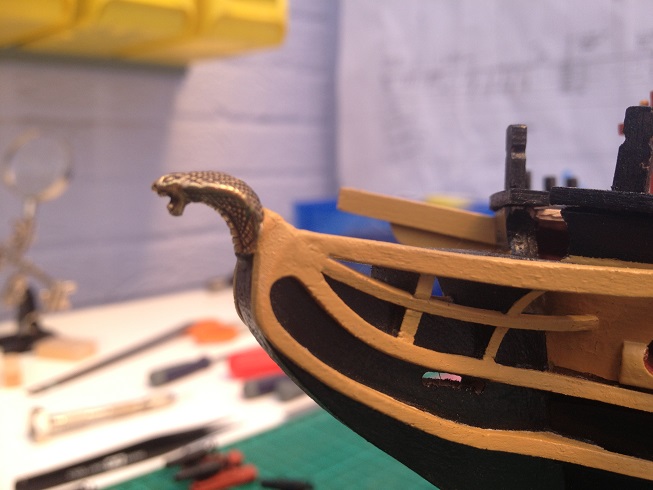
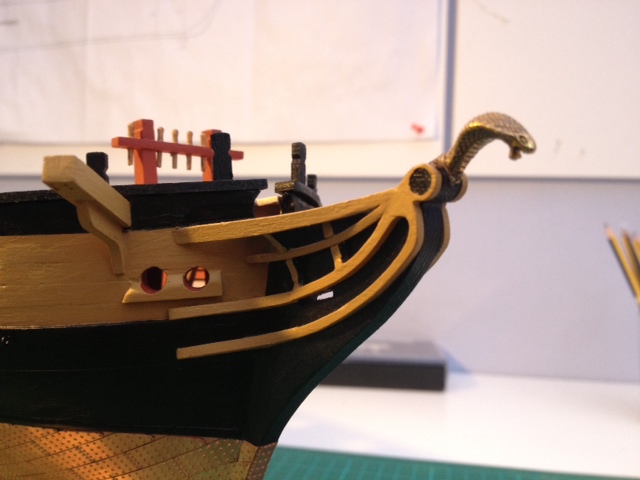
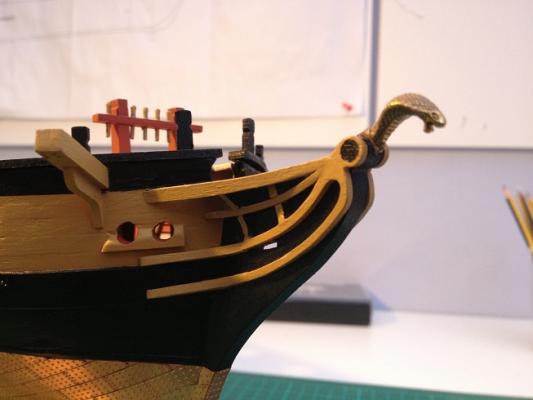
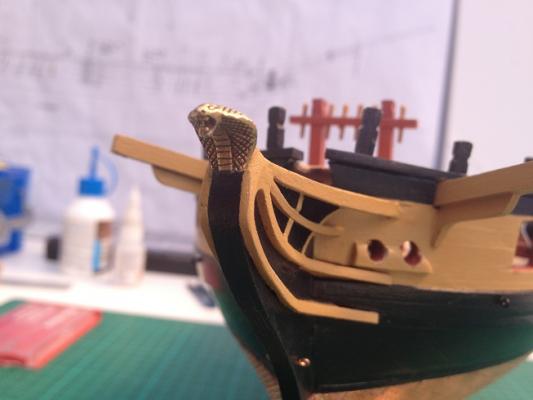
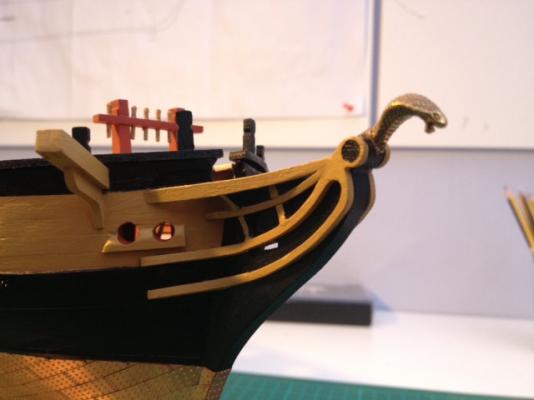
Doesn't life just seem to get in the way! Been a while but found a little time to get back to the build. Hopefully be able to post a bit more regularly again. Still working on the carronades but decided I wanted to improve the figurehead I had installed. I didn't like the way I had it before so instead removed it, and reworked the fitting. Comments welcomed! First image is a before, and second two afters.....

- 412 replies
-
- 2
-
-
- snake
- caldercraft
- (and 1 more)
-
Things are a bit less hectic so back to the build it is! Putting together my last 8 carronades. Then rigging for the 16 not yet rigged. A quick question. Have tried to create coiled rope, coiling out from the centre but this seems to be really tricky. Would a piled coil of rope on the deck be more or less appropriate? First things first though. In Portsmouth to visit HMS Victory and warrior this afternoon. Plenty of pics for future modelling inspiration!
-
Hi mate, Happy Birthday! Now that life has quietened down a bit again, I can start back on the Snake build and keep an eye on yours. More Carronades to assemble and rig......
-
Hi Pete, Off the top of my head I seem to remember 0.25mm for the tackle lines and 0.75mm for the breaching rope.
-
Hi Lol, sorry for the delay. I have my finals in a week or so, so the build has been put aside for the time being. Once i'm done i'll be right back on it!!
-
Hi Stergios, I ordered some extra rigging hooks and eyepins and rings to rig up the carronades. The blocks are 3mm singles and doubles. I am in the process of rigging my carronades. I will take some images as I go, so hopefully should give some hints.
-
That looks really good Jason! Starts looking up method......
-
Looks really good in the sun Jason! Currently toiling away putting carronades together and making rope coils for the deck.....
-
Cheers for that Jason. I am actually on holiday in Cornwall at the moment. Will be passing by Cornwall Model Boats on my way home and will pick some 2mm rope up. Anyone need anything else whilst I'm there! ;-)
-
Quick query. Putting together my first anchor and the instructions call for the 2.5mm rope to be used which makes sense, but then this must be threaded through the first grating. The grating in question is constructed with a couple of cross beams missing to allow for the rope but the three main beams do not allow enough room to thread the rope through. Is it worth removing the outer two beams at the front to allow enough room with just the central beam in place. Make this makes sense.

-
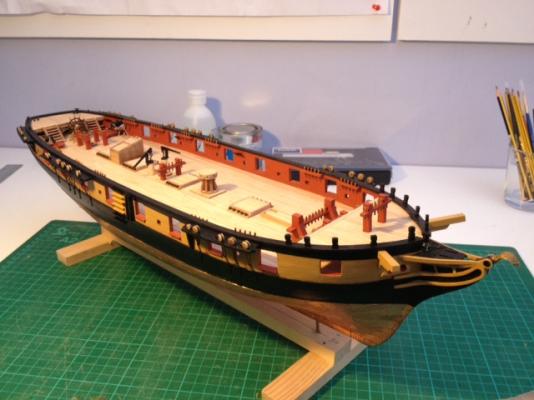
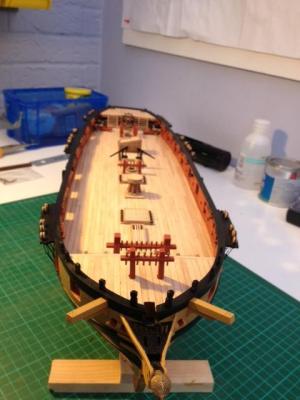
Hello, Quick update to add some images so far. The hull is pretty much finished! I have spent some time touching up paintwork and trying to make sure that all the required eyelets, cleats, holes etc have all been added. I will now varnish the while lot. Still trying to decide whether to use my brush on Polyurethane varnish or use a couple of coats of a spray on varnish. Primarily I want to make sure that everything is as protected as it can be before adding all the masts and rigging. Next step is to build and rig up the remaining carronades. I have also shaped the first part of the bowspirit and also stained in walnut as described in the instructions. The colour is extremely dark and my first gut instinct was that it seemed a little too dark, but I may be just fussing over nothing.

- 412 replies
-
- 2
-
-
- snake
- caldercraft
- (and 1 more)