HOLIDAY DONATION DRIVE - SUPPORT MSW - DO YOUR PART TO KEEP THIS GREAT FORUM GOING! (Only 13 donations so far - C'mon guys!)
×


jim_smits
-
Posts
653 -
Joined
-
Last visited
Content Type
Profiles
Forums
Gallery
Events
Everything posted by jim_smits
-
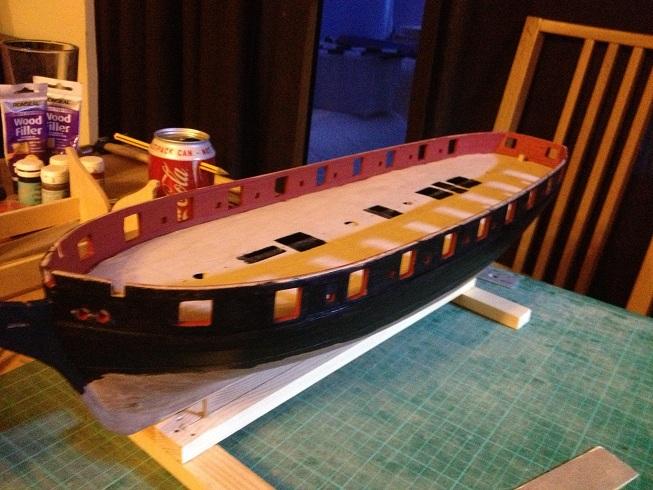
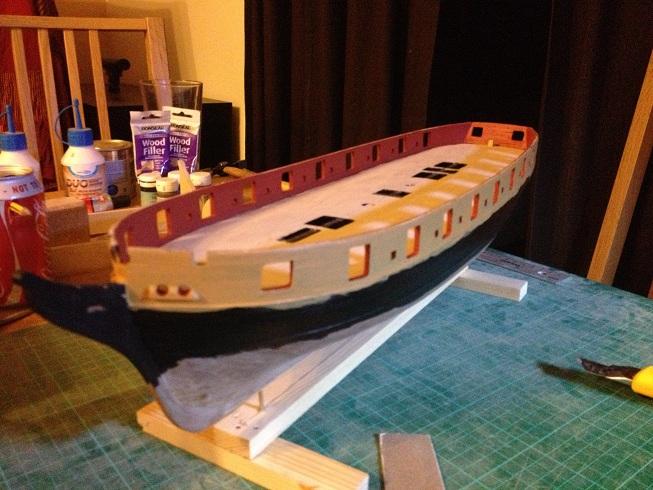
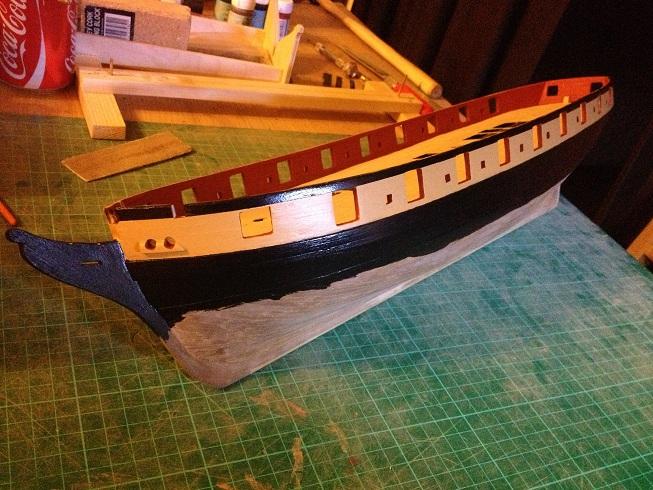
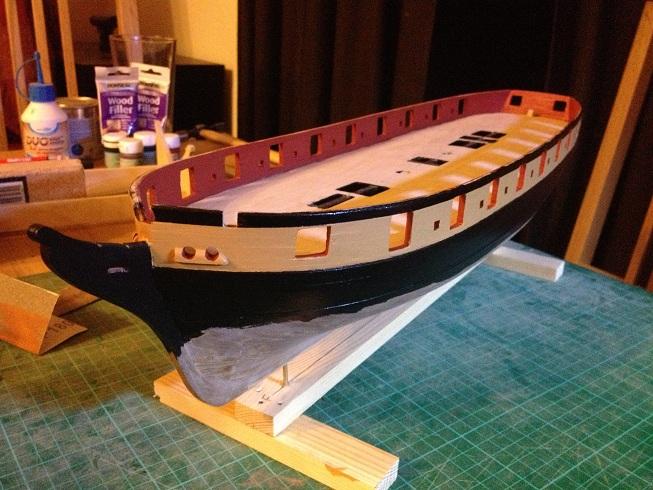
 Quick update. Managed to create a little jig to guide drilling the holes in the bulwark for rigging my carronades. Done one side of the ship now. Need to add the sills and holes to the other side. Also started to try and fit the capping rail. I've decided the easiest way of doing this is to permanently pin the rail in place and sink the pins slightly and cover with a little filler and paint. And finally, decided to add my little personal touch with the addition of a figurehead of sorts. A little Cobra figurine I found on eBay sold in Thailand. Chopped of the coiled bottom of the figurine and attached the hooded cobra head to the front of the bow, to fit underneath the bowspirit. Quite pleased with it!
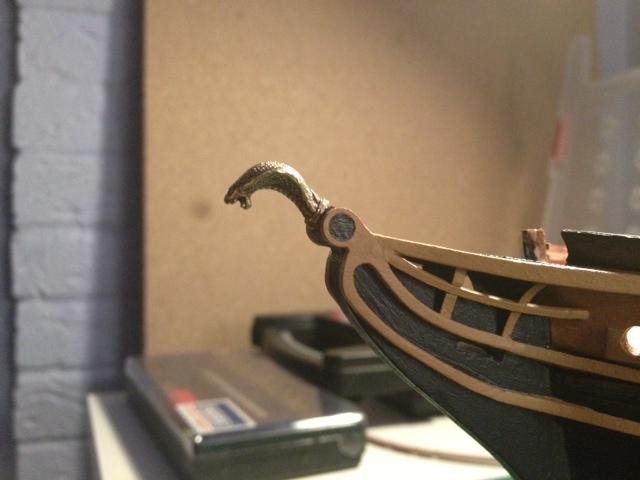
-
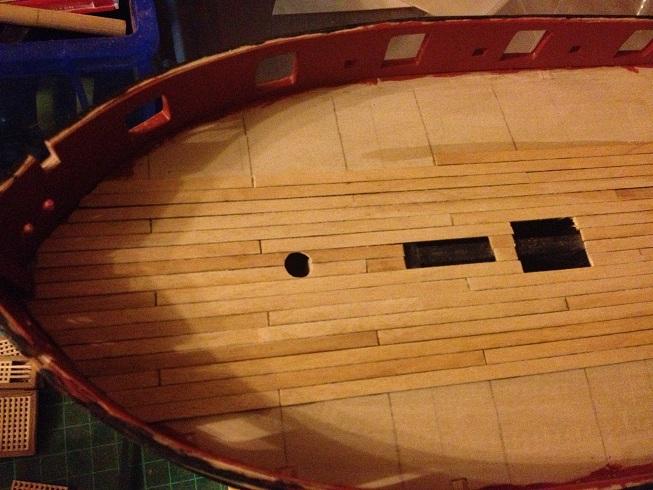
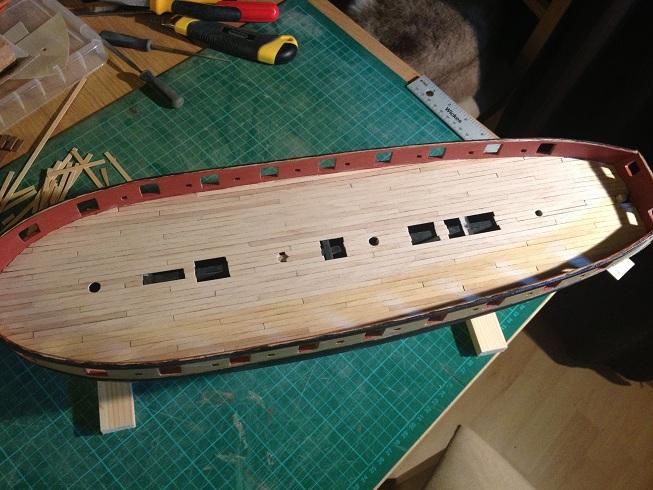
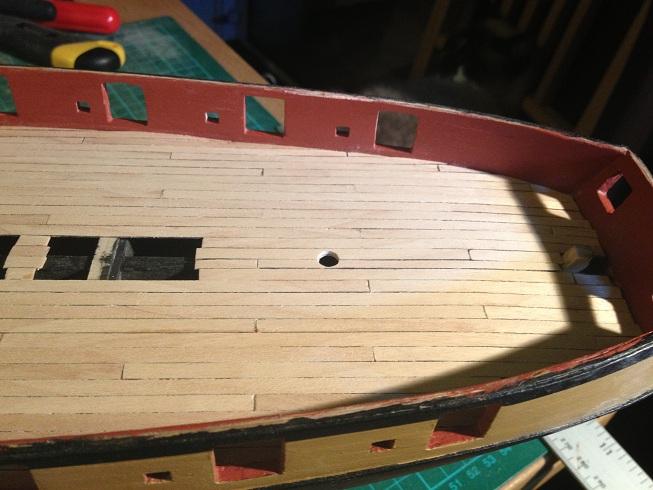
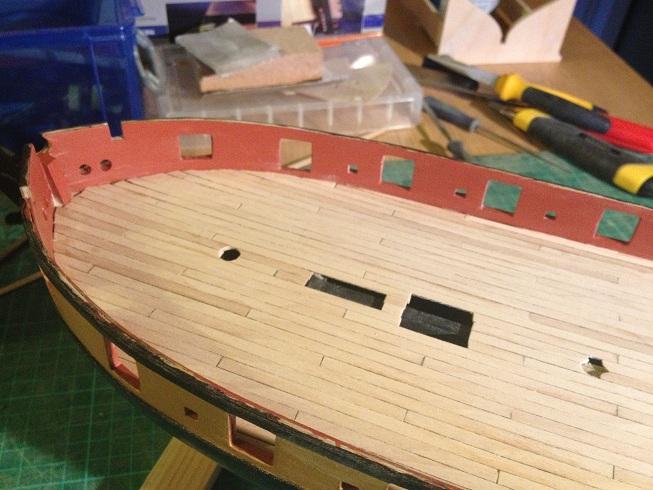
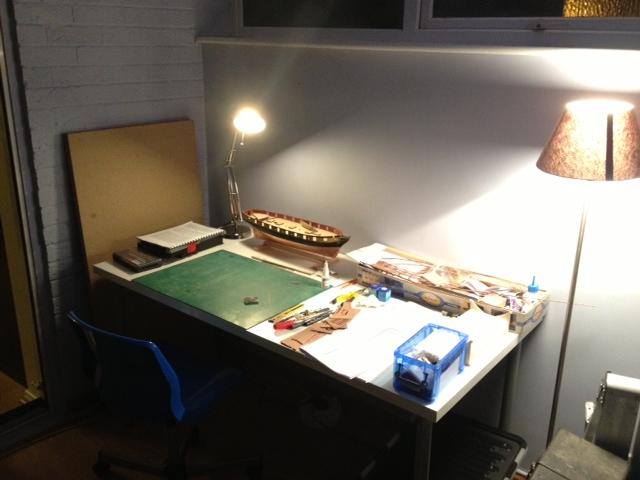
Hi, Managed to complete gunport sills down one side of the ship. I think in need to use some filler and touch up paintwork as I presume the sills should be seamless from the inner bulwarks? Also, thinking about the Carronades and whether many ships used a metal arc attached to the deck for the rollers of the carronade. Was thinking of potentially adding to the build but wondered if it was that common? Also made an upgrade to my working area. Decided to move from the lounge table. So I have cleared a space from the conservatory / lean-to extension, and bought a new worktable and chair. Lots more space to work now.
- 412 replies
-
- 1
-

-
- snake
- caldercraft
- (and 1 more)
-
Looking fantastic so far. Keeping a close eye on this build as I would like to attempt the Diana as my second build once my Snake is completed. Best of luck with the surgery.
-
Hi I personally haven't applied any varnish to the coppering. I will be letting it tarnish naturally. It depends if you want a shiny copper hull or not.
-
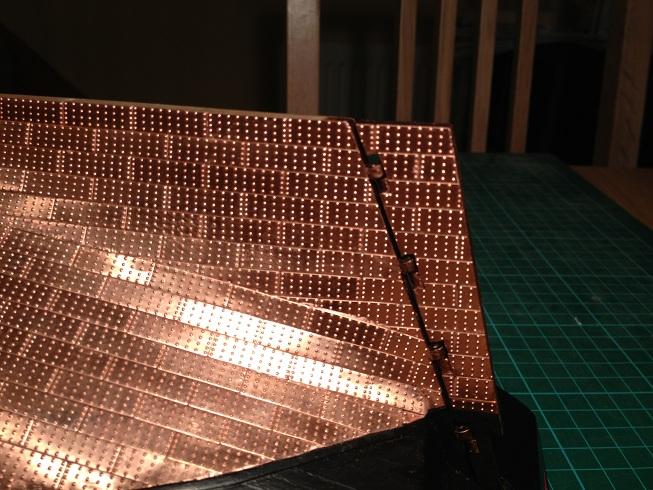
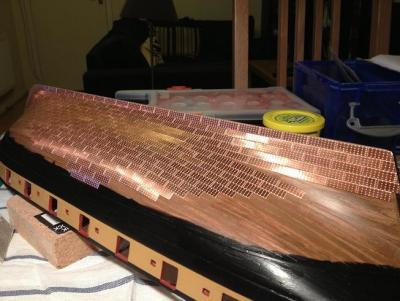
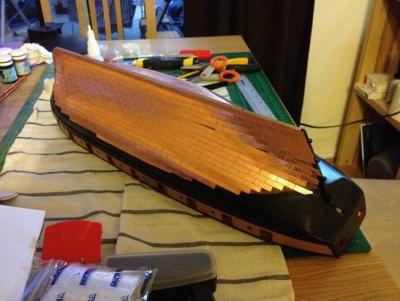
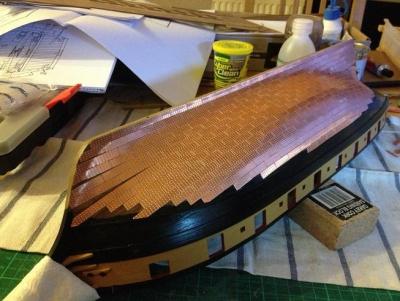
Hi all, Now I've finished the coppering I have now turned my attention to the plethora of different little jobs now to be done! Knocked together the capstan, companionway and the main assembly for the ships wheels. The actual wheels are a little underwhelming. Thinking of upgrading from caldercraft accessories. A wheel kit costs about £15. My question if anyone knows offhand is - is that for one wheel or a pair of wheels? Also now working on the gunport sills, filing to size and drilling the pivot pin holes. Finally, added the sills to fit the fore and aft platforms. Lots done and to do but makes such a pleasant change from the coppering marathon!
-
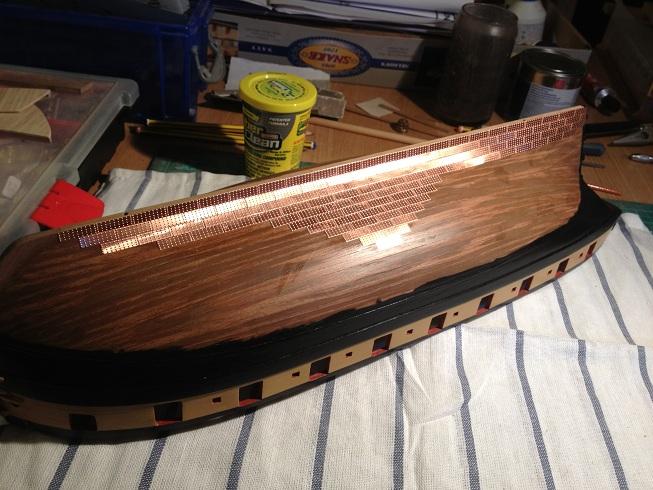
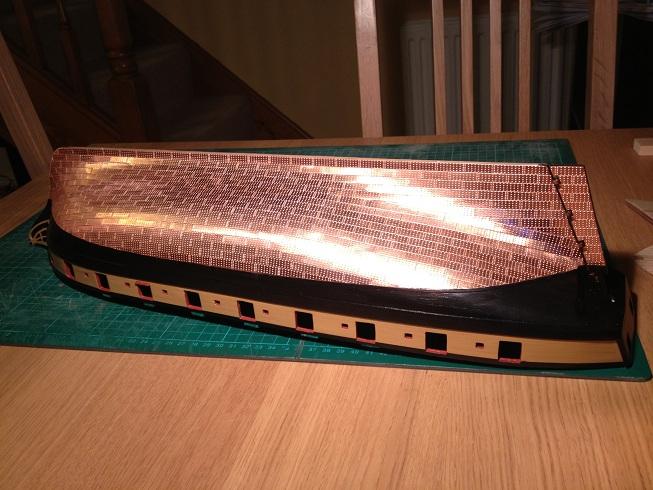
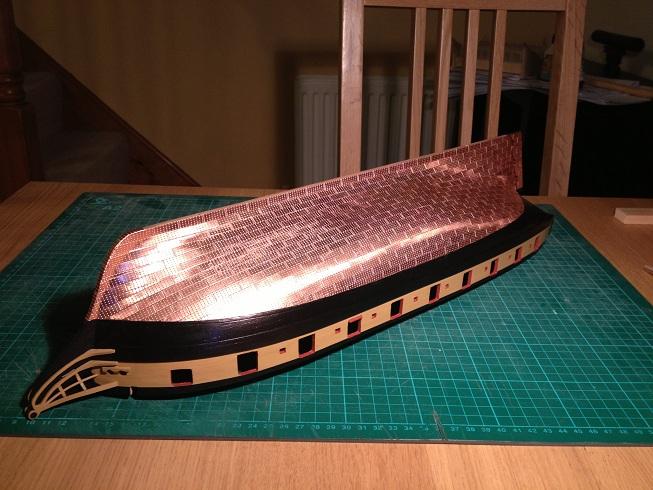
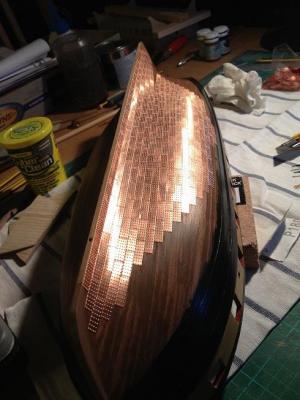
Hi all, Coppering complete!! Phew! That feels like a major accomplishment. The rudder is also complete. Painted the mounting pins in copper and also the inside edge of the stern and the rudder. Still have the rudder straps to add. Will paint these in copper as well. Still waiting on some round head pins from Cornwall Boats before installing the straps. Now looking forward to adding detail to the deck and hull. Already thinking that the capping rails might be a pain as they arent an exact fit.....
-
Got to agree with this sentiment as well. I am rapidly approaching my three month mark in build time and, barring a week away, I have worked weeknights and one day a weekend on my build. Only just about finished the coppering. I think three months would be possible if you were lucky enough to be retired and could dedicate several days a week to the build.
-
Jason,When tiling the bottom edge of the keel did you trim each tile to the correct width?
-
Looking really good Jason. I've been thinking about the coppering for my rudder, so these images will be really useful. Keep up the good work!
-
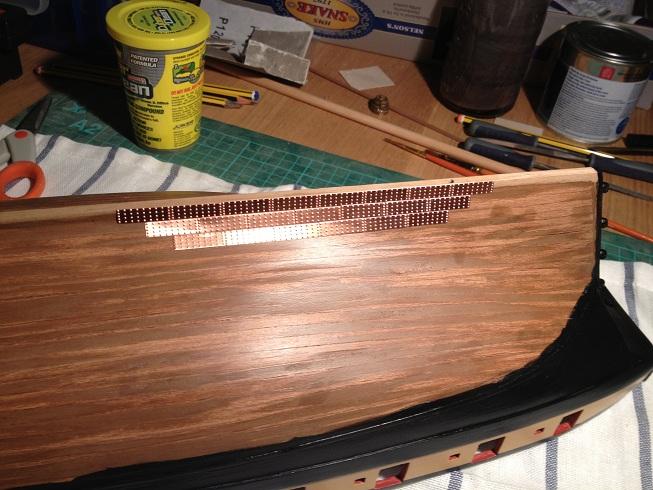
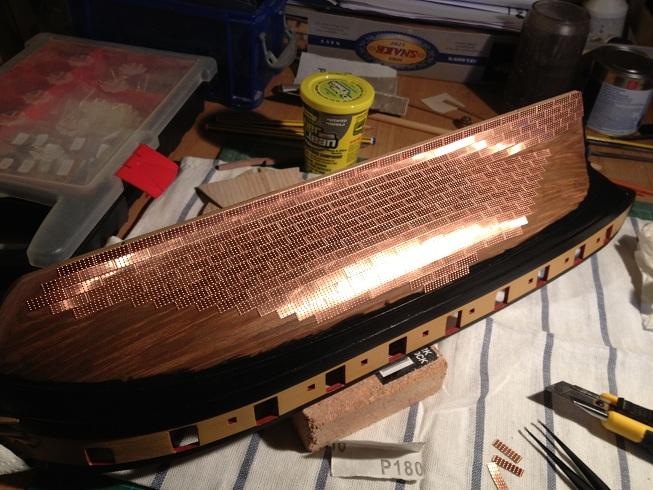
Coppering completed on the port side! Just the fine detail on the starboard to go.....

- 412 replies
-
- 1
-
-
- snake
- caldercraft
- (and 1 more)
-
Try cornwall model boats online. They are pretty good and ship international I recall. I will be ordering some bits and pieces from them in the near future....
-
Looks like the rudder fittings were brass from what I can determine. Looks like a bit of copper paint to go on the pintles etc.
-
Hi Jason To be honest the pintles are only under coated at the moment. Was thinking of copper as this would look better with the straps and plating. I will attempt to look up the authentic look though
-
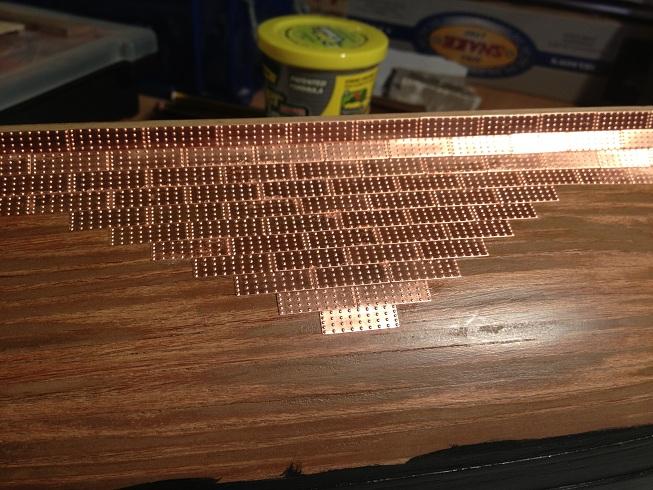
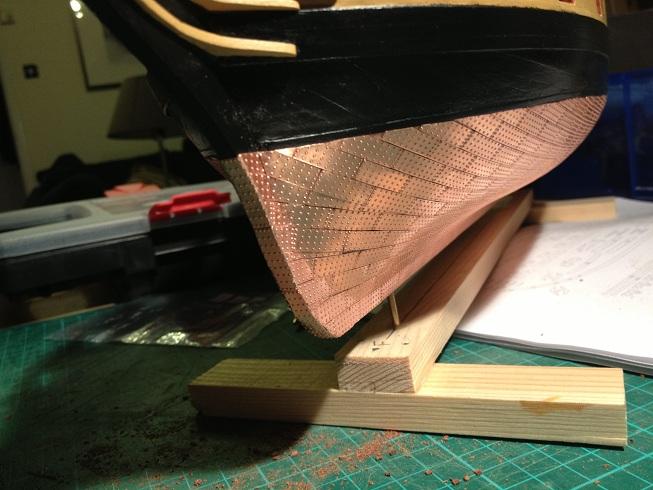
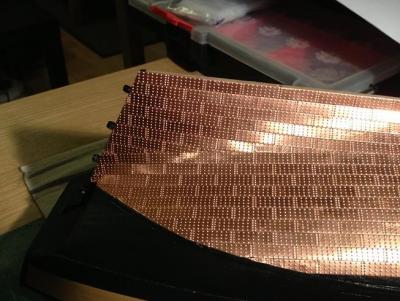
Todays progress so far... Some copper tiles peeled off to allow some overlapping where there were some really thin slivers required. I have also managed to lay upto the waterline approaching the bow. More 'stealers' to fill there as well....! Back to it!
- 412 replies
-
- 1
-
-
- snake
- caldercraft
- (and 1 more)
-
Hi Mort The vast majority of my tiles are butted together. I have only done overlap where I am left with thin slivers where the 'stealers' are. I still have the rudder to copper and I have just about enough plates. You could always buy some extra tiles?
-
Welcome back!
-
I did wonder about the laminated edges. Were you going for a walnut coloured paint?
-
Thanks for that Jason. Got bored of coppering and put the Capstan together and that got me thinking that it looked a little plain and I wanted to bring out some colour but without actually staining. I will purchase some satin and give that a go, and see how it looks. On the subject of coppering. For some of the 'stealers' and gaps did you physically overlap tiles or did you just cut to shape? If overlapping, I will need to remove some plates to lay the pieces to be overlaid. Just figured cutting to shape will take forever and might result in little gaps.
-
Hi. It was to protect the paint on the outside of the hull as I figure it will be subject to bumps and scrapes during the rest I the build. As an aside what sort of finishes work best for walnut deck fittings etc?
-
Hi Stergios Yes, I applied a couple of coats of Matt varnish over the entire hull. Polyurethane base to the varnish if I recall correctly. Hope this helps
-
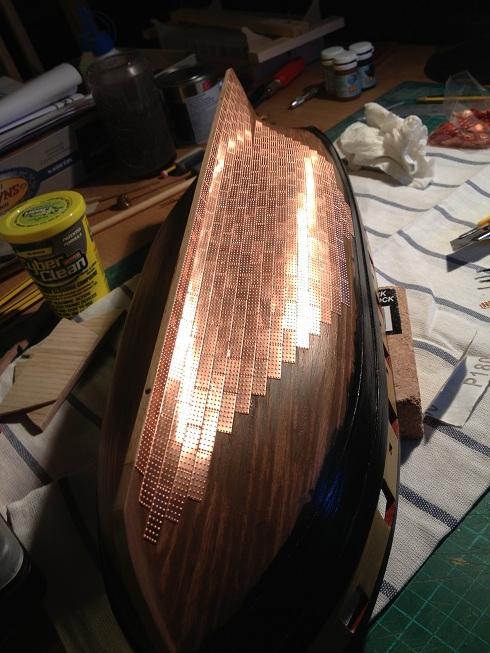
Last catch up to bring the build log back up to current state. At the coppering stage at the moment. I have completed the main bulk of the coppering on one side, with just the gaps to the waterline, stern, bow and 'stealers' to complete. I have also completed about 75% of the other side as well. Not looking forward to completing the gaps. wonder if I will have to flatten some plates and do some overlapping to ease the process. Of course this means I will need to remove and re-apply some tiles. Any advice? Going to concur with Beefwellingtons build in that Cyano seems to be the way to go with coppering, as long as care is used and a couple of small drops spread over the back of each tile. Tried contact adhesive but found it a pain to use on so many smalll items and quickly switched.


- 412 replies
-
- 1
-
-
- snake
- caldercraft
- (and 1 more)
-
Good to see you back and log up and running. I will mail over the cache of your old log tonight.
-
Hi Mort, I hadnt planned on rigging train tackle and to be honest hadnt heard of a train tackle for carronades in the same way as cannons. I was planning on doing the breaching tackle and also rigging up tackle for pointing of the carronade. Anything else will look bulky I would imagine. My carronades will wait until I have finished coppering and adding the other deck details. Further images to follow tonight to catch up on coppering work. Completed the main coppering on one side but still need to add the cut plates to finish upto waterline and to the bow and stern.