HOLIDAY DONATION DRIVE - SUPPORT MSW - DO YOUR PART TO KEEP THIS GREAT FORUM GOING! (Only 75 donations so far out of 49,000 members - C'mon guys!)
×


Jim M
-
Posts
165 -
Joined
-
Last visited
Content Type
Profiles
Forums
Gallery
Events
Everything posted by Jim M
-
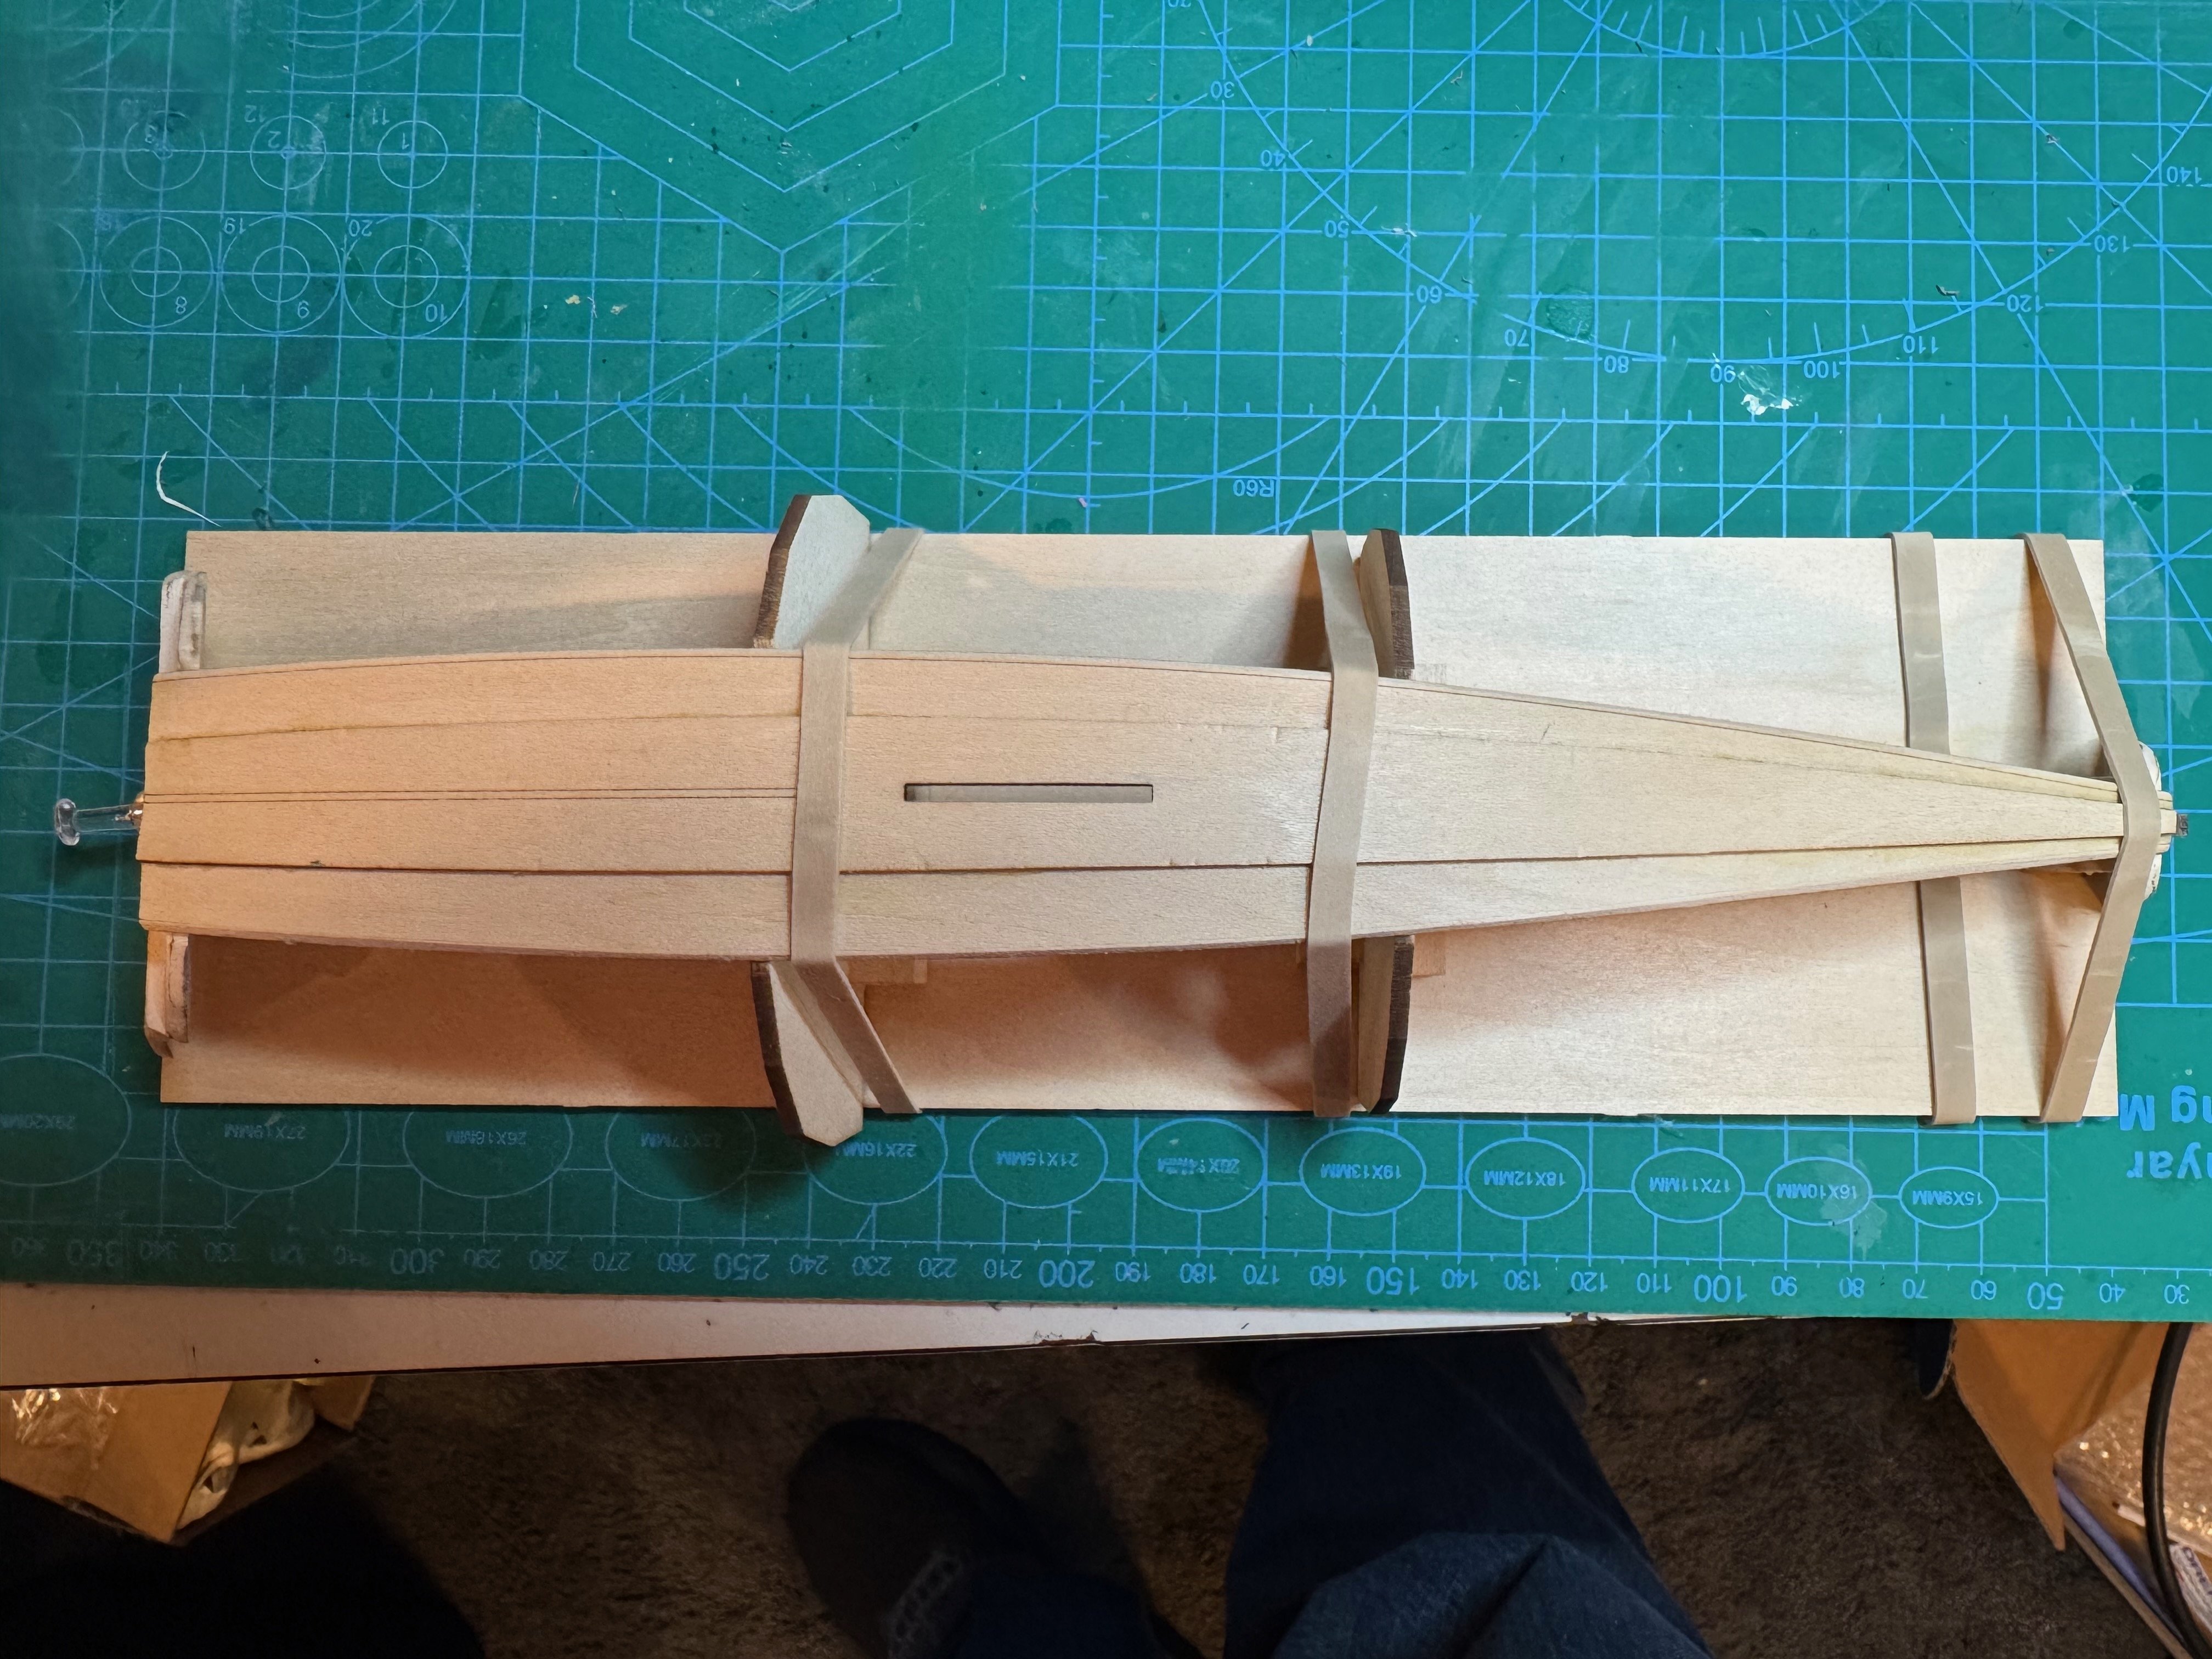
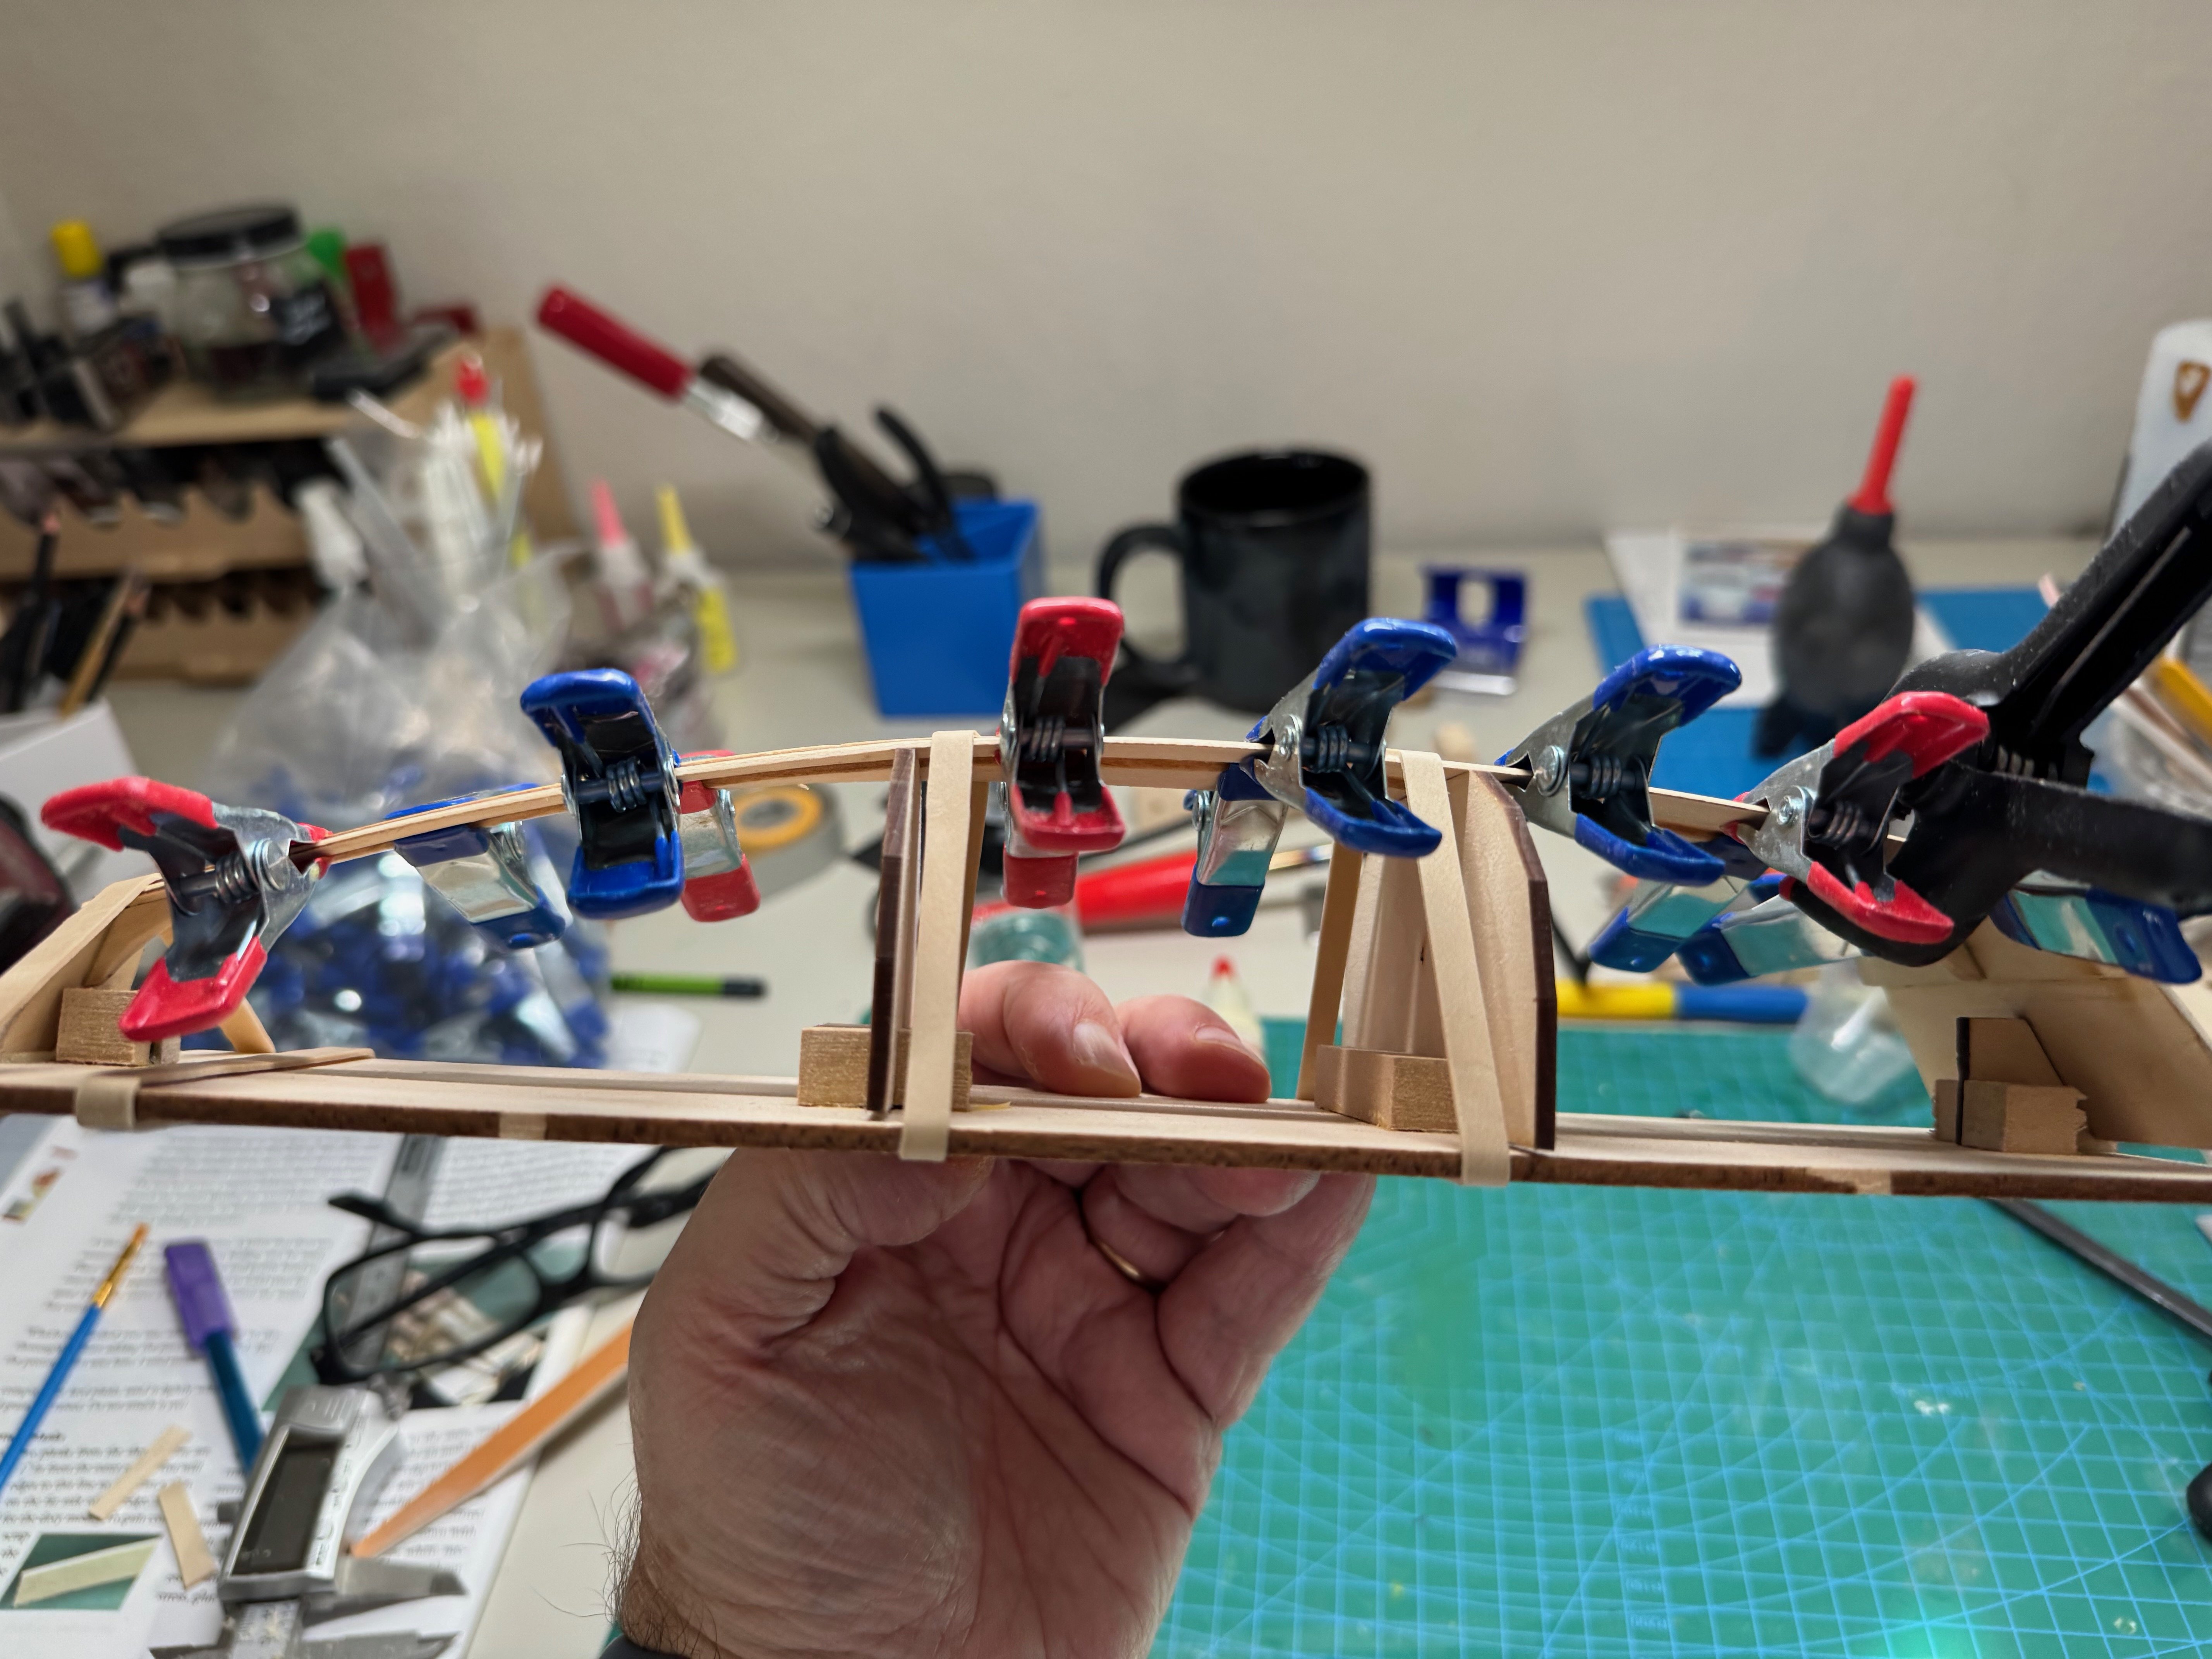
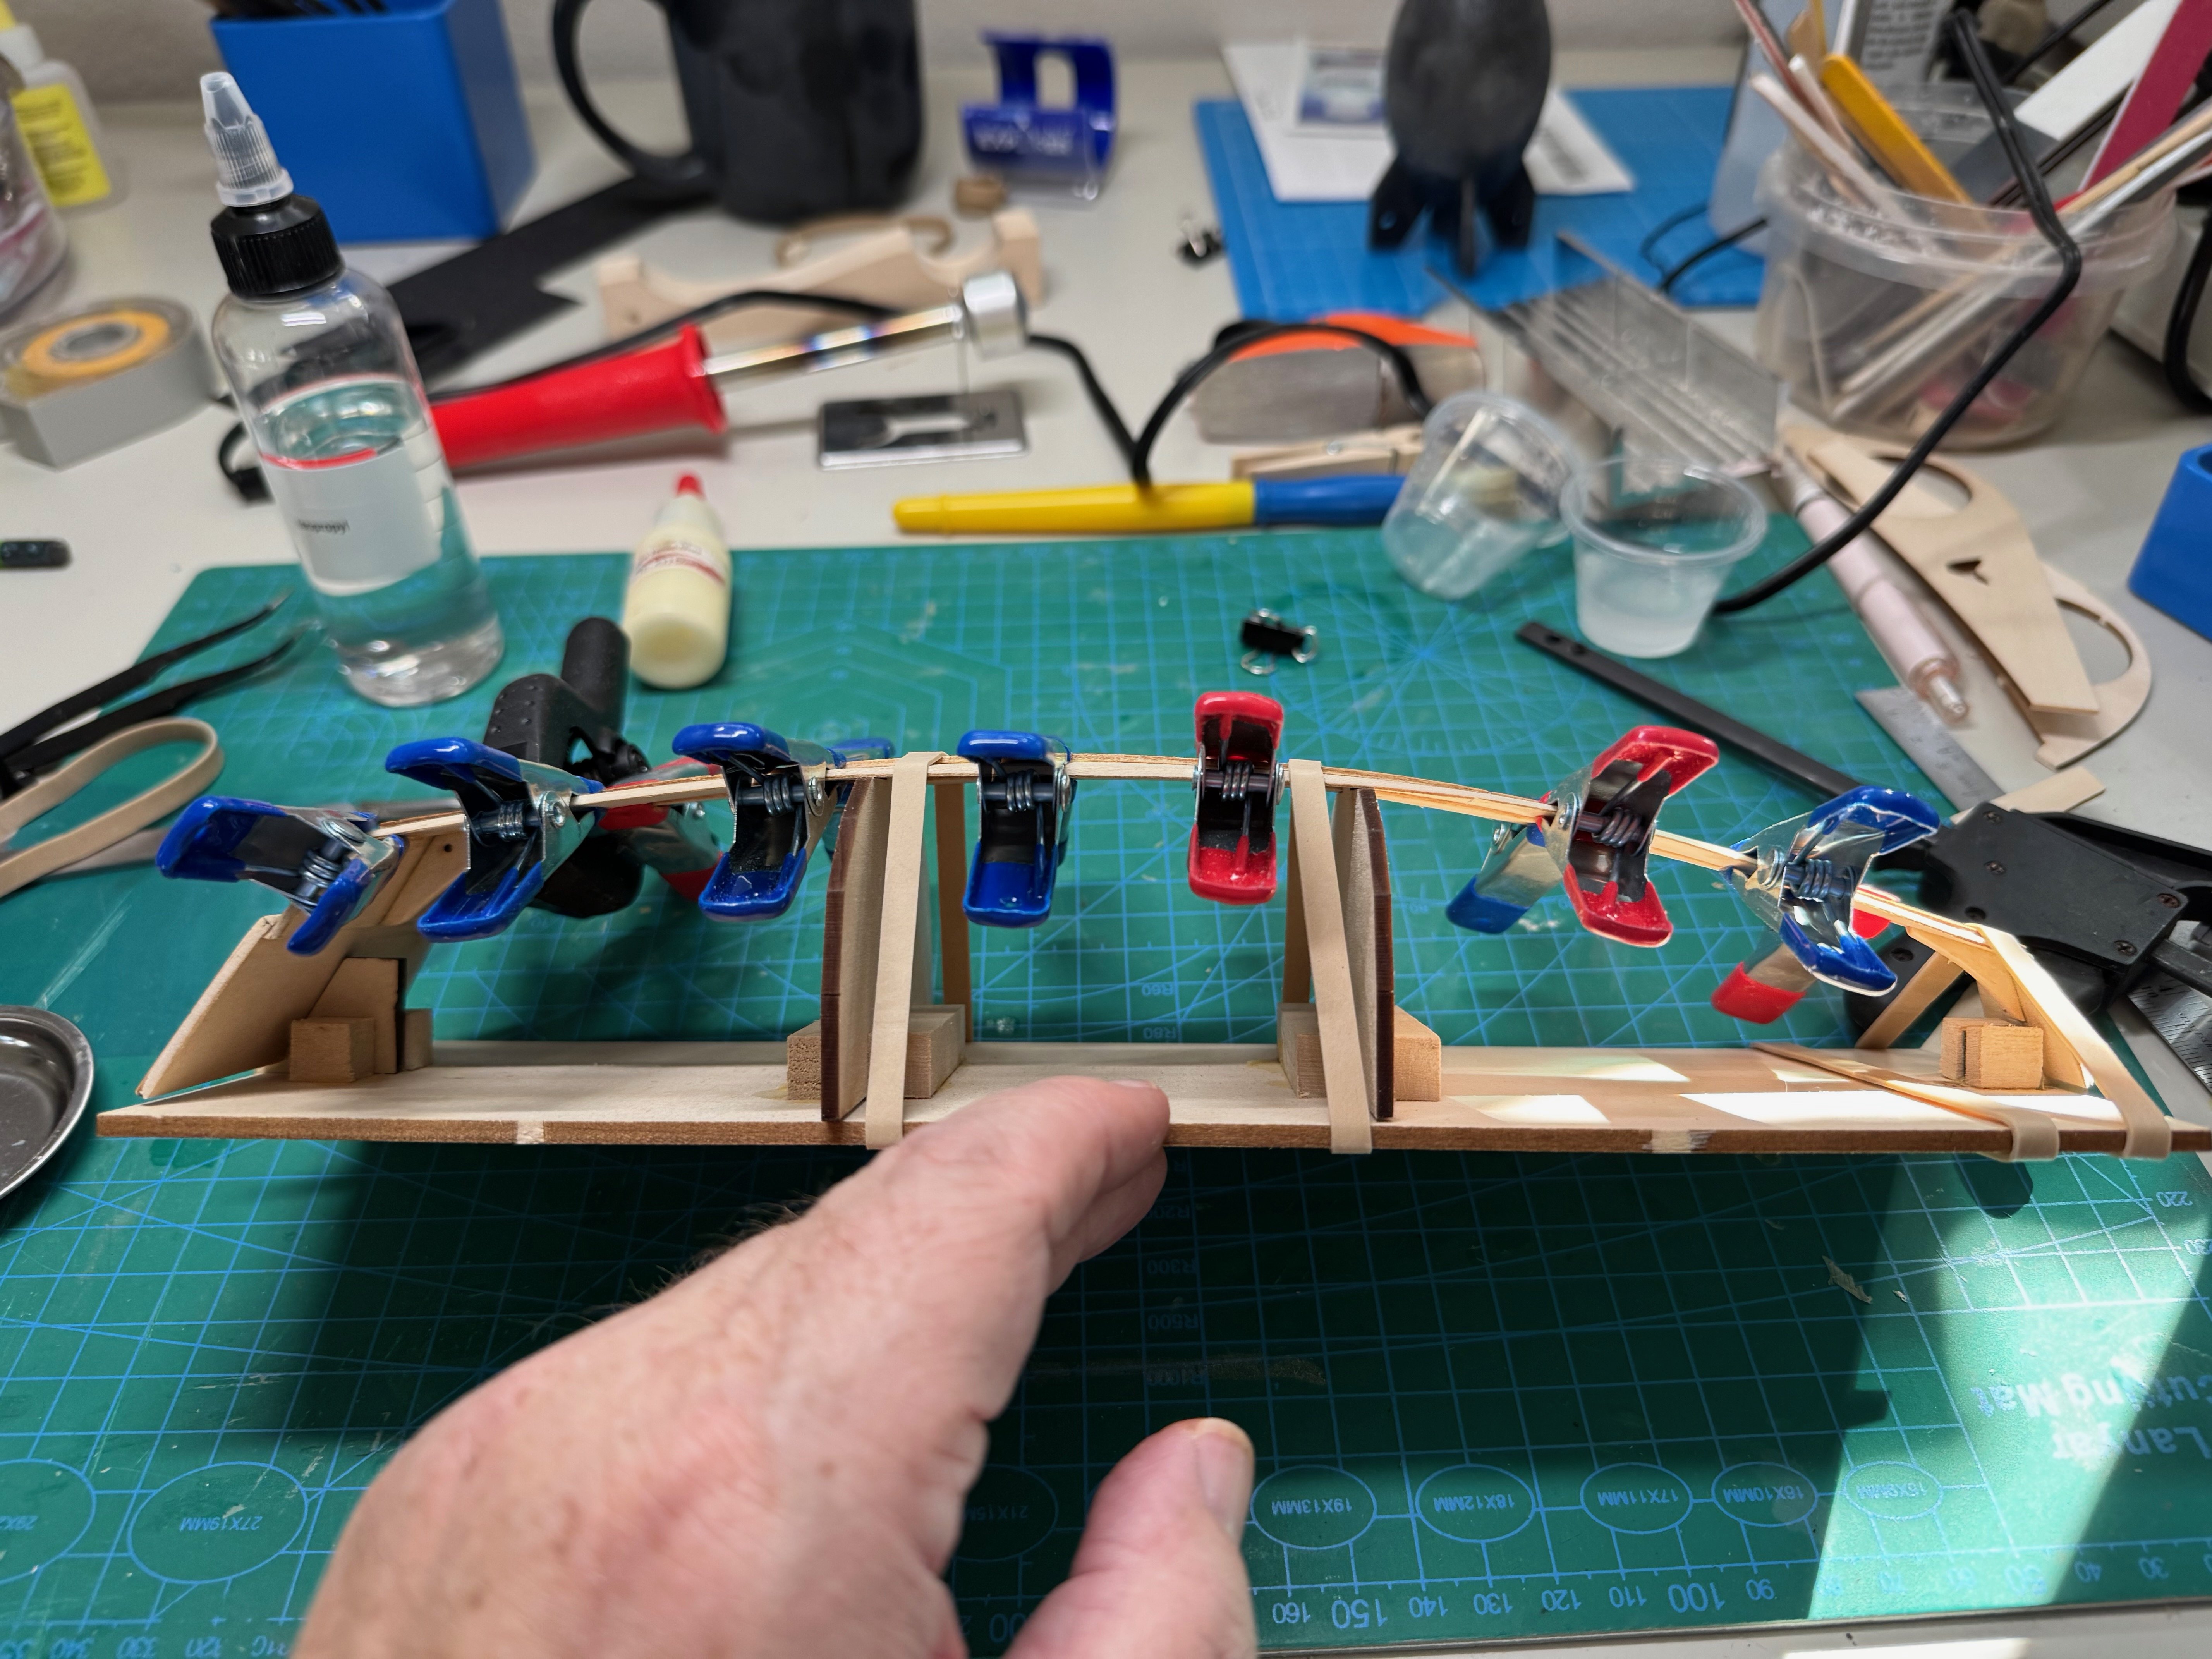
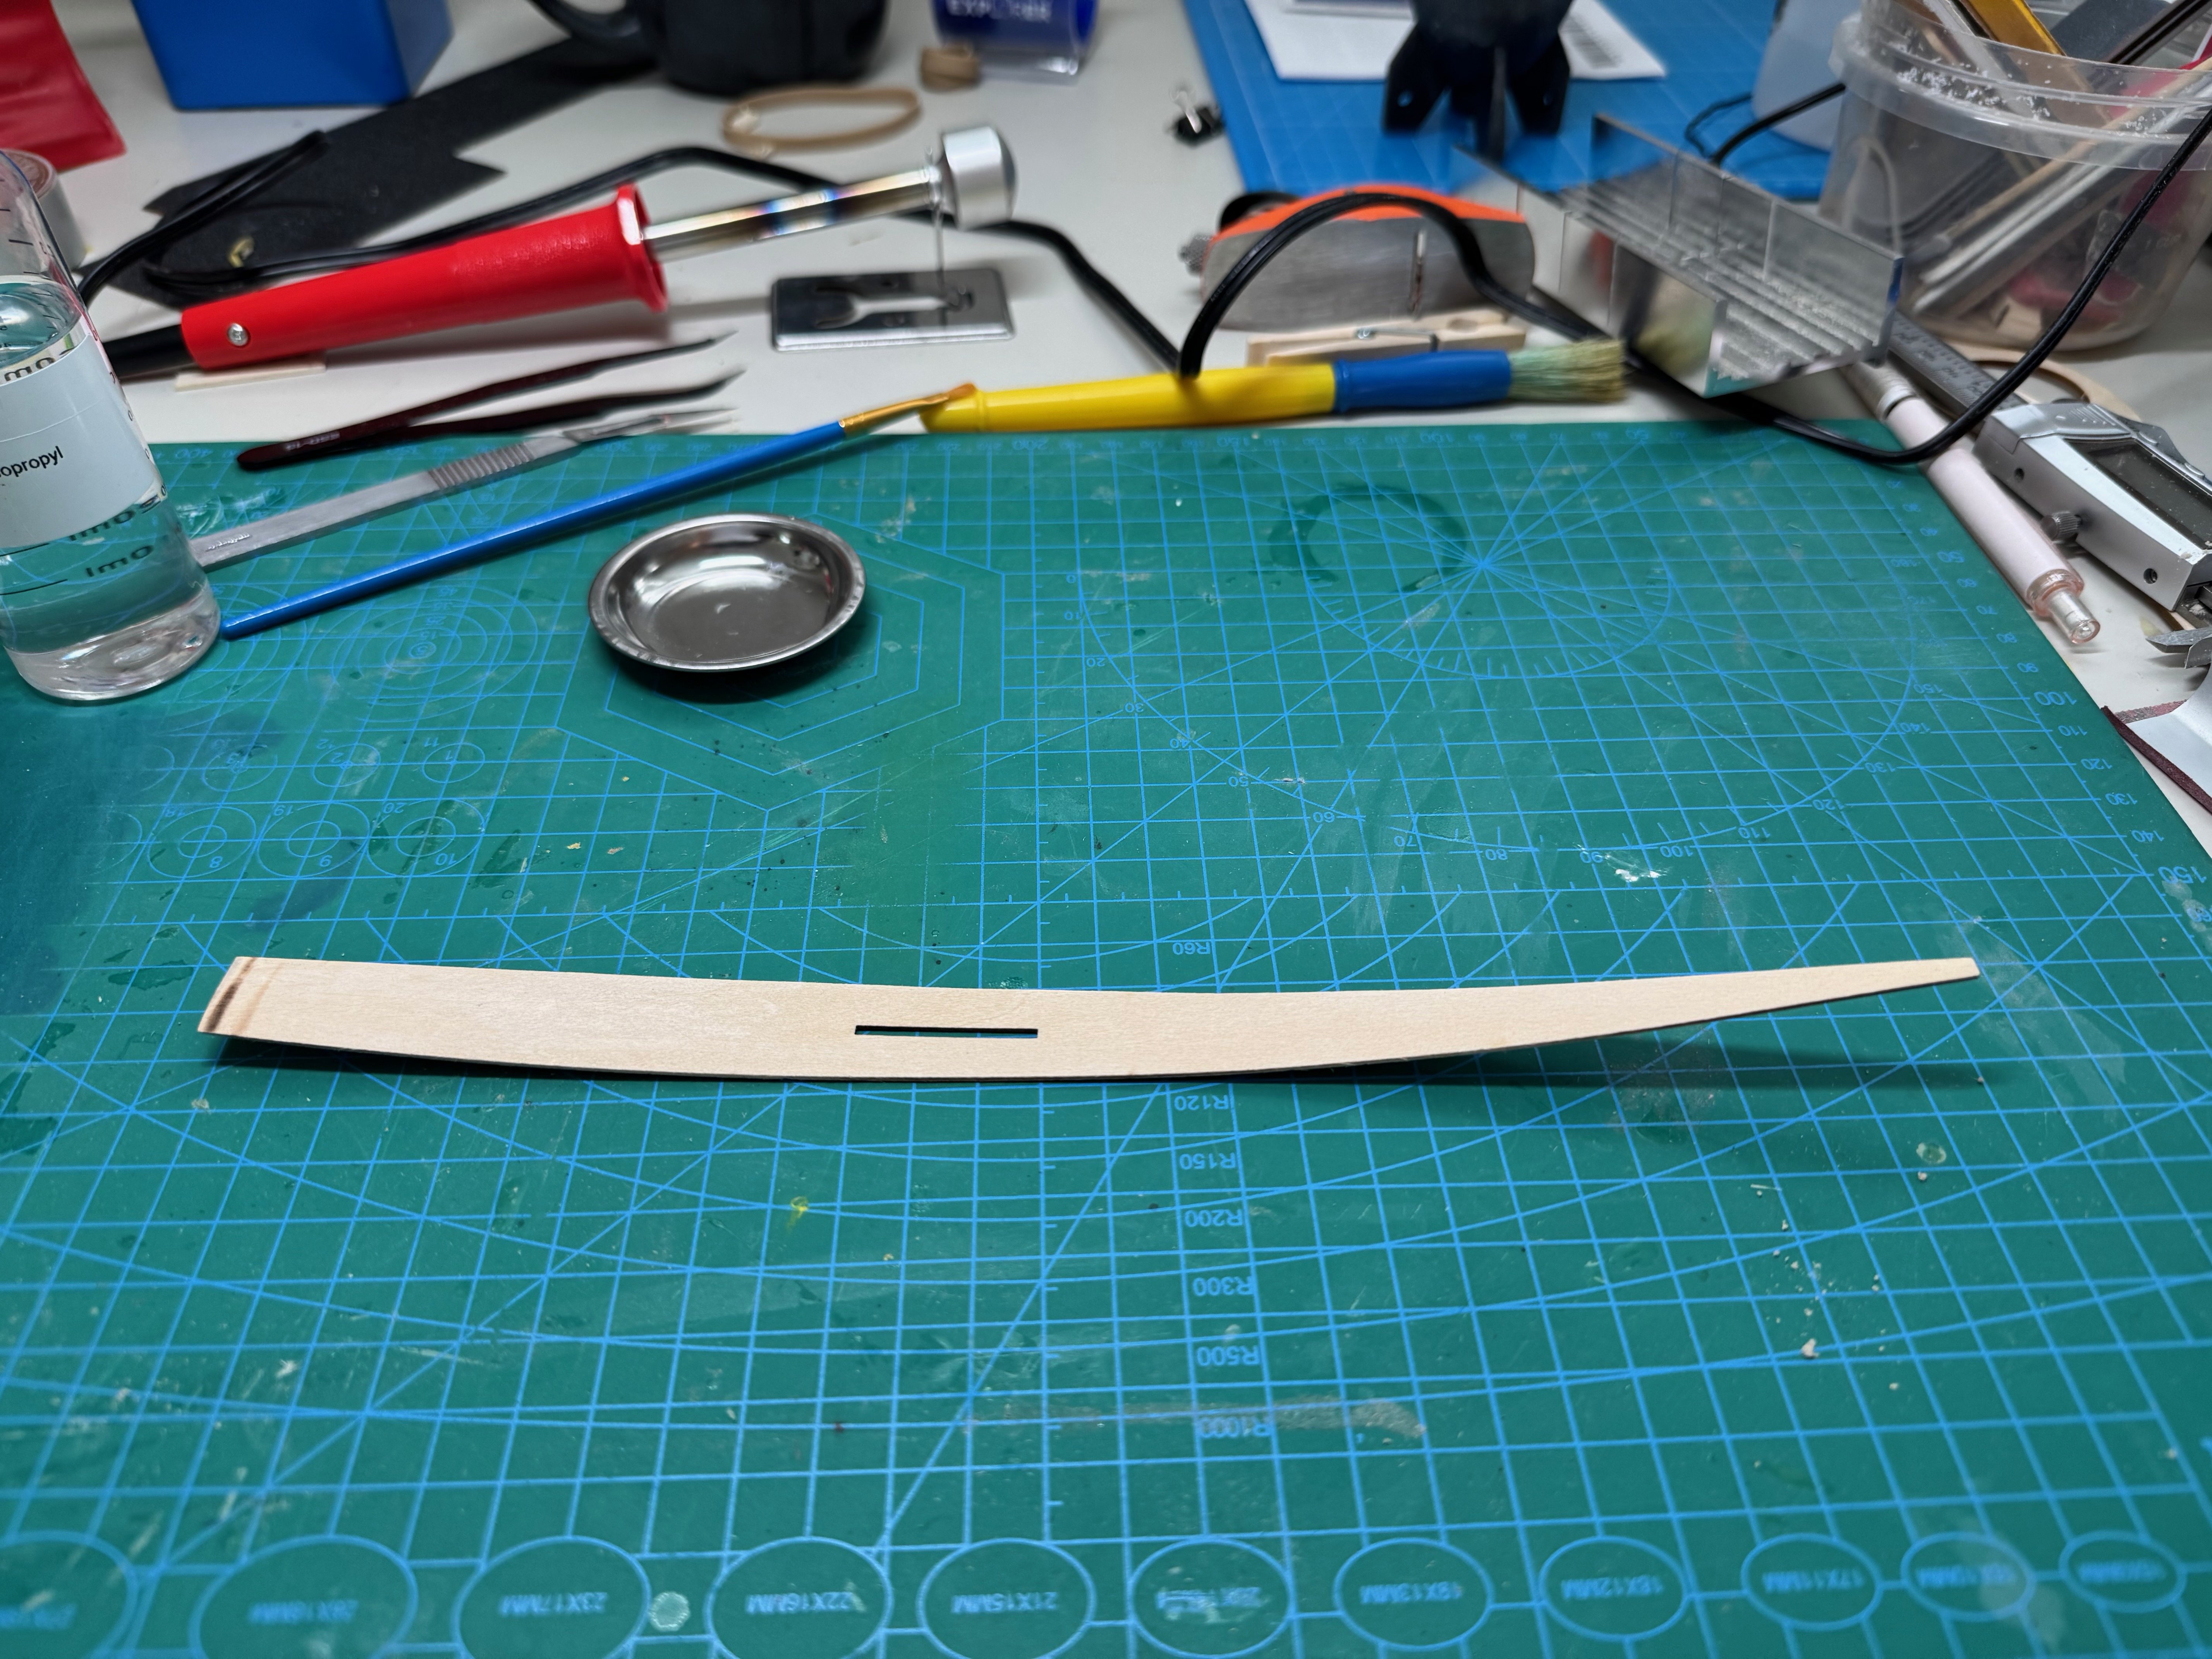
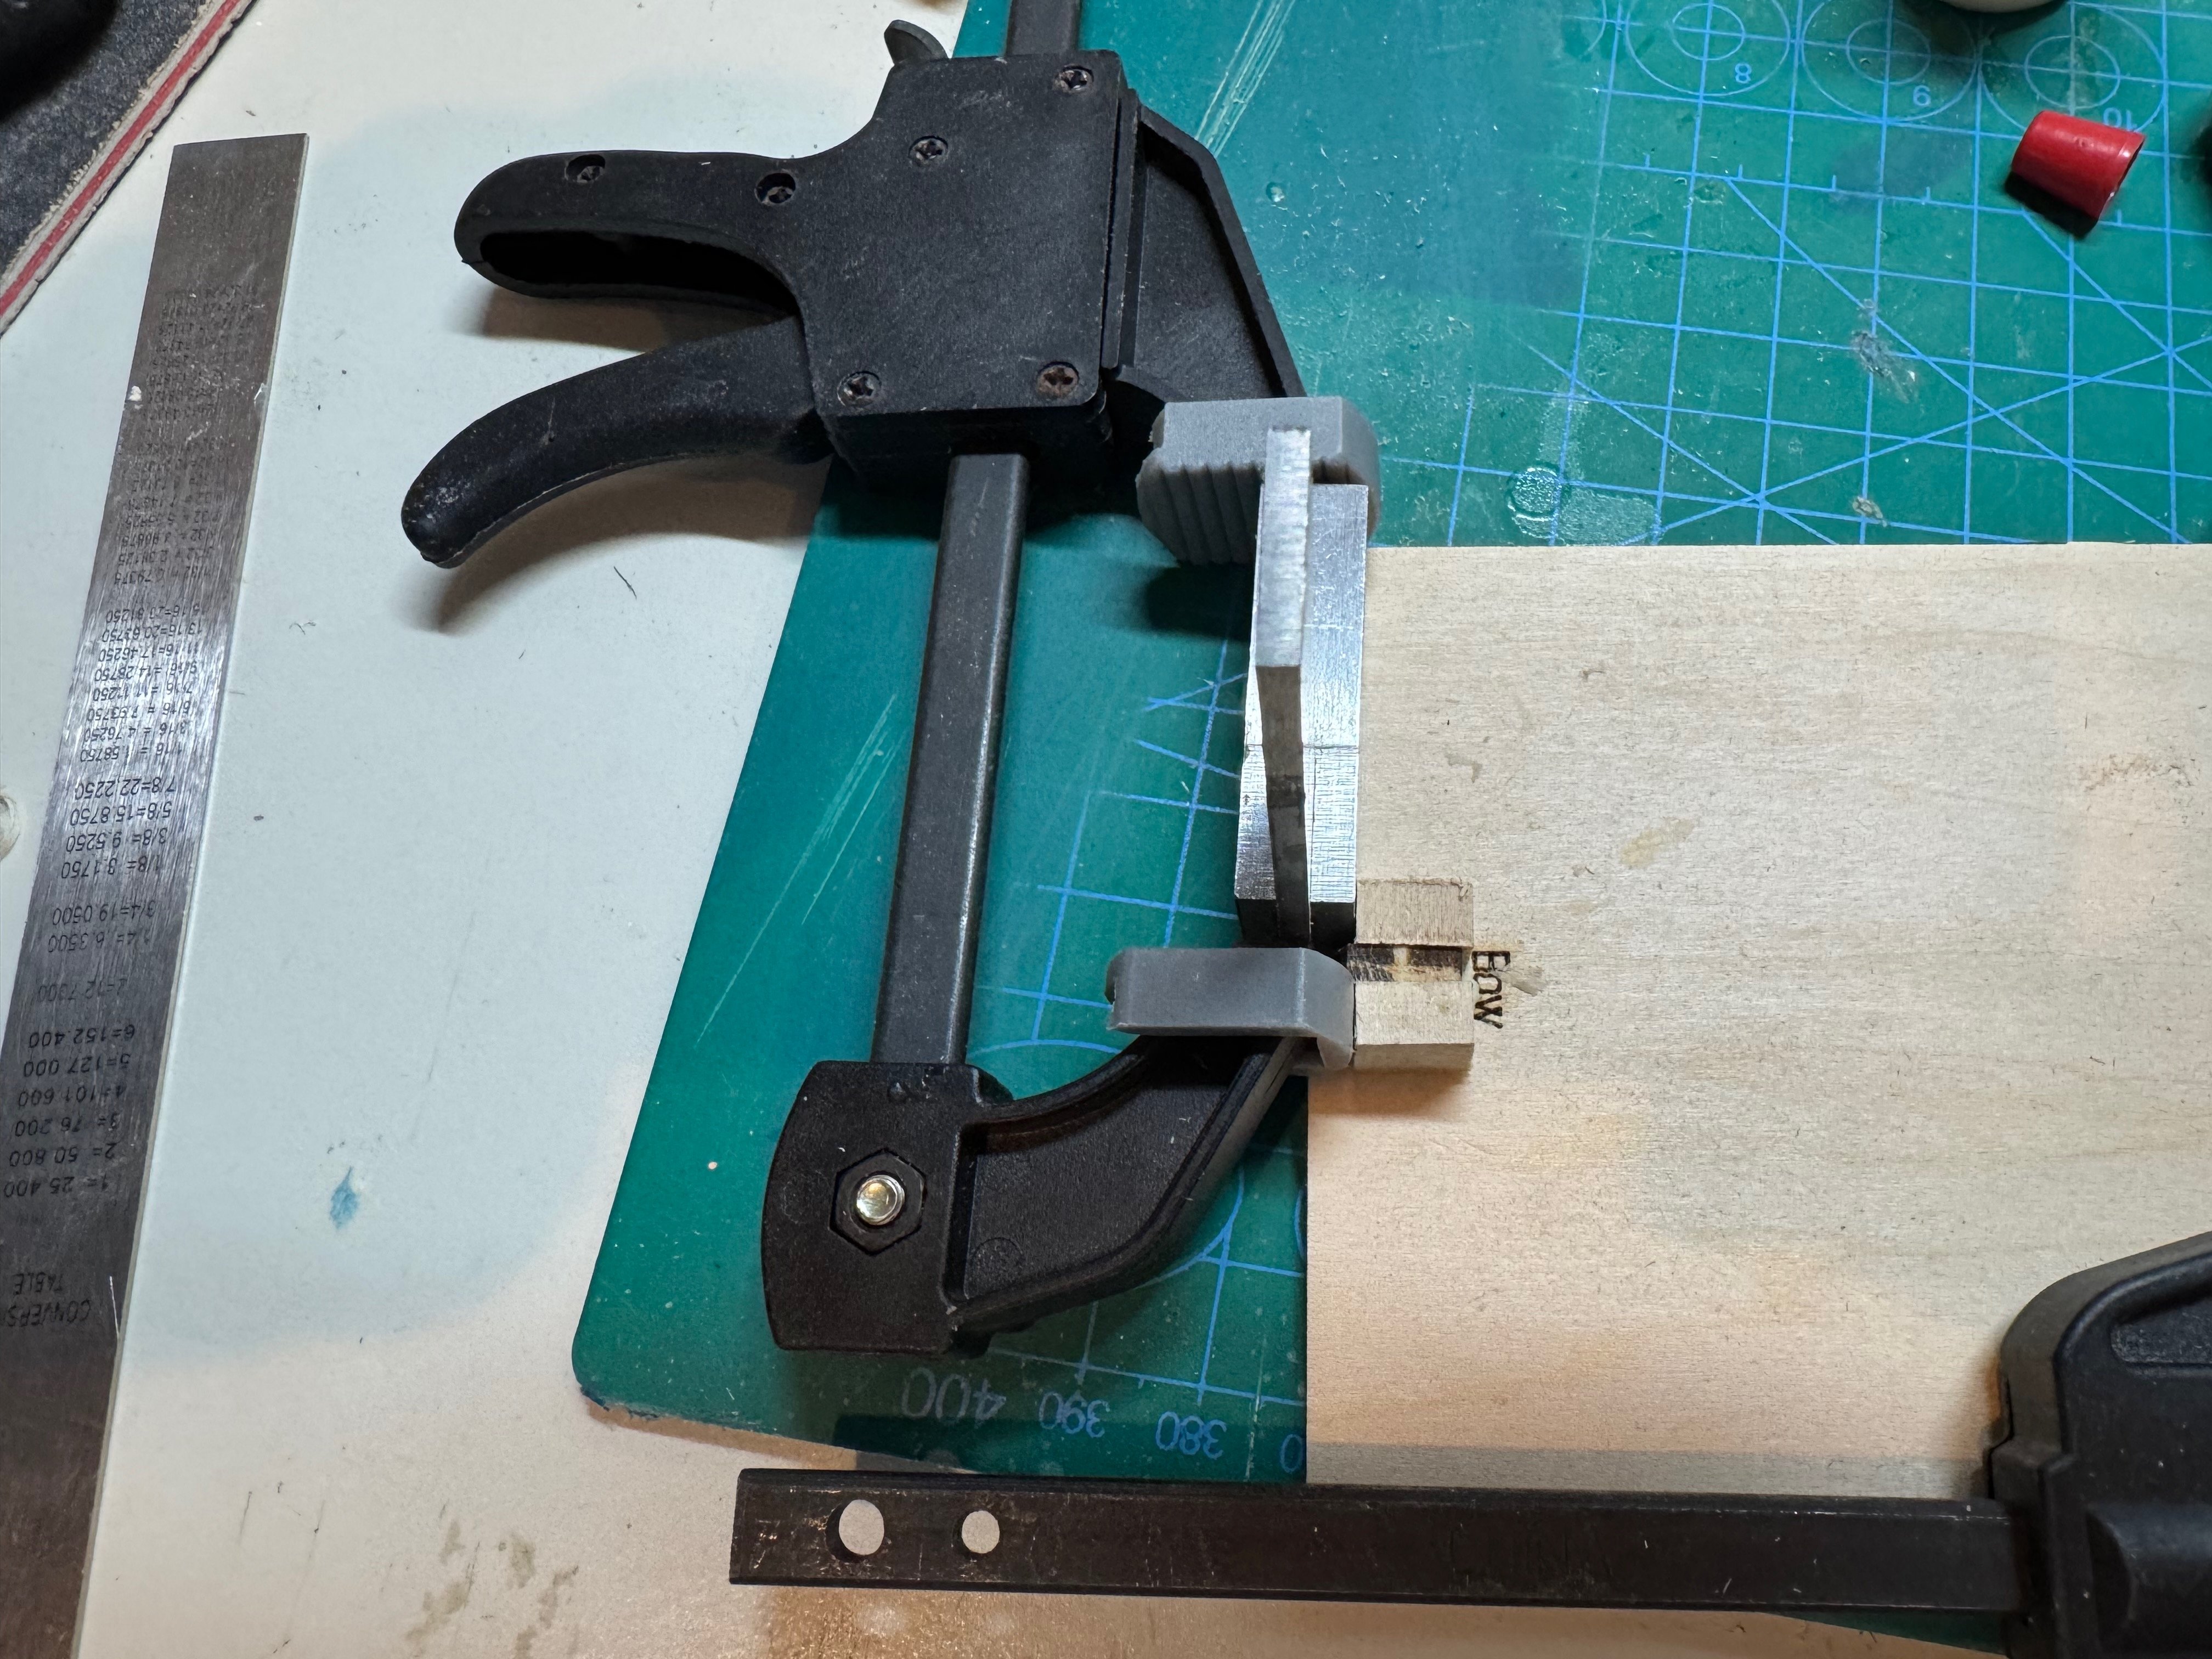
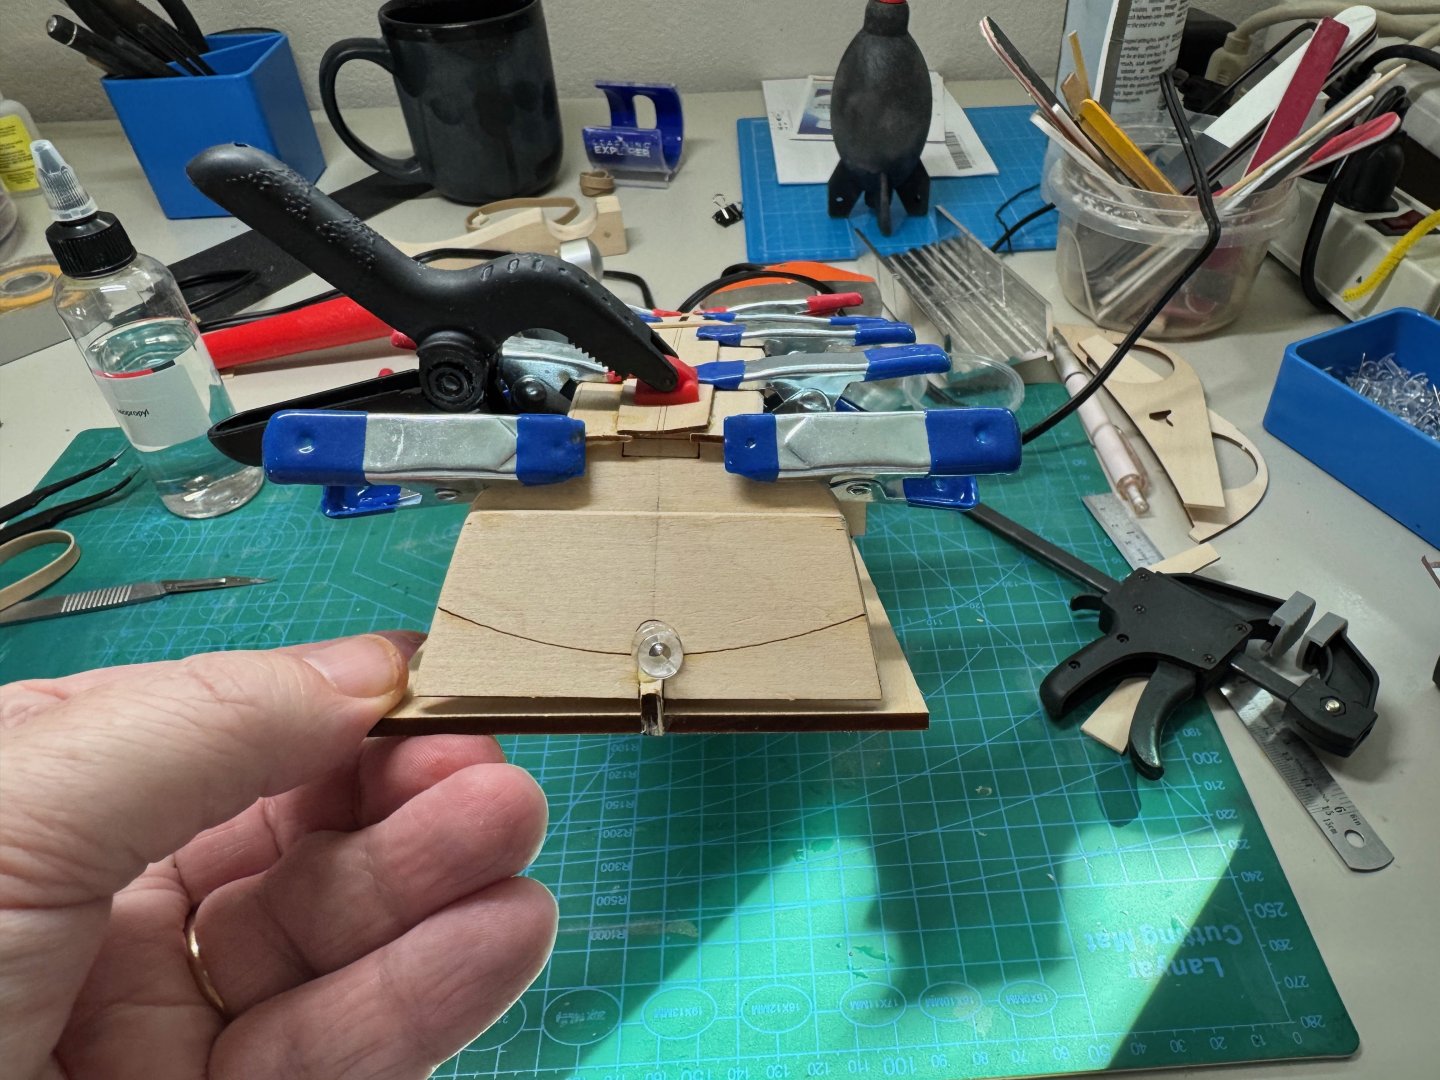
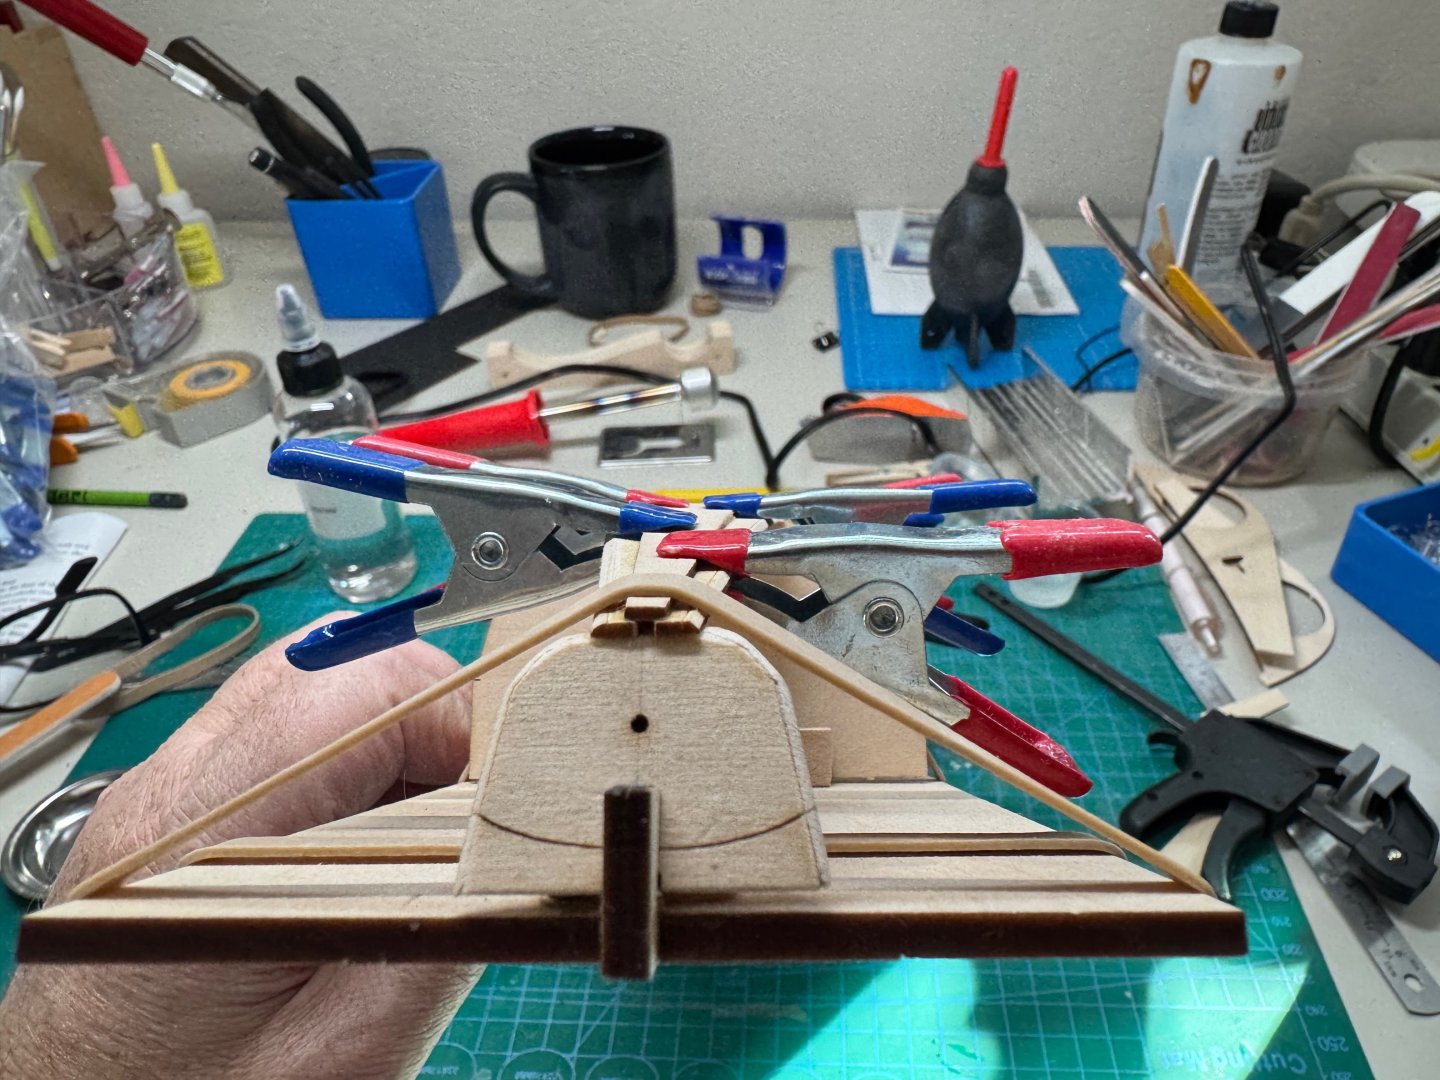
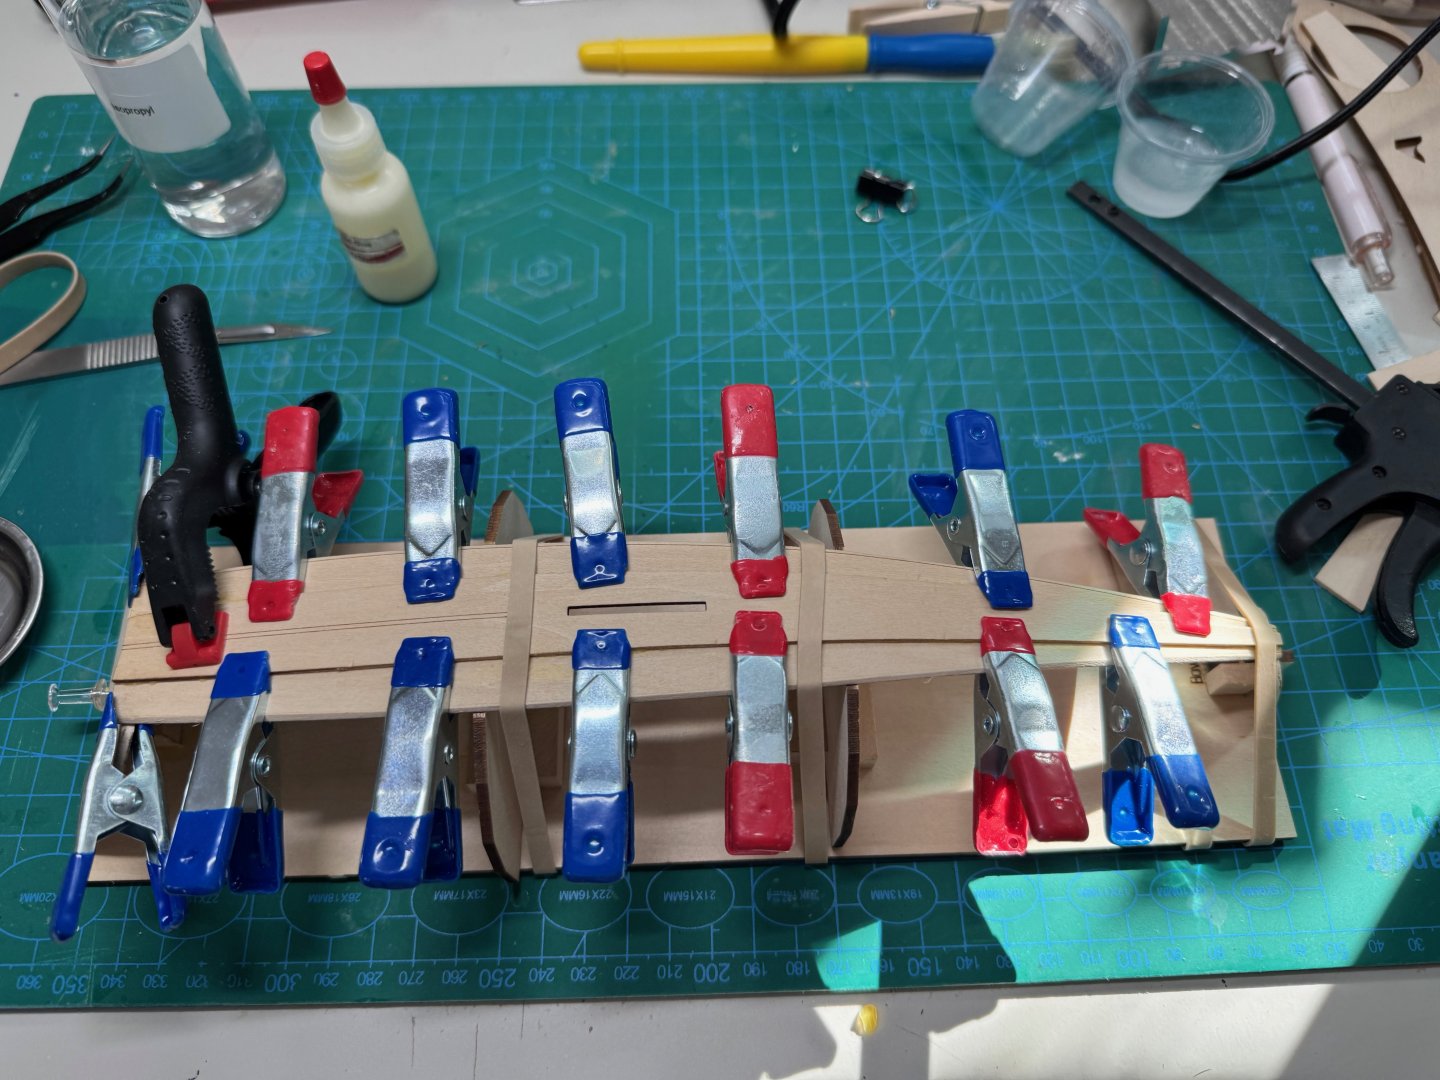
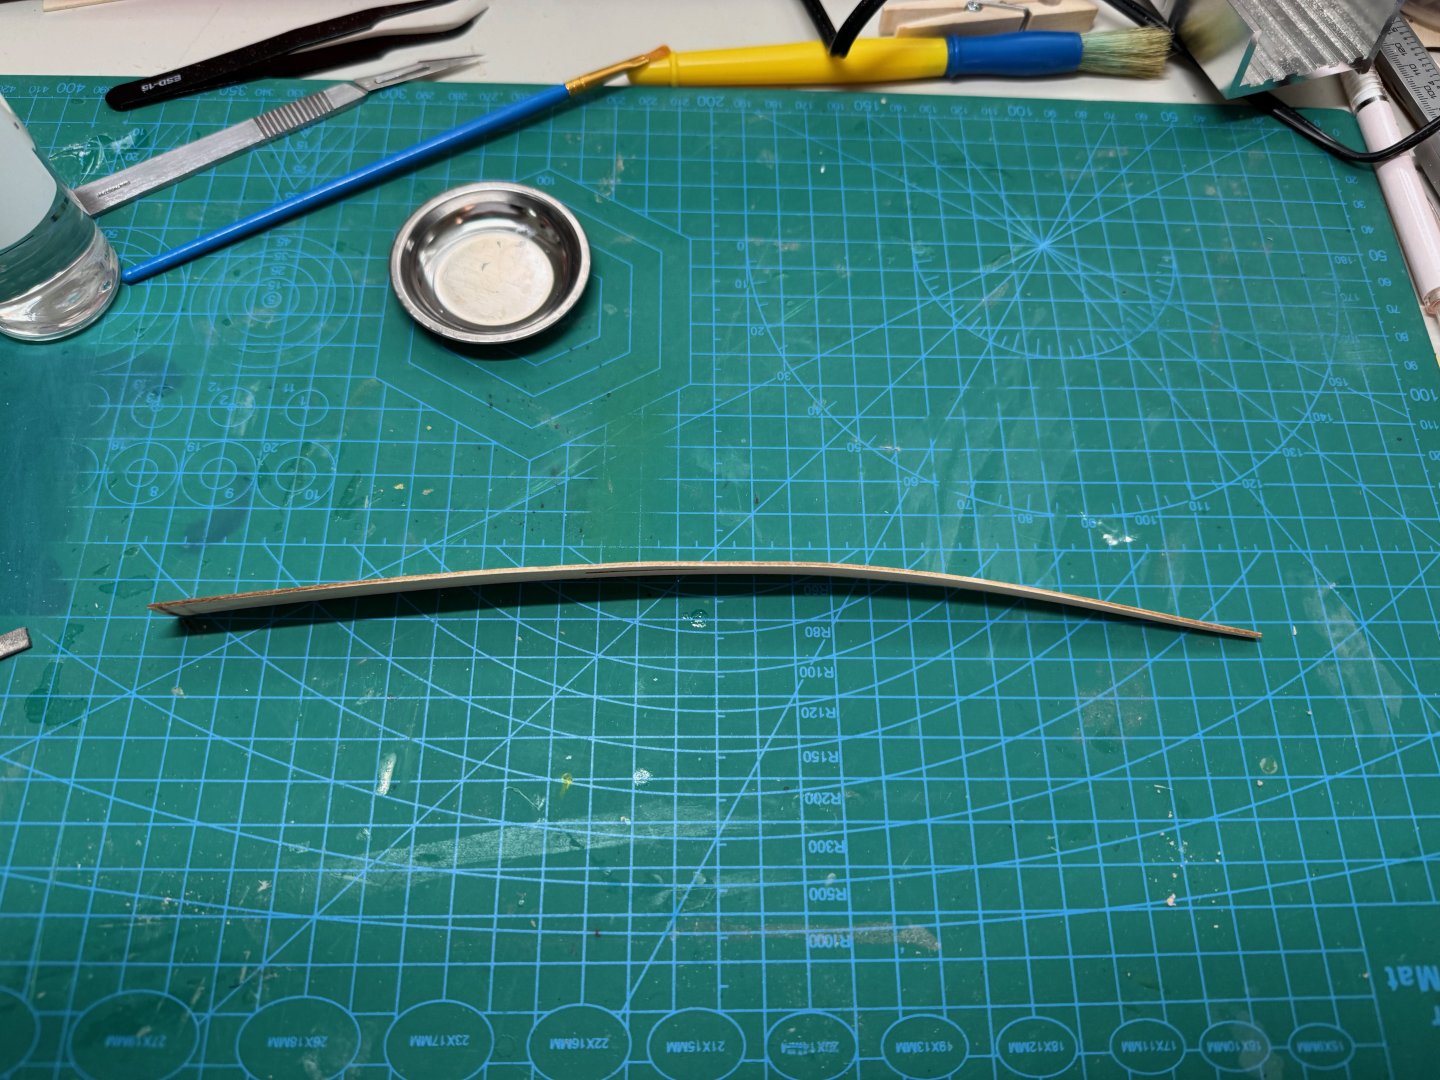
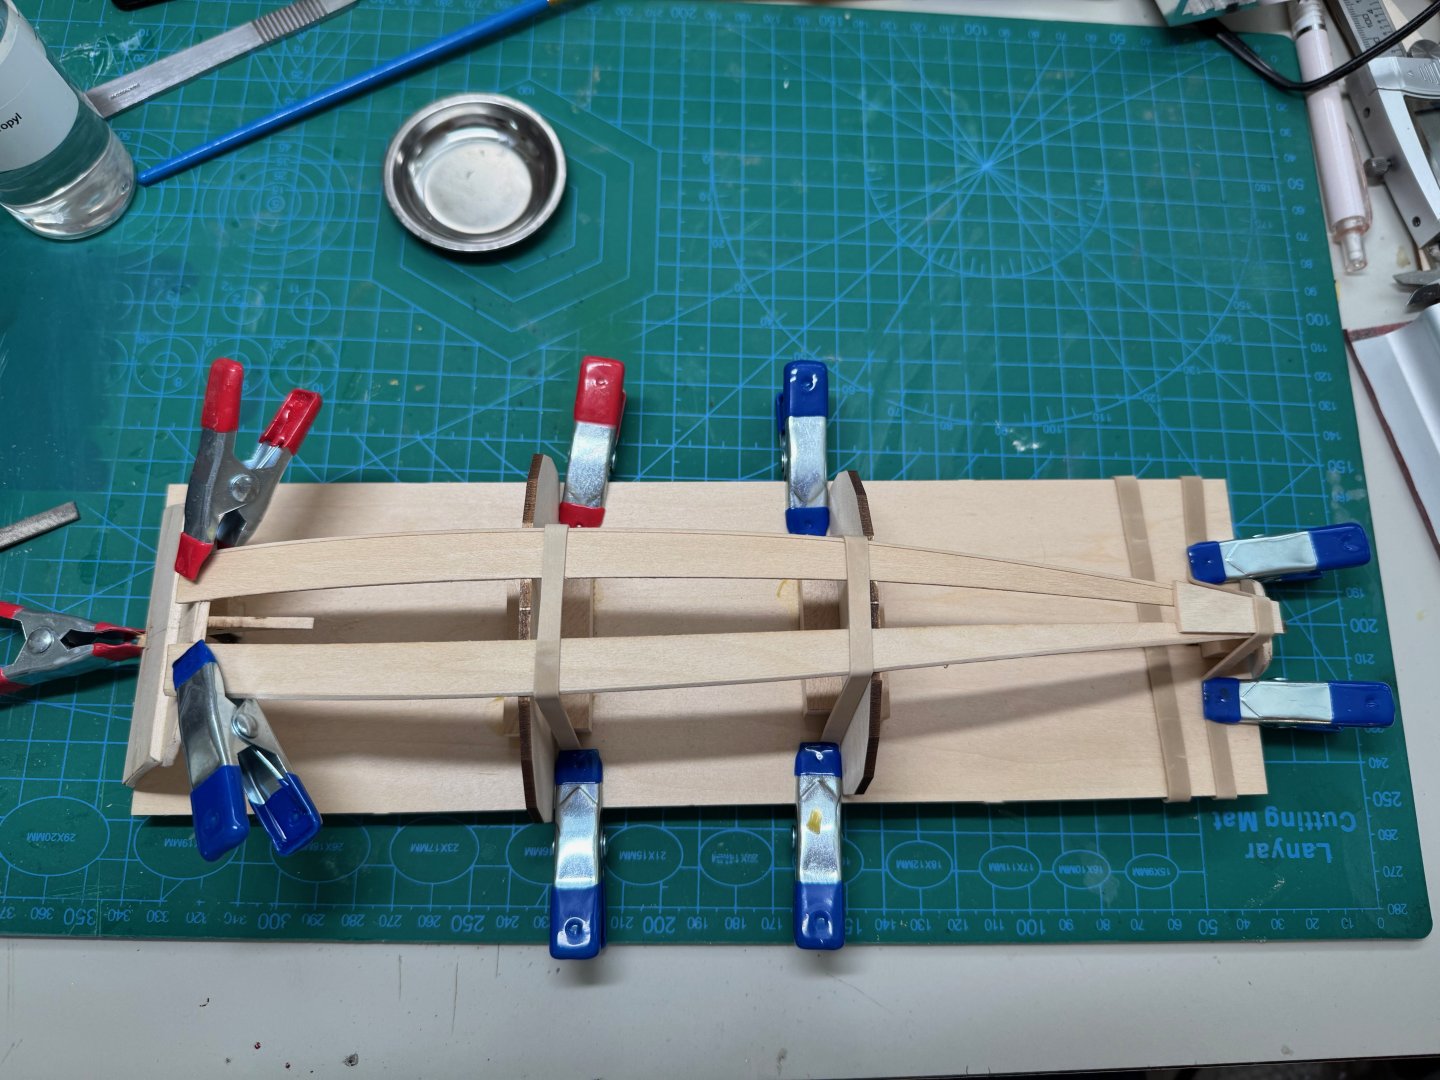
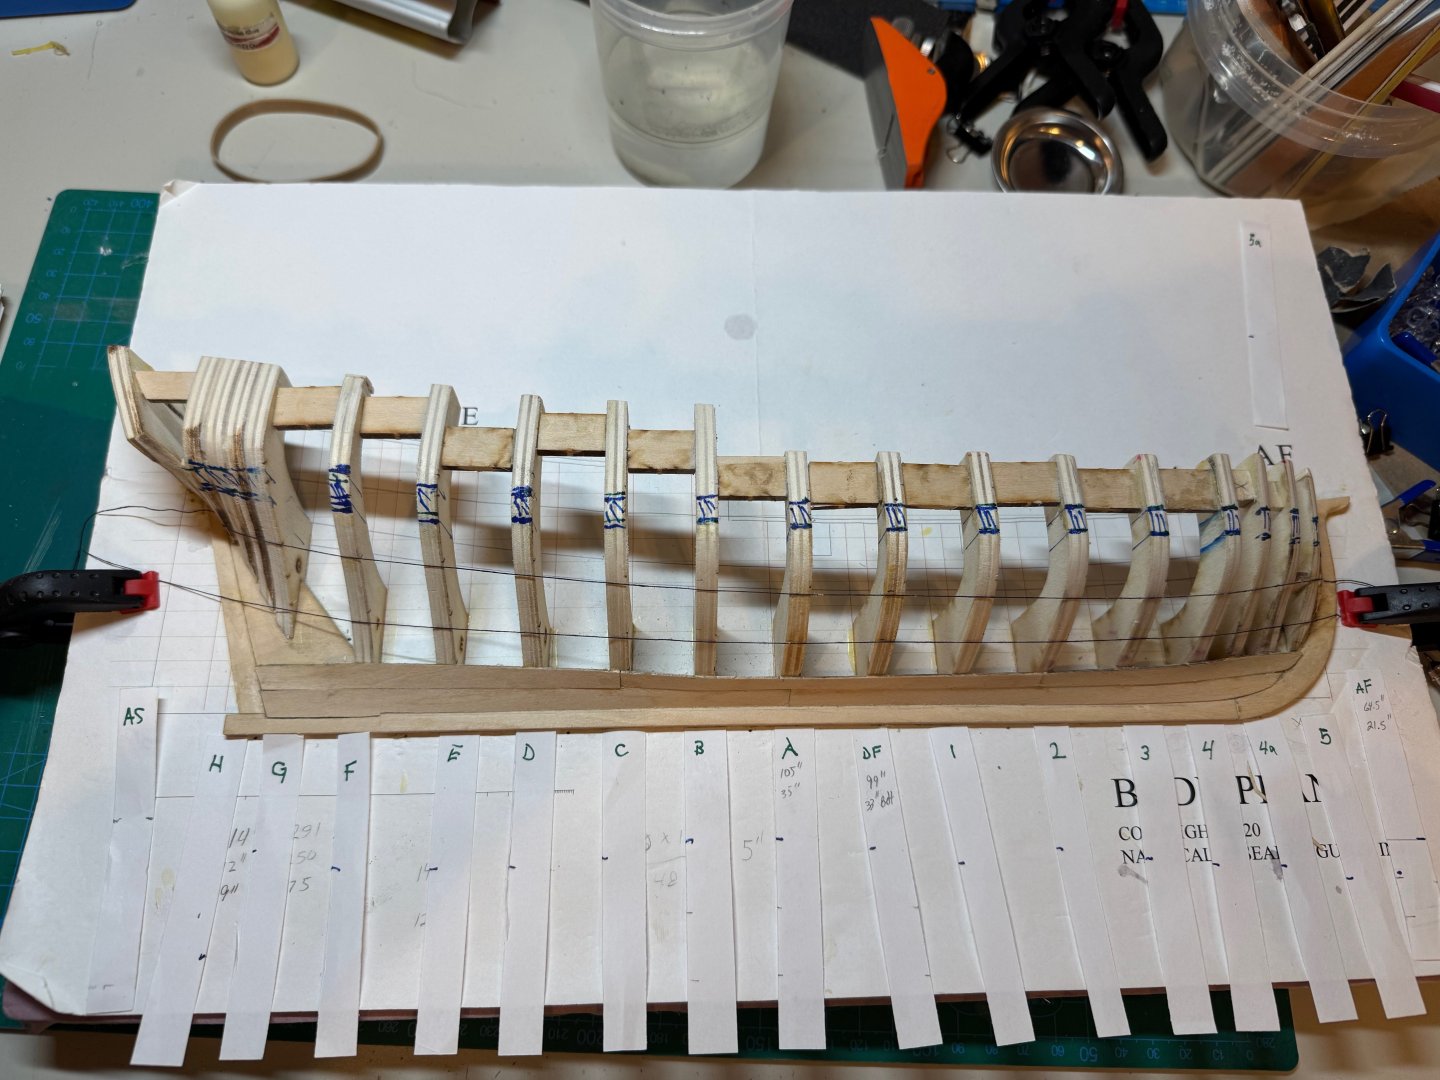
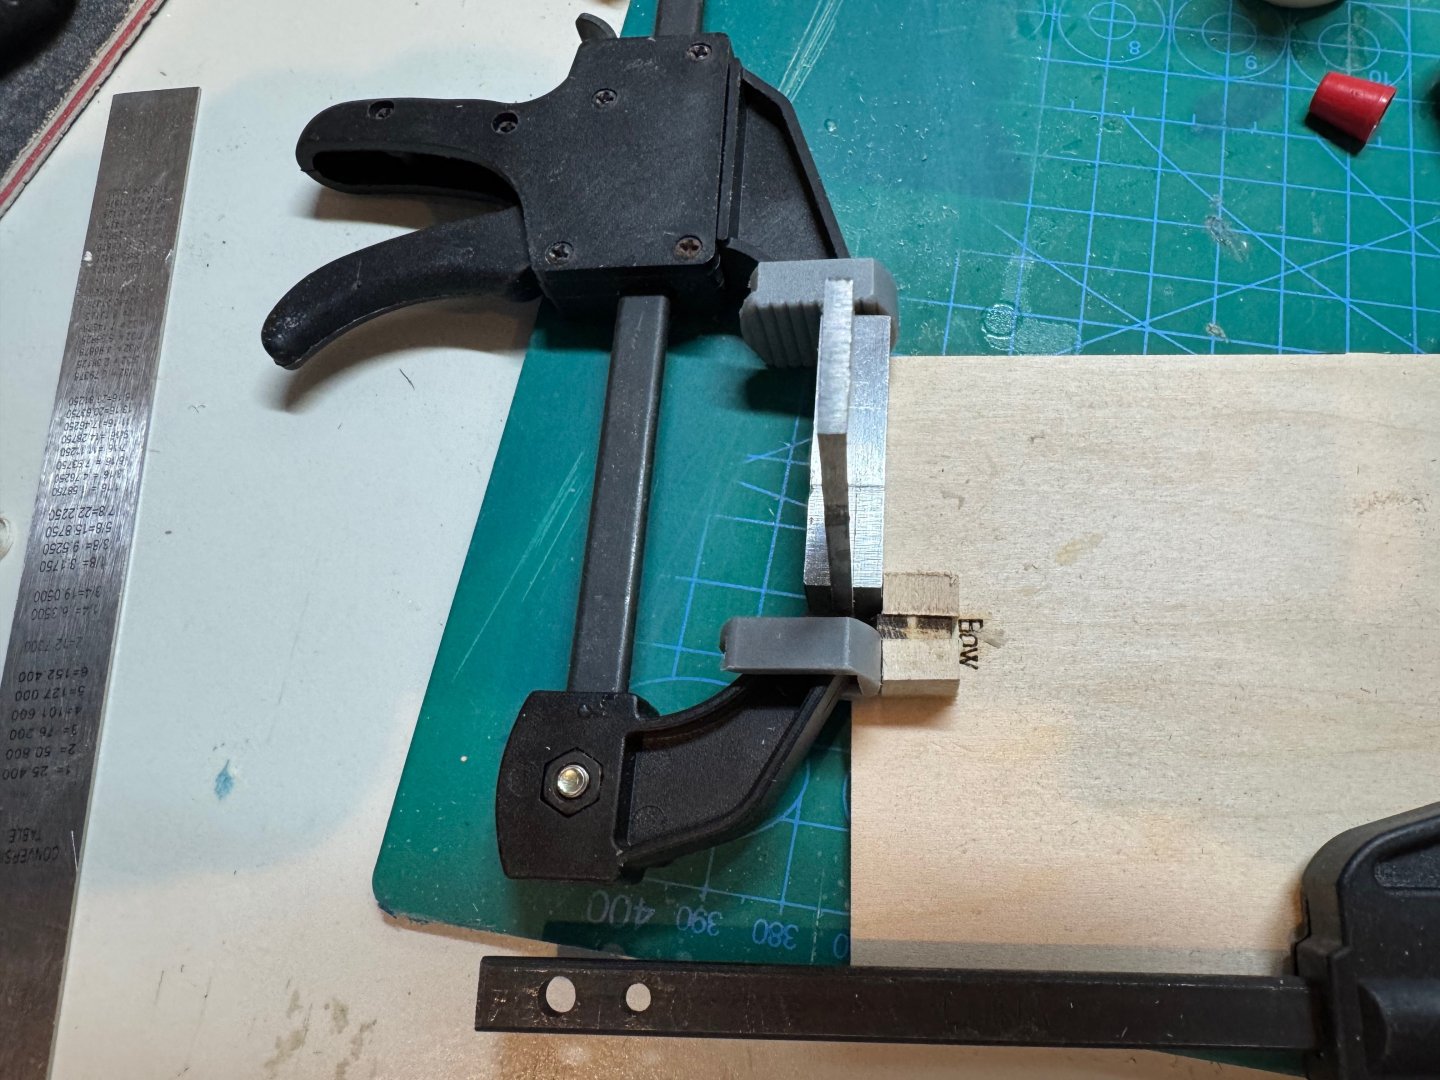
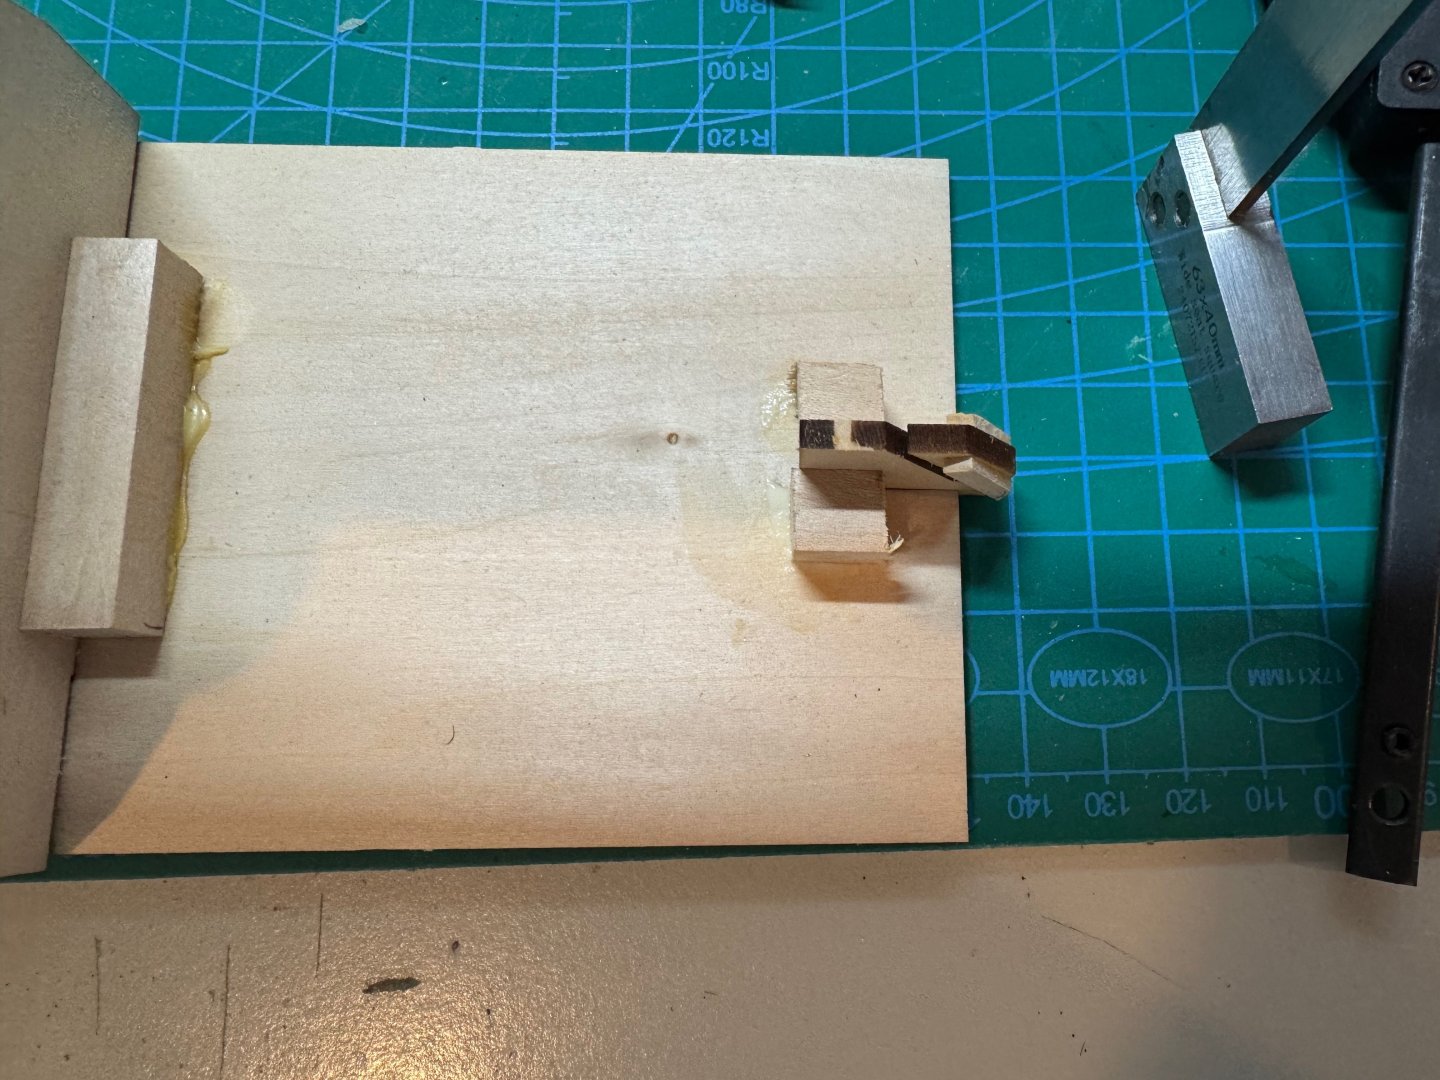
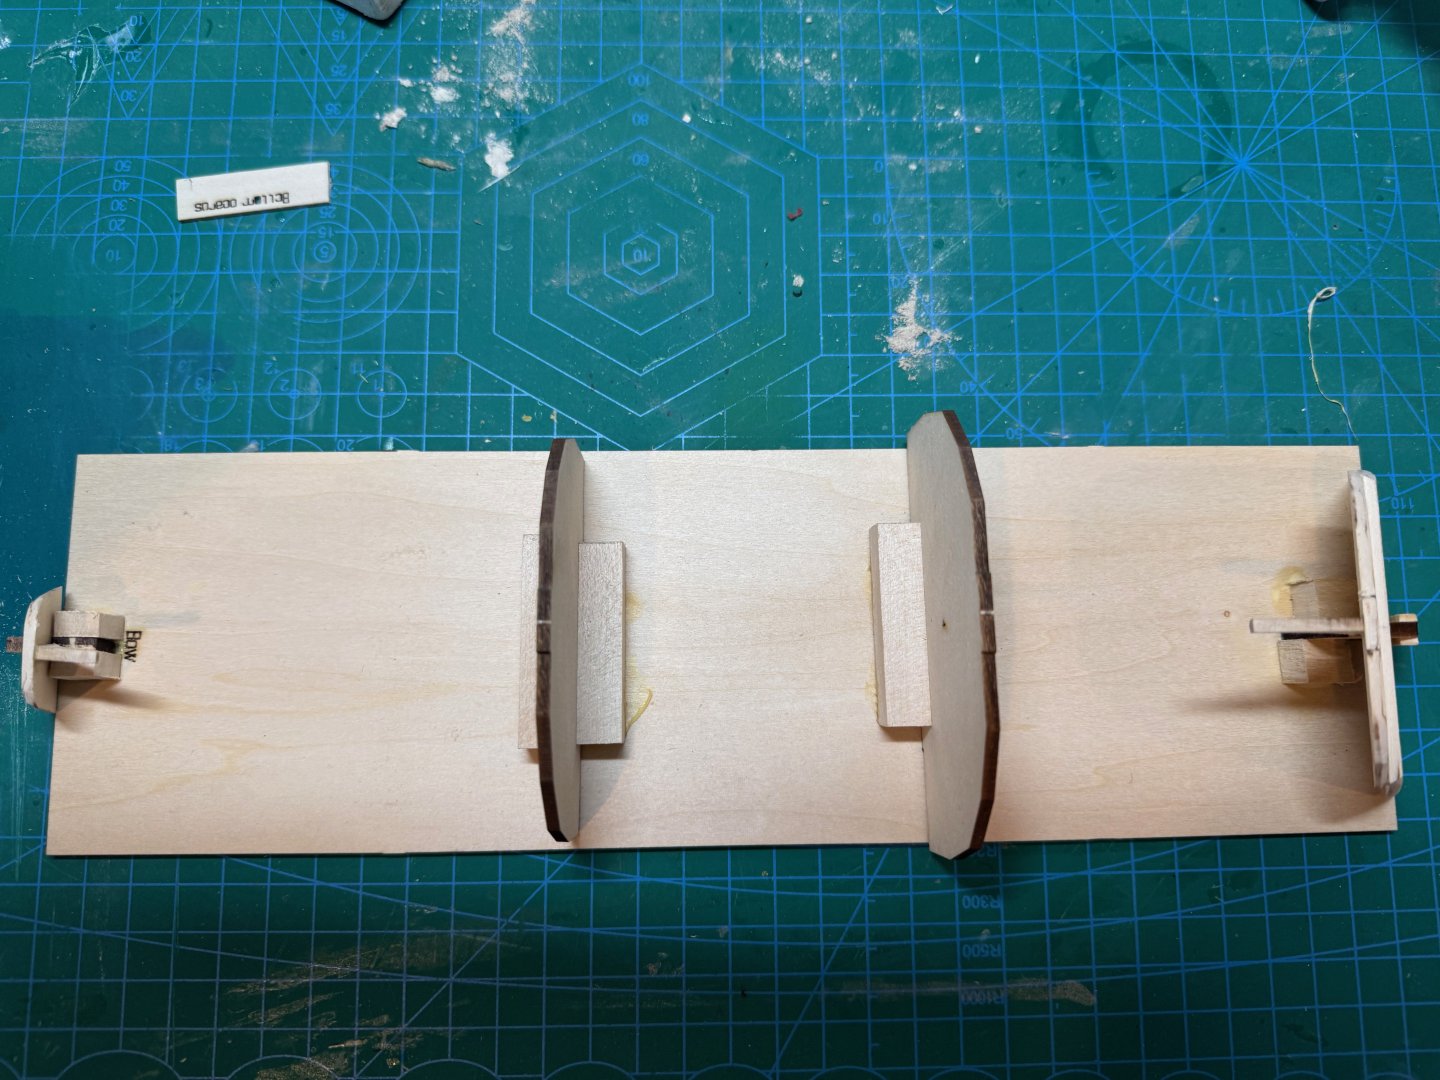
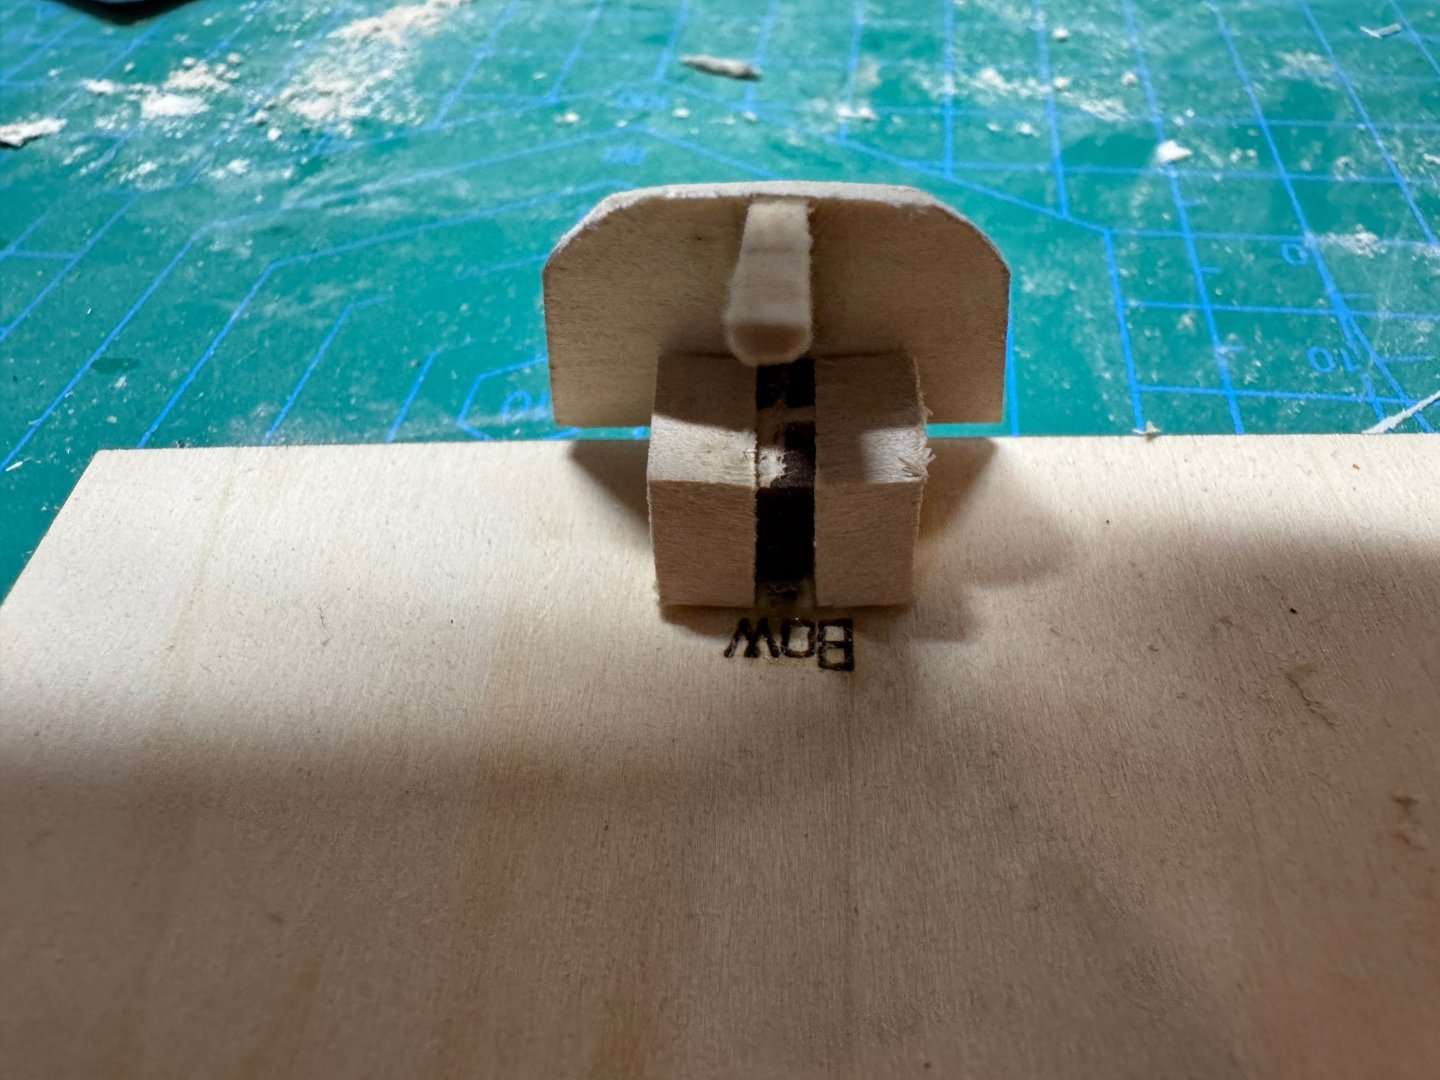
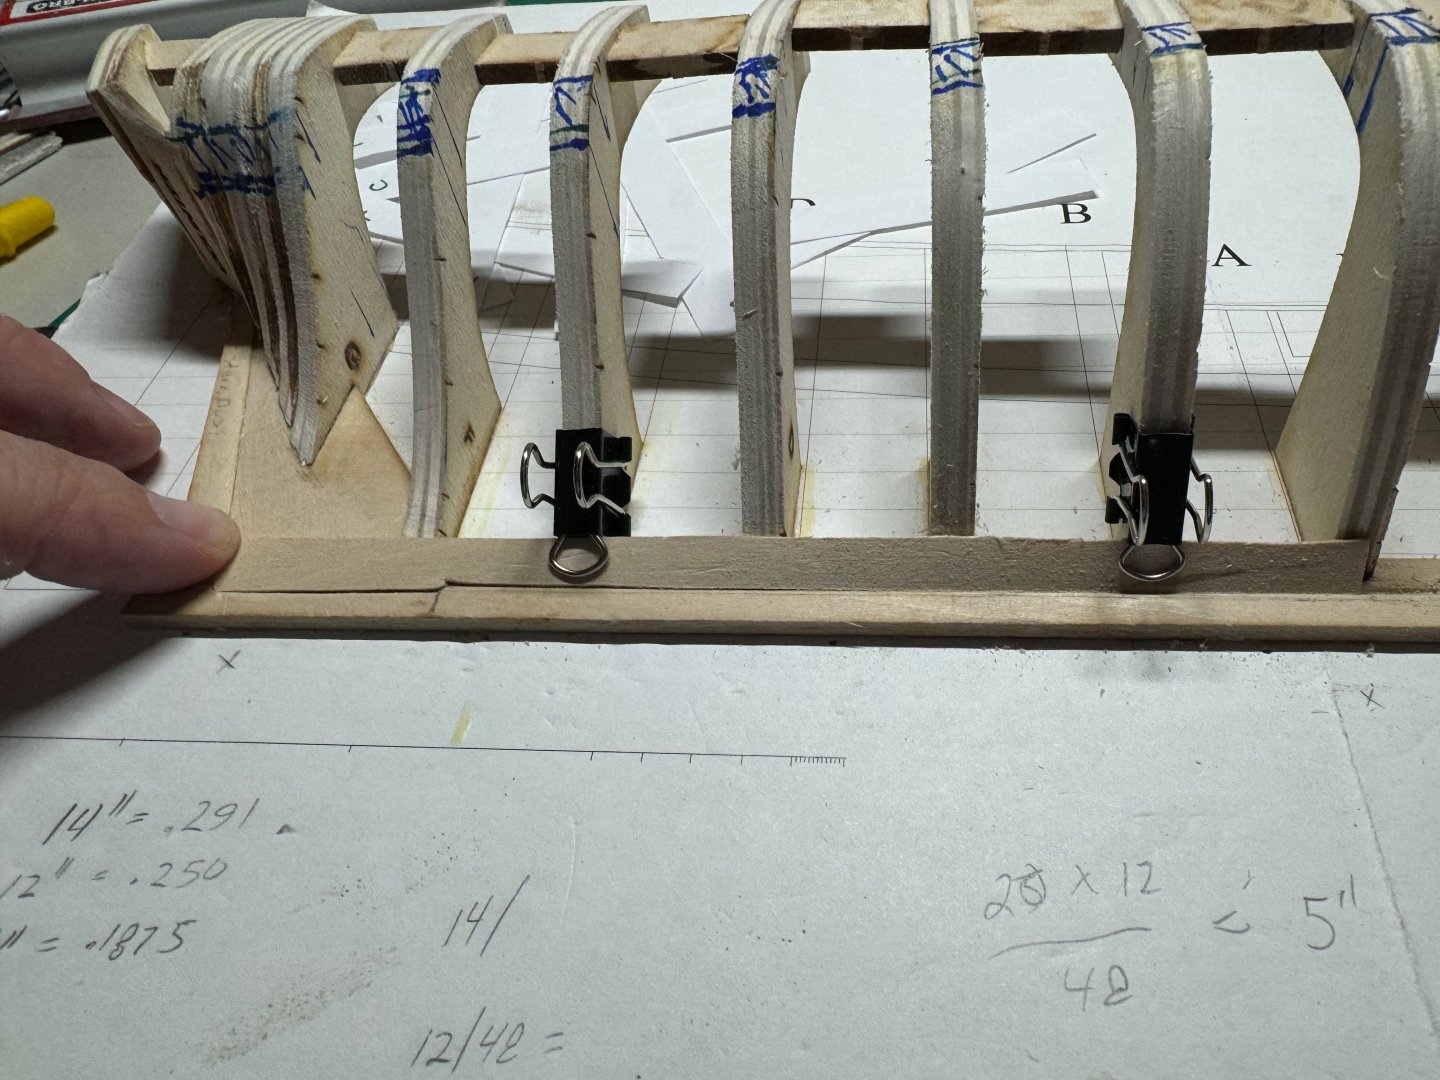
 Good evening, and Happy New Year. The weekend prior to the Christmas holiday I was able to get some work done on the pram, covering steps 7 and 8. First I cut out the two bottom planks, and then soaked them in some hot water so that I can get a nice curve on the planks. Similarly I added the third plank and was able to get a nice curve. As a side note I did help the curve along using my plank bender after mounting the planks onto the jig. After I was satisfied with the bend I then glued everything together. If you notice that the stern post holder is broken. The tension shattered my piece so I ended up tacking the transom into the jig with some pva, and I pinned it to hold it in place. I will need to use isopropyl to break the bond. I am really frustrated with these Model Expo kits, and the quality. The bow is lined up nicely with the center of the bow transom. A side view of the clamps to hold the boards together. A view of the stern and pin. Notice that the centre board is lined up with the center of the transom. Finally after the glue had a chance to set, I removed the clamps. Again with the quality issues, notice that one of the side boards is not even in width. I spent a lot of time getting the boards tight onto the jig, however the jig is not correct. Have a good night
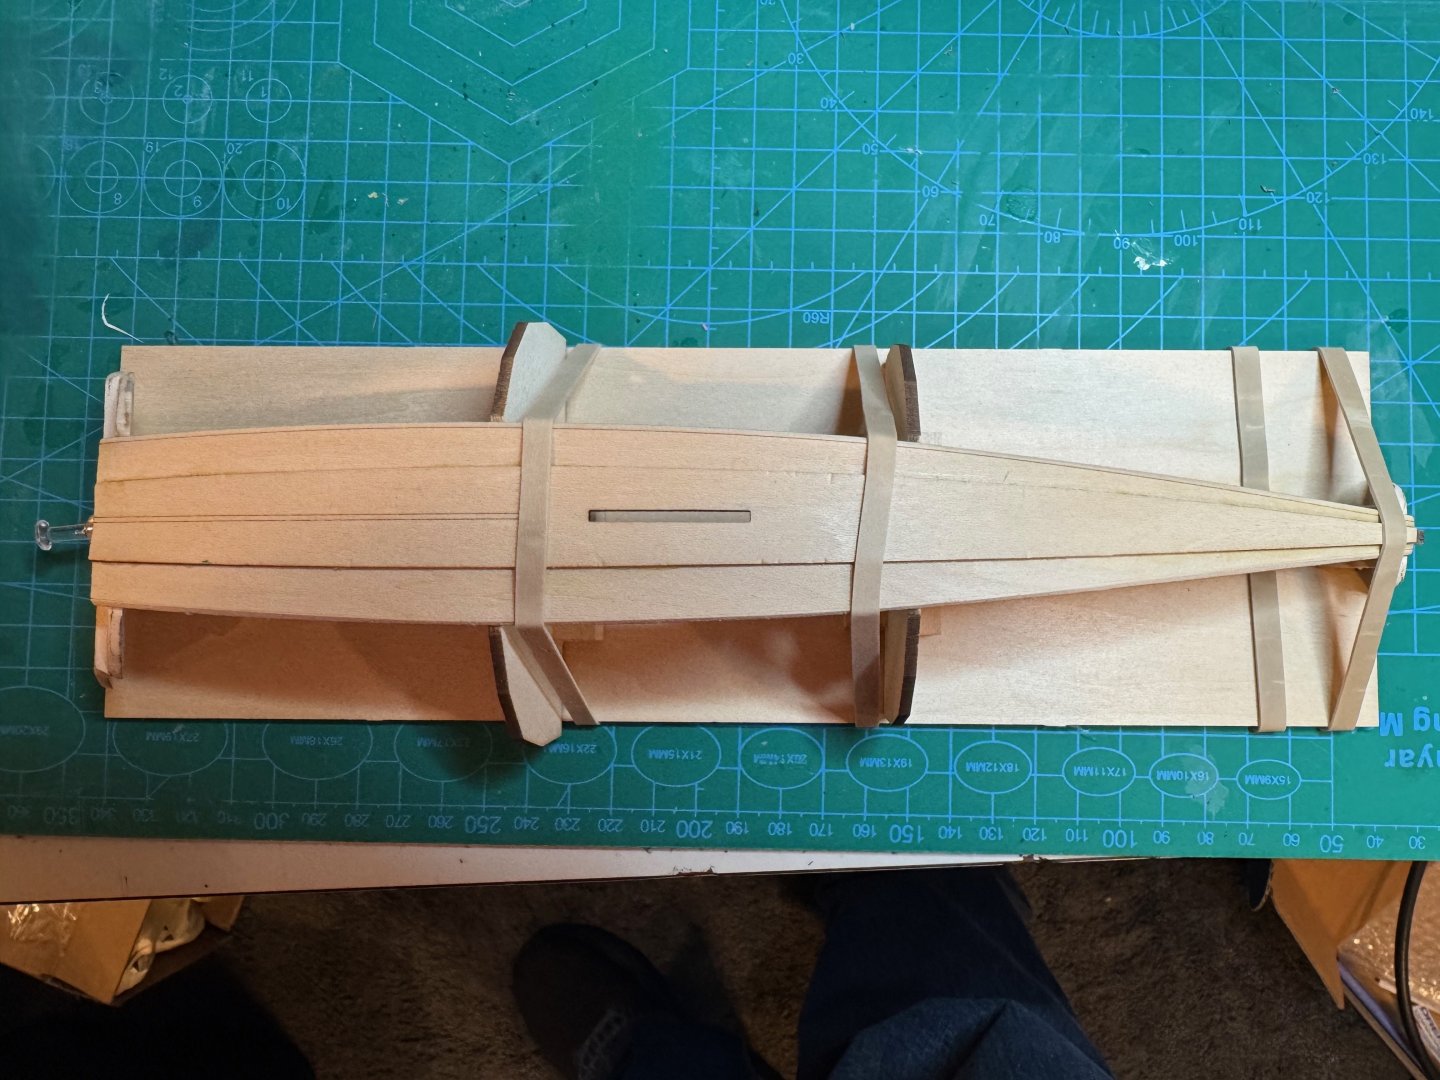


- 6 replies
-
- 7
-

-
- Norwegian Sailing Pram
- Model Expo
- (and 2 more)
-
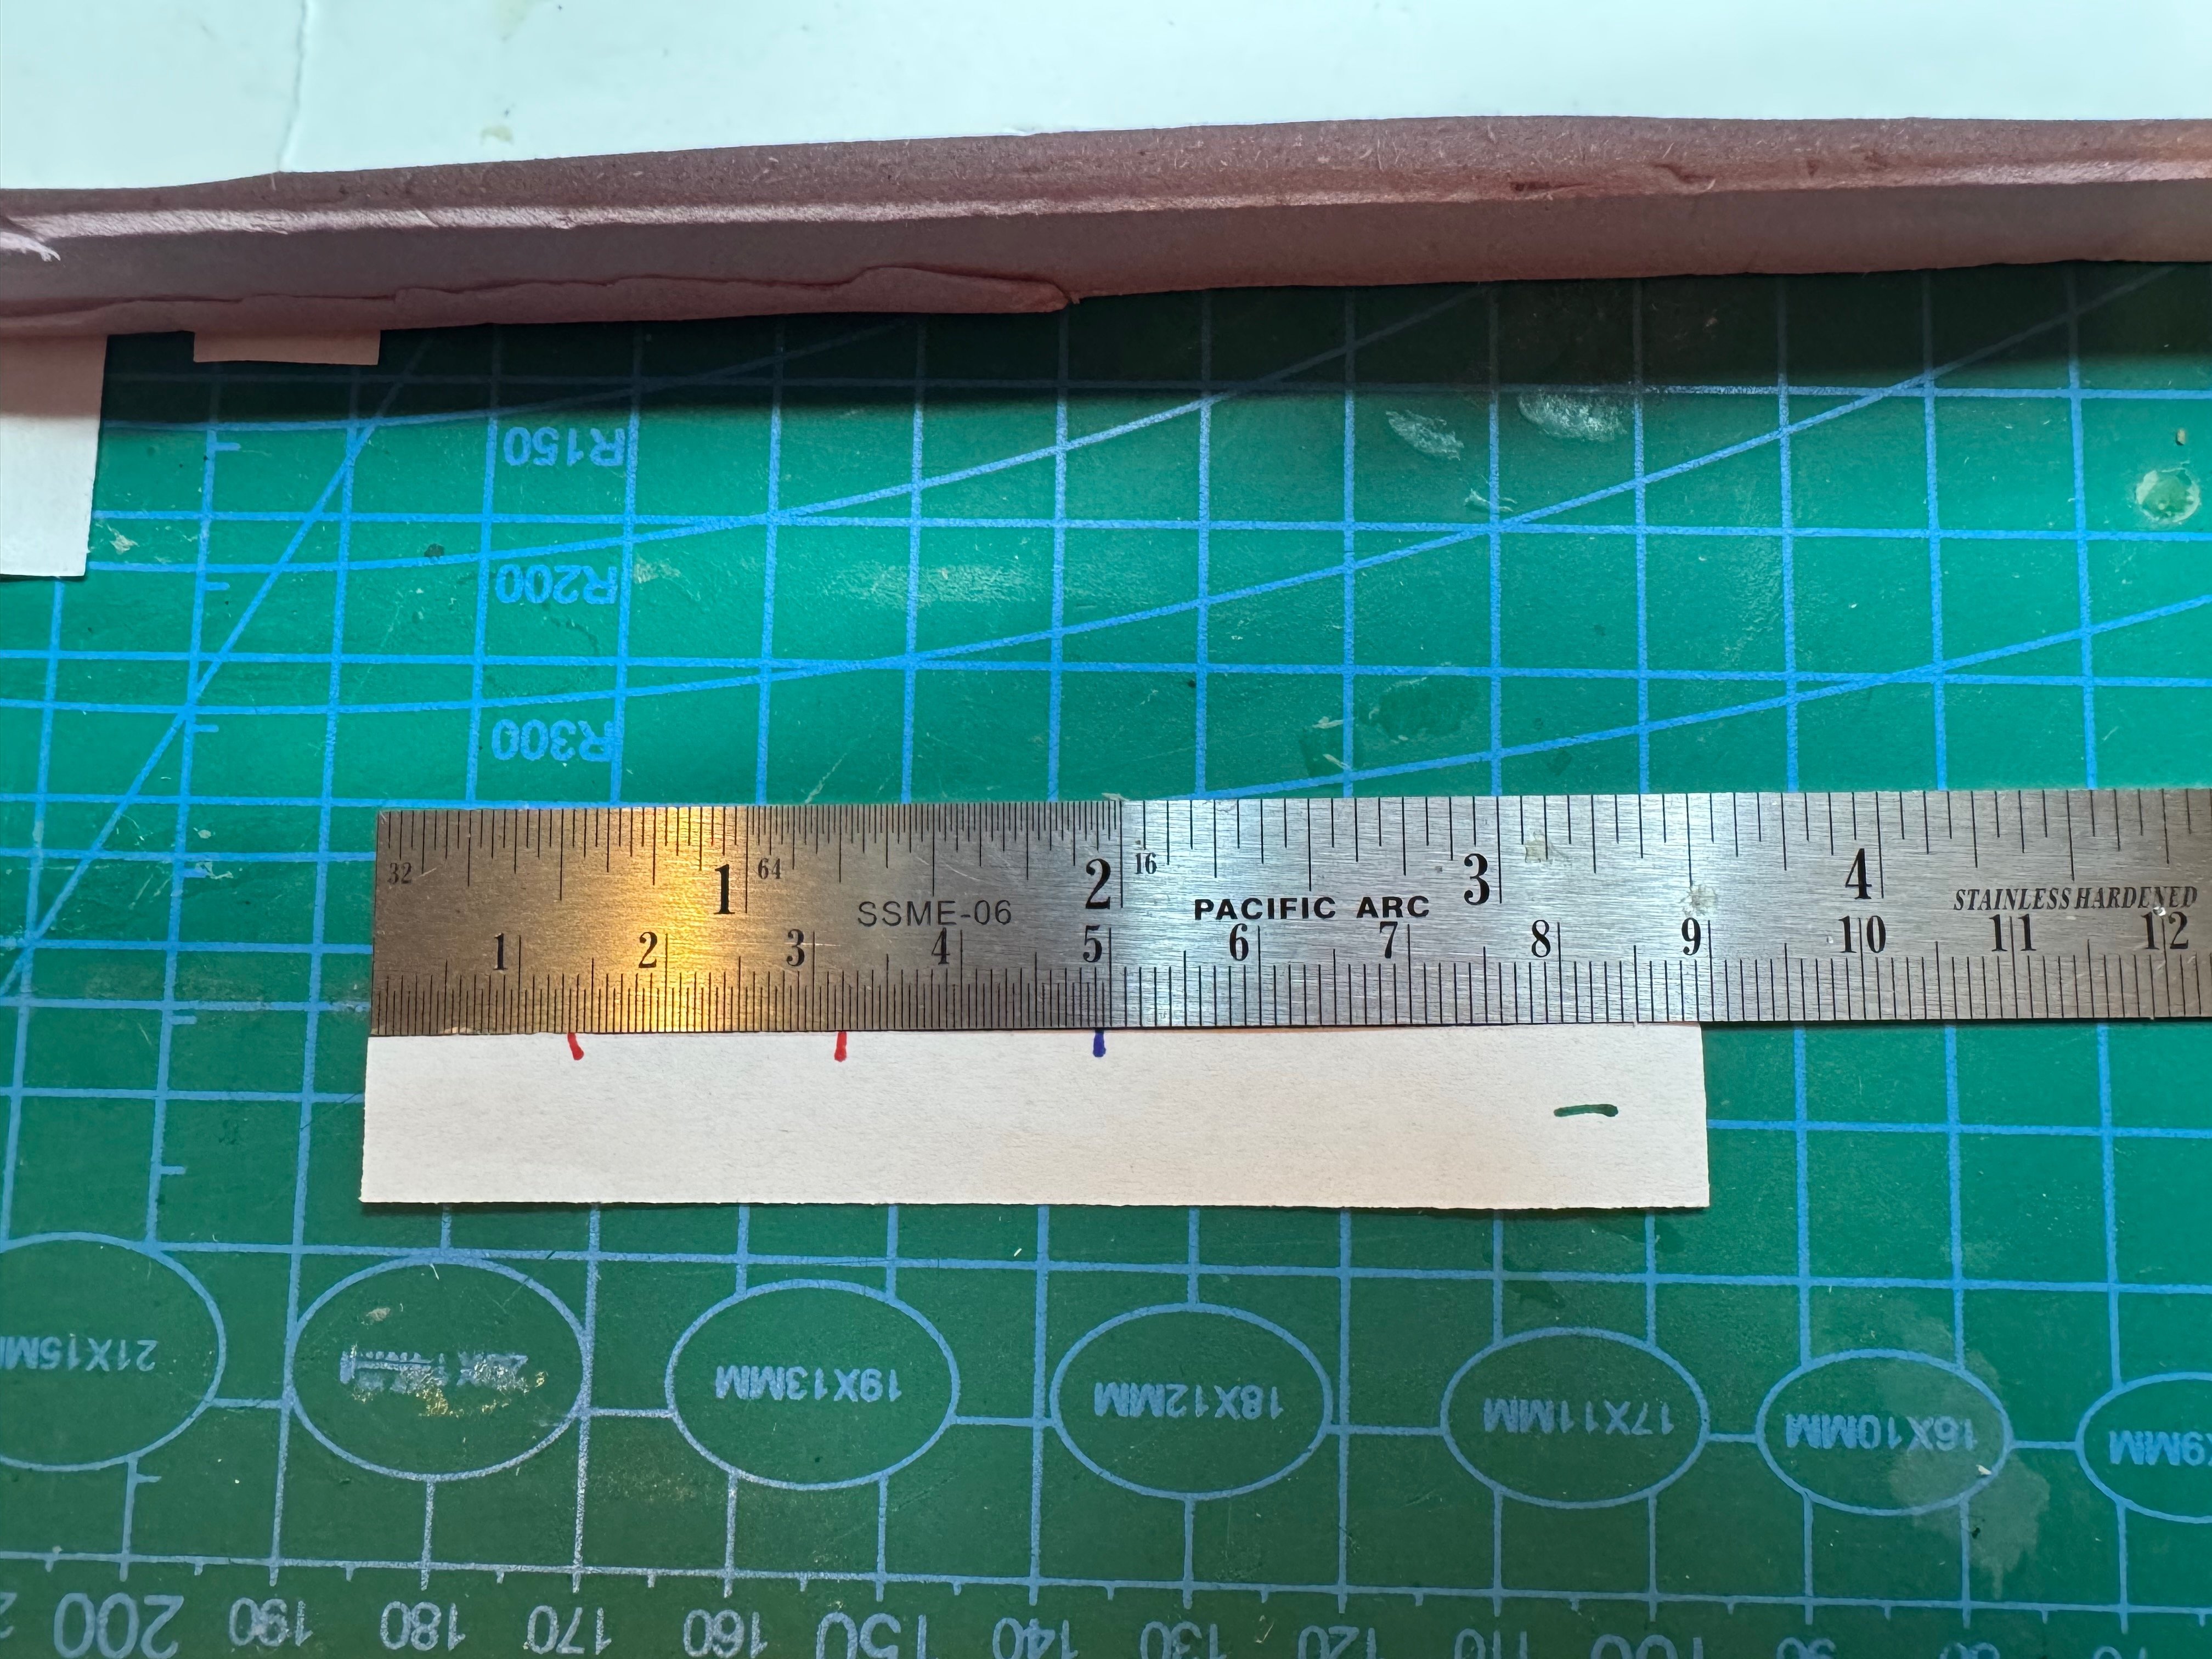
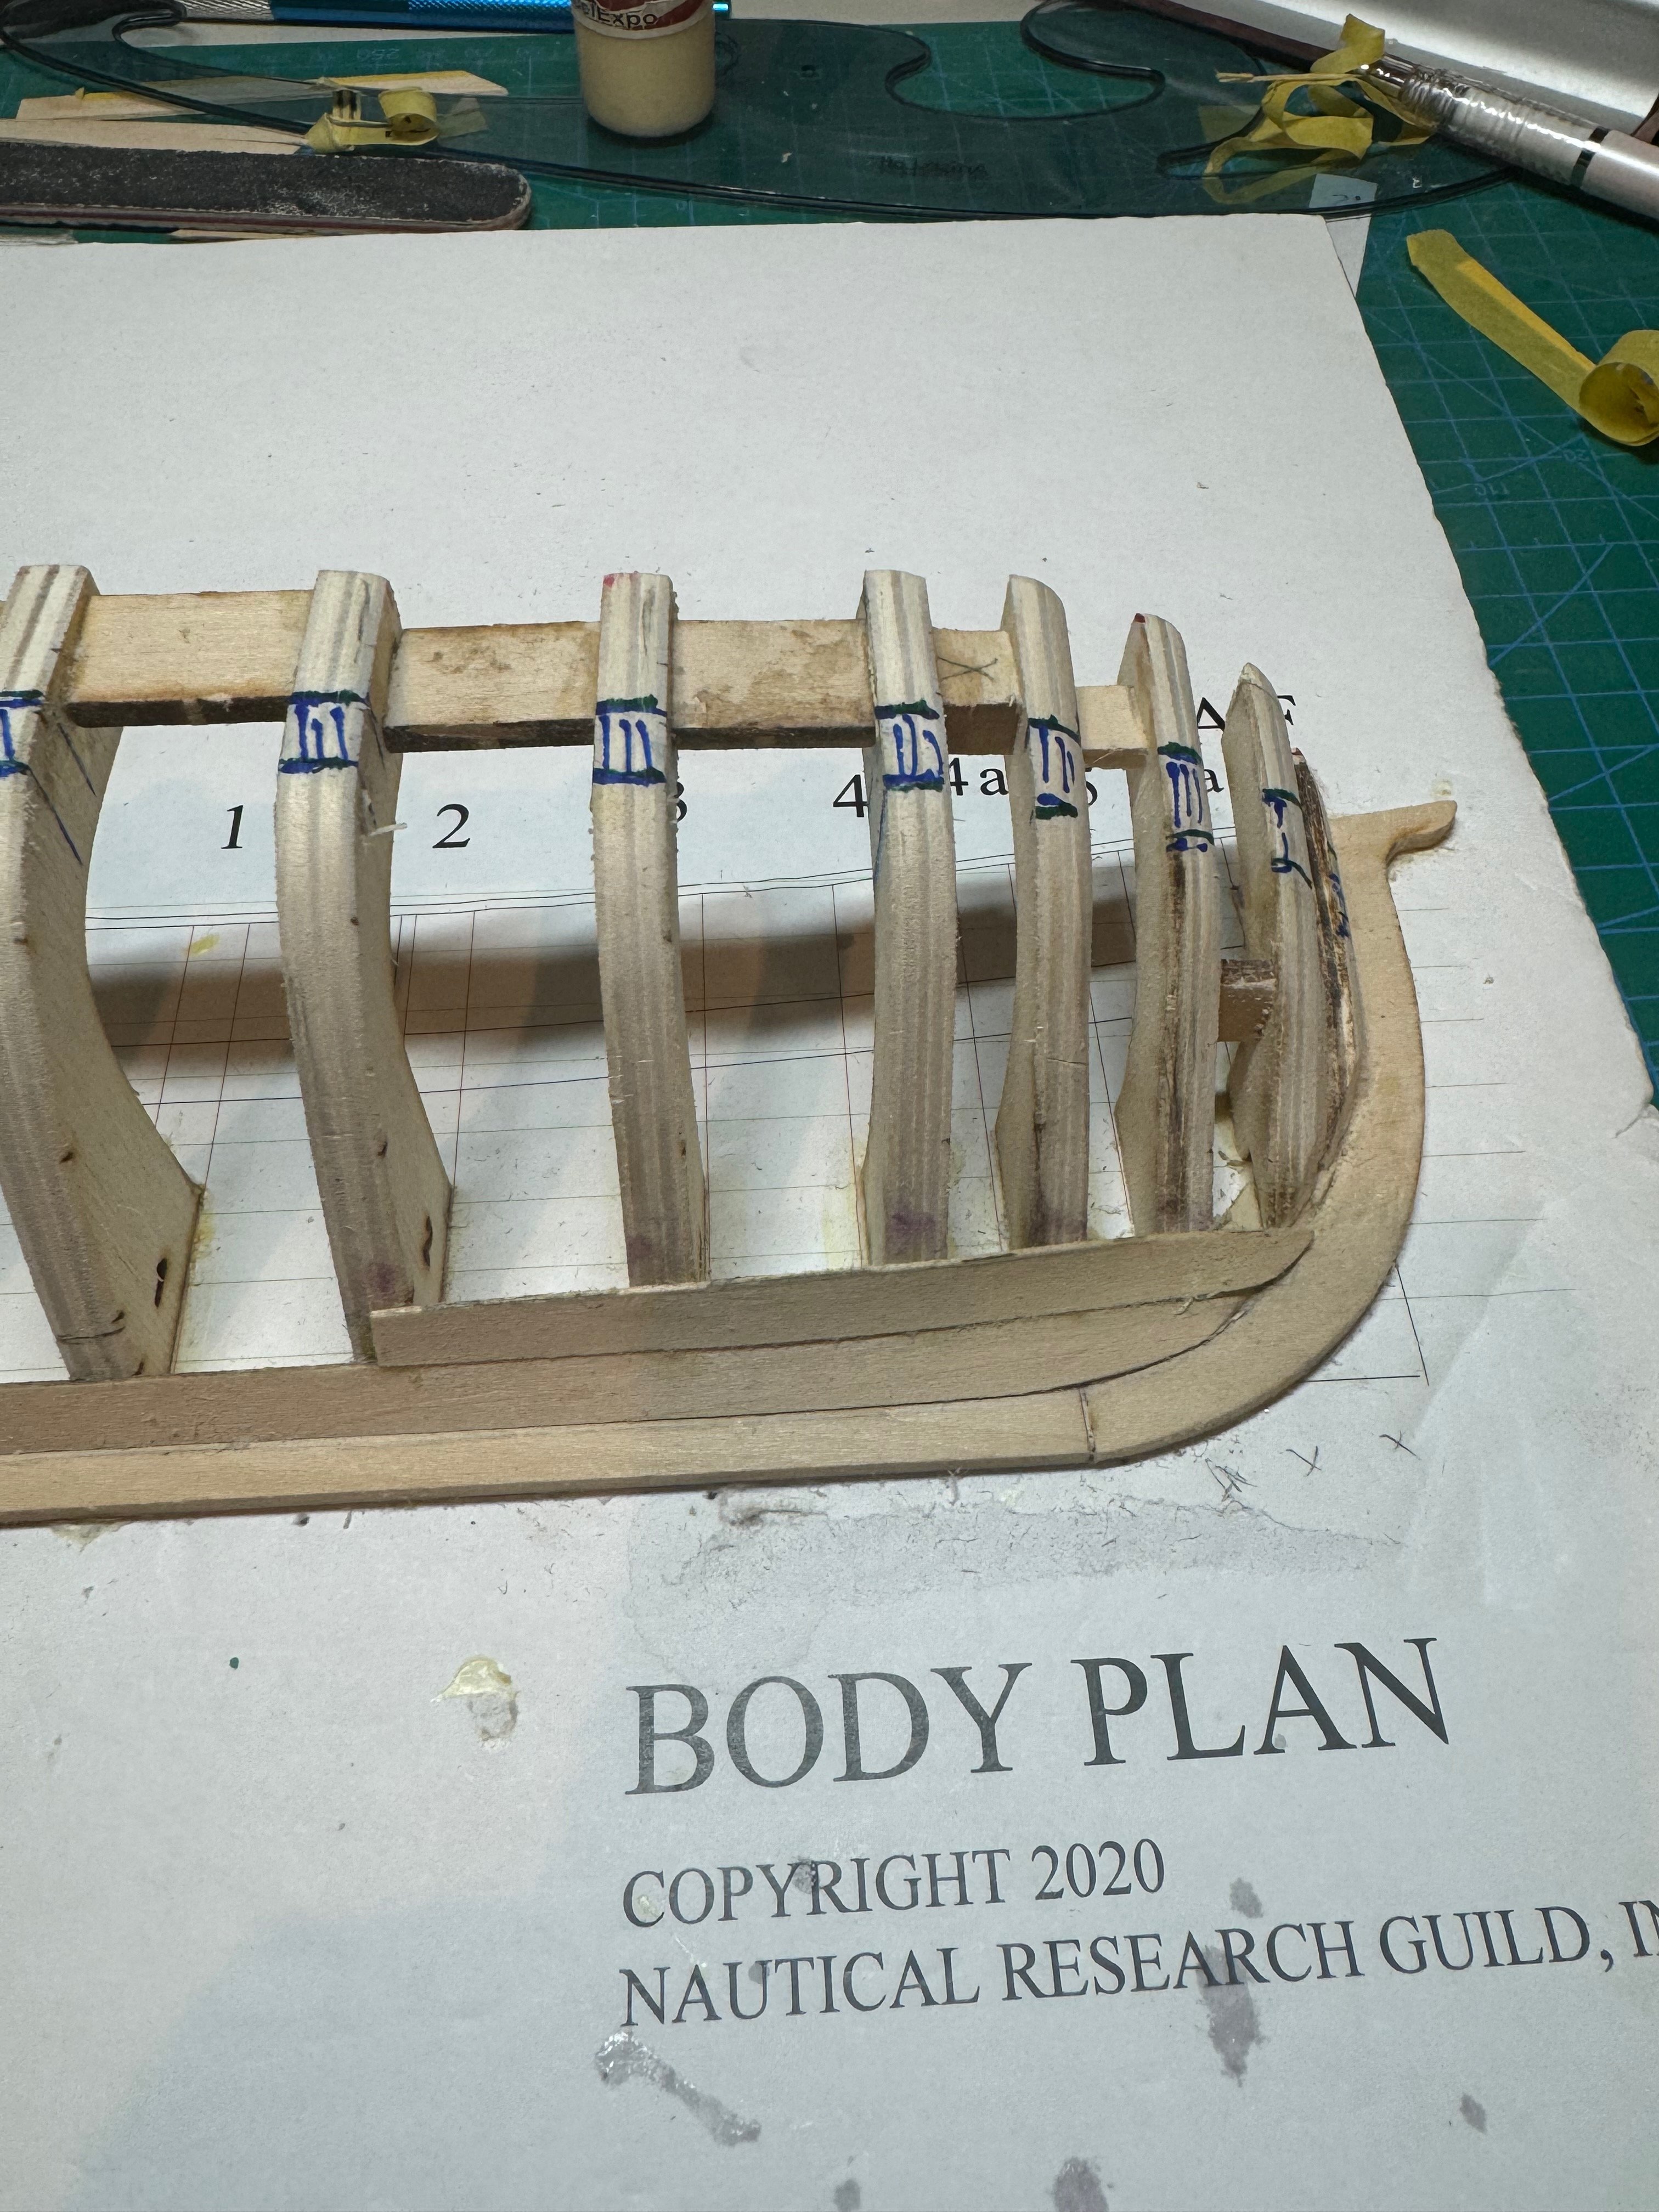
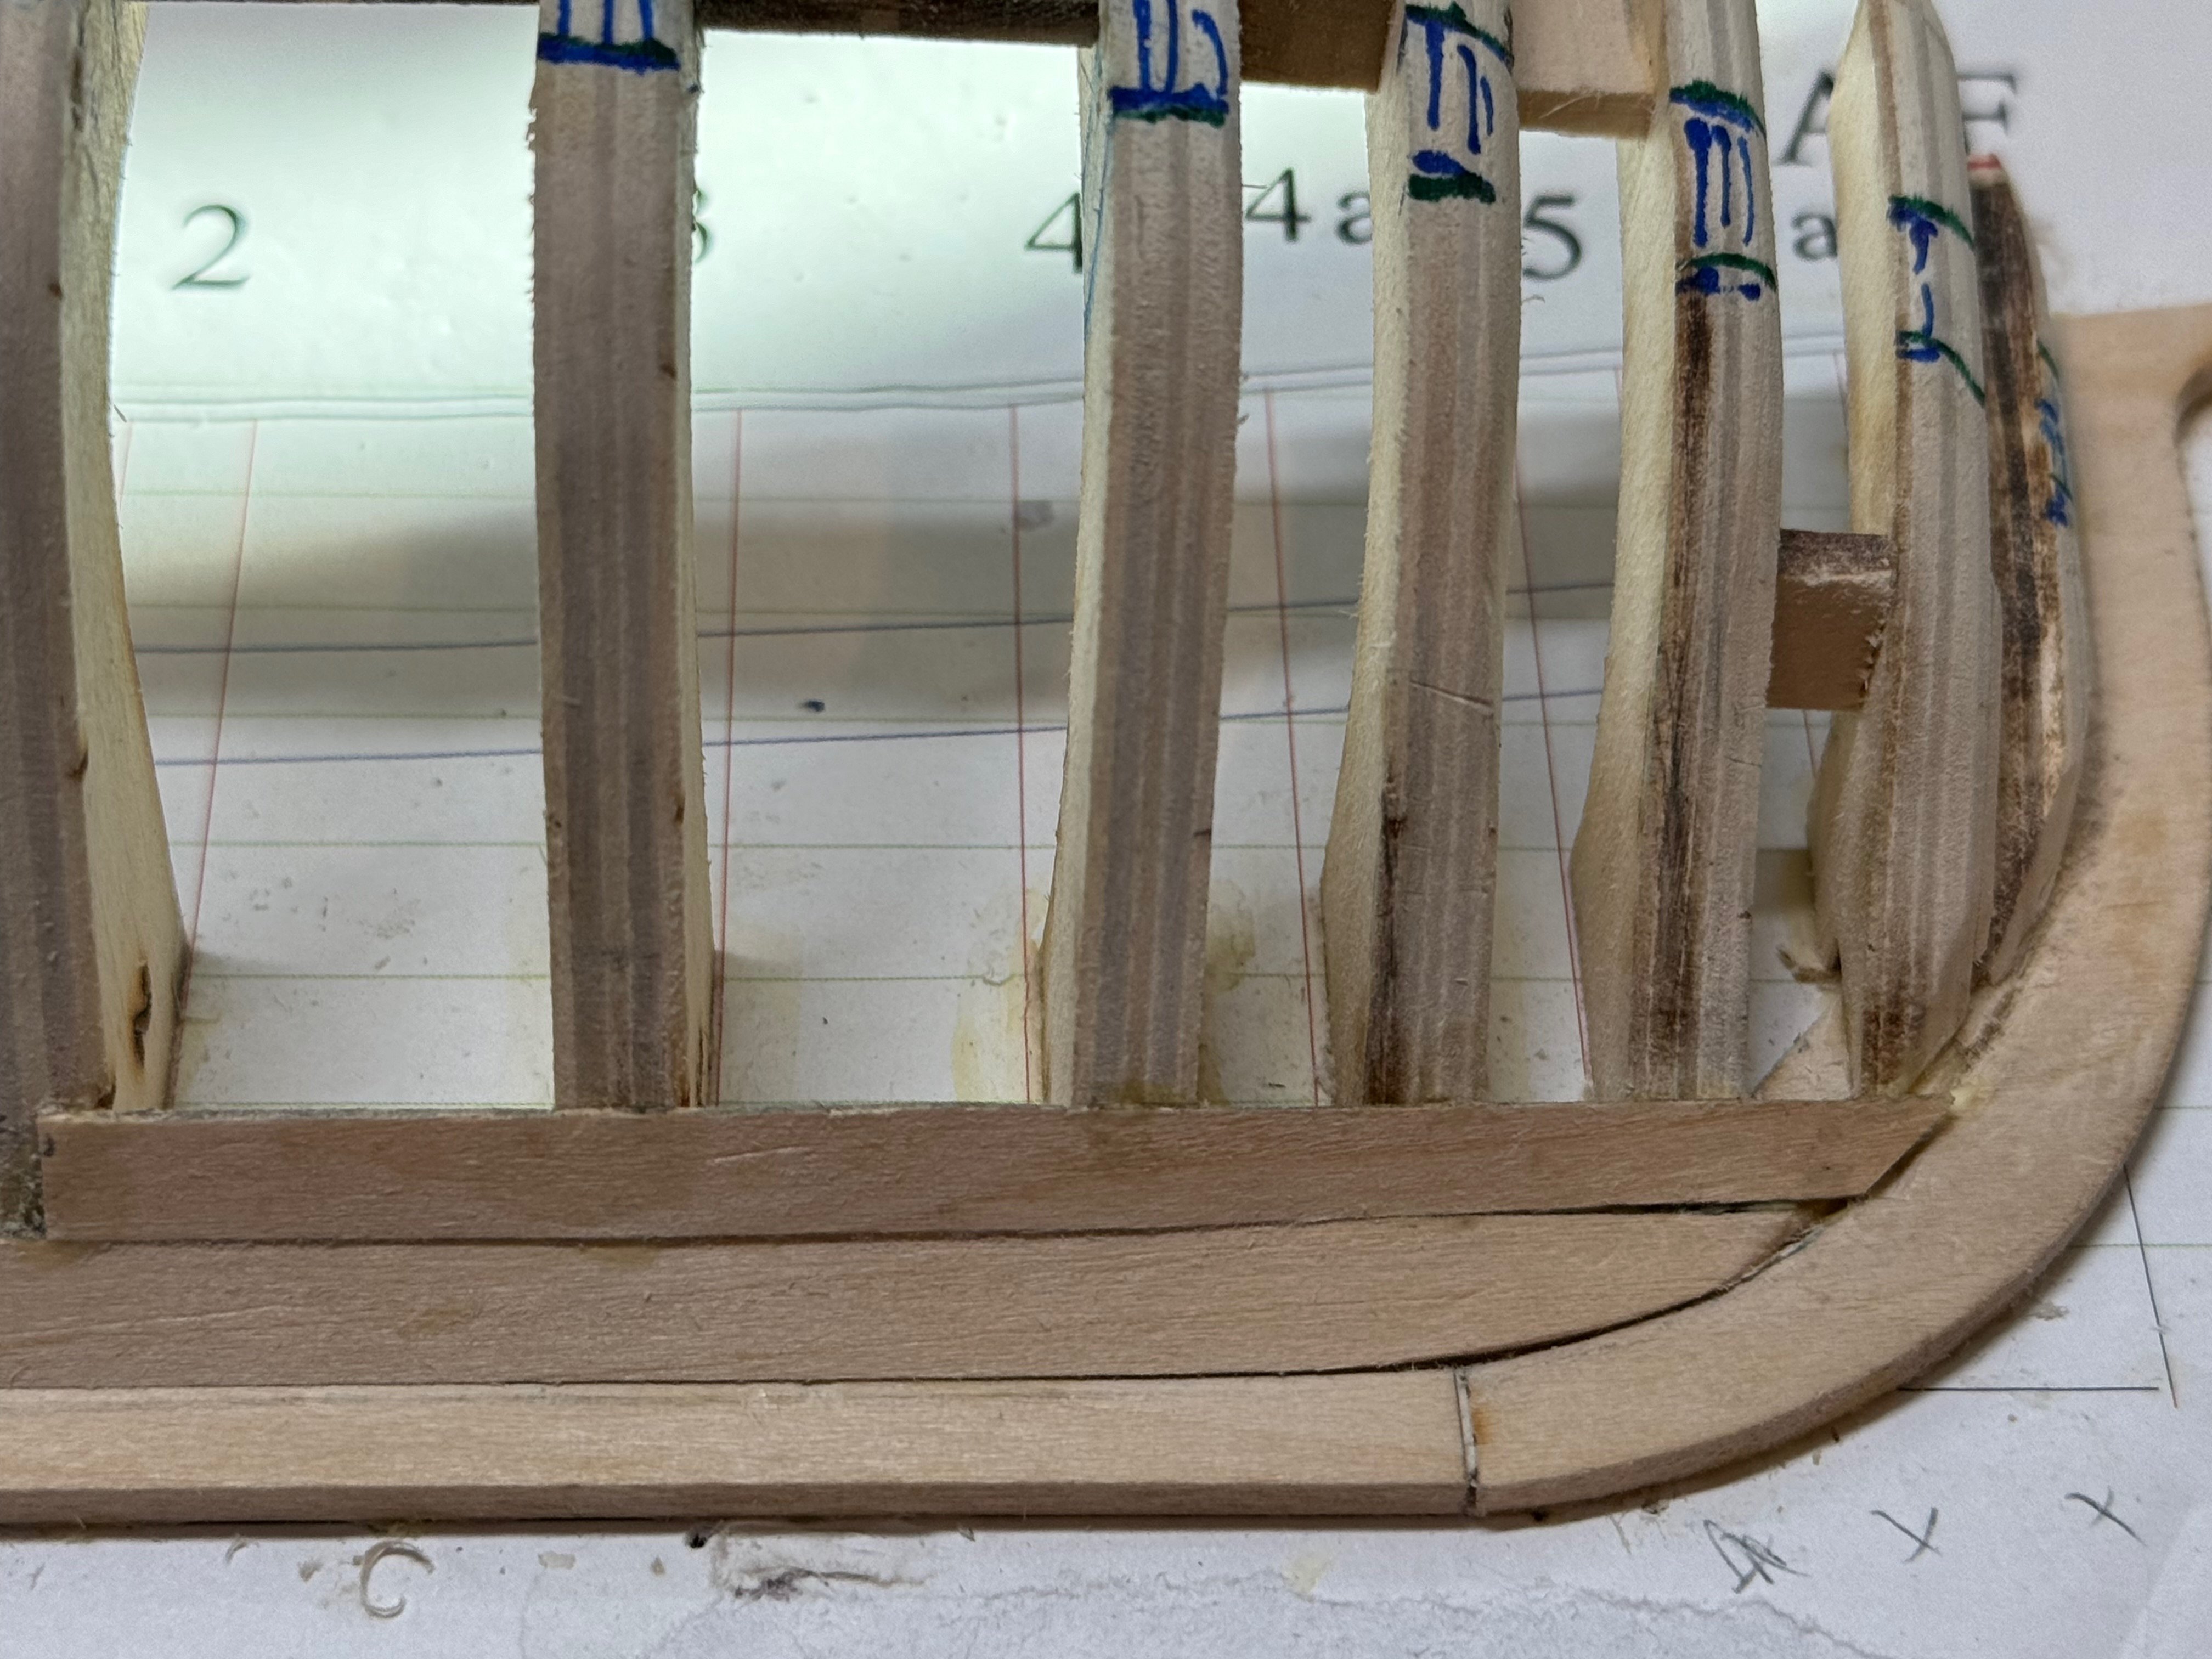
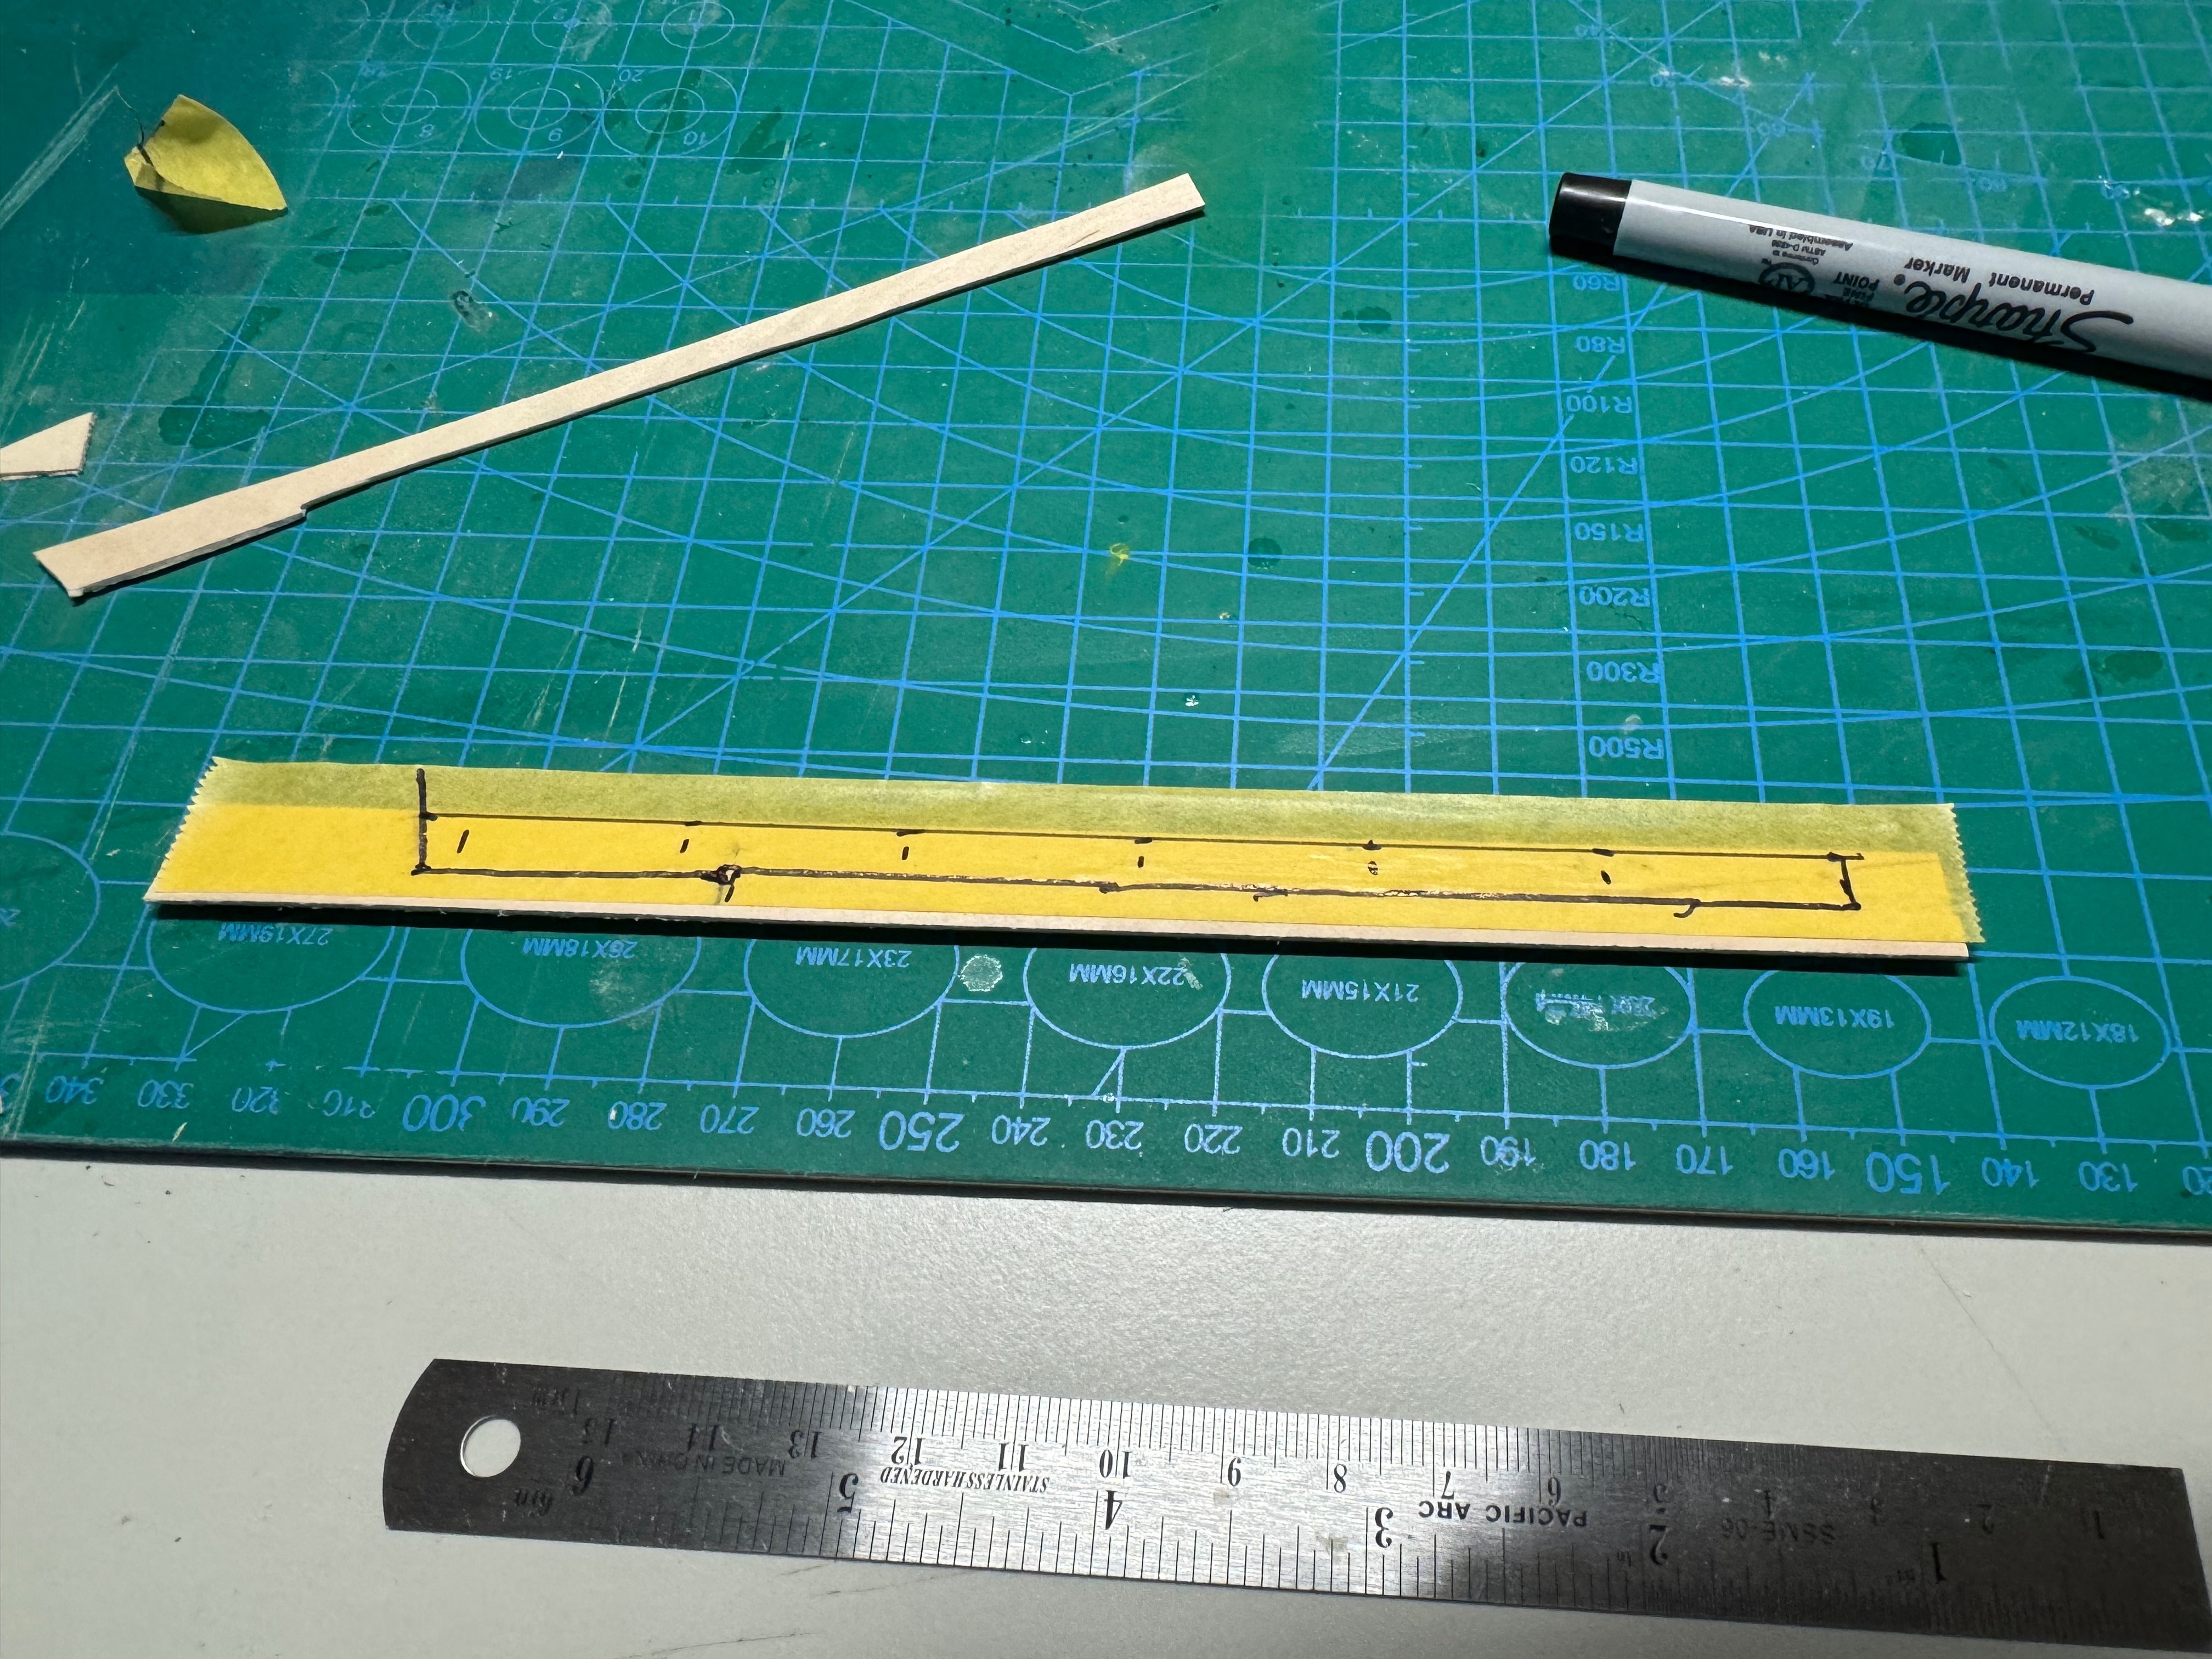
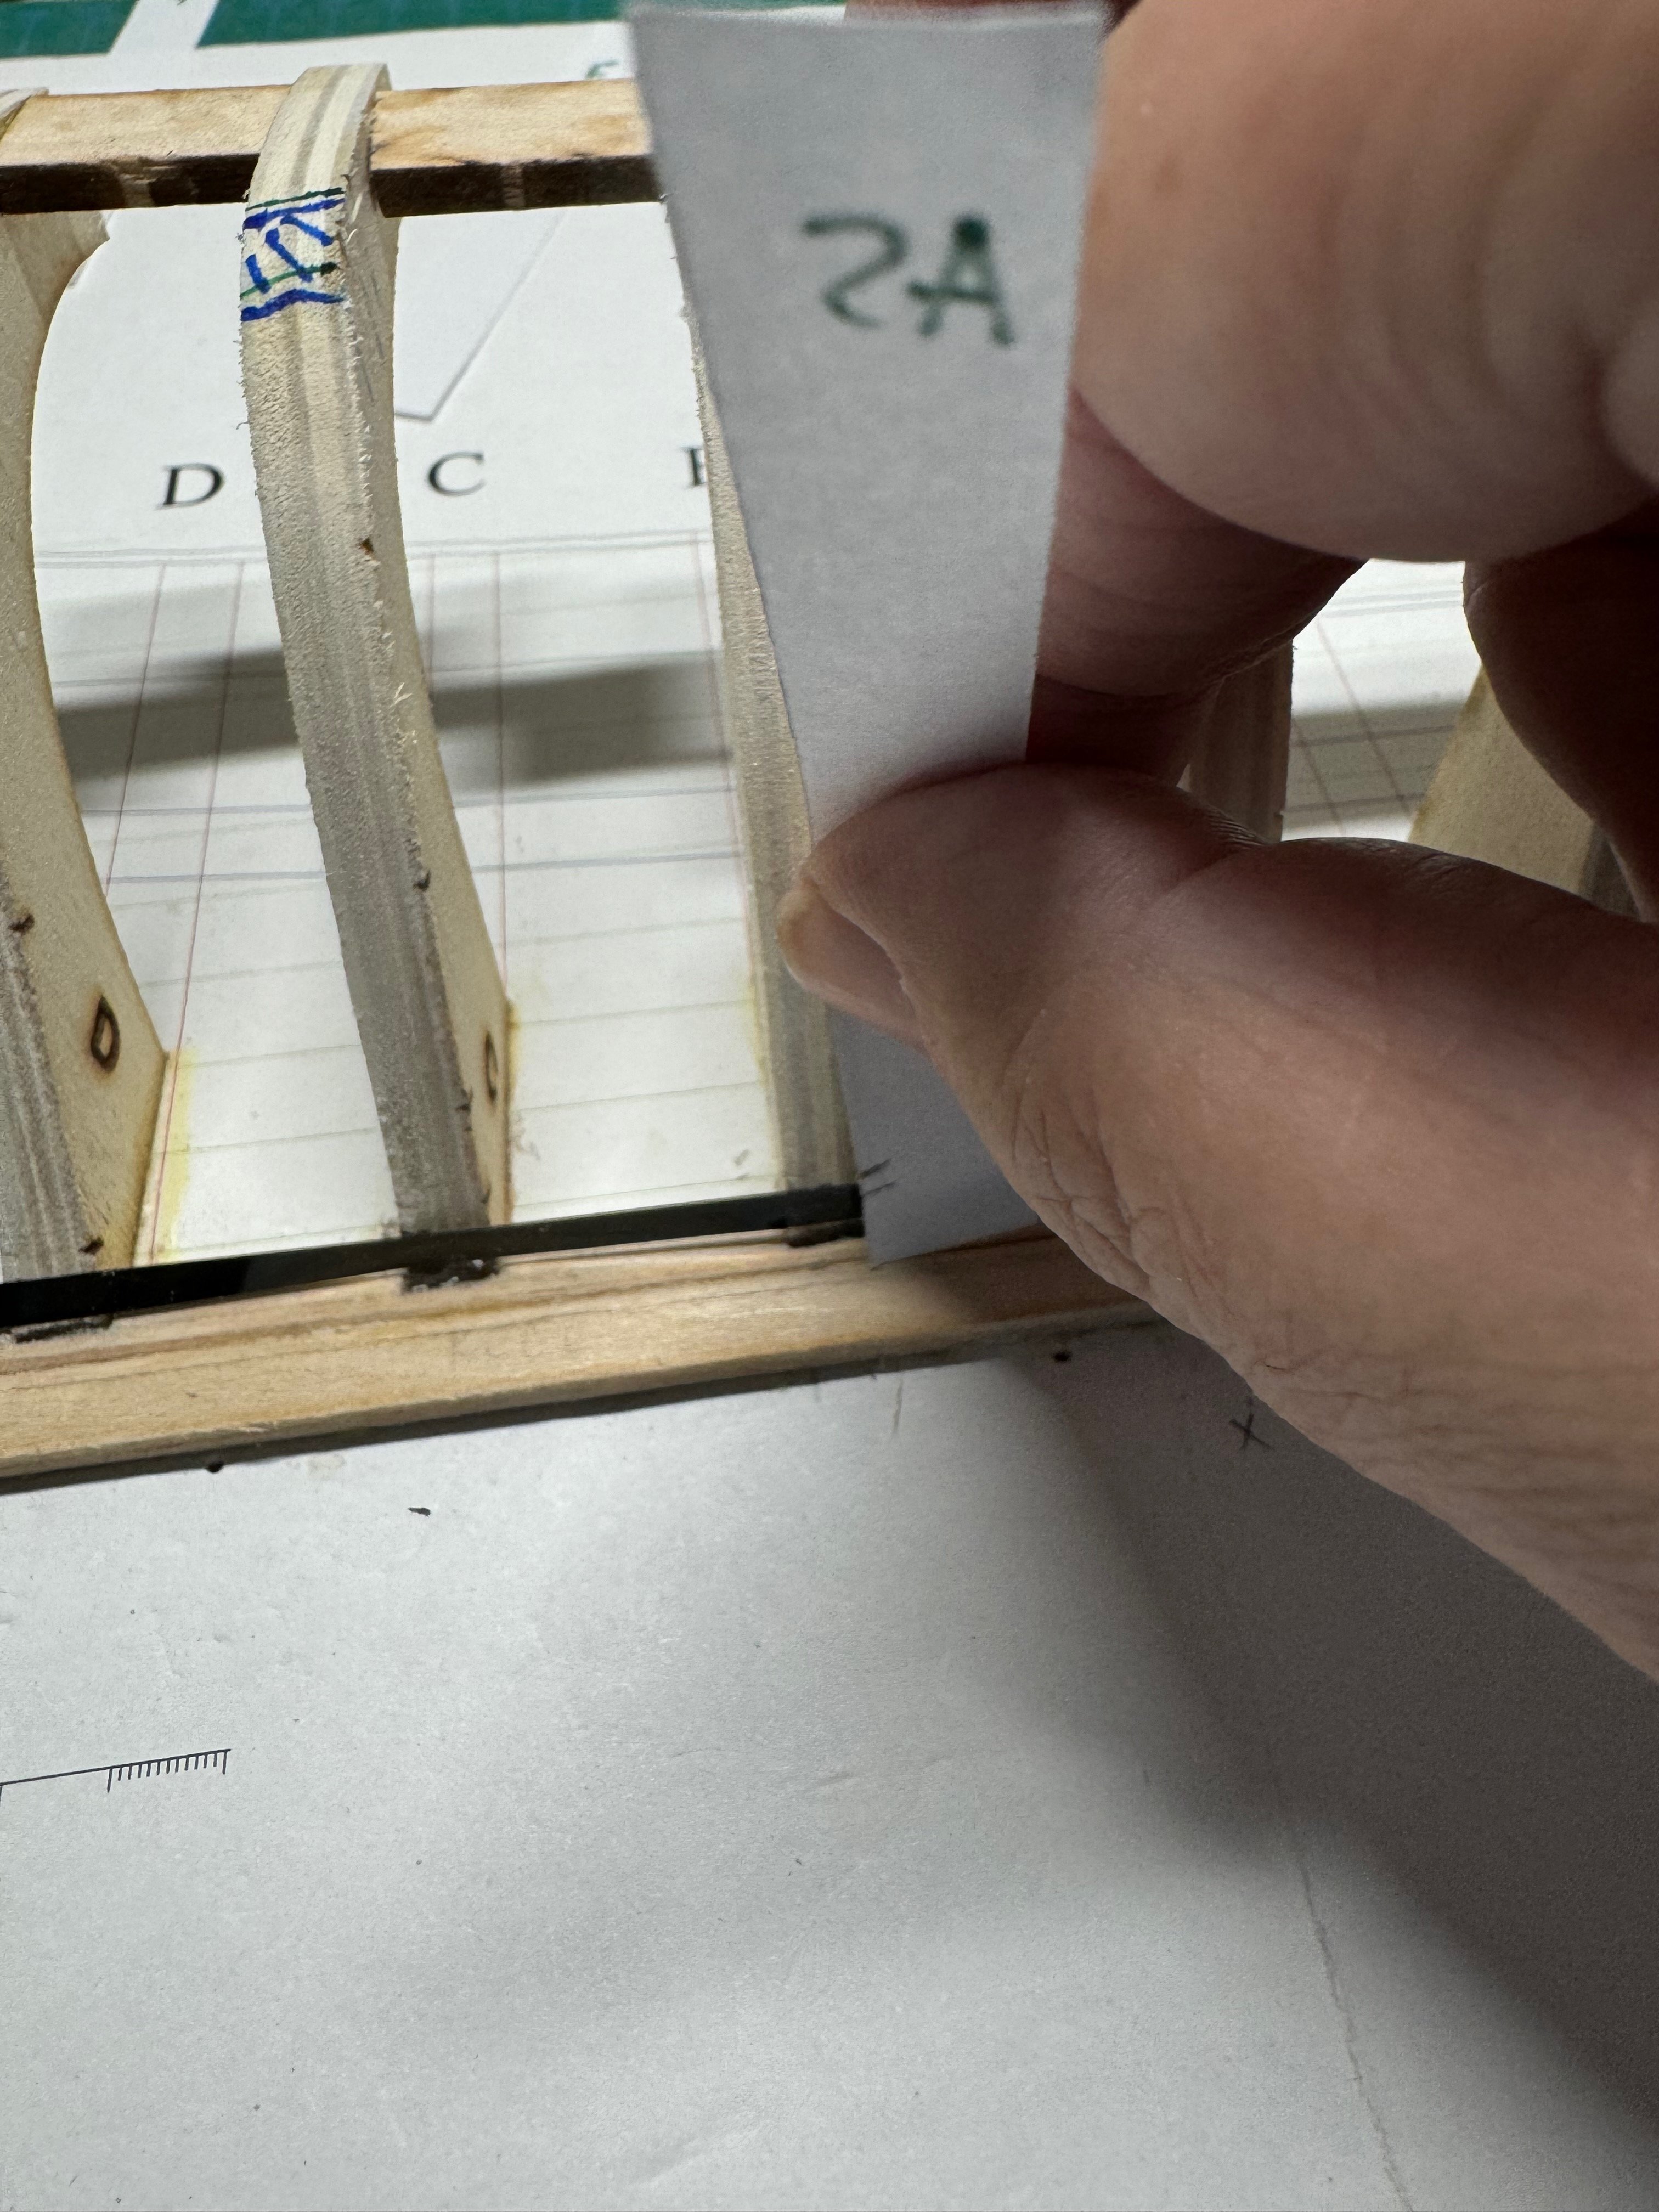
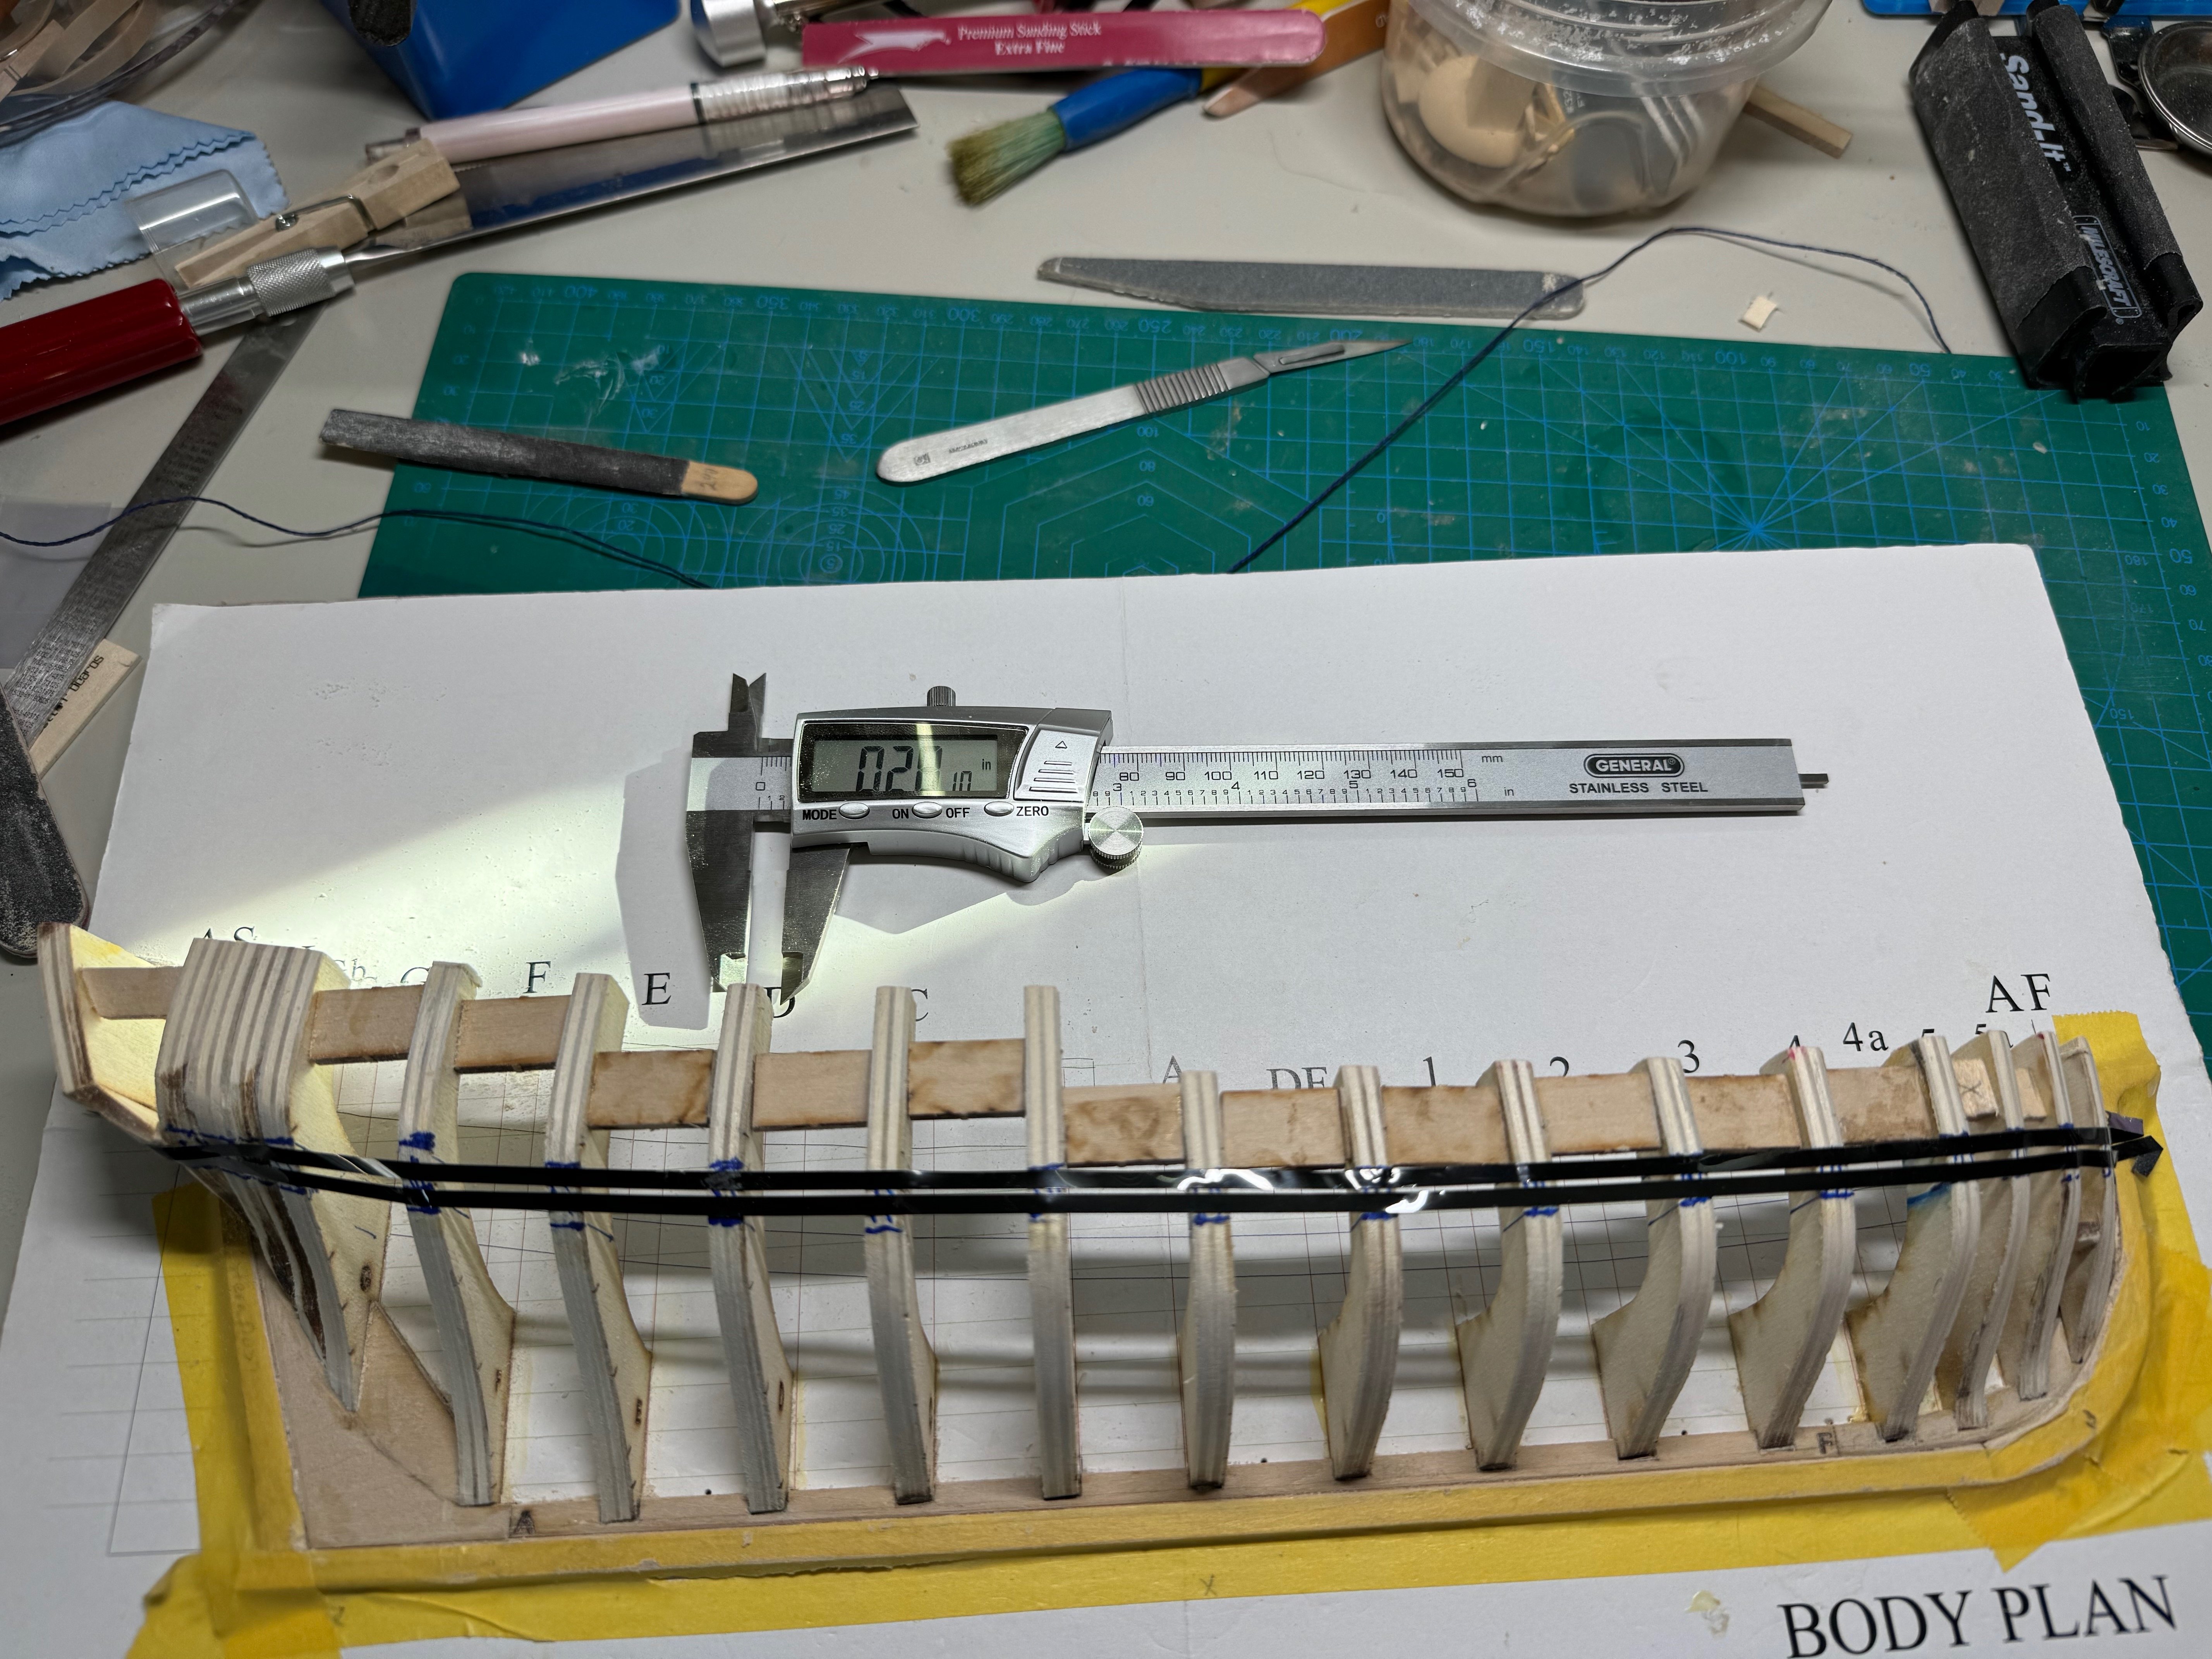
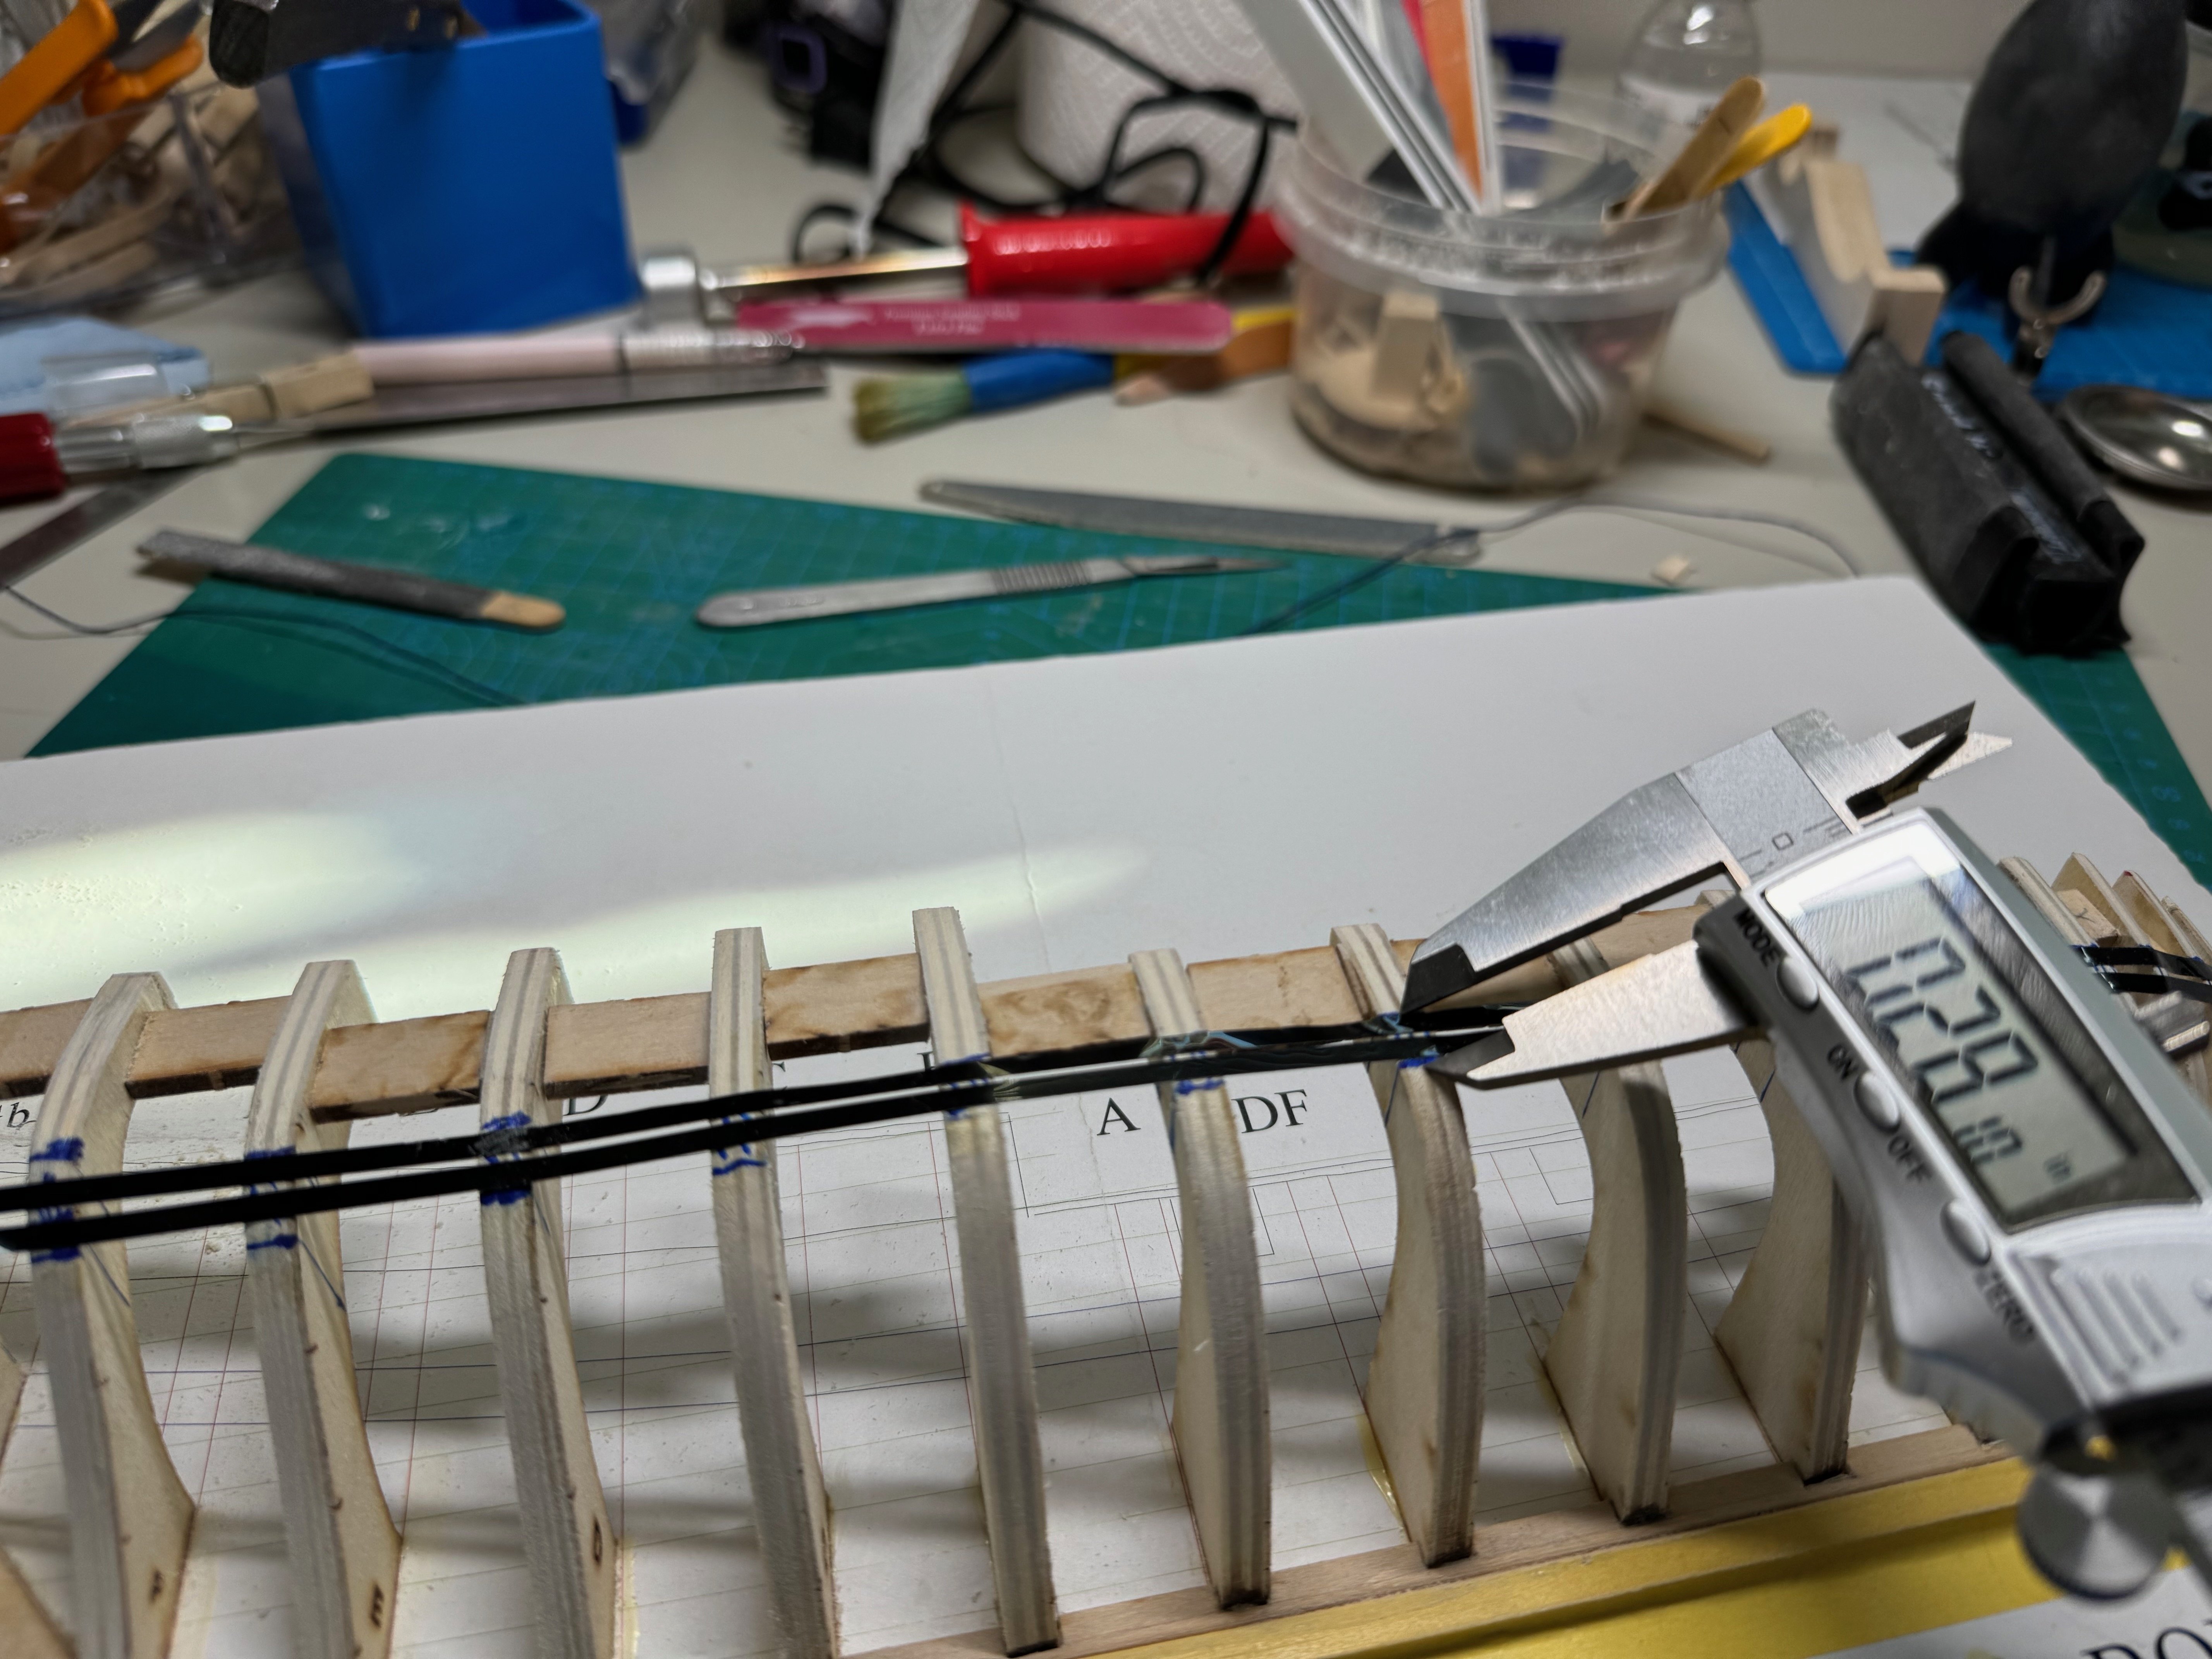
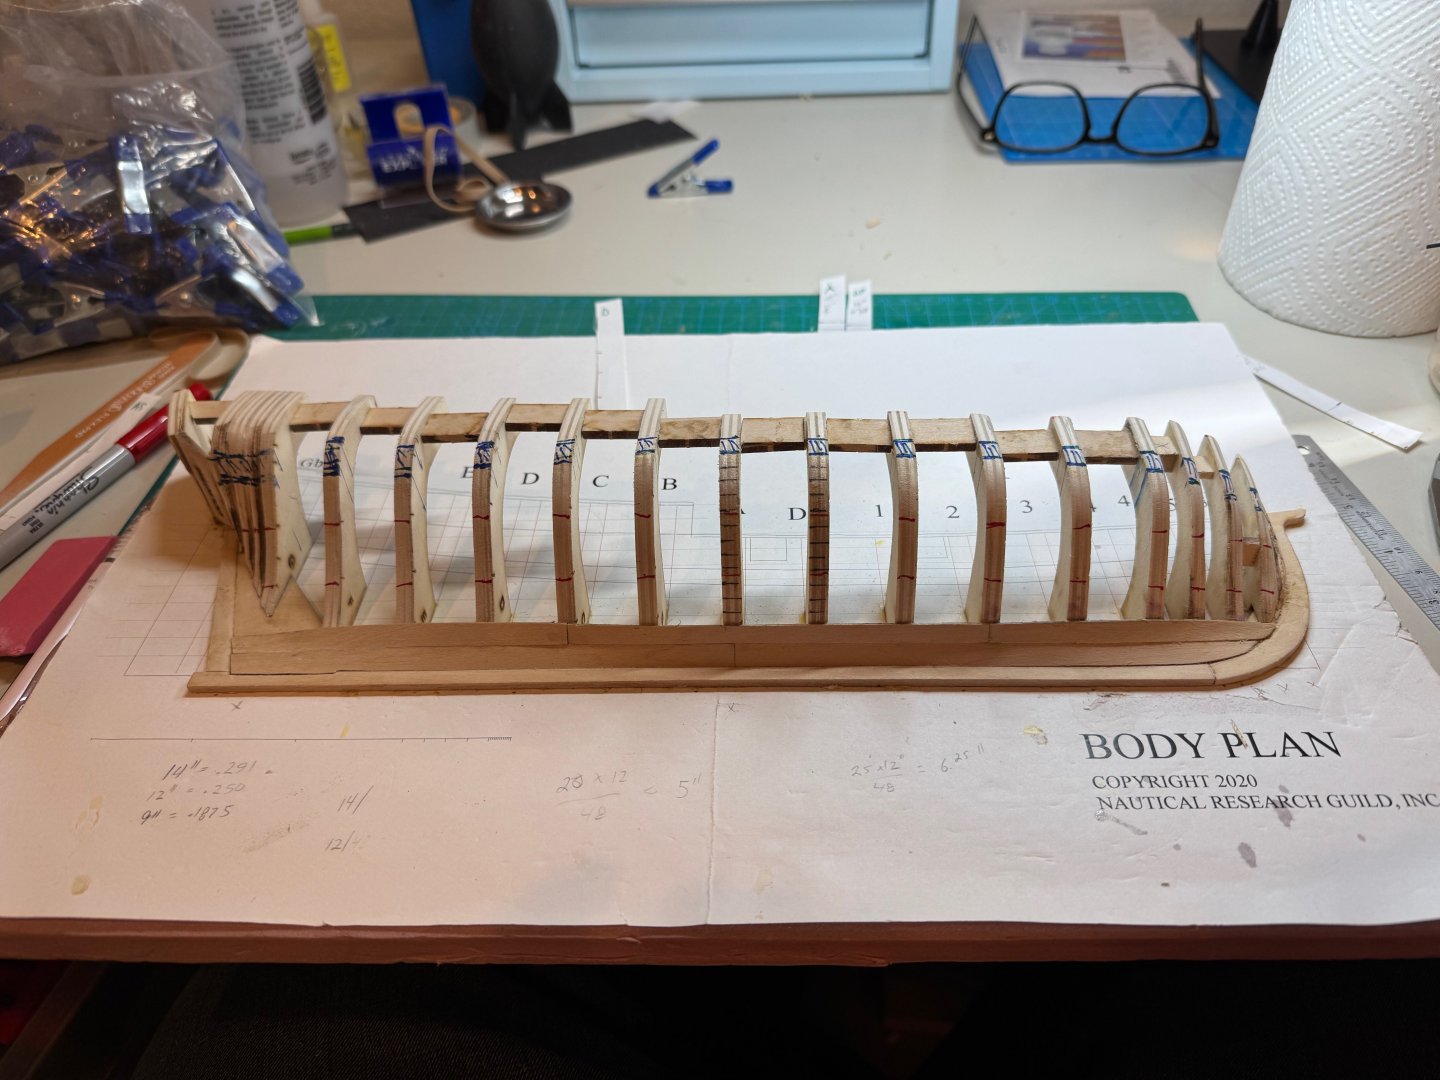
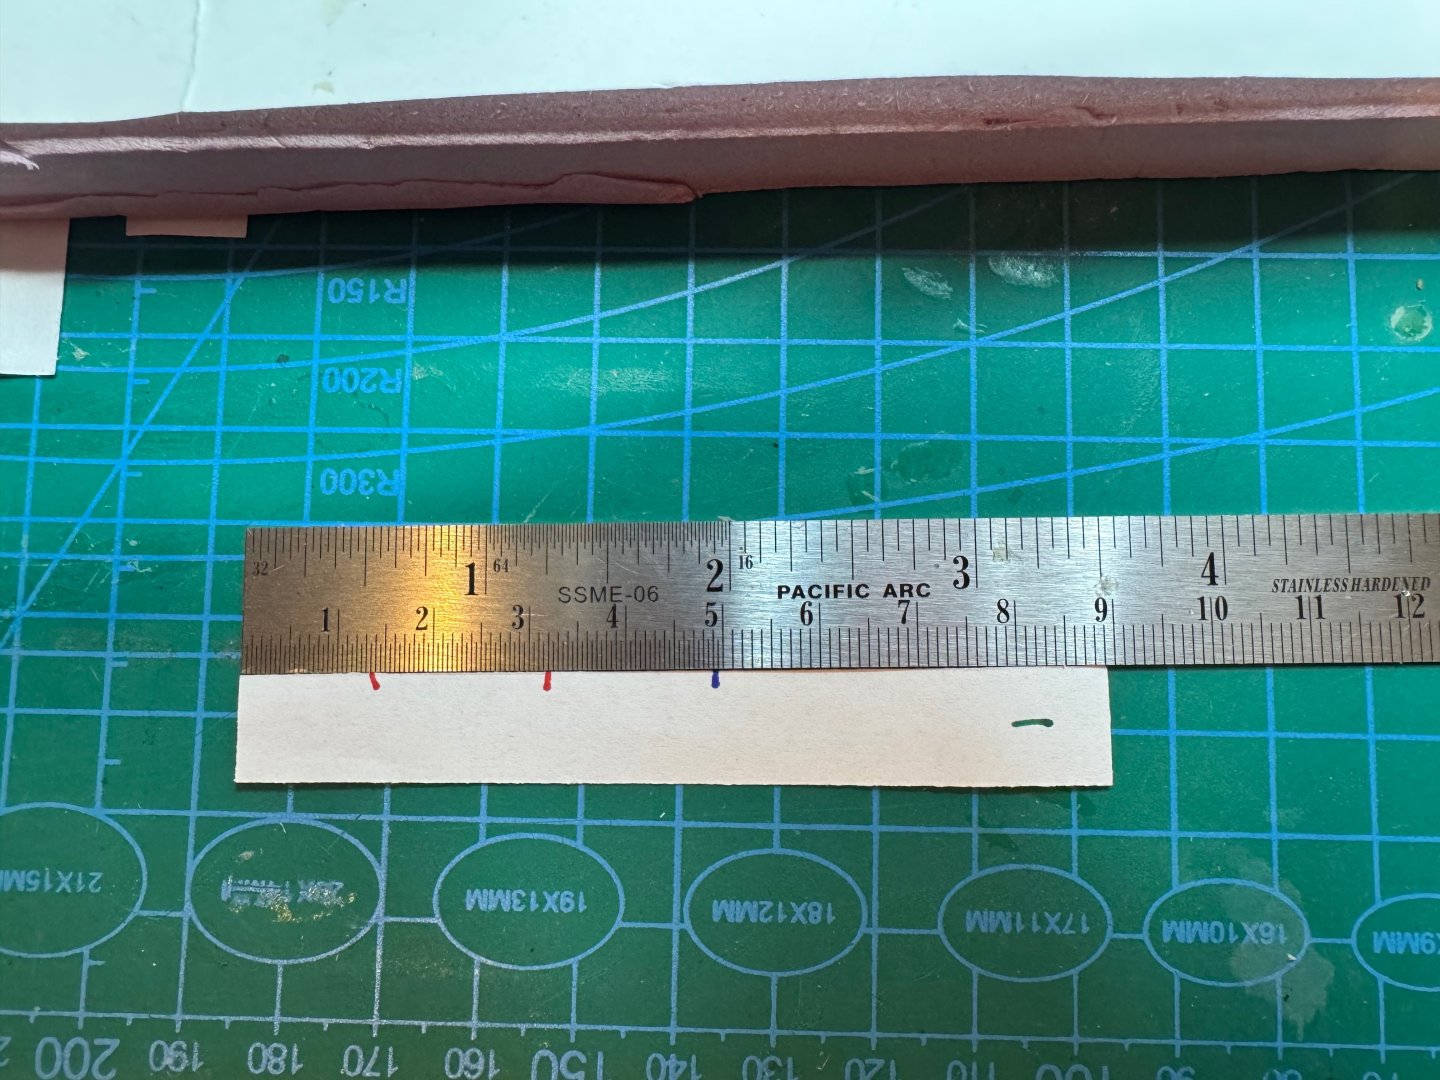
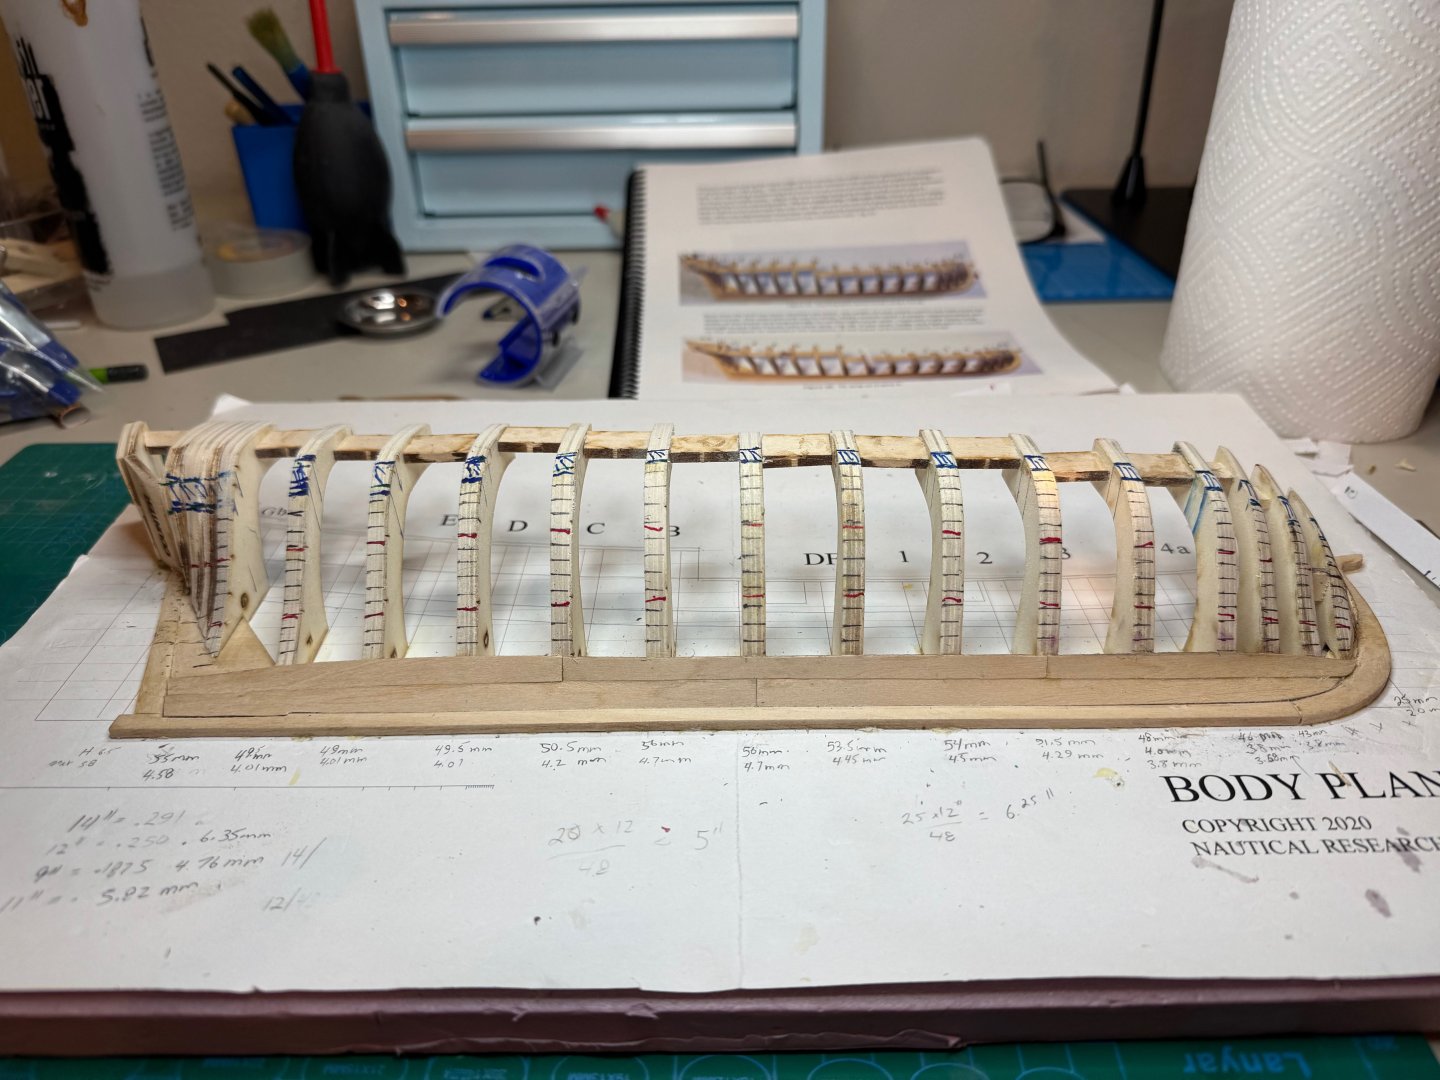
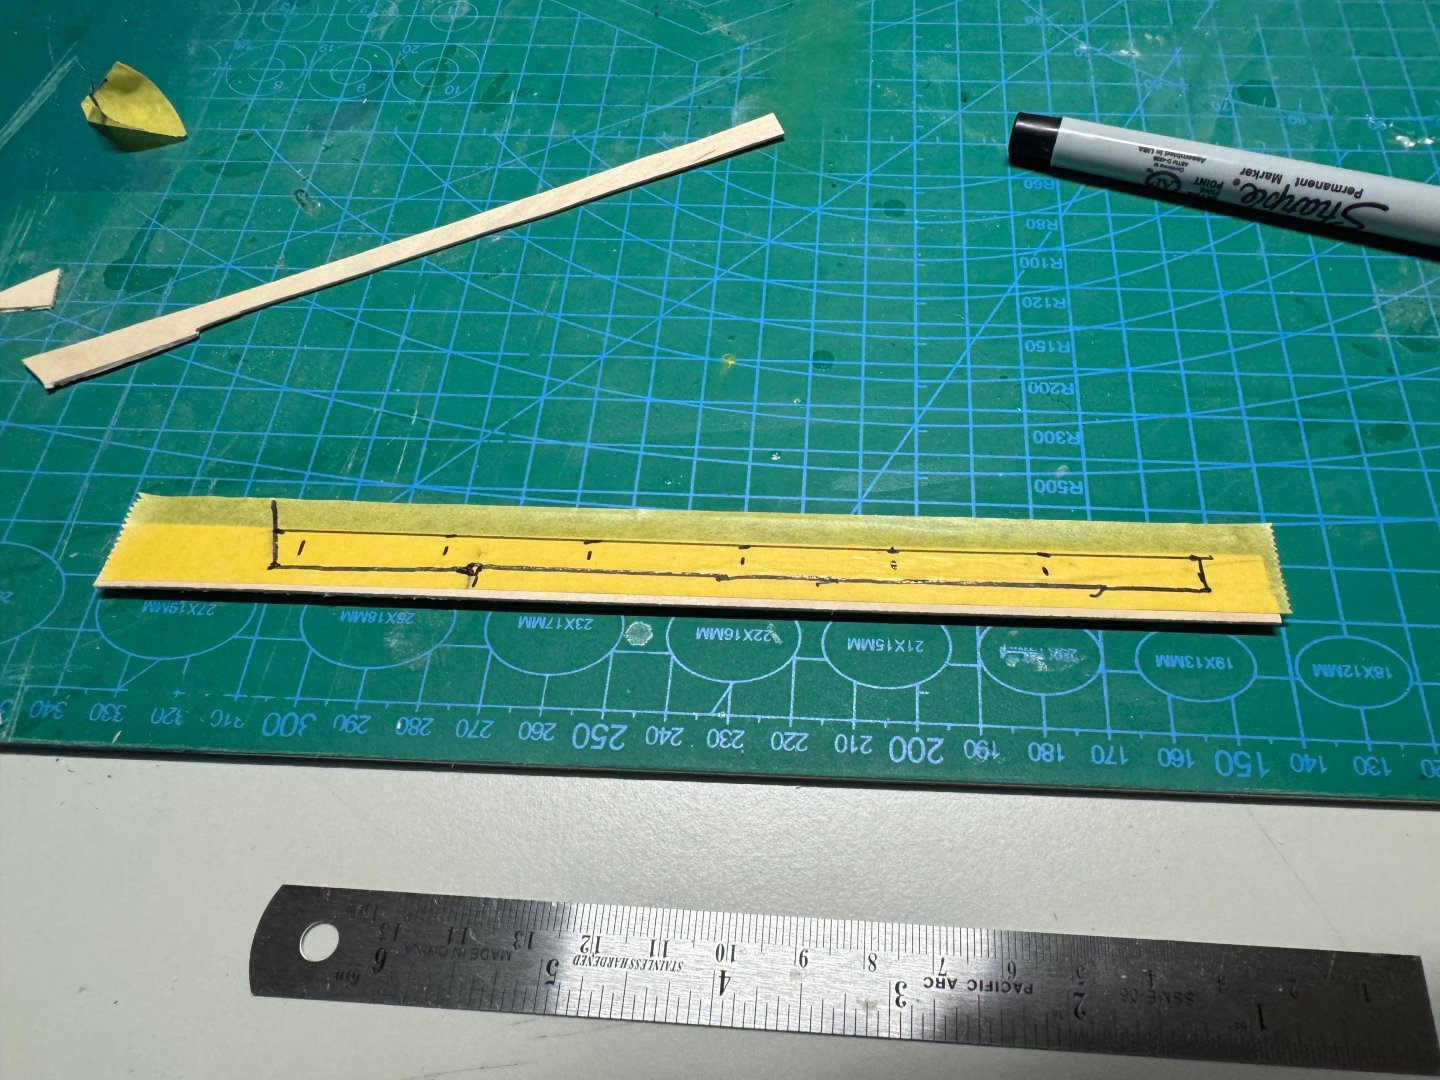
Good evening, and Happy New Year!! After the hectic holiday and minor illness I am able to get back to my planking project. Tonights objective was to get the planks marked on the bulk heads. I ended up taking the measurements from the first strake to to the bottom of the whale, as I noticed that my belts where not as even as I would like. Secondly I really struggles with the obsolete imperial measurement system so I had to make some calculations. So going back to the document we know we want our plank width at B, A, and DF to be 9 inches. So we know that 1 inch = 25.4 mm. So our width would be 9 * 25.4 mm = 228.6 mm. Now we need to adjust for the scale, so we need to divide by 48. Thus 228.6 mm / 48 = 4.76 mm as our maximum width. Similarly for the the maximum width at the stern post to be 11 inches (279.4 mm) our value is 5.82 millimeters. Thus for my DF bulk head it measured 54 mm which works out to 54 / 12 = 4.4 mm per plank. Now B and A came to 56 mm each so the width is 4.7 mm or ~ 9 inches. Below is the marking of A and DF after doing my calculations. This is an example of the transfer of planks to the tick sheets. The red on the tick sheets is my marks from my plank belts. These we transferred prior to splitting out the planks. Though I do like the concept of planking belts, it is obvious I could not get them even and you can see the challenges on the next photo after completing the planks marking. I plan on adding a steeler between plank 4 and 5. For the bow, my plank width is 2.0 mm. This is less thank half of 4.7 mm which is 2.35mm, so I will need to plan at least three drop planks. Have a good evening

-
yikes. hopefully when i get there it will not break
-
Happy New Year @BMT i have not started yet. still working on two projects at the moment. the holiday season has been hectic.
-
best SECOND model ship kit recommendations
Jim M replied to palmerit's topic in Wood ship model kits
i use titebond for gluing and i avoid ca as much as possible. i will give wipe on polly a try. i however do have a collection of airbrushes so what do you recommend for spraying? -
thanks the knees are square to the transoms though the pictures are off they at quite loose in the frame and i may add another support to keep square
- 6 replies
-
- 2
-
-
- Norwegian Sailing Pram
- Model Expo
- (and 2 more)
-
@GGibson Greg what do you use for stain?
-
Good evening. I made an adjustment to the planking belts. I am going to sleep on the change before making the final commitment. Cheers

-
Good evening, I spent some time today determining the planking bands. I was a little confused on the the counter, but after re-reading the instructions a few times, I noticed that I should keep 4 planks at 9" for the upper band, so I added a mark there. For the bow, again it was a little confusing, but I ended up using the distance from the first broad strake, to the whale using bulkhead 5a, and there i created the marks for the bands there. On the stern, I did not calculate the split, but after rethinking it, I decided the stern plank should be 11", and I set the second band 1/2 way between the first strake, and the third belt. The plank count turns out to be 4.5 per band, so I will create a steeler between first and second bands. After correcting for 11 inch planks at the stern, the curve for the third band will need some adjustment tomorrow from left of B. Cheers jim

-
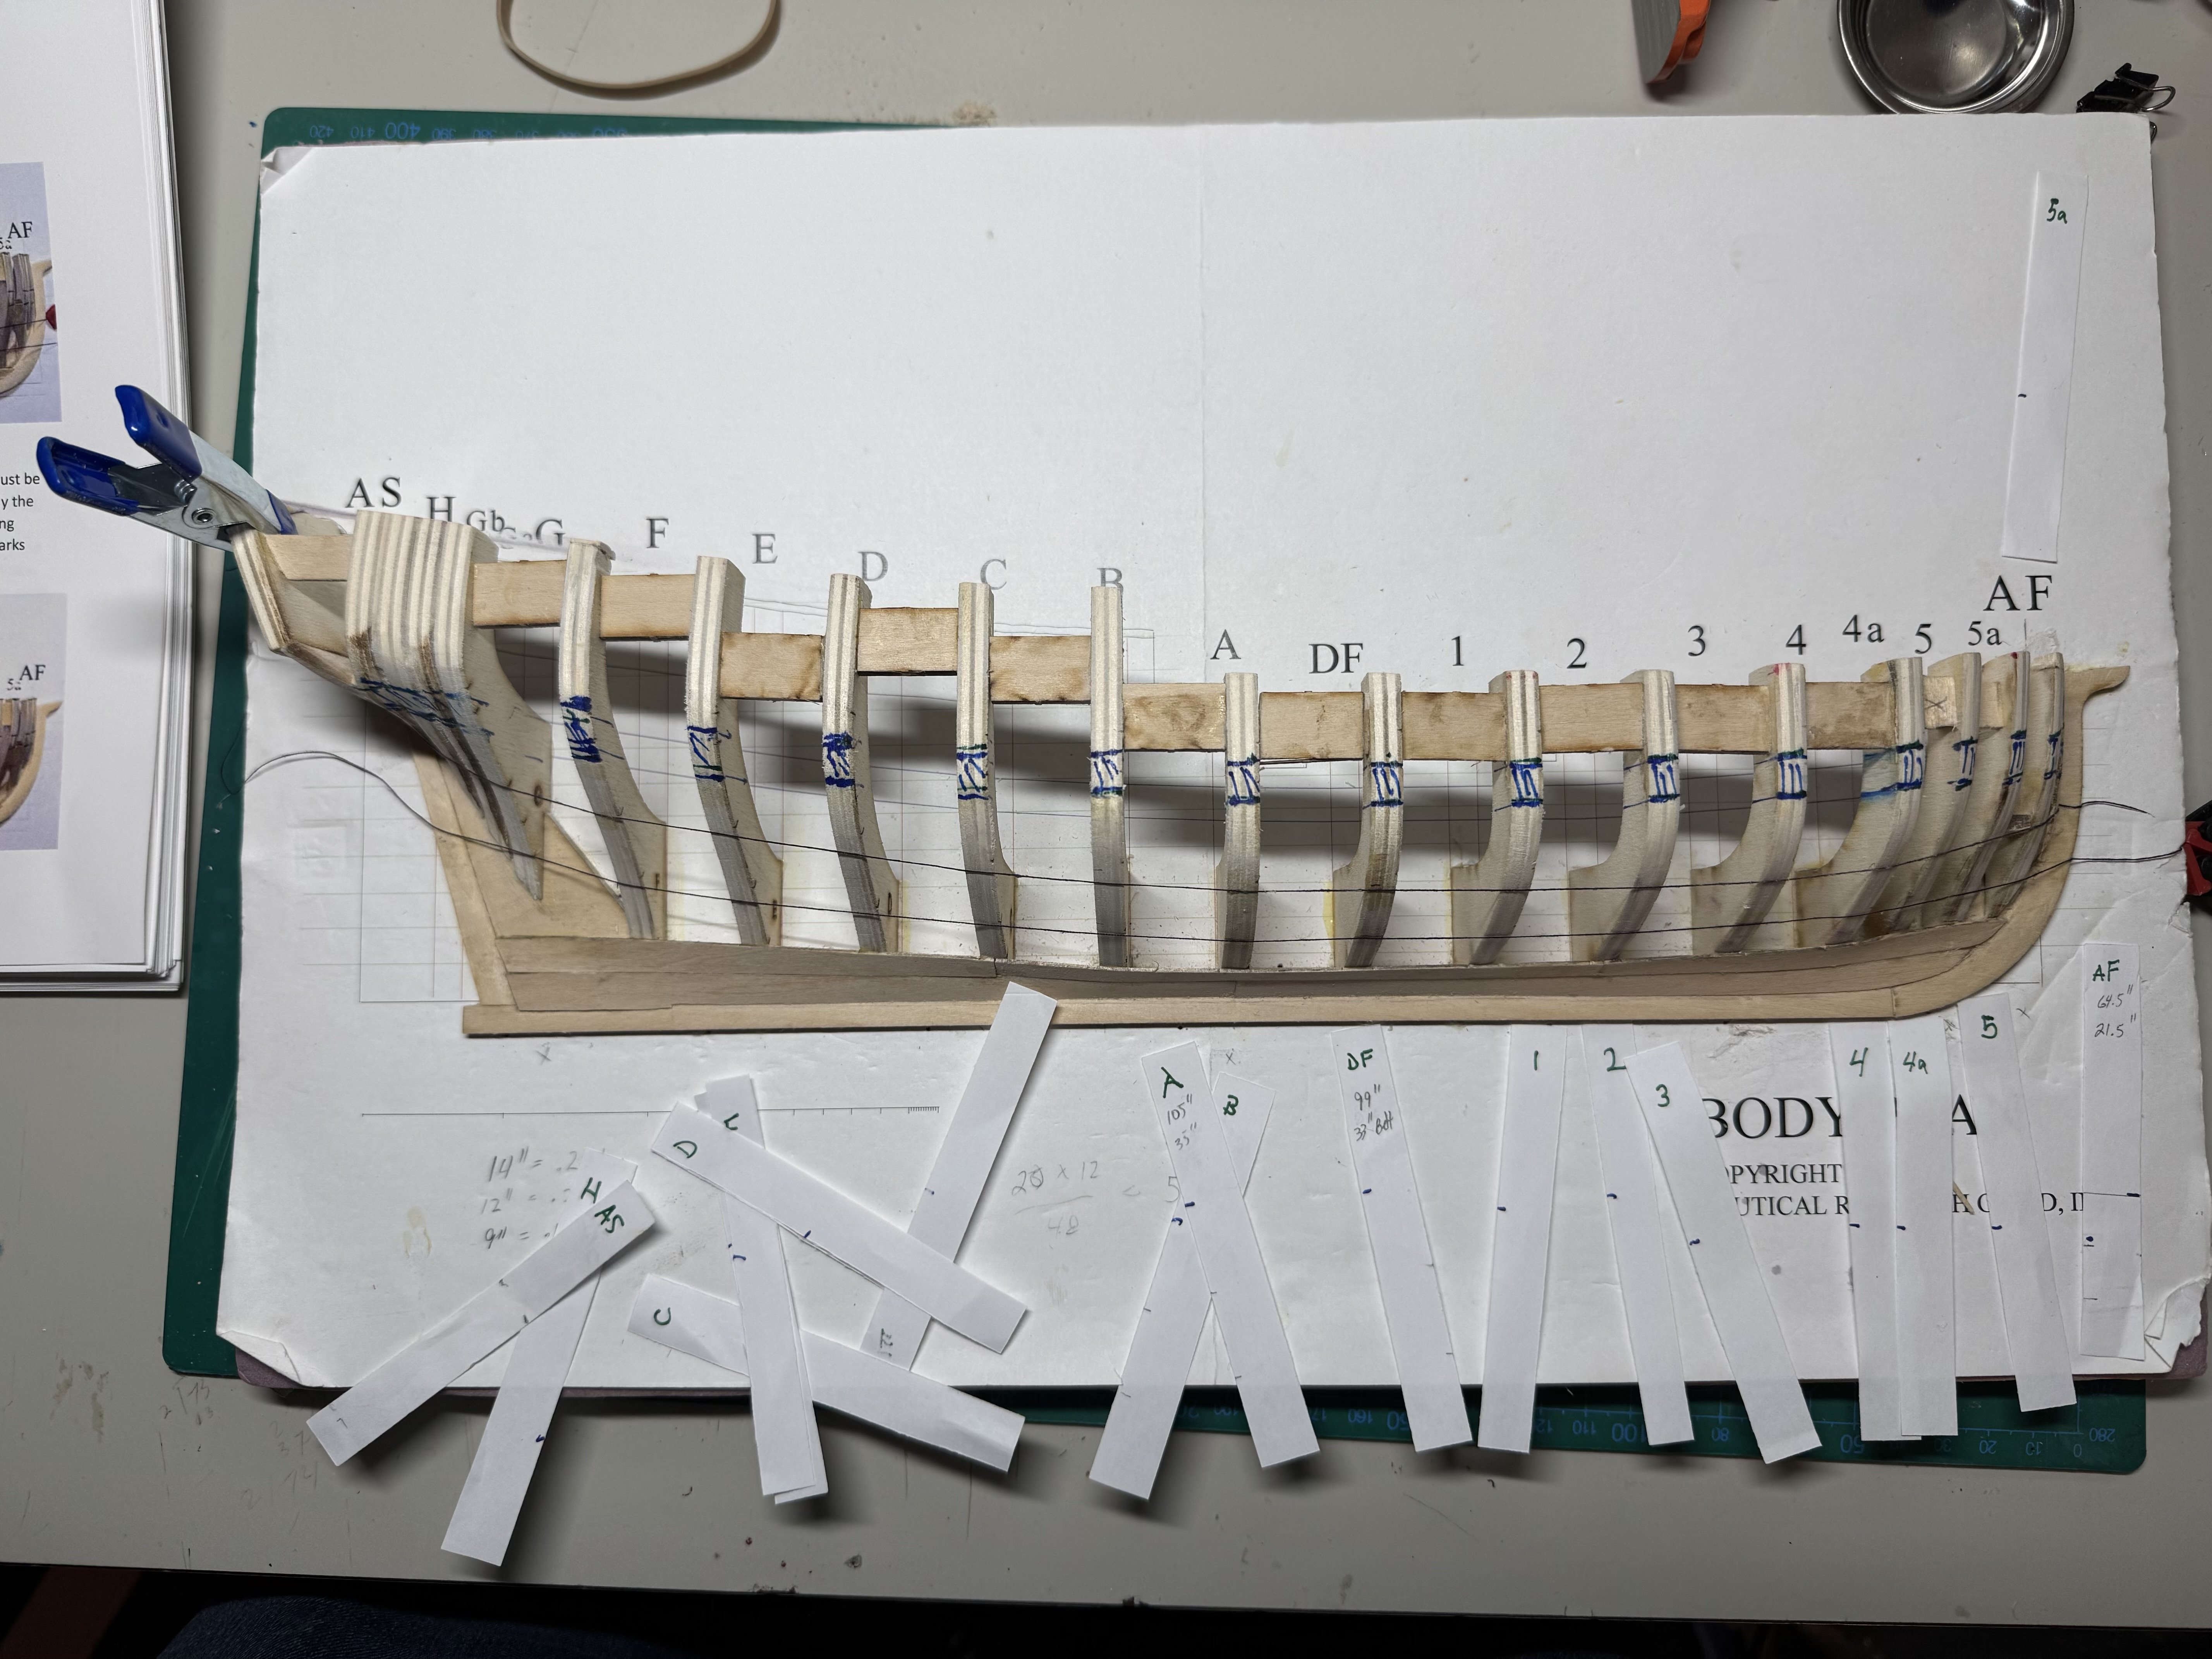
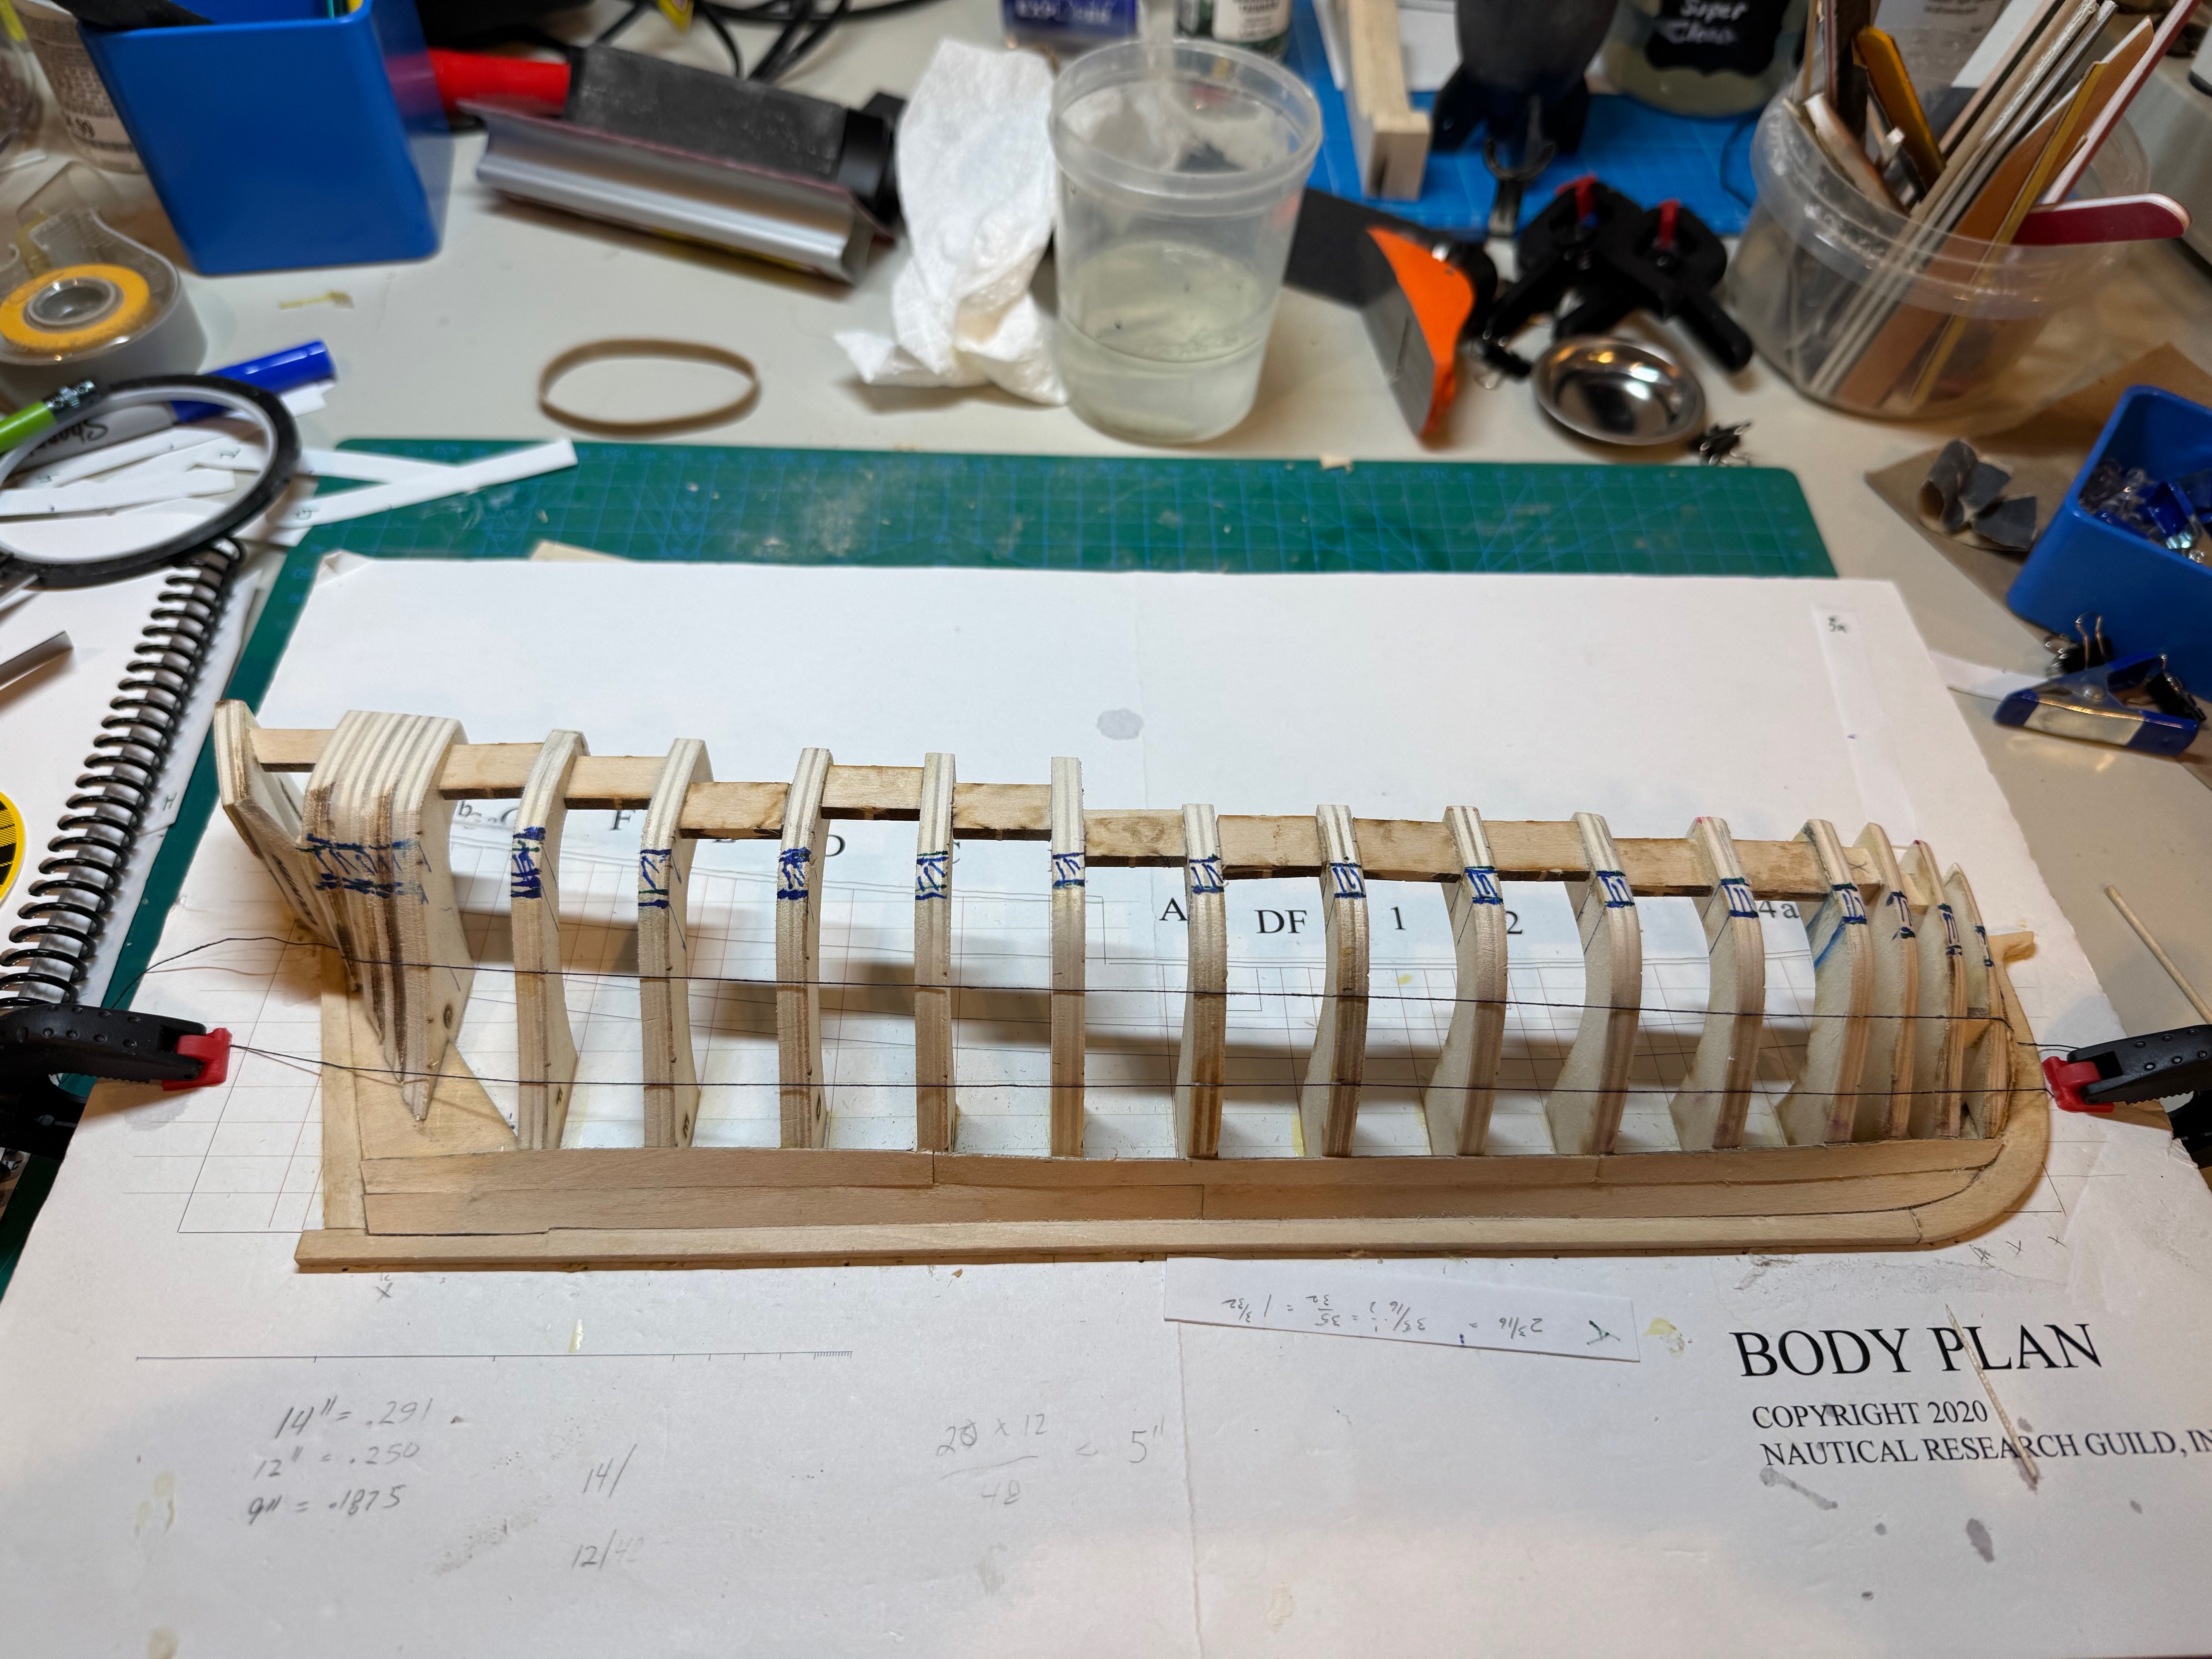
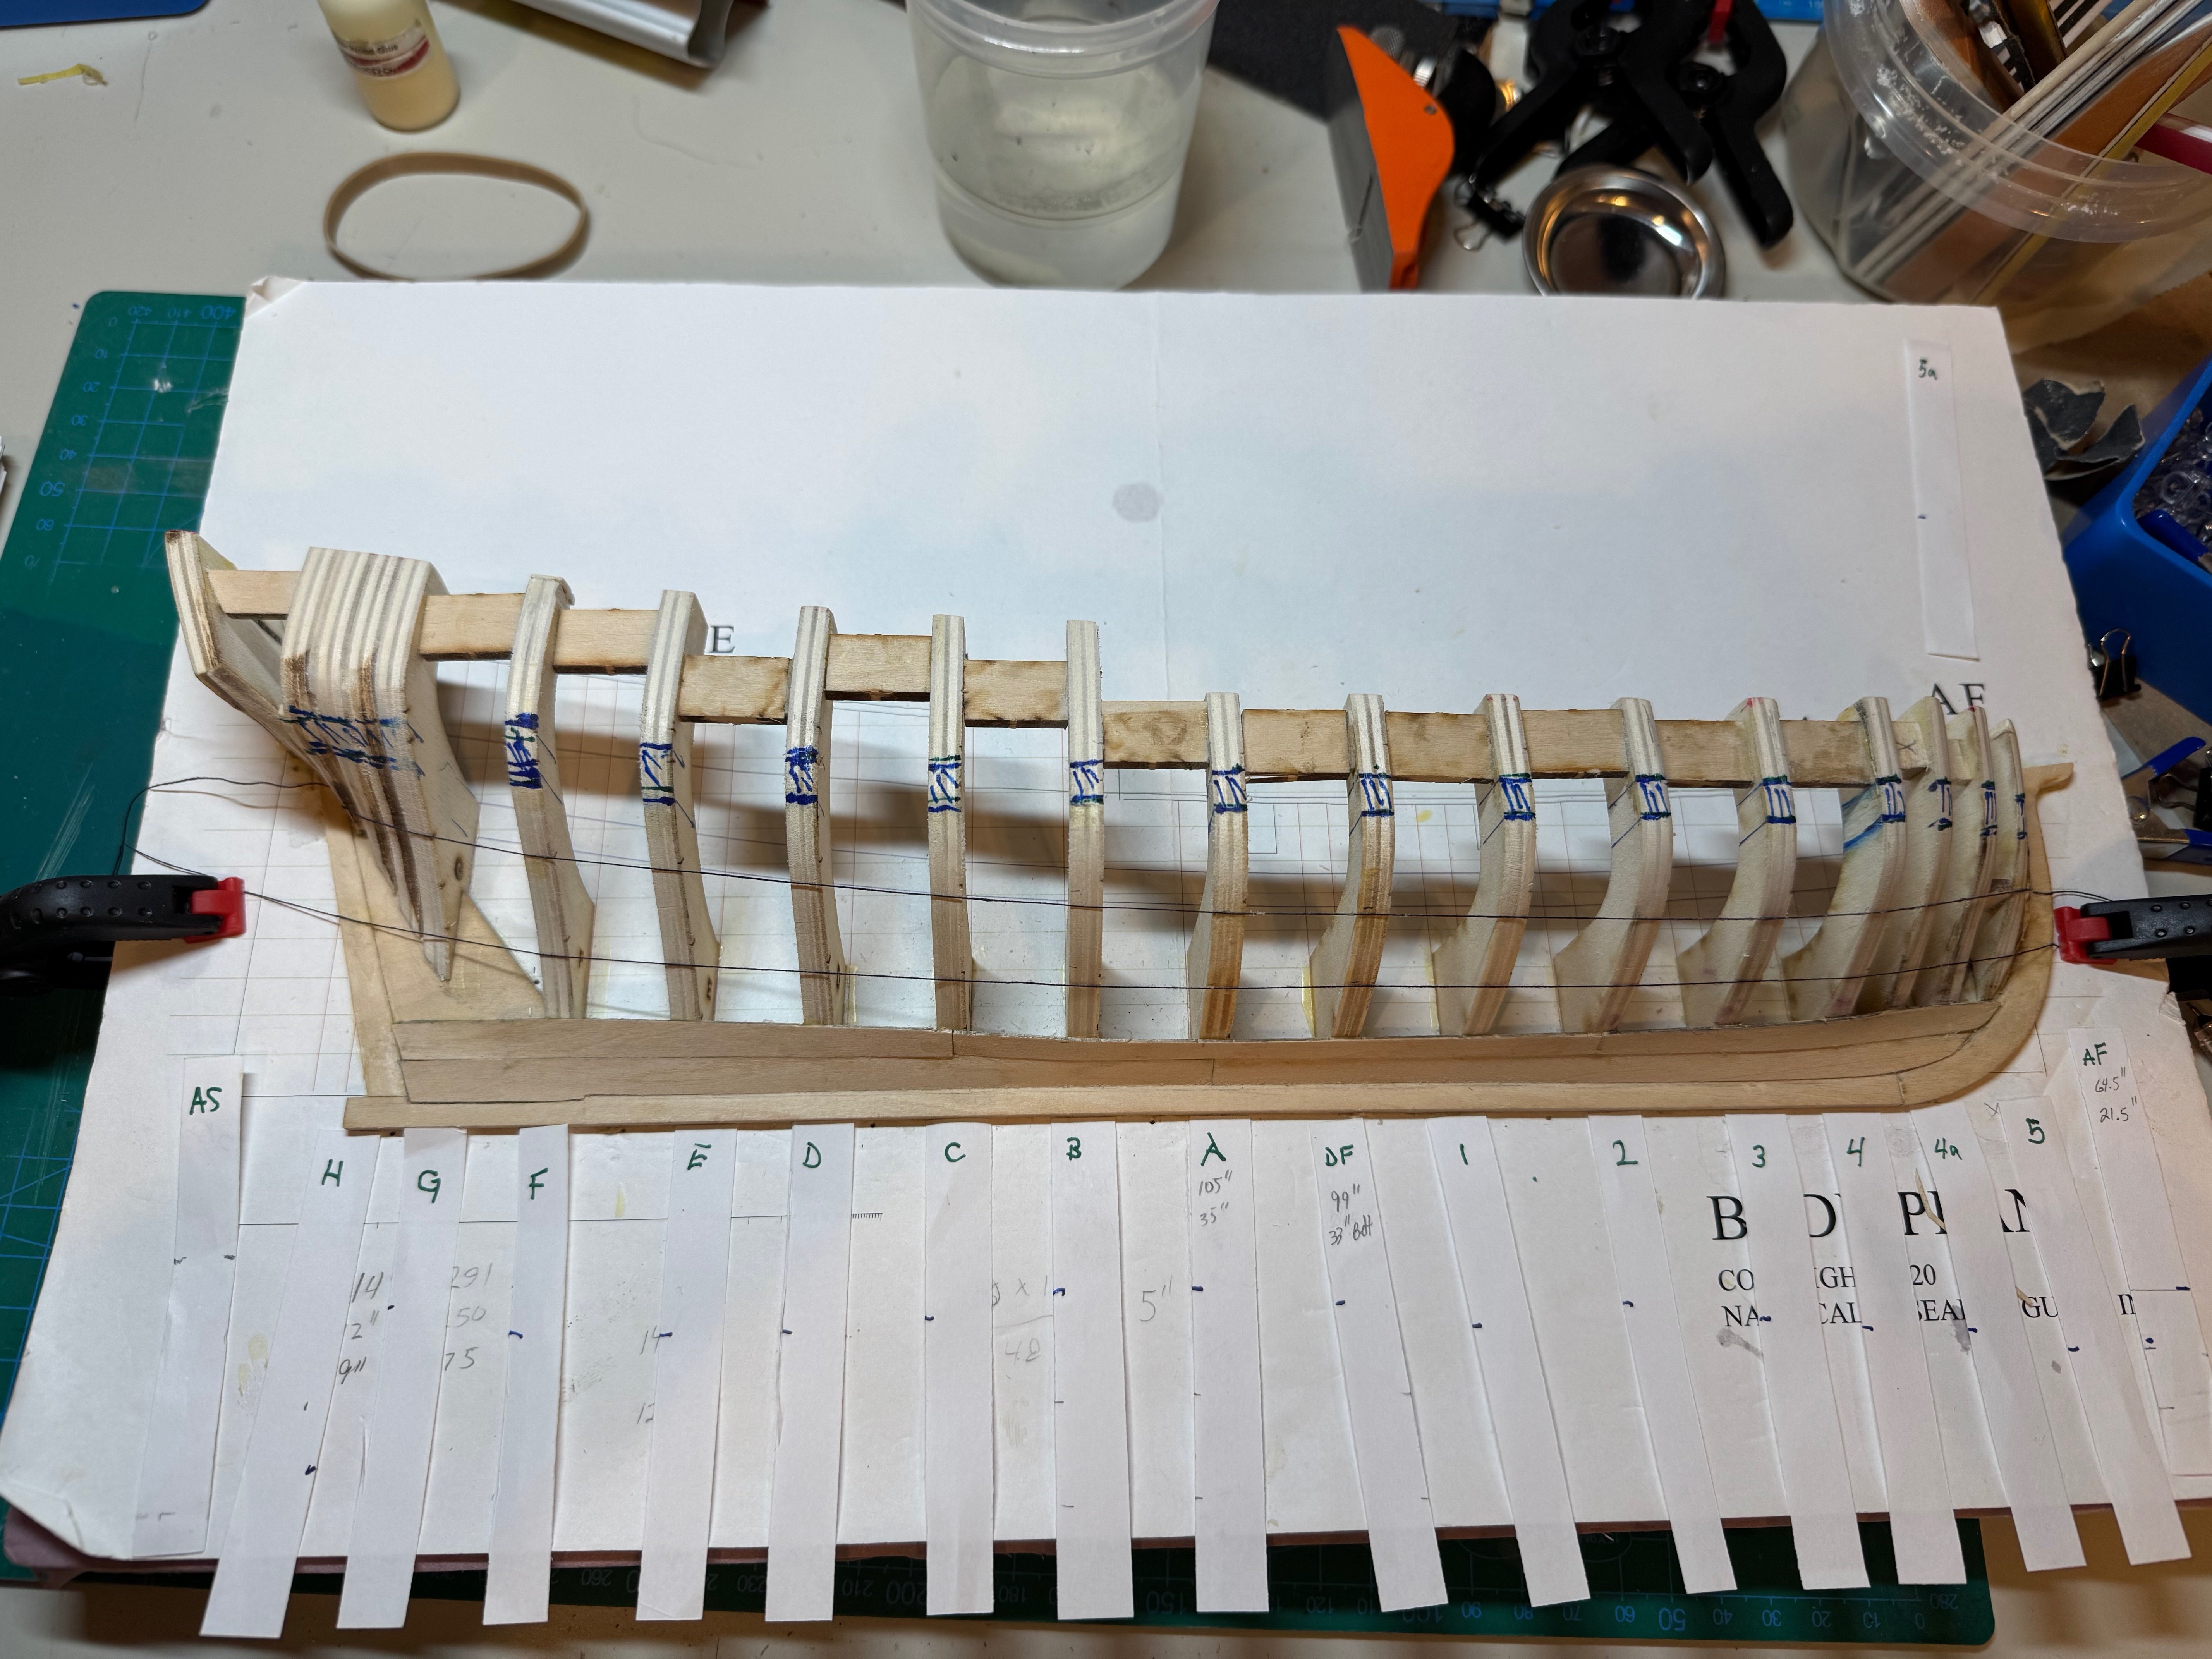
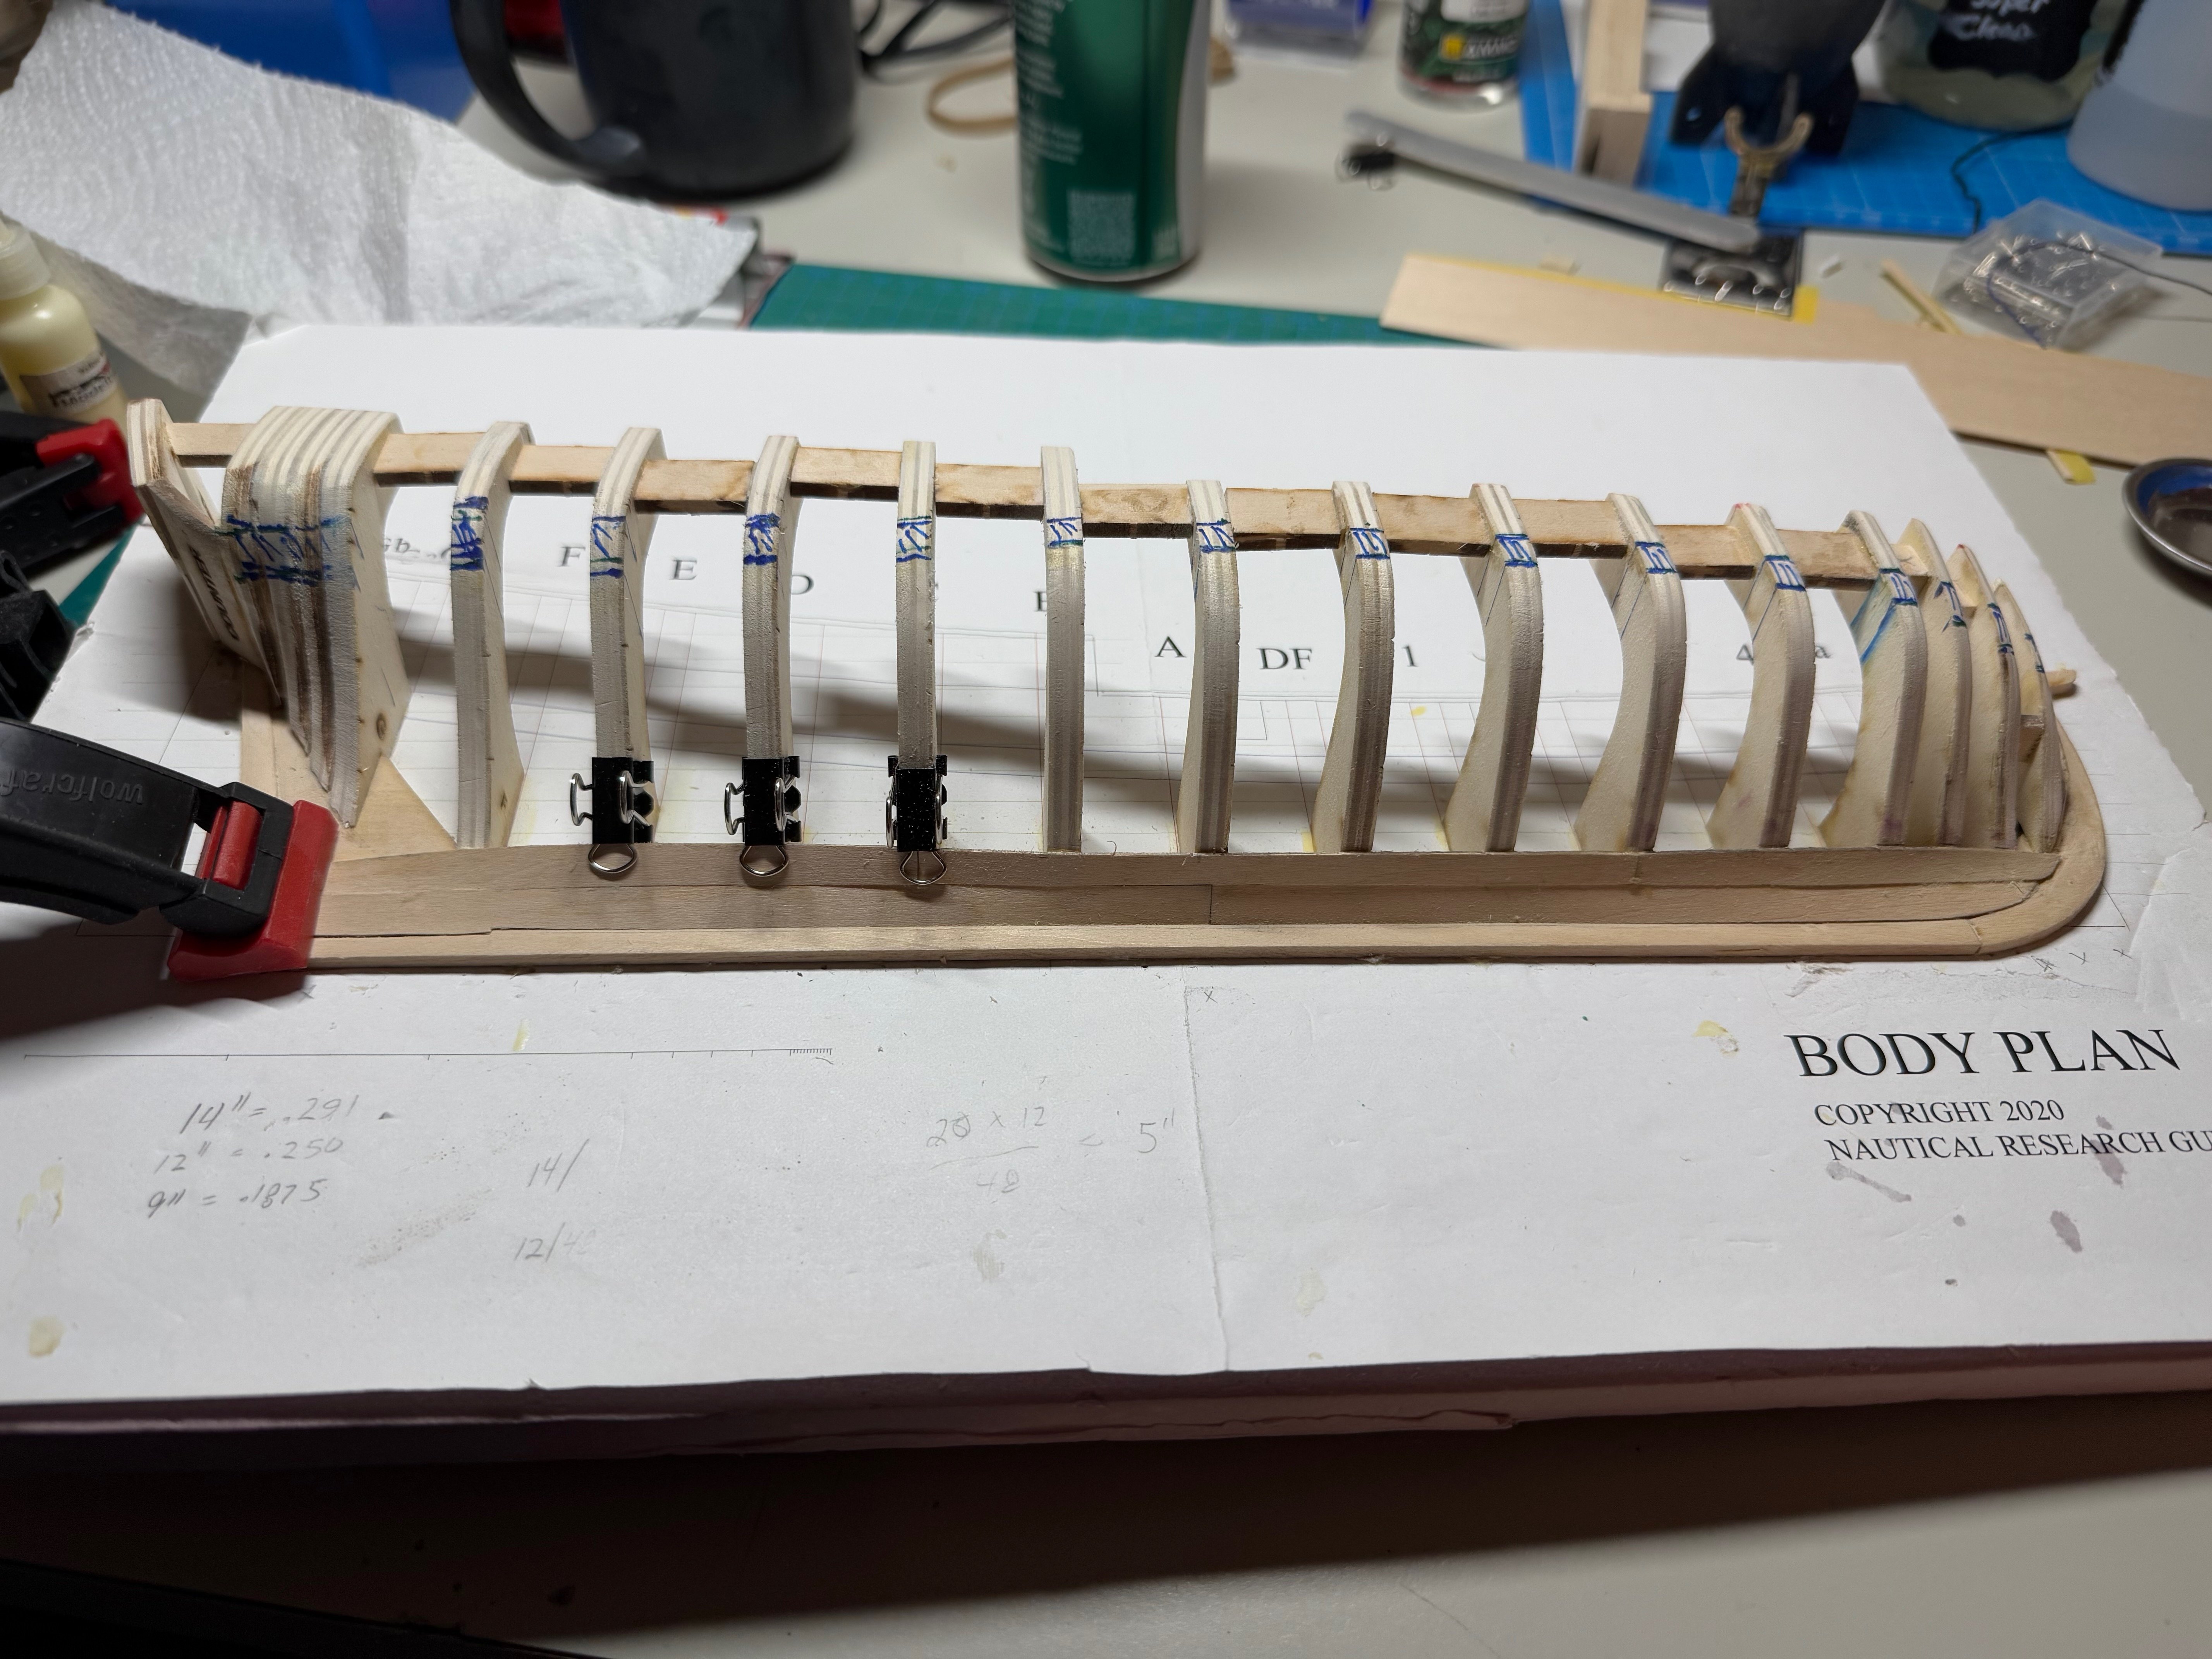
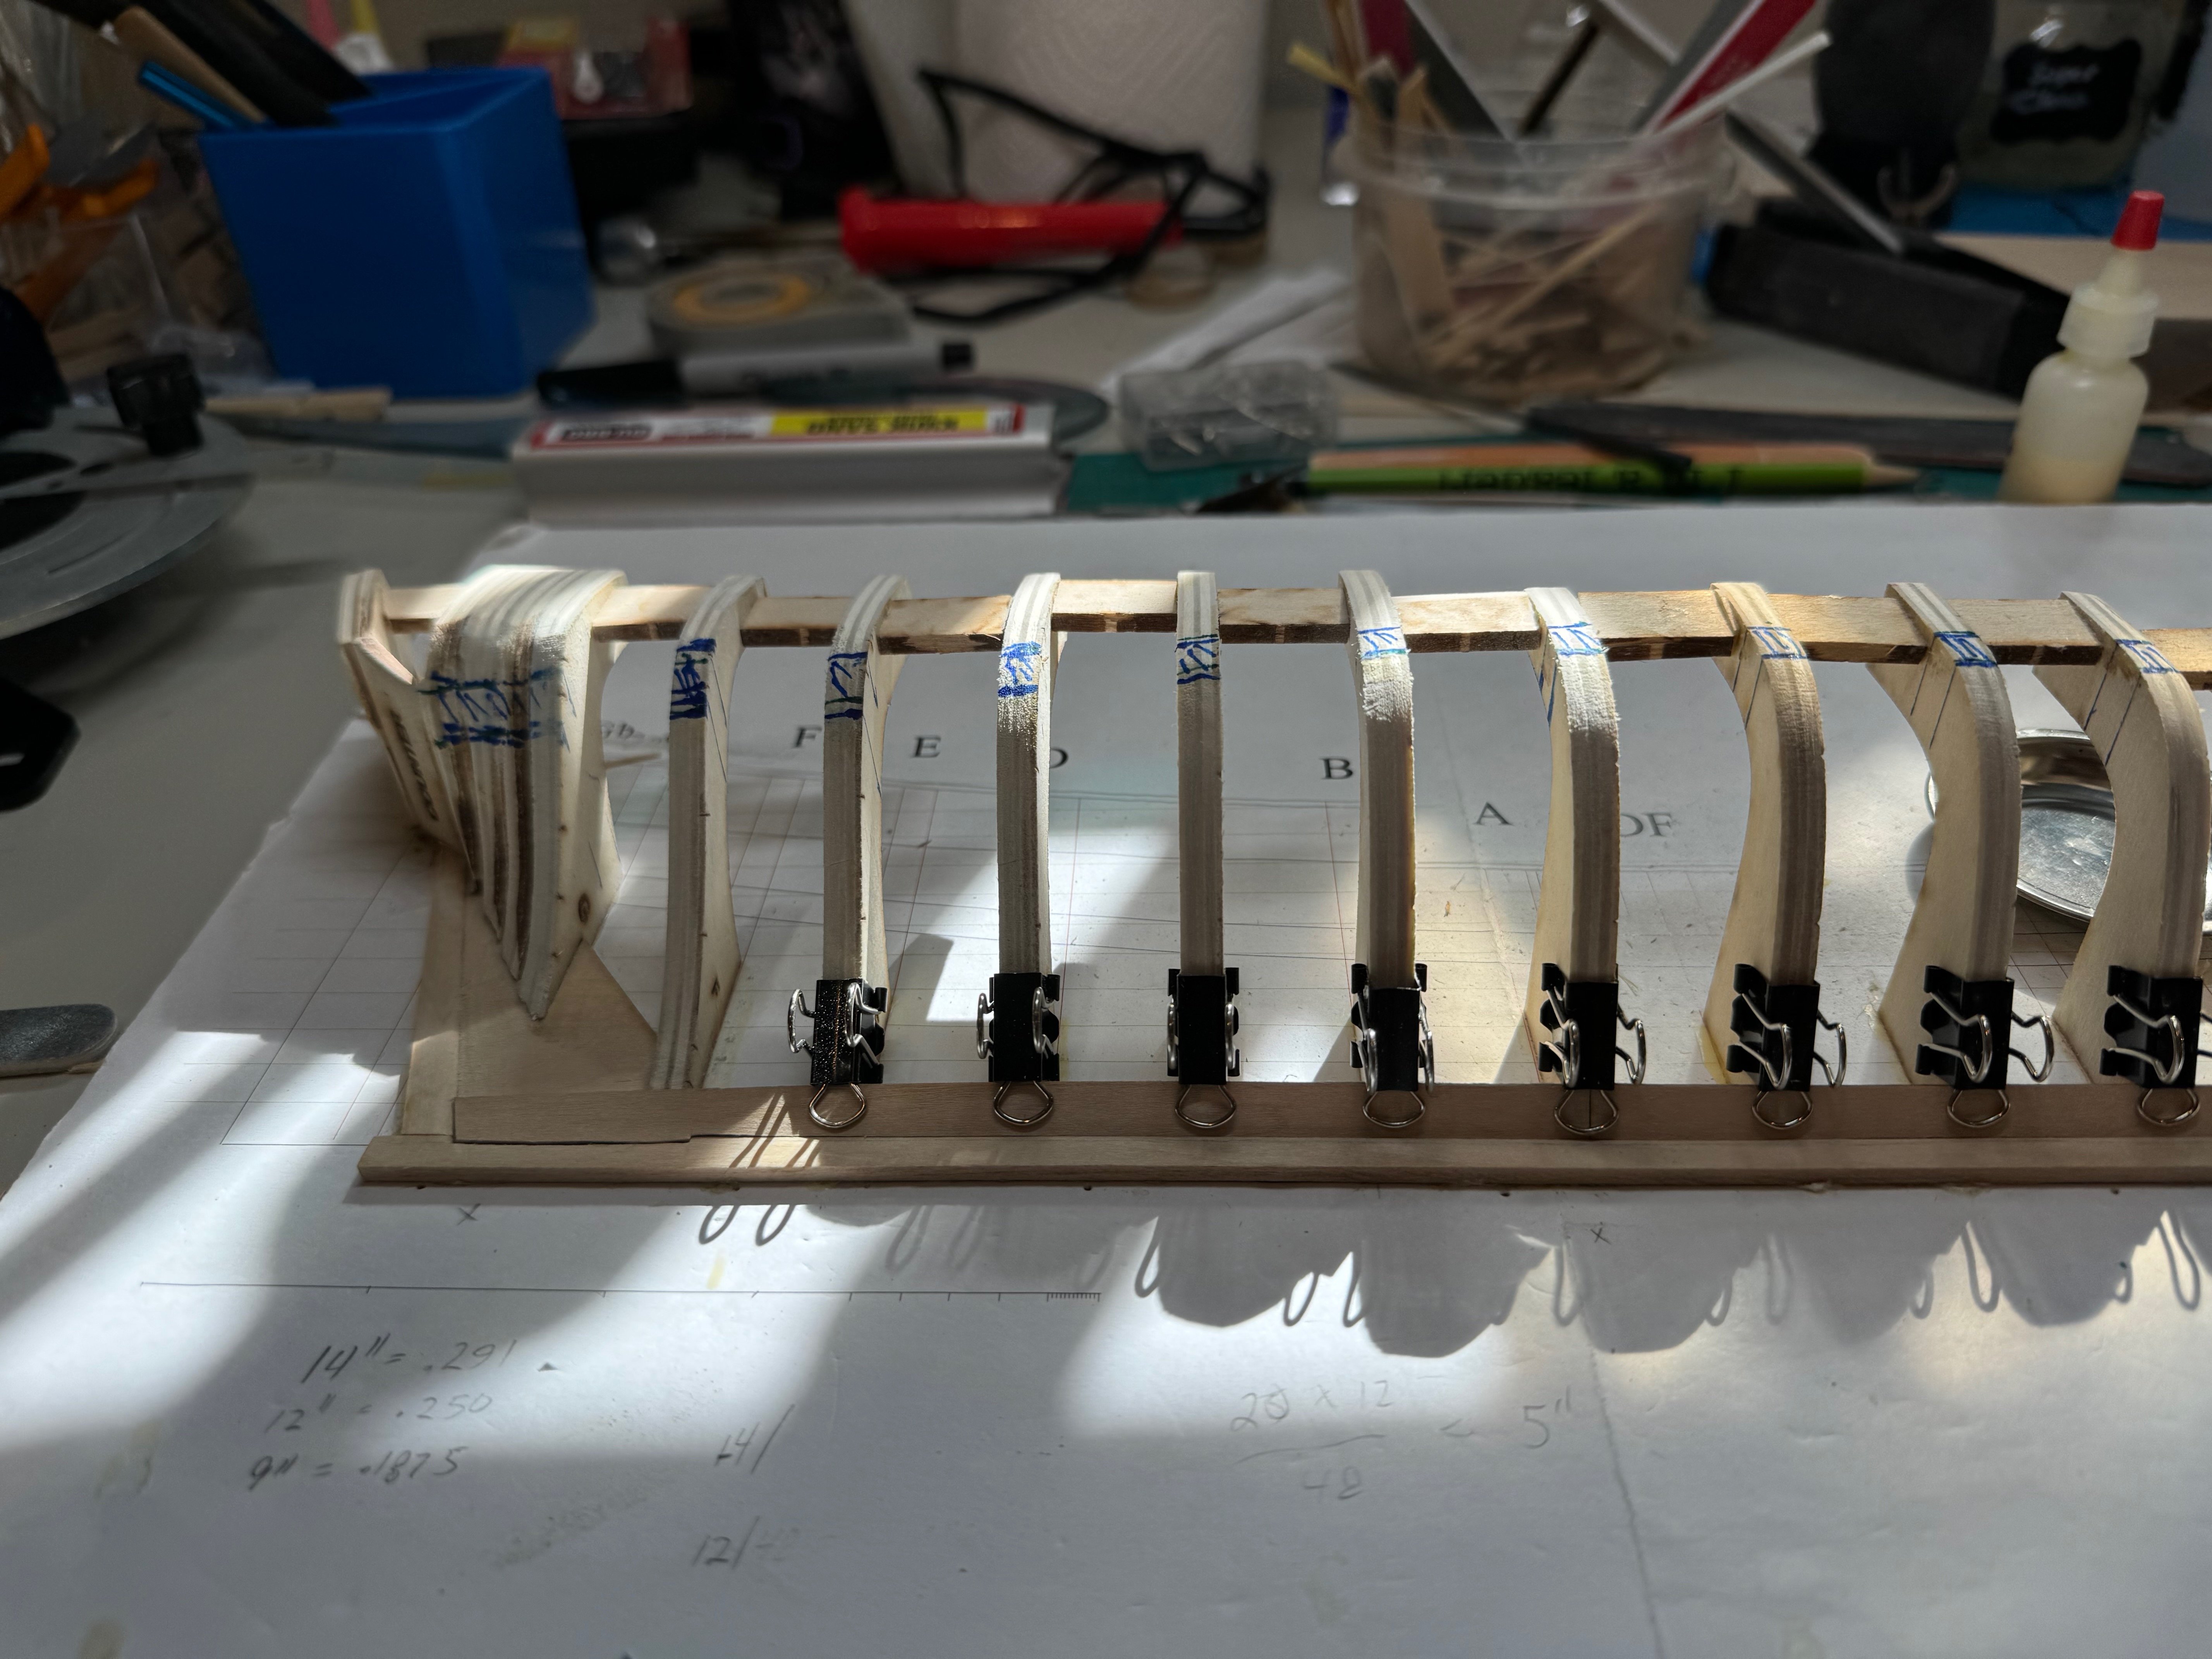
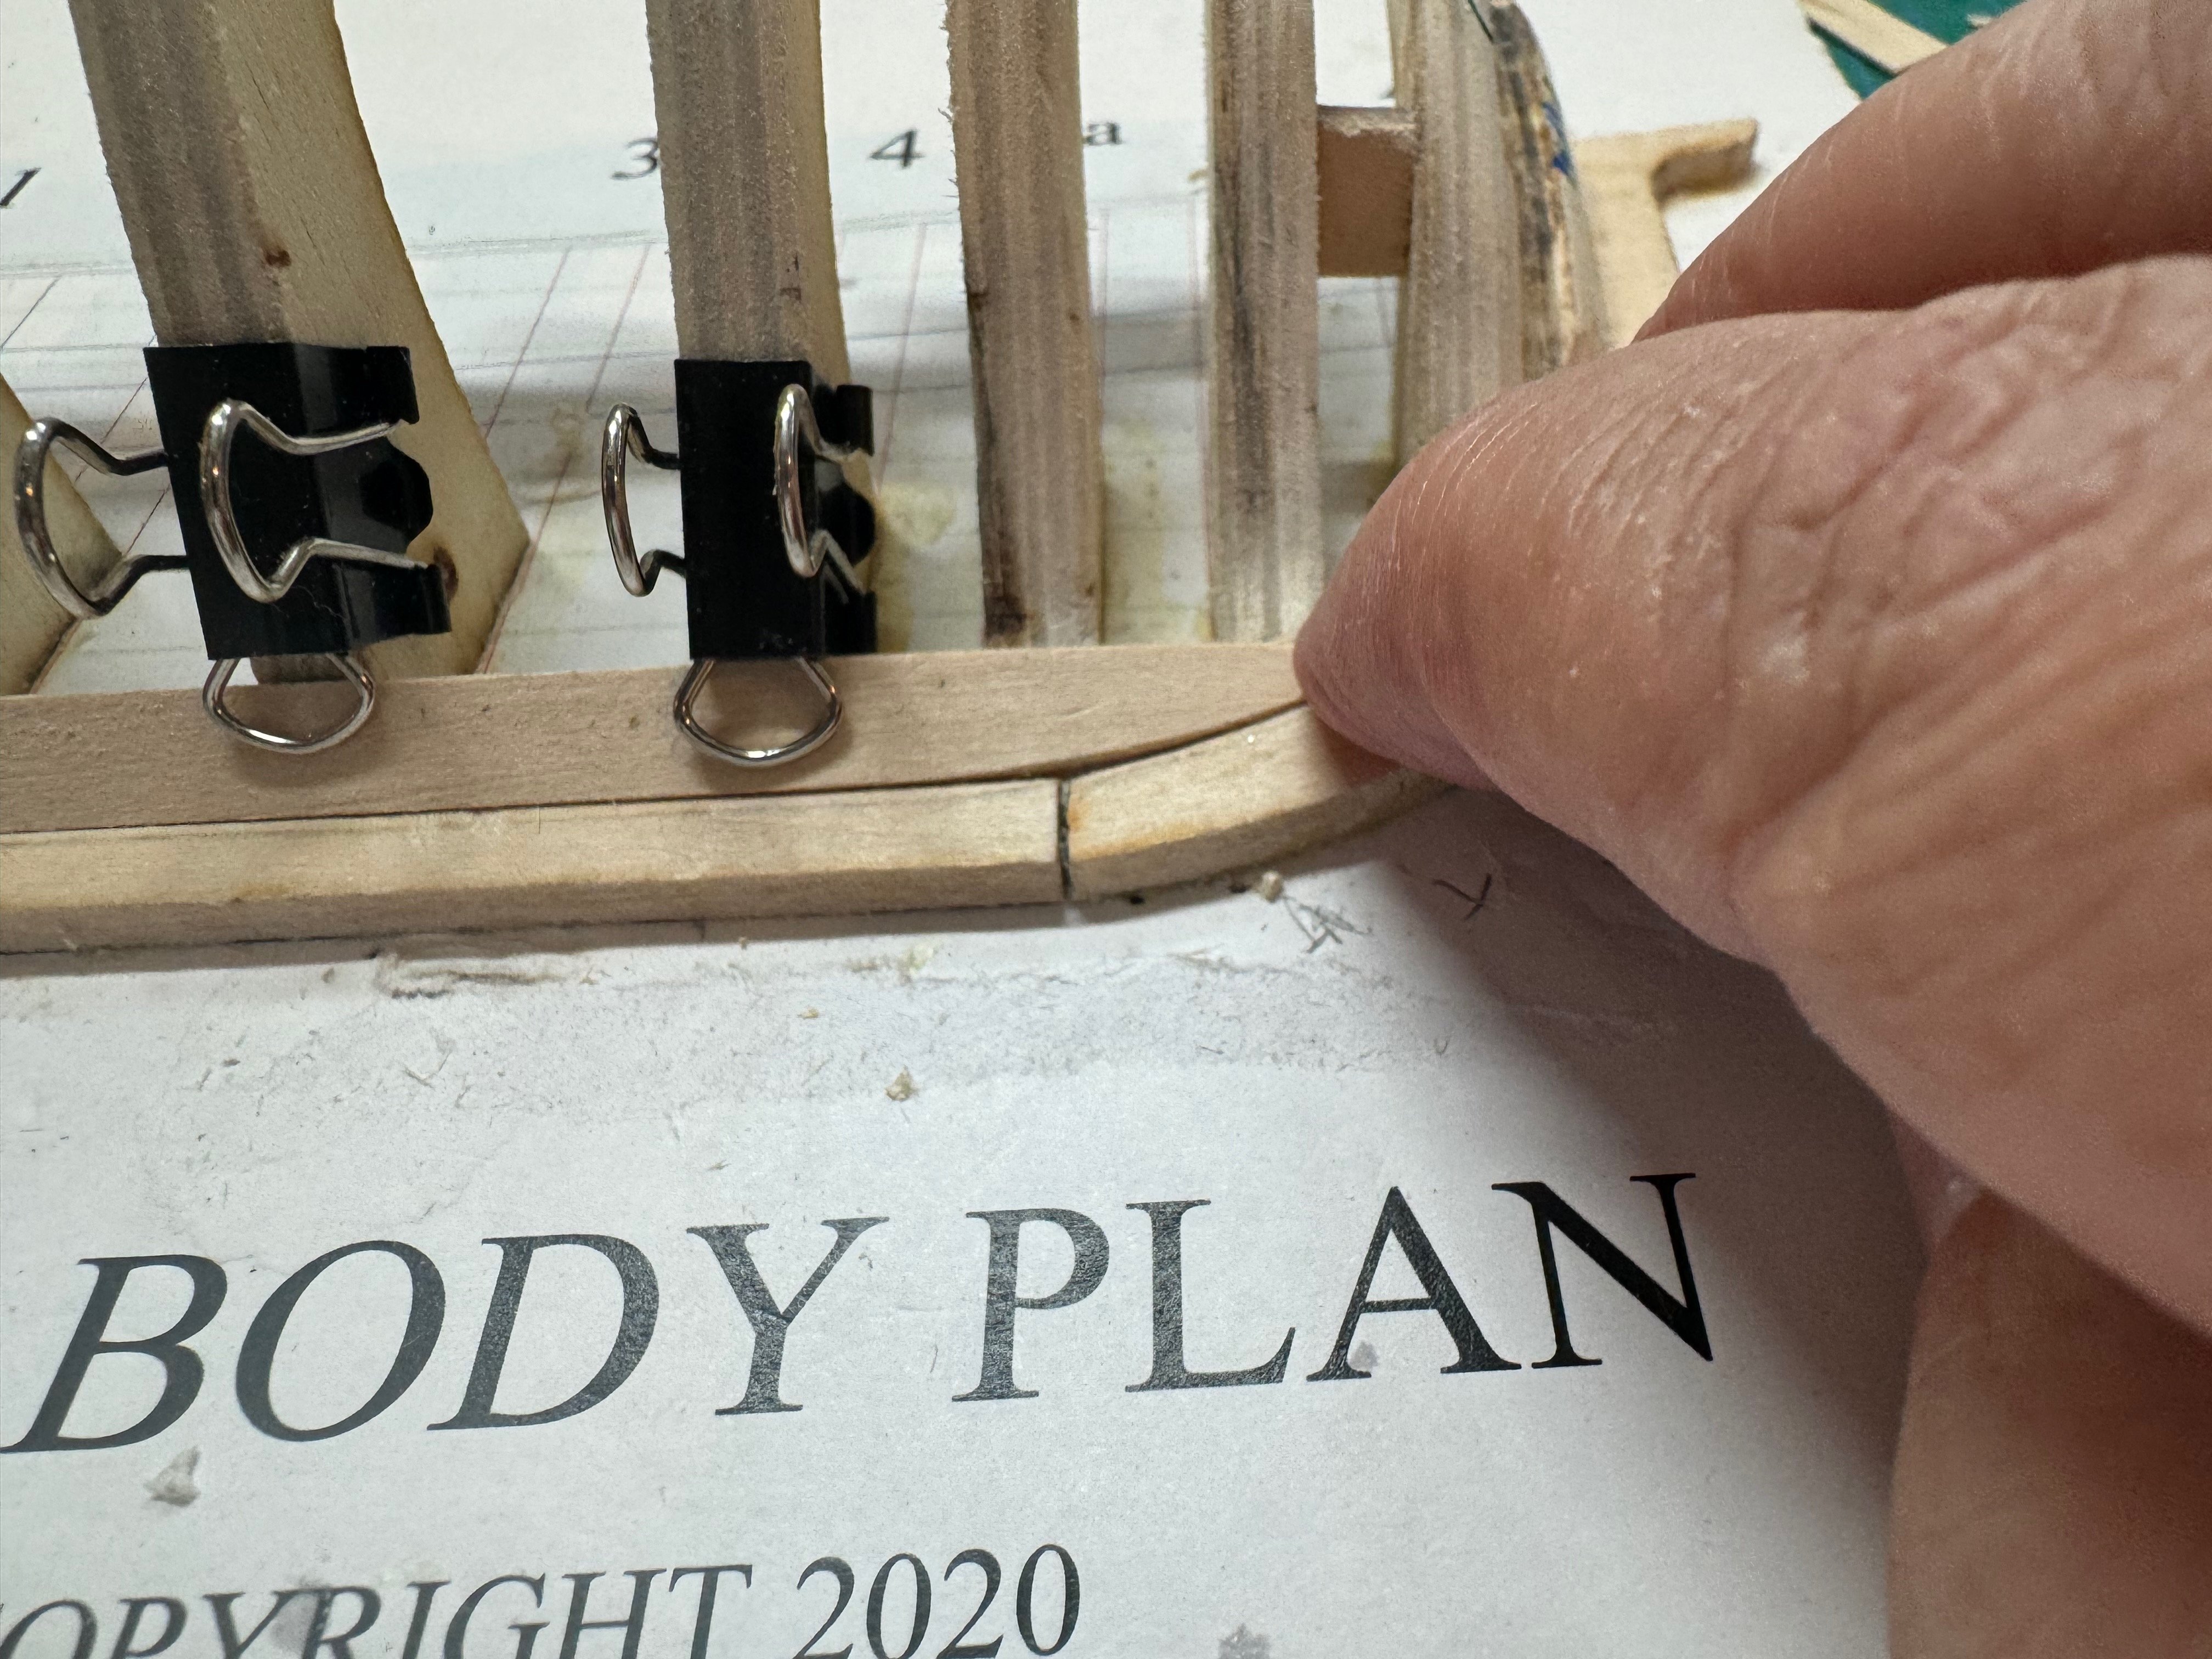
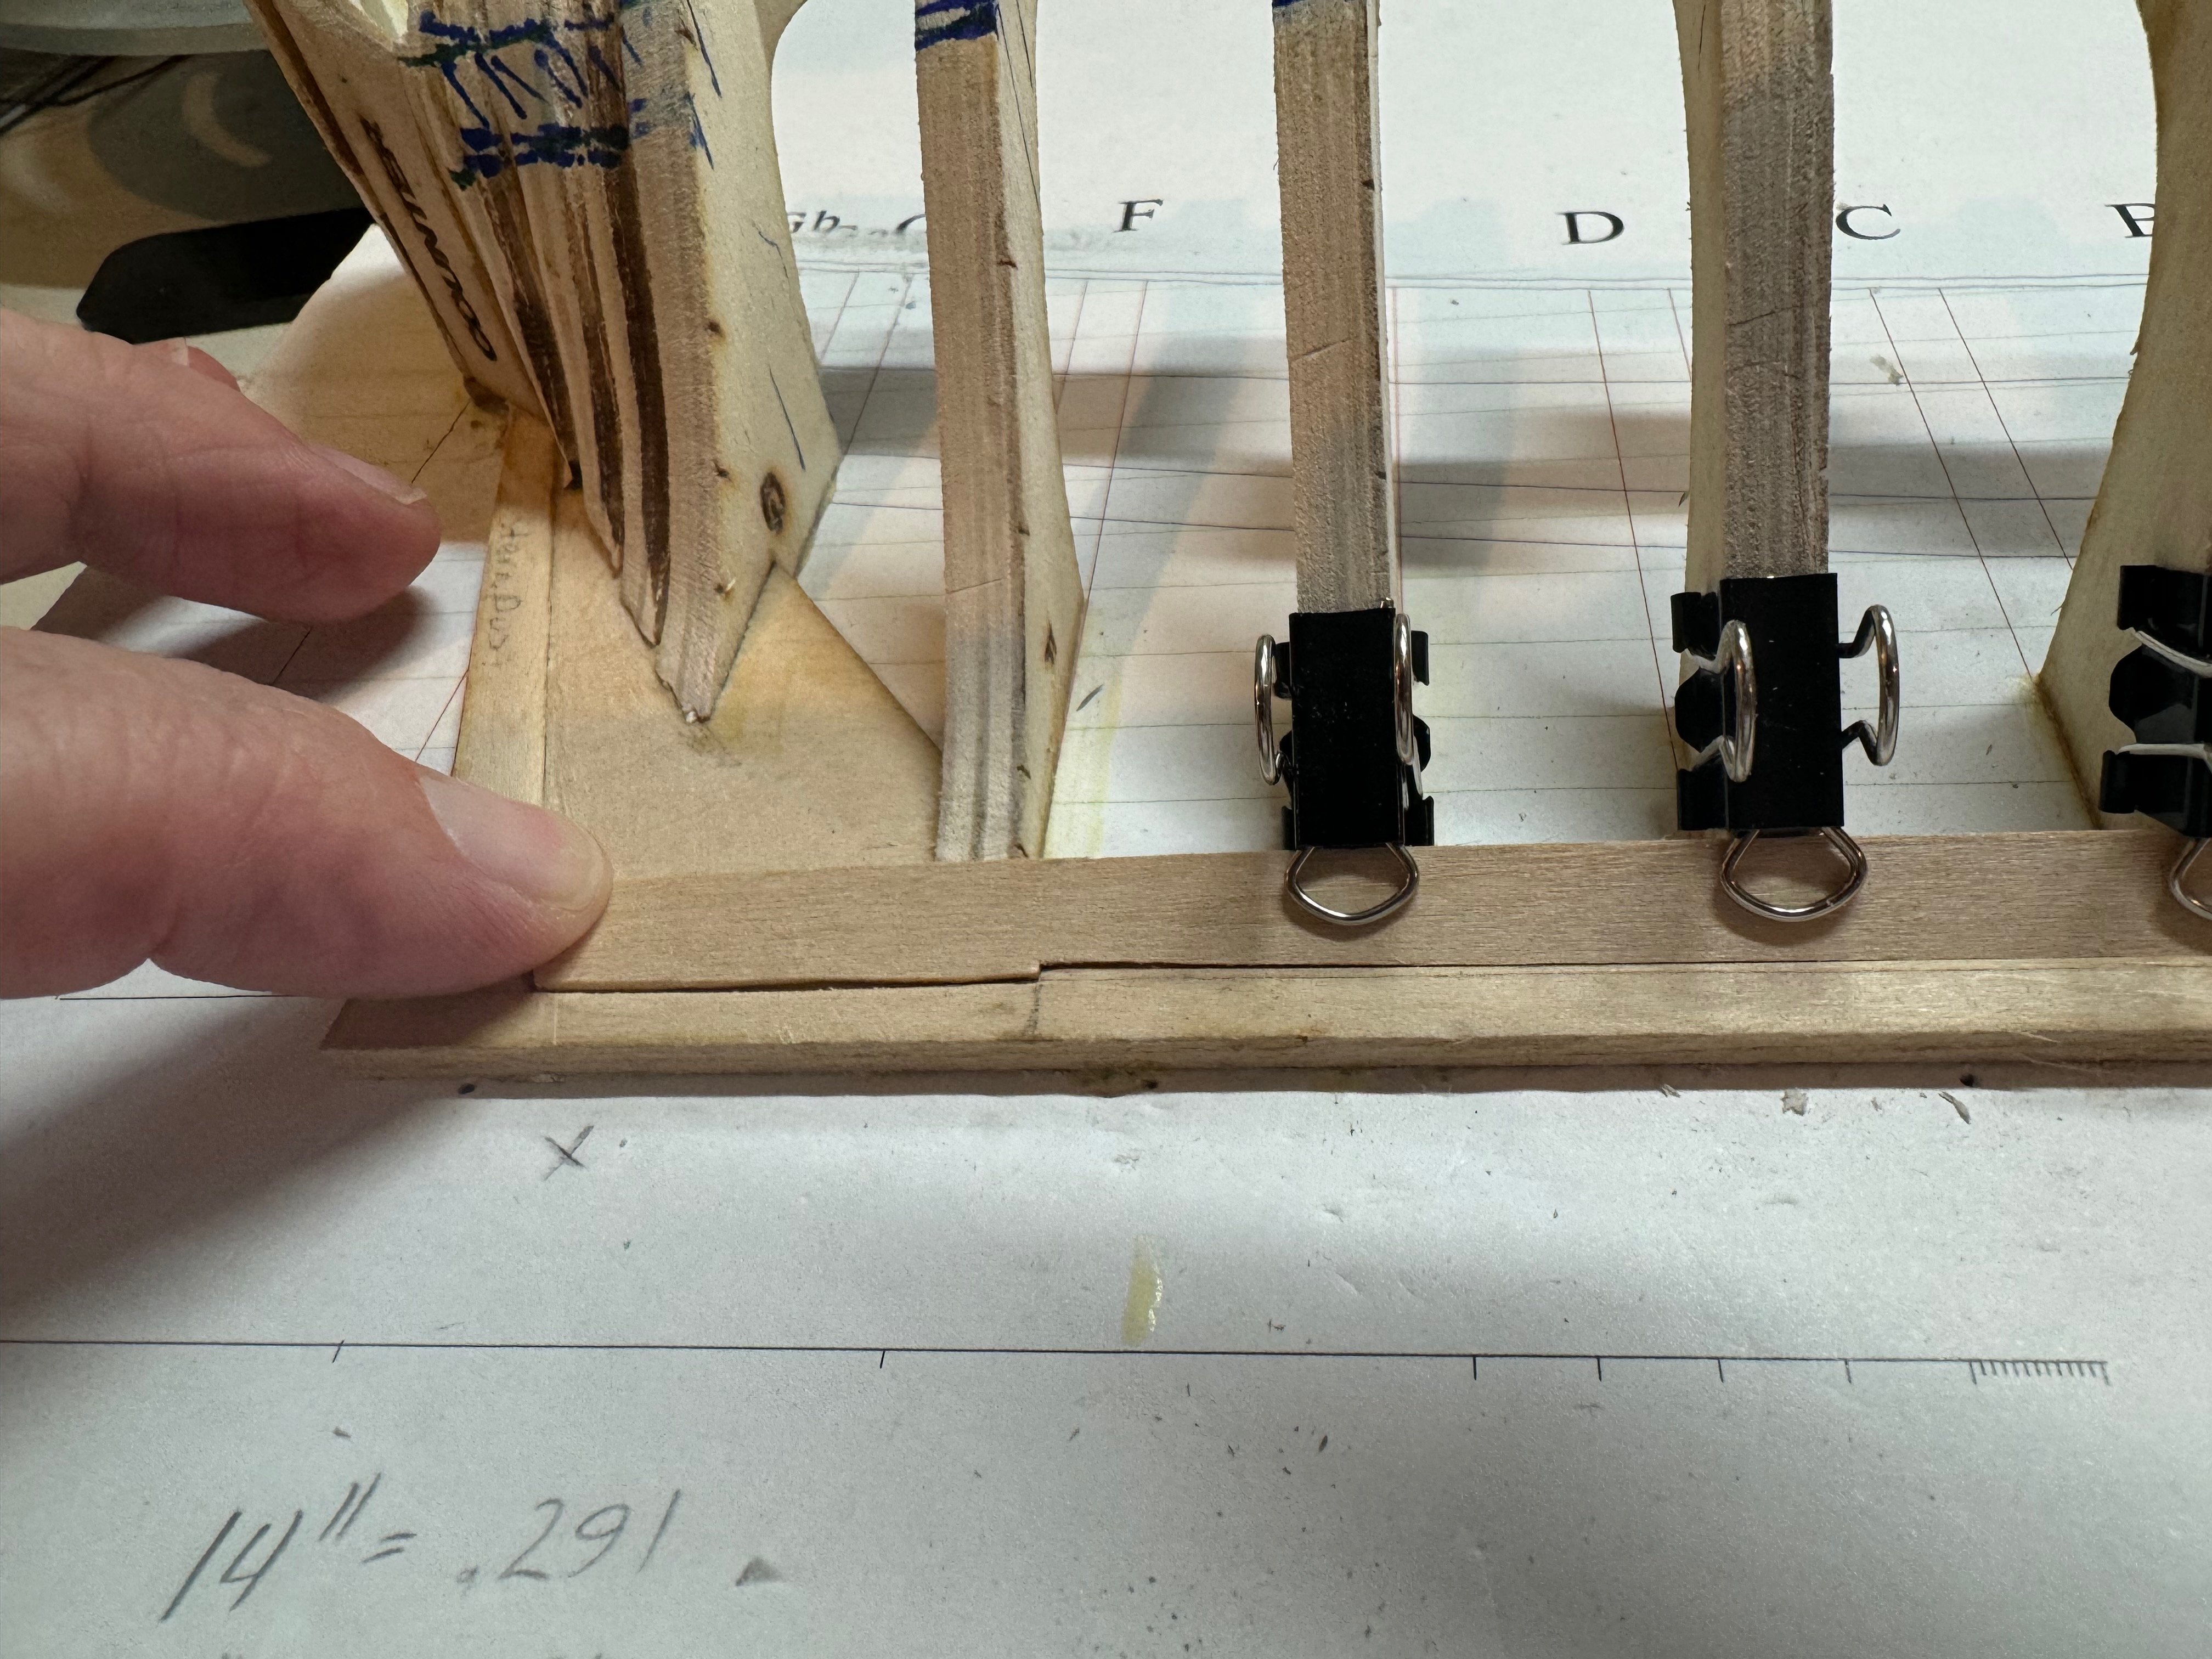
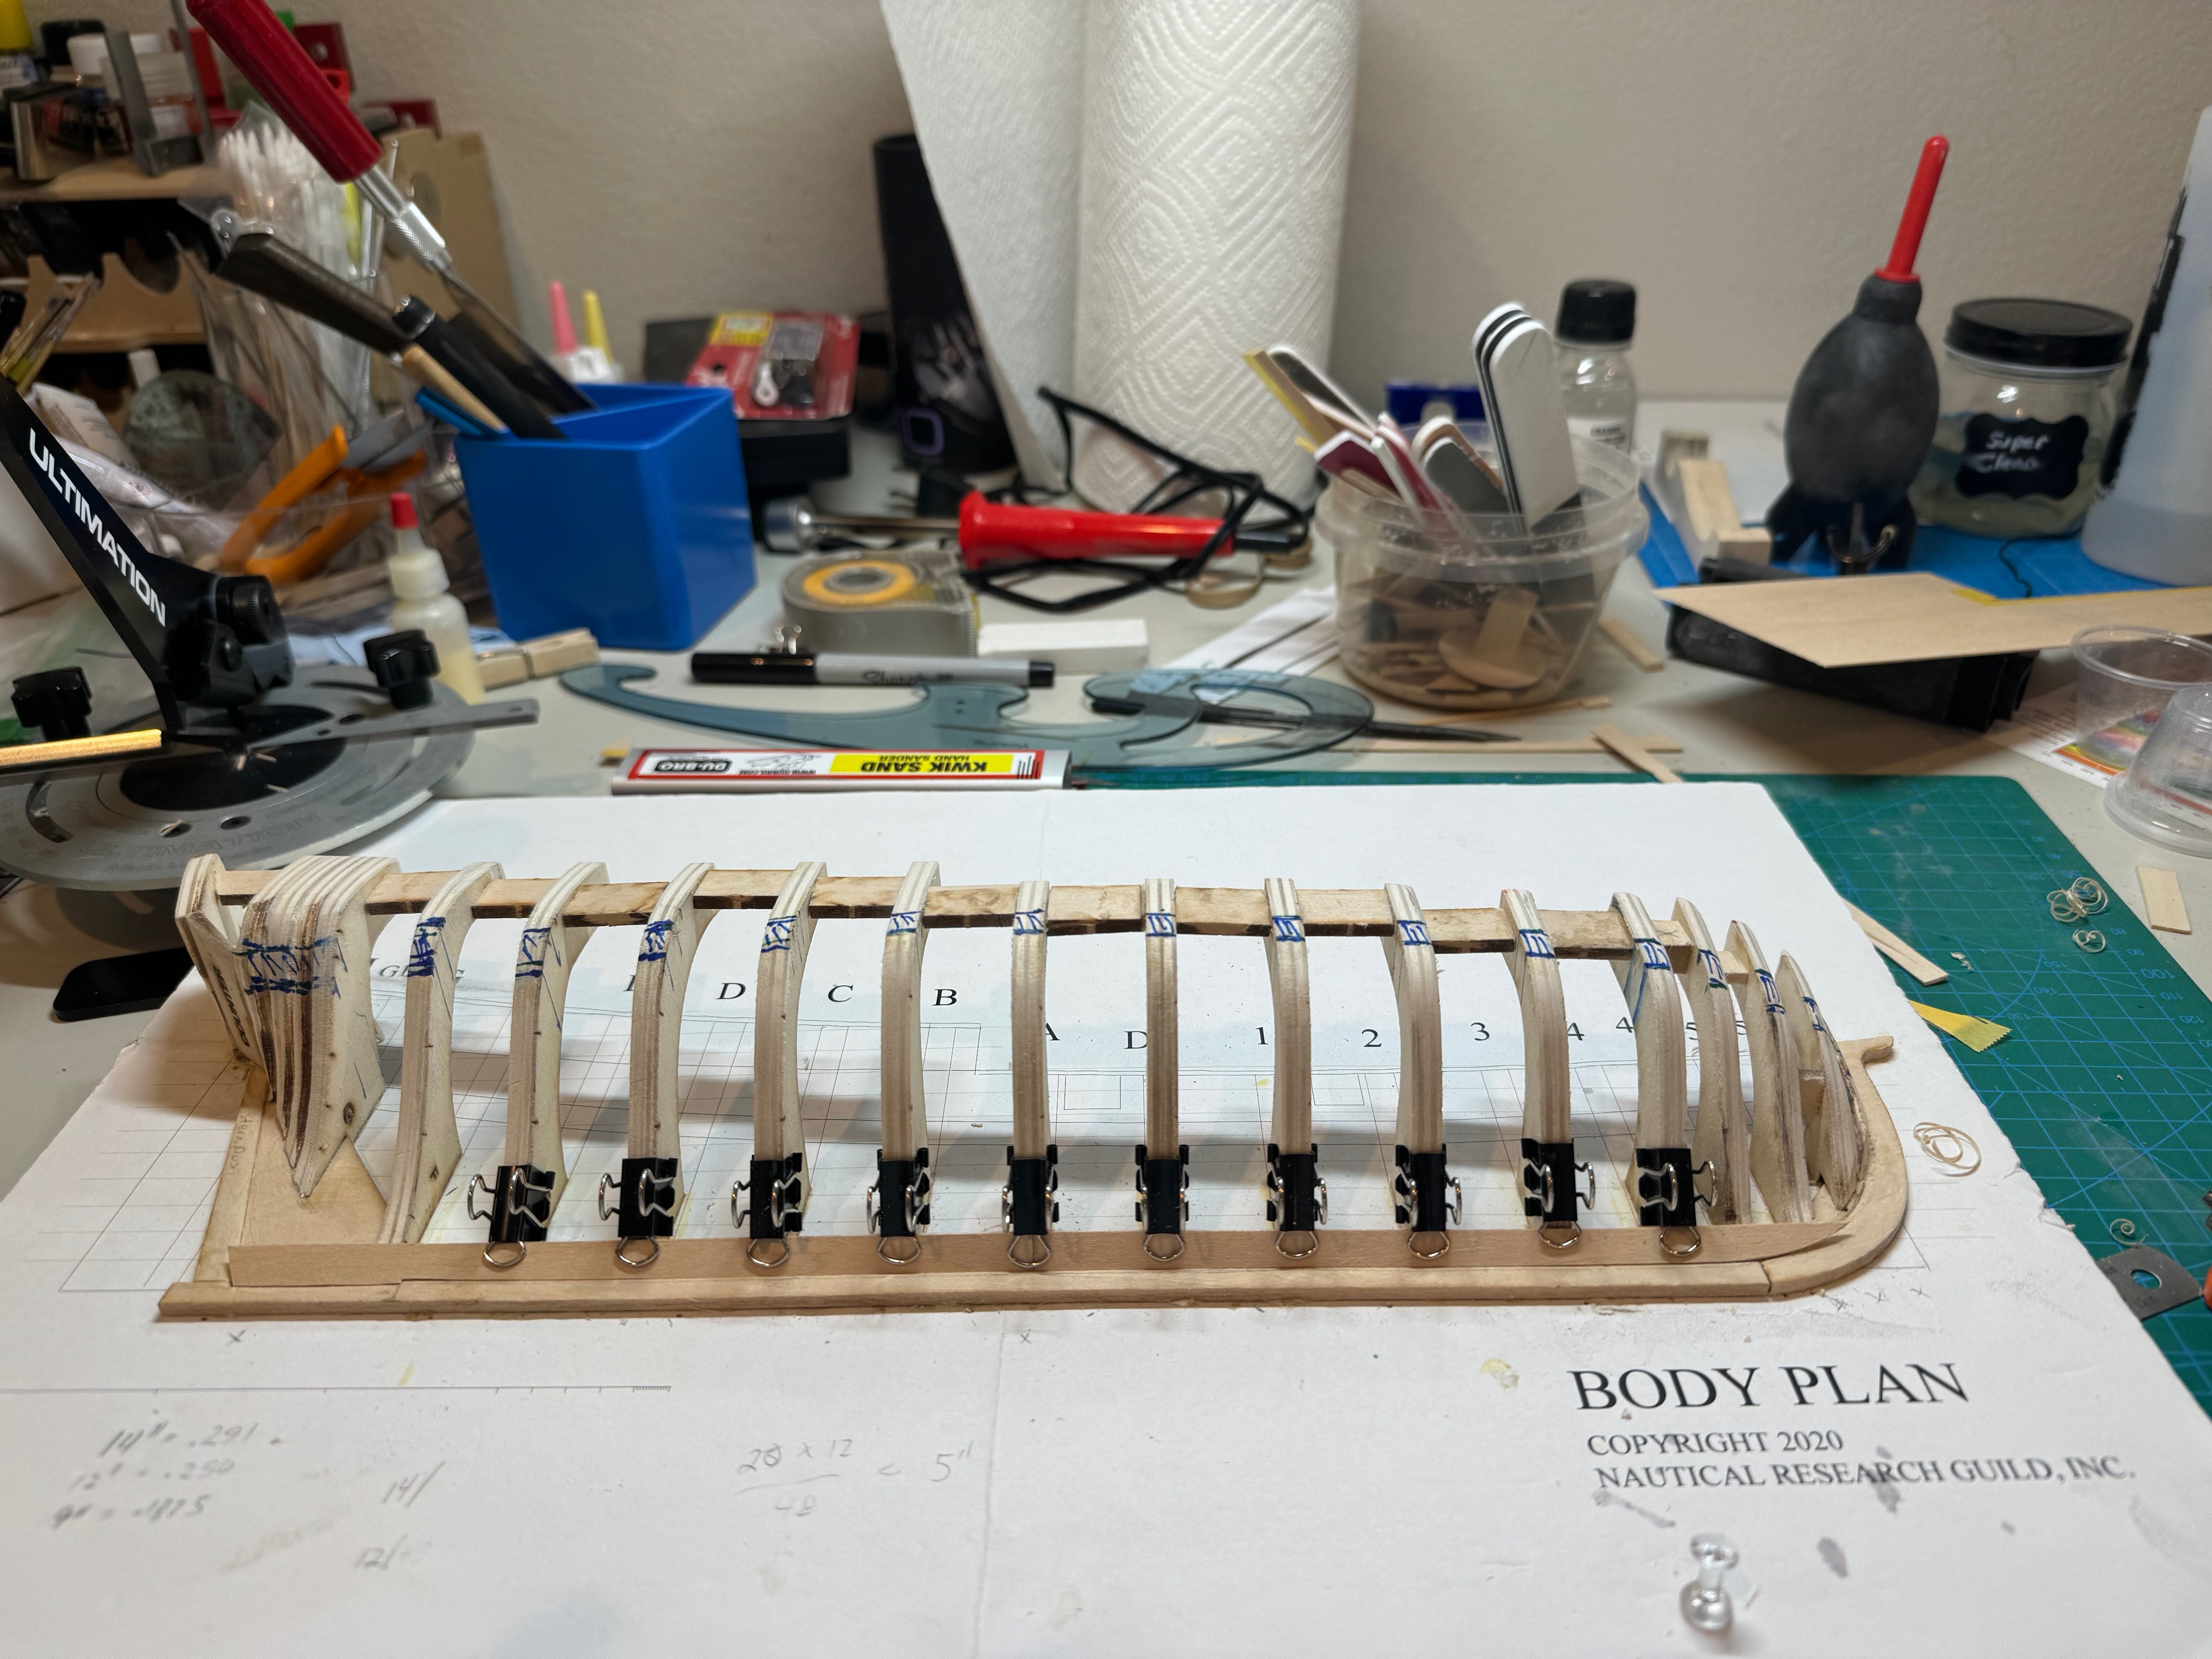
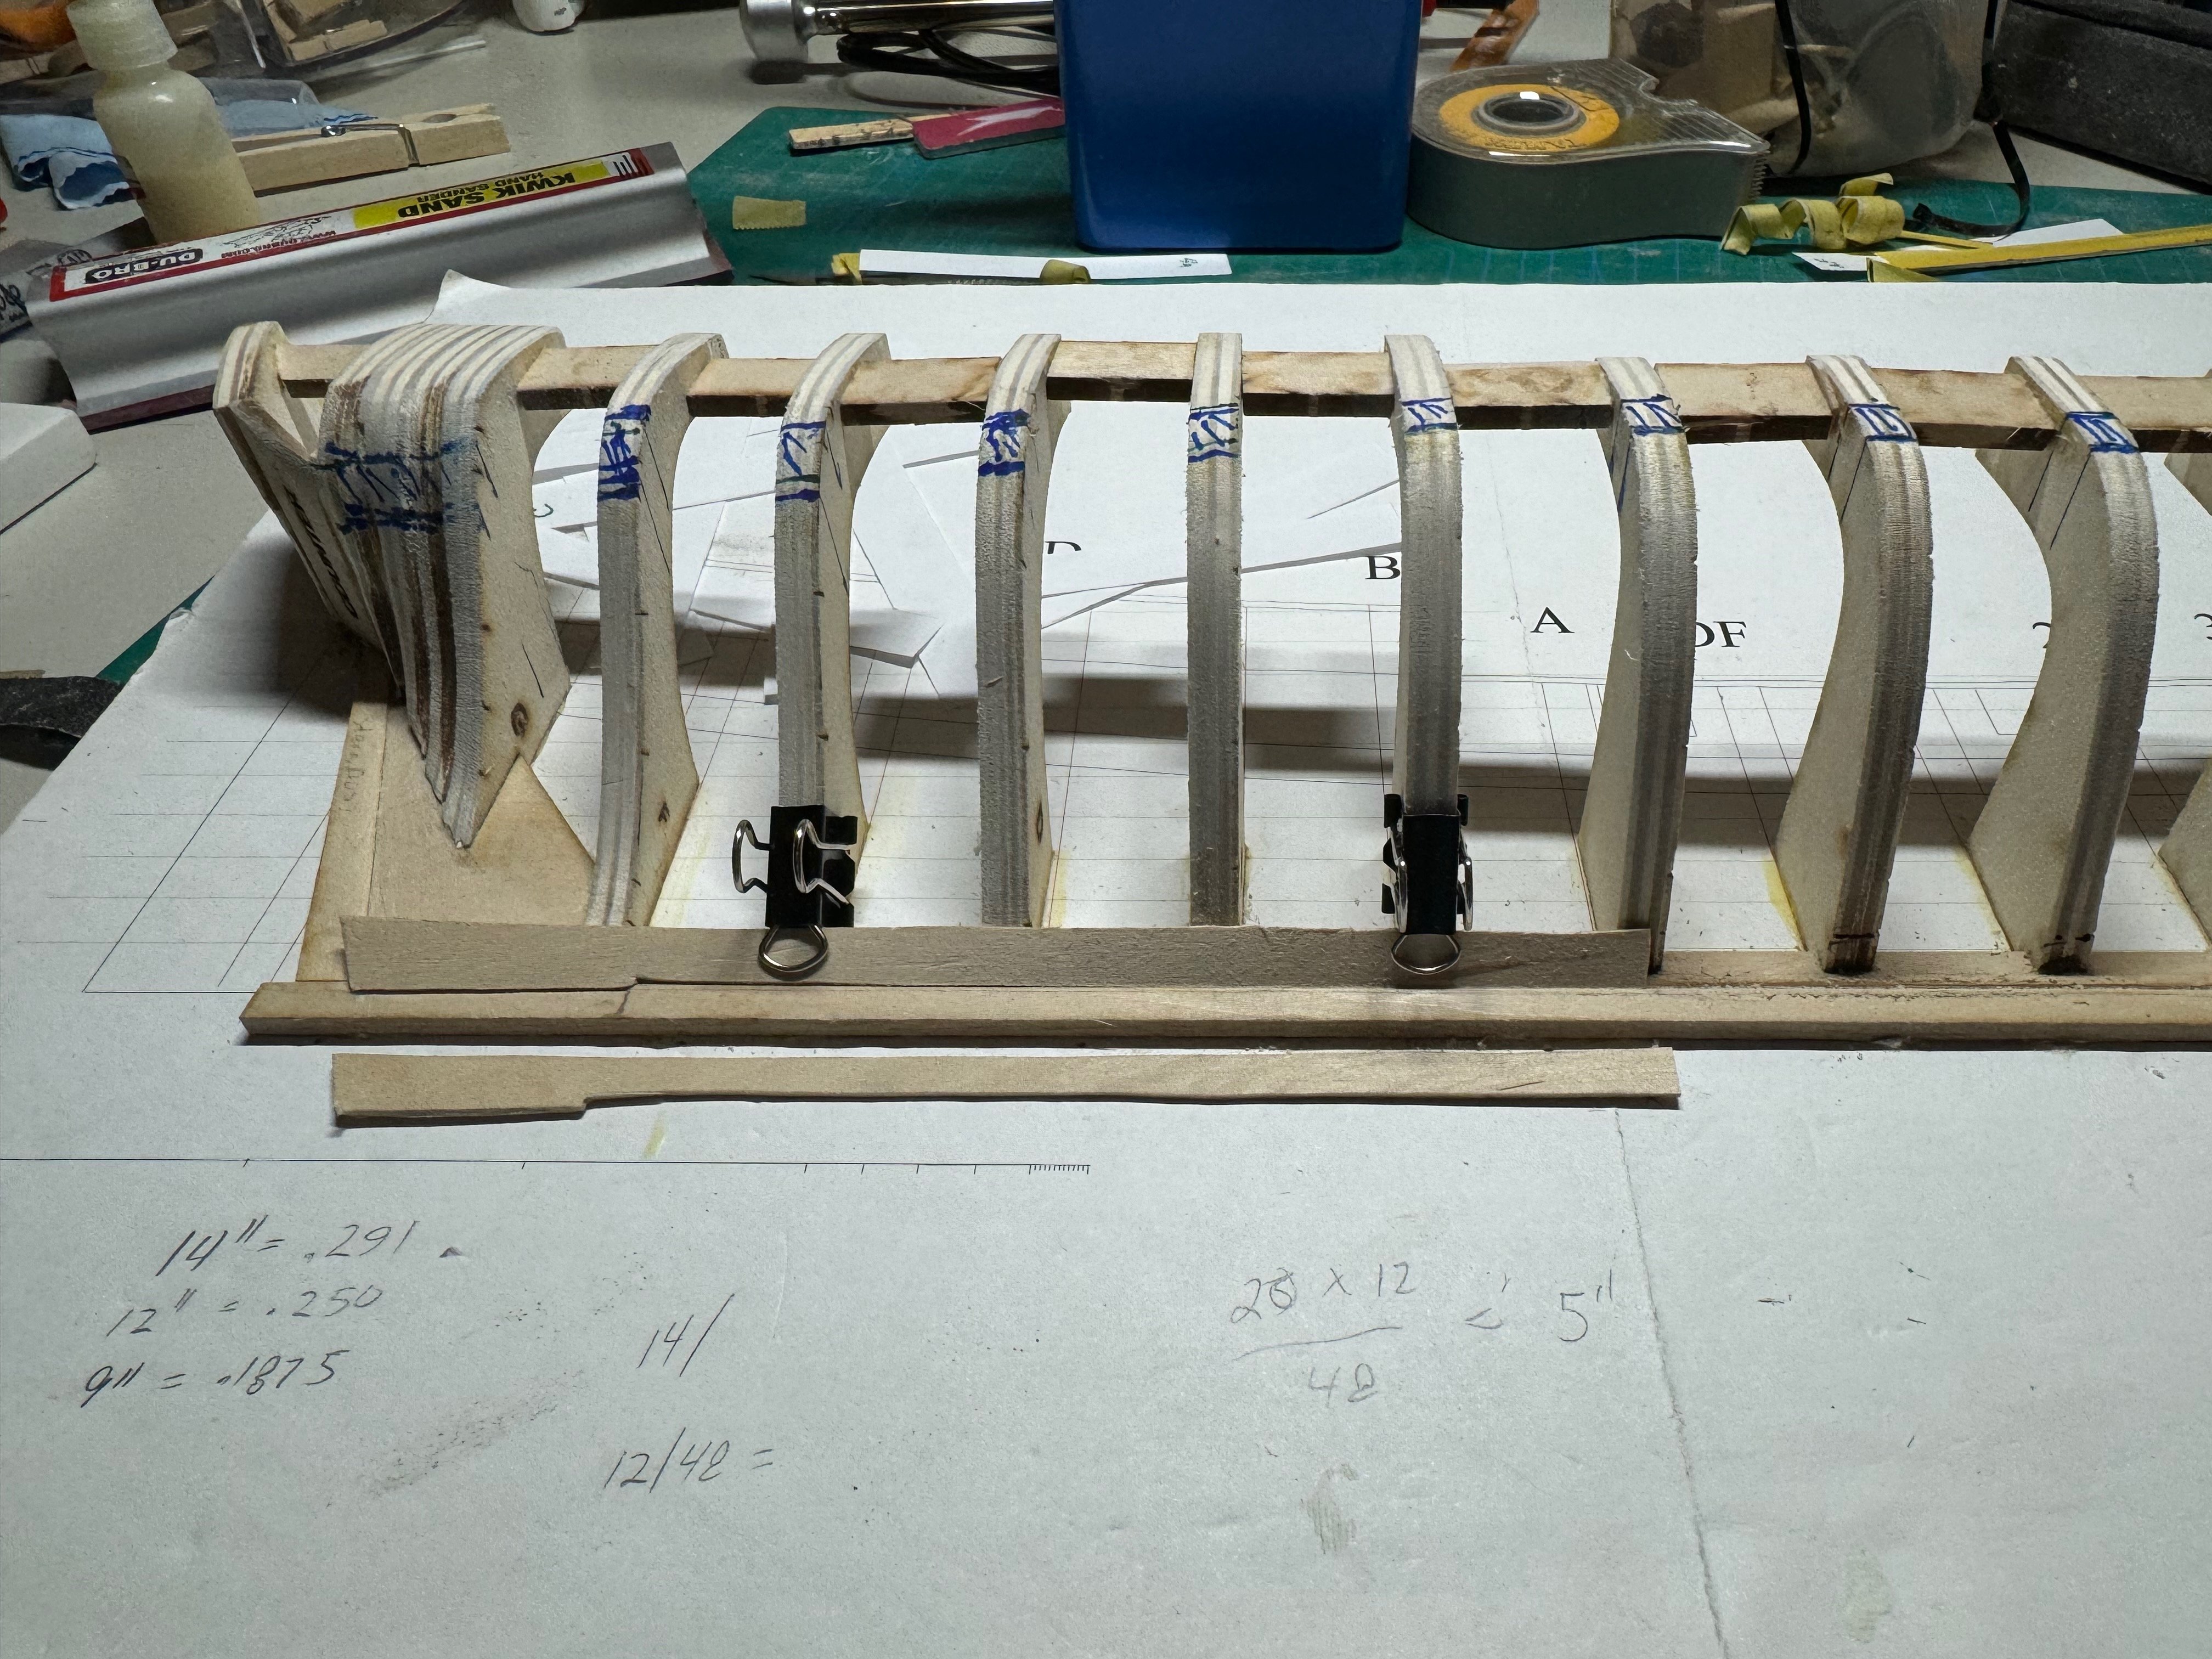
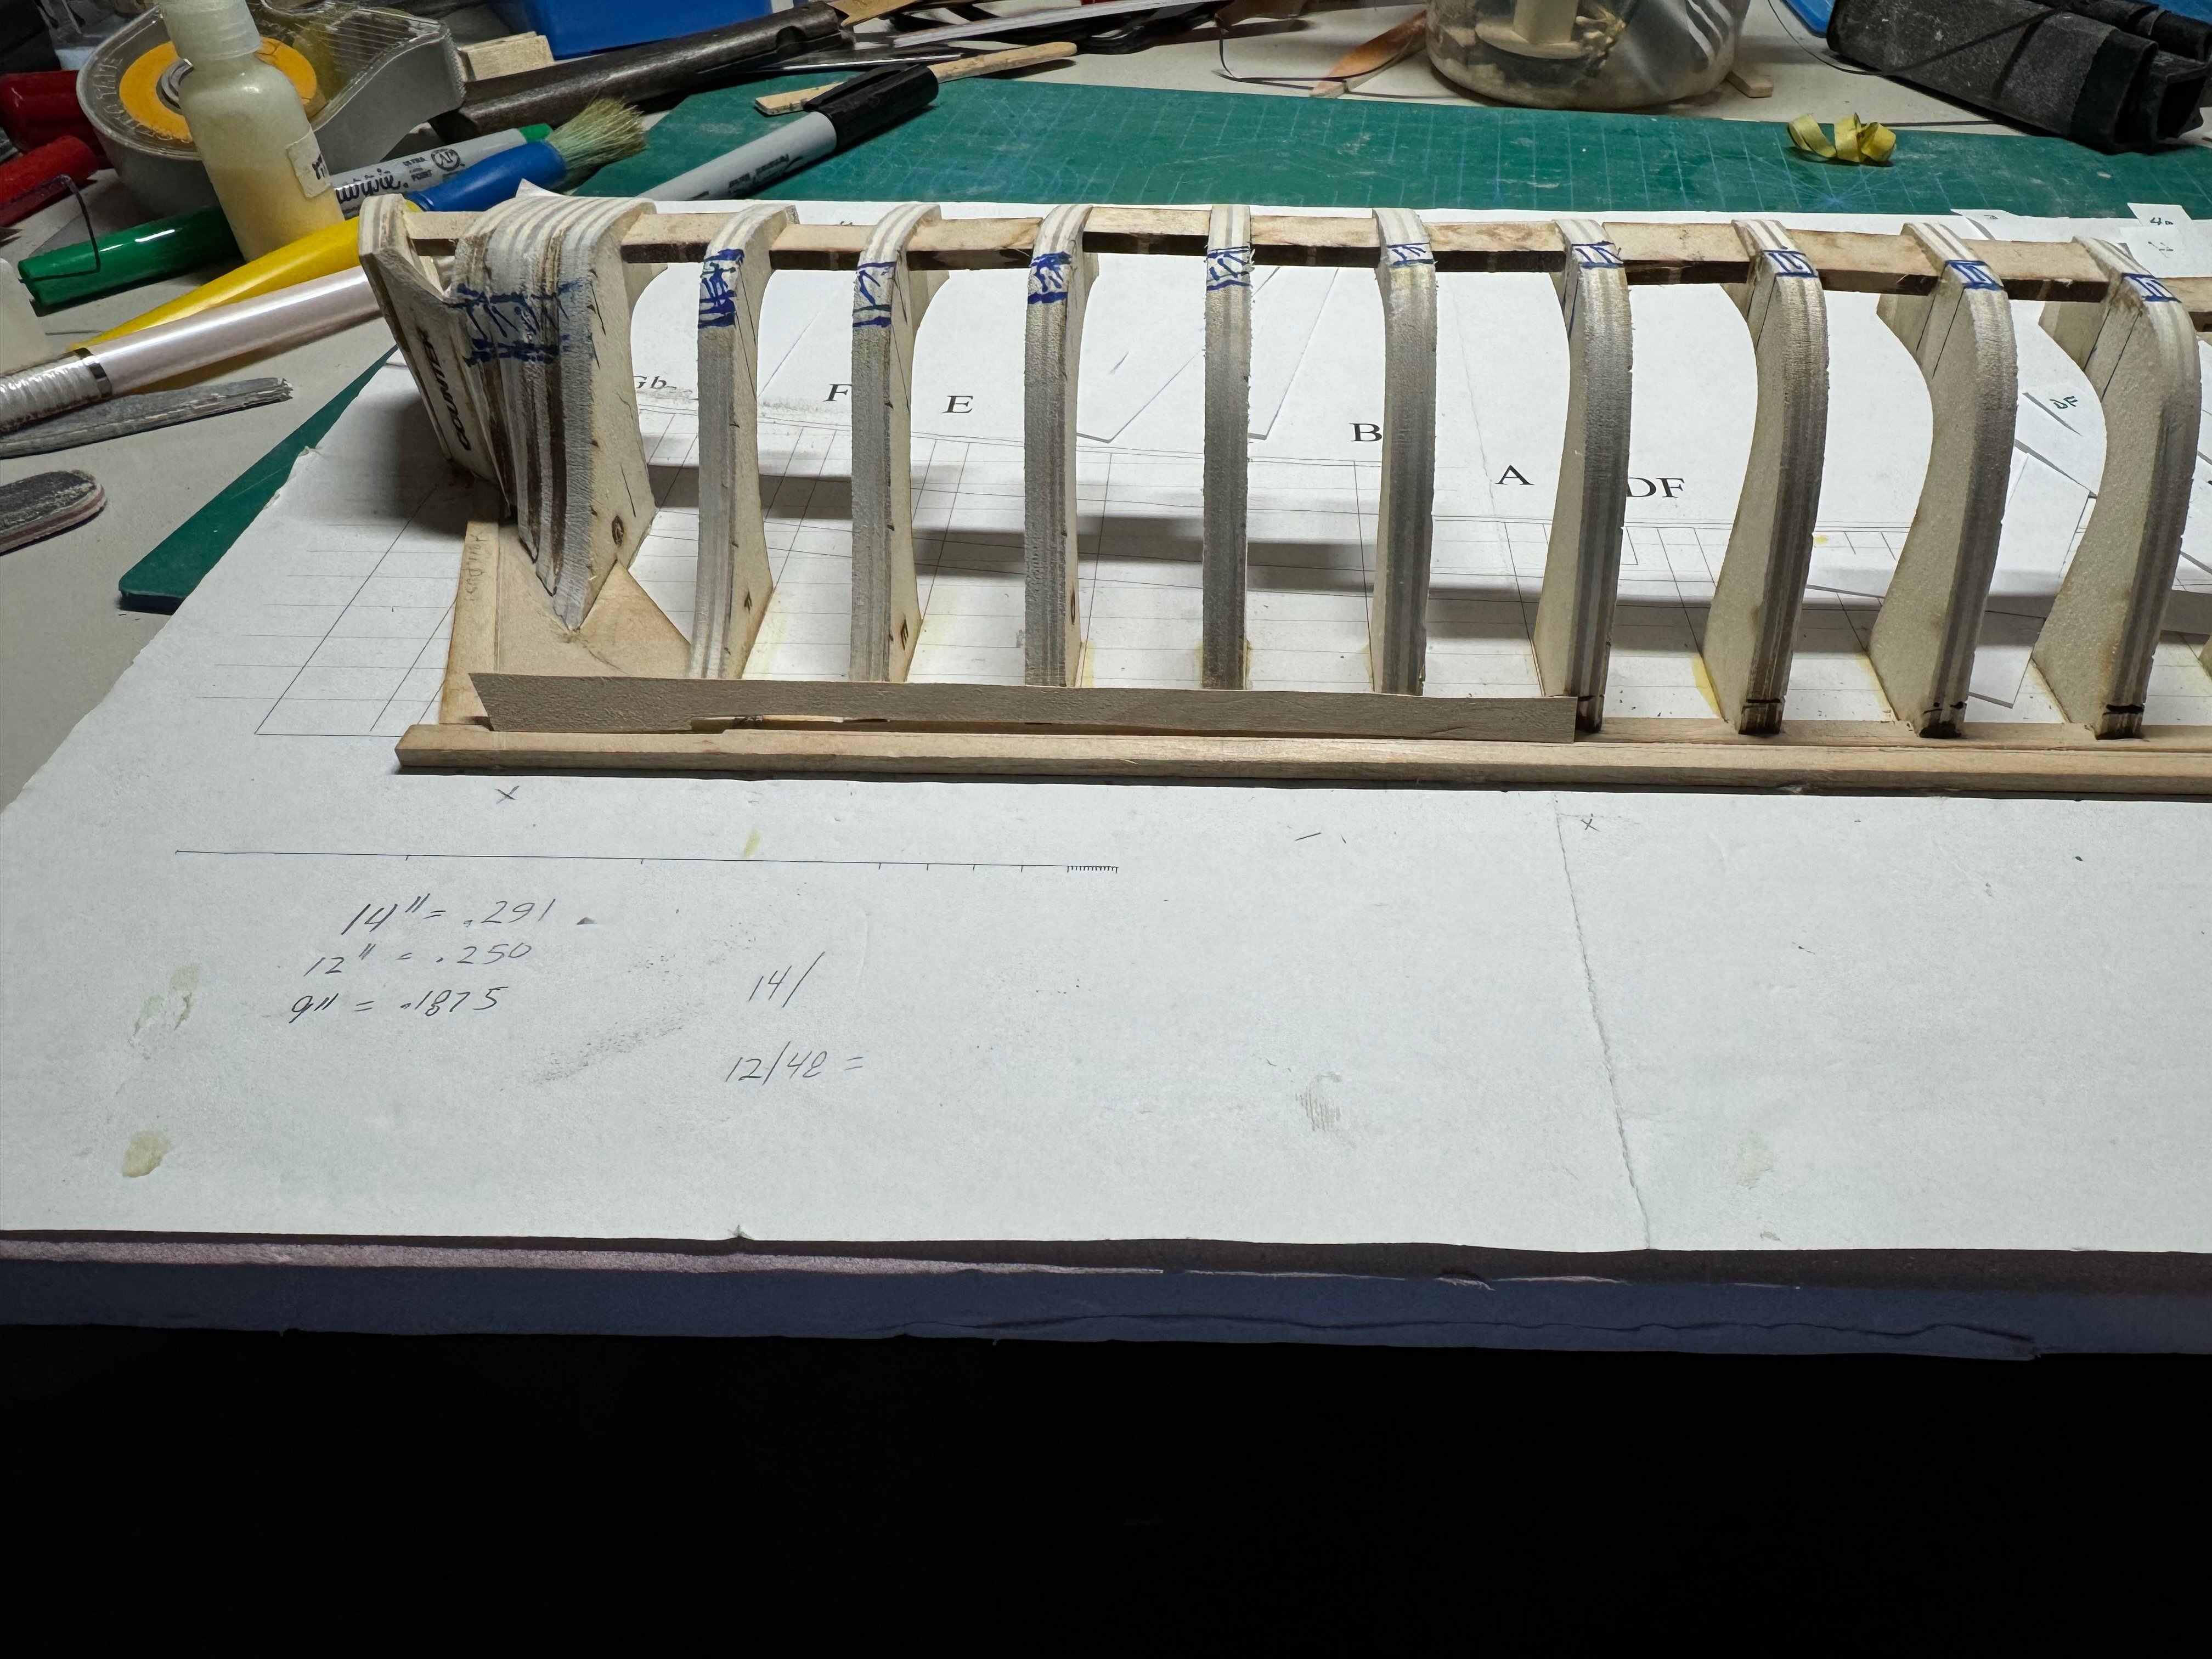
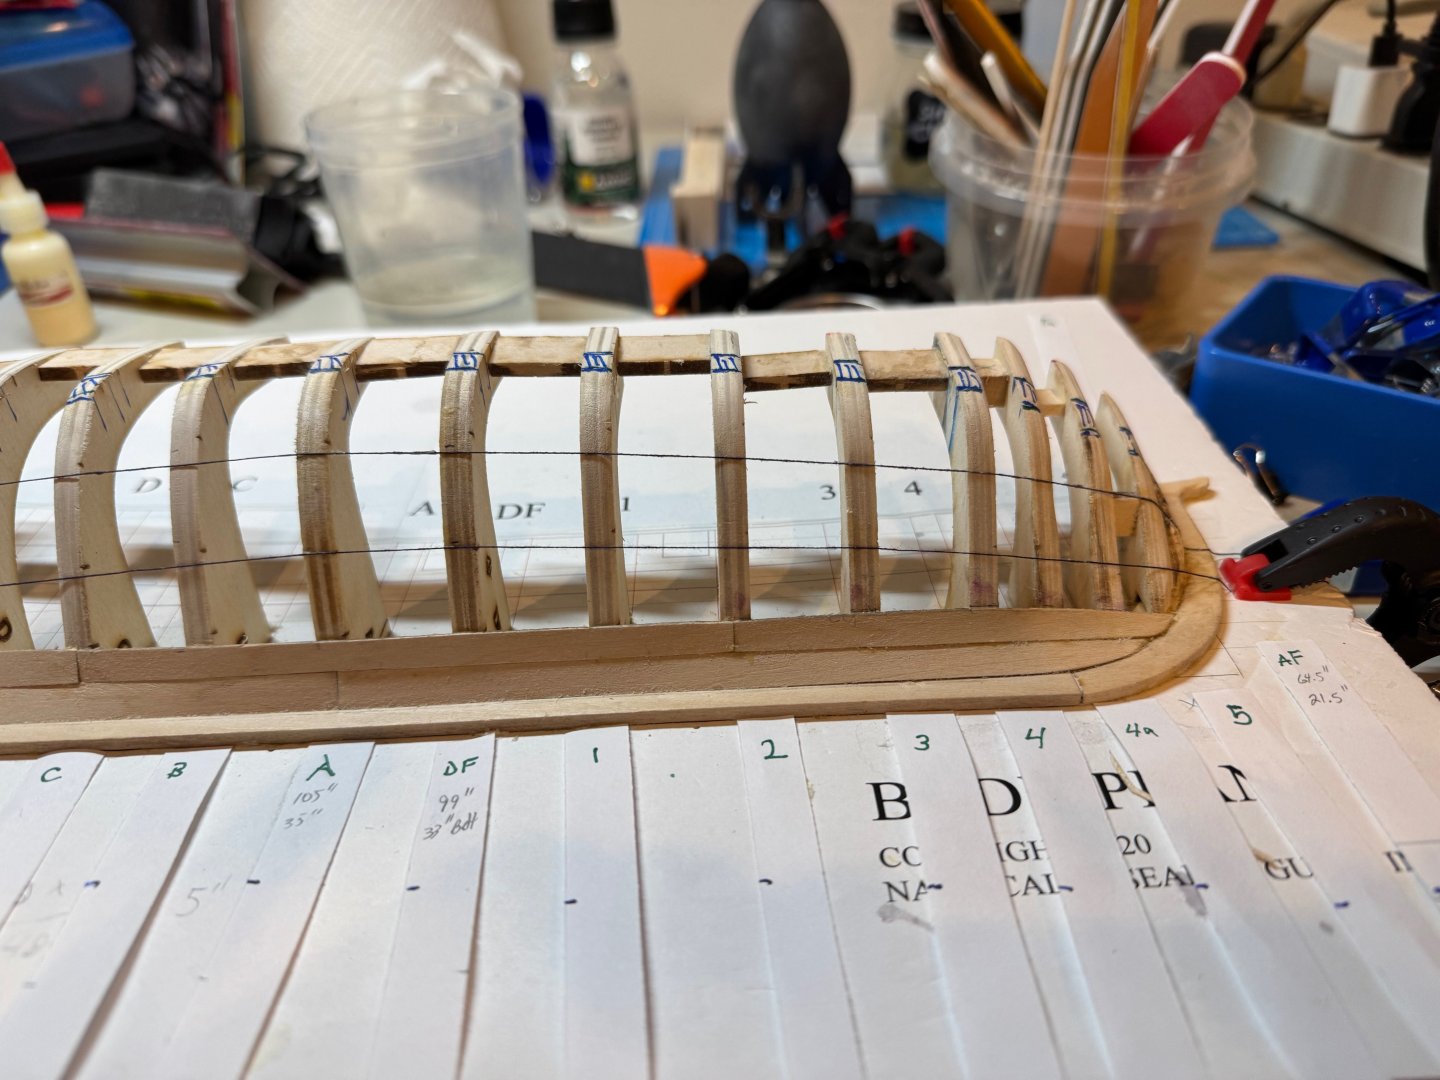
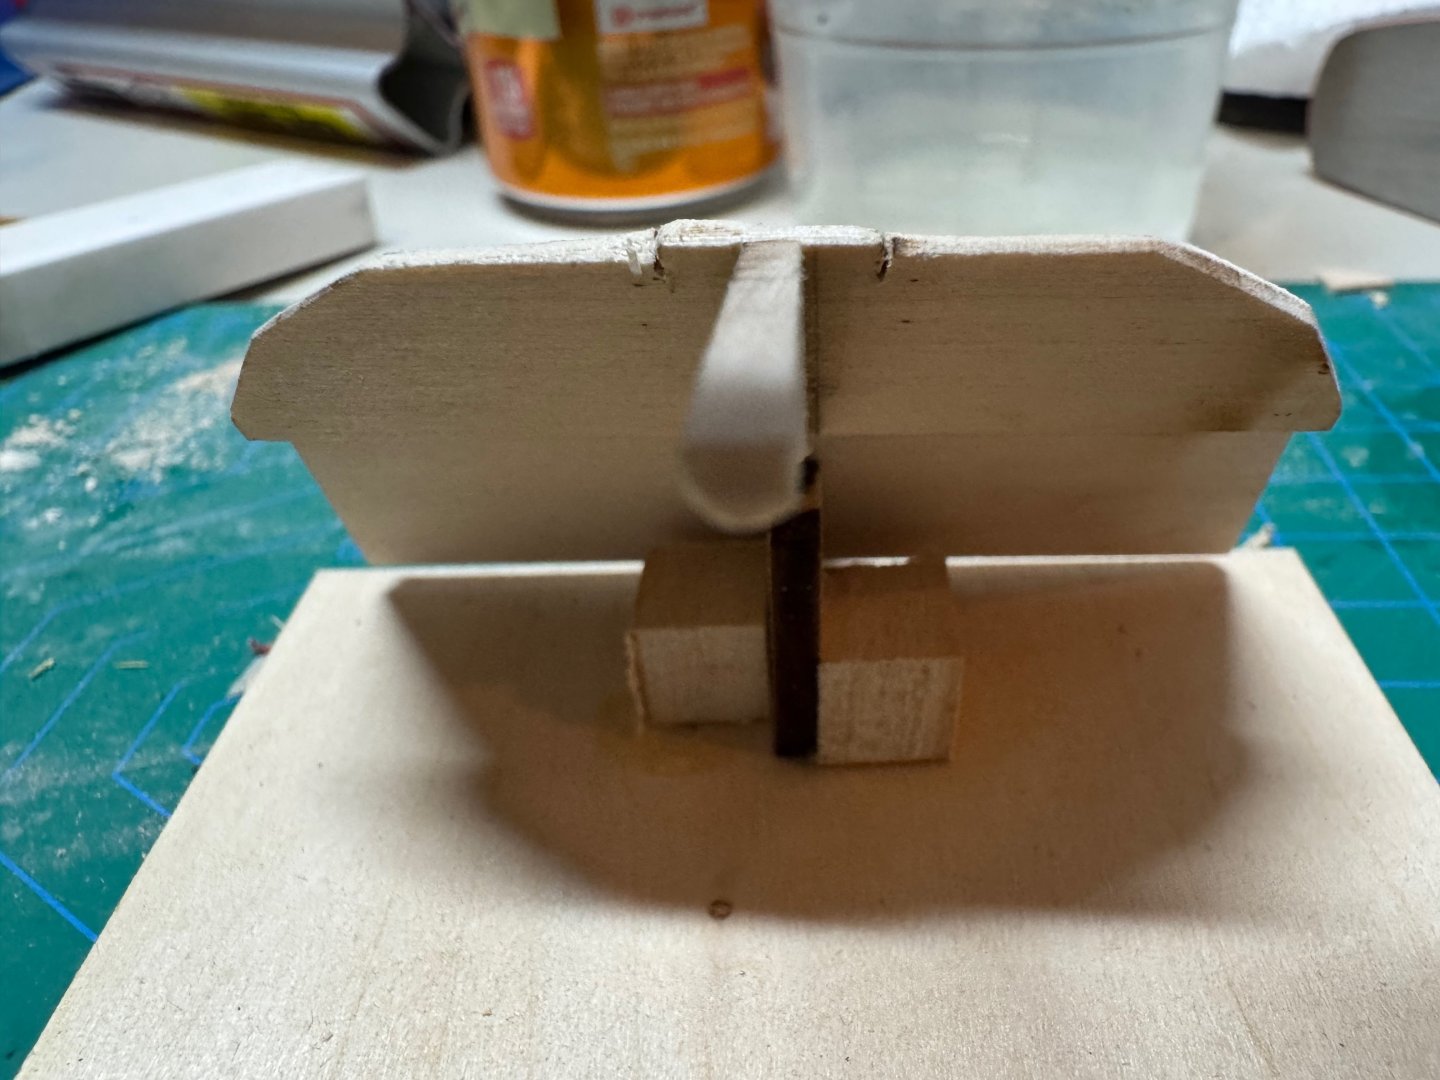
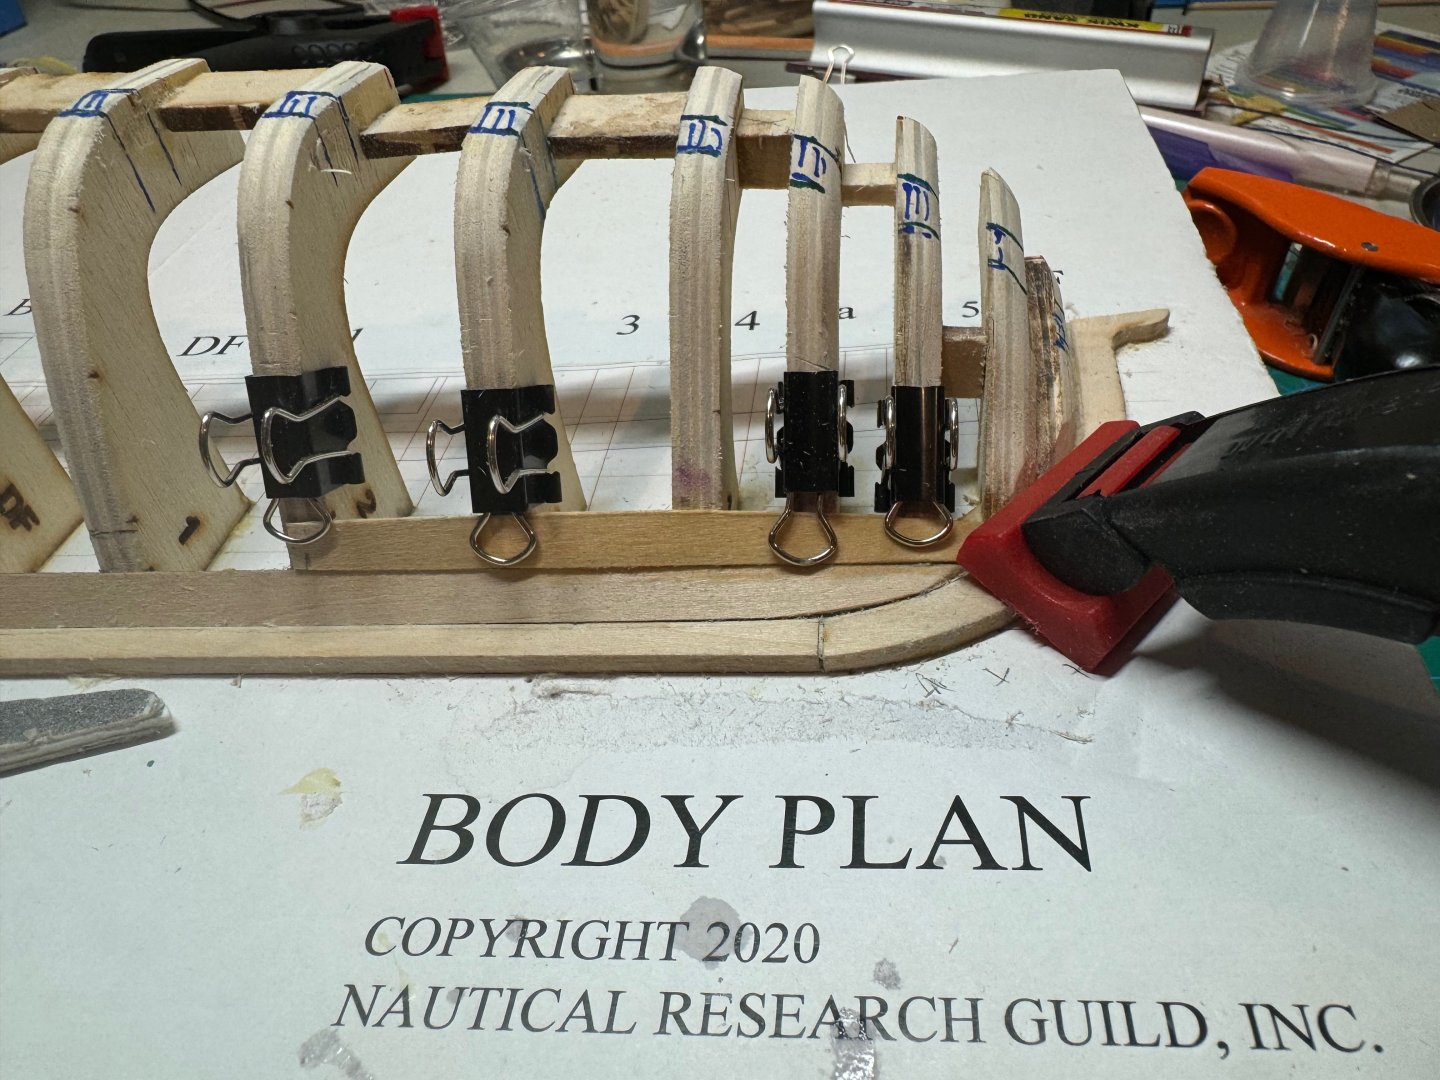
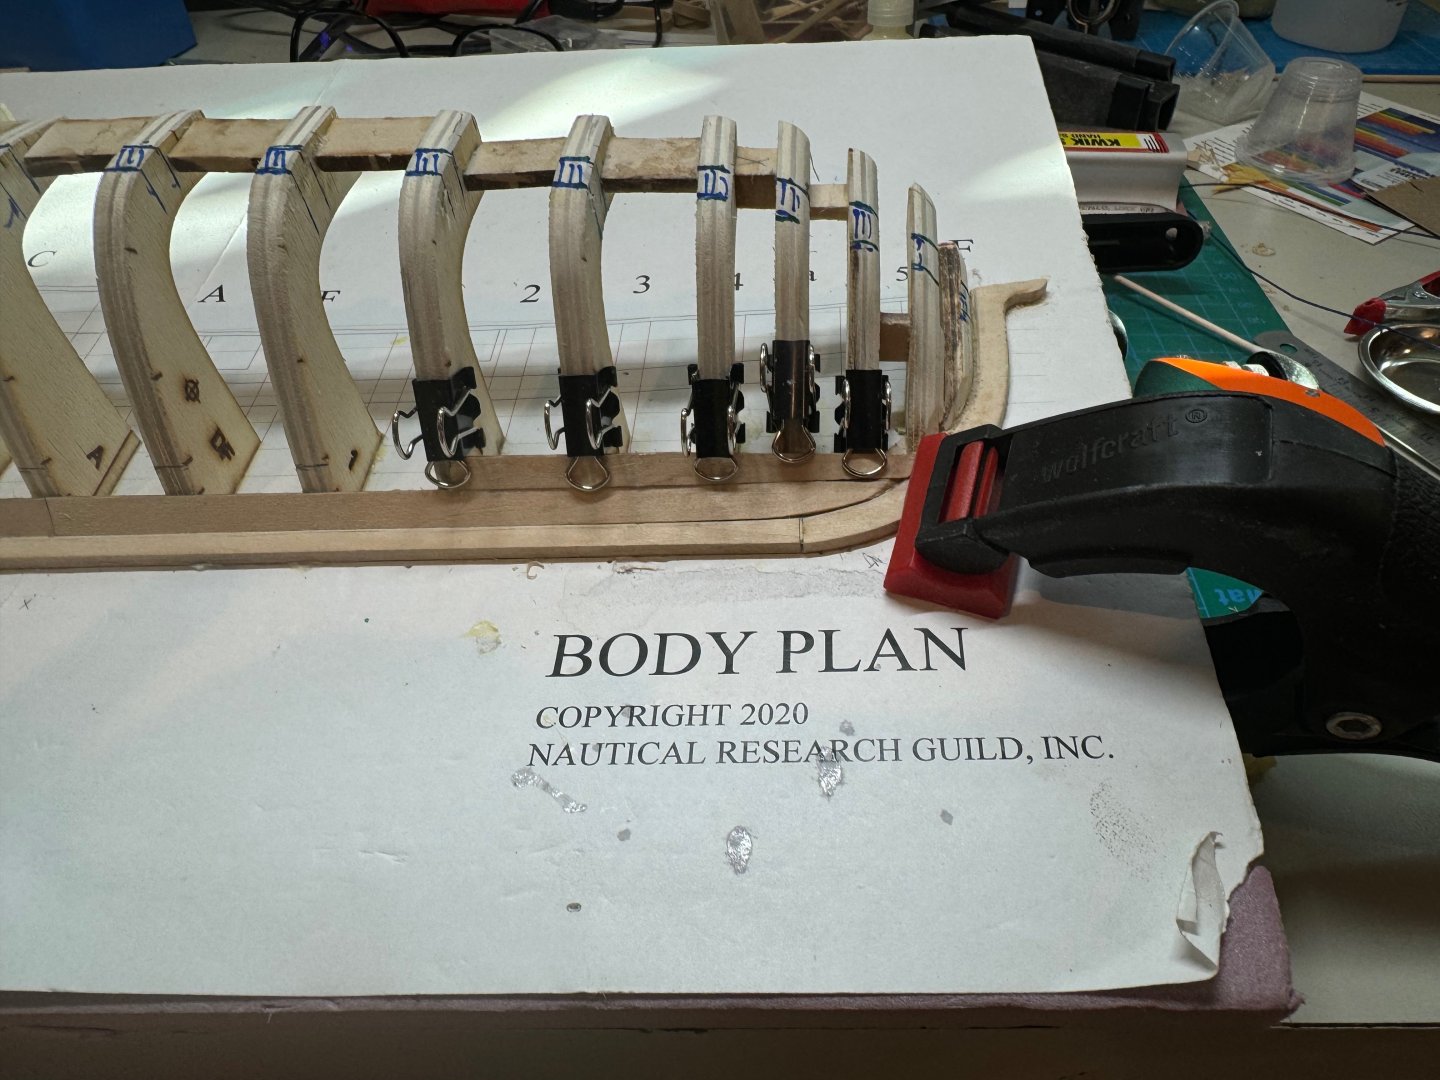
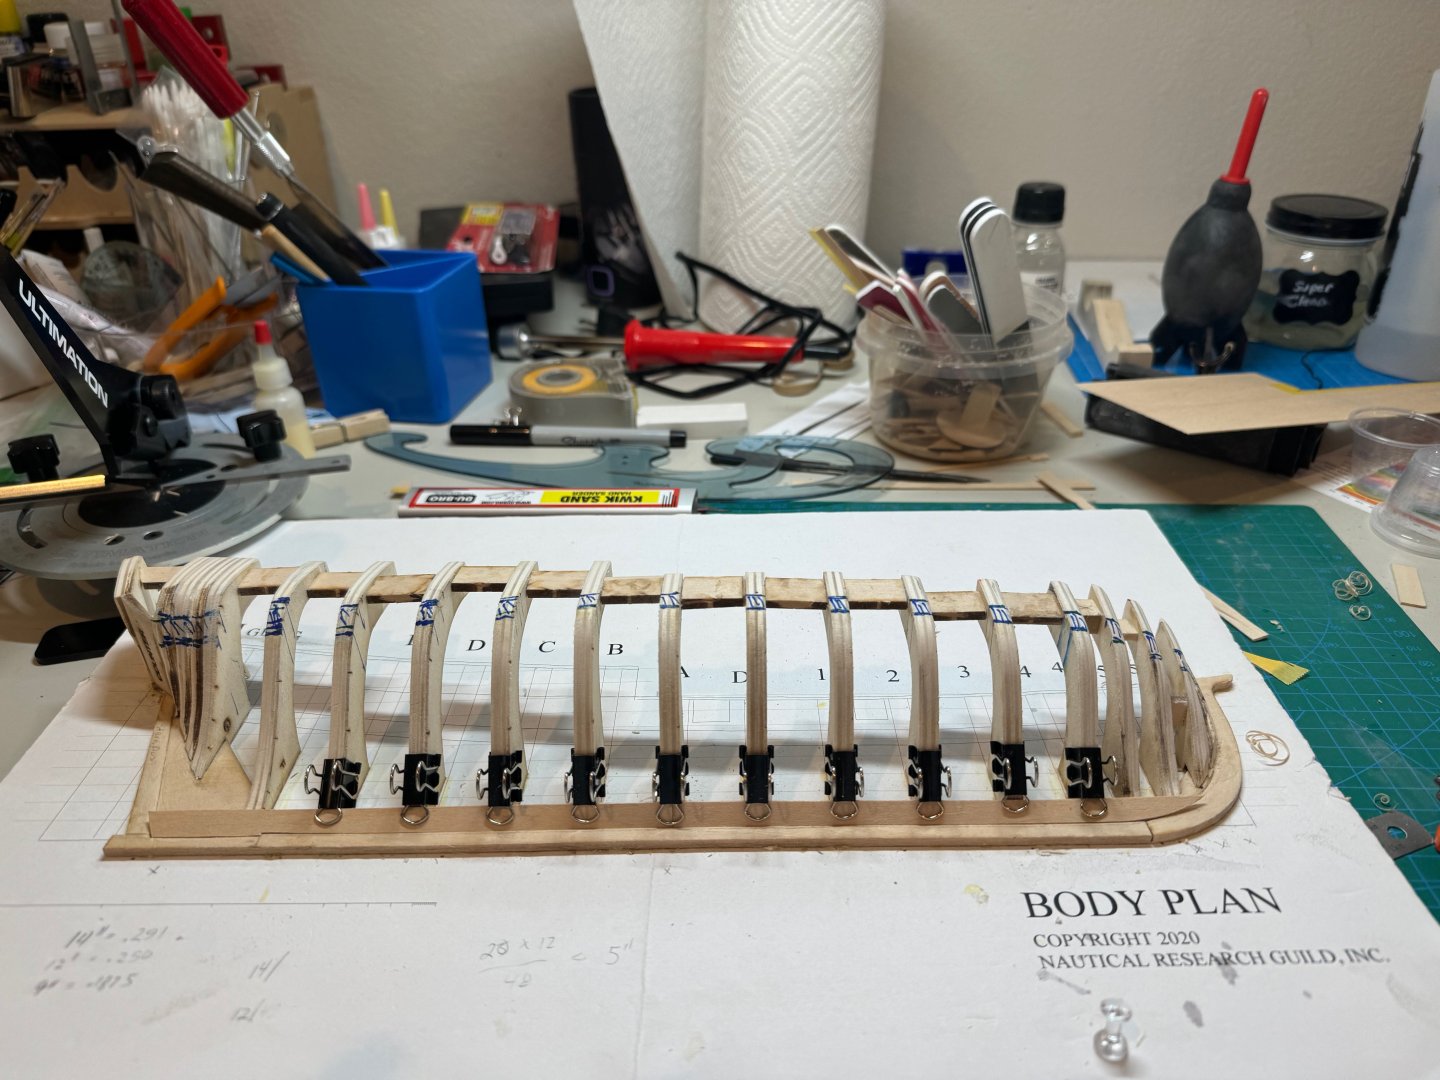
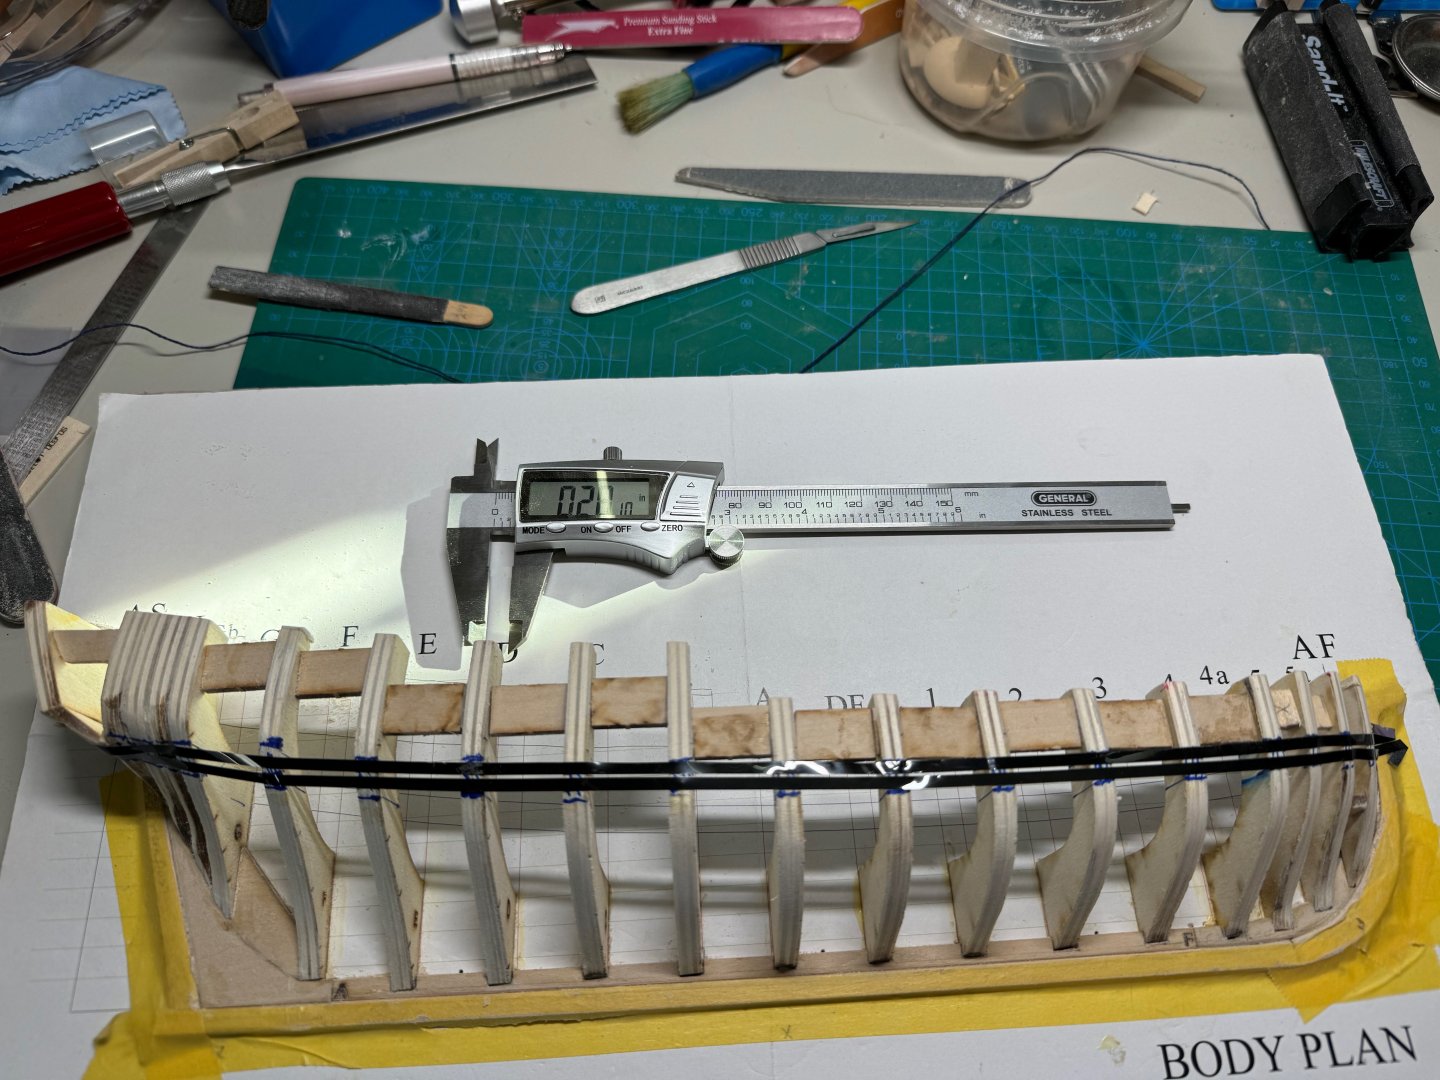
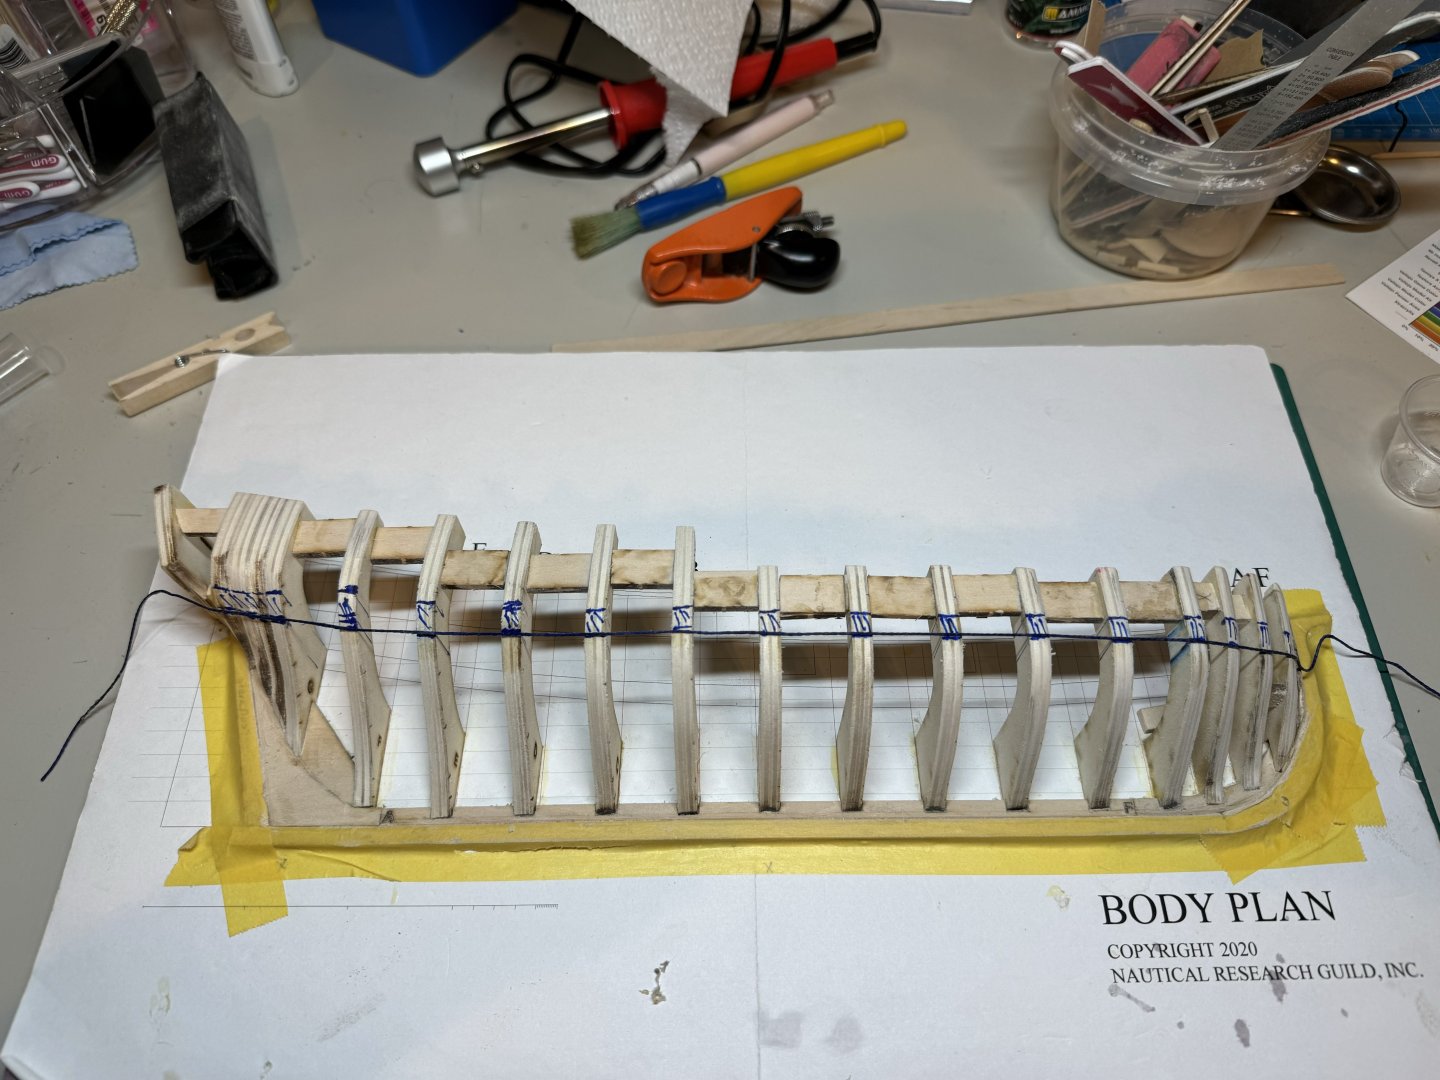
Today, I was able to complete step 5, building out the building board. I found that the forms needed some fitting, so I had to expand the joints. Pre fitting the parts, I noticed that the bow and stern posts where a little loose, whereas the frame forms where to large for the opening. I am noticing a trend with the Model Expo kits they are not fully uniform. I then made some re-enforcements for forms to maintain their strength and to help keep them at 90 degrees to the building board. When mounting to the building board, I had the numbers printed on the part going towards the bow. I broke the stern post while I was dry fitting the piece. I then cut a couple pieces reinforcements for the joint as I glued it back together. I also added some more stock to help support the bow stem post. Similarly with the stern post. Overall here is the final after the glue had a chance to set. The bow. Finally the stern.


- 6 replies
-
- 5
-
-
- Norwegian Sailing Pram
- Model Expo
- (and 2 more)
-
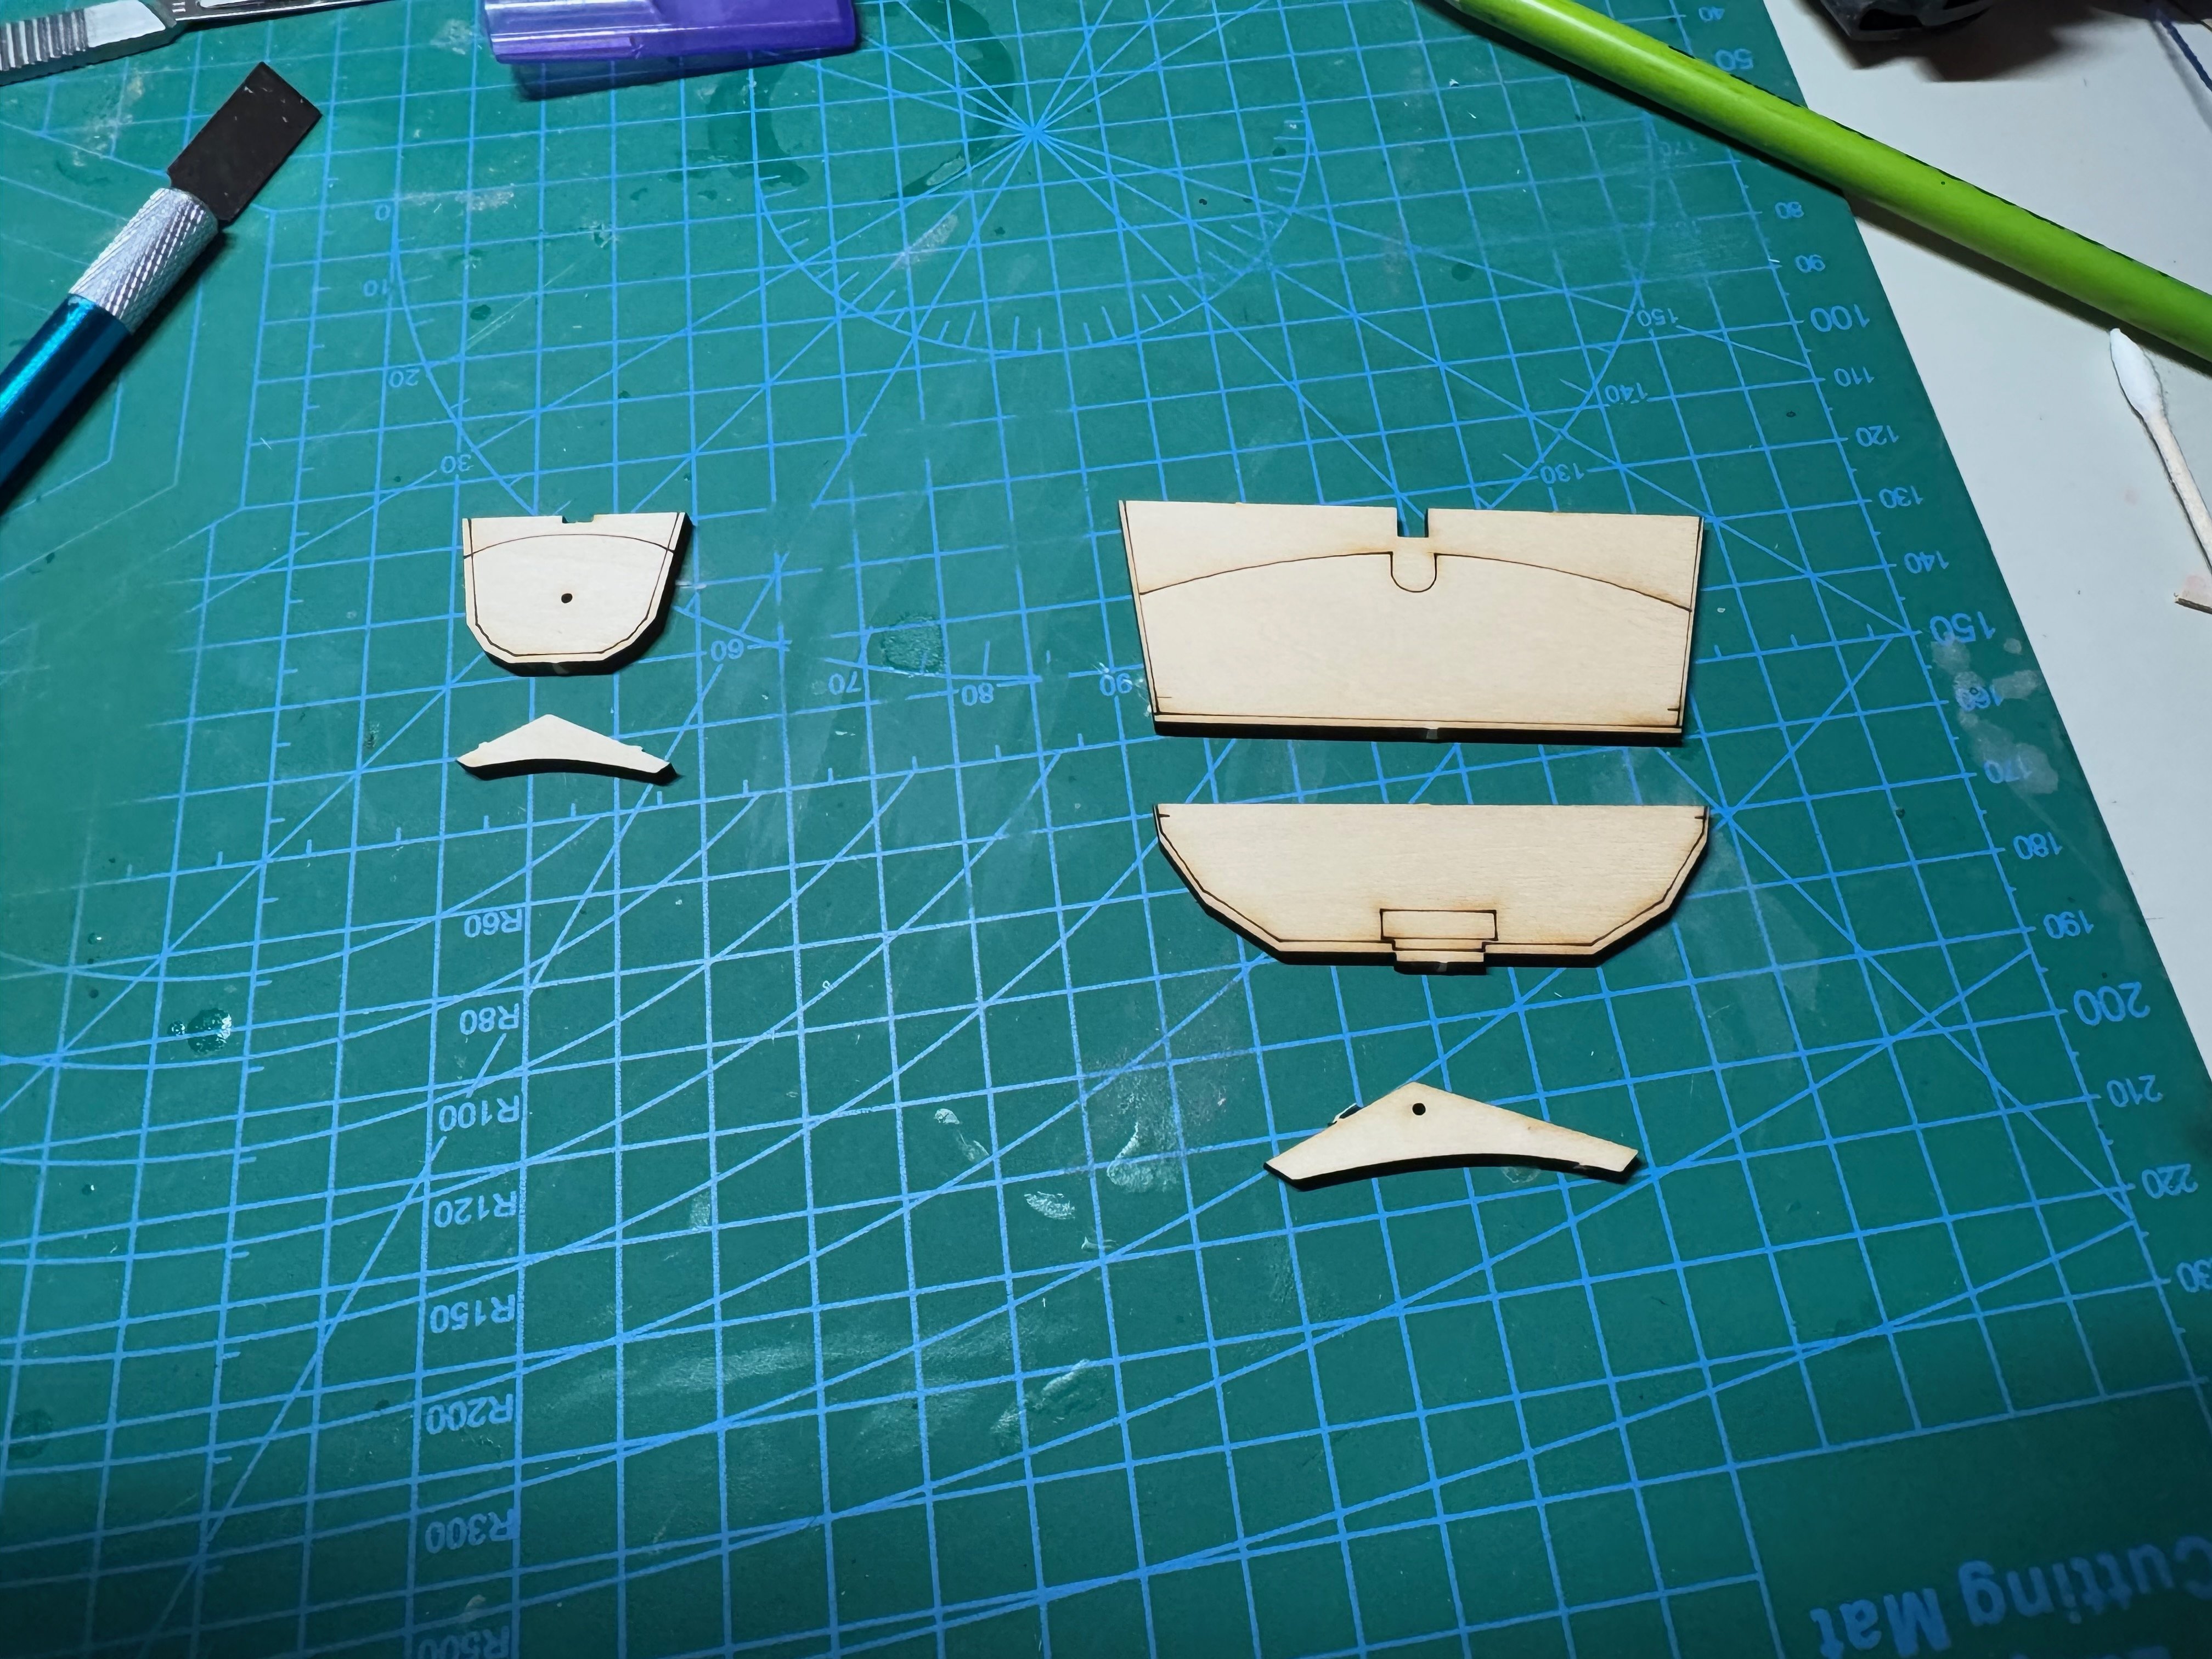
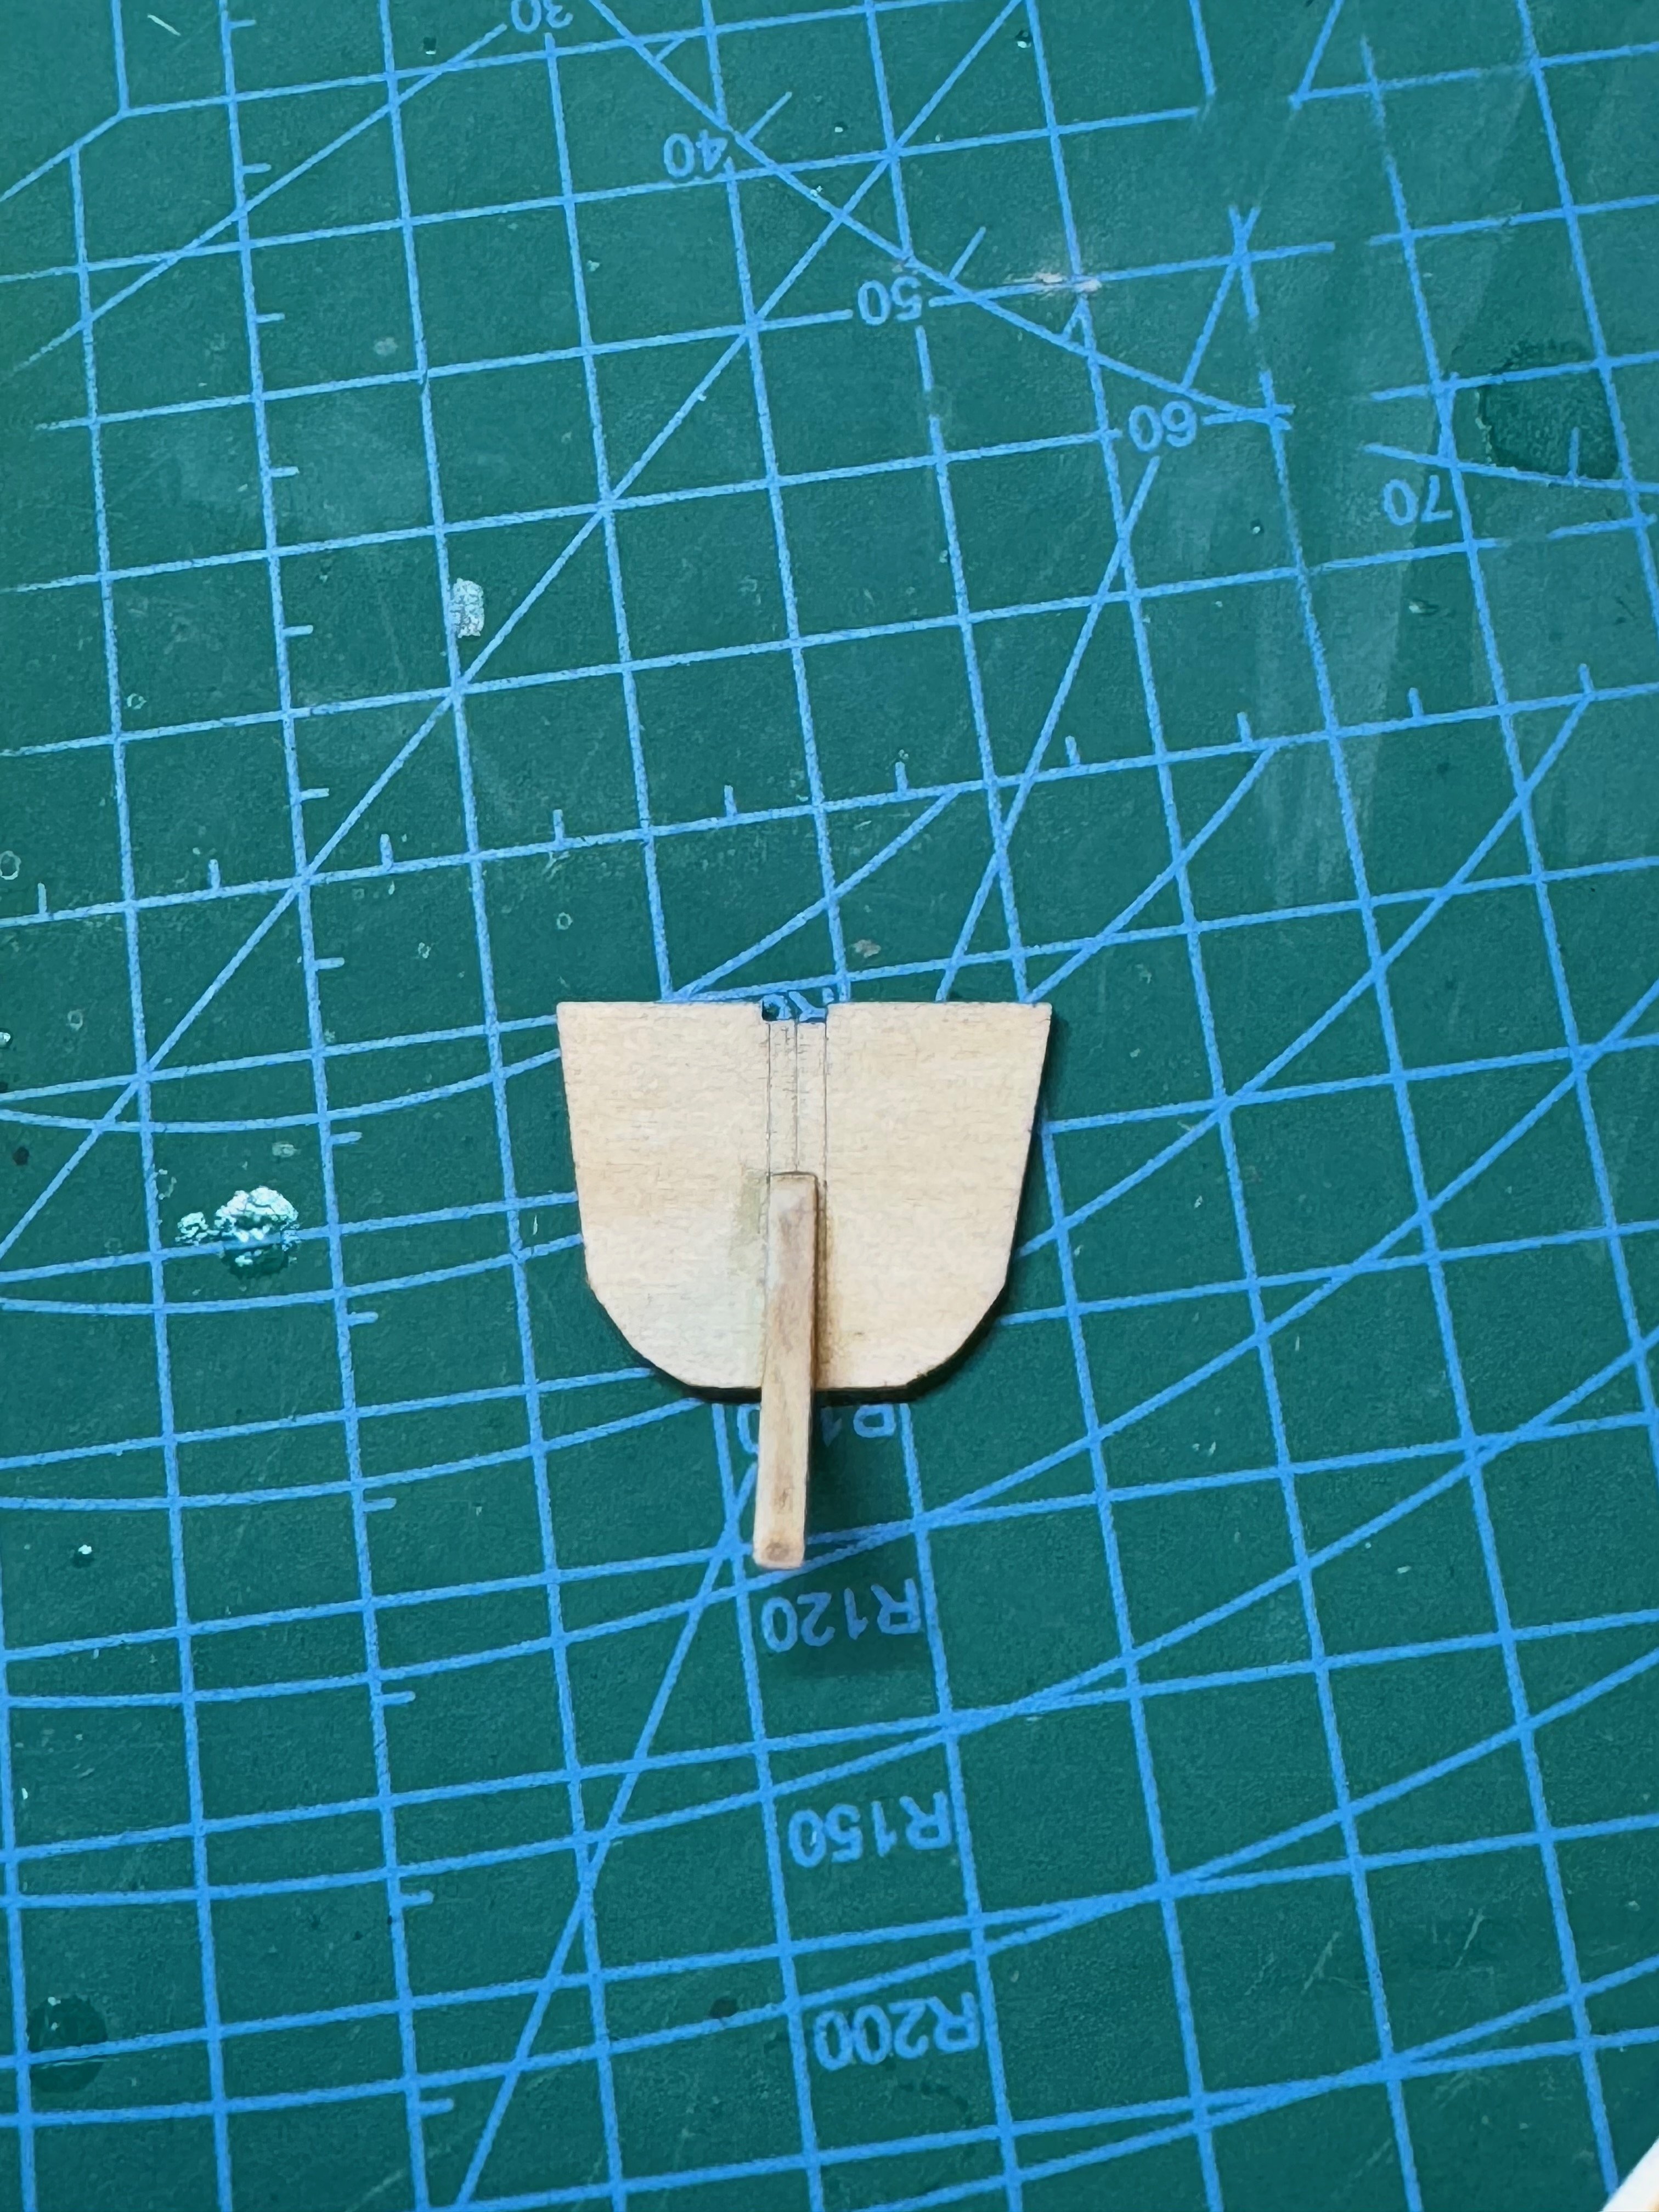
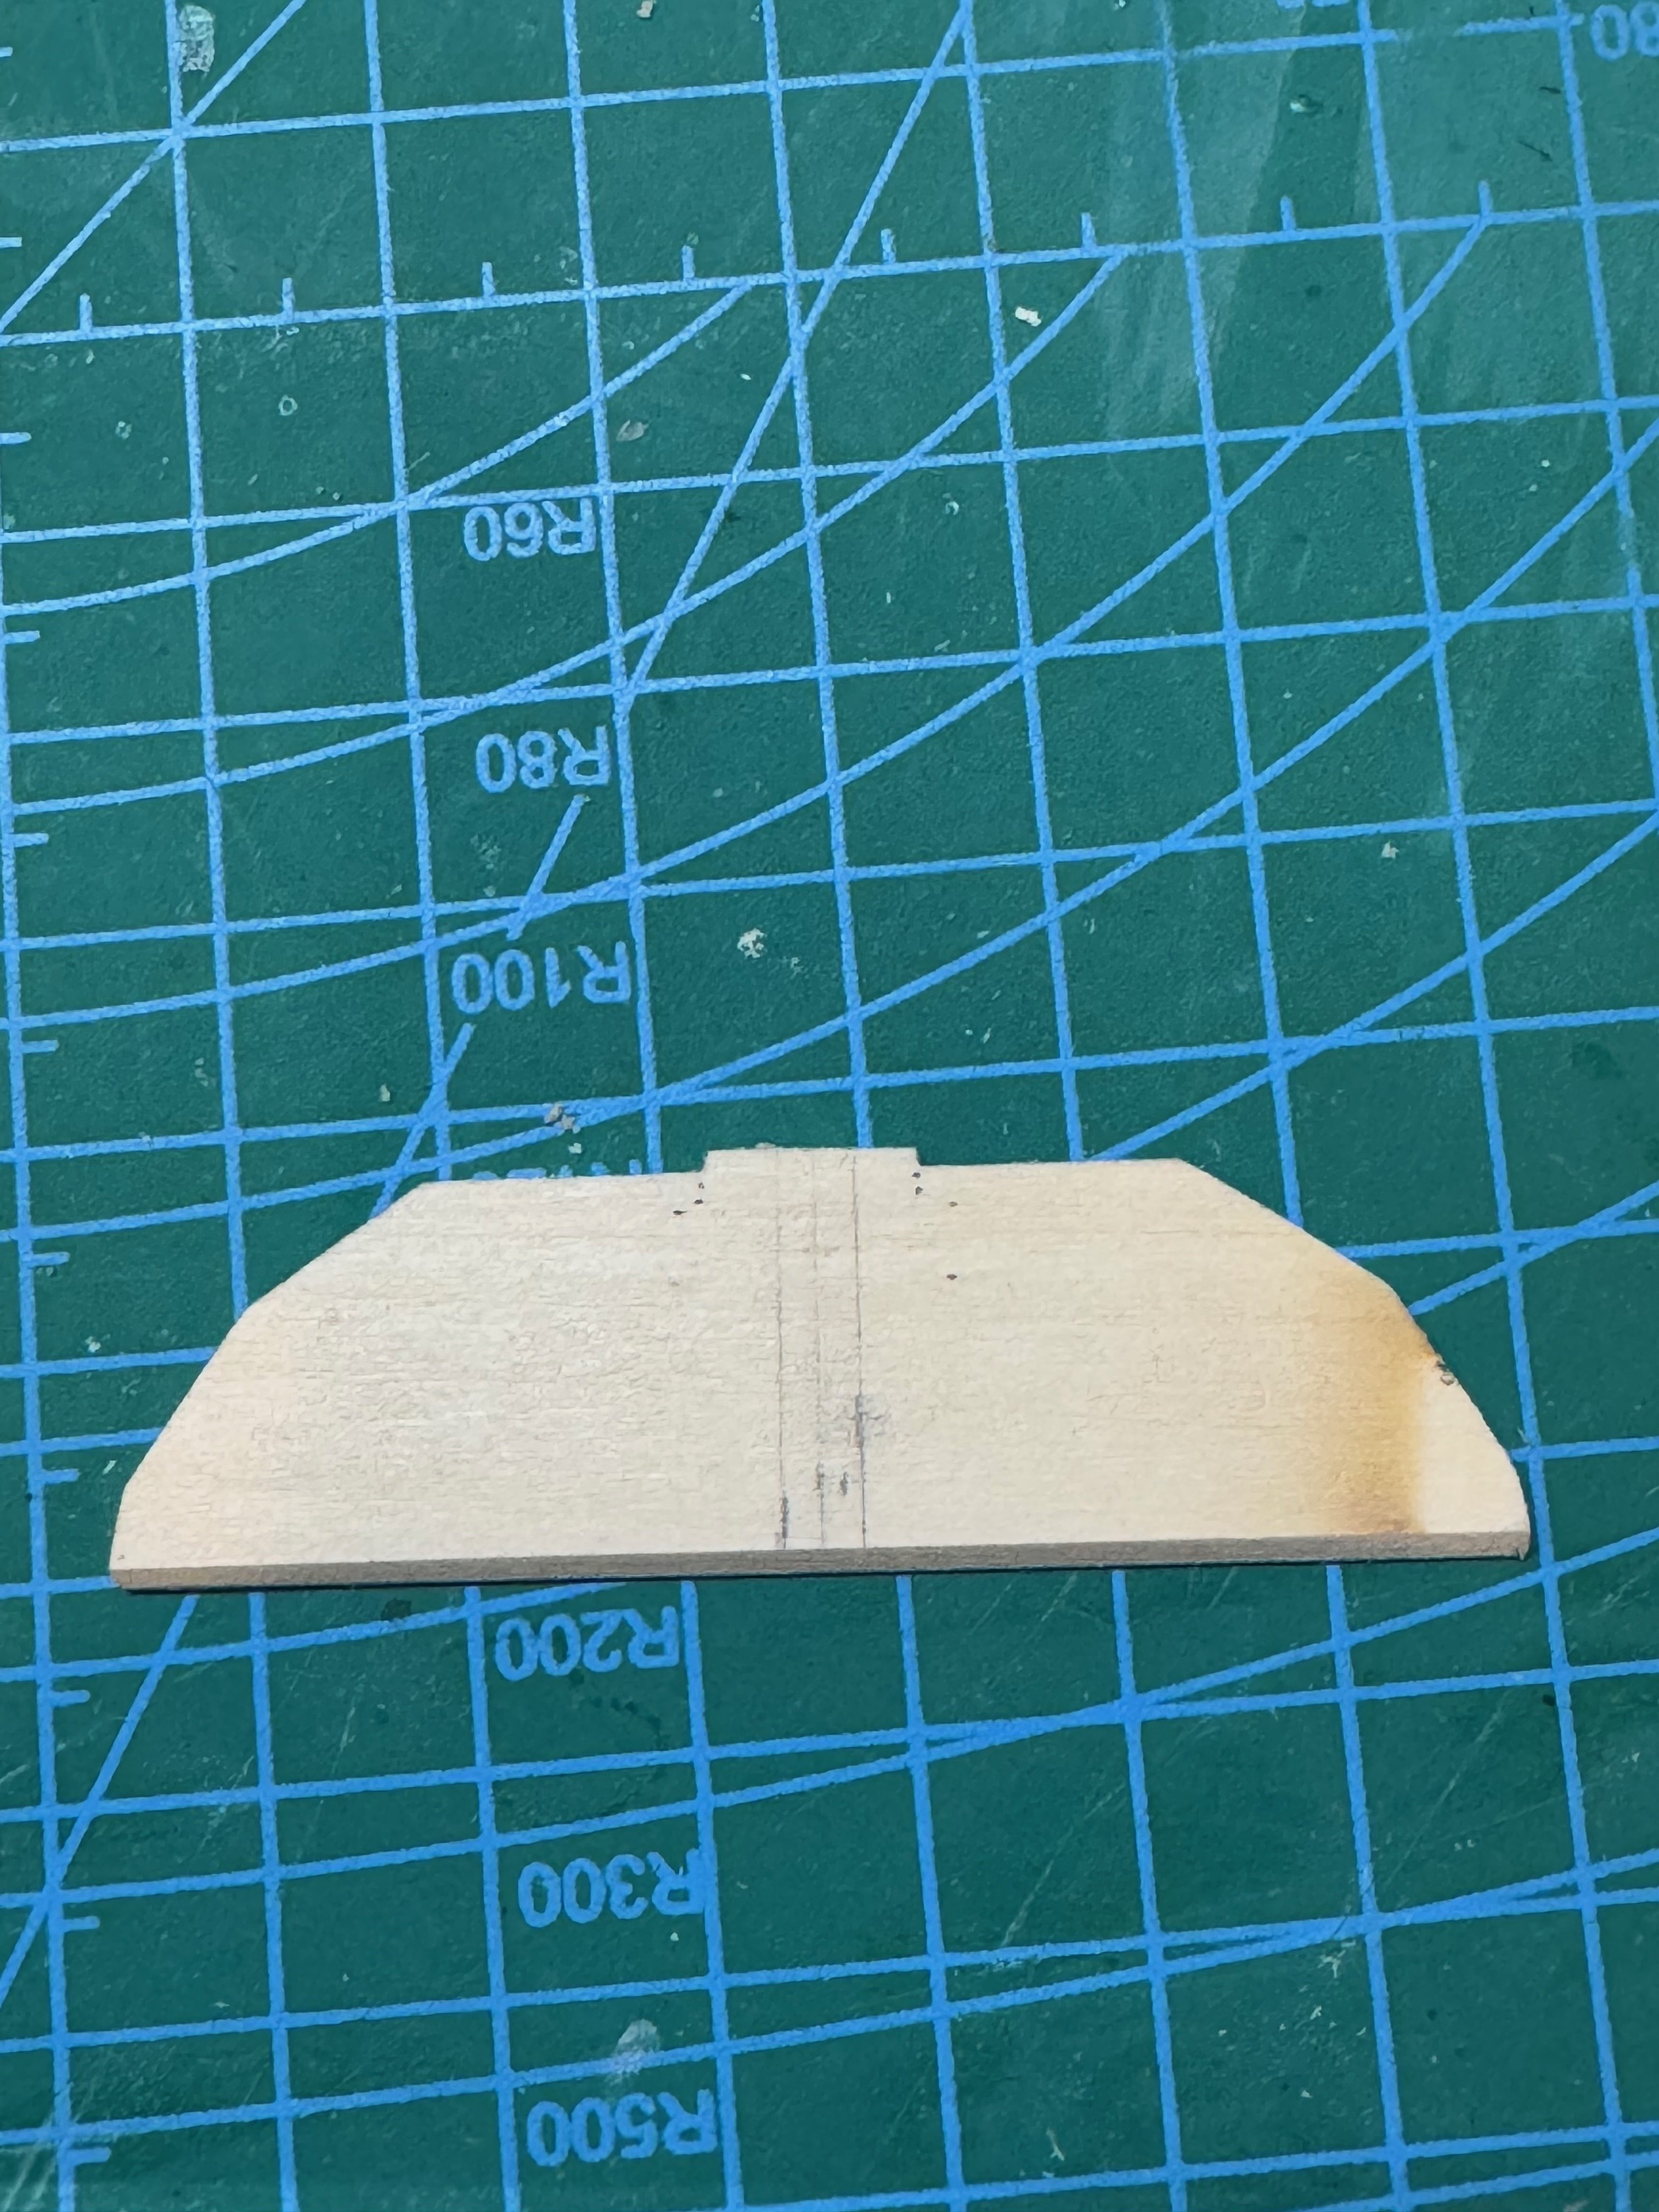
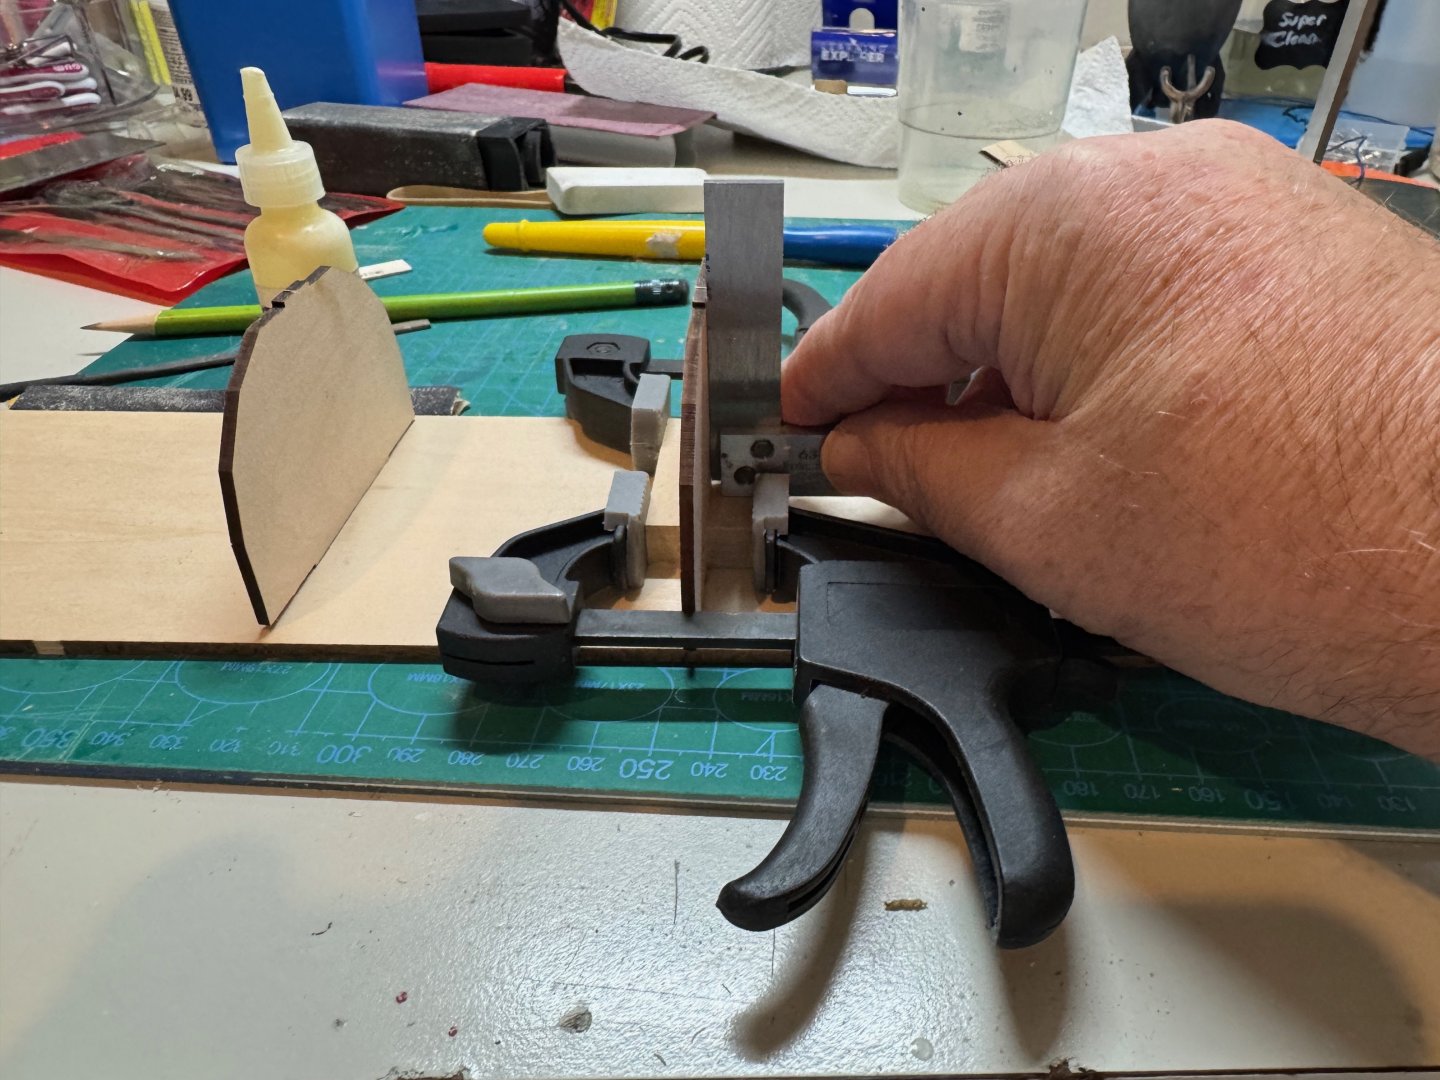
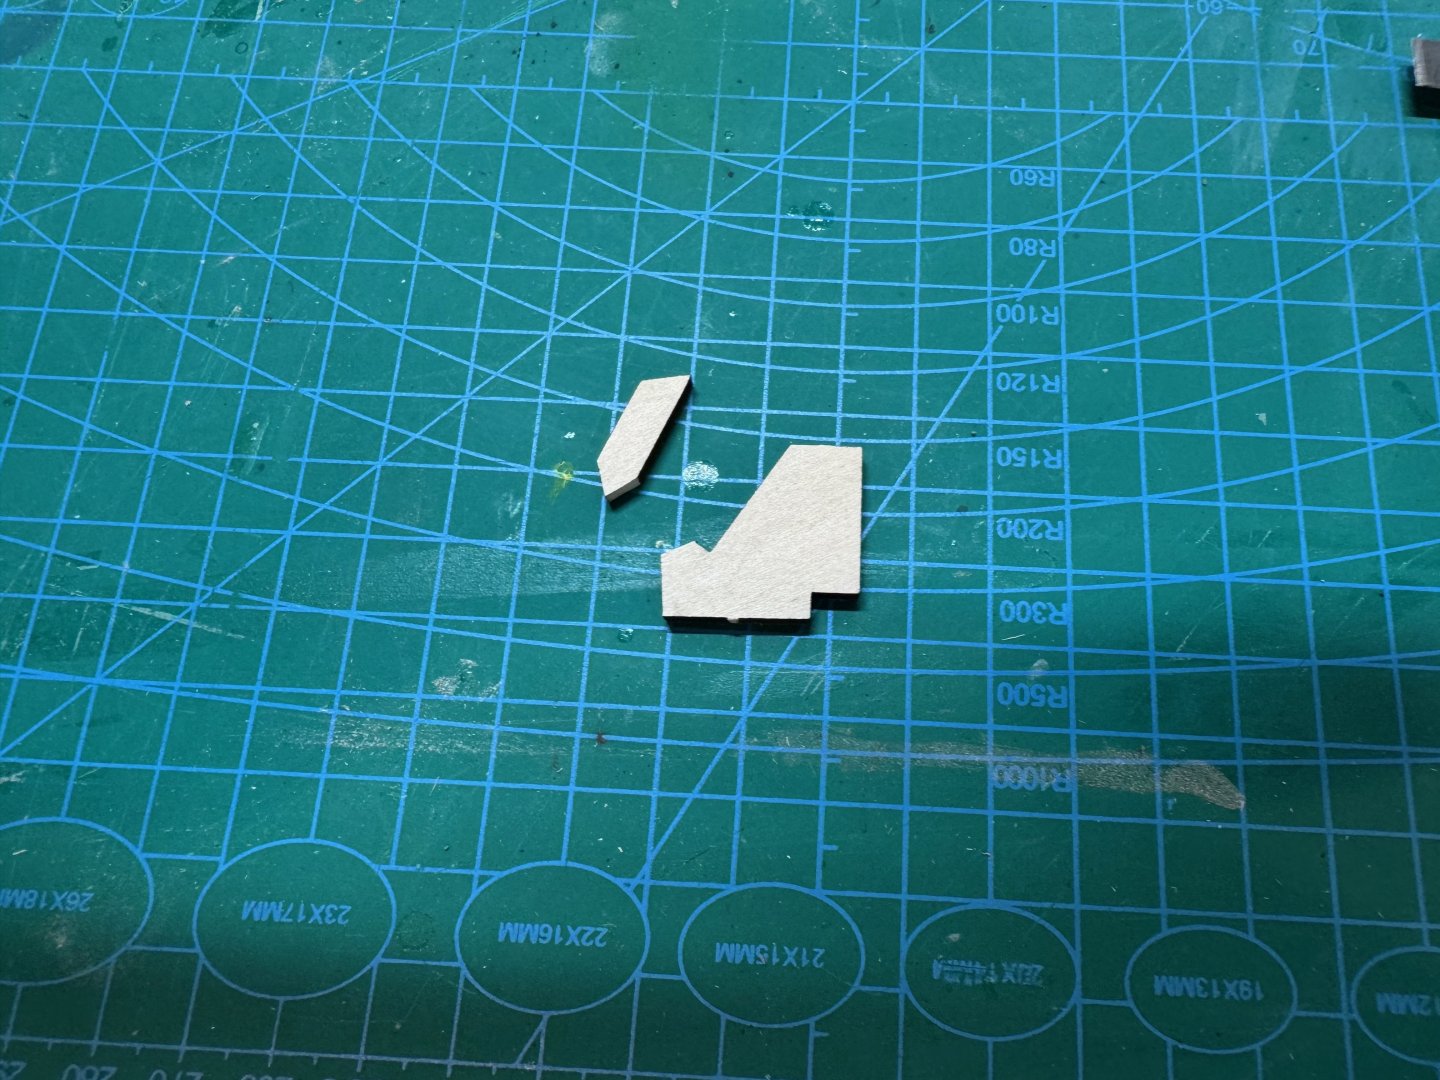
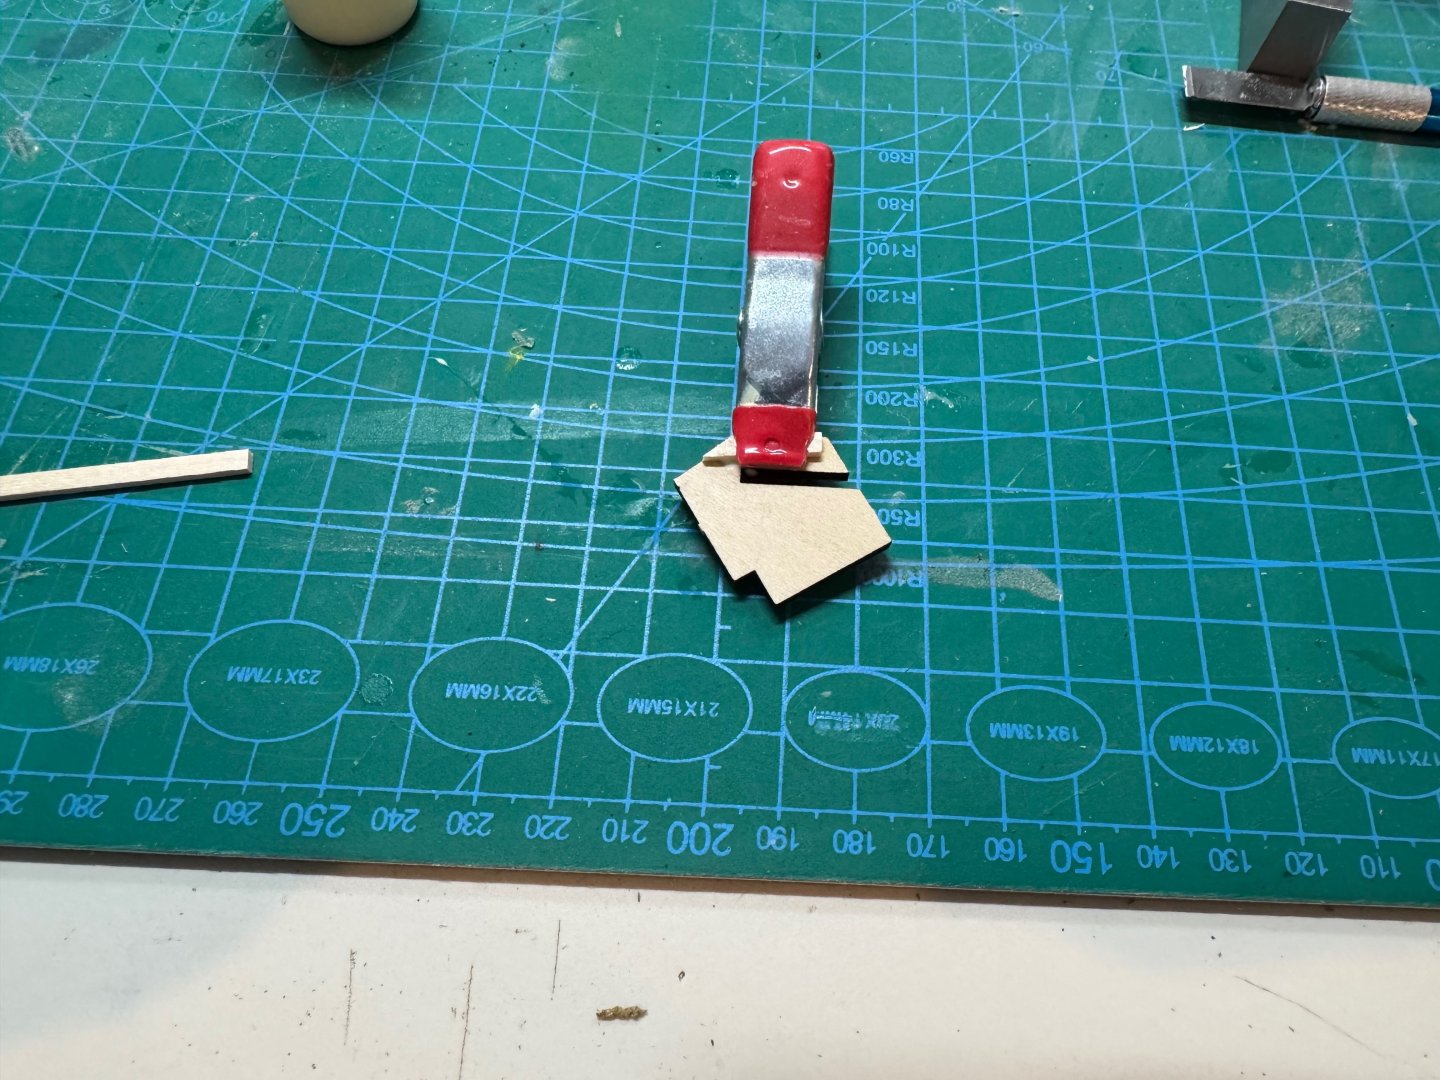
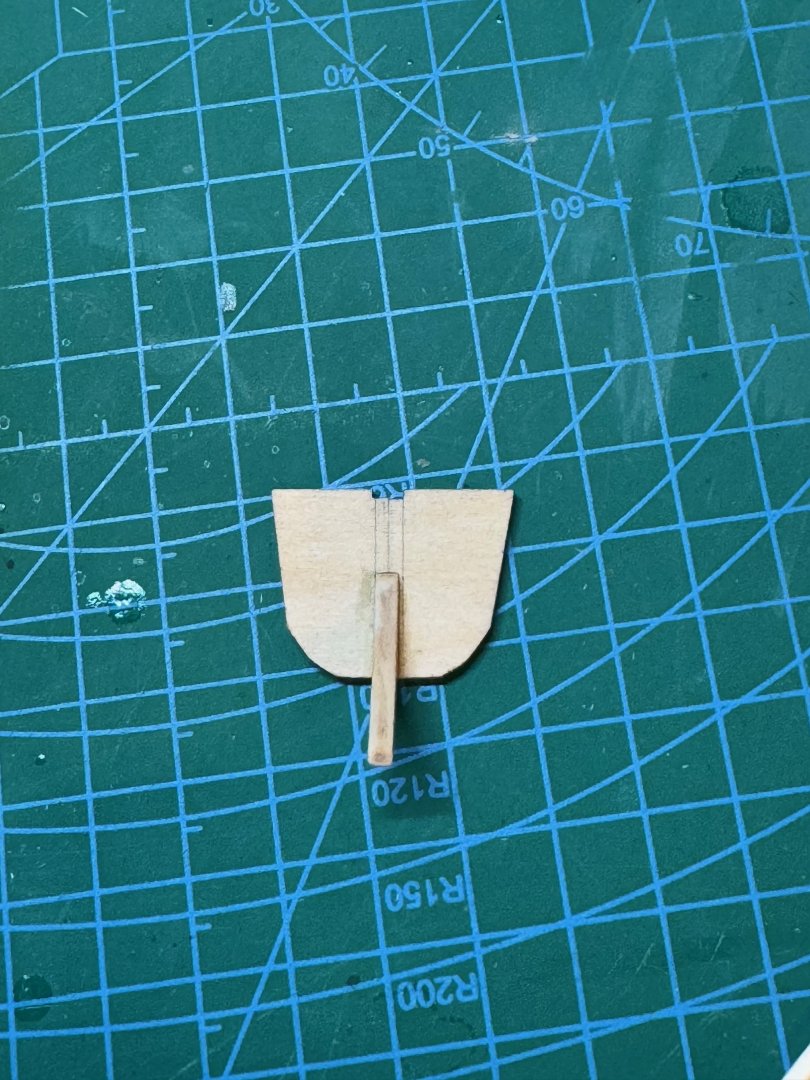
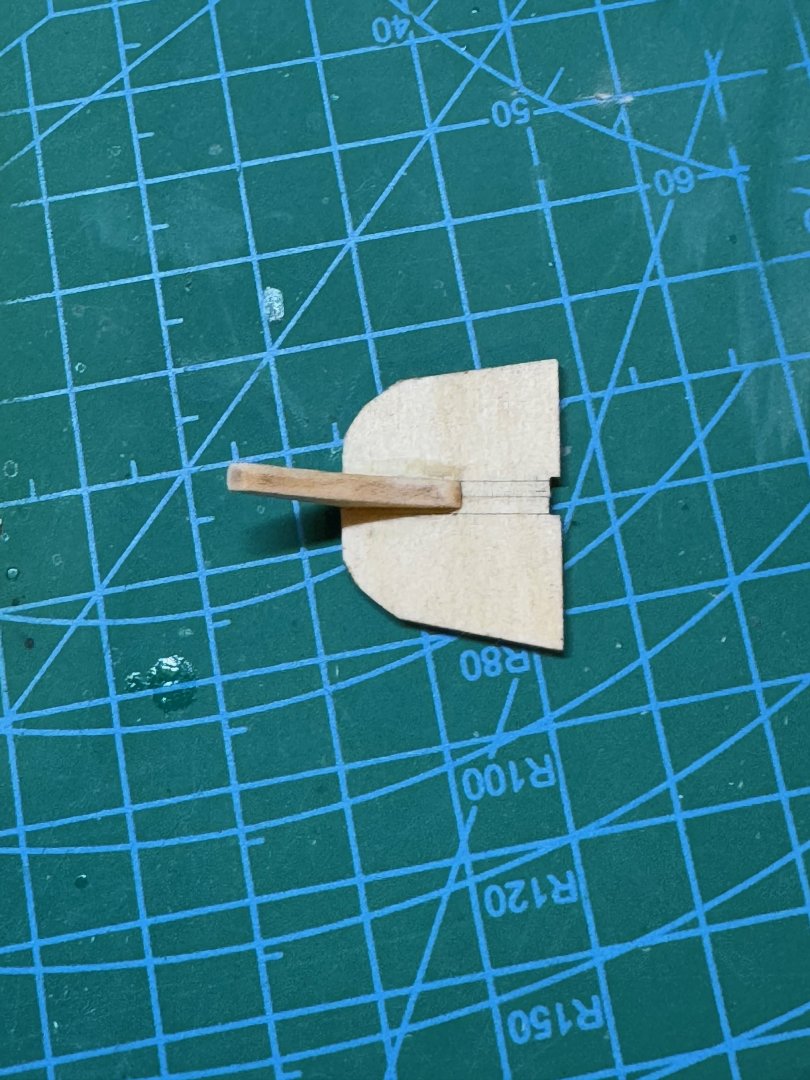
I thought I would start to work on the Norwegian Sailing Pram in tandem with my Half hull planking project as I can optimize my time while glue is setting. Instead of doing a out box photos, I decide to just get right into the build. Yesterday, I cutted out the knees and transom pieces from the kit. I rounded first removed the char, and then proceed to mark out the center, and on the transoms. I also marked the upper stern transom with a 1/8 inch line so I can attach the lower and upper transoms together. I then glued on the knees. I then proceeded to bevel the transom, being careful to keep the facets intact. This concludes steps 1 - 4 in the documentation.


- 6 replies
-
- 5
-
-
- Norwegian Sailing Pram
- Model Expo
- (and 2 more)
-
Good afternoon, Sorry for the lack of progress the last week, I was in Vegas for a week long conference for work. I was able to get the other two planks in for the first strake yesterday. My next step is to start to determine the planking bands.

-
very interesting Gregg. I was thinking of one his kits in the future but I may not until the quality issues are sorted.
-
@GGibson I am really surprised how this kit has so many challenges. Do you feel that is it poor quality or just bad design?
-
Good evening, The countdown has begun for dead turkey day; I have a lot to due this week, with brining the turkey, making apple and pecan pies, along with my cranberries, and stuffing. However I was able to get some work done on my planking project. As a recap, I was not happy with the garboard last time. I had already cut two planks, and they just where not working. After taking a couple days from the project I was able to get the offending plank done. I first re-scribed the plank. I found that using a small piece of wood I was able to properly burnish the rabbet a lot better, and the length in the template was much more accurate. I then cut the plank a little oversized and used my planner and sanding sticks to bring it the right size. I would check against the marks I made at each the bulkhead. As you can see below, I was able to get the full garboard mocked up nicely using this technique. A close up of the stern A close up of the bow. Next I then glued the planks to the model. I then proceed with the bow for the first strake. However, after I pulled the clamps I noticed that the there was a gaping whole between the planks. It took me three tries to get this plank correct but I was able to finally obtain the results I was looking for. With this plank I decided to wet the plank as I was putting the clamps on for a dry fit so that it would bend a little better. After waiting for the plank to dry, I then glued it on. I did forget to add the pencil to simulate the caulk but I will go back and do it in the morning. Cheers Jim


-
I found on the second plank having the ability to iterate over it was better. When I worked on the transition, I placed my scalpel in the wrong spot and it slipped. How did you integrate the slicer on these custom planks? Just for the length?
-
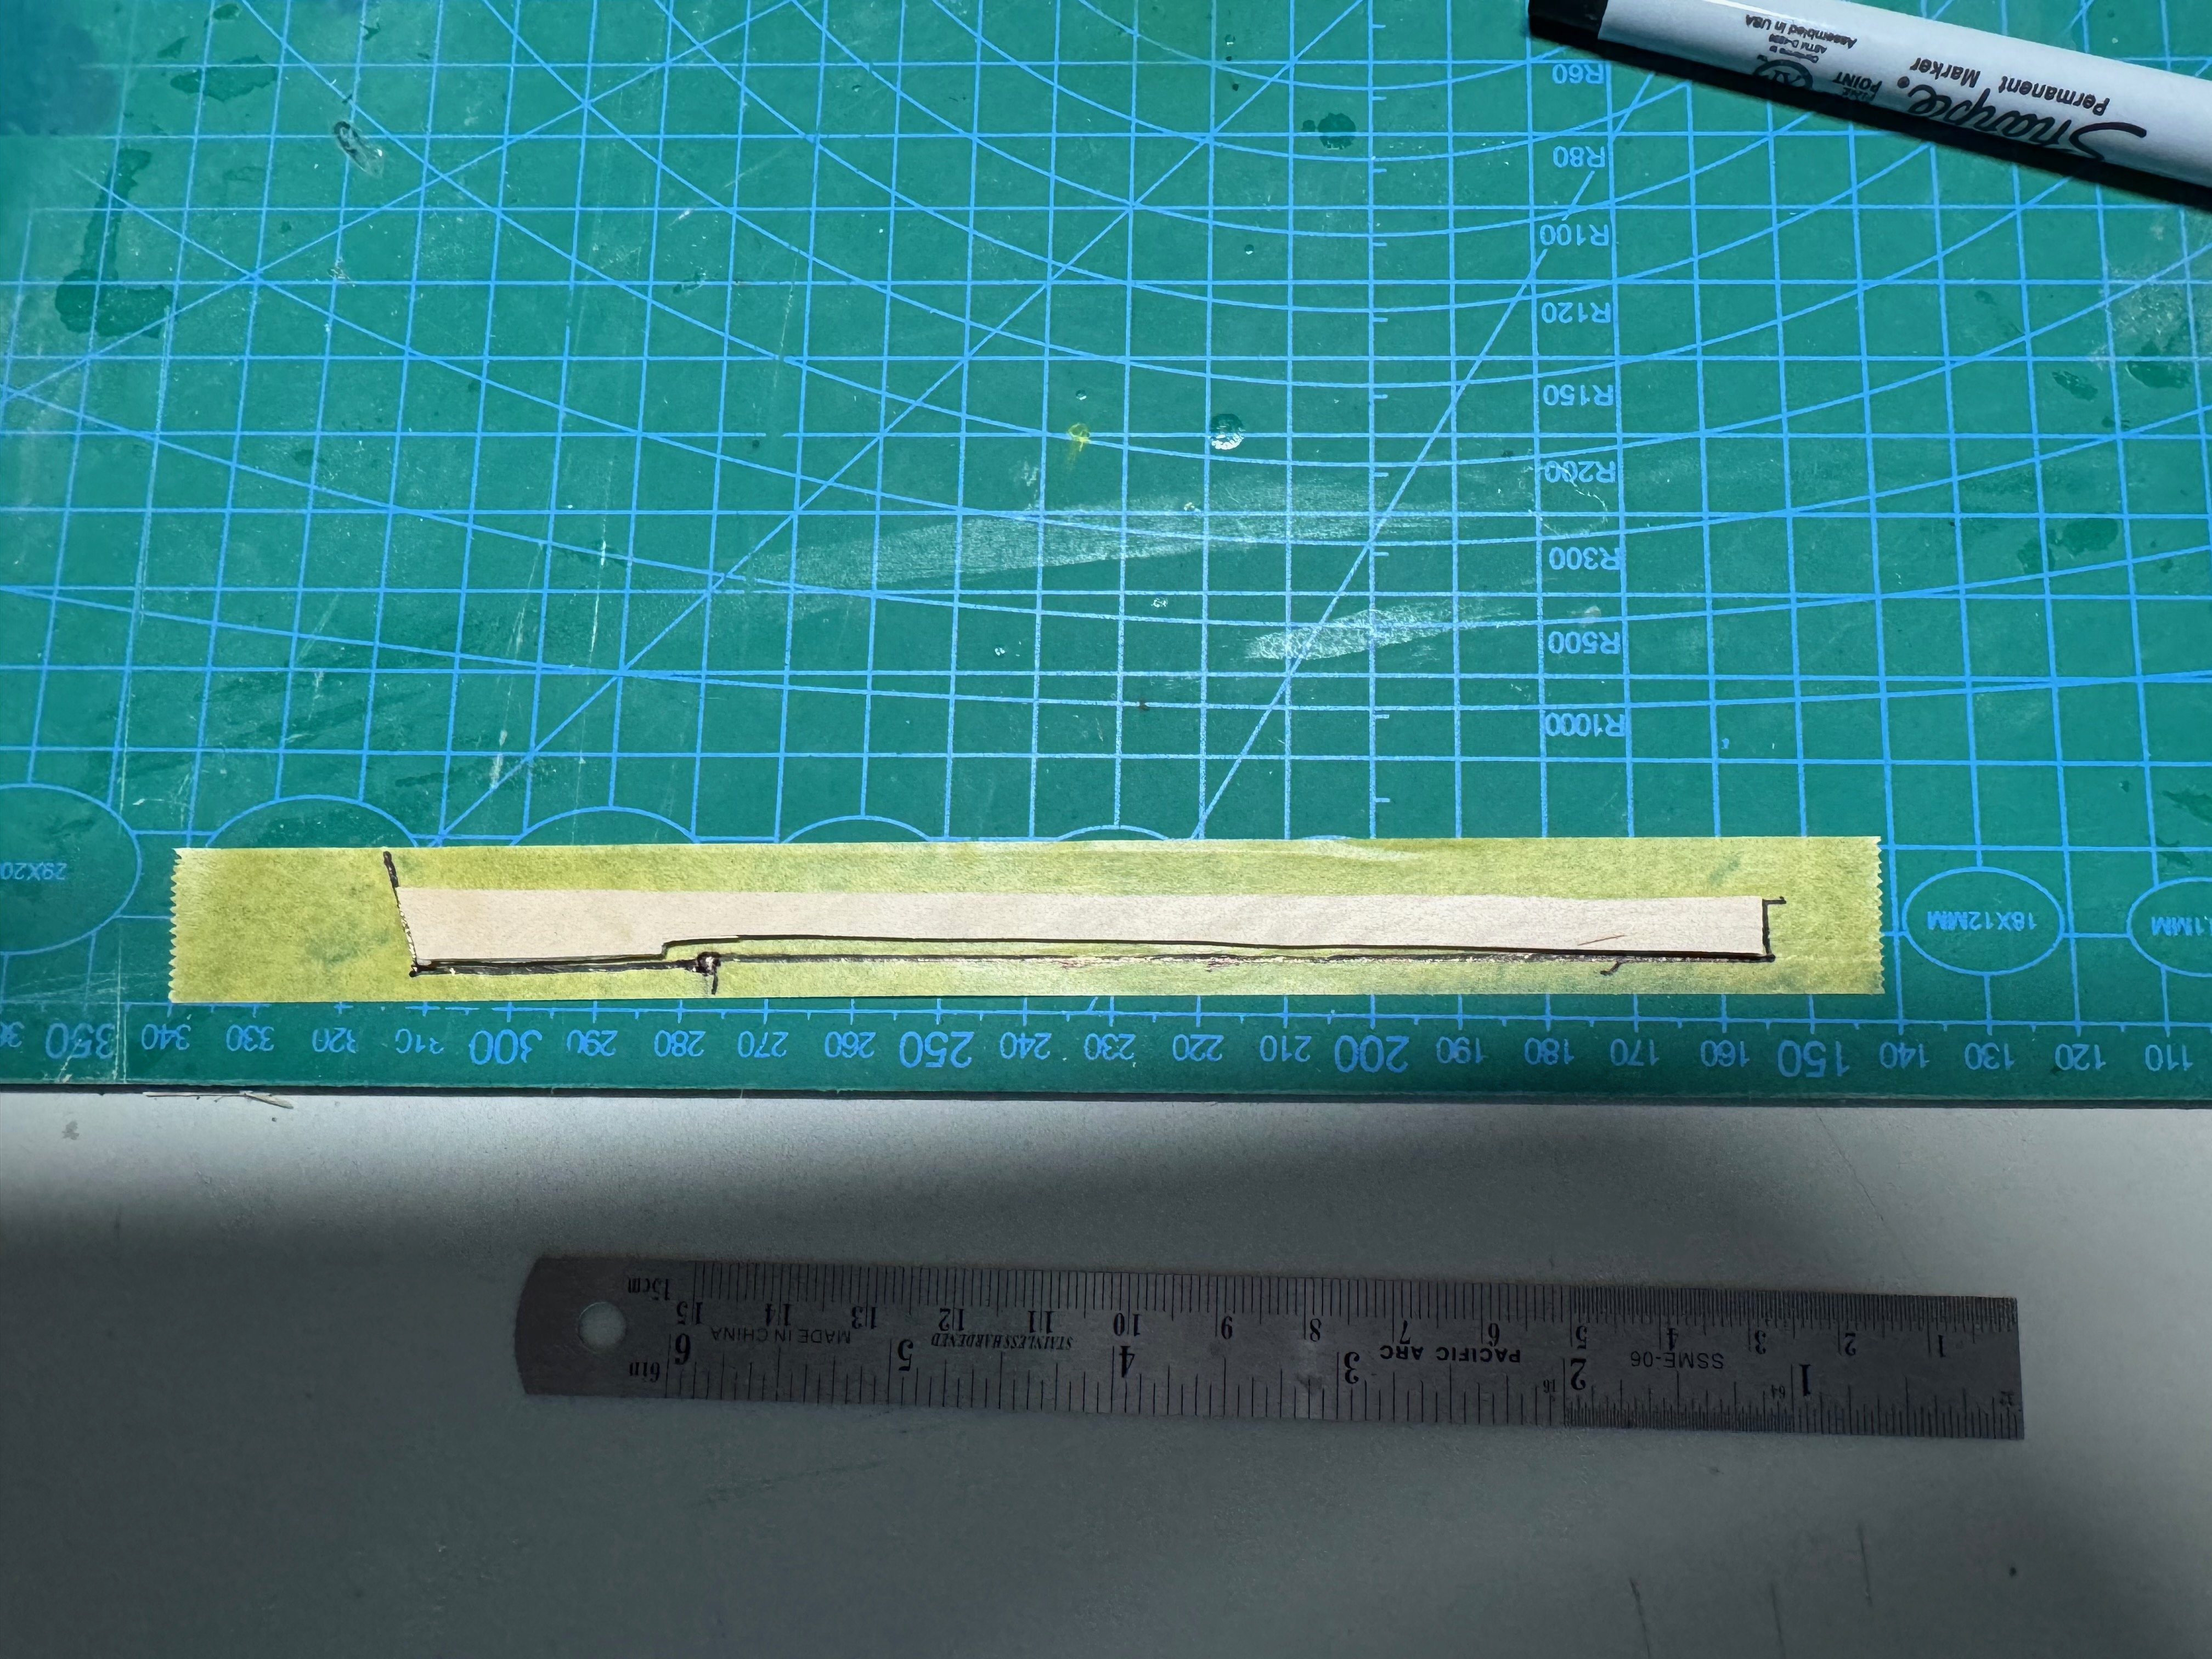
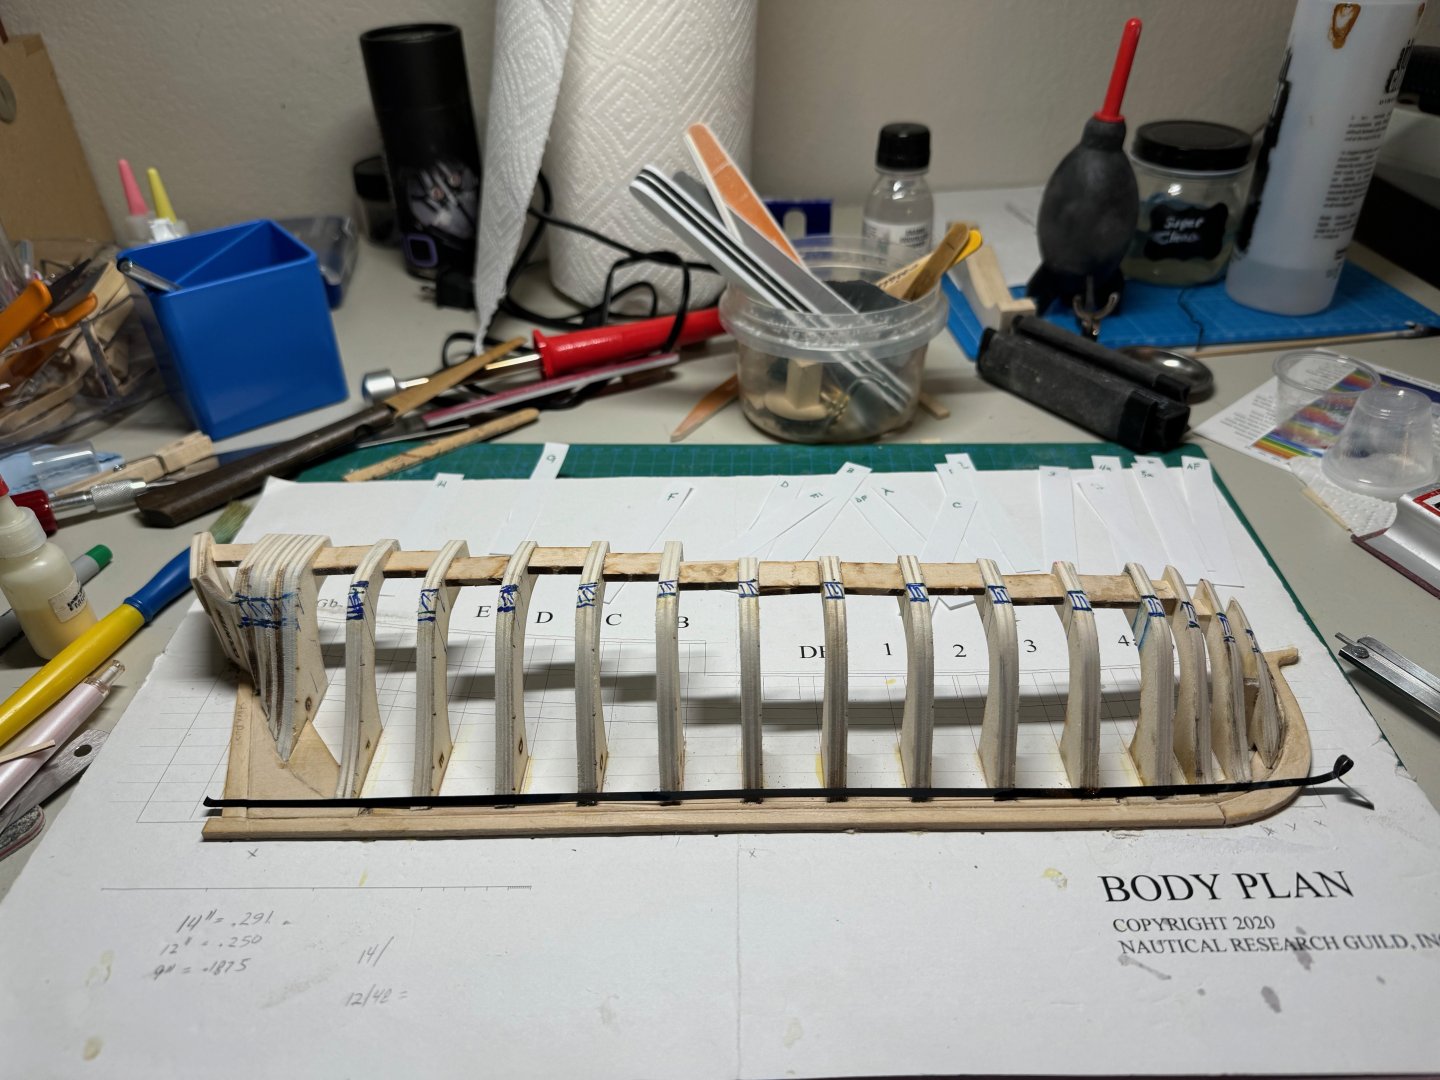
Good evening, I spent some time relining my wale line this afternoon. I received some better chart tape yesterday, so I was able to map out the full wale, get the lines correct. The calapiers helped in visualizing the wale, and where it needs to be. I ended up using some green marker to mark the final positions. I also did some more fairing on the stern to make it a little more smoother. I suspect I may need some more when I get closer to the deck. I then marked out the 14 inches at the stern for the garboard, and the 12 inches for frames D - 3. I also spent some time making tick sheets. Here is the stern And here is frame B After I was happy I took a break to look at the garboard how it is going to lay down. I then marked out and cut out the first half of the garboard on a piece of scrap planking material. I definitely did not like this result. I repeated the process and you can see that the scribing is larger than my fist attempt. I also cut the plank outside of the lines this time so that I can shape it a little better. After cutting it out, I it definitely was a little better in the fit category. I had to do some sanding. However, I am not fully satisfied with this plank; I did not cut the notch correctly, and the plank does not sit in the rabbit correctly. I decided to take a break tonight. However, I think I am going to redo this plank again. Cheers Jim


-
I suspect it is a sealer of some form, but a sealer blocks staining. I normally stain first then seal the wood.
- 86 replies
-
- 2
-
-
- Model Shipways
- Norwegian Sailing Pram
- (and 3 more)
-
I use Surfacer on plastic, wood and metal with no issues. The Dory I finish I used all of Mr Hobby paints.
- 86 replies
-
- 2
-
-
- Model Shipways
- Norwegian Sailing Pram
- (and 3 more)
-
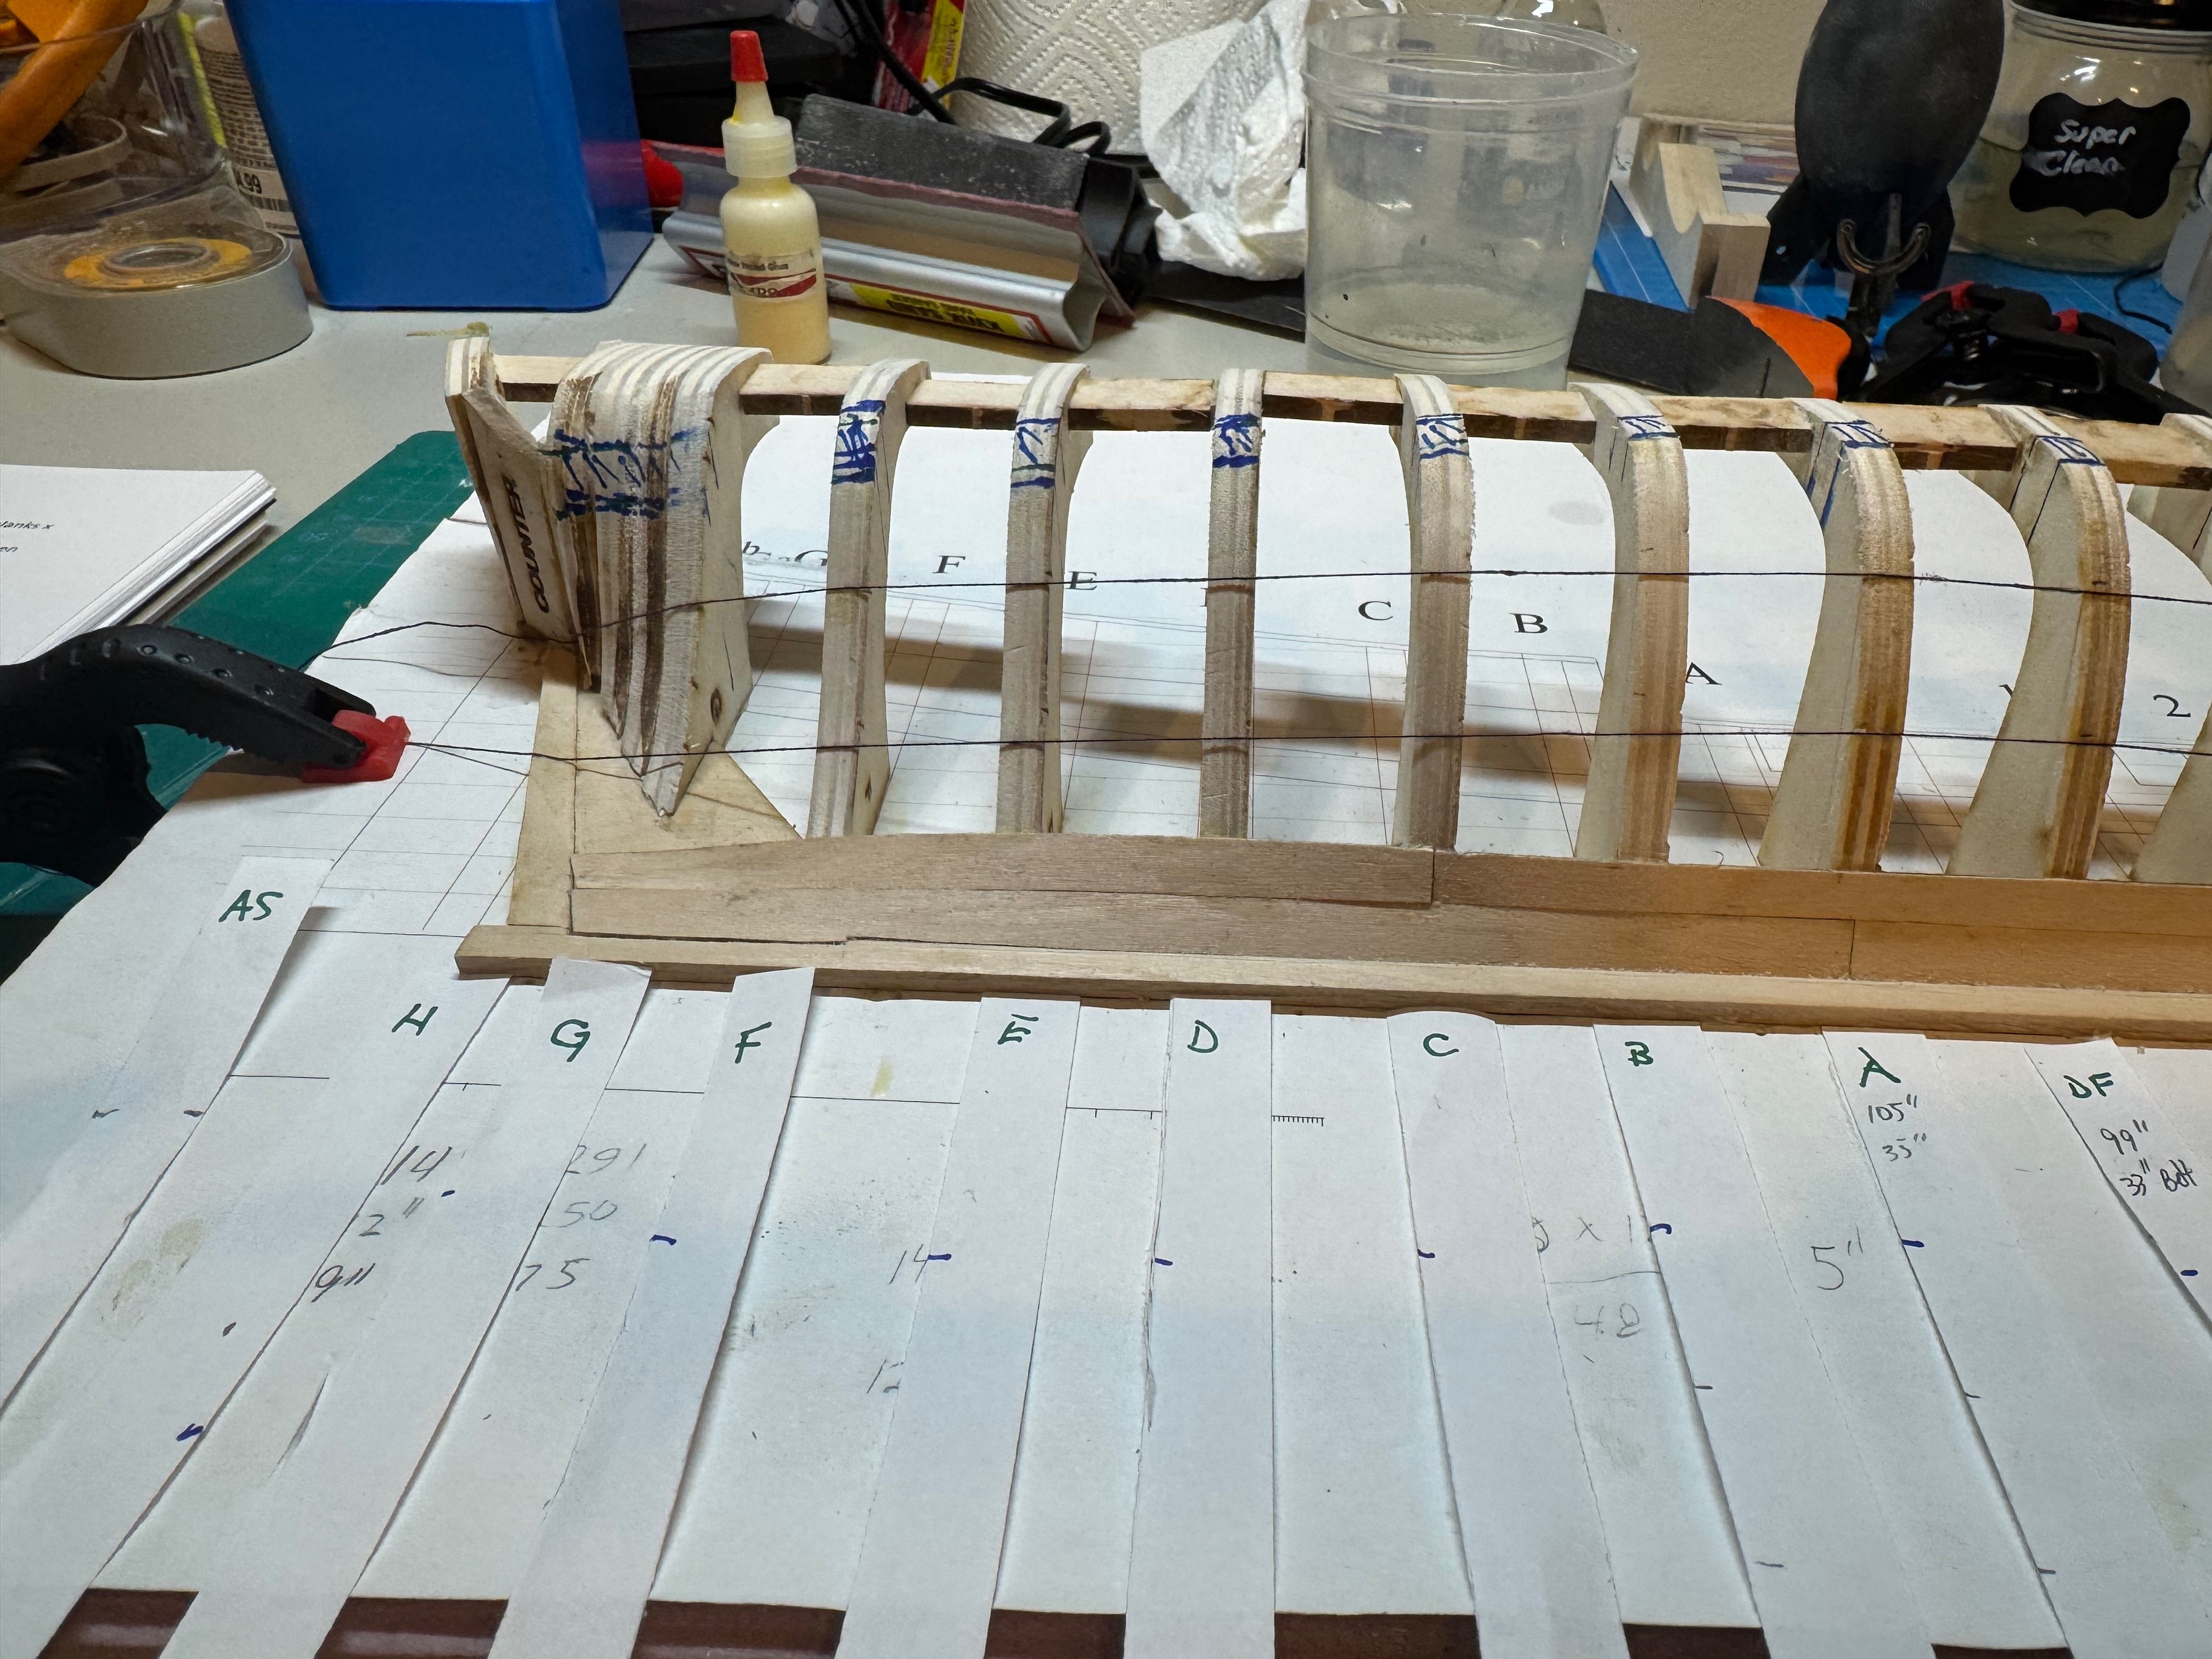
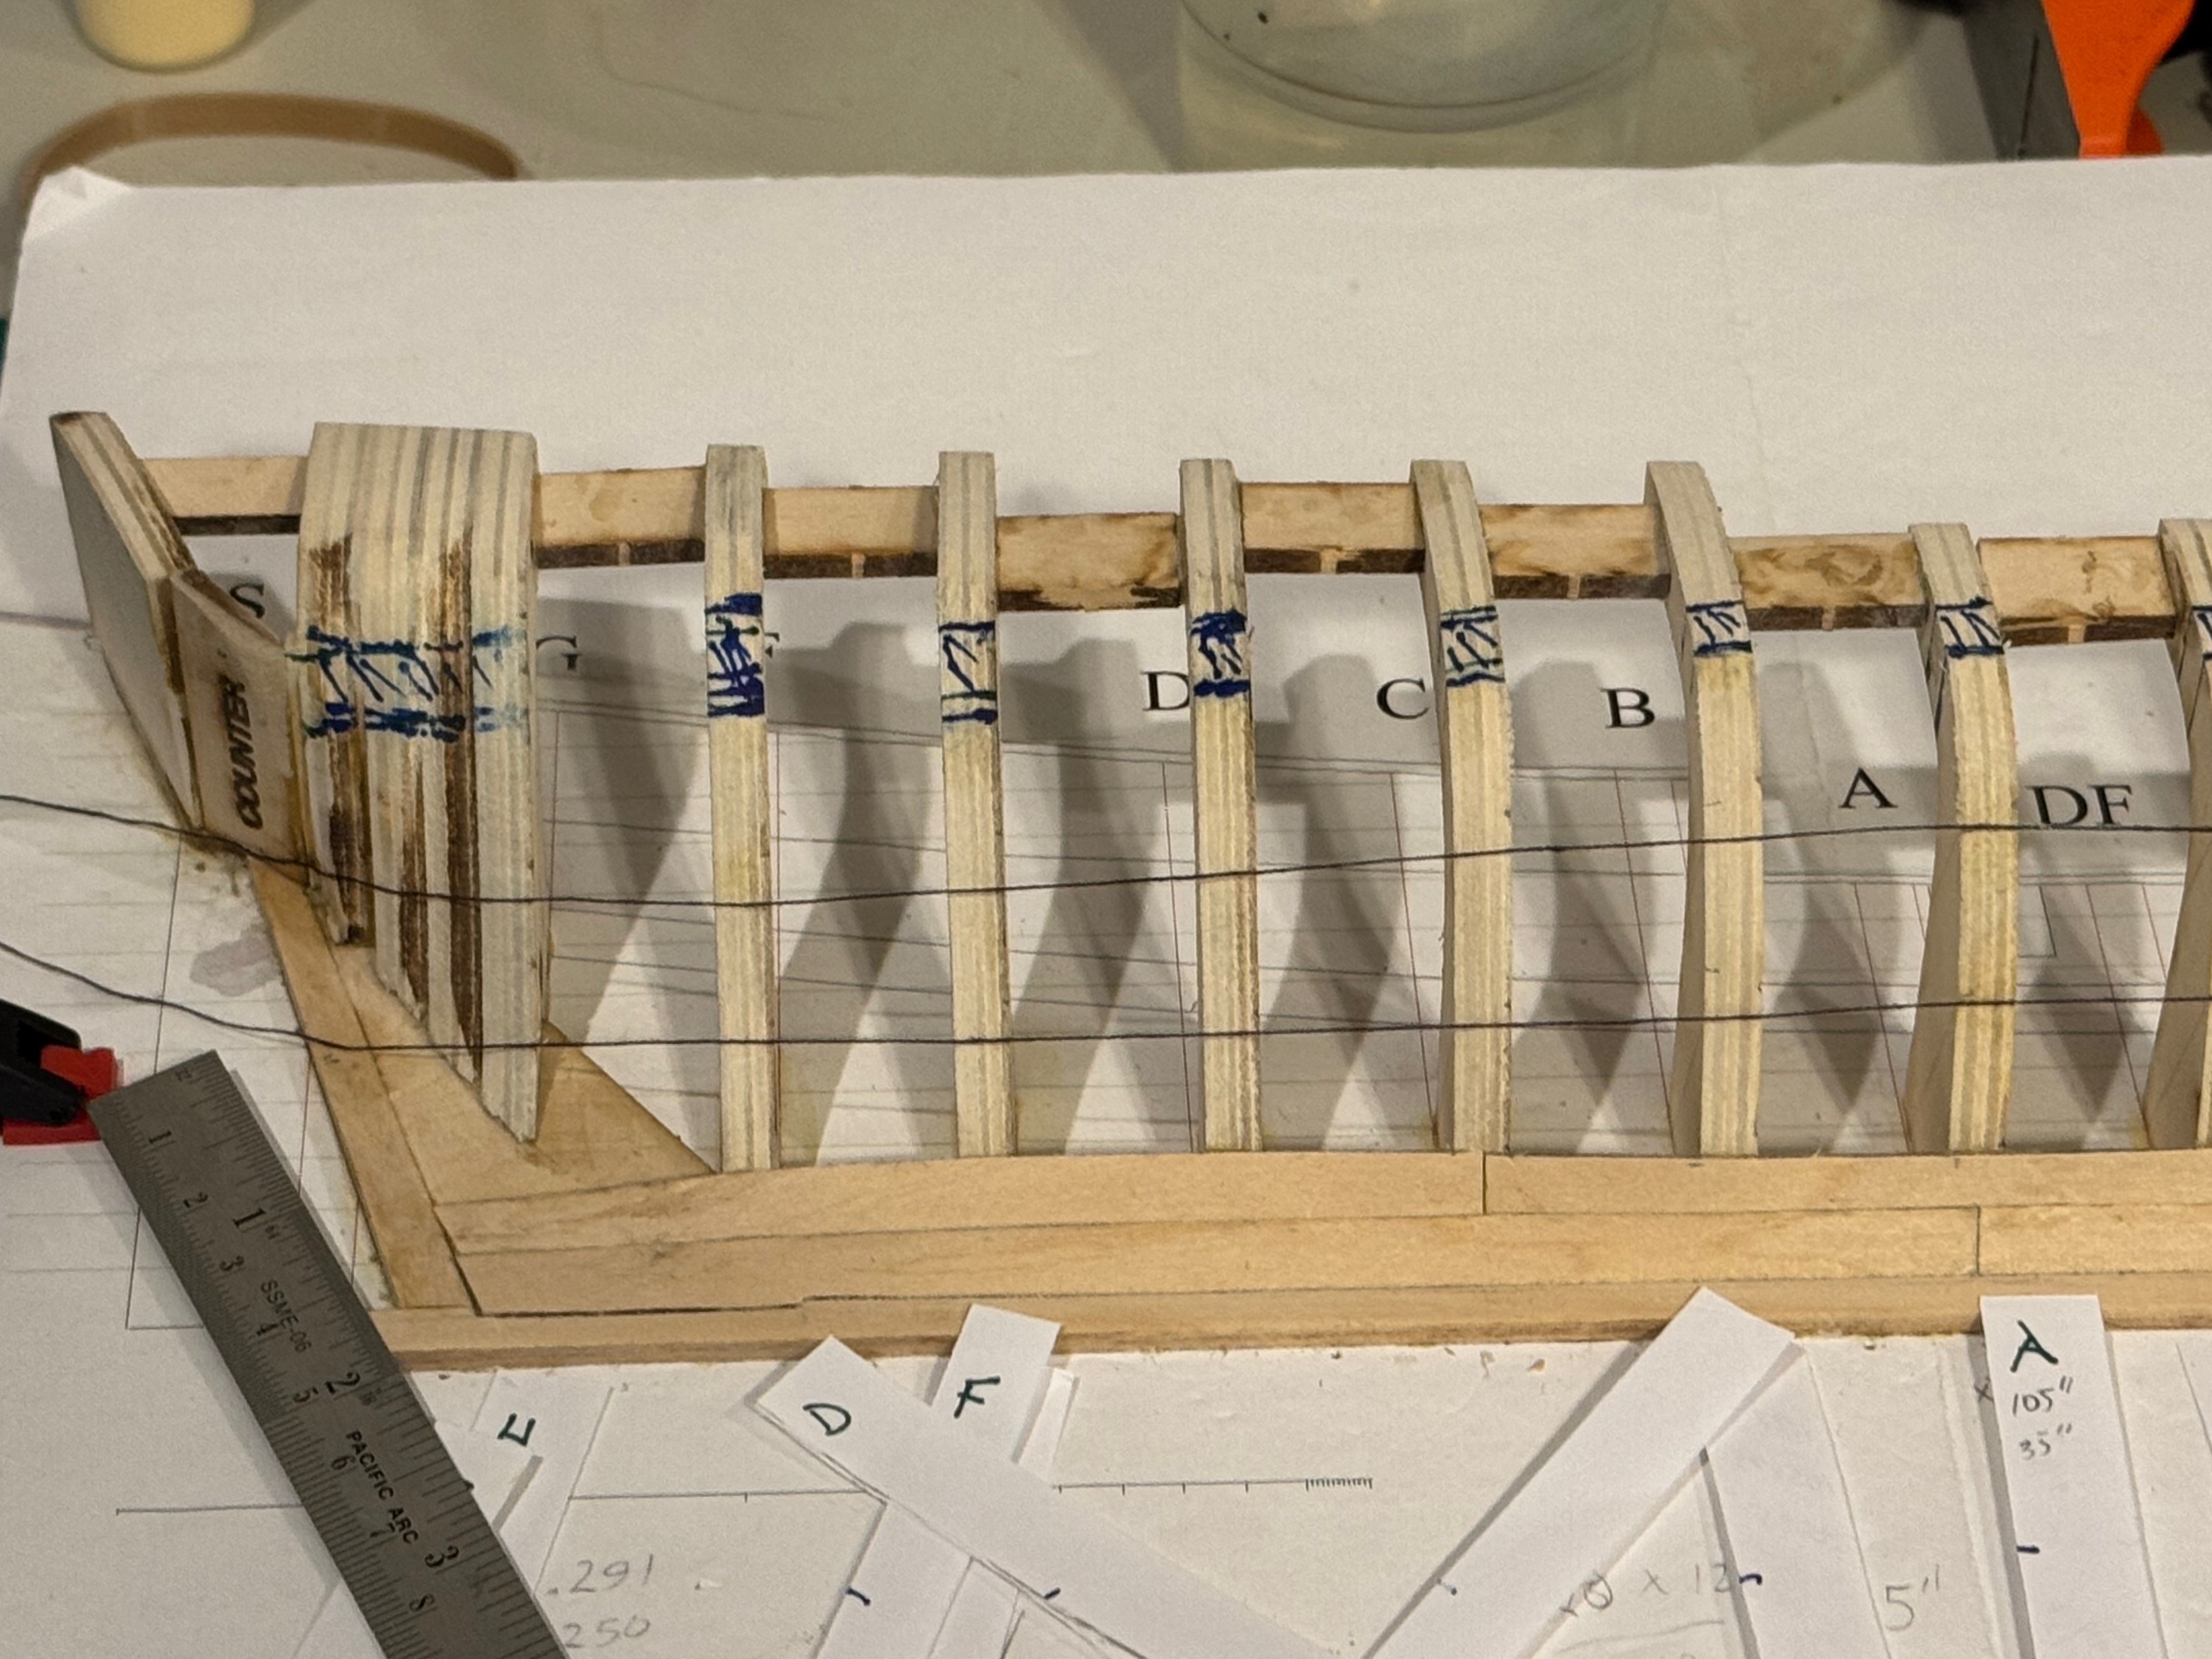
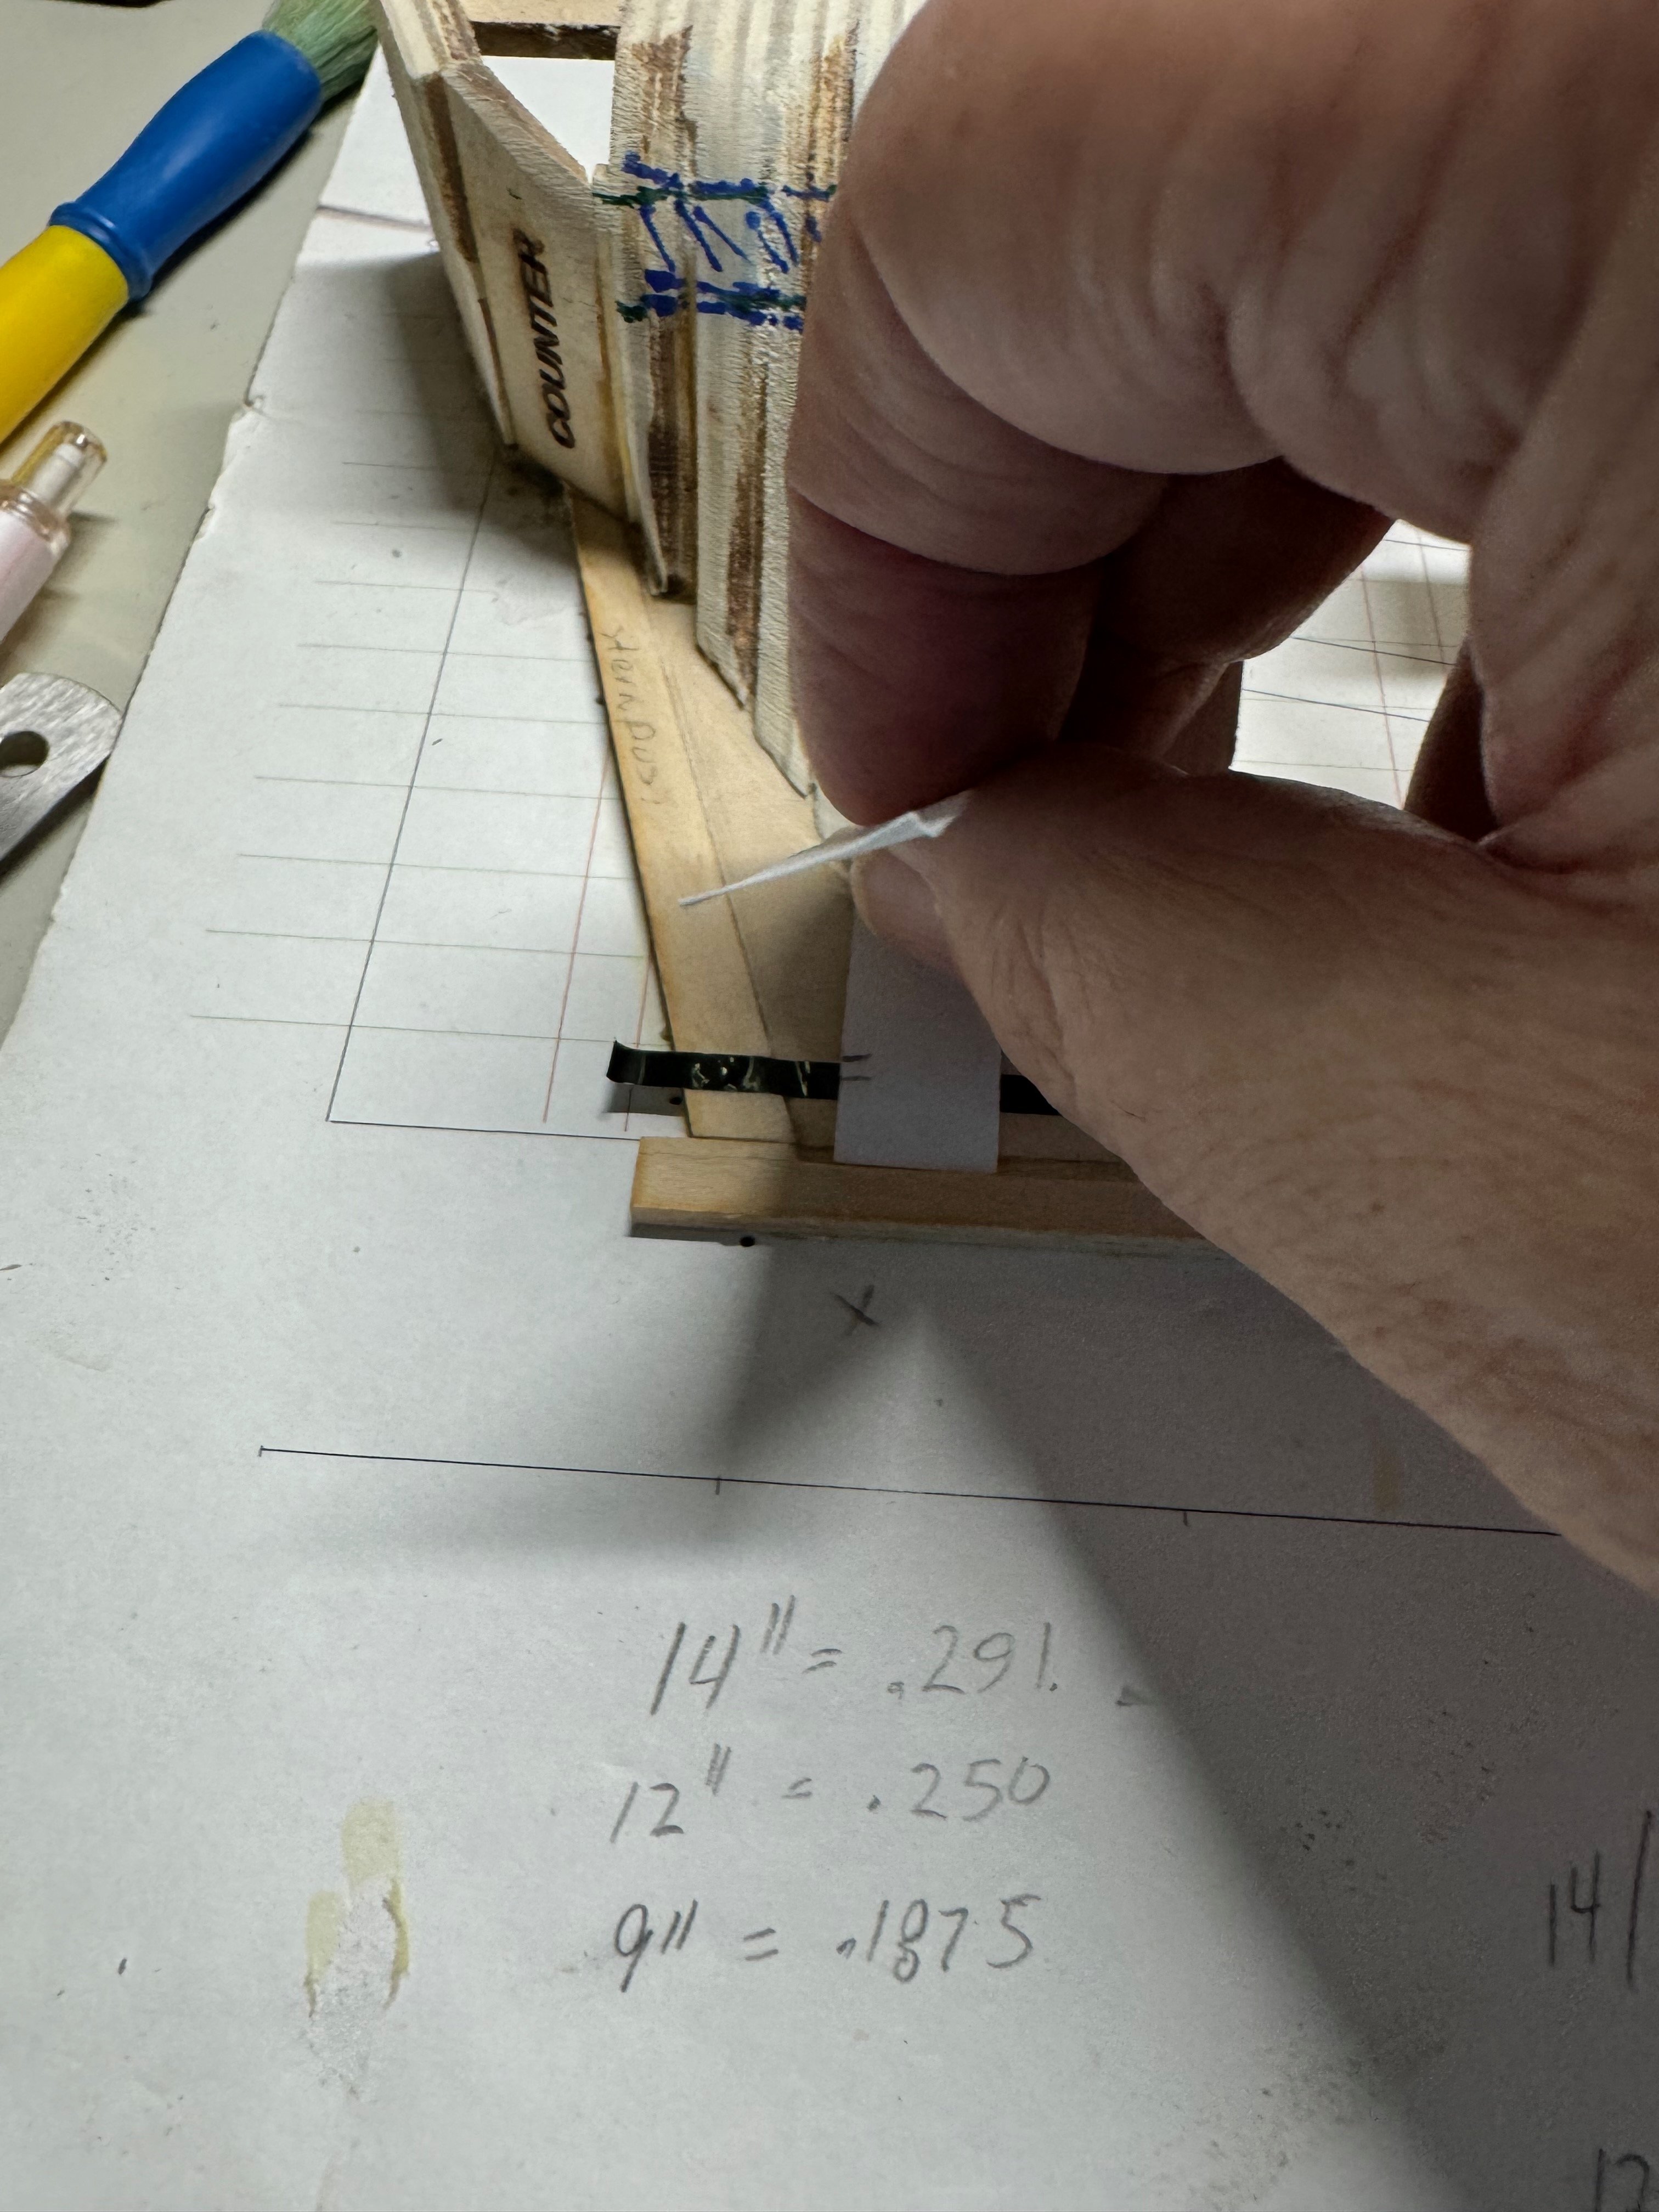
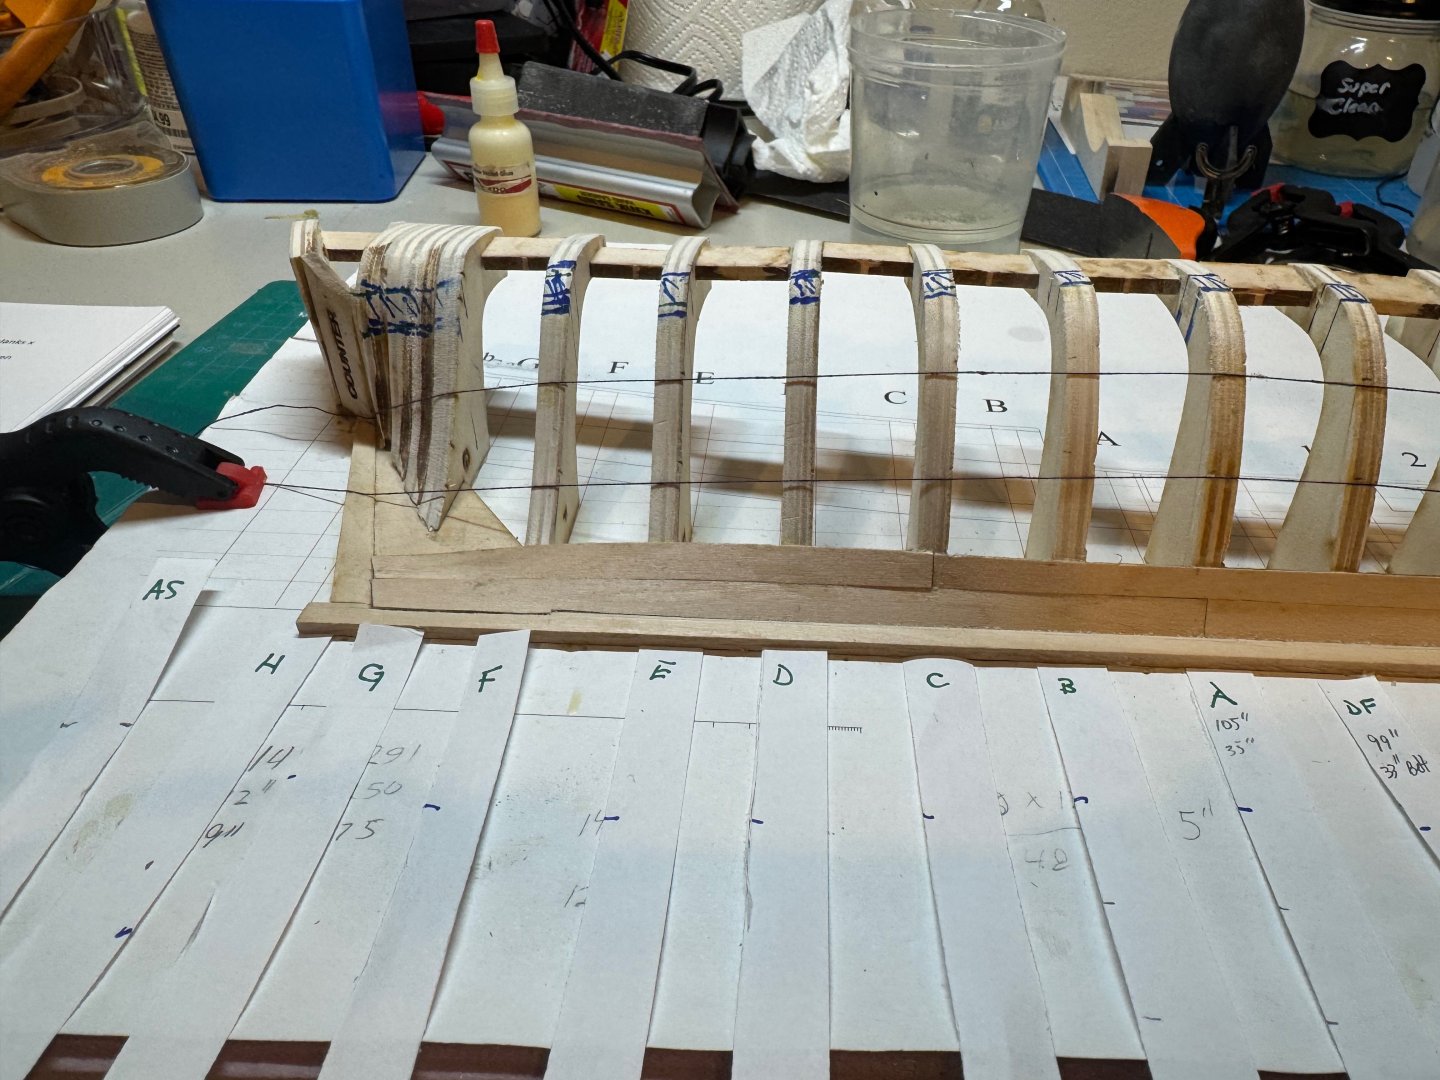
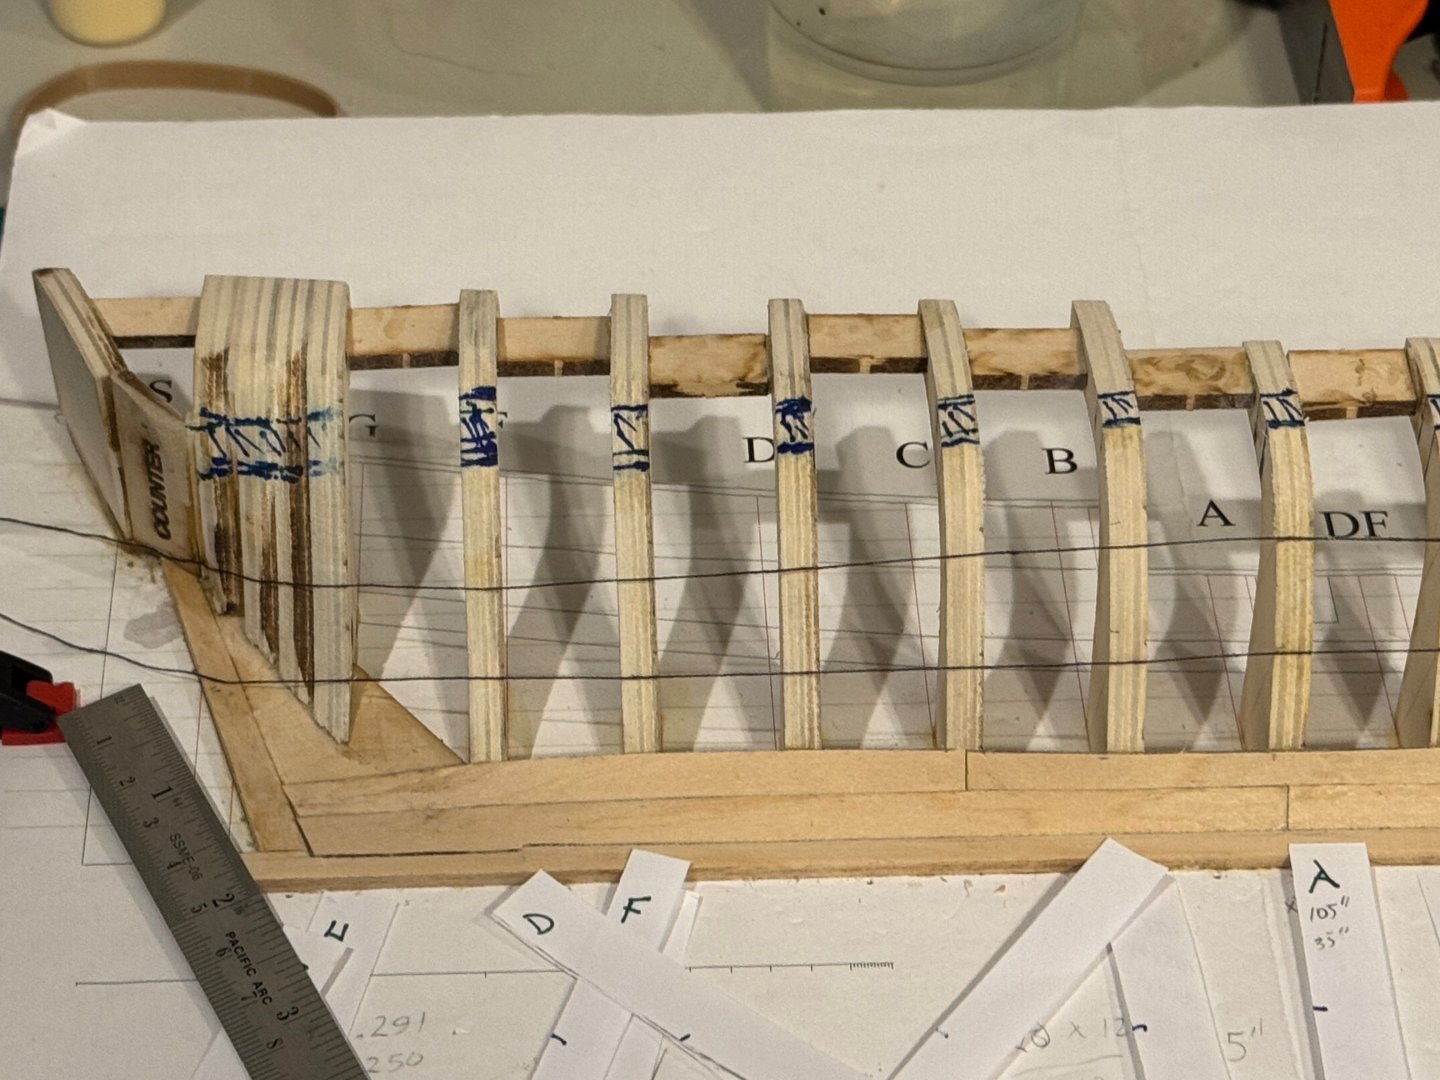
Good evening. Tonight I added the counter. I was a little aggressive with the sanding and I added a shim to get a solid connection. Secondly i mapped out the wale and added a string line to get the bottom into a nice curve. Have a good night.
-
@MBerg In my opinion is that you should use a lacquer based primer and spray it on. If you want to use an acrylic base primer, Monument Hobbies (ProAcryl) makes a fantastic spray primer. Similarly Mr Hobby (Mr Surfacer) with their Aqueous Surfacer 1000. I do really like Mr Surfacer 1000 lacquer primer for the first priming. It fills in the minor defects. The product is also available as spray. Before I lay down any paint I will sand and smooth out the primer with 1500 grit wet/dry sand paper. Finally I will then hit it with Mr Surfacer 1500 and then lightly sand after it is cured. I found the Model Expo paint to be grainy at best; the paint does not thin well, either with isopropyl or water or medium. When I paint with acrylics I always use a retarder, and I thin it to help the paint lay down smoothly. To thin I generally used both a retarder and acrylic thinner and/or medium. I do recommend that you seal your model with either a sanding sealer or shellac. If using shellac i thin it it 1:1 with isopropyl, then I sand lightly with 400 grit paper, and then apply a second coat to remove the raising of the grain. After that, I then prime and paint. jim
- 86 replies
-
- 2
-
-
- Model Shipways
- Norwegian Sailing Pram
- (and 3 more)
-
Looking good. Those chisels look awesome. did you get the add ons for you slicer and sander?
- 63 replies
-
- 1
-
-
- Norwegian Sailing Pram
- Model Shipways
- (and 2 more)