HOLIDAY DONATION DRIVE - SUPPORT MSW - DO YOUR PART TO KEEP THIS GREAT FORUM GOING! (89 donations so far out of 49,000 members - C'mon guys!)
×


Digitalis
-
Posts
26 -
Joined
-
Last visited
-
 Old Collingwood reacted to a post in a topic:
'Oseberg' Viking Ship (v3) by James H - Ships of Pavel Nikitin - 1/25
Old Collingwood reacted to a post in a topic:
'Oseberg' Viking Ship (v3) by James H - Ships of Pavel Nikitin - 1/25
-
Digitalis reacted to a post in a topic:
La Niña by Digitalis - Artesania Latina - 1/65 - First Build
-
Digitalis reacted to a post in a topic:
La Niña by Digitalis - Artesania Latina - 1/65 - First Build
-
Digitalis reacted to a post in a topic:
La Niña by Digitalis - Artesania Latina - 1/65 - First Build
-
Digitalis reacted to a post in a topic:
La Niña by Digitalis - Artesania Latina - 1/65 - First Build
-
I've watched several videos on planking wooden model ships, and I’ve noticed some builders swear by wood glue, while others recommend cyanoacrylate (superglue). Is there a general consensus on which is best for this purpose? The cyanoacrylate approach seems more convenient, especially for a beginner like me, but I’d love to hear your thoughts since I’m new to this.
-
eatcrow2 reacted to a post in a topic:
La Niña by Digitalis - Artesania Latina - 1/65 - First Build
-
SaltyScot reacted to a post in a topic:
La Niña by Digitalis - Artesania Latina - 1/65 - First Build
-
That was my impression as well but wanted to check just in case before I make adjustments so it sits lower. Thanks!
- 47 replies
-
- 1
-
-
- La Nina
- Artesania Latina
- (and 1 more)
-
Digitalis reacted to a post in a topic:
La Niña by Digitalis - Artesania Latina - 1/65 - First Build
-
Knocklouder reacted to a post in a topic:
La Niña by Digitalis - Artesania Latina - 1/65 - First Build
-
AON reacted to a post in a topic:
La Niña by Digitalis - Artesania Latina - 1/65 - First Build
-
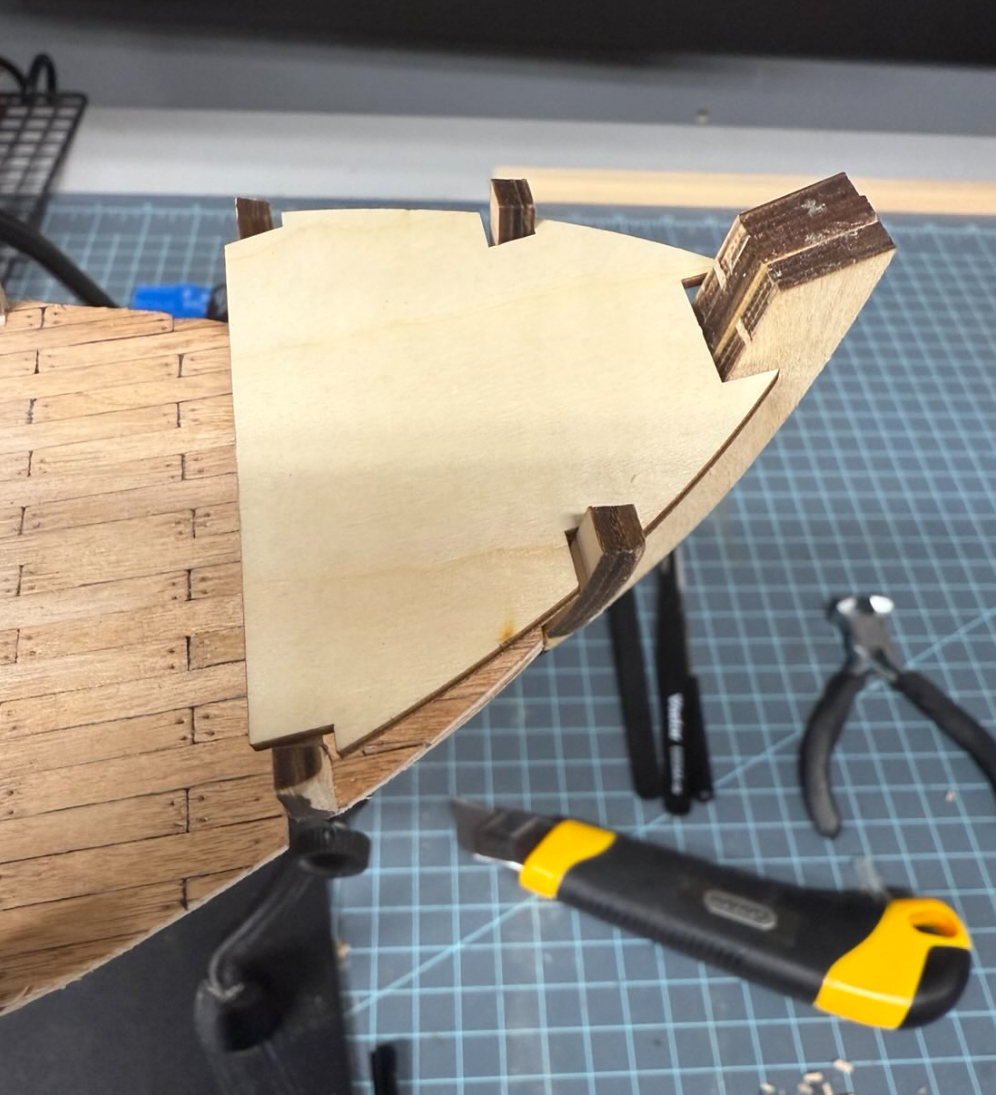
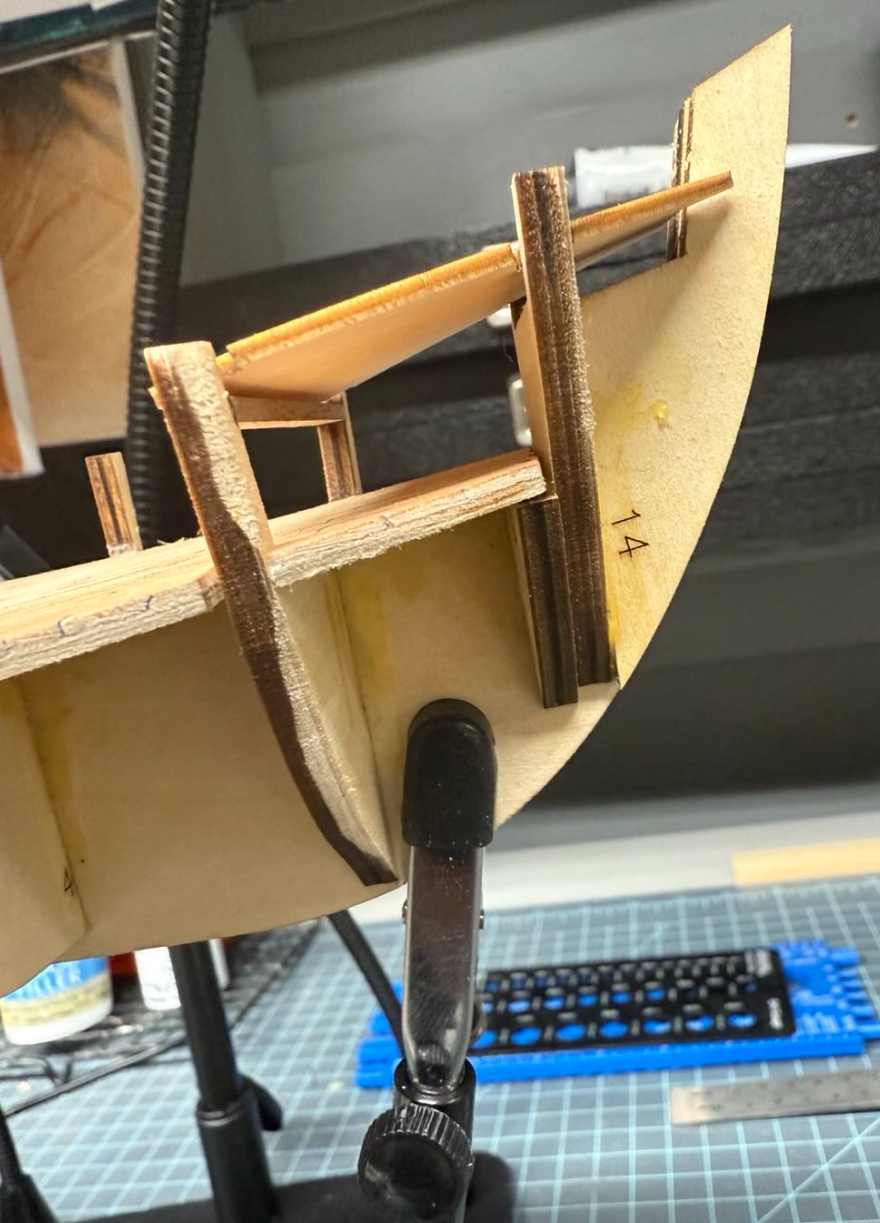
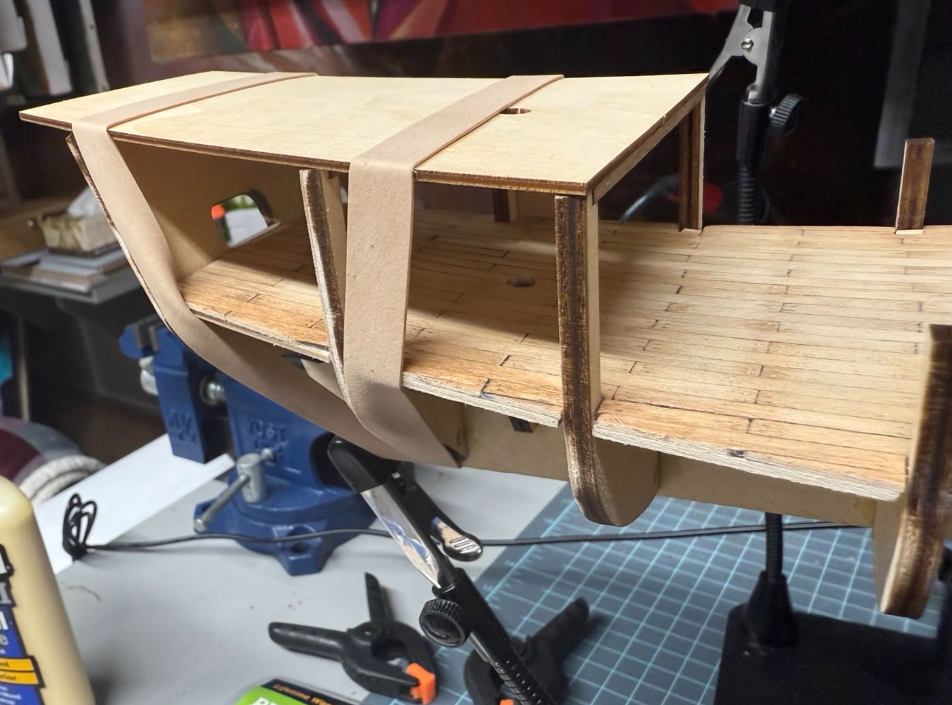
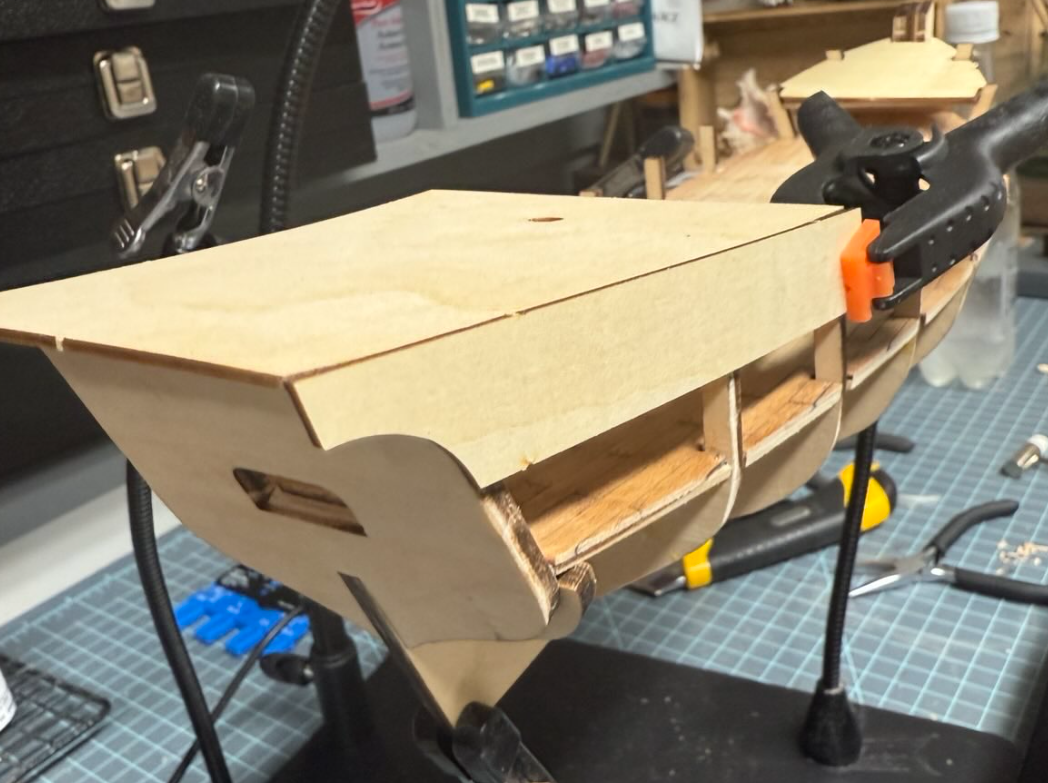
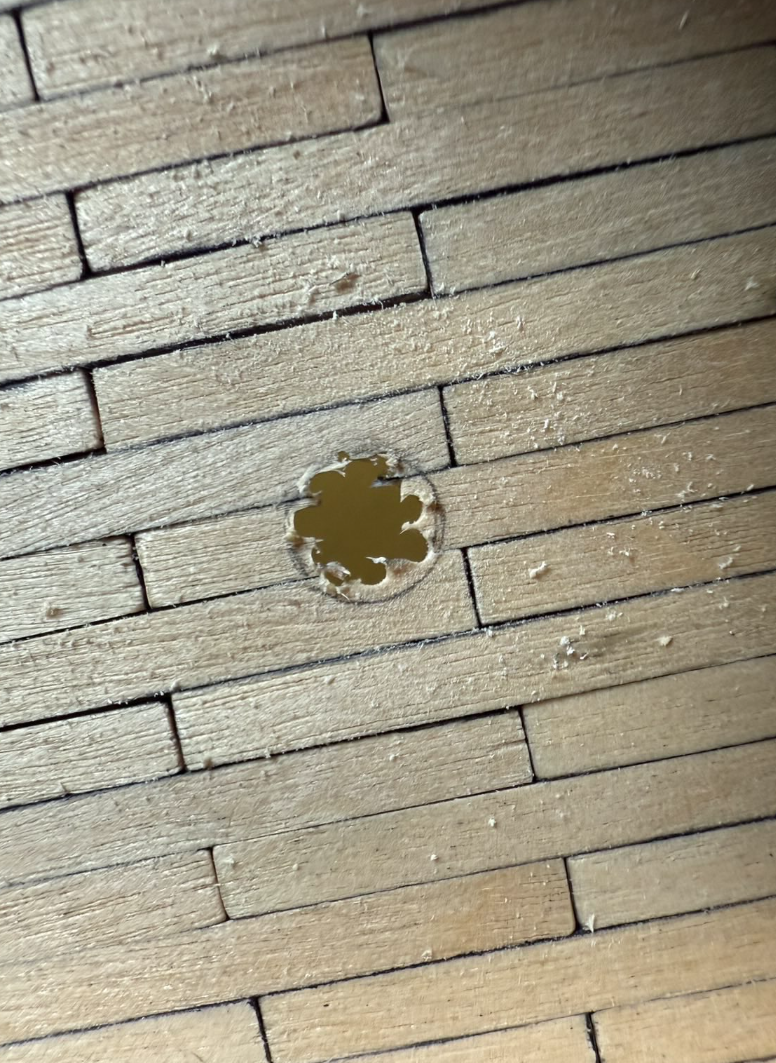
I might end up making it worse, but honestly, I don’t mind the patch. After some sanding and distressing, it should turn out just fine. Plus, I think it adds character to the story—back in the day, they probably had to repair and patch things all the time, right? Being my first project, it’s like a badge of honor, a little scar to remind me of all the mistakes I made along the way, and I’m okay with that. On another note, I’ve started adding the upper decks and noticed that the one in the front doesn’t lie flat. Is this intentional? Should I keep that angle or should I sand the nudges until it lays flat over the bulkhead? I wish the instructions weren’t so cryptic


- 47 replies
-
- 3
-
-
- La Nina
- Artesania Latina
- (and 1 more)
-
thibaultron reacted to a post in a topic:
'Oseberg' Viking Ship (v3) by James H - Ships of Pavel Nikitin - 1/25
-
Digitalis reacted to a post in a topic:
La Niña by Digitalis - Artesania Latina - 1/65 - First Build
-
Digitalis reacted to a post in a topic:
La Niña by Digitalis - Artesania Latina - 1/65 - First Build
-
AON reacted to a post in a topic:
La Niña by Digitalis - Artesania Latina - 1/65 - First Build
-
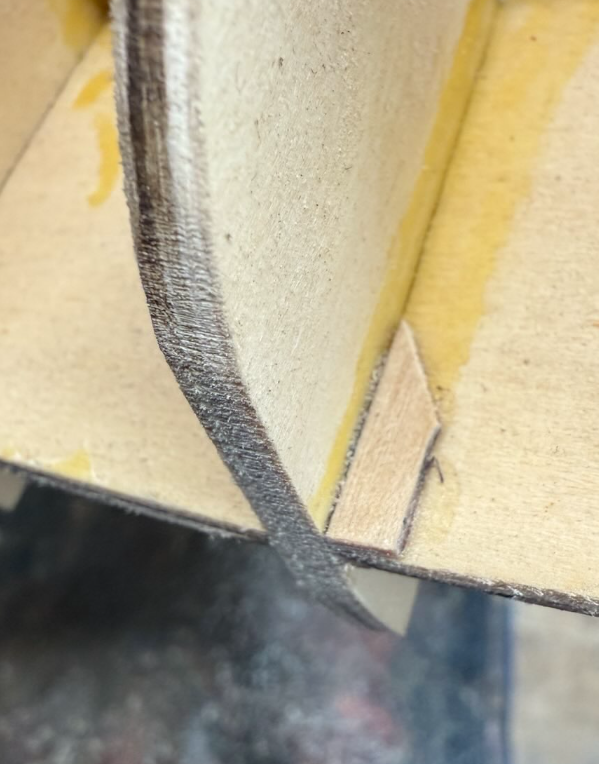
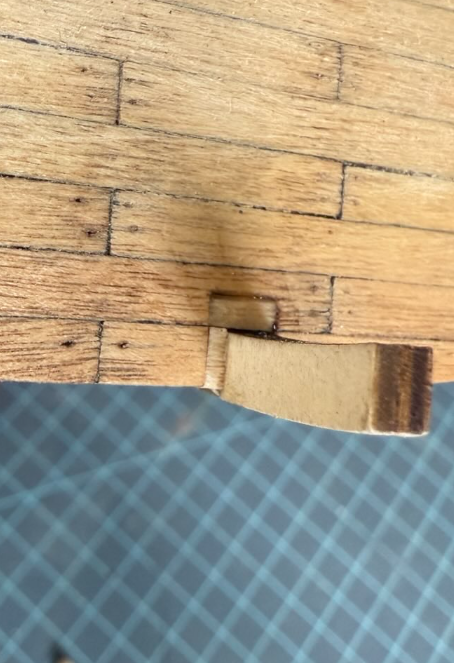
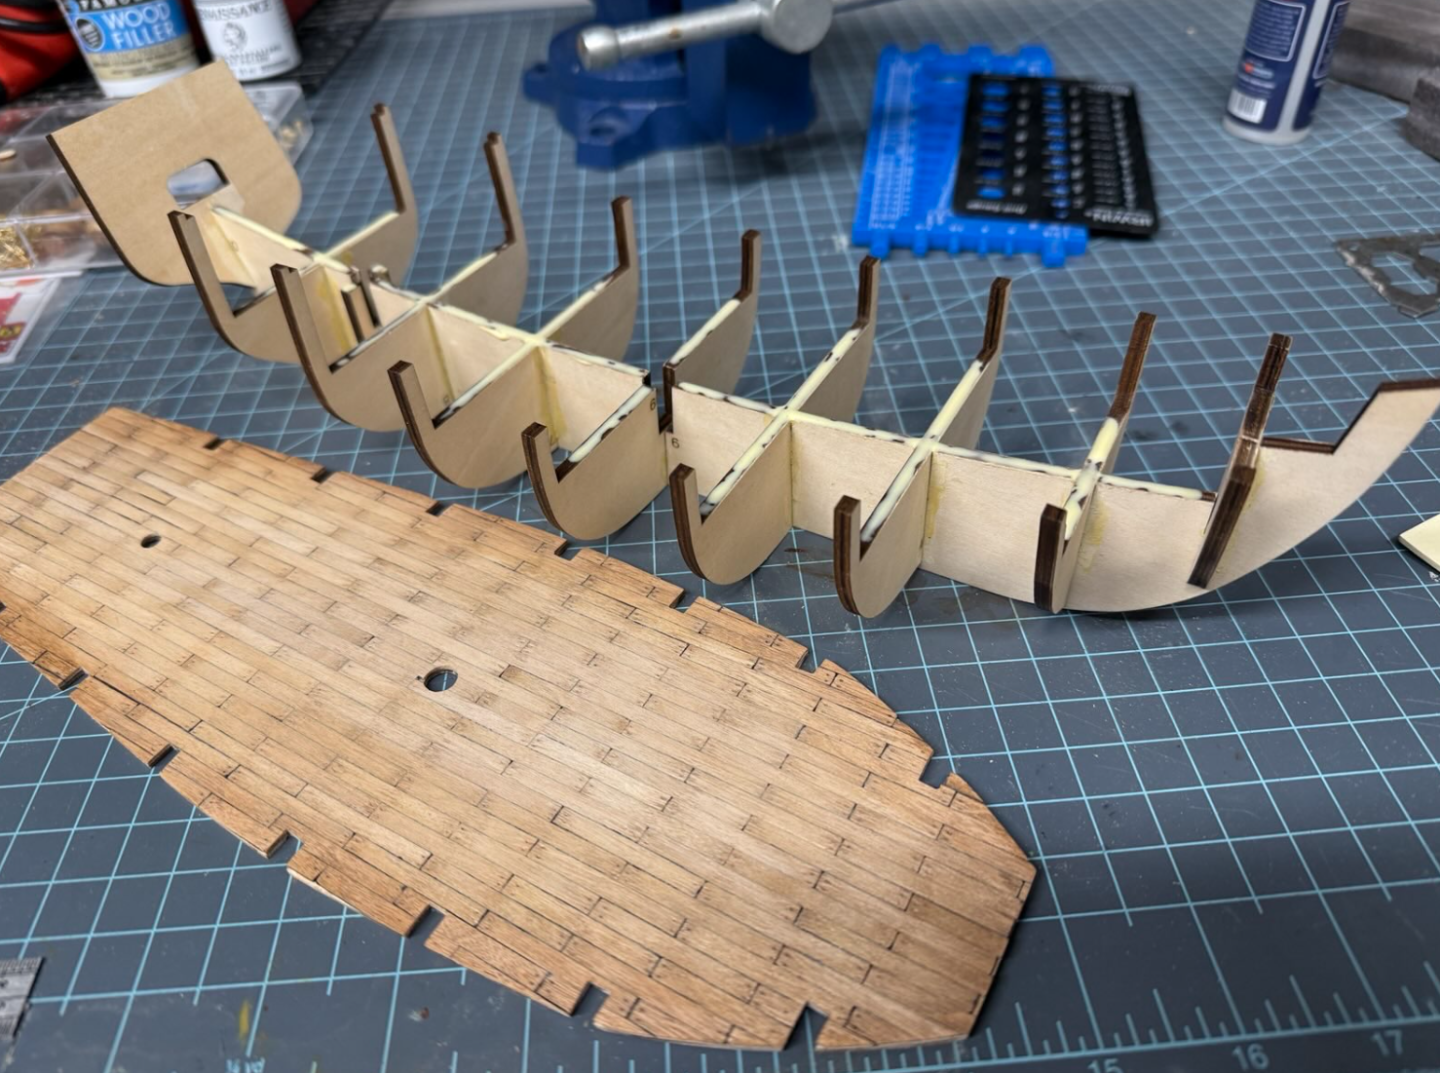
For now, I plan to patch it as best I can by backing the gap with a larger piece beneath the false deck to support two smaller strips, compensating for the thickness. Once I install the baseboard (as specified in the instructions), I’ll assess whether I have enough leftover material to extend it around each bulkhead column along the baseboard’s perimeter or if is unnecessary.
- 47 replies
-
- 1
-
-
- La Nina
- Artesania Latina
- (and 1 more)
-
Digitalis reacted to a post in a topic:
'Oseberg' Viking Ship (v3) by James H - Ships of Pavel Nikitin - 1/25
-
I really love the look of this ship—way more than the Artesania Latina version. But I’m a little nervous it might be too tough for a beginner like me. I’m currently working on the La Niña (my first build ever!) and want to tackle the full trio—Santa María, Pinta, and Niña—though I’m not stuck on using the same manufacturer for all three. If I manage to finish my current one, do you think this kit would be overwhelming for someone who’s not an expert?
-
Digitalis reacted to a post in a topic:
La Niña by Digitalis - Artesania Latina - 1/65 - First Build
-
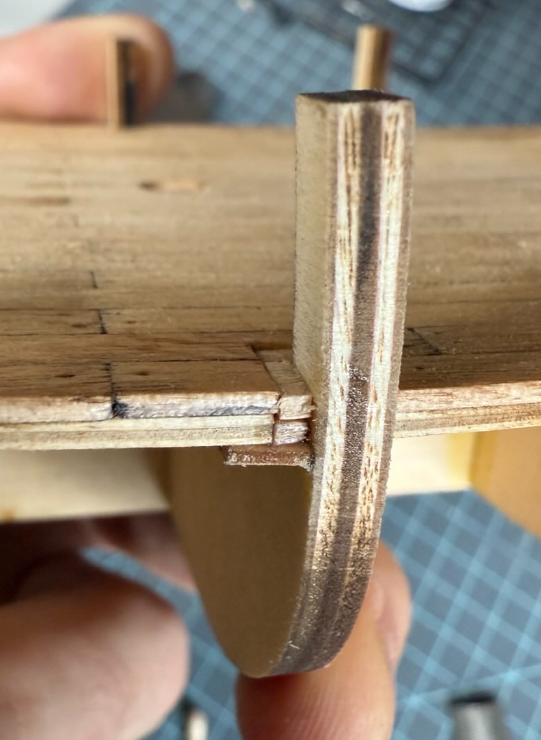
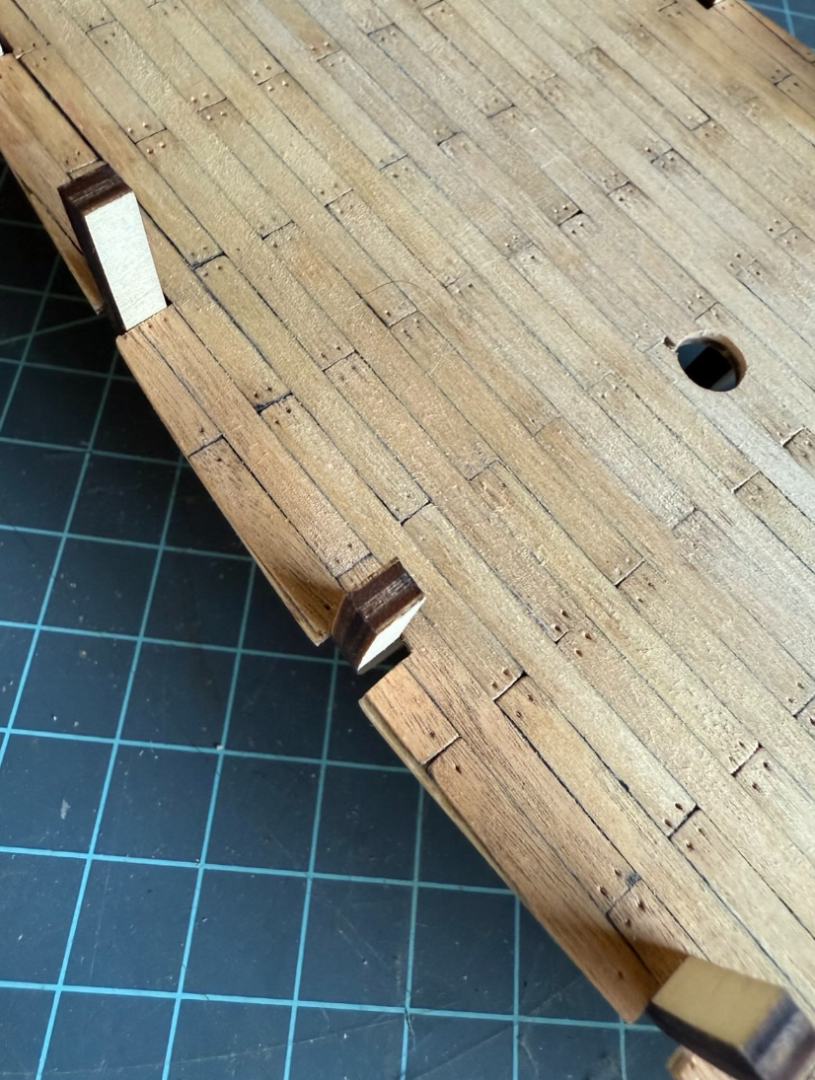
I’d greatly appreciate any advice or hacks you could share on fixing these larger gaps. I’m sure this wont by my last mistake and I’ll have more lessons to learn along the way! While reflecting on this, I just thought of something... what if I craft some sort of trim or edging strip to fit snugly around each bulkhead column? It might not be entirely historically accurate, but it could neatly conceal the oversized notches. Is this an approach sometimes used in situations like this? or is starting over from scratch the usual fix? I’m trying to weigh my options and figure out the best path forward.
-
AON reacted to a post in a topic:
La Niña by Digitalis - Artesania Latina - 1/65 - First Build
-
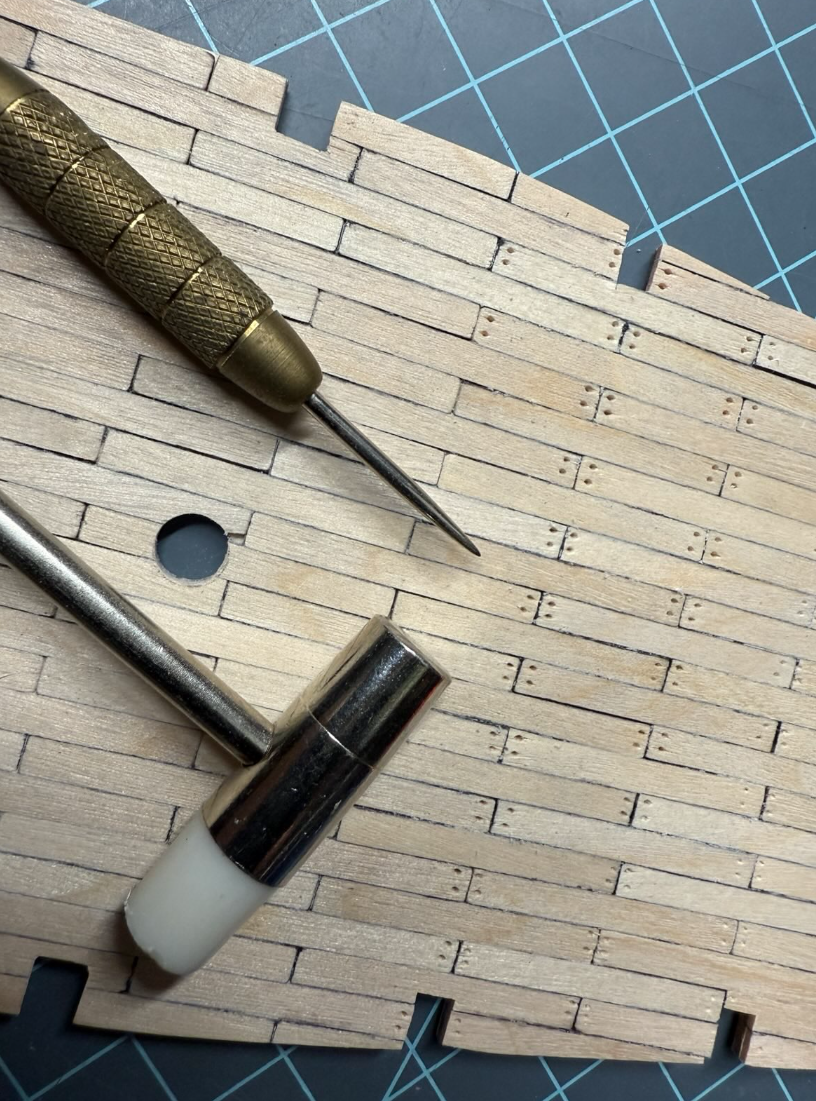
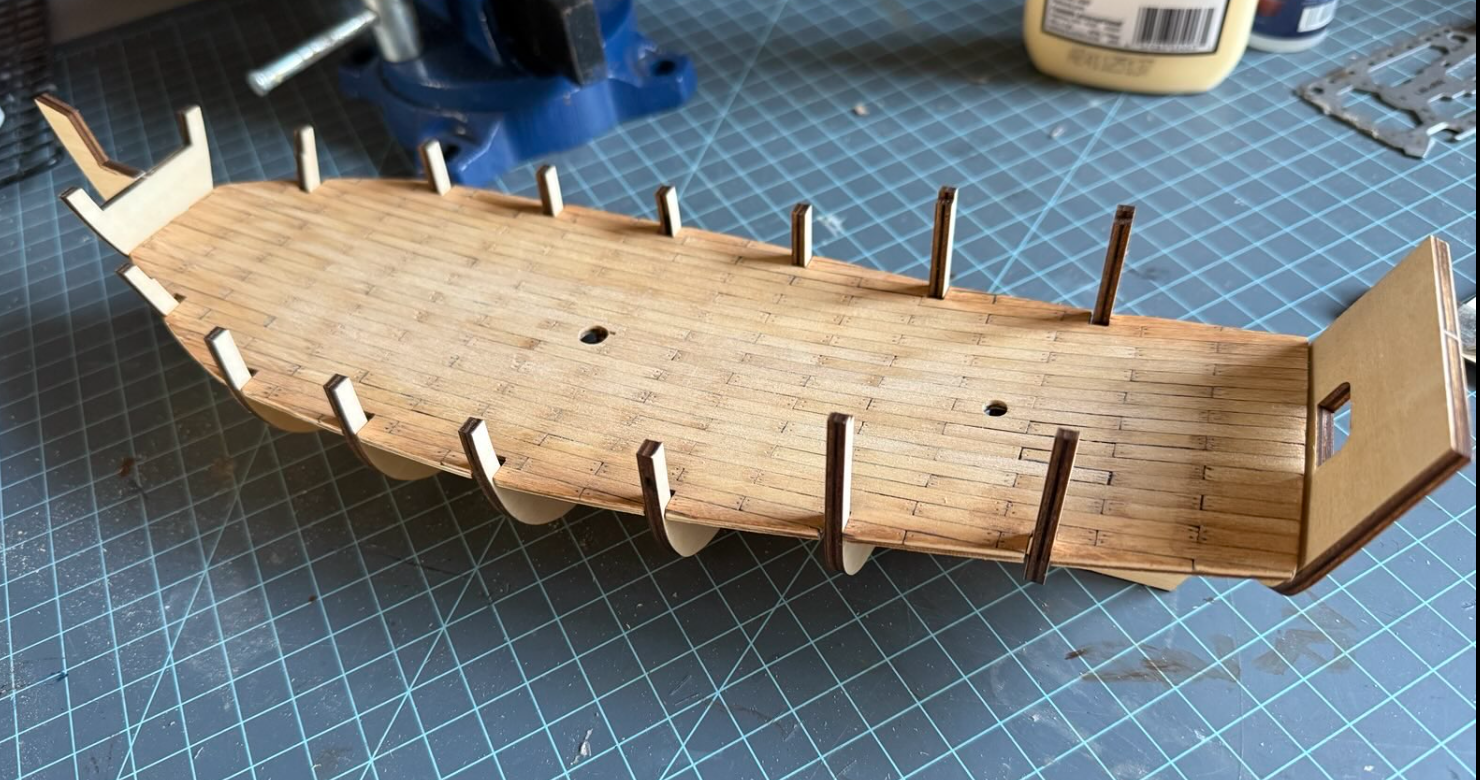
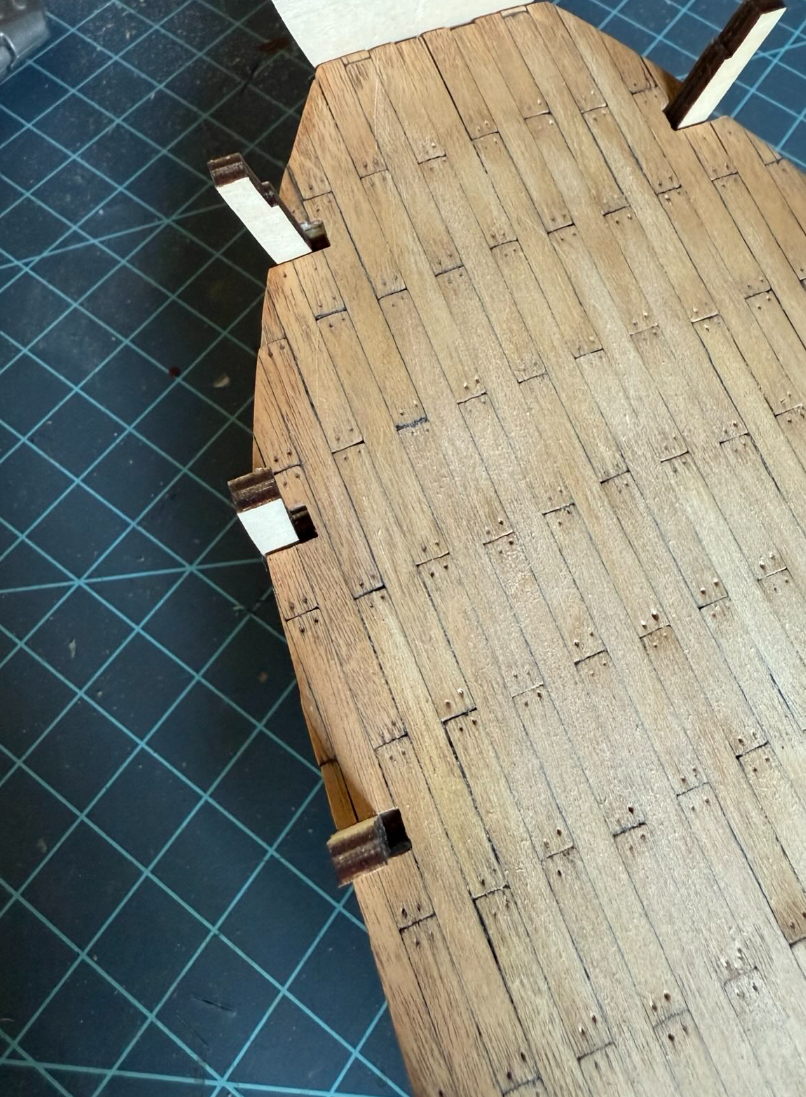
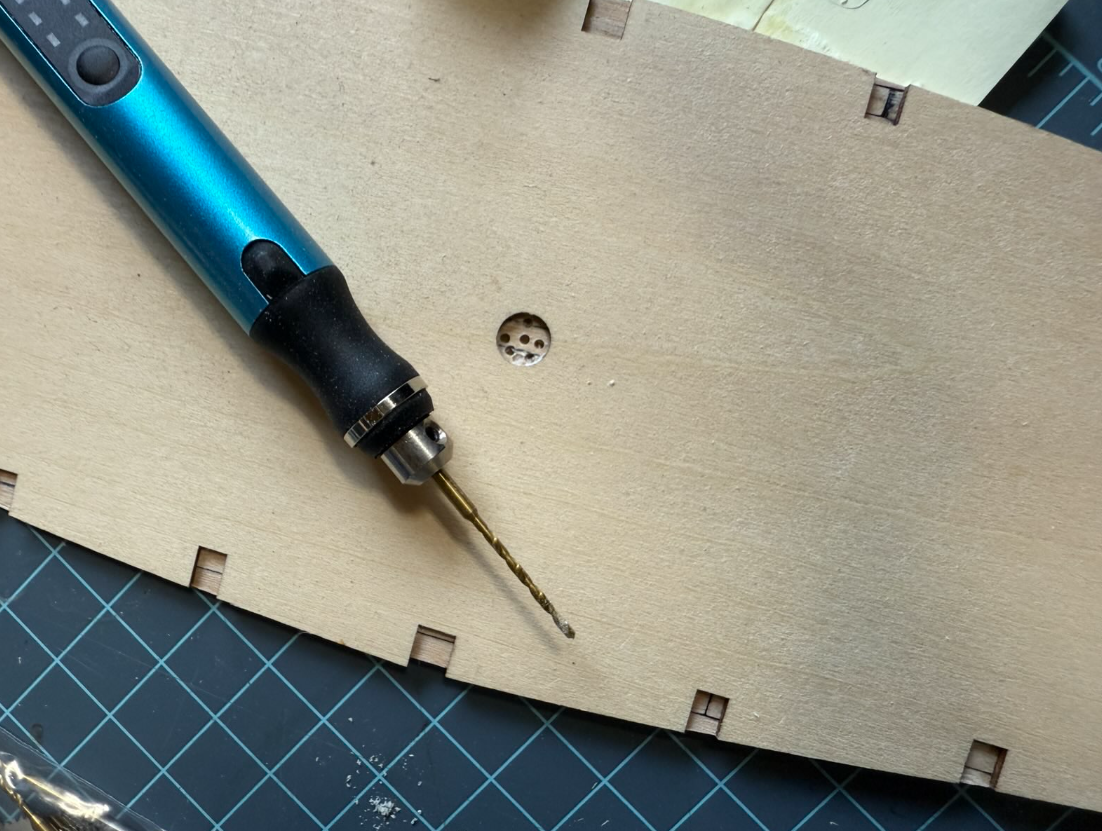
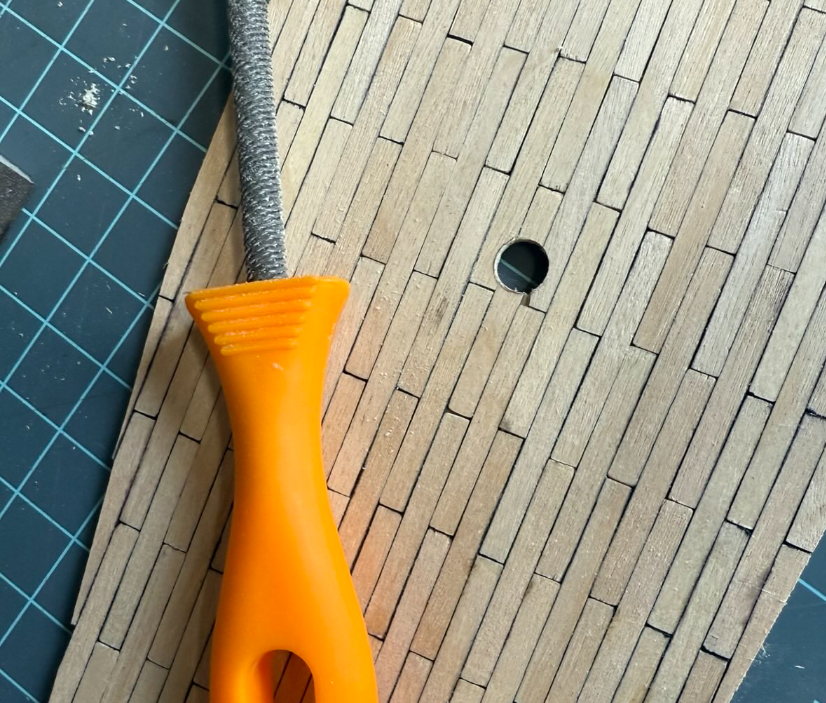
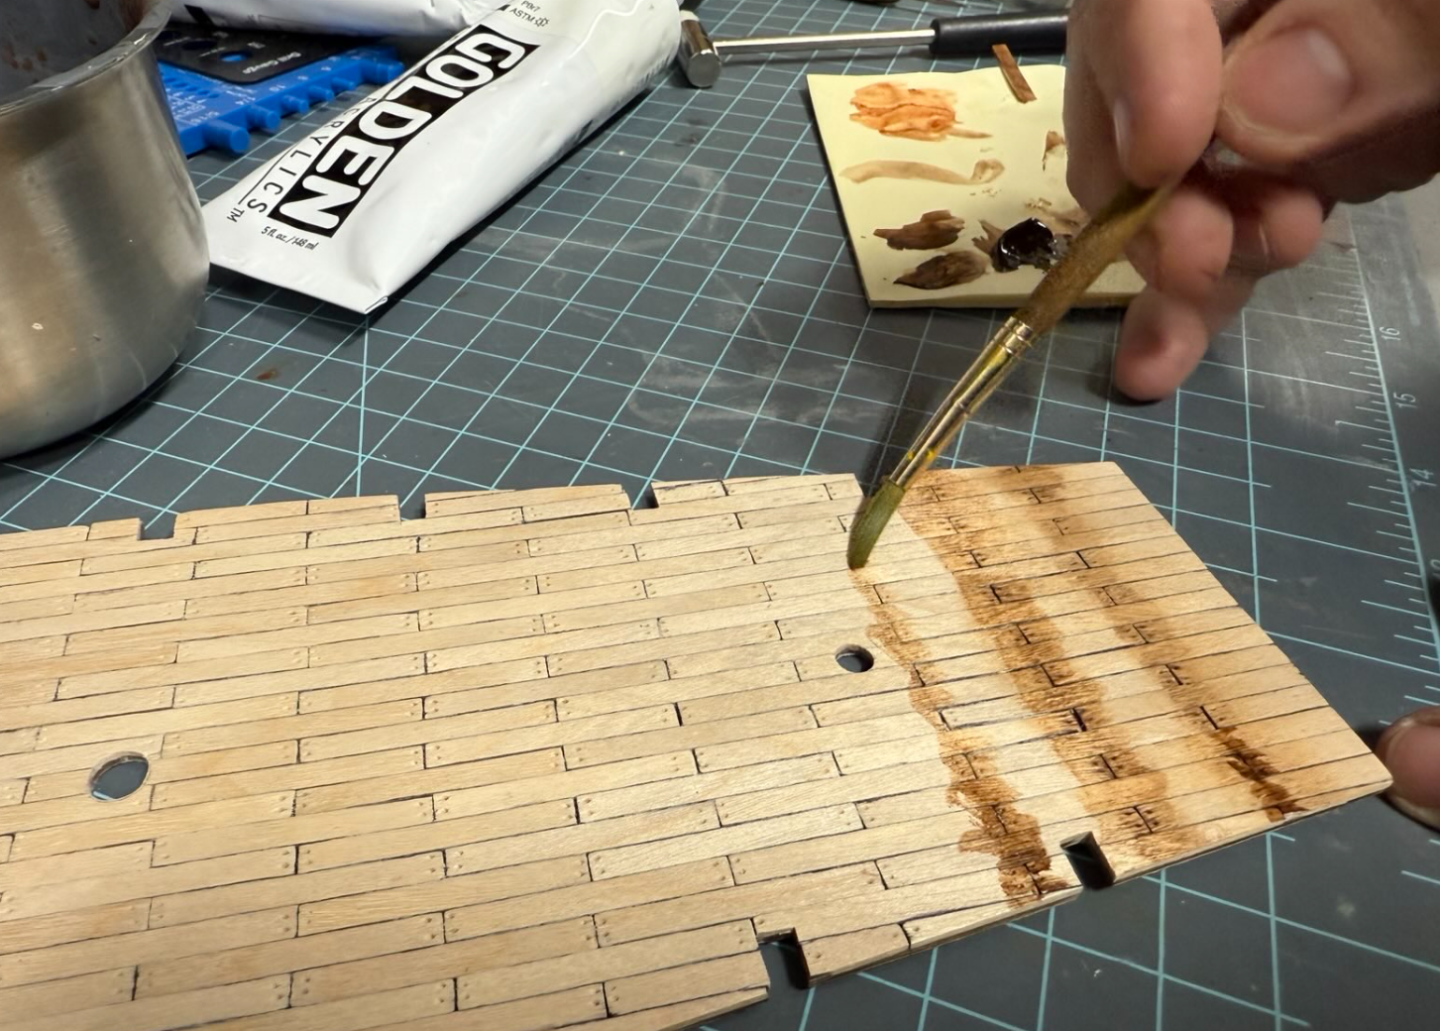
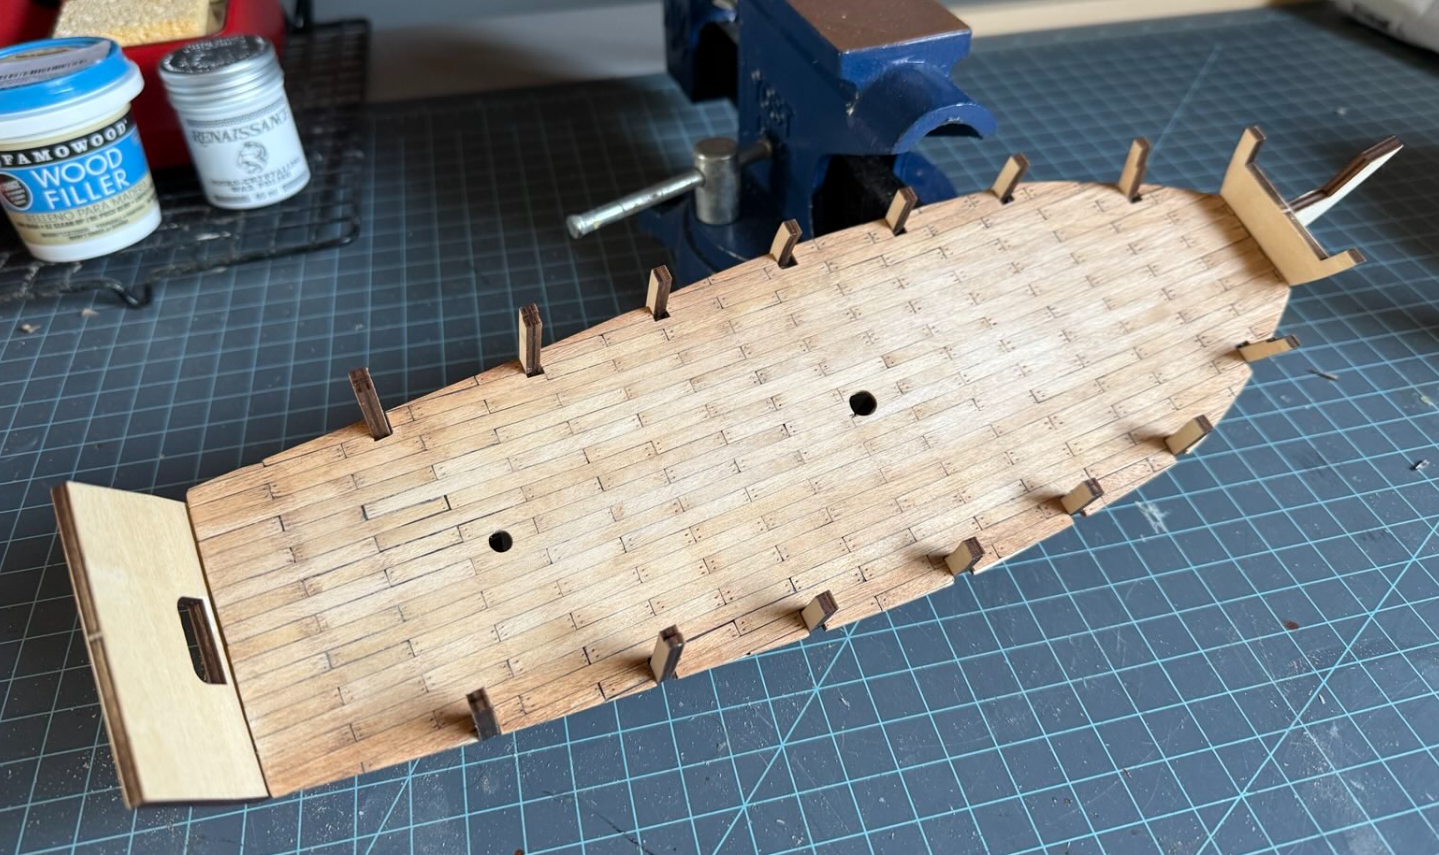
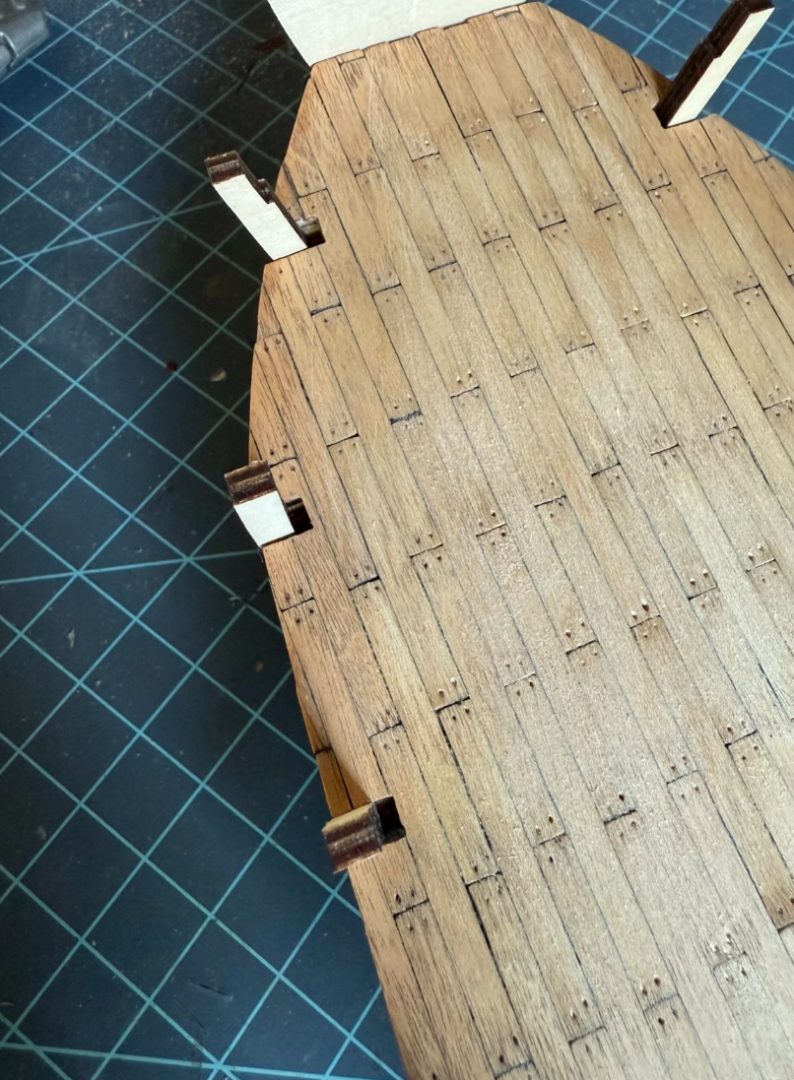
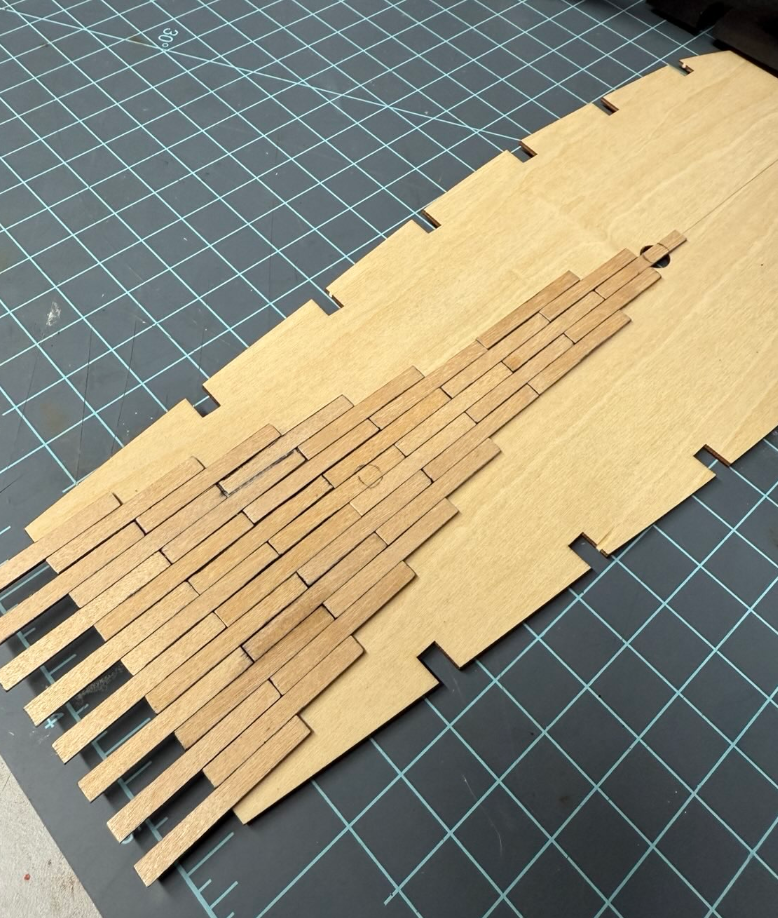
After some effort, I successfully completed the deck planking for my ship model. However, I’ve run into a few issues and I’m hoping someone can suggest a solution. I decided to plank the false deck before attaching it to the hull, which made the process much smoother. This approach allowed me to easily trim the planks to size, sand them, and adjust the entire deck surface with precision. Pleased with how manageable it was, I then decided to weather the deck to enhance its realism. Instead of simulating nail heads by drawing them with a pencil or using the toothpick method, I opted to punch them into the wood using an old, darkened pinhead. My plan was that, after painting, the holes would fill with paint and create a rusted, distressed look that I thought could add character. While I achieved the weathered effect I was aiming for and was initially happy with the result, I now realize I may have made a HUGE mistake by doing all of this before attaching the false deck to the hull. Some of the notches along the sides—those intended to align with the bulkheads —ended up too large, leaving noticeable gaps that detract from the finish. As the saying goes, "live and learn." At this point, I’m unsure if there’s a viable fix that doesn’t involve redoing the entire deck. My original concern was that planking the deck after attaching it to the hull as it would need to follow the deck’s natural curve might complicate the alignment. I never imagined I’d end up with a problem this frustrating by working on it separately.


- 47 replies
-
- 1
-
-
- La Nina
- Artesania Latina
- (and 1 more)
-
eatcrow2 reacted to a post in a topic:
La Niña by Digitalis - Artesania Latina - 1/65 - First Build
-
Digitalis reacted to a post in a topic:
La Niña by Digitalis - Artesania Latina - 1/65 - First Build
-
ccoyle reacted to a post in a topic:
La Niña by Digitalis - Artesania Latina - 1/65 - First Build
-
Thanks! There’s so much to learn, lol. I used to think a Sharpie was a permanent marker! Thanks for the tip. What would you recommend I seal it with? I was thinking of using acrylic washes to distress the wood later on, you think that might mess with the Sharpie as well?
- 47 replies
-
- 1
-
-
- La Nina
- Artesania Latina
- (and 1 more)
-
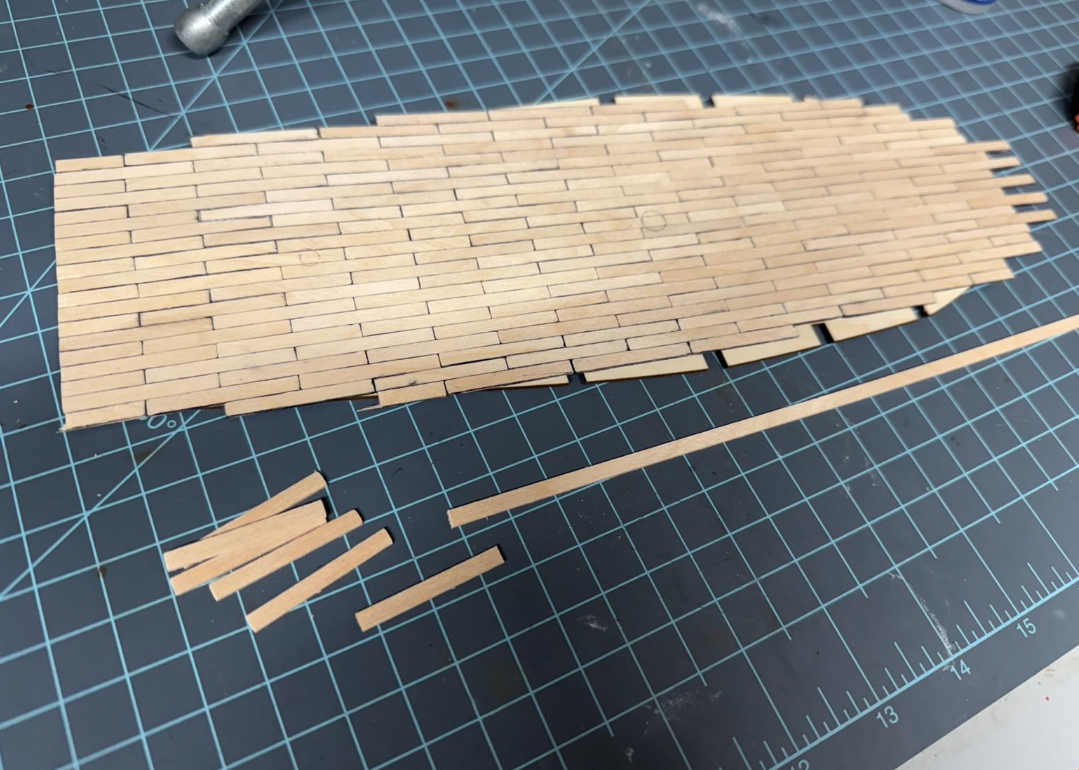
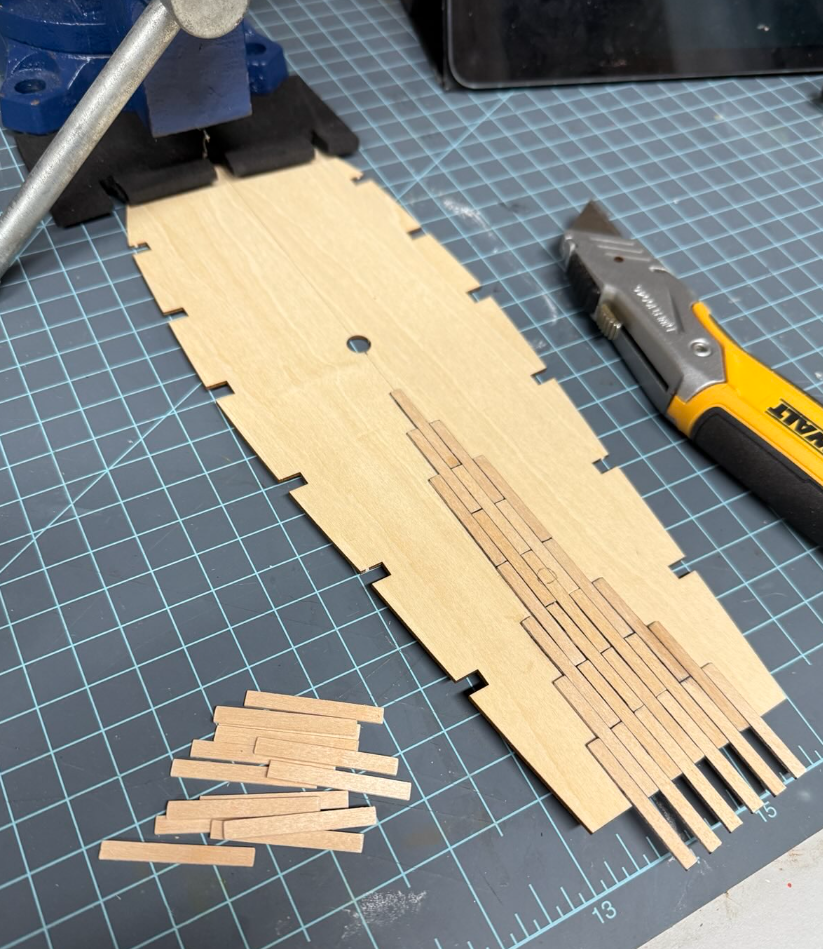
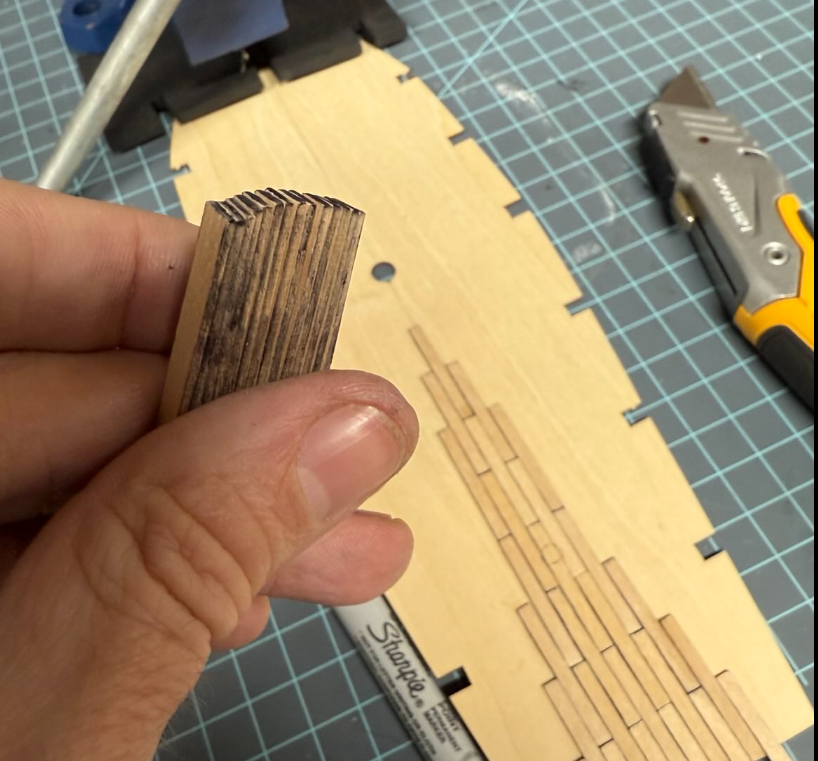
Today, after dry-fitting the false deck and confirming the alignment with the bulkheads, I decided to experiment with single-plank decking instead of the kit’s recommended full length batten deck-planking method. I also tried edge-staining the plank sides for a more realistic look. I considered using the thread-caulking technique to simulate seams, but as a novice, I felt it might be too ambitious for now. I’m drawn to the individual planking approach—it feels more authentic than laying down a single long strip and scribing plank lines afterward, as the instructions suggest. To streamline the process, I batch-cut the planks to length using a straightedge and razor, then bundled them together and lightly stained the edges with a worn-down Sharpie to tone down the contrast (full strength felt too dark). Next time, I’ll add more pencil guide lines on the false deck; relying on a single centerline wasn’t enough, and I noticed some drift toward one side as I laid the planks. So far, I’m pleased with planking the false deck before attaching it to the hull structure. I just hope this sequence doesn’t cause issues when I integrate it later—time will tell.
- 47 replies
-
- 3
-
-
- La Nina
- Artesania Latina
- (and 1 more)
-
This is an excellent reference, exactly what I was looking for! Thank you all so much; this is incredibly helpful. I’ll also make sure to check out the other forum
-
Thank you! Yes, I did see that, but I was under the impression you were referring to ships from the 1700s or 1800s. Since the images you shared were of the English Man of War from 1650–1850, I thought they might not apply to my ship. I was just looking for a simple image reference of the pattern and some recommendations of plank length at my 1/65 scale, the whole presentation, while great, feels a bit too advanced for my current skill set. It covers many historical precedents and jumps between actual ship measurements and models, which I really appreciate, but it’s more than I can take on right now
-
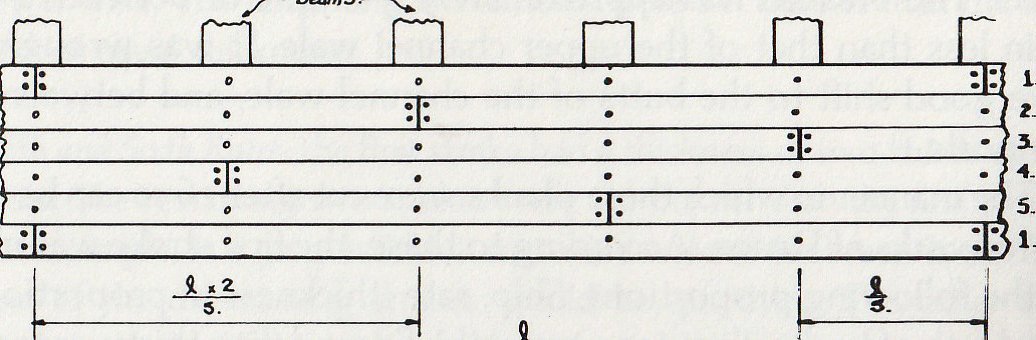
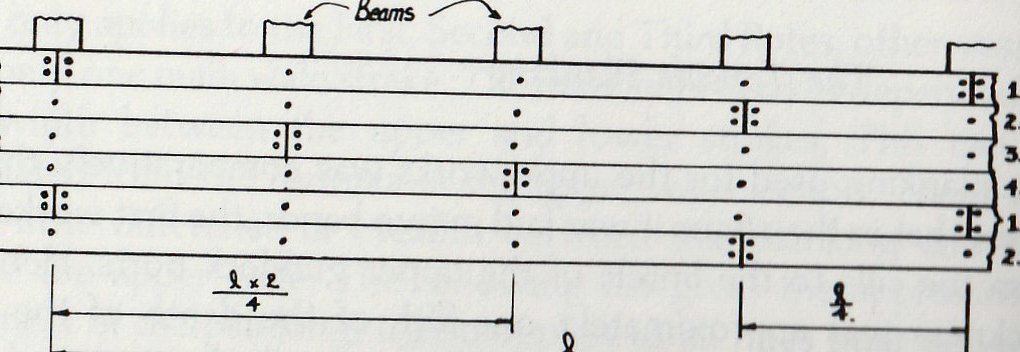
Thanks for clarifying that those images are for a different type of ship! I found them in a Google image search that was sourced from this forum, so I’m not sure of the original source. I’m still trying to understand what “shift of three” and “shift of four” planking patterns look like, some people suggested them for a ship like mine, so any visuals or descriptions would help. Your Treenails presentation is a great reference, and I’ll keep it handy as I get better at this hobby. Right now, I’m just working on figuring out a planking pattern and proper lengths I should be using for this type of ship. I’m also tempted to try the wooden plug idea with toothpicks, it could be overkill, but it might pay off for bigger builds later... With that in mind I think I will prepare by getting the 5" MAK stainless steel Parallel Pliers, as they may come in handy In the meantime, if you or anyone has tips or examples of hull planking patterns and lengths that’d would make this caravel even better, I’d love to hear them!
-
Thanks, that makes sense! The keel seems okay so far, but I’ll keep an eye out for warping. Great tip for future builds. I like the two-plank idea to stabilize it; I was thinking something similar for my vise. For the false deck, I’m leaning toward planking it before attaching it to the keel. Not having to worry about the curves and bulkheads might make trimming easier that way. Any downsides I should know about? I’m still open to suggestions as I figure out the pros and cons. About planking patterns, are they for the hull, deck, or both? I’ve researched period ships like this and see “shift of three” or “shift of four” recommended probably for the deck, but maybe the hull too? I can’t find clear pictures to show what those look like. So far, I’ve found these but dont know if they refer to the deck or the hull, or what determines the length of each plank. If anyone has better examples or tips, that’d be great!
-
While reading the next steps in my wooden ship model instructions, I noticed they recommend attaching the deck using nails. However, I’ve watched several videos where builders deliberately avoid nails, opting for glue instead. I’m inclined to try the nail-free approach unless you think nails are the better option here, any insights on that? Additionally, I’m wondering if it might be smarter to plank the deck before attaching it to the hull. My thought is that planking it flat could simplify the process, avoiding the challenge of working around the hull’s curve. I’d love to hear your thoughts or any recommendations you might have!
-
As usual, I didn’t have much time today, but I managed to carefully glue the hull frame together. I ensured each section was aligned at a 90-degree angle to the keel. Since the panel was slightly warped, I used rubber bands and clips to apply pressure where needed. I just hope this doesn’t cause any issues later on