HOLIDAY DONATION DRIVE - SUPPORT MSW - DO YOUR PART TO KEEP THIS GREAT FORUM GOING! (Only 27 donations so far out of 49,000 members - C'mon guys!)
×


Jerry
-
Posts
1,753 -
Joined
-
Last visited
Content Type
Profiles
Forums
Gallery
Events
Everything posted by Jerry
-
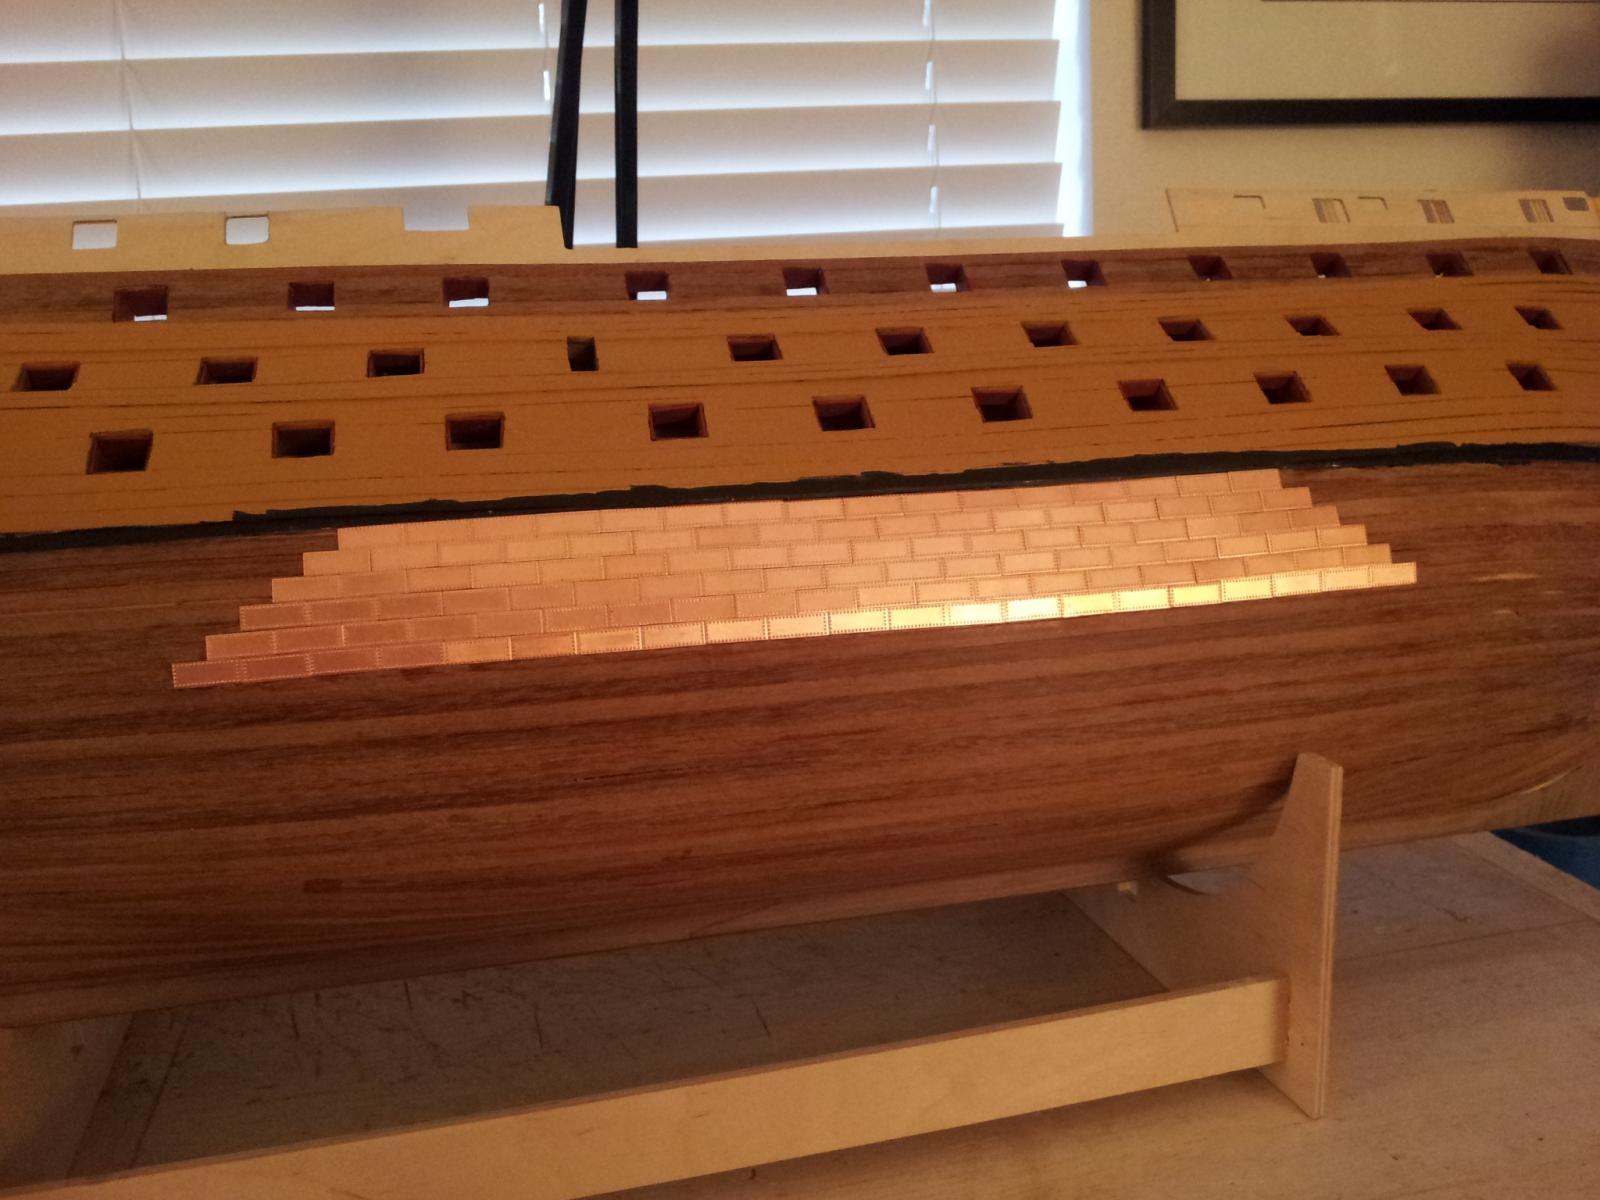
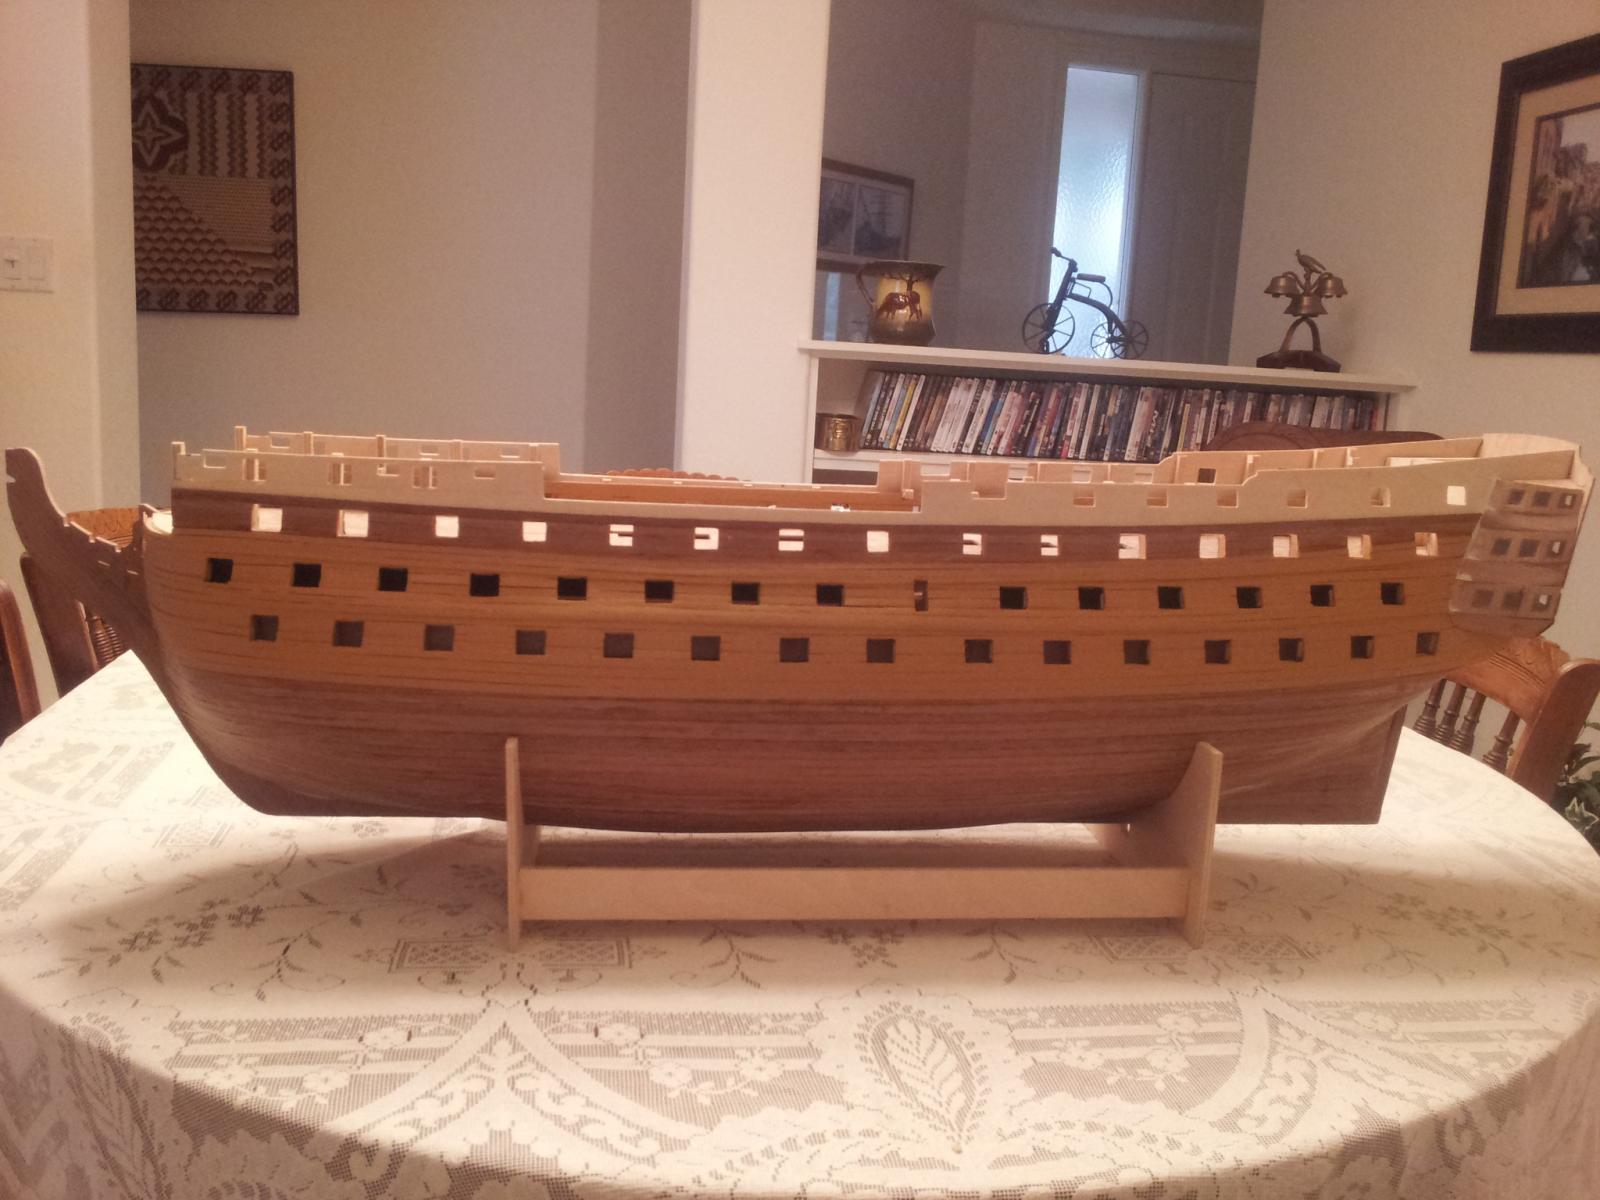
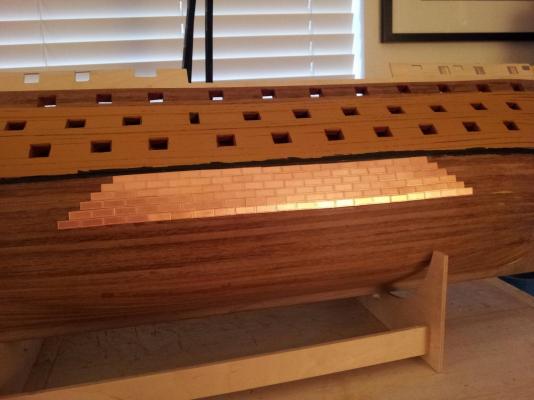
OK folks...After I complete this post I know I'm going to hear from Shipyard Sid who will probably rip me up a bit because I didn't take his aadvice and prime the hull of Victory before beginning the copper plating. Actually, the hull is in excellent shape, i.e., it's really smooth enough for the plates. It's the upper sides around some of the gunports that I was referring to that need filling as there are some nasty spaces between some of the planking up there. That will definitely be filled and sanded before painting. So I began the plating and here is the result of a couiple of hours this afternoon. I do wonder what the best method is of cutting a plate when it needs to be trimmed. I don't think a sharp knife works well but I tried a scissors and it worked great. What do you think?
- 900 replies
-
- 1
-

-
- victory
- caldercraft
- (and 1 more)
-
Thanks, David....I will prime the hull as you suggest and smooth it out for plating. I also plan to fill and sand the rest of the hull from the waterline up to to the topside. I was hoping to let you know when we'll be in the UK this summer as I thought we'd get a chance to meet. But, my wife opted for an Alaskan cruise instead. We often stay in Hertford for a month or so in June...but not this year. I plan to begin the plating tomorrow. Take care my friend. Jerry
-
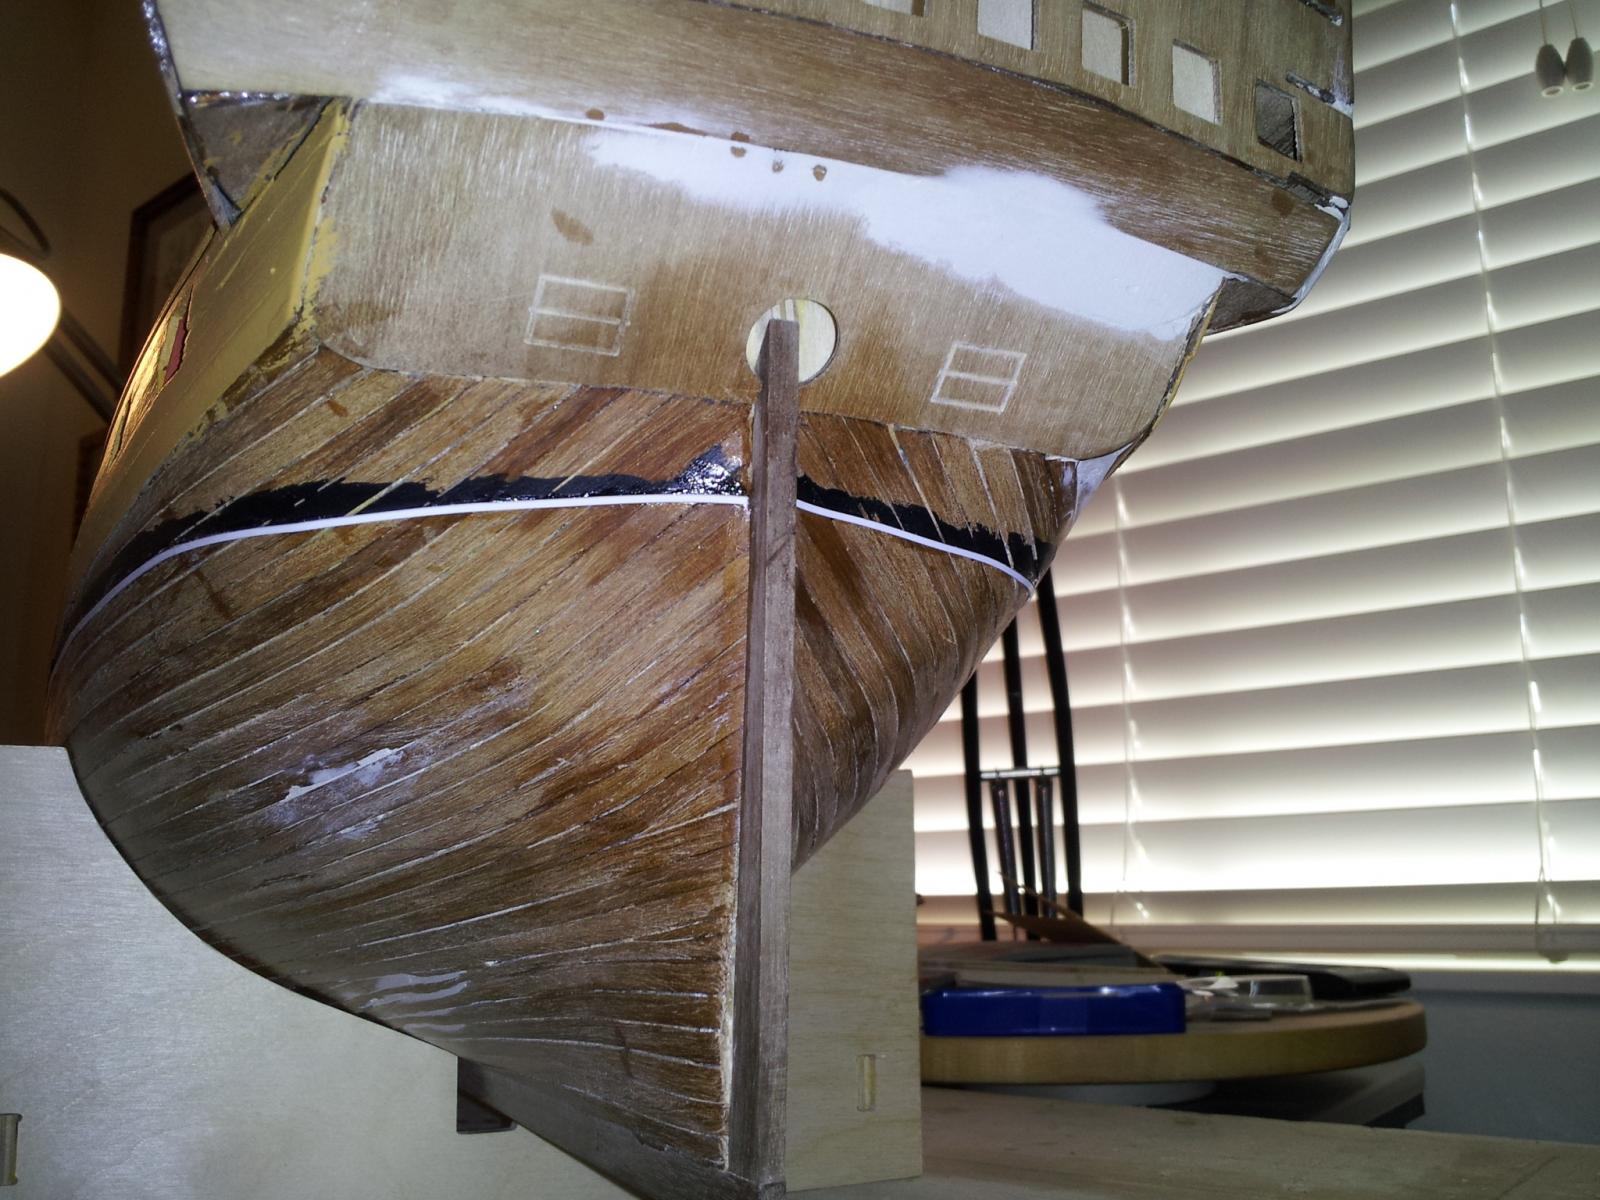
Well, I managed to apply the styrene waterline marker to the hull as tiny as it is. (about 1mm x 0.5mm) So now I decided to do some wood filling and sanding of the hull before I paint the styrene black and begin the coppering. I know that Shipyard Sid and Kevin started from the waterline and worked down although the manual suggests the opposite, from the keel up. Here are some pics of the styrene waterline marker before I paint it black.

-
HI Muggebigge.. Just wanted to say hello and welcome you and encourage you to continue posting your build. I was reluctant at first to start a log but had so much persuasion from other Victory builders, I had no choice but to give in. You're going to be very happy that you started your log because I can guarantee you'll be getting a lot of help from other builders of HMS Victory. Good to have you and keep letting us know of your progress.; Good luck to you....Jerry
-
Good morning to you David...At first I thought you were upset with me but then realized you were just kidding me. So, as soon as I get the styrene I'll paint it black and begin the coppering. I'm having a camera (cell phone) problem at the moment not being able to email any photos to myself for posting on the forum. I hope to sort this problem out quickly. Have a great day.. Jerry
-
Good morning, Kevin.. (morning here) I hope youare doing well. Yes, I have found these forums invaluable. Thanks for your comment. I'm really looking forward to begin the copper tiling and to get on with the build. Jerry
-
Hello David... i was hoping to hear from you; in fact, I was about to send you a message when I received notice of your post. I will not run out of glue...The styrene strips have been shipped as I received notice of that yesterday. The waterline worked out well and I'm raring to go. My question is, did you begin coppering at the waterline or at the keel. I believe you once mentioned that you began at the water line. I hope you were joking about my hesitancy as I wasn't happy taking so long to get the waterline finished.
-
It looks like it's been a week since I entered a post with respect to progress on Victory. Actually I have been at a standstill debating how to mark the waterline so I can begin the wonderful chore of coppering. I constructed a homemade version of a waterline marker and it looked like it would work pretty well. At first I used a fine soft tip pen but the darn contraption wandered too much so I tried a pencil in its place which did no better, so I finally gave up on it. I borrowed a commercial waterline marker and tried that and ran into the same problem as before with wandering. Seems as if the pencil point gets caught between two planks and then jump out creating a wandering line. One of my fellow club members here in Naples suggested that I use the plans to locate the waterline in several places along the hull and then use the bottom edge of masking tape to indicate the waterline by painting black paint over it.; that's what I did and fortunately, it turned out well. I'm waiting for delivery of some styrene strips which I will use to give me a three dimesnsional line. This is from the advice that David (Sipyard Sid) graciously shared with me. Also, at David's suggestion, I plan to paint the strips black also and then begin the coppering. With all the time I usually have available it sure hurt to sit around and play on line poker. Can't wait to get going again. I'll edit in a couple of images as soon as it's feasible. Jerry

-
HMS Victory by Yon - Caldercraft 1:72
Jerry replied to Yon's topic in - Kit build logs for subjects built from 1751 - 1800
Your work looks beautiful. I hope I can do as well. Real nice job, Yon. Jerry -
Looking good, Kevin... It must be nice to be rich. LOL Jerry
-
Ok, thanks, Patrick. Actually one can buy Evo-Stik on Ebay. Check it out. Trouble is the S&H will cost more than the product unless you buy a bunch of other stuff. Jerry
-
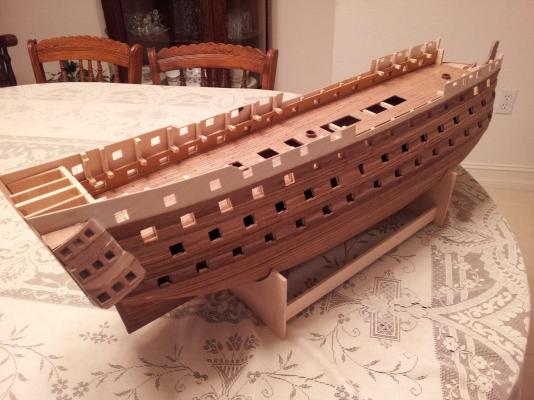
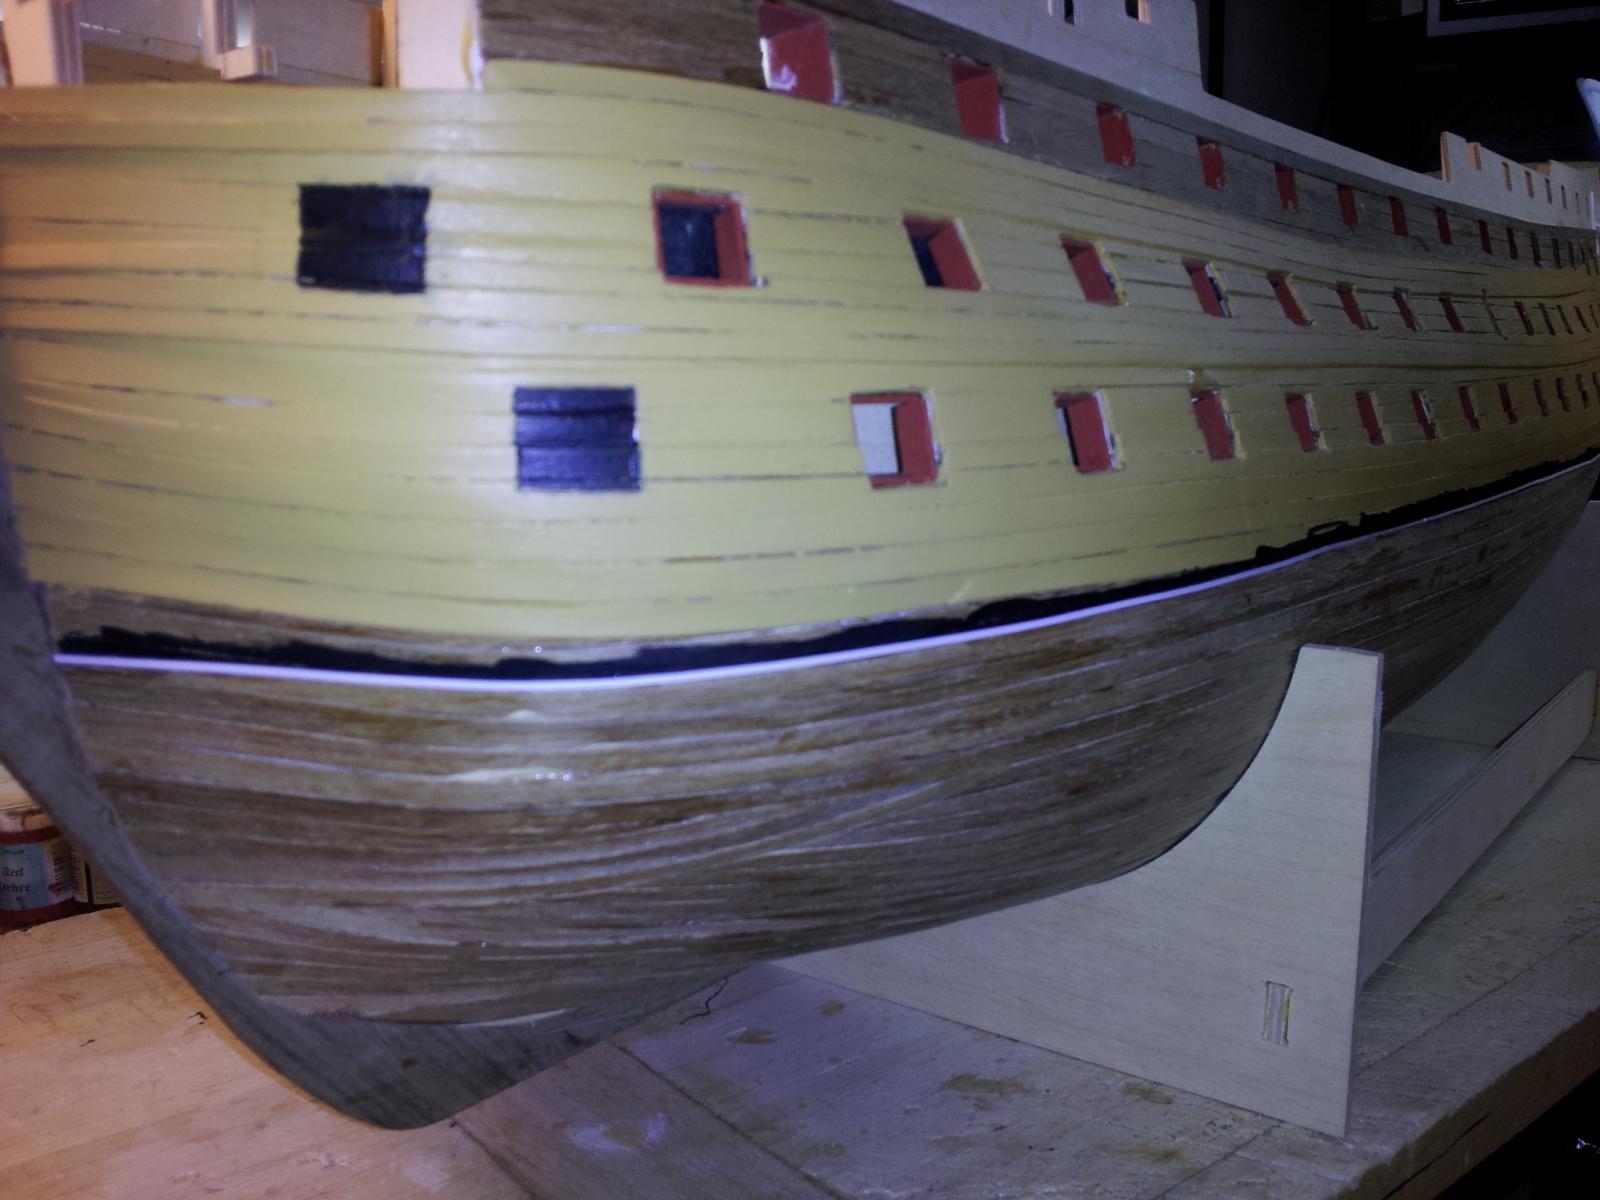
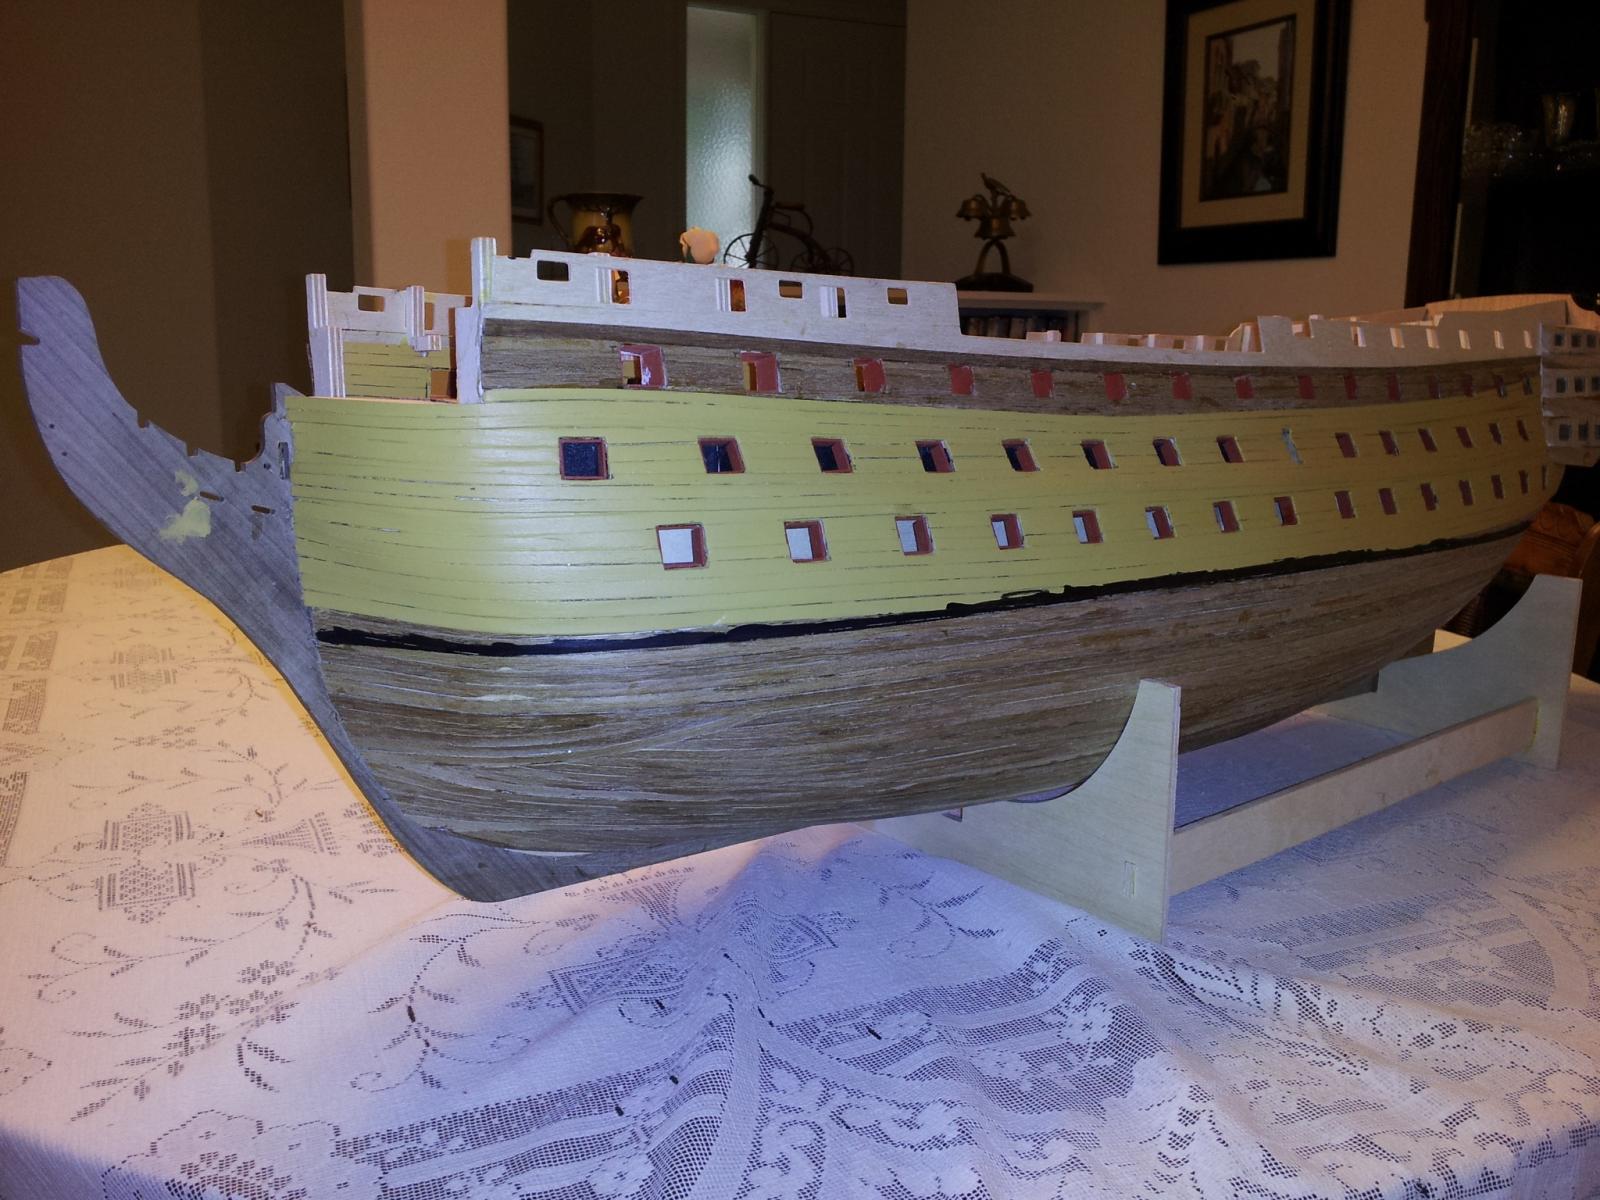
Nice to hear from you Patrick. How are you? I didn't realize that one could purchase evo stik at Home Depot. That's a good reason for me to try it. I thought i'd have to have it sent form th UK. I 'm going to buy some and experiment with it before I make the final decision. Glad you're making progress also. I just finished the gunport linings and painted red the ones previously installed. Look like I still have to paint the black bands onto the hull and mark the waterline; hope I don't have any trouble with that. Then I'm ready for coppering. No sense posting a picture since the one I posted yesterday (starboard side) looks like the rest of the ship. Take care... Jerry
-
Good day, David...I just want you to know that I sincerely appreciate all the time you take to advise me. It's so nice to know how decent some people are and you are one of them. As I mentioned before, I did use CA when tiling Cutty Sark. I really had no problems, even if I decided to remove a tile later on. I used "Un-cure" to clean any CA that may have showed as residue and it worked well as long as it is used sparingly and kept it from getting under the tile. It was along time ago so I'm relying on a foggy memory. It'll be "Evo-Stik" or CA as my adhesive of choice although I seem to be favoring CA. I'll cerainly take your advice with respect to gaps. I still have plenty of other work to do - finish lining gunports, painting, etc., - before starting the plating. Again, thanks much... Jerry
-
Thanks, Kevin..........
-
Hi David (Hopeful) ... Thanks for your nice comments. Cutty Sark took about a year to finish and it was my first experience in model ship building. As I mentioned, after completing this kit, I figured one ship build in a lifetime is enough but like everything else in life...things change. LOL Have a great day. Jerry
-
Kevin, the CA (super glue) that I use, according to the label, is "gap fillng, 5 - 15 second." Did you run out of copper plates due to the kit being under supplied or did you purchase the 200 additional plates because of building errors? My kit came with 2 bags of the buggers; I hope that's enough. Jerry
-
Hey Kevin...Thanks for your post.... lol, When you get to be my age you'll have plenty of time also. I plan to use the kit copper plates as I have had experience installing them before when building Cutty Sark. (as a matter of fact, I found a bag with leftover plates but they're different in size.) I also realize that there's a lot more plates on Victory but I'm pretty sure I can handle it. Although I see that you and other builders have used "evo stick" cement, I plan to use 15 second CA glue as I also did before. In the past. One drop in the middle of the plate did the trick as it spread when applied to the hull. If I had to remove a plate for any reason, i didn't have a problem. Cutty Sark was completed at least 12 or 13 years ago and all the copper plates, although tarnished, are still in place. Have a great day............Jerry
-
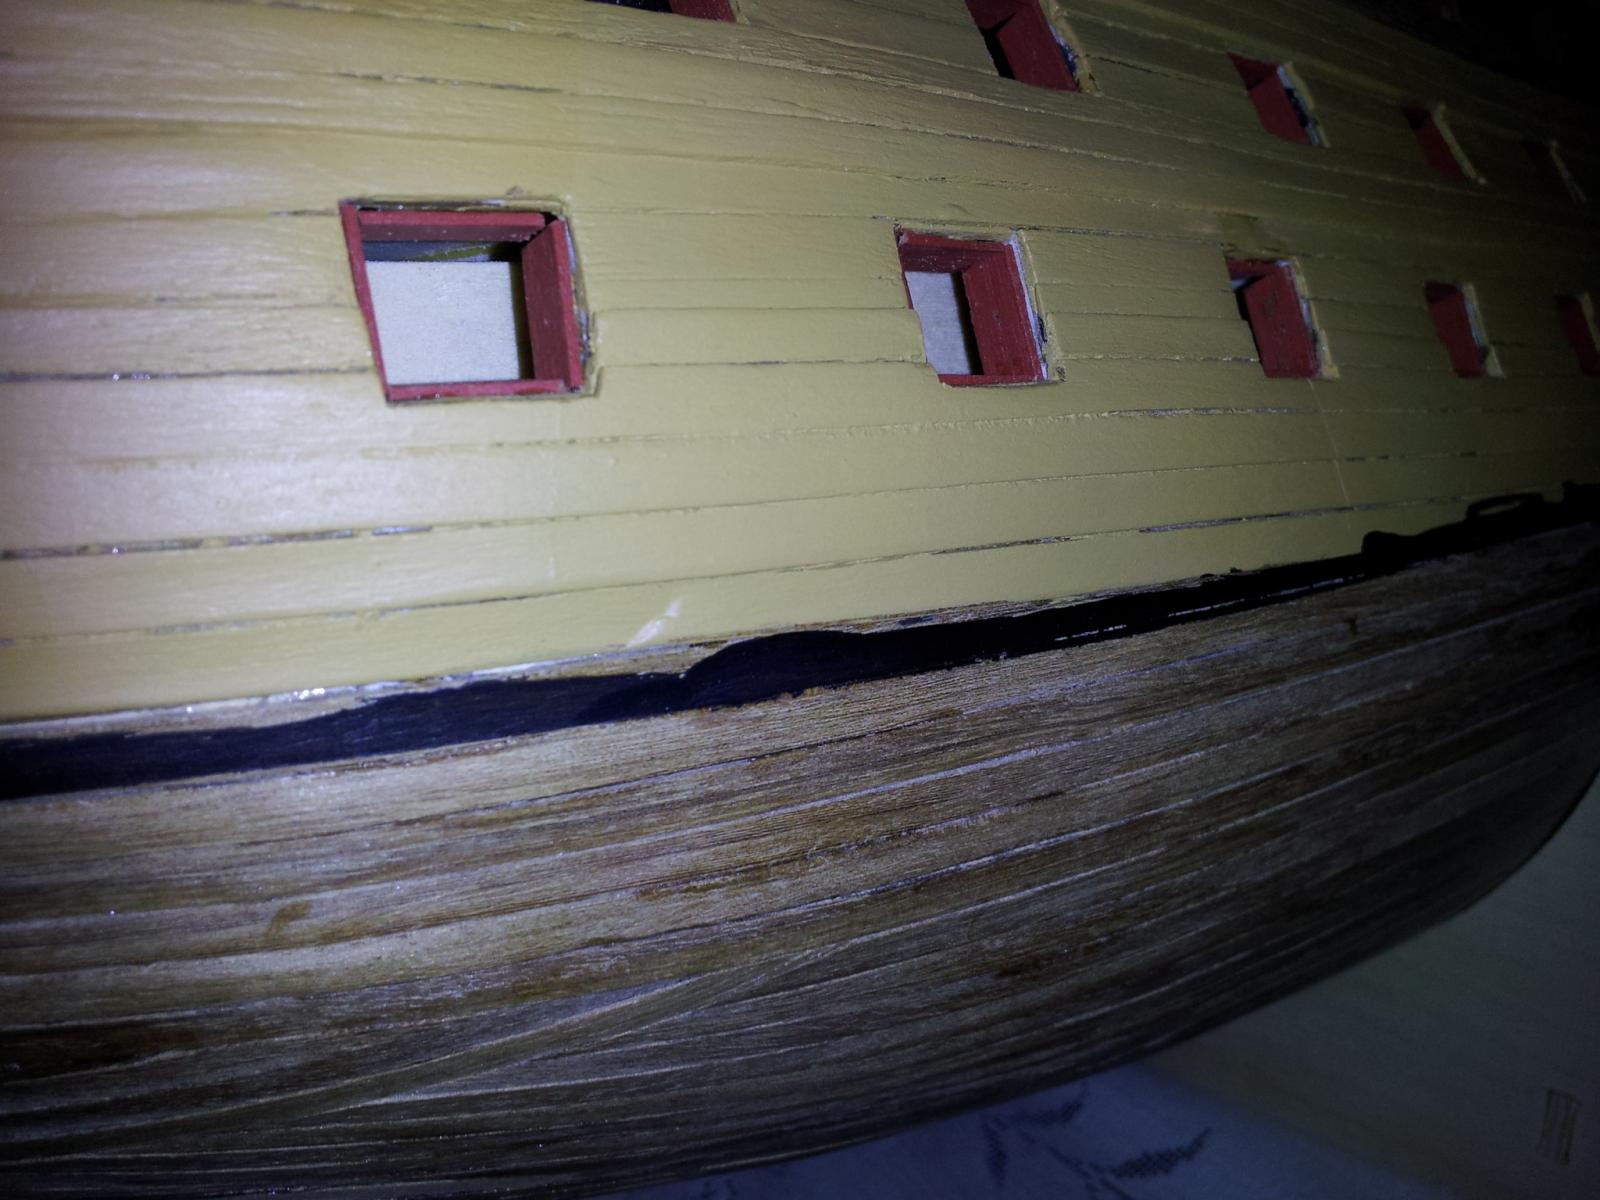
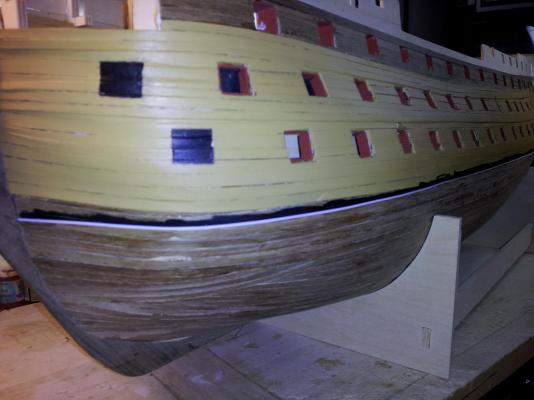
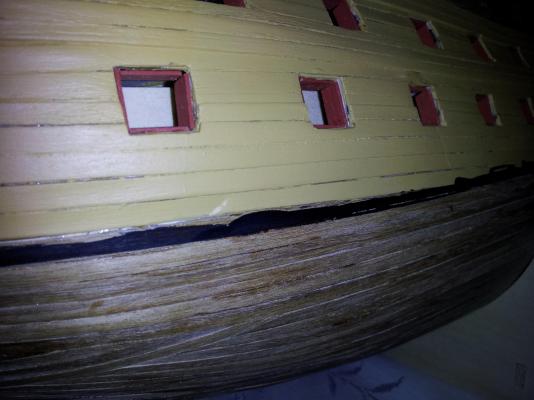
Hi David, good to hear ffom you again. Most of the linings are already finished. I only have to do the 9 upper deck gun ports on the port side. Thanks for your encouragement and to answer your question, I work on the ship about 5 hours a day and relax to join my wife in the evnings. She's very much younger than I am and is an 8th grade school teacher here in Naples so I can't spend any time with her during the day anyway. After the linings are completed I will touch up the yellow paint on the inside gunport wall where I trimmed the excess gunport lining. I also need to go back and paint the top gunport linings that are not recessed that were finished earlier. I also have some filling and repainting of the hull to do and then I'll probably paint the black bands to be followed by coppering. Take care... Jerry
-
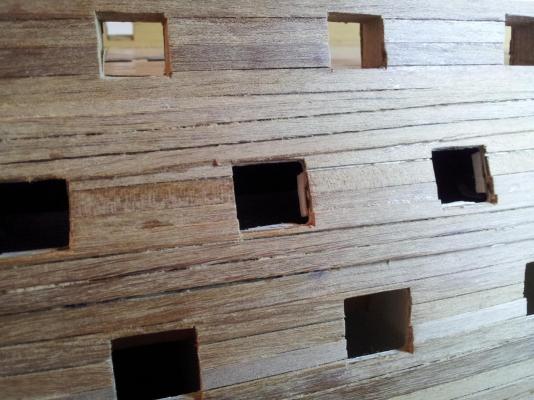
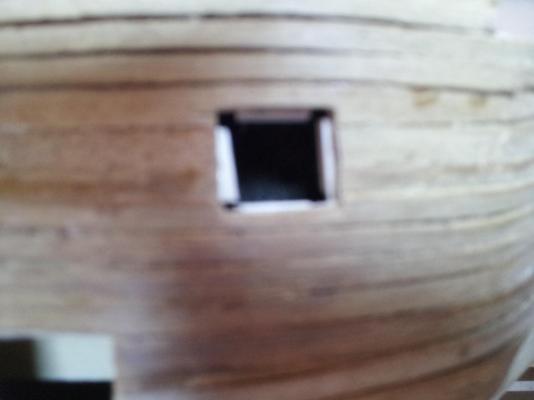
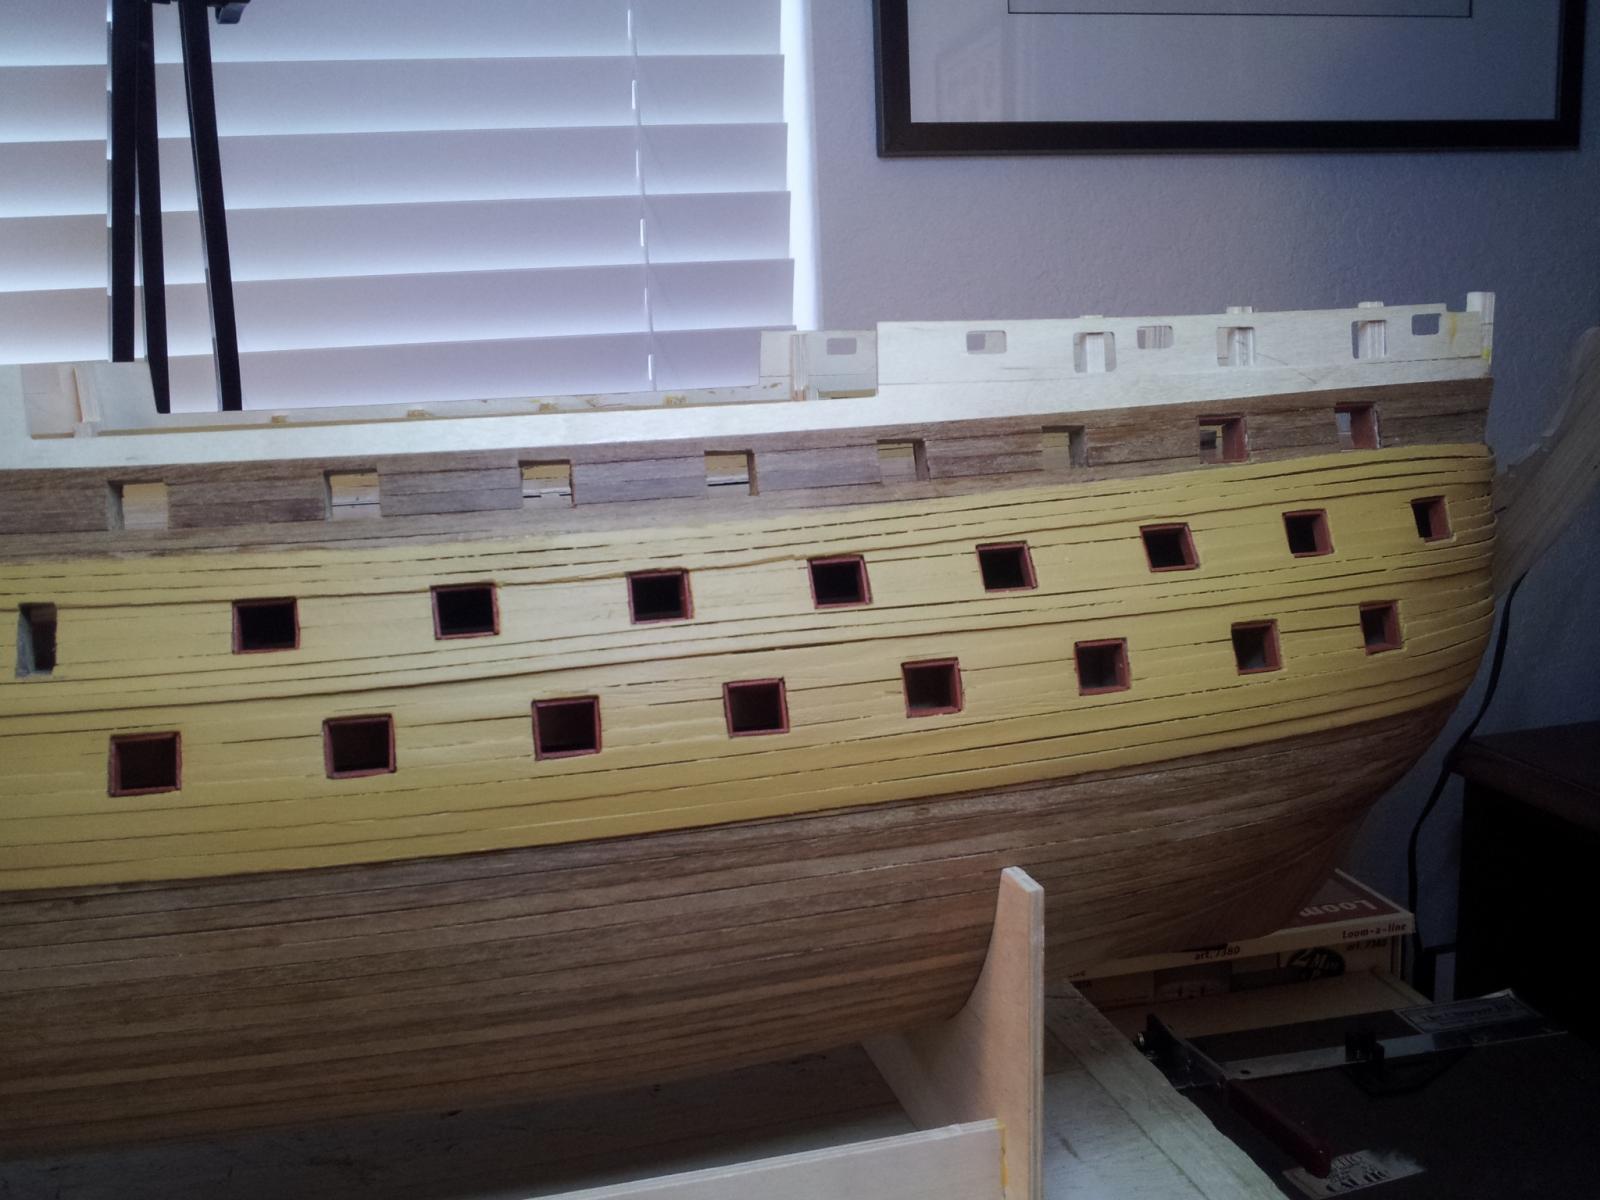
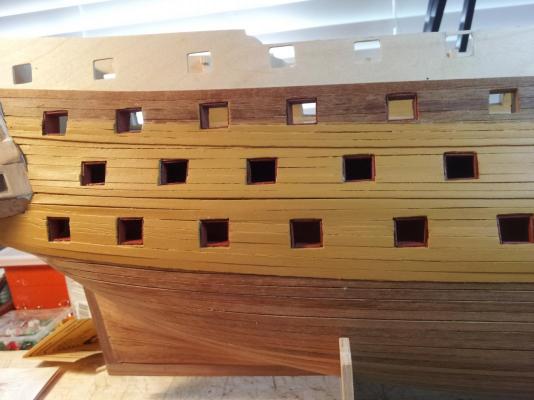
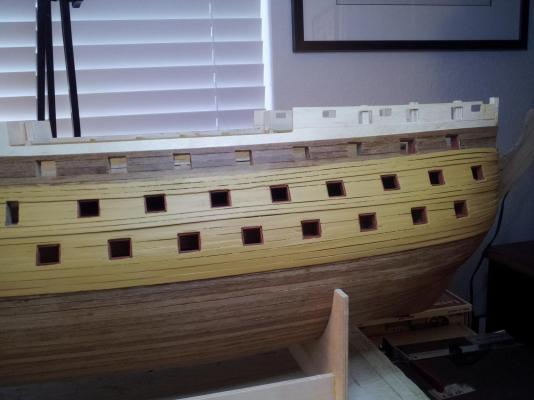
I've been quiet for a couple of days...all work and no play. I found the last construction to be the hardest so far, lining the gun ports. But I kept on trying and thanks to David's idea of making balsa seats for the lining, I finally finished the starboard side of the ship. Here are three images of where I stand as of now. It'll be back to work and if all goes well, and with today's experience under my belt, I hope to complete the gun port lining by tomorrow evening. May 7 close up of gunport linings a little longer view of the gunport linings Full view of starboard gunport linings So until tomorrow or so... Jerry

-
Hi Derek...Thanks for your compliment. I appreciate your comment as I have visited your log many times, watched your progress and learned a lot. I got the idea for the fishhook tool from your log and from David's too. Your log is one of a handful that helped me make the decision to start the Victory Thanks, again...Jerry.
-
OK Mort, let ,e know of I can be of any help. Jerry
-
Thanks trippwj...Nice of you to make a complimentary comment. FYI, I too have an autistic son who is now 58 years old, living in a great facility and still has never spoken. He was diagnosed about 55 years ago. He seems happy, takes care of himself, manages to work easy tasks and I daily pray for him. I understand your feelings very well; thank you for the avatar. Jerry
- 900 replies
-
- 1
-
-
- victory
- caldercraft
- (and 1 more)
-
Hello Jared.. Thank you for your pleasant note. I need sleep! LOL I can't believe my misunderstanding of how to post but, as you said, I finally got things worked out. I appreciate friends like you. Jerry
- 900 replies
-
- 2
-
-
- victory
- caldercraft
- (and 1 more)
-
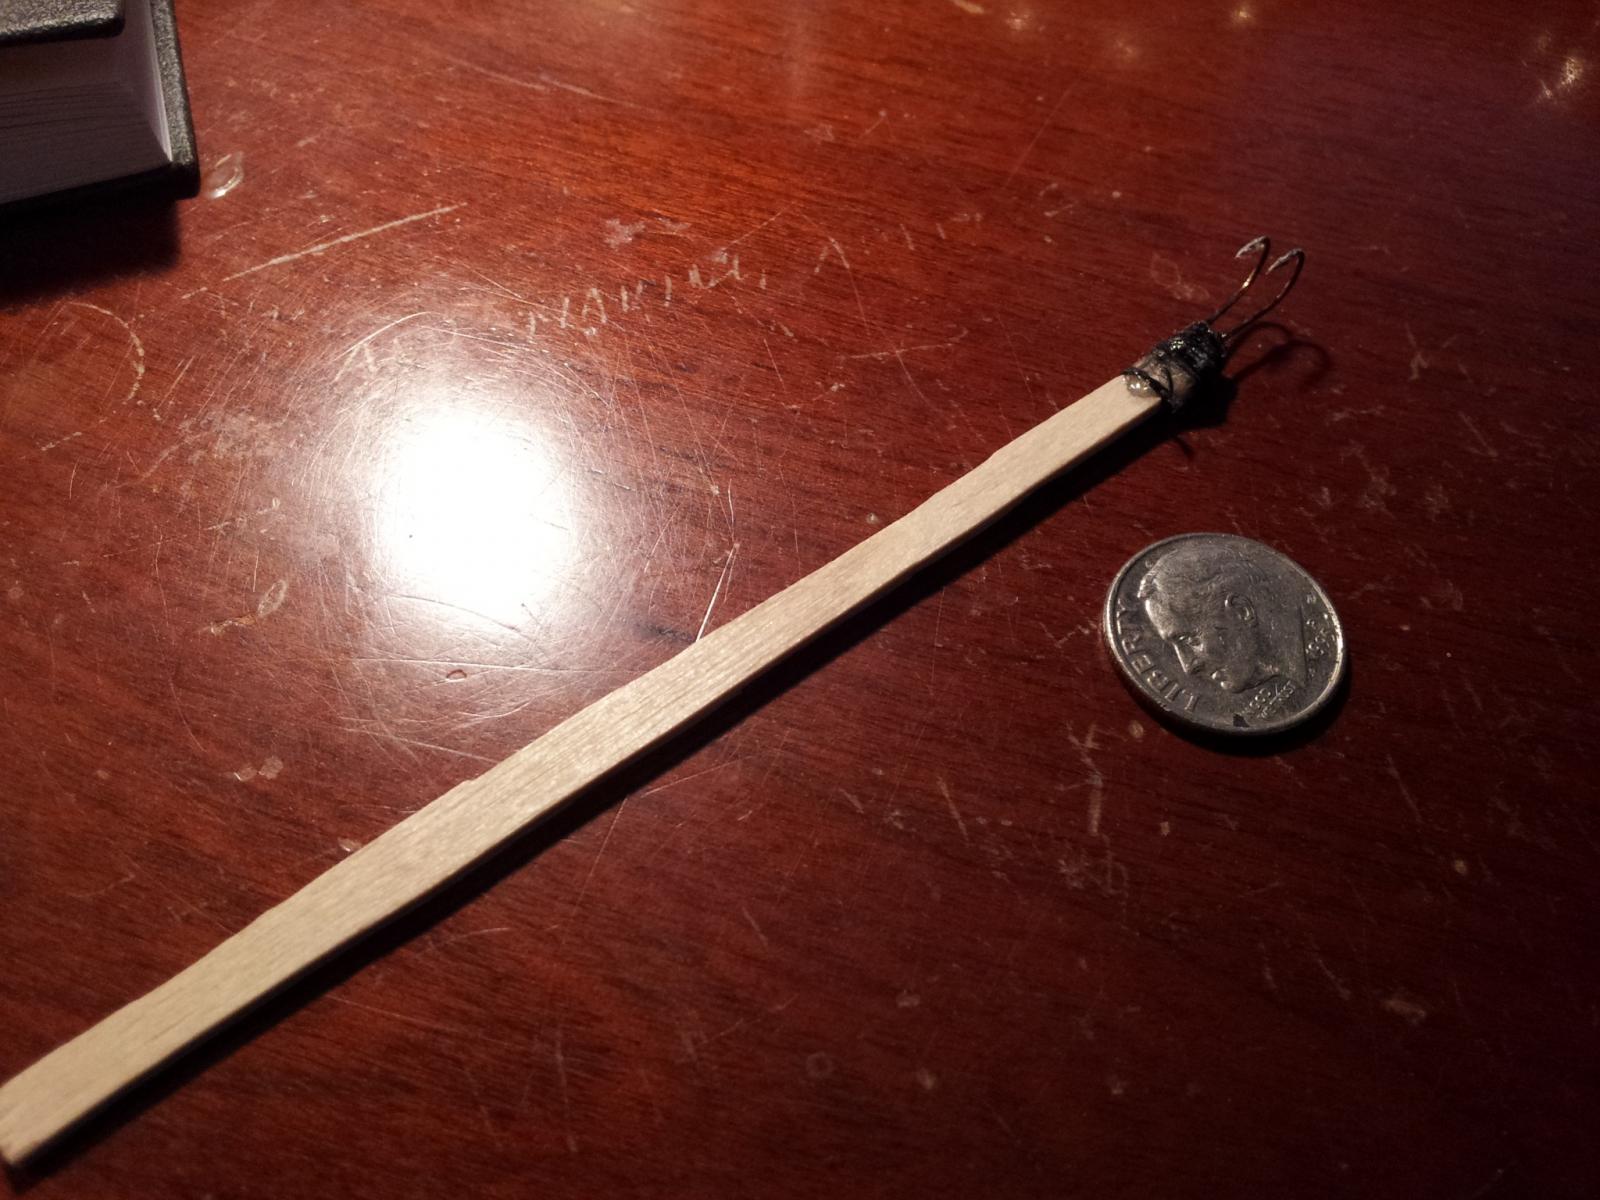
Sorry, Mort.. I have no idea. I bought them a long, long time ago. They were snelled hooks and I cut off the leader. They are a just a drop leass than a quarter of an inch or about 5mm in diameter. Check out the pic of the tool on my site and notice the relationship between the tool and the American dime. Hope this helps you. Jerry
-
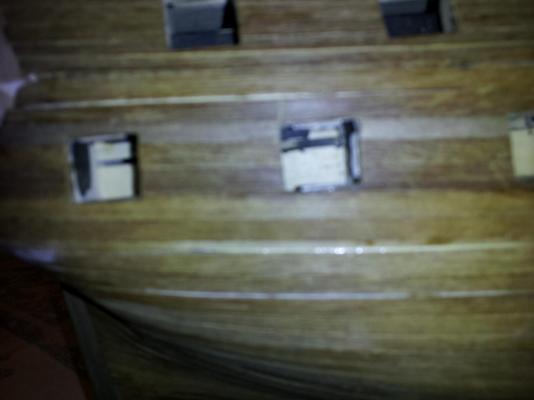
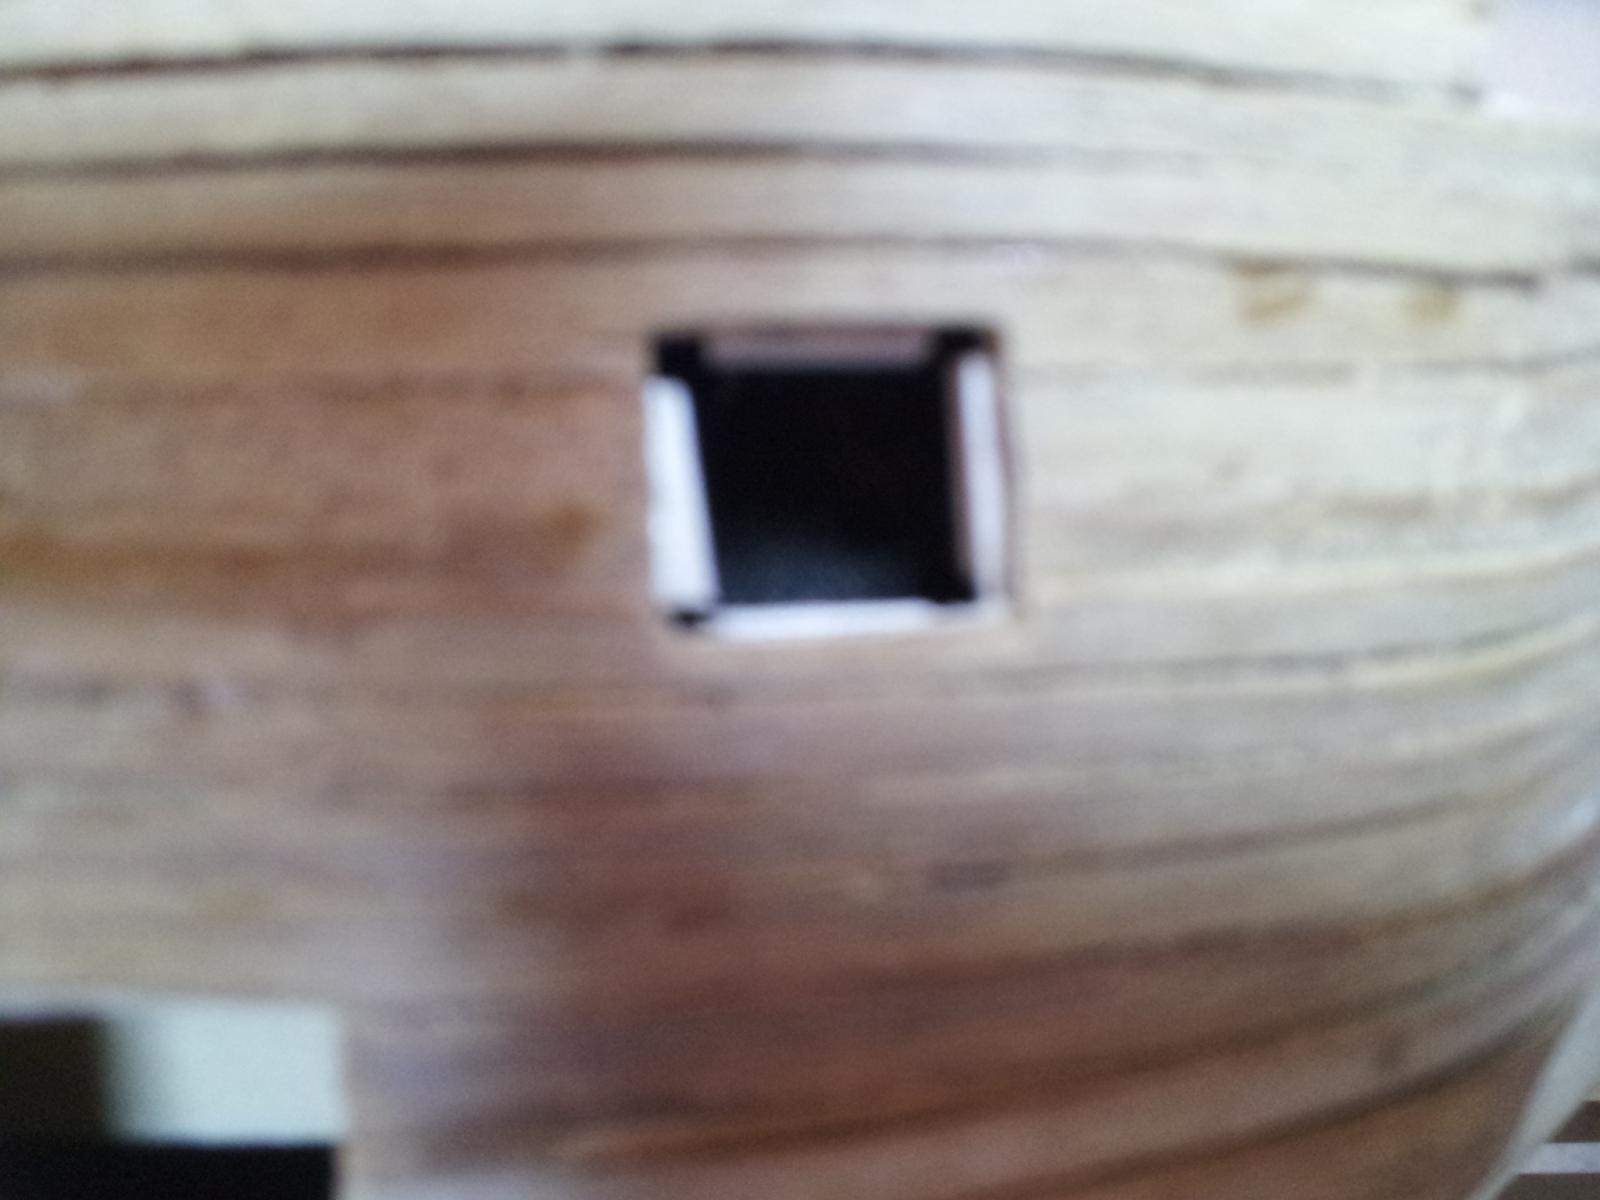
The following will bring my build up-to-date........... I would like to acknowledge Shipyard Sid (David) with a very special thank you for enlightening me about the balsa lining seats. They are not in the instruction manual so I was very lucky to hear about this method from David. Thanks again, David.... Apr 25 This is the tool that I used to place the balsa seats that will support the gun port linings. It is made with two very small fish hooks which turned out to be perfect. Apr 26 Balsa seats after being trimmed Closeup of gunport with rough balsa seat Apr 28 Another closeup of a couple of balsa seated gun ports Balsa seats completed in all gun ports Apr 29 Both sides of hull painted yellow ochre