HOLIDAY DONATION DRIVE - SUPPORT MSW - DO YOUR PART TO KEEP THIS GREAT FORUM GOING! (Only 27 donations so far out of 49,000 members - C'mon guys!)
×


Jerry
-
Posts
1,753 -
Joined
-
Last visited
Content Type
Profiles
Forums
Gallery
Events
Everything posted by Jerry
-
Hi david, I don't blame you for taking advantage of the nice weather. When I've been in the UK I also have been lucky with good weather. Seems that June and July can be lovely in England. Stop dilly dallying and get back to work; we all need pics of your progress. LOL I forgot to glue the eyelets on the back of the cannons before I primed them. So i need to do that before I paint them black. Take care and enjoy beautiful Britian. Jerry
-
Hey Patrick.. Keep it going; it looks great. I also started at the waterline and worked my way down. I didn't run into any problems and you can see in my log that everything came out OK. Just stay determined and you'll end up real fine. I had a lot of encouragement from Shipyard Sid and the others who have all been so friendly and helpful. Take their advice; thay certainly know what they're doing. Happy to see someone else building Victory....Jerry
-
Patrick... I feel like I've been in the middle of that firing squad. It's just 1, 2, 3 o this and then 1,2, 3 do it all over again. Good luck with your coppering, another one step at a time operation. thanks for writing to me. Jerry
-
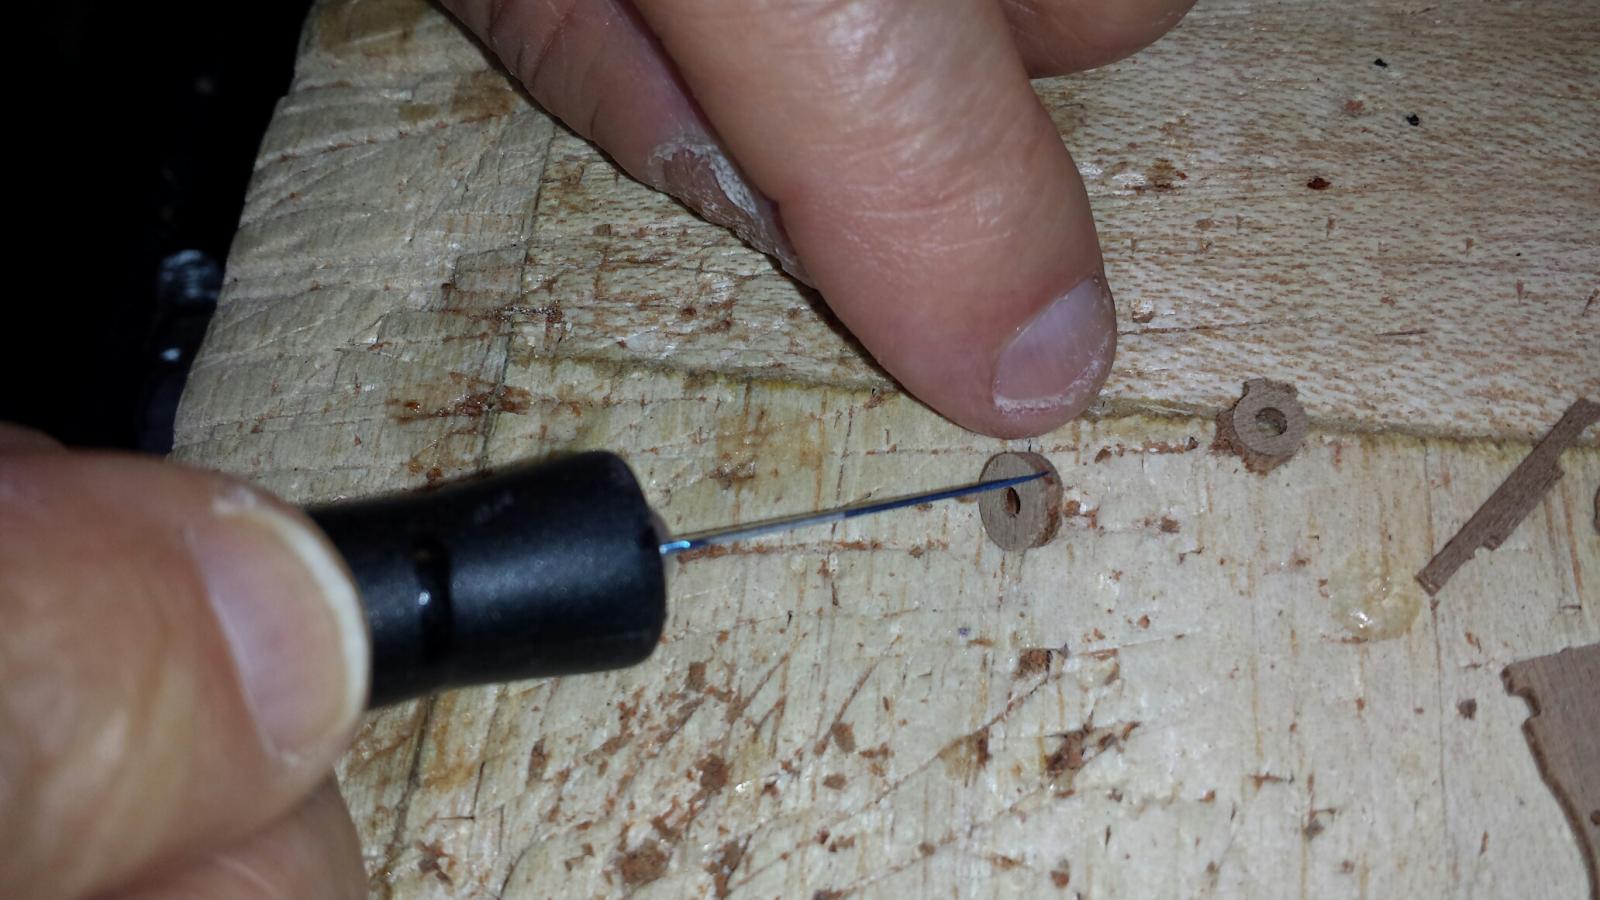
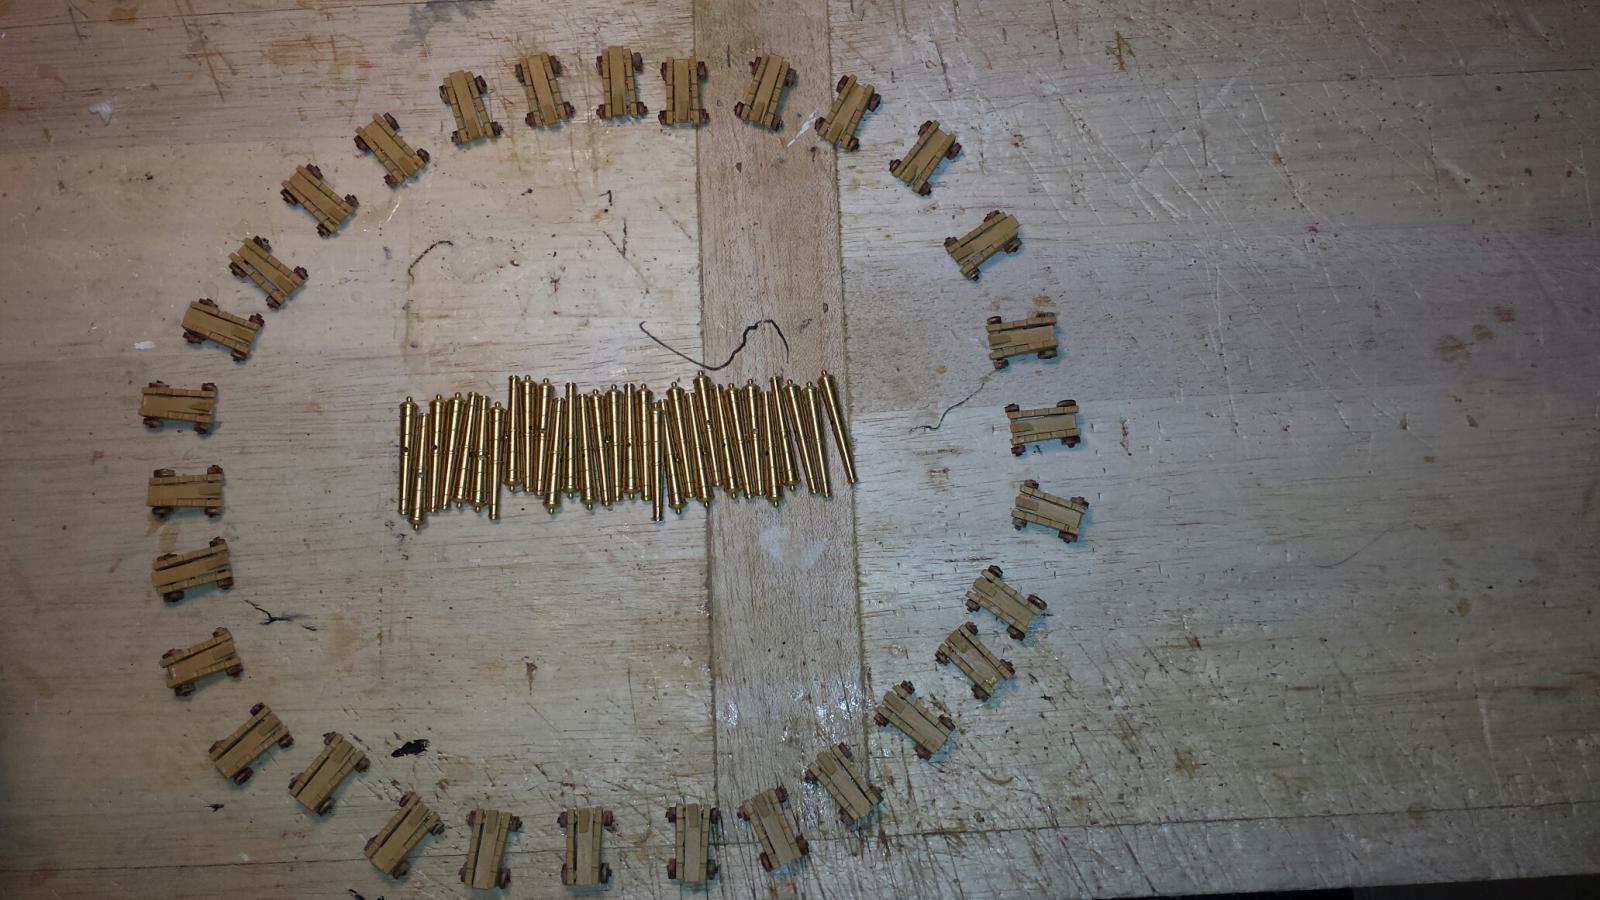
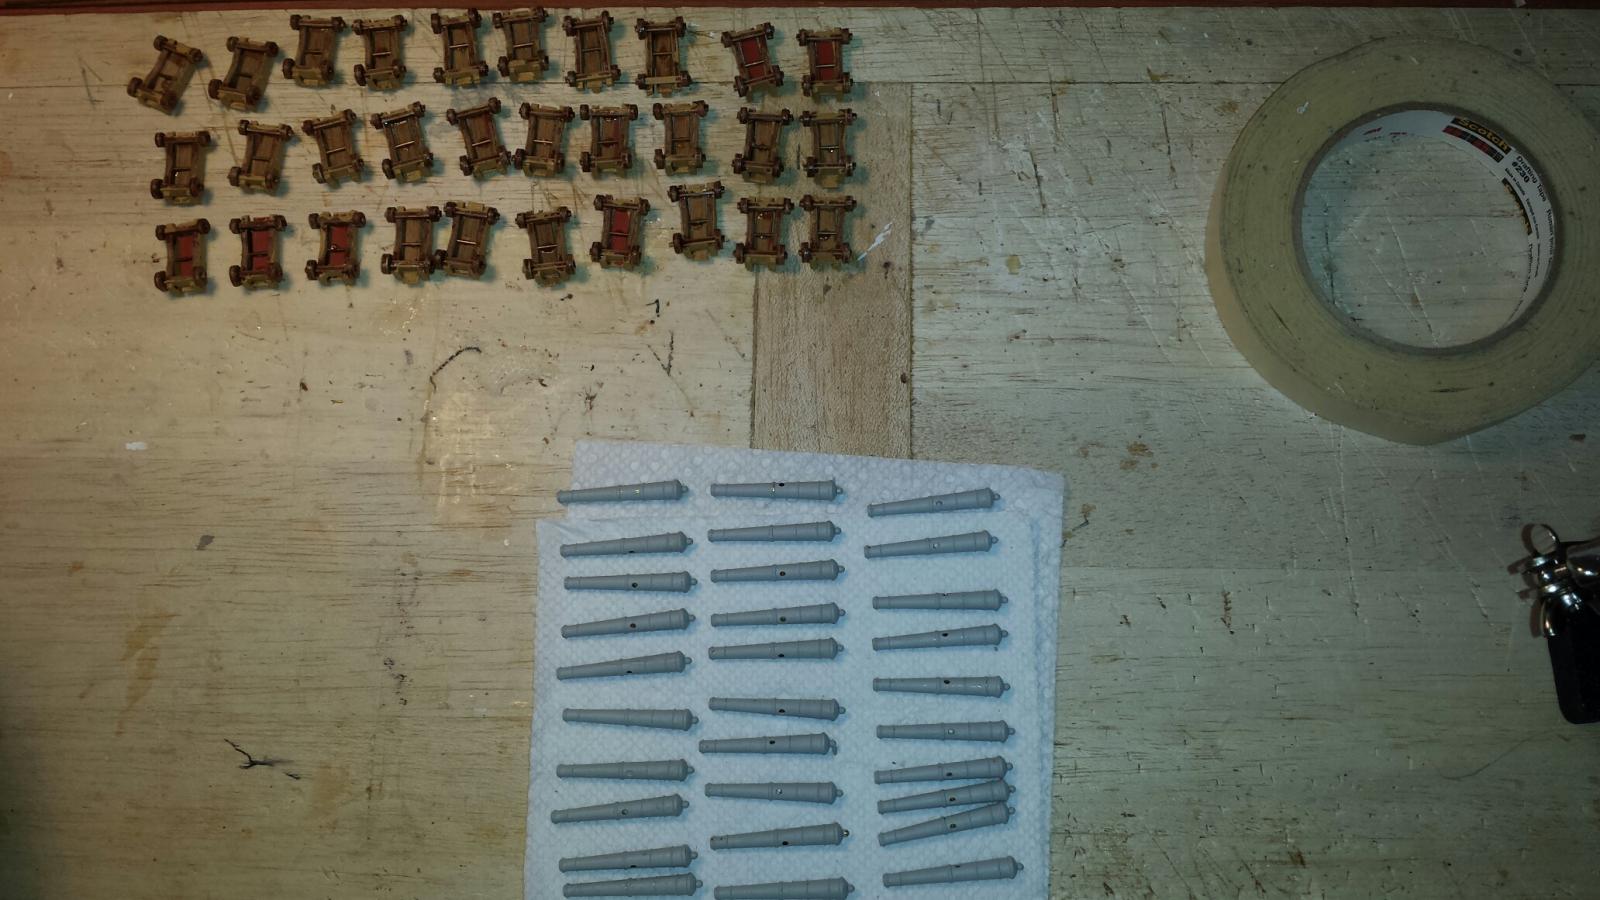
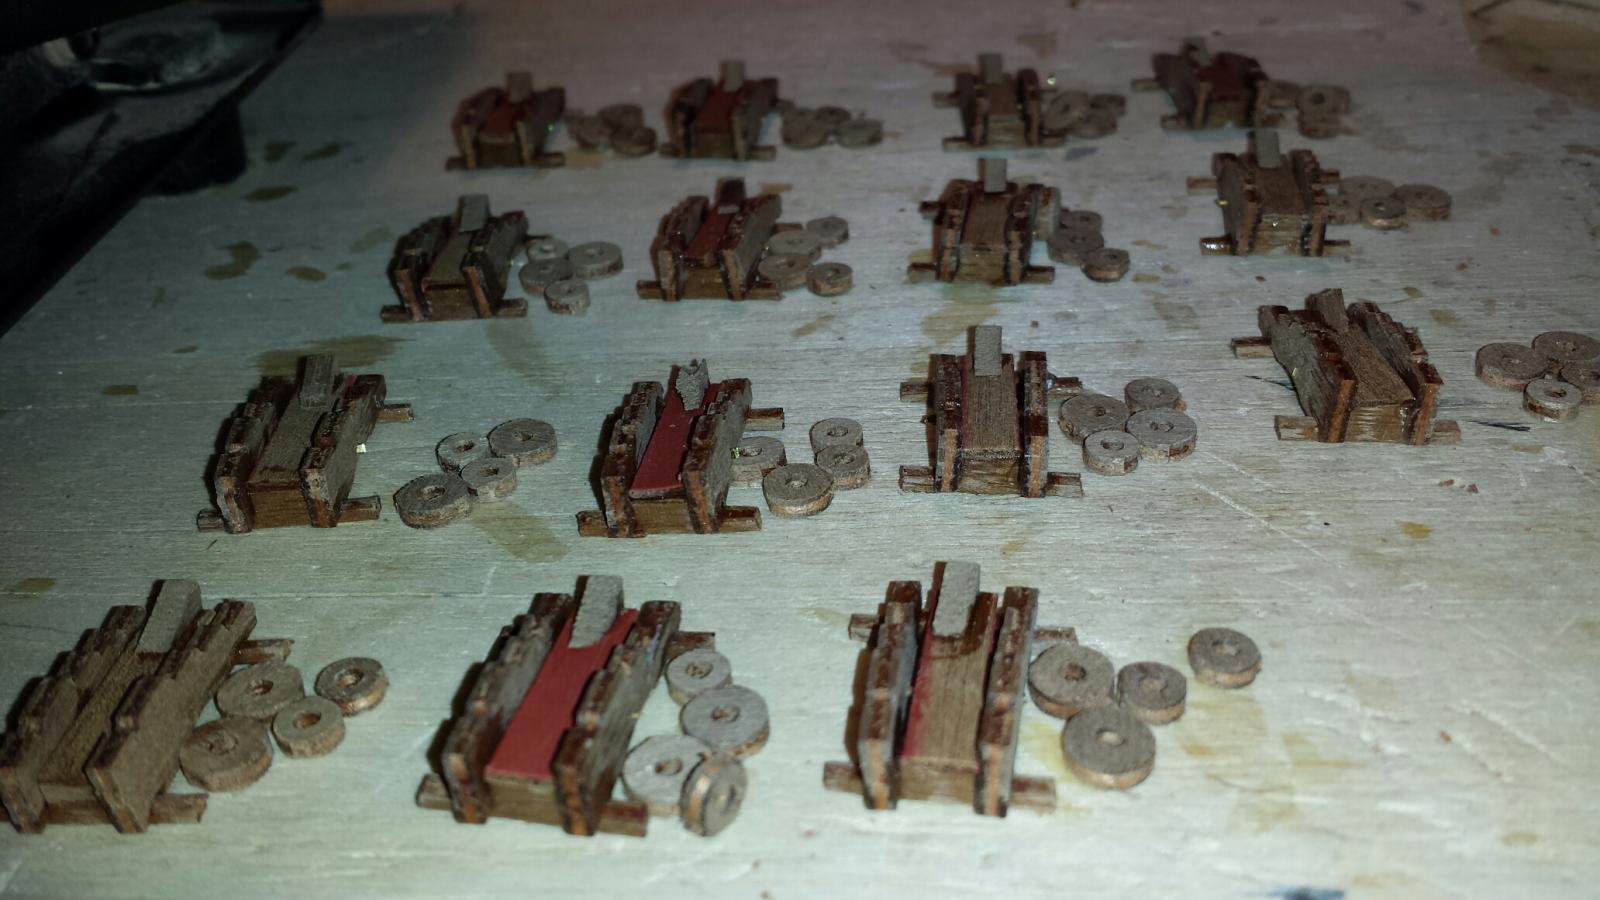
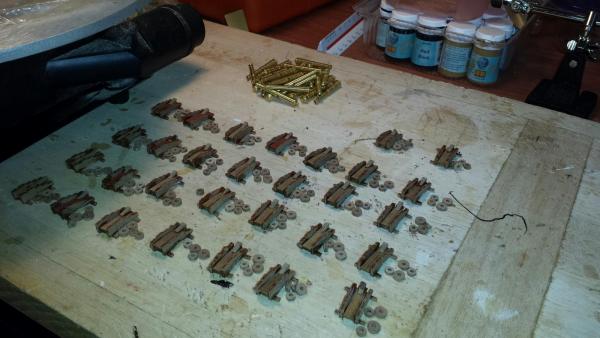
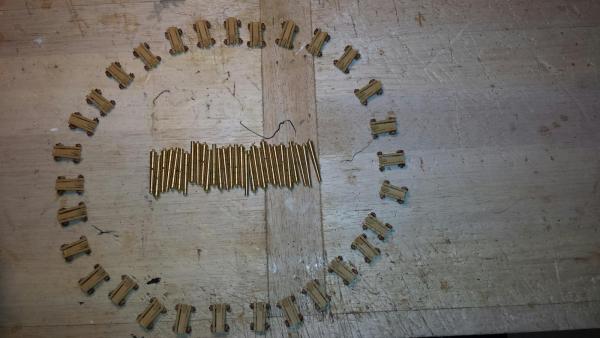
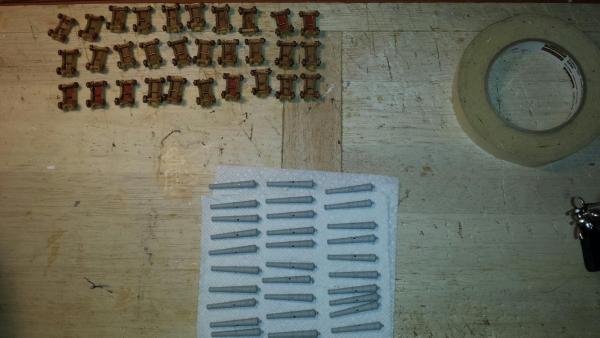
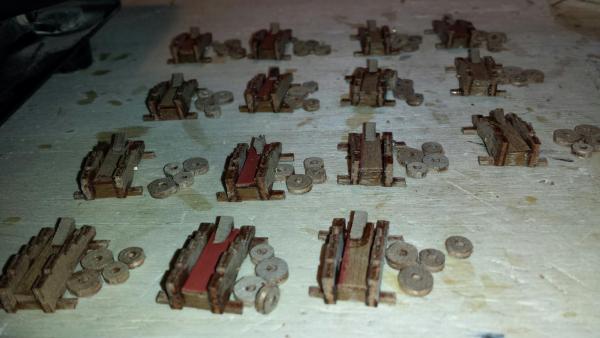
To bring my build log up to date I am posting some of the latest pictures although progress at this point is very slow. One has to be very deliberate when at this stage of construction as the work is slow and tedious. As you may know, I'm in the phase of cannon carriage construction and am taking it one step at a time. I have finished the building of the first 30 carriages that are to be positioned on the upper gun deck. They have been painted yellow ochre and the truck wheels are now varnished. I am getting close to attach the brass cannons and have just finished applying a metal primer coat. After that the cannons will be painted black, they'll be mounted to the carriages, the trunnion brackets will be set, "rivited" with small cut domed nails and thay and the 5 additional eyebolts will be painted black. My next visit will be after I have accomplished all of the above. I guess I'll see you all in a week or so. Best regards, Jerry
- 900 replies
-
- 1
-

-
- victory
- caldercraft
- (and 1 more)
-
Brian, thank you.. You are too nice, Jerry
-
I appreciate you, Kevin.. Many thanks. Jerry
-
Patrick and Kevin.. I don't think I'll be passing anyone (which is very far out of my mind).. Right now I'm sick in bed with a touch of the flu. So progress is at a standstill. I also stupidly cut my index finger and so there's going to be some healimg time needed. With the cut finger and the flu I'll see evryone in a few days. Thanks for contacting me. (Cough, cough.) Jerry
-
Dave, I guess I used the wrong type of glue on the wheels. Spit didn't seem to work. Next time I'll try CA. Yep, it's a good idea to clean your work area once every couple of years. This time it looks like you'll be lost with a new paint job on the walls. More pics to come as soon as I make a more progress. Jerry
-
Hello everyone.. Not much to report but I thought I would check in with an interim pic of my progress. I'm still at it and have just about reached the half way point on the 30 upper gun deck carriages. Hopefully by the end of this week I'll have them finished and can begin the necessary rigging for those cannons that will be seen. Have a great week everyone. regards, Jerry July 8, 2013
-
Lawrence.. You certainly have not disappointed me. I just voiced my opinion about color choice. As I wrote in your build log, I think your Victory looks great and I envy your progress. I'm just anxious, I guess, to get a bit further ahead. Best regards, Jerry
-
Good evening, Lawrence. Thanks for your post and explanation. I guess one should build the way one prefers. I don't mean to be offensive but I personally think the blue looks sharp and that it breaks up the monotomy of all the black paint on the ship and metal parts. From what I have seen of other builds I thimk the blue contrasts beautifully with the etched brass trimming. As they say,"To each his own." Take care, Jerry
-
Thanks, Patrick.. Tugging my air compressor around, even though it's a small one isn't much fun. I think I'll make a stop at Home depot (abouy 9 minutes from my house) and give the 3M stuff a try. Have a nice holiday. Jerry
-
Best of luck in Maine, Wayne. (rhymes)... It's a pretty but cold in the winter state. I used to hang out in Bar Harbor for a few years. Drive safely. Jerry
-
Well today is a big day in America. July 4th... It's our birthday. Happy Birthday America! It's also a day that I tried something and it worked pretty well. One of the issues I have had with this Caldercraft kit is that where laser cuts are made on the parts sheets residue sticks to the pieces after they are cut out. This laser sawdust packs very tightly on the dropped out part and takes a lot of time to scrape off using a craft knife. It's hard enough to handle these small parts when they are "clean" so the time needed to clean them off discourages progress. I decided to try something...I have a small air compressor with which I was able to blow out most of the laser debris from around the parts and this accomplished two things: I was able to remove the part quicker from the sheet and spent a lot less time cleaning the part off. Just something I thought some of my friends would like to know. Jerry
-
Hey Wayne.. Thanks for checking in. I started making the carriages for the cannons and that turns out to be no simple task. (as if anything is with this build.) If you get a chance please let me know where in Arkansas you are located. I lived in the Fayetteville area for a long time. Jerry
- 900 replies
-
- 1
-
-
- victory
- caldercraft
- (and 1 more)
-
Hi Lawrence... Thanks for your comments. I wrote to you on your log. Isn't the stern supposed to be blue? Jerry
-
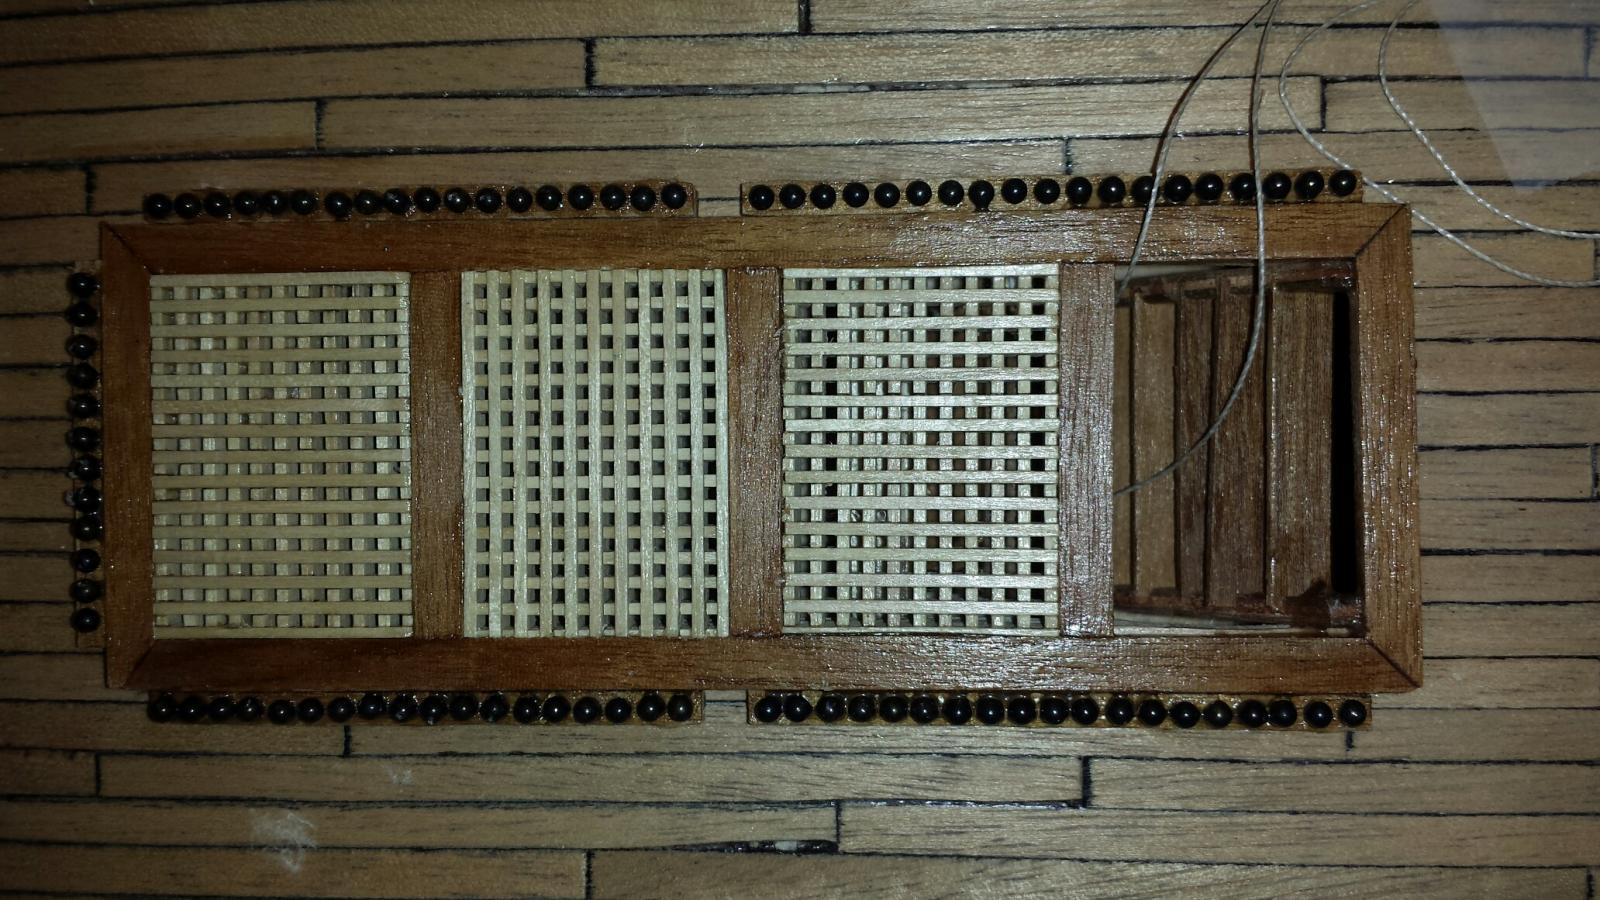
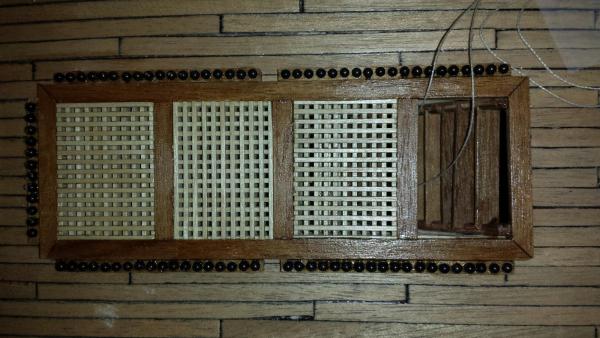
At this point in my build I'm ready to begin construction of the upper deck cannons. Although I realize this will be a repetitive operation, I'm truly looking forward to this phase as I have looked forward to reach this point as a milestone of progress. Upon reading all the beautiful logs posted on this site I truly remember thinking how happy I'll be if I ever each this point as the others have before me. I had trouble when I first tried to glue the 2mm cannon balls into the various garlands but I came upon a method that made it simple. It did take time, however, since each little ball had to be treated carefully. I held a ball in a reverse tweezer and after having dropped a bit of glue into a garland hole I hovered over the garland hole with the tweezers, aimed for the hole and released the ball which most of the time dropped and rolled right into place. Thank goodness for the magnifying lamp. When an odd ball (no pun intended) missed the hole, I nudged it into place with the point of the tweezers. Good friend David (Shipyard Sid) suggested a couple of coats of varnish over the balls and garlands, I took his advice and this helped secure these little devils into place. The cleats are purposely not parallel to the deck as it is shown this way in the plans. I assume the rigging lines will come to these cleats at the angle the plans call for the cleats to be secured. Some pics follow:


- 900 replies
-
- 2
-
-
- victory
- caldercraft
- (and 1 more)
-
Good afternoon David, Actually I was wondering if I should varnish the garlands and cannon balls. Thanks for the information and I will do so. I'm fussing with the 4 large cleats, filing flashing off of them, priming and painting them black. If all goes well, I'll have that finished this afternoon and then I'll begin constructing the cannon assemblies. Your ship looks beautiful; you did one heck of a beautiful job on it and I can only hope I can do as well as you. Have a very good evening and regards, Jerry
-
Nice to see you're still at it, David. Thanks for the latest photos. I very well remember walking the decks of Cutty Sark. It was quite a thrill for me. Putting down all the cannon balls hasn't been easy but I finally figured out how to "drop" them in place. I'm working on that now; then the 4 cleats and then I will begin the cannons themselves. I'll post some new pics on my log a bit later. Have a great week. Jerry
-
Hi David.. I love your log. Hope you are well; haven't heard from you for awhile. Hope you are well. Jerry
-
Hello Nick.. Thanks for your comments on Victory. It would be nice to live where you do if one was building the model of HMS Victory. That will be one of my goals...going to Portsmouth to see the real thing. As you may know, I built the model of Cutty Sark and best of all I have pictures of me standing on the deck of the real ship in Greenwich. In any event, I'm now starting the deck pieces for the upper gun deck so away I go. Have a great day and thanks for reading my log. Jerry
-
Good evening, Lawrence..and thanks for your visit to my log. Alaska was nice but having lived there once I'm happy to be back in SW Florida. The weather was great but I know how thw winters there can be, I expect to continue my progress which means there'll be more pics coming soon. Please stay tuned and take care. Jerry
-
Hello Tom and thanks for your comment. I appreciate your looking in on my log. Take care, Jerry
-
I'm back from Holiday and happy to be working on Victory once more. We had a great time having the wonderful fortune of beautiful weather in Alaska. I've been to Juneau, Alaska about q dozen times and for the first time, I saw the sun shining there last week. The pics attaches show where my progress is aas of today. I guess I'm about to begin the "upper deck fixings" so this will be a new phase, an exciting one for me. I hope all my MSW friends are fine and doing well. Jerry 6/26 http://modelshihttp://modelshipworld.com/uploads/monthly_06_2013/post-545-0-65731300-1372272738_thumb.jpgpworld.com/uploads/monthly_06_2013/post-545-0-33359300-1372272721_thumb.jpg


-
To all my MSW friends...I miss talking to you all but have to admit that the break from HMS Victory is welcome. Hope to talk to you all soon but in the meanwhile here's a pic of where I am right now...Juneau, Alaska. OOPS...Looks like the pic is too large to upload. I'll try again another time as the cost of being on the internet is UNLAWFUL....Later then... Jerry