HOLIDAY DONATION DRIVE - SUPPORT MSW - DO YOUR PART TO KEEP THIS GREAT FORUM GOING! (Only 24 donations so far out of 49,000 members - C'mon guys!)
×


Jerry
-
Posts
1,753 -
Joined
-
Last visited
Content Type
Profiles
Forums
Gallery
Events
Everything posted by Jerry
-
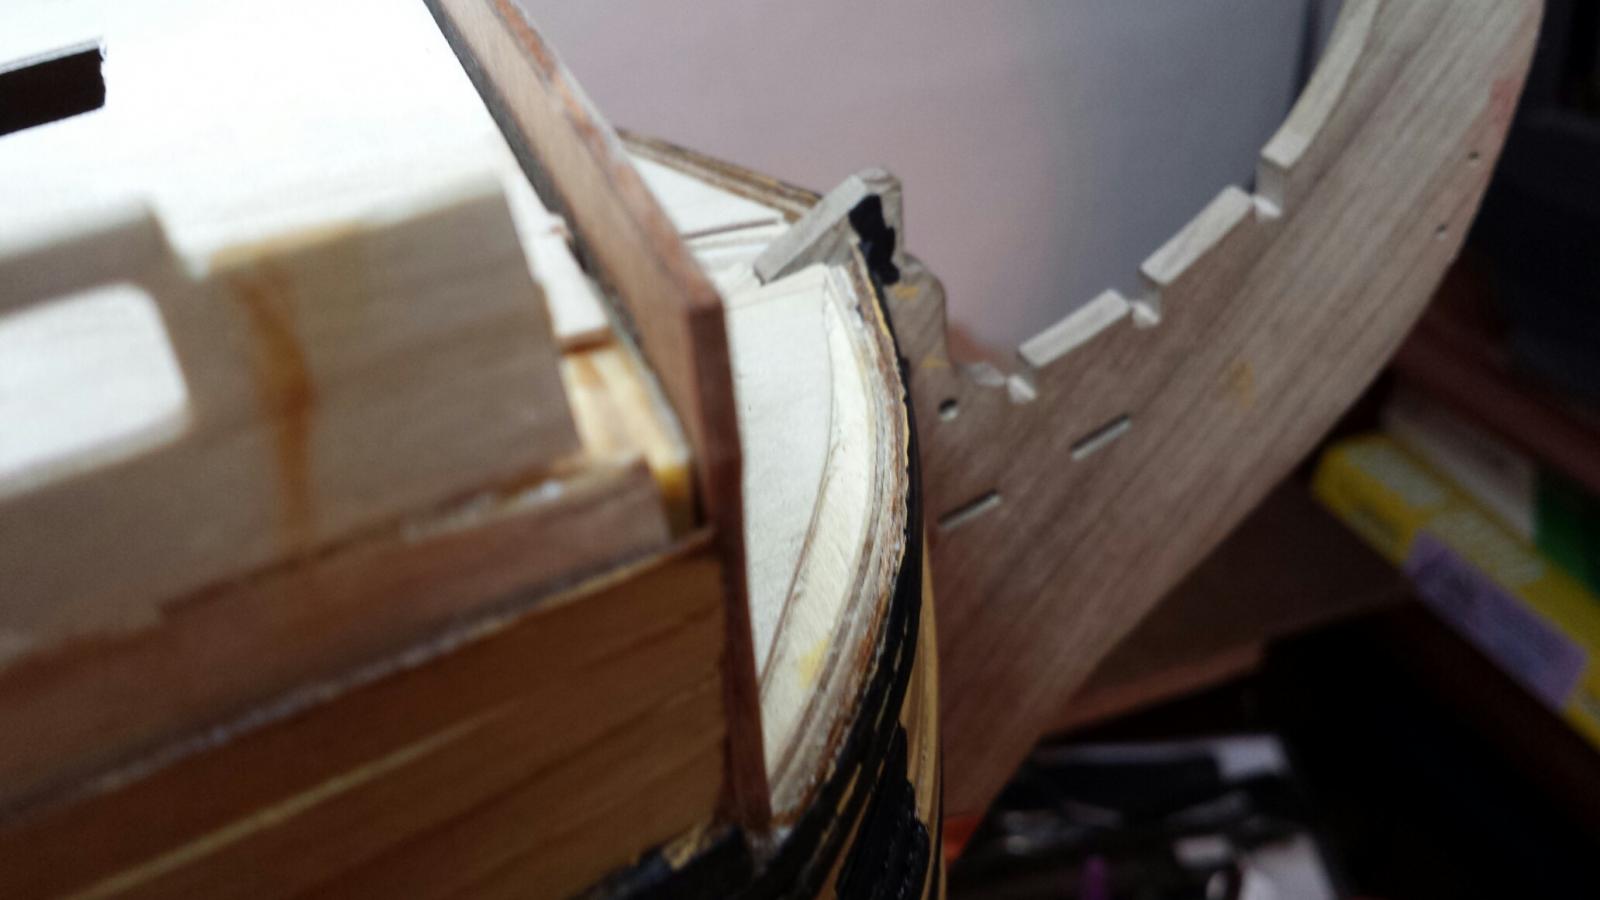
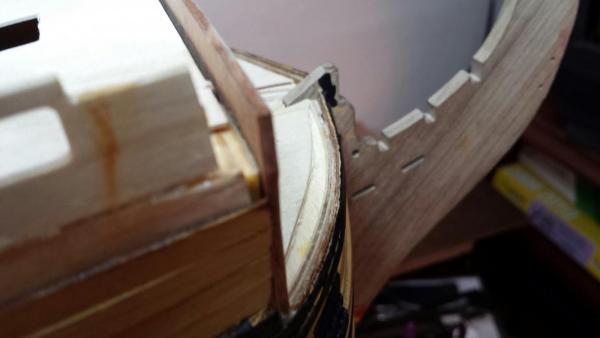
Good afternoon friend David...Thank you for your kind words. It will feel good to be "out in the daylight." First comes the Beakhead Bulkhead which puzzles me a bit as it leaves spaces at top and is lower than the ship's sides. But in checking your site it looks like that's the way it's supposed to be. The foto will explain what I mean. School has started ehre again so that means my better half who is a teacher, is working all day again and that leaves me with a very quiet house to work in. Let me know, please, if the beakhead looks wrong. Many thanks again, Jerry
-
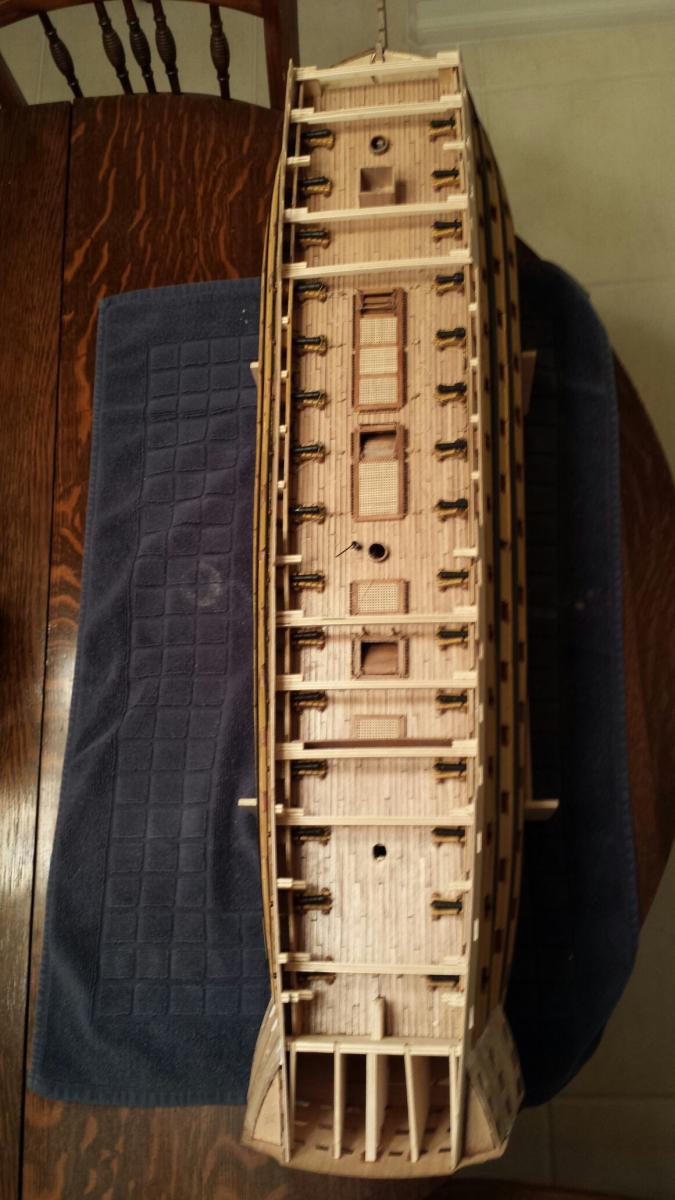
Hello.. Latest progress (not much)...Installed Quarterdeck, Skid beams, fore brace bitt pins and skid beam pillars. As you can see the progress has slowed due to the intricacy of the work..More later.. Jerry


- 900 replies
-
- 1
-

-
- victory
- caldercraft
- (and 1 more)
-
Hello Colin,,, I love your build. It's the perfect remedy for the anxiety I contracted as I build the Jotika version of Victory. My build log is available here at MSW if you care to look at it. My problem is that I'm unhappy as I'm about to glue on the quarterdeck and therefore hide so much of the work that has taken so many hours to construct. I really believe that I would like to build the same cross section kit as you but have no idea where to purchase it. Perhaps you can help me out and let me know. I have no qualms about buying it from a UK company as I bought my Victory kit from an English company. Please let me know the name of a company where the cross section kit is available. Many thanks.... Jerry http://modelshipworld.com/index.php?/topic/1951-hms-victory-by-jerry-jotika-scale-172-1805-version-wood/
-
Good evening, Lawrence.. Thanks for your reply. Actually, there's an opening in the quarterdeck right above the steam trunk so maybe a hatch or something will be added. The steam trunk comes right up to the bottom of the quarter deck. As sson as I find out I'll let you know. How's your build coming along? I haven't visited your log for awhile but intend to do so soom. Take care, Jerry
-
Good evening, David...I have no idea what the steam trunk is or what it's for. I tried the internet and of course what I got mostly ...a steam trunk was used by passengers yo carry their belongings while travelling on ships in the 20's and 30's and 40's. I think you're right, it's a large sauna for the admiral and his girl friend. Thanks for your compliments, I'm sure that by now, you know I appreciate them and you. I hope the weather in NE England is still decent. Ta ta...Jerry
-
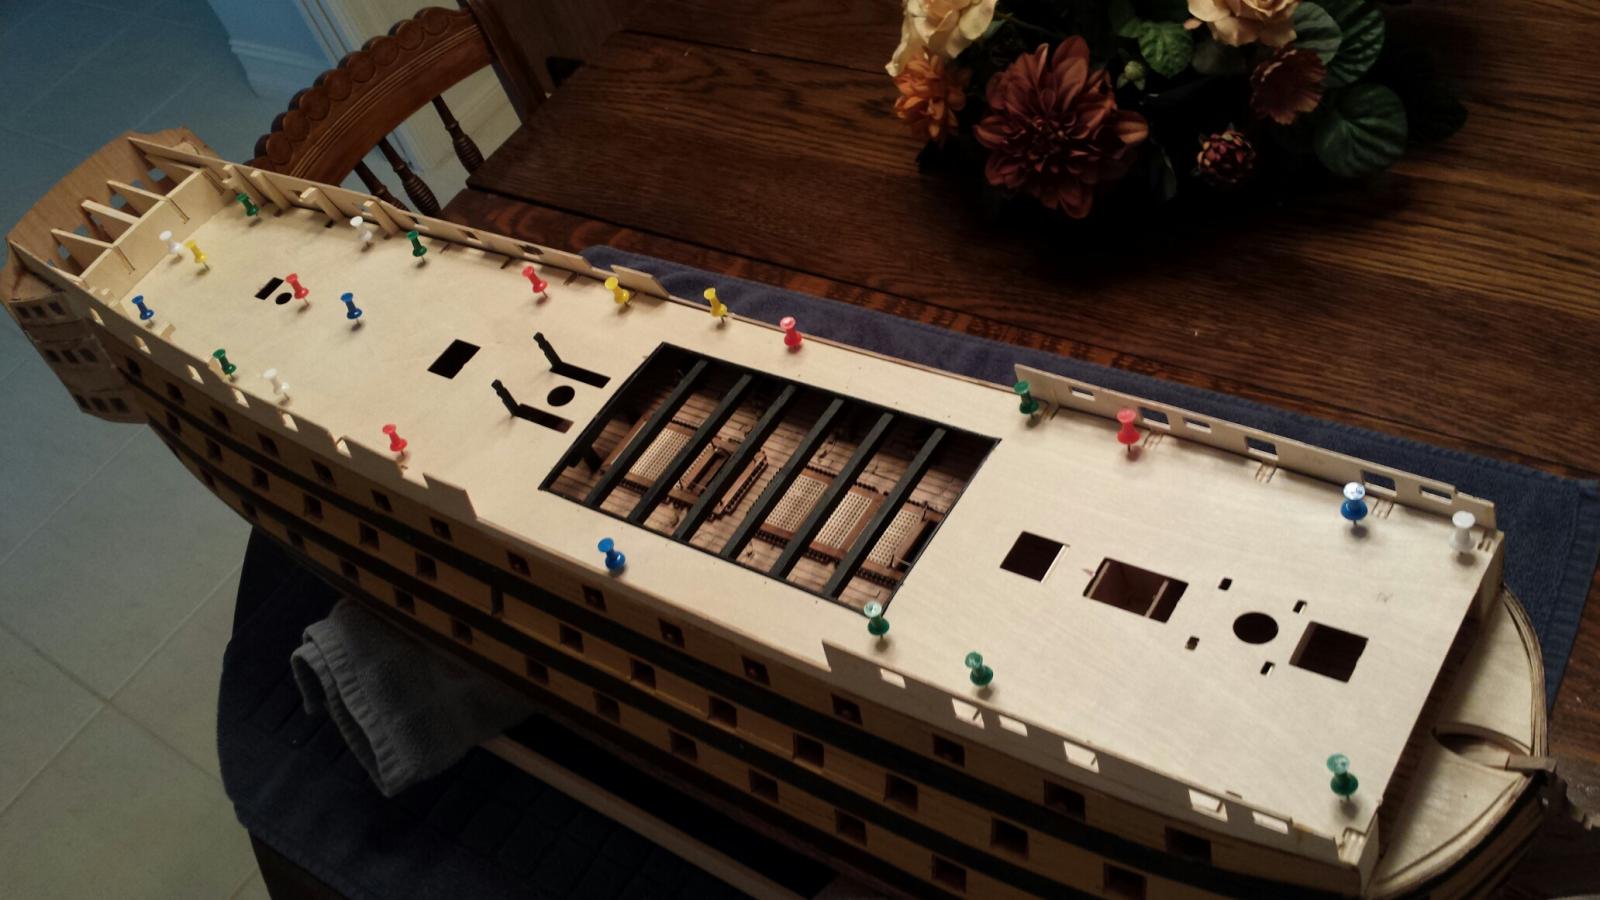
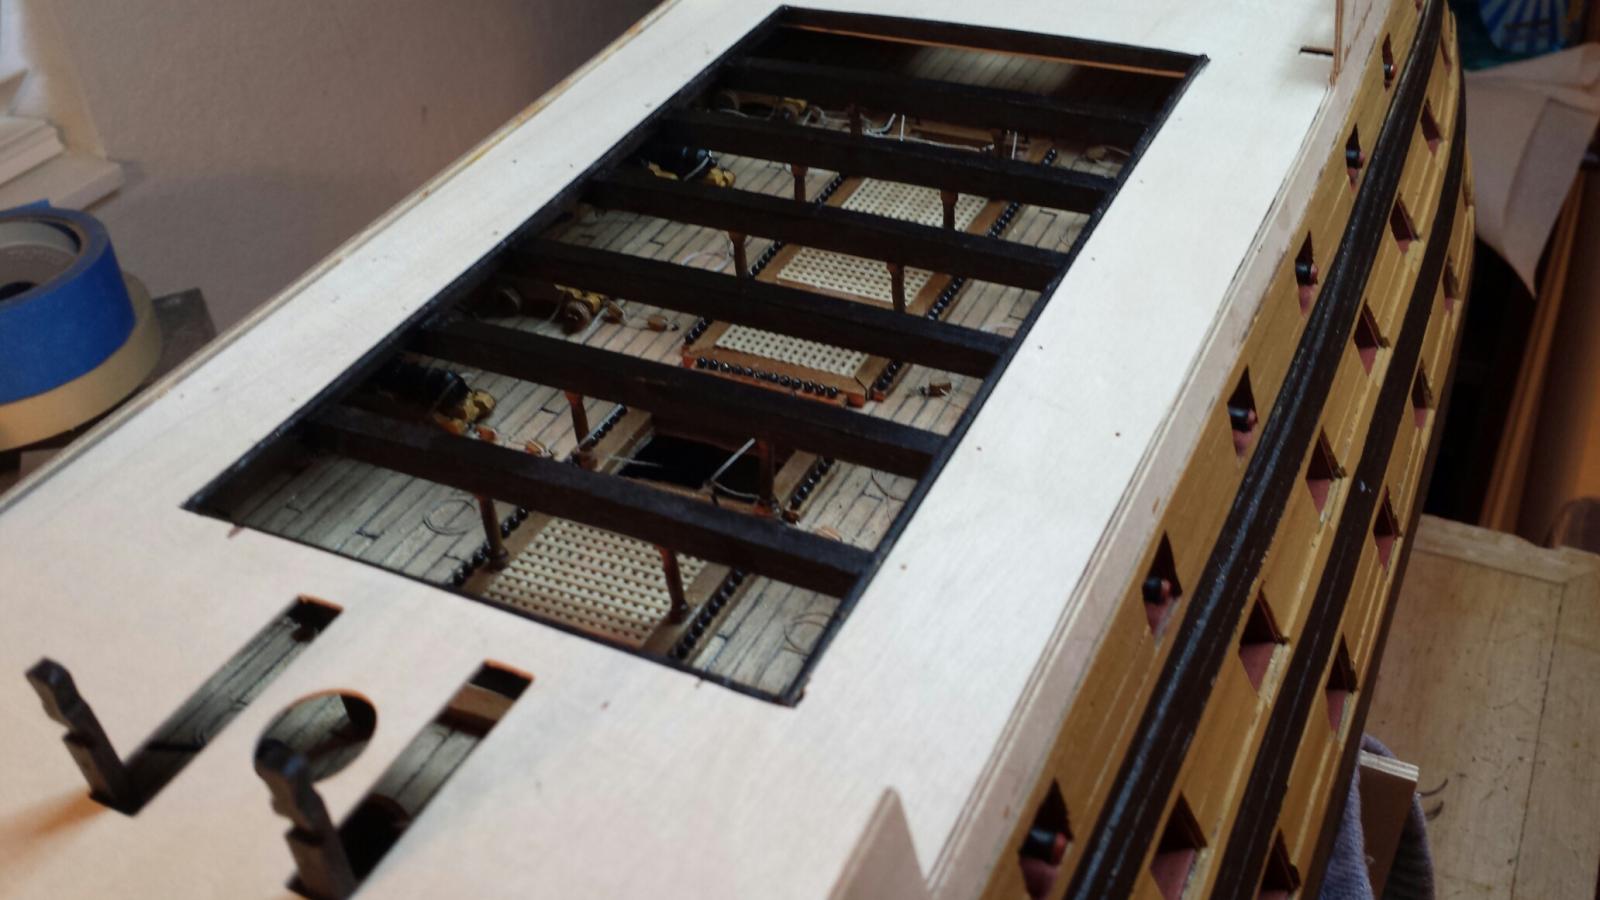
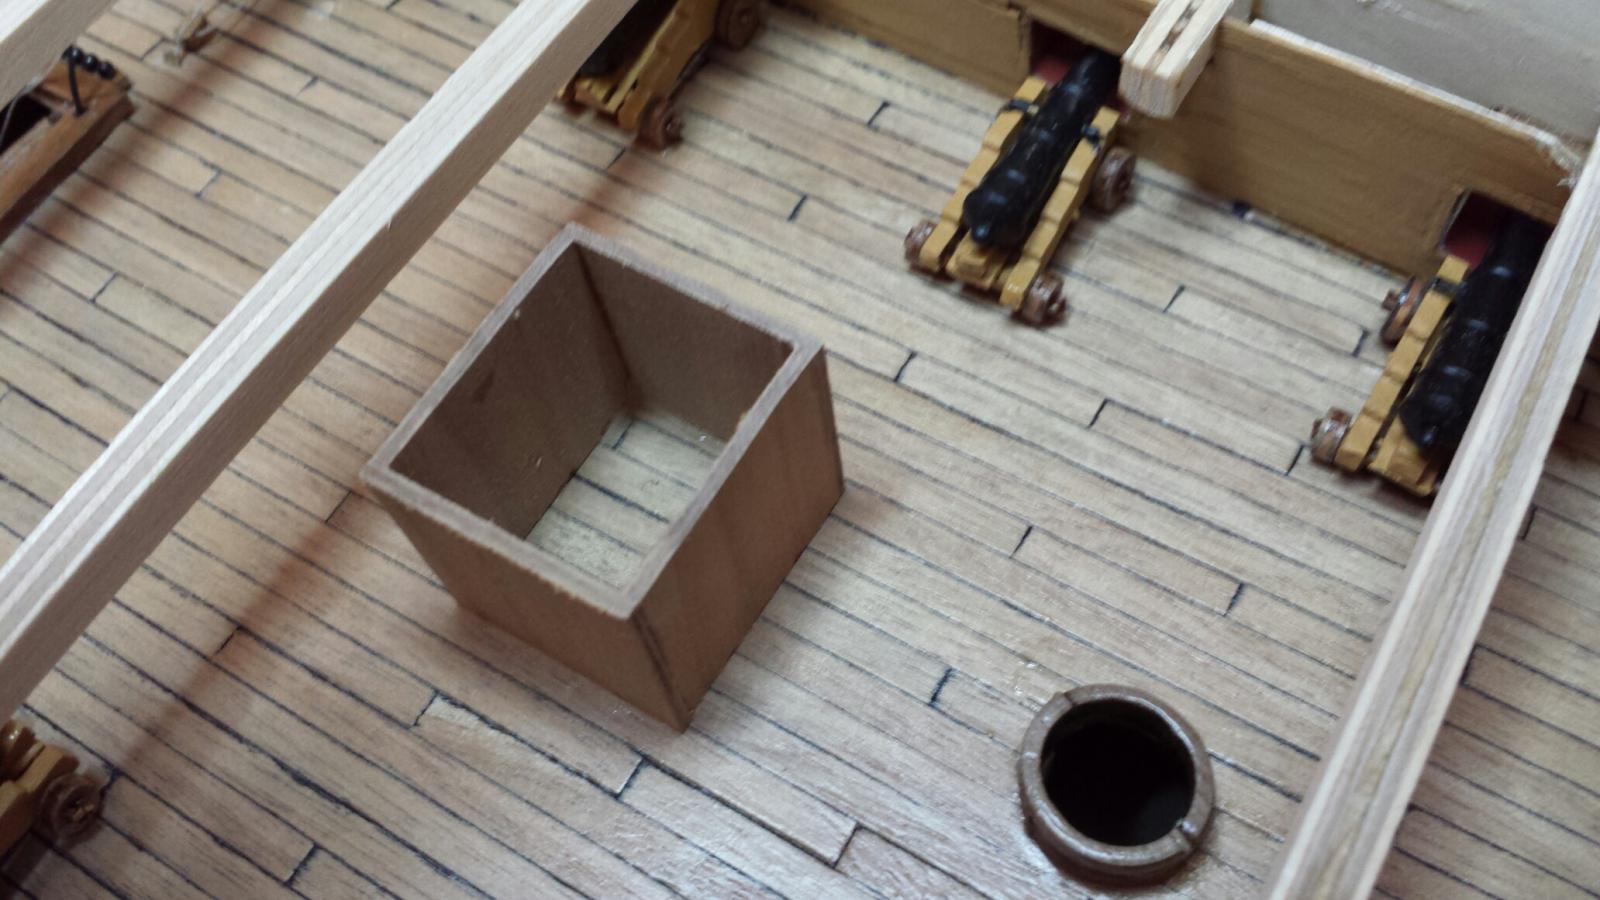
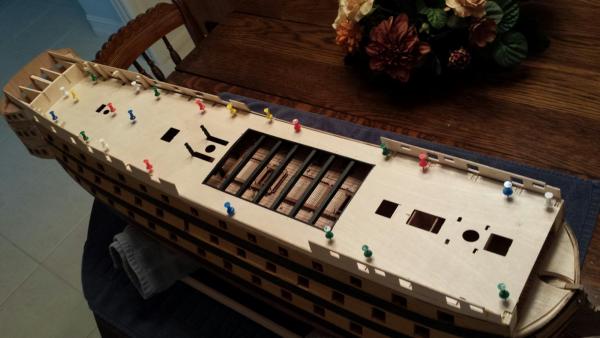
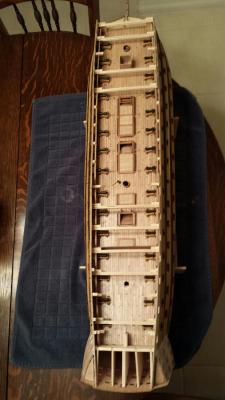
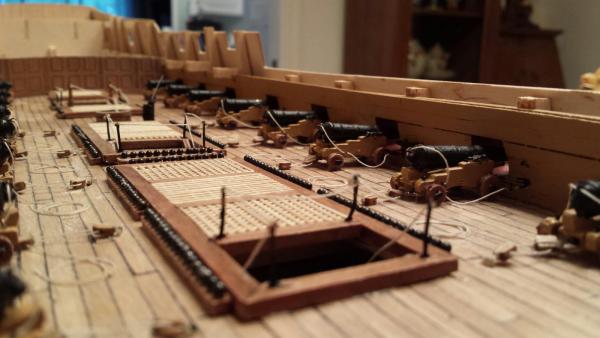
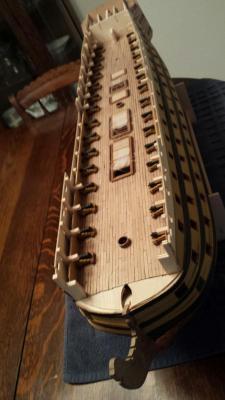
Things are beginning to move along nicely again. I'm happy that I'm ready to glue in the quarter deck. You will notice that the camber beams are in place and that there really is a steam trunk on the upper gun deck. BUT, this is also a time of bitter sweetness. So much of the details of Victory are about to be covered up. Thankfully I have the photos to remember what everything looked like. I remember that before I started my build I gave a lot of thought as to a way to have a large opening in one side of the ship so as to see what kind of guts this model has. I know that there is a model of a cross section of Victory and if I'm still around and have my vision and sanity when this model is finished, maybe I'll attempt to construct it. Yeah, I know, they're not the same scale but really, what's the difference? Just a thought anyway. By the way, does anyone else agree with me that the attached photo of Victory, viewed from above, reminds me of a Manatee...We have a lot of them here in Florida. So here are the pics taken today, August 15, 2013. Later, everyone.


- 900 replies
-
- 2
-
-
- victory
- caldercraft
- (and 1 more)
-
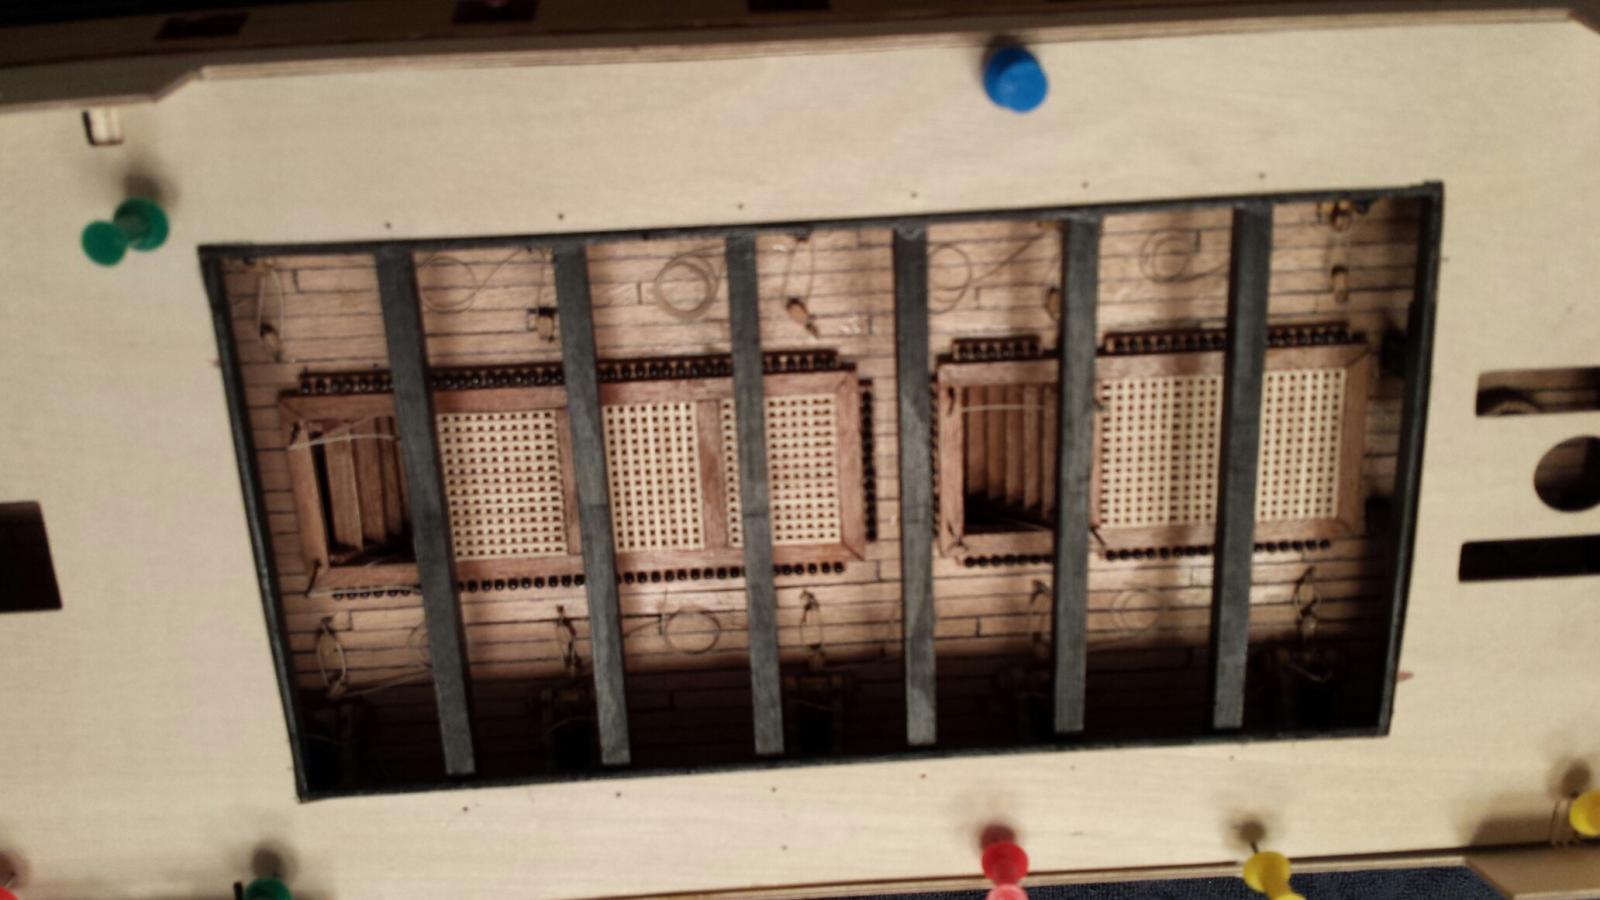
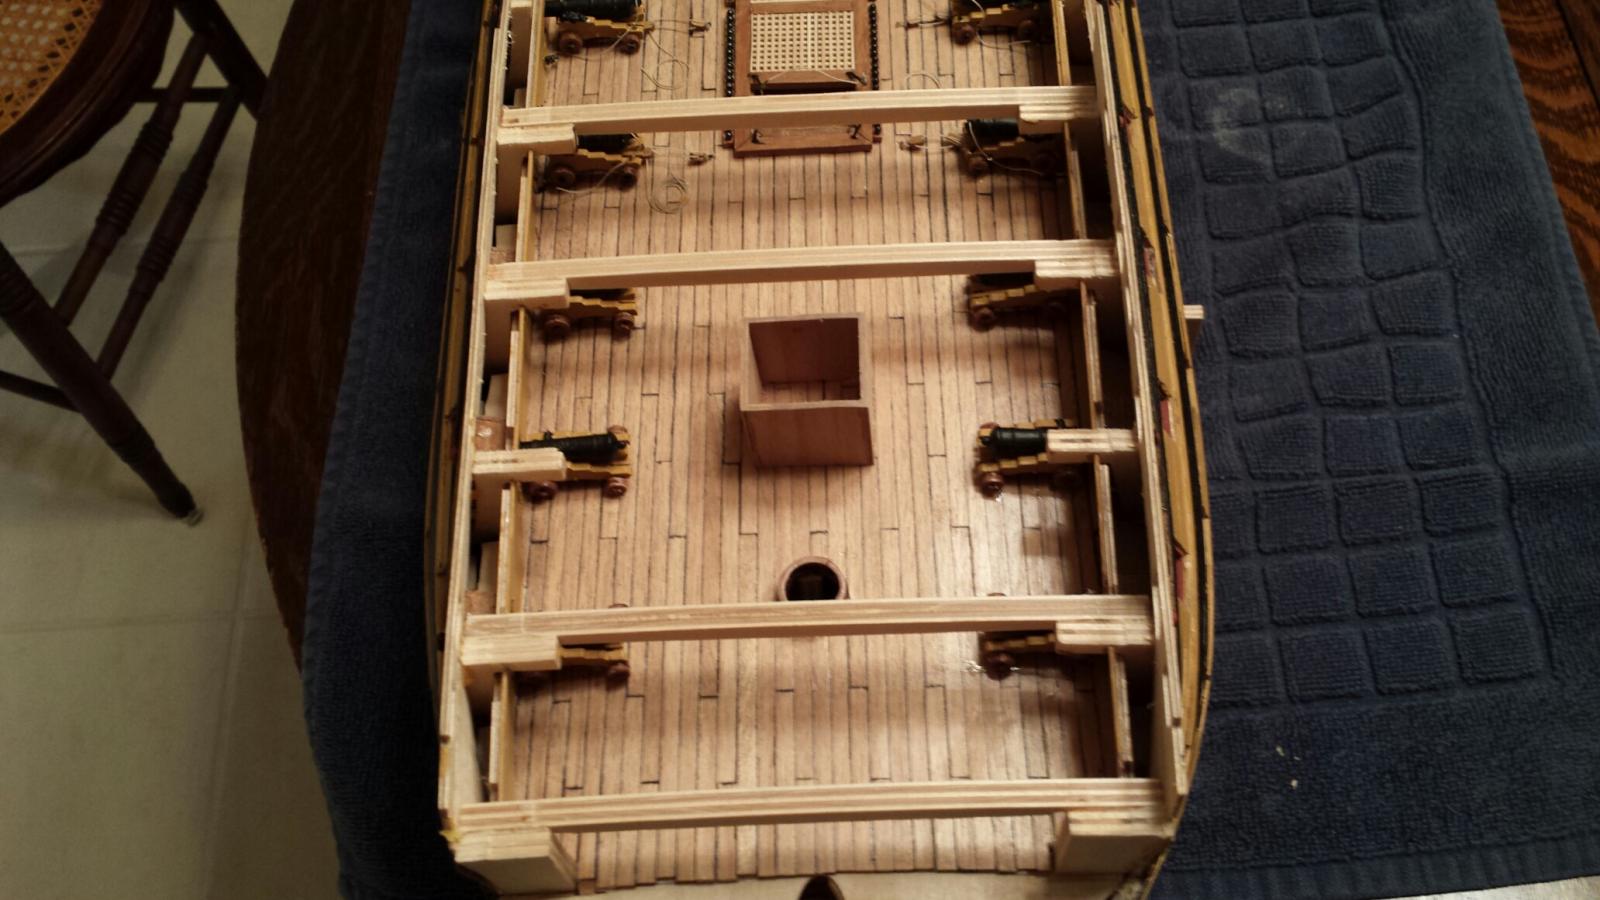
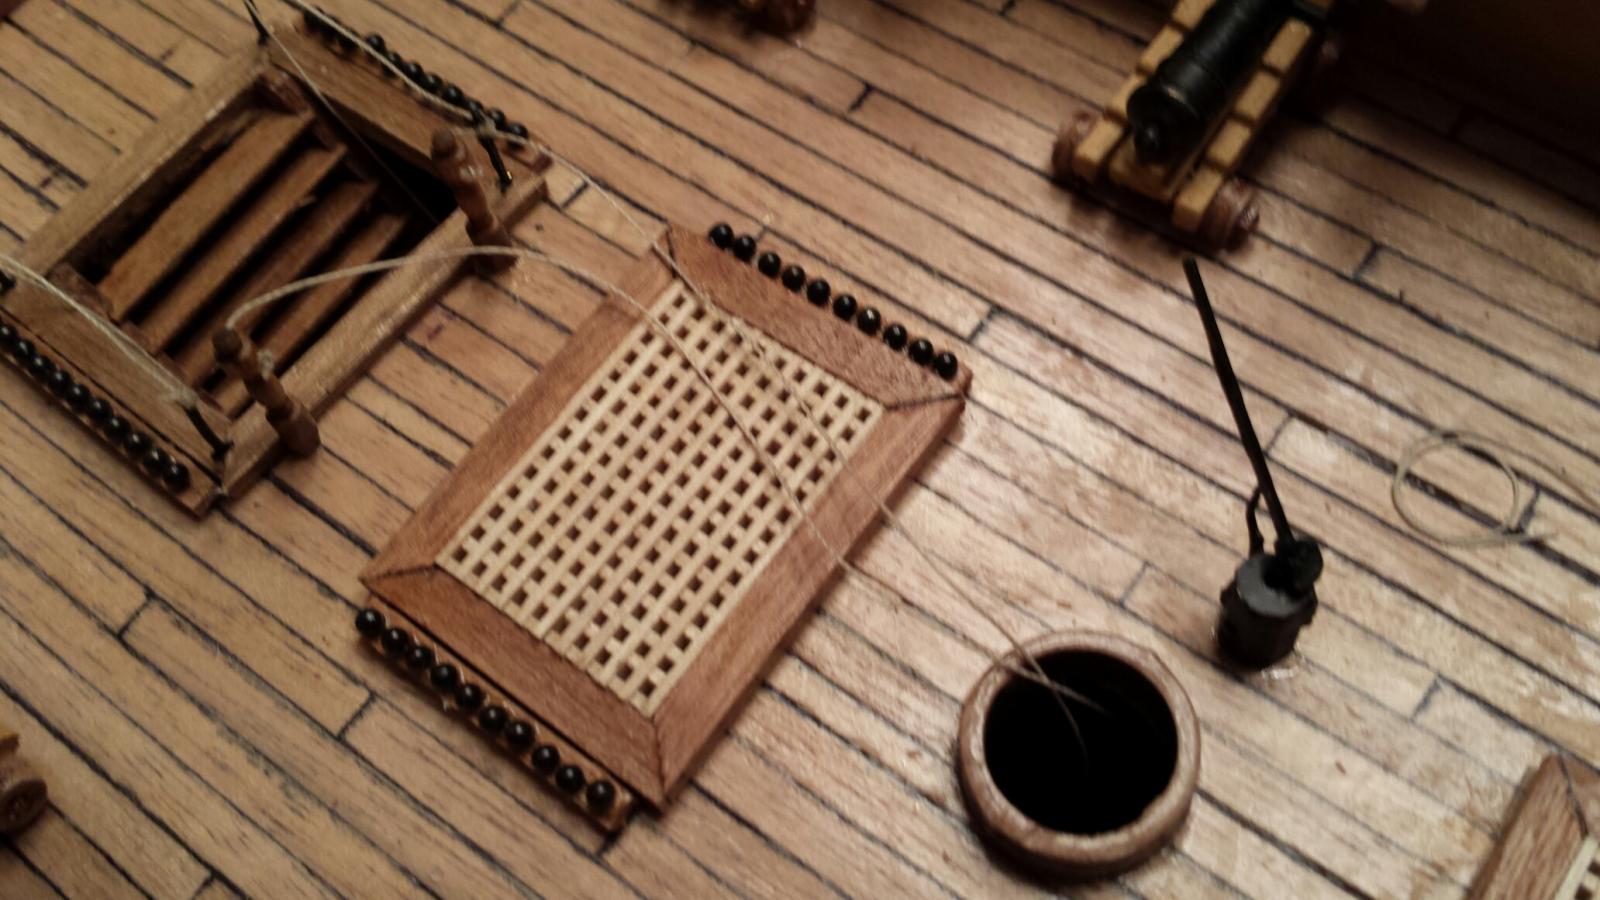
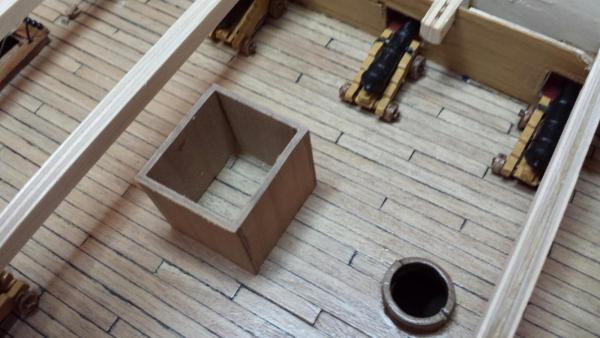
Hi Lawrence.. As far as I can tell, the steam trunk is a 4- sided box that sits on the upper gun deck just aft of the foremast. I'm really not sure of its use but I believe it was used for storage. In this kit there is no top, just the four pieces, 2 sides, a front and a back. Since the sides are attached to the outsides of the front and back, the box actually is not a square; it is slightly wider than long. Believe me, I will not be haunted if I leave the trunk off the ship. It will never be seen as most of the upper deck cannons. And, you are right, I am looking forward to adding the "fun stuff" to the model. Hope you are having a nice morning and thanks for your thoughts. Regards, Jerry
-
Here's a few pictures of the latest progress on my build. It looks like things are shaping up again and it won't be long before this old guy will be squeezing in the quarter deck. According to the construction manual I'm ready to build the Steam Trunk. This something no one will ever see so what's the sense of spending precious time assembling it? In any event, I'm ready to glue in the camber beams for the quarterdeck if I don't panic and think I misplaced them as before. I'll be back again when additional progress is made. Happy days everyone... Jerry


- 900 replies
-
- 1
-
-
- victory
- caldercraft
- (and 1 more)
-
Good morning Brian.... I appreciate your comments on my build. You're so right; it's ambitious all right and has become the consumer of most of my time. Lately I have learned that there are other things in life so my progress has slowed a bit. Please stay in touch. Jerry
-
Good morning, Lawrence... Building the Cutty Sark was a walk in the park compared to Victory. The one thing that was very helpful for Victory was applying the copper plates on Cutty Sark. It was about 15 years ago when I built Cutty Sark but I remembered the method I used in applying the copper and it came in handy when doing the same with Victory. I get a real good feeling of satisfaction whenever I walk into my house and see Cutty Sark, in it's beautiful display case, moored by my front door. And thank you for sharing your progress with your current build. Rigging the cannons was very time consuming as was building their carriages. To think that this procedure isn't really finished is troublesome as more cannons will have to be rigged and carriages built for the quarter deck. Good luck with your build: let me know how you're doing. Best.... Jerry
-
Hi David.. Your masts look so good. I can't wait to get the stage that you're at. Looks like you really know what you're doing and I'm happy to know you and be one of your friends. The best of luck to you. Jerry
-
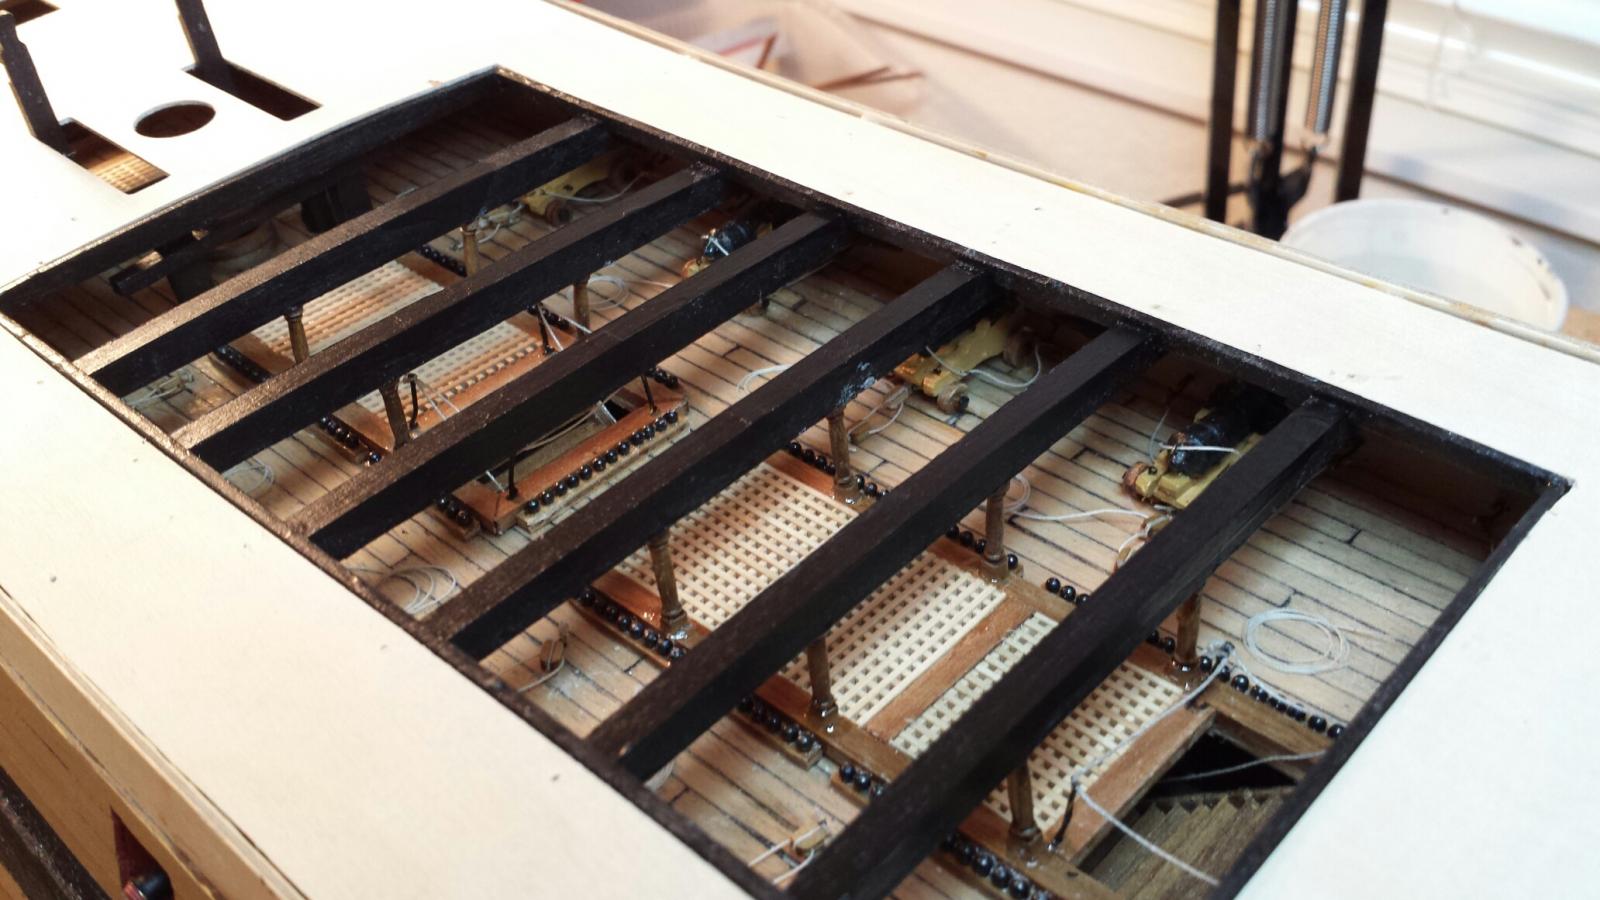
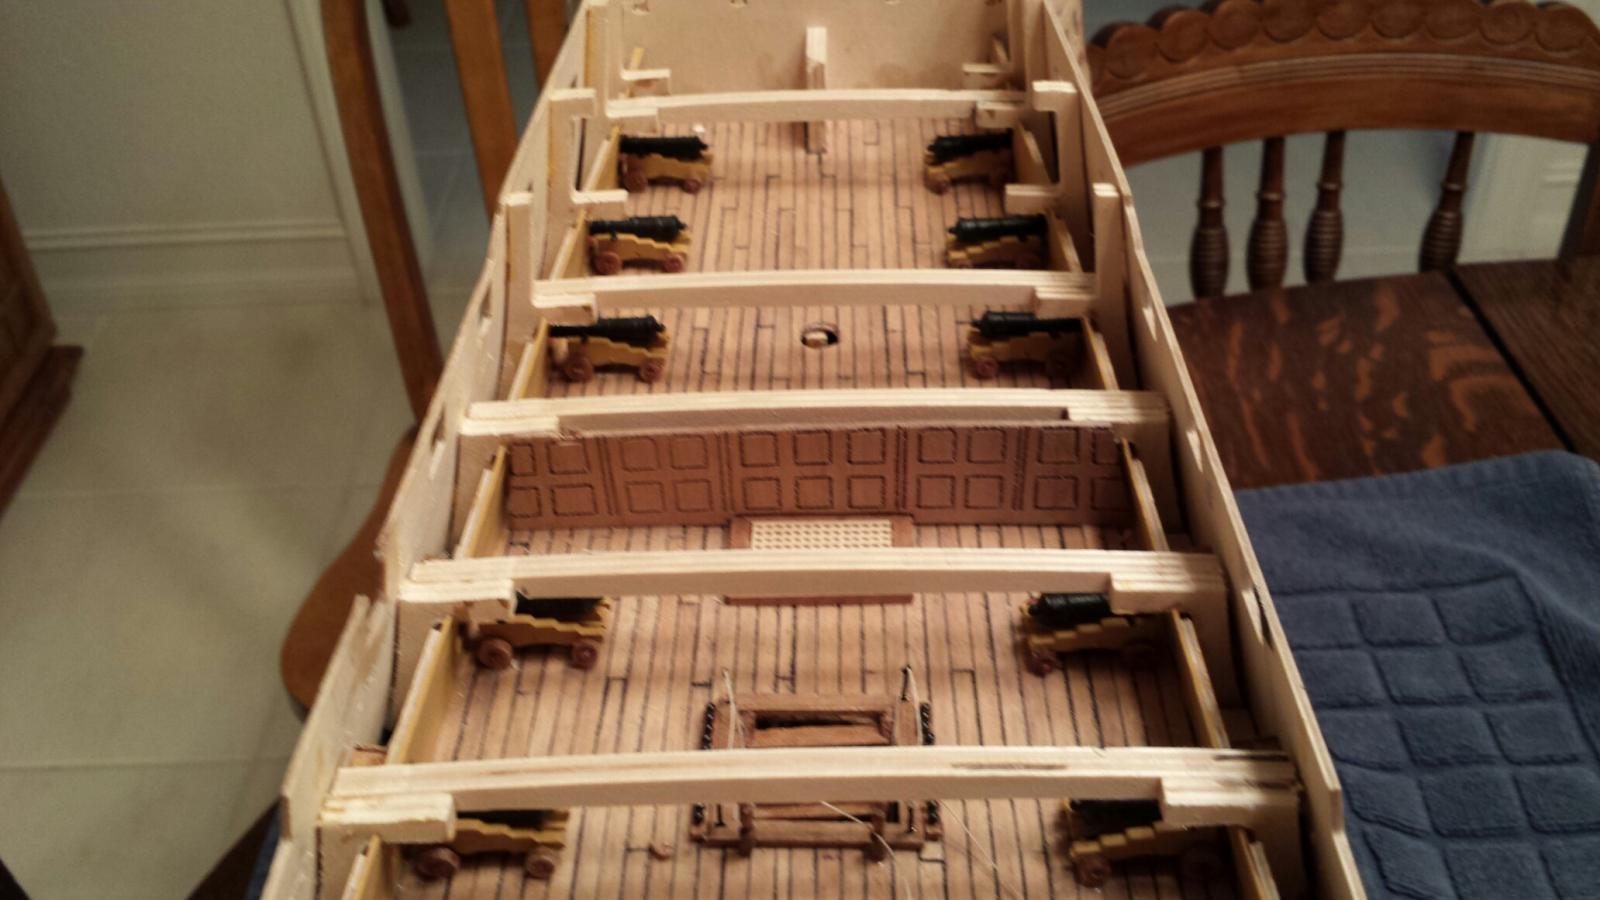
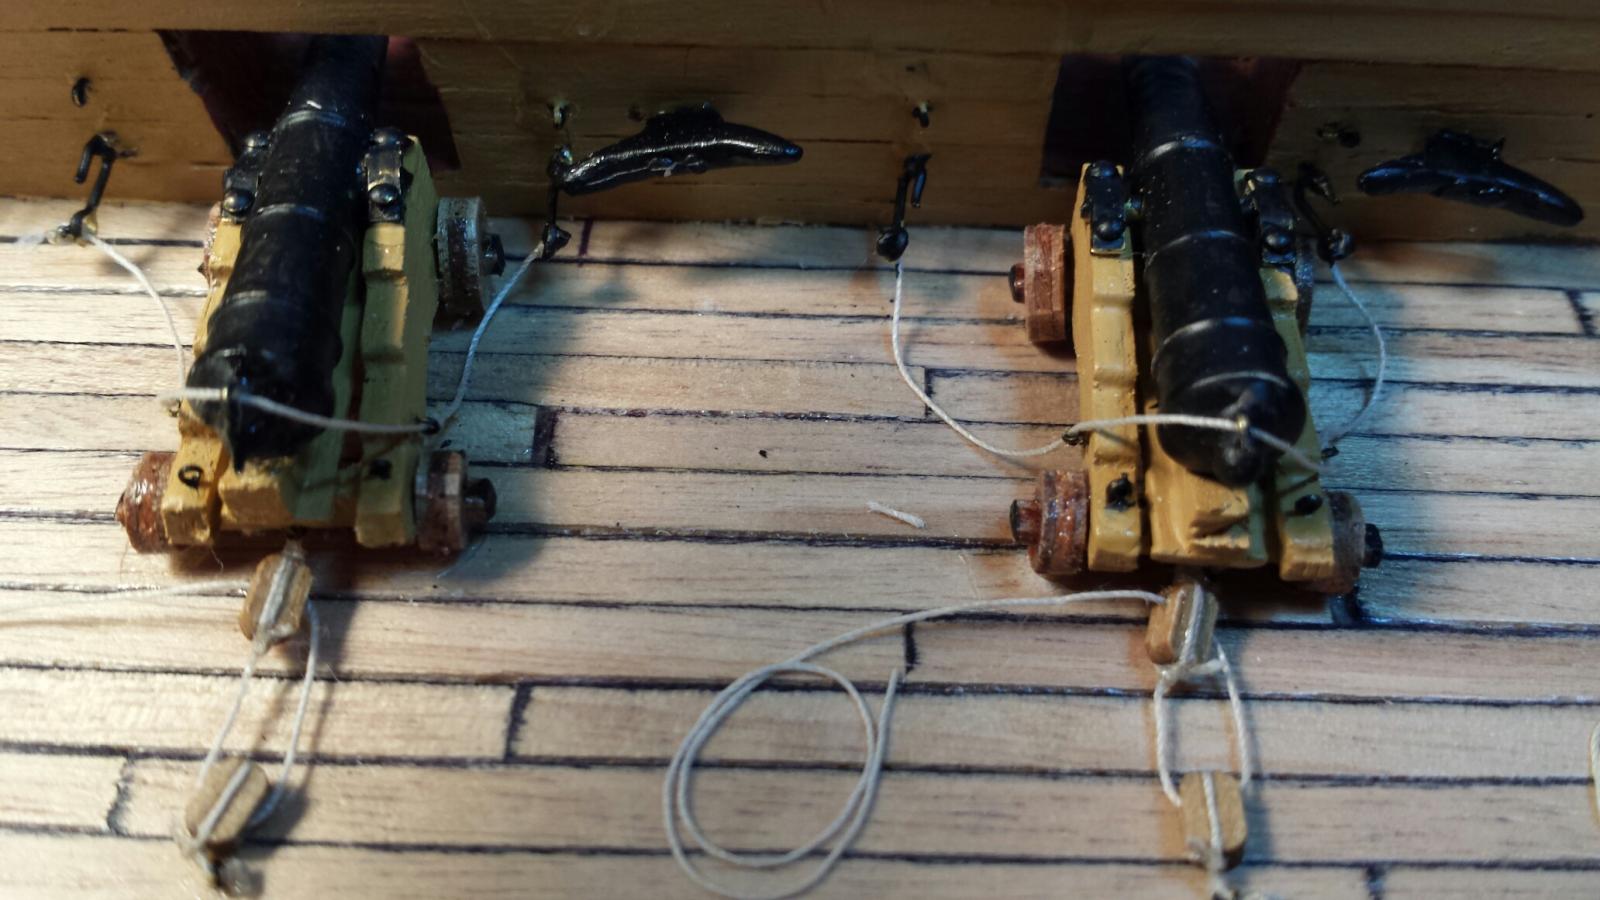
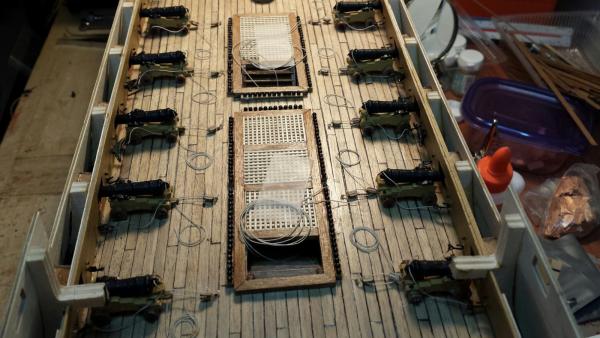
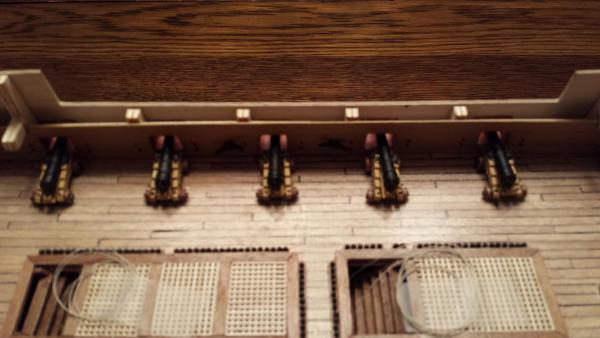
Well, here I am back again and happy to say that the upper deck breach lines anad cannon tackle is finally completed. As stated before, I have chosen to limit this phase of the build to the 10 cannon carriages that will be seen, even though through an opening in the deck above. So, whatever the manual calls for next, I am excitedly looking forward to doing it. Thanks to all of you who have helped me with this part, especially Dave (Shipyard Sid,) who was gracious enough to supply me with some photos that were extremely helpful. I appreciate any comments anyone may have.
- 900 replies
-
- 2
-
-
- victory
- caldercraft
- (and 1 more)
-
Thanks, lawrence. Do you really think there's something easier? I hope you;re right. I'm getting sick of looking through my magnifying lamp. Actually I'm enjoying the build and will admit I'm learning something all the time. Hope you're doing well to. Jerry
- 900 replies
-
- 1
-
-
- victory
- caldercraft
- (and 1 more)
-
It's Sunday evening and I spent a few hours today working on the cannon rigging for the Upper deck. So far I've finished rigging the starboard side cannons I have chosen to rig and I have now completed the breach rigging of the port side cannons. I'm anxious to complete this job so I can go on to something else. Working all these hours on carriages, cannons and their rigging has me yearning for something different to do on this ship. I hope to accomplish this tomorrow and get on with it. Latest pic attached. Jerry

-
Good morning, Lawrence... Yep, I'm sorry. I forgot that you are building a different kit than I am; I apologize for the misunderstanding. I'm about to continue working on the cannon rigging that I began yesterday. Oh what fun! Have a great day and thanks for clearing up the situation. Jerry
-
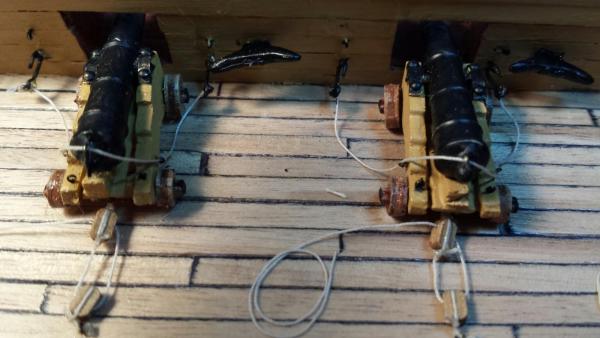
Hi Lawrence.. Thanks for your comments. I'm not so sure I know what you mean by the centre deck. Do you mean the upper gun deck which is the one I'm working on. If it is, then you'll need to rig 10 cannons since 5 on each side will be seen. I started to rig the breech lines and prepare the tackle lines that run from the back of the cannon carriages to the eyelet behind it on the deck.

-
Hi David... I appreciate your appreciation. You are too nice. I'm actually building a stretcher (jig) to use to construct the rigging. Sort of like one I saw on someone else's log. I think it may have been Gil Middleton but I'm not sure. I bought a piece of cork board so that I could stick straight pins in it. These pins are the ones with spheres for a top. I'll set them apart the right distance and construct the block and tackle between them. I'm planning to use small hooks that came with the kit at each end of the tackle. Hope you understand this; I'll have pictures as soon as I get started. Jerry
-
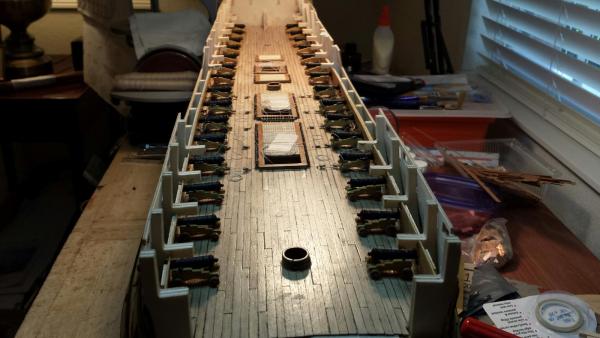
Happy weekend everyone...A progress report follows: I am finally ready to rig the cannon tackle and breech lines for the 10 cannon carriages that will be able to be seen. As others have chosen, I also will only rig these 10. As I took the pictures of the cannons on the upper deck lined up as ready for a 30 gun salute, I felt a bit of anger I must admit. Why do we spend all the hours we do ruining our eyes and our nervous system making thing that we will never be able to enjoy since we won't ever be able to see them? I remember thinking before I started to build Victory how nice it would be to have an opening in the side of the hull in order to see the interior of this fine ship. But, like a lemming, I am building her in the way of most others. Some photos taken today are attached. Tomorrow I hope to begin tackling the tackle. Jerry


-
Hello Lawrence and thanks for the note. The 10 cannons that I plan to rig for the upper deck have been finished except for black touch up painting. I plan to do that tomorrow as well as mounting to their carriages the other 20 cannons that will only be seen frrom the outside of the hull. I also plan to rig the 10 mentioned above and place all 30 guns in their positions on the deck. Well, that'sa bit of progress even though my eyes are not as good as they once were. I've been checking your log a lot lately and envy the progress you've made. Your build looks great and I hope to get where you are one of these days. Take care and happy building. Jerry
-
Hey Lawrence.... Thanks for the very kind words. I never realized that some cannons came with the breech rings already mounted. Good for you; it took me a day just to attach the little buggers but as of tonight all 30 of the upper deck cannons are painted and ready to be attached to their carriages. It was fun painting the muzzles red and then the cannons black. One needs a steady hand to do that so at 81 (almost) I'm thankful that I haven't begun to shake yet. I plan to rig just the 10 cannons that will be seen tomorrow and get on with the next upper deck work right after that. I'm actually happy to be able to move on. Best to you, Jerry
-
David, I guess I can finish the breech rings tomorrow. Then I'll paint them black and continue with the micro drilling and eyelet installations. Have a good night my friend. The problem is holding the ring in place waiting for the quick glue to set. I tried 1 to 5 second glue and am now back to 5-15 second glue. I need the extra few seconds to position the eyelet after dropping the glue in place. Oh what fun. Jerry
-
Lawrence.. Thanks, Buddy. Slow and steady and hope for the best.
-
David, So far I finished about 6 of them and the shaft snips off OK.
-
Hello David... I'm in the process of attaching the breech ring to the rear of the cannon; I finally figured out a method. I'm gluing the eyelet on with the shaft that I'll cut off before painting black.. As you can see there's a prime coat painted on at this time. I just started as I received your message and wanted to answer you. Best to you. Jerry
- 900 replies
-
- 1
-
-
- victory
- caldercraft
- (and 1 more)
-
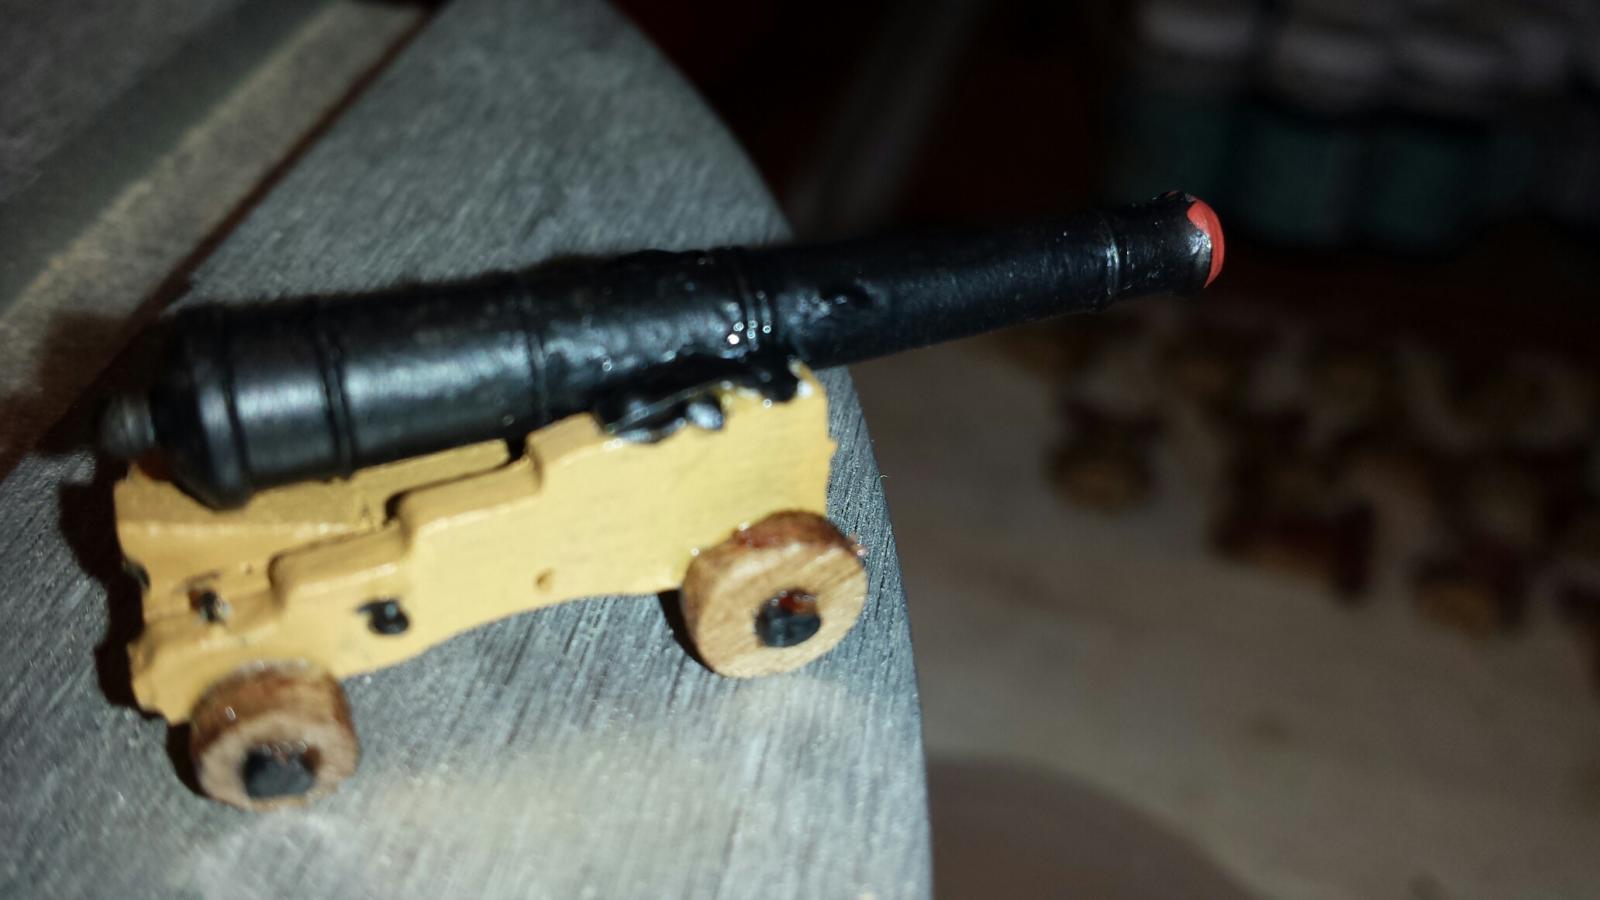
Hi Lawrence...Thank you for your response and much appreciated comment. I'm off to the hobby shop this morning to find the right size eyelts to turn into breach rings for the cannons. The kit didn't mention or supply them and they are definitely attached to the rear of every cannon. Some builders ignored tham completely and merely ran the rigging around the breach "knob." Shipyard Sid graciously supplied the correct size, (0.9 mm) so I'm going to need them as I'm about to paint the cannons with a second coat, this one black. I've attached a pic of my prorotype cannon which took several hours to make. I've cleaned up the paint job since I posted the photo especially around the red muzzle of the gun. Attaching the six tiny eyelets, gluing and nailing the trunnion brackets took more time than I imagined. I hope to get more than one cannon finished a day. Best regards, Jerry July 18, 2013

- 900 replies
-
- 2
-
-
- victory
- caldercraft
- (and 1 more)