
MORE HANDBOOKS ARE ON THEIR WAY! We will let you know when they get here.
×


kruginmi
-
Posts
629 -
Joined
-
Last visited
Reputation Activity
-

 kruginmi got a reaction from yvesvidal in Jylland by kruginmi - Billings Boats - 1:100
My intent is to do something every evening that I am home. Today the agenda was full but I still managed to get down to the shipyard. I cut out the false main deck. I of course measured three times and still managed to cut a piece short so I will need to go to the store for another 1/32" basswood board. Additional wood is required for the fore and aft upper decks anyways.
Still a few touches to do before gluing these down. The decks are cut a little proud to allow sanding to shape. The rigidity of the hull will certainly be much greater soon. There is a camber to the deck side to side. I will glue and brad nail to affix, then pull the nails after the glue dries.
Cheers, Mark
-

 kruginmi got a reaction from Keith Black in Lady Anne by kruginmi - FINISHED - 1:50 - kitbash of Artesania Latina Harvey
So, after a bit of a hiatus from this site and a return to document my Jylland efforts, I realize I never posted the final pics of the Lady Anne. To recap I configured the deck (Krug design) to handle the Pride of Baltimore II rigging and true to form that is how I outfitted her. She turned out pretty nice and met my expectations.
Still haven't made a display case but I keep her close by my work at home desk to give me happy thoughts when I need them.
Stay Building My Friends, Mark
-
 kruginmi got a reaction from Knocklouder in Lady Anne by kruginmi - FINISHED - 1:50 - kitbash of Artesania Latina Harvey
So, after a bit of a hiatus from this site and a return to document my Jylland efforts, I realize I never posted the final pics of the Lady Anne. To recap I configured the deck (Krug design) to handle the Pride of Baltimore II rigging and true to form that is how I outfitted her. She turned out pretty nice and met my expectations.
Still haven't made a display case but I keep her close by my work at home desk to give me happy thoughts when I need them.
Stay Building My Friends, Mark
-
kruginmi got a reaction from yvesvidal in Jylland by kruginmi - Billings Boats - 1:100
Small steps but it all adds up. Glued in the 13th slotted bulkhead, the last contained in the kit. As mentioned earlier, I will do two additional forward of this last but I need some structure present to identify sizing. There are also two subsections going from the main deck up to the fore and aft upper decks.
I then proceeded to glue the central spine in. This was not in the kit. Given the wonkiness of the bulkheads I defined and cut the slot as well as provided the wood. This not only strengthens the hull but provides a good basis for the two part false deck. Sections of the spine will need to be eventually cut away (staircases and mast blocks) but the stability will be taken up by the planking. The side slots are ignored - they do not line up. I will glue in spacers between each bulkhead (one each side) for additional stability.
I used glue fillets as opposed to glue in the actual joint. The wood in the kit was very porous and I found sucked in the glue and became super tacky very fast. My concern with the snug fit was that I would not be able to get the wood positioned after glue up before It became 'stuck.' Additionally, this was not a load bearing component. This will be fine.
Tomorrow I hope to get the first half of the false deck glued up. If things go well I might be affixing the first plank at deck level this weekend. I will be adding the bulwark supports next to the bulkheads.
Still need to decide on the aft deck size. Follow the model plans or follow the museum ship. Thinking to follow the museum ship layout in this regard.
Mark
-
 kruginmi got a reaction from AgesOfSail in Jylland by kruginmi - Billings Boats - 1:100
My intent is to do something every evening that I am home. Today the agenda was full but I still managed to get down to the shipyard. I cut out the false main deck. I of course measured three times and still managed to cut a piece short so I will need to go to the store for another 1/32" basswood board. Additional wood is required for the fore and aft upper decks anyways.
Still a few touches to do before gluing these down. The decks are cut a little proud to allow sanding to shape. The rigidity of the hull will certainly be much greater soon. There is a camber to the deck side to side. I will glue and brad nail to affix, then pull the nails after the glue dries.
Cheers, Mark
-
kruginmi got a reaction from yvesvidal in Jylland by kruginmi - Billings Boats - 1:100
On to the rough in of the bow. This is a week spot of the model as designed and several changes will be made. The newer model had some good ideas so I used some of those as well as some of my own. The last two bulkheads were the following:
You can see their lack of symmetry. The proposed changes were sketched in and then checked against the build as it stands today - primarily the location of the false deck support. Once satisfied I cut away the parts no longer needed.
You can see the amount of bulkhead I cut away on the topmost one by seeing just a hint of the previous slots cut in by Billings. Verified by the plans I drew and by eye, comes out just right. This was one of those areas where drawing the plans presented a lot of intersection pieces at different angles. Best to get the base complete and then fine tune on the actual model.
These were all the supports provided by the kit. I intend to add two additional ones. One below the forward end of the deck as well as one half way between for support and something to plank against. This will be quite sturdy eventually.
Note: The bowsprit buts up against the forward bulkhead, coming down the stem. I did finally look at the supplied wood for the masts and spars fully expecting dowels. Nope. They are already sized and shaped. That will save some time. Part of me wants to scratch build them but again the intent is to make the kit my Uncle always wanted too.
Stay Building My Friends, Mark
-
 kruginmi got a reaction from BobG in Jylland by kruginmi - Billings Boats - 1:100
My intent is to do something every evening that I am home. Today the agenda was full but I still managed to get down to the shipyard. I cut out the false main deck. I of course measured three times and still managed to cut a piece short so I will need to go to the store for another 1/32" basswood board. Additional wood is required for the fore and aft upper decks anyways.
Still a few touches to do before gluing these down. The decks are cut a little proud to allow sanding to shape. The rigidity of the hull will certainly be much greater soon. There is a camber to the deck side to side. I will glue and brad nail to affix, then pull the nails after the glue dries.
Cheers, Mark
-
 kruginmi reacted to robdurant in Jylland by kruginmi - Billings Boats - 1:100
Looks like a great start. Hope you don't mind if I follow along.
-
kruginmi got a reaction from AgesOfSail in Jylland by kruginmi - Billings Boats - 1:100
On to the rough in of the bow. This is a week spot of the model as designed and several changes will be made. The newer model had some good ideas so I used some of those as well as some of my own. The last two bulkheads were the following:
You can see their lack of symmetry. The proposed changes were sketched in and then checked against the build as it stands today - primarily the location of the false deck support. Once satisfied I cut away the parts no longer needed.
You can see the amount of bulkhead I cut away on the topmost one by seeing just a hint of the previous slots cut in by Billings. Verified by the plans I drew and by eye, comes out just right. This was one of those areas where drawing the plans presented a lot of intersection pieces at different angles. Best to get the base complete and then fine tune on the actual model.
These were all the supports provided by the kit. I intend to add two additional ones. One below the forward end of the deck as well as one half way between for support and something to plank against. This will be quite sturdy eventually.
Note: The bowsprit buts up against the forward bulkhead, coming down the stem. I did finally look at the supplied wood for the masts and spars fully expecting dowels. Nope. They are already sized and shaped. That will save some time. Part of me wants to scratch build them but again the intent is to make the kit my Uncle always wanted too.
Stay Building My Friends, Mark
-
kruginmi got a reaction from AgesOfSail in Jylland by kruginmi - Billings Boats - 1:100
The fun times when the shape of a ship emerges in just a couple of hours. I have one bulkhead left up front, but am doing some major mods into how it fits the upper deck. Truth be told, this is about a month in. Each bulkhead needed extensive work for height, keel cut out and mirror shaping. But with the plans I drew and mods made, it fit together very well.
The goal right now is to have the false deck attached by the end of the weekend. I will be adding spacers between each bulkhead for strength when sanding.
Stay Building My Friends, Mark
-
kruginmi got a reaction from AgesOfSail in Jylland by kruginmi - Billings Boats - 1:100
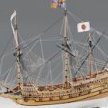
My Uncle had this one bouncing around his house (un-built) since probably the early 70's if not before. He asked if I could build it which I happily said yes.
Win - Win. I build a ship, there is a place for it to go. So here we go!
Note: This is the 'original' kit and not the new updated one. Actually pretty rough in the wood department - especially pre-cut stuff. I have spent quite a bit of time getting the pre-cut bulkheads to be usable as well as drafting my own plans off of the supplied ones to make something that fits the actual model.
I am just going to jump in from where I am. I kept updating and modifying the plans based on photos and the the Billings Boats downloaded mini plans for the updated model. Finally I just said lets make some wood shavings and glue something. We can figure stuff out as we go.
This model is a biggie - 30" hull length. I am adding a 1/32" false deck below the planking. The supplied deck will not be used (doesn't fit and stamped lines). This drawing exercise was essential for figuring out actual locations and good stuff like aft deck rake and bowsprit angle.
In this pic the rear three bulkheads have been glued and now am gluing the forth from the back. I abandoned the slots on the left and right in each bulkhead since they didn't line up. I defined and cut the central rib going down the middle. Yes, there are places where things go below deck (faux stairways, etc) but I want it straight and strong. Once the false deck is affixed as well as the top level planking cutting through this rib will be fine.
You can also see on the central bulkhead aft how much wood needed to be added for the upper deck.
So the build is on, with LOTS of scratch upcoming. Sooner than later need to figure out how far the aft deck goes (my plans show much farther than the museum ship has or the new plans show).
Cheers, Mark
-
kruginmi got a reaction from BobG in Jylland by kruginmi - Billings Boats - 1:100
On to the rough in of the bow. This is a week spot of the model as designed and several changes will be made. The newer model had some good ideas so I used some of those as well as some of my own. The last two bulkheads were the following:
You can see their lack of symmetry. The proposed changes were sketched in and then checked against the build as it stands today - primarily the location of the false deck support. Once satisfied I cut away the parts no longer needed.
You can see the amount of bulkhead I cut away on the topmost one by seeing just a hint of the previous slots cut in by Billings. Verified by the plans I drew and by eye, comes out just right. This was one of those areas where drawing the plans presented a lot of intersection pieces at different angles. Best to get the base complete and then fine tune on the actual model.
These were all the supports provided by the kit. I intend to add two additional ones. One below the forward end of the deck as well as one half way between for support and something to plank against. This will be quite sturdy eventually.
Note: The bowsprit buts up against the forward bulkhead, coming down the stem. I did finally look at the supplied wood for the masts and spars fully expecting dowels. Nope. They are already sized and shaped. That will save some time. Part of me wants to scratch build them but again the intent is to make the kit my Uncle always wanted too.
Stay Building My Friends, Mark
-
kruginmi got a reaction from BobG in Jylland by kruginmi - Billings Boats - 1:100
My Uncle had this one bouncing around his house (un-built) since probably the early 70's if not before. He asked if I could build it which I happily said yes.
Win - Win. I build a ship, there is a place for it to go. So here we go!
Note: This is the 'original' kit and not the new updated one. Actually pretty rough in the wood department - especially pre-cut stuff. I have spent quite a bit of time getting the pre-cut bulkheads to be usable as well as drafting my own plans off of the supplied ones to make something that fits the actual model.
I am just going to jump in from where I am. I kept updating and modifying the plans based on photos and the the Billings Boats downloaded mini plans for the updated model. Finally I just said lets make some wood shavings and glue something. We can figure stuff out as we go.
This model is a biggie - 30" hull length. I am adding a 1/32" false deck below the planking. The supplied deck will not be used (doesn't fit and stamped lines). This drawing exercise was essential for figuring out actual locations and good stuff like aft deck rake and bowsprit angle.
In this pic the rear three bulkheads have been glued and now am gluing the forth from the back. I abandoned the slots on the left and right in each bulkhead since they didn't line up. I defined and cut the central rib going down the middle. Yes, there are places where things go below deck (faux stairways, etc) but I want it straight and strong. Once the false deck is affixed as well as the top level planking cutting through this rib will be fine.
You can also see on the central bulkhead aft how much wood needed to be added for the upper deck.
So the build is on, with LOTS of scratch upcoming. Sooner than later need to figure out how far the aft deck goes (my plans show much farther than the museum ship has or the new plans show).
Cheers, Mark
-
 kruginmi got a reaction from GrandpaPhil in Jylland by kruginmi - Billings Boats - 1:100
My Uncle had this one bouncing around his house (un-built) since probably the early 70's if not before. He asked if I could build it which I happily said yes.
Win - Win. I build a ship, there is a place for it to go. So here we go!
Note: This is the 'original' kit and not the new updated one. Actually pretty rough in the wood department - especially pre-cut stuff. I have spent quite a bit of time getting the pre-cut bulkheads to be usable as well as drafting my own plans off of the supplied ones to make something that fits the actual model.
I am just going to jump in from where I am. I kept updating and modifying the plans based on photos and the the Billings Boats downloaded mini plans for the updated model. Finally I just said lets make some wood shavings and glue something. We can figure stuff out as we go.
This model is a biggie - 30" hull length. I am adding a 1/32" false deck below the planking. The supplied deck will not be used (doesn't fit and stamped lines). This drawing exercise was essential for figuring out actual locations and good stuff like aft deck rake and bowsprit angle.
In this pic the rear three bulkheads have been glued and now am gluing the forth from the back. I abandoned the slots on the left and right in each bulkhead since they didn't line up. I defined and cut the central rib going down the middle. Yes, there are places where things go below deck (faux stairways, etc) but I want it straight and strong. Once the false deck is affixed as well as the top level planking cutting through this rib will be fine.
You can also see on the central bulkhead aft how much wood needed to be added for the upper deck.
So the build is on, with LOTS of scratch upcoming. Sooner than later need to figure out how far the aft deck goes (my plans show much farther than the museum ship has or the new plans show).
Cheers, Mark
-
 kruginmi got a reaction from robdurant in Jylland by kruginmi - Billings Boats - 1:100
My Uncle had this one bouncing around his house (un-built) since probably the early 70's if not before. He asked if I could build it which I happily said yes.
Win - Win. I build a ship, there is a place for it to go. So here we go!
Note: This is the 'original' kit and not the new updated one. Actually pretty rough in the wood department - especially pre-cut stuff. I have spent quite a bit of time getting the pre-cut bulkheads to be usable as well as drafting my own plans off of the supplied ones to make something that fits the actual model.
I am just going to jump in from where I am. I kept updating and modifying the plans based on photos and the the Billings Boats downloaded mini plans for the updated model. Finally I just said lets make some wood shavings and glue something. We can figure stuff out as we go.
This model is a biggie - 30" hull length. I am adding a 1/32" false deck below the planking. The supplied deck will not be used (doesn't fit and stamped lines). This drawing exercise was essential for figuring out actual locations and good stuff like aft deck rake and bowsprit angle.
In this pic the rear three bulkheads have been glued and now am gluing the forth from the back. I abandoned the slots on the left and right in each bulkhead since they didn't line up. I defined and cut the central rib going down the middle. Yes, there are places where things go below deck (faux stairways, etc) but I want it straight and strong. Once the false deck is affixed as well as the top level planking cutting through this rib will be fine.
You can also see on the central bulkhead aft how much wood needed to be added for the upper deck.
So the build is on, with LOTS of scratch upcoming. Sooner than later need to figure out how far the aft deck goes (my plans show much farther than the museum ship has or the new plans show).
Cheers, Mark
-
 kruginmi got a reaction from mtaylor in Heller 1:100 HMS Victory, deconstructed rigging instructions
Thanks Mexspur. I provide as an attachment. I am pretty sure pretty accurate (haven't delved into the various backstays in depth). Again, it is my take and what I intend to do. Others can modify as they wish.
Note: This is a decomposition of Heller 1:100 Victory lines defined in instructions.
An enhanced legend is at the end. I also ID'd which lines I will not use but also, lines that are not present that I will add. Interesting to note none of the studding lines are present.
I include a tab on how Heller defined their deck tie downs but will largely defer to Nepean for his definitions.
My goal is to allow anyone making the model 'as is' to have more clarity on what they are doing and have more enjoyment.
Mark
Krug Victory Rigging Lines.xlsx
-
 kruginmi got a reaction from Mexspur in Heller 1:100 HMS Victory, deconstructed rigging instructions
Summary: I created a spreadsheet that documents all the rigging lines defined in the Heller 1:100 victory instructions with cross references to Nepean Longridge's 'Anatomy of Nelson's Ships', Lennarth Petersson's 'Rigging Period Ship Models' and finally John McKay's 'The 100-Gun Ship Victory'
I had looked around pretty sure someone had previously done the same thing but couldn't find any examples. At the final conclusion I got 8 lines I cannot define (missing from the instructions or just couldn't understand why there). There were also several (I assume) bowlines affixed to yardarms. Examples also show bowlines affixed to the sails that didn't seem to exist in other plans.
I have attached some snapshots showing how it is formatted (using the Main Yard & Sail). I also have an Excel tab that documents the complete kit defined deck attachment points (which differ from actual practice). These differences mainly go down to the lack of provided cleats on the shrouds and elsewhere, forcing the designer to grab what they thought made sense from a build point of view.
Still going through triple checking. Would anyone have any interest in this? Or is there a location that someone can point to that has a completed copy of such a thing.
Mark
-
kruginmi got a reaction from mtaylor in Heller 1:100 HMS Victory, deconstructed rigging instructions
Summary: I created a spreadsheet that documents all the rigging lines defined in the Heller 1:100 victory instructions with cross references to Nepean Longridge's 'Anatomy of Nelson's Ships', Lennarth Petersson's 'Rigging Period Ship Models' and finally John McKay's 'The 100-Gun Ship Victory'
I had looked around pretty sure someone had previously done the same thing but couldn't find any examples. At the final conclusion I got 8 lines I cannot define (missing from the instructions or just couldn't understand why there). There were also several (I assume) bowlines affixed to yardarms. Examples also show bowlines affixed to the sails that didn't seem to exist in other plans.
I have attached some snapshots showing how it is formatted (using the Main Yard & Sail). I also have an Excel tab that documents the complete kit defined deck attachment points (which differ from actual practice). These differences mainly go down to the lack of provided cleats on the shrouds and elsewhere, forcing the designer to grab what they thought made sense from a build point of view.
Still going through triple checking. Would anyone have any interest in this? Or is there a location that someone can point to that has a completed copy of such a thing.
Mark
-
.thumb.jpeg.fc5d633a7b34428fcf19419a73d56d55.jpeg) kruginmi got a reaction from EricWilliamMarshall in Legacy of a Ship Model by Rob Napier
kruginmi got a reaction from EricWilliamMarshall in Legacy of a Ship Model by Rob Napier
I just got this book for Father's Day from my son and I wanted to add my very favorable impressions from page 1 to page 197. Incredible, just simply incredible.
I read half the book last night, finishing it up today. The pictures are numerous, spot on and just simply go on and on. As a builder of a plank on frame model I found this insight into an original 3 decker build very informative and will help me going forward. For example it is okay to simplify some structures (the one piece after cistern as an example), or have a non functioning tiller. It is okay to use 'SWOPEM' (Situation Where One Part Equals Many). Great to see was the presentation of 'Nobody's Perfect.' A pictorial of things found on the model that were obvious mistakes or modifications made to account for fit by the original builder was awesome. They happen to everyone and glad to see (once again) it is okay to keep them on the model.
My only 'regret' (maybe too harsh) is that the middle deck memory board (picture taken form directly above) is only one page in size, whereas the rest are a full two pages in size. I would LOVE to have access to these pics in a digital format. SO much to take in and learn from.
I expect to pick this book up many times. When things are going slow, when I need some inspiration or I am figuring out how to advance my build in a particular area.
A wonderful resource, a wonderful read and a book that I will keep close at hand. I highly recommend, especially those that are either in a PoF build, or have one under their belt. So much information about the internals of a ship model.
Mark
-
 kruginmi got a reaction from Spellapeaka in Lady Anne by kruginmi - FINISHED - 1:50 - kitbash of Artesania Latina Harvey
Worked on first of two main mast stays (both port and starboard) - pretty happy with the result. After I get the port one fashioned up will probably need to start on the ratlines. Not too many.
Had to find (make) my 'Put'r There 3000' for actually rigging - especially to tie them up at the cleats. With the meat hooks I have for fingers only way to go. My essential tools in addition to this for rigging are two fly typing clamps (need more), hemostats and my vise for holding the clamps when possibly. Could also throw in my magnifying glass(s). Peepers just aren't the same as before.
I am approaching this rigging as have some fun while doing stuff. So.....while I do look at suggested rigging thicknesses I also look at my supply and choose what I think would work. Having the blocks on hand showed the ones I chose that had to go through the blocks had to fit. Color selections are entirely on me (very liberating). I did decide early on that I was going to settle on two sizes of blocks from Syren for ease (and cost). My calculations over the whole ship showed 186 blocks required (single, double, triple - both sizes). The 1/8" were the smallest I wanted so therefore that and 3/16's were the answer.
Having fun so will keep at it, -Mark
-
kruginmi got a reaction from Spellapeaka in Lady Anne by kruginmi - FINISHED - 1:50 - kitbash of Artesania Latina Harvey
Much better......
-
kruginmi got a reaction from Spellapeaka in Lady Anne by kruginmi - FINISHED - 1:50 - kitbash of Artesania Latina Harvey
Moved on to the Fore-mast. Of course the chain plates had more eye-bolts in them so the jig couldn't be used the same way. So...time to adapt.
I clamped to the bulkhead on the deck side.
Then the process remains the same. It seems as soon as you get good at something, it is time to move on (haha). I have a few backstays still to go.
Then came the all important check: are the masts in line and appear to be perpendicular to the deck......
I can live with that result.
Stay Building My Friends, Mark
-
 kruginmi got a reaction from catopower in Lady Anne by kruginmi - FINISHED - 1:50 - kitbash of Artesania Latina Harvey
Hey, I actually did something (queue fanfare) (and the peasants rejoiced).
First up was the supports for the boom shelf on the main mast. Since this was at an angle, I used some old business cards (hated that company) to define the angle required at four points (the sides ended up being 90 degrees, which was actually a good thing). Then a simple matter to pull out some basswood and cut to length, cut to angle and cut the beveled outer edge. I am not going to say I messed up and cut the same angle twice (but I did).
Put this into it's place and now my twitch can go away. I possibly could have done more than four, but when the rigging is complete and boom installed this will be hard to see anyway. (and yes I scraped away the sanding sealer to insure the piece will stay put when glued).
Finally I need to add a cheek block way up at the tippity top (technical term). I modified a block I had laying around from the kit and glued on. Given that the main gaff topsail line runs through this I thought it prudent to add some reinforcement so I drilled through both the block and mast and ran a section of brad nail through to insure it stays where it was.
Once snipped and super glued it was ready to go.
So......I can actually start putting the shrouds in place and descend into ratline purgatory. It will at least get my knot tying skills back up. Three shrouds per side. Something for this weekend (and the next, and the next, and....you get the picture).
Stay Building My Friends, Mark
Edit: I should add the mast cap and trestle trees are not parallel to the deck, which is an issue. However, this mast was (originally) constructed a long time ago in a house far far away. While I have done major reconstruction to make it more attuned with the Pride of Baltimore, I decided to leave the mast cap and trestle trees as originally assembled since it would require much surgery. It is what it is.
-
kruginmi got a reaction from catopower in Lady Anne by kruginmi - FINISHED - 1:50 - kitbash of Artesania Latina Harvey
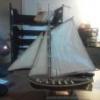
Alright, the Lady Anne is the project for the Winter. Time to put it in the done column. Pulled it out of storage, found the Pride of Baltimore plans, and actually found all the masting and sparring I had completed.
I have a ropewalk but I am okay with using stuff at hand. Plus this is a work boat so I don't even need all the rigging matching in color. I pulled out all of the prospective 'rope' I had stuffed here and there. Four sizes from .008 to .025 should do the job, in both tanish and blackish (though I like brown for the shrouds).
Using my thread sorter I think I found the threads that I will use:
The key test (I did pick up blocks from Syren of course) was would the fine thread fit through the 1/8" blocks:
Success! Now to get the workspace organized, make sure the the masts are totally setup then getting onto those ratlines (everyone's favorite part).
Stay Building My Friends, Mark
-
kruginmi got a reaction from GrandpaPhil in Lady Anne by kruginmi - FINISHED - 1:50 - kitbash of Artesania Latina Harvey
Worked on first of two main mast stays (both port and starboard) - pretty happy with the result. After I get the port one fashioned up will probably need to start on the ratlines. Not too many.
Had to find (make) my 'Put'r There 3000' for actually rigging - especially to tie them up at the cleats. With the meat hooks I have for fingers only way to go. My essential tools in addition to this for rigging are two fly typing clamps (need more), hemostats and my vise for holding the clamps when possibly. Could also throw in my magnifying glass(s). Peepers just aren't the same as before.
I am approaching this rigging as have some fun while doing stuff. So.....while I do look at suggested rigging thicknesses I also look at my supply and choose what I think would work. Having the blocks on hand showed the ones I chose that had to go through the blocks had to fit. Color selections are entirely on me (very liberating). I did decide early on that I was going to settle on two sizes of blocks from Syren for ease (and cost). My calculations over the whole ship showed 186 blocks required (single, double, triple - both sizes). The 1/8" were the smallest I wanted so therefore that and 3/16's were the answer.
Having fun so will keep at it, -Mark