HOLIDAY DONATION DRIVE - SUPPORT MSW - DO YOUR PART TO KEEP THIS GREAT FORUM GOING! (89 donations so far out of 49,000 members - C'mon guys!)
×


Dfell
-
Posts
251 -
Joined
-
Last visited
Content Type
Profiles
Forums
Gallery
Events
Everything posted by Dfell
-
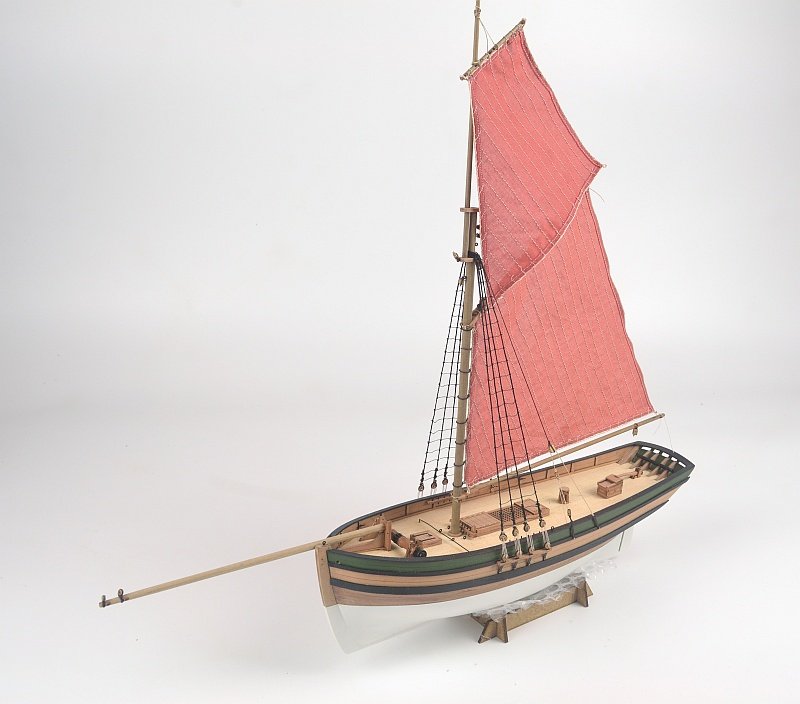
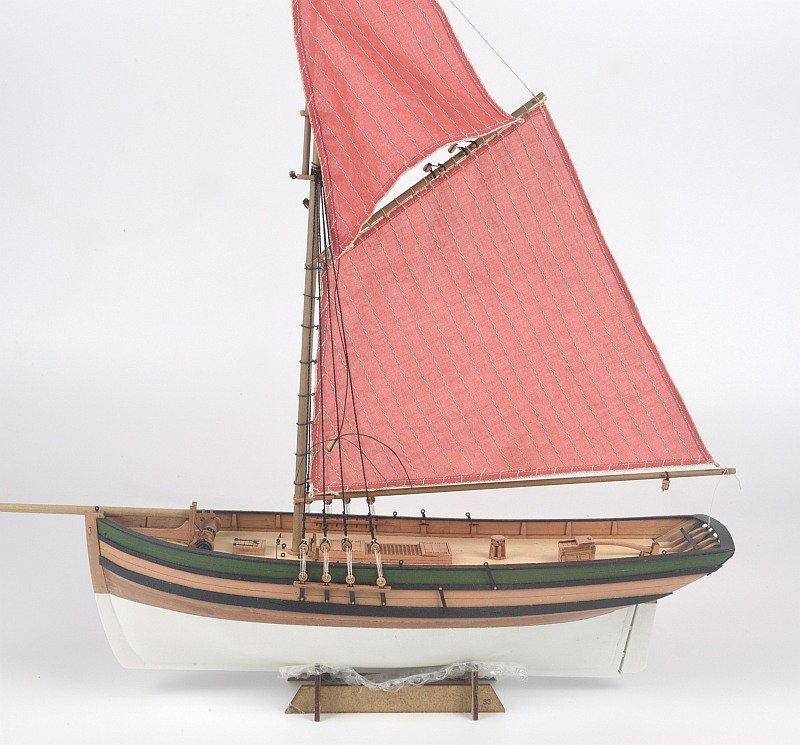
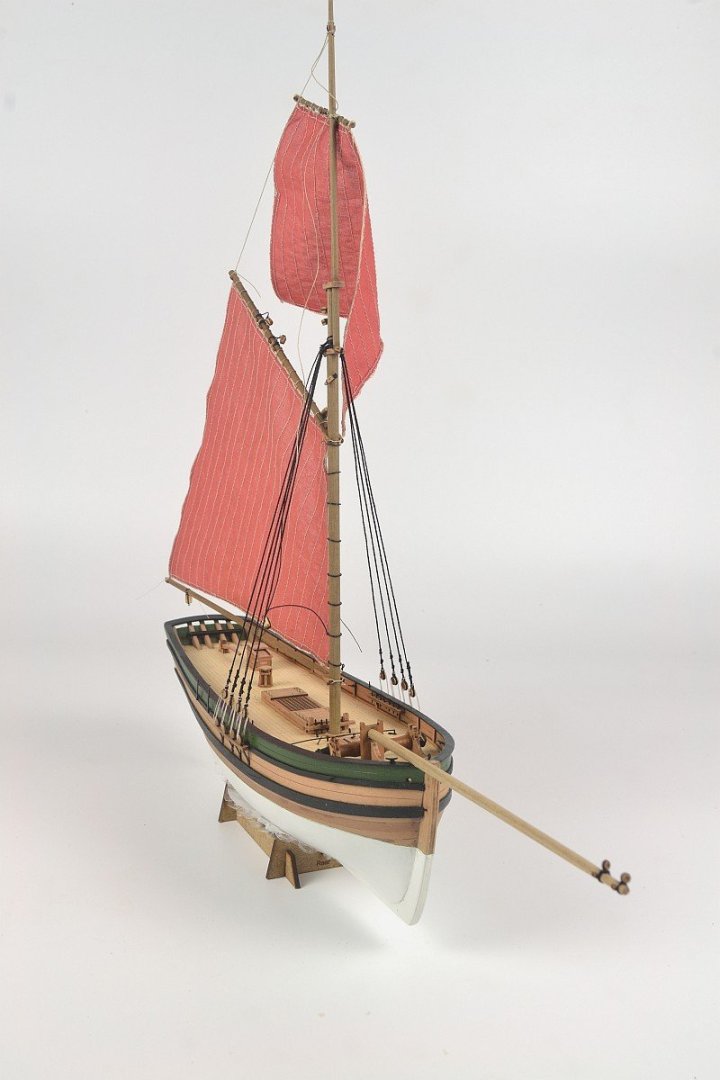
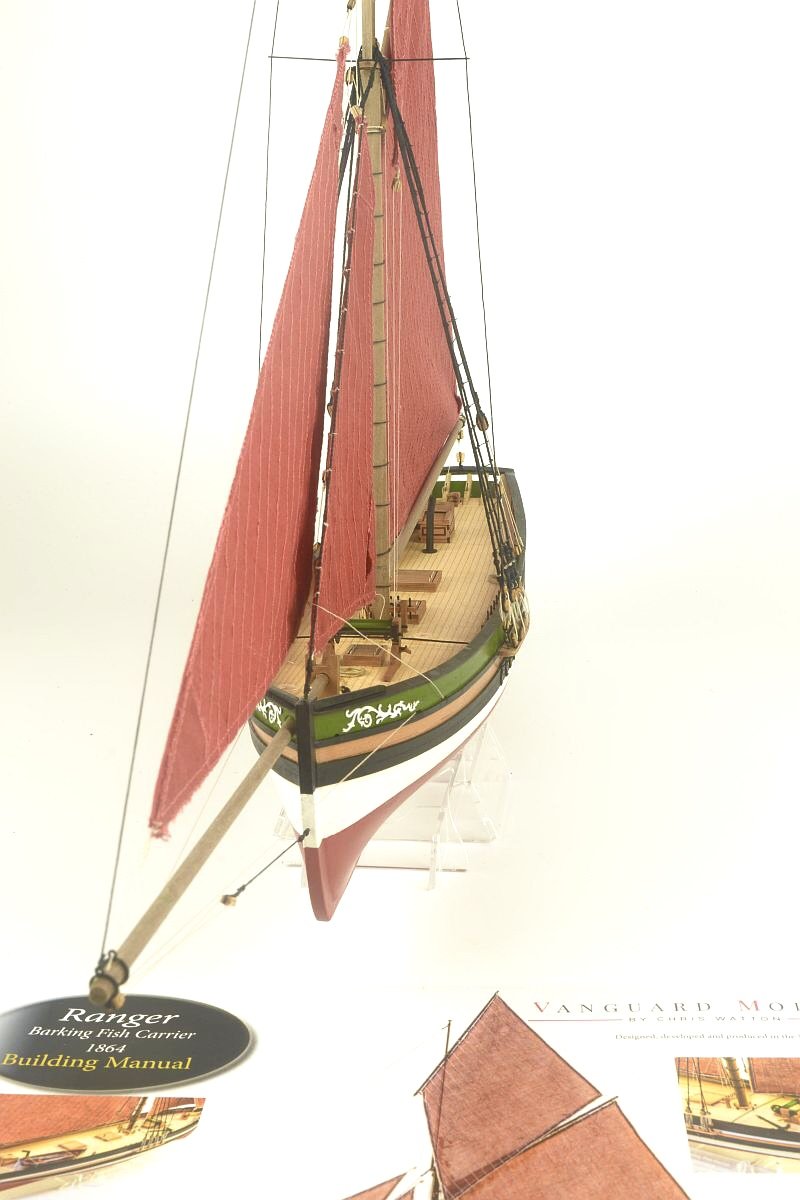
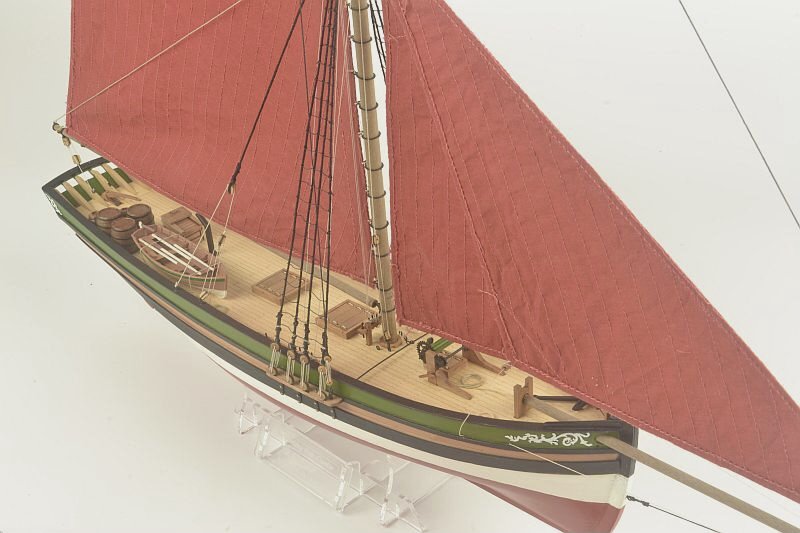
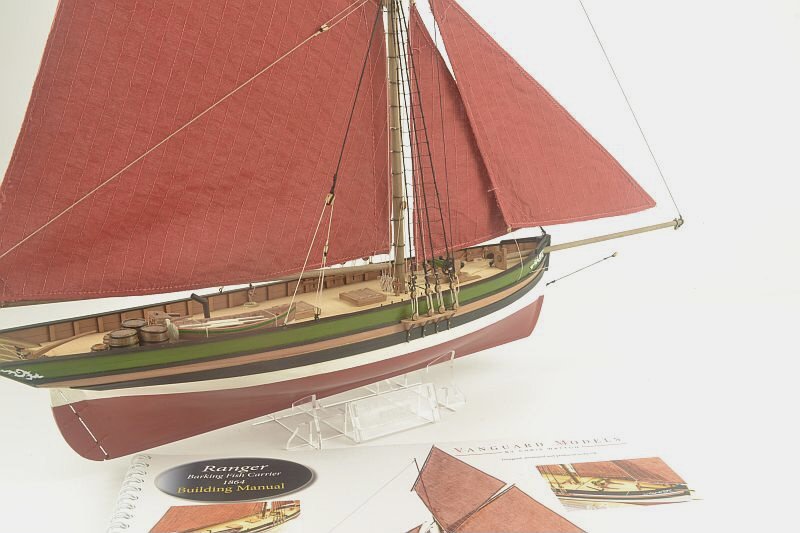
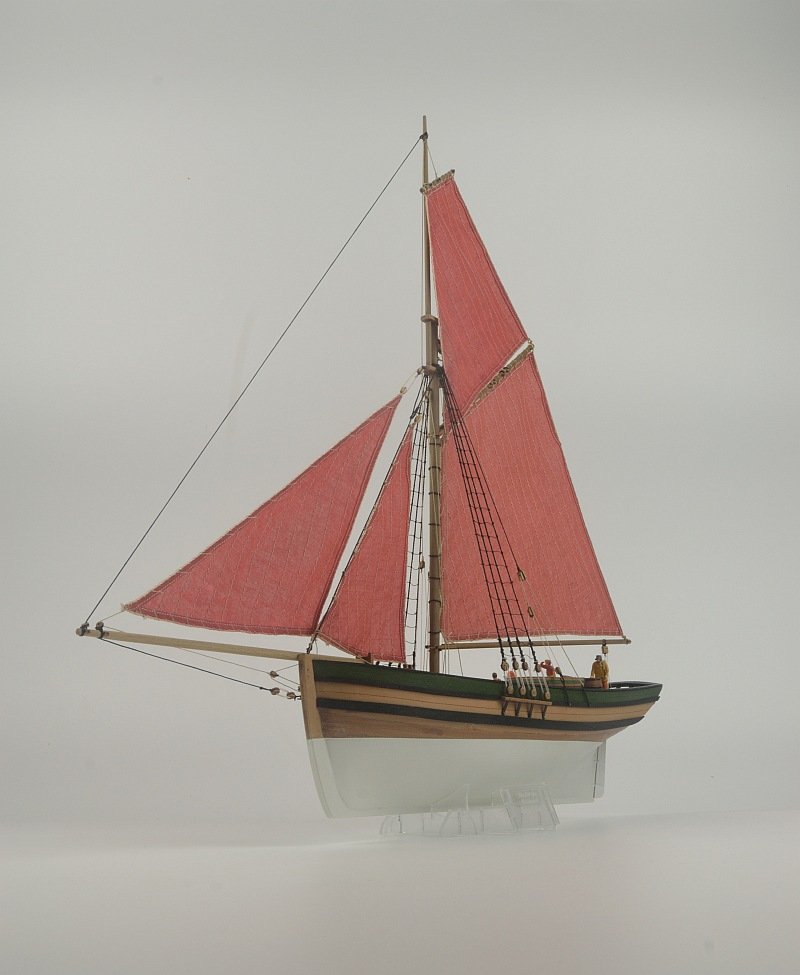
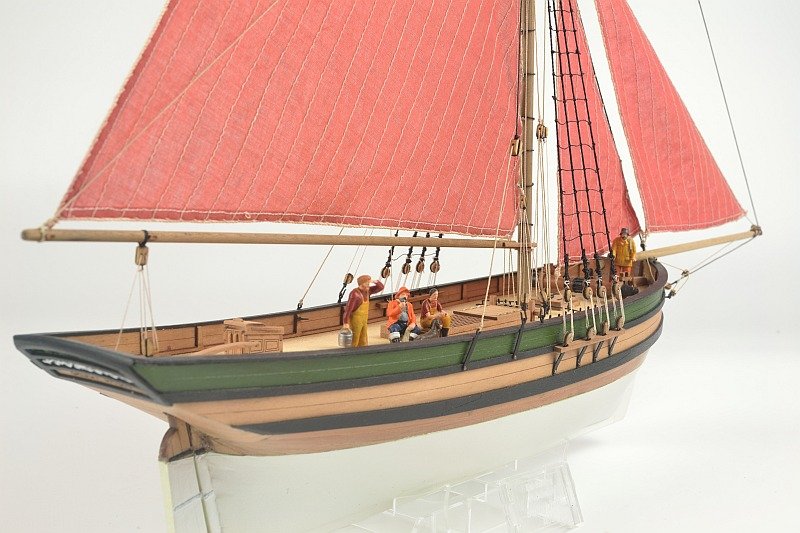
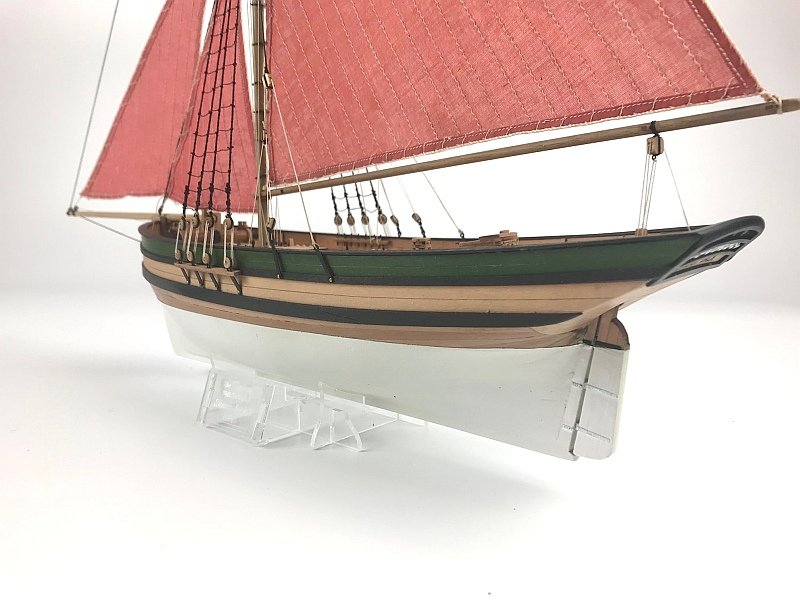
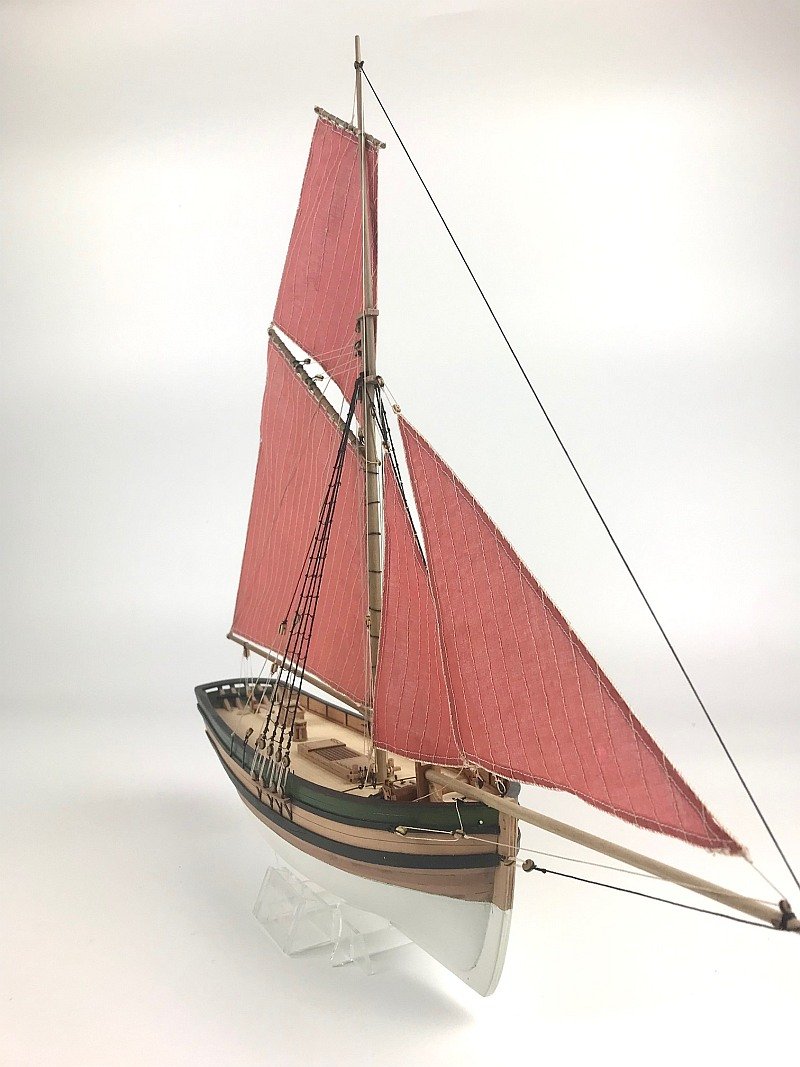
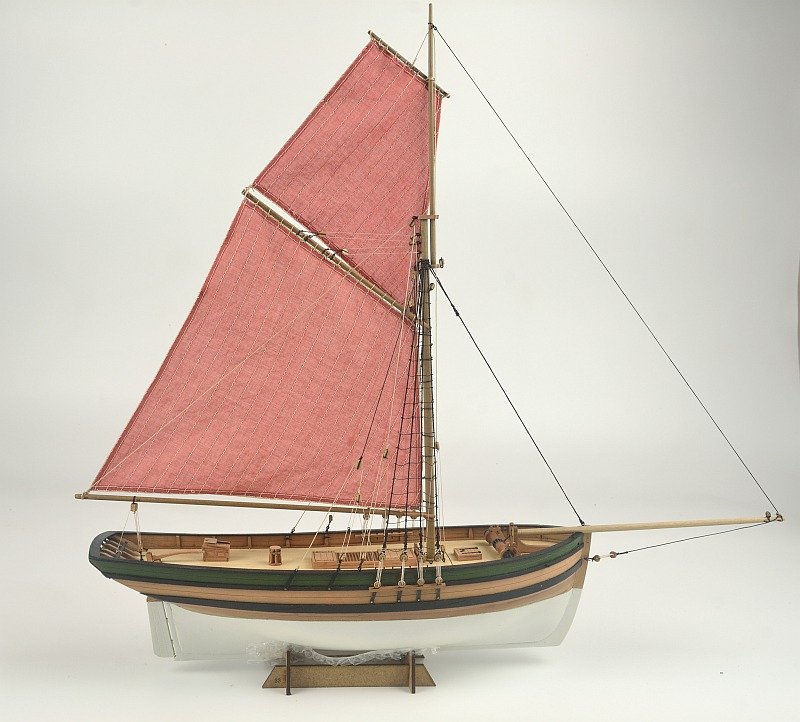
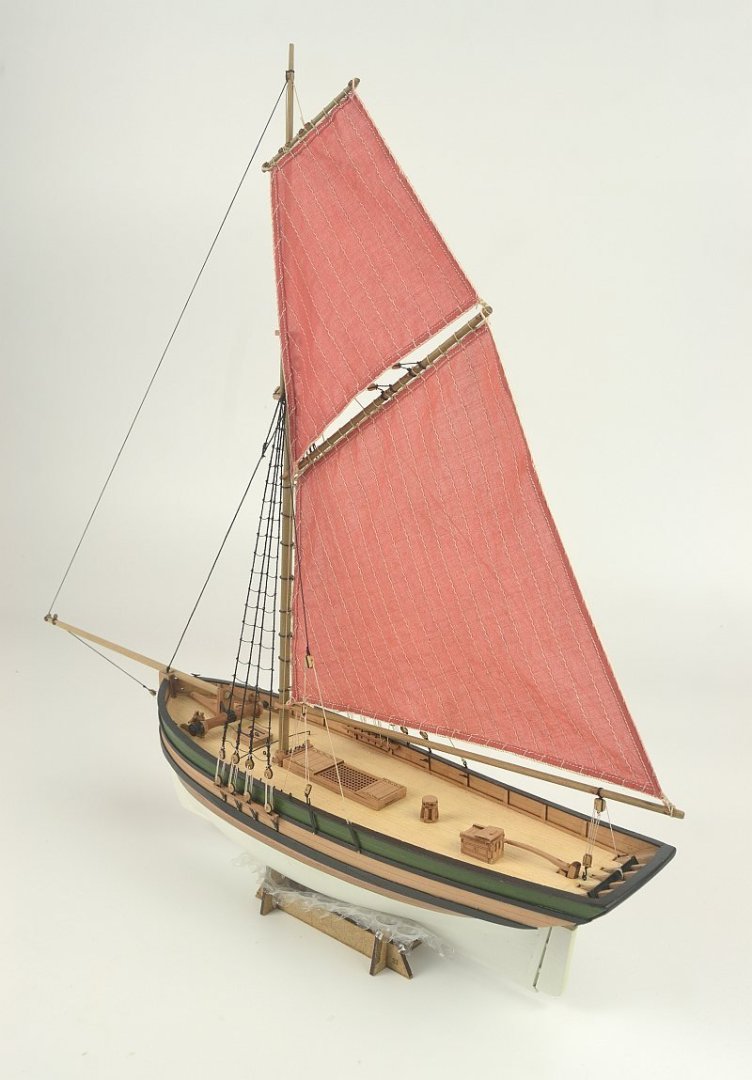
Hello - Ranger now completed. Sails all rigged, rope coils etc, barrels and now sitting on the Perspex stand. The name plates on the stand were difficult to fix on - very tight. One plate slightly split - not very noticeable fortunately. Thank you all for looking and the ‘Likes’ Regards Doug


- 18 replies
-
- 8
-

-
- Ranger
- Vanguard Models
- (and 1 more)
-
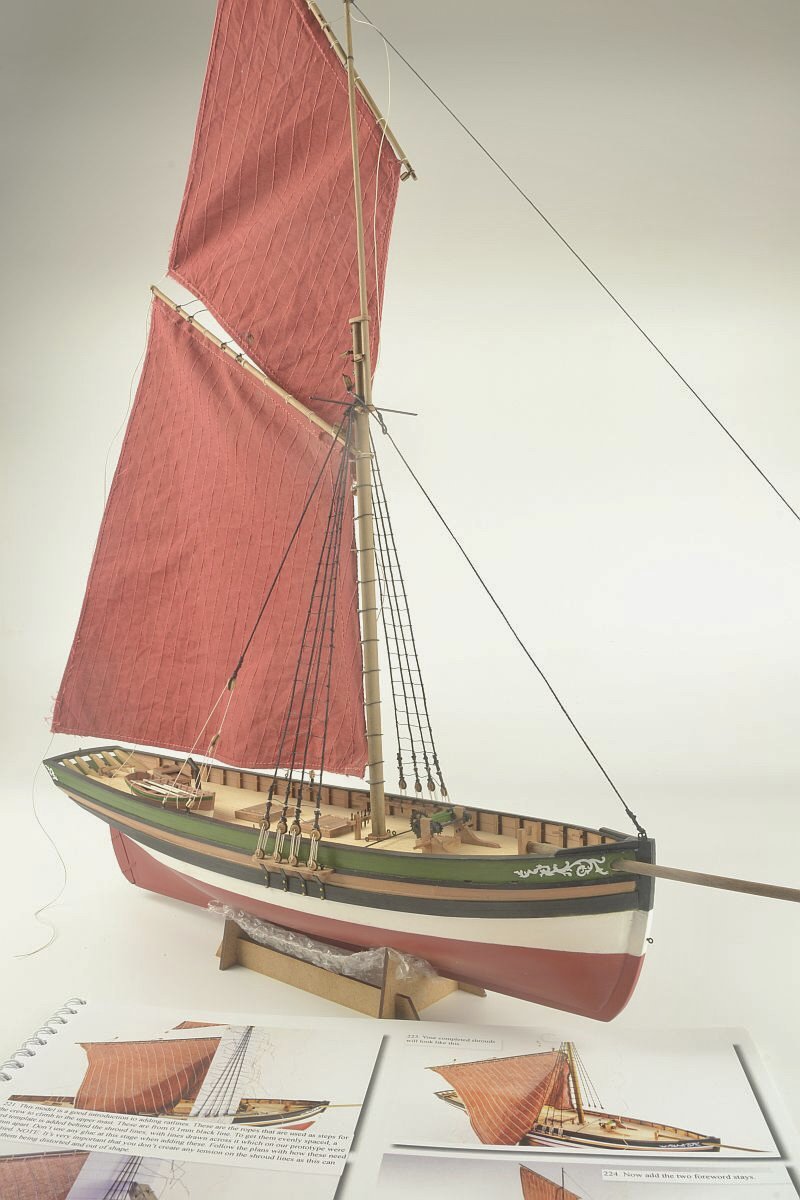
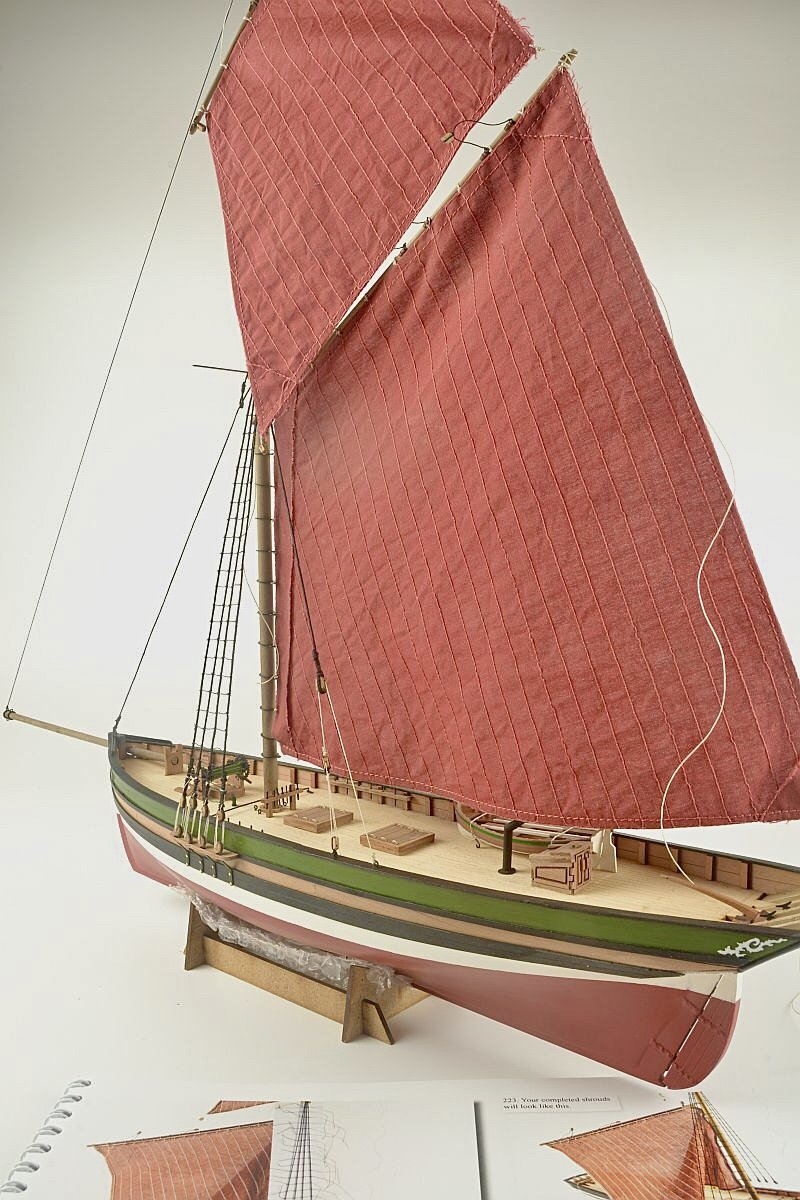
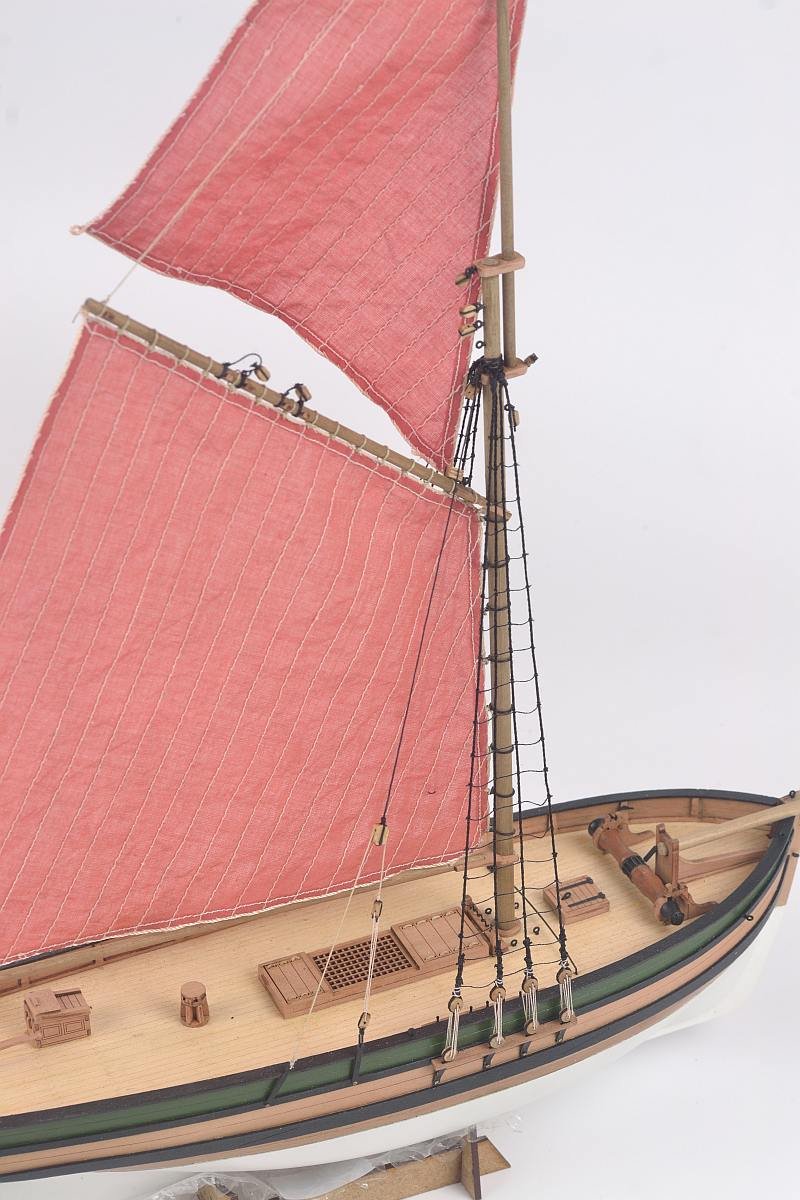
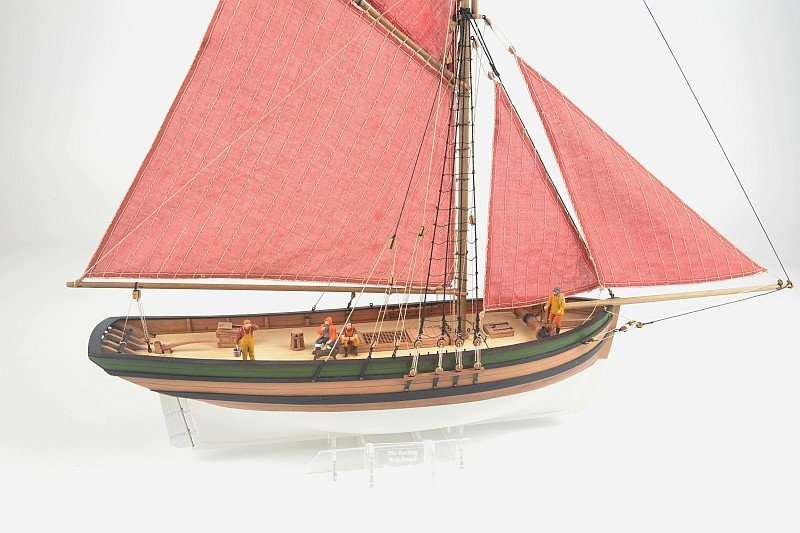
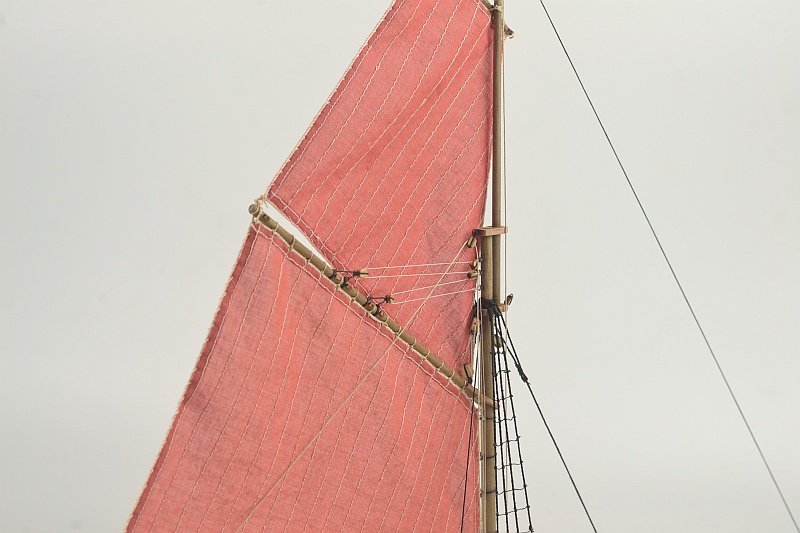
Hello - getting there. Shrouds / Ratlines / Stays etc done. The Yard / Gaff / Boom have been shorten a tiny bit due to sails shrinking from the dyeing process. Thank you for looking and the ‘Likes’ Regards Doug

- 18 replies
-
- 8
-
-
- Ranger
- Vanguard Models
- (and 1 more)
-
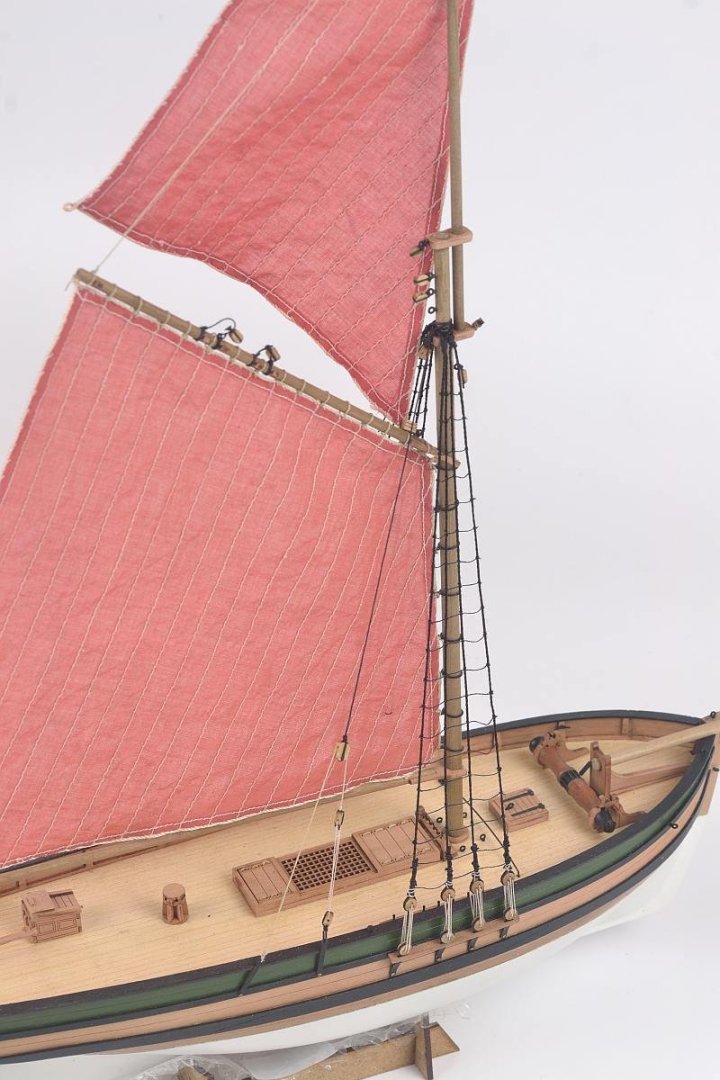
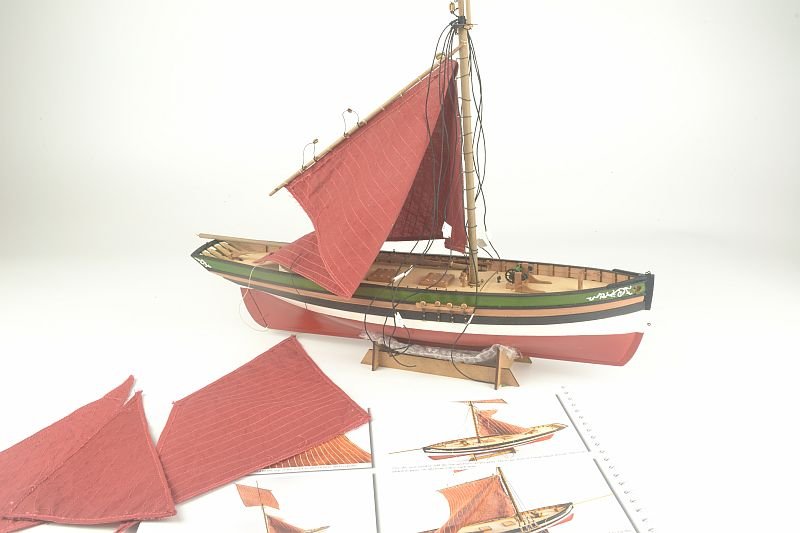
Hello - a small update. Sails all dyed using Rit cocoa brown and scarlet (equal mix of each). Wanted a deep red to match the bottom of boat. The Main Sail secured to Yard, rings added and fitted to Mast. Doing the Shrouds before fitting the Top Sail unlike the instructions. Thank you Doug
- 18 replies
-
- 9
-
-
- Ranger
- Vanguard Models
- (and 1 more)
-
Hello palmerit - all looking quite colourful. Think you may have the rack behind the mast the wrong way round and this may be a problem at a later stage. Regards Doug
- 133 replies
-
- 3
-
-
- Ranger
- vanguard models
- (and 1 more)
-
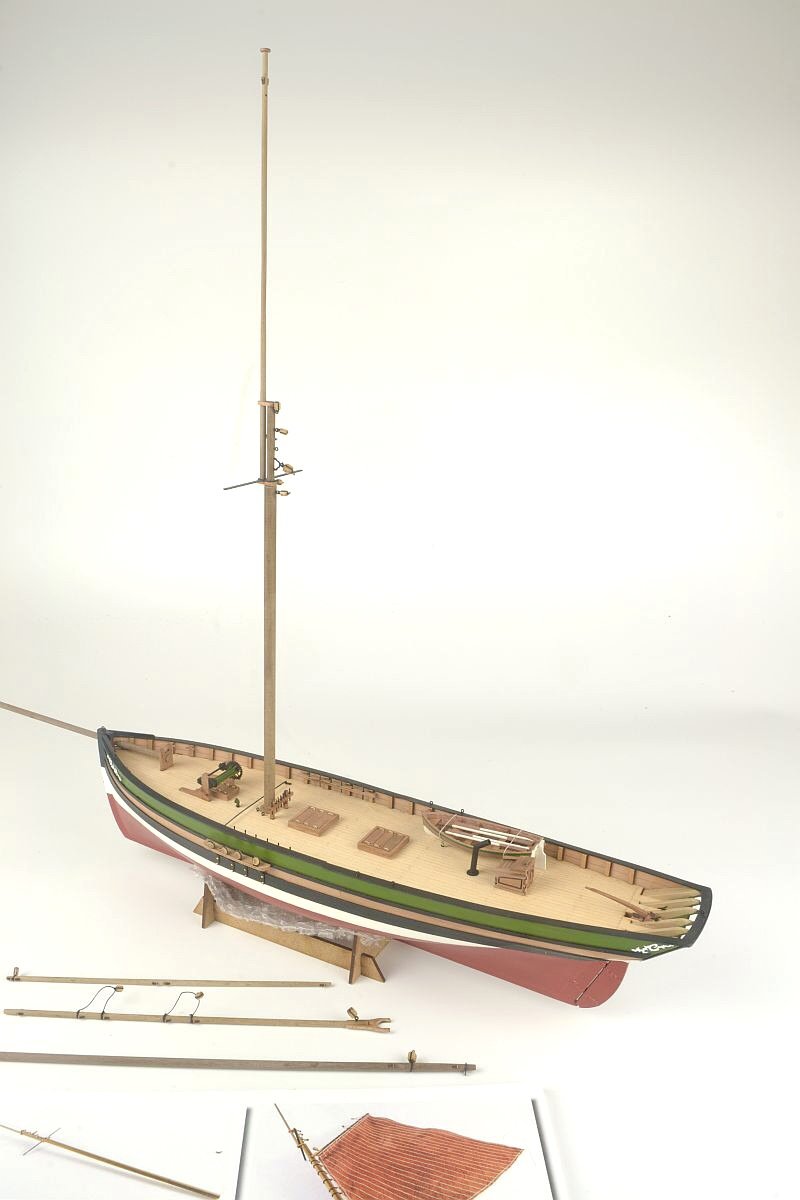
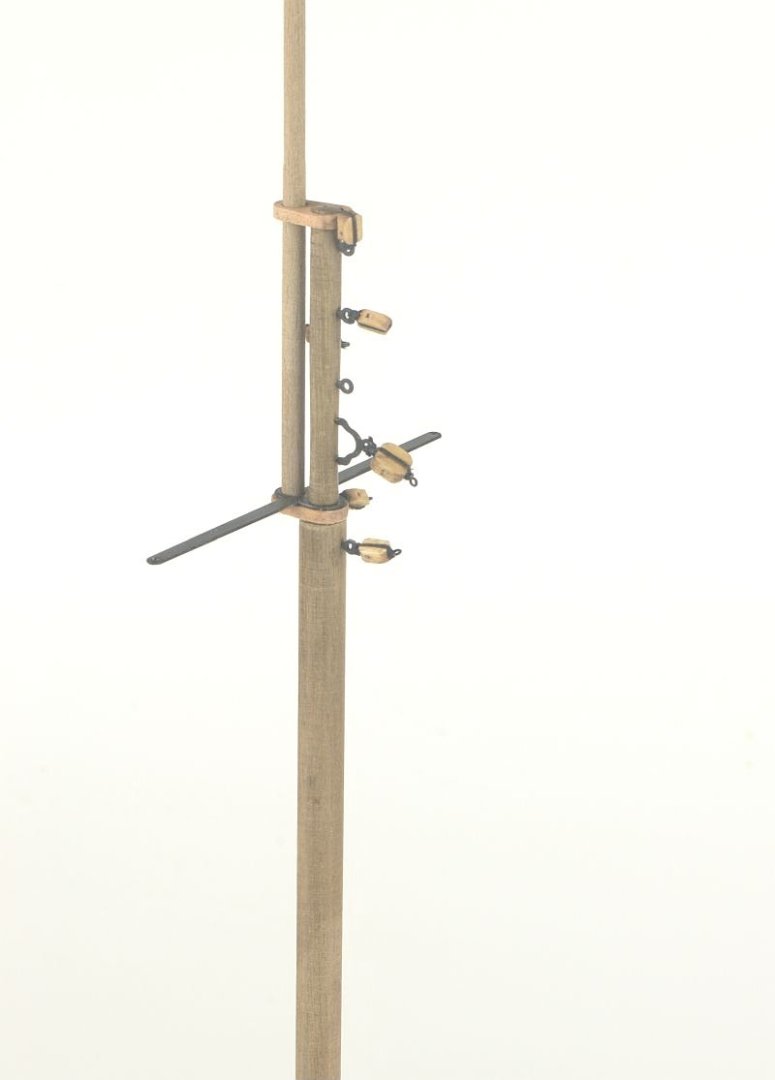
Hello - small update. Main mast shaped / assembled with various eyebolts / blocks Must refer to plans for what blocks and where as the illustrated instructions book has blocks on all eyebolts which does get corrected later on in the book. Main Gaff and Boom plus Yard all shaped and ready with blocks attached etc. Sails next I guess. Again thank you for looking. Doug


- 18 replies
-
- 8
-
-
- Ranger
- Vanguard Models
- (and 1 more)
-
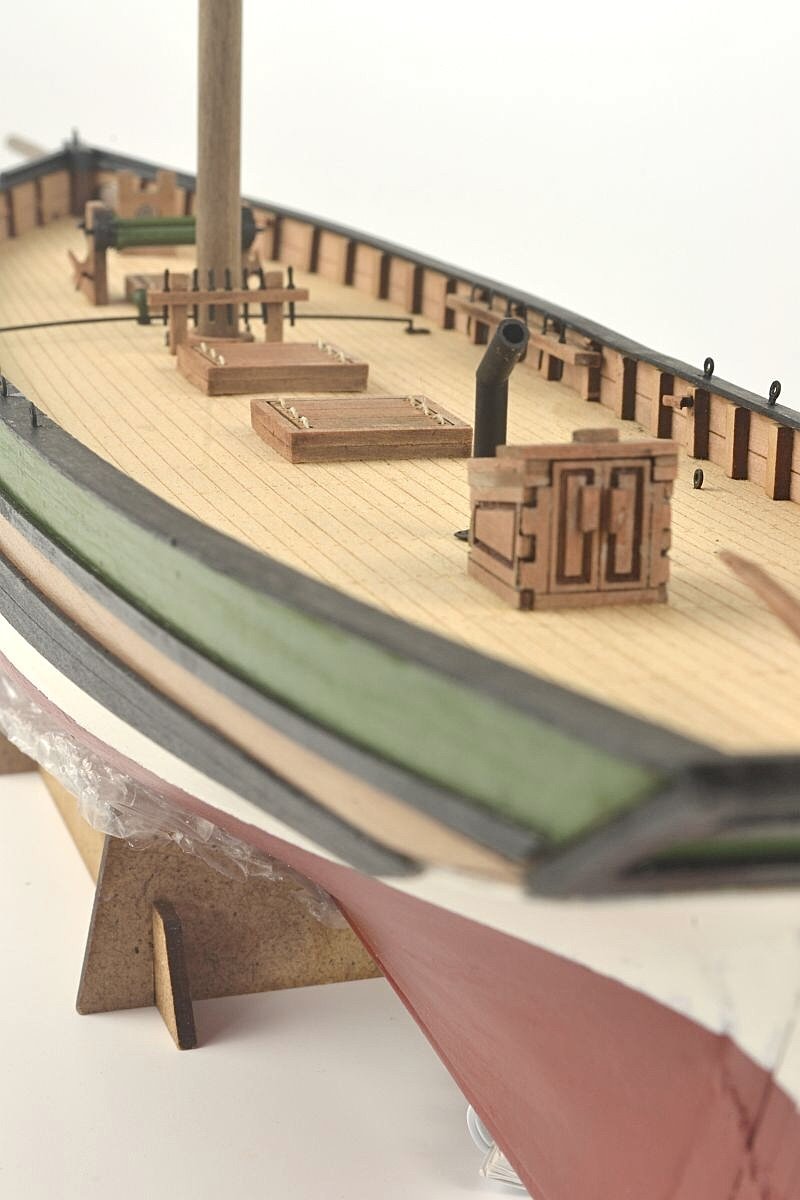
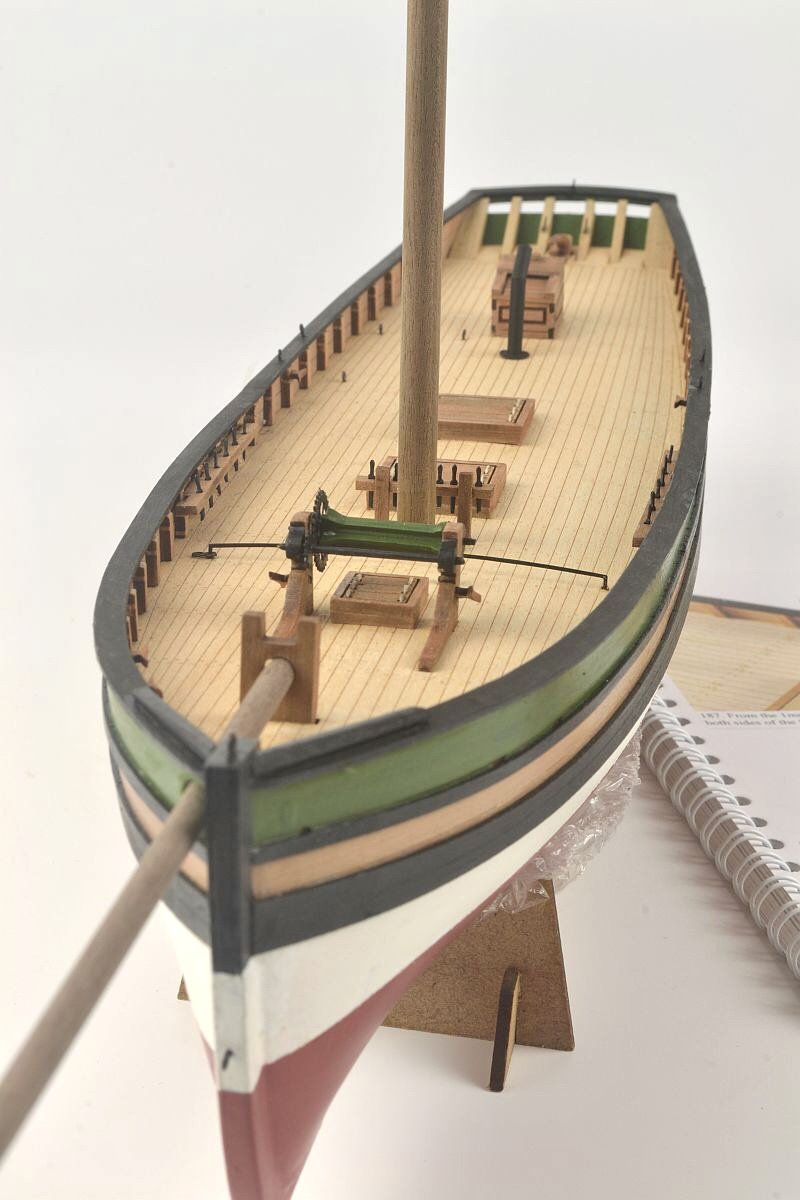
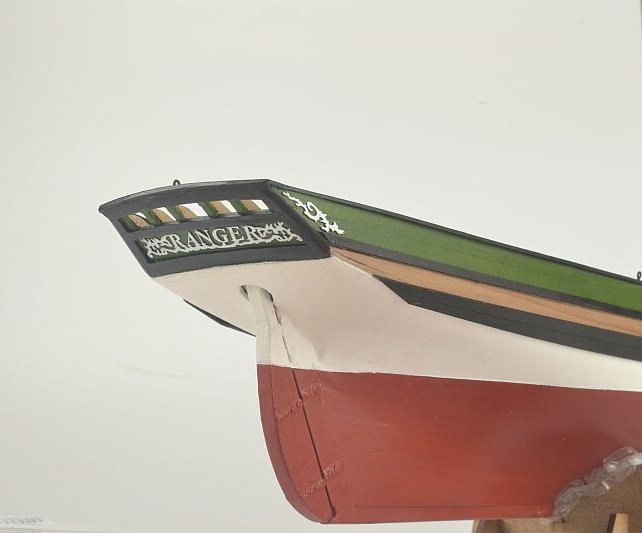
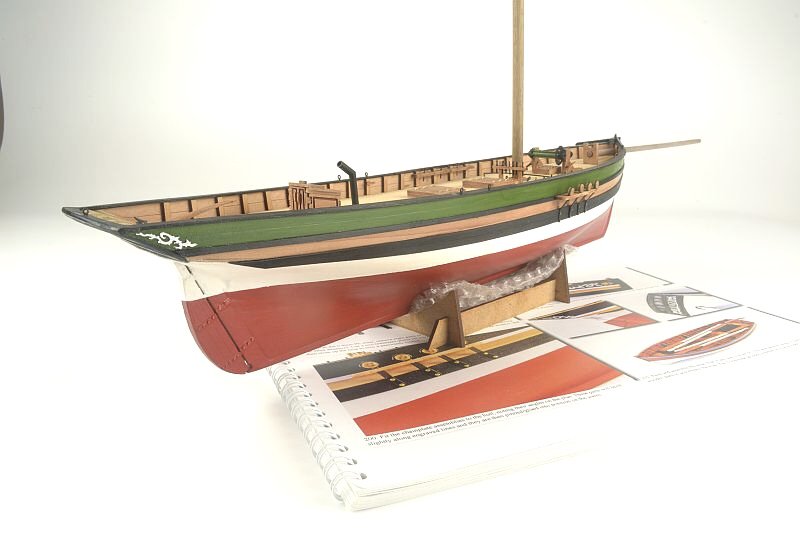
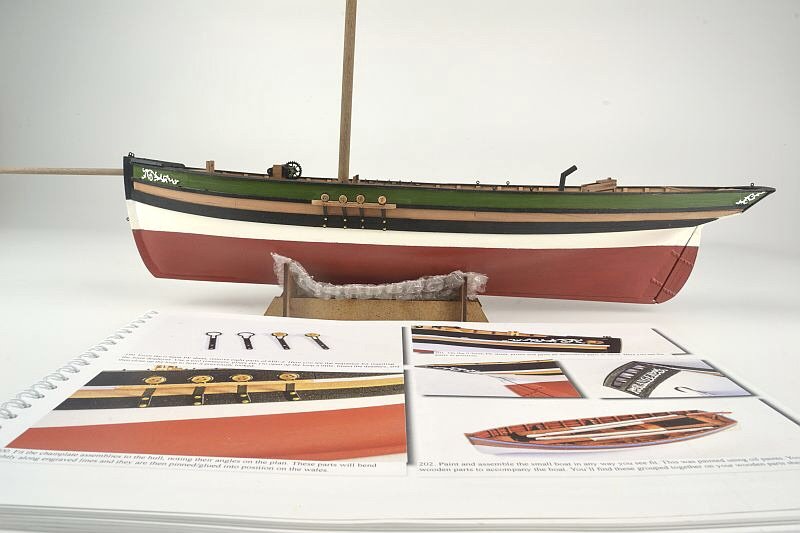
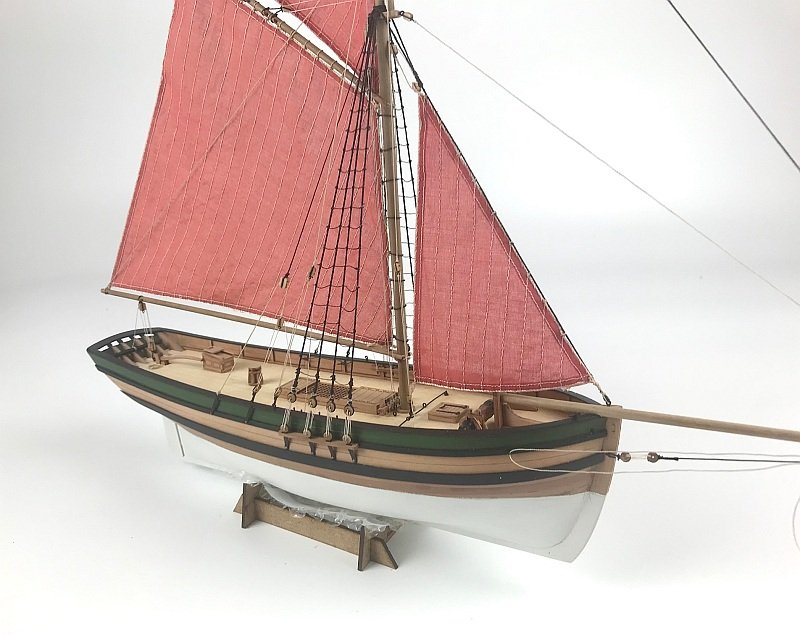
Hello - Channels / Blocks / Chain plates all fitted in place plus decorations. Small boat assembled and painted. The green stripe is tape. The small boat roped down as instructions. Thank you for looking and again the ‘Likes’ Regards Doug
- 18 replies
-
- 11
-
-
- Ranger
- Vanguard Models
- (and 1 more)
-
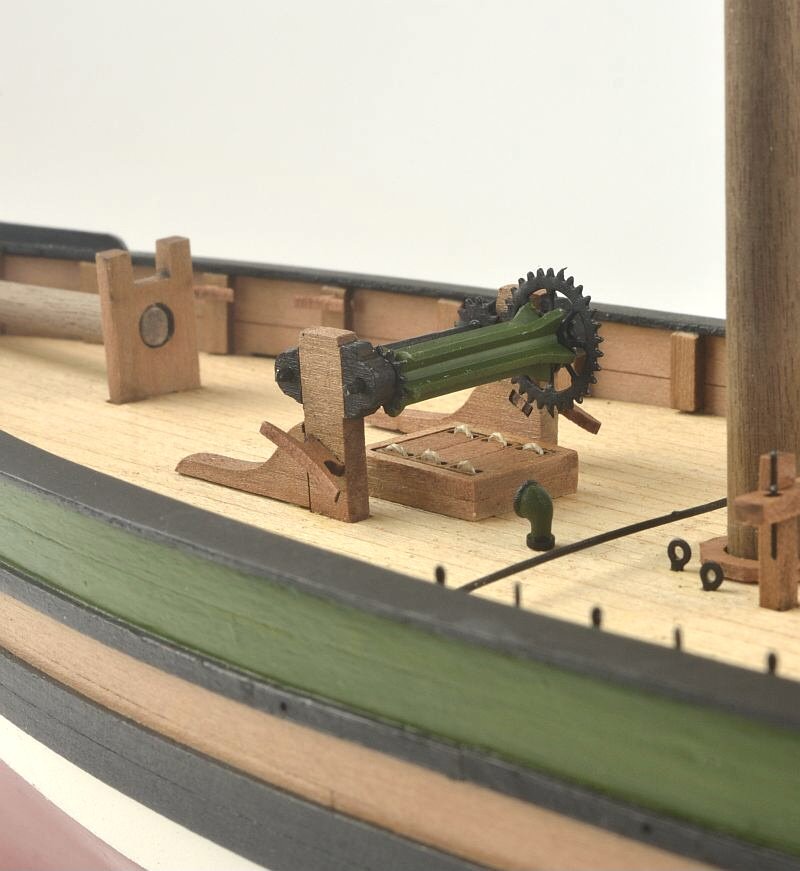
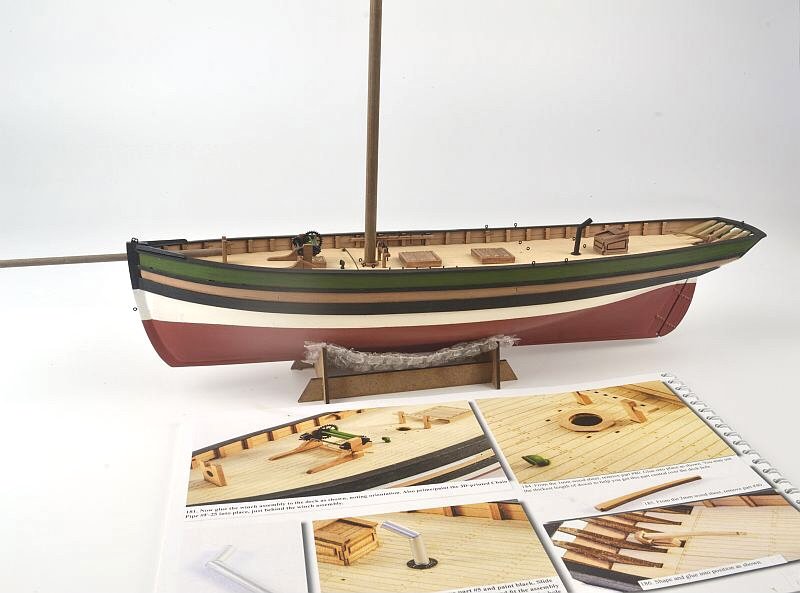
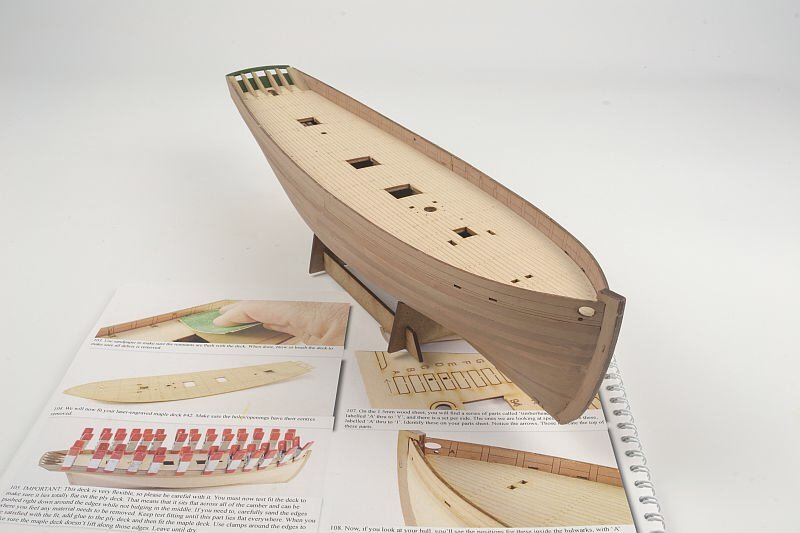
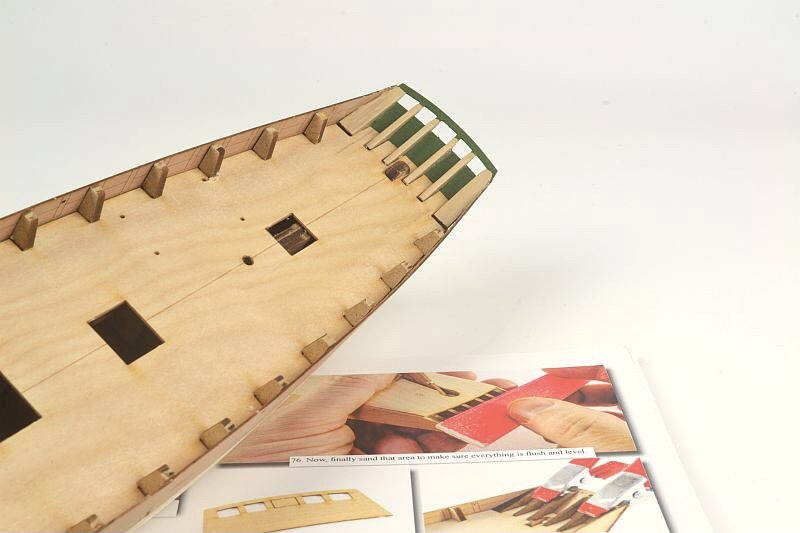
Hello - further progress. All bits and pieces that are for the deck installed along with the Bulwark Capping Rails. The winch / cleats / hatches / tiller / stove pipe etc A close up of the Winch Overall view Thank you for looking Regards Doug


- 18 replies
-
- 11
-
-
- Ranger
- Vanguard Models
- (and 1 more)
-
Hello palmerit - not sure if this would help I did mine in either 2 or 3 pieces and not one long length. This helped me to get either end good. Also sanded the top edge at an angle so it fitted neater / tighter to the one you’re butting up to. Guess you won’t know how good / bad things are until you give it a sand. All the best Doug
- 133 replies
-
- 4
-
-
- Ranger
- vanguard models
- (and 1 more)
-
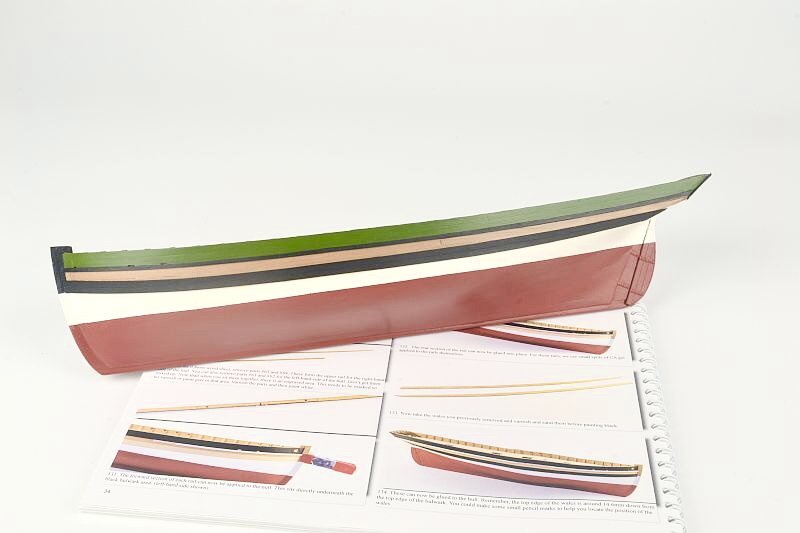
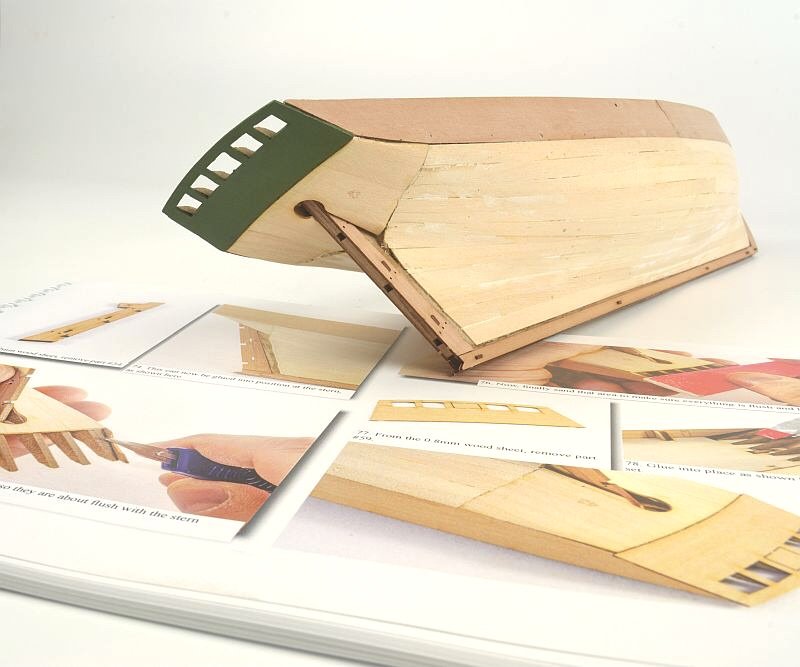
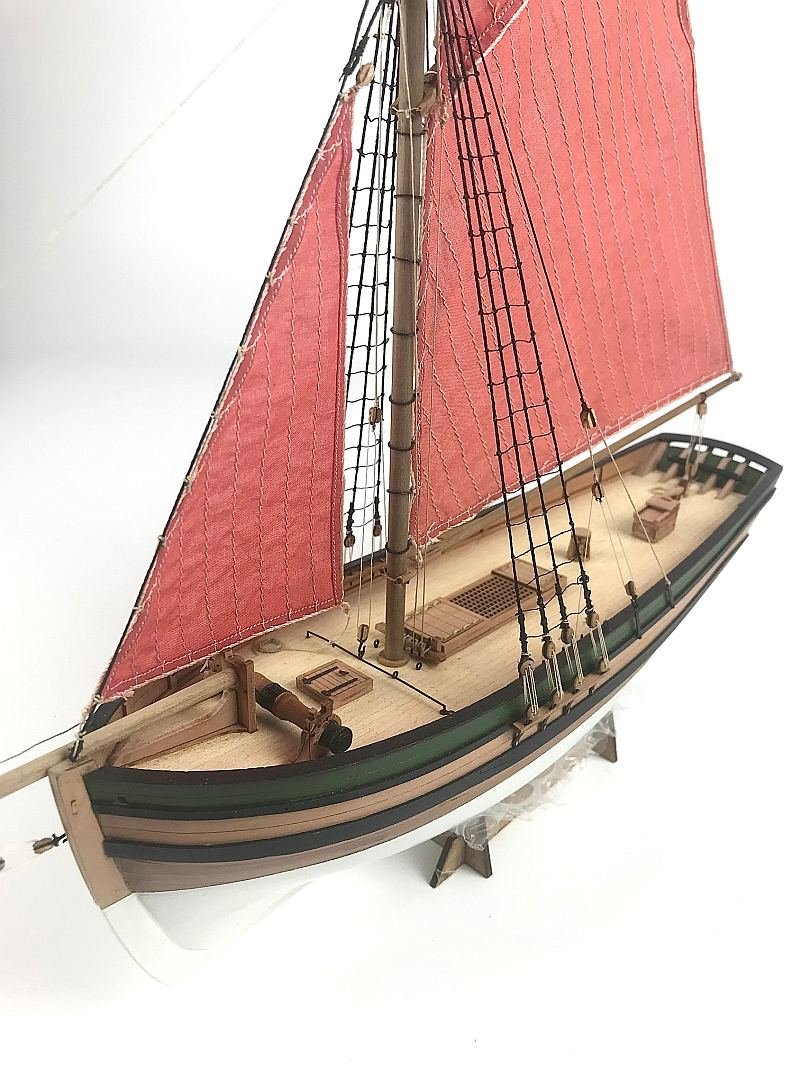
Hello - a lot further on, various stages completed. The rudder with its 3 layers laminated and the brass hinges with brass pin heads for bolts added. The hull was sprayed with an undercoat with a filler and then Matt white. The red oxide sprayed on the lower half. Sorry missed taking a photograph of this stage. Next stage was adding the Wales having painted them black before gluing them on at the height as instructions. Same with the rails - have gone with a different colour scheme. Thank you looking and the ‘Likes’ Doug
- 18 replies
-
- 9
-
-
- Ranger
- Vanguard Models
- (and 1 more)
-
Hello palmerit - I stuck a block of thick foam to the deck so the hull could be turned over while working on the sanding of the hull thus protecting the fragile stern section. Doug
- 133 replies
-
- 4
-
-
- Ranger
- vanguard models
- (and 1 more)
-
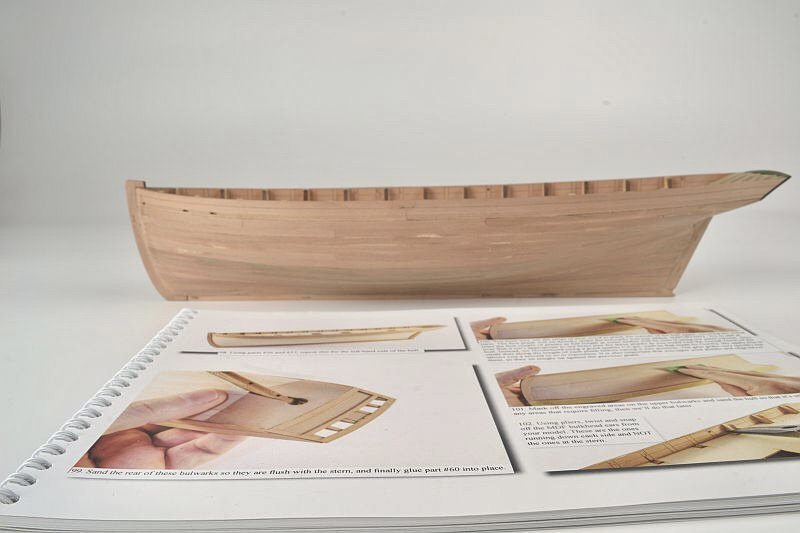
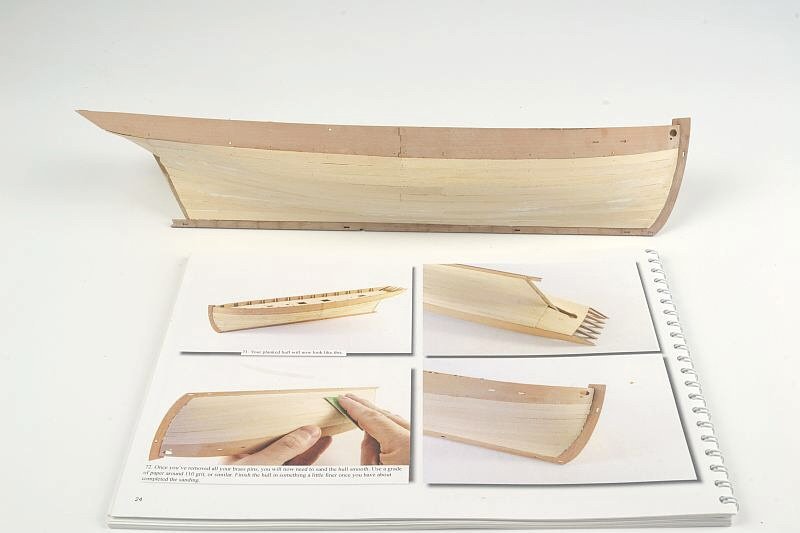
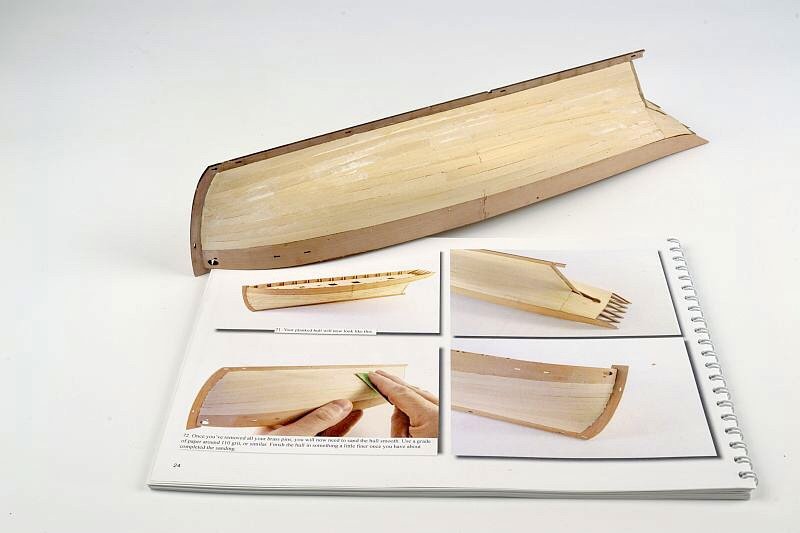
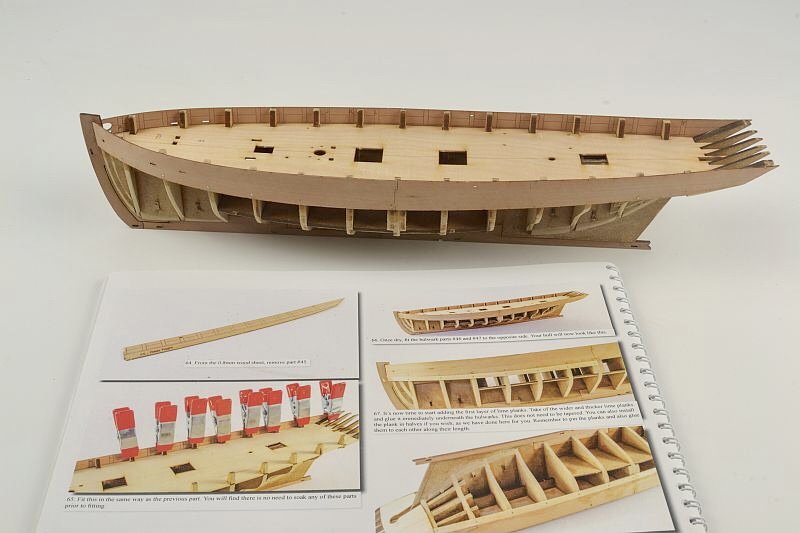
Hello - Second planking completed. Just as well most of it gets painted over. Ply deck fitted into place - no problems. The Bulkhead ears were snapped off with pliers as instructions. Thank you for looking and the ‘Likes’ Regards Doug
- 18 replies
-
- 8
-
-
- Ranger
- Vanguard Models
- (and 1 more)
-
Hello palmerit - yes it’s a little difficult right on the end. Used as you have done with strips of wood and where I can the pins at an angle. Did not use super glue. Good luck with it. Regards Doug
- 133 replies
-
- 4
-
-
- Ranger
- vanguard models
- (and 1 more)
-
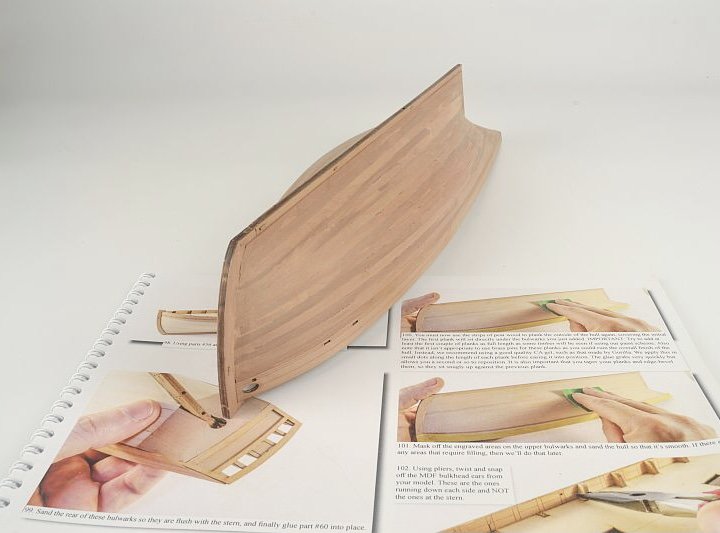
Hello - small update. The outer layers of the Bulwarks added along with pieces on the Stern. The lower piece unfortunately when picking it up snapped in two so obviously not watching what I was doing. I found glueing this down not by what the instructions said but first clamping the piece in the centre of the top edge first and then once dry clamp either side in the middle. Again once dry glue and clamp the edges. The second planking next 😕 Thank you for looking and the ‘Likes’ Regards Doug
- 18 replies
-
- 7
-
-
- Ranger
- Vanguard Models
- (and 1 more)
-
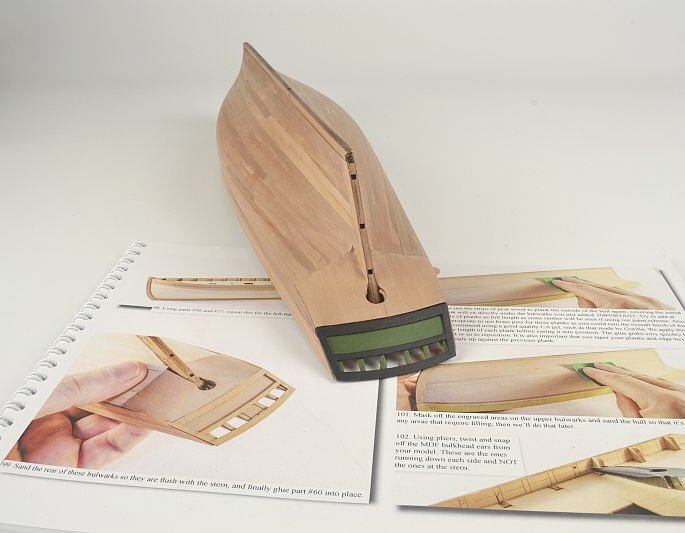
Hello - further steps forward. First planking completed. Starting to feel / look like a boat now. The next series of photographs show the Rudder Post plus the upper Stern section (painted) having been added along with the other parts that make the outer skin of the Keel, all pegged. It’s good to see another Ranger being built - not many of them on this site. Thank you for looking. Regards Doug
- 18 replies
-
- 10
-
-
- Ranger
- Vanguard Models
- (and 1 more)
-
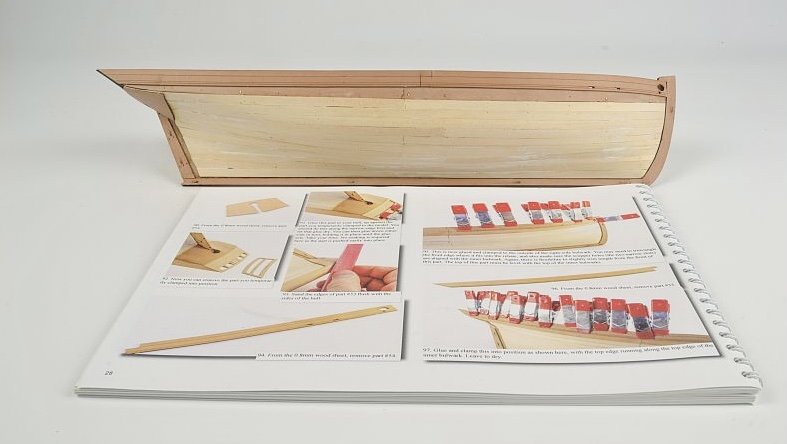
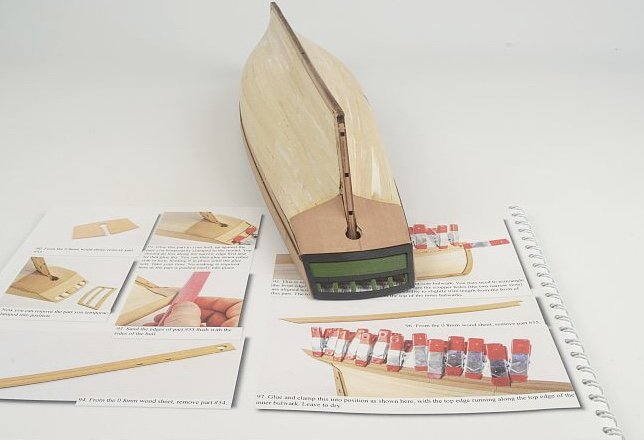
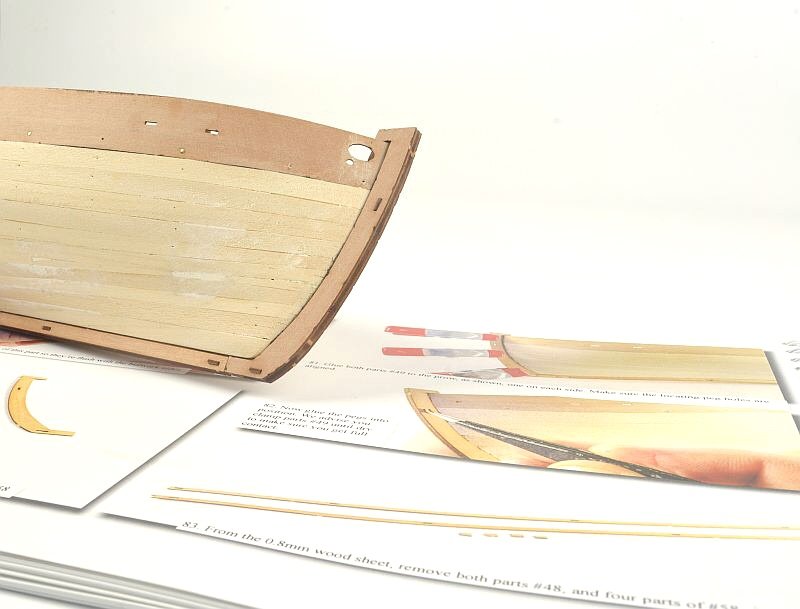
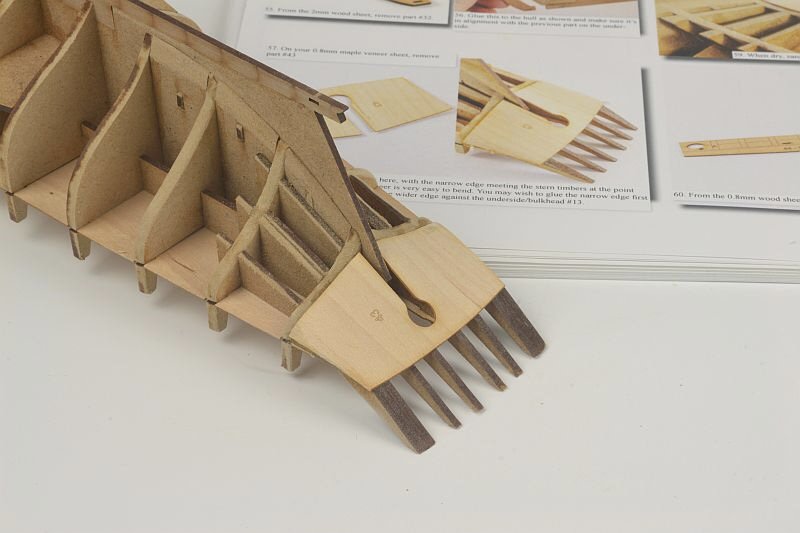
Hello - further steps forward. Extra pieces added to stern (sorry - no photo) and then the Bulkheads etc were sanded to allow a smooth run for the first planking. Then the two parts of the Keel were glued on plus the maple veneer piece at the stern. 4 side pieces glued on / pinned into place. First planking next to do. Regards Doug
- 18 replies
-
- 8
-
-
- Ranger
- Vanguard Models
- (and 1 more)
-
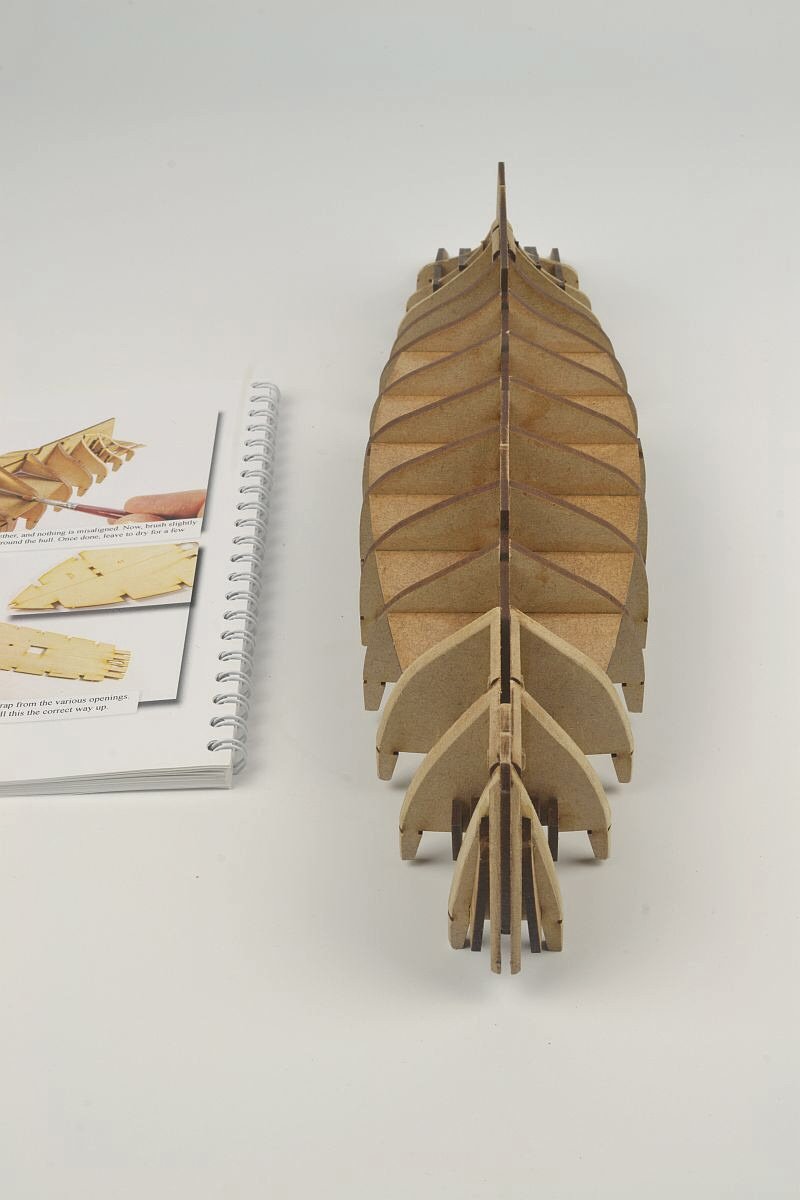
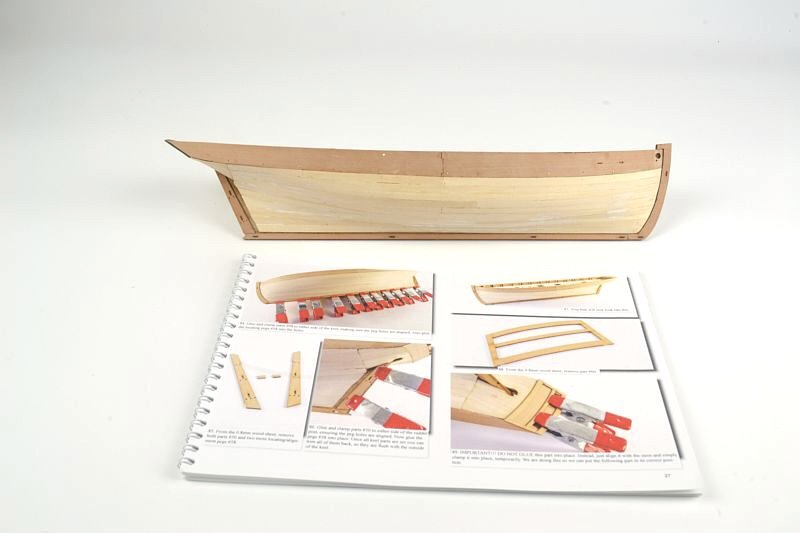
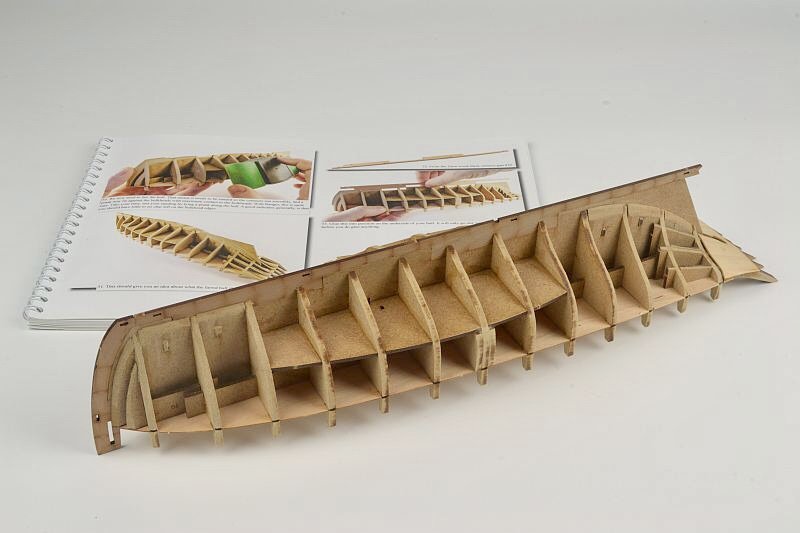
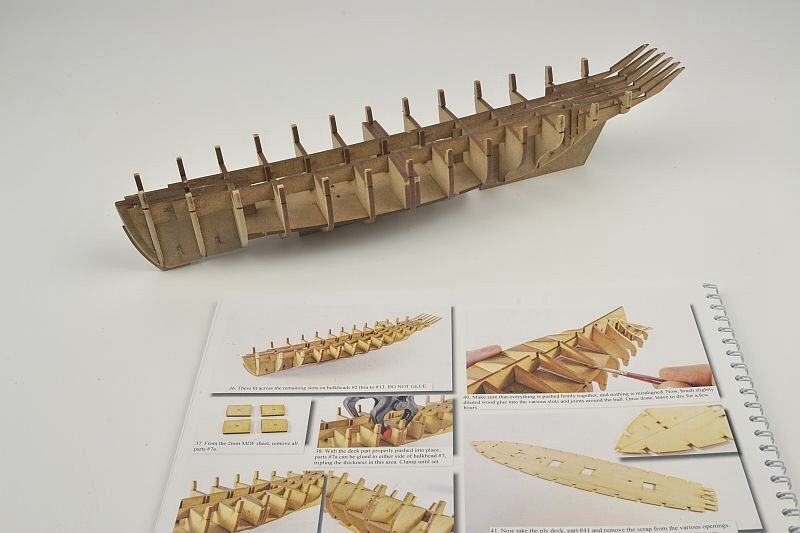
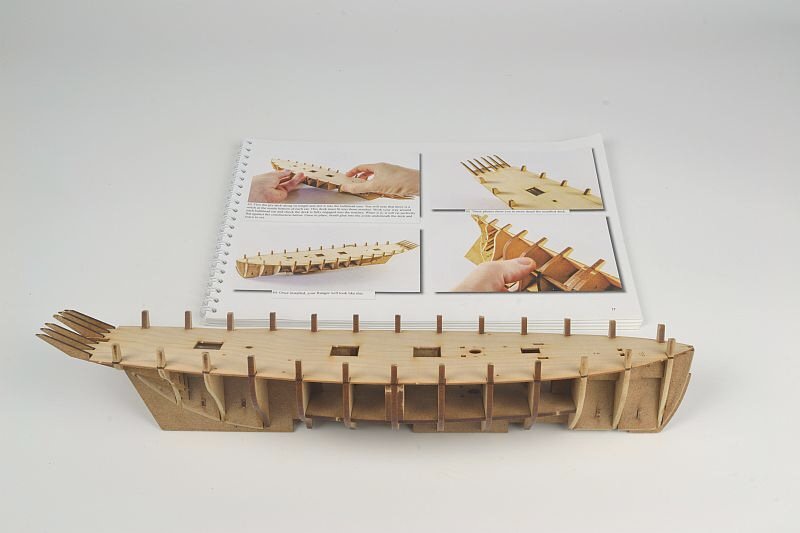
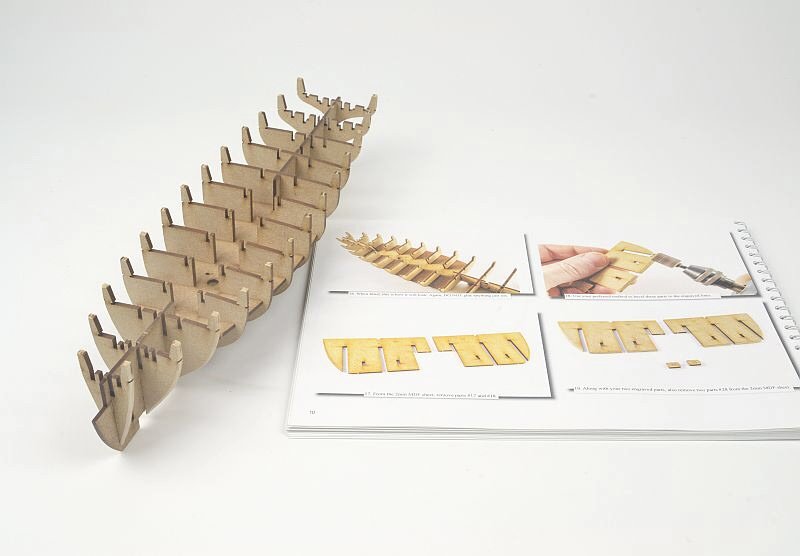
Hello - further updates. All Bulkheads needed quite a bit of sanding so everything could be slotted together which was unlike Saucy Jack where everything slotted together with no trouble at all. Restraint had to be used so as not to break bits - patience and a bit more sanding. Bow and Stern Bulkheads etc were bevelled prior to attaching to Keel as instructions. Prior to attaching the ply Deck all joints were brushed with diluted glue. The ply Deck installed. Thanks for looking. Regards Doug


- 18 replies
-
- 8
-
-
- Ranger
- Vanguard Models
- (and 1 more)
-
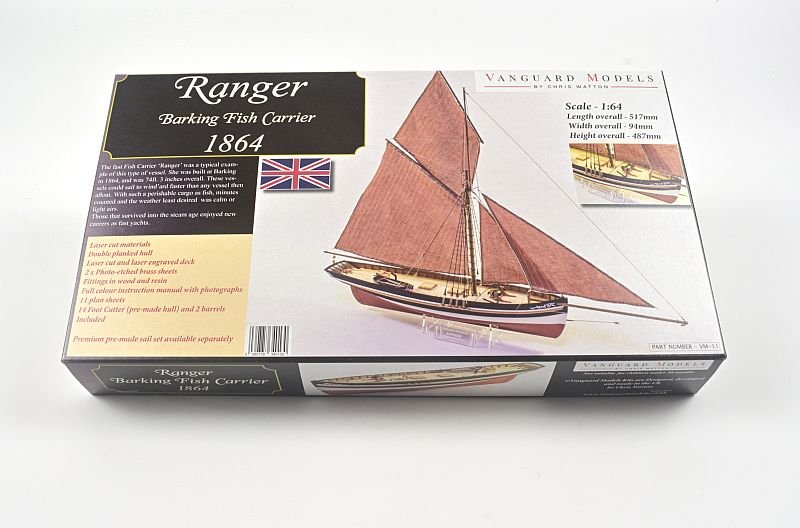
Hello - Have decided to make another Fishing Boat. So here's the start. Regards Doug
- 18 replies
-
- 6
-
-
- Ranger
- Vanguard Models
- (and 1 more)
-
Hello AJohnson and Knocklouder - Thank you for the comments. Haven’t got anything planned as have now run out of space but in time we will see when I miss making them. Regards Doug
-
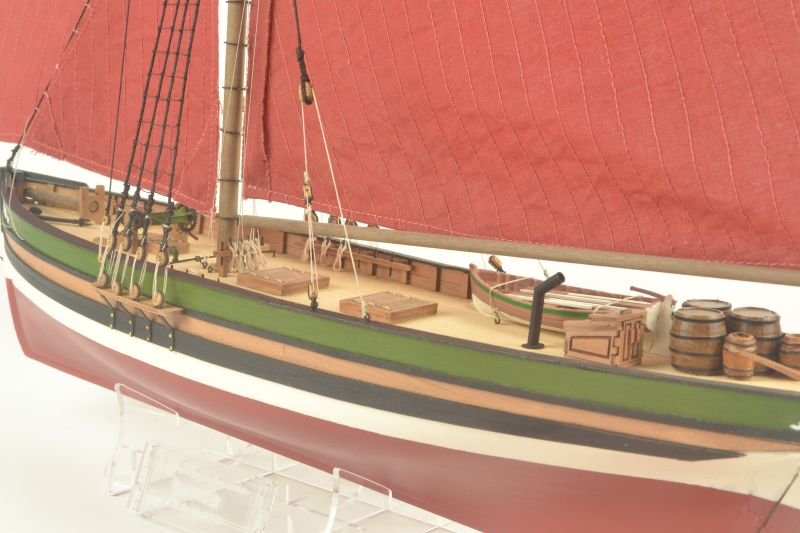
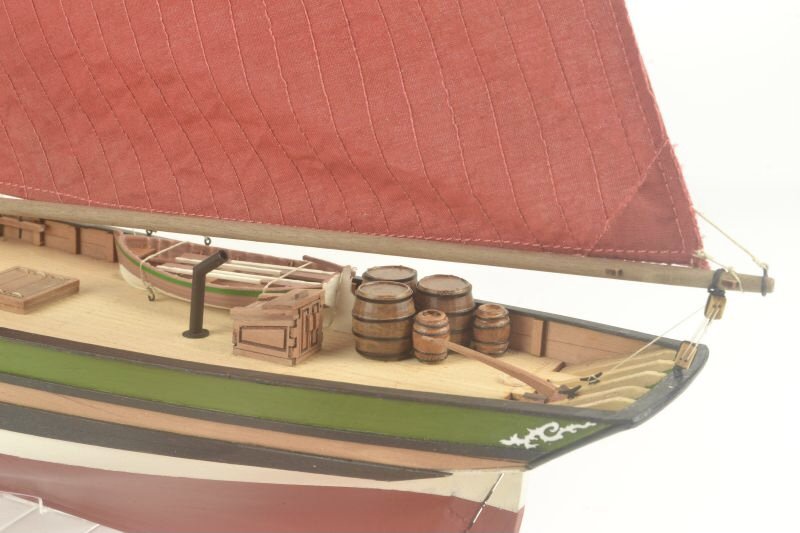
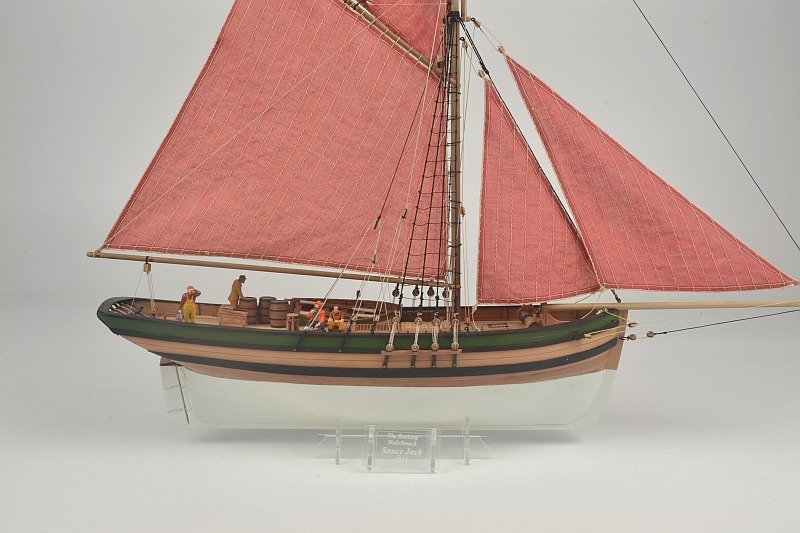
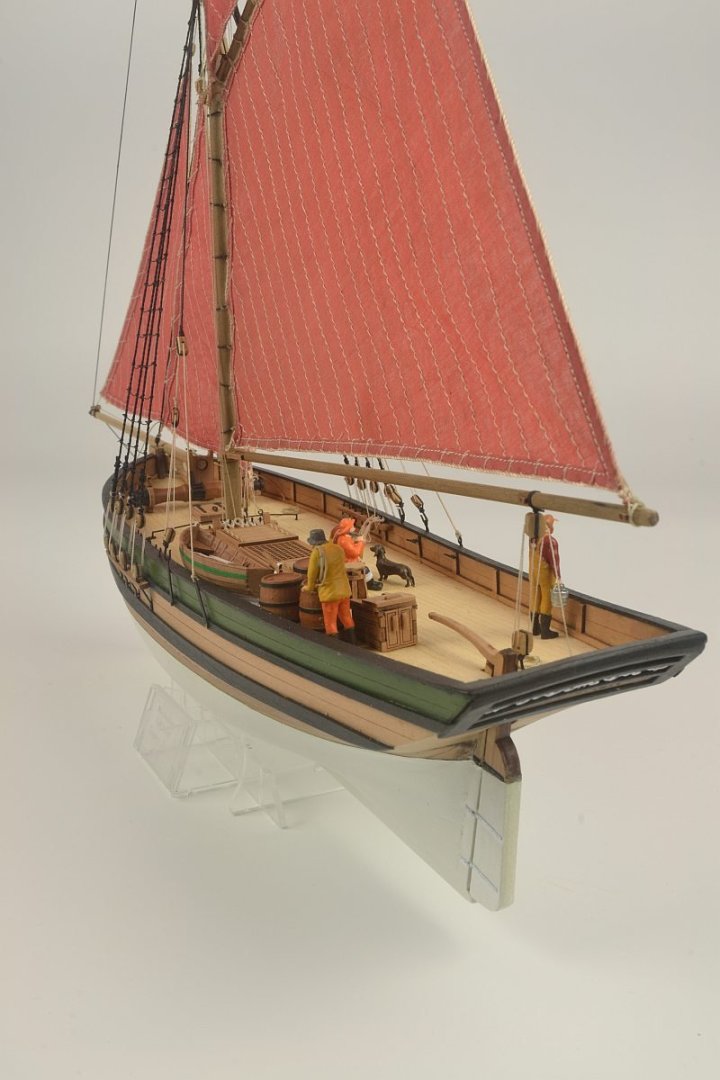
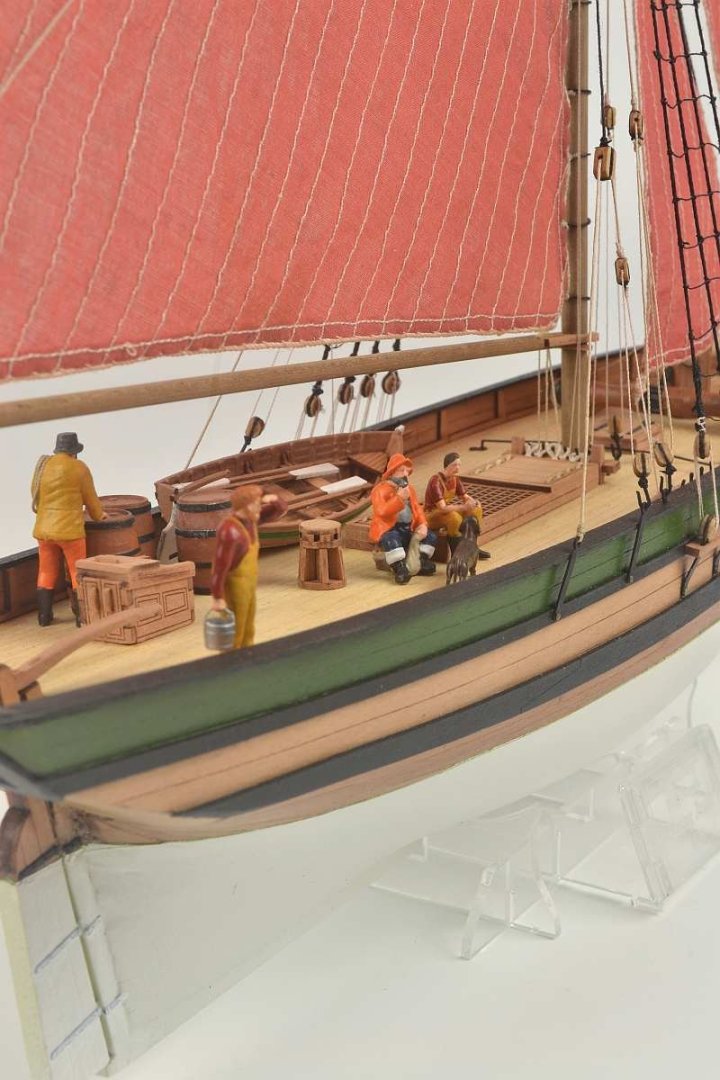
Hello - All finished. Barrels (supplied with kit) done with tape for metal hoops. All rope coils done although I can see in photo one has come unstuck. It was a nice build to do. Thank you all for looking and the encouraging comments and the 'Likes' Regards Doug
-
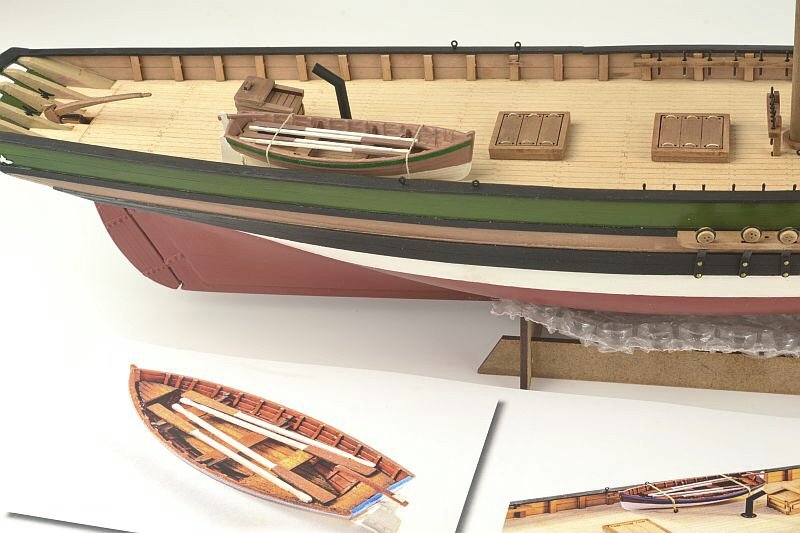
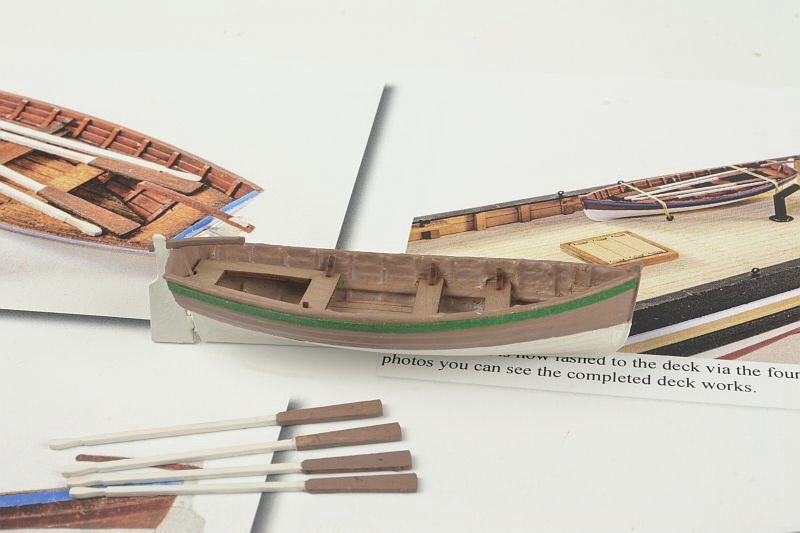
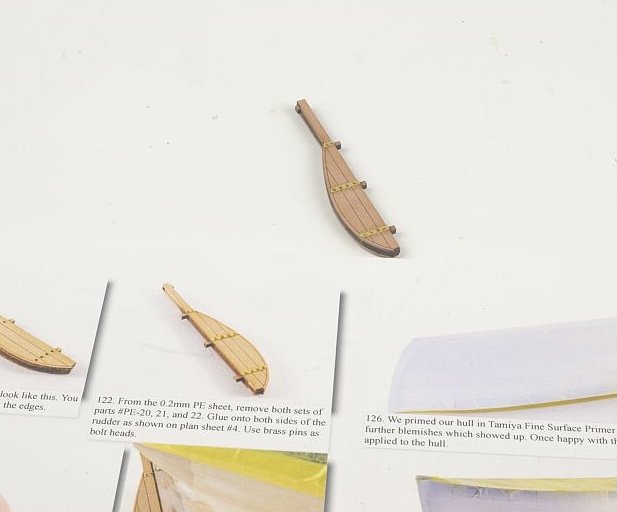
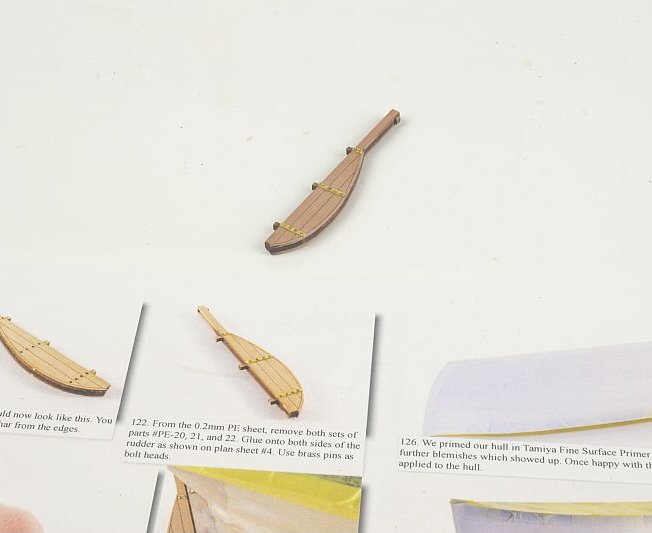
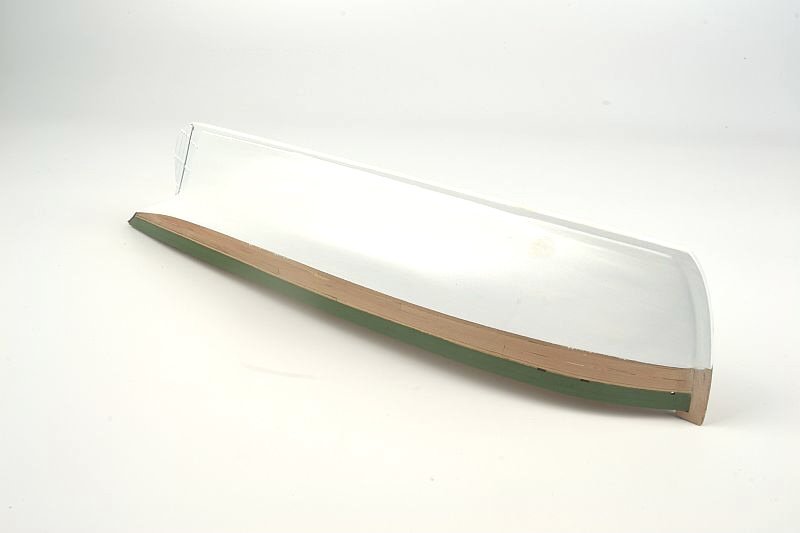
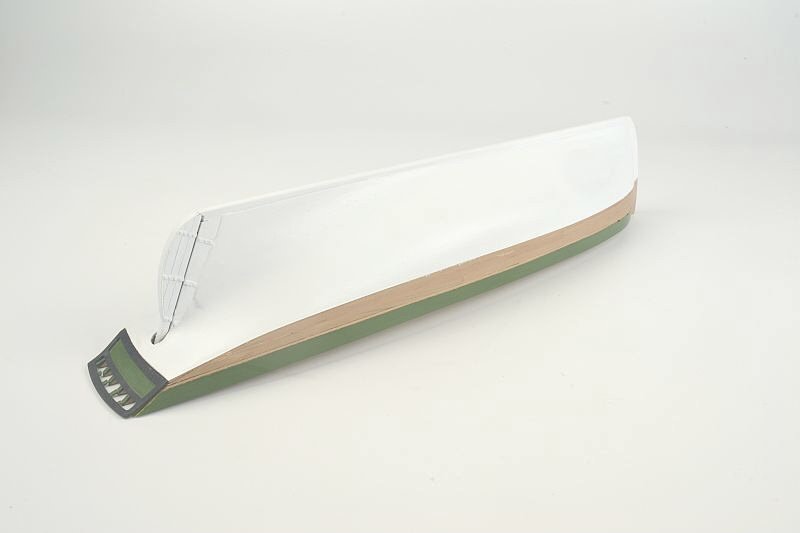
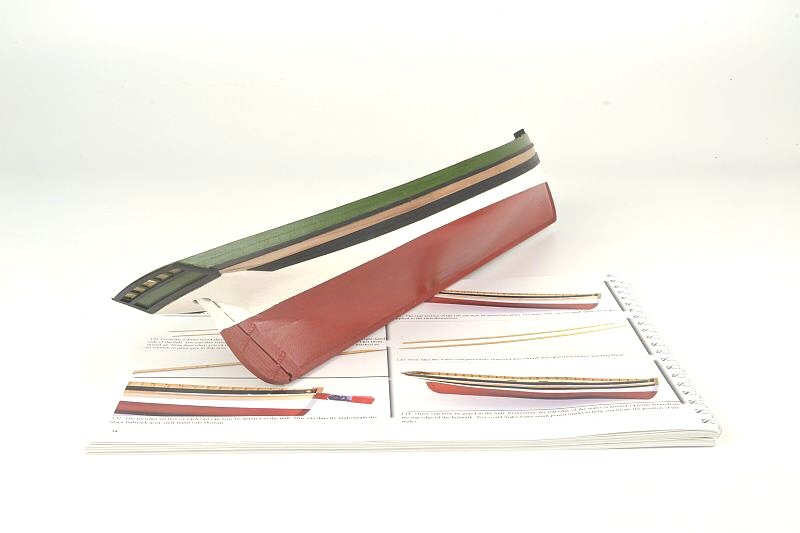
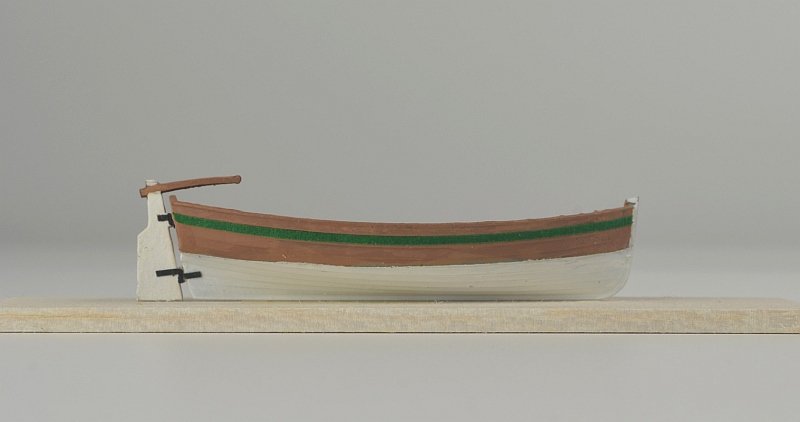
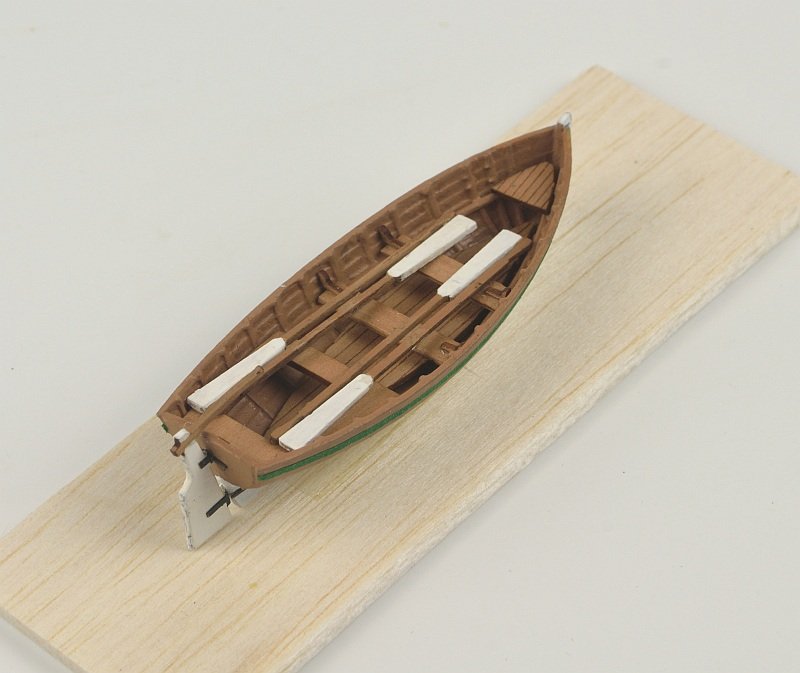
Hello - Okay one of the last few things crossed off the list. The ship's boat - this is supplied with the kit. A pre formed hull with wooden parts for the seats, oars and the rudder. The hinges and green stripe are tape. Regards Doug
-
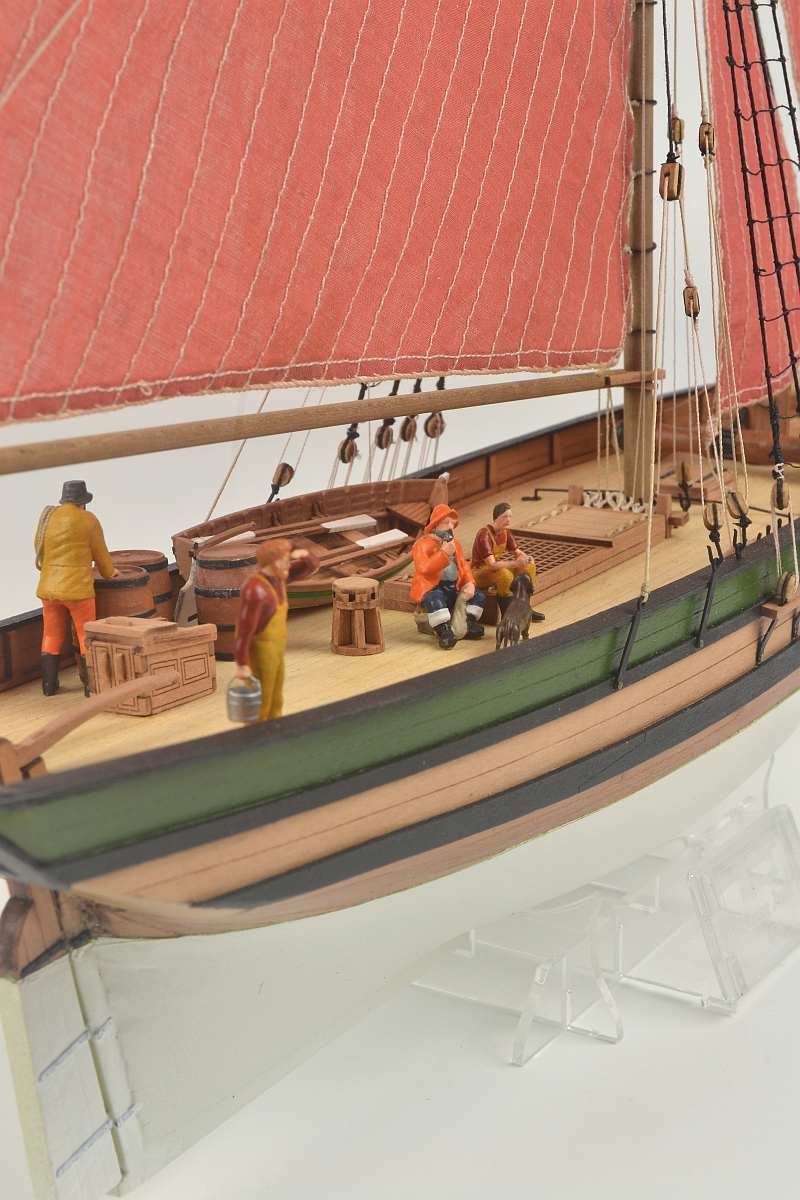
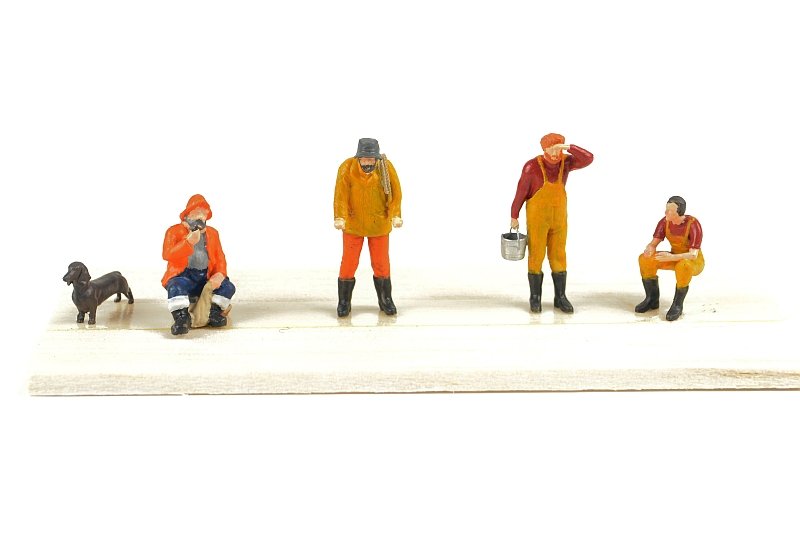
Hello - small update. The Motley Crew painted and ready to go aboard, The detail is incredible given the very small size of the characters. Wasn't expecting the dog. Now all aboard..... Thank you for looking and the 'Likes' Rope coils and small rowing boat yet to do and that should be that. Regards Doug

-
Hello - a question for Chris Watton. Cannot see on the Vanguard website that you have the crates for sale that James H mentions in the build manual for Saucy Jack. Tried going through the contact page on the website but in pressing the submit button nothing seemed to happen. If you could please let me know as have the fishermen figures in the basket awaiting to order. Thank you Doug
-
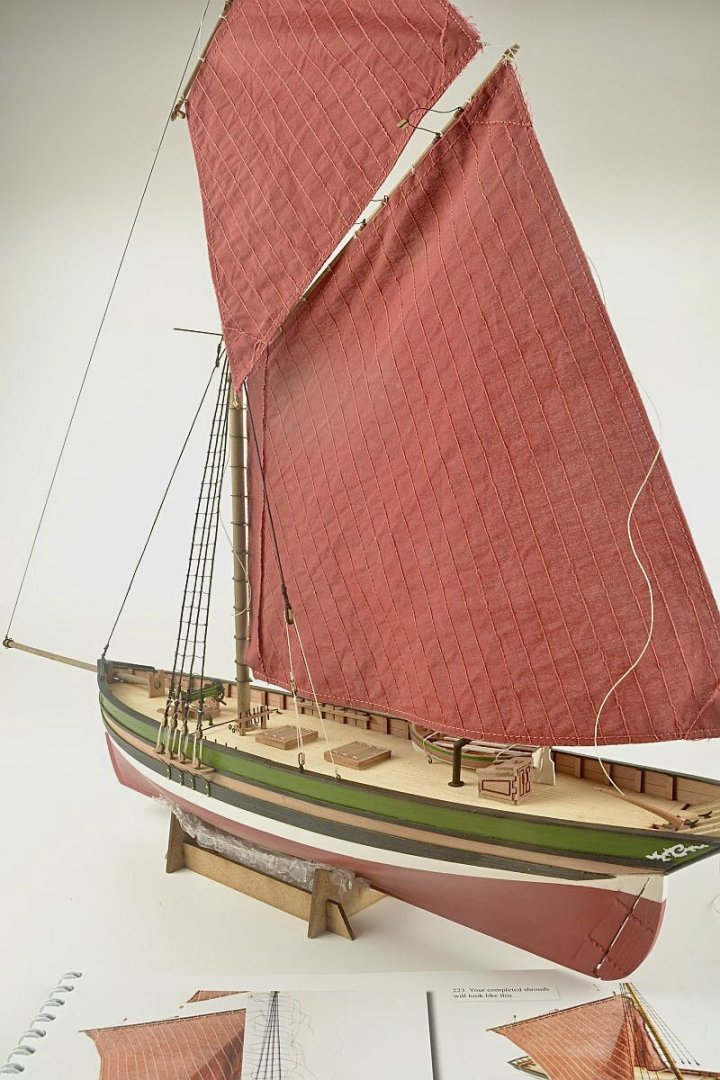
Hello - Finish line in sight. Change of image quality as now using mobile phone 'cos camera has been sent off for repairs - but still the same dodgy build work though. Inner Jib in place and all tied off. Outer Jib Just remembered the Rudder Hinges needed doing......... Final picture Thank you very much for your comments - SiriusVoyager - Knocklouder - Jim Lad -AJohnson plus the 'Likes' The small boat / barrels to paint plus some more rope coils to do. Thank you for looking Regards Doug

-
Hello - further updates. All rigging associated to the two main sails done and tied off. Did find tying off onto the belaying pins a little tricky...... Final picture Thank uou for looking and the 'Likes' - much appreciated. Regards Doug

-
Hello - Shrouds as instructions completed. Next The Ratlines and the Mast Stays all done. Thanks for looking Regards Doug