DONATION DRIVE - SUPPORT MSW - DO YOUR PART TO KEEP THIS GREAT FORUM GOING! (91 donations so far out of 49,000 members - C'mon guys!)
×


gil middleton
-
Posts
308 -
Joined
-
Last visited
Content Type
Profiles
Forums
Gallery
Events
Everything posted by gil middleton
-
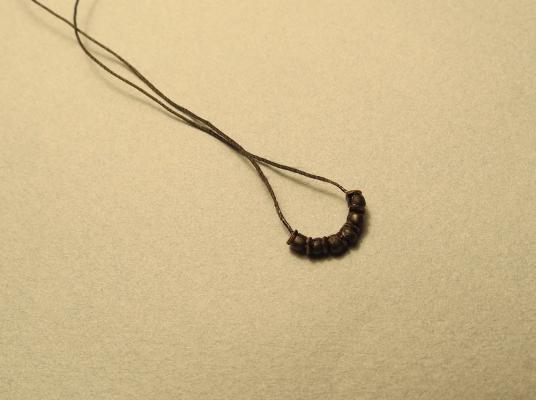
Hi Lawrence, I'm not sure I understand the question. Are you talking about where the deadeyes are lashed together? Gil
-
David, As I said, I couldn't respond to your private message because it put me in Internet Explorer 11 and I was unable to up-load photos. Firefox lets me up-load. Attaching the lines from the bow sprit is difficult to see on my photos of the real ship, but their location is clear. Photos from my log shows them rather clearly due to a better camera angle. Two photos from the real ship. Eyebolts with blocks are seen attached to the lower rail just above the round house. Four photos of the model show the eyebolts with blocks, forming a part of the tackle. I hope this answers the question. Cheers, Gil


- 755 replies
-
- 9
-

-
- finished
- caldercraft
- (and 1 more)
-
Many thanks Joe, Michael and Jerry. It's only one way to do it. There are others as good or better, but I guess it's my choice. Cheers, Gil
-
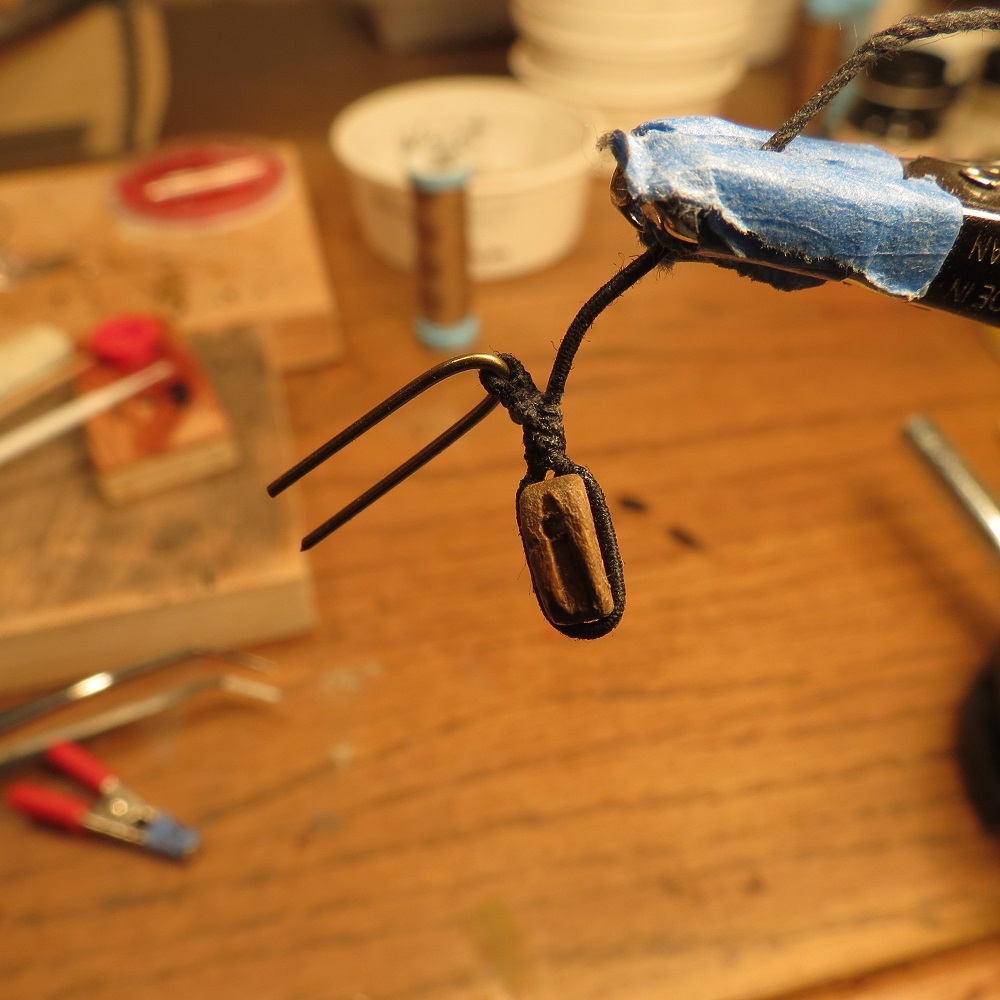
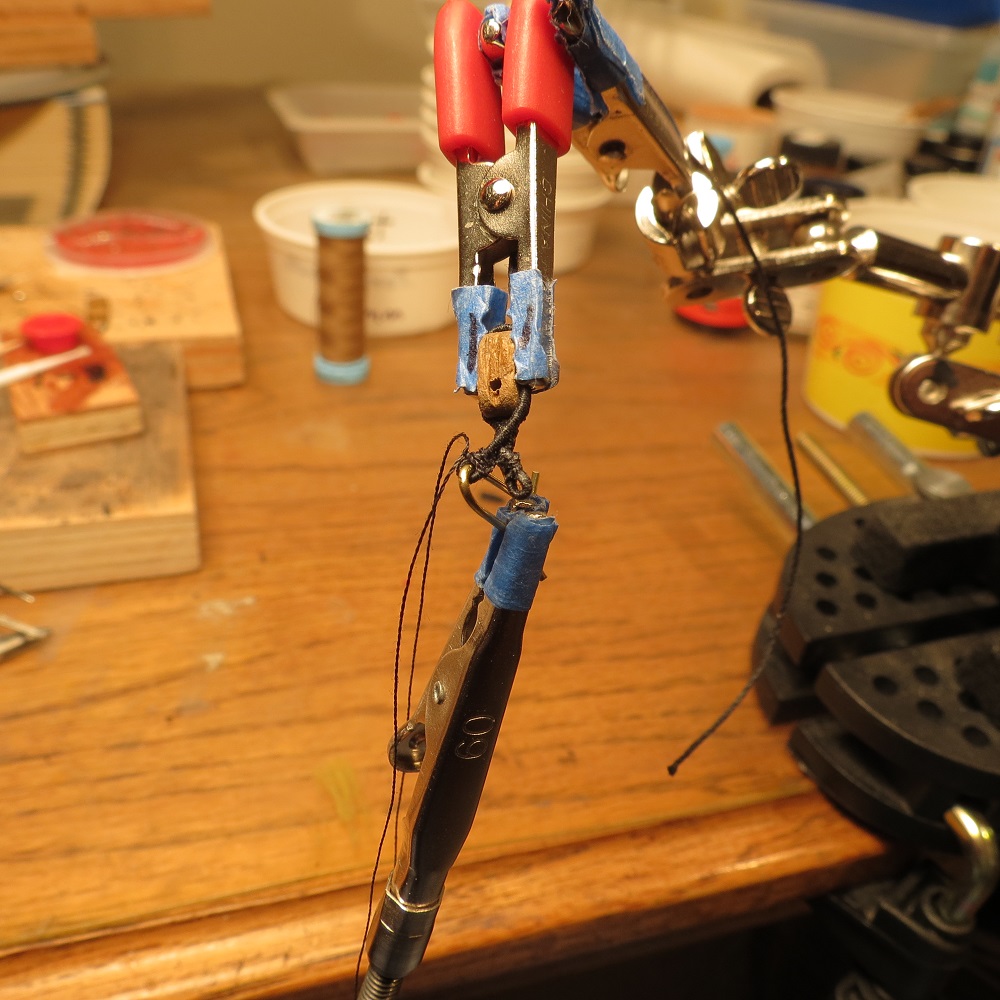
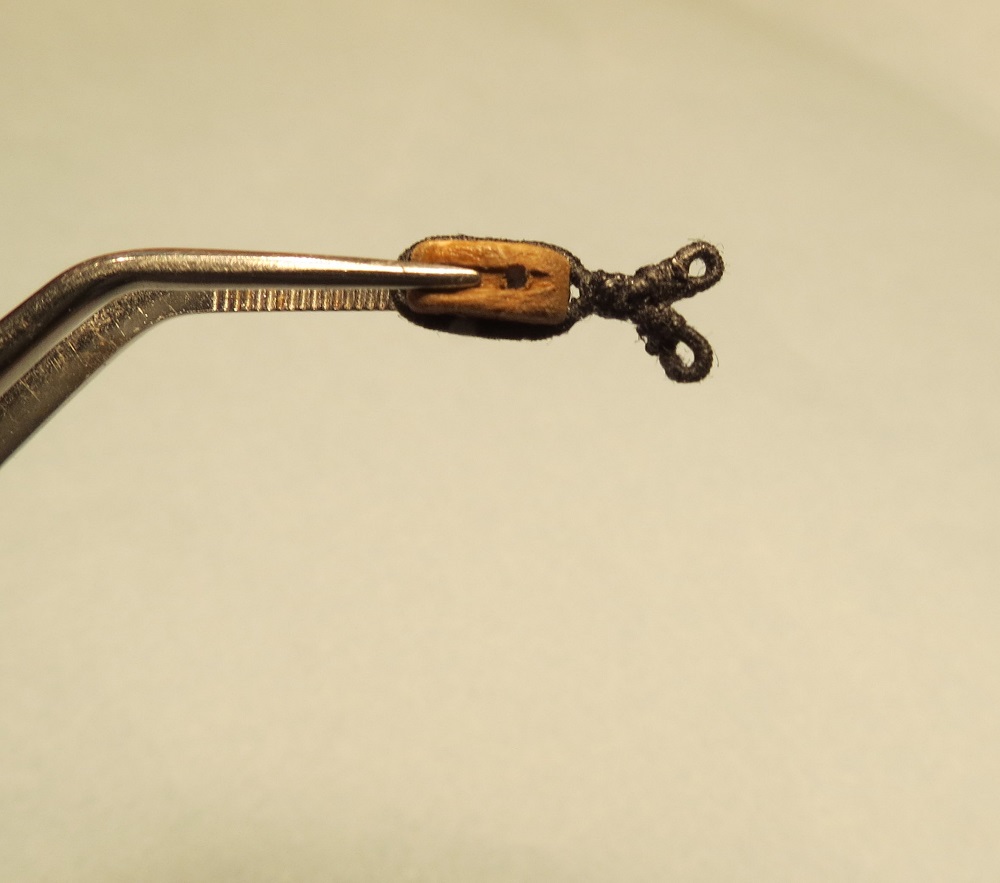
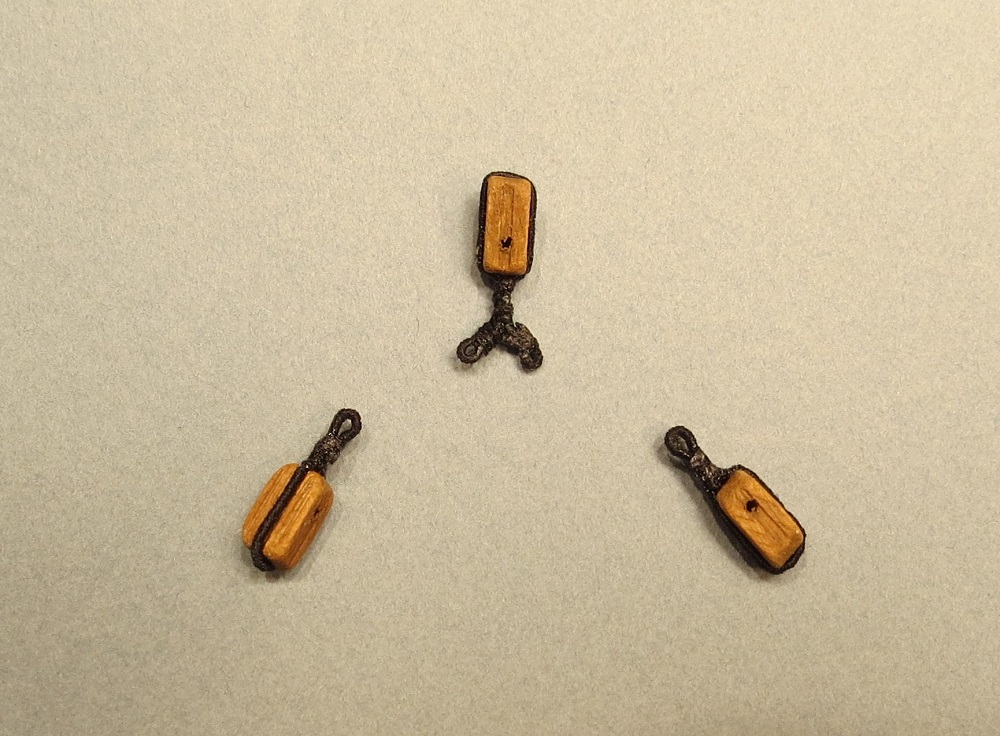
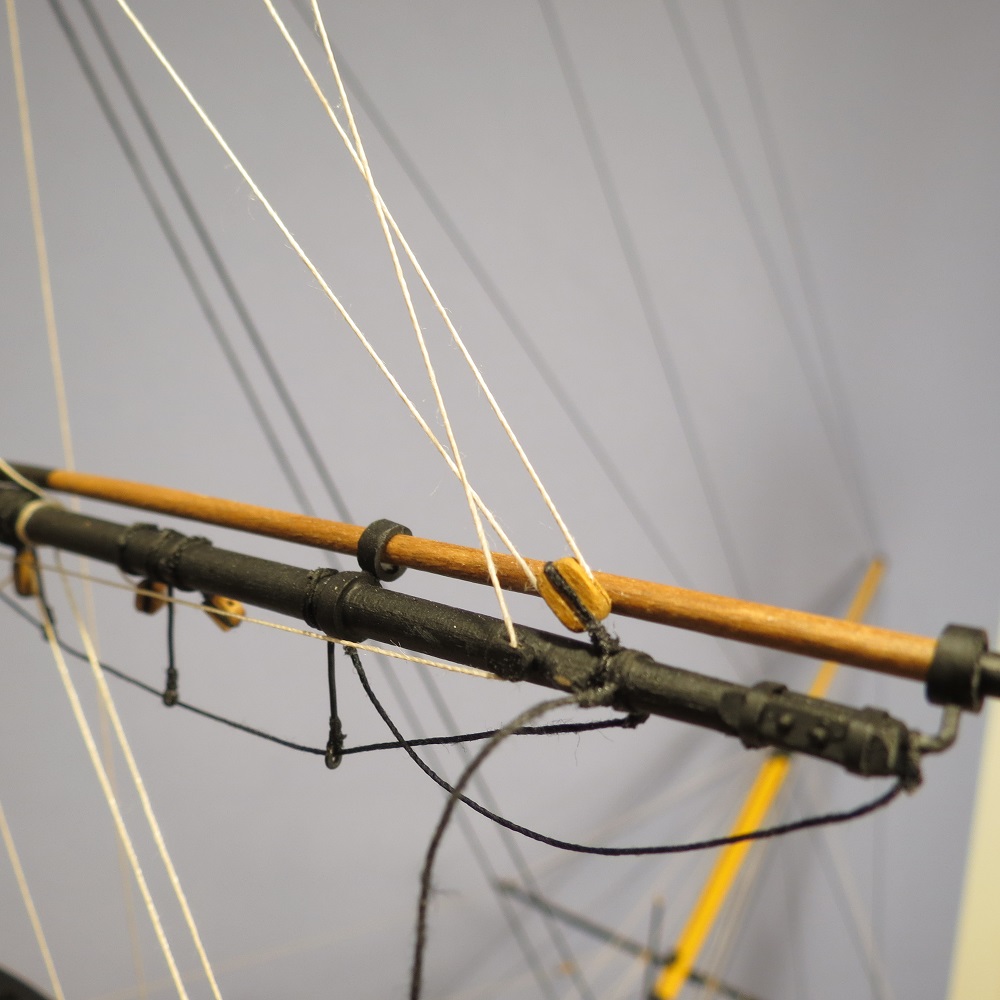
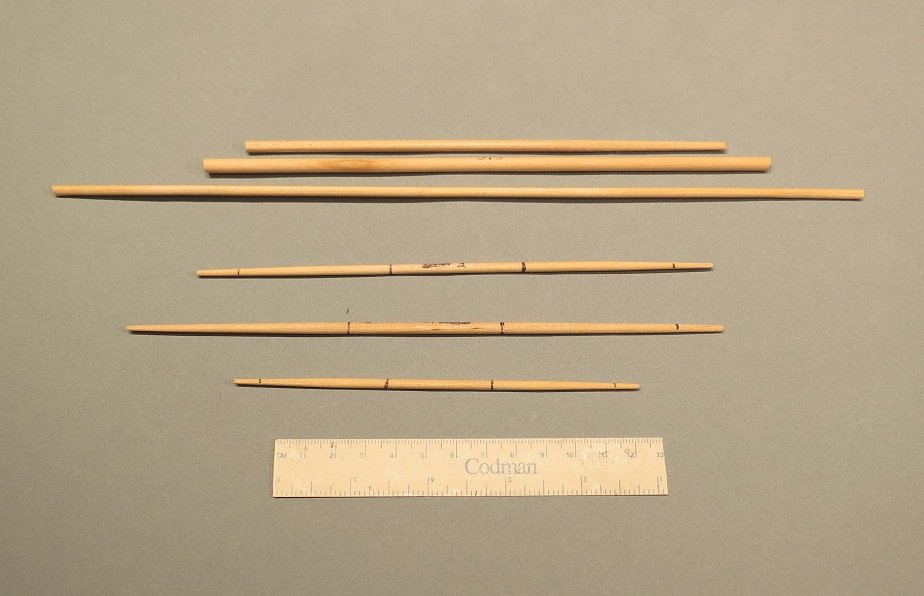
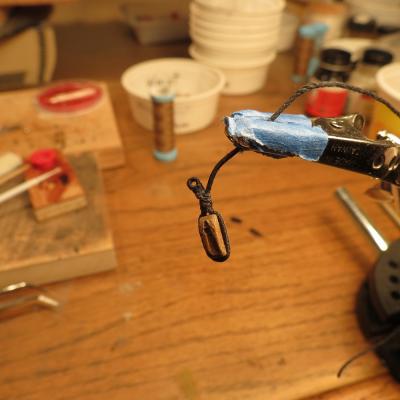
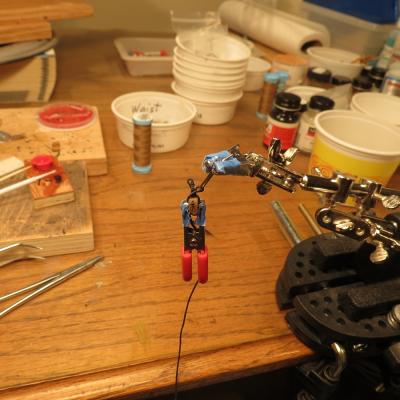
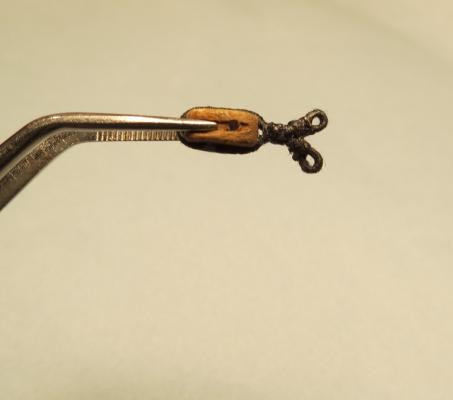
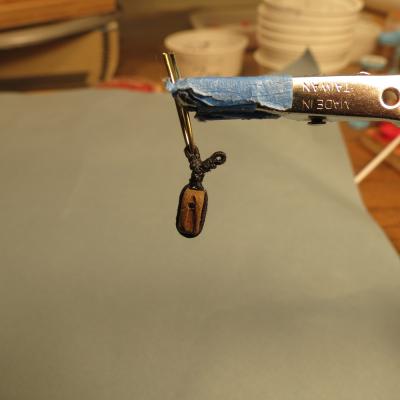
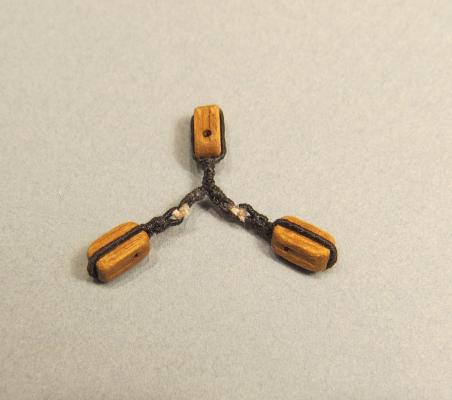
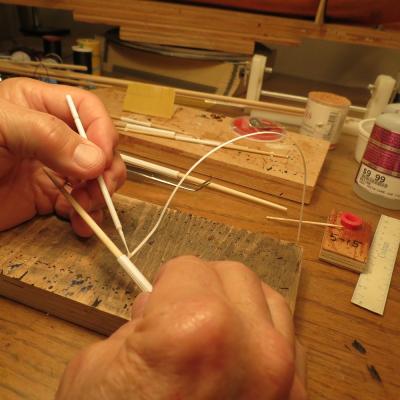
A bit more on the clue, sheet and tack blocks. The photos I have of the Victory show the blocks held together with shackles (which hadn't been invented in 1805. McKay's drawings show a monkey fist and loop arrangement. I've simply prepared the blocks and lashed them together. I suspect McKay's illustration is more accurate. Fashioning the clue block. All line including the strop and eyes are served. Brass rod used to maintain the eye. One eye completed. Forming the second eye. Sheet block


- 755 replies
-
- 21
-
-
- finished
- caldercraft
- (and 1 more)
-
Thank you John and Mark. As scratch builders, you have talents I can't begin to match and working in our den, a Byrnes saw, lathe, drill press or rotory sander just won't fly. Fortunately, we all have fun and contribute in our own way. Mark, the serving tool is simple and does everything I want it to do. Since I'm not into rope walks with so many lines available (previous models and fabric stores), simple is good. Kevin, I can't believe the progress you've made on the "Bismarck." It's interesting following your thoughts on plastic vs. wood. Mort, Lawrence and Dave, it's kind of you to visit and Happy holidays to each of you. Cheers, Gil
-
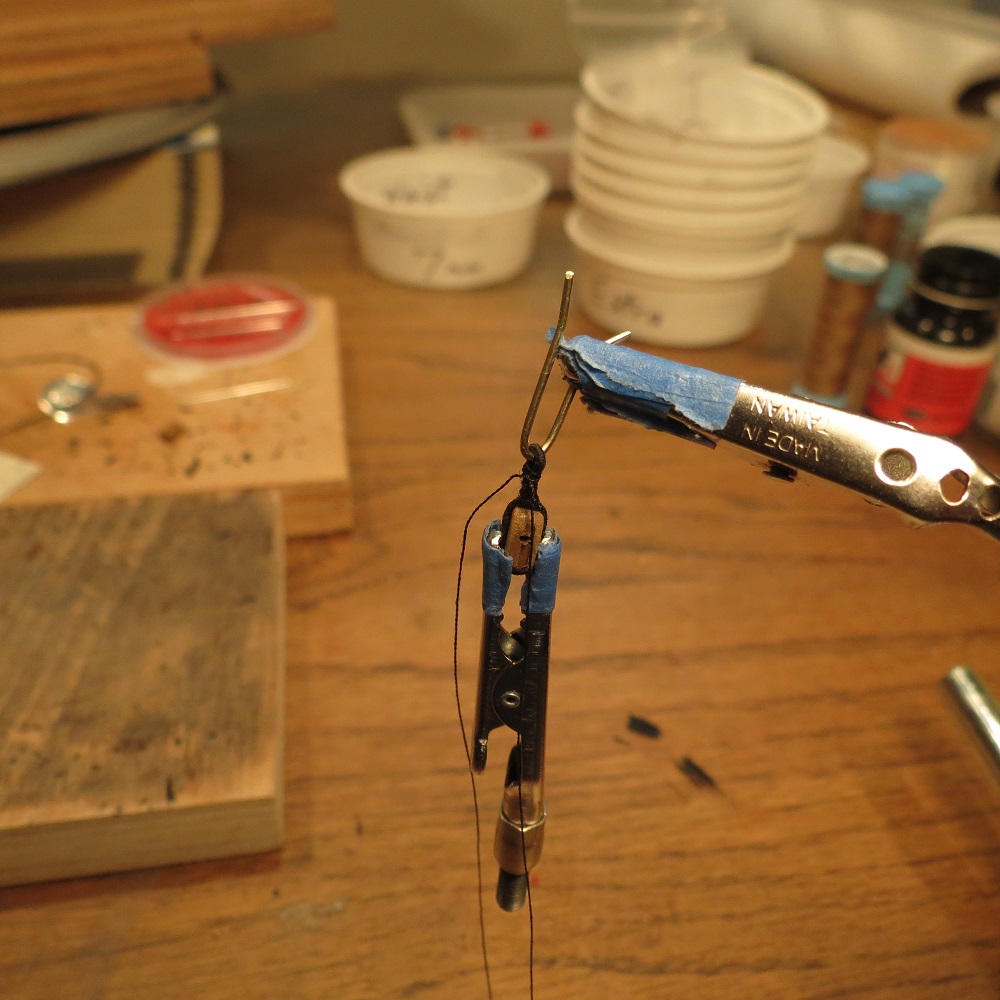
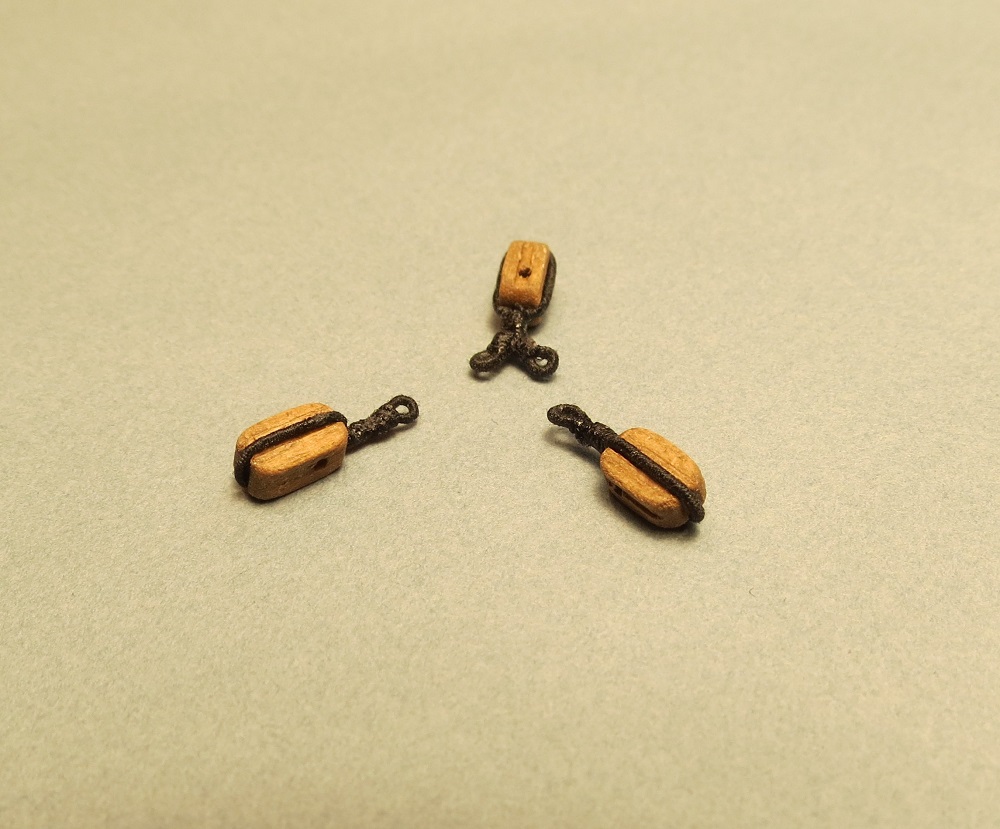
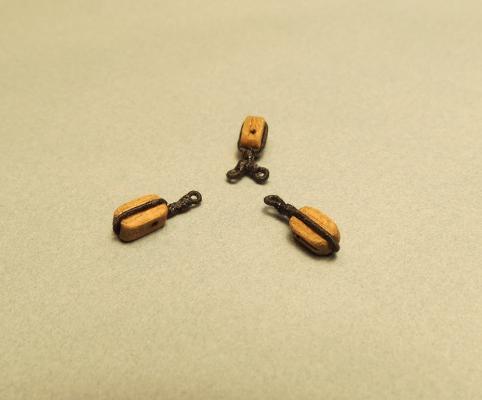
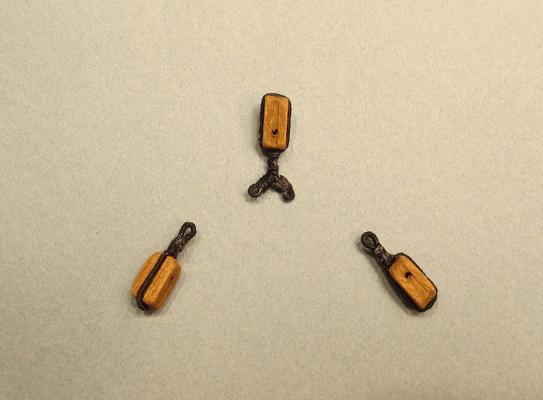
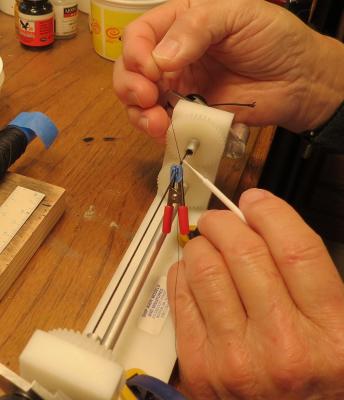
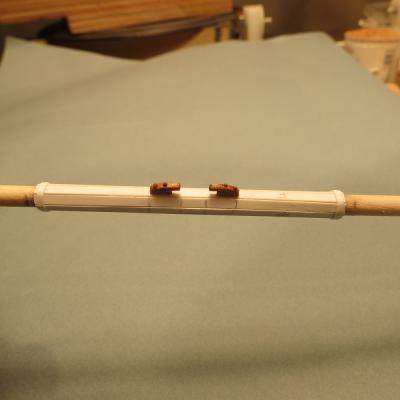
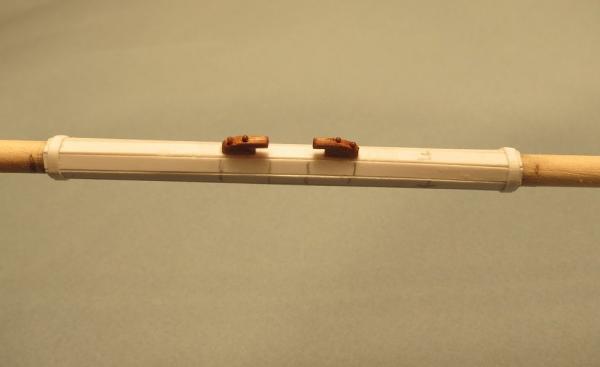
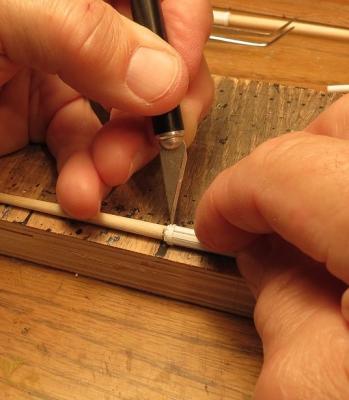
Before the c/a has fully cured, use a hemostat or needle driver to mold the end of the serving to hide the end of a thread. Sieze the strop or eye, placing the knots carefully since siezing is difficult to slide over served line. Clue line block, sheet block and tack block. (strops and eyes served). Clue line block sheet block and tack block lashed to gether.
- 755 replies
-
- 12
-
-
- finished
- caldercraft
- (and 1 more)
-
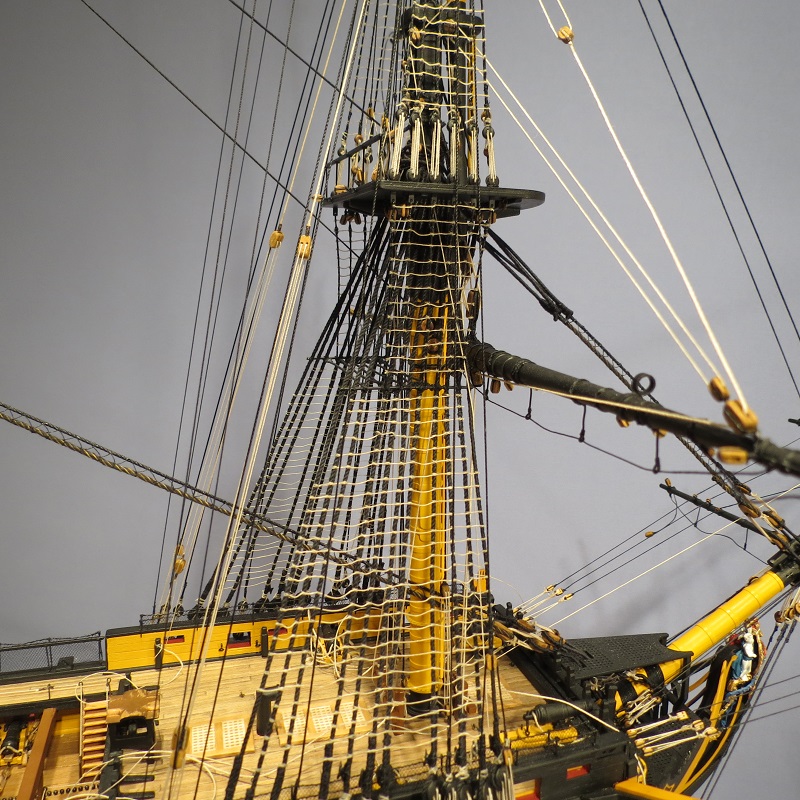
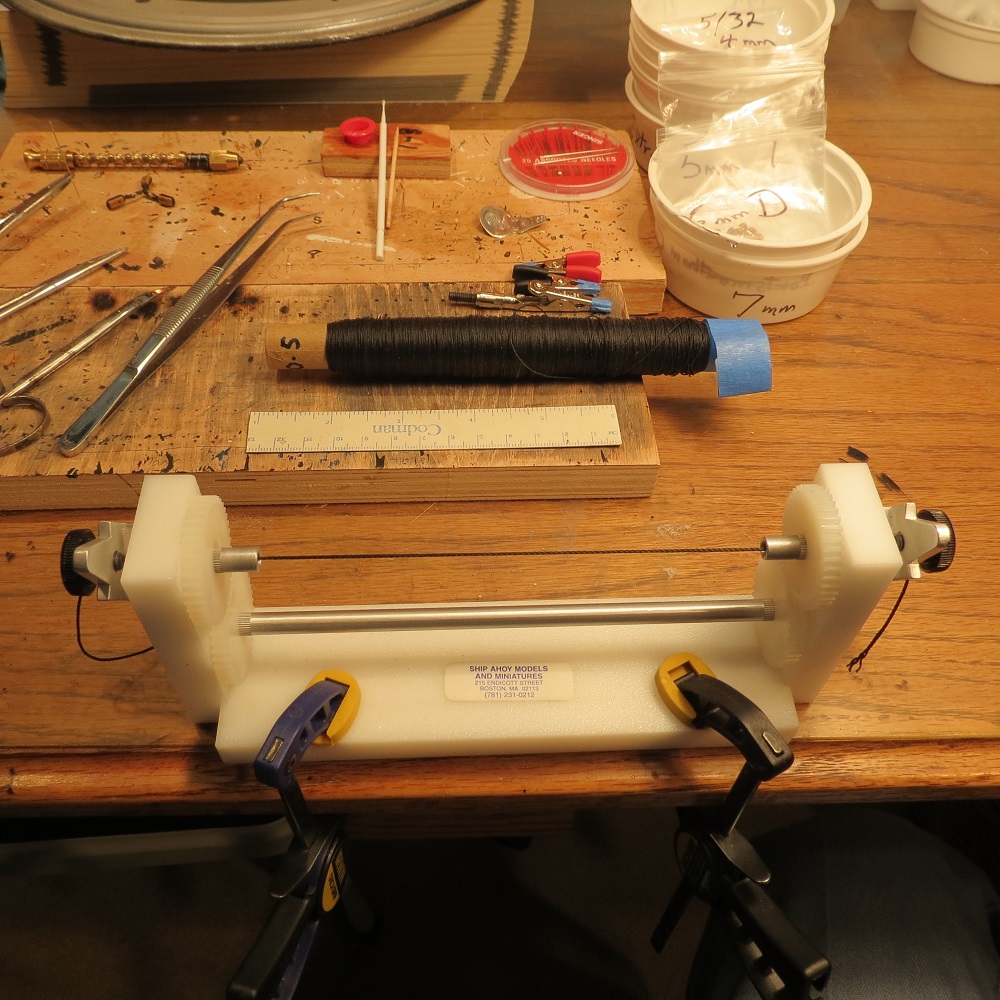
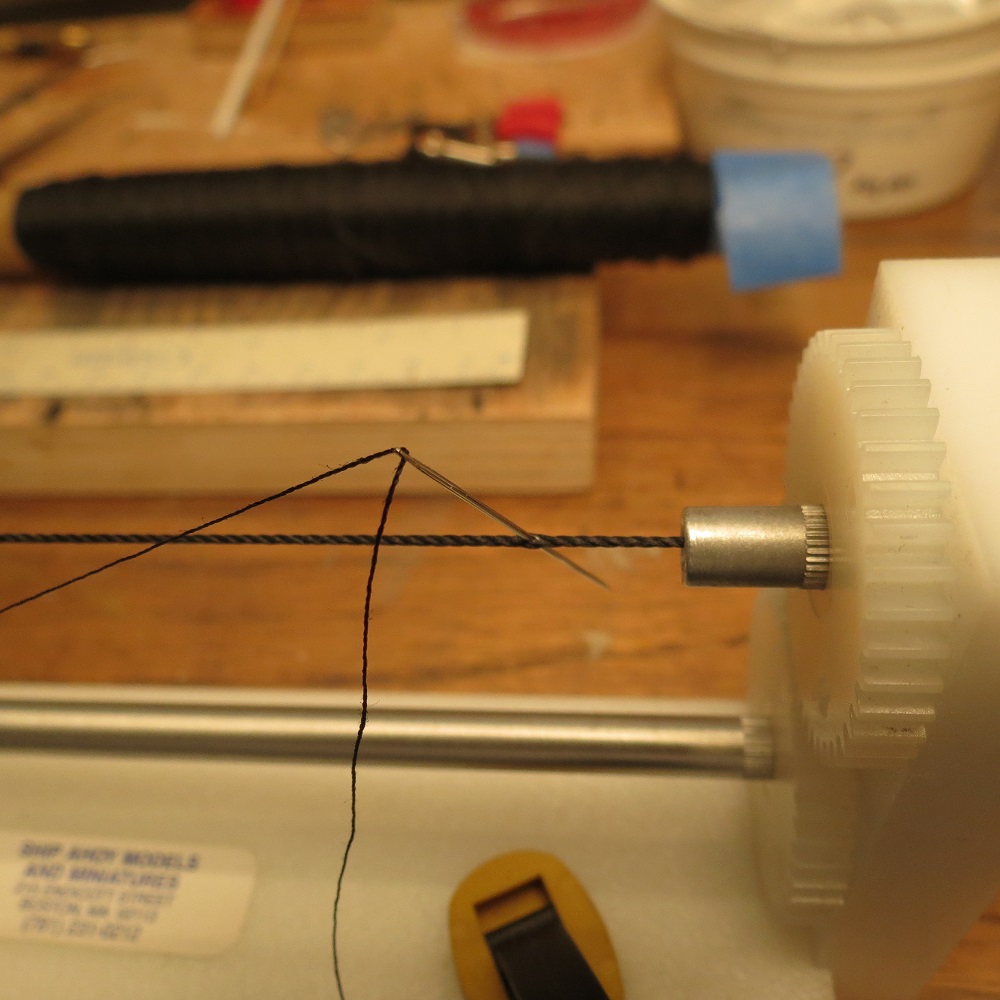
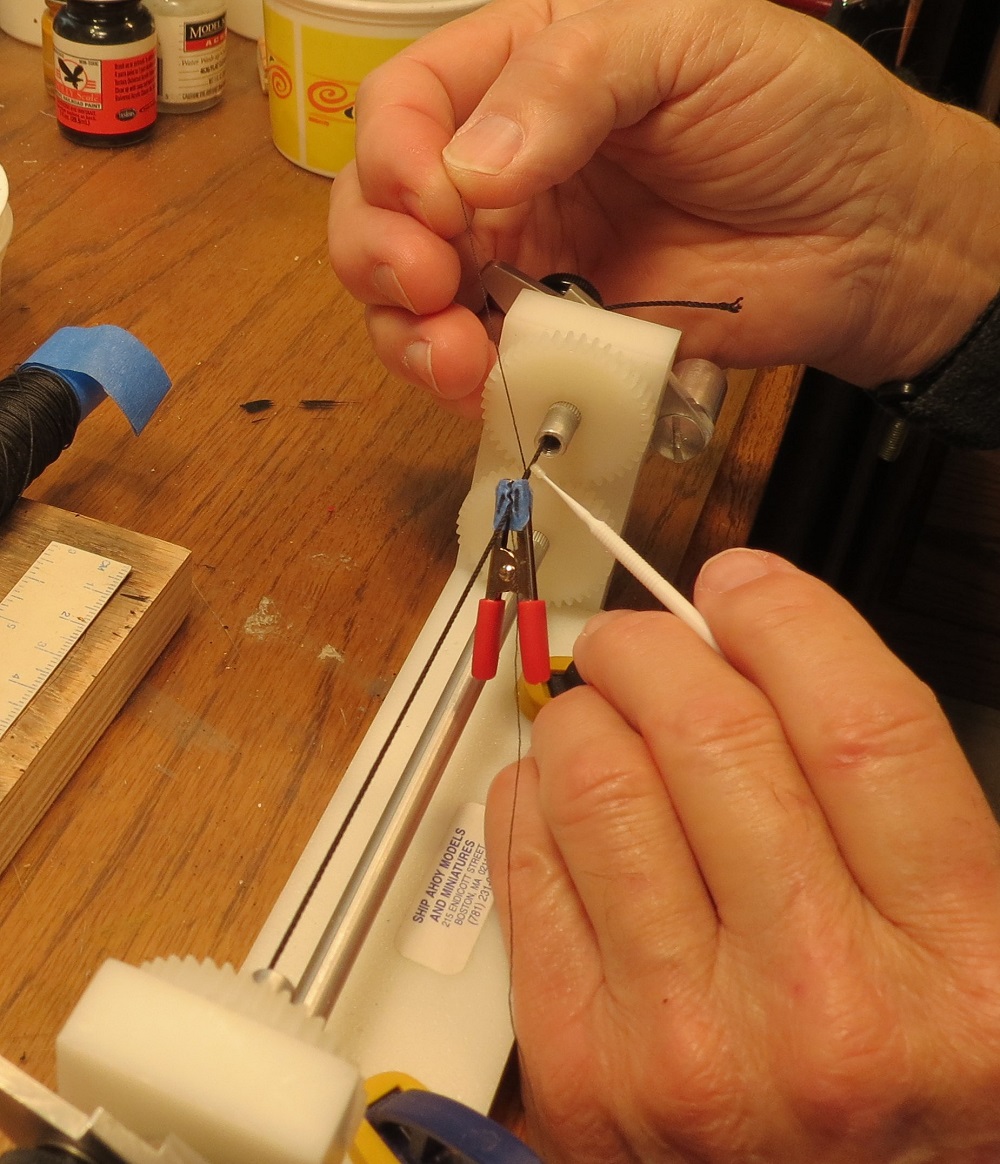
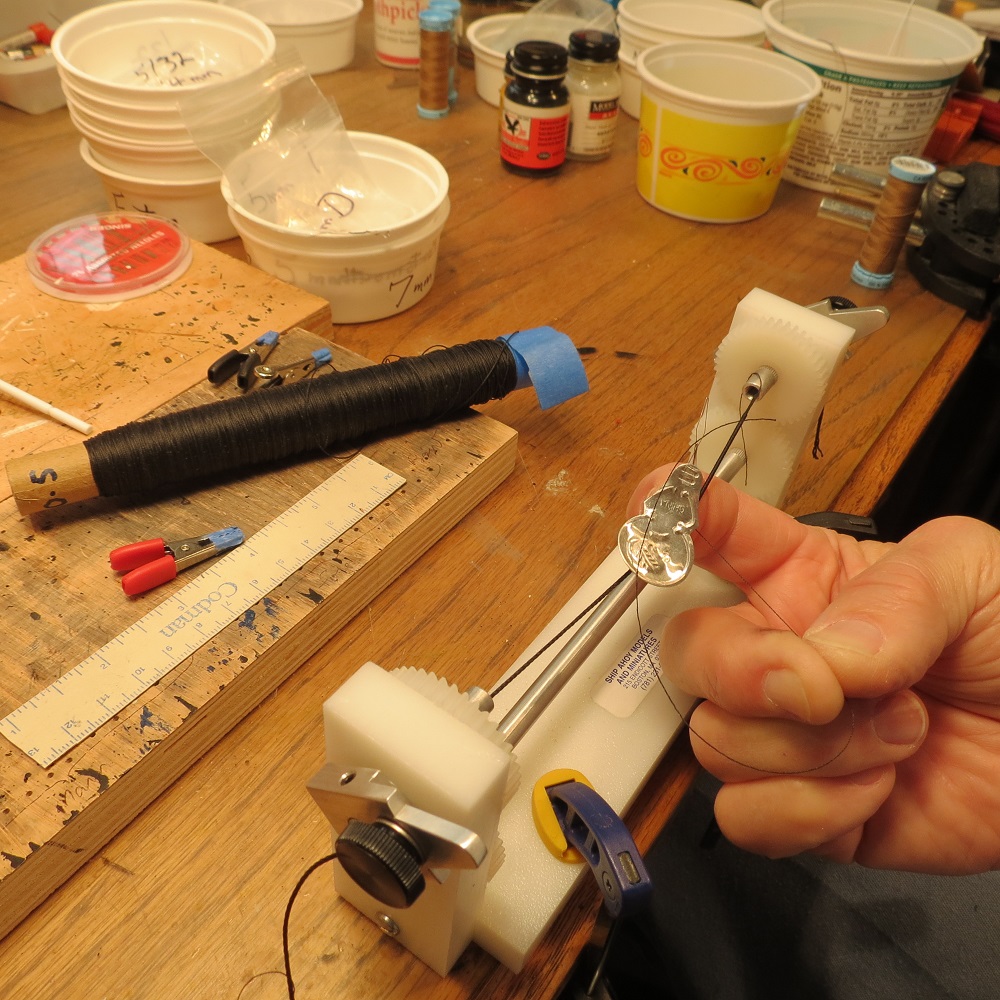
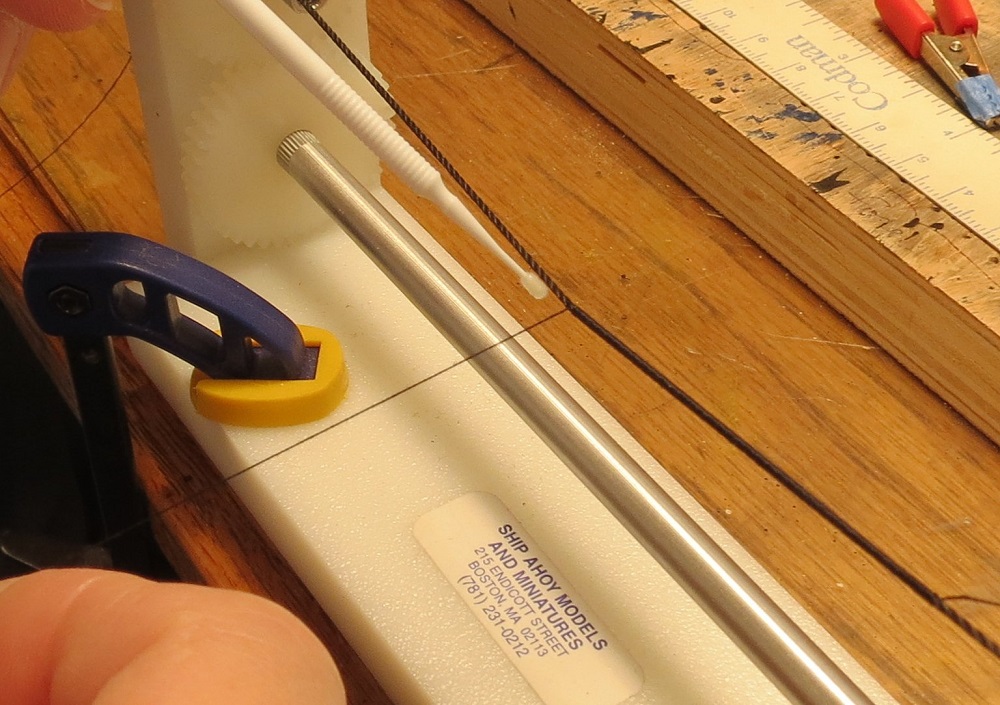
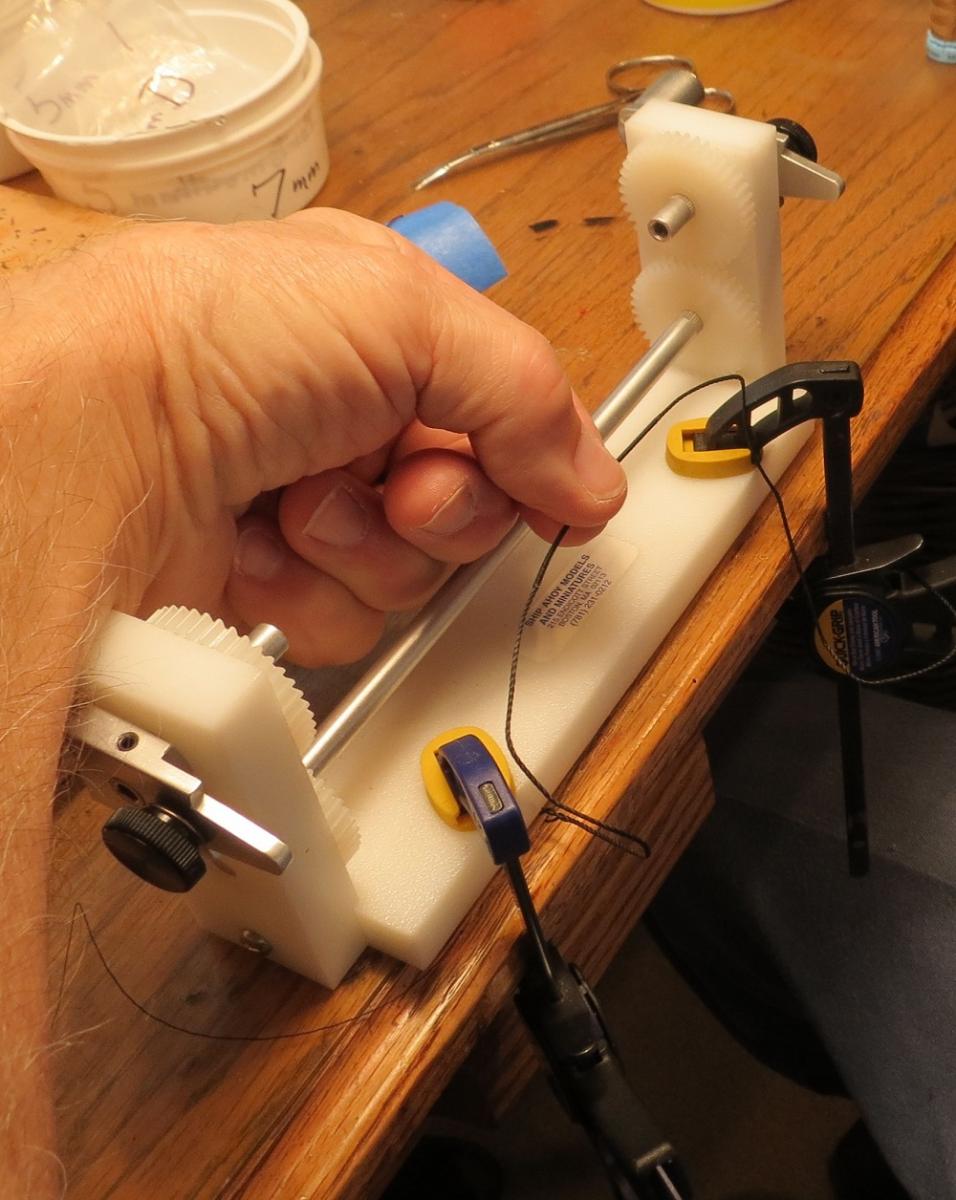
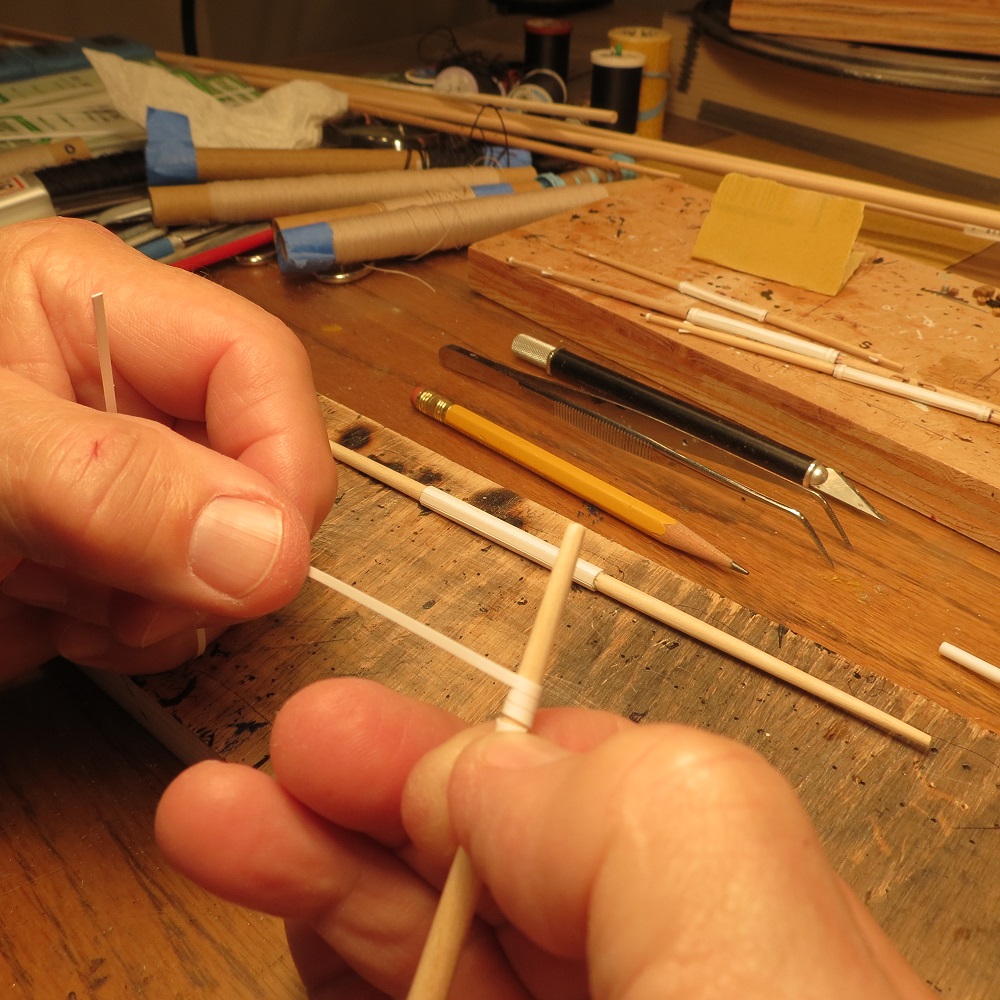
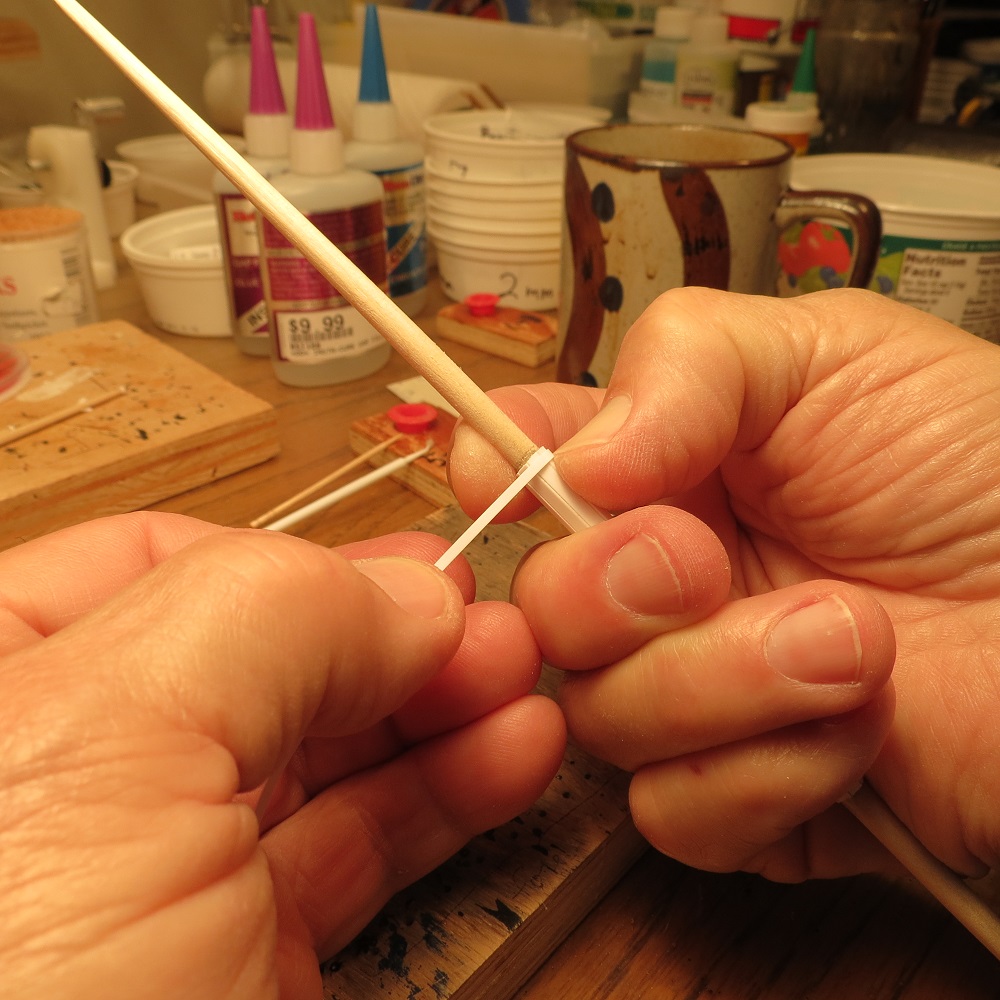
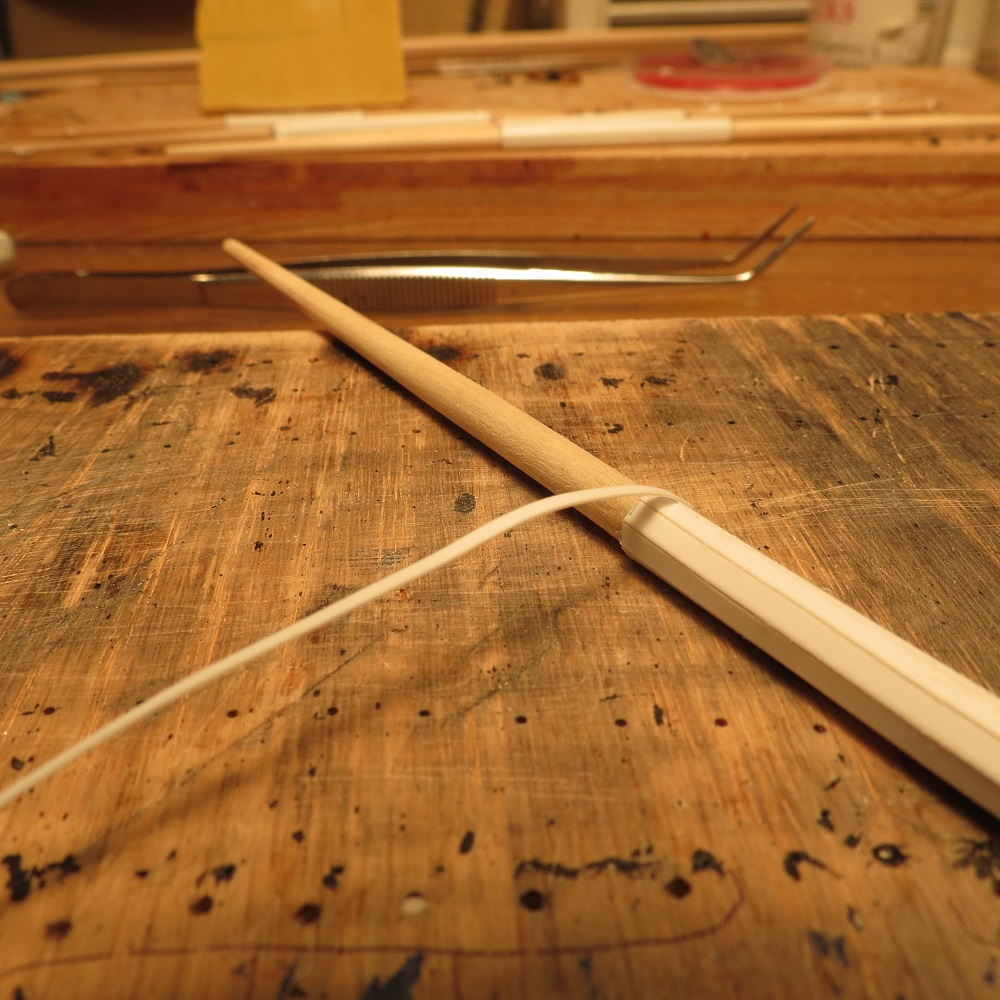
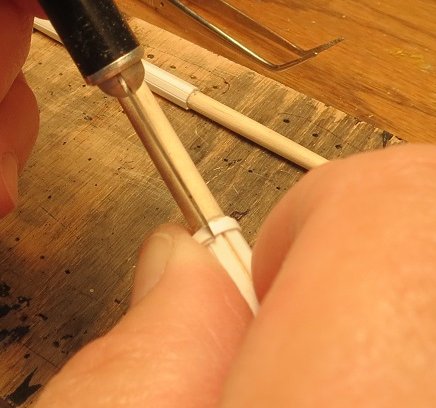
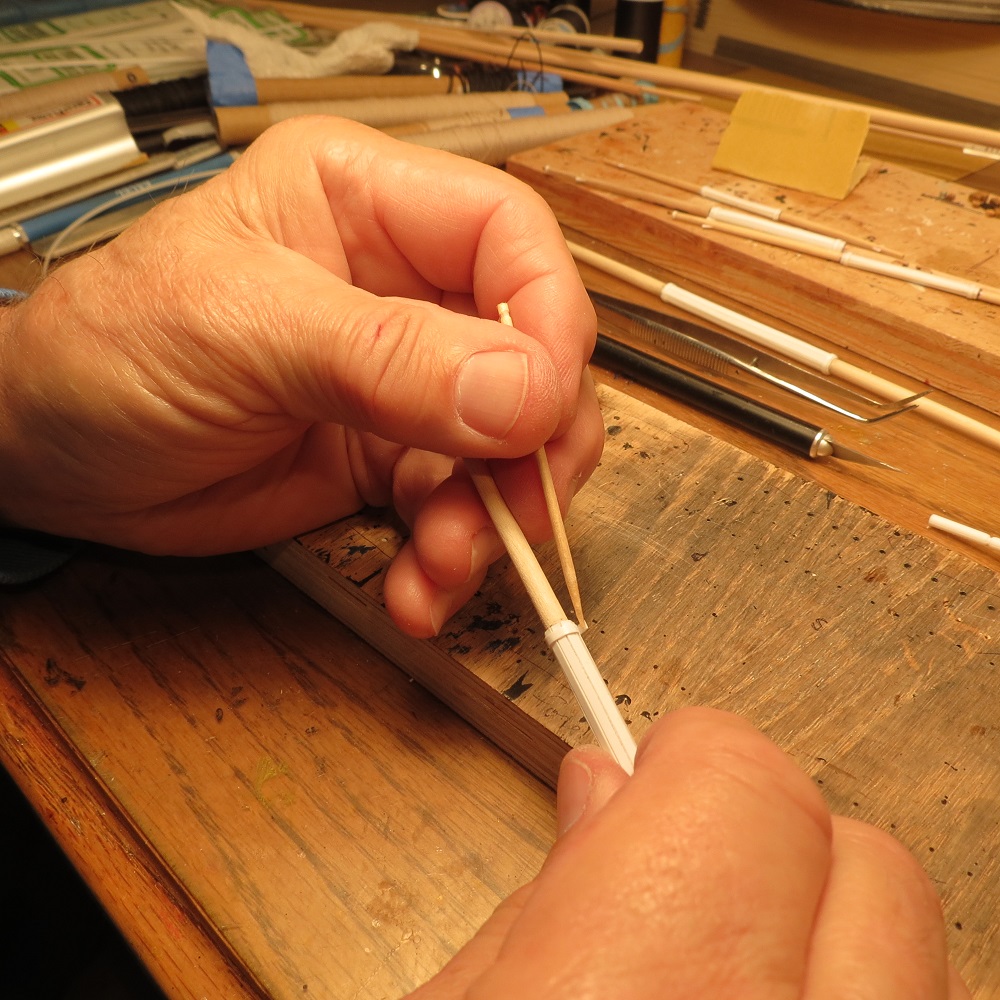
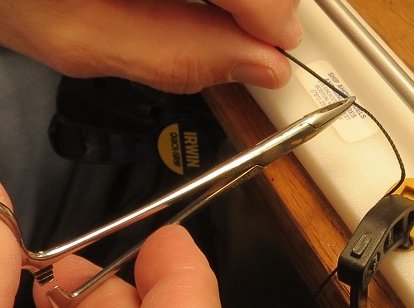
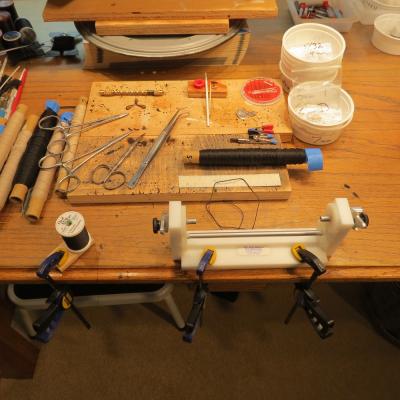
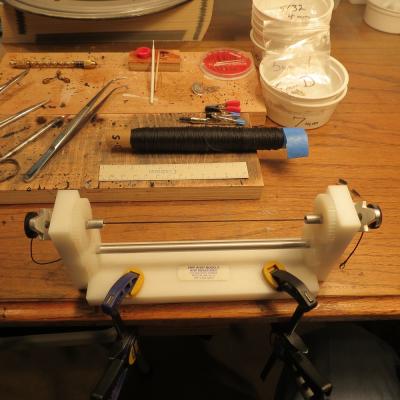
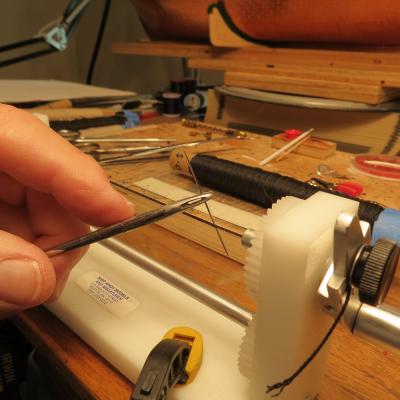
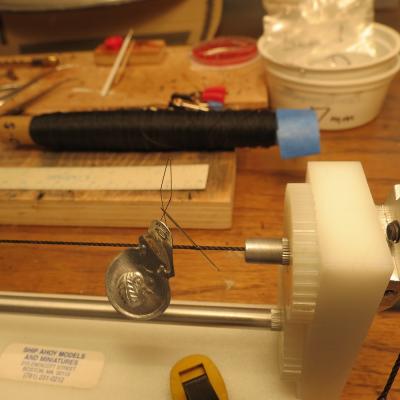
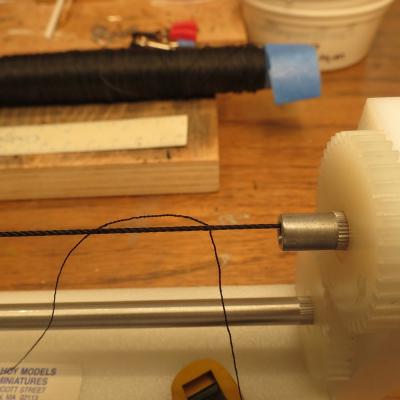
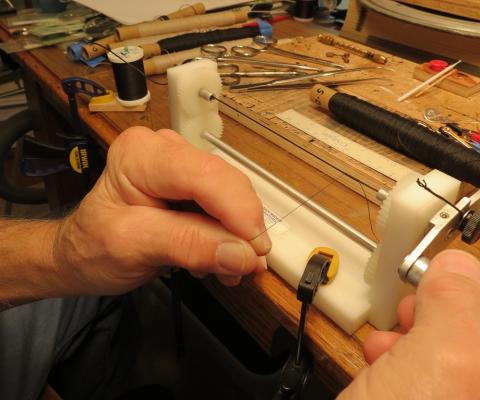
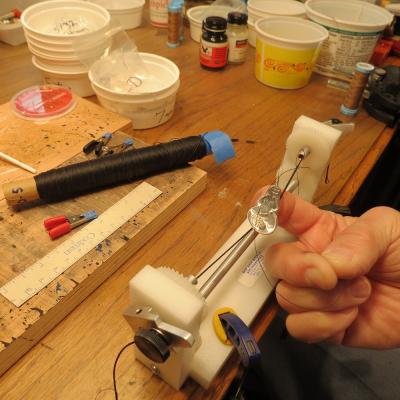
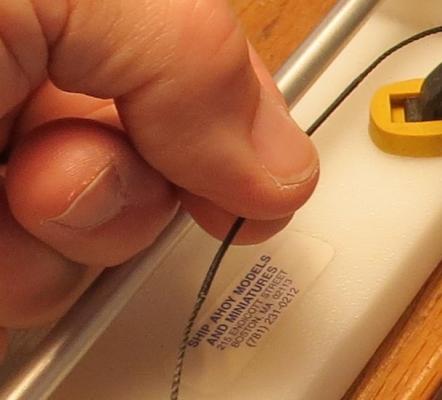
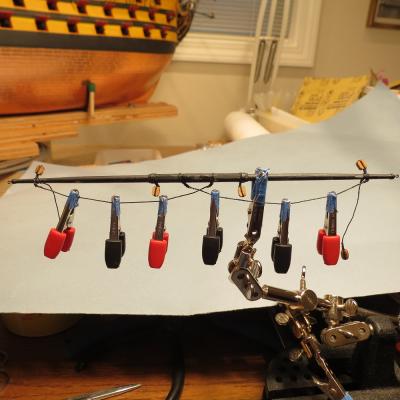
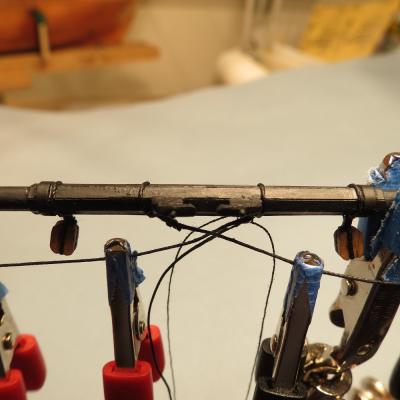
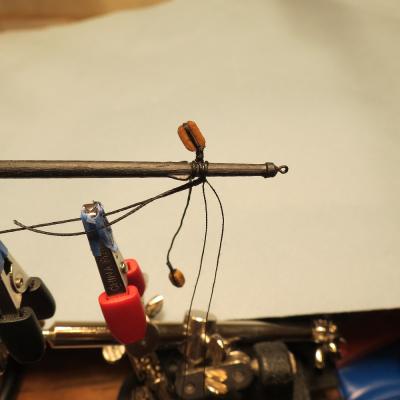
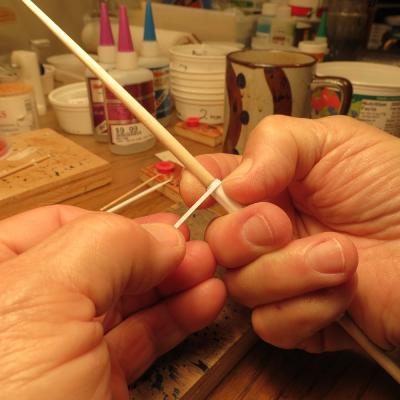
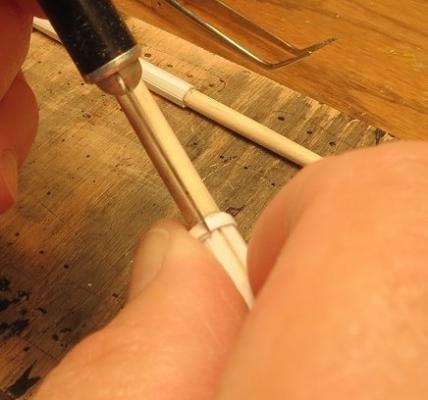
SERVING LINES The question has been asked about how to serve shrouds or for that matter, strops for blocks, lifts, or where ever serving is indicated. One is reminded that the large lines such as shrouds at the top were first wormed (passing smaller line in the crevices between the strands of the larger rope), then parcelled (wrapping with strips of canvas saturared with Stockholm tar) and finally served with a smaller line to protect from chaffing. The practical limit in modeling is serving, simulating all of the above. Looking back in my log, I notice the tools are shown, but a method for serving is not. Among the different methods, some seem rather complicated. The following is perhaps one of the simplest. The set up is shown with a serving tool available from "Ship Ahoy Models and Miniatures" held in place by temporary clamps. A spool of serving thread is on the left. One might guess that I'm left handed. For purposes of photography, I used a heavy line, 1.0 mm in diameter, as one might use for shrouds, with a serving line of less than 0.1 mm (Coats and Clark all purpose polyester coated polyester). For smaller lines such as strops for blocks, 0.5 to 0.25 mm, the serving line might be Coats and Clark "fine" polyester or Orvis round fly tying thread #12.. Magnification helps where passing a needle through small lines. Measure the length to be served and place that part of the line tightly in the serving tool. If one is serving an entire shroud, the line can be moved until the entire line is served. Pass a needle at the starting point Thread the needle with the serving line and pass through the larger line. Take 15 or 20 turns so that a droplet of fast (1 to 3 sec.) c/a can be applied only to the point where the serving line passes through the larger line. Continue to take turns with gentle traction on the serving line to the length of serving desired and repeat passing a needle with the serving line through the larger line. Touch that point with fast c/a. After about a minute, trim off the extra serving line.


- 755 replies
-
- 11
-
-
- finished
- caldercraft
- (and 1 more)
-
Thanks Dave, but you still haven't taught me how to make those beautiful miniature metal fittings you made for the "Bluenose." Popeye, you always seem to find time from you fleet of boats to visit and comment. My compliments. I haven't learned to multitask. Floyd, Perhaps a Rigging workshop would fly. I've sent an e-mail so we can talk about it. Cheers, Gil
- 755 replies
-
- 2
-
-
- finished
- caldercraft
- (and 1 more)
-
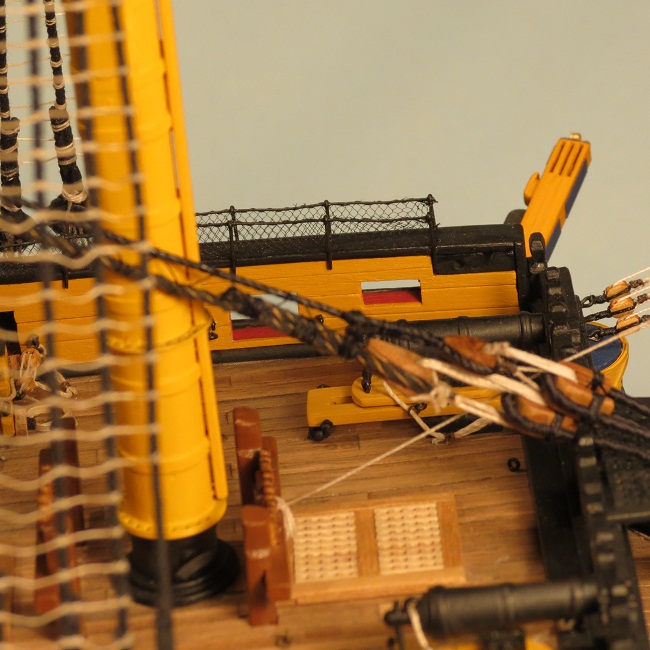
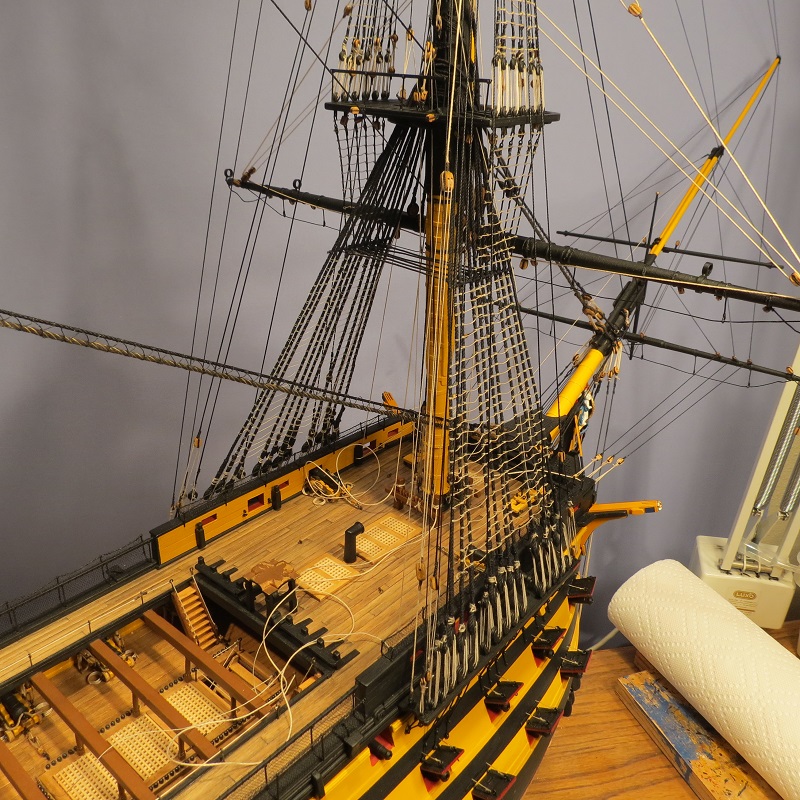
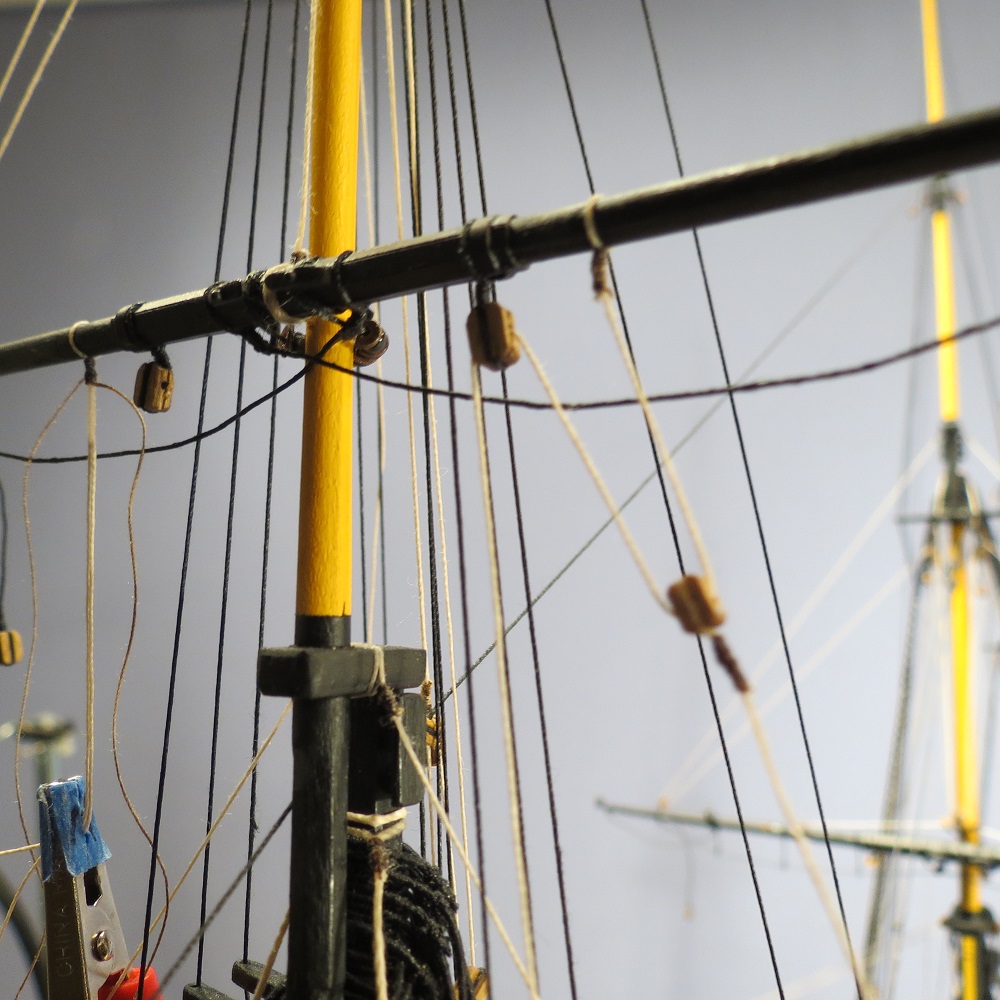
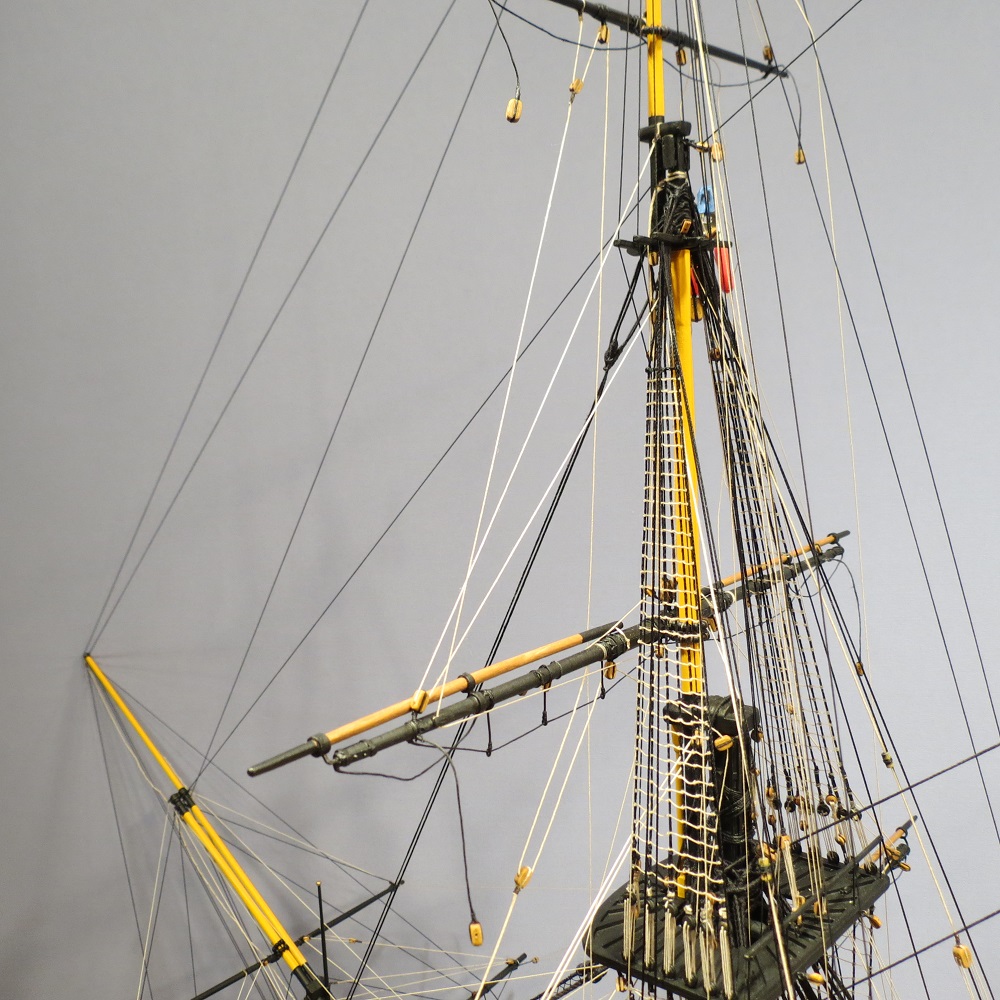
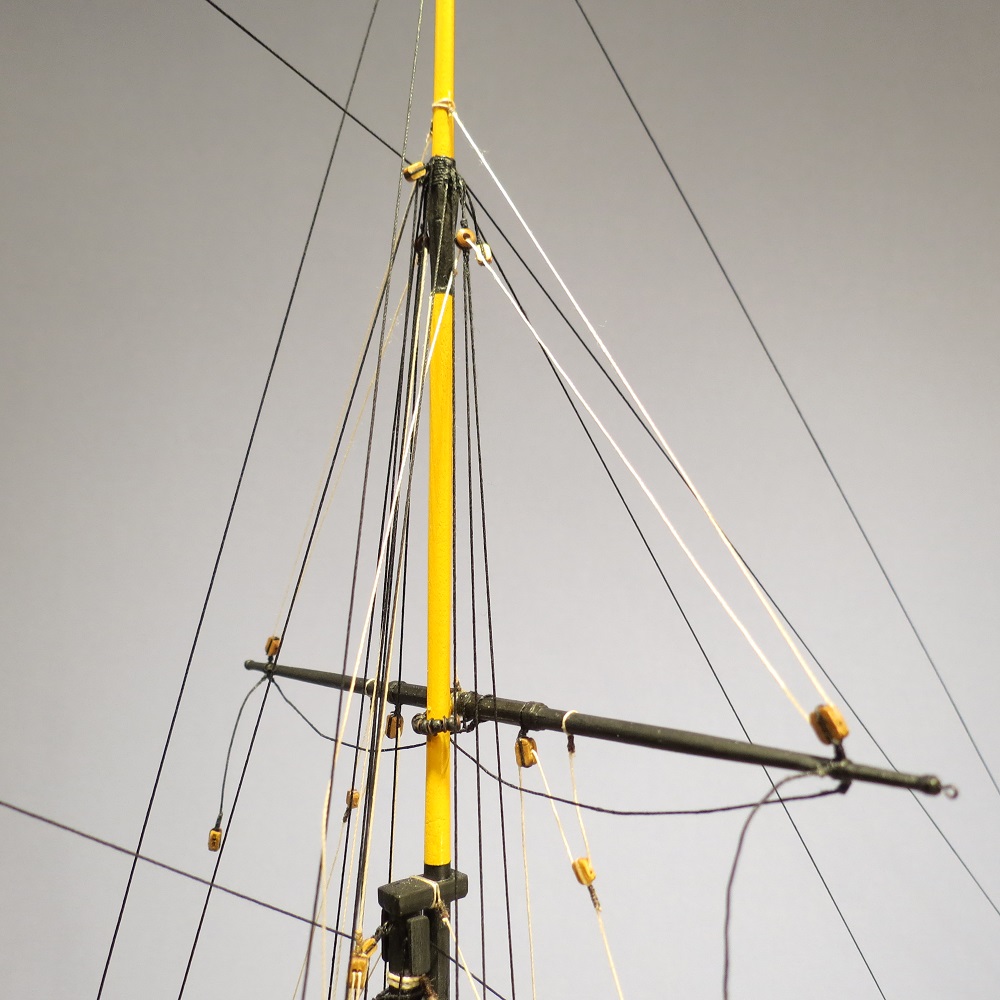
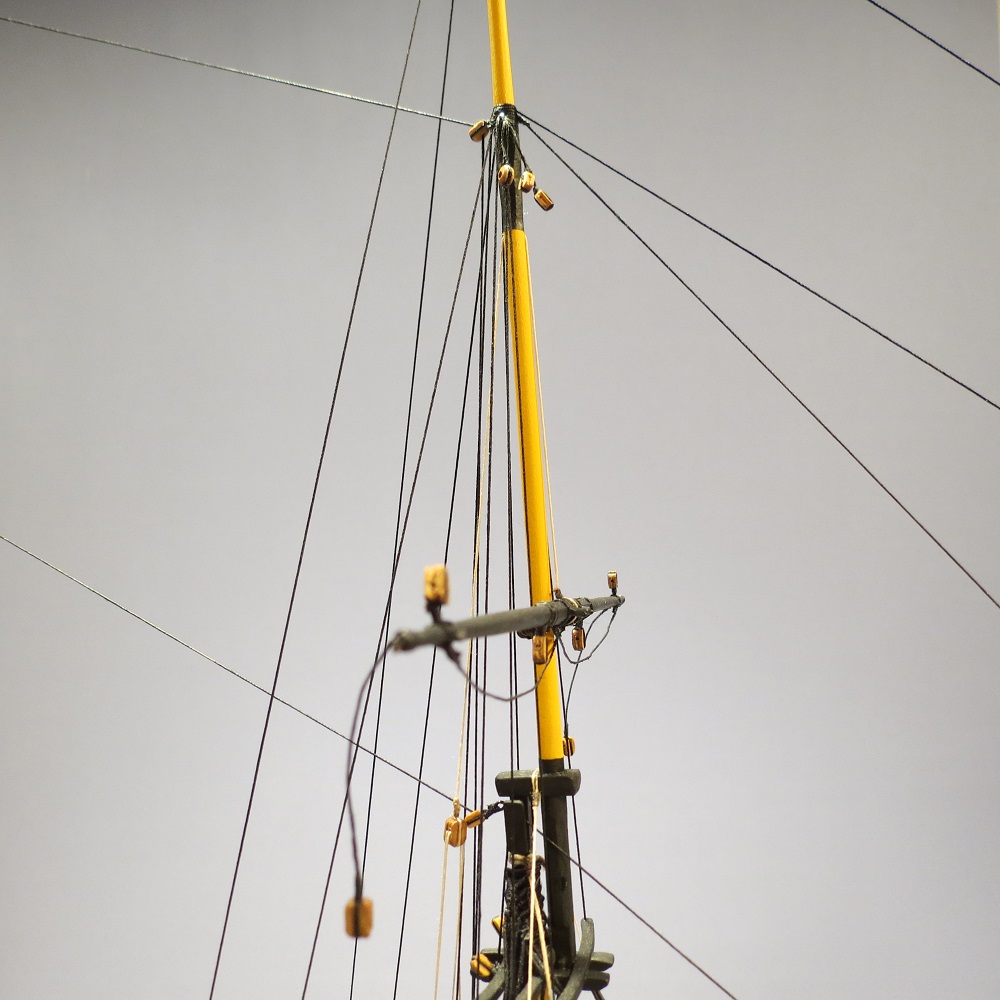
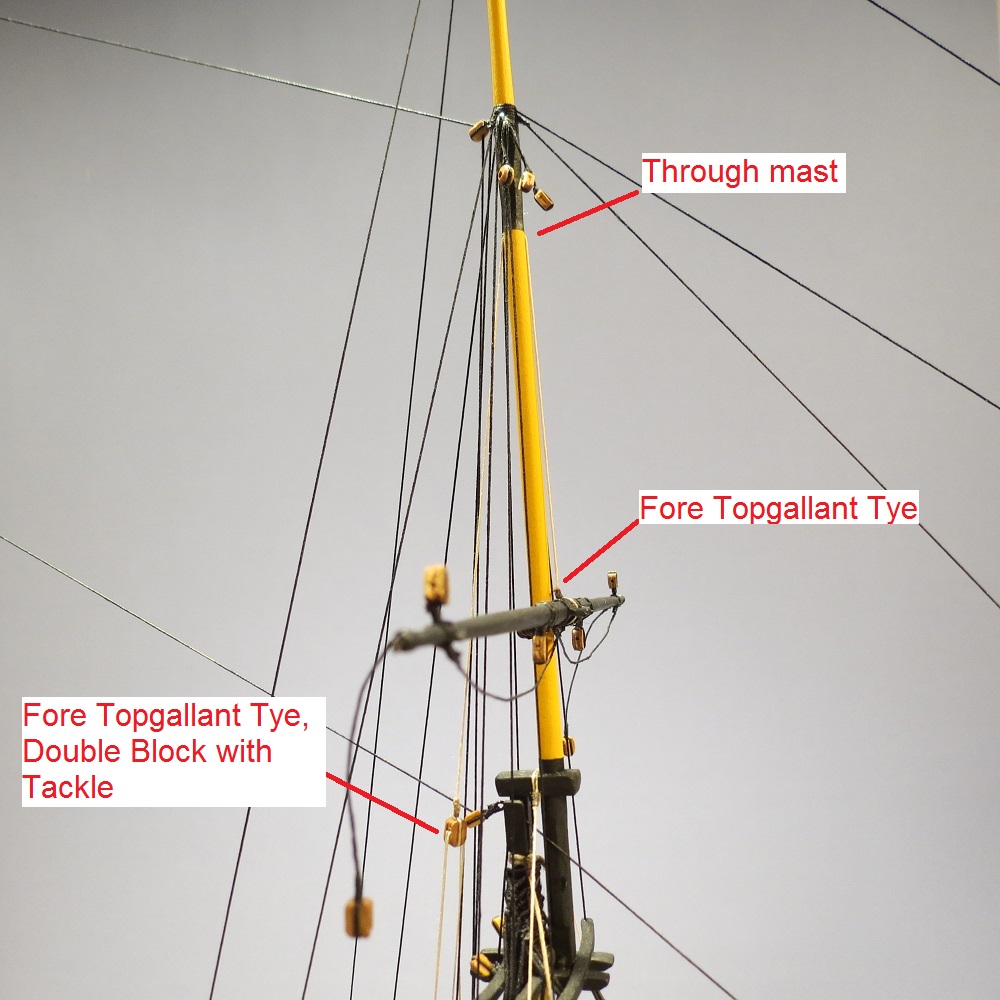
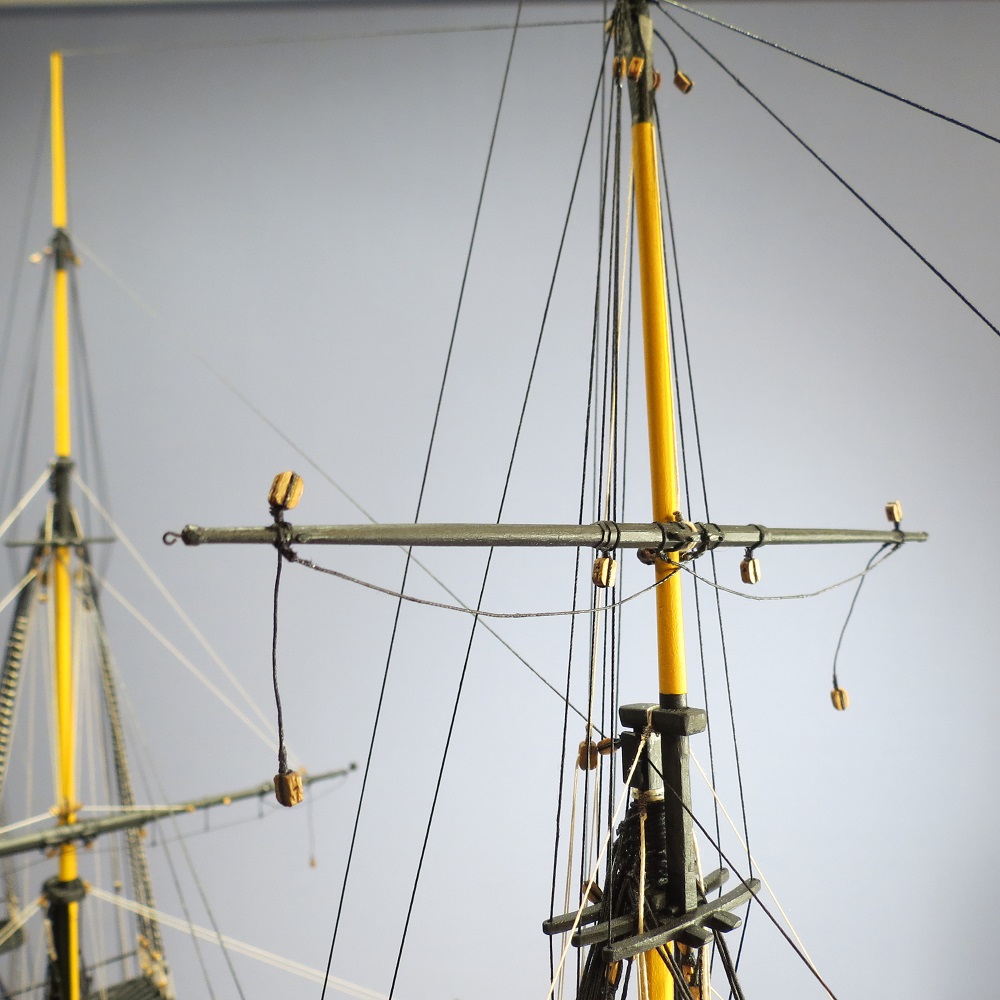
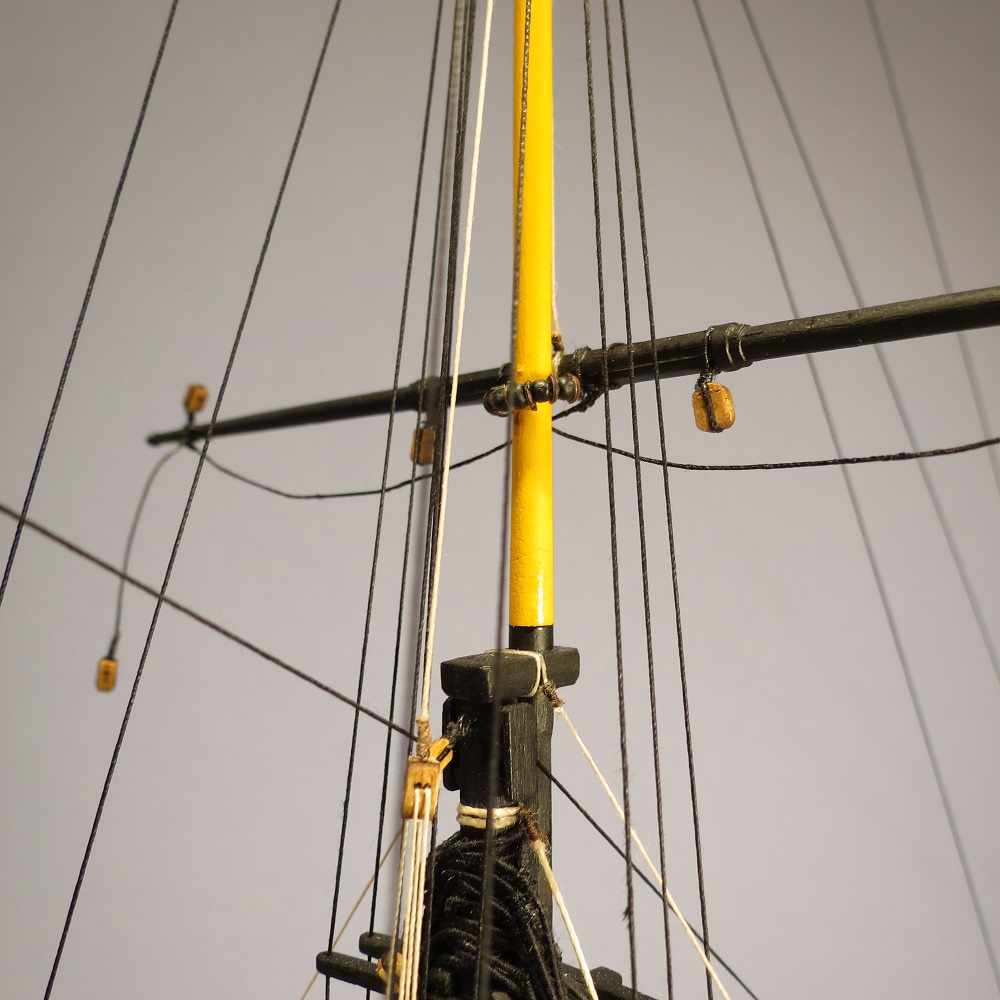
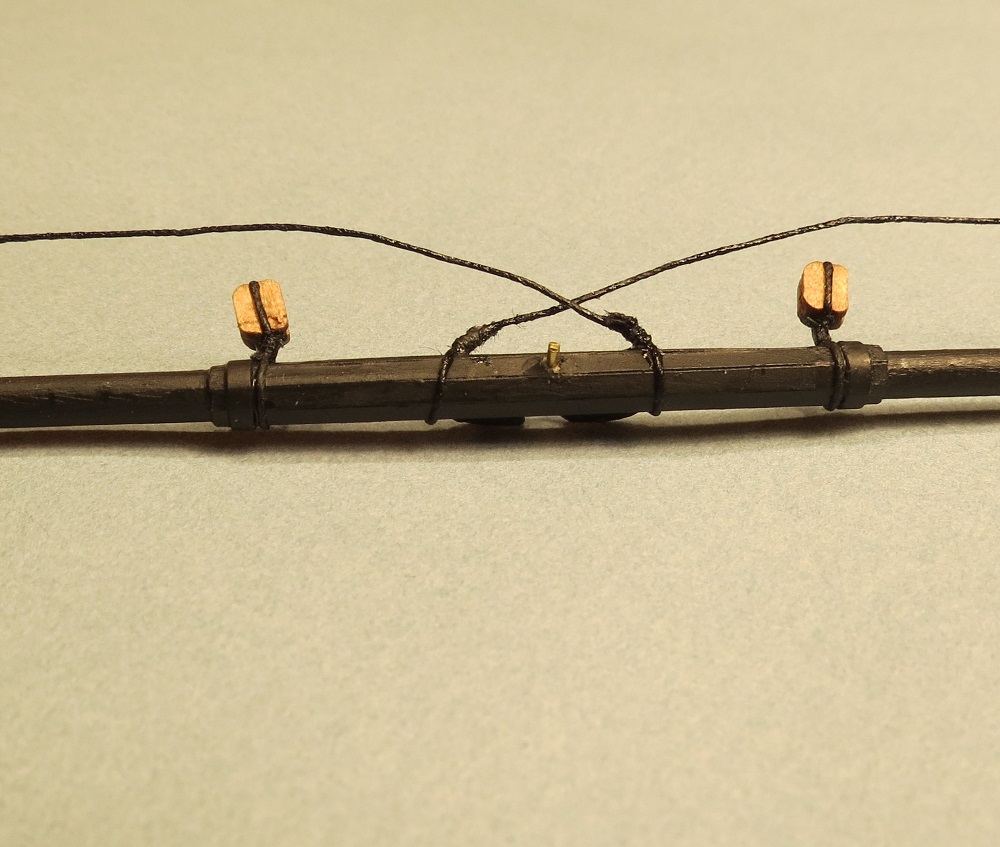
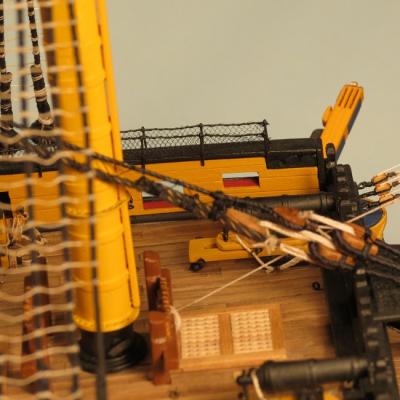
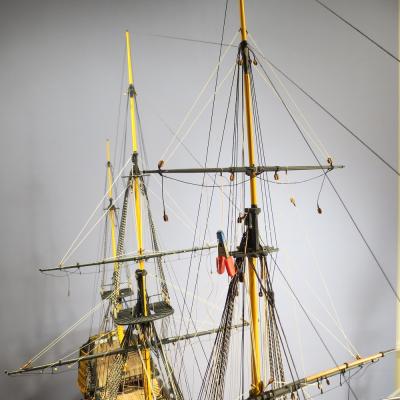
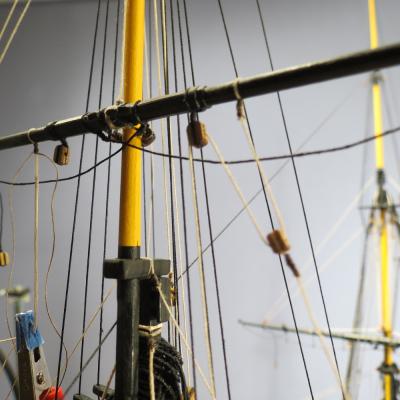
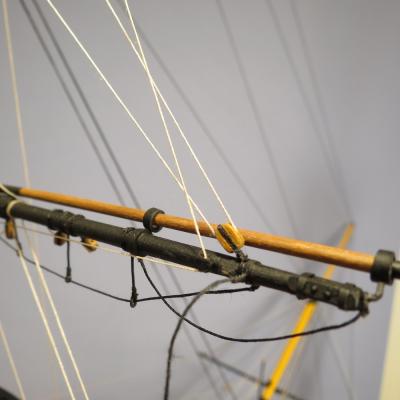
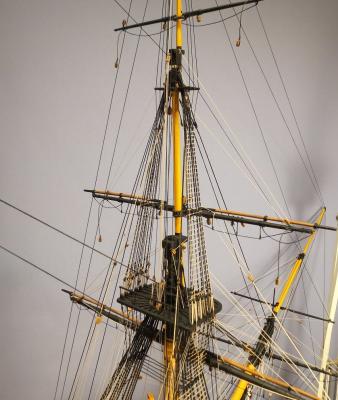
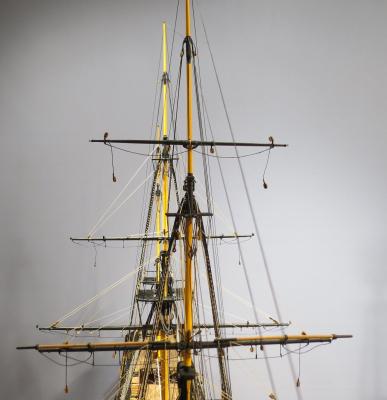
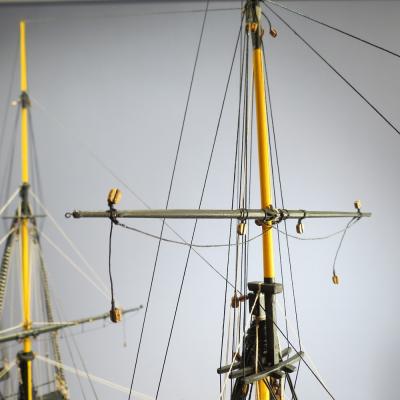
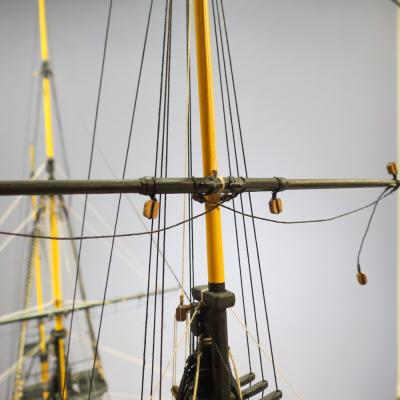
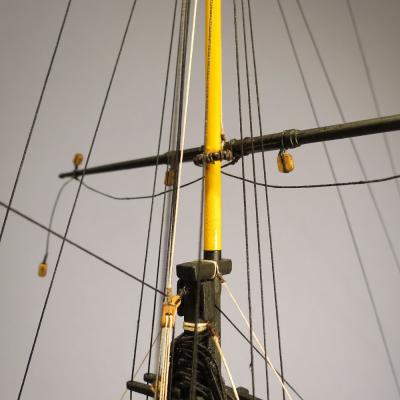
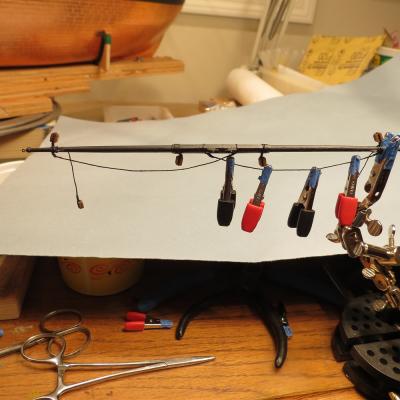
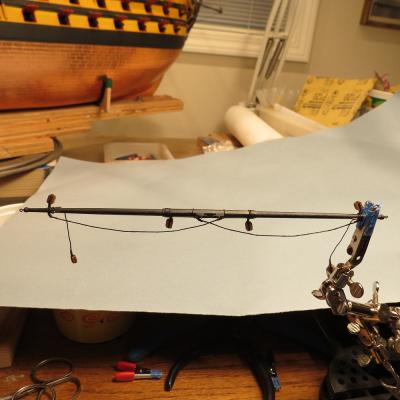
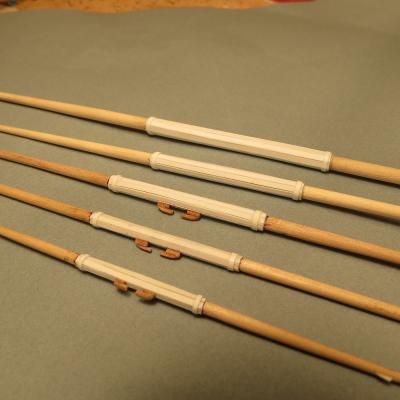
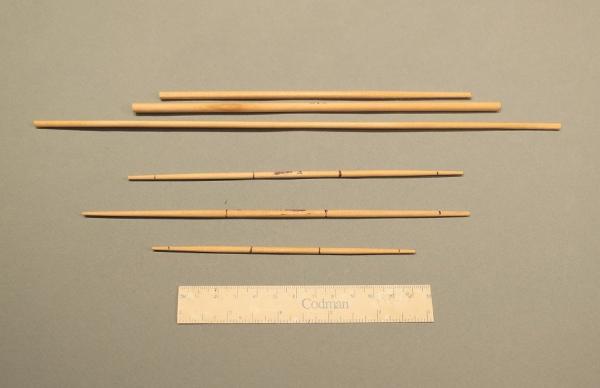
Finally finishing the Fore topgallant yard Clueline and clueline block Clueline and clue block with strop spliced to fore topgallant sheet, which leads to cheek block at outer aft end of the yard. Topping lift to outer block on yard. Topgallant sheet to cheek block on aft side of the yard. Cheek block made by contour sanding the block to fit the aft side of the yard and further sanding to thin the block. Sheet to central yard block and then down to shroud cleat. At the origin of the topping lift on the topgallant mast, I passed a small wire through the mast to act as a stopper. The lift after passing through blocks at the end of the yard and the mast, passes down to a shroud strop at the fore top. I used the topmast shroud strop Clueline to aft block at the topmast top and then down to a shroud cleat. Next stop, the Main topgallant yard which is rigged much the same as the Fore topgallant yard.

- 755 replies
-
- 14
-
-
- finished
- caldercraft
- (and 1 more)
-
Danny, Thanks for the instructions on adding links to a post. I've printed them and no longer have excuses. You are gradually dragging me from the dark ages. Lawrence, you're already underway with great looking deadeyes. Edwin, Many thanks. I'm envious. We never made it to Europe on the boat, but did transit the Panama Canal and travelled the east coast, Erie Canal, Great Lakes and rivers, Caribbean and South America. AND we've been to Port Alberni by car and by boat. Next time we'll track you down. Cheers, Gil
-
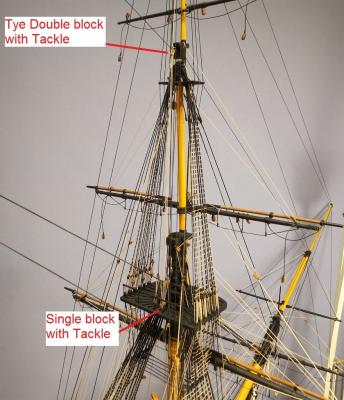
This post is made thanks to Mark Taylor. I ran into trouble, unable to post photos when my IE 9 was upraged to IE 11. Mark's note on posting caught my attention. Then Joe (Wacko Wolf) noted that photos uploaded if one used Firefox. I now post using Firefox with no problem. As most of you know, one can enlarge the photo by double clicking. Thanks Mark and Joe. Still on the topgallant yard, the topgallant tye runs up and through the mast to a double block at the level of the topmast cap. The tackle beginning at the fore top terminates with the falls extending to the Main top bowline bitts. Next up, Clue lines. The braces will be put off to later. It's amazing how easily elbows, fingers, instruments, watches etc. get tangled in the rigging. Oops! I generaly work with bare arms and slowly. Cheers, Gil


- 755 replies
-
- 12
-
-
- finished
- caldercraft
- (and 1 more)
-
Thank you all. I'm even more amazed at this website after Danny's kind gesture. John and Popeye, You touch on so many build sites, how do you get any work done on your own builds? Peter, We still plan to stop at Shearwater on our boat next summer. Can you organize a national model builders convention at the Coast Guard Station by that time? At least two of us will show up. Mechelier and ZyXuz, nice to have you on the site. Grant, the content links will help me too when looking back to see what I did. Kevin and Lawrence, two more old friends to kibitz with. Cheers, Gil
- 755 replies
-
- 3
-
-
- finished
- caldercraft
- (and 1 more)
-
Danny, What can I say? I would never have presumed to ask you to do my job. You must have sensed a Computer Challenged old guy across the pond who is perhaps better at tying knots than wrestling with a computer. For those of you who hadn't seen Danny's modest post: HE ADDED PAGE LINKS TO EACH CATEGORY OF CONTENT ON THE FIRST PAGE OF THE LOG. An extraordinary kindness. I had planned to do that (as soon as I learned how). My sincere thanks Danny.' I'll reply to our other friends shortly but Danny's post warranted a singular reply. Gil
- 755 replies
-
- 7
-
-
- finished
- caldercraft
- (and 1 more)
-
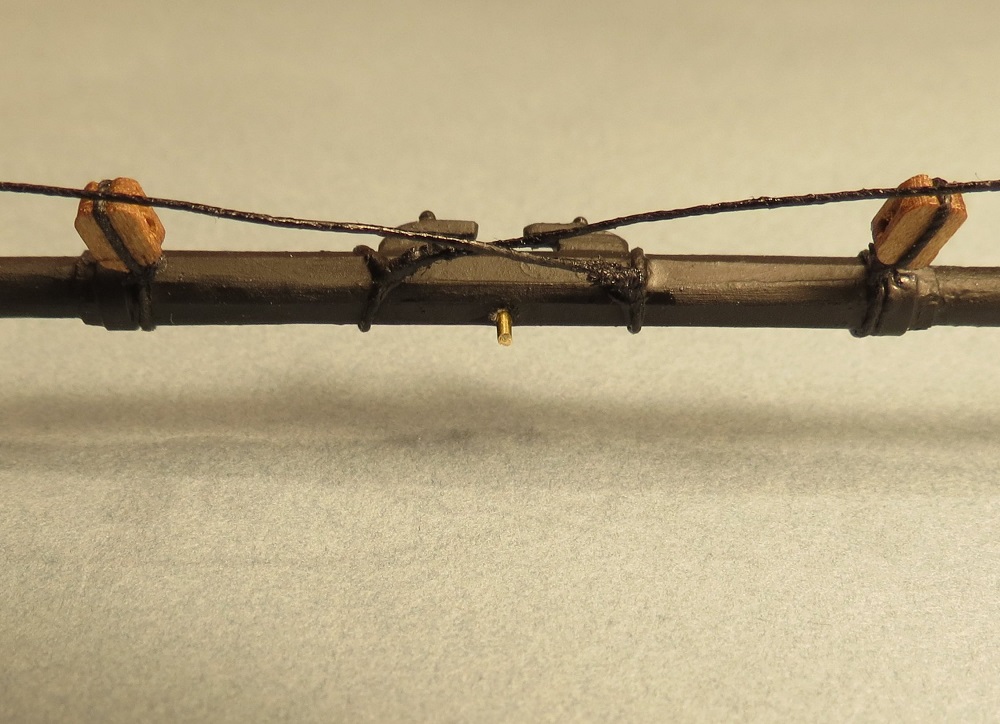
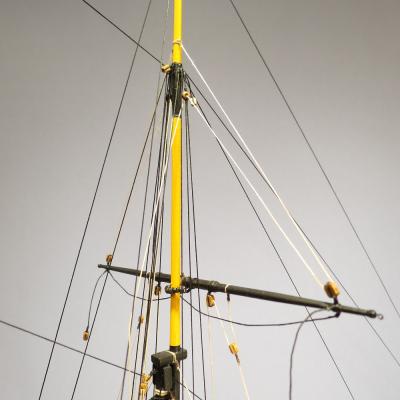
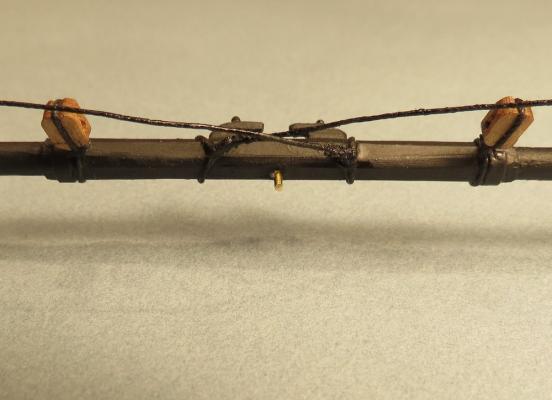
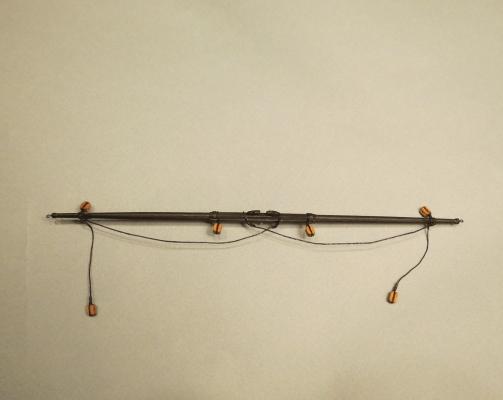
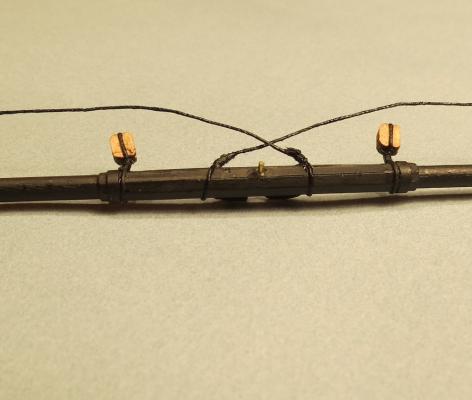
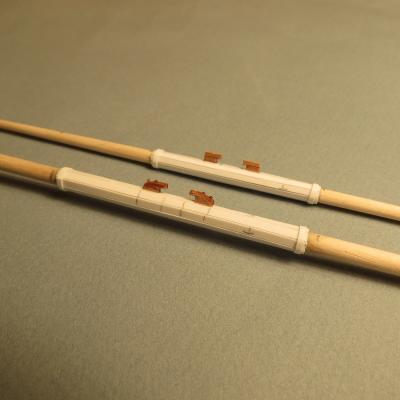
Continuing with the Fore Topgallant Yard. Pin to fix yard to mast (with 5-15 second c/a) to fascilitate tensioning rigging. Topgallant Tye and parrell. Parrell. Coated with flat acrylic clear. Yard in place. Parrell
- 755 replies
-
- 10
-
-
- finished
- caldercraft
- (and 1 more)
-
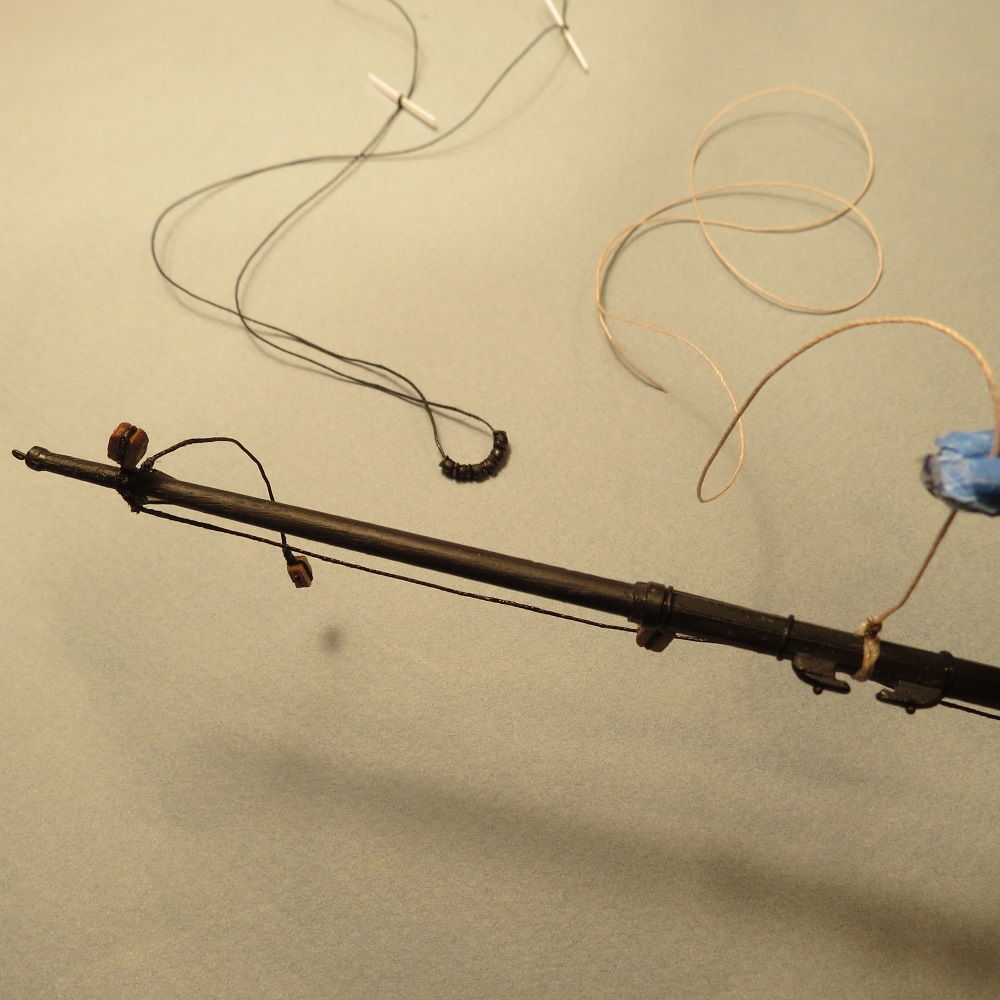
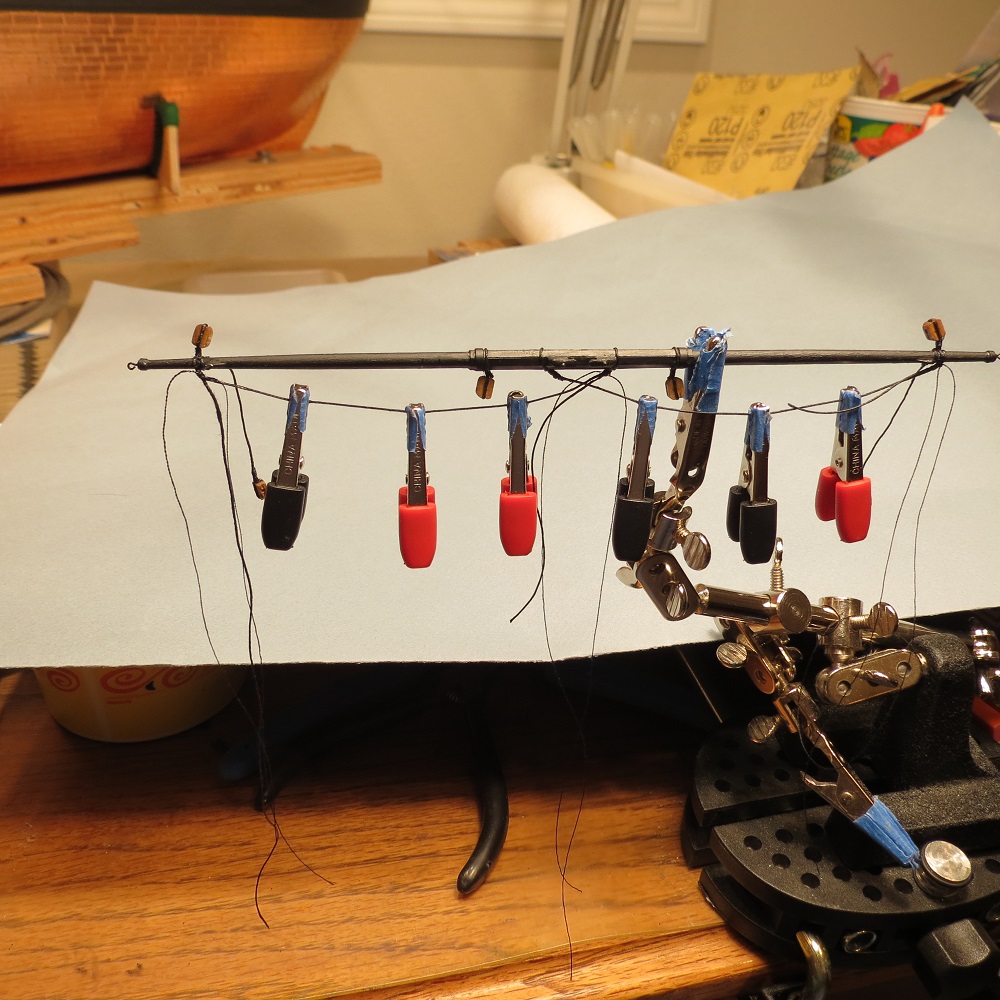
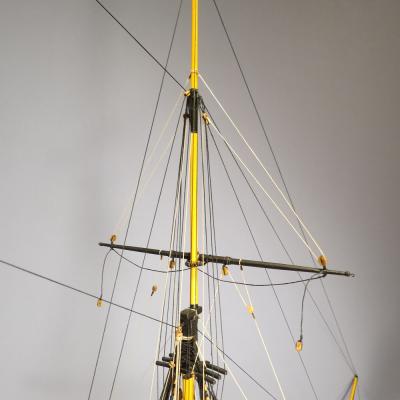
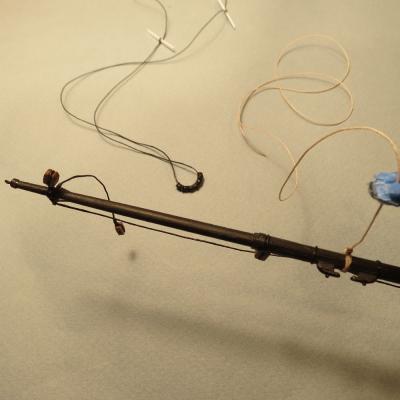
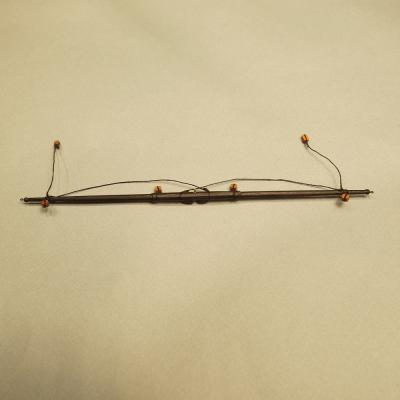
Harvey, Your sense of humor is as warped as mine. But on with the ForeTopgallant Yard. Rigging the foot rope. Shaping the foot rope with fast c/a appleid to spaces between the clips. Clips then moved to areas with c/a and fast c/a again applied between clips. Topping lift block,brace block and foot rope


- 755 replies
-
- 7
-
-
- finished
- caldercraft
- (and 1 more)
-
Thanks John and Popeye, You do keep us on our toes. Mark and Daniel, The so called "tutorial" is really pretty simple stuff, but it may help avoid a lot of frustration for a few of our newer members. And look what it brought out. Kevin's preformed styrene tube and Augie's electric wire shrink wrap. Two great ideas. I work with shrink wrap all the time on our real boat, but never thought to make the connection. I don't think we ever get off the learning curve. Cheers, Gil
- 755 replies
-
- 5
-
-
- finished
- caldercraft
- (and 1 more)
-
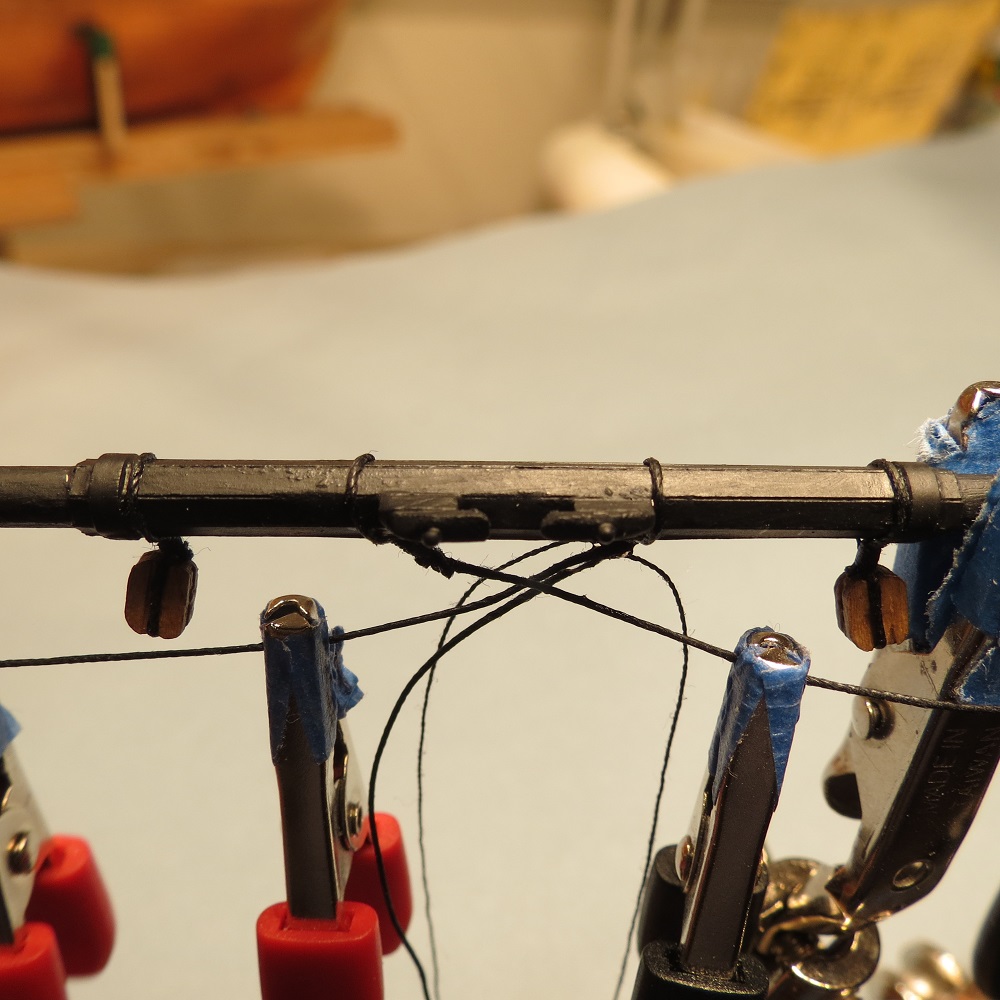
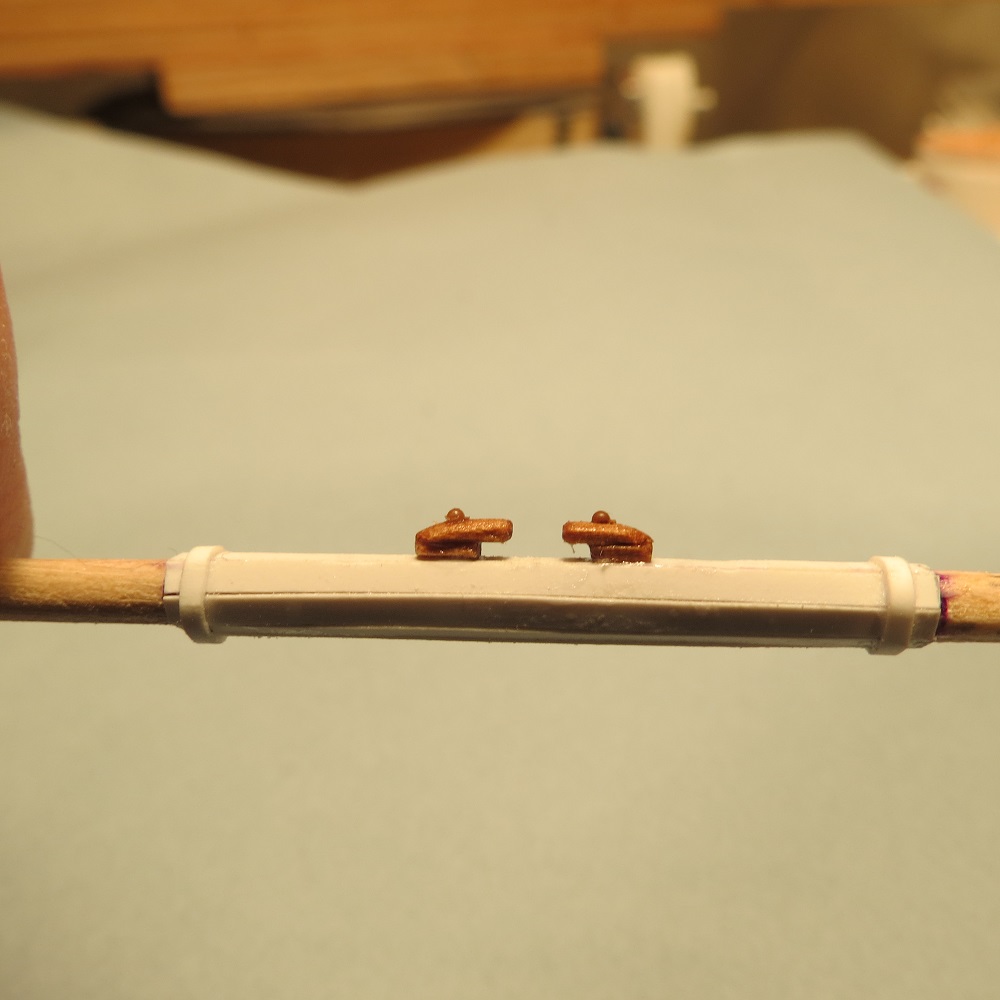
Another question that came on e-mail was the problem of gluing very small parts with out getting glue on instruments and fingers. Typically the part ends up glued to the forceps, thumb or whatever. An example are the line stoppers or chalks at the end of the yard. An alternative is to leave a tab for holding or glue a larger piece, let the glue cure overnight and then trim or sand to the proper shape. Topgallant yard and Crossjack yard


- 755 replies
-
- 7
-
-
- finished
- caldercraft
- (and 1 more)
-
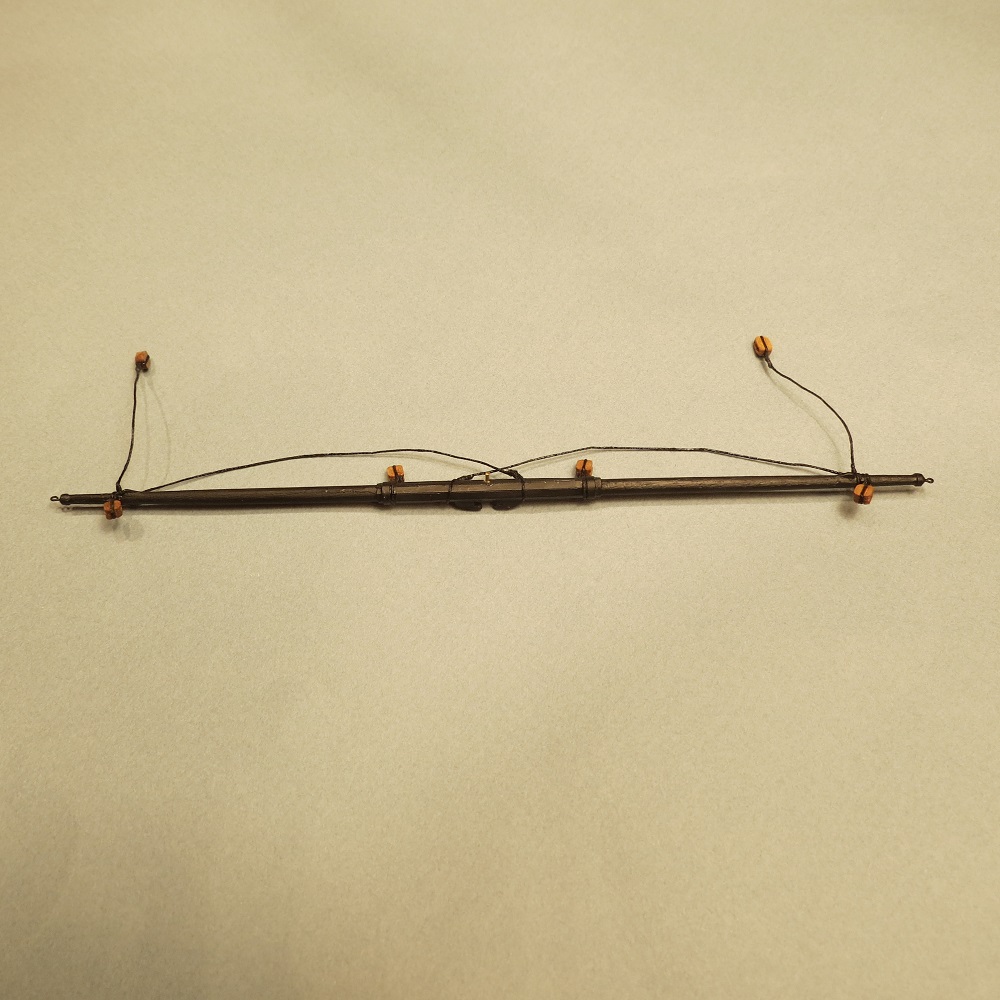
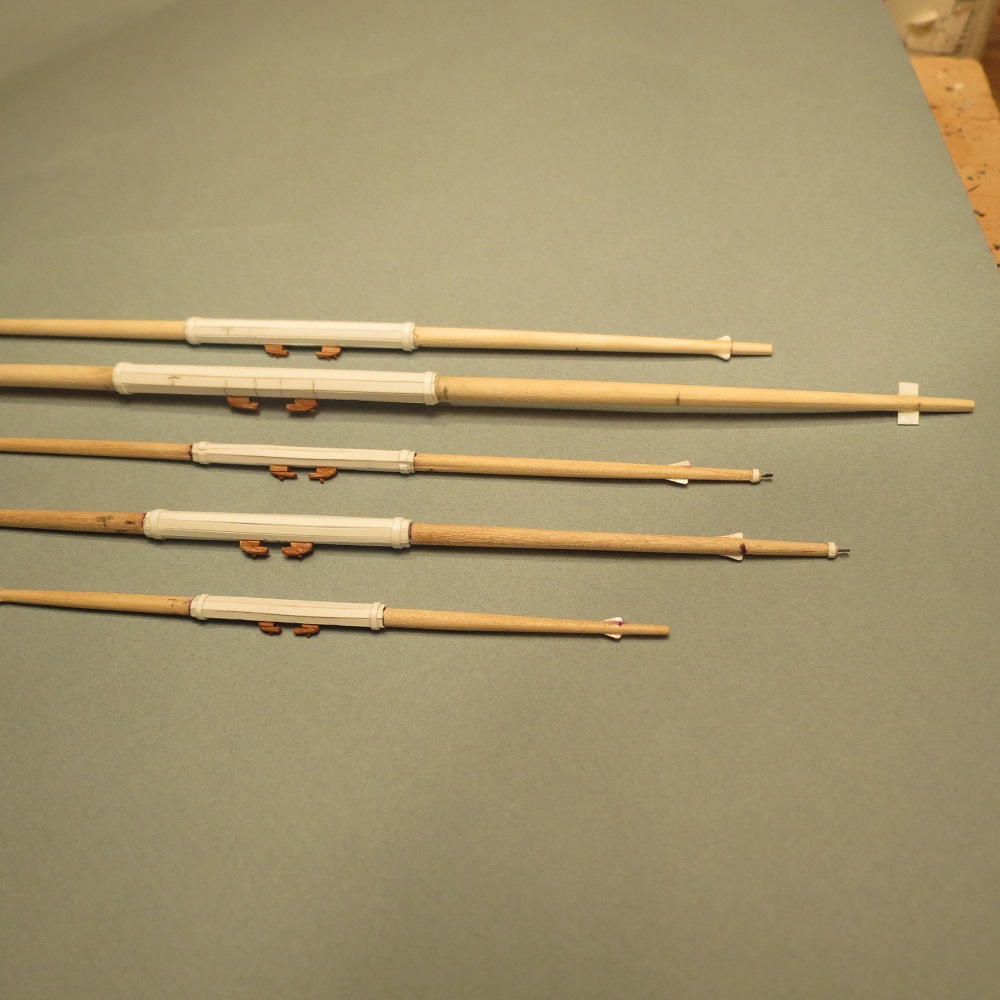
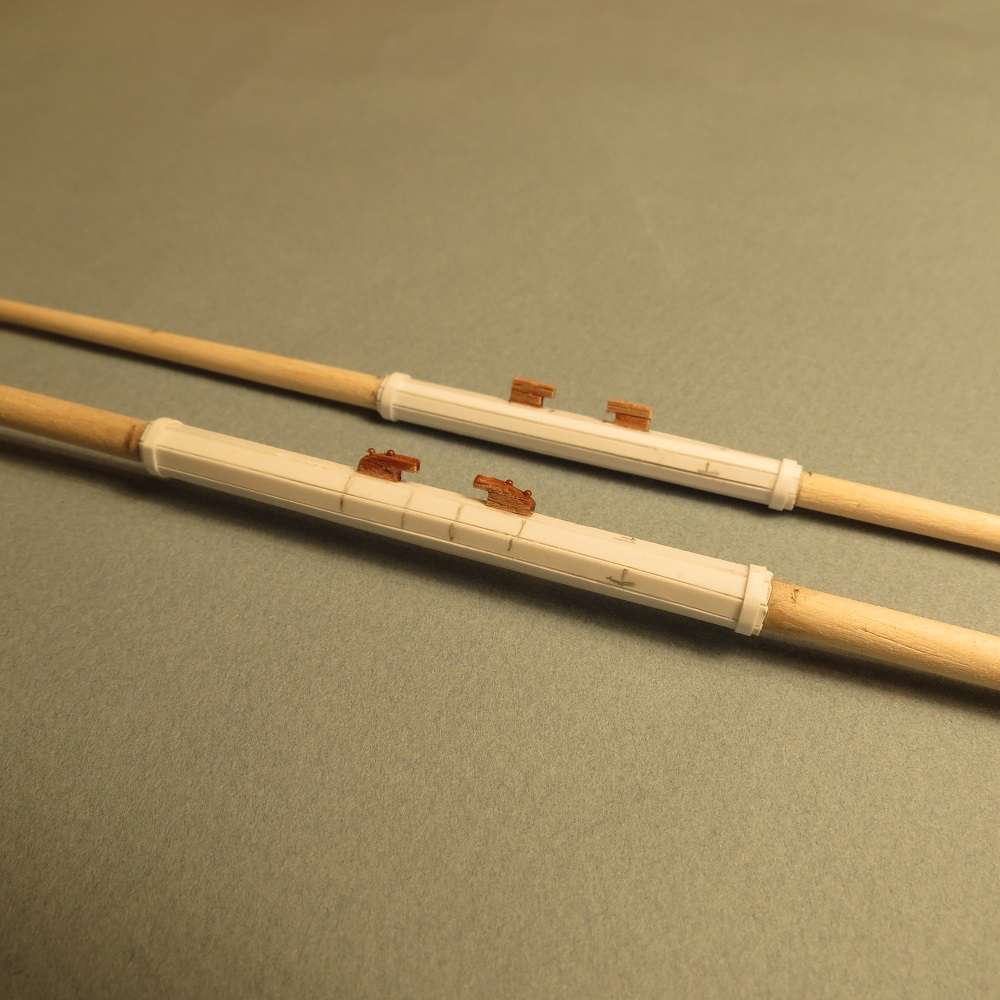
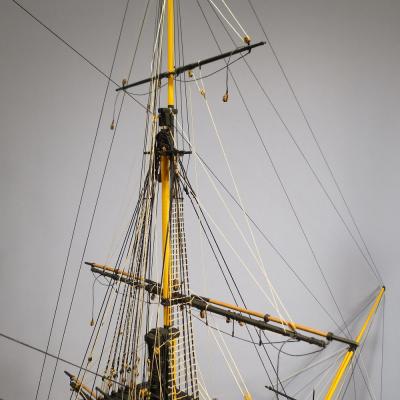
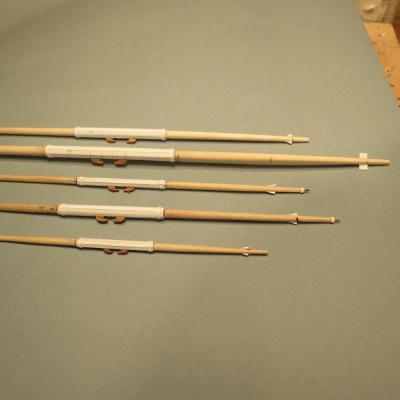
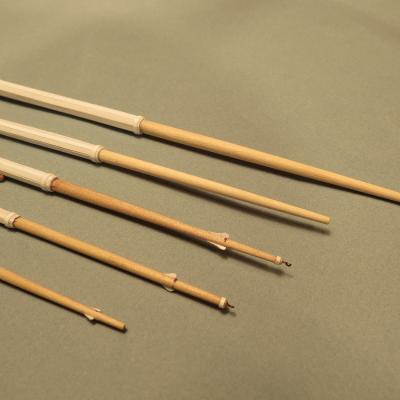
Crossjack Yard, Mizzen topmast yard and three topgallant yards. The end of the Main topgallant yard with line stoppers or chalks, and "iron ring" around end of yard. Sling cleats. Crossjack yard (completed) and Mizzen topmast yard (not yet shaped)

- 755 replies
-
- 7
-
-
- finished
- caldercraft
- (and 1 more)
-
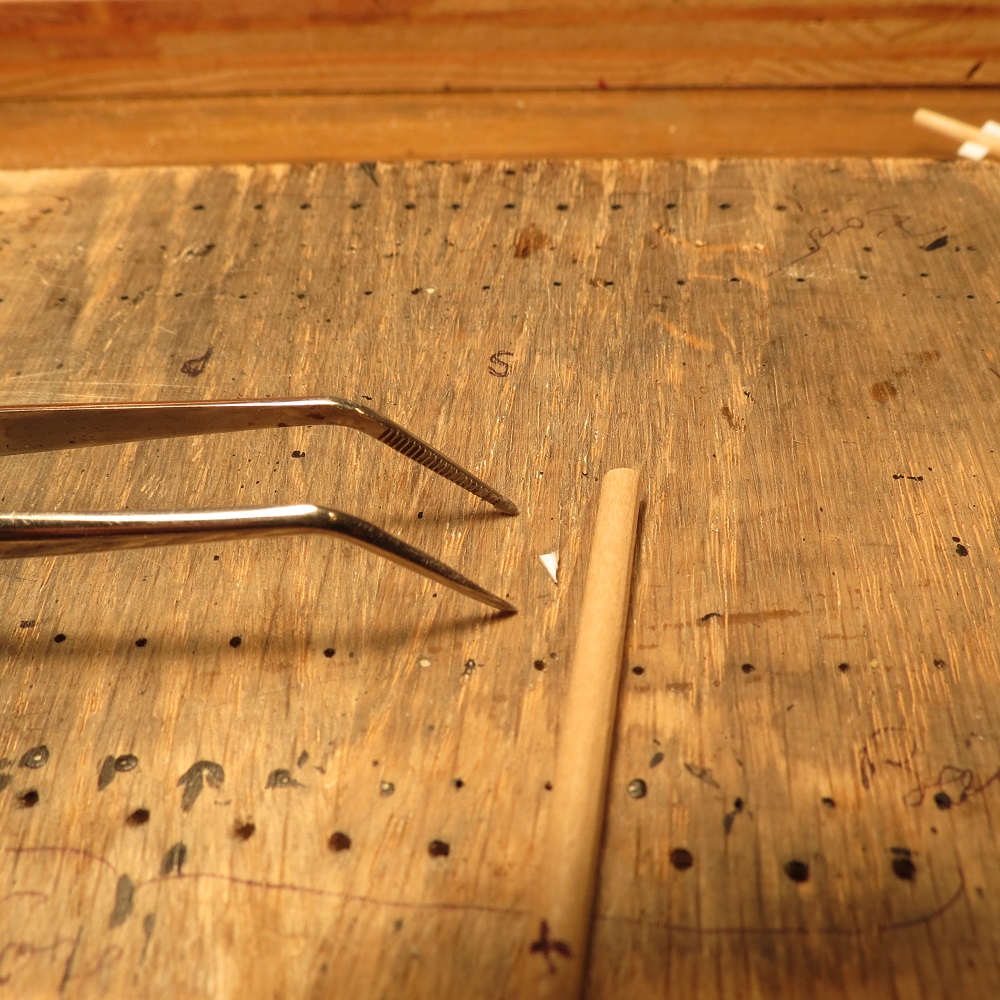
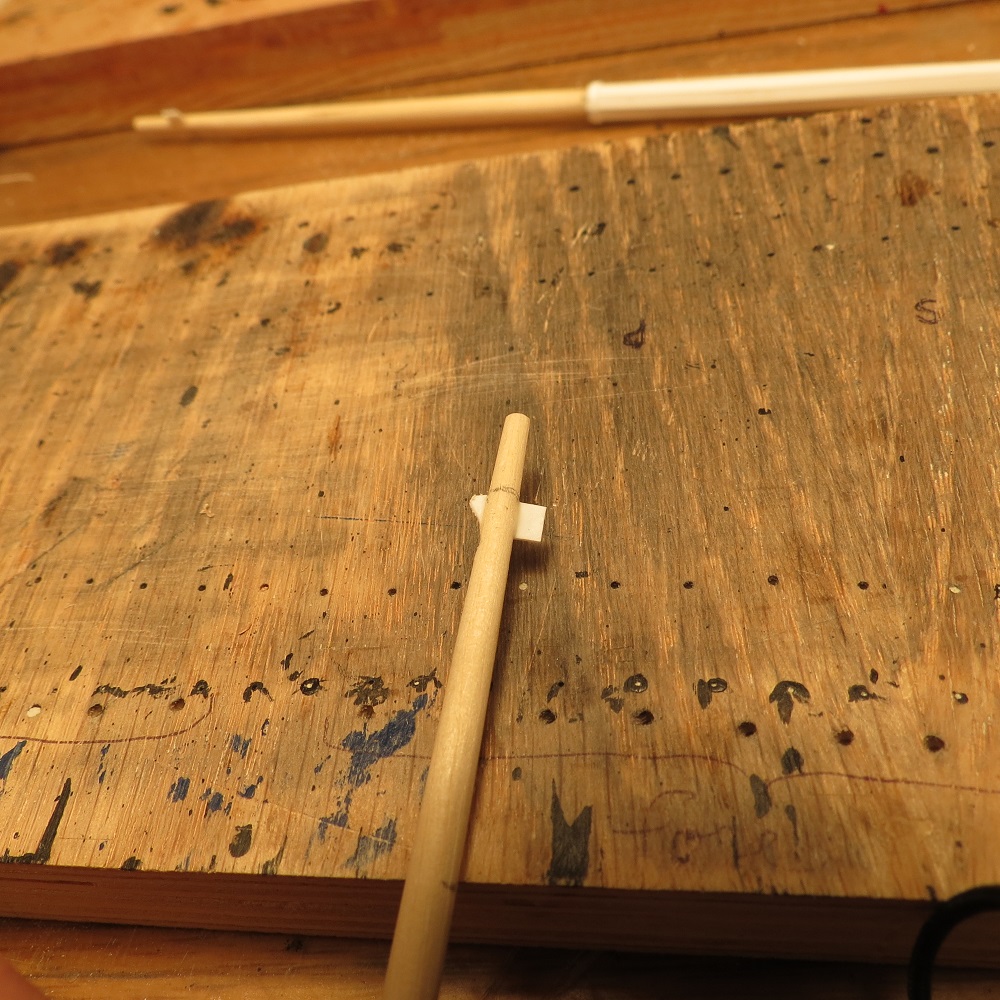
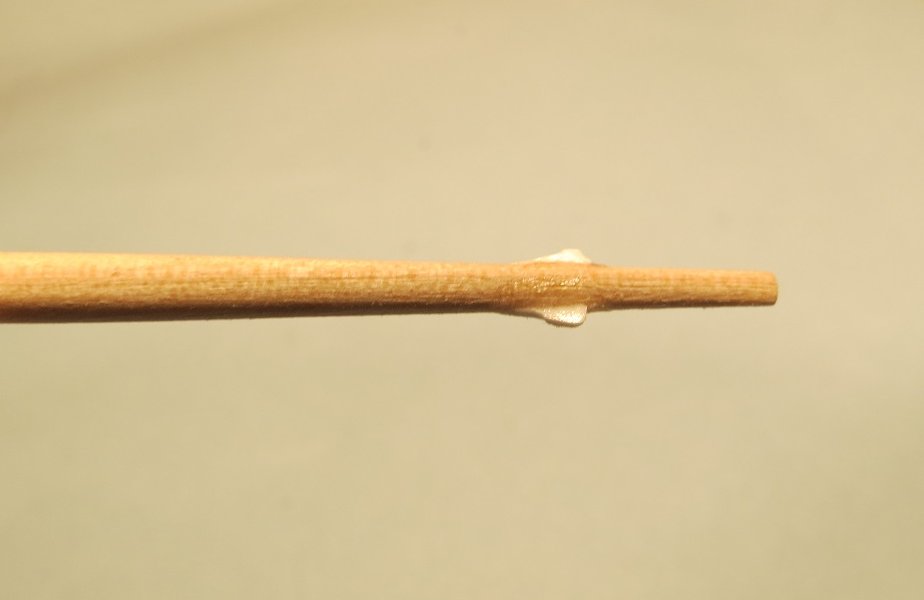
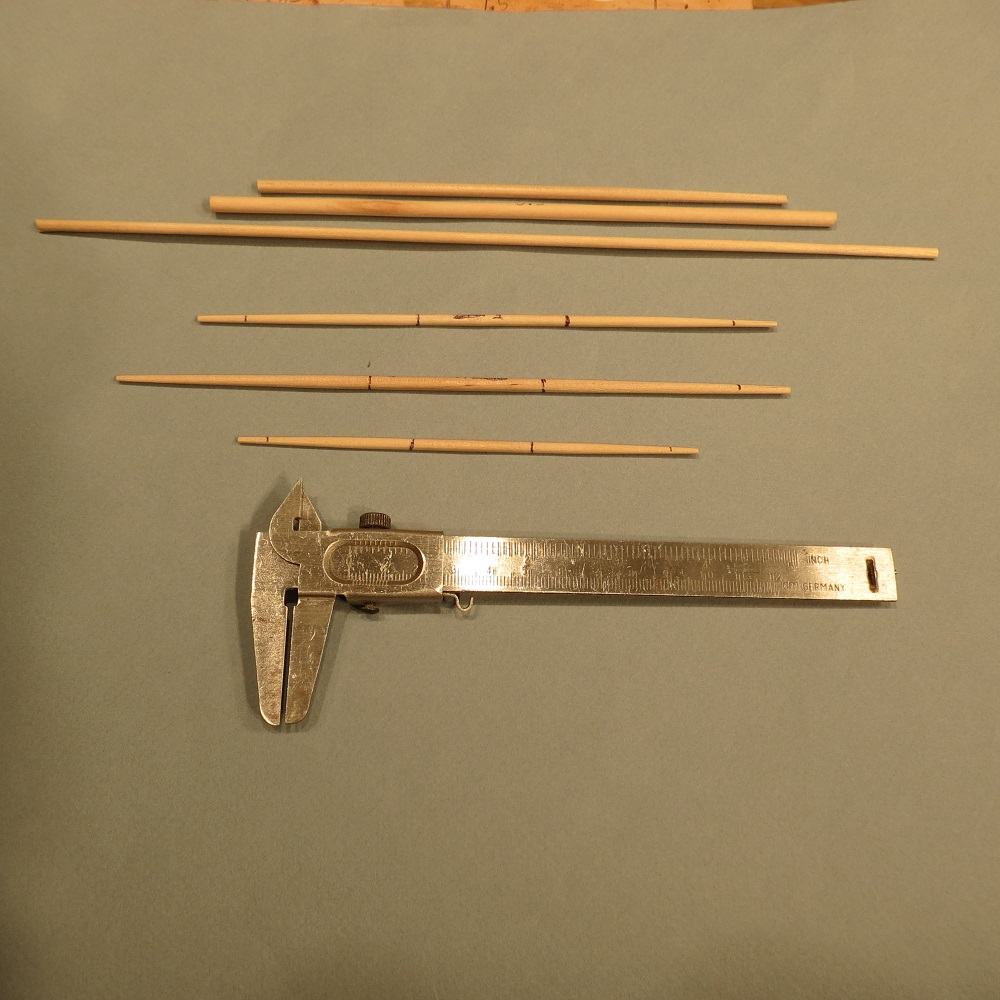
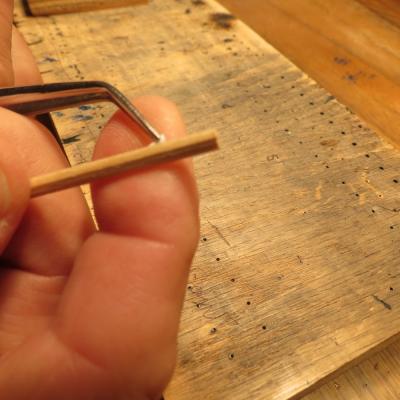
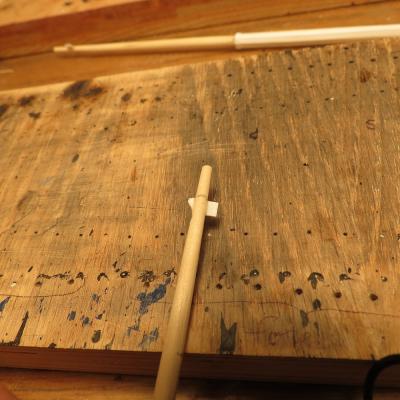
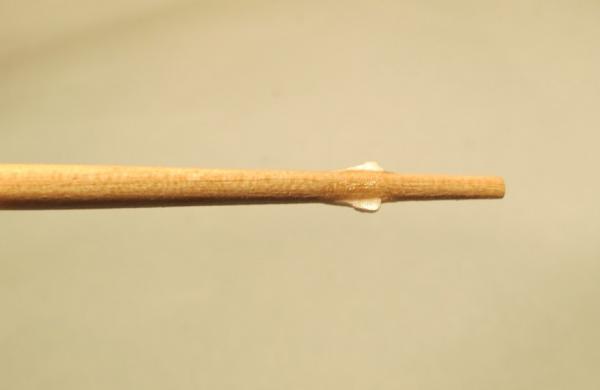
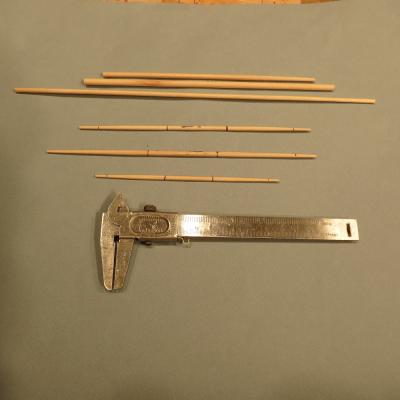
Finally, getting back to actually doing something on the model. A bit of progress on the topgallant yards and mizzen yards. These yards were too thin to use power tools such as a lathe. At least in my experience, the thin part just twisted and deformed. At 1.0 mm to 1.5 mm, hand sanding seemed the best way. A couple of our members asked for help on using styrene to make simulated "iron bands" on yards, masts, etc. The problem seemed to be that the styrene would not hold when glued. The following is simply my experience on what has worked well for me. Pick a size of styrene strip that seems in scale and wrap it around a smaller diameter than needed. I seems to soften the strip and prevent breaking when it's been glued. Glue one end to the yard using gap-filling (5 to 15 sec.) C/A. Fast C/A absorbs into the wood and doesn't hold. If the glue has been around for a time(like my 5 month hiatus), it tends to get thicker and slower. If it takes more than 10 to 15 seconds to set, start with fresh glue. The end is glued. Let it set for several minutes. Note: the battens are styrene strip forming the octagon. Add glue to the strip and hold until the glue sets. Cut off excess to complete the ring. Ad glue to the end of the band and hold in place with the tip of a blade.


- 755 replies
-
- 5
-
-
- finished
- caldercraft
- (and 1 more)
-
Hi Jerry, The studding sail boom is not forgotten, although you are very observant. There are a number of details that have not yet been added including the name on the stern, chalks for the anchors, pike poles on the masts, aft lanterns, etc. Some for fear they would be knocked off (lanterns), others because they might interfere with rigging (anchors) and others for no reason at all; simply to be done later. Hopefully, I'll catch up on details in the coming year. I suspect David and Kevin might have similar reasoning. Cheers, Gil
-
Hi Patrick, I used 1.0 mm thread for the recoil or breech lines. I think they could have been slightly larger but the 1.0 mm thread was the largest available short of the anchor line. I had some thread stock that was larger but the color didn't match. For the blocks and tackle, I used 0.25 mm line which would equate to about 18 mm or between 5/8" and 3/4" line on the real ship. That seems about right for the working tackle but that's just my opinion. Cheers, Gil
-
Lawrence, What trouble. What can a couple of old guys do that would be more fun. Sjors and Mark. Nice to be back. I'm actually starting on topgallant yards. Thank you Modelman. On our way home, we had a very short stay in Helsinki. Nice to have a friend in Finland. Cheers, Gil
-
Lawrence, After reviewing my log, I have to thanks you for the heads up. While there has been a lot of serving on shrouds, mast heads, etc., there is no clear method of serving shown. I'll try to show my way of doing it in a separate post. Further, on page one, my good intentions of indexing (or showing content) was never carried out. I've gone back and added page numbers for various stages of the build. Perhaps when I become a bit more computer savy, I'll add automatic page links to the various stages. You've pointed out the obvious. What is often clear to the writer is not always clear to the reader. Many thanks, Gil
-
Lawrence, Sorry if I mislead you. I was referring to Ed Tosti's Victory build site in which he has indexed various stages in the build, including serving etc. Cheers, Gil
-
What a warm welcome from so many friends. I'm currently trying to catch up on the many wonderful build logs (very slowly), responding to several hundred e-mails and all the other stuff that follows time away. It will probably be a while before I accomplish any productive work on the "Victory." Jerry, They had a record flood on the Danube in June, but not while we were there. However, they did manage to run us aground. Didn't sink. Lawrence, It may be a while before I consider a tutorial on serving. However, I could do a much better job indexing page numbers with various stages of building. Ed Tosti puts us all to shame with his superb organization and clear photos. I'll try to learn how to index with links. Cheers, Gil
- 755 replies
-
- 1
-
-
- finished
- caldercraft
- (and 1 more)