DONATION DRIVE - SUPPORT MSW - DO YOUR PART TO KEEP THIS GREAT FORUM GOING! (91 donations so far out of 49,000 members - C'mon guys!)
×


gil middleton
-
Posts
308 -
Joined
-
Last visited
Content Type
Profiles
Forums
Gallery
Events
Everything posted by gil middleton
-
Rowan, Thanks for your comments and good to see you underway. I marvel that you can make any progress with work and wee ones. Years ago, I gave up oil painting because emergency call interrupted a wash or detail, with wet brushes and left a mess. At least the three dimensional art of model ship building will patiently wait while you look after the important stuff and contemplate your next step. Good luck on your build. We'll all enjoy watching her come to life. Cheers, Gil
-
Kevin, I just get back and find you leaving. Our loss! I so enjoyed your build log, but look forward to the "Bismarck." Will you have to remodel the house again to fit her in? I'm almost envious, since at 80, I can't afford to put my "Victory" in ordinary for very long. Your many friends in the "Victory group" will miss you. Cheers, Gil
-
David, Great work on the rigging. When I finished the rat lines, I took a deep breath and looked forward to different challenges. Jerry paid you a very nice compliment for helping him get started on his build. A vote of thanks for your help in making this such a great website. Cheers, Gil
- 439 replies
-
- 2
-

-
- victory
- caldercraft
- (and 1 more)
-
Grant, I'd like to get on with my build, but I'm having too much fun catching up on your log and many others. Your ship's boats (I haven't even started them) and block are masterpieces. It makes me want to go back and replace all my blocks (not going to happen). Cheers, Gil
-
Daniel, After a long hiatus, I still marvel at your intricate details. And just when I think I've solved a conundrum, you challenge us with more questions and insights. Great fun to follow your log. Cheers, Gil
-
Patrick, Just getting around to catching up on all the "Victory" logs. Yours is a standout with great painting and coppering. If that is your standard, it will be sheer joy to watch it unfold. Cheers, Gil
-
Jerry, We just returned from cruising the Rhine and Danube rivers (NOT on our boat) and found your very nice note. You're very kind particularly since we are all on the same learning curve. I enjoyed reading your log and appreciate the great help David (Shipyard Sid)has been from the beginning. It seems to be what MSW is all about. Your "Victory" is coming along beautifully and in a fraction of the time it took me. Since we're the same age, how can that be? Yes. Bell-Kirk H & AC is our provider. Small World! I'm looking forward to getting back to modeling,(five months under a dust cover) however, with so many great logs to catch up on, it may take a while. You'll probably pass me in short order. Many thanks Jerry, Gil
- 755 replies
-
- 5
-
-
- finished
- caldercraft
- (and 1 more)
-
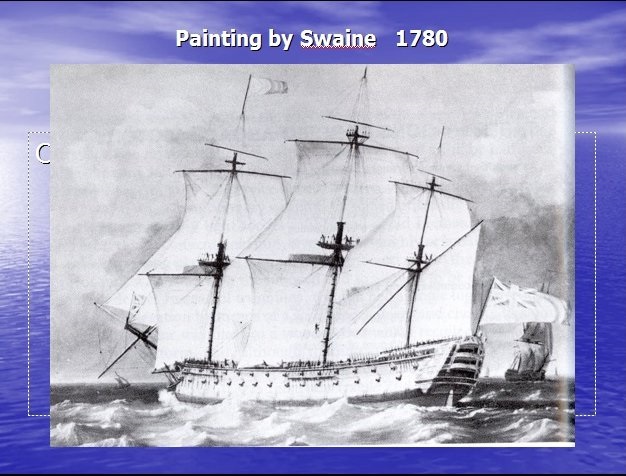
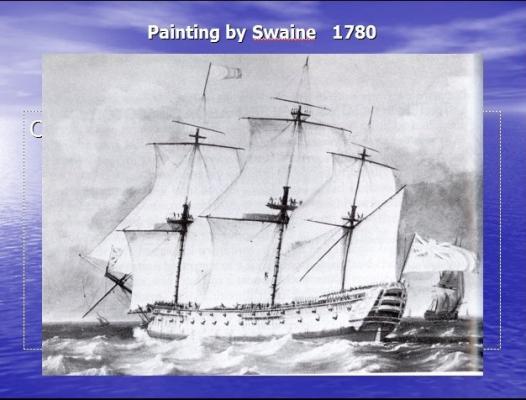
Hi Rob, After reposting my build log (with sincere thanks to you for recovering it) I got way behind in following your log. What fun to review it. I love your ideas on lighting (perhaps my next build), holystoning the decks and coppering. Your "Victory" will be more historically accurate than mine. I presented a History of the Victory along with construction of the model to our offshore sailing group, and was constantly reminded of the many changes brought about by each new captain, sailing master or bos'ns mate. Hence I've taken artistic license in parts of the build. I think we've all seen the copy of the painting by Swaine (1780) of the same ship, HMS Victory with stern balconies for the Captain and Admiral and a lateen sail on the mizzen. All these changed in a refit before Trafalgar. Cheers, Gil
-
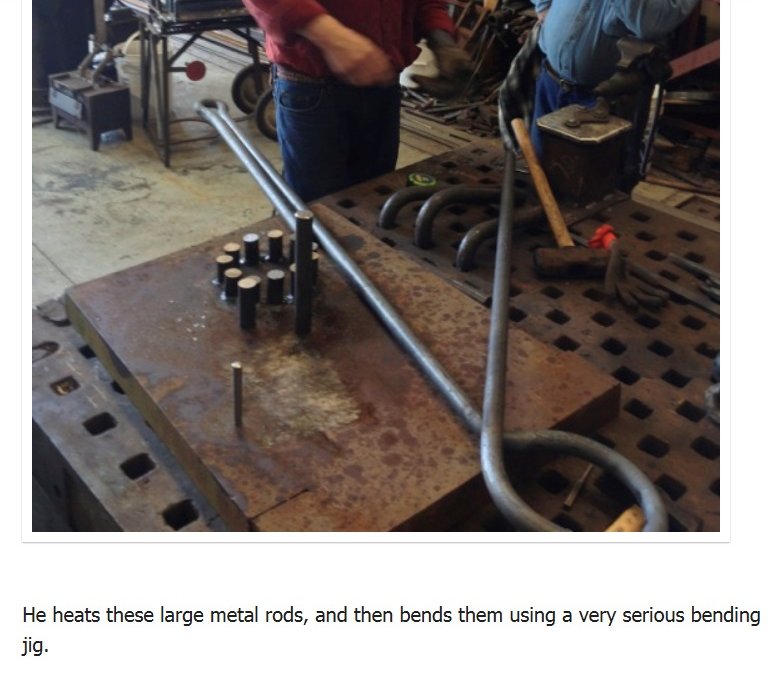
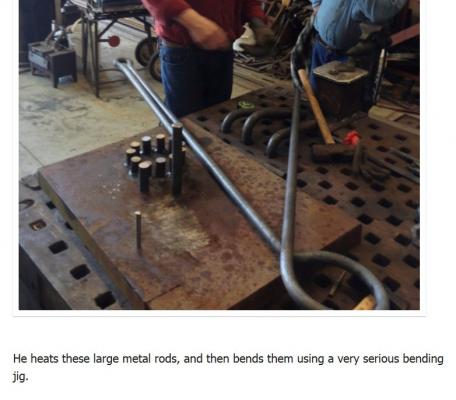
Daniel, As always, love your build log and always learning from it. I thought the following photo was interesting. Making chain plates for the restoration of the Charles W. Morgan (Whaling Ship) at Mystic Seaport, Conn.
-
Grant, It's been too long since I've read through your log. Before your surgeries and rather long recovery. It's great to see you back at innovating and trying new ideas. As a "freehander" with only a hand drill, I thoroughly enjoy your log. You may yet drag me from the dark ages into the world of milling machines, lathes etc. Also, your log seems to attract so many interesting responses and links, a great source of information. I'm already looking forward to comparing notes in the fall. cheers, Gil
-
Hi David, I'm just getting around to catching up on your log. Those stern views are beautiful. I also notice what a great job you've been doing in helping others over the rough spots. I think that is what makes MSW such a great site. Great work. It's fun to see the progress. Cheers. Gil
- 439 replies
-
- 1
-
-
- victory
- caldercraft
- (and 1 more)
-
Mike, You are way too kind. The pleasure was ours. Your ship is coming along beautifully and will be much more interesting with your interior lighting (wish I'd done that), "Spotted Dog" (haven't tried that), violin (Jack Aubry), cello (Dr. Maturin) and rum barrel (have tried that !). And Admiral it is. At least Admiral of Opening Day of Boating in Seattle. Were we born 200 years too late? Cheers, Gil

- 188 replies
-
- 2
-
-
- surprise
- artesania latina
- (and 1 more)
-
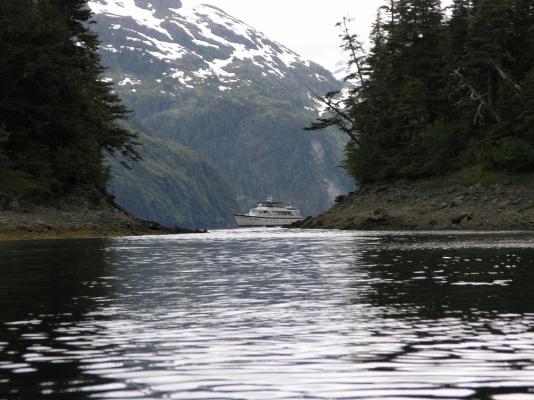
Peter, Thanks for the heads up on Shearwater/Bella Bella. We always stop there on our way to Alaska, however, this year we will not get that far. If you are there next year, it will be a highlight of the trip. Warm regards, Gil
-
What a grand send off from so many good friends. Many thanks to each of you. While no work is being done on the model, connecting with the internet allows one the chance to catch up on your wonderful build logs. I belong to a cruising club (The Cruising Club of America) where members have crossed oceans in their own boats, and a good number have circumnavigated. Like Model Ship World, there is a deep pool of experience and knowledge, with conversations that are greatly enjoyed and from which we all learn. Accordingly, I should be a wee bit smarter about model ship building and cruising in boats when returning to HMS Victory. Cheers, Gil
- 755 replies
-
- 5
-
-
- finished
- caldercraft
- (and 1 more)
-
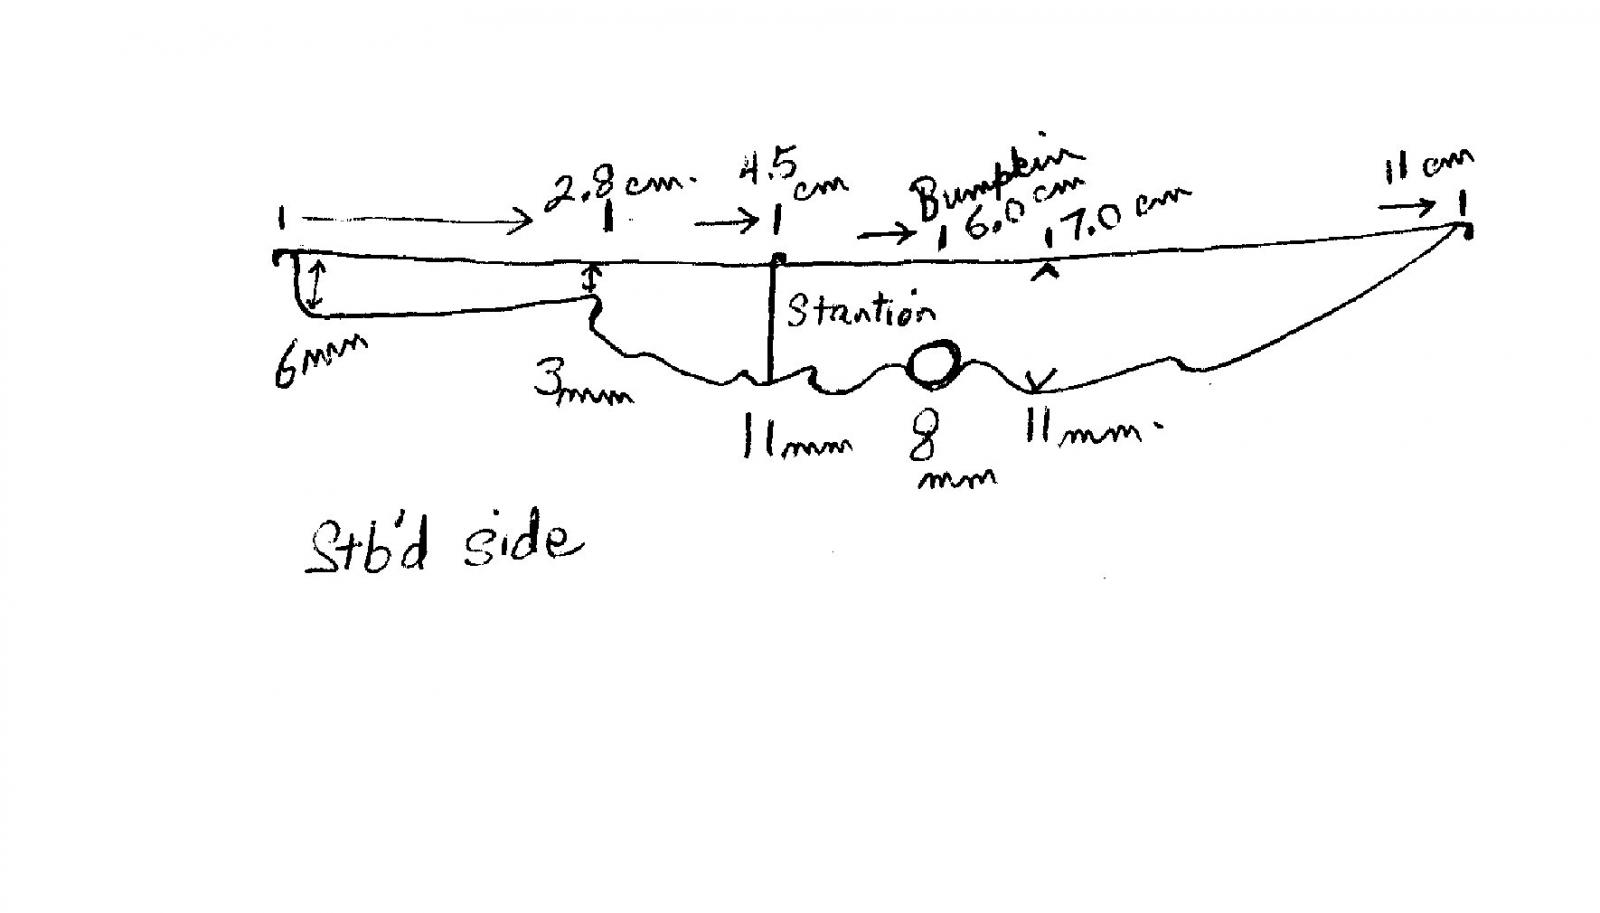
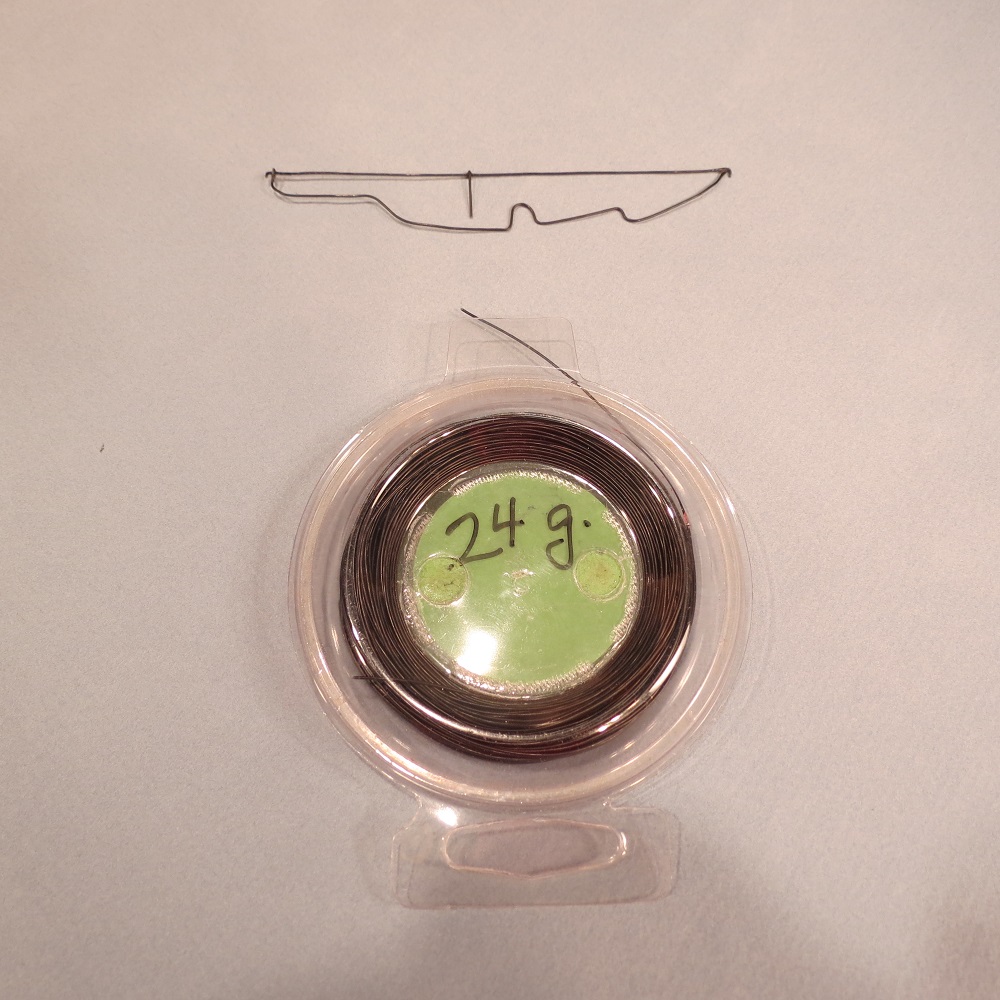
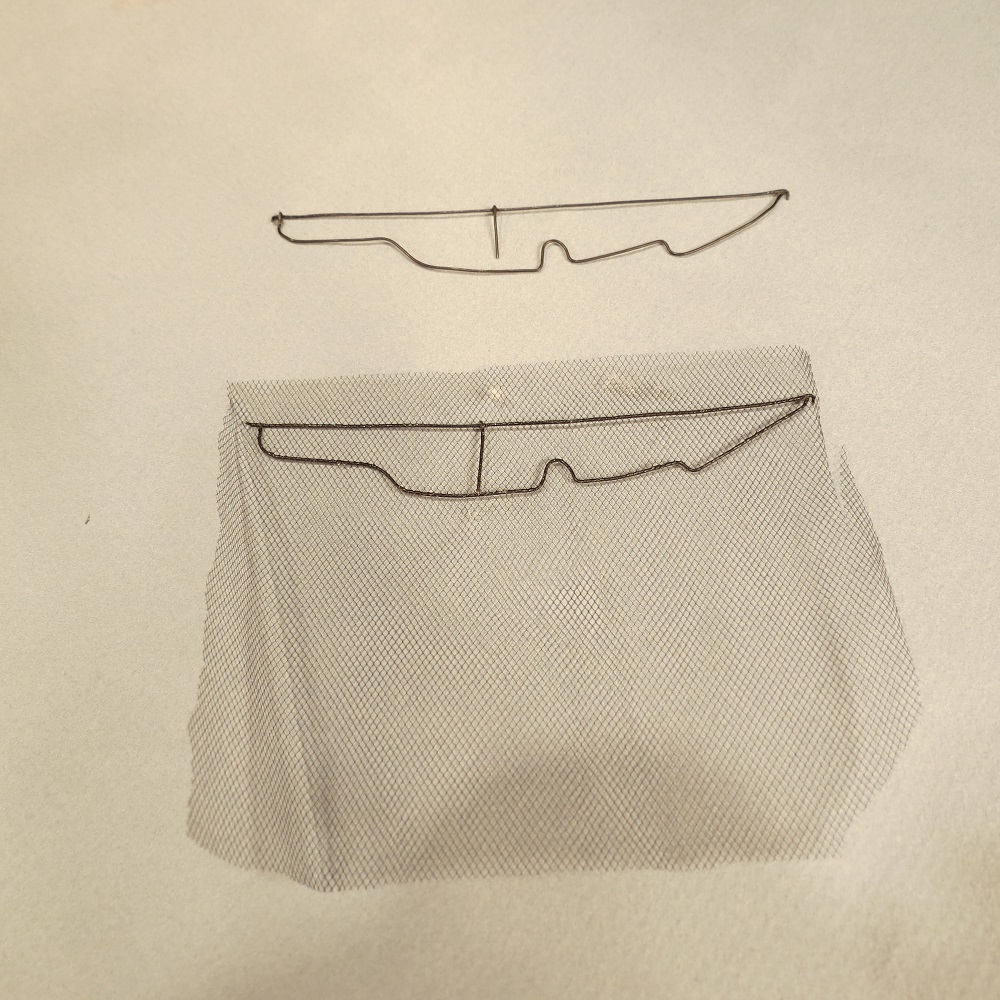
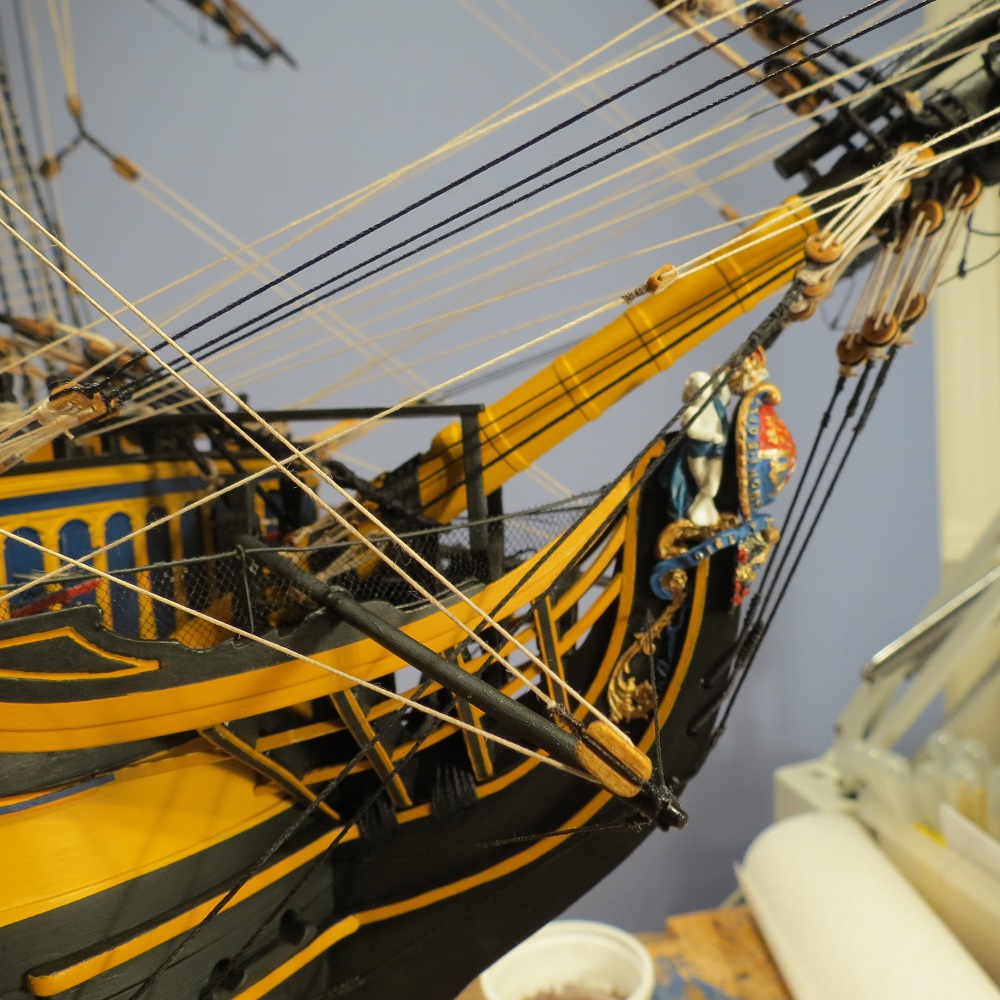
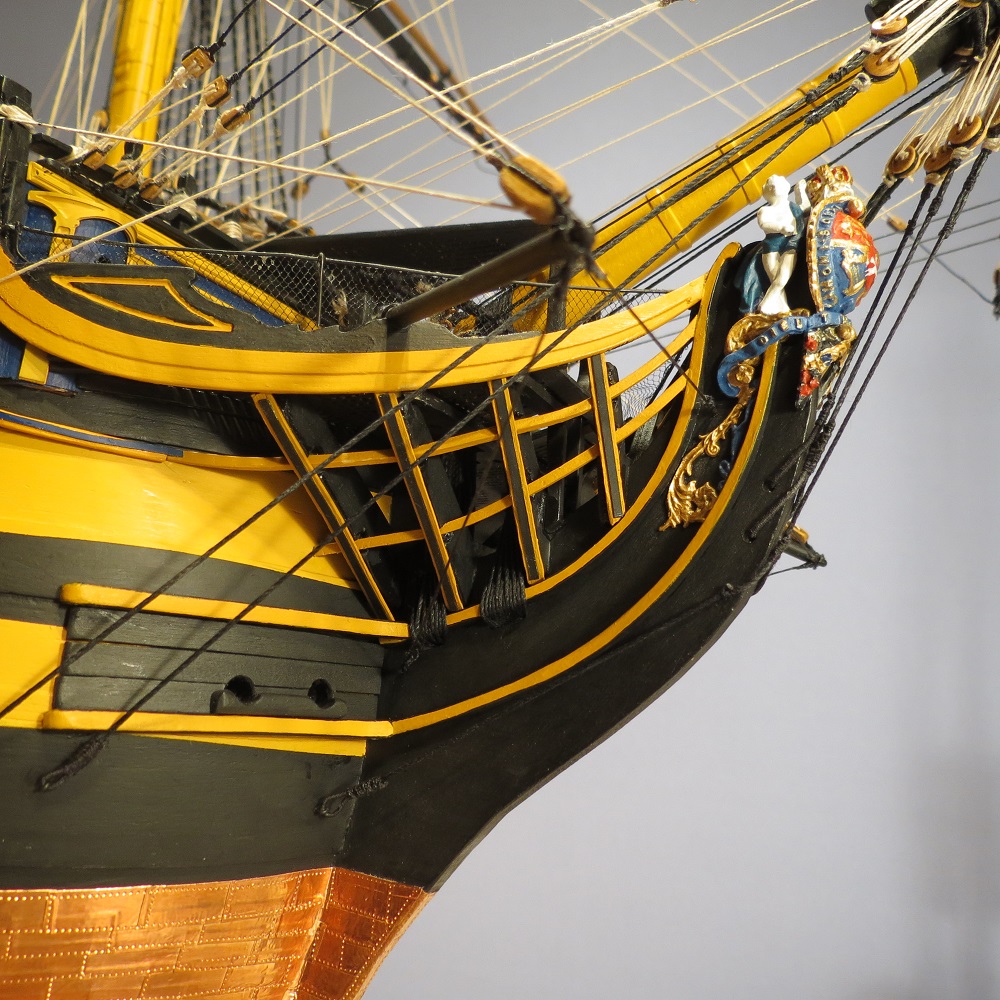
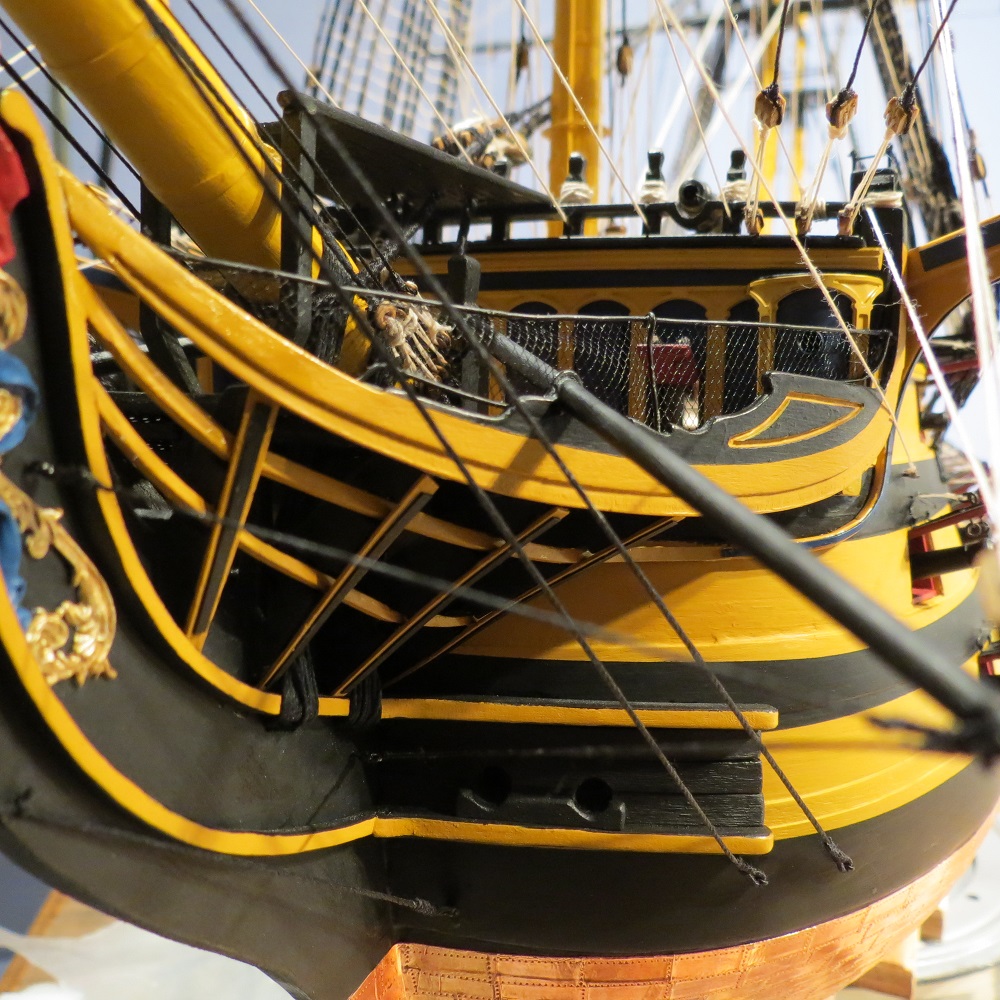
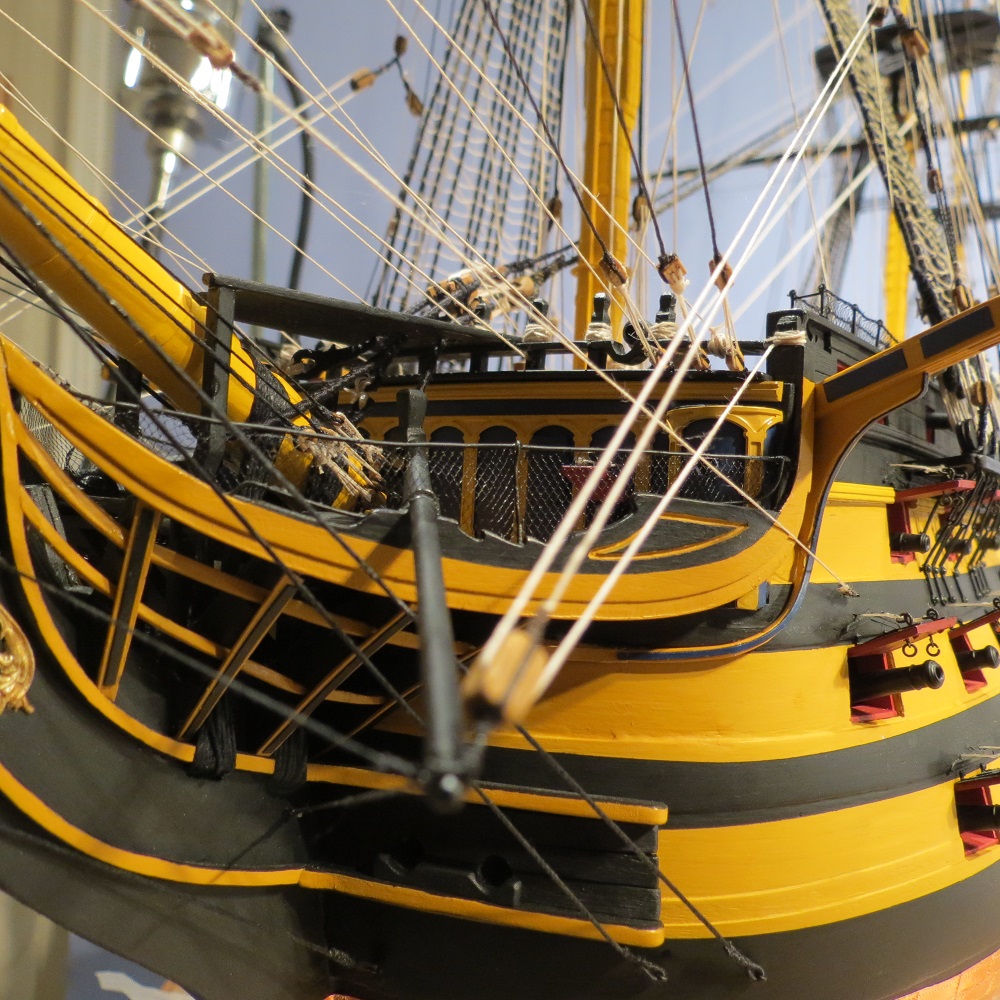
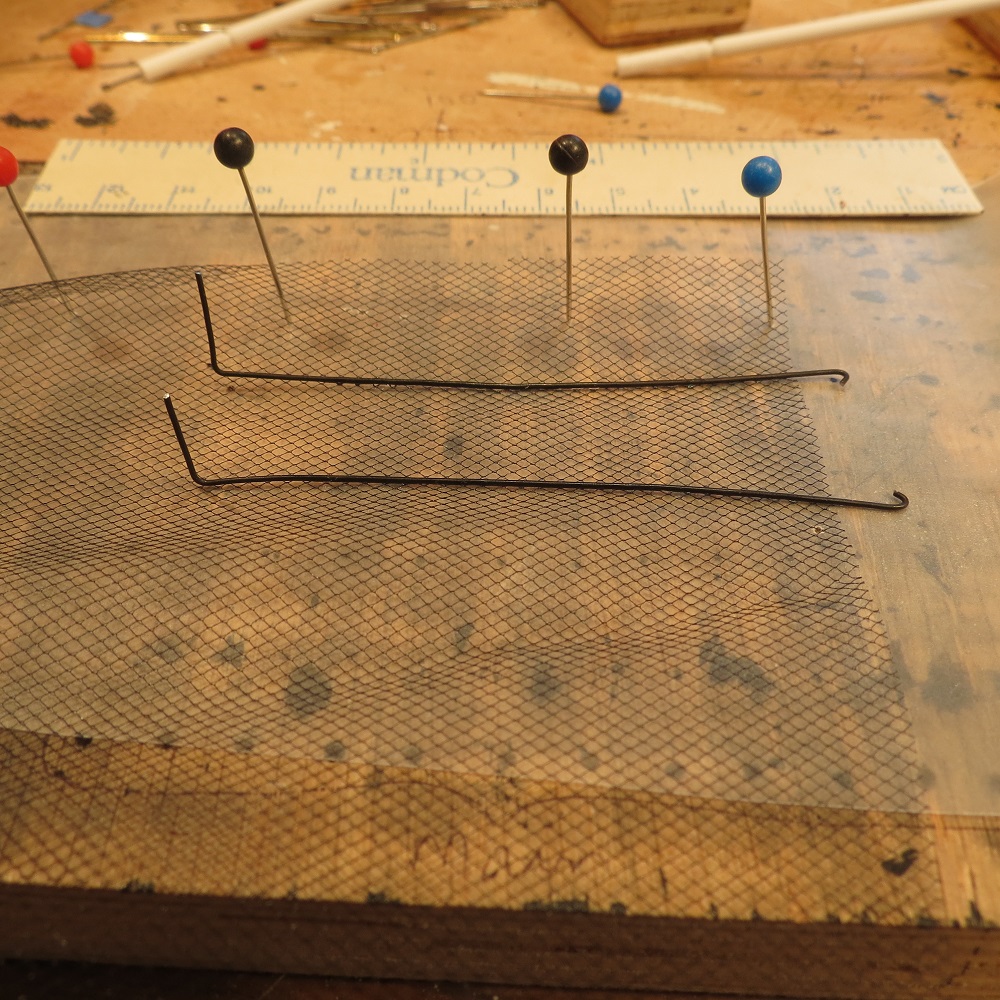
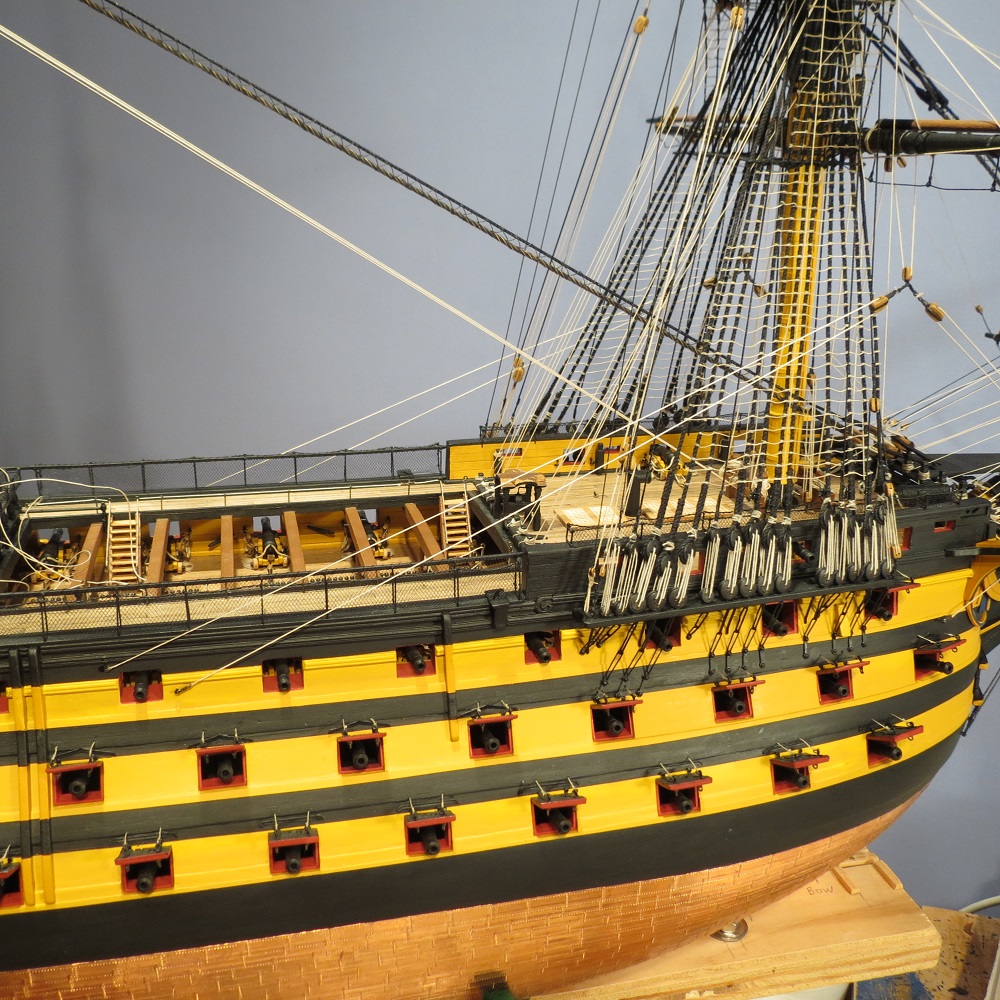
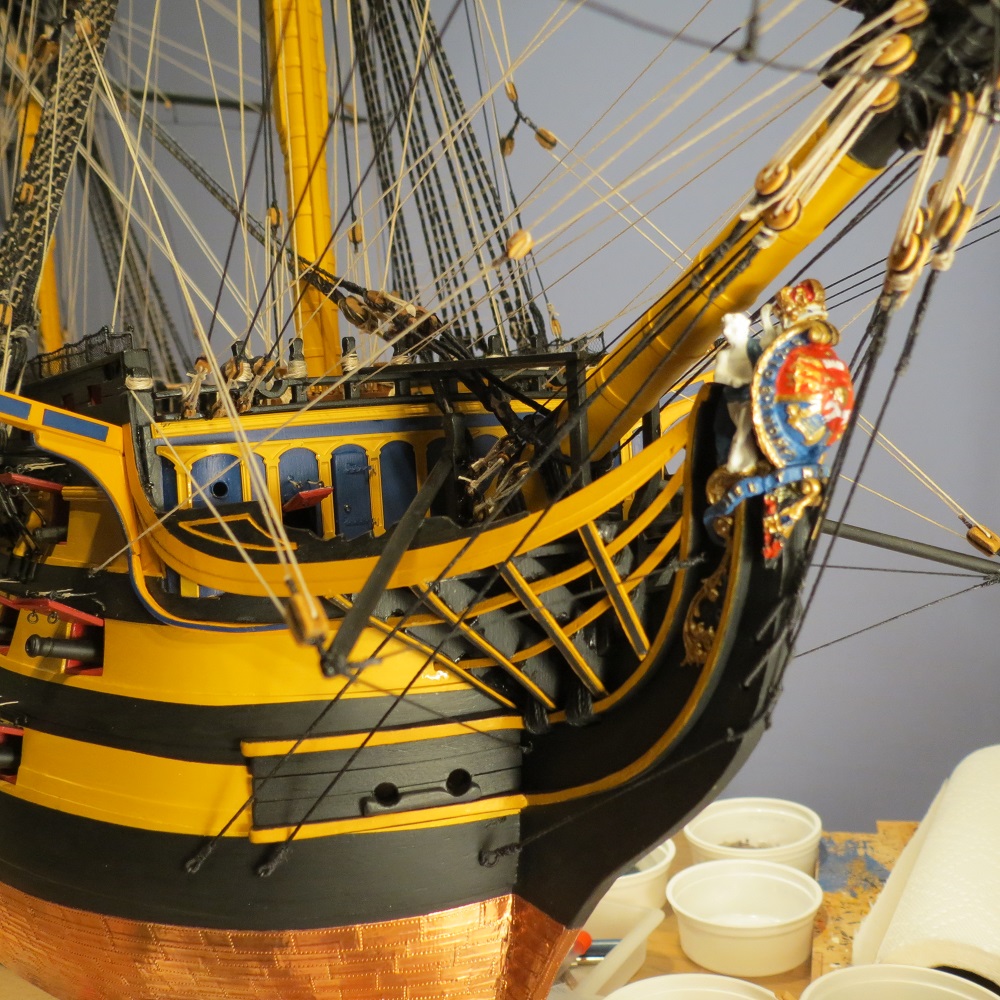
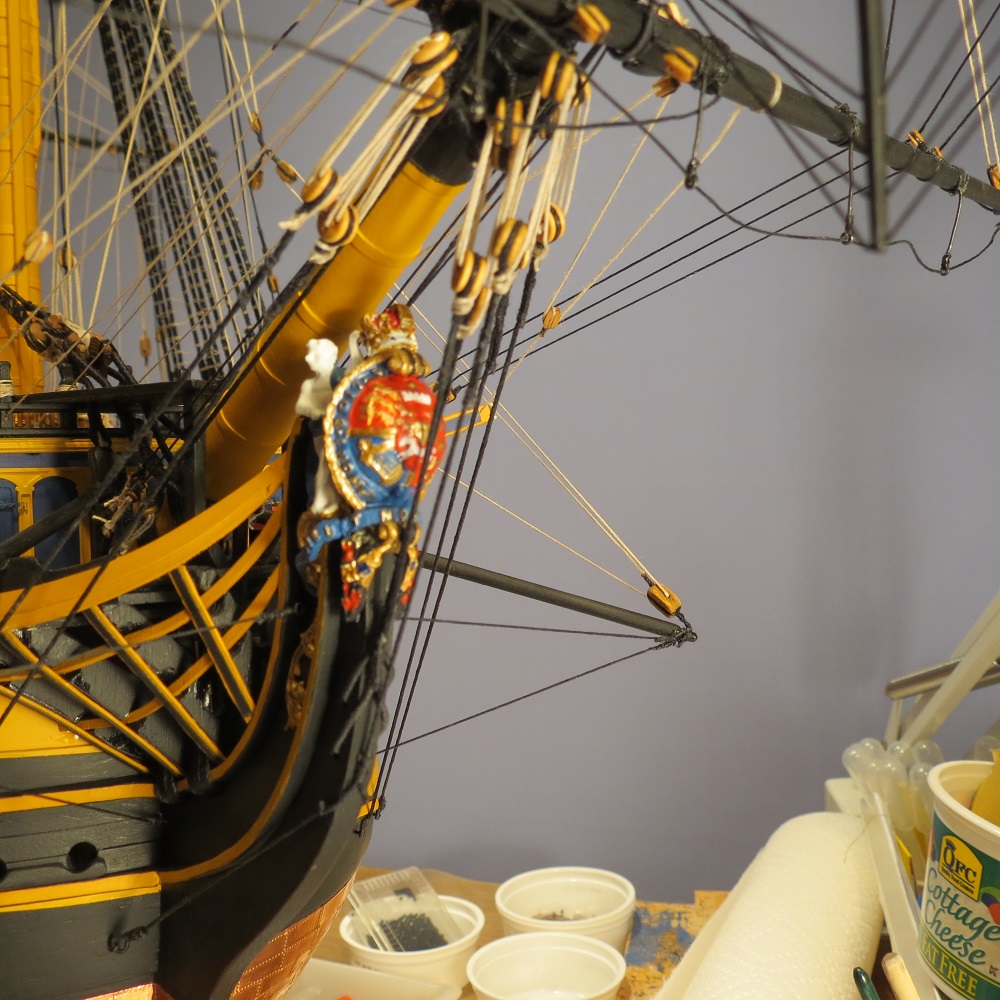
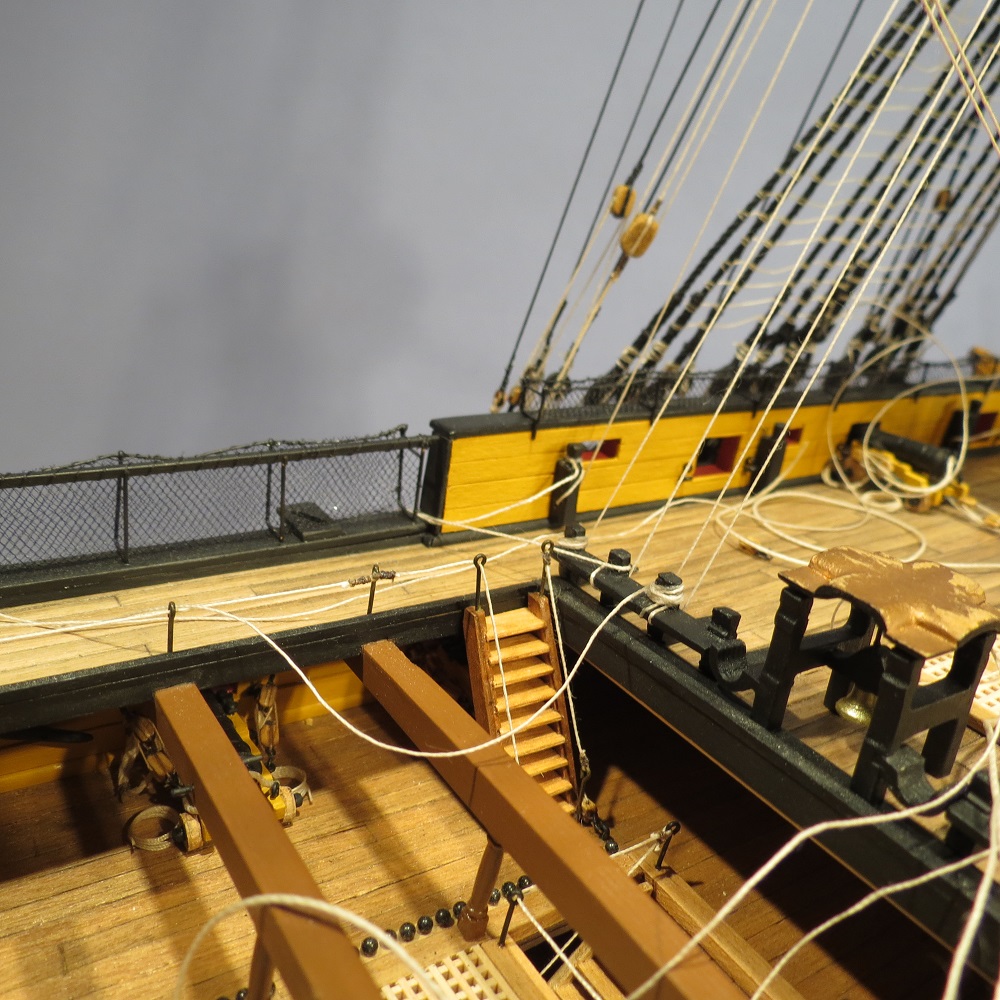
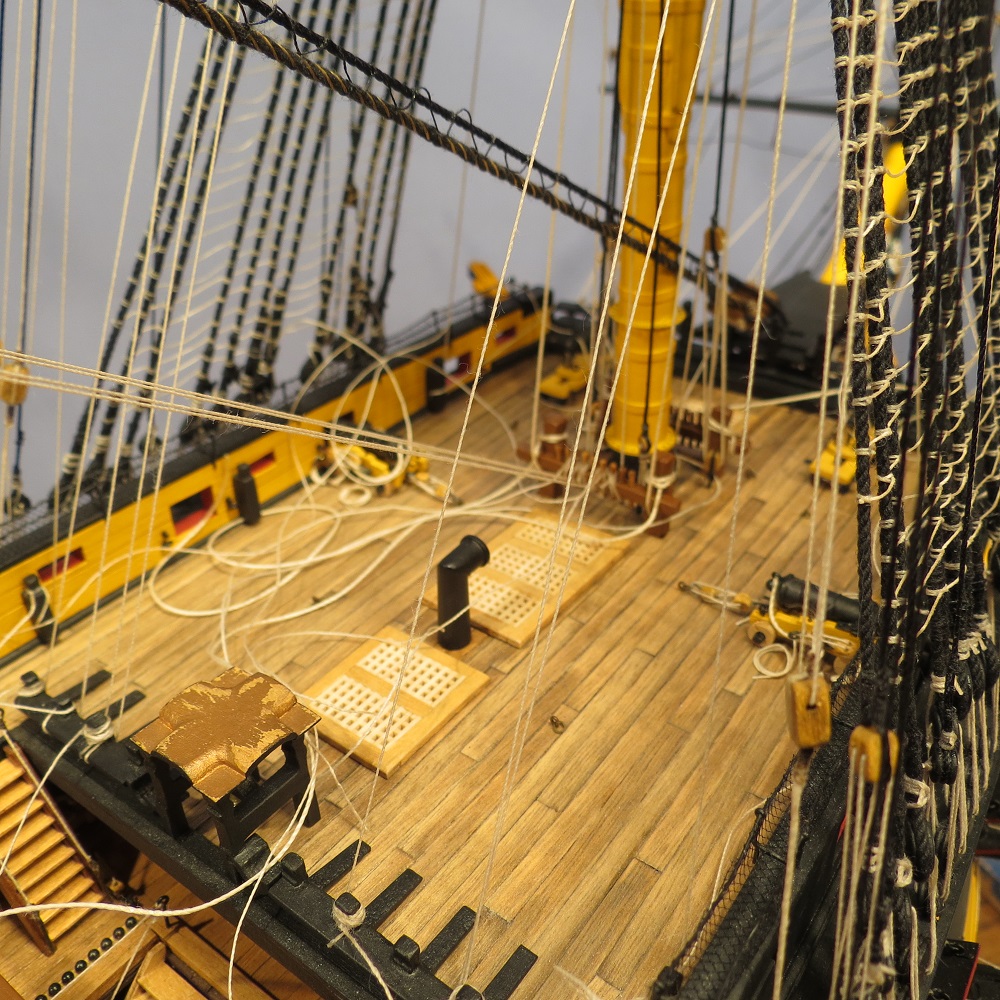
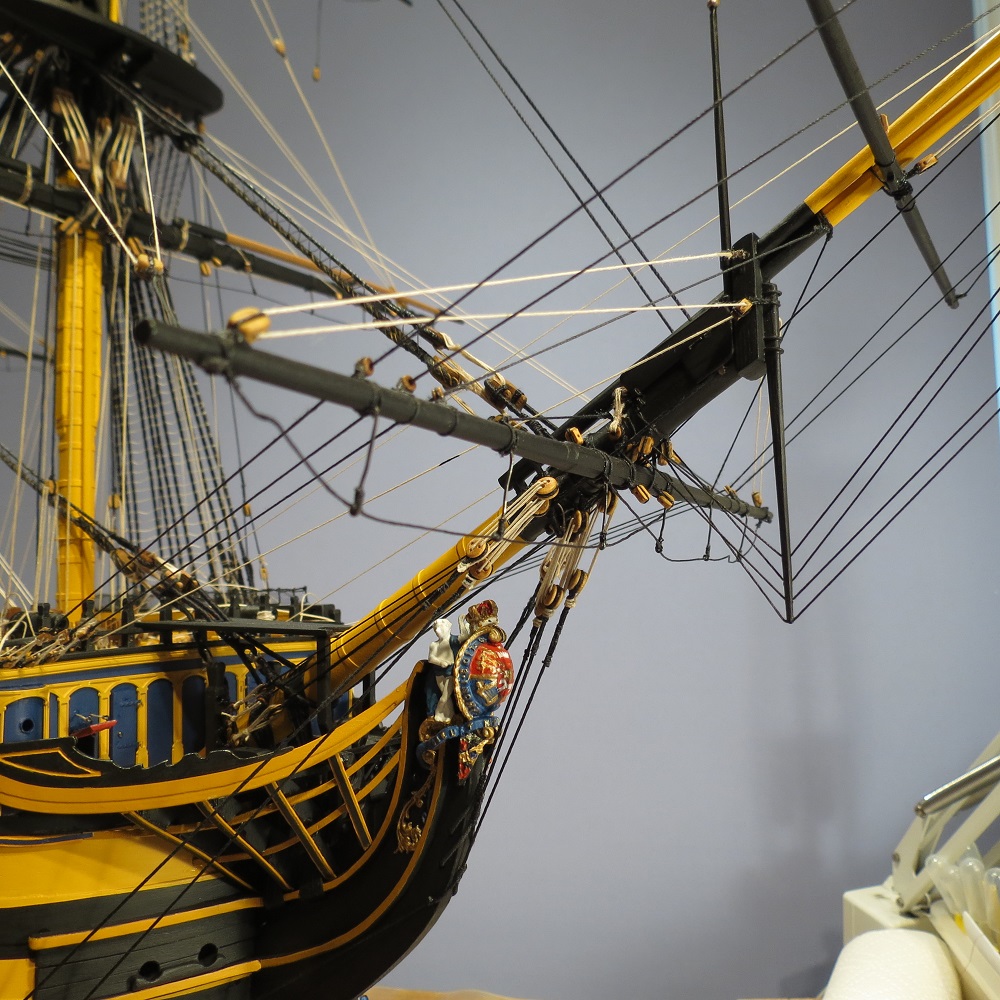
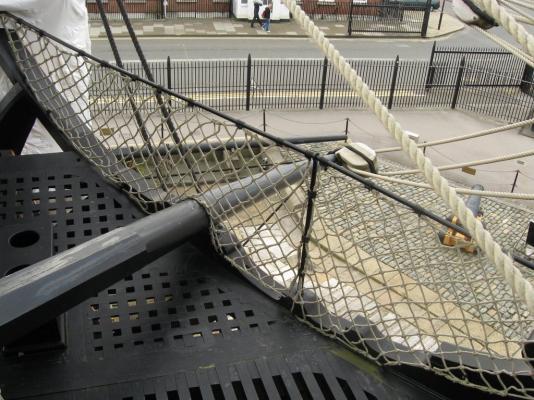
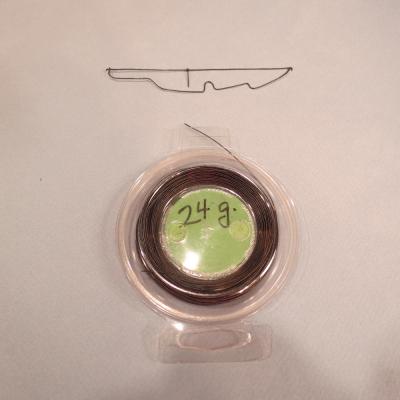
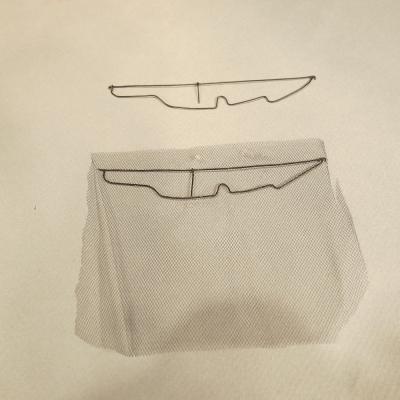
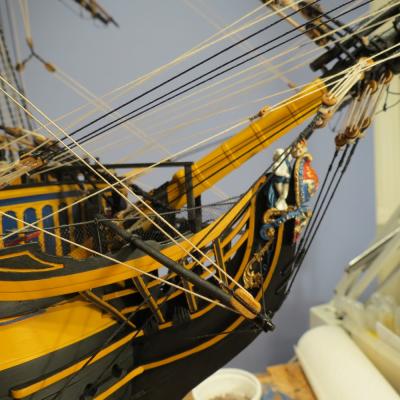
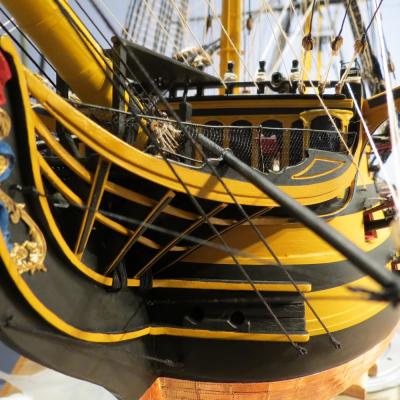
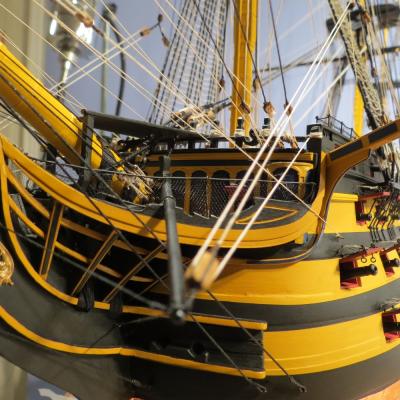
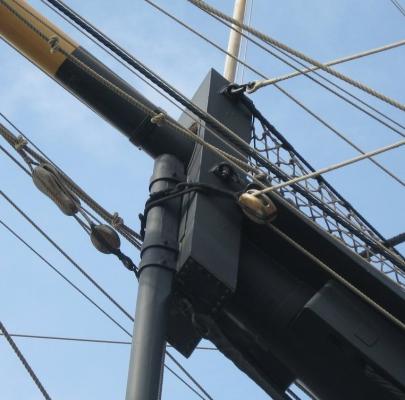
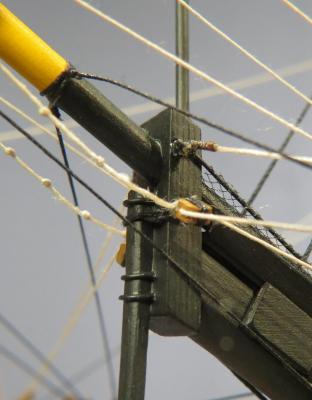
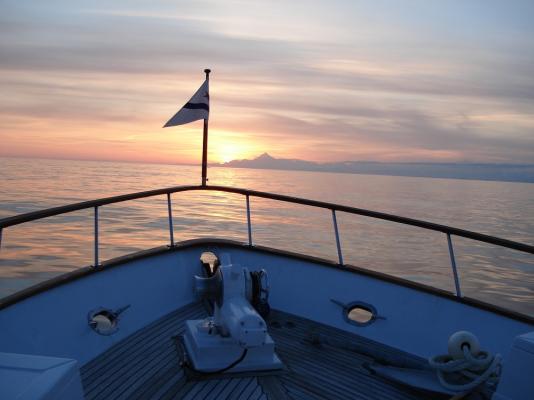
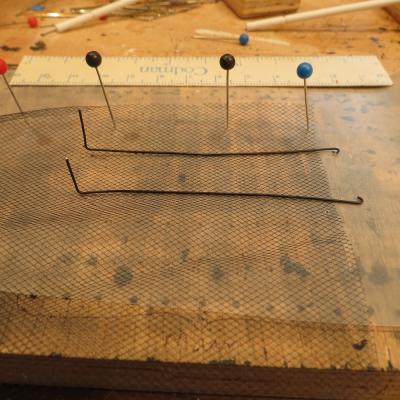
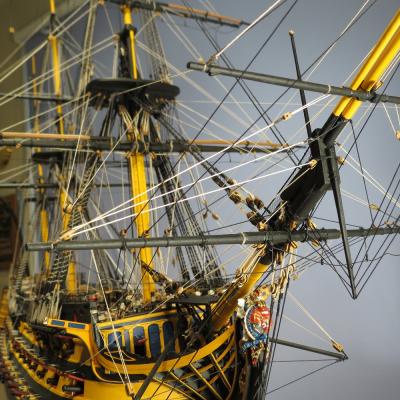
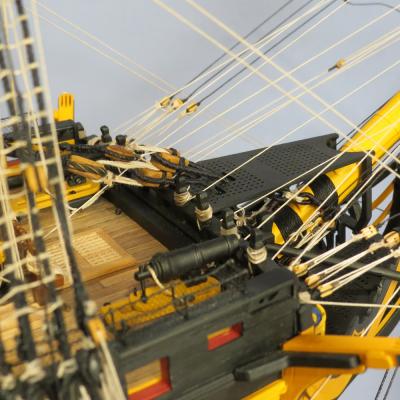
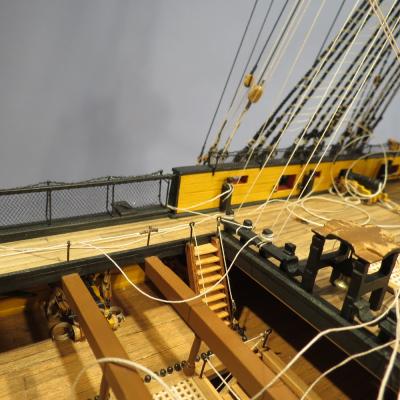
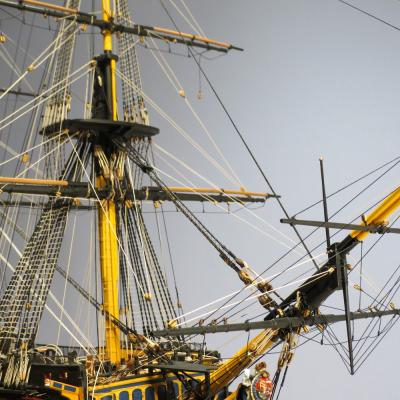
Just a wee bit of progress before covering the old ship for a while. Applying the netting to the bow or fore deck before the roundhouses. Some of you did this early, however, I was afraid I would destroy the netting or bumpkins while rigging the bow sprit. First a view of the bow without the netting. The real ship with netting viewed from inboard. A simple drawing with measurements to act as a template for the netting.24 gauge annealed wire shaped from the template. A small hook at each end to fit an eyebolt at the roundhouse and at the bow.Wire glued to the netting, over wax paper (tulle) with C/A Netting placed starboard.Netting placed on port Adding the foot ropes to the bowsprit, jib boom and flying jib boom. A little dilute (10:1 water/white glue helps maintain the natural draping of the line. A fun view comparing the bow sprit cap on the real ship and the model. There will probably be a two to three month hiatus as we look to the open water. (after a lot of sanding varnishing and painting) Like Andy's view of sunset on the Great Lakes, all seems right with the world looking at the sunrise crossing the Gulf of Alaska. Cheers, Gil


- 755 replies
-
- 10
-
-
- finished
- caldercraft
- (and 1 more)
-
Dave, Grant, Popeye, Augie and Mark Thanks so much for your kind sentiments. Floyd, be careful what you ask for. Deck hands are kept locked in the focs'le except when on duty. We run a tight ship. Gil
-
Ed, So very glad to see your log returning. It has been an inspiration and wonderful resource to all of us. I'd give it a gold medal. Thanks for putting her back on MSW. Cheers, Gil
-
Thank you guys for your much apprediated concerns. It has been rather scary, but she is getting better. Floyd, thanks for your comments, but the jokes on me. When Judy developed the blood clot, I moved into full time nurse, cook, etc. With no time to get the boat ready (she sits in the weather all winter), and with regrets,I had to cancel our participation in Opening Day. I'll go and salute the Admiral of the Day, watch the national champion University of Washington crew race but the boat will miss the show. With so few days without rain in the spring, April dictates full time attention to getting the boat ready and I would not even consider hosting Admirals and Generals with ratty varnish and peeling paint. Oh well, there's always next year. Cheers, Gil
-
Thanks Keith and Joe, Sorry for the delay in responding but have been sidetracked with my wife's surgery. We said "Let's grow old together," and here we are. Besides we're having a taste of spring, and all the other priorities kick in. Cheers, Gil
-
Grant, Kevin and Popeye, Many thanks. B.E. Thanks for the heads up on the crew. Somehow, I doubt I'd be any happier as a "waister." And since I don't like heights, perhaps I'll aspire to be SirJoseph Porter, K.C.B. of Gilbert and Sullivan's HMS Pinafore. "I am the monarch of the sea, The ruler of the Queen's navee..........etc." Keith, You are too observant. Indeed they are port (larboard) and starboard. Actually, the clue,sheet and tack block cluster is probably wrong since they were likely done by eye splices and a turks head as shown by Longbridge. As for the U-bolts or shackles, were they even in use in 1805? I served the strops and eye splices and simply lashed the eyes together. Cheers, Gil
- 755 replies
-
- 3
-
-
- finished
- caldercraft
- (and 1 more)
-
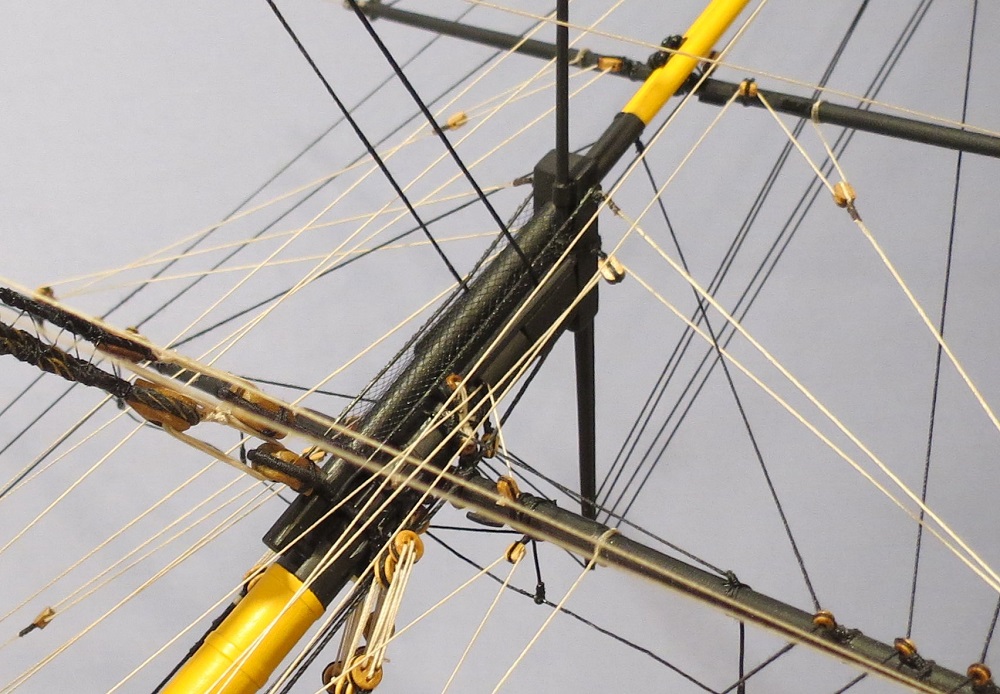
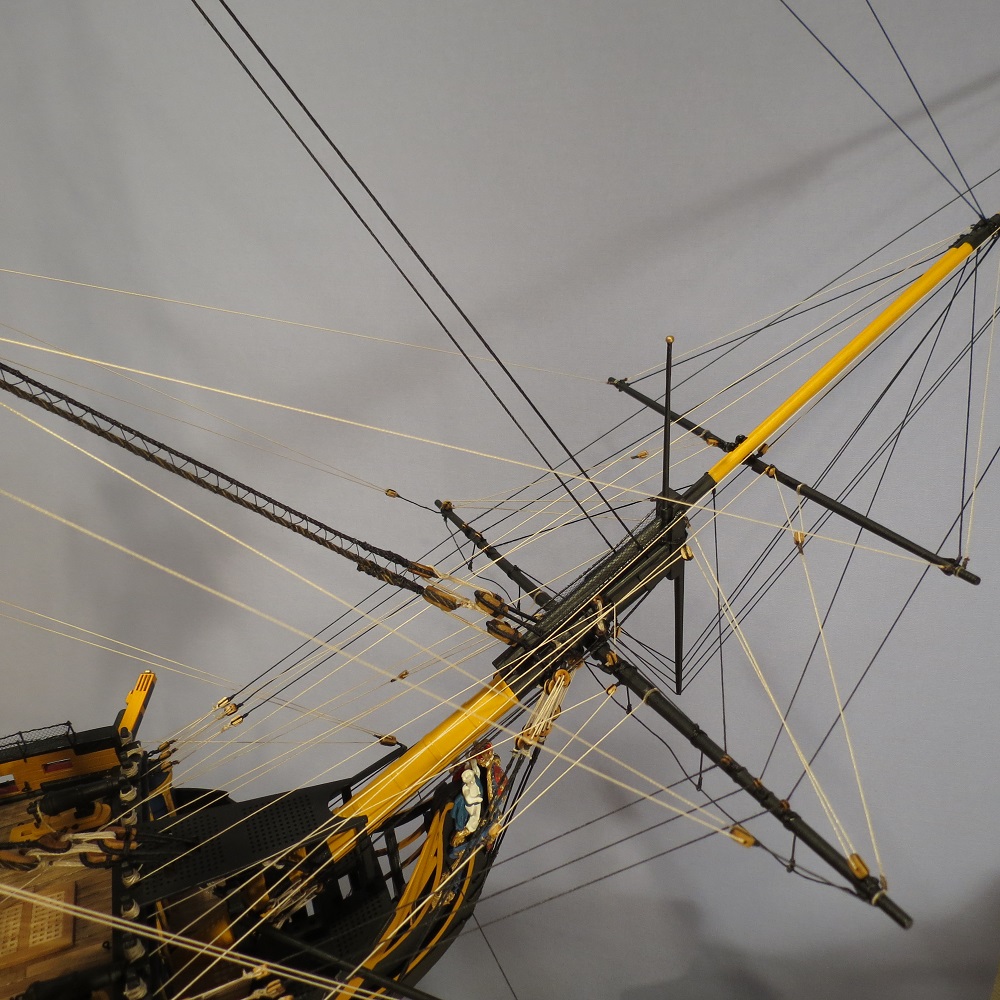
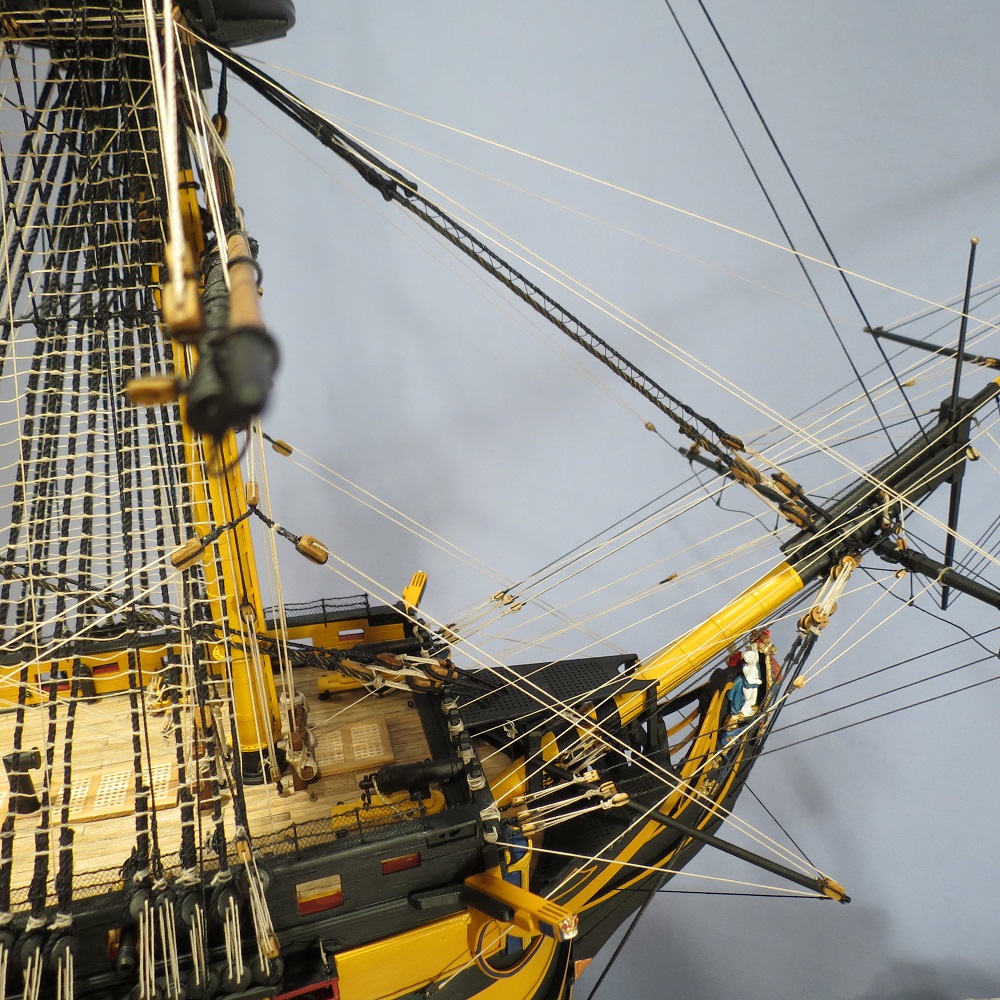
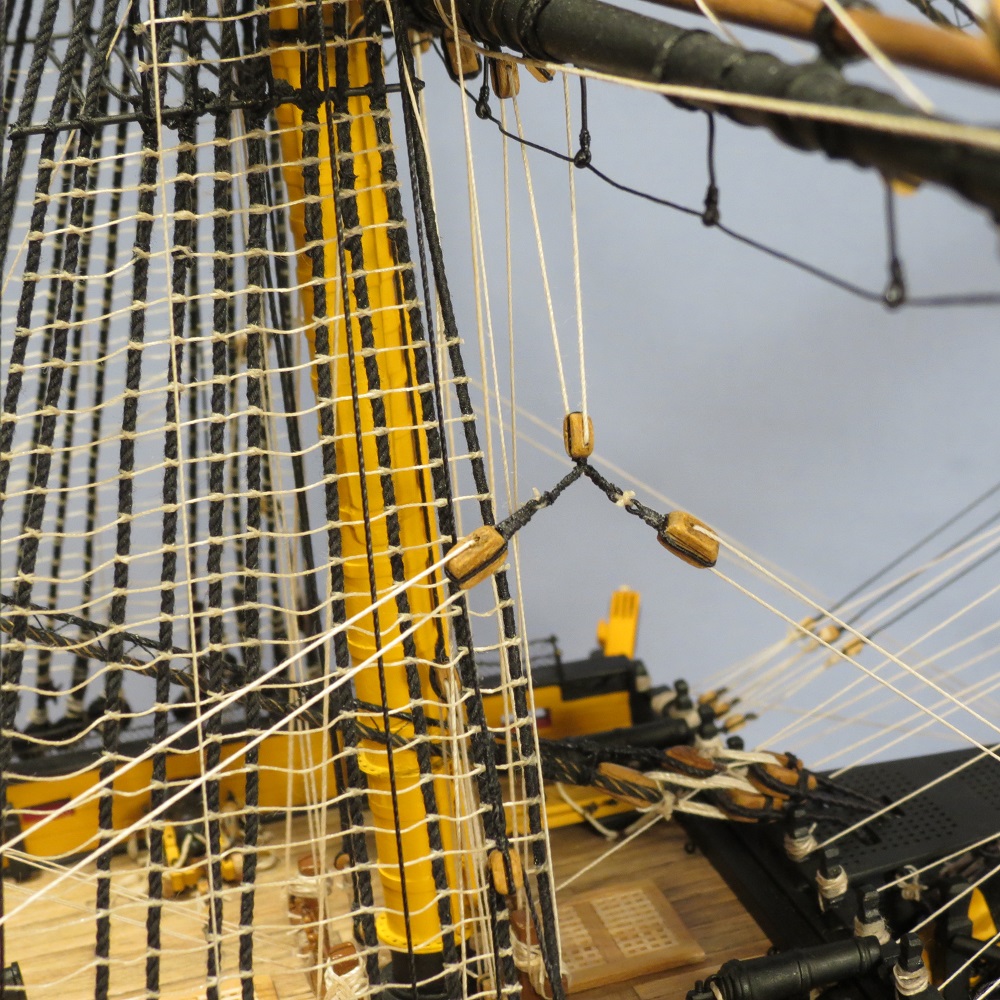
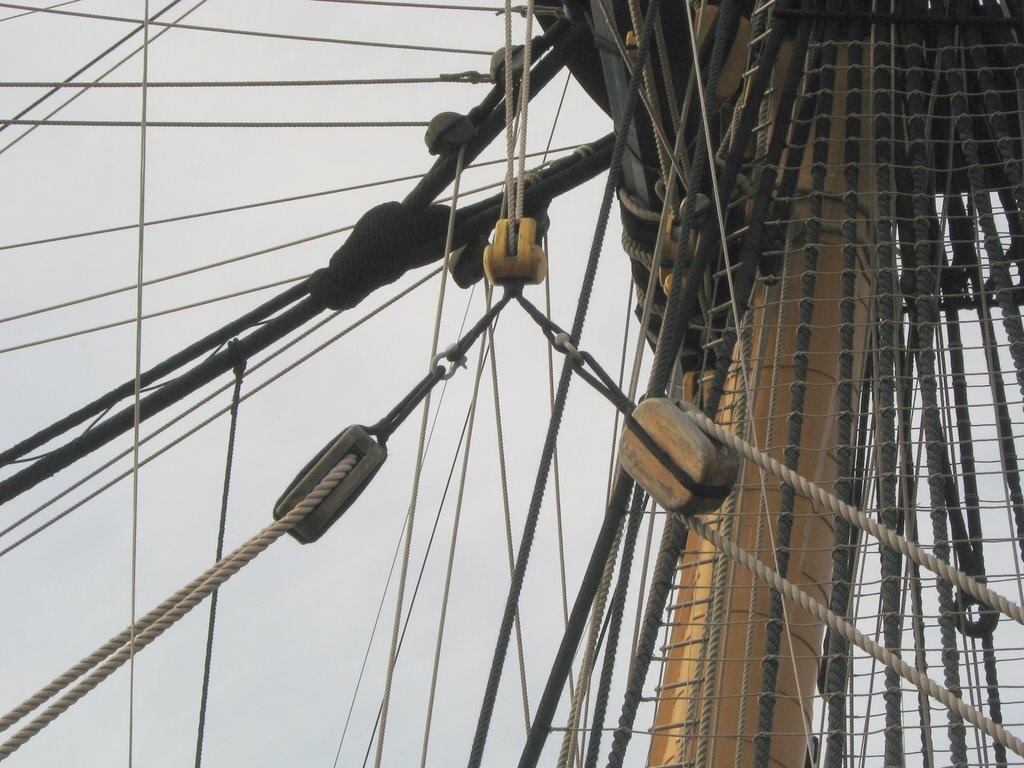
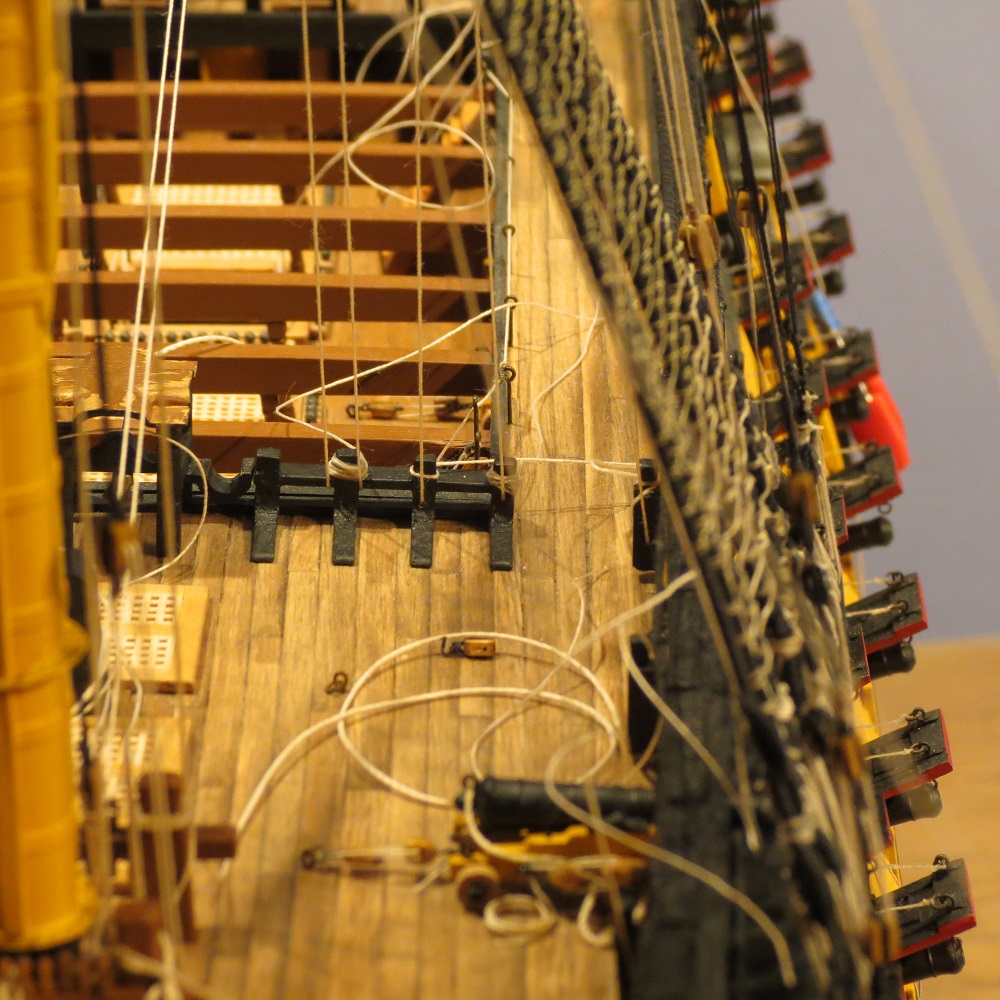
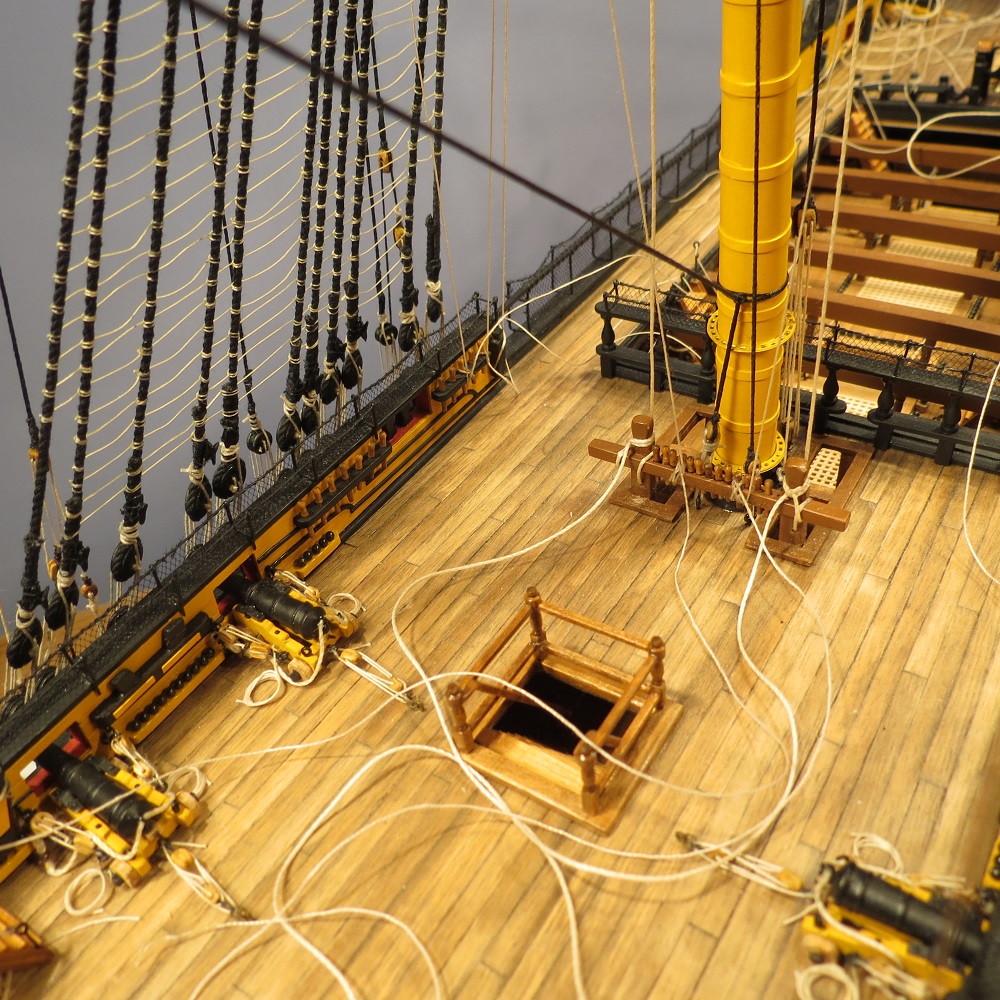
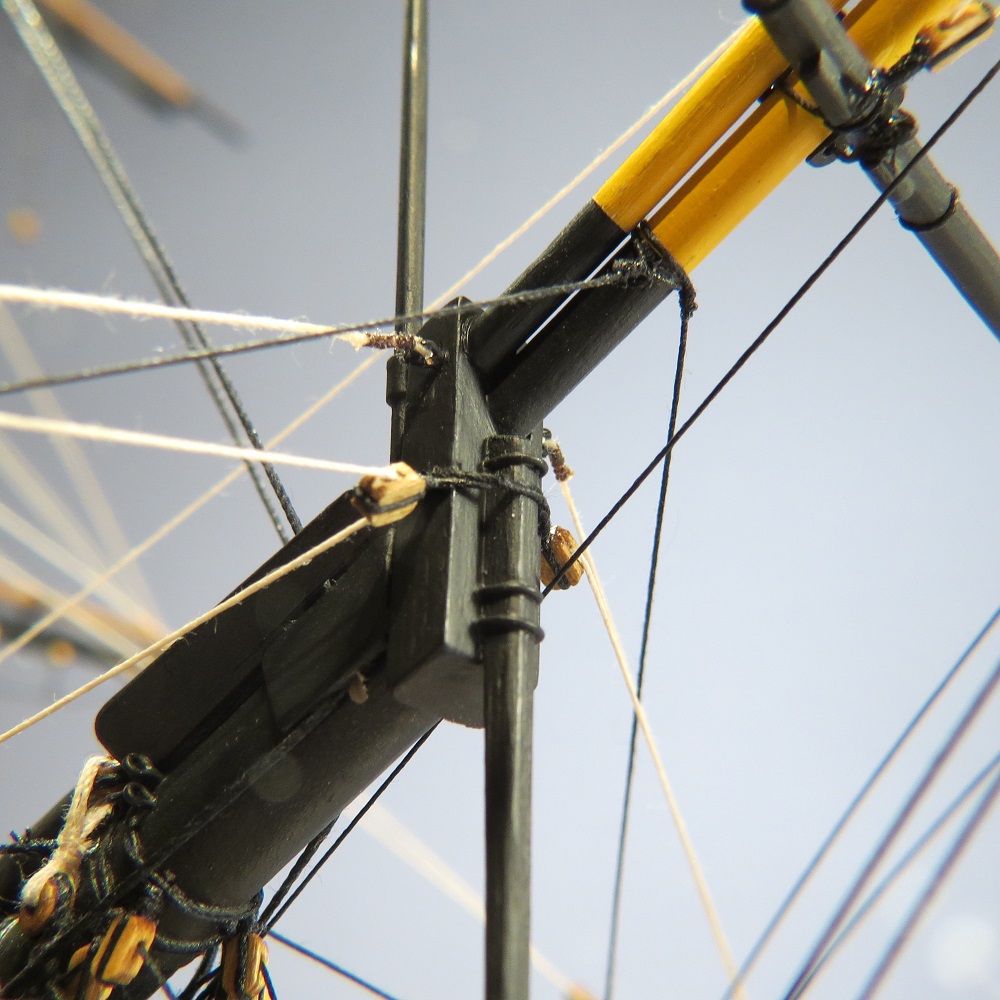
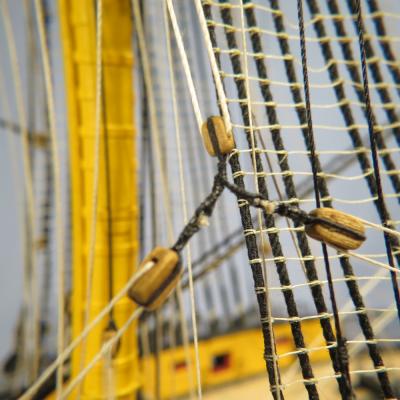
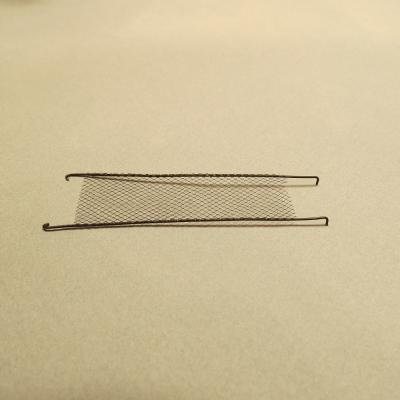
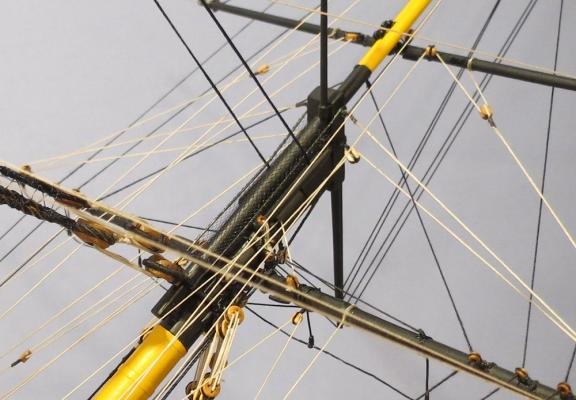
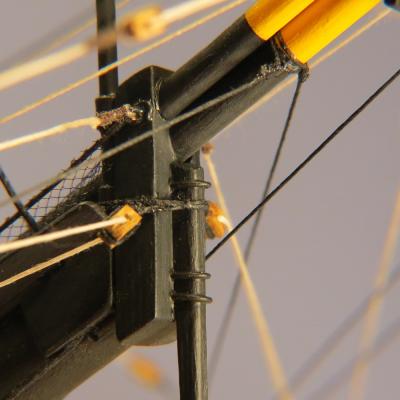
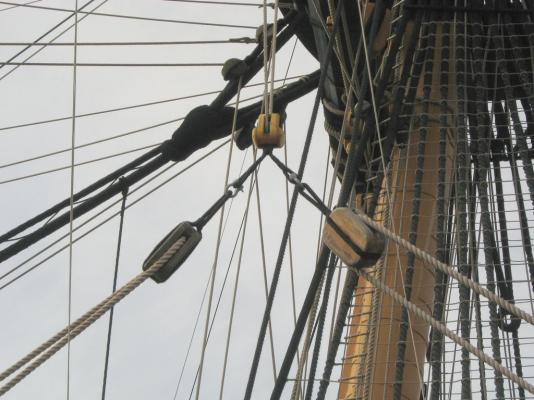
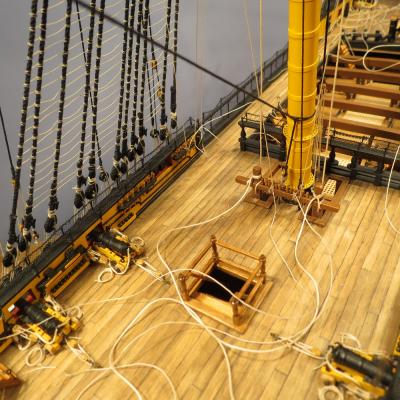
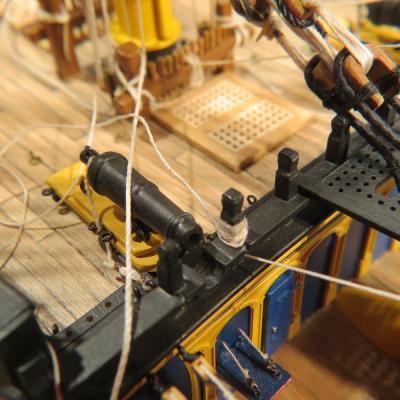
Keith, Many thanks for the link. Incredible work which shows the limits of our expertise. Making small steps with perhaps a half of the running rigging completed. Preparing the netting over the bees, using blackTulle. 24 gage dark annealed wire was used for the supporting lines, glued to the tulle and the excess netting trimmed off. Netting in place Photo showing Spritsail sheet and clue line and bowsprit topsail sheet and clue line. Also spritsail yard brace and topsail yard brace. Foremast lower yard clue line and block (just under the yard); tack line leading forward to the bumpkin and sheet running aft to hull. Starboard bumpkin. Tack line leading to outer kevel at foredeck. Lines attached at timberheads at the beakhead. Foremast lower yard clue block, sheet block (aft) and tack block (fwd). Real ship. Sheet originating from an eyebolt on the hull, terminating through the hull to a cleat on the upper gun deck. Top mast yard sheet and clue line. Stb'd and Port bumpkins. Spritsail yard lift originating from the cap and returning to pass through a block at the cap. Lines terminating at the timberheads at the beakhead. Lines terminating at the timberheads at the belfry


- 755 replies
-
- 5
-
-
- finished
- caldercraft
- (and 1 more)
-
Keith, It's my favorite time of day with a wee dram of scotch. Floyd, "Wigwam burners?" I was never up close. Always just off the shore passing in a boat. However, there were a lot of them up the coast.
- 755 replies
-
- 1
-
-
- finished
- caldercraft
- (and 1 more)
-
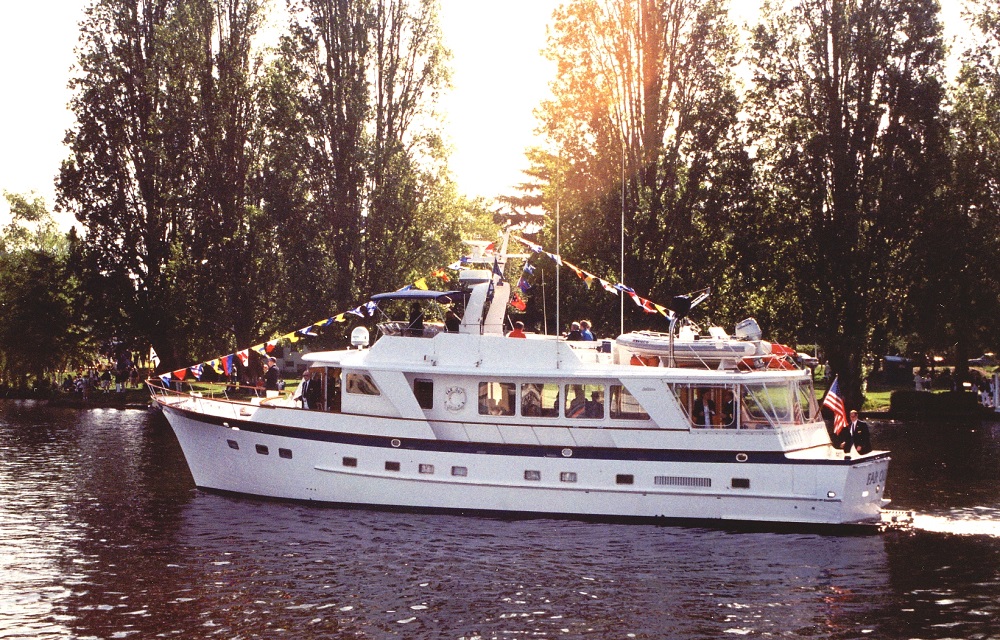
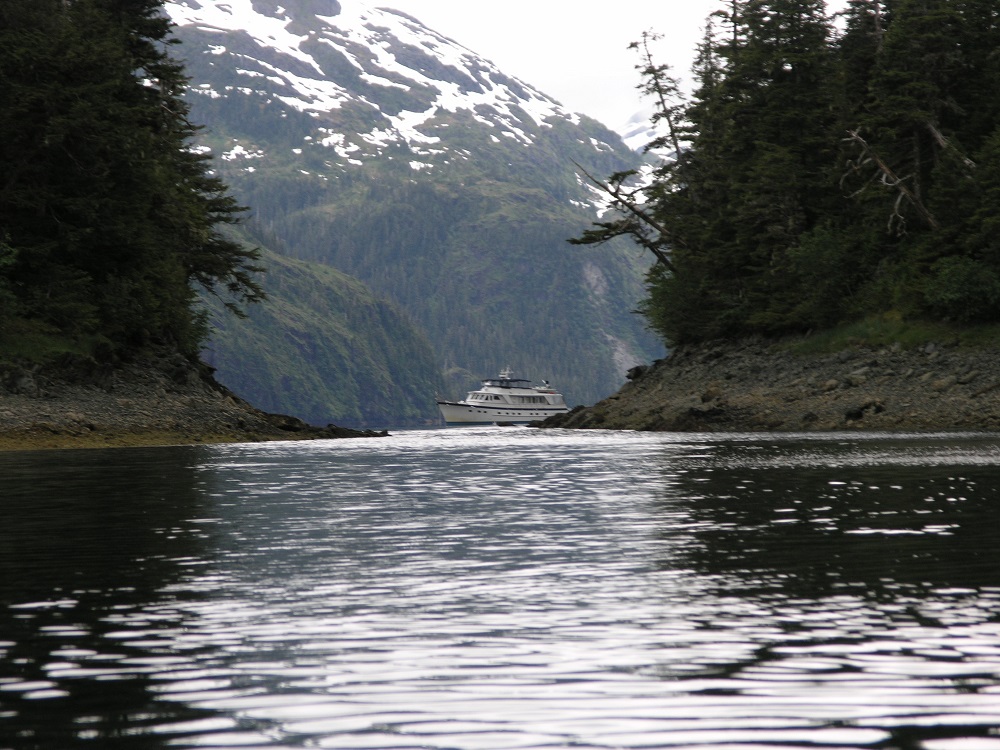
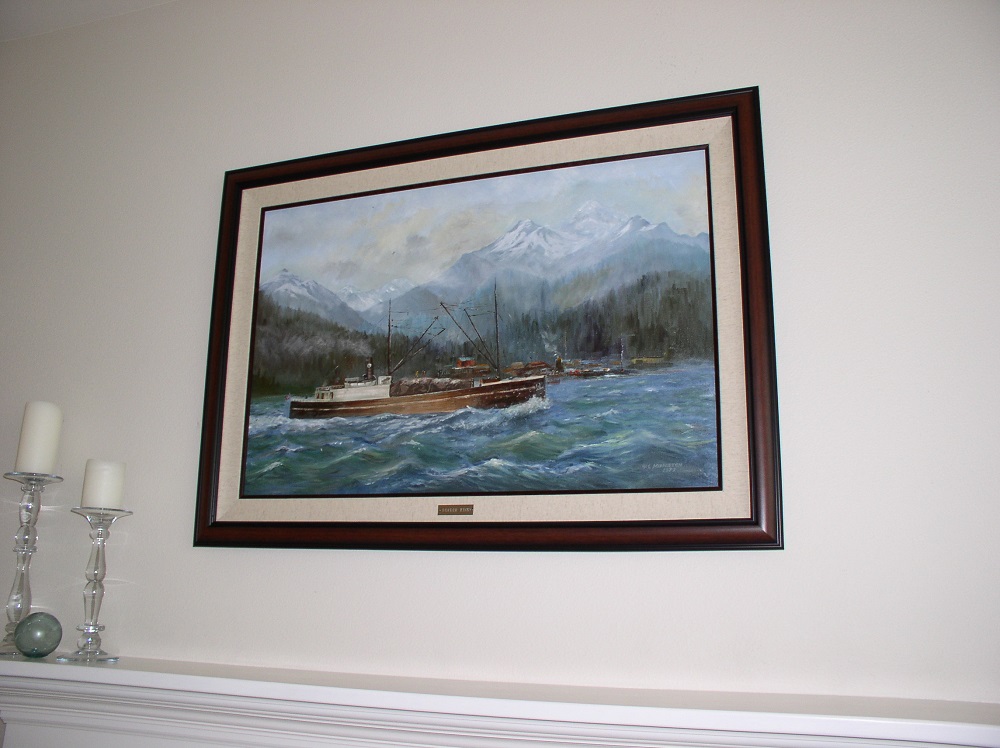
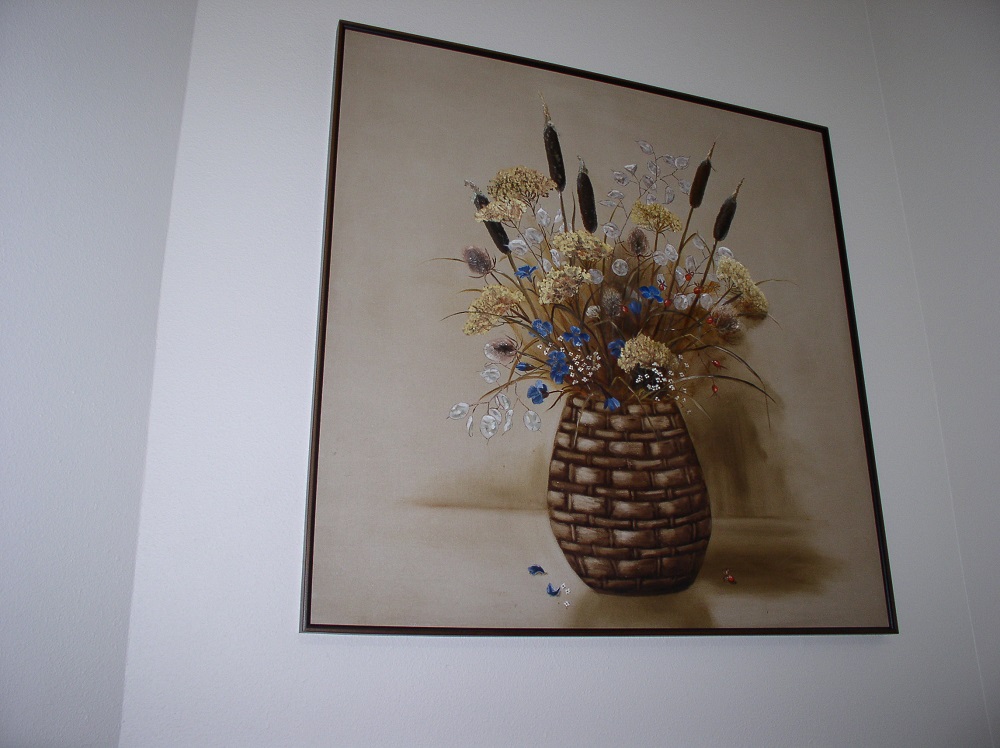
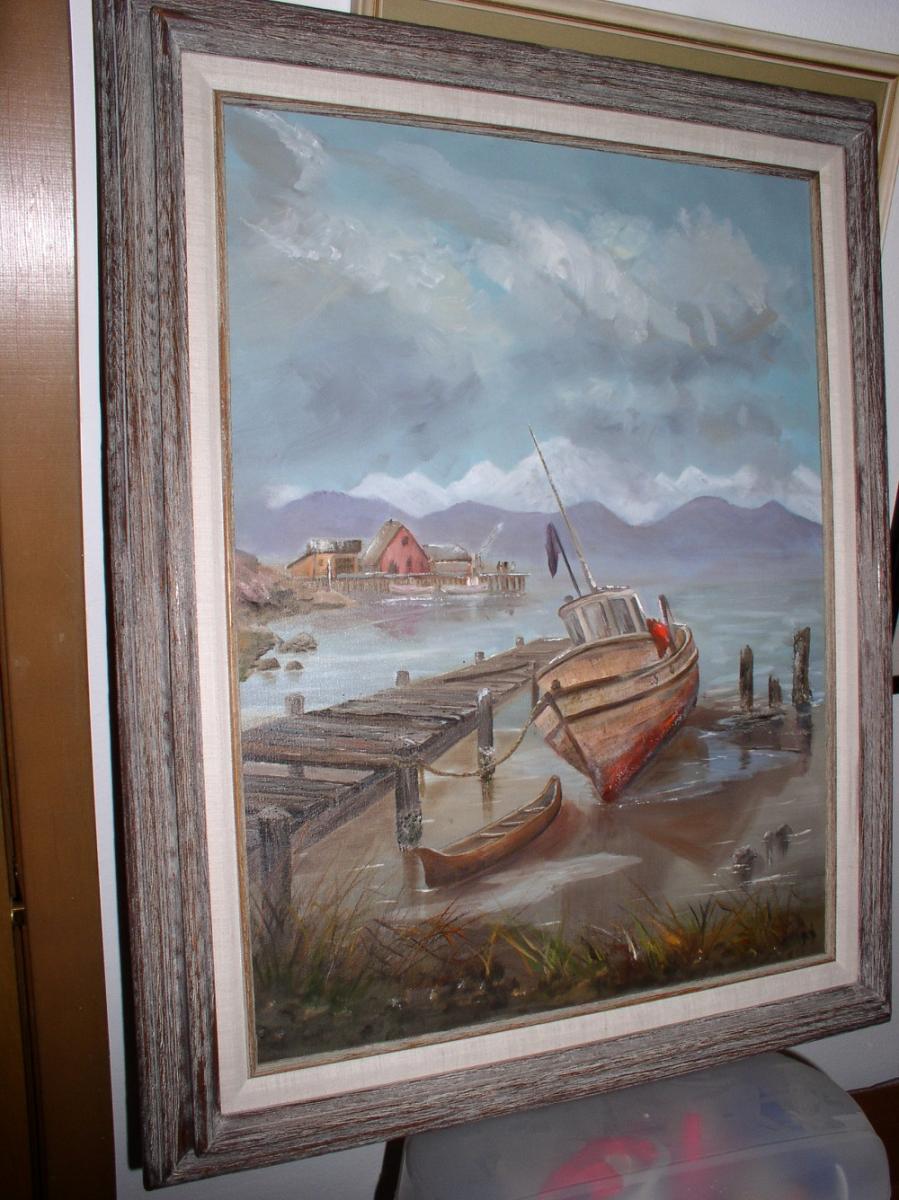
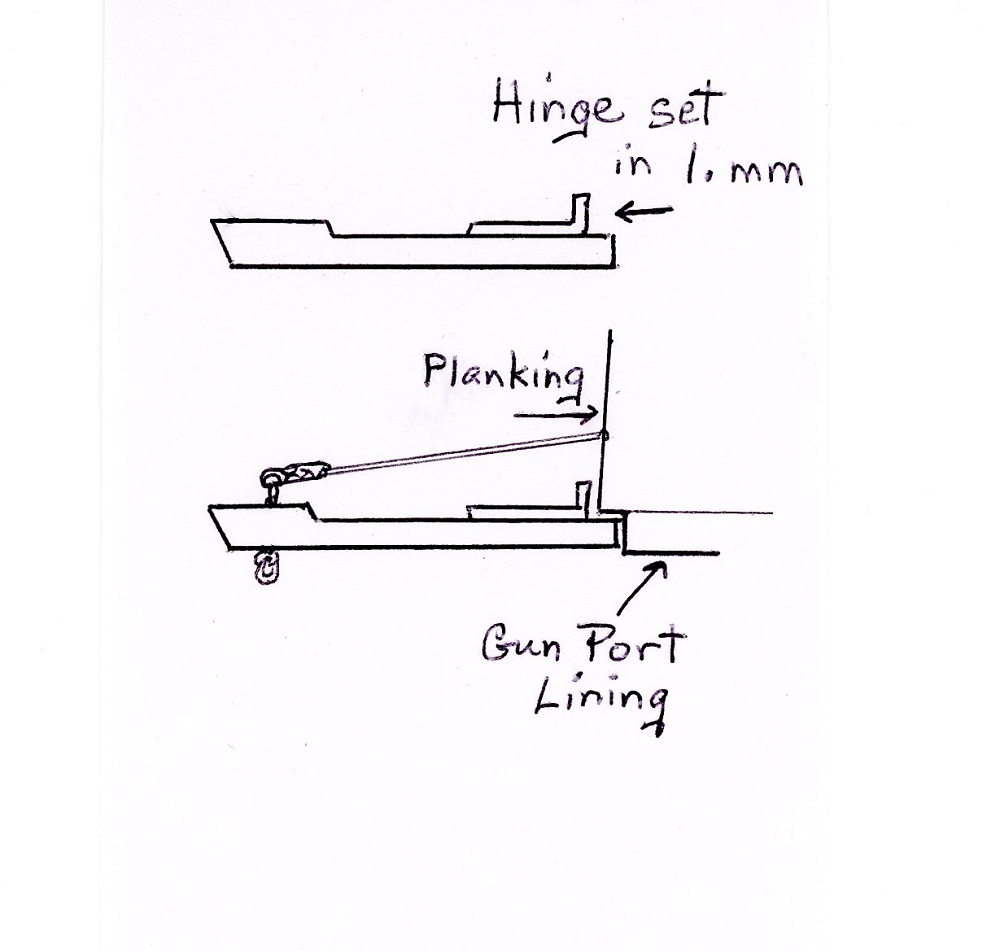
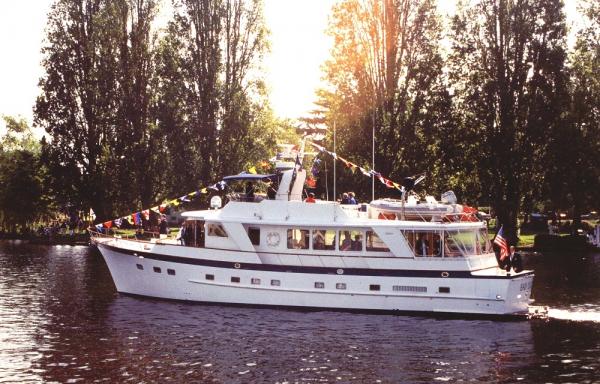
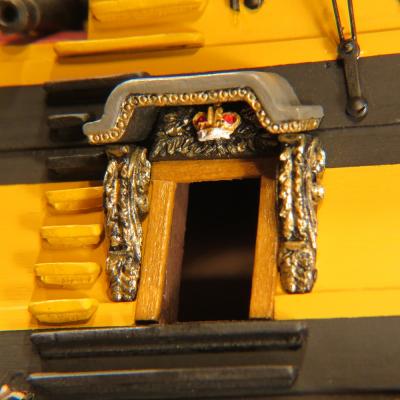
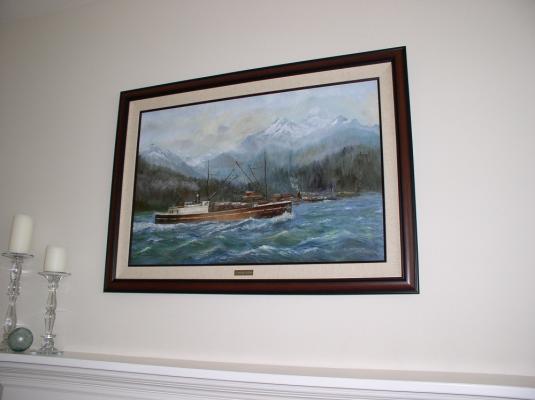
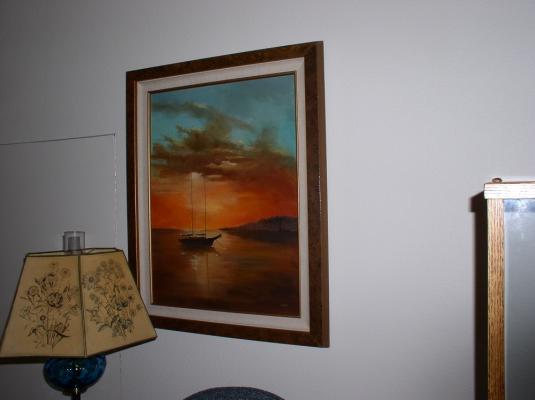
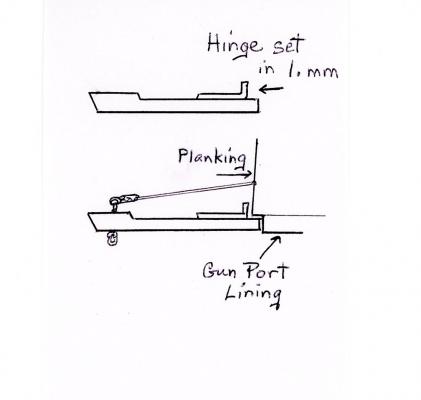
Floyd, You're on for the christening, but don't get too excited. I'm guessing another year with all the yards and booms to go. Just getting to the boomkins (I was afraid I would knock them off before this). Then little details, anchors, etc., etc. In the mean time, the "Far Out" is supposed to be in "spit and polish" condition for the Seattle Opening Day celebration May 4 for the real admirals. However, with all the rain, I may not even get to the varnish. Photos: A previous Opening Day, and where she'd like to be. Kevin, For the Captain's entrance canopy, I used Model Master Flat Natural Grey Acrylic. Very similar to what you did, just because it looked right, plus English Oak stain on the frame. Mark, Thanks for your concern. Appreciated by Judy. All went well today, although I'd rather have a knee rebuilt than have a shoulder replacement. John, I can't pronounce "mate" the proper way, but the meaning is the same, and thank you. Popeye, Augie and Sjors: I'm impressed with true craftsmen who can take a piece of wood or metal and turn out a fine fitting. Not my forte. I think of ship modelling as three dimentional art. Tried oil painting years ago, but gave it up when I was constantly interrupted with emergency calls. My dad ran a small fleet of wood frieghters carrying news print from the pulp and paper mills on the British Columbia coast to Seattle. When he retired, I gave him this from a postcard size photo. The "Border King" in the foreground, a small logging operation on shore with a sawdust burner, and the coast range in the background. A quiet anchorage. Money trees and Cat Tails. Abandoned fish trawler on the BC coast. Michael, You are too kind. I will acknowledge that the present ship is turning out better than the first. Keith, Thank Tammy for me. Clearly, she has good taste. Lawrence, On the gun port hinges, they were bent with simple forcepts. However, the following telephone pad drawing explains. The hinges were glued to the lid, setting them back 1 mm. to equal the inset from the ships planking to the gun port lining. This resulted in a secure fitting for glue to retain the lids with the hinges in contact with the hull. Dave, The launching sounds better and better. Cheers, Gil


- 755 replies
-
- 1
-
-
- finished
- caldercraft
- (and 1 more)
-
Keith, I responded to your posting, posted it and it dissapeared into the ether. I'll try again. Imagine if one was a farmer, Shanghaid by a press gang, and then sent up the rigging. Scary stuff. I'm certainly not the expert, and Harvey's response is probably more informative. Pine tar from an area in Sweden (Stockholm tar) was used between and over layers when major lines, eg. stays and leading shrouds, were wormed, parcelled and served, producing a dark colored line, while Manilla hemp was bleached by sun and salt. Soft lay hemp was very flexible and easy to splice or run through blocks while hard lay hemp was quite stiff. I've never used Pine tar, but did use Tung oil and Linseed oil on our old sailboat in the 50's. What can I tell you, a teacher of chemistry, about Cu and Fe. I think about the time the Constitution was built (1797), something over 300,000 copper nails were used for the copper sheathing. Kevin, I posted on your suggested site. Great idea. It took 3 photos - the model was too large. Len, You're very kind. I consider it a privilege just to be on this great web site. Your Avatar makes you look about 30. You must have discovered Ponce de Leon's Fountain of Youth. Blue Ensign and Grant, Many thanks. Rigging is probably not that exciting unless you're in the midst of doing it yourself. And visualizing a mummified Andy or Sjors in the rigging is sobering indeed. Cheers, (I think) Gil
- 755 replies
-
- 2
-
-
- finished
- caldercraft
- (and 1 more)
-
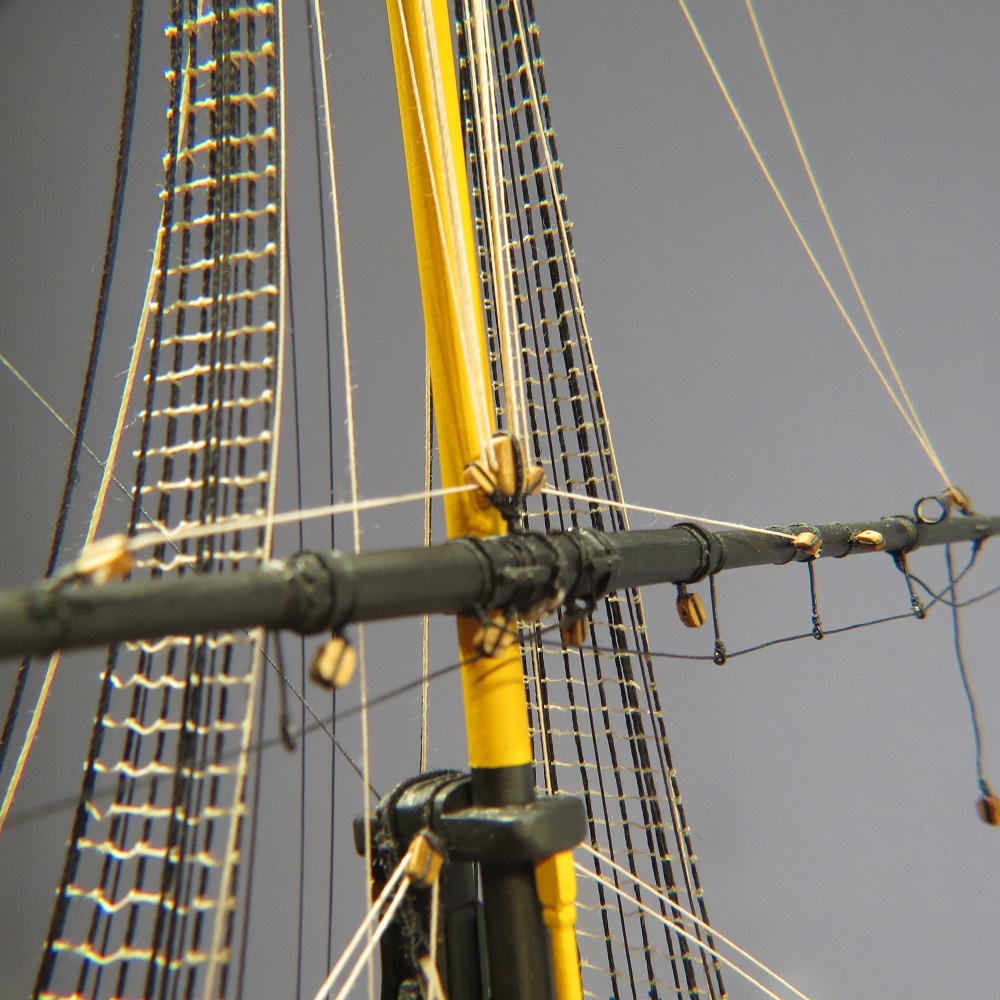
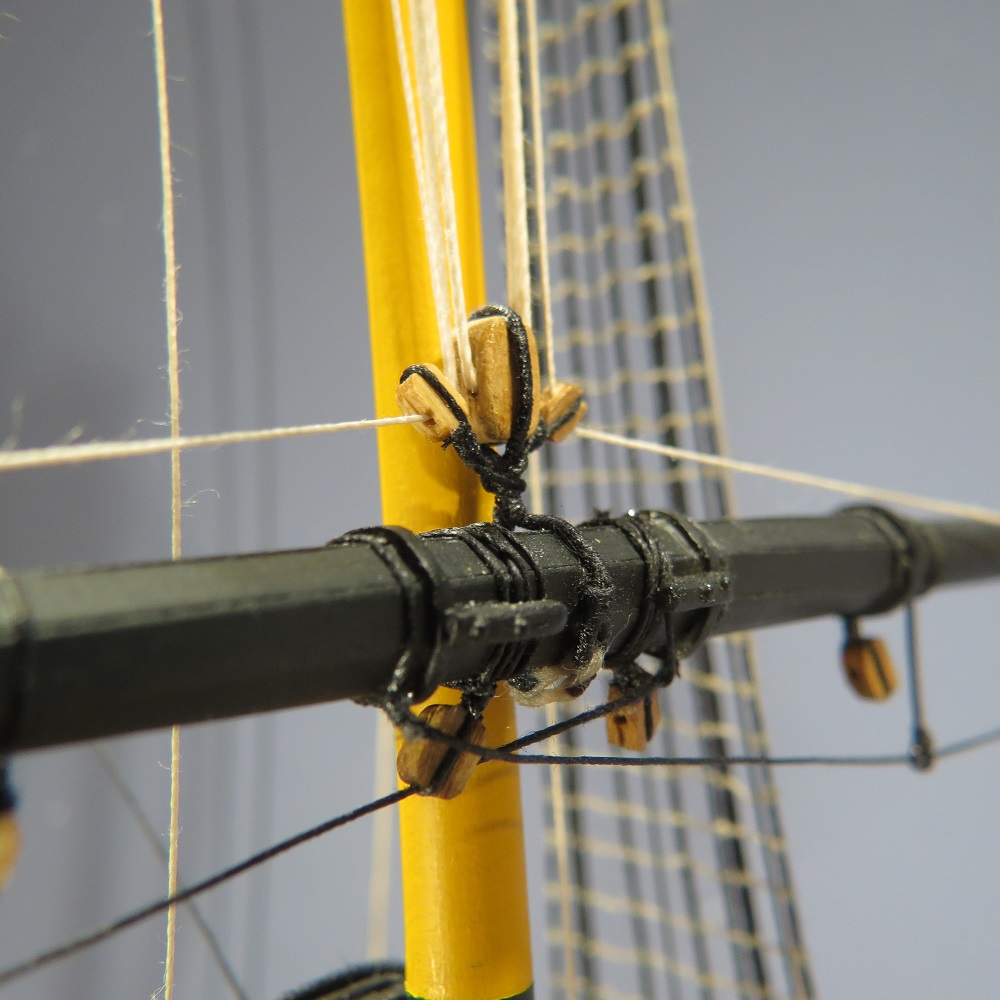
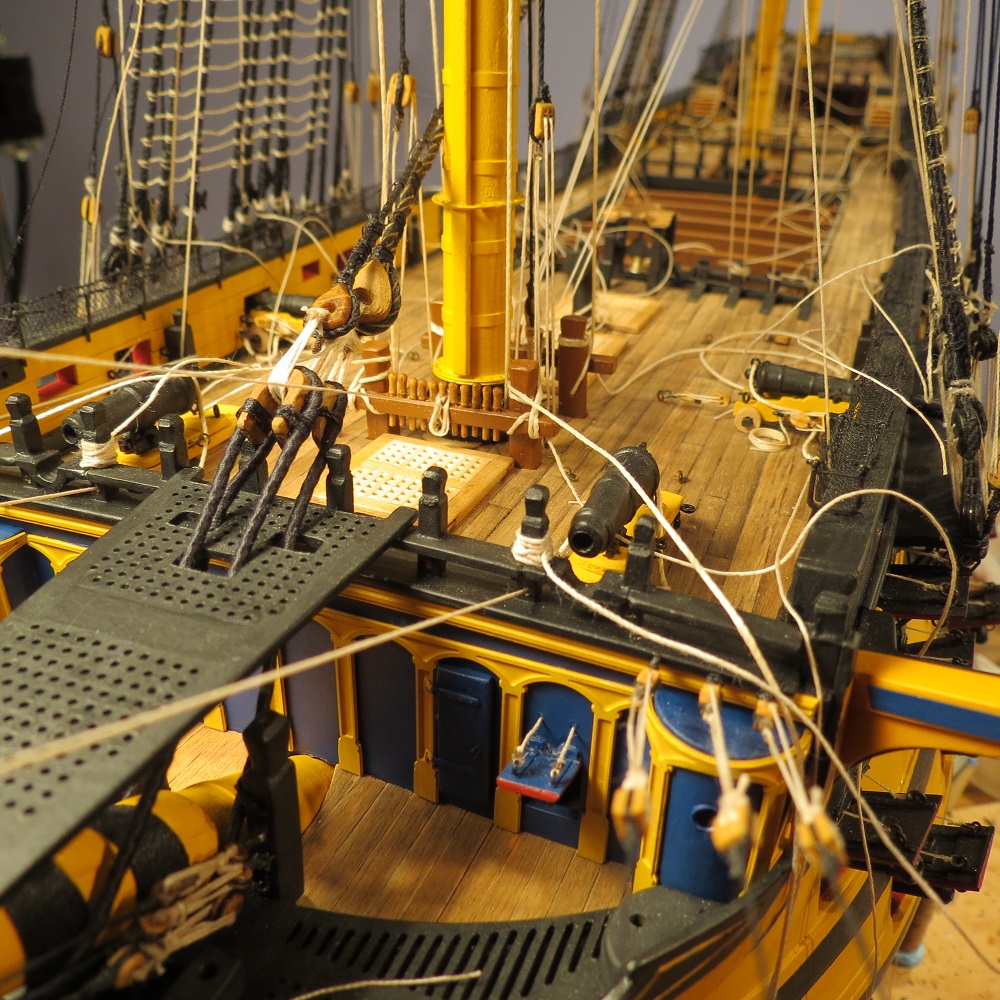
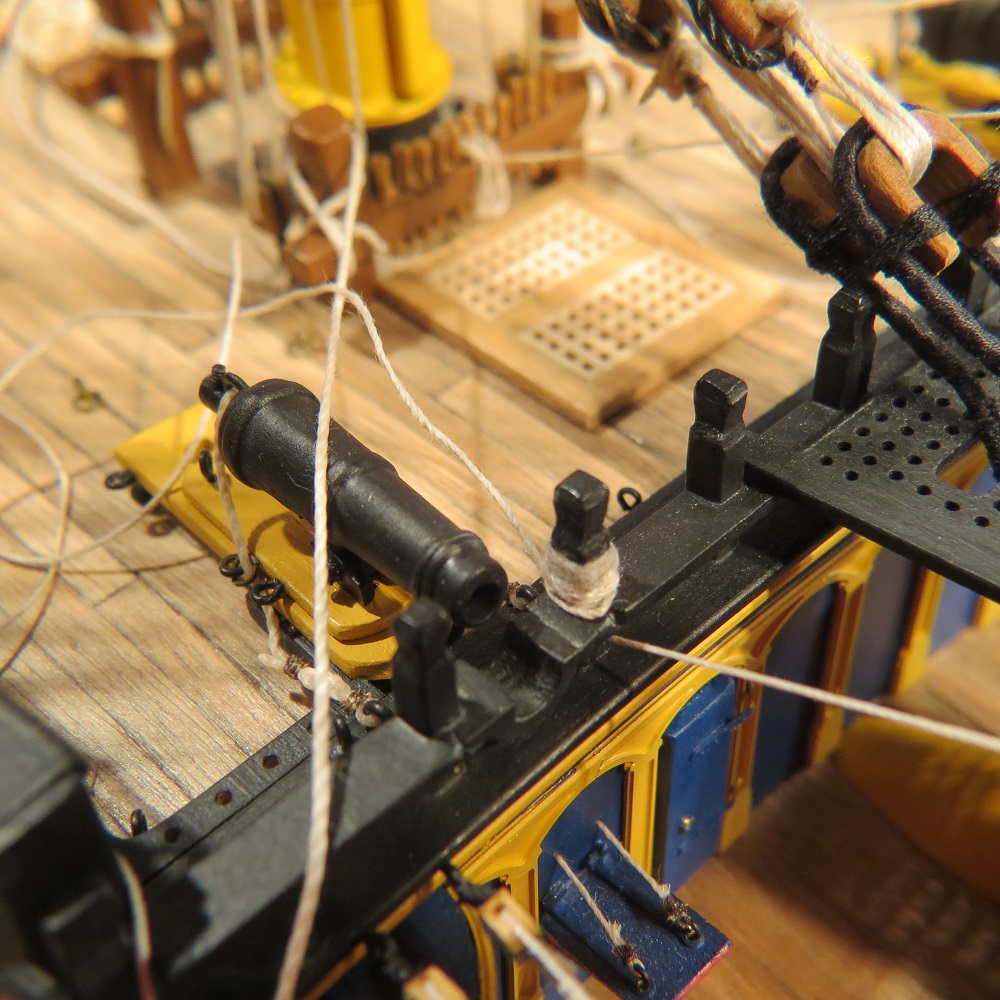
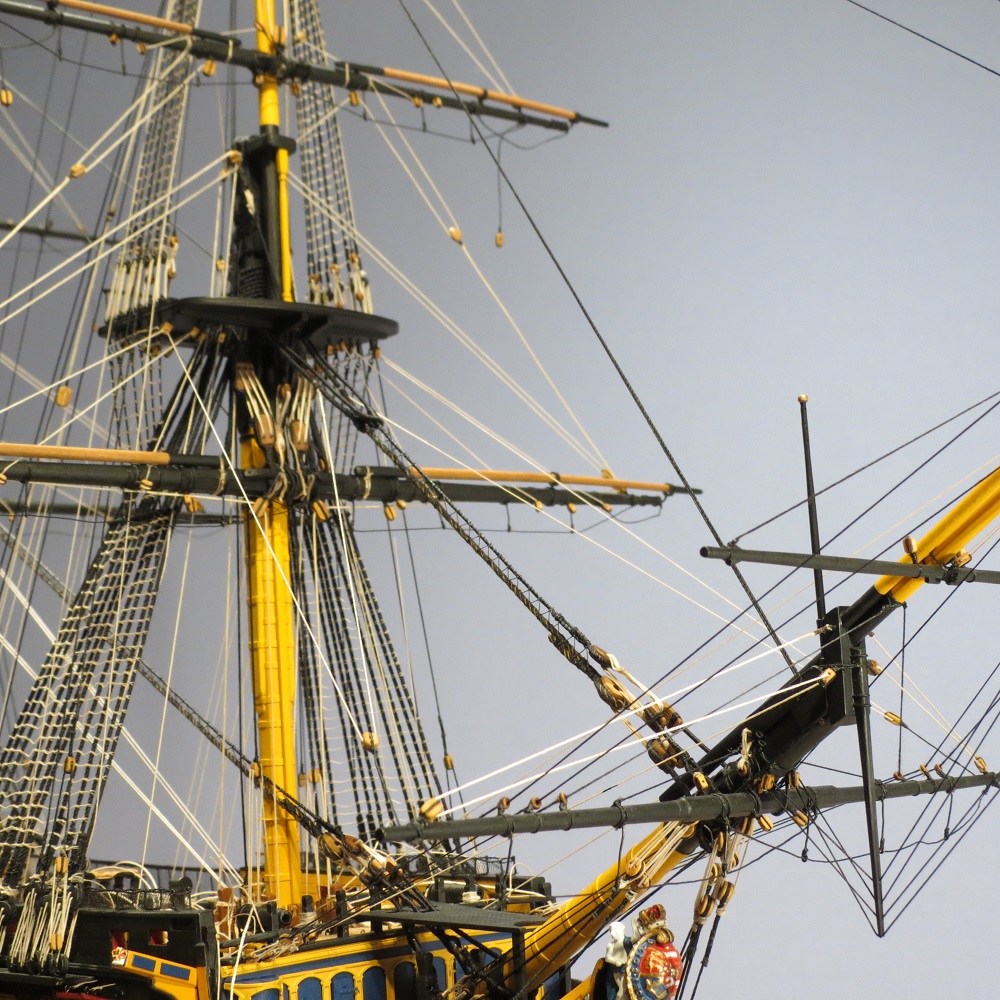
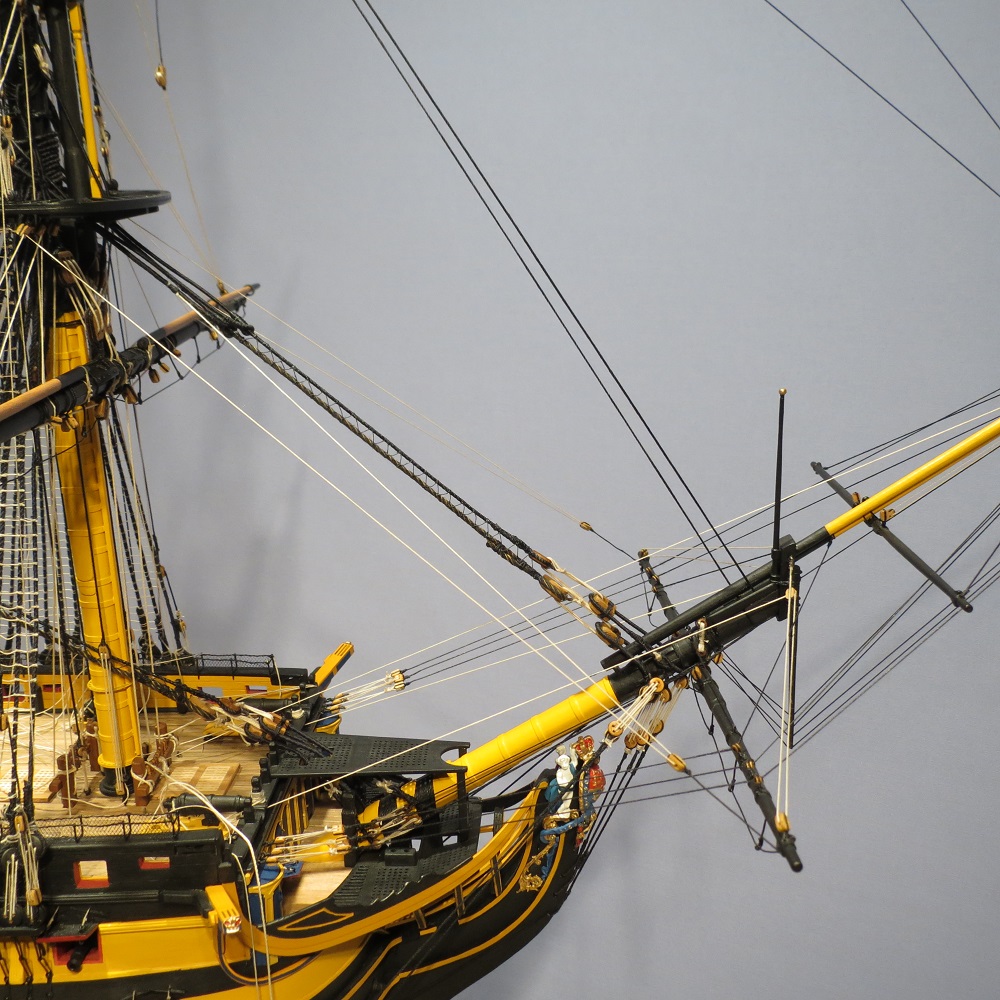
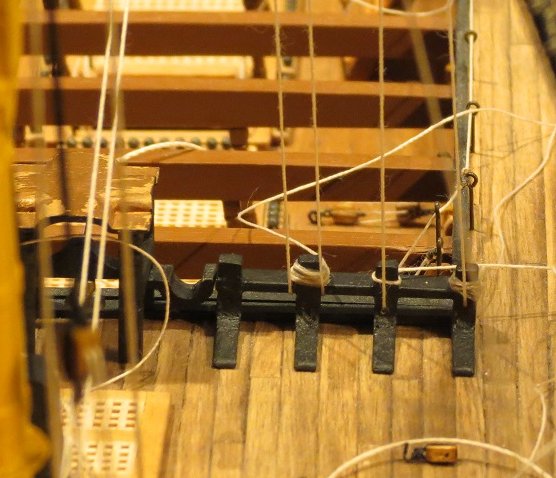
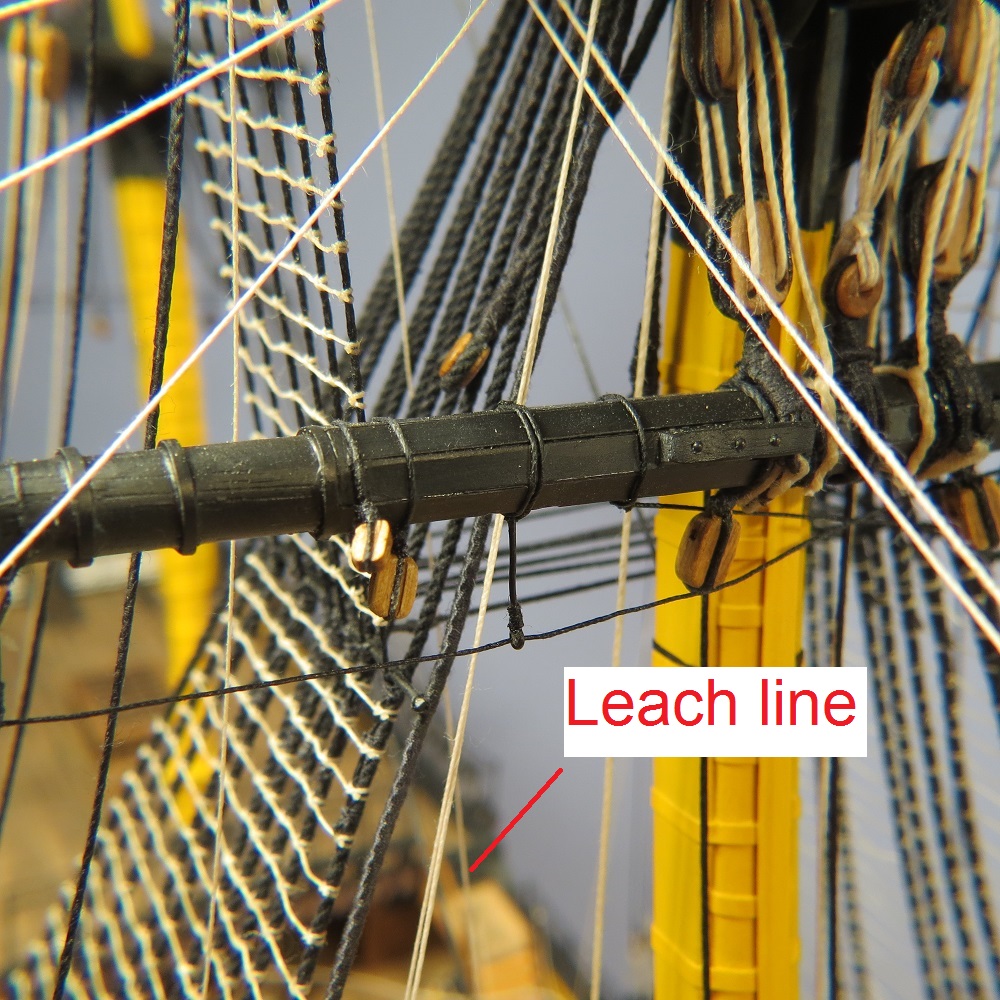
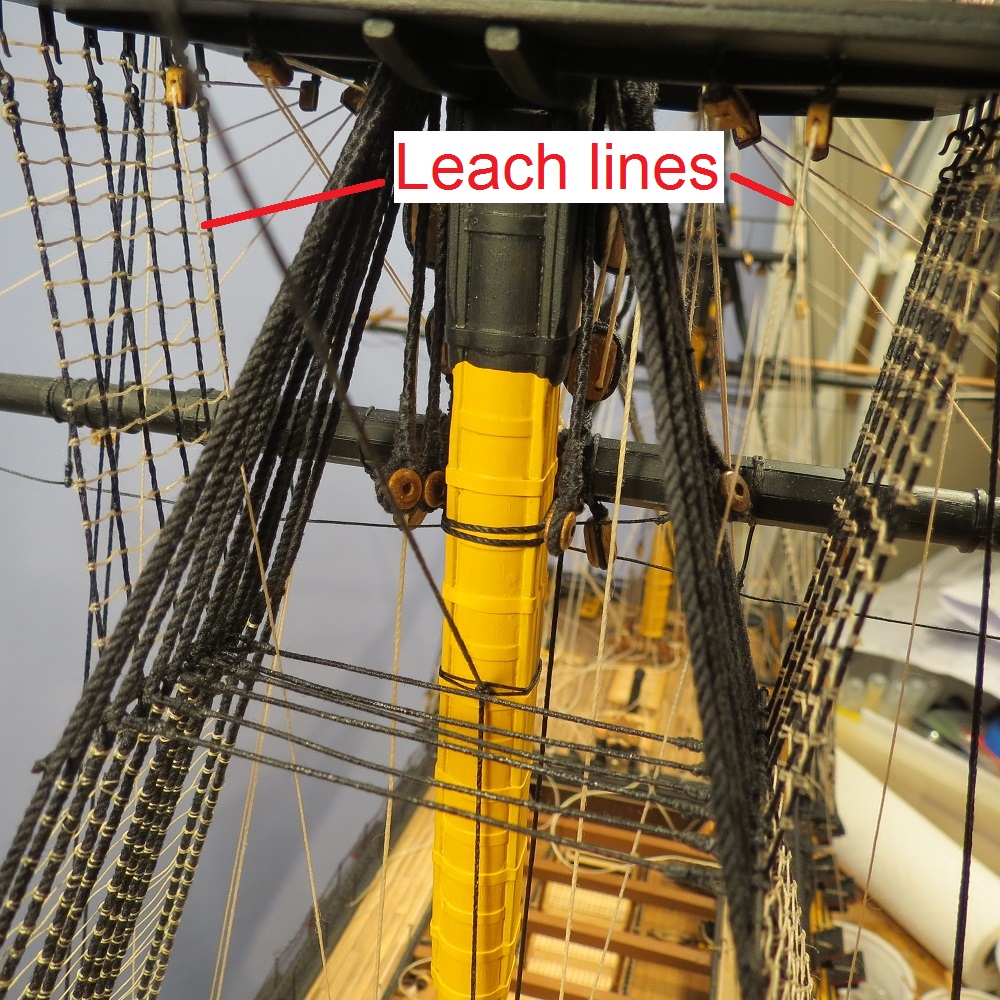
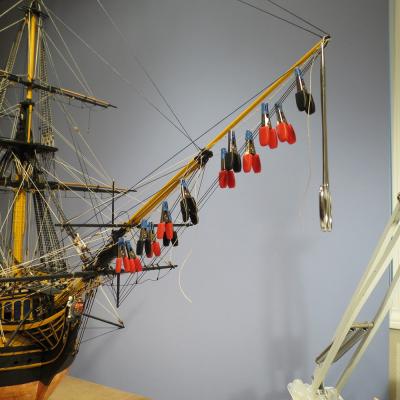
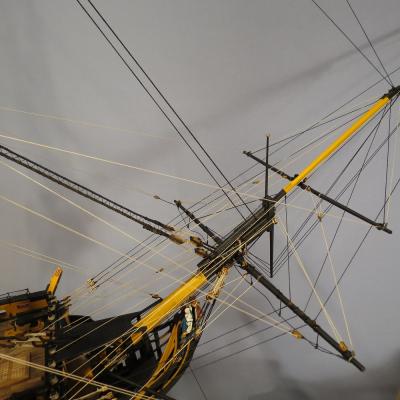
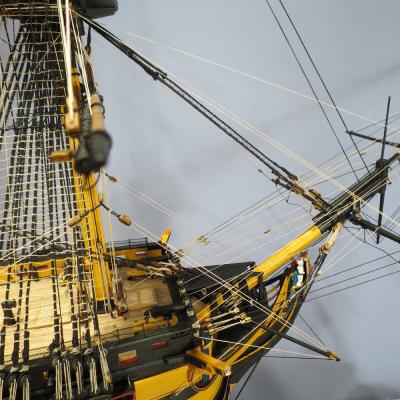
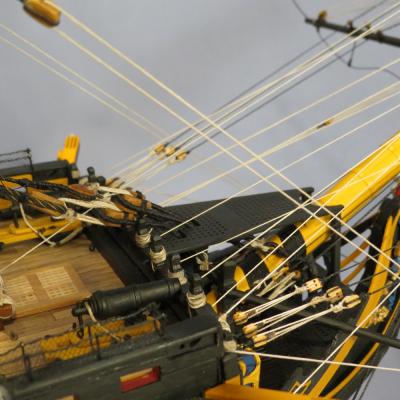
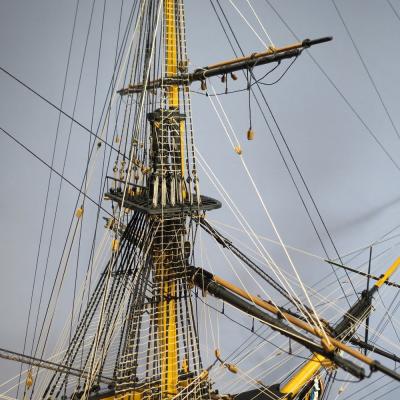
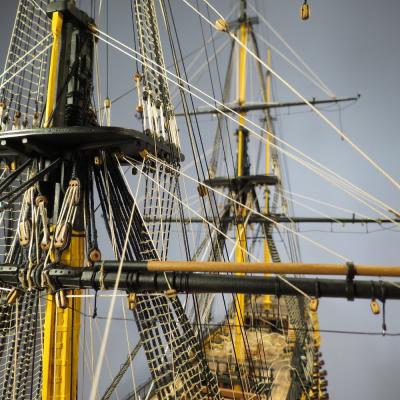
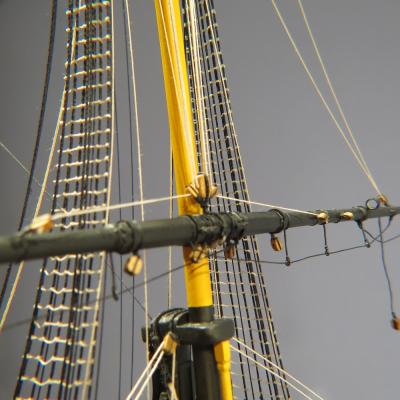
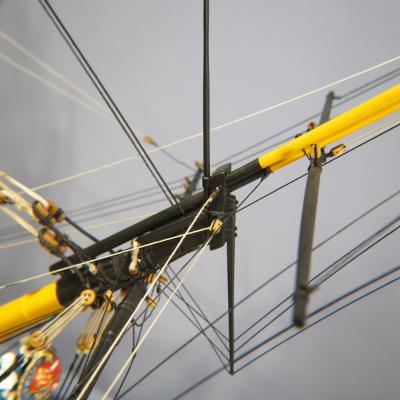
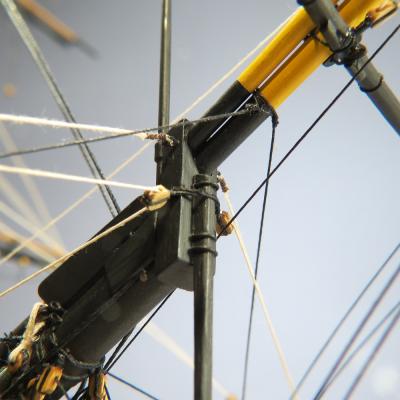
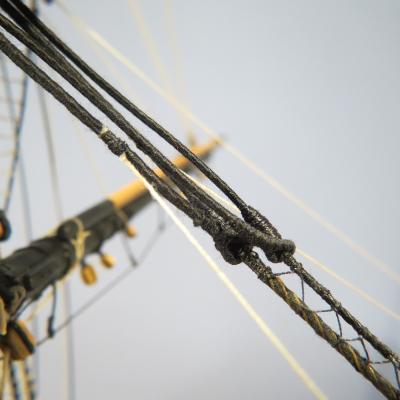
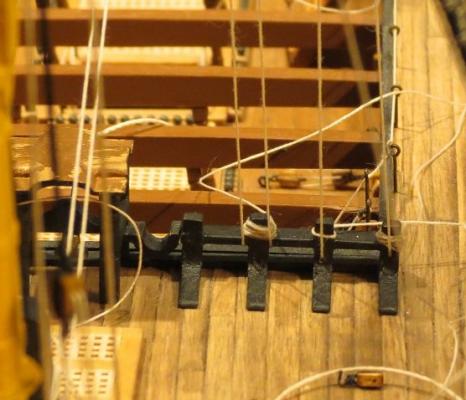
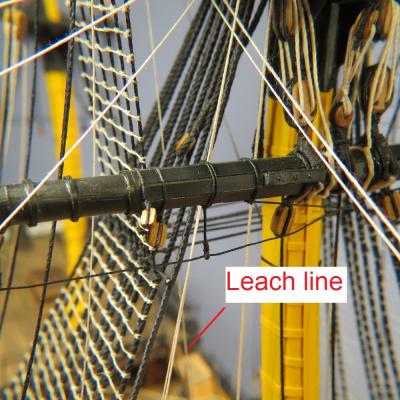
As one approaches the smaller lines such as bunt lines and leach lines, things get congested and a bit confusing, requiring muliple sources to put things in perspective. Even smaller lines such as reef lines and stuns'l rigging will likely be omitted to avoid clutter, however that decision can be made later. Included in this post are: the Foremast lower yard bunt lines and leach lines, Mainmast lower yard bunt lines and leach lines, Main topmast yard bunt lines, Spritsail yard lifts and Spritsail yard braces. Left to the next post are: the Spritsail bunt lines, Spritsail top sail yard braces, Spritsail yard lifts, Spritsail top sail yard lifts, Spritsail yard sheets and clew lines, Spritsail top sail Yard sheets and clew lines, Netting at the bees and Knotted rope walk. So many lines, so little time. The port Foremast yard bunt lines and leach line can be seen. While making the mast top, I had a senior moment and placed two single blocks where there should have been double blocks (for the bunt lines). I can attest that it's more frustrating placing bocks under the mast top at this stage than when one could pick up the mast and turn it over. (Mistake number one). The bunt lines pass behind the stuns'l boom, through two blocks under the top and terminate at the forecastle breast beam supports. The mainmast yard buntlines are similar to the foremast yard buntlines but terminate at the main top bowline bitts (aft of the foremast). The leach lines leave the blocks at the top, pass through the shrouds and catharpins to the forebrace bitts (aft of the mainmast). The Main topmast yard bunt line passes through the yard block to a block attached to the lift block. The plans specified that the bunt line blocks were to be attached to the top of the lift blocks. Having missed that, I attached them to the strop at the base of the lift block. However, I suspect they might have been rigged this way at some time during her career. (mistake #2). The Spritsail yard lift originates at the jib boom cap, passes through the lift block on the yard, returns to the block at the cap and terminates at the timberheads at the beakhead. Finally, the braces for the spritsail yard are seen in the first two photos.The spritsail yard braces originate at the forestay collar. The brace was seized to the collar as a typical splice, and then the splice itself seized to the forestay collar. The brace then passed through the brace block from the yard, through two blocks under the top and terminates at the forecastle breast beam supports. Ah, I see the eyes glazing over. Enough rigging for one post. Cheers, Gil


- 755 replies
-
- 5
-
-
- finished
- caldercraft
- (and 1 more)