HOLIDAY DONATION DRIVE - SUPPORT MSW - DO YOUR PART TO KEEP THIS GREAT FORUM GOING!
×


gil middleton
-
Posts
308 -
Joined
-
Last visited
Content Type
Profiles
Forums
Gallery
Events
Everything posted by gil middleton
-
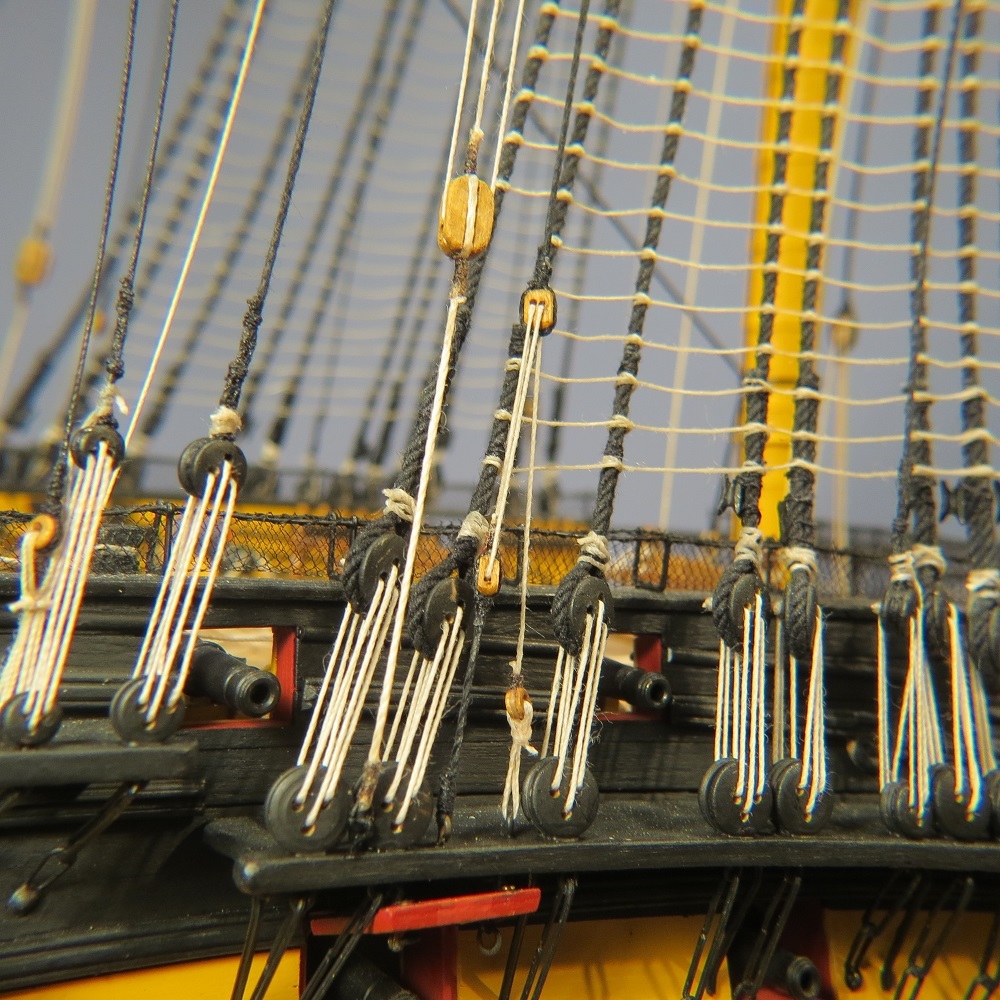
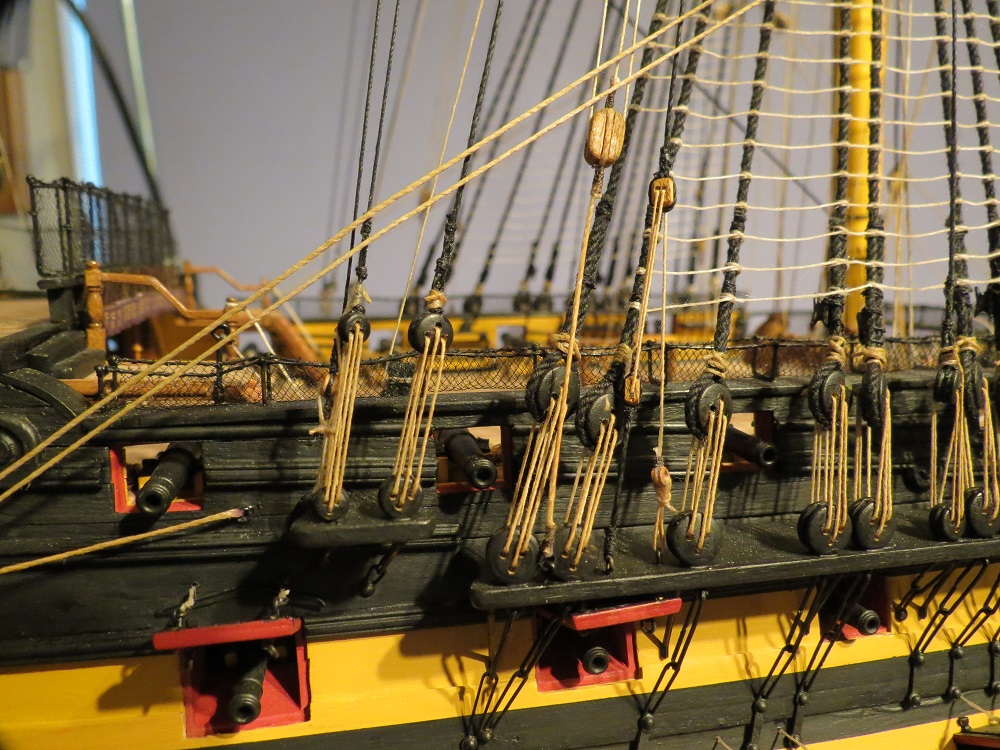
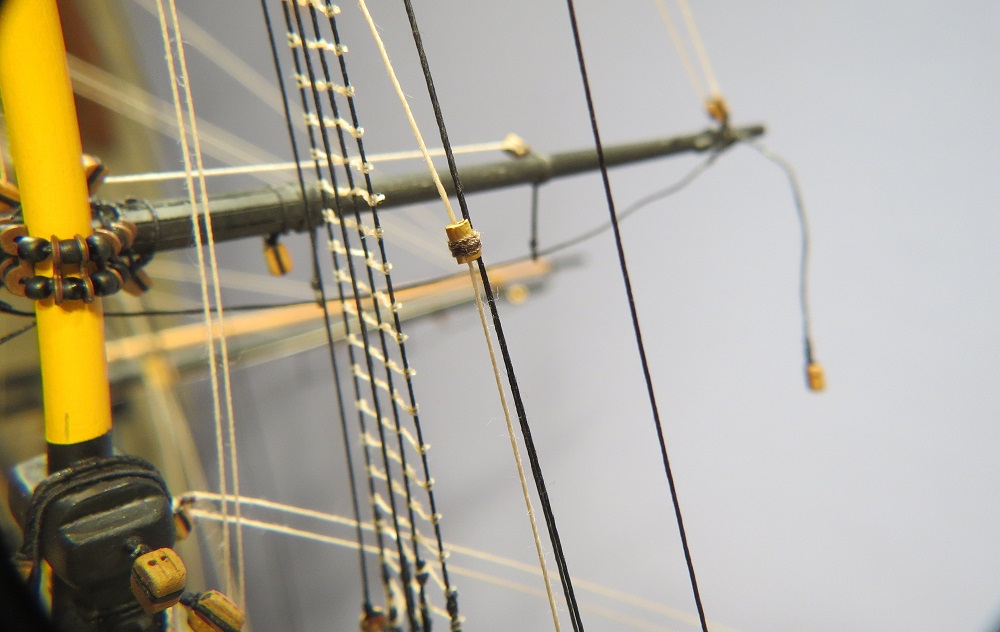
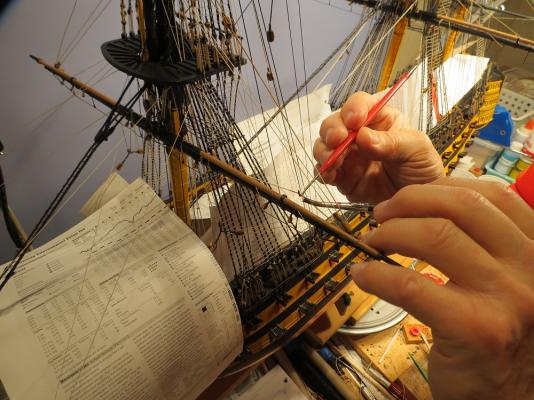
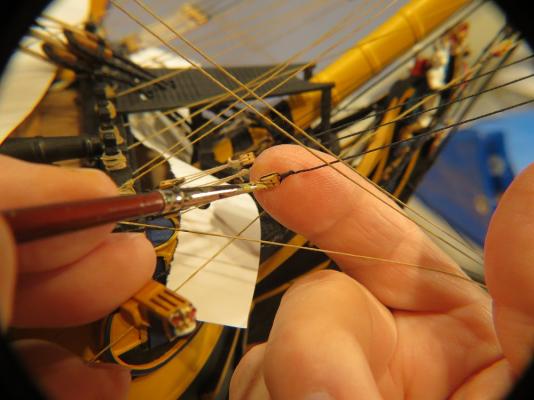
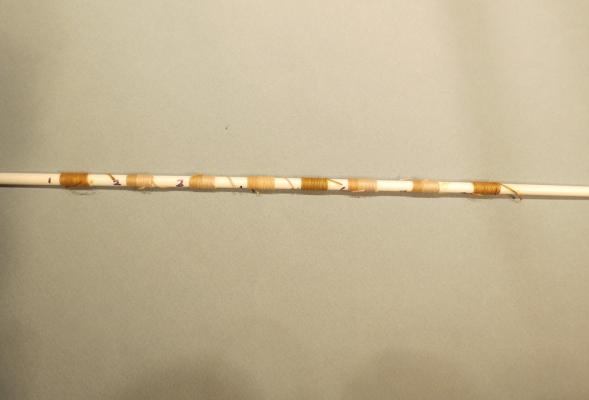
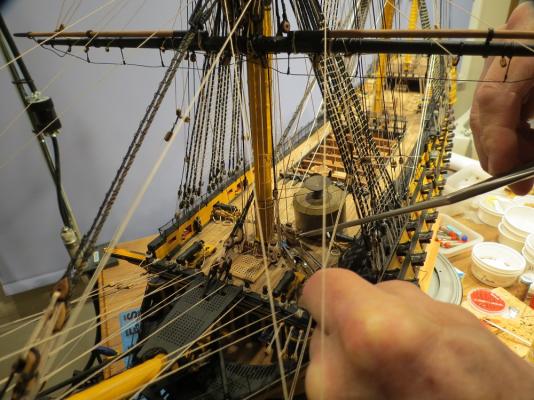
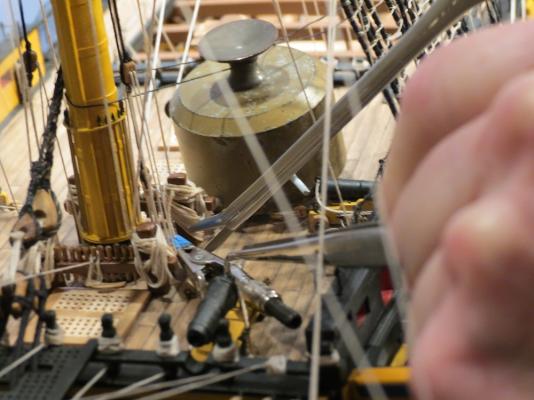
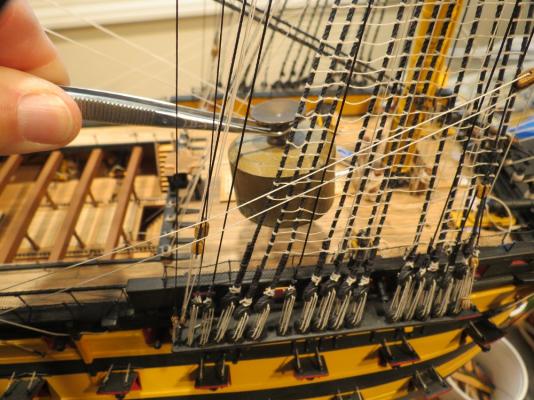
PAINTED RIGGING OR "Doing it the hard way." Hopefully most of you will never need or want this technique. You will select the desired color and pre-treat the lines before embarking on the rigging process. Having said that, when I began rigging the cannons and running rigging, I thought that the light tan or "natural" line from JoTika would work. However, the more I progressed, the lighter it appeared. In incandescent light and particularly in photos, it appeared white. Playing with white balance and color editing in the camara and computer simply introduced unwanted color hues and tints. Finally, when adding rope coils, the "white" took center stage and to my eye was not satisfactory. I've likely bored many of you with attempts to match Manila or hemp with a paint wash to paint the rigging. Why on earth mess up a pretty good model by painting the rigging???? Is anyone that dumb???? Well...................... Supplied "natural" line supplied by JoTika. C/A applied on the left, untreated on the right. However, the rigging appeared white. Paint wash selected after experiments. Masking to protect the deck. Notice on the mizzen. Starboard rigging has been painted while the port side is untreated. Using a hook to separate the line from the yard. Tiny brushes used at the deadeyes. I found it necessary to change brushed frequently for they became gummy rather quickly. The next posts show comparisons between the "natural" lines and the painted lines.


- 755 replies
-
- 8
-

-
- finished
- caldercraft
- (and 1 more)
-
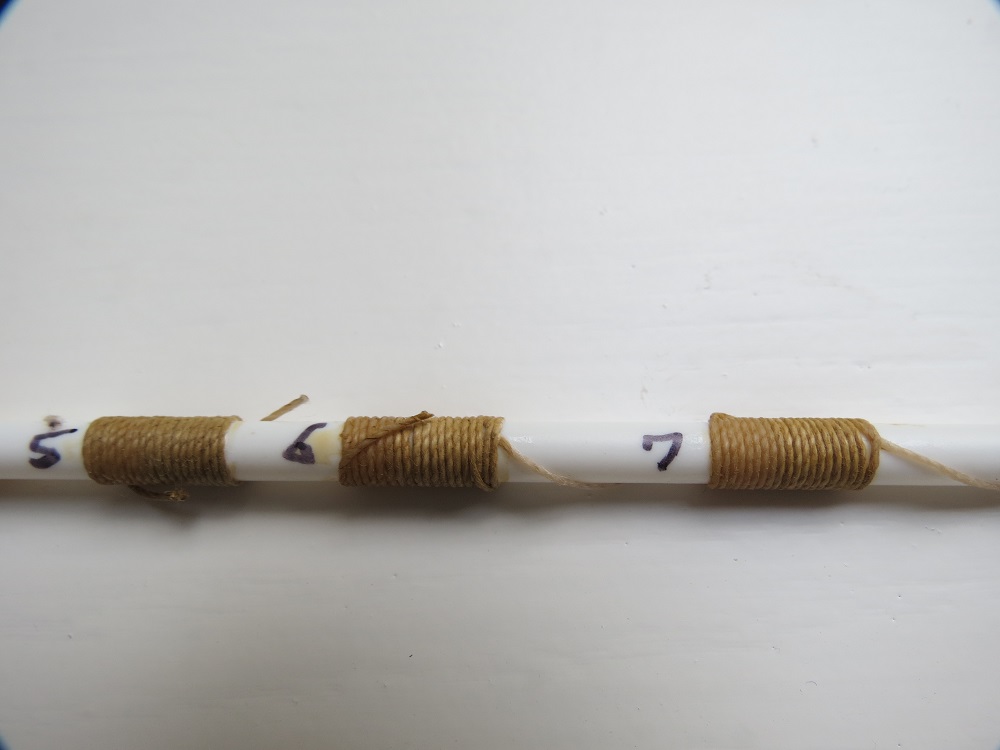
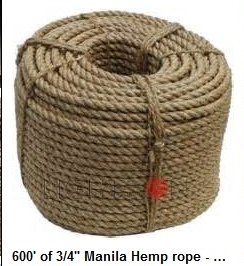
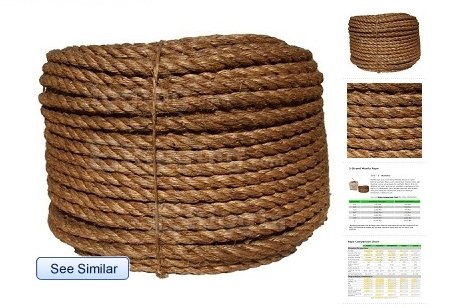
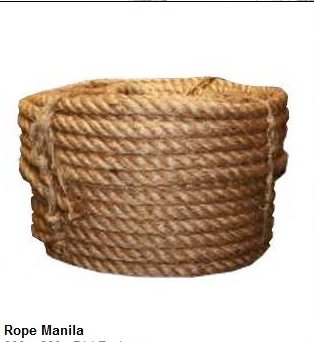
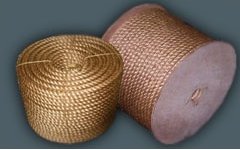
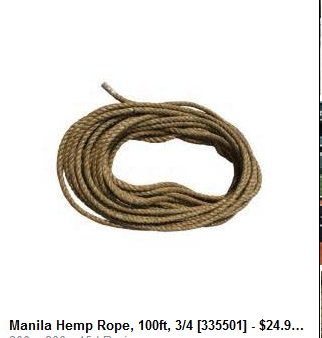
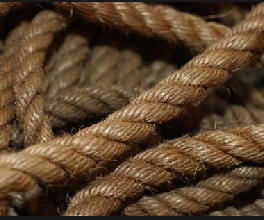
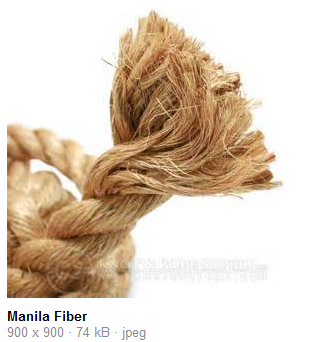
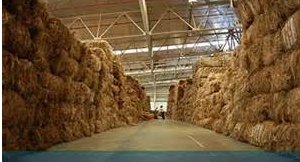
Trying to simulate Manila hemp or Hemp rope from around 1800 is difficult at best and I'll leave it to the historians of our group to advise which was used. Manila Hemp (not truly a hemp since it's made from fibers of the Abaca plant) has been the favored fiber for marine cordage because of it's strength and resistance to salt water damage. The middle fibers of the leaf stem produced colored line of the greatest strength, while the central core white fibers gave a white line of somewhat lesser strength. The term Manila has almost become generic including Manila hemp or line used in marine cordage, but also Manila plus sisal, Manila plus jute, dyed Manila, bleached manila, Manila plus polyester, synthetic Manila, decorative manila, etc. The color of Manila rope and hemp rope appear very similar. The following photos show the variation of colors beginning with Manila hemp sold for rigging. Additional photos of Manila line. Storage of Abaca fiber for rope making My attempts to simulate the color of Manila line were, I believe, a bit too dark. ( Number 5) Adding a very light white-gray seems to have improved the appearance and added a bit of life to the rope. ( Number 6) Equal parts, Brown Oak Wash (Model Master/Testors), Dust (Polyscale) and Universal Acrylic Thinner (Model Master/Testors). Cheers, Gil

- 755 replies
-
- 5
-
-
- finished
- caldercraft
- (and 1 more)
-
Hi Jerry, You raise an interesting question, but I'm not sure that I agree with the advantage of adding shrouds to the lower mast before completing the topmast, etc. It was done that way at the yard and certainly at sea, but I think the advantage goes to completing the masts before rigging on a model. First, the mast is much easier to build and align sideways and fore and aft on a work table than progressively on the ship. When the masts are placed on the ship and shrouds added, it is simple to align the topgallant masts with each other. Threading the shrouds around the mast is quick and simple. they simply need to be seized together close to the mast, with a few turns around both shrouds. If one is serving the shrouds where they go around the mast, seizing won't slide easily and must be done where you want the seizing to remain. If you are not serving the shrouds, seizing can be done at a distance and then slid into place. I do this part with a lazy susan to alternate tension on the shrouds as they are added, and a step stool so you are working in a comfortable position. You may find disagreement here, but this is the way I've done three full rigged ships and it has worked for me. Cheers, Gil
- 755 replies
-
- 1
-
-
- finished
- caldercraft
- (and 1 more)
-
Colin, I'm not much help regards the bulworks at the forecastle. Like you, I hadn't seen recent photos or drawings showing these, but accepted JoTika's statement that they were there at Trafalgar. On the other hand, they showed panels on the poop deck that remained after the caronades were removed, however I did not add these for appearance sake. I look forward to following your build. Alan, I also served on a "stone frigate," HMCS Discovery in Vancouver, teaching Sea Cadets seamanship. Looking forward to seeing the process on the "Bellerophon" from an engineer's viewpoint. It has to be better than my "seat of the pants" approach. Popeye, I looked back at the Nordkap and Cux 87. A wee bit less rigging than the Victory, but fun to compare. Cheers, Gil
- 755 replies
-
- 2
-
-
- finished
- caldercraft
- (and 1 more)
-
Popeye, I also clamped a second light to the work table, which then began to fall towards the model. Quick reflexes saved the day. I'm much more careful in mounting lights now. Tell me more about polished hemp. Sounds interesting. Alan, Many thanks for the BZ. (I'm old enough to have learned it as "Baker Zebra" rather than Bravo Zulu). I tried but could not make out the ship's badge. As a midshipman, I trained aboard HMCS Antigonish and HMCS Sioux 1951-1954. Have you started a build log? With your engineering skills, it should be a winner. Cheers, Gil
-
Hi Modelman, I looked for your build log but couldn't find one. By all means, post a build log of your "Victory," We're all learning from each other, and for any question, there are a host of modelers more experienced than ourselves willing to help. Plus, one makes friends from just about everywhere. Cheers, Gil
-
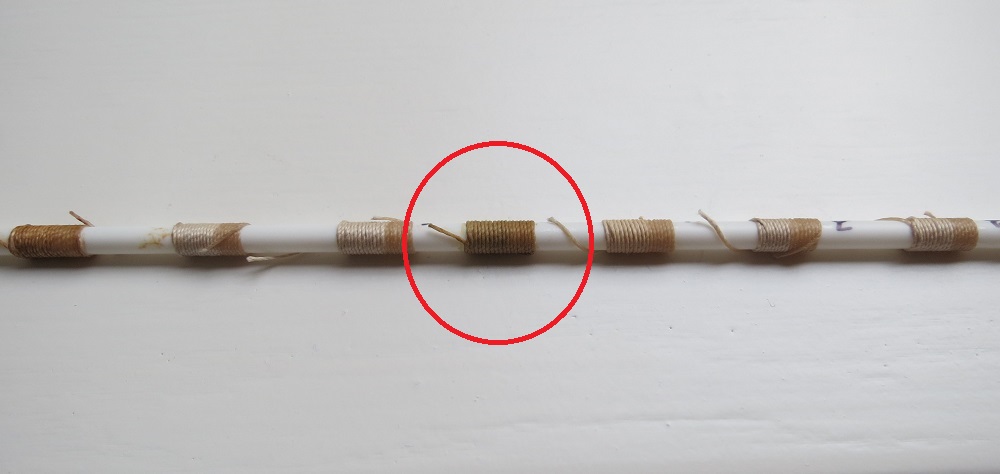
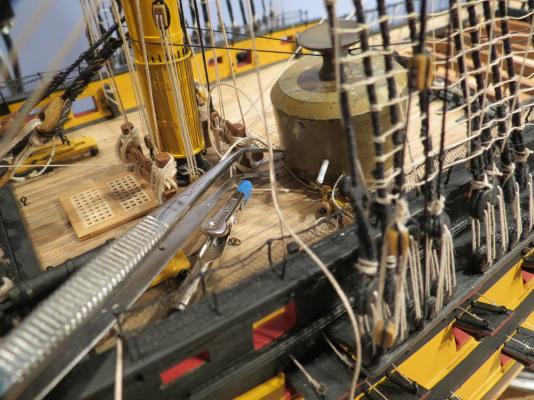
Thanks guys for the helpful comments. Popeye, As the TV add says: "You've got it." From here on I'll pre-treat the lines. It will be interesting being a paint, but as a wash and very dilute, it may not effect the flexibility as much. I'll tell you later if I discover problems, flaking, etc. Mark, I rarely allow flash because it changes the entire color spectrum. I think it is likely as Daniel suggests, that the camera brightens the line compensating for the darker background. Perhaps our cameras are getting too smart (Is it time for a professional photography course?) Daniel, The effect on hanging ropes will become more apparent as I get further along. This is all new ground for me. I haven't noticed the wash making the fibers stand up. In fact my early observation is the reverse. The line looks better than the untreated line. (The third photo) The following photos show the major color changes with different light. 1. Taken with incandescent light 2. Overcast daylight The third photo to judge the effect of the paint wash on the line.
- 755 replies
-
- 8
-
-
- finished
- caldercraft
- (and 1 more)
-
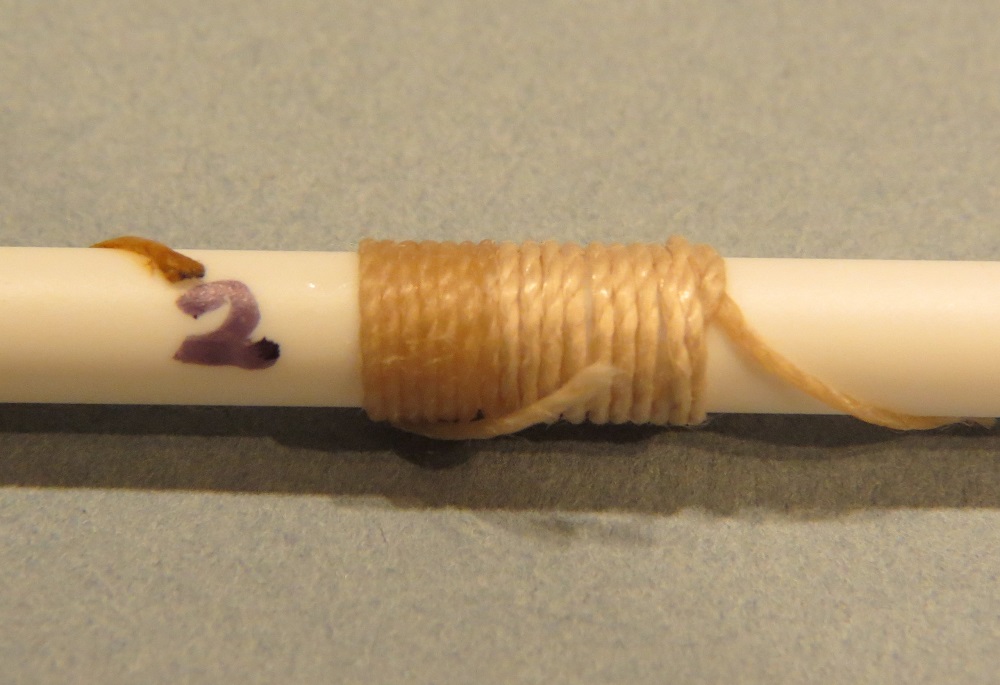
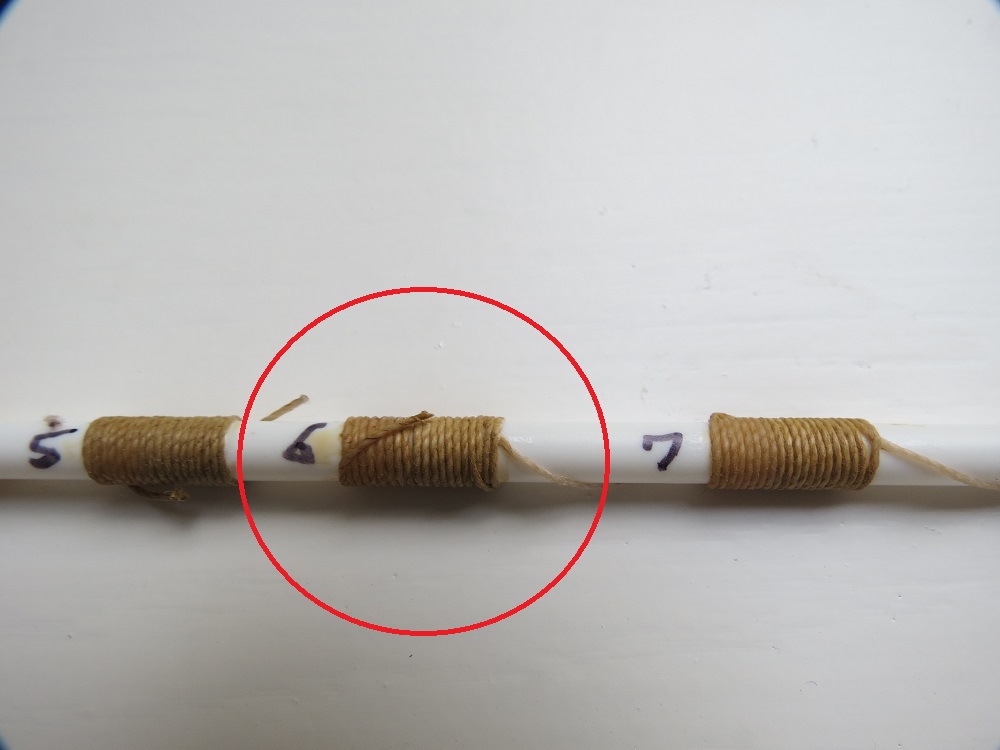
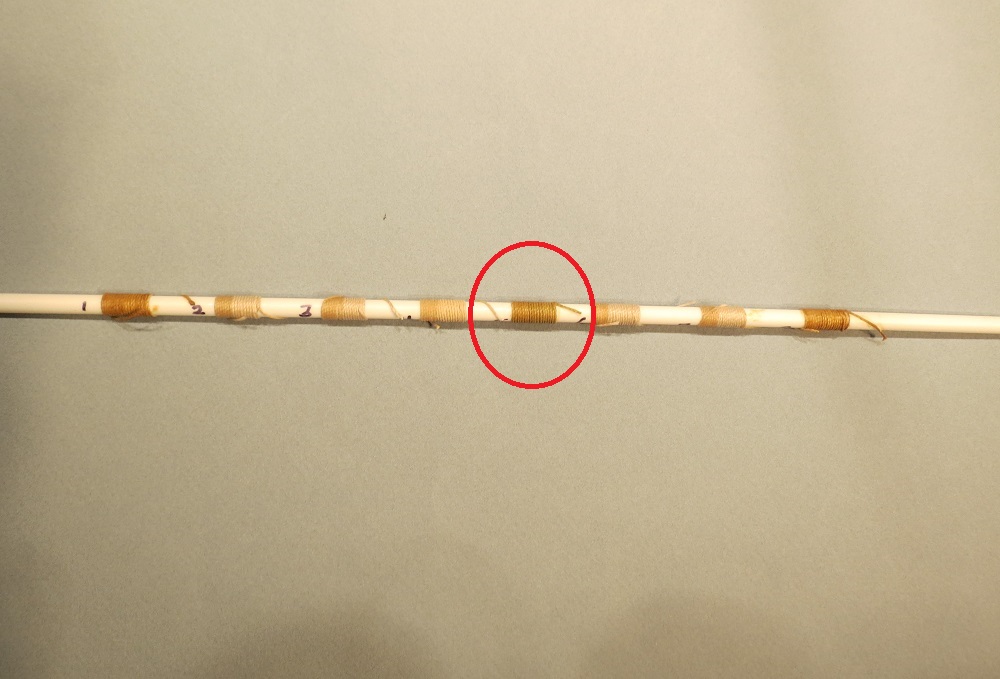
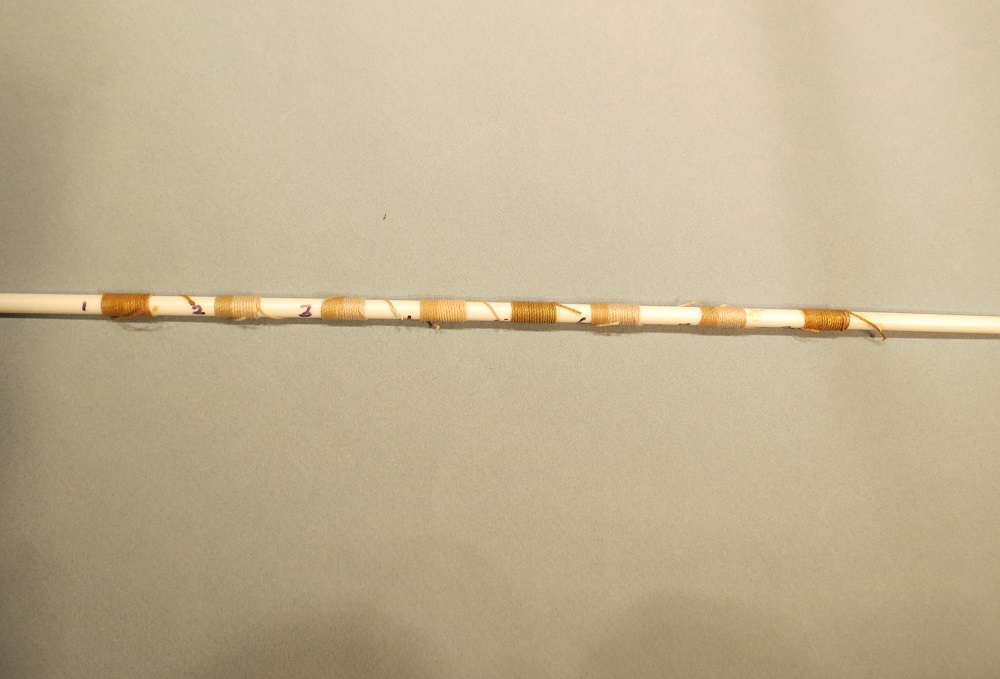
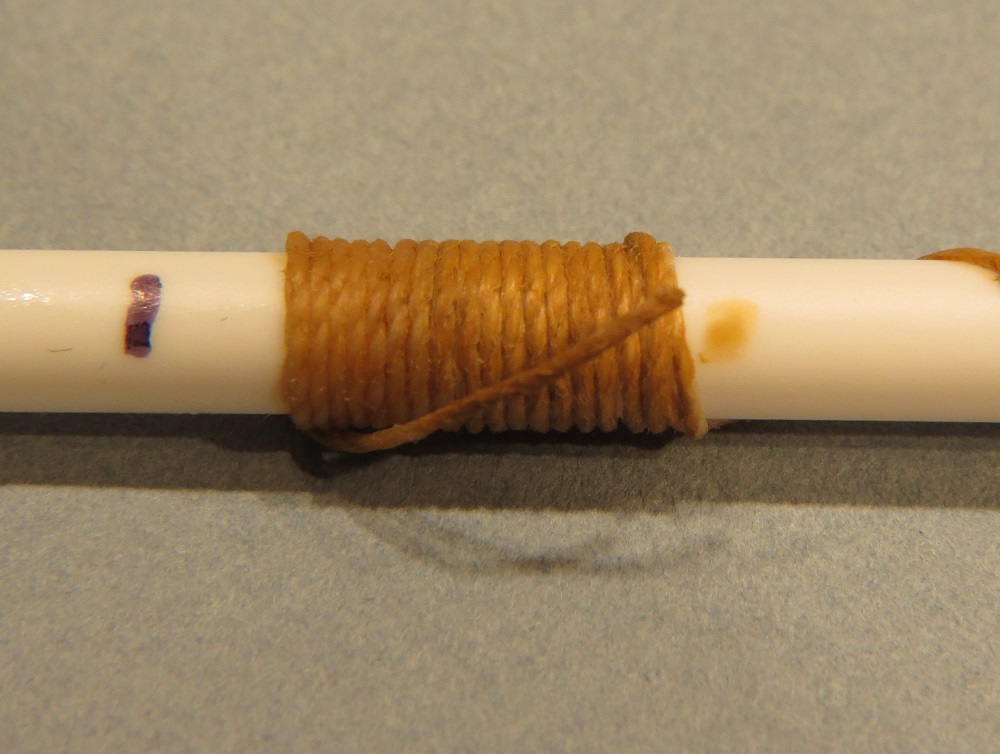
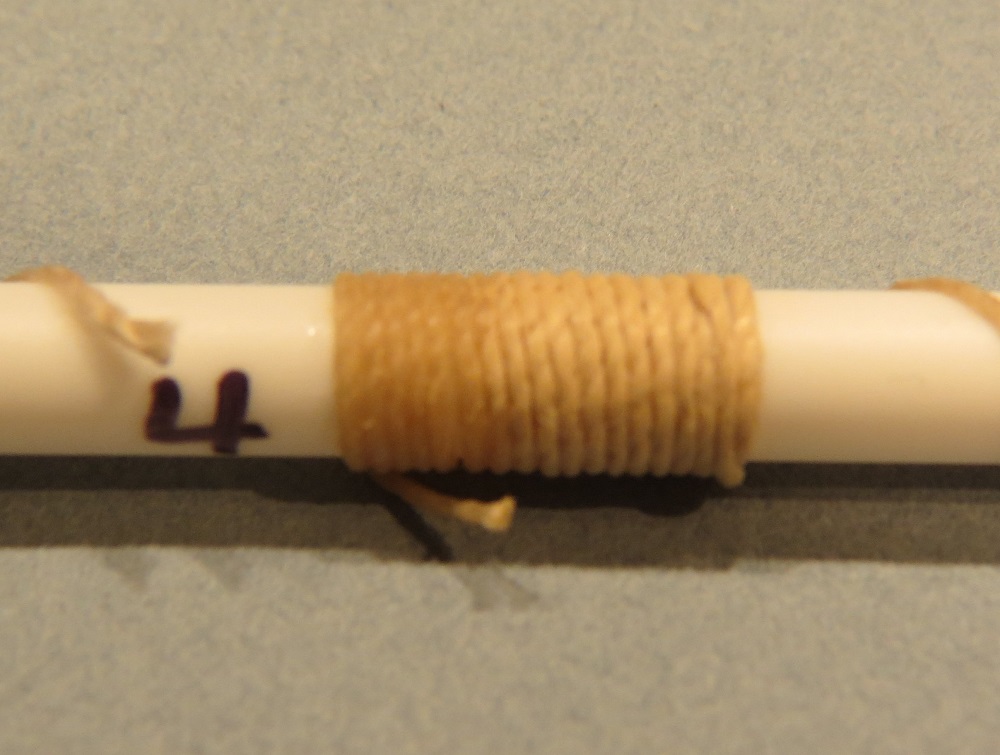
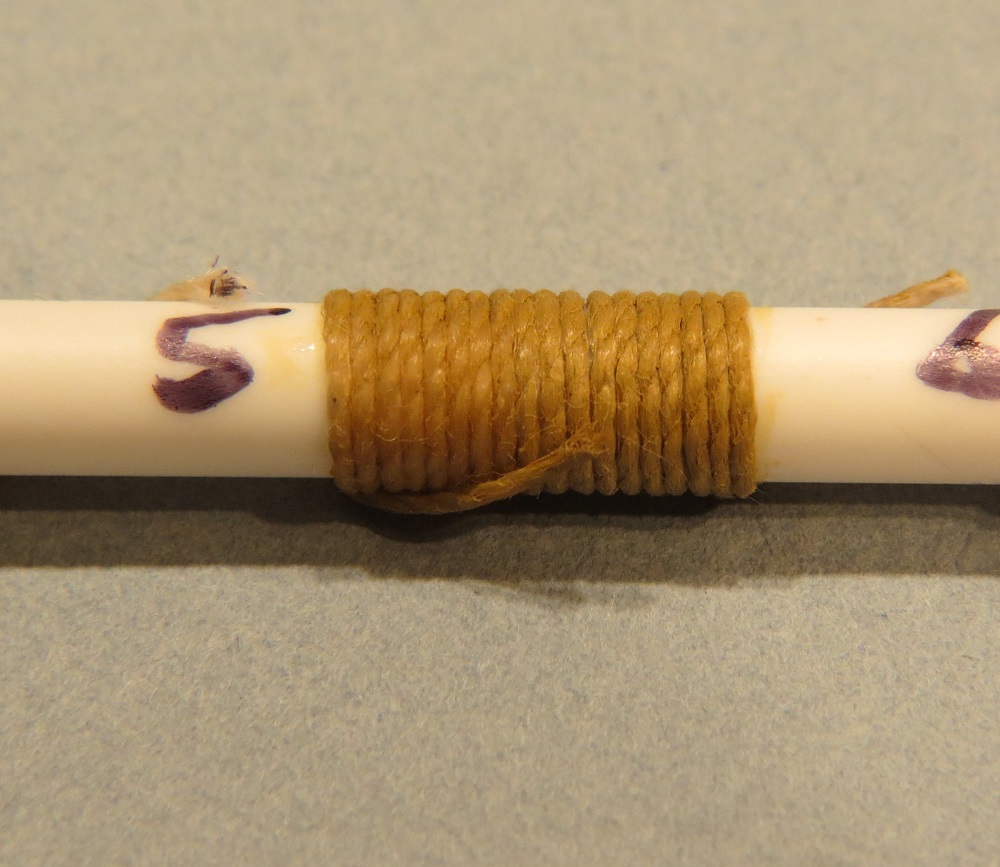
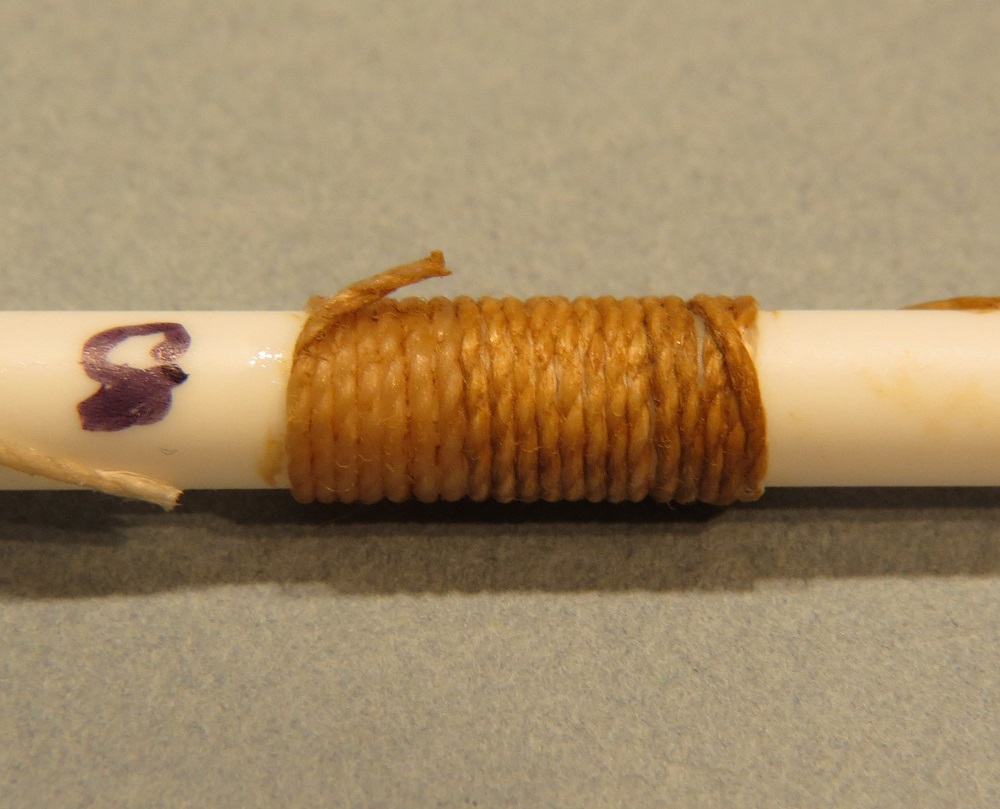
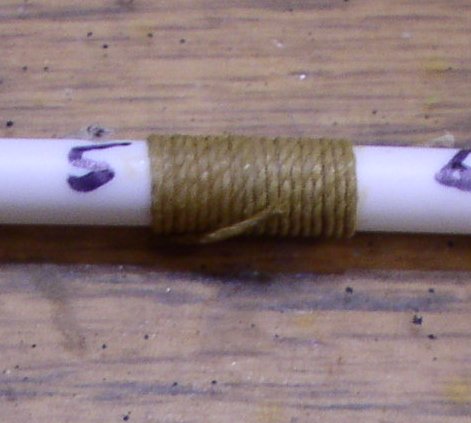
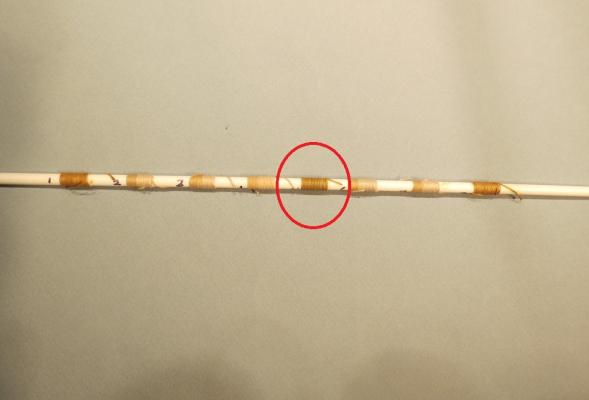
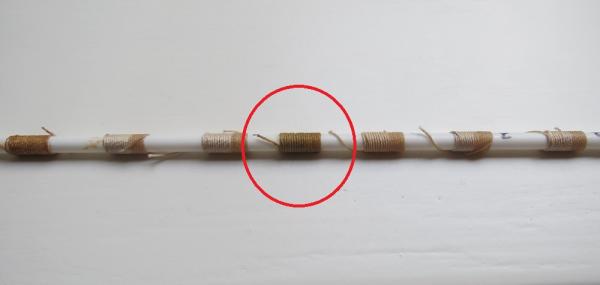
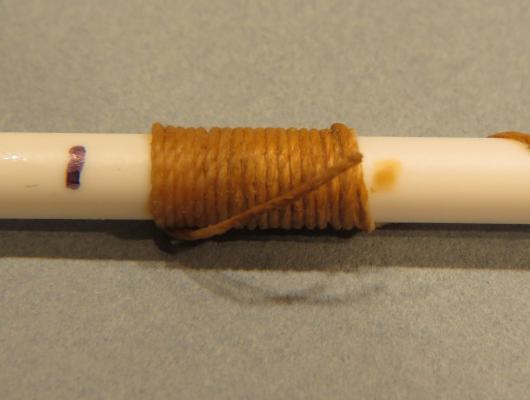
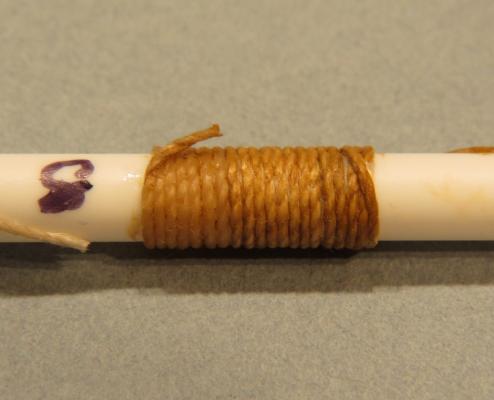
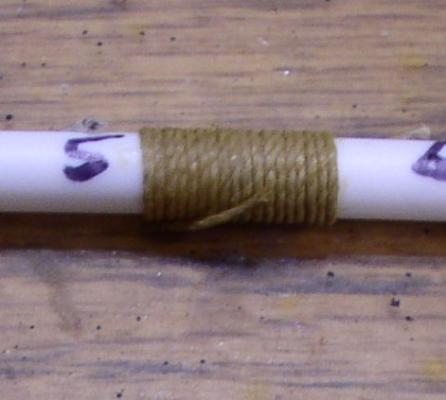
In the last post, I was not satisfied with the rope coils which appeared harsh white and became the center of attention. The line supplied by JoTika is actually a light tan, but on the model appears white, particularly in photographs. I tried different stains but the areas treated with C/A appeared very different from the untreated lines. Further, the staining was uneven. The following photo was an early attempt. Better but more work needed. Mark was kind enough to suggest equal parts white glue and water with stain and a couple drops of detergent. I also tried washes (very dilute paint) having used a light gray wash to tone down the rat lines at an earlier stage. The following is the result of testing different methods. The real message of course is treat your lines BEFORE rigging, and the observation that none of these match Chuck's beautiful lines. However, this is an attempt to correct a problem. Lines were wrapped around a white dowel and numbered. On the photo, the second and third wrap from the left are controls (no staining). Control wraps. On the left, lines were touched with C/A (as in splices, wraps on the yards, etc.), while on the right, the line was untreated. It's hard to understand why the line appears so white on the model. On number 1, a mixture of equal parts white glue, water and stain (water based English Oak / Minwax) plus a couple drops of detergent. There was a slight difference between C/A treated and non-treated threads and slightly irregular uptake of the stain, although I doubt most observers would notice. The color has a reddish tint, but of course that's the stain. Fruitwood would be a better option. Number 4, though slighty blurred, was a wash (Basswood Acrylic Wash) which gave poor coverage with a major difference between C/A treated and non-treated areas. In addition there was a pinkish tint. Number 5 used Brown Oak Detail Wash (Model Master Acrylic / Testors). This gave a more even coverage of treated and untreated areas. The camera gave it a brighter yellowish tint that is not present on the test stick. A second photo by a different camera gave a closer match but still missed the warmer brown. The color on the test stick, to my eye, is closest to relatively new Manila hemp. In my years of sailing (over 70), it seems even old and worn Manila hemp retained something of a brownish gray tint. Number 8 was English Oak Water based srain with a notable difference on the C/A treated area and rather uneven uptake of the stain. My conclusions were that the Brown Oak Detail Wash gave the most realistic result followed closely with the white glue/water/stain technique (but substitute a Fruitwood stain). However, I'll probably spend a good deal of time fussing and masking and may not post for a while. Are we having fun yet? Cheers, Gil


- 755 replies
-
- 7
-
-
- finished
- caldercraft
- (and 1 more)
-
Mark, Many thanks for the suggestion. For me, it's new territory. Let the experiments begin. Cheers, Gil
-
Thank you all for your input, and helping me decide where to go from here. What bothered me was the stark white appearance of the coiled line, rather like white nylon or white cotton rope which it certainly would not be. As such, it becomes the center of focus rather than a coil of rope in the background. This is where I wish I had modified the color of the line before beginning the rigging. In fact I did experiment but was not pleased with the result. I should have persisted using the expert advise from some of our members. I'd like to use the full coils if they can be blended in with the background. The following photos are experiments in retrograde coloring of the lines. The problems are obvious. Areas with C/A glue will not take up stains, if one succeeds with the coils, all other lines will have to be altered and most of all, it's a pain................ I've tried to use similar lighting in the photos, however, we all know how lights and cameras drastically alter the appearance. I'm experimenting with washes (very dilute paint) but of course masking become a daunting task. I'll report later on the results (or lack there of). Each photo of untreated line is followed by one of treated line. The unfinished coil on the right can be used as a control. Unfortunately, they were taken on different days. Cheers, Gil


- 755 replies
-
- 12
-
-
- finished
- caldercraft
- (and 1 more)
-
Just for fun, I added the full tail of line for the jeers. 0.75 mm. line is very near to scale for the 2.5" (6 mm.) line and 36" would be nearly equivalent to 250' on the real ship. Which is best used in a model? A token coil to suggest additional line (as in the previous post) or the entire tail which is perhaps more realistic, but a bit overwhelming? And the winner is?


- 755 replies
-
- 10
-
-
- finished
- caldercraft
- (and 1 more)
-
Thanks you all for your comments. If our purpose is to encourage discussion, it seems to have worked. Mark, It was rather a crude first attempt and I have no doubt someone will come up with a better method. Making coils at the work table and then placing them makes sense but it didn't seem practical for the jeers and braces. Daniel (Sailor 1-0) I accept your admonitions and I probably took too much artistic licence. I hope your "spidey senses" have recovered. Our own boat certainly reflects your First Lieutenant's view. On the other hand, David Steel noted in 1794 that the main yard jeers (jears) were 2 1/2" (6 cm) in diameter and 70 fathoms each in length. At the least, when two blocked, somewhere around 300' of heavy line remained on deck. Coiling this mass of line as one would smaller lines is not possible. The main brace at 1 1/2' and 50 fathoms, probably left around 200' on the lee deck. At the other extreme are flag halyards which being circular, had no tail. Perhaps we can agree that a series of coils, the same shape and size does not fairly simulate a working ship. And that was the thesis of the post. To raise our awareness to the wide variety of size and length of lines on a sailing ship and reflect those differences in our models. I sincerely appreciate every comment, and look forward to when Daniel (Dafi) reaches this stage on his Victory. We will see fifteen tars hauling on a line with a petty officer calling the count. Animated? With sound? I can't wait. Cheers, Gil
- 755 replies
-
- 4
-
-
- finished
- caldercraft
- (and 1 more)
-
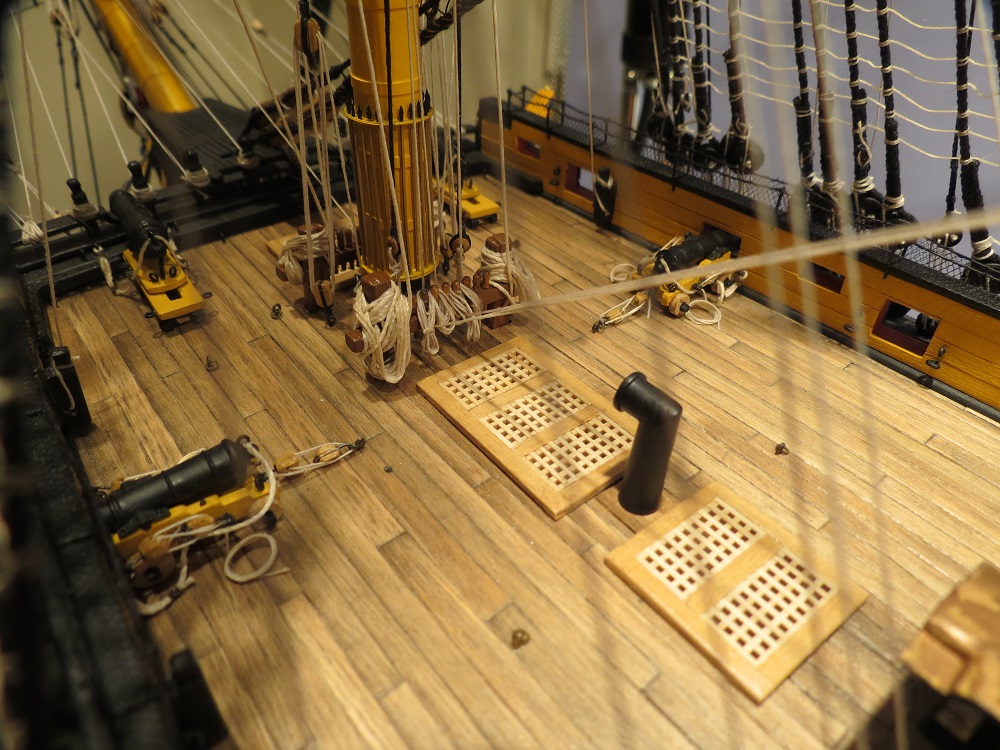
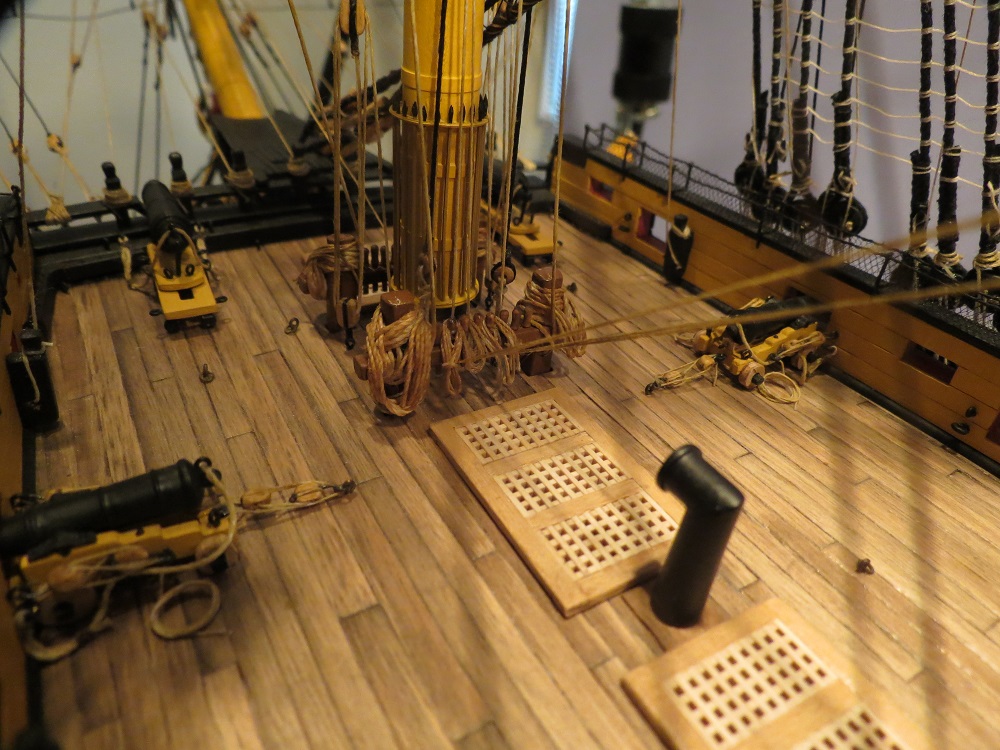
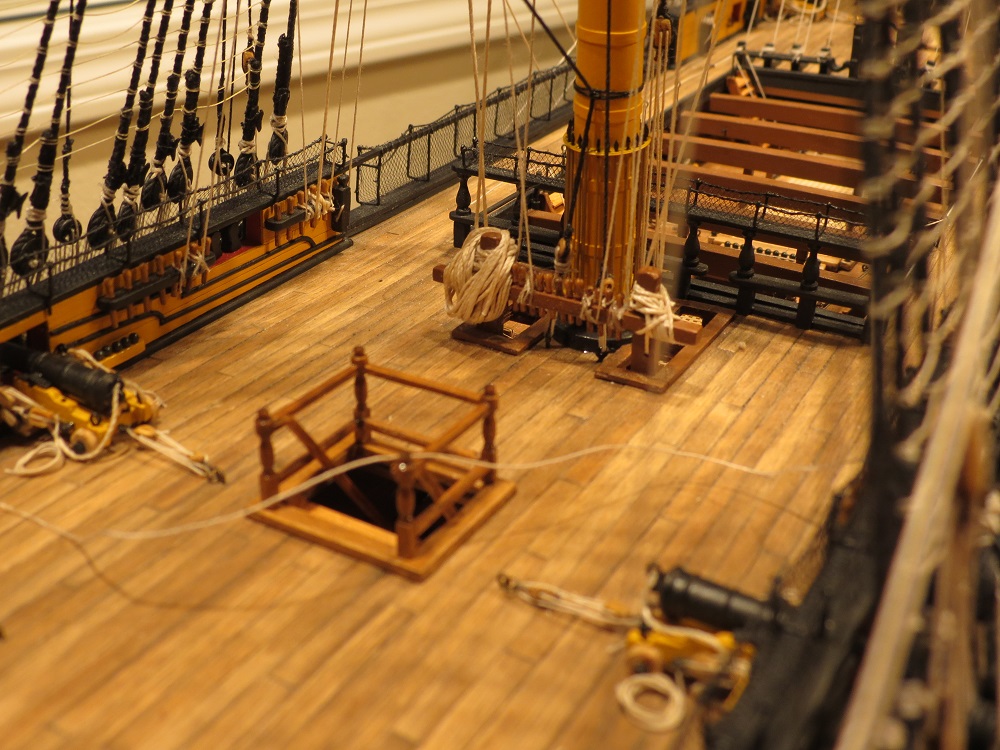
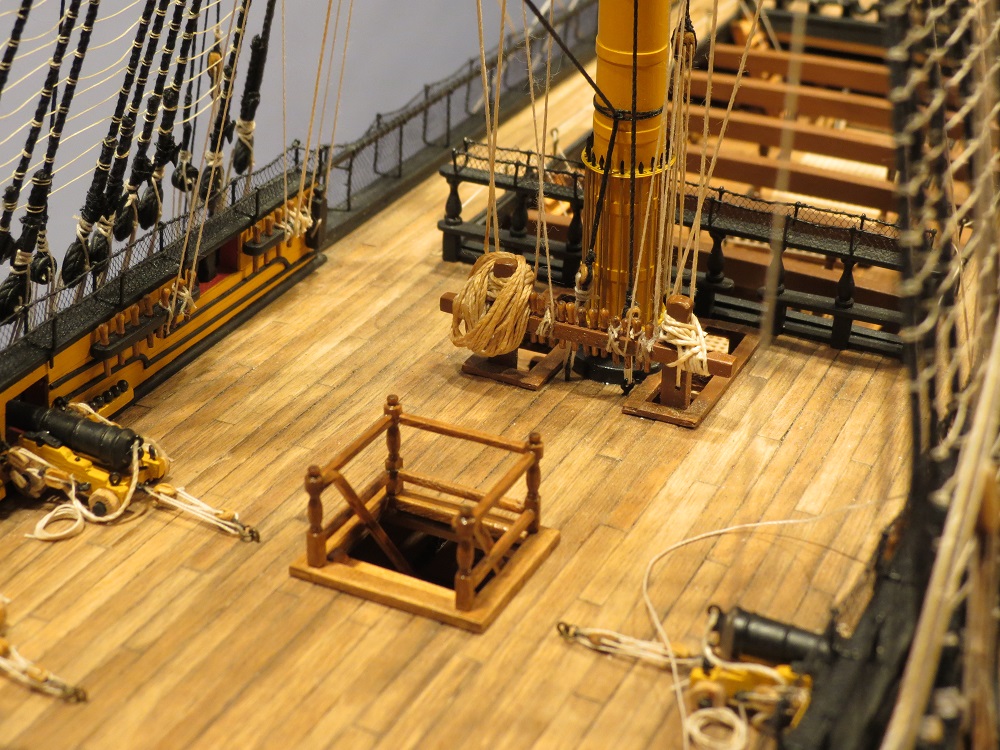
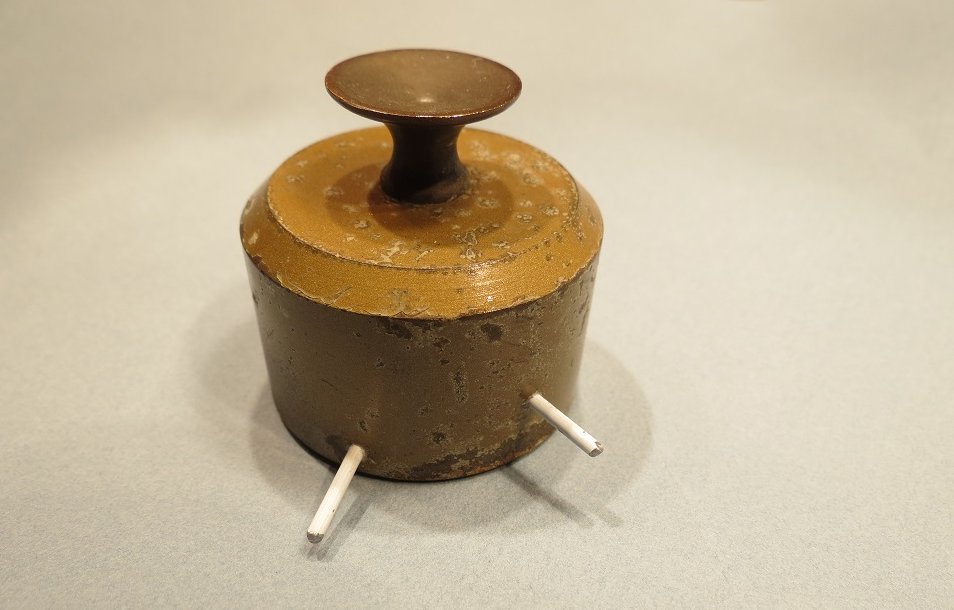
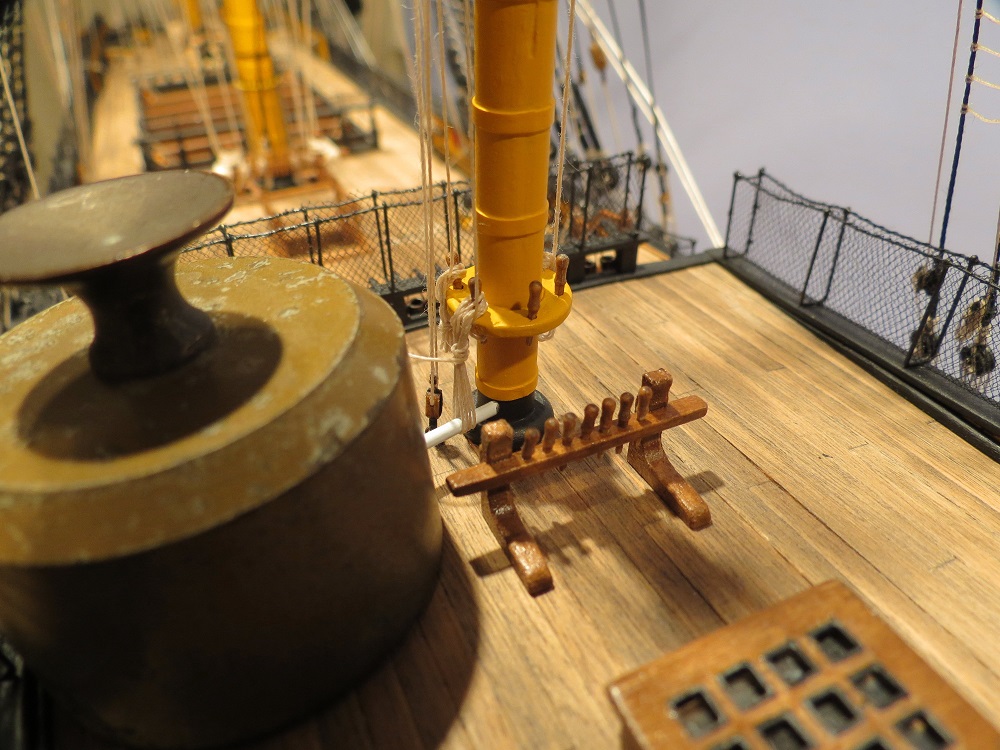
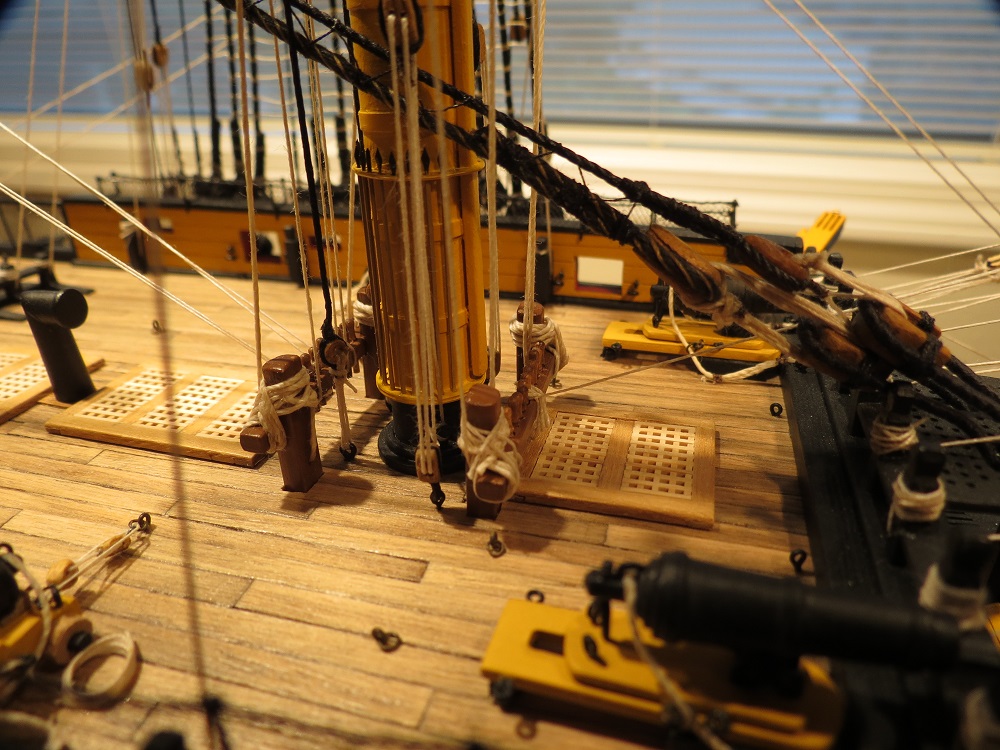
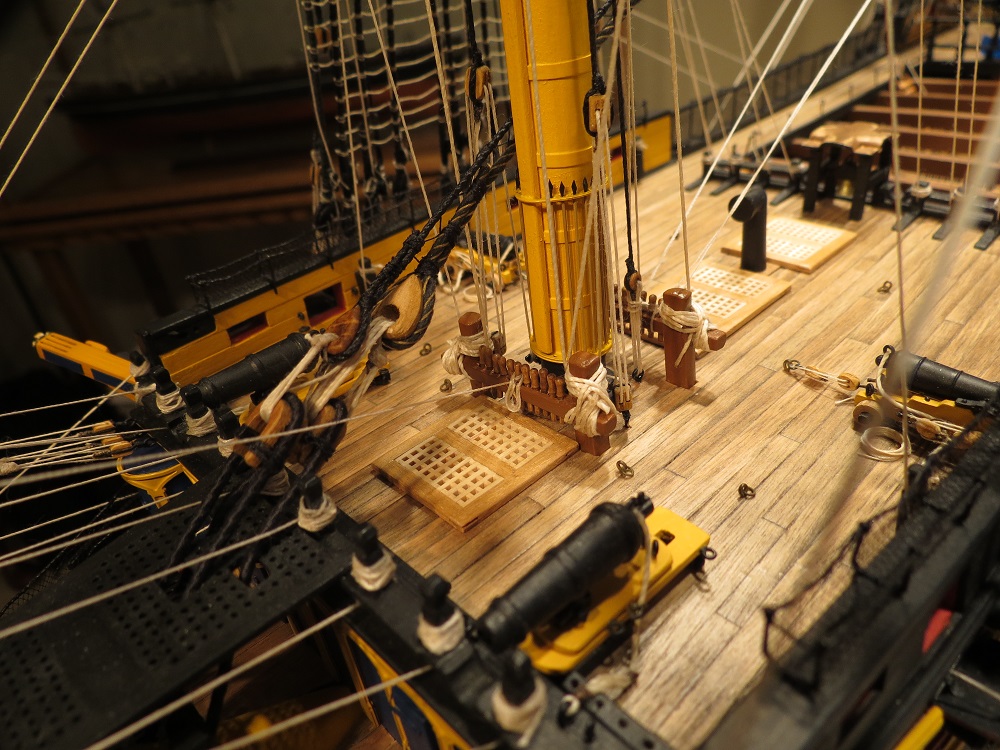
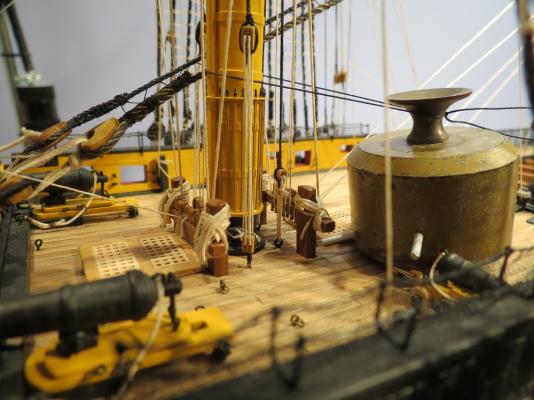
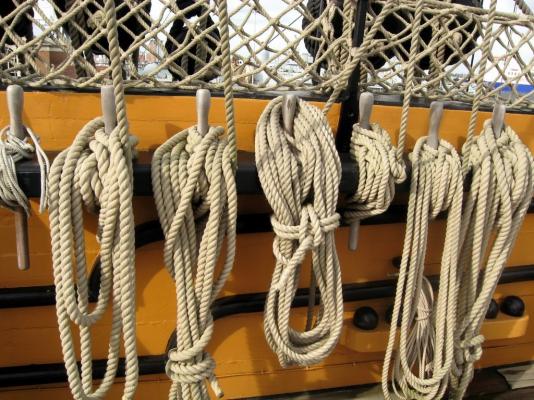
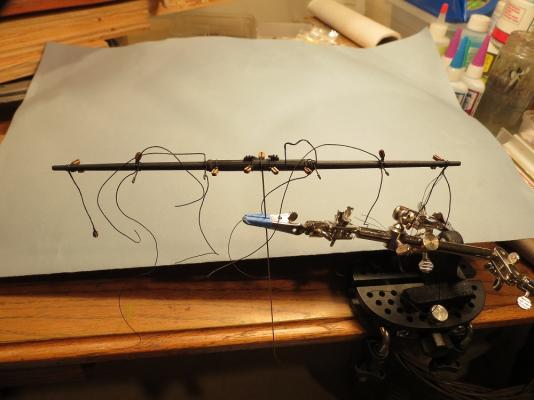
Chart weight (for holding nautical chart on a chart table) 2 mm. hanger wire glued into holes drilled into weight. Rope coils at Main Top Bowline Bitts Loose coils at fore topsail sheet bitts.


- 755 replies
-
- 13
-
-
- finished
- caldercraft
- (and 1 more)
-
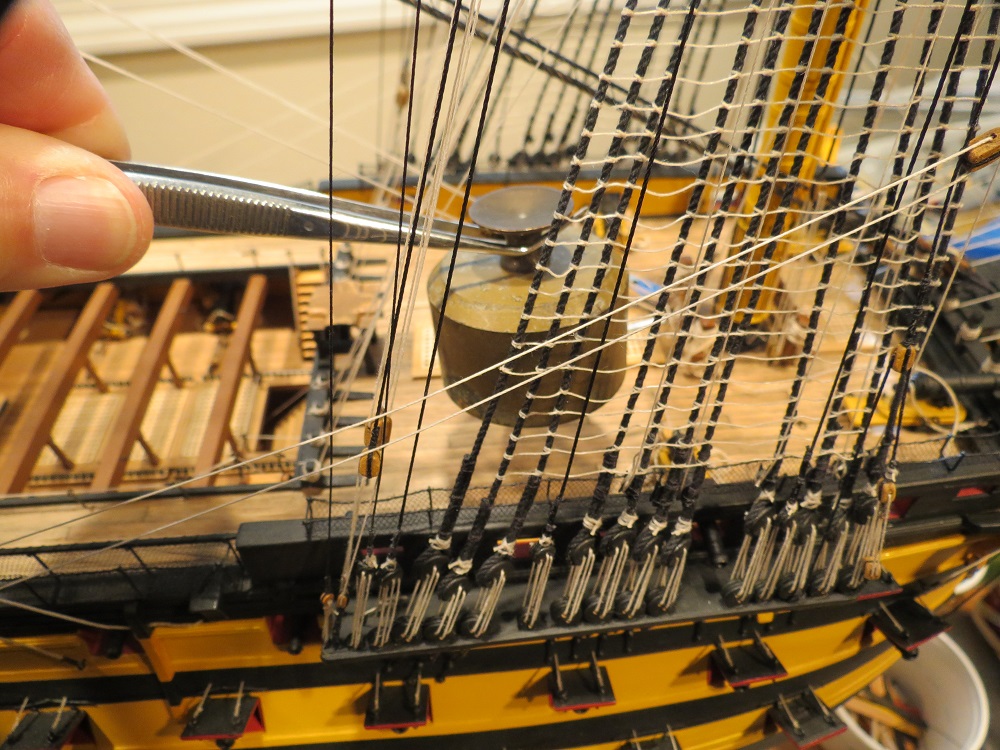
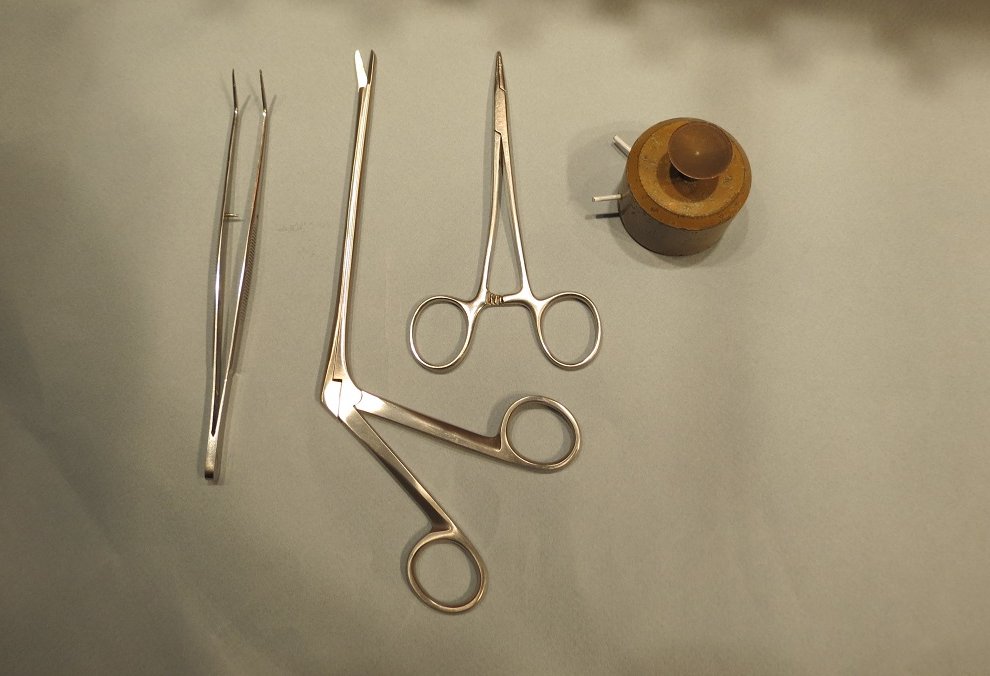
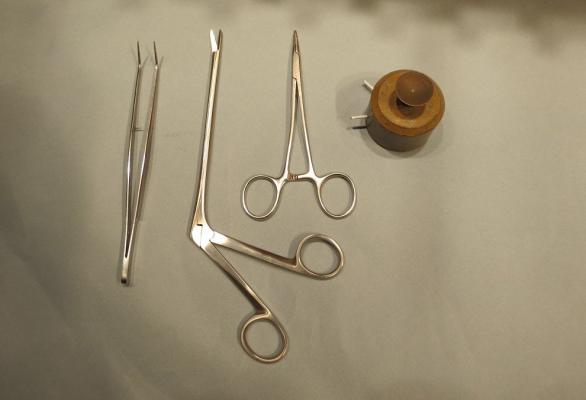
Fore Topsail Sheet bitts Using weight with hanger wire to form coils. Long forceps and long nose scissors Cutting off excess. Lifting weight between the lines. Loose coil on Main Top Bowline Bitts Long forceps, Smooth jaw needle driver, long nose scissors (Micro Mark #84737) and chart weight with wire drilled into weight. Next post


- 755 replies
-
- 8
-
-
- finished
- caldercraft
- (and 1 more)
-
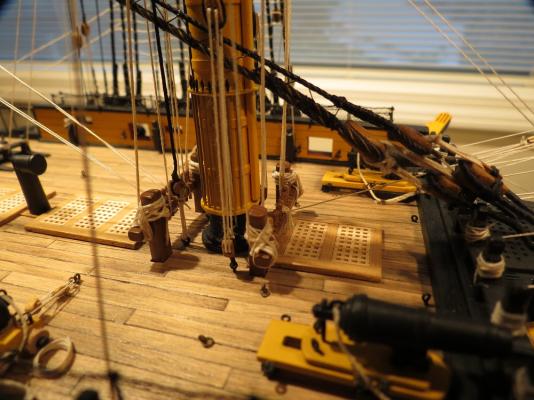
Coils on forward bitts Fore topsail Sheet Bitts Mizzen mast belaying pins port Stbd. Chart weight with hanger wire to form lower loops After white glue (1:10 with water). Occasionaly use fast C/A to hold line on belaying pin. Adding variation to rope coils And next post.


- 755 replies
-
- 13
-
-
- finished
- caldercraft
- (and 1 more)
-
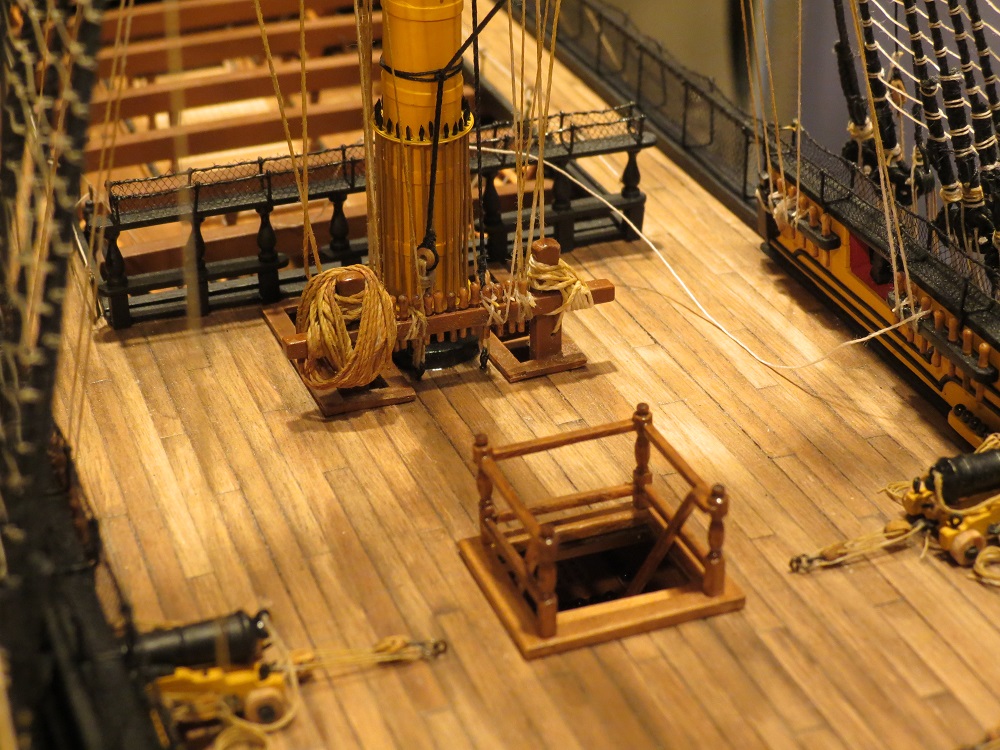
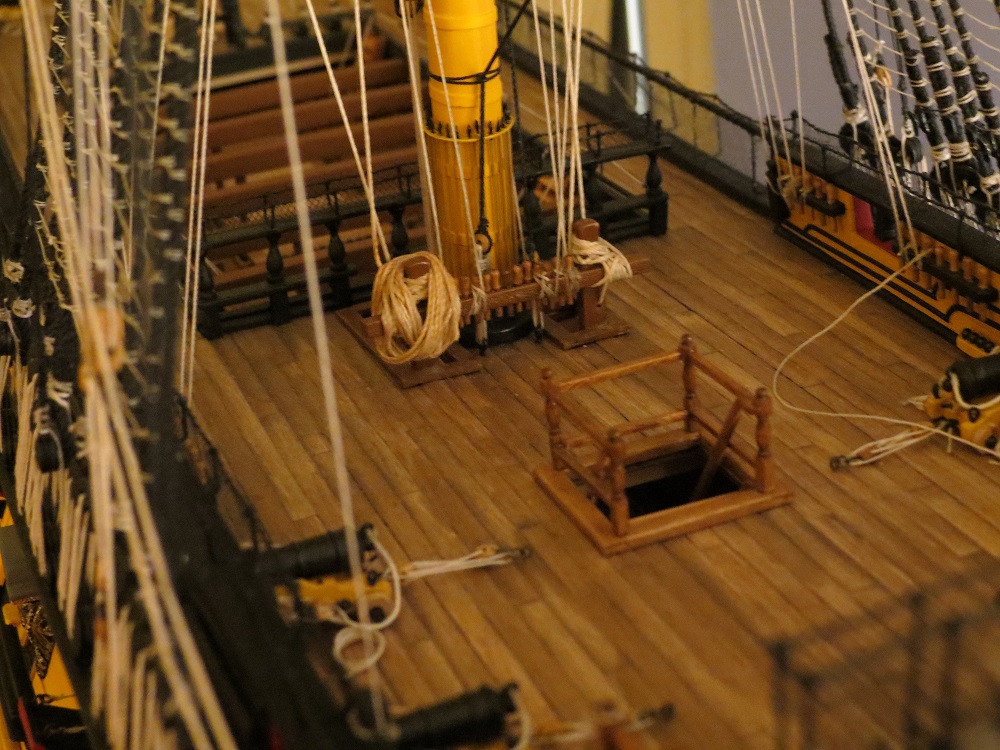
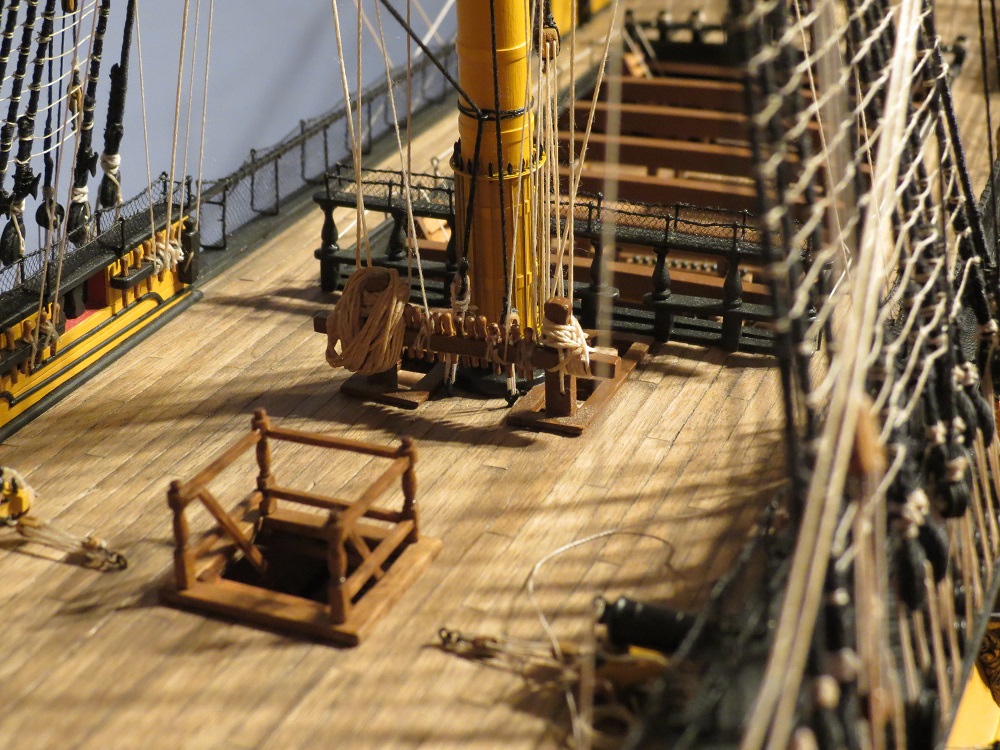
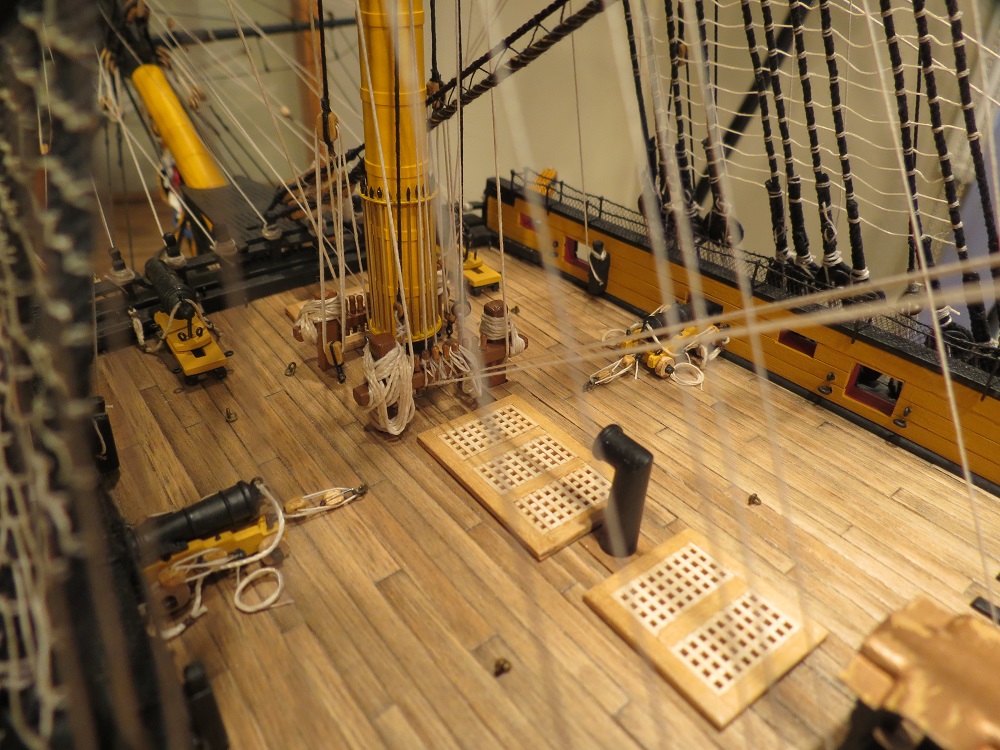
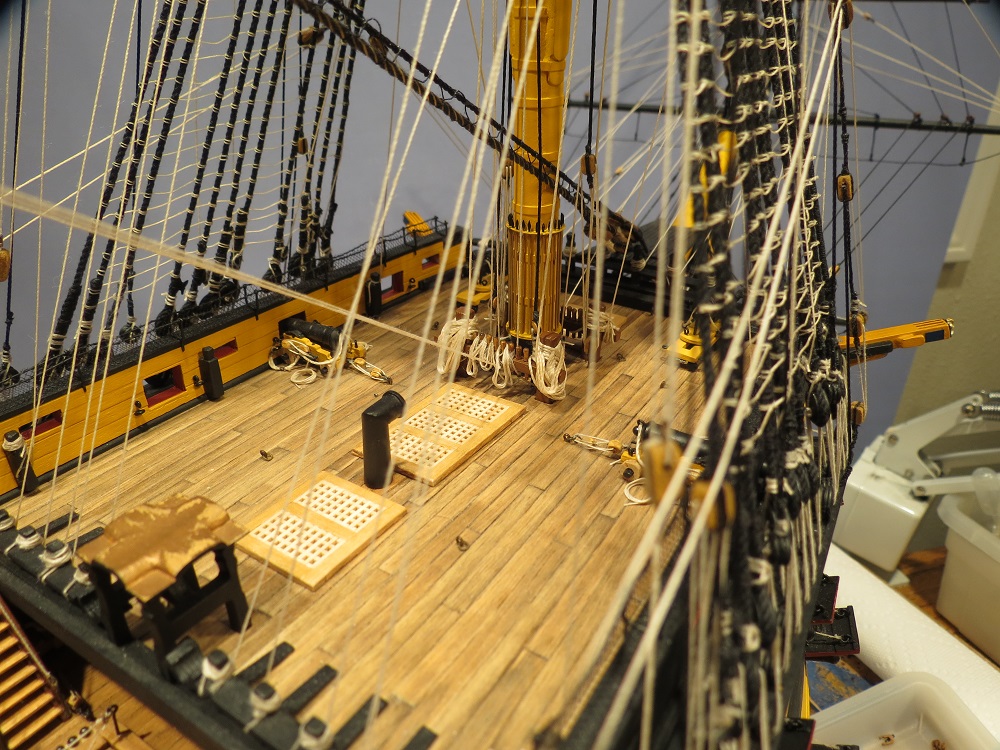
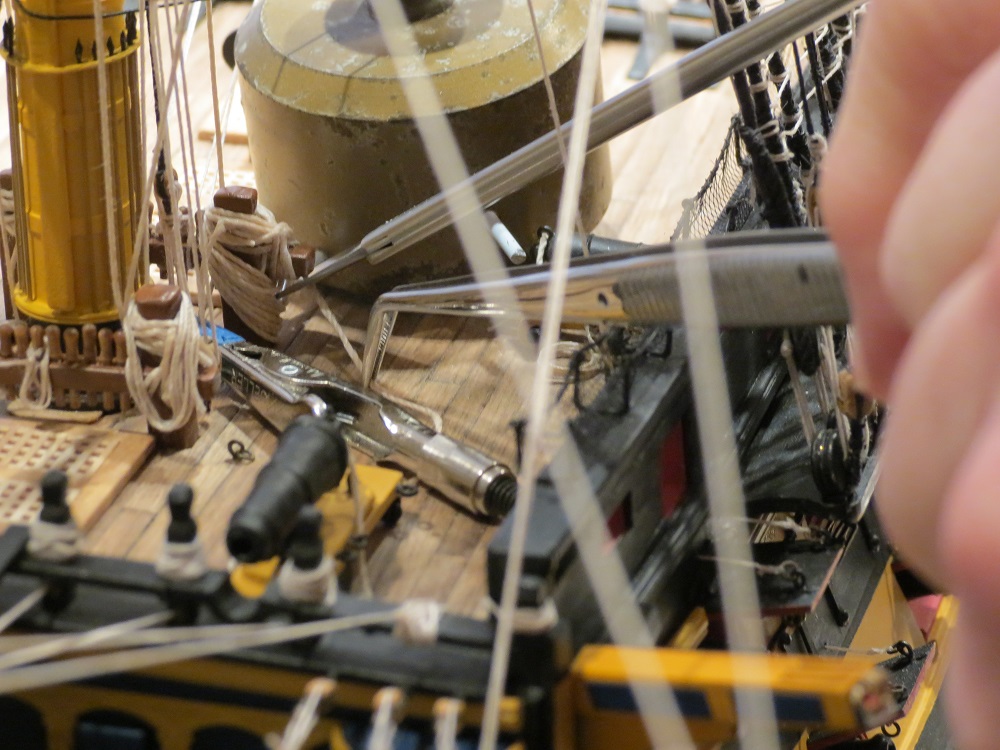
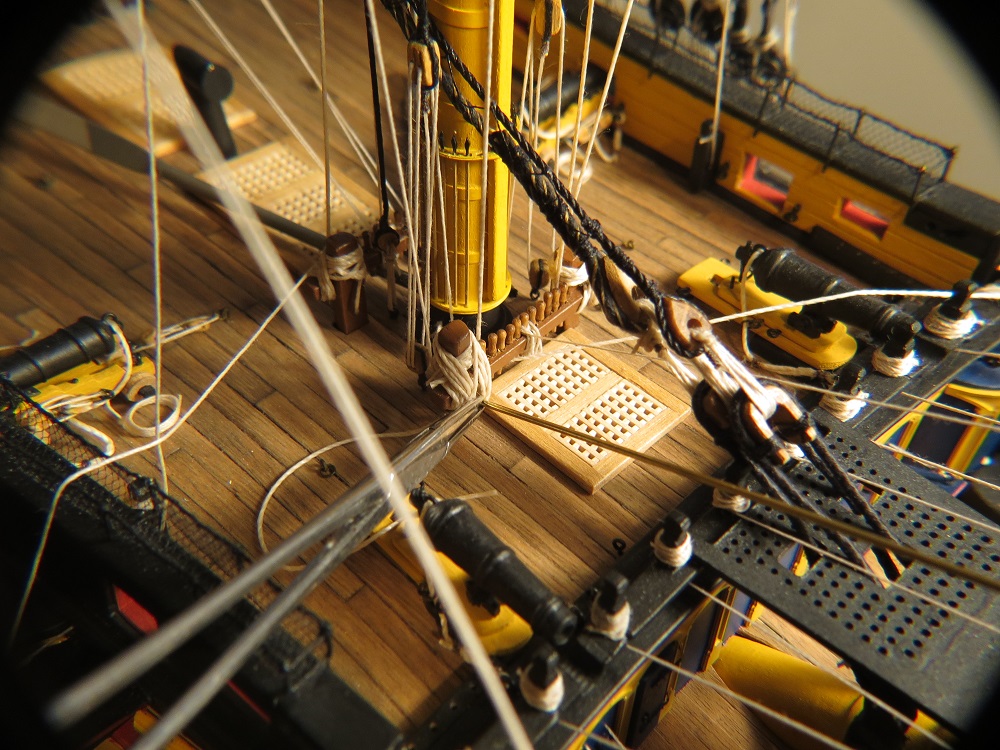
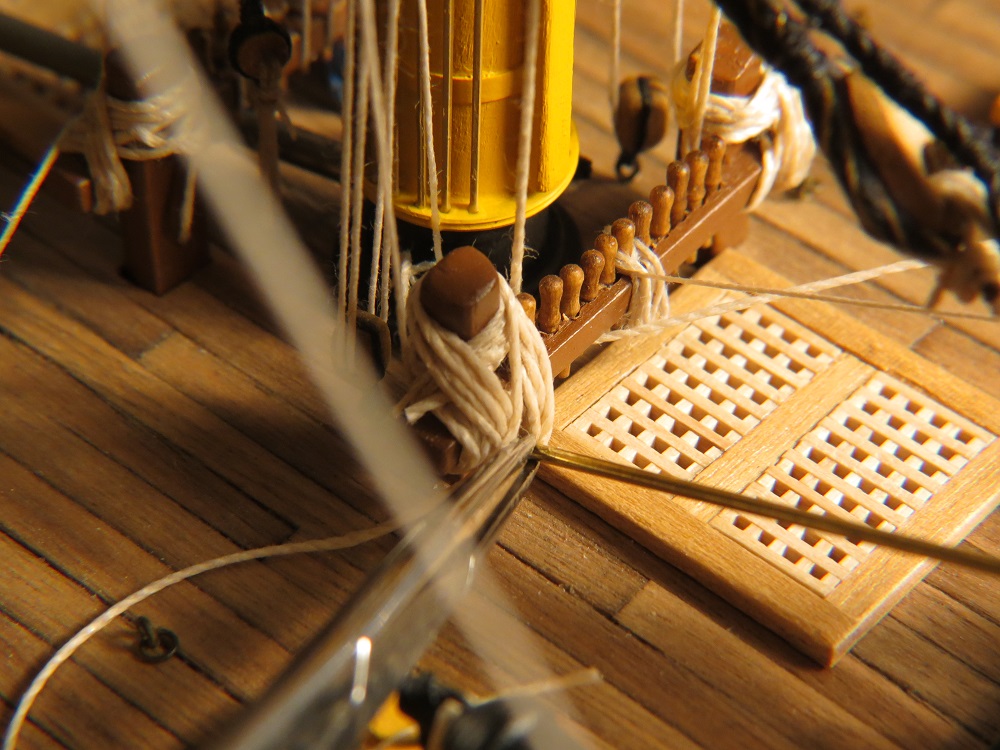
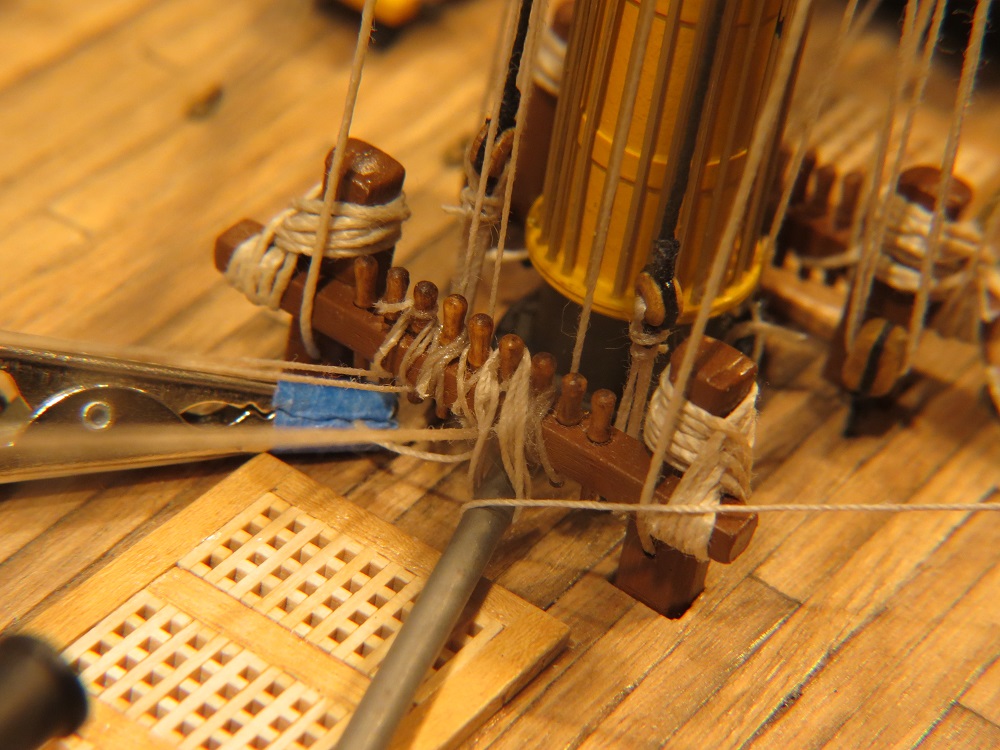
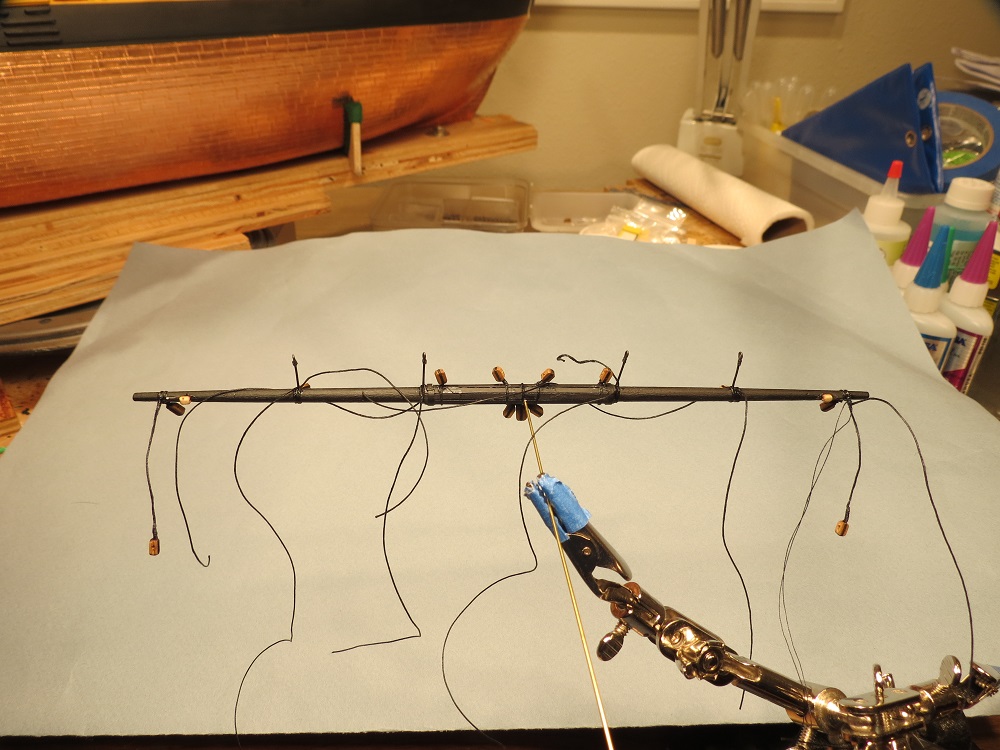
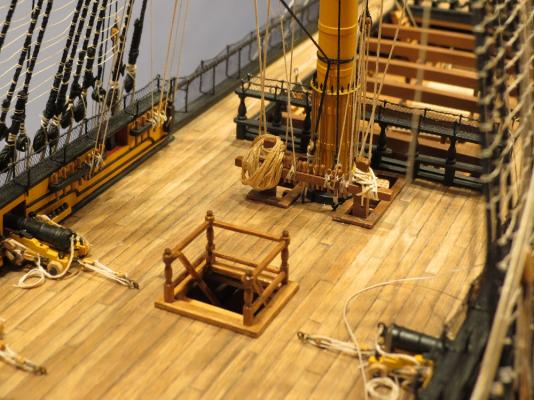
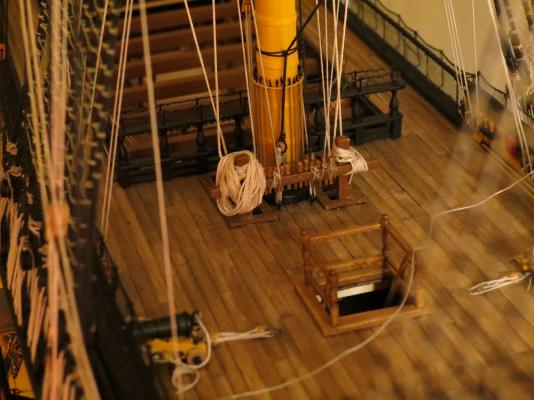
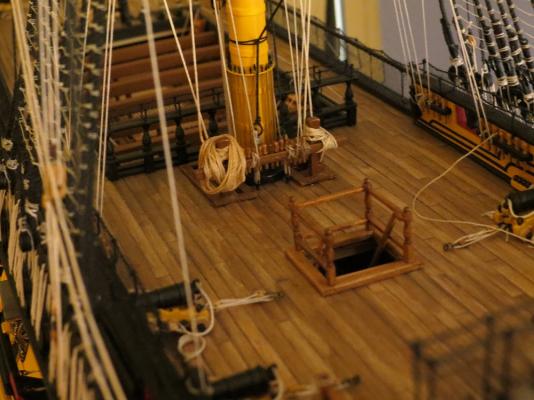
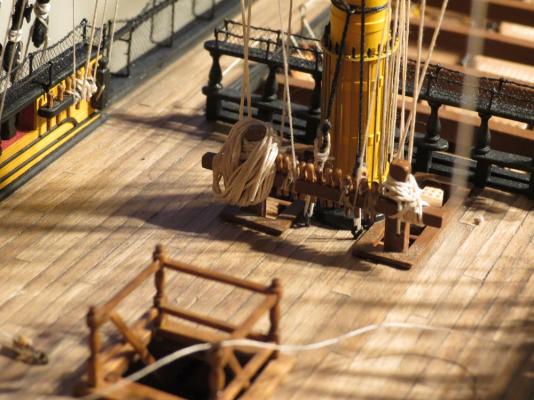
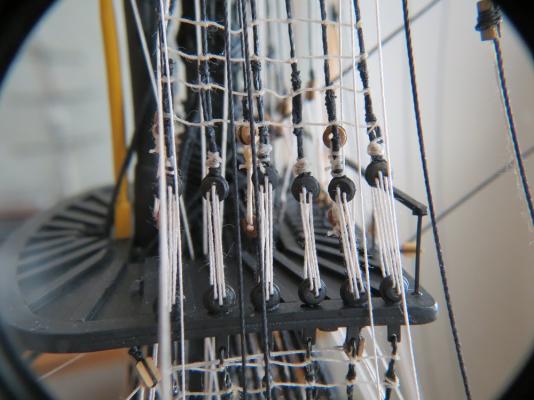
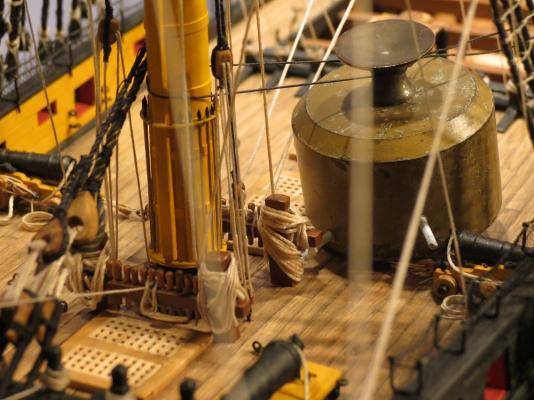
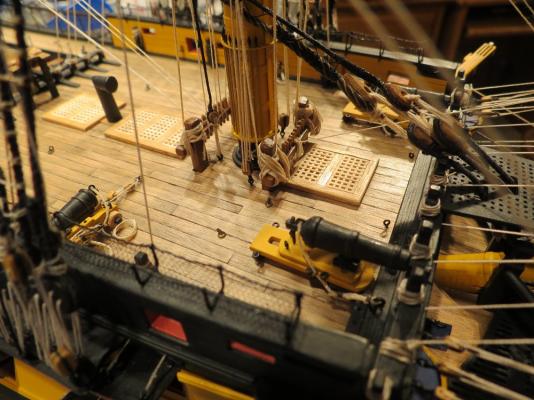
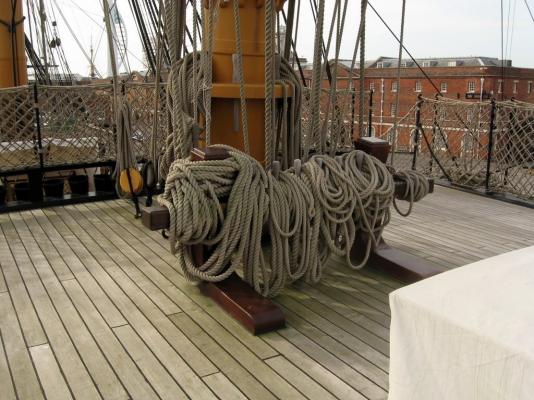
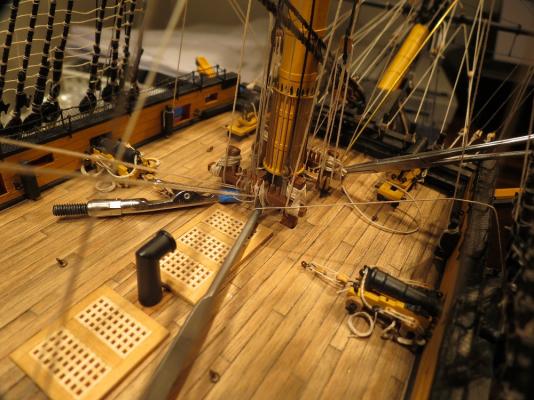
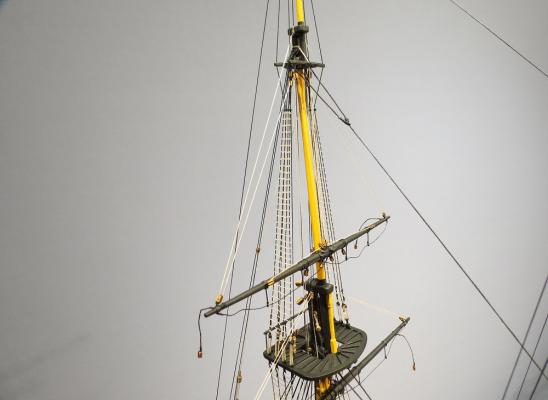
ROPE COILS A few years ago, Mike Graff came to our Puget Sound Ship Modelers group with a simple small model of a cat rigged sloop. It had a single rope coil laying over the hatch, hanging down over one edge as if tossed aside. No thread coil takes on this natural shape. Obviously, Mike had carefully worked the threads and fixed the shape with dilute white glue. This single coil looked so exquisite and so natural that it changed my view of how coils should look on model ships. On my former models, the rope coils were well formed with a single loop over the belaying pin. They were precise, uniform and made a great presentation. BUT THEY DID NOT LOOK REAL. I reviewed the postings on rope coils, several with excellent suggestions and technique, and then looked at all my photos of real ships. We all draw our mental picture from our own experience or that of others. Ed Tosti noted that it was impossible to show all the tails of all the lines without hiding many details. He showed a few with exceptional results. Peter (Petervisser) and Jay (modeler 12) gave clear presentations of their excellent methods. I believe a common shortcoming of our rope coils (certainly of mine) is uniformity. There are very heavy lines such as the jeers (7 1/2" circumference / Longridge, about 2.4" or 60mm diameter) with long tails leading from triple blocks. There are much smaller lines with short tails and every thing in between. A plethora of very different lines. I decided if I could carry the idea of Mike's single coil into all the lines, I would achieve the more natural look I was striving for. It would be far simpler to form the rope coils before limiting access by the running rigging but of course one can't add a rope coil until that rigging line is in place. The extensive rigging around the fore mast on the Victory makes it virtually impossible to get a hand or short instrument to the bitts. A couple simple tools are shown in the following posts. First, a few photos from the real ship.There are tight "shippy" coils in some areas. Mizzen Topsail Sheet Bitts Belaying pins at the bulworks. Most coils are laid over the pins, some loose, some with a light wrap and some tied. Like most of us, I experimented using dilute white glue (1:10 with water) Then tried brass rod to form the lower loops. Too small Then tried a file handle which turned out to be too large I decided coat hanger wire was about the right size but it needed to be weighted to hold it in position. On to the next post.


- 755 replies
-
- 7
-
-
- finished
- caldercraft
- (and 1 more)
-
Patrick and Popeye, You're very kind. Thanks. Gil
-
Jon, Did you notice it was an I.Q. test to see if you would pick it up. That sounds much better than "a senior moment" on my part. Thanks for noticing. I enjoyed looking at your Rattlesnake, What a lovely build and use of the Byrne's saw. Jerry, I thinks the Boarding pikes add a nice touch. The mast looked rather bare without them. Many thanks for your comments. Grant, I think you've gone over the top again. I don't even know how to use all your new machines. Just an old guy having fun, and enjoying your company. Cheers, Gil
-
Thanks John, On reviewing all the methods of coiling ropes, I loved your photos of organized chaos of deck lines on old commercial sailing vessels. Gil thanks John
-
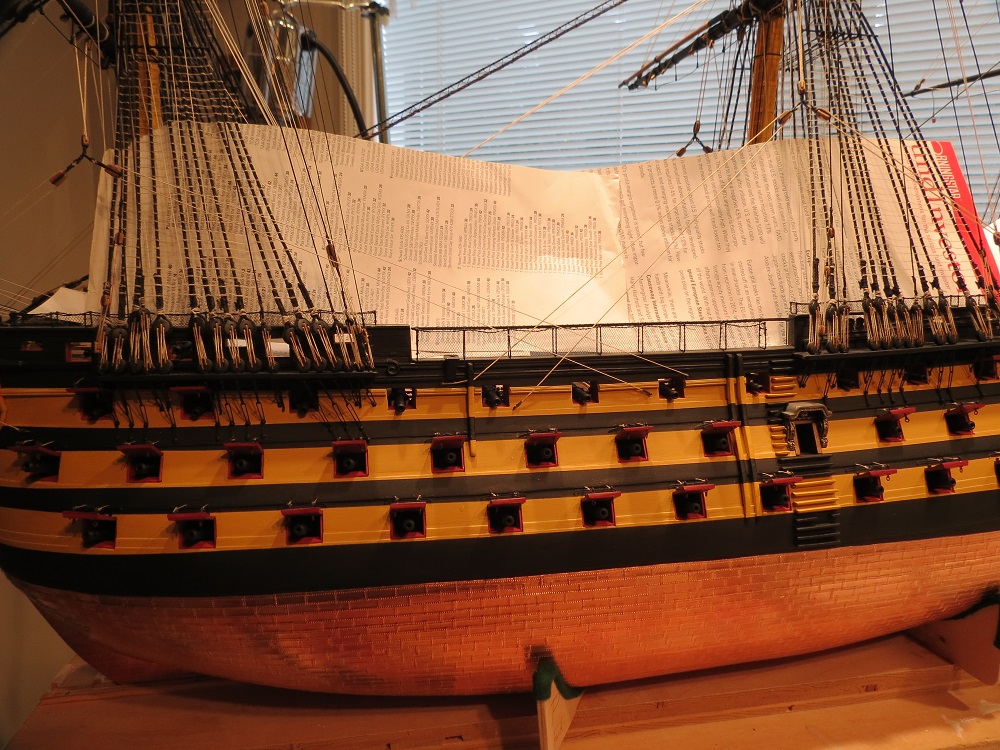
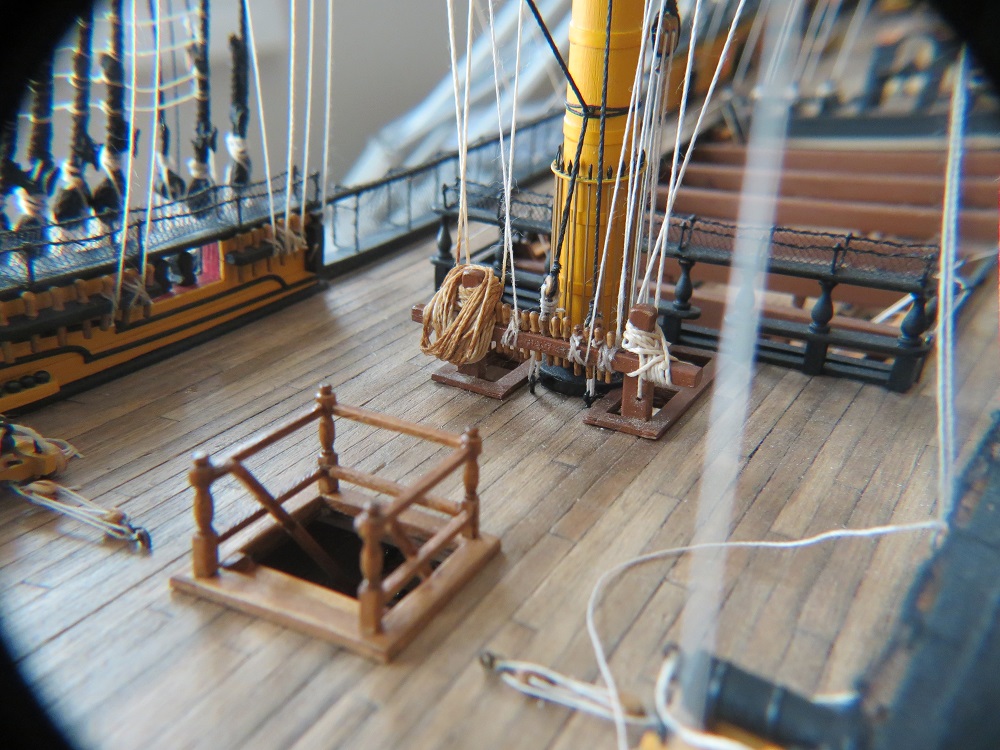
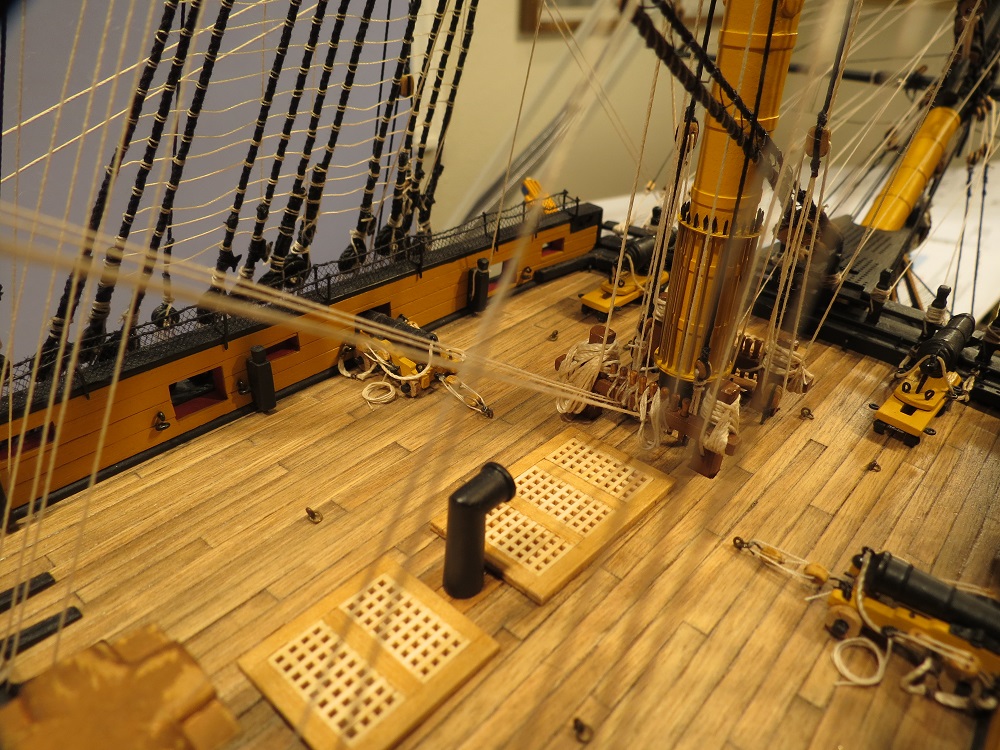
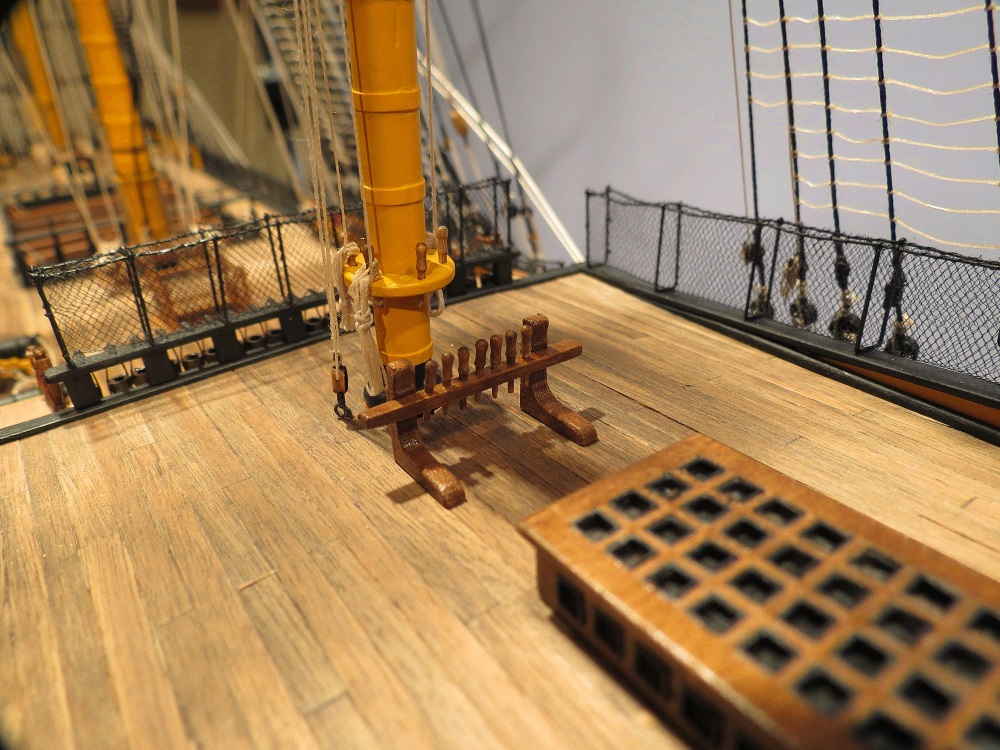
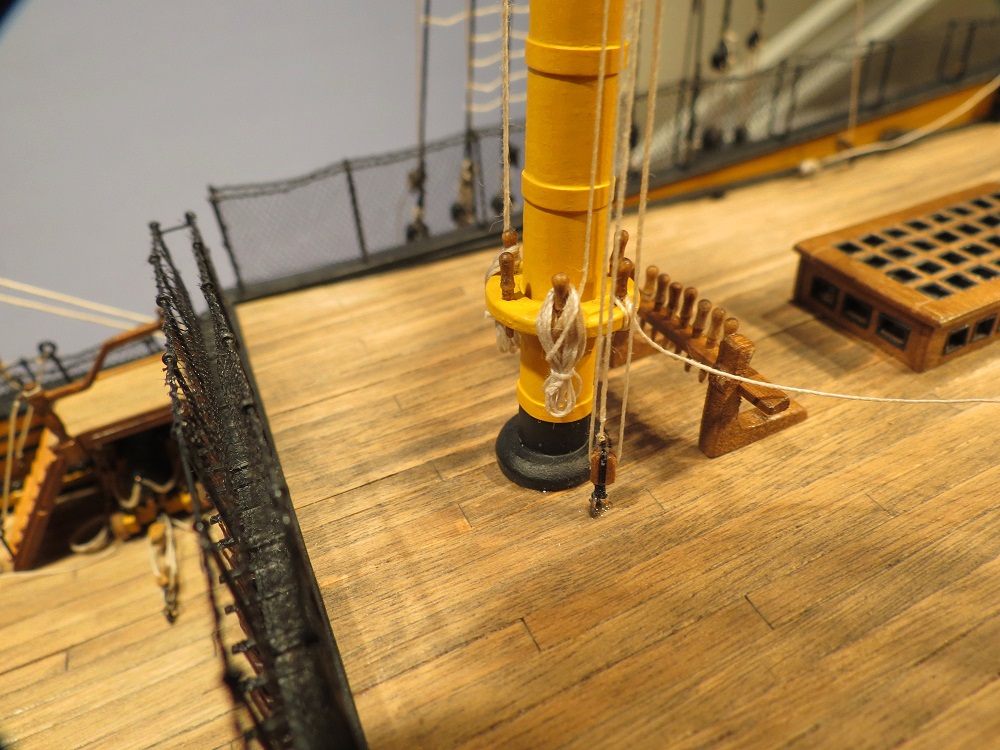
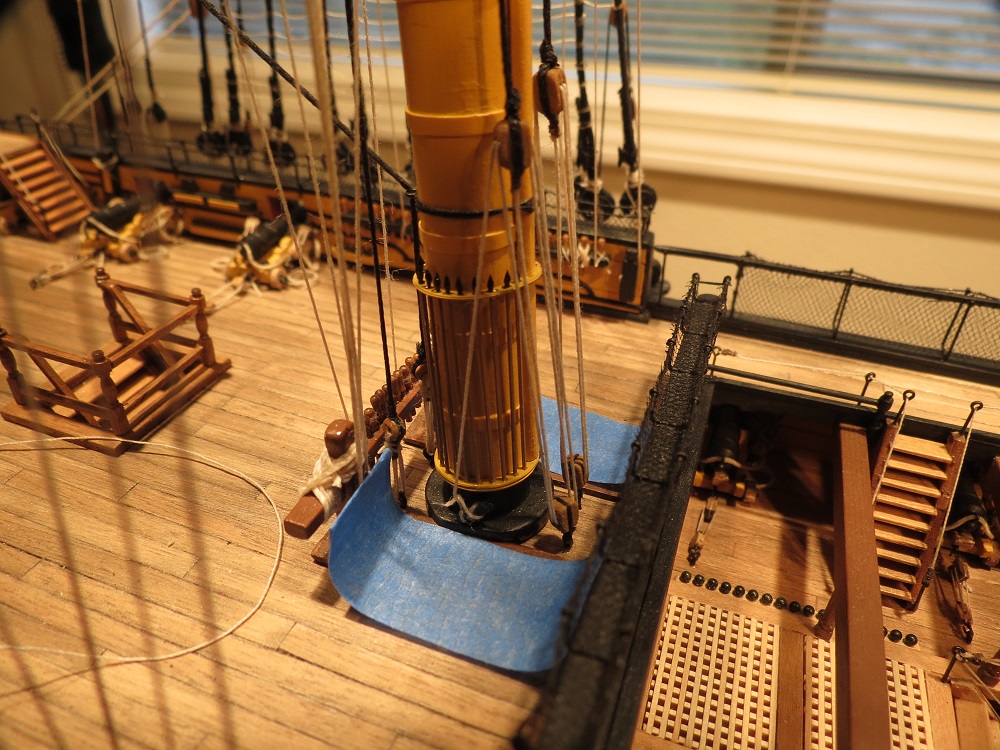
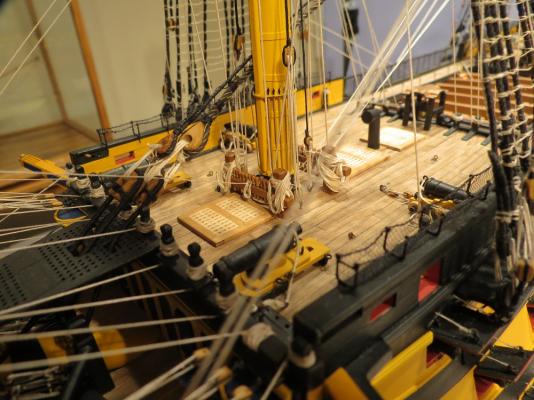
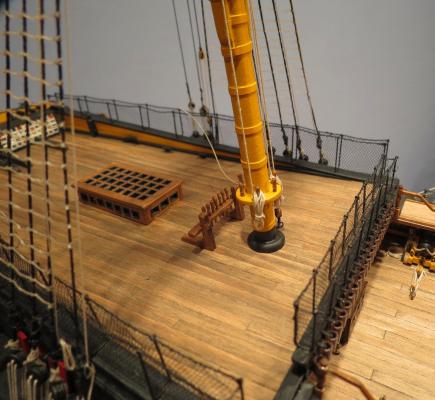
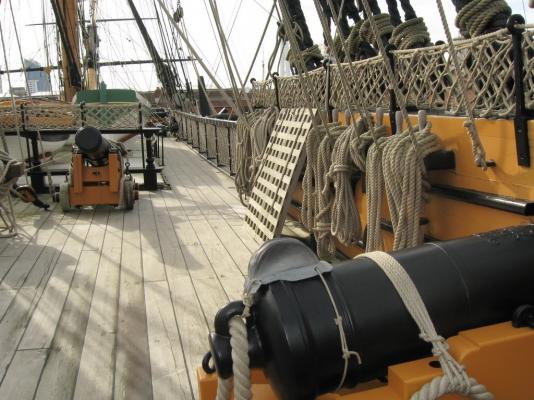
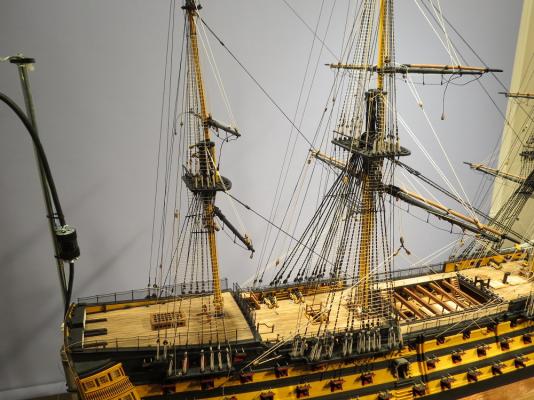
Only the mizzen topgallant yard to go before moving on to the Driver boom and gaff. In the meantime, small details need to be added such as the boarding pikes at the foremast and main mast. These would be much easier to add before all the rigging. I thought I would snag lines, but even that would be easier than trying to work through the rigging. After dropping a couple pikes into the upper gun deck, it occured to me to add tapes over the deck openings. Further, a tiny drop of slow C/A on the back of the heads, allowed to cure, stopped the pikes from falling through the rack, but isn't seen outboard. On the real ship, the steel heads are hidden in the rack, while JoTika plans show them projecting above. I chose the latter to highlight the detail. The shafts are painted to simulate wood, while the heads are black for definition. Lots of little details to add. Next, Rope coils. Cheers, Gil


- 755 replies
-
- 14
-
-
- finished
- caldercraft
- (and 1 more)
-
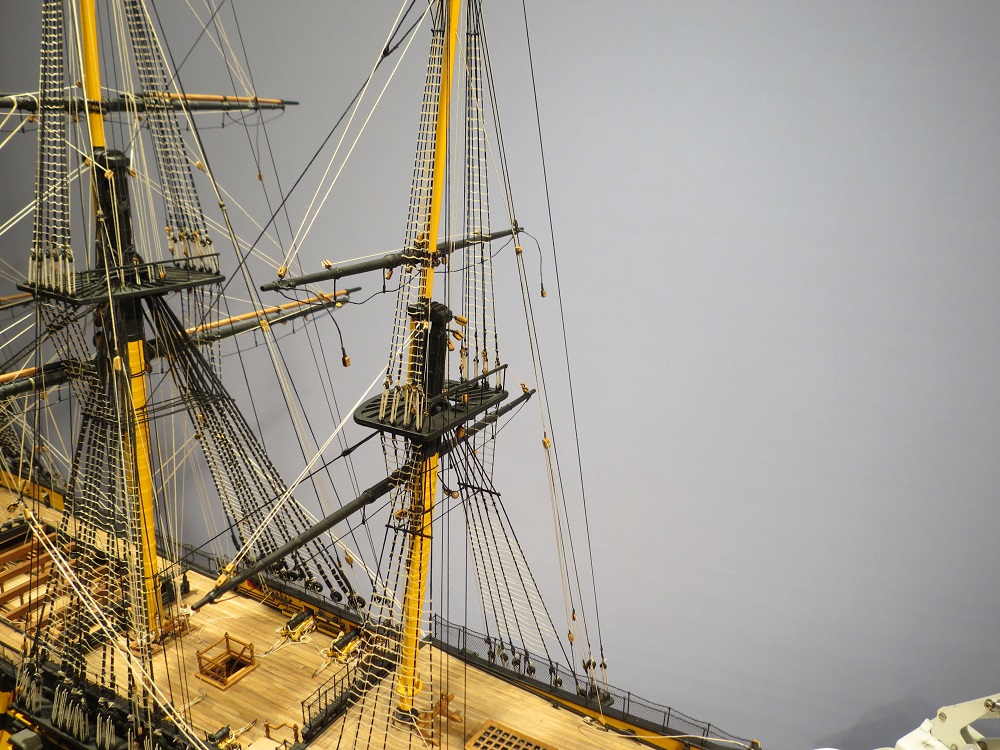
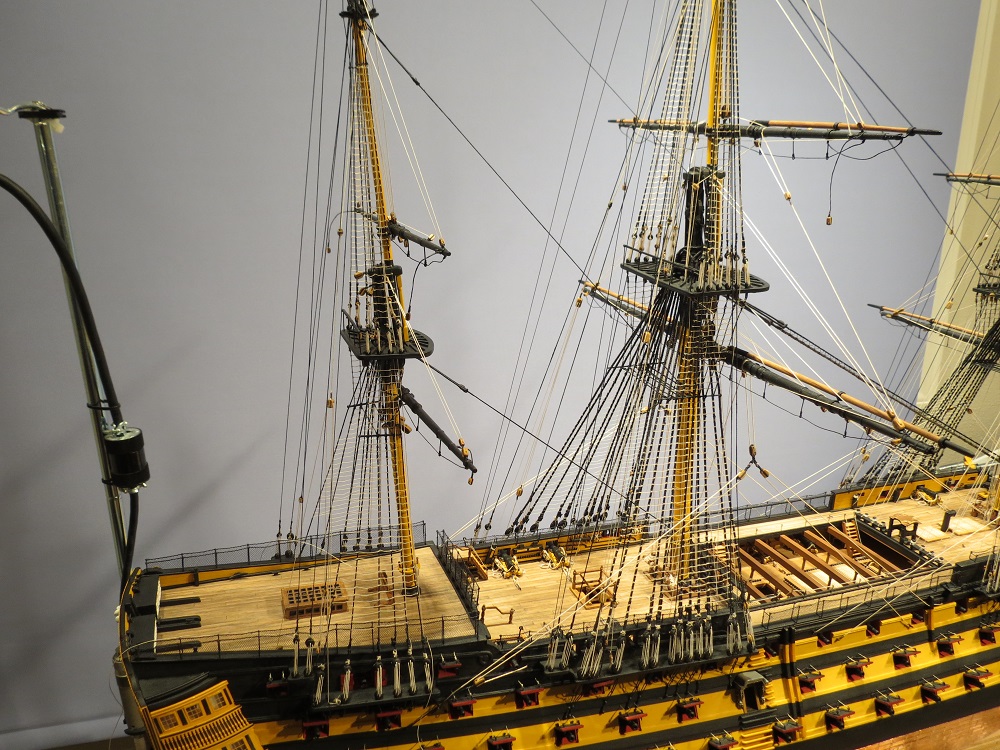
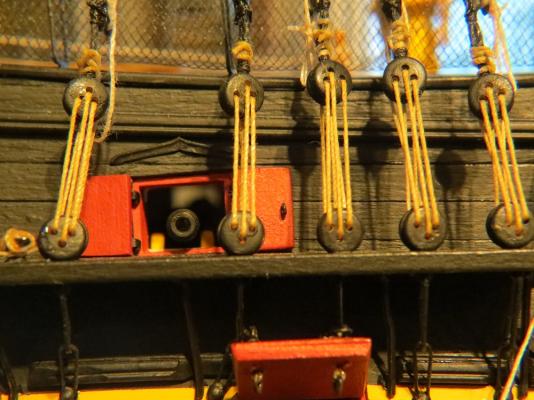
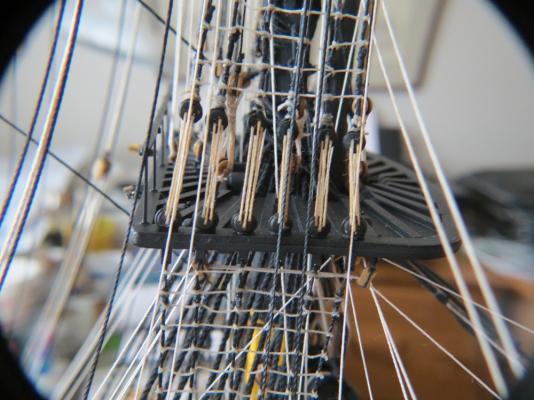
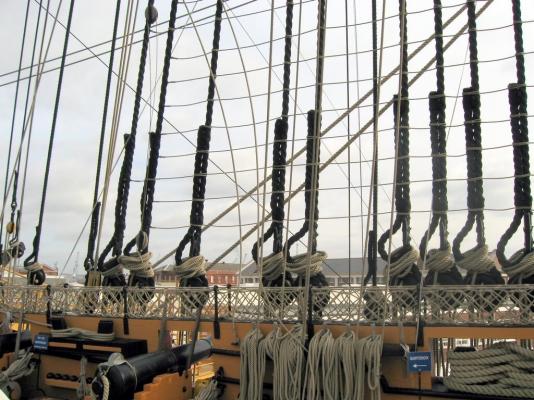
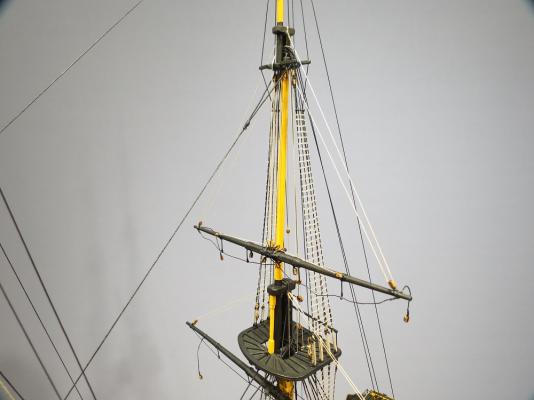
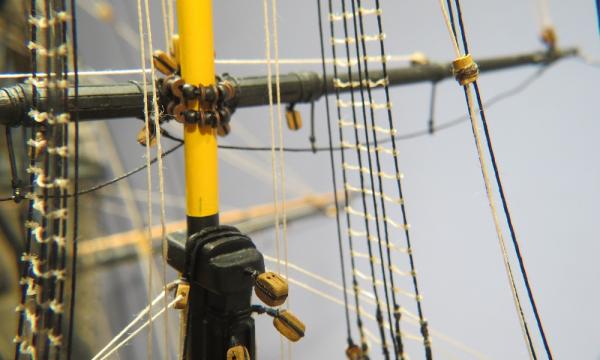
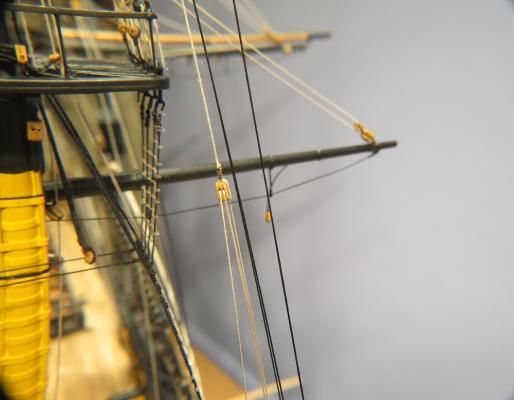
One more yard, the Mizzen topmast yard. This is the tenth yard rigged (including the bow sprit yards) and is rather similar to the rest except that the brace blocks are rigged aft to the Driver Gaff. The following photo (forward inferior view) shows the brass rod to pin the yard to the mast (it also is a convenient way to hold the yard for rigging), Tye block and yard cleats, Brace pendant blocks (directed aft to Driver gaff), Topping lift blocks, Clue blocks,Topgallant sheet blocks (below yard cleats) and cheek blocks (aft of yard at ends), Bunt lines blocks and foot rope stirrups. Front view Aft view OOPS! Same photo. Thanks Jon Port view. Note: Yard lift, Yard tye and Bunt lines all tensioned with no downhauls. Brass pin and parral hold yard securely. Note shroud truck for tye, to starboard. Port aft Starboard aft. Yard tye passes through topmast at hounds, through a shroud truck (aft of yard) to tackle below. Tackle anchored by pendant from the aft channel, while the tail is secured in board on the poop deck.


- 755 replies
-
- 4
-
-
- finished
- caldercraft
- (and 1 more)
-
Kevin, Just another senior moment. Gil
-
Lawrence, Nice to hear from you. Your progress on the Bismarck is amazing, but the Victory does sort of grow on you. I can understand your hesitation to have two "large ships" in progress. Apart from the space, I can only wrap my mind around one at a time (and keep track of hundreds of wee parts). Popeye on the other hand has a whole fleet of ships in his yard. He must have a huge yard with a large staff. Popeye, If I tried to follow your prodigious example, I'd end up with shrouds on the Captain's gig and oars on the square rigger. Cheers, Gil
- 755 replies
-
- 1
-
-
- finished
- caldercraft
- (and 1 more)
-
Hi Rob, Just getting around to catching up on your log. The coppering is beautiful and so well done. A time to celebrate before moving on to other tasks. We knew there was flooding in Calgary but your photos were sobering. Having lived in Edmonton, it would never have occurred to me to worry about flooding in either city. Glad you made it through. Gil