DONATION DRIVE - SUPPORT MSW - DO YOUR PART TO KEEP THIS GREAT FORUM GOING!
×


gil middleton
-
Posts
308 -
Joined
-
Last visited
Content Type
Profiles
Forums
Gallery
Events
Everything posted by gil middleton
-
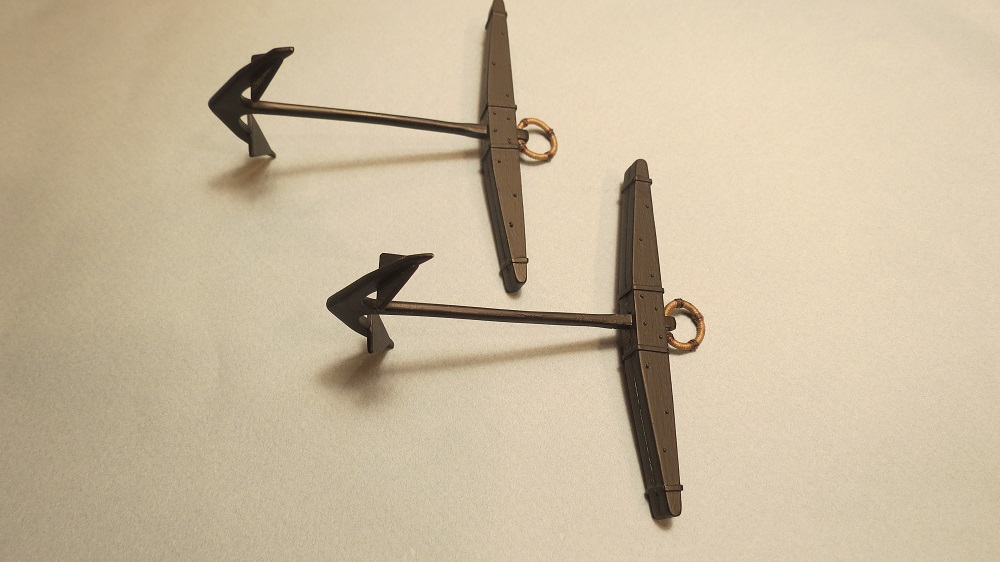
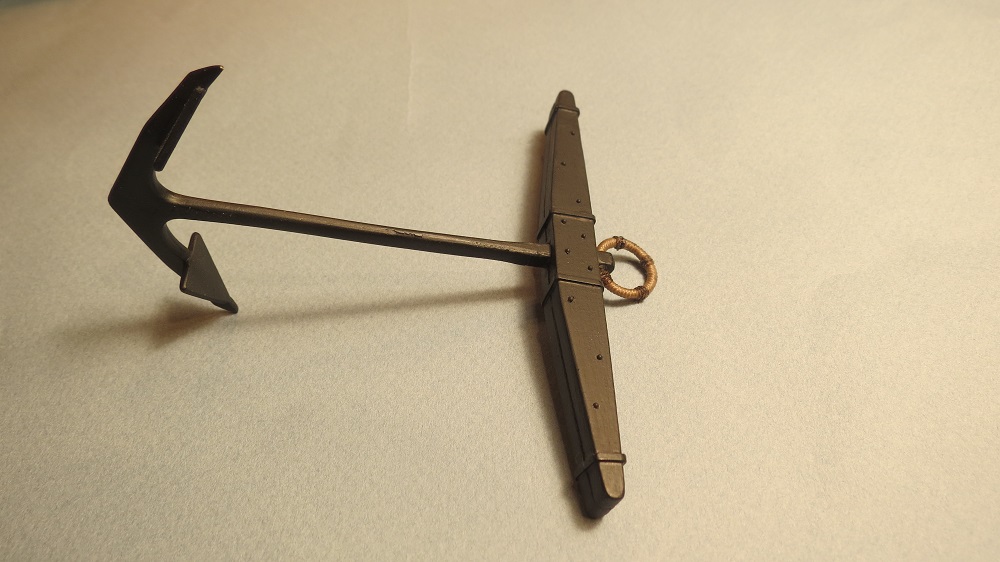
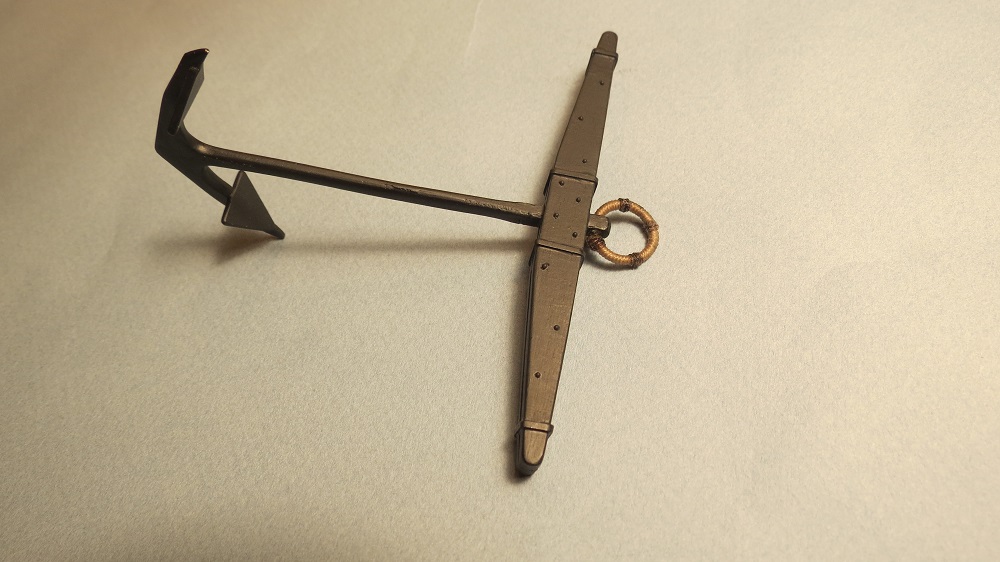
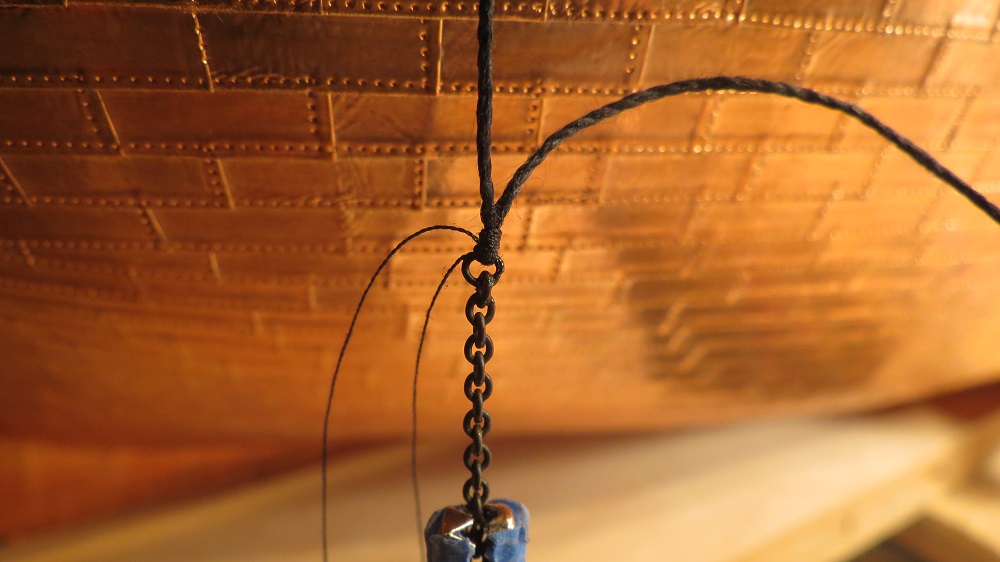
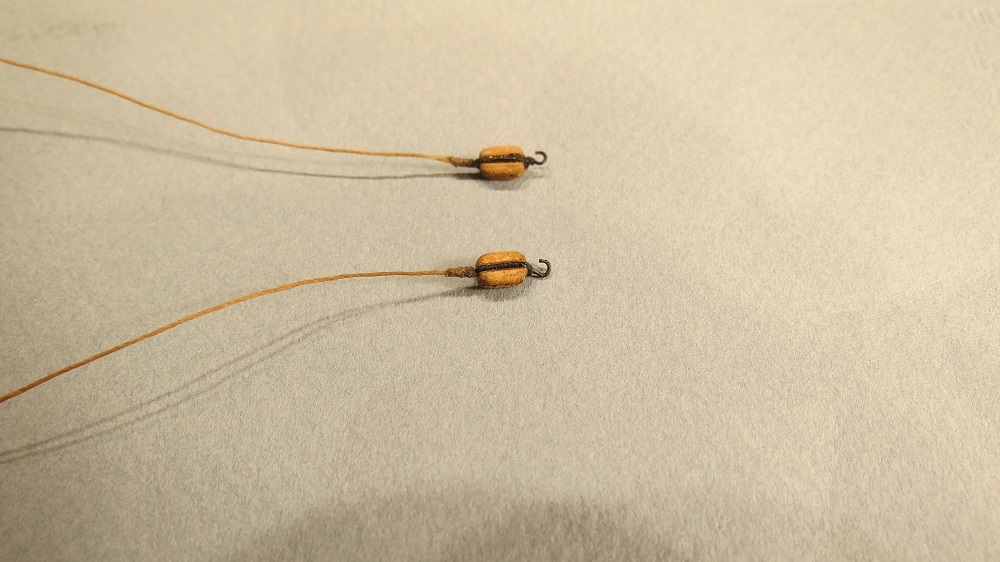
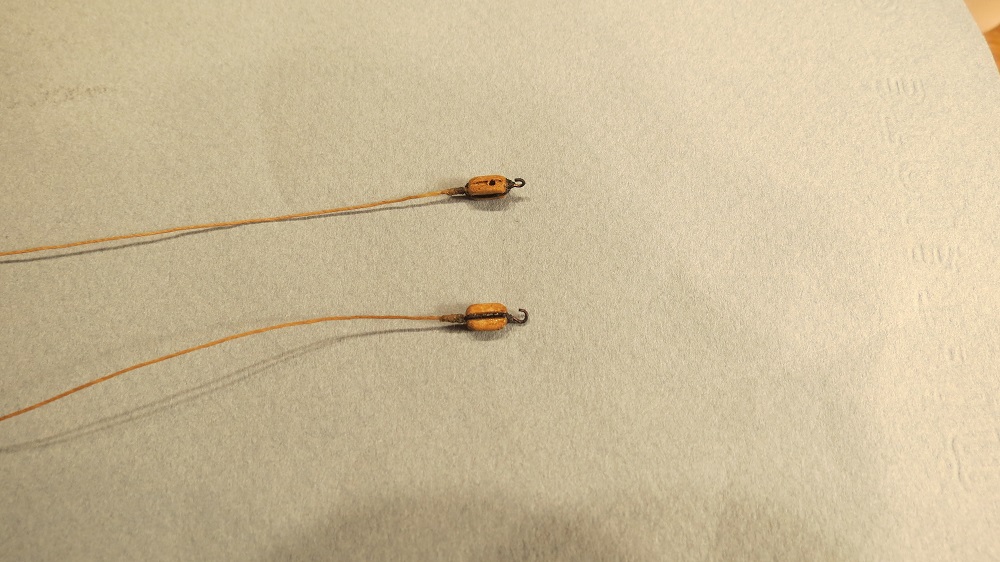
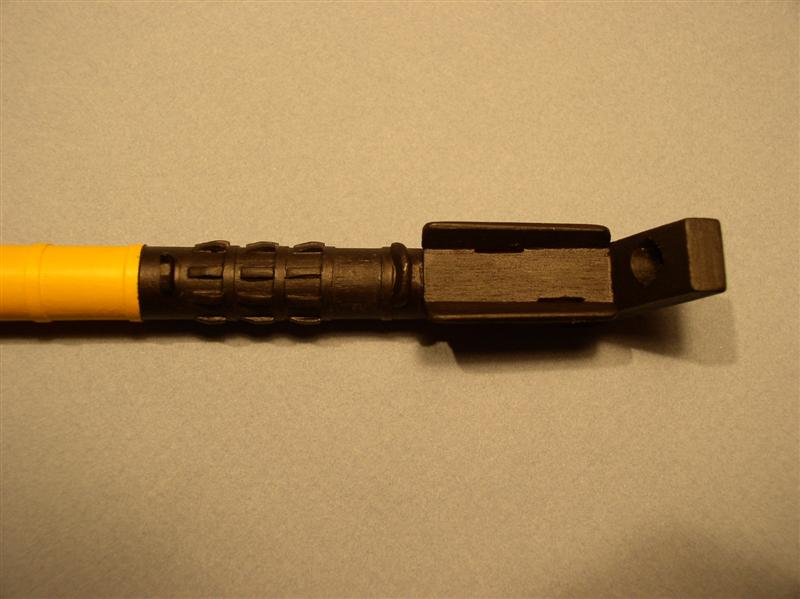
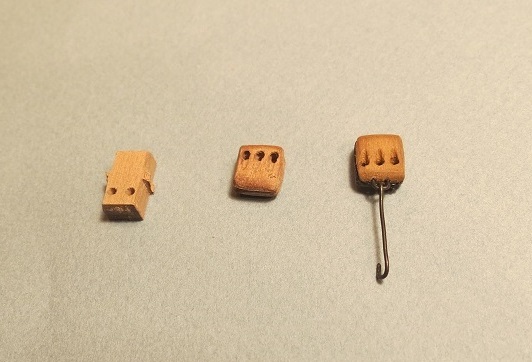
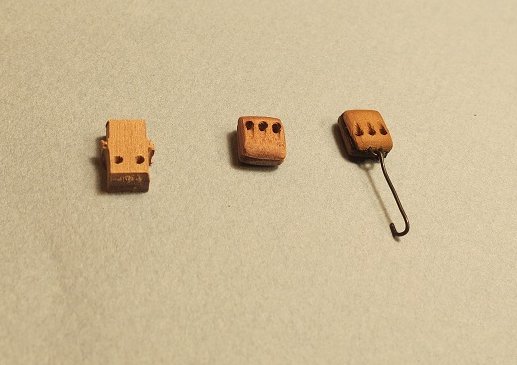
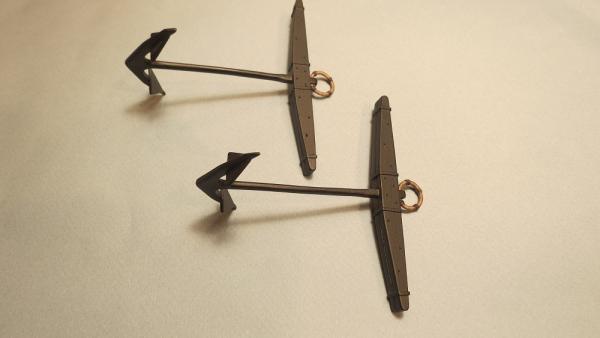
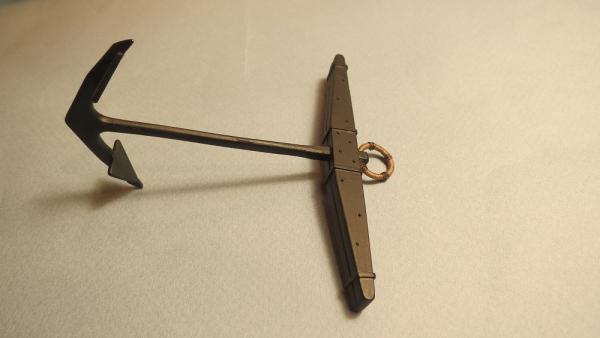
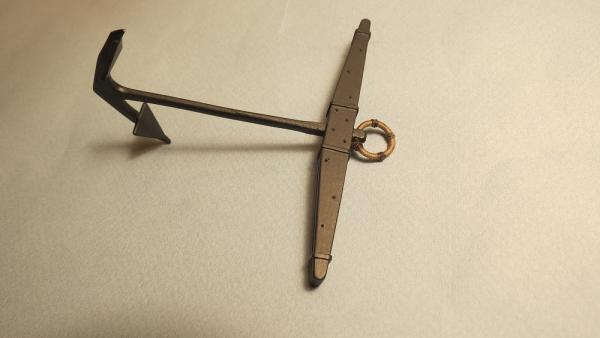
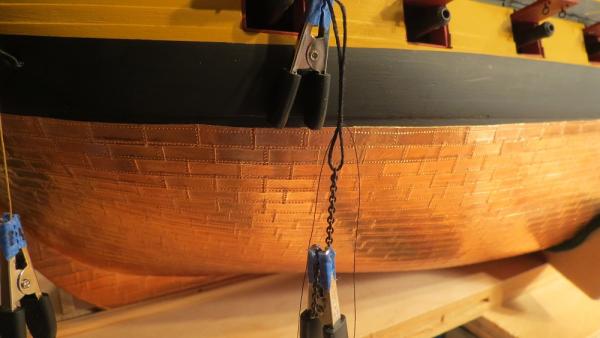
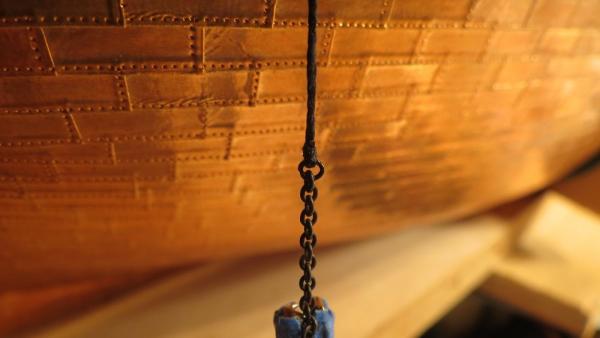
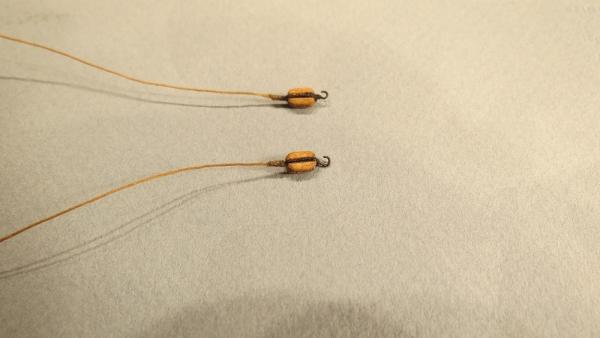
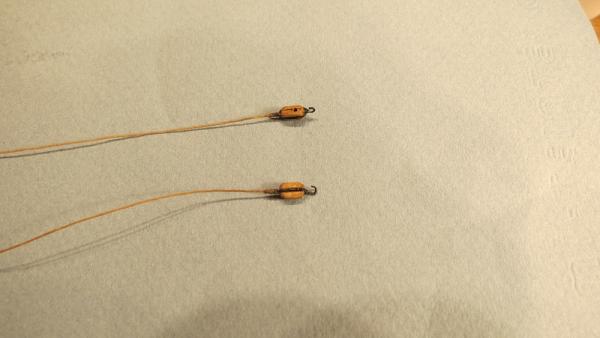
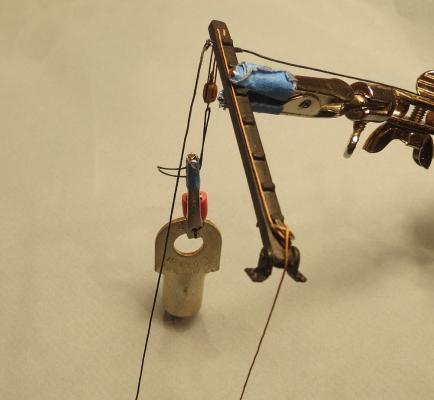
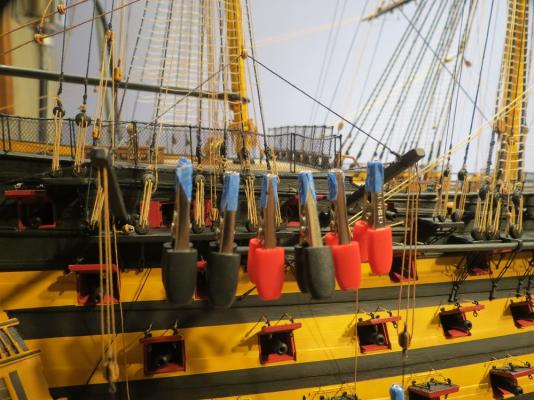
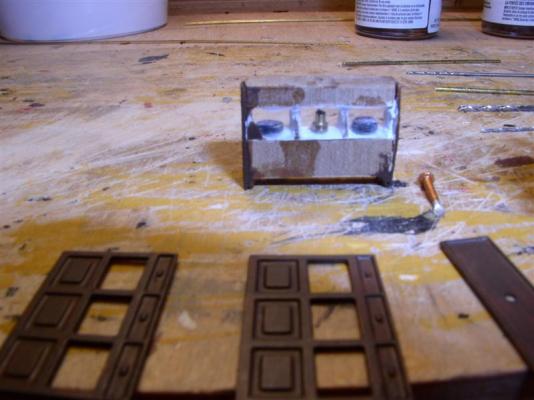
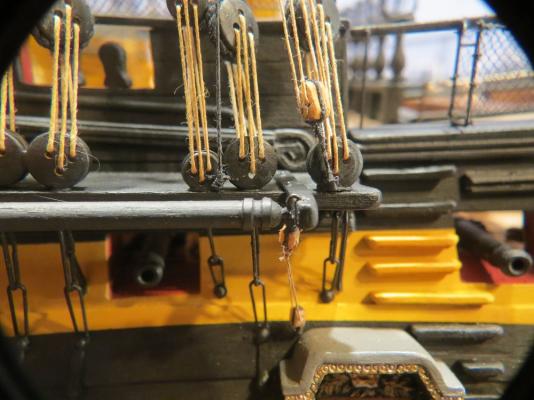
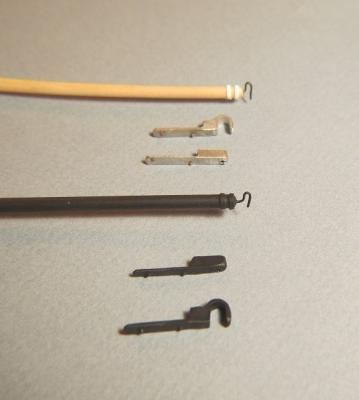
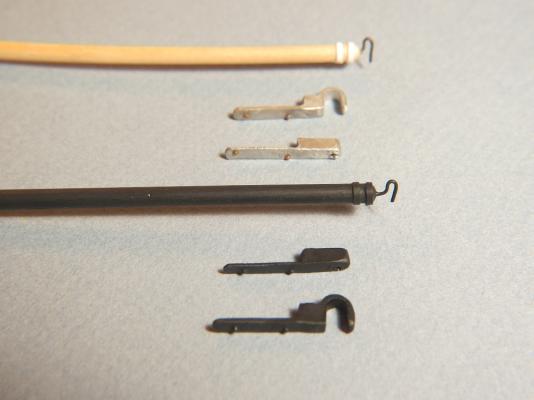
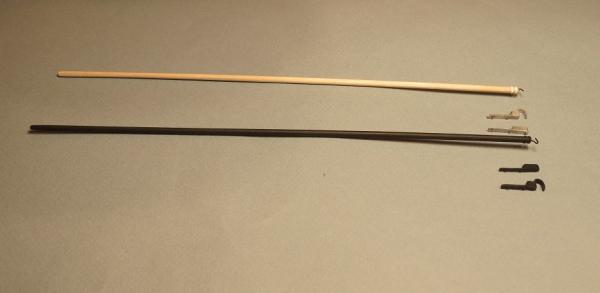
Attaching the anchors. From left to right, a double block as supplied, a triple block shaped and a tripple block stained, stropped, with steel becket and anchor hook. I should have added holes in the upper part of the block to look more natural. On the starboard block, (the display side) those holes and carved slots will be added. Preparing the anchors. These were previously covered in Section 13, page 3, post #39. I plan to display the port best bower anchor in the stowed position (after McKay), while the starboard anchor will be suspended by the anchor block from the cathead. This conveys even to the novice, the function of the cathead. Creating an eye splice from a line to chain, to support the stowed anchor. Continued in next post

- 755 replies
-
- 11
-

-
- finished
- caldercraft
- (and 1 more)
-
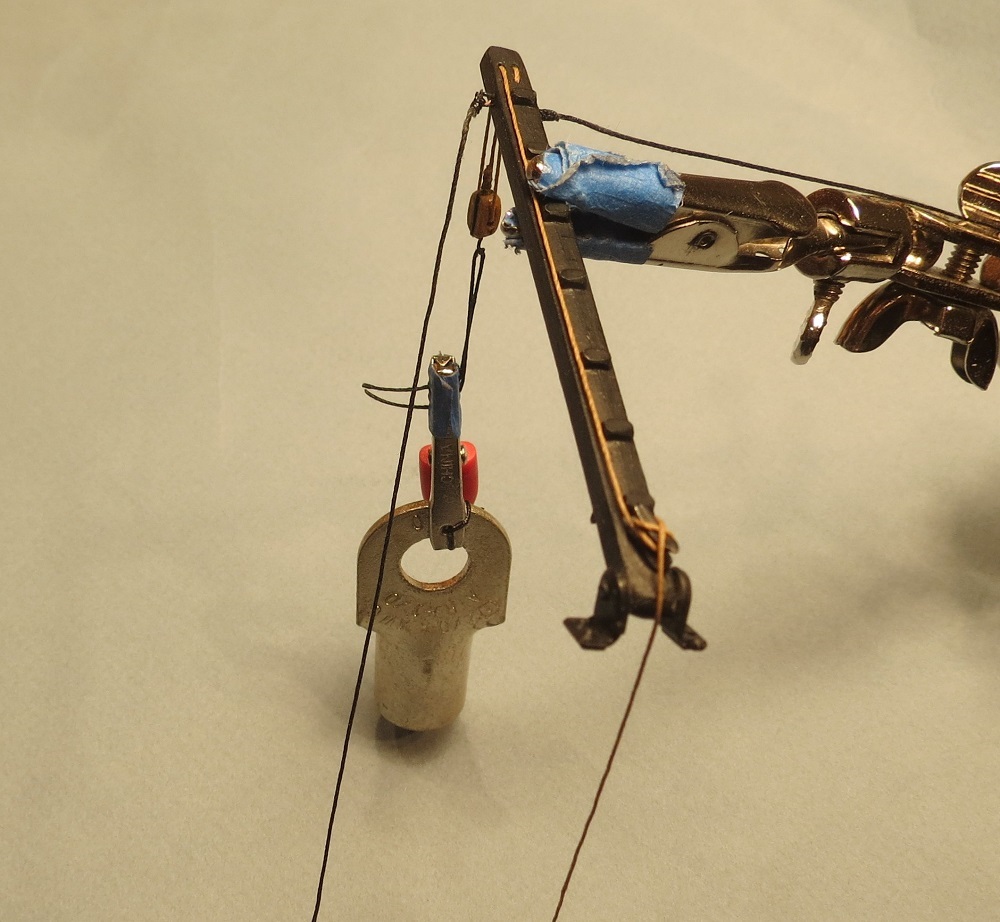
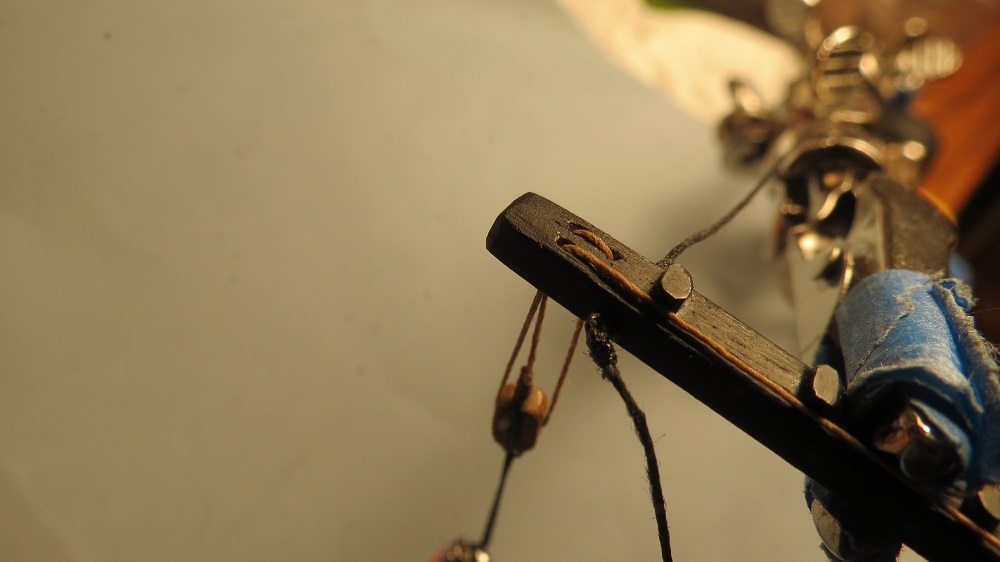
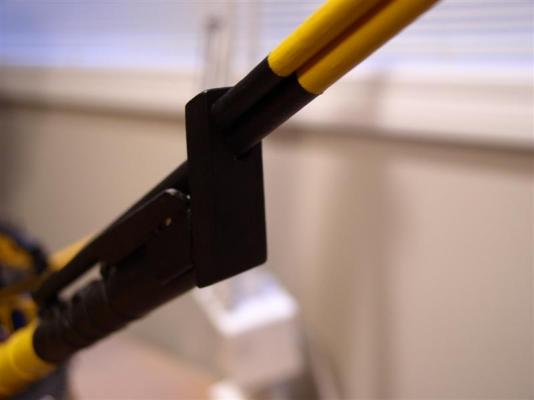
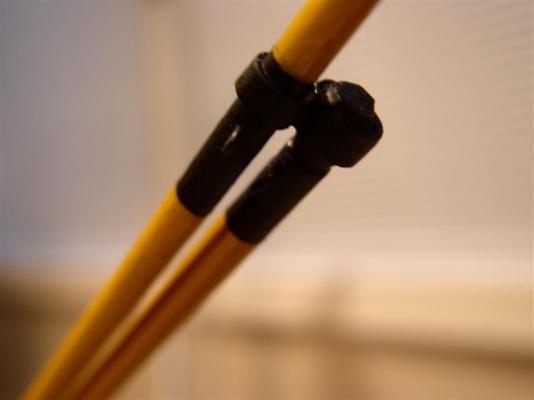
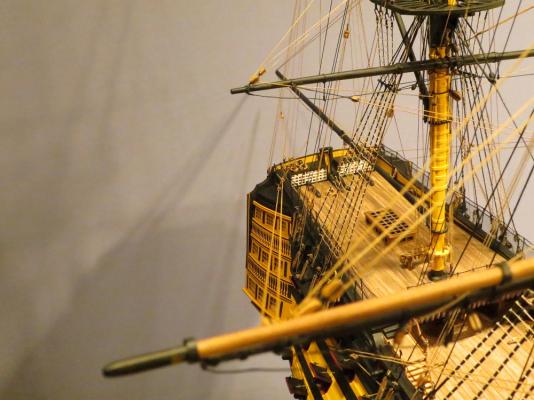
Moving to the port davits. Making the falls (tackle) for the port davits. I've chosen to display the port davits in the inboard position, while the starboard davits will be in the launching mode. Note the slack topping lift. Topping lift tensioned with weighted clip. Lift sling, jackstay and guys treated with fast C/A to hold shape. Weighted clip (Battery cable end filled with solder and tied to the mini clip.) These can be very helpful, placing light tension on lines during rigging. Cheers, Gil


- 755 replies
-
- 7
-
-
- finished
- caldercraft
- (and 1 more)
-
Lawrence and Jerry, Many thanks for your kind remarks. Cheers, Gil
-
Jerry, I've just caught up on your log after being away for six months. You've made great progress in spite of the surgery. I think we are about the same age and I went through the same surgery after being able to walk only about a hundred yards. I hope your recovery is as successful as mine. Life is certainly much better without pain. You've already passed me, working on the boats. I'm reassured by your beautiful launch that I can benefit from your build. Cheers, Gil
-
Grant, You've received every accolade one can think of. I finally went through the last six months or your log and was amazed that you've finished your Victory. We've compared notes, kibitzed, and challenged one another, and I enjoyed every moment. Congratulations on your beautiful build. Thanks for the heads up on the ships boats. You've probably saved me a few false starts. I'll miss the on going posts. Warm regards, Gil
-
Daniel, I finally found time to catch up on the last six months of your posting. What fun to follow your ideas, inspirations and great results. Man eating Lady Bugs in the rigging, monsters peering through magnifiers and simply wonderful techniques. What more can one ask? I thoroughly enjoyed the read. Cheers, Gil
-
Kevin and Augie, Many thanks to you both. Mark and John, if any part of the model begins to look like the real thing, I'll be delighted. Thanks Daniel. I promise not to mount the anchors until I have thoroughly perused your postings. So many ideas and useful tips. And when I start on the boats Grant, your log should save me from false starts and problems in construction. Although I'm rather intimidated by your results, I'll try to come close. Gil
- 755 replies
-
- 3
-
-
- finished
- caldercraft
- (and 1 more)
-
Davit attached to hull. Line weighted to create curve in jackstay. (Fast C/A between clamps, Clamps moved and second application of C/A) Forward hinge at hull Topping lift Tackle for cutter Aft block and hook Haven't built the boats yet, but I'll have to study Grant's lovely cutters, pinnace, etc. Cheers, Gil Topping lift Lines left to right, guy, topping lift and jackstay Termination of topping lift from block on mizzen mast through block on deck ring


- 755 replies
-
- 19
-
-
- finished
- caldercraft
- (and 1 more)
-
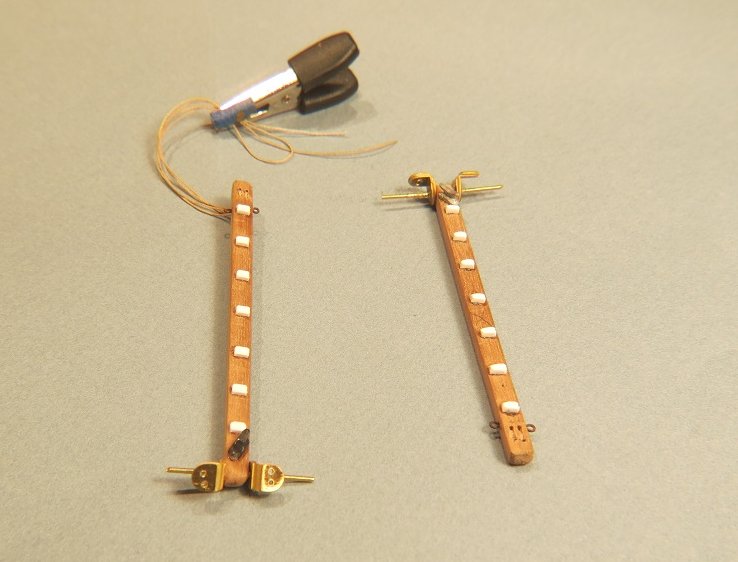
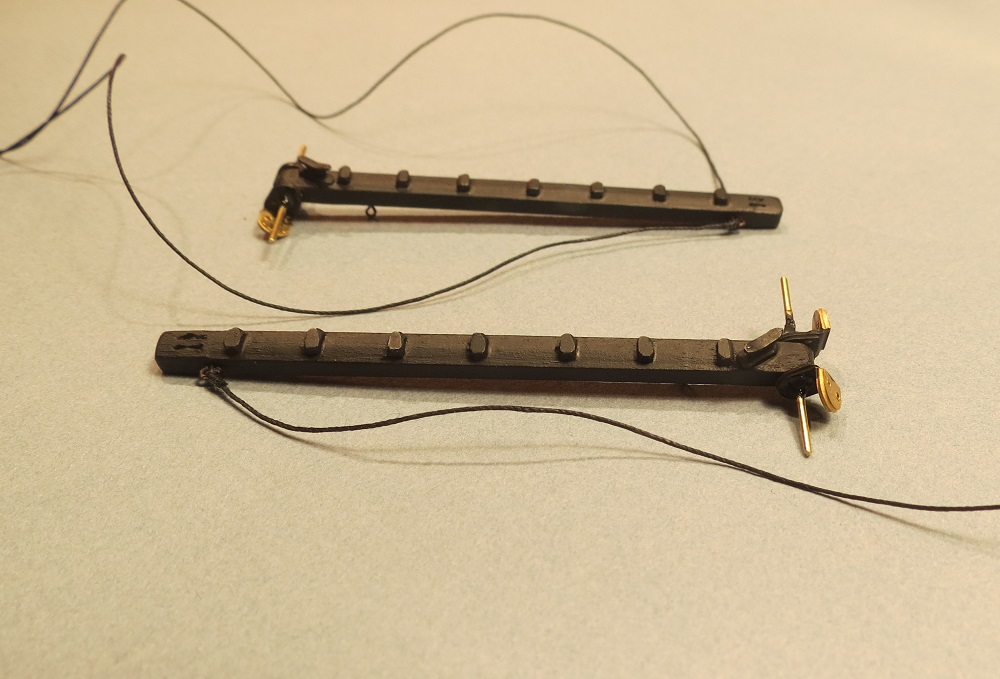
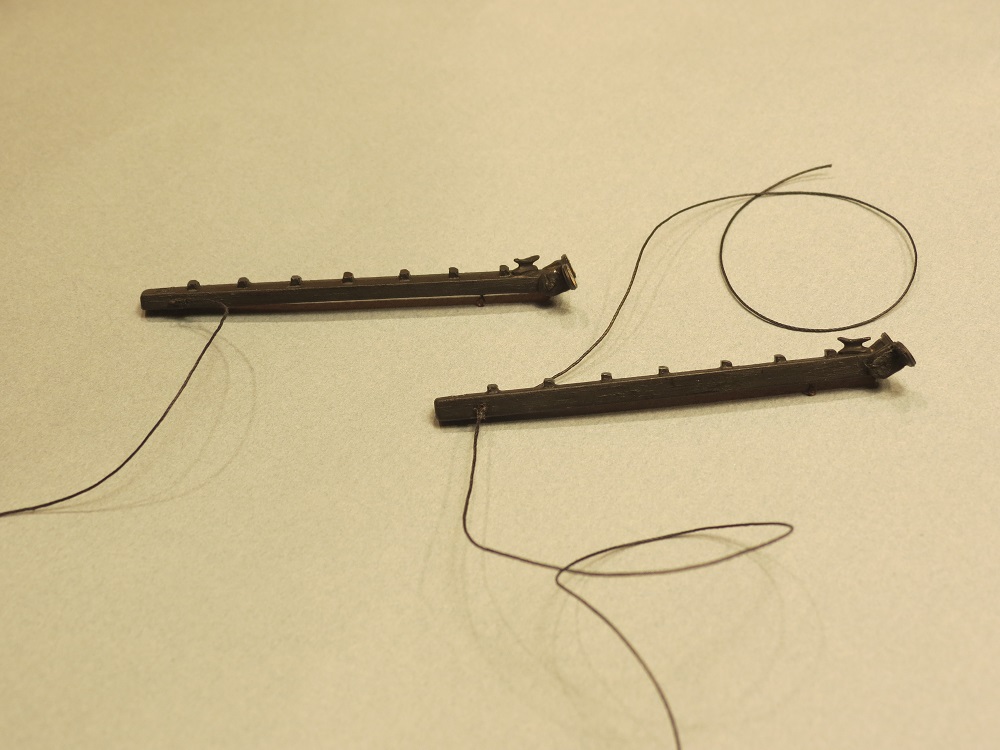
Adding more details. Making the Davits Styrene used for foot steps. Holes shaped by the drill to simulate line passing over a sheeve. Guys and jackstay added.

- 755 replies
-
- 11
-
-
- finished
- caldercraft
- (and 1 more)
-
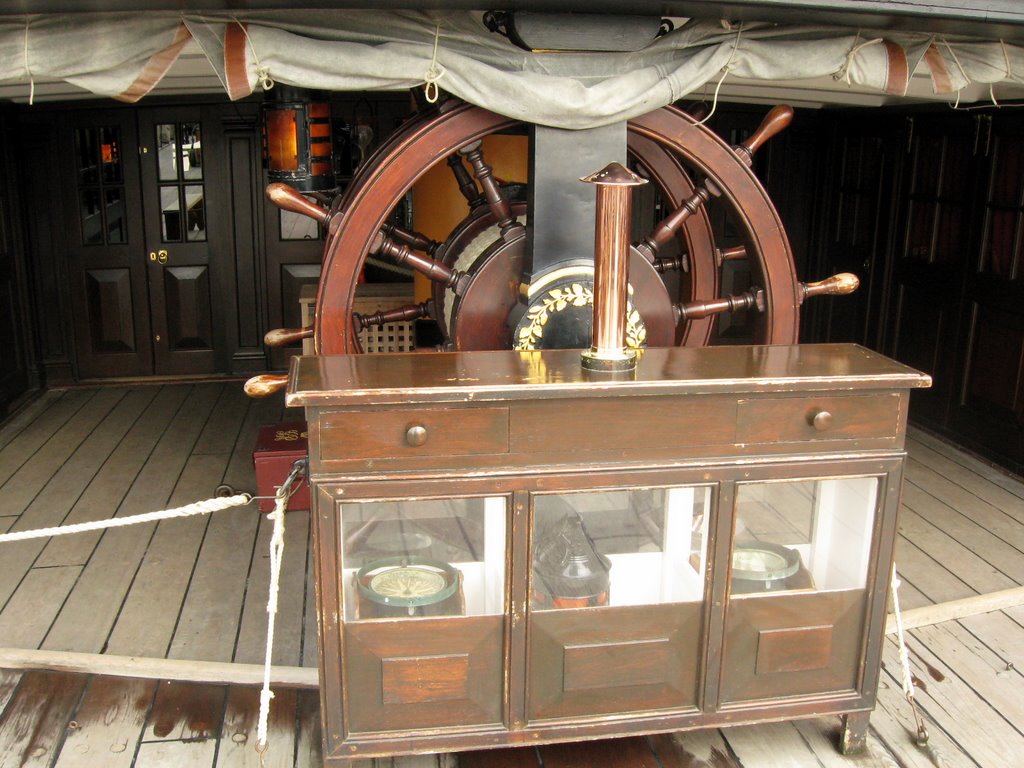
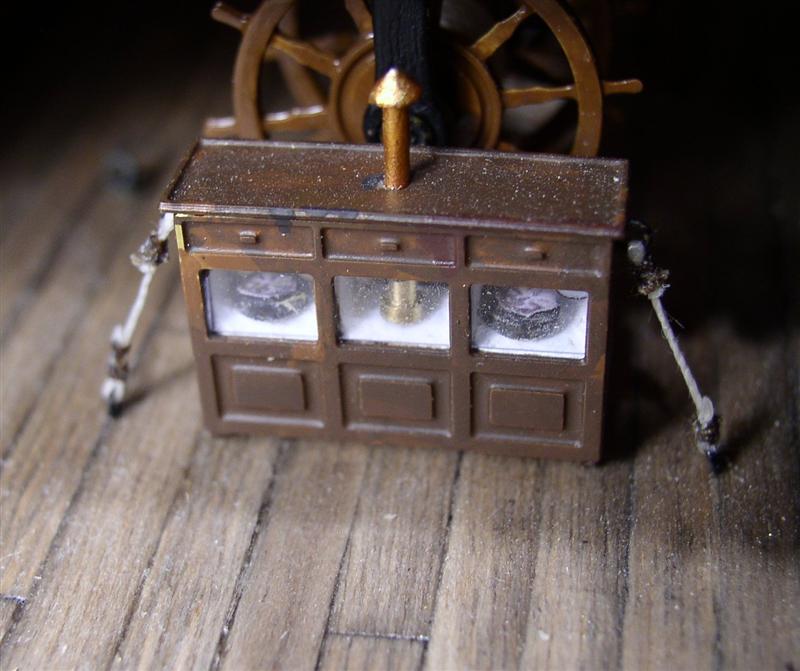
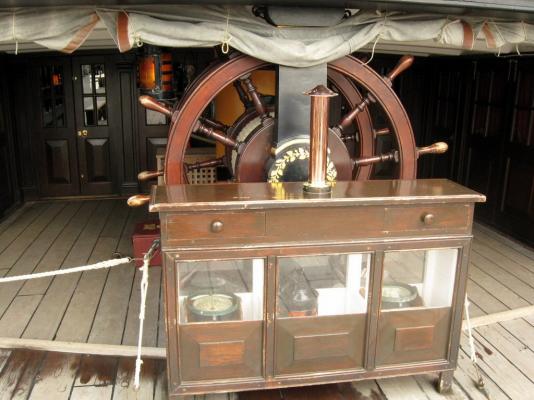
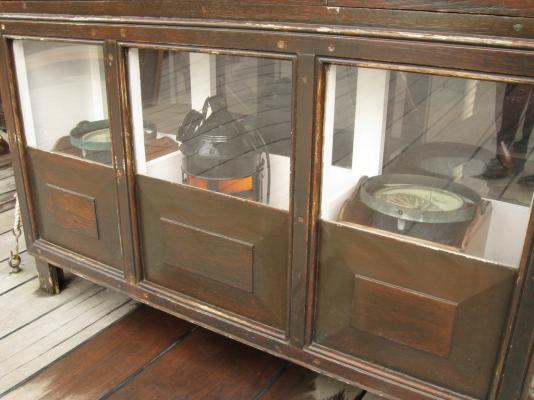
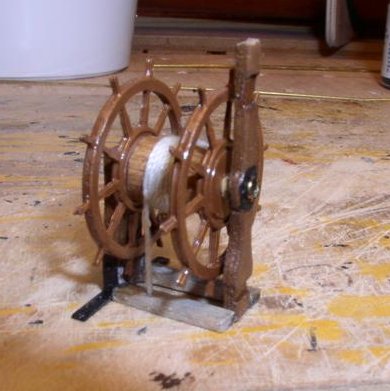
Michael and Lawrence, Thanks for your visit and kind comments. My apologies to all our friends whose logs I haven't yet visited. We're still settling in and time at the table is somewhat limited. Philippe, The fascia or veneer of the binnacle was part of the JoTika kit as were the wheels. The compasses were added for effect, as were the deck braces and ring door handles. I'm not sure other photos would be helpful. What kit are you working with? From the real ship, the wheel with the angle iron deck support and binnacle with compasses, ring door handles, etc. And from the model, the binnacle and wheel. The wheels assembled on a dowel, angle support iron added (not in the kit). Building the binnacle, fascia supplied, compasses added, and a dusty binnacle. Hope this helps. Gil


- 755 replies
-
- 12
-
-
- finished
- caldercraft
- (and 1 more)
-
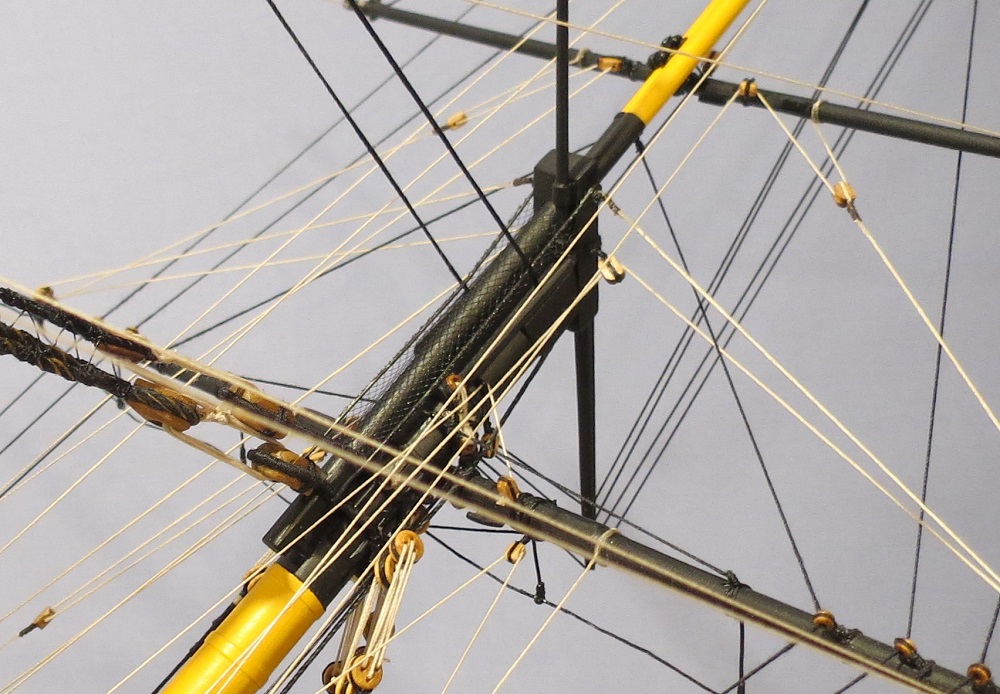
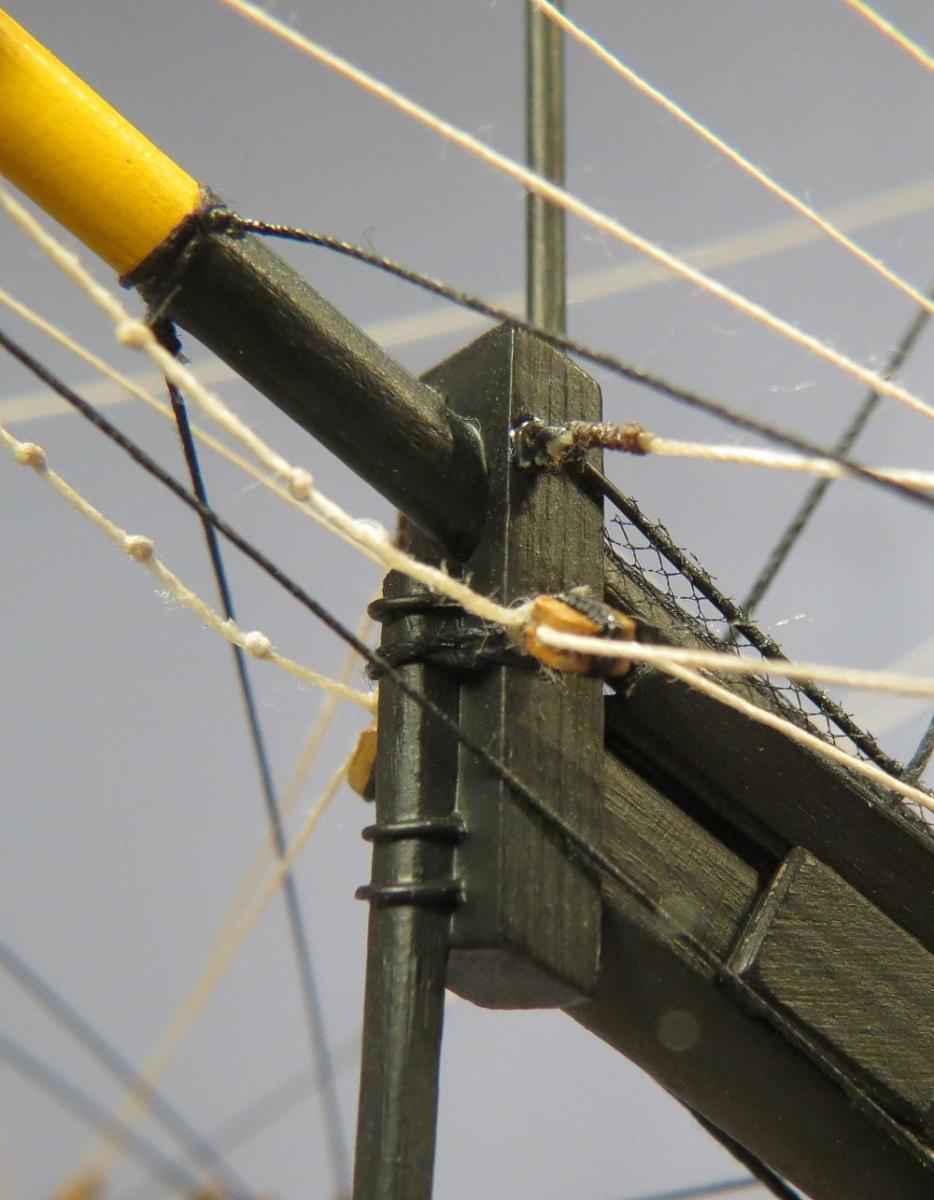
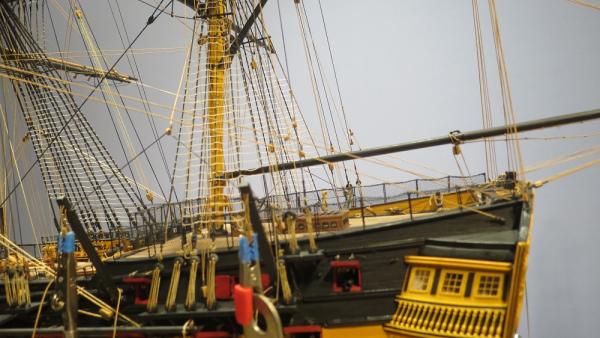
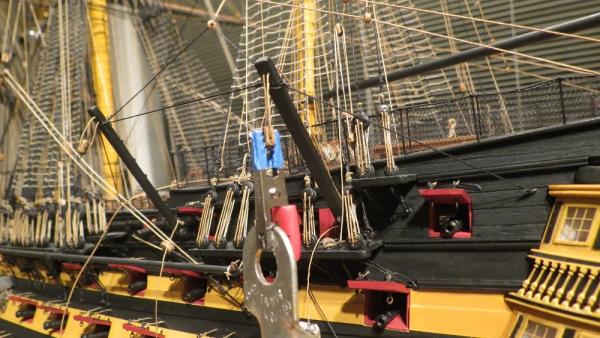
Completing the bowsprit. The jib boom passes through the round hole in the cap. The flying jib boom base is beveled to fit the forward face of the cap. The flying jib boom is supported by the jib boom. Much later, netting was added. (Details of the netting are shown on page 3) The bow sprit cap seen on the real ship. And on the model. I hope this makes sense of the original photographs. Cheers, Gil

- 755 replies
-
- 12
-
-
- finished
- caldercraft
- (and 1 more)
-
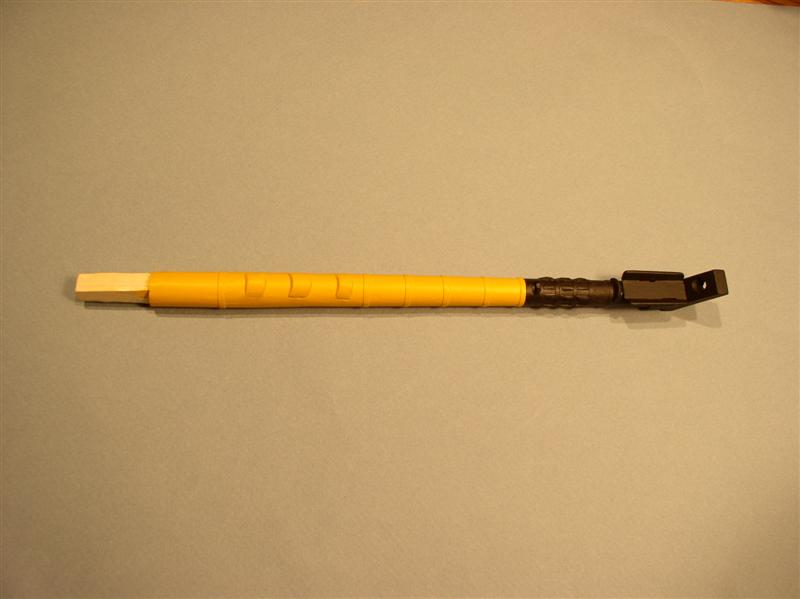
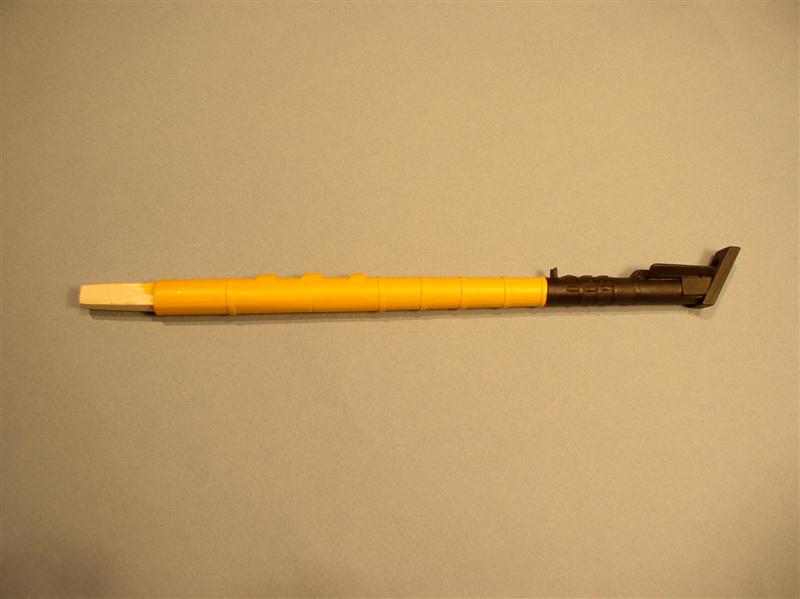
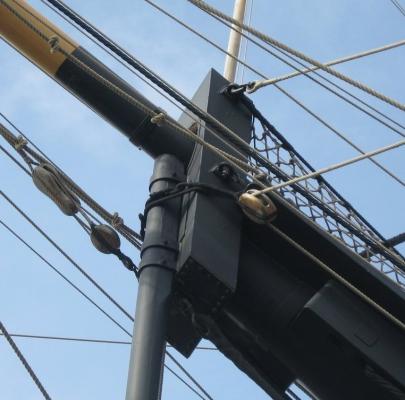
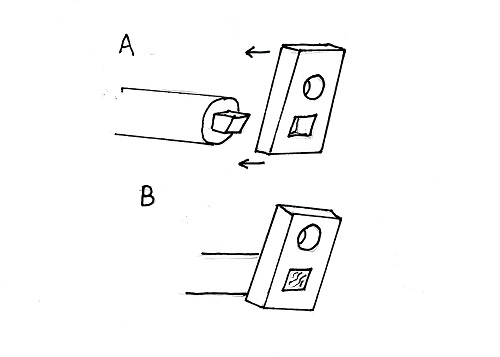
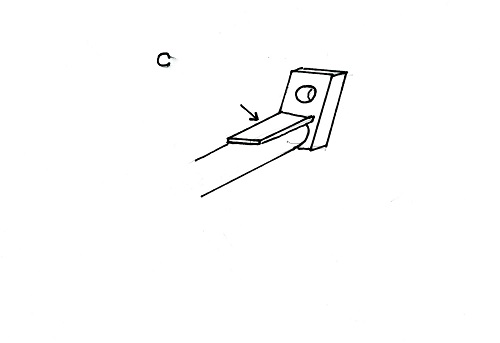
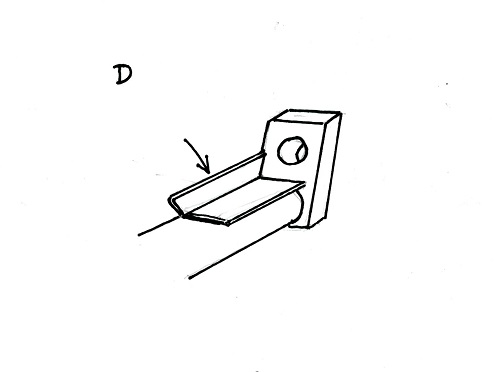
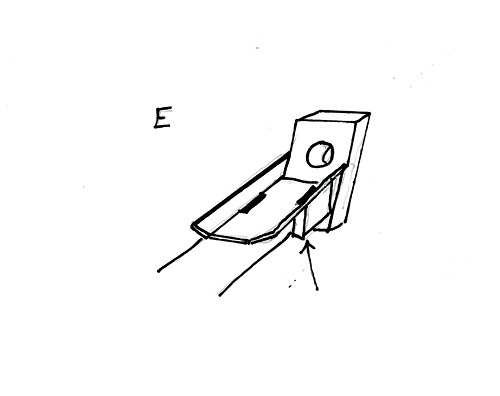
A few simple sketches to show the details. A and B. Bow sprit cap fitting on the tenon C. A flat base added on top of the bow sprit. One can simply plane down the top of the dowel, but the added base makes a more secure attachment for the bees. D. The "bees" are added to each side. E. Finally, cheek blocks are added to each side, which receive the fore topmast stay and preventer. Slots cut in the base for access to the cheek blocks. Completed bow sprit. Top view Side view Close up A few more photos follow to put it in perspective.

- 755 replies
-
- 7
-
-
- finished
- caldercraft
- (and 1 more)
-
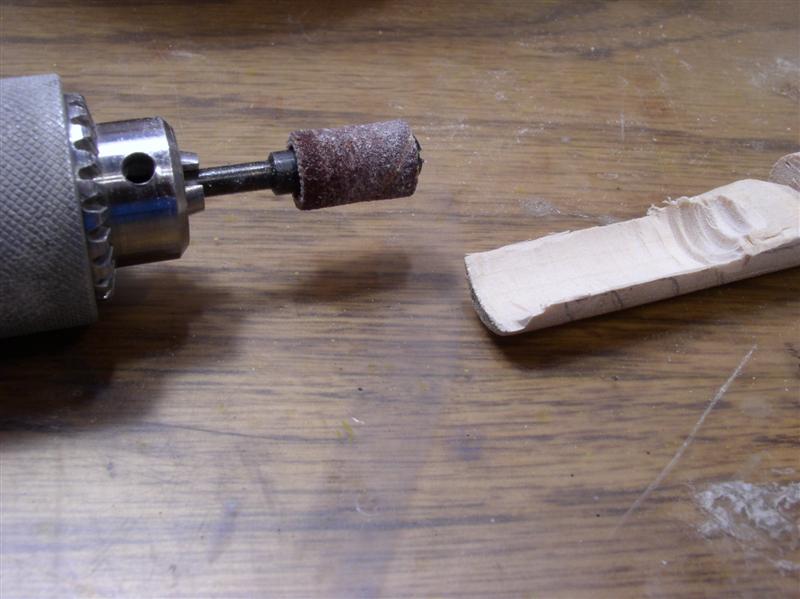
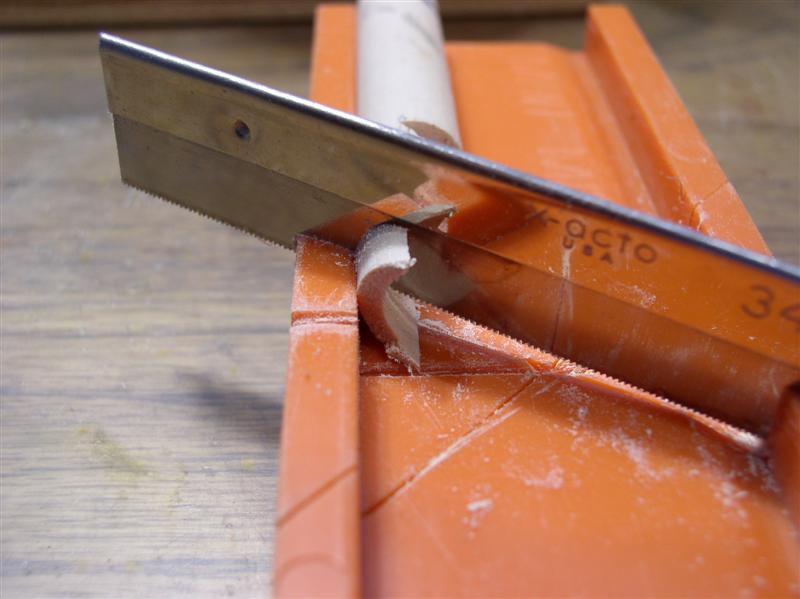
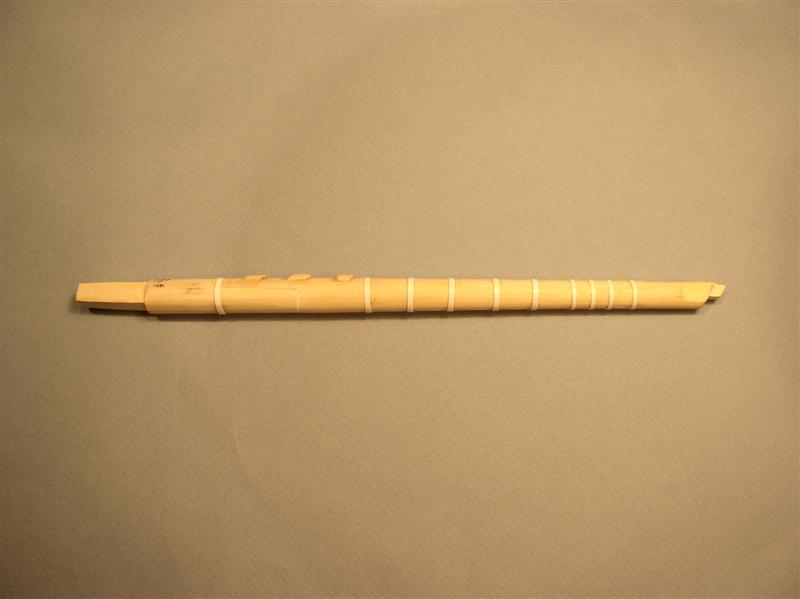
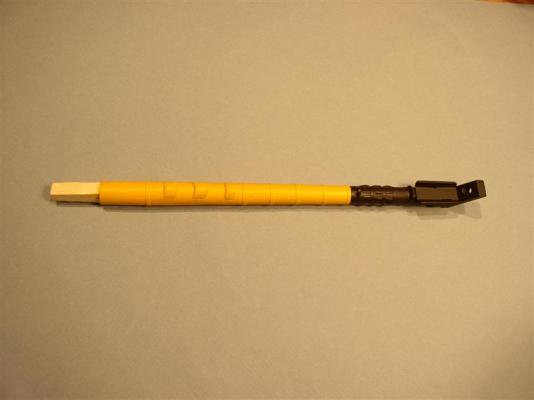
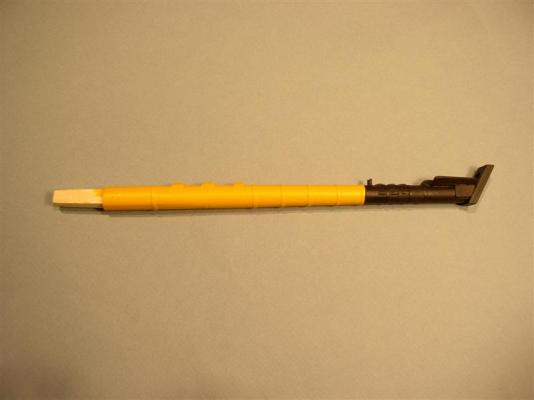
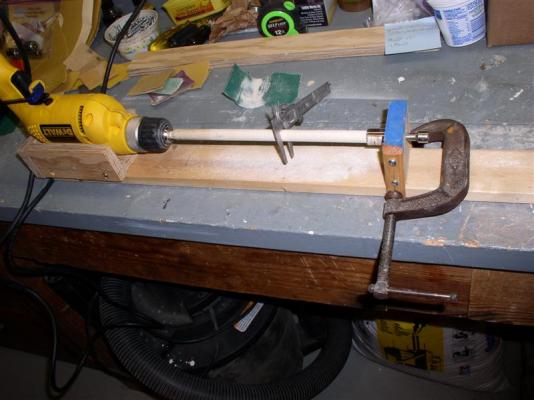
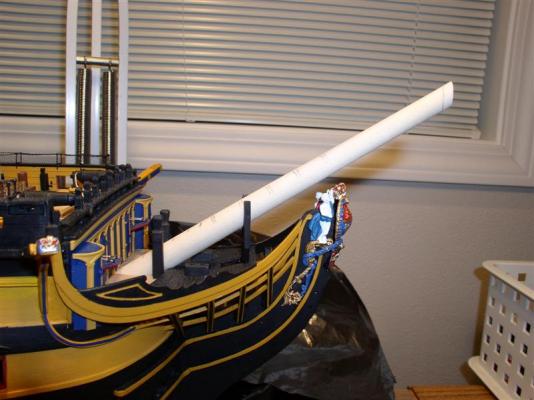
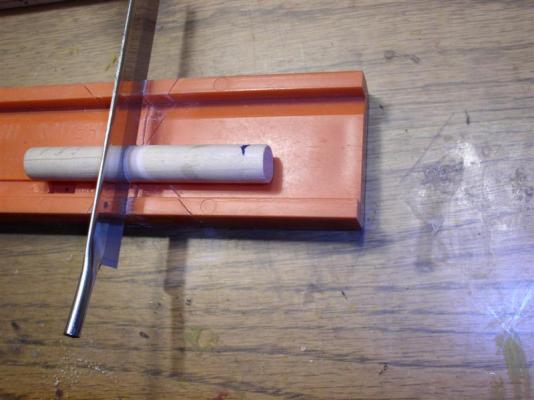
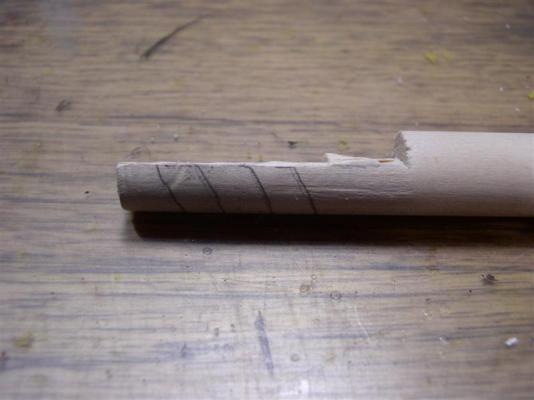
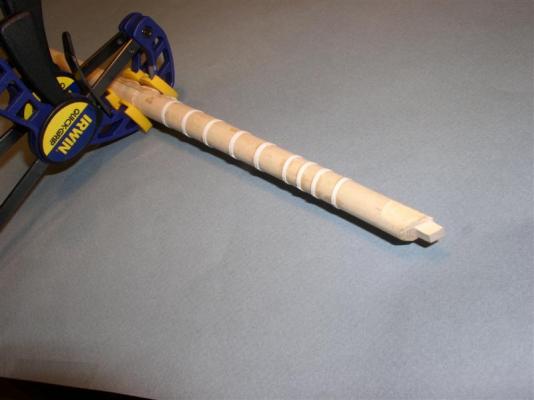
BOW SPRIT I've been asked about building the bowsprit, and on reviewing the photos (page 3 of this log), it is somewhat confusing. Though most of the photos were reentered after the crash of 2013, most comments were not. To explain, I'll duplicate some photos and add a drawing or two. Of course, this is simply one way to do it. Tapering the bow sprit with a "poor man's lathe" ( Hand drill in a cradle). Bow sprit fitted at fore deck Making gammoning "saddles." Using another dowel of the same size, cut half way through. One half thickness of the dowel removed. Grinding out the center of the dowel. Cutting saddles on a bias. Gluing saddles in place, Tenon fashioned at the forward end to fit square hole in the cap. Saddles in place, "Iron rings" added and tenon at the right side. Drawings to follow.


- 755 replies
-
- 8
-
-
- finished
- caldercraft
- (and 1 more)
-
Jon, Good grief ! More photos missing. Thanks for the heads up. It could have been so much worse. Gil
- 755 replies
-
- 1
-
-
- finished
- caldercraft
- (and 1 more)
-
After Mark explained what happened while I was gone, I read the postings of others with the same problem. Looking back through my log, I believe all the photos have been replaced. Cheers, Gil
- 755 replies
-
- 3
-
-
- finished
- caldercraft
- (and 1 more)
-
Many thanks Mark. I've been out of touch since mid March and had not realized others were having the same problem. I'll get busy tomorrow tracking down photos. Gil
- 755 replies
-
- 1
-
-
- finished
- caldercraft
- (and 1 more)
-
I was recently asked about how to make rope coils. Looking back to pages 26, 27 and 28, I discovered that the photos are no longer posted, but only the index number of the photos displayed. Somehow, the files have been corrupted, deleting the photos. They used to be there, now they are not. Has anyone else had this problem? And what is the cause? Before further discussion on rope coils, it appears I need to go back and edit a number of posts to reinsert photos. In fact I probably need to review every post to see how extensive the problem is. Cheers, (I think). Gil
-
Thanks Kevin, For those not familiar with Studding Sails (Stuns'ls), the following should clarify. Studding Sails Studding Sail Boom Ship with Studding Sails deployed. Cheers, Gil

- 755 replies
-
- 10
-
-
- finished
- caldercraft
- (and 1 more)
-
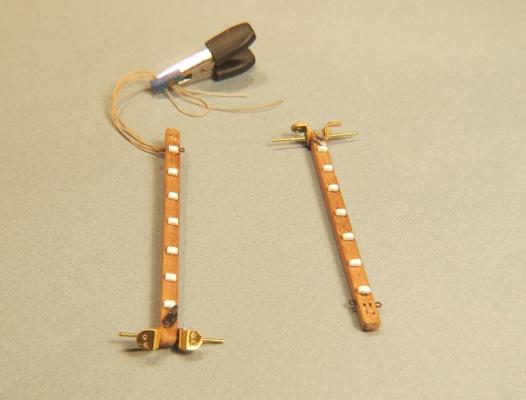
Continuing with studdingsail boom. Channel support with appearance of bolts through the channel. Small block to receive line from studding sail. Starboard fitting with control tackle Upcoming projects, Anchors and small boats. After viewing Daniel's (Dafi) precise anchor treatise and Grant's beautiful small boat construction, my task seems easier. Cheers, Gil
- 755 replies
-
- 10
-
-
- finished
- caldercraft
- (and 1 more)
-
Finally returning to model ships, with baby steps. Most of the time devoted to the real ship preparing for winter. Someone mentioned earlier that I'd missed the studdingsail boom. It was intentional, until the running rigging was completed. The main studdingsail boom follows, while the foremast stun's'le boom may or may not be added depending on securing the anchors. Preparing the boom and hardware. Adding "Bolts" for the channel. Booms tapered to approximately 3/4 the inner diameter. Port Studdingsail boom. Inner swivel and small tackle per McKay's drawings.

- 755 replies
-
- 11
-
-
- finished
- caldercraft
- (and 1 more)
-
Thank you all for such a warm welcome home. It's nice to know that our family of model ship builders is alive and well. I look forward to learning from each of you and throwing in a few thoughts along the way. Cheers, Gil
- 755 replies
-
- 5
-
-
- finished
- caldercraft
- (and 1 more)
-
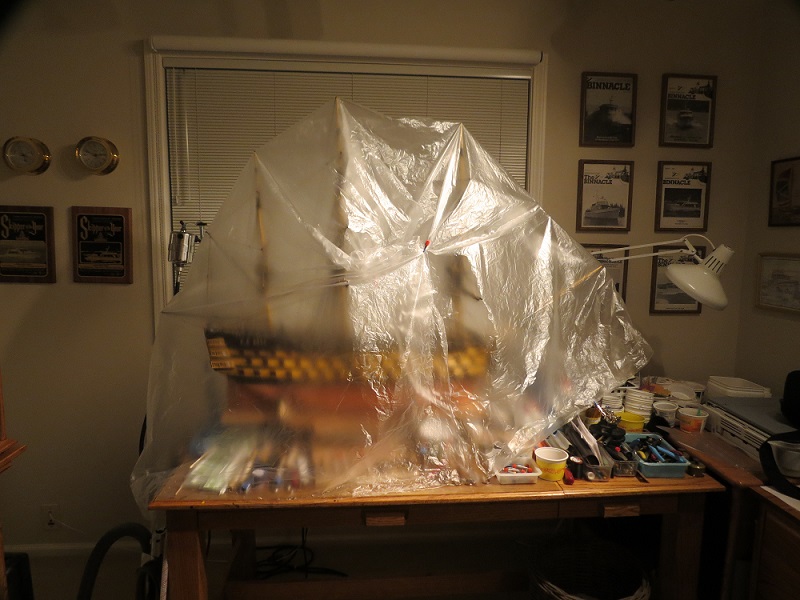
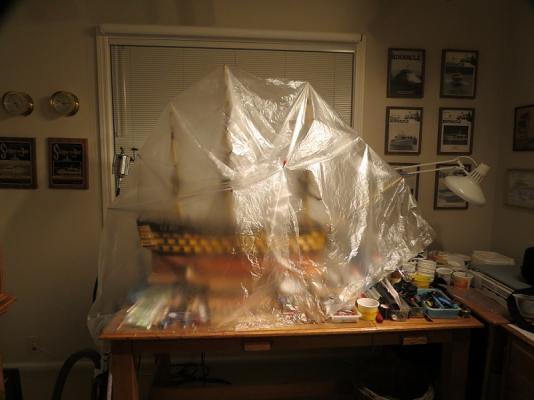
We've just returned to Seattle after a few months. It has been six months since the kind posts of Daniel (Sailor1234567890), Scott Larkin and Jason (Beef Wellington) to this site. While taking the "Victory" out of mothballs, I've replied by PM. Peter, many thanks for your remarks. I'll look for photos on rope coils, or make them, however it may take a bit of time to get organized. And Jack, thanks for your kind comments, however you are far more experienced than I in model ship building. There is still work to be done in preparing our real boat for the winter, but I look forward to bringing the Victory back to life. Cheers, Gil The "Victory" mothballed.
- 755 replies
-
- 12
-
-
- finished
- caldercraft
- (and 1 more)
-
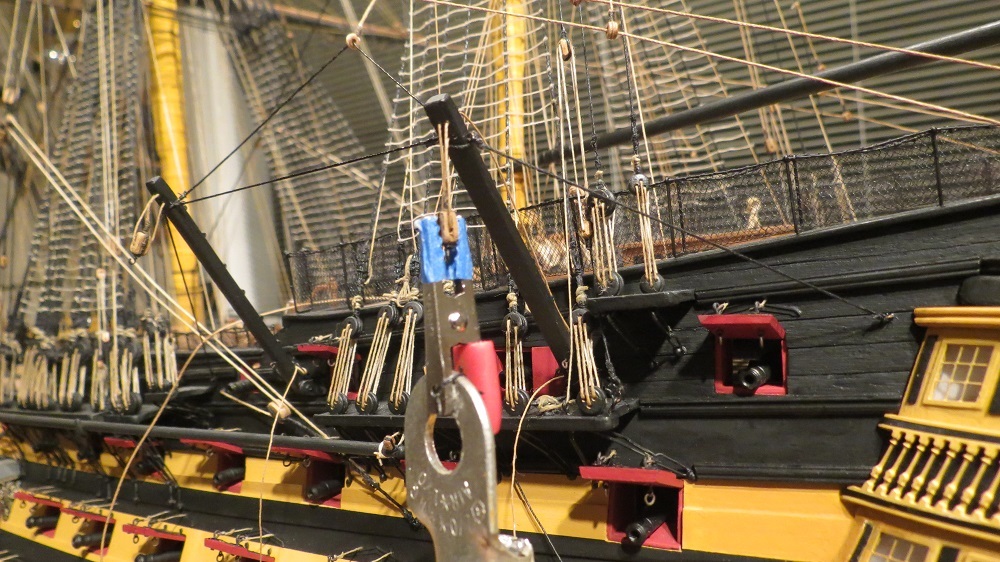
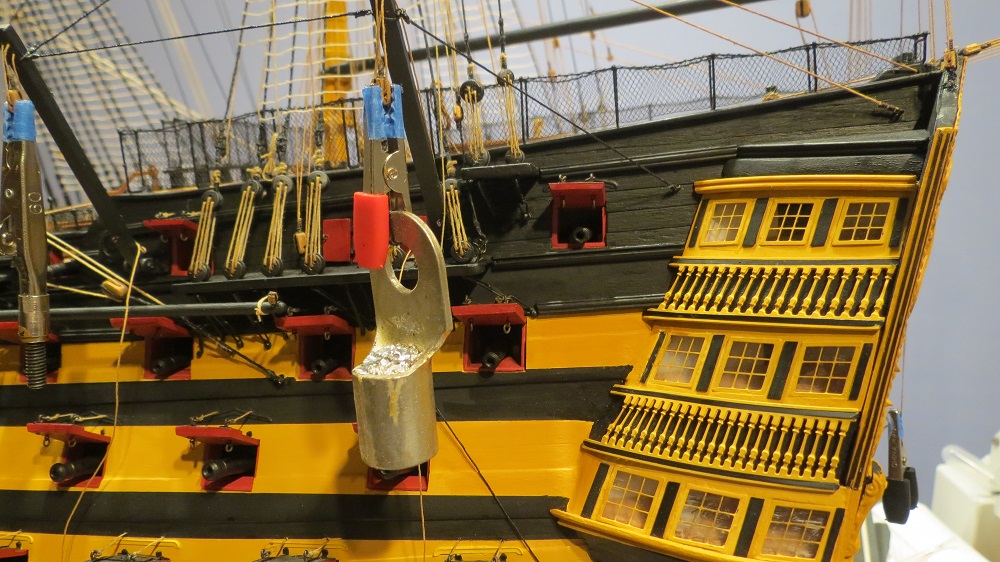
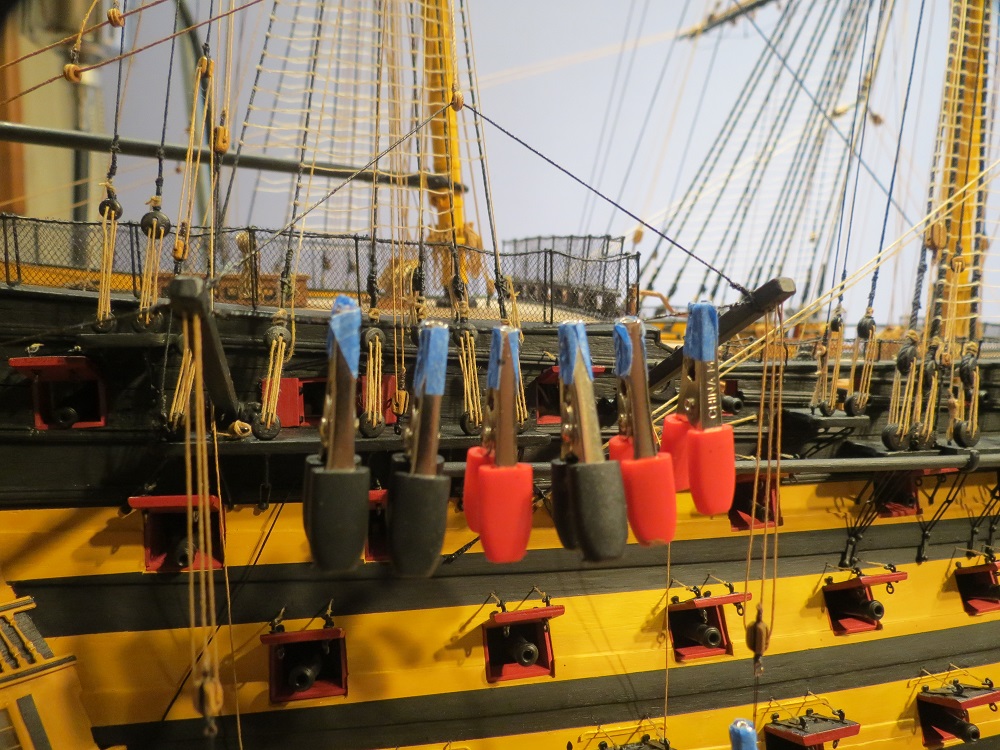
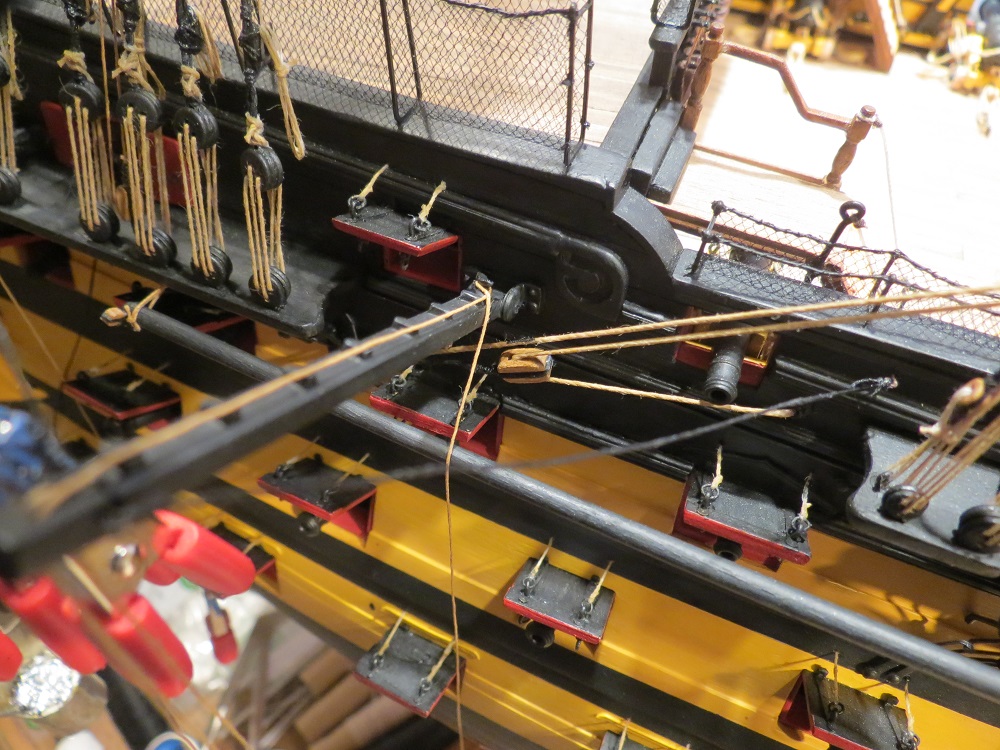
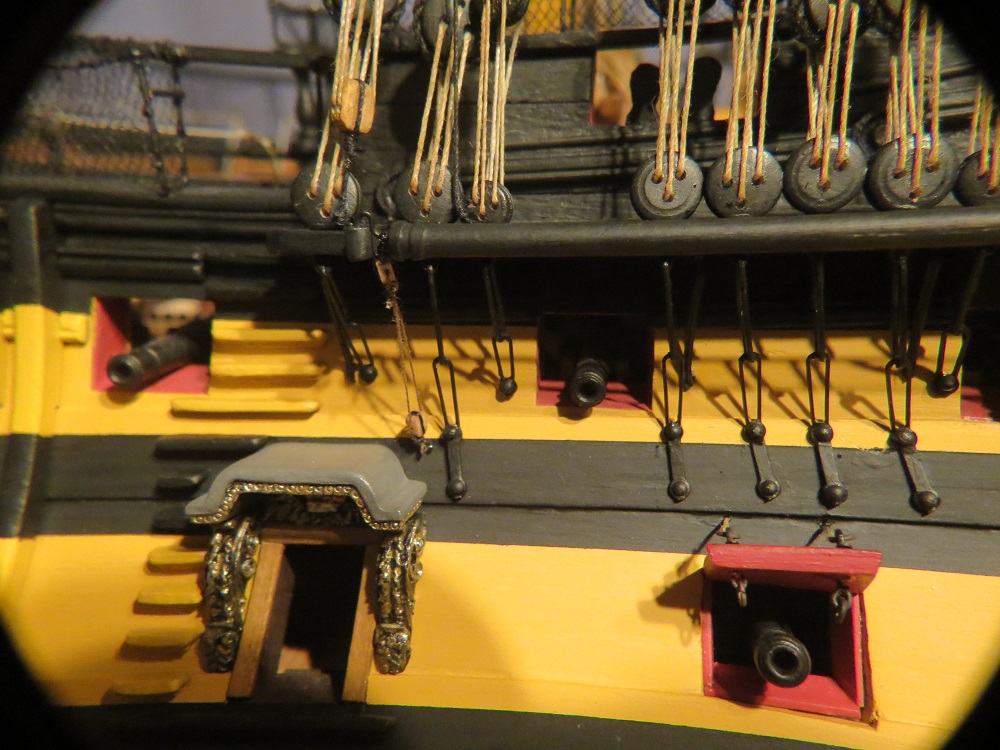
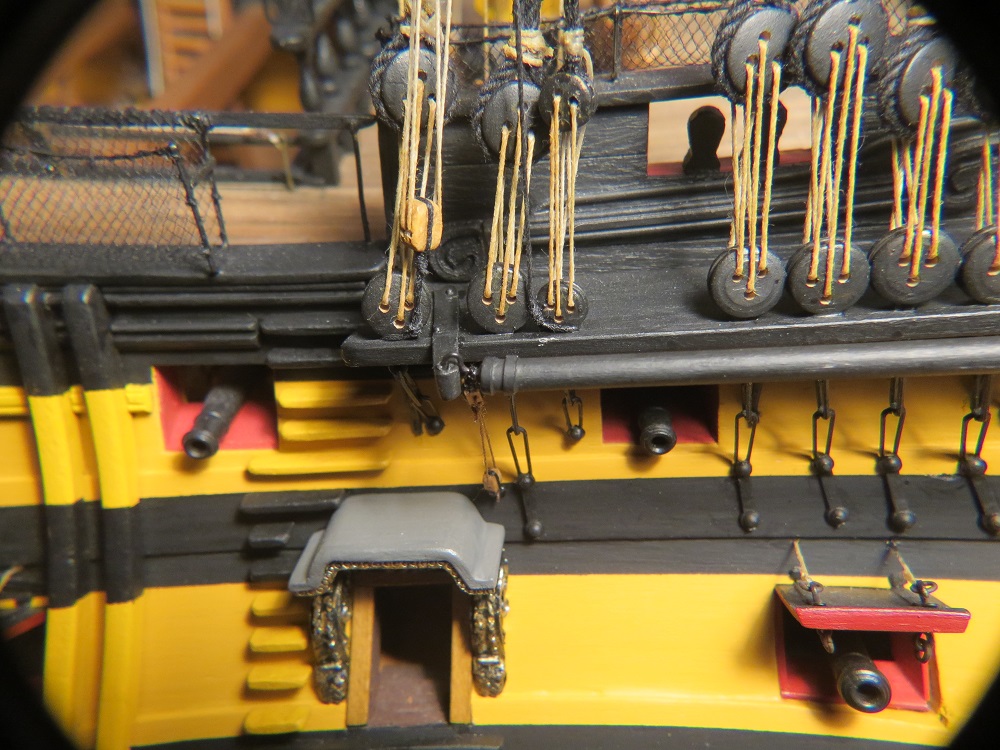
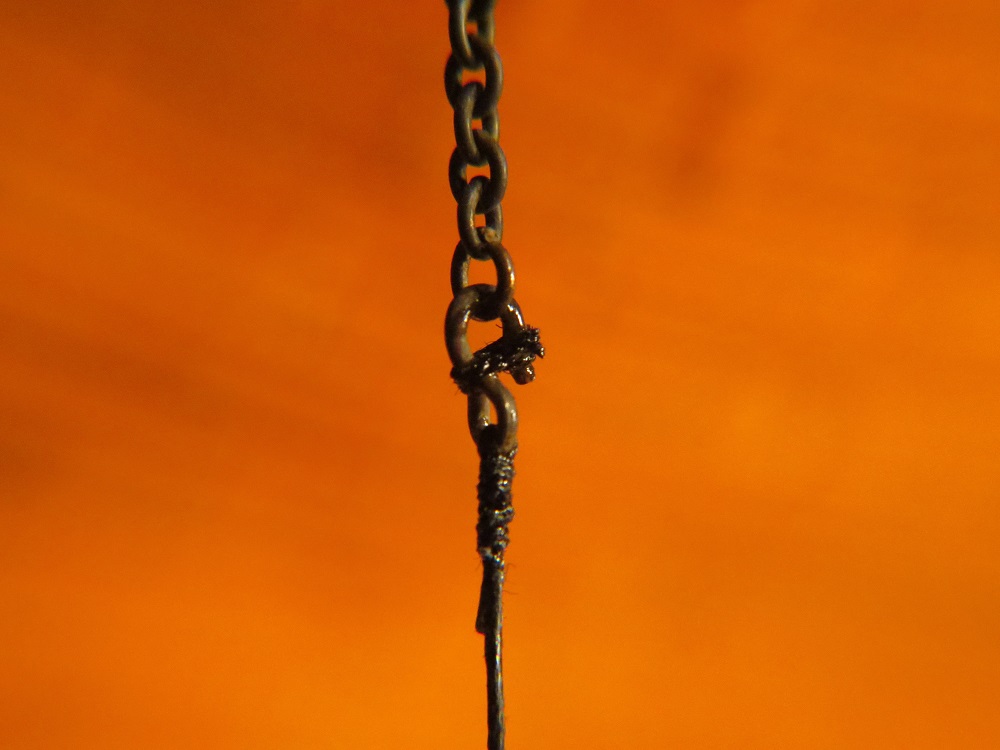
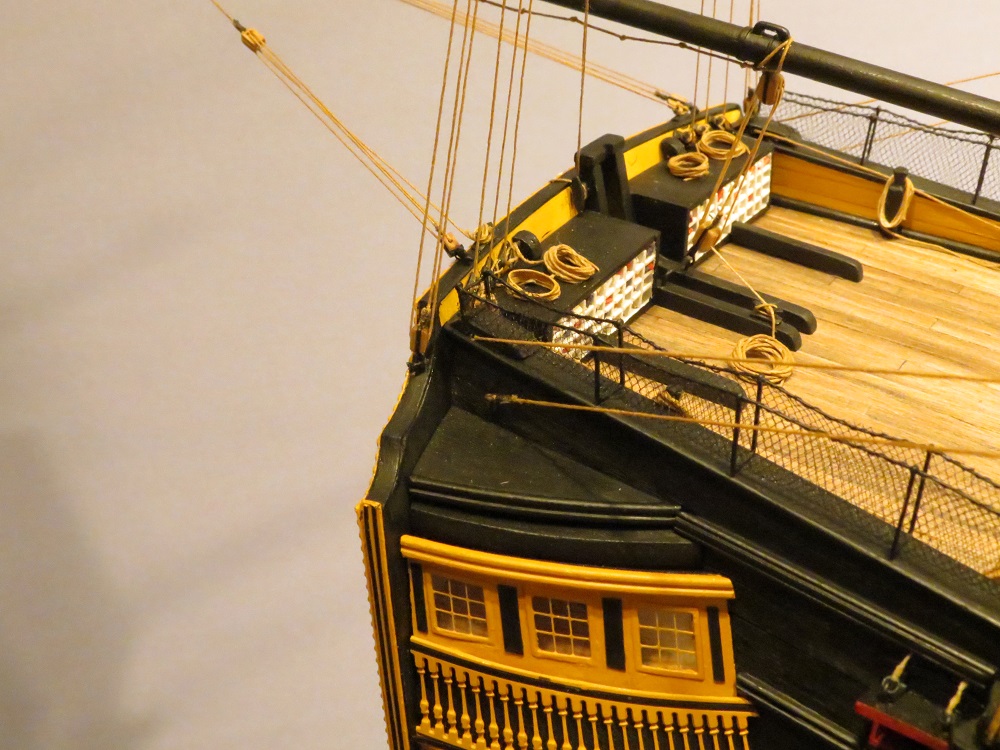
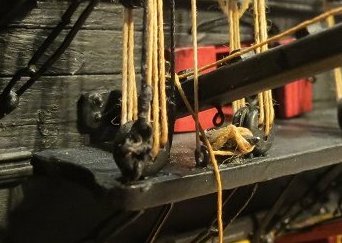
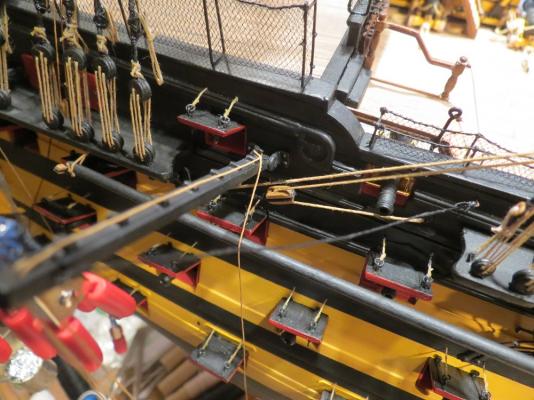
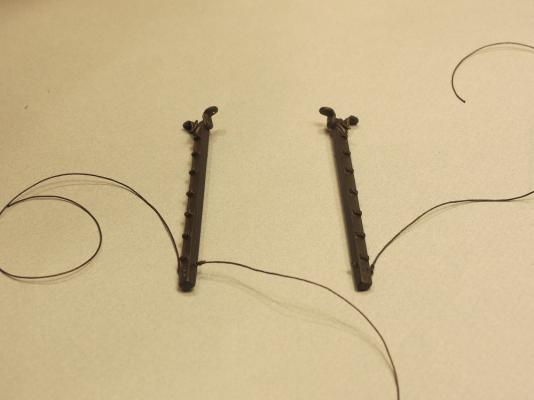
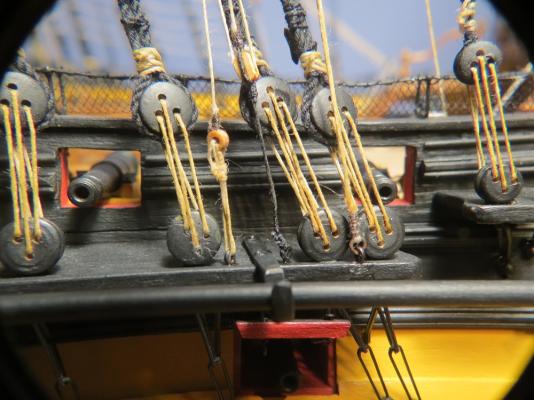
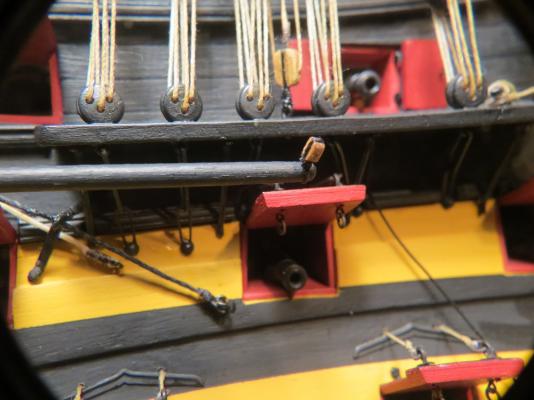
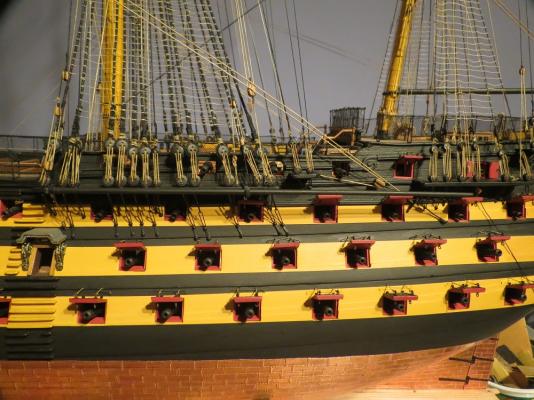
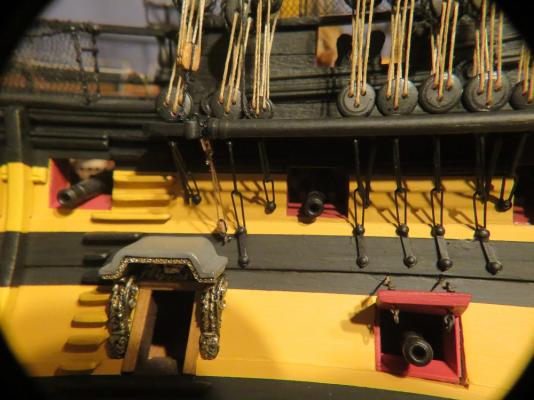
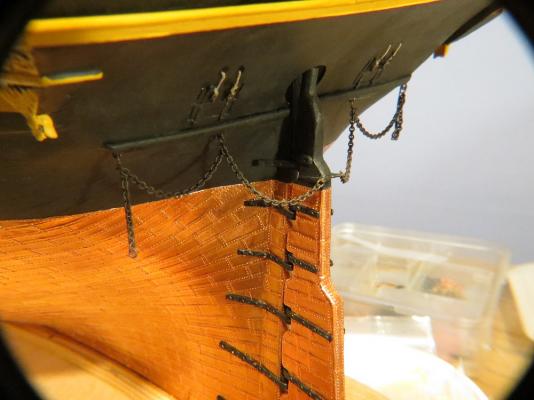
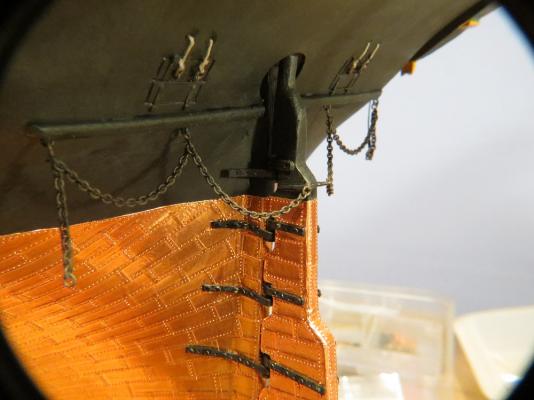
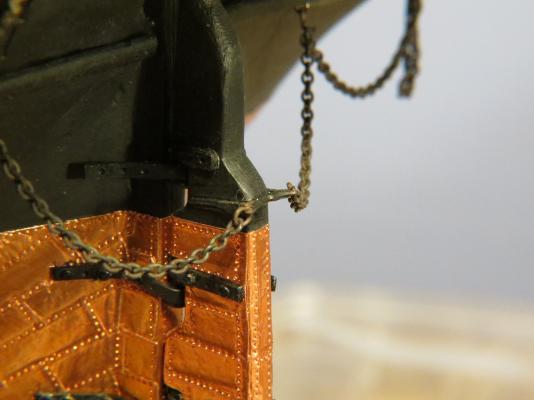
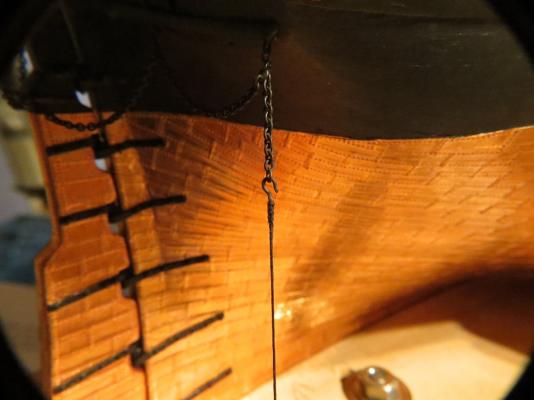
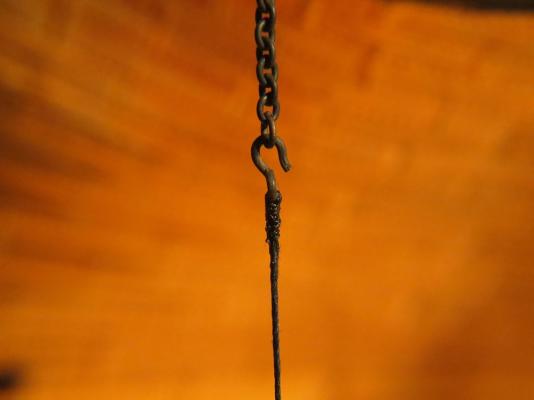
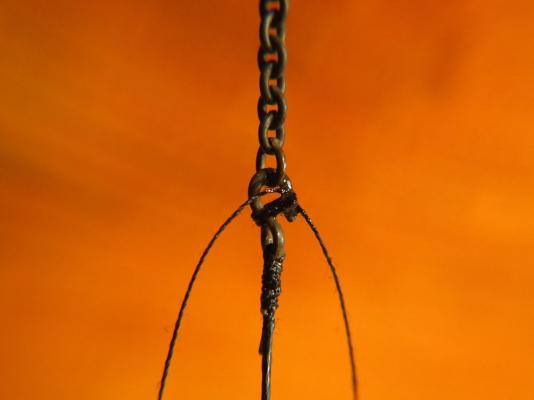
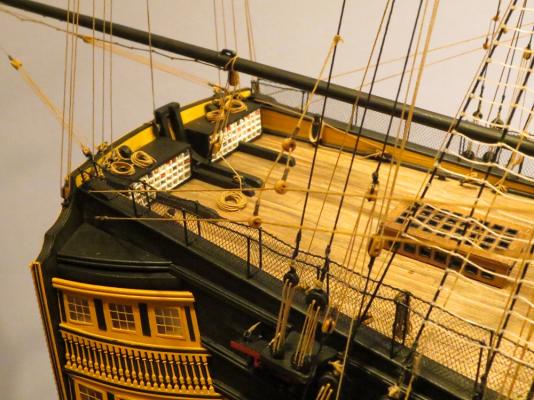
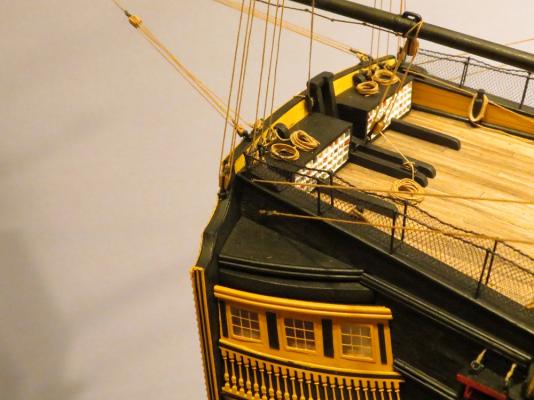
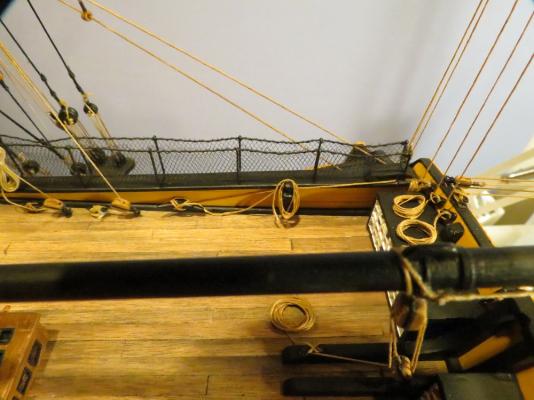
The fun stuff. Small details that were left unfinished earlier. The chain from the spectacle plate acted to secure the rudder when it was unshipped as well as provide another method for emergency steering. The end was left free to avoid interference with the gun port lids. A hook connecting the chain with the line (made from an eyelet). Lashing the hook 28 G. dark annealed wire through a hole in the channel, to allow seizing the line at the eye formed in the wire, and to act as a messenger to pull the line up to the channel.

- 755 replies
-
- 22
-
-
- finished
- caldercraft
- (and 1 more)
-
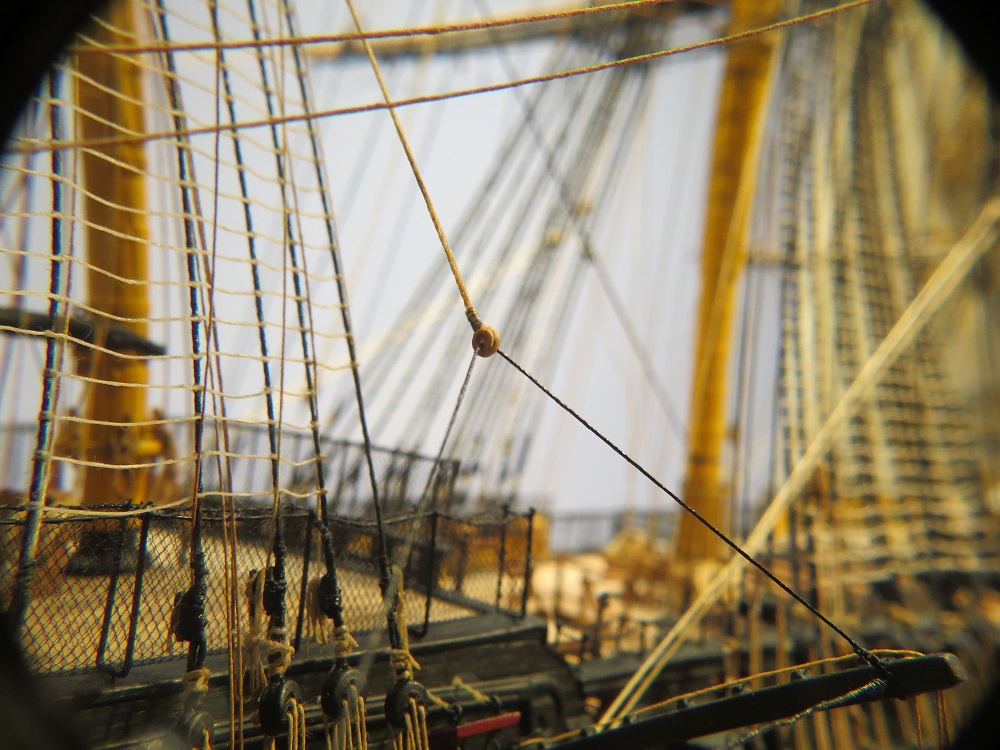
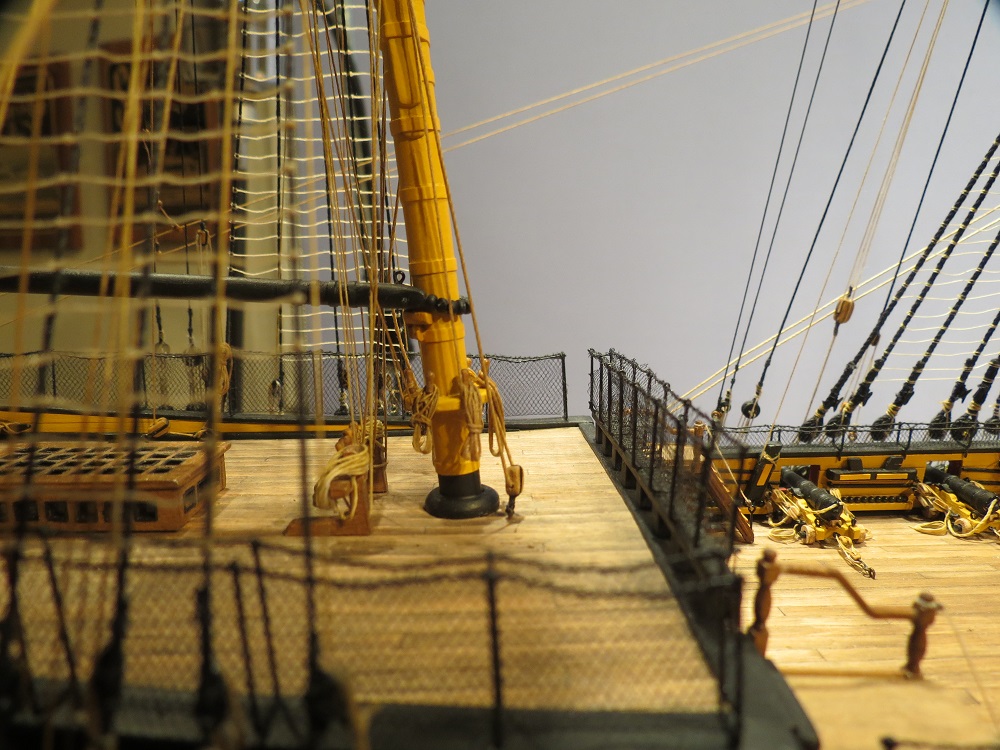
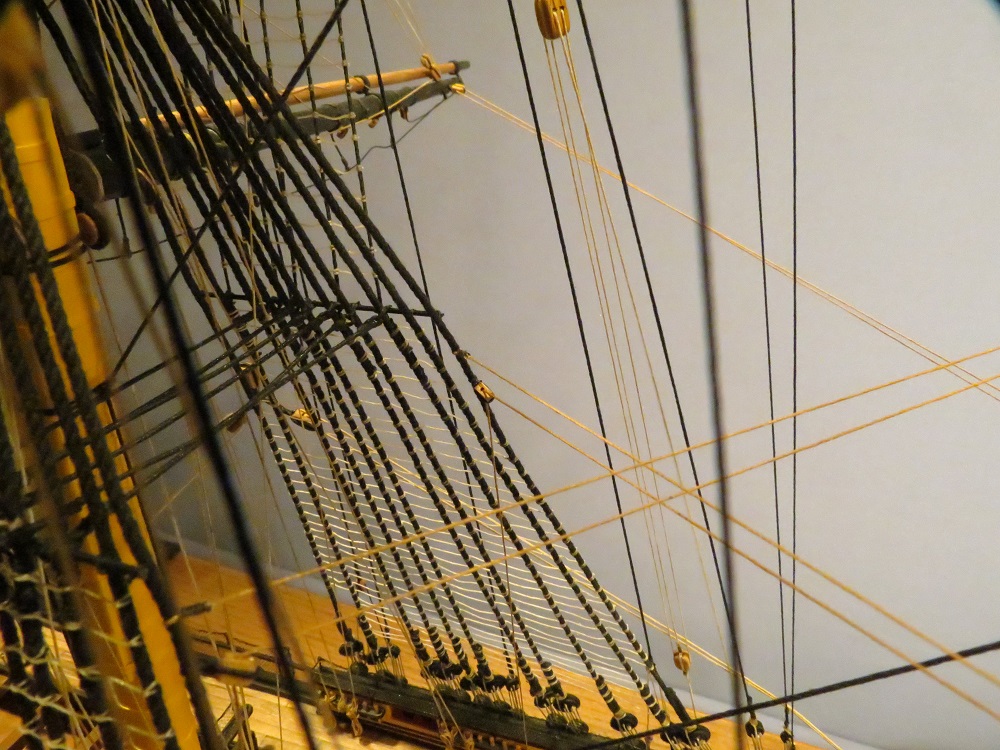
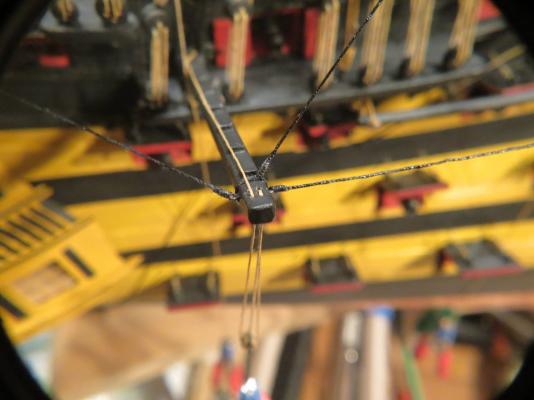
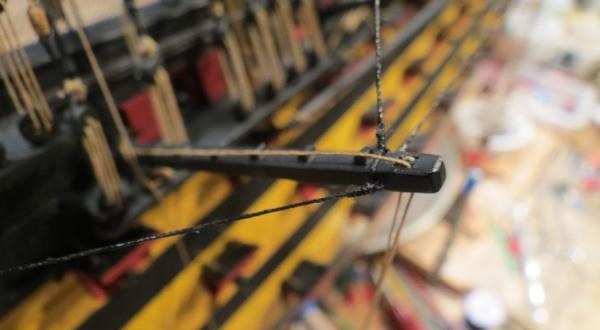
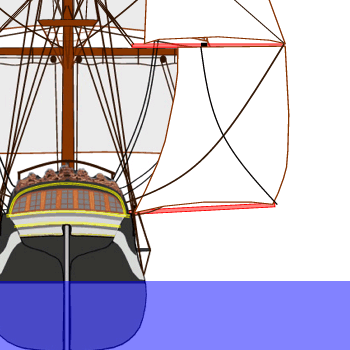
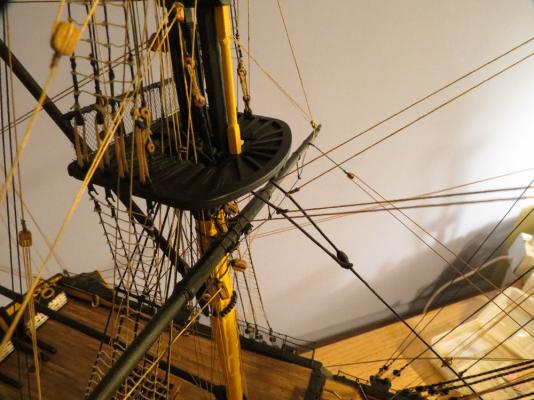
Crossjack Yard Brace. Braces arrise from the aft main shroud, pass through the opposite yard block and return to the block on the shroud before leading to the pinrail. Note the yards cross each other, seen better in the second photo. This completes the braces. Cheers, Gil

- 755 replies
-
- 14
-
-
- finished
- caldercraft
- (and 1 more)
-
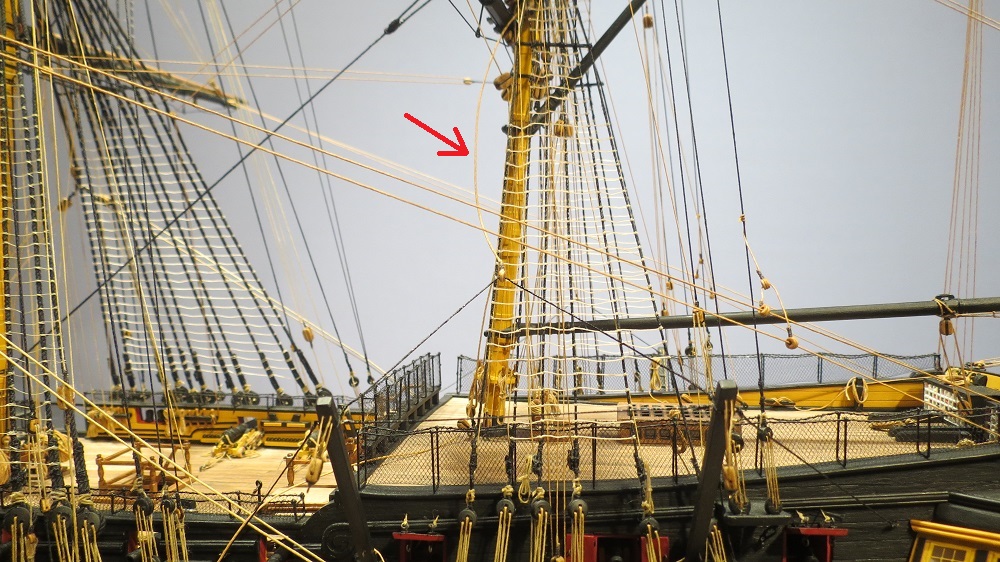
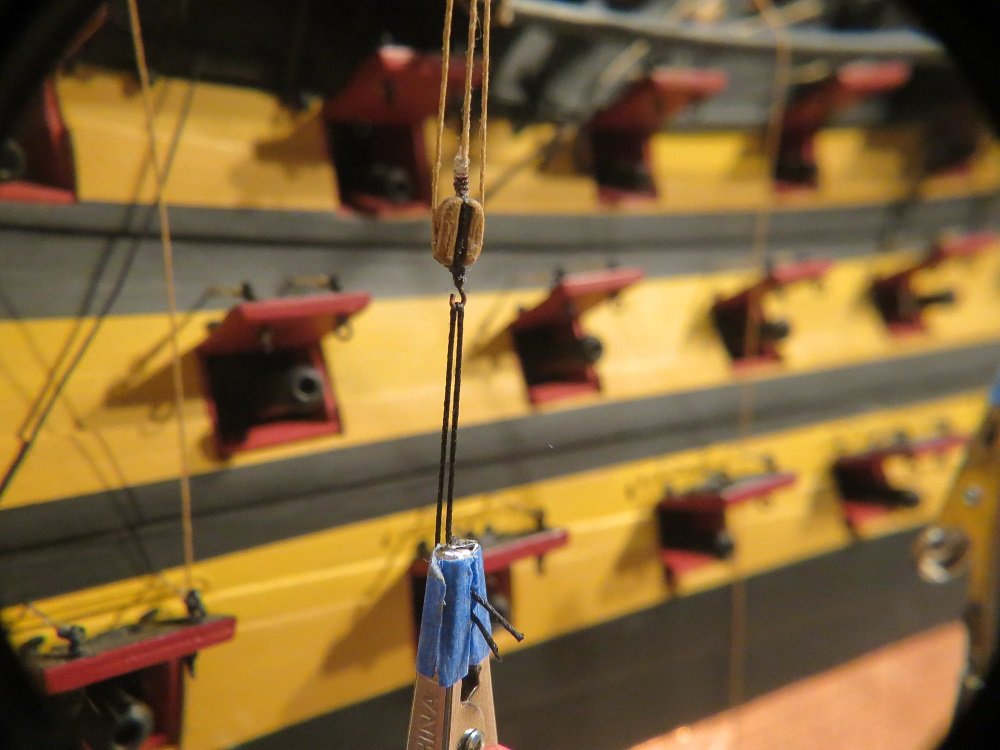
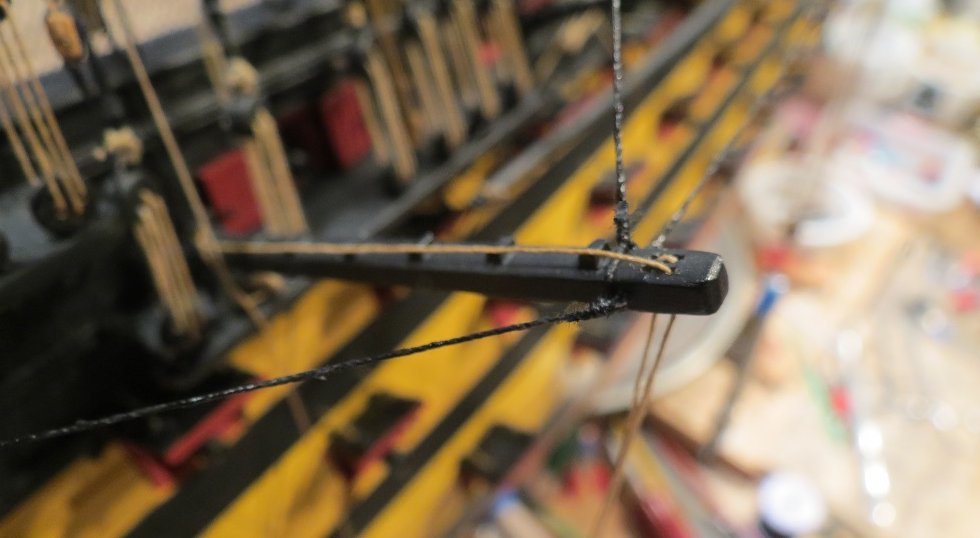
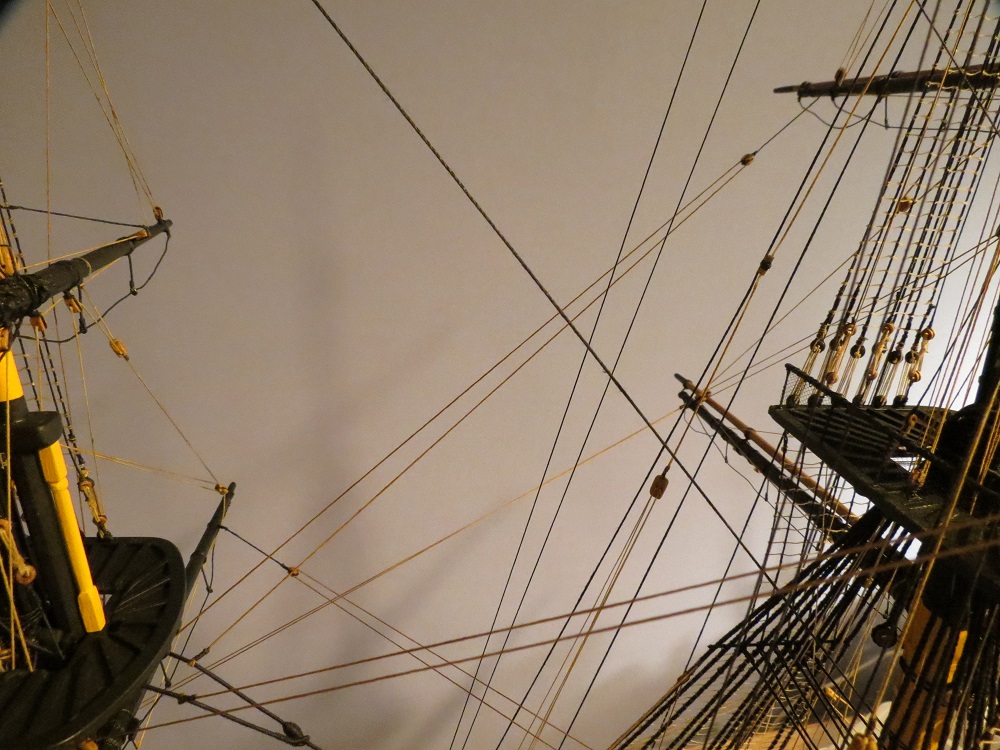
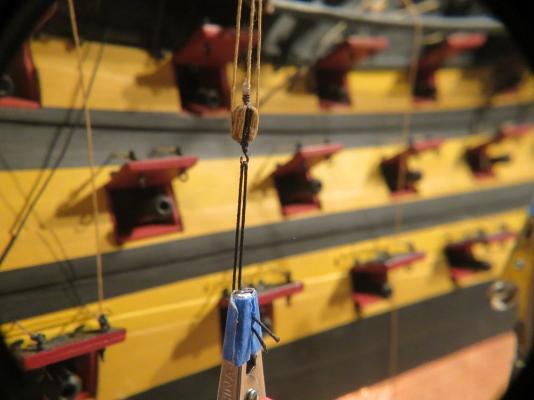
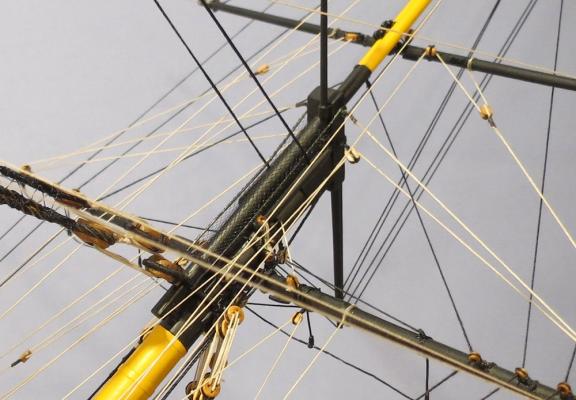
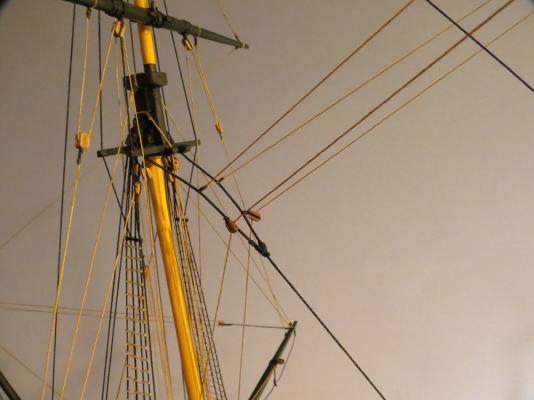
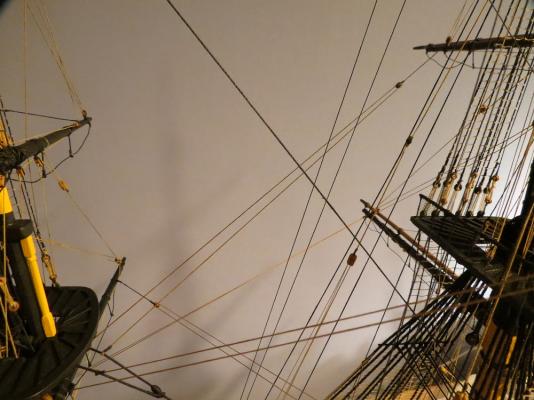
Continuing with the braces. We think of rigging as complicated, rather tedious and once done, to be left alone. However, I'm currently reading "The Life of Captain James Cook" by J.C. Beaglehole and I'm intimidated by the fact that in severe gales or storms, Cook strikes the topmasts and yards, only to send them aloft again when the weather moderates. Can any of us do that with our models? Perhaps Grant is the most experienced among us, with his vast experience with broken masts. (Sorry Grant, I couldn't resist). Of course the point is that when one looks at real life experience, rigging takes on a dynamic role with every line serving the ship. This will complete the braces for the mainmast yards and crossjack yard. Then we can deal with the prodigious excess of line each generates. Main Topgallant Yard Brace. Originates from the mizzen topmast stay collar, passing through the yard block and back to a block on the collar, then to a shroud cleat. Main Topsail Yard Brace. Originates from the Mizzen stay collar and returns to a block on the mizzen just below the bibbs. Main Course Yard Brace. Lizzard off the after mizzen shroud. The origin at an eyebolt, passing through a block at the rail and belaying to a large deck cleat.

- 755 replies
-
- 17
-
-
- finished
- caldercraft
- (and 1 more)