Roks82
-
Posts
40 -
Joined
-
Last visited
Recent Profile Visitors
1,680 profile views


-
 Tigersteve reacted to a post in a topic:
USF Confederacy by Roks82 - Model Shipways - Scale 1:64
Tigersteve reacted to a post in a topic:
USF Confederacy by Roks82 - Model Shipways - Scale 1:64
-
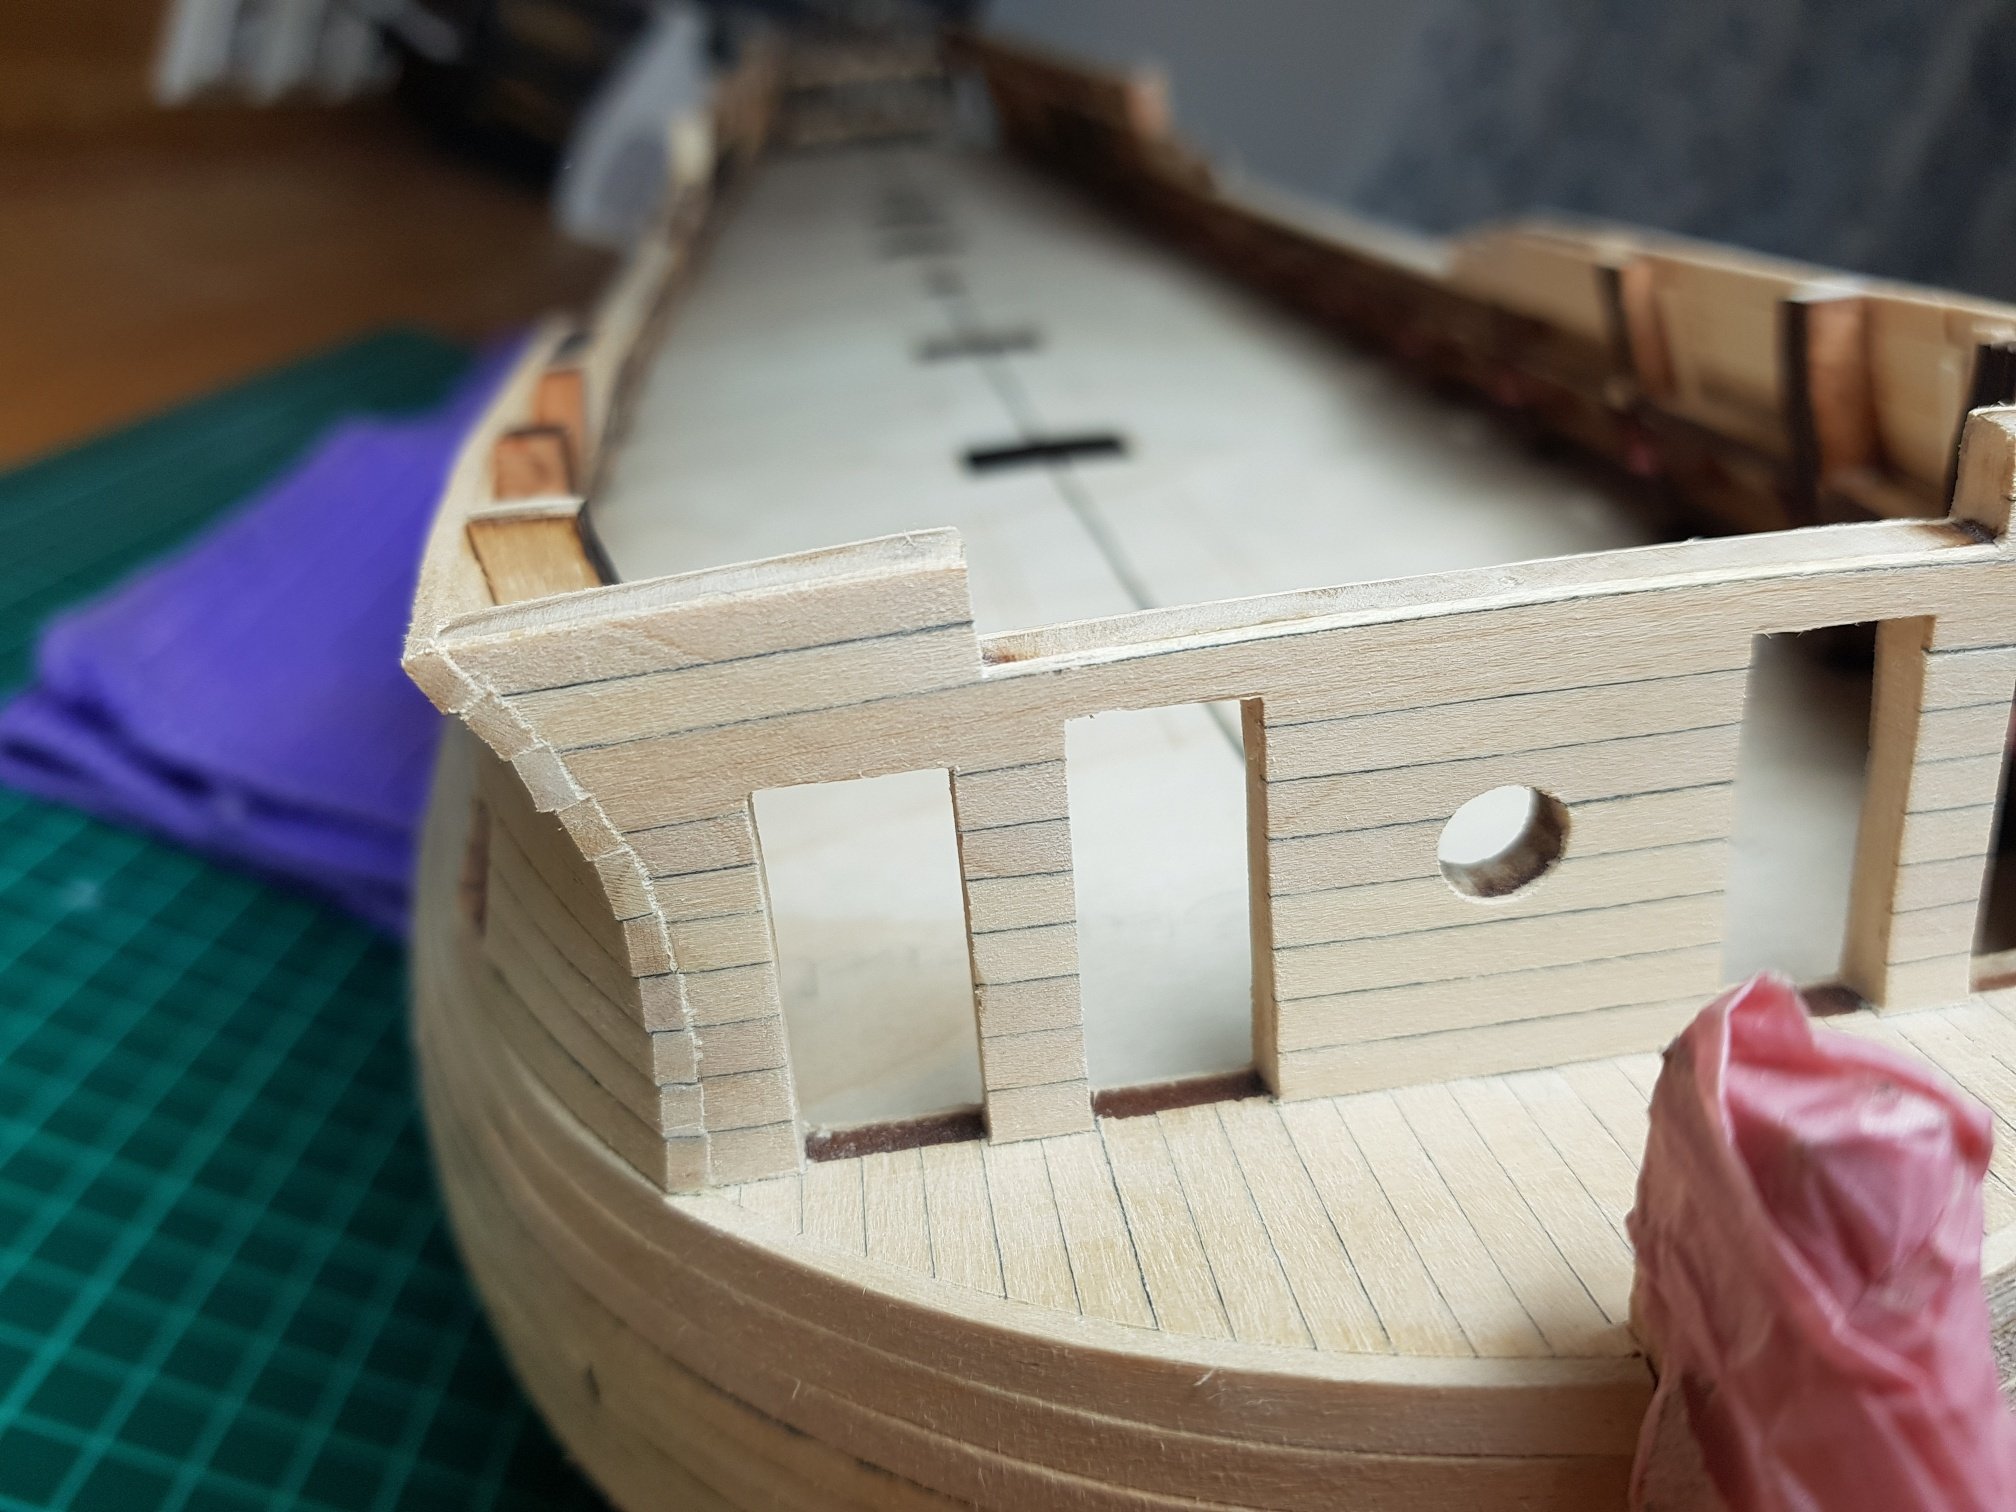
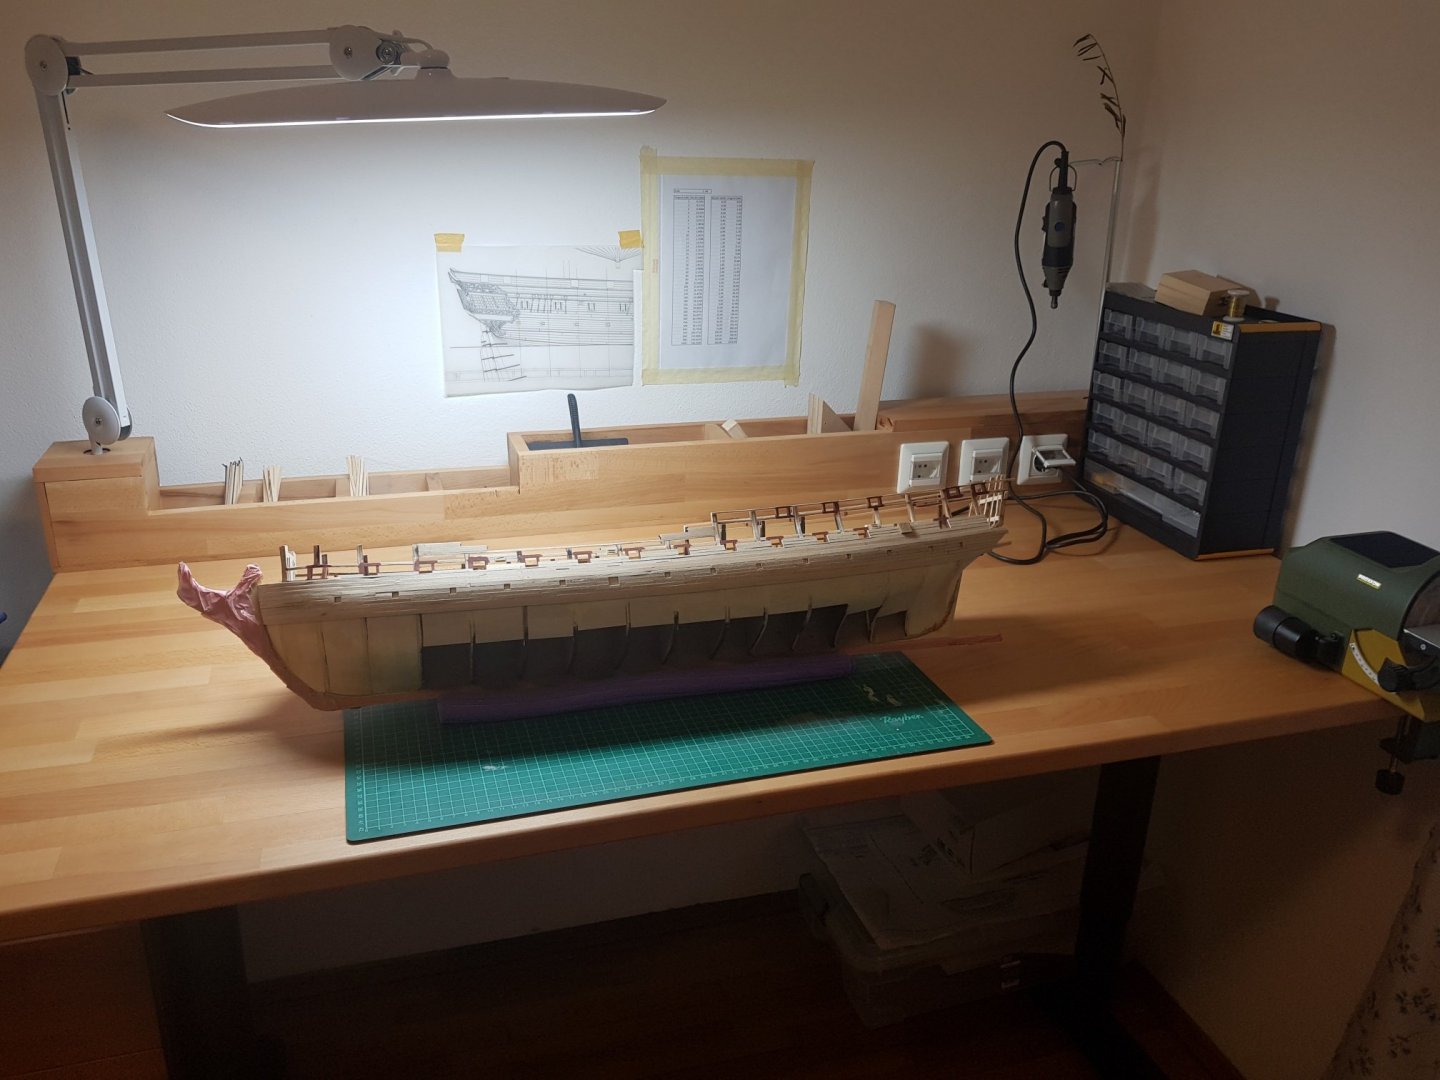
Work has continues with the paining of the wales and the completion of the stern gallery. I must admit that aligning the stern as per the instructions is quite challenging in case the decks and planking was not done spot on from the beginning. Closing the quarter galleries would also be quite difficult if it wouldn't be for the filler which you can as they will be painted anyway. For the paint I use Tamiya flat black without any primer and I am very happy with the result, unfortunately the pictures do not show it credit as it accumulated some dust from the various sanding processes but it's easily cleaned with a brush.


-
Nick 843 reacted to a post in a topic:
USF Confederacy by Roks82 - Model Shipways - Scale 1:64
-
KARAVOKIRIS reacted to a post in a topic:
USF Confederacy by Roks82 - Model Shipways - Scale 1:64
-
KARAVOKIRIS reacted to a post in a topic:
USF Confederacy by Roks82 - Model Shipways - Scale 1:64
-
KARAVOKIRIS reacted to a post in a topic:
USF Confederacy by Roks82 - Model Shipways - Scale 1:64
-
KARAVOKIRIS reacted to a post in a topic:
USF Confederacy by Roks82 - Model Shipways - Scale 1:64
-
KARAVOKIRIS reacted to a post in a topic:
USF Confederacy by Roks82 - Model Shipways - Scale 1:64
-
KARAVOKIRIS reacted to a post in a topic:
USF Confederacy by Roks82 - Model Shipways - Scale 1:64
-
Tigersteve reacted to a post in a topic:
USF Confederacy by Roks82 - Model Shipways - Scale 1:64
-
vossiewulf reacted to a post in a topic:
USF Confederacy by Roks82 - Model Shipways - Scale 1:64
-
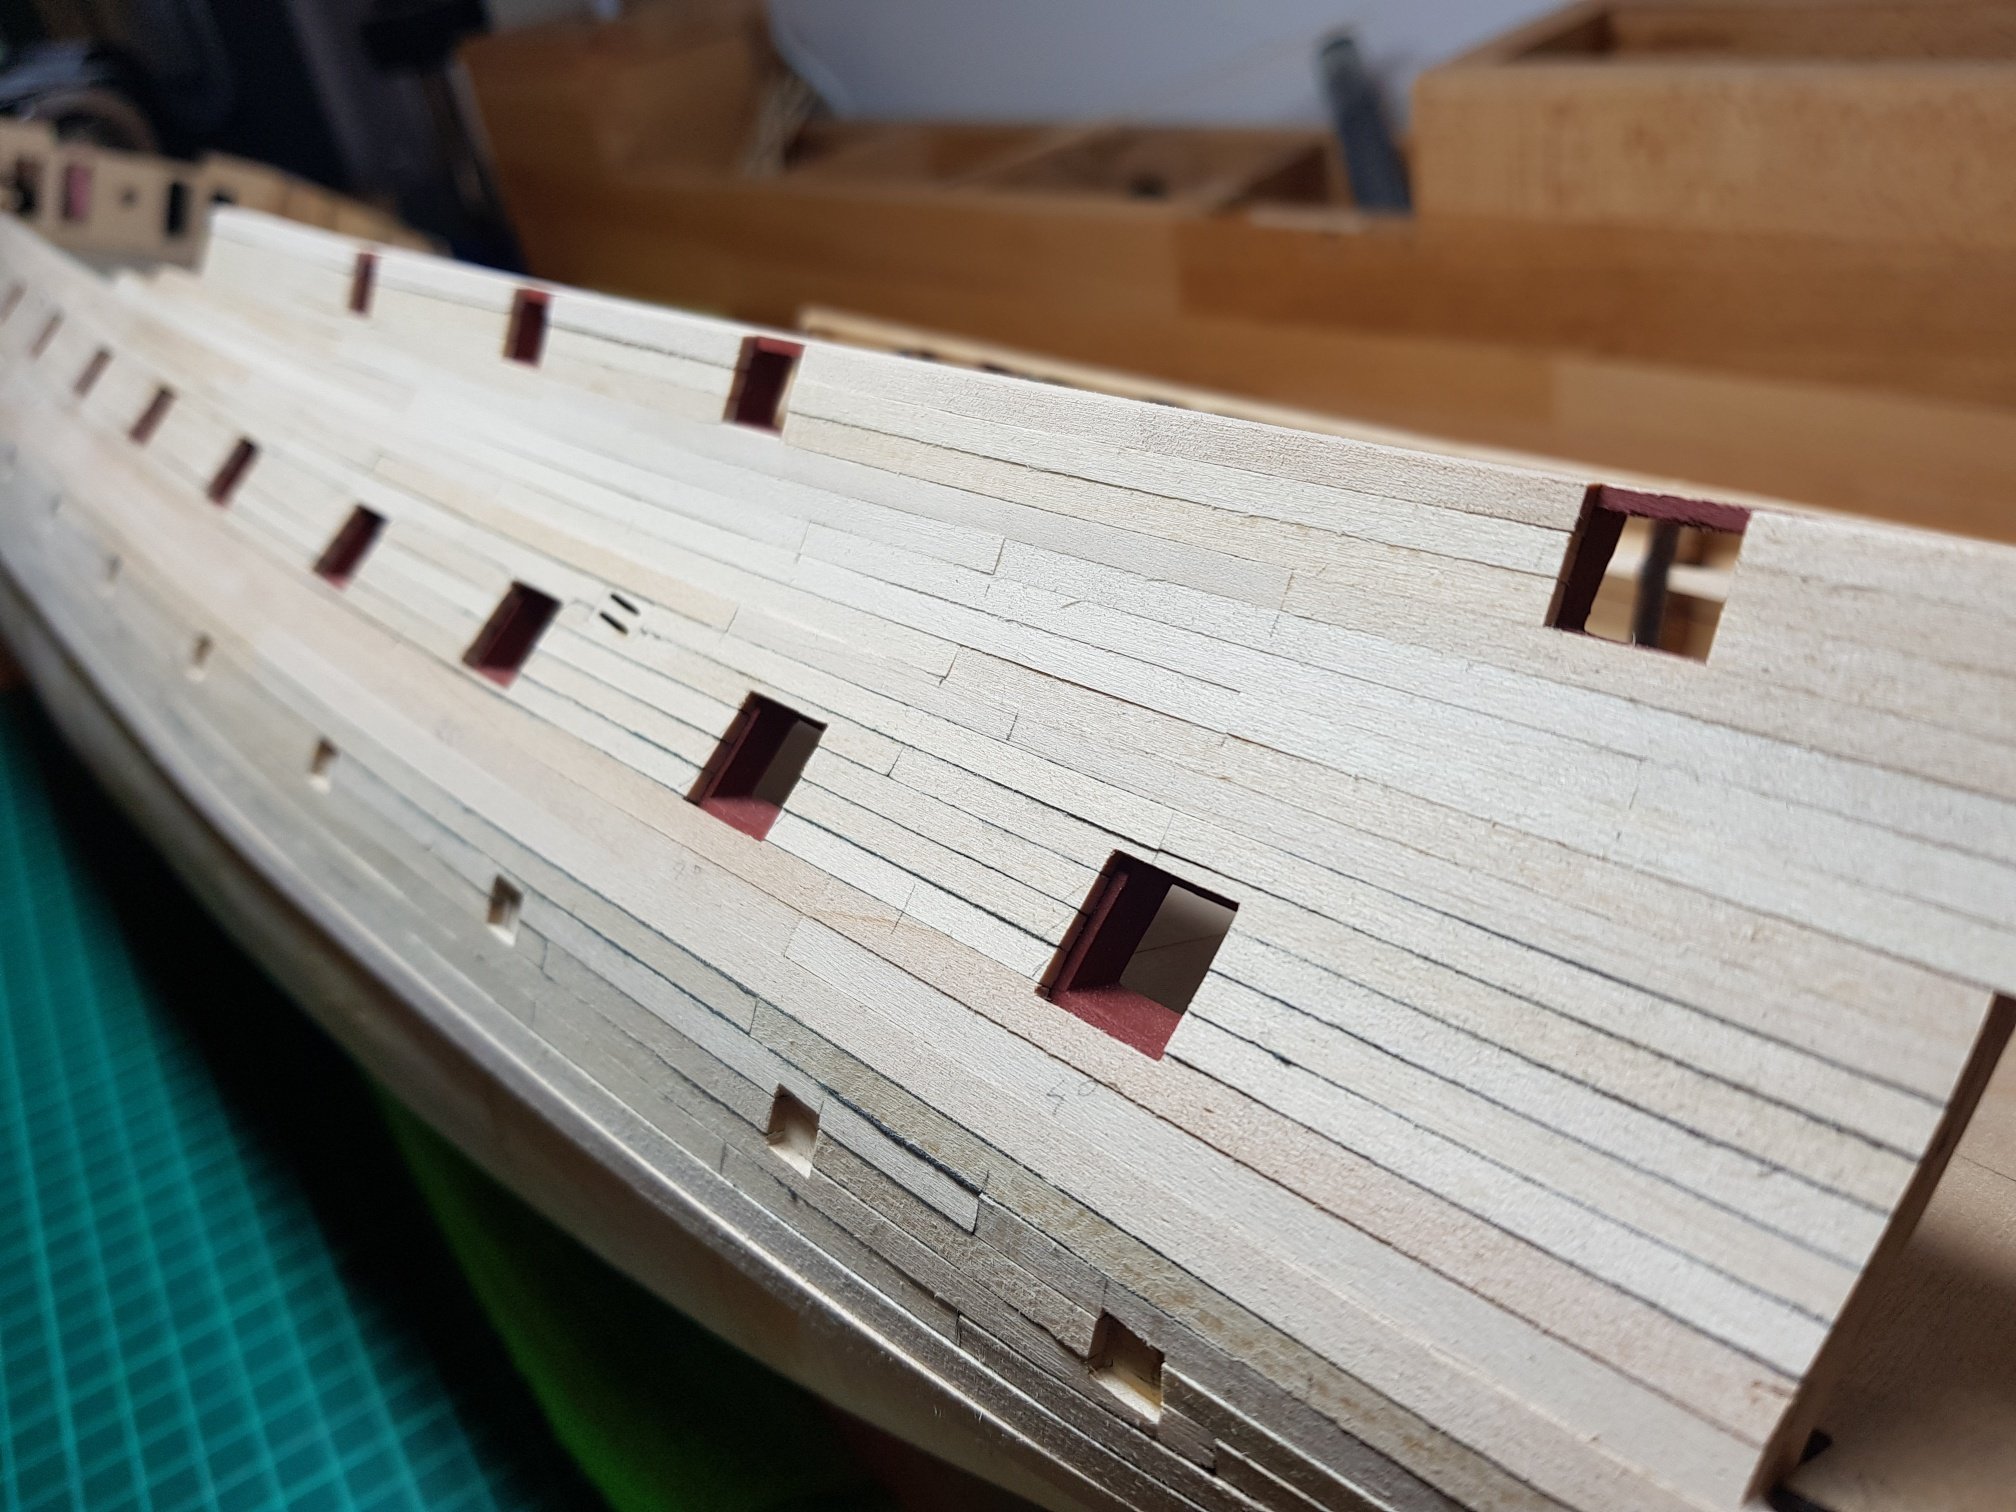
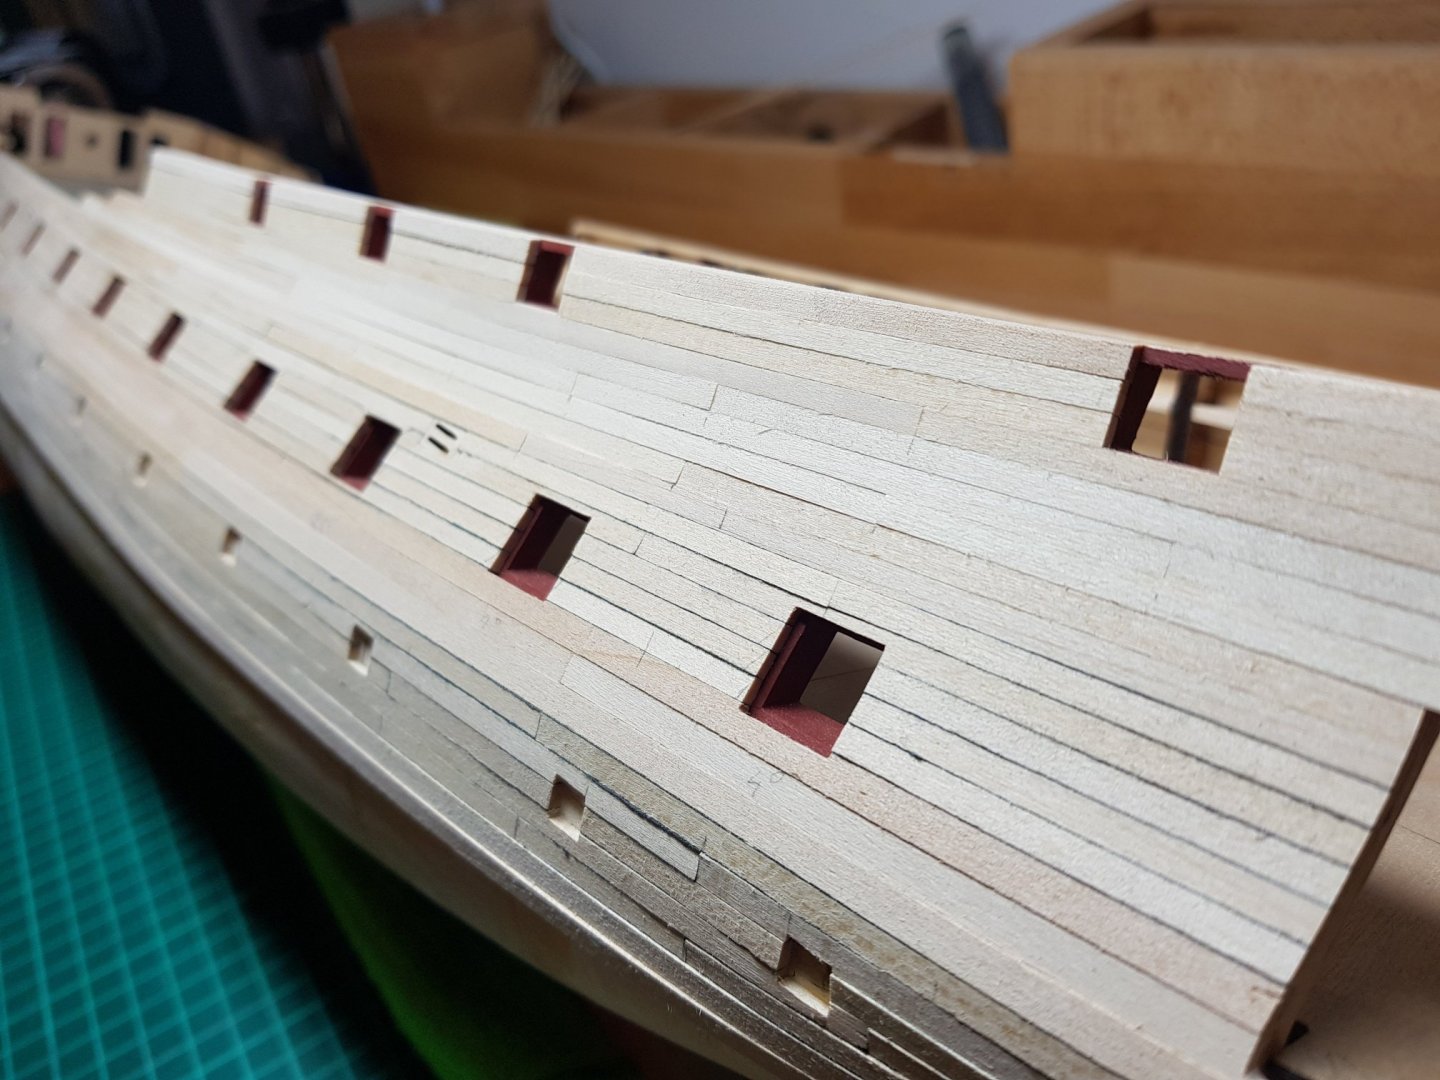
It’s been years since I’ve started this build log and I’ve gone through many things in the meantime, the most imporant being becoming a father 3 years ago. Now I can finally take some more time for my hobby and thus decided it’s really time to complete the Confederacy! And so…planking complete!!! A few planking rules were violeted but in I am happy with the outcome in general.


-
Roks82 reacted to a post in a topic:
H.M.S. Triton Cross Section by roks82 - 1:48
-
Roks82 reacted to a post in a topic:
H.M.S. Triton Cross Section by roks82 - 1:48
-
Thanks for the tip Chad, I still have 8 frames to go to use it
-
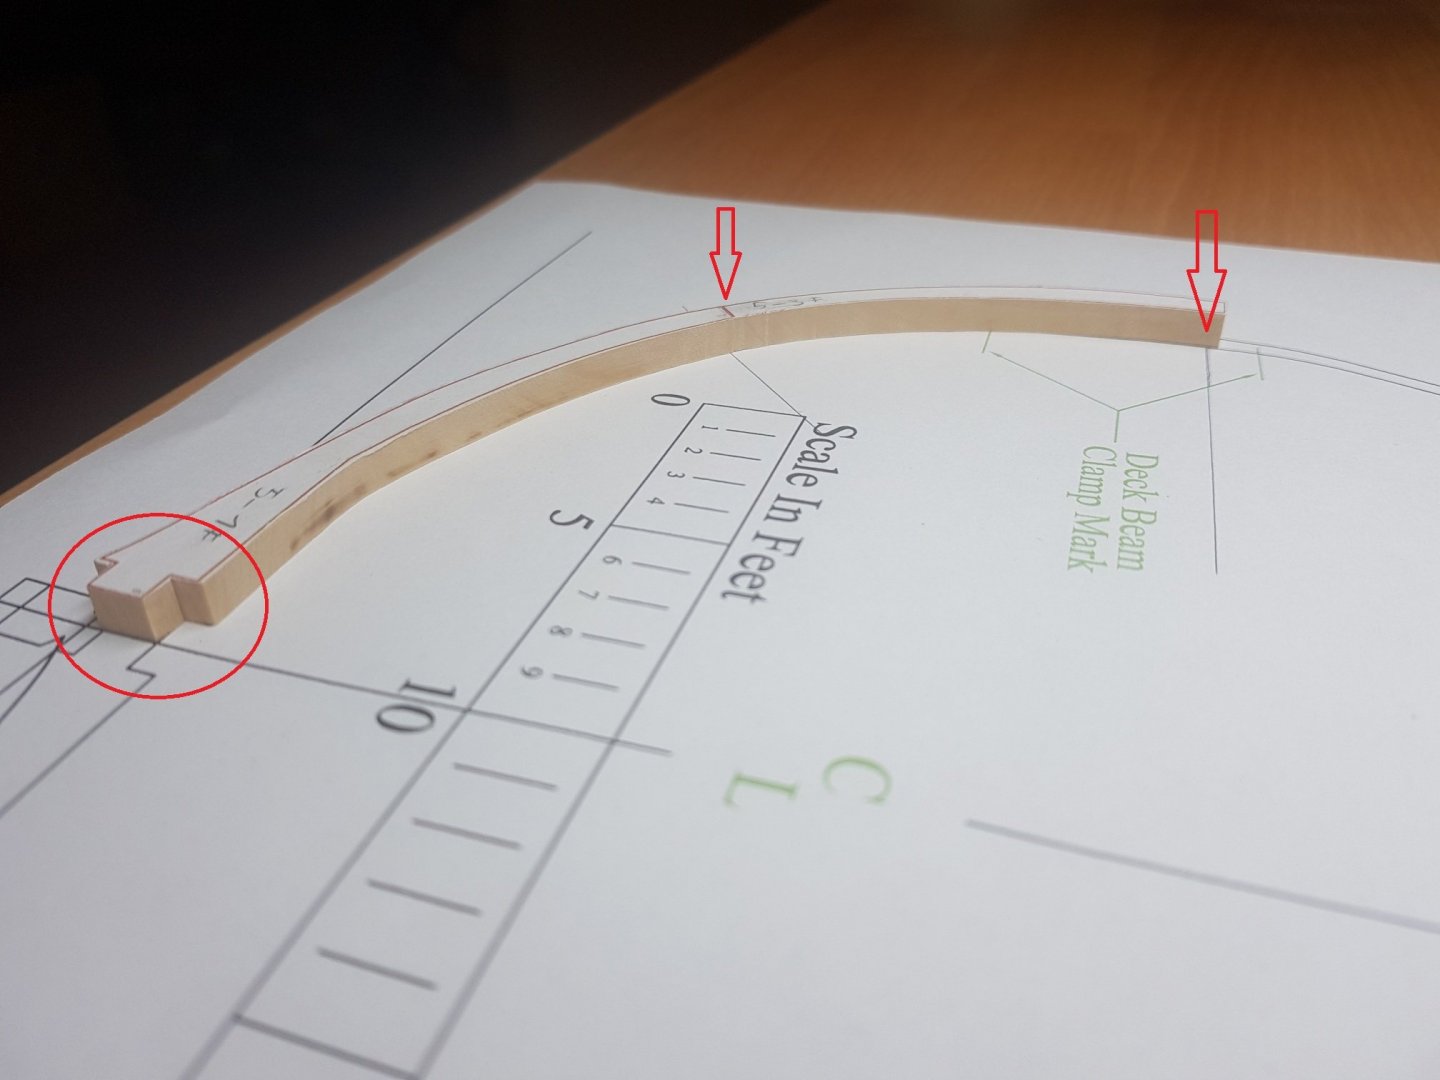
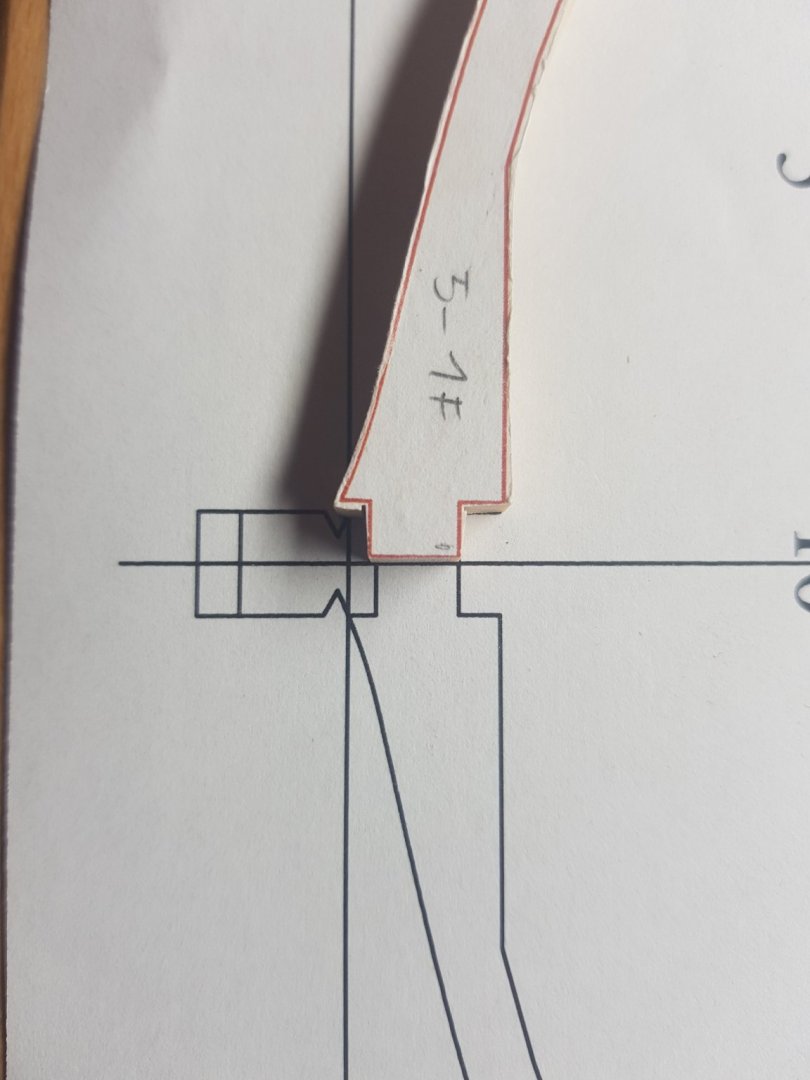
Thanks Christian! Indeed it was caused by the stretching of the paper while glueing it on the board. This was most noticeable on the long and thin parts like the 4th futtock (frame 5). I have used a water based glue stick so presume this caused the paper fibers to deform....lesson learned!
-
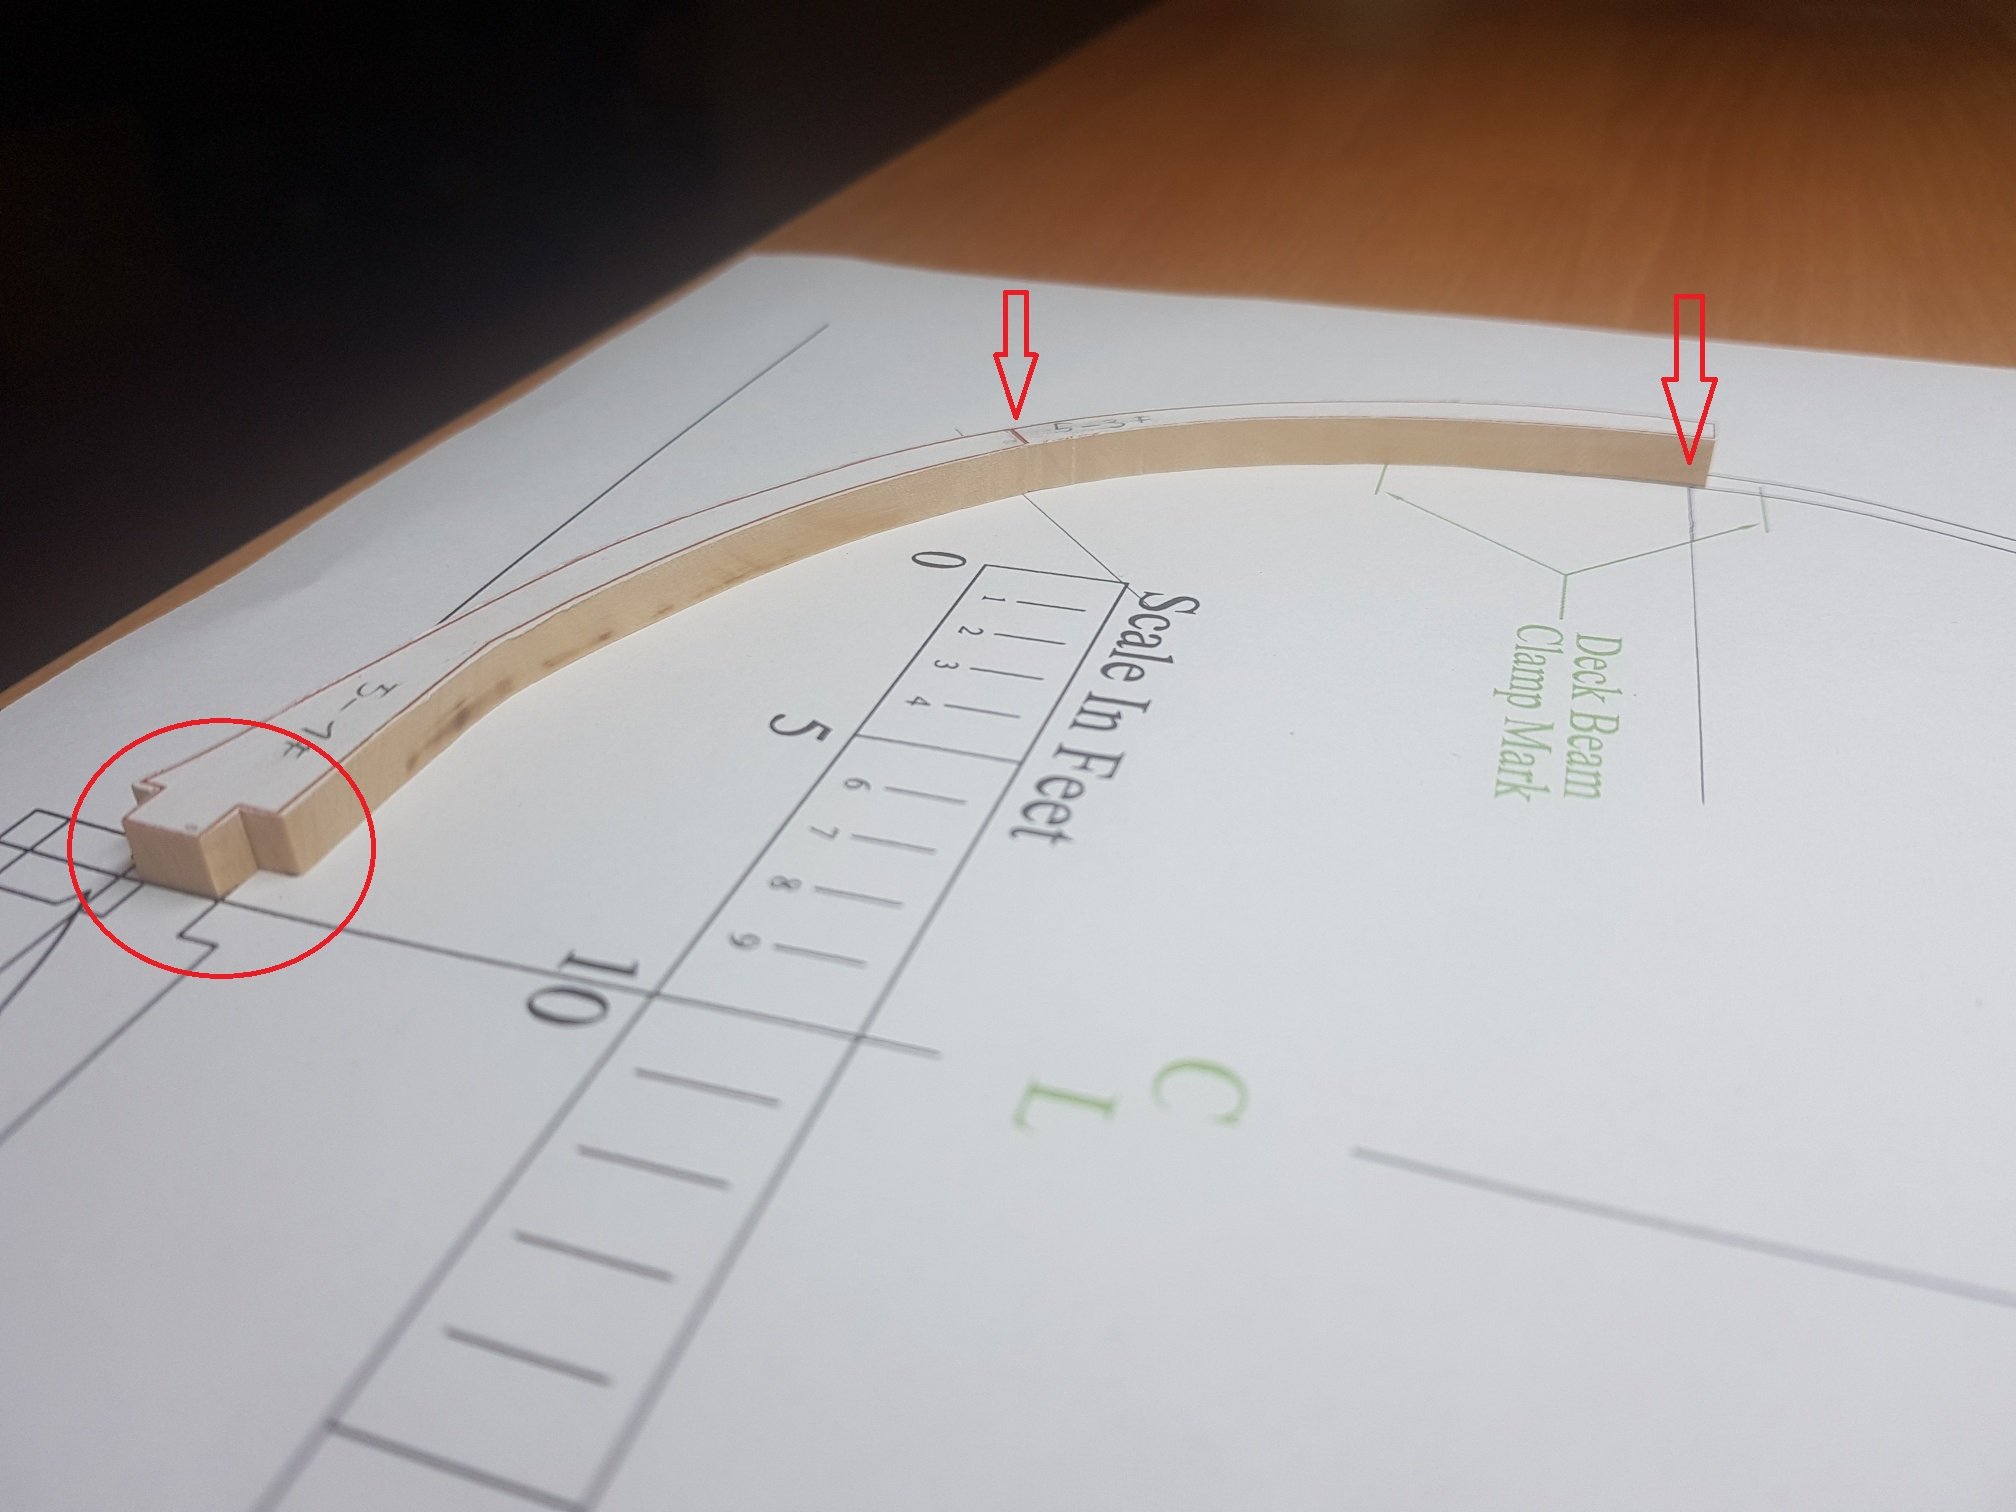
I need some help from you fellow Triton builders. I've sanded the frames up to the line and they fit in perfectly however while checking the assembly drawings it looks like the frame parts are slightly too long. I've also checked the that the scale printed correctly and can confirm it is ok... So the only logic solution to me is to sand the frames further (over the line), has anyone else experienced this issue?
-
Roks82 reacted to a post in a topic:
H.M.S. Triton Cross Section by Ainars Apalais - 1:48
-
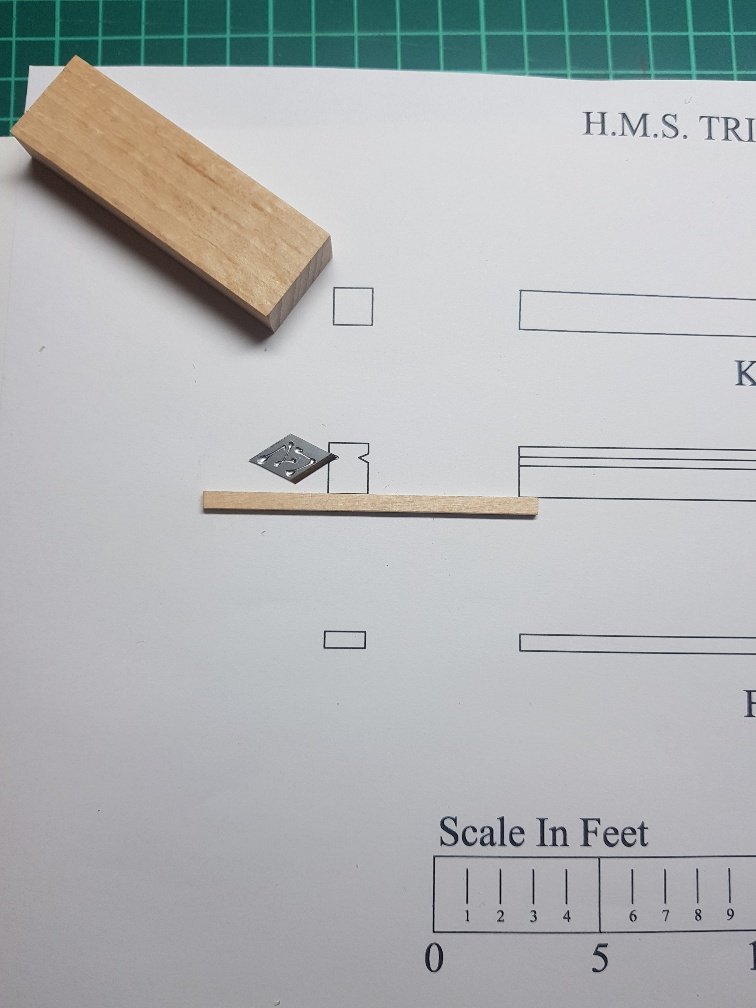
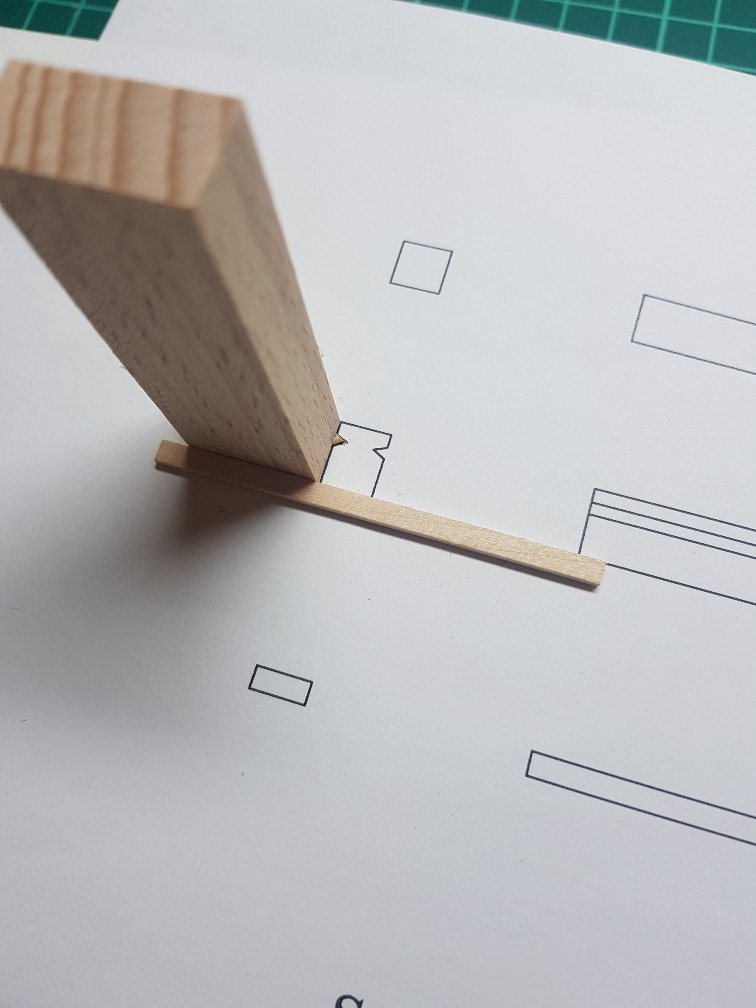
Thanks Christian for the welcome! I've taken the liberty to use Chad's approach for cutting out the rabbet line on the keel. First I glued the razor blade on the plan with a very small amount of CA glue, I then glued the guide scrap piece on the blade and finally glued it all together on a flat surface. I then scraped off each side of the keel....
-
Roks82 reacted to a post in a topic:
H.M.S. Triton Cross Section by roks82 - 1:48
-
Roks82 reacted to a post in a topic:
H.M.S. Triton Cross Section by roks82 - 1:48
-
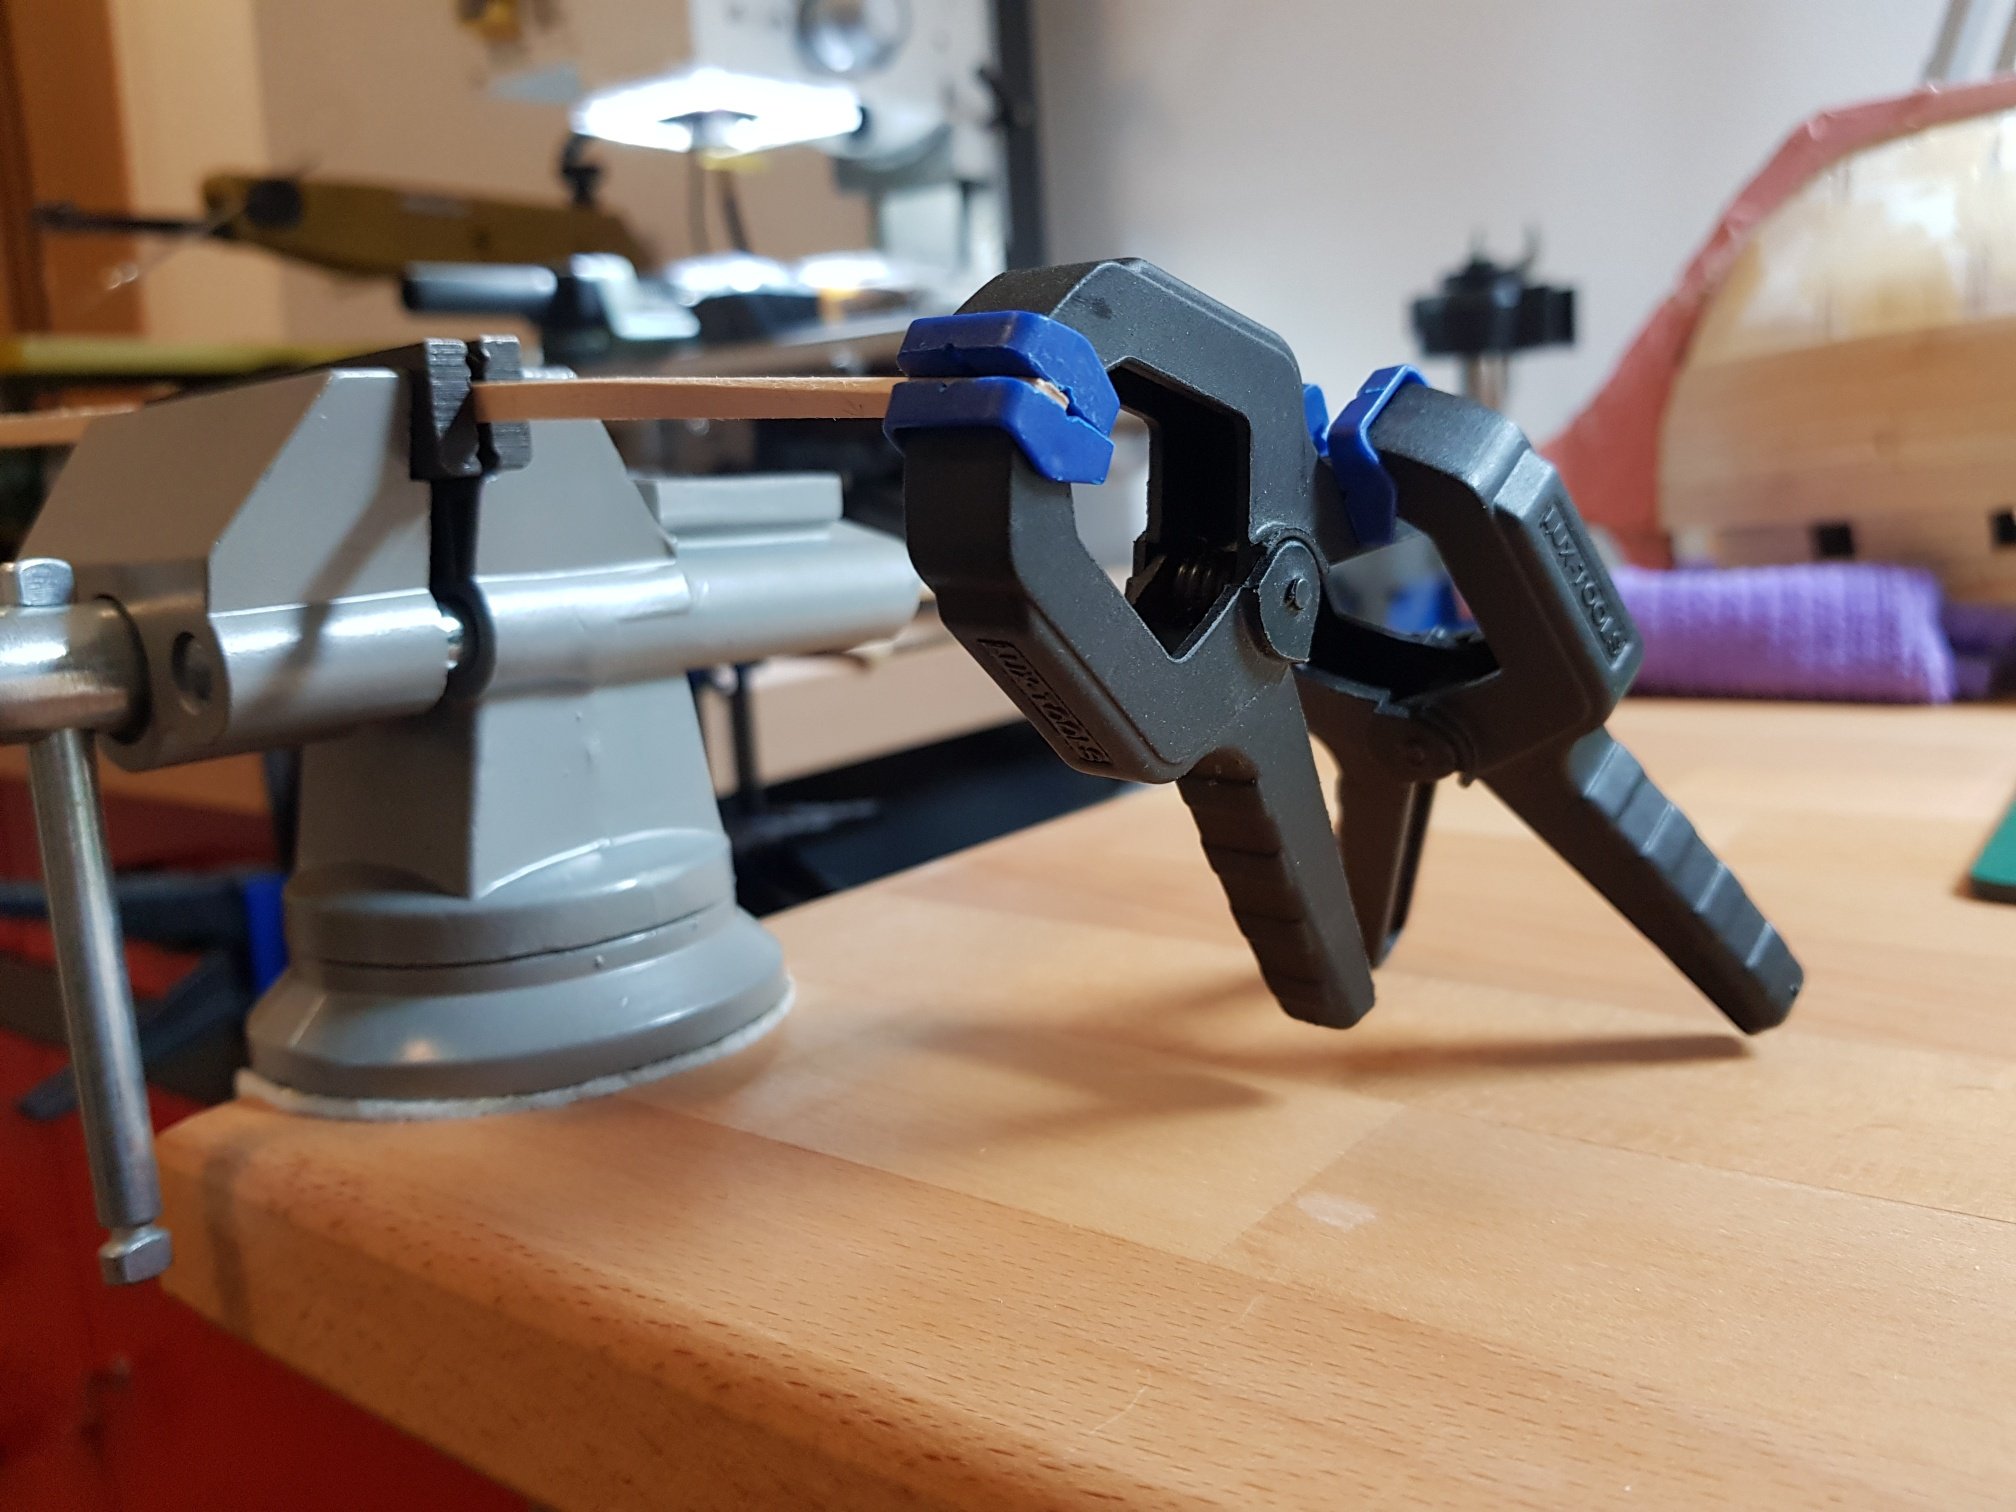
This time I'd like to share with you my method of bending/twisting the planks. First I just slightly wet the plank with some tap water - wetting the fingers and passing on the area that I intend to bend. I then position the plank in the vise and with the help of some clamps twist it in position (actually just slightly over bend). I then use a normal hairdryer to heat up a plank and woila...in 3 minutes you have your fully bent plank Hope this helps someone. Rok

-
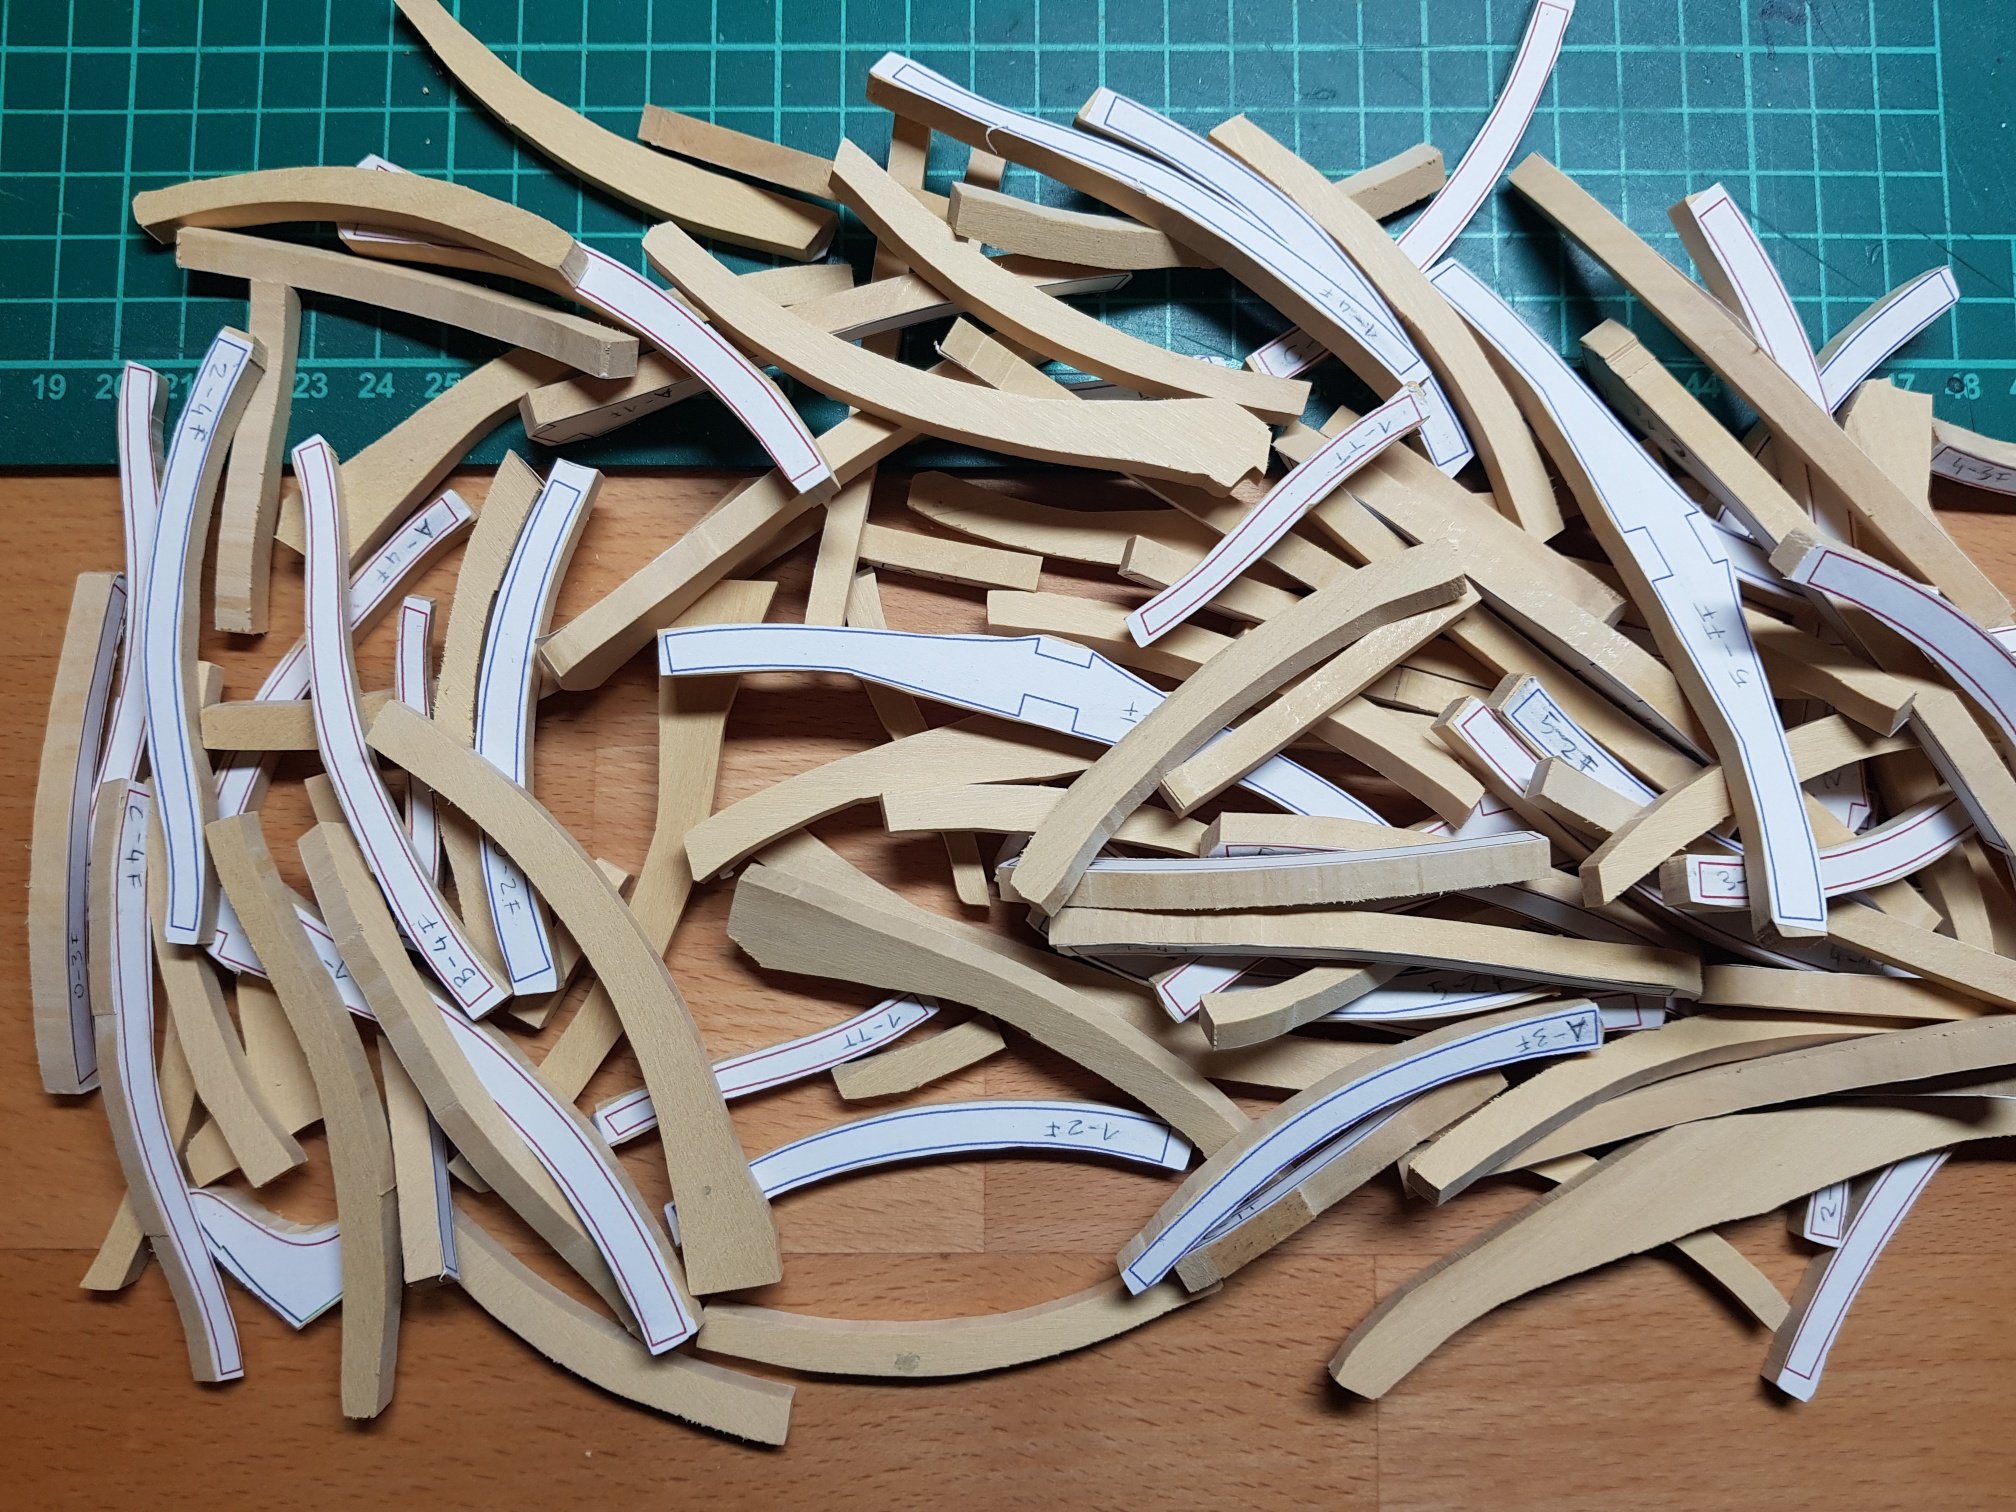
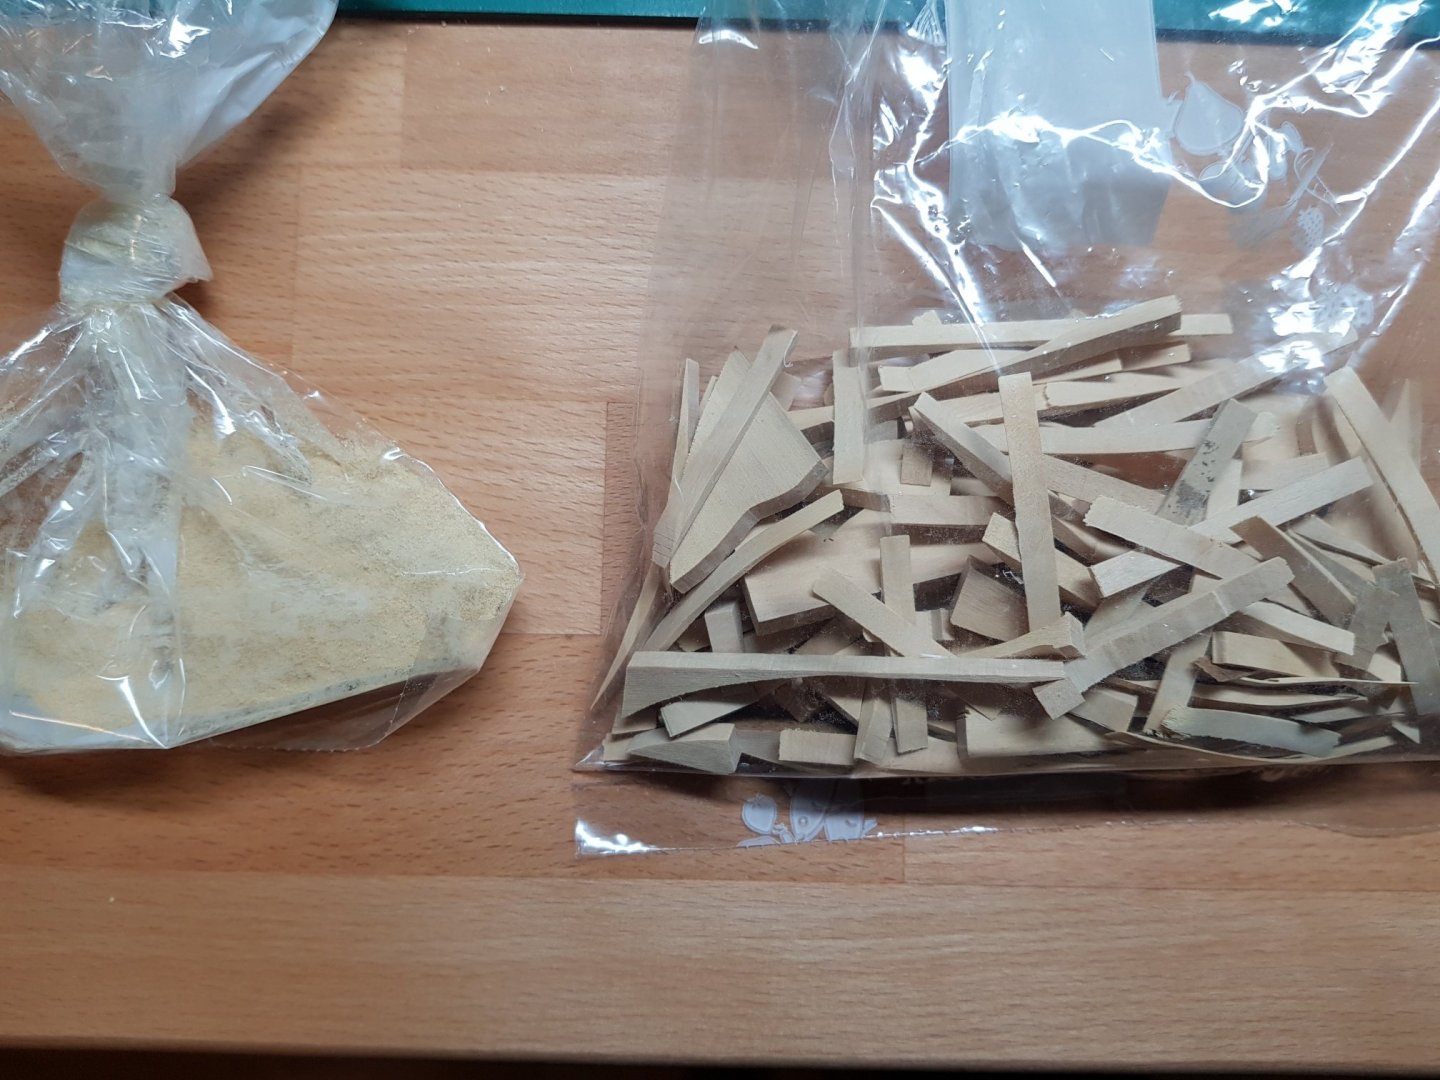
Thanks Jon, for the encouraging words The first step has been completed; I must say there were much more frame parts then expected. I’ve kept the leftover parts and collected some dust as well – perhaps it will come handy during this build. Rok

-
Hello comrades! I have some questions for you which hope you can answer and perhaps help some of us newbies: - After finishing the planking what is your fairing procedure? - Which sandpaper’s grits do you use? Are you using files too? - How do you protect the keel/stem/sternpost from being scratched? - Any tips for fairing tight corners? Thanks in advance!
-
The shipyard re-opened! The upper planking has been completed with some issues however. I've been using very thin black paper to simulate the caulking which did not allow me to bevel some of the edges causing minor gaps in the planking. Now it's time for some sanding to make it smooth. Could some of you guys advise how do you perform the caulking (except for the pencil method)? For the lower planking I'll go without the caulking simulation so I am aiming for some better results


-
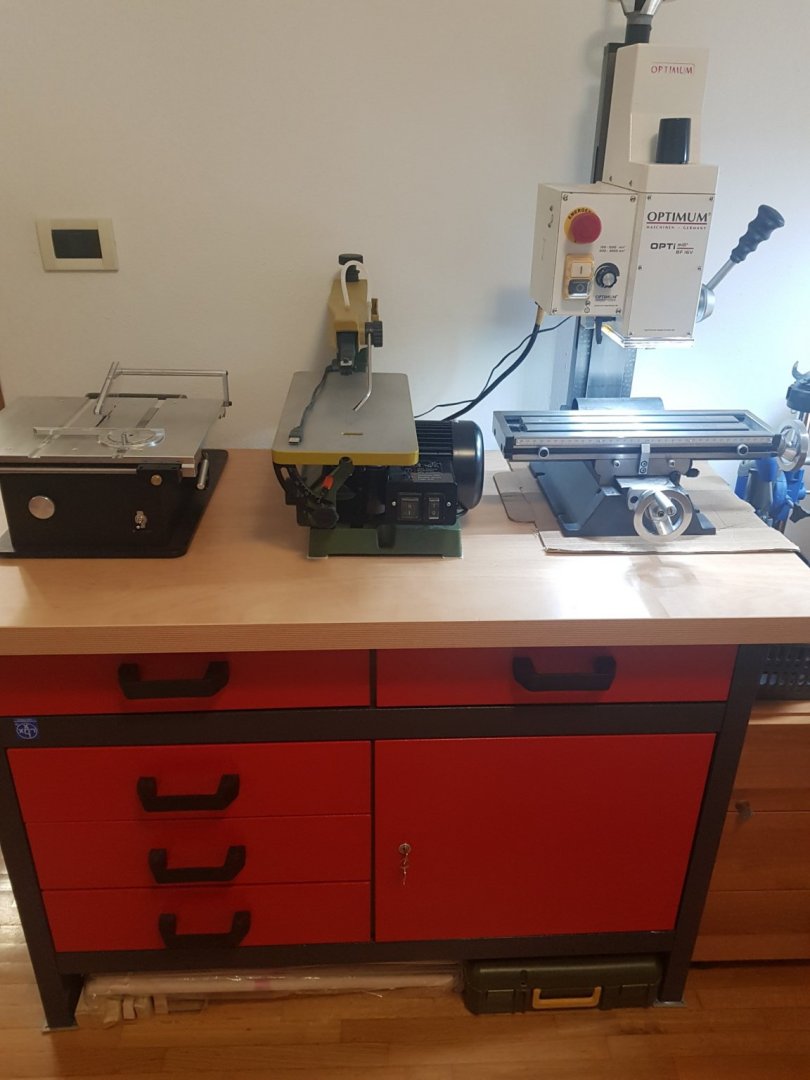
It's been a while since my last post - the shipyard has been closed for a while due to lack of motivation Anyway some upgrades have been done this year so work has now resumed and hopefully will continue till finishing this interesting project. I've upgraded the workshop with a Byrnes table saw, a Proxxon DSH 2 scrall saw and an Optimill which might seem a bit exaggerated for our hobby but the reason I bought it instead of a smaller Proxxon is that I could now use it for other projects/materials. Not clearly seen but on the picture is also a extremely useful electrically adjustable table - I've bought the base in Ikea and fitted it with a custom top...it really helps to lift it and work while standing from time to time!
-
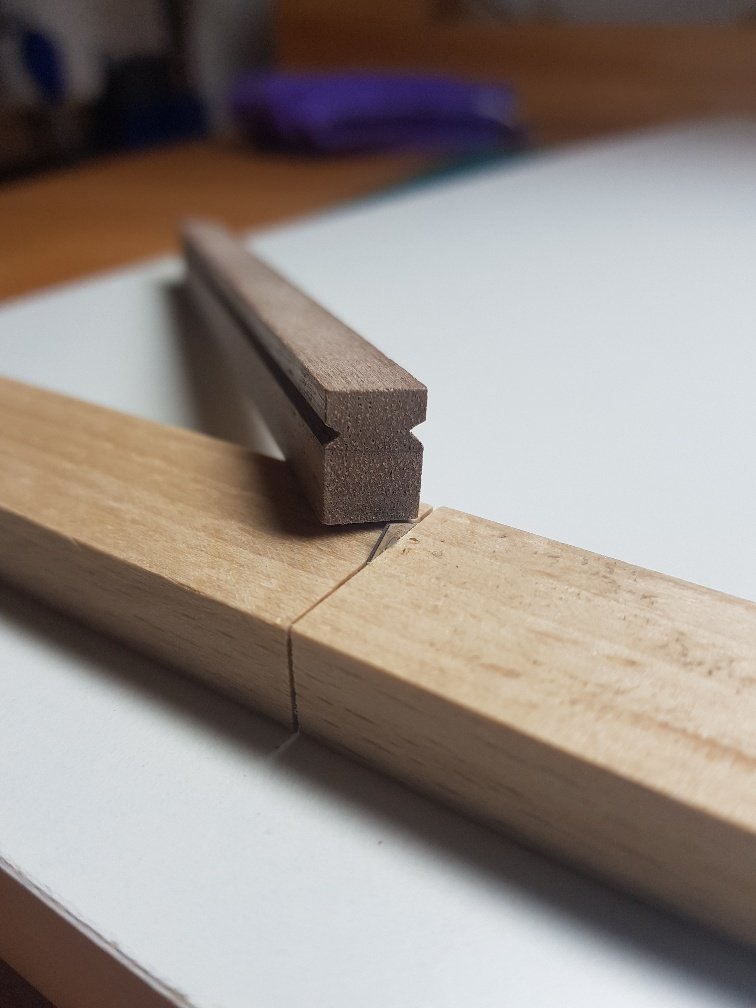
Like many of you I have also chosen the cross section as my first scratch build. I’ll be building it simultaneously with by Confederacy so maybe some steps will proceed slower then expected. The first step for me was choosing the wood...I’ve decided for a combination of boxwood and walnut, maybe I’ll also use some pear but haven’t fully decided yet as I am a bit concerned about a conflicting color scheme. I am really looking forward to this build and your comments and suggestions!
-
Welcome to the club Peter!
-
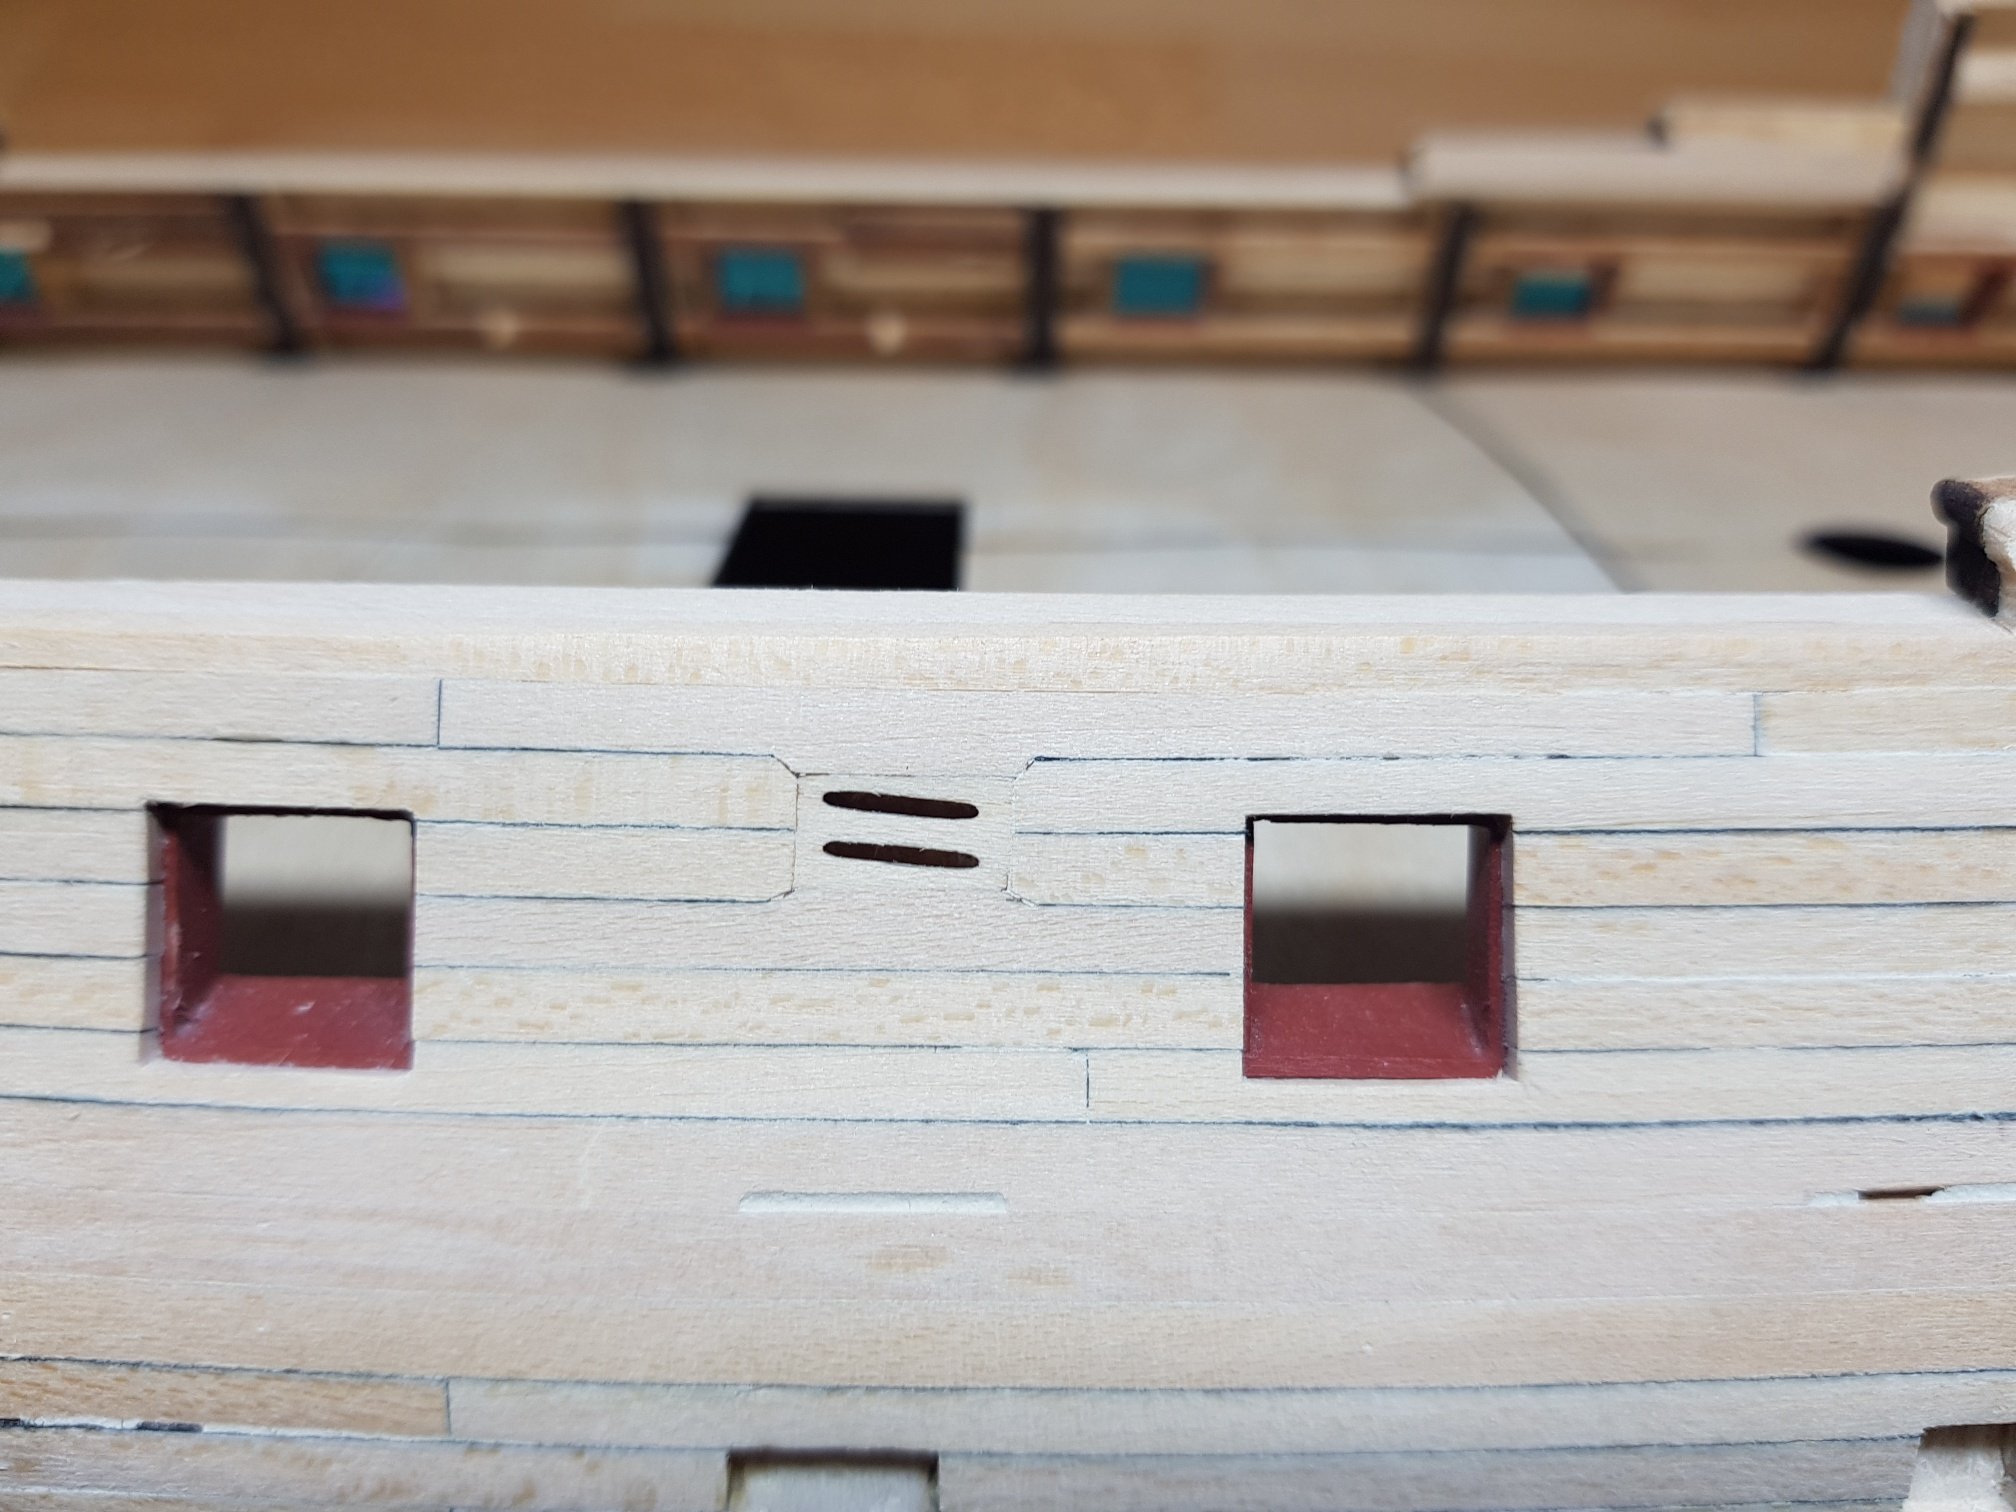
Work continued in the shipyard... The lower counter has been planked, I've added some thin lawyer of paper in between to simulate the caulking however seems that it was too thin so some of it tear apart and is not visible throughout the whole length of the planks...lesson learned! Exact sanding on the port and starboard side will be done at a later stage once the side planks are positioned. I had some spare time and decided to make the doors for the beakhead. I think it was easier to make them now considering that the cut out doors on the bulkhead G are much shorter then the pre-cut doors so some careful sanding is required. PS: I am not sure why some pictures are not rotated properly, I am posting the URL from Google Drive and they all look formatted properly there?!
-
Hi Jim, Thank you so much! Seems that we are both having some issues with emails. I’ve sent one email last week and another one this week....maybe it ended somewhere in the spam folder. I will resend it also from my business email so hopefully you should get it. Anyway I am very happy that you are still in business and that the magic saws are still available