-
Posts
43 -
Joined
-
Last visited
Content Type
Profiles
Forums
Gallery
Events
Everything posted by Rick
-
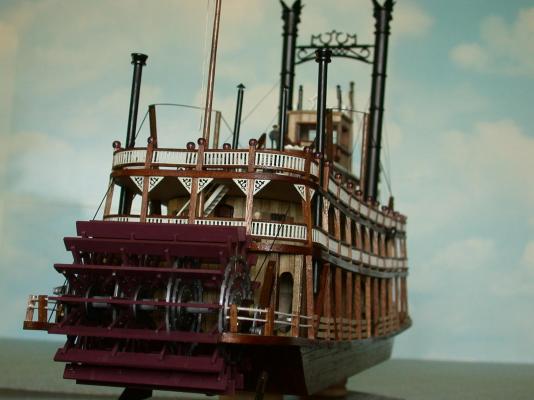
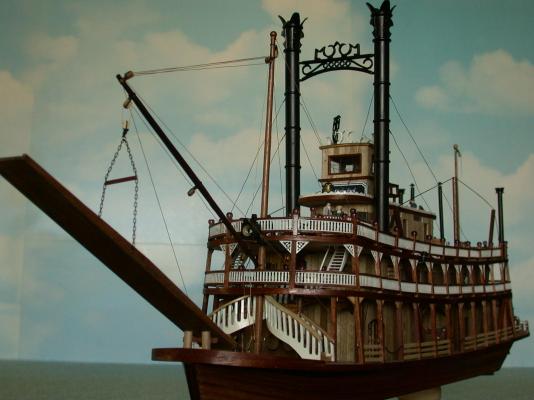
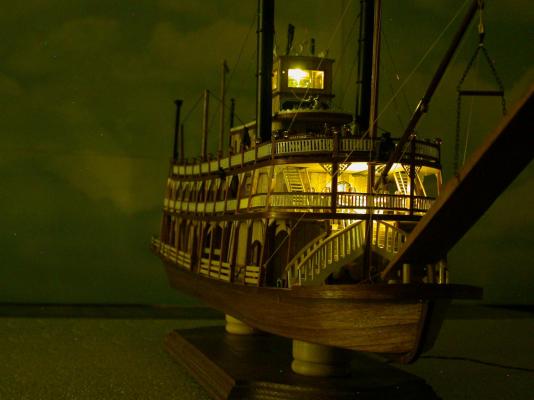
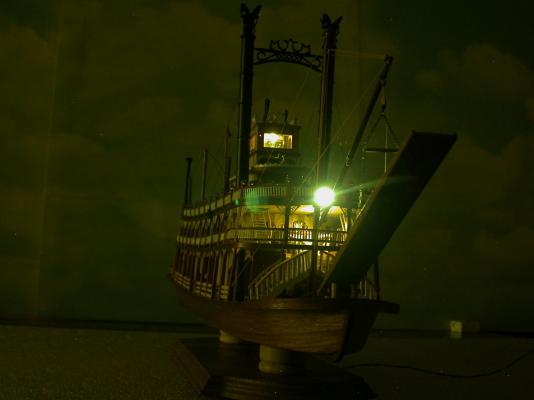
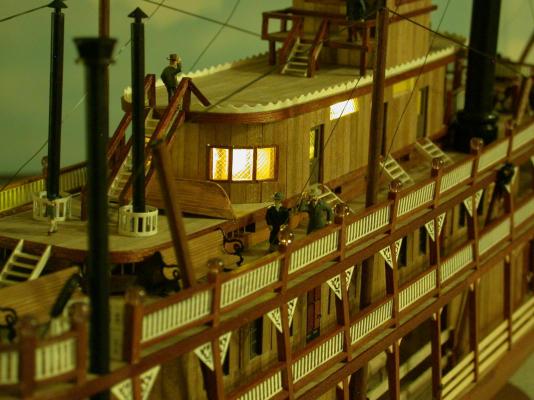
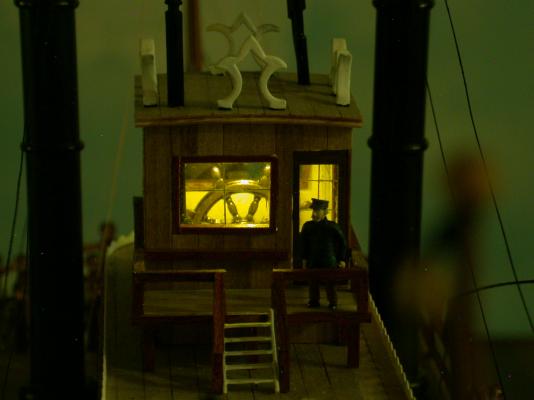
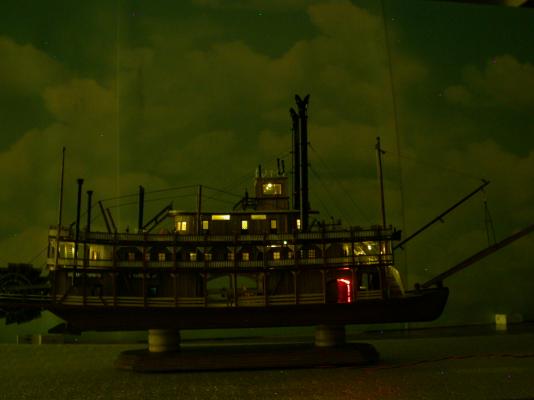
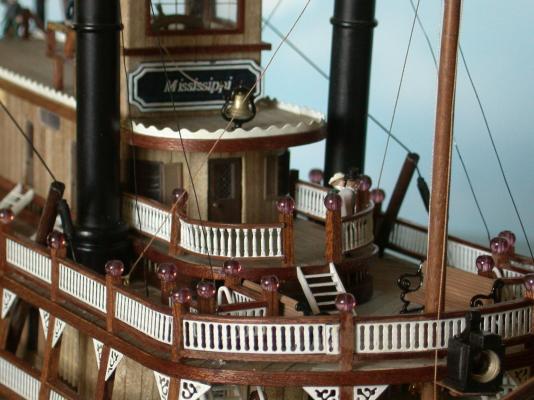
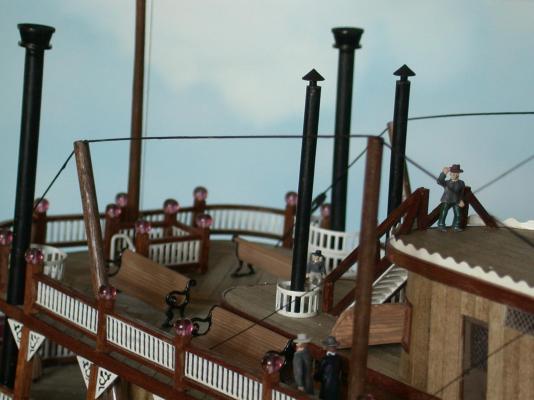
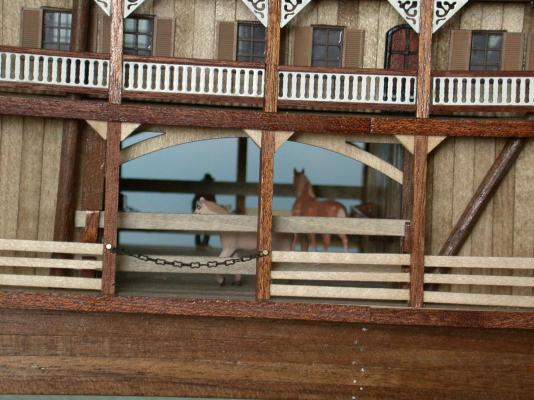
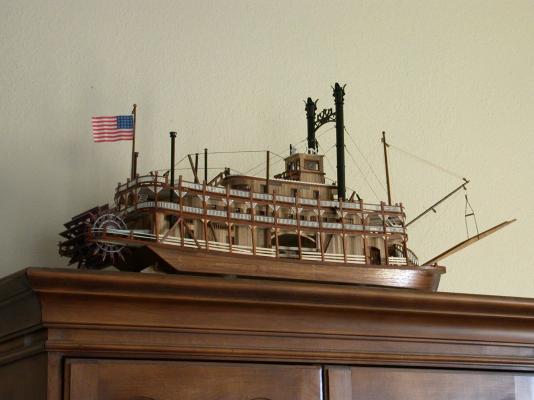
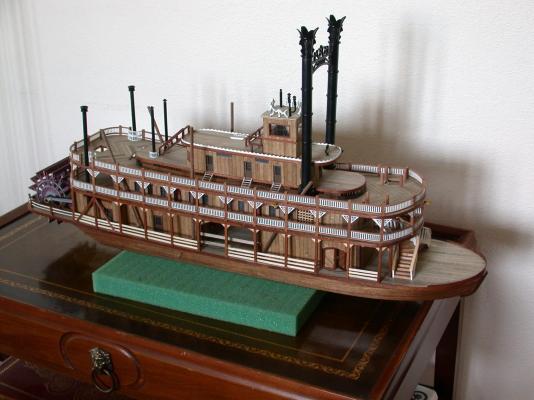
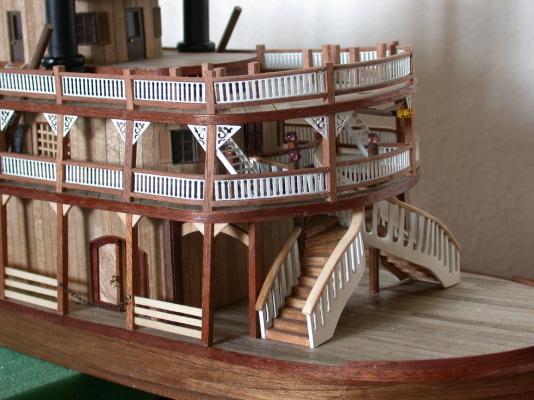
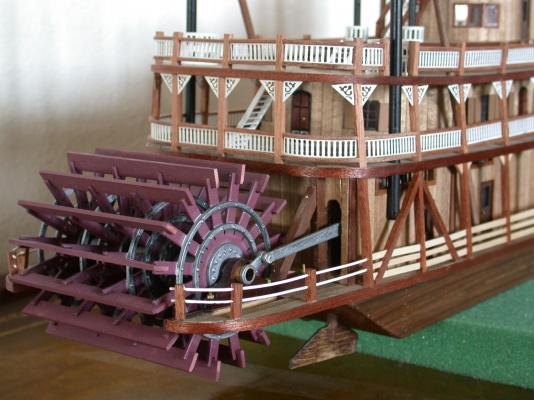
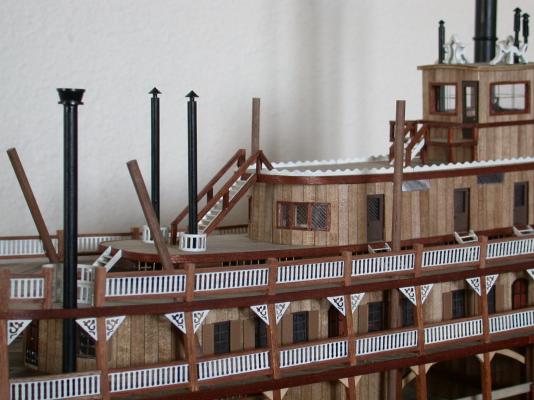
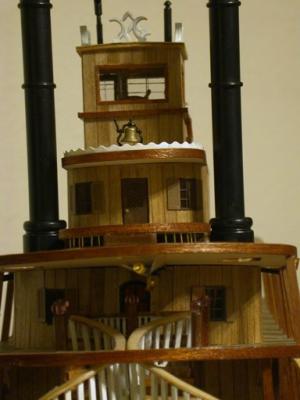
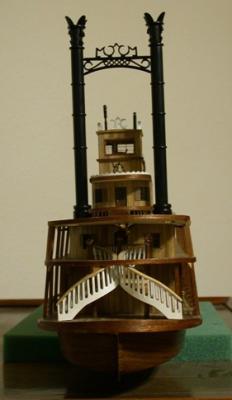
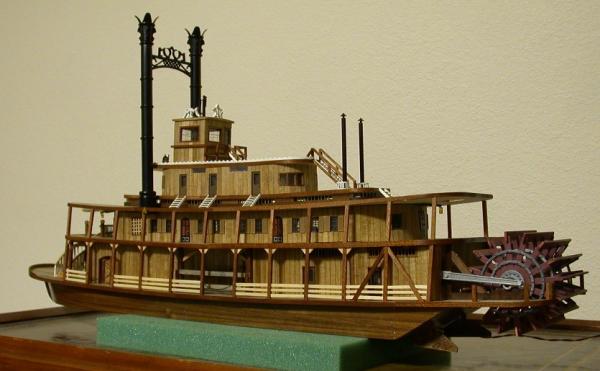
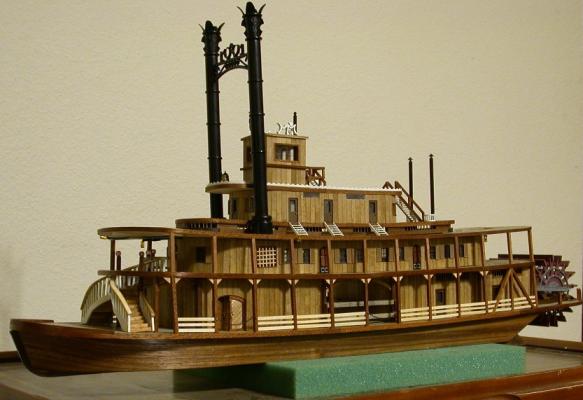
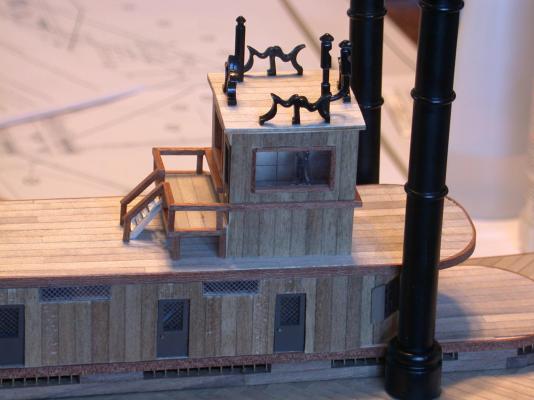
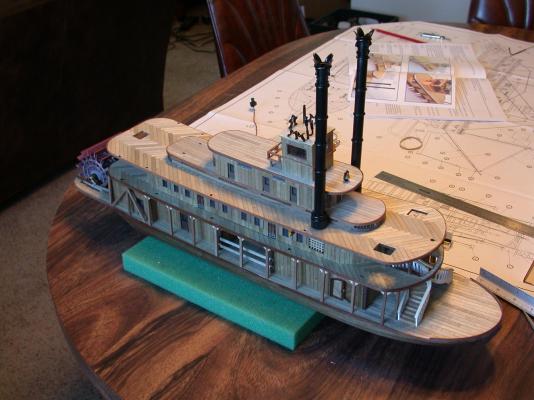
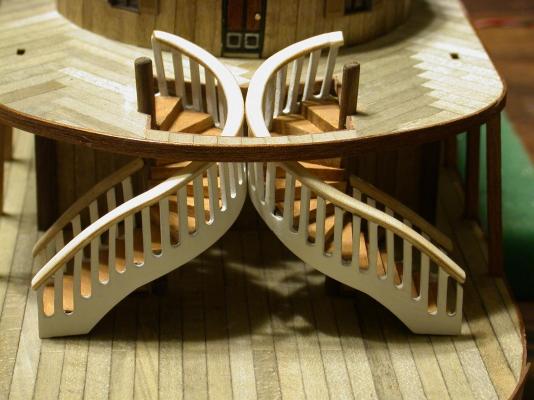
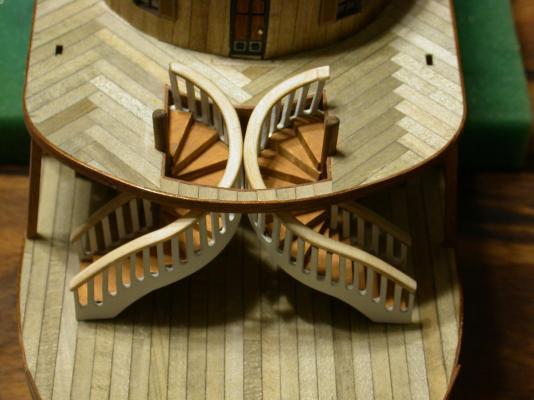
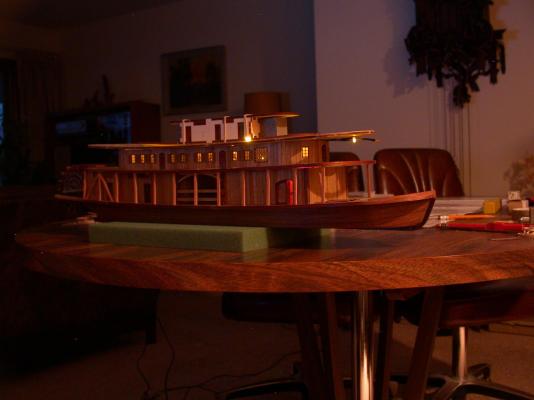
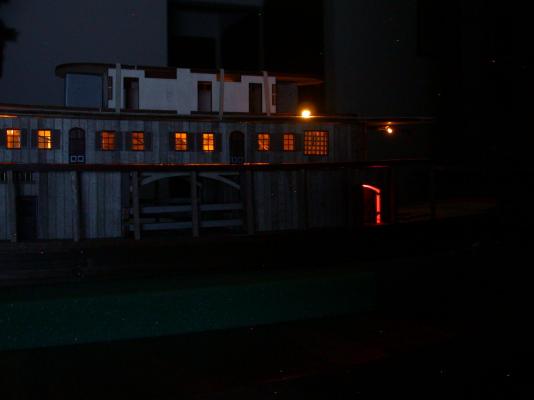
It has been slightly over two years since I started this kit and believe it or not, about a year since I finished it. I am finally posting pictures of the completed boat in order to wrap this project up. I have just seen several new KoM building projects on this site and they all look like good builds. I encourage everybody to finish your project and feel the reward of satisfaction of a successful build. The reason for the late posting is a classic story (...used by students not turning in their homework...) is my computer crashed last year. Believe you me, getting digital things back in order is a royal headache. All I can say is back up your work. Unfortunately, I did not document the last steps of my build from where I left off last year. You will see details in the pictures and feel free to send me questions about what how I did things. There are many new details borrowed from HO scale model railroading including the figures which I painted myself, the sitting benches, heavy black chain, and several light fixtures. The rigging I used a heavy tan thread, music wire for the hog chain, and very thin wire from the kit for guy wires. I remade the gang way about twice as long for the front of the boat to better match historic steamboat photos. The bottom photo is how I display model and the way I see it every day. You can see and hear the paddle wheel and lights if you click on this link. Thanks for your comments and good luck with all of your builds. Rick
- 44 replies
-
- king of the mississippi
- artesania latina
-
(and 2 more)
Tagged with:
-
Mark, I didn't think that there was any differences between browsers. I have always had good luck with Internet Explorer since practically my first computer in the late 1980's. But I tried Google Chrome as a test, and yessiree, it made a world of difference and solve the posting problem as well as sped up responses from your server. I think you should tell all newcomers to absolutely not use IE 11. The site may be losing newbies because of this incompatibility. Thanks for your help, Rick
-
Thanks, Anja for helping me solve this problem, Related to your first question, the 'Add to Post' option has not been clickable for me for quite a while. What happens most of the time, is the photos automatically become 'Attached Thumbnails' at the end of the text that I had typed in the edit box. The last few attempts in posting I kept losing all of the text and photos to a 'This page cannot be displayed' page which kicks me out of the MSW website when I hit the 'Post' button. That is why I save my typing to Word and expect to paste the saved text into the next time I try to 'Post' a message on my build log. Your list of steps to add a post is the way it used to work for me. Step #3, 'Add to Post' seems to be where things go wrong in my current attempts at posting. Rick
-
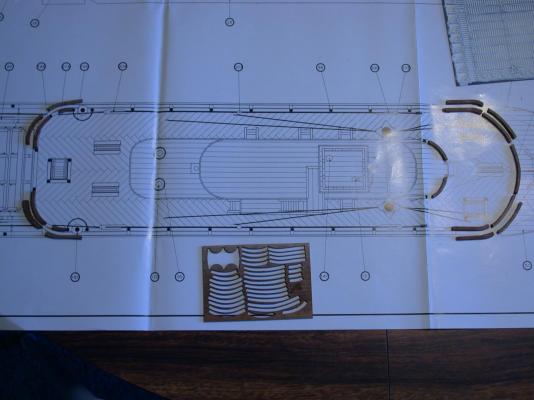
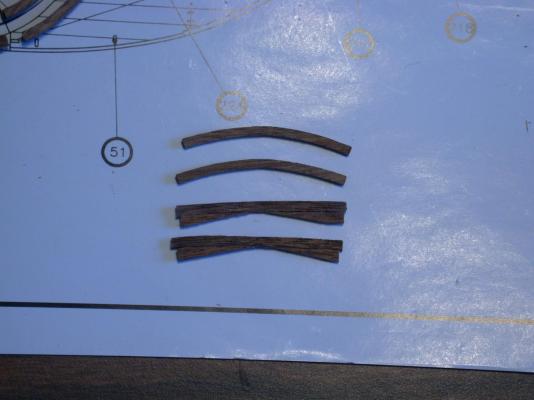
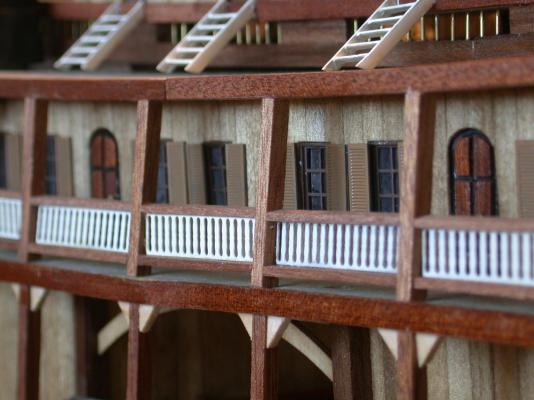
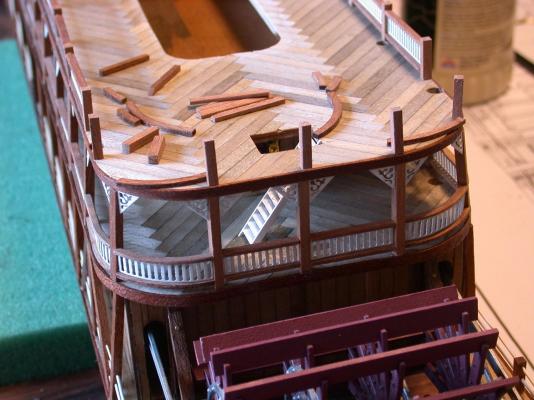
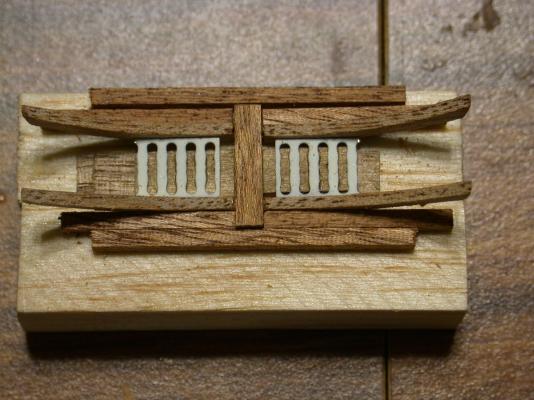
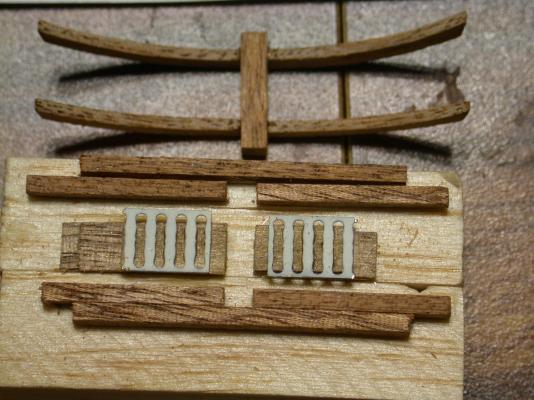
I have some pictures that I took some time ago. They should be posted before moving on to where my build is at this current date. Getting the railings organized was essential. I had a little difficulty in knowing which curved pieces went were until I laid them out on the full size plan. Locating the obvious one first narrowed down the choices for the ones that looked similar. Also, realizing the curved pieces were very similar in curvature and length between the second and third deck helped. The railings on the shorter inner deck didn't seem to have any laser cut pieces that would fit so I replaced them with HO scale porch railing made by Grandt Line. They are very realistic and surprisingly close to the size and dimensions of the AL railing. I knew I had to make a pair of long, easy curved railings for changes I had planned for the front of the second deck and I include a photo of how I spliced pieces side by side and then sanded to shape. This was way easier that soaking, boiling, and try to bend a straight piece of African walnut. (Ask me how I know). By not using brass etching on the short inner deck I had just enough to finishing the added front railing on the second deck. I located the railing posts directly above the vertical pillars according to the full size plan which were carefully measured and marked on the edge of the decks. This was a mistake, either in my reading the scale or AL drawing the plan as there were several millimeter differences. In hindsight, it is obvious that they should be the same and that length is exactly the length of the brass etchings. A few of the worst ones were relocated and others, if you look closely, some pillars and posts are misaligned. a few curved railings had to have a butt splice to close in the gaps. I was going to build the railing separately, off the boat and I built a jig to make everything uniform. But I got to thinking it wouldn't work for the second deck (pillars) and seemed to me to be too fragile on the third deck. But here is a picture of it if anybody else wants to try it. So, instead of the jig, I used a scrap piece of 2x2 millimeter to get uniform spacing off the deck for the bottom rail and glued on the etching and top rail so they are snug. There was a lot of fussing to trim the etching to length, which I said before was a mistake. I used other small pieces of scrap as a spacer to help align the etching front and back (setback) centered on the posts and railings. I prepared the etching weeks ago by using a spray can of primer to coat the brass. Then I brushed on two to three coats of what is called 'Reefer White' by Floquil paints. I understand that this paint is no longer being made. I think a good coat of spray can white on top of the primer would have worked OK. The triangular decoration went on quite rapidly using thick glue, rather than CA (superglue). The strength is from the fillet formed to capture the thin etching to the wood. Another trick I learned from Adrieke is to turn over the boat and put the triangles on up side down. And an item from the previous post is how I changed the stairways to the pilot house. The landing behind the pilot house is full width and the railing is made from the 2x2 millimeter walnut. I had seen a photo of real Mississippi steamboat with the stairway continuing down the center of the boat towards the stern. It made sense to me. I have noticed that the Polyurethane Clear Satin doesn't change the appearances of most types of wood, however it darkens and shines a little on the african walnut. It gives the boat a classy look. I wonder if I should apply it to the painted parts of the paddle wheel? It may give it a nice wet look or it may change the color, too dark? Rick
- 44 replies
-
- king of the mississippi
- artesania latina
-
(and 2 more)
Tagged with:
-
Several of the builders of the KoM on the Model Ship World site reported problems with the laser cut slots on the decks. Check the build logs of John46 and Adriecke and Dragzz. Dry fitting the rooms together and then dry fit them to the main deck shows them to be about a half of slot off. Test fit the second deck onto this assemble to be sure which slot is off. I ran into another set of slots that did not fit on the third deck. The test for that is if the smoke stacks did not line up right as well as forming a vertical line between the decks on the rear of the boat. Good luck with the rest of your build. Rick
- 28 replies
-
- king of the mississippi
- artesania latina
-
(and 1 more)
Tagged with:
-
Cutting off the heads of the brass nails to use on the hull is a good idea. I clipped the heads off before installing them. I did drill a hole slightly smaller than the diameter of the nail shaft and filed the cut end flat before driving them in flush. I actually save the nail heads and glued them on the back side of the paddlewheel castings. After painting they look like nuts to the bolt heads that are molding on the other side. A little extra detail on the signature assembly of this kit. Rick
- 28 replies
-
- king of the mississippi
- artesania latina
-
(and 1 more)
Tagged with:
-
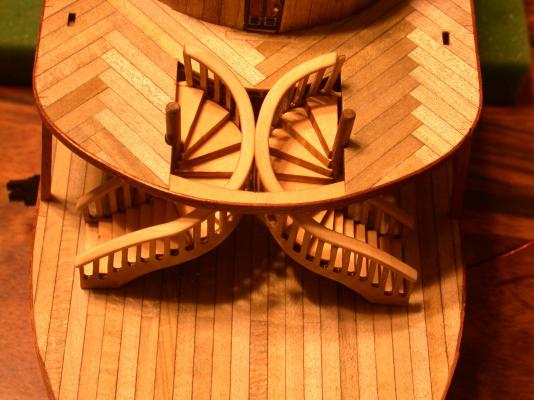
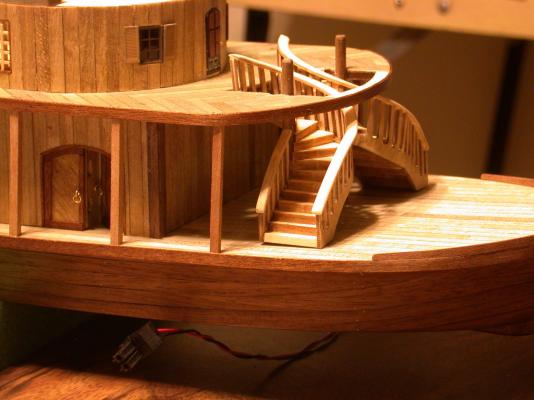
Kpnuts - welcome to this log, I am interested in your comments. Thanks Adrieke - always glad to see you checking in. Hello Casey - Thanks for your comment. Are you be building a steamboat? I figured it was time for an update on this buildlog. My KoM is starting to take on it's own unique character. This kit has a huge number of details, some I like, and others I wanted to improve. In the first photo below, looking straight on the front of the boat, the spiral stairs that I changed around doesn't look too bad. Other details I've changed are the decorative beads on the railing posts. I found some in a bead shop that sort of match the color of my paddlewheel. The lights (LEDs) are very visible in this view. The forward one will be made into a search light, common on steamboats in the 1880's. I am hoping that the ceiling light will light up the staircase detail, usually a very dark place on model boats. The second photo shows a dramatic improvement of the smokestack decoration. When simplifying the pilot house decoration I had an extra casting or two. Wonder what to do with it, I suddenly thought it might be able to go between the stacks, but it was too small to fit by itself. With very little filing I was able to shape the base to fit on the stack decoration/bracing and I am pleased how it looks. My intent for pilot house decoration was to lighten it up a bit closer to what I've seen on historic photos.I saw some classic shapes (fleur-de-lis) in the casting that seem to fit on a boat that is often called King of the Mississippi. Although I haven't found an actual historical picture of any boat with this name. The side view photo of the boat shows the wooden railing along the main deck. Instead of using the provided dark wood as per the instructions I wanted light colored railing as seen on some of the other kit steamboats. With plenty of decking planks left over, I decided to use it, but it was too wide and seemed very thin (21 inches wide in HO scale). I devised a cutting jig to slice the strip into two equal pieces getting a very reasonable 10 inch boards. Cutting these to fit between the pillars took extra time but it shows nicely in close up photography. Heavy chain from Builders in Scale ( 12 links to an inch) looks better to me than the brass ring chain provided in the kit. The last photo is the traditional view we all like. The short stairs I made from metal castings from Scale Structures Ltd. The bell is O scale (1:48) locomotive bell from Precision Scale. It sill needs its pull rope. I'd be interested in any of your thoughts about all of the changes I'm making to this kit. Rick
- 44 replies
-
- king of the mississippi
- artesania latina
-
(and 2 more)
Tagged with:
-
It looks real good what you've done so far. There will be a few more adjustments needed to your KoM kit. Read ahead what other build logs say about how to solve many of the problems you might encounter. I too, am having problems with posting photos within the text. In my last few posts they have ended up as attachments. I am currently using Internet Explorer ver. 11 which may be the problem. Older versions I think work better. Keep up the good work and great postings. Rick
- 28 replies
-
- king of the mississippi
- artesania latina
-
(and 1 more)
Tagged with:
-
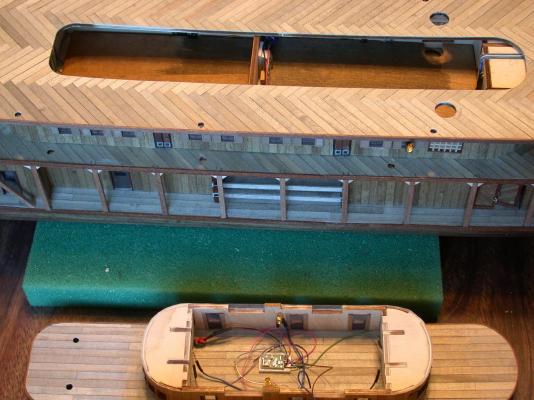
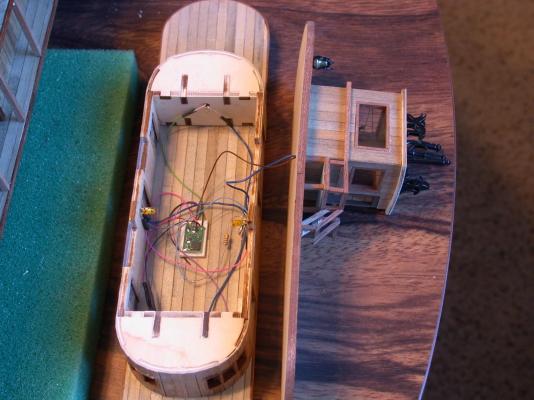
Finishing the pilot house really helps the appearances of the boat. Several things about this part of the kit I decided to change after much deliberation. Would it look sort of clunky? Will the change make it look worse than the instruction photos? Well, I went ahead with the modifications and all I can say it is my boat and I am enjoying this build. The first photo (from the bottom) shows the wiring and the second decoder inside the Texas deck. This decoder controls four lights with independent control, one forward in the curved State Room, one in the rear State Room, one in the pilot room and two connected together in the central State Room. The next photo up shows the Texas and the Boiler decks to relate their different size. The inside of the Boiler Deck has the first, more powerful decoder, which controls the paddlewheel, the sound effects and 10 different lights, I was able to find some old scribed basswood for the flooring to cover the nest of wiring in this area. The flooring is removable even when the third deck is glued down. Here is a photo getting an advance view of the smoke stacks. They don't get glued down until later. And finally, (at the top) the pilot house with the modified roof trim and the rear landing for the stairway. Another stairway will continue down from this deck to the read of the boat. Rick
- 44 replies
-
- king of the mississippi
- artesania latina
-
(and 2 more)
Tagged with:
-
Hello John, Thanks for looking at my build log. As you can see I did not follow the instructions exactly as Artesania Latina (AL) wrote them. I used a cut-off iron nail that was the same size as the hole in the crank (98) and the rod (99) to make a new pin to connect the rod and crank without binding. The nail had a flat head and I fitted a ring cut from a styrene tube that fit snugly on the stub end of the nail. A very small amount of super glue keeps the ring in place. The thickness of the head had to be small in order to clear the support block of the paddle wheel shaft. Looking at some my photos shows the white ring holding the shortened nail in place when looking sideways at my paddle wheel. The AL directions say to use a very short piece of the thicker brass wire as a fastener of the crank and rod but they don't say how. If I were using the wire I would try to mash one end to form sort of a flat head nail, cut it very short to fit through the crank and the rod and then carefully mash the other end flat enough not to slip back through the hole. If that doesn't work try bending the very end of the wire and cut a small piece off a little longer than the thickness of the crank and rod and then bend the other end to keep it from falling out. It would work more like a cotter pin doing it this way. Hope you find a way to make it work. Rick
- 44 replies
-
- king of the mississippi
- artesania latina
-
(and 2 more)
Tagged with:
-
Barry, You have a very good start on your project. The stairs, I think are the hardest part to get right and any creative solution may be the best thing to do. Several "King of the Mississippi" build logs are on the Model Ship World site. They are all worth while looking into to see how others have tackled various problems. Adrieke, Dragzz, John46, Robert1965, Rick, and others have done an excellent job in documenting their builds. I speak for the others in welcoming you as you share your work as you have already done so above, Rick
-
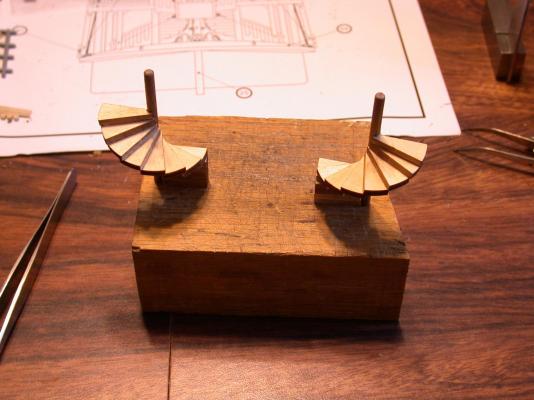
The main stairs for this boat are unique and seem to be a challenge for most people to build. It took me several iterations and a lot of looking at other KoM builder's logs, which helped considerably in deciding what to do. I came up with new problems not encounter during their builds. The first photo show the step assemble using methods from John 46 and Adrieke. Unfortunately, that is when I stop taking pictures until I was confident of finishing the whole assembly. Something about AL's King of the Mississippi appearance from the front that I didn't like. Missing the second deck rail around the forecastle seemed to appear to me like a cleft pallet. I saw that the stairways could be swapped right and left and essentially still function as spiral staircases - just climb the steps leaning in the other direction. Plus, it shows off the step detail to the front of the boat and makes them more visible to viewers. I figure I would need to do the following changes:1) Build new railing and deck across the front, 2) the railing at the top of the stairs must be modified slightly, 3) the column near the base of the stairs must be moved over slightly 4) the arch over the passageway needs to be changed, 5) the notch in the second deck for the center pole need a slight adjustment. When test fitting, both in the way the instructions say and trying my new idea, the steps would come up significantly short. The height between the surface of the main and second decks on my boat is 43 mm. Each step from the kit is 3 mm tall and 13 steps in all add up to 39 mm. I decided adding another step would help the fit between the deck and fitting extra step to the railings and the balusters would take careful placement to hide the difference. I ended up making an extra baluster out the fret material for each of the straight balusters and fabricating longer railings for that side of the stairs. Getting the balusters and handrails to curl proved to be the hardest part for me. Wetting, soaking, forming slowly the spiral curve went very slowly. Not finding good ways to clamp the pieces into the new shape was difficult. I would use a cylinder the diameter of the staircase and elastic bands but this wouldn't work on the critical top and bottom edges of the balusters. The railings were harder to shape trying form twists and bends and straight sections. I ended up breaking one baluster seven times, the other one did OK. Bending a weakened piece smoothly is near impossible so it got glued back together rather warped. Towards the end I sanded off the worse bumps and re-broke several balusters to even up the spacing. I am amazed the finished photos don't look as bad as they really are.
- 44 replies
-
- king of the mississippi
- artesania latina
-
(and 2 more)
Tagged with:
-
Here are some initial photos testing the new lights. The red flicker from the boiler room door is nice. I think I want to have them a little brighter which means changing out a resistor. Getting independent control of the lights is tougher than I thought due to programing issues. Remapping function keys is not easy to do. Rick
- 44 replies
-
- king of the mississippi
- artesania latina
-
(and 2 more)
Tagged with:
-
You know Adrieke, that I have had a lot of experience with model railroads. This part come easy. Now with ship building it is a different story. It definitely is a new challenge for me. I had trouble with the bow and Dagzz had good suggestions. I have just finishing the main stairs and as everyone says it probably the hardest part of the build. I appreciate your observations and encouragement. I am learning a lot with this project and hope other get new ideas from it. Rick
- 44 replies
-
- king of the mississippi
- artesania latina
-
(and 2 more)
Tagged with:
-
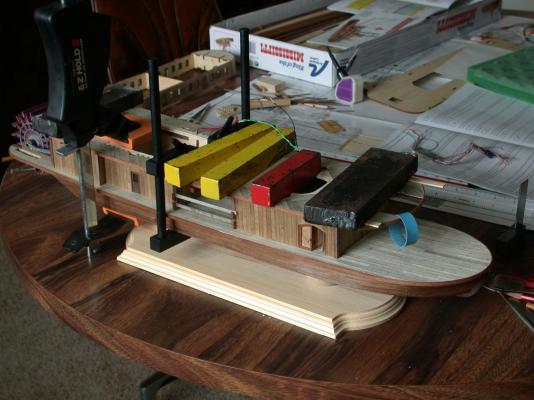
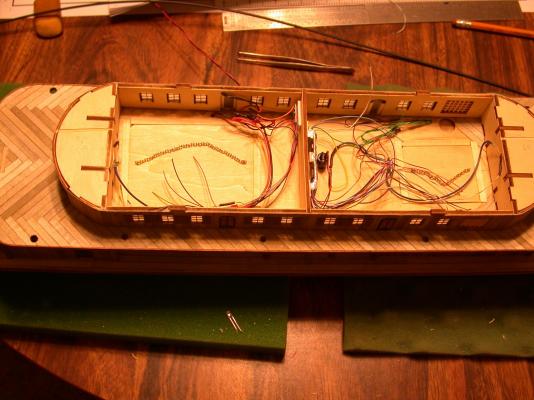
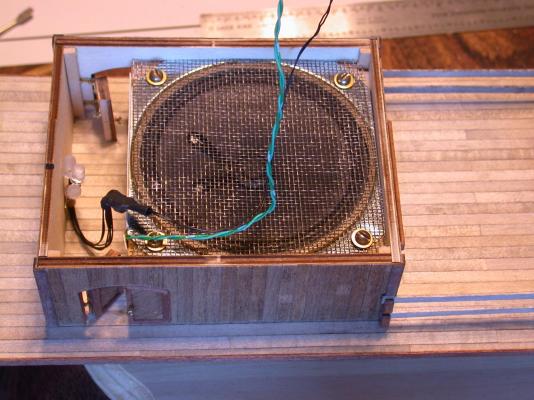
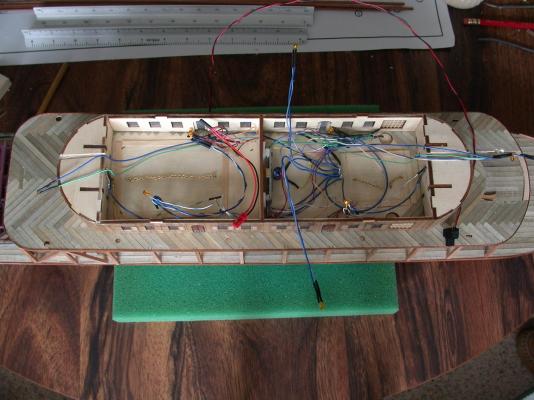
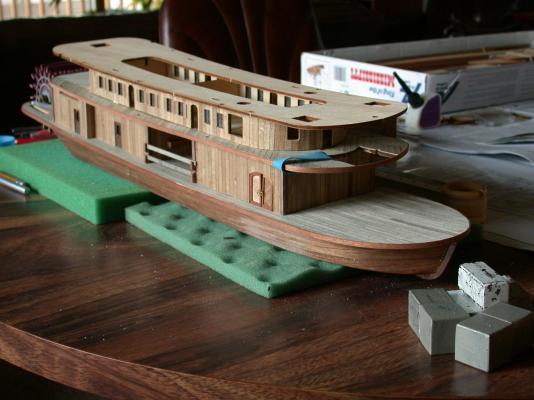
Moving ahead, I glued the engine and boiler rooms onto the main deck. The photo shows the effort to get a tight joint at the base of the walls. The rooms have been sitting on the deck for weeks as I worked on getting the control and wiring figured out... The next photo shows the 'nest' (before anything is really hooked up) where the wires and the control circuit board will be. On the green pad is a sample of the LED light I am using. They came from Christmas Lights. (BTW Happy Holidays to you all ). Of course the DC motor to the paddle wheel needs power. I also have estimated about 22 LED to light her up. And because I am a big fan of steamboat whistles I put in the biggest speaker I could. It is the exact width of the boiler room. Also in view are three LEDs on the left side of the room. They are colored LEDs - red, yellow and amber. When power is supplied to this circuit it flickers randomly. I figure the men feeding wood to the boilers will get a nice light show. The system that controls all of this is borrowed from model trains. I am using a DCC (digital command control) sound decoder that has internal sound files for whistles, bells, steam exhaust and a big assortment of other sounds. To control the decoder, usually model railroaders use a DCC throttle that is attached to the tracks and sends a coded signal through the rails to the locomotive in which the decoder has been installed. The decoder will then turn on headlights or increase voltage to the motor and send synchronized sound files to the onboard speaker, all in response to the throttle commands. The photo shows the throttle made by North Coast Engineering and the panel plugin unit on the left that should be attached to the front of the train layout. The power supply is plug into this as well as the throttle. The installation manual of the decoder are also in this photo. Since I am not using rails for my boat, the connecting wires (red and black) go directly into the boat though the keel stands and up through the hull to the decoder. The decoder is attached to the dividing wall between the staterooms. It is amazingly small for what it can do. And thus begins the process of connecting all the lights. More on that next time. Rick
- 44 replies
-
- king of the mississippi
- artesania latina
-
(and 2 more)
Tagged with:
-
Congratulations Paul, the boat came out very nice. It will make a great display. You also have a beautiful work area, nice and bright. Are you going to start another ship model? Rick
- 12 replies
-
- king of the mississippi
- artesania latina
-
(and 1 more)
Tagged with:
-
Enjoy the Gorch Fock Adrieke, may it bring you new adventures in ship building. Your build log on the King of the Mississippi has been valuable to us all, for me particularly. Finishing the boat must be satisfying and a relief. It will bring you many memories. Thanks for sharing it with us. Rick
- 1,038 replies
-
- King of the Mississippi
- Artesania Latina
-
(and 1 more)
Tagged with:
-
Adrieke, She is a beauty. You will have to break out the champagne when you finish. I hope my boat will look as good as yours. Rick
- 1,038 replies
-
- King of the Mississippi
- Artesania Latina
-
(and 1 more)
Tagged with:
-
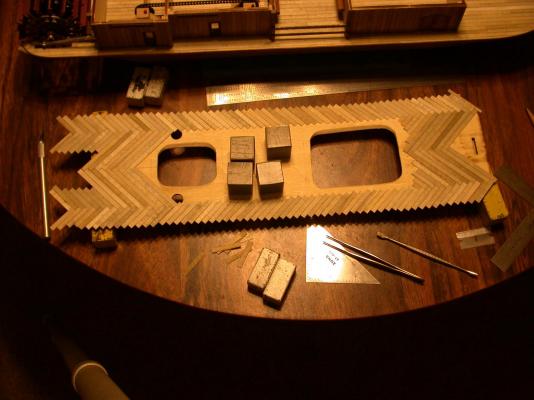
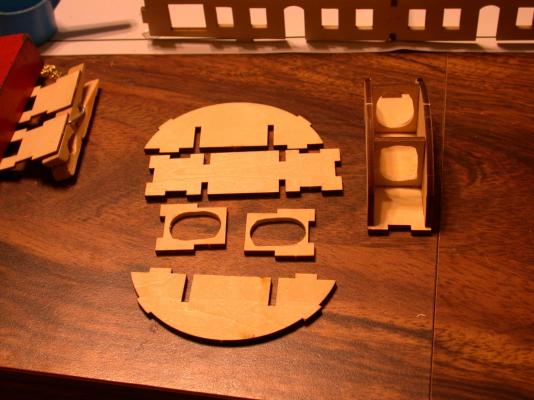
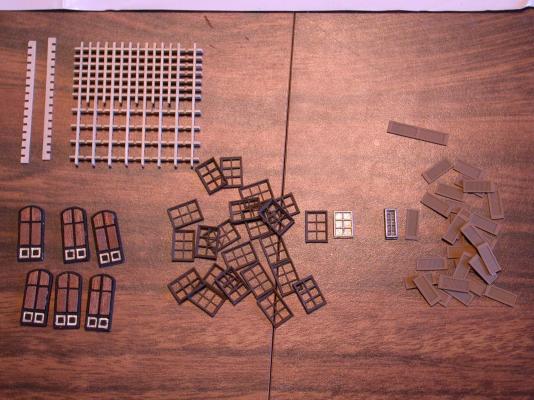
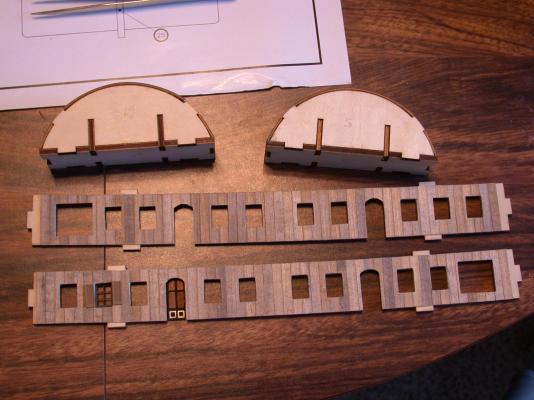
Thanks Adrieke. Now that the paddlewheel is running pretty good, it's time to build the next deck. I chose weathered planking using the herring bone pattern. I knew I didn't need to plank inside the second deck staterooms so I didn't do anything to the hatch covers. I want to add lights to the end staterooms with the curved walls that could be turned on and off separately from the main staterooms. The windows in those rooms are separated by means of internal bulkheads and I didn't think its worth two bulbs for such tiny space. So cutting an opening in the bulkheads inside of the rooms lets one bulb light up two windows. Here is where HO scale comes into play. The KoM is a 1:80 kit but I am pretty sure most finished boats get HO scale figures to add life on the decks for nice pictures. HO is pretty close at 1:87 and many detail parts are manufactured commercially for scratch building structures. The window castings in the AL kit were replaced by windows made by Tichy Train Group part #8026 and the louvred shutter by Grandt Line Products #5175. The windows are a tiny bit taller than the opening but allows interior lights to shine out. I did have to trim the window frames in order to be flush with the outside edge of the wall. The shutters originally are 87 scale inches tall but when cut in half match perfectly to the windows. This photo shows the difference between the AL castings and the replacement parts. Note the ventilator grate assembly. I didn't realize there weren't enough pieces to fill in the gaps. Planking the curved walls of the staterooms was a challenge. There are a few tapered planks that aren't very noticeable. The last photo shows the windows and shutters. The wood color of the shutter blends with the wall color and are not very visible. The ventilator grid is not done yet. The photo above shows the grating assembly which was not the right approach. I decided to frame the ventilator with sapeli and carefully rebuild the grates to fit. This wasted most of the wood AL ingeniously cut for the grates. More, later Rick
- 44 replies
-
- king of the mississippi
- artesania latina
-
(and 2 more)
Tagged with:
-
Here, if youtube cooperates, is the video of testing the paddlewheel. http://youtu.be/Entyn_UQuXM Hope you like it. Rick
- 44 replies
-
- king of the mississippi
- artesania latina
-
(and 2 more)
Tagged with:
About us
Modelshipworld - Advancing Ship Modeling through Research
SSL Secured
Your security is important for us so this Website is SSL-Secured
NRG Mailing Address
Nautical Research Guild
237 South Lincoln Street
Westmont IL, 60559-1917
Model Ship World ® and the MSW logo are Registered Trademarks, and belong to the Nautical Research Guild (United States Patent and Trademark Office: No. 6,929,264 & No. 6,929,274, registered Dec. 20, 2022)
Helpful Links
About the NRG
If you enjoy building ship models that are historically accurate as well as beautiful, then The Nautical Research Guild (NRG) is just right for you.
The Guild is a non-profit educational organization whose mission is to “Advance Ship Modeling Through Research”. We provide support to our members in their efforts to raise the quality of their model ships.
The Nautical Research Guild has published our world-renowned quarterly magazine, The Nautical Research Journal, since 1955. The pages of the Journal are full of articles by accomplished ship modelers who show you how they create those exquisite details on their models, and by maritime historians who show you the correct details to build. The Journal is available in both print and digital editions. Go to the NRG web site (www.thenrg.org) to download a complimentary digital copy of the Journal. The NRG also publishes plan sets, books and compilations of back issues of the Journal and the former Ships in Scale and Model Ship Builder magazines.


