HOLIDAY DONATION DRIVE - SUPPORT MSW - DO YOUR PART TO KEEP THIS GREAT FORUM GOING!
×


RMC
-
Posts
933 -
Joined
-
Last visited
Content Type
Profiles
Forums
Gallery
Events
Everything posted by RMC
-
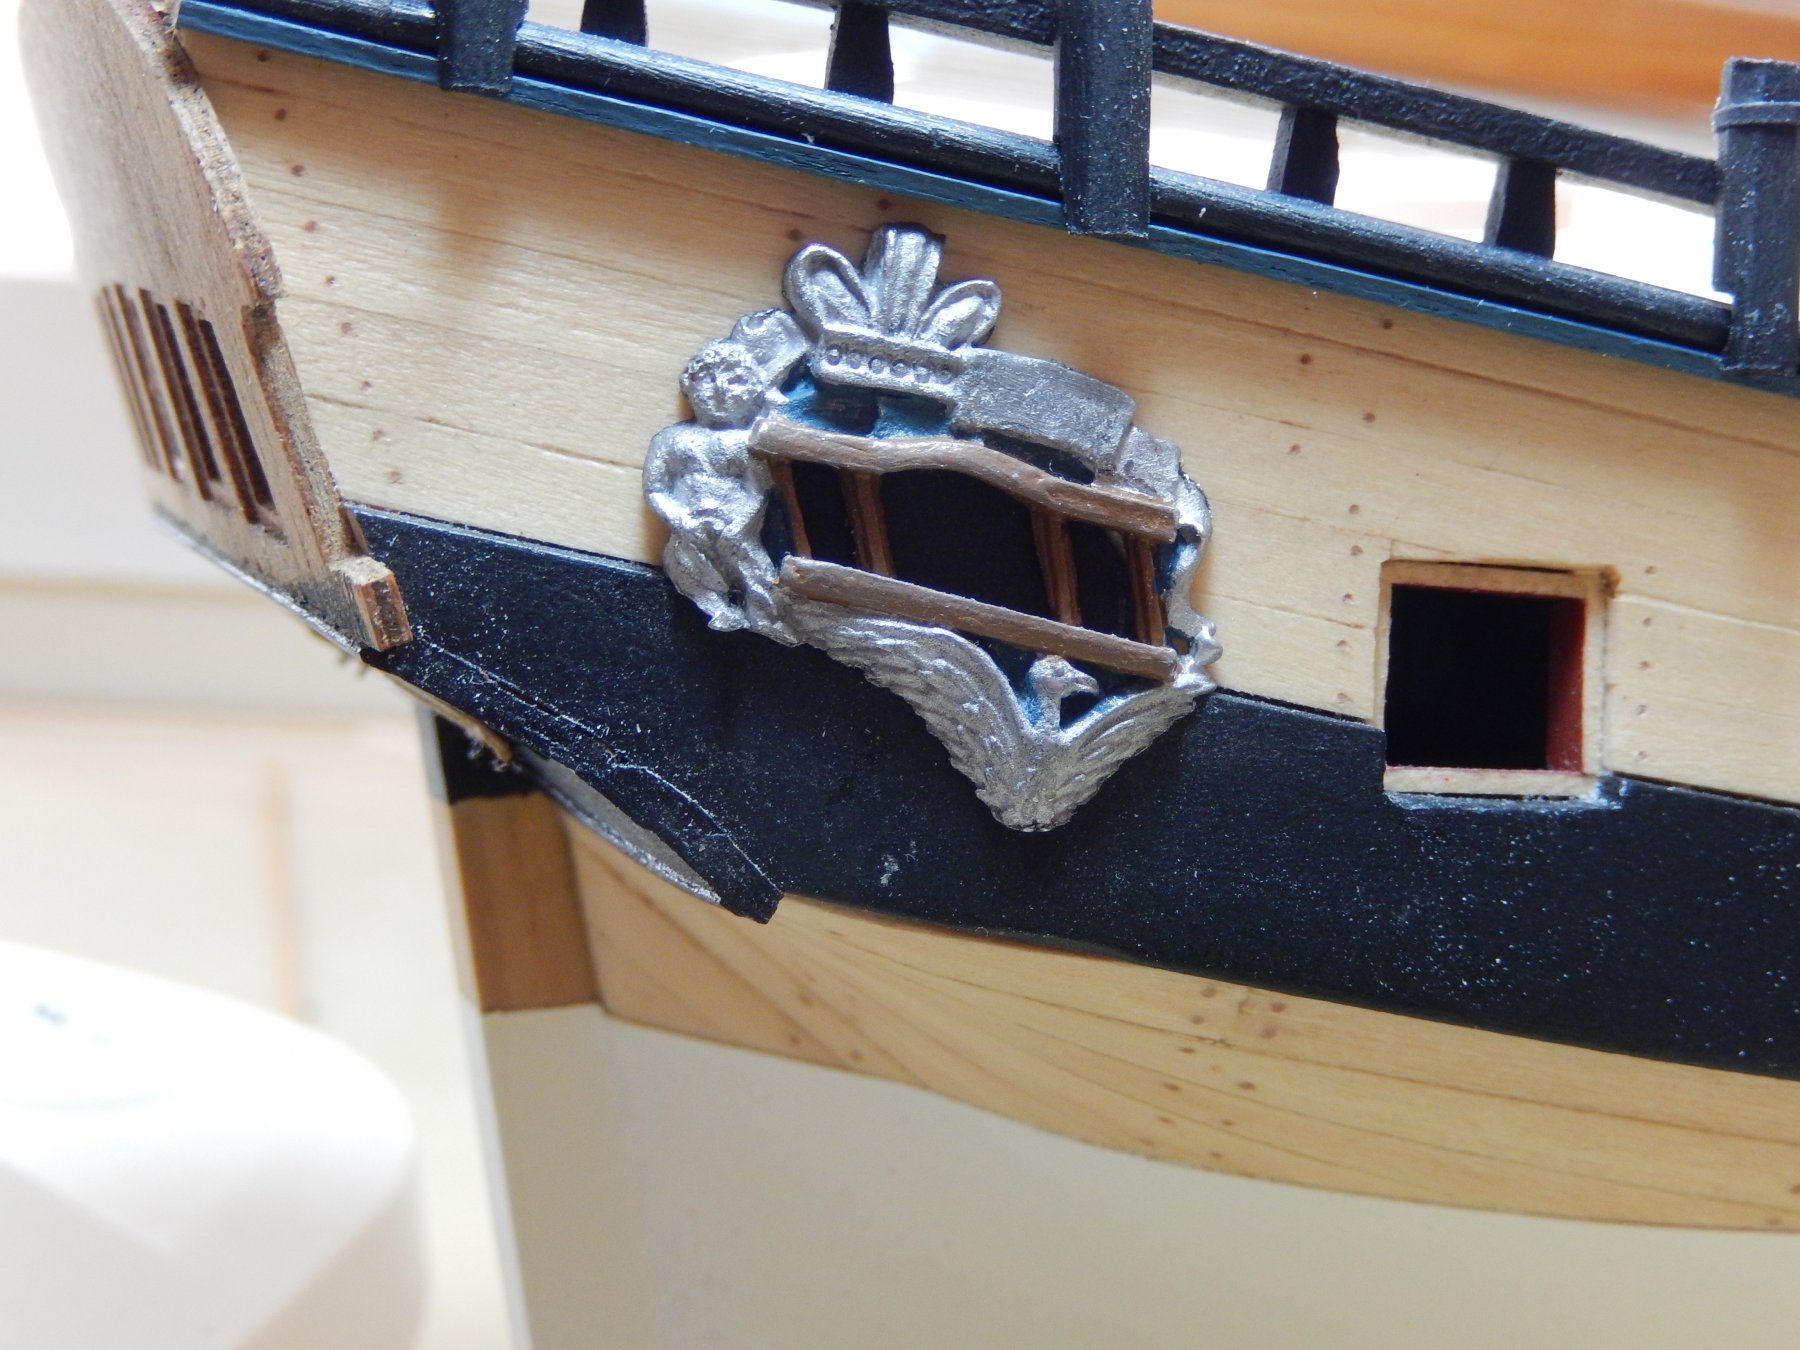
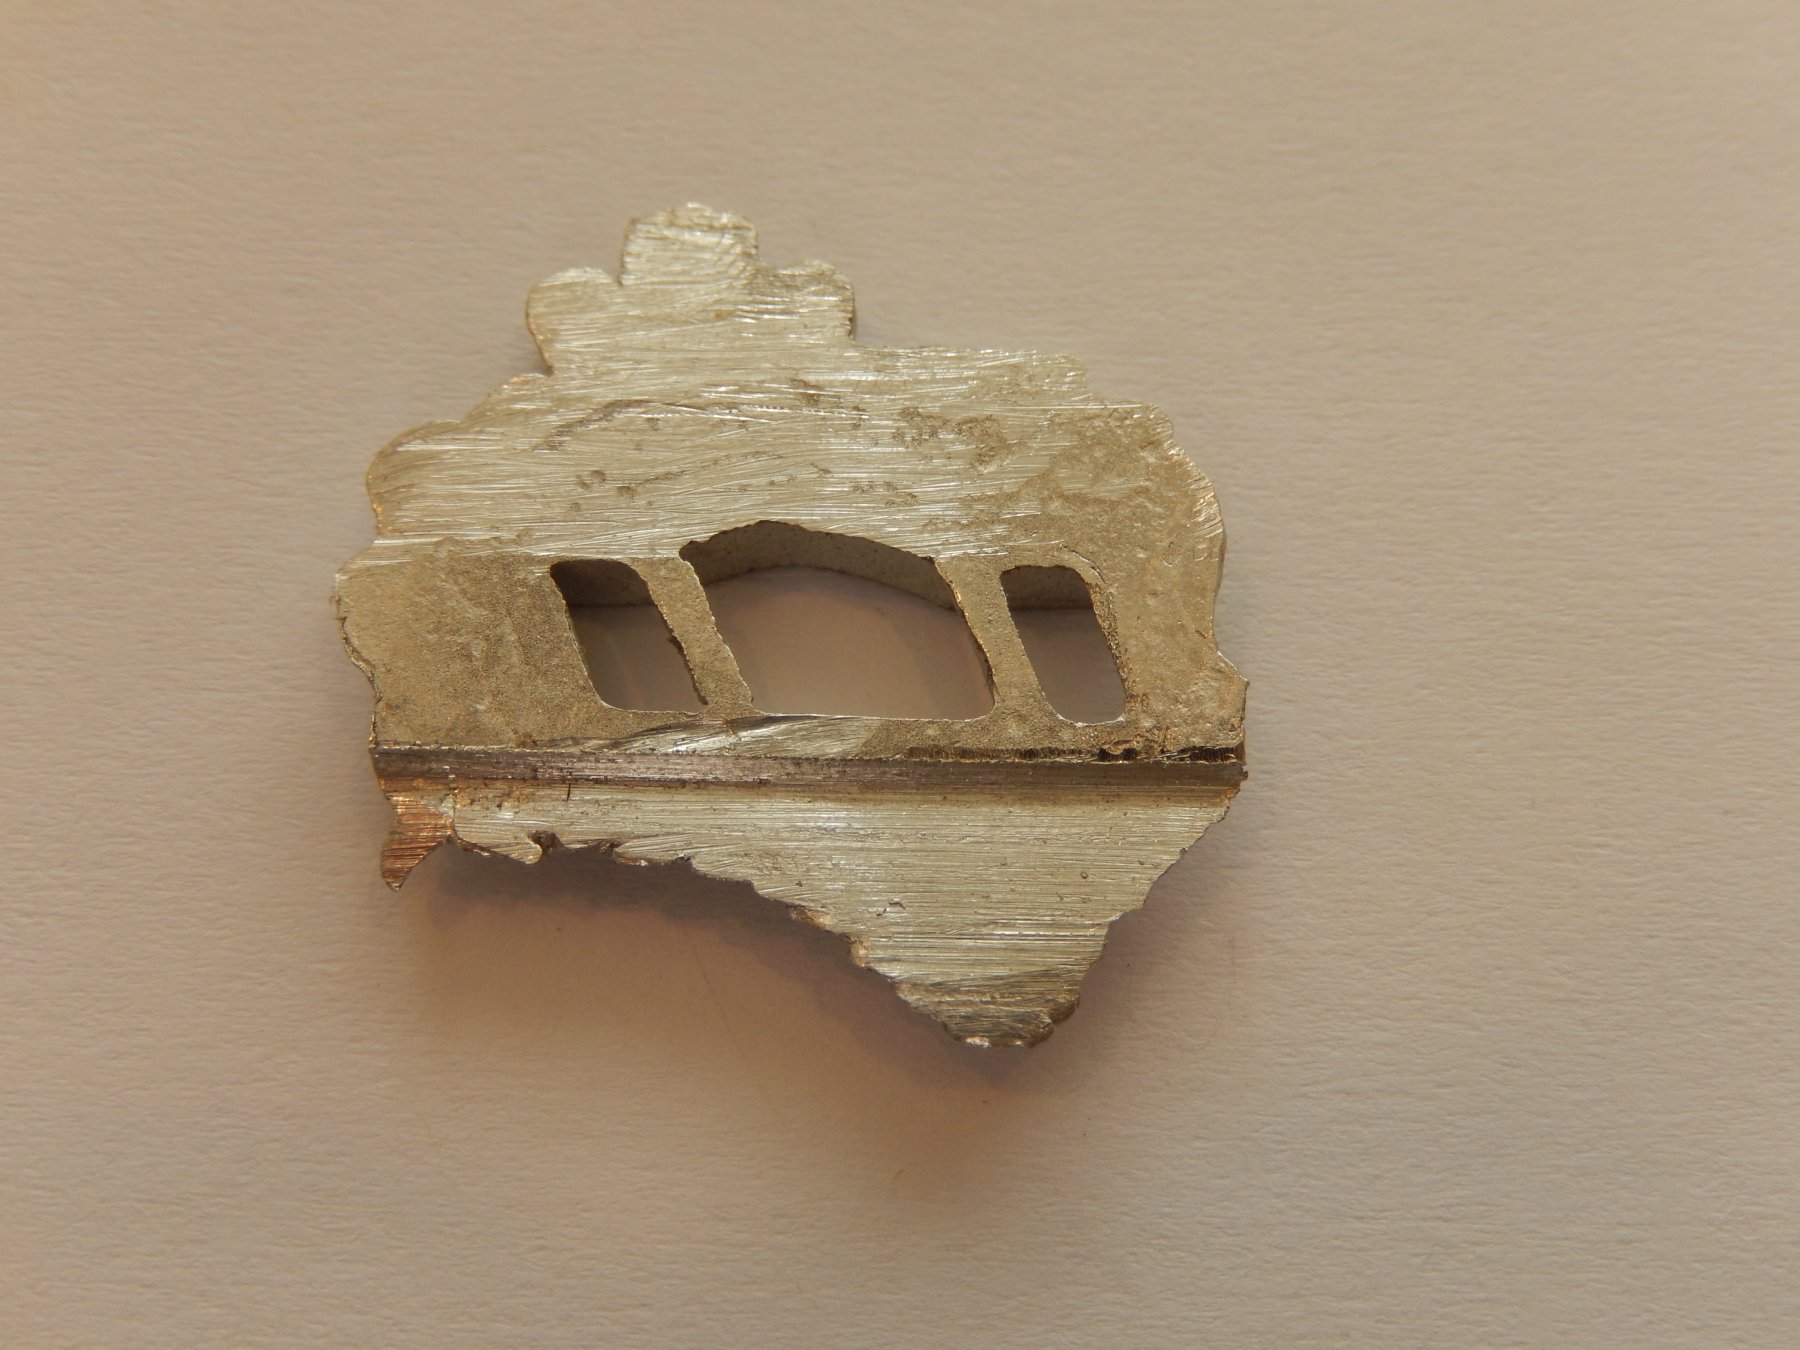
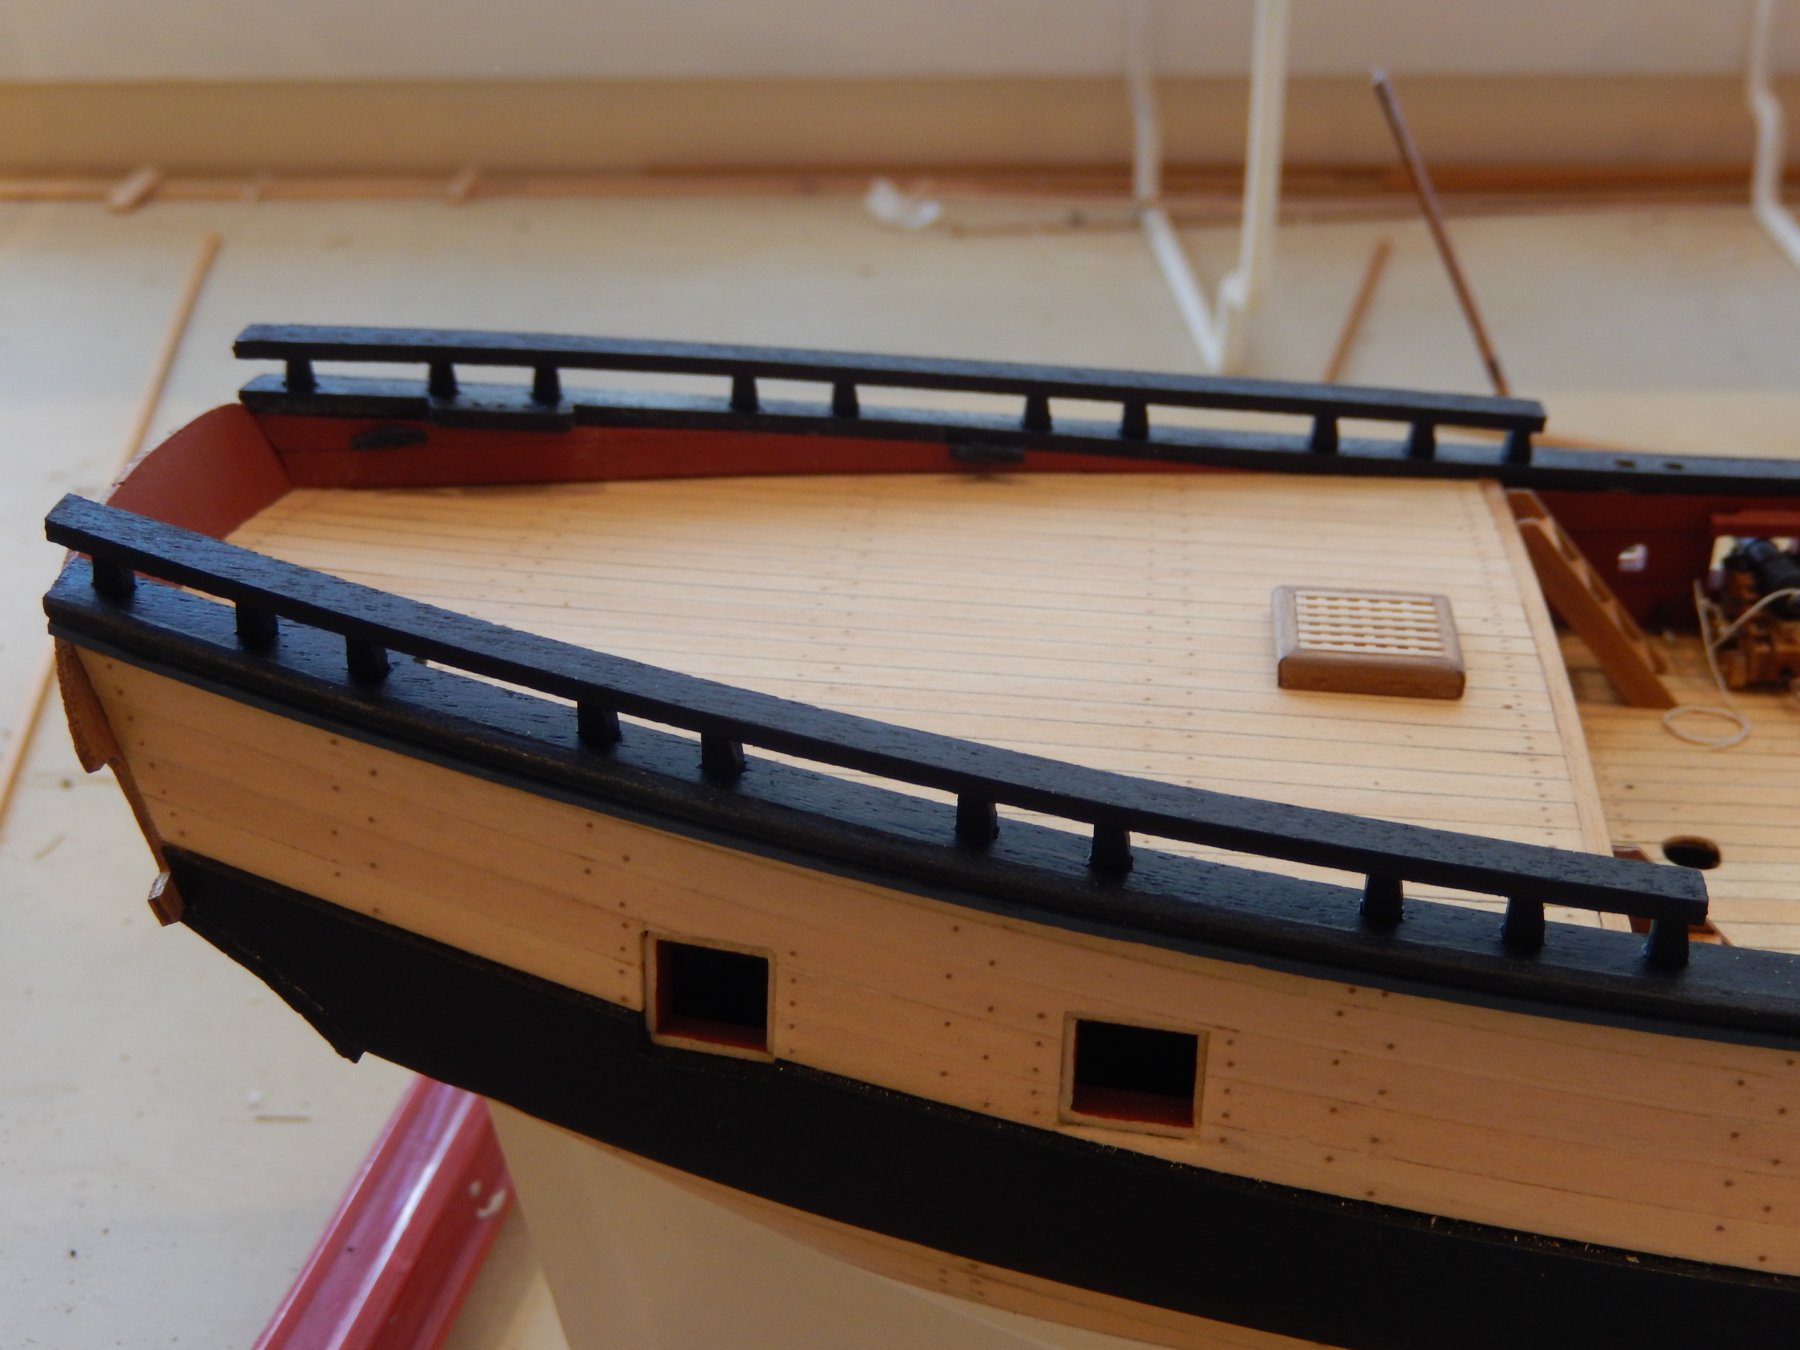
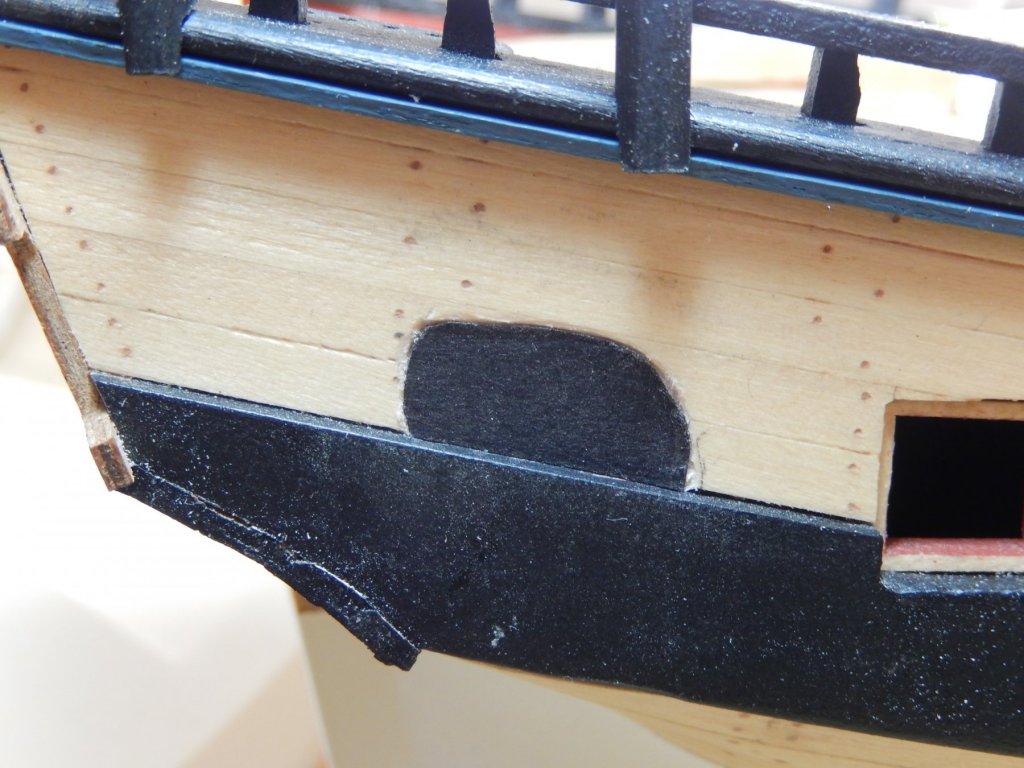
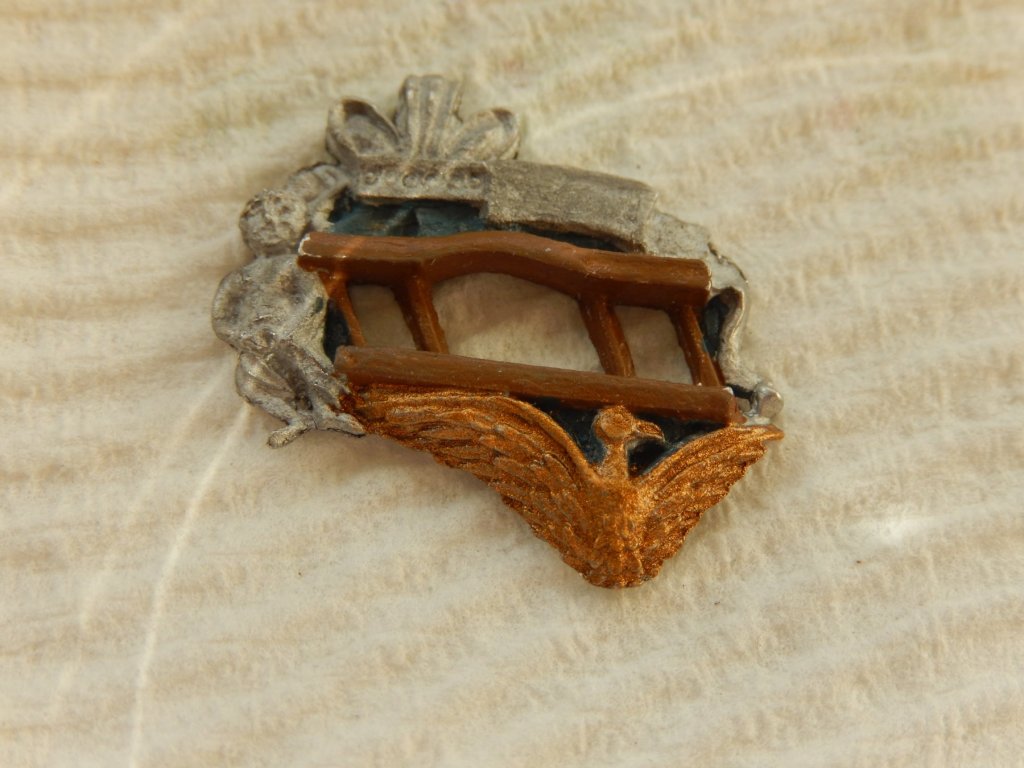
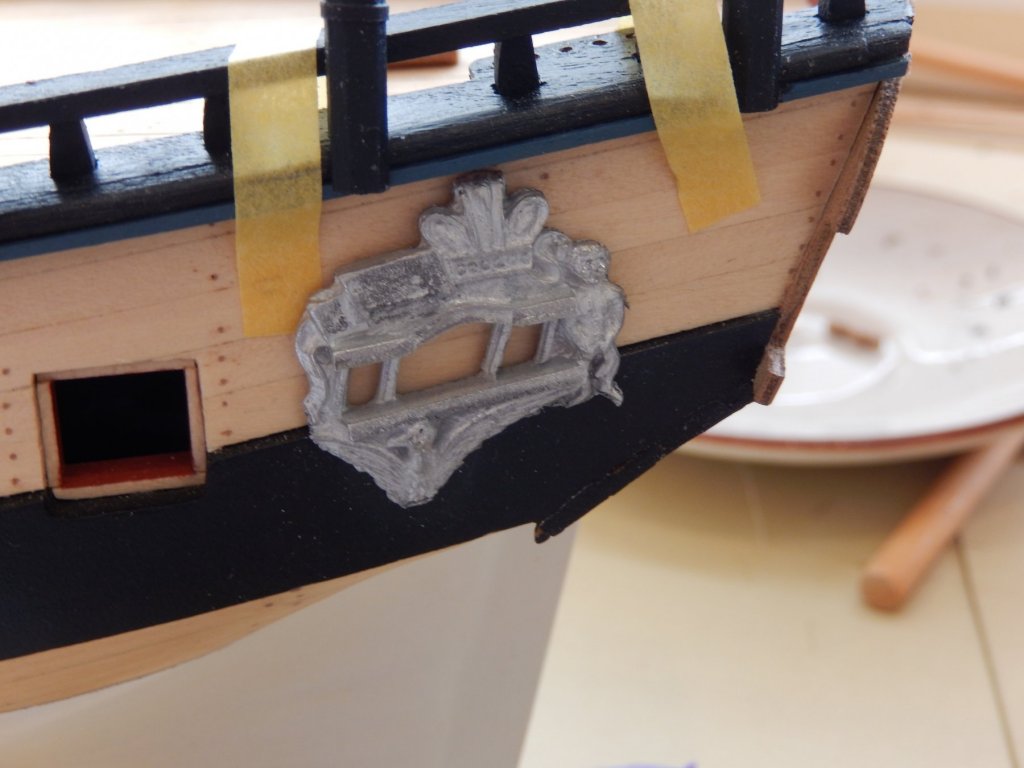
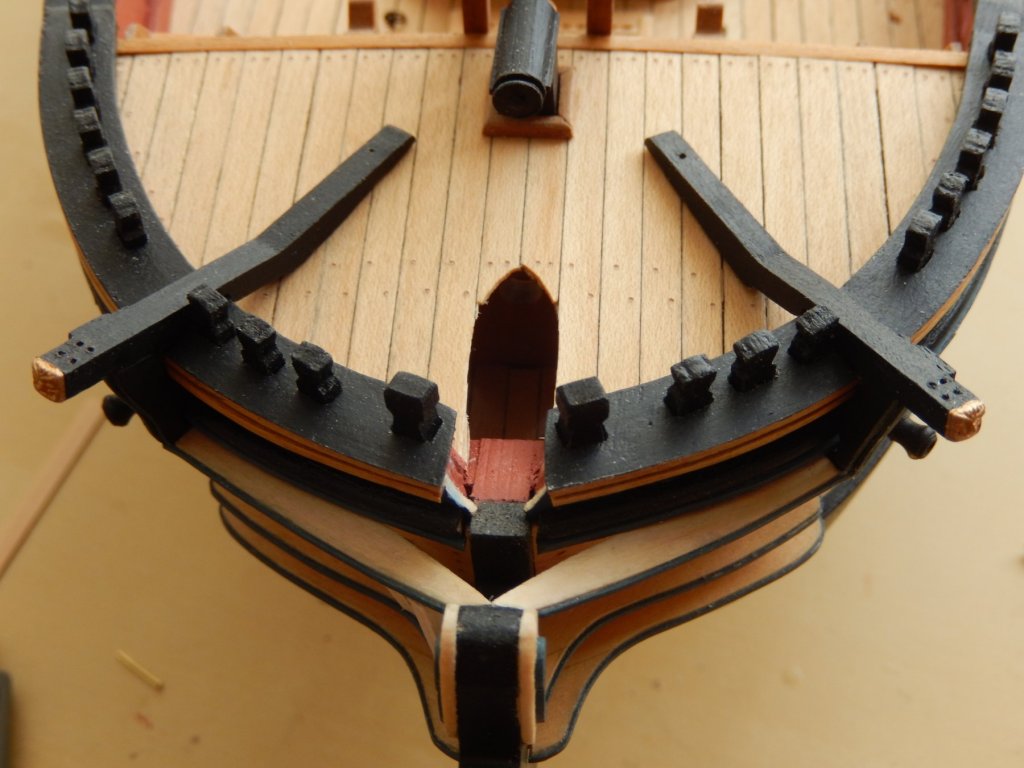
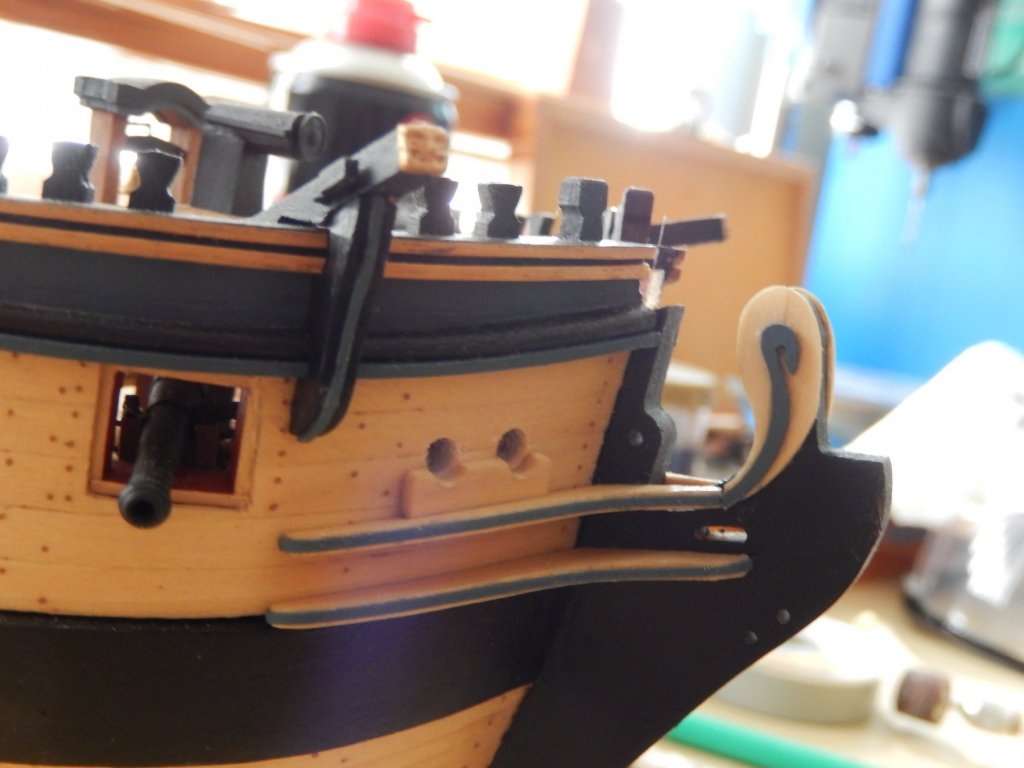
Hi Uralex. As you will see from the following photos I have adopted your method - thank you for the suggestion. Here are the steps. Cutting out the first layer of planking. Fitting black cartridge paper. I'm think about painting the hole instead to provide a very slightly bigger gap between the hull and the window. The decoration dry-fitted and partly painted. The brown is supposed to be walnut and is darker than I would like, but it's acceptable. As an experiment, I have painted the phoenix bronze -just one coat so far. At least it looks a bit like the representations of the phoenix that may be found on the web.

- 421 replies
-
- 10
-

-
- caldercraft
- granado
- (and 1 more)
-
Hi Uralex. Thank you for taking the time to comment. I am now in two minds regarding the treatment of the decorations. Your method is far better than that suggested in the instructions and has turned out well. Making a hole, while I think it may look a little better, is probably a bit risky. Big decisions😕. I'm still debating what colours to paint the damn things. The bird on the bottom is, I think, supposed to be a phoenix. Painting it white with a red beak and a black eye (shown in the instructions) makes it look a bit like a startled duck, whereas it should look (having Googled 'phoenix') more like an angry duck a l'orange. I think I will settle on a boring brown.
-
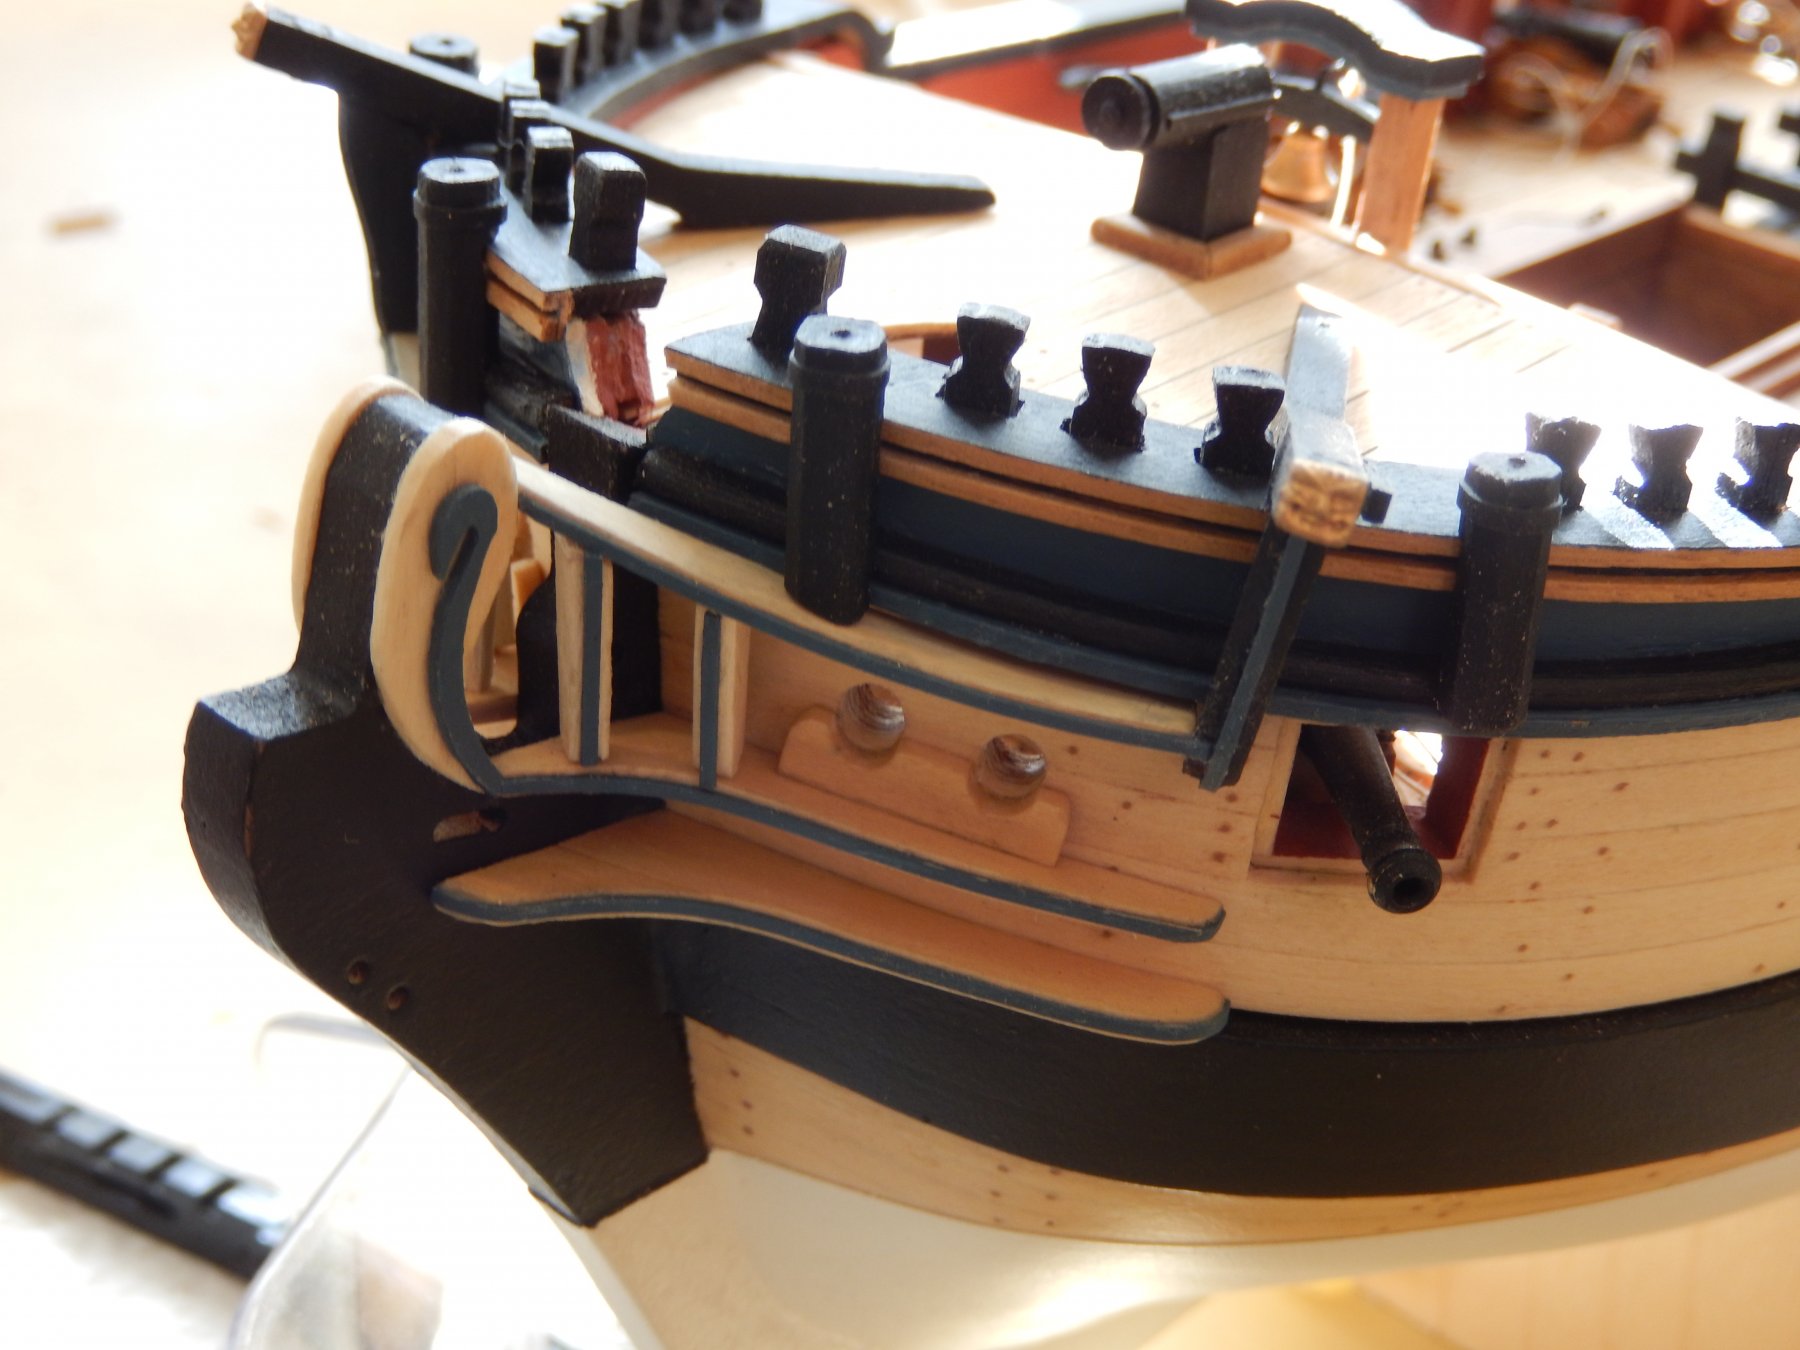
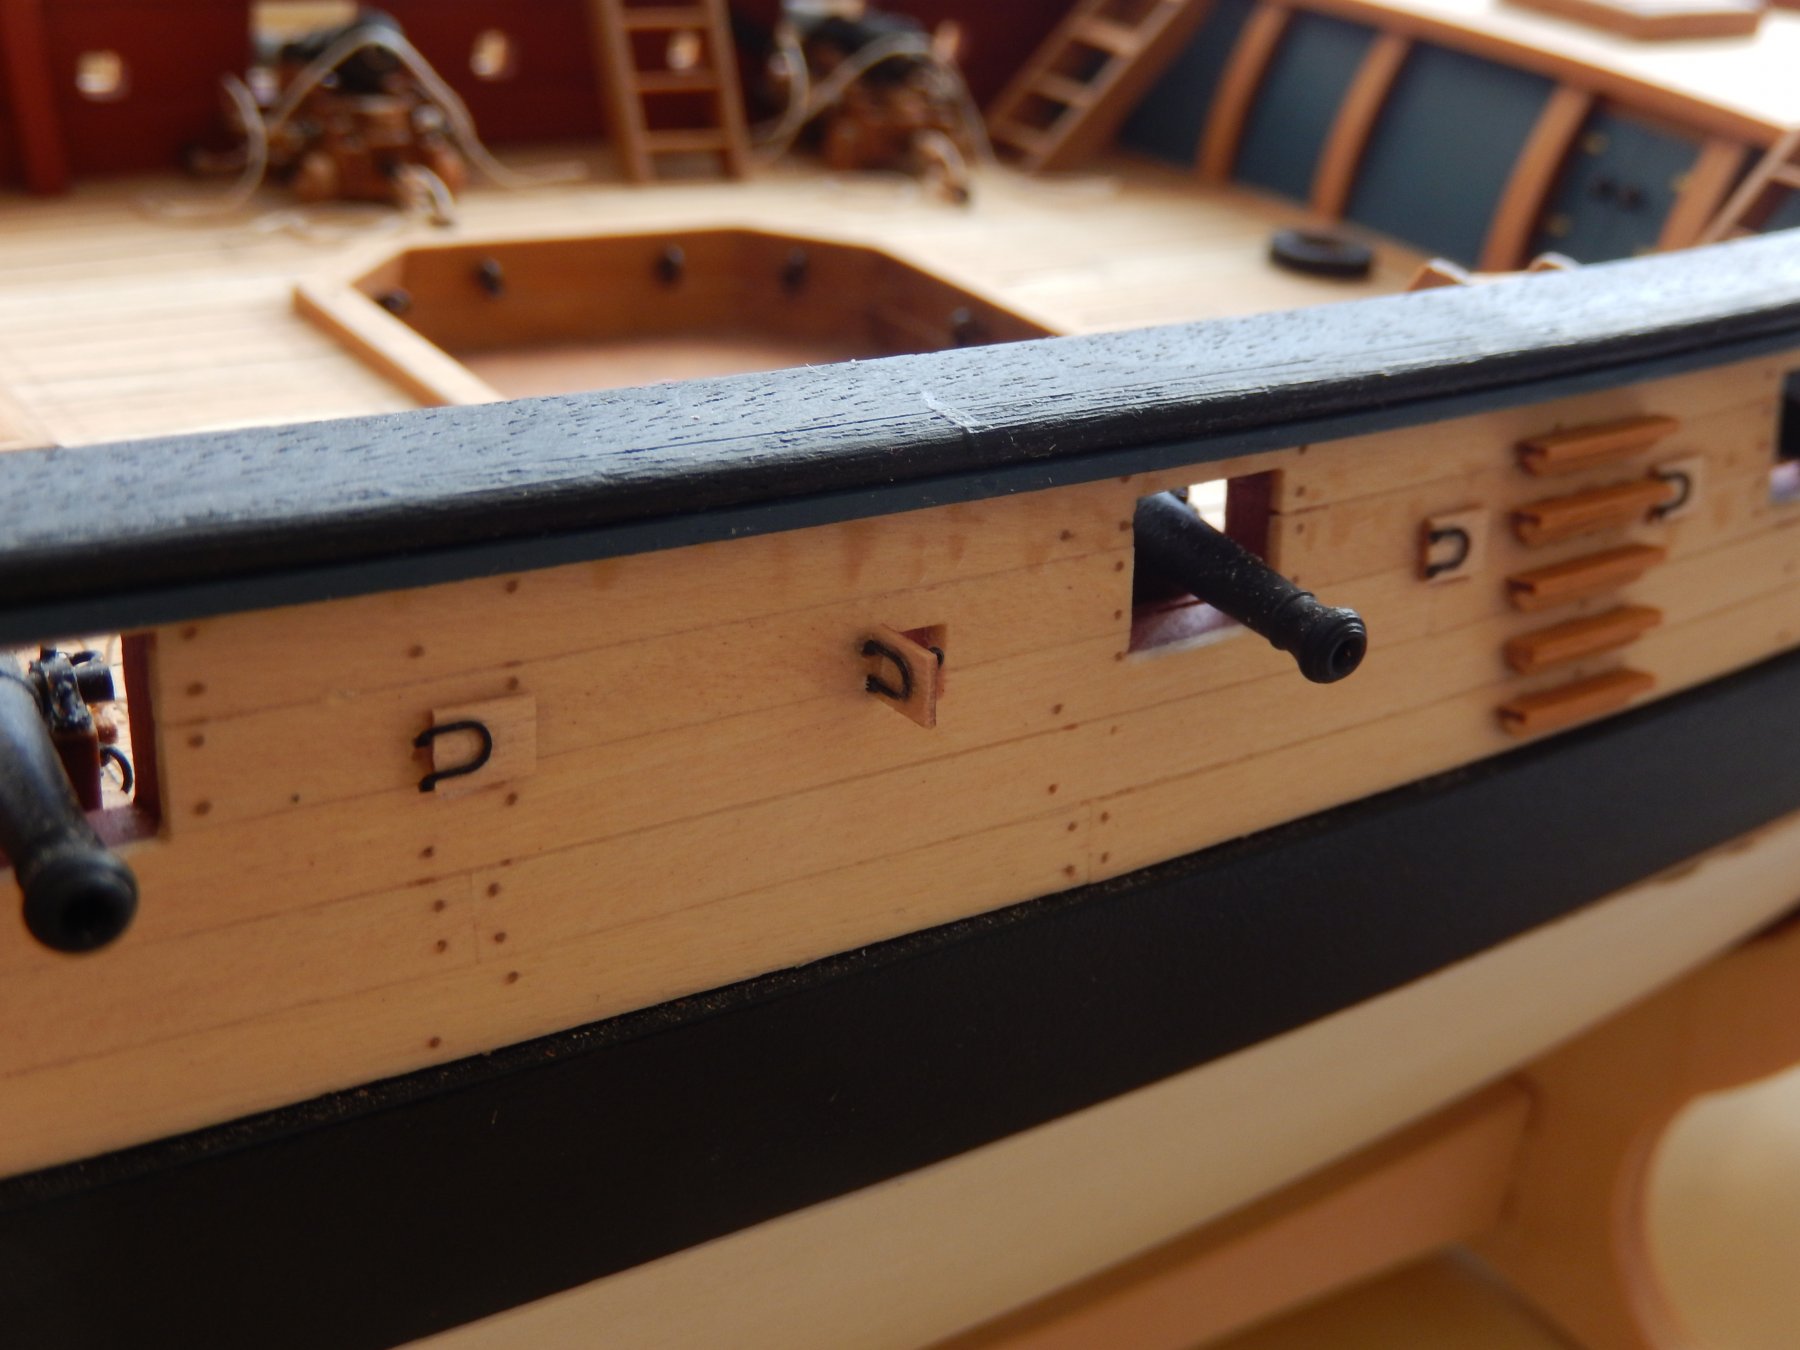
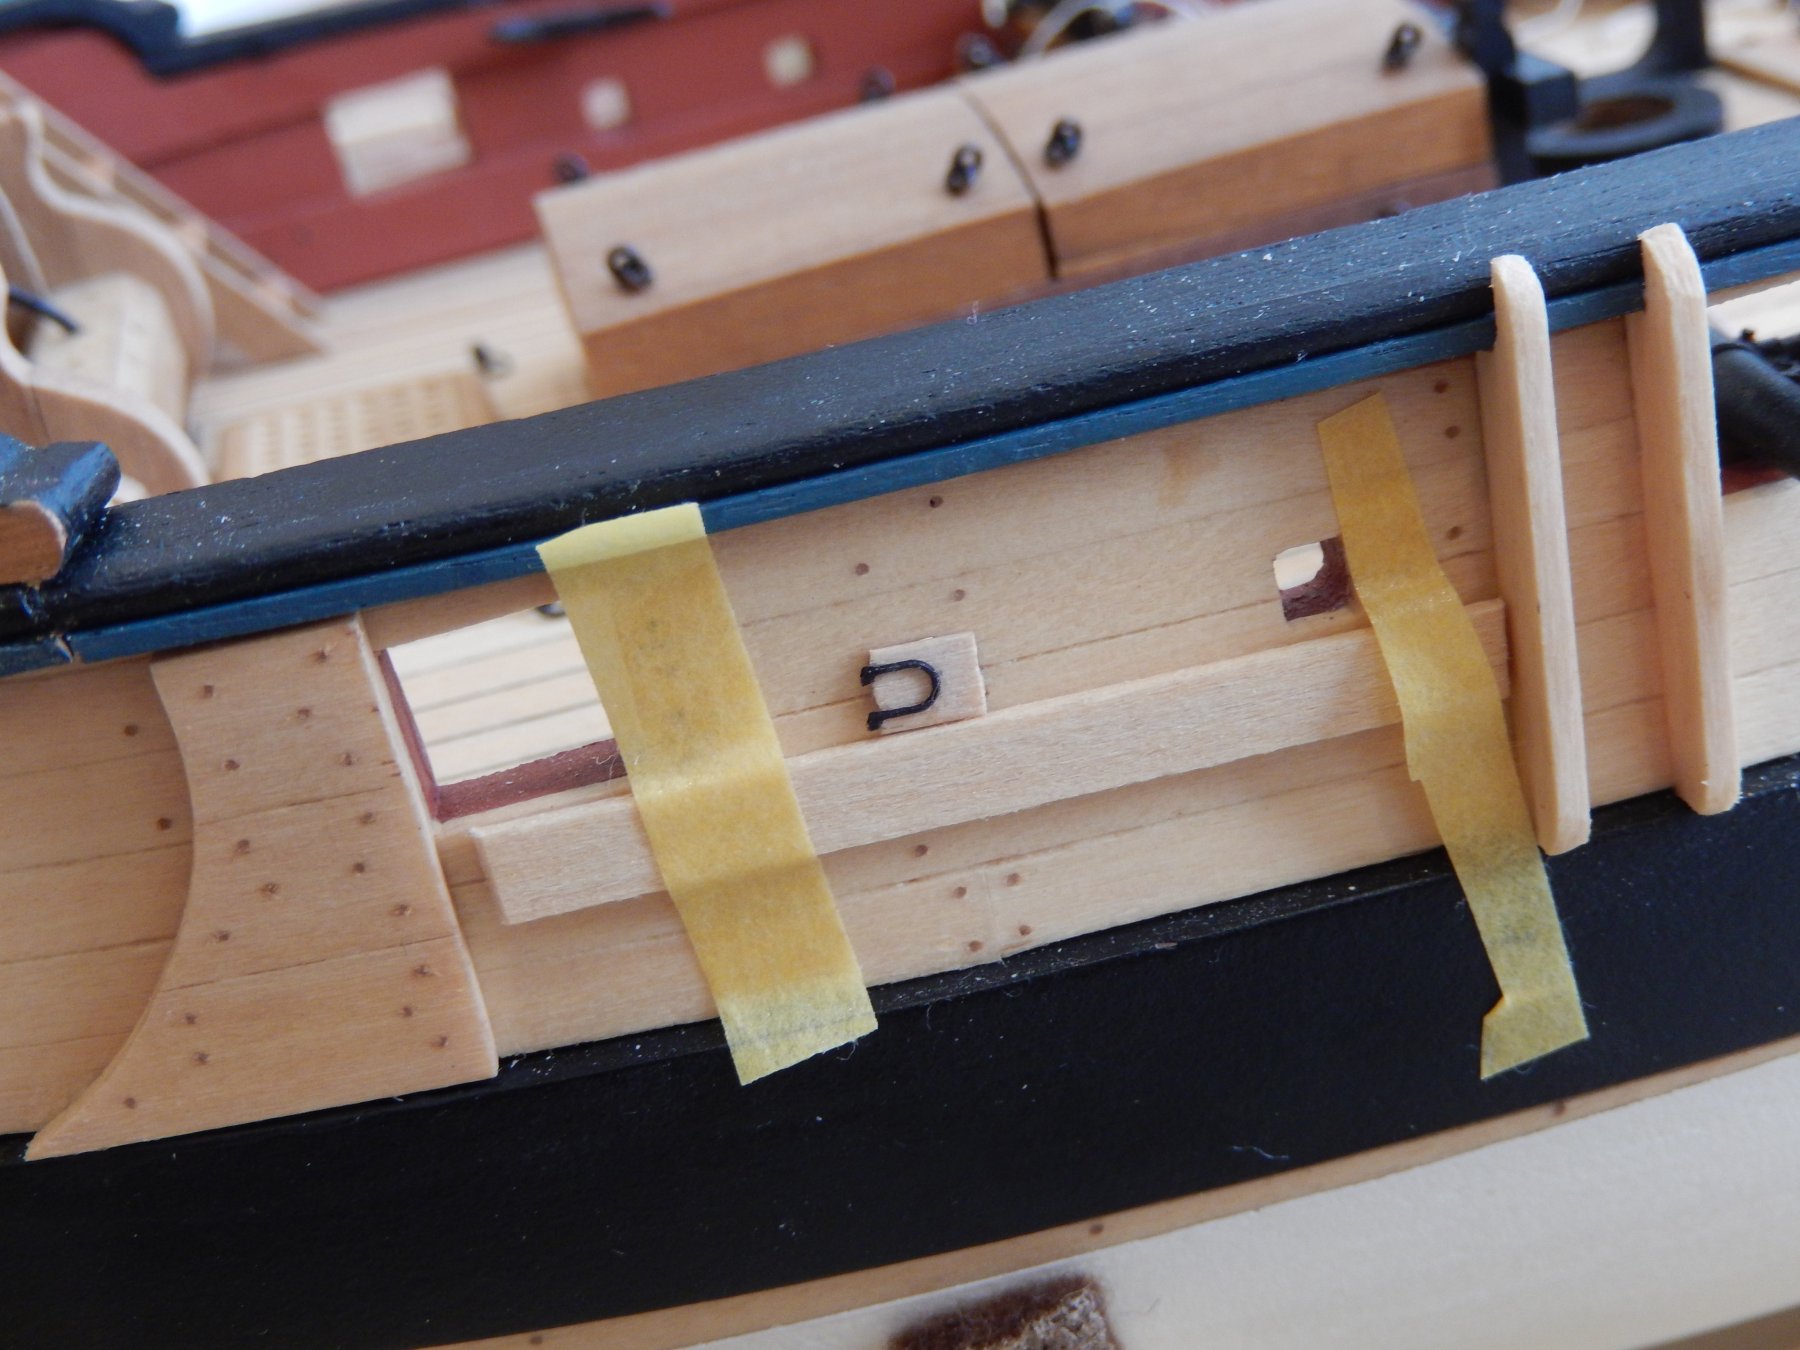
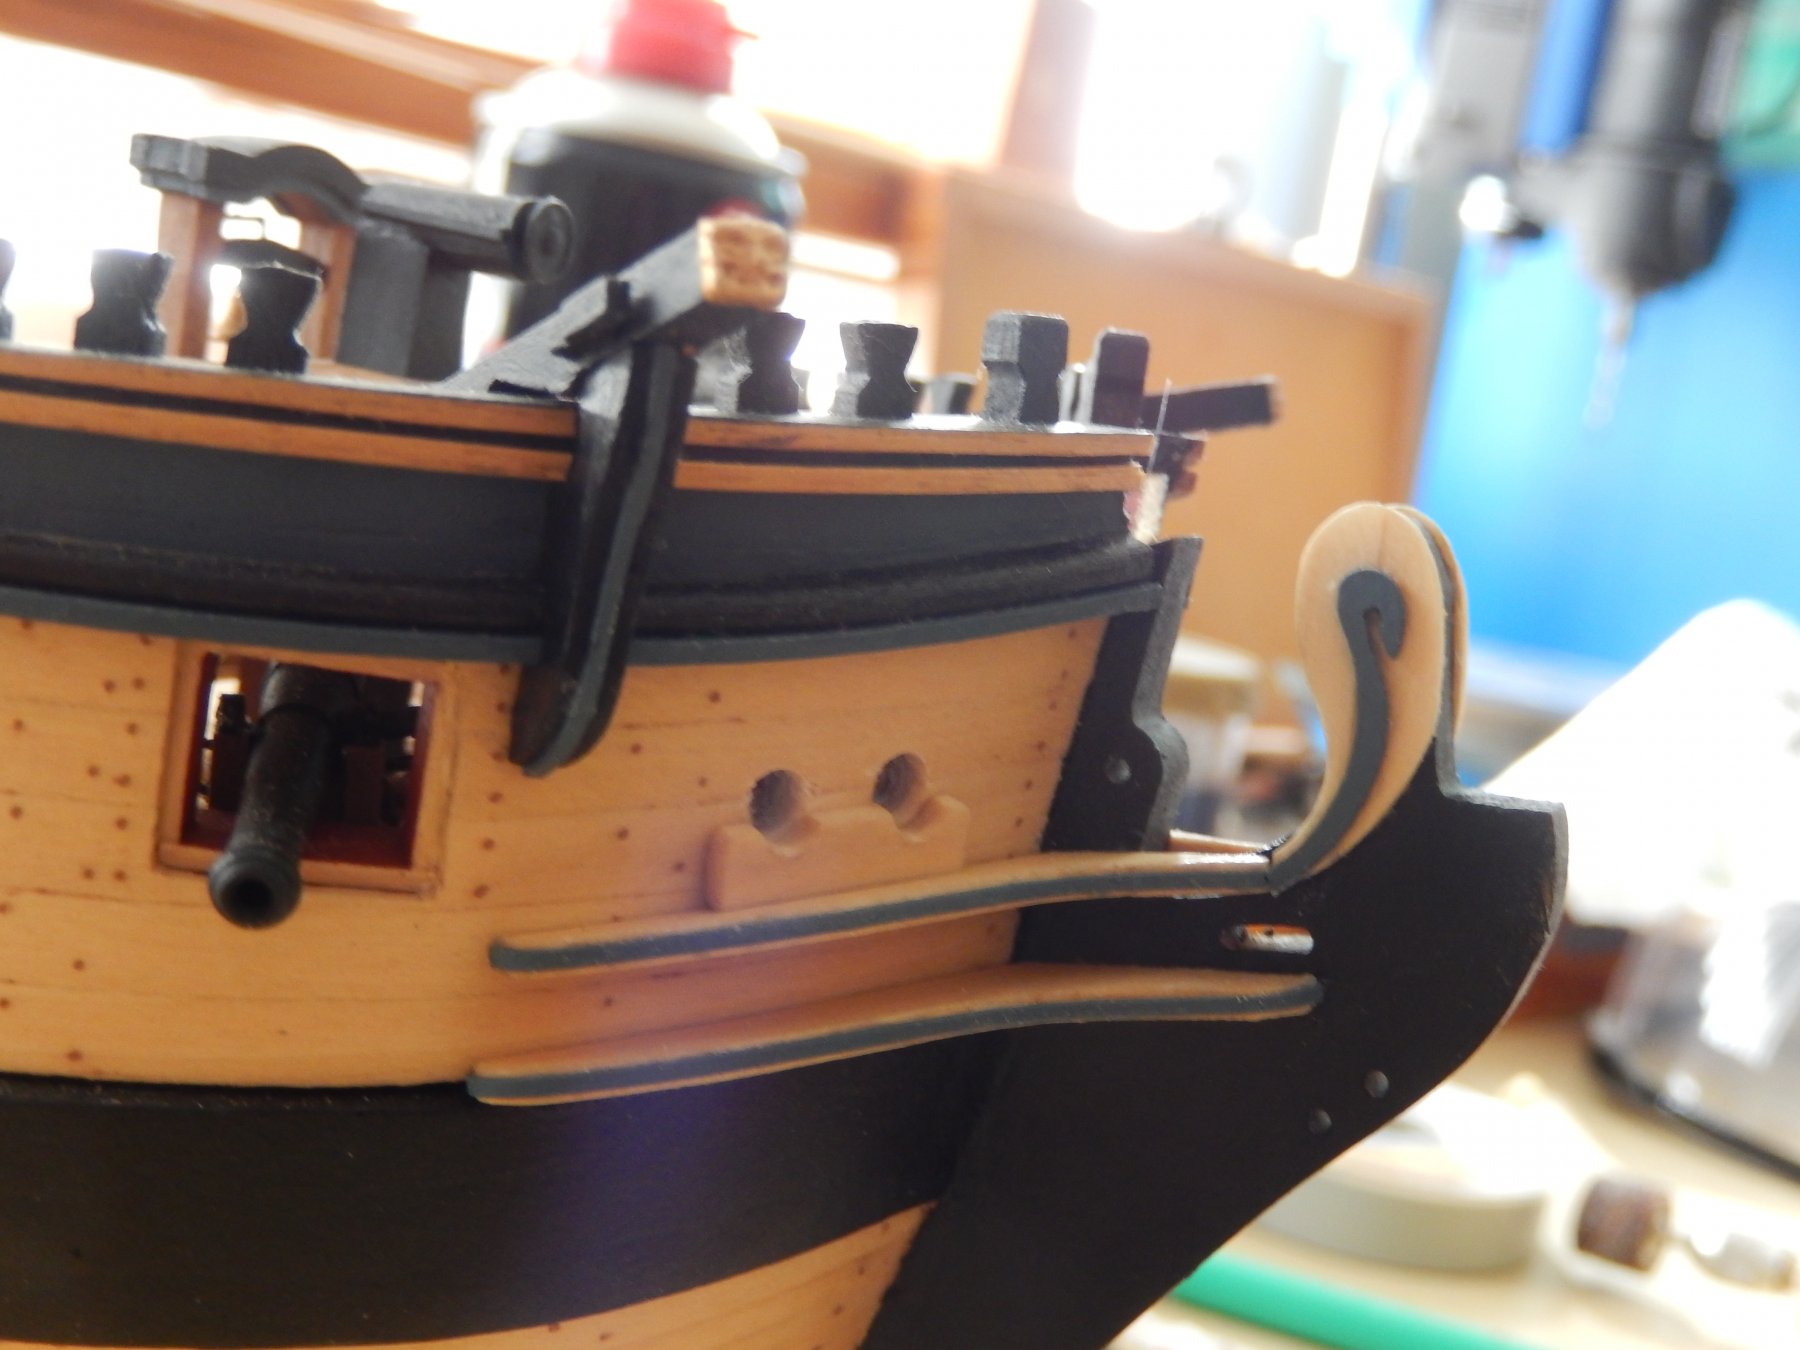
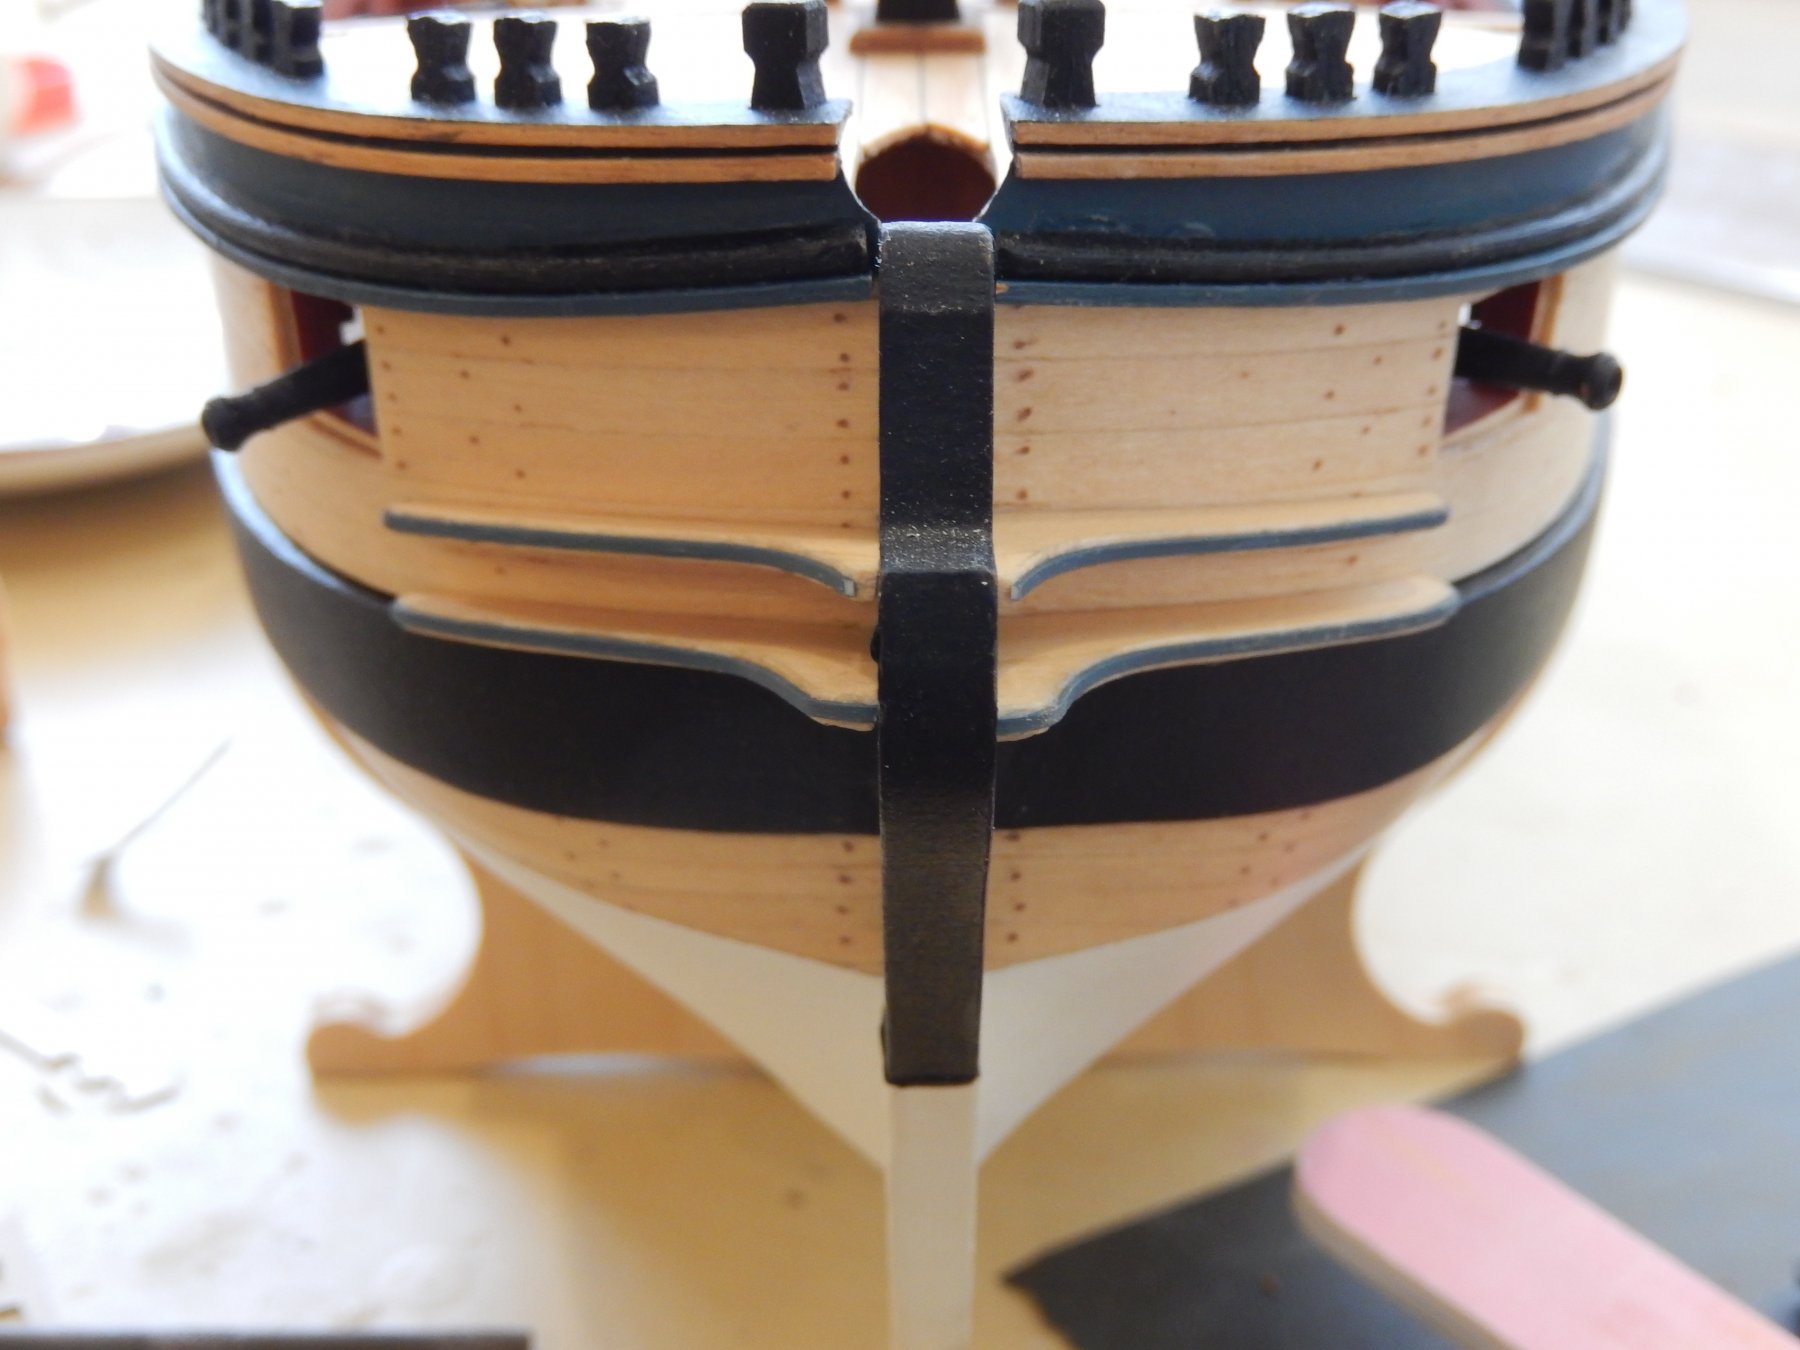
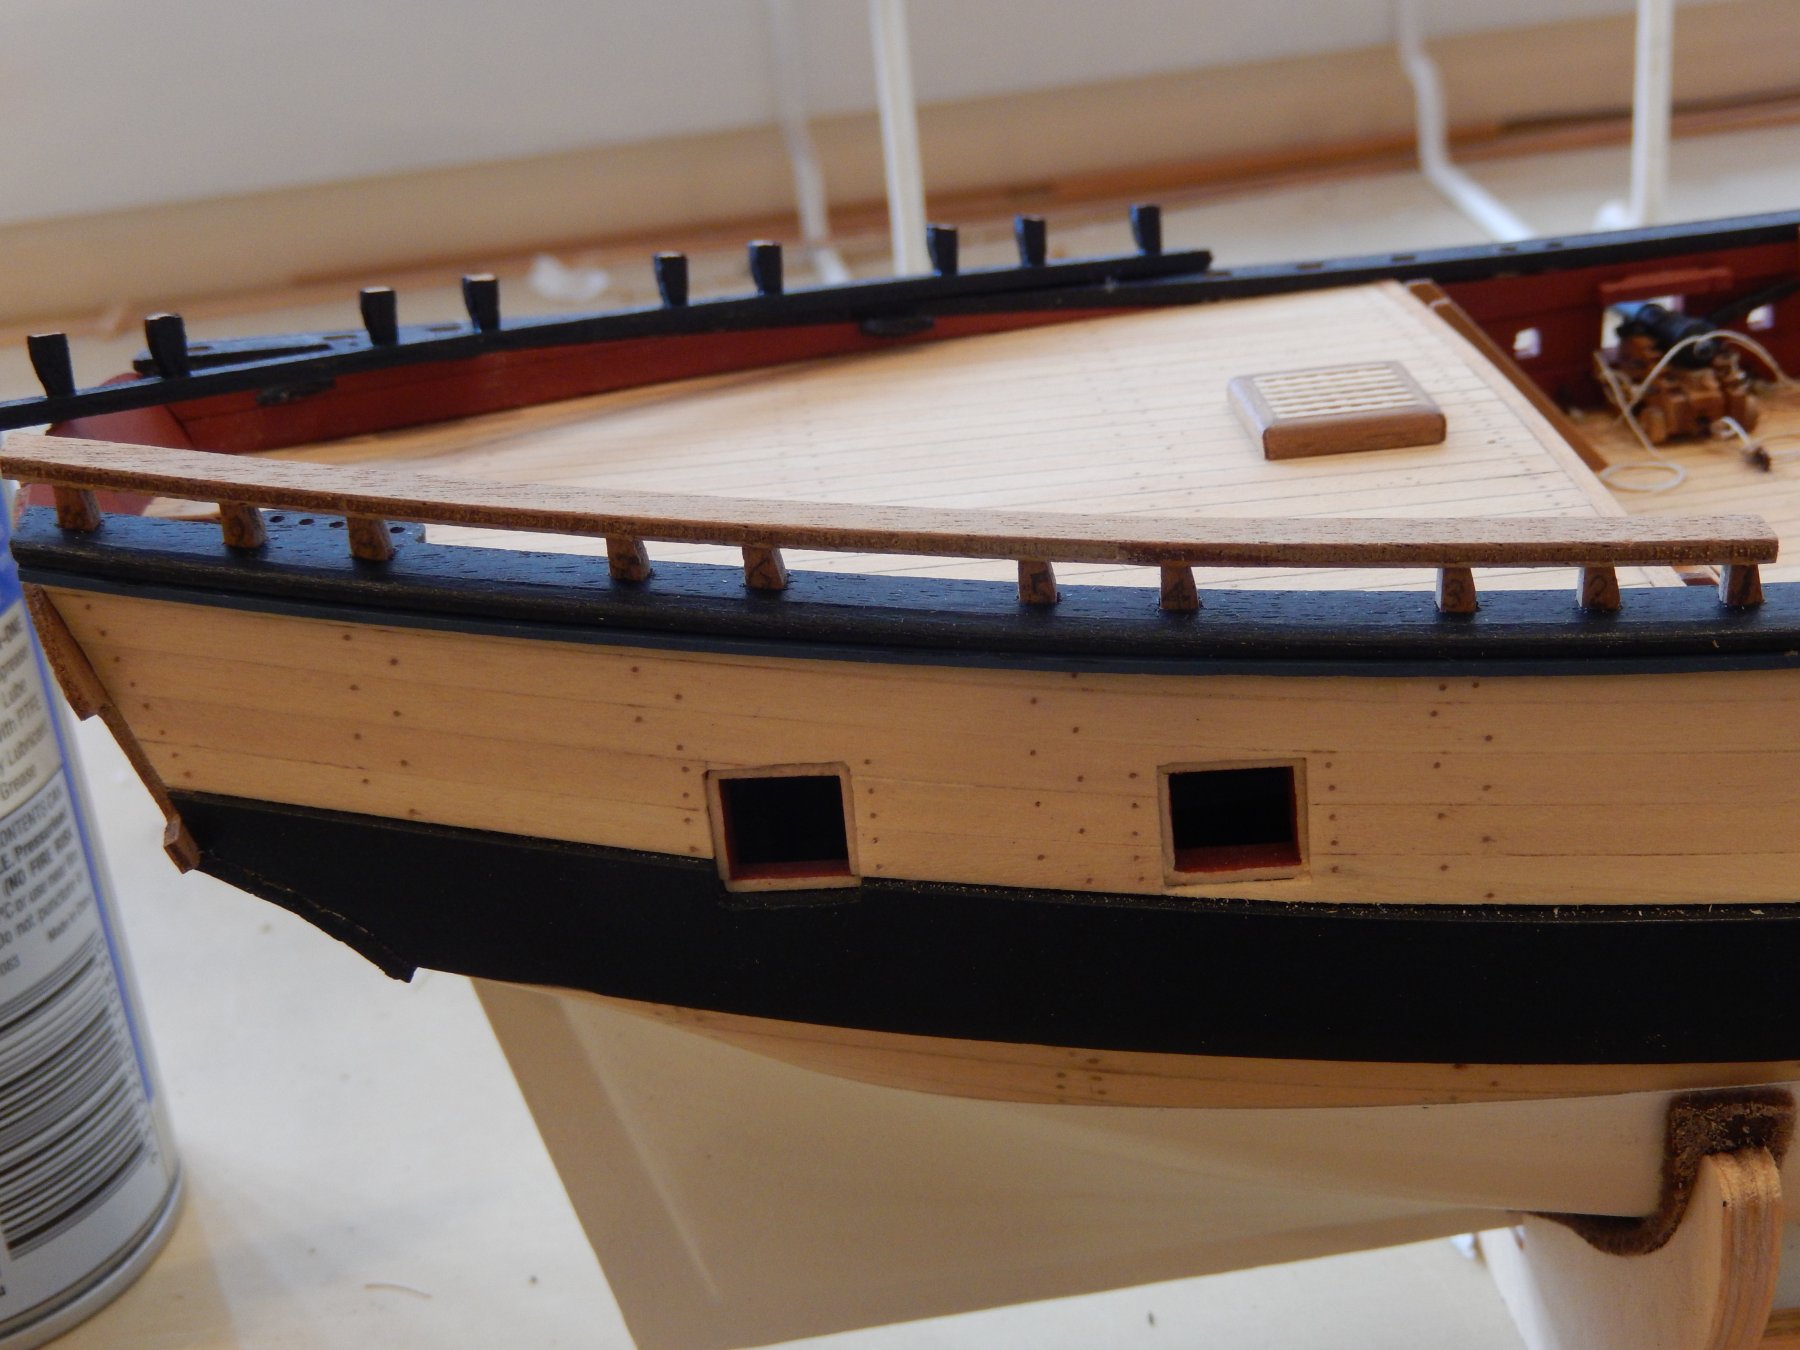
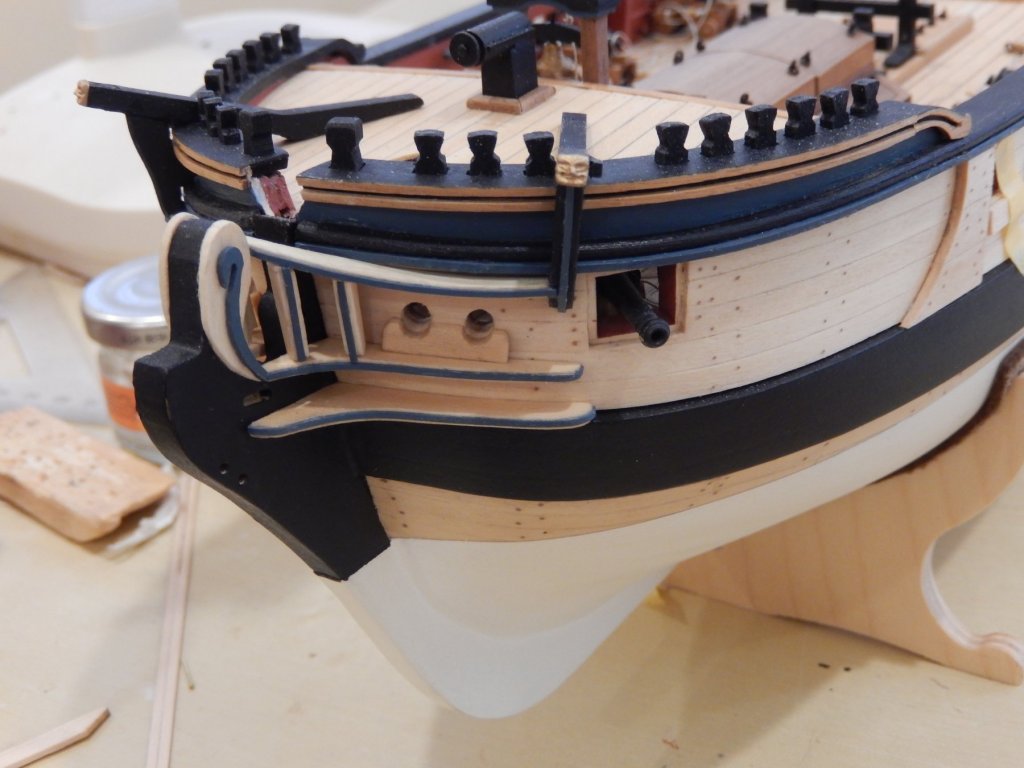
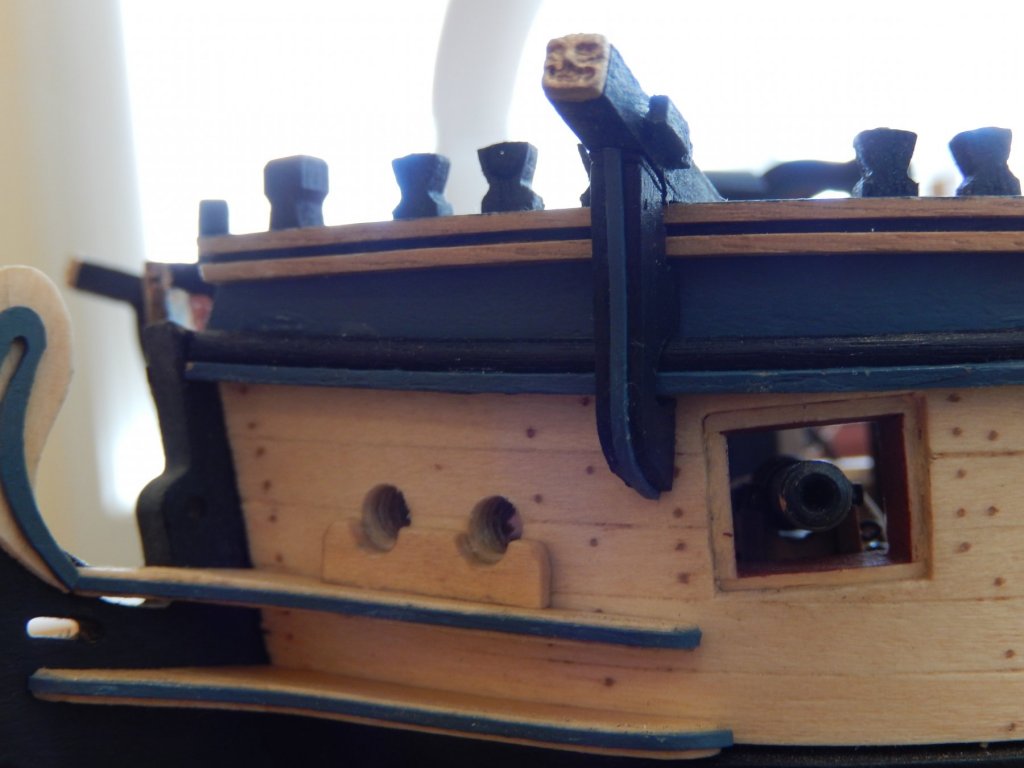
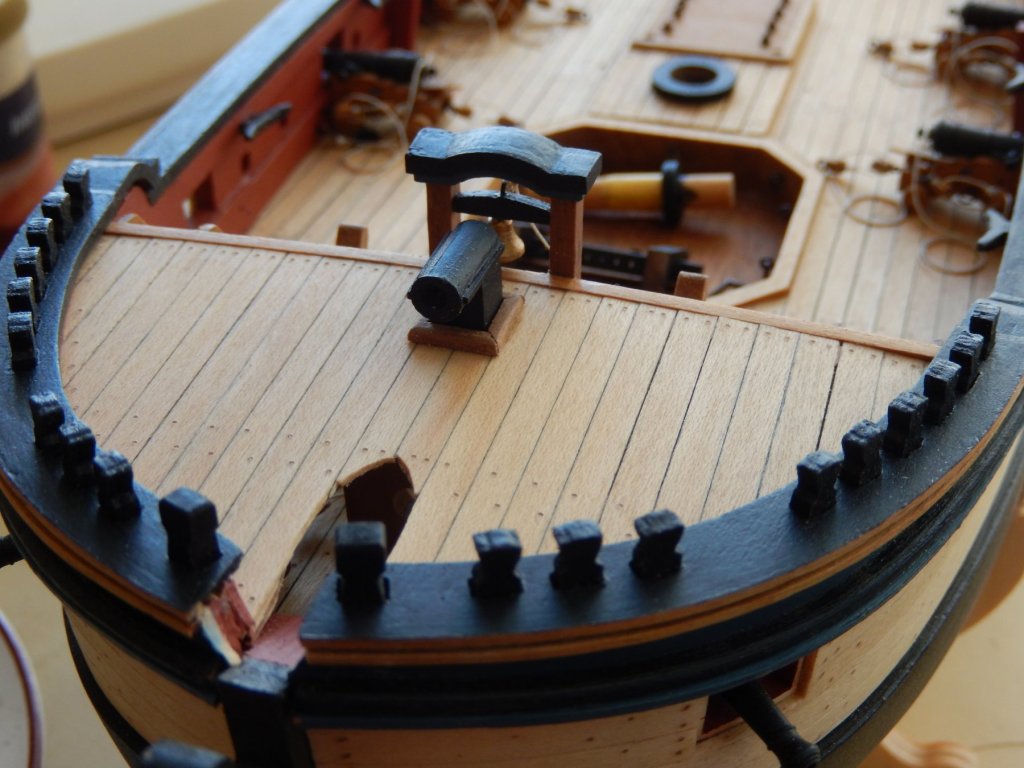
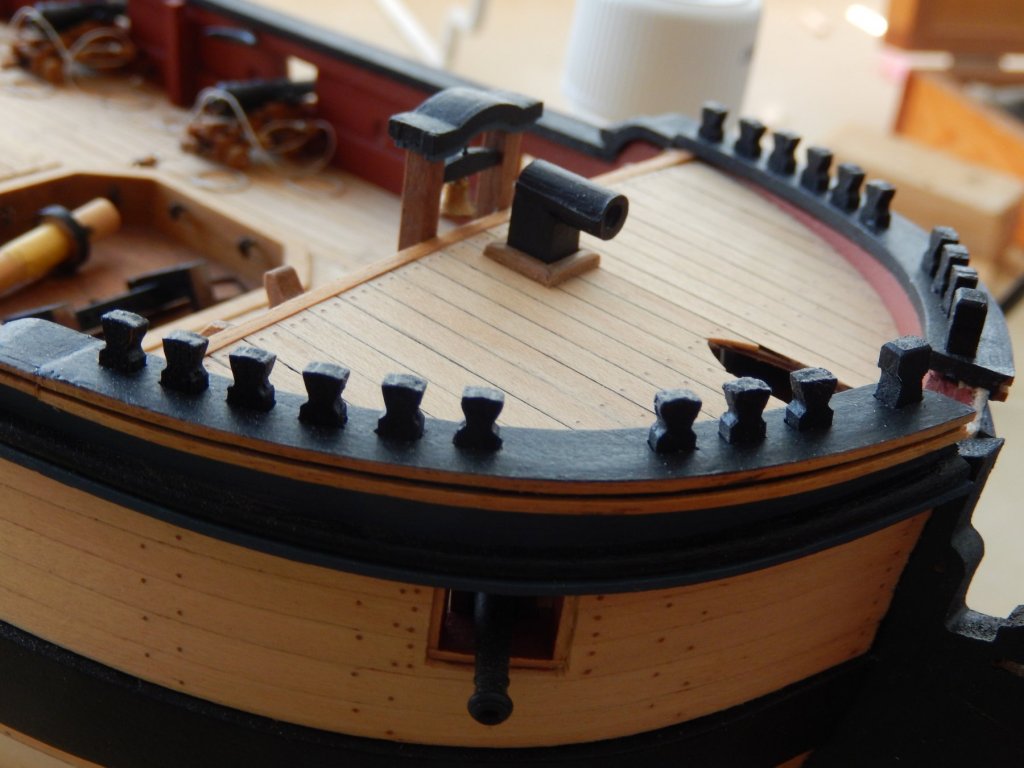
Not much progress over the last couple of weeks. Home renovations have caused the usual chaos. The gun pedestals are now finished. The four in the mid-deck will be installed after the channels are put on. I have begun the decorative quarter badges. To fit them over the wale requires quite a bit of filing. The instructions show some black paper stuck immediately behind the windows to give the impression of depth. This doesn't seem to me to be very satisfactory at all. I'll think about making a hole in the side of the hull to give the appearance of a cabin behind them. Here is the filing that needs to be done. Dry-fitted - and held on by gravity.

- 421 replies
-
- 11
-
-
- caldercraft
- granado
- (and 1 more)
-
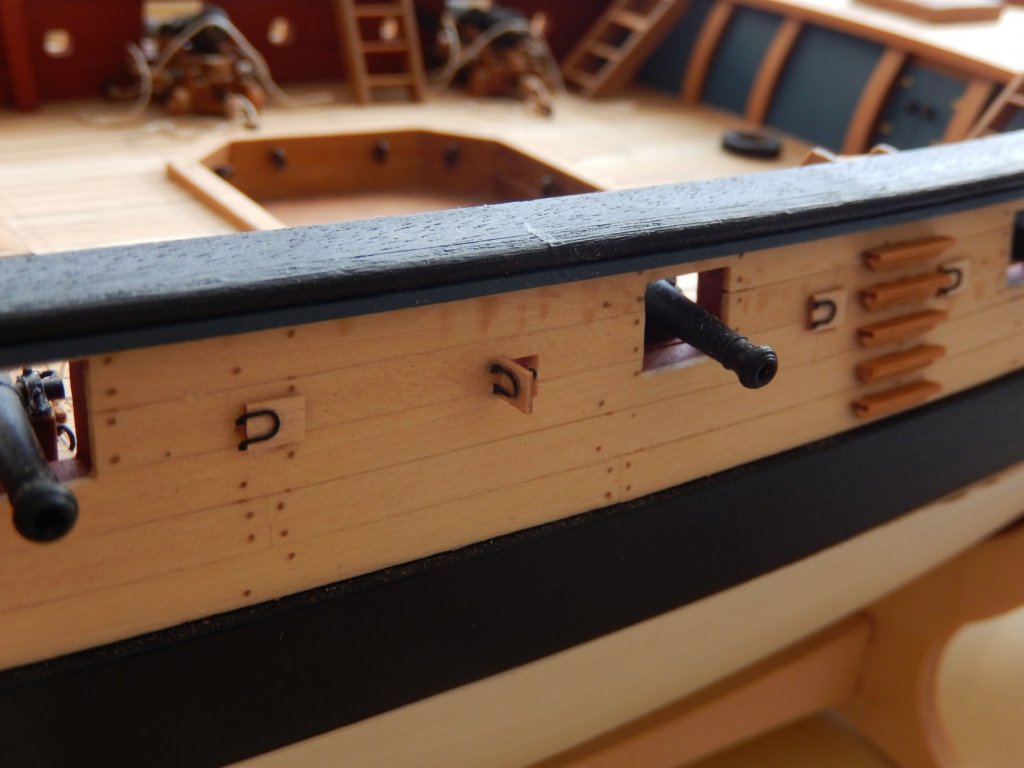
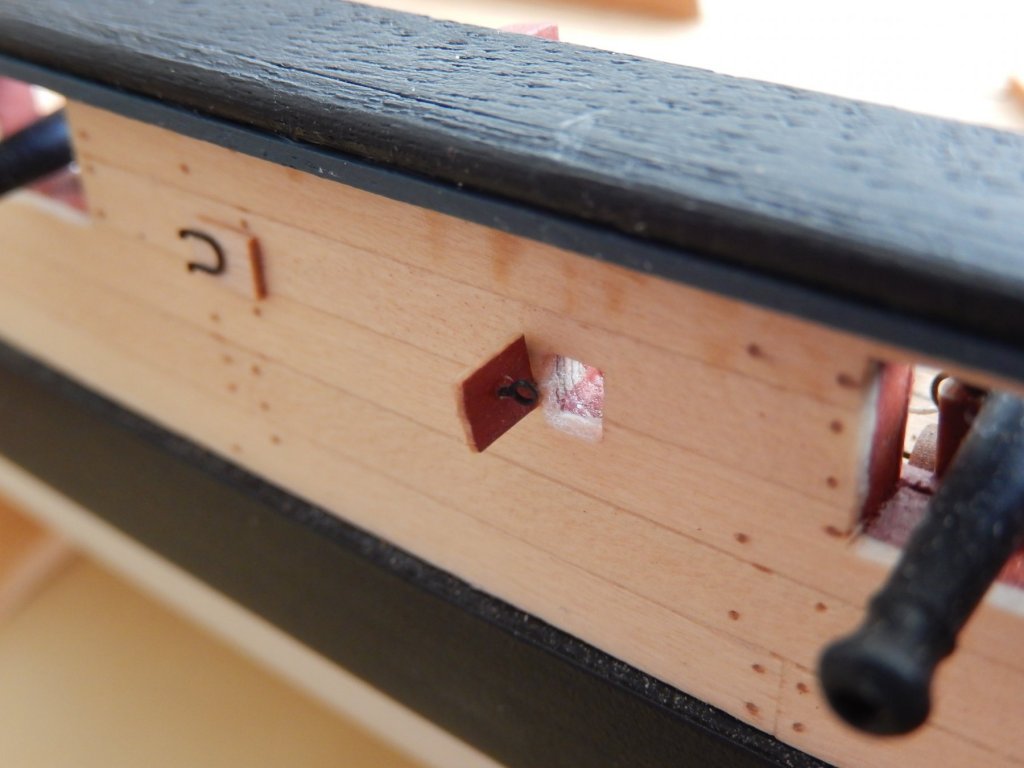
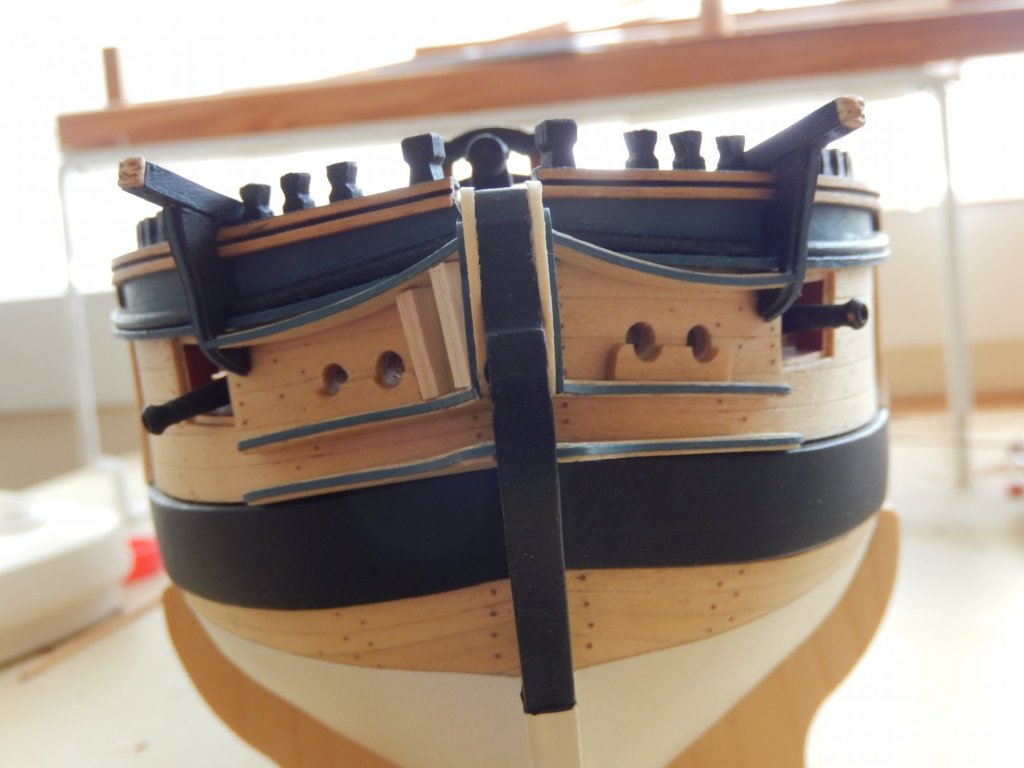
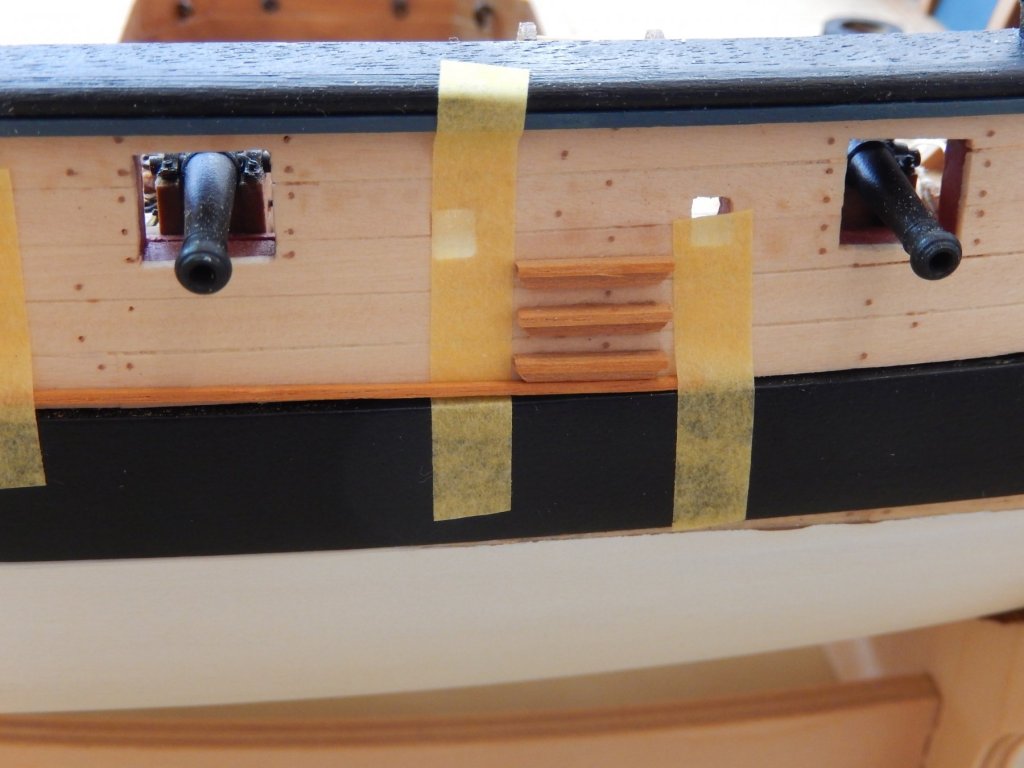
The covers for the sweep ports are now done on one side. It's a very awkward little job. I decided to have just one cover open as an illustration - and I see from the photo it needs a little adjustment and the usual touch-up.

- 421 replies
-
- 12
-
-
- caldercraft
- granado
- (and 1 more)
-
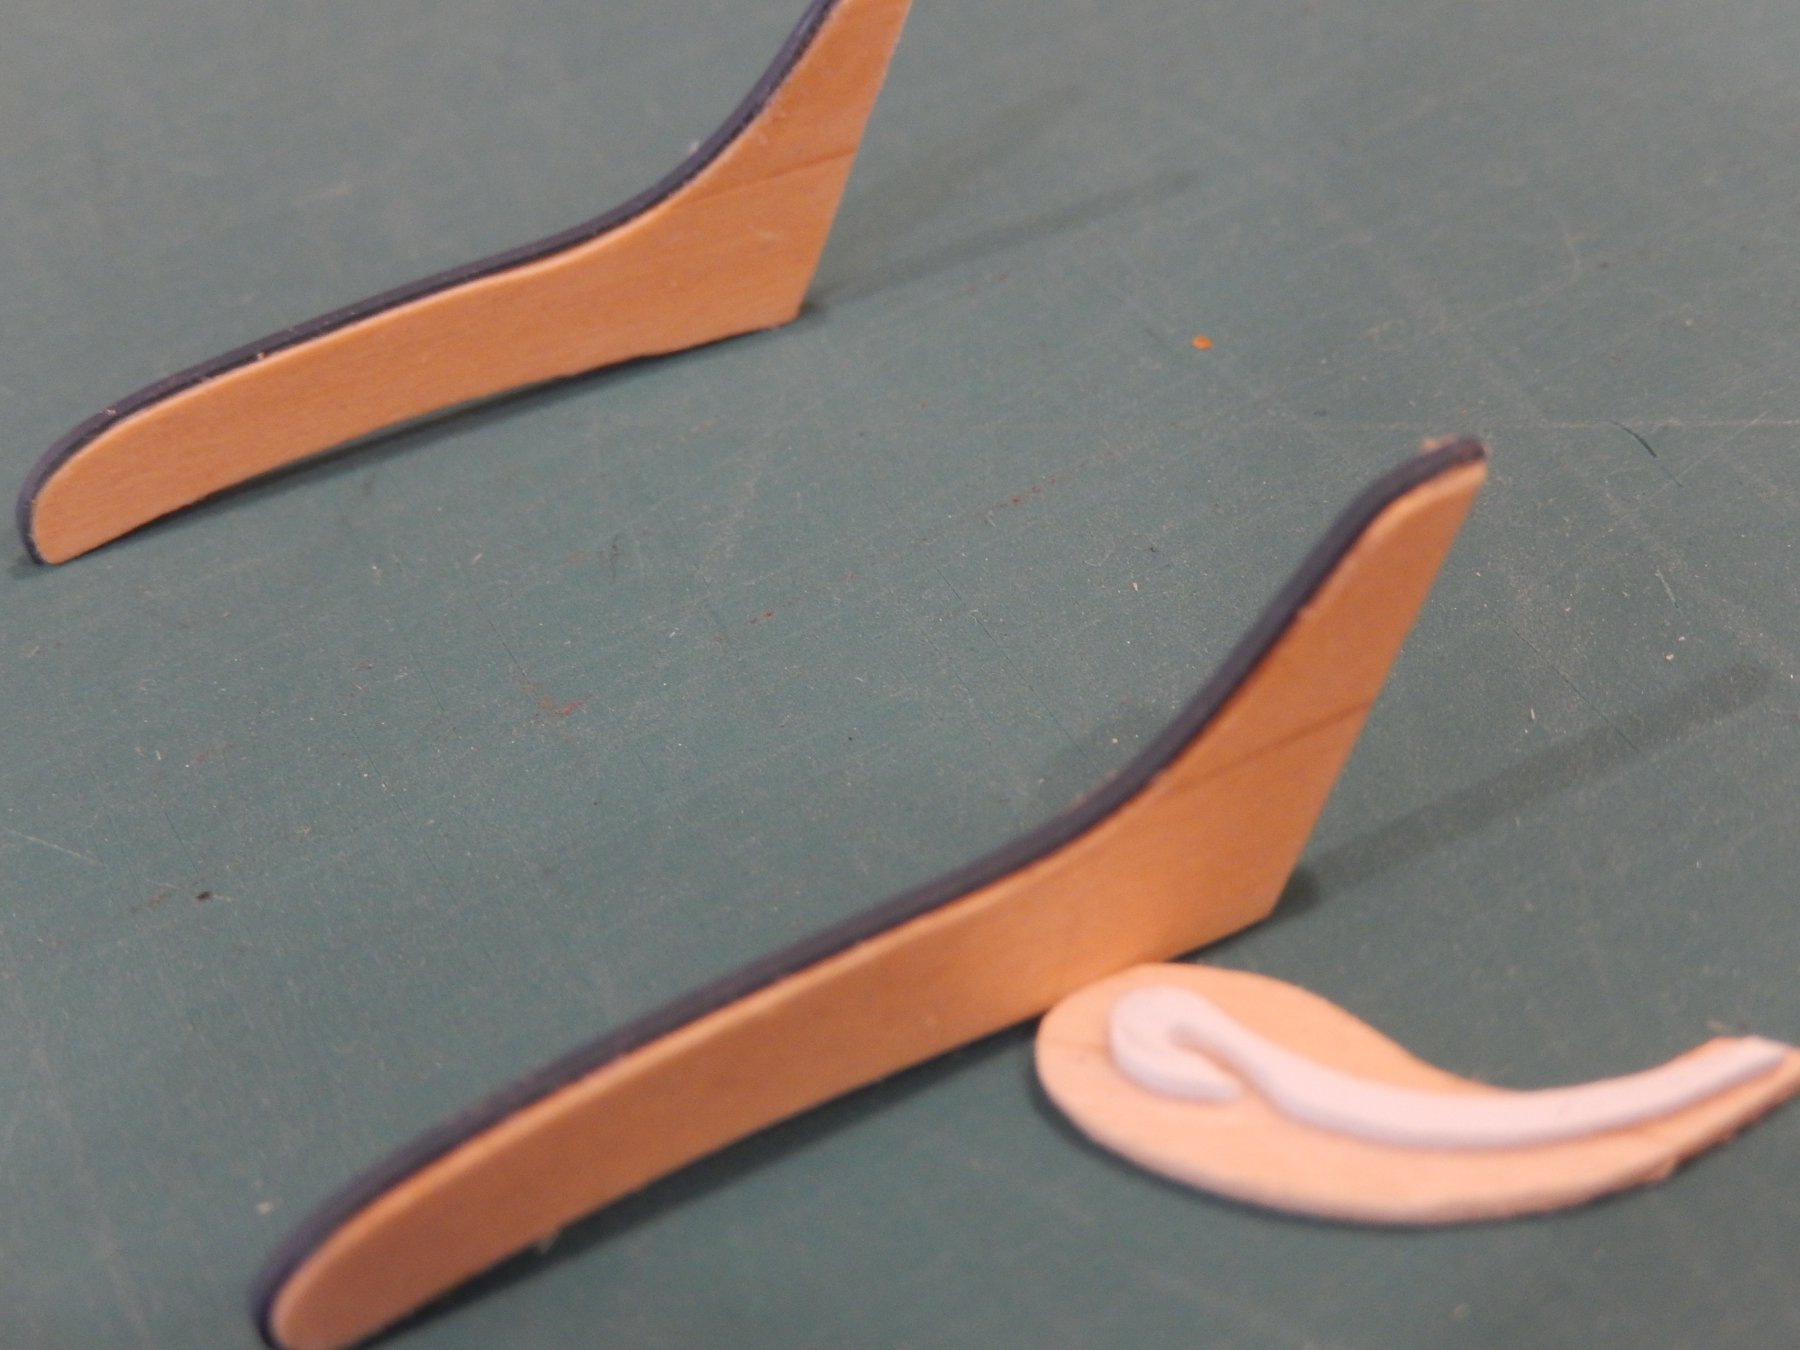
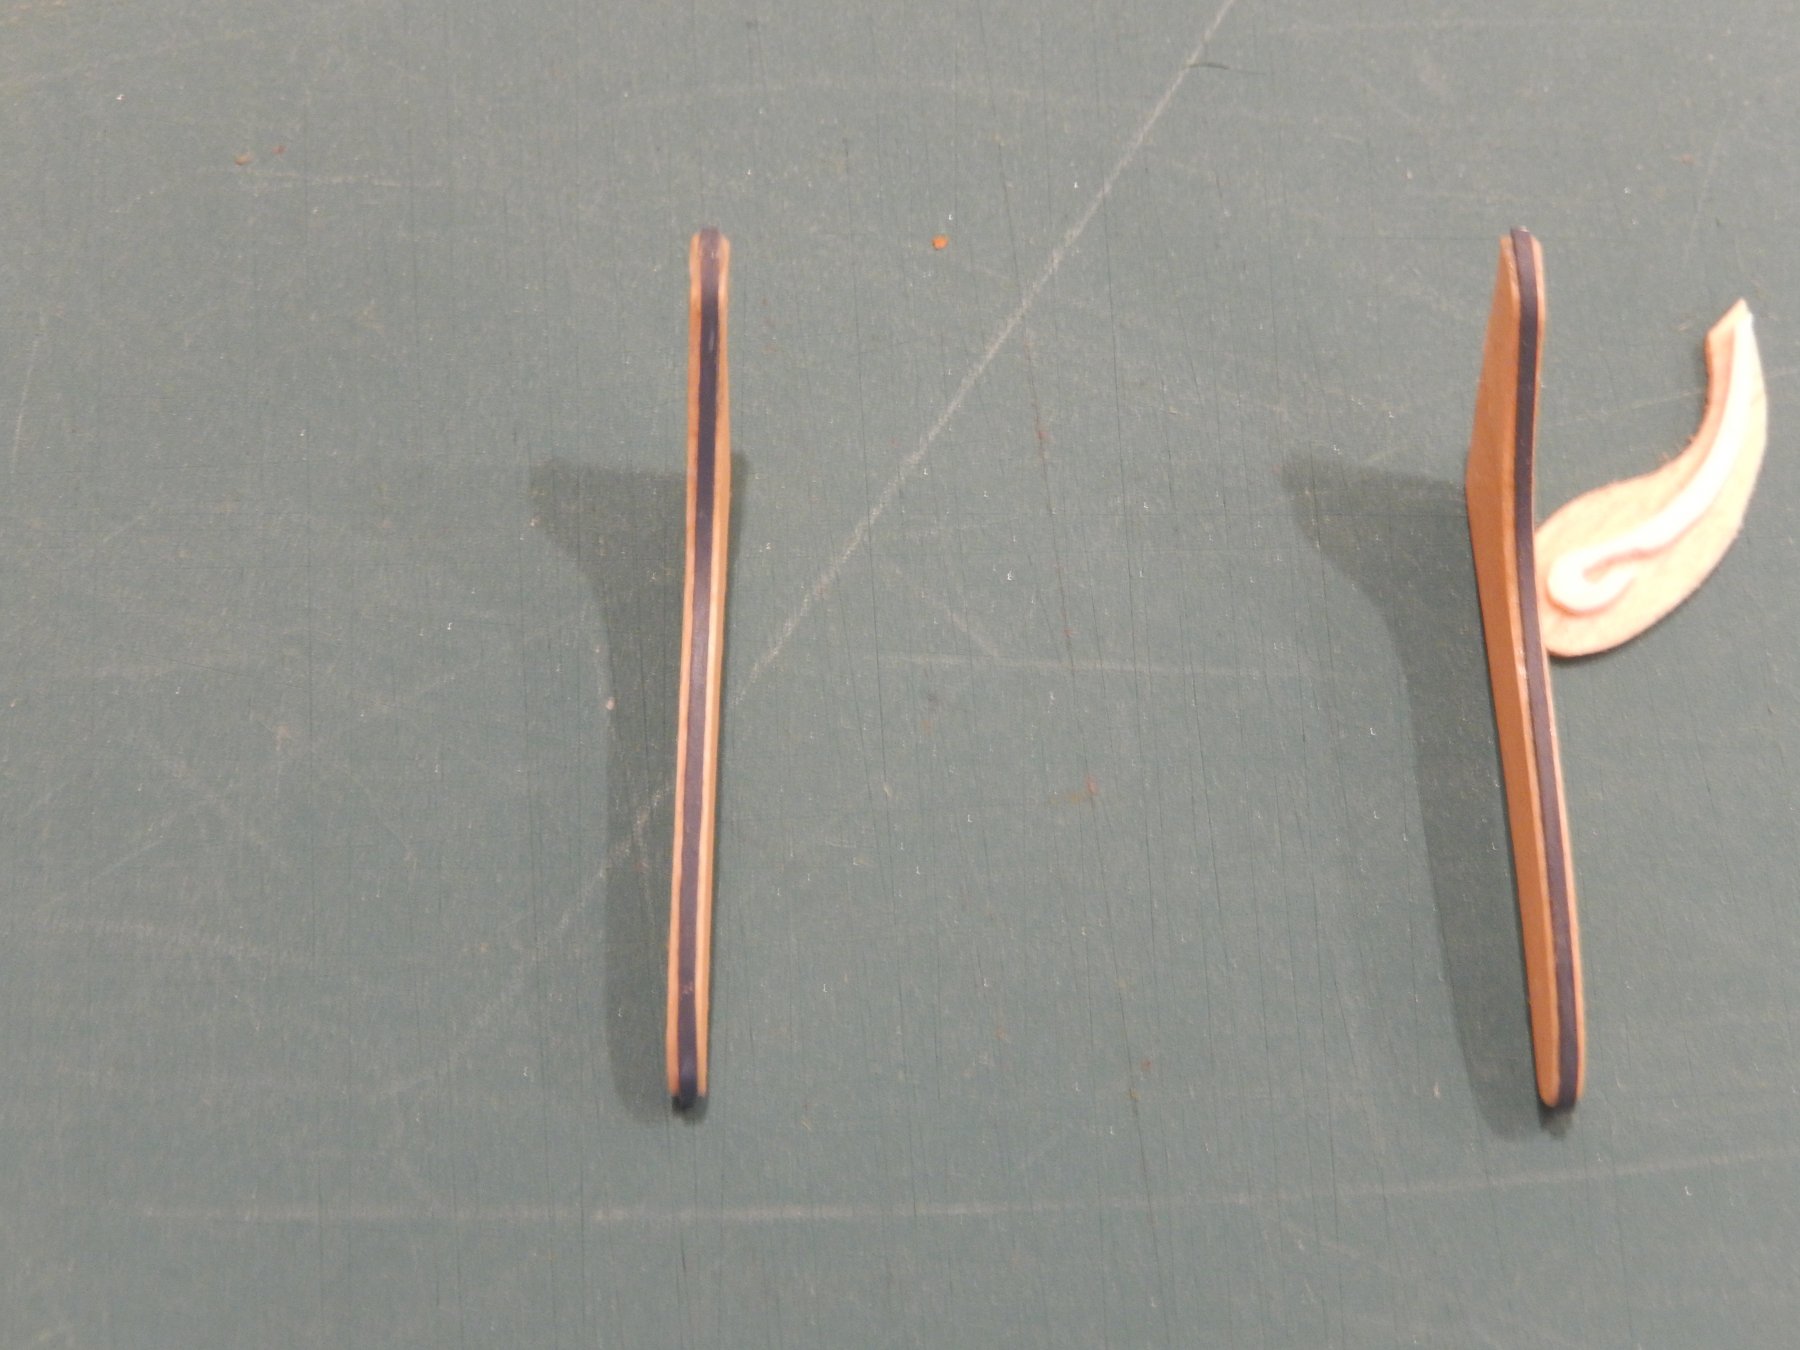
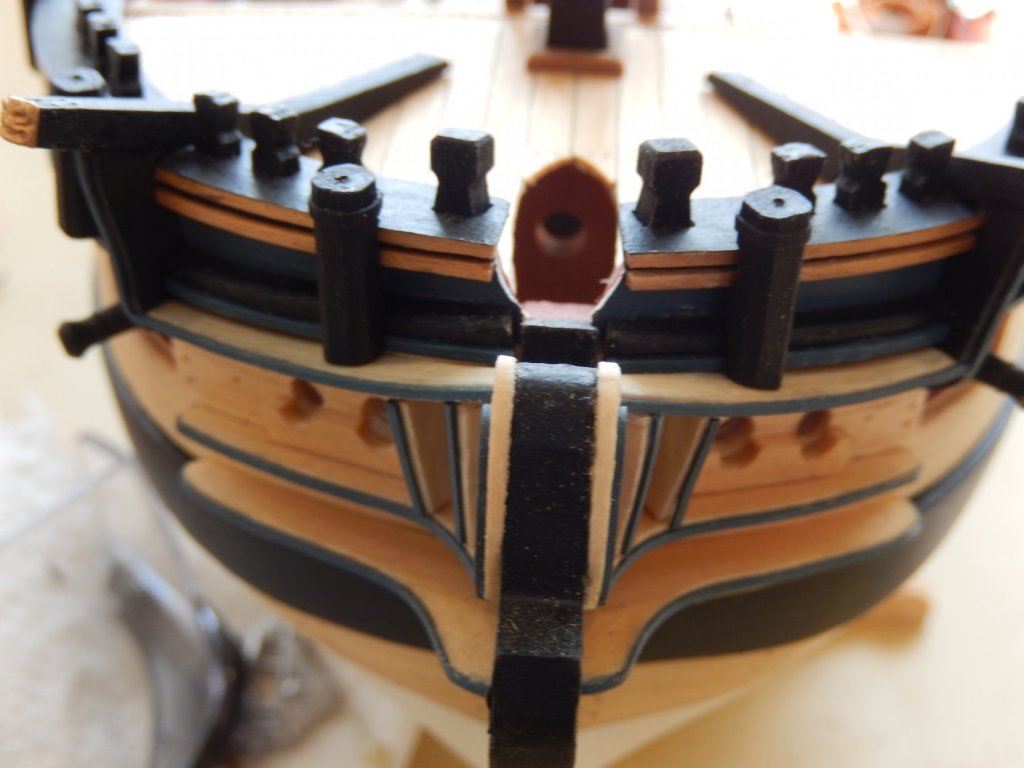
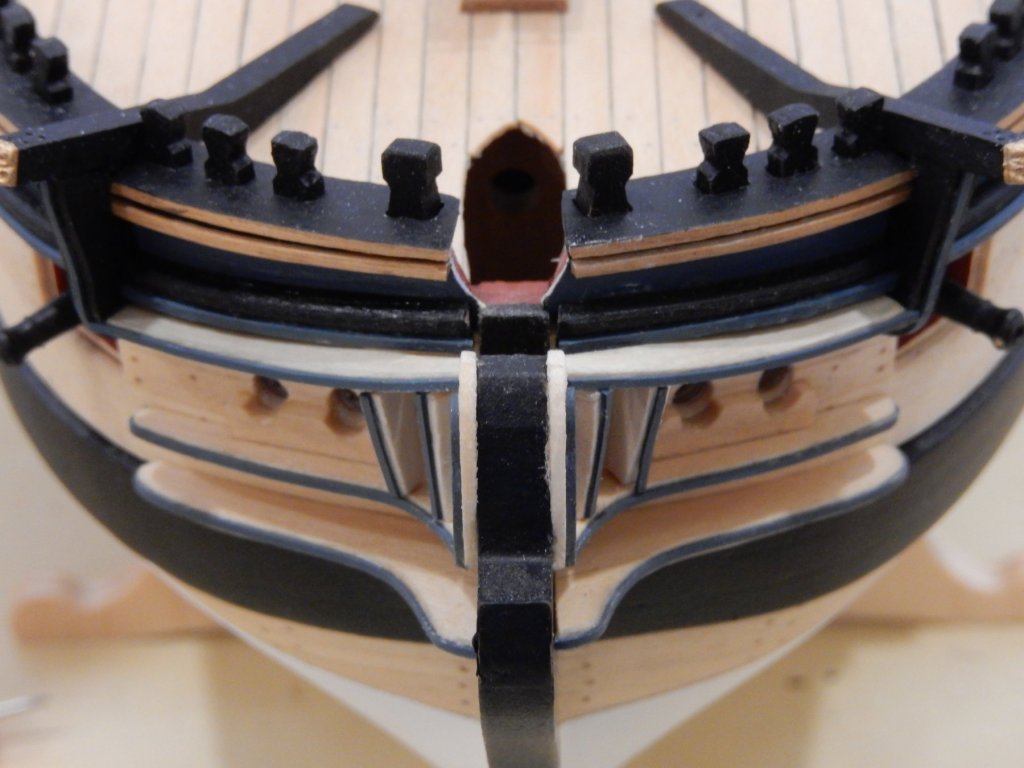
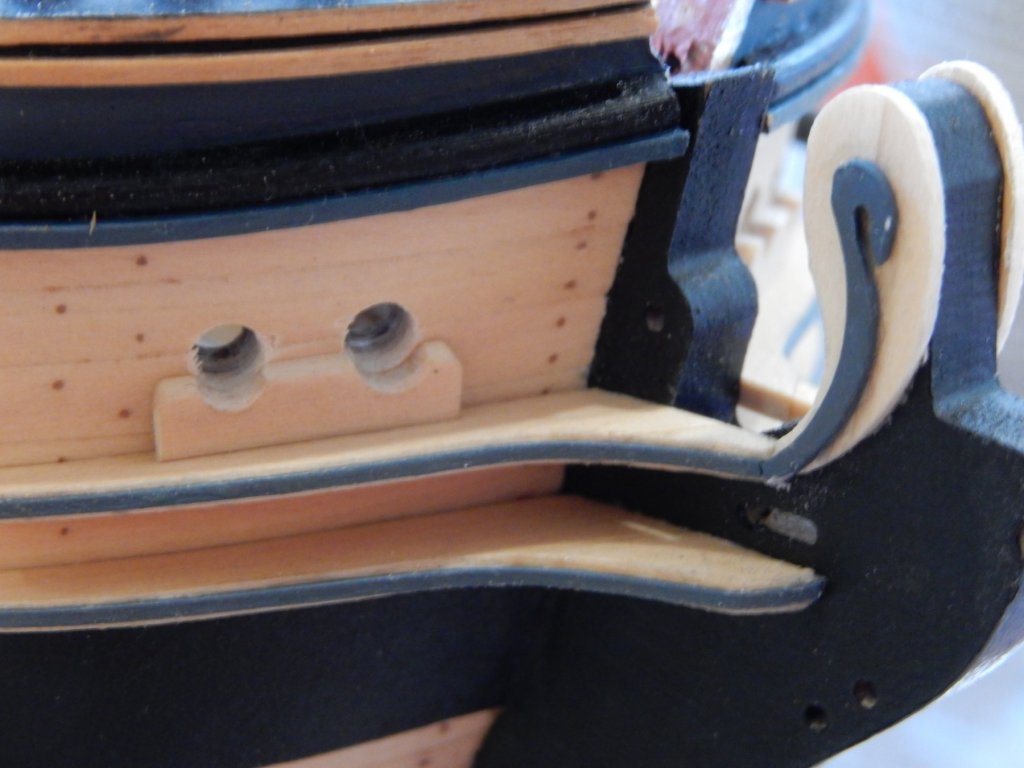
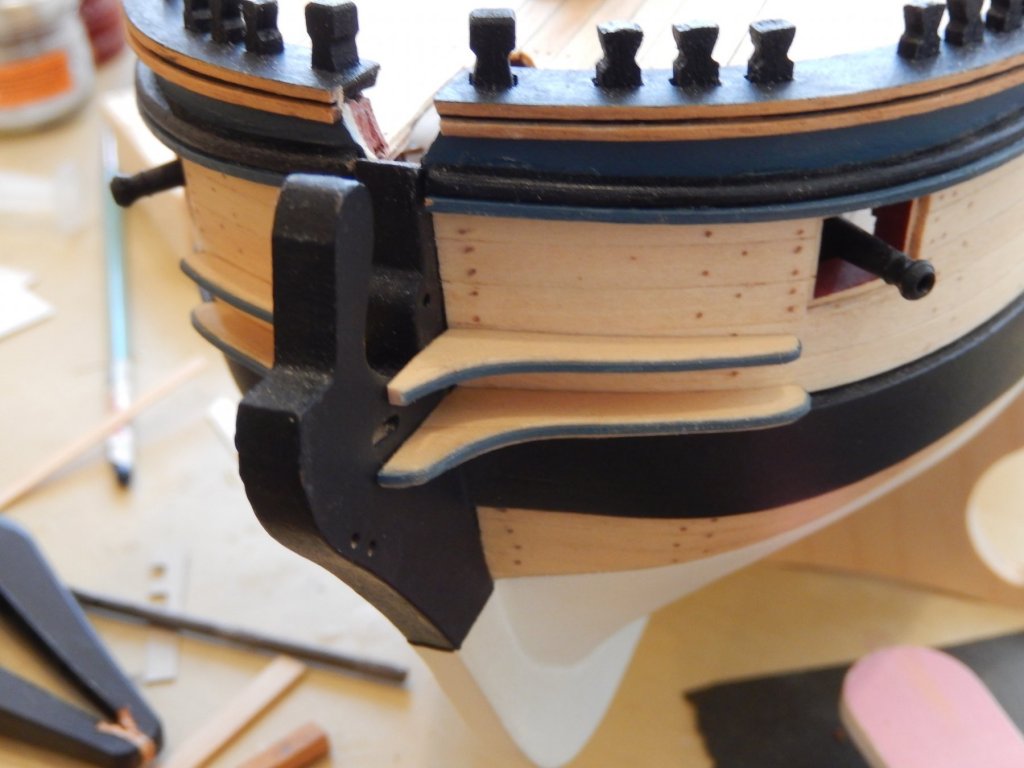
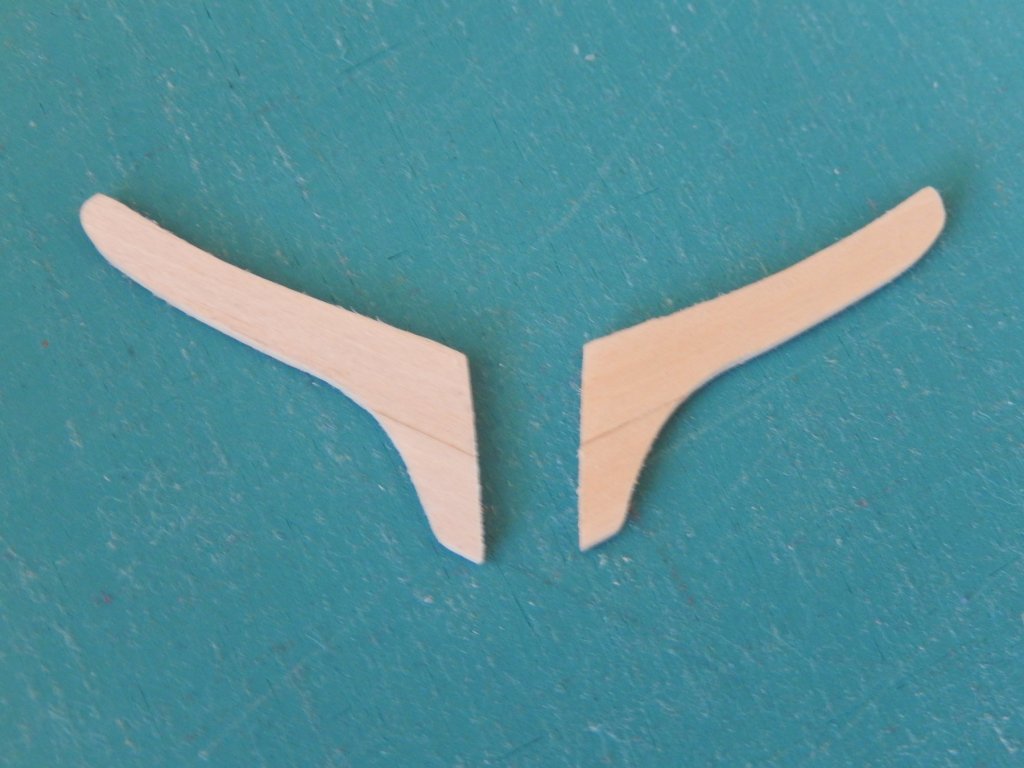
Finished the headrails and glad to see the end of them. As usual they need a couple of coast of poly and a bit of touching up, but they have come out acceptably. They are not historically accurate according to the Anatomy but then neither is the kit. A a small tip: I made one of the supports a tiny fraction too short, which made a difference to its positioning. Making another one didn't bear thinking about. I therefore glued a sliver of balsa to its top. The balsa is soft enough to 'give', so that the support could be nuggly fitted into the correct spot. A minor adjustment has been made to the left support in the following photo after the photo was taken. (Again: why the underline?)

- 421 replies
-
- 11
-
-
- caldercraft
- granado
- (and 1 more)
-
The headrail saga is almost finished. The supports for the rail shown in the third photo are in the process of being dry-fitted. They are very fiddly indeed. I notice below that the lower cheeks are slightly out of alignment. I will try to correct it. I guess one good thing is that the later rigging, anchors and so on will cover a lot of the mistakes - I hope. Edit: misalignment now corrected. While waiting for things to dry, I started on the covers for the rowing ports. Here is progress.


- 421 replies
-
- 8
-
-
- caldercraft
- granado
- (and 1 more)
-
The kit is certainly a challenge. The plans are good, the instructions are excellent and the parts list is brilliantly done.. Of the fittings, the brass work too is excellent, however the white metal fittings are generally poor, and the timber strip and ply are a real mixed bag. I found the Amati material generally superior and in some cases - particularly moldings of various parts - greatly superior. The vanguard is a far more expensive model and that is likely to explain at least some of the difference. I guess you get what you pay for.
-
Thanks Kevin for your encouragement. In many ways have found this project more difficult than the Vanguard.
-
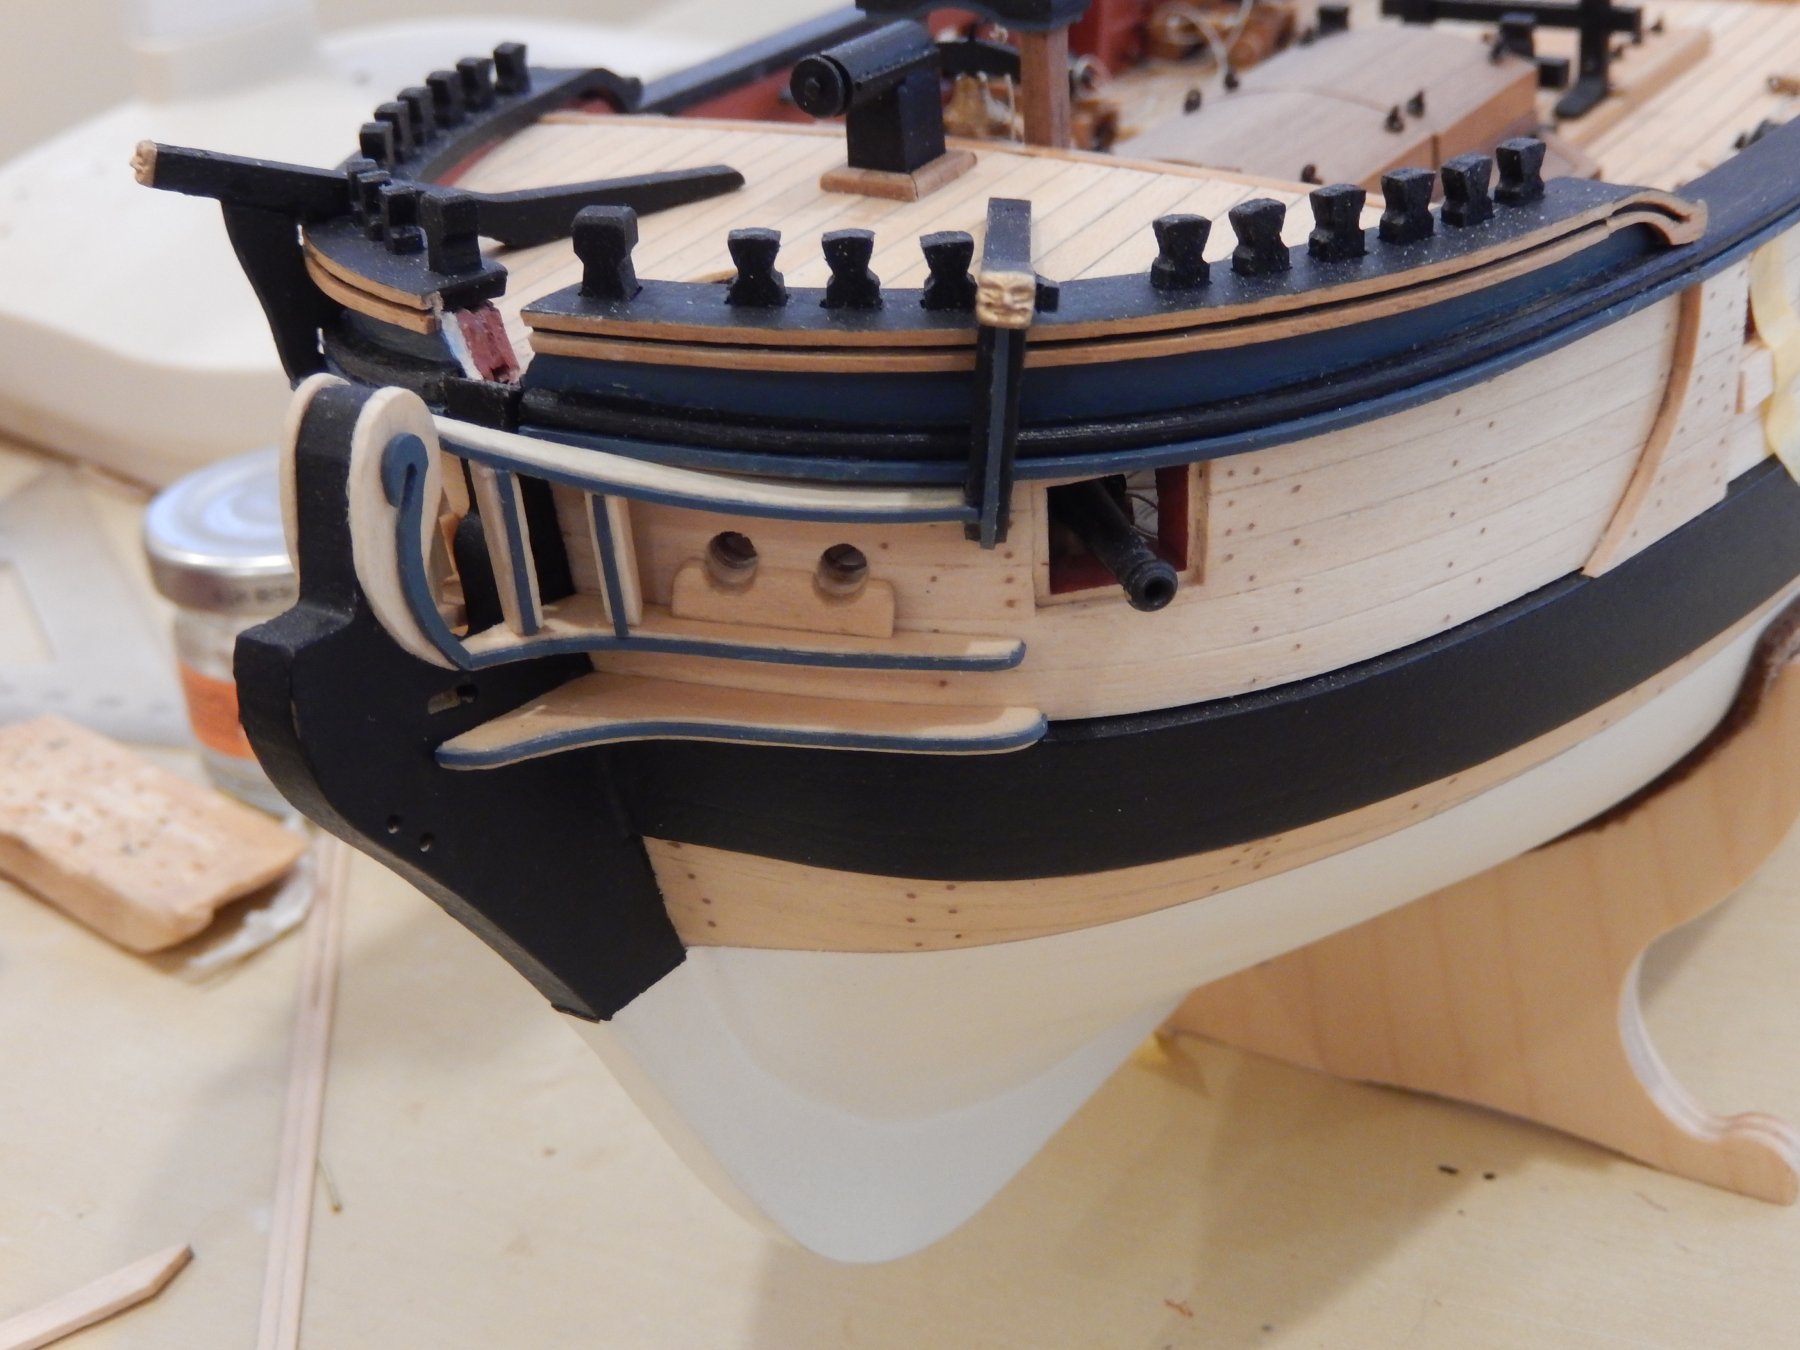
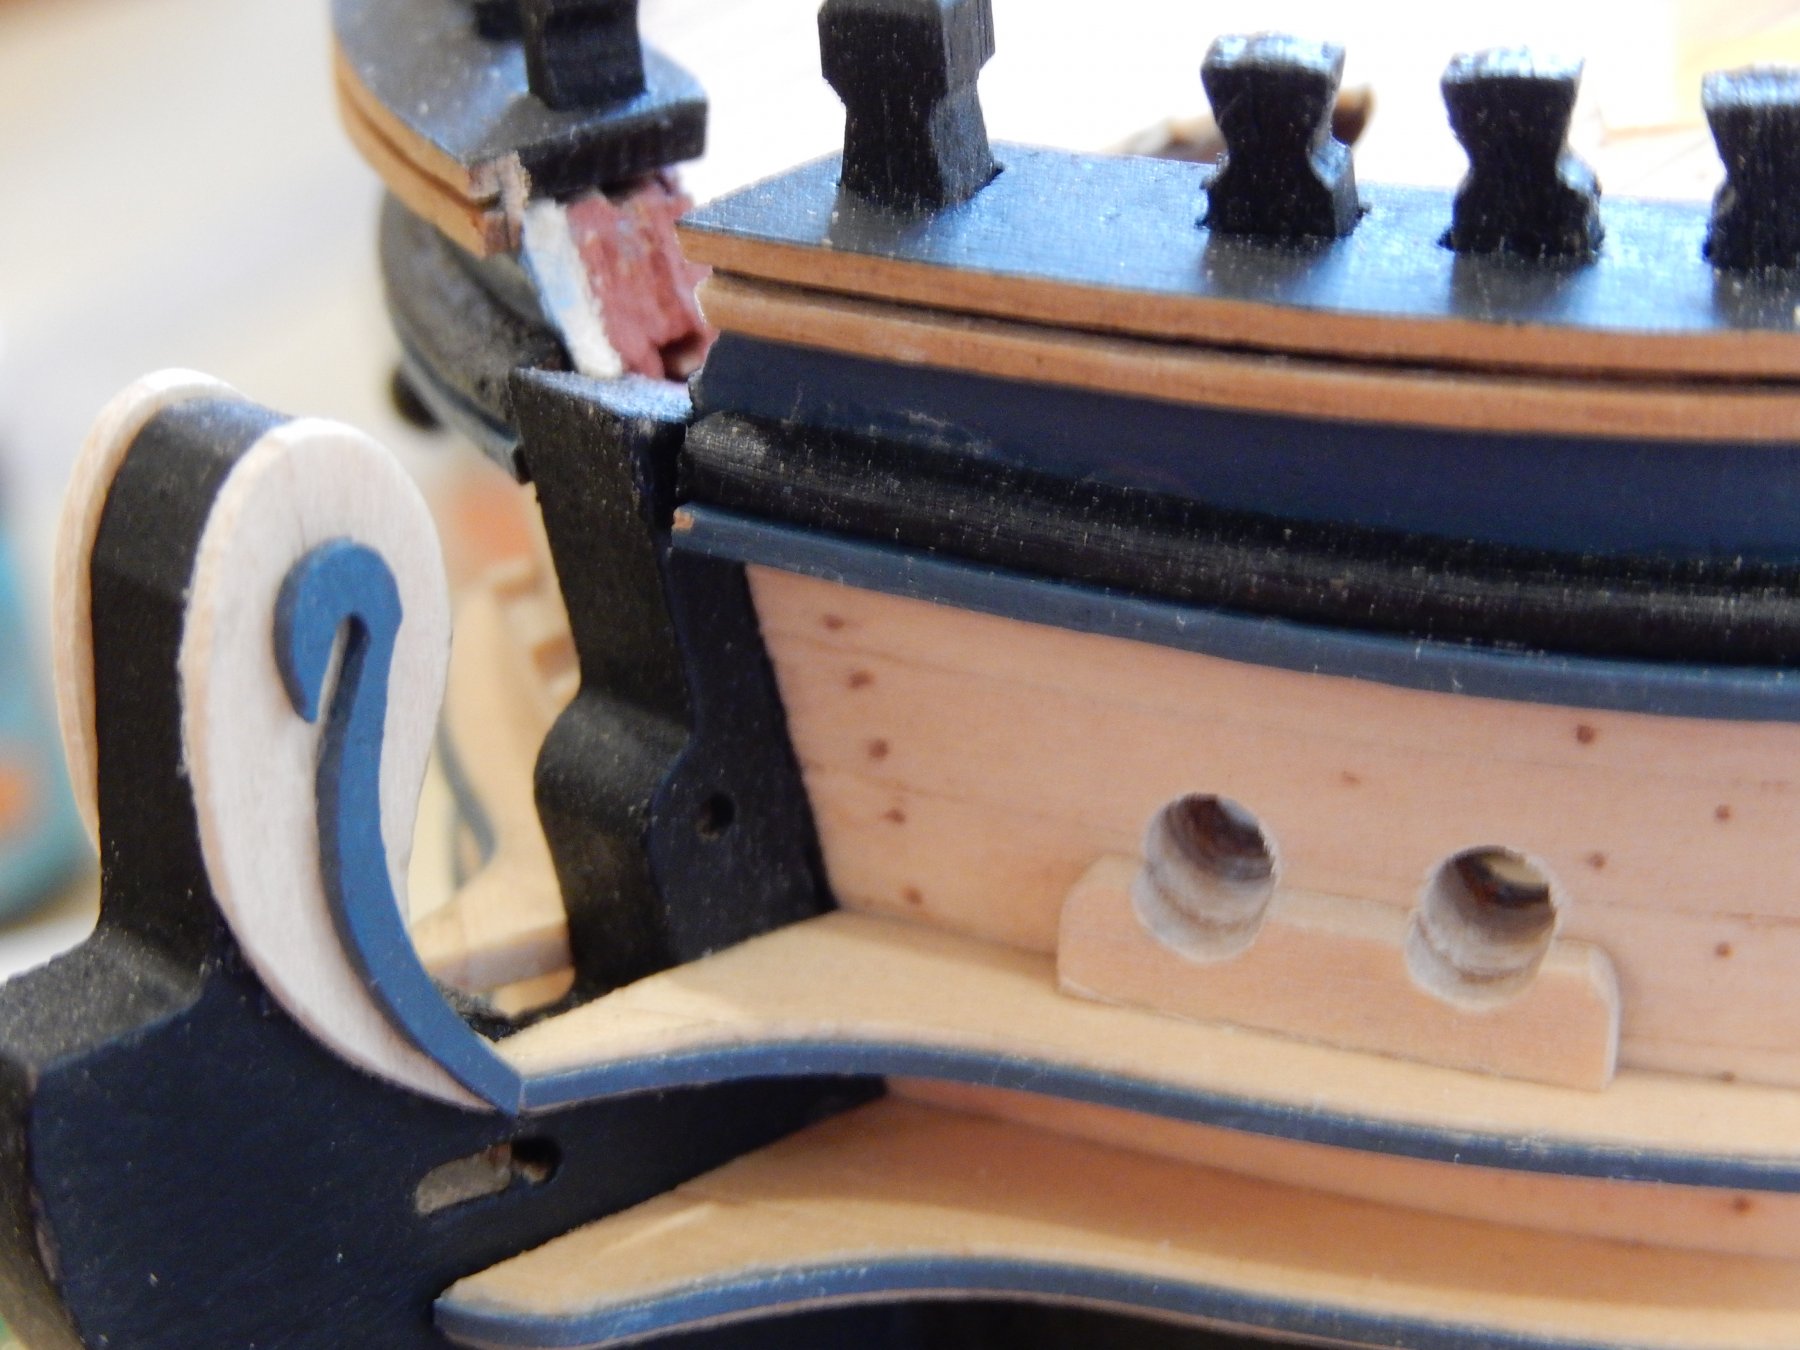
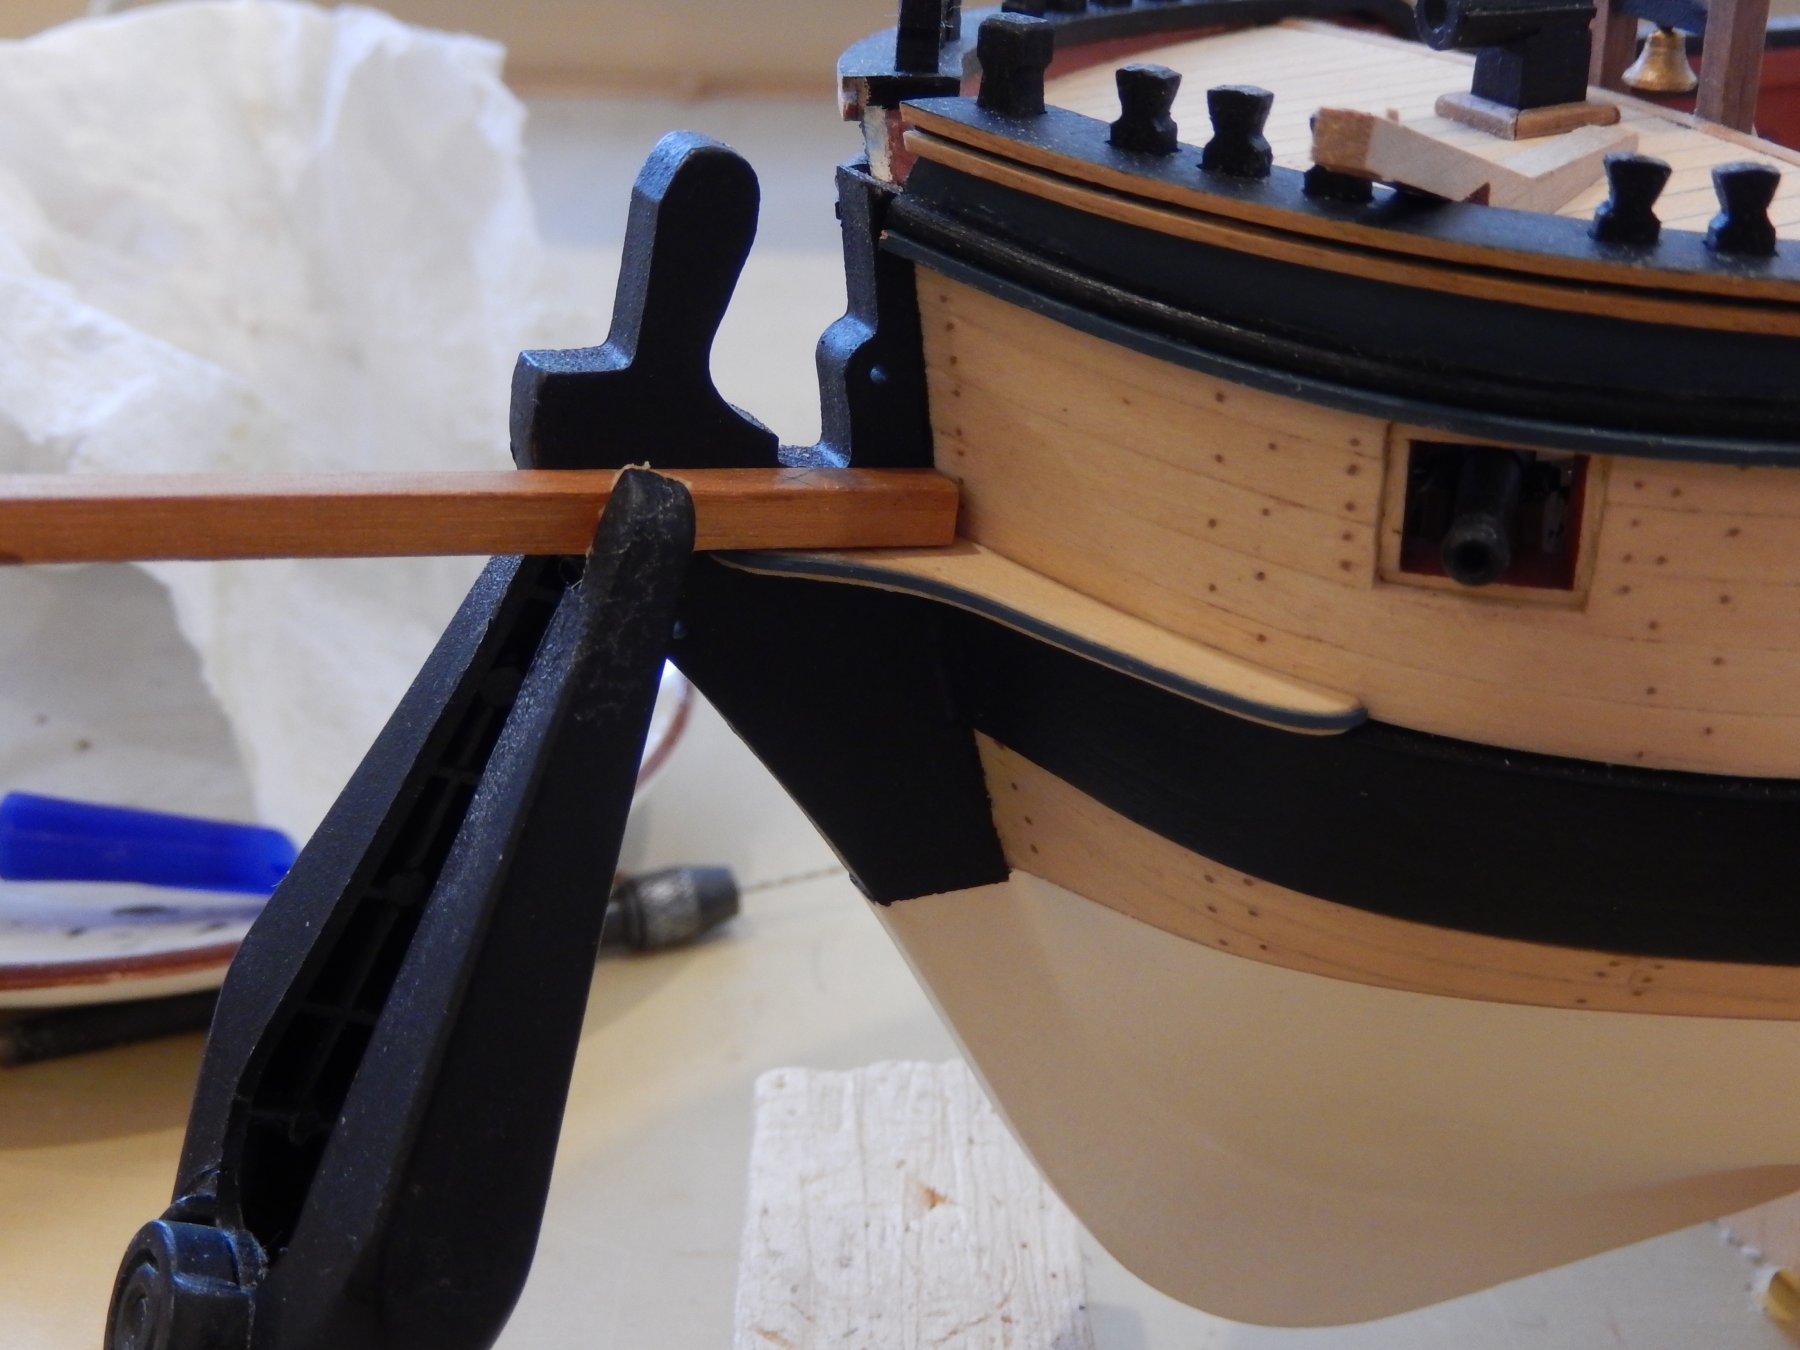
But for a couple of coats of polyurethane, and some minor touching-up, the catheads are now finished and installed. The head rails have been made, but final adjustments will be needed before installation. Whether all the trouble has been worth it, will only be known when they are finished off and installed. Here is progress. I hope the whole thing will be done over the weekend if all goes well. Both head rails were positioned by eyelets fitted into the deck. They were removed once the glue was dry, and the holes will be touched-up


- 421 replies
-
- 14
-
-
- caldercraft
- granado
- (and 1 more)
-
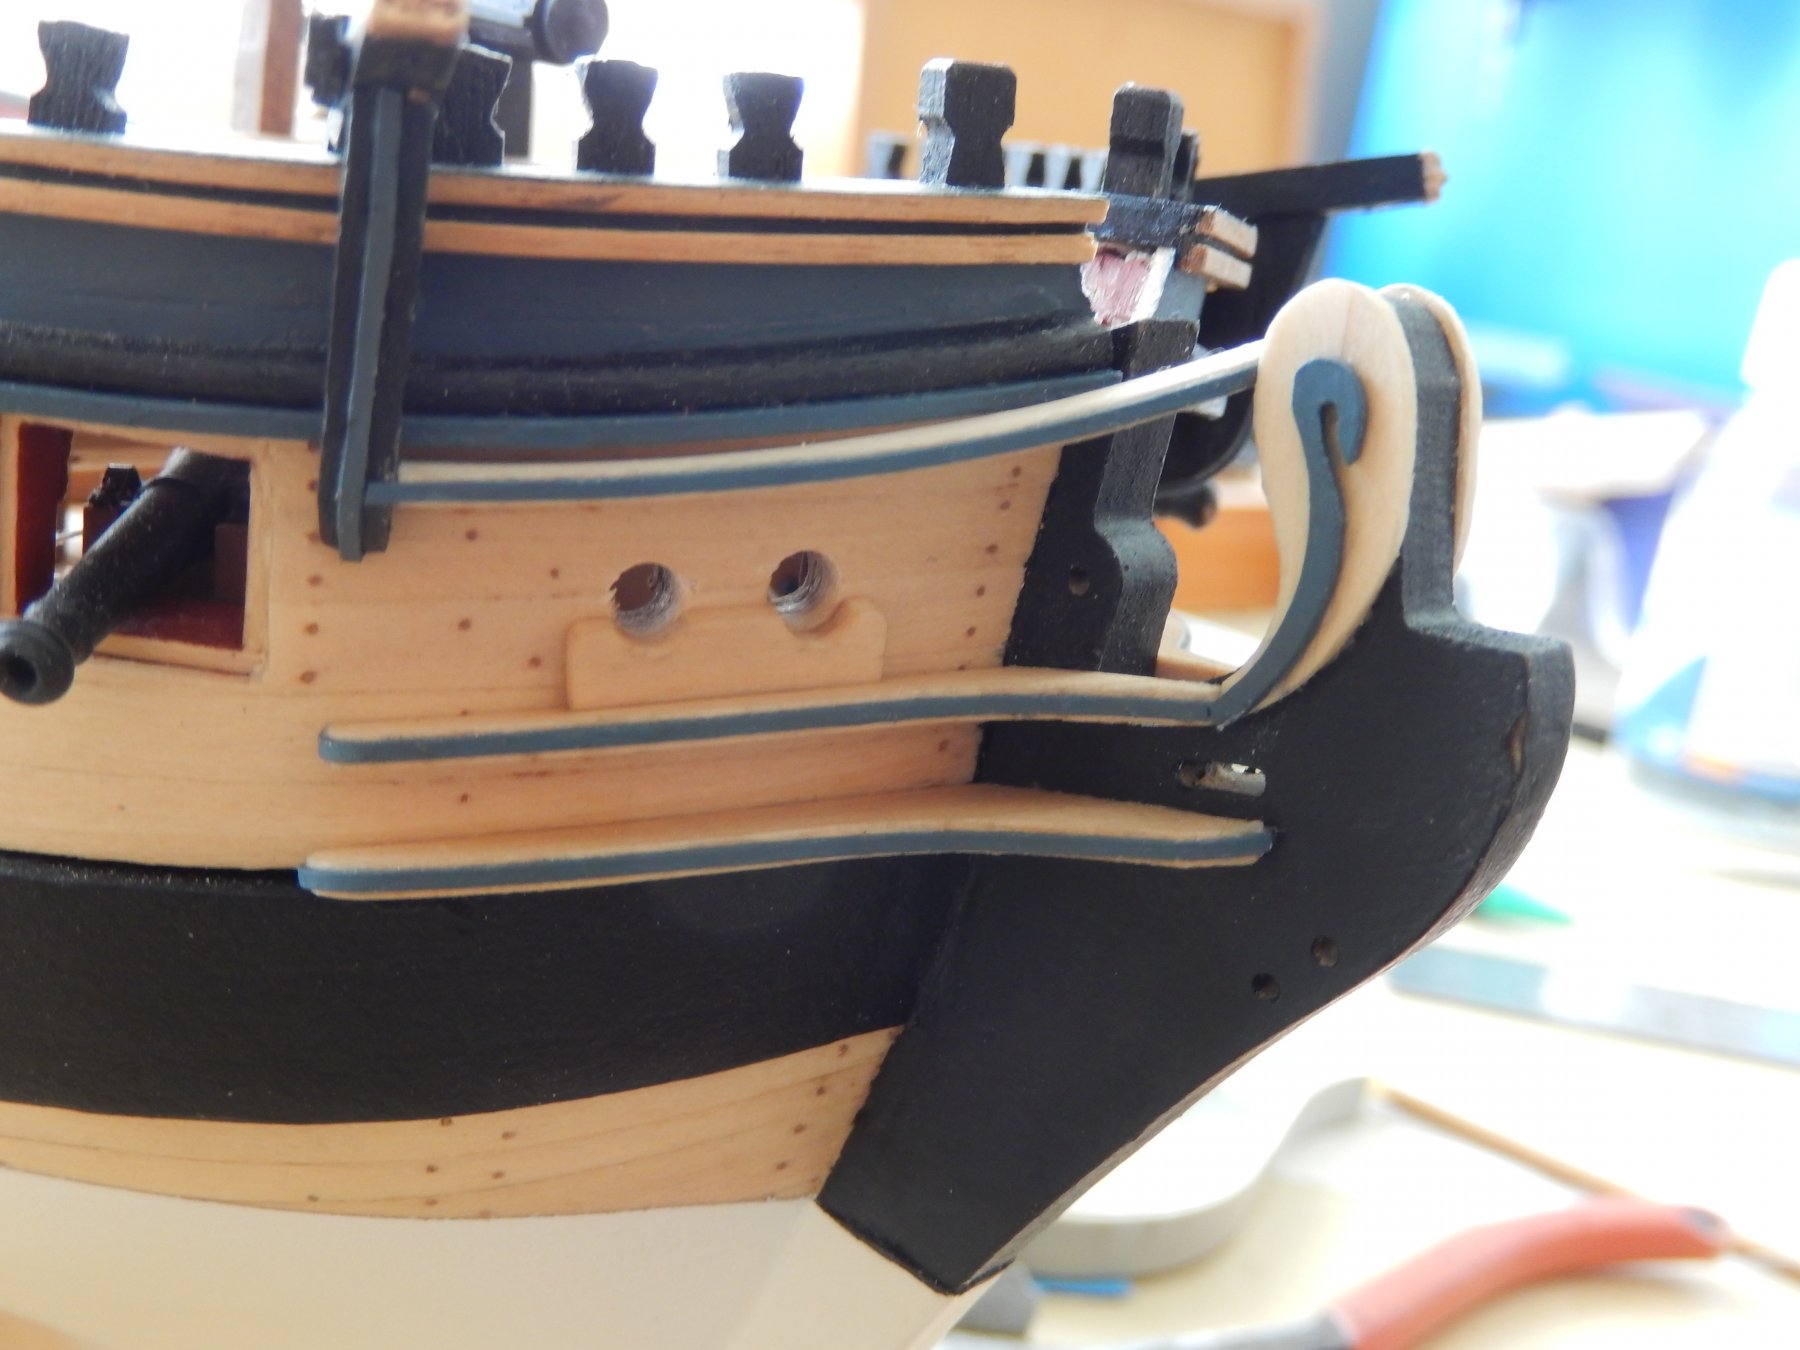
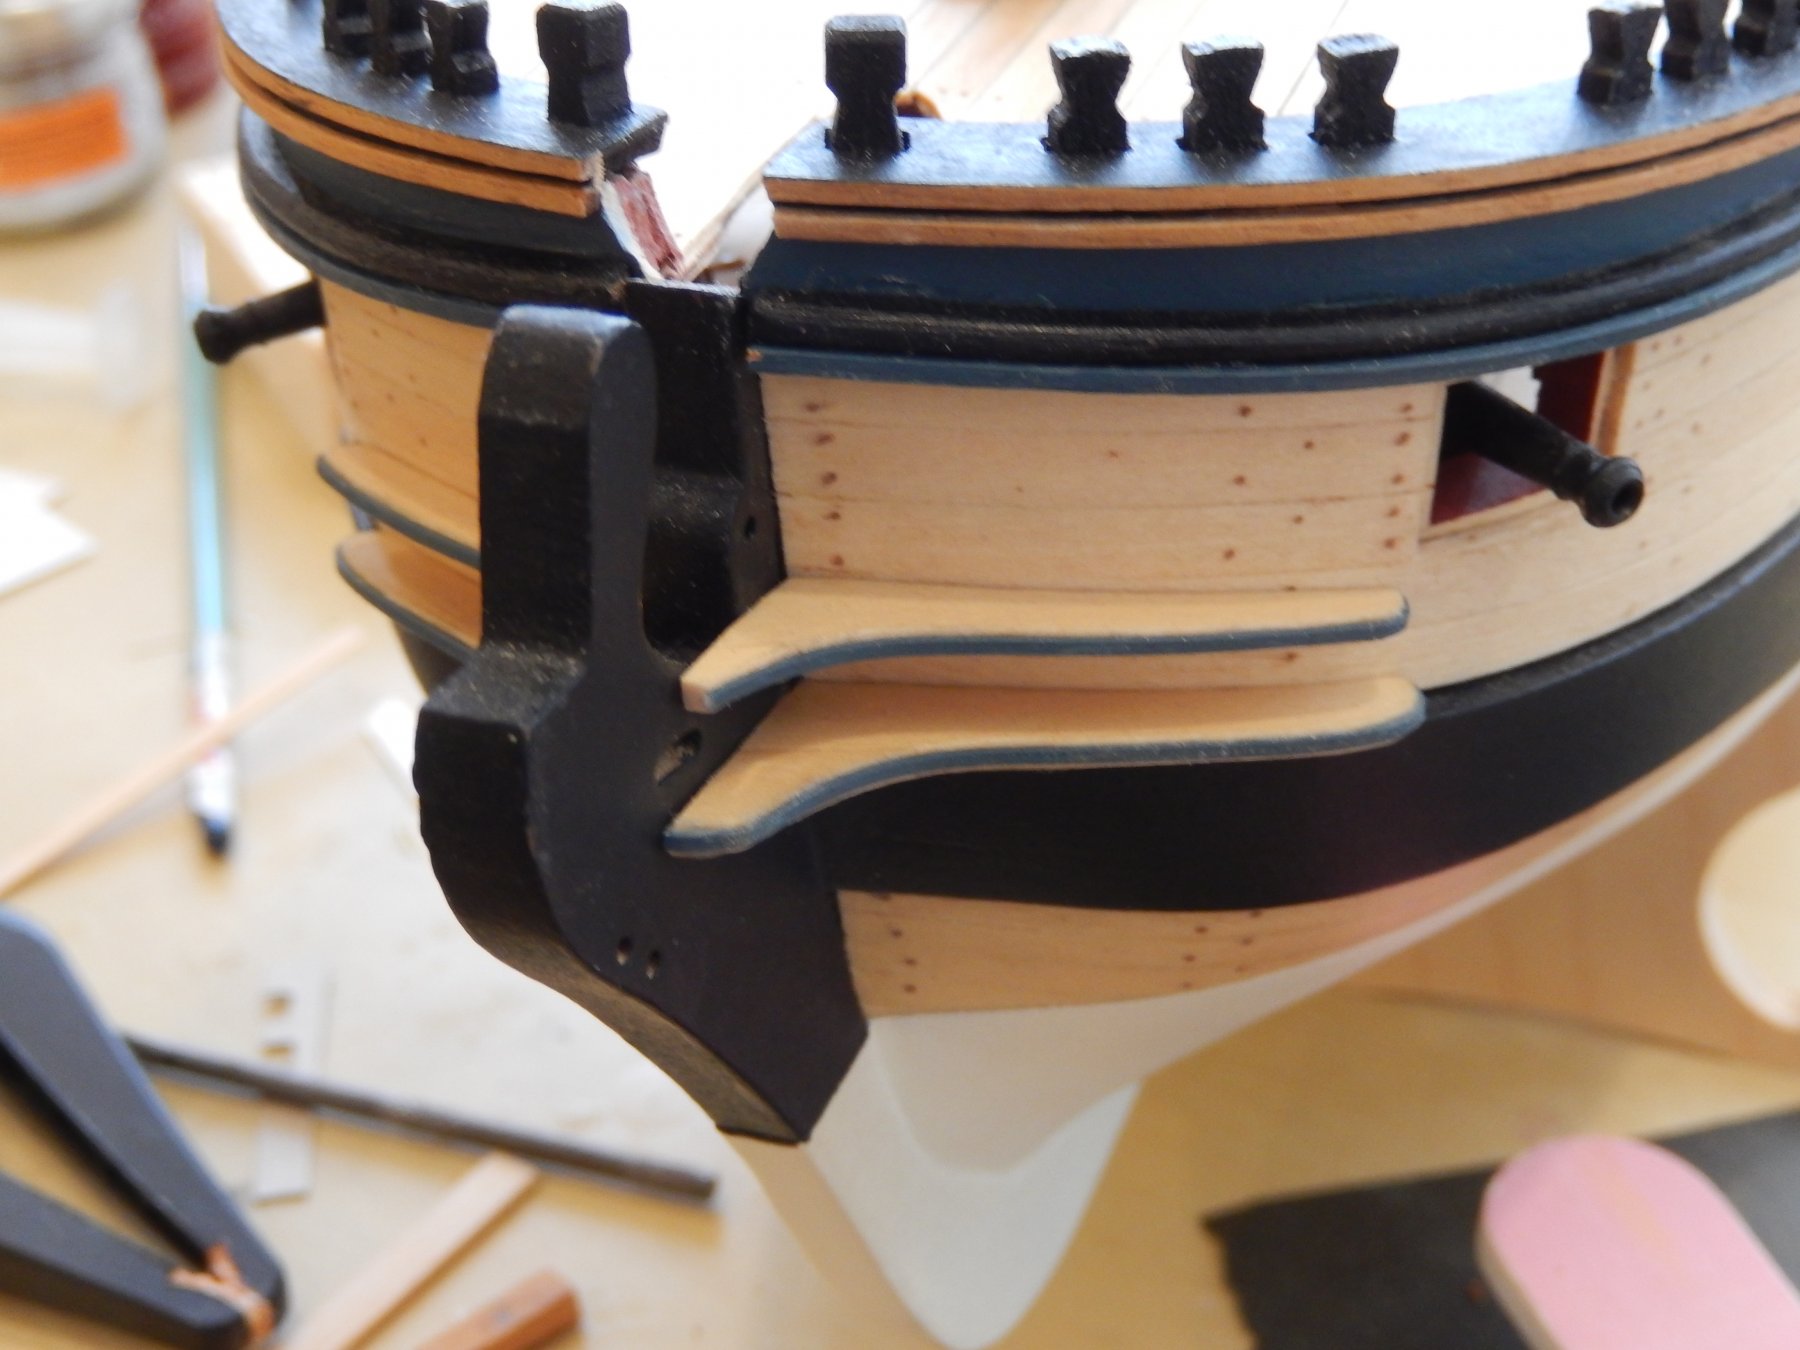
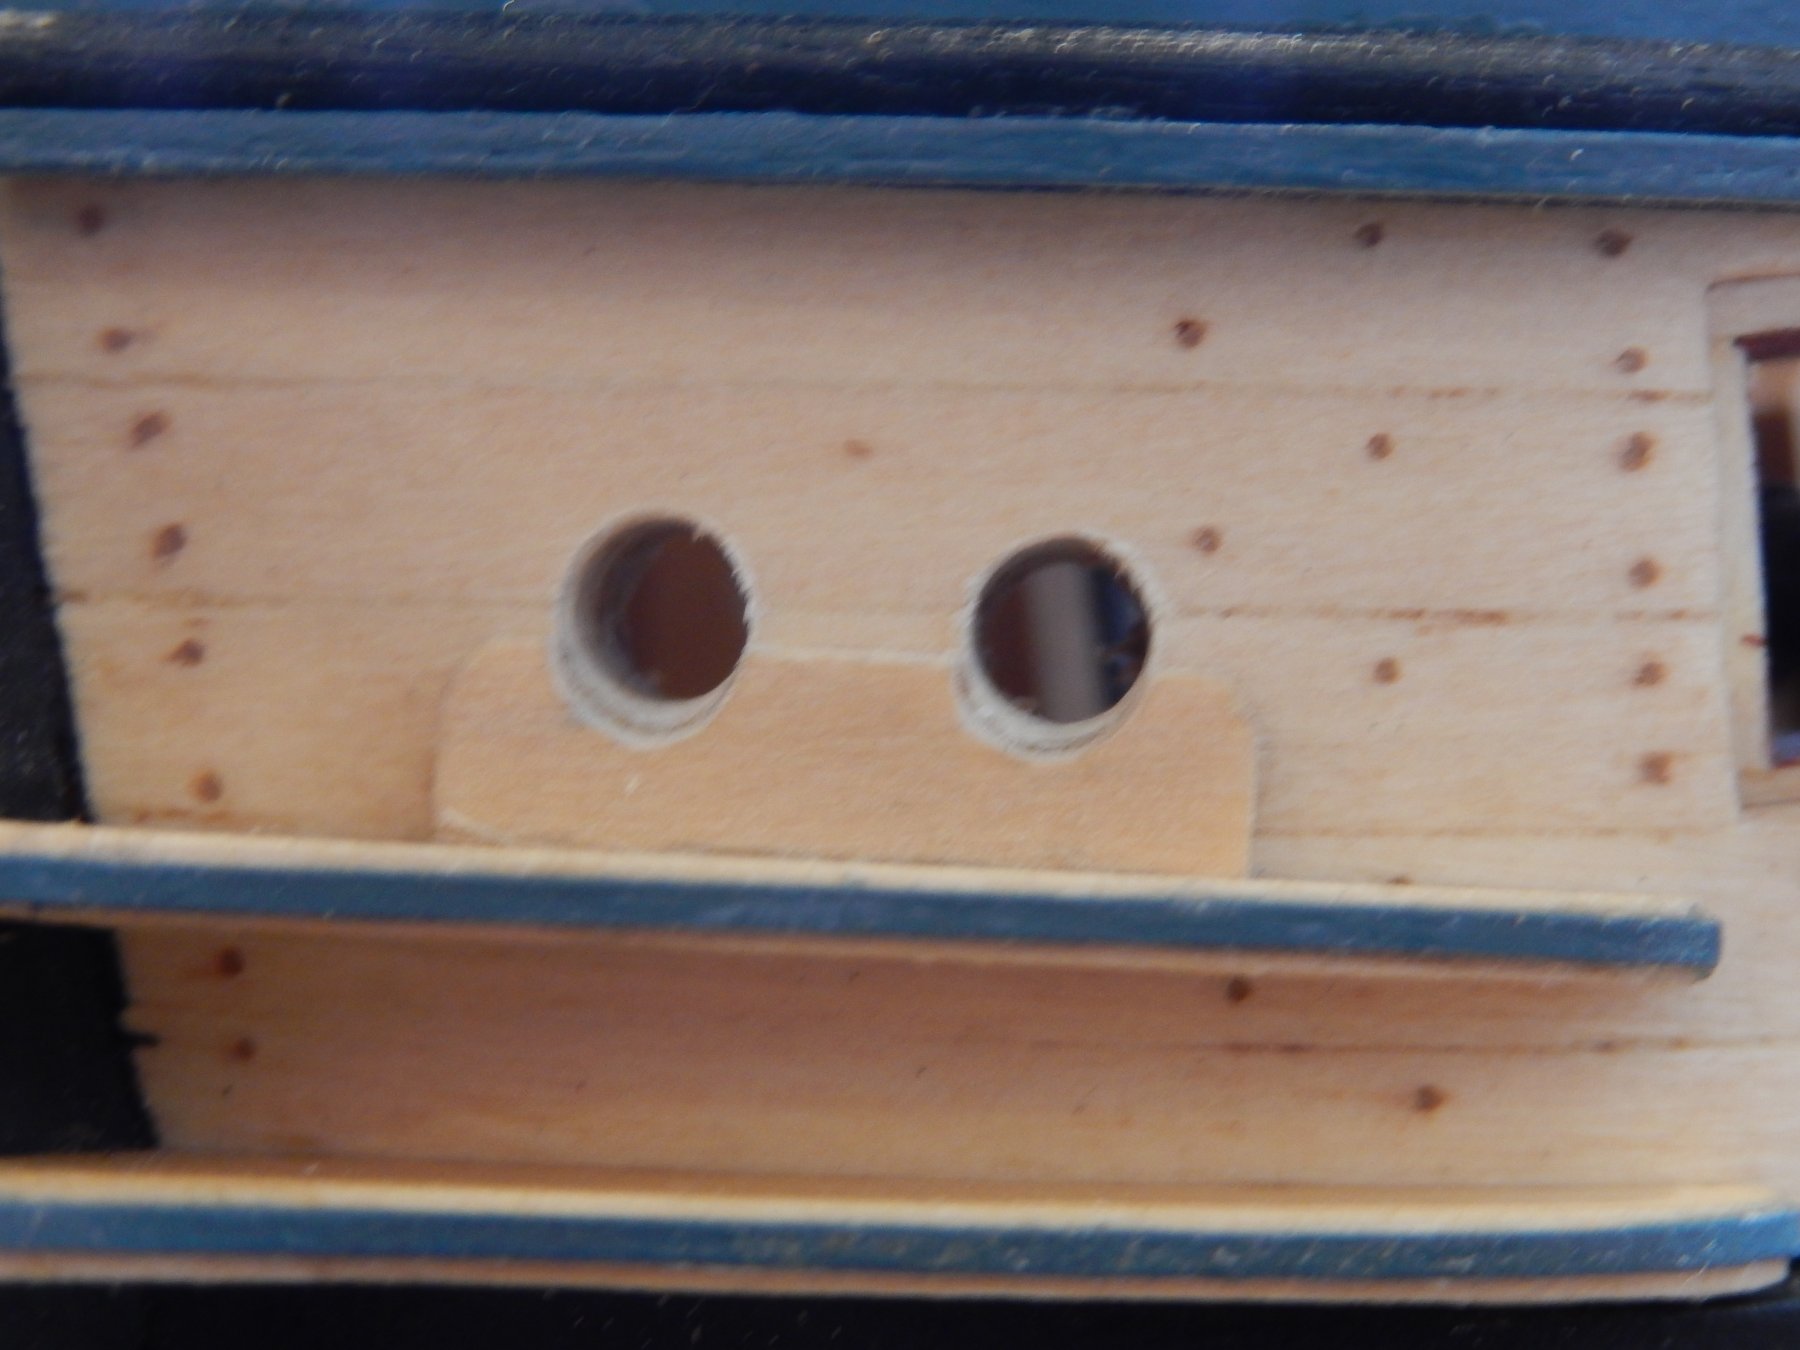
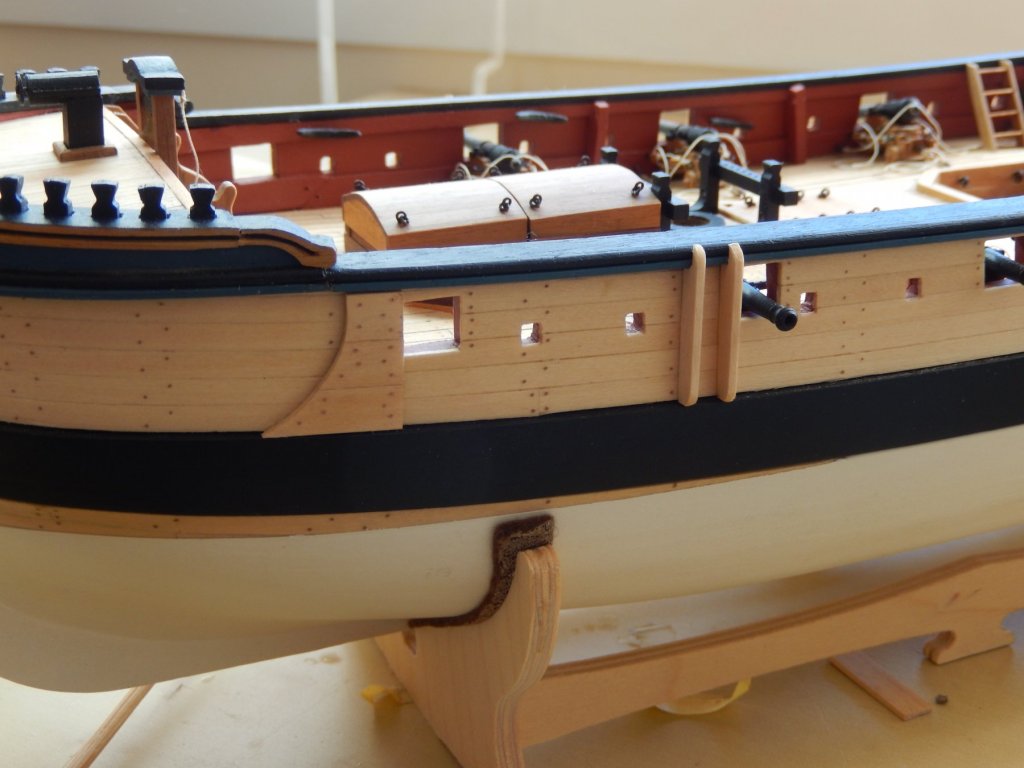
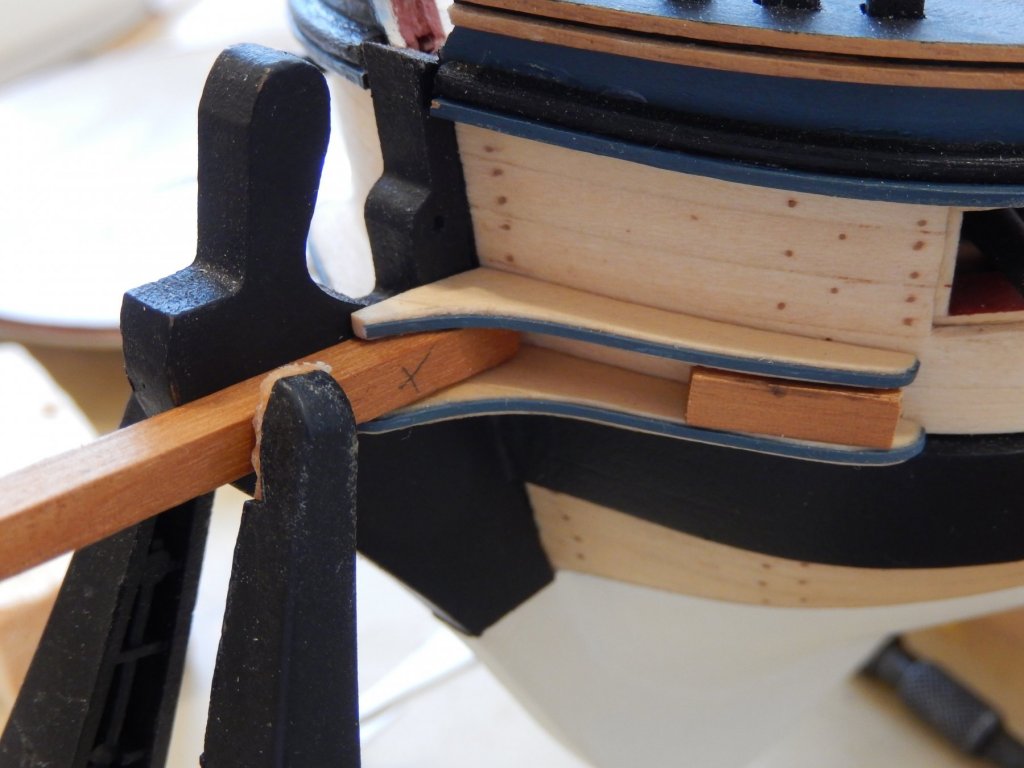
The various fittings for the forward part of the model are now almost complete. The cathead is now ready to install, but there is still some work to be done on the head rails. The steps are a bit fiddly. The have to be horizontal, so the slope of the wale can't be used as a guide. I used a piece of 1x1mm strip as a spacer from the wale, but making it horizontal as best I could. I then moved up the hull, using apiece of 1.5mm thick strip as a spacer for the remaining steps The anchor lining and fenders are on. The ply parts supplied are again of poor quality and I have made substitutes. There are a couple more photos I wished to include, but the speed is so glacial, I'll make it another time. I will be taking a couple of small grandchildren to the beach for Easter (at this time of year😎) so that isthe end of immediate progress. Thank you for all the reactions. They are really encouraging. .
- 421 replies
-
- 10
-
-
- caldercraft
- granado
- (and 1 more)
-
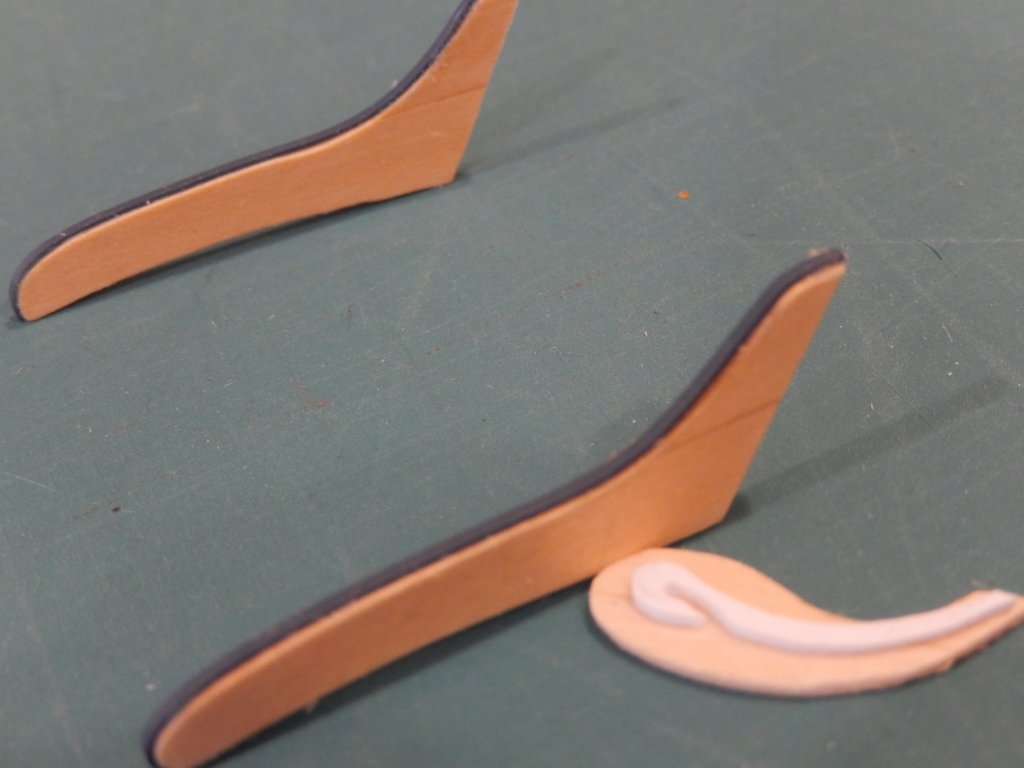
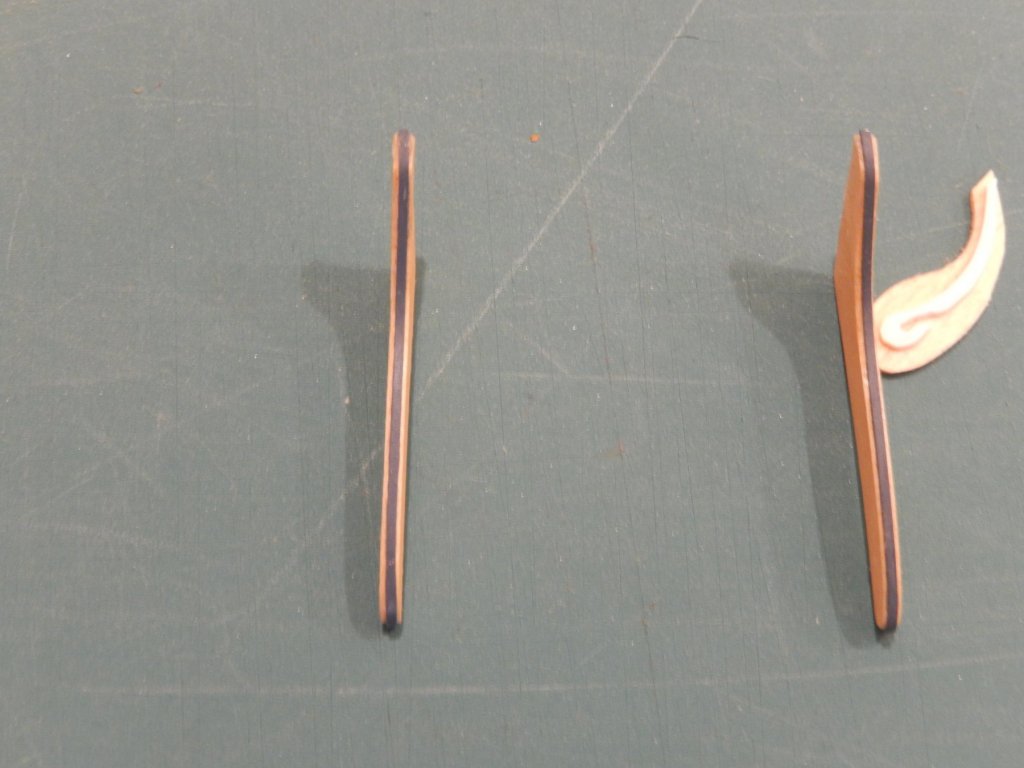
The decoration on the stem has now been done, but I see that a bit of touching up is needed, and a couple of coats of polyurethane.. I think it's better than the kit's approach, but I may be biased. The headrail/cathead saga continues. Here is the first of the supports for the cathead. It looks like a dog's breakfast here, but it finally fits quite well. I have just put a coat of paint on it and it looks quite civilized.. Having spent hours on the damn thing, it took about an hour to do the second one. I found the catheads did not fit flush to the deck, so a small adjustment was needed. The one shown on the right also has a small piece of timber added under the extension which protrudes over the rail. It ends flush with the edge of the rail, and in turn its edge fits flush with the support. The same was added to the other cathead after the photo was taken. The addition may just be seen in this photo (dry-fitted: the whole thing has since been tidied up). Why all of this is underlined is a mystery.

- 421 replies
-
- 7
-
-
- caldercraft
- granado
- (and 1 more)
-
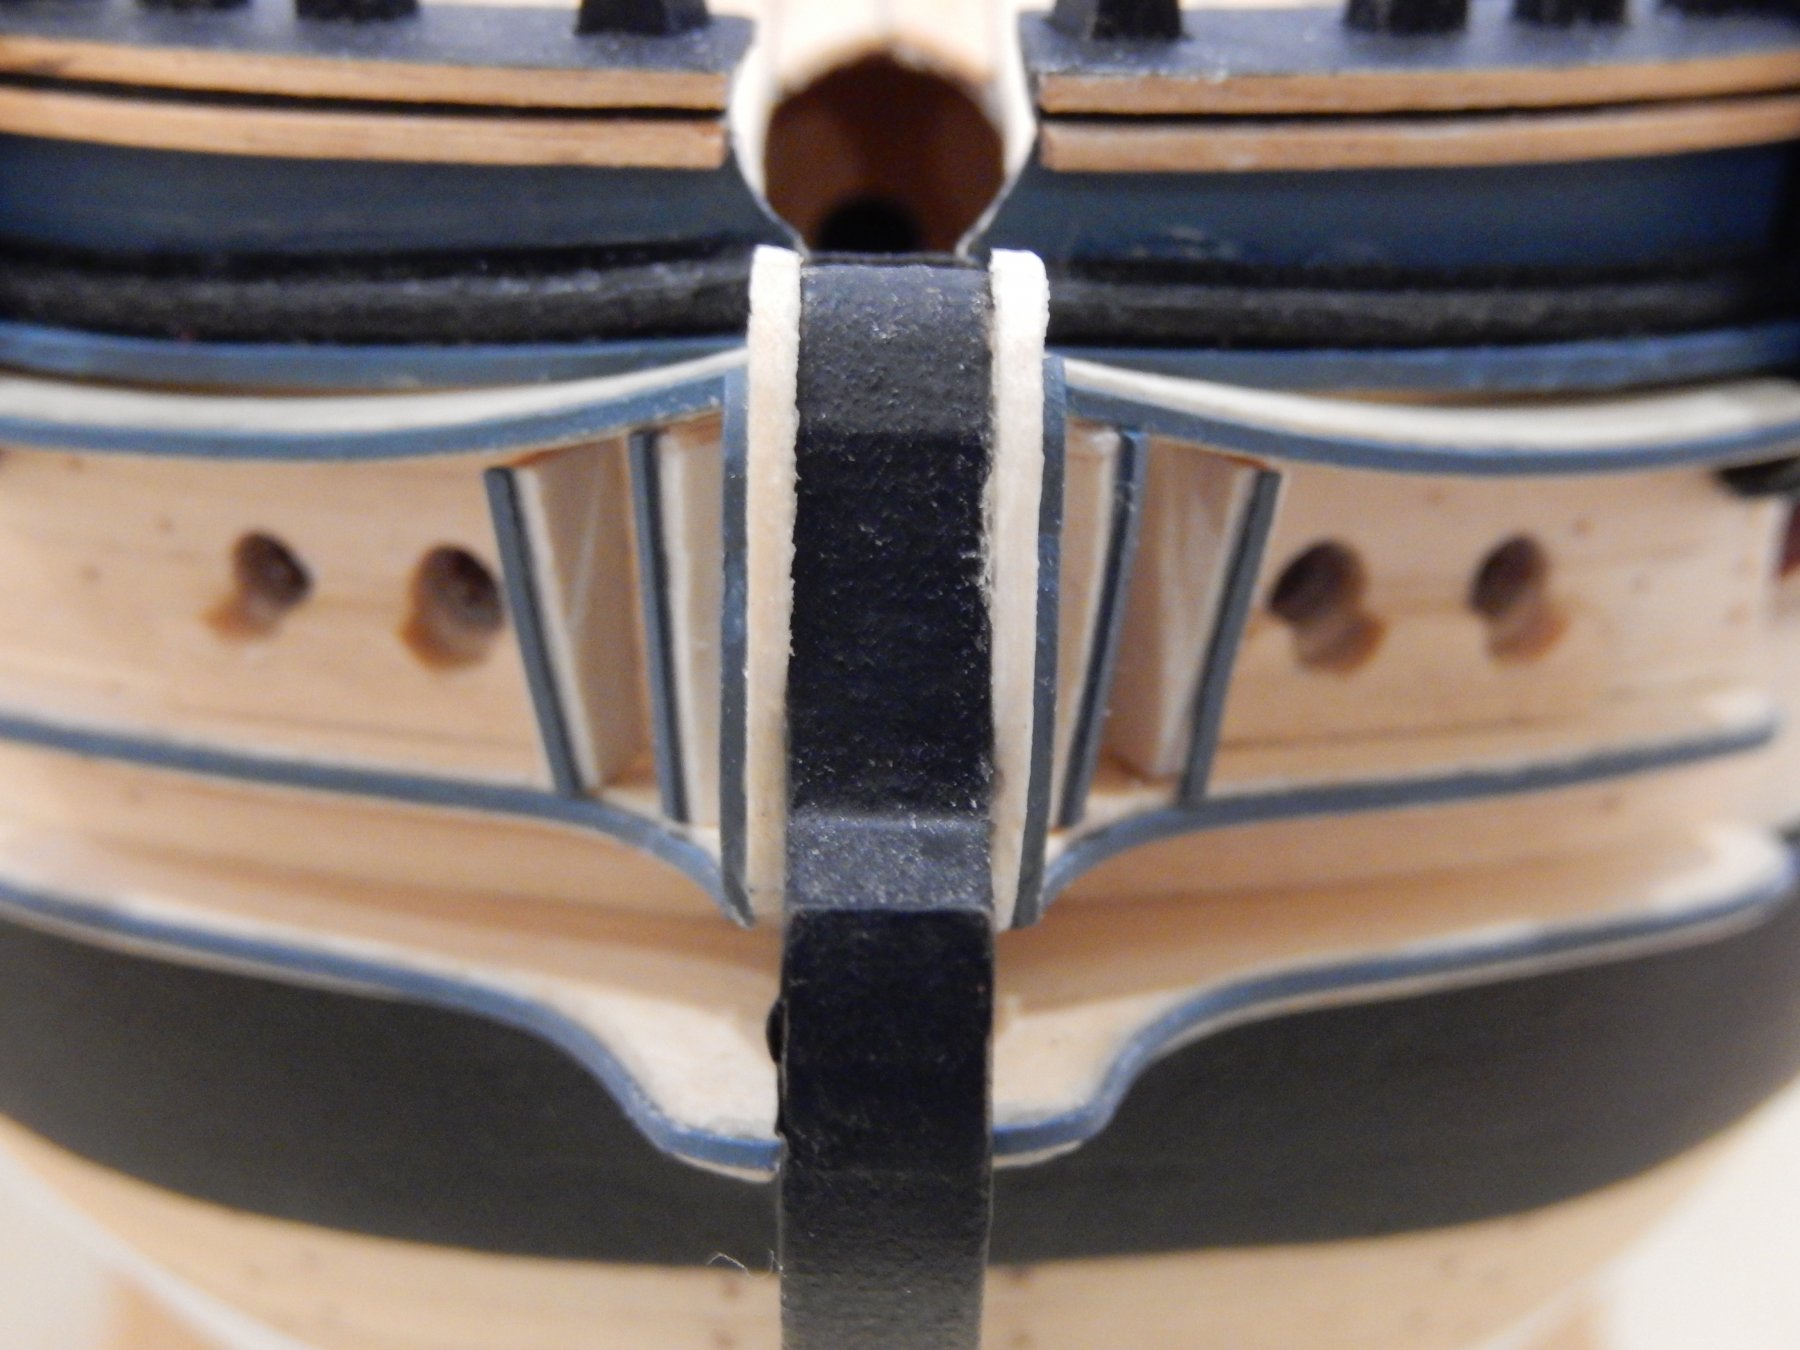
Progress is very slow. At least the lower and upper cheeks are finished. This is how they have turned out. I used pieces of 4x4mm strip to space the two cheeks. This is one of the hawse hole bolsters in position. The kit supplied parts were of poor quality ply and consequently I made replacements. The head rails are proving to be a nightmare. I have decided to use a method similar to Joe V's and have spent two or three days making not much progress.


- 421 replies
-
- 15
-
-
- caldercraft
- granado
- (and 1 more)
-
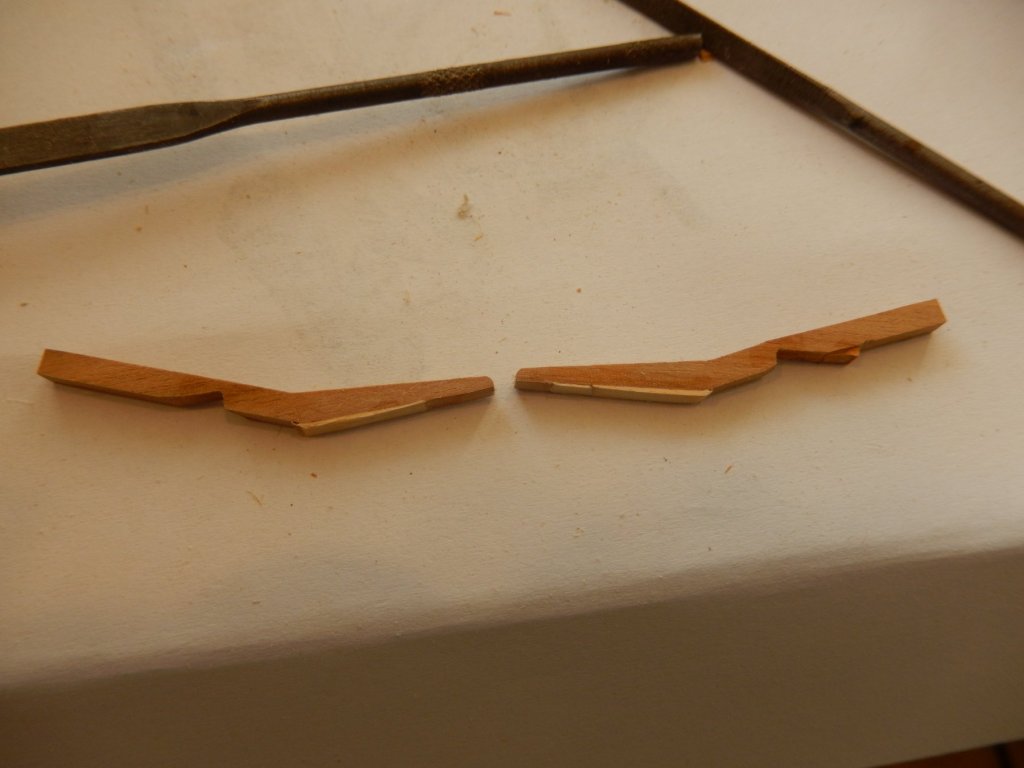
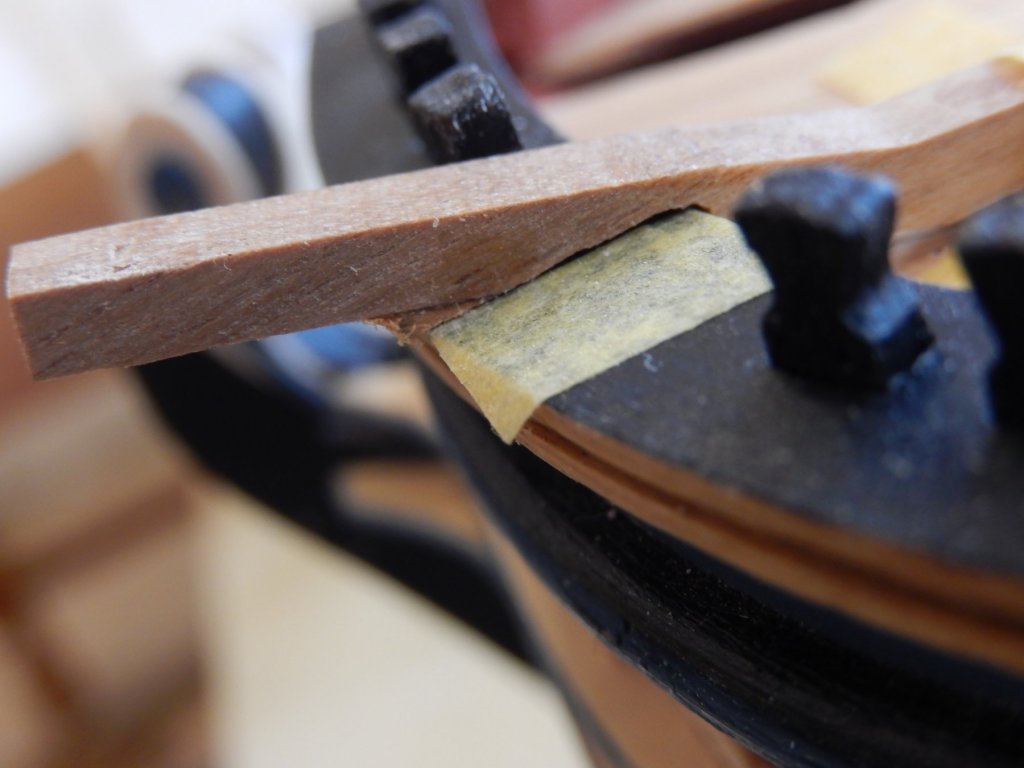
Here is some progress on the cheeks. The blue on the cheeks is painted 1x0.5mm polystyrene. It gives a nice clean finish. In the foreground is a first attempt at part of the cheeks. I'm reasonably happy with the general idea (it will of course be painted), and there will probably be slight adjustments when all the other bits are put together.
- 421 replies
-
- 9
-
-
- caldercraft
- granado
- (and 1 more)
-
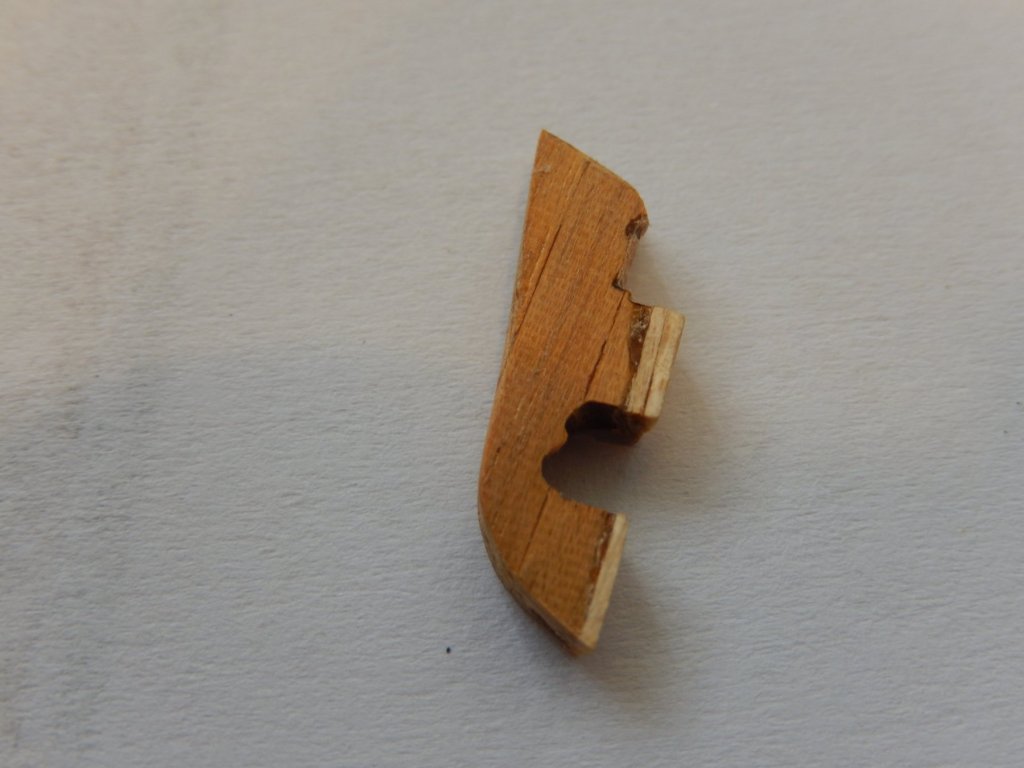
The knightheads and the timberheads are now complete. The holes provided were, of course, too small, so out came the dentist's drill bits again. For those who in futuremay build the model, I strongly advise checking to see that all the holes can accommodate all the timberheads before all the associated bits and pieces are put on the model. Doing it in situ is not a good idea. I have also been looking at the cheeks and head rails supplied. Their quality is quite poor. I have looked at Joe's excellent work in replacing them. I certainly can't duplicate that, but have a couple of ideas that may improve on the kit. If all else fails, there is always the kit to fall back on. Here are the beginnings of the replacement lower cheeks.
- 421 replies
-
- 7
-
-
- caldercraft
- granado
- (and 1 more)
-
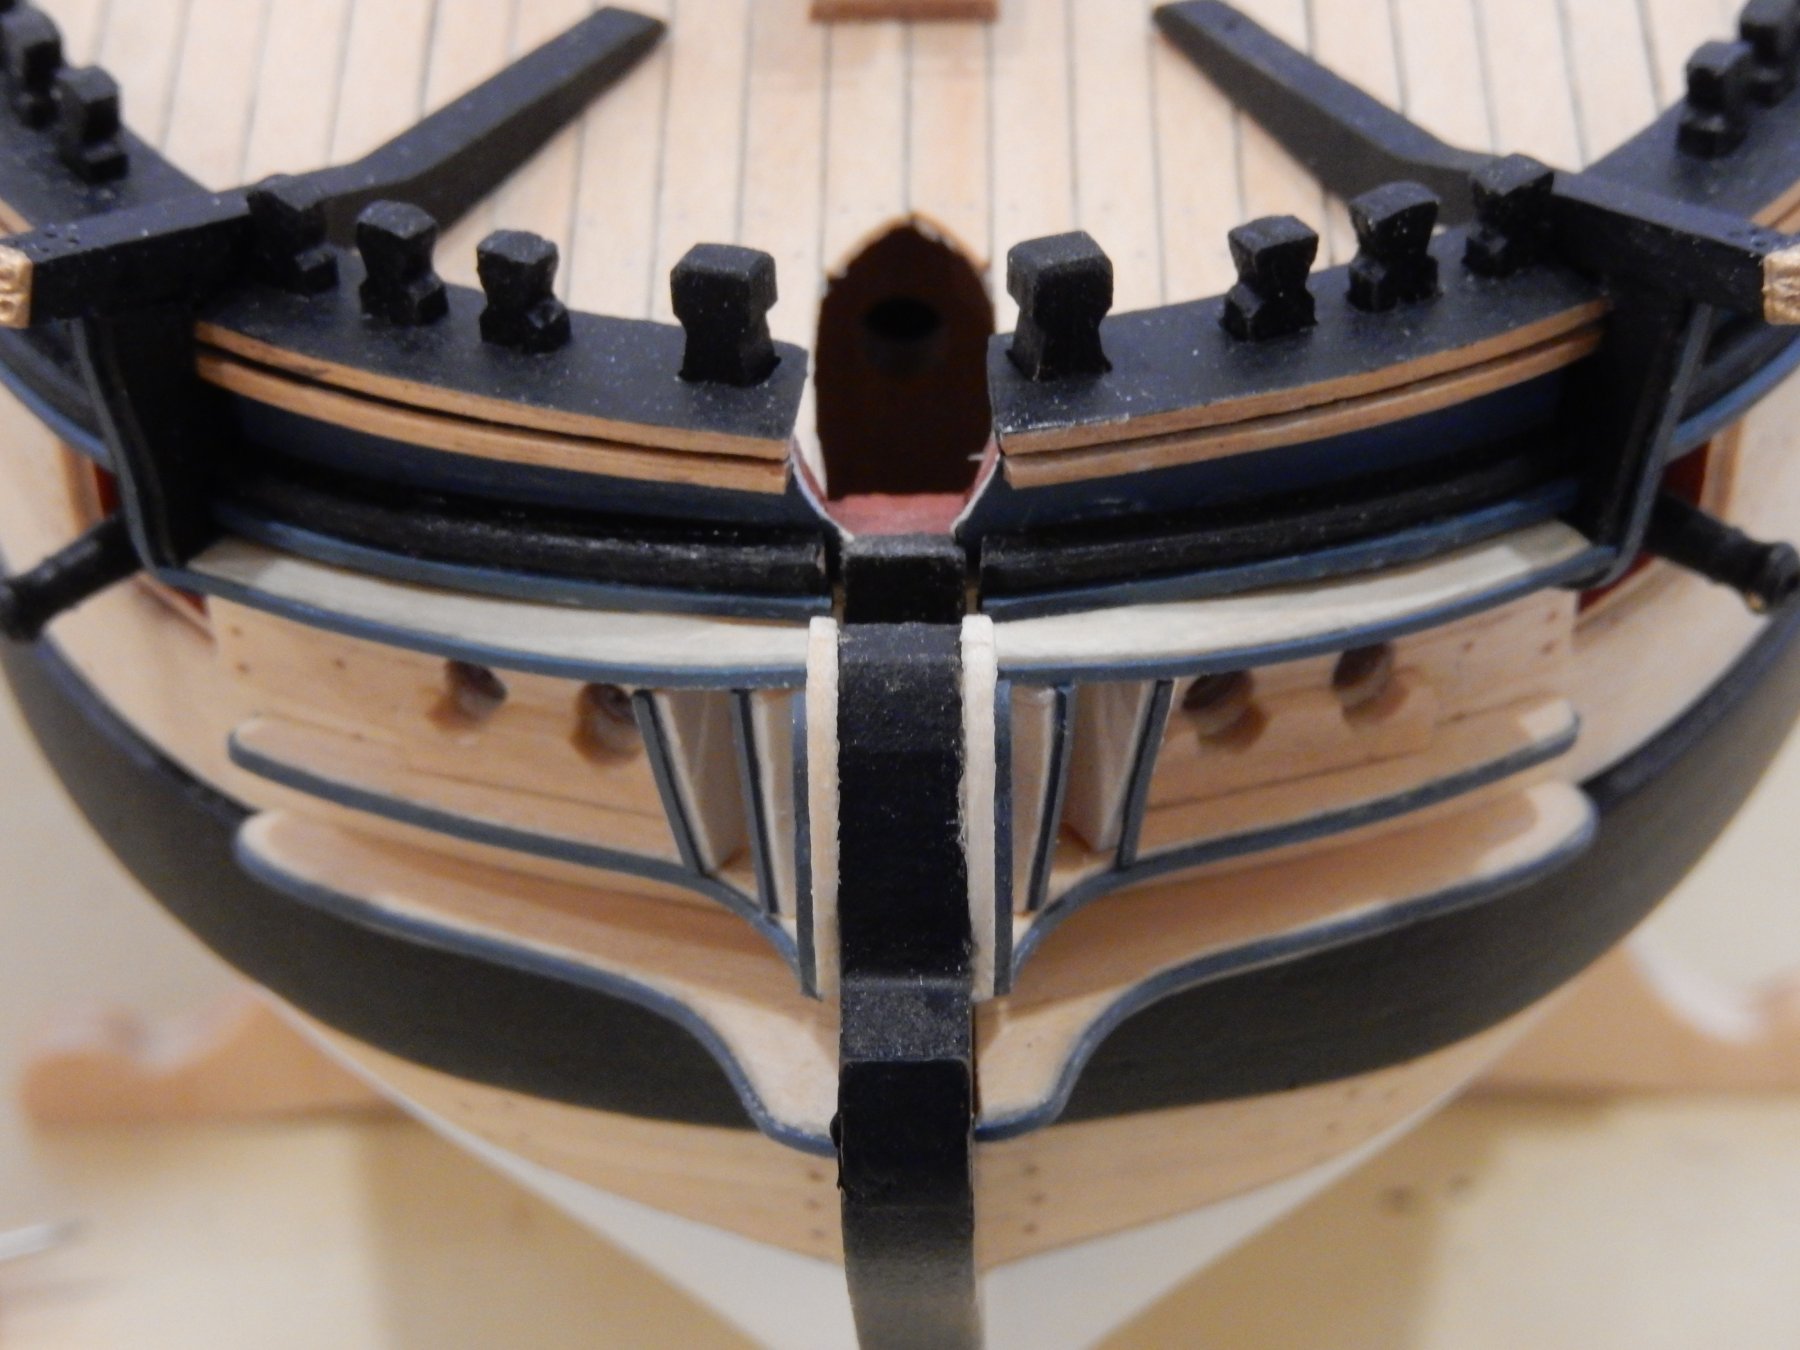
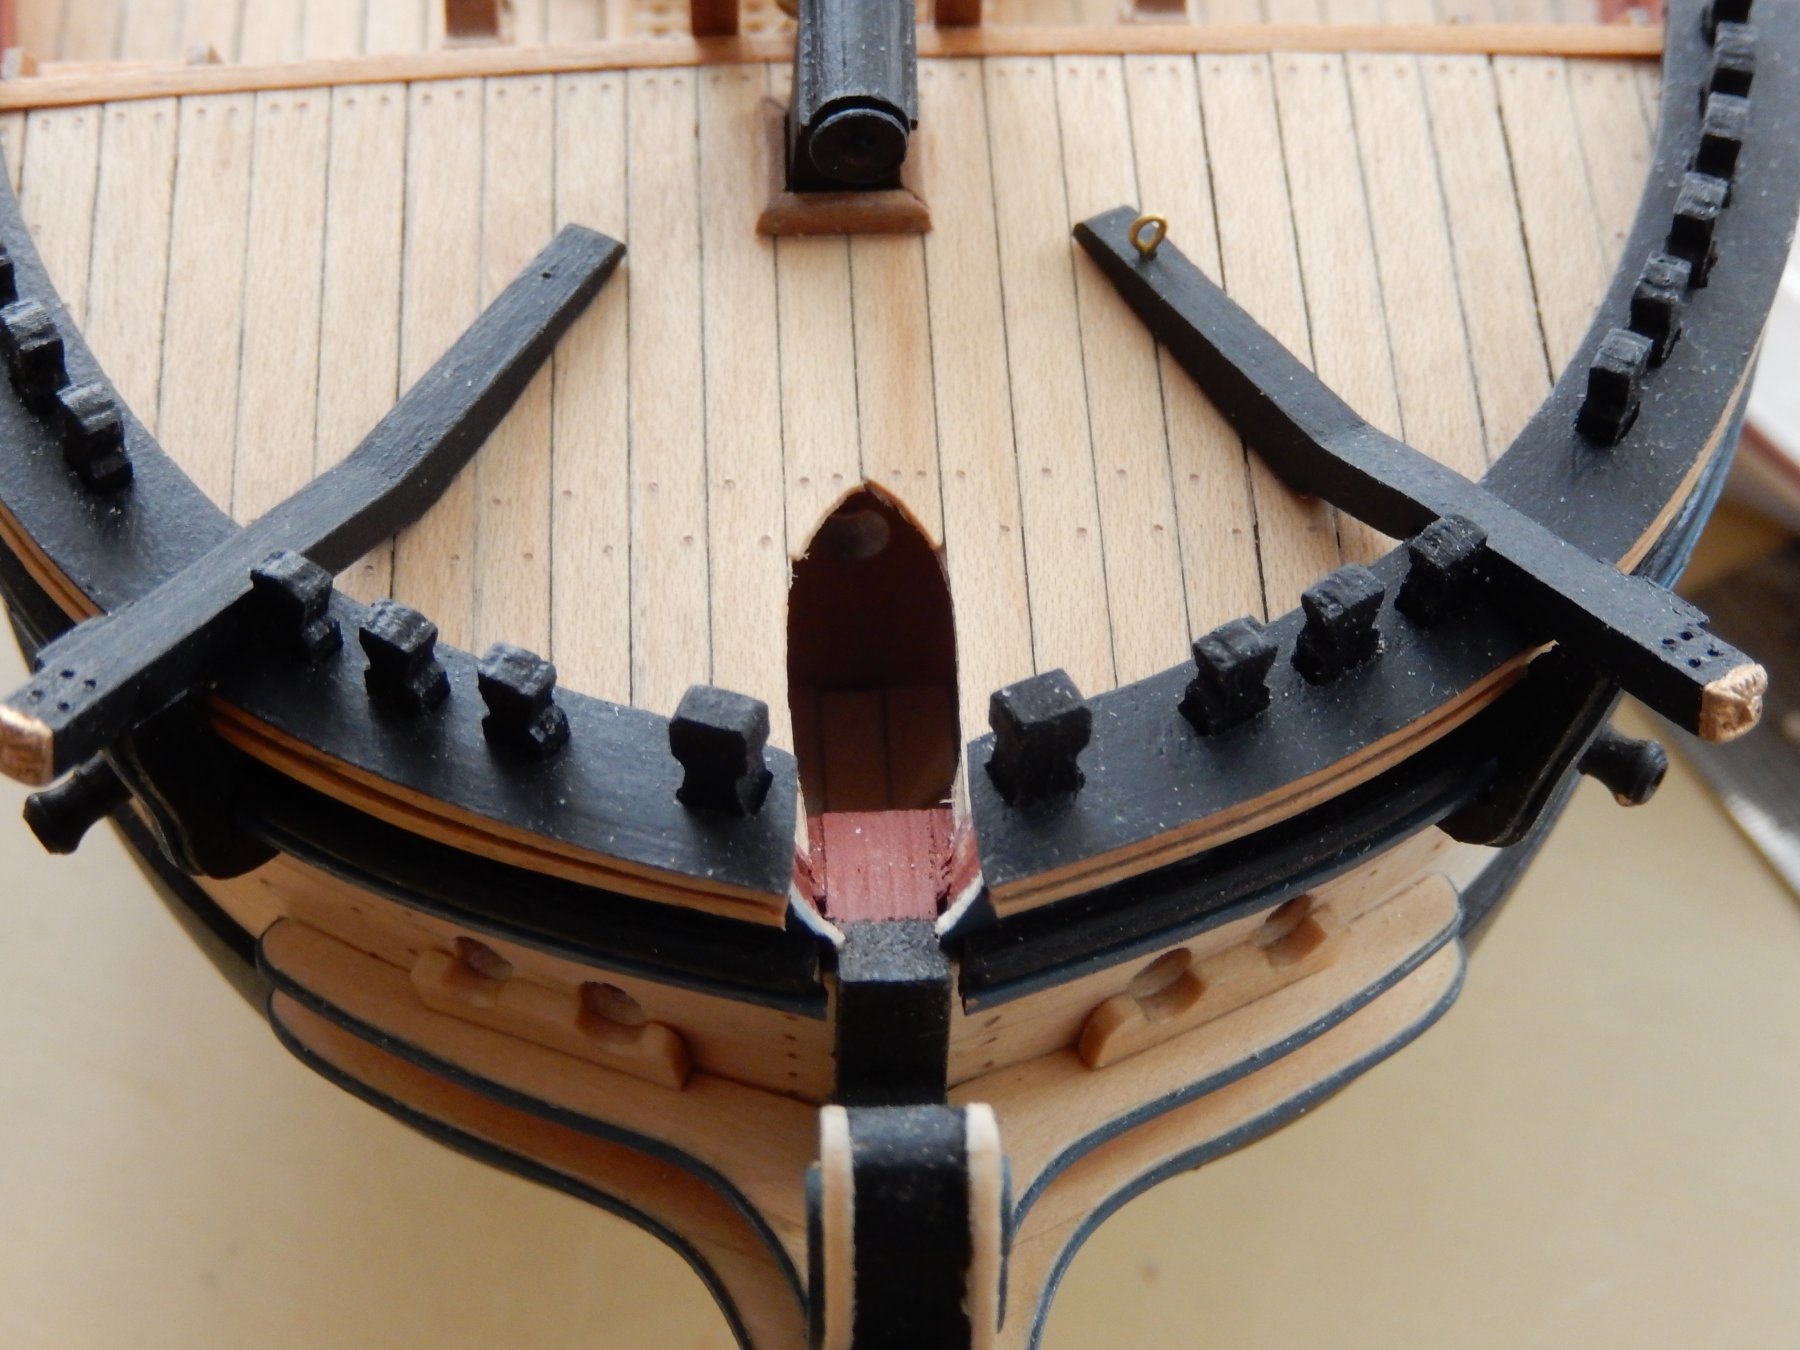
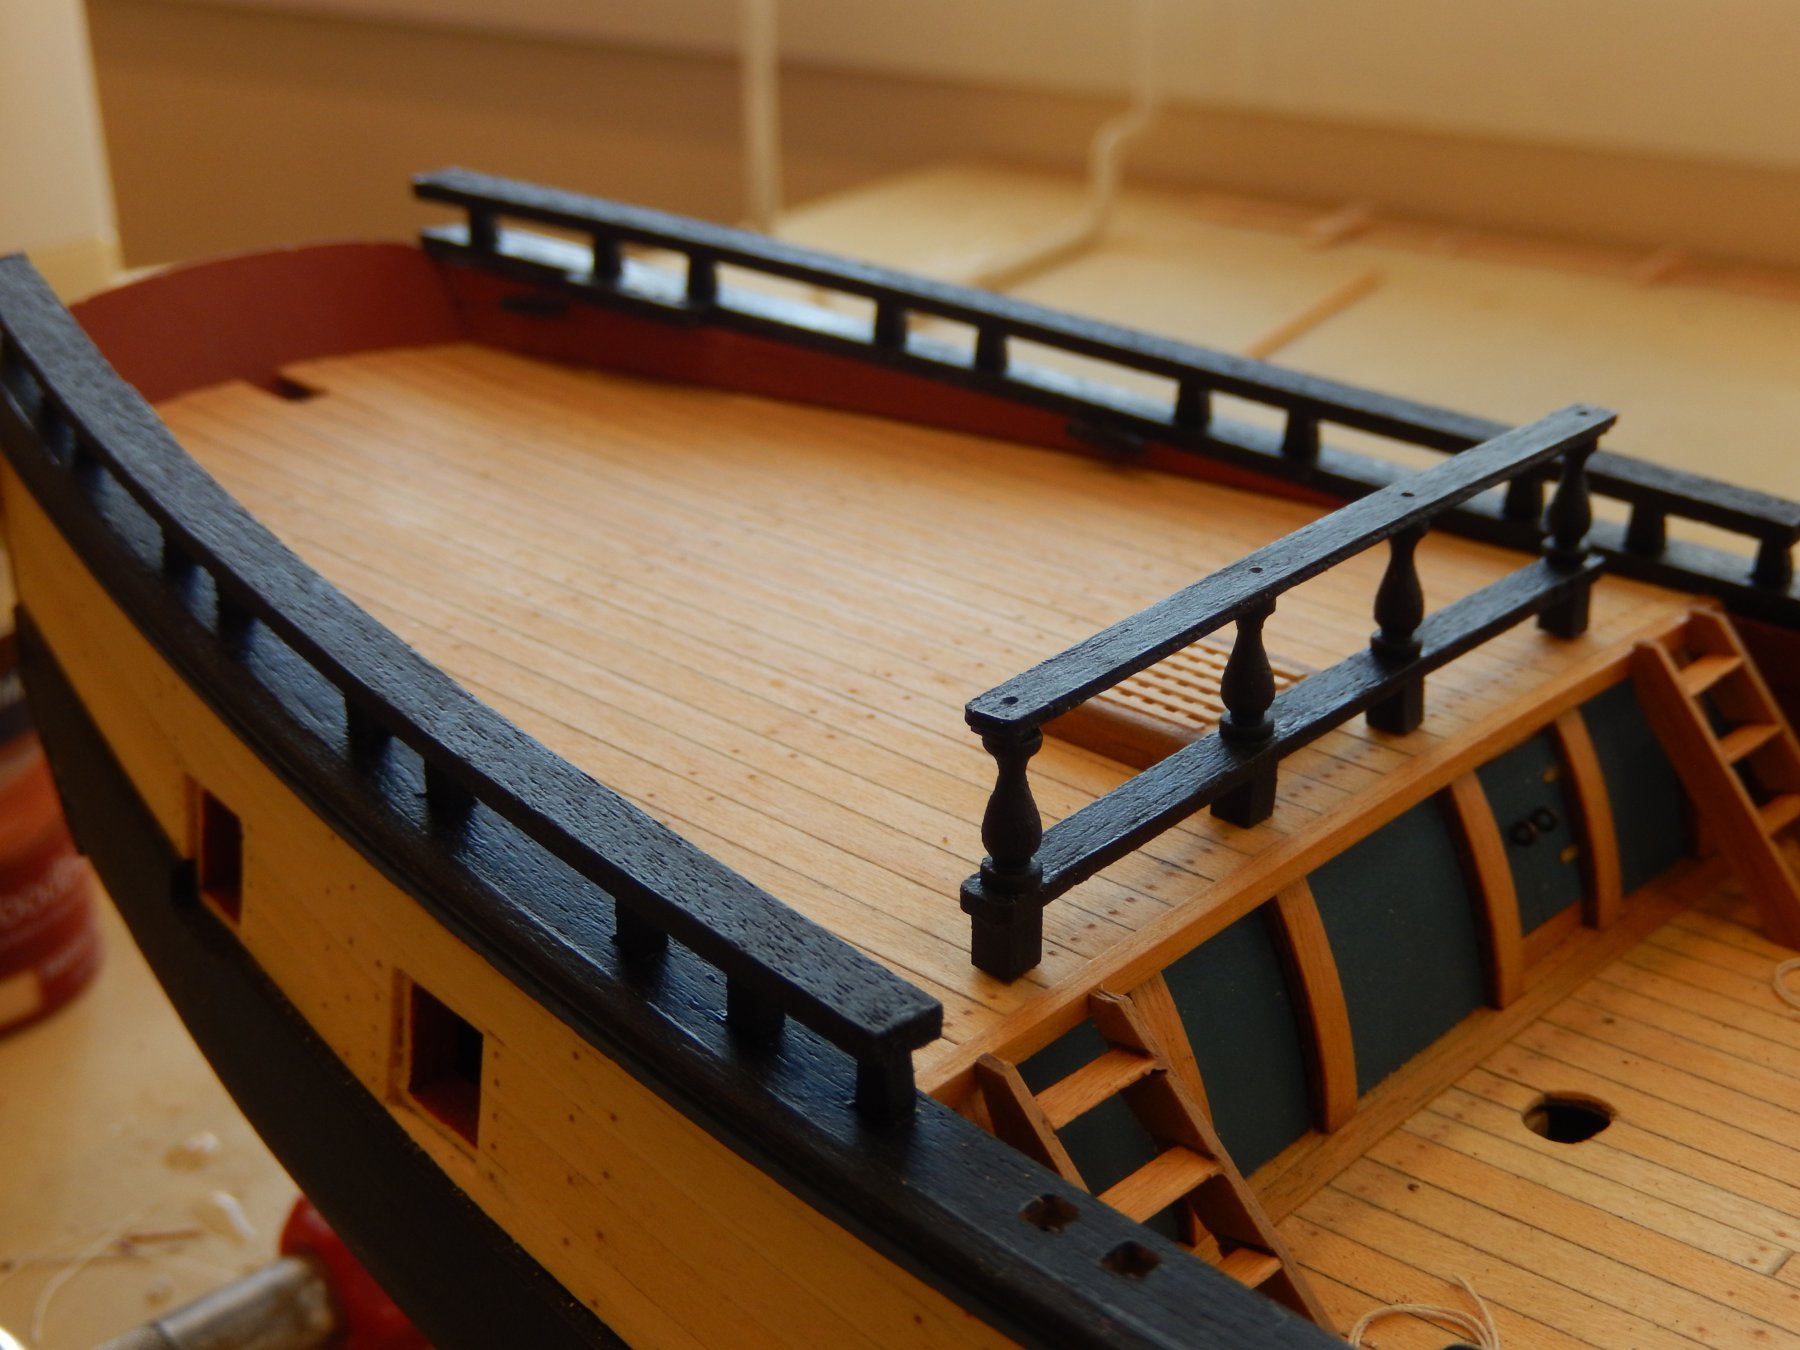
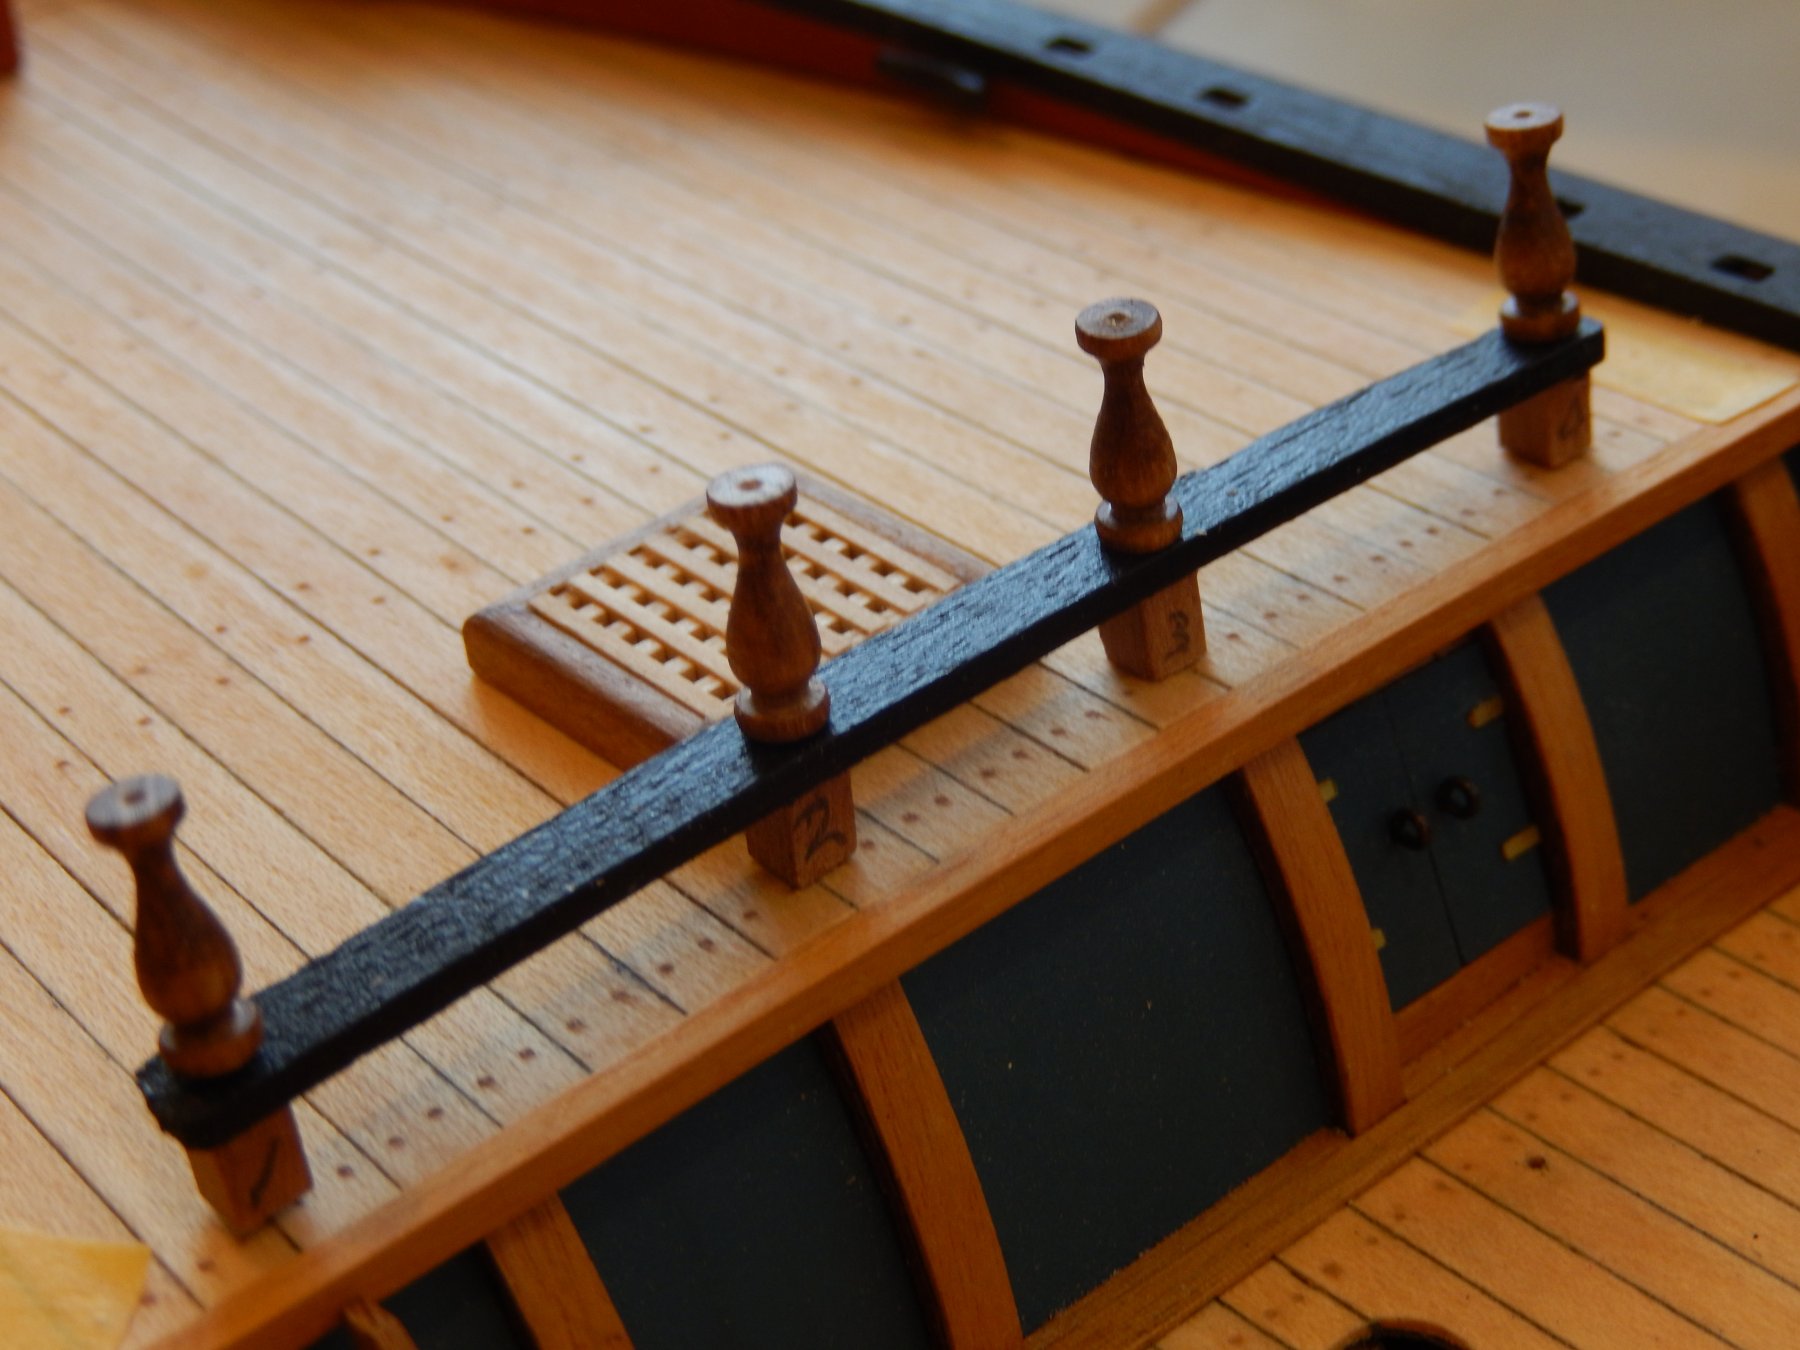
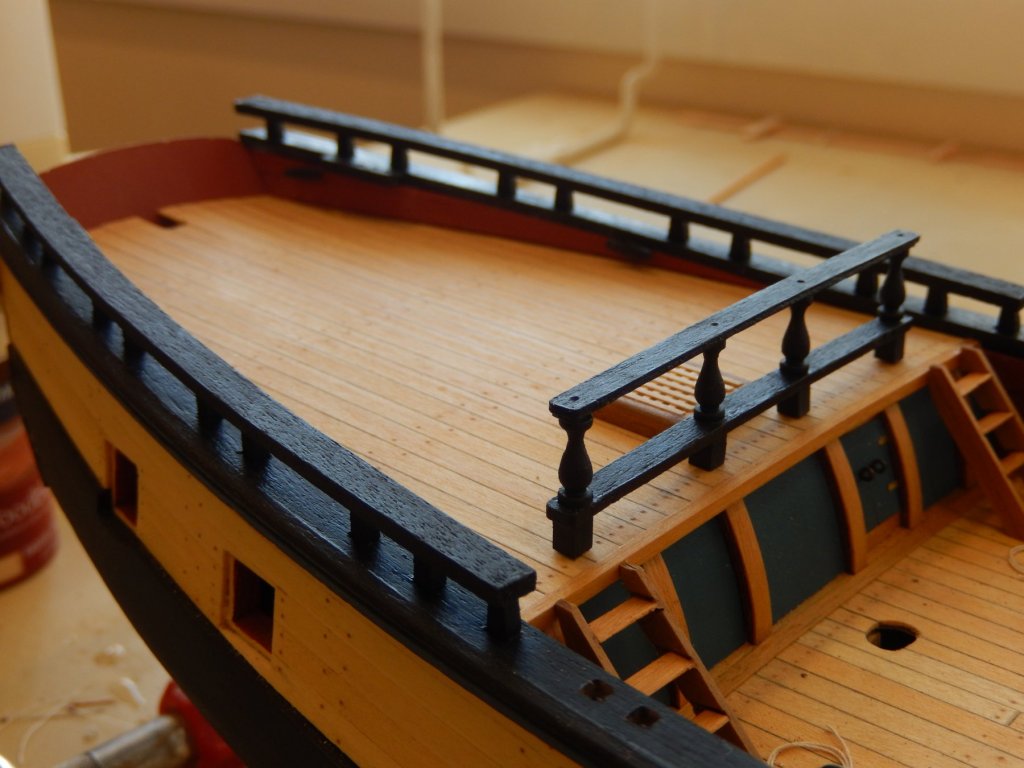
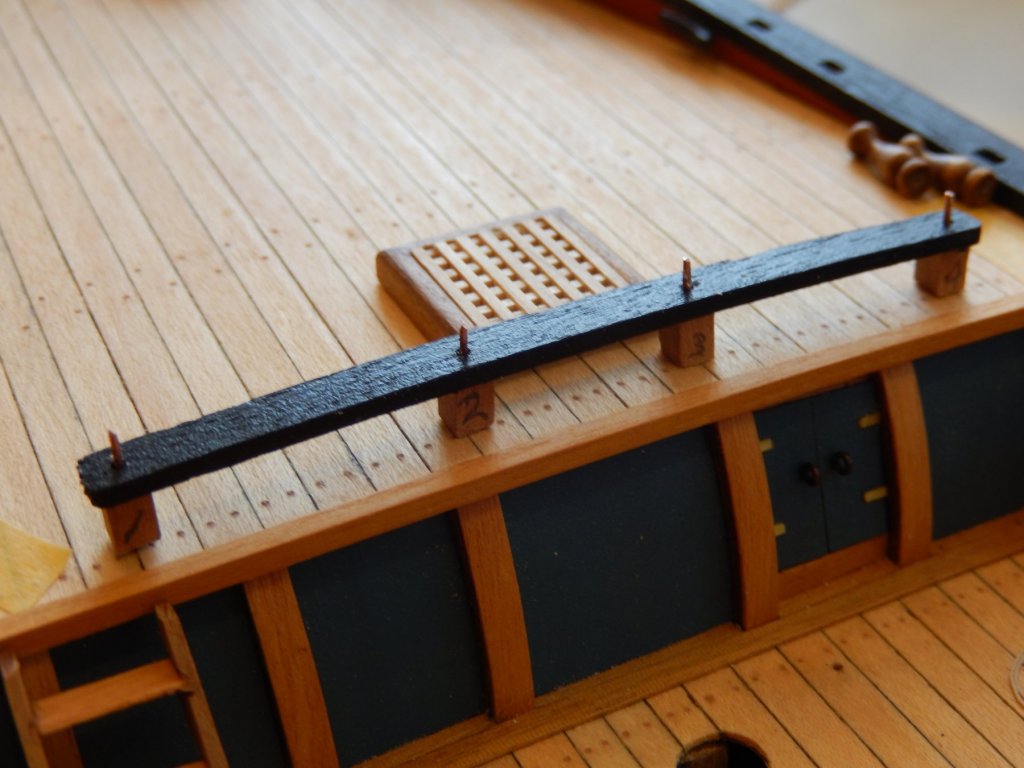
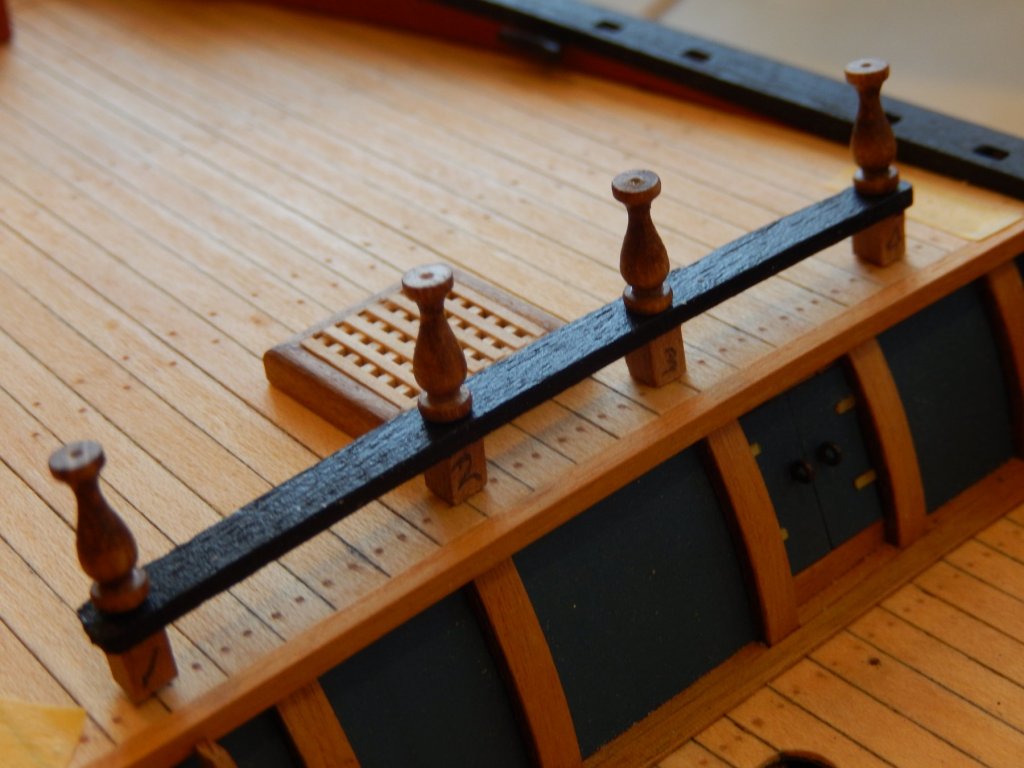
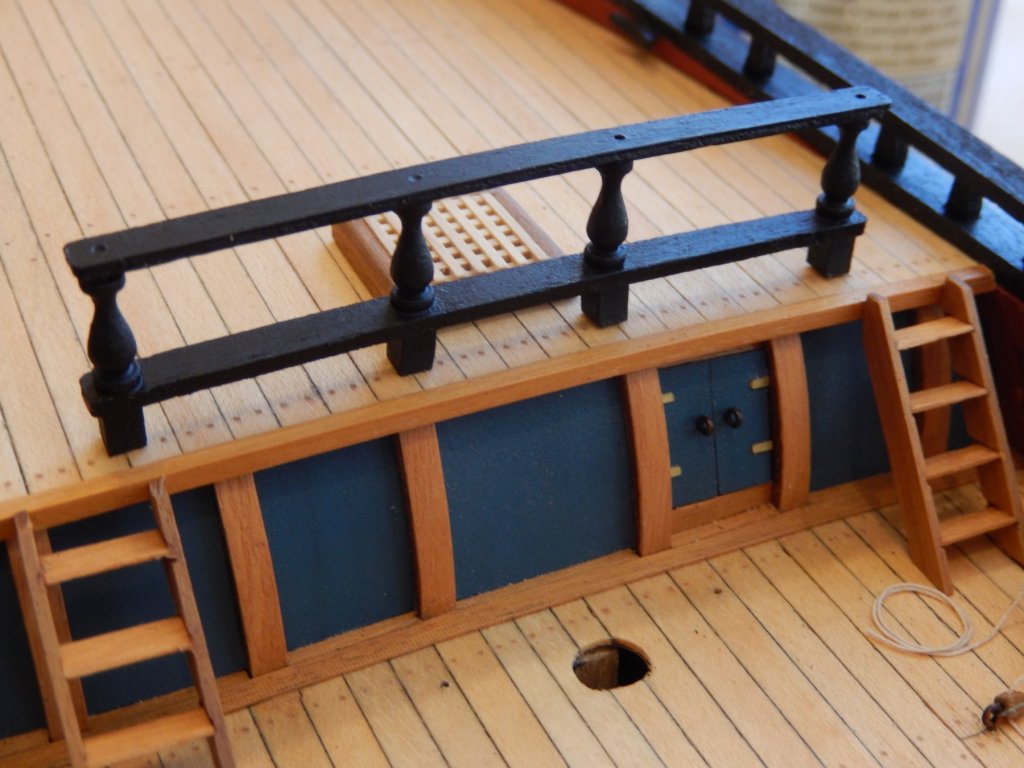
Here are the rough tree rails finished. The first photo shows a rail with the supports fitted (but not glued) to the holes on the capping. The supports had been fitted to the shallow holes provided in the rails. Fortunately those holes were too small. This enabled me to enlarge them using the dental drill bits so that the supports fitted into them very snugly, but allowing a little movement. They were taken out and drop of PVA was then put in the hole, and the supports reinserted. Before it sets, the PVA allows any slight adjustment necessary for the supports to fit the capping holes. The rail in the foreground is awaiting the PVA to finally dry. The rail in the background has dried and removed for painting. Incidentally it is an idea to soak the rails briefly before doing any of this so that you may easily bend it to conform with the curvature of the capping. Here both rails are complete. At this stage I will leave the barricade simply pinned rather than glued to the deck. Removing it may make for better access for rigging and it's easy to replace it.


- 421 replies
-
- 11
-
-
- caldercraft
- granado
- (and 1 more)
-
Peter: I have all of Patrick O'Brien's books and the audio books of the Aubrey/Maturin series. They're one of the great joys of reading. Progress has been a little slow of late. However the rough tree rail has now been finished and is now awaiting polyurethane to dry before finally gluing (photos to come). I have not followed the instructions. Gluing the timberheads in place first and then fitting them to the holes provided in the rail the rail is, I think, not the best way to go about it. Rather, the reverse works well, as it is far easier to glue (with PVA which allows some movement before setting) the timberheads into the small holes (in fact they were too small) provided in the rail, and then adjust and fit the timberheads into the larger holes (again, not large enough) in the capping. (More on this with the photos.) The forecastle timberheads have been painted and dry-fitted. The holed provided for them in the capping were far too small and had to be enlarged significantly. My dentist's drill bits came to the rescue again. With hindsight this could have been done far easier had the timberheads been dry-fitted before the capping had been fitted.
- 421 replies
-
- 1
-
-
- caldercraft
- granado
- (and 1 more)
-
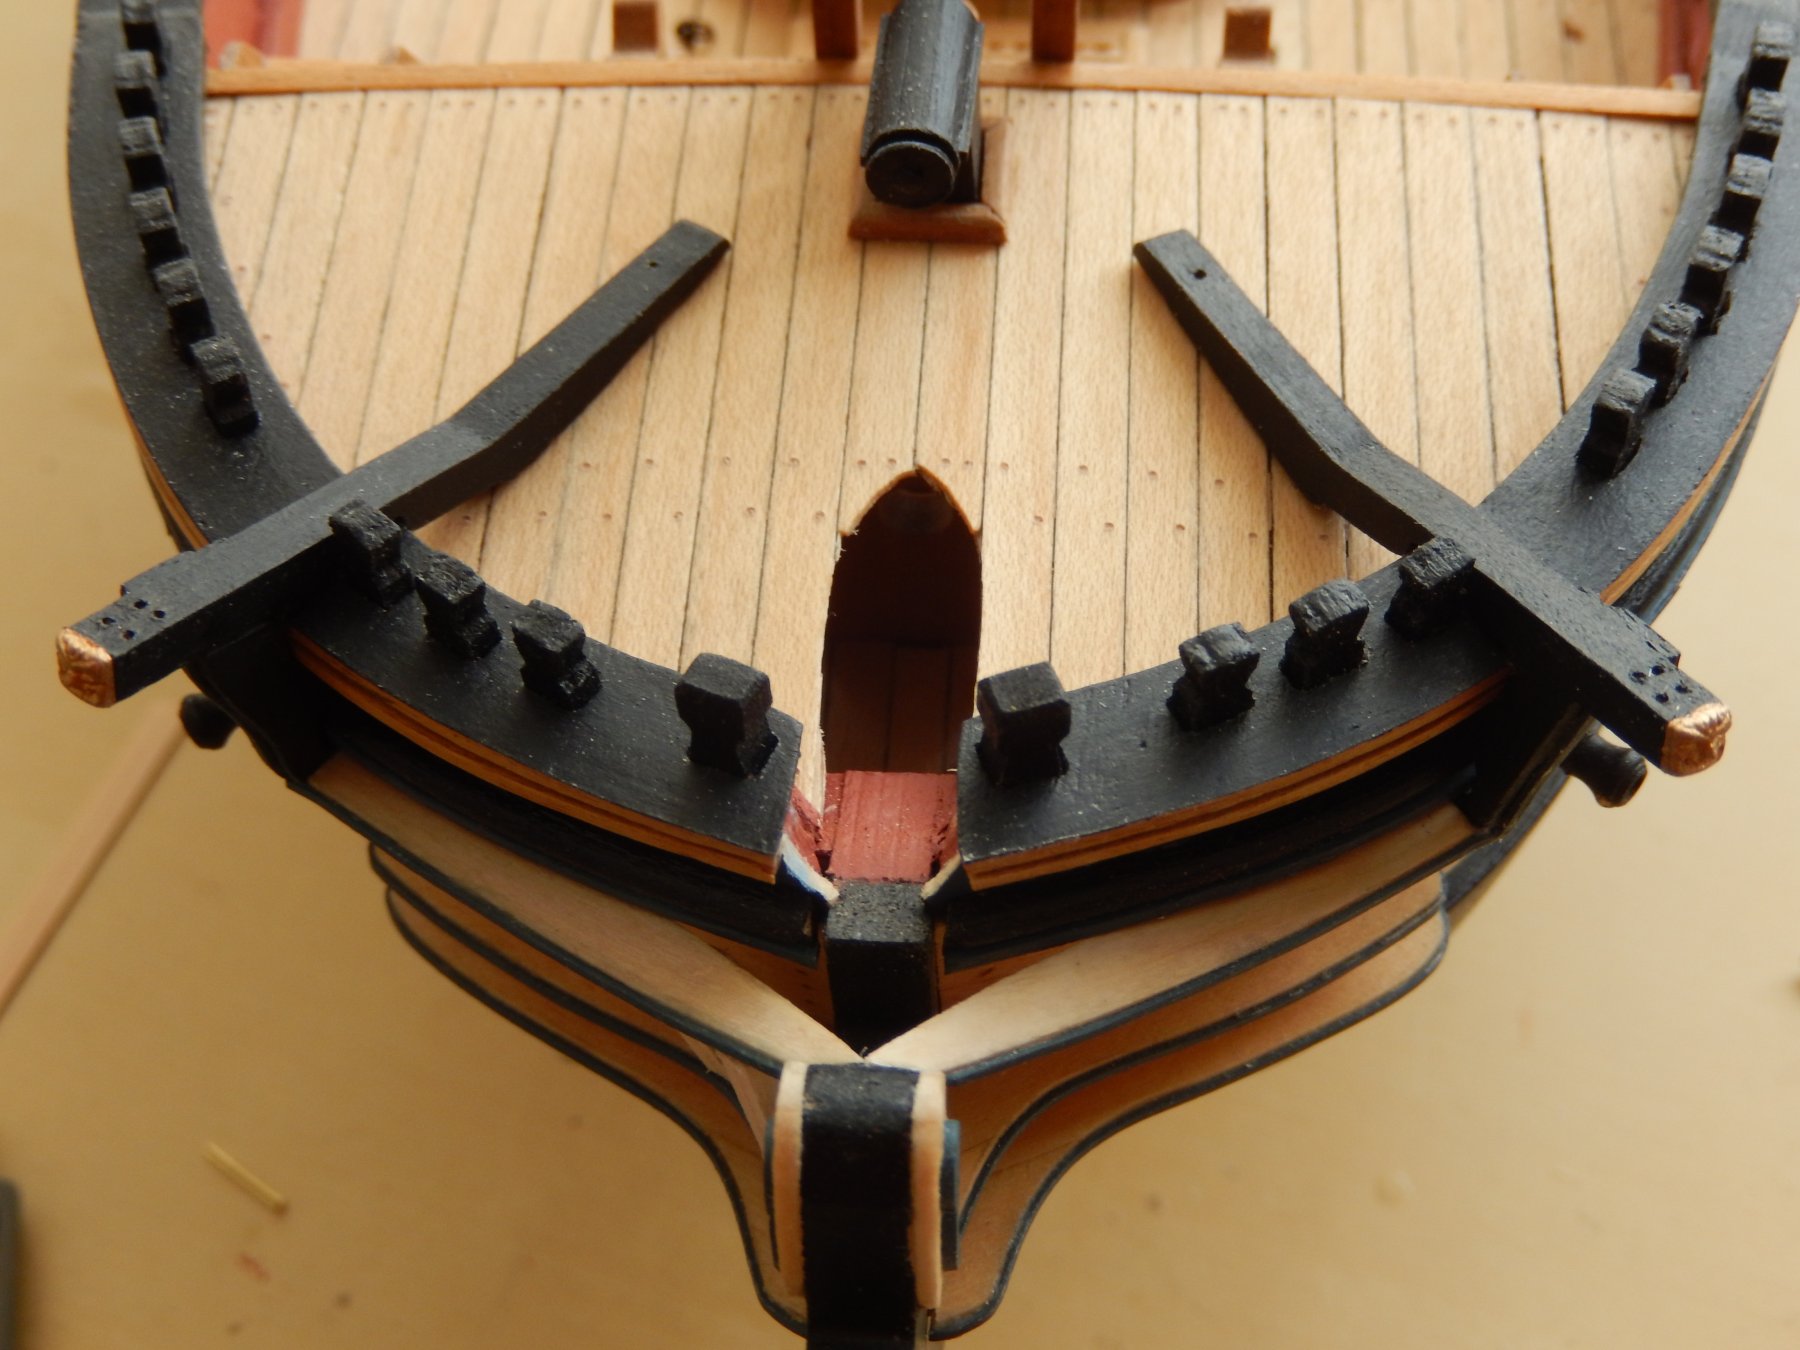
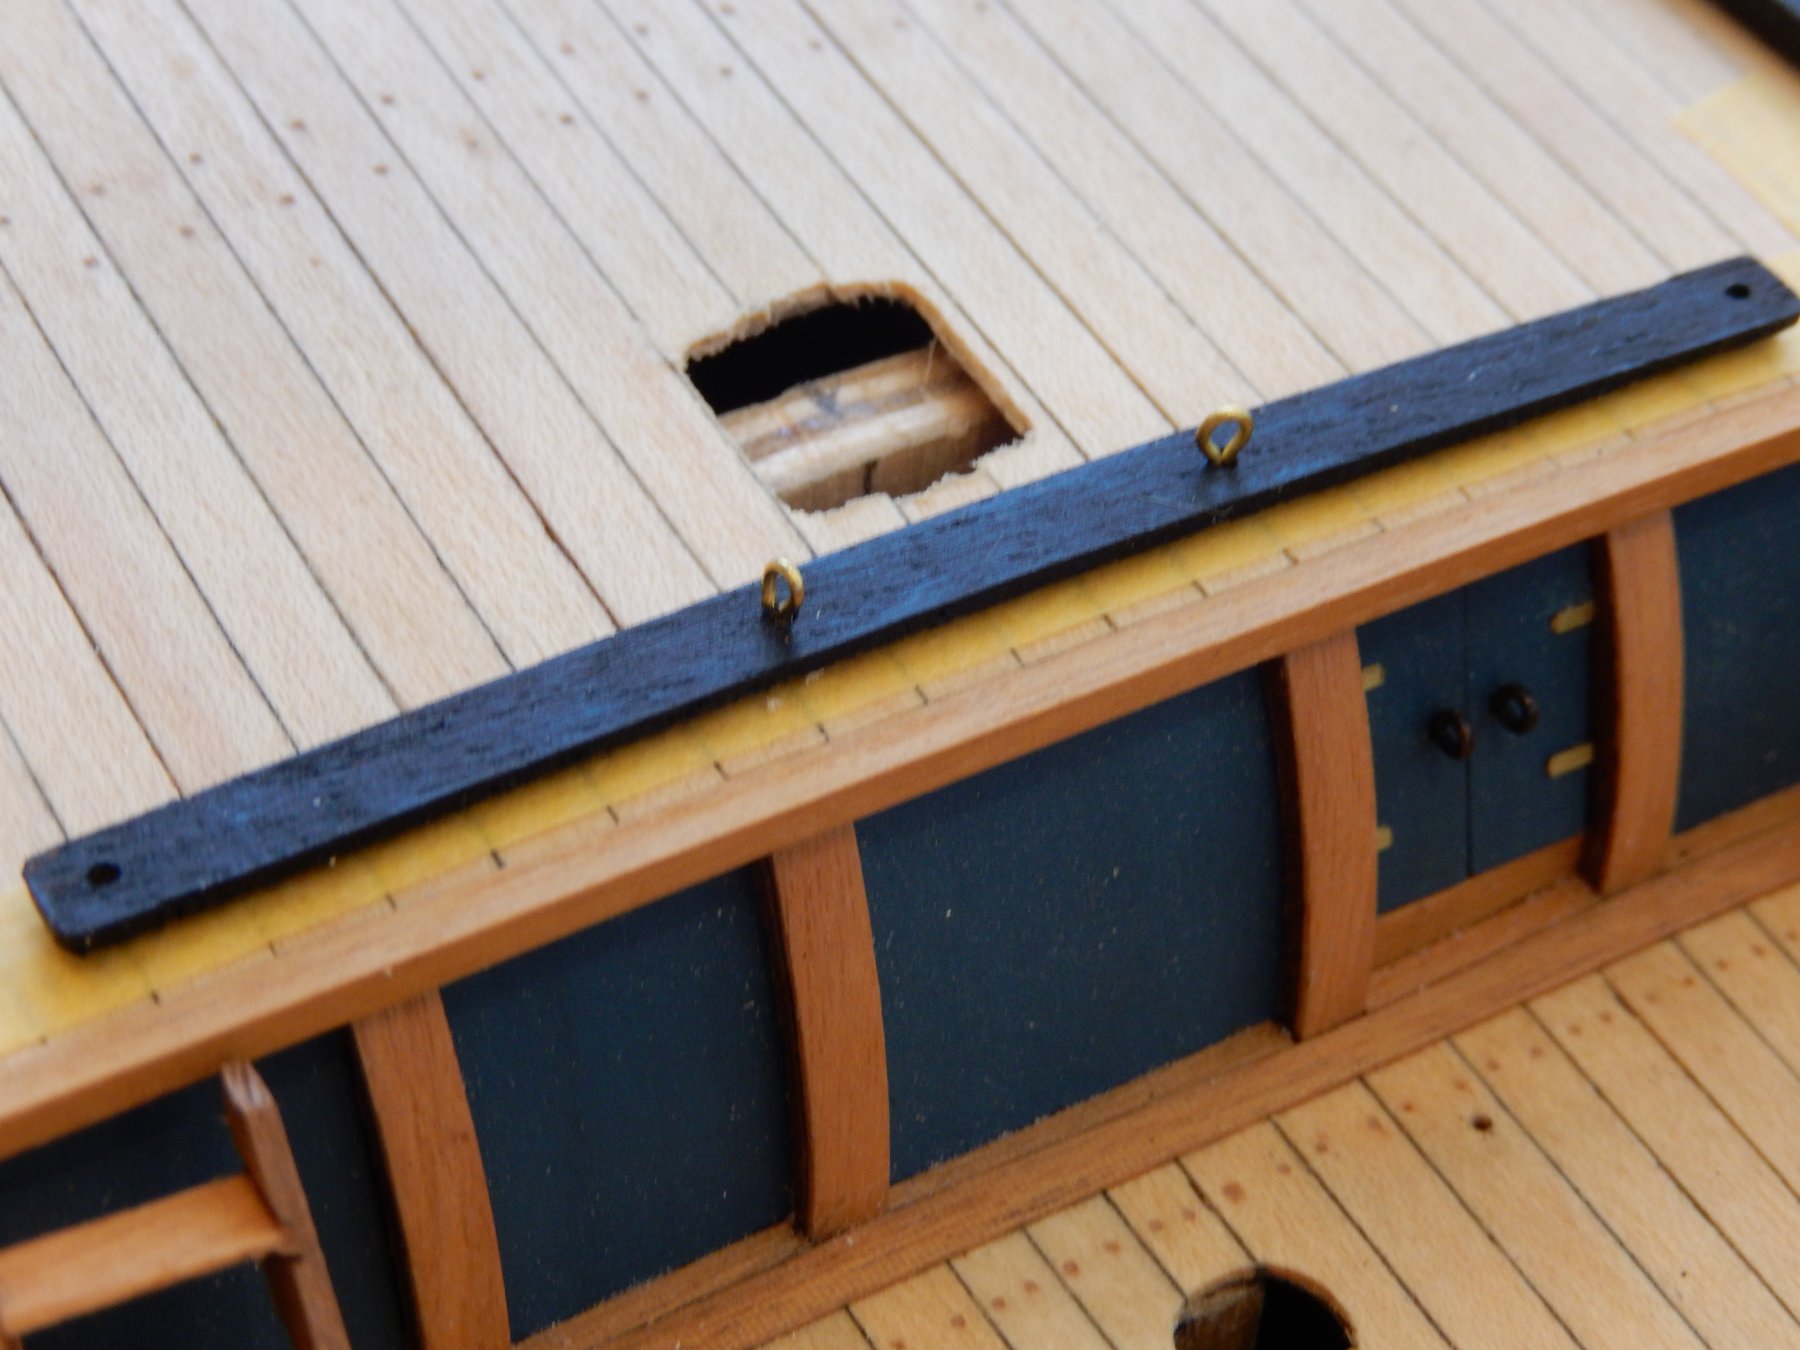
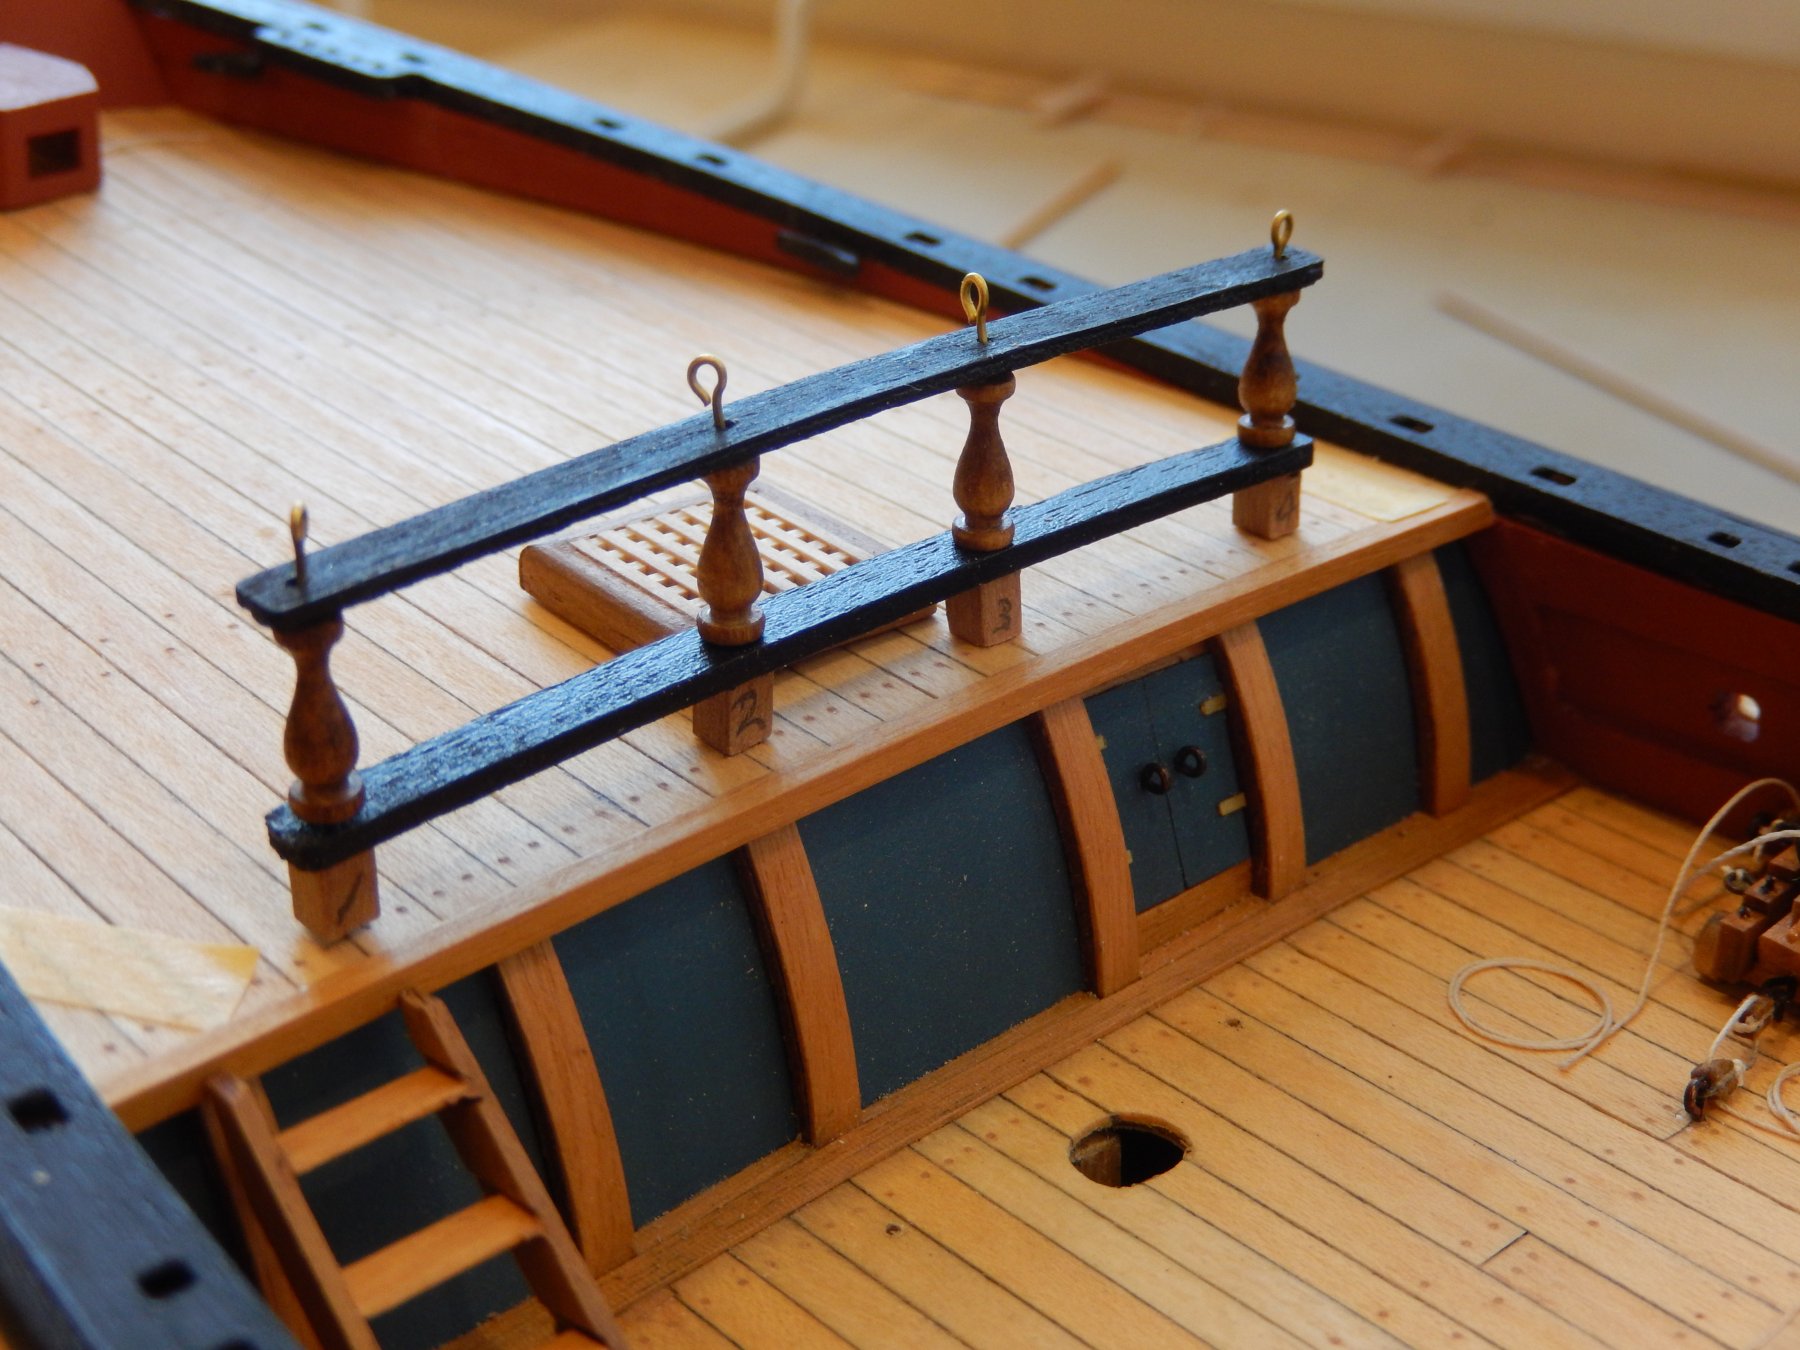
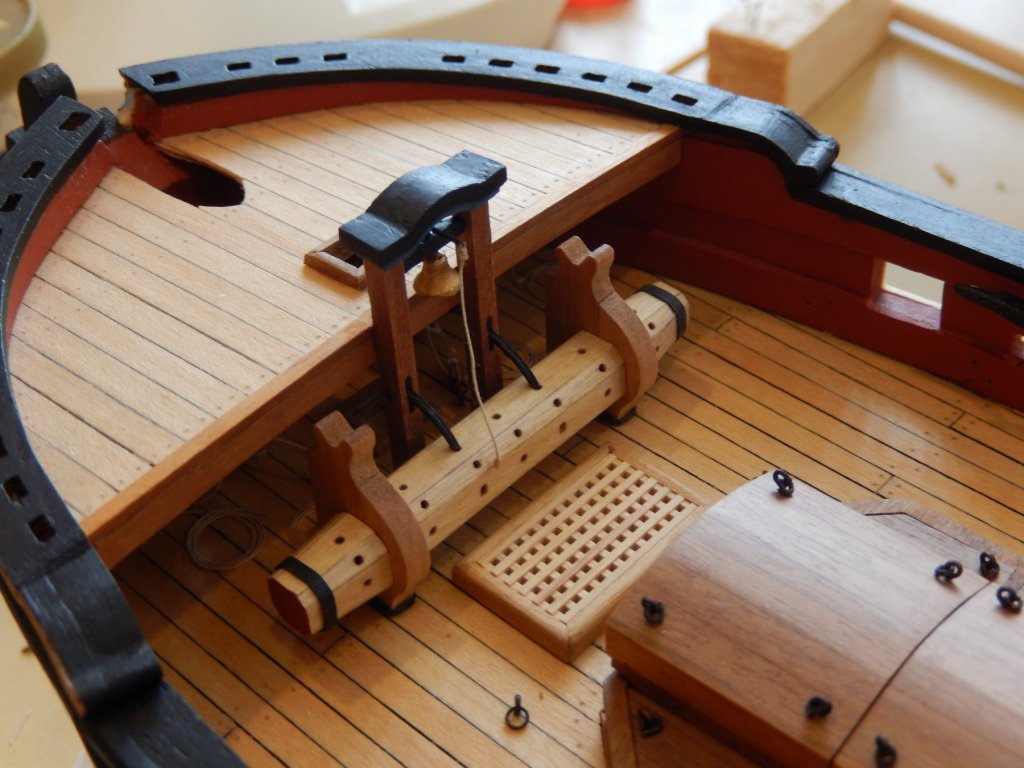
Perhaps it was your wet feet that inspired you. Your configuration certainly works, though as you say, 3 and 4 are probably a bit tight. I don't suppose there is any record of this sort of rearrangement. It sounds a bit too sensible. On another subject: here is the delayed quarterdeck barricade construction. First, both cross-members were bent to the curvature of the deck well before construction by clamping them to the bulkhead pattern. The square supports were drilled top to bottom and copper wire inserted through the holes to locate the supports on the deck and the pillars. Similarly holes were drilled in the tops of the pillars to receive wire supports. The whole structure could then be removed and painted off the model.


- 421 replies
-
- 12
-
-
- caldercraft
- granado
- (and 1 more)
-
Euralex: I agree. The decals are terrible. They make the model look more a toy. I had thought to try painting, but given the problems I had with the Tamiya blue paint (see earlier in my log), I decided on prudence. I am quite happy with the result as it is. I have read somewhere (?) that there is an alternative treatment where timber planks are laid across the deck to make up the bulkhead rather than the painted panels. I think Rafine has done this. In any event, evidently no one really knows what the colour scheme was, so perhaps there weren't any painted pictures anyway. Peter. Good to hear from you. I agree with you too. There just isn't room for the guns as specified to properly operate. Oddly enough, I had the same thought as you regarding the pumps and wet feet. Moreover one of them impedes access to the doors in the bulkhead. But aside from that .....
-
The quarterdeck barricade is quite a difficult little project. I was going to go through the steps to put it all together but the speed of of the file uploads was so glacial that I would be here until Christmas - so another time.
- 421 replies
-
- 1
-
-
- caldercraft
- granado
- (and 1 more)
-
Uralex. Thanks for the comment. I have been quite unhappy about the rope coils. Unfortunately it's too late to duplicate your excellent work I have no desire to rig guns again any time soon - perhaps ever. However I have redone my coils and am happier with the result. They are now far smaller and less intrusive. Photos to come.
- 421 replies
-
- 1
-
-
- caldercraft
- granado
- (and 1 more)
-
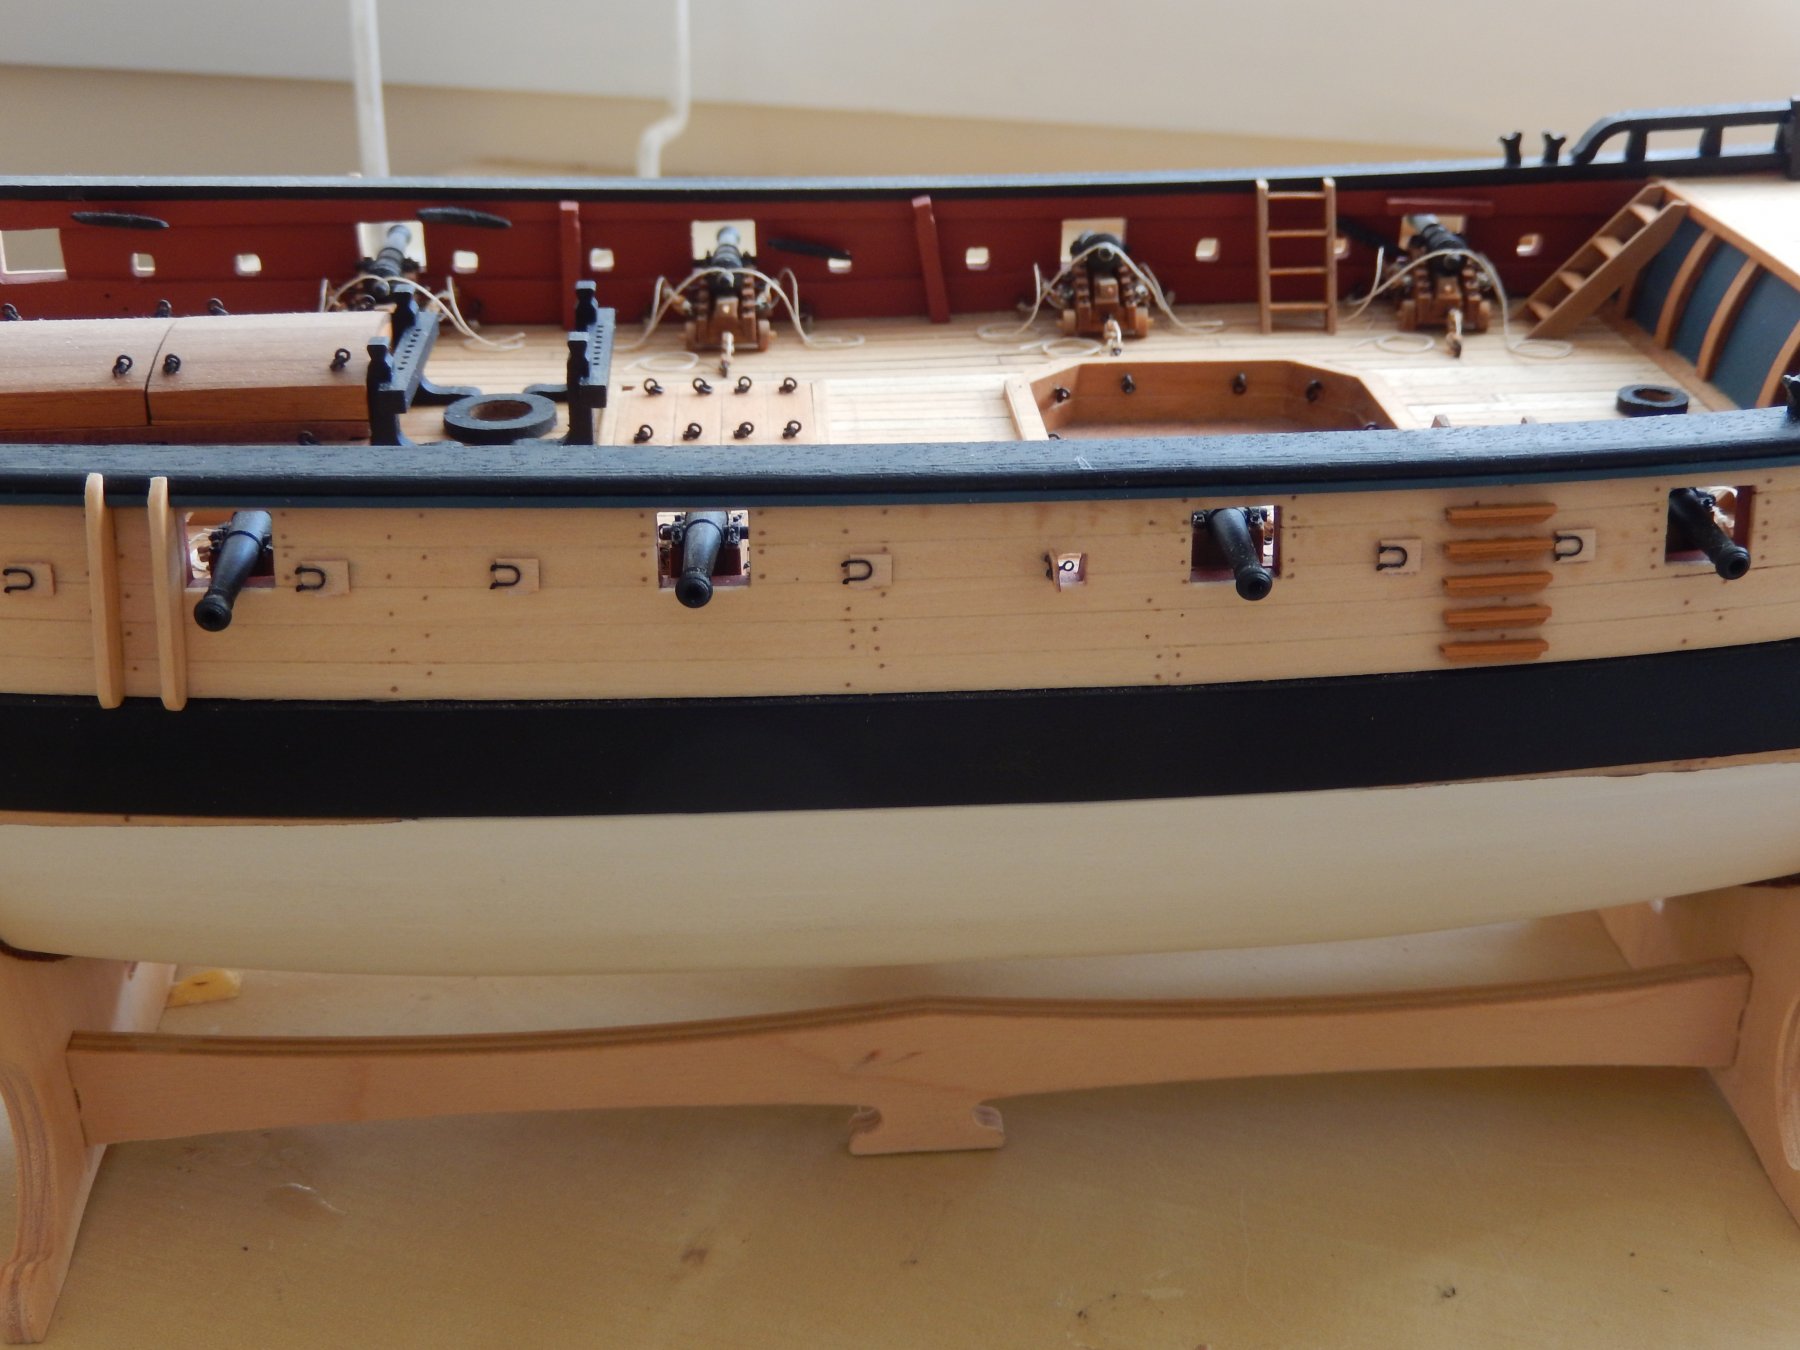
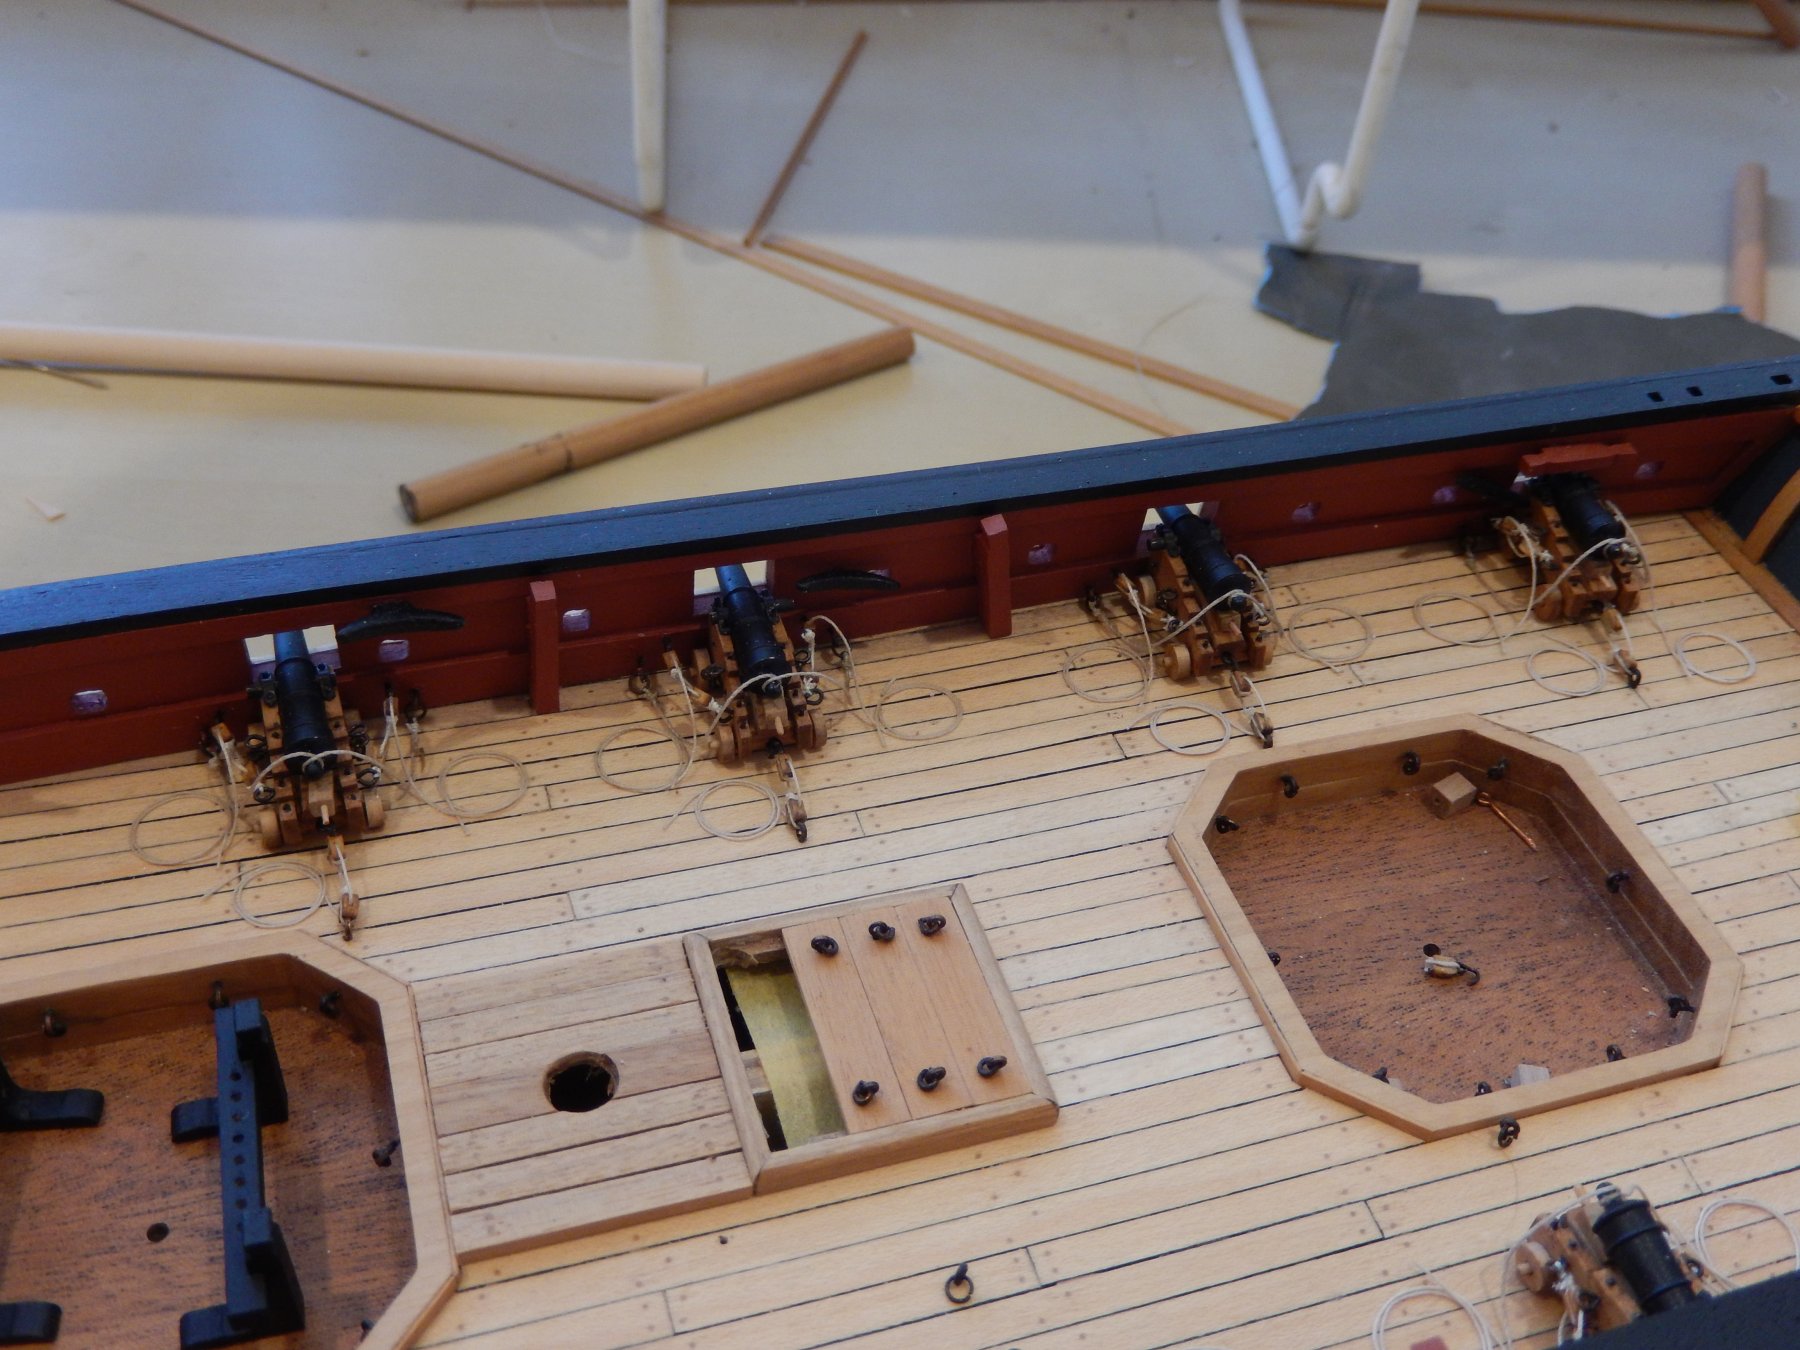
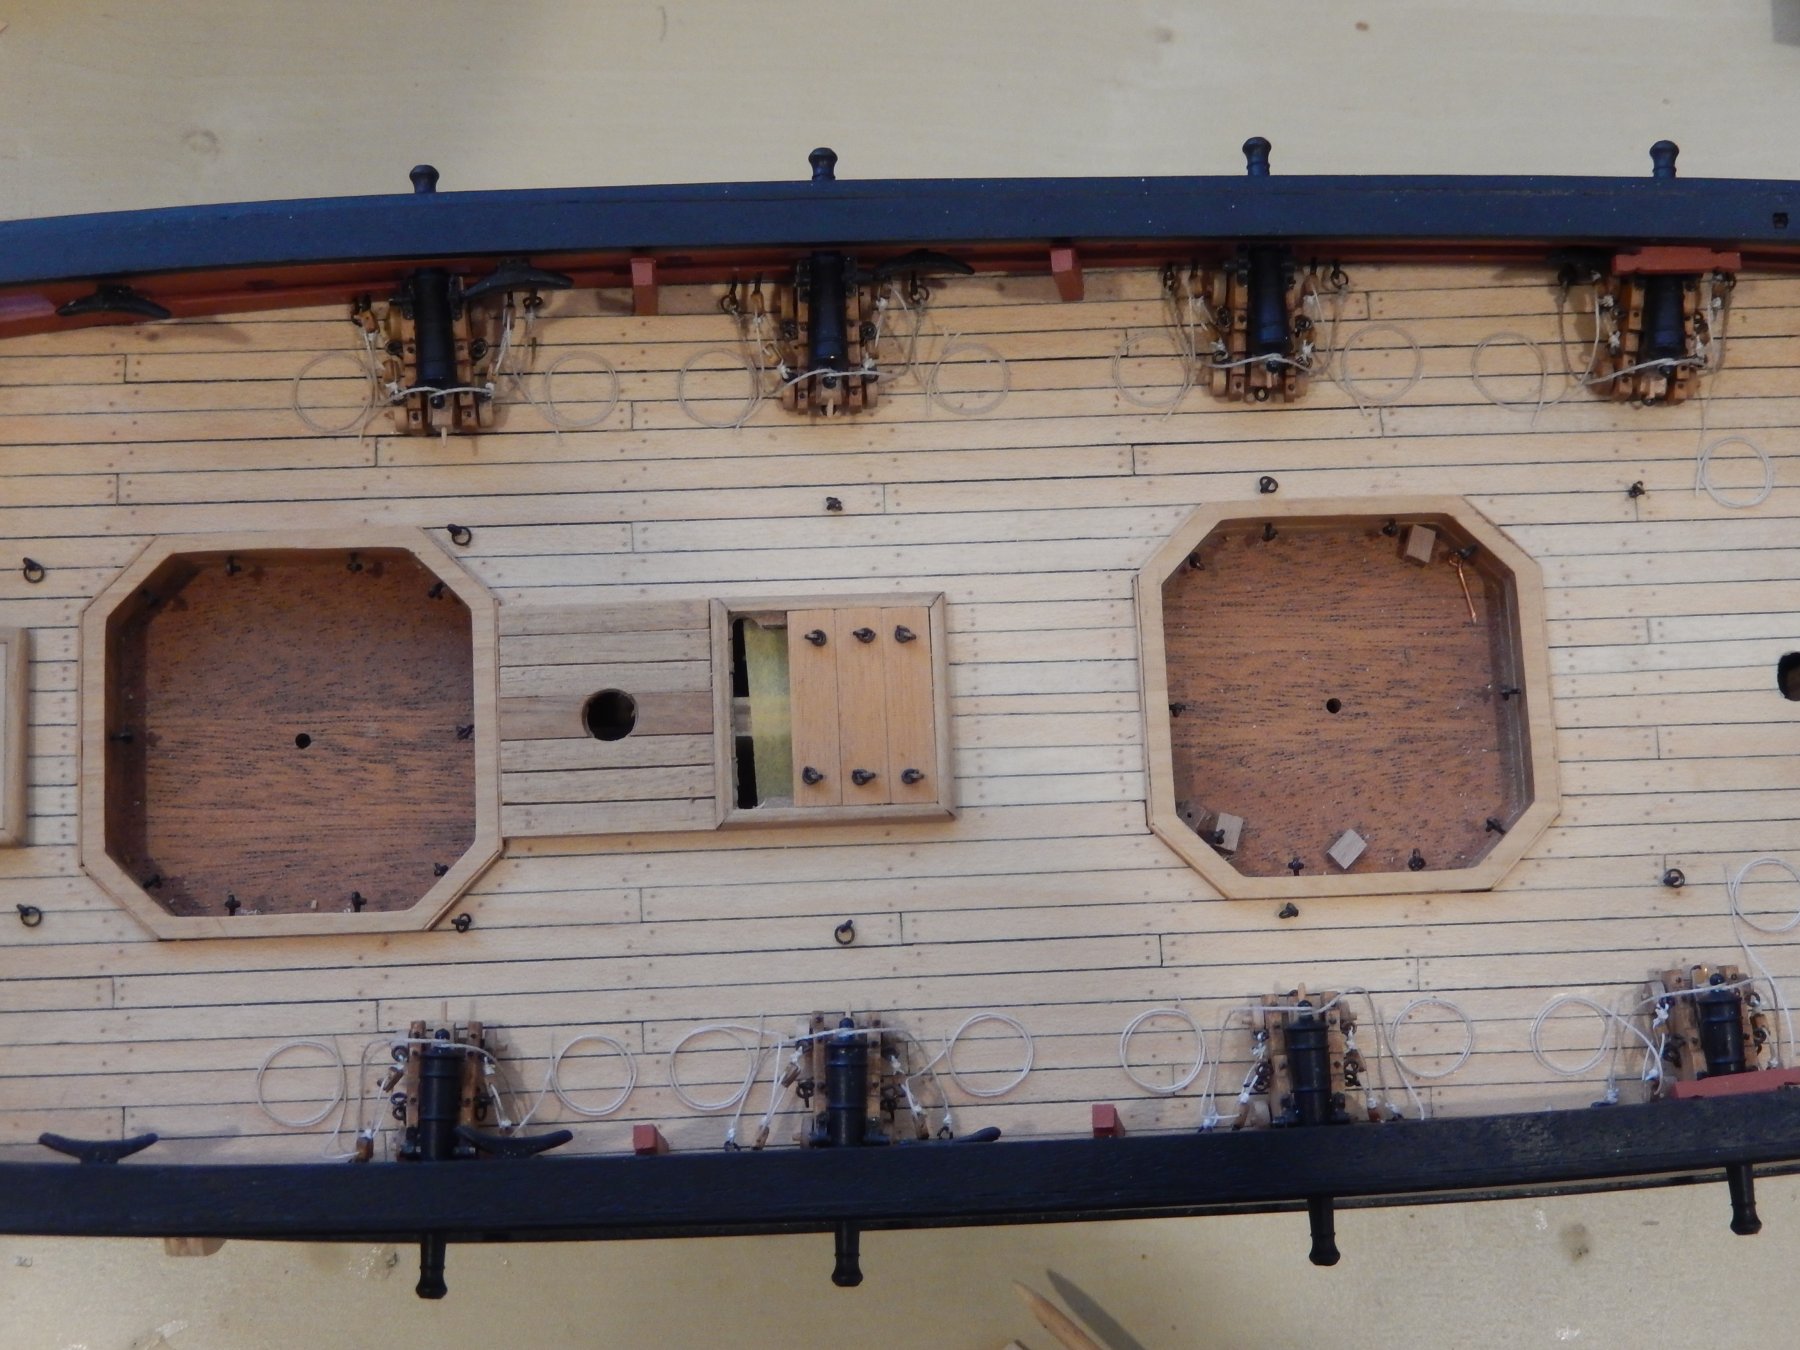
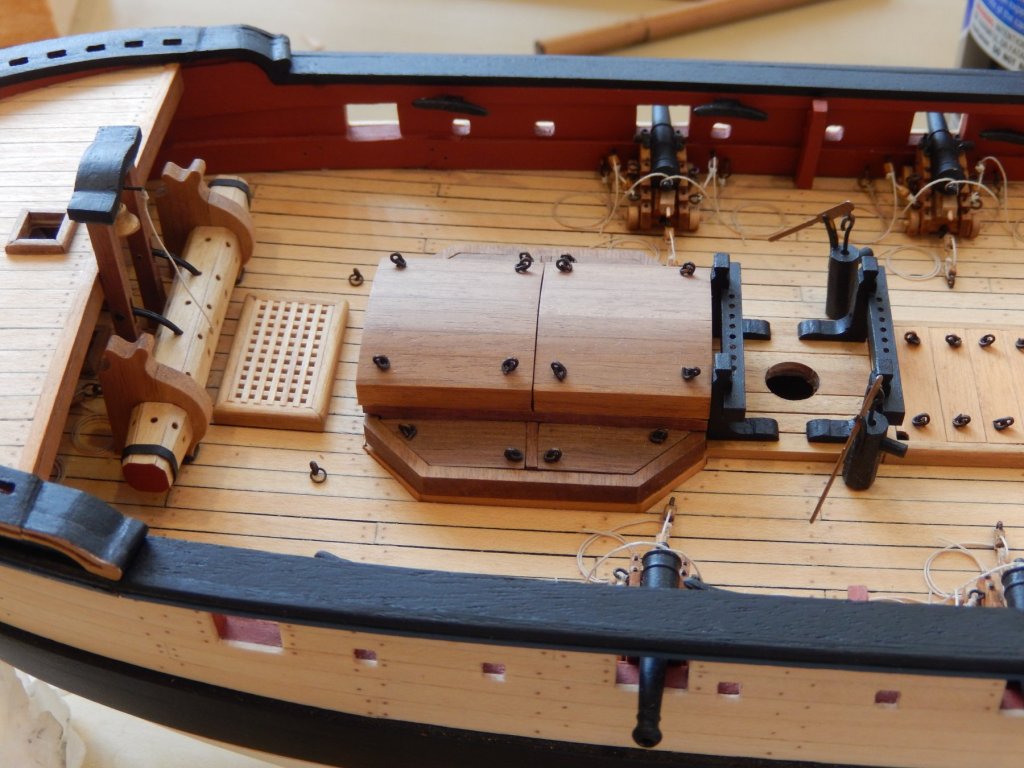
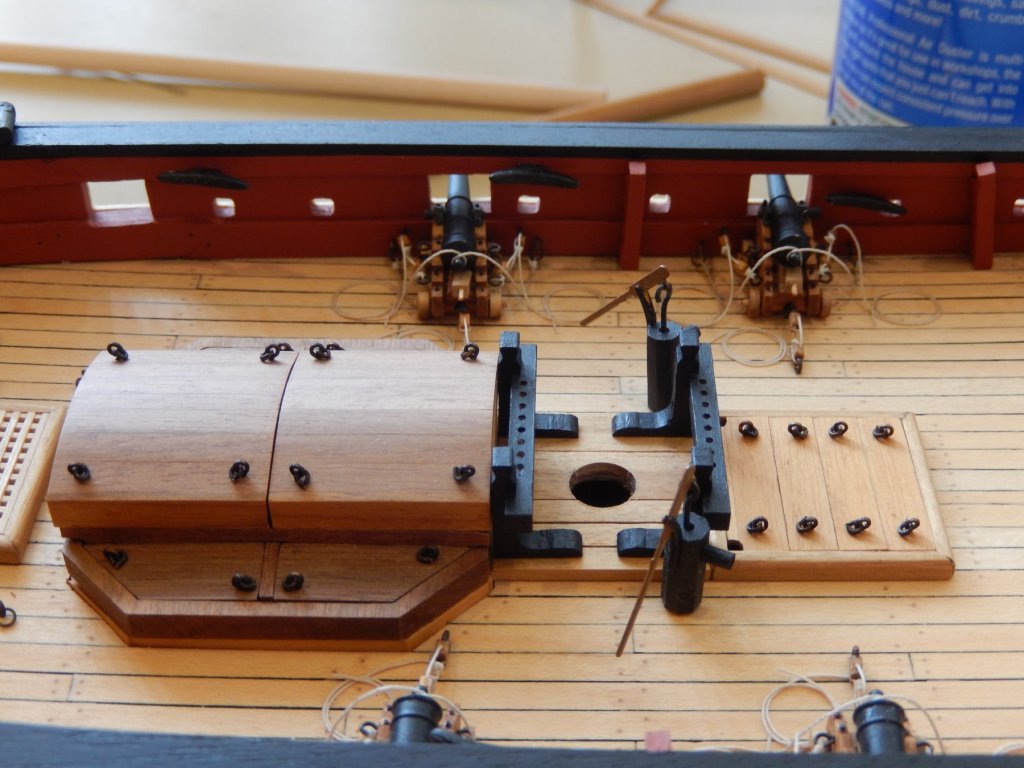
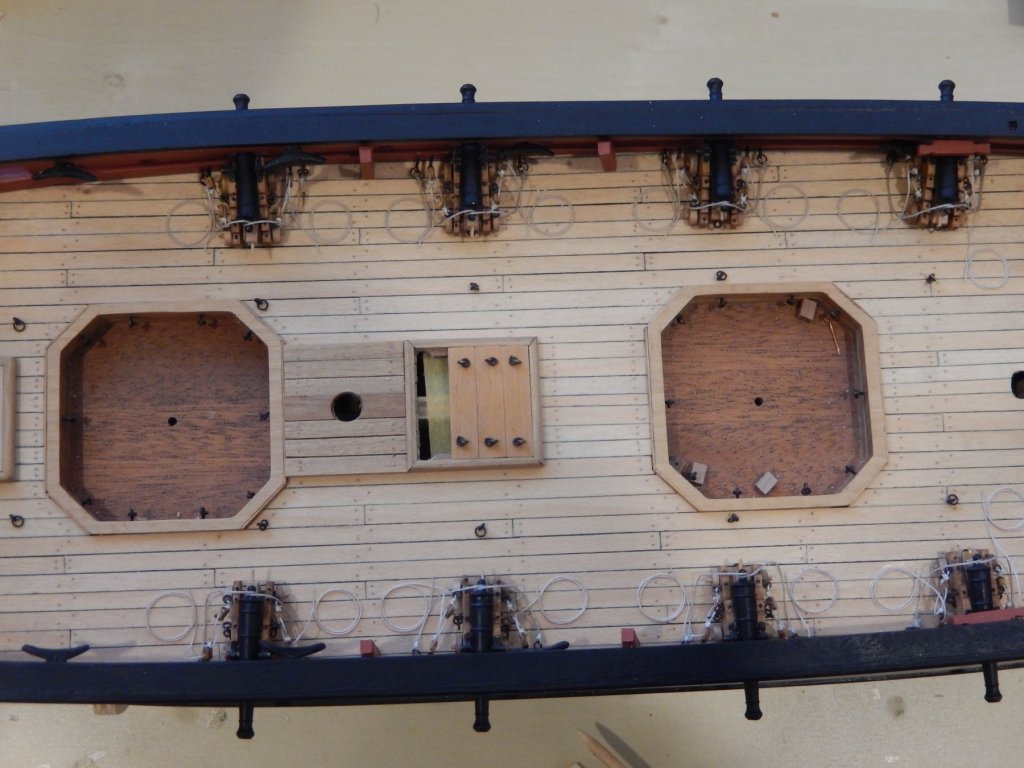
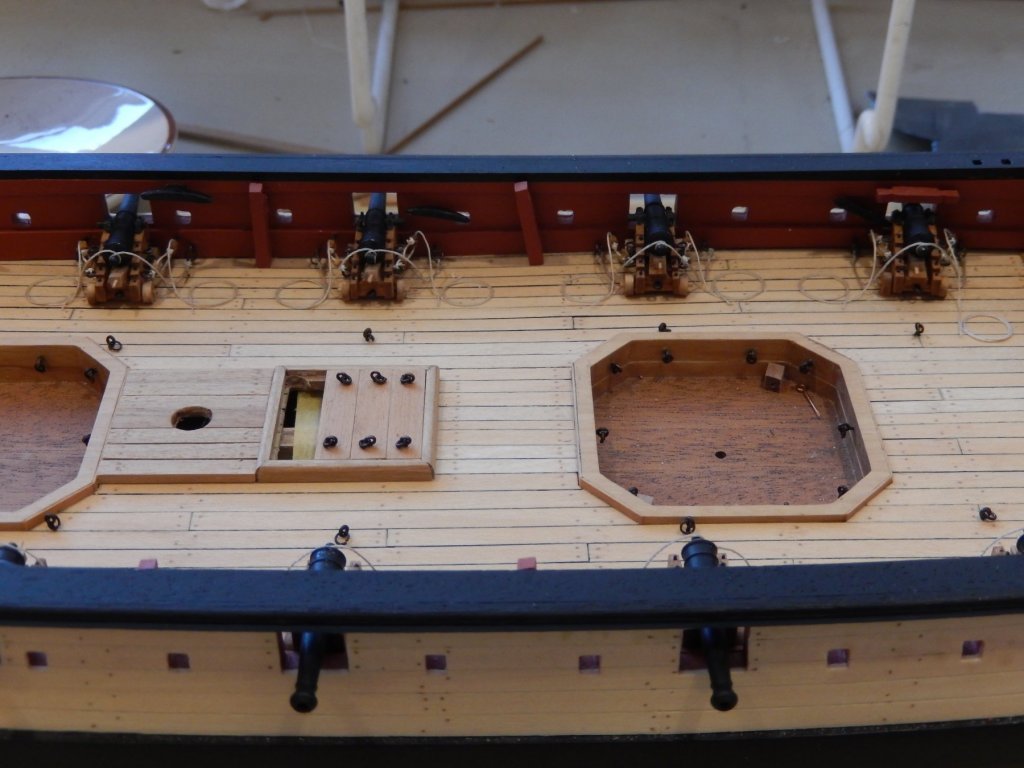
The guns are now finished. The belfry and the windlass are fitted and glued. I have dry-fitted the remaining deck furniture shown in the photos just to see how things will look. With ropes and other bits and pieces it is very crowded indeed. To me, the ship seems to be more dangerous to the crew than the enemy.
- 421 replies
-
- 13
-
-
- caldercraft
- granado
- (and 1 more)
-
The traversing tackle is now complete on one side and the other will be finished tomorrow. The result is adequate. I hope the shortcomings will be overshadowed by the various bits of deck furniture (most or all of which is finished).

- 421 replies
-
- 7
-
-
- caldercraft
- granado
- (and 1 more)
-
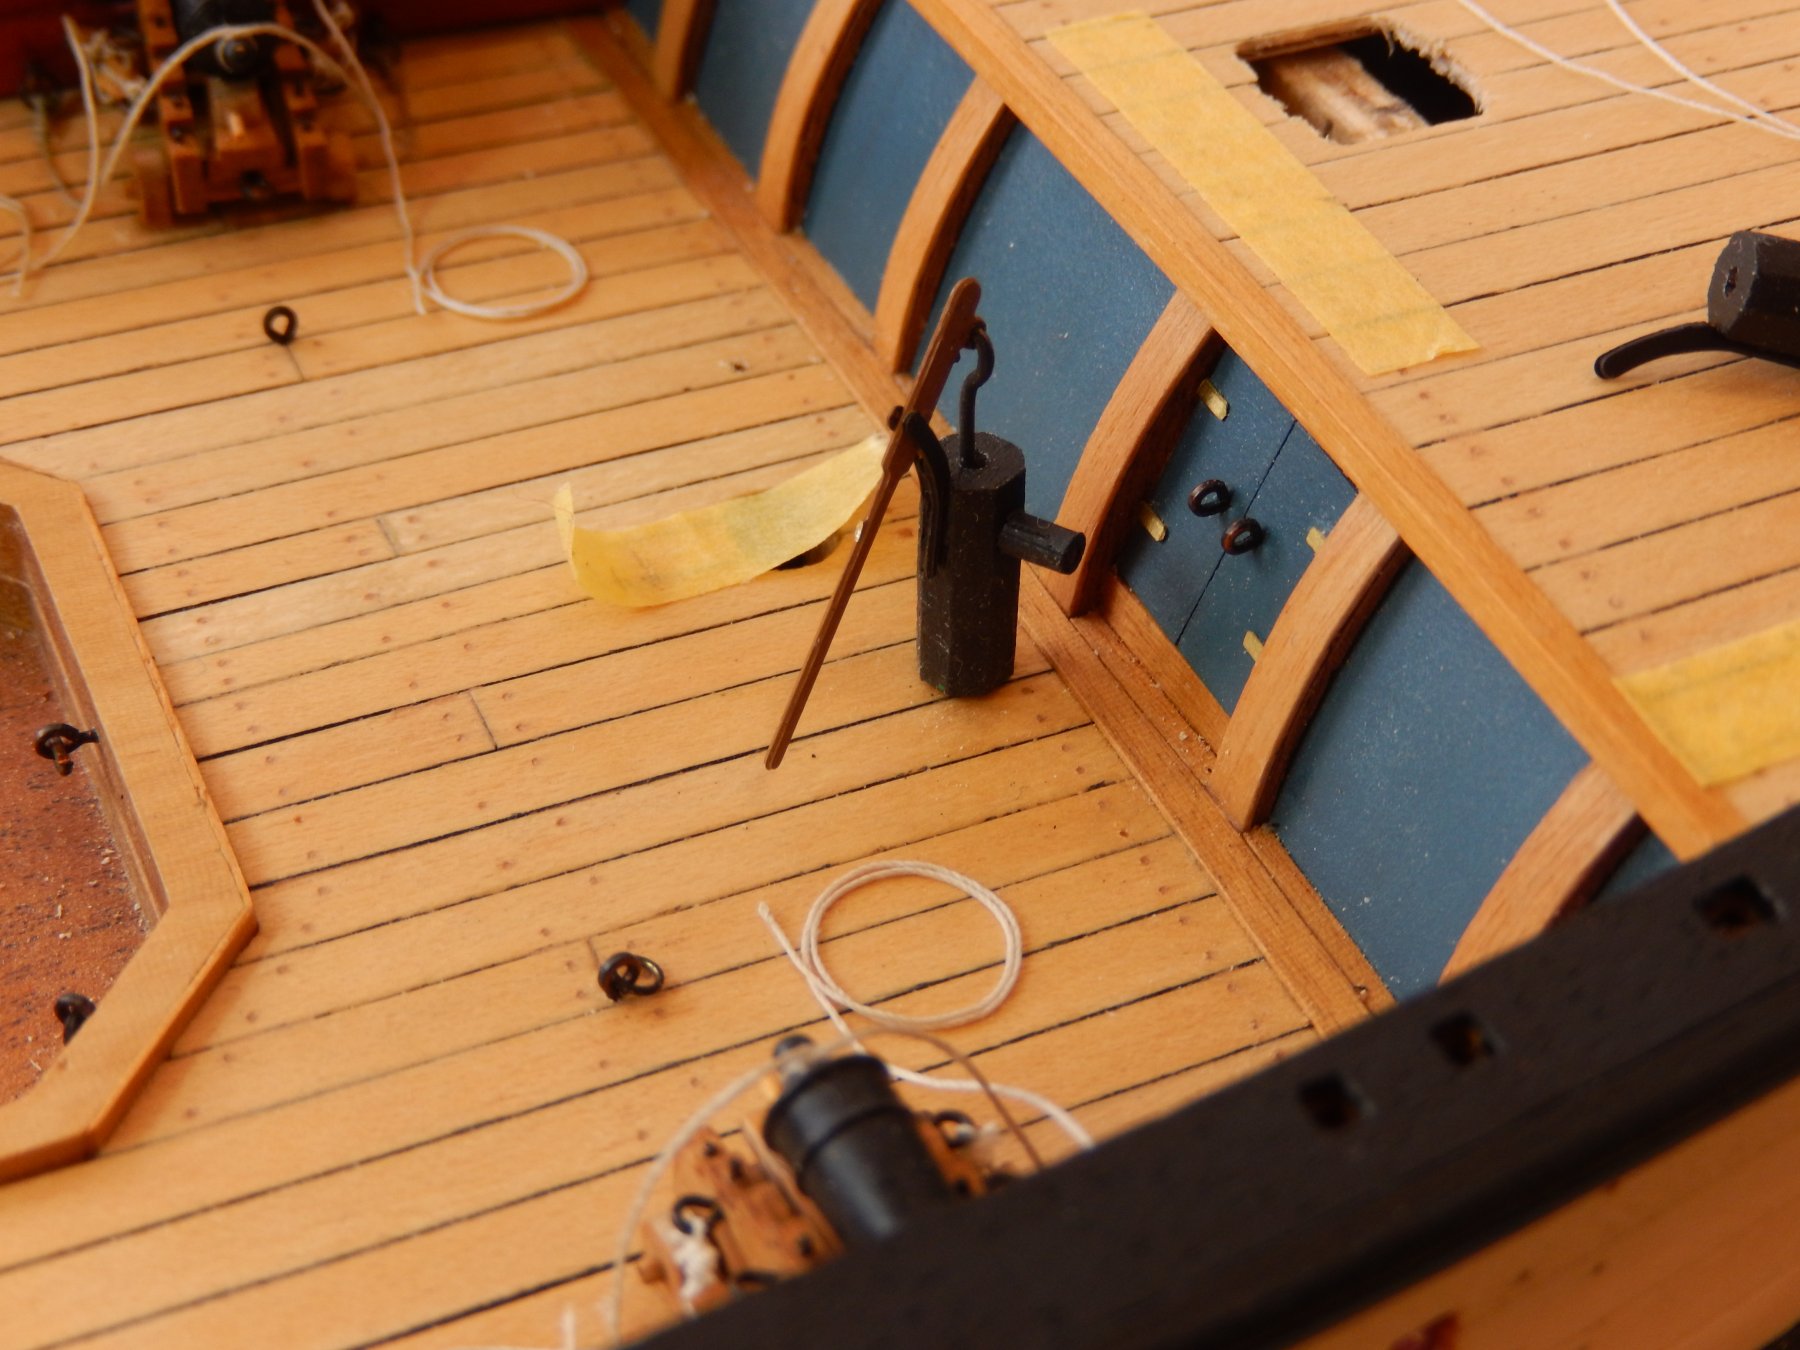
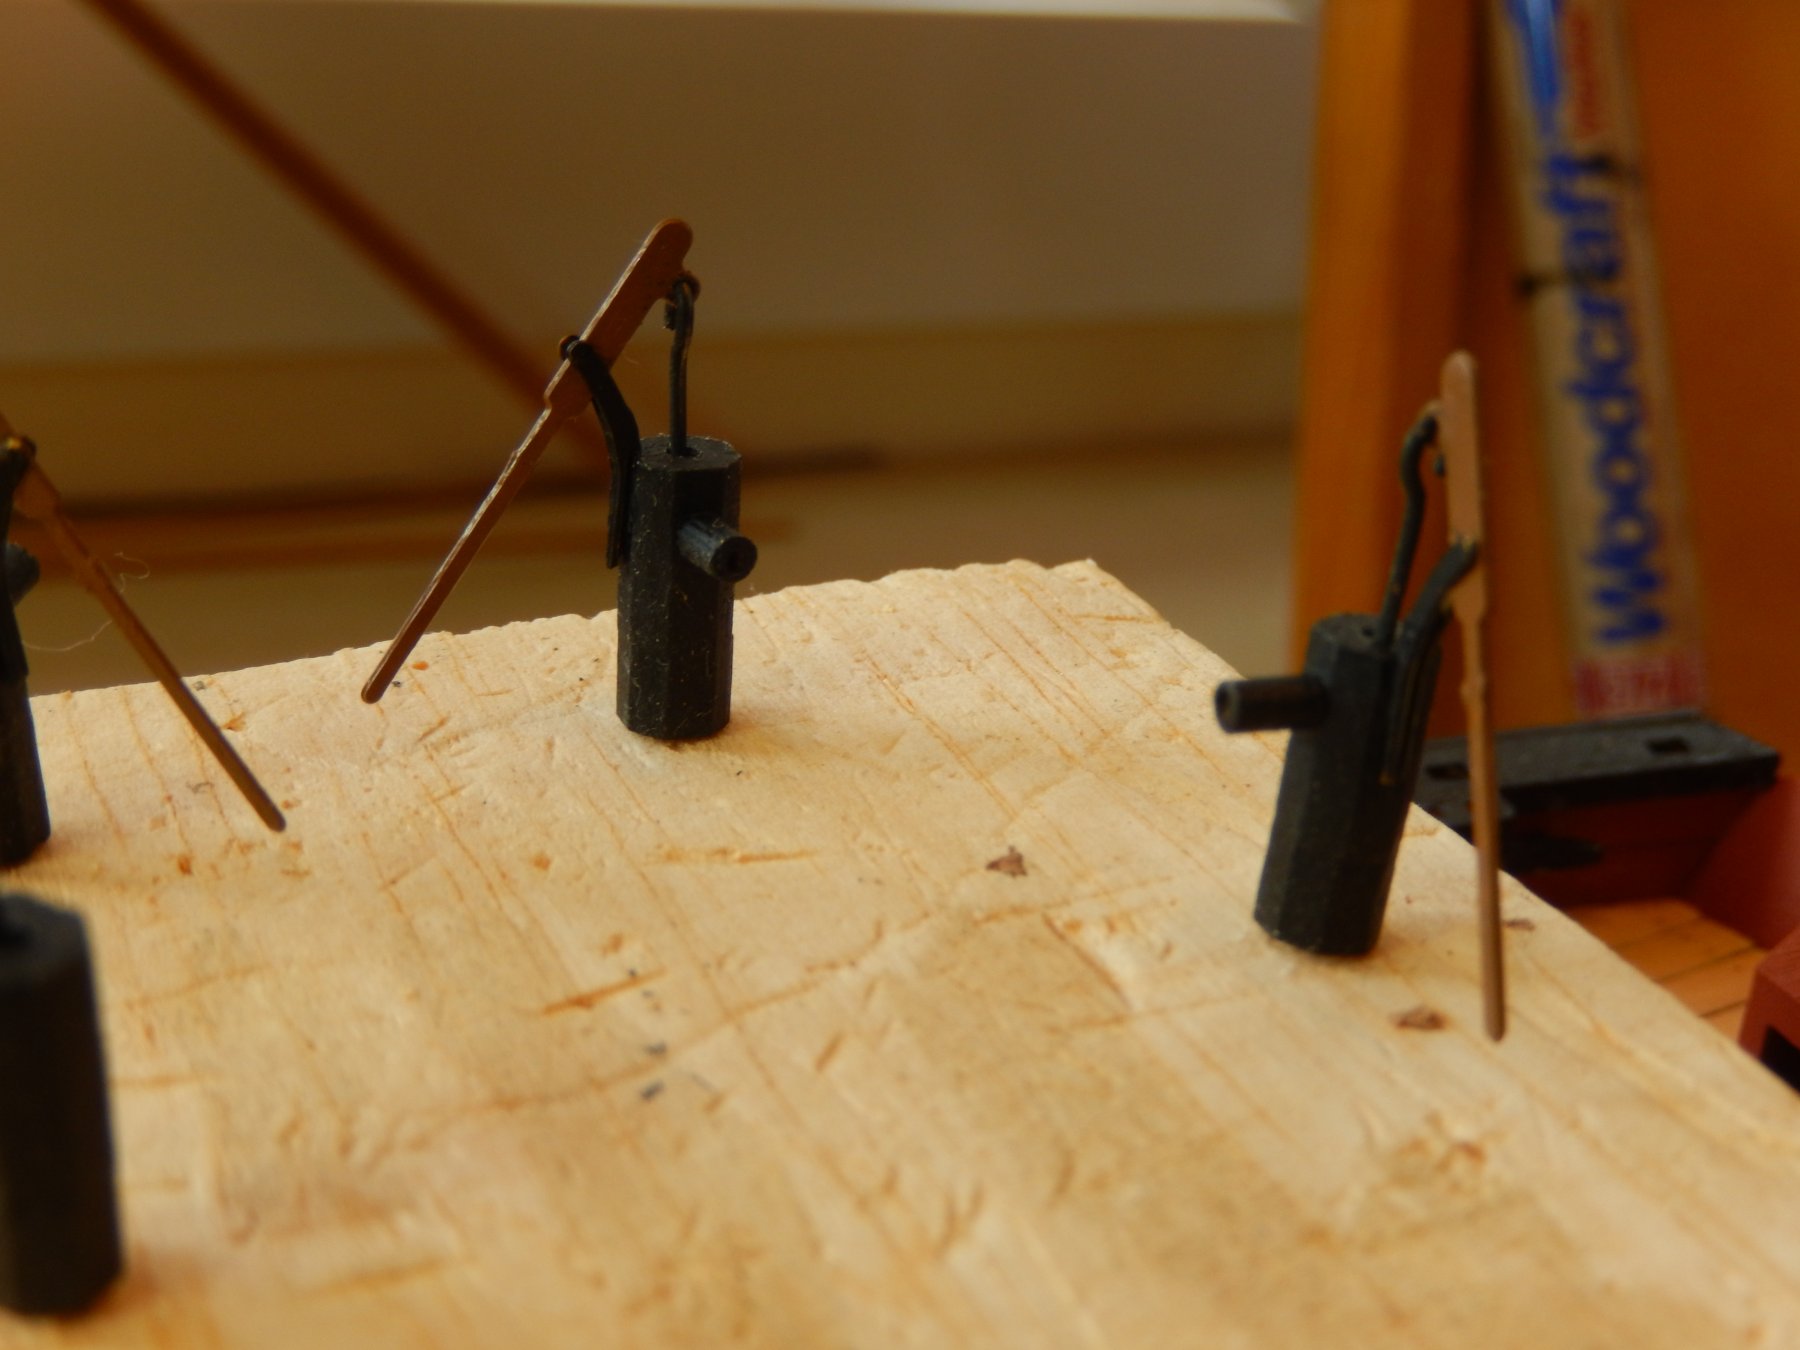
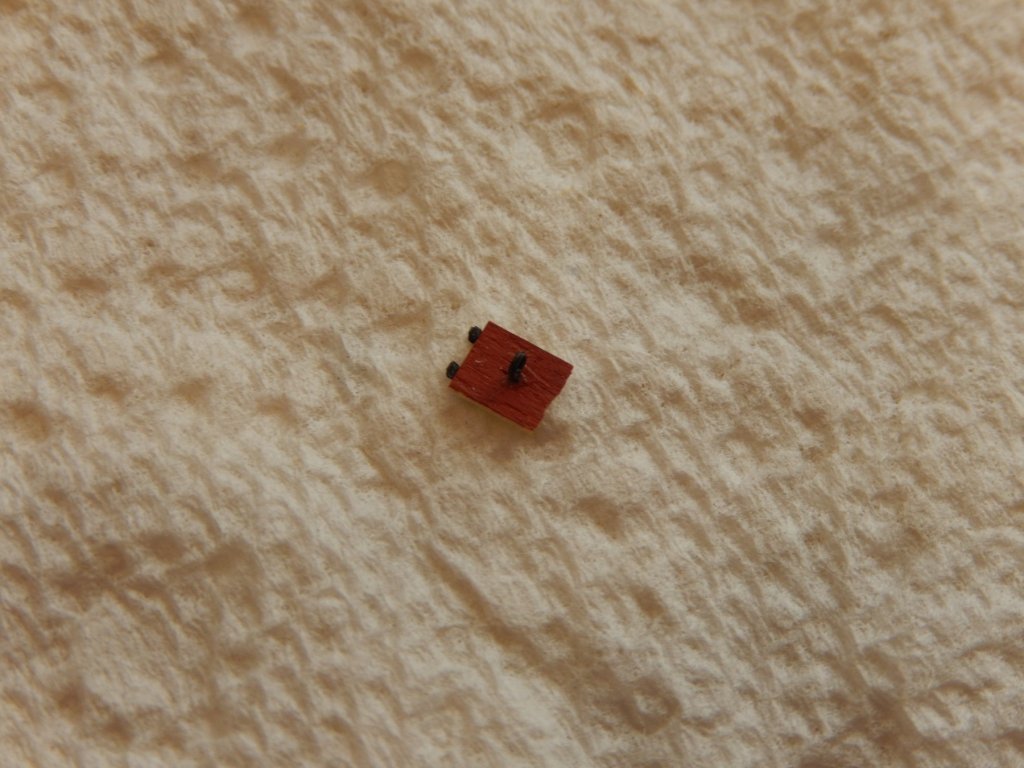
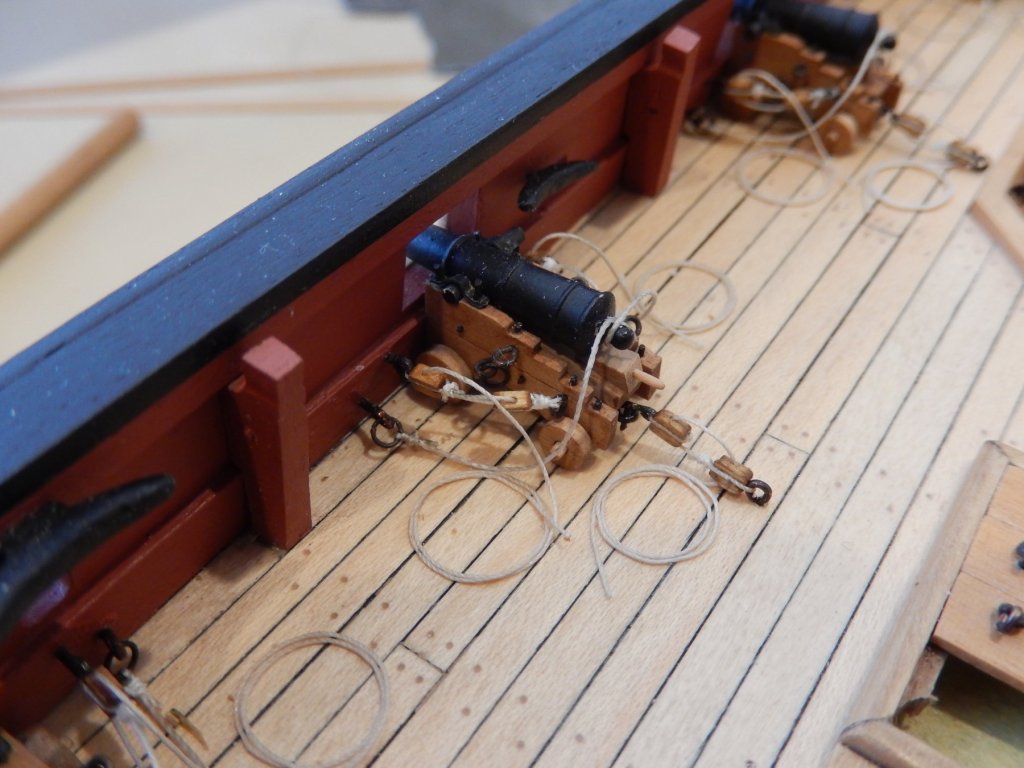
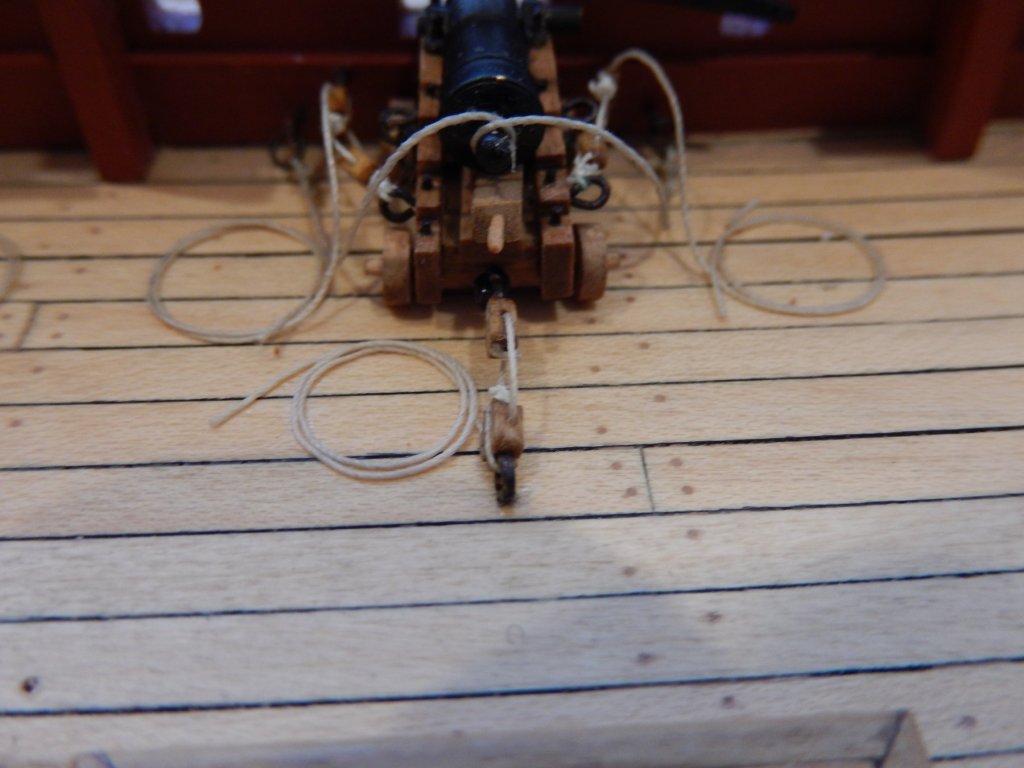
The traversing tackle has continued to cause problems. I hoped to rig it consistent with the AOAS depiction. That doesn't work at this scale, and my experiments with alternatives have proven underwhelming. I have now settled on a least worst solution and with luck, will finish the guns next week. I the meantime the pumps are now done, though they will not be installed until most of the other deck furniture is complete. This gives the idea - it and the other three pumps have since been touched up and look quite civilized.. In the process of touching up ....


- 421 replies
-
- 8
-
-
- caldercraft
- granado
- (and 1 more)
-
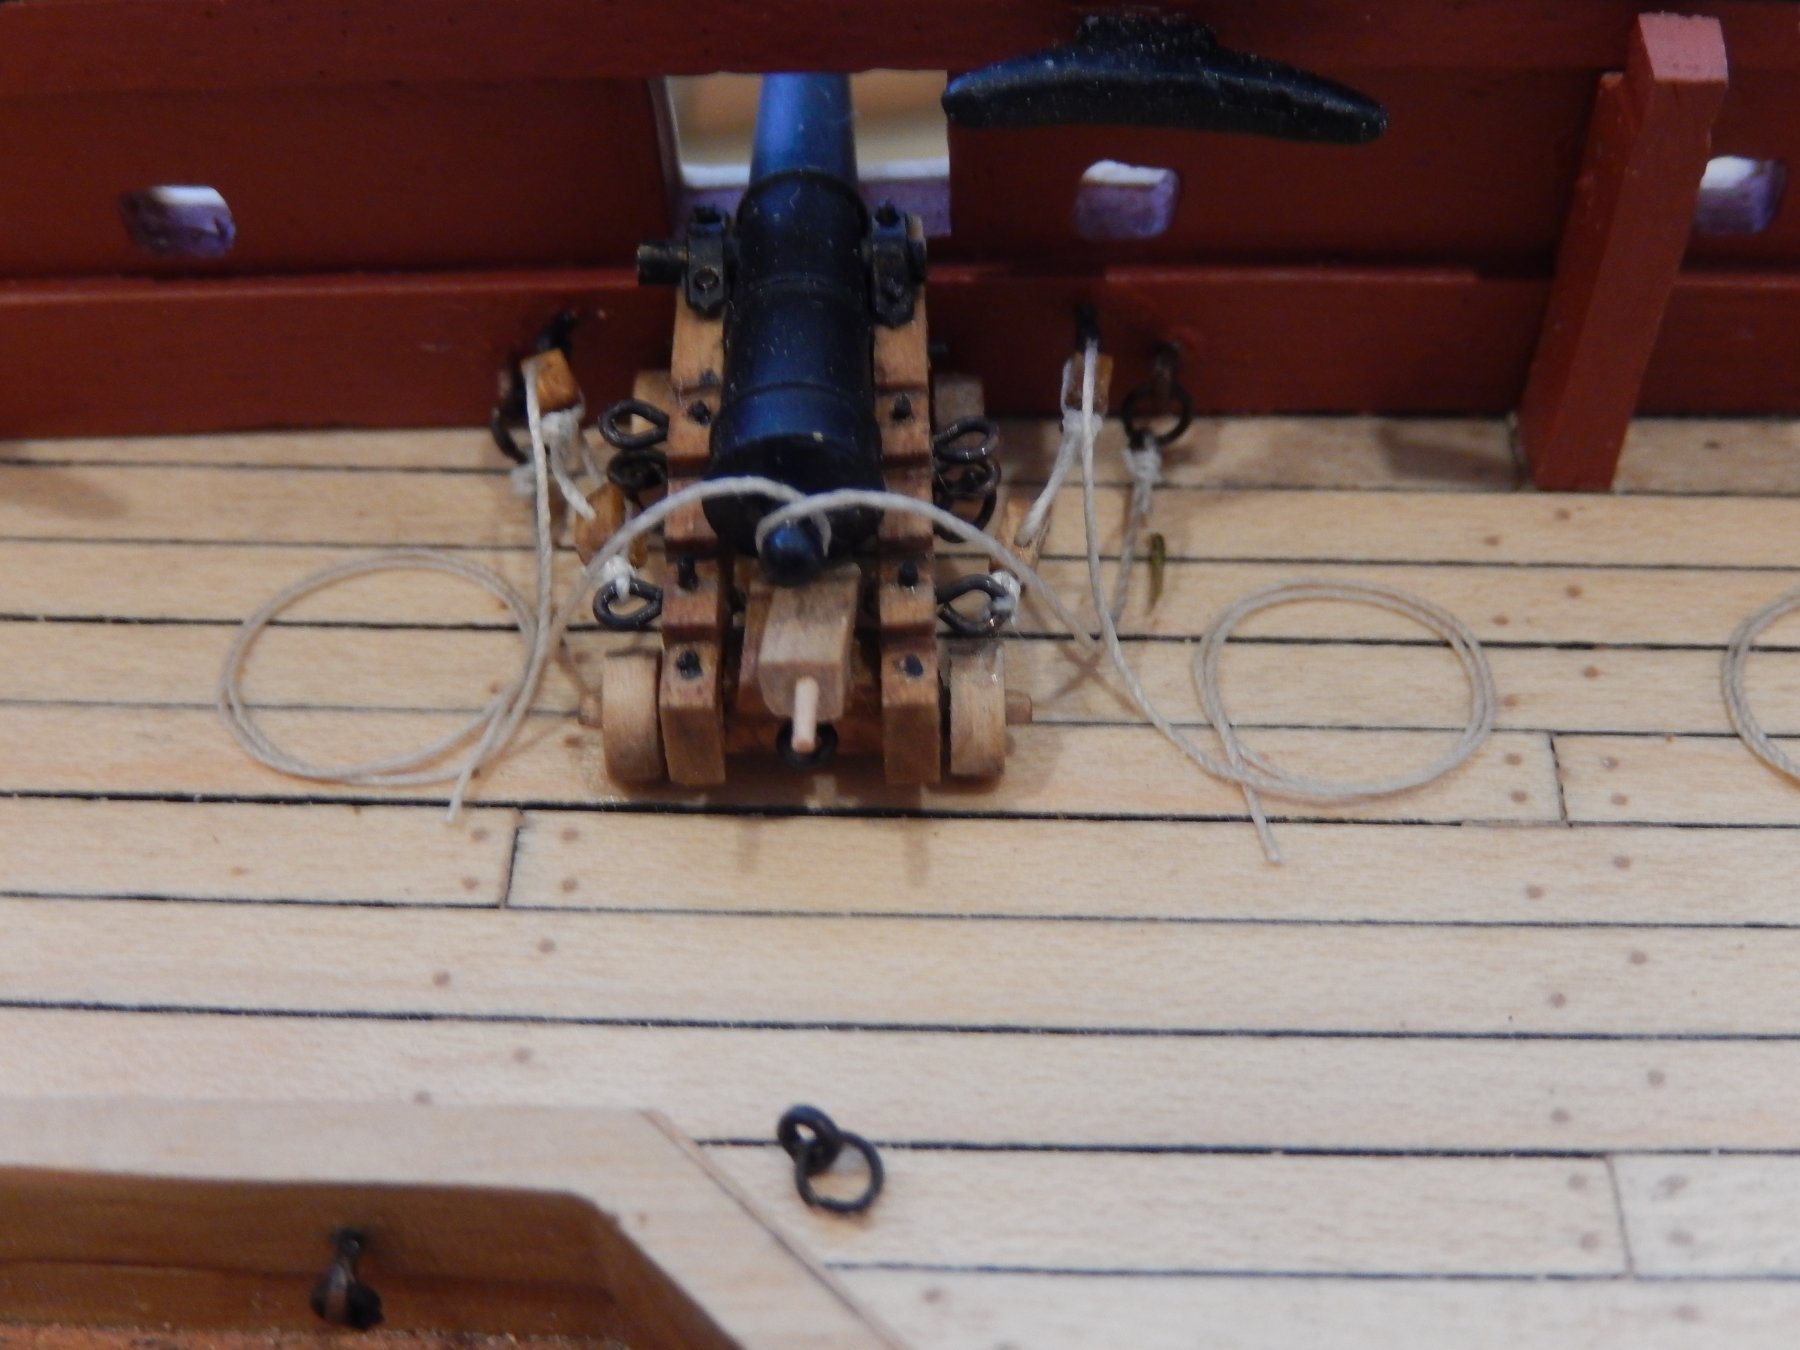
The guns are now rigged with the exception of the traversing tackle which is causing problems. Essentially the blocks supplied are too large. My intention was to hook the blocks onto the guns and to the rings mounted on eyelets on the deck - consistent with that shown in the Anatomy of a Ship. This turns out to leave very little distance between the blocks. The whole thing looks rather odd and out of scale. Fortunately the eyelets shown in the photos are dry-fitted, so I may ditch the rings and lash the blocks directly to the eyelets. I will leave the blocks on the guns attached by hooks. All of this should provide a slightly larger and more acceptable gap between the blocks, and I hope, look a little more realistic. Comments are welcome.

- 421 replies
-
- 5
-
-
- caldercraft
- granado
- (and 1 more)