HOLIDAY DONATION DRIVE - SUPPORT MSW - DO YOUR PART TO KEEP THIS GREAT FORUM GOING!
×


RMC
-
Posts
933 -
Joined
-
Last visited
Content Type
Profiles
Forums
Gallery
Events
Everything posted by RMC
-
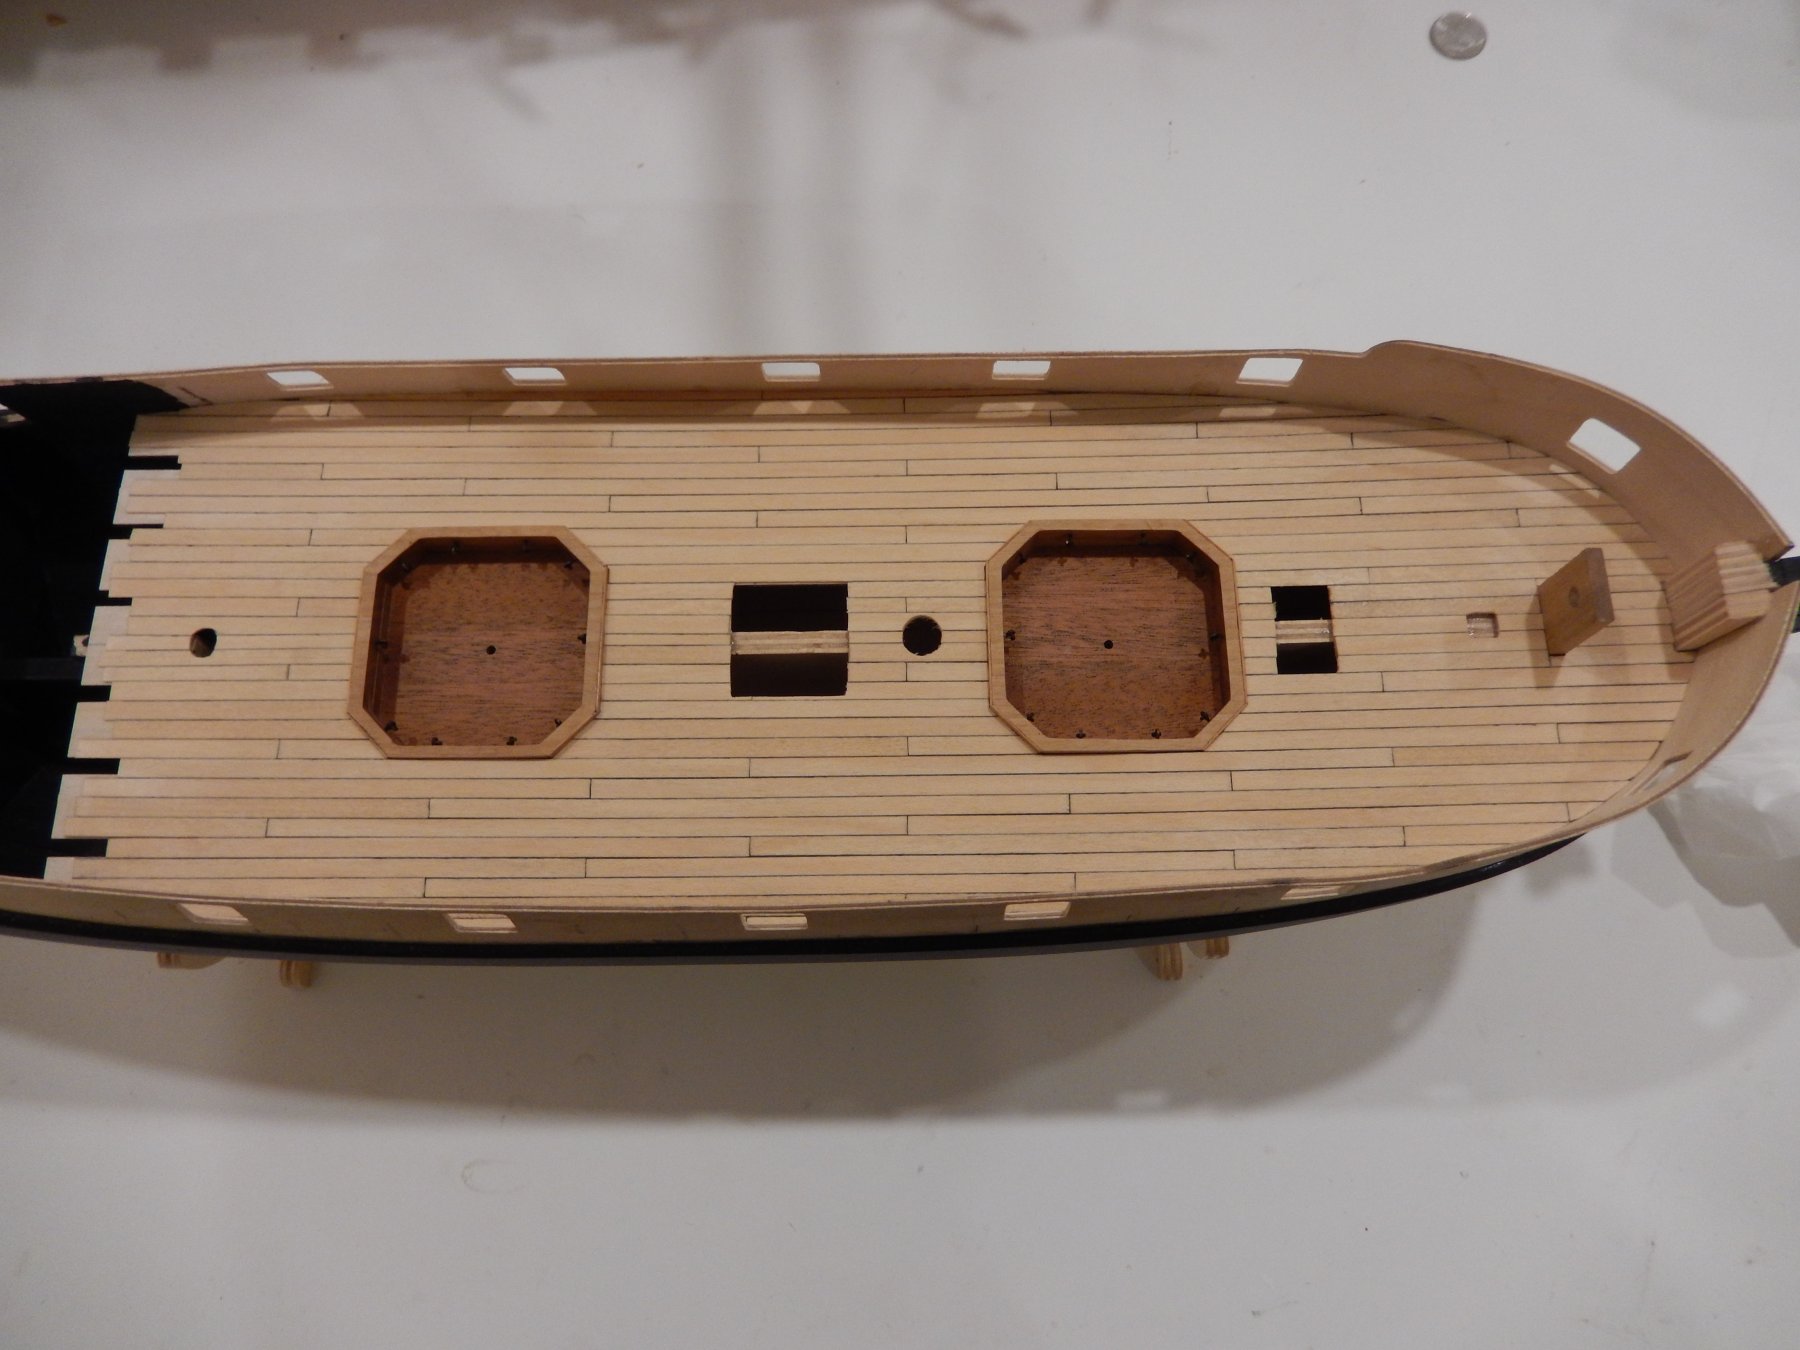
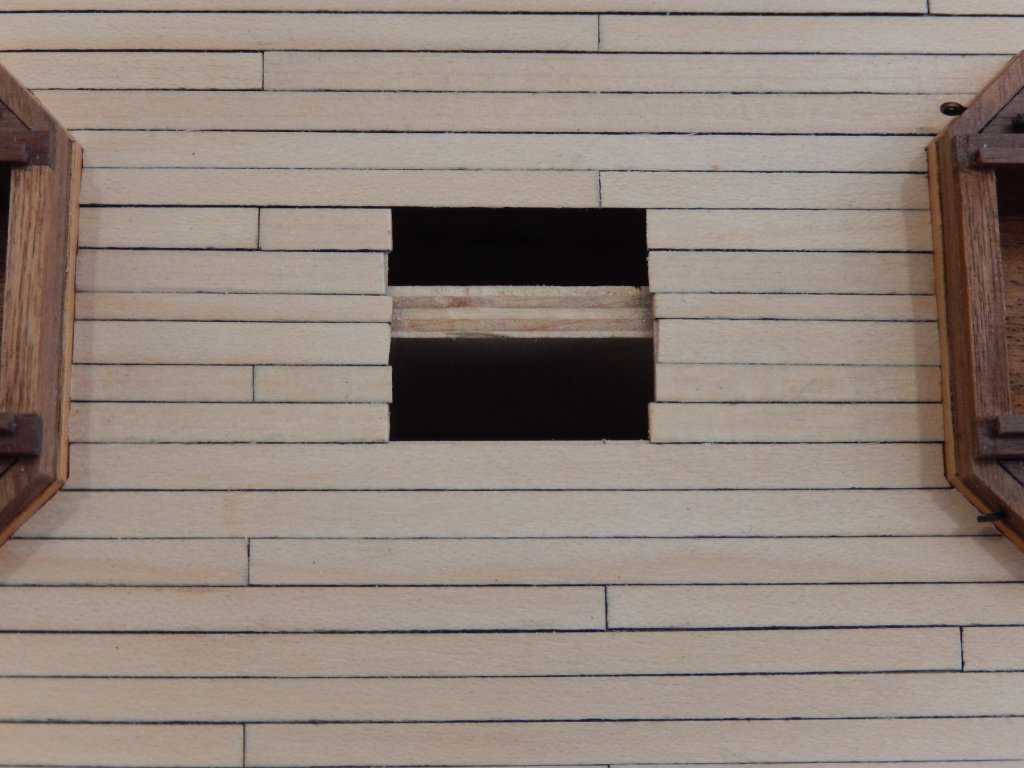
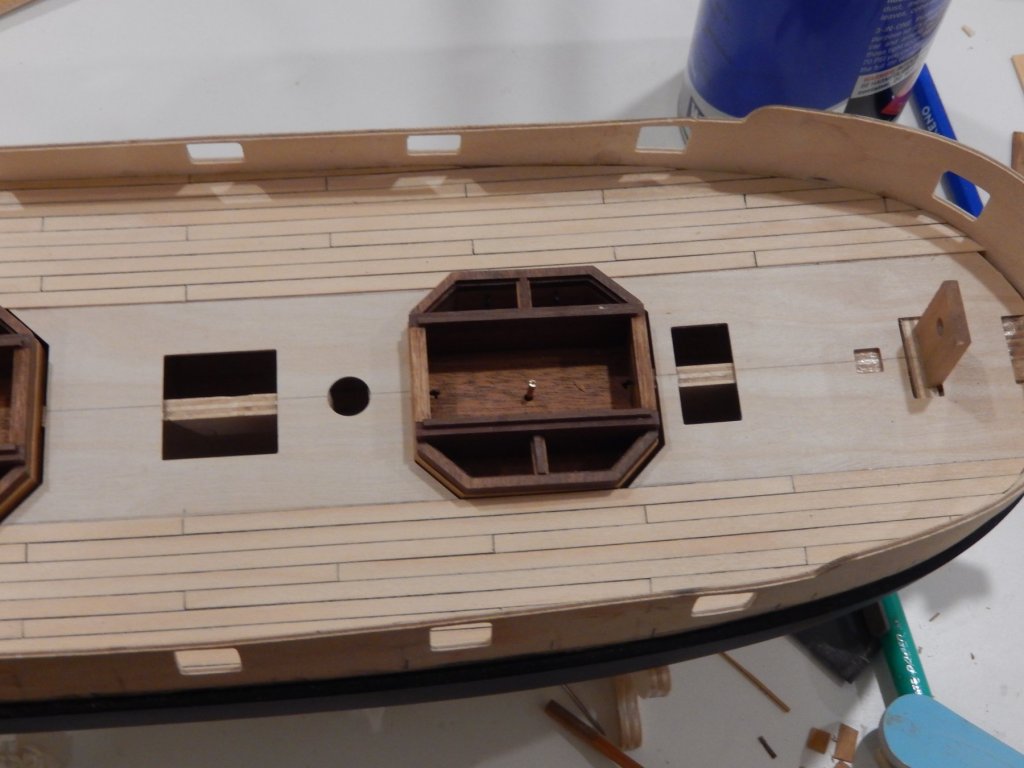
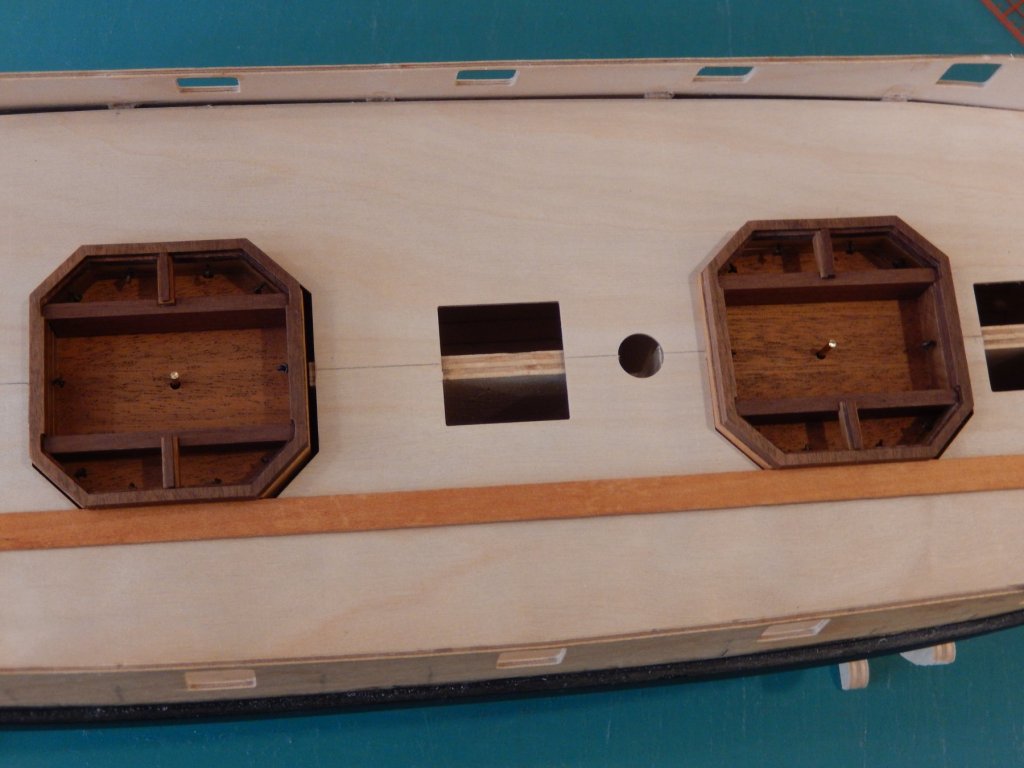
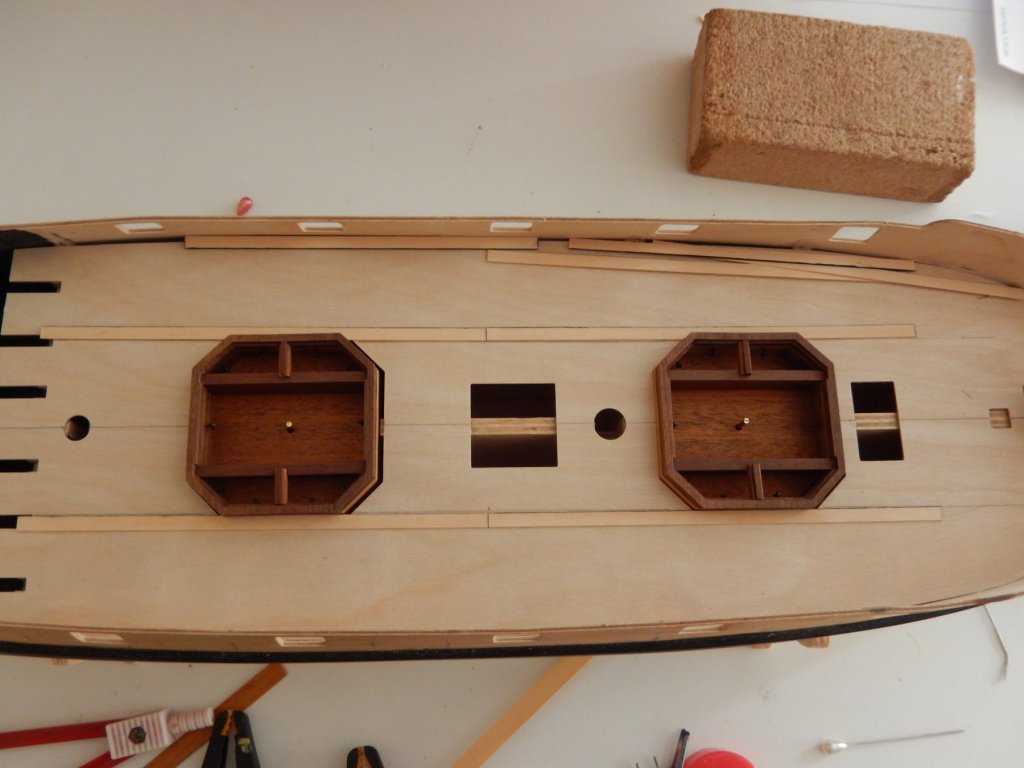
The deck planking is finished. It has turned out acceptably, but I should have taken far more care in accommodating the different width of the planks. As you will see from the following photos the centre plank varies in width quite a bit. In consolation, as Joe points out, the deck gets 'busy' and with luck it will obscure the mistakes. Here the deck has been given a coat of polyurethane in the process of drying. Once fully dry I will drill holes for the treenails then fill with a light brown wood filler. I'm hoping that any surplus filler can be wiped off the poly without leaving a trace on the planks. Once that is done another coat of poly will be applied over the lot. At least that's the plan.


- 421 replies
-
- 8
-

-
- caldercraft
- granado
- (and 1 more)
-
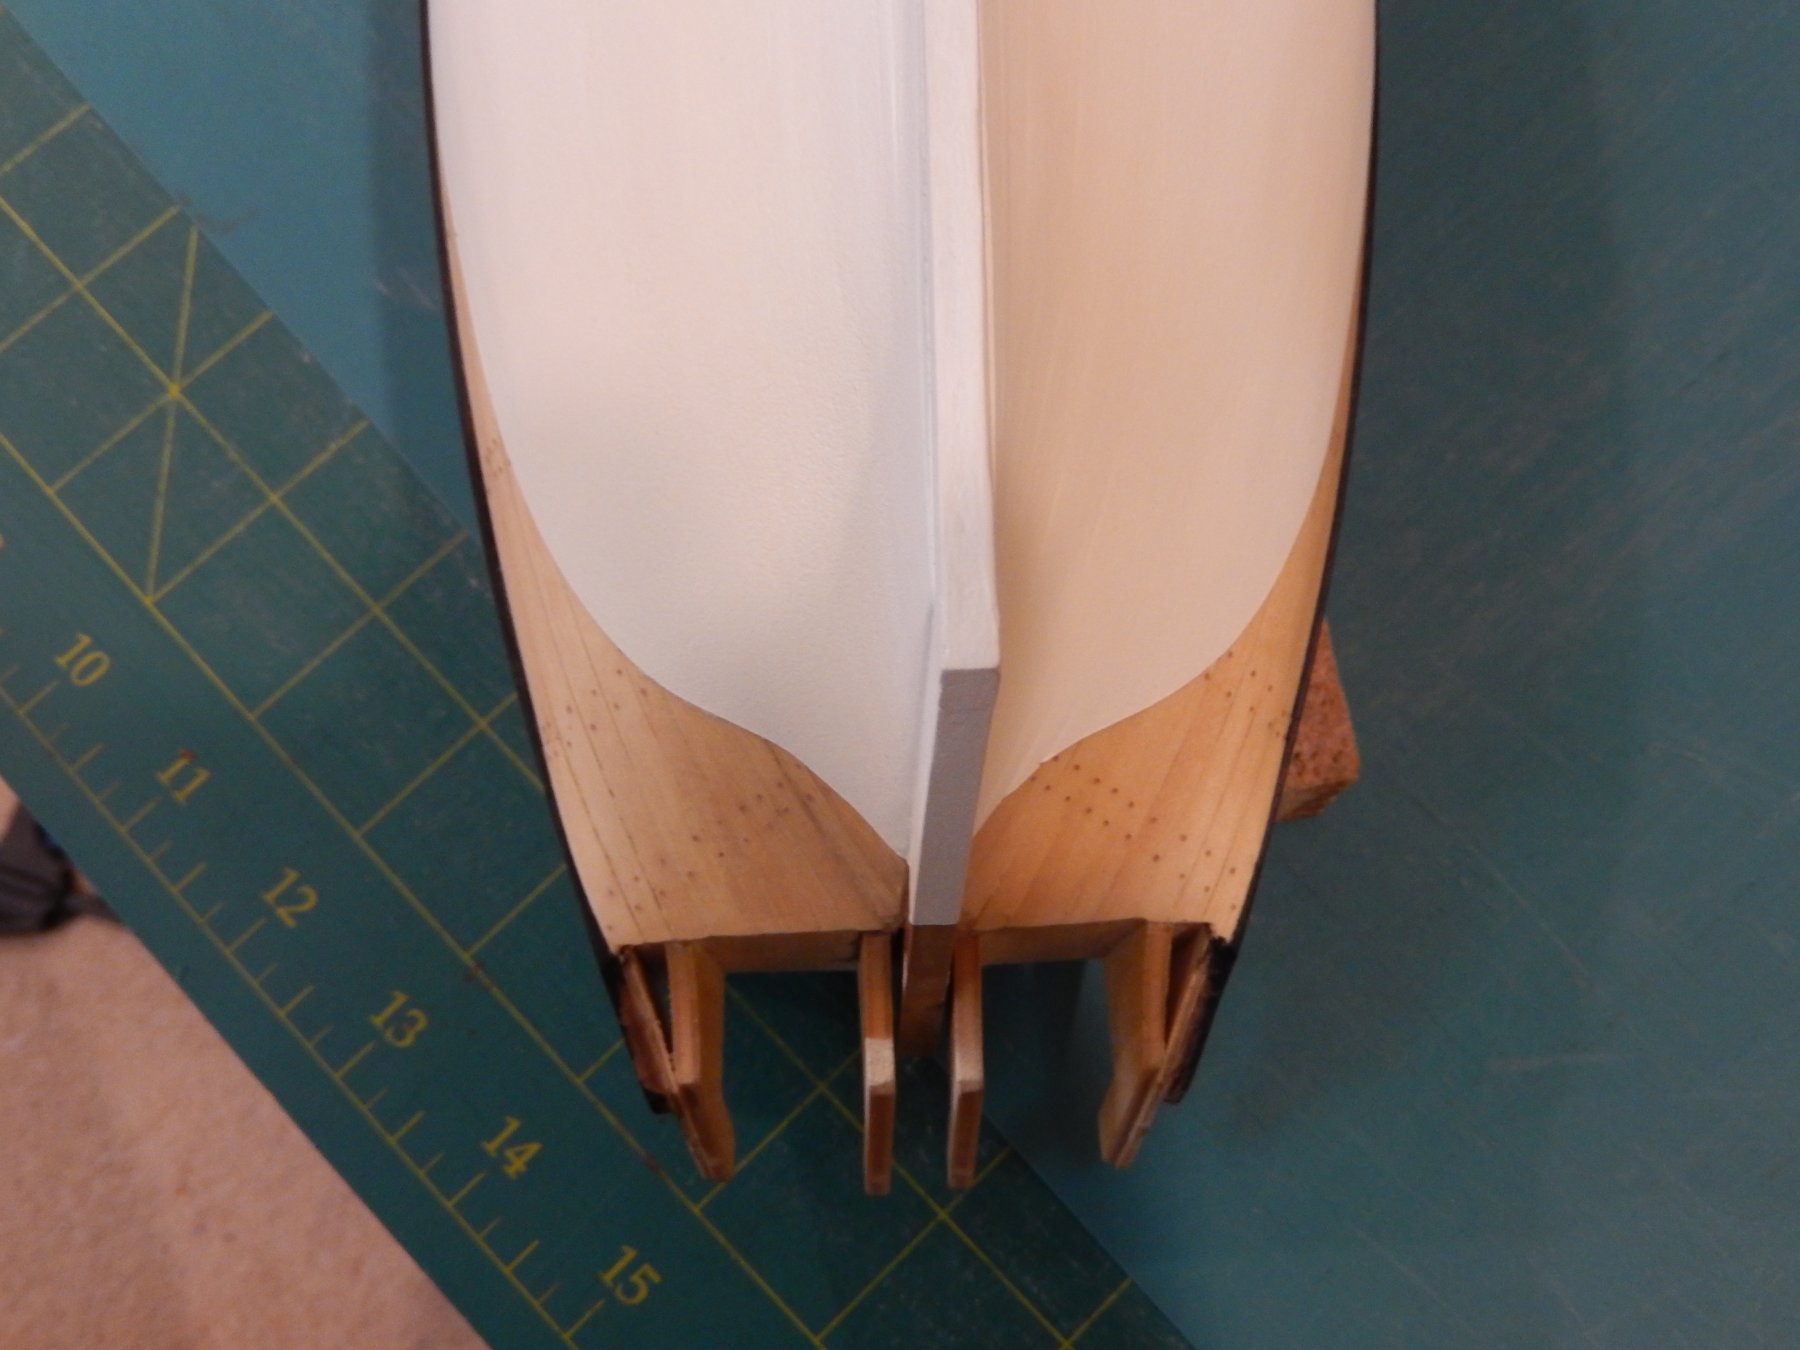
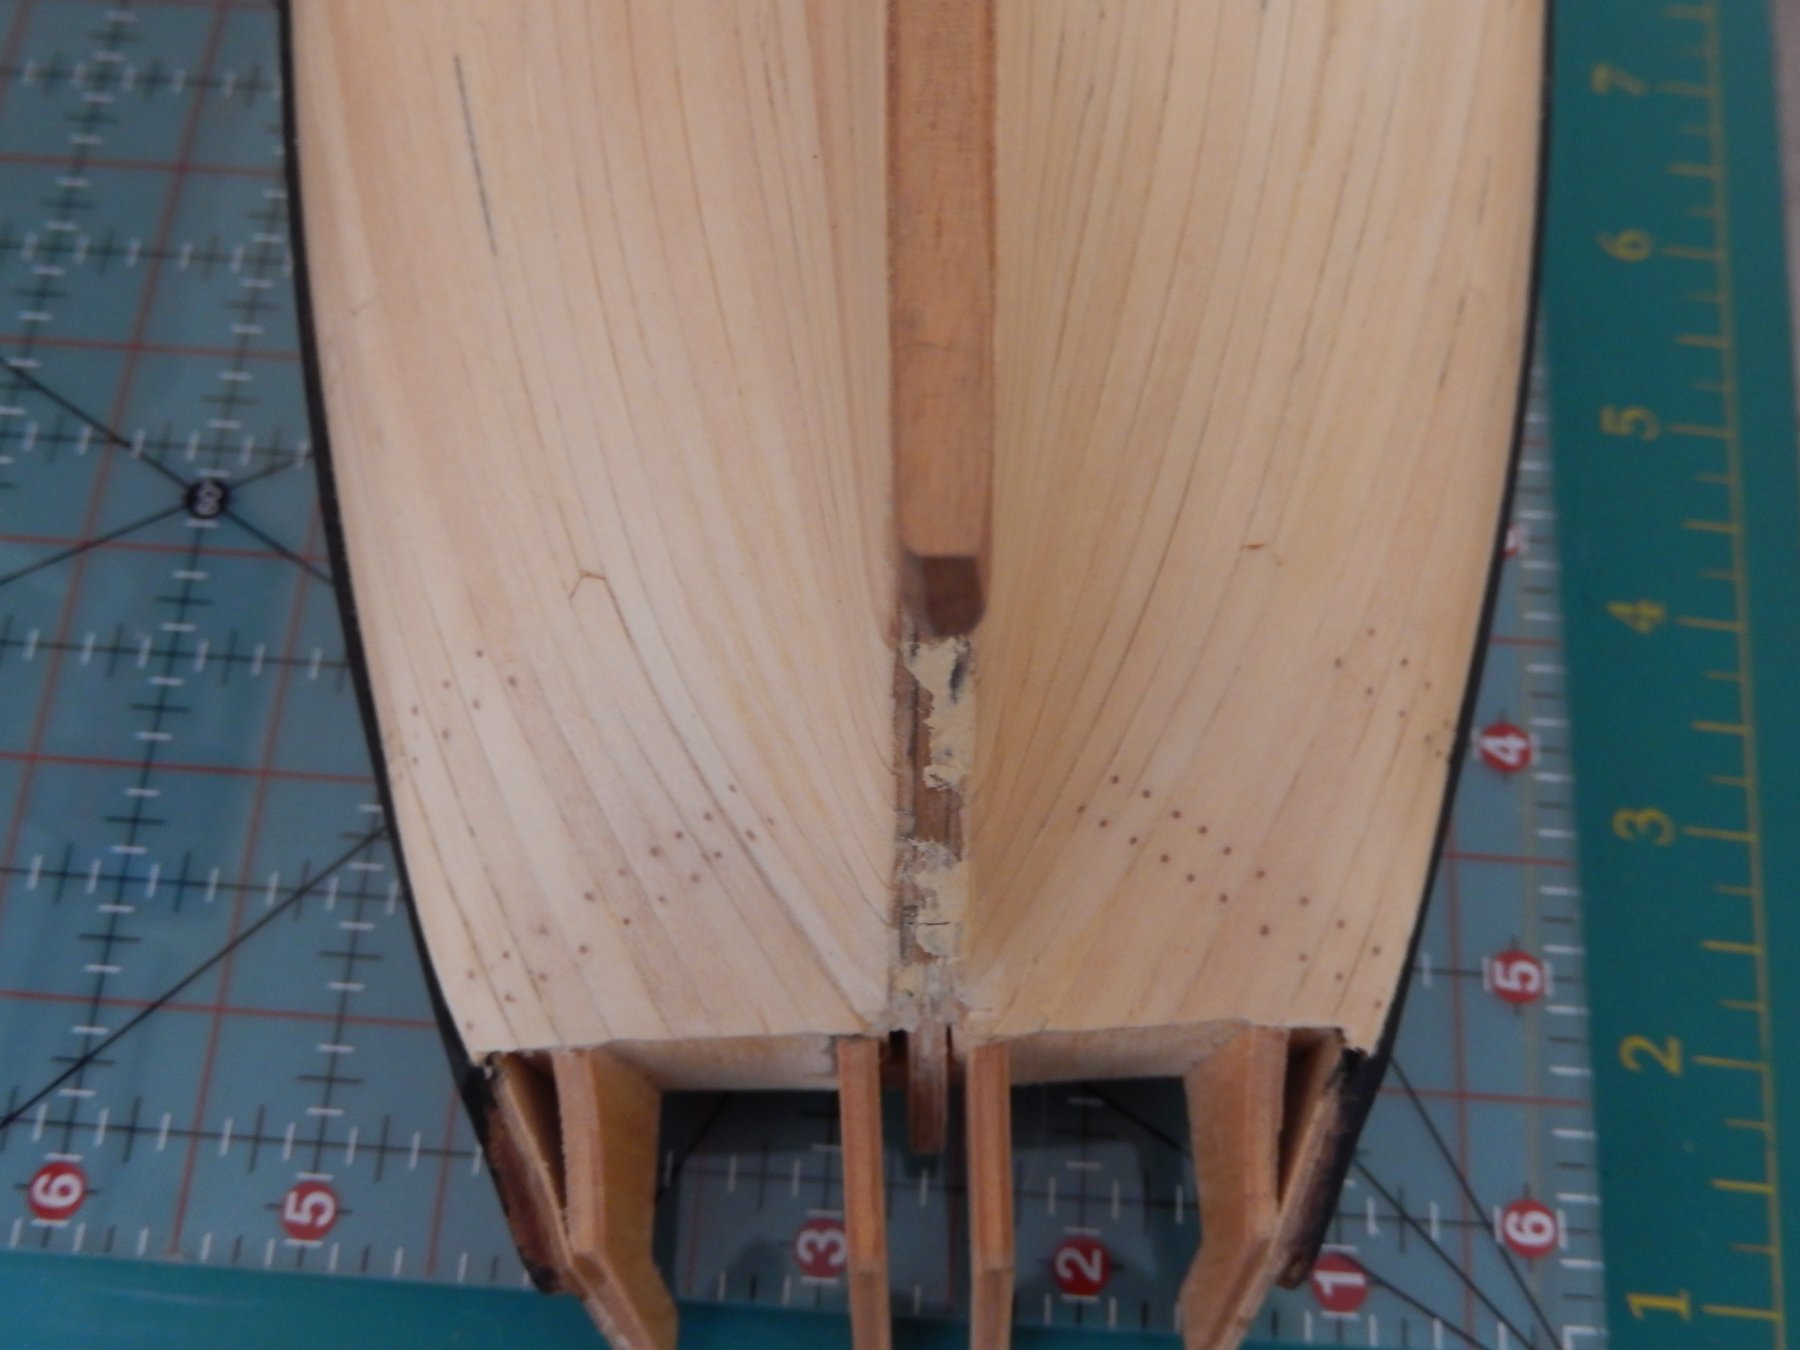
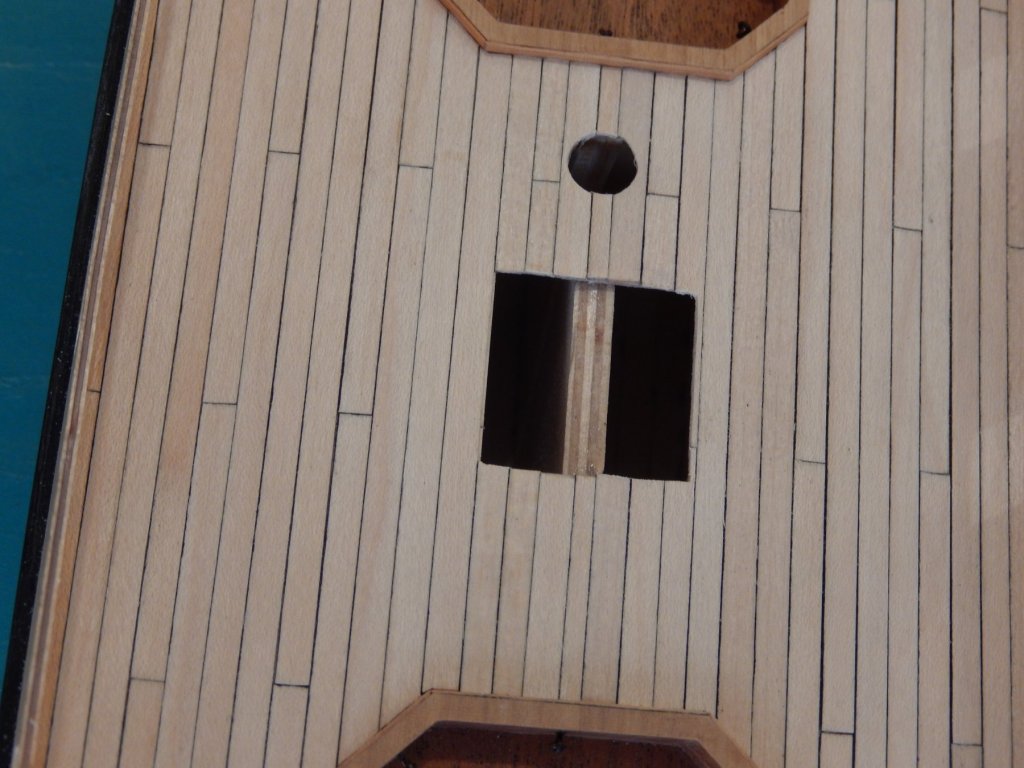
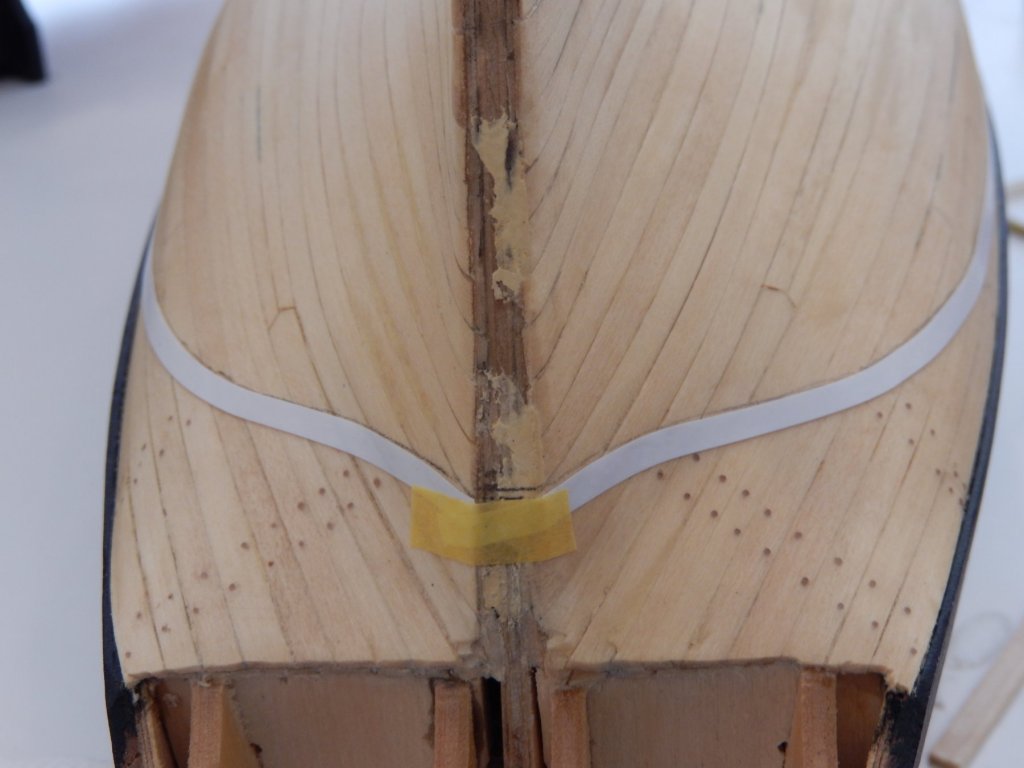
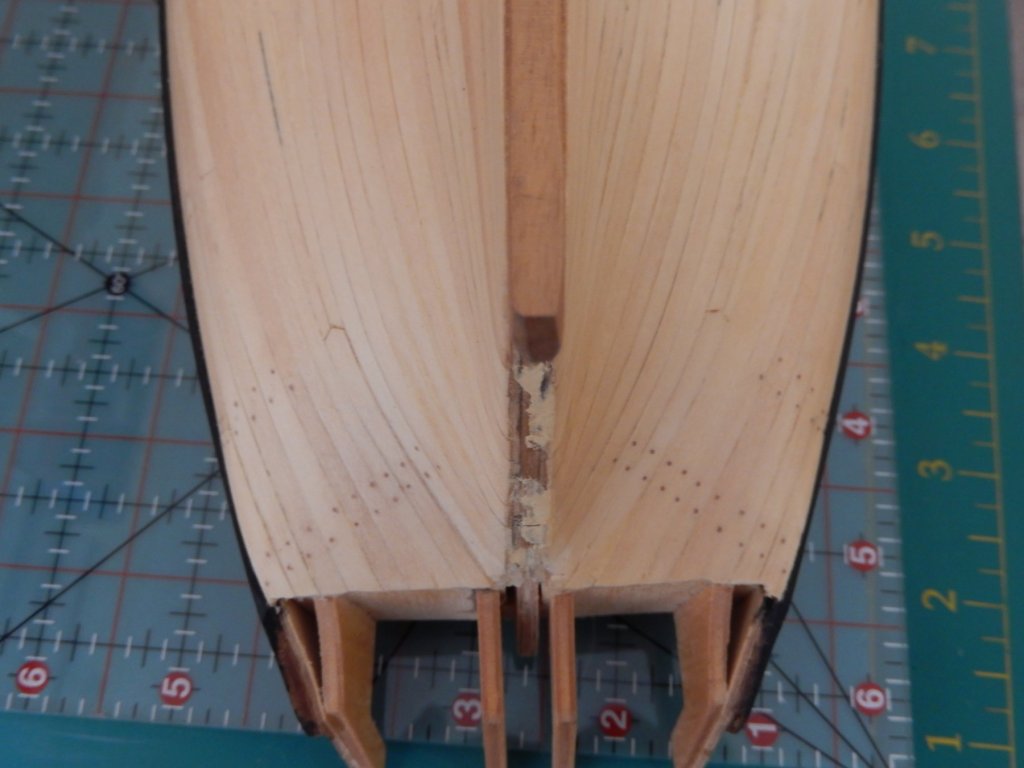
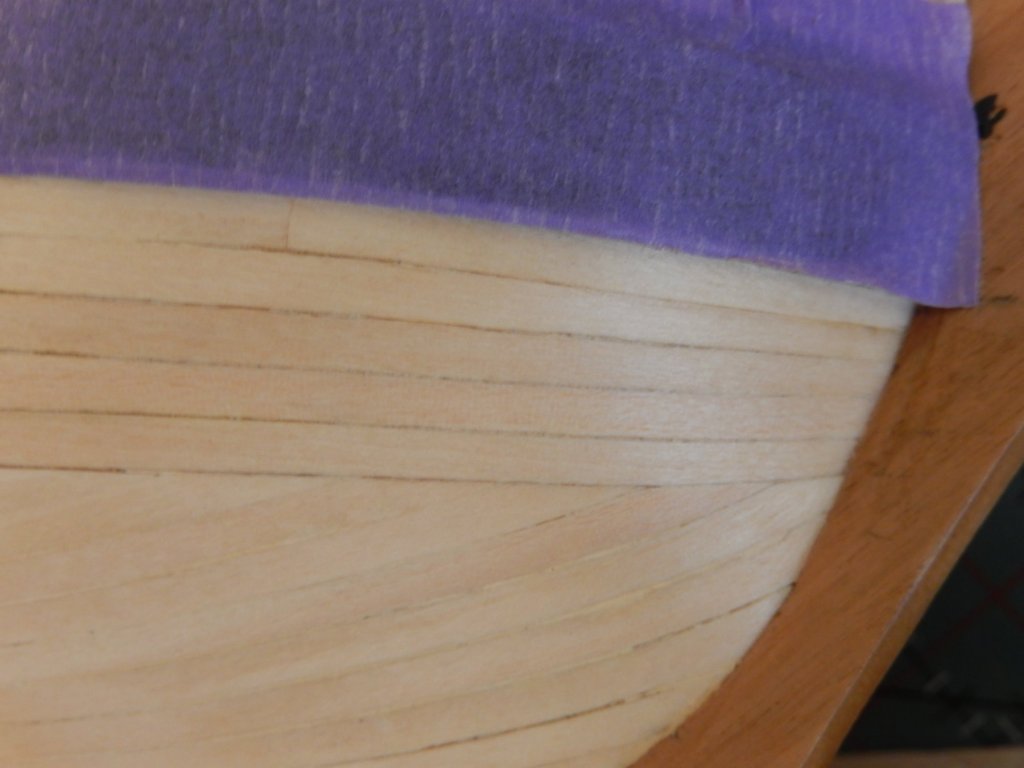
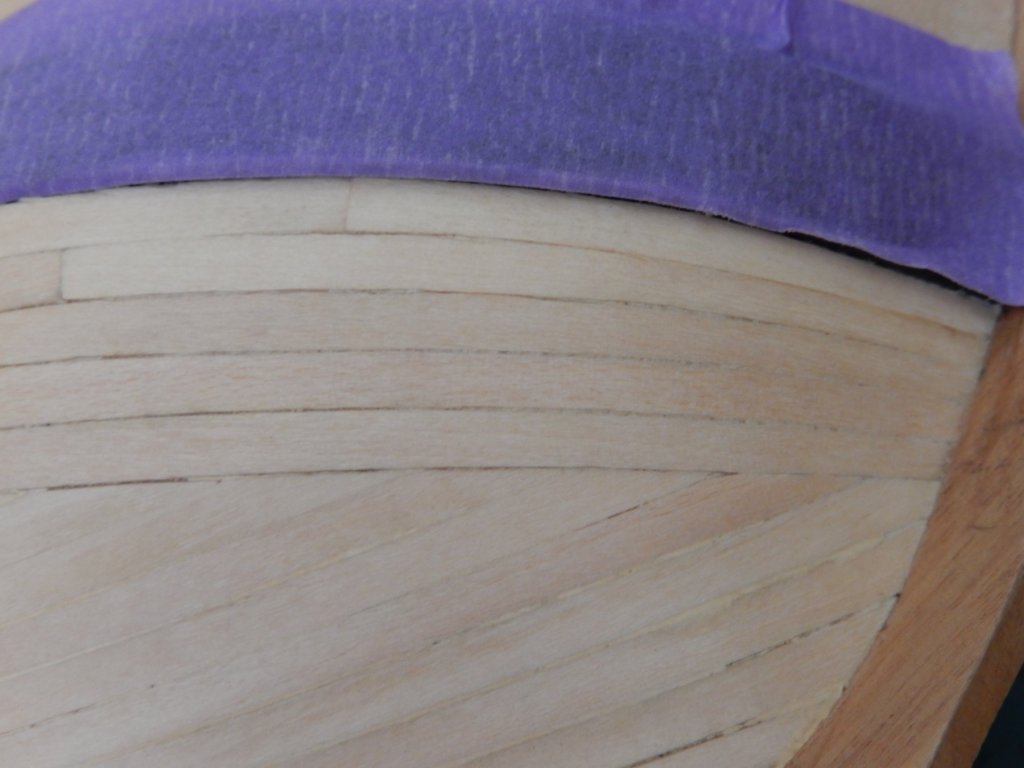
Thanks for the comment OrLin. Progress on the deck planking has been a little more time-consuming than I expected. Planking from the outside to the centre means the centre plank has to accommodate any errors from both sides. The planking material varies in width by up to 1/2 mm which doesn't help. I first planked to within 1/2 a plank's width of the centre line on one side. This left a gap of about 1.5mm between the edge of the last plank and the centre line. Then, on the other side, I aimed to plank to the same distance from the centre line as the first set of planks. To do this I sanded the edges of the last 3 planks to be laid so that the edge of the last plank was the appropriate distance from the centre. Sanding the edges of 3 planks meant the necessary adjustment was more evenly spread and (I hope) less noticeable. Once I had a gap which was equidistant from the centre line I sanded a final plank to fit. The centre plank is narrower than I would like, but I've been told you can't have everything. Here is the centre plank dry-fitted ... and finished. There is more of this to do fore and aft, then the tree nails are to be done.


- 421 replies
-
- 12
-
-
- caldercraft
- granado
- (and 1 more)
-
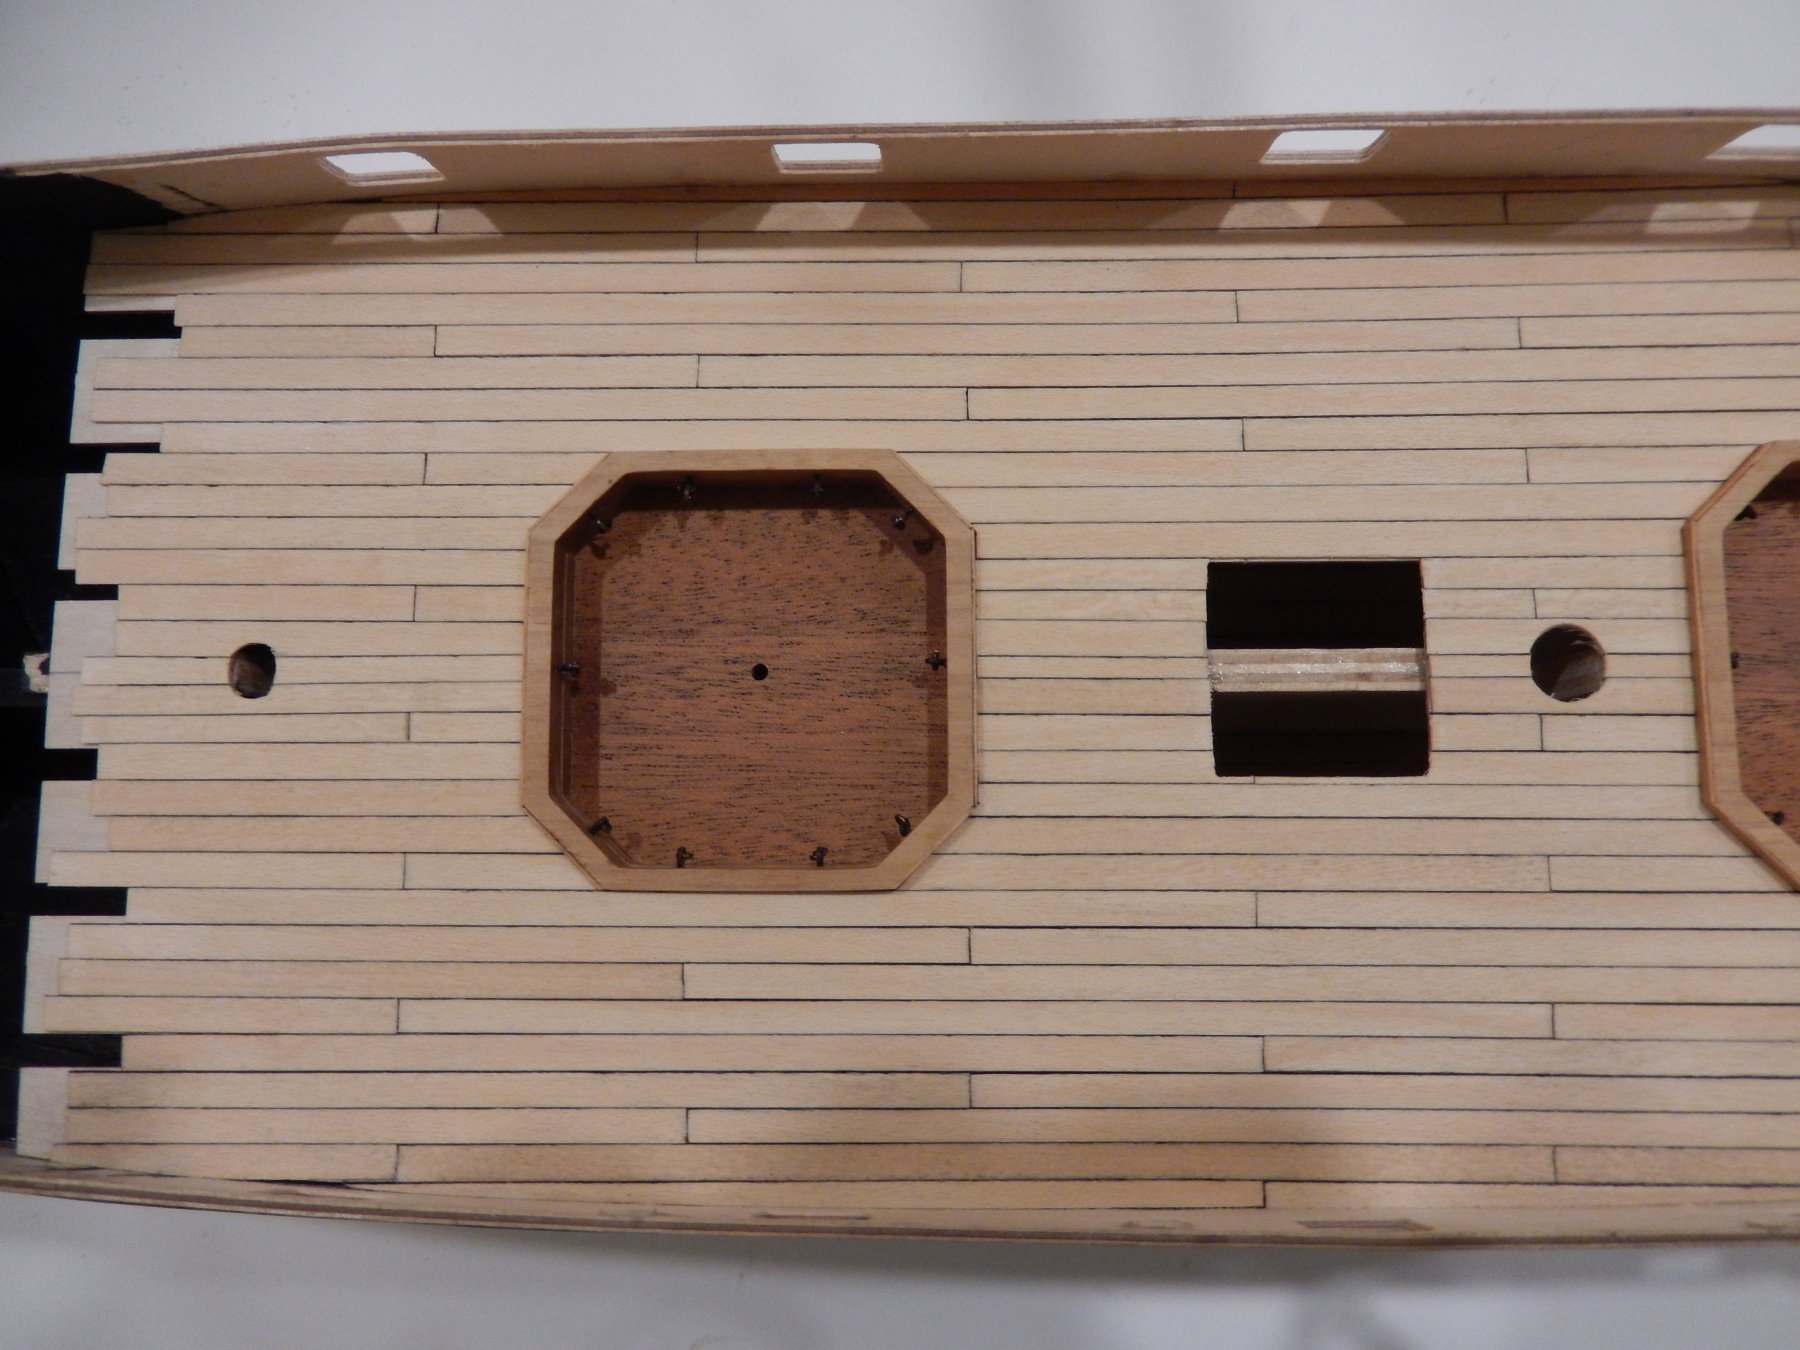
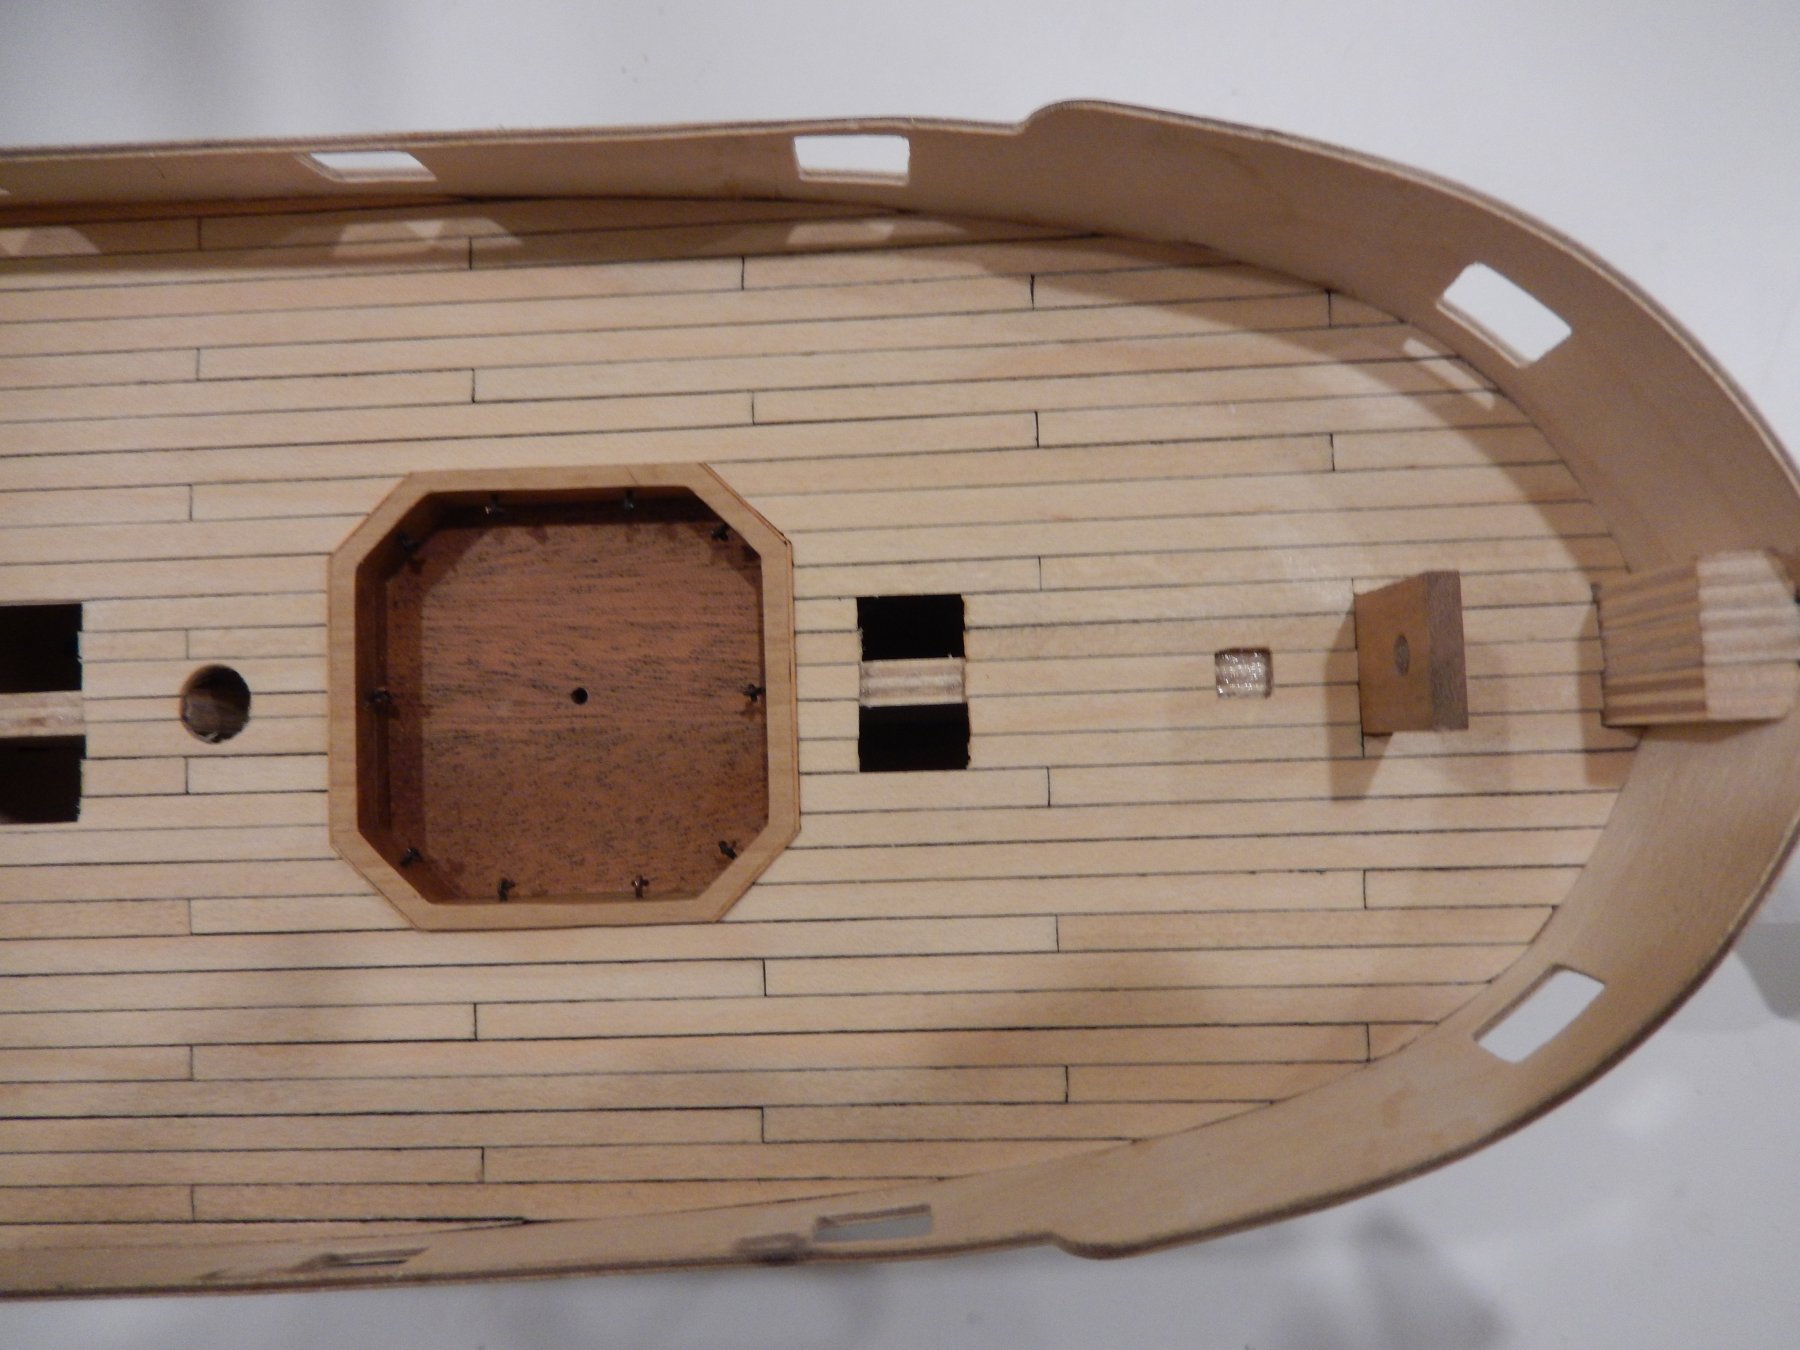
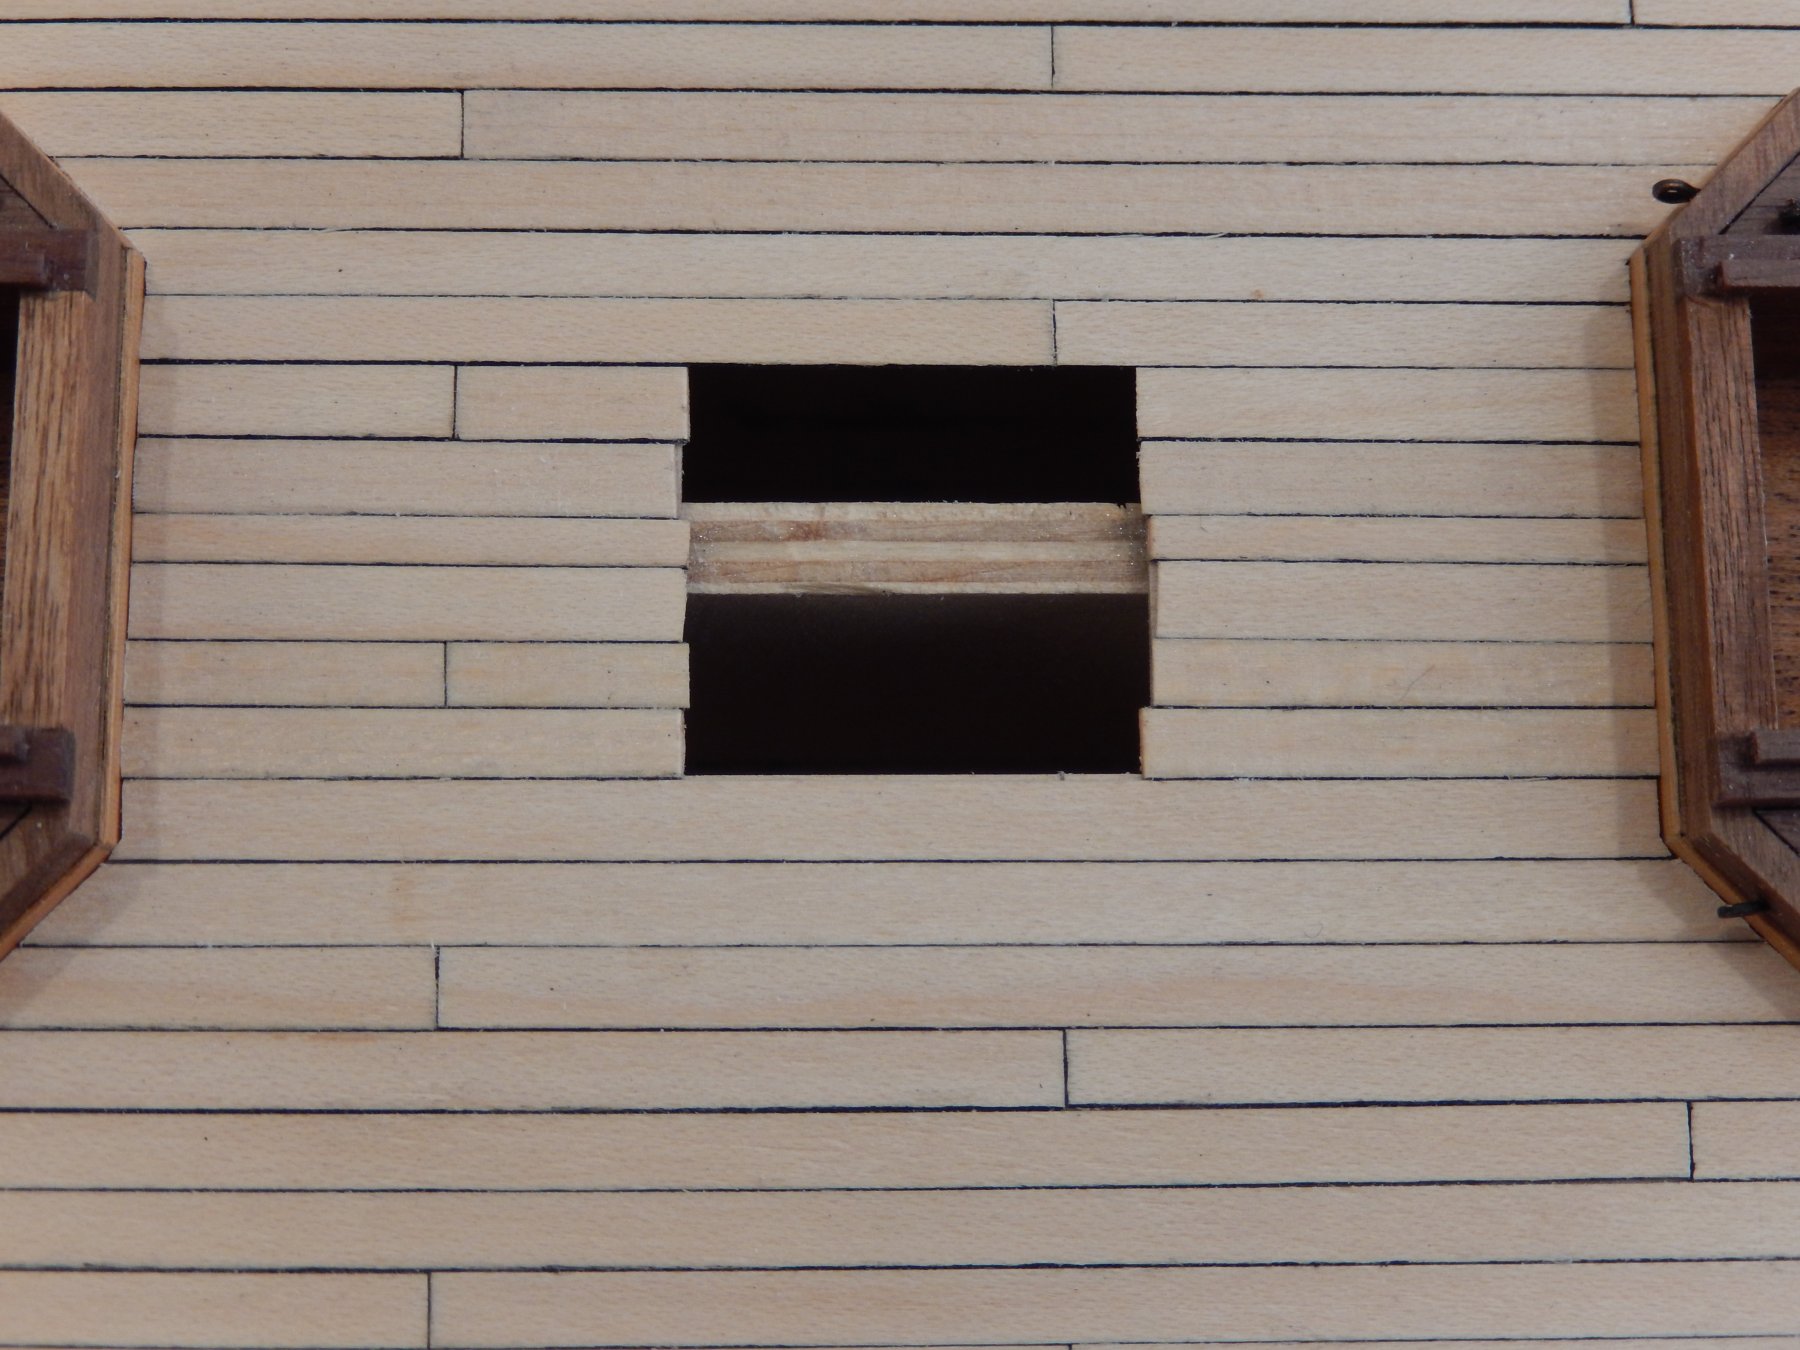
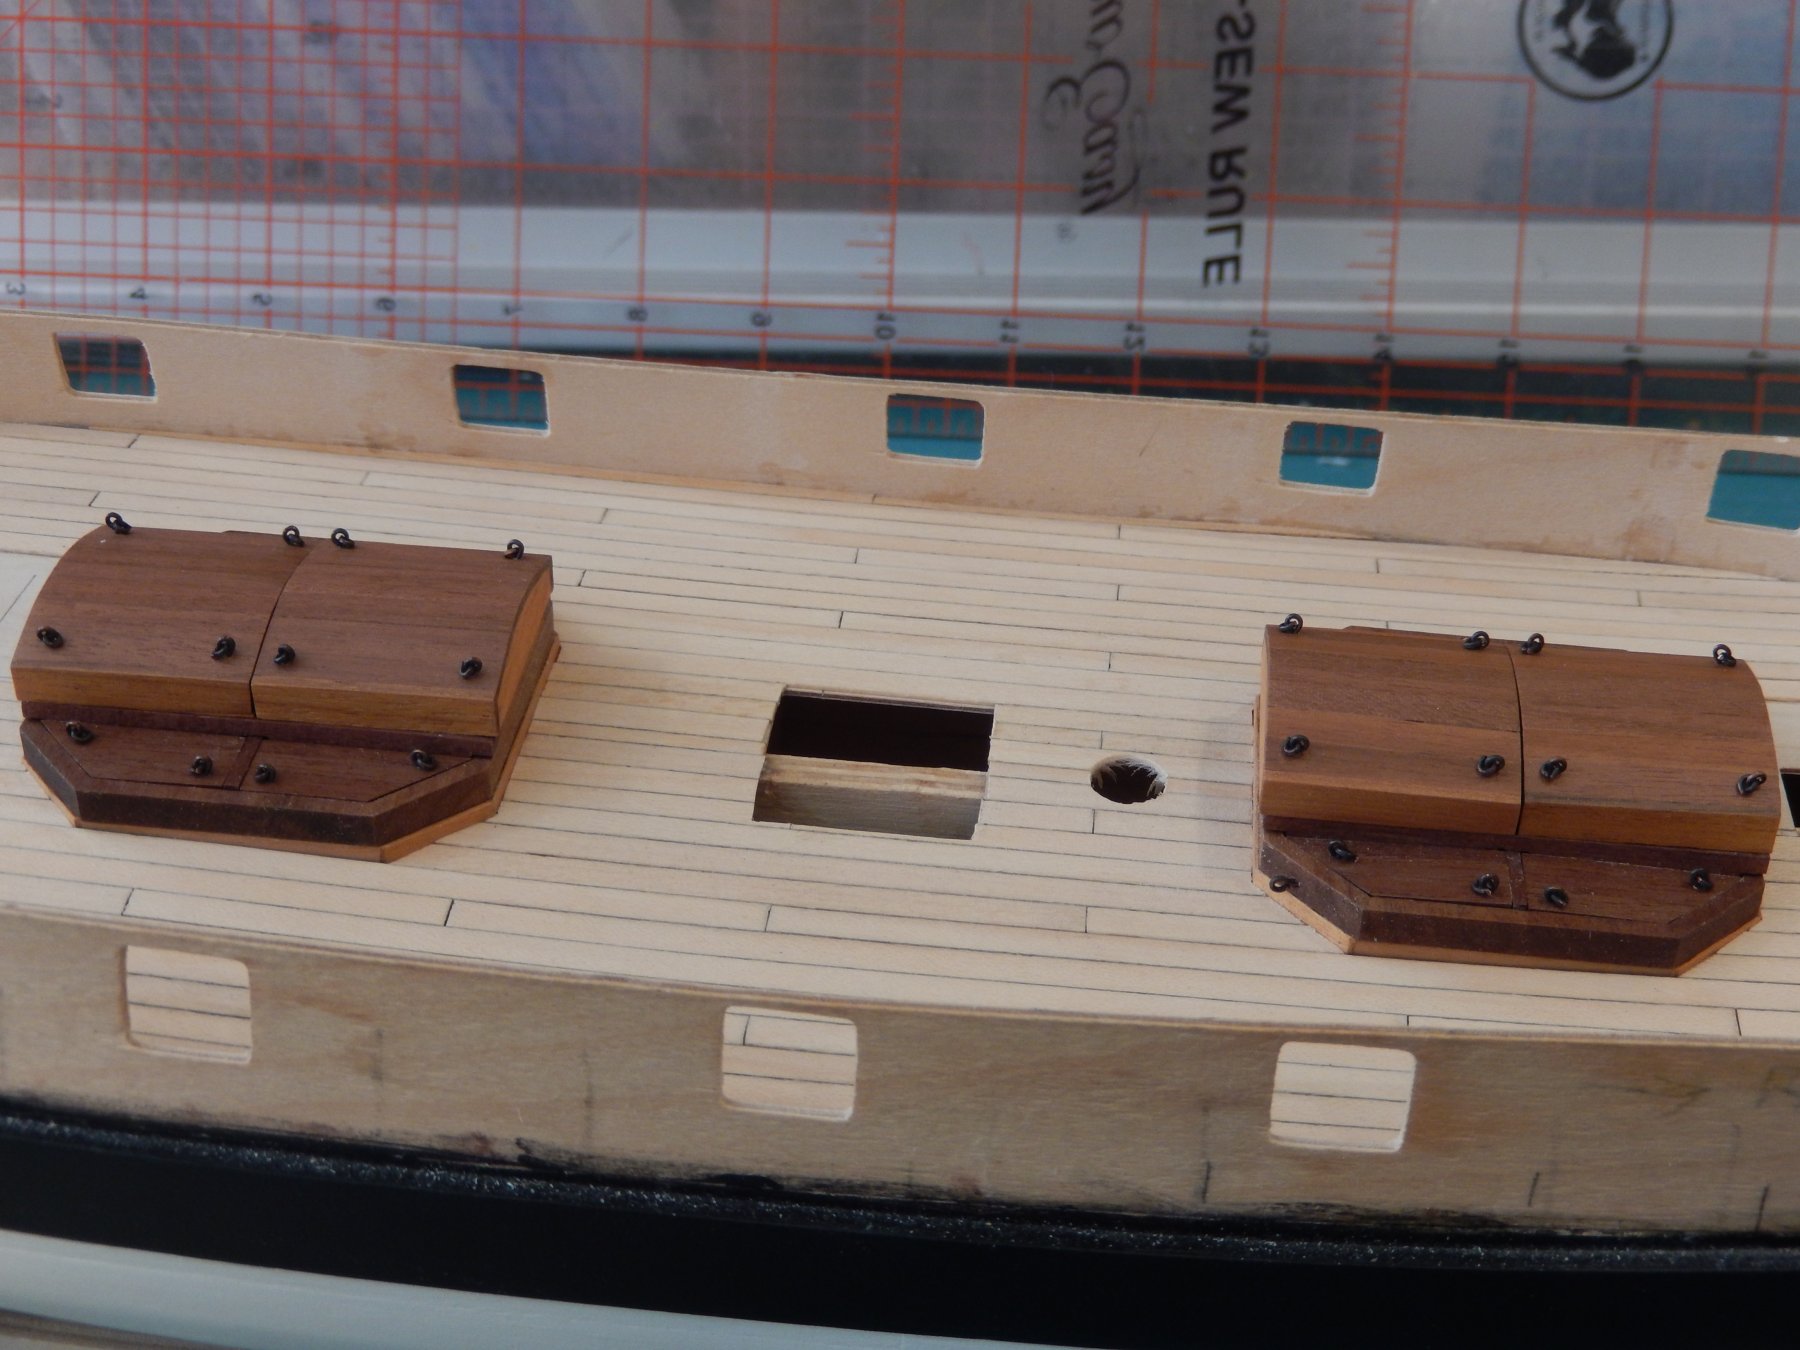
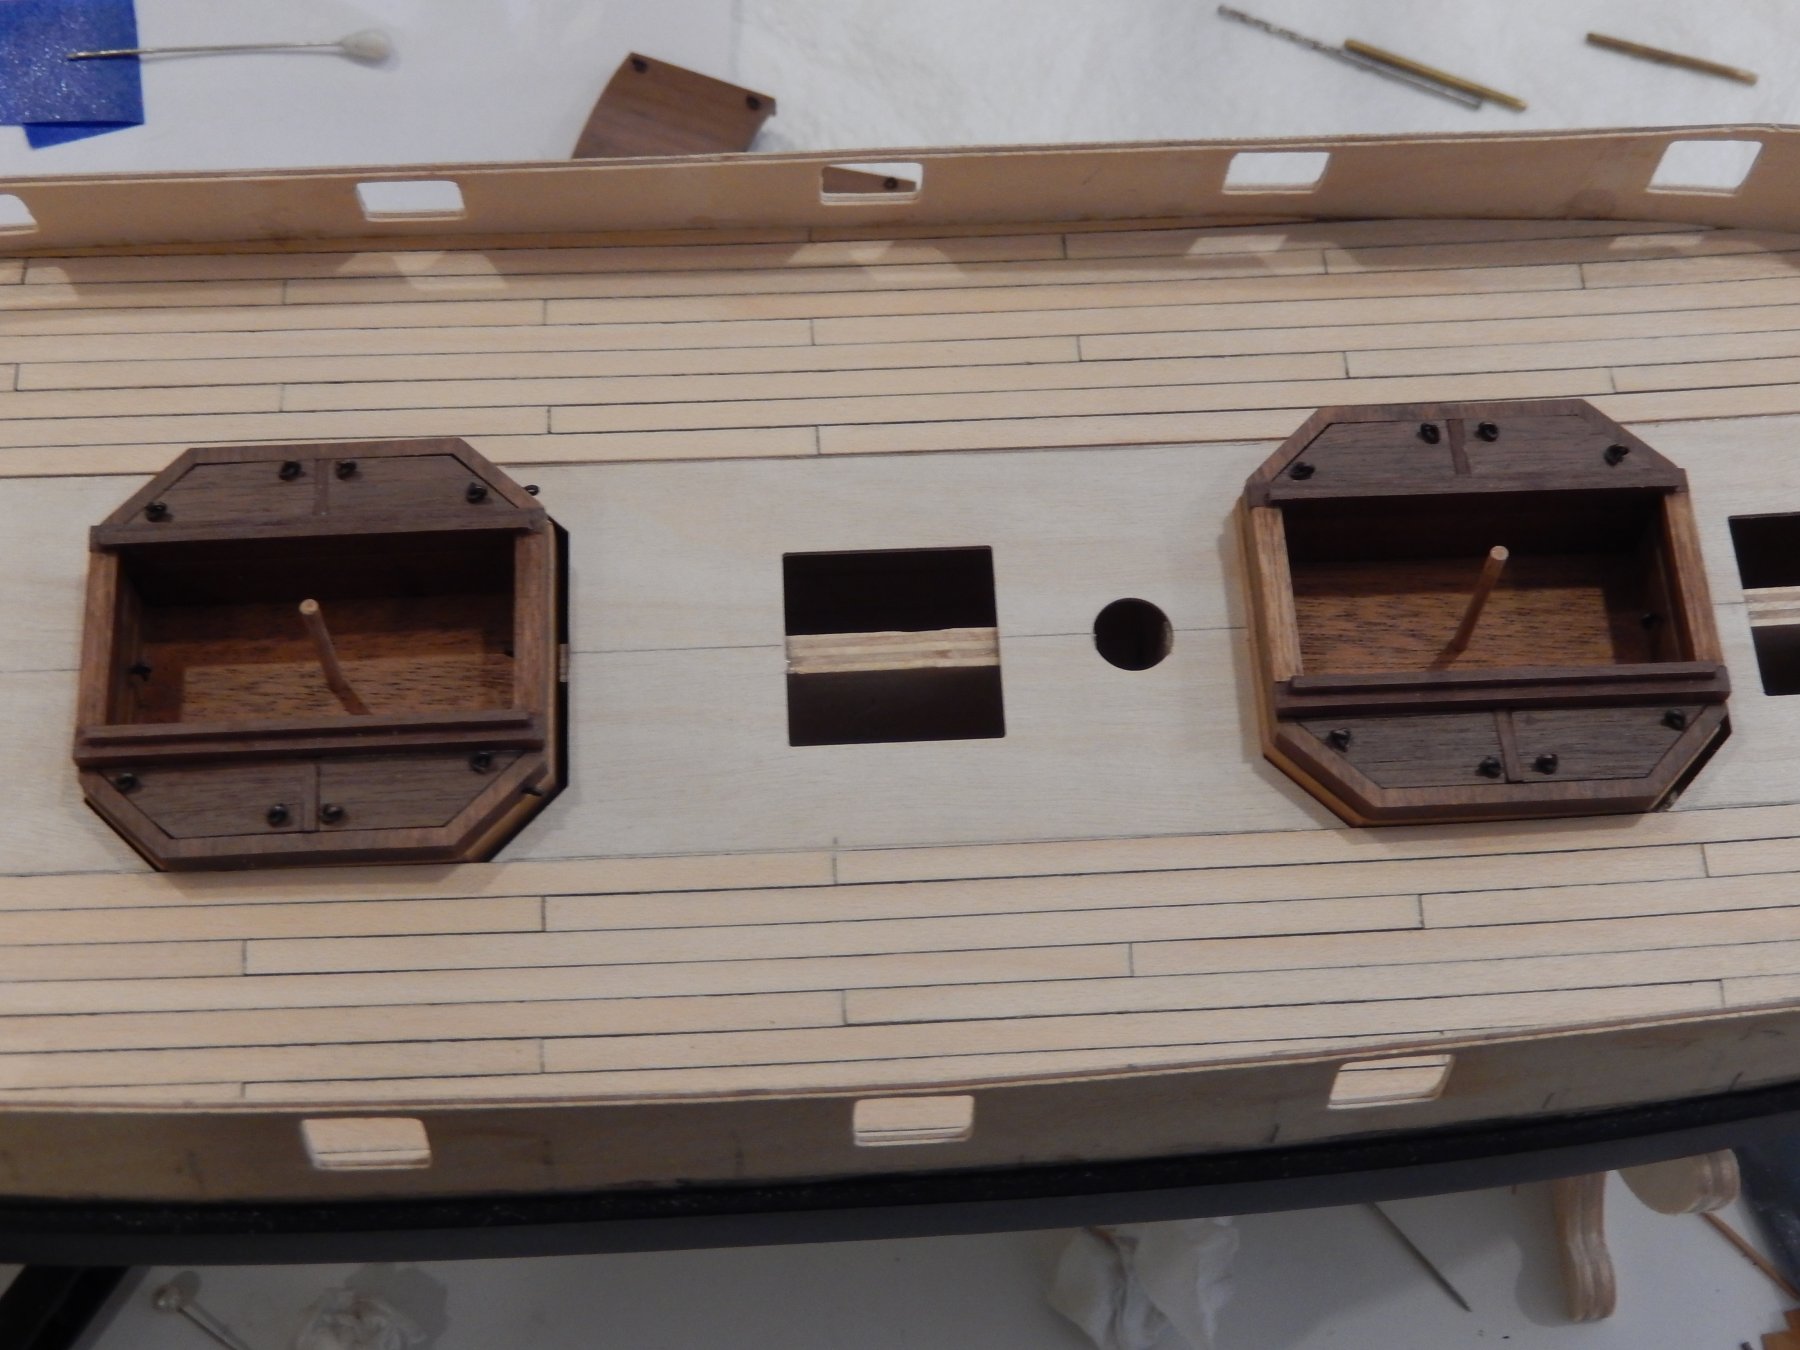
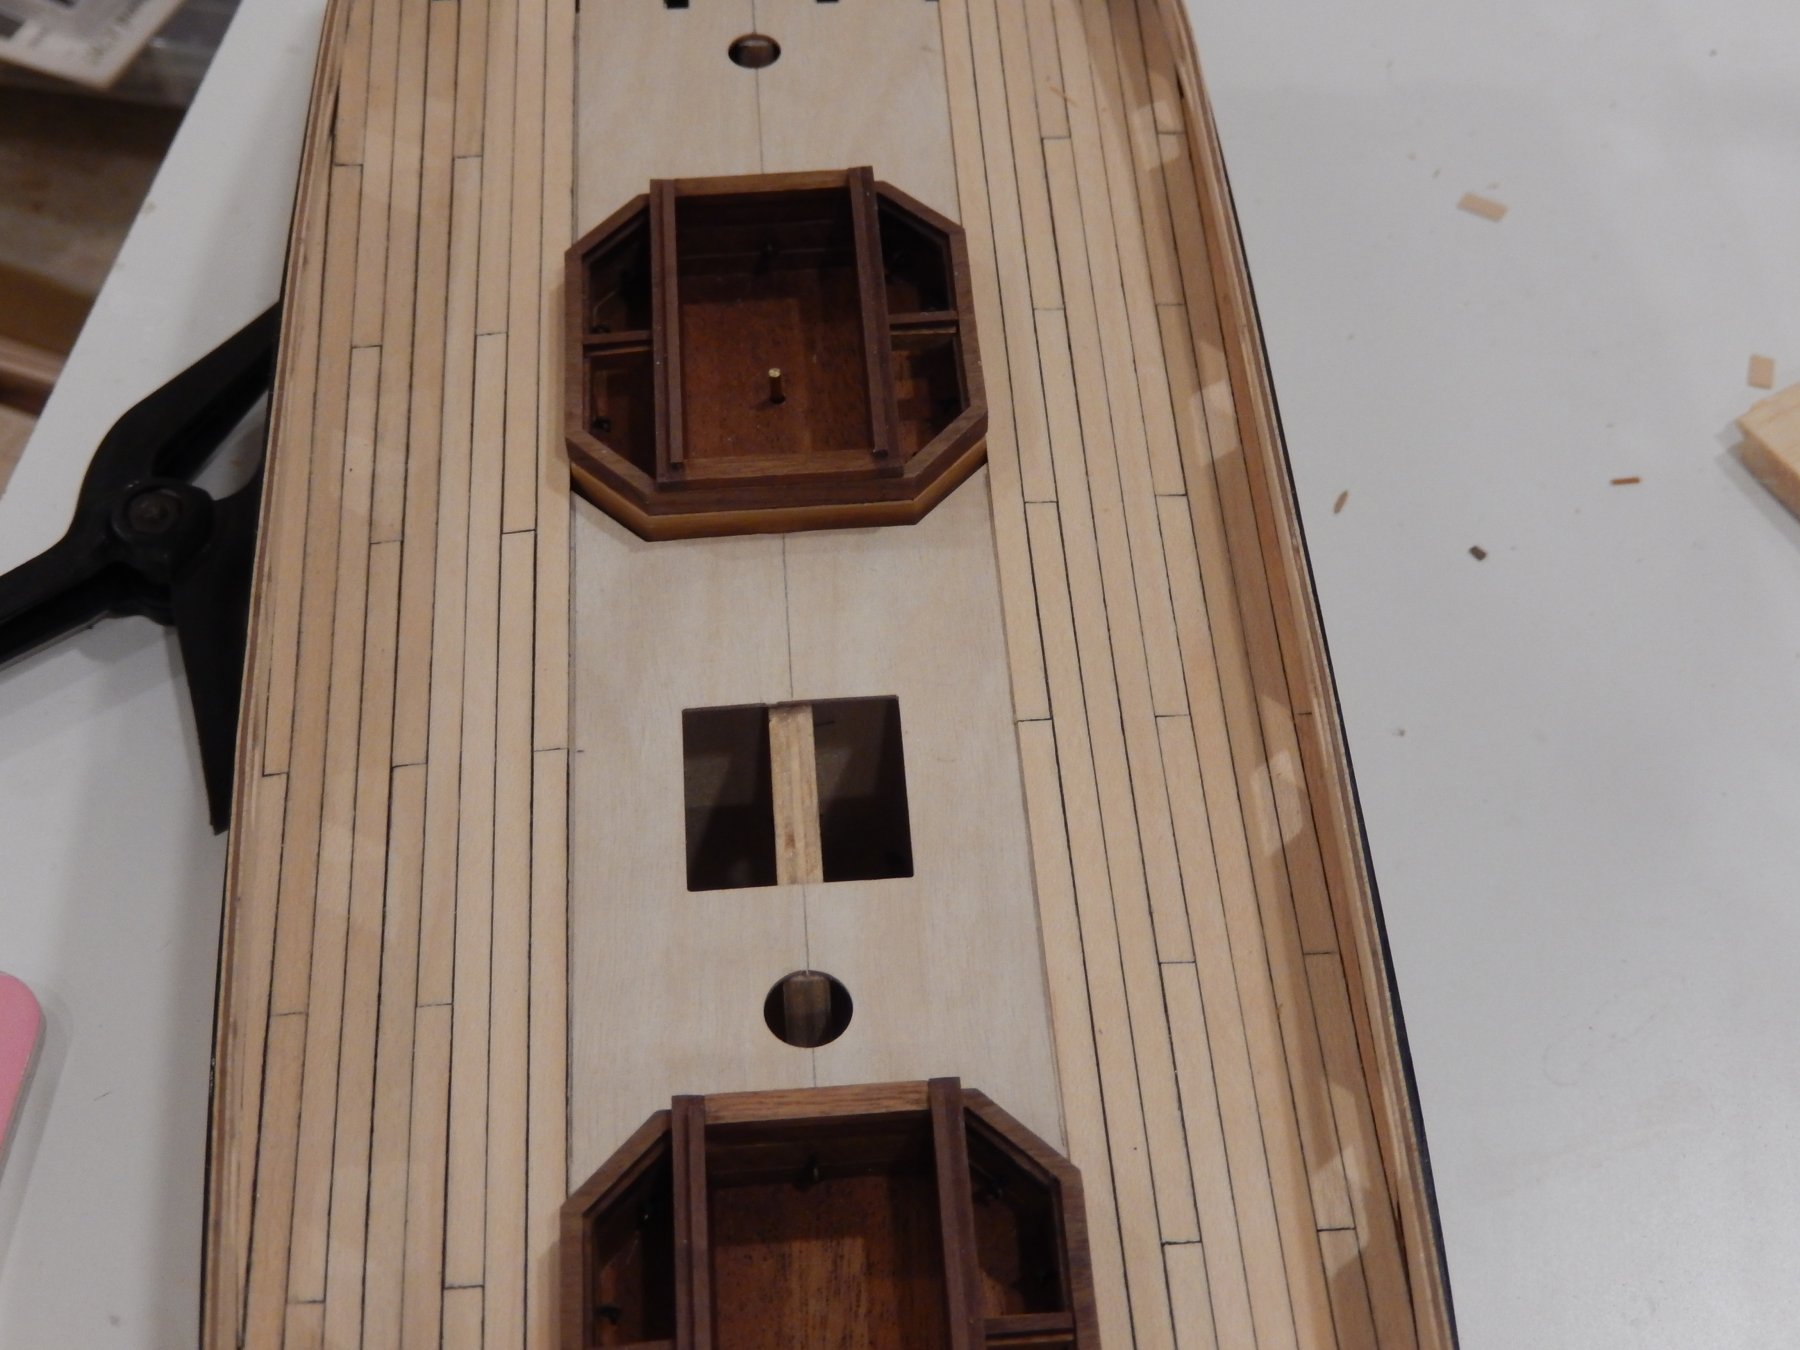
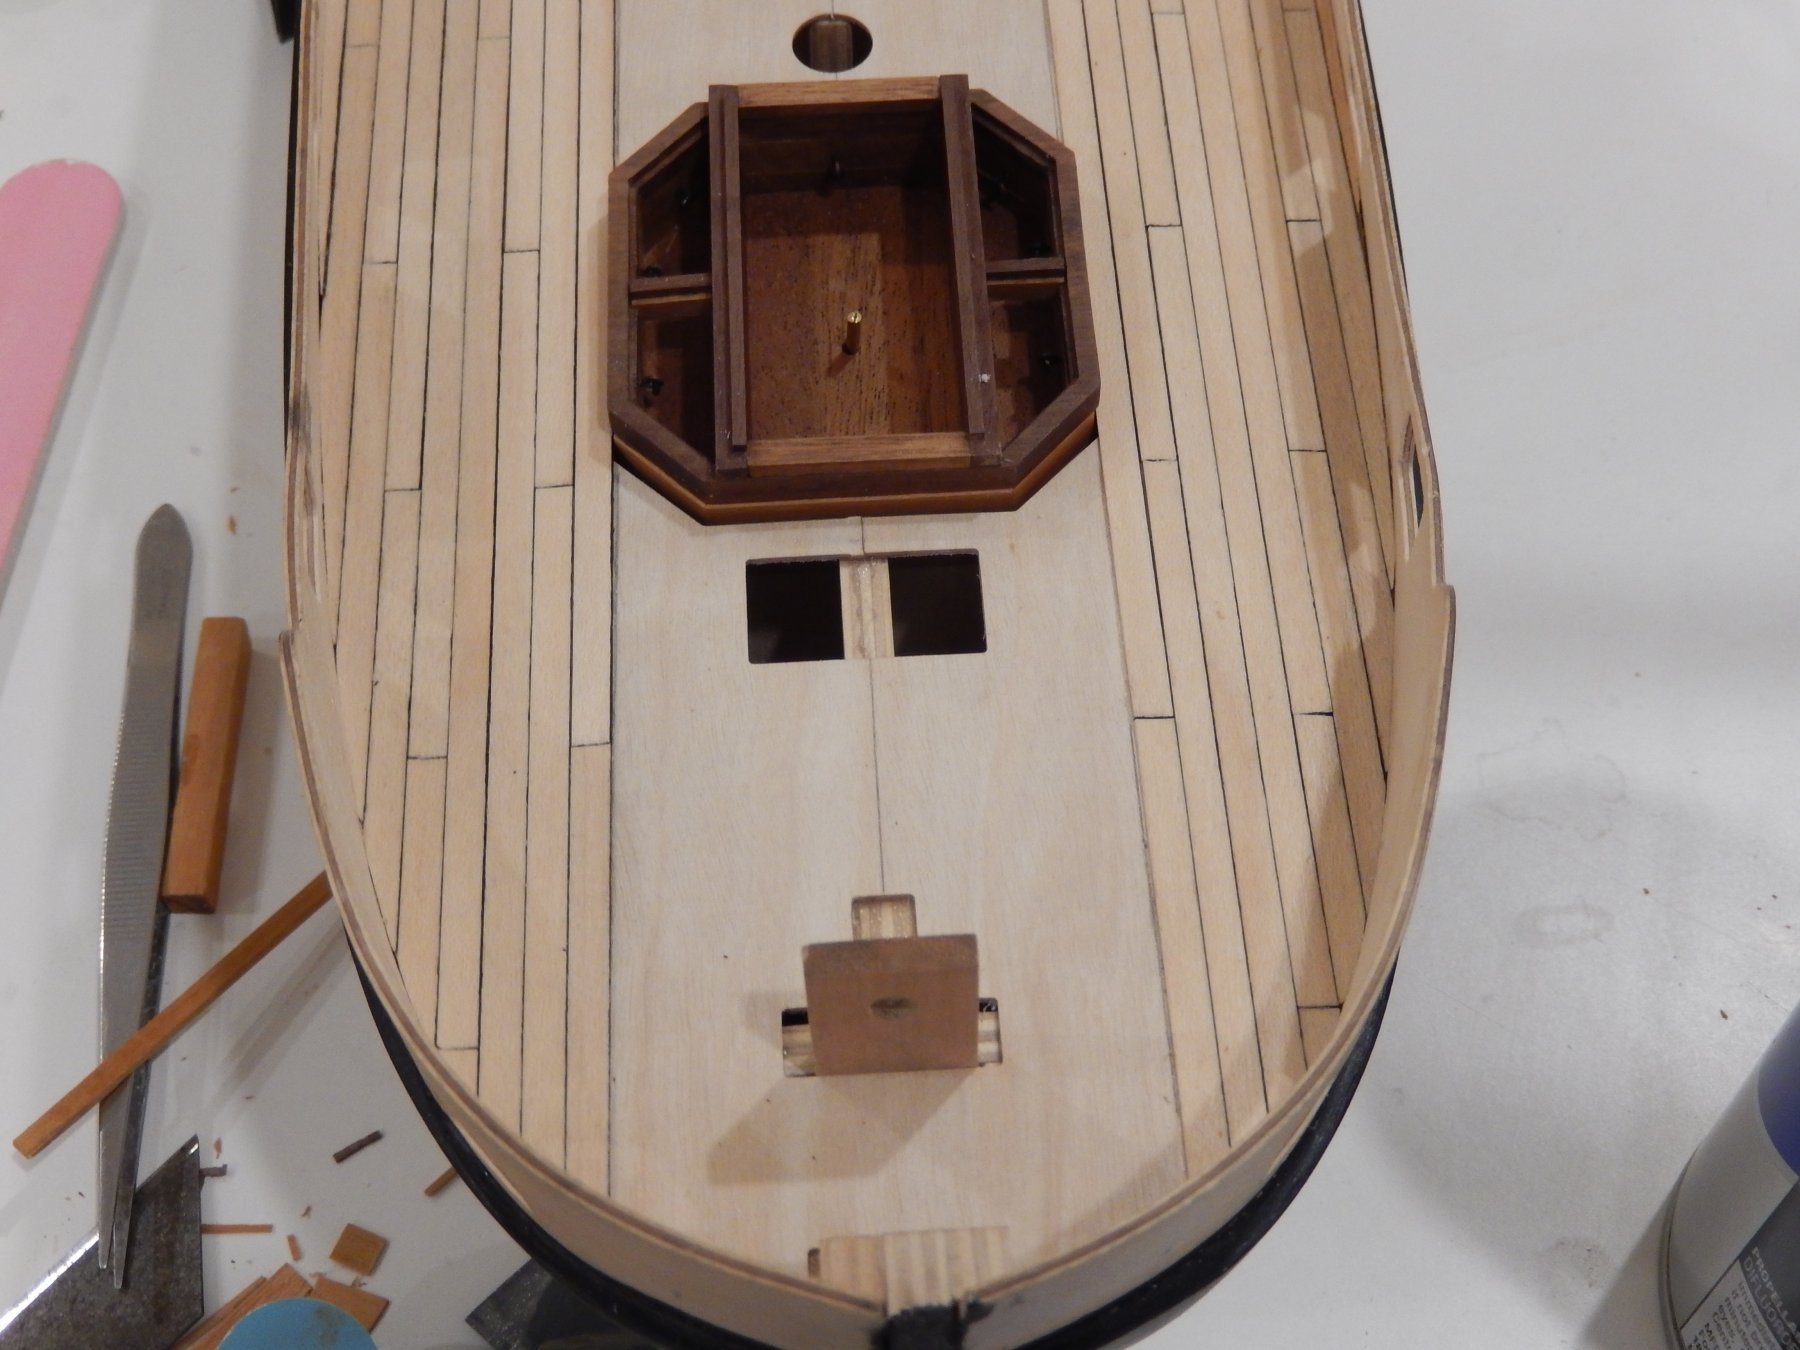
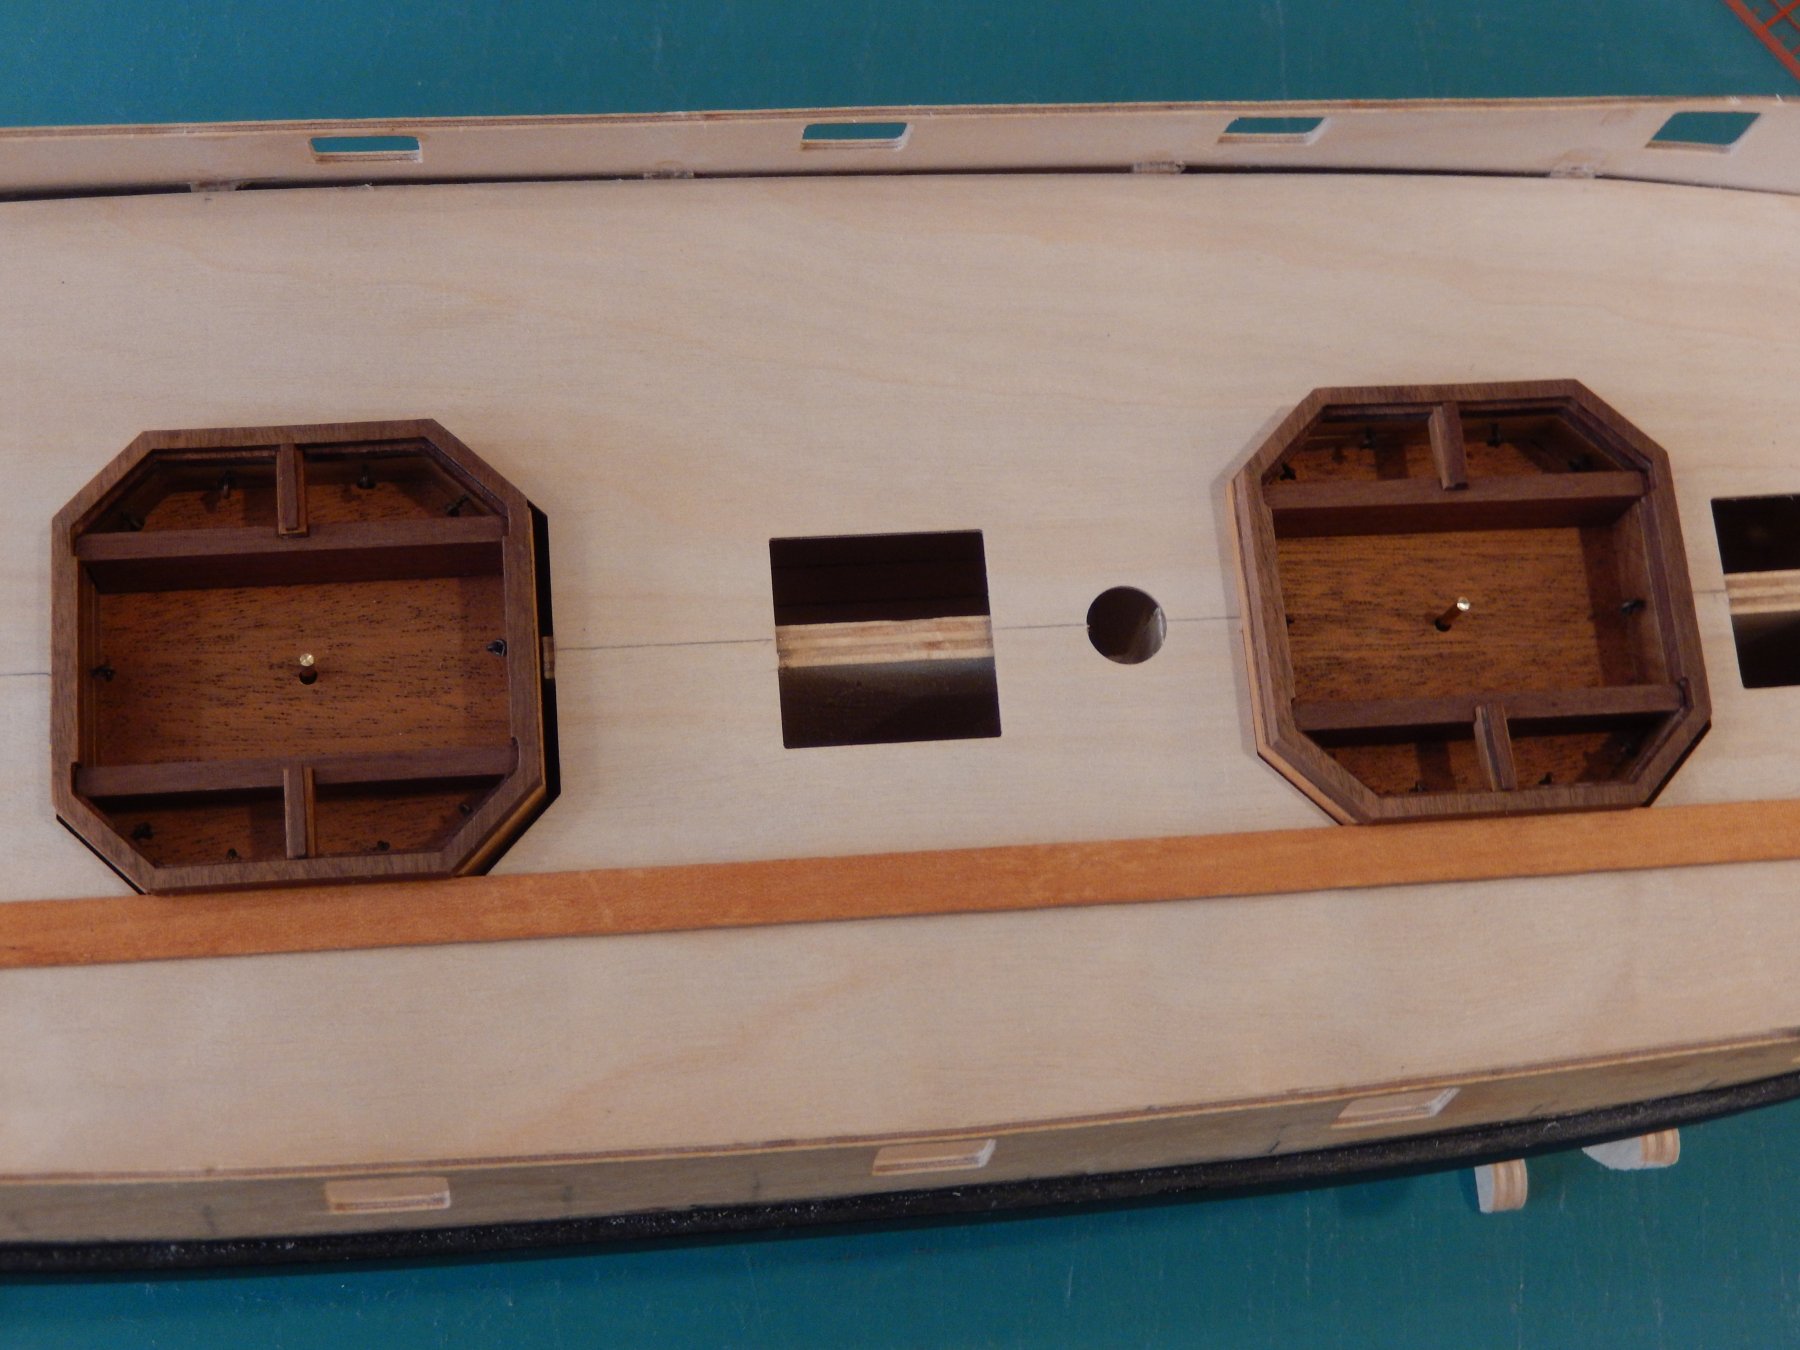
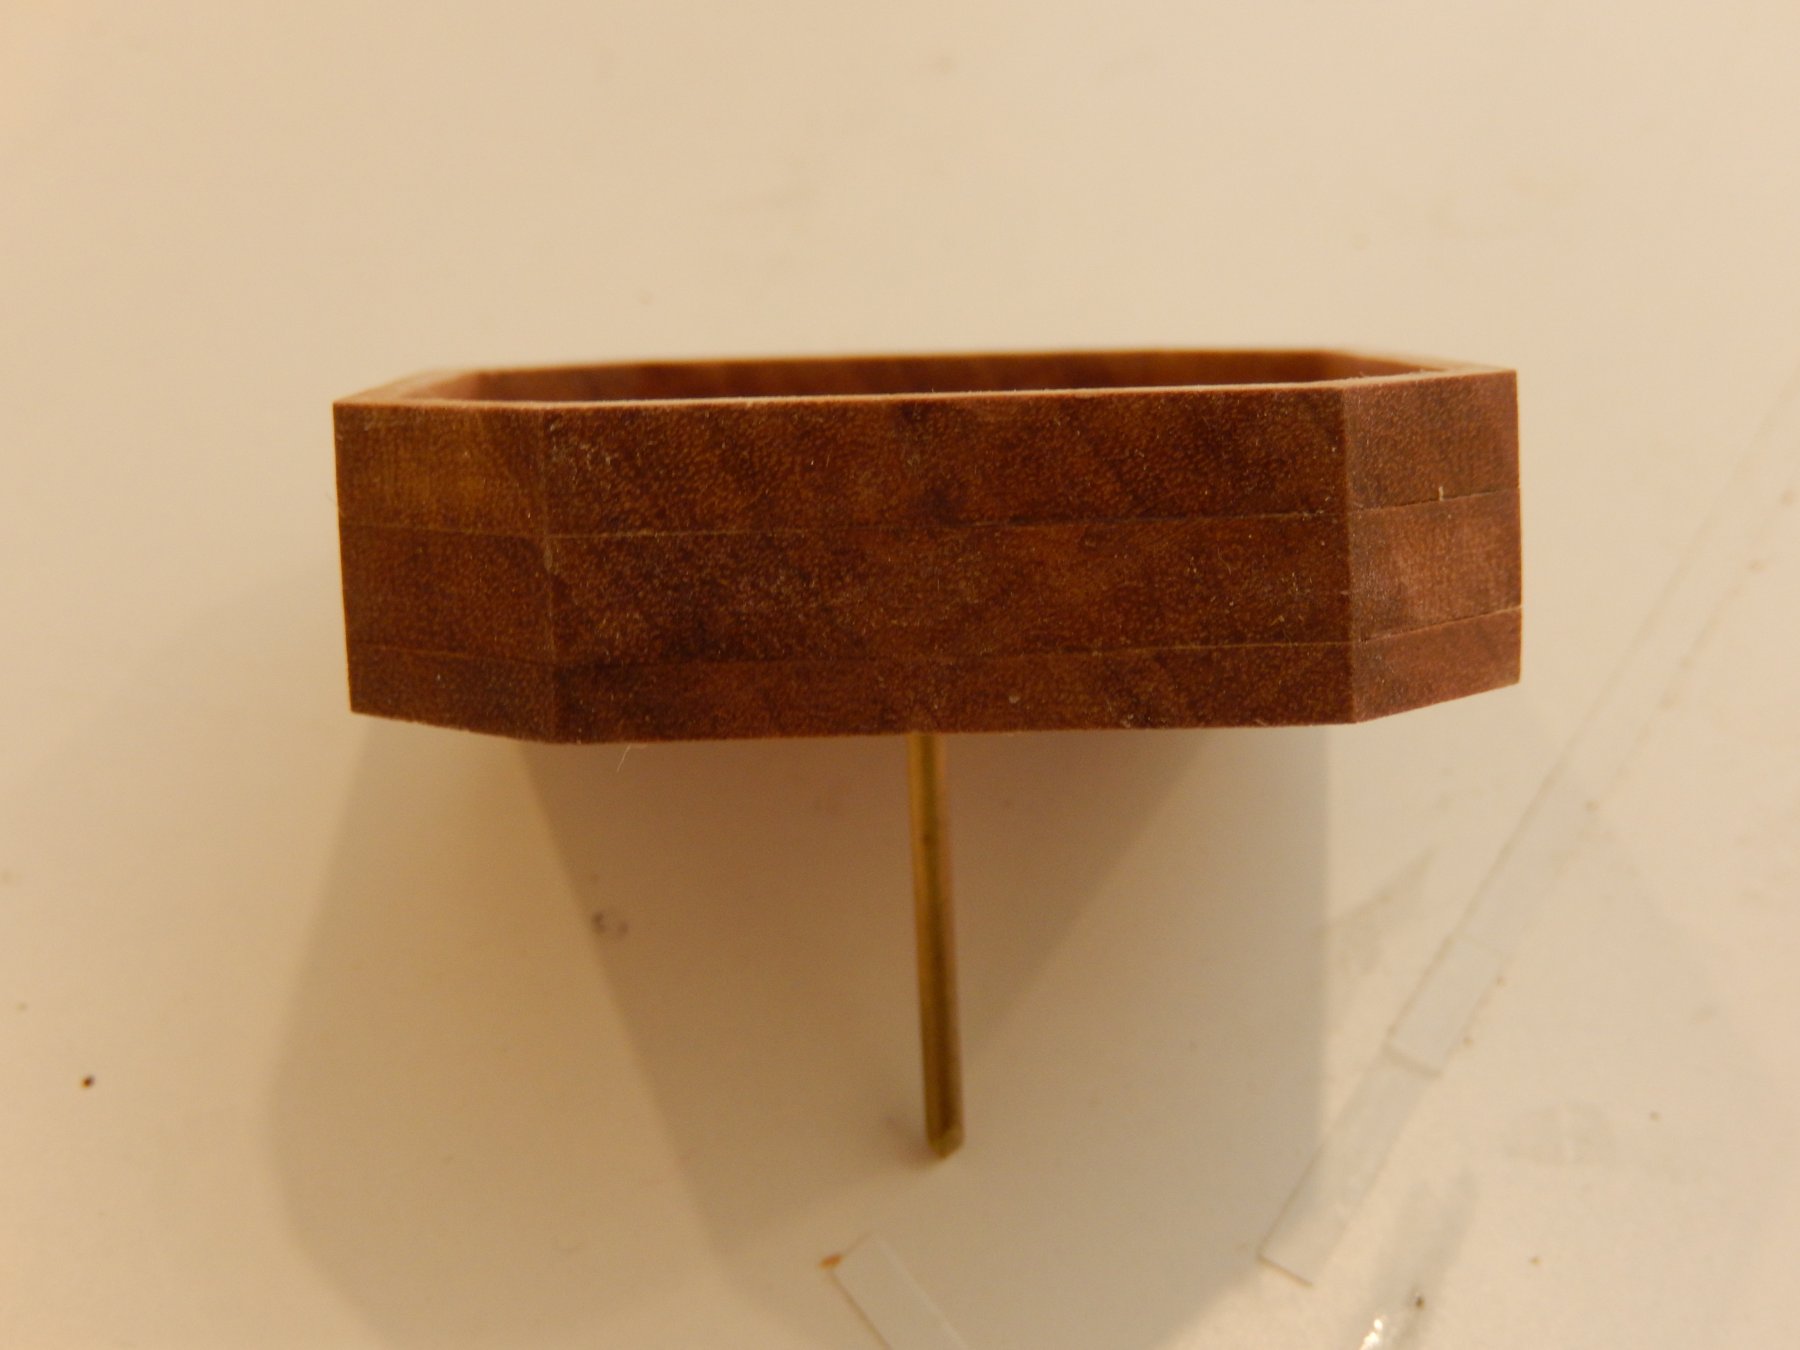
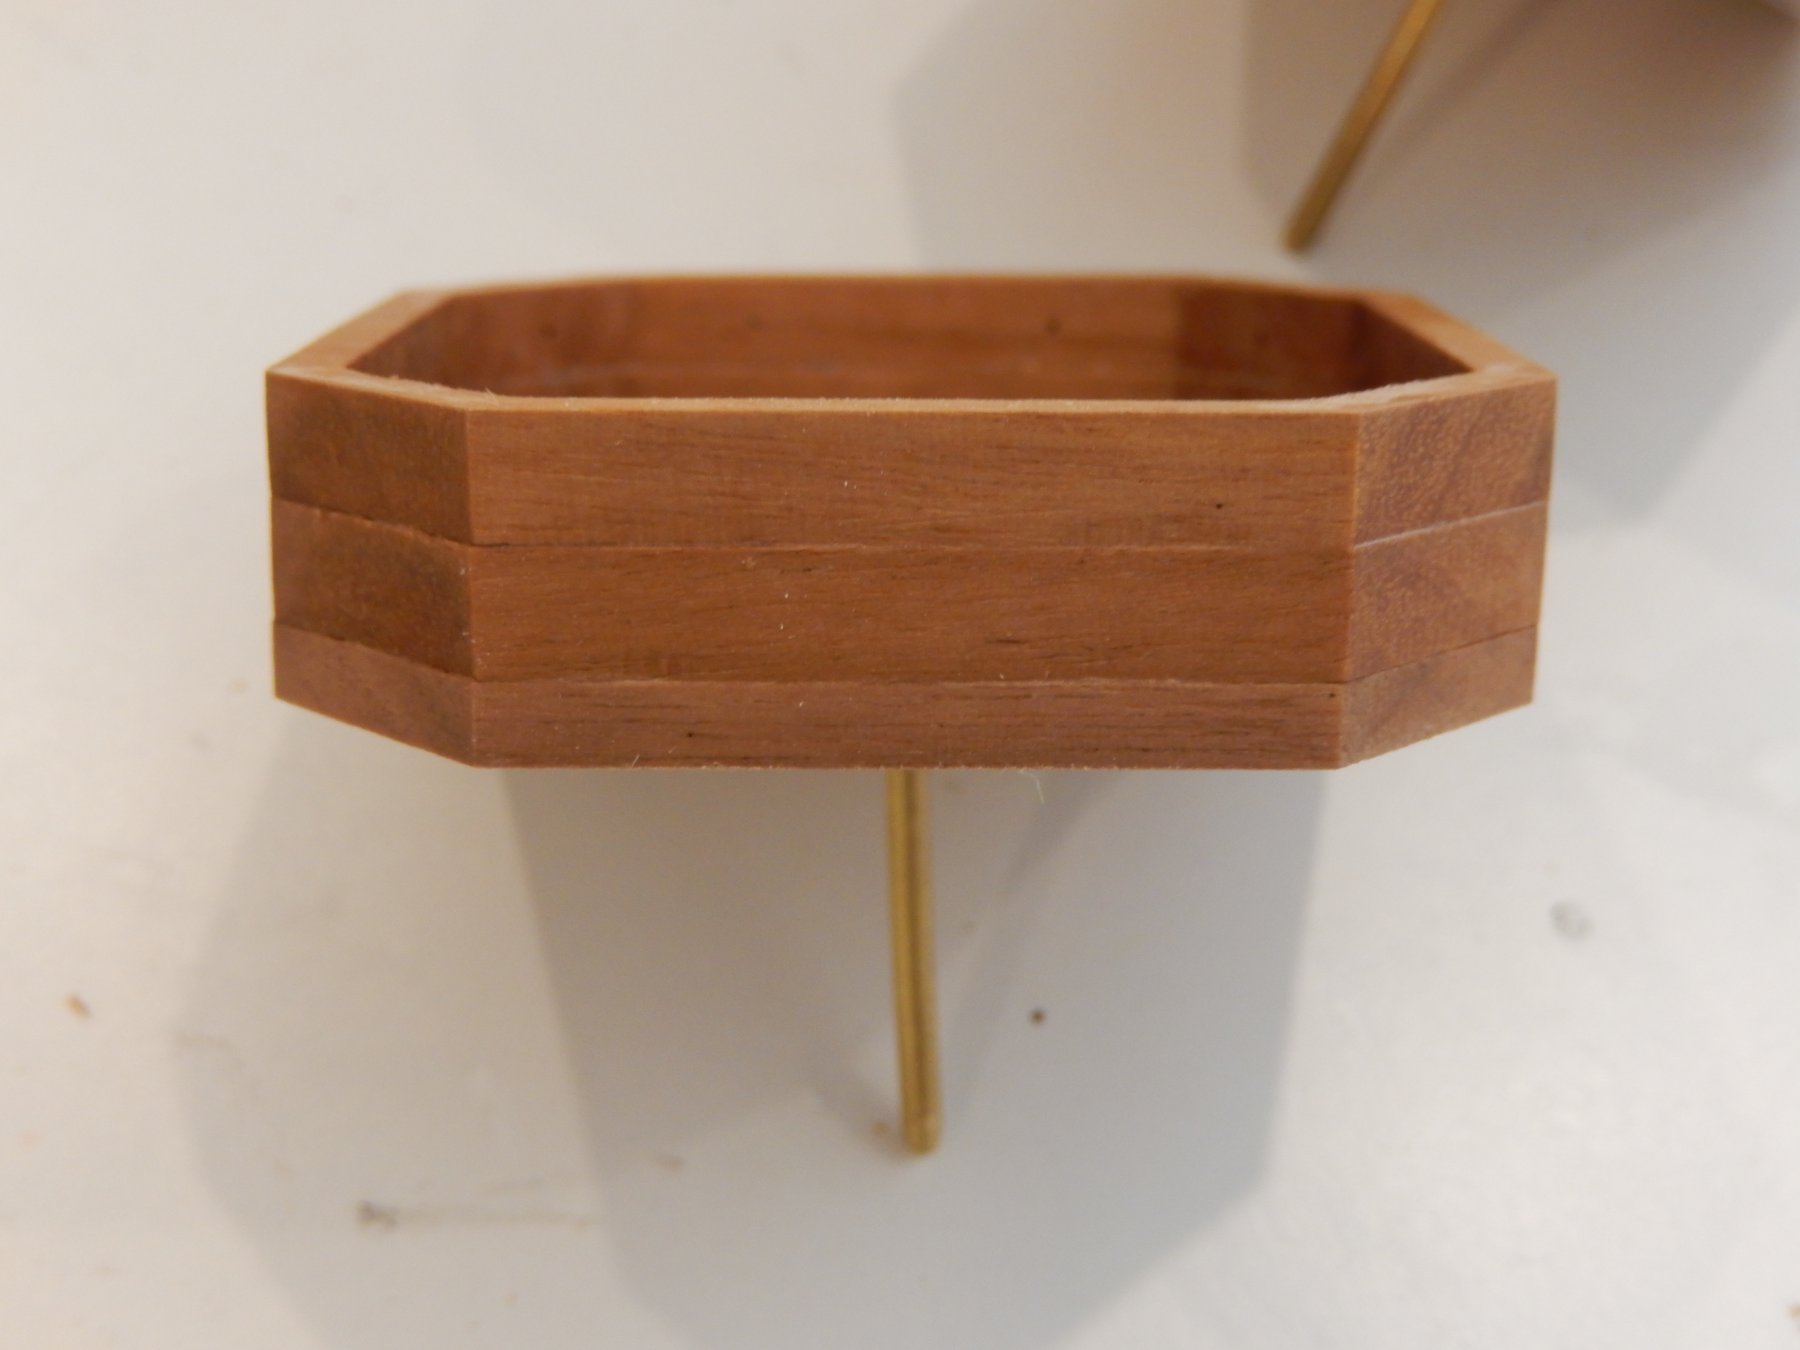
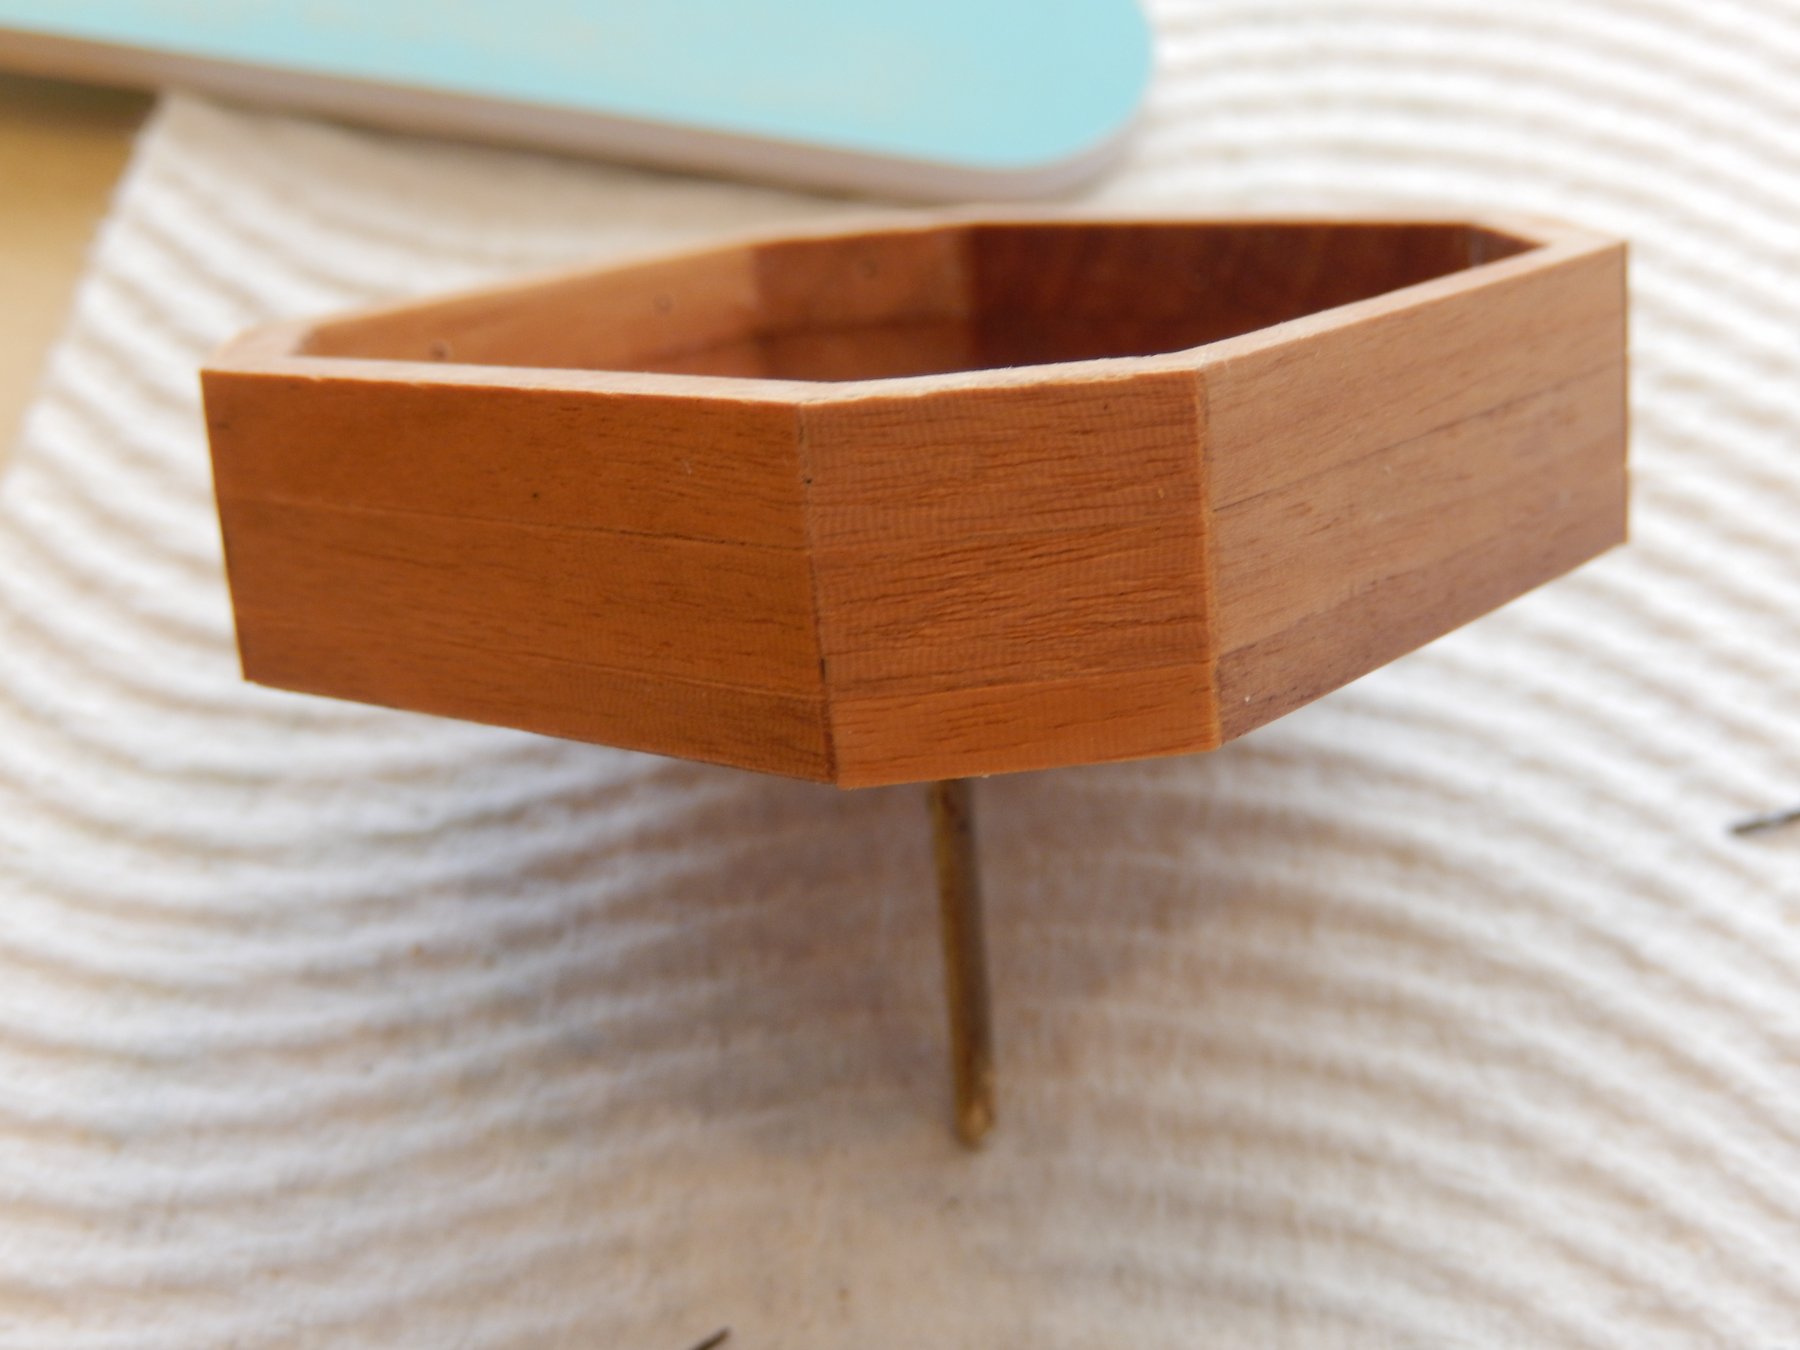
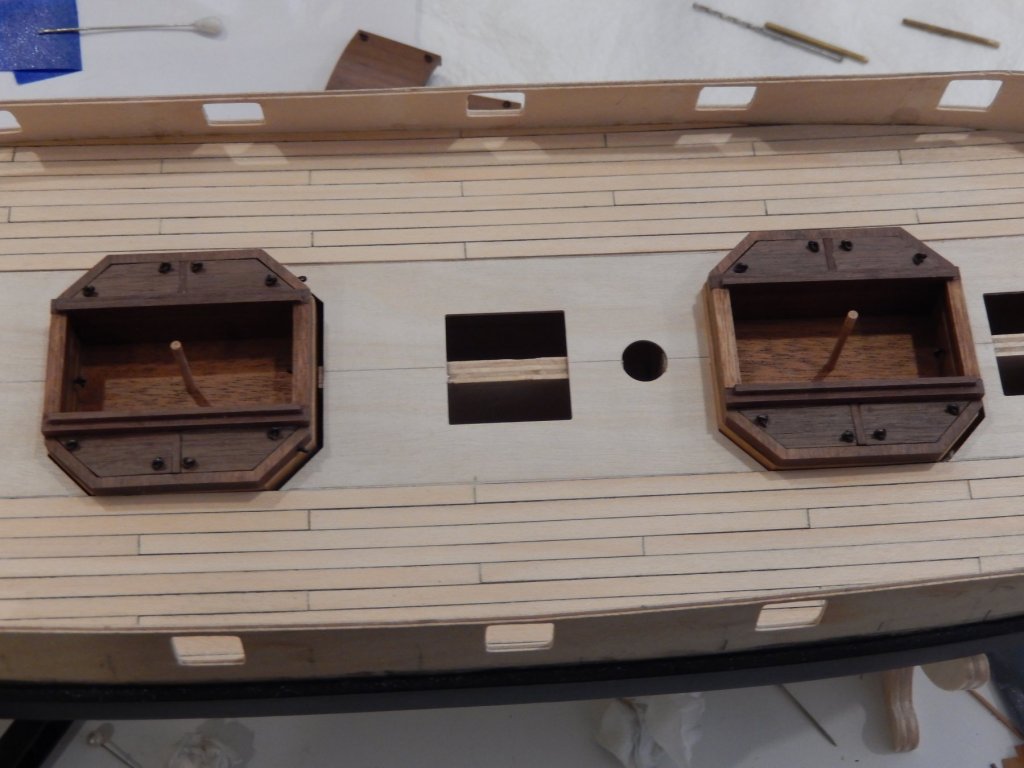
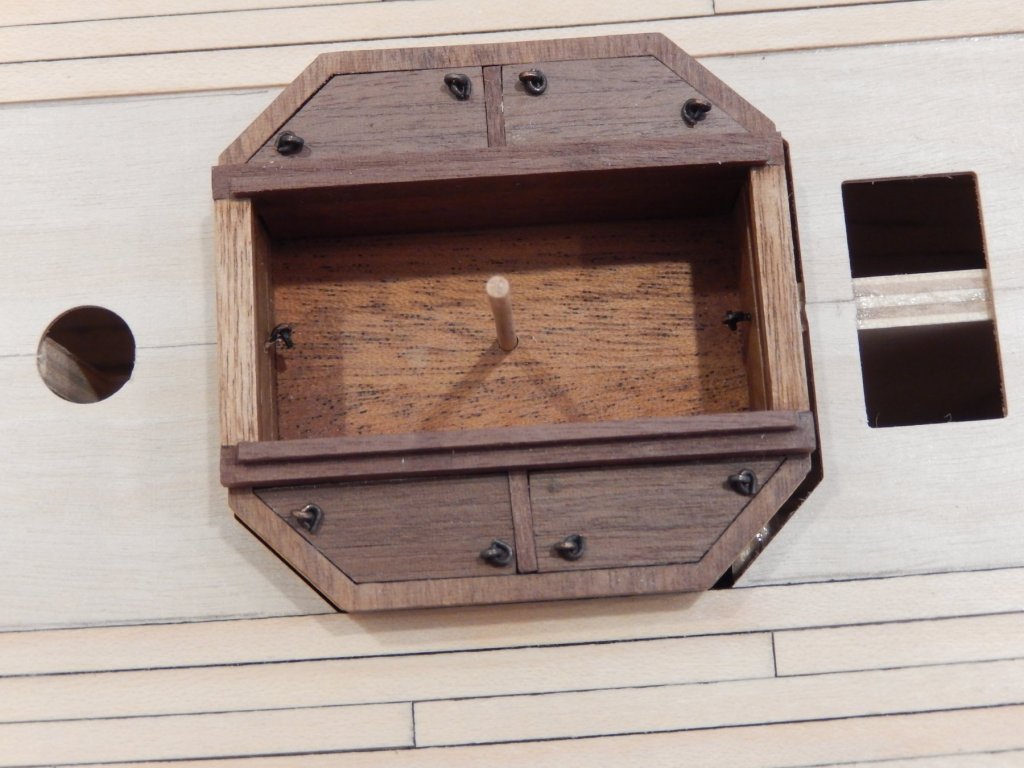
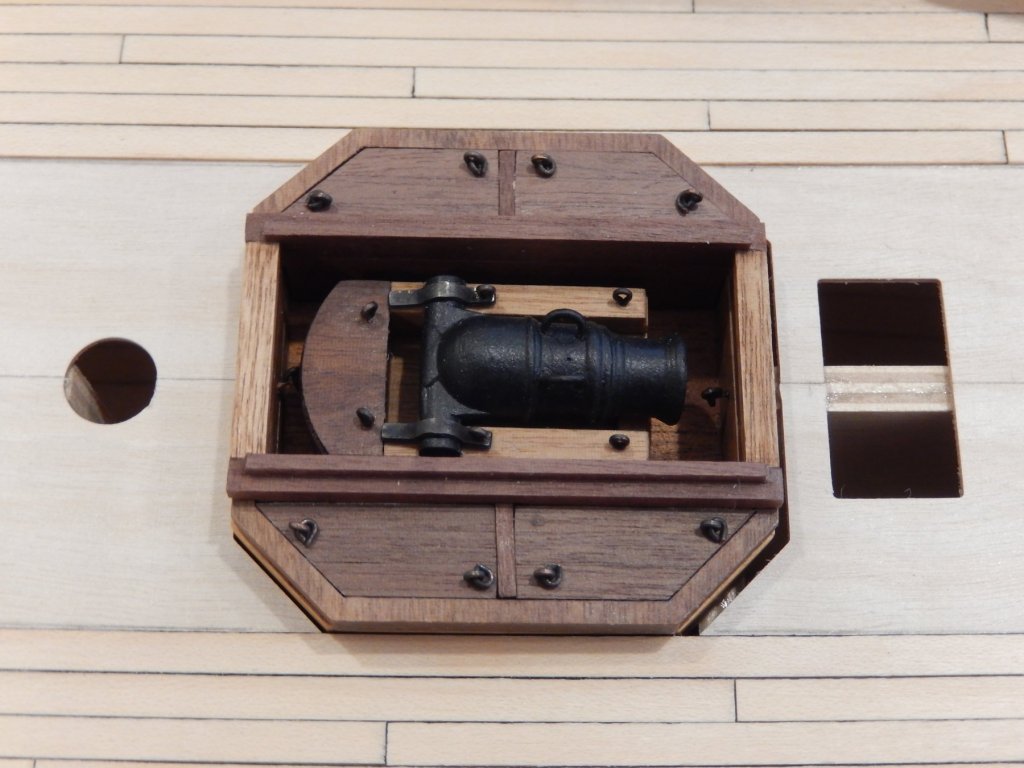
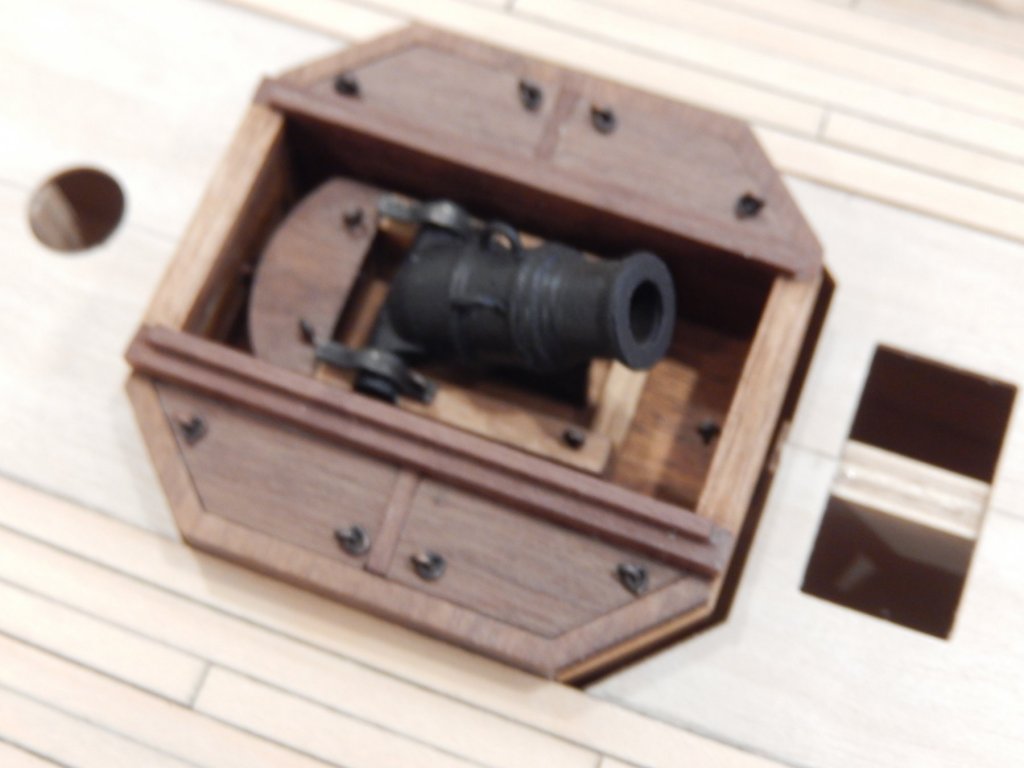
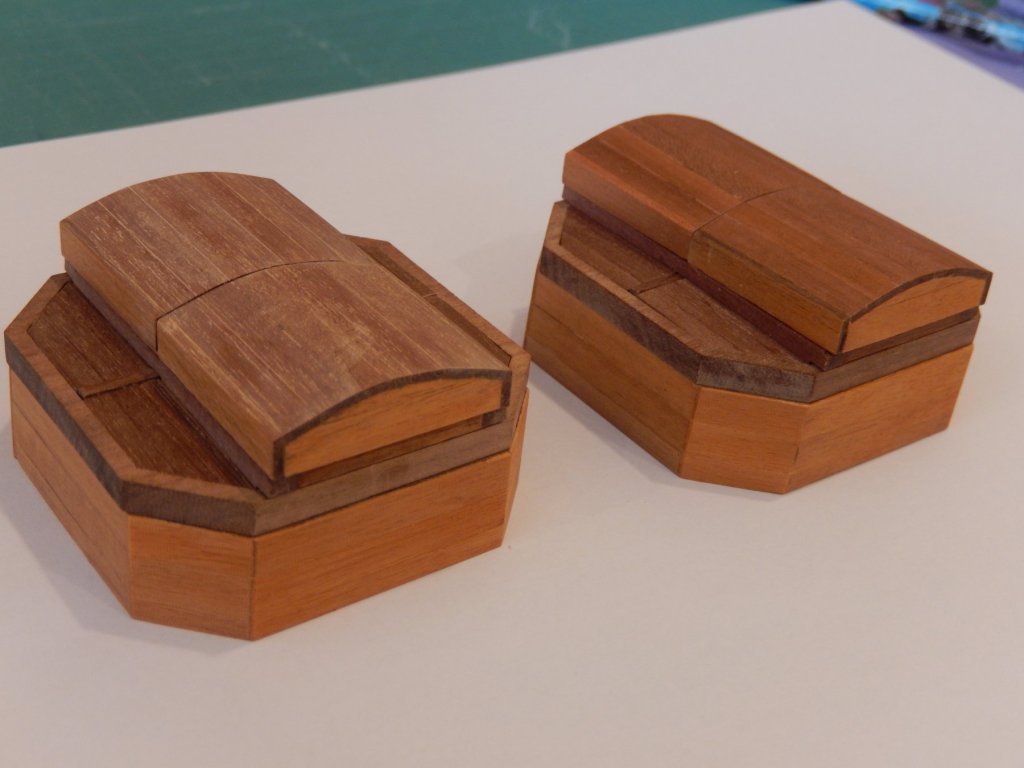
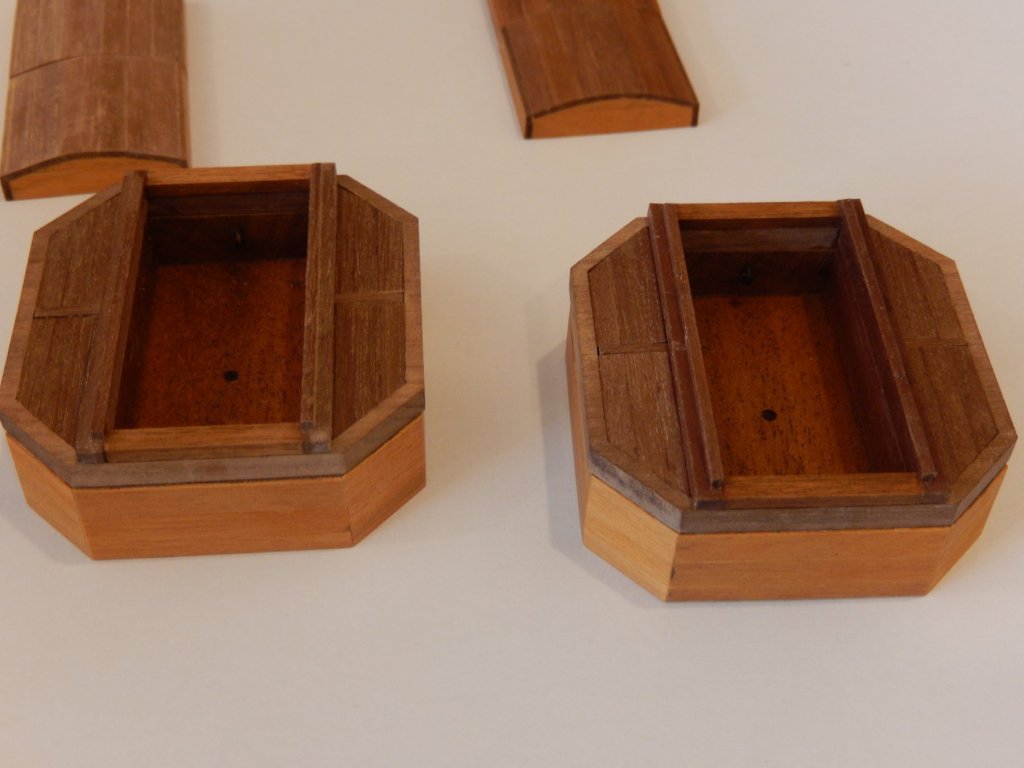
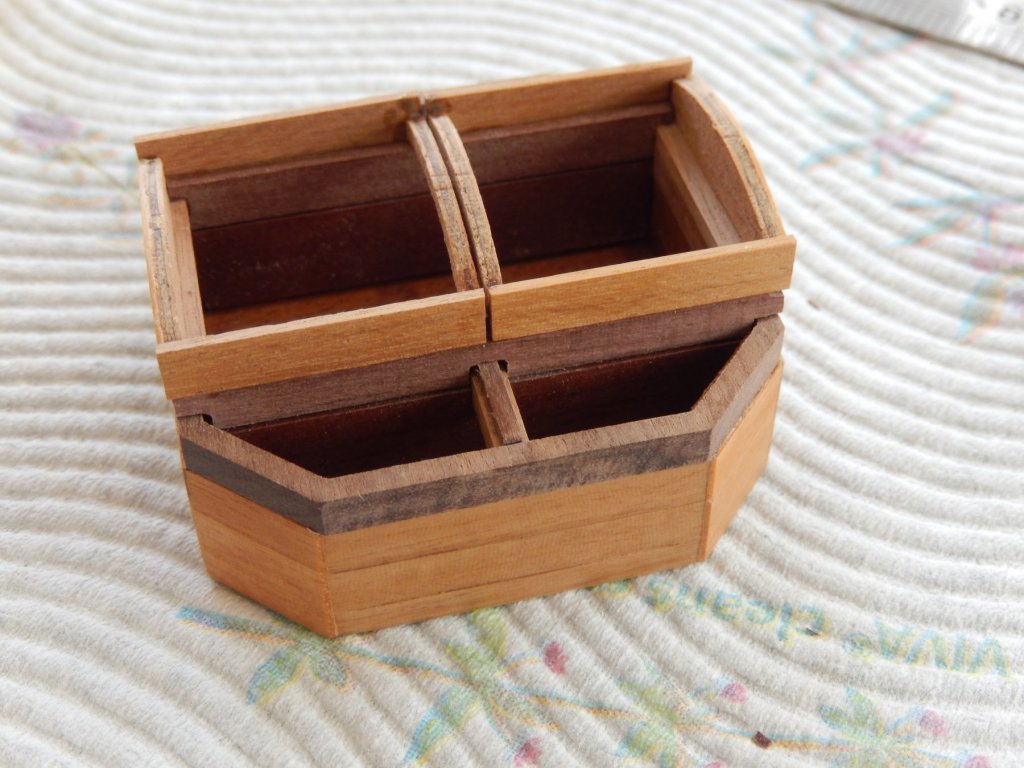
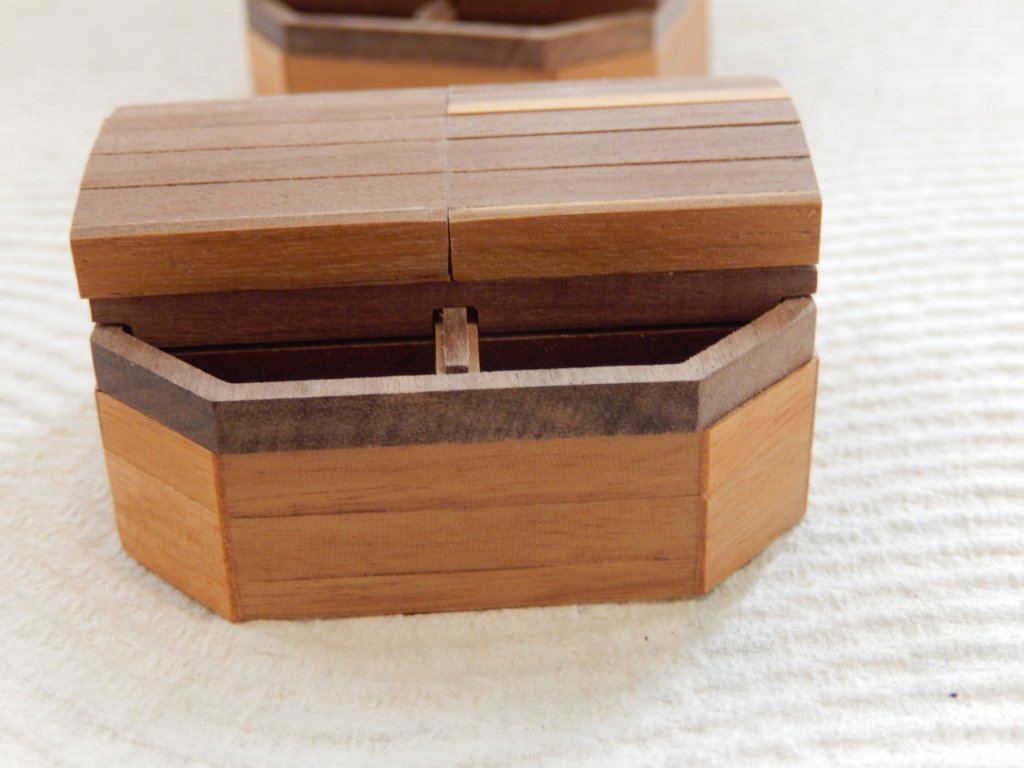
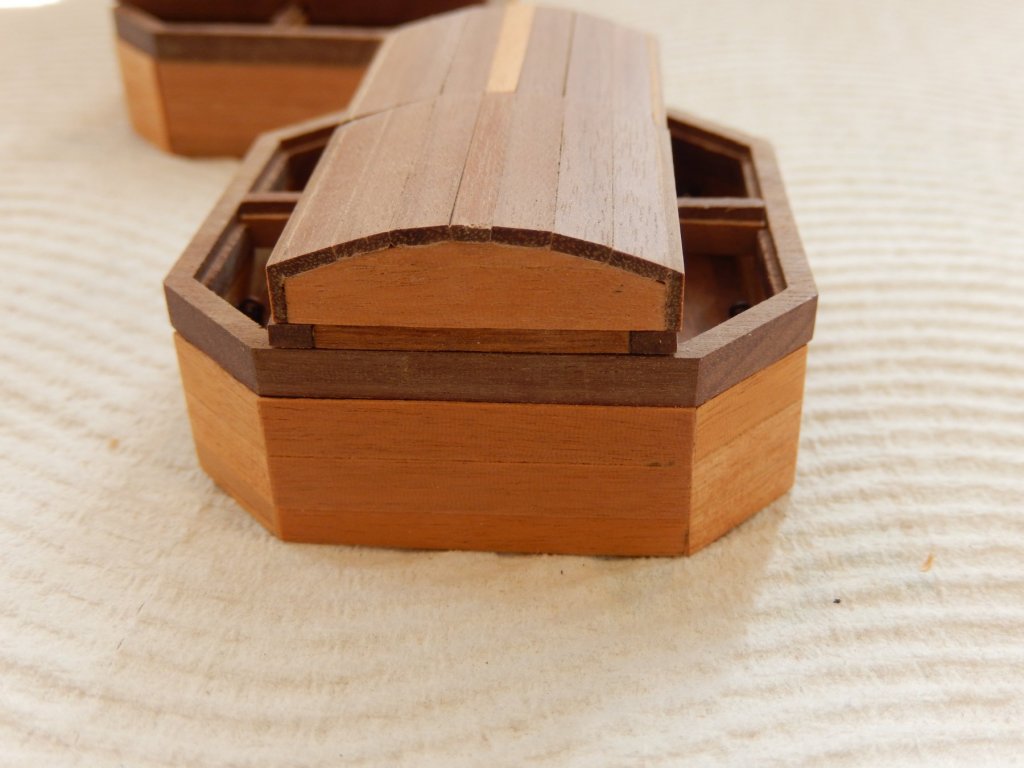
The mortar housing and bed are now finished. Here are the housings. Fitting the lids was quite time-consuming The eyelets are positioned in the way shown in the 'Anatomy of a Ship'. For those who may follow, the eyelet at the rear of the forward housing shown below should be VERY well recessed. Mine originally protruded about 0.5mm too much which caused it to foul the mortar bed. The trunnion brackets in the following photos are only dry-fitted, and there is some touching-up to do. There is also a potential problem with the eyelets on the sides of the mortar beds. If the are to fit into the housings the eyelets must again be recessed (shown below) as there is almost no room for the whole assembly. I suggest before gluing the eyelets, dry-fit them to make sure the bed, eyelets and all, fit the housing.


- 421 replies
-
- 13
-
-
- caldercraft
- granado
- (and 1 more)
-
Good to have you back Mitsuaki. I finally finished my Vanguard - only took 5 years. I look forward to following your progress with Bellerophon. All The best Bob (rmc)
- 126 replies
-
- 2
-
-
- victory models
- amati
- (and 2 more)
-
The deck planking is proceeding reasonably well. The centre section is still to complete, but so far it doesn't look too bad. It will be interesting to see how the centre section goes, especially how it meets in the centre of the deck.


- 421 replies
-
- 6
-
-
- caldercraft
- granado
- (and 1 more)
-
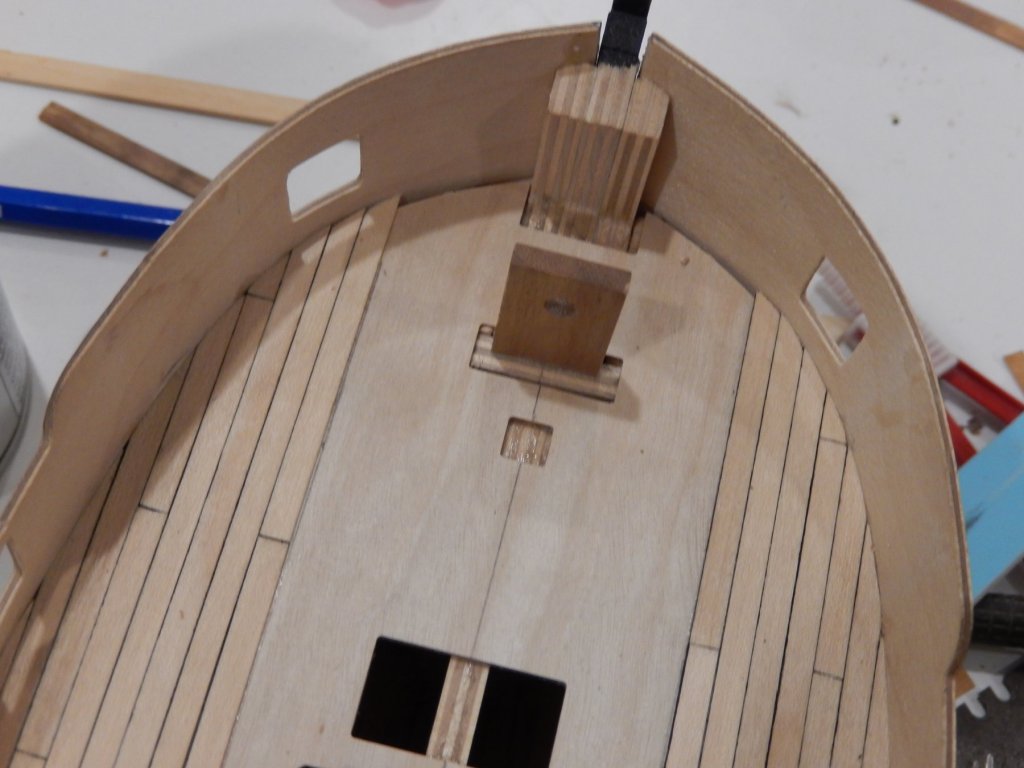
The mortar housing are now finished and installed. The deck planking has begun. Here is part of the process. This stuff gives quite a good appearance when finished. Application on one side of the plank is sufficient. A little CA on the ends prevents bleeding into the grain.
- 421 replies
-
- 7
-
-
- caldercraft
- granado
- (and 1 more)
-
A belated thanks Jason. Here are the mortar housings finished but for a bit of touching up, and a couple of coats of poly. Fitting the side housing covers was quite time-consuming, but came out reasonably well. Matching timber again proved a problem, but I promise this will be my last whinge about it. The polyurethane should improve the appearance. A rather strange thing happened with uploading a couple of the these files. I was notified that the uploads had failed so I tried again without looking to see if indeed nothing had appeared. When I eventually looked, there are all the files, 'failures' and all - failure into success - who would have thought .... If only it worked like that in life. In the circumstances I will leave well alone.


- 421 replies
-
- 12
-
-
- caldercraft
- granado
- (and 1 more)
-
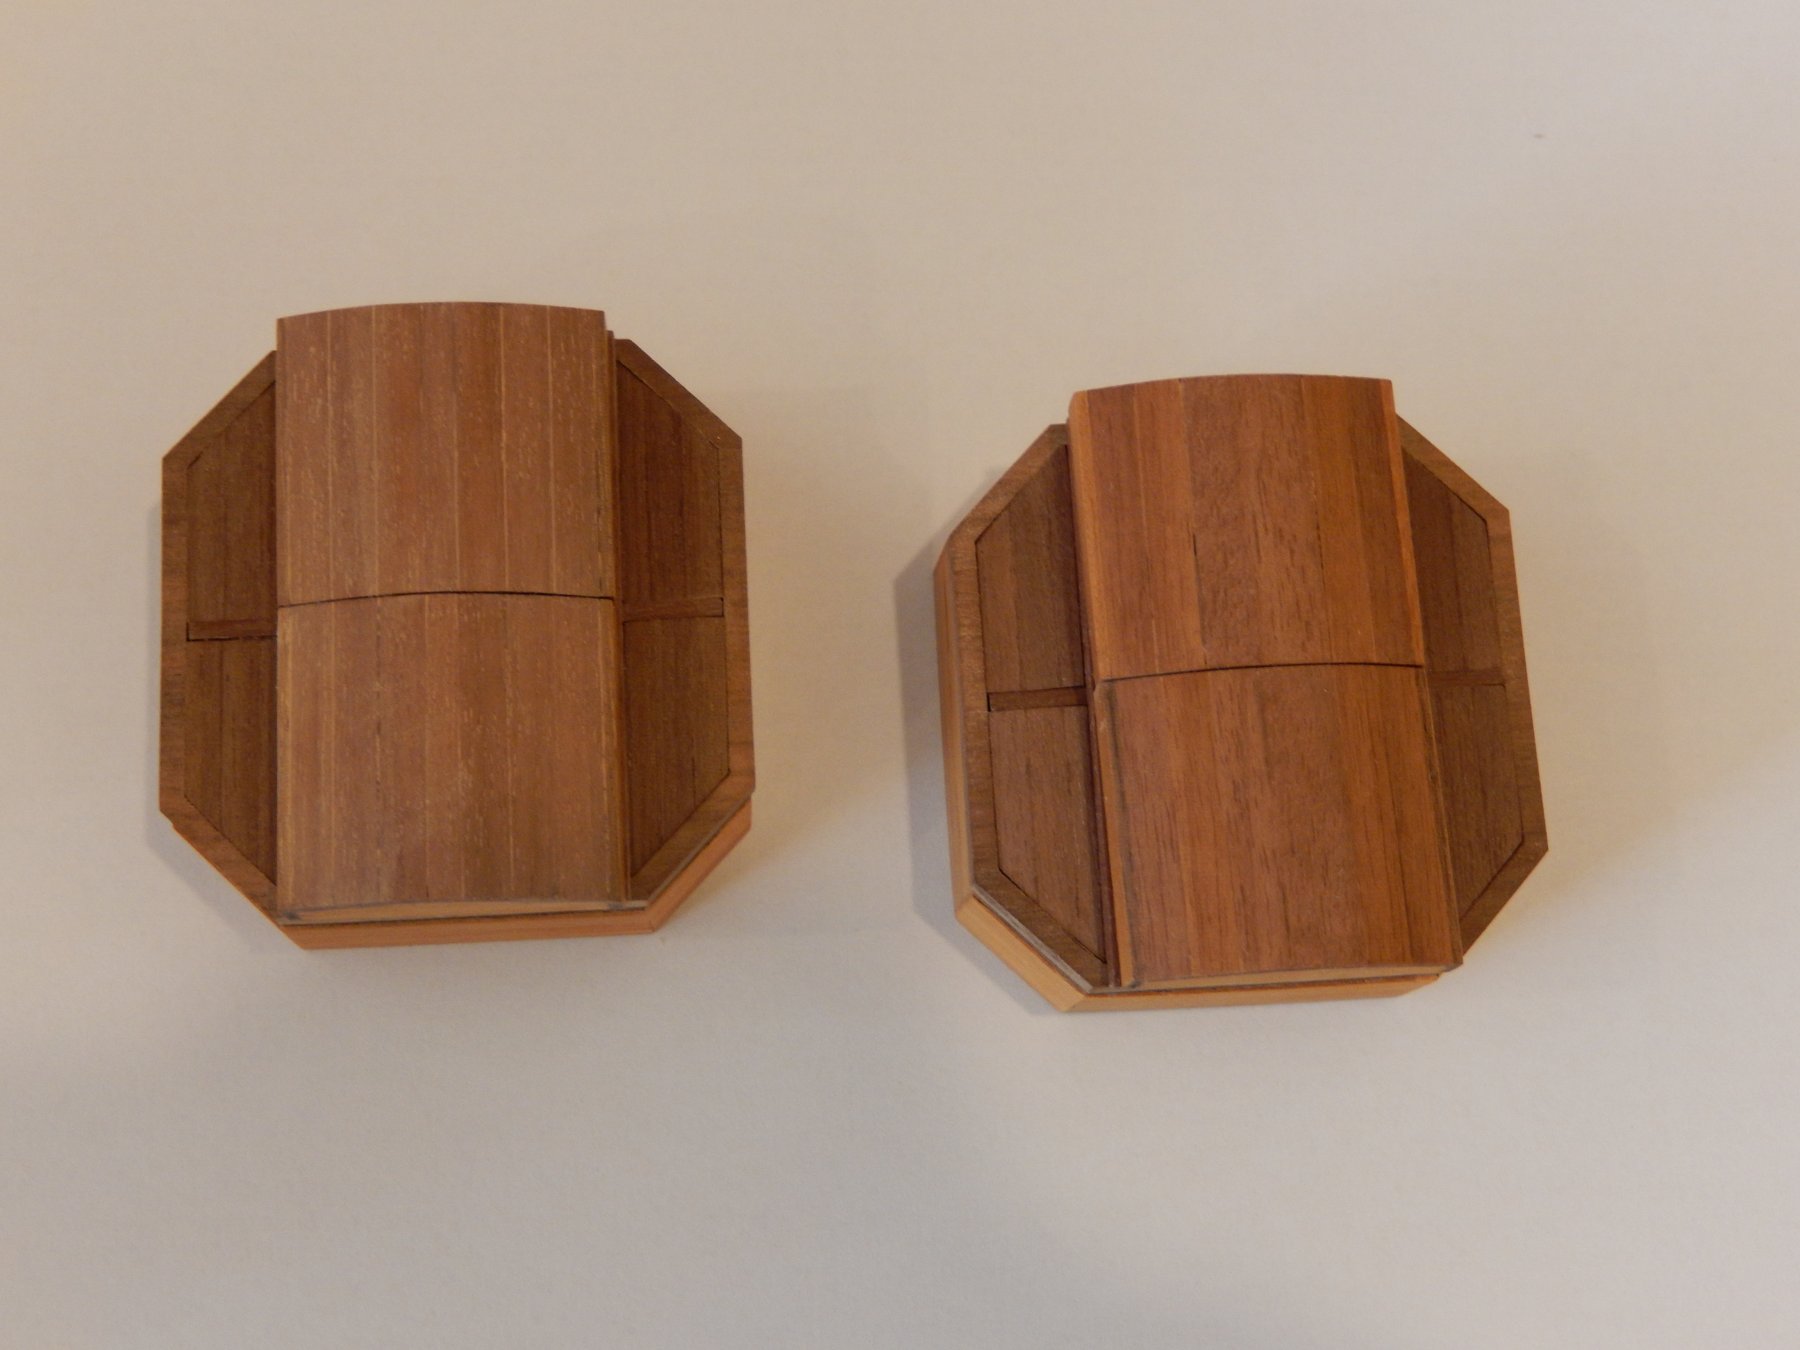
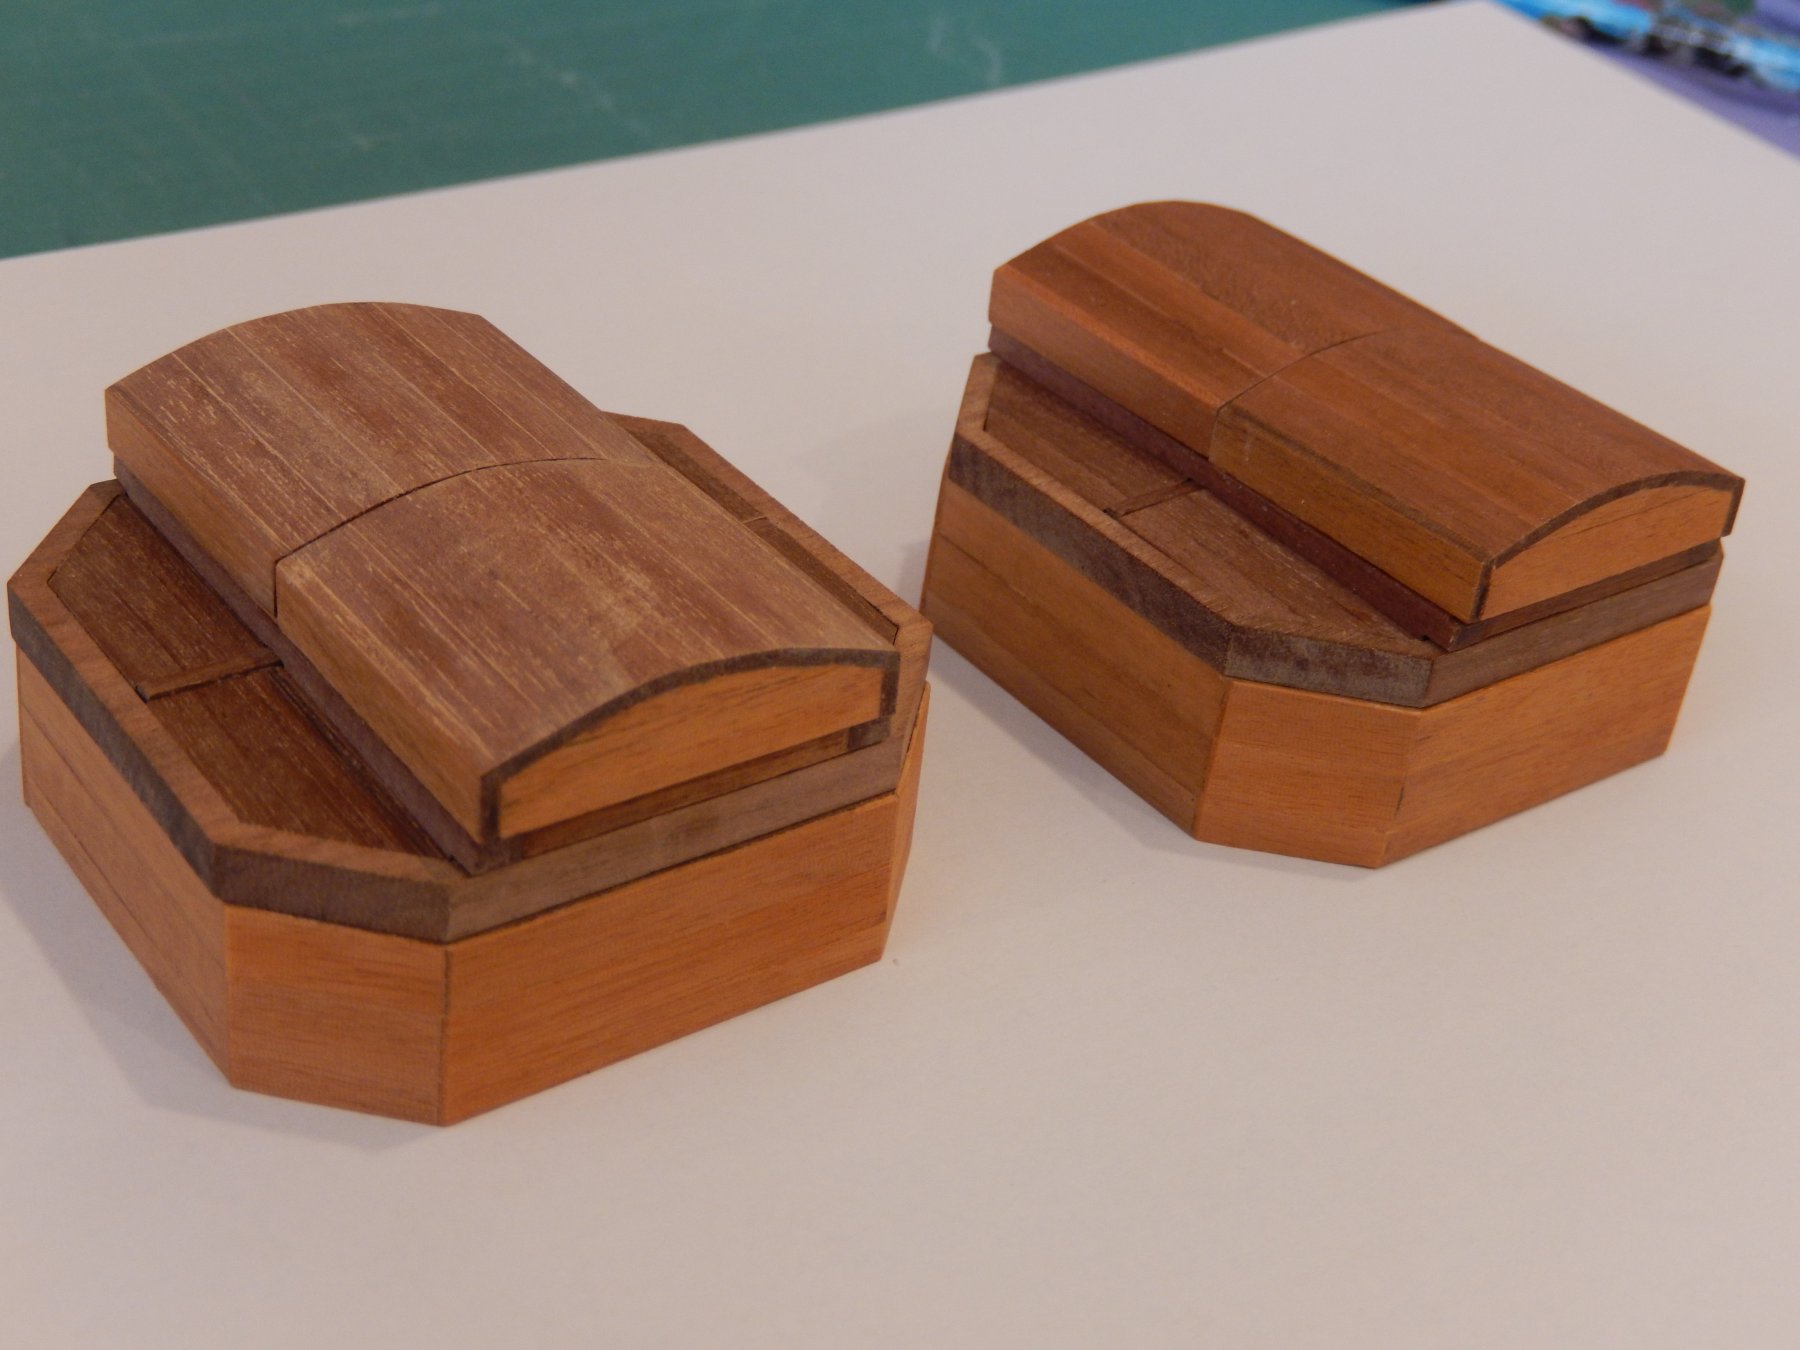
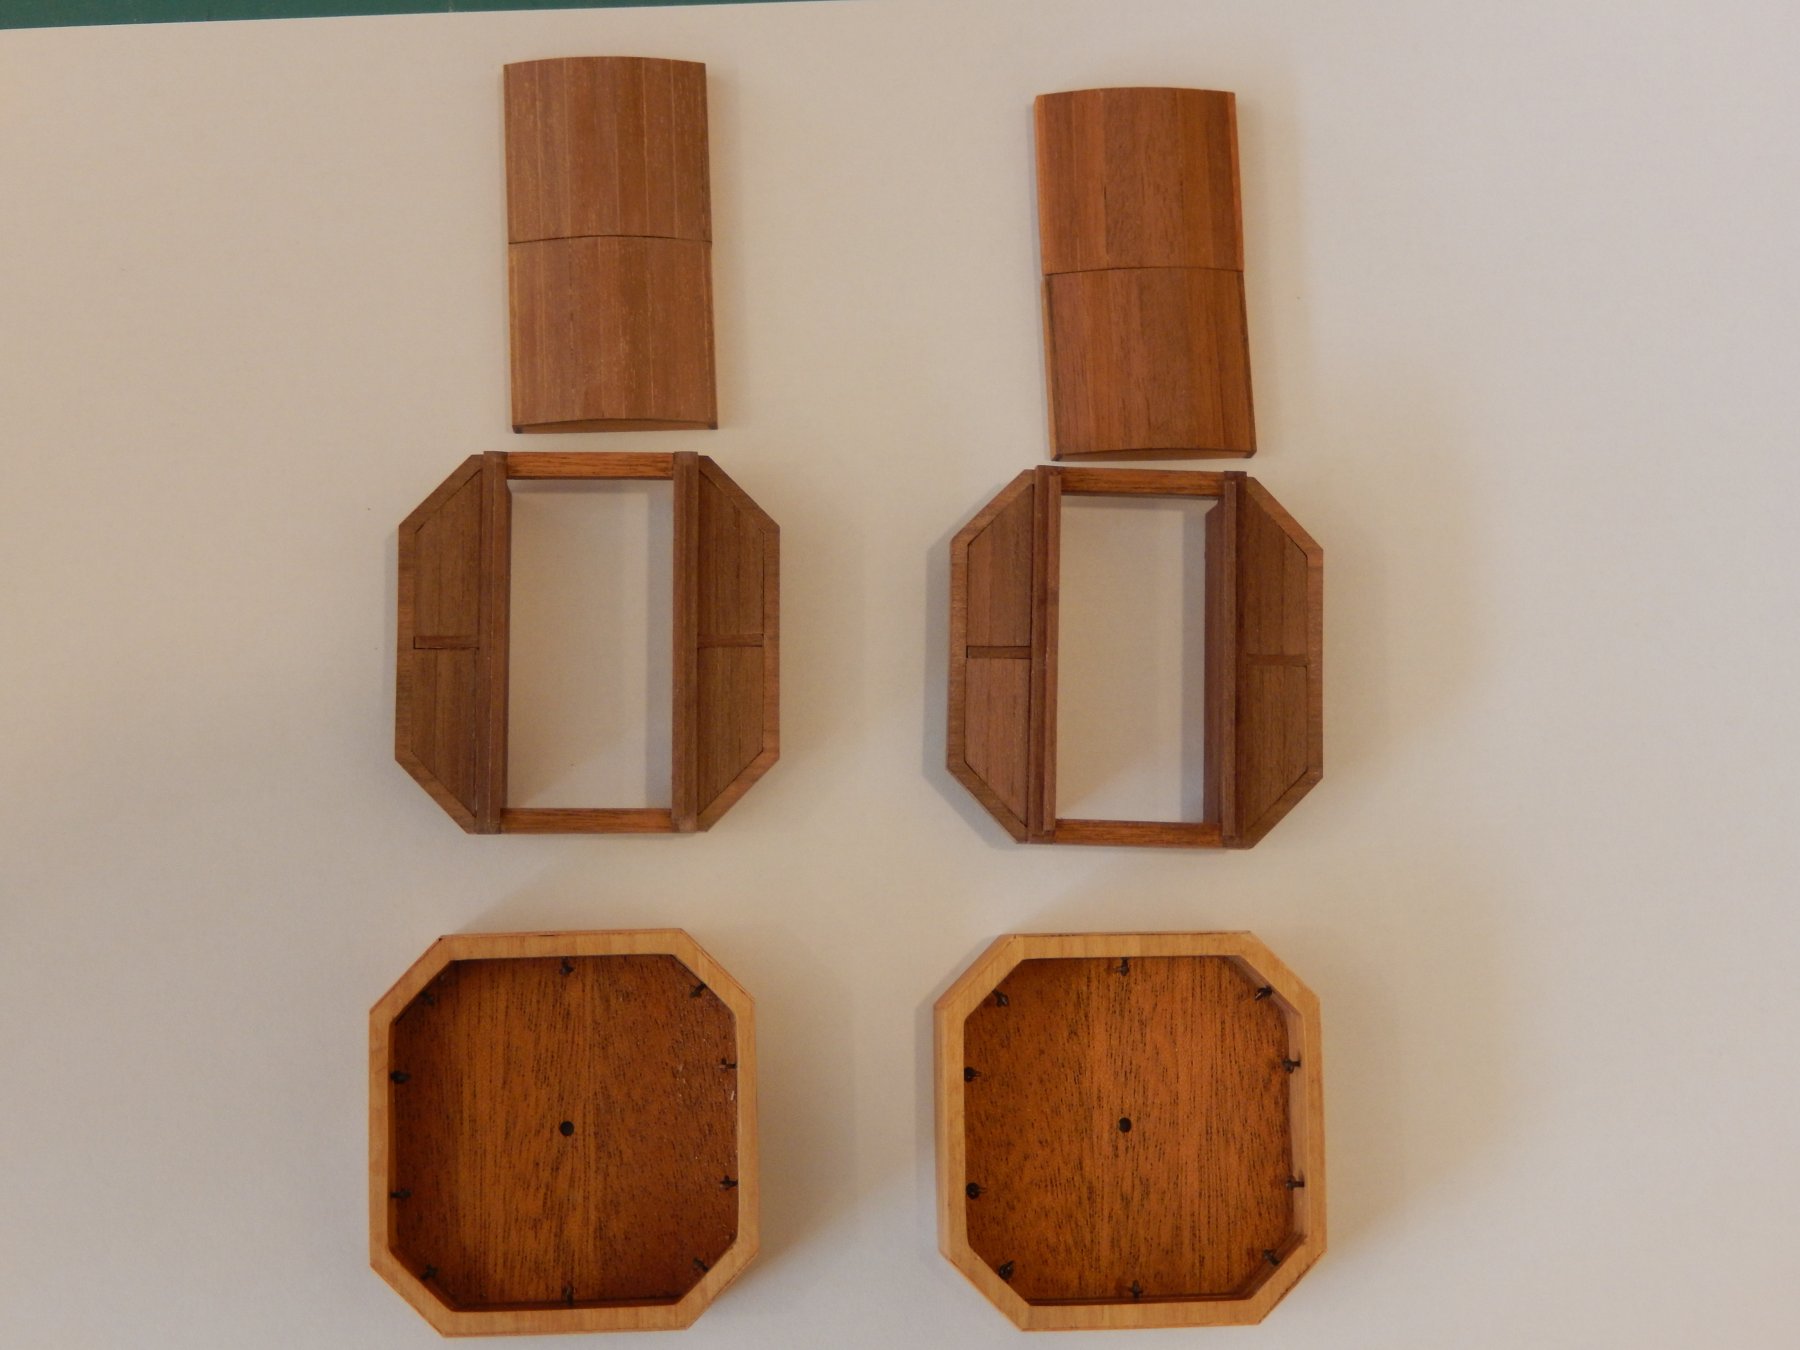
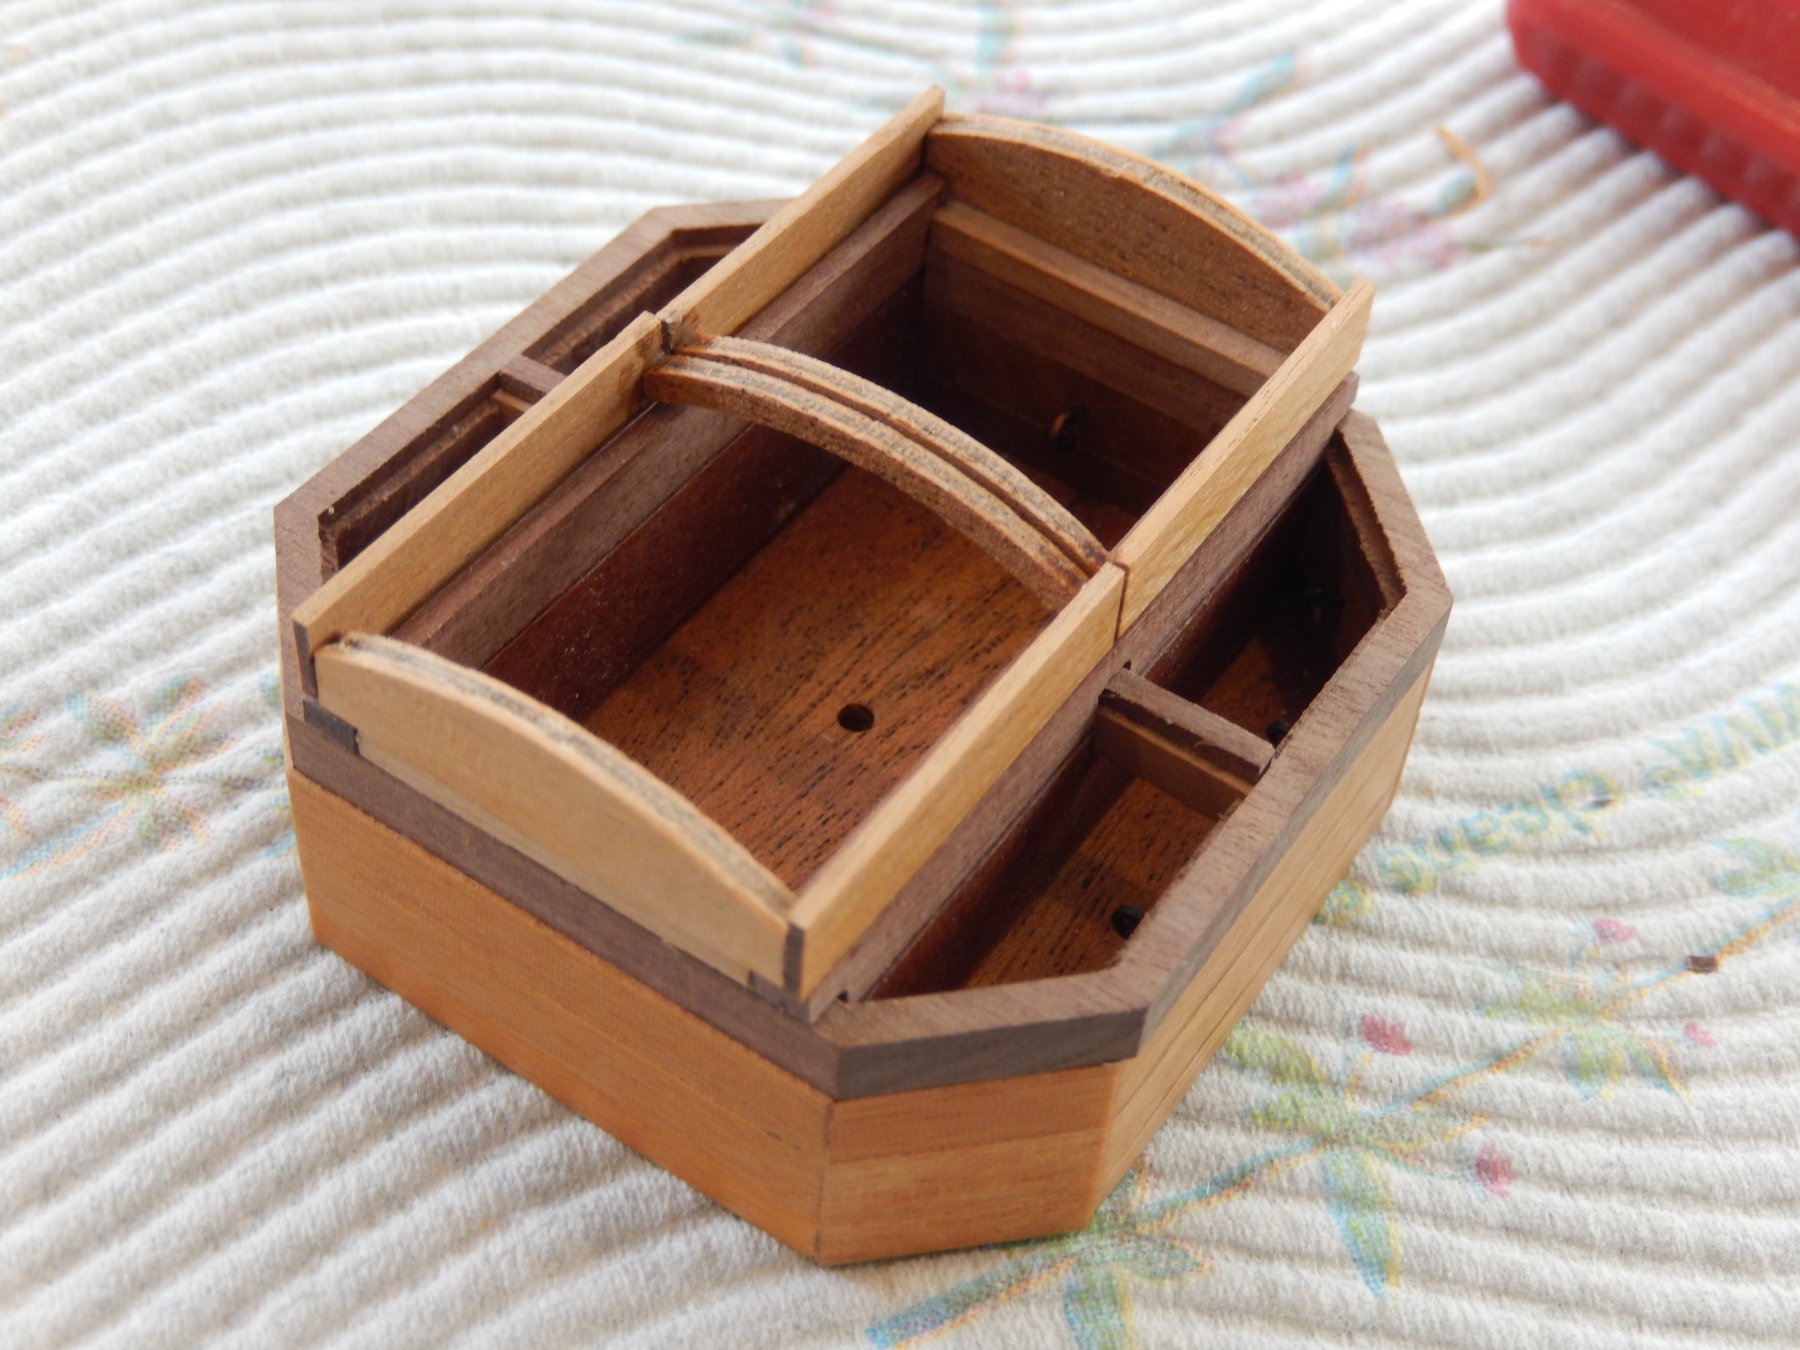
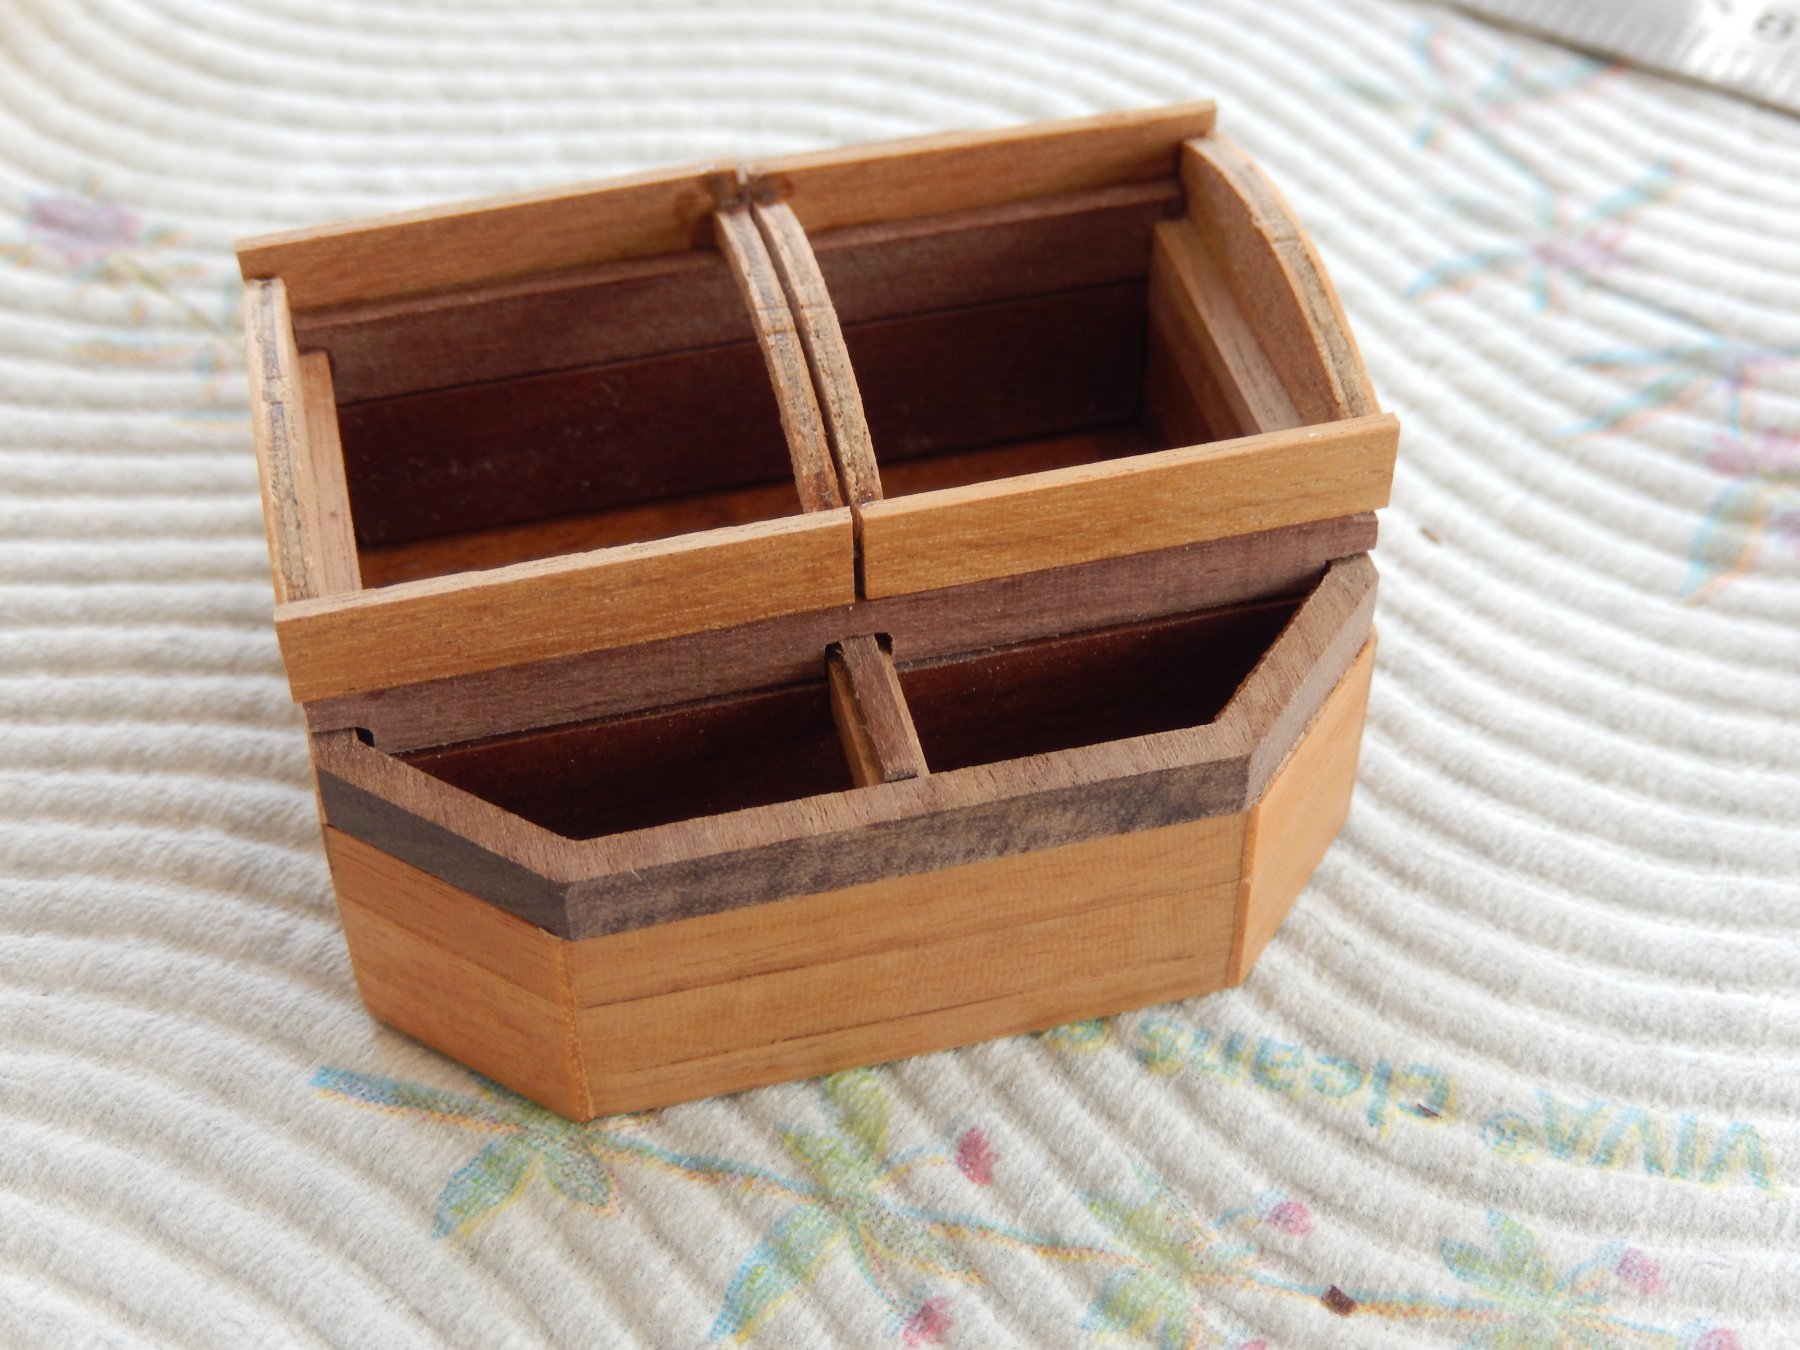
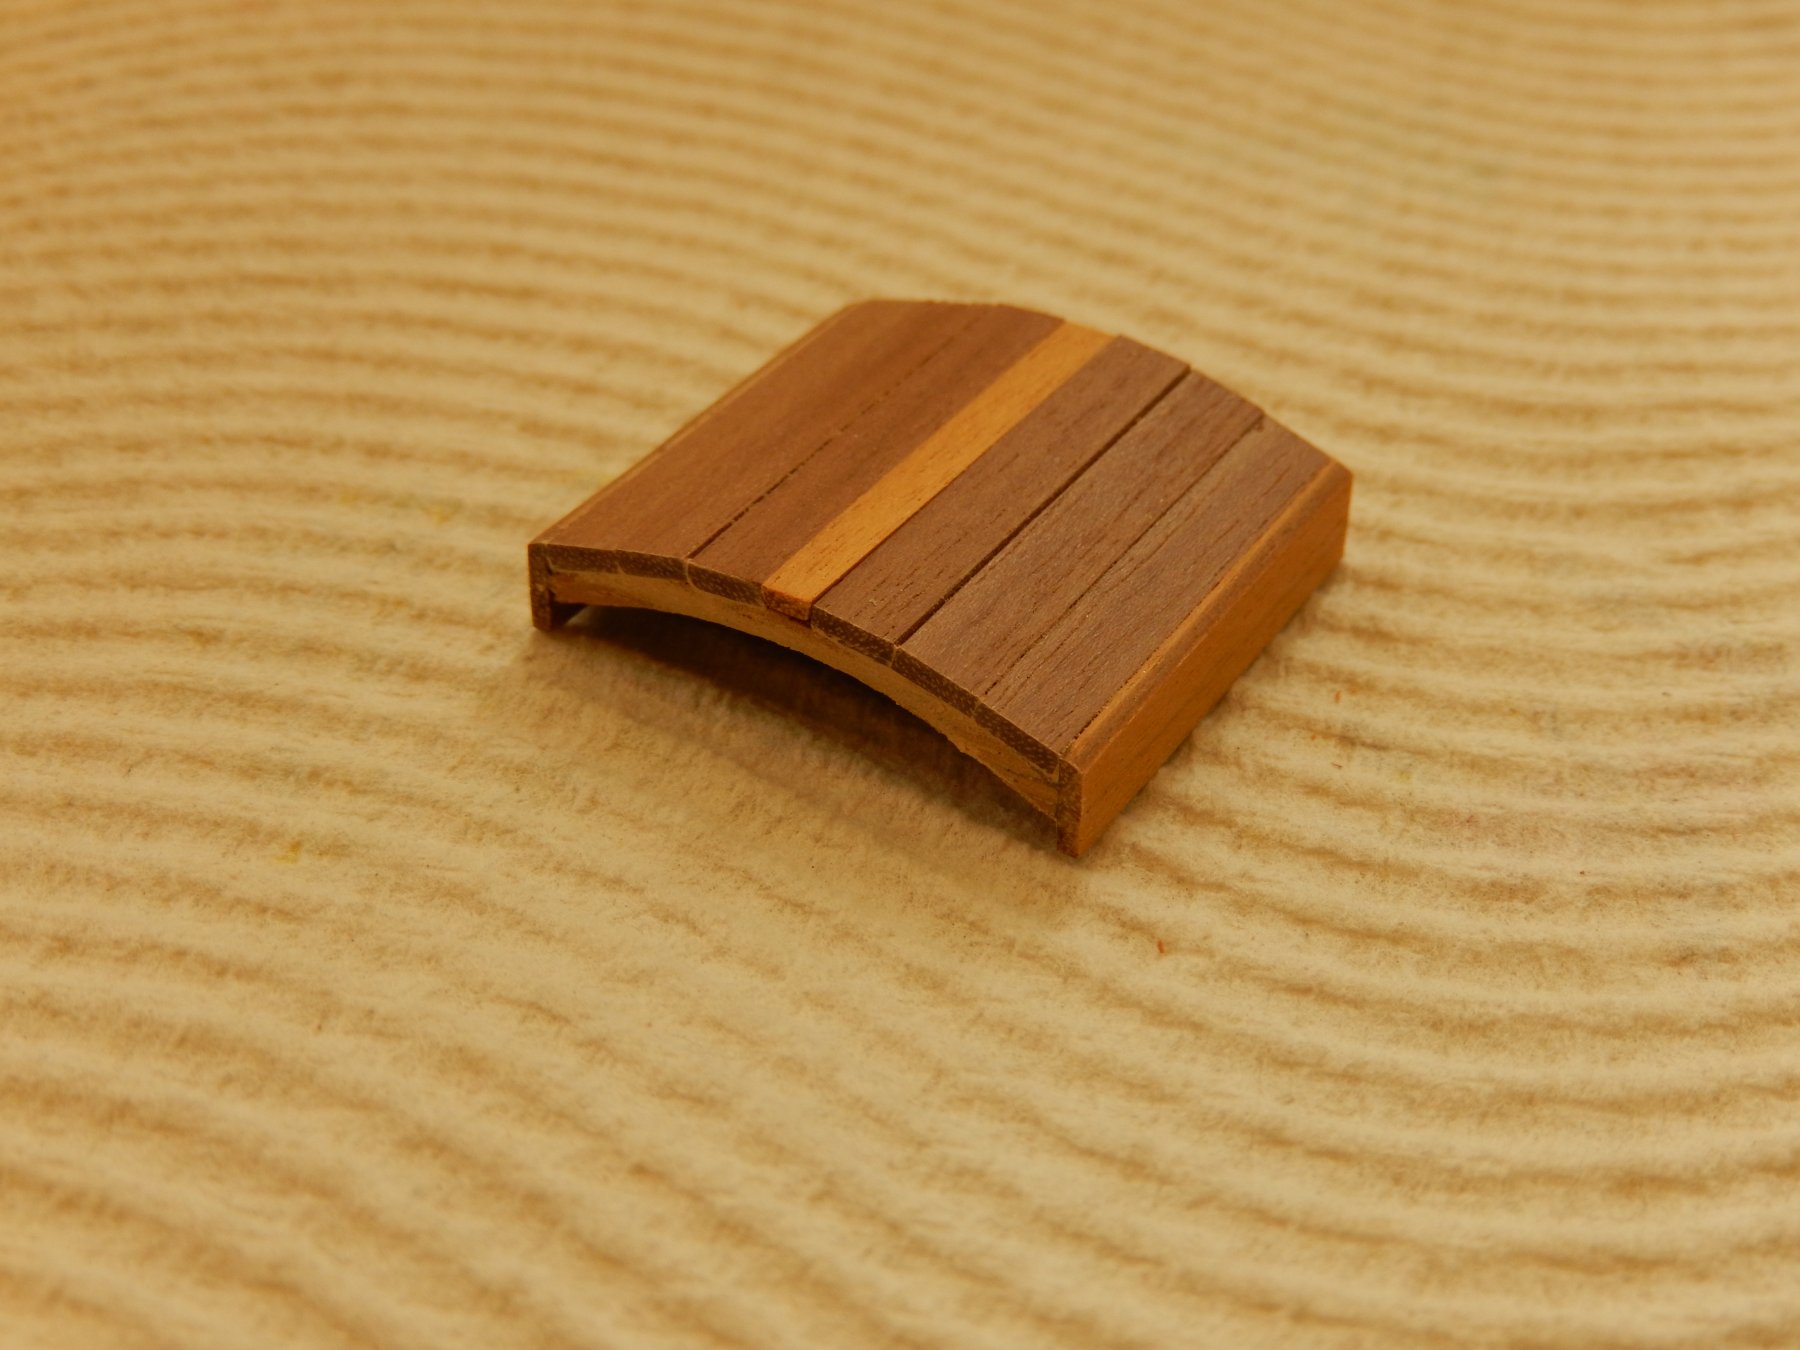
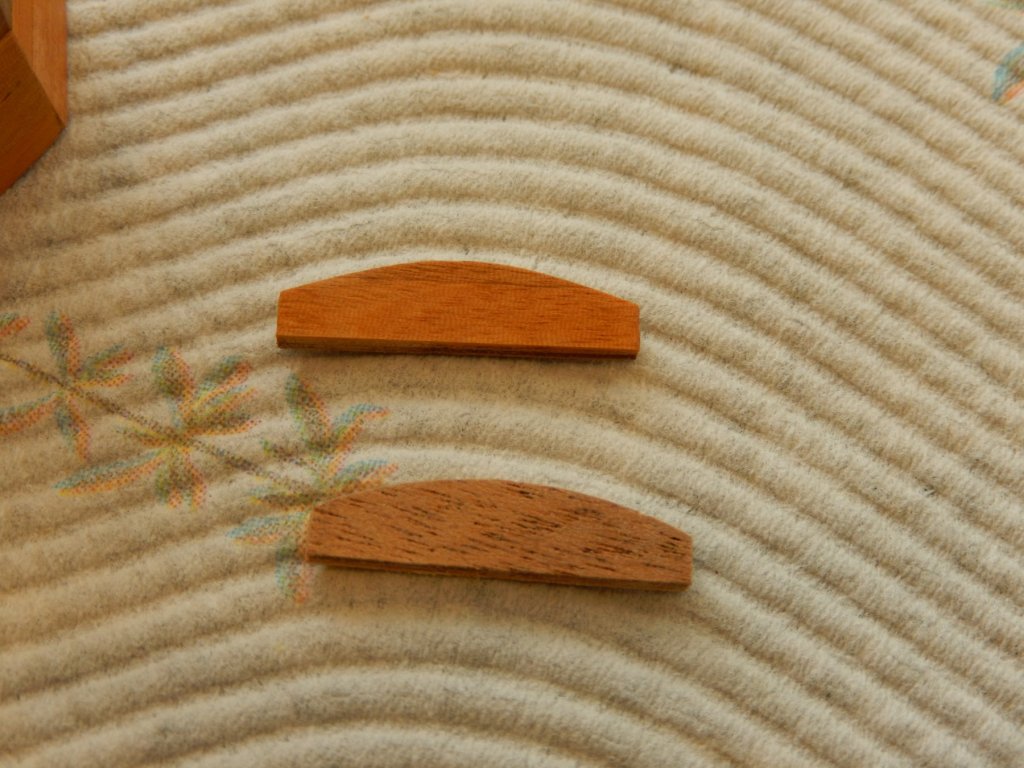
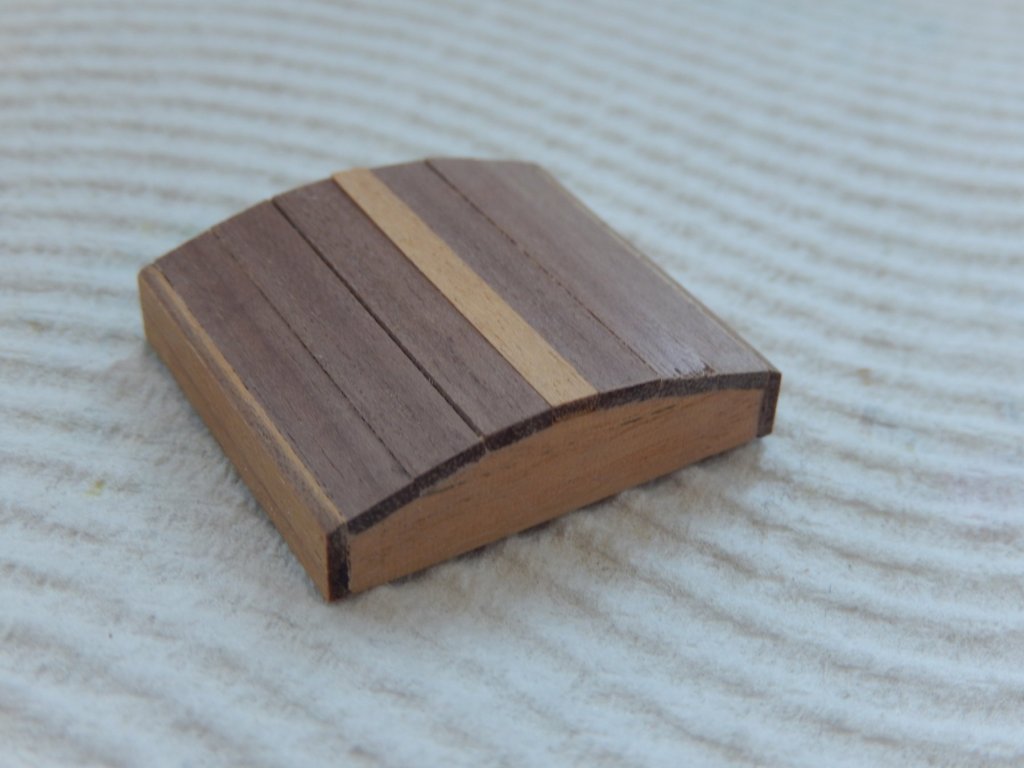
Thanks OC. The mortar housings are proving to be very tricky - particularly the removable canopies. Shown below are canopy components - the lower one is taken from the walnut ply as supplied which is quite coarse and unlike any of the other timber in the overall assembly; the upper one is that component with the same wood veneer I applied elsewhere. The point is there are five different wood textures/colours which makes the whole assembly look like a dog's breakfast. I have used the veneer in an attempt to make the finish/colour a little more consistent. Here are some stages of the construction. Getting the middle supports for the canopies correctly positioned is tricky indeed. Here I a couple of pieces of timber strip which were (i hoped) the right thickness (about 1.5mm) to raise the supports to the correct height. The piece of timber towards the top of the photo is to keep the support square and vertical. Here is one of the semi-finished canopies. The top has not been sanded, nor has a coat or two of polyurethane. The light strip in the centre is an experiment and has not been fixed. This shows both the light and the matching centre strips. I will probably discard the light strip, though I don't think it looks too bad. Once the required touching up is done at least two coats of polyurethane will be applied to everything above the first three layers of timber.


- 421 replies
-
- 10
-
-
- caldercraft
- granado
- (and 1 more)
-
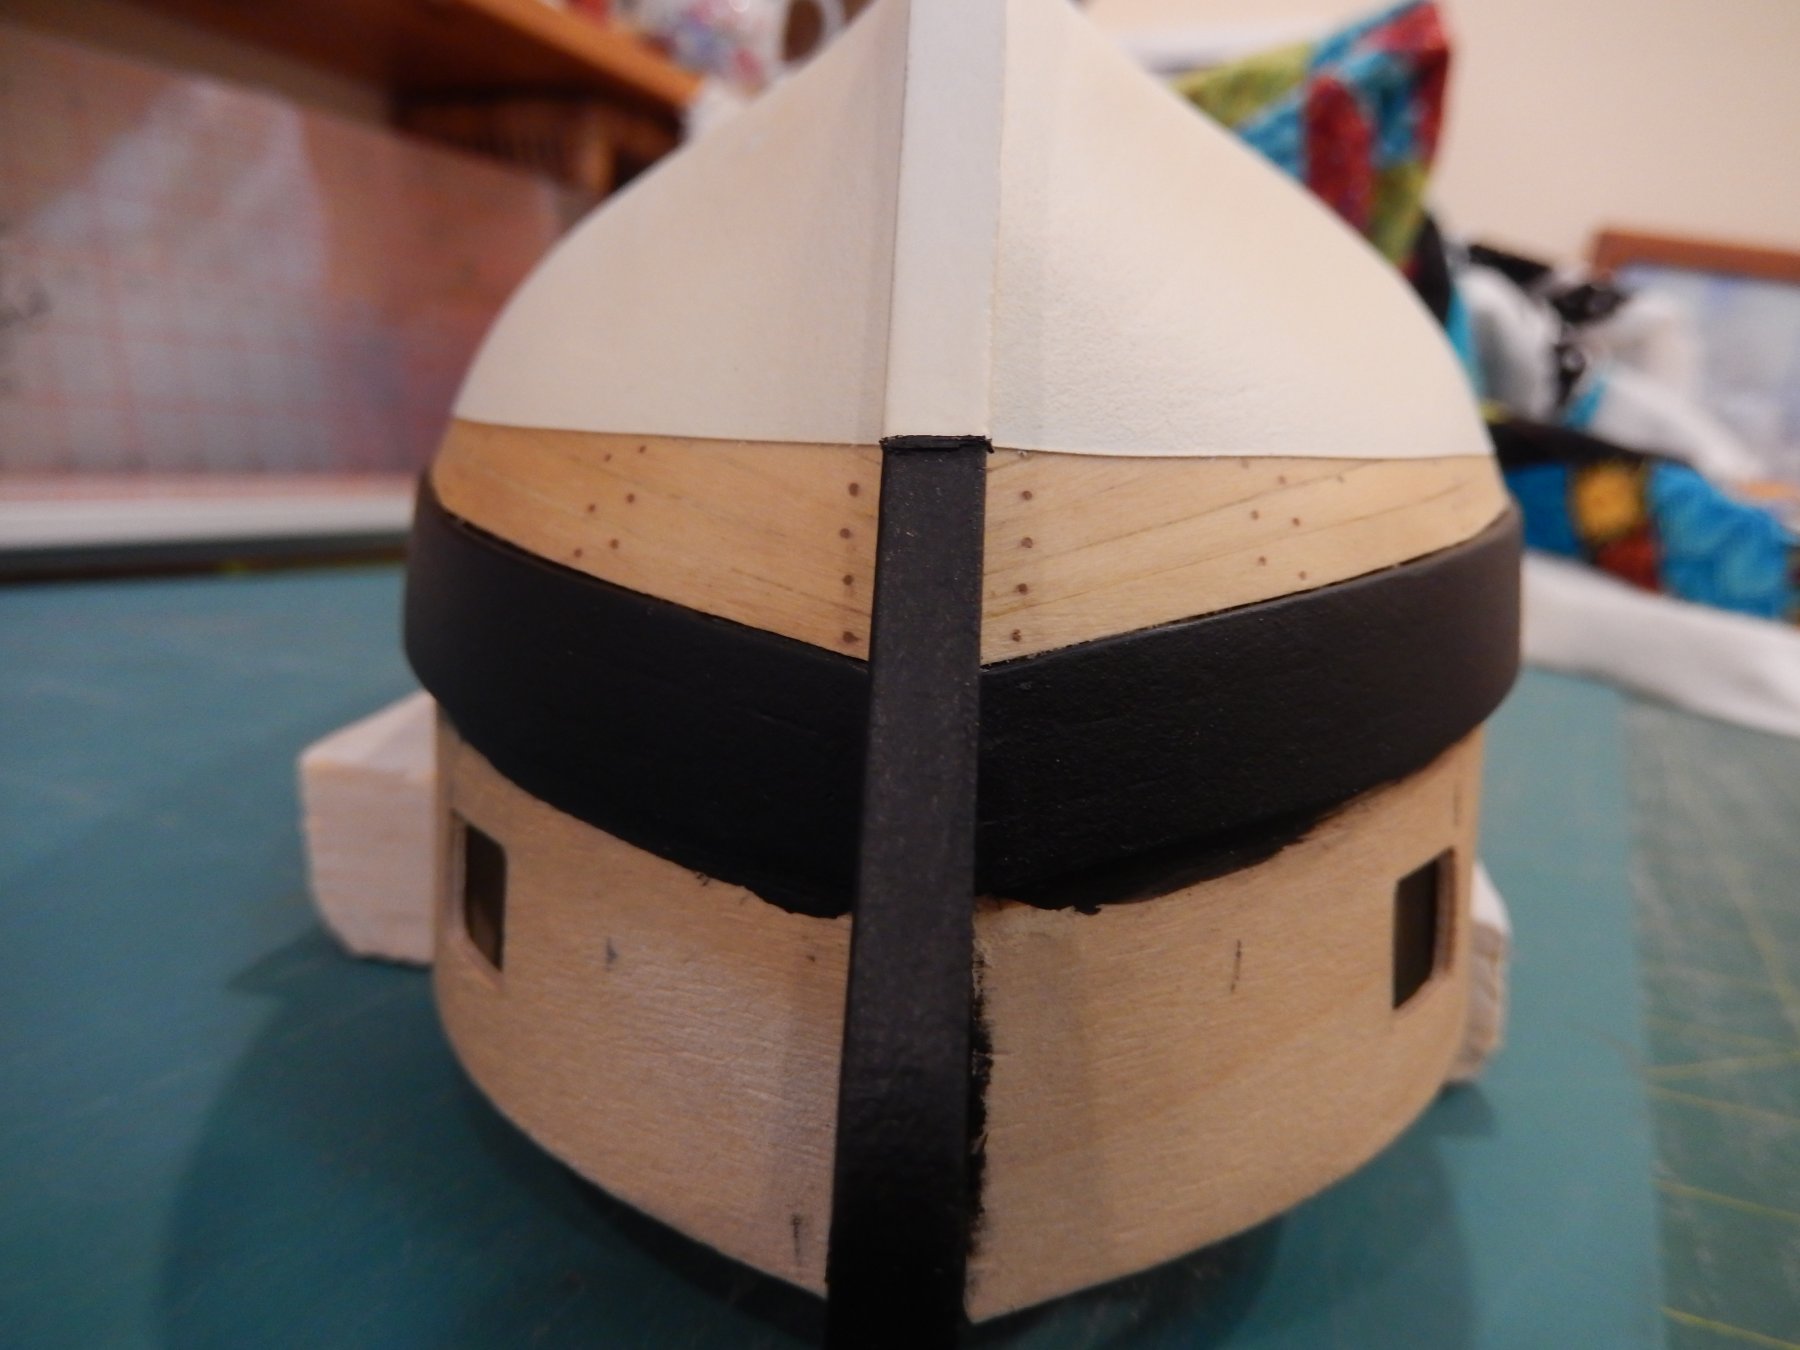
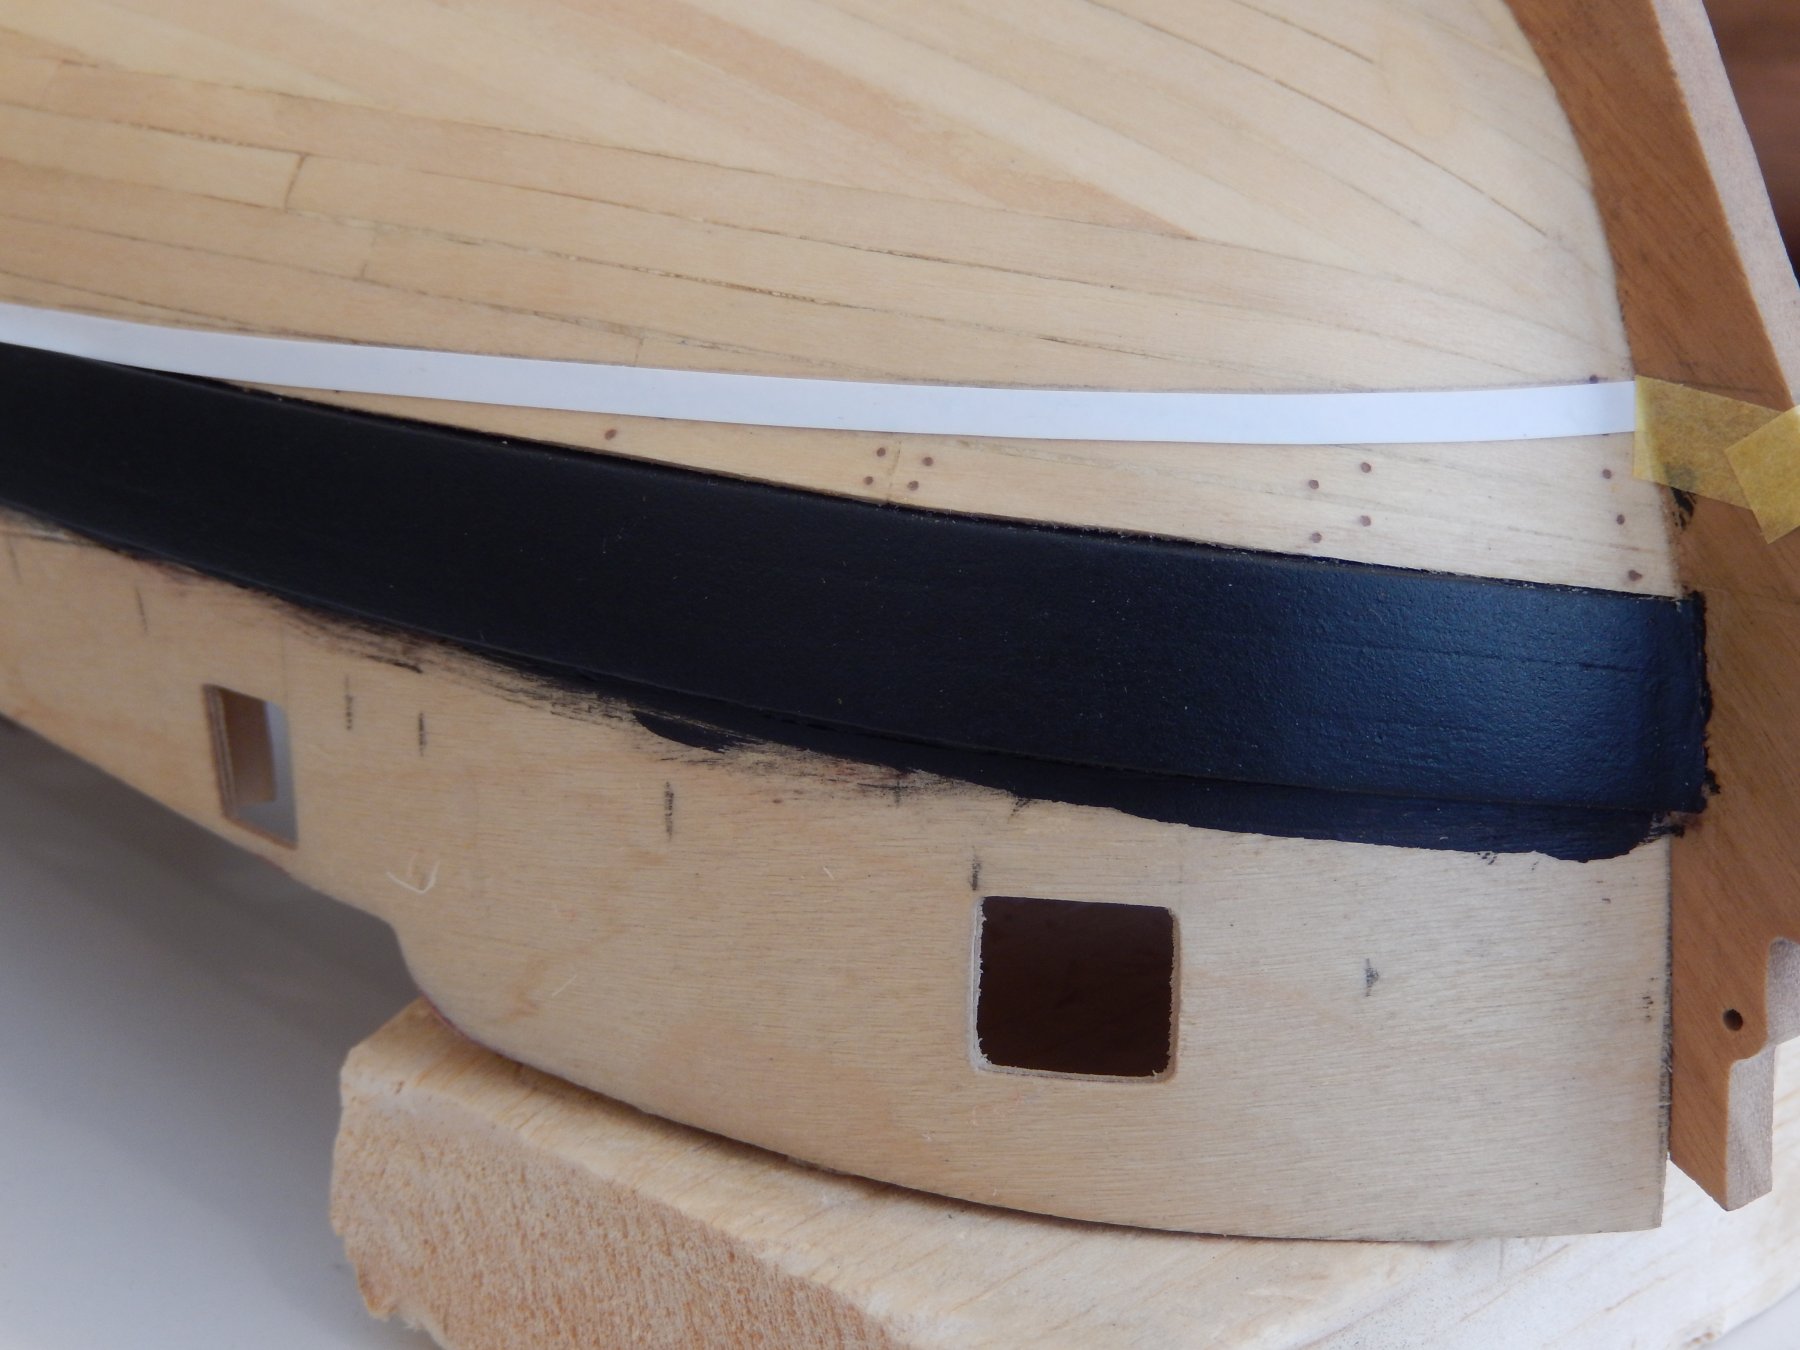
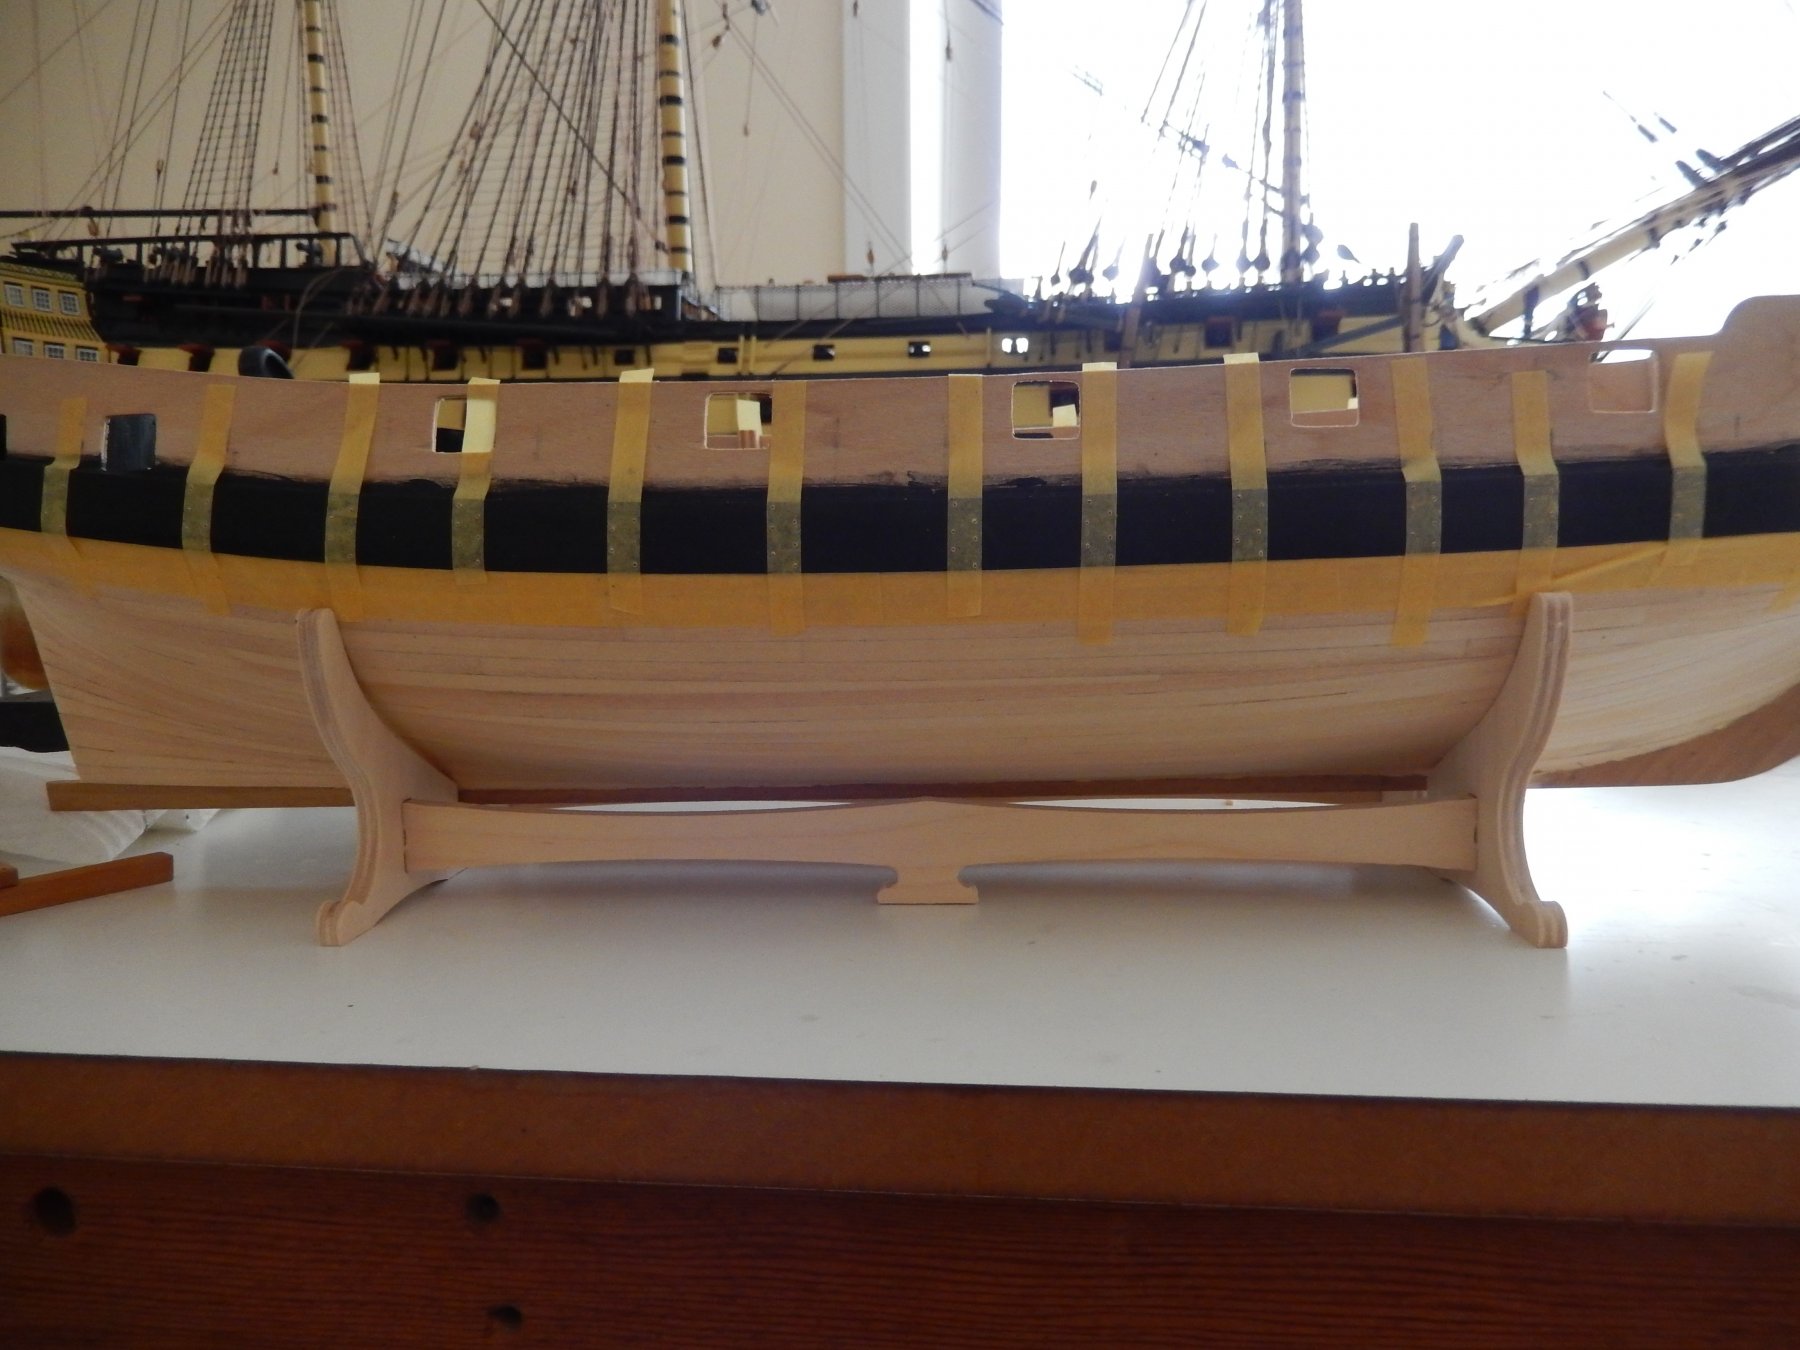
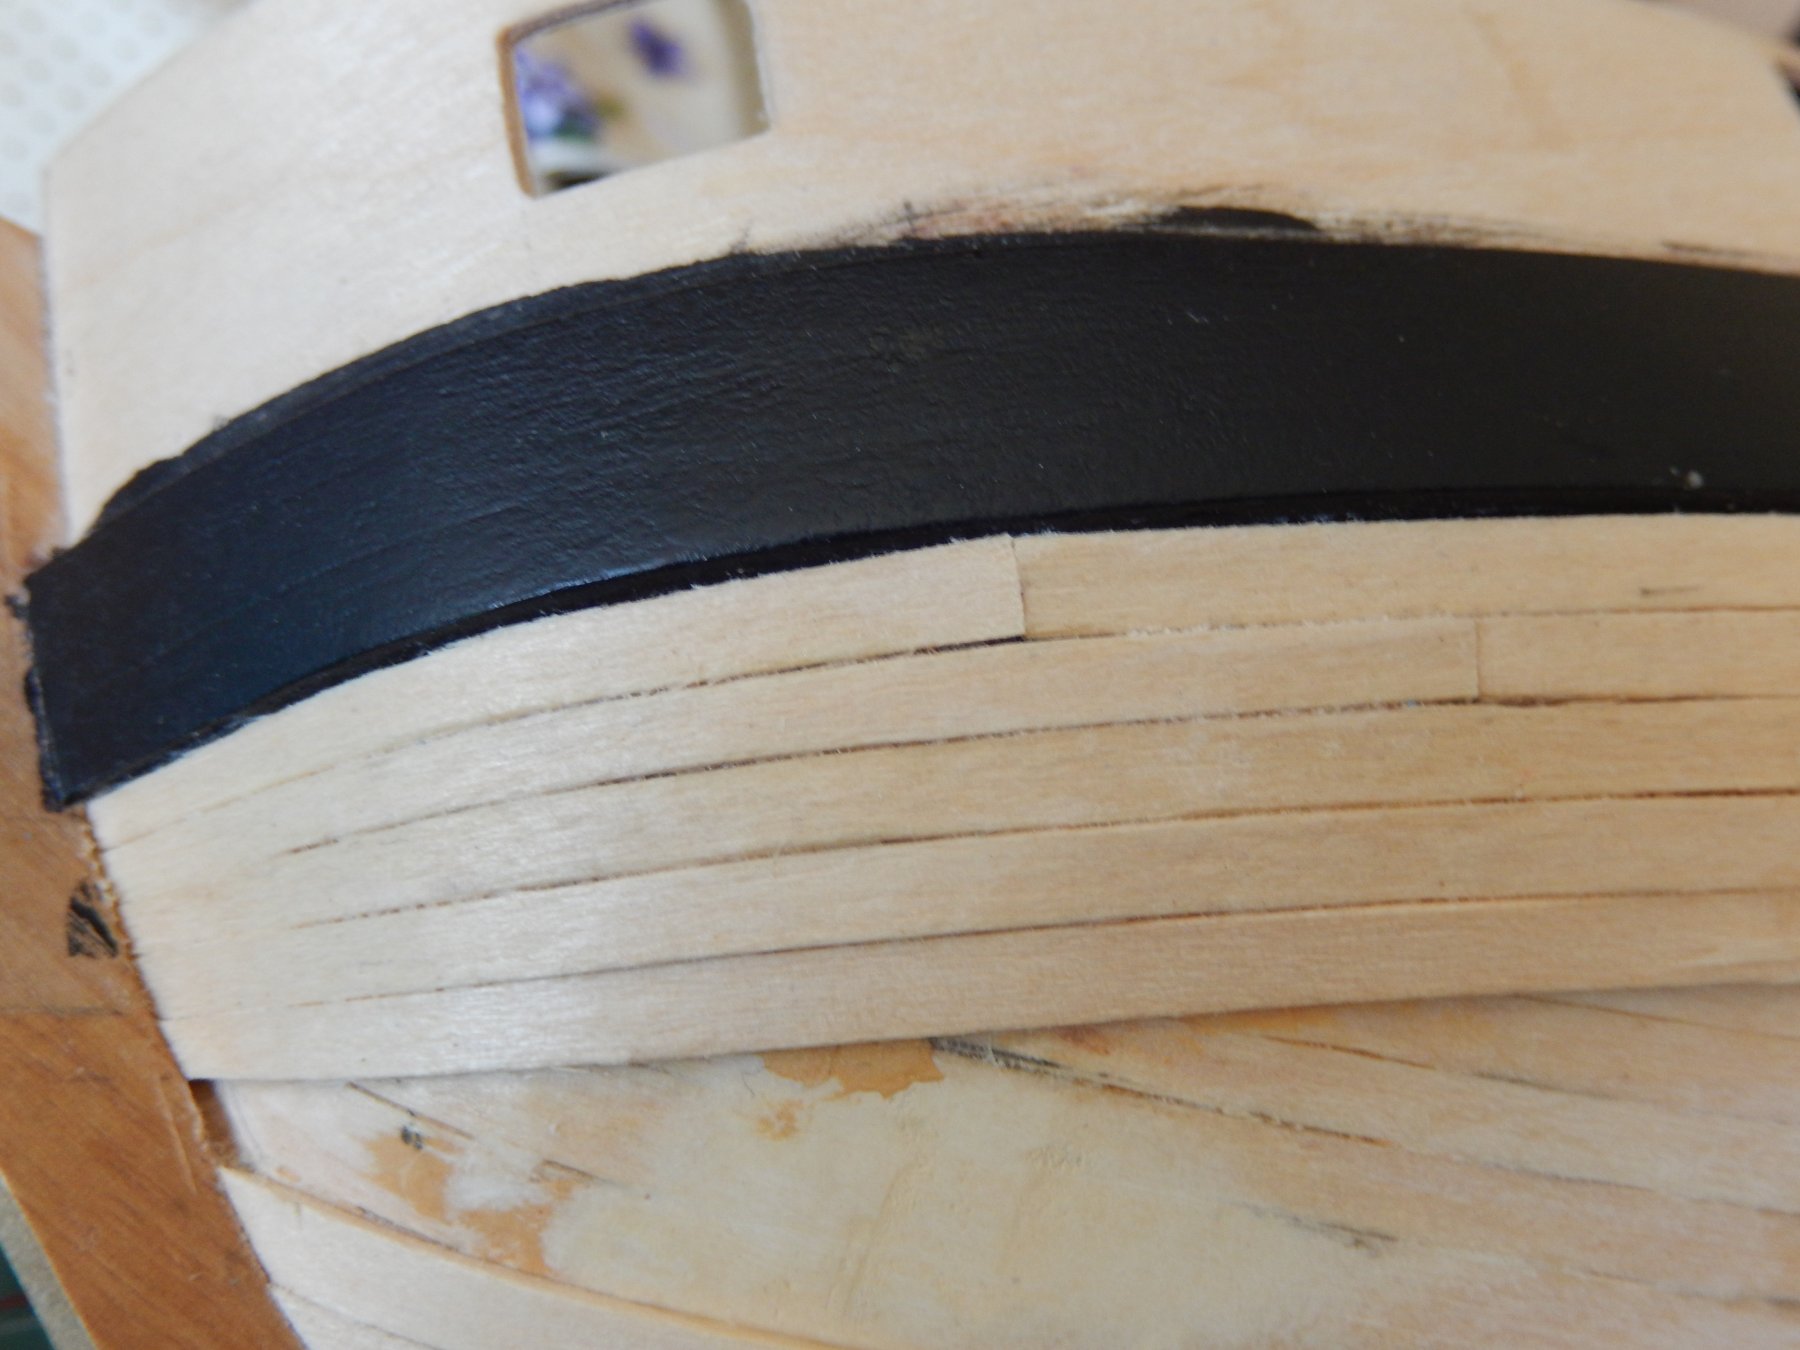
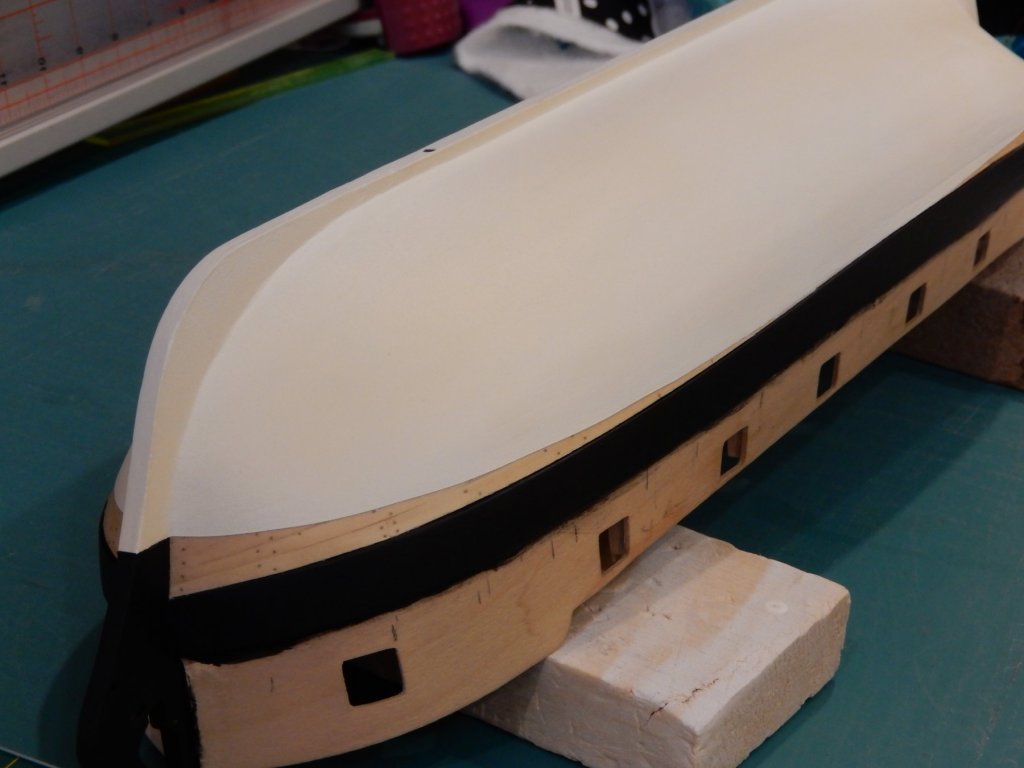
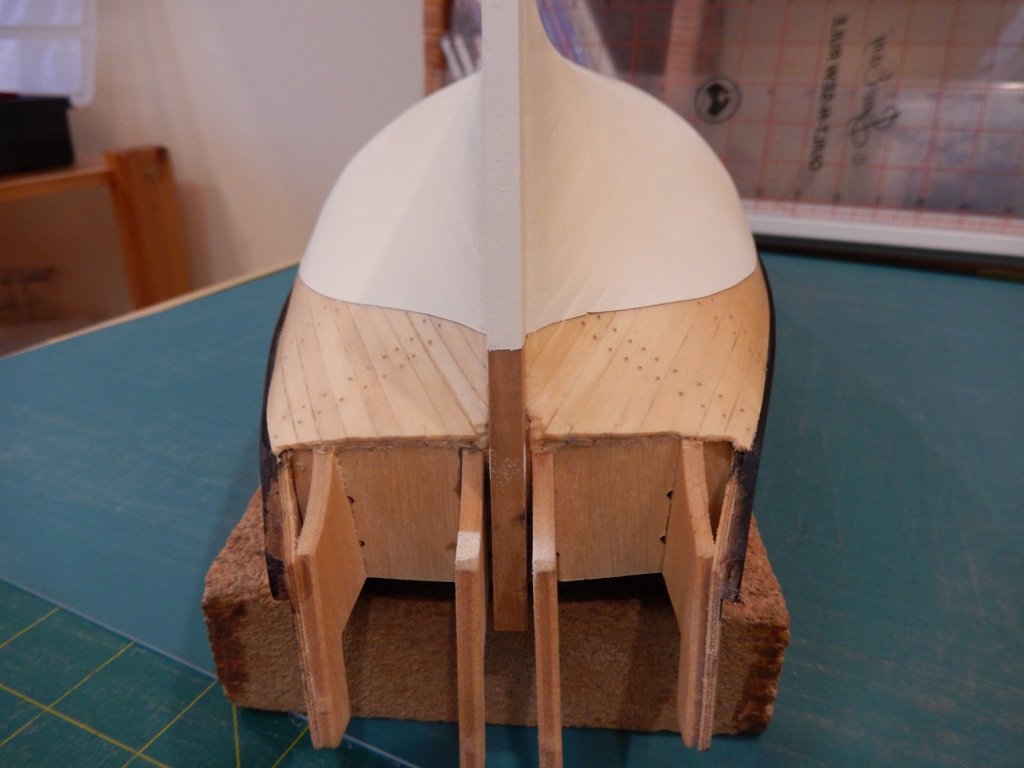
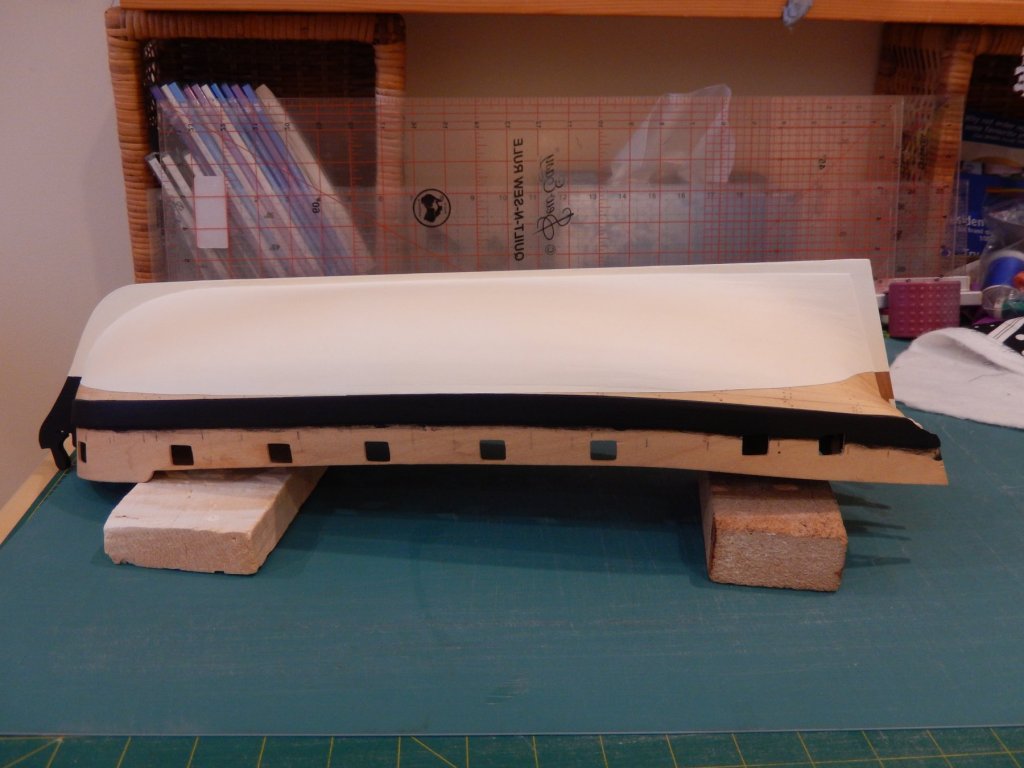
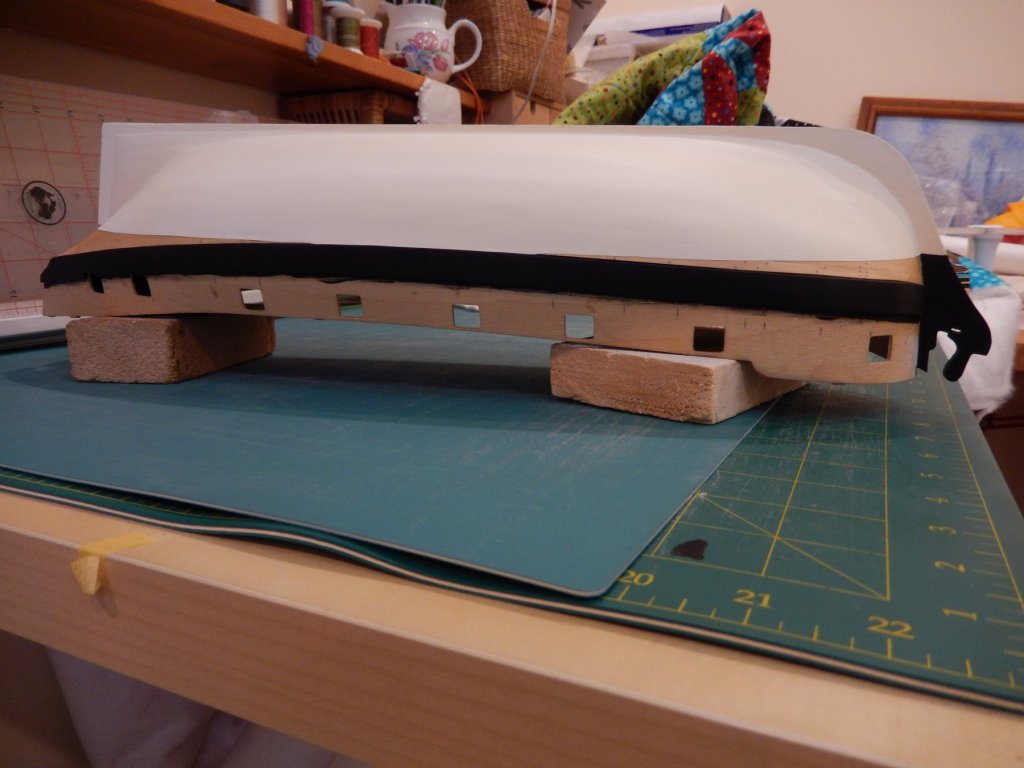
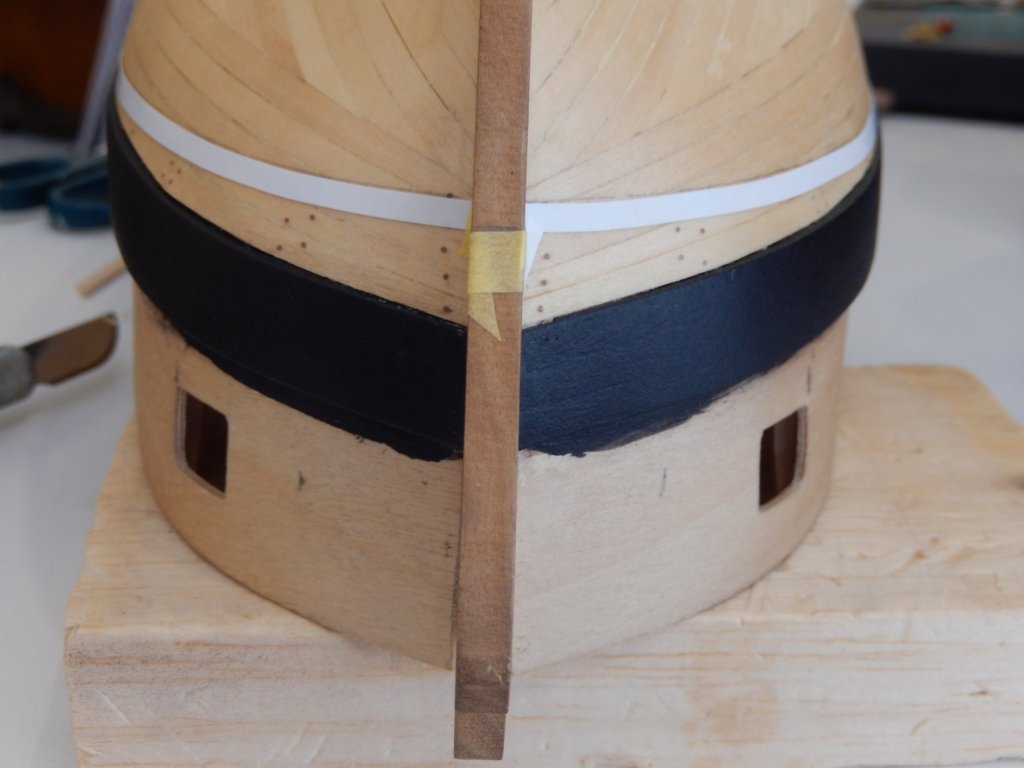
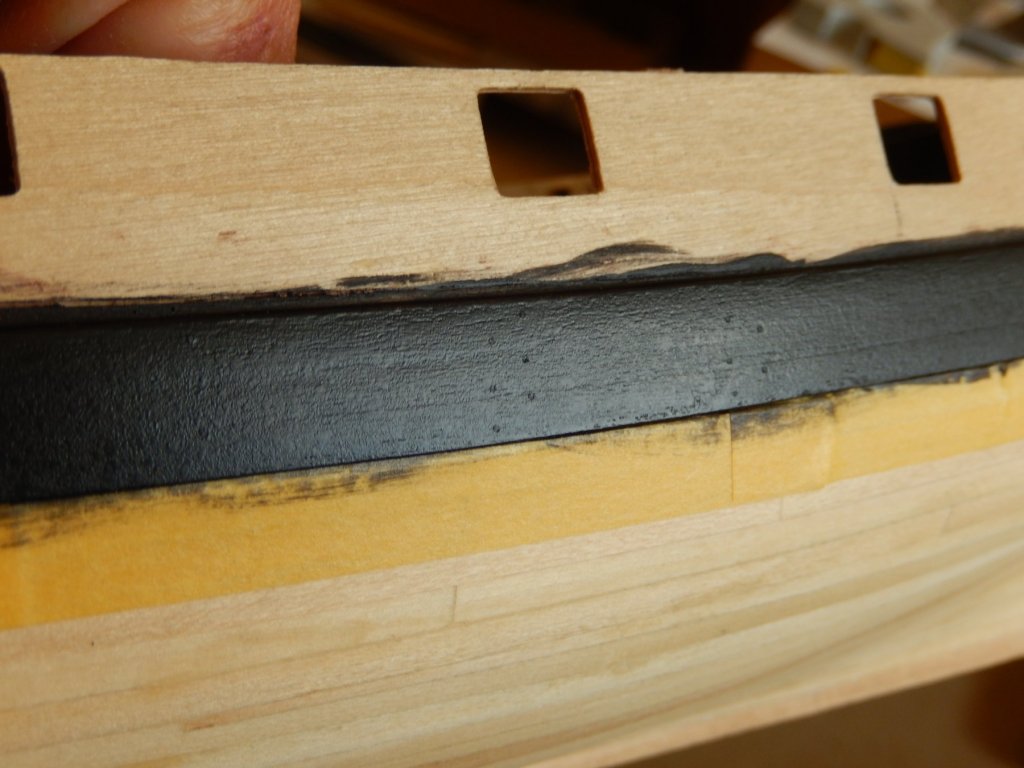
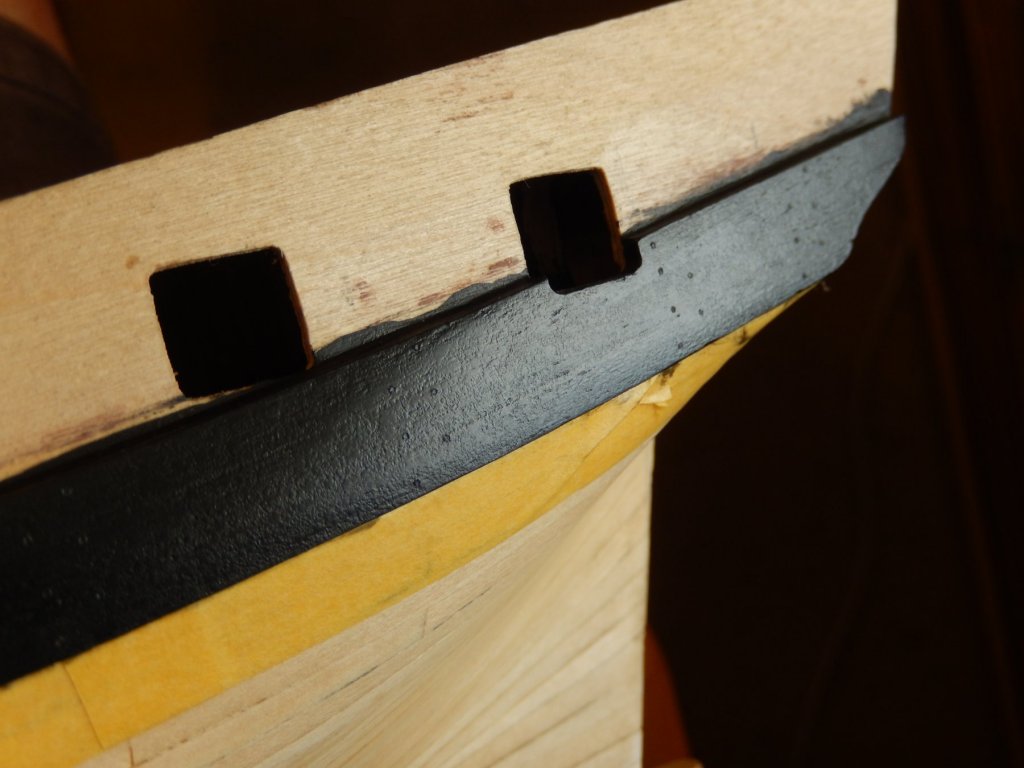
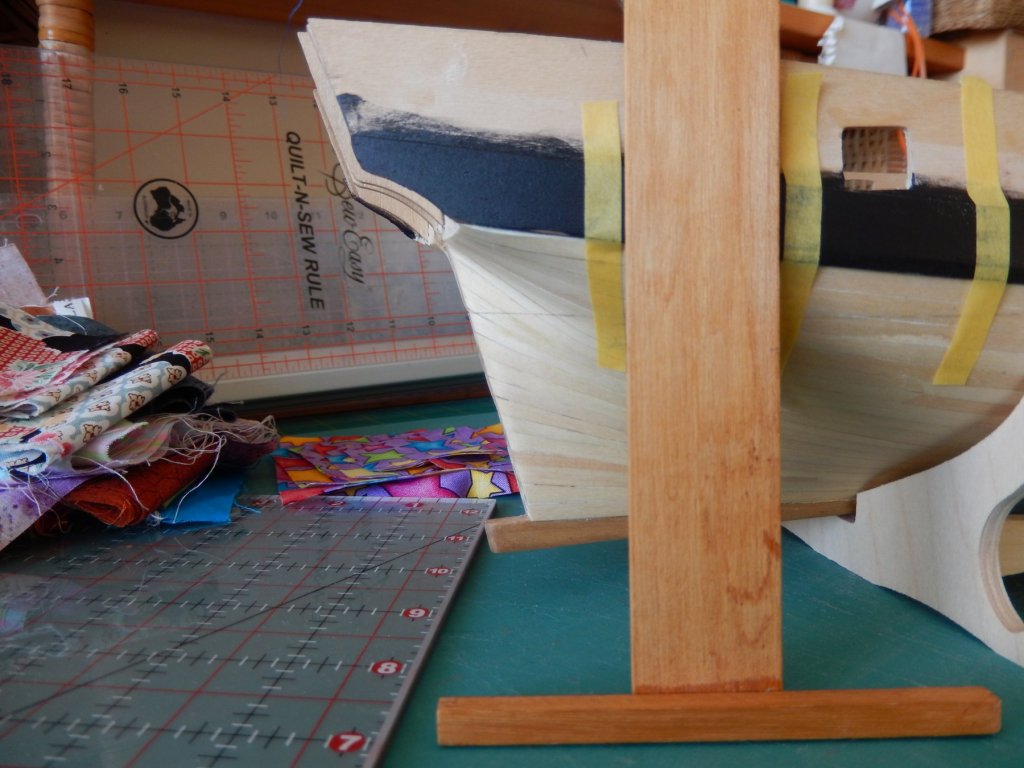
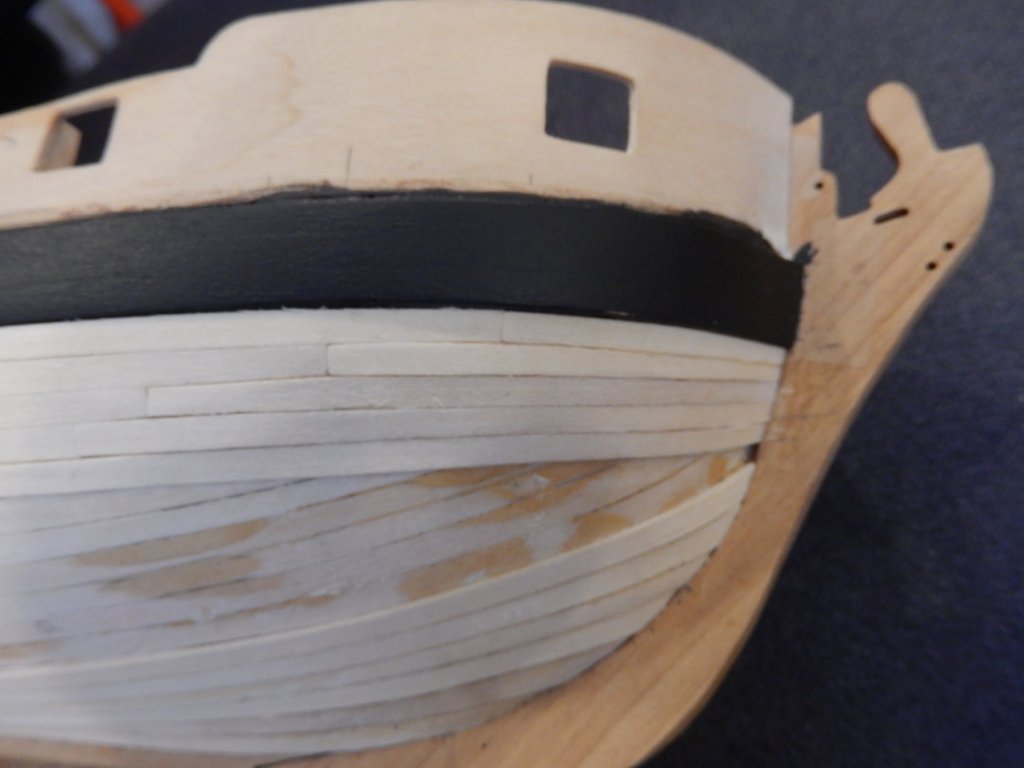
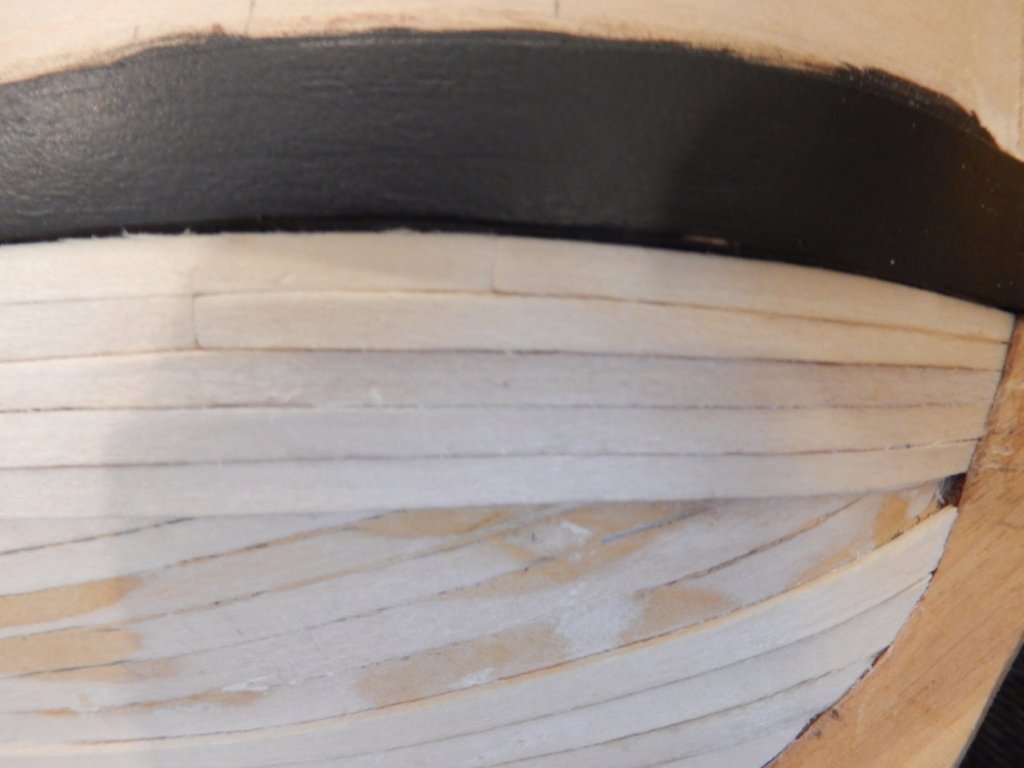
Thanks Jobbie, there's plenty of room. Painting the white stuff below the wale is, I hope, complete. It has proved to be very time-consuming and frustrating. For those who may follow, I suggest the waterline be masked about 1mm below the low point of the wale, rather than flush with it. The latter requires the making tape to be tucked over the lower side of the wale which makes it difficult to make it adhere properly. It makes the tape stick to both the side of the wale and its bottom, and if my experience is a guide, the tape doesn't like to do that. Taping about a mill. or so beneath the wale will enable the making tape to have a good grip immediately below it. Below is the result of 5 coats of admiralty matt white acrylic (brushed on and sanded between each coat), one coat of Humbrol spray acrylic (I only had enough for one coat, but by that time the whole thing didn't look too bad), and 3 coats of spray polyurethane. If I had my time over, I would have bought another can of Humbrol for the lot. Incidentally Jason, the poly does tone down the brilliant white to be a pleasant ivory colour. The black paint on the stem has yet to have polyurethane applied, which should give a better finish.


- 421 replies
-
- 13
-
-
- caldercraft
- granado
- (and 1 more)
-
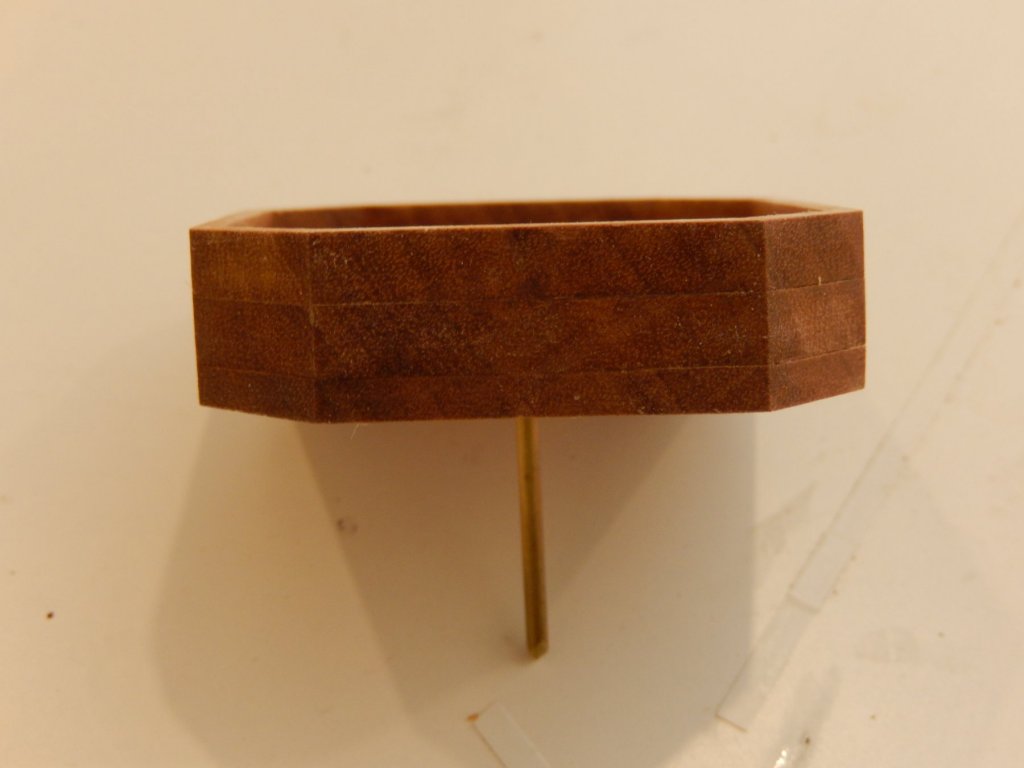
OC: thanks for your advice. Sorry not to have replied earlier but other things intruded on boating matters. I still have some problems with admiralty paints lack of adhesion, even after a great deal of surface preparation and allowing 24 hours to dry. It makes masking over it difficult. The white painting is now finally complete - the required masking finally successful. I am now waiting for the black trim on the stem to dry before taking off the masking tape there. In the meantime I have done some work on the mortar housings. The sides are made of three layers each one shaped in a rough octagon in a single piece of walnut. This leaves the end-grain showing on four surfaces which does not look 'right'. I have used some 0.5mm veneer to cover the end-grain and here is the result. This shows the end-grain. And here is the veneer.


- 421 replies
-
- 8
-
-
- caldercraft
- granado
- (and 1 more)
-
Hi Joe and Jason. Thanks for your comments. Joe: I found the acrylic thinner to be quite effective. As well, before brushing I dampened the brush. The combination worked well. Unfortunately I only discovered all of this fairly late in the process. Oh well ..... I have just put on a coat of acrylic spray and things are beginning to look almost respectable. A couple more coats may do the trick. Jason: I'm sticking with the matt white. However I will cover it with 2 or 3 coats of polyurethane, which if previous experience is a guide, will tone down the colour to be more 'ivory'. I certainly agree that the brilliant white really just doesn't look 'right'.
- 421 replies
-
- 2
-
-
- caldercraft
- granado
- (and 1 more)
-
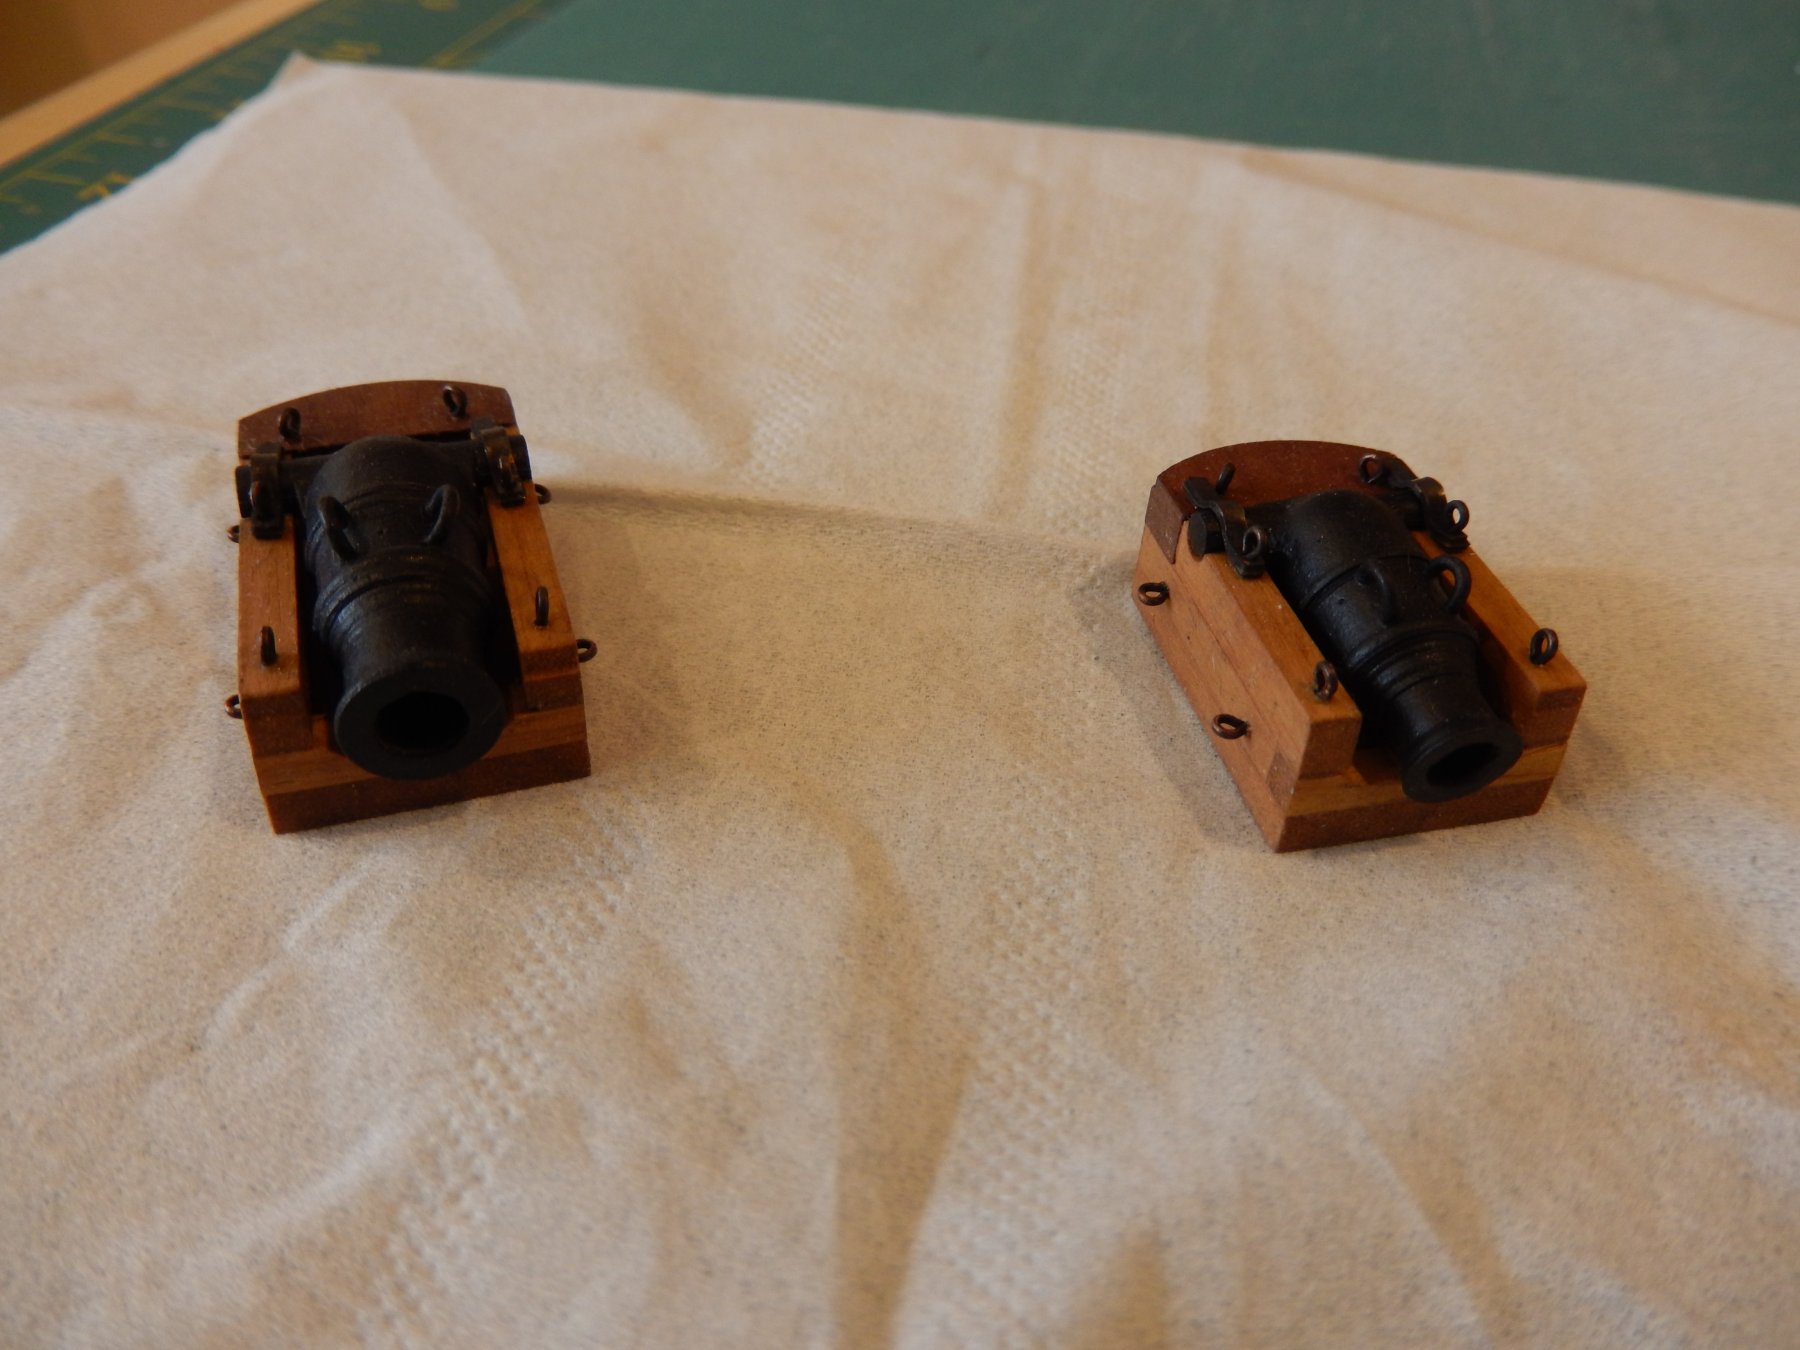
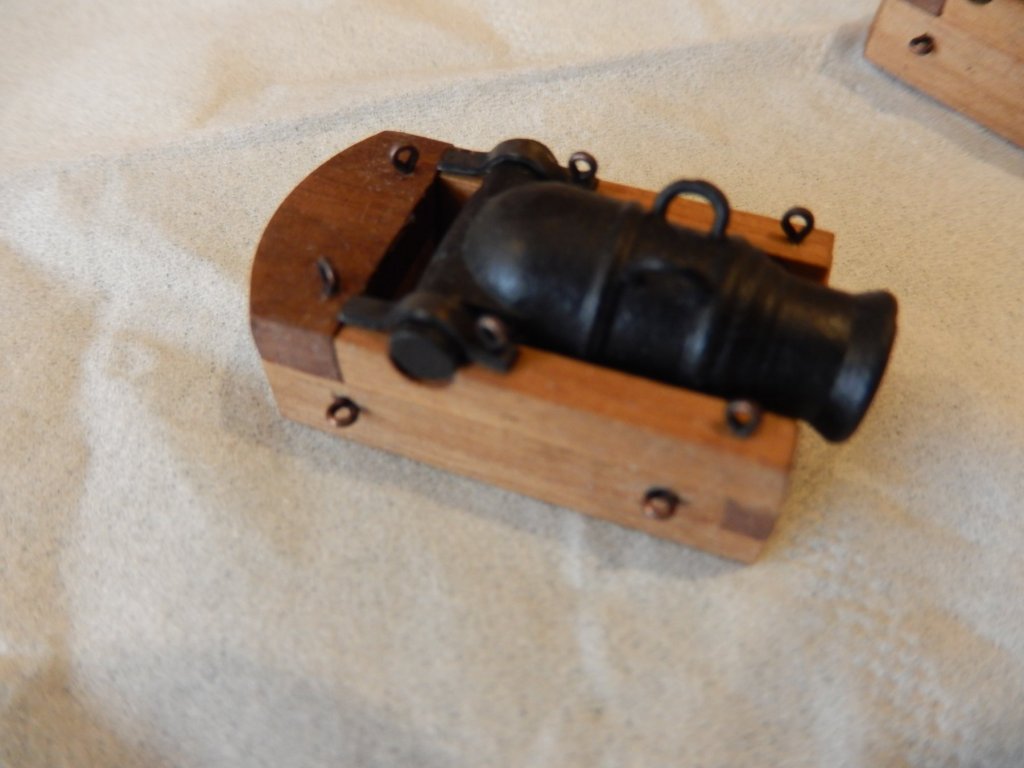
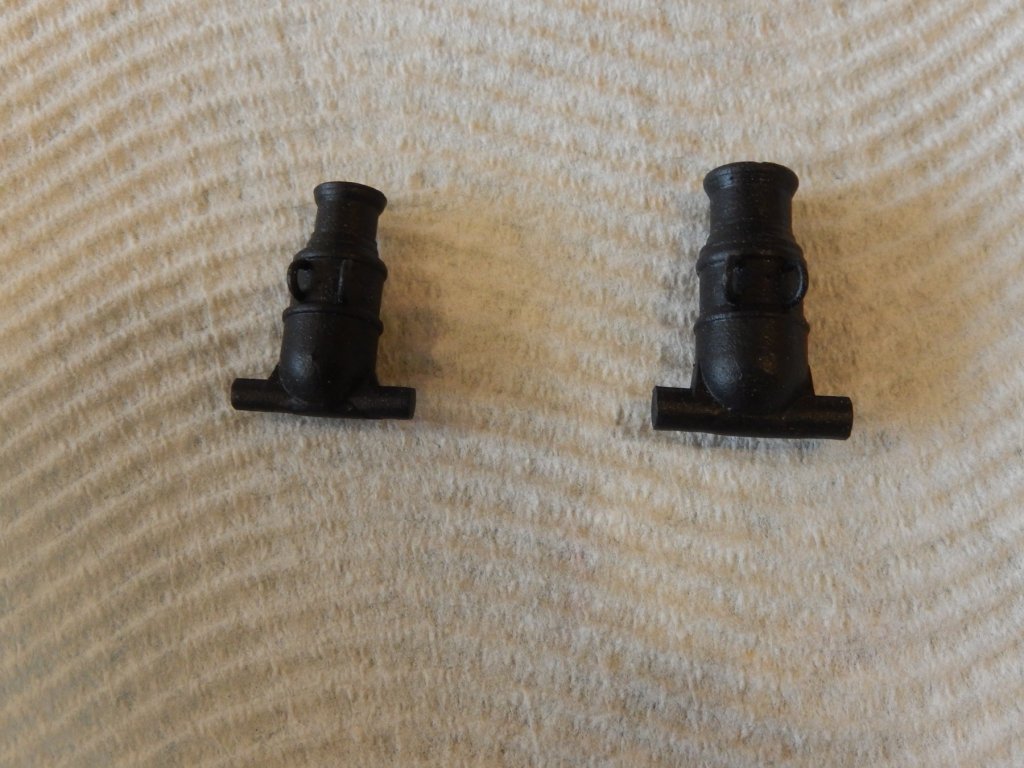
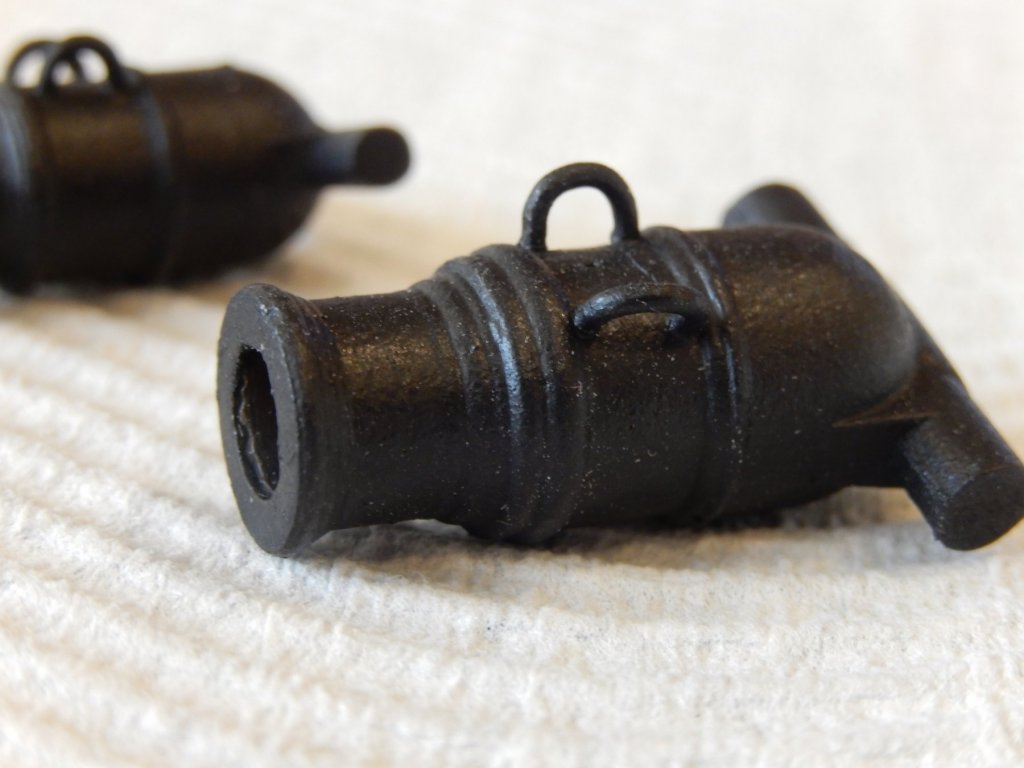
Thanks for your suggestion OrLin. I decided before taking more drastic action, to thin the admiralty paint with Tamiya acrylic paint thinner. It seems to have worked quite well. I have sanded the hull around the peeled paint and so far have applied 4 coats of the thinned paint over it. The surface now doesn't look too bad (photos later). I am now running short of paint (!) though there is probably enough for another coat. If I need more I will use Tamiya acrylic as it is readily available here. I will then spray it with some leftover Humbrol matt white acrylic followed by polyurethane spray and hope the whole thing looks respectable. The white shows up every fault unfortunately and there are plenty. The following photos show marking the waterline with Tamiya tape for curves (excellent) and an Amati waterline marker (works well, but probably not worth the price). Sometime in the last few weeks I made up the mortars. Following Rafine's and Joe's leads I stuck a couple of handles on each. Here's how they turned out. There was of course one small disaster. I seem to have lost one of the mortar chocks. I guess one of the mortars will have to lay down or I'll have to make one up.


- 421 replies
-
- 11
-
-
- caldercraft
- granado
- (and 1 more)
-
Nothing seems to have gone smoothly on this build, though most of the wounds have been self-inflicted, though not this one. The white paint for below the water line is causing problems. The admiralty paint dries far too quickly to get a smooth result, and in taking off a piece of masking tape, the paint (four coats!) came with it. When (if) I have a reasonably acceptable result in brushing on the paint, I will use an acrylic spray to finish. I have bought some acrylic thinner and may mix it with the paint it to help prevent the drying problem. Advice on this would be appreciated.
- 421 replies
-
- 1
-

-
- caldercraft
- granado
- (and 1 more)
-
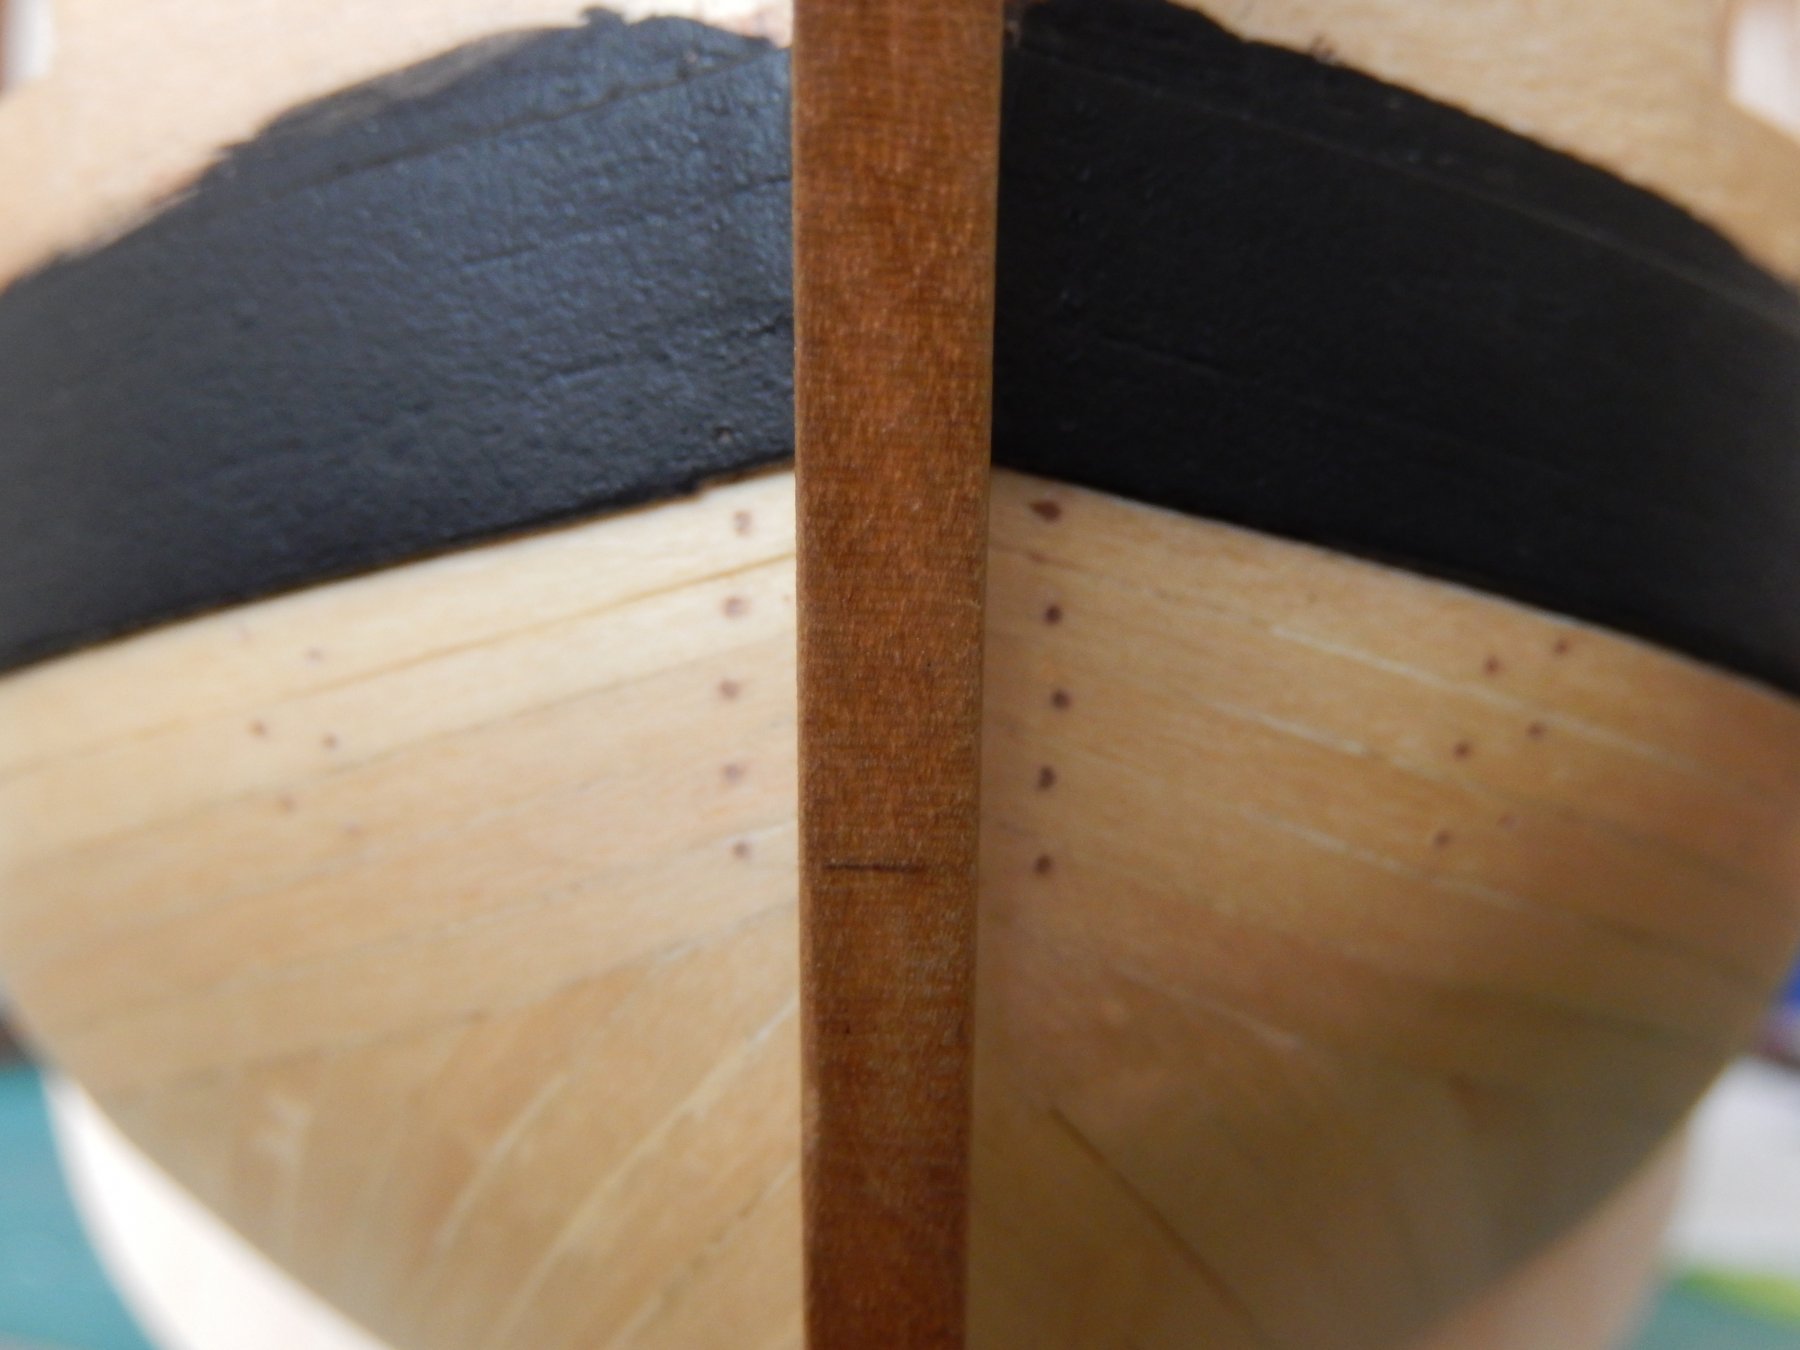
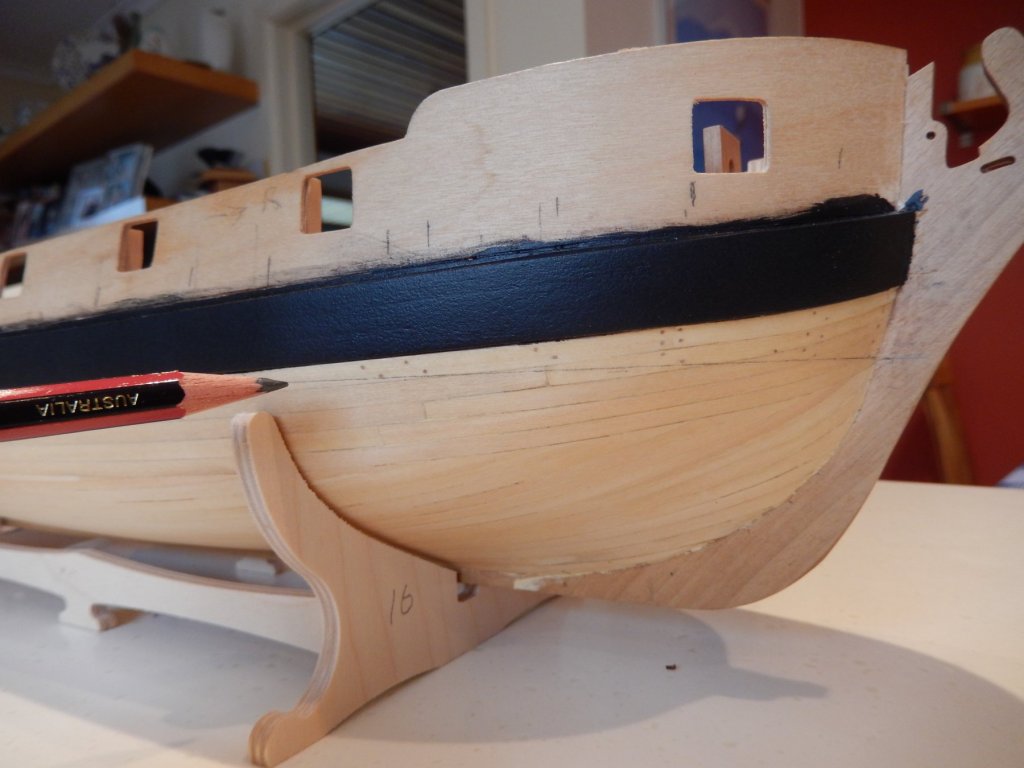
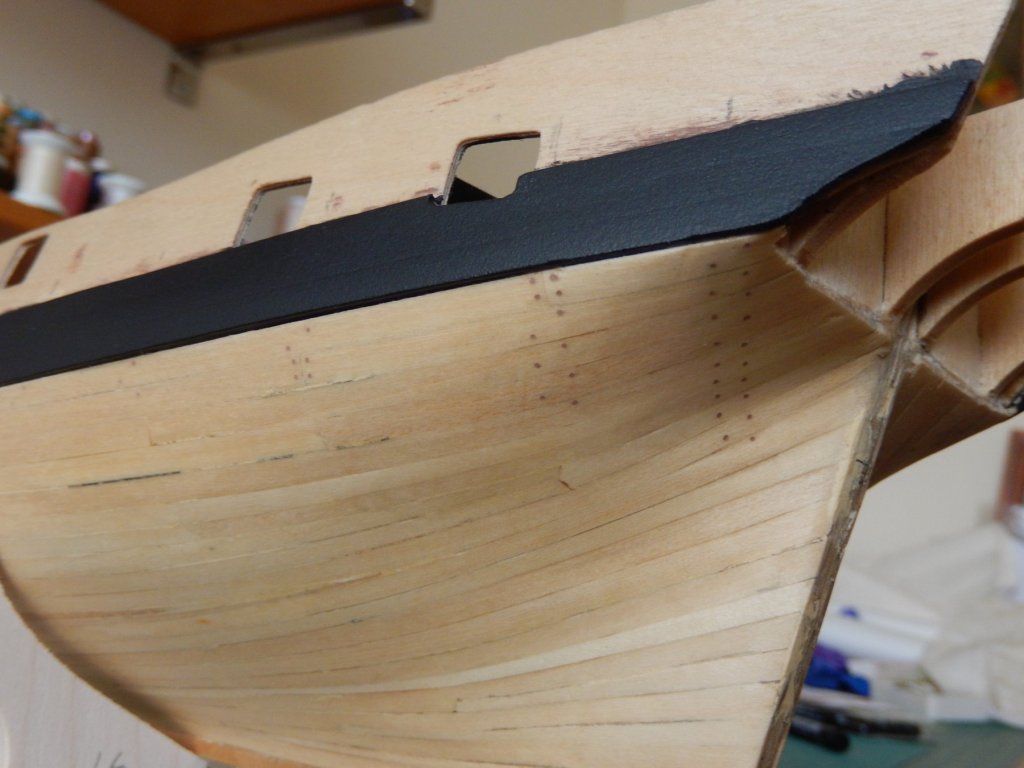
Thanks for the very kind comment OC. The treenails above the waterline are finally done after quite a few tribulations. Next is to do the painting which is usually rather nerve-wracking. Here are photos of progress. Had I done the second planking properly I would have extended the treenailing to the keel. However, given the result of the treenailing for the wale - where it is all but invisible under the paint - it probably would have been a waste of time.

- 421 replies
-
- 10
-
-
- caldercraft
- granado
- (and 1 more)
-
Jim and Richard: thanks for the encouragement - it's always appreciated.
-
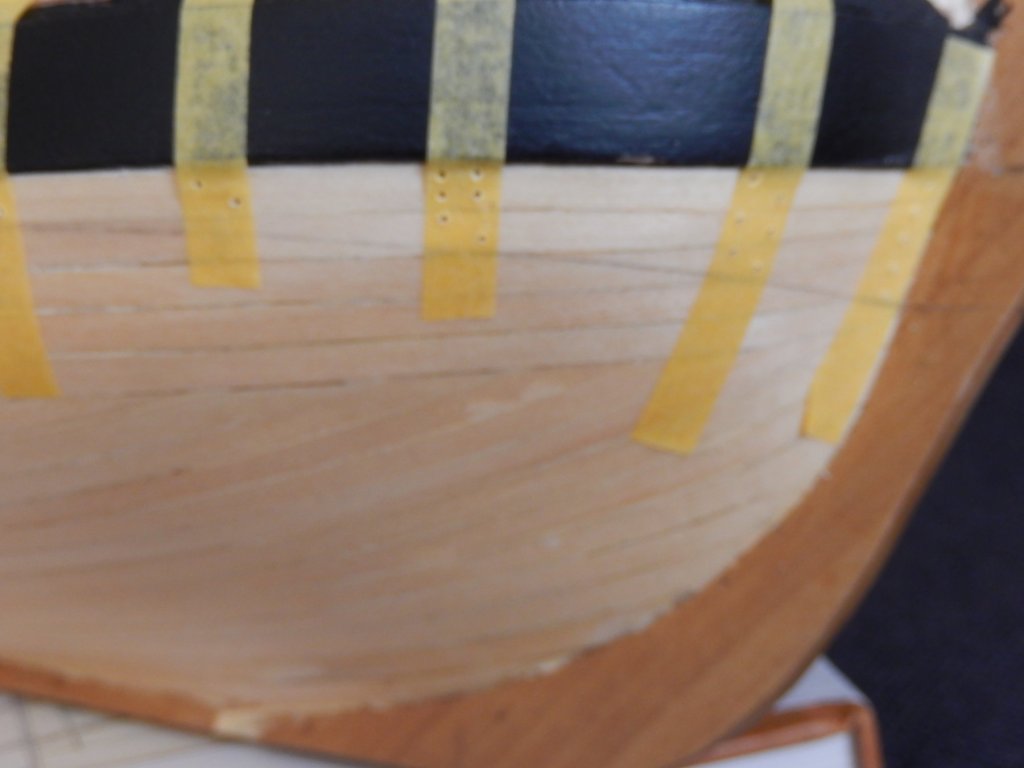
Well 10 days with two hyperactive munchkins proved .... diverting. Despite this, a little progress has been made. 'Treenails' have now been put in the wale. I suspect it's hardly worth the effort, but anyway it's done. Again I have used Tamiya tape, both as a guide and to prevent the bit slipping. Below are the results before a coat of polyurethane. The treenaills can only be really seen under direct light shining on an angle. The polyurethane will probably further obscure them - but at least they're there.

- 421 replies
-
- 8
-
-
- caldercraft
- granado
- (and 1 more)
-
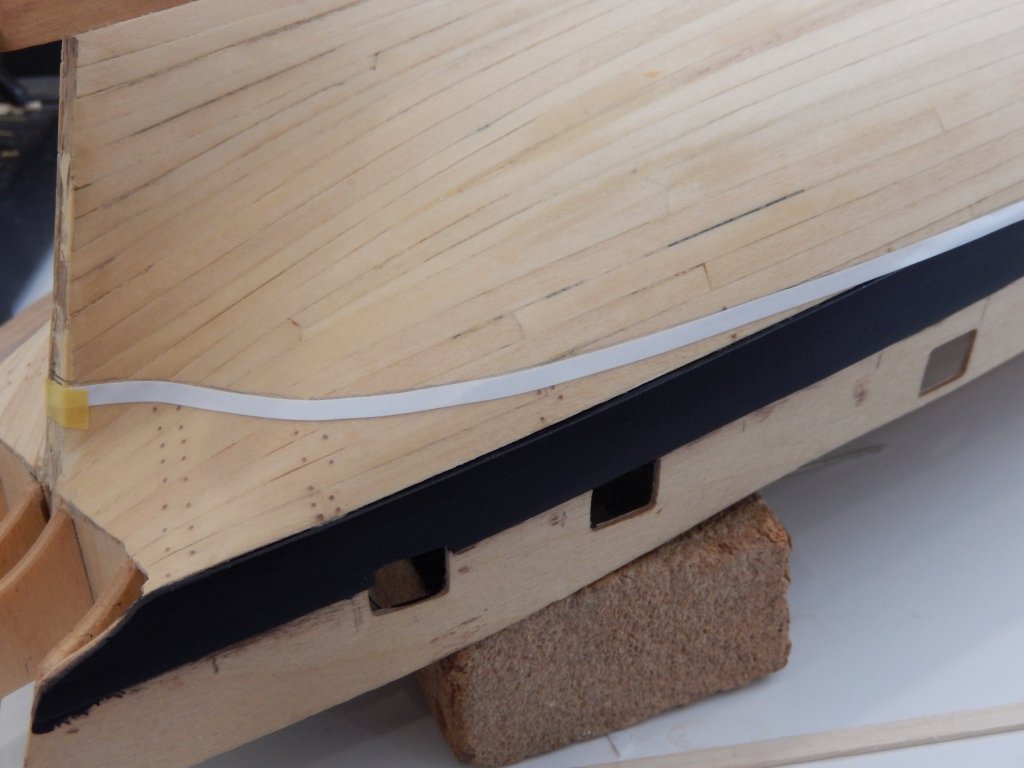
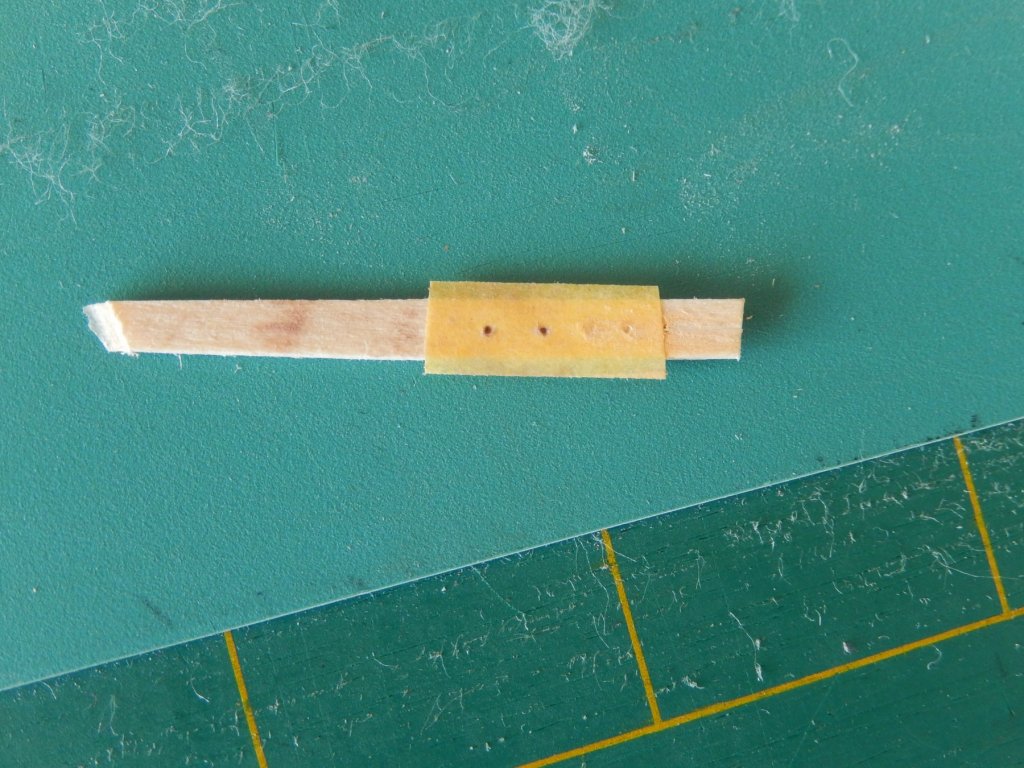
Here is work-in-progress. Despite appearances the tree nails in the second photo are vertical. The tape serves both as a guide and to stop the drill bit slipping. Once the holes were drilled I filled them directly over the tape to avoid the filler spreading over the wood surface. Below is an experiment. It worked reasonably well, but provided the hull is coated with polyurethane before filling, it's probably not necessary. Photos of the result will have to await the return of the menagerie.
- 421 replies
-
- 5
-
-
- caldercraft
- granado
- (and 1 more)
-
I have now done tree nails below the wale and above the waterline (photos later). Progress now will be delayed for about 10 days during the school holidays - those with small grand children will probably understand.
- 421 replies
-
- 1
-
-
- caldercraft
- granado
- (and 1 more)
-
Thanks for the comment Jim - always appreciated.
-
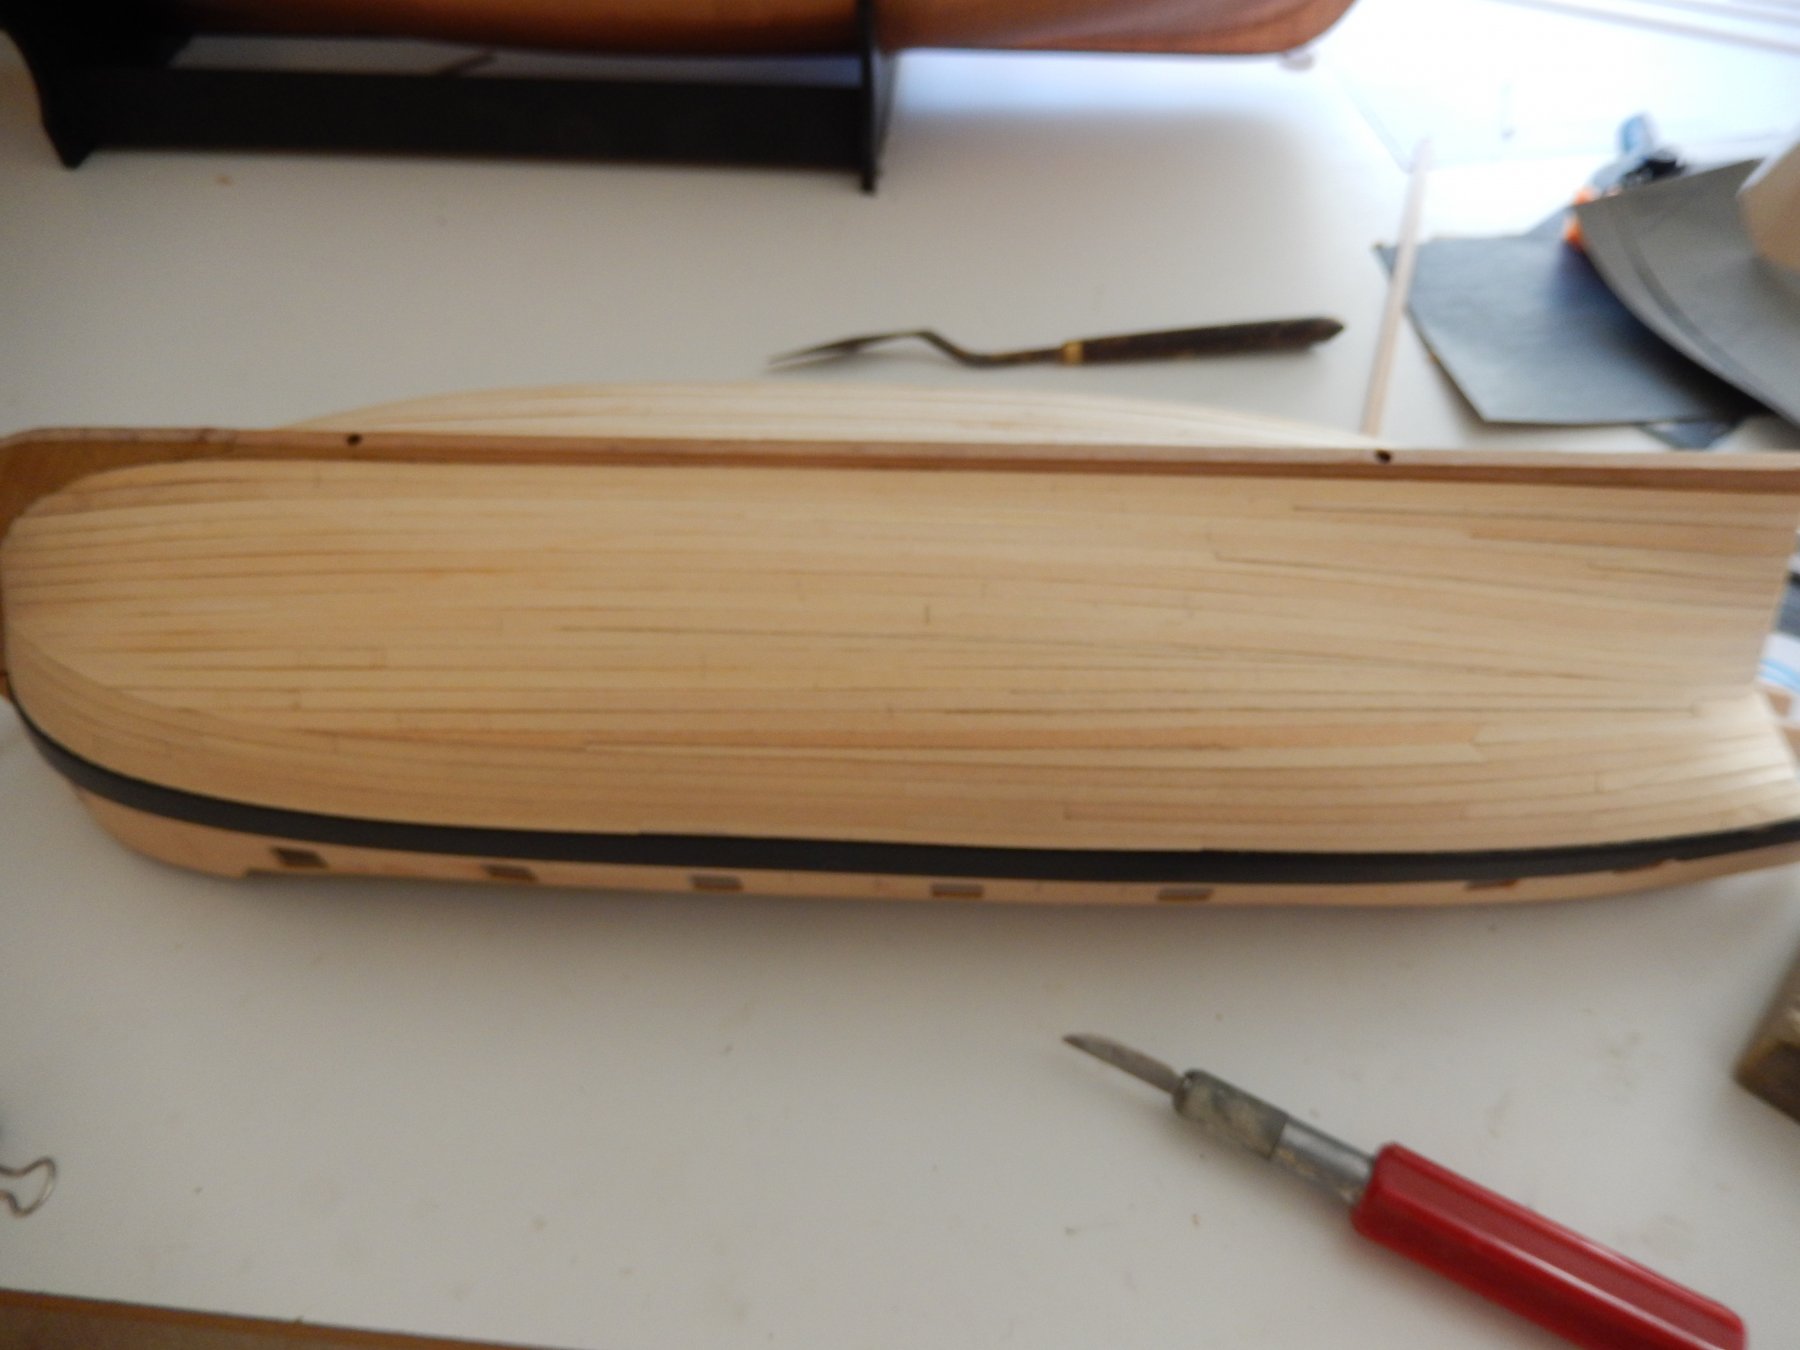
I have now sanded the second planking and applied a coat of polyurethane. To my pleasant surprise it has turned out well. In the following pictures the parallel planks are the only ones which are of relevance, and of those, only a few at the bow and the stern will be seen. The rest will be painted. I have yet to do the waterline.


- 421 replies
-
- 10
-
-
- caldercraft
- granado
- (and 1 more)
-
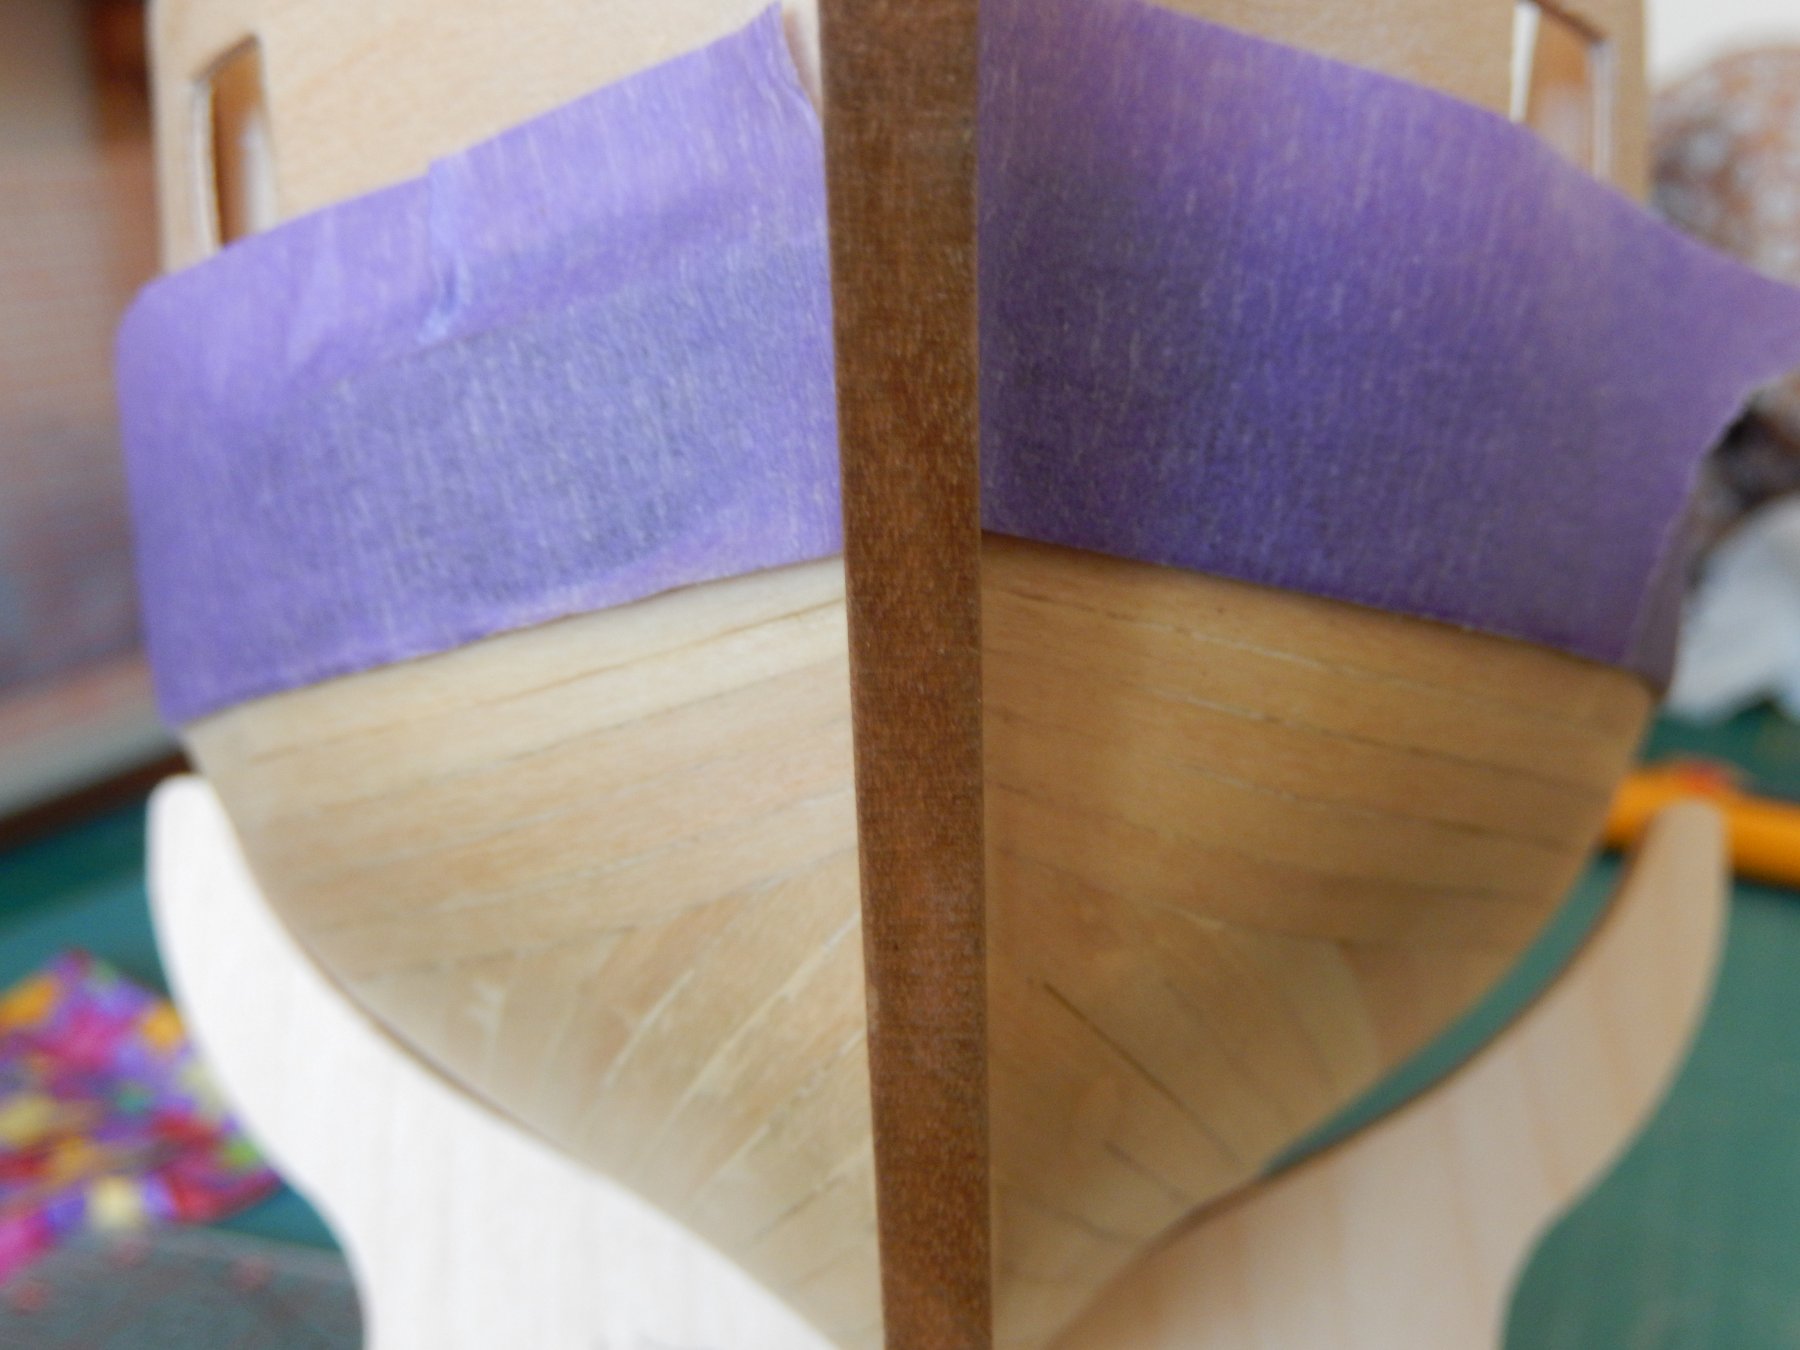
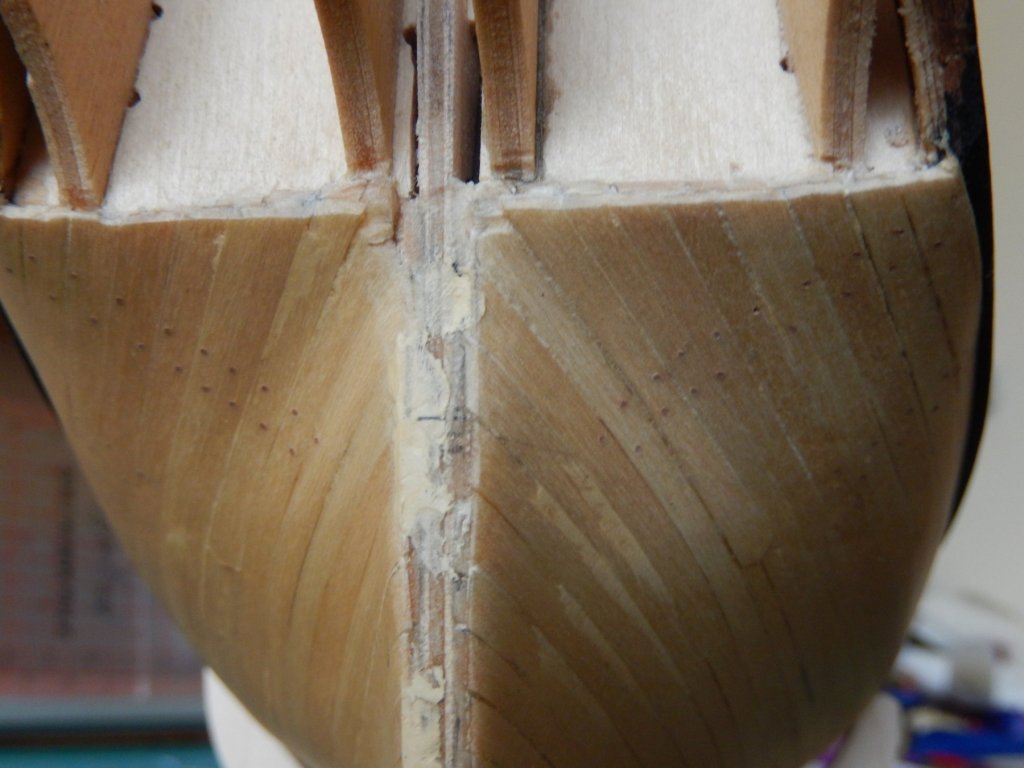
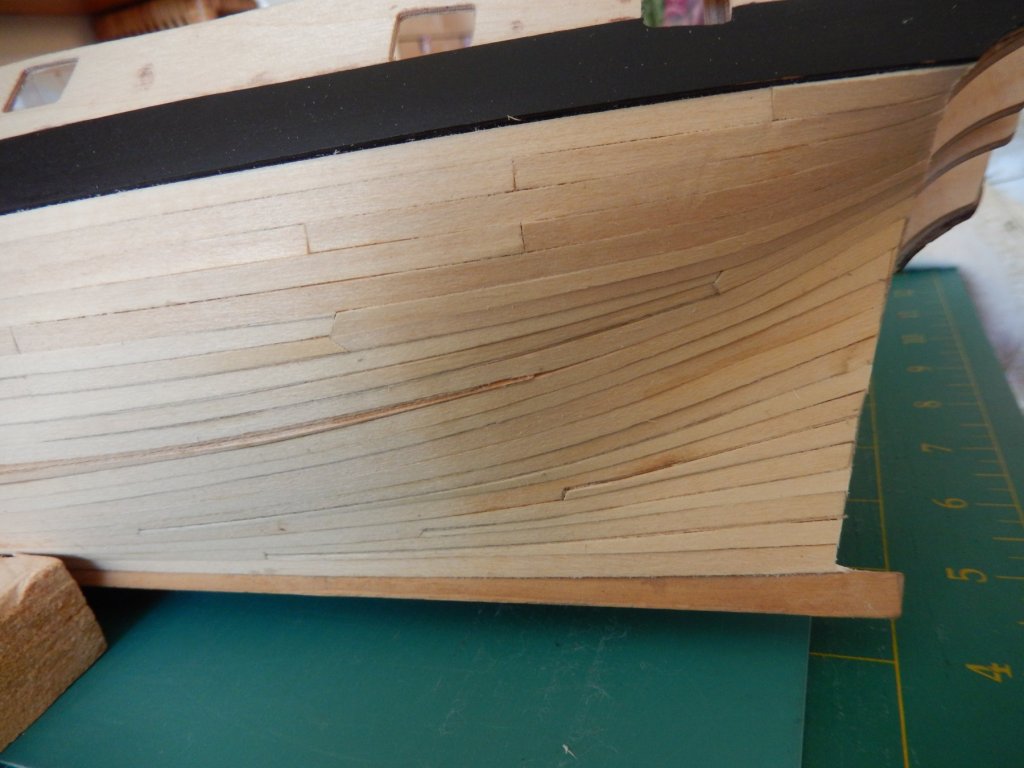
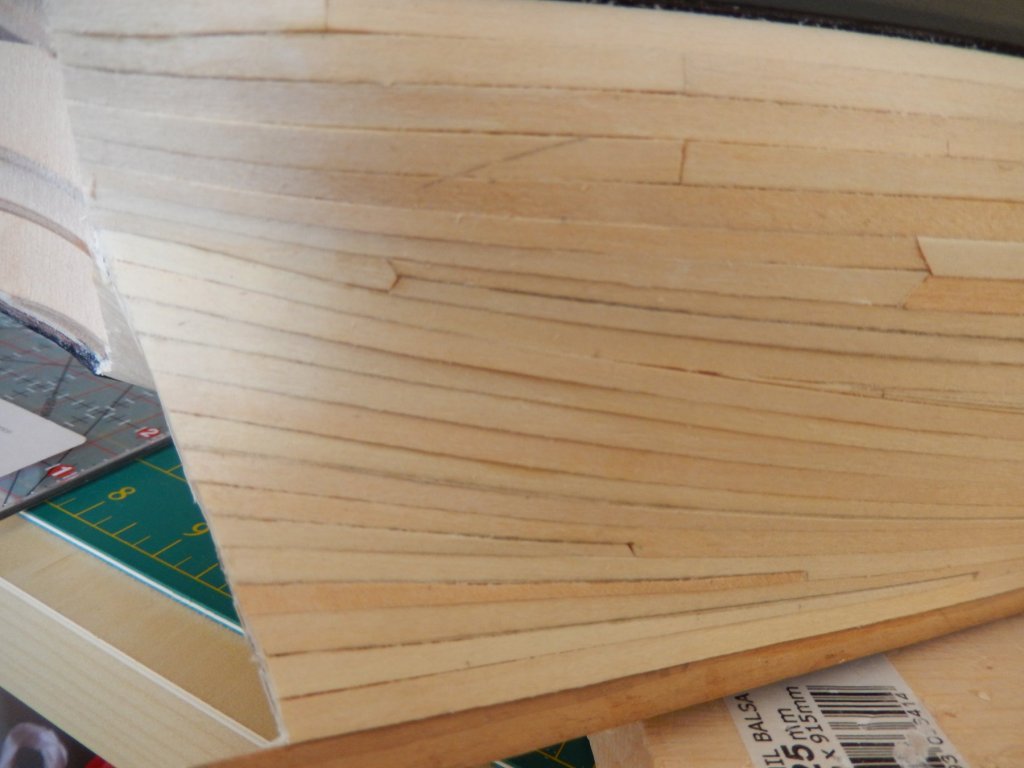
The second planking below the wale is now finally finished. I am not at all pleased with it. The wood is a bit of a disaster - it's far too soft - and I did give a thought to buying the Amati version of the Granado to take what is best from both versions. Sanity prevailed. I had hoped to do the planking in an 'authentic' manner but it simply didn't work out. The planking that will be above the waterline however is of the appropriate pattern, and I hope after sanding and painting, the result will be acceptable. Here the wood has been coated with dilute PVA and has dried overnight which I hope will provide a firmer surface for sanding. The result prior to sanding: The apparent gaps in the planking in the photo below are caused by stain from my staining experiments. There are, in fact, no gaps. Almost all of the planking here will be filled and painted.
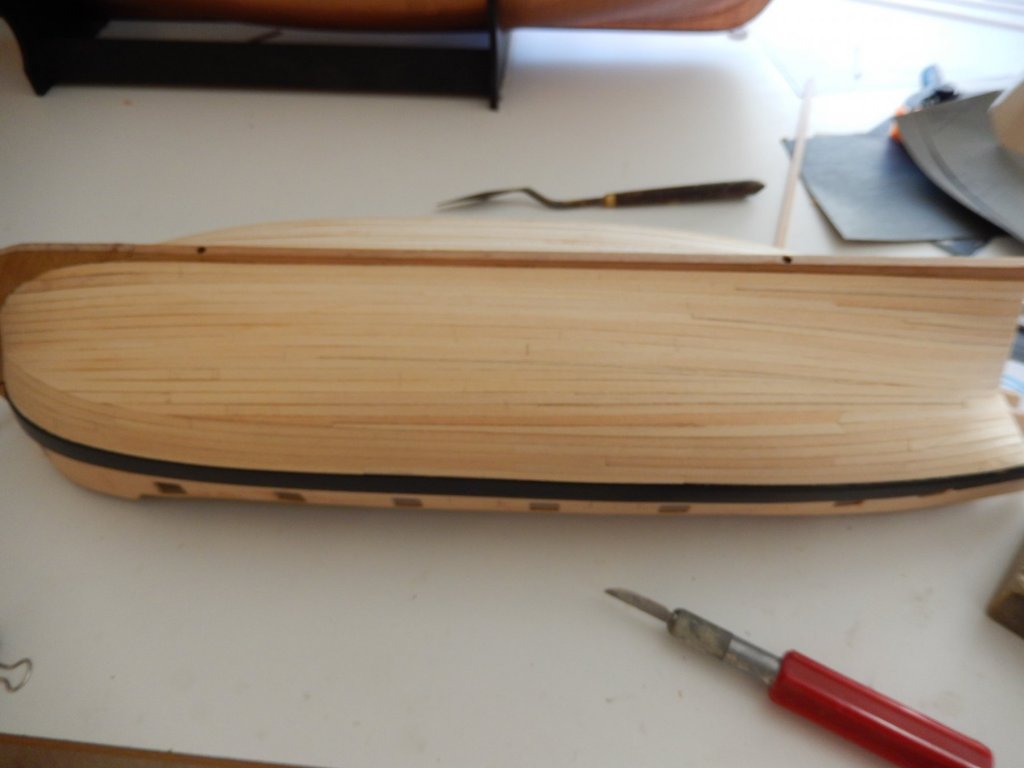
- 421 replies
-
- 4
-
-
- caldercraft
- granado
- (and 1 more)
-
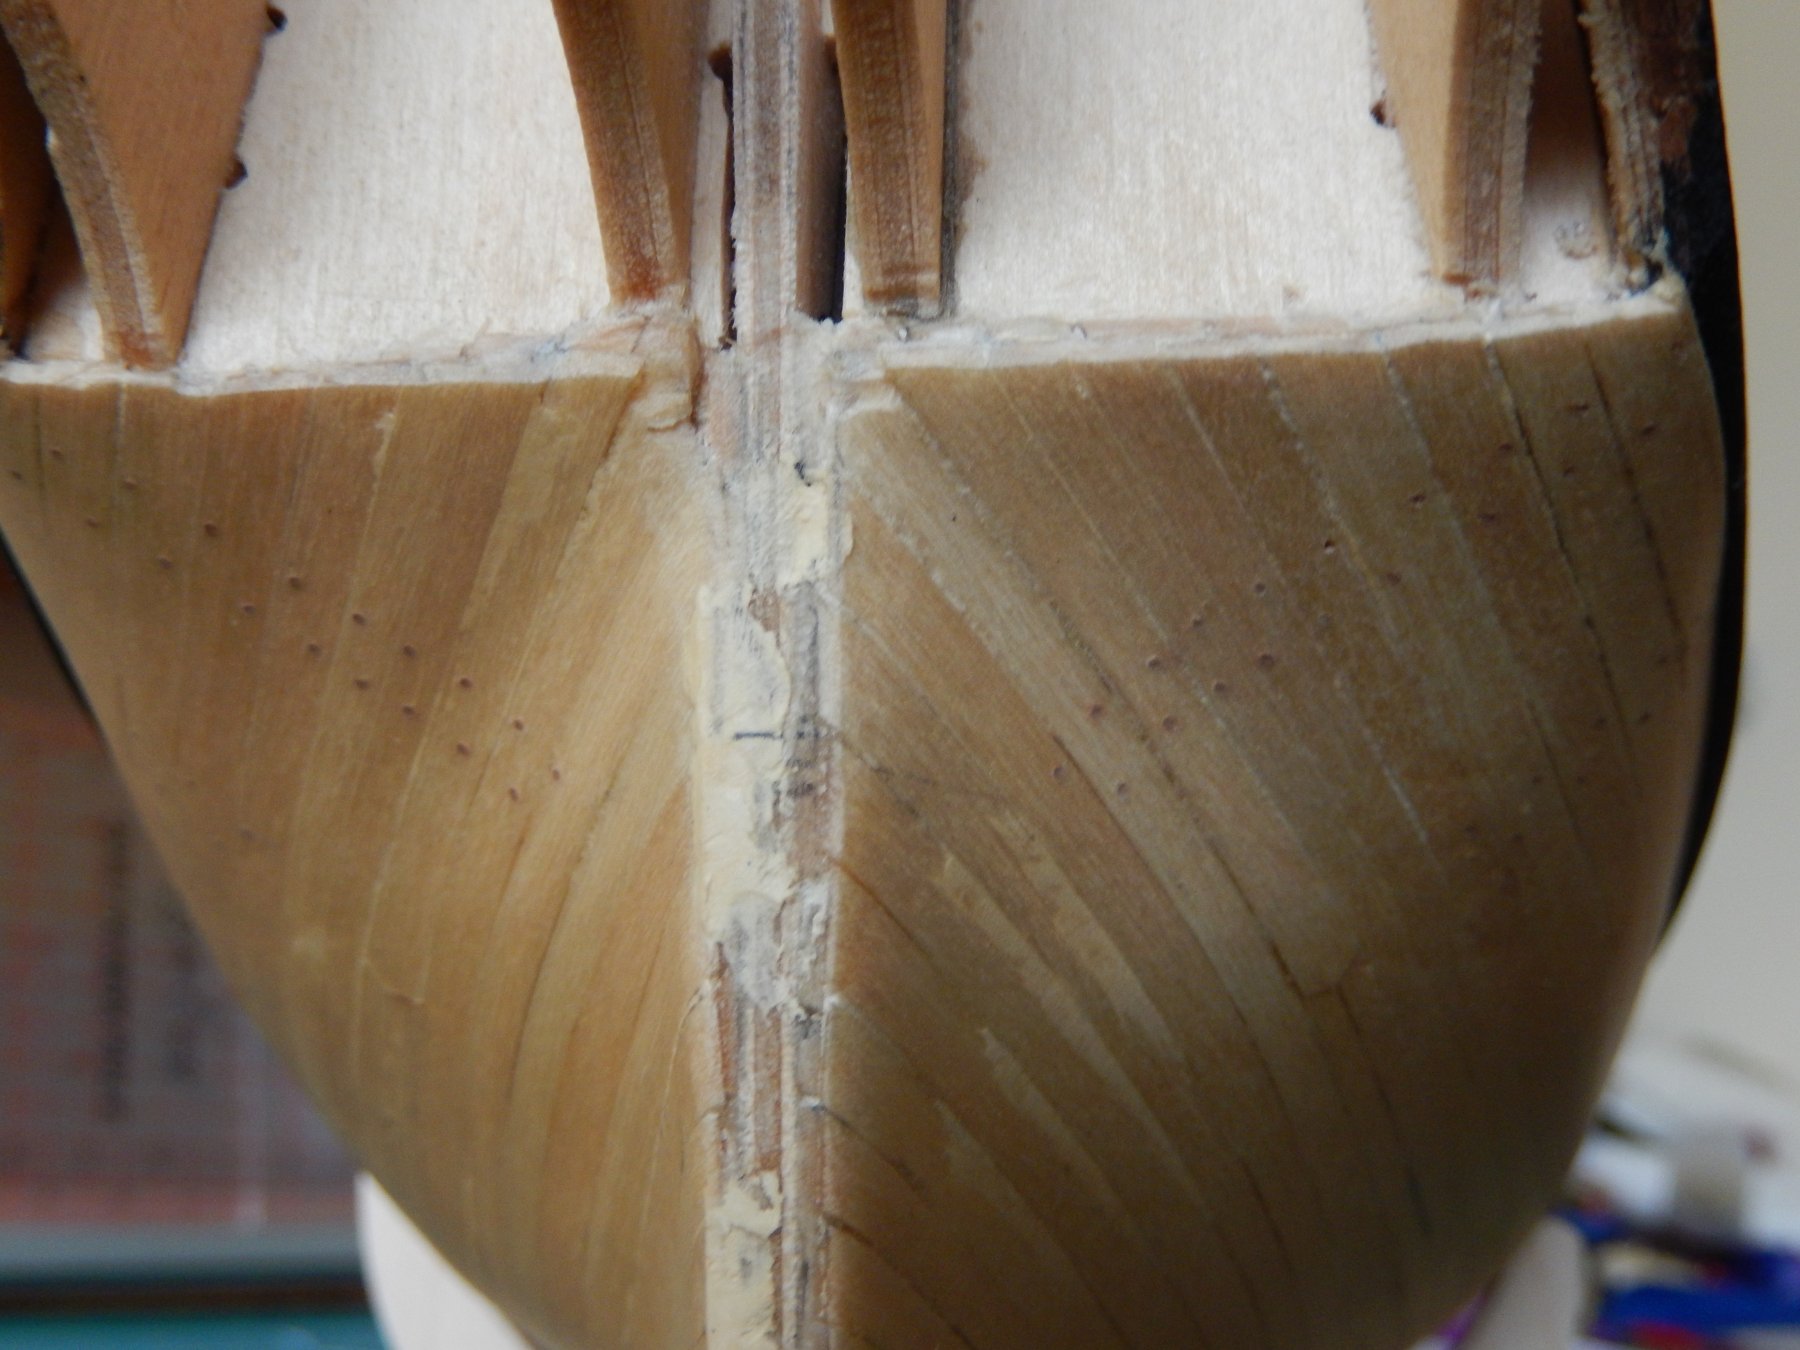
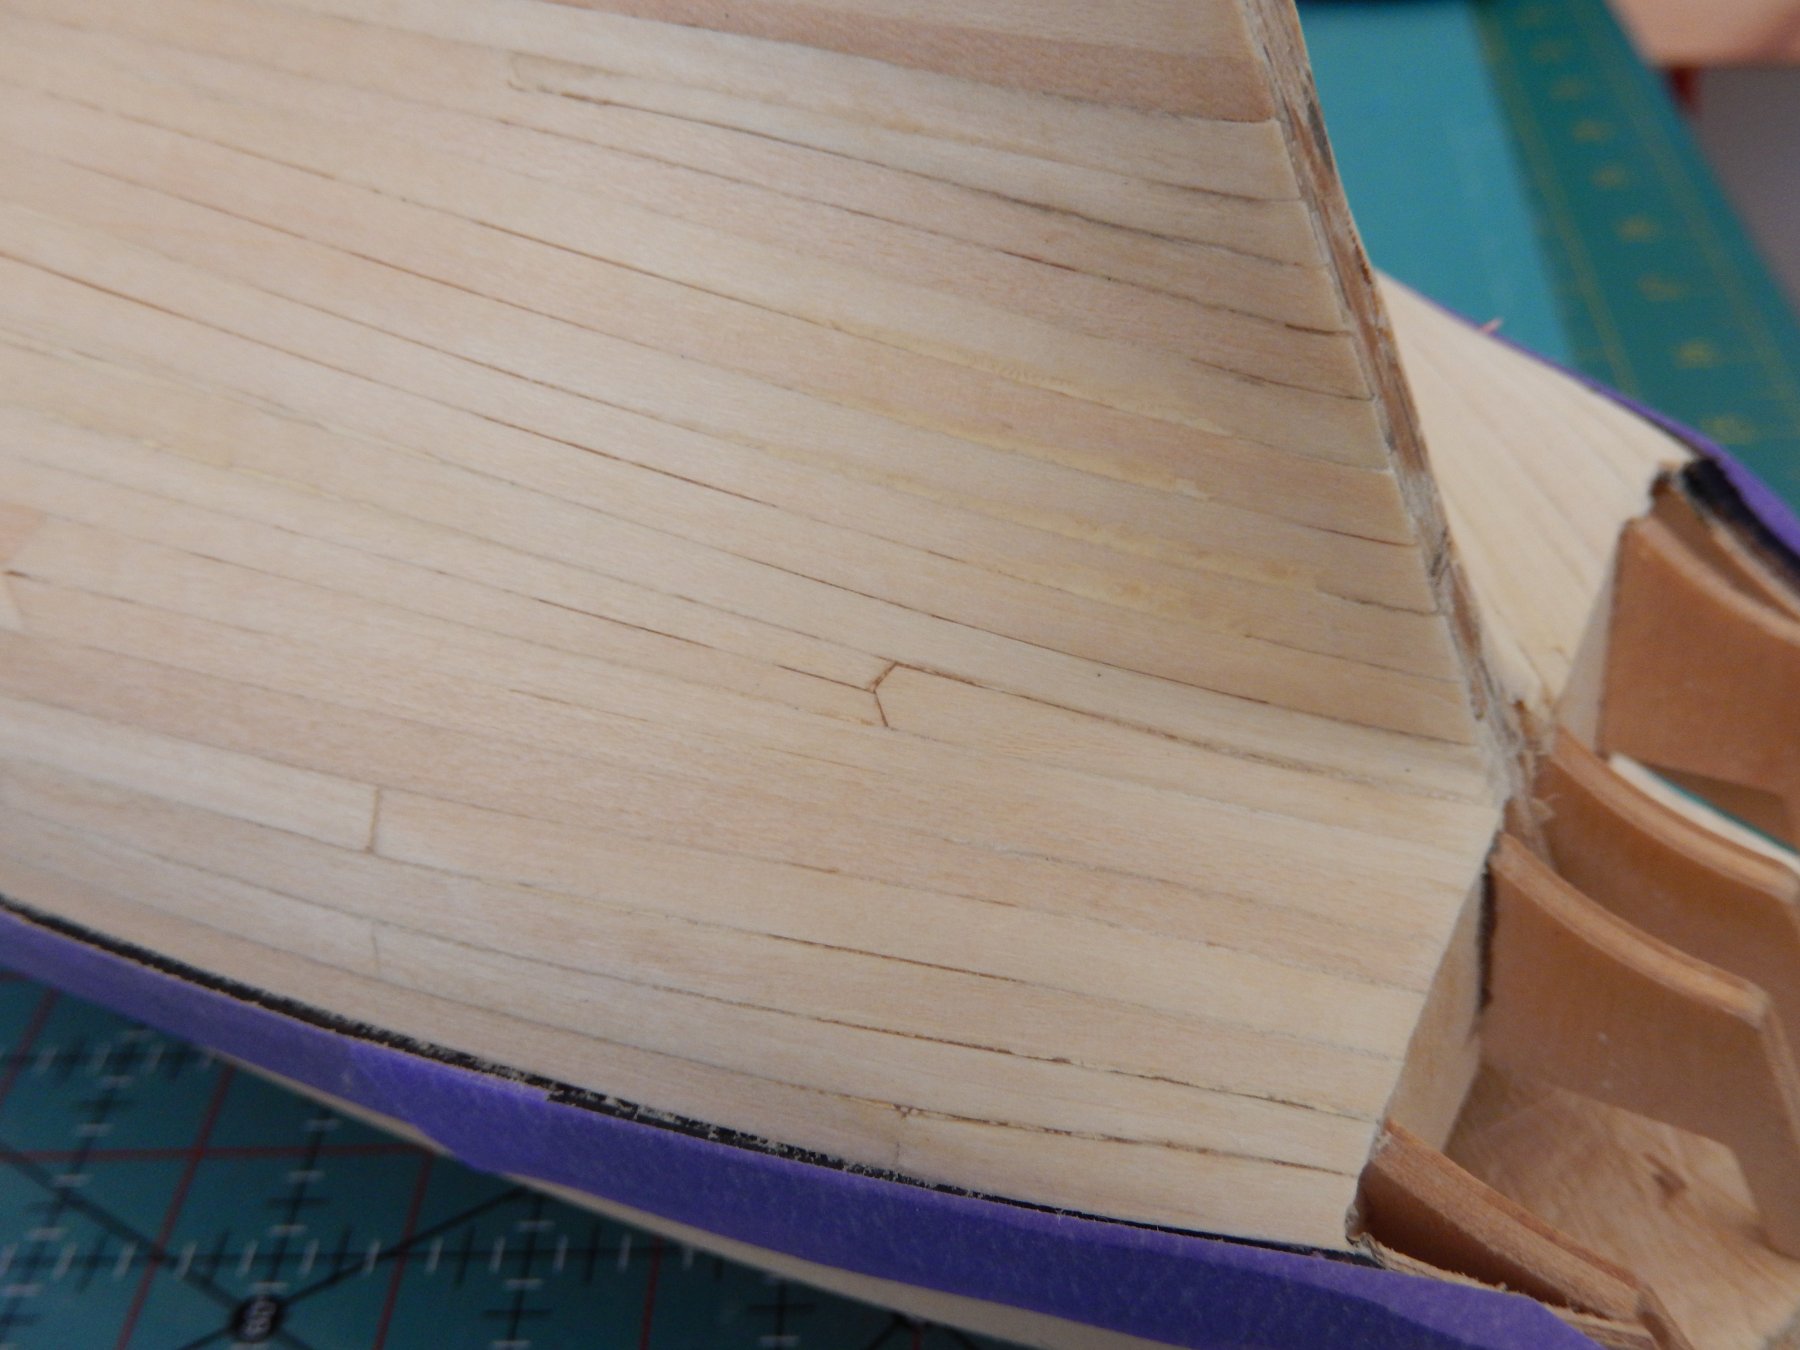
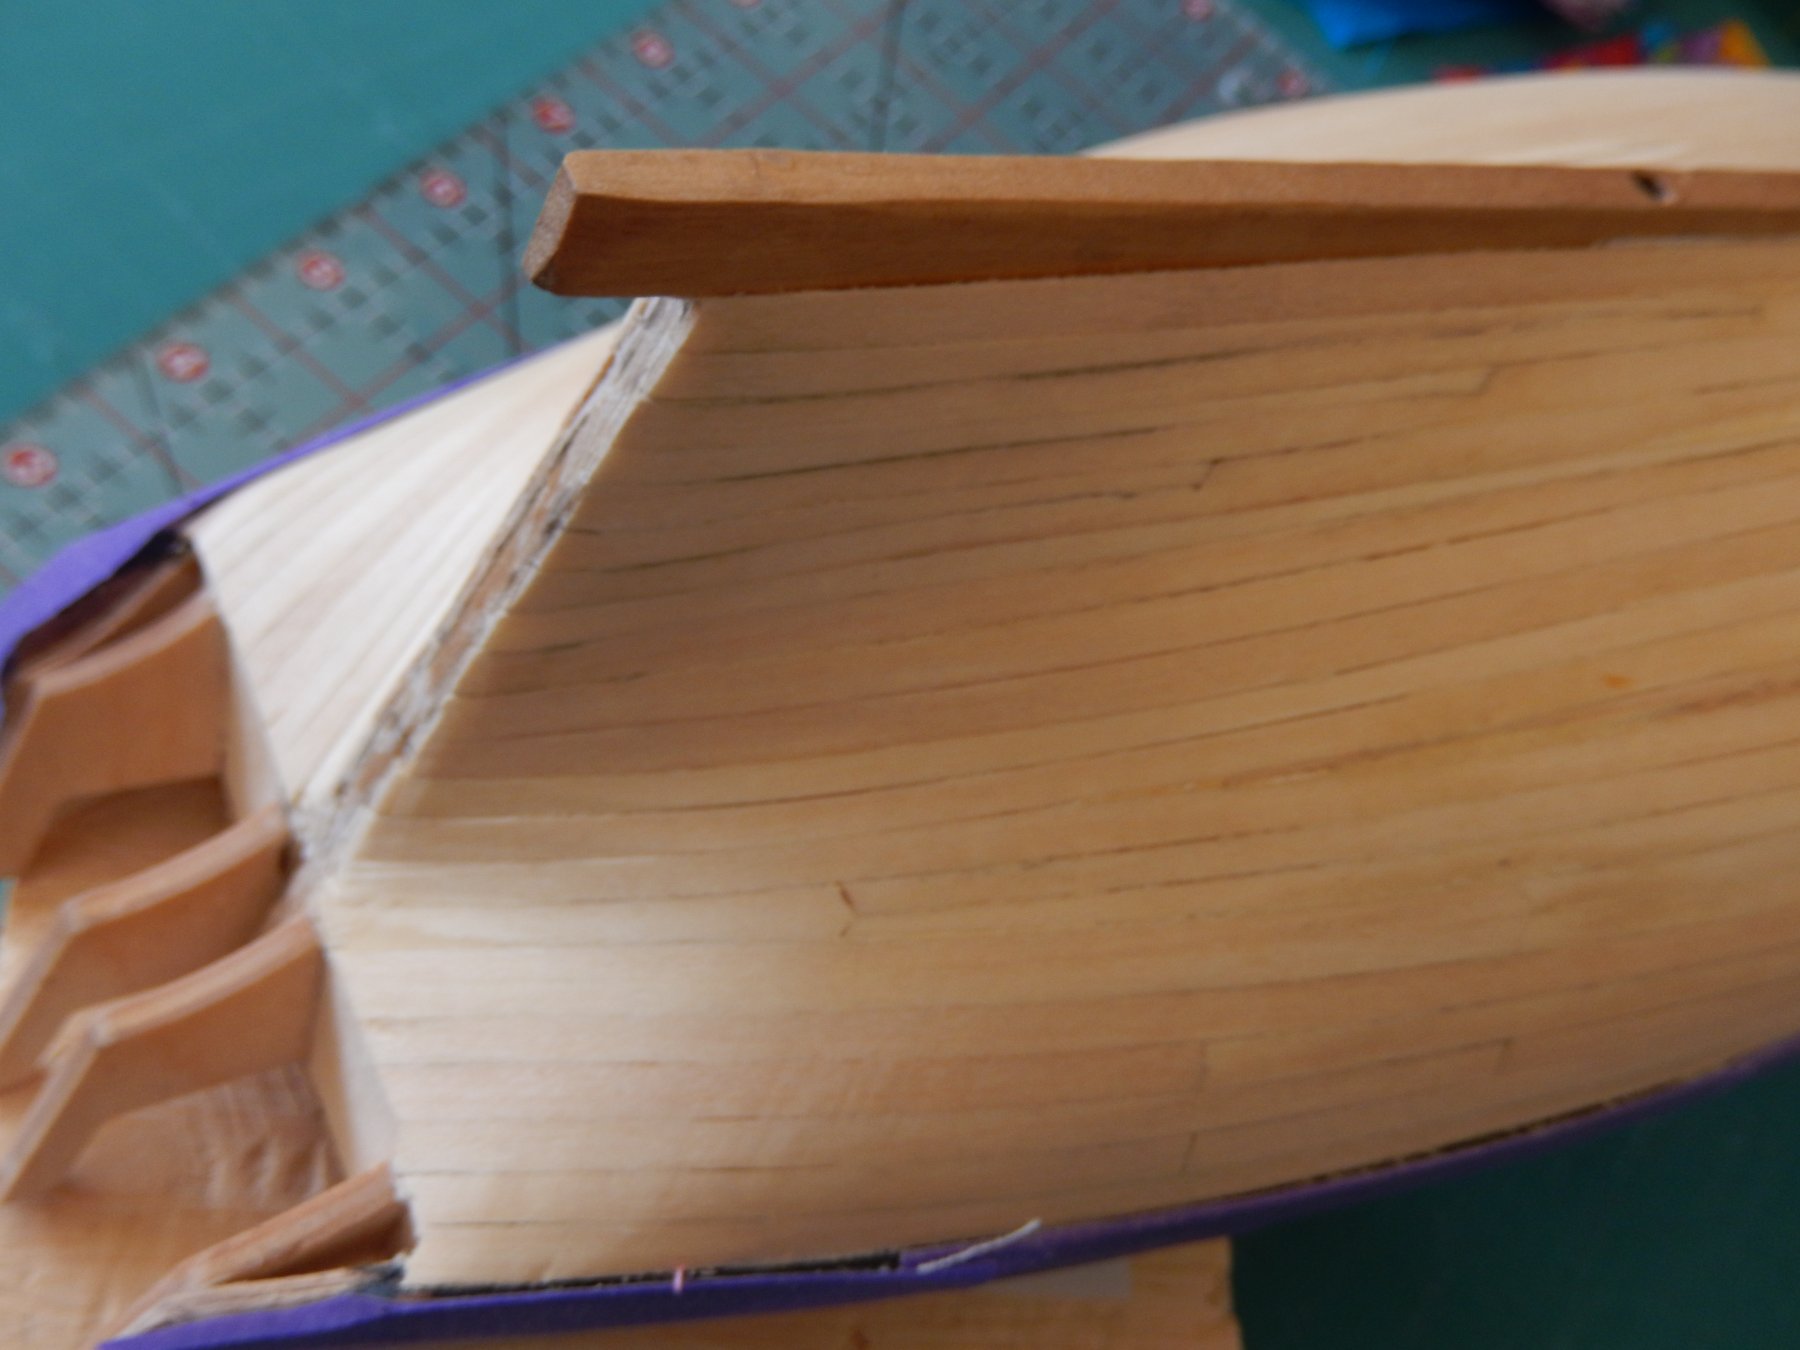
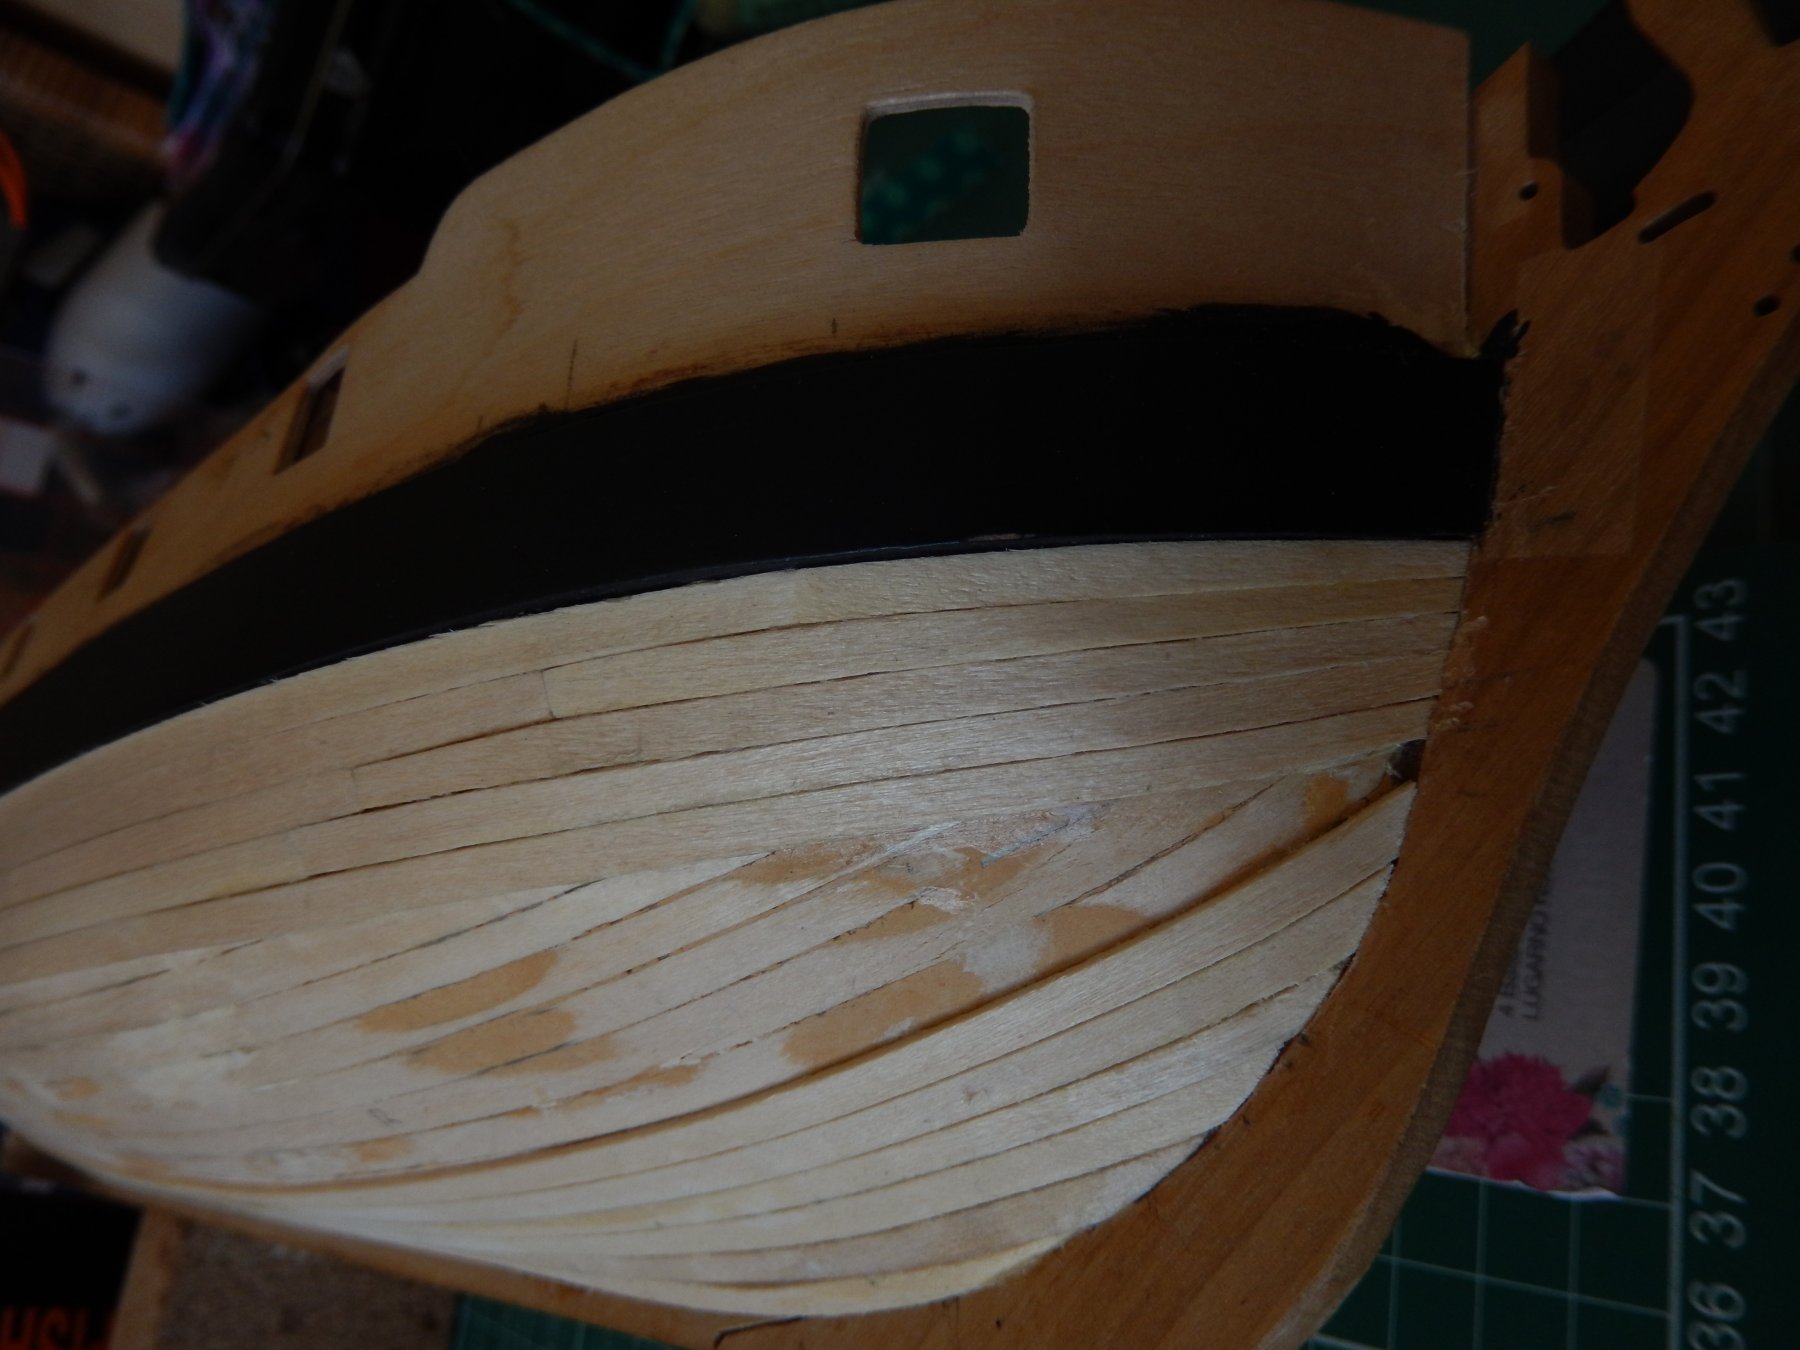
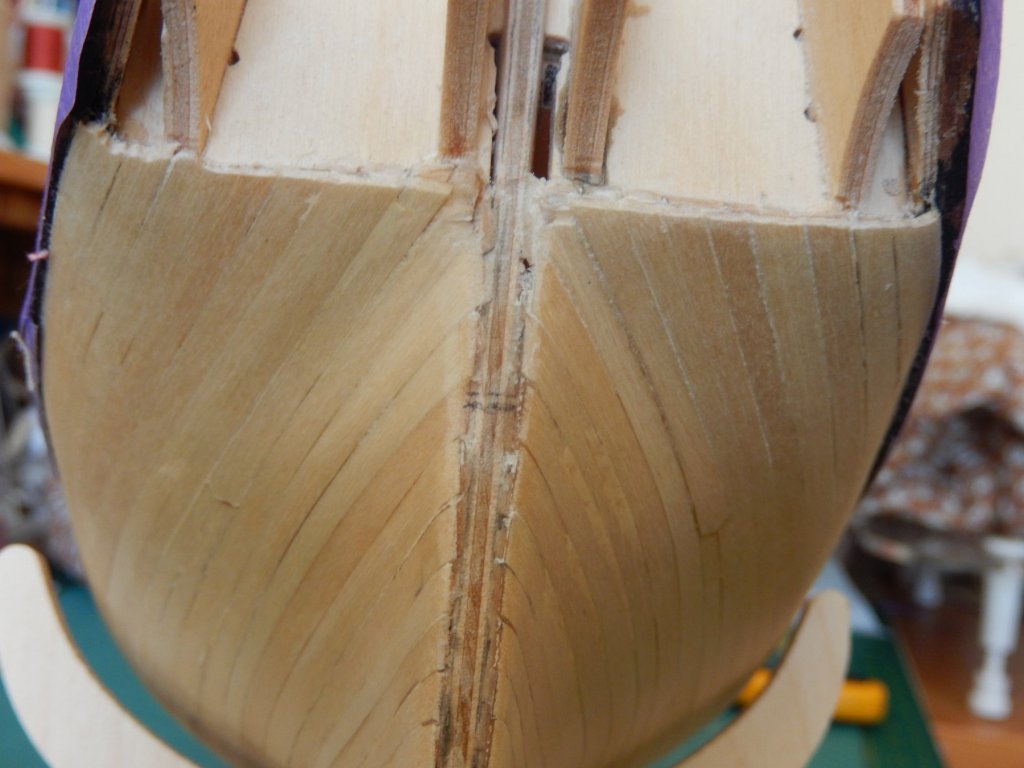
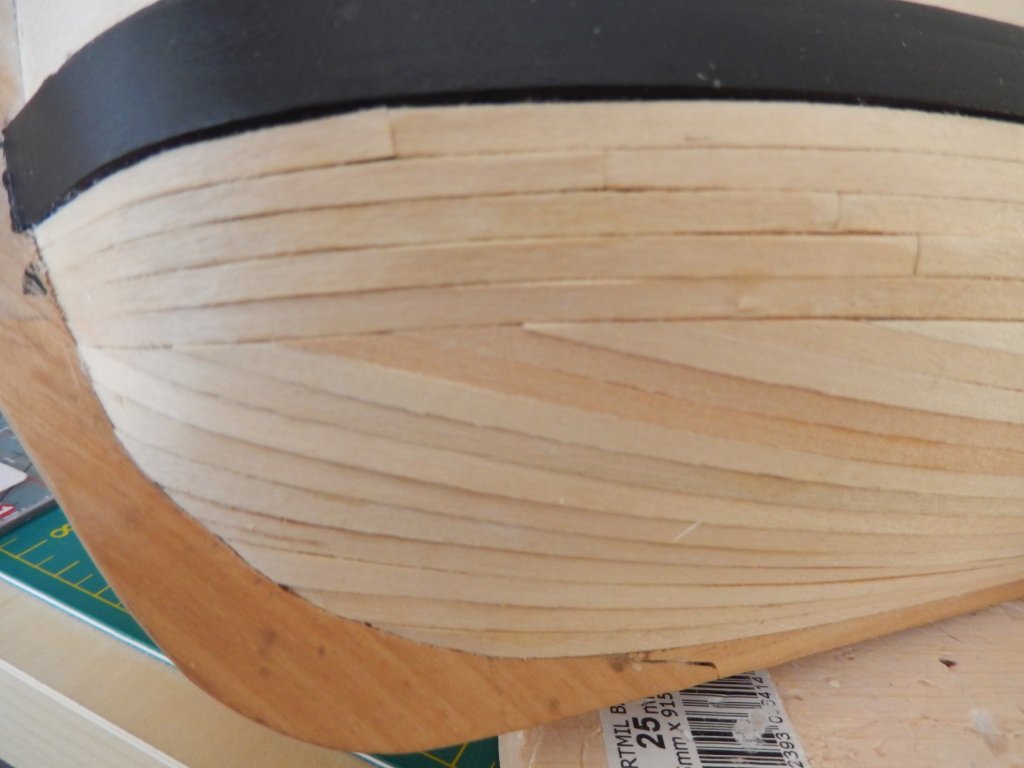
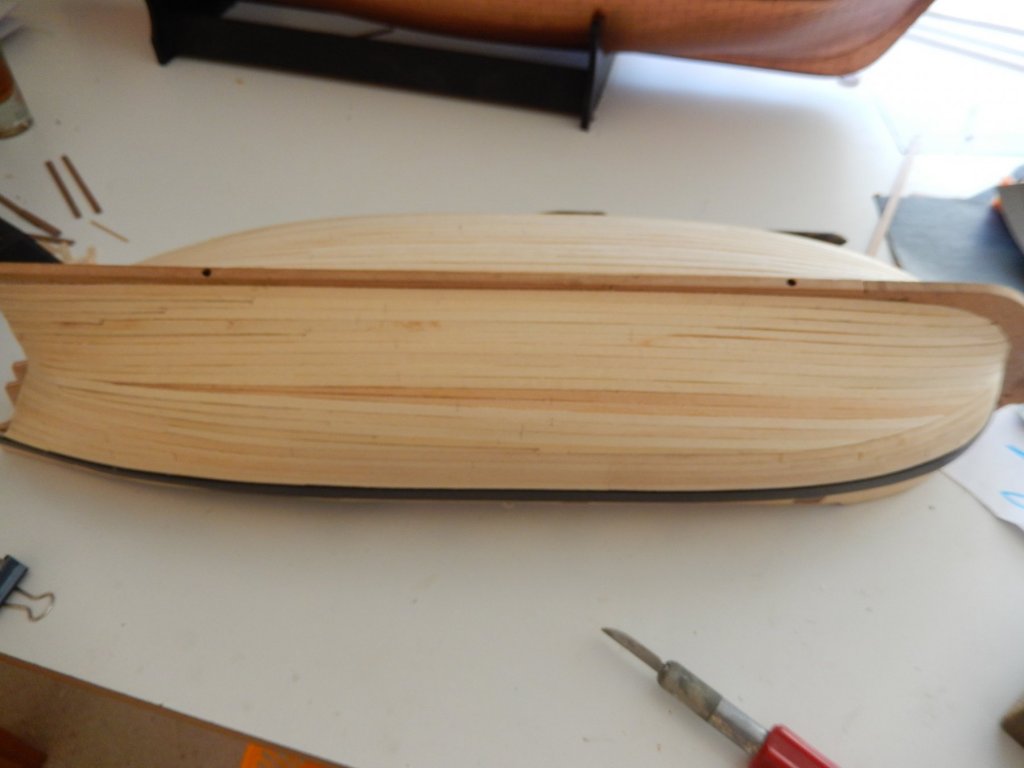
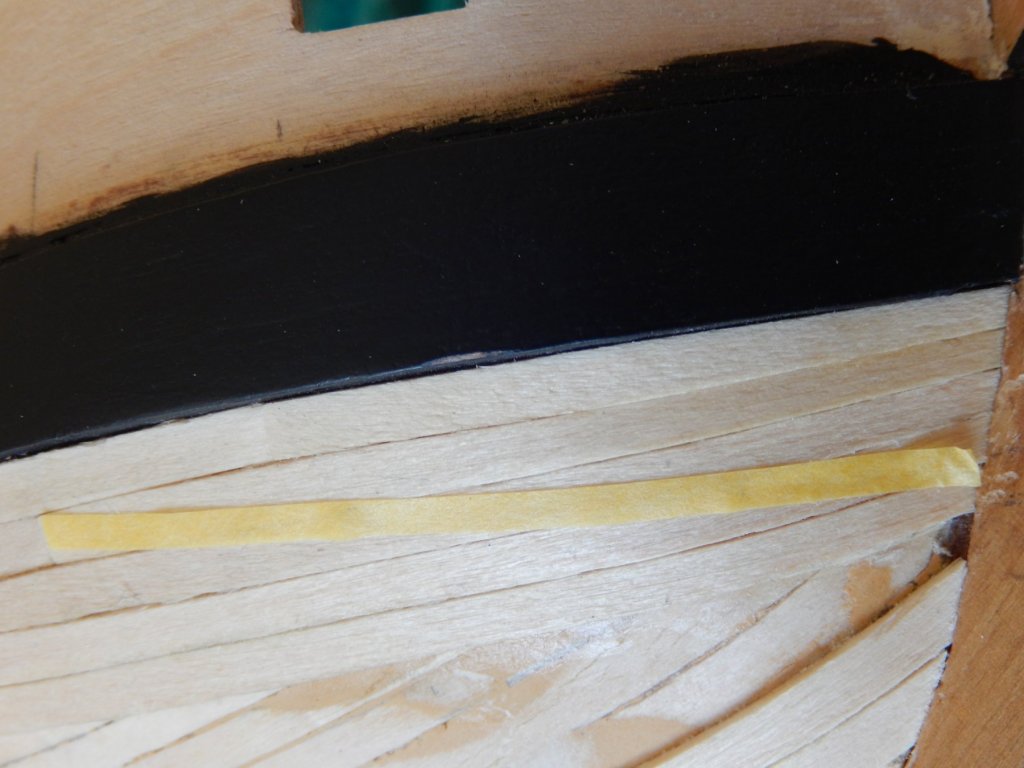
I have stripped off and replaced the original second planking around the bow where the problem is most obvious. The result is better, but far from perfect. The wood I find ultimately comes from Artesanialatina and is certainly labelled boxwood. In the following photos the wood has been 'painted' with dilute PVA glue to harden its surface, which otherwise was absurdly soft and tended go into strips when sanded. This appears to solve that problem. The planks in the photos however, have not yet been sanded back. Bear in mind too, that the photos are close-ups and exaggerate the faults. Here are the results. The tape in the following photo shows the approximate position of the waterline. The planks above it are the only ones to show once the model is painted below it. They are really the only ones about which I am concerned.


- 421 replies
-
- 2
-
-
- caldercraft
- granado
- (and 1 more)
-
Peter: I am now leaning towards taking off the poorly done strips as you suggest and replacing them with what I hope will be a better job. I have experimented with a number of alternative fillers and none really do the job well. I am now conducting my last experiment and if it does not give a satisfactory result then it looks like the removal option.
-
Thanks for taking the time to comment OrLin - and do use and comment in the forum in future. It's useful for all of us. This is the first time I have had a real issue with the quality of the timber supplied in a kit. The timber supplied for my Amati Vanguard was very good (the walnut was beautiful - pity it was painted - have a look at my early Vanguard log) and Mantua's for the Royal Caroline and the Astrolabe was quite acceptable. With hindsight I cwish that I had bought the Amati version of the Granado, though I think this one will probably turn out OK. I guess - aside from me - it's for others to judge.
- 421 replies
-
- 1
-
-
- caldercraft
- granado
- (and 1 more)
-
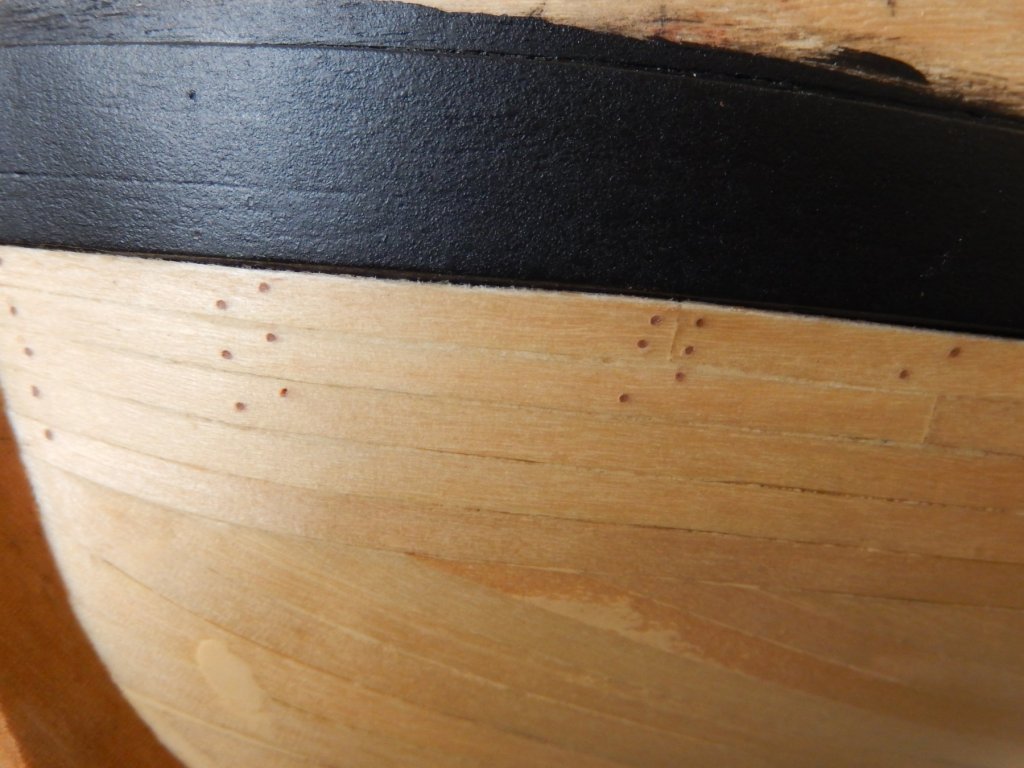
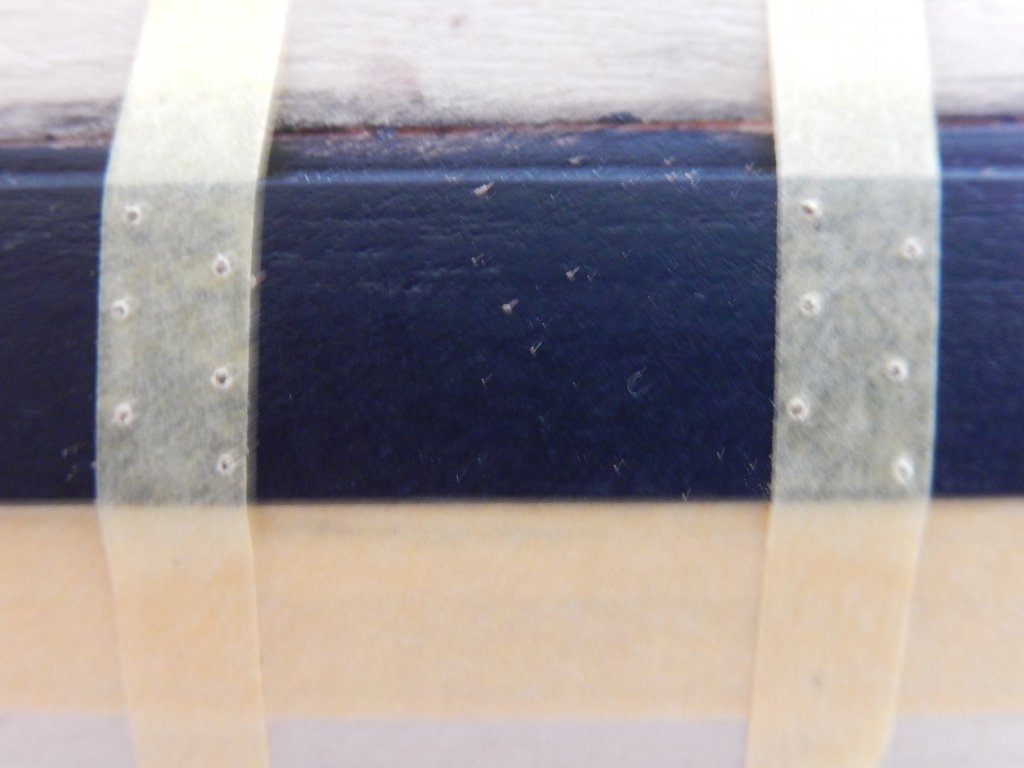
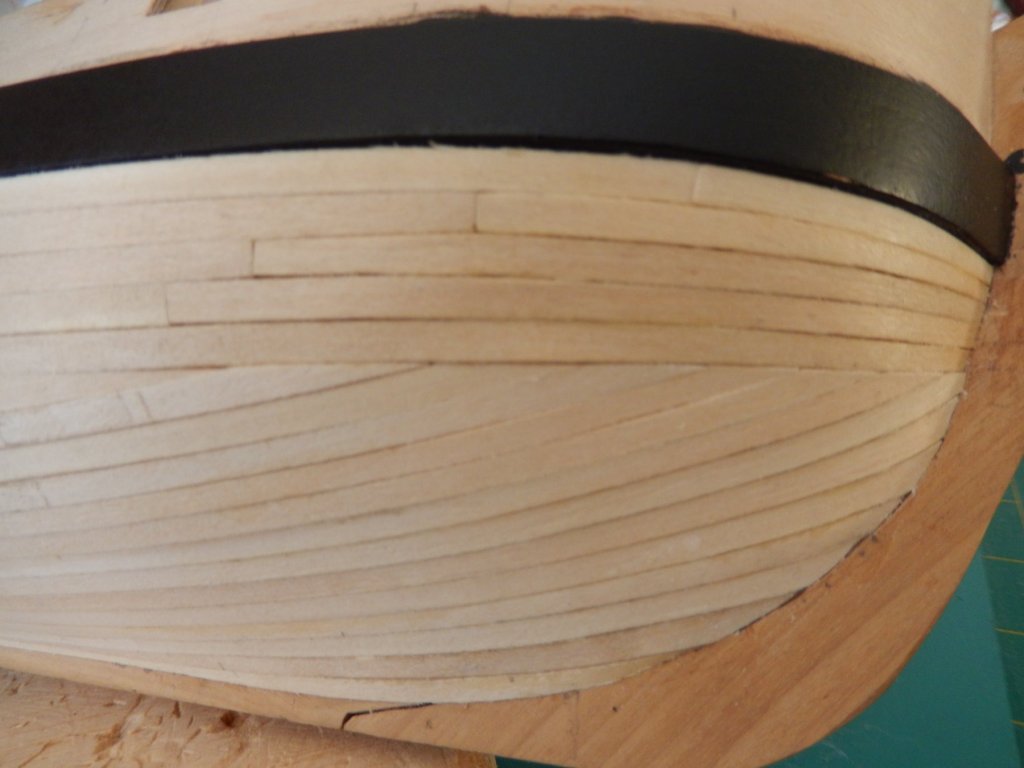
Thanks for the comments Peter and Jason. The stuff was sold as boxwood, but I really have no idea what it should look like. The first planking is lime and this is very similar, though with a slightly less coarse grain. I would have preferred a darker colour, but staining did not prove to be satisfactory - so here I am. I am now really locked in to whatever timber it is. While most is below the waterline, some is above - about four strips near the stem and perhaps a dozen around the stern below the wale. I can't then use the (poor quality*) walnut above the wale as it obviously doesn't match the stuff below, so I'm stuck with what I have. If it doesn't eventually turn out, I'll send it off the the breaker's yard. * The wale was done in the walnut supplied. You can see how coarse it is in the photos above despite 6 coats of paint, sanding between each coat and a coat of poly. In mitigation, the grain (and the mistakes) are however magnified by a factor of at least 4 in all of the close-up photos.
- 421 replies
-
- 1
-
-
- caldercraft
- granado
- (and 1 more)