HOLIDAY DONATION DRIVE - SUPPORT MSW - DO YOUR PART TO KEEP THIS GREAT FORUM GOING!
×


RMC
-
Posts
933 -
Joined
-
Last visited
Content Type
Profiles
Forums
Gallery
Events
Everything posted by RMC
-
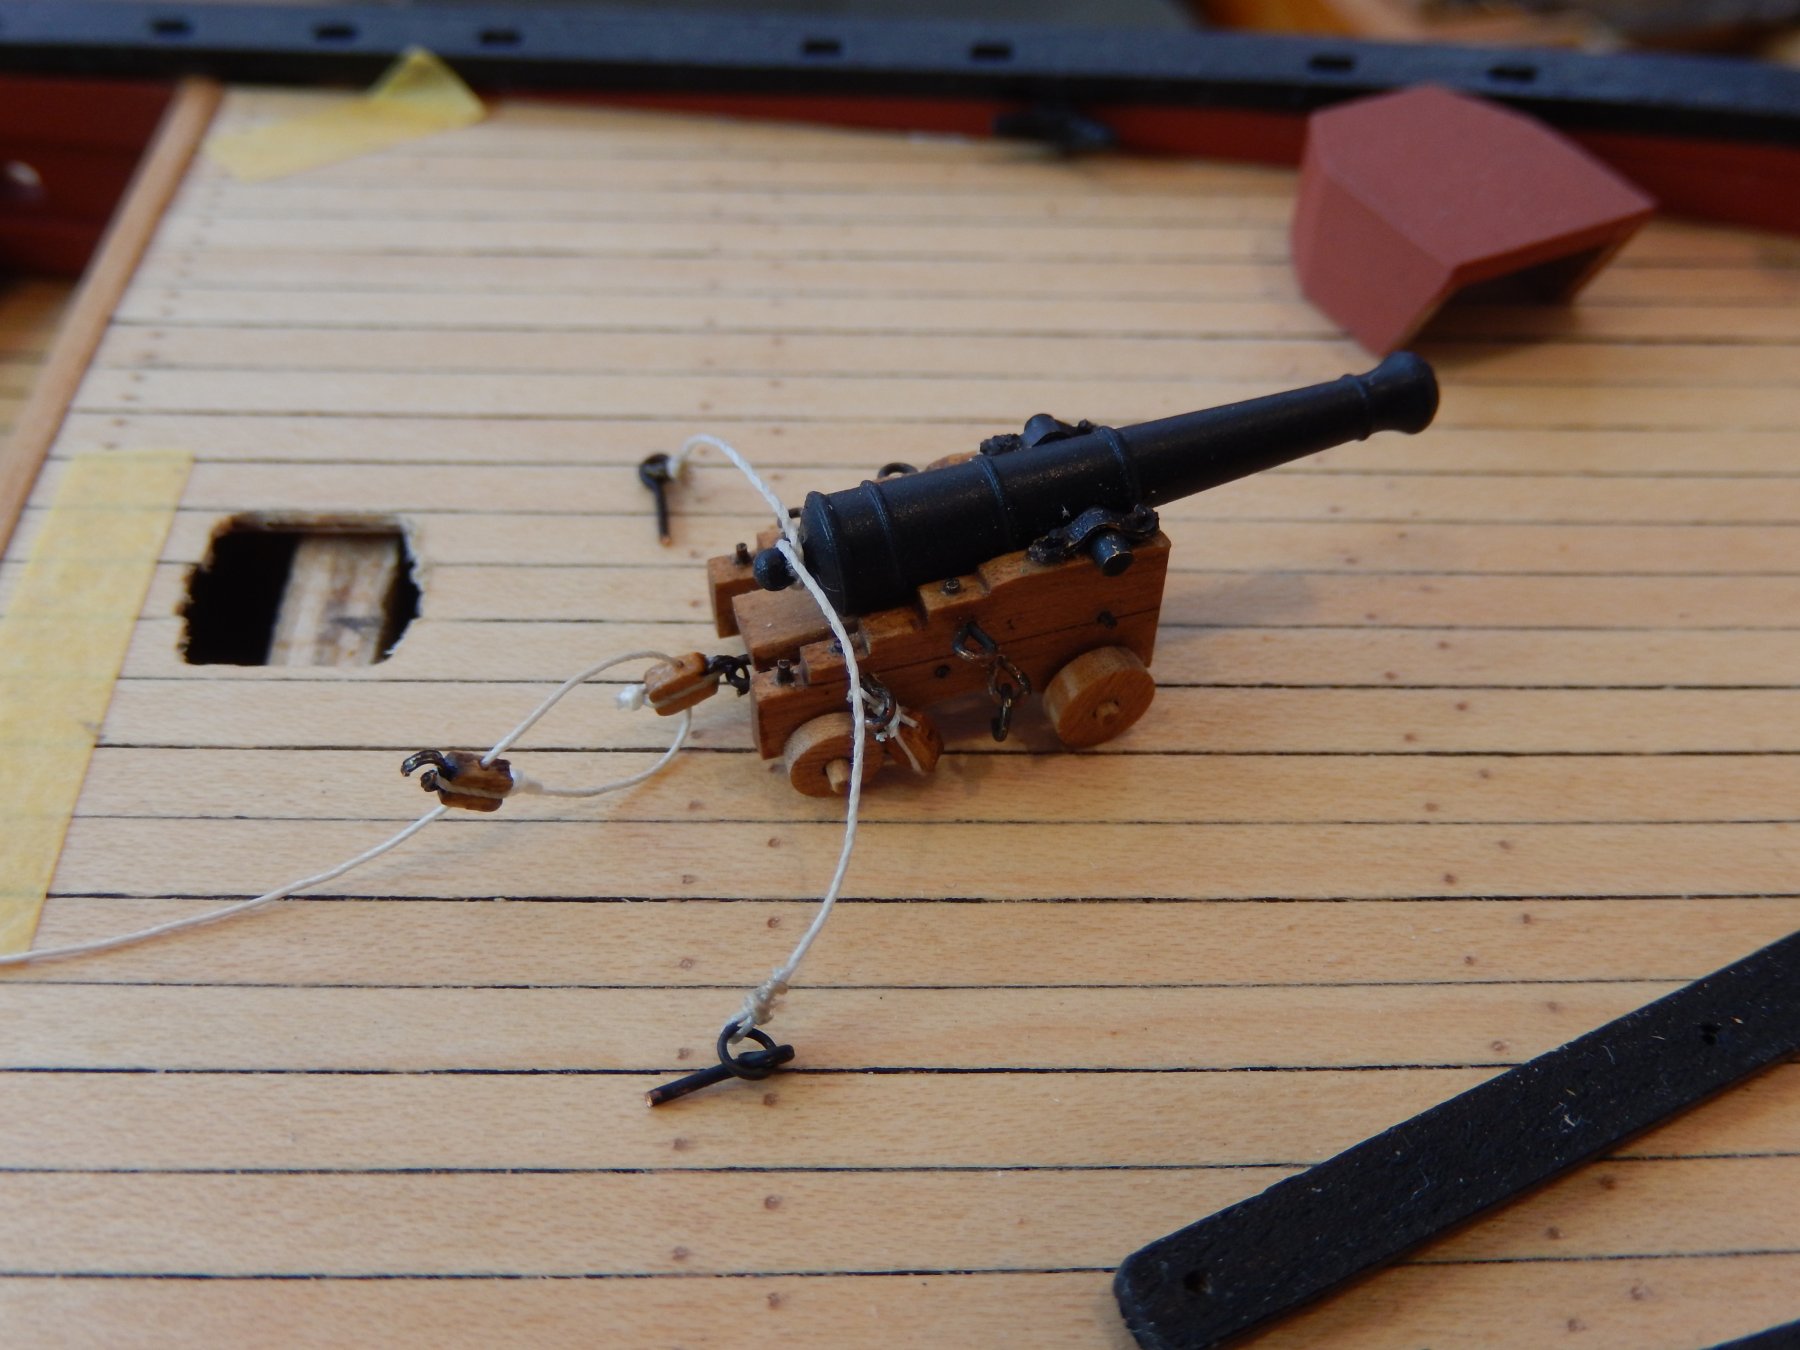
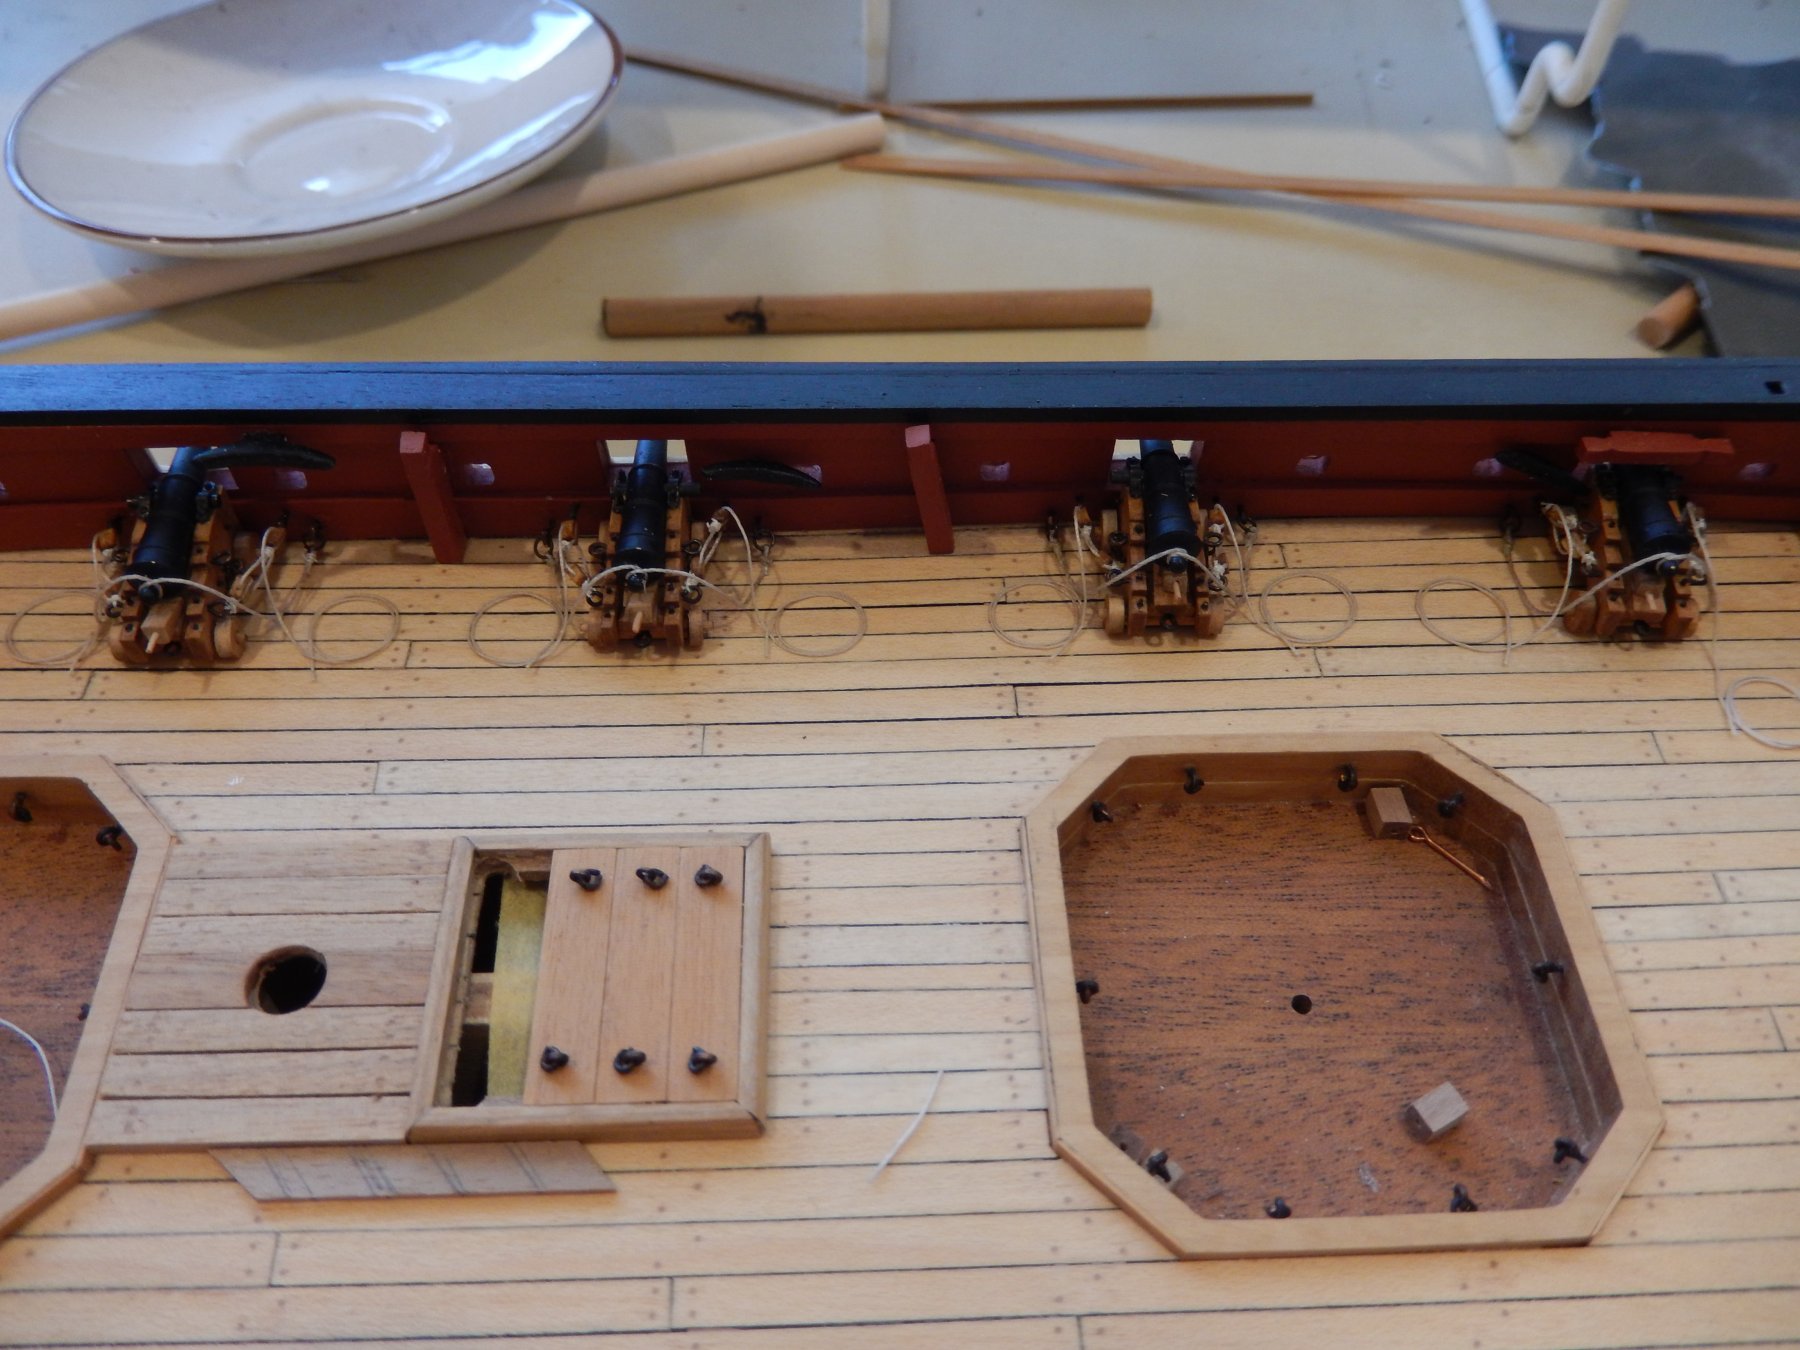
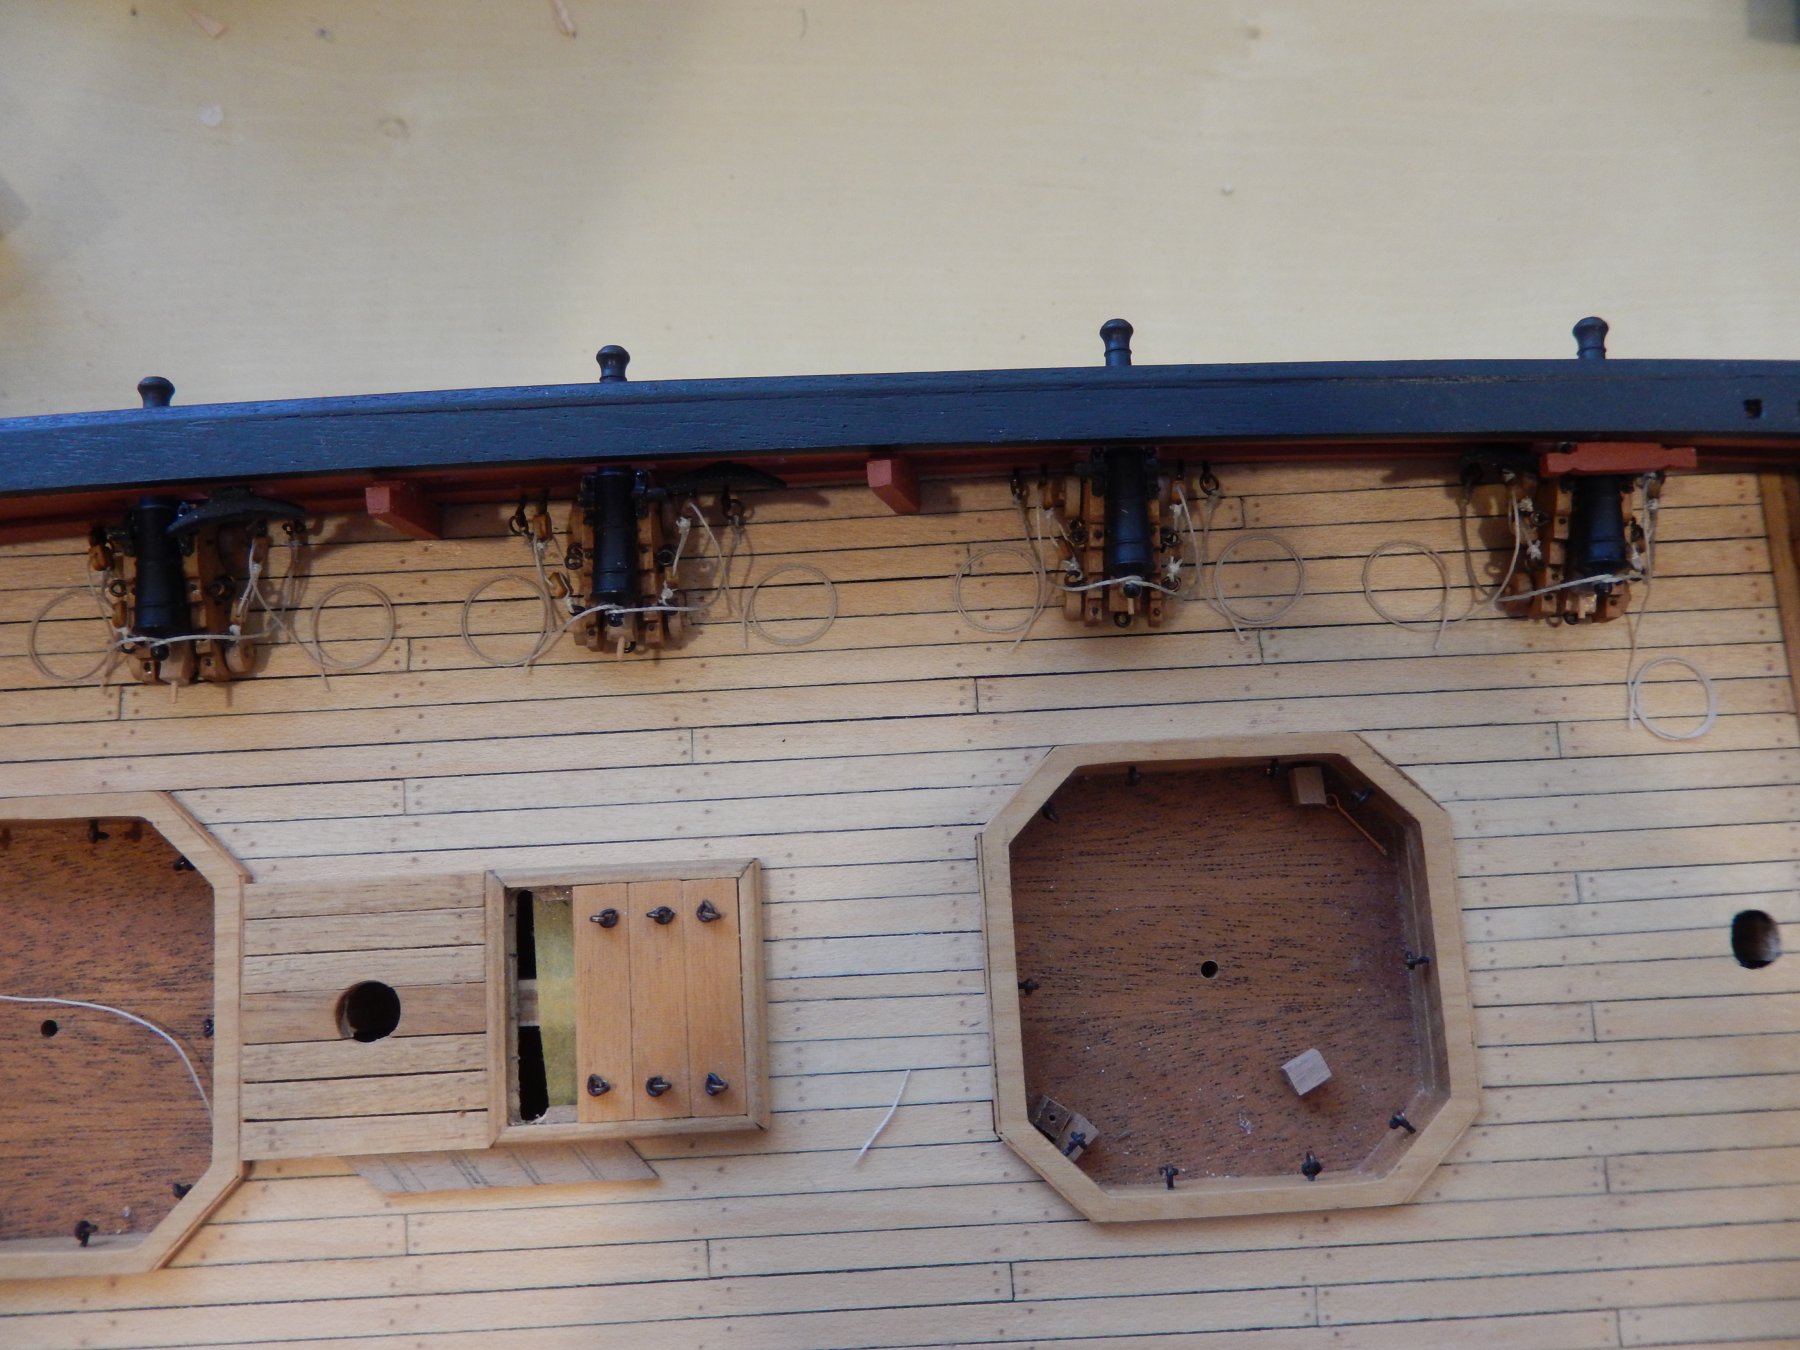
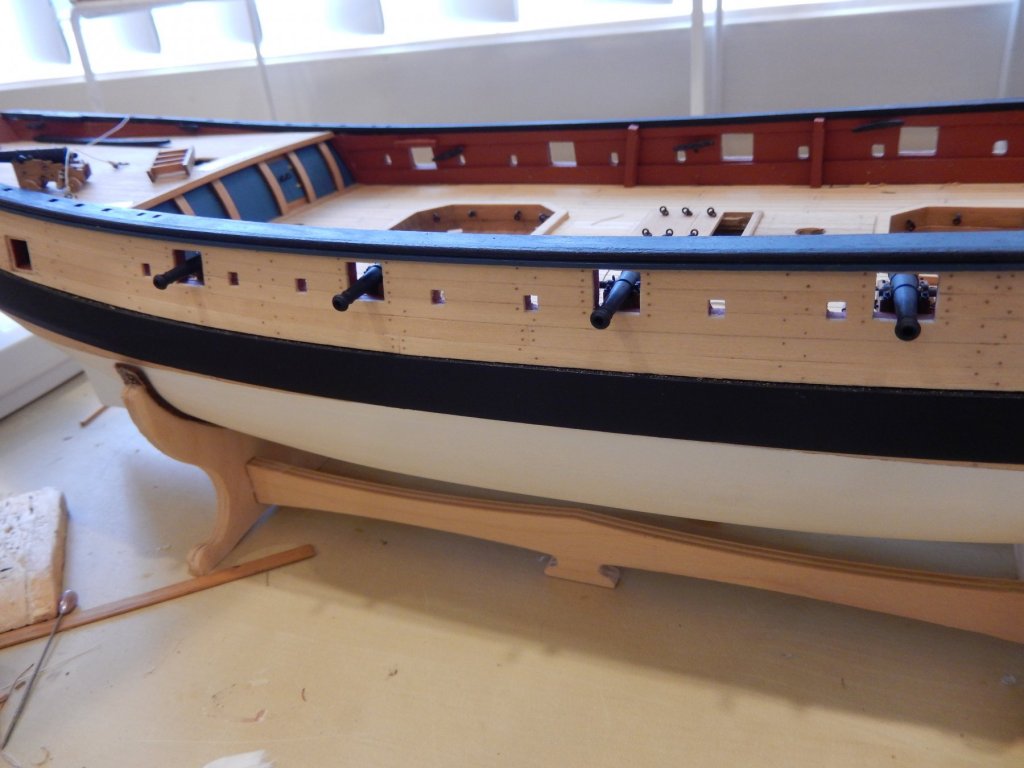
The rigging of the guns has proven rather drawn-out. Four of the remaining eight guns have been rigged and installed, and the last four are rigged and should be installed in the next day or so. Here is progress. Rope coils are not my favorite part of the process. The thread is about as cooperative as the golf balls I hit today. The coil at the far right of the photo is positioned to avoid the stairs to the poop deck. It seemed to least impractical spot to put it. I suspect these days OH and S would have something to say about it.


- 421 replies
-
- 9
-

-
- caldercraft
- granado
- (and 1 more)
-
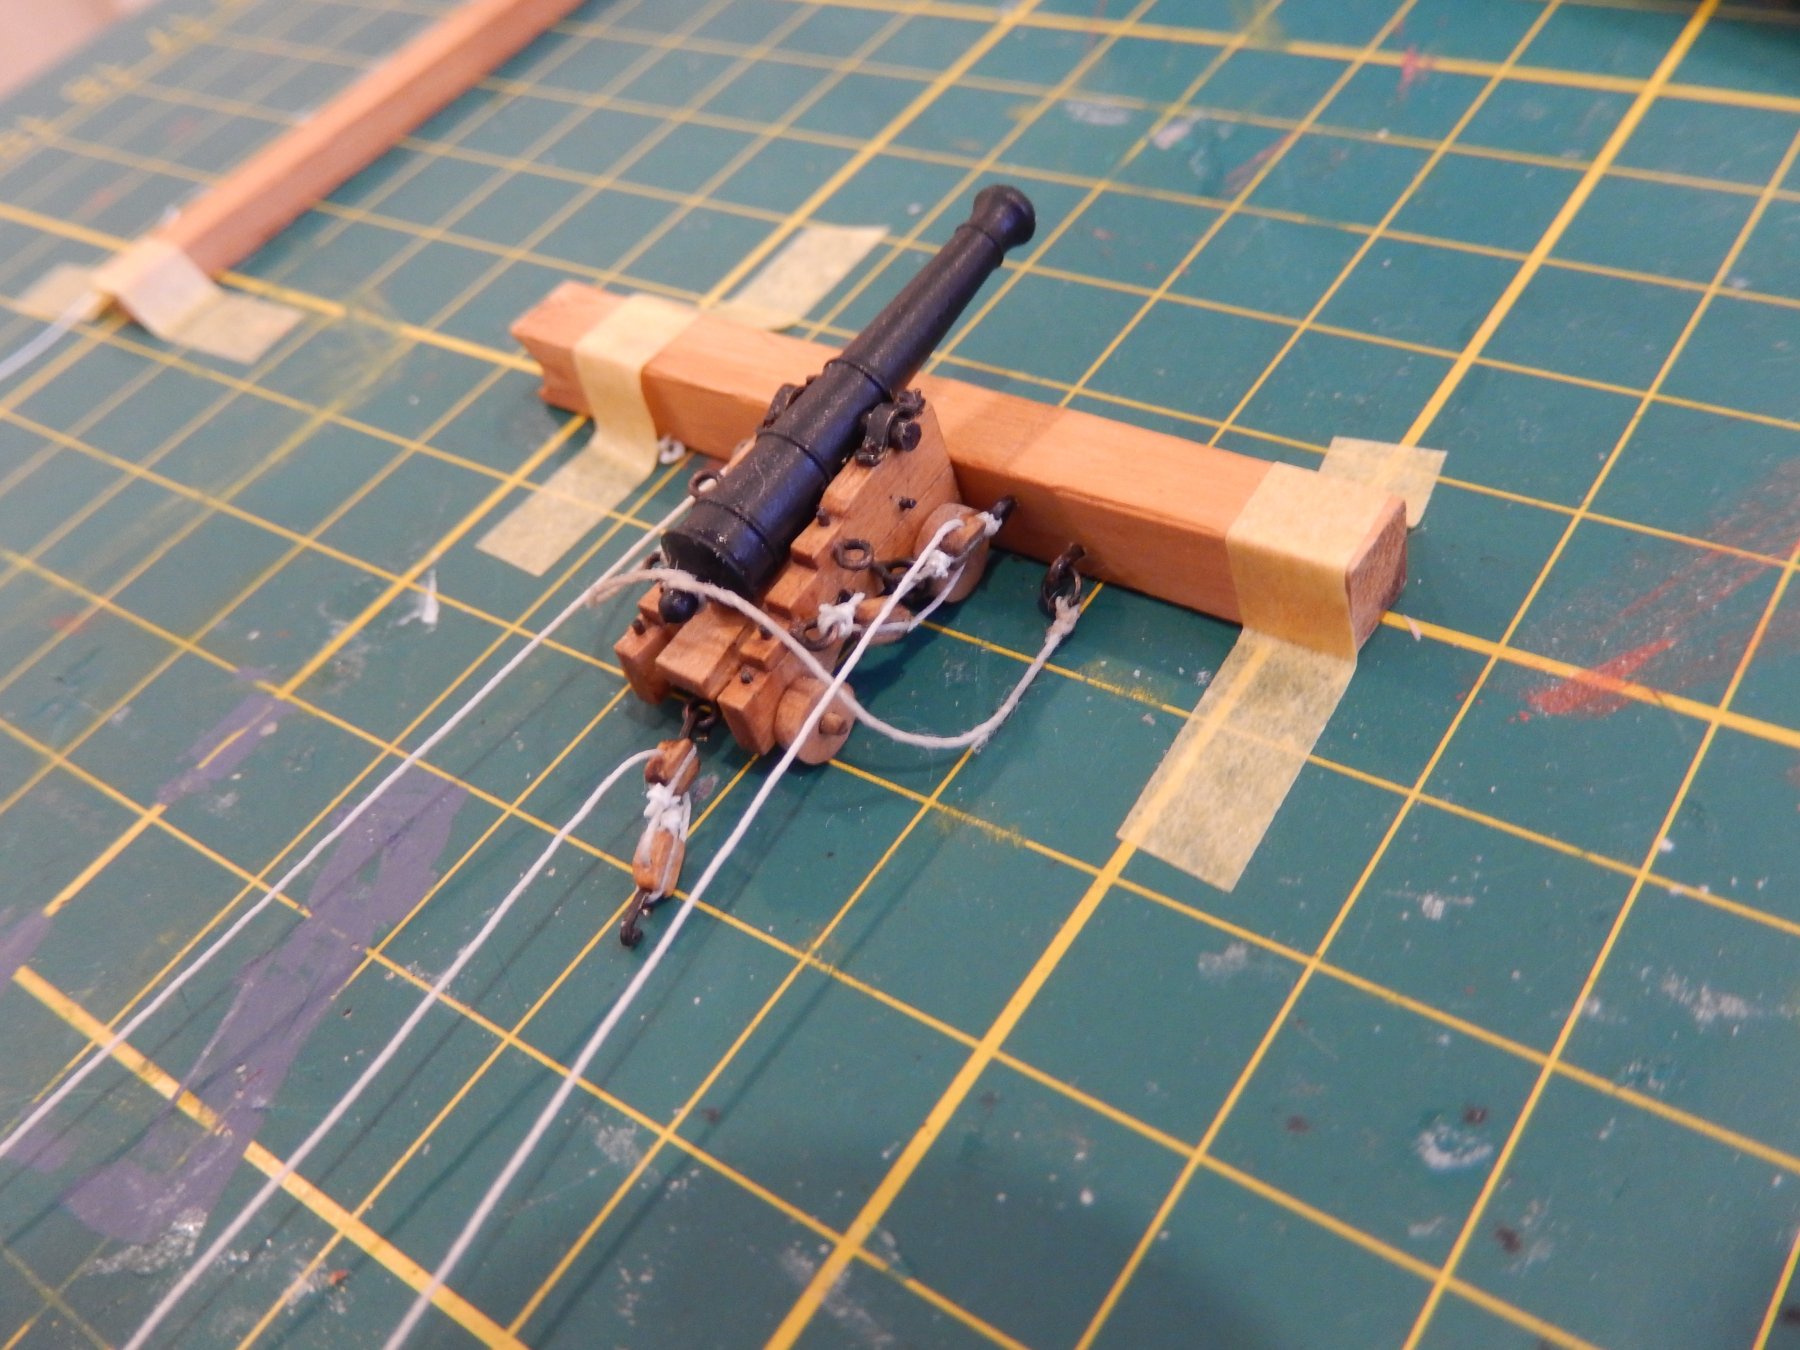
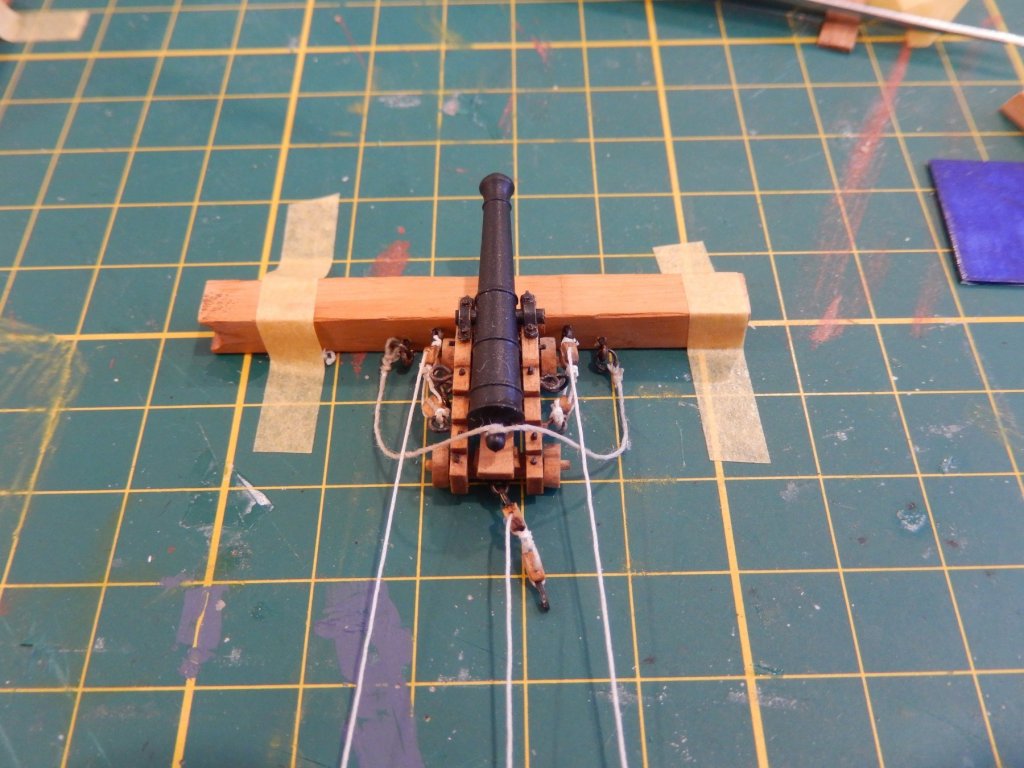
Things are proceeding very slowly. The stairs are finally finished and have come up well. The rigging of the guns is going very slowly indeed. The 2.5mm blocks are of variable quality, are probably a little large and I may not have enough of them. Aside from that .... Here is the first of the guns with the rigging in progress (quoin has not yet been fitted). I'm not all that pleased with it but I should be able to hide most of its faults behind other deck furniture. At least I have learnt a few things that I can apply to the remaining guns.

- 421 replies
-
- 5
-
-
- caldercraft
- granado
- (and 1 more)
-
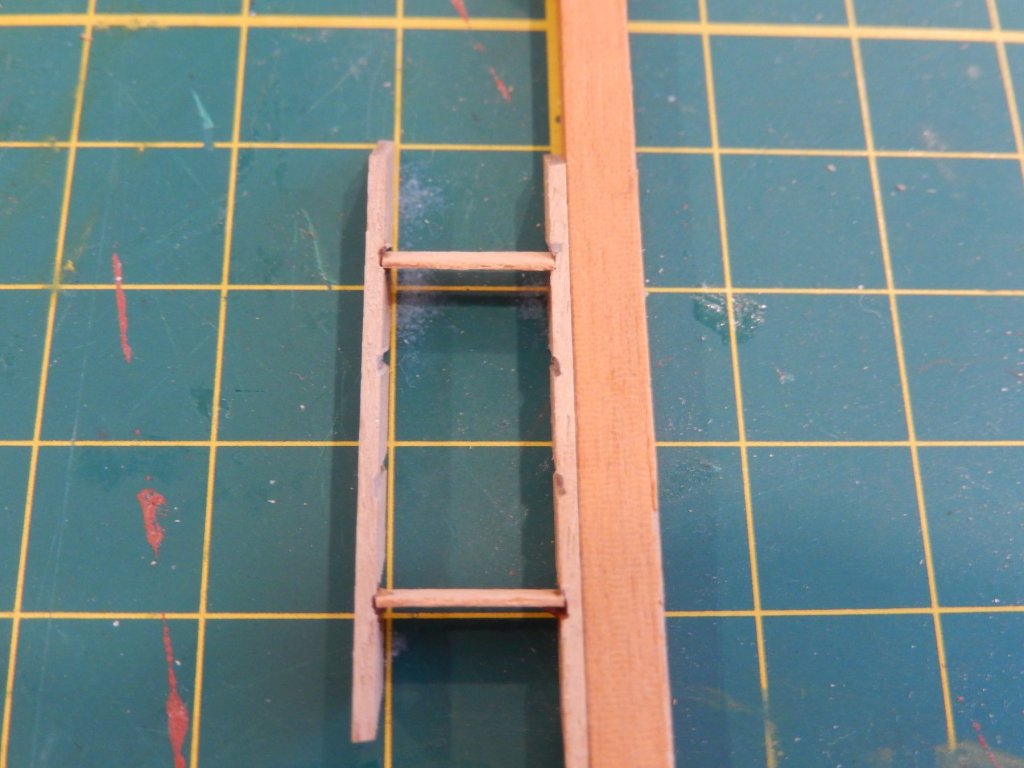
Thanks Joe. I have found the ladders to be a bit of a pain - getting each pair to match has taken quite some time. I have used a slightly different method to yours. Once the slots for the steps were completed (slightly wider than the steps themselves), I slotted in, and glued the top and bottom steps making sure they were parallel. Once these were dry, the two intermediate steps were slotted in. They could then be easily adjusted, if necessary, to make them parallel to the top and bottom, then glued in situ. Here are the results: dry-fitted and poly urethane to come.

- 421 replies
-
- 11
-
-
- caldercraft
- granado
- (and 1 more)
-
For the last few days it's been too hot to do anything very much- temperatures where I live in Sydney are in the middle 30s C with high humidity, and it's far hotter elsewhere. Passing our nearby golf course, it is the first time I have seen it completely deserted on a Sunday. I have done a little work on the ladders which has been quite difficult. If the steps are even a fraction out of alignment it shows. Here are two dry-fitted and before two coats of polyurethane. I have used Tamiya tape as guides for their placement, and the piece of strip across the railings shown in the first photo checks that the steps are horizontal.

- 421 replies
-
- 11
-
-
- caldercraft
- granado
- (and 1 more)
-
As far as ship building is concerned, January has not been all that productive. I have put on the various cleats and timberheads and made some progress on the guns. We spent most of late December until last weekend away, and there were other things to do. Here is progress such as it is. The cleats are cast in white metal. Unfortunately the castings are quite poor as are many of the other castings.

- 421 replies
-
- 11
-
-
- caldercraft
- granado
- (and 1 more)
-
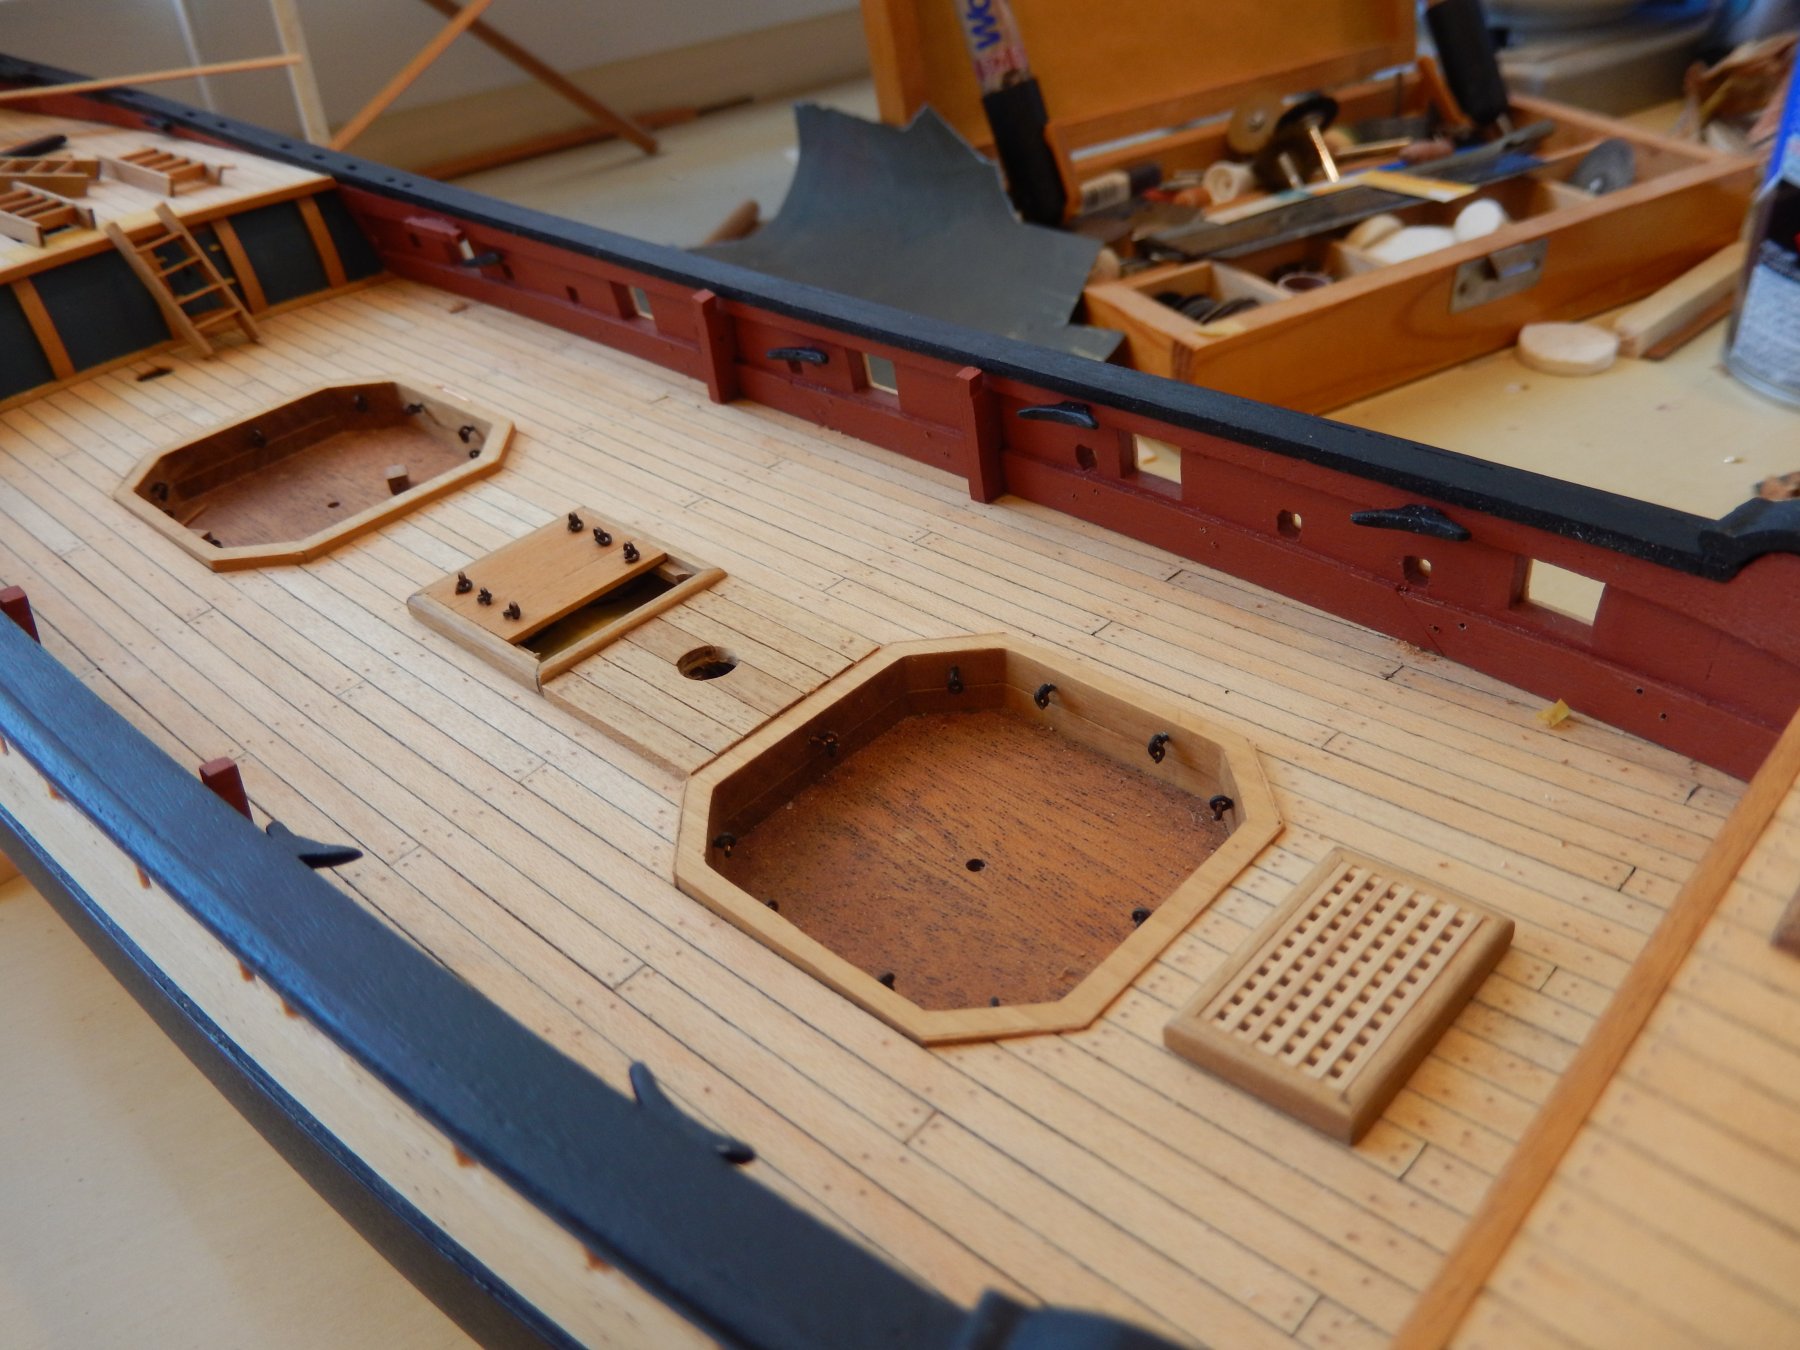
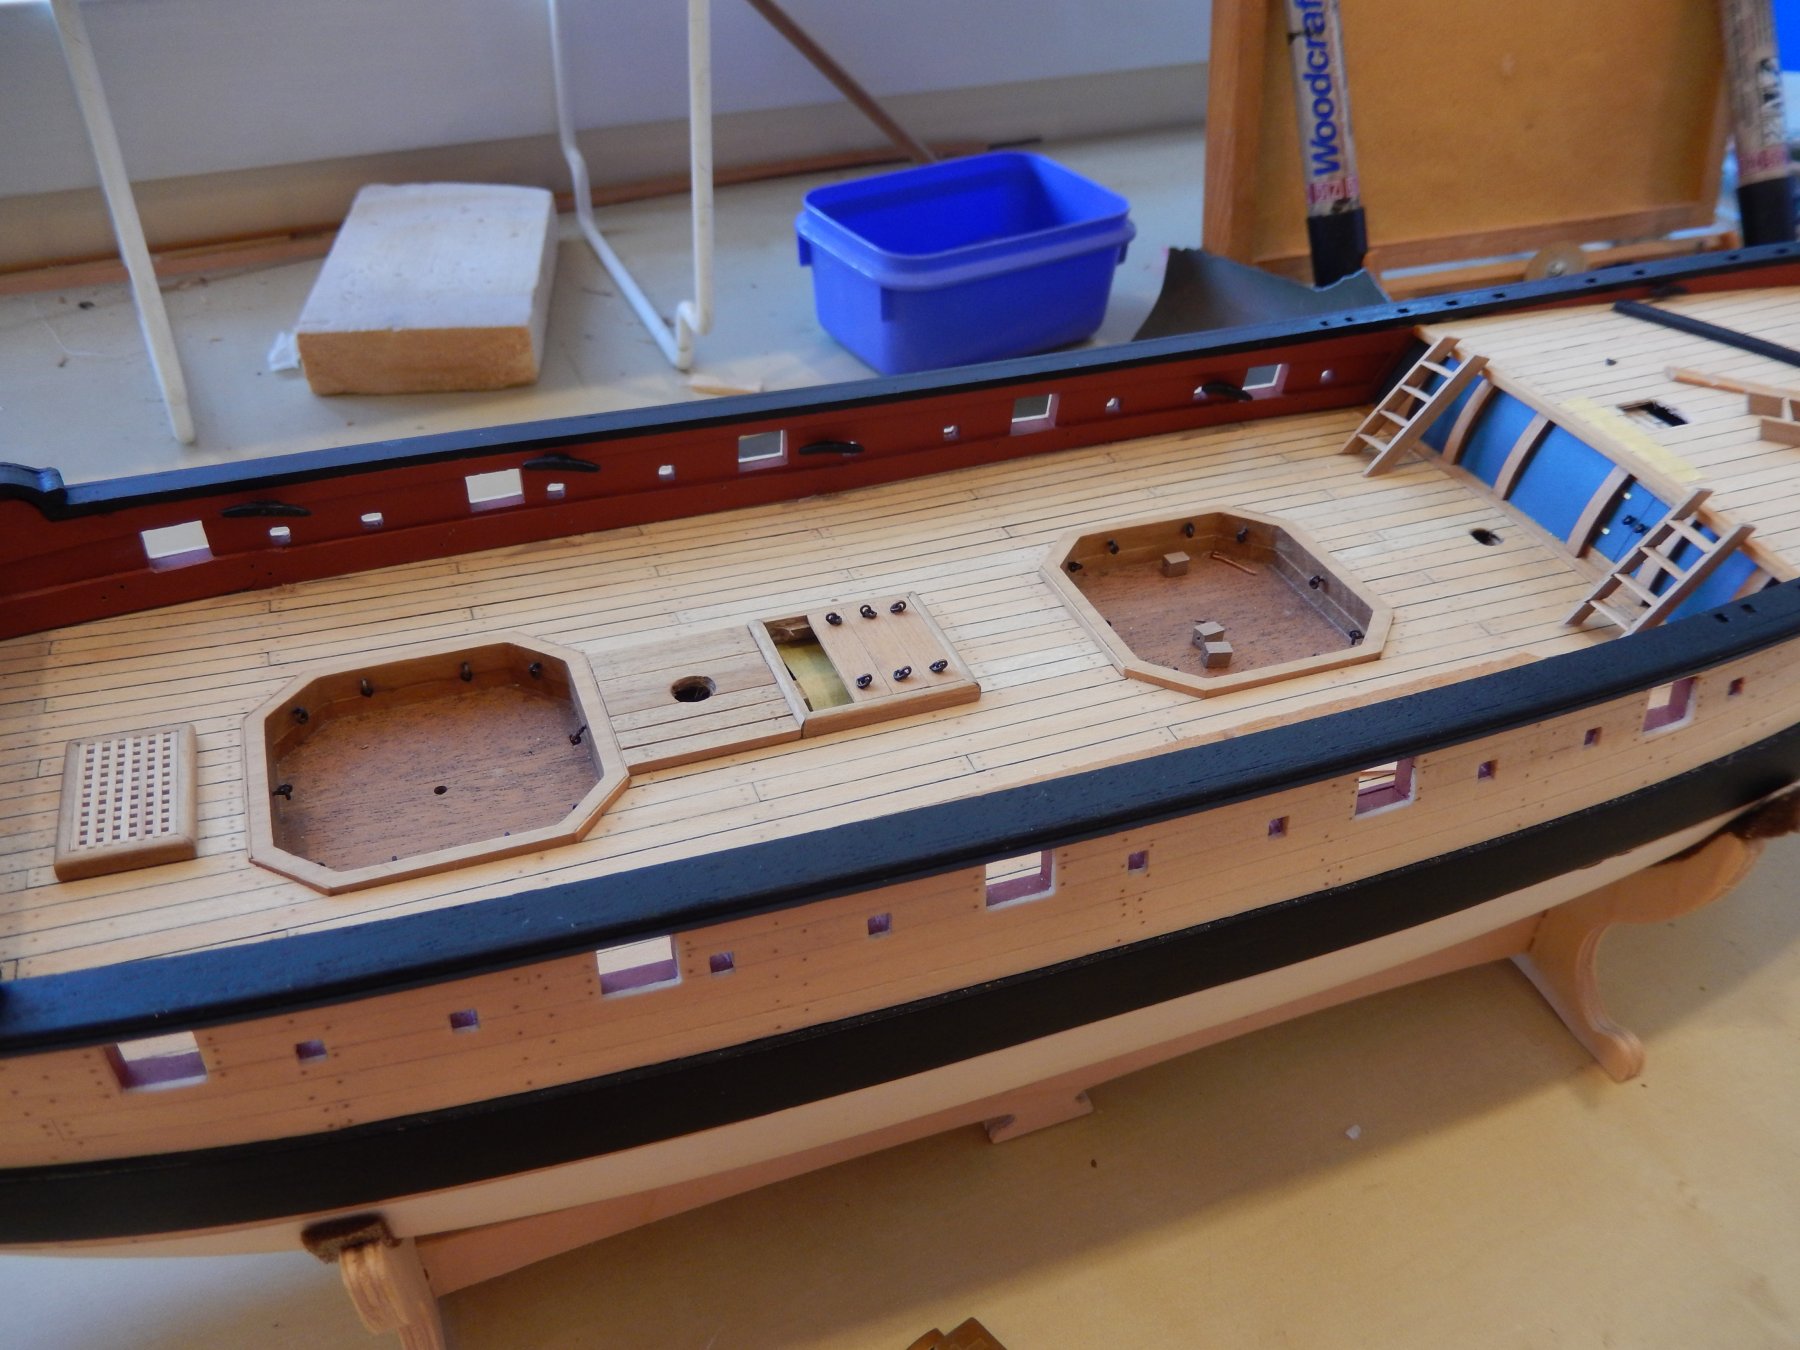
Before rigging the guns, I decided to drill all the necessary holes for the various cleats. The guns and the various other bits and pieces which will eventually be on the deck will make it difficult to do later. As well, the kevel cleats supplied in the kit made from 2mm ply are very rough indeed. Similarly the 2mm ply for the ladders is both rough and out of scale. I have made replacements which I hope look a little better. Unfortunately the photo is not too clear. It shows the cleats from the kit (top and bottom) and my replacements - a piece of 2x2mm strip and glued to it a piece of 1x2mm strip. The final product, painted. This shows the cleats positioned but dry-fitted, and the unfinished ladders I have copied shamelessly from Joe.

- 421 replies
-
- 10
-
-
- caldercraft
- granado
- (and 1 more)
-
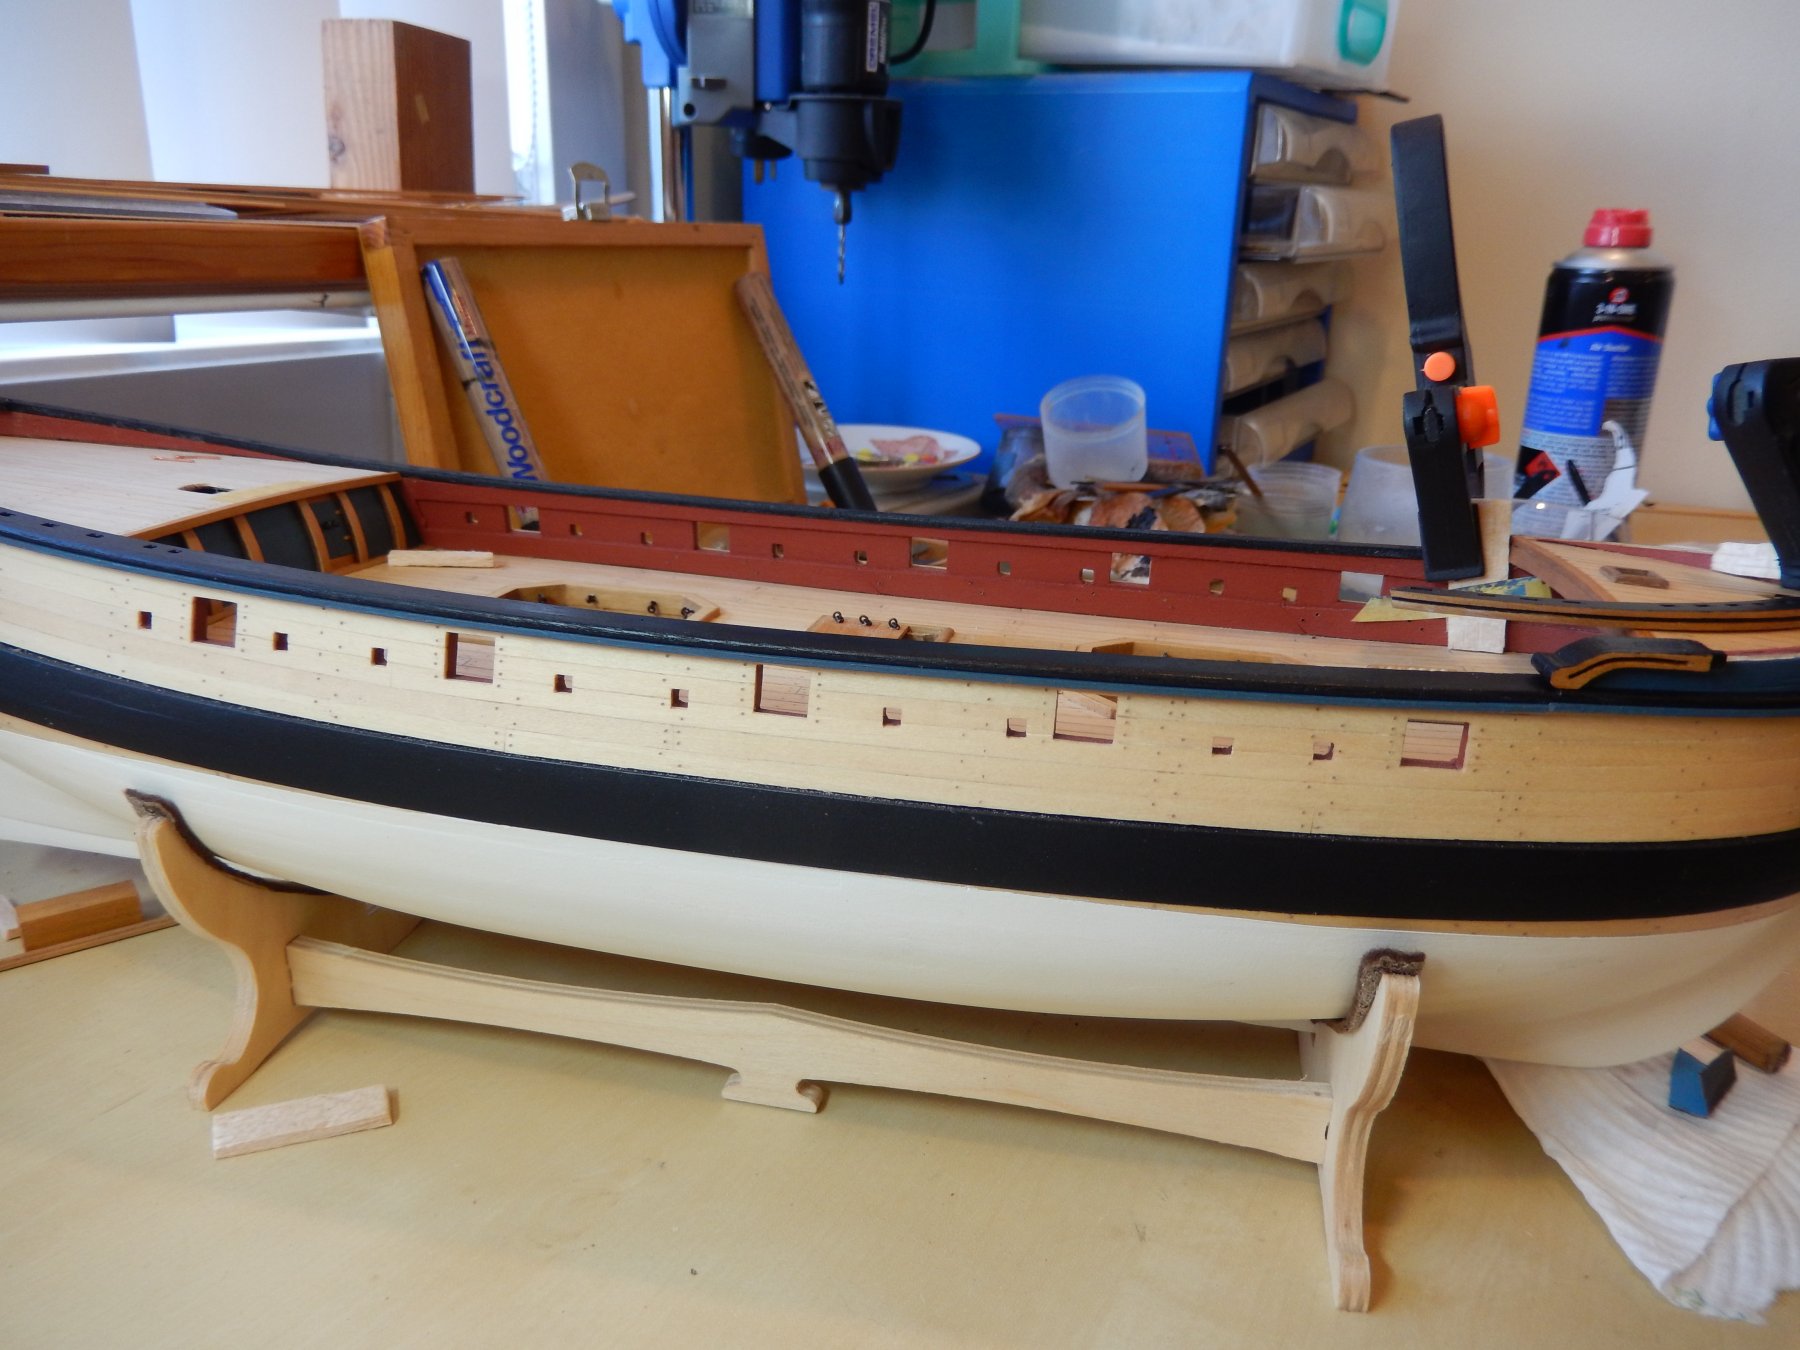
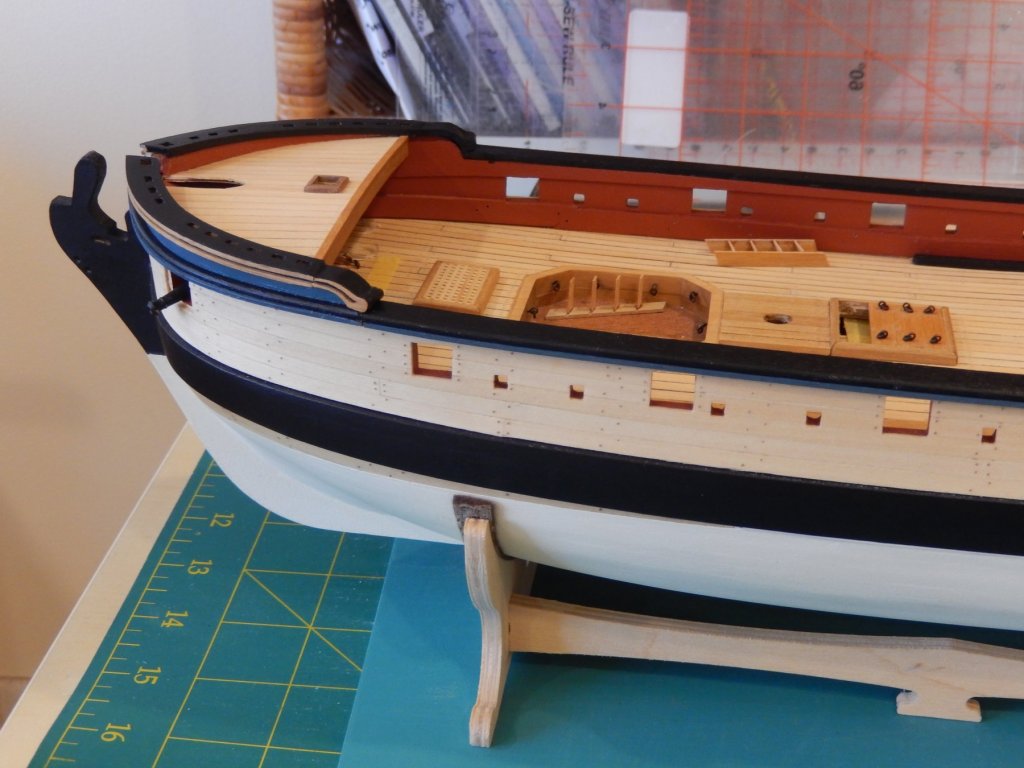
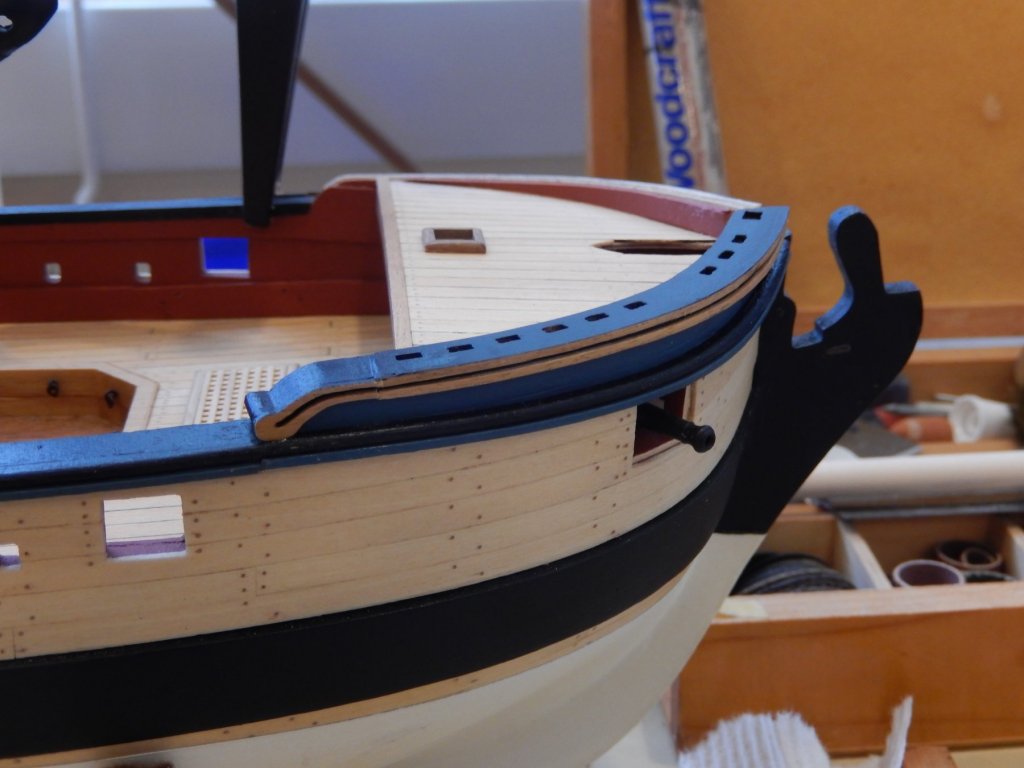
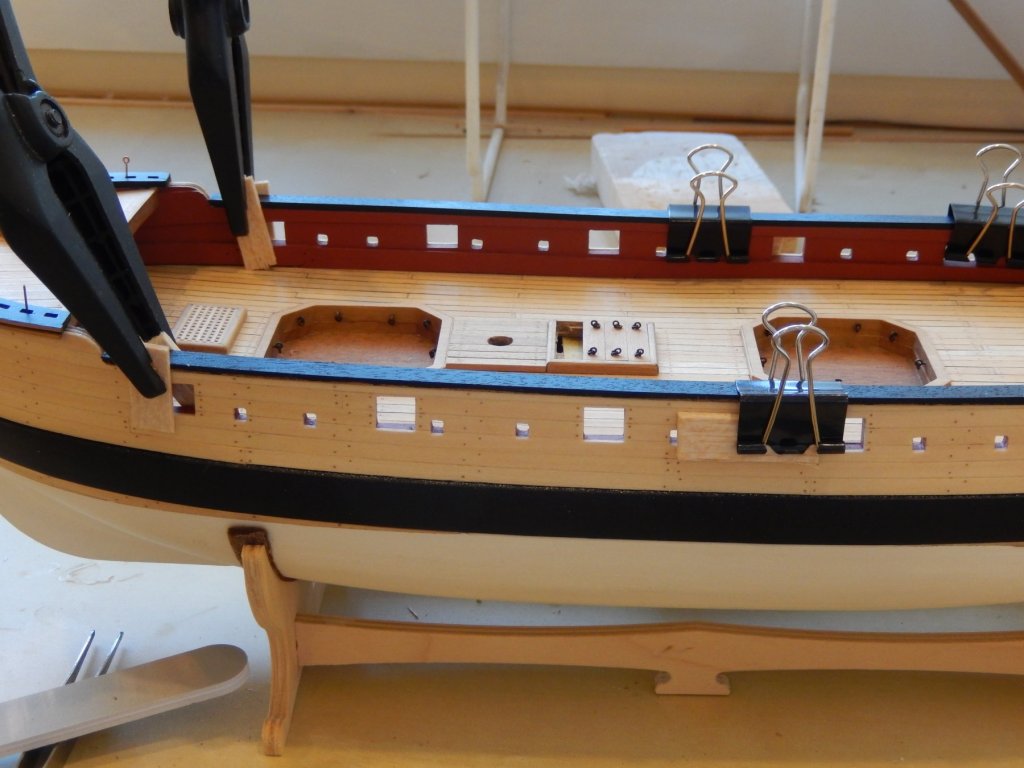
The capping and sheer rails are now complete, but for a couple of coats of polyurethane. The two following photos give the general idea of how it all looks. The poly will even out the paint finish between the fore and main caps. I am quite pleased with the result, but I would not like to do it all again.
- 421 replies
-
- 11
-
-
- caldercraft
- granado
- (and 1 more)
-
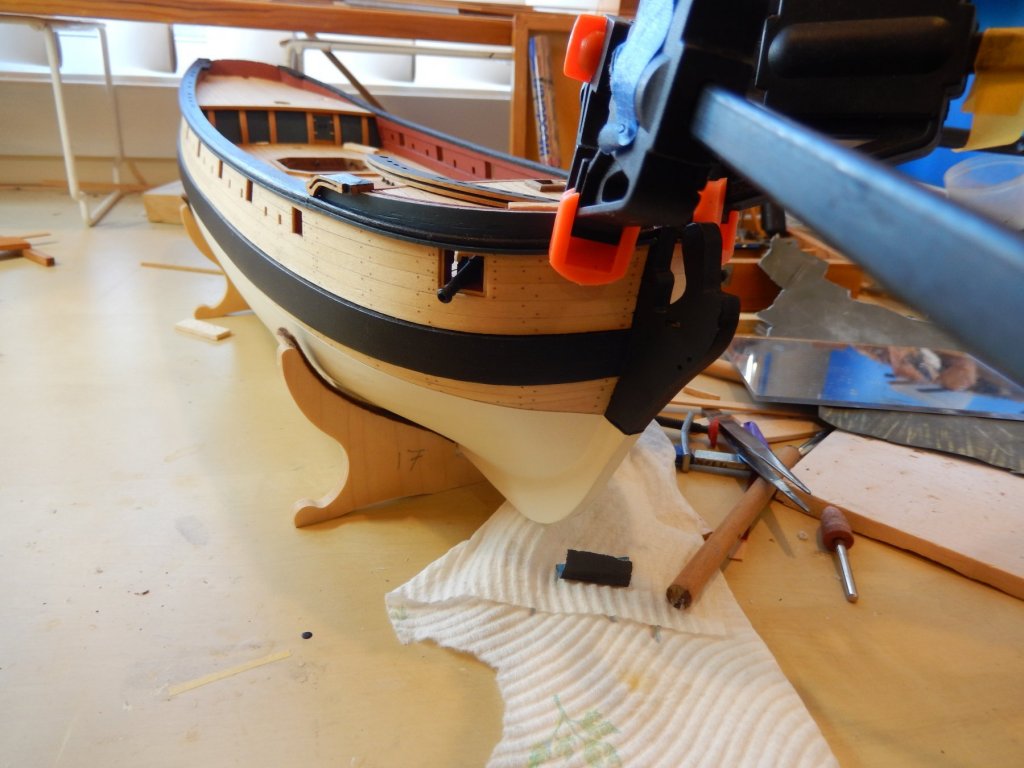
Three weeks worth of clamping seems to have solved the bending problem. This is progress. There is some touching-up to do and with luck the other side will be finished in the next day or so. The whole thing has proven to be very difficult indeed, though most of the difficulties have been self-inflicted. While way we had some interesting weather. We have had a property overlooking the ocean for more than 30 years, and while away, experienced some of the strangest weather we have seen: thick ocean fogs, storms, and quite amazingly, a roll cloud. I had never heard of such a thing. It was about 300 metres from the sea surface, about 500 metres high, stretched from a headland to the horizon and was shaped like ...well, a perfect roll. Unfortunately I hadn't brought my camera, but photos may be found on the web. Evidently they are very rare. As it moved north towards us, without warning we were hit by a single huge gust of wind which blew lunch (and almost us) off the table. It was quite extraordinary.

- 421 replies
-
- 11
-
-
- caldercraft
- granado
- (and 1 more)
-
Thanks for your comment and good wishes Kevin. I'm afraid it's a bit late to apply heat, though at certain times I wouldn't have minded applying flames to the whole thing. All the best Bob
- 421 replies
-
- 2
-
-
- caldercraft
- granado
- (and 1 more)
-
Alan: I have found a shop in Sydney that sells Mr Hobby paints. They did not have the colour I wanted of course, but progress, nevertheless. A combination of the Tamiya paint and the capping rails has proven difficult. I think the paint problem is finally solved, but the rails etc continue to be a problem. The highly curved part around the bow is VERY reluctant to remain bent to shape. It's self-inflicted unfortunately - the molding that I have used is happy enough to bend - but only so far. I had glued it, then left it clamped for 24 hours, but after an hour or two it came adrift near the stem. I have re-glued it and will now leave it clamped. I will be spending two or three weeks down the coast south of Sydney from next Sunday, so I hope that be the time I return, the molding will have behaved. This is how things look at the moment. The first photo gives an idea of how the capping around the fore deck will look. The connecting molding between the fore and main capping needs a little touching up and will need its length to be adjusted, but it has turned out well. The main capping needs another coat of paint and a coat of polyurethane, but I'm pleased with the result so far. Below are the curved moldings clamped round the bow. Provided they behave after nearly three weeks worth of clamping, the whole thing should turn out well. Of course the captain of the Titanic probably said something similar on leaving Southampton. Oh, and Happy Christmas etc to all those who have been kind enough to comment, 'like', 'react' ........ since I began all of this.


- 421 replies
-
- 11
-
-
- caldercraft
- granado
- (and 1 more)
-
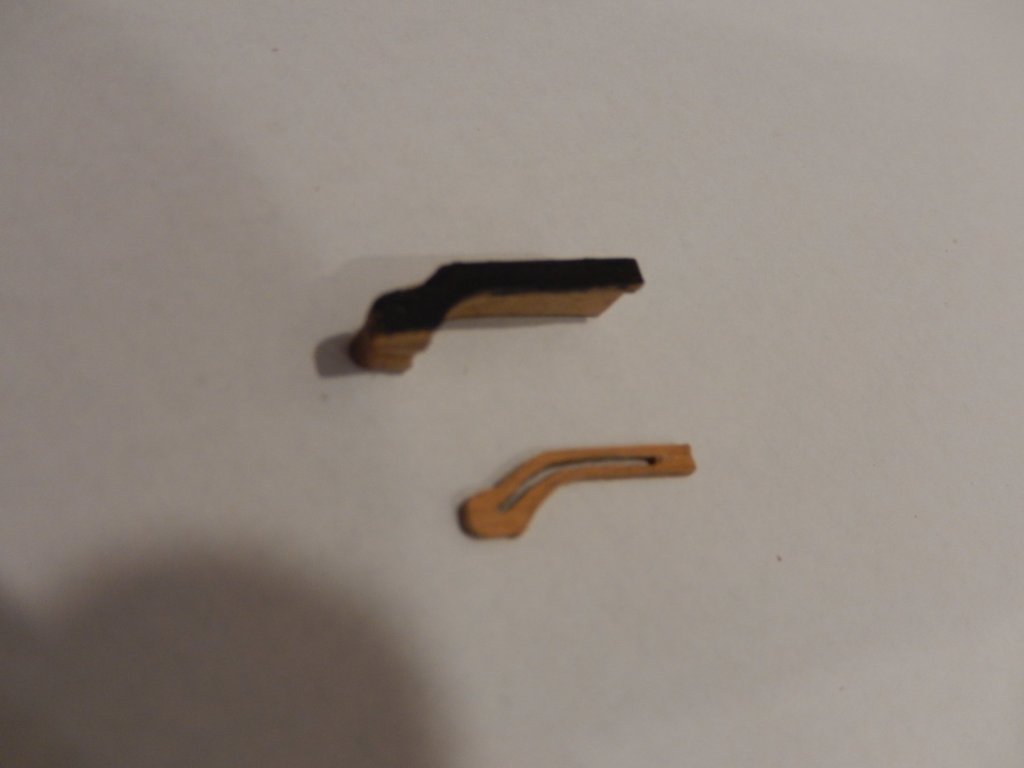
While waiting for paint to dry (really) there are a few bits and pieces that may be done in the meantime. The molding connecting the fore and main capping rails needs to be adjusted to fit properly and to blend with my the edging of the fore capping rail. I am hopeful the following method will work The fore cap with edging is 8.5mm wide. The molding supplied is 5mm (top of first photo). I have shaped a piece of 2mm strip (painted black), and a piece of 1mm strip to conform with the molding. The 1mm strip has been cut through to follow the curvature of the molding (bottom of photo). The last two shaped strips will then be glued to the side of the molding showing the black painted sub-surface ( last photo, dry-fitted). Since the photo was taken, the cutout has been tidied up. In the photo below, the cutout is just laying on top of the other pieces to give the general idea.

- 421 replies
-
- 3
-
-
- caldercraft
- granado
- (and 1 more)
-
Thanks for the suggestion Alan. I will have a look on the net. I'm hoping that I won't have to use any more blue on this project as I'm rather stuck with the Tamiya - but NEVER again.
-
I have found the Admiralty paints only slightly less unfriendly Joe. I have thinned the Tamiya and that improves it a little. I am painting the bit just below the fore capping rails and it isn't going well, though better than yesterday. One side now seems to be OK, but the other is still a bit of a disaster. I think in future I will stick to enamel. It gives a better finish, though of course it takes far longer to dry.
- 421 replies
-
- 1
-
-
- caldercraft
- granado
- (and 1 more)
-
This is how I propose to finish the trim for the capping rails. The profiled timber strip is 'P' -shaped in cross-section. I have run a piece of 1x1mm blue painted strip along the lower part of the P. Here is how it has turned out for that part of the trim which curves around the bow. Elsewhere, he blue Tamiya paint is proving to be a problem: it is very reluctant to stick. Dragging a brush over the surface to be painted is just as likely to take the paint off as put it on.

- 421 replies
-
- 2
-
-
- caldercraft
- granado
- (and 1 more)
-
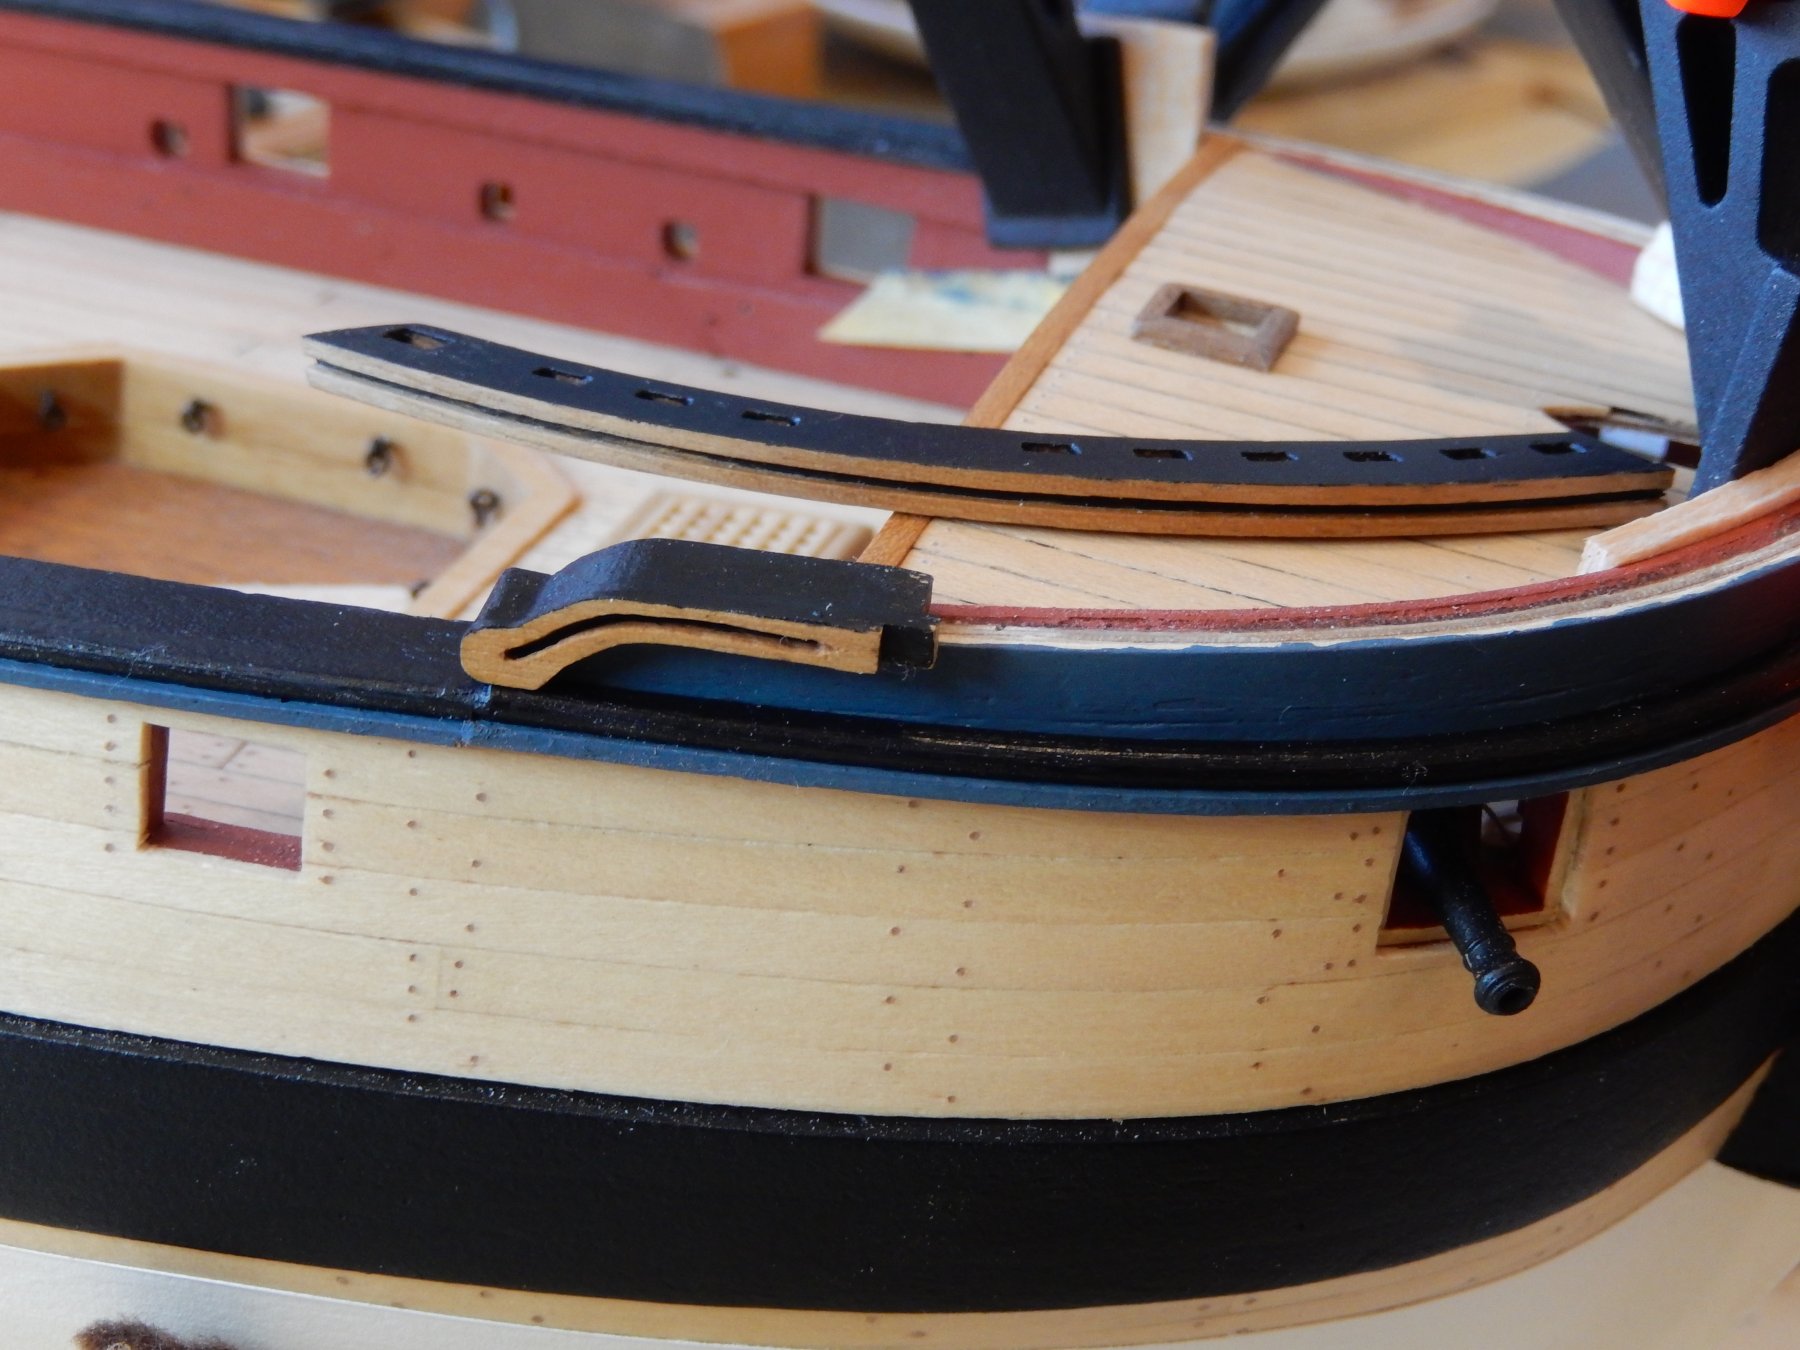
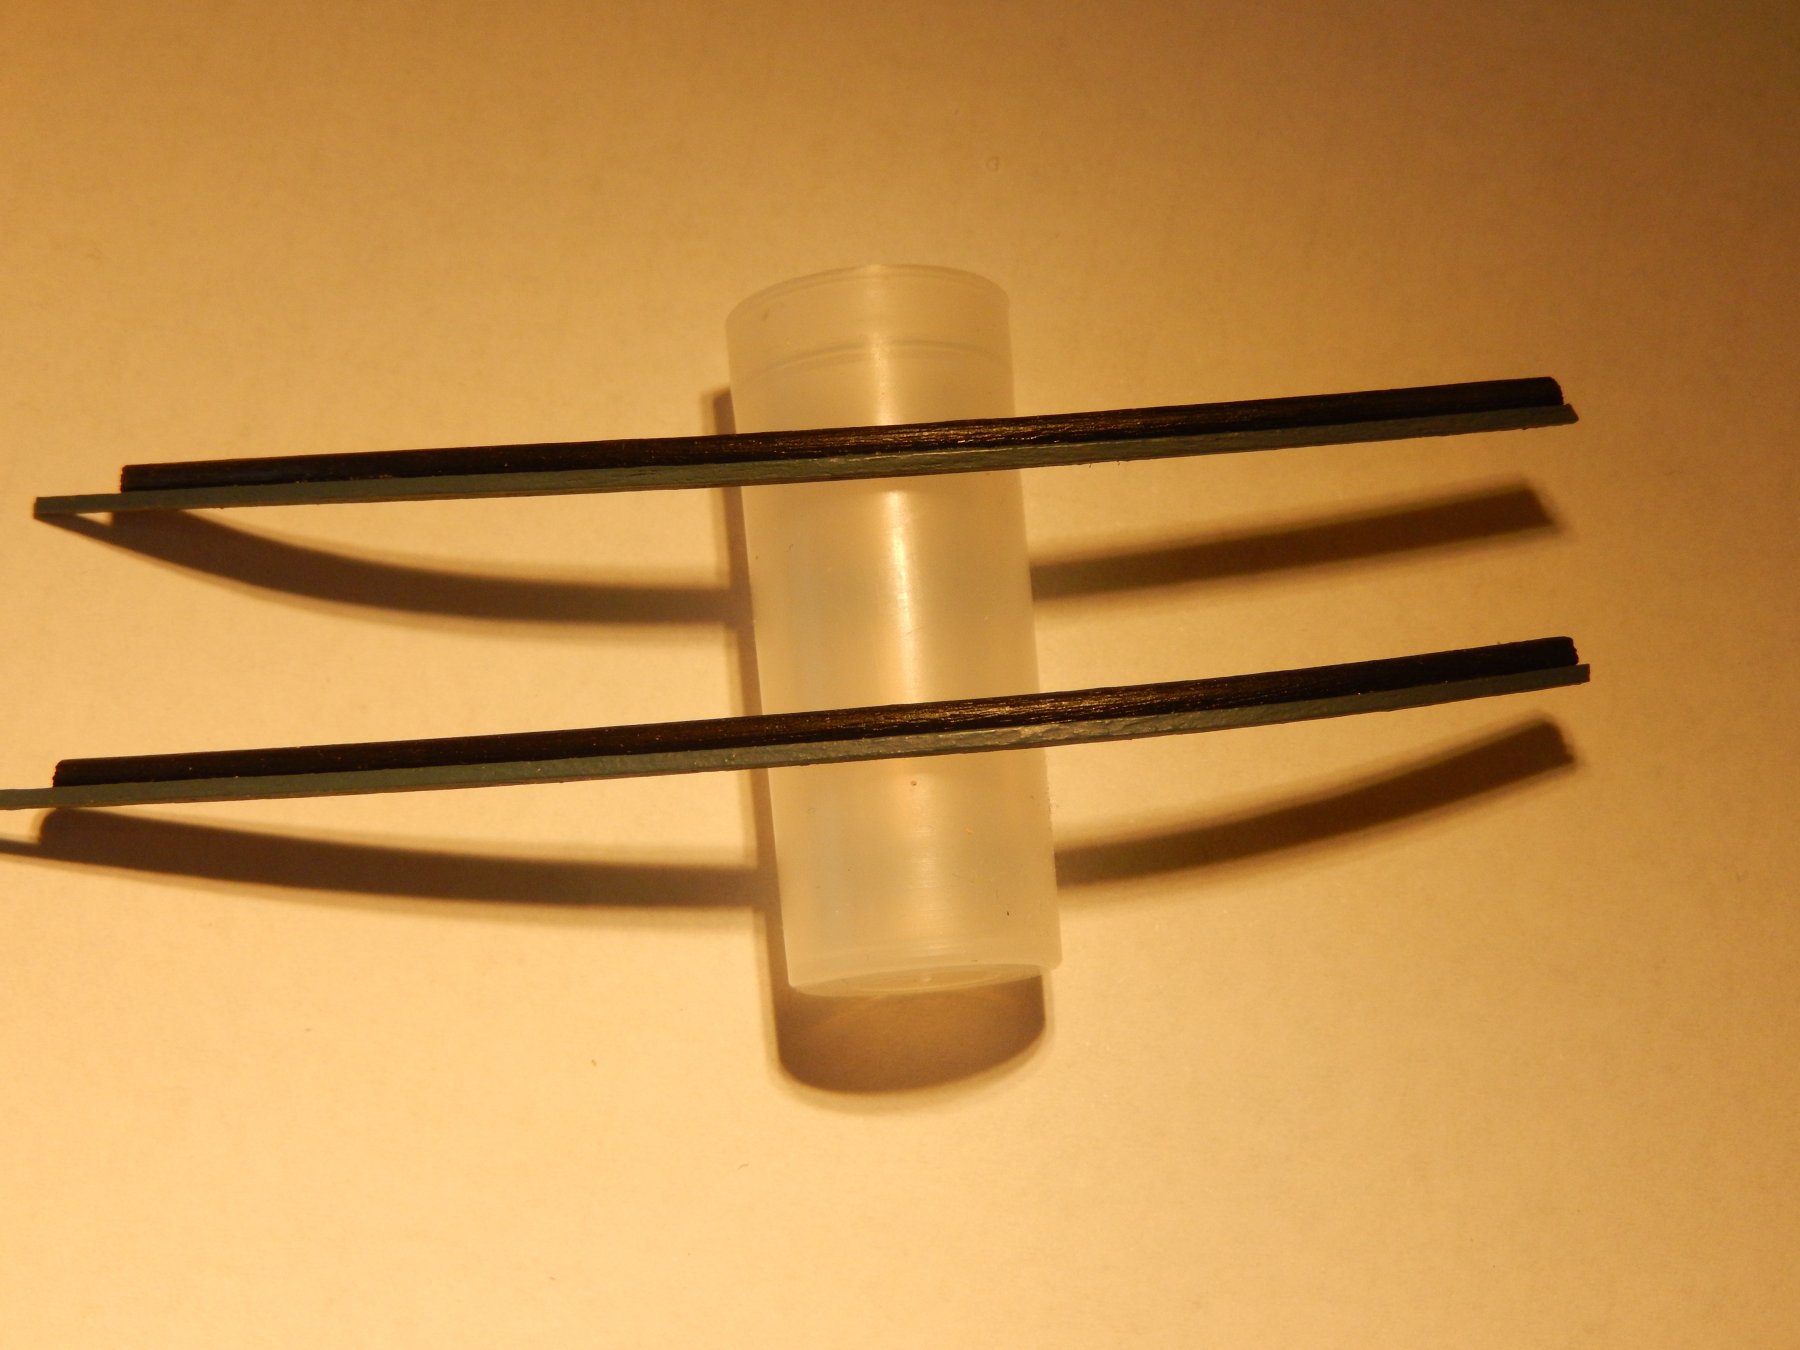
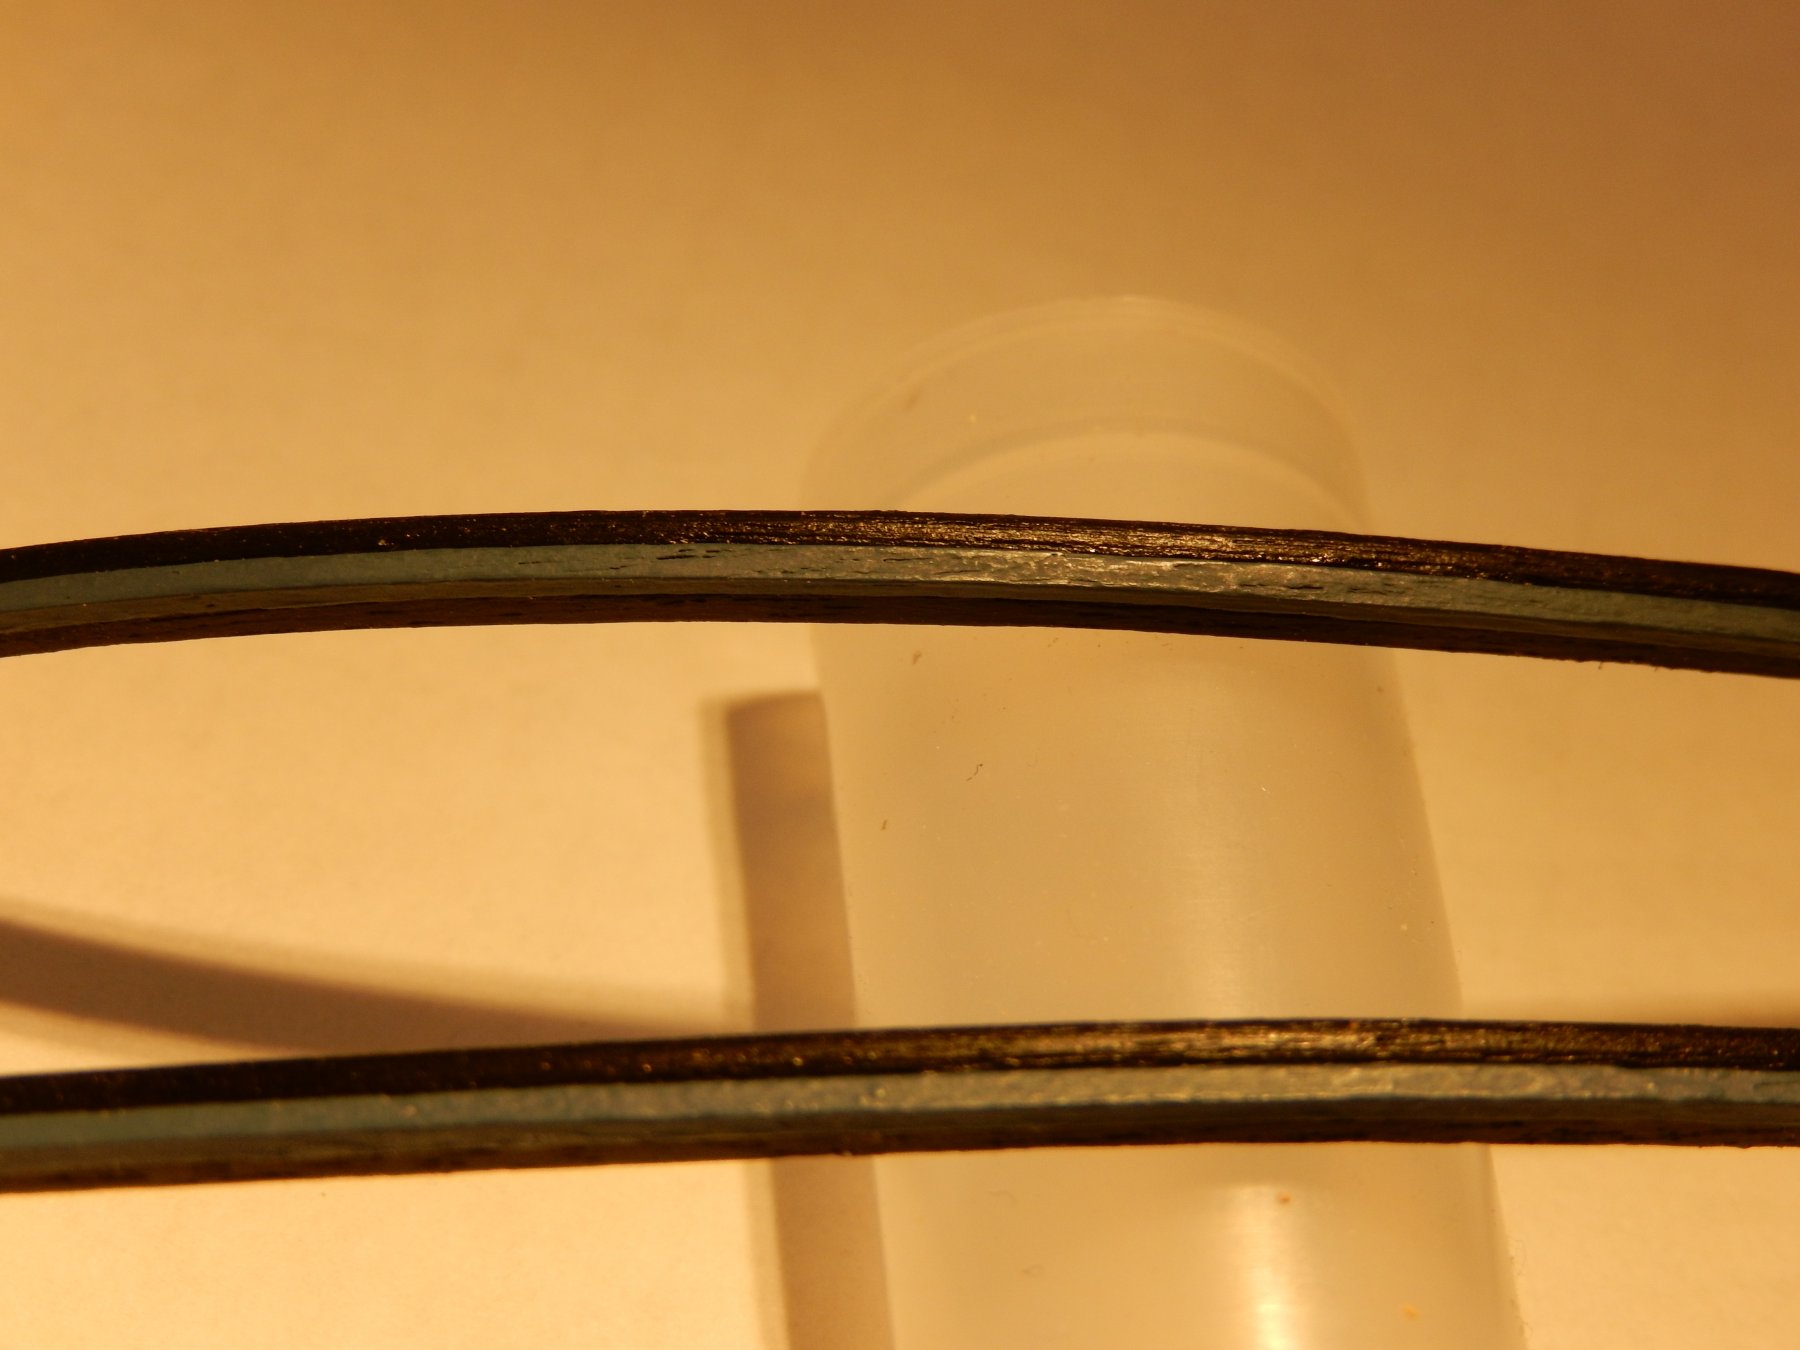
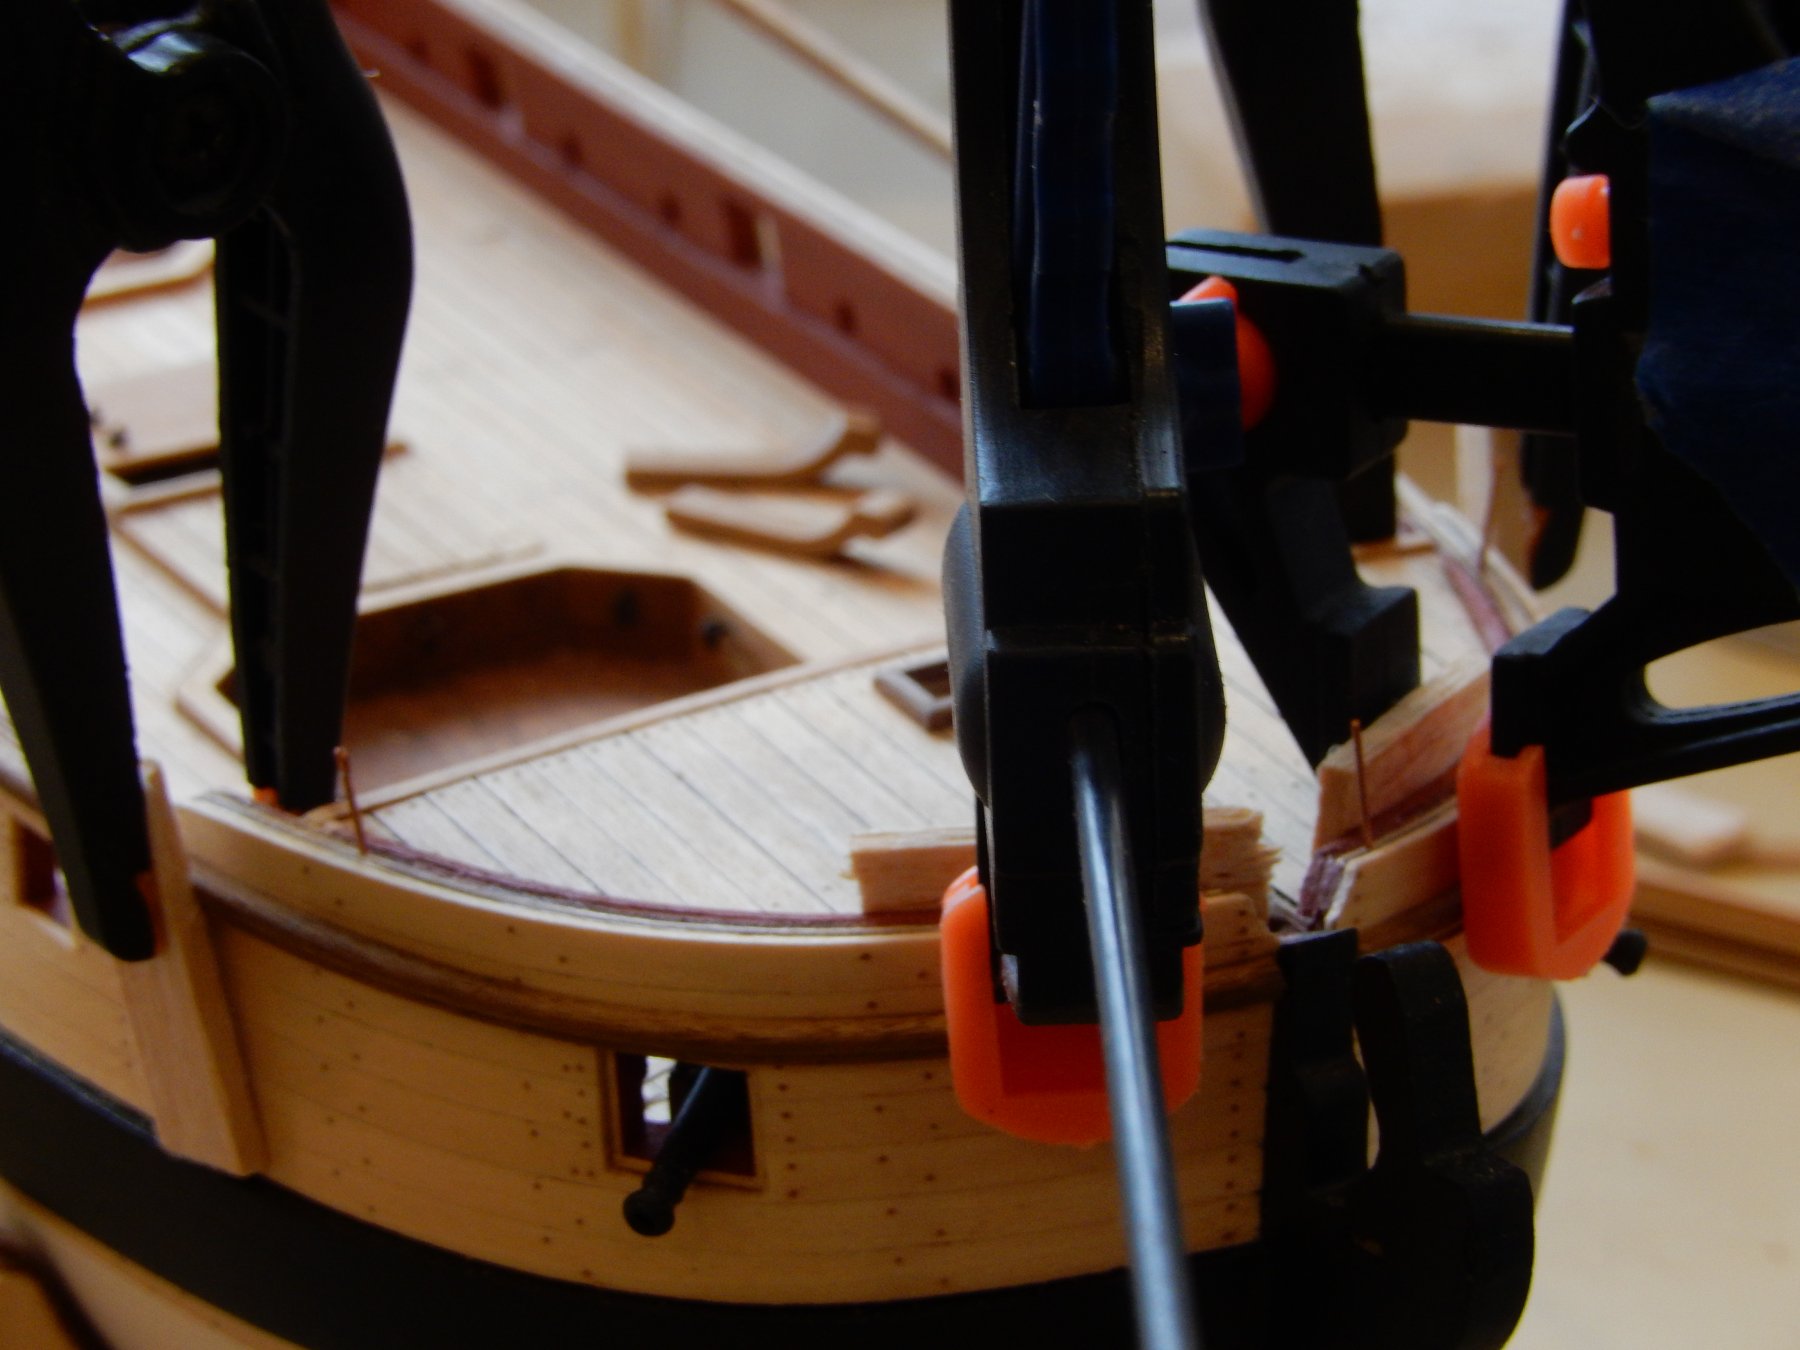
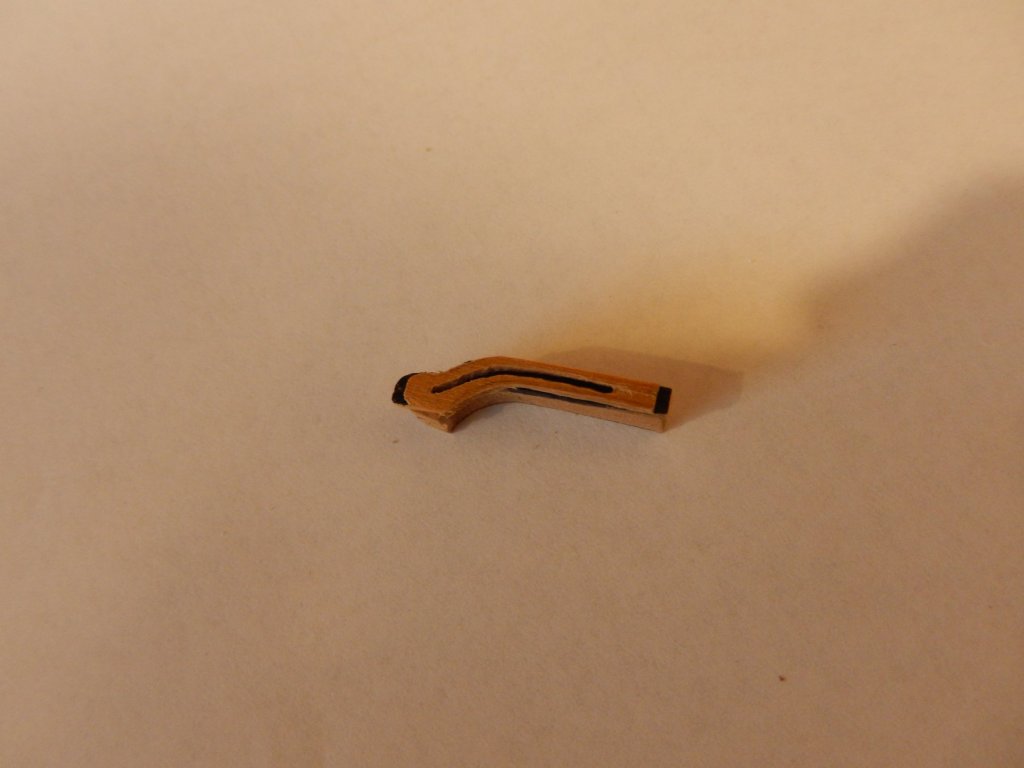
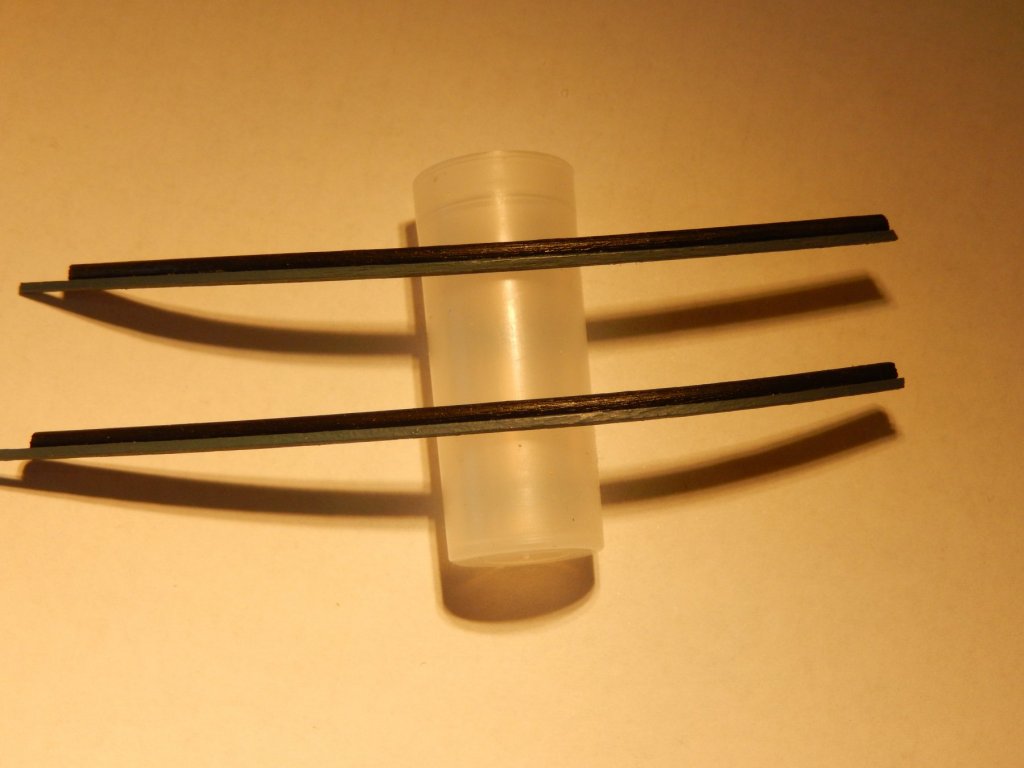
The main capping rails should now be bent to shape a little more easily. Leaving them in place over the weekend worked quite well. The trim for the rails does not look to be an easy job. Rather than the brass wire, I have found some profiled walnut with the right dimensions. I will try to fit it in three pieces: the first around the curve of the bow to the beginning of the main capping rail; then another break near the bulkhead. The timber was well soaked and then left to dry in the gunport shaper supplied in the kit. Despite this the curve in the timber was not quite right and the photos show them dry fitted and clamped where I will leave them overnight. They will be painted before being permanently fitted. Here is a suggestion for shaping the stern fascia capping - a good soaking, then fitting the timber strip into the hole from which the fascia comes.
- 421 replies
-
- 7
-
-
- caldercraft
- granado
- (and 1 more)
-
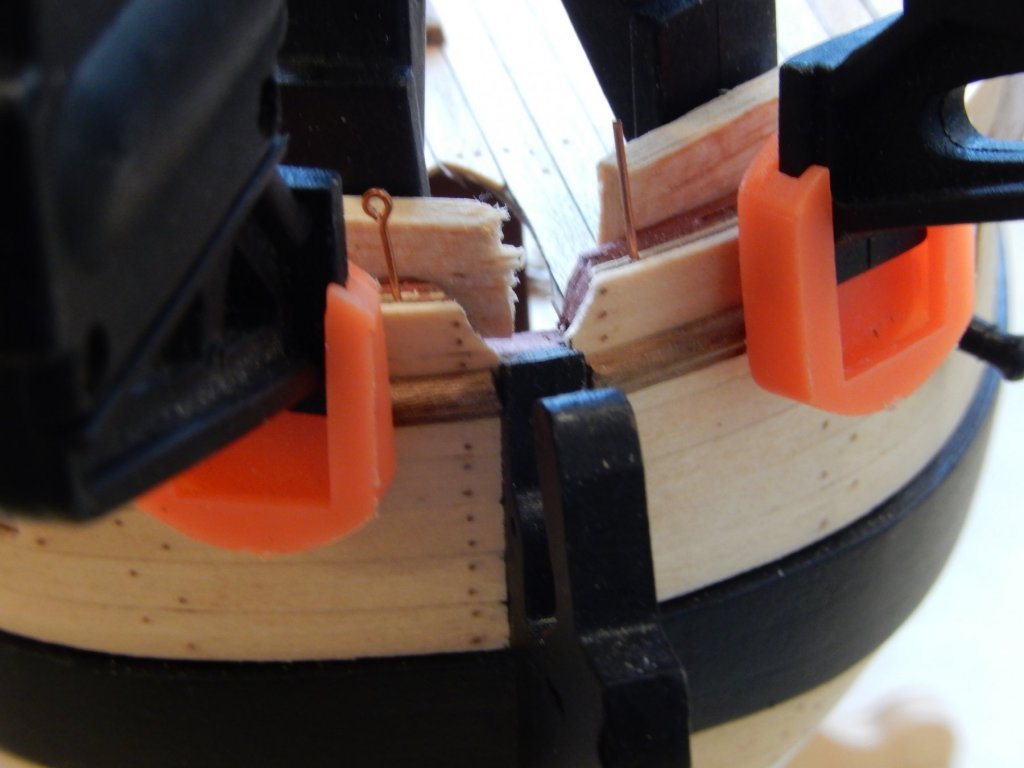
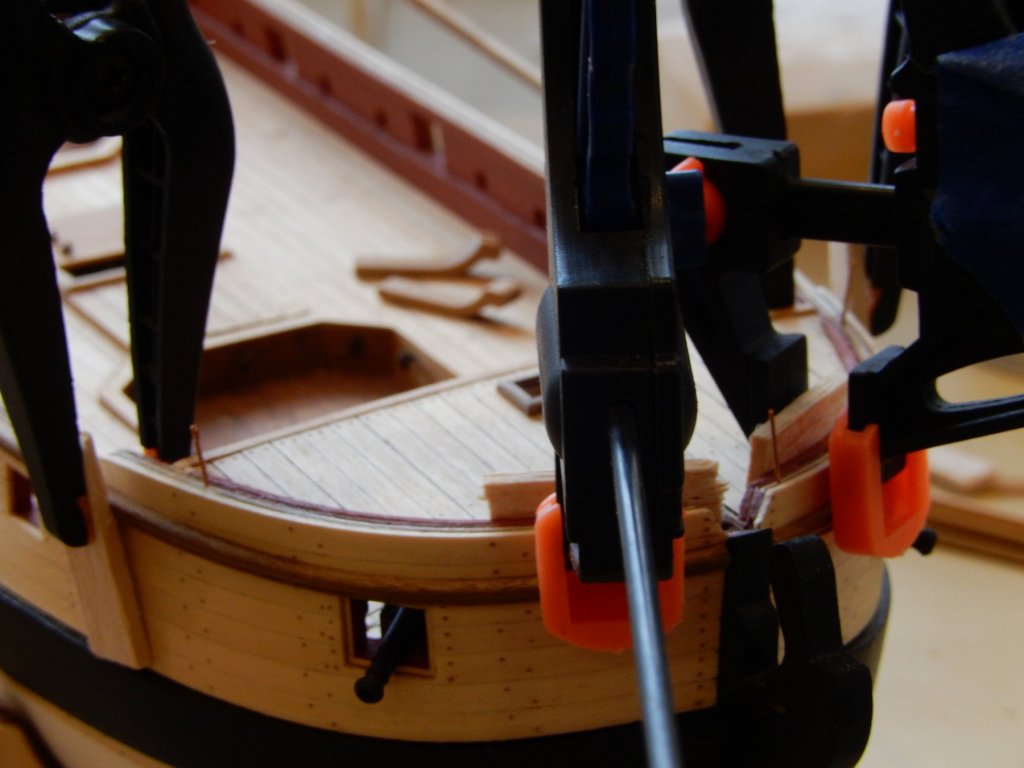
I am now working on the capping rails. Fitting the main rails is quite a demanding little project. They have to be level and accurately follow the curvature of the inner bulwark. The rails are plywood, already shaped, and there is very little 'give' in attempting to bend them to the actual curve of the bulwark. Fortunately the bulwarks are fairly accurate and not much adjustment is required - just a slight bend of both near the stern. I will be away for a few days and I will leave them bent to shape, dry-fitted, and hope that at least part of the bend will remain when I return. This is how things look. The eyelets shown here are pushing the rail inwards towards the edge of the bulwark. I use balsa to cushion the clamps. I have stolen another of Joe's ideas in using the paper clips as clamps.
- 421 replies
-
- 10
-
-
- caldercraft
- granado
- (and 1 more)
-
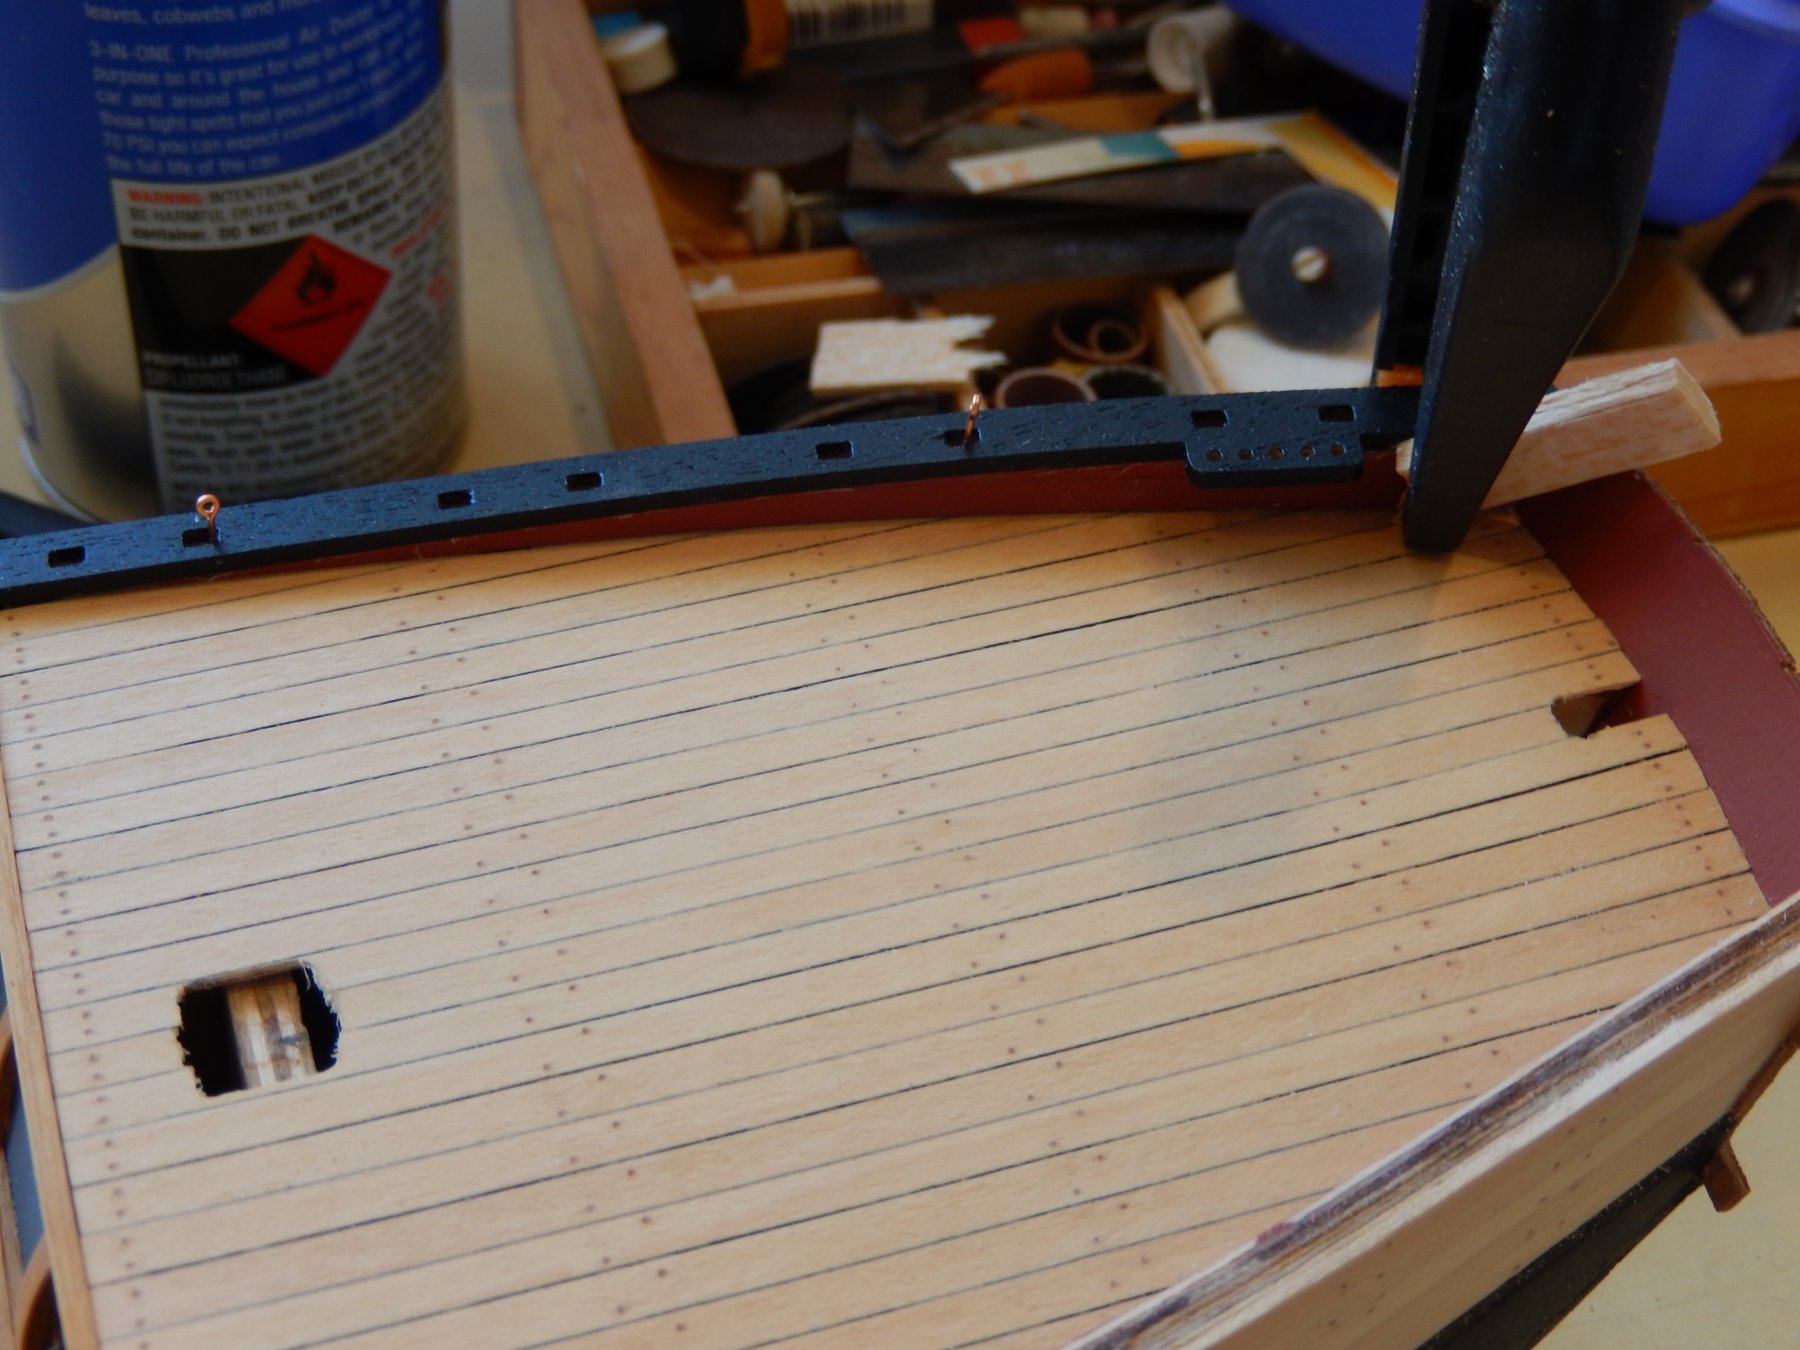
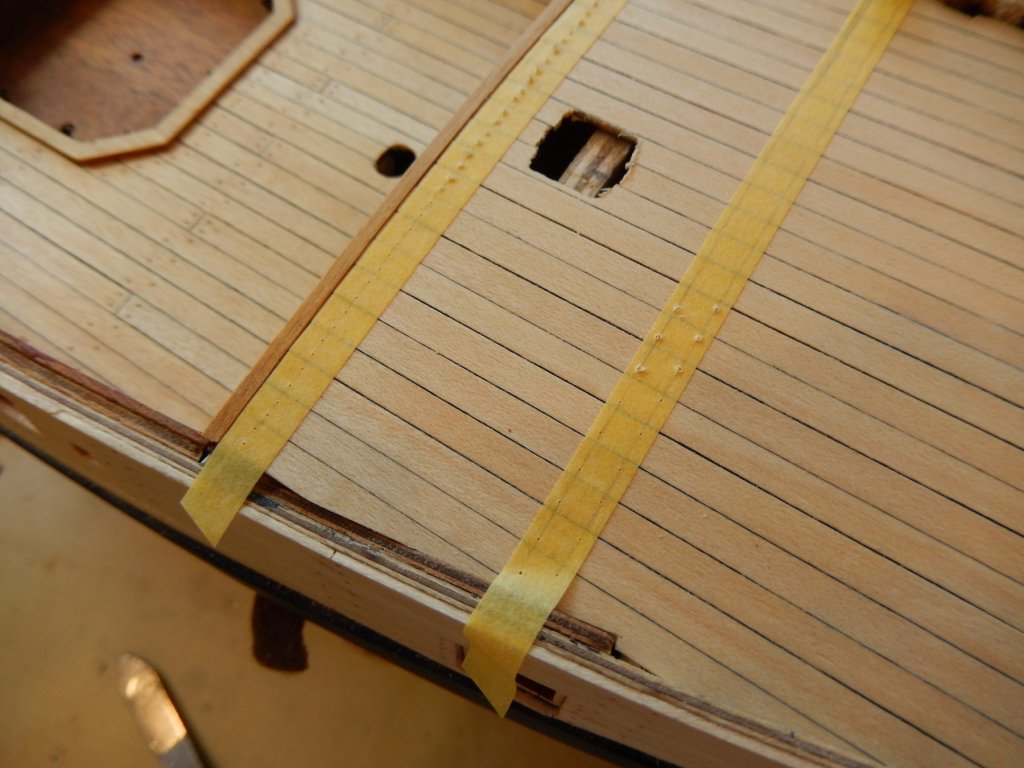
The treenailing is finished. Here are some photos of the process. A pencil line is drawn on Tamiya tape as a guide. A pin then marks the appropriate places for the nails. This provides a guide for the drill bit, and makes it less likely for mistakes to be made. The first two photos show both the pinpricks and the drill holes. Not shown, the tape is then applied closely to either side of the rows of drill holes and the filler scraped along the gap between the two strips of tape, filling the holes. This is done so that not too much filler needs to be rubbed off (by a dampened piece of kitchen paper) in the finishing process. Finished.

- 421 replies
-
- 7
-
-
- caldercraft
- granado
- (and 1 more)
-
Thanks Joe. I forgot to give you credit for my using the polystyrene. I would never have thought of it. Thanks too for the 'reactions' (what ever happened to 'likes'?) they always provide encouragement. I had hoped to finish the treenailing today, but gardening got in the way. Here's a tip. Don't plant bougainvillias.
-
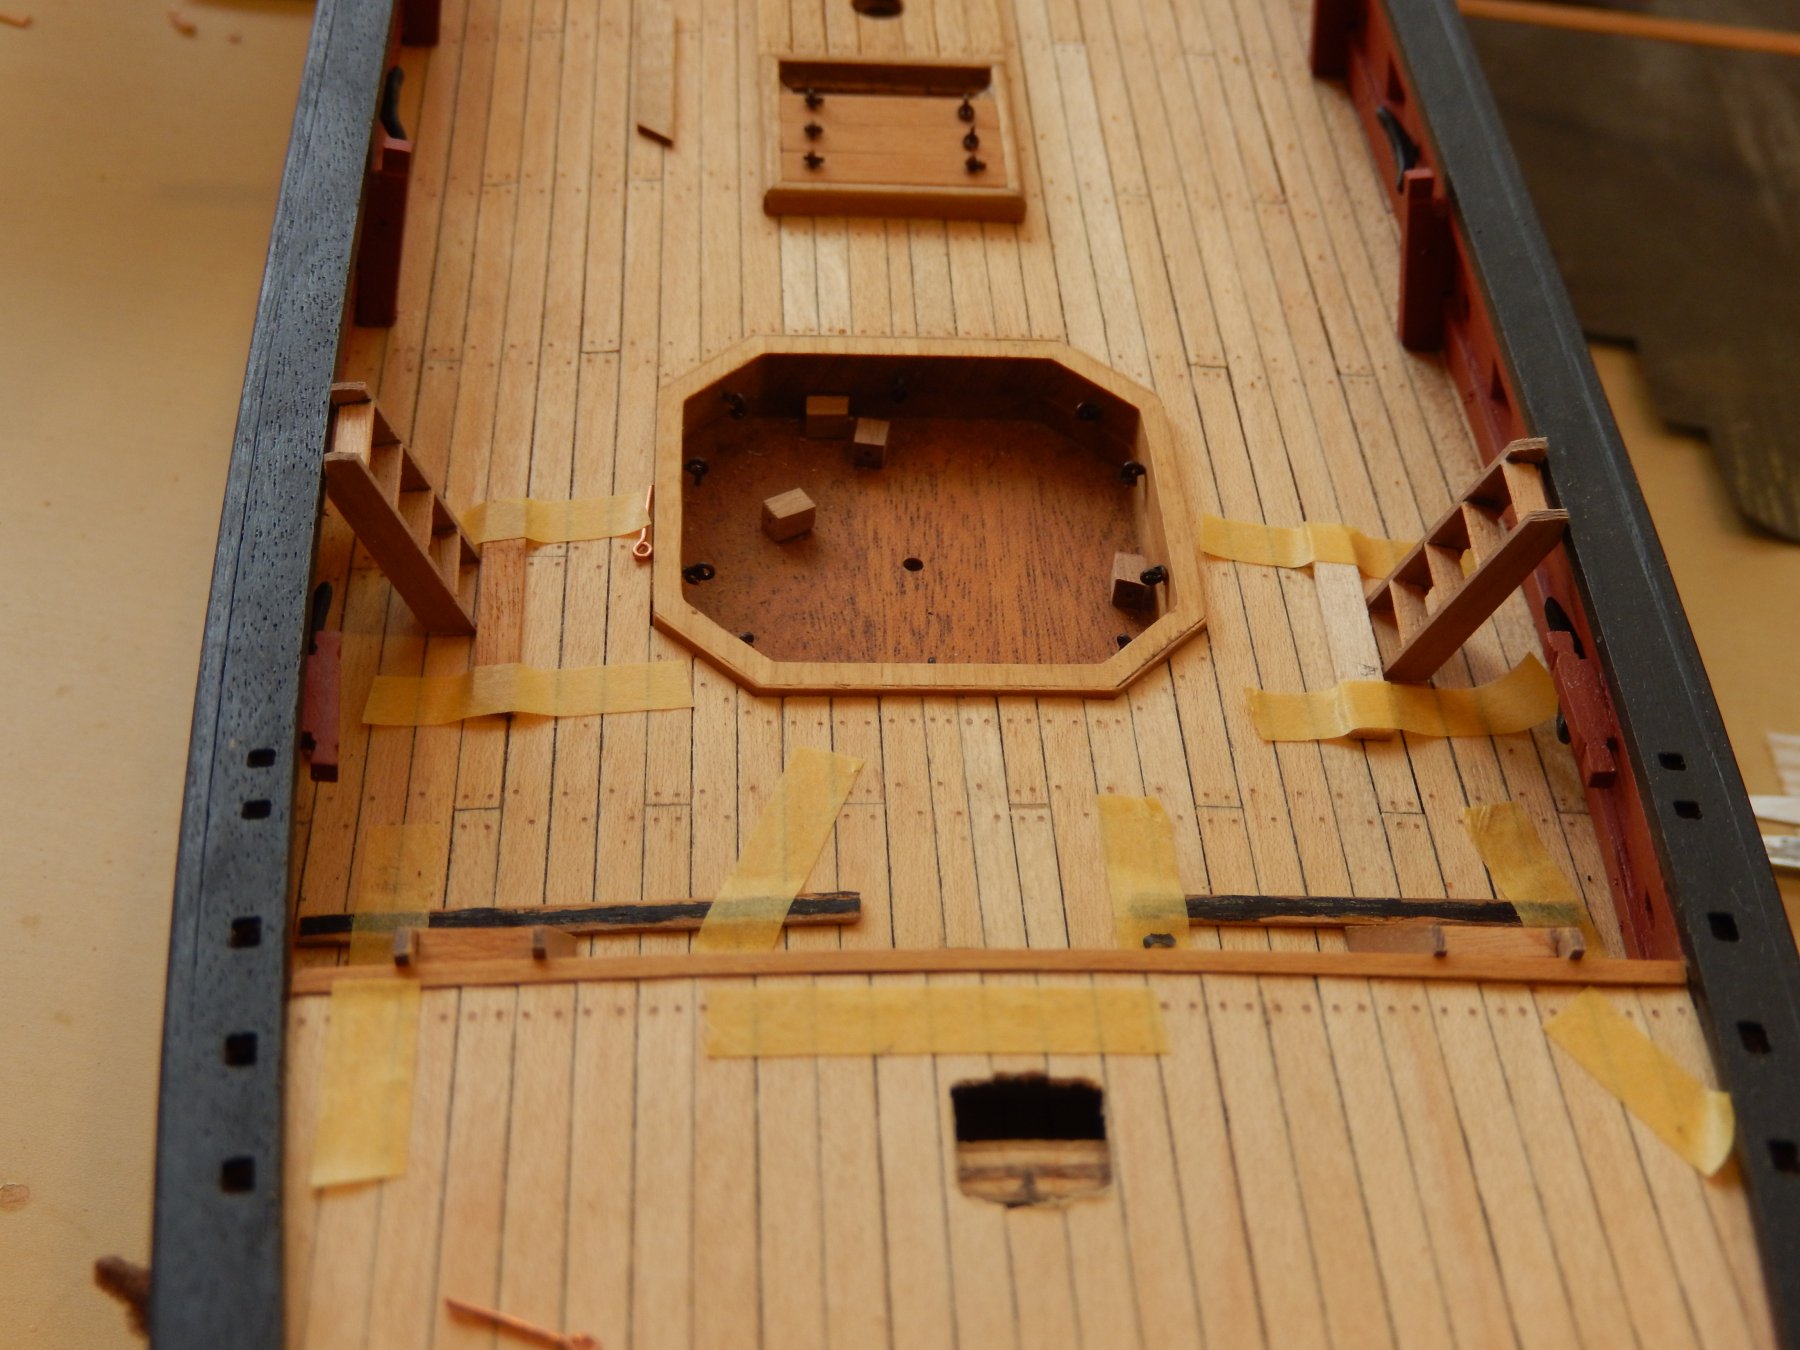
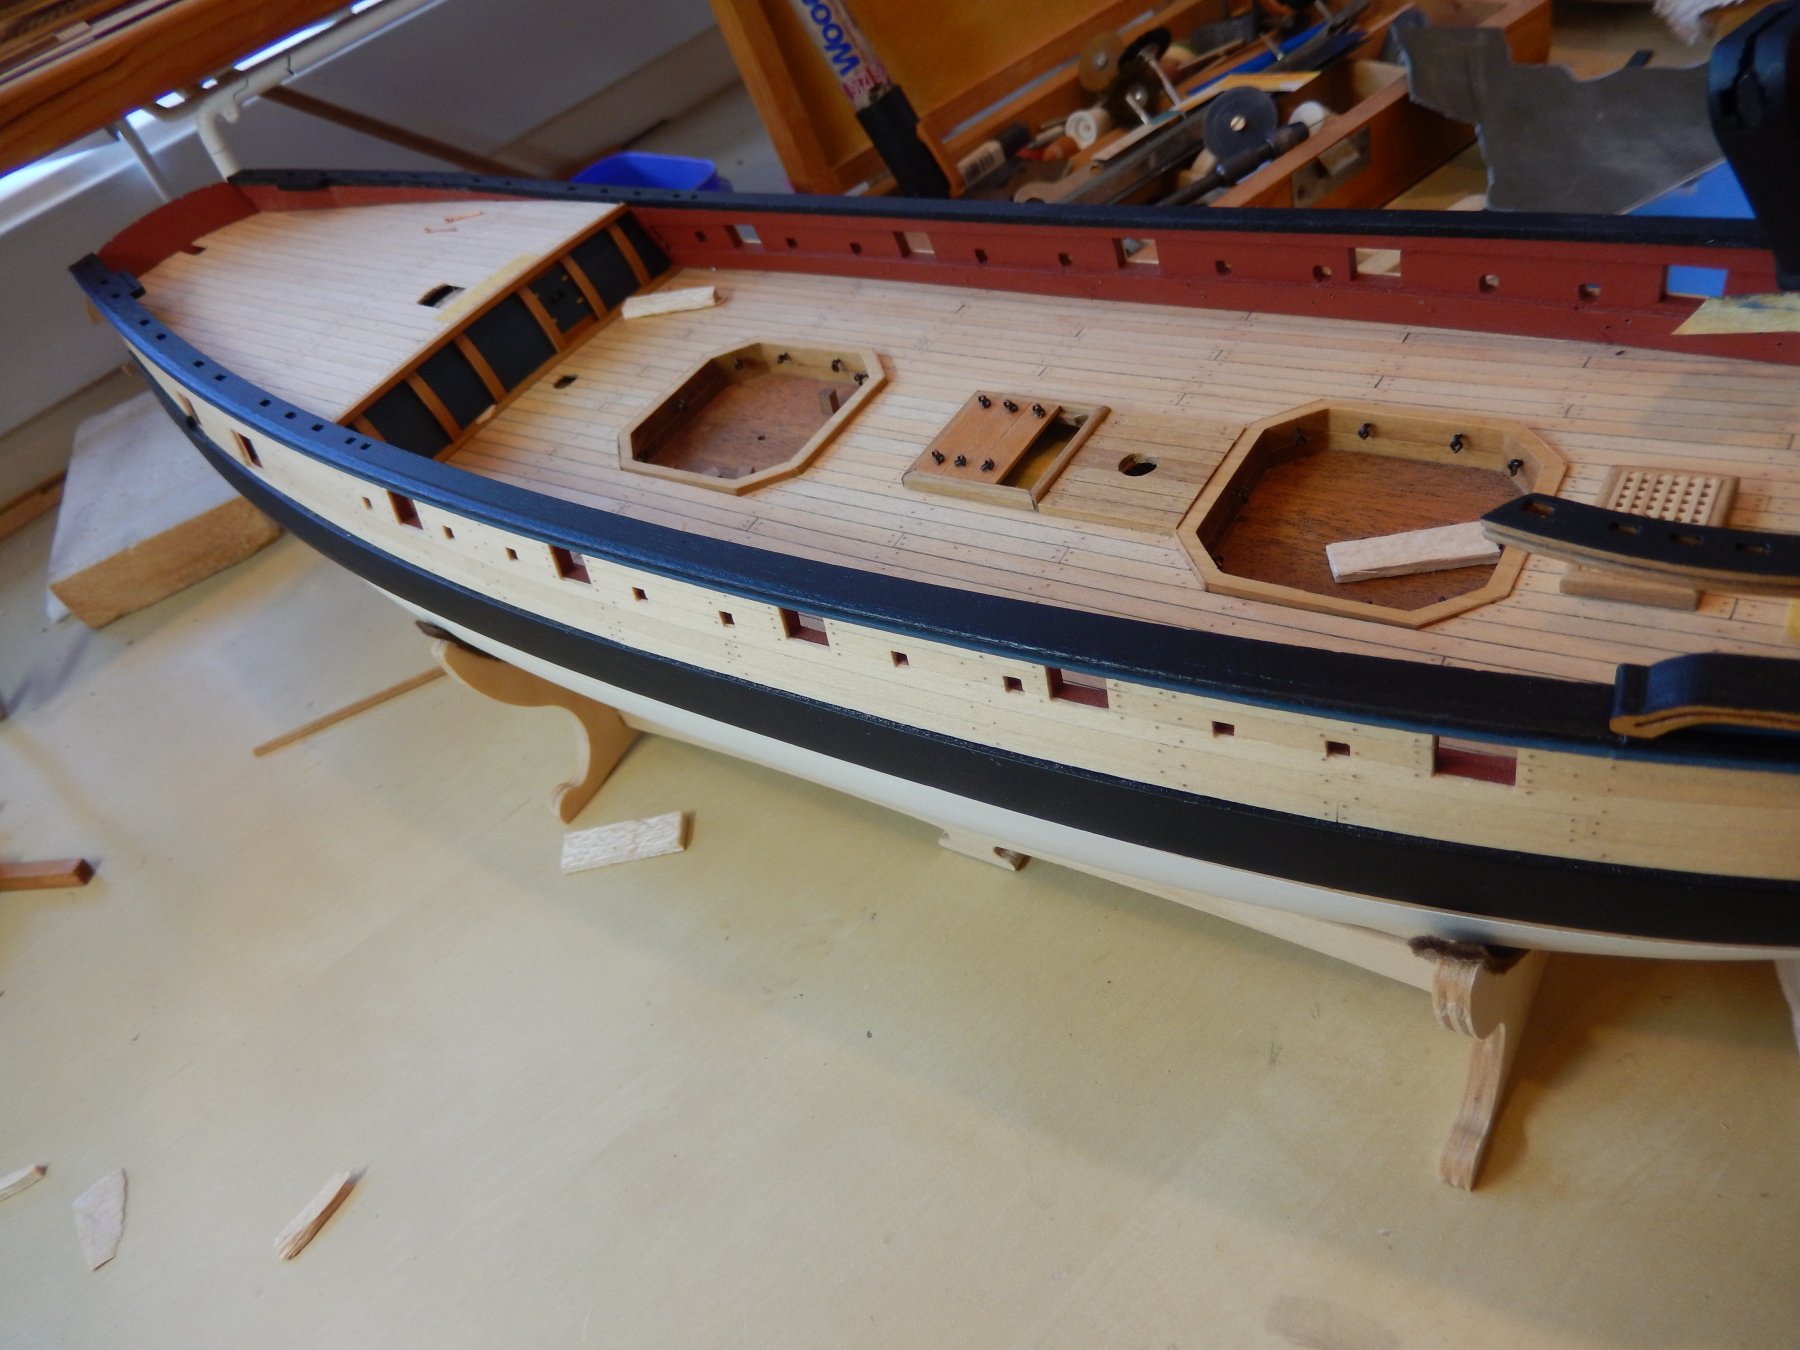
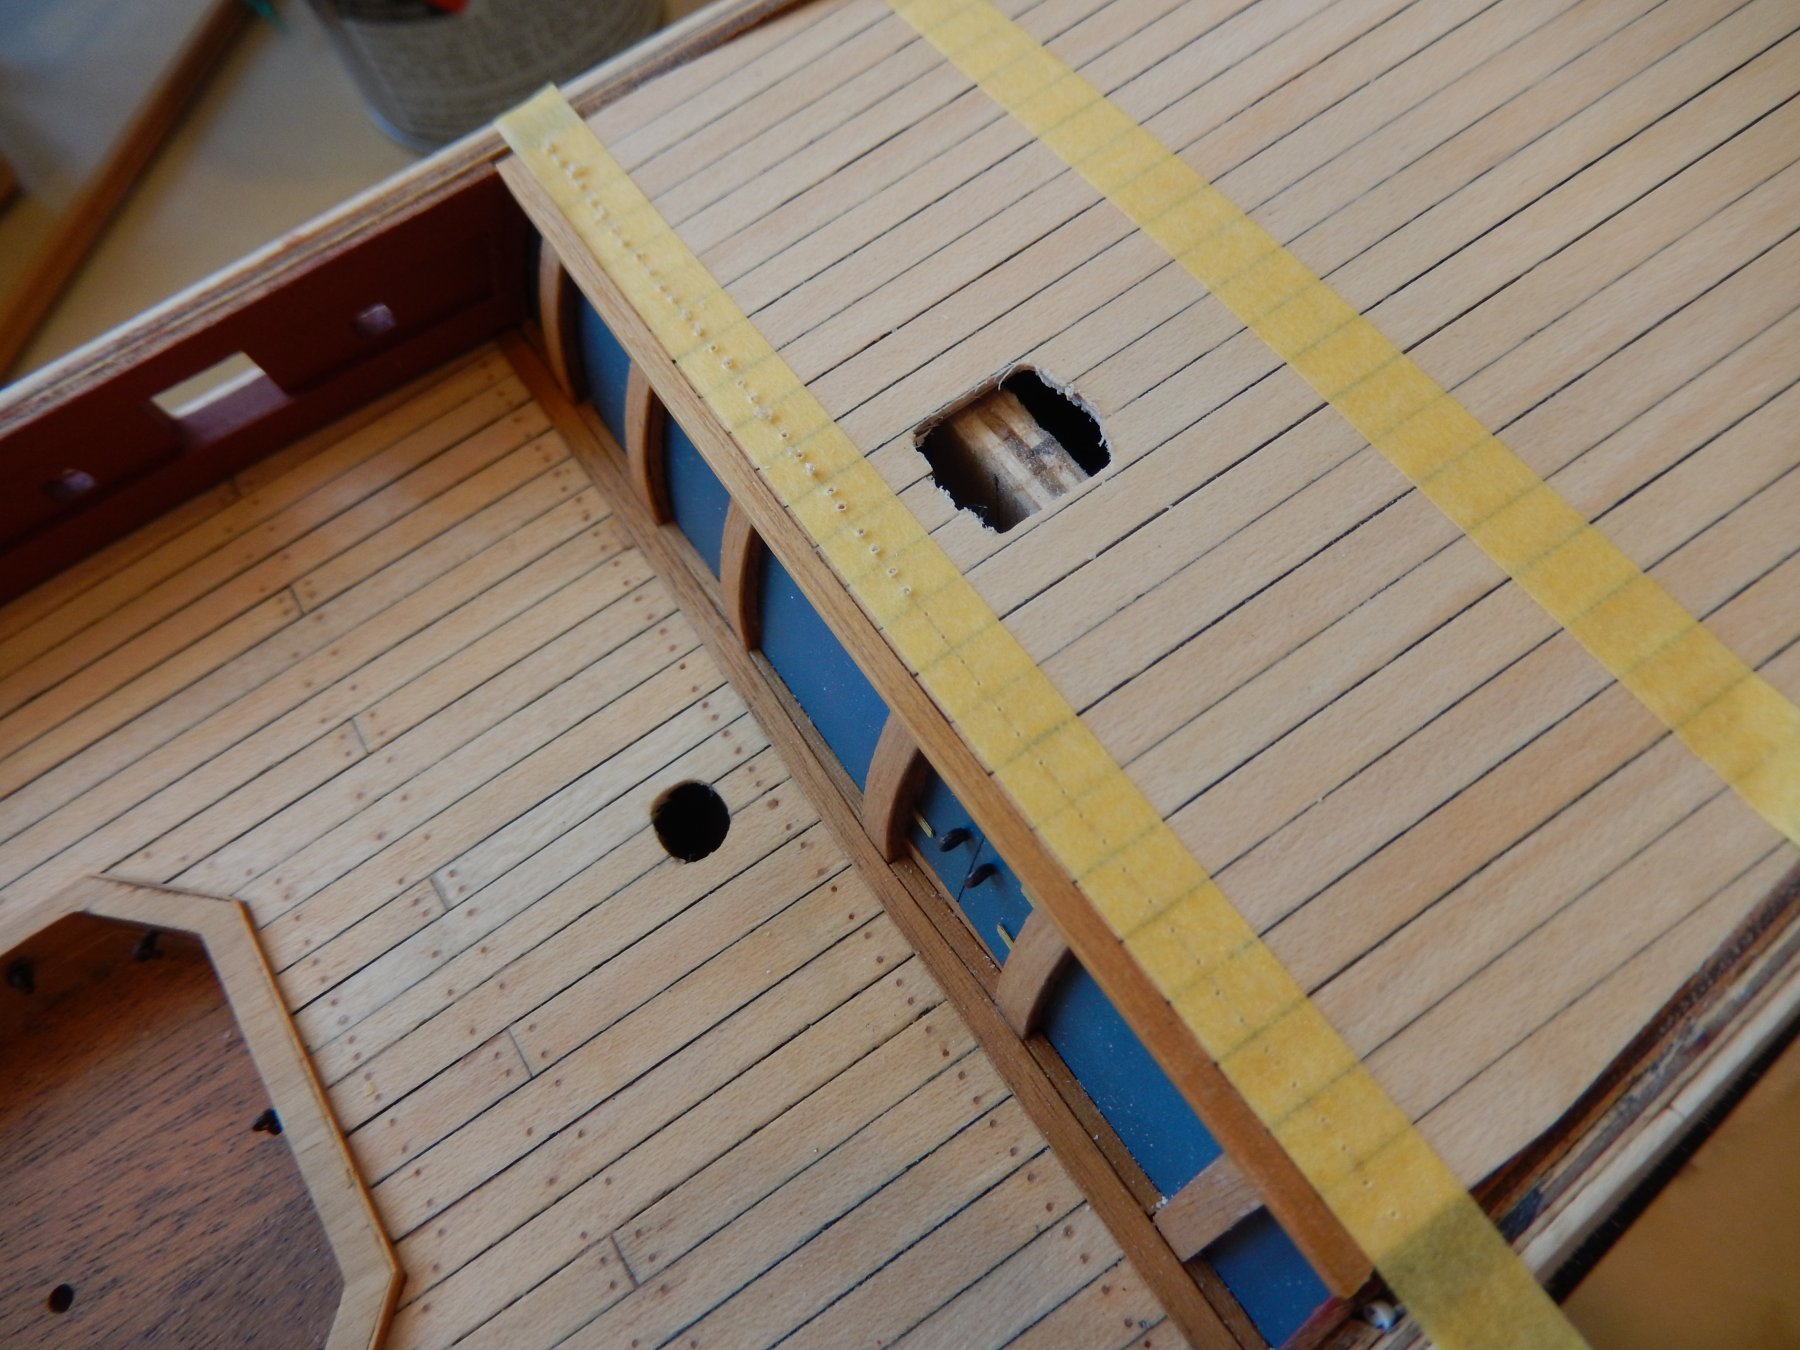
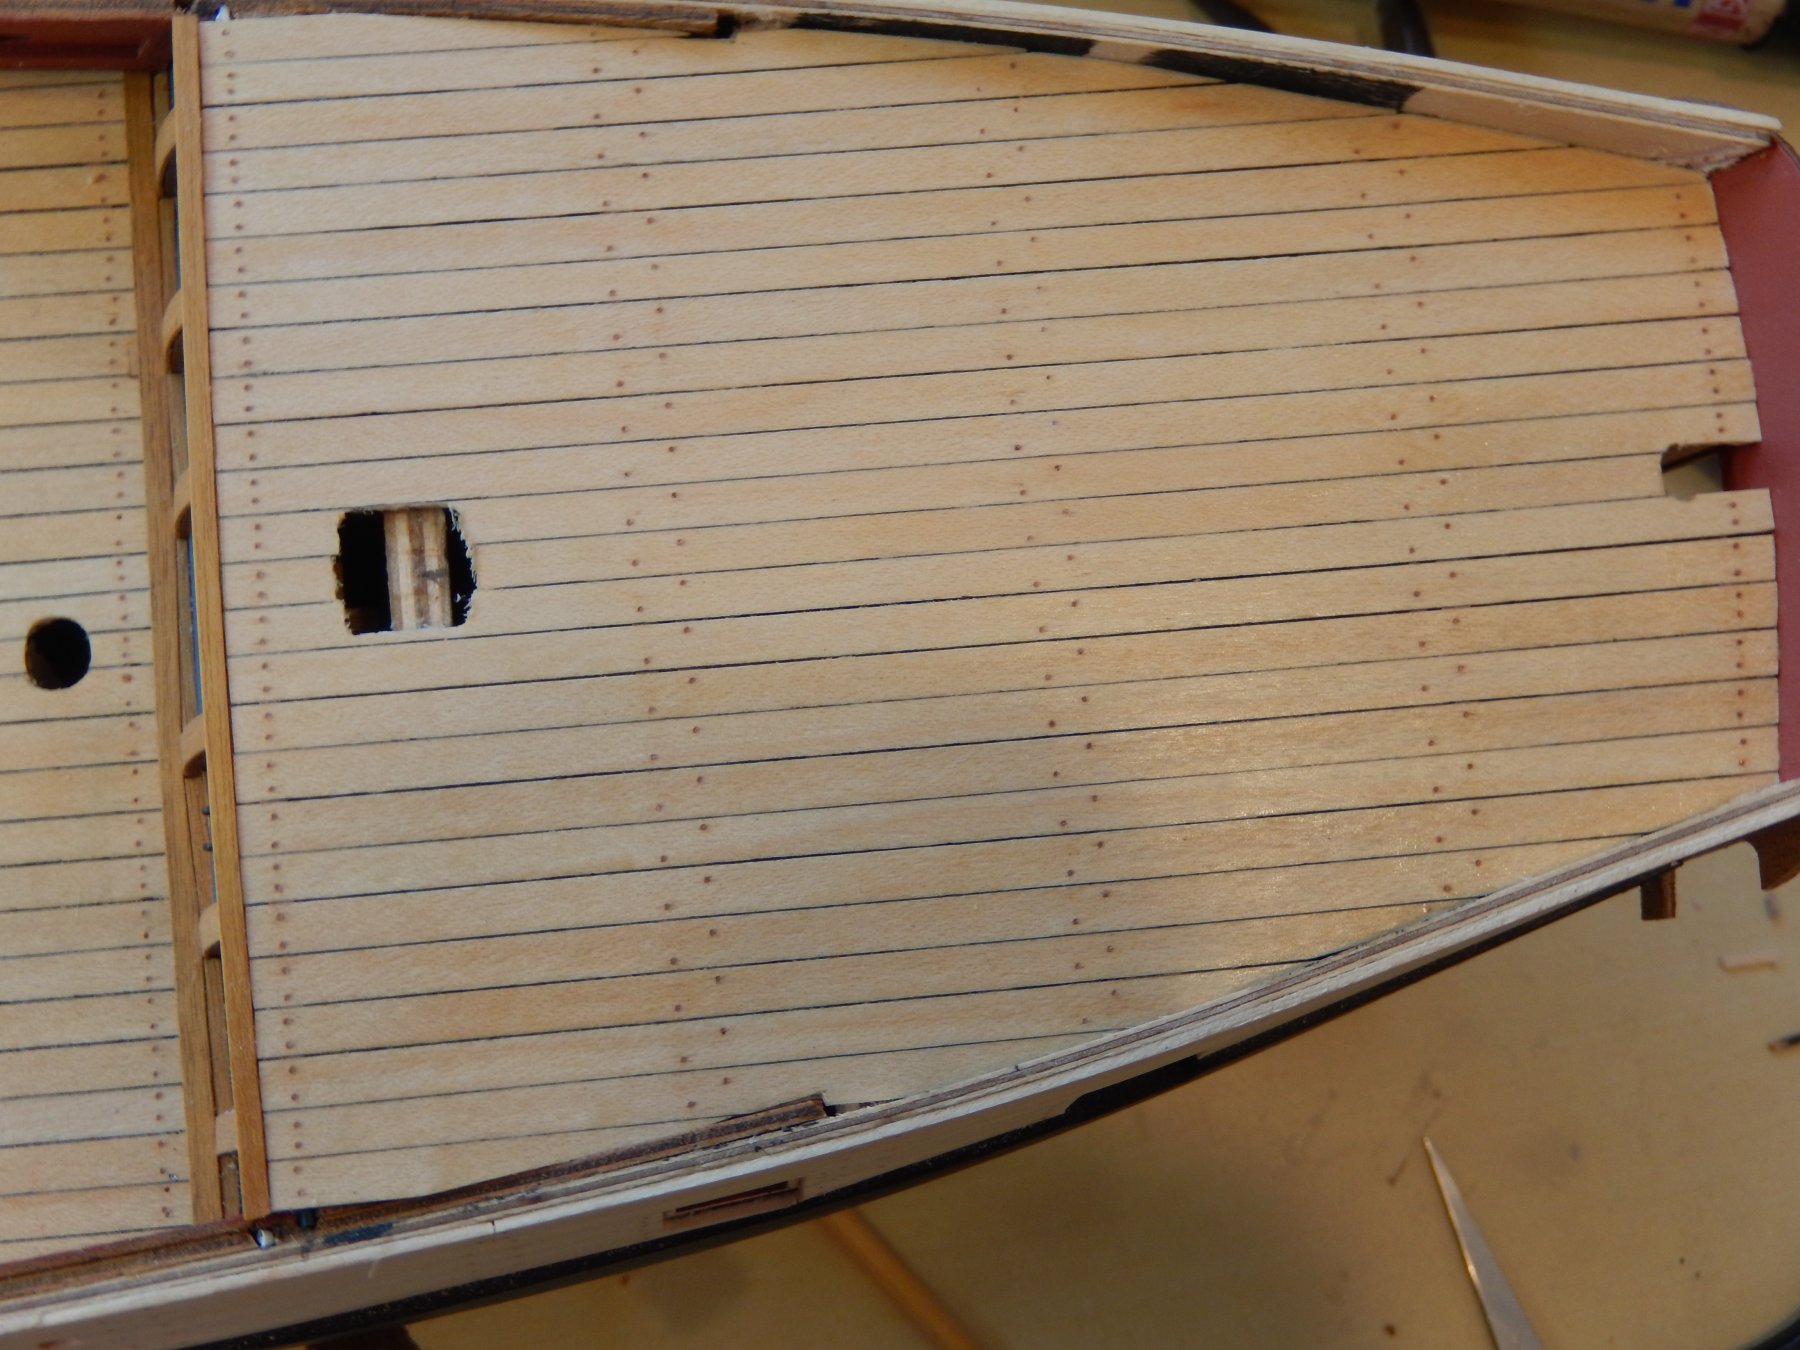
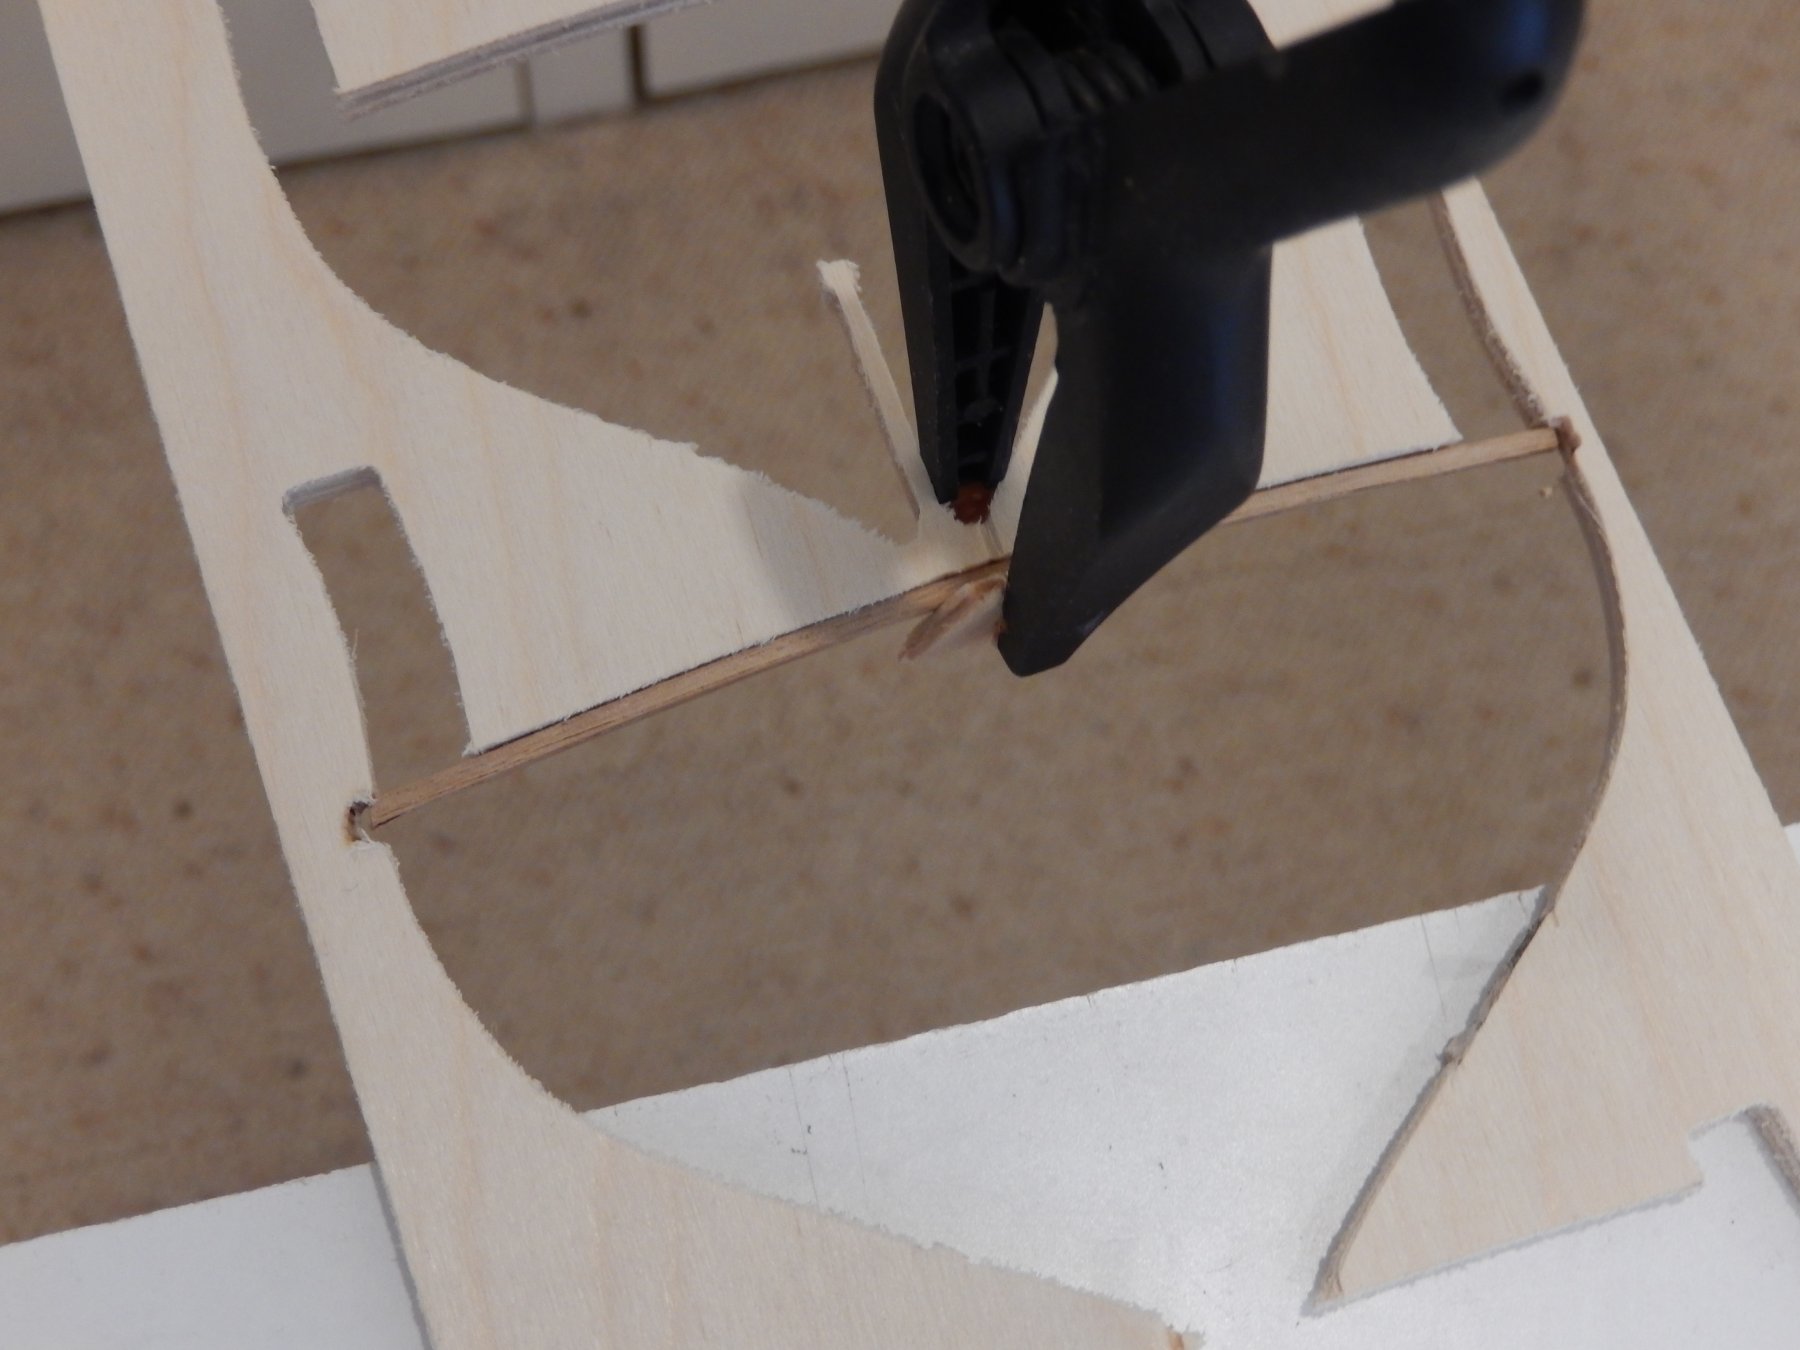
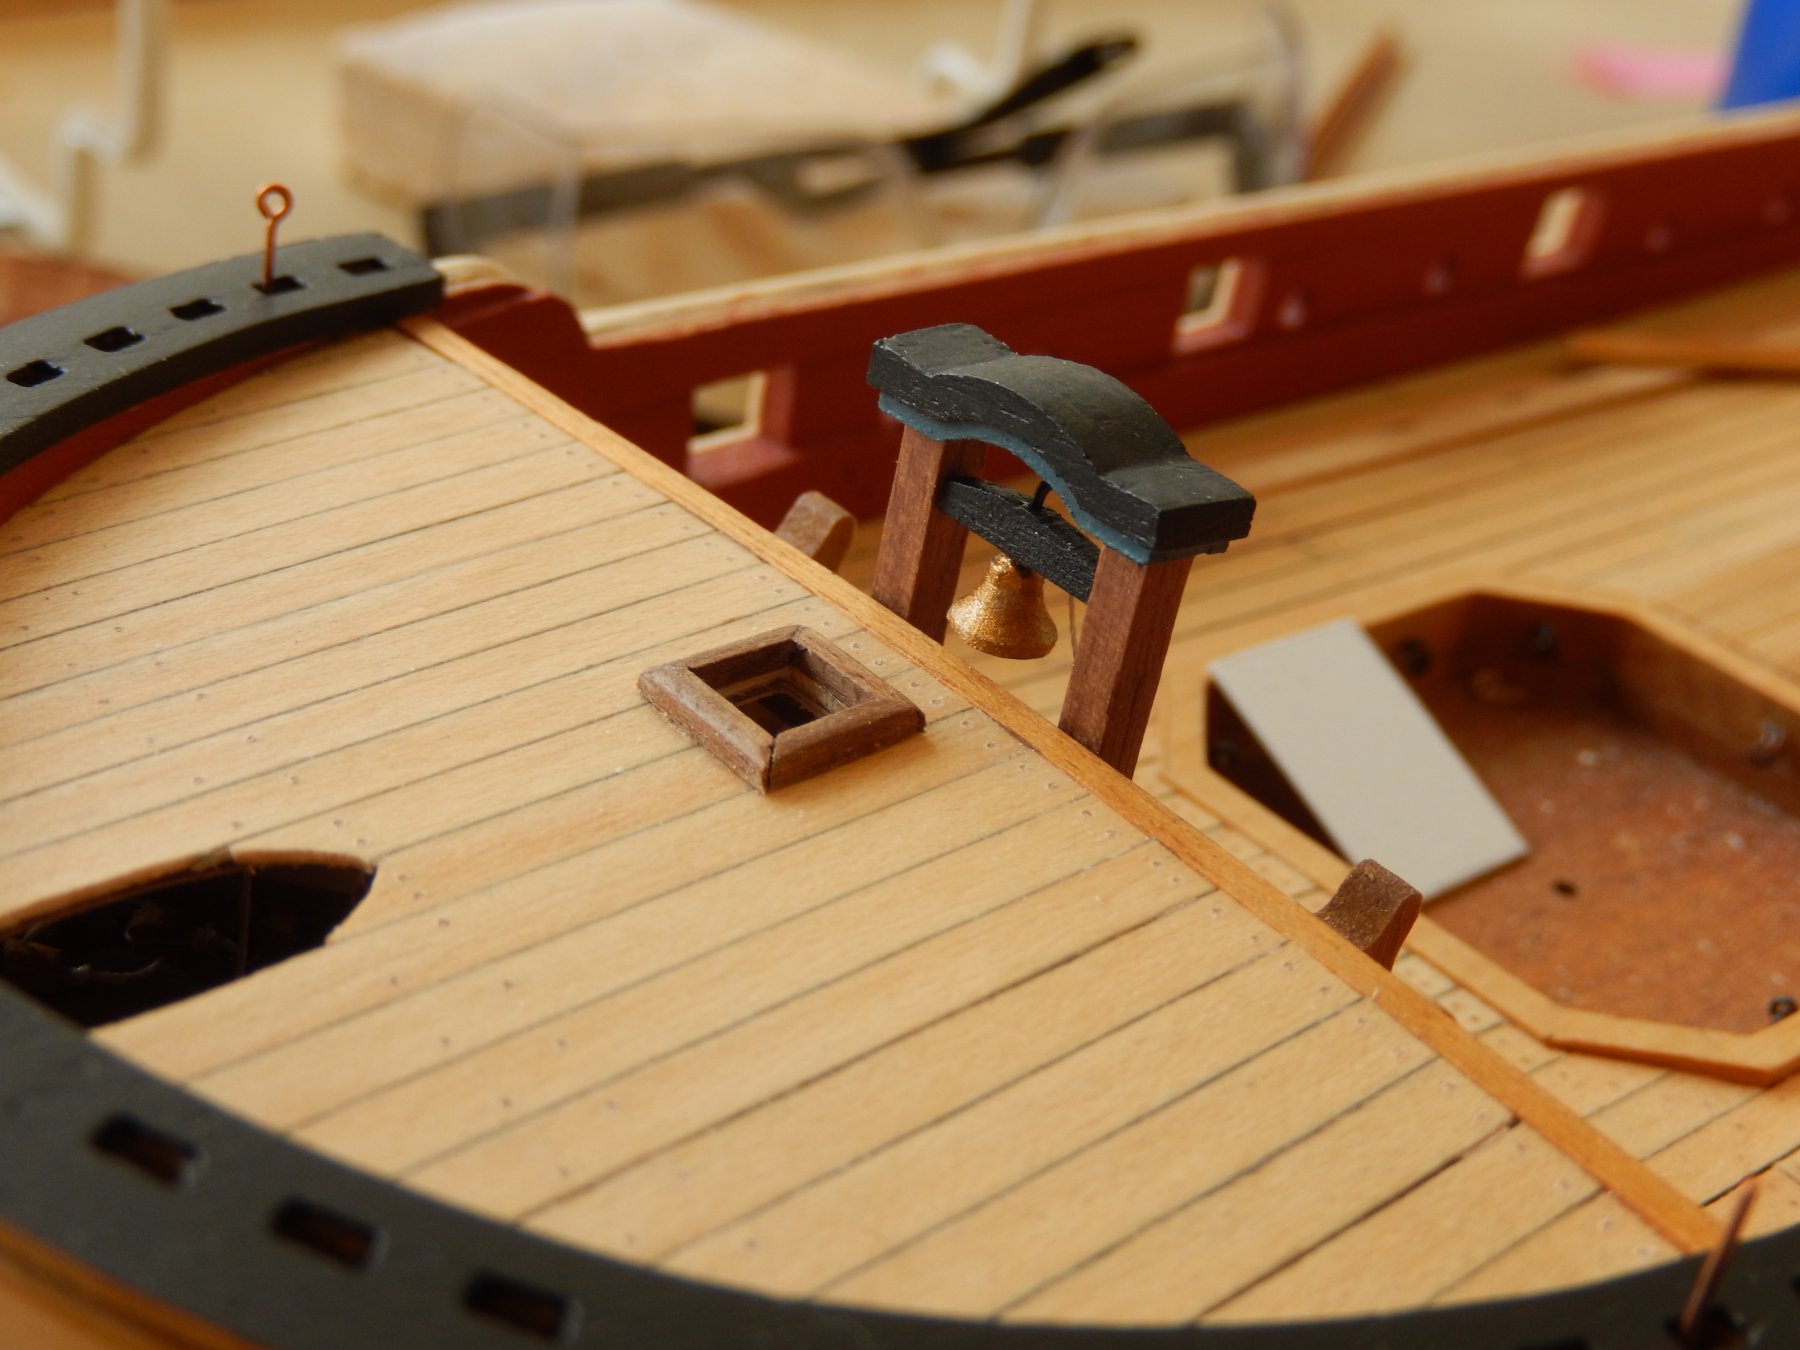
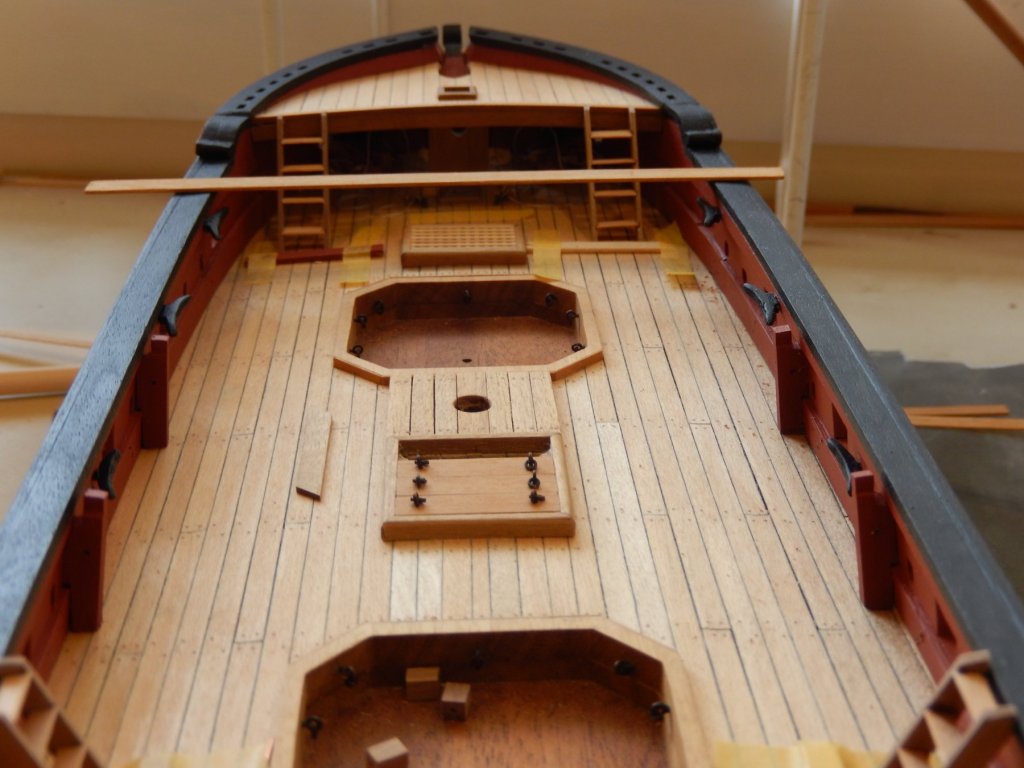
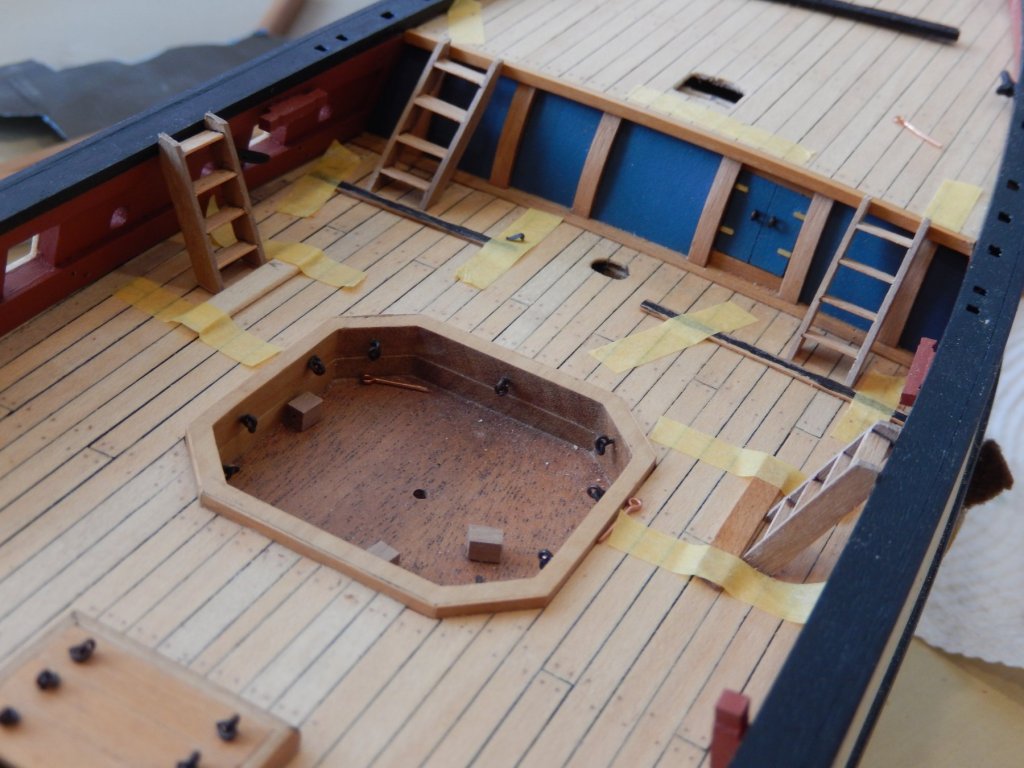
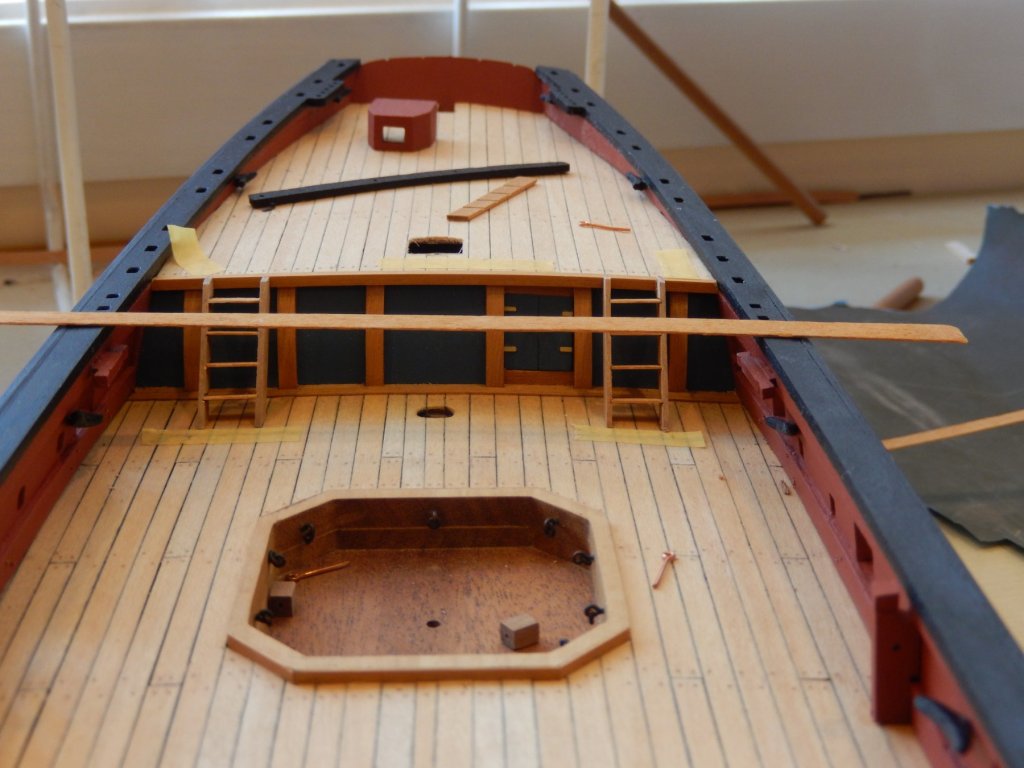
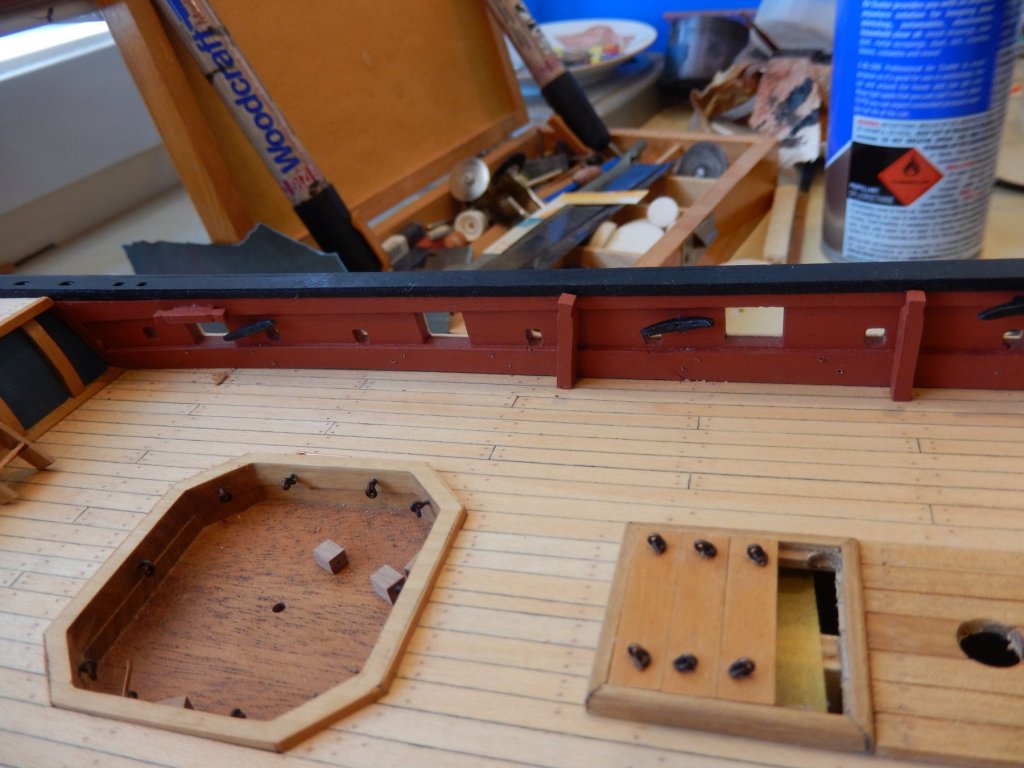
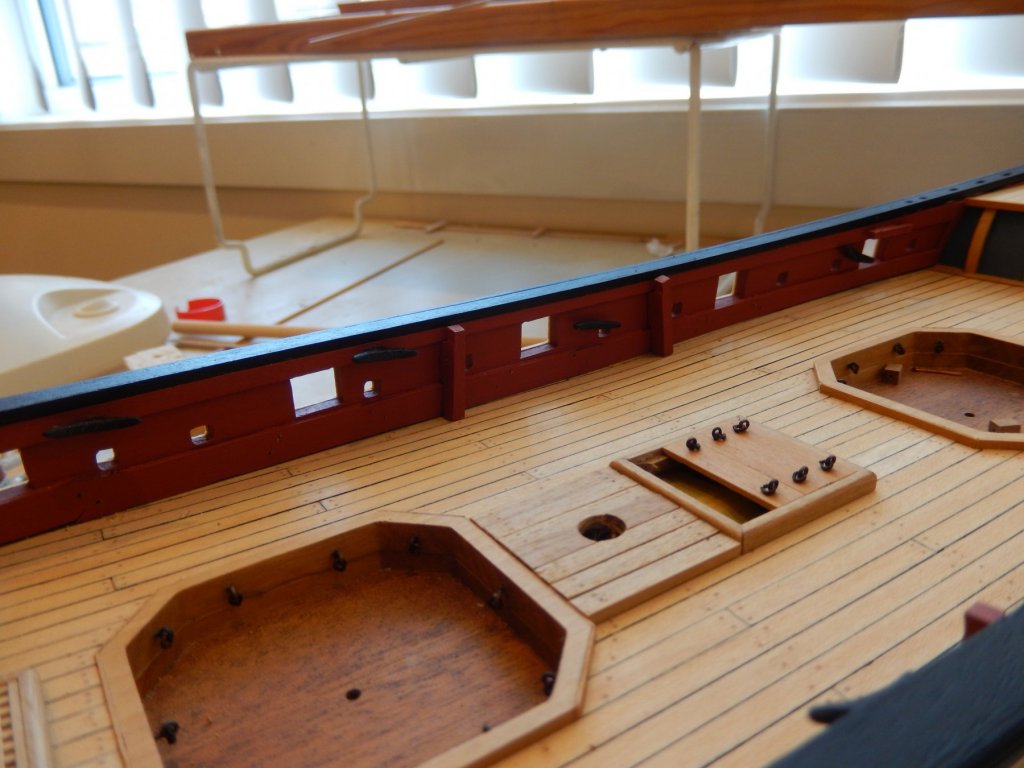
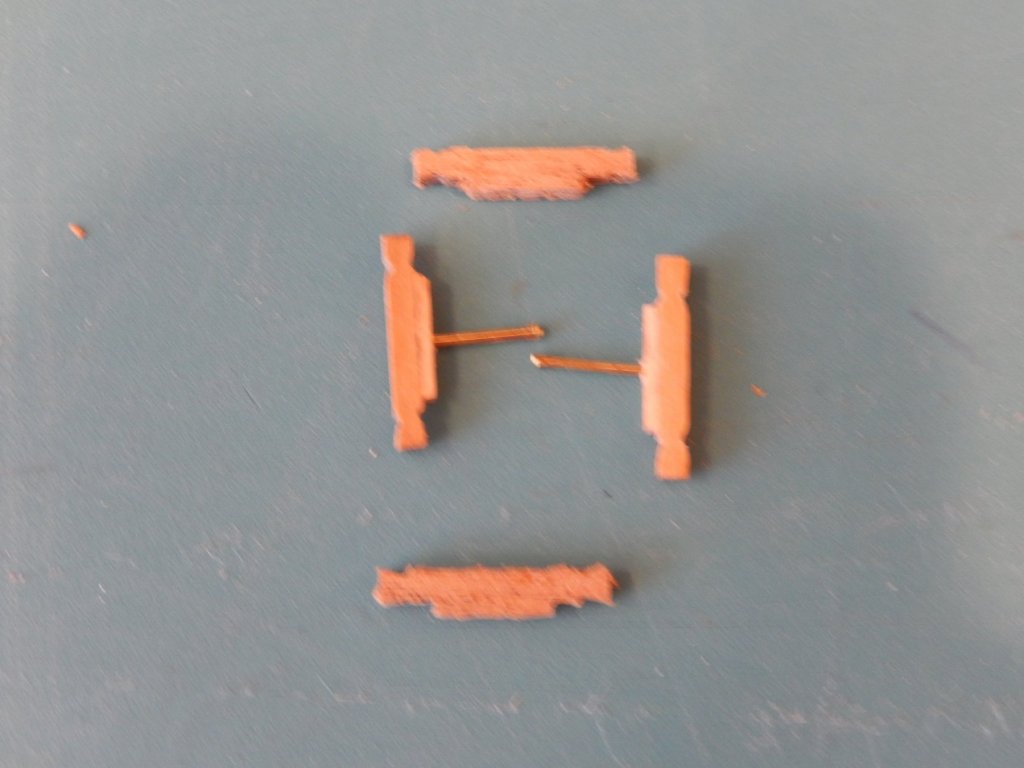
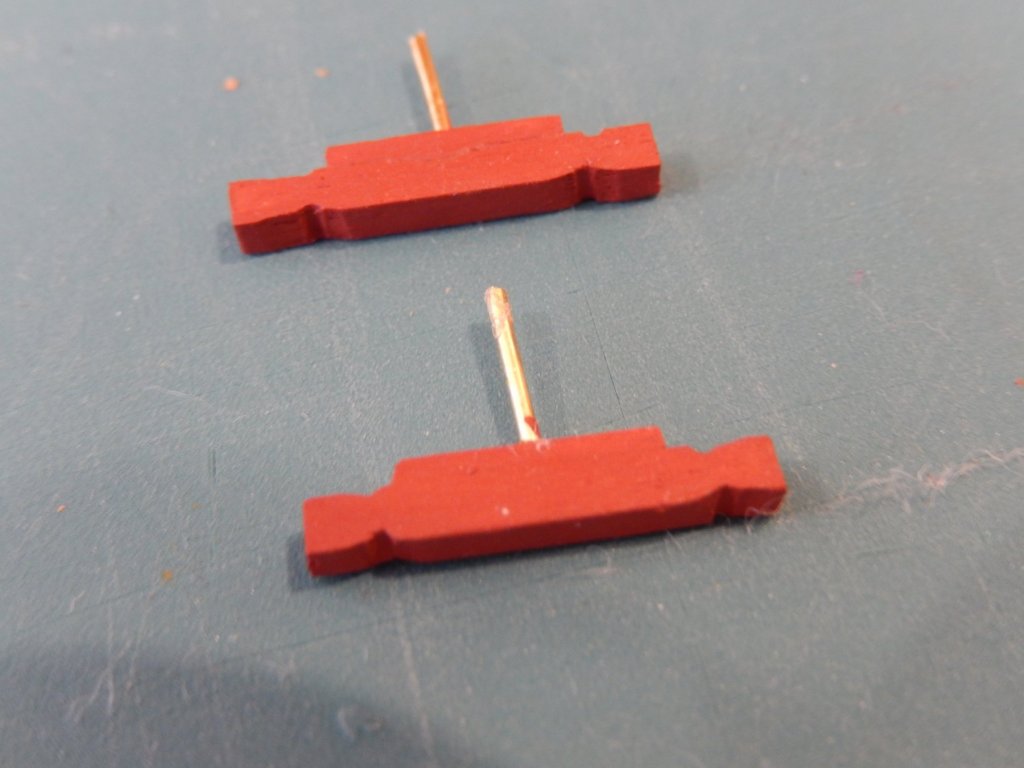
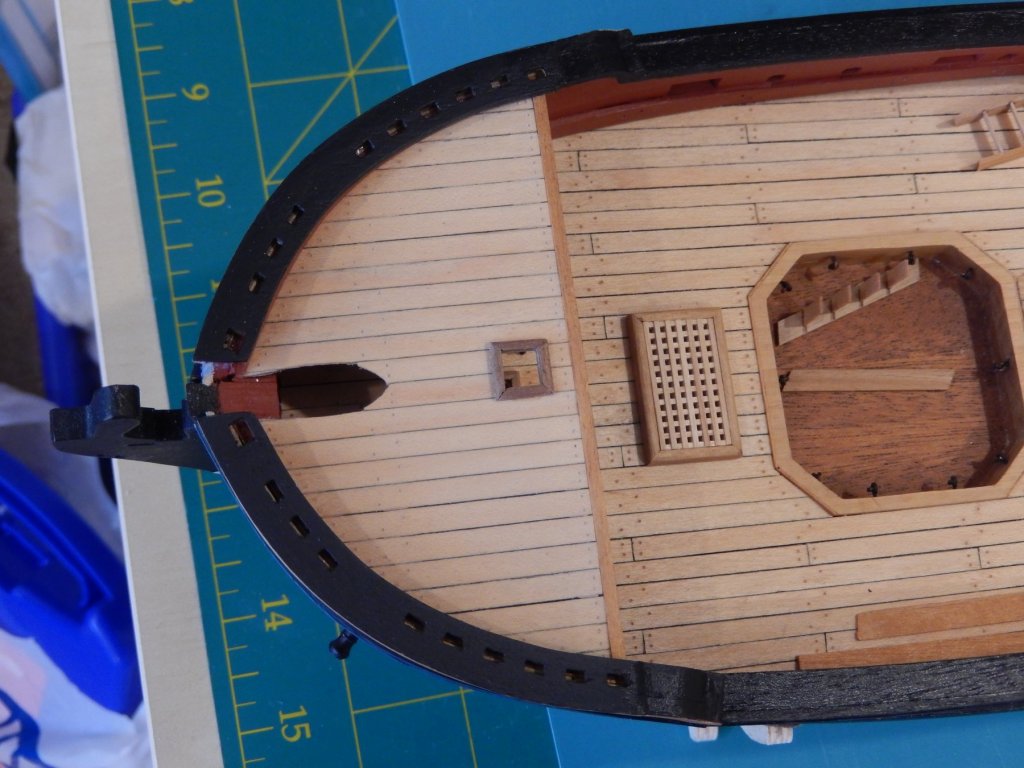
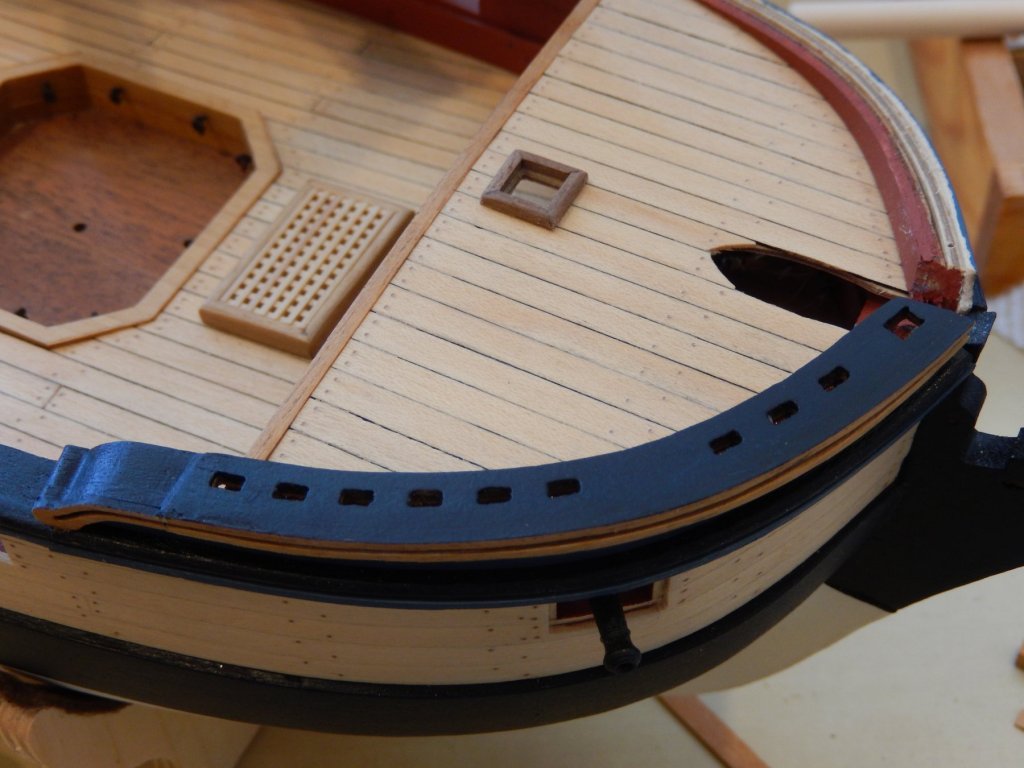
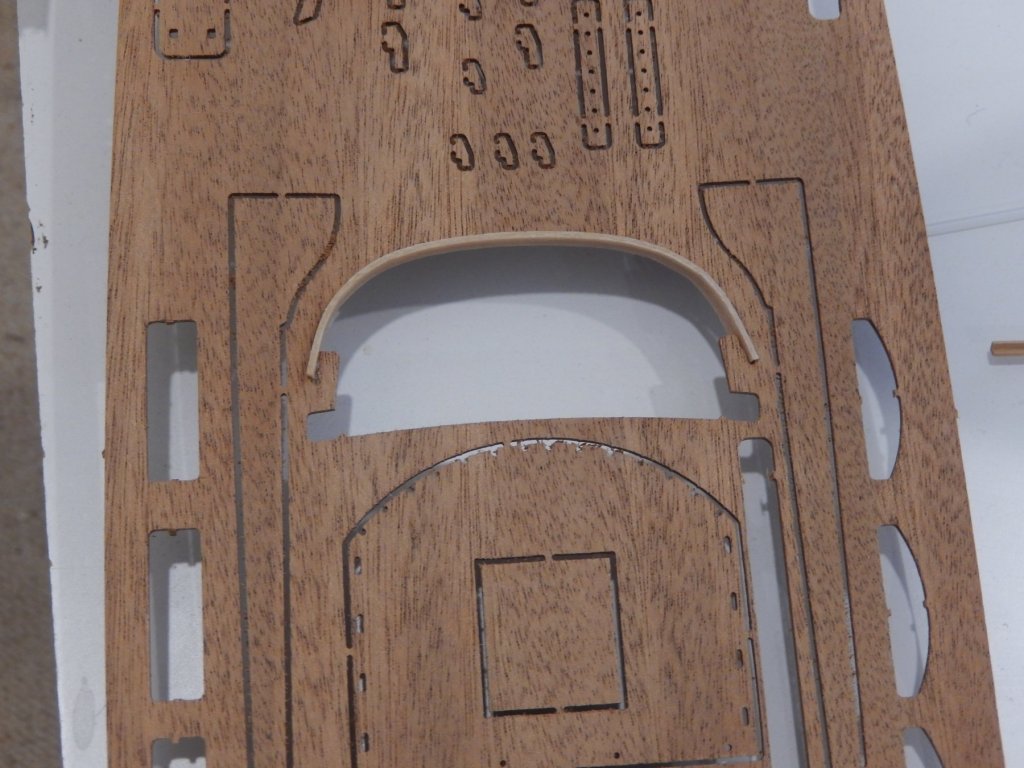
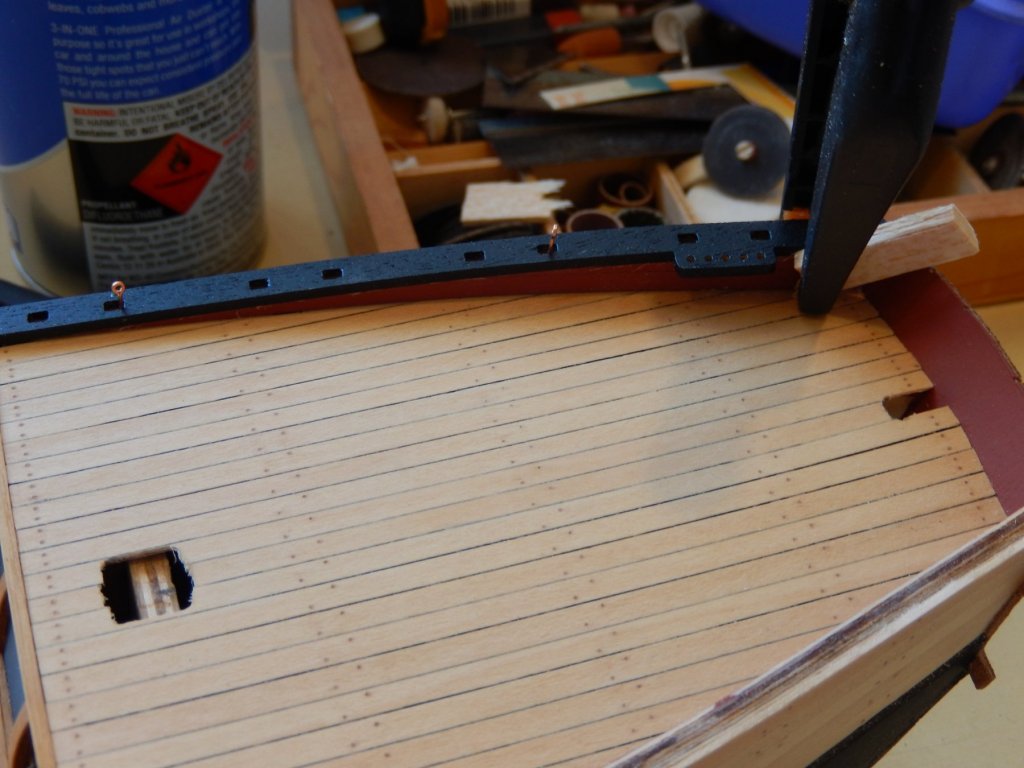
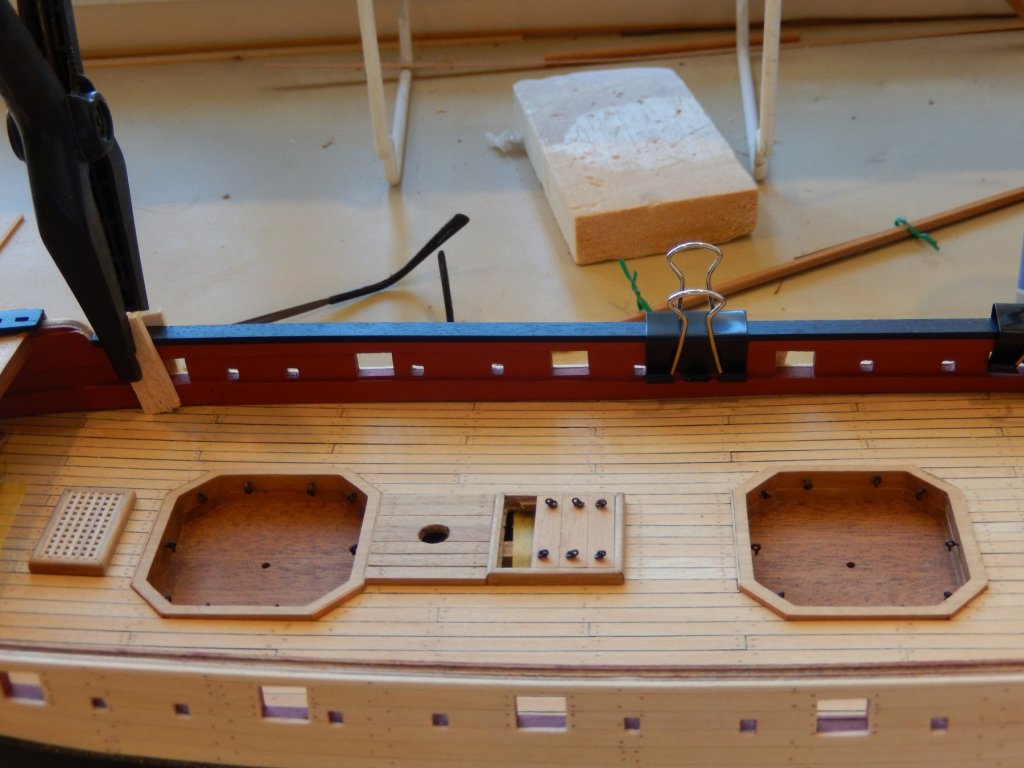
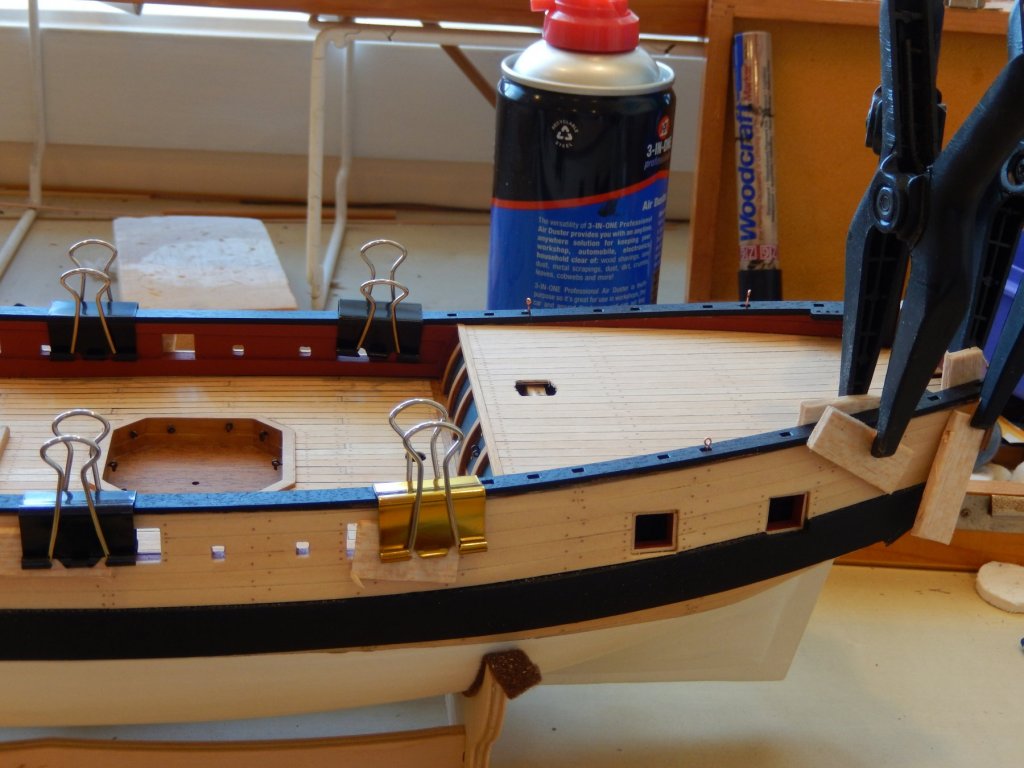
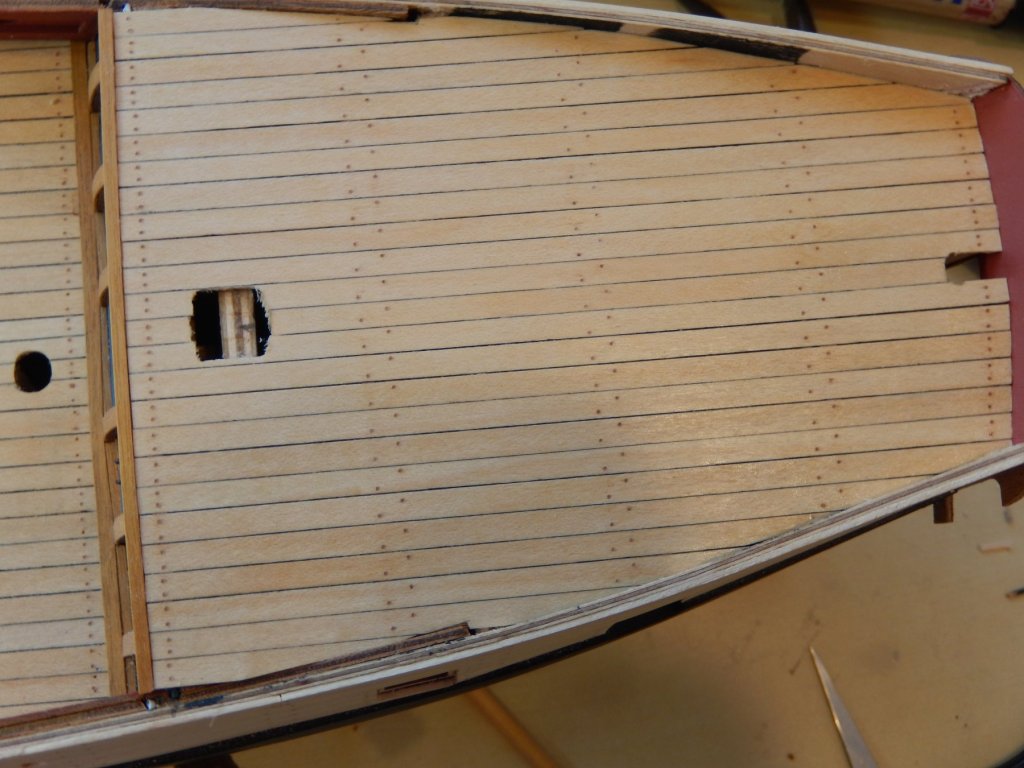
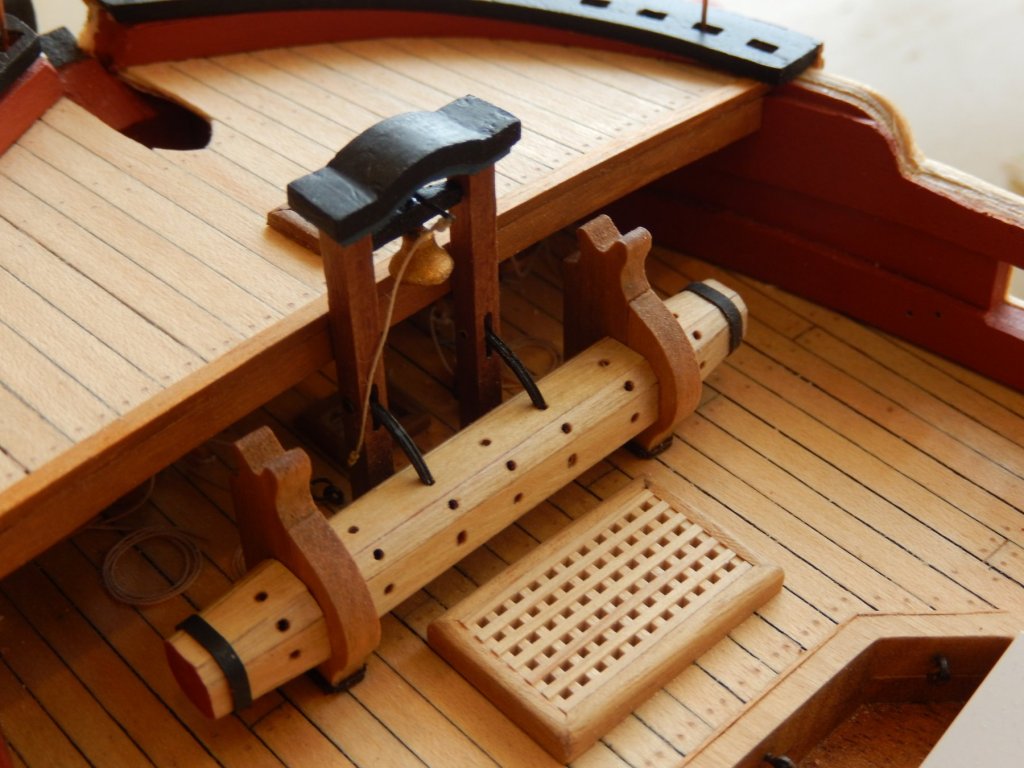
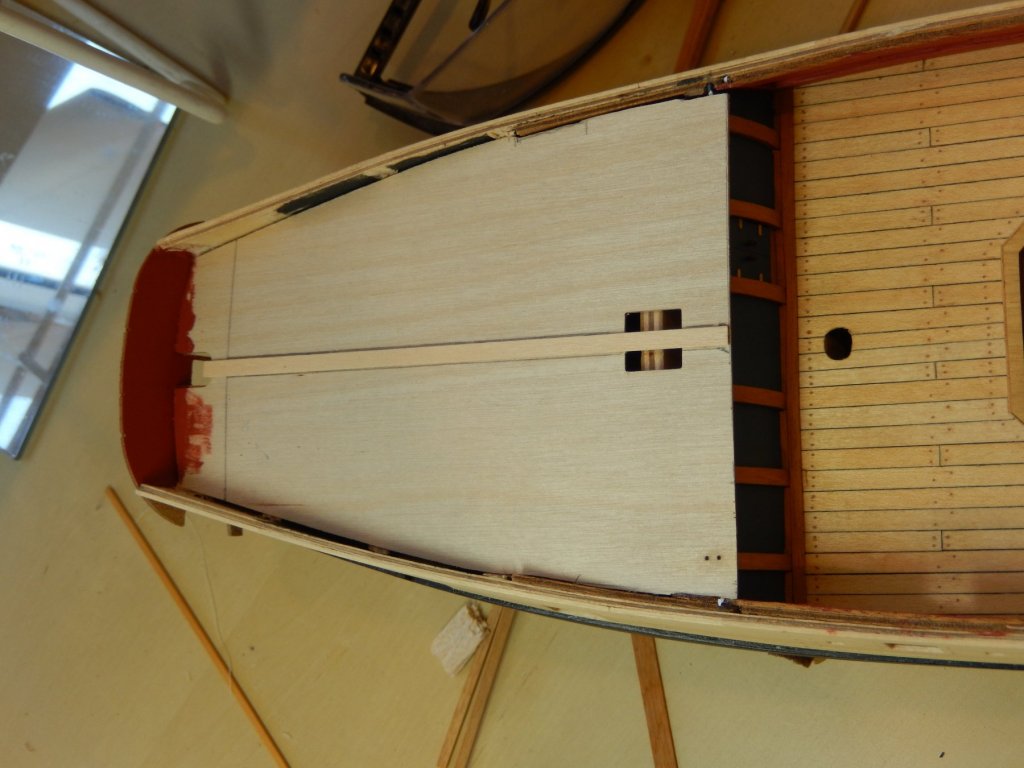
I am in the process of planking the quarter deck. It concerned me that the front edge of the plywood sub decking would show. This was my original solution: gluing a piece of 2x2mm timber to the edge once the decking was complete. The timber would need to follow the curvature of the deck and would best bent before gluing. The following worked well. Simply soak the timber, then clamp it to the ply from which the bulkhead was cut and leave it to dry. I include it here as it may help those who may not be able to take advantage of a far easier solution I discovered while looking through a box of odds and ends - some L section timber. Here is the result. The L section covers the edge, and fits nicely onto the deck. It, and the planking had not yet been coated with polyurethane. .... now with a coat of poly. Once dry, the treenailing will be done, and then another coat of poly applied. Here is another problem to be avoided. The belfry is supposed to fit flush against the rear edge of the foredeck. If you install the bell too low - as I did - it will foul the edge as I discovered. Having tried unsuccessfully to reposition the bell, I eventually glued some 1mm thick strip to the bottom of the supports which raised it just enough to clear the deck. Here are the belfry and windlass roughly positioned. The 'modification' cannot be seen.


- 421 replies
-
- 13
-
-
- caldercraft
- granado
- (and 1 more)
-
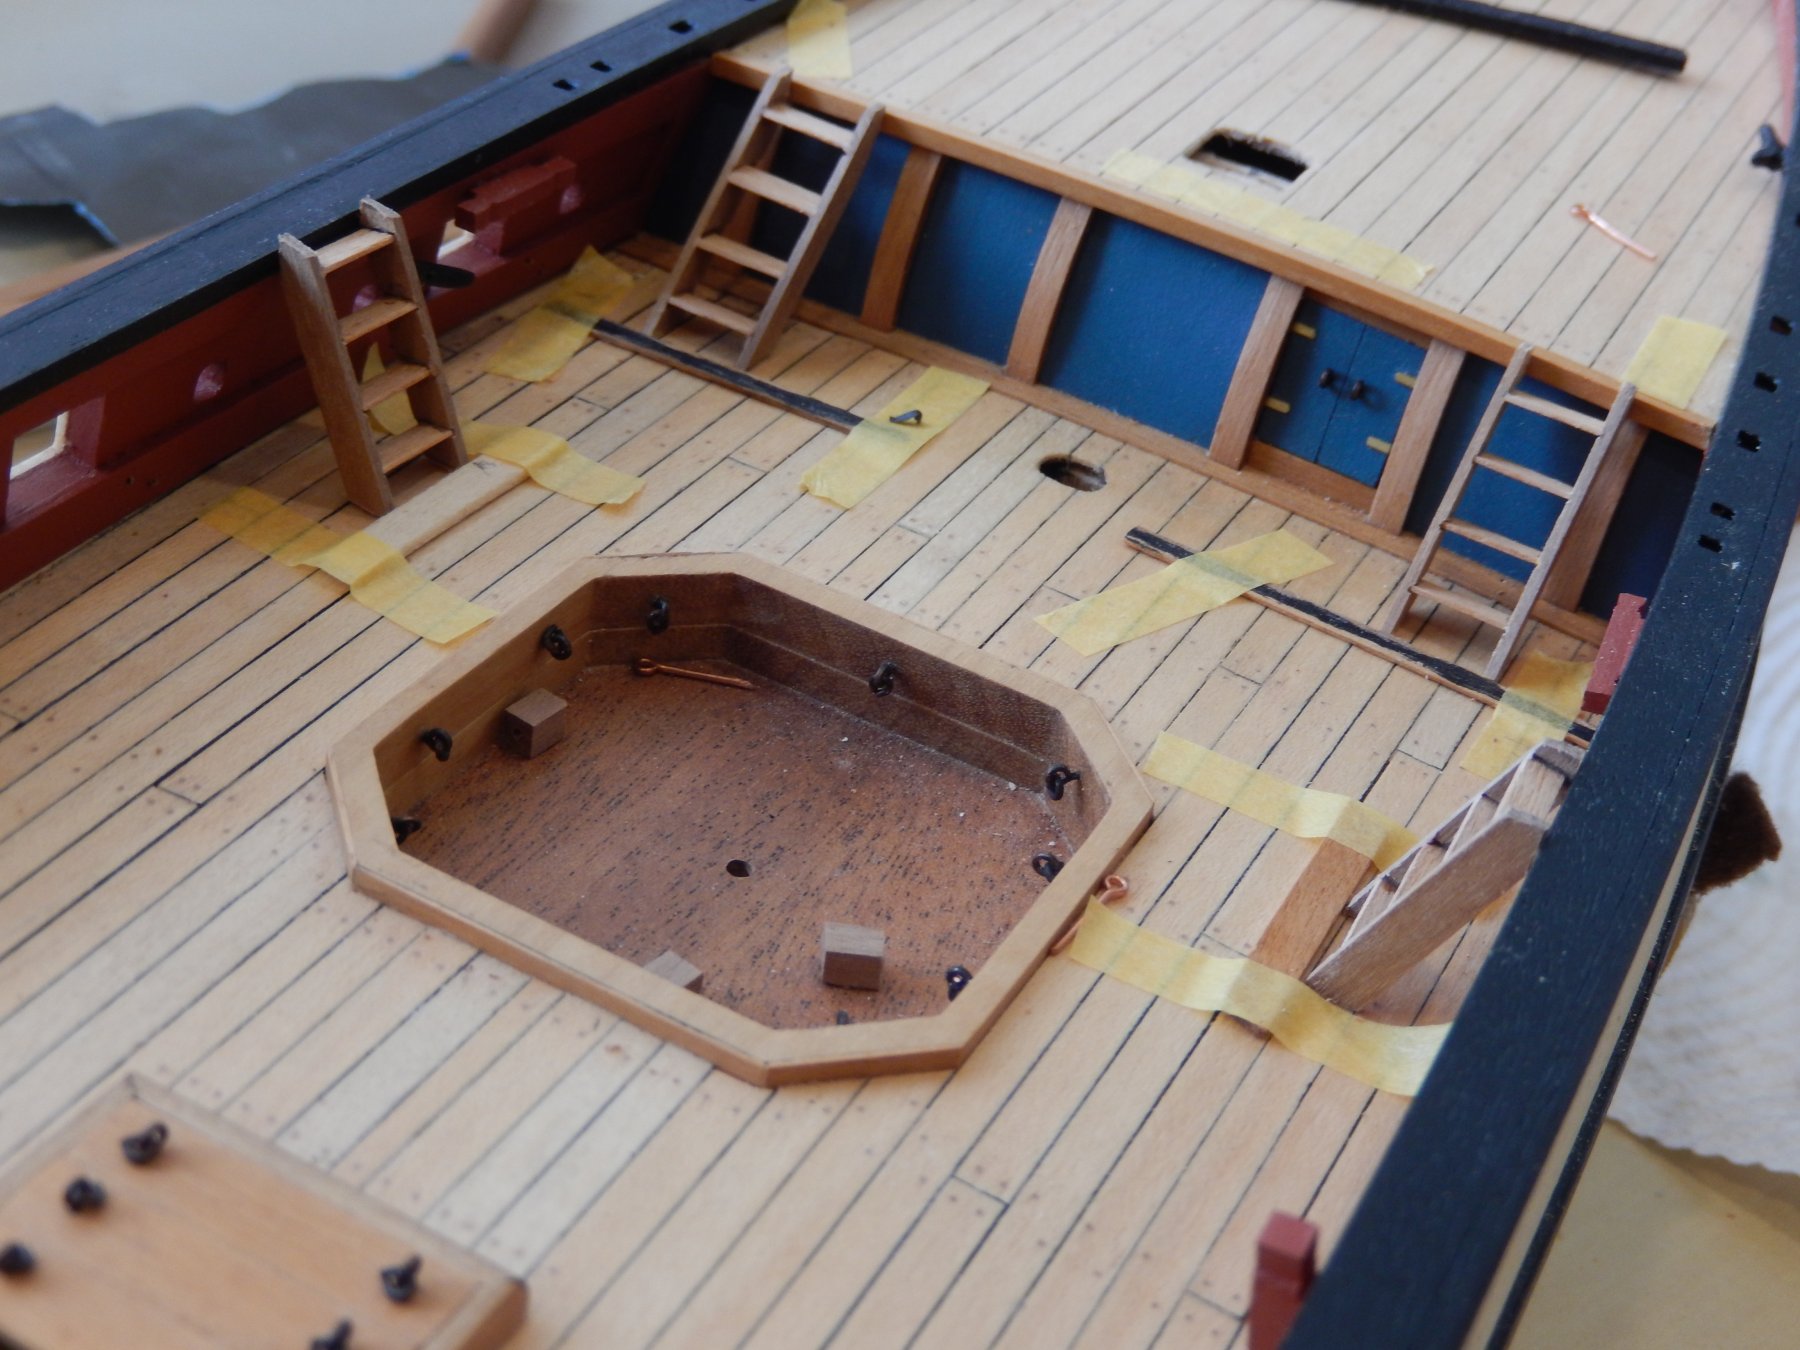
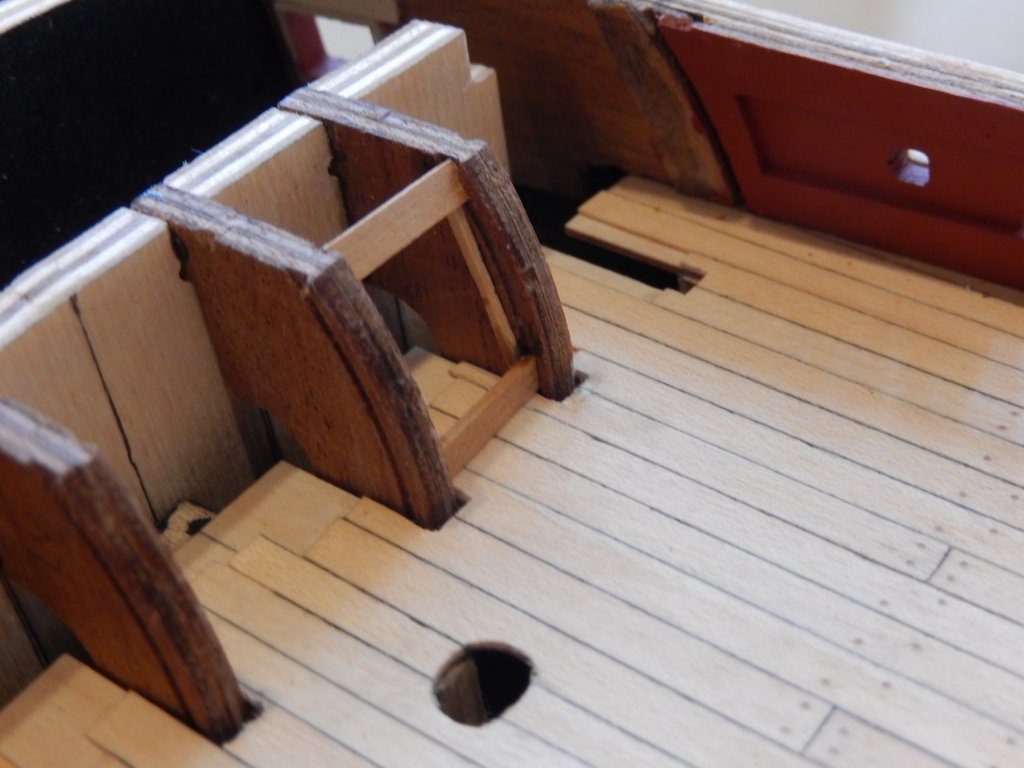
The bulkhead is finally complete - treenails and all. I can't think of anything that has given more trouble (at least in building model ships) most of which is self-inflicted. The obvious advice is to fit the curved supports before planking. The spaces provided for them in the plywood decking are far too long. As well I would advise using polystyrene for the panels. The plywood panels supplied did not want to bend to shape. The quarterdeck is now in progress.
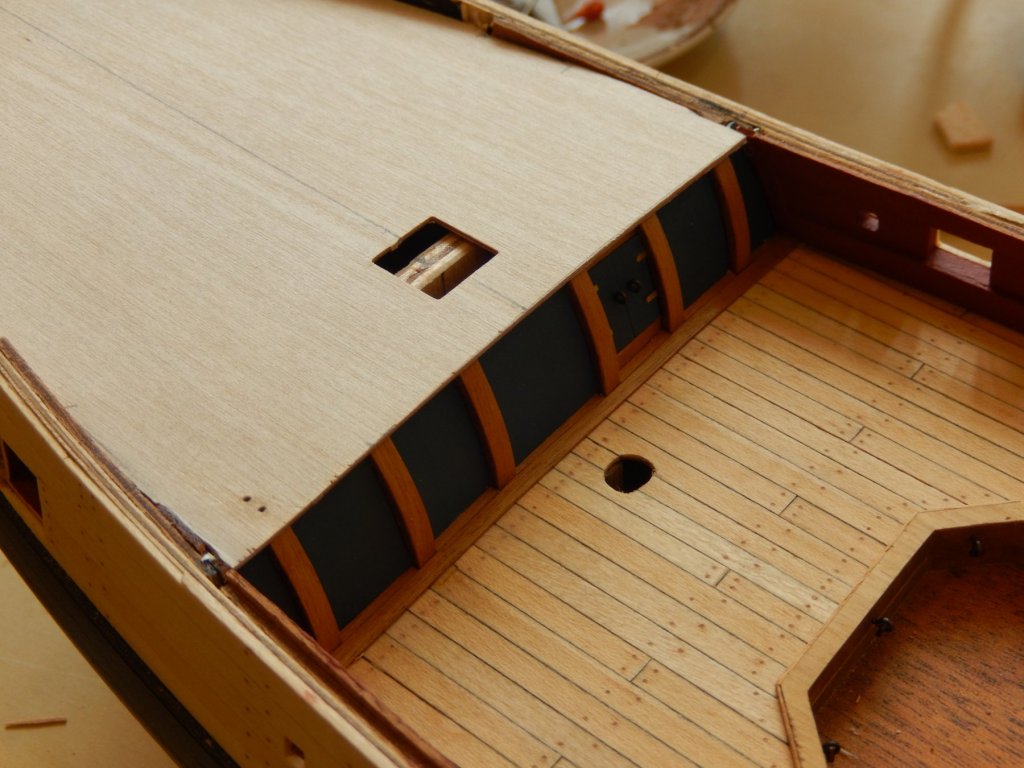
- 421 replies
-
- 9
-
-
- caldercraft
- granado
- (and 1 more)
-
Thanks for the encouragement Jason. The gaps (perhaps that's an overstatement) are between the pieces of timber between the supports and the strip in front which goes from balustrade to balustrade. It's more obvious than I would like and draws attention to the faults in the bulkhead. I think I can live with it. Peter: thanks too. I anticipated your suggestion regarding the treenails. It looked bare without them. They are now there.
-
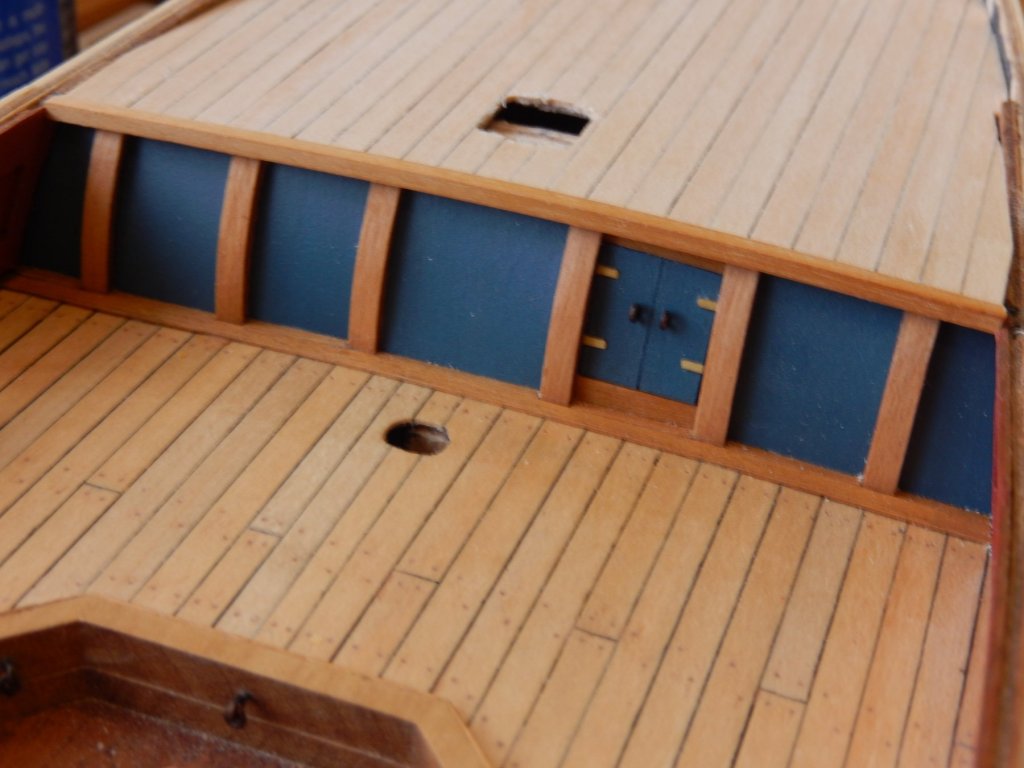
It has taken me quite some time to rectify my errors with the bulkhead. The fix is certainly not perfect, though I am reasonably pleased with the result and the doors have come out well. I would not care to do the whole thing again. I am hoping that eventually there will be so much stuff near it on the deck (ladders, pumps etc.) that any problems won't be noticed. In the next two photos a piece of wood strip has been draped across he bulkhead to give an idea of how things will eventually look. This shows the small gaps between the strips between the bulkhead supports and the strip covering the gaps in the deck. I may try to fill them. The blue shown here is closer to the actual colour.
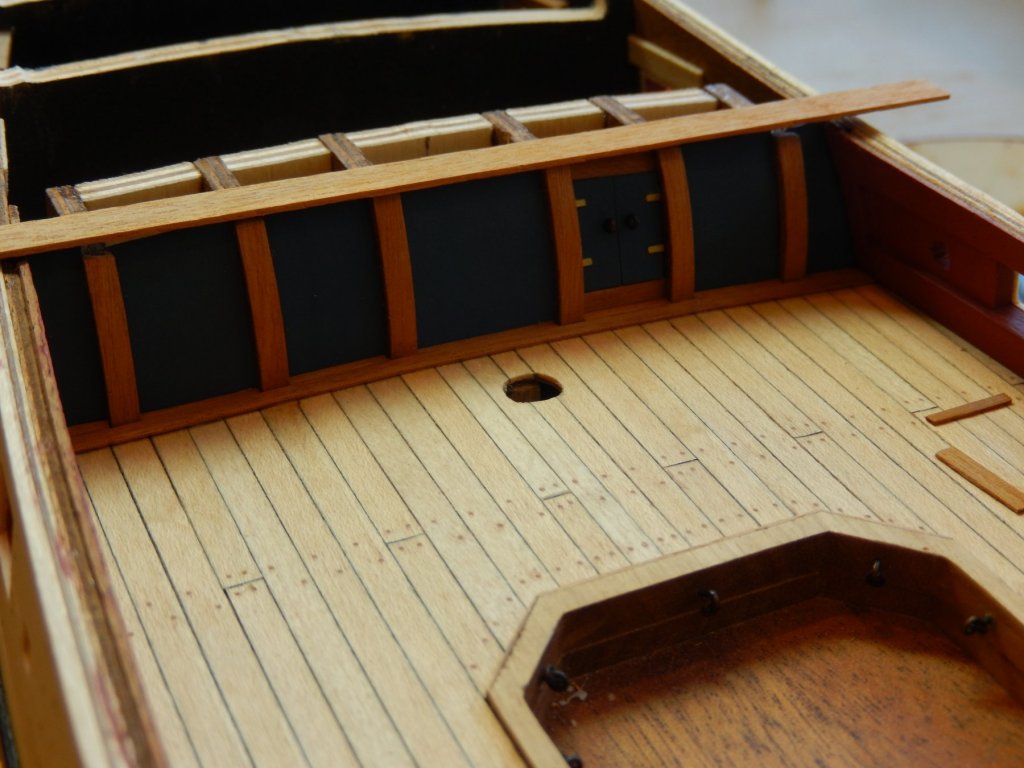
- 421 replies
-
- 12
-
-
- caldercraft
- granado
- (and 1 more)
-
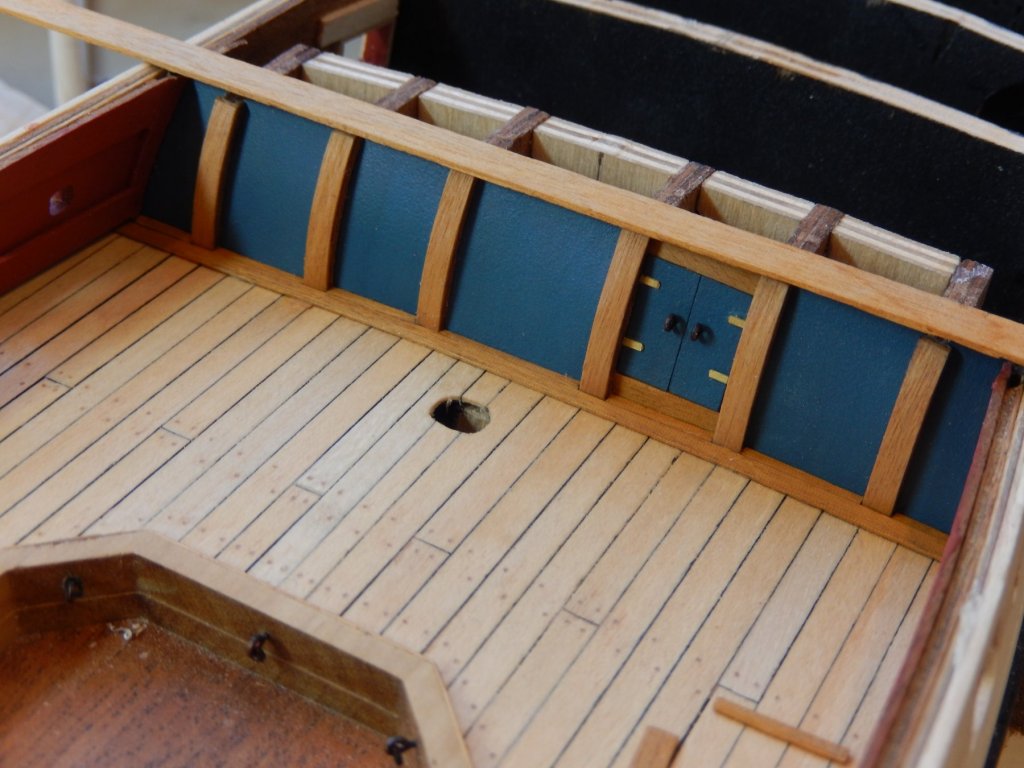
Thanks Sam. I've certainly decided not to use the decals. On the colour - the photo exaggerates the blue. In fact it is a far more restrained grey/blue.
-
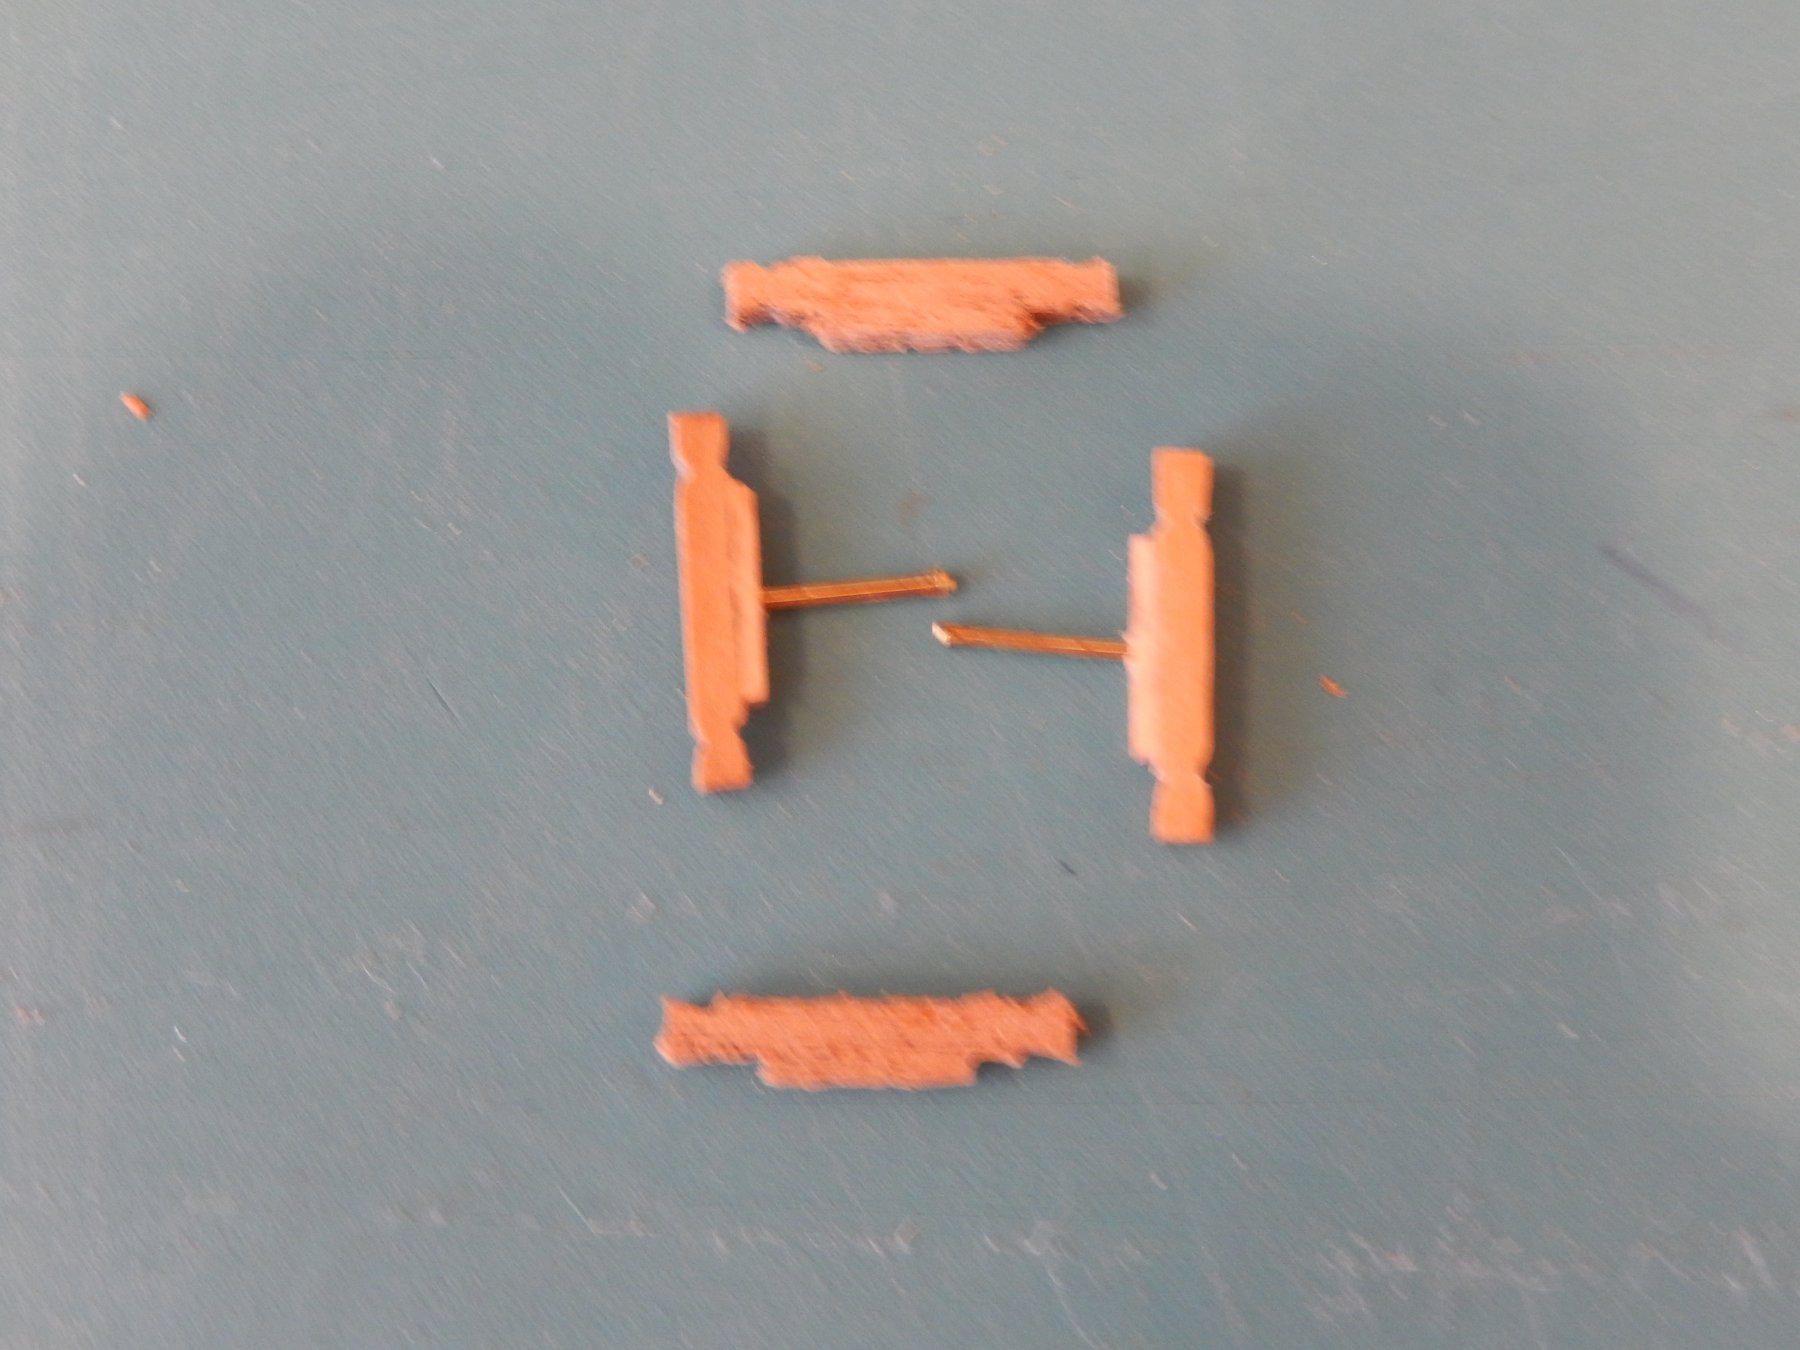
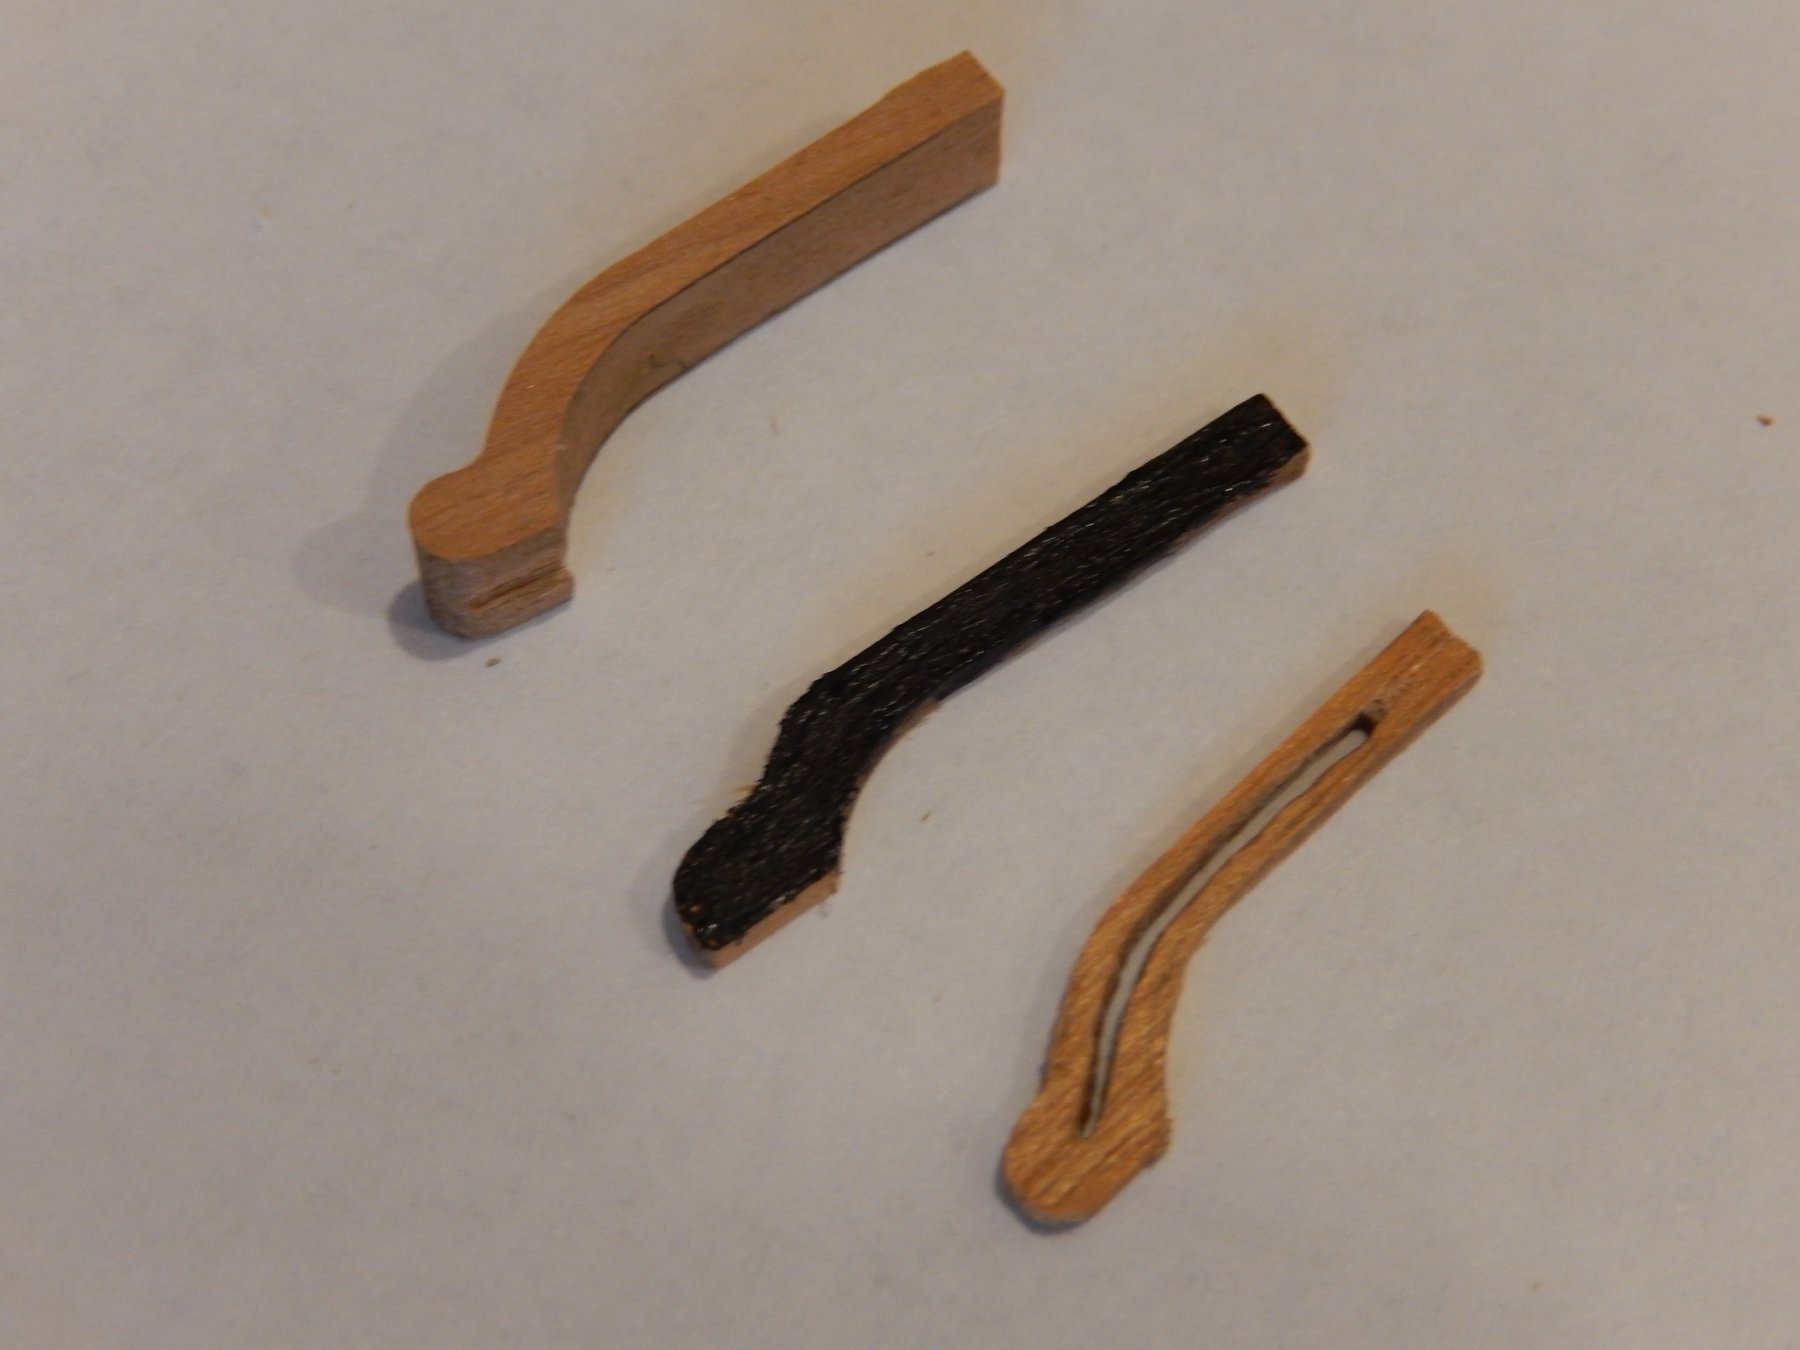
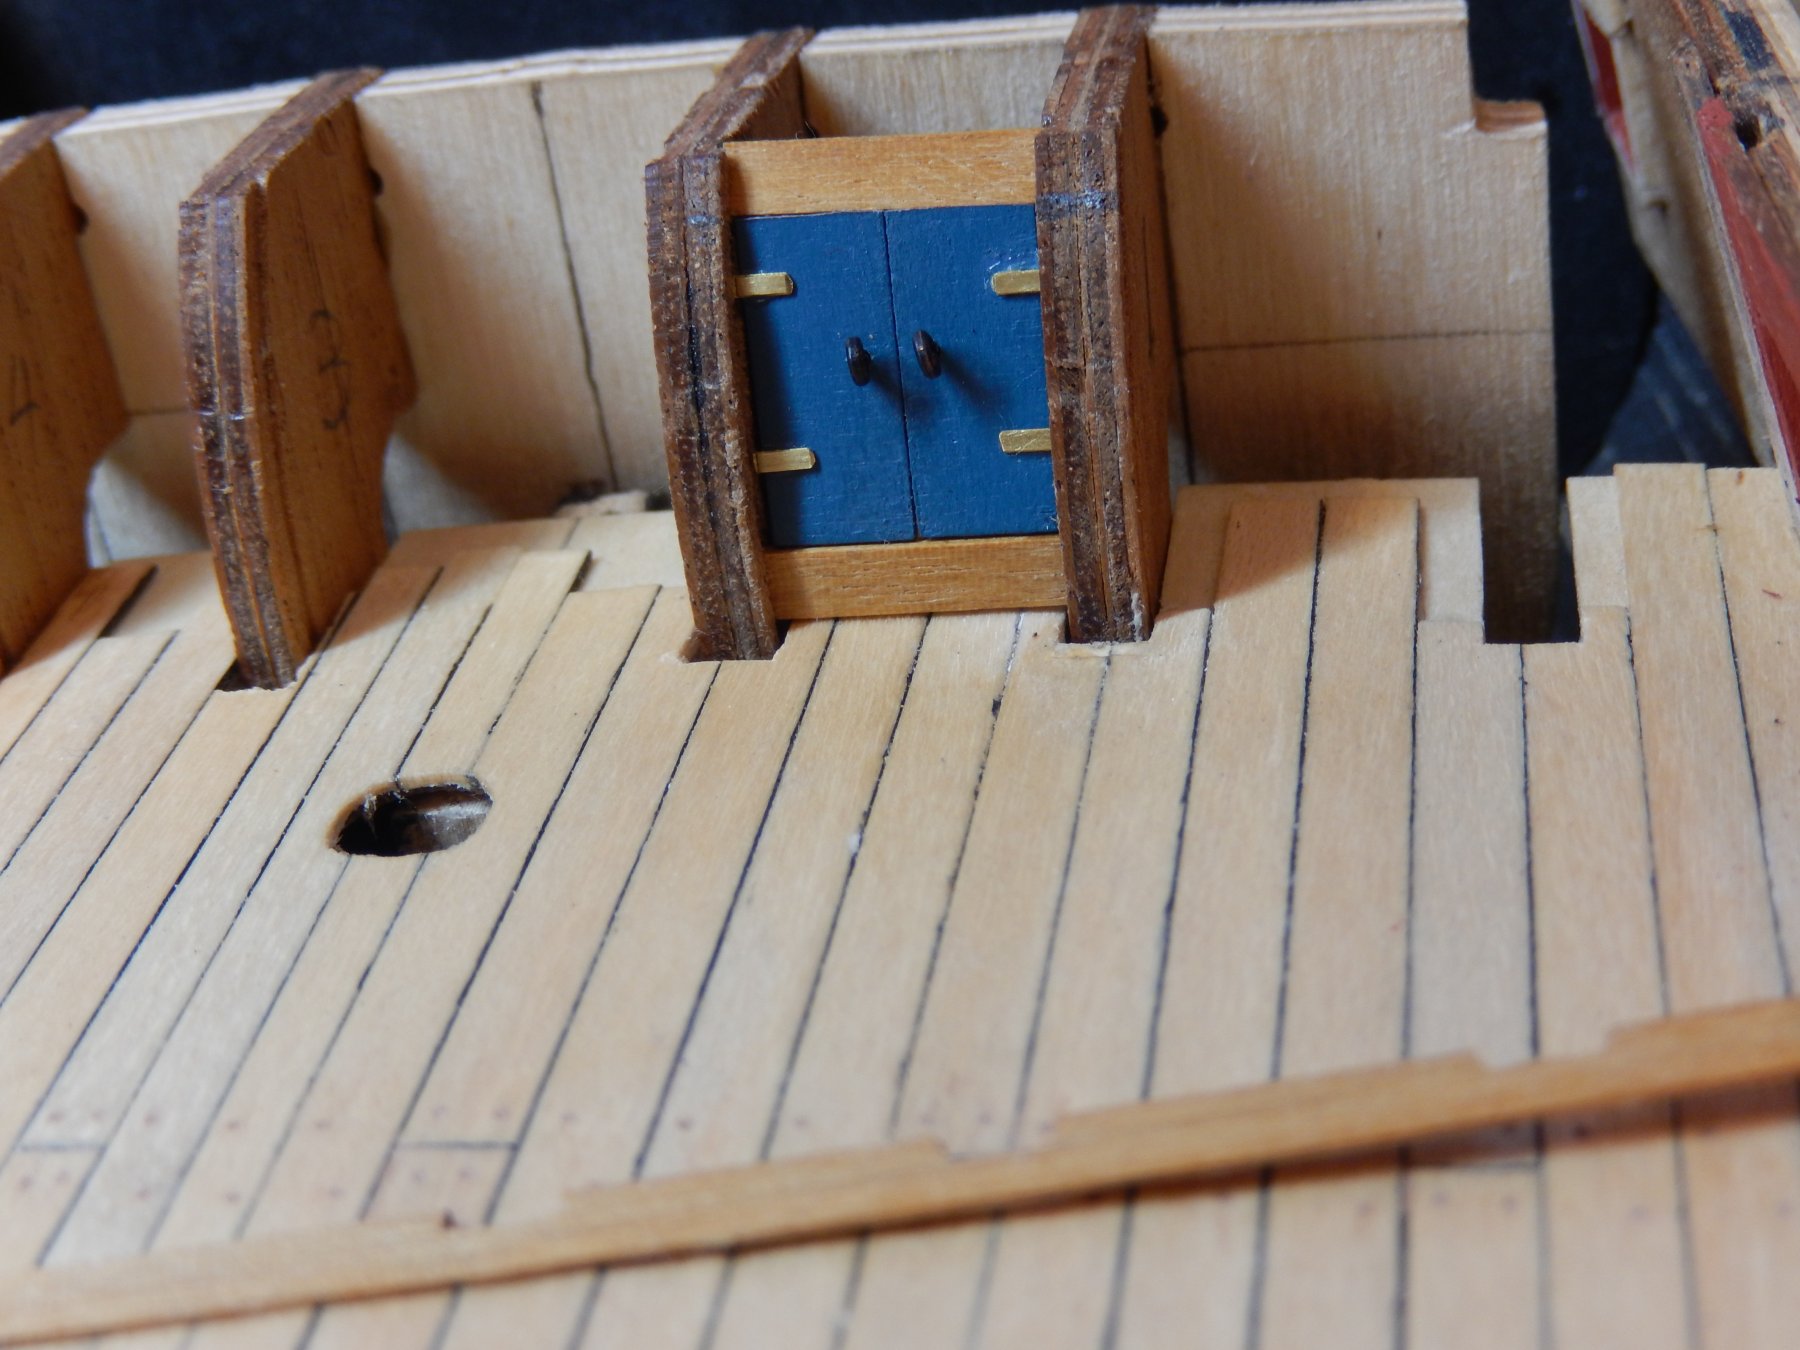
Here is a flat set of doors. I'm not sure if it was worth the trouble .... It needs some touching up and the 'handles' are dry-fitted at this stage. A coat of polyurethane is to come.


- 421 replies
-
- 5
-
-
- caldercraft
- granado
- (and 1 more)
-
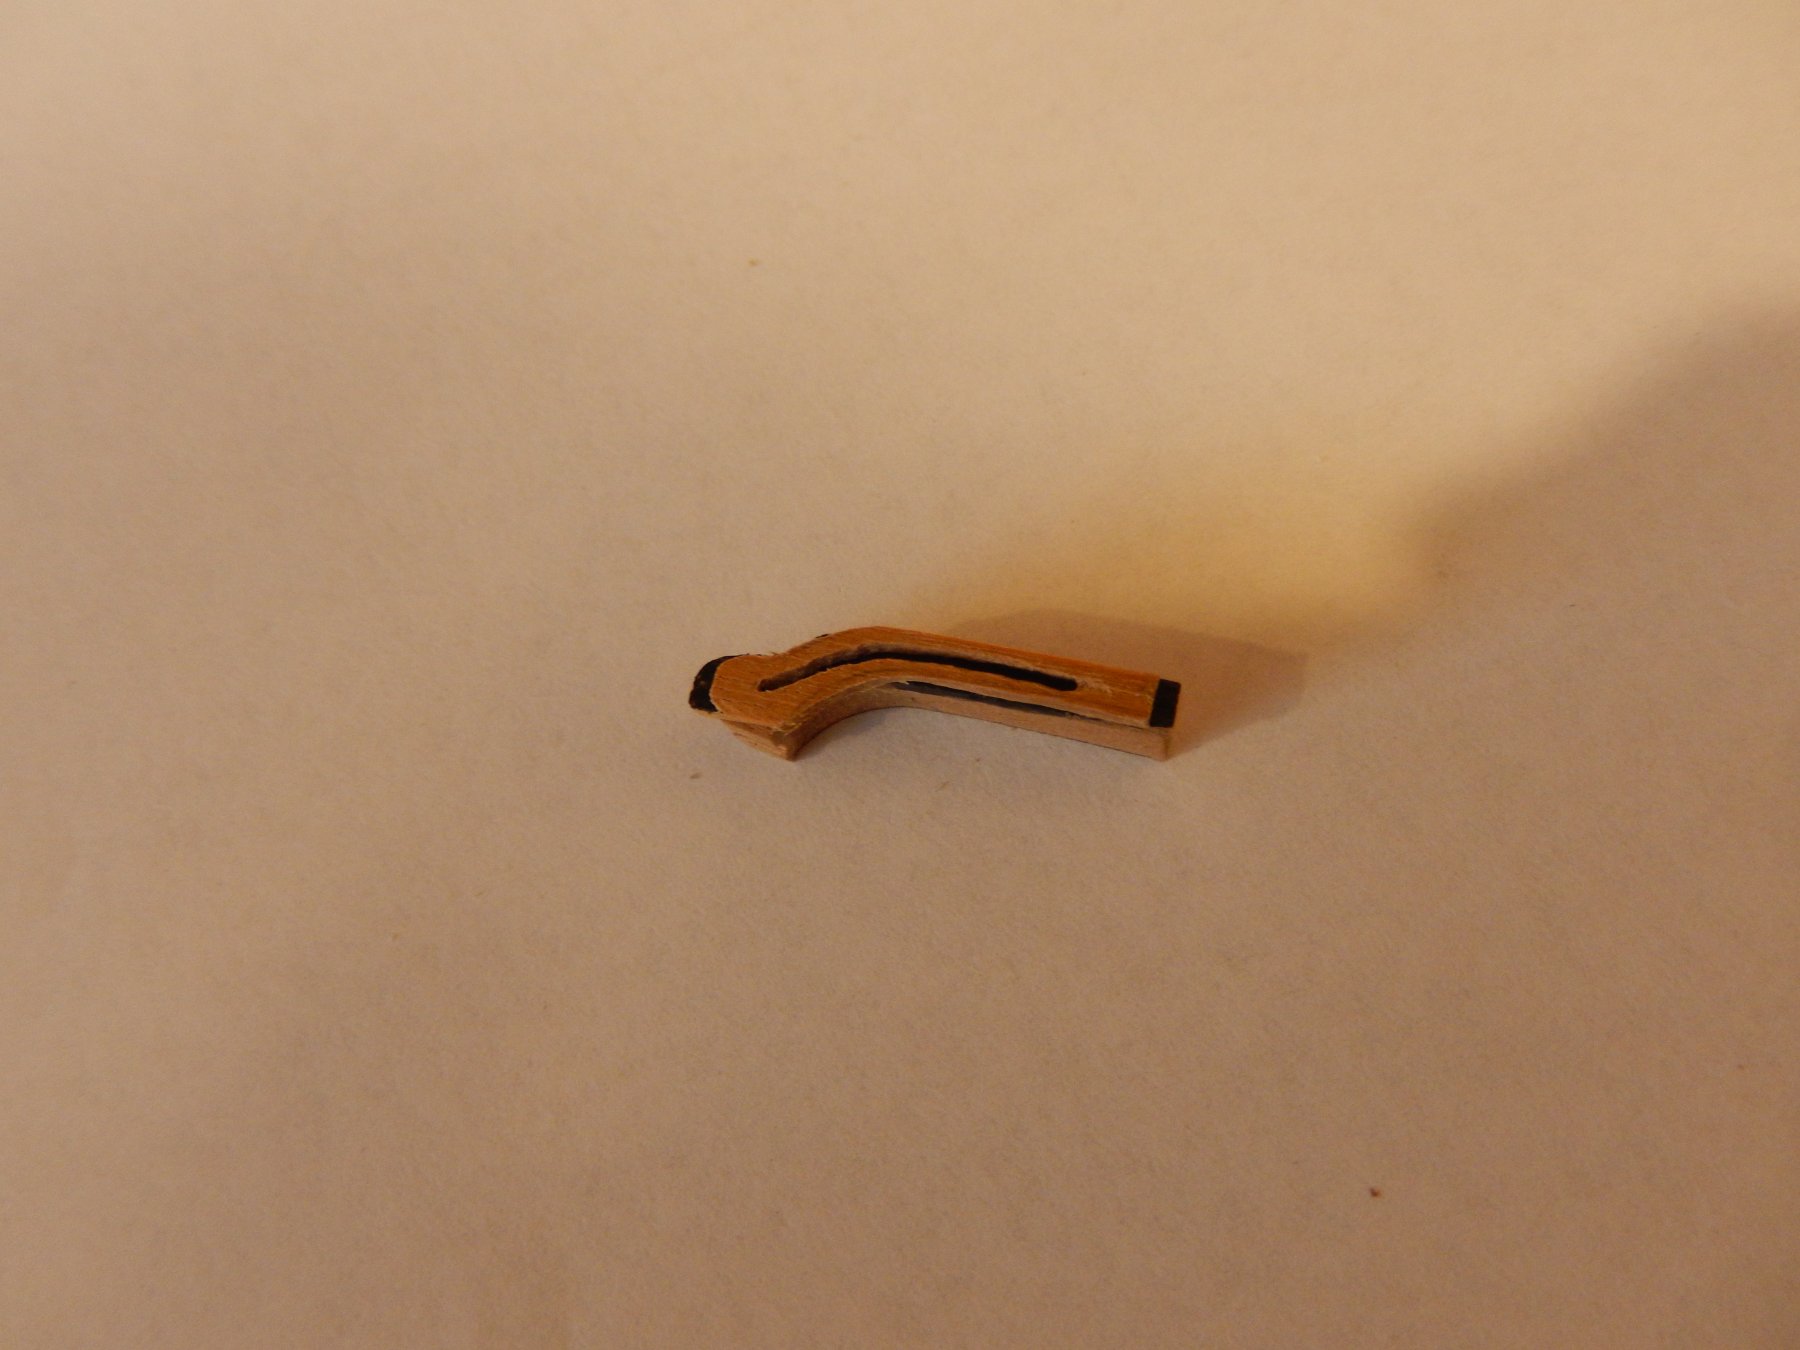
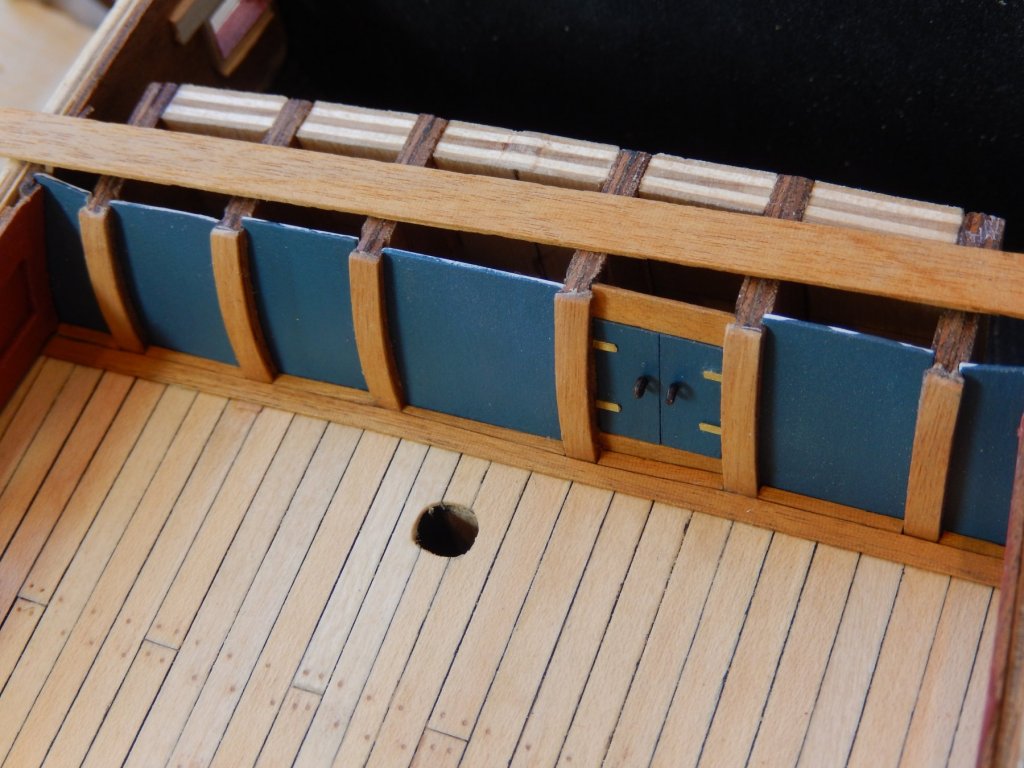
Thanks Jason. The bulkhead has become a bit of a nightmare - and it's still not finished. Alan: I have had a very close look at the photos in the Anatomy book. Sure enough on p.35 the doors are flat. I am in the process of making a couple so we'll see how it turns out. Thanks for pointing it out. It wouldn't have occurred to me. All the best Bob