HOLIDAY DONATION DRIVE - SUPPORT MSW - DO YOUR PART TO KEEP THIS GREAT FORUM GOING!
×


RMC
-
Posts
933 -
Joined
-
Last visited
Content Type
Profiles
Forums
Gallery
Events
Everything posted by RMC
-
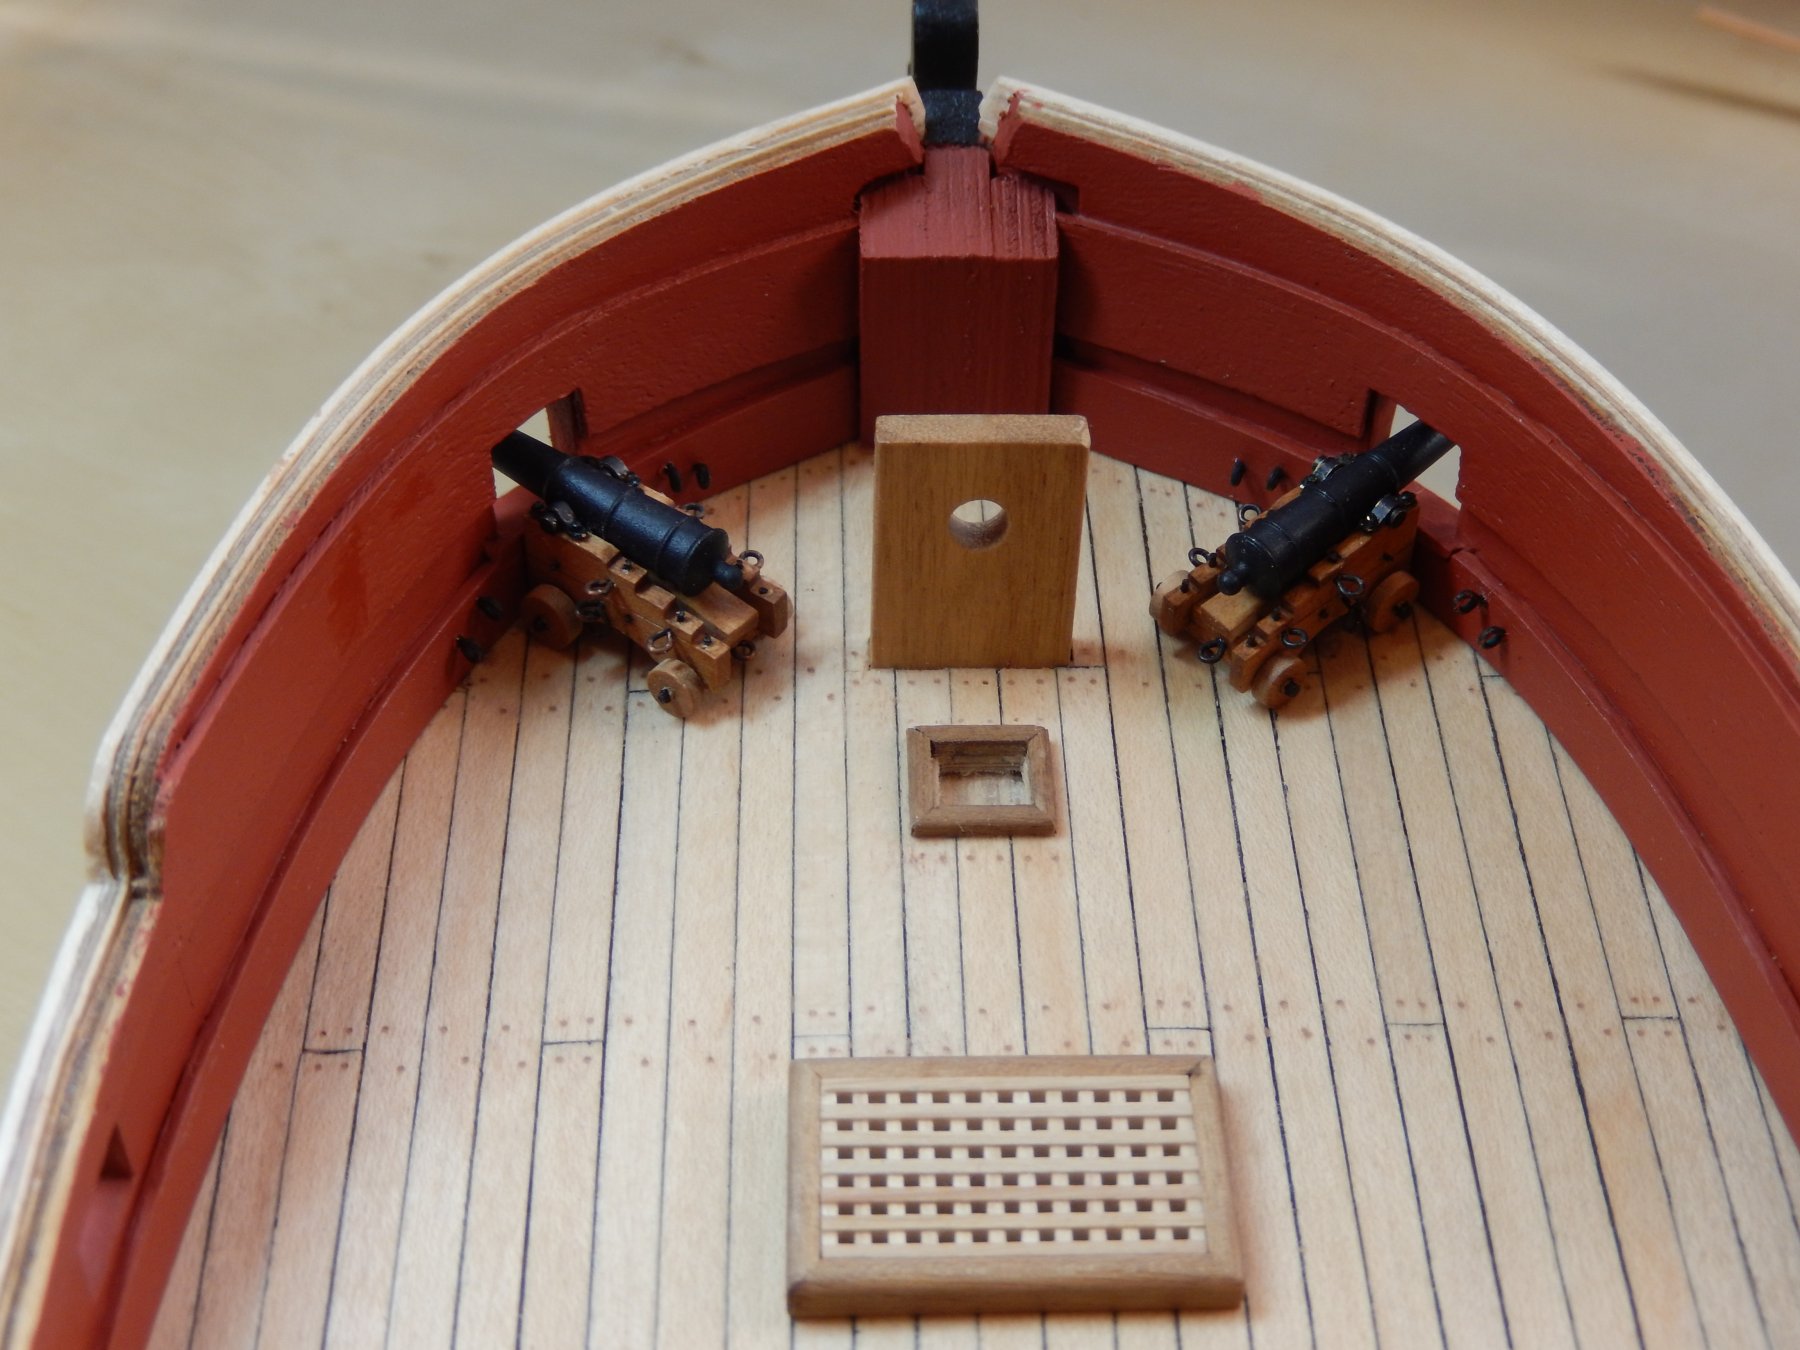
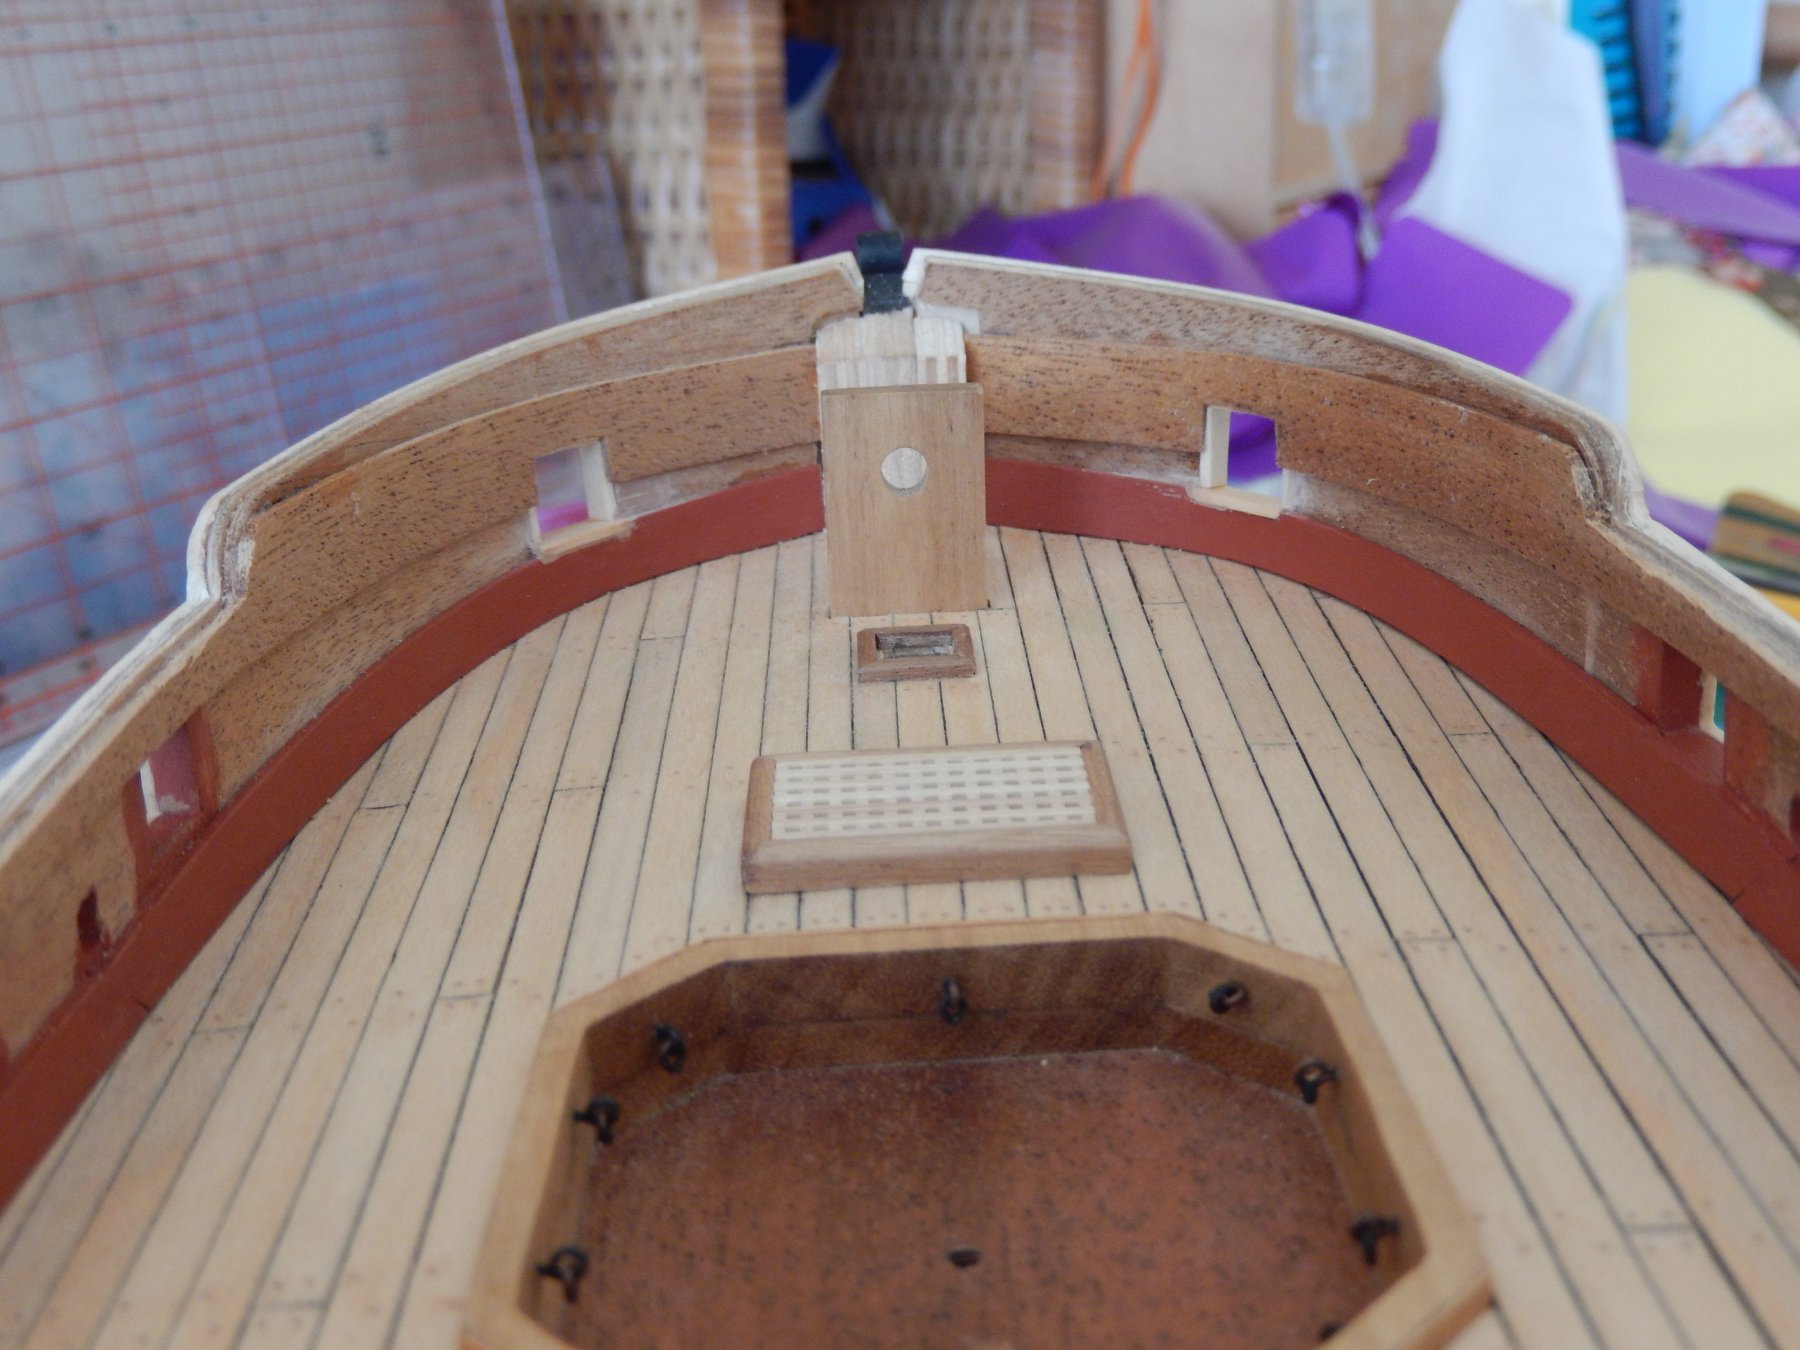
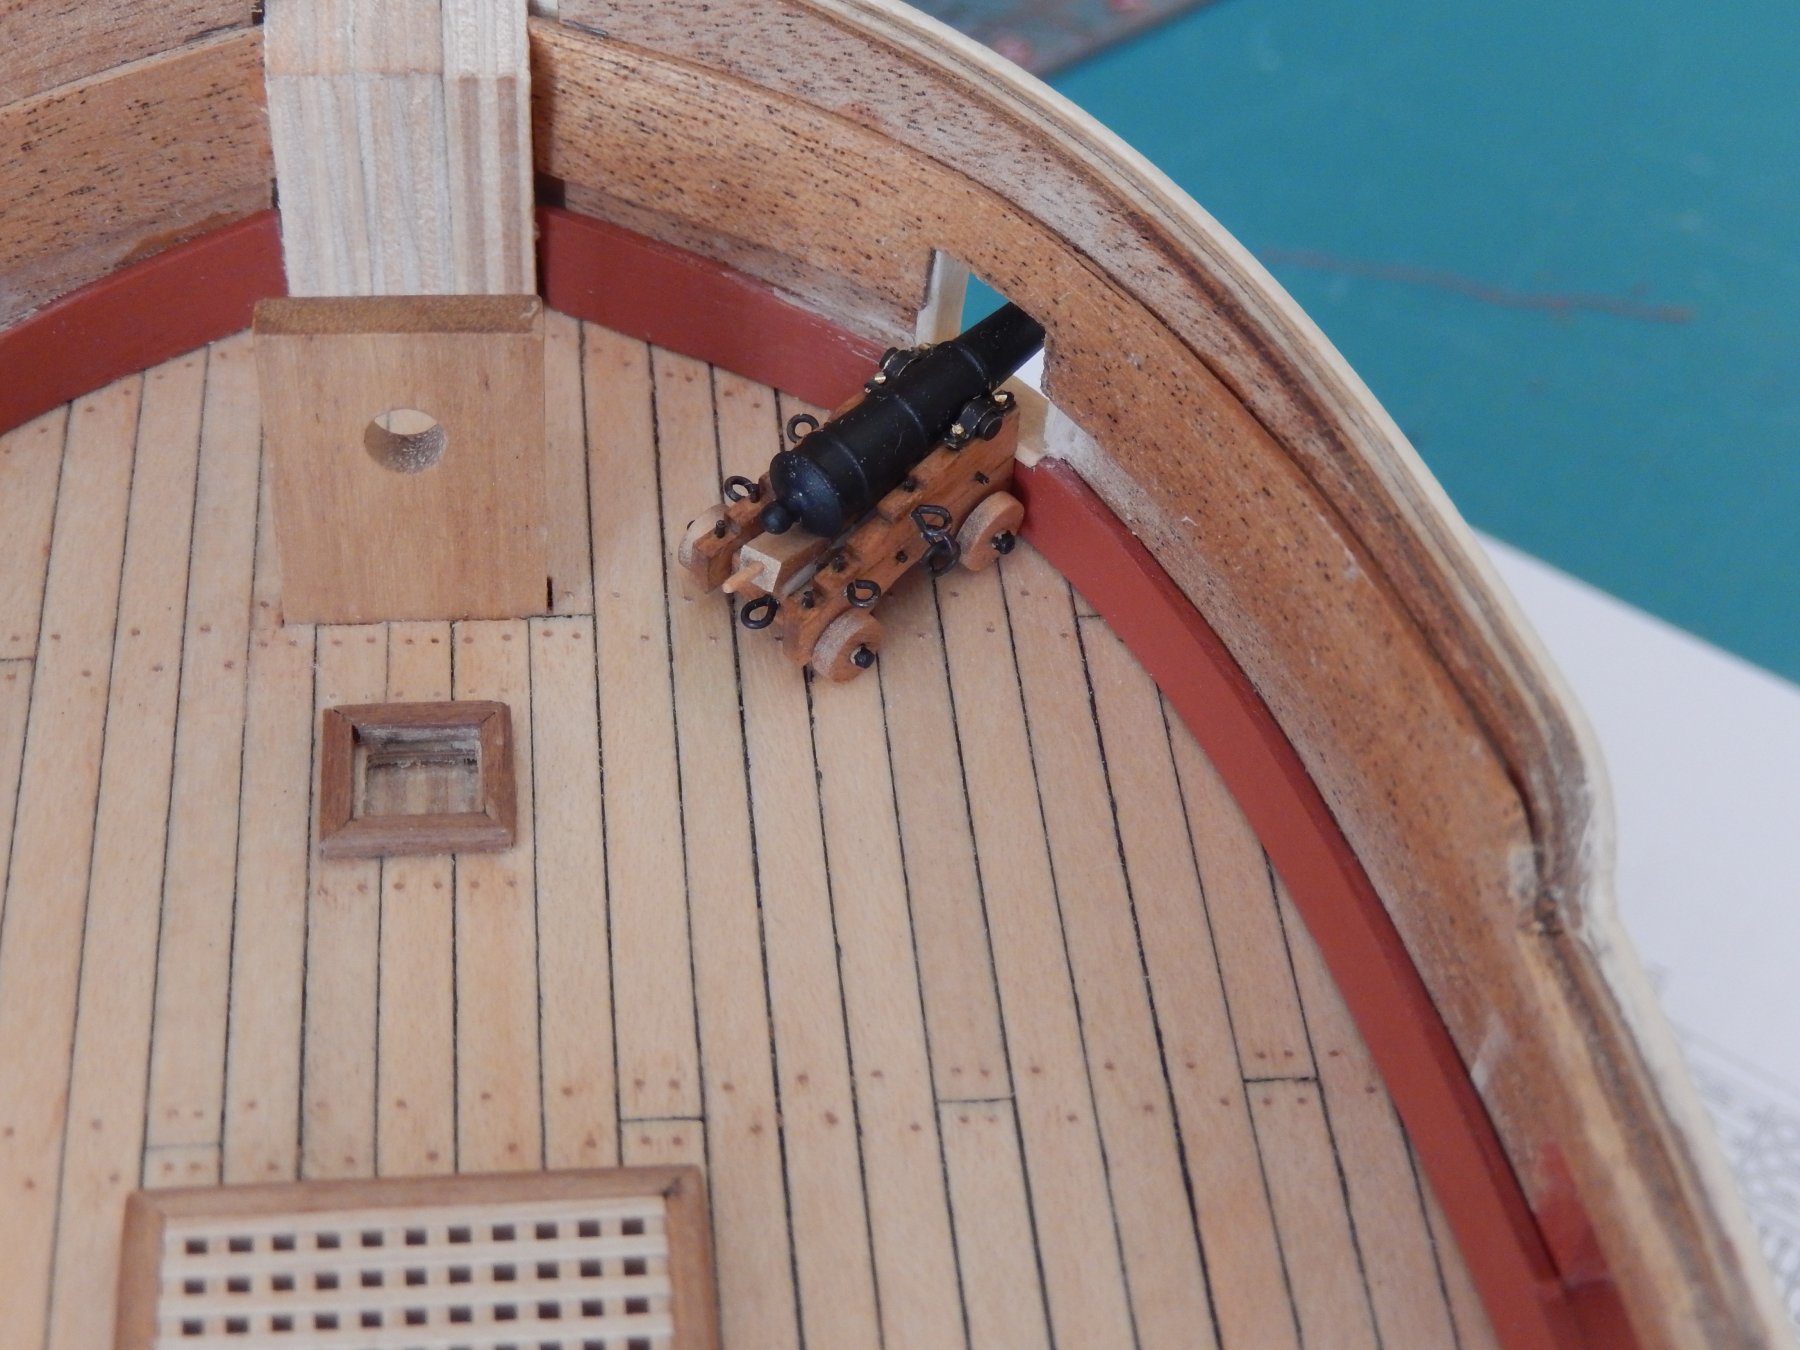
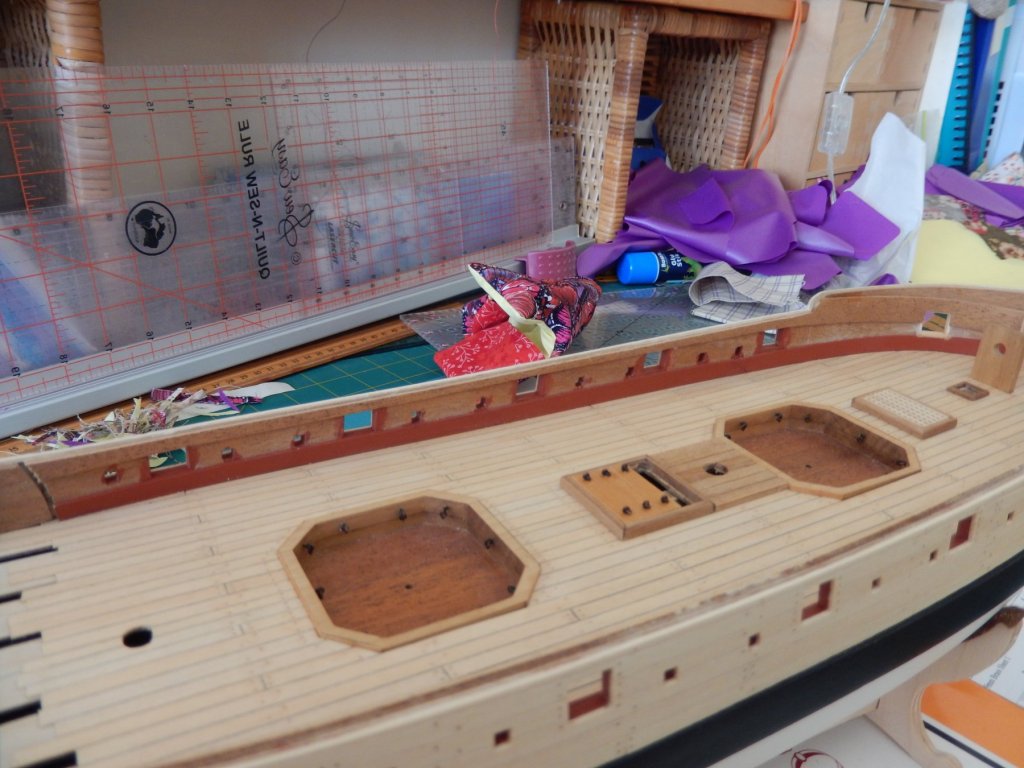
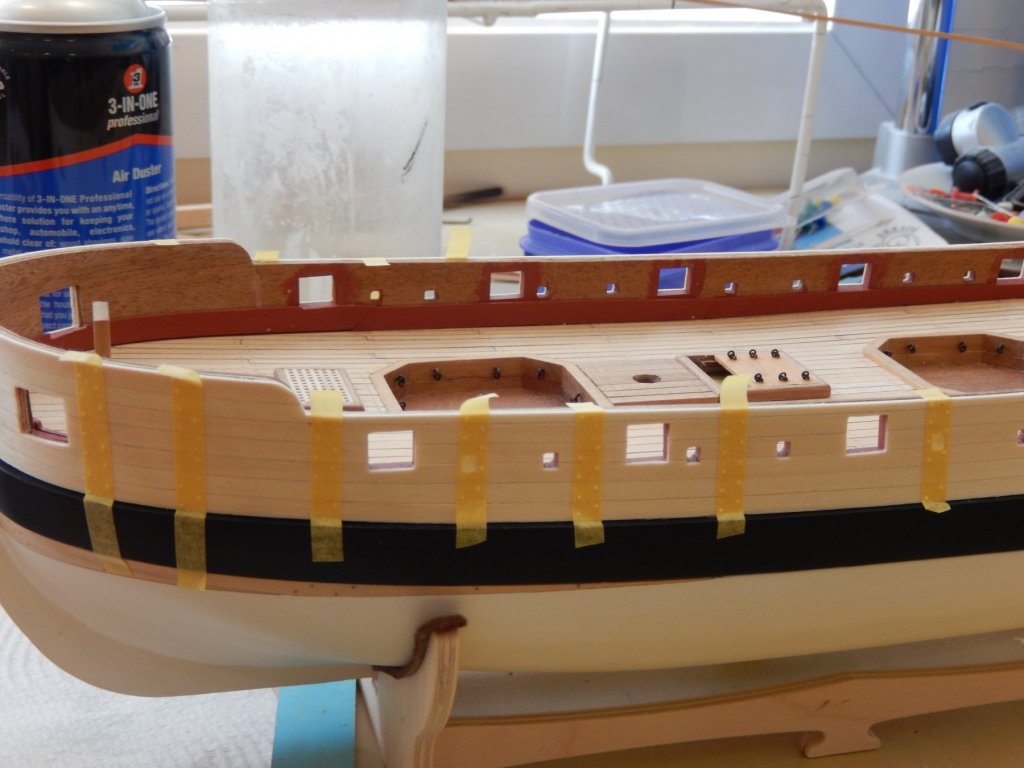
The third coat of paint and two coats of polyurethane have been applied and it has certainly improved the finish. The eyelets for the guns' rigging have been installed and once the rigging is done, the foredeck may be made up. There first photo shows the eyelets and the second, an idea of how the guns will look.


- 421 replies
-
- 12
-

-
- caldercraft
- granado
- (and 1 more)
-
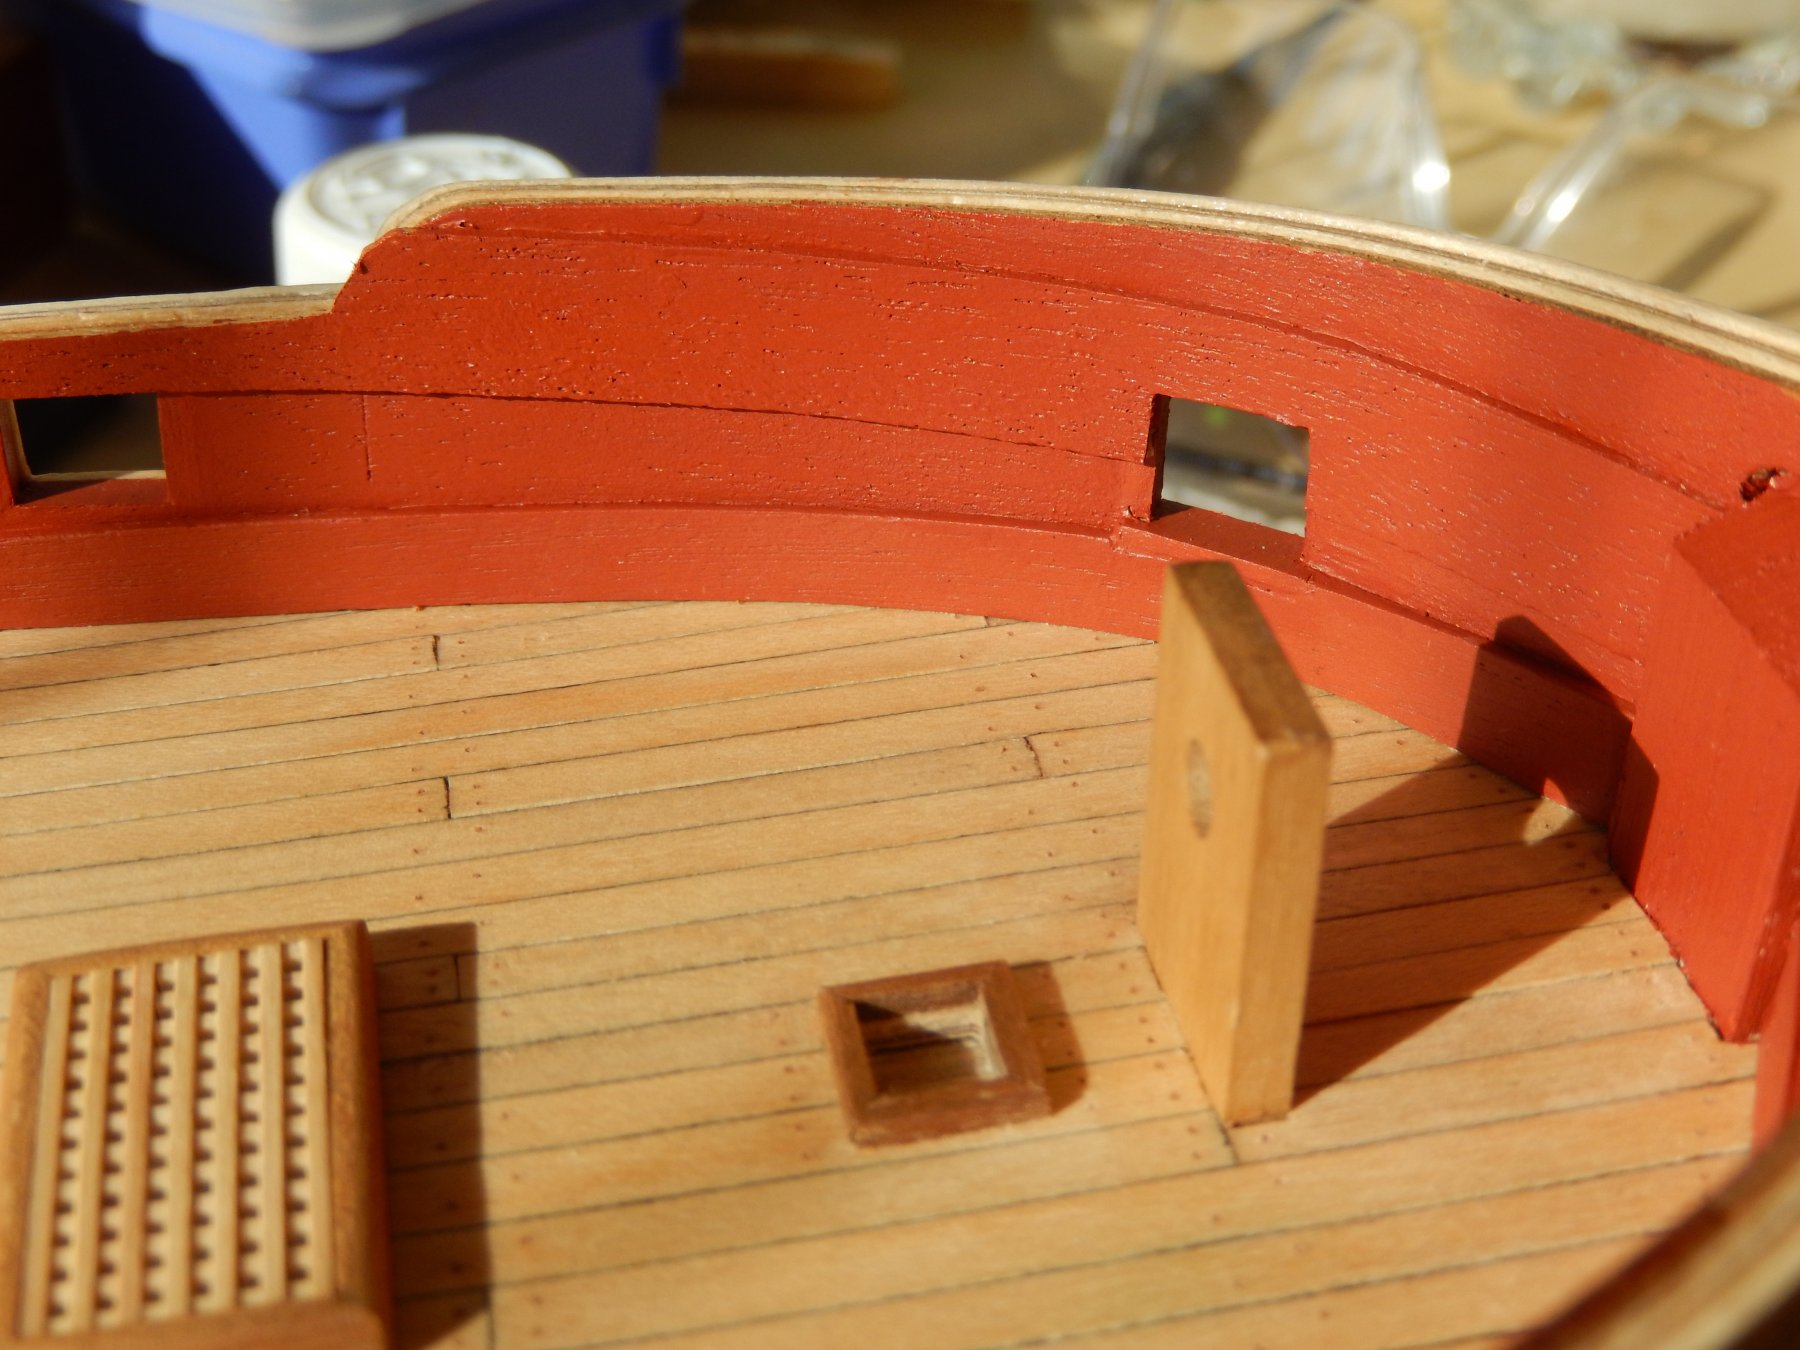
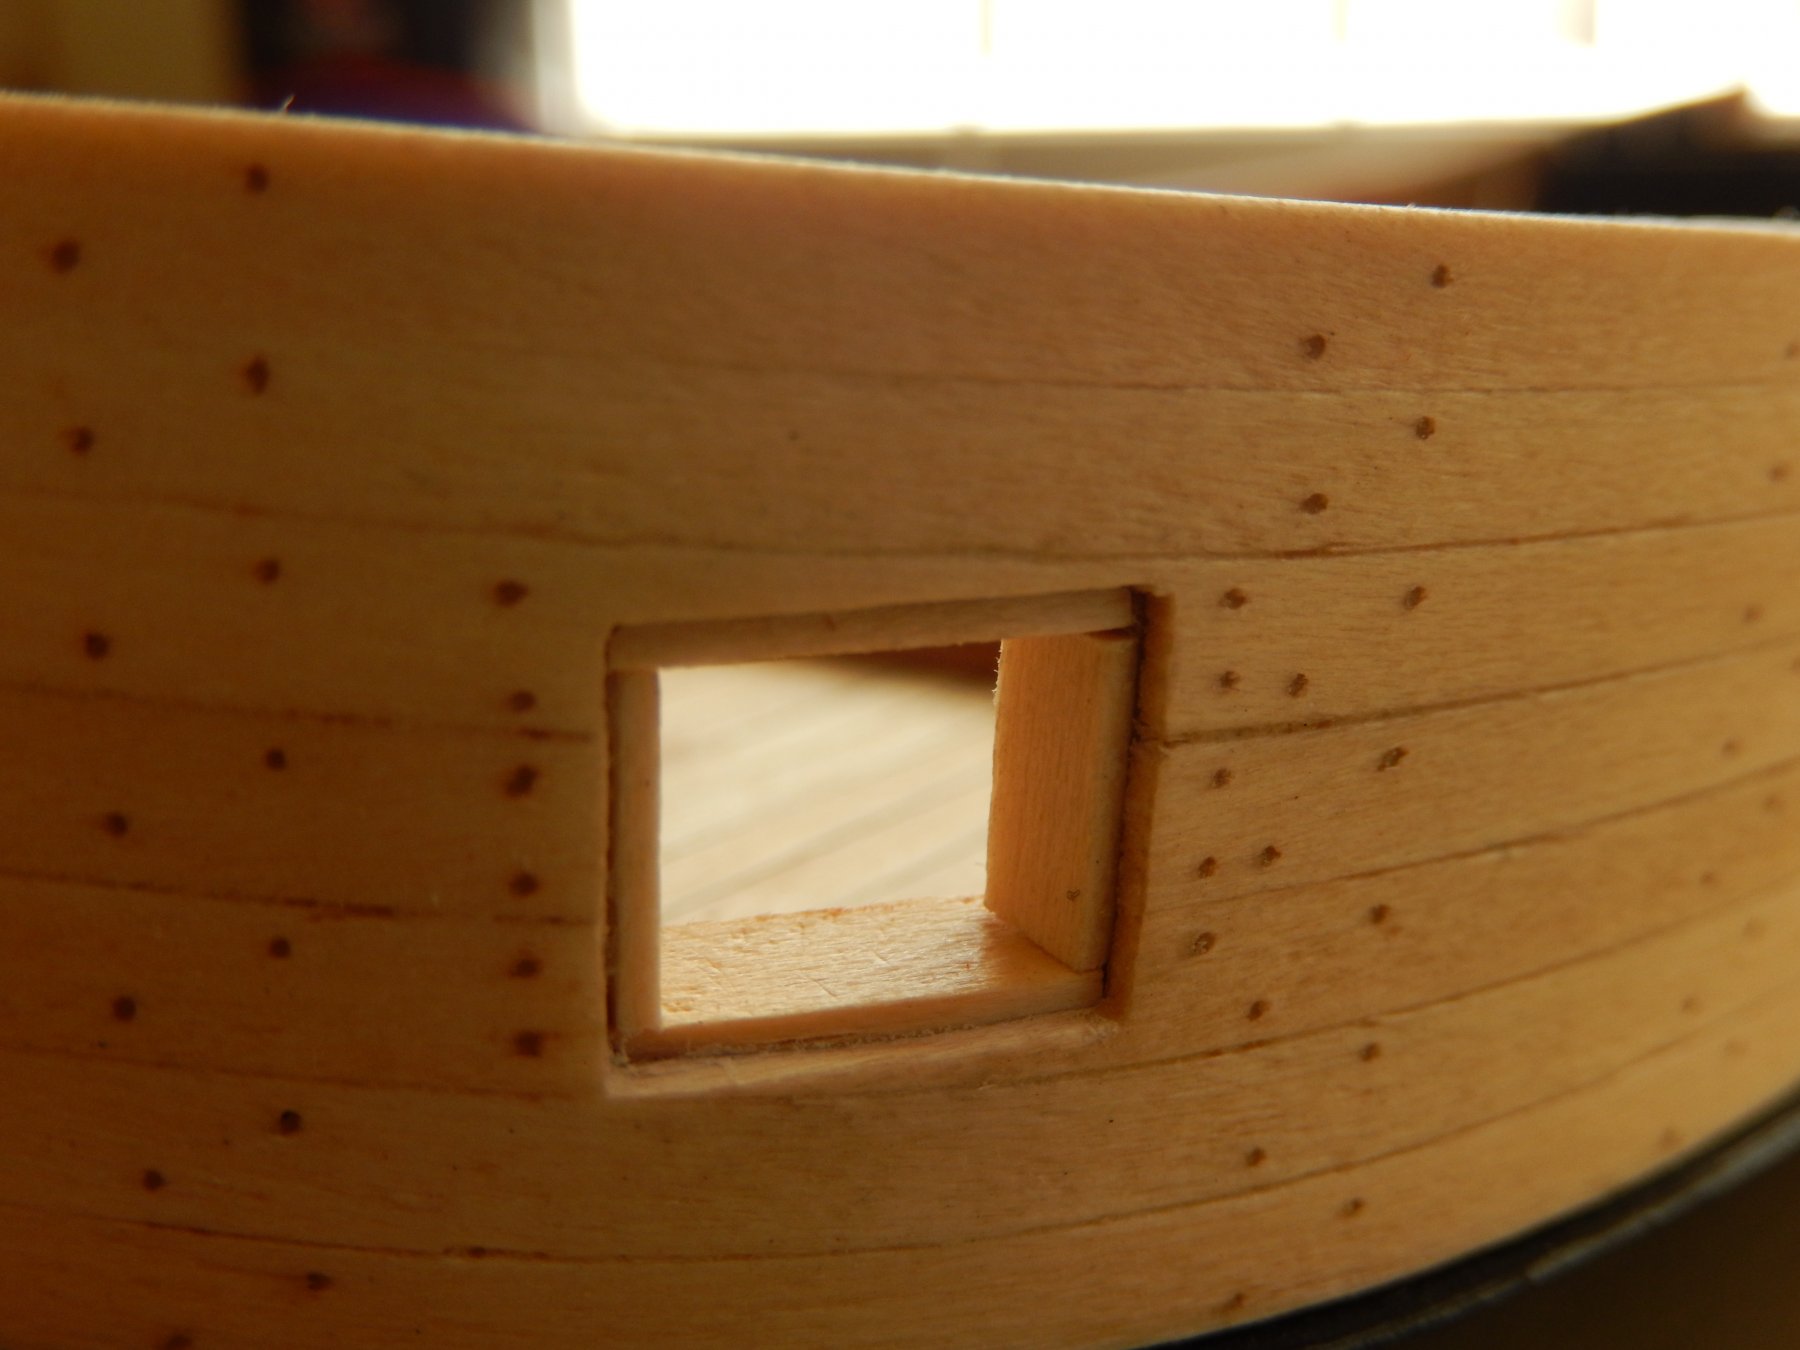
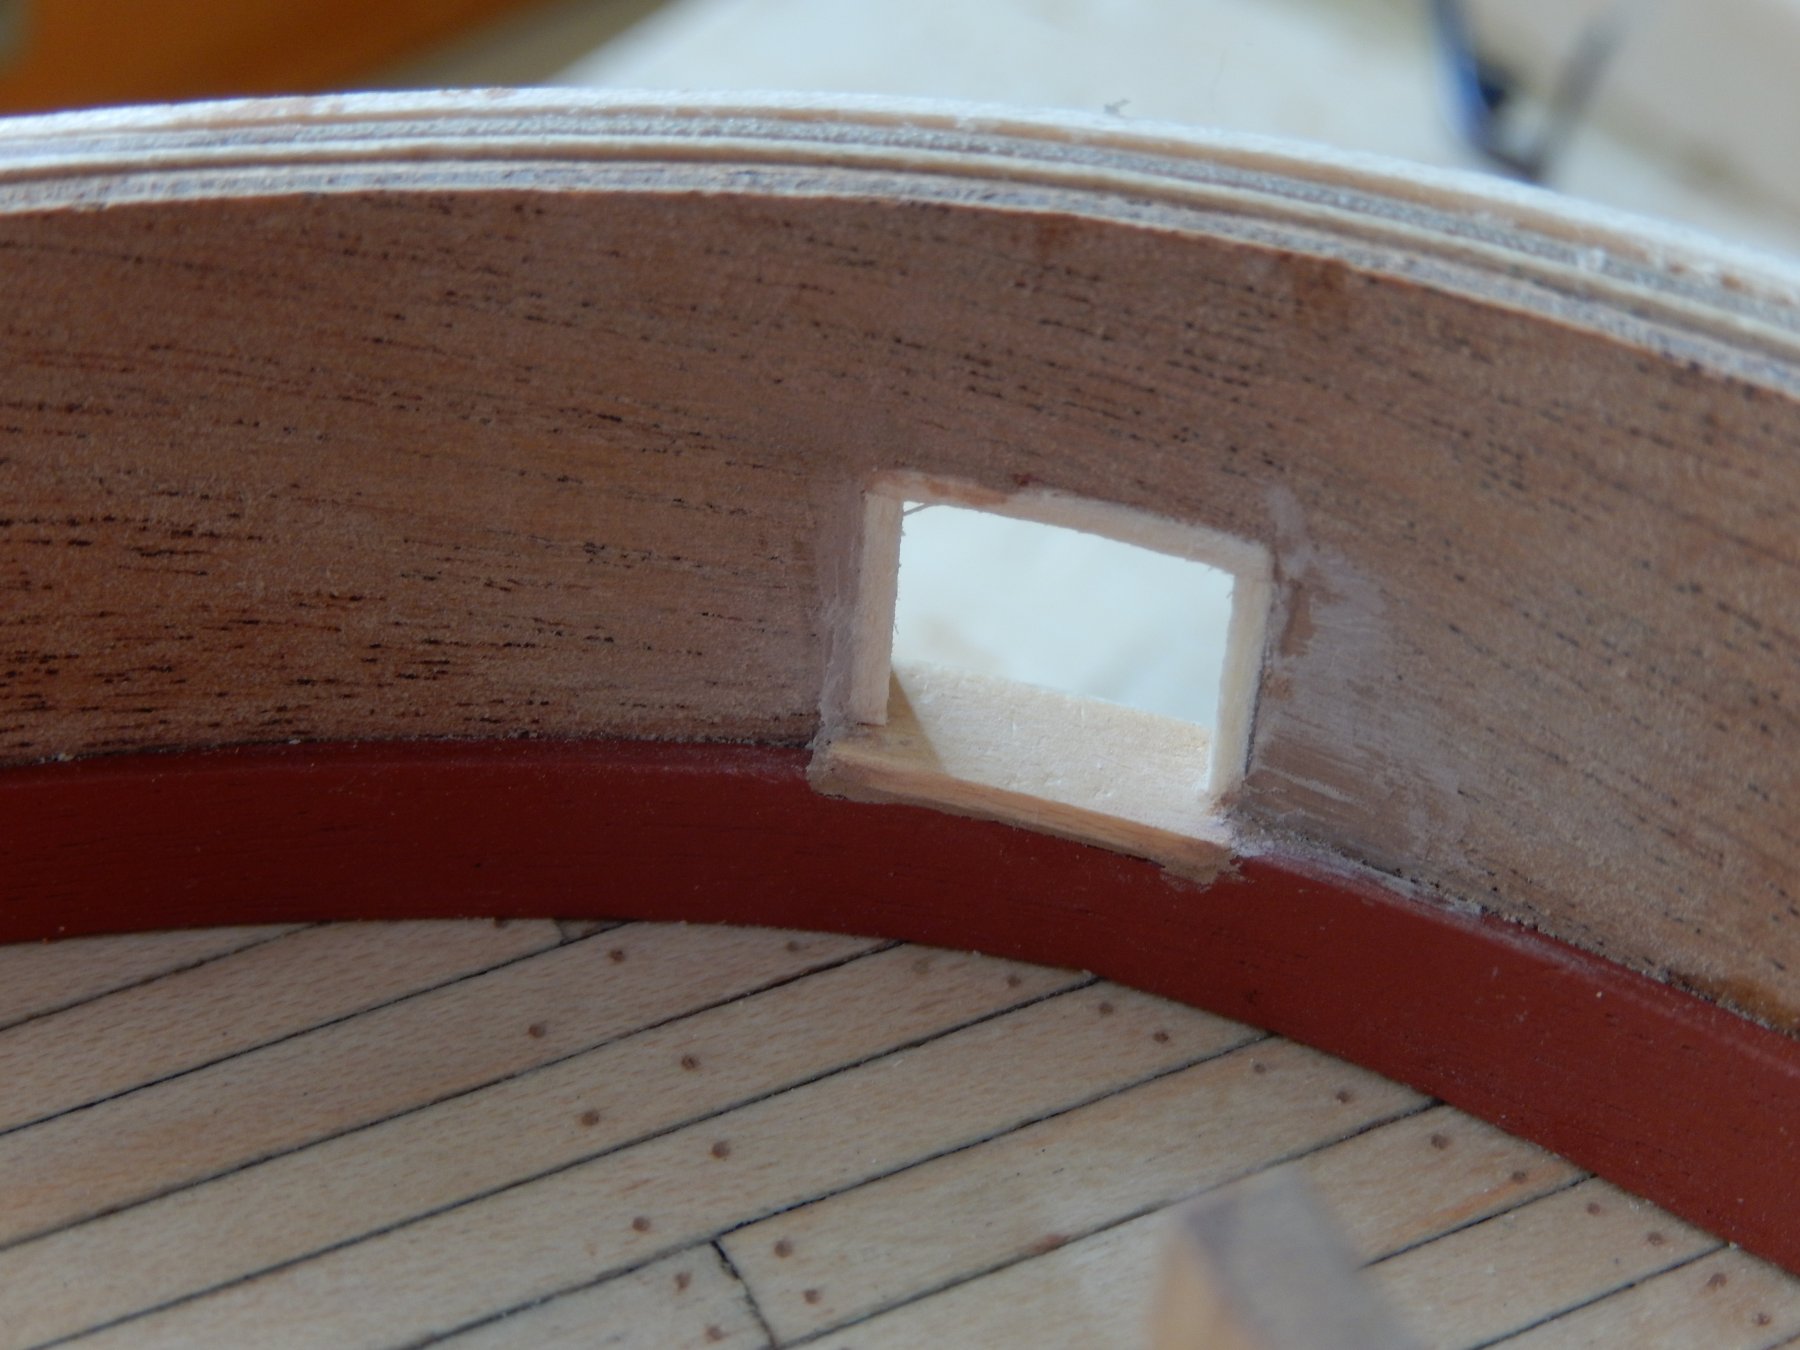
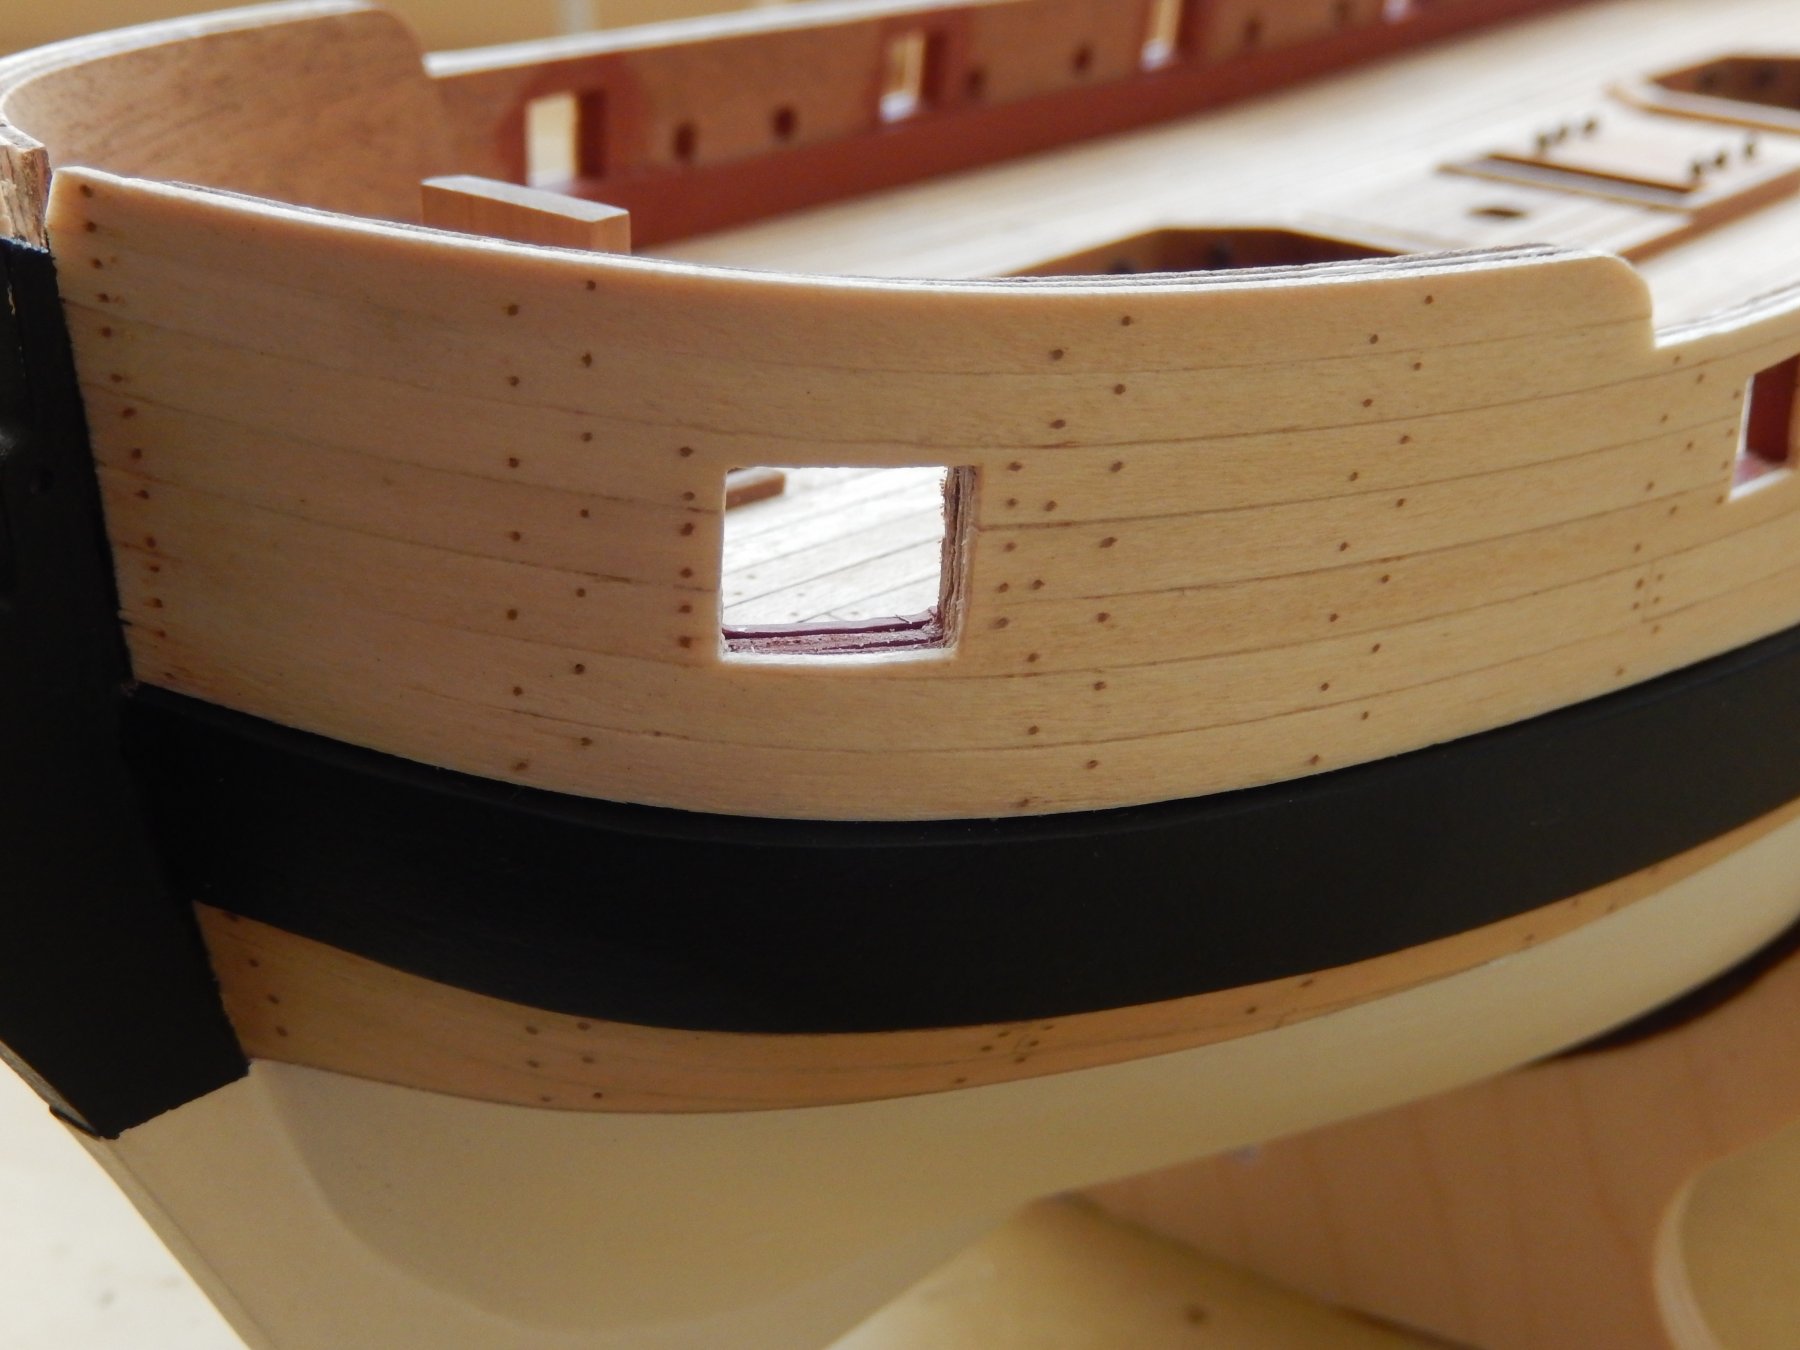
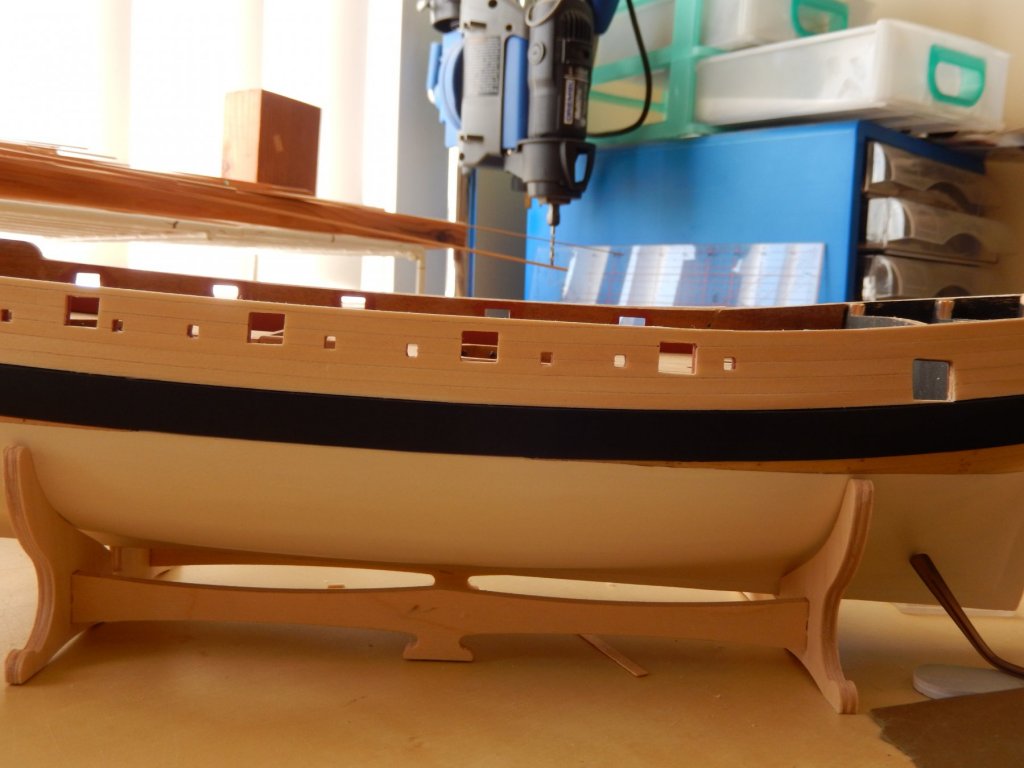
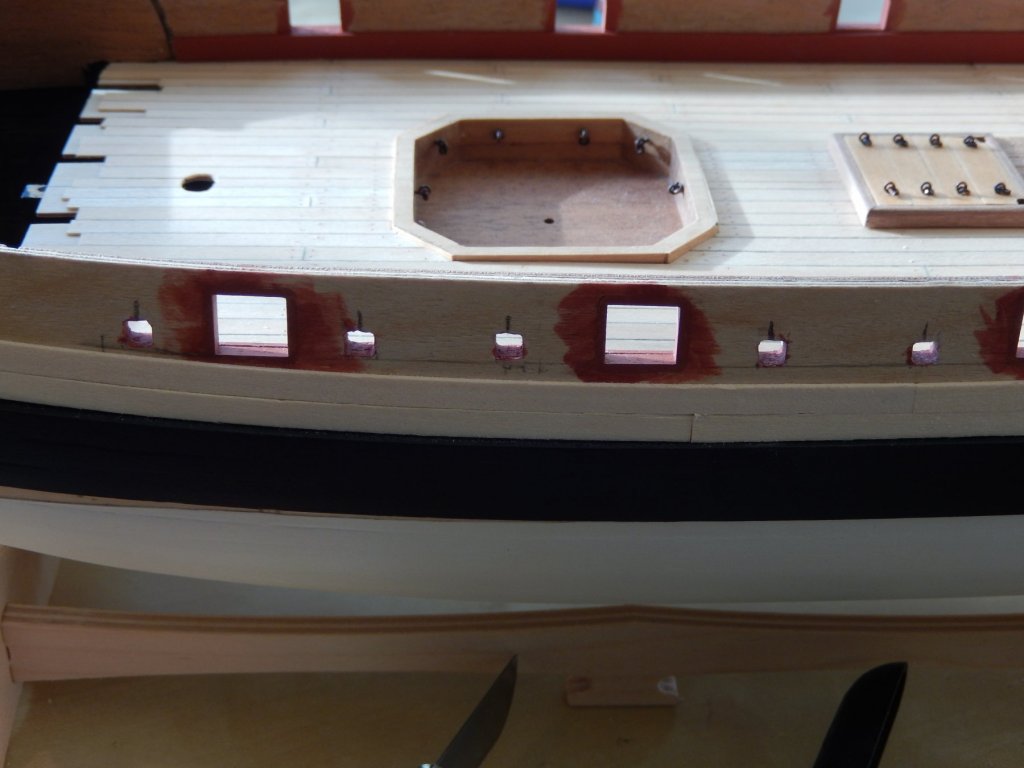
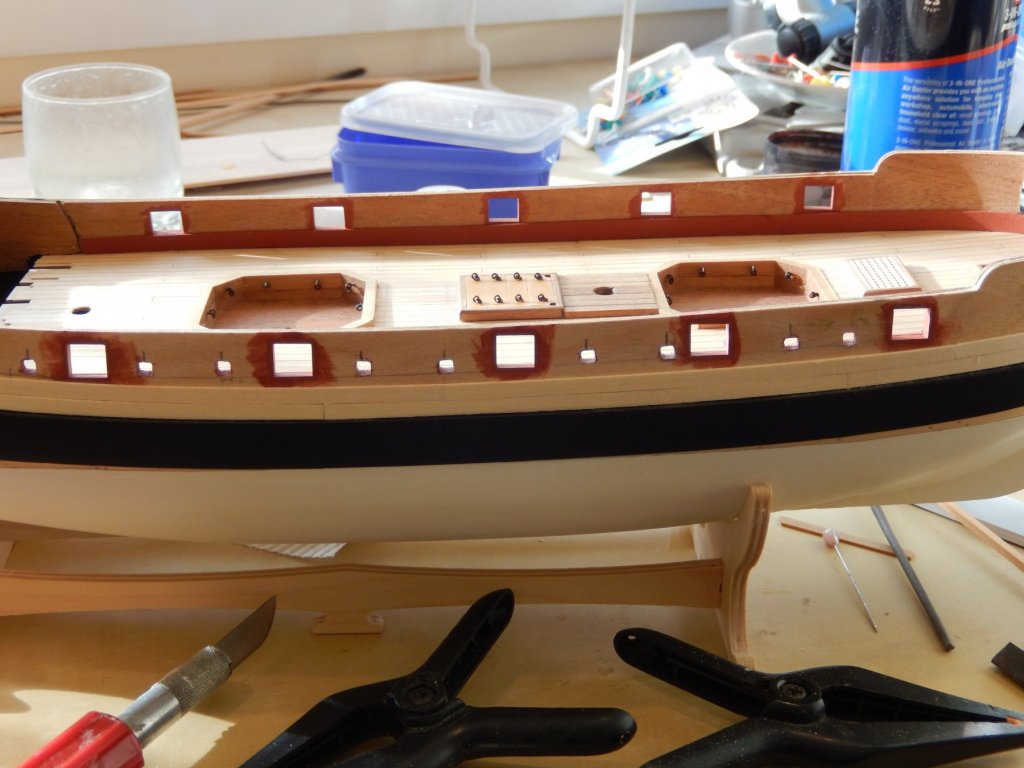
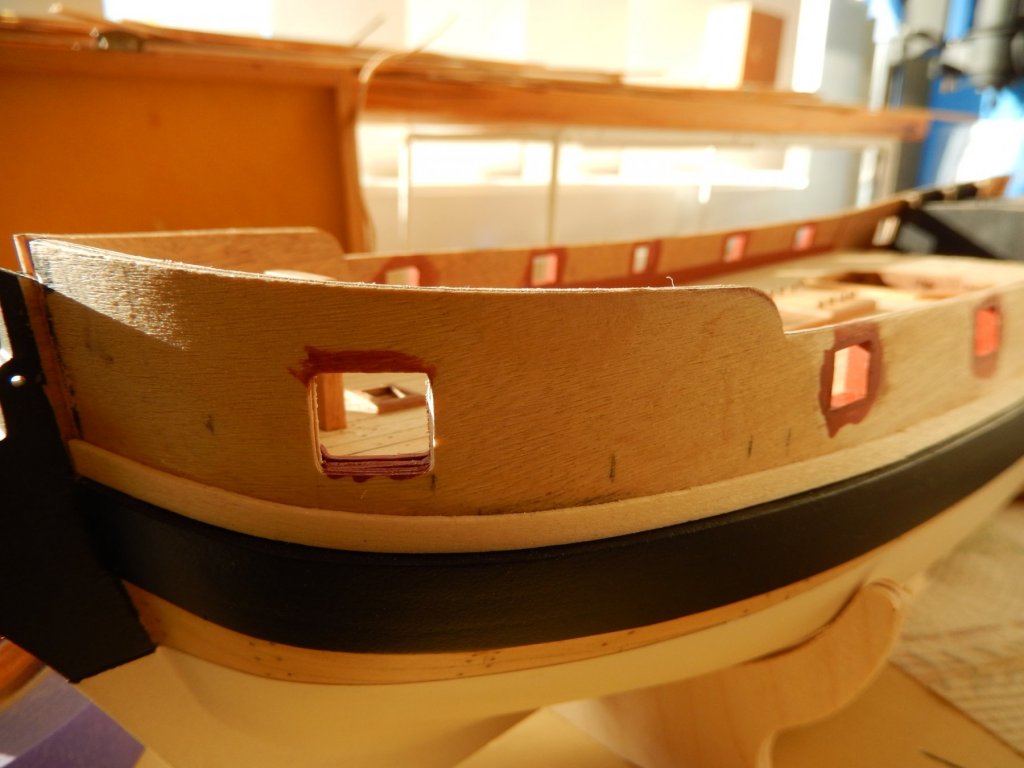
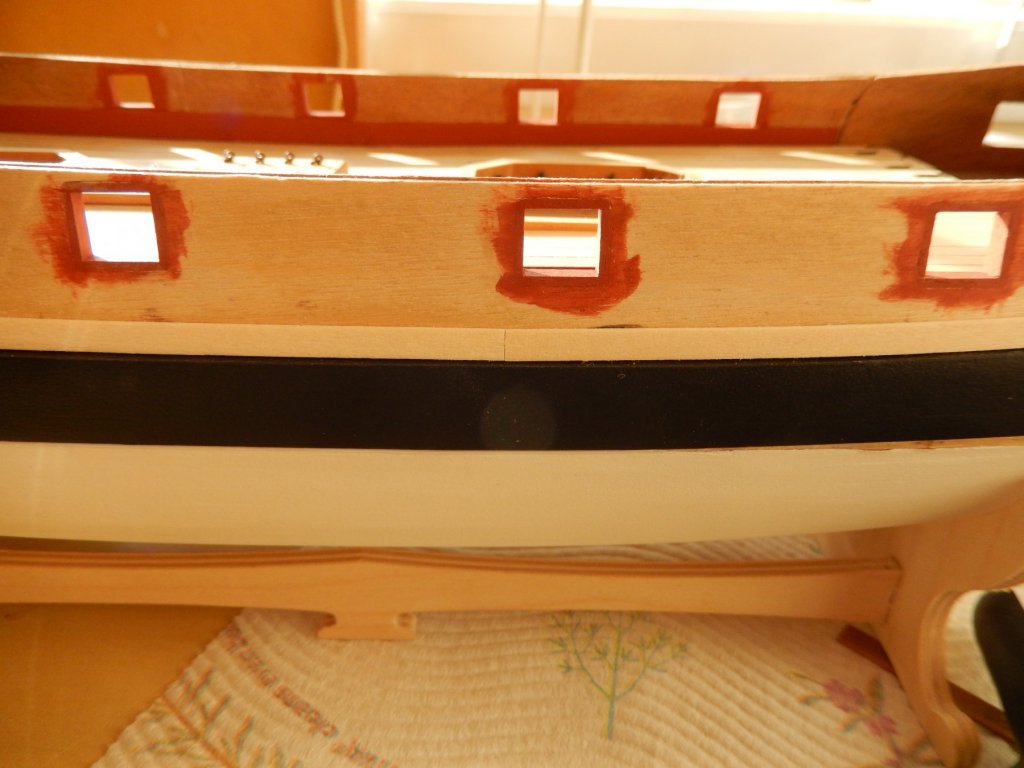
Thanks Joe. Mounting the barrels is a bit of a nightmare. While I have only done a couple, the cap square is difficult to position properly and each one took about an hour to do. Words were said. I have put two coats of paint on the bulwarks and it probably needs a third. The timber for the sheer rail is very coarse and as you will see from the following photos the grain really shows up. In finishing painting the chase ports and cabin lights I used Maskol to prevent paint getting on the front of the linings. On my Vanguard it worked well: not so in this application. It is difficult to apply it precisely and it tends to get caught in little crevices. I ended up scraping the unwanted paint off with a craft knife. The first photo however shows the Maskol in a more suitable application. This photo exaggerates the wood grain. Another coat of paint I now think will improve it and two coats of polyurethane I hope will finish it nicely. Here are the chase ports etc. before coating with poly.


- 421 replies
-
- 10
-
-
- caldercraft
- granado
- (and 1 more)
-
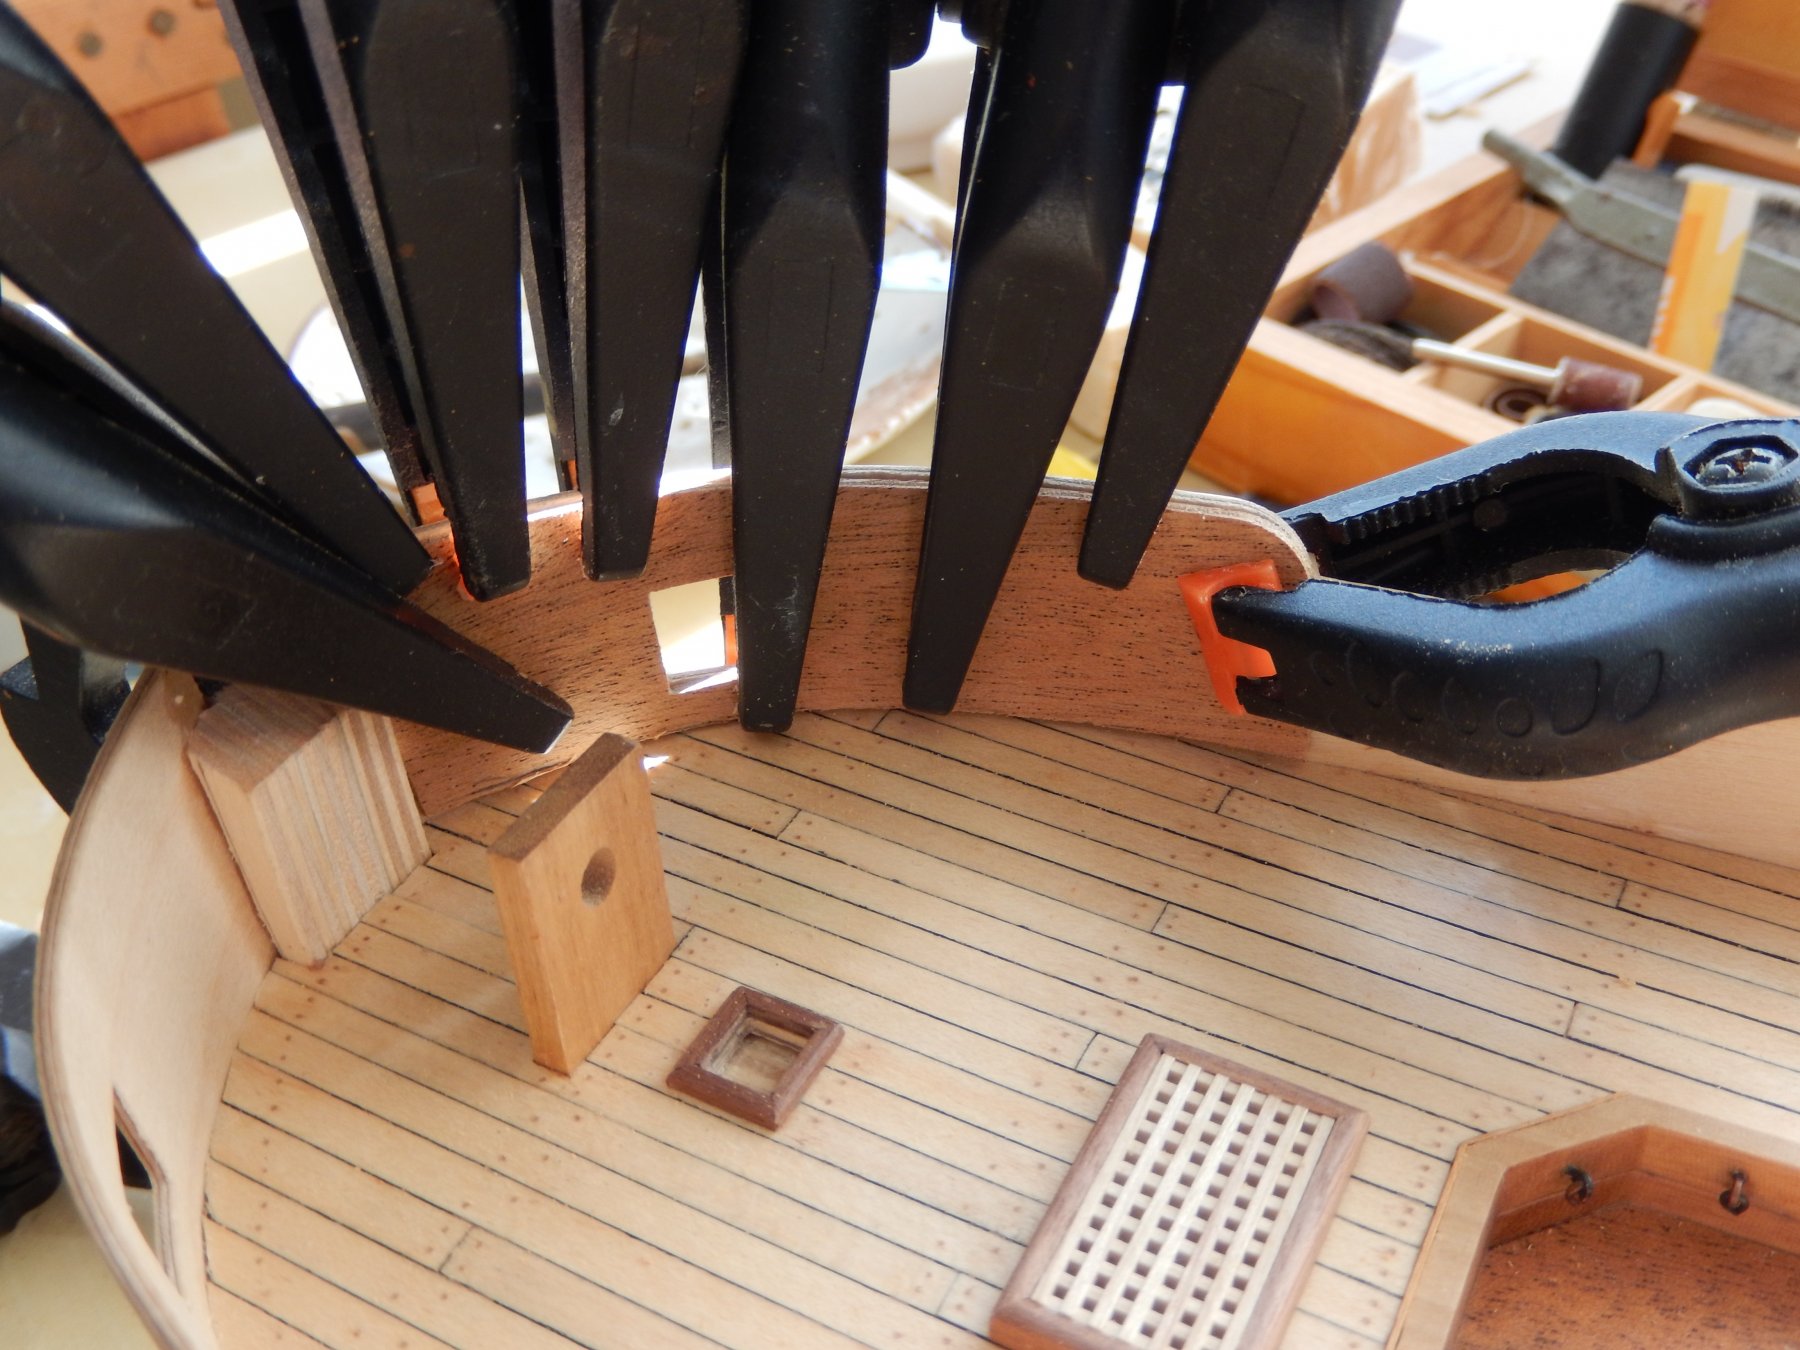
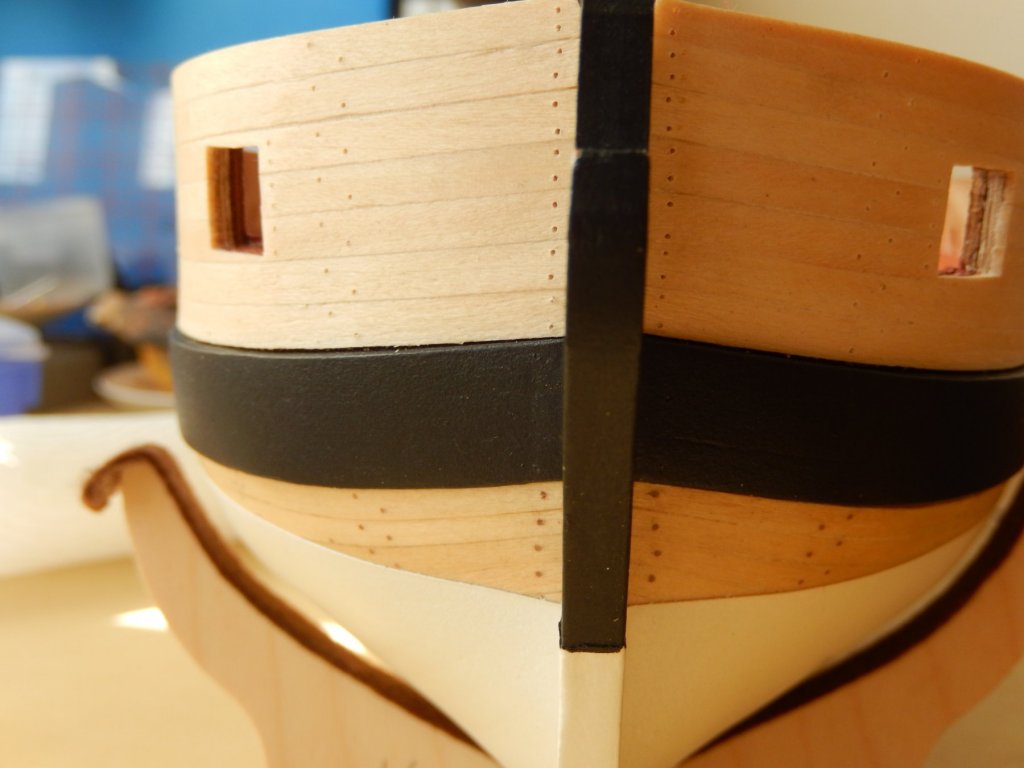
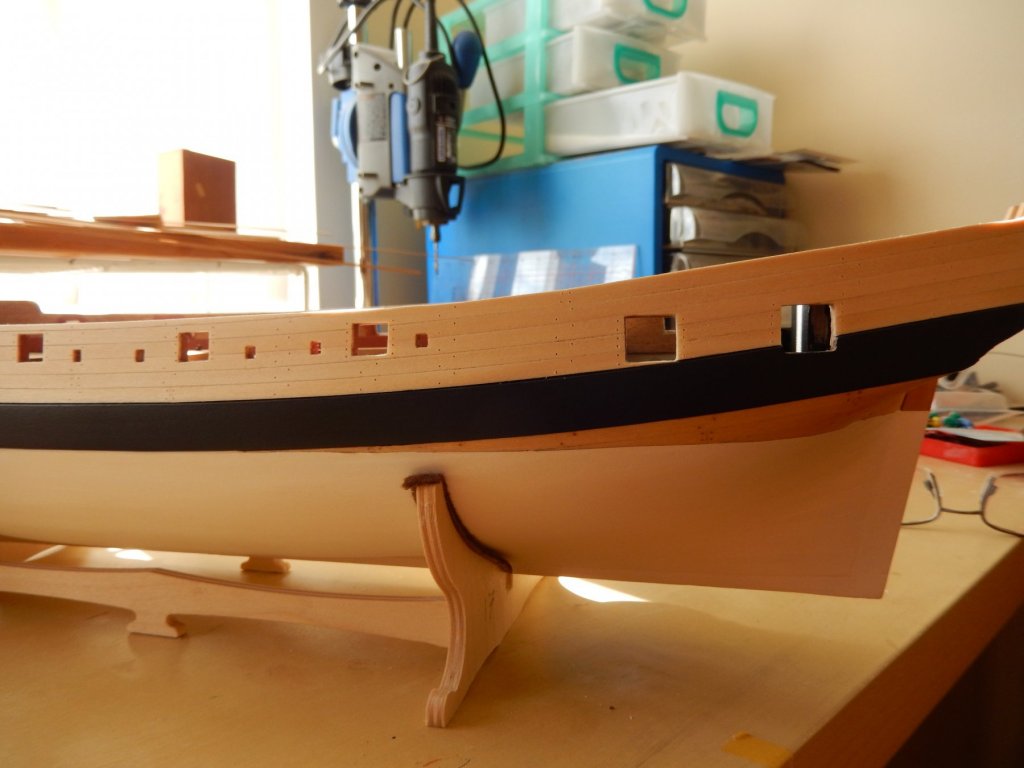
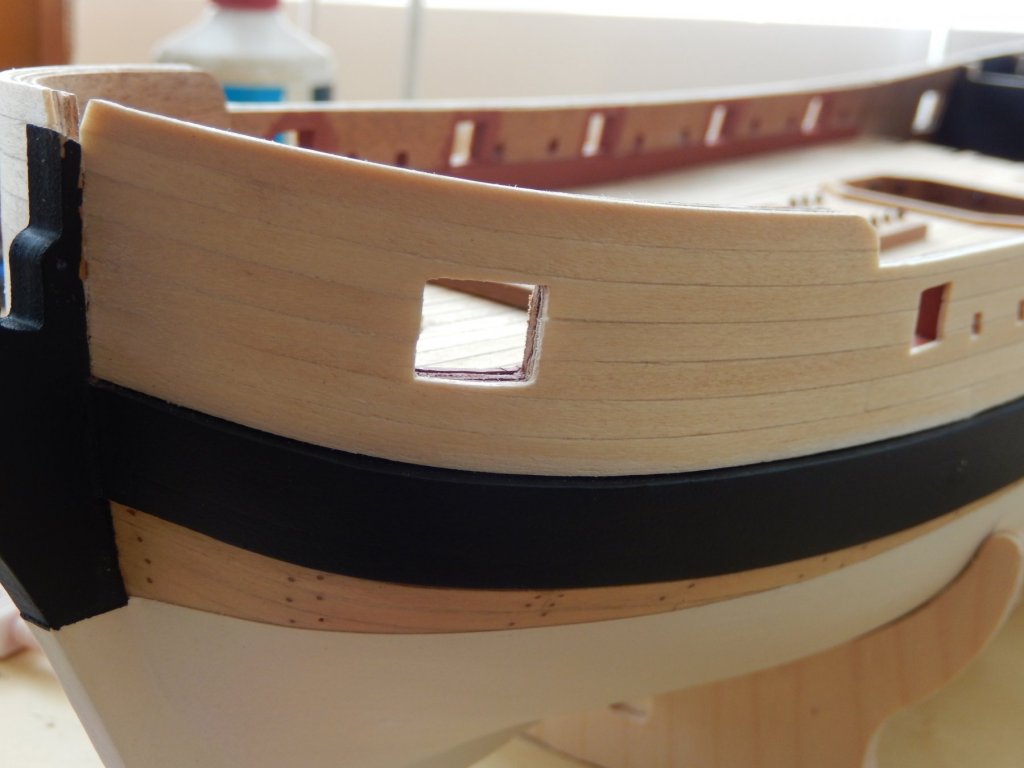
The sheer rails are now on. The 10x1mm timber supplied was very reluctant to bend in two dimensions. It was glued in two stages: first around the curved bow (taking eight clamps to properly seat them), then once the glue was properly dry, the remainder towards the stern. The latter required the timber to be bent downwards quite considerably. If there is a lesson in all of this it is the need for lots of clamps. Here is one of the Syren guns. It needs to be touched up and eventually rigged.


- 421 replies
-
- 10
-
-
- caldercraft
- granado
- (and 1 more)
-
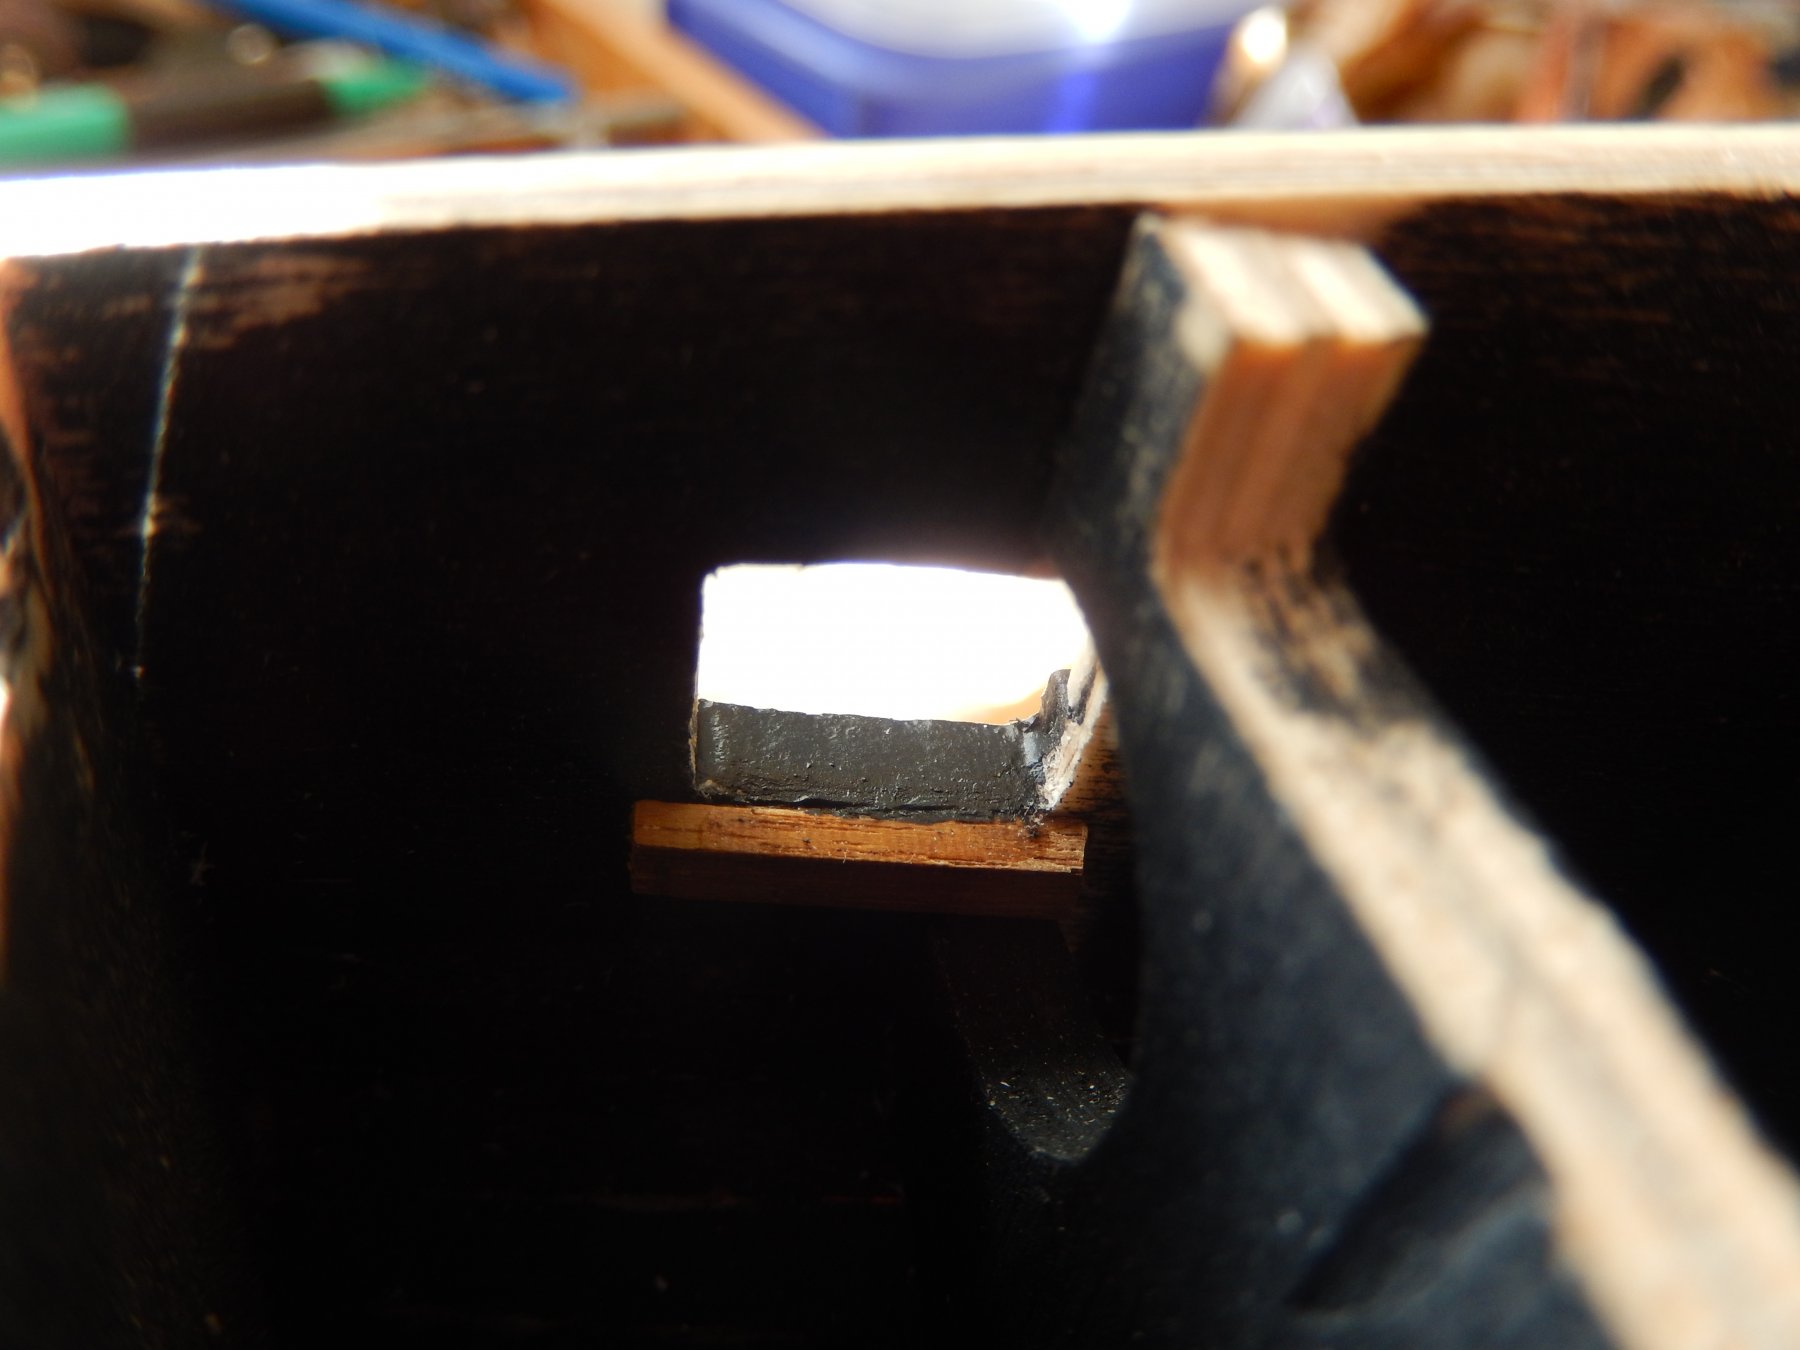
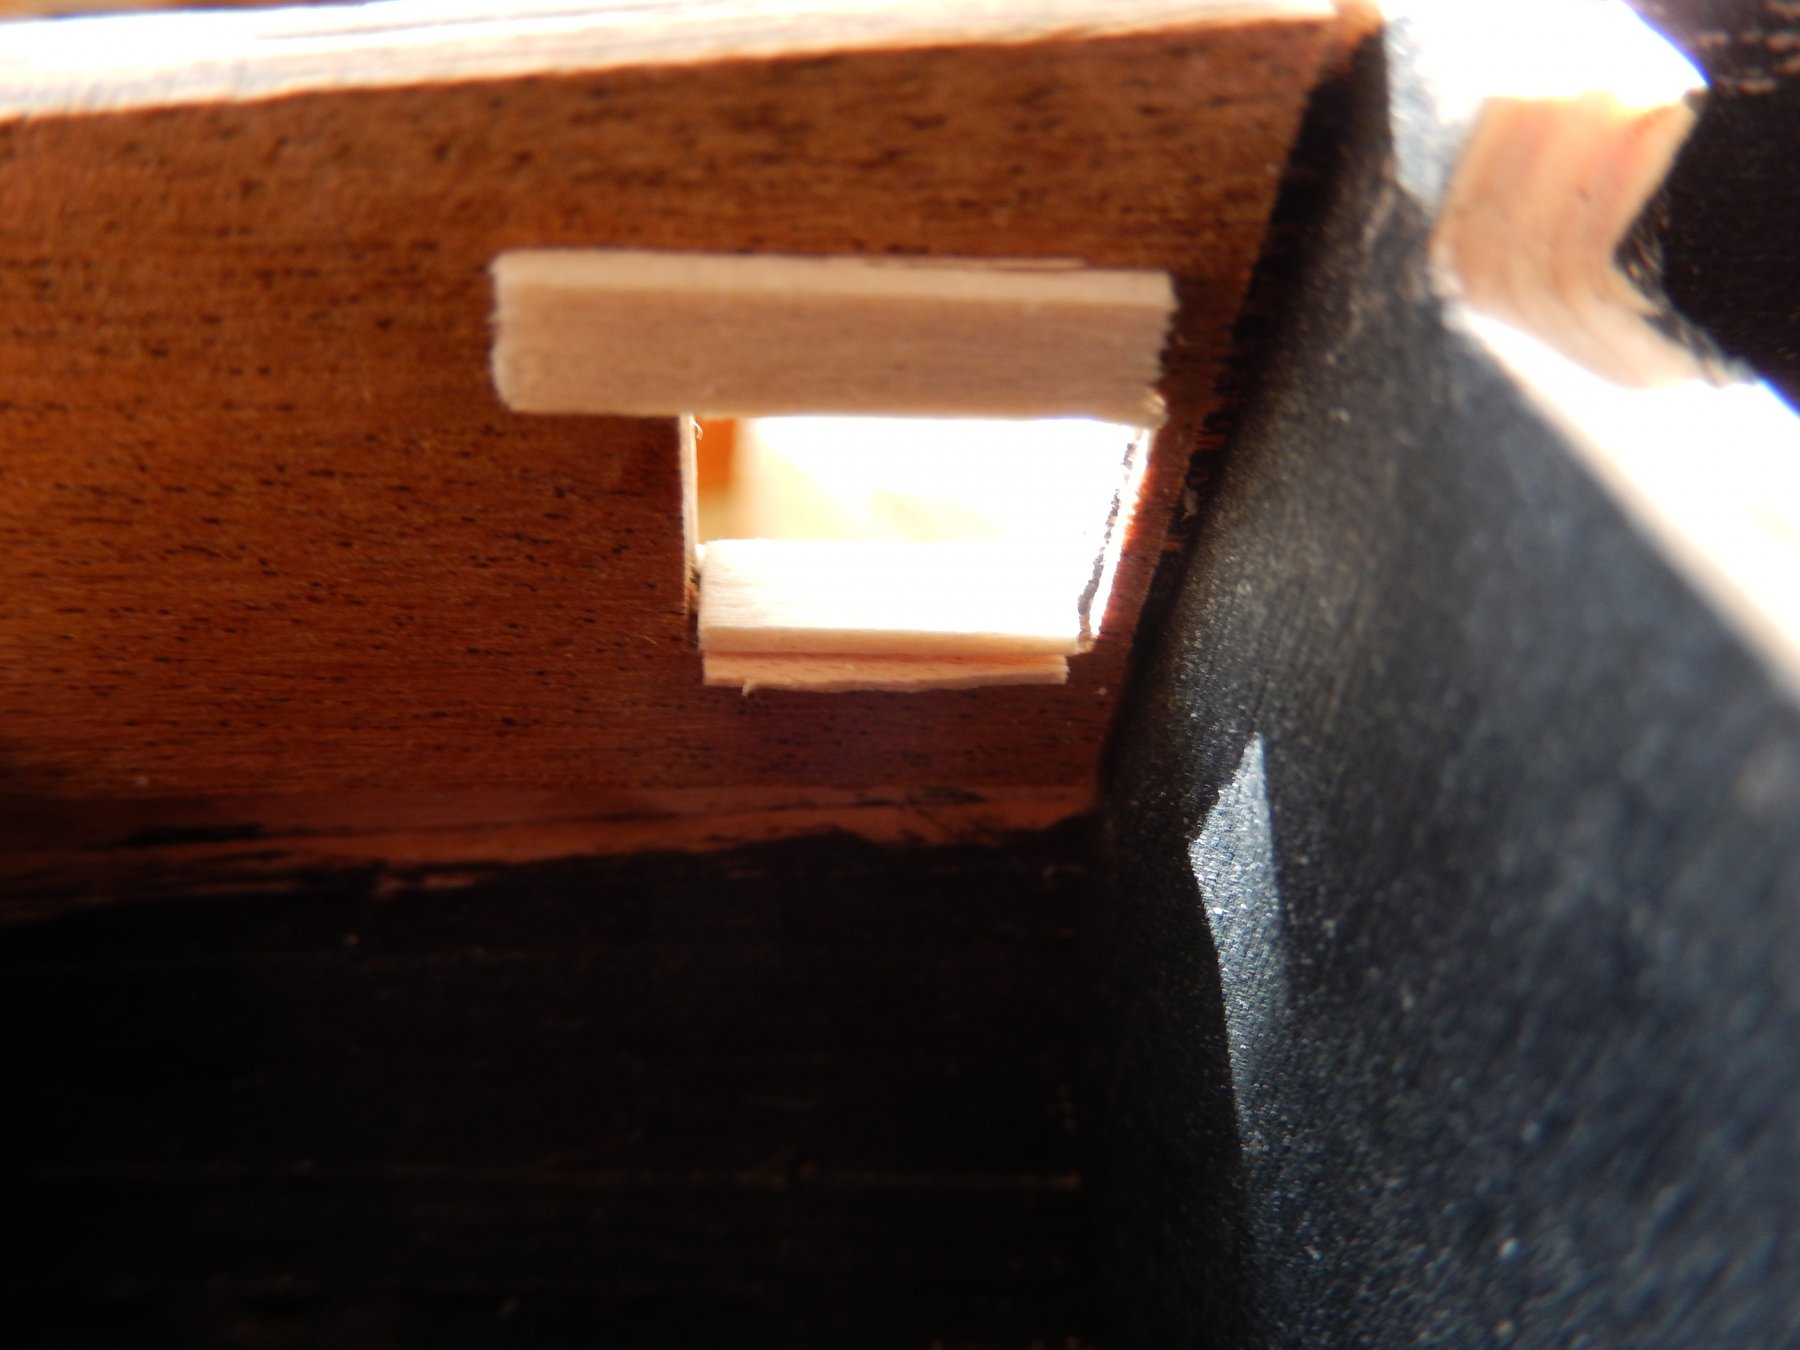
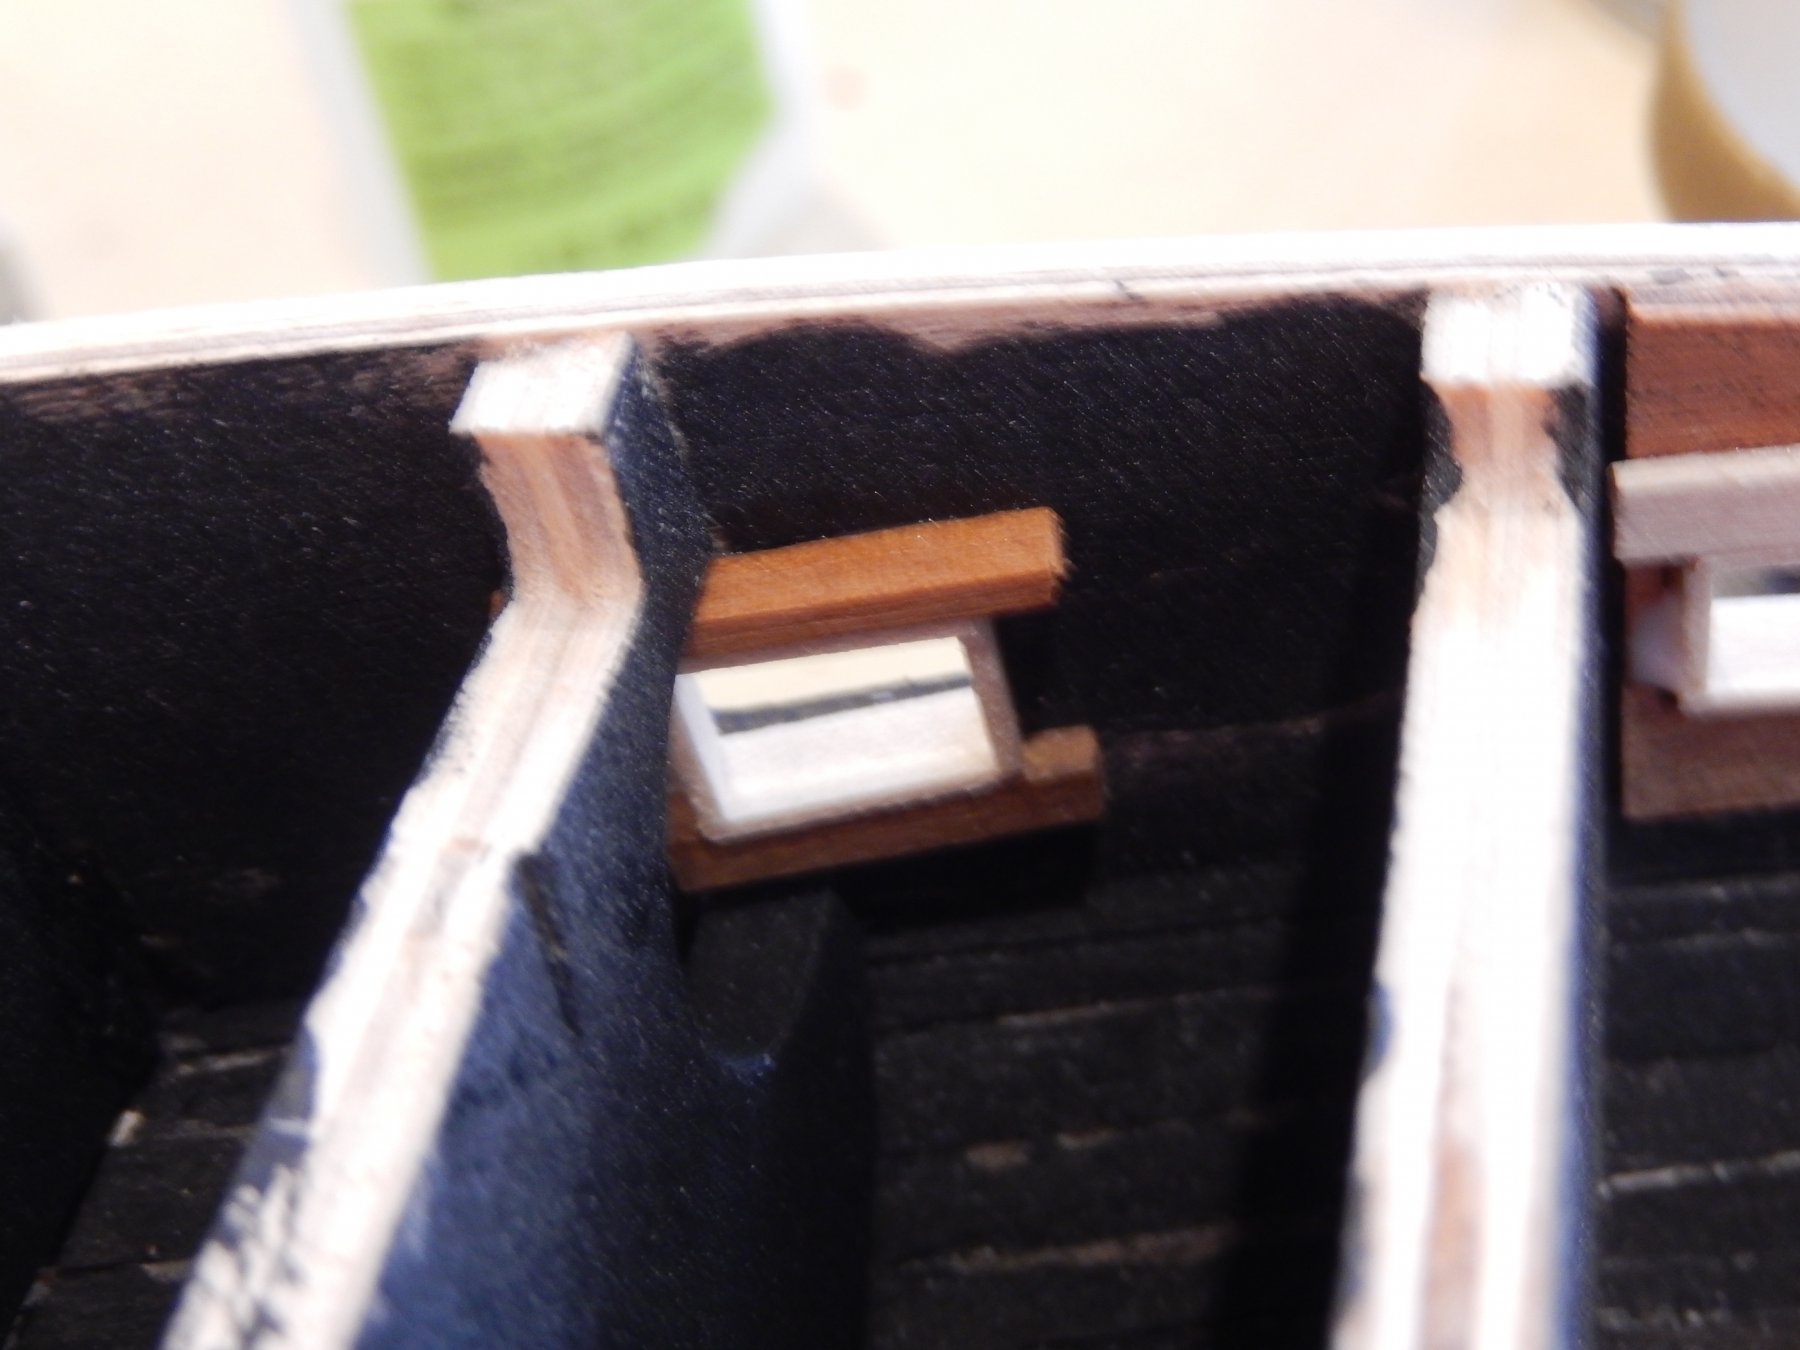
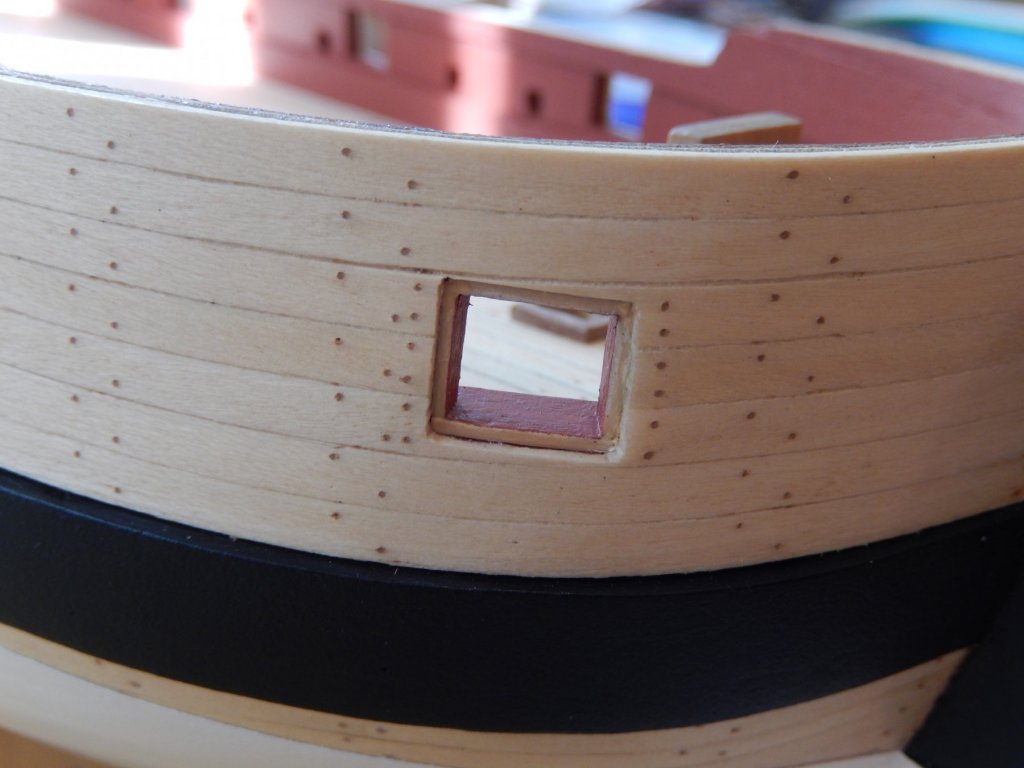
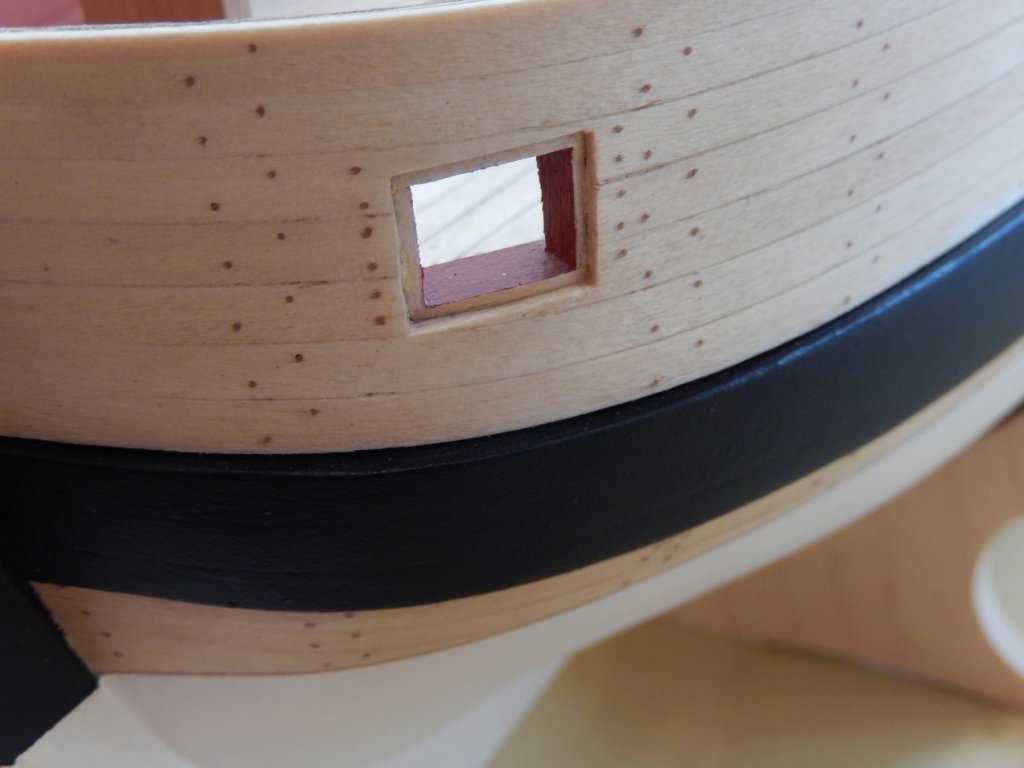
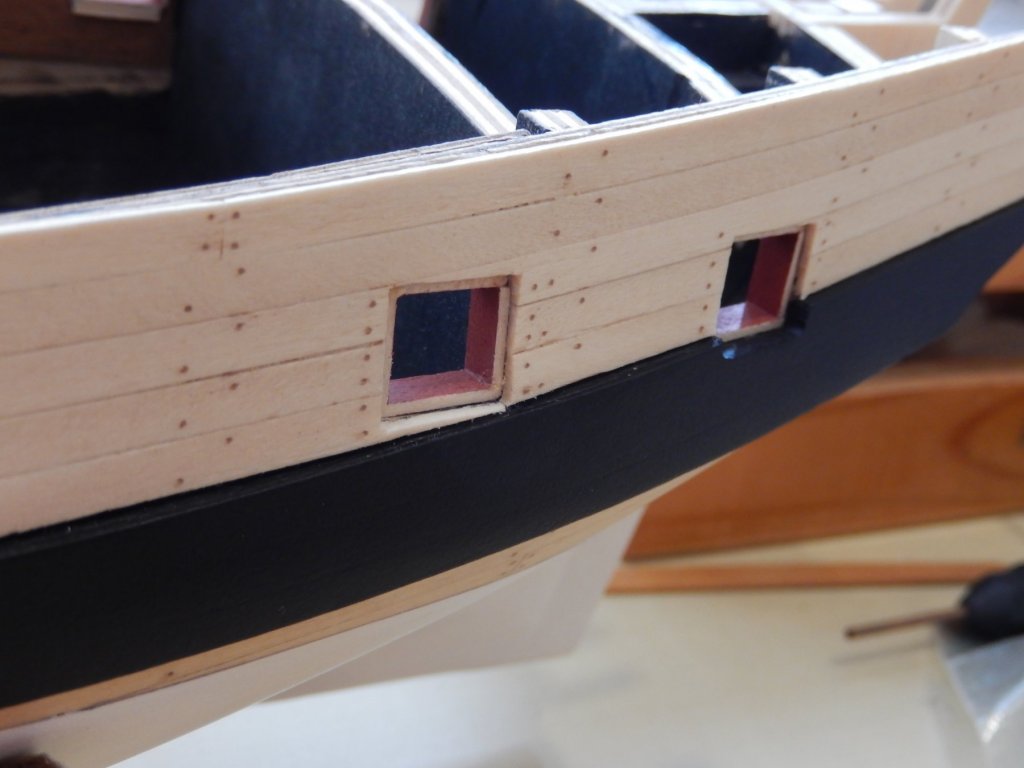
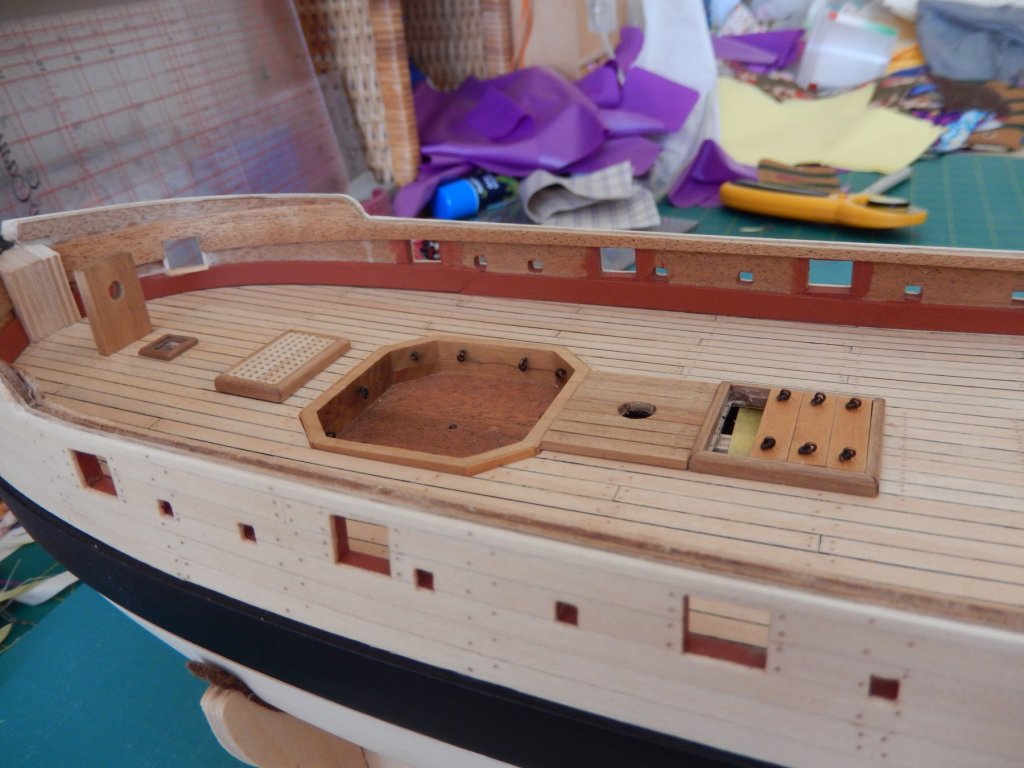
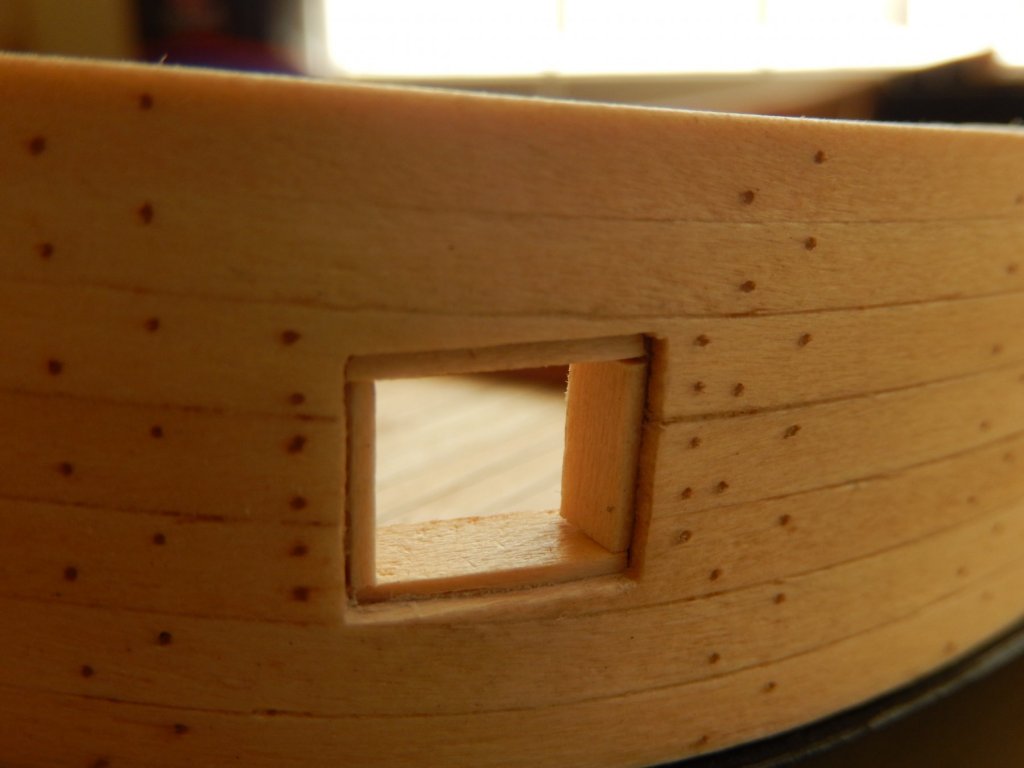
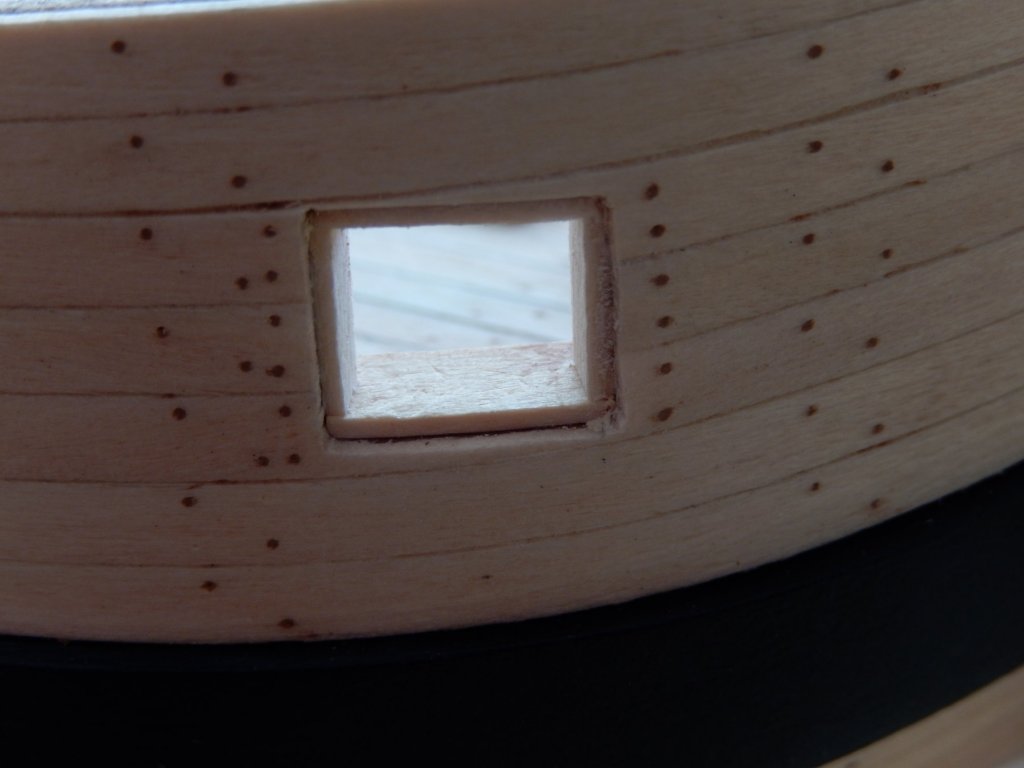
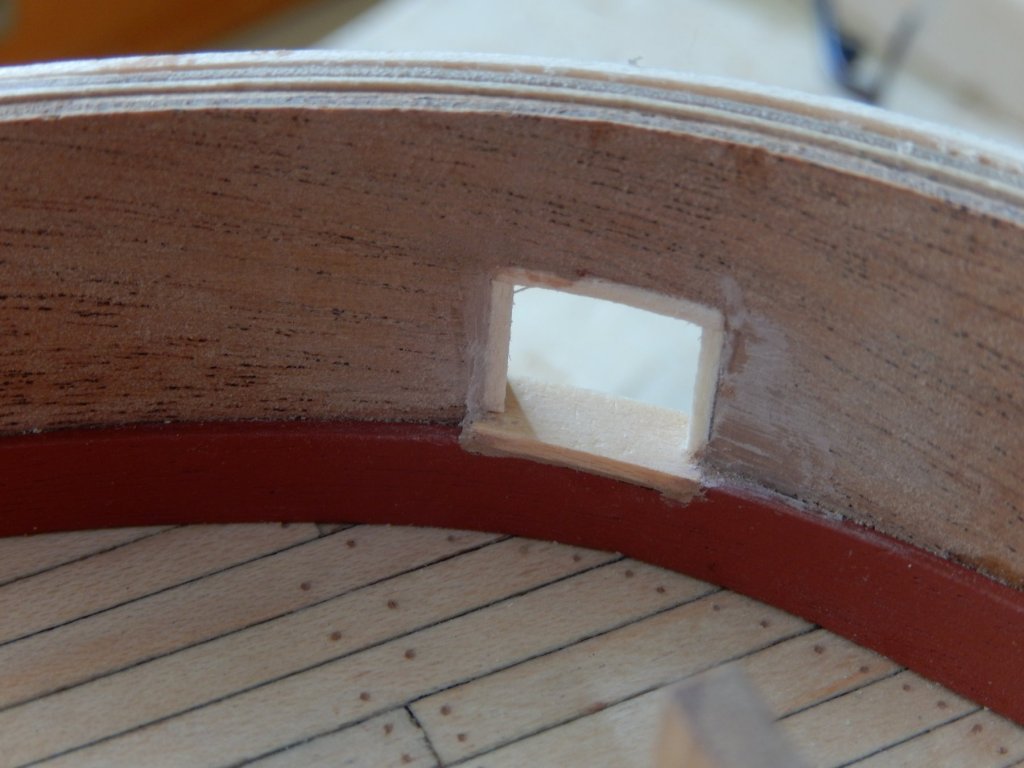
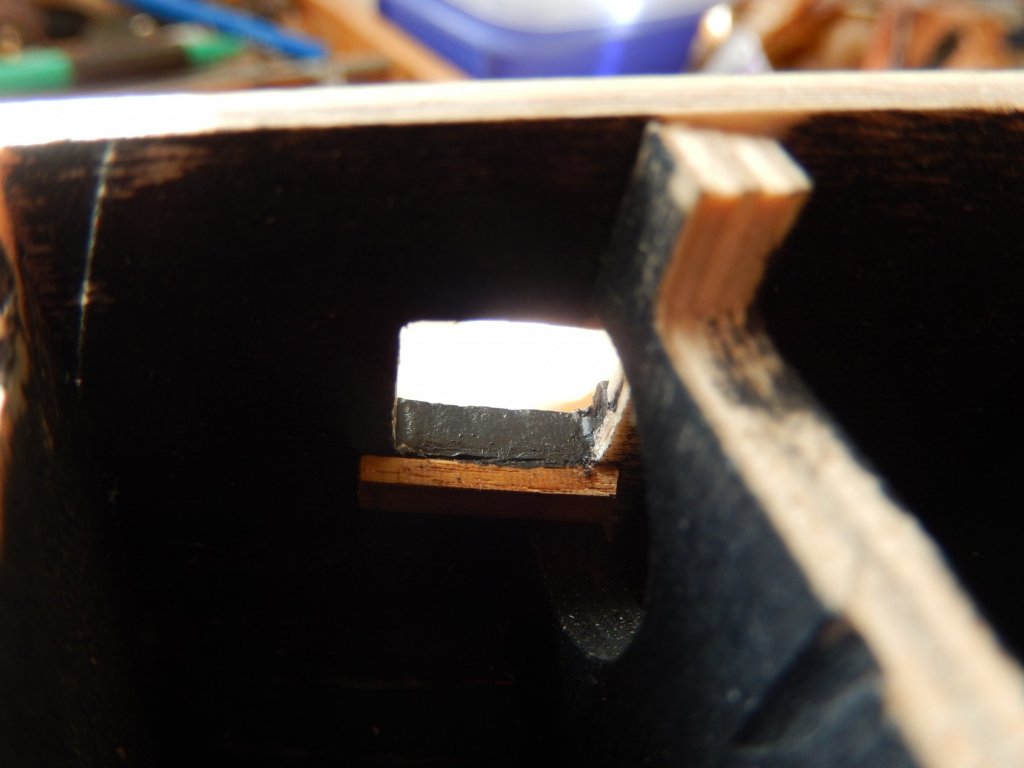
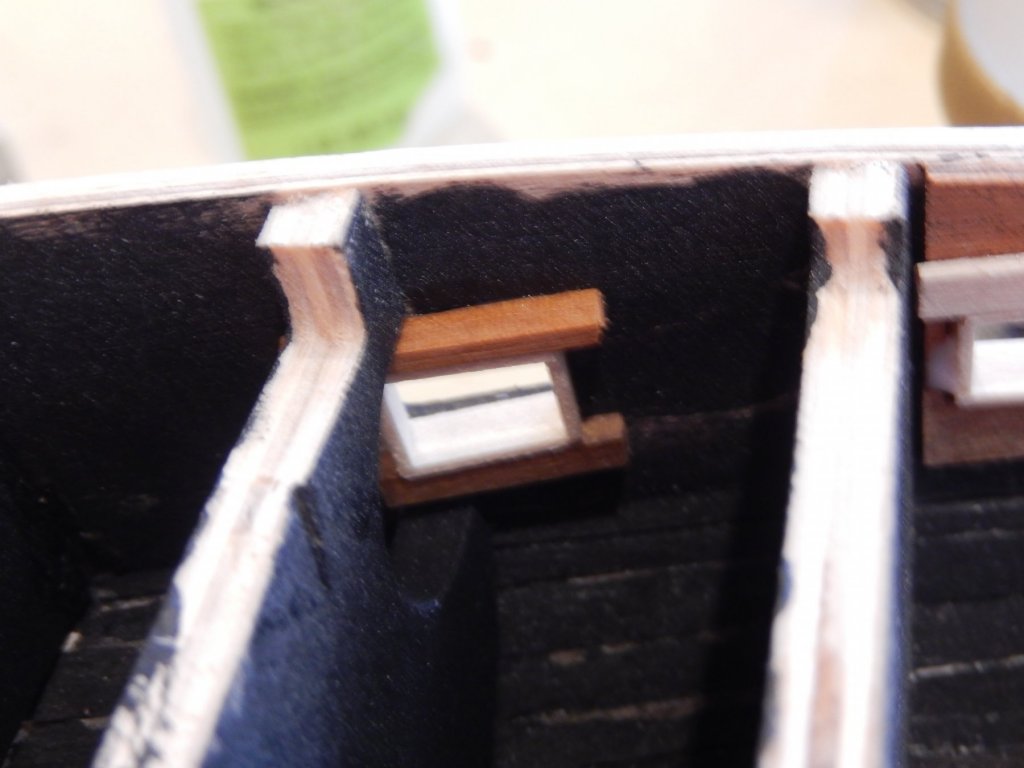
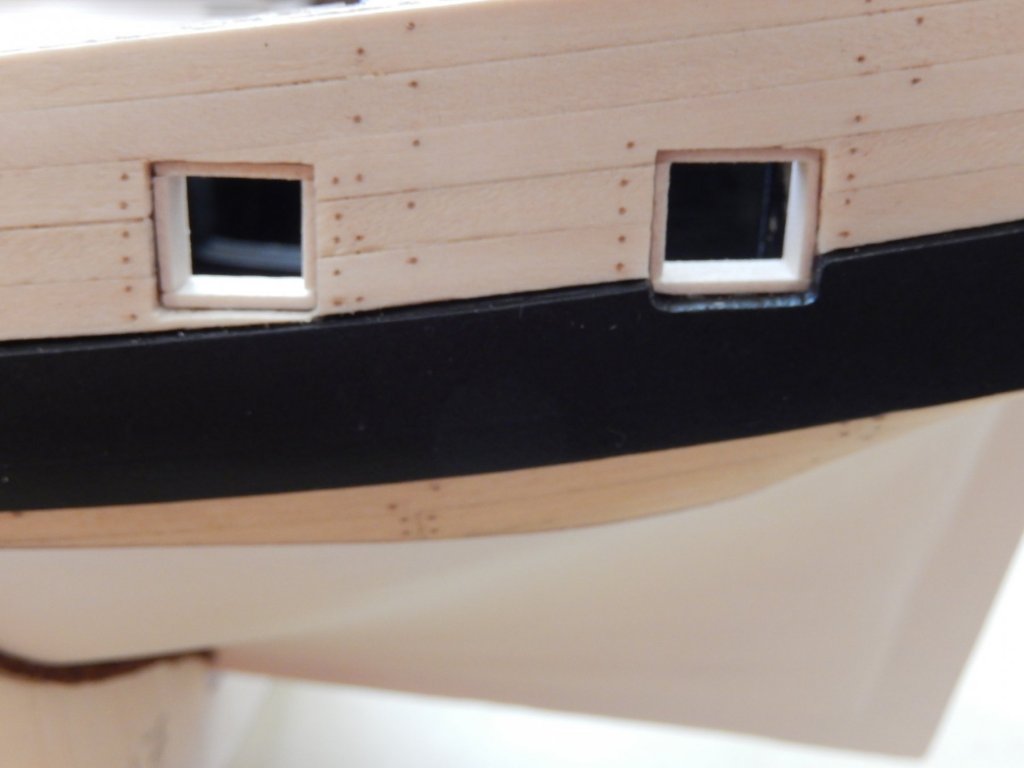
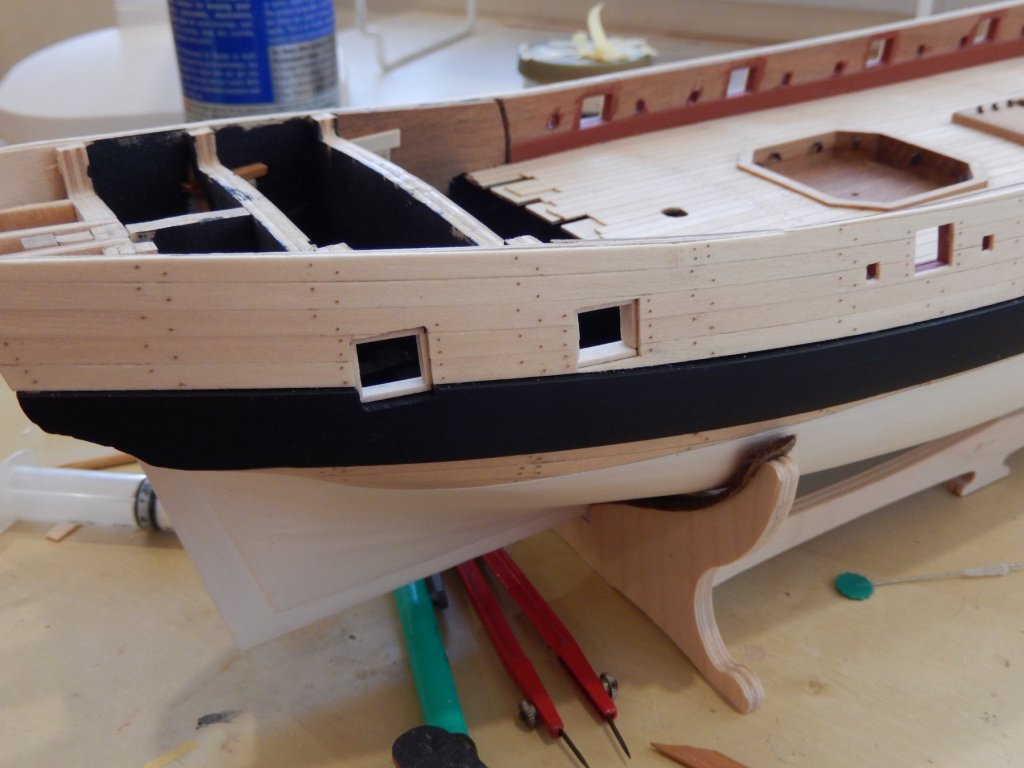
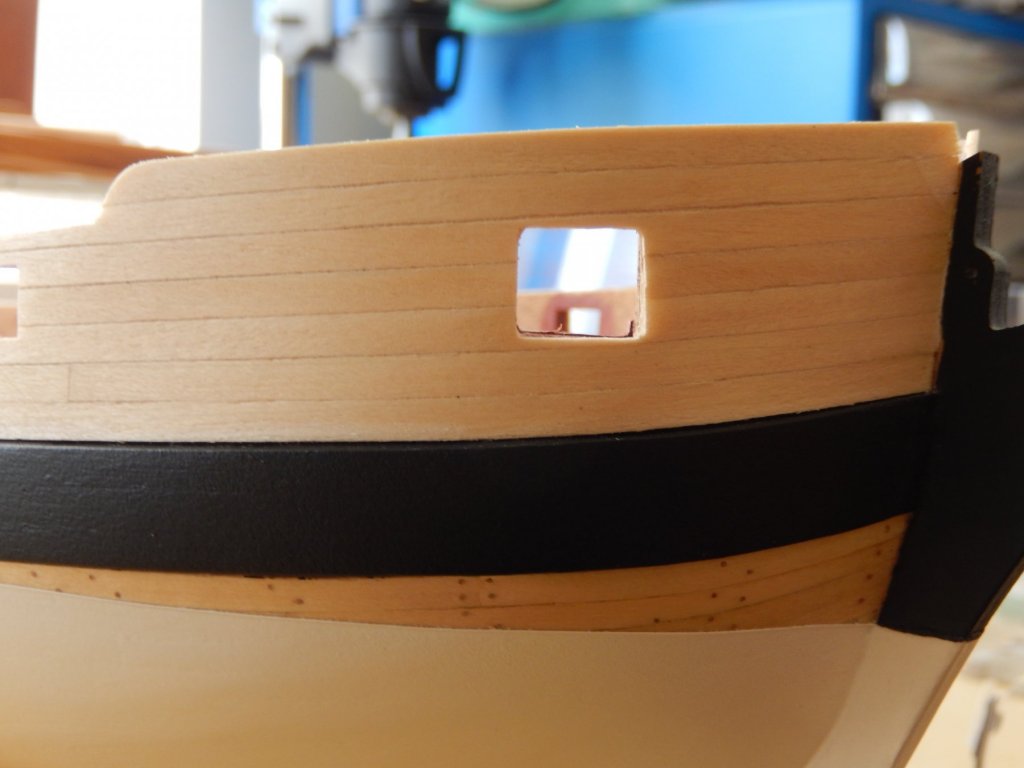
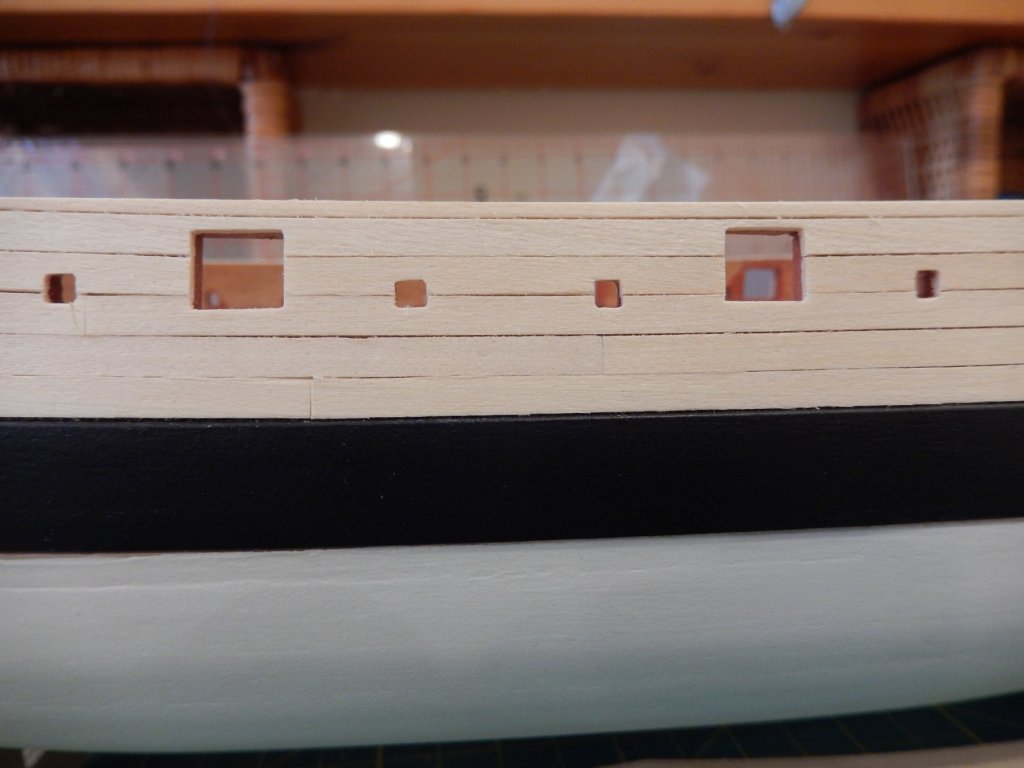
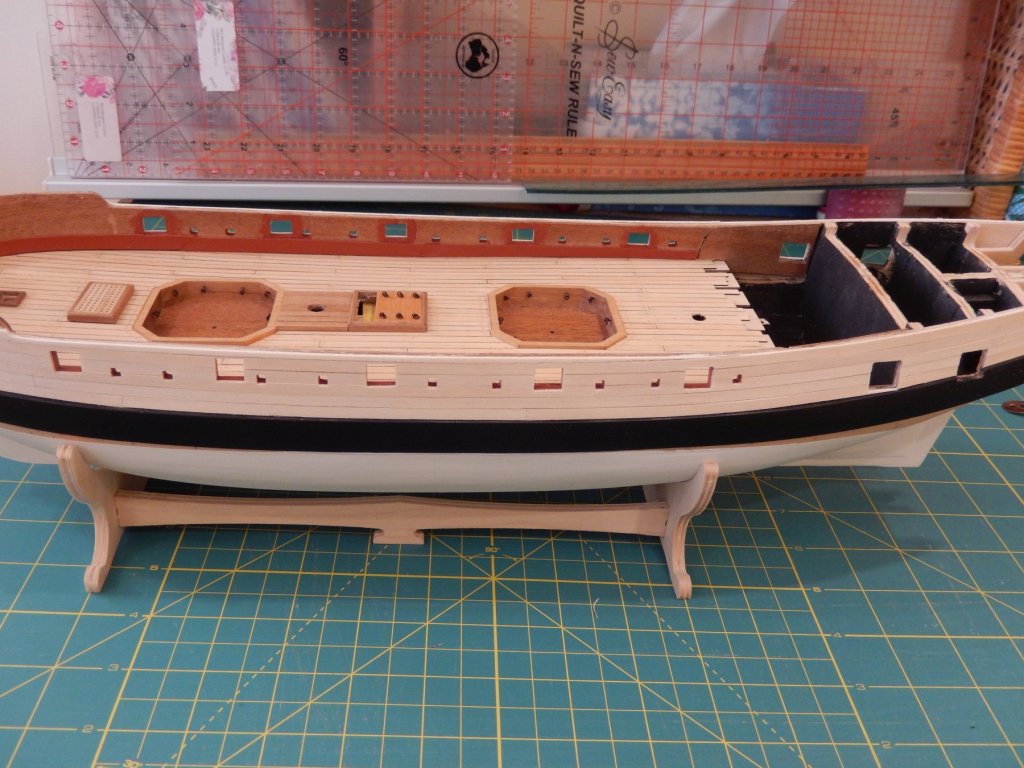
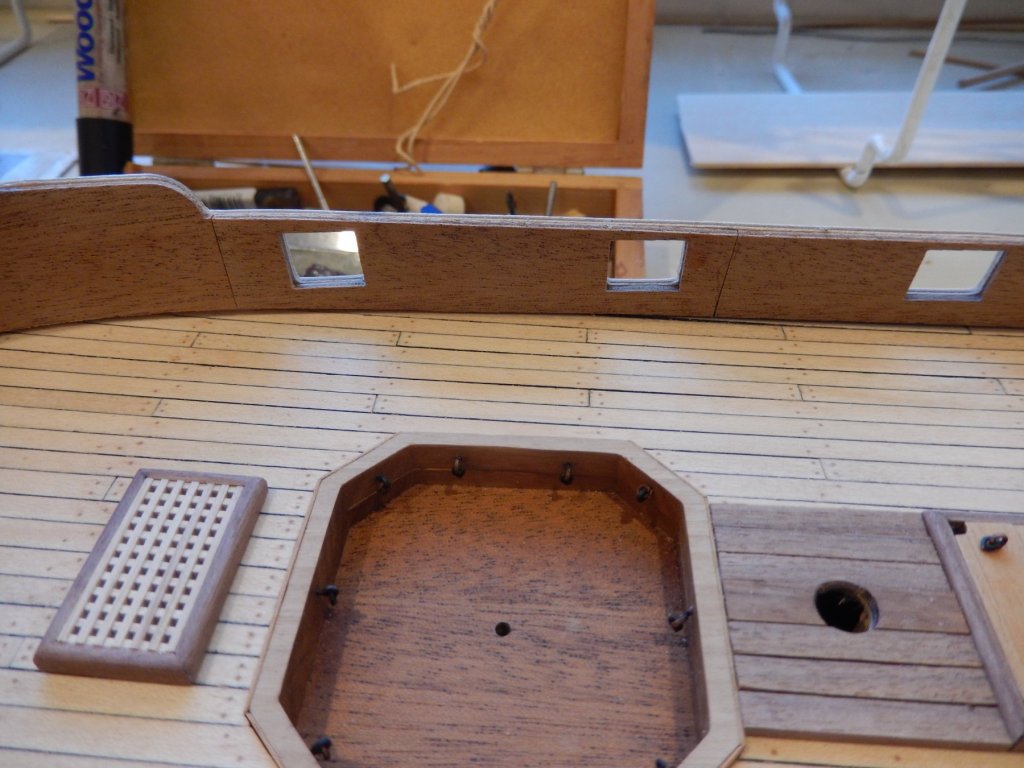
The lining of the chase ports and cabin lights are now installed. There is touching up to do, and when that is complete they will scrub up pretty well. The chase ports were reasonably straightforward. The cabin lights less so. The problem is that there is very little material onto which the linings are to be stuck. My solution was to glue pieces of timber to support the upper and lower linings. While awkward, it worked fairly well. Here are results so far. The chase ports: The cabin lights and the supports for the linings: The semi-finished articles:

- 421 replies
-
- 15
-
-
- caldercraft
- granado
- (and 1 more)
-
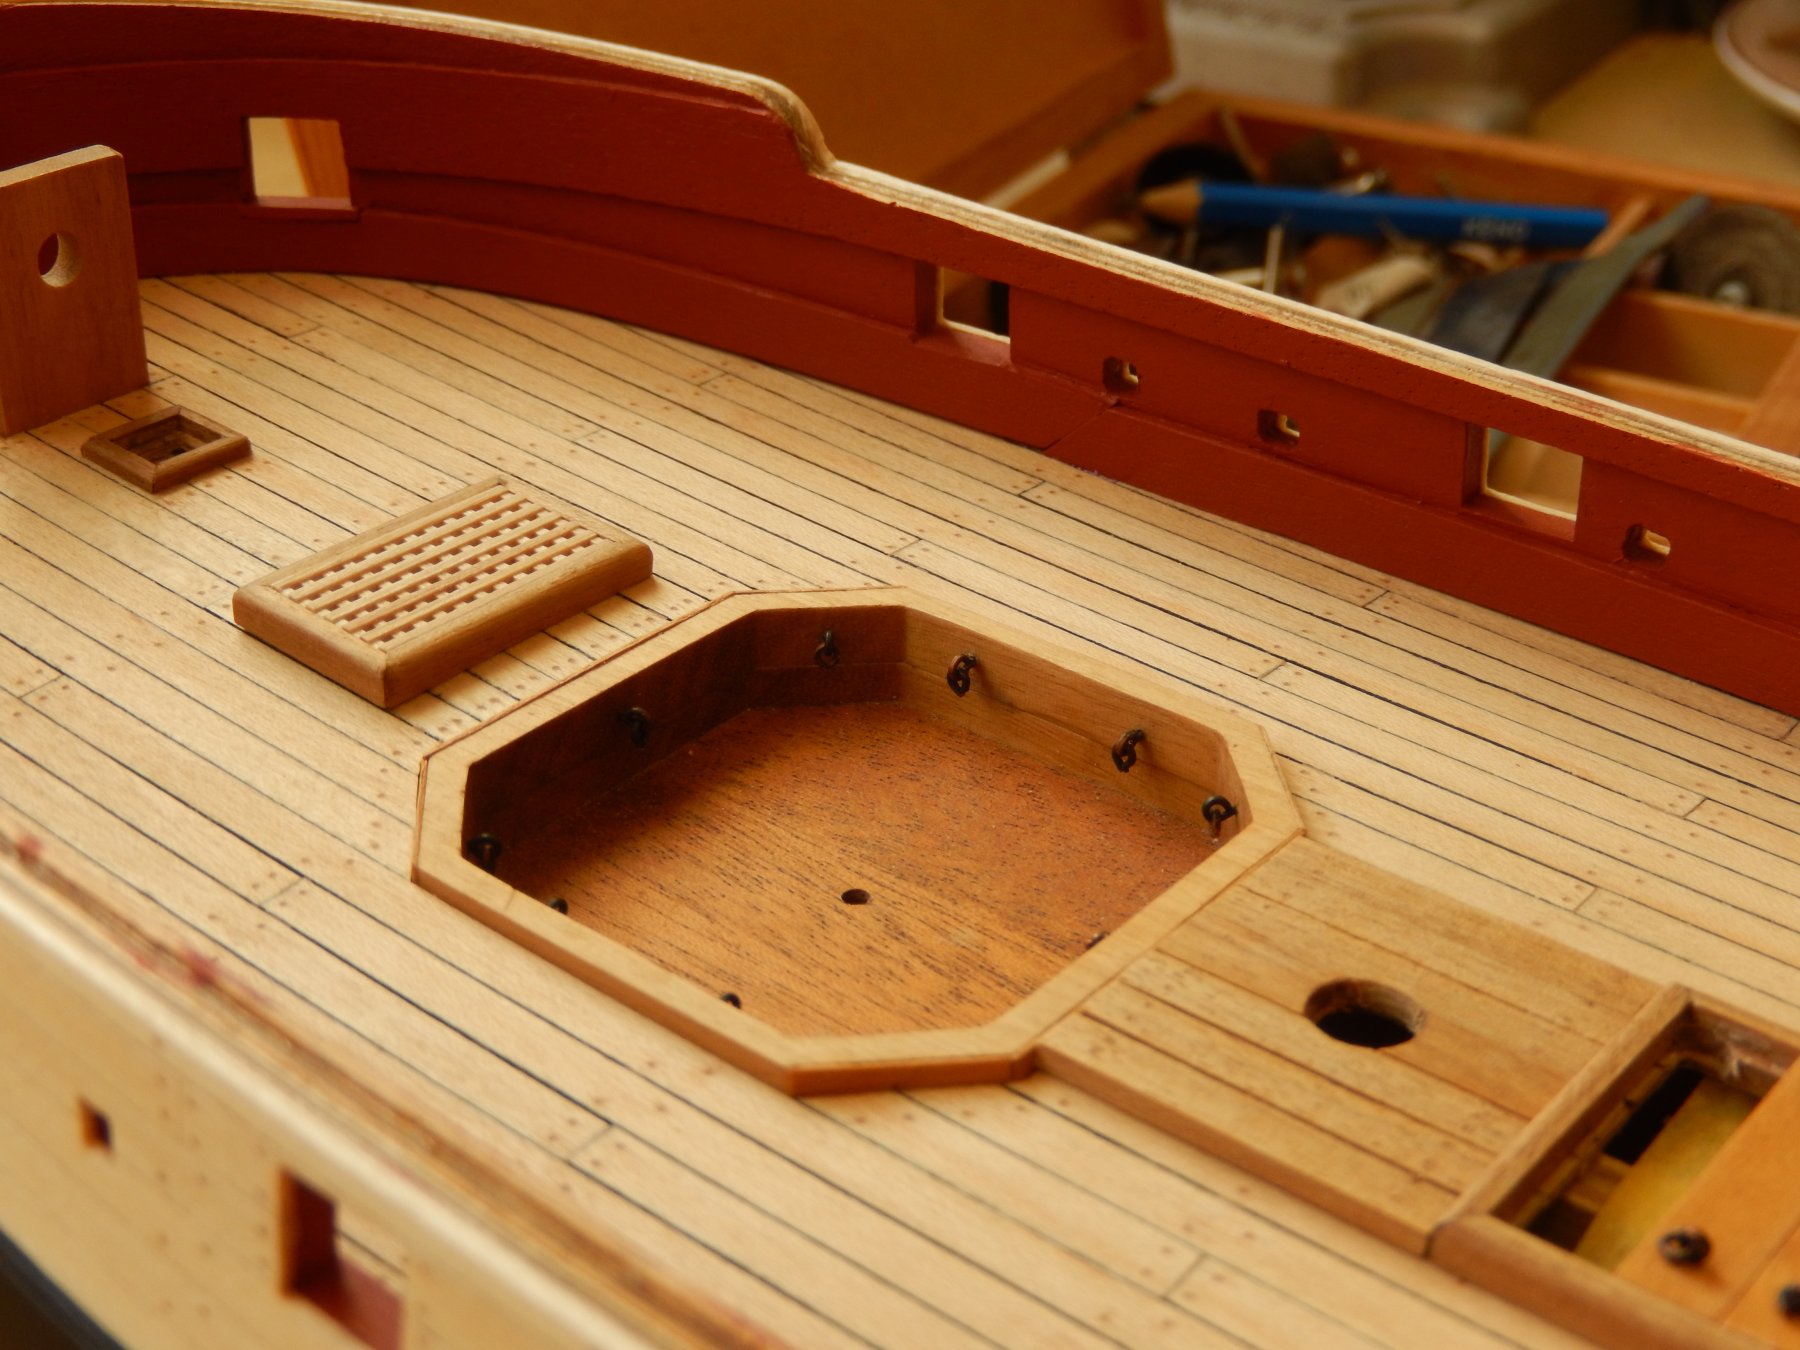
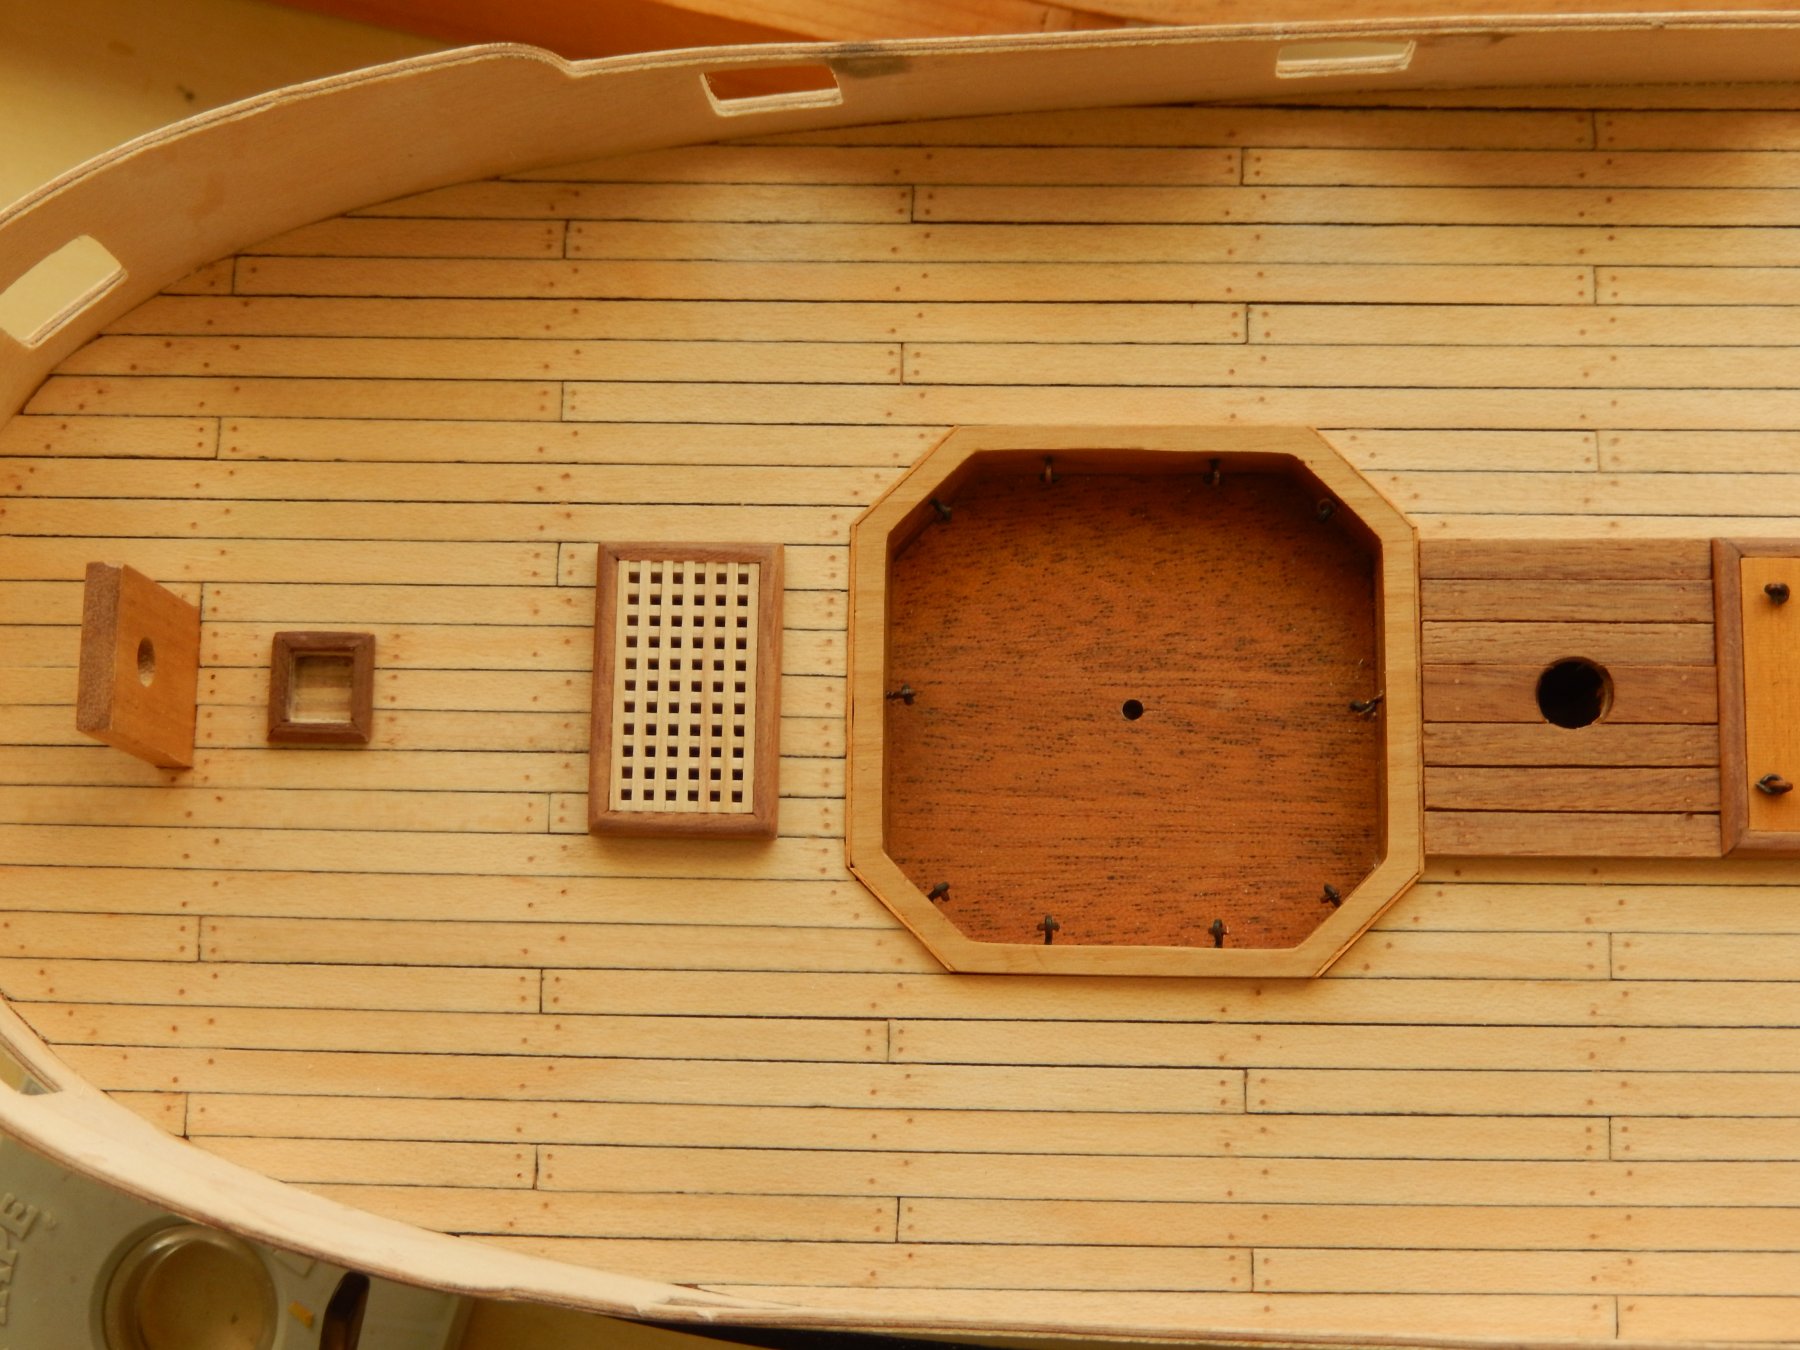
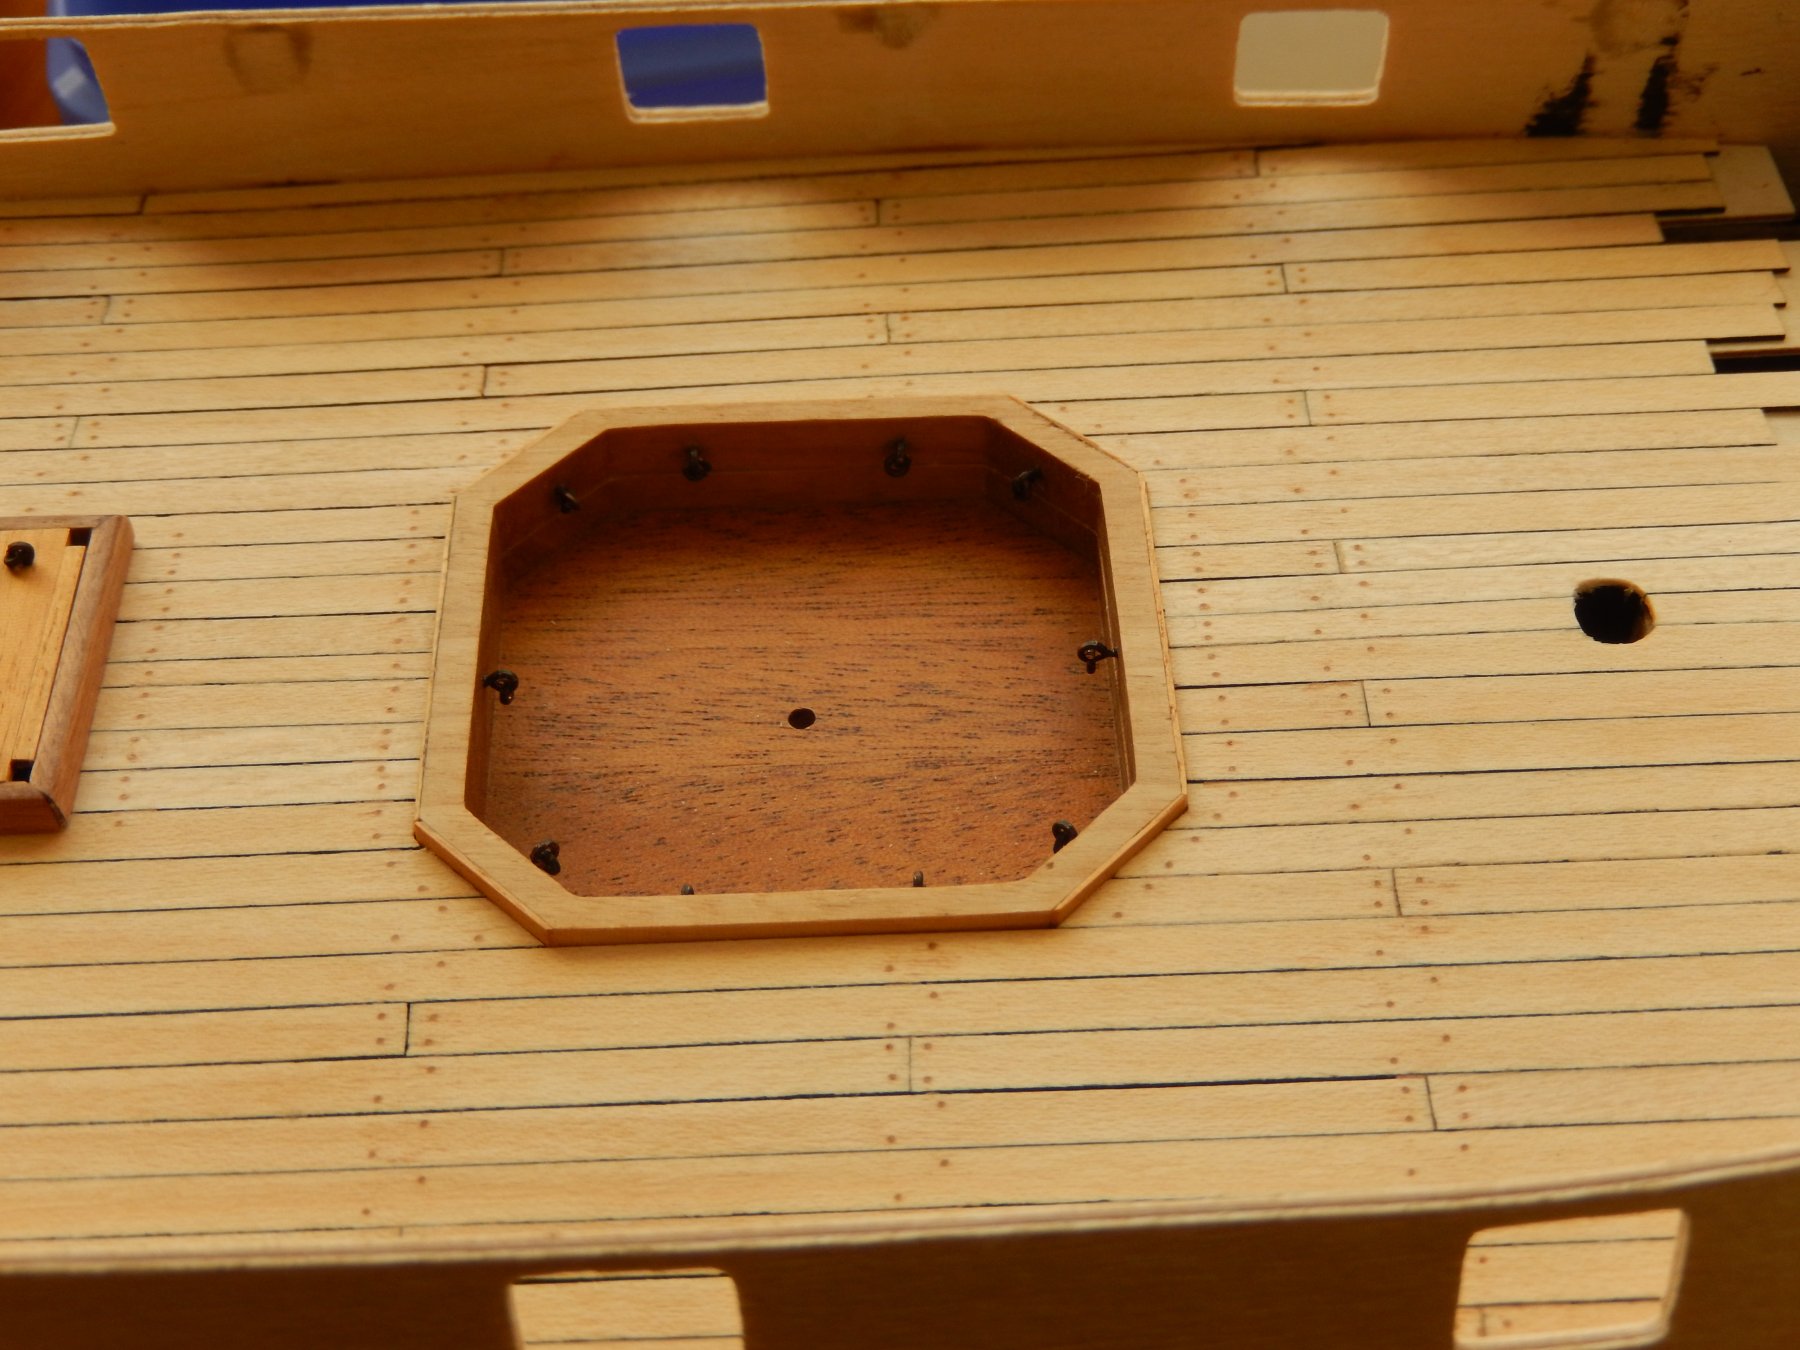
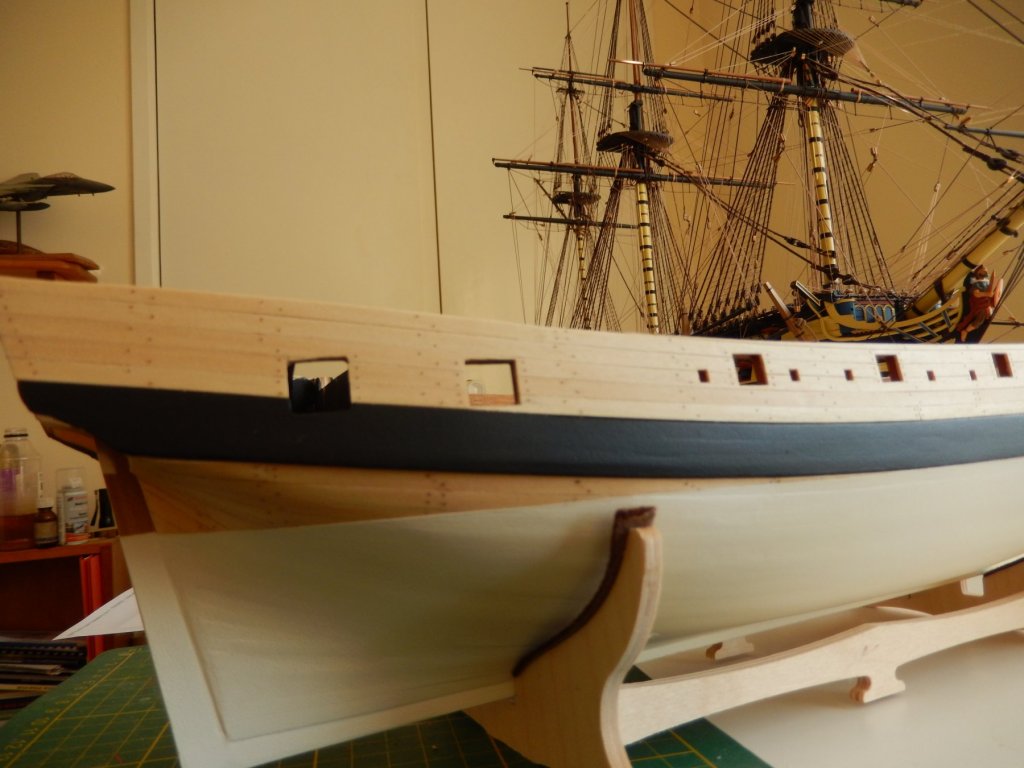
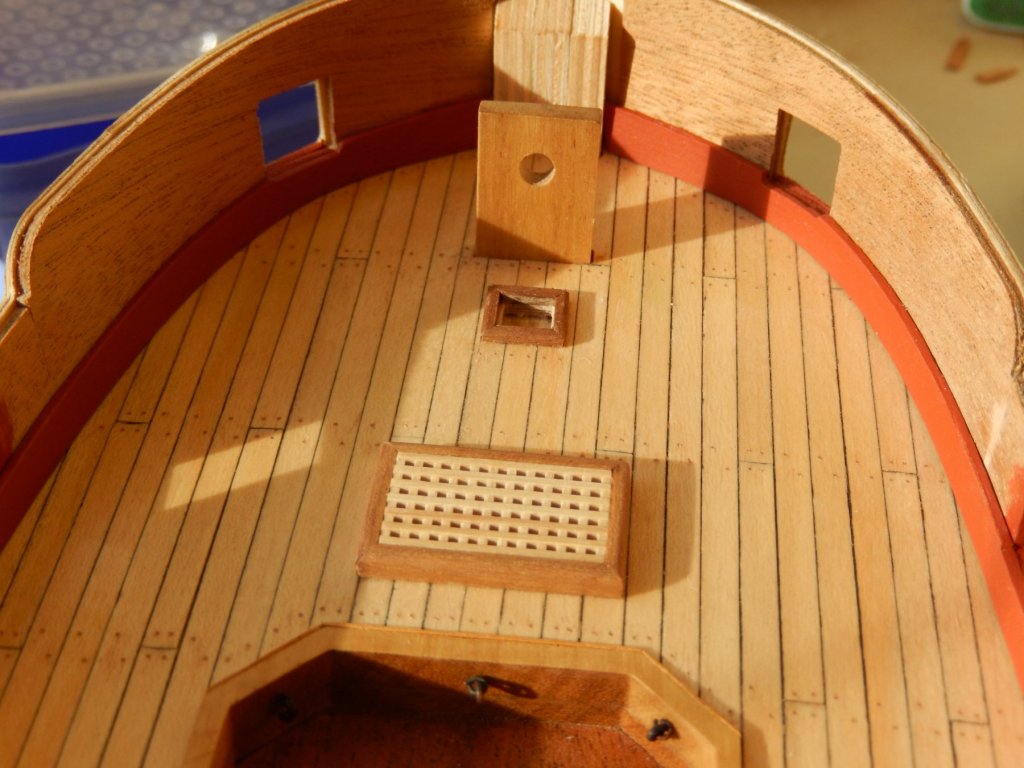
The treenailing is finished. Here is the result. On it is one coat of polyurethane with another one or two to come. The bulwarks now have to be finished and painted and the frames of the gun ports touched up.

- 421 replies
-
- 15
-
-
- caldercraft
- granado
- (and 1 more)
-
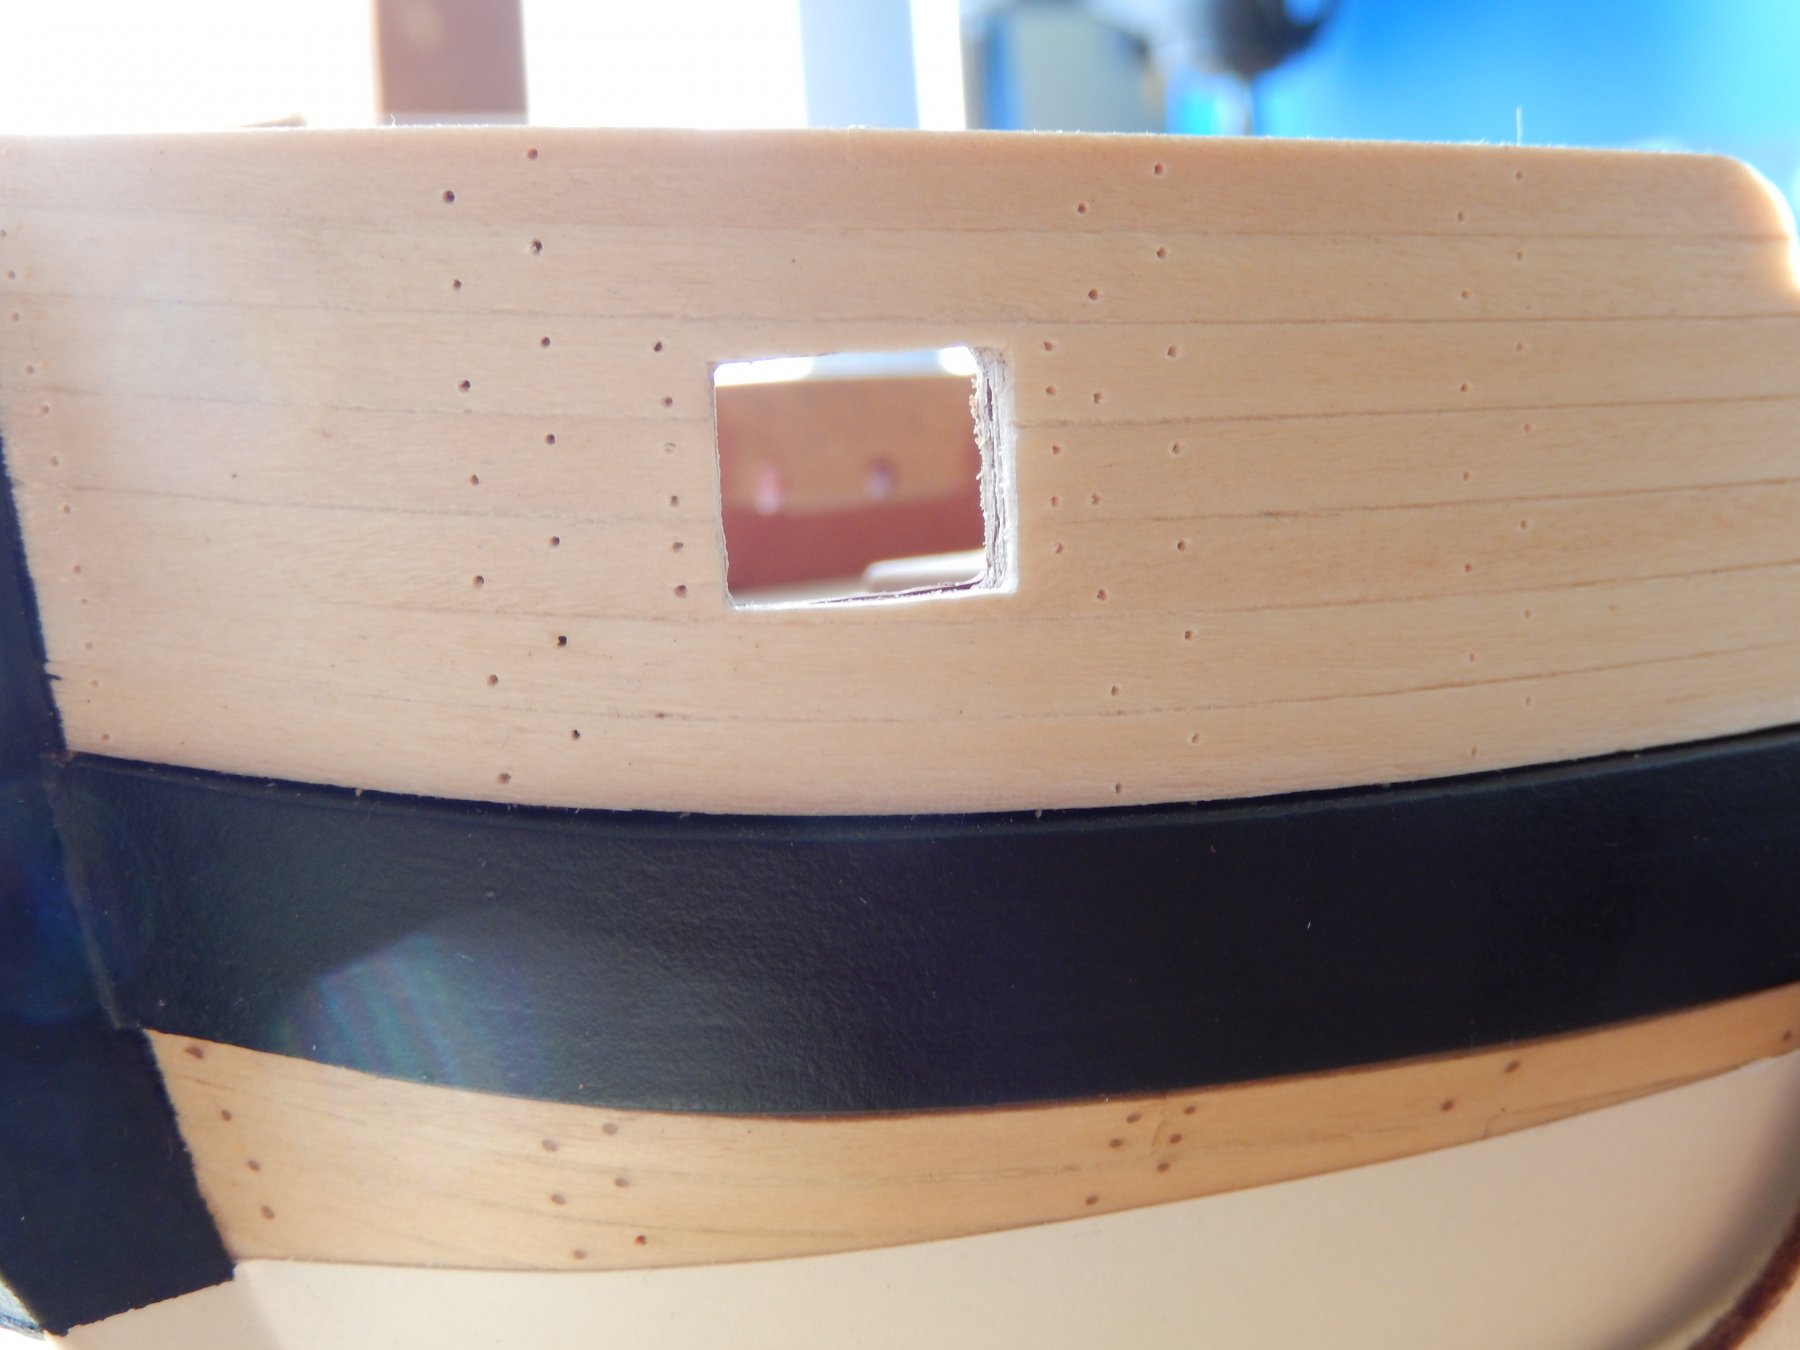
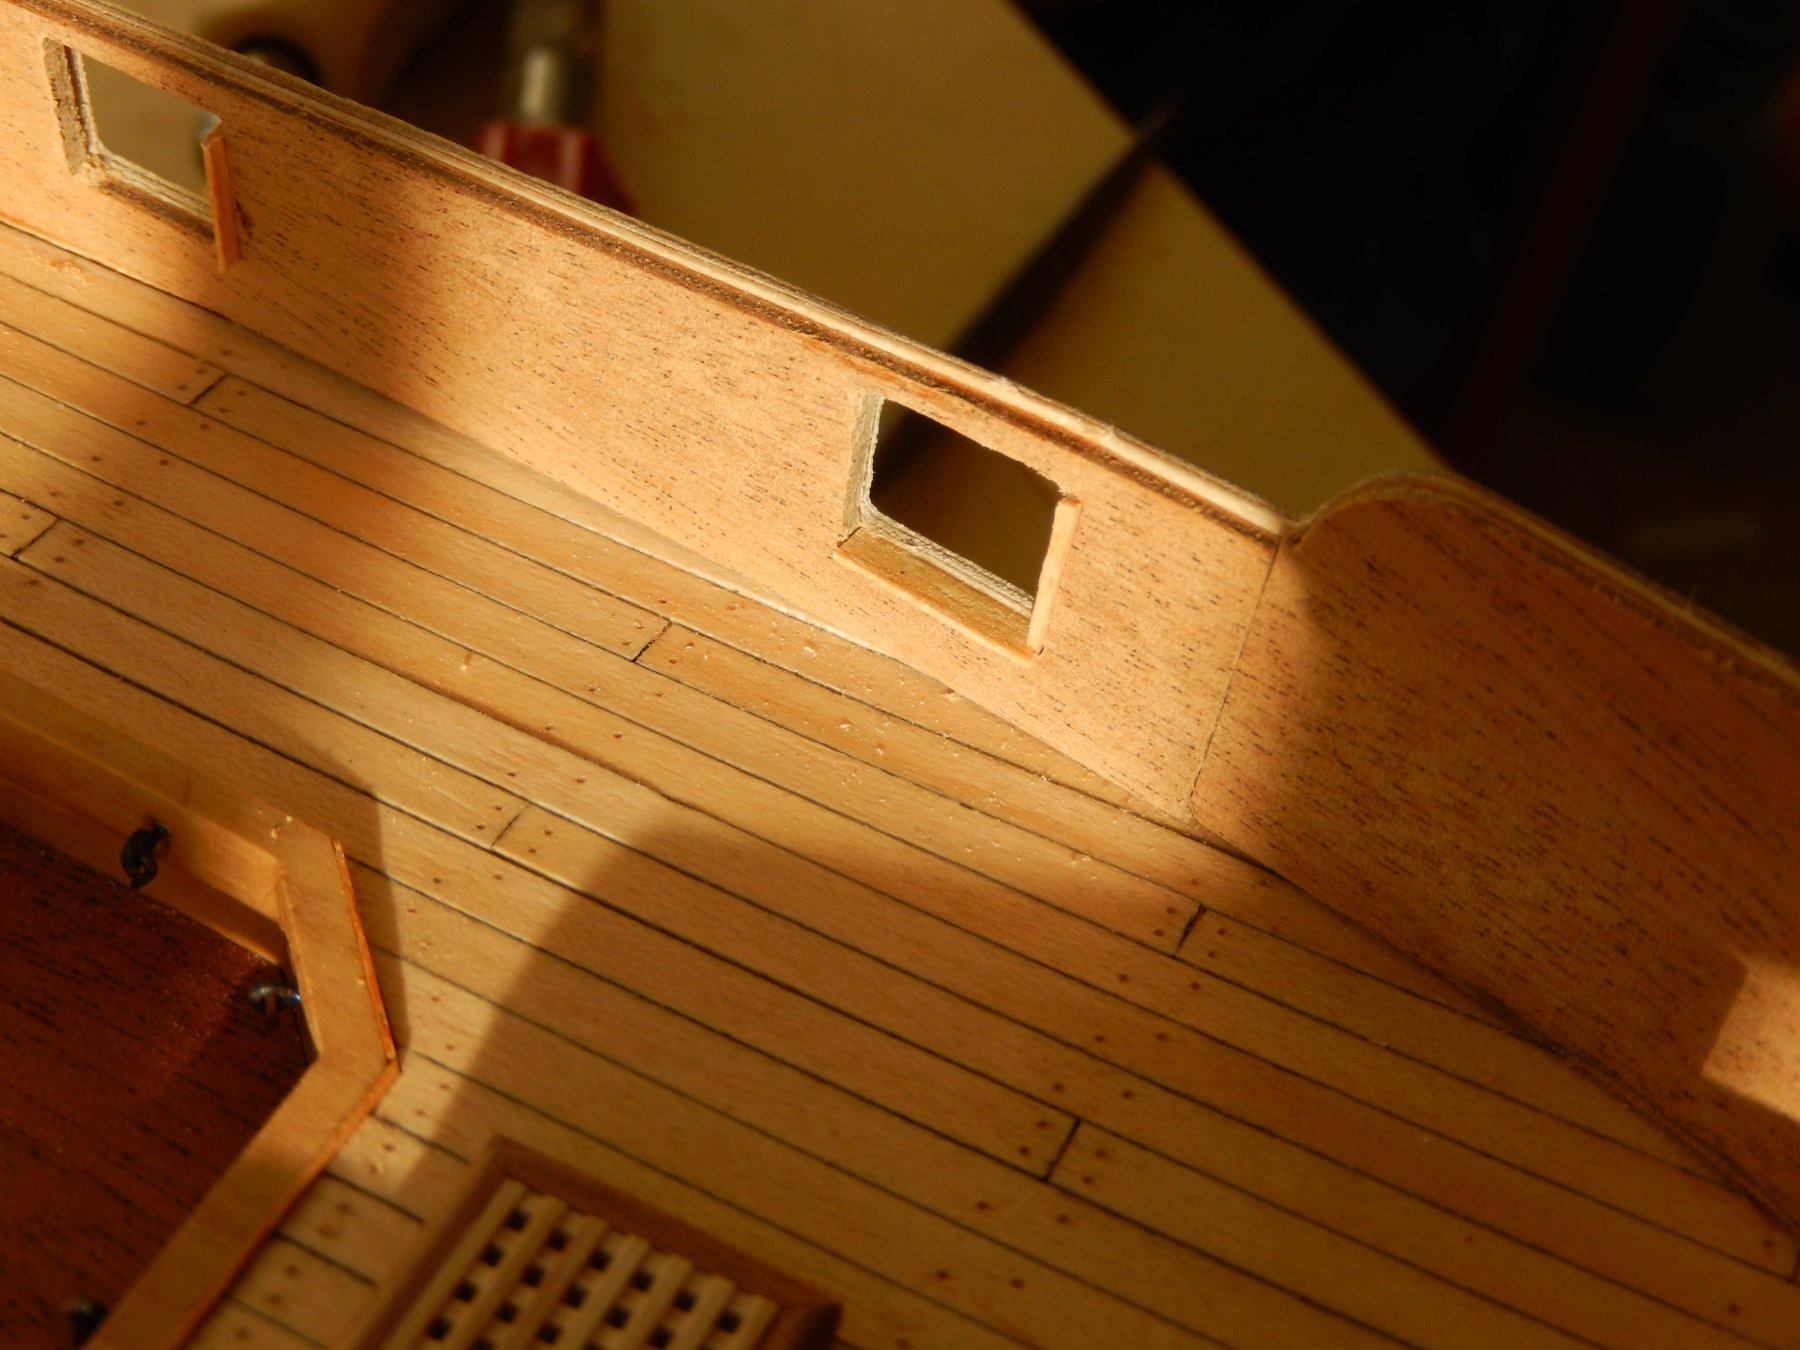
The holes for the tree nails are finally complete. Before after drilling I run a finger over the holes to push in any timber pulled out by the drill bit, then use a pin to fully open the holes ready for filling. The photos below show how things look before the holes are filled.

- 421 replies
-
- 13
-
-
- caldercraft
- granado
- (and 1 more)
-
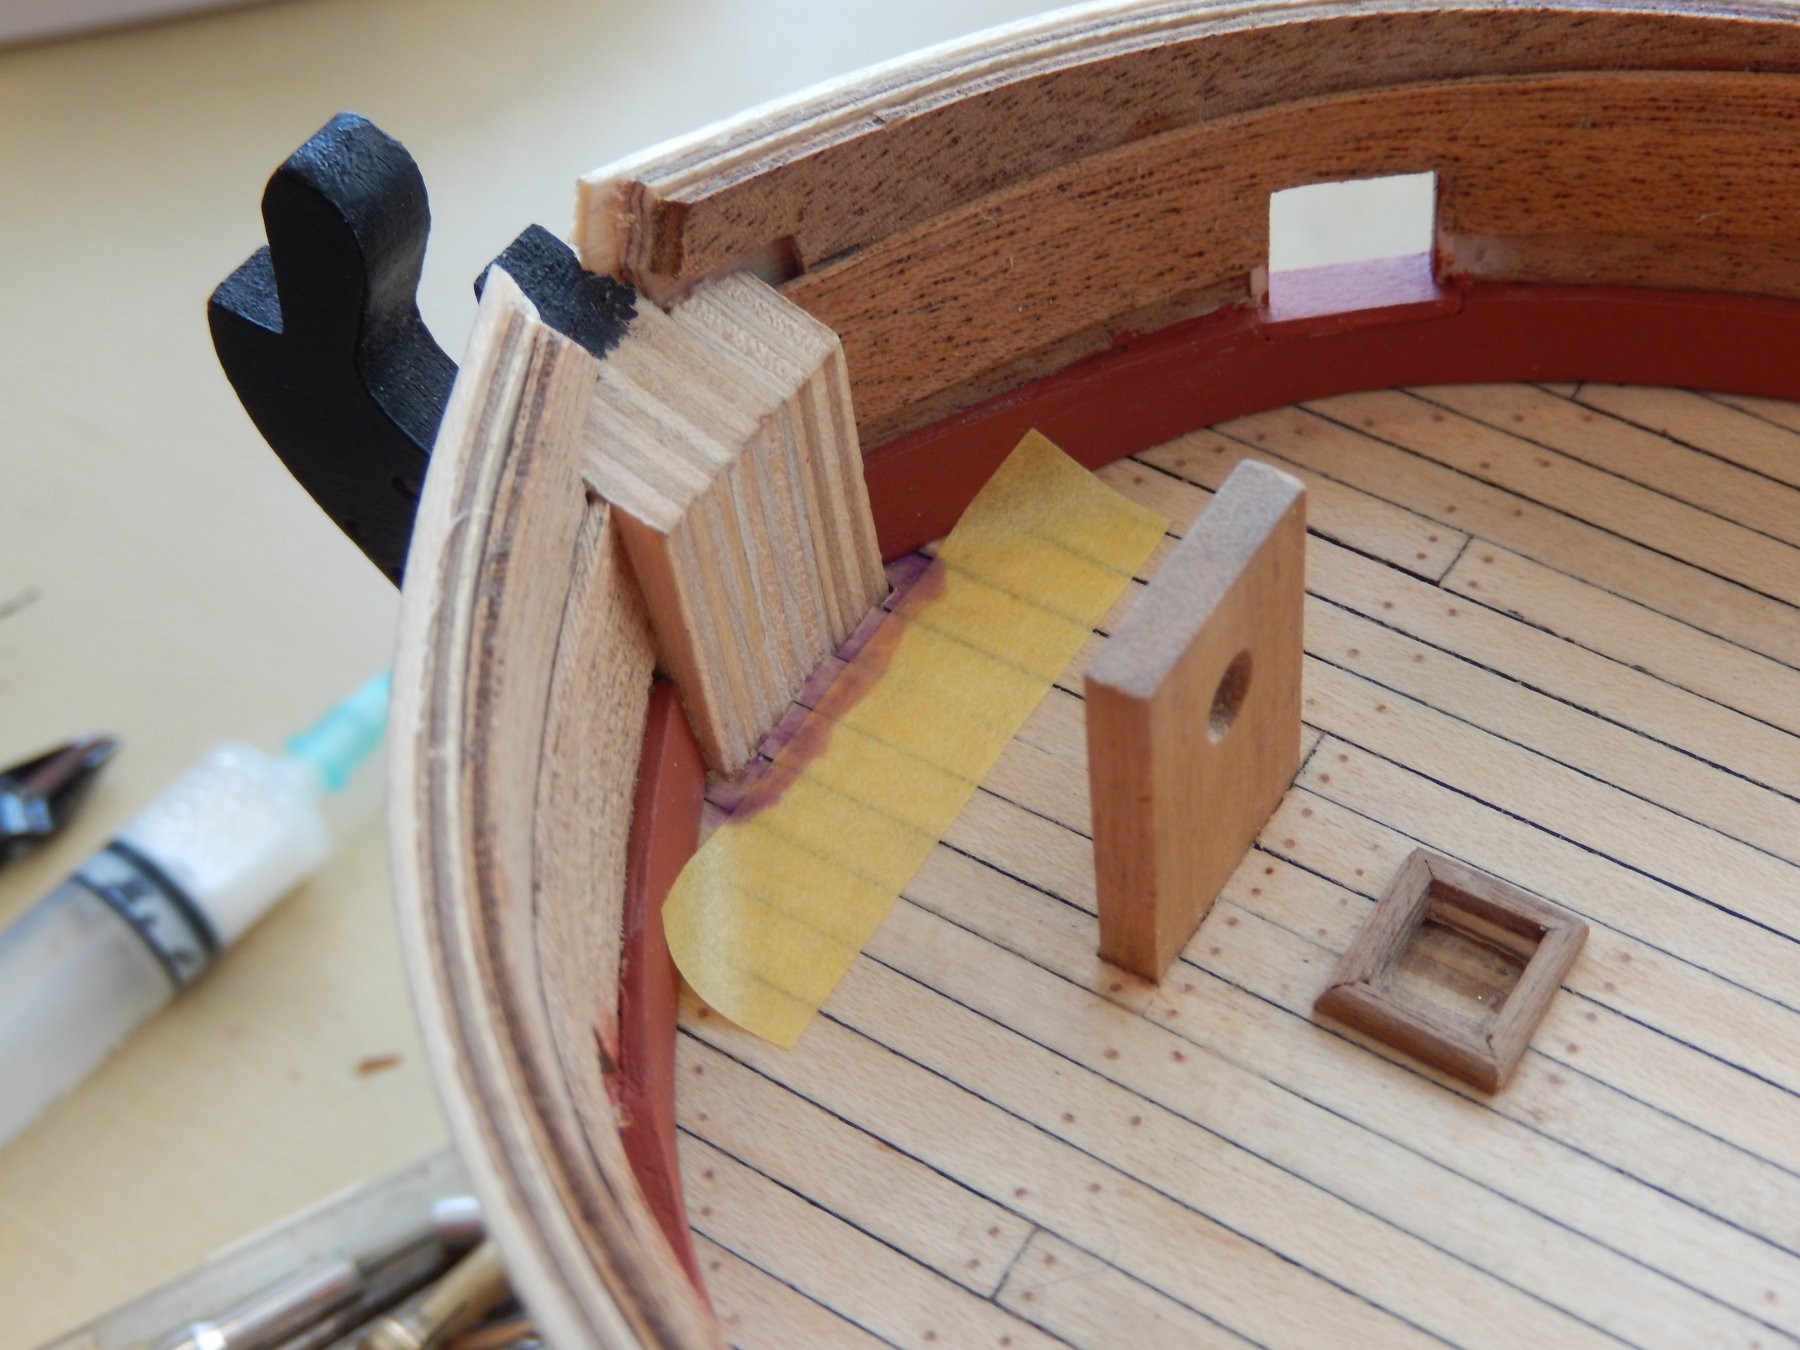
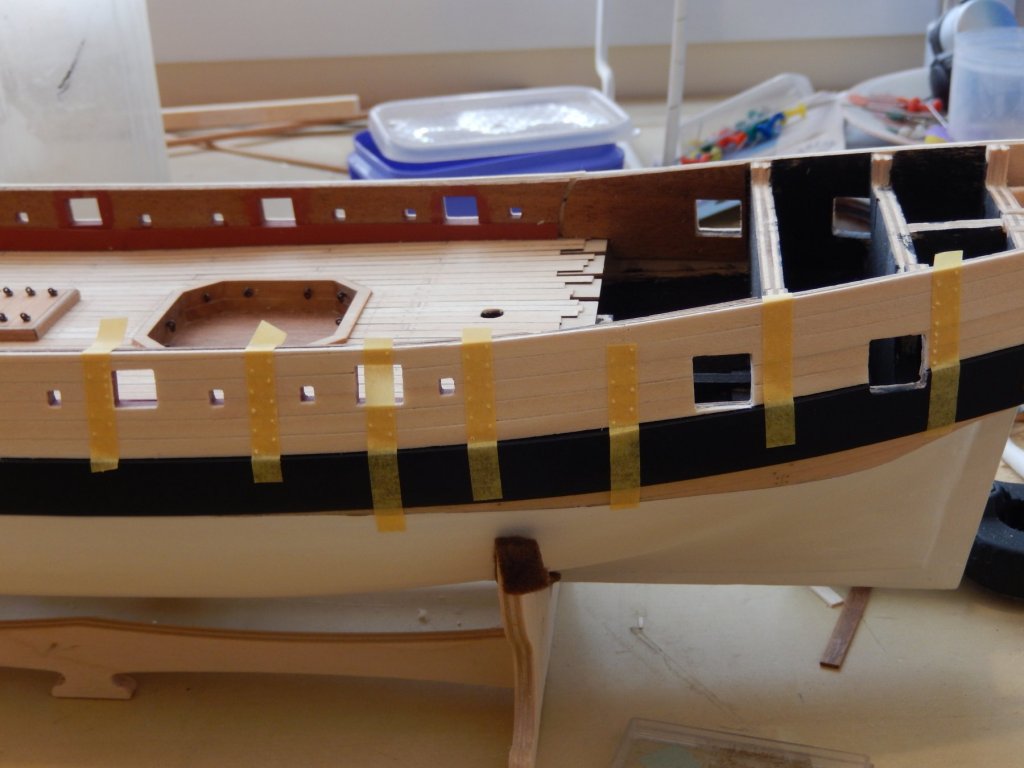
I have not had much chance to work on the model over the last week or so, but here is some progress on treenailing the upper planking. I have used Tamiya masking tape to provide a guide for each column. I first establish one vertical column using the tape, then from this, use a pair of dividers to make sure each successive piece of tape is the same horizontal distance top and bottom. This makes each piece of tape vertical and of course parallel. A pin is then used to mark to positions of the nails. This helps avoid the 0.5mm drill bit slipping and mistakes to be made.
- 421 replies
-
- 12
-
-
- caldercraft
- granado
- (and 1 more)
-
Thanks Joe. The remaining painting should be straightforward. Incidentally, I've looked at your log and admired your paintings replacing the transfers of the drums etc. I will have a go at it too, though I'm having trouble finding suitable polystyrene. If it doesn't turn out, I will not use the transfers (I think they look toy-like) , but will just rely on a painted surface. Thanks for the encouragement Zappto.
-
Thanks Kevin. You've certainly done a lovely job. All the best Bob
-
Al: thanks for your kind comment. Kevin: I'm not sure just what you mean - painting the inside bulwark? I painted the spirtketting off the model to avoid getting paint on the natural wood of the deck. it's now fixed. I'm hoping that painting the rest of the bulwark above it will be straightforward. As well, would you clarify what you mean by 'sticking' - what to what? Thanks for taking the time to help.
-
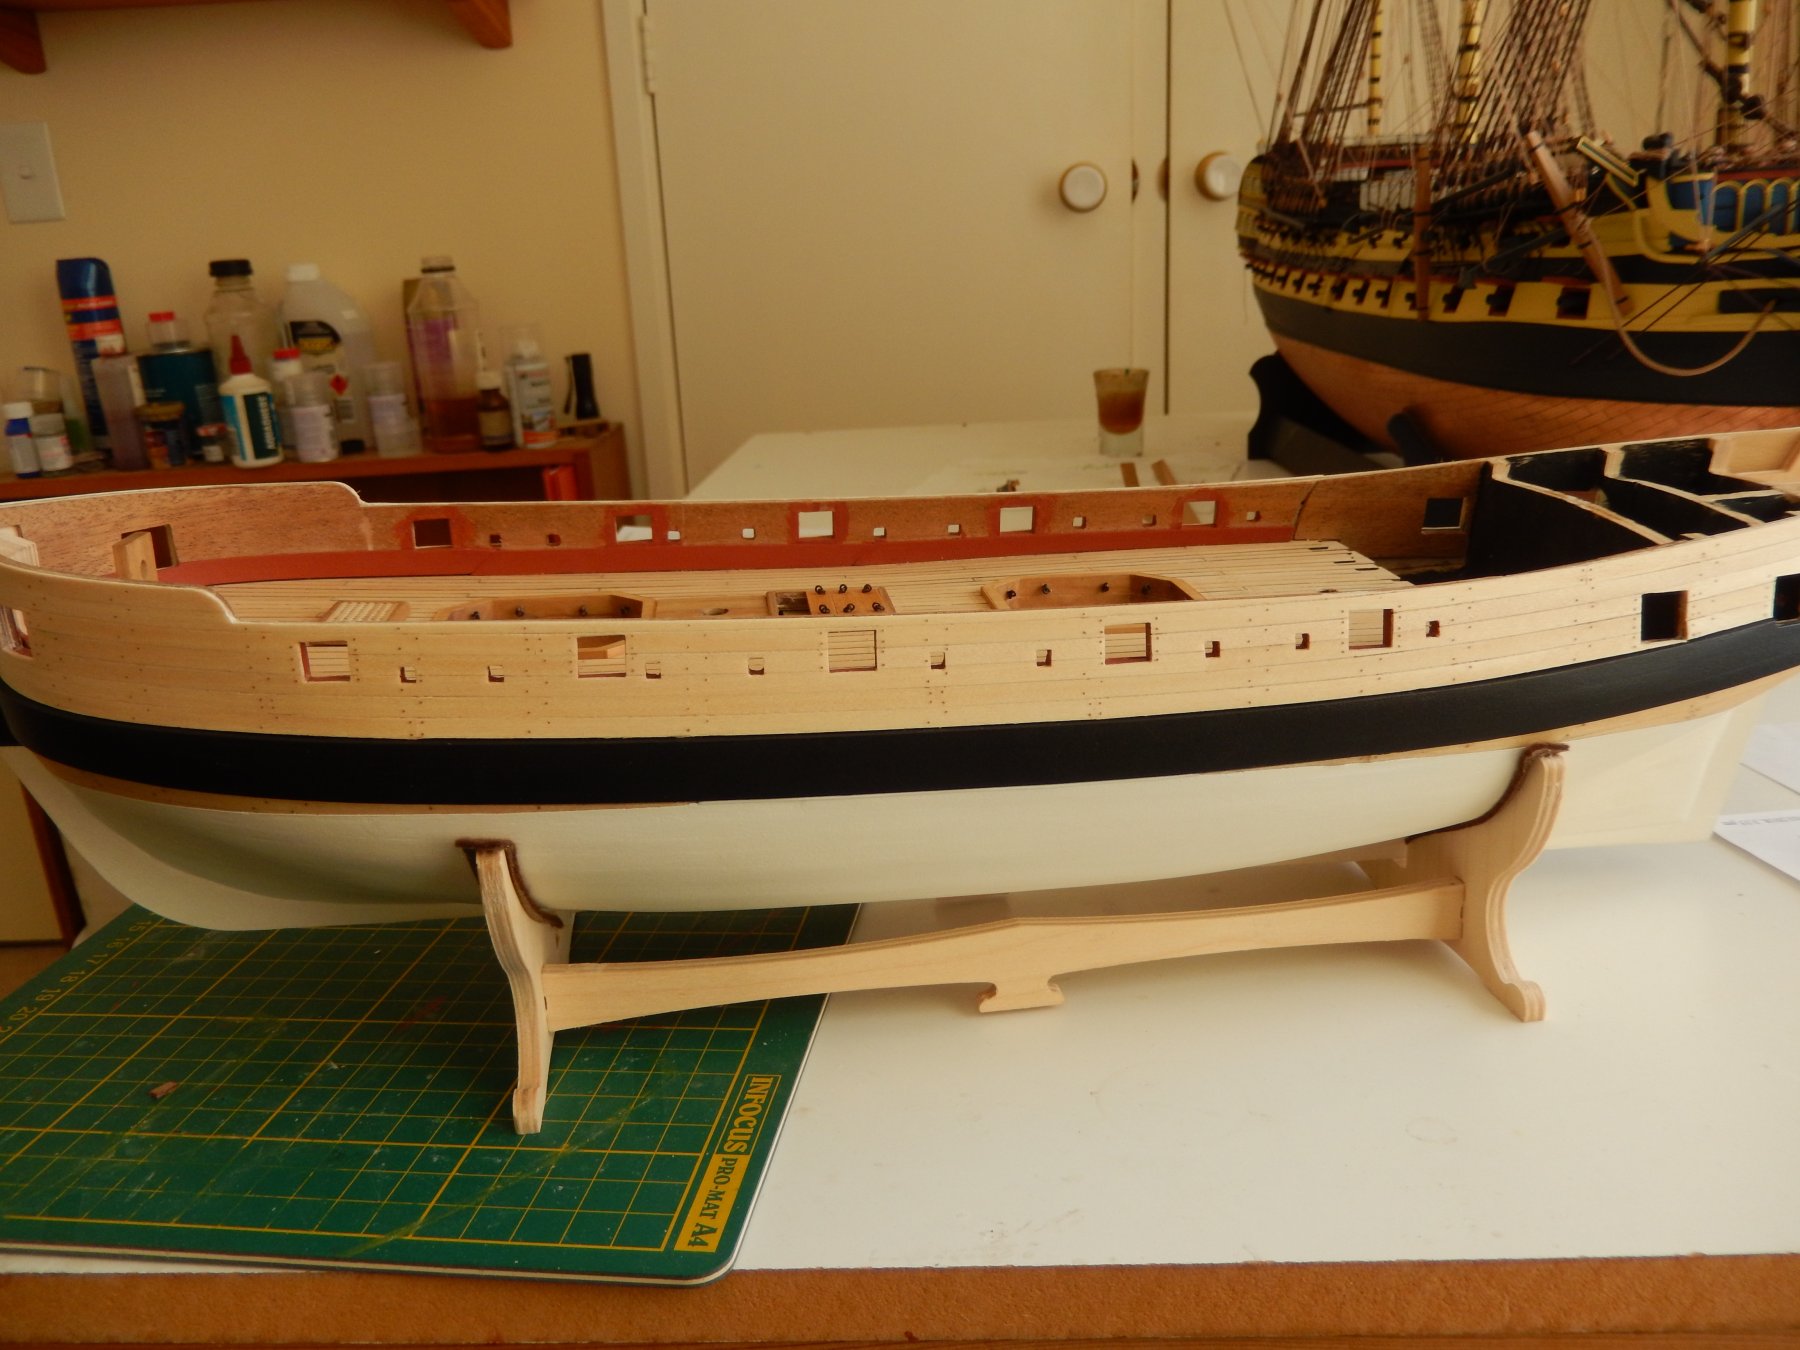
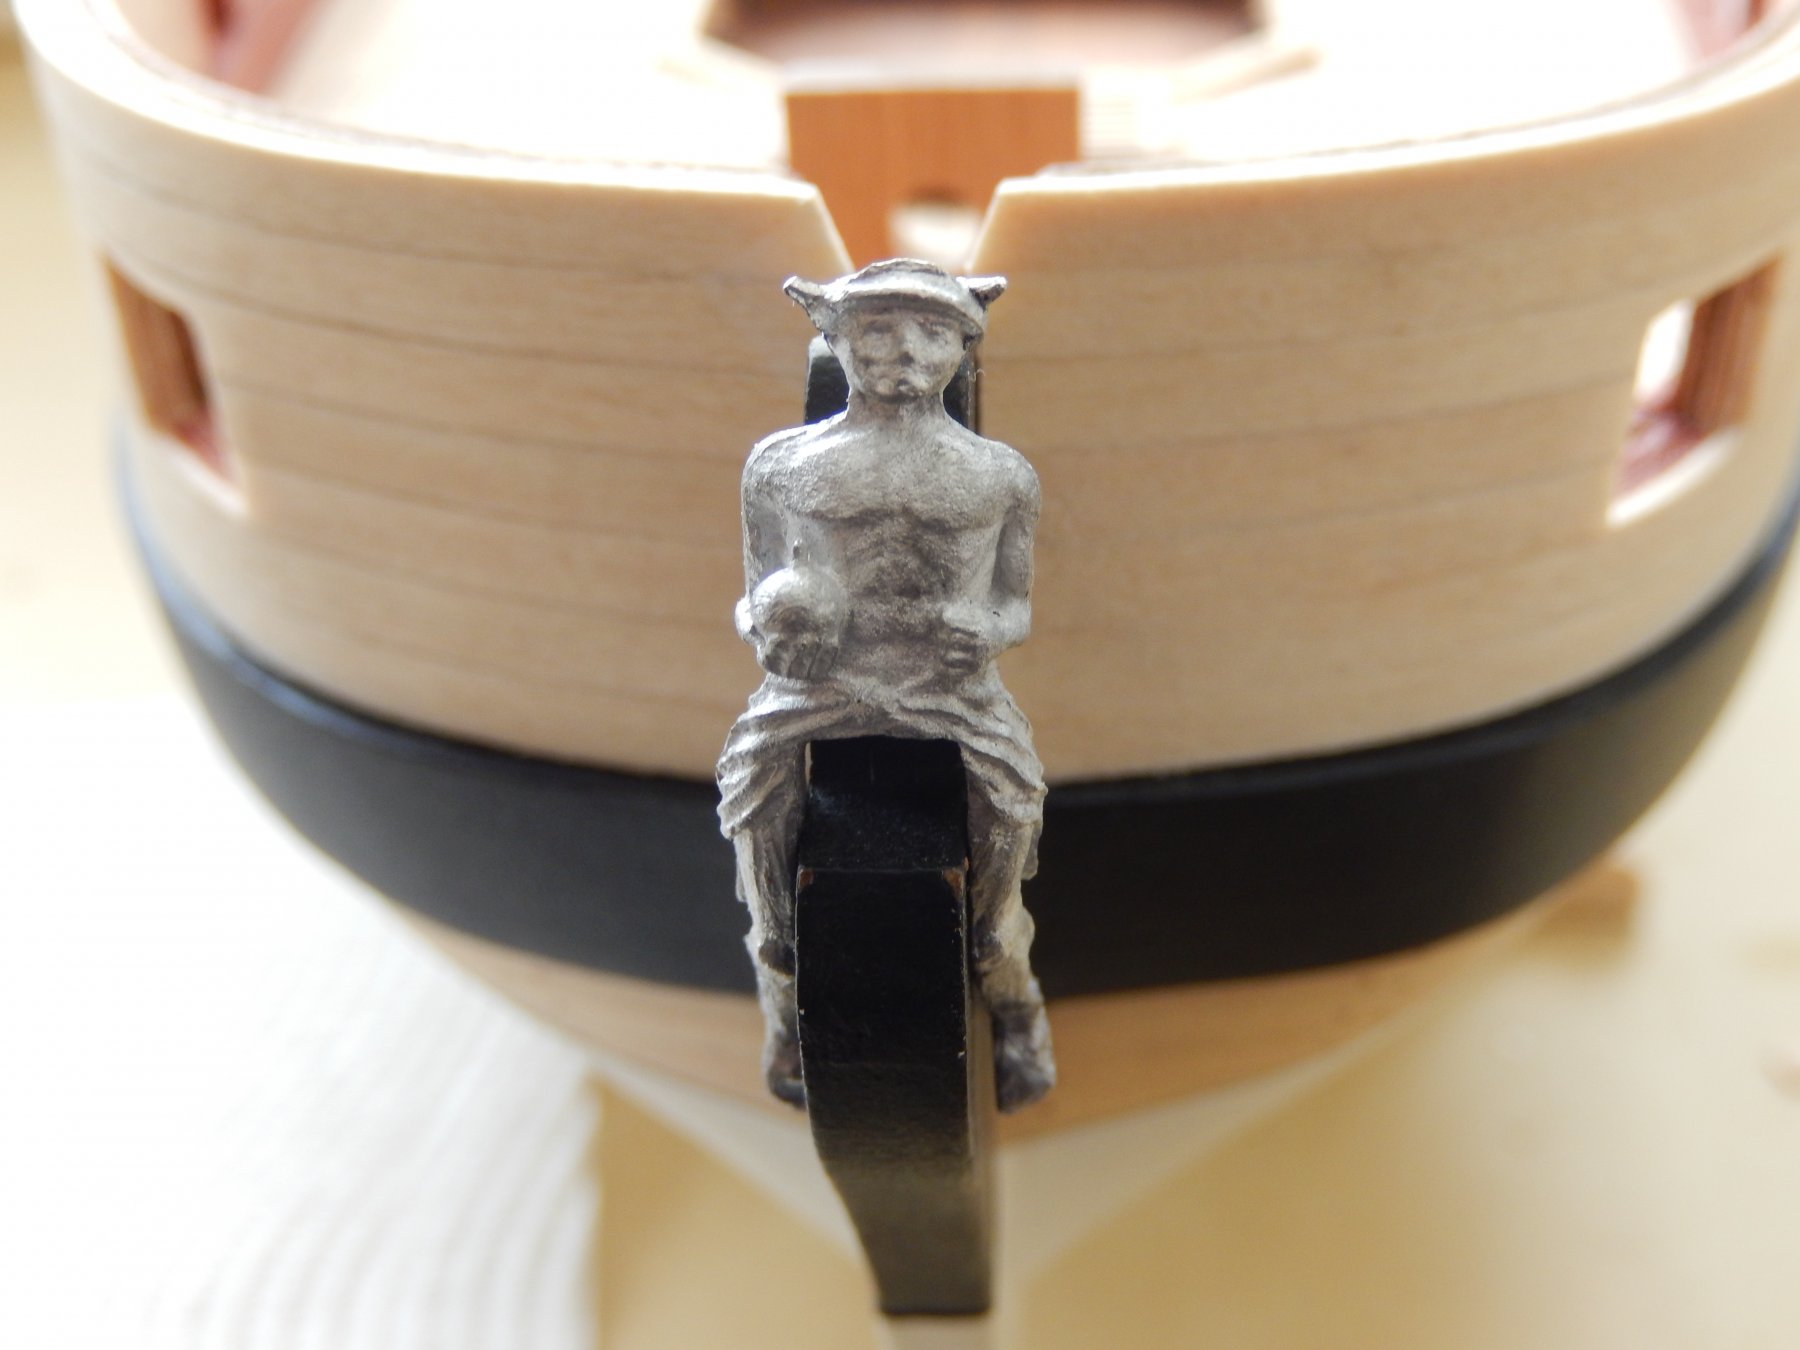
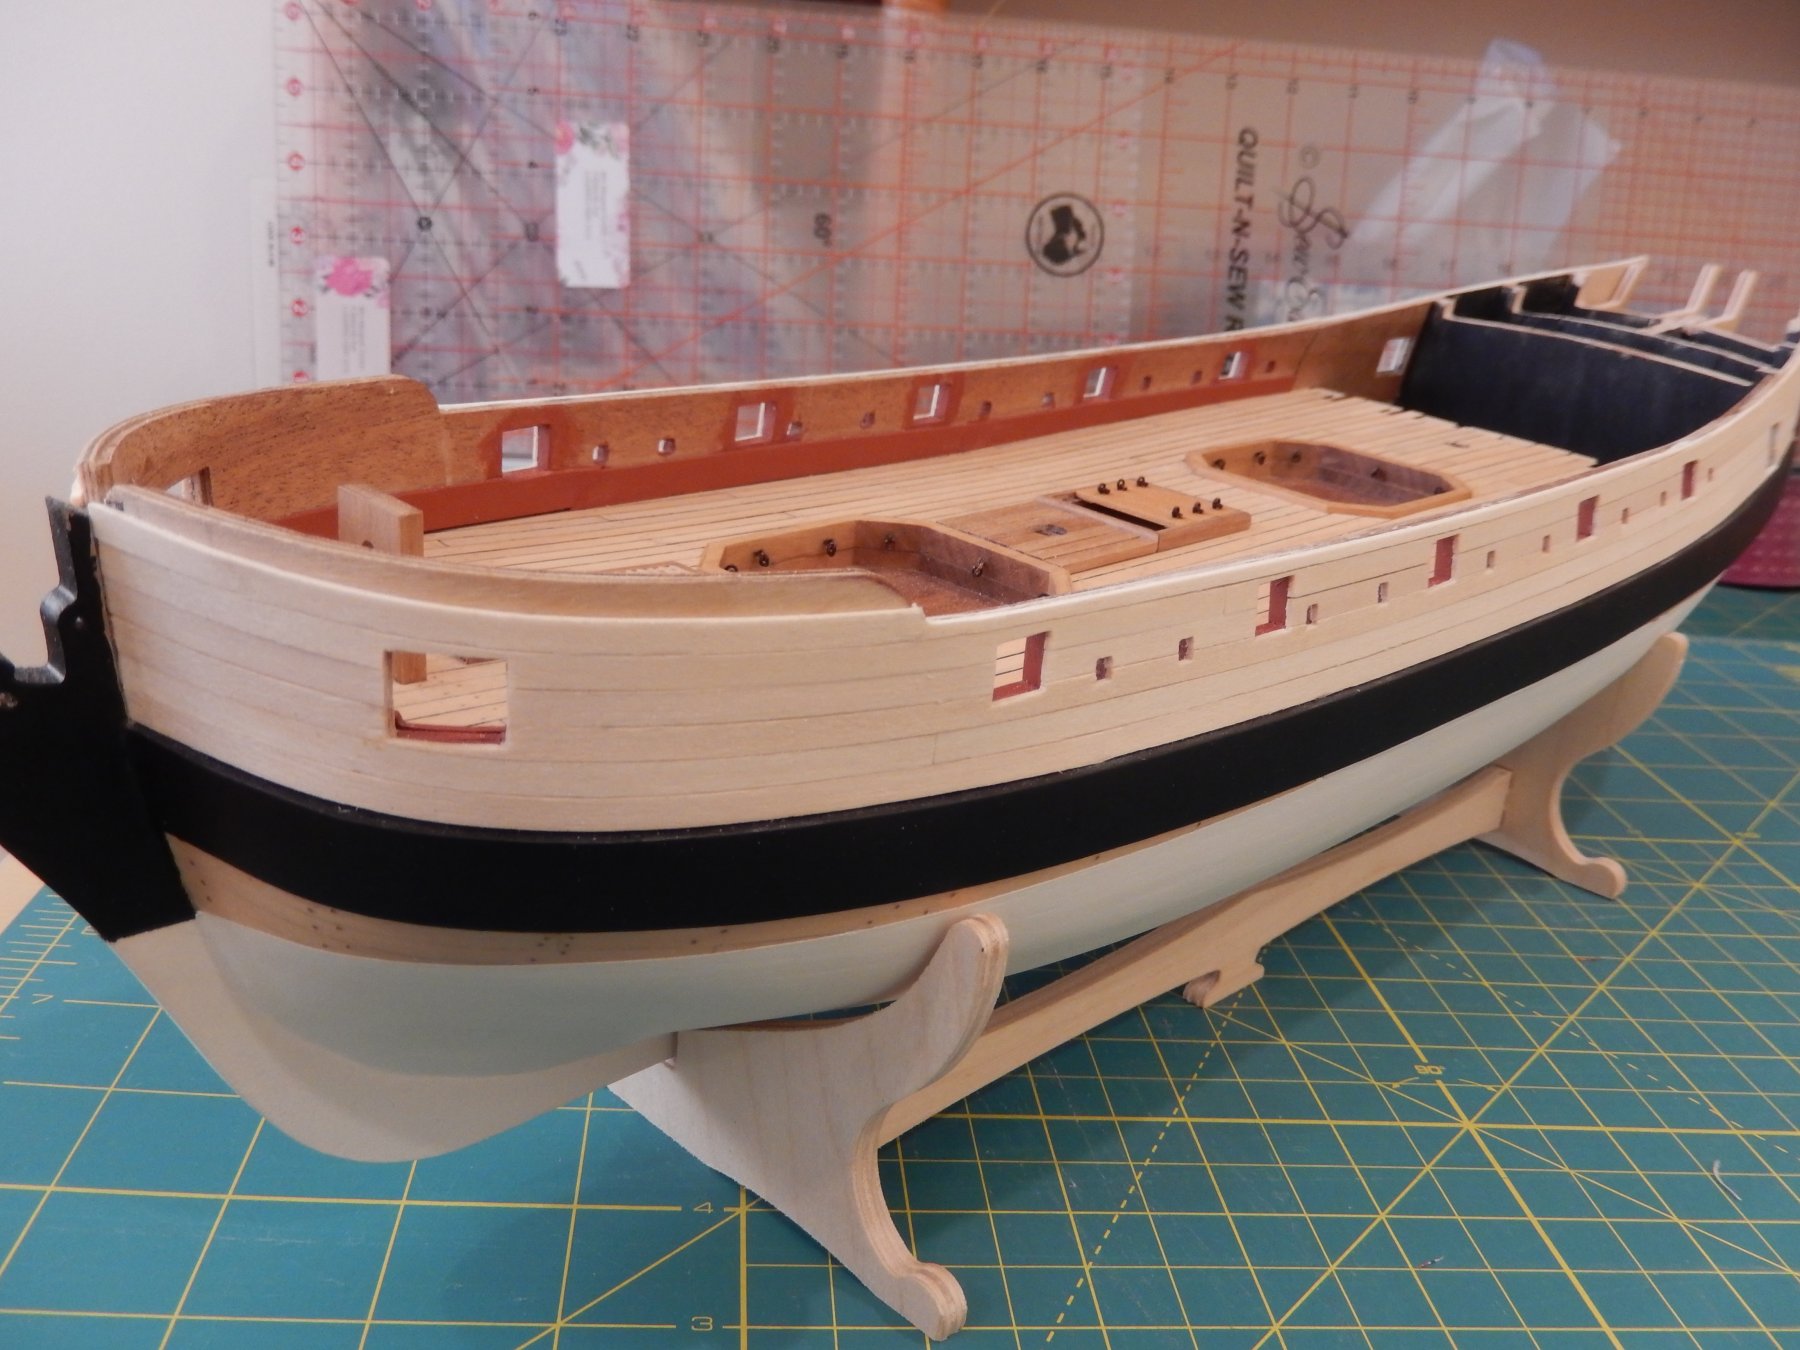
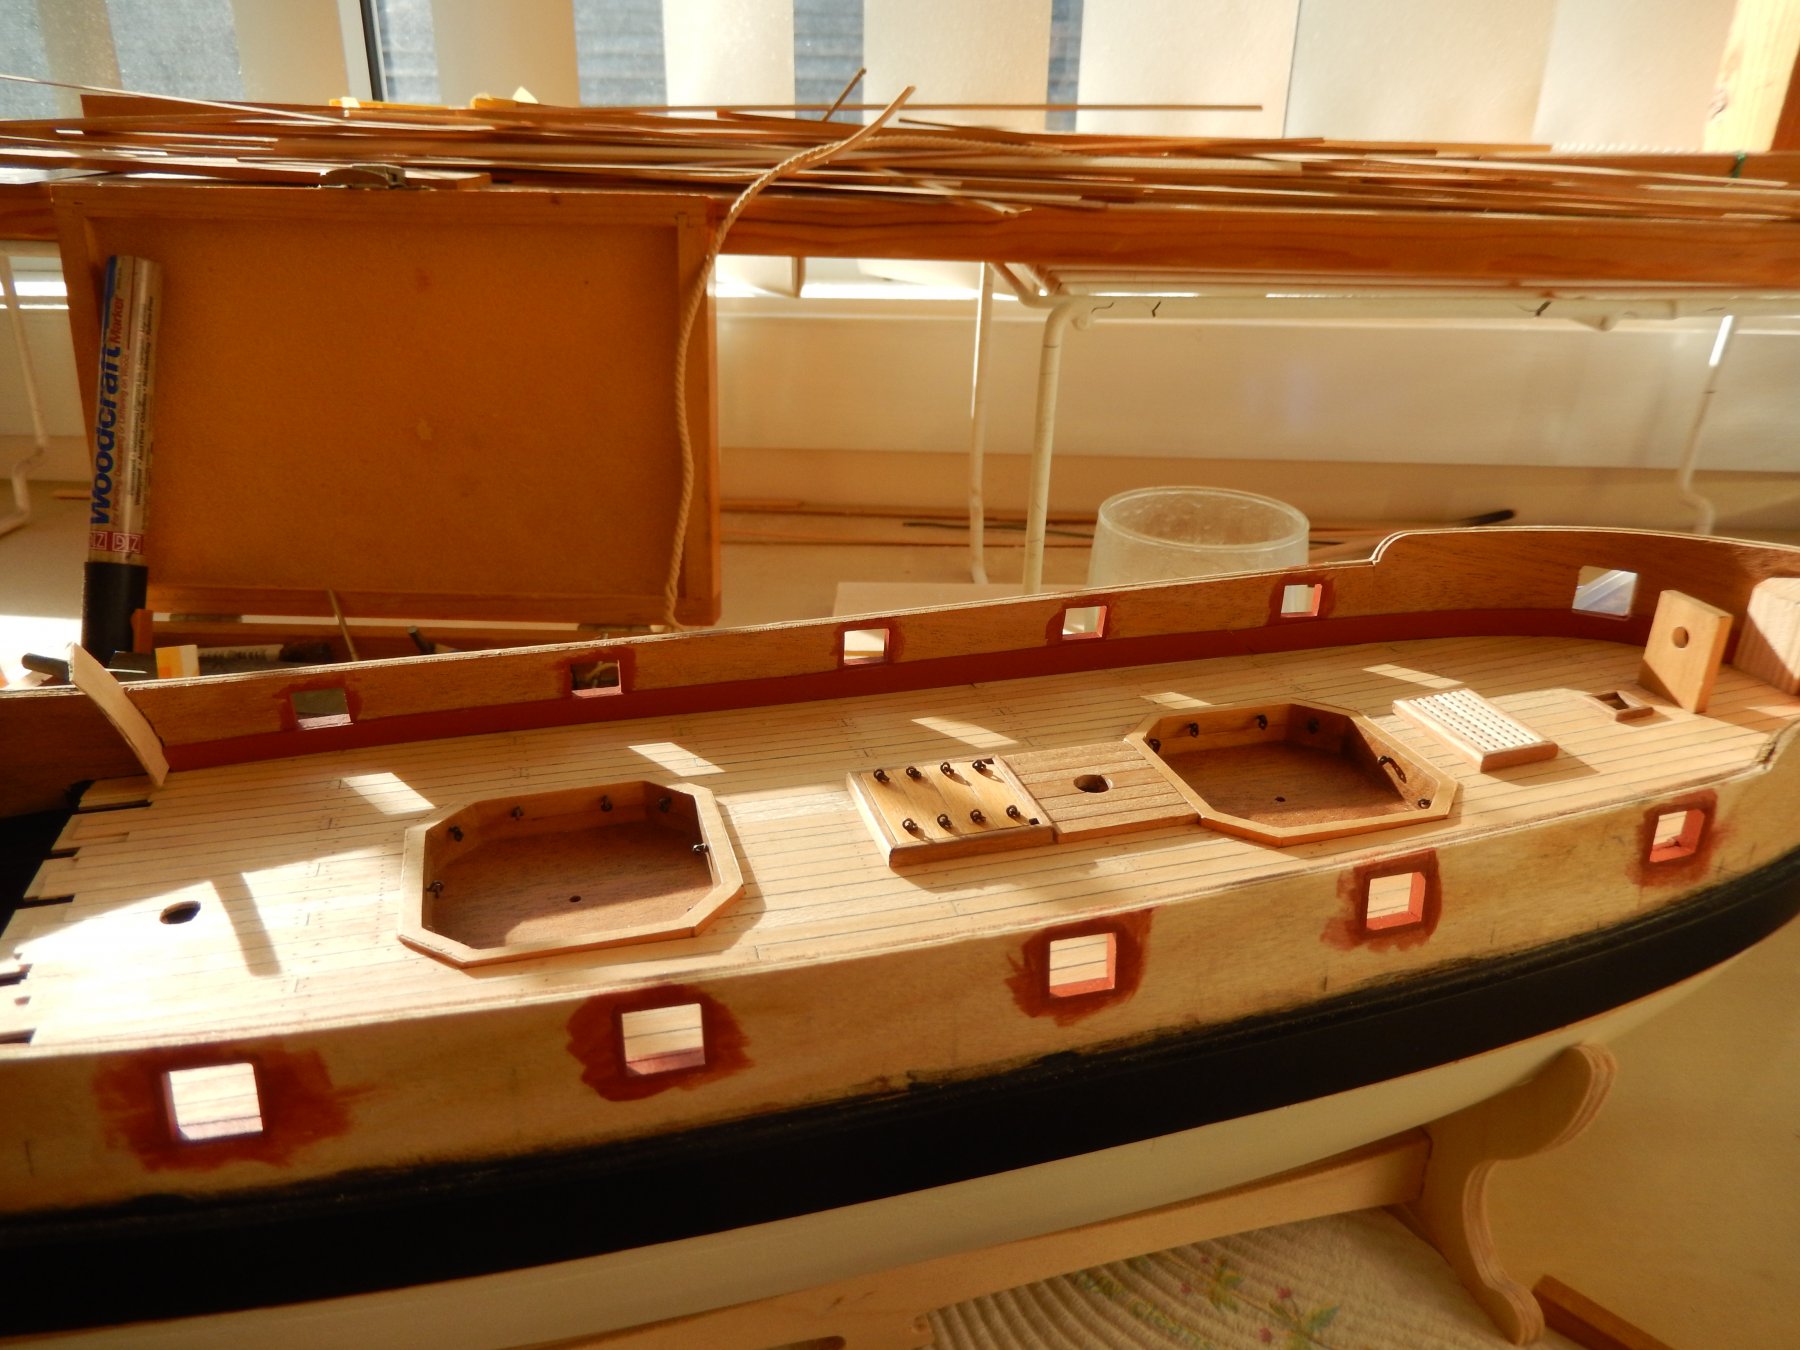
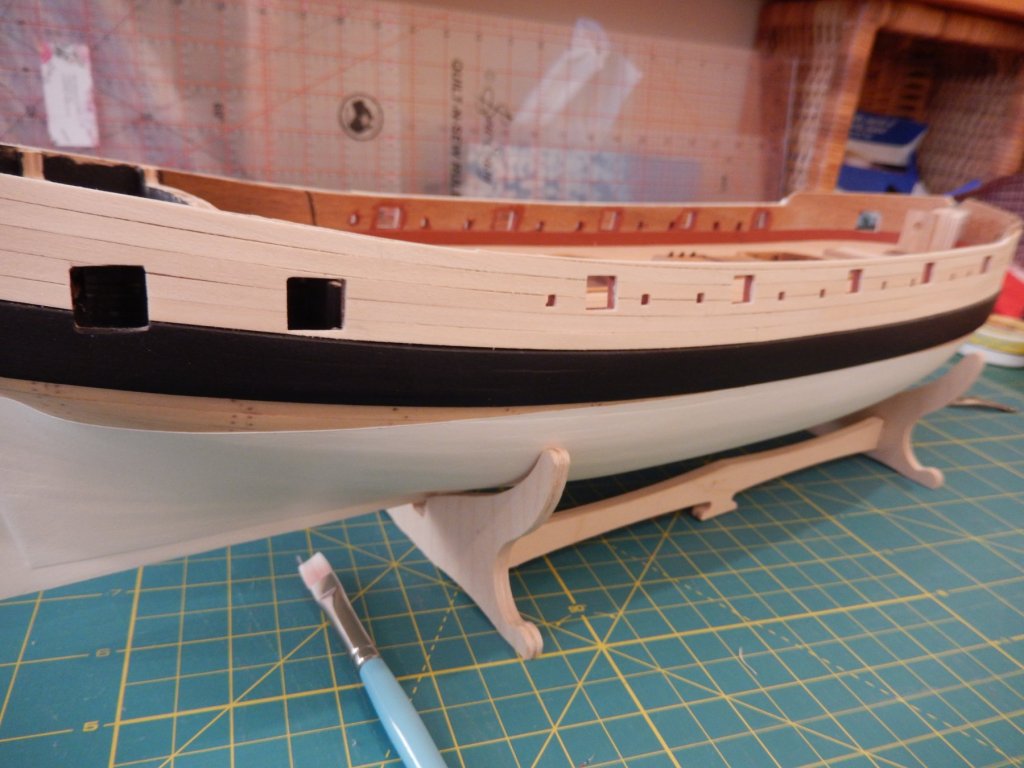
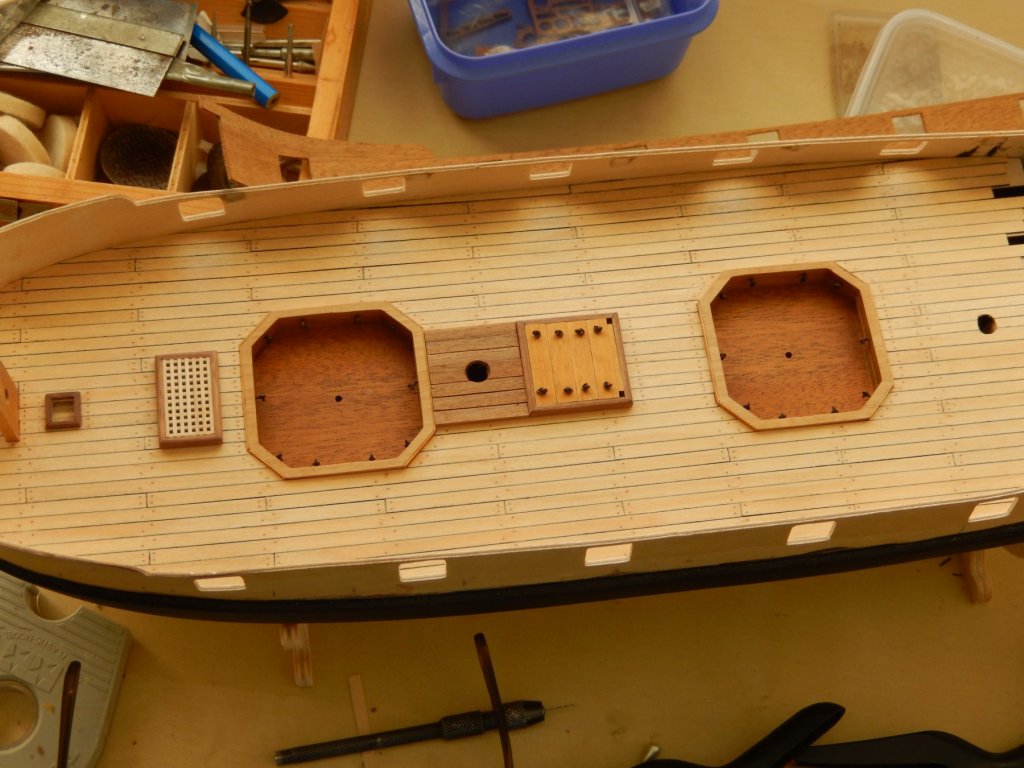
The second planking is now complete. Two coats of dilute PVA seemed to make the very soft timber amenable to sanding, then two coats of poly were applied. Next, the holes for the treenails will be drilled, then filled, and the whole lot will be given a coat or two of poly. This is how it looks now. The gaps between a few of the planks have been closed, though in a couple of cases a bit of touching up will be done. As well the rabbets need to be filled and painted. While away, between wrangling 4 and 5 year-old anarchists, I took a look at the castings for the various decorations. They're pretty rough. I took my dentist drills with me and tried to do something about poor old Hermes, the figurehead. Here he is below following a LOT of work on him, and still a bit more to go now that I've seen the photo below. I should have taken a 'before' shot. His horns (or whatever they are) were just two blobs. I hope once he is painted he may look a little more civilized.

- 421 replies
-
- 11
-
-
- caldercraft
- granado
- (and 1 more)
-
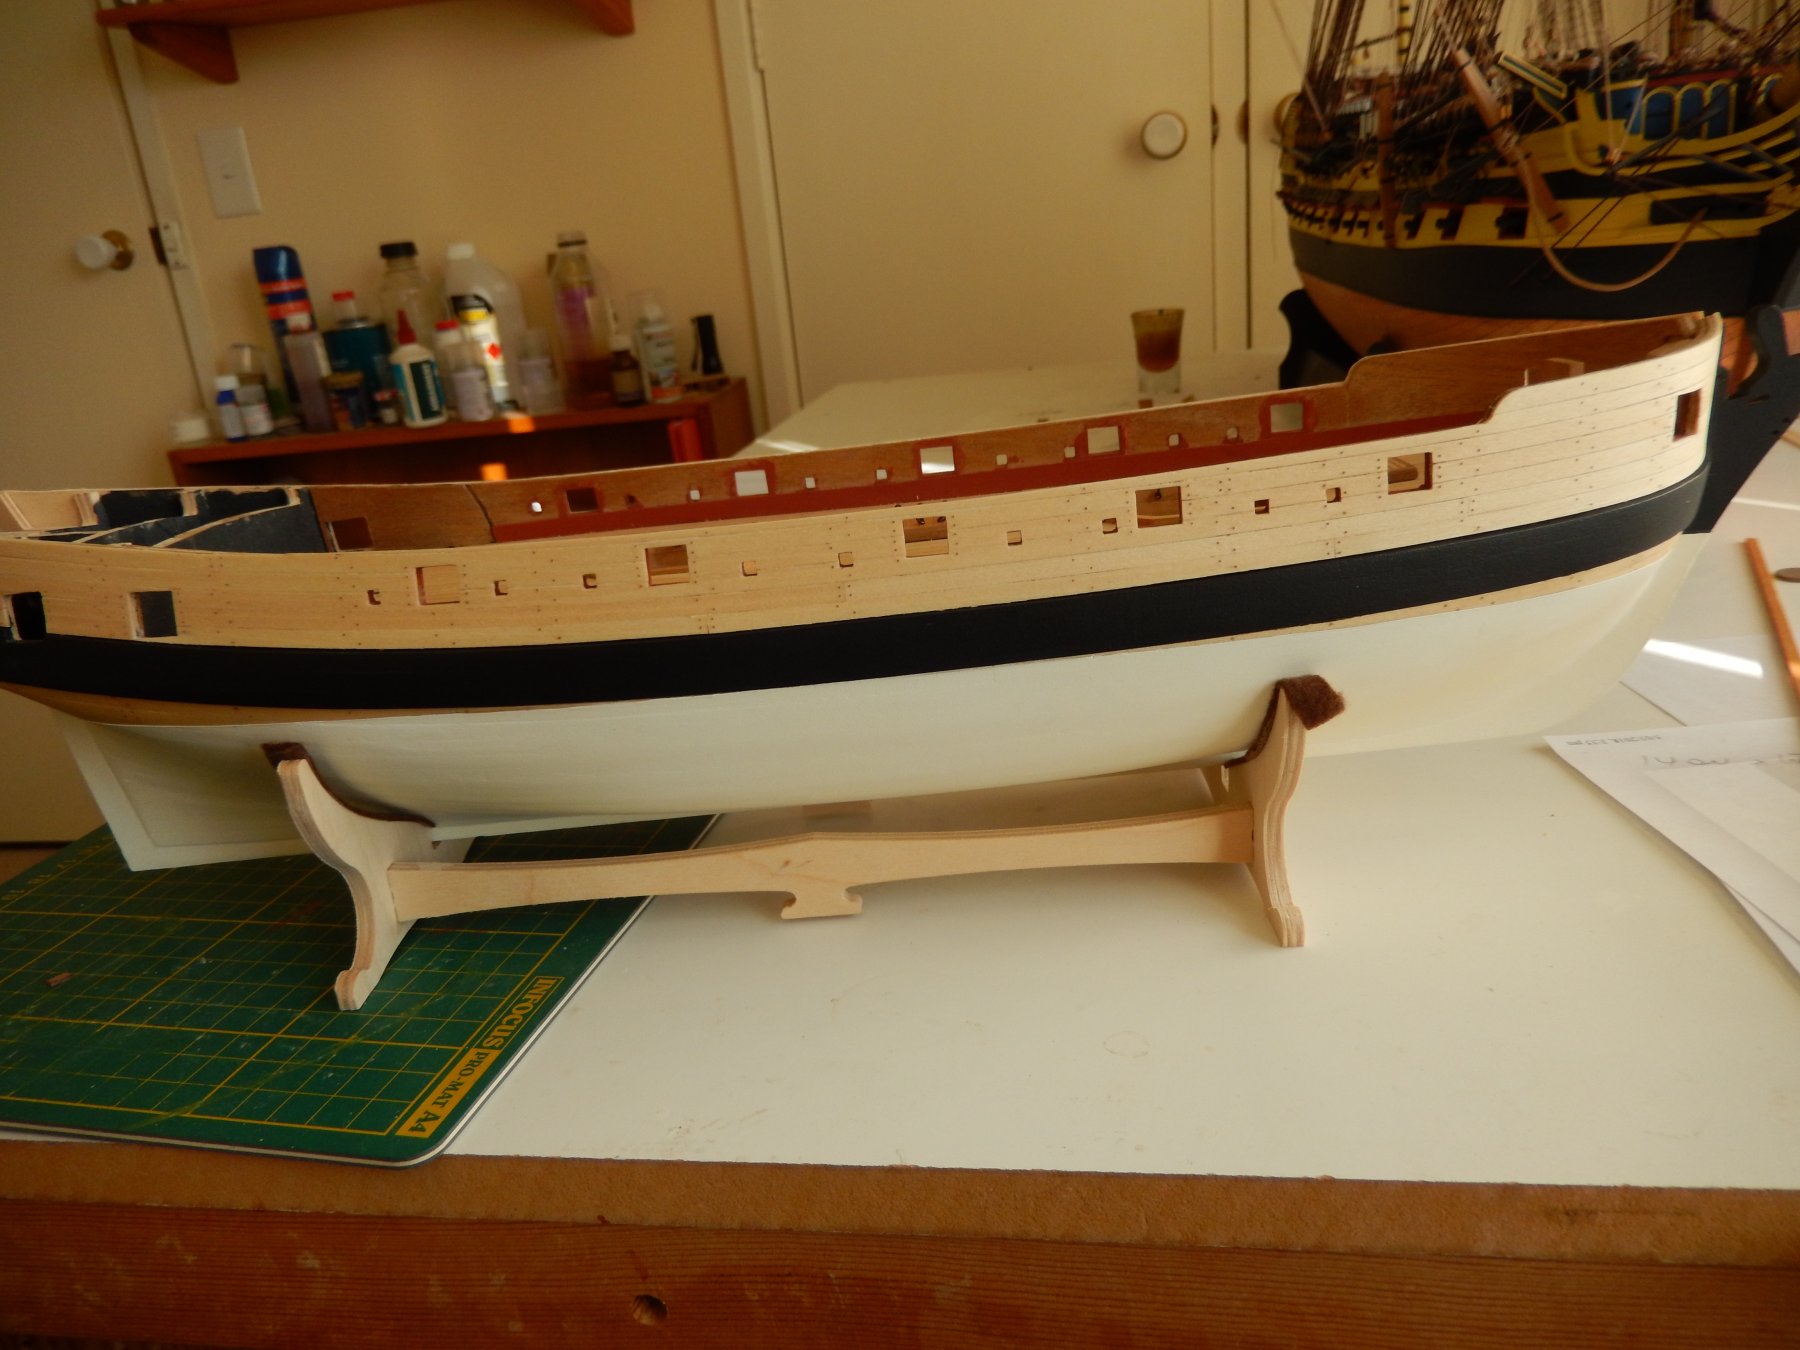
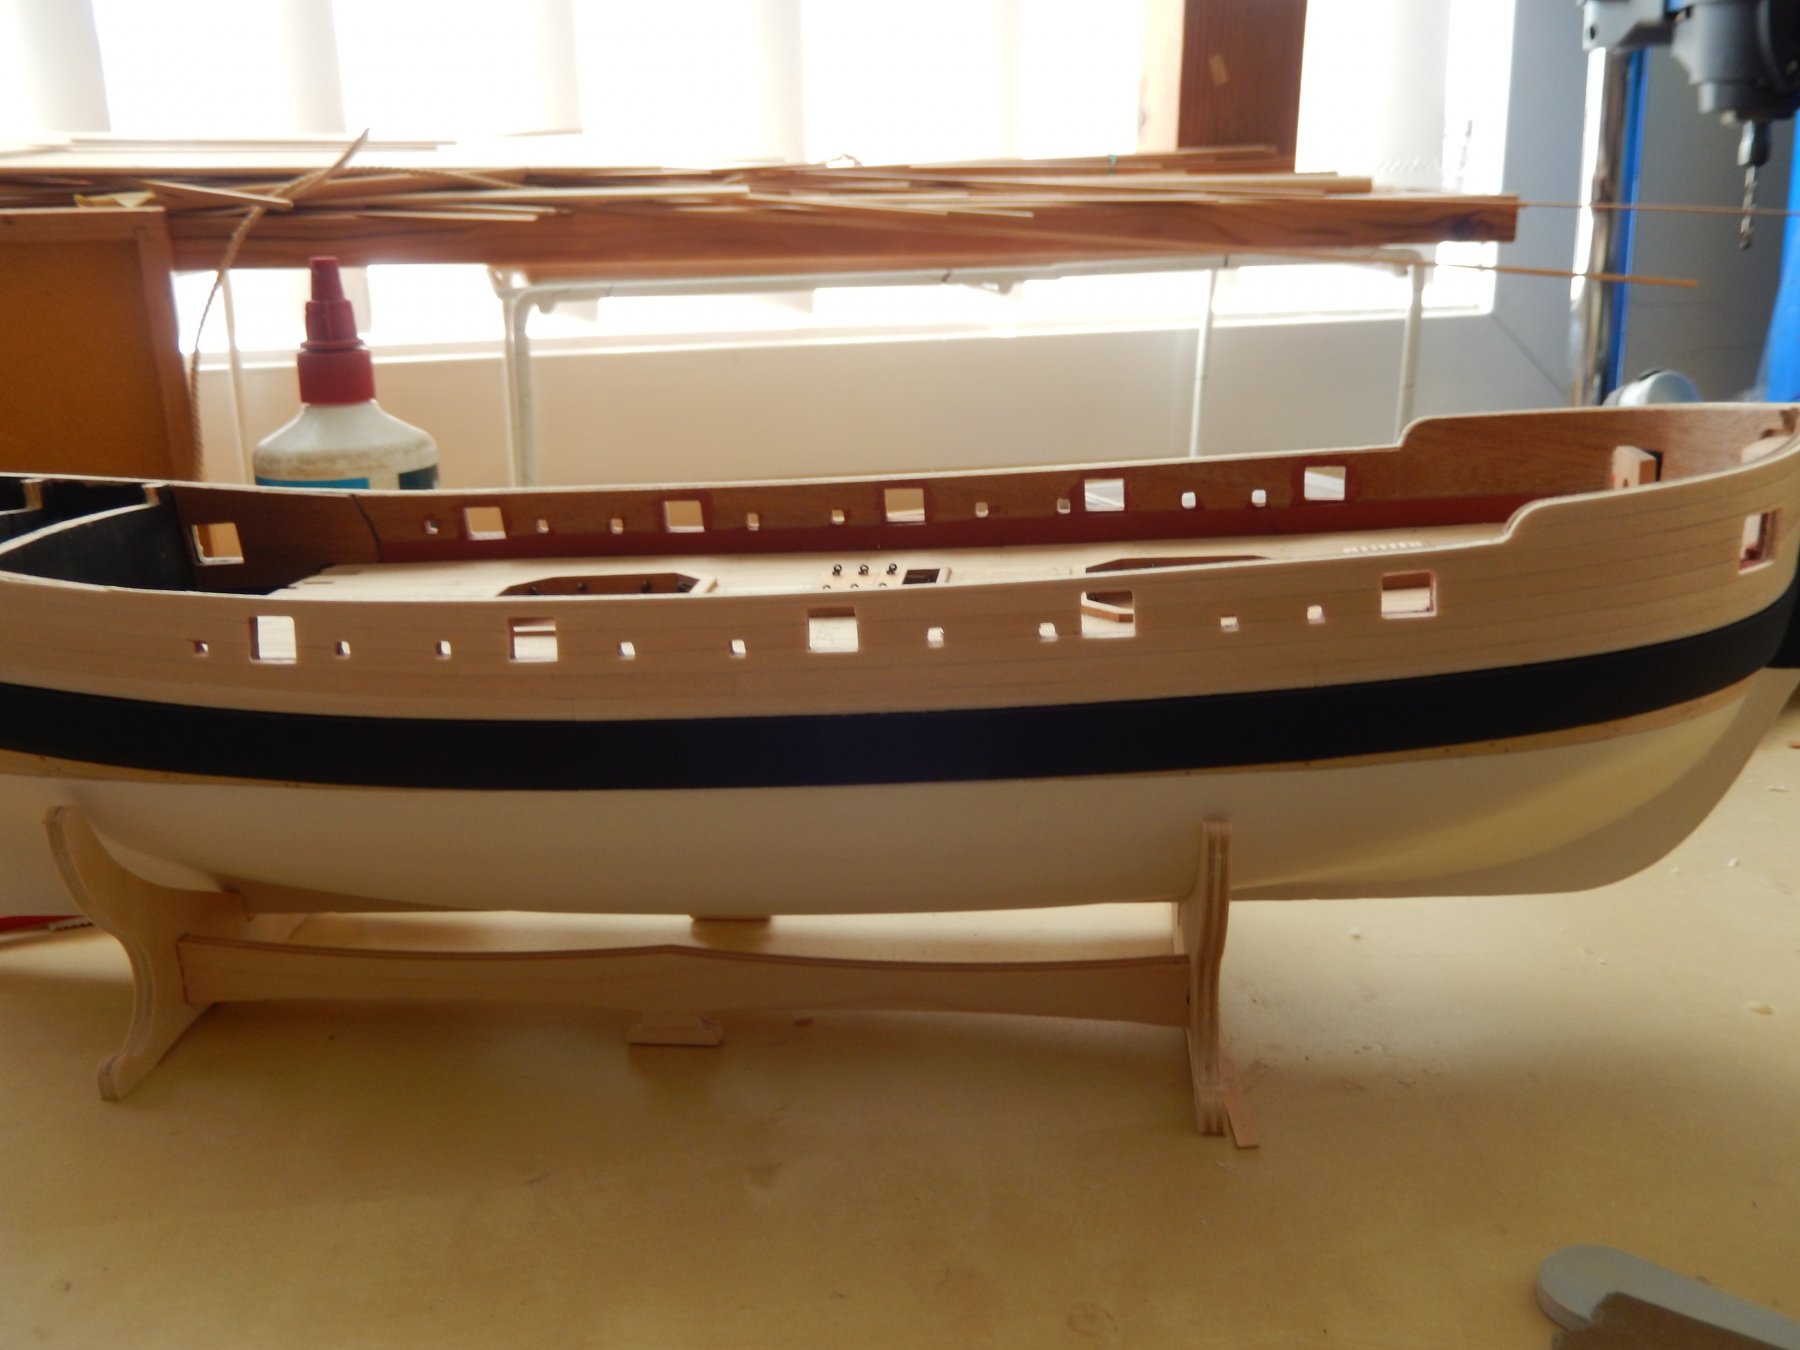
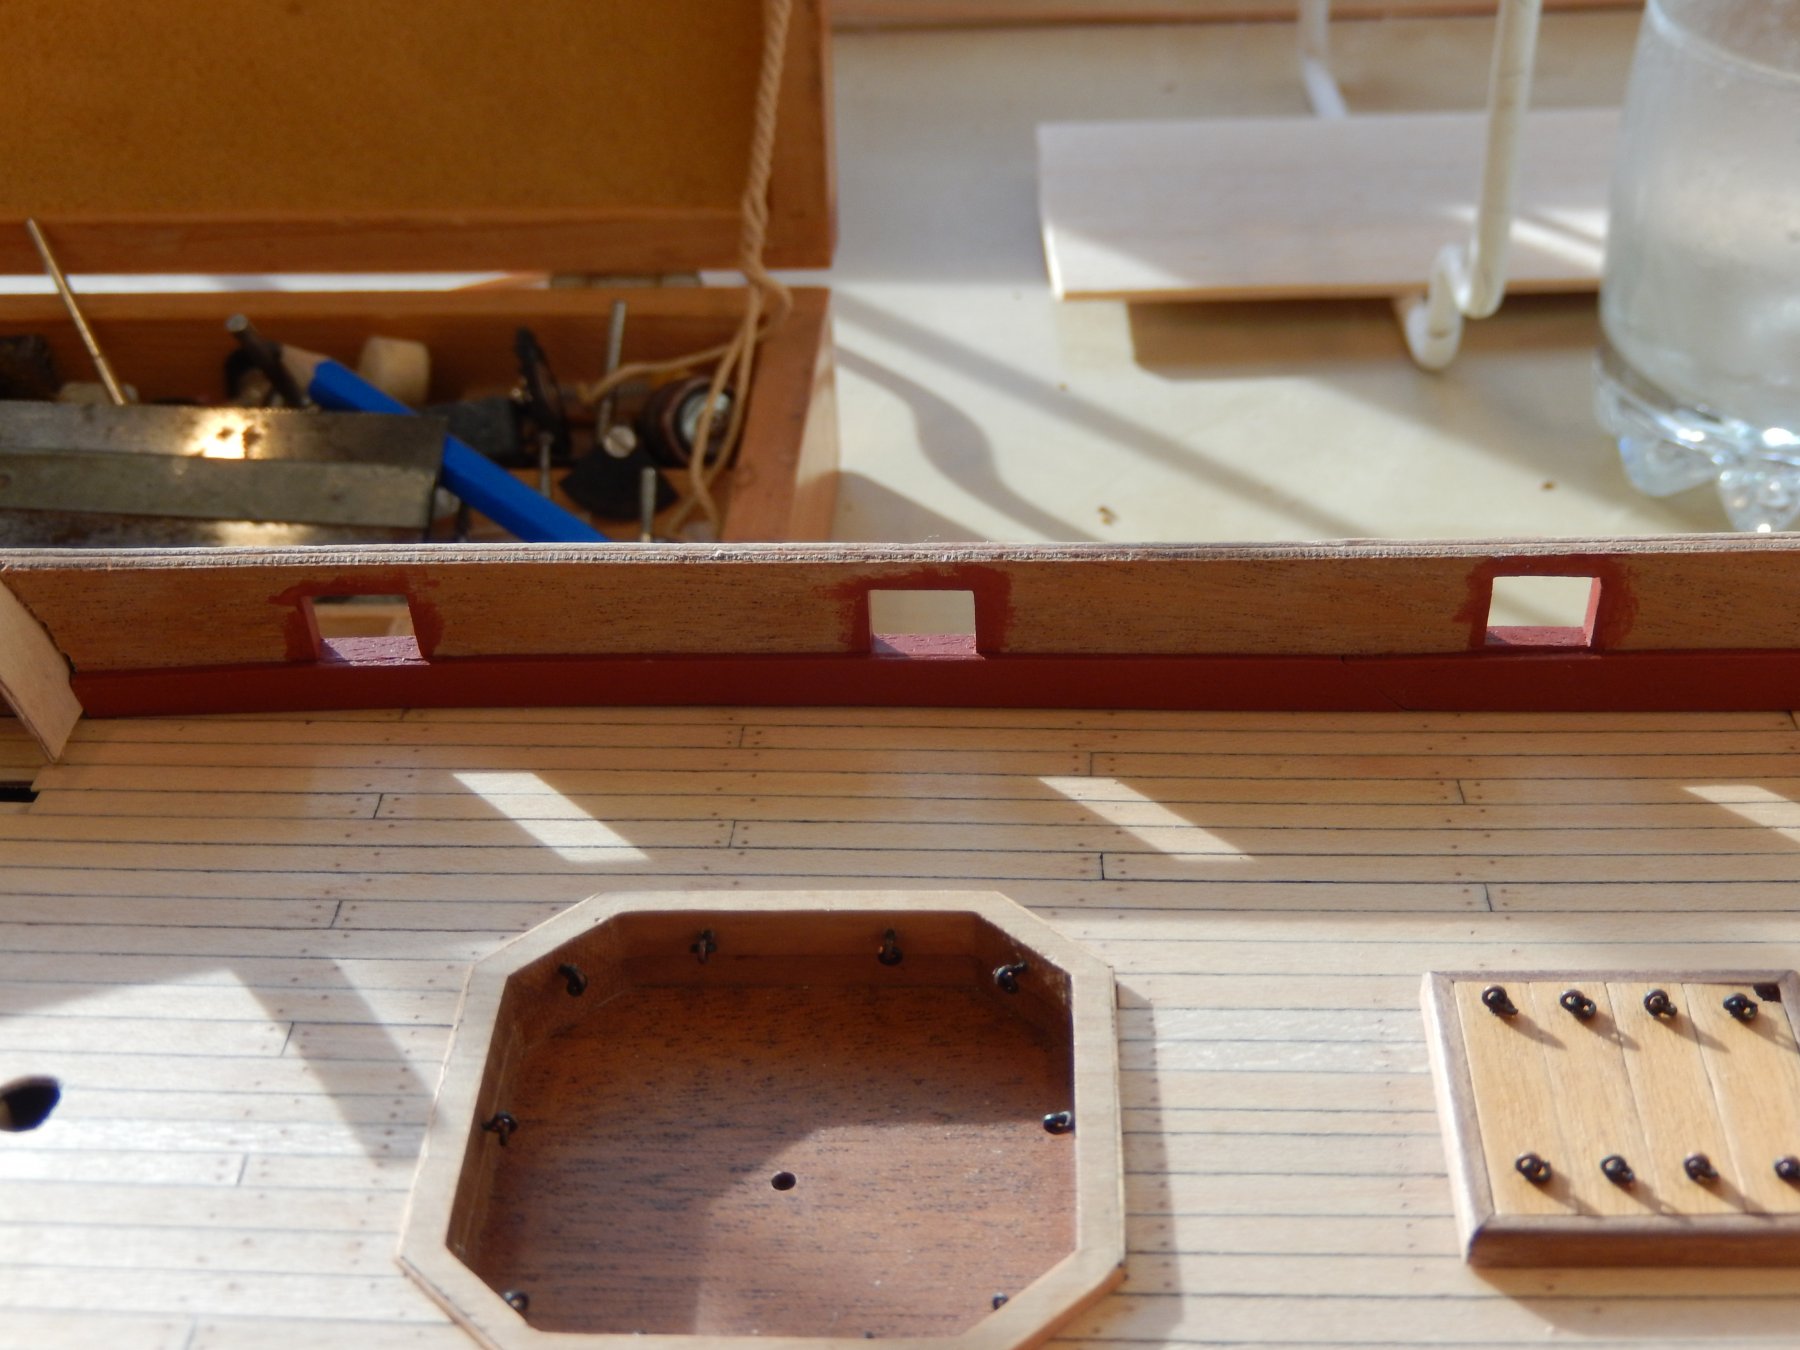
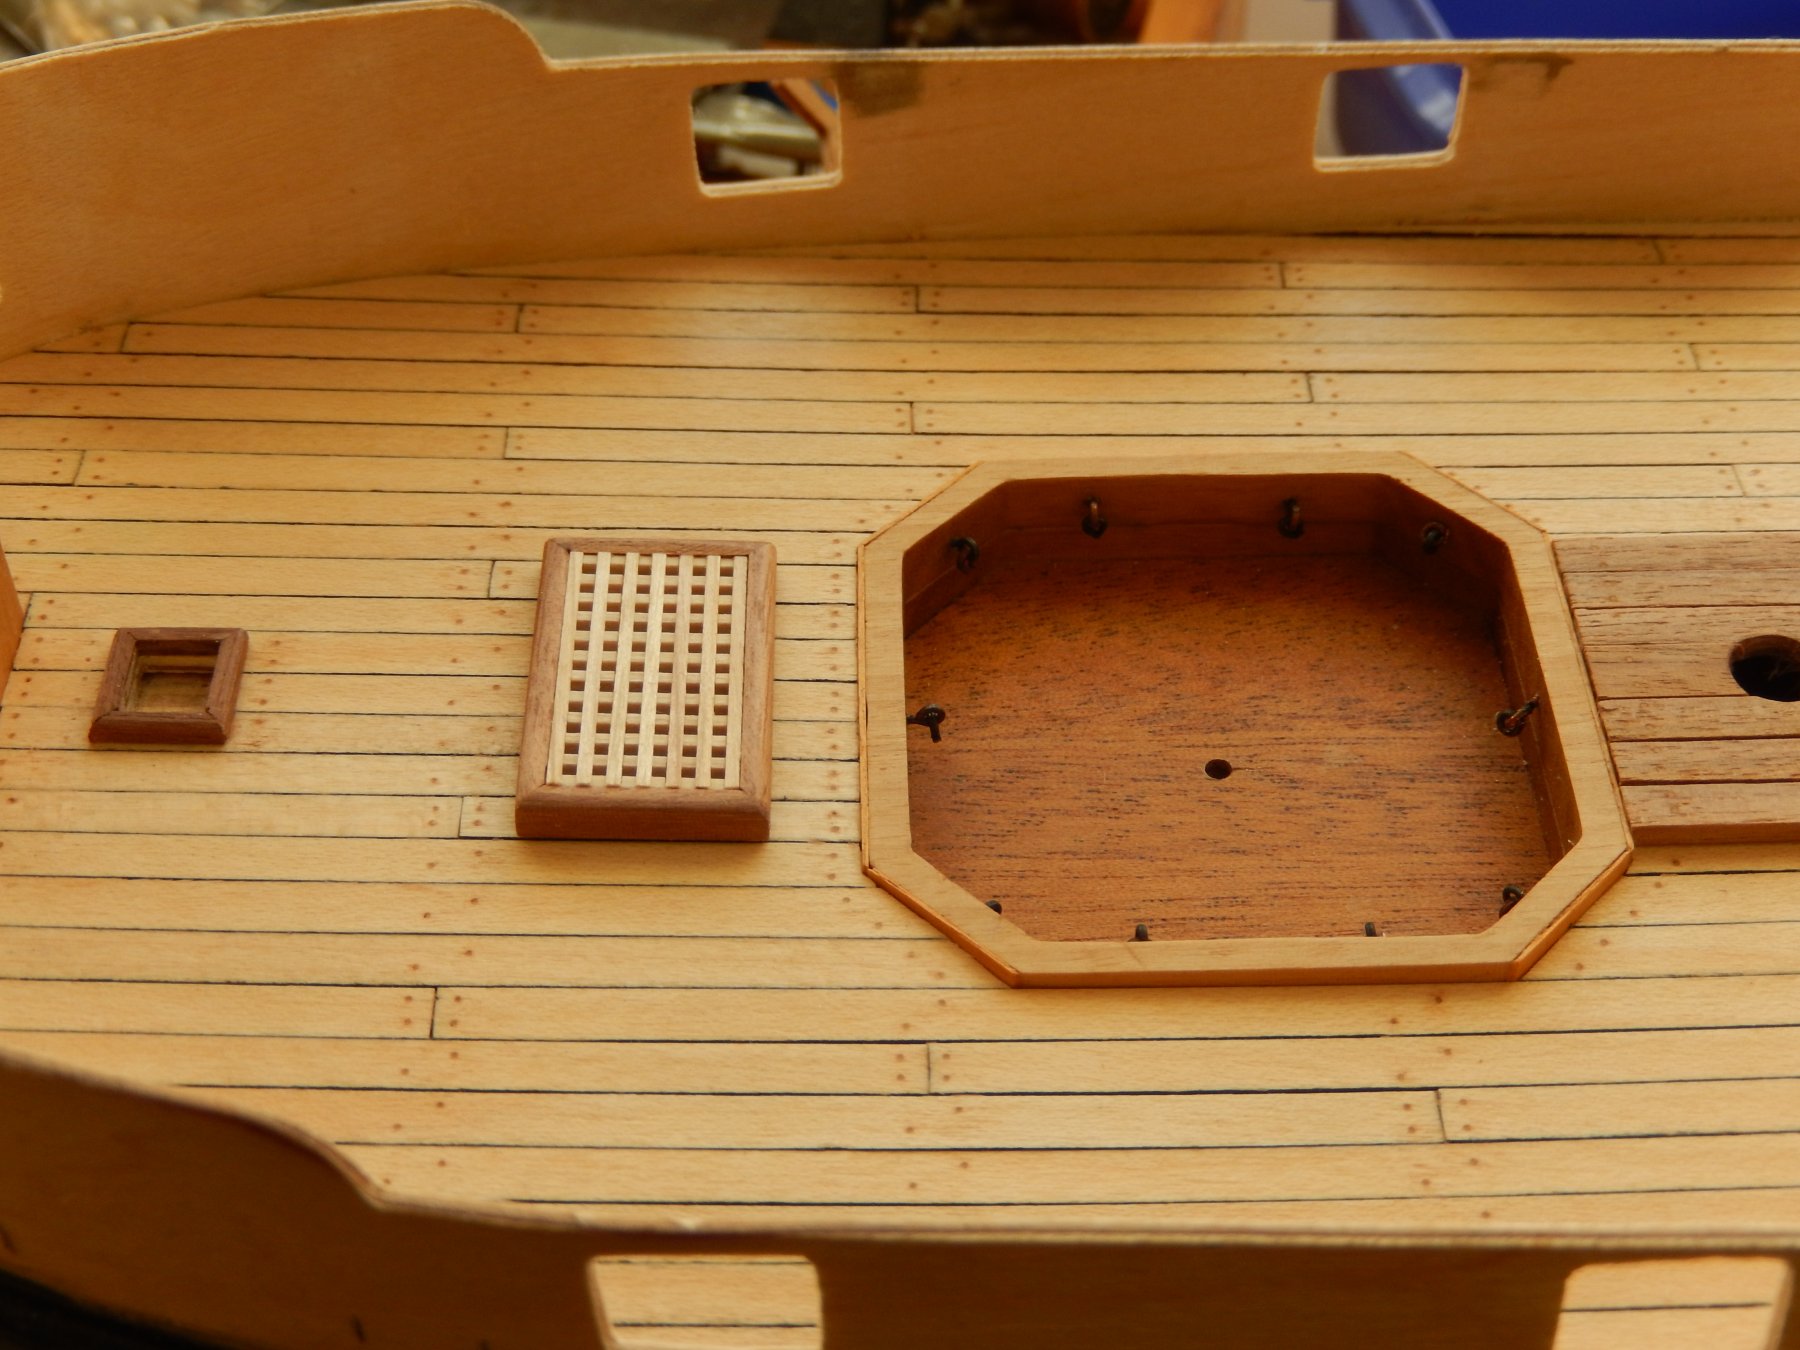
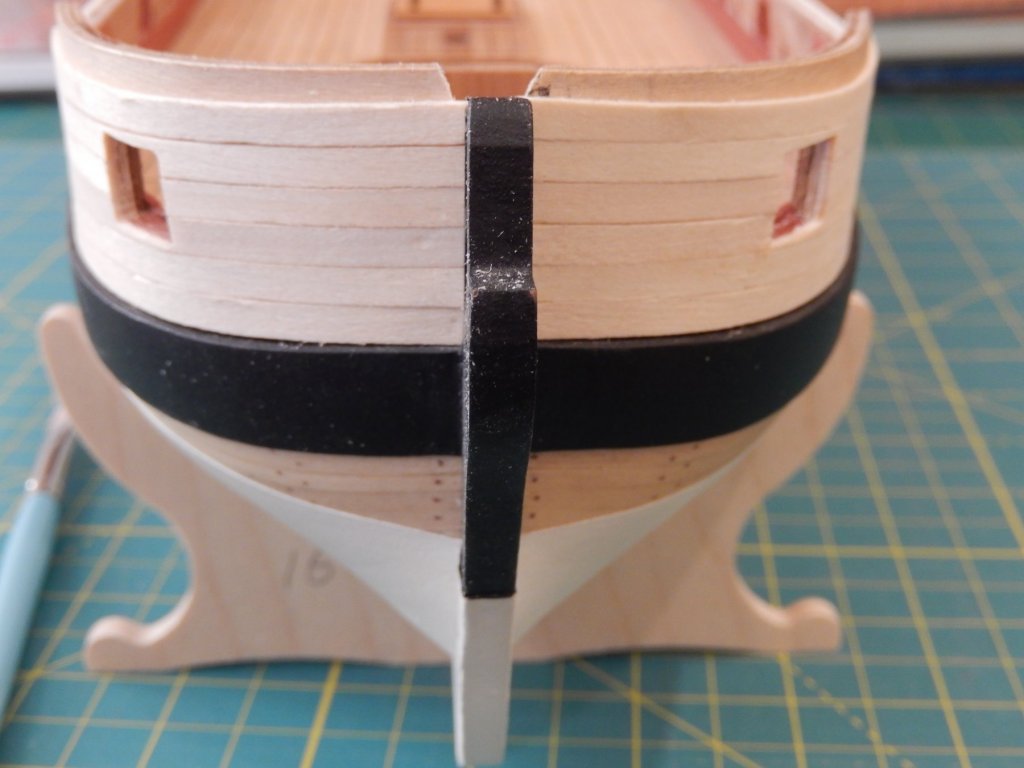
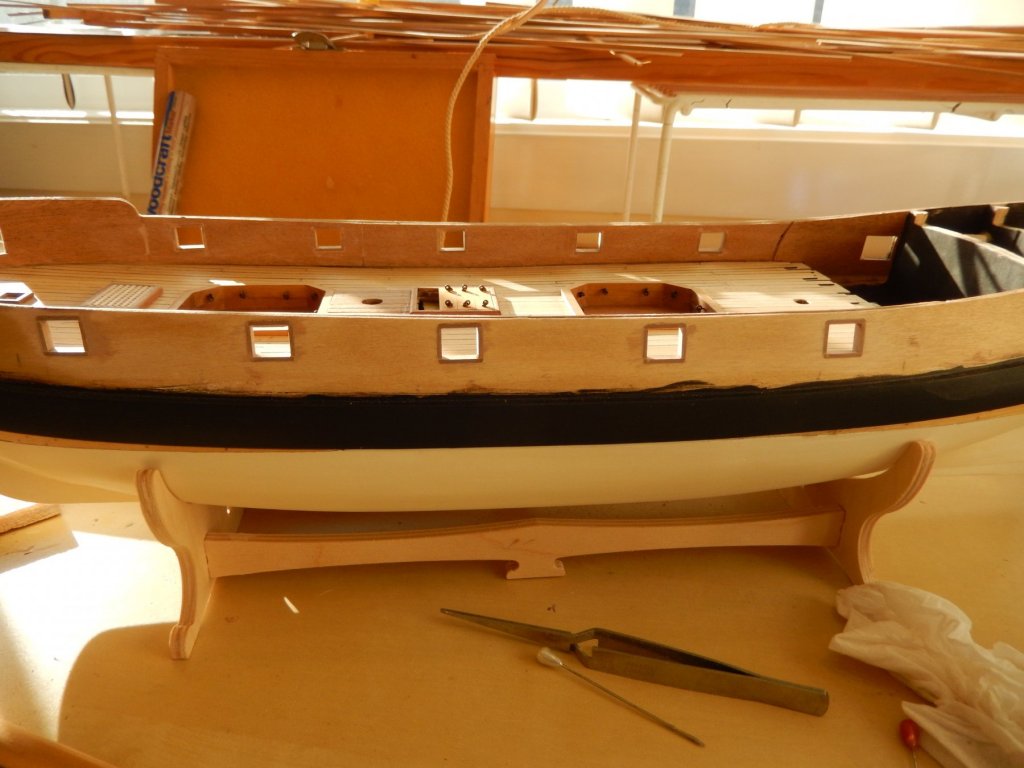
The second planking is just about finished. Two planks remain to do but these will be straight forward. Next week we will be taking our two little granddaughters away for the school holidays, so boat building comes to a stop. The whole business proved to be far more difficult than I anticipated. I'm not sure that doing the holes for the sweeps was worth the trouble. They have lids that may be open or closed and it would have been easier to just glue a 'closed' lid over the position of the opening. Once the last two planks are glued I will coat the lot with with 50:50 PVA and water. The box wood (or whatever it is) is very soft, and this I hope will harden it a little so the it may be sanded back without damage. Here is progress. The top planks are still to be done .... The gap between the planks here is larger than I would like, but once the sanding is complete and a couple of coats of polyurethane are on it, it should turn out OK. There is also some touching up to do - unfortunately these photos magnify every mistake.

- 421 replies
-
- 12
-
-
- caldercraft
- granado
- (and 1 more)
-
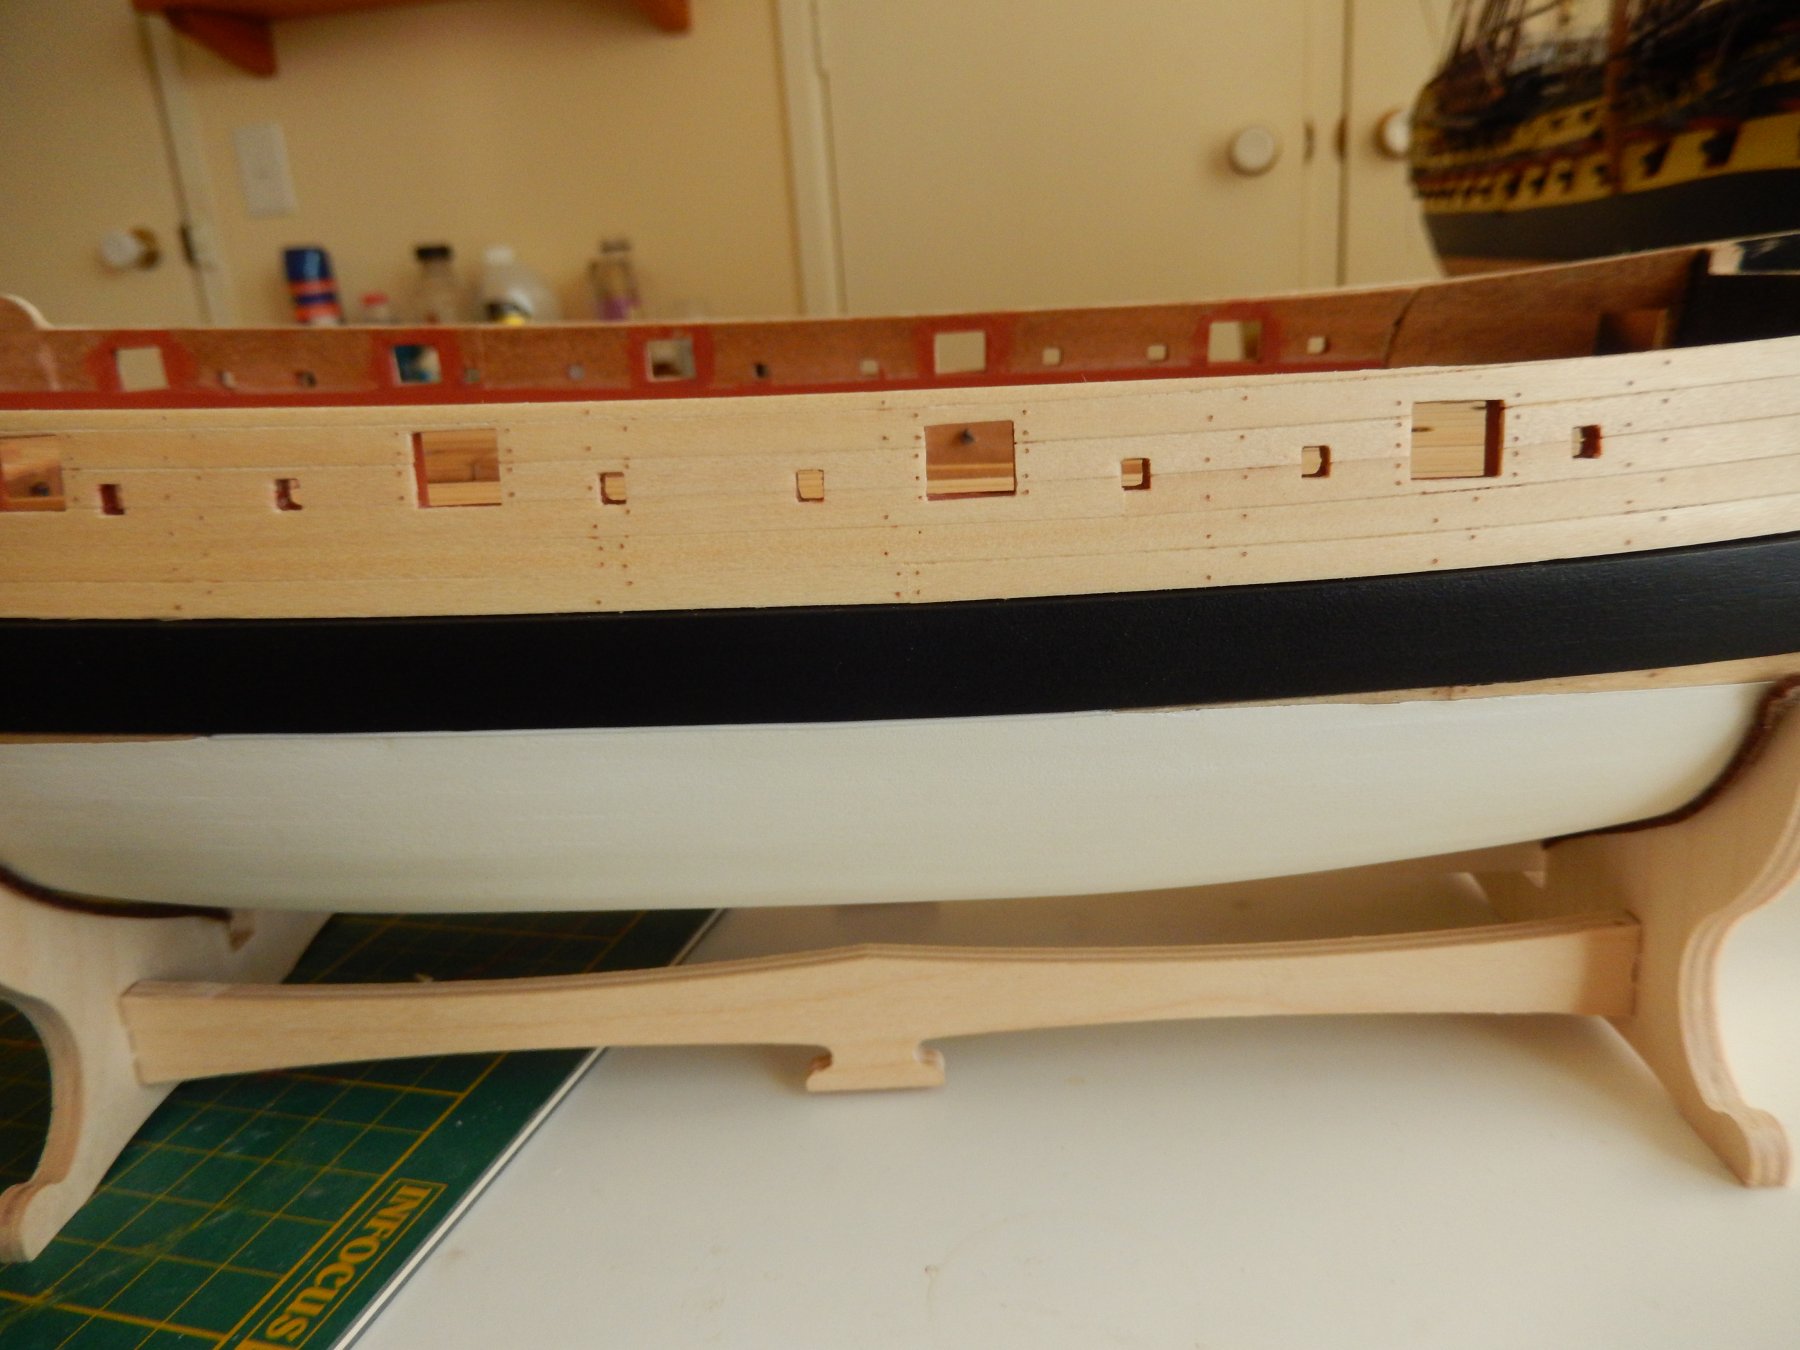
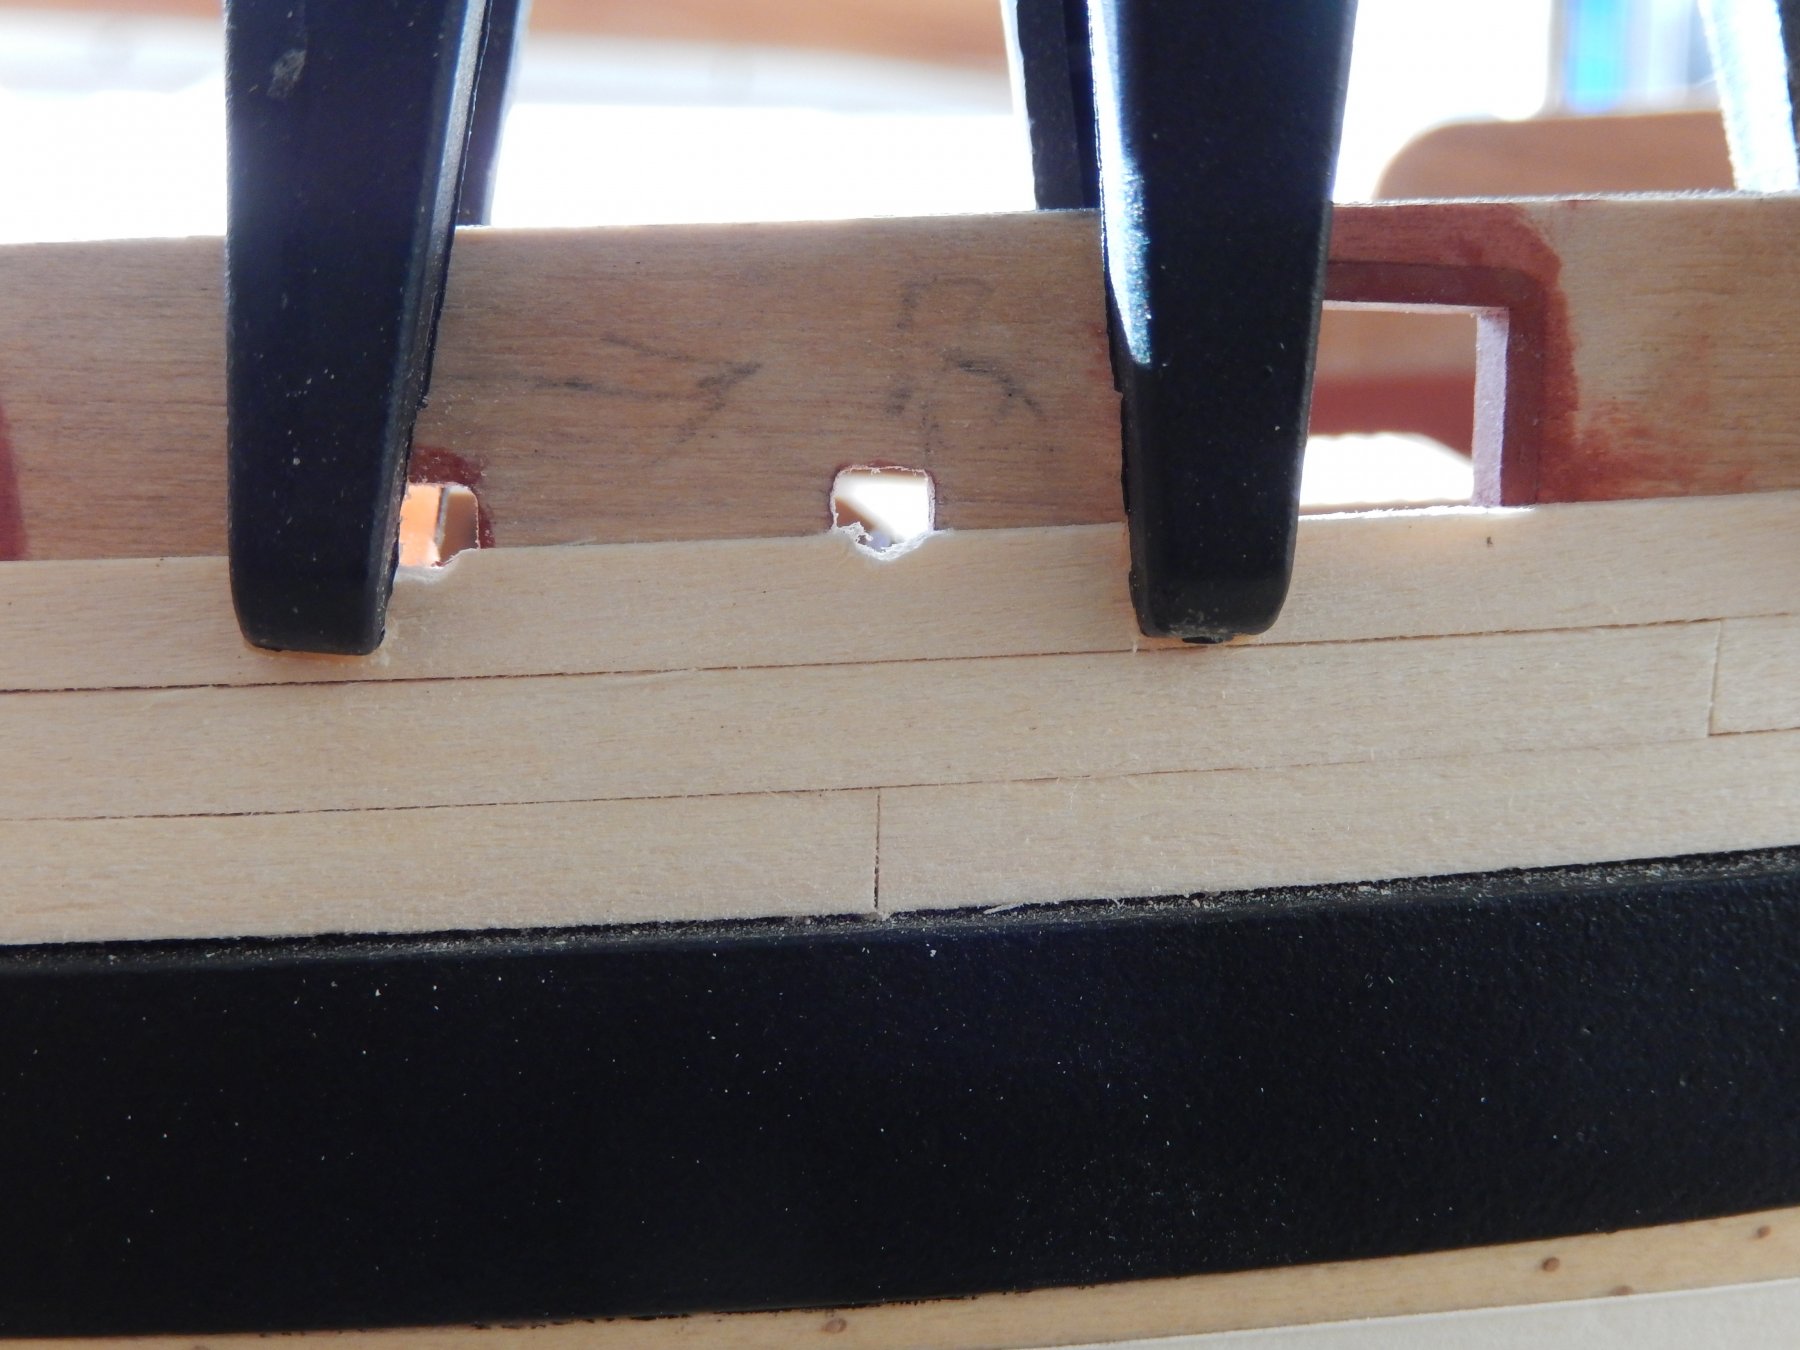
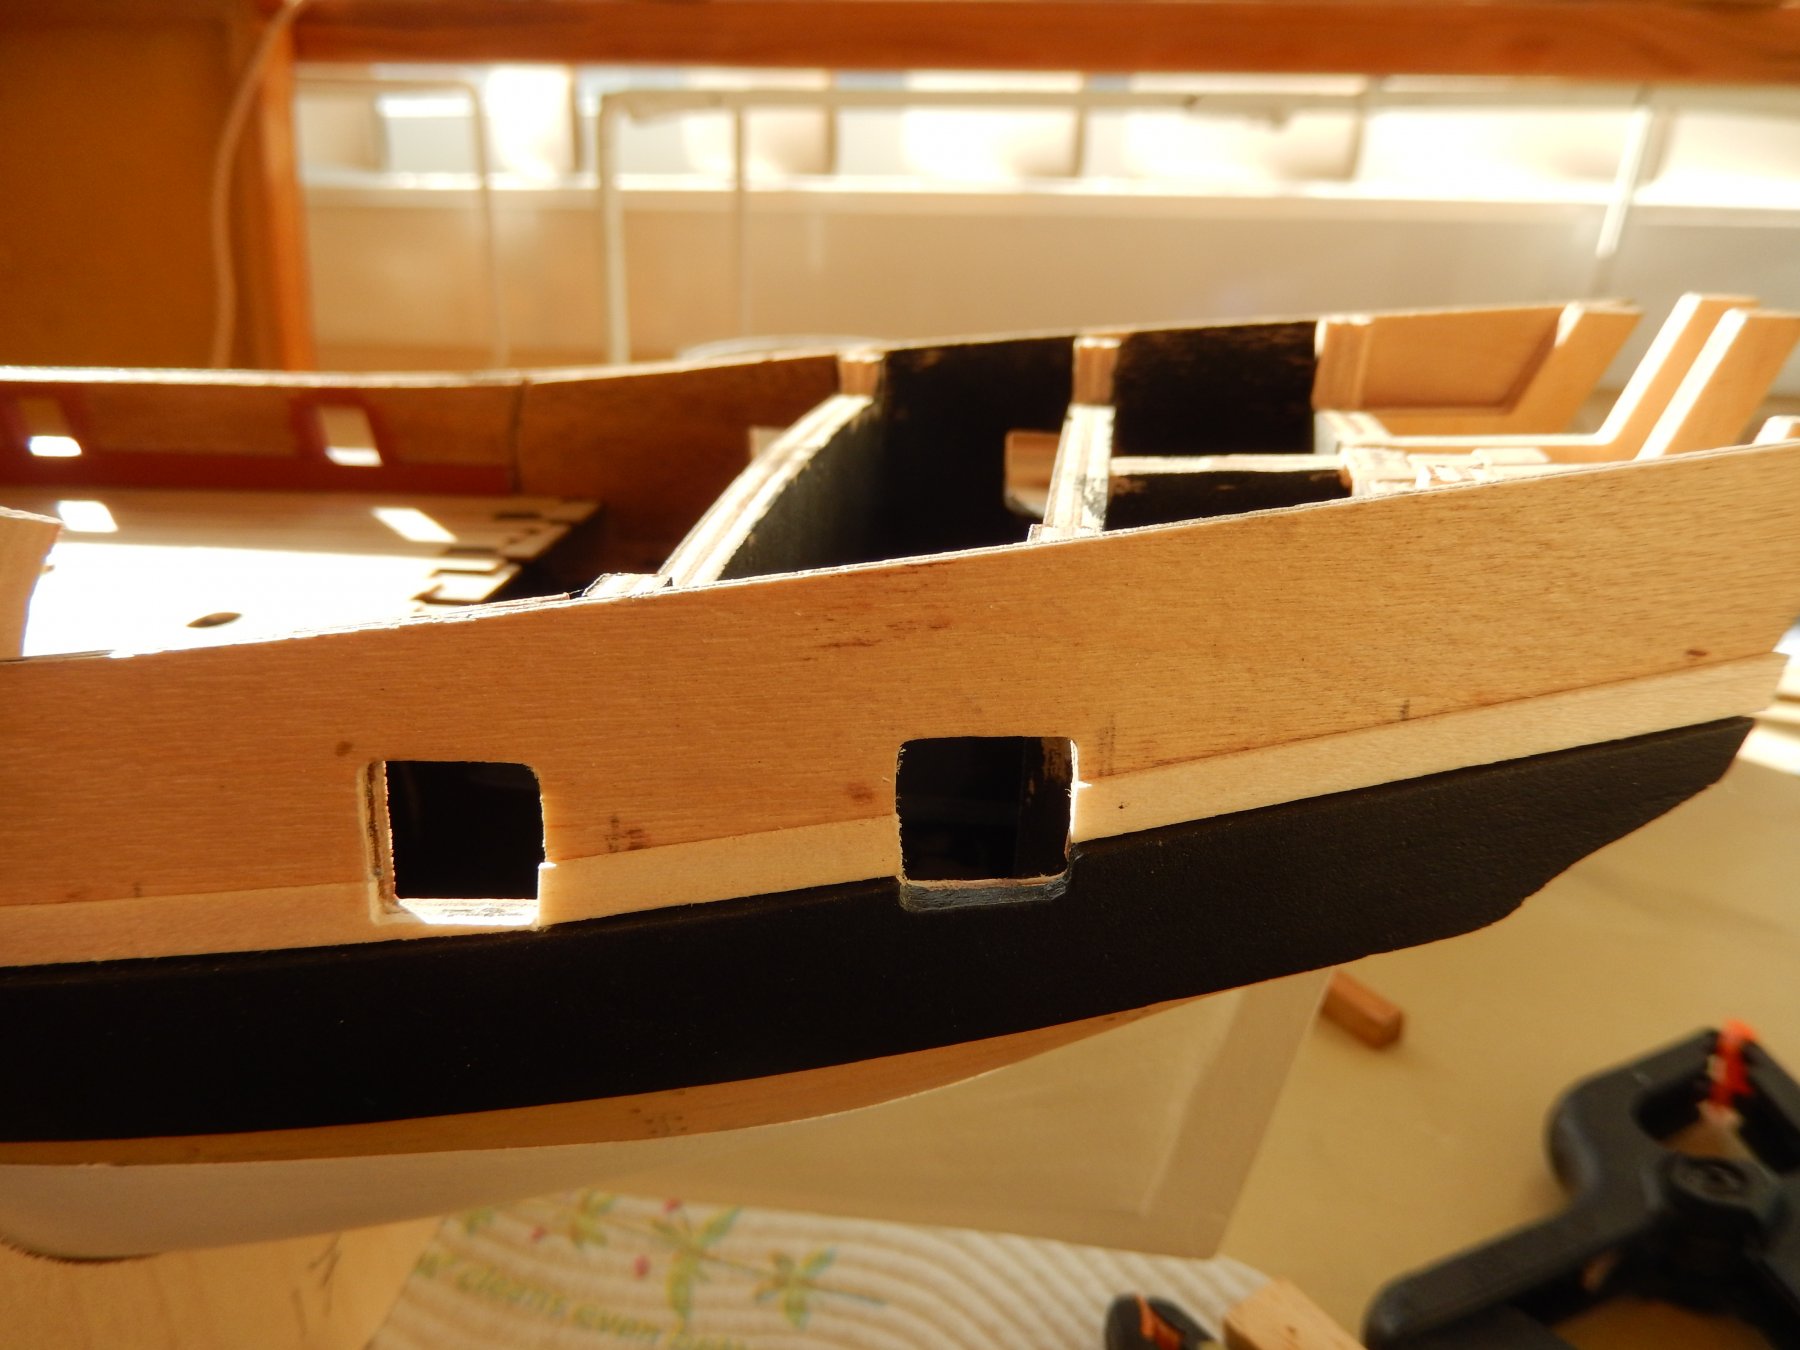
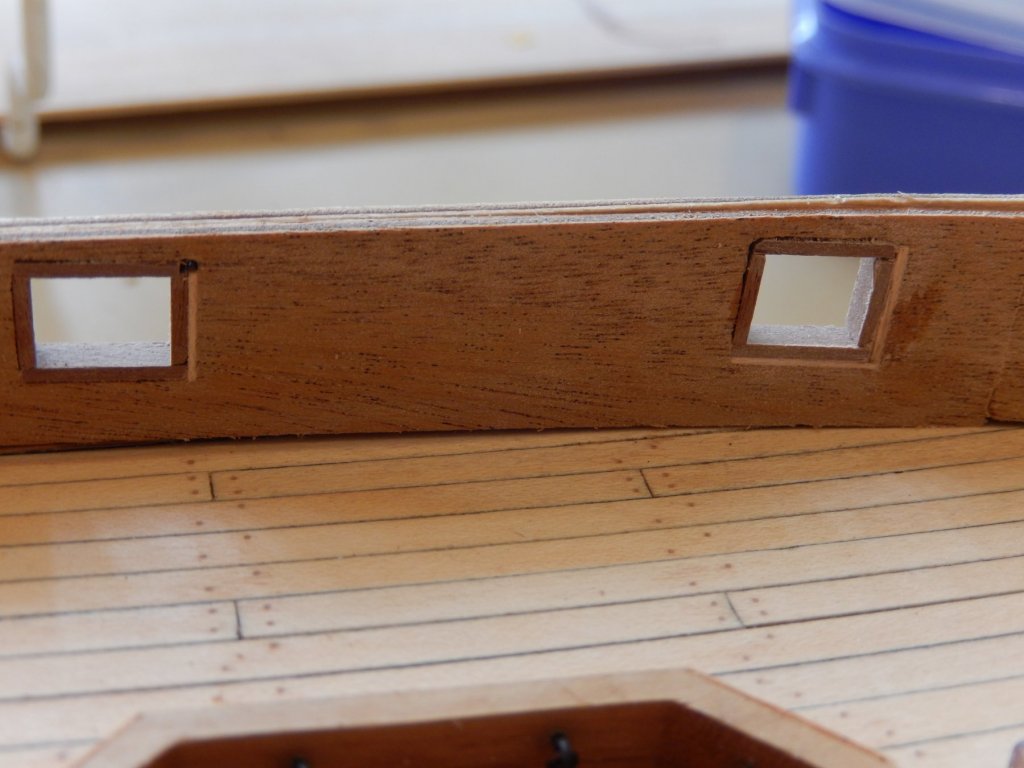
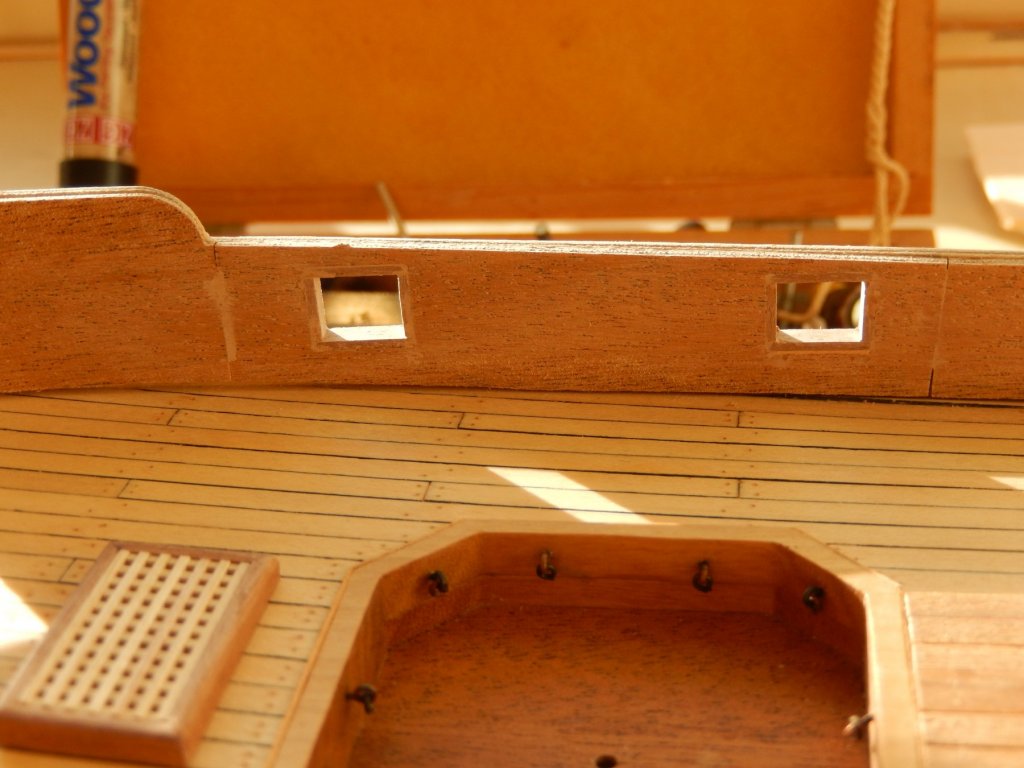
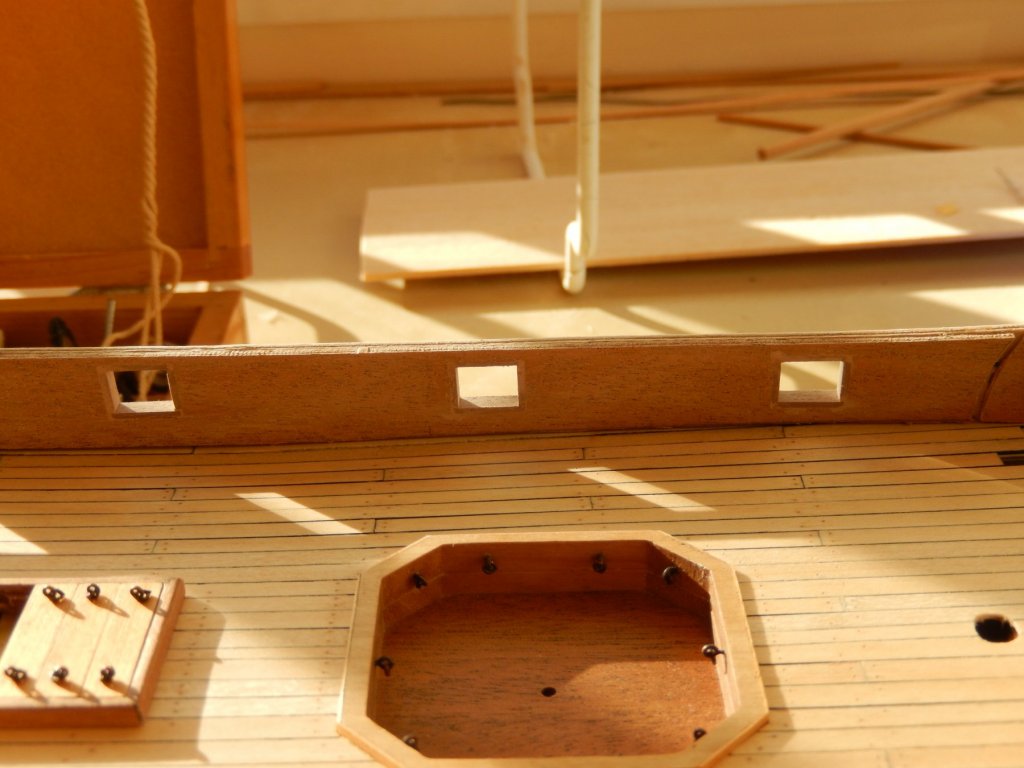
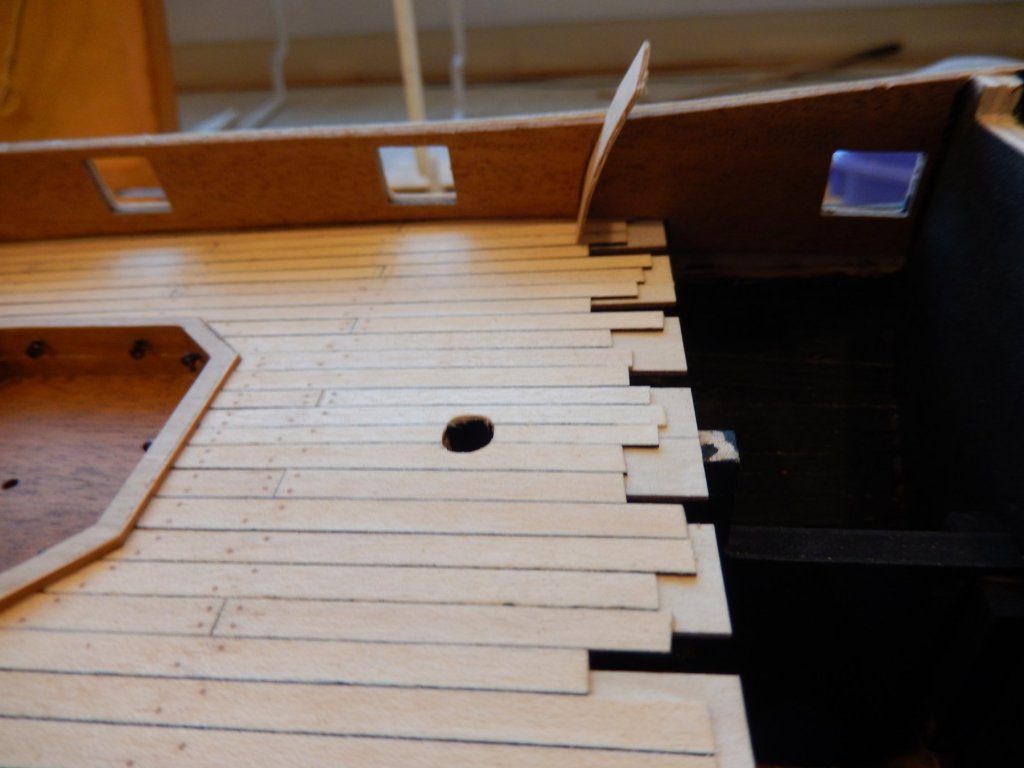
The second planking above the wale is in progress. I decided to complete the holes for the sweep oars more or less at the same time. This may well be a mistake. Drilling, then 'squaring' the holes proved difficult and the result was just acceptable. I started before the final planking drilling into the bulwark pattern and the pattern for the gunports. In the appropriate places, for each square hole a 1mm hole was drilled in its centre and then 0.6mm holes in each corner. I then used the various drill bits I was given by my dentist (used (disinfected I hope) but still usable) to finally shape the holes. The bits come in all sorts of shapes and sizes and have proved to be really useful. The next plank has been glued and when dry, the holes will be partially completed. I shall do the same with each successive row of planking. The photos below show the beginning of the process. I will use different abrasive dental bits to make it square.


- 421 replies
-
- 7
-
-
- caldercraft
- granado
- (and 1 more)
-
Thanks for the kind comment Jobbie, and thanks to the others for the 'likes'.
-
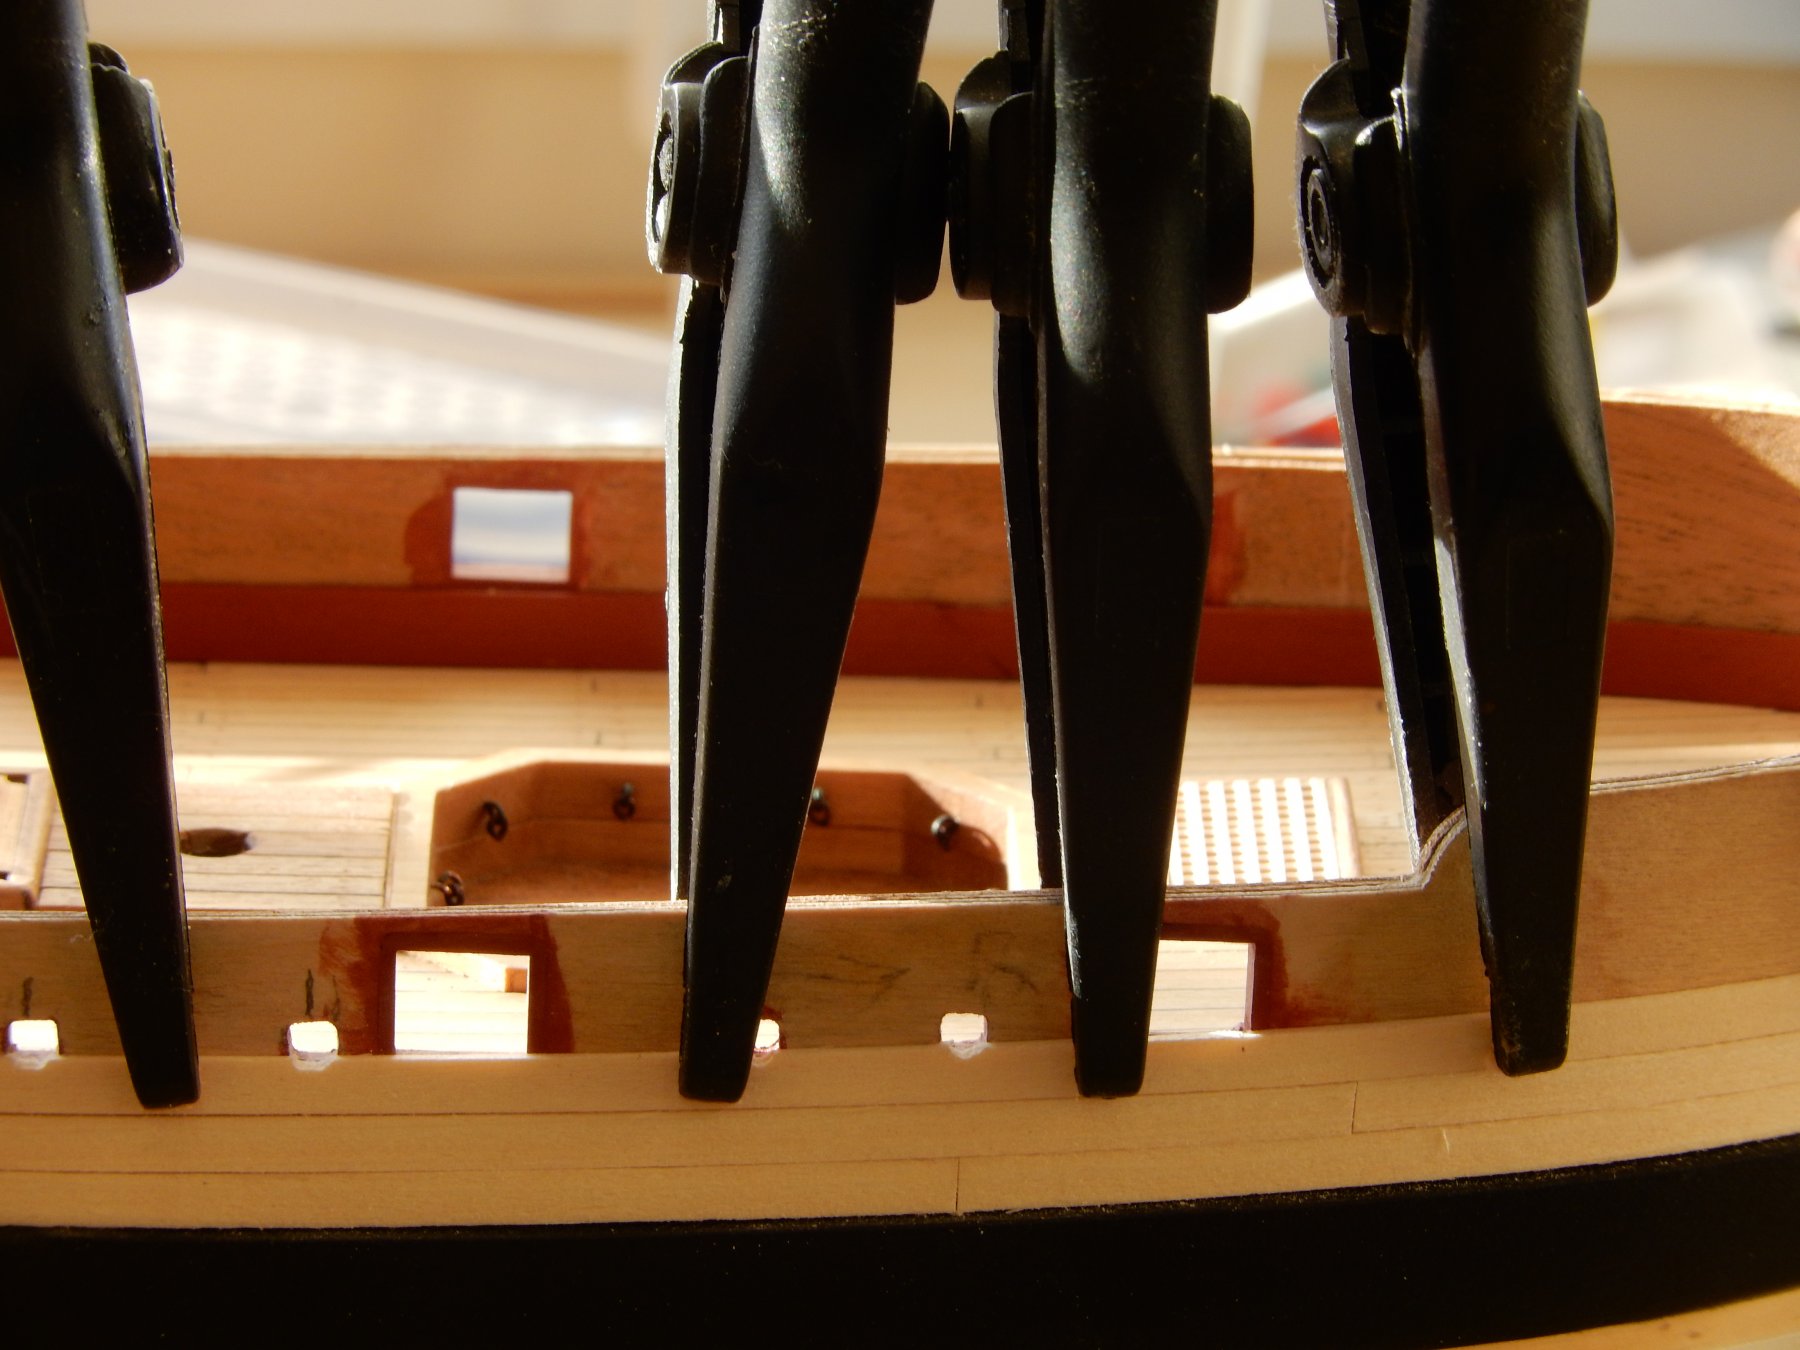
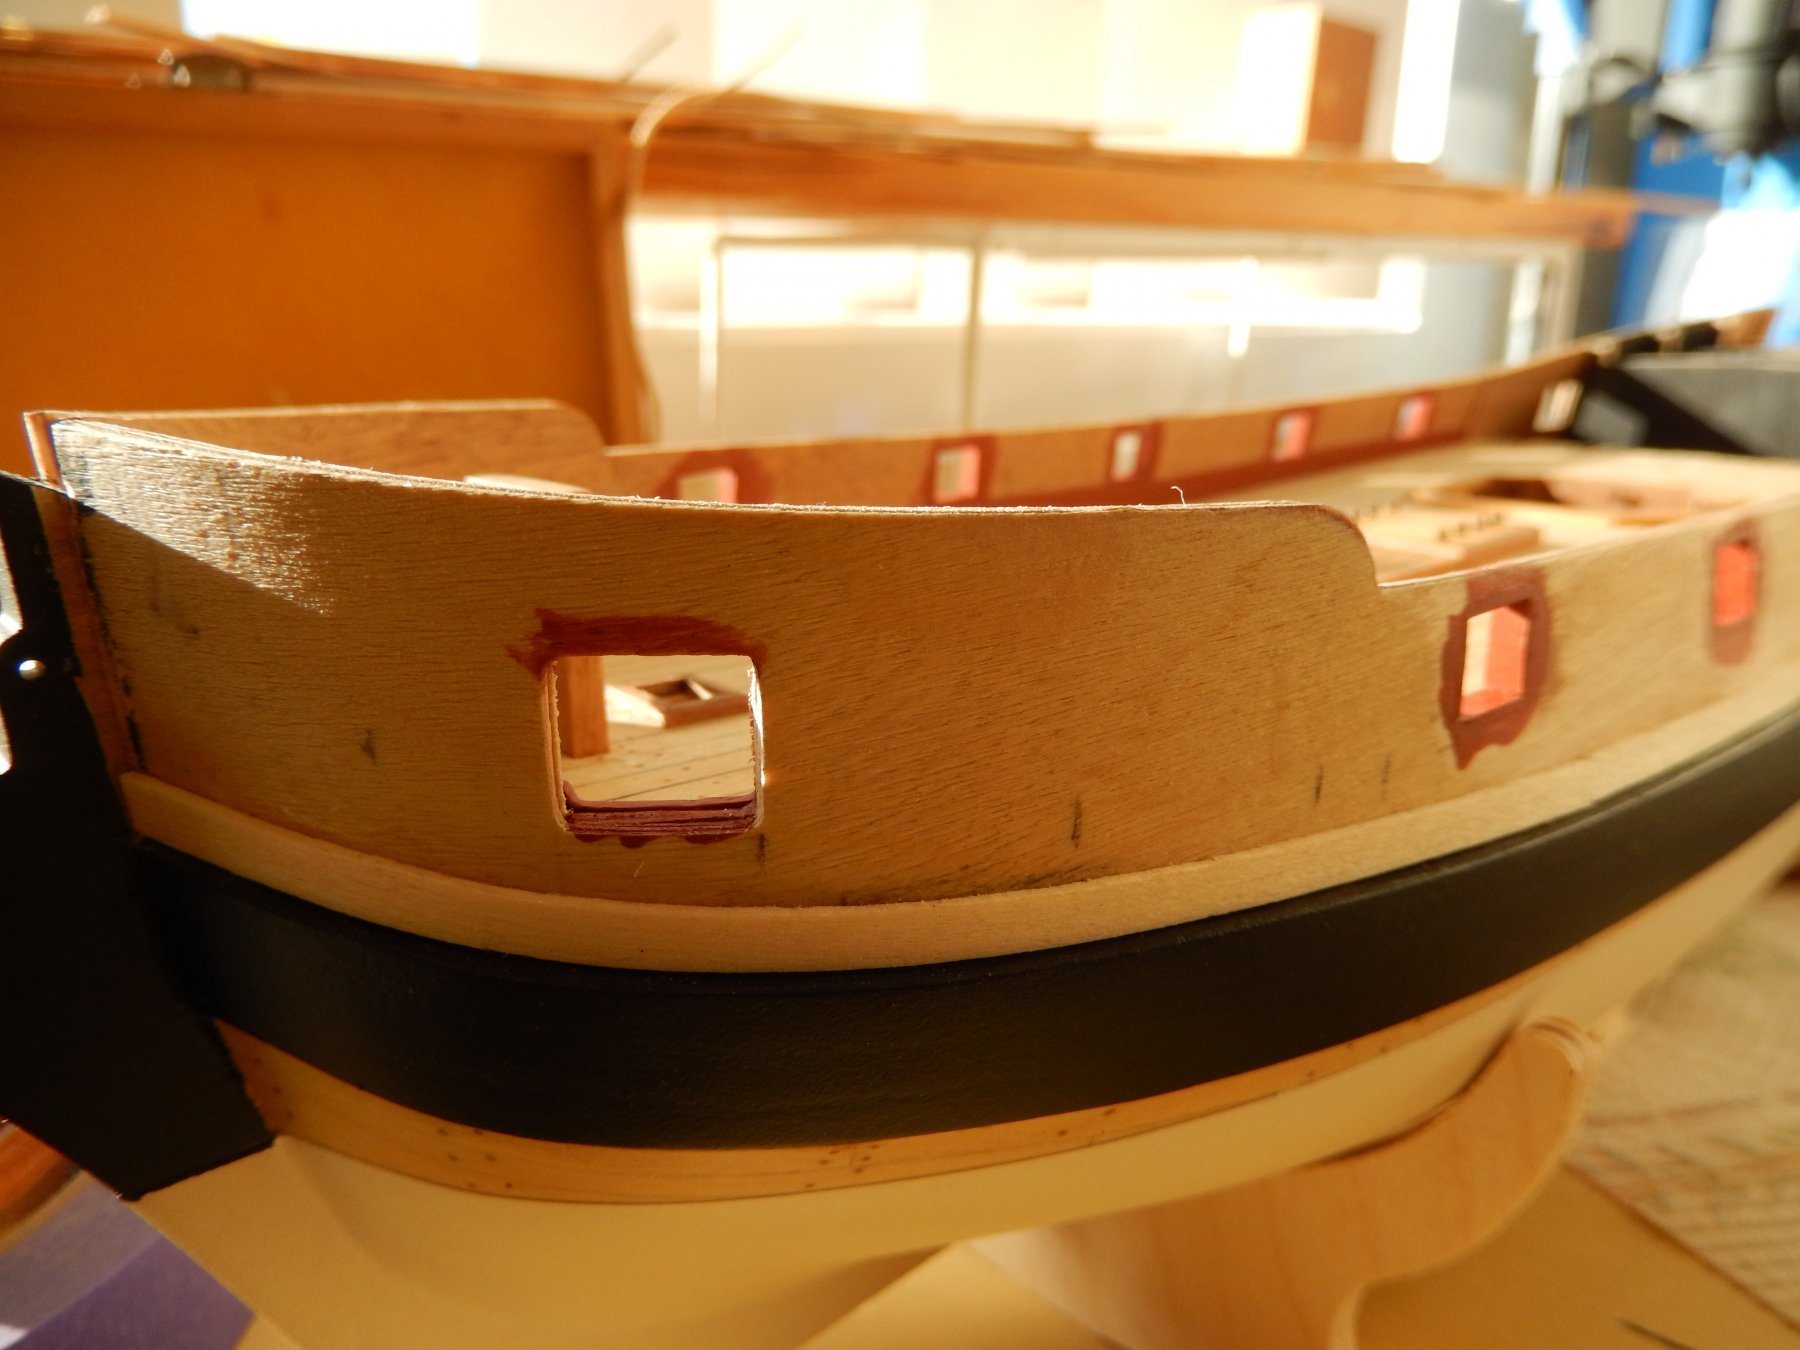
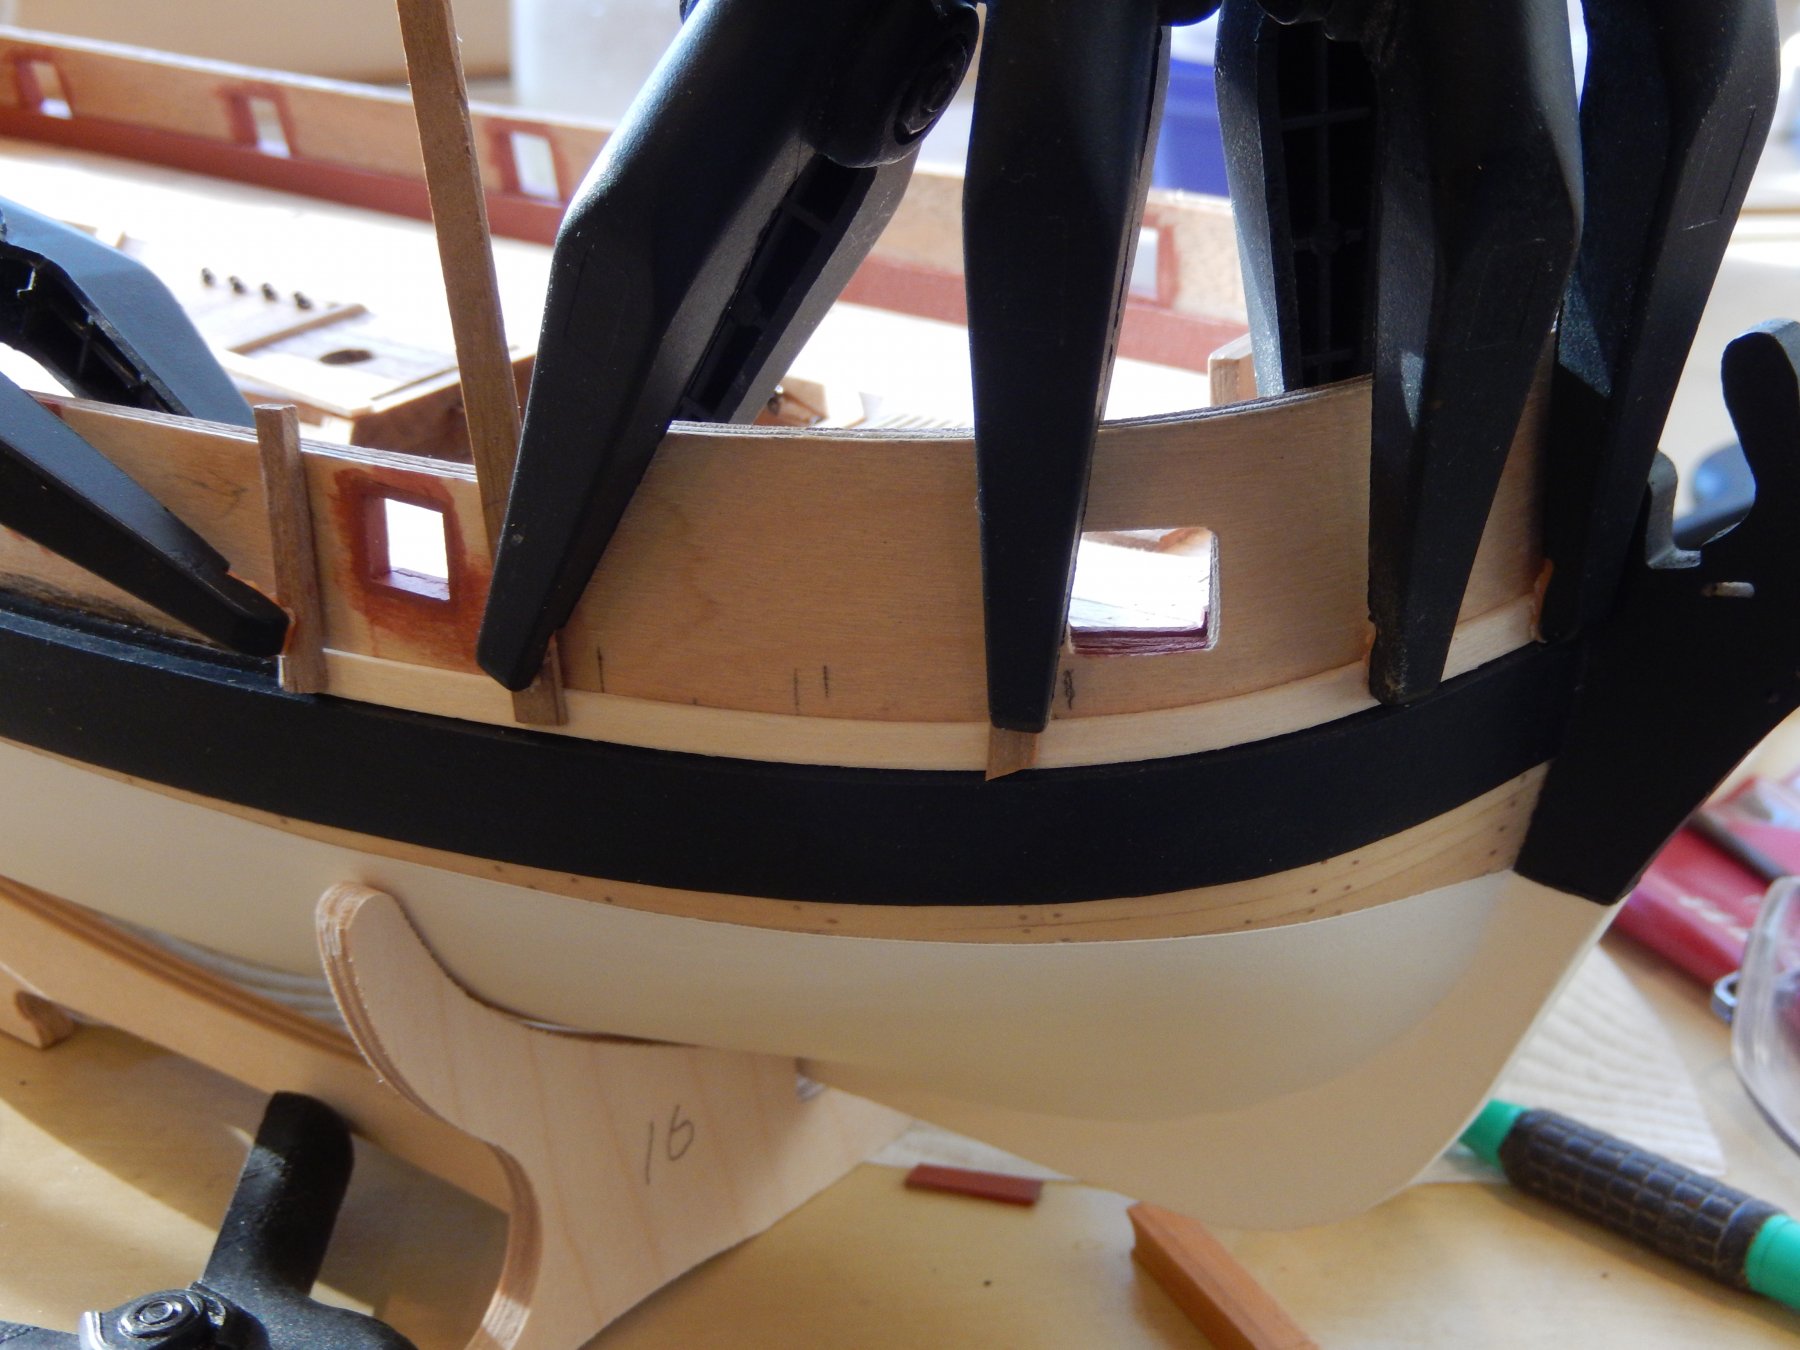
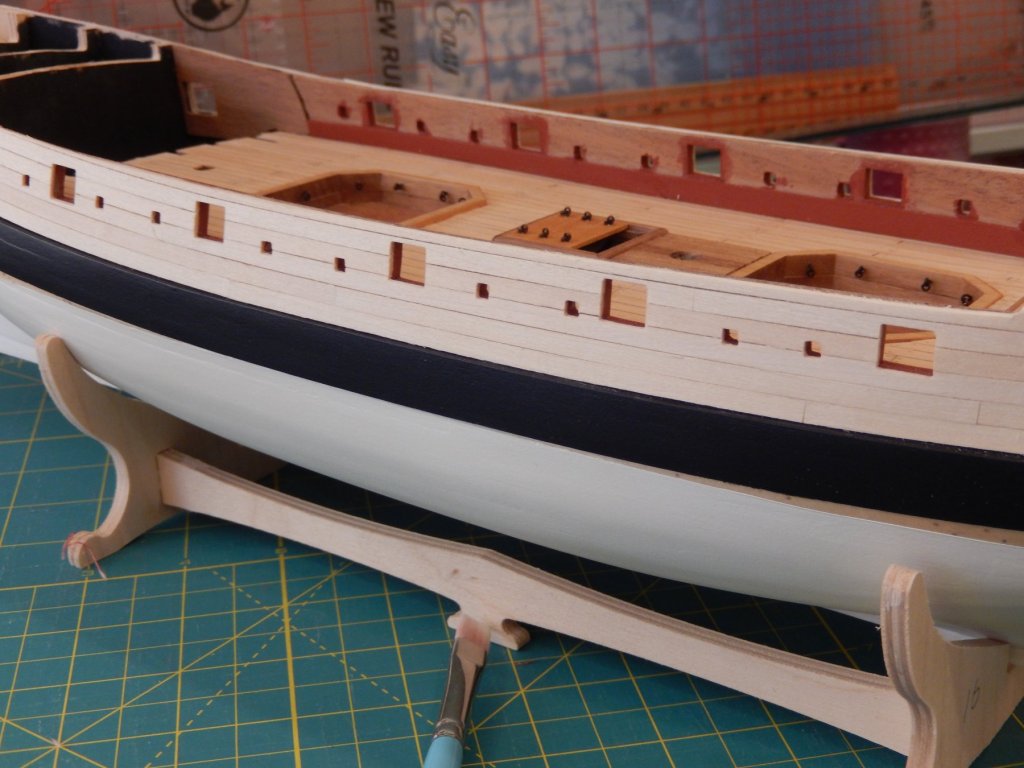
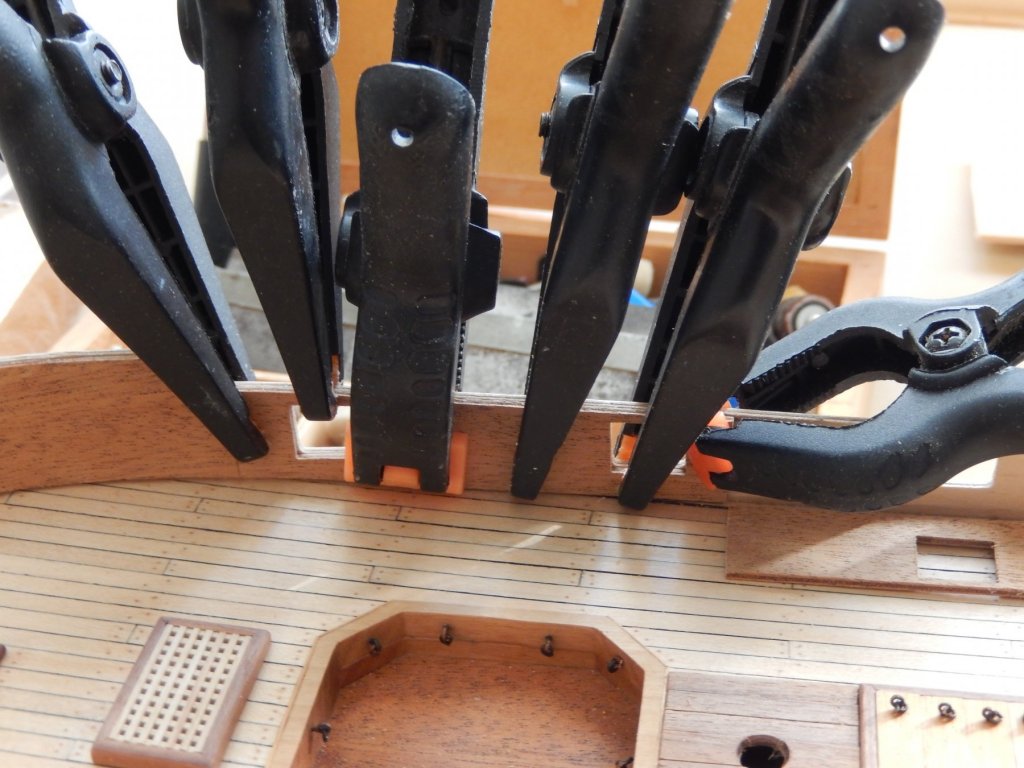
The spirtketting is now complete and the second planking above the wale begun. The spirketting proved to be quite difficult. The wood strip did not want to bend and I ended up cutting it into four pieces with lots of fitting and adjustment of each one needed. There is still a bit of touching up to do, but it's come out fairly well. Rather than do the second planking in single pieces, where possible, I decided to cut each plank as shown in the Anatomy of a Ship. Below is the fitting of the first plank above the wale which is likely to be the most difficult. A tiny bit of adjustment is needed for the first join, but aside from that it's come out respectably. I have cut a rabbet in the stem to hold each plank and clamping was a bit of a pain. The first join - bit of work to do. The second join. Clamping - I have realised that the holes for the sweep oars are to be done, though at the moment I'm not sure how without making a mess of the spirketting.


- 421 replies
-
- 9
-
-
- caldercraft
- granado
- (and 1 more)
-
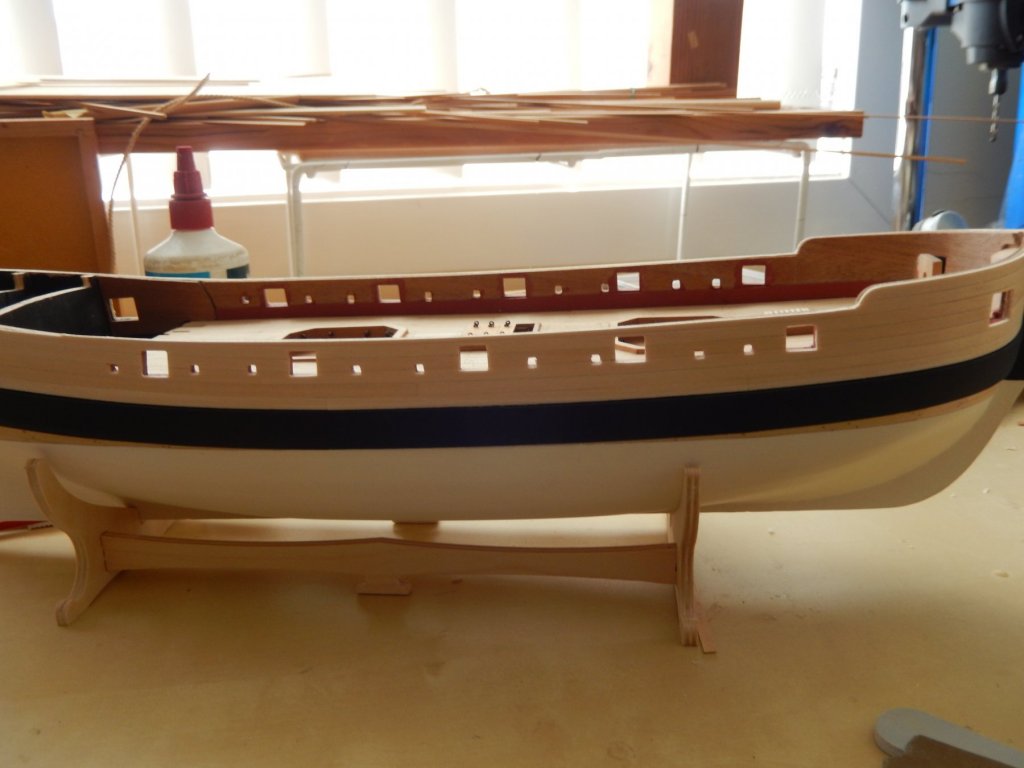
The bulwarks are made up of three components: the pattern, the spirtketting (a plank stuck on to the bottom of the pattern and flush with the deck), and the sheer rail which aligns with the top edge of the pattern. The final surface then is the sheer rail, then the pattern, then the spirketting! I think the pattern is supposed to make it easy to align the gunports and the inside cladding of the bulwarks. I imagine it is meant to go on in one piece, but at least in my case it did anything but. It would be just as easy to use wood strip - but anyway it's done now, and thankfully has turned out quite well. The gunports and the spirketting are in the process of being painted. I will then fit the spirketting, followed by the second planking of the upper hull. Alll the best, Bob
- 421 replies
-
- 1
-
-
- caldercraft
- granado
- (and 1 more)
-
Thanks for your support Jobbie. I don't know about 'master' but I think it has a certain ring to it. I'm not sure my wife would agree however. I used a 0.5mm drill bit and Intergrain Woodblend. They have all sorts of colours - the one I used this time was teak/blackwood. Good luck Bob
- 421 replies
-
- 2
-
-
- caldercraft
- granado
- (and 1 more)
-
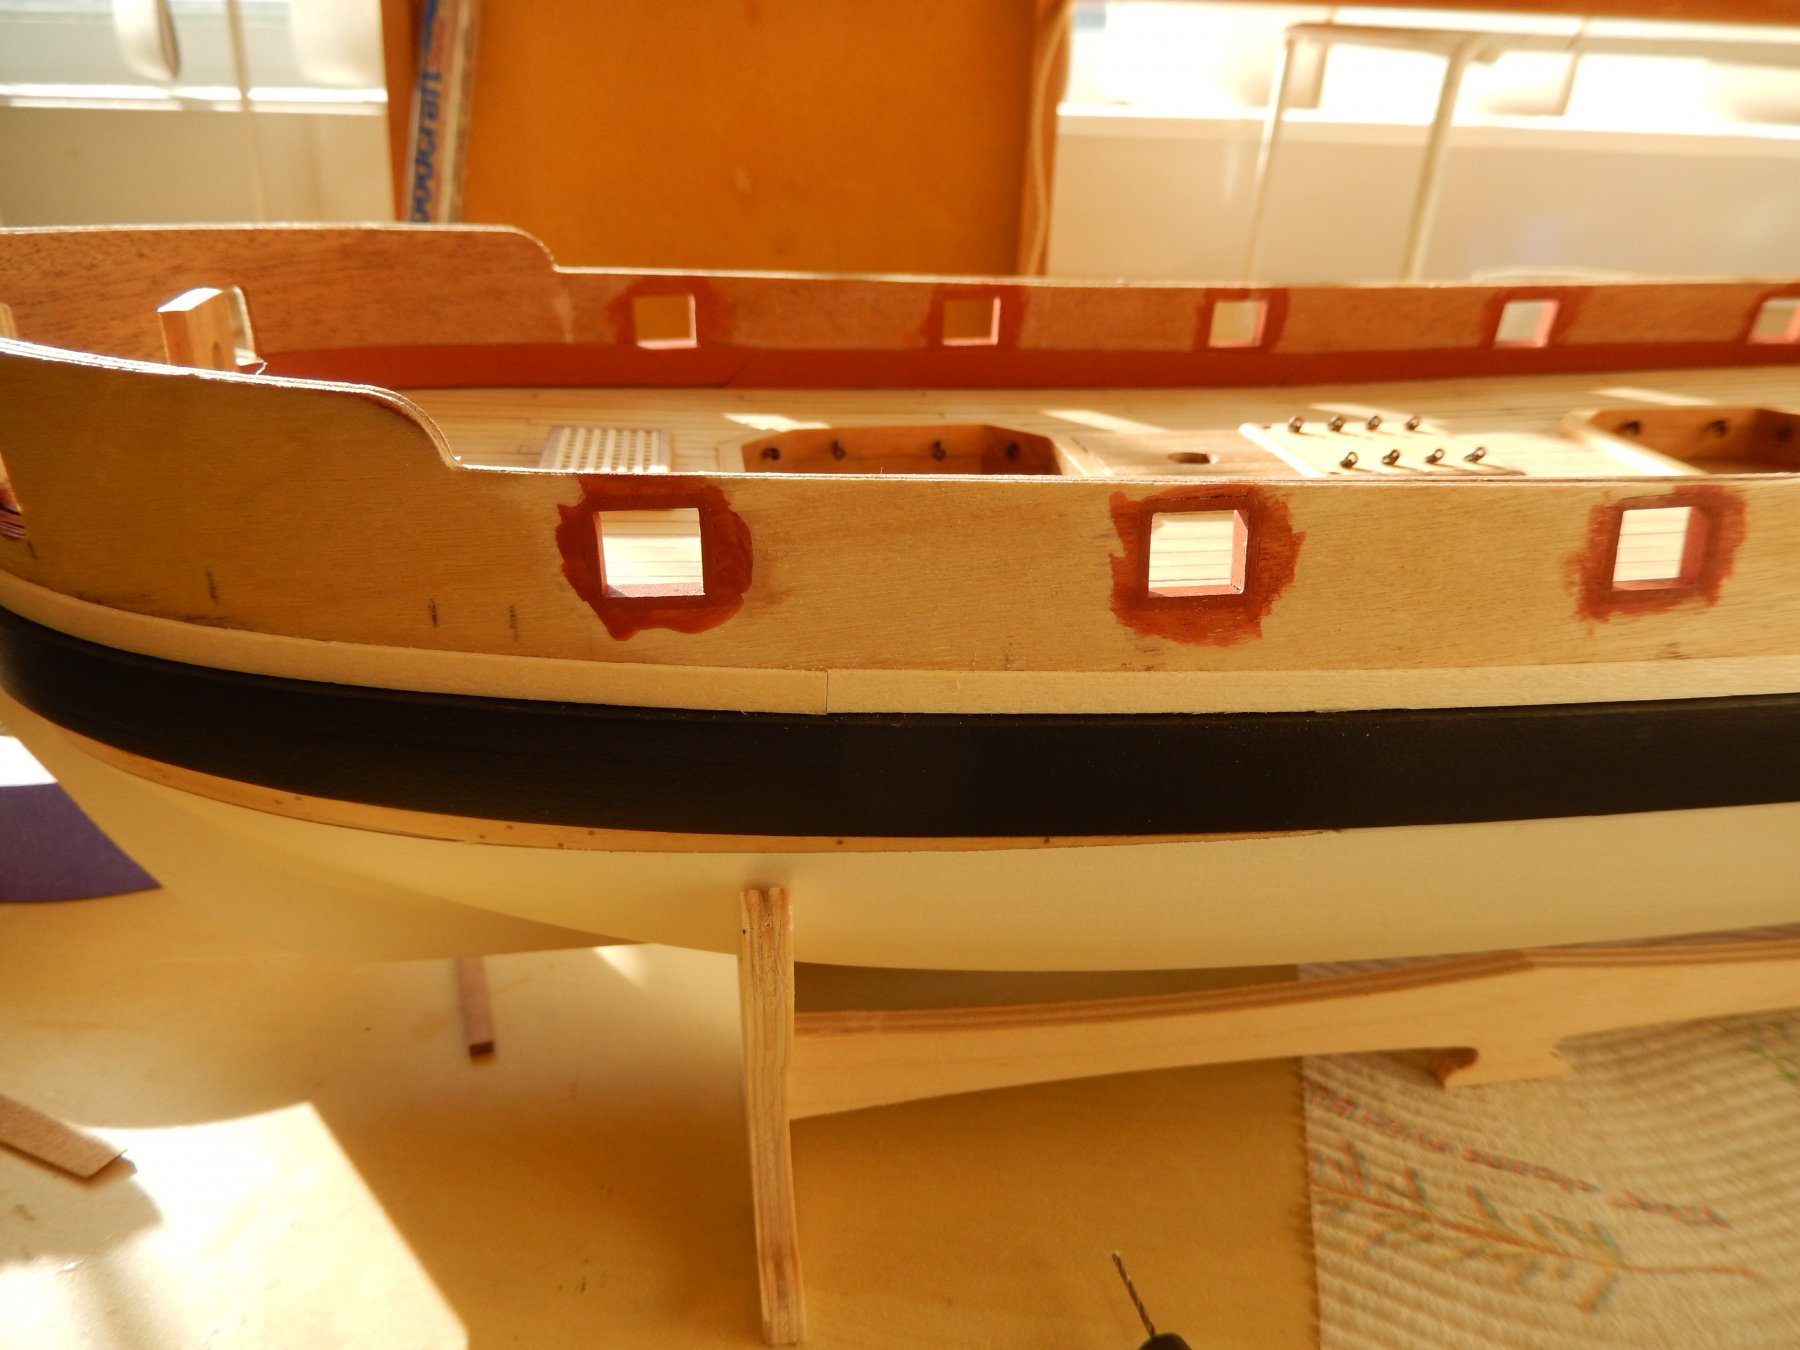
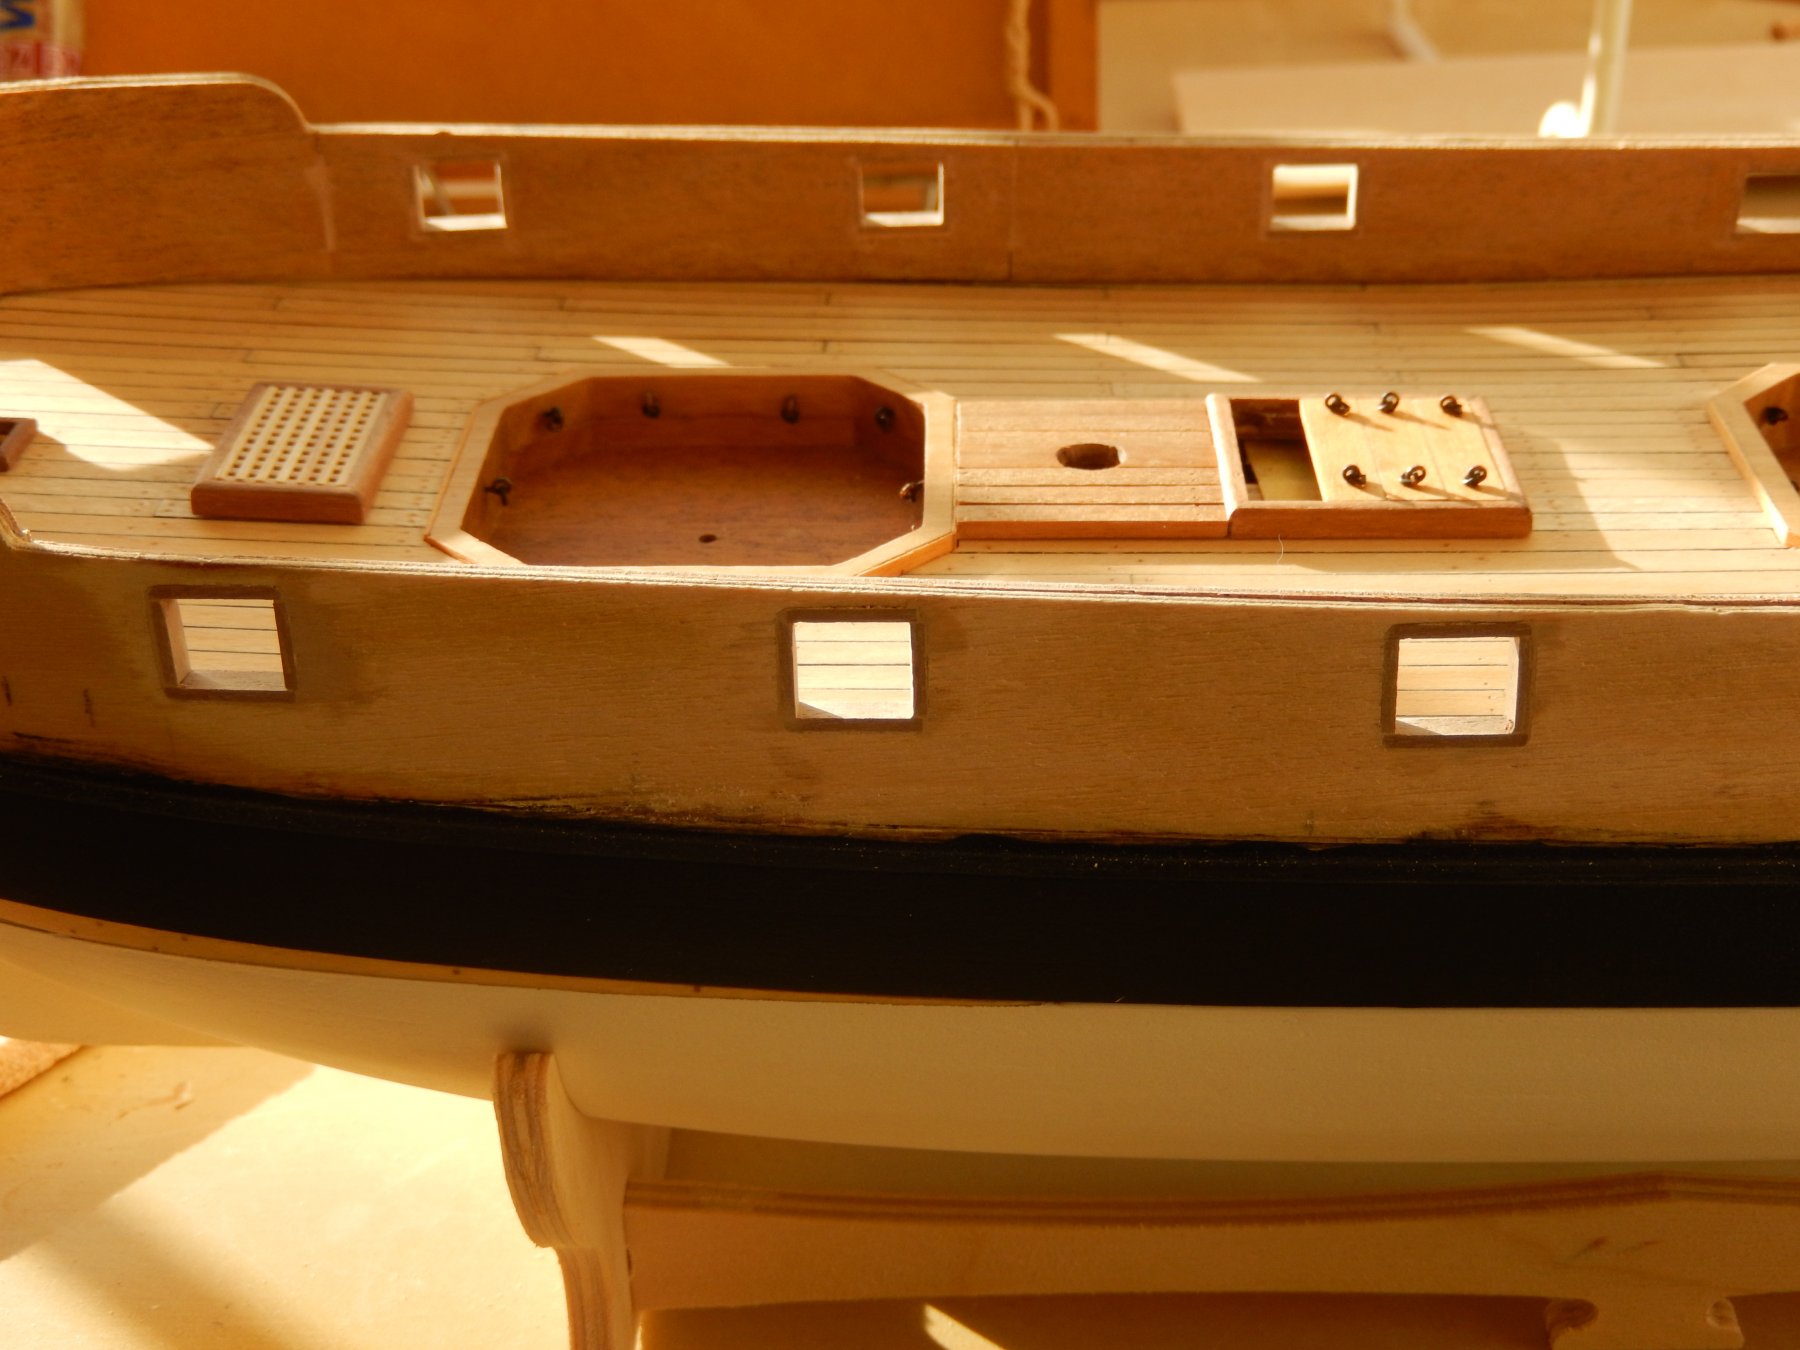
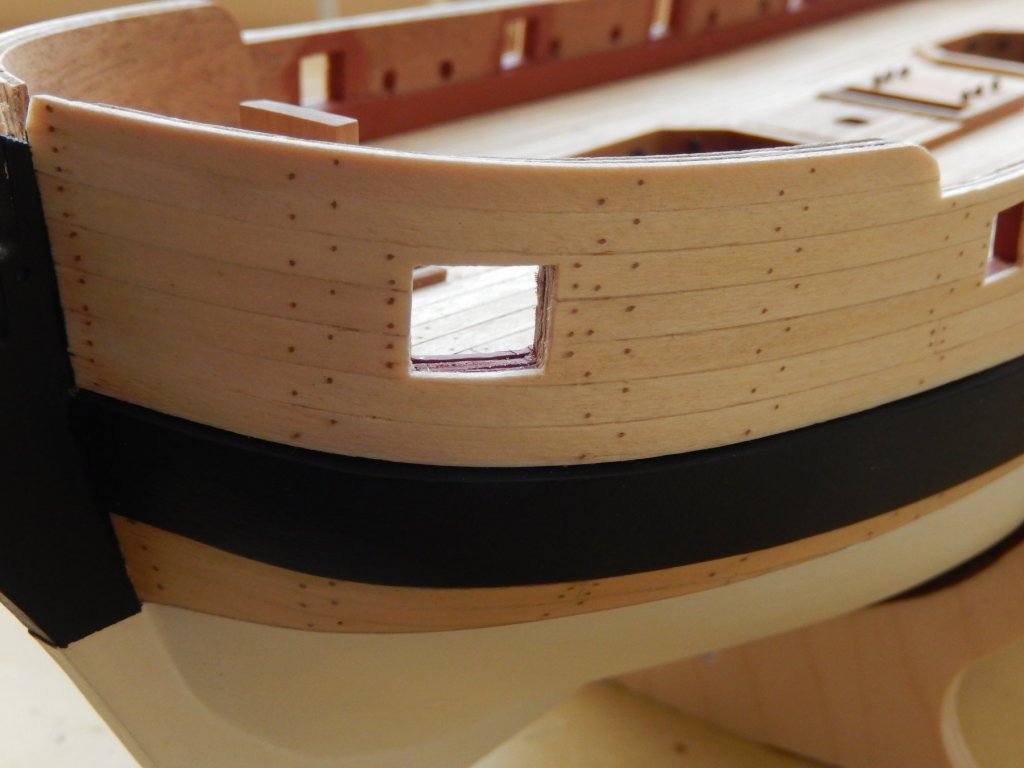
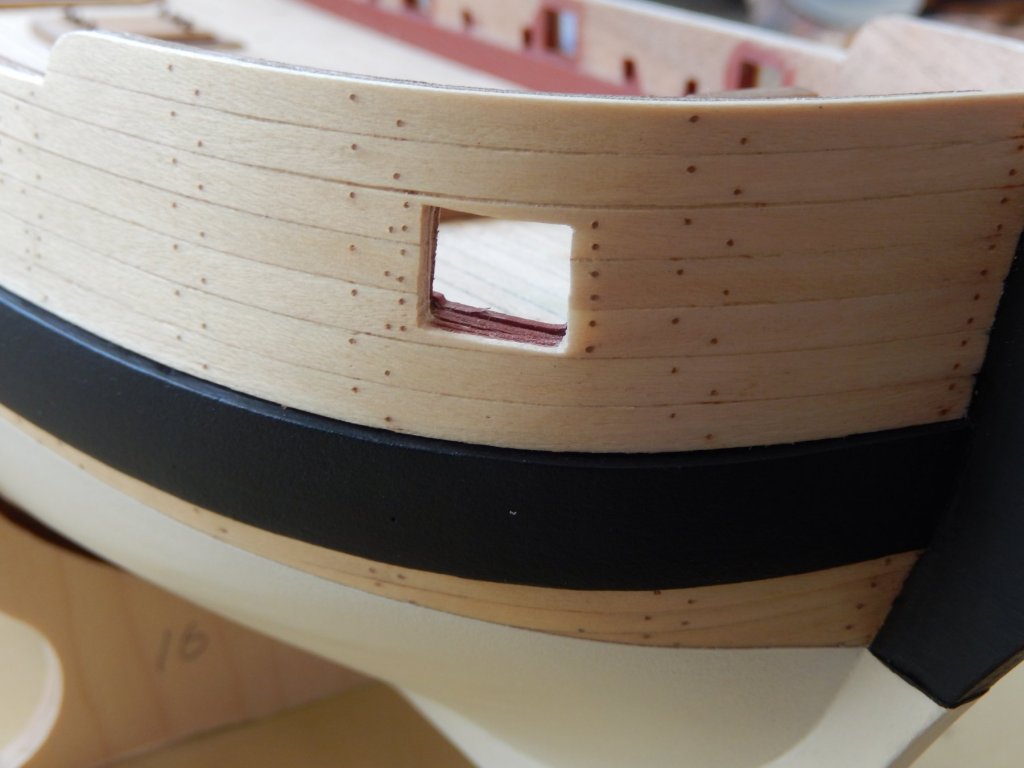
The gunports are now finished. They have turned out quite well. I found one of the inner gun port patterns slightly out which affected two gunports. I used pieces of thin strip to fill the gaps. The first photo shows the strips before trimming .... and after. By firmly holding a short length of flexible timber strip to the inner bulwark pattern while inserting the gunport linings enabled the linings to be flush with the inner bulwark without the need to sand them back. It's much easier to do on the outside of the hull than the inside. Here are some shots of the finished articles.


- 421 replies
-
- 10
-
-
- caldercraft
- granado
- (and 1 more)
-
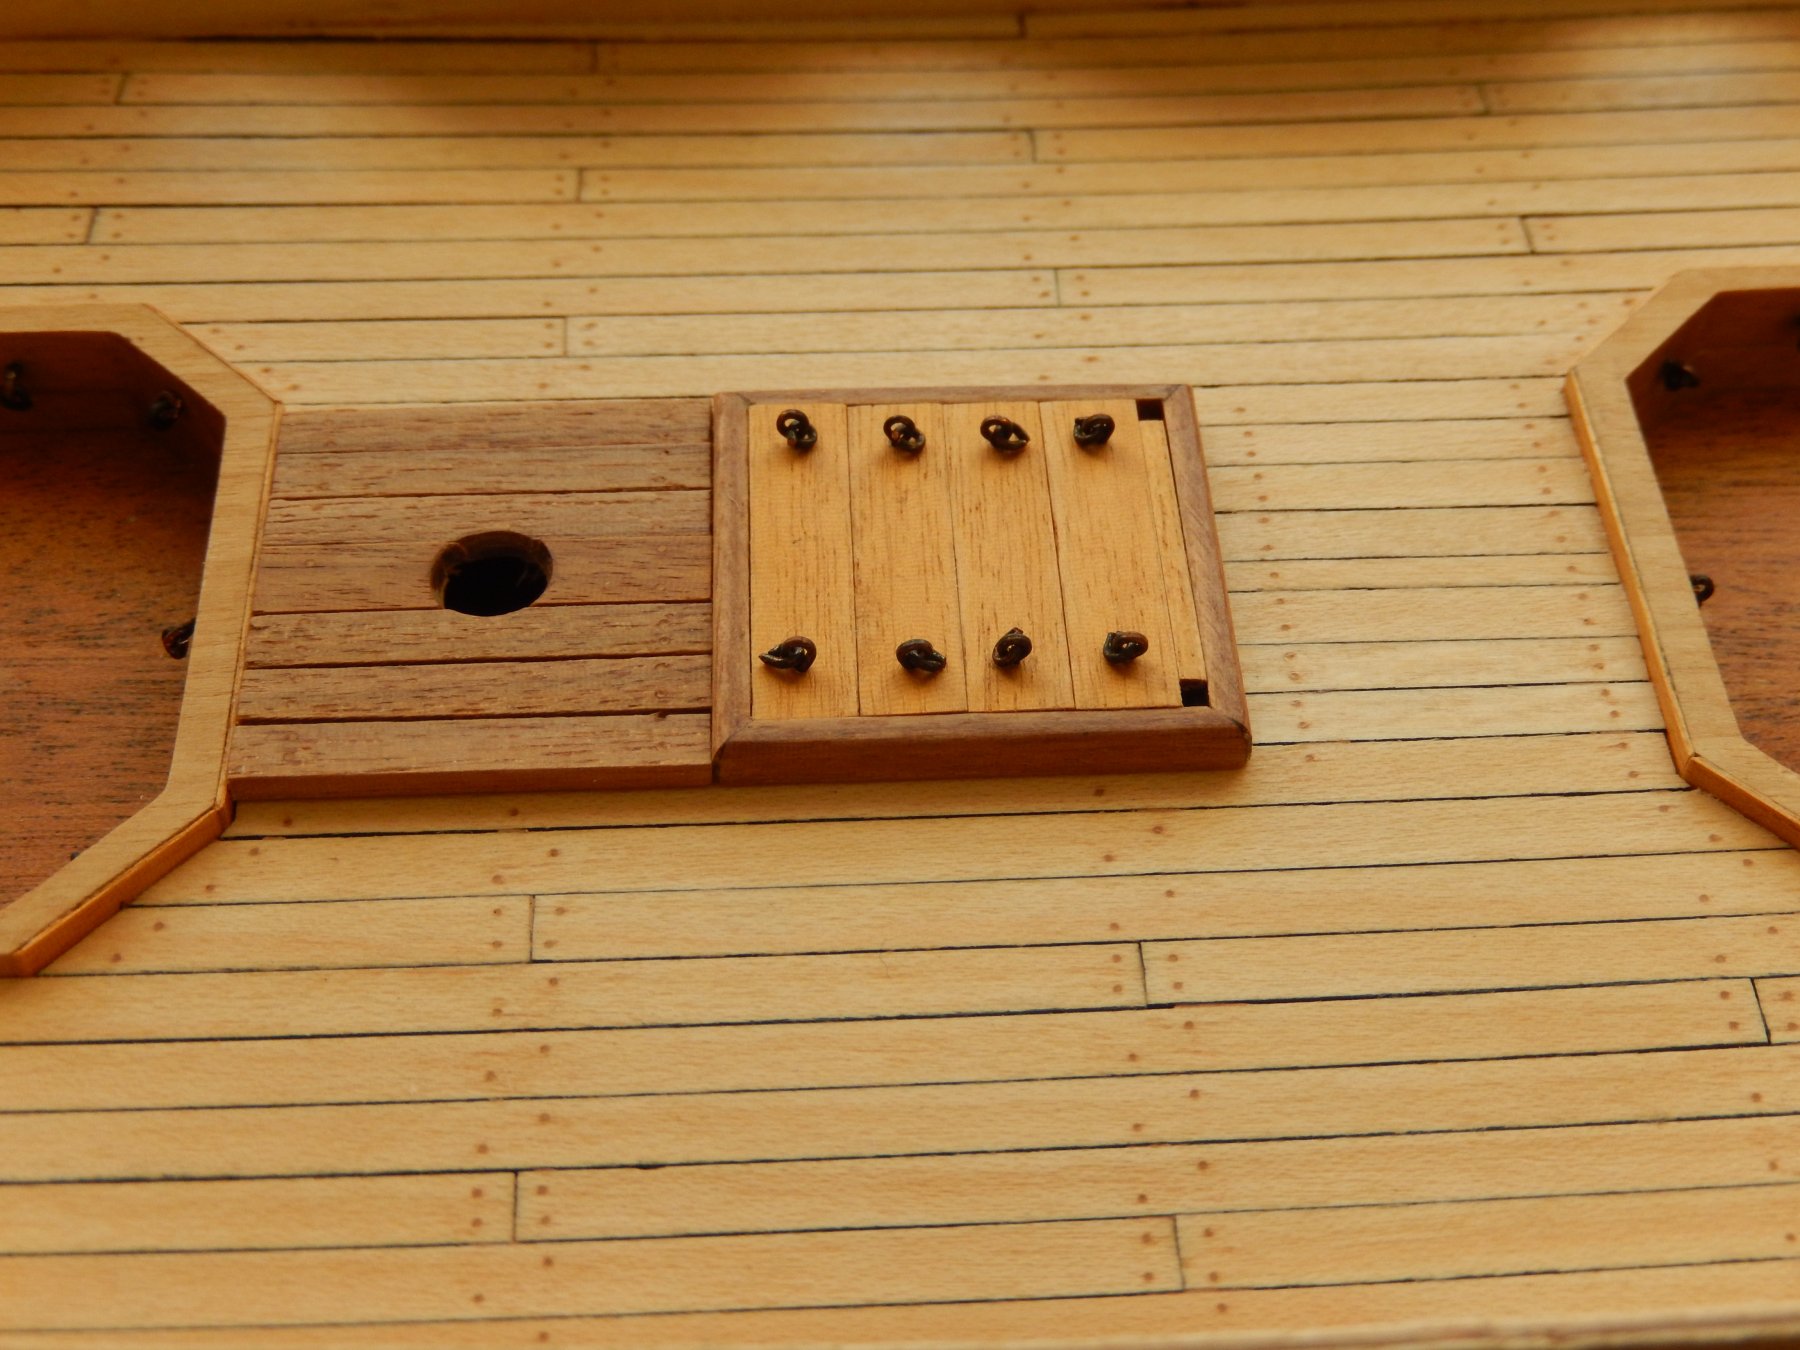
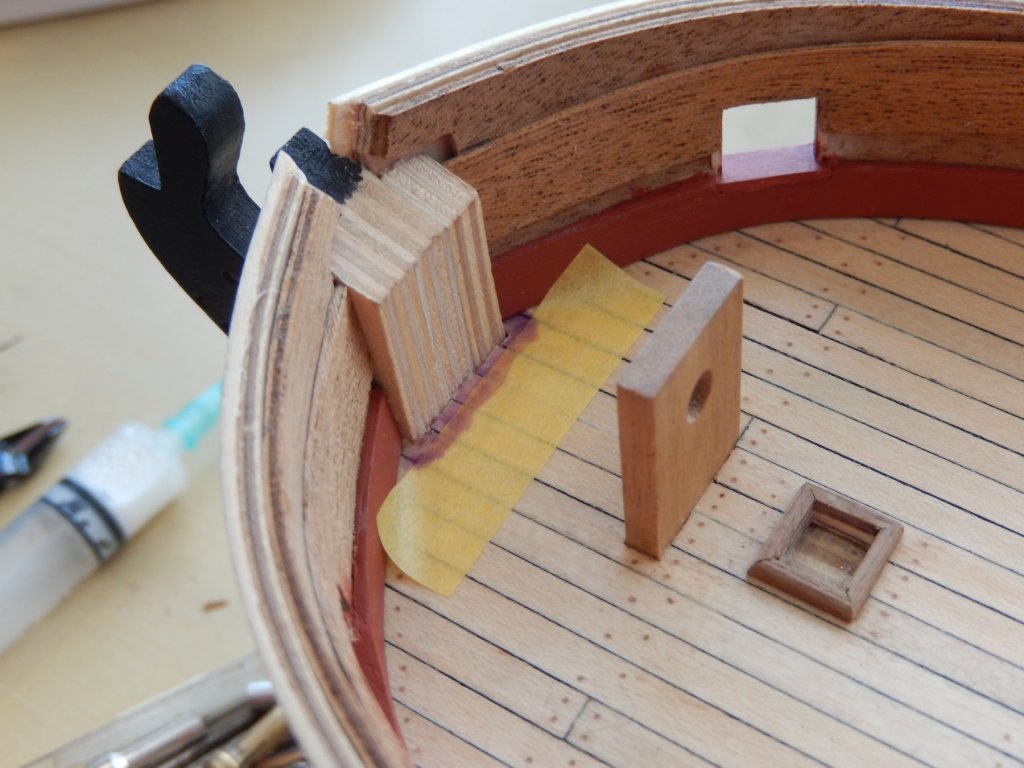
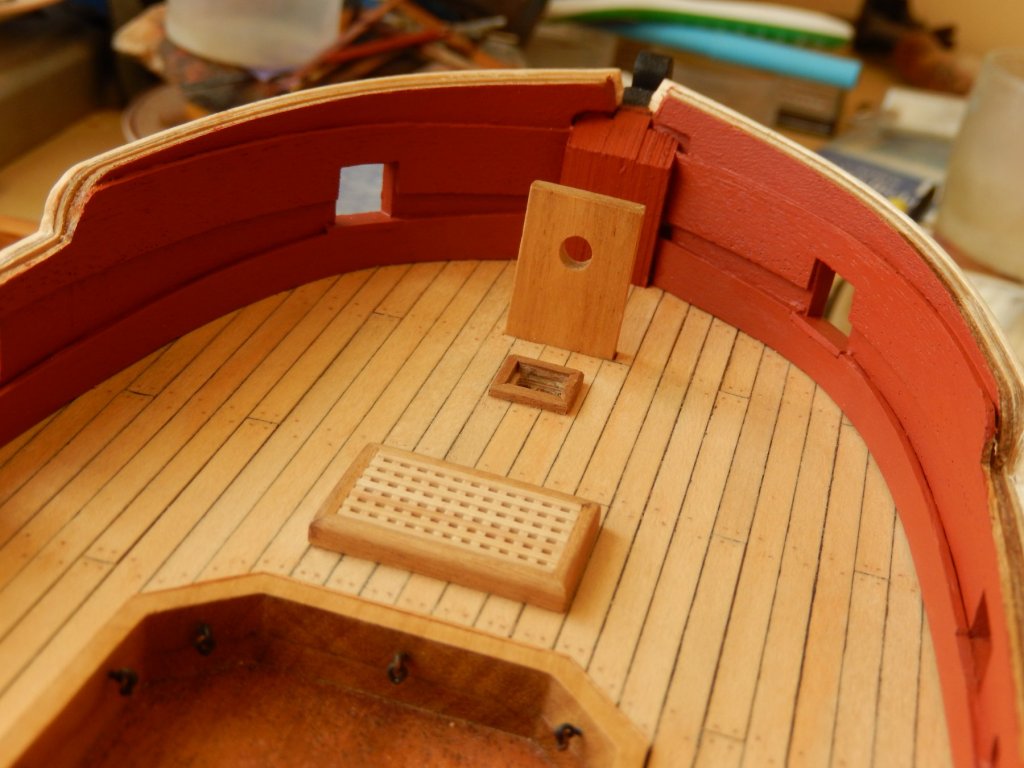
I have spent a large part of a day correcting a couple of silly errors. Both could have been avoided had I read the instructions/looked at the plan - which of course are last resorts. First, I woke a at 1.08am suddenly knowing that I had placed the holes for cables in one of the elements of the main hatch cover towards the stern rather than the stem. I then spent 20 minutes removing the hatch cover ready to retrieve the mistake today. To my surprise all went well. Incidentally, the holes for the cables as specified are not really big enough to comfortably fit the 1.8mm cable that is supposed to be supplied. My cable seems to be in the same place as the phantom 2x5mm wood strip. Fortunately I have some very good quality cable left over from Vanguard which should do. Second, in applying the gunport patterns without checking that they are not identical, I unthinkingly applied a pattern to the wrong side. The whole patterns are too long and I applied the first one in four parts, adjusting the lengths appropriately. The problem was that I had cut the stern-most piece around the curve for the quarter deck bulkhead screen. This provides seating for the curved screen. The last photo shows my solution. Here is the pattern near the stem. Everyone of the clamps was needed the second part butting the first ... How they look. Here is the difficult one. A piece of the screen material is slotted between the third and fourth pieces of the pattern to provide the appropriate spacing.


- 421 replies
-
- 7
-
-
- caldercraft
- granado
- (and 1 more)
-
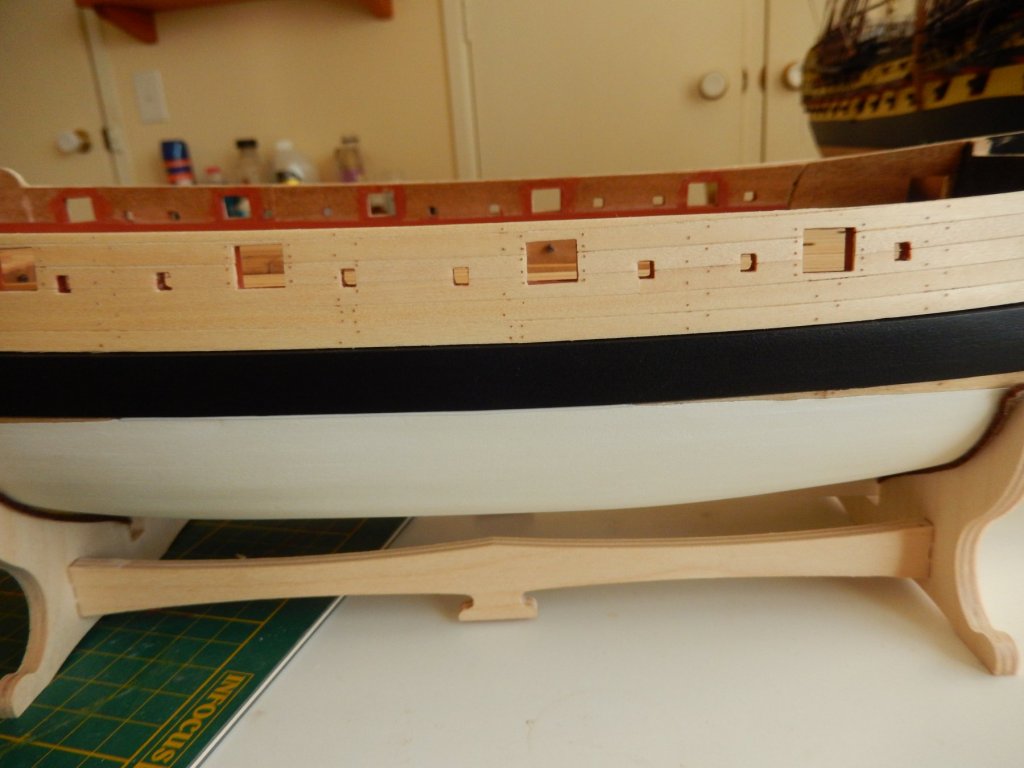
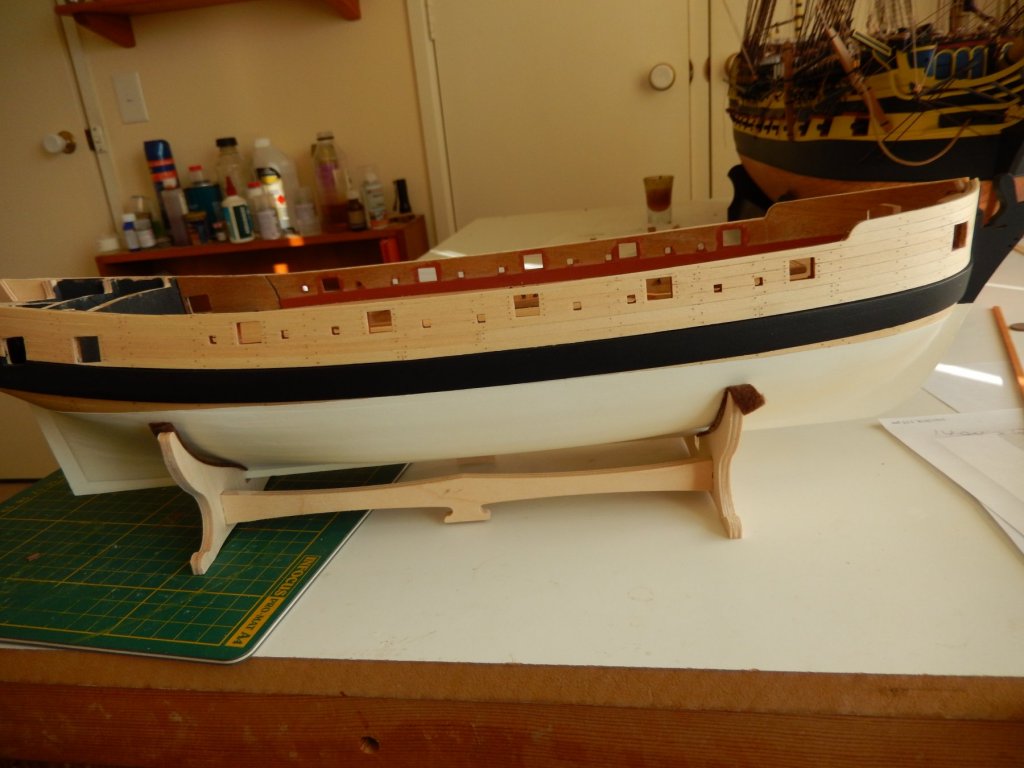
Here are the threenails finished. Next, the gunport patterns which certainly don't fit without quite a bit of adjustment.


- 421 replies
-
- 7
-
-
- caldercraft
- granado
- (and 1 more)
-
Good to hear from you Peter. I don't know about the recovery. There are still some wood problems to come, but I will try to replace it from other sources. It's a pity, because the difference in cost between supplying good quality stuff in the first place, and what has actually supplied is, I suspect, peanuts. I would certainly be happy to pay more to have the certainty of good quality. I have now finished the treenails and am happy with the result. (Photos to follow ) I do take your point however about their scale.
- 421 replies
-
- 1
-
-
- caldercraft
- granado
- (and 1 more)
-
Thanks for the encouragement Jobbie. It's always welcome. And thanks too for those who have 'liked'. Filling the holes is in progress which will eventually determine how it all looks.
-
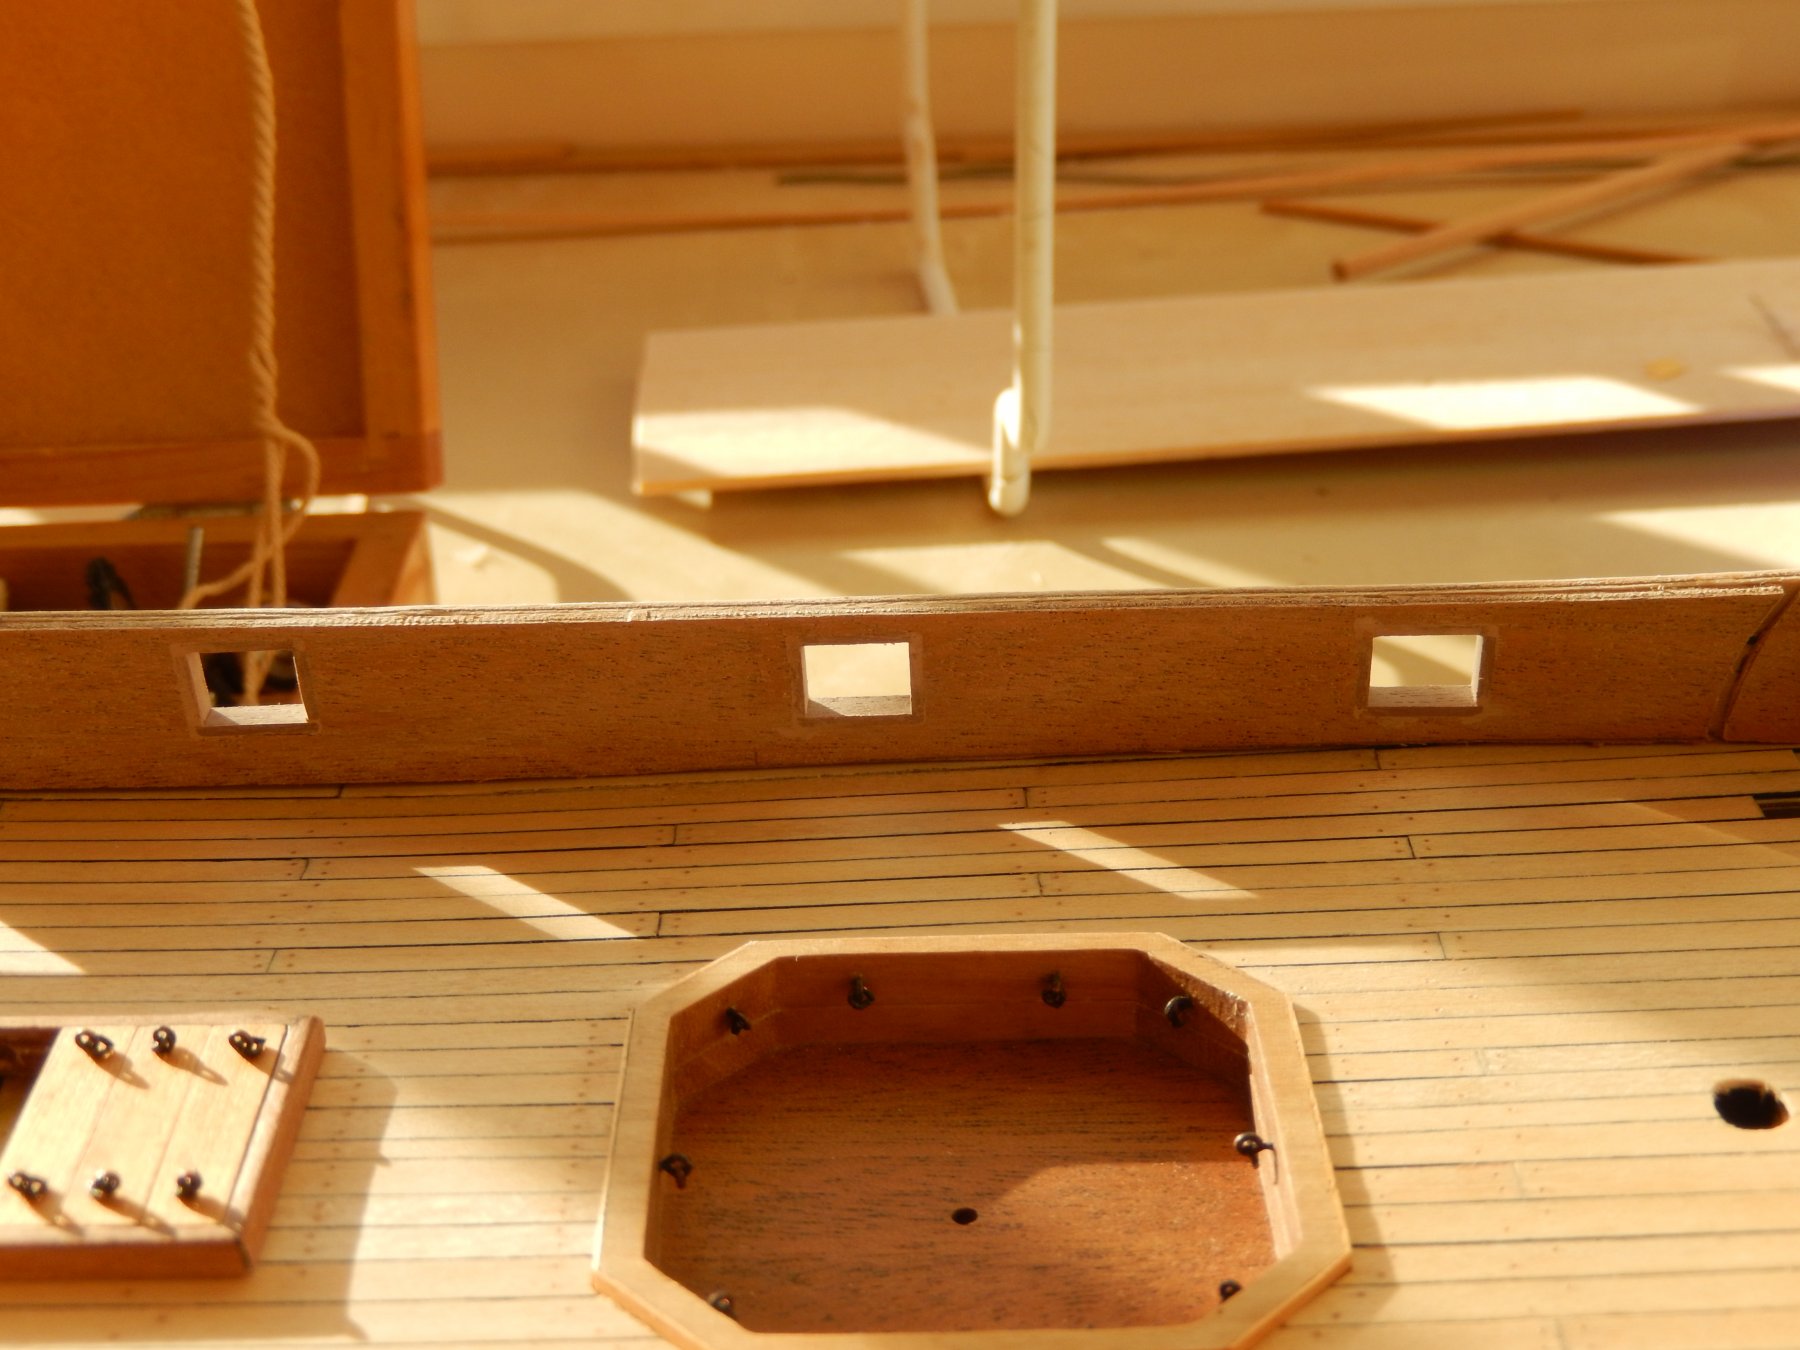
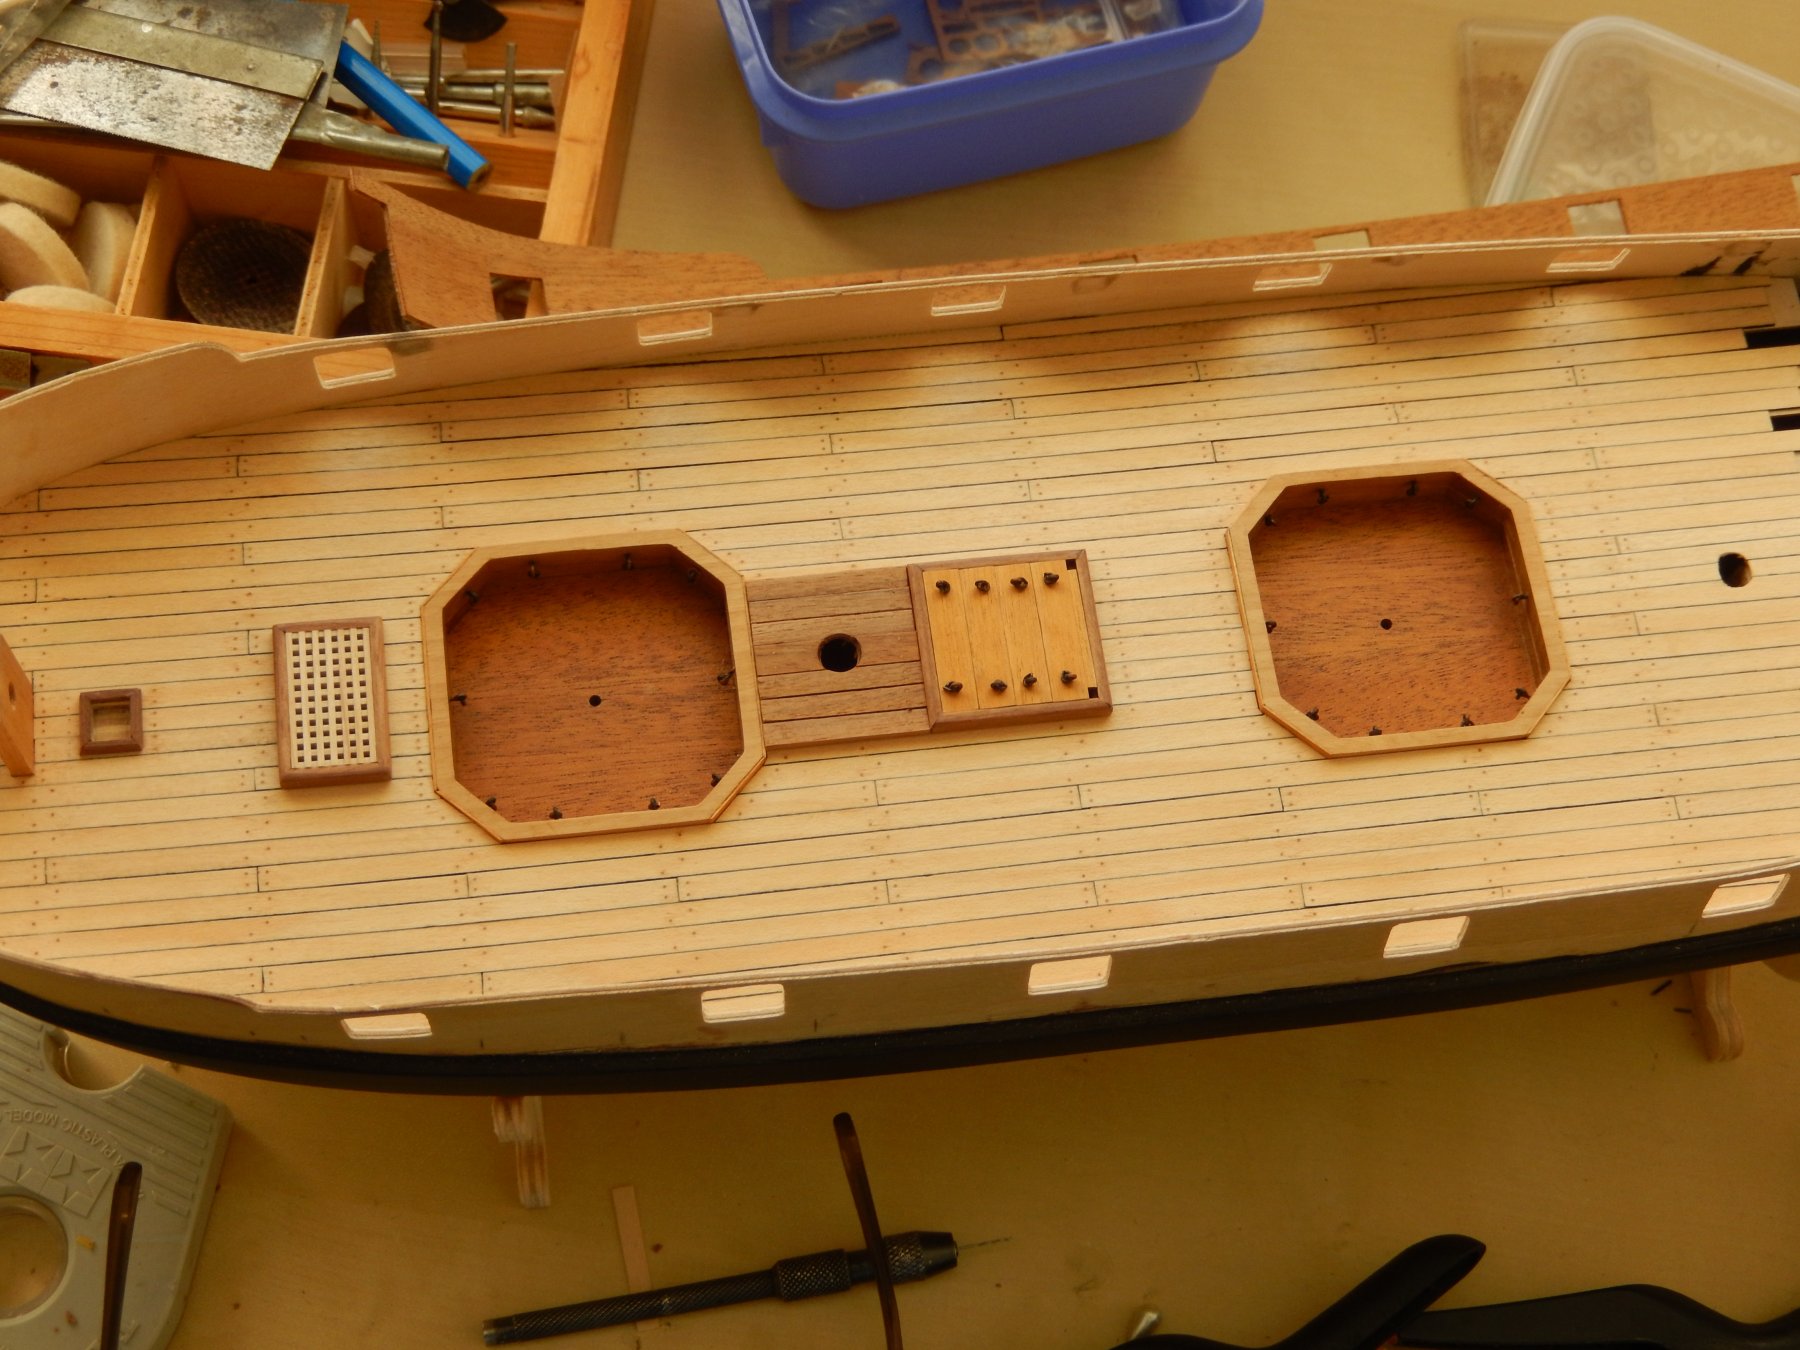
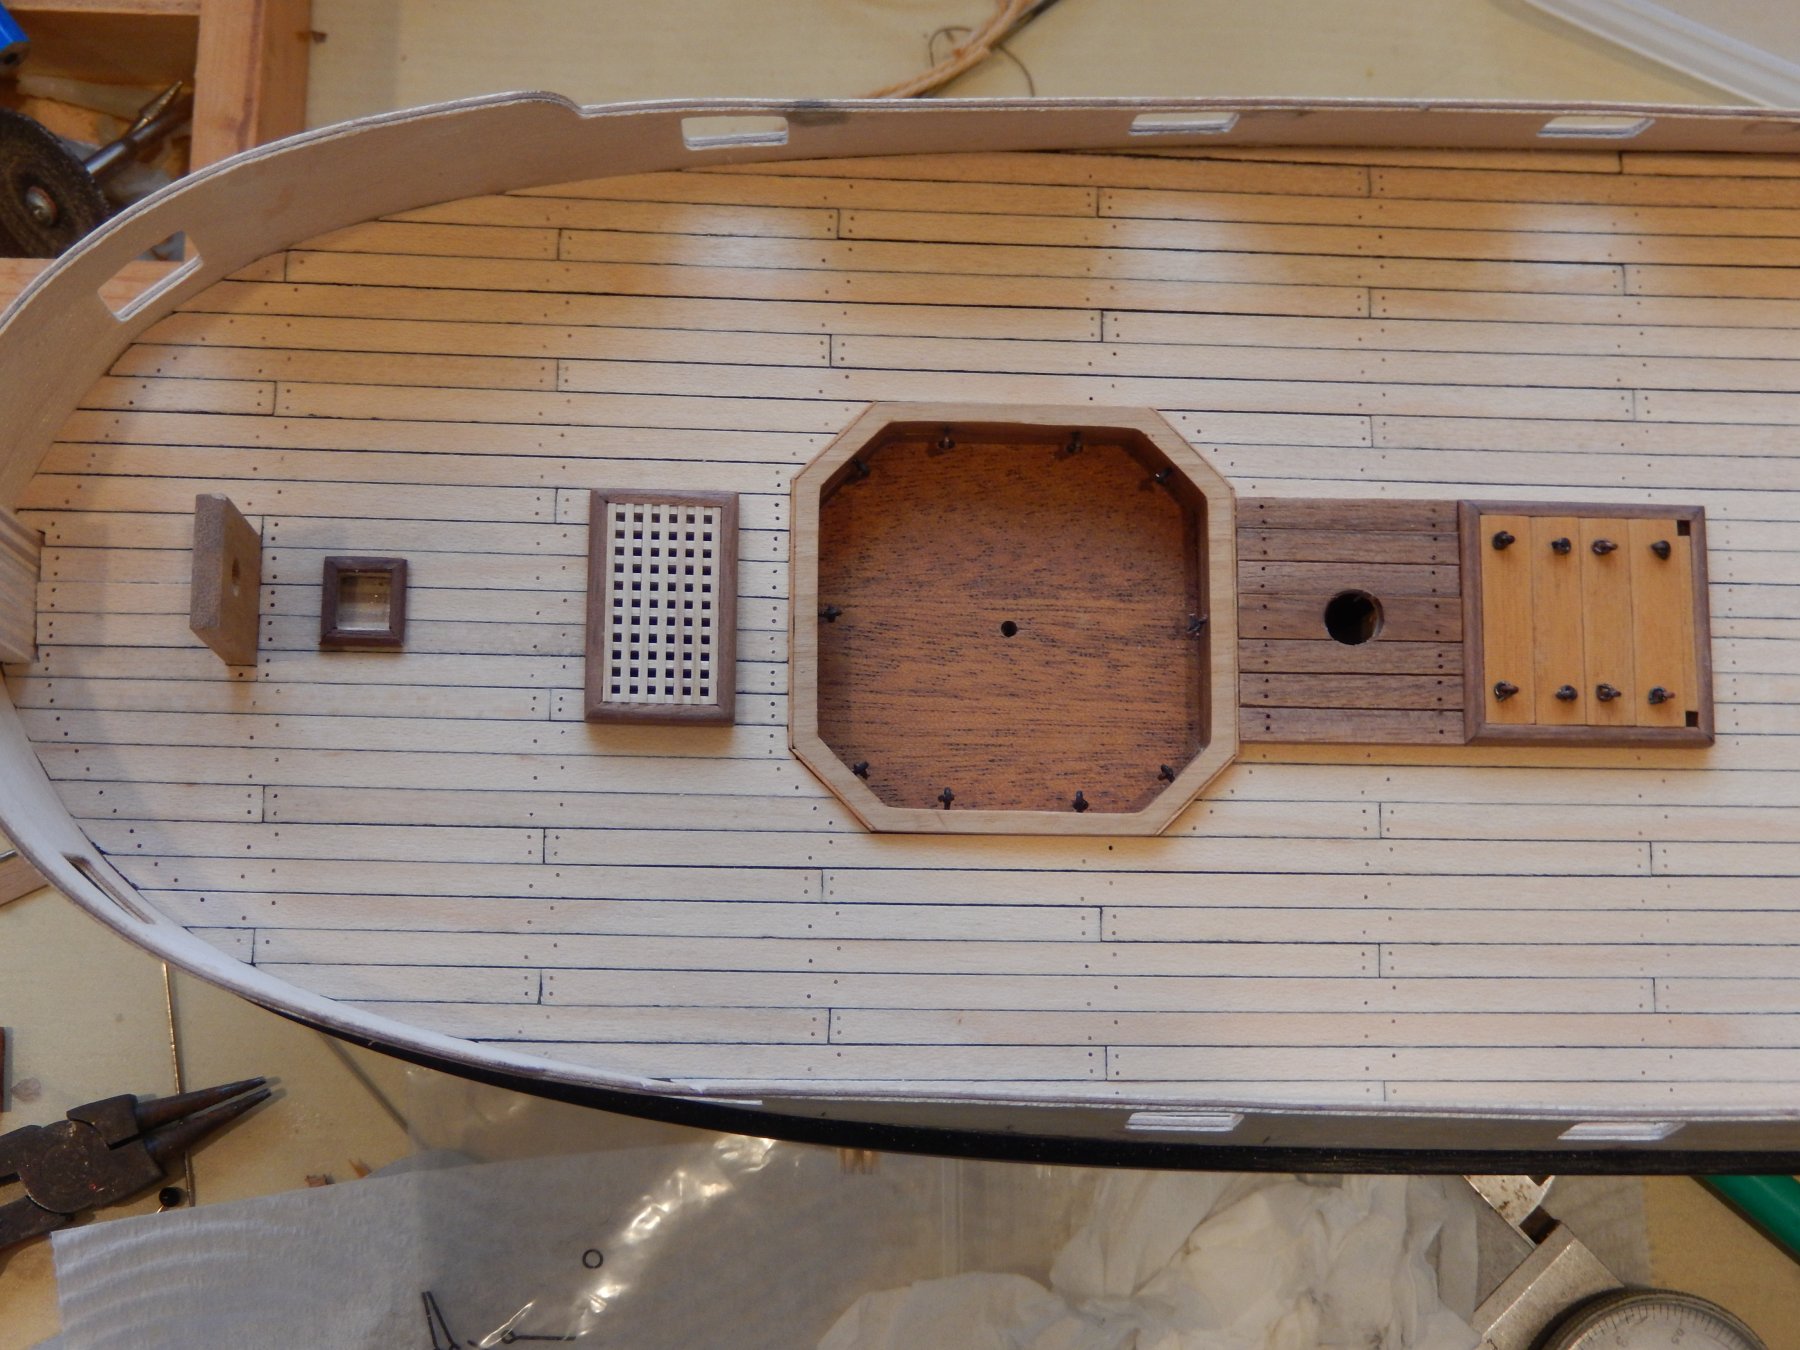
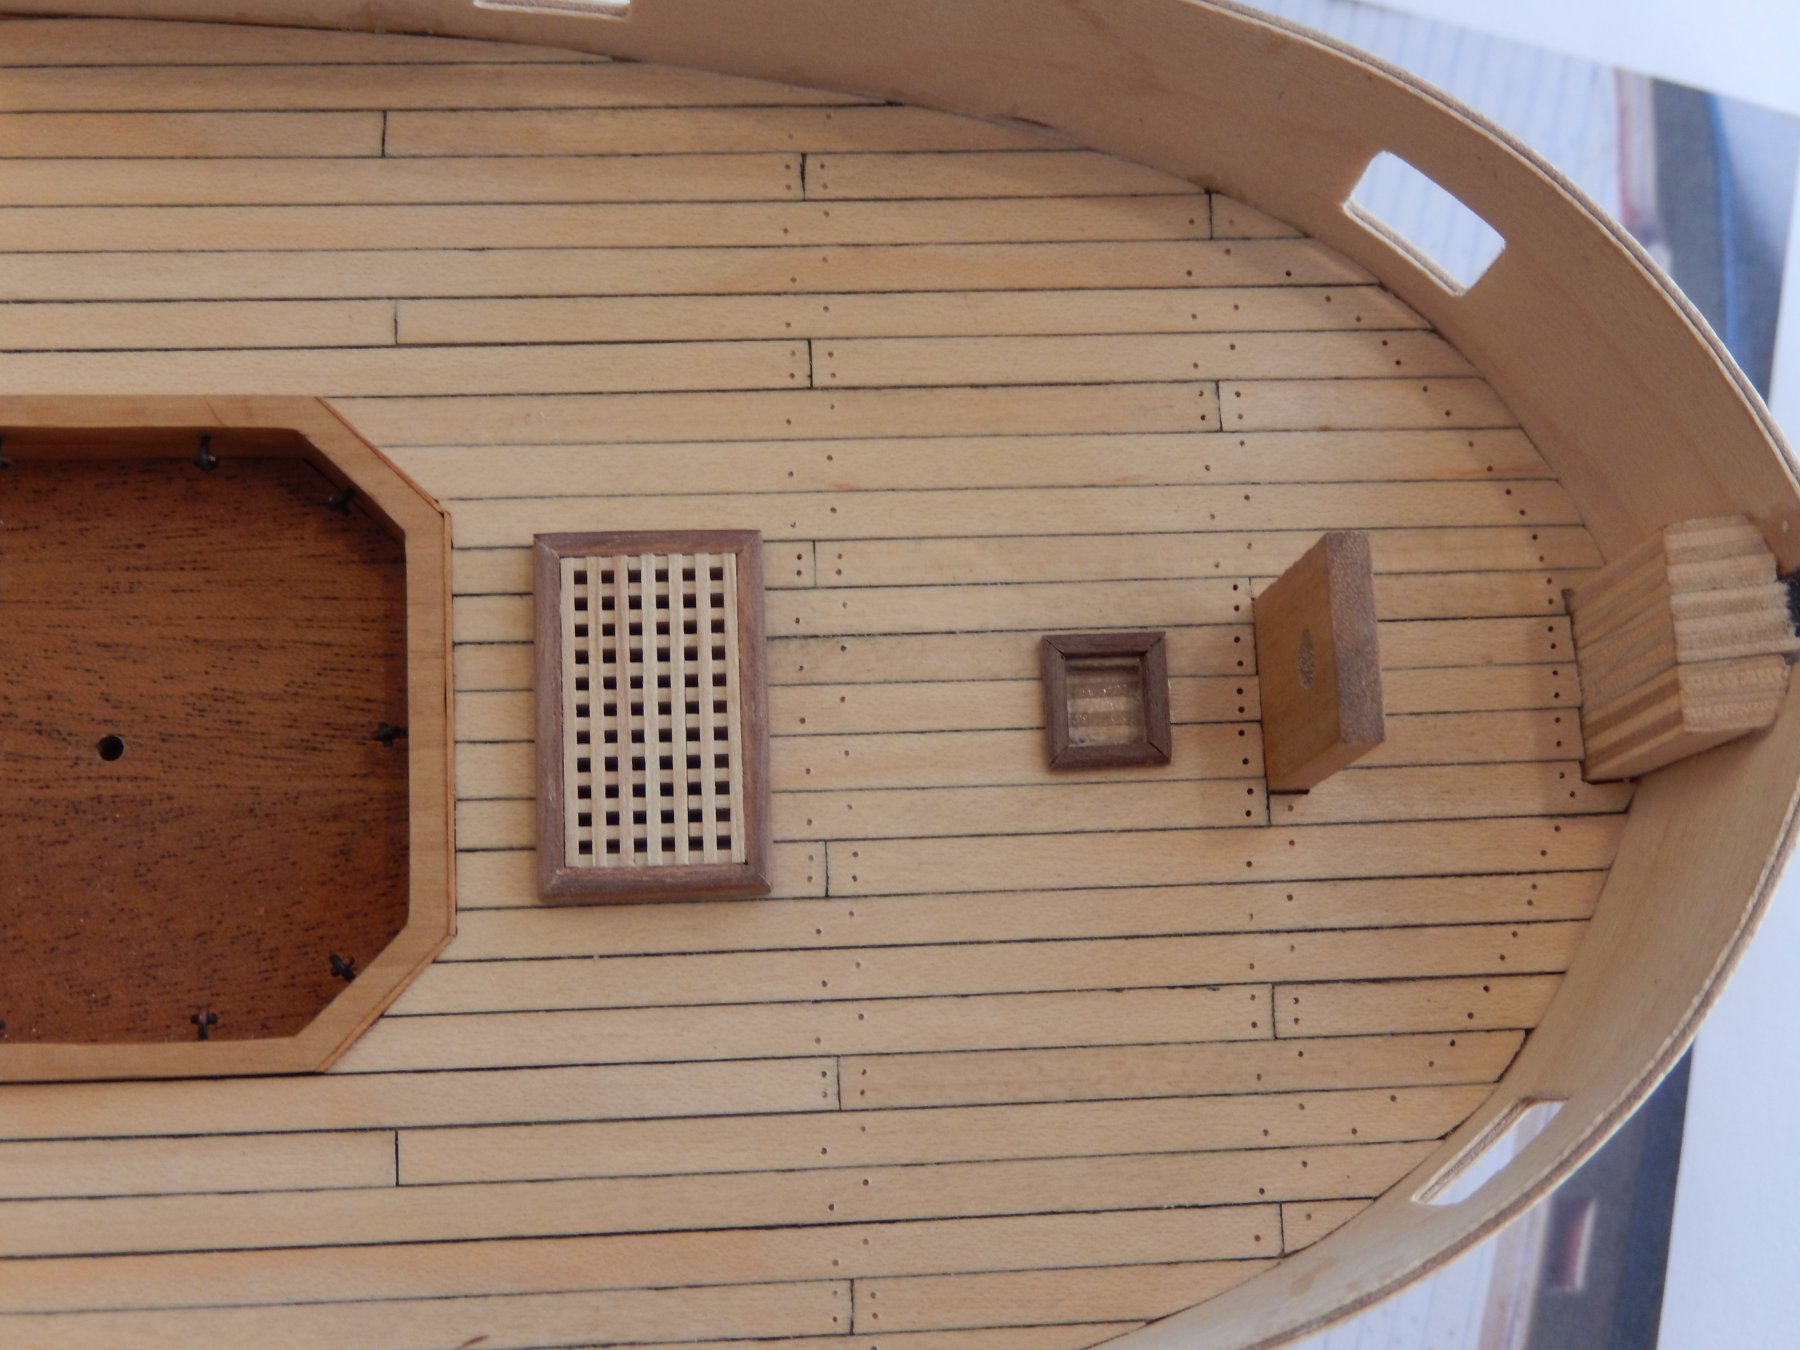
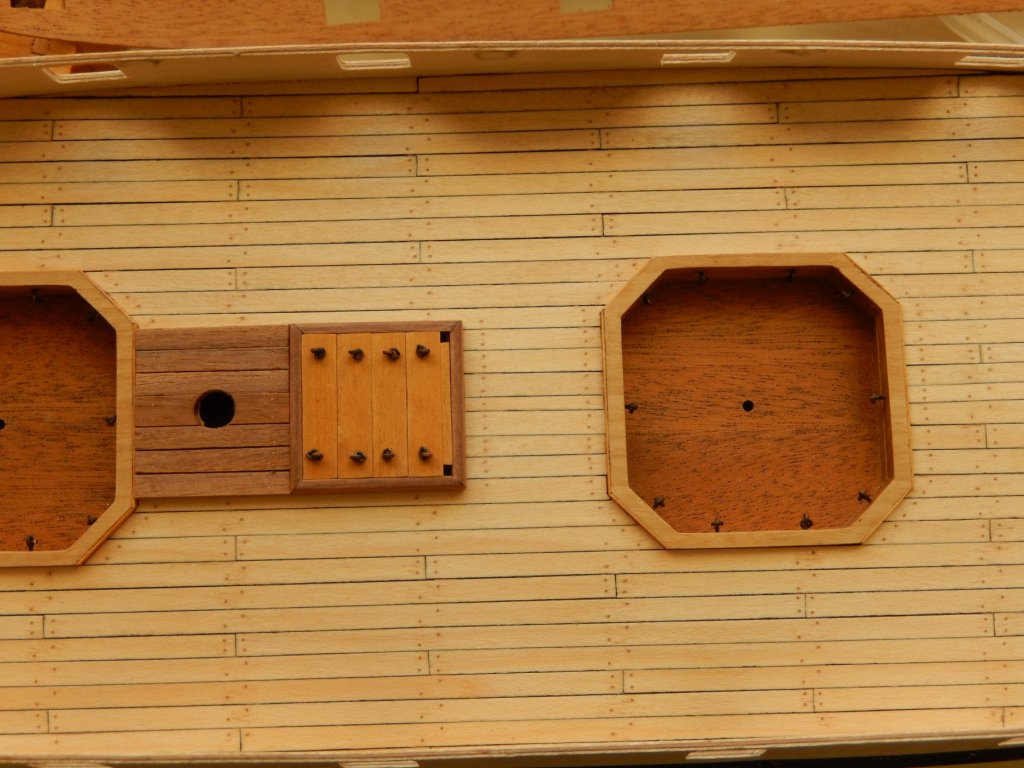
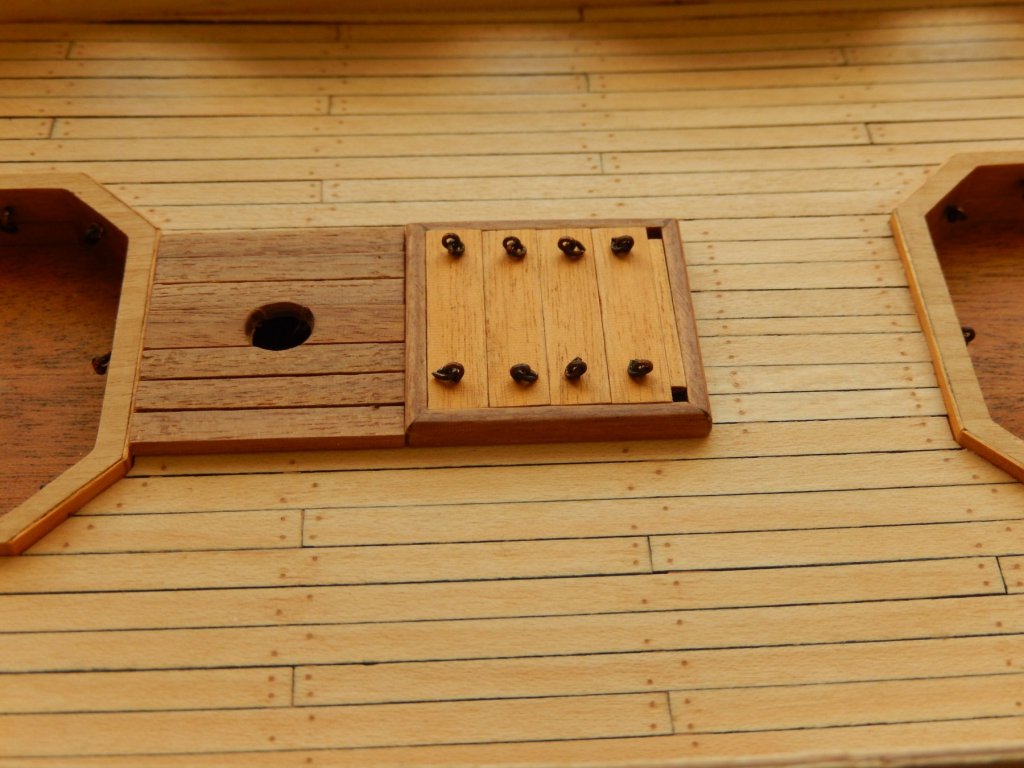
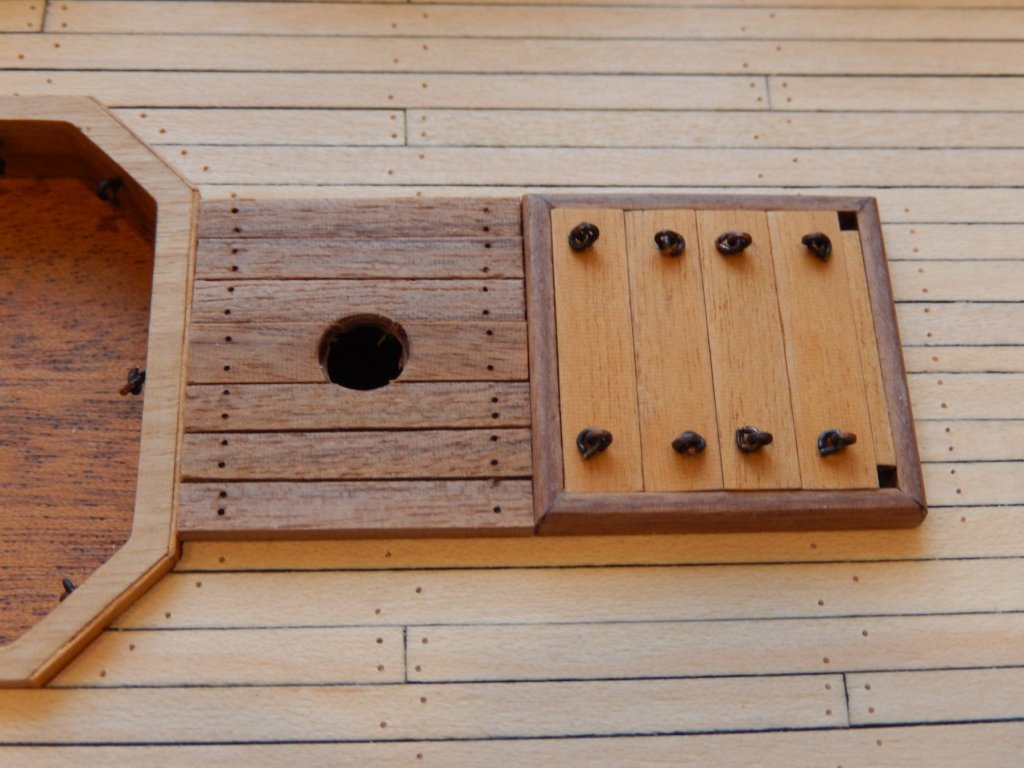
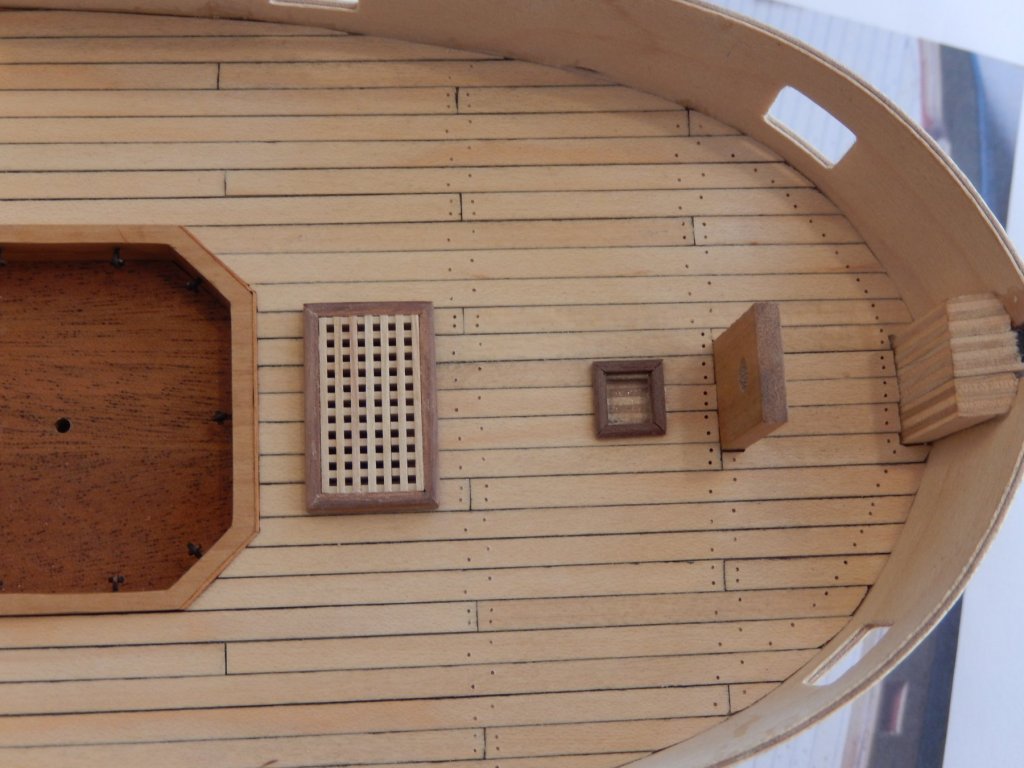
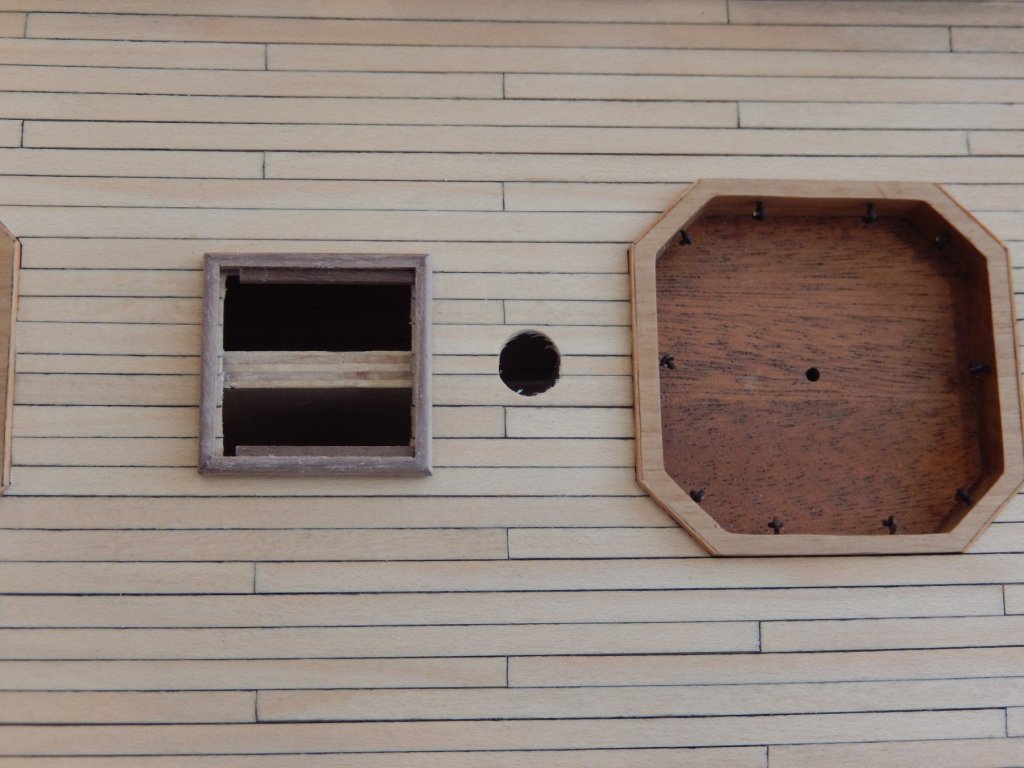
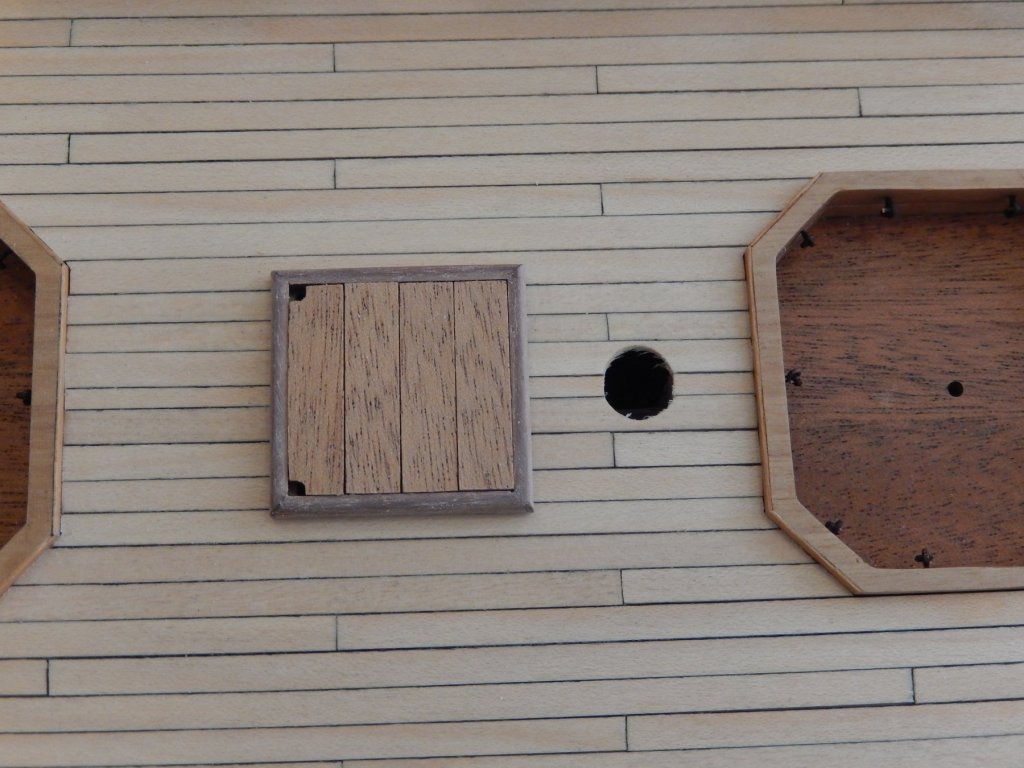
The holes for the 'treenails' are finally drilled - not difficult, just time-consuming. The first photo shows the reinforcing of the deck and the main hatch. The reinforcing is comprised of six 2x4mm strips and one 2x5mm strip - total width of 29mm - the same as the exterior width of the main hatch. However the one 2x4mm strip supplied was of very, very poor quality. Of the one 600mm strip supplied, about 400mm could be best used as kindling; the remaining 200mm in bits and pieces along the length of the 600mm strip, was only just acceptable after quite a bit of work tidying it up. Nevertheless it was still very splintery. The whereabouts of the 5mm strip remains a mystery. Fortunately I had a small bit of 1.5x5 mm strip which I used after sticking a piece of 0.5x5mm strip beneath it. At least most of the reinforcing (and a slip of the drill bit) will be obscured by the bitts and rigging. For the elements of hatch, I have substituted strip for the ply supplied. The strips were not finally stuck down when the photos were taken. For comparison, the ply may be seen in the last photo of my previous post. Now I have to fill the holes.

- 421 replies
-
- 11
-
-
- caldercraft
- granado
- (and 1 more)
-
kit review 1/72 HMS Vanguard 1787 - Victory Models/Amati
RMC replied to James H's topic in REVIEWS: Model kits
I have finished the Vanguard version of the kit. It's superb. I agree with Peter's thoughts on the shipship's guns. They are quite disappointing, though with a bit of fiddling they can be made presentable. Have a look at Syren's gun kits. They may be the answer, thought the scale may be a problem. All the best Bob (rmc)- 18 replies
-
- 3
-
-
- victory models
- elephant
- (and 3 more)
-
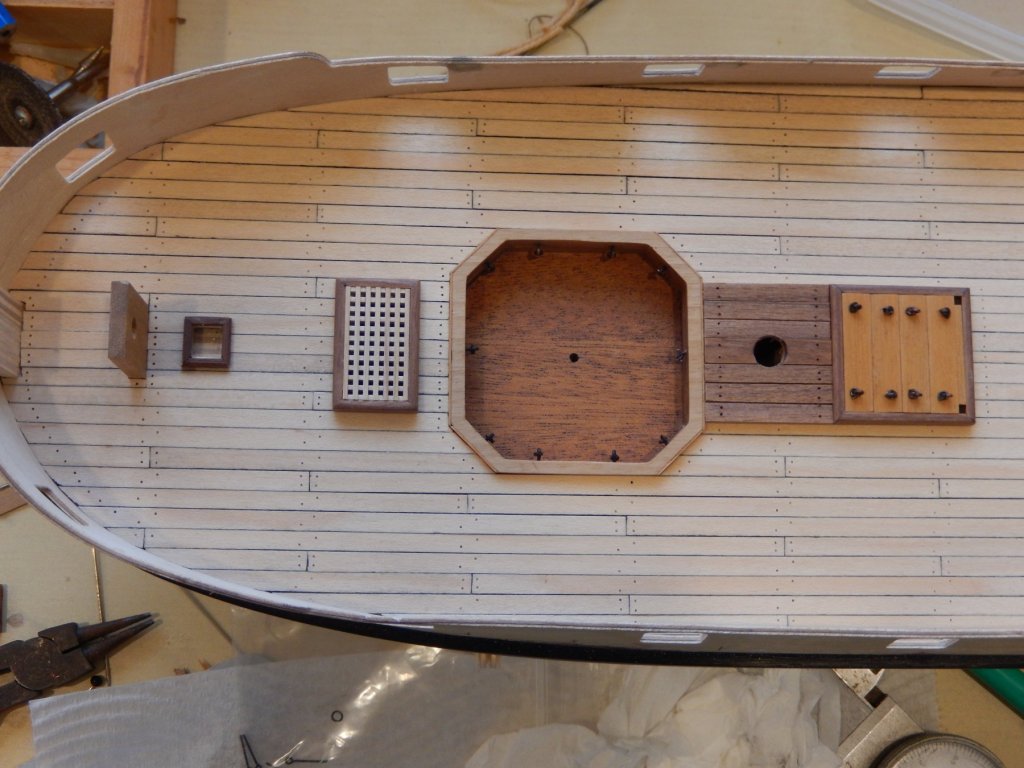
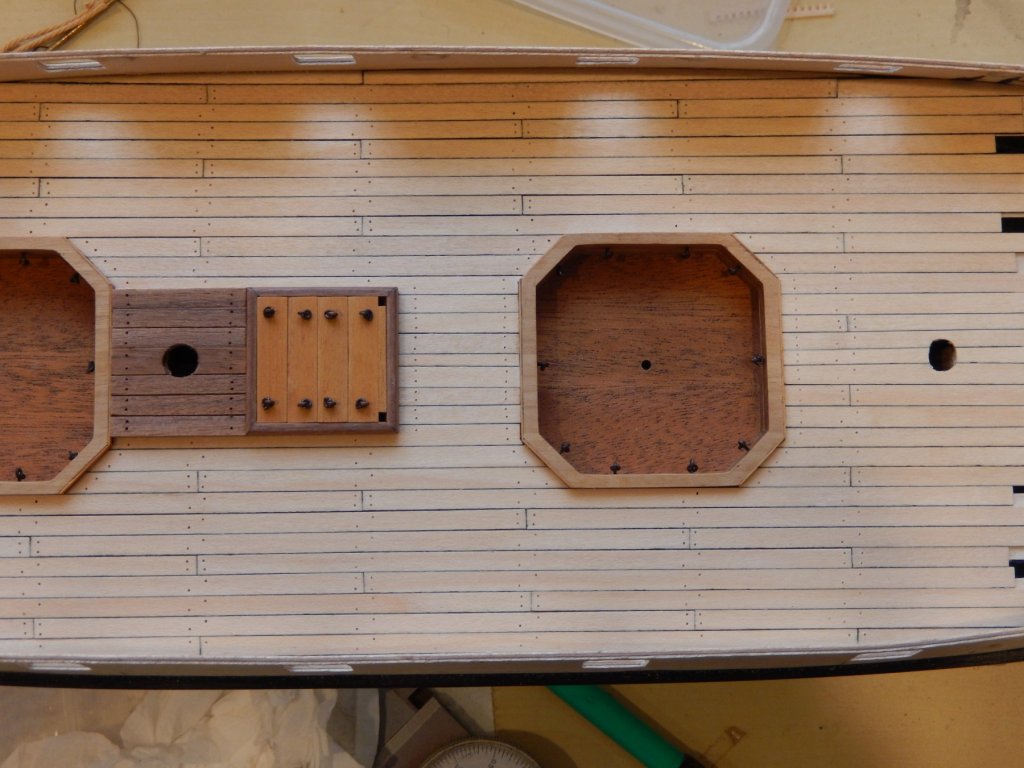
The treenails are proceeding slowly. In the following photos the holes for the treenails have not yet been filled. I thought to break up the job a little I would do the surrounds for the various hatches. The main hatch was quite difficult. It has to be a square with 29mm sides. Making it square was the hard part. The cover for the hatch is made of 1.8mm ply, which I don't think is very attractive at all. I will probably experiment with putting veneer over each piece to see how that looks. A coat of poly has been put on the new work after these photos were taken. Here is progress.
- 421 replies
-
- 8
-
-
- caldercraft
- granado
- (and 1 more)