alross2
-
Posts
411 -
Joined
-
Last visited
Content Type
Profiles
Forums
Gallery
Events
Everything posted by alross2
-
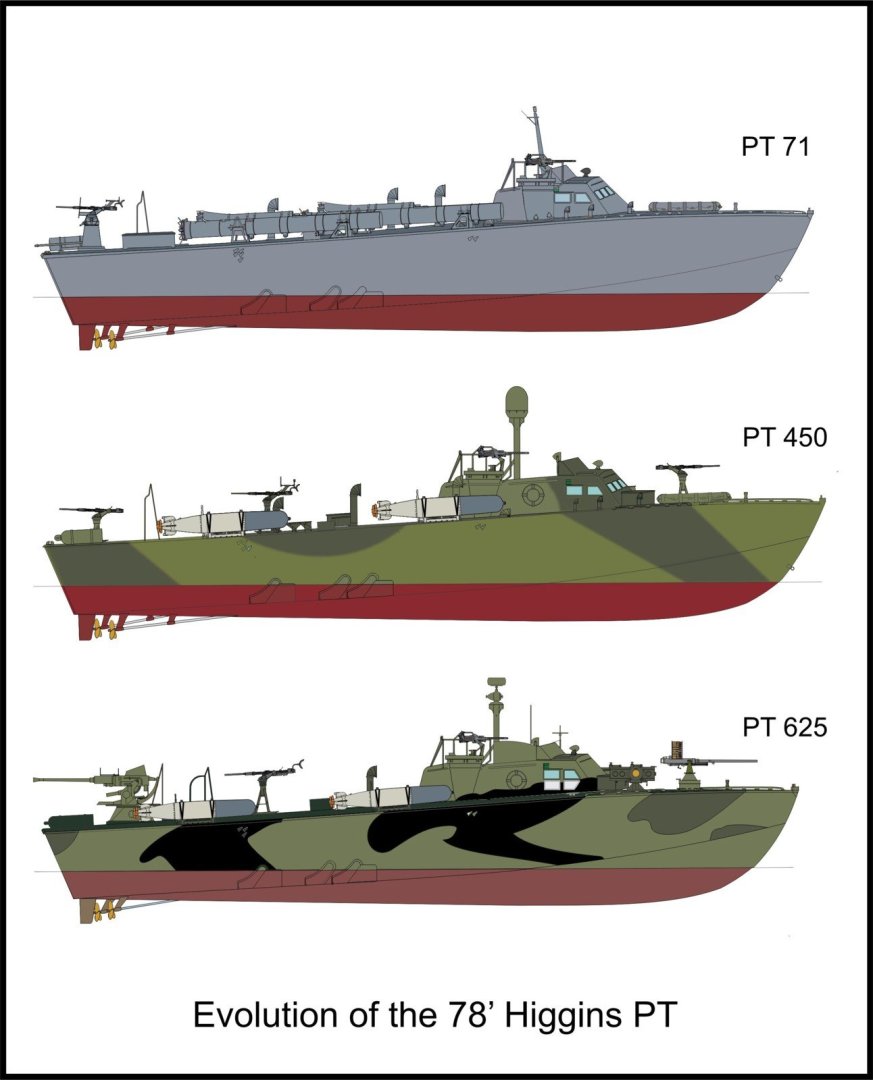
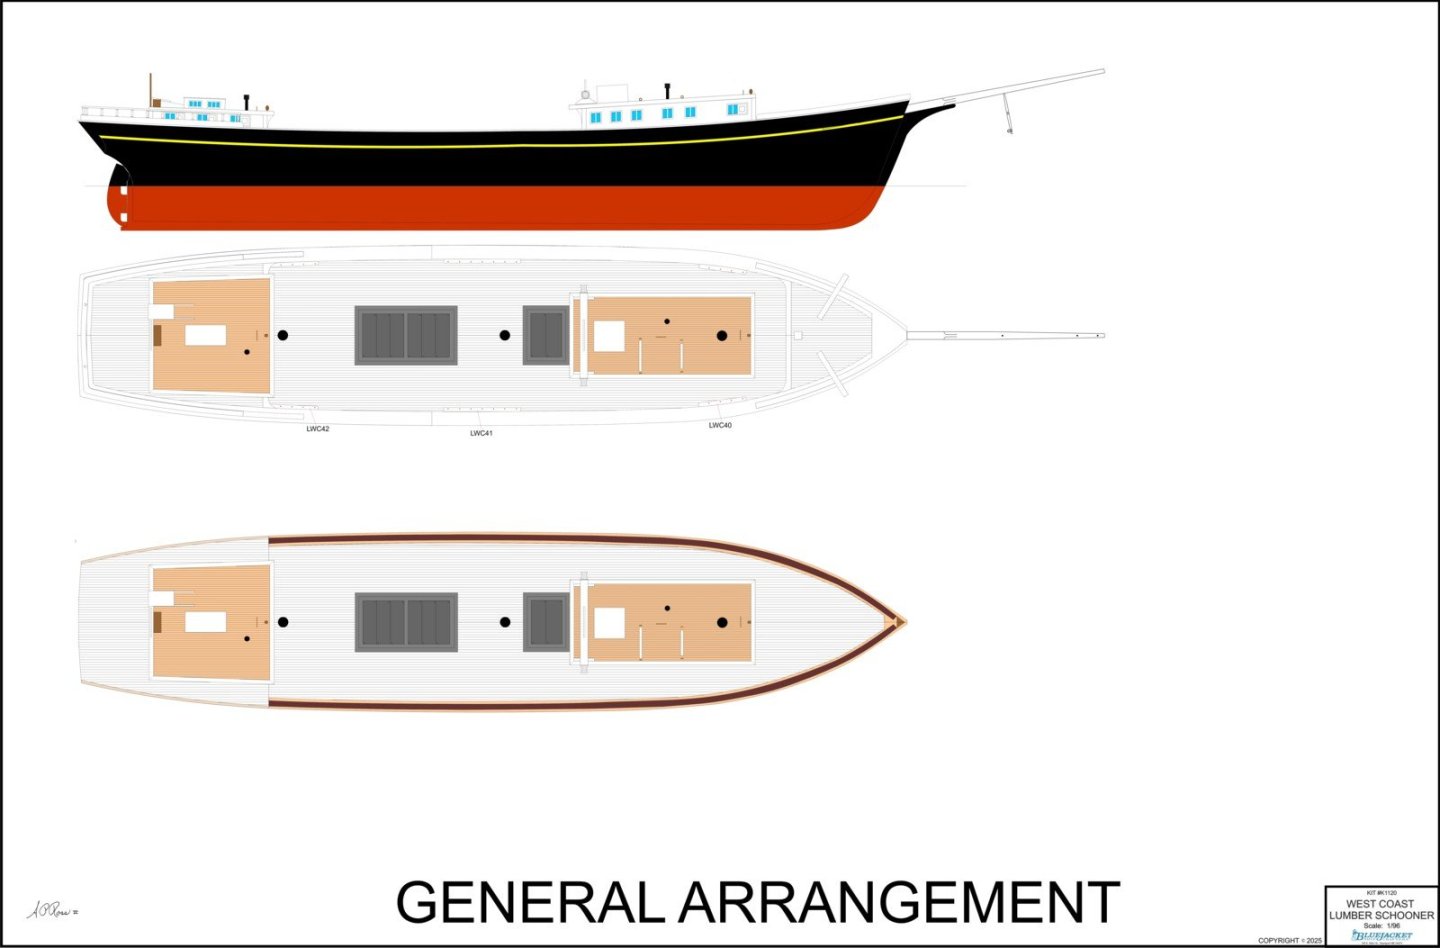
 A bit further along. The main deck is now on and has the locations of the major deck furniture lasered on it. This saves the modeler from having to measure from the plans. This arrangement is for the initial series boats, so I haven't added the locations for the torpedo tubes or the roll-off racks. Still not sure which version/versions I'll end up doing. Profiles for the three as built are shown below but there were many reconfigurations of all three groups over time.
-
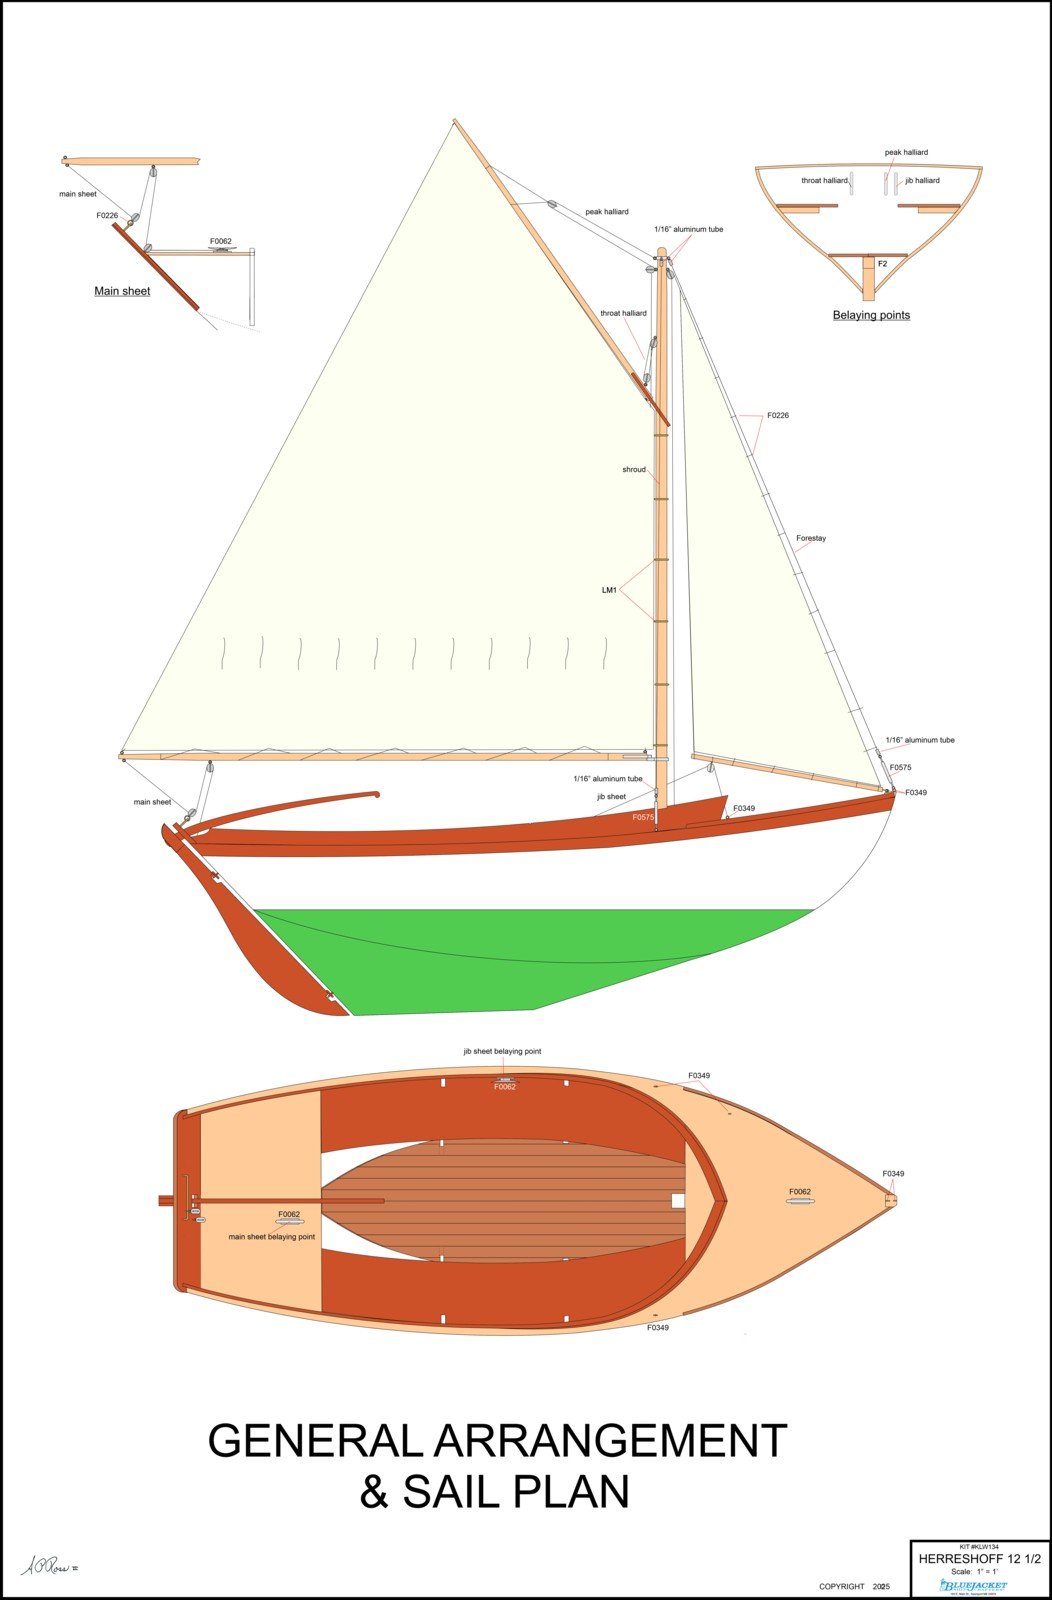
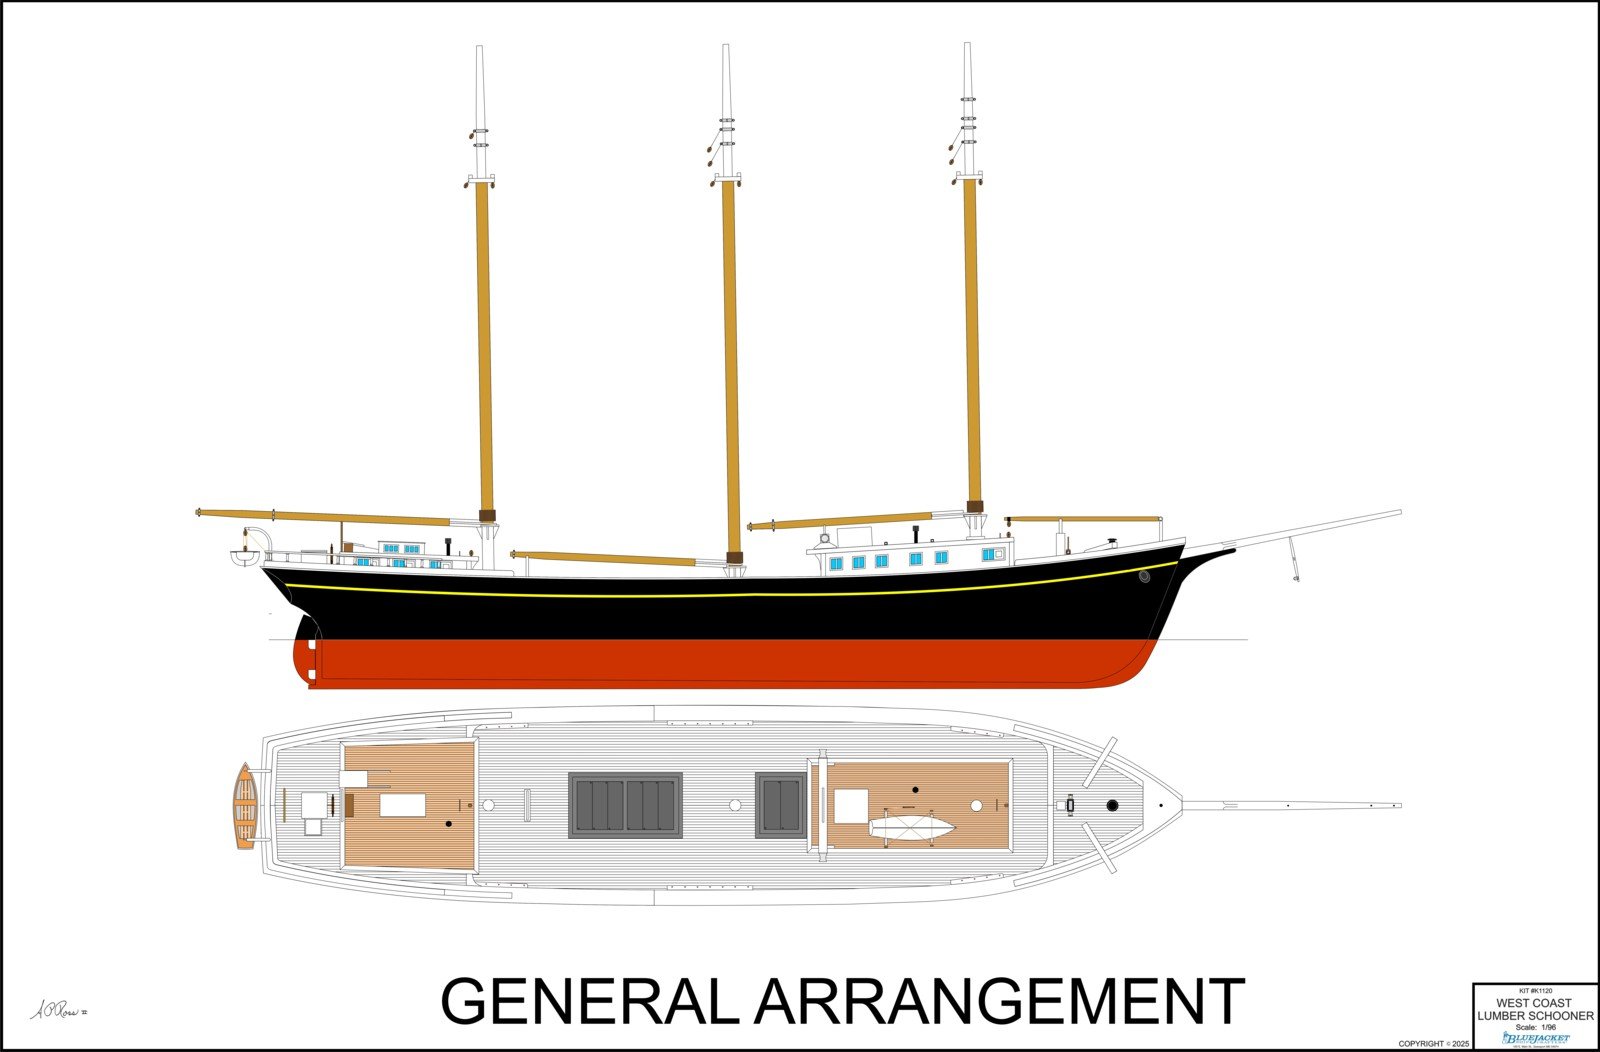
At the moment, along with developing new kits I'm also revising some of the older kits. One thing that computer drawing has let me do is add color to the traditionally black and white plans. This makes it easier to differentiate among the various laser-cut components and saves having to describe the color scheme for the model. I'm just finishing up revising the Herreshoff 12 1/2 kit and here are a couple of the new drawings. The GA/Sail Plan drawing is 24" x 36", so some of the details may be hard to see in this reduction.

- 3 replies
-
- 12
-

-

-
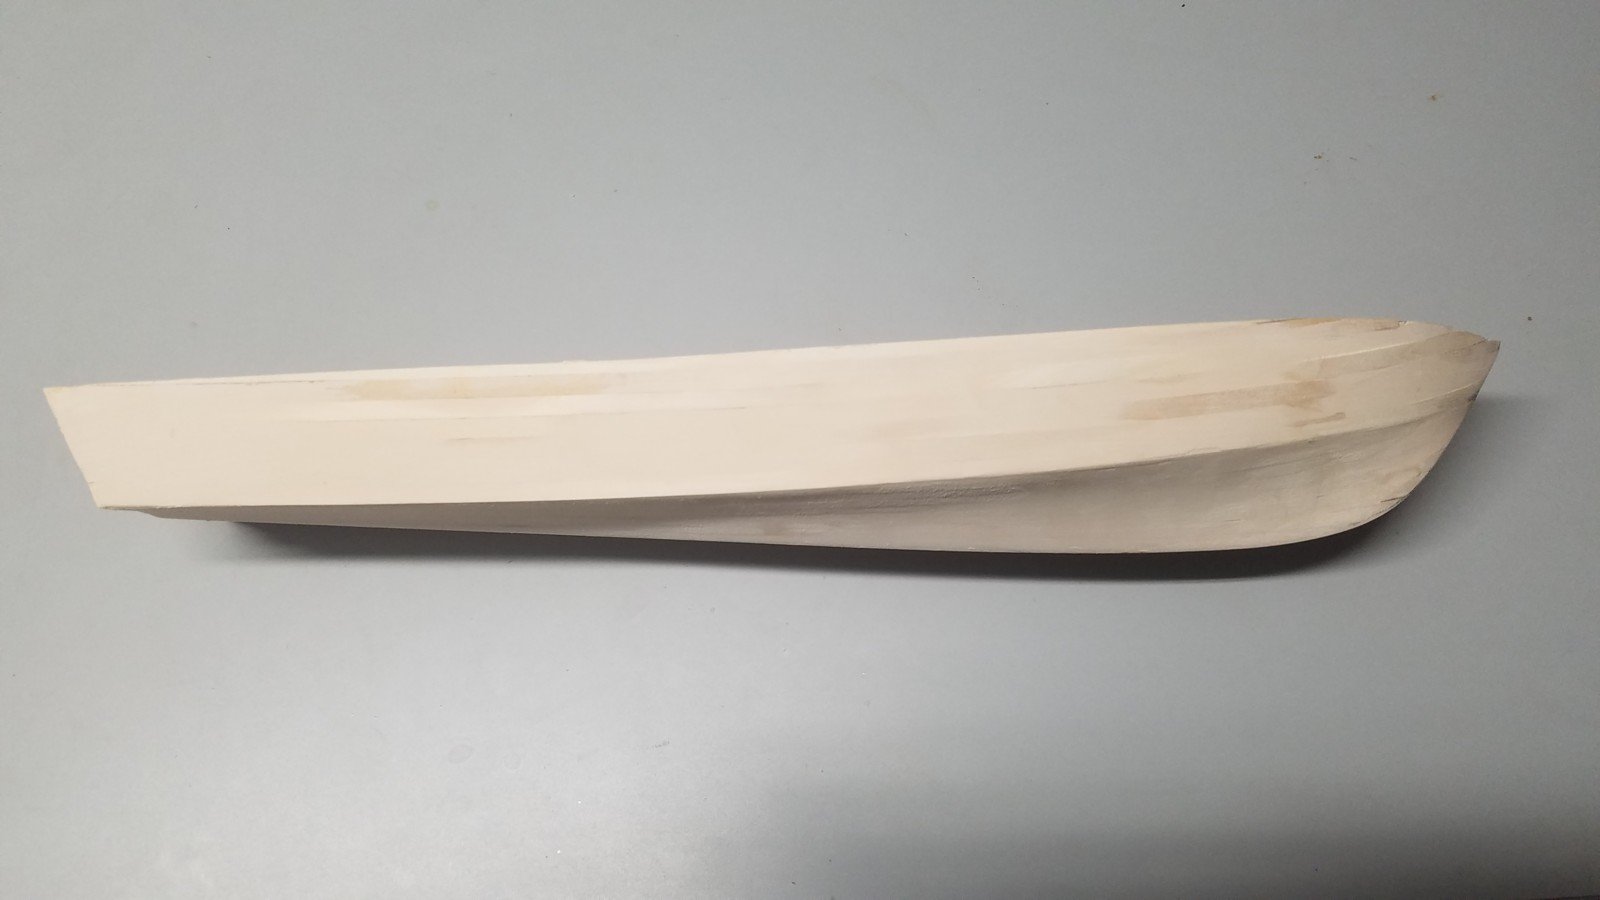
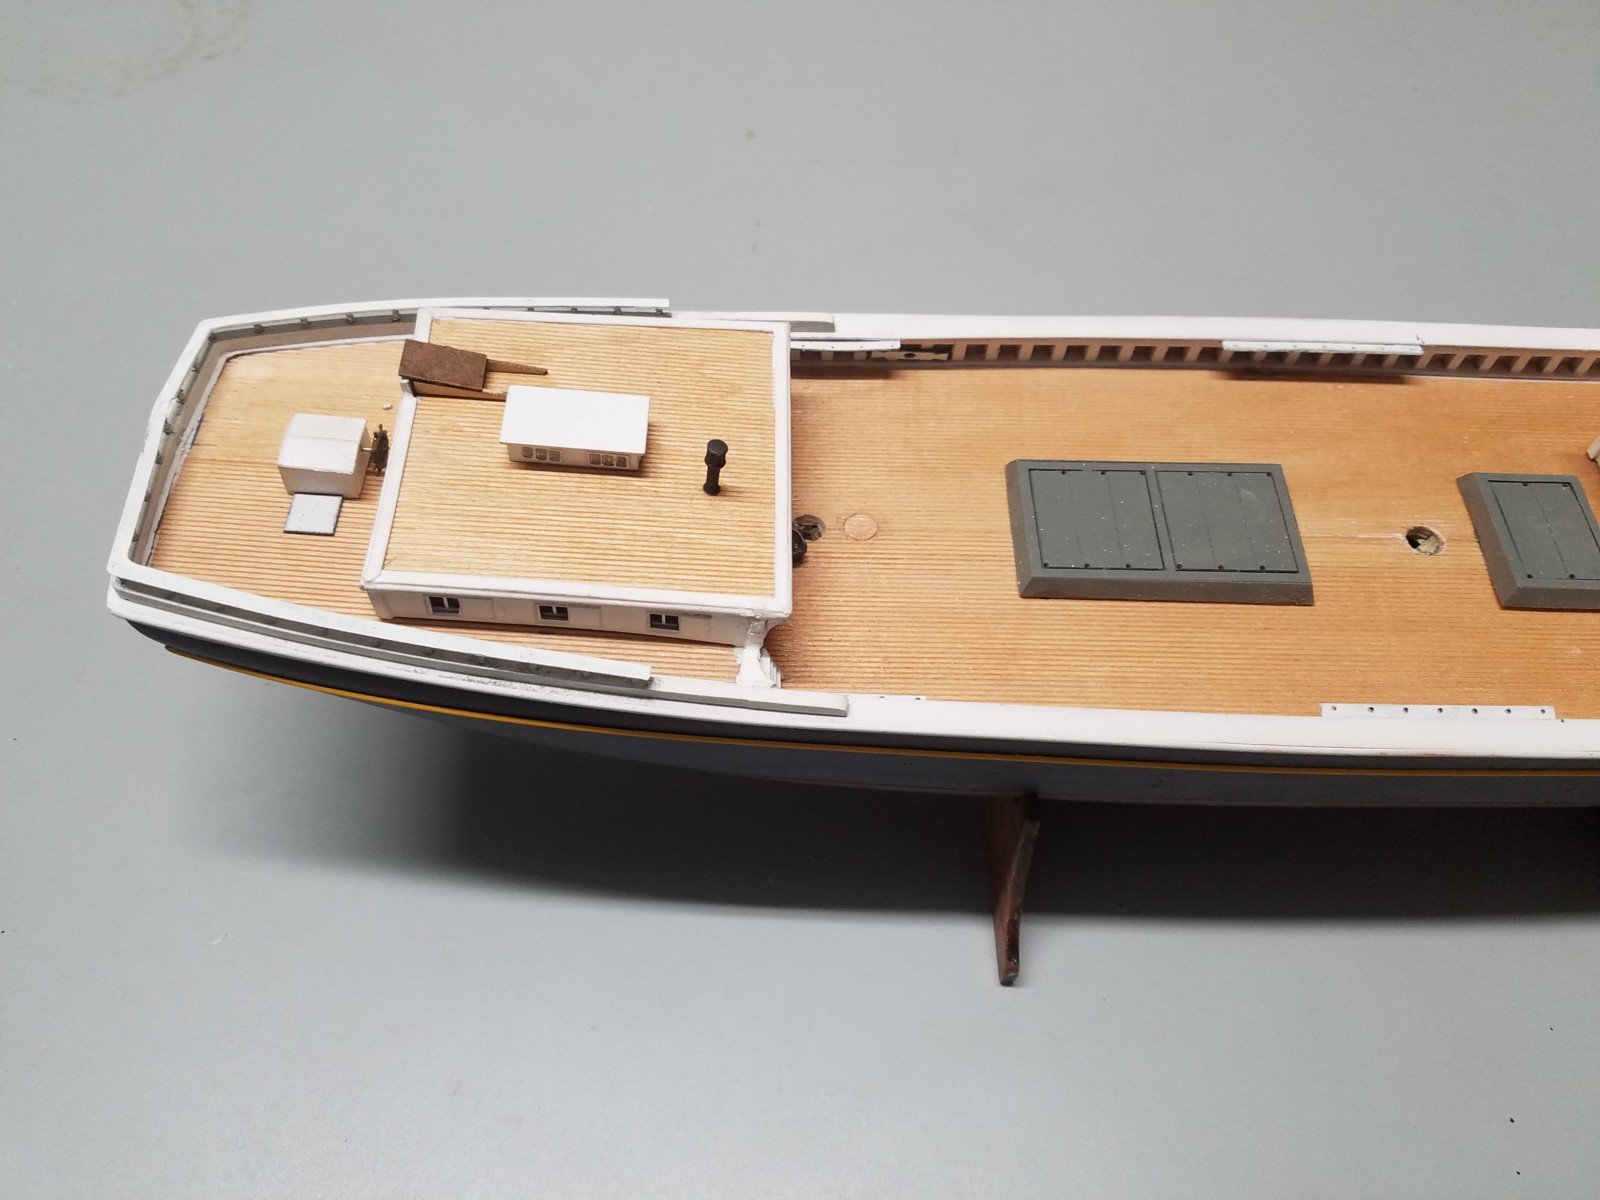
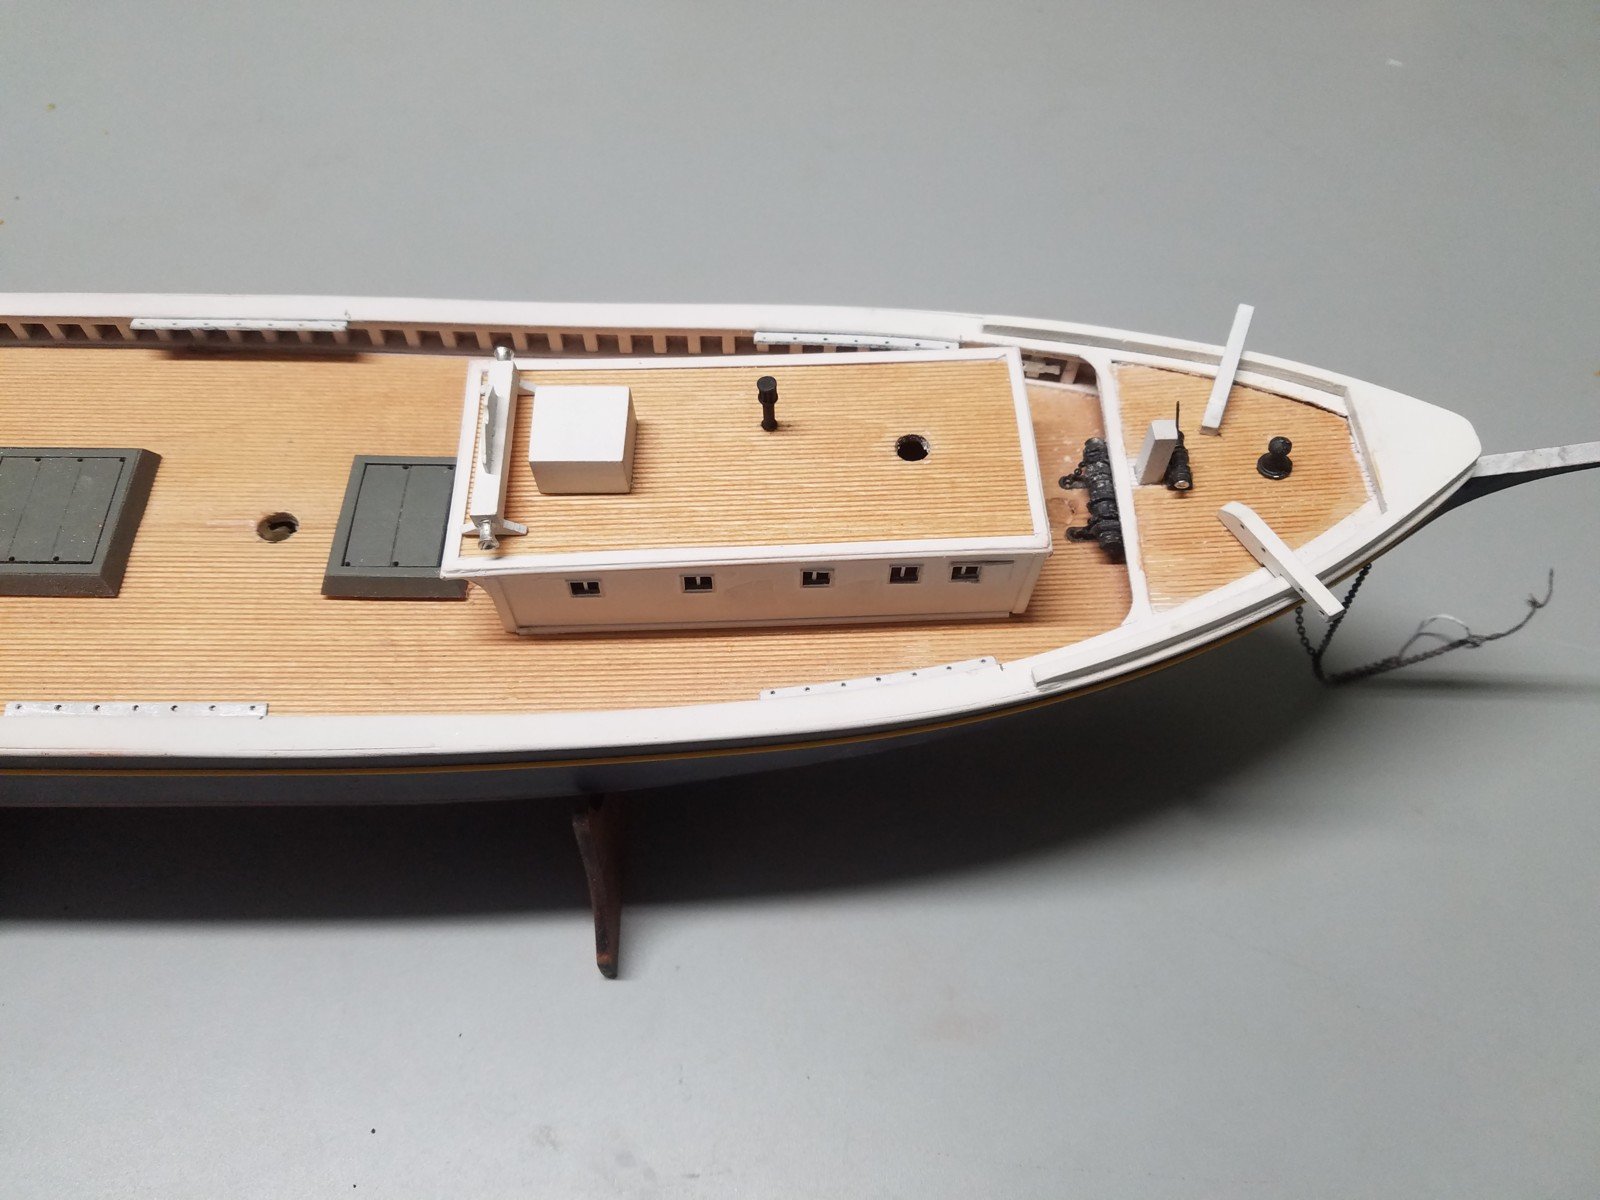
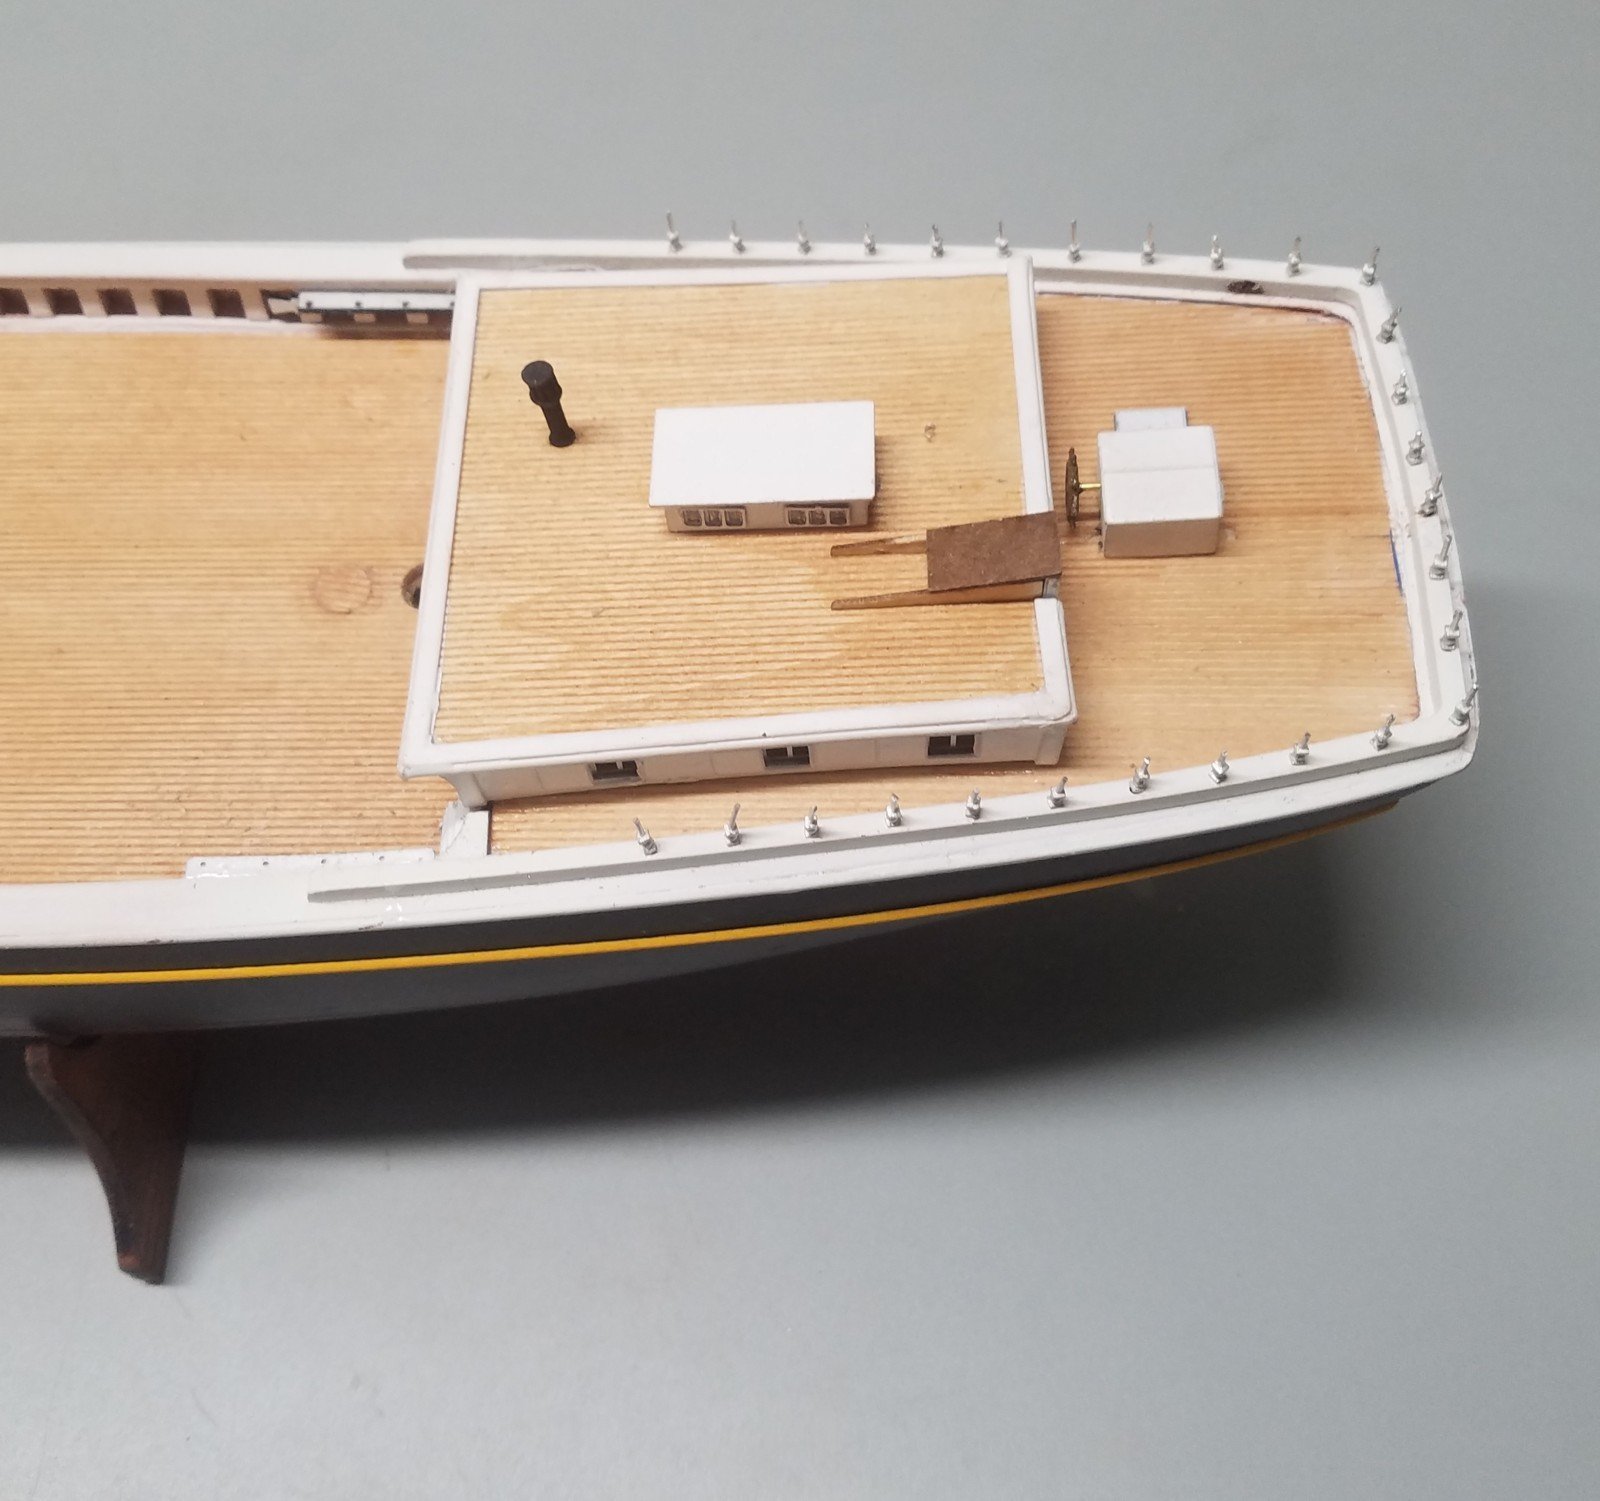
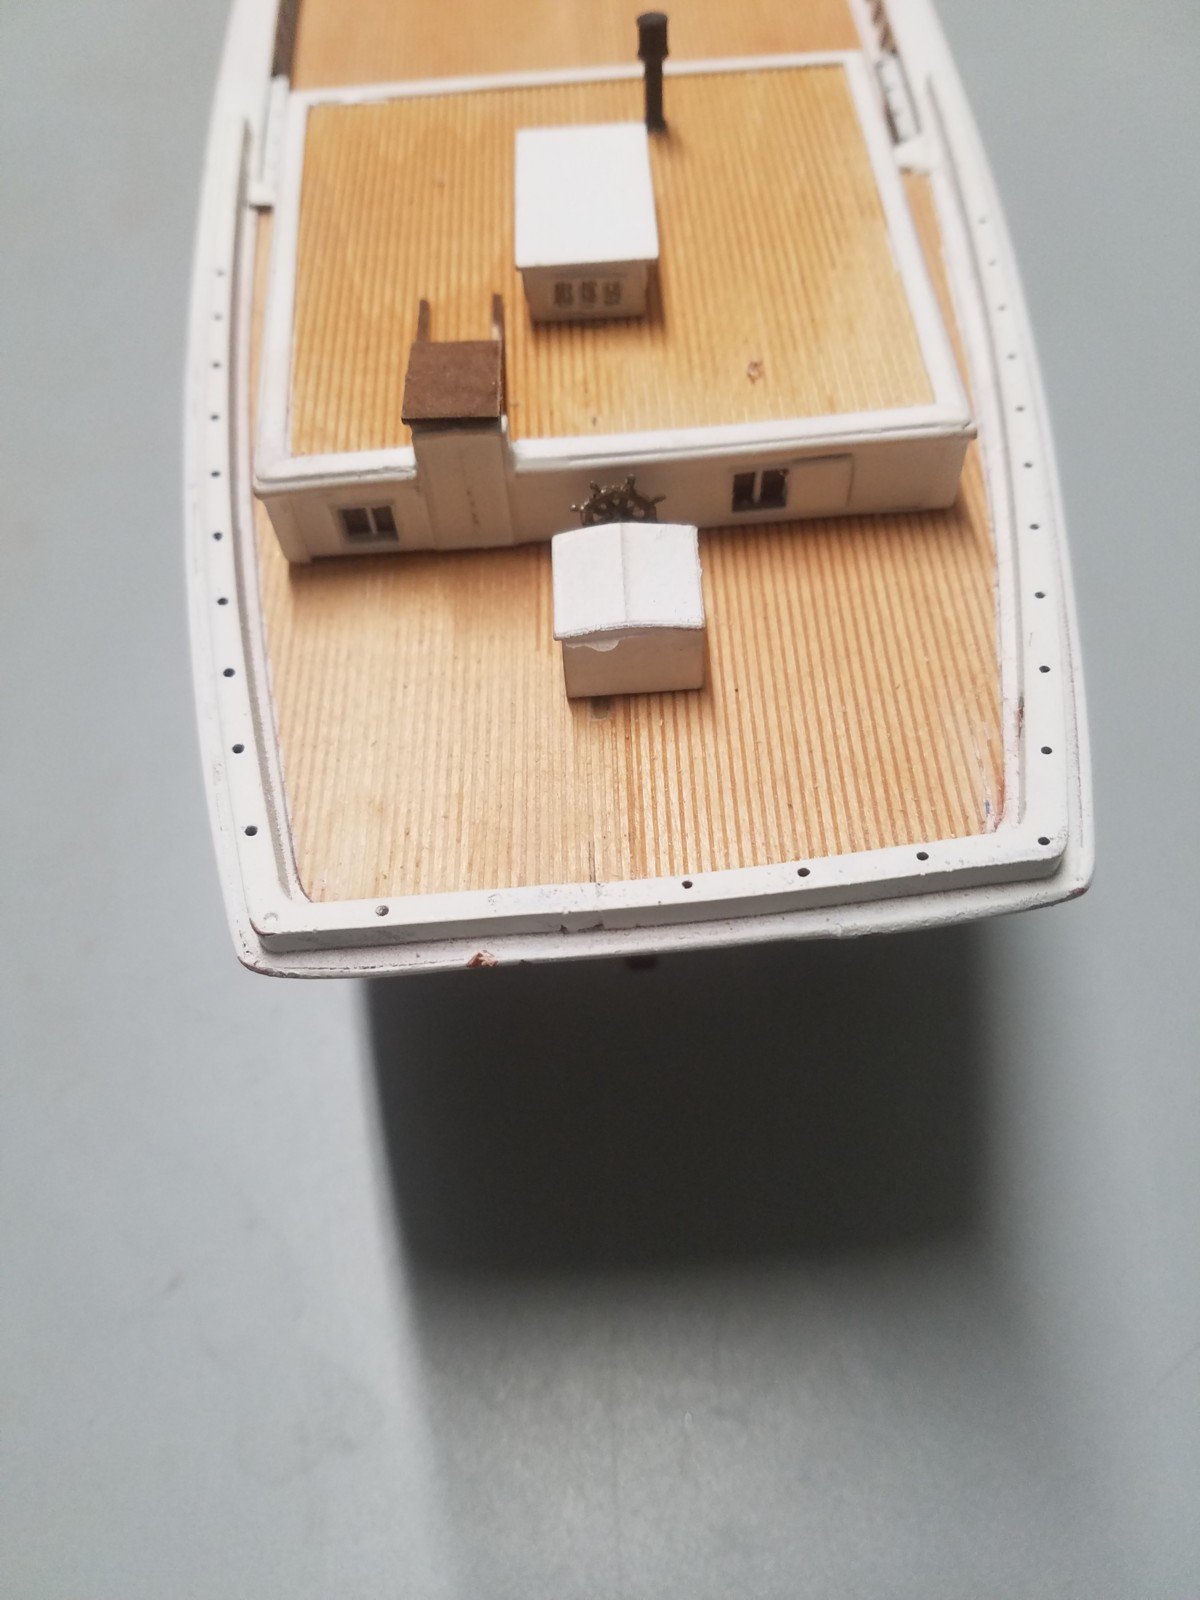
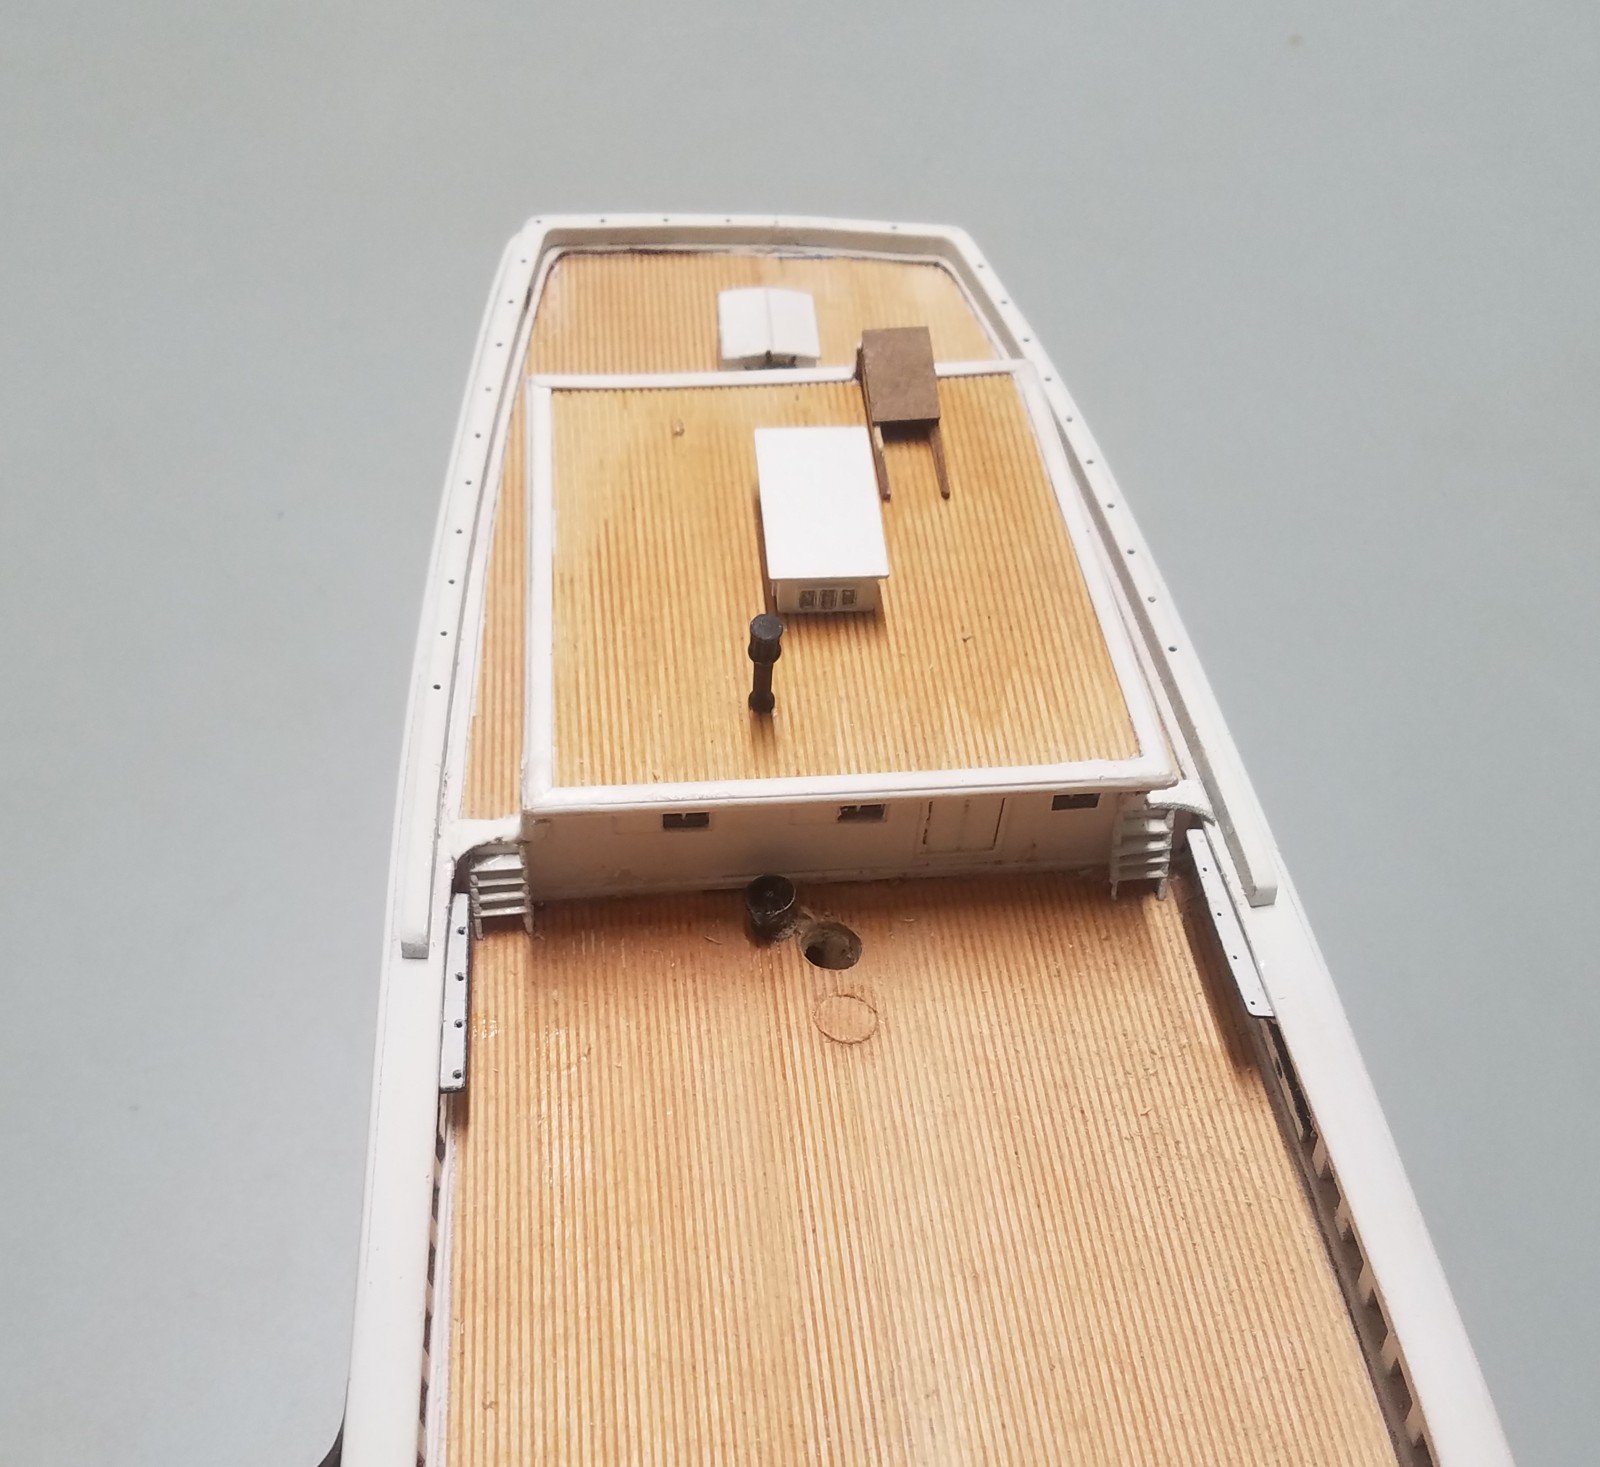
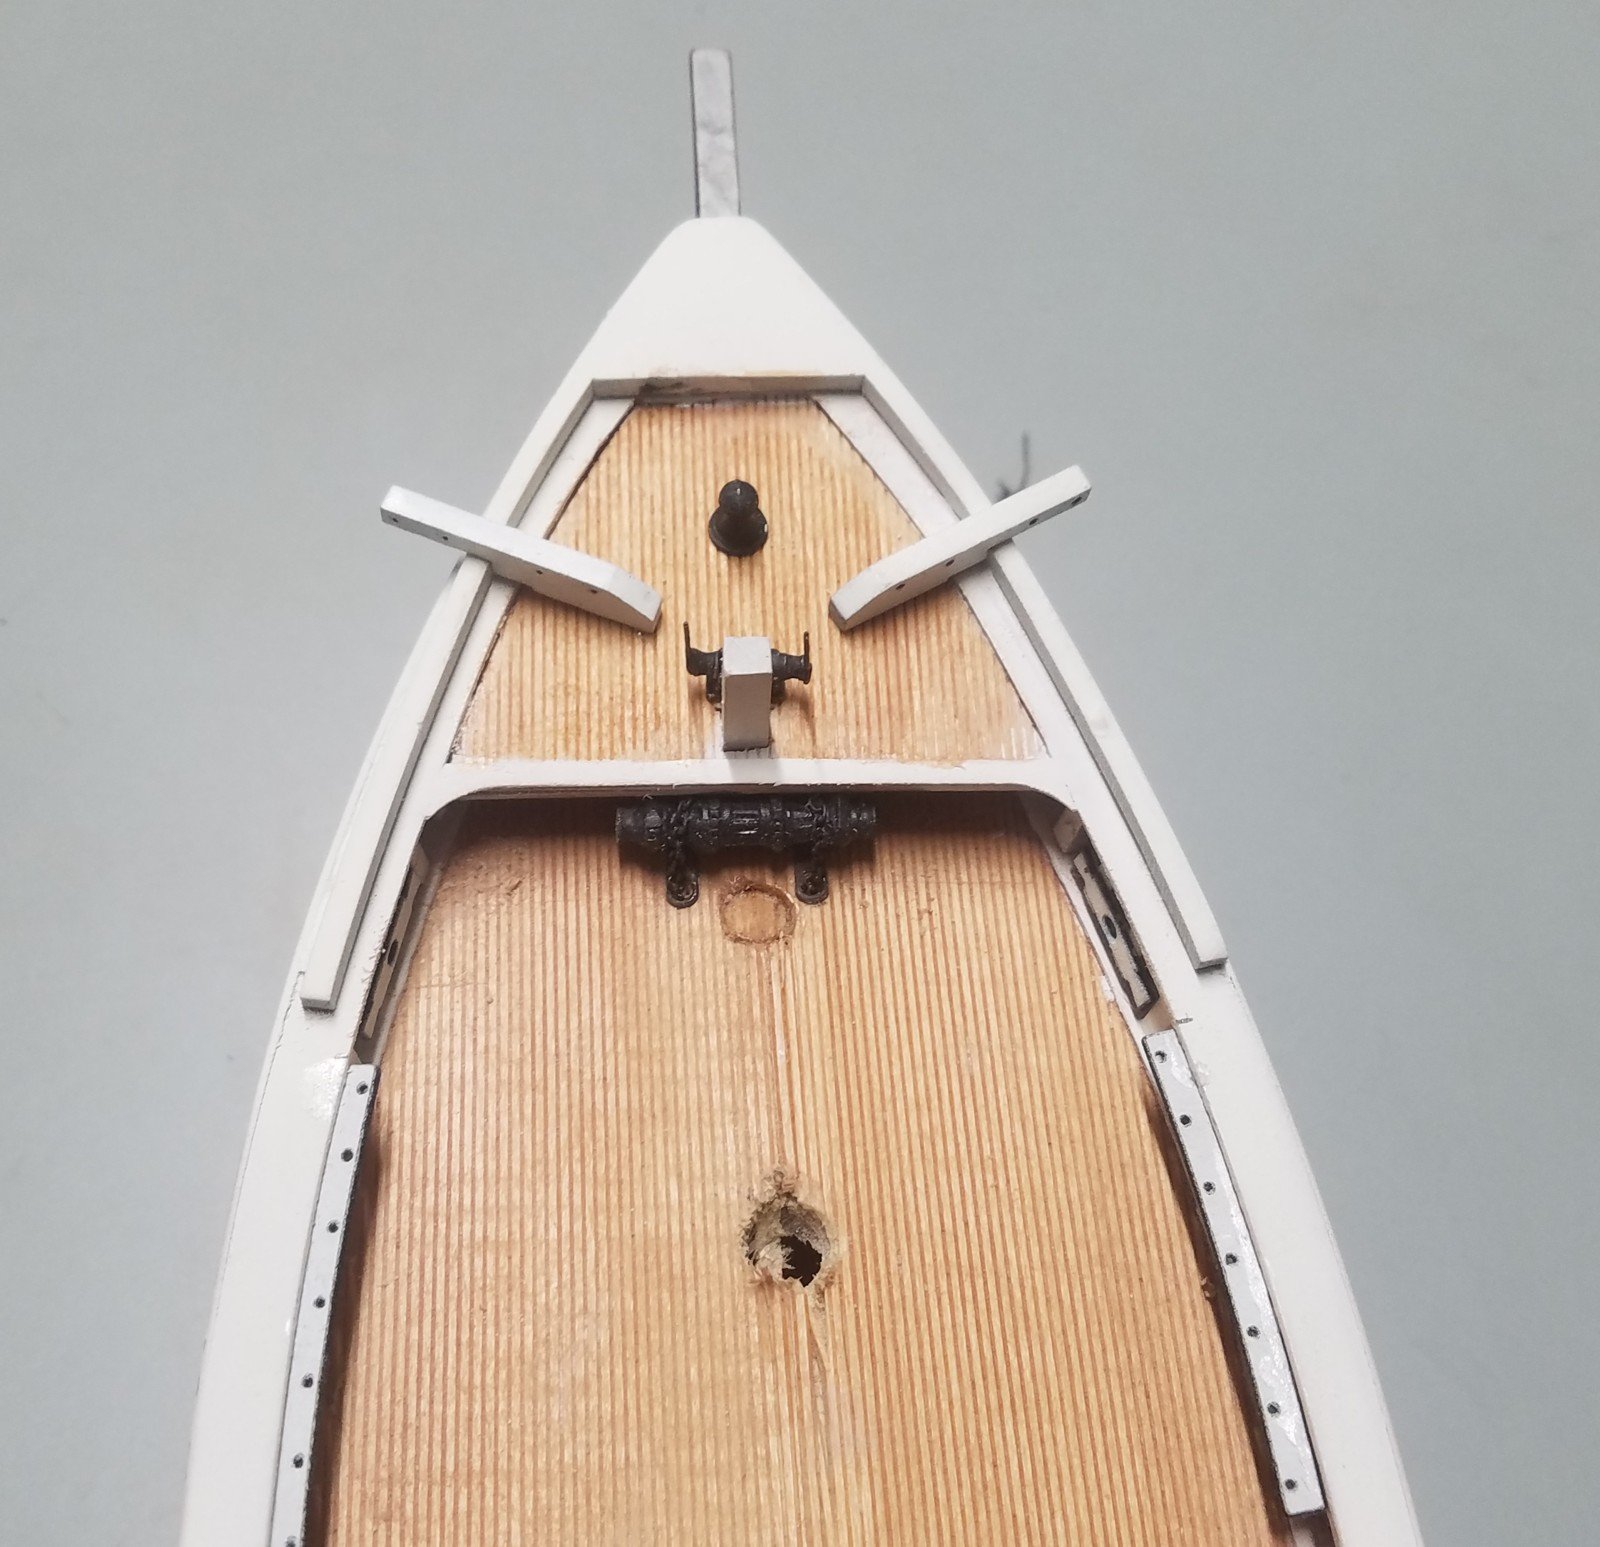
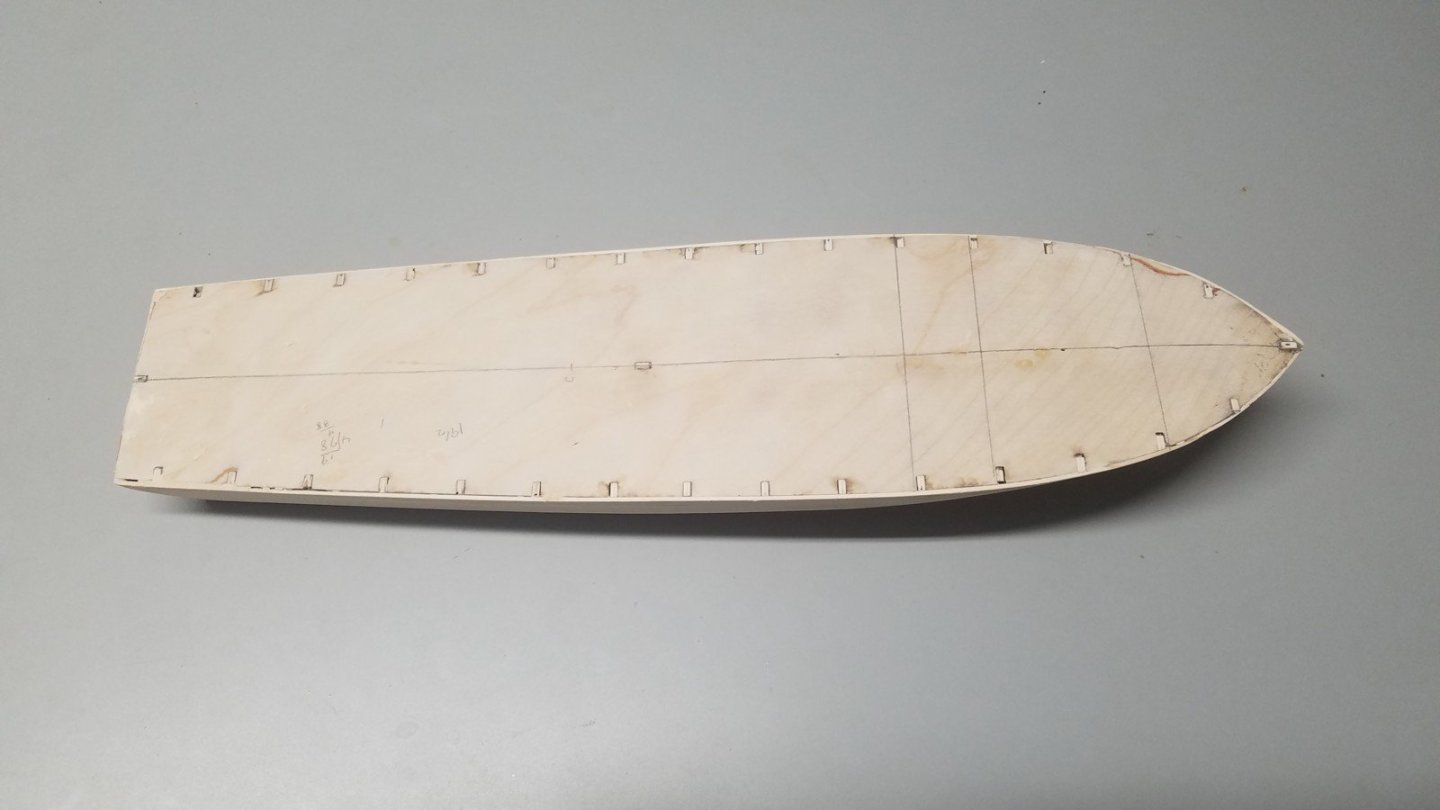
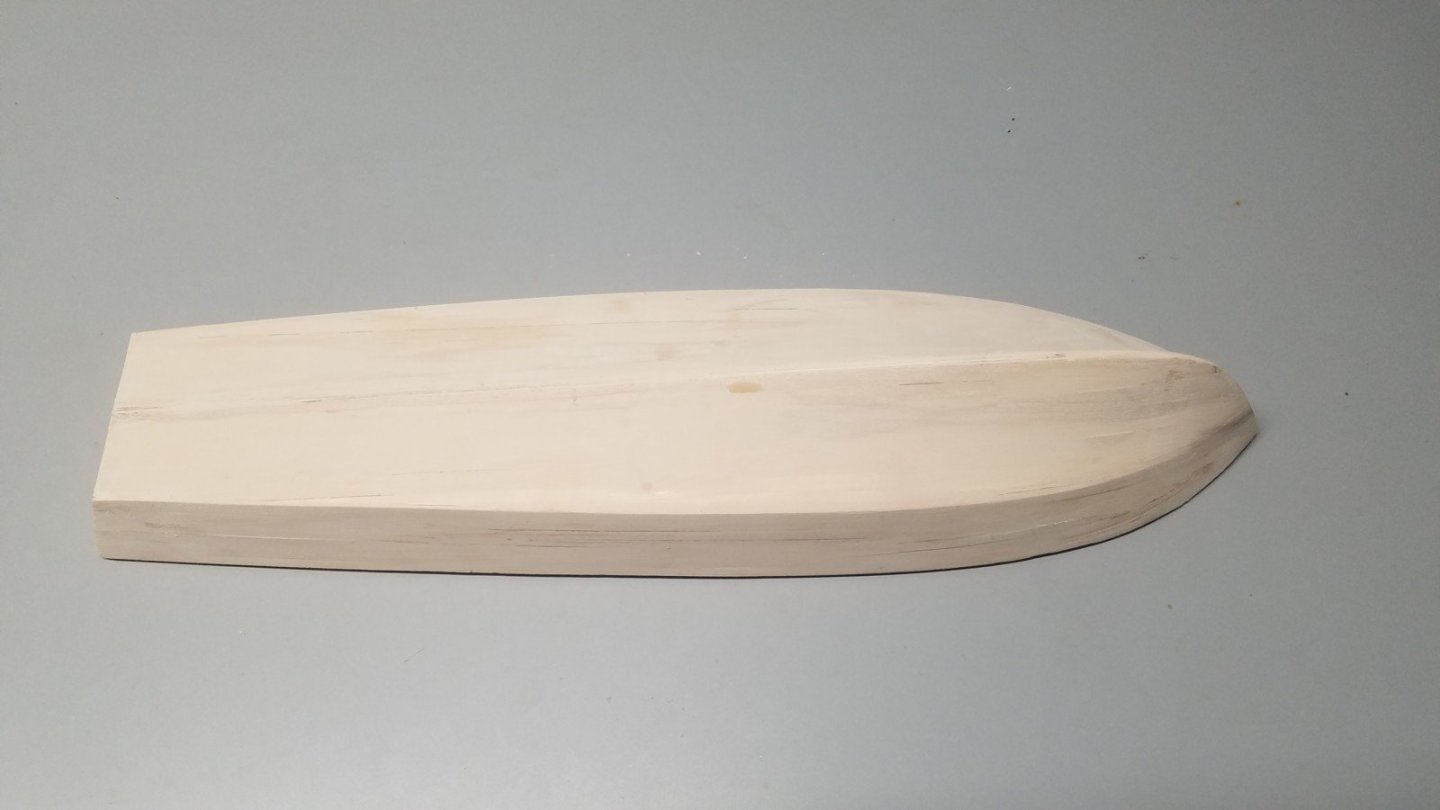
A bit further along on the potential 1/48 scale Higgins kit. The hull is planked and filled and I've adjusted the laser drawings a bit. The deck you are seeing is the subdeck. It will be covered with a 1/32" ply deck that has the positions of the primary components (deck house, engine room hatch, etc.) lasered onto it. I'm toying with the idea of including enough materials to do any of the three different classes. There were two slightly different hulls. The initial hull form was slightly tunneled aft while the later hull was flat aft as they discovered the tunnel caused drag. There were three different pilot houses as well. We'll see what happens as I play around with this one.

-
It closely resembles Thayer but certainly allows for kit-bashing.😎
-
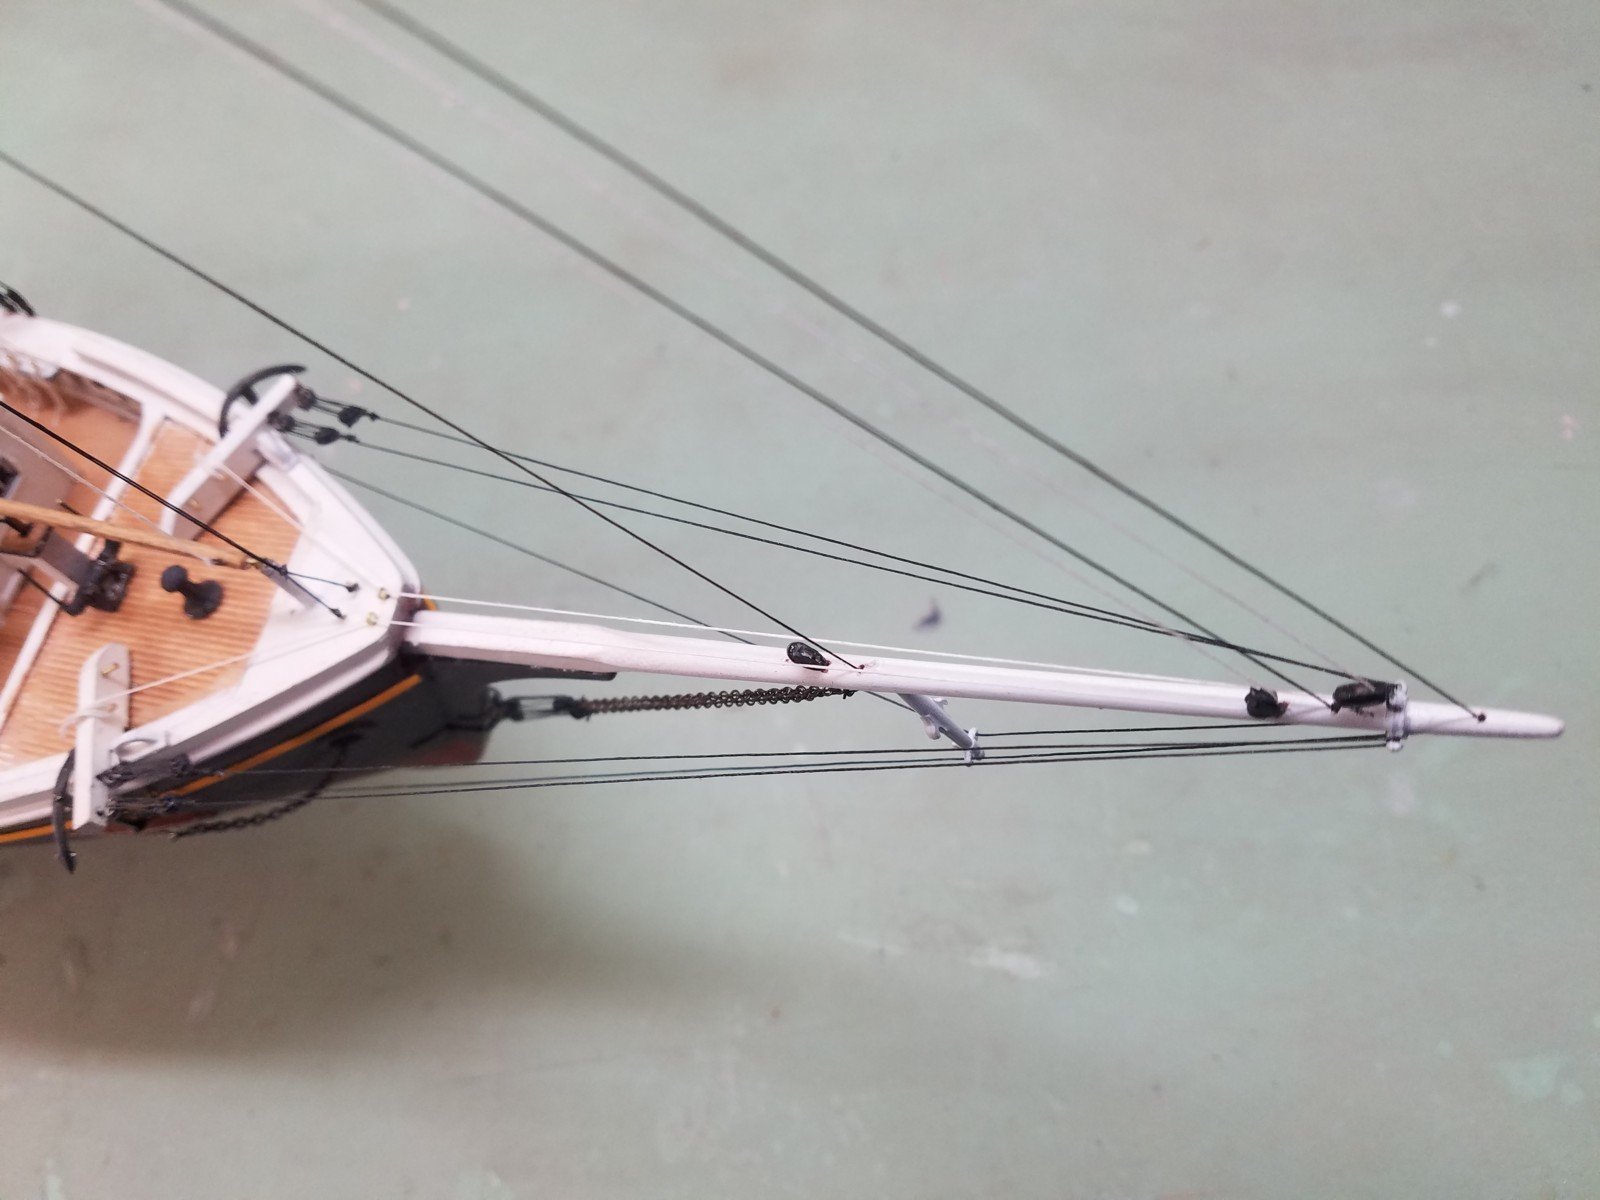
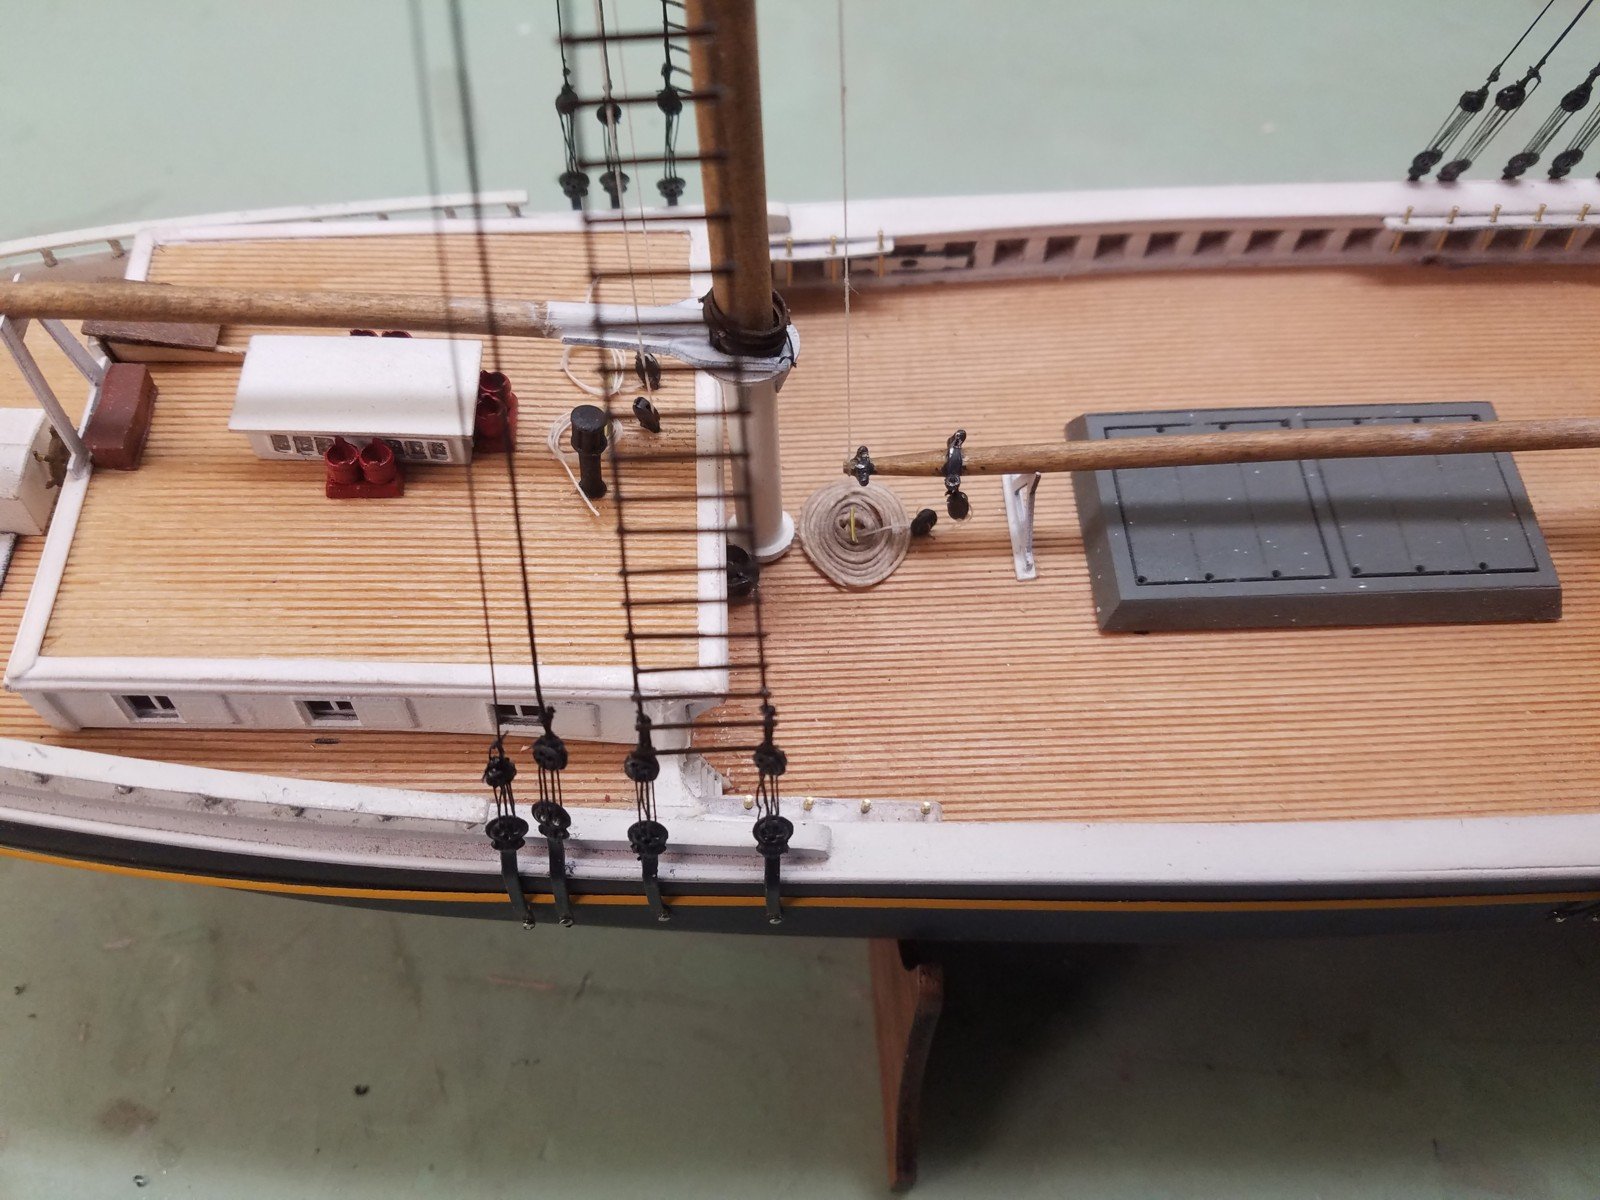
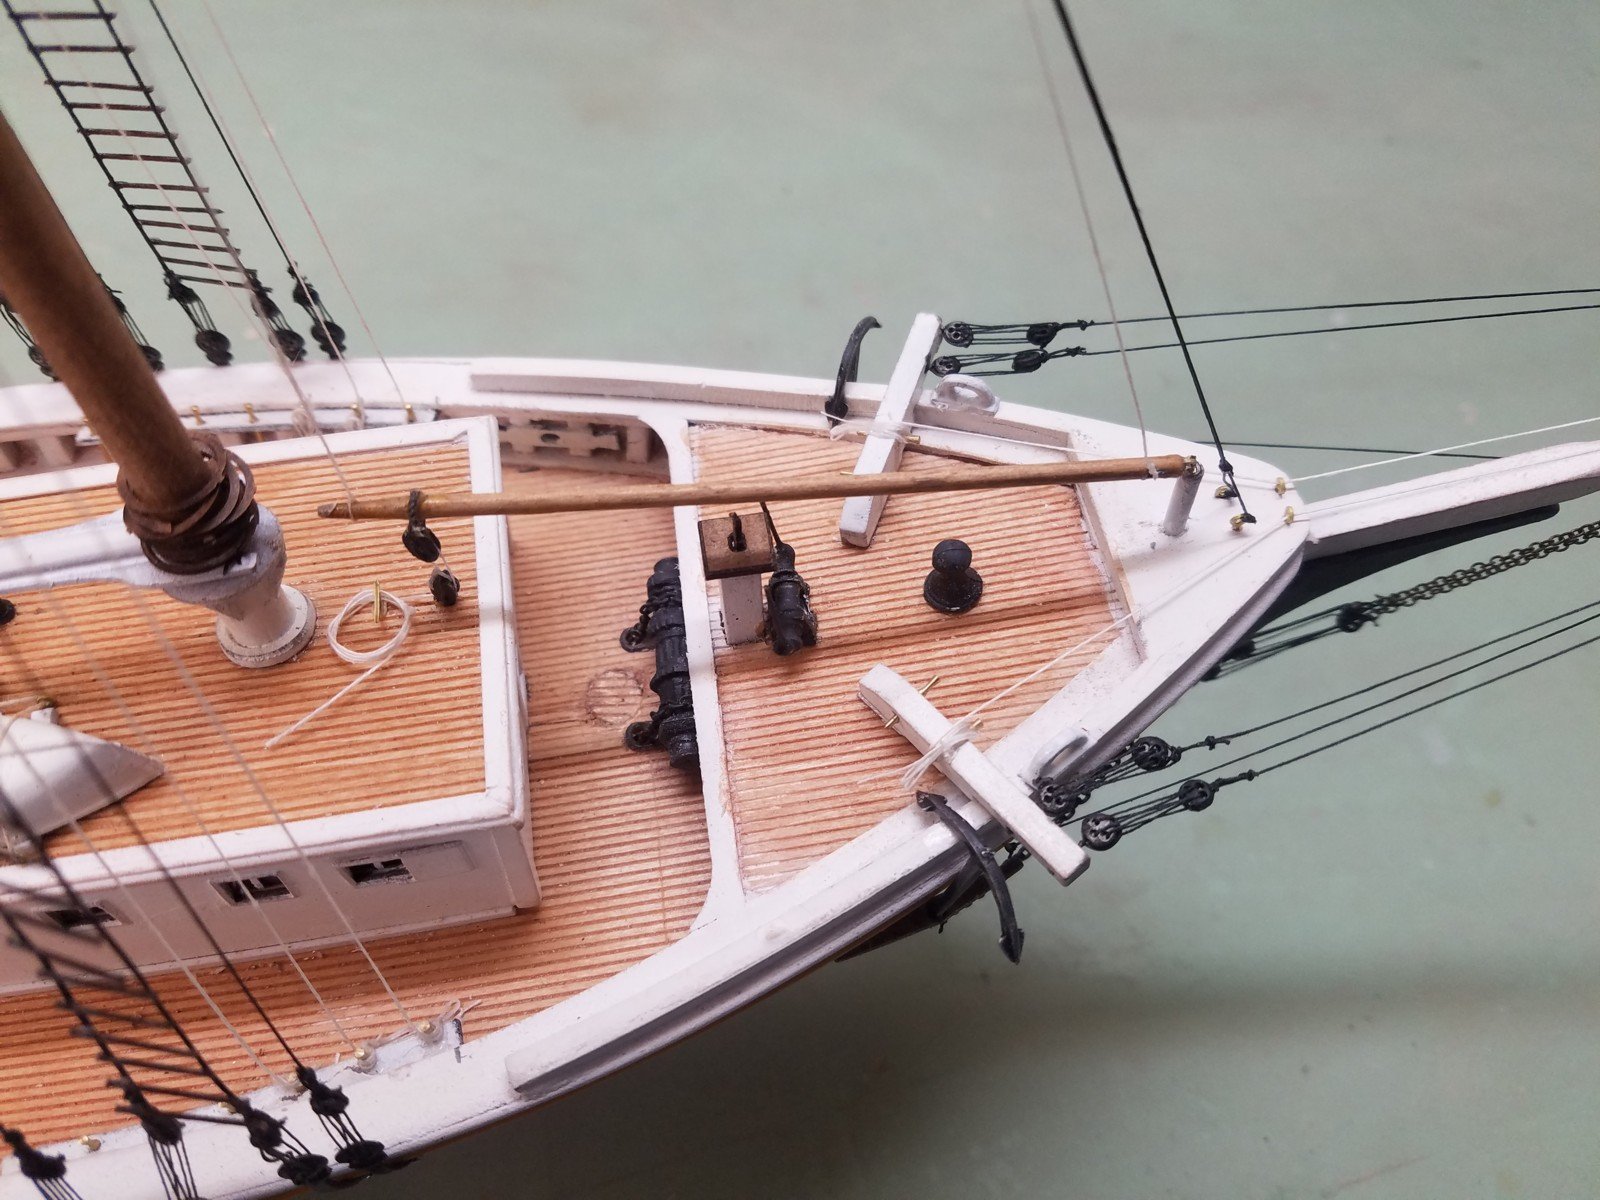
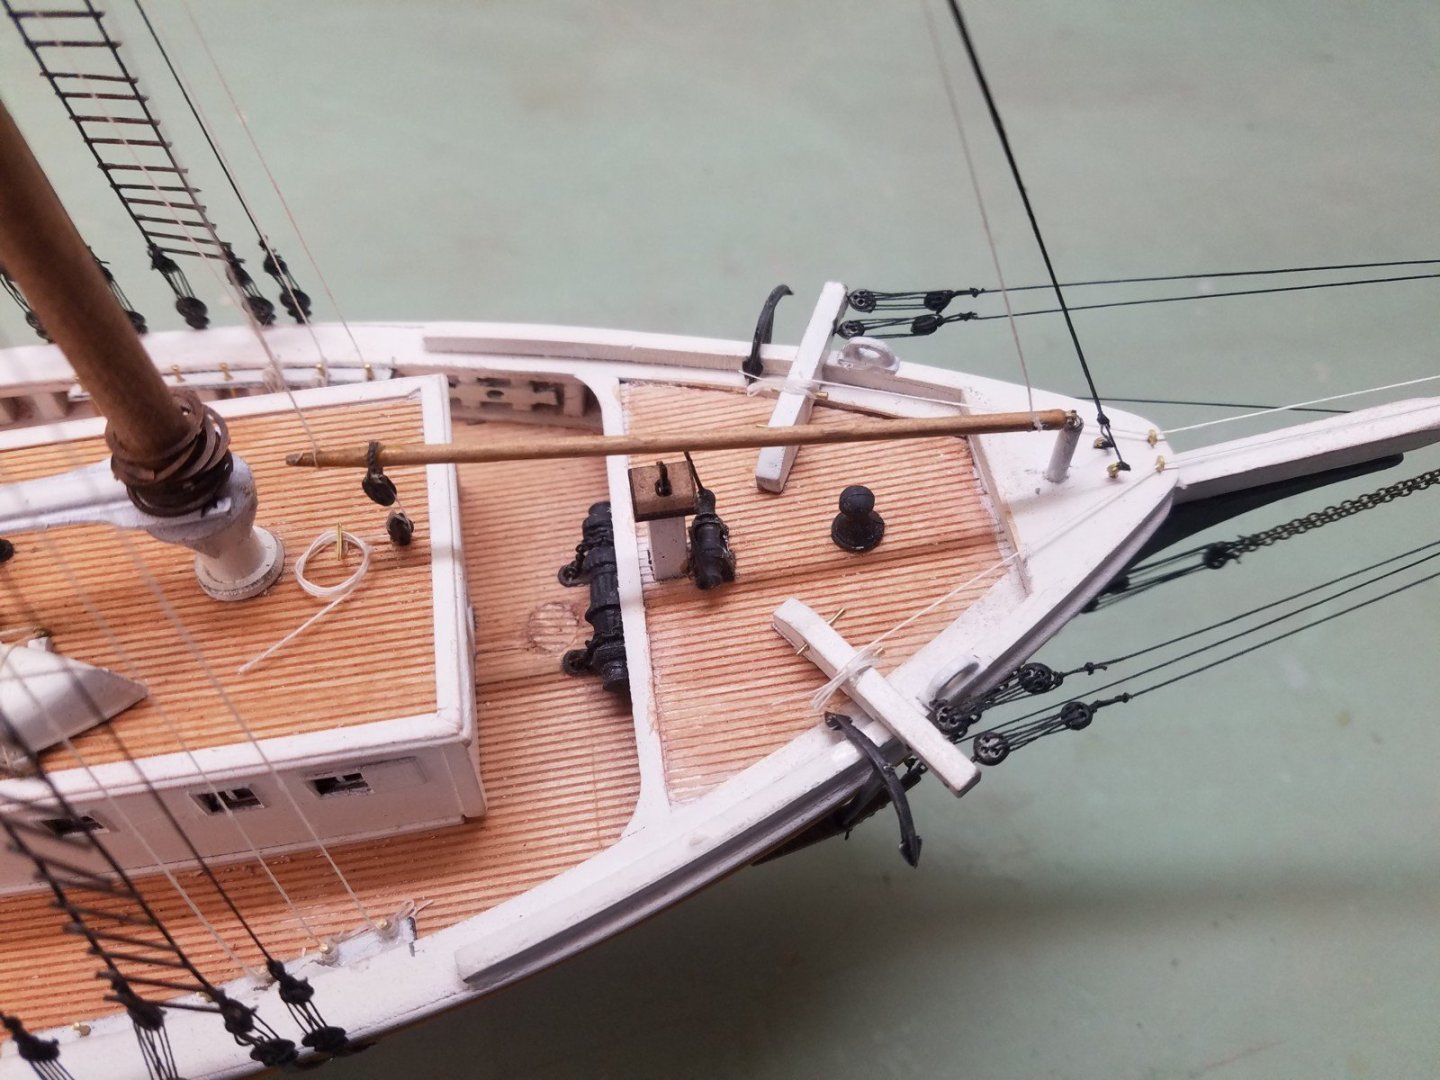
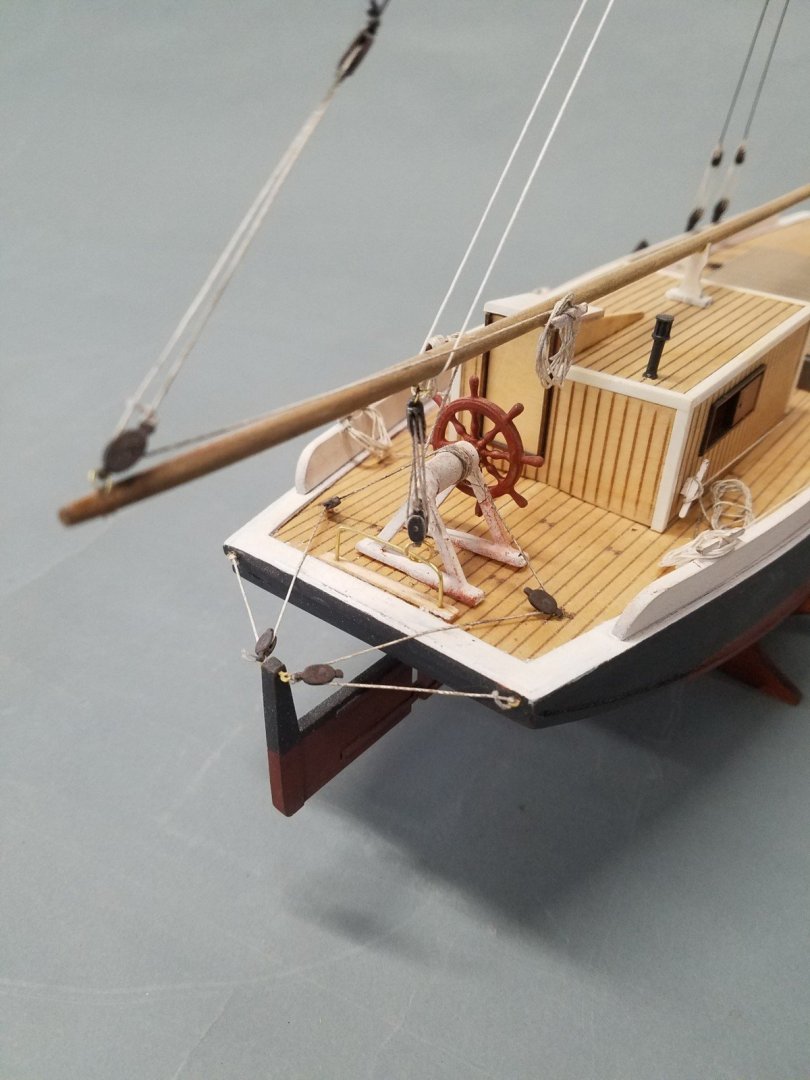
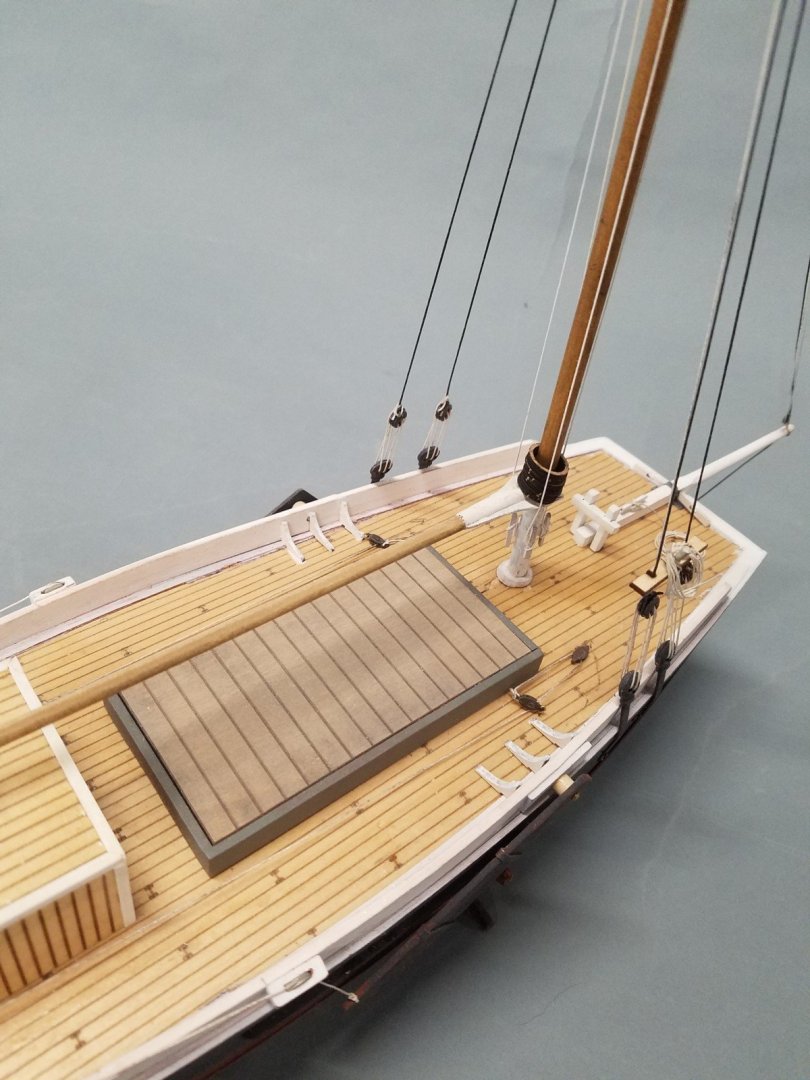
Now that Nic has finished rigging it (looks great up close!). I'll finish up adding a couple details and she's done. After that, I have to adjust the plans a bit, finalize the instructions, do a cost analysis, get Josh to set a retail price, and she'll be ready for release. The kit will probably be available early Spring. Here are a few detail shots.


-
I recently reworked what had been an old Laughing Whale kit, the Square Toed Frigate. This was a 30' version of a typical 19th Century scow sloop, so the kit is in 1/24 scale. It's plank on bulkhead with lots of laser work including a deck with simulated trunnels and butt joints. Planking mimics the original - longitudinal side and transverse bottom. It's available now @ $199 plus shipping. Kit #K1119.
-
- 10
-
-
-
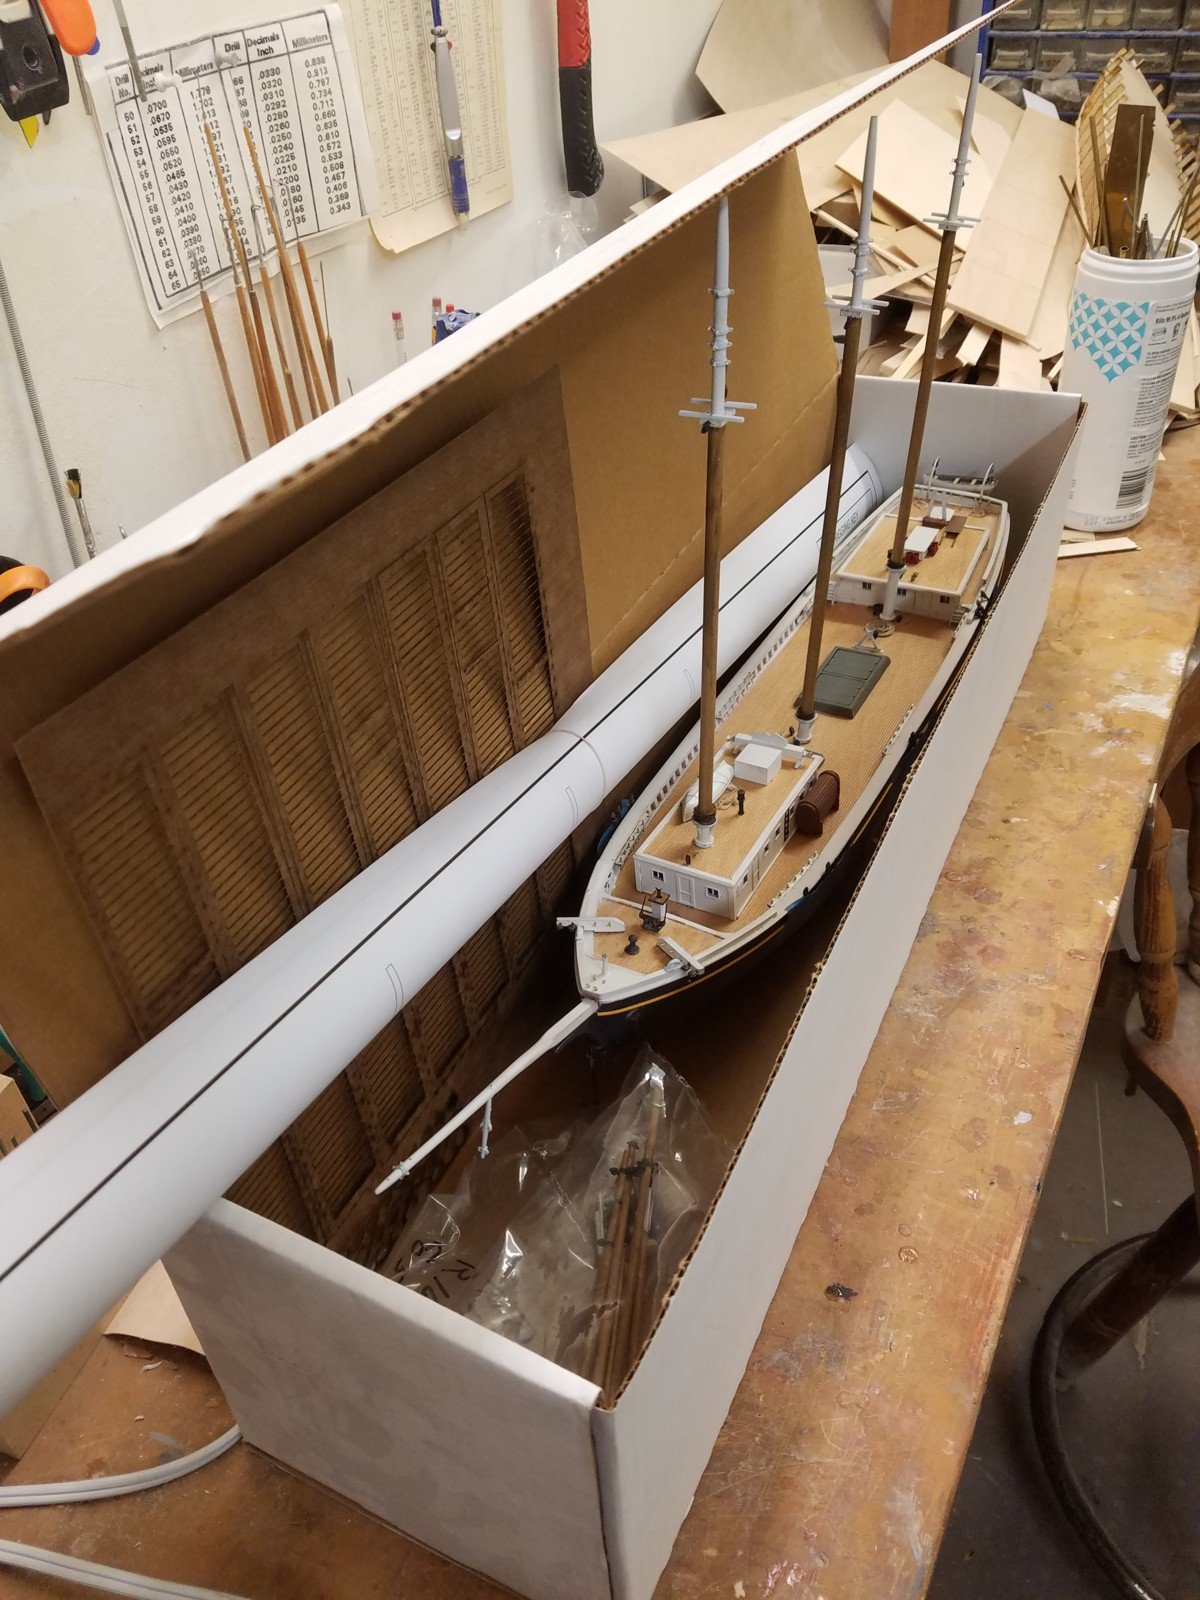
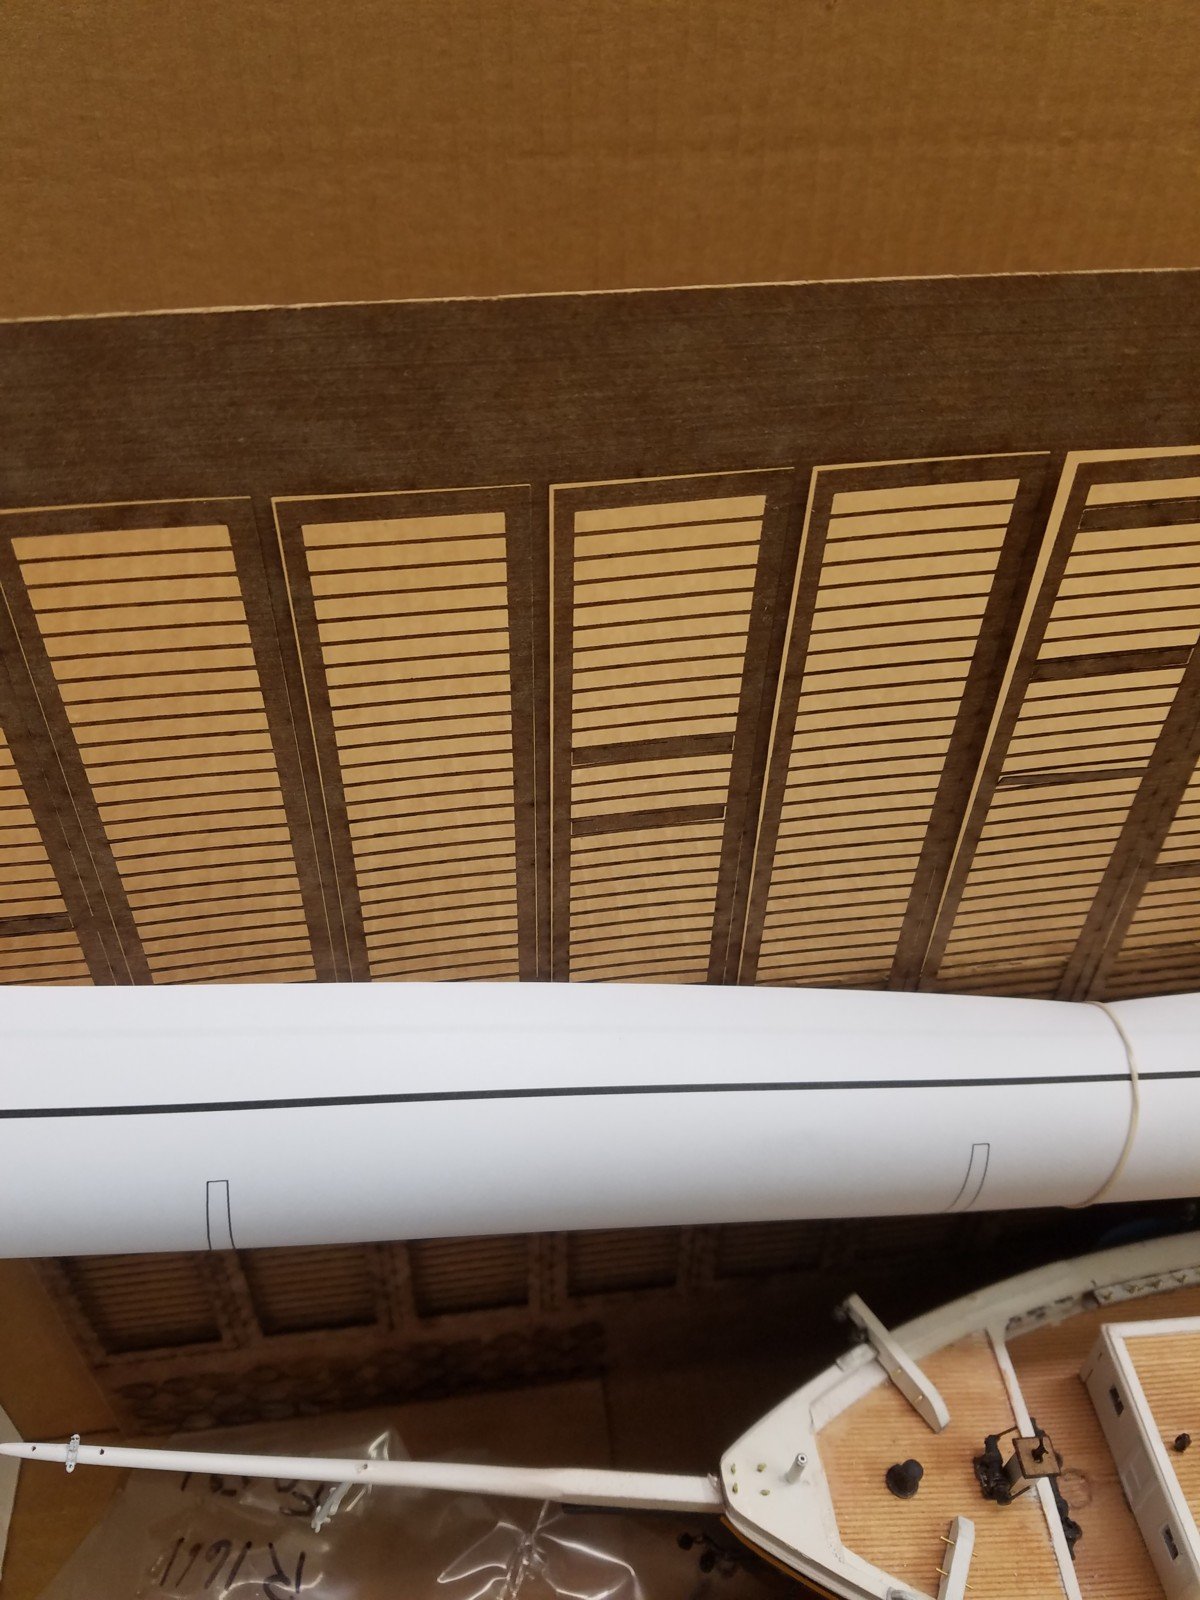
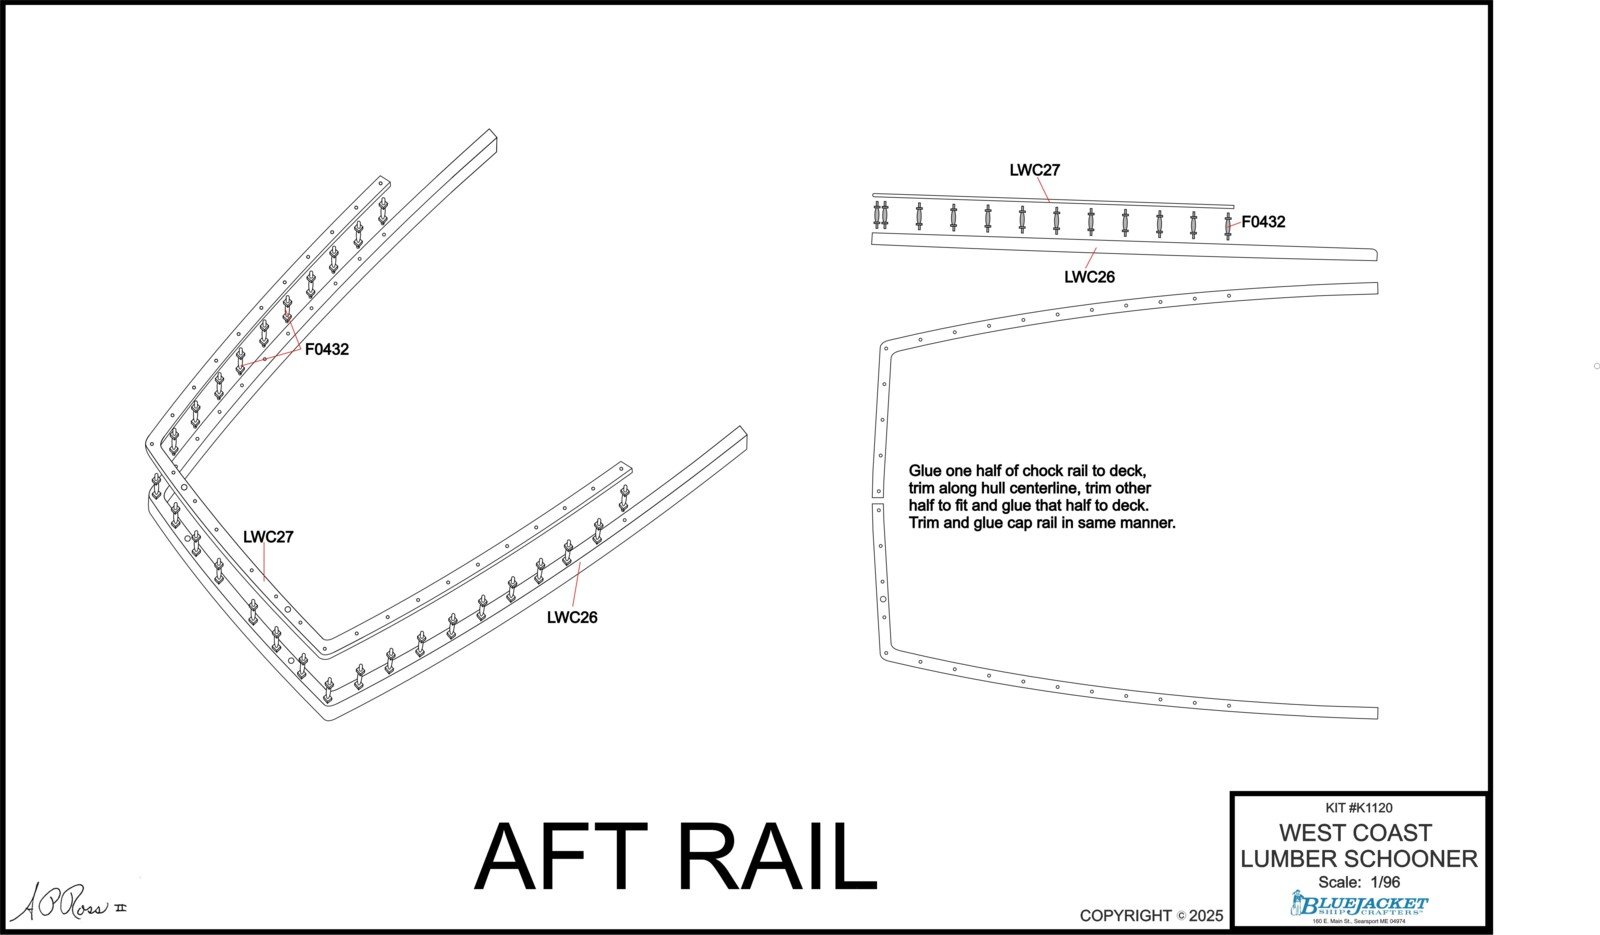
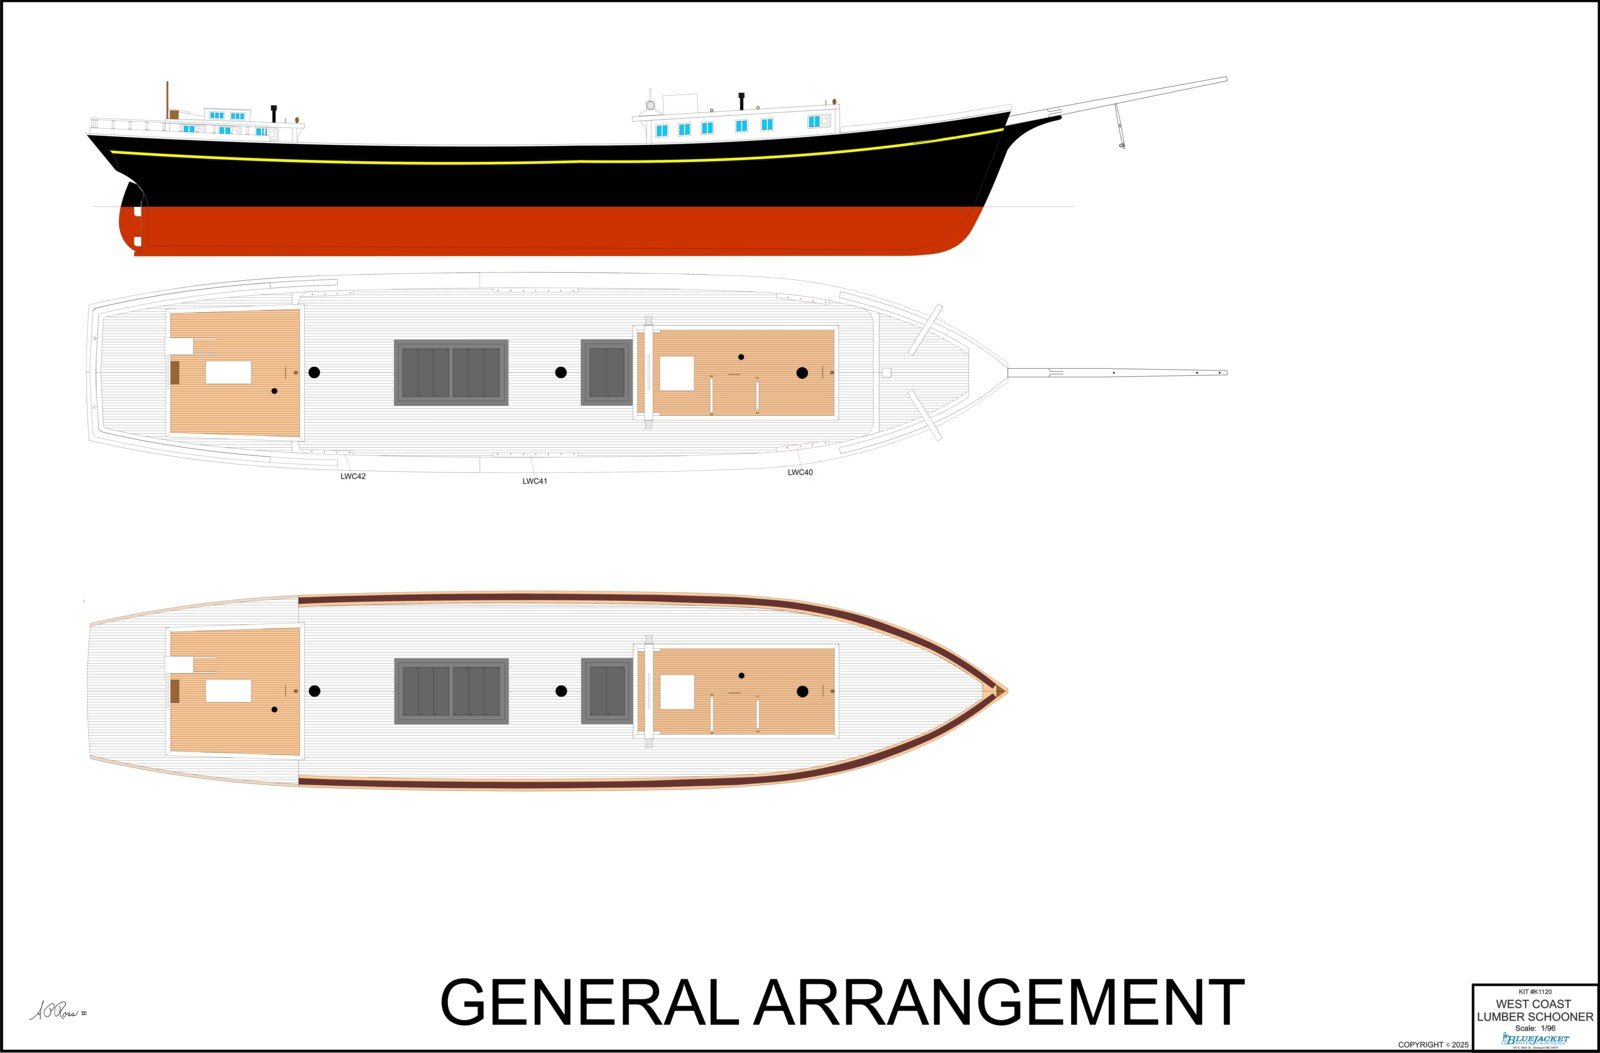
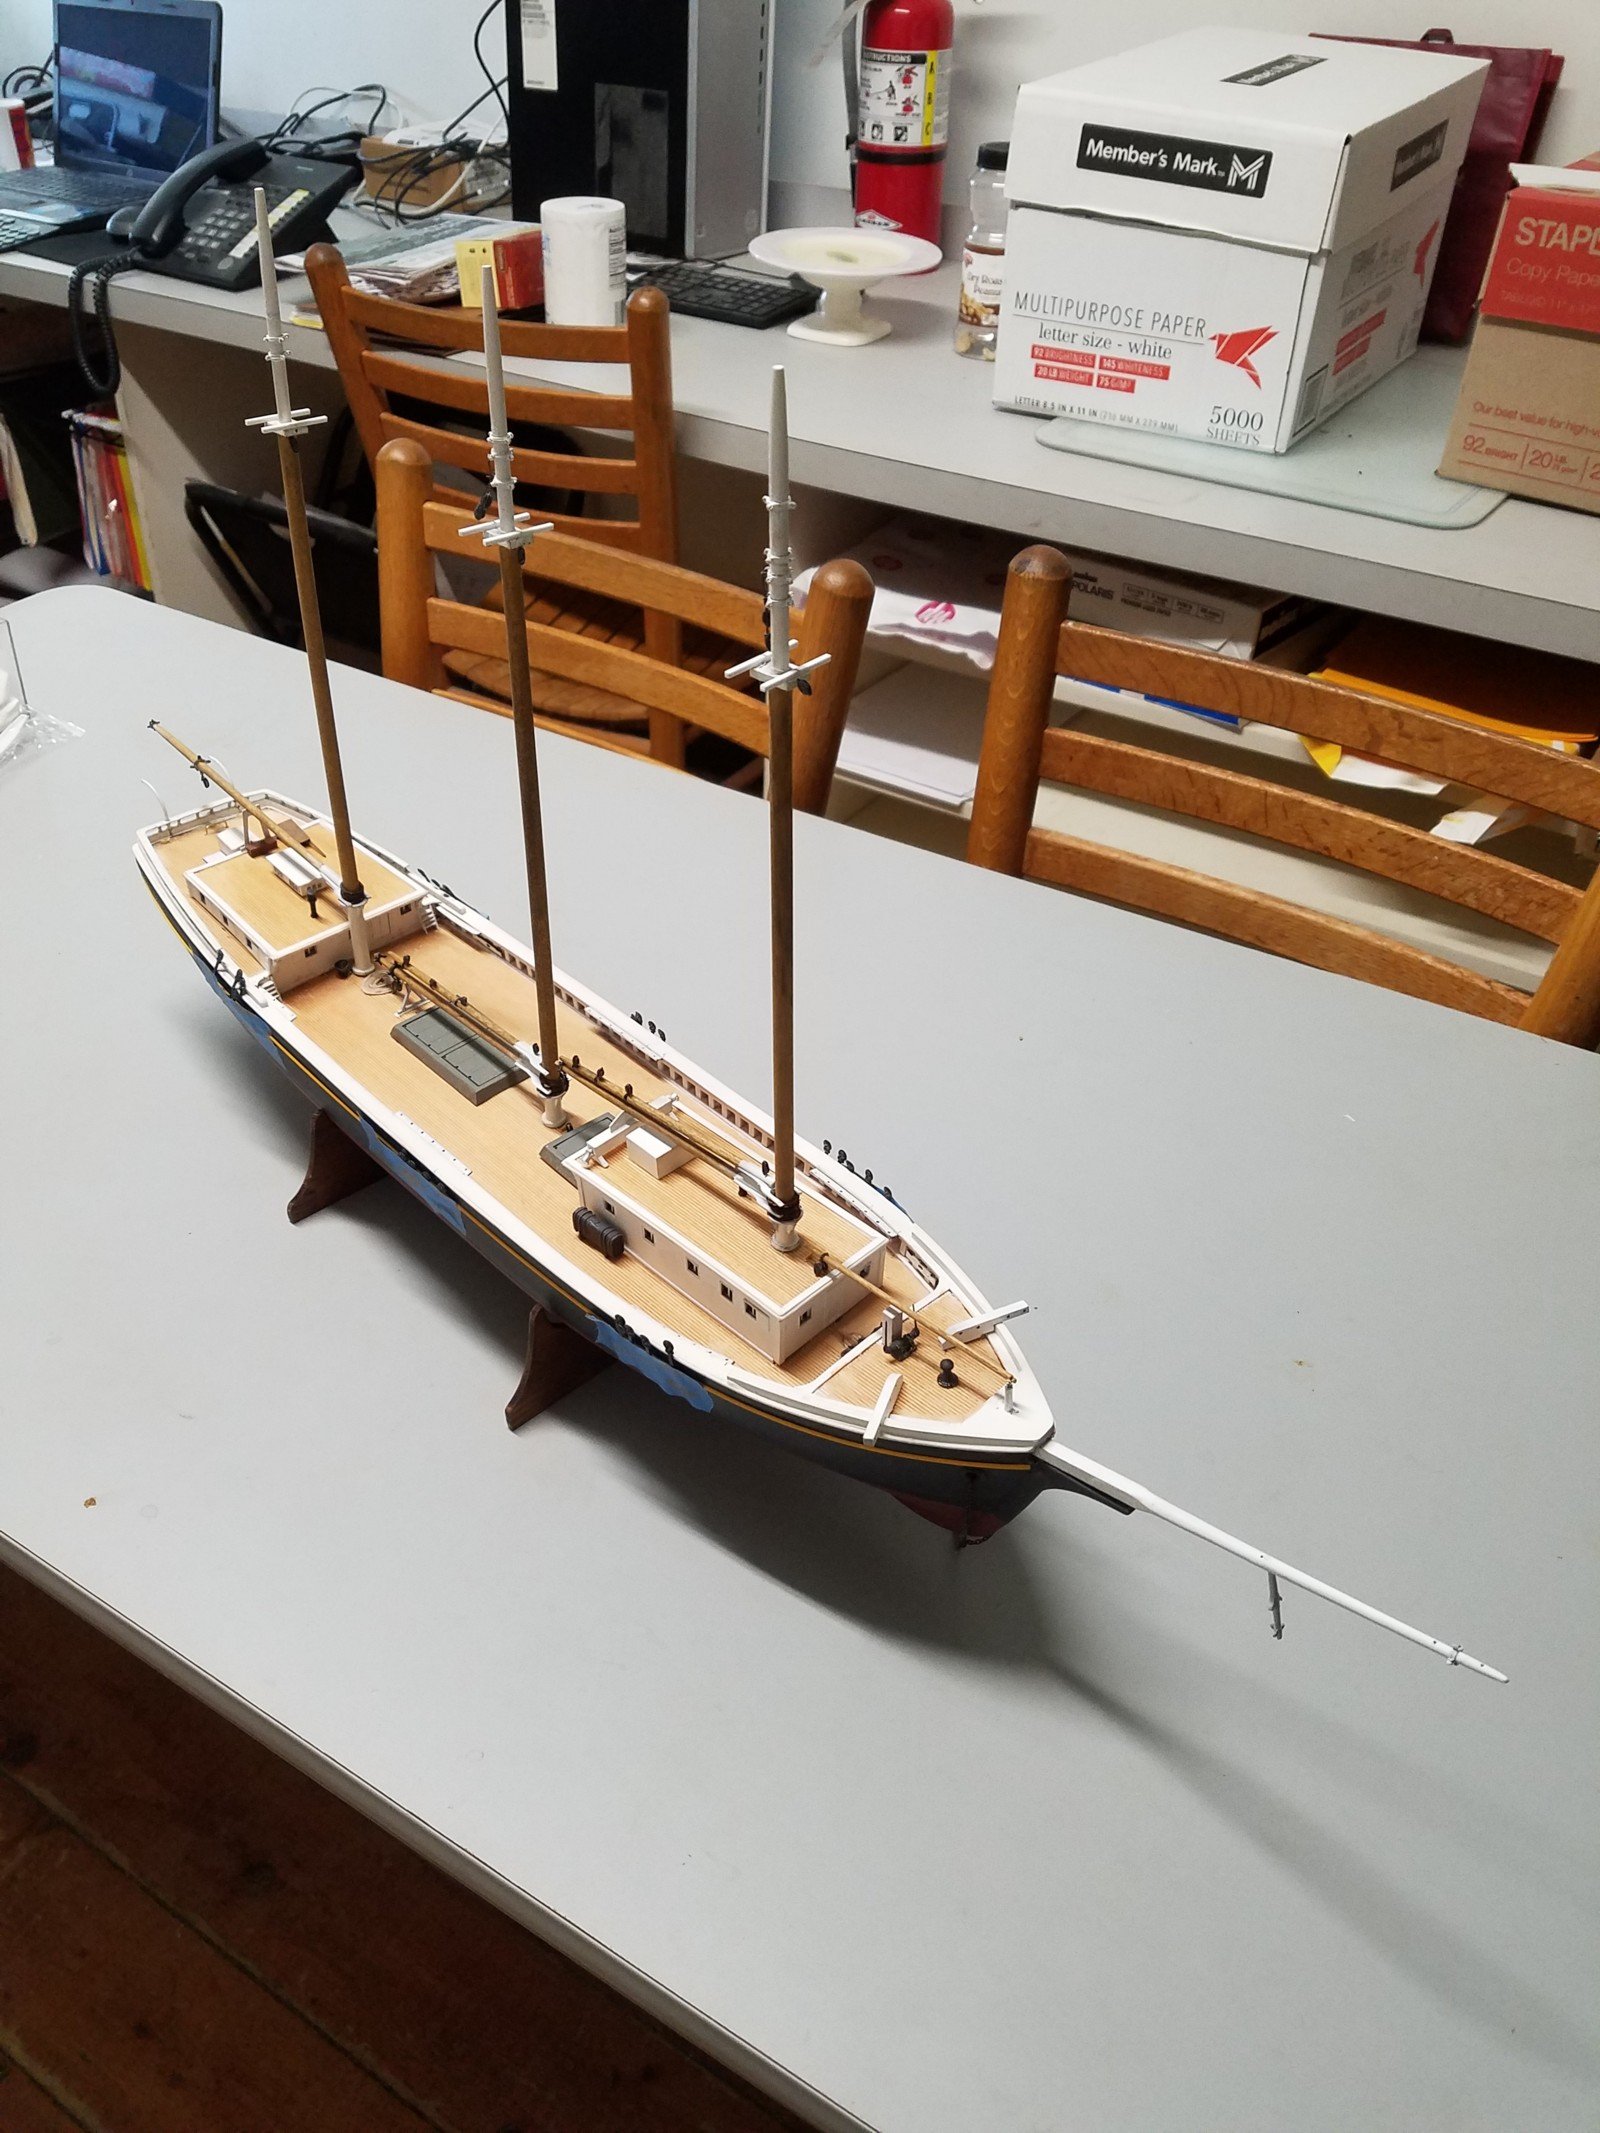
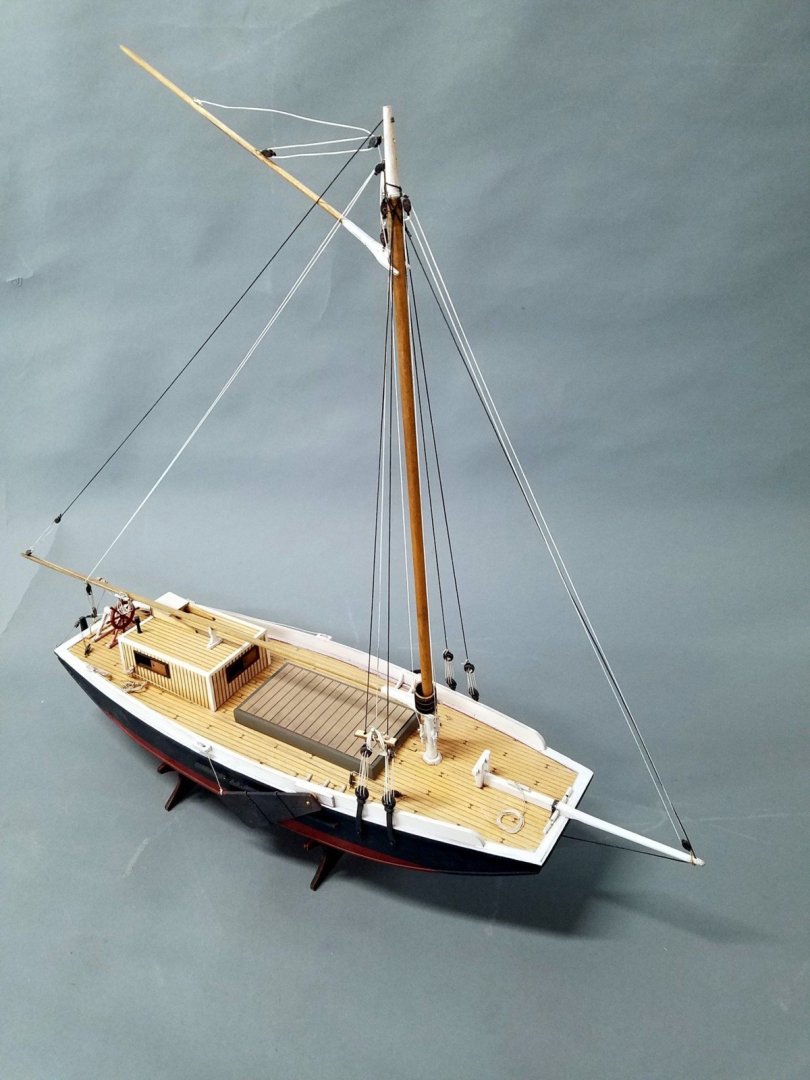
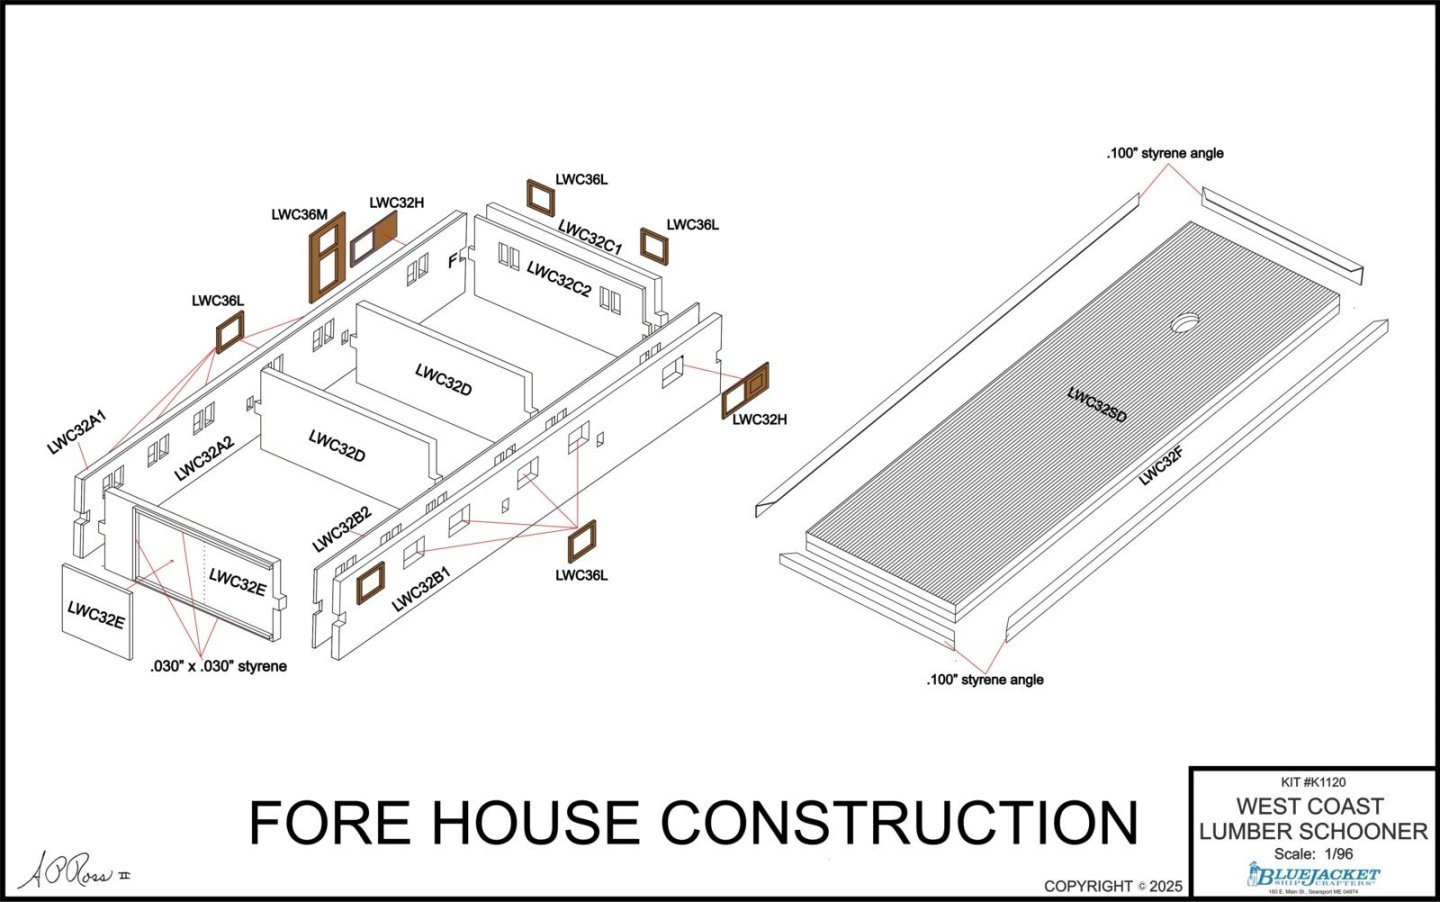
OK, the West Coast Lumber Schooner display model is boxed up and going to Nic for rigging (he enjoys rigging, I don't) 😎. I still have to do the sail plan, write the instructions, and, when he's finished the rigging, add a few more items to the display model. Since these boats had the slat ratlines, we've included the laser-cut ones in this kit - real time saver.


-
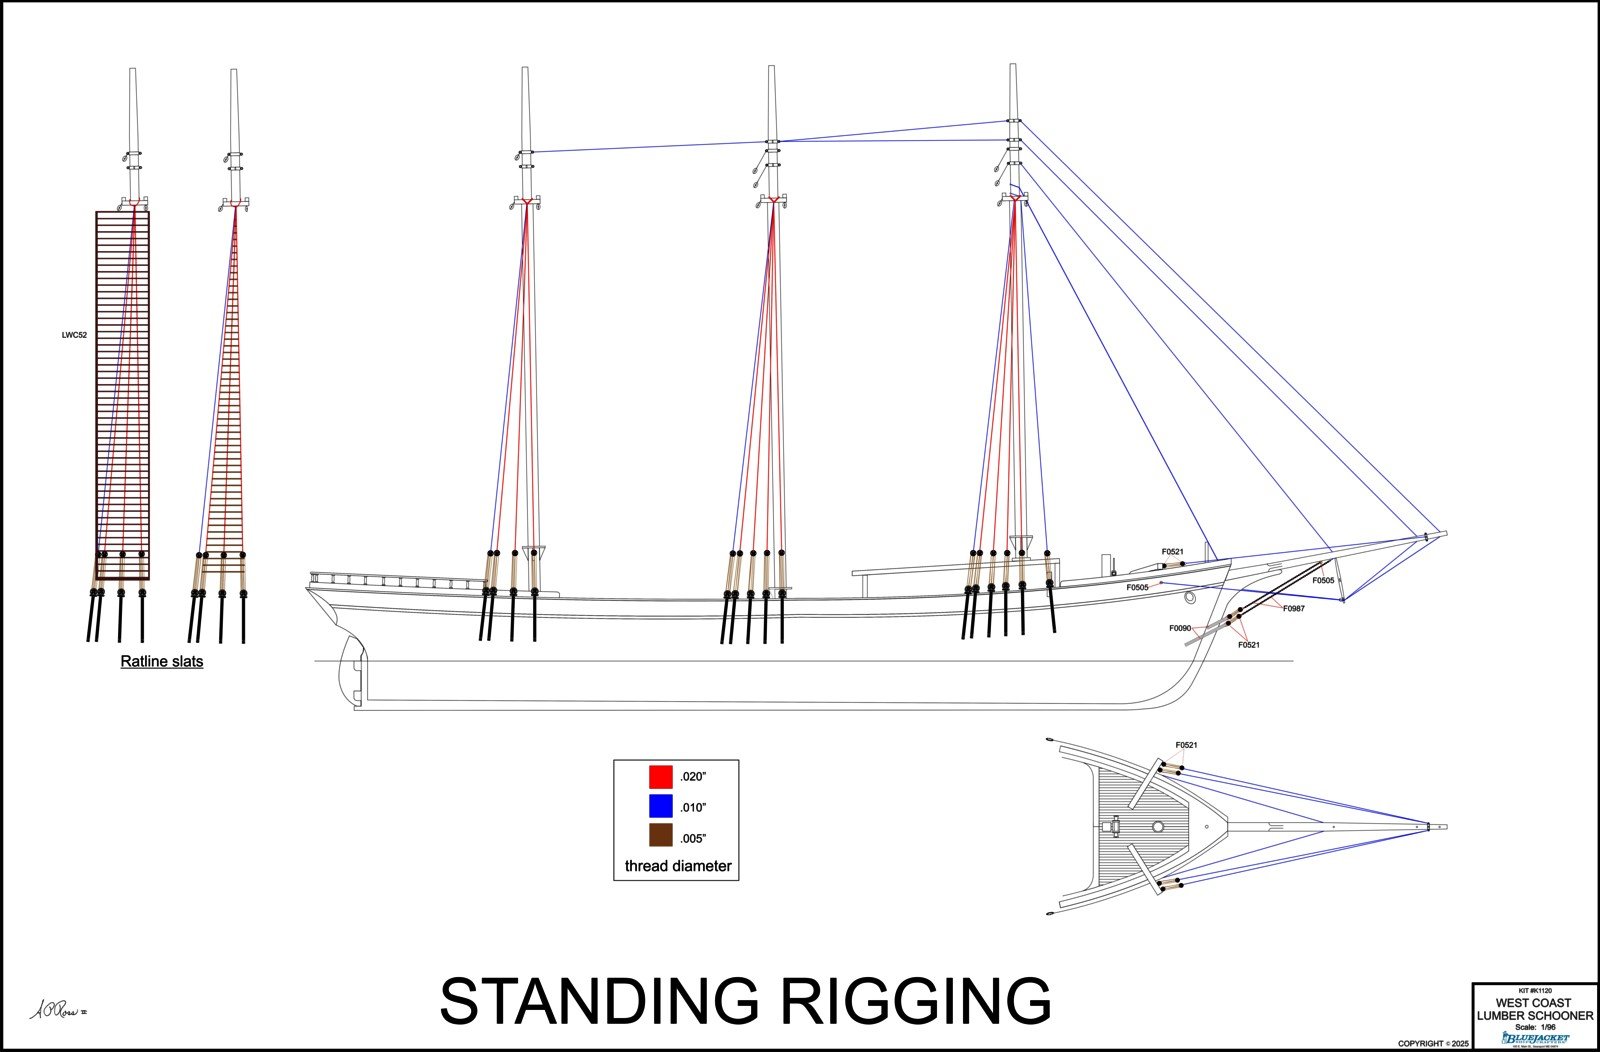
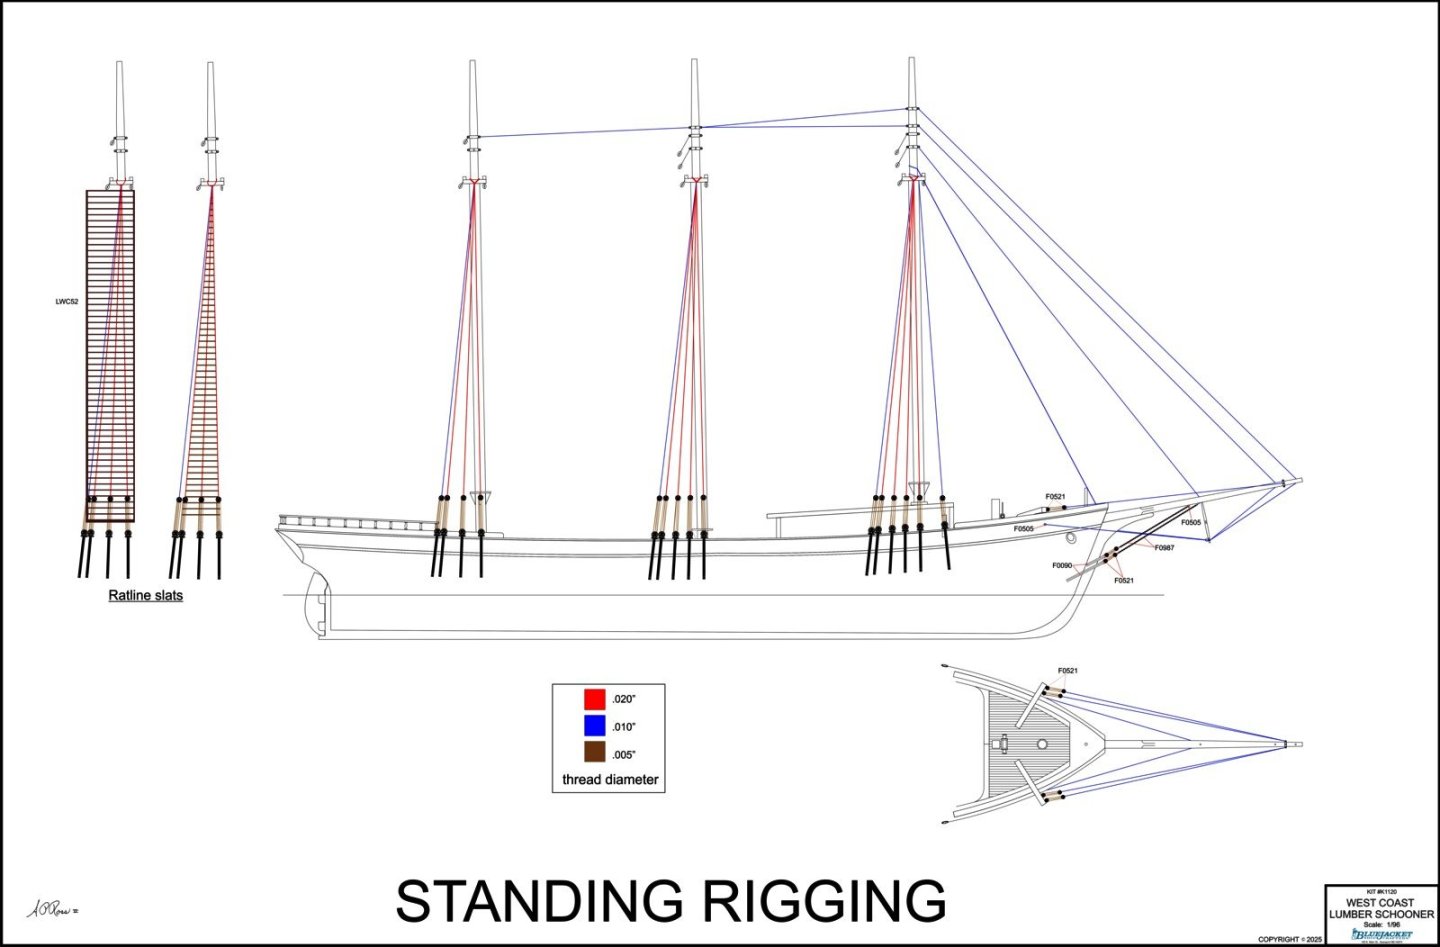
Mostly-finished Running and Standing Rigging plans. Both are greatly reduced from their original 24" x 36" format. I prefer to do separate rigging plans as it makes them less confusing for the builder with limited familiarity with rigging. Because the original vessels used slats for ratlines, I've used the same laser-cut ladder format as I did with WYOMING, NOTMAN, and a few other kits.

-
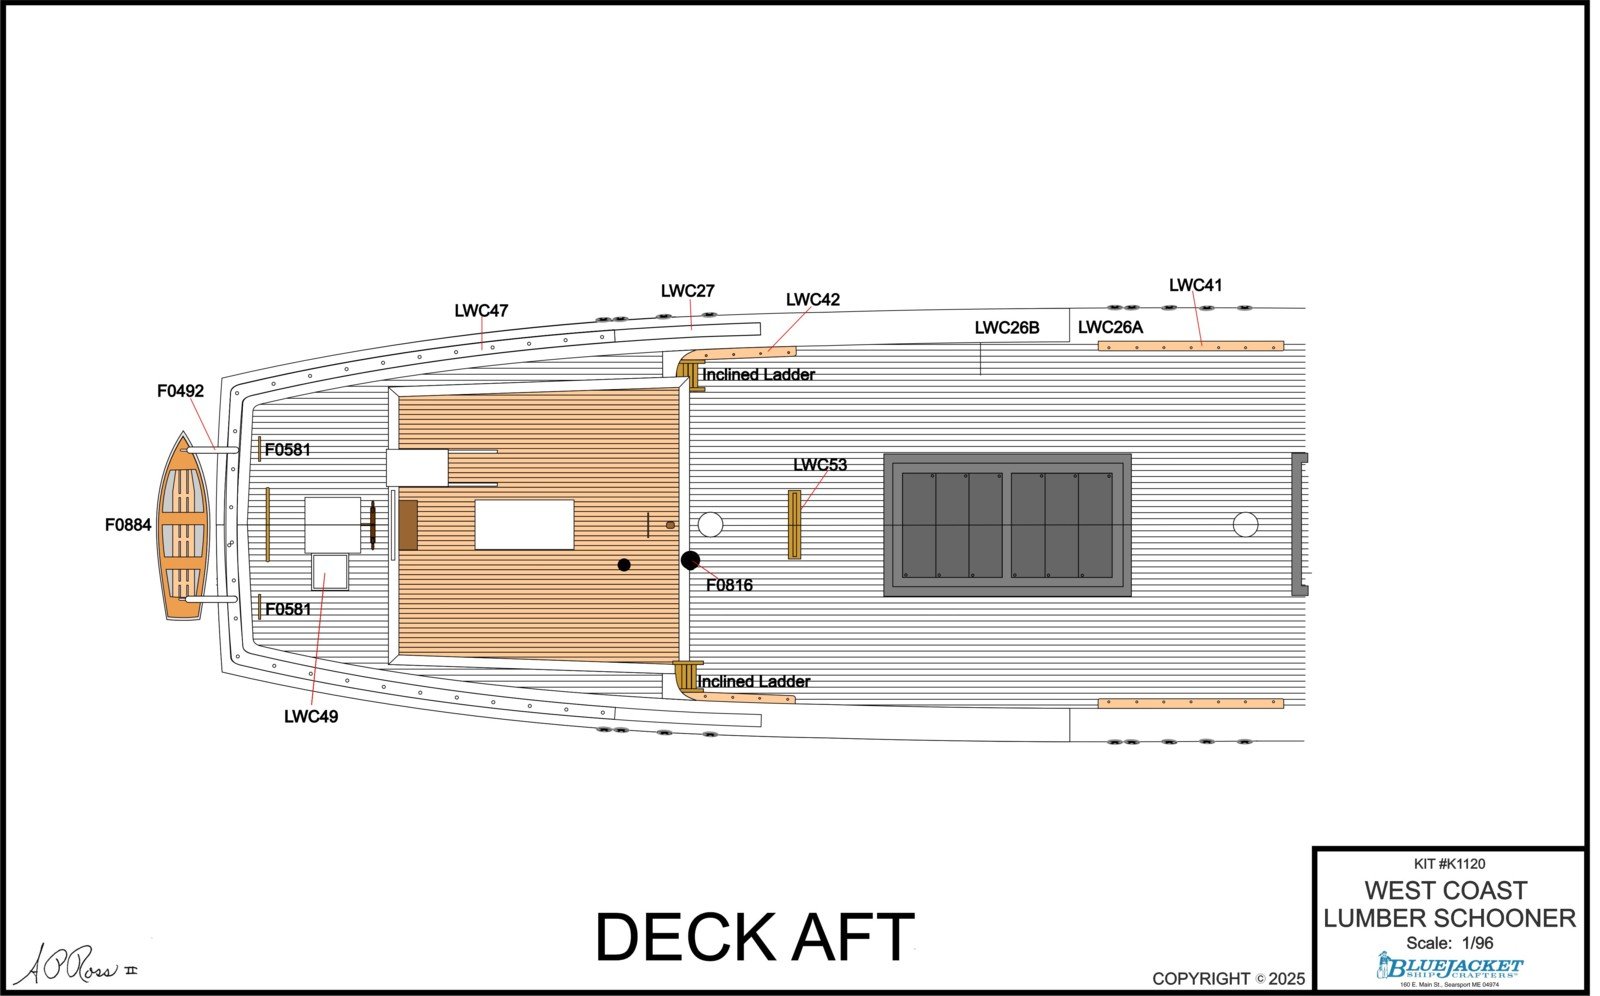
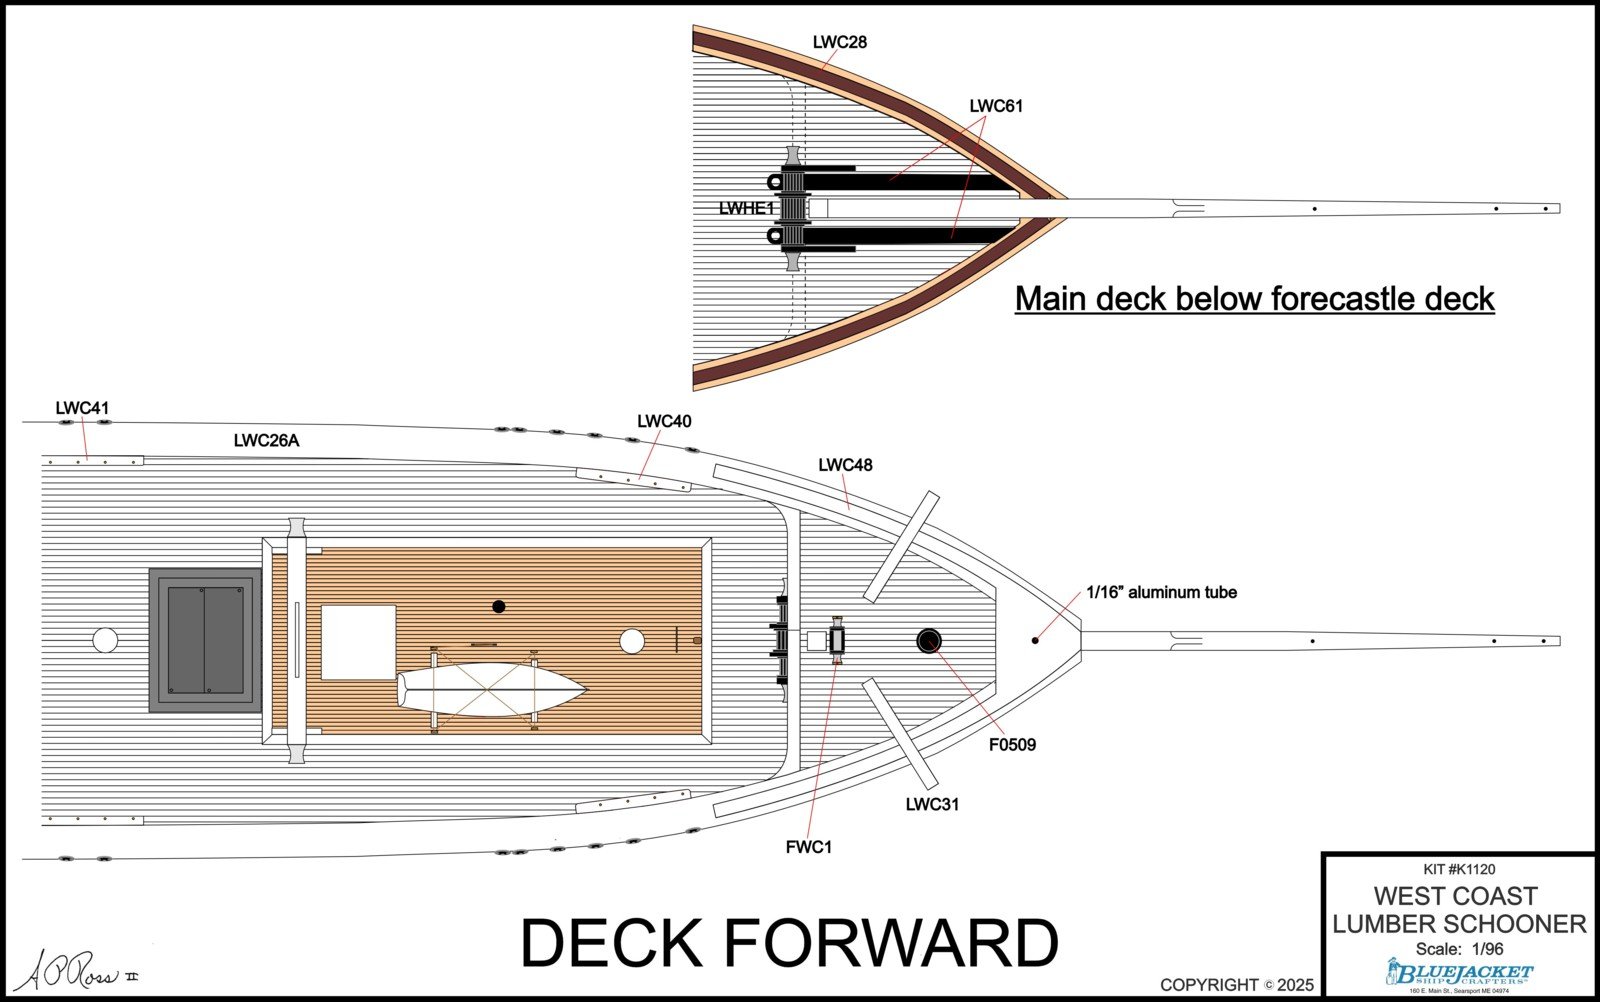
A few more completed kit plans in the 11" x 17" size.


-
I love the ability to change things easily with the computer drawings. As you can see, this is quite different from this same drawing posted earlier. Still have to add the gaffs, deadeyes, rigging and a few other details.

-
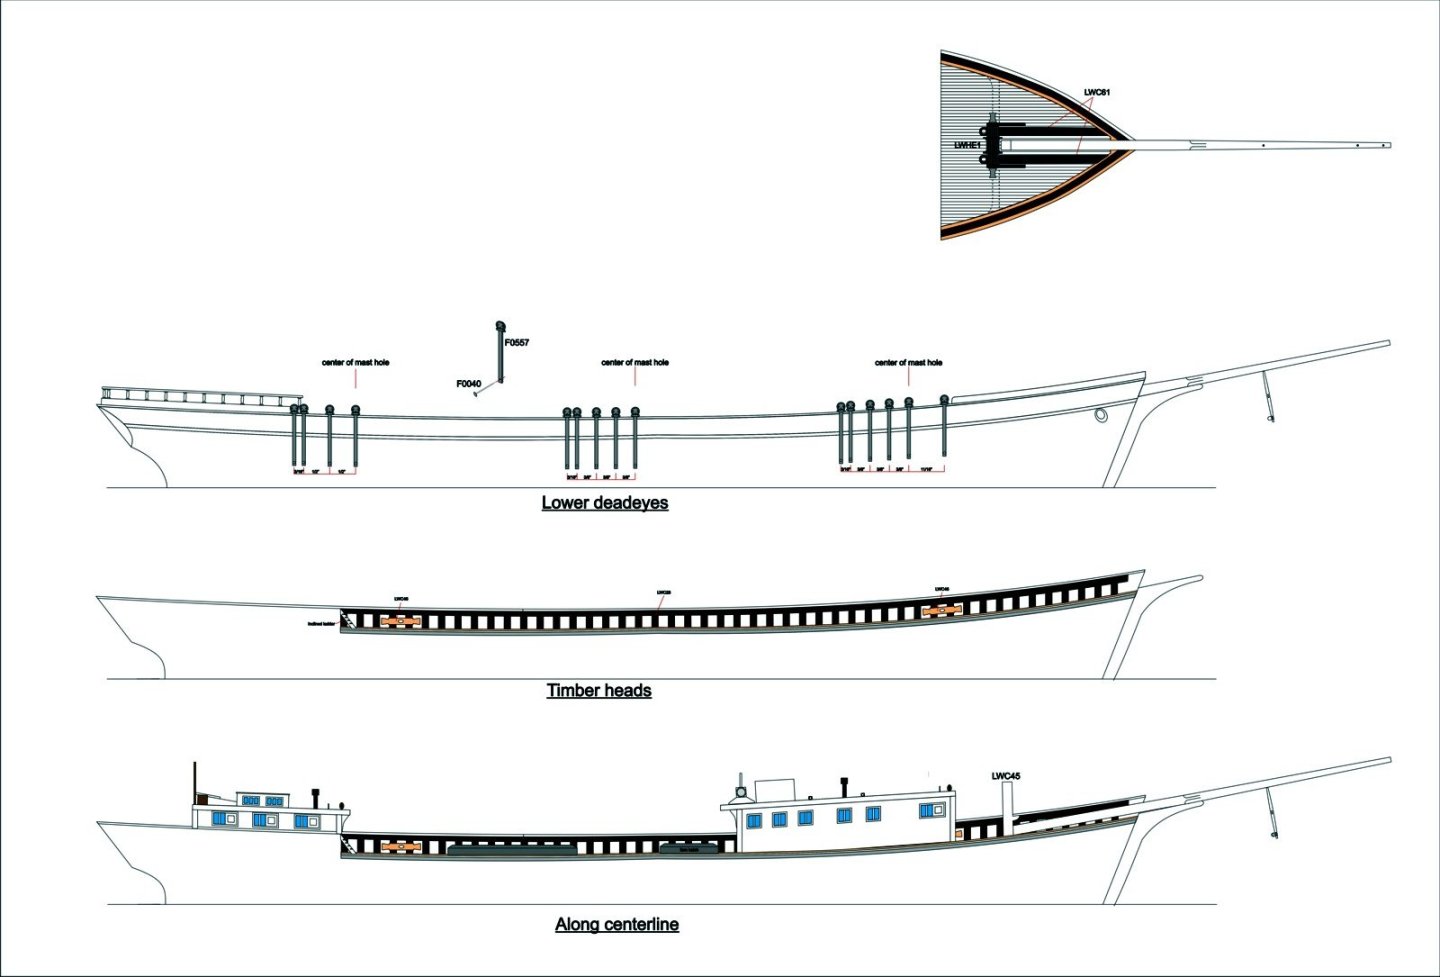
More as-yet completed drawings. The image with the spacing of the lower deadeyes shown is probably the most useful one. On the rigging drawings, they will take the appropriate angles to match the stays and shrouds.
-
This week and next (at a minimum) will be spent drawing. I've been creating the plans by importing the laser drawings as a base which speeds up the process and also gives me another fit check. These two will probably be rearranged several times before they're done. These are the 24" x 36" sheets.

-
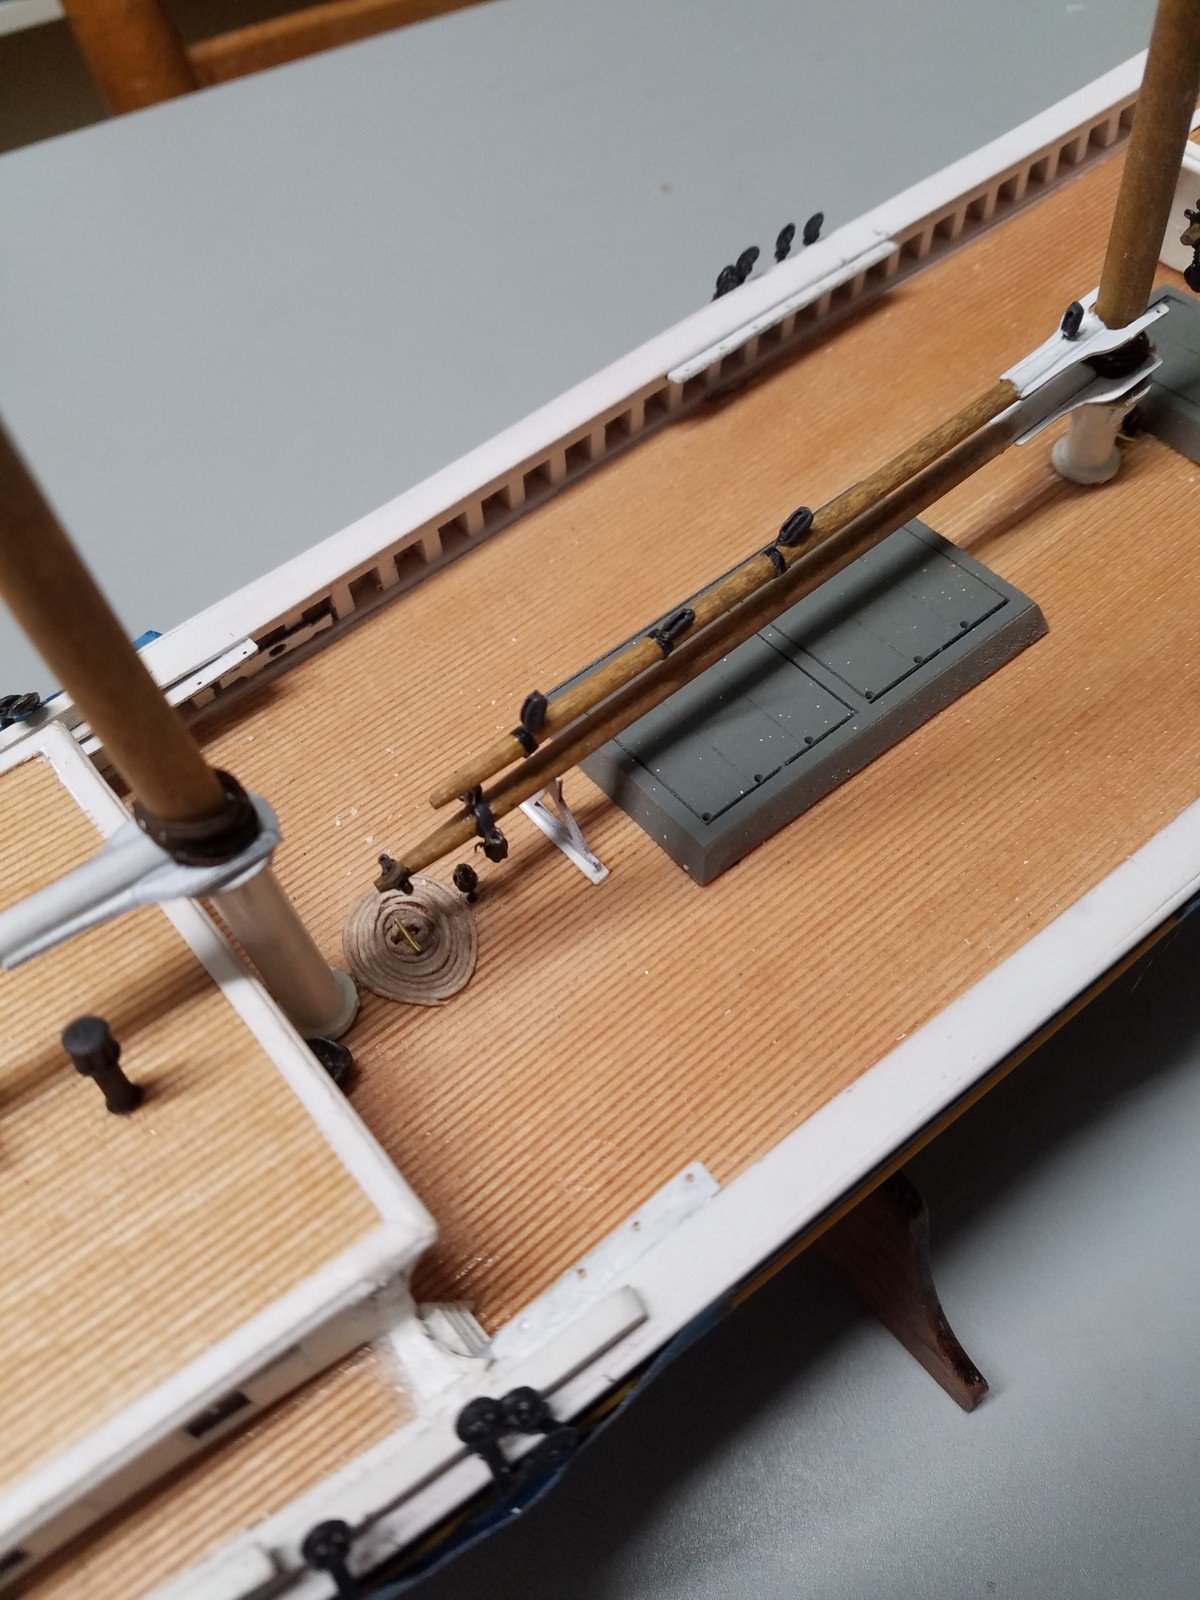
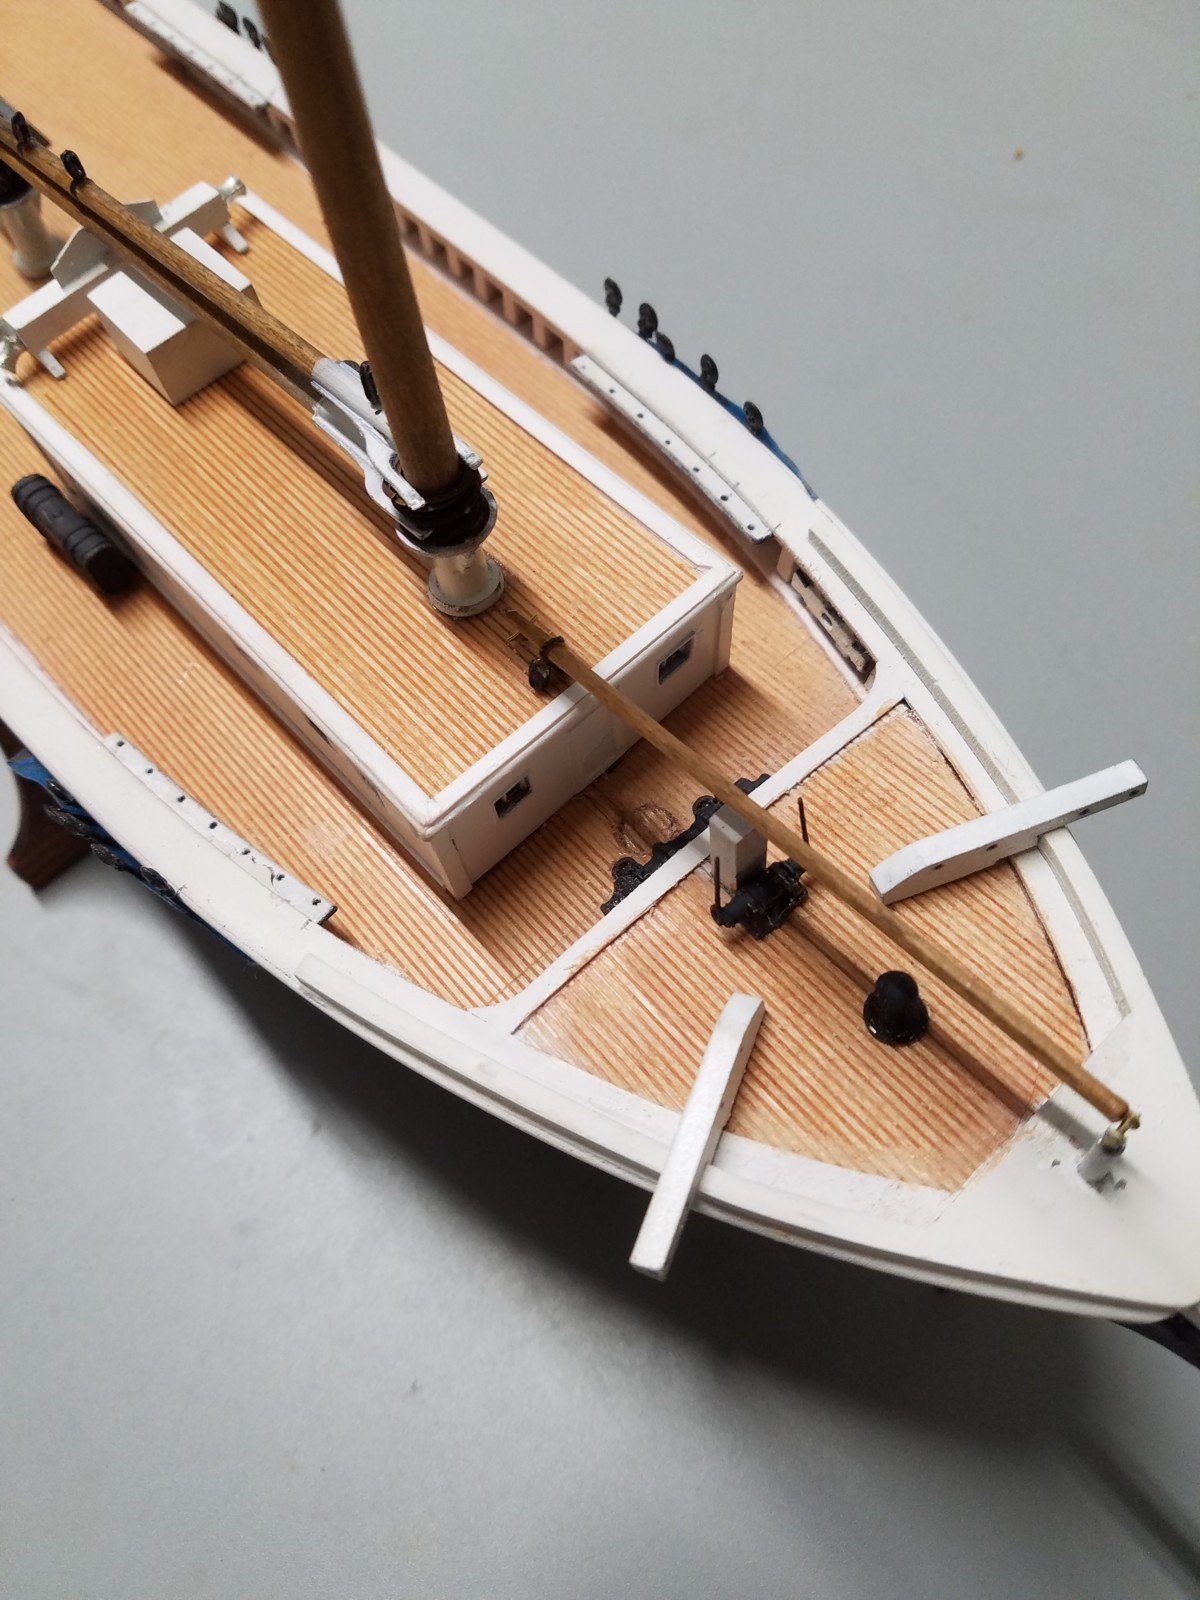
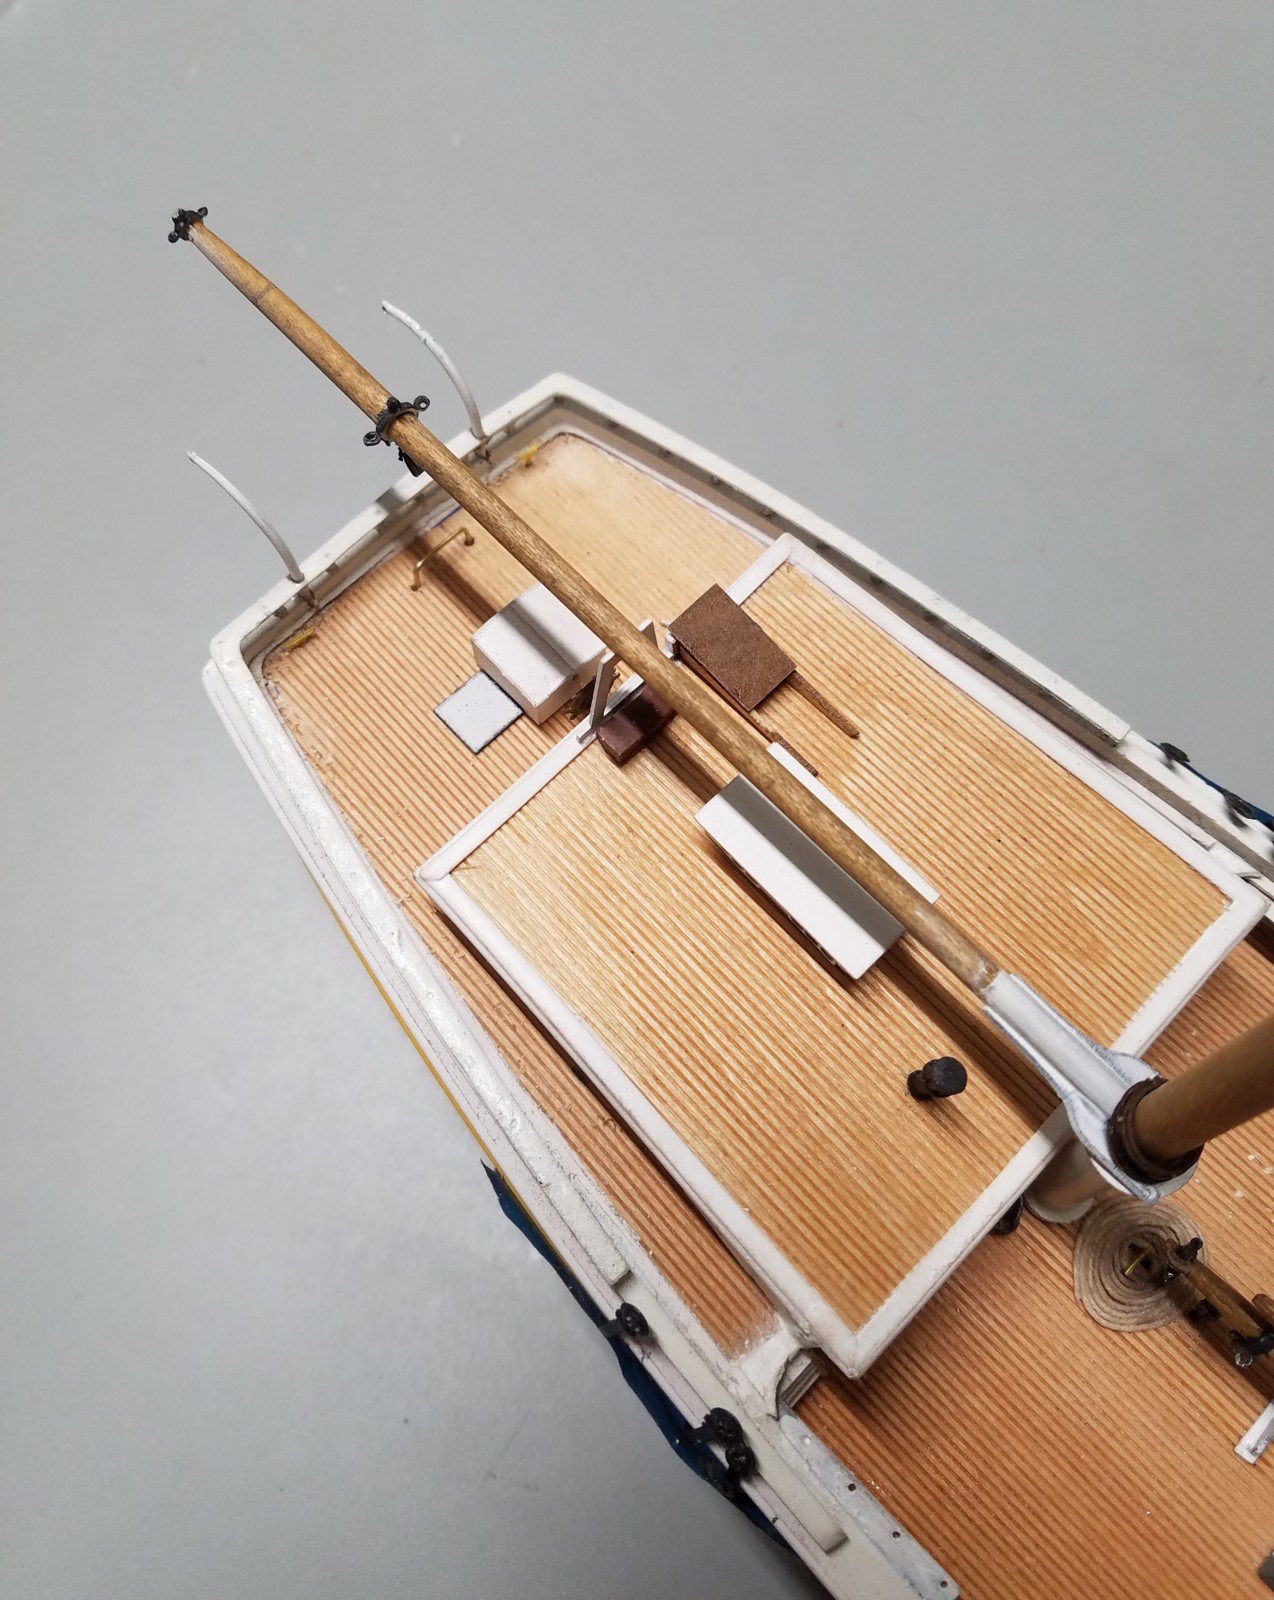
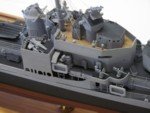
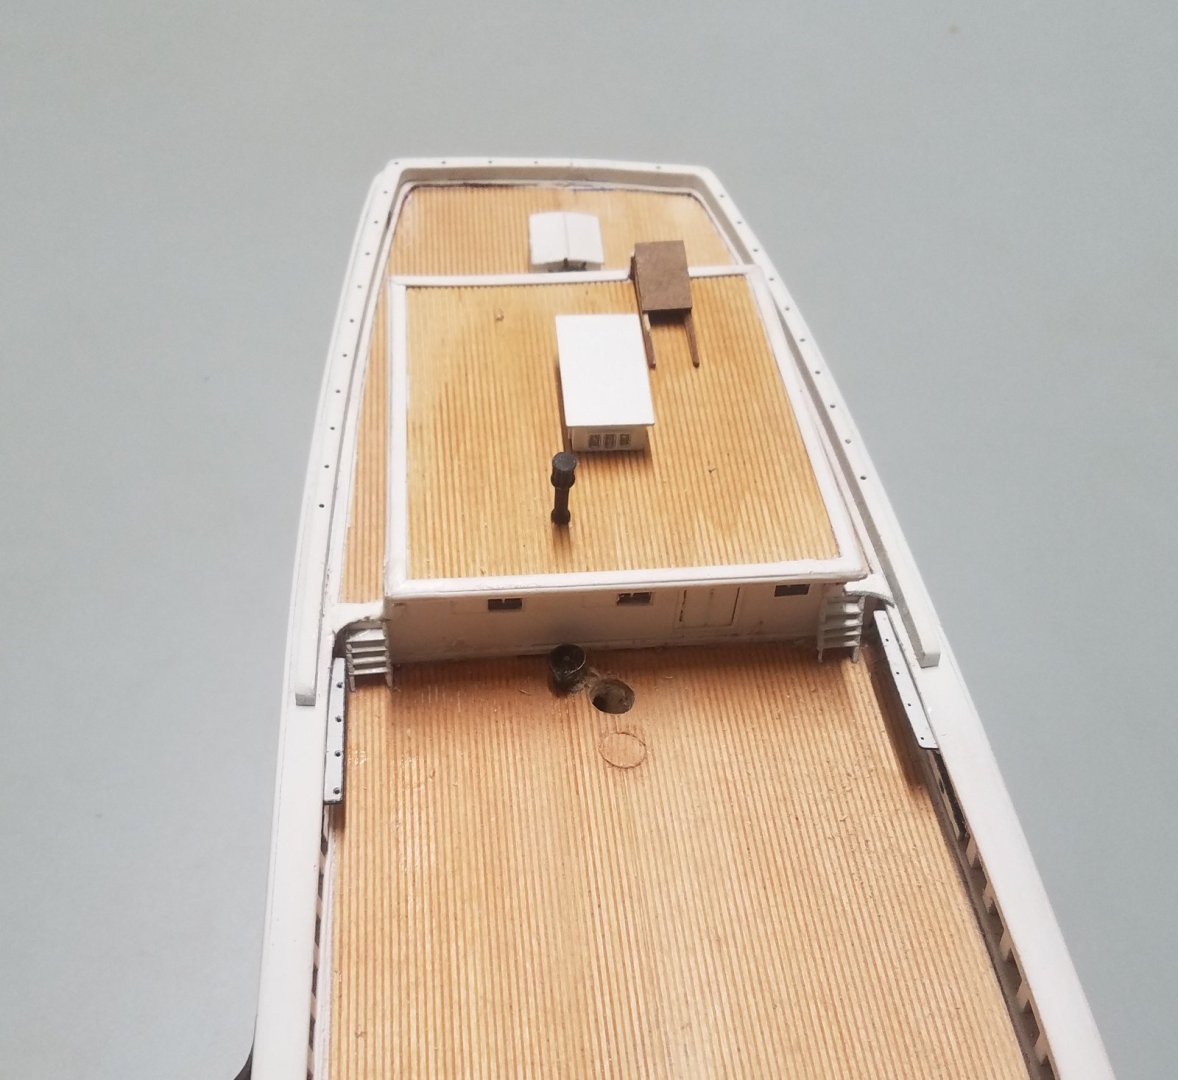
A few more details added. The boat on the davits has lasered floorboards and thwarts added and fire buckets have been placed around the skylight. Another boat with lashings has been added to the fore house roof.


-
Added the top view of the framing. Port side just shows subdeck applied, starboard side shows actual framing, fillers, etc. I do like the ability to add color to the drawings to differentiate the parts.

-
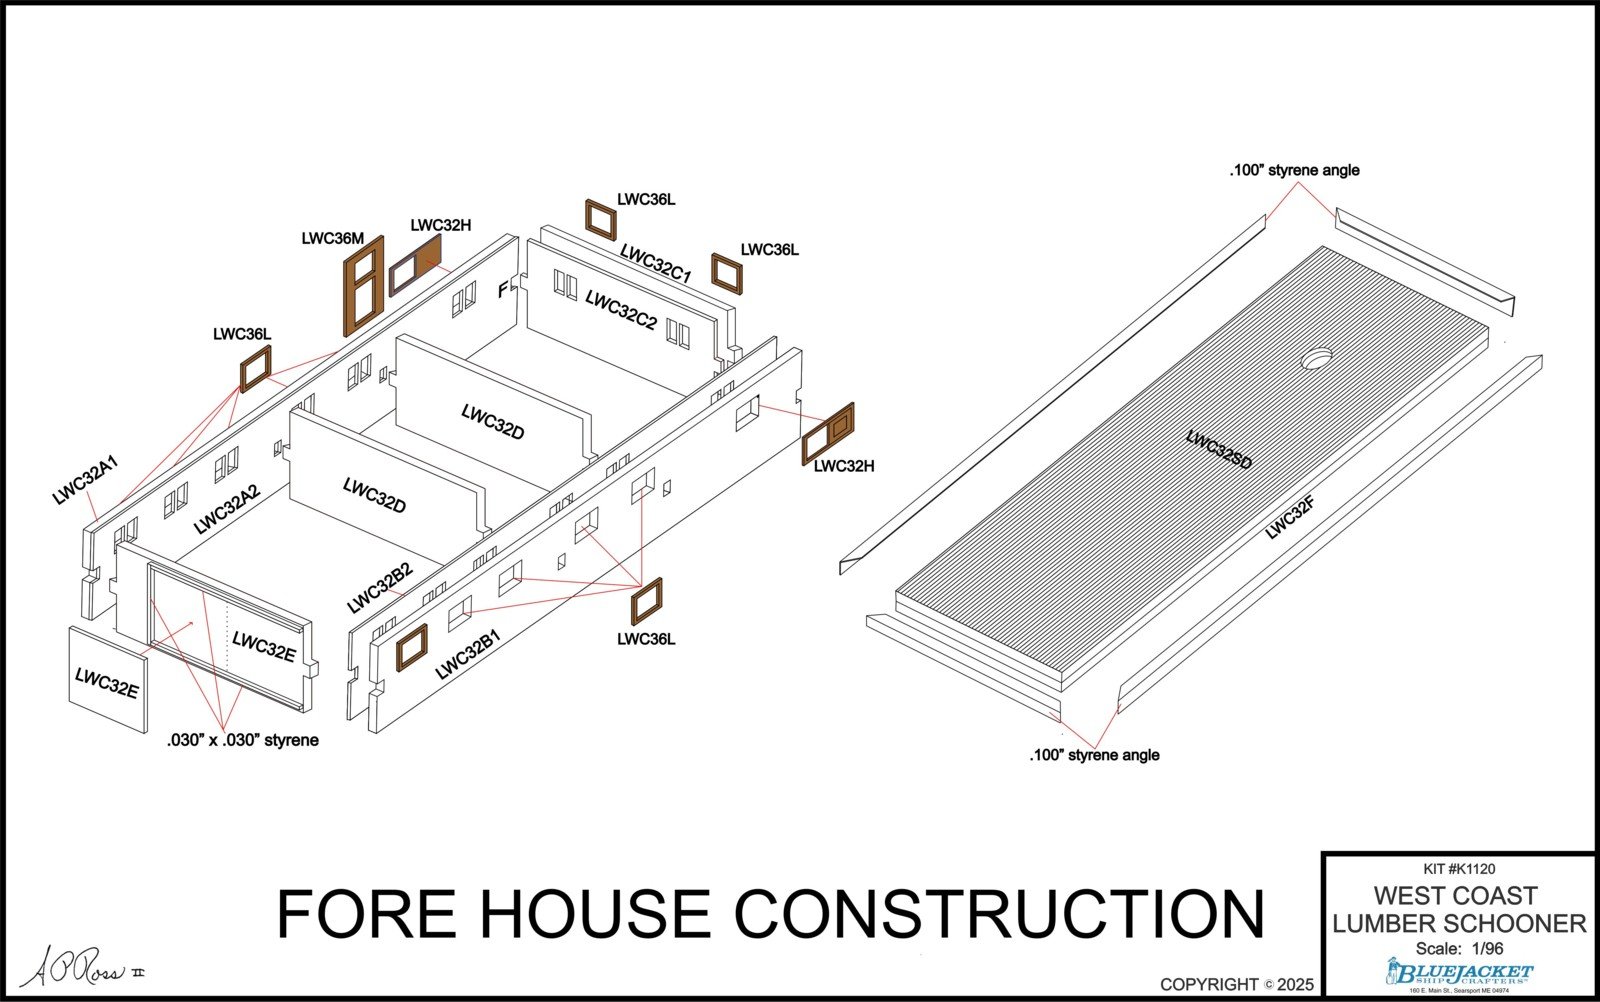
Some of today's drawings. These are part of the hull construction sheet. This is reduced copy as the sheet will be 36" wide.

-
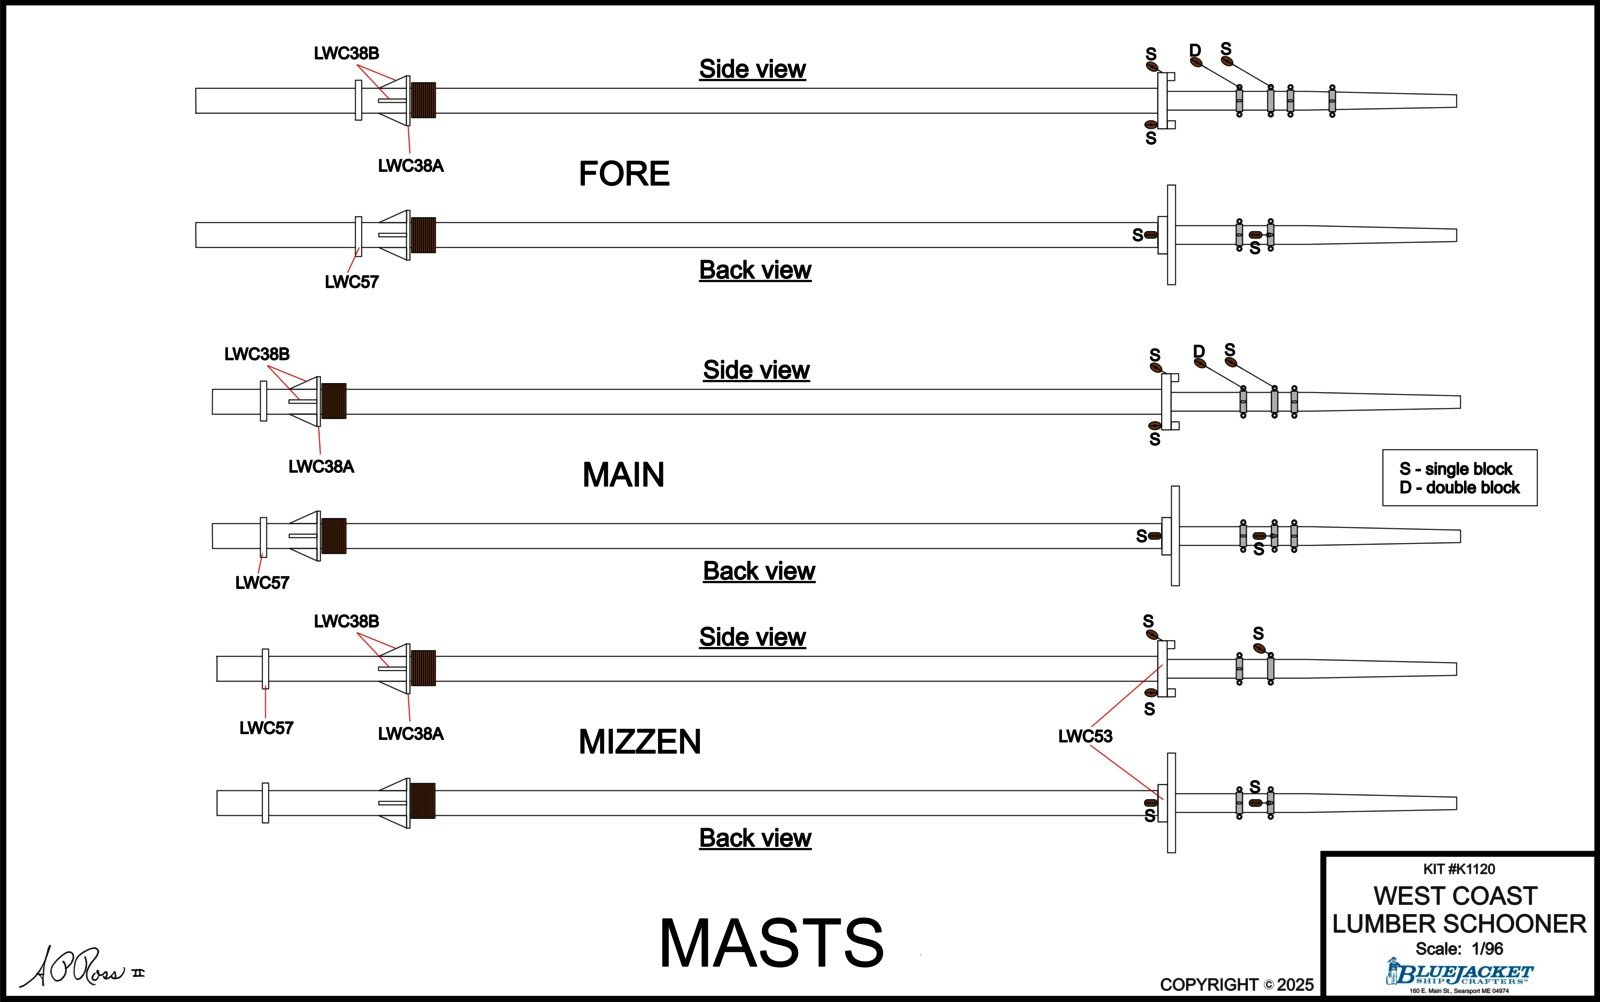
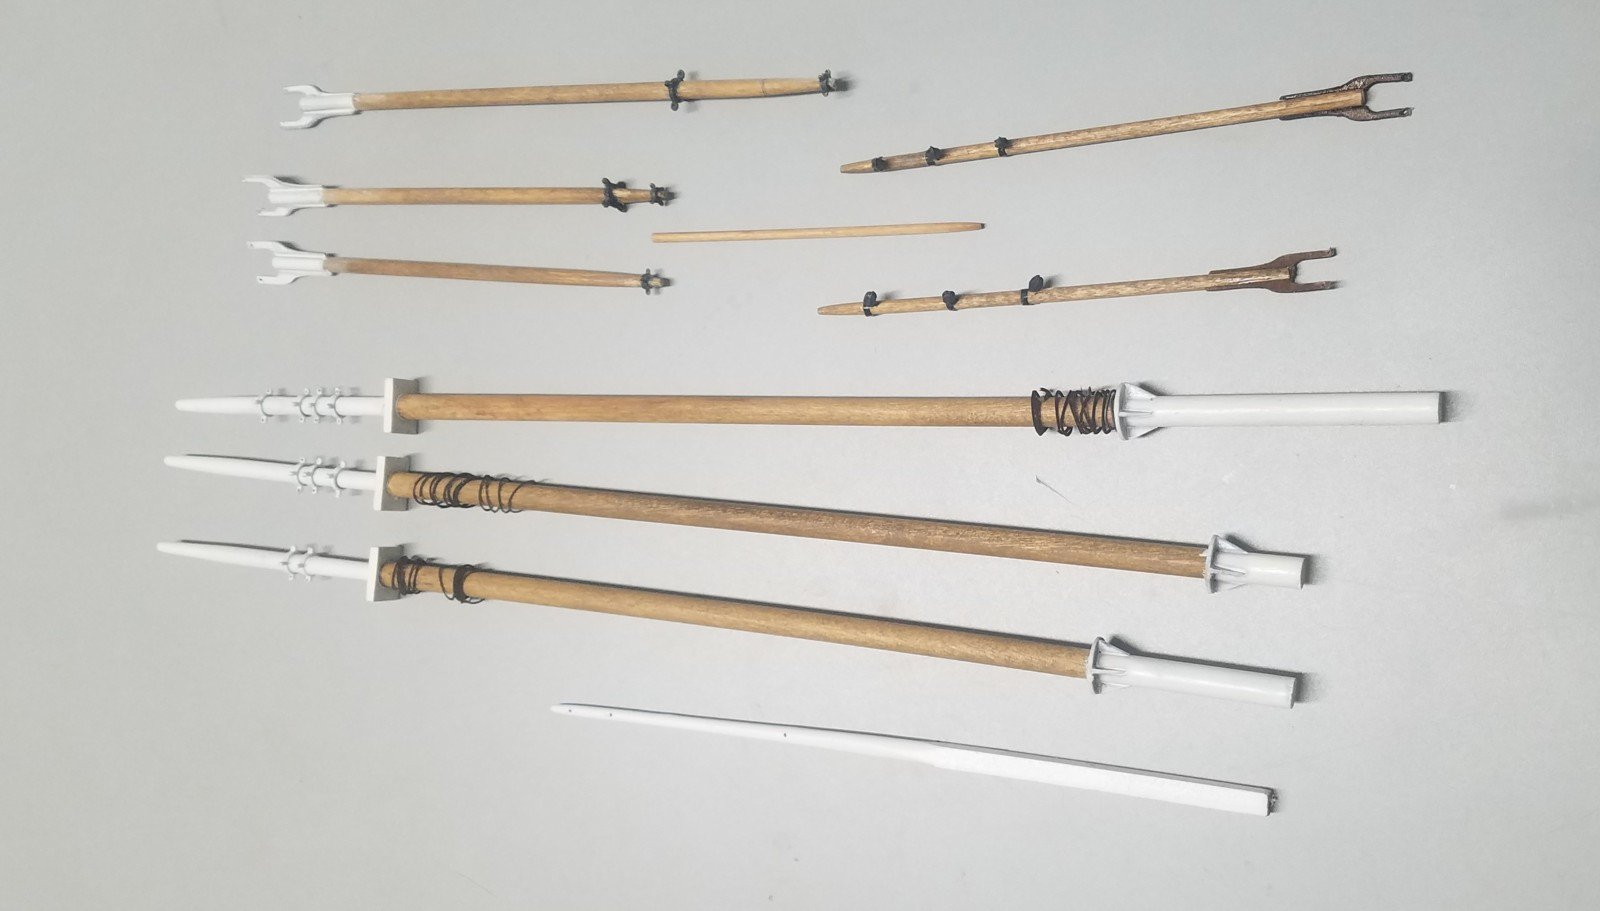
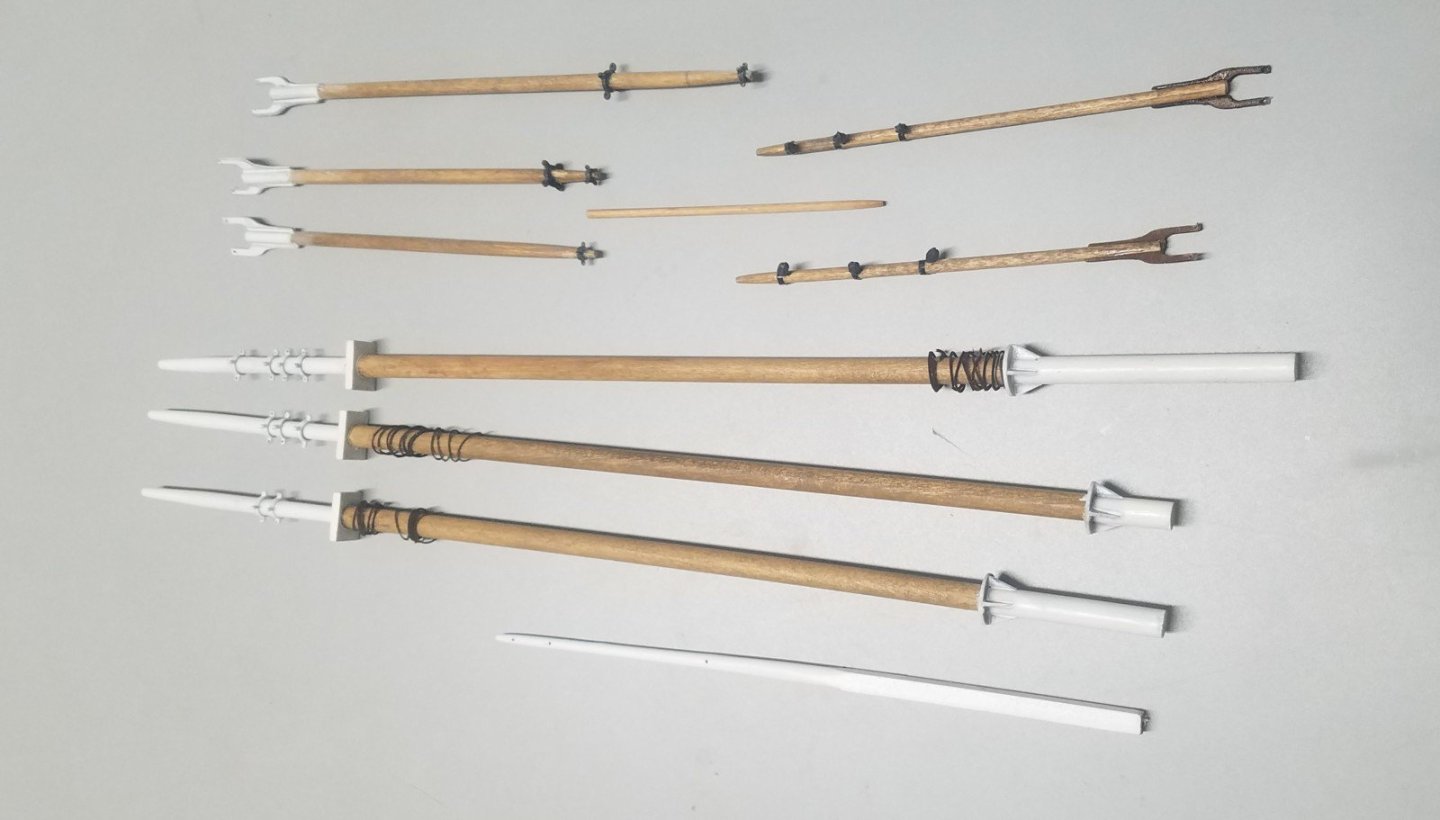
And the "sticks" are drawn.


-
Third set of plans. Working on the "stick" drawings now.

-
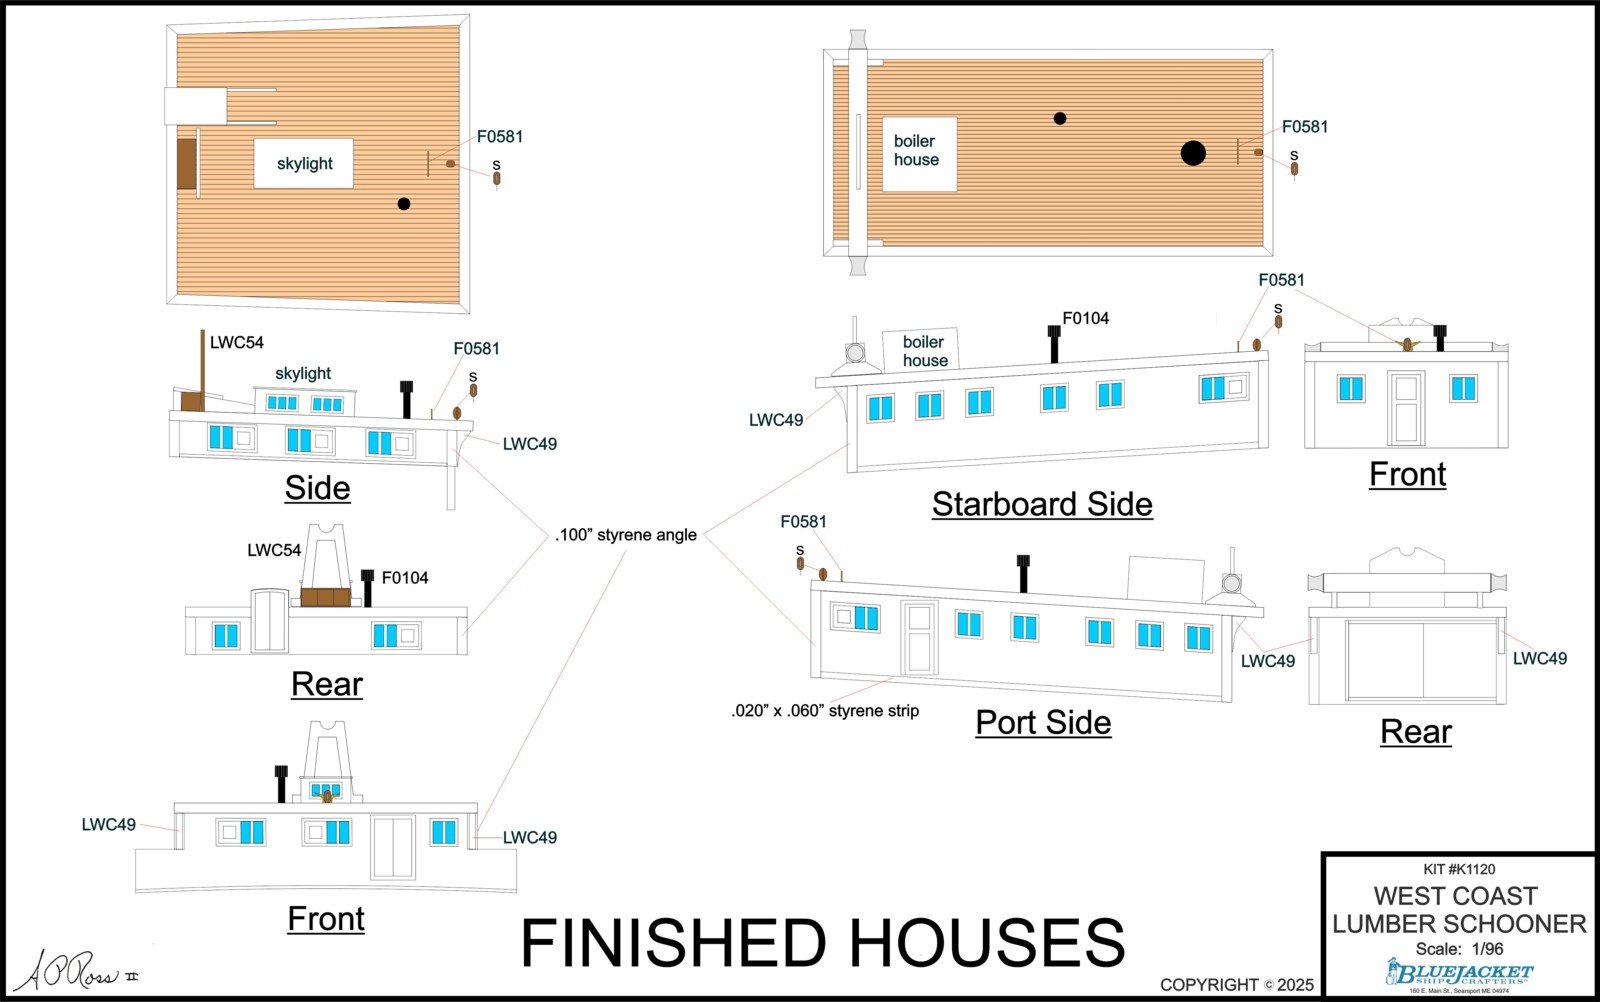
Second set of plans. Next up will be standard side view/top view drawings of both houses as completed.
-
First of the kit drawings. AFT HOUSE CONSTRUCTION.pdf
-
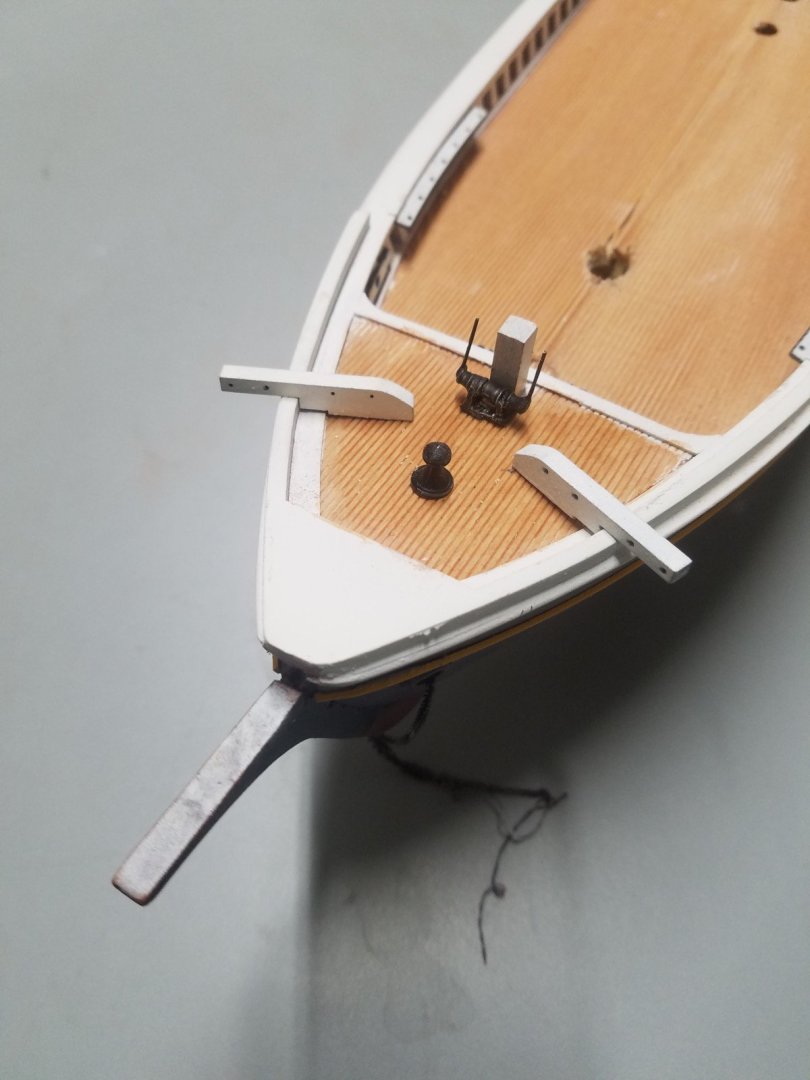
Stanchions are in. Cap rail will go on next week.

-
Starting some assembly now. Today I have to drill and paint the 30+ deadeyes with chainplates.


-
The basic "sticks" are done. Each mast has a dozen mast hoops from .015" laserboard. At the moment, I'm stropping blocks with twisted wire.
-
Nope, just plain old automotive bondo.