HOLIDAY DONATION DRIVE - SUPPORT MSW - DO YOUR PART TO KEEP THIS GREAT FORUM GOING! (Only 13 donations so far - C'mon guys!)
×

alross2
-
Posts
408 -
Joined
-
Last visited
Content Type
Profiles
Forums
Gallery
Events
Everything posted by alross2
-
 For those who attended the meeting and visited the BJ table, I'd like to get some feedback (positive or negative) on the OREGON and WYOMING kits, particularly the bound plans concept.
 -
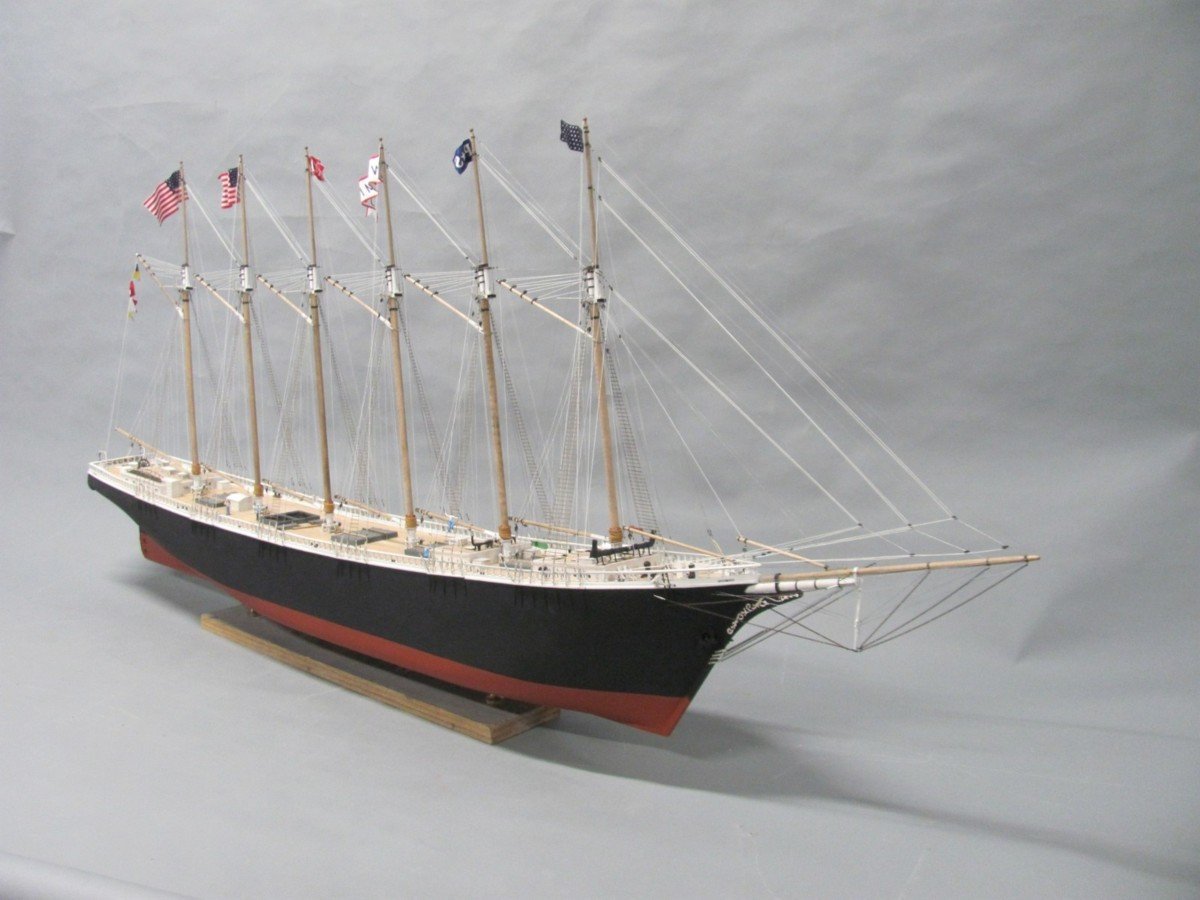
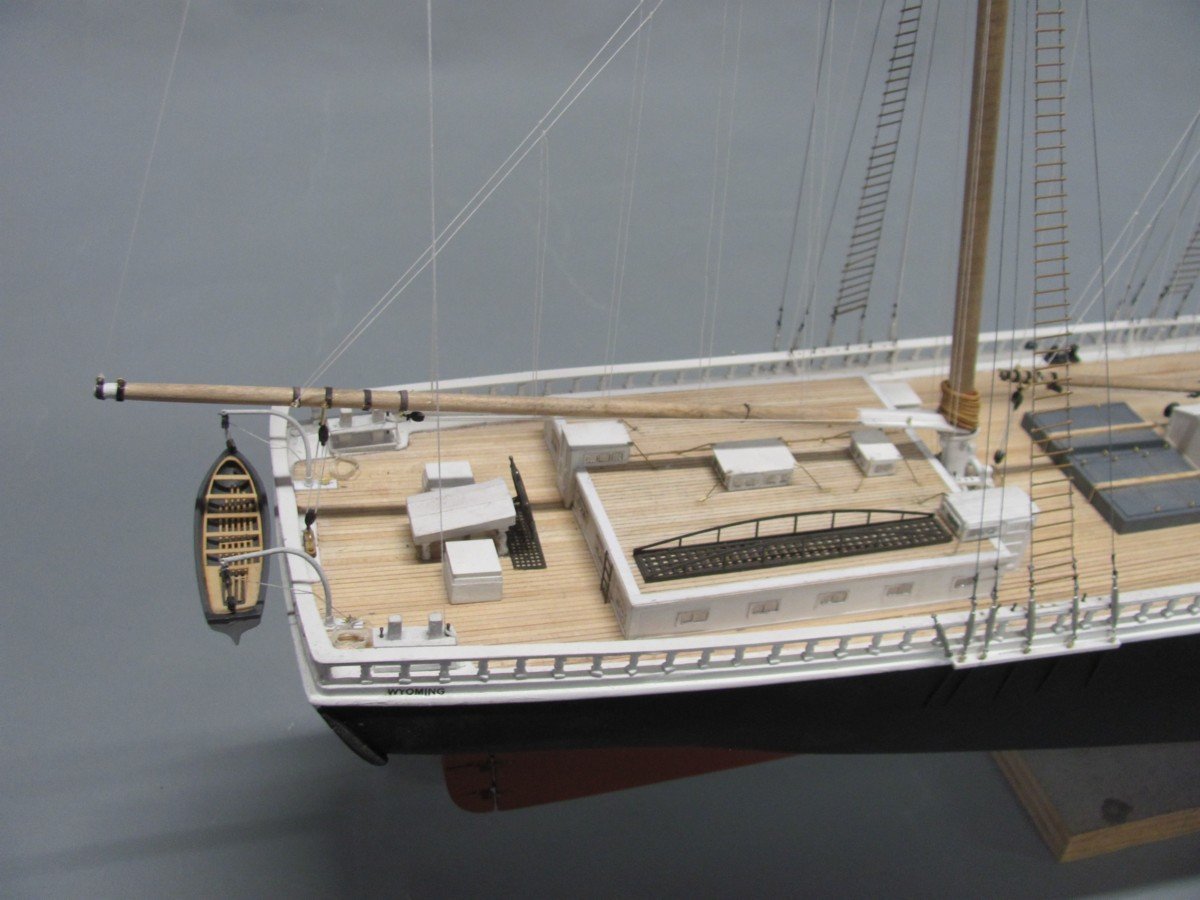
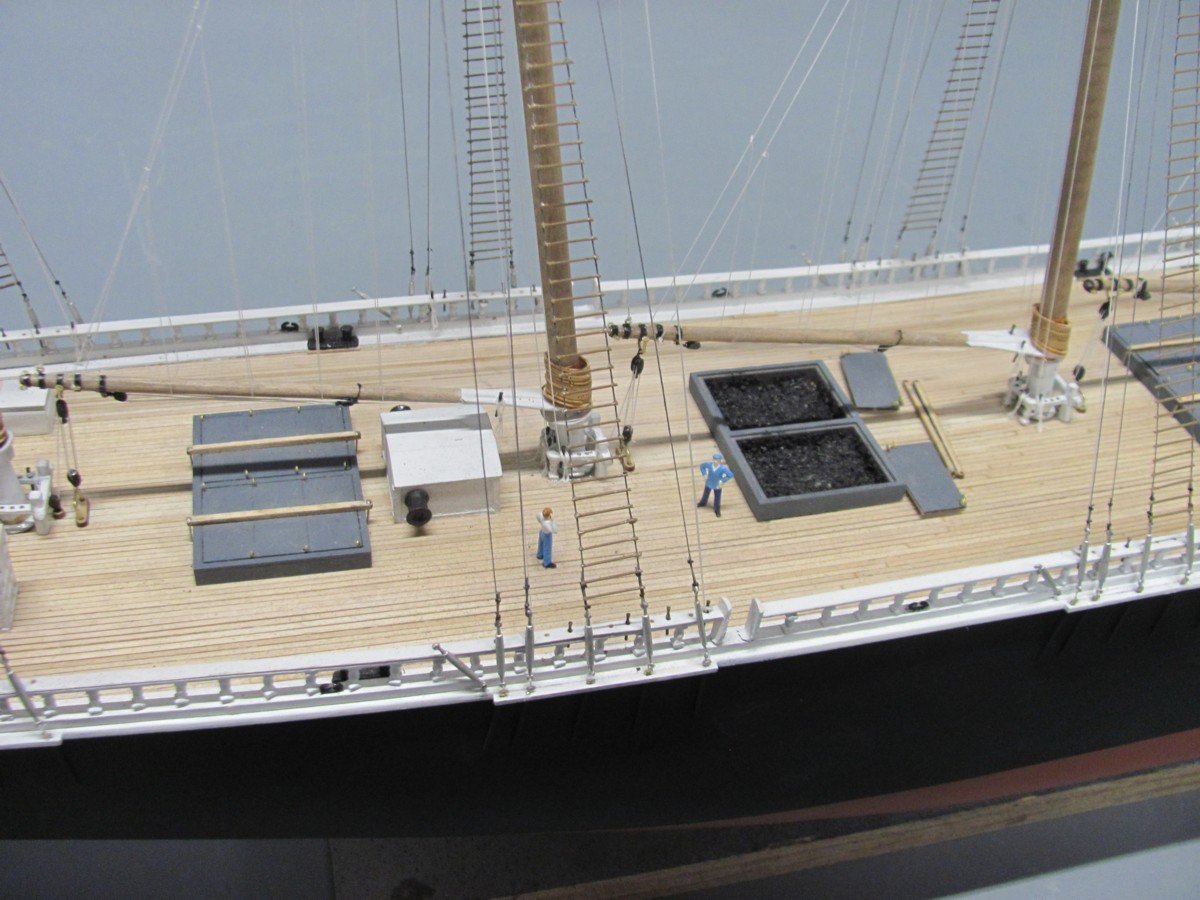
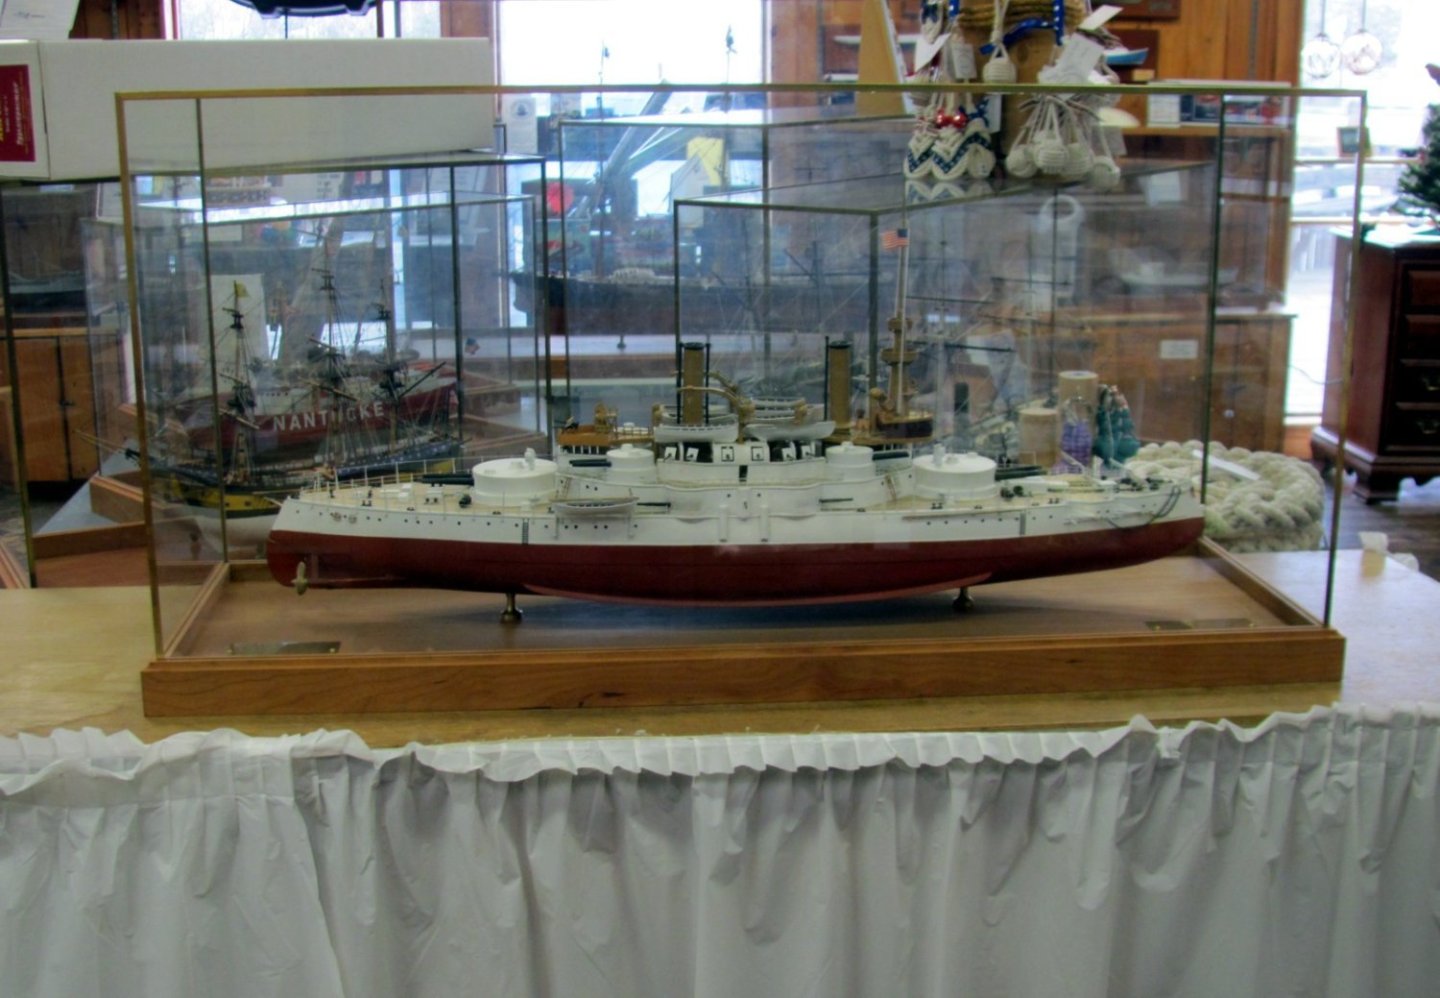
WYOMING went into her case yesterday and is now on display in the gallery as you come in the door. She, OREGON, PERRY, and the MORGAN cross section will be going to the New London event this weekend.


- 1 reply
-
- 20
-

-

-
You'll get the grand tour if you do! There are about 75 finished models in the gallery. We try to keep one of every kit we sell on display. There are a few missing as they were sold and not yet replaced., WYOMING will be out there in a week or so. Both models are going to the New London show at the end of the month.
-
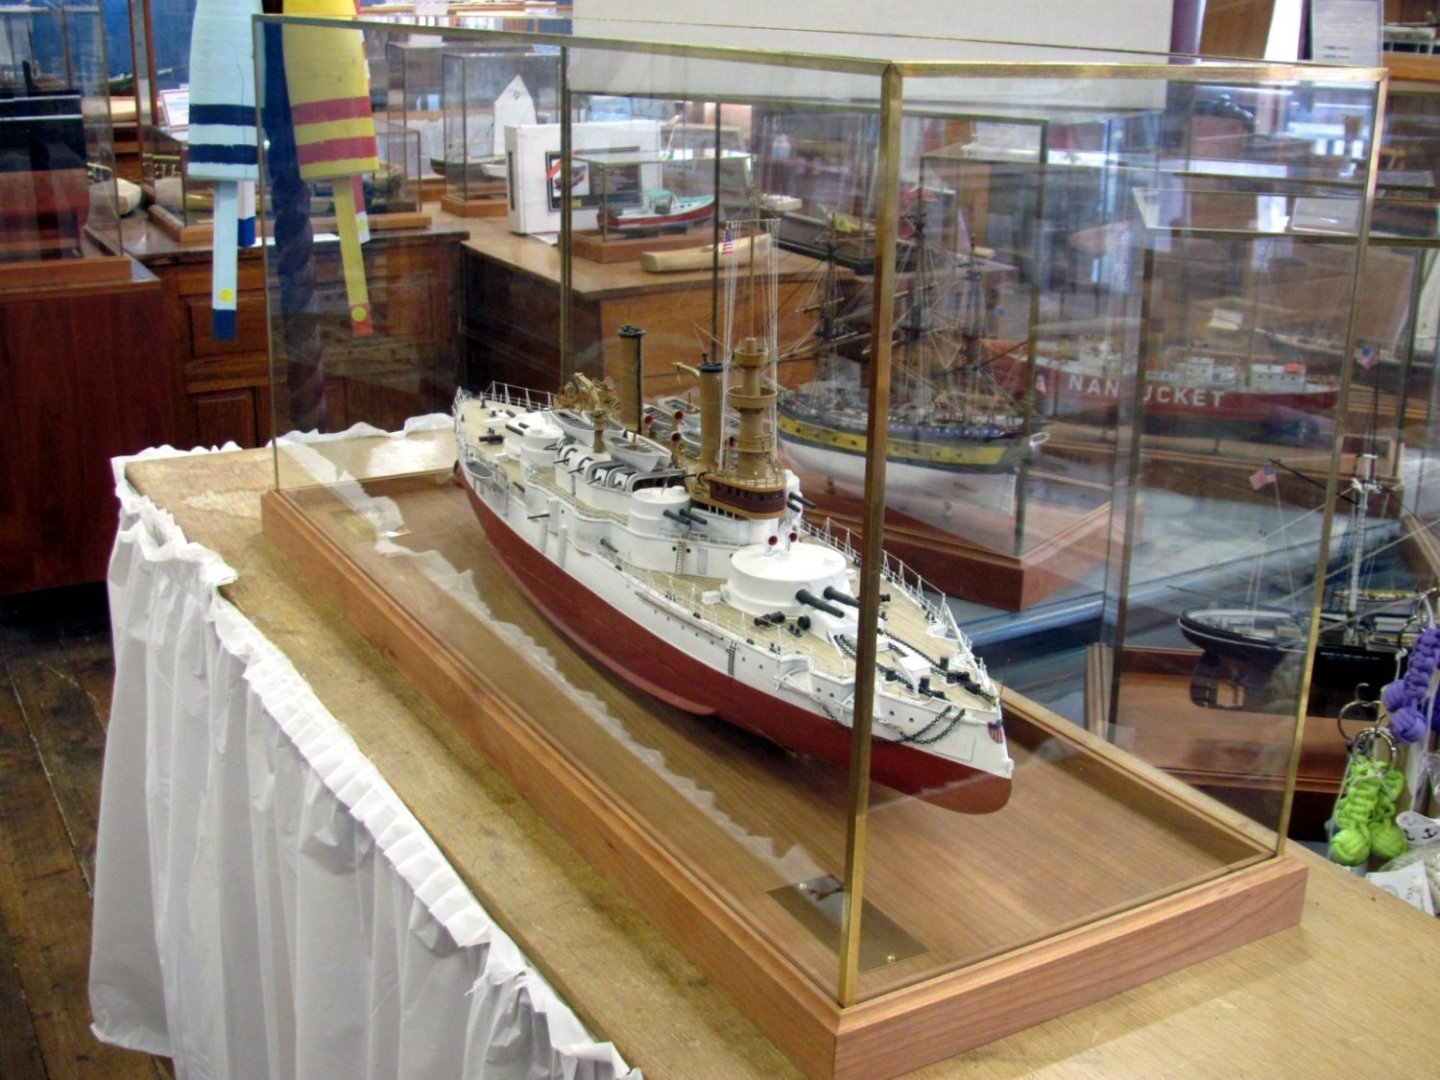
OREGON is now in its case and on display in the gallery. If you're in the area, stop in and take a look.
- 3 replies
-
- 15
-
-
-

-
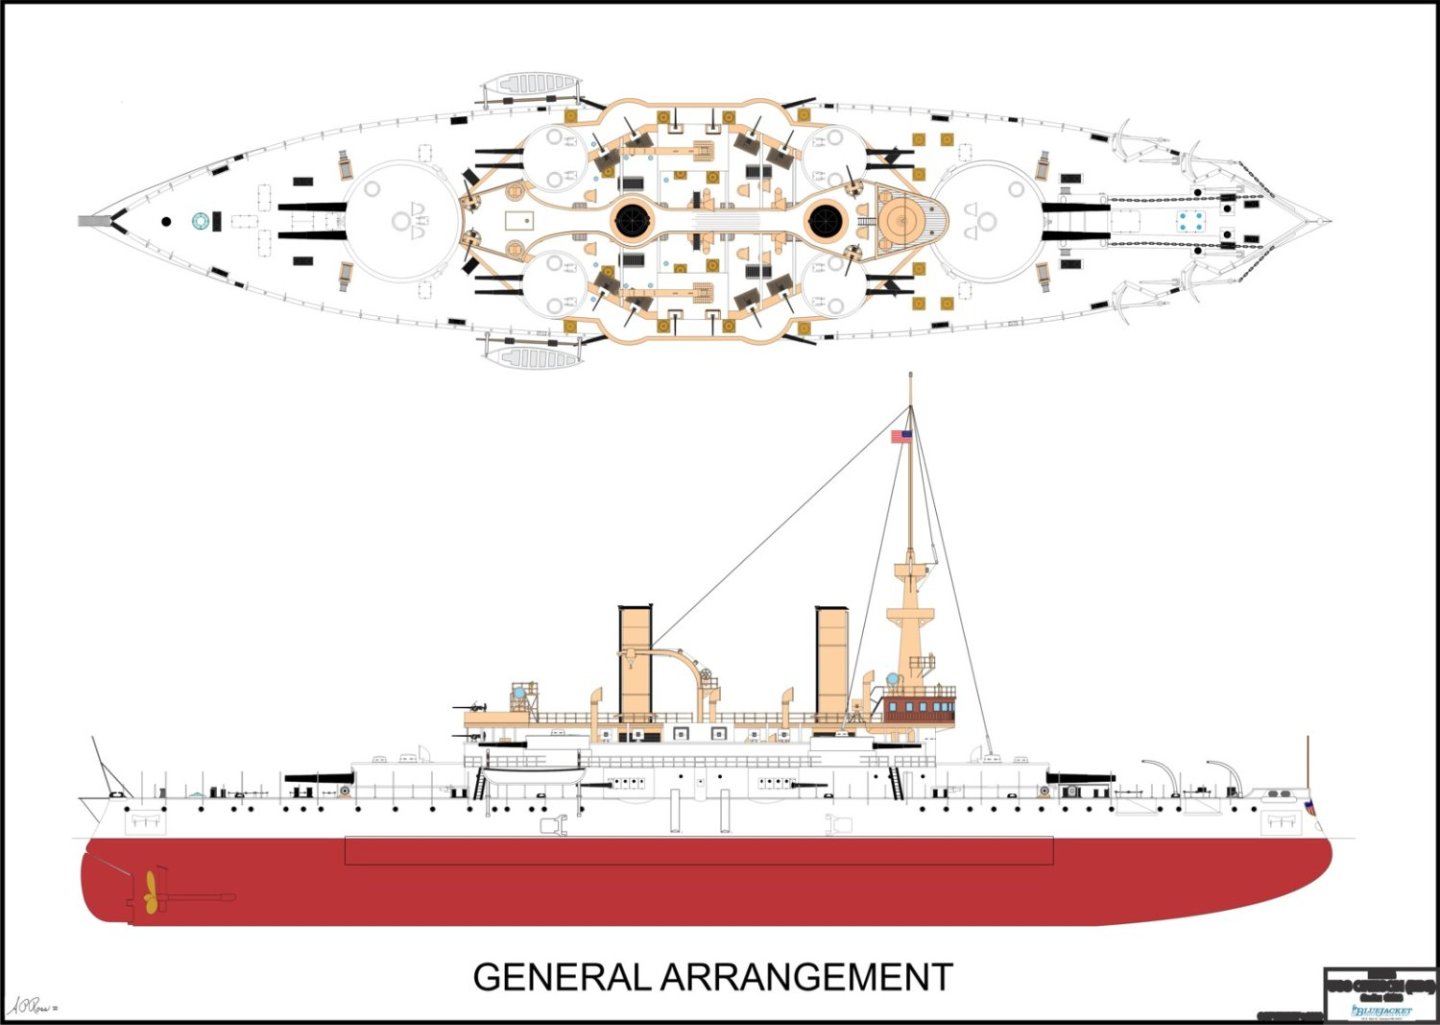
This is the general arrangement drawing for the kit. It is one of the large sheets and measures about 34" x 65"! You can see why I went to the 11" x 17" sheets which are mostly full scale as well.

-
- 8
-
-
Here are some of the 100+ images (construction and finished model) on the CD that is available for the OREGON kit.
-
- 11
-
-
-
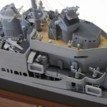
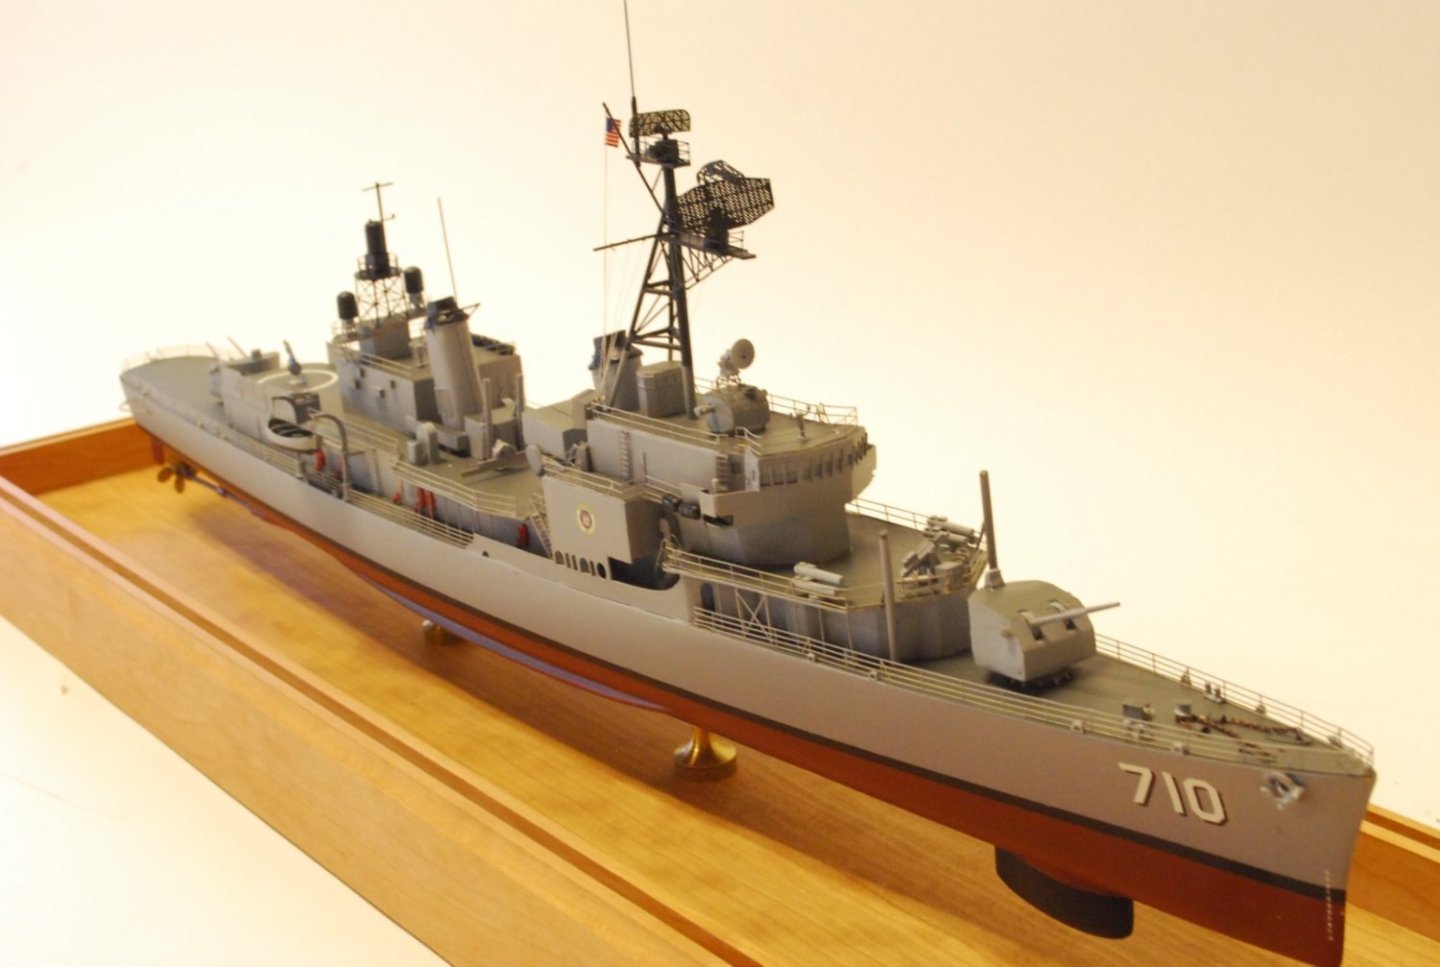
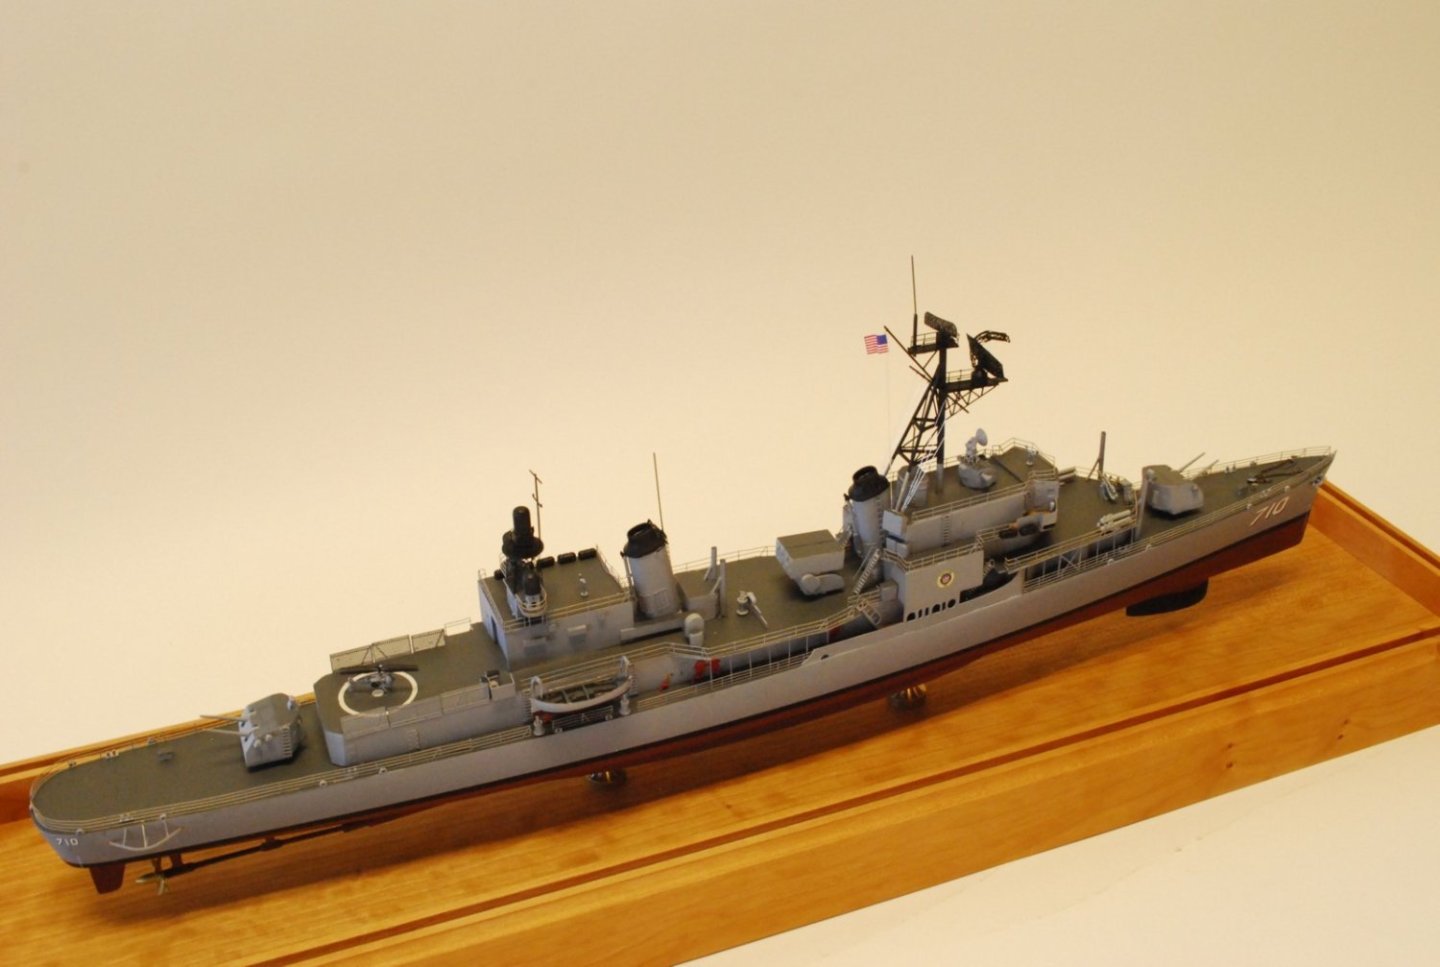
For comparison of the types (SUMNER/GEARING), this is GEARING (DD710) as a FRAM 1. While outwardly similar, you can see the differences in the superstructure, electronics, and armament.
- 19 replies
-
- 2
-
-
- Putnam
- BlueJacket Shipcrafters
- (and 3 more)
-
There are no floater net baskets in the DDG51 kit. BJ sells a 1/192 scale Navy Brass fret that has them, along with lots of other useful items like WT doors, radar screens, ladders, railings, etc.
- 19 replies
-
- 3
-
-
- Putnam
- BlueJacket Shipcrafters
- (and 3 more)
-
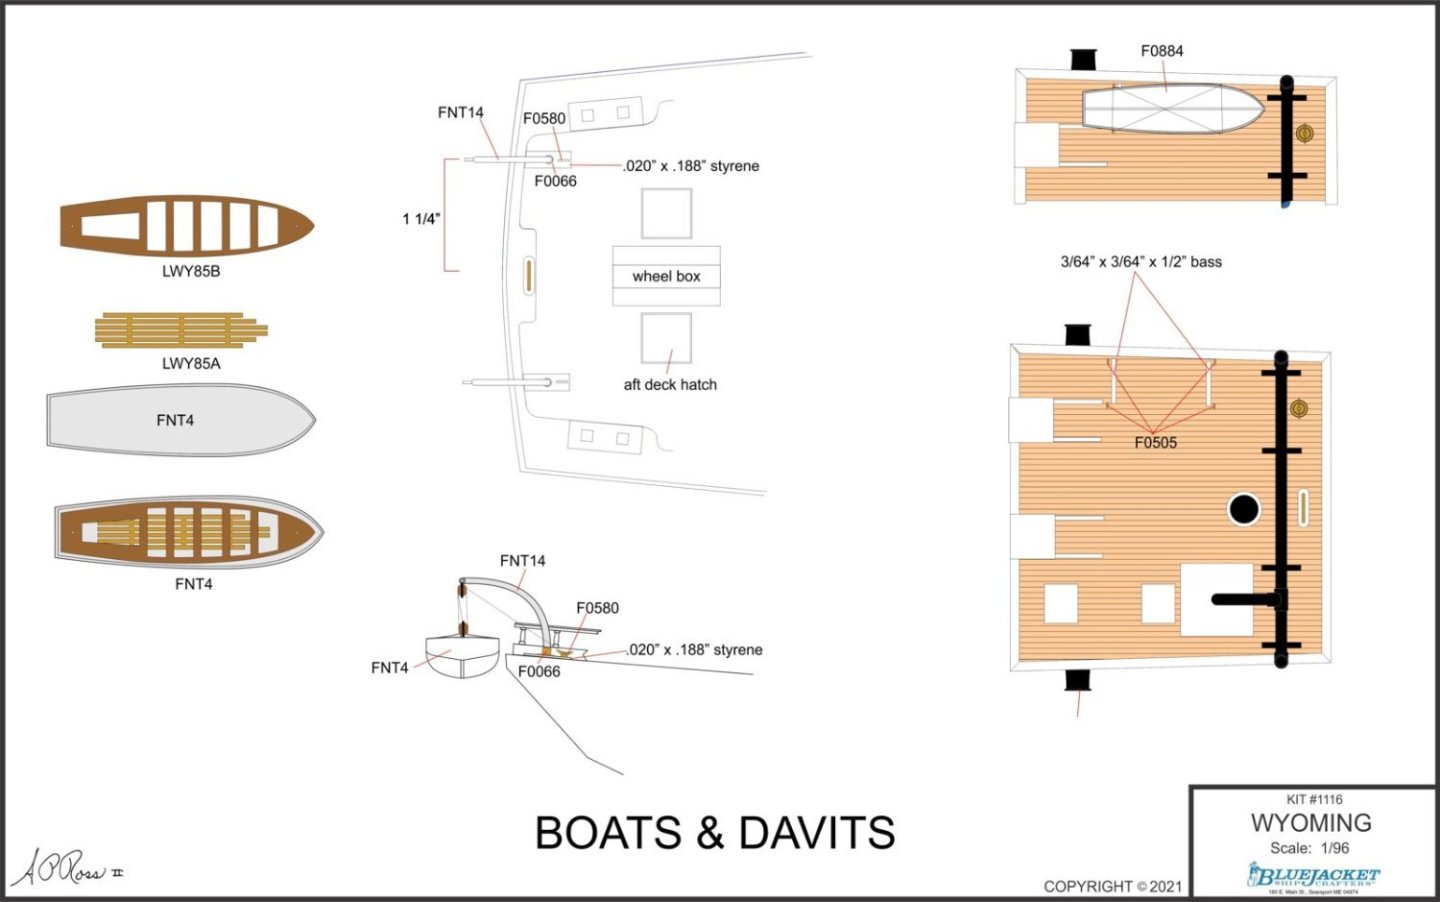
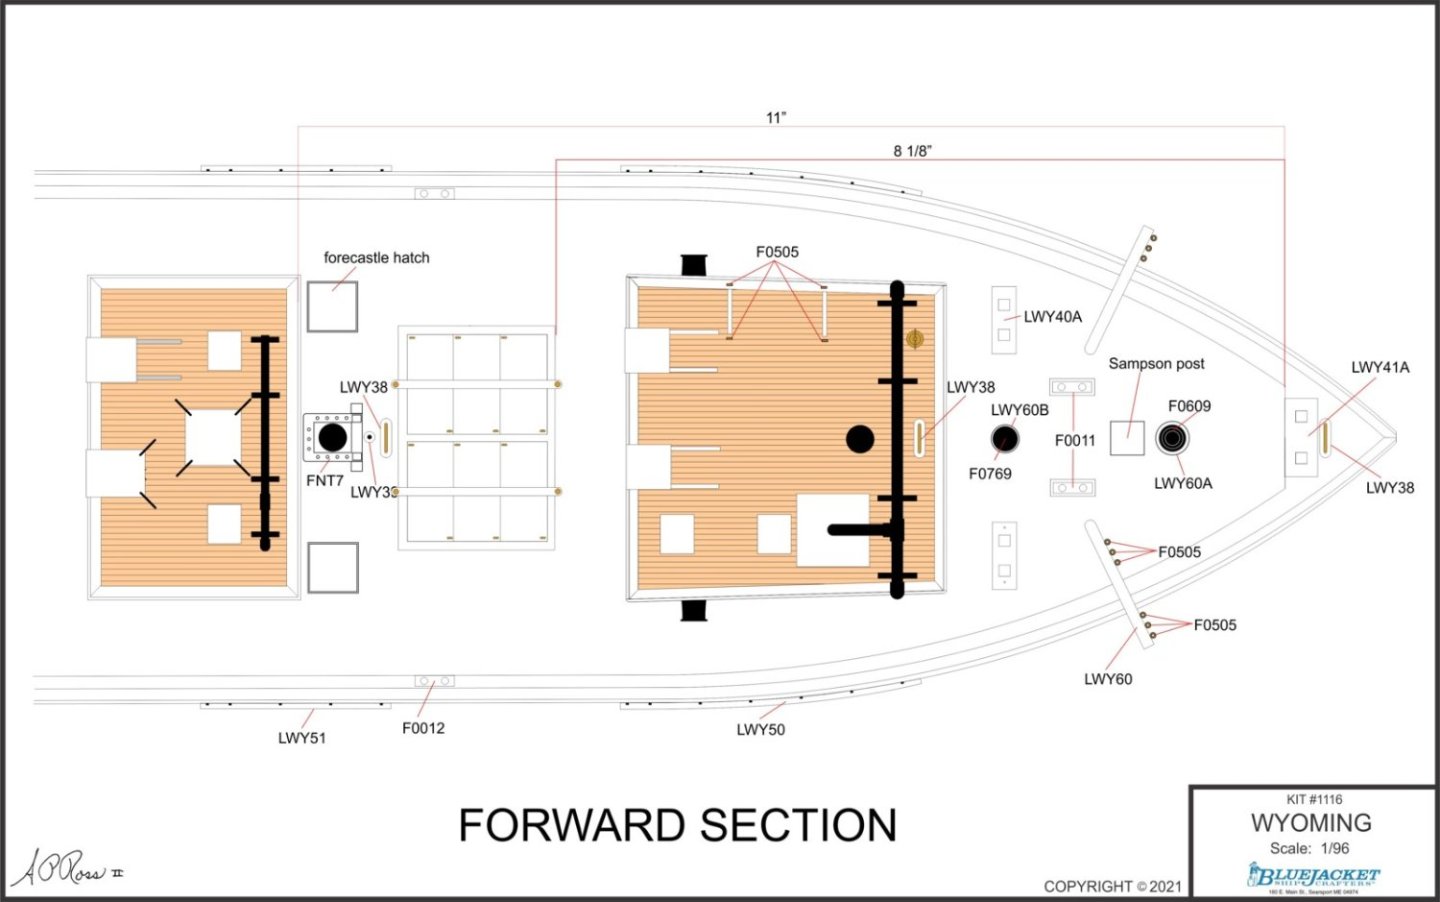
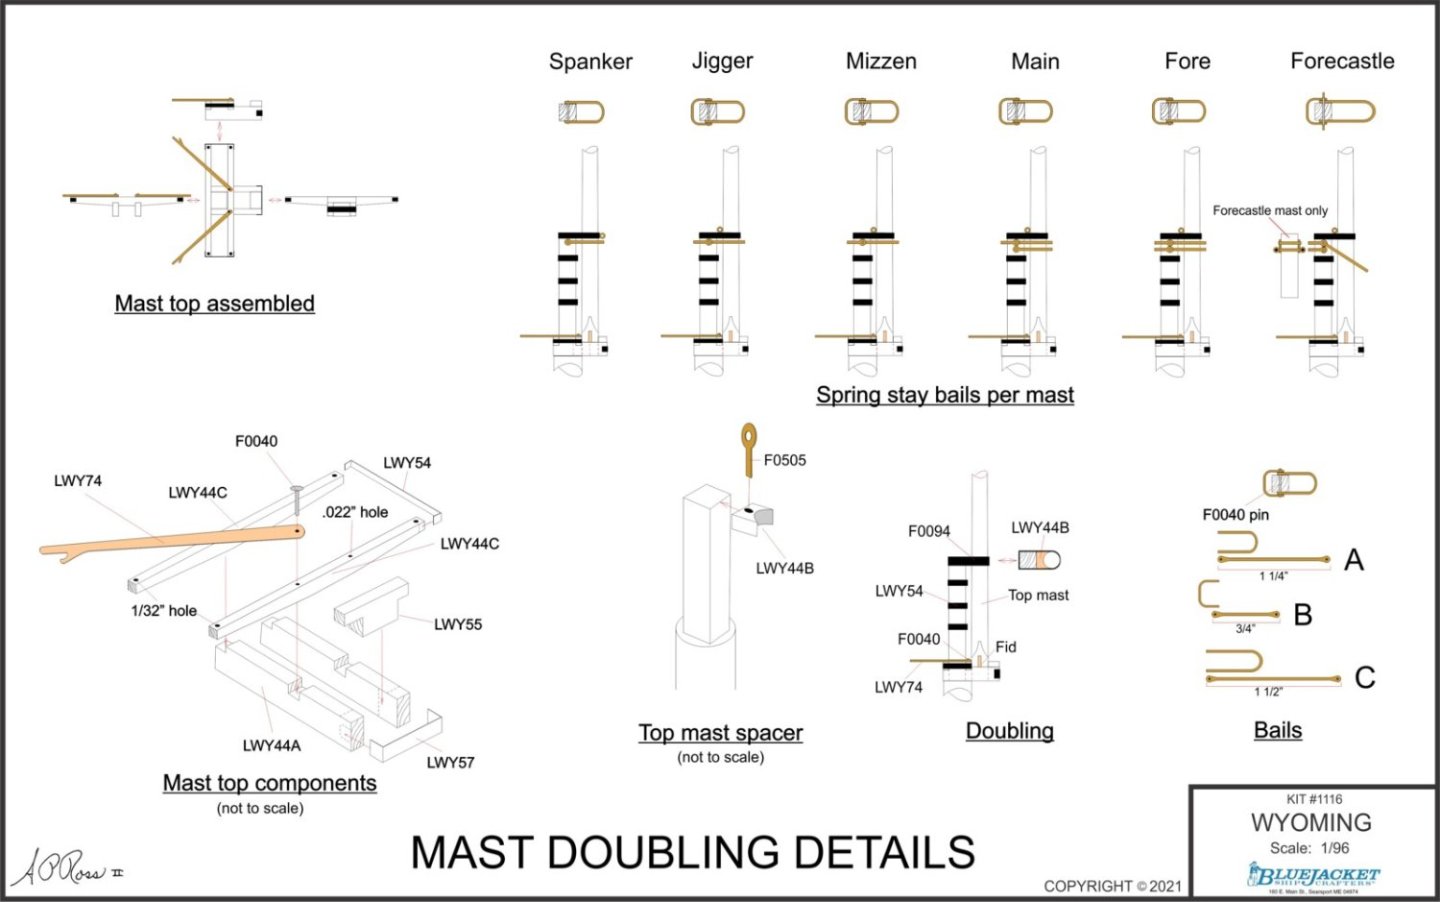
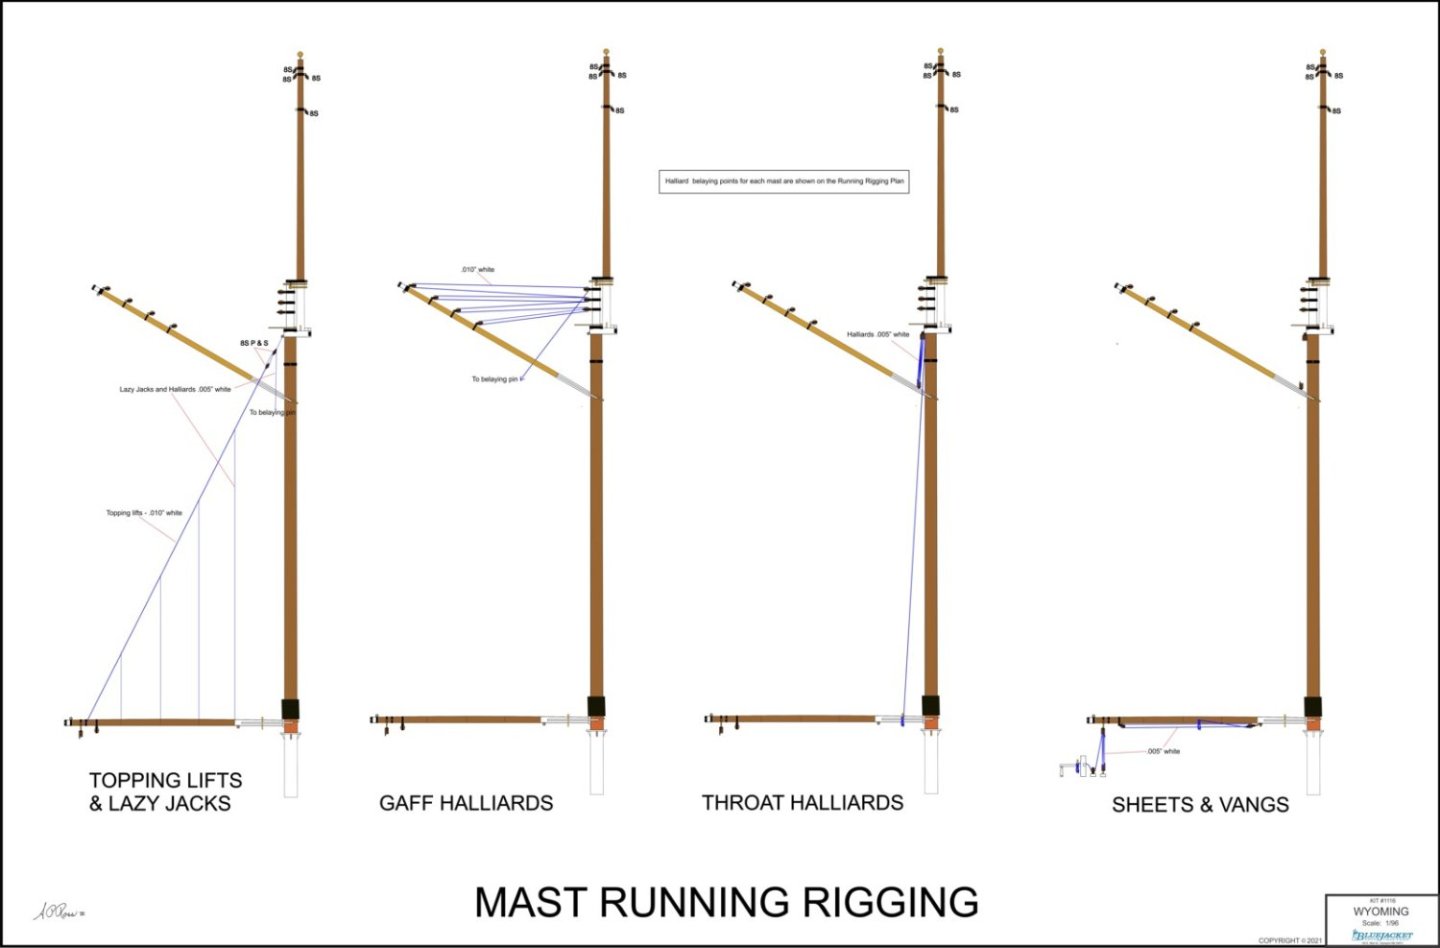
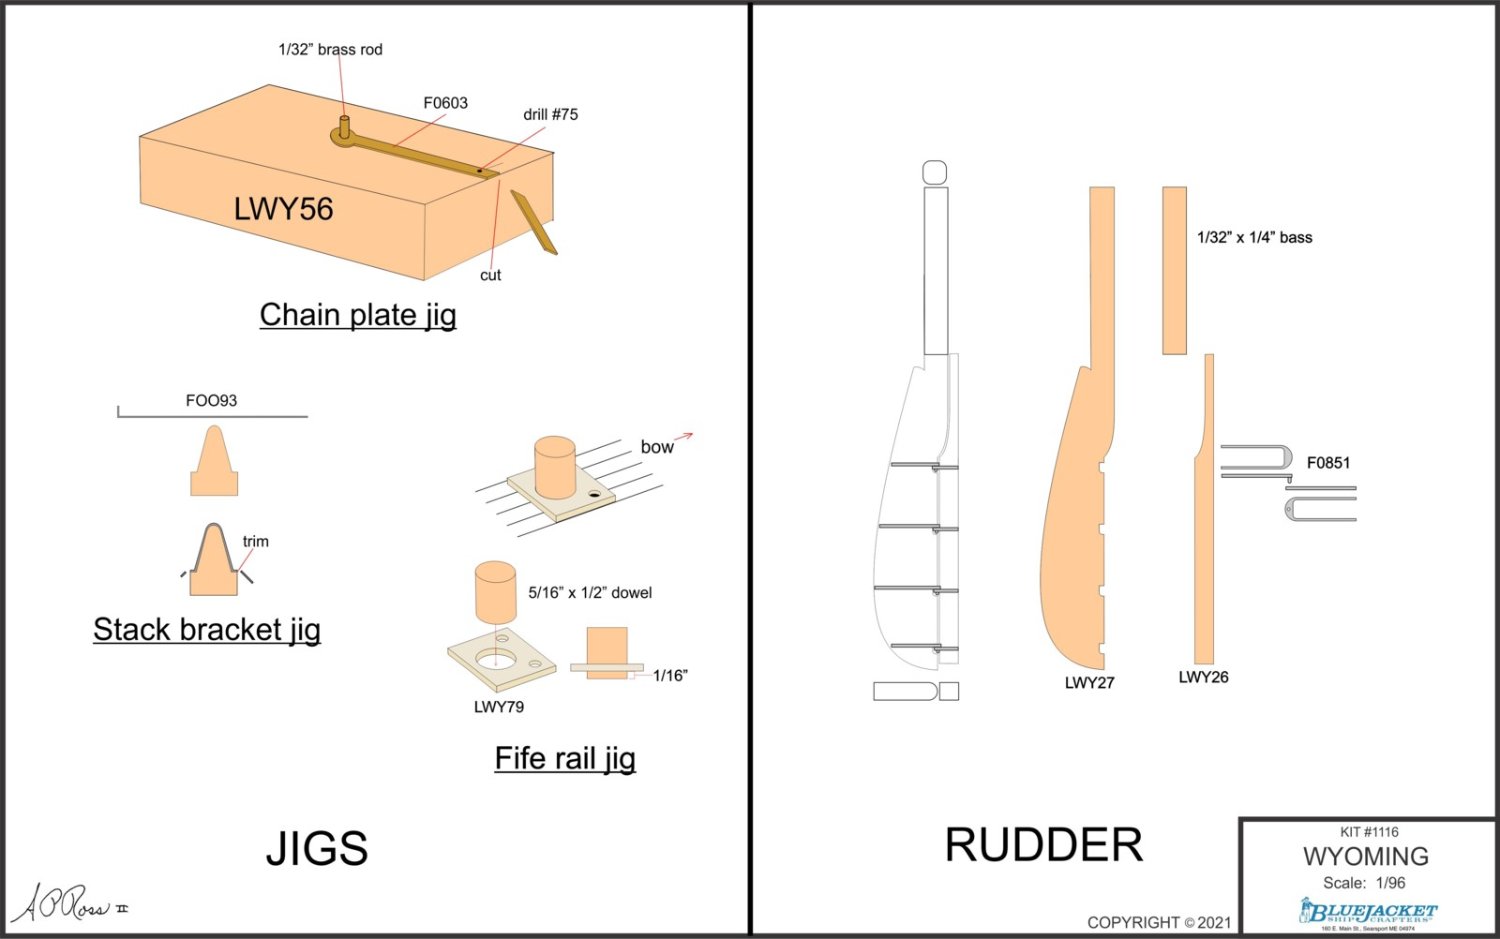
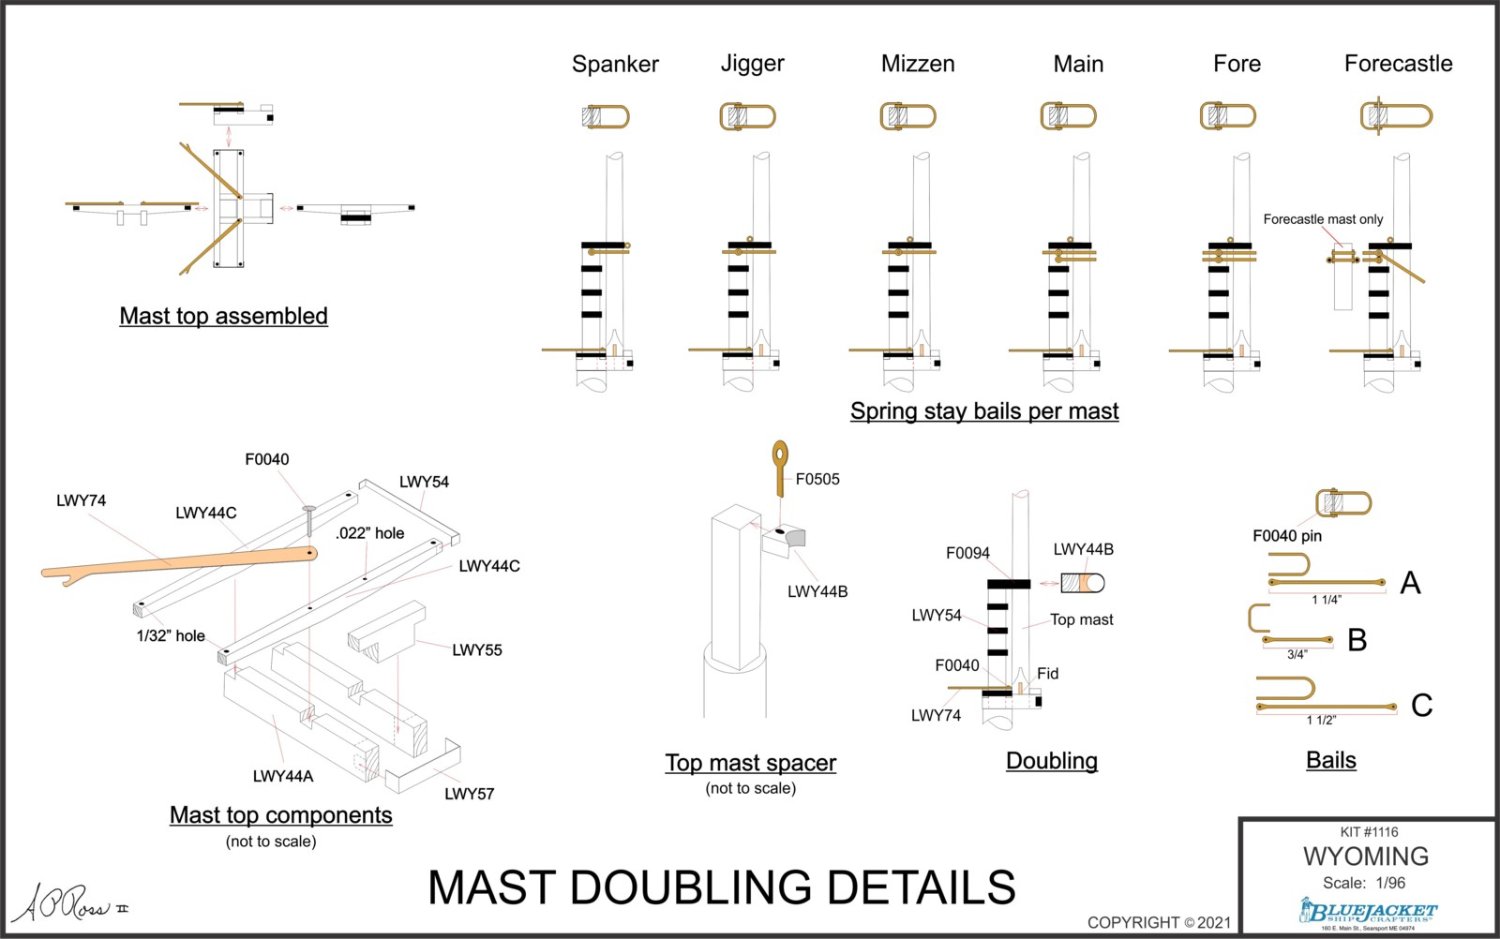
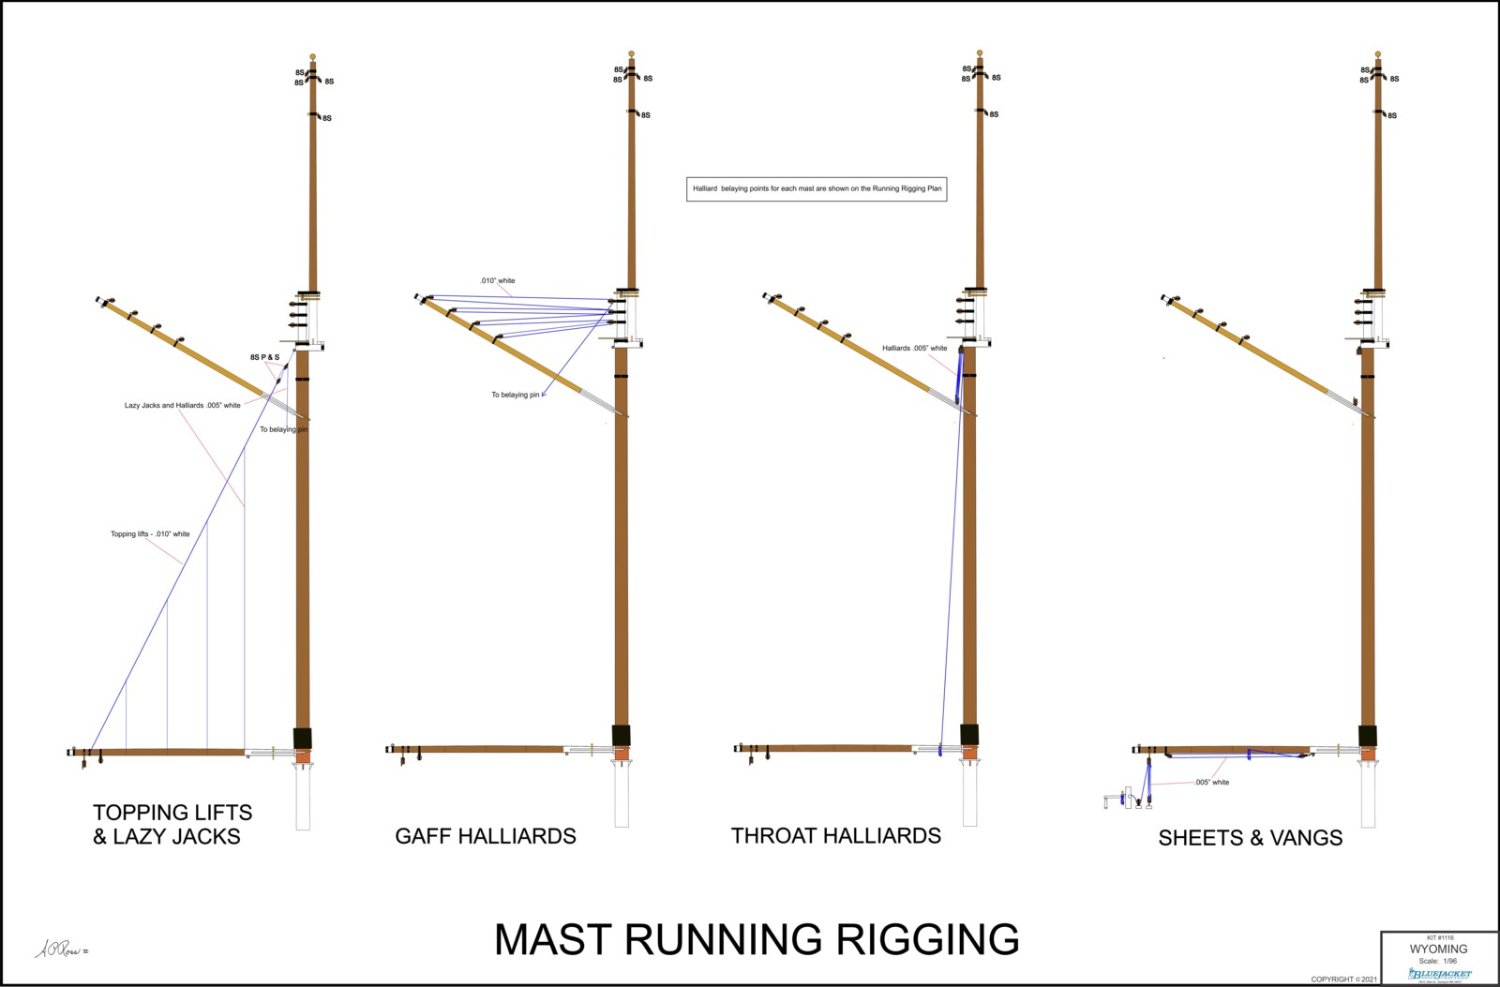
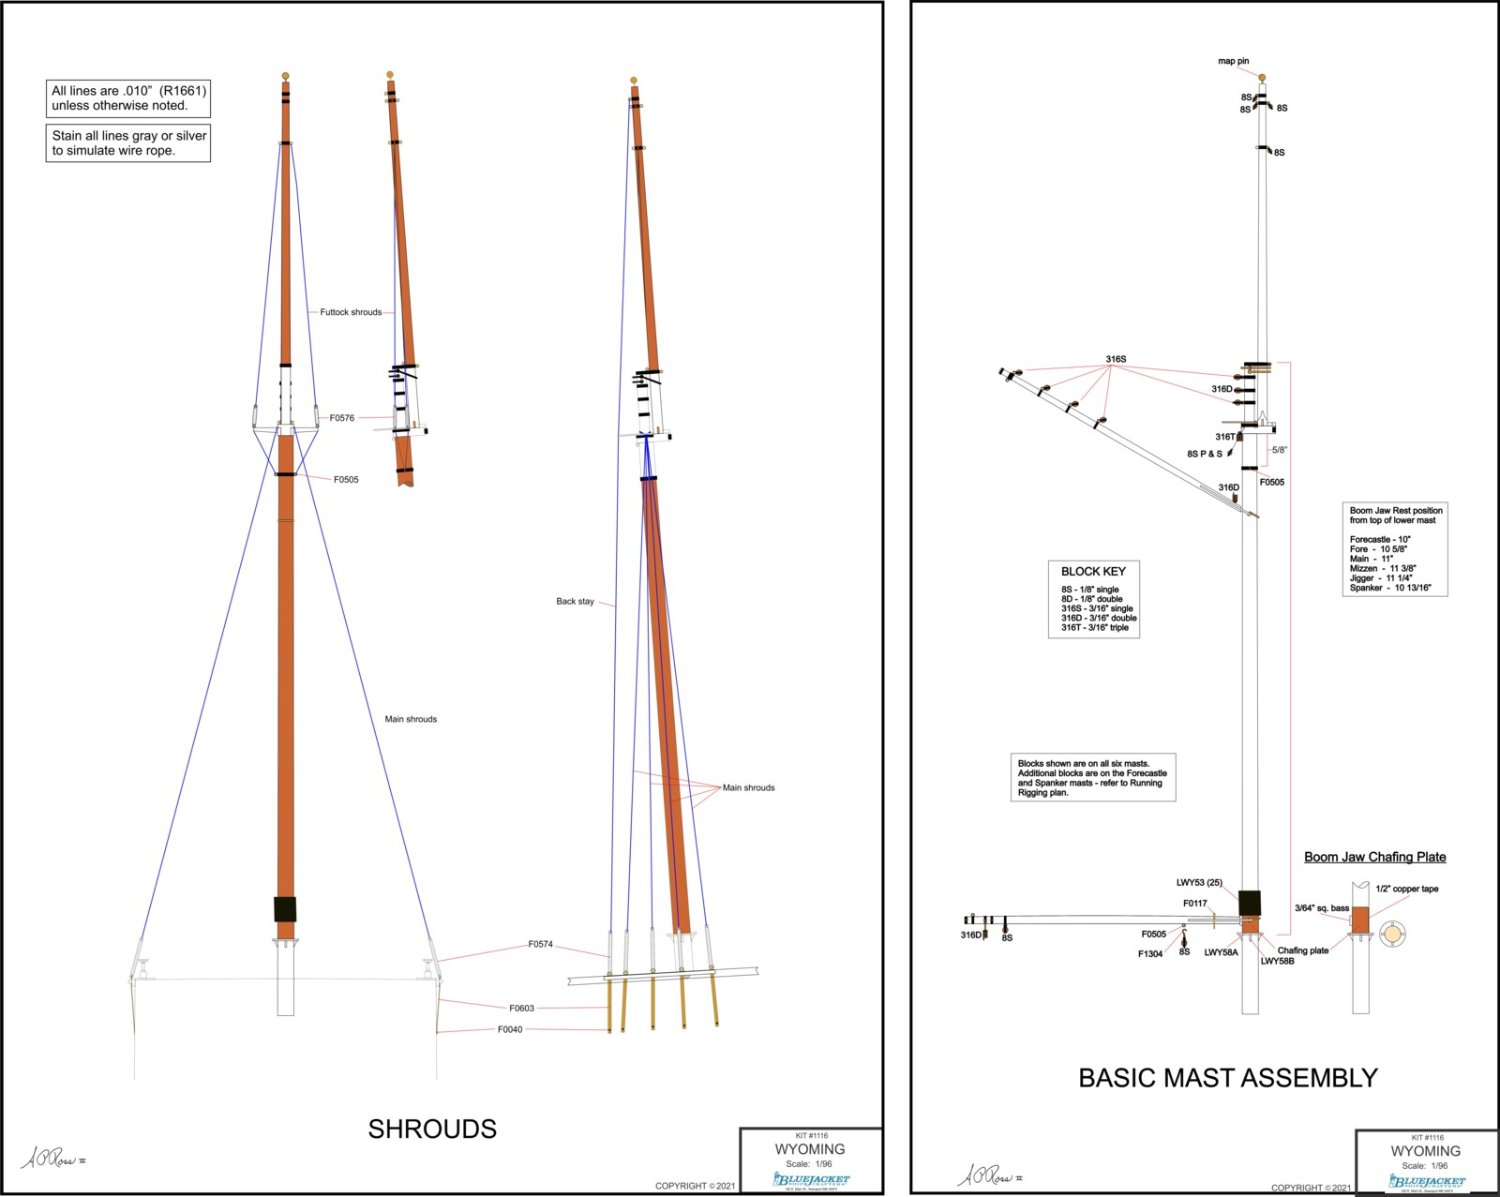
Like the OREGON kit, there are about thirty five 11" x 17" plans for building the WYOMING kit bound with a spiral binder. This is in addition to several full sheet (VERY LARGE) plans. Here are a few of the bound plans, along with one of the full sheet plans (mast).


-
- 5
-
-
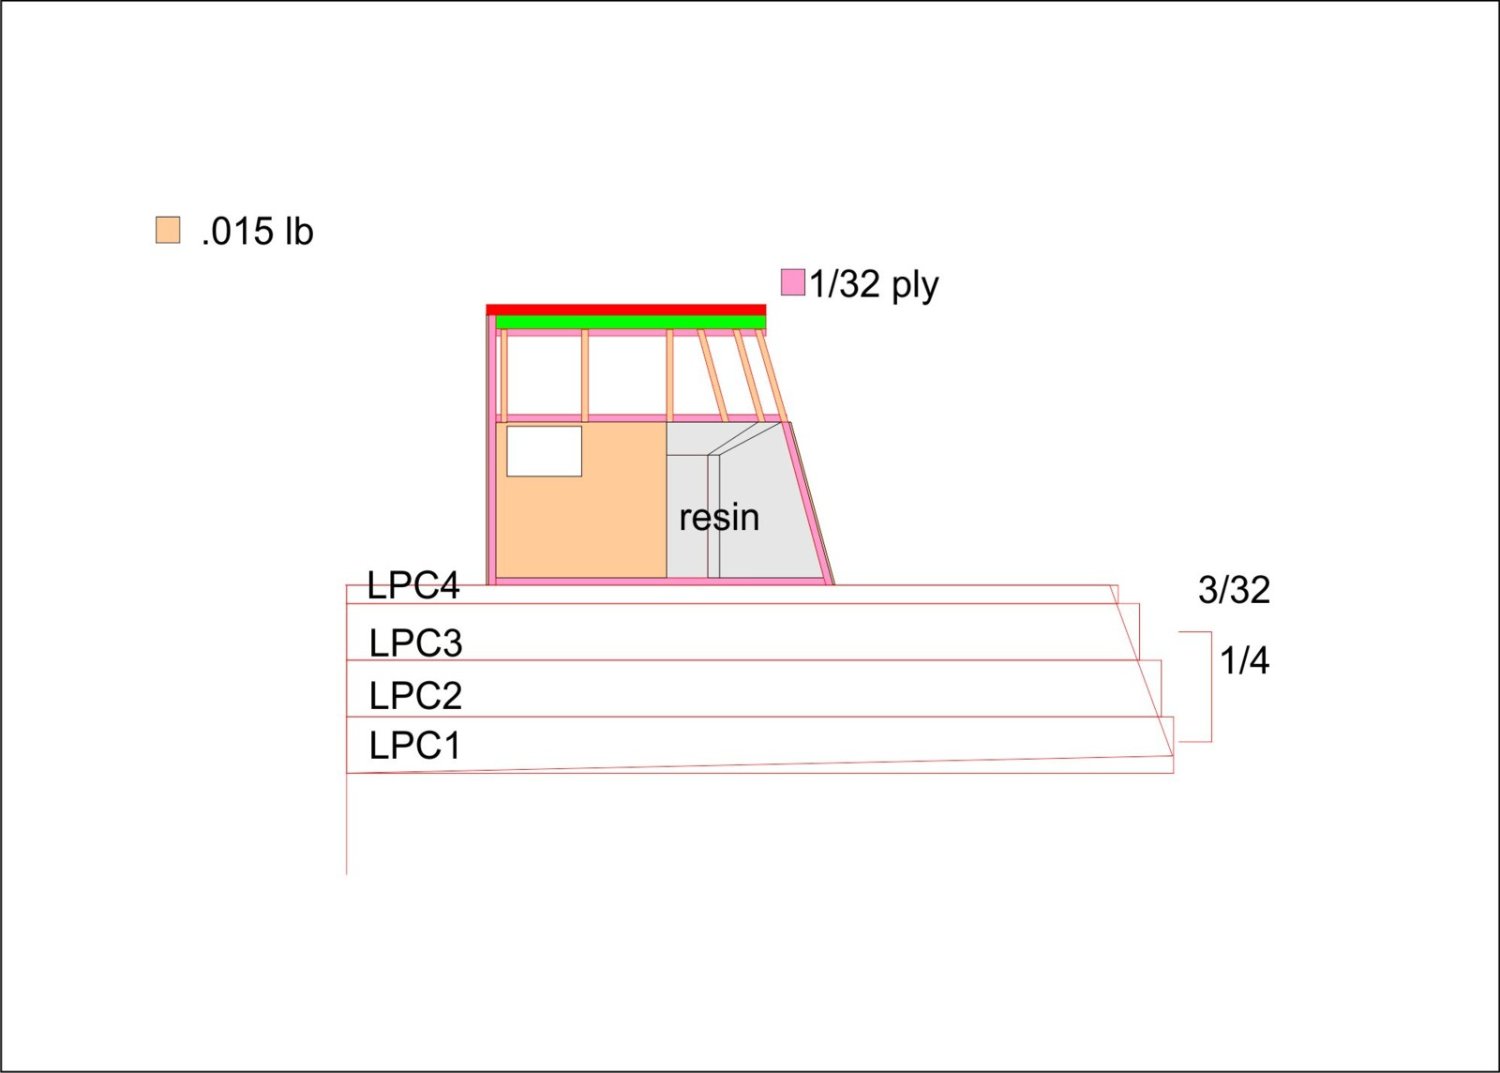
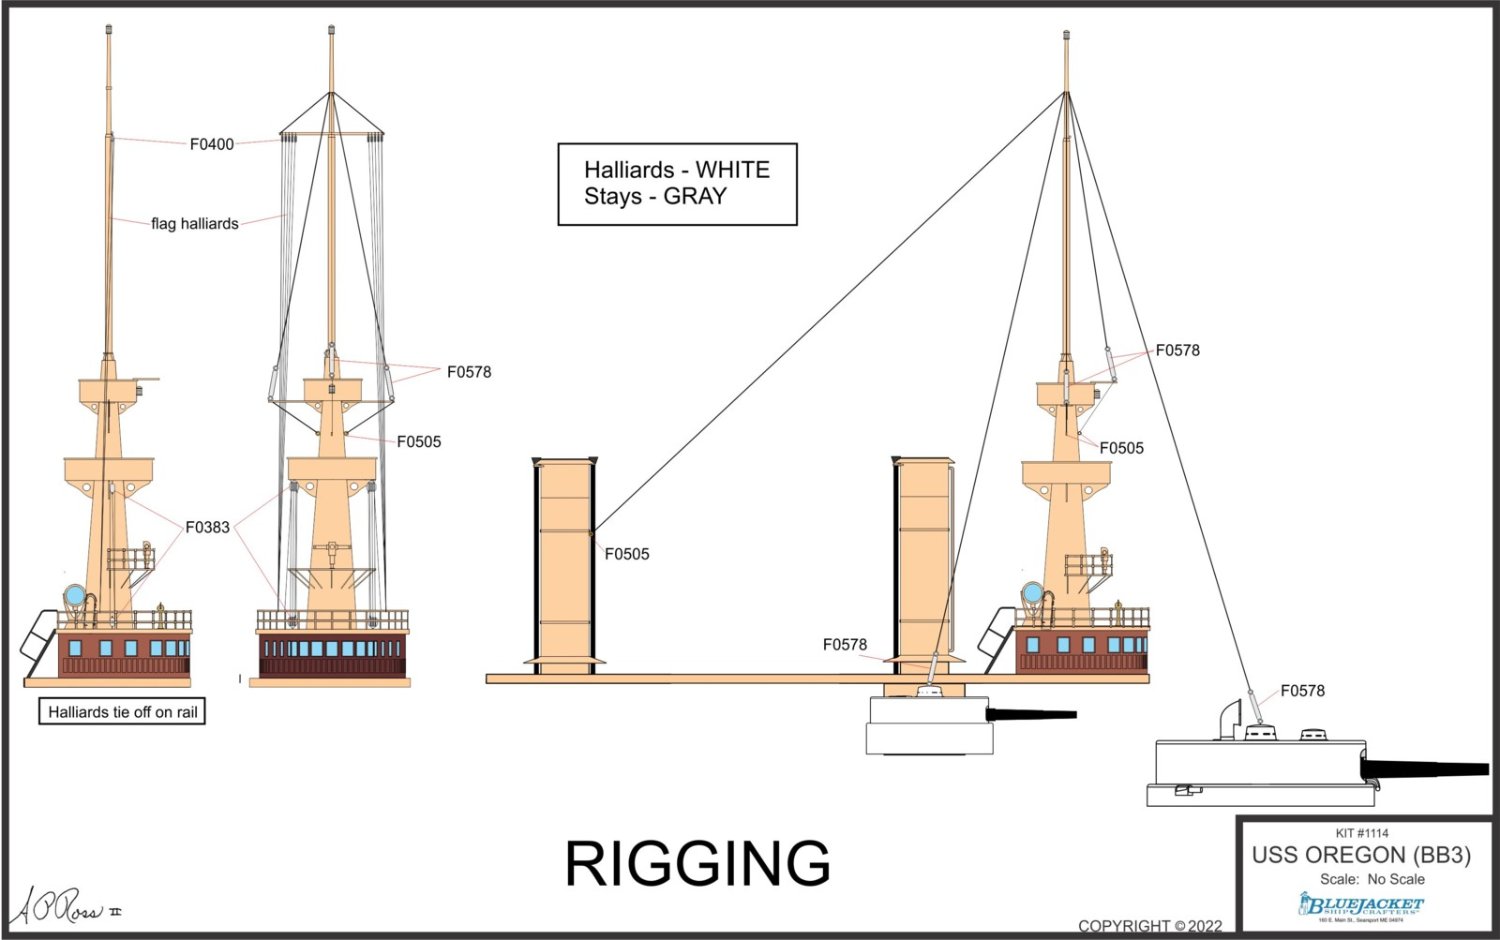
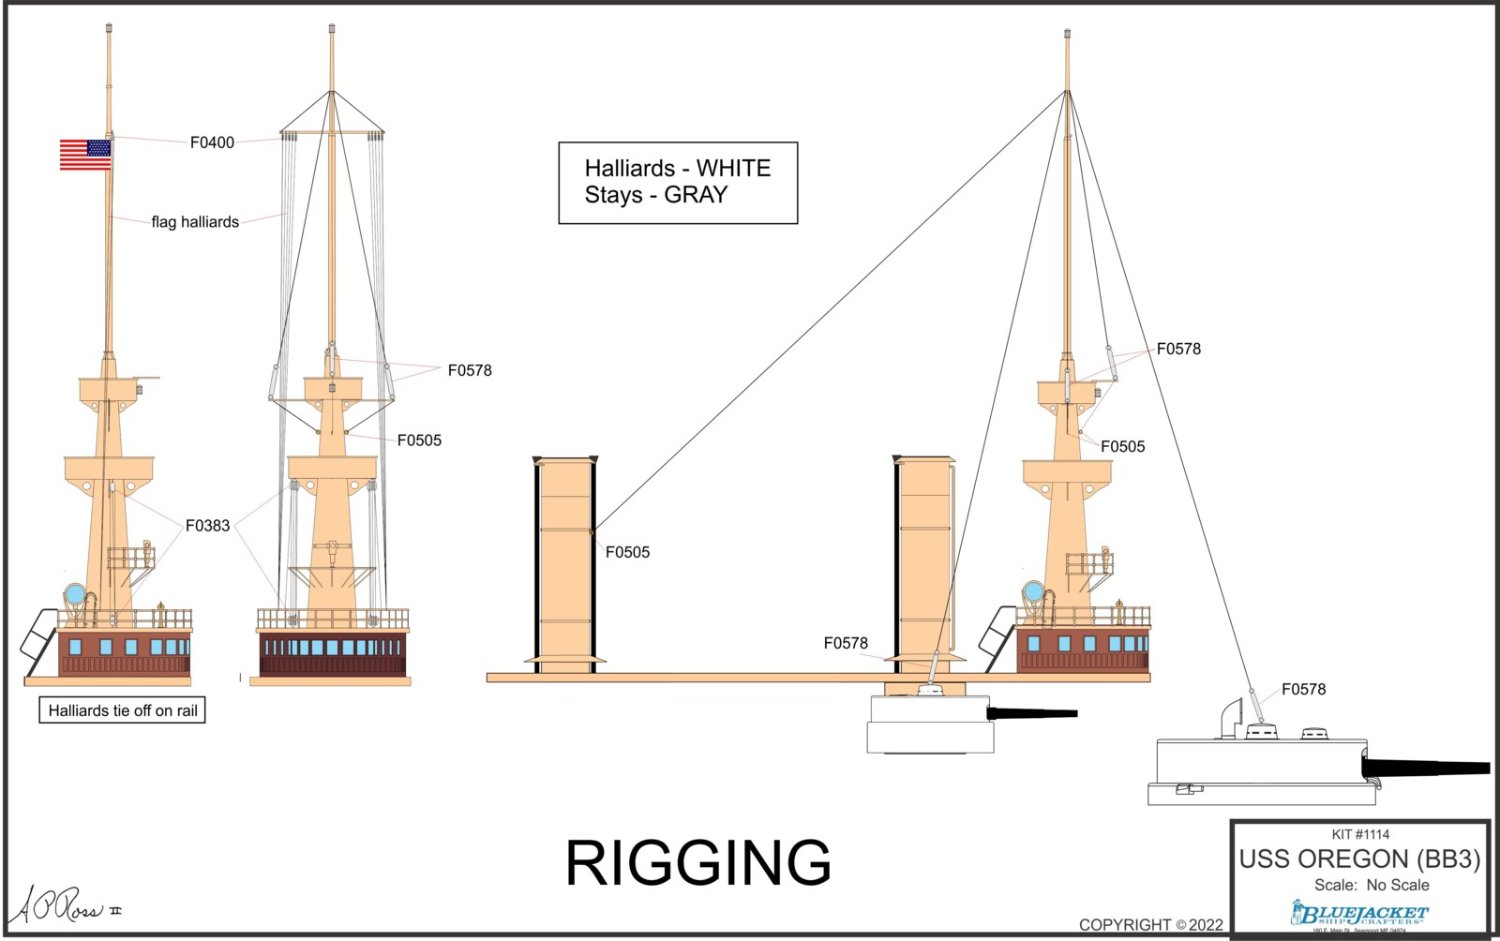
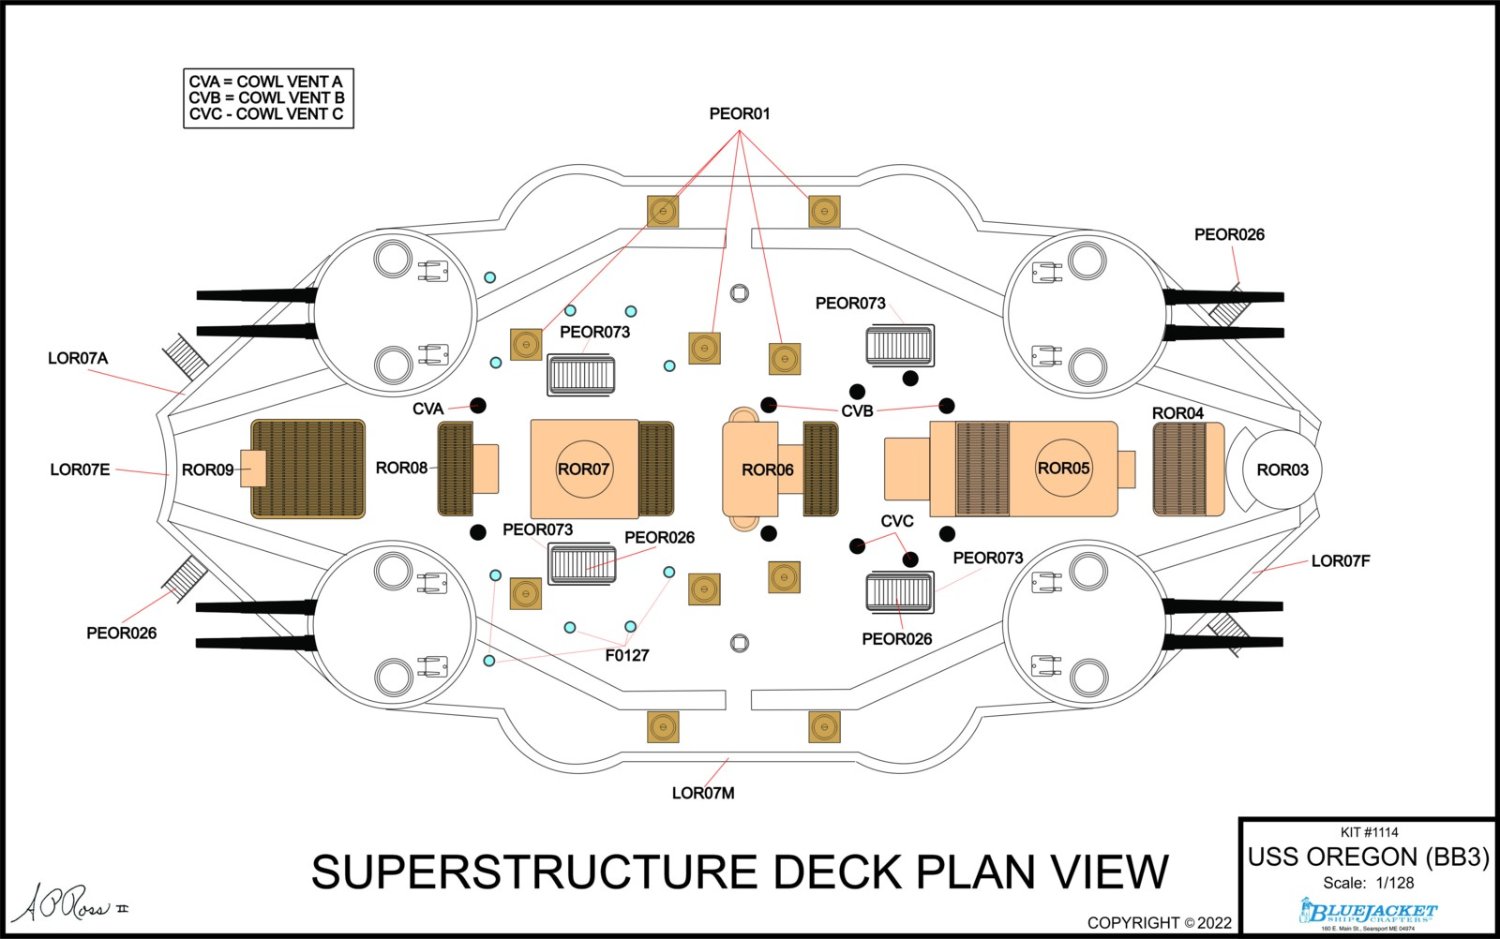
There are about forty 11" x 17" plans for building the OREGON kit bound with a spiral binder. This is in addition to a couple full sheet (about 24" x 36") plans. Here are a few of the bound plans.
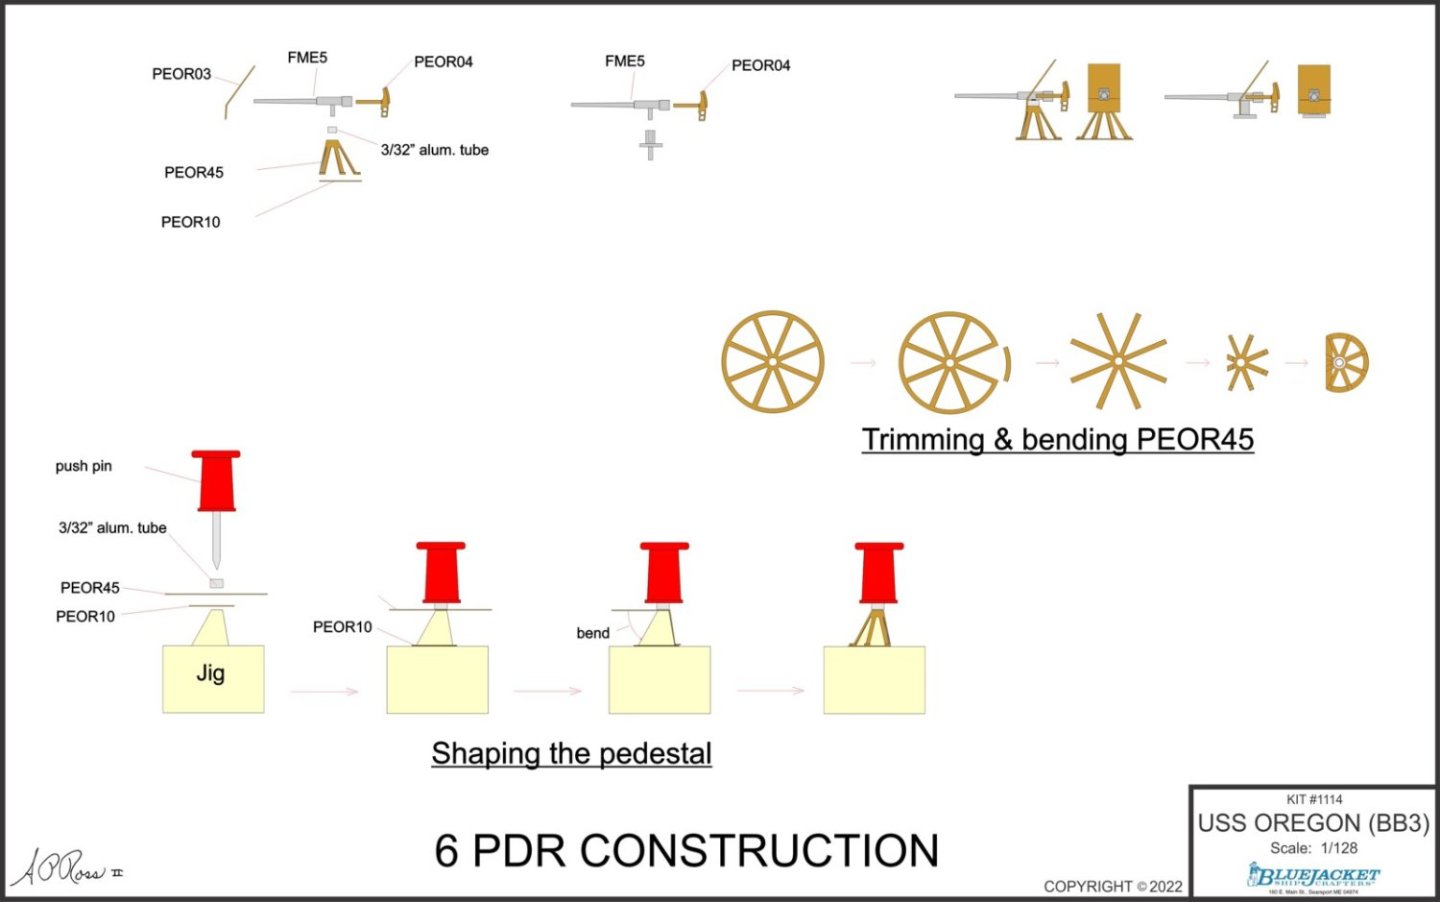
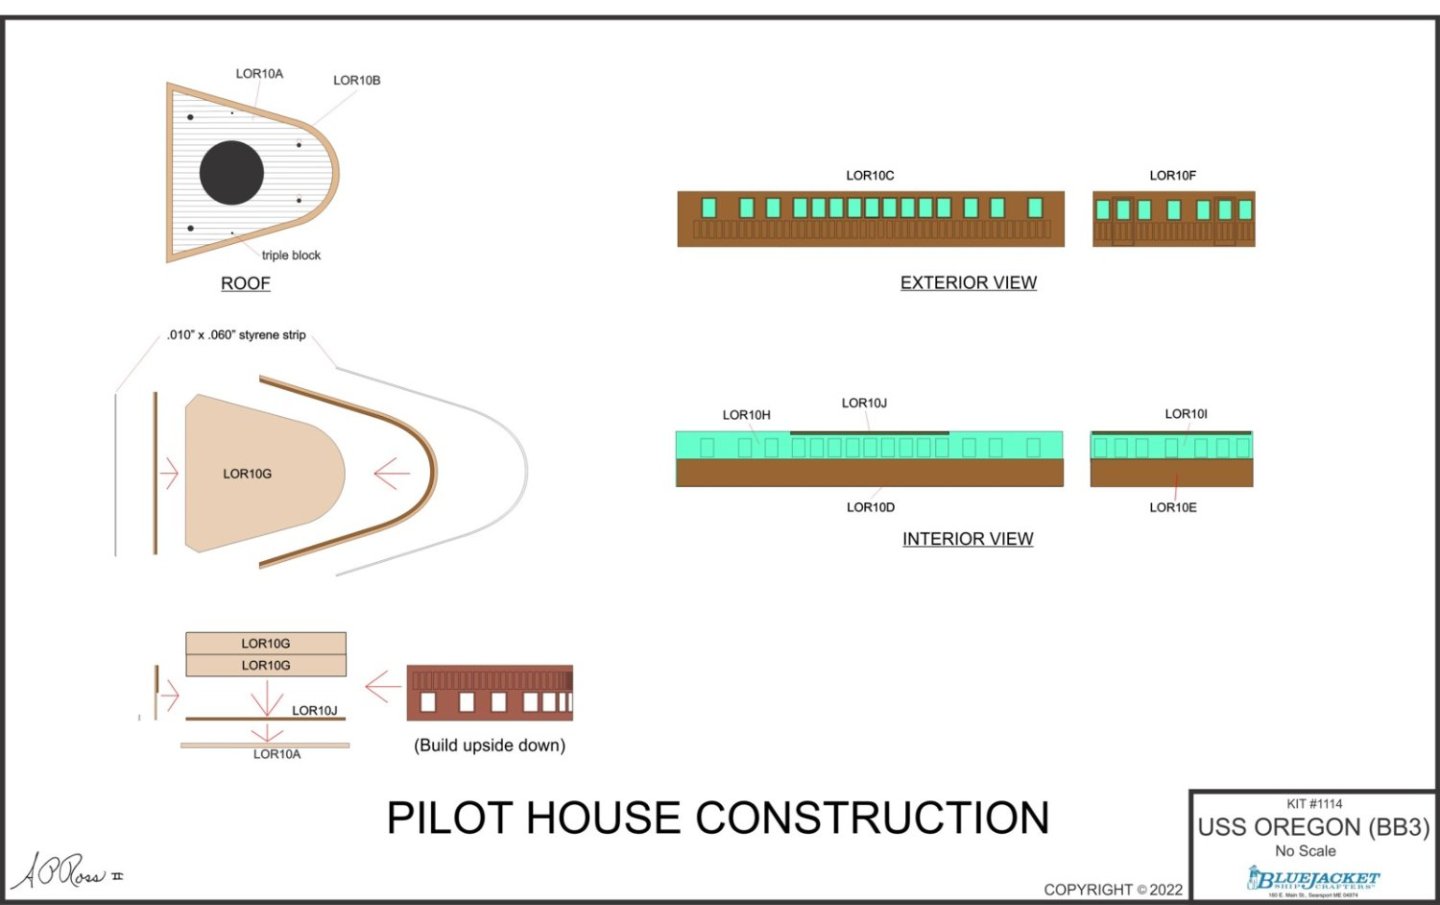
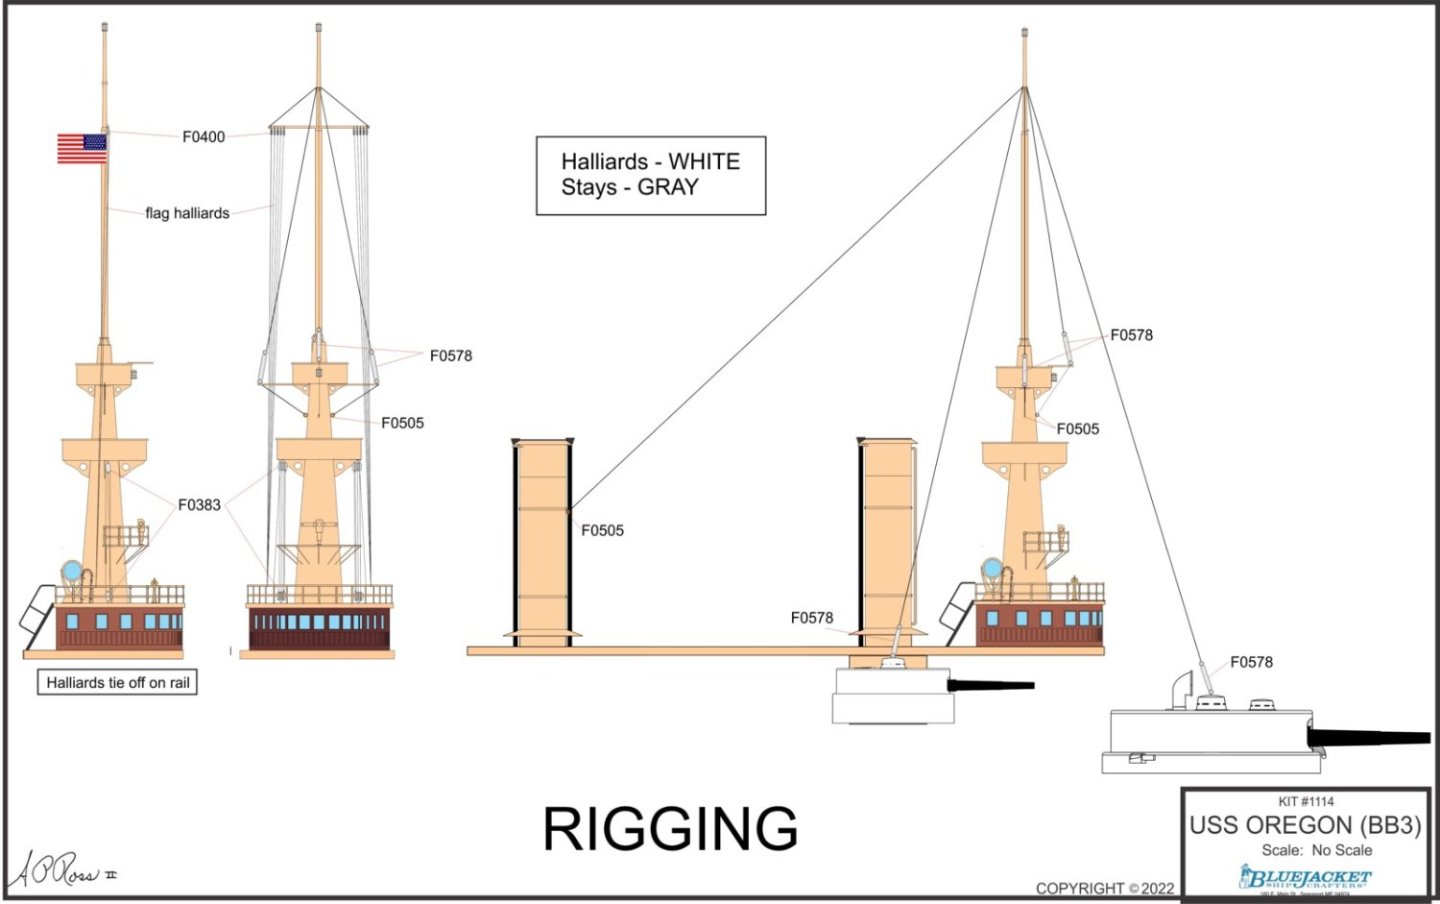

-
- 2
-
-
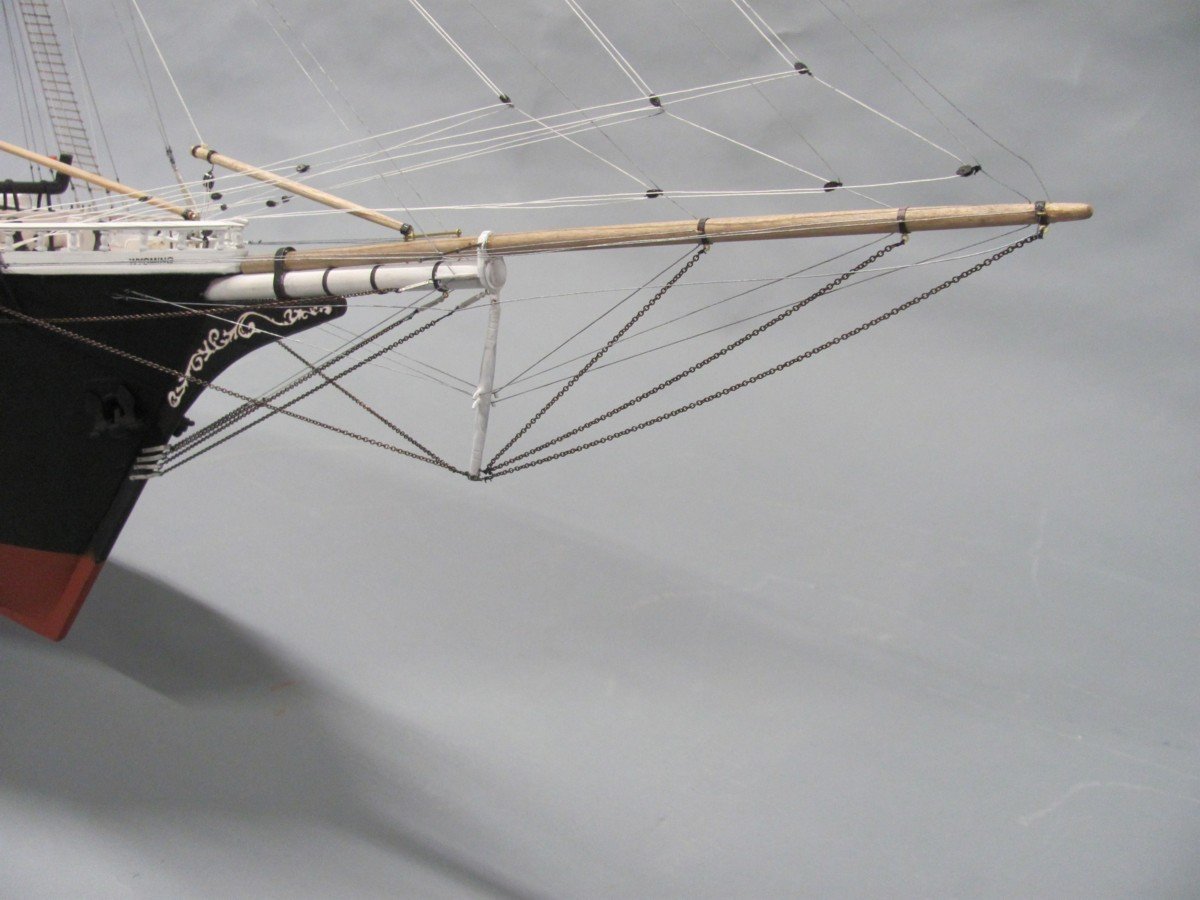
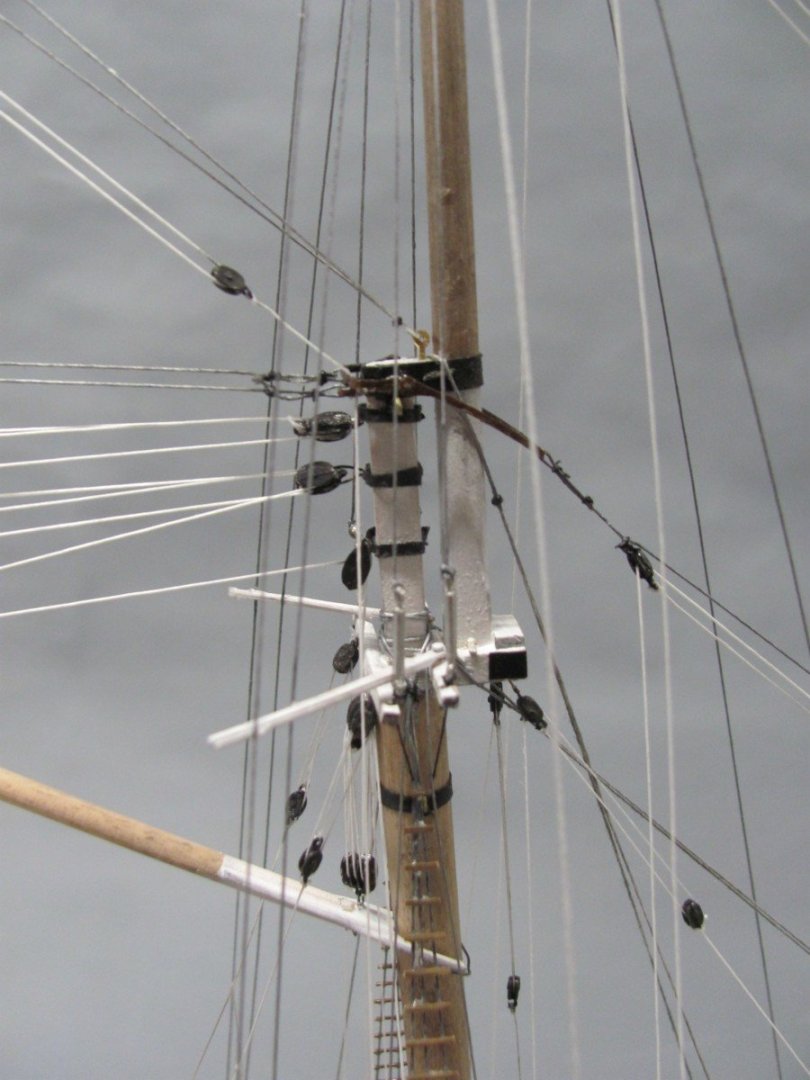
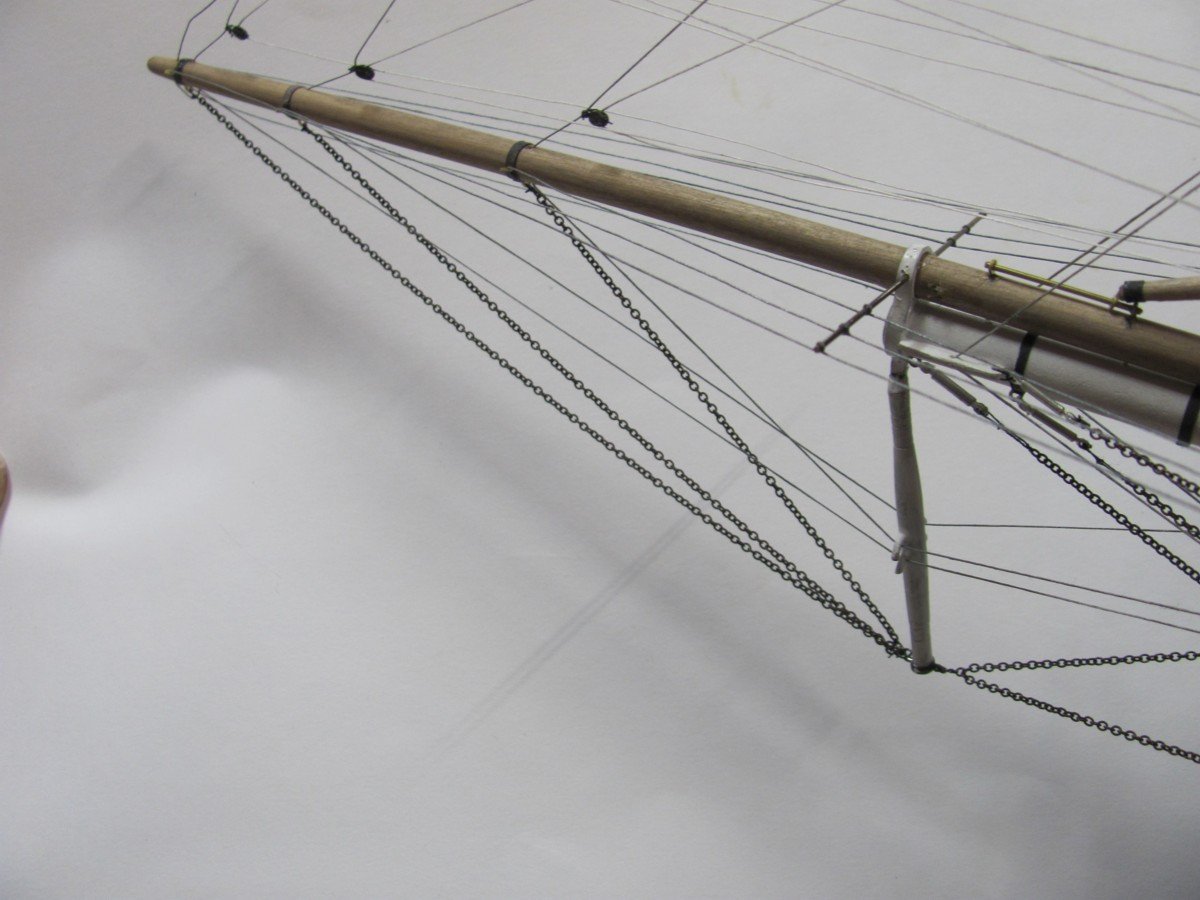
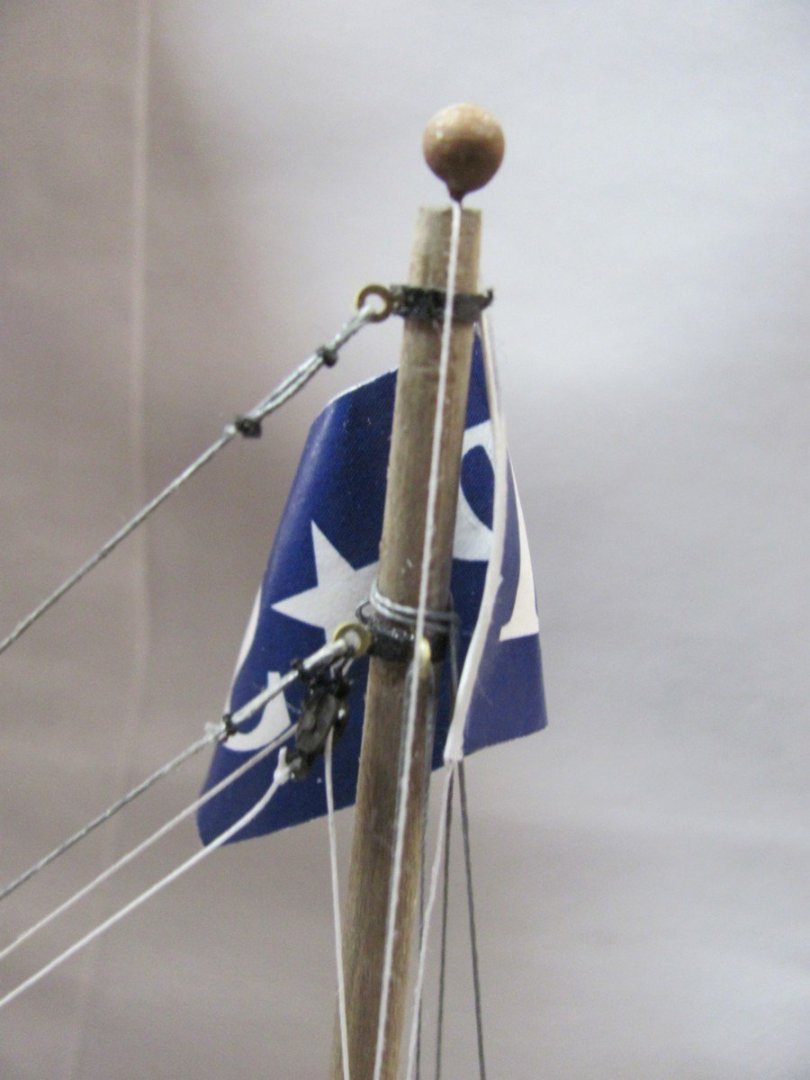
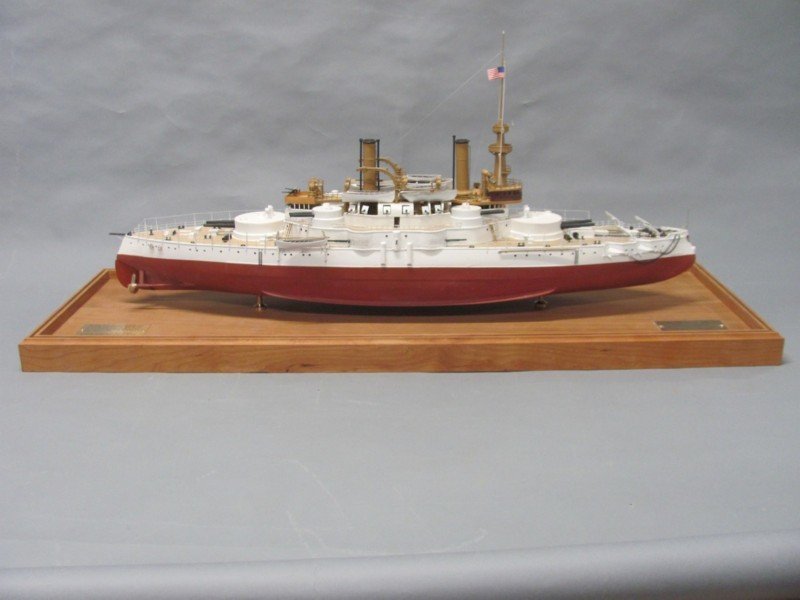
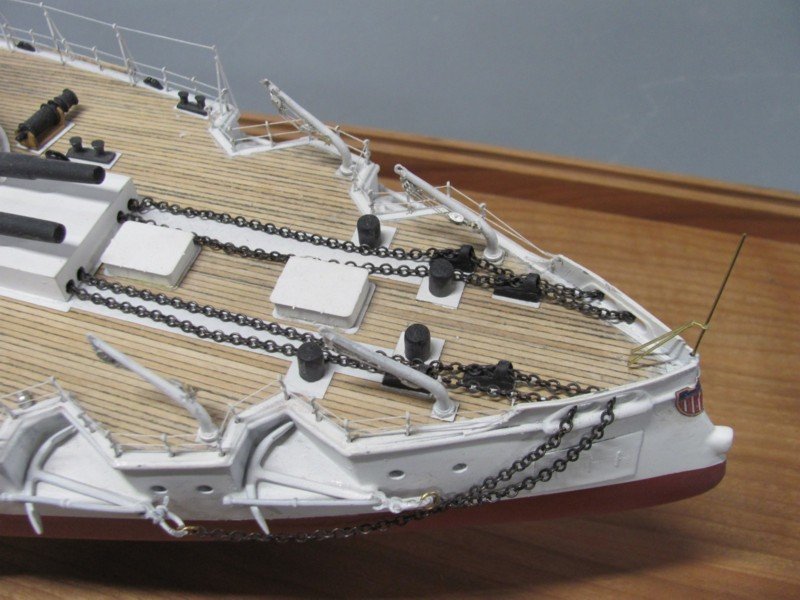
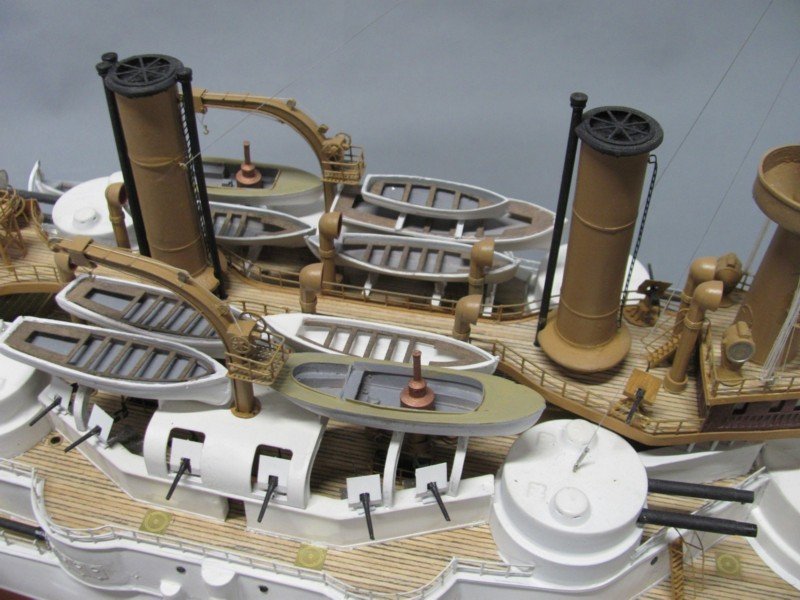
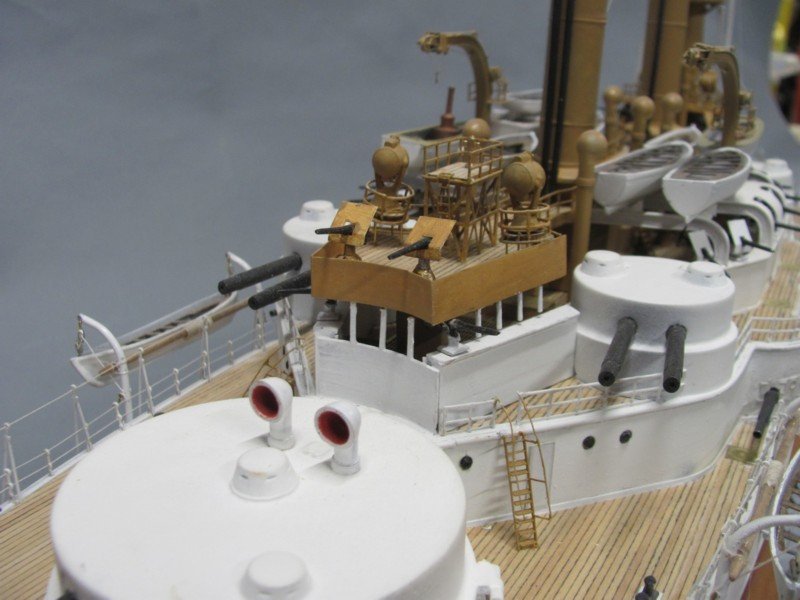
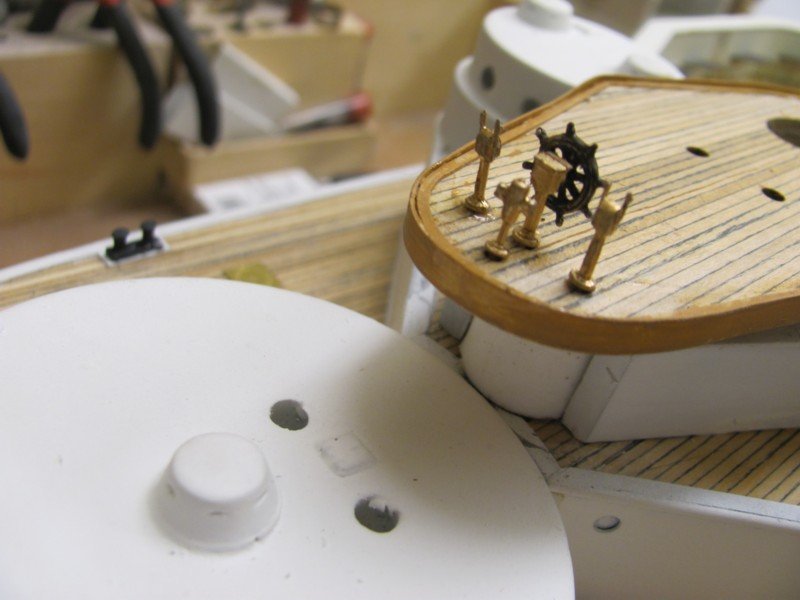
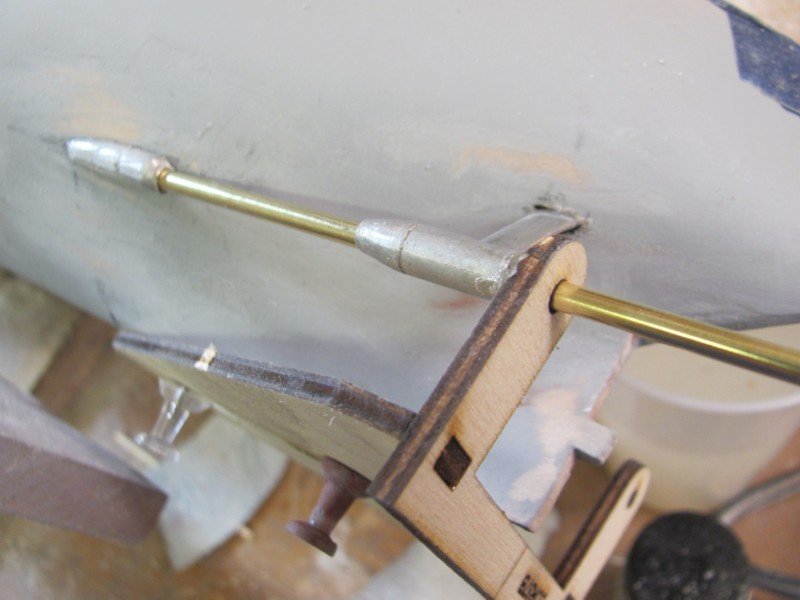
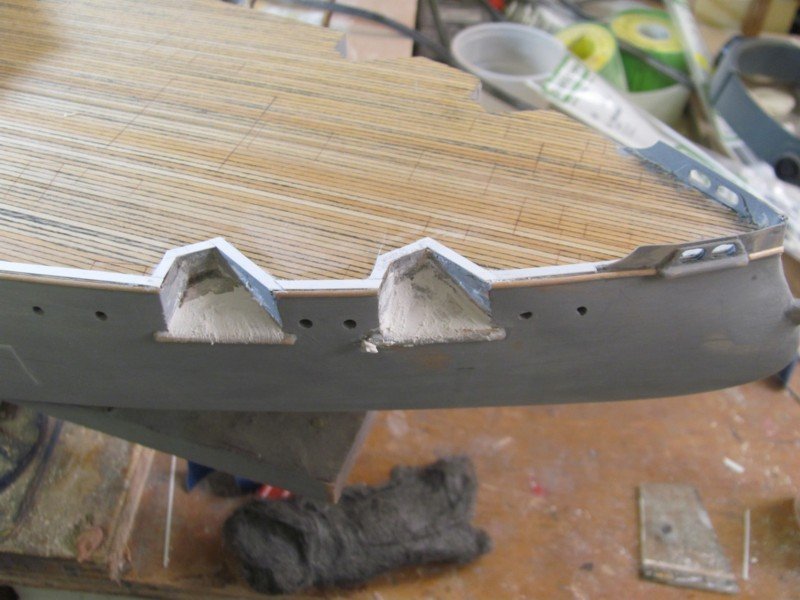
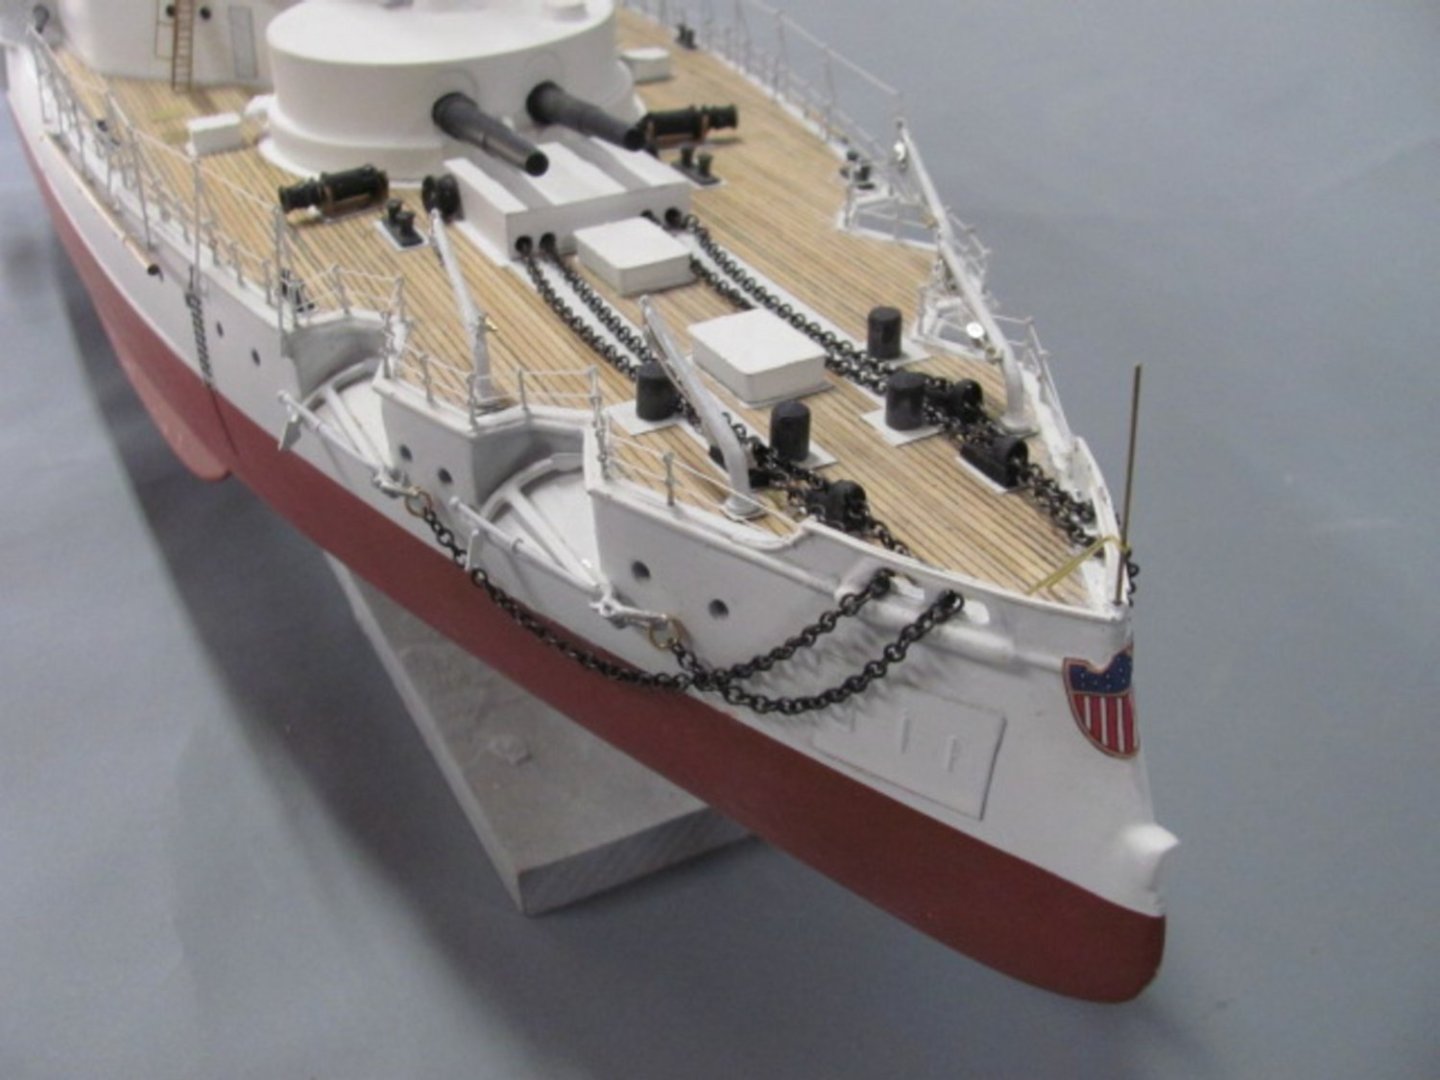
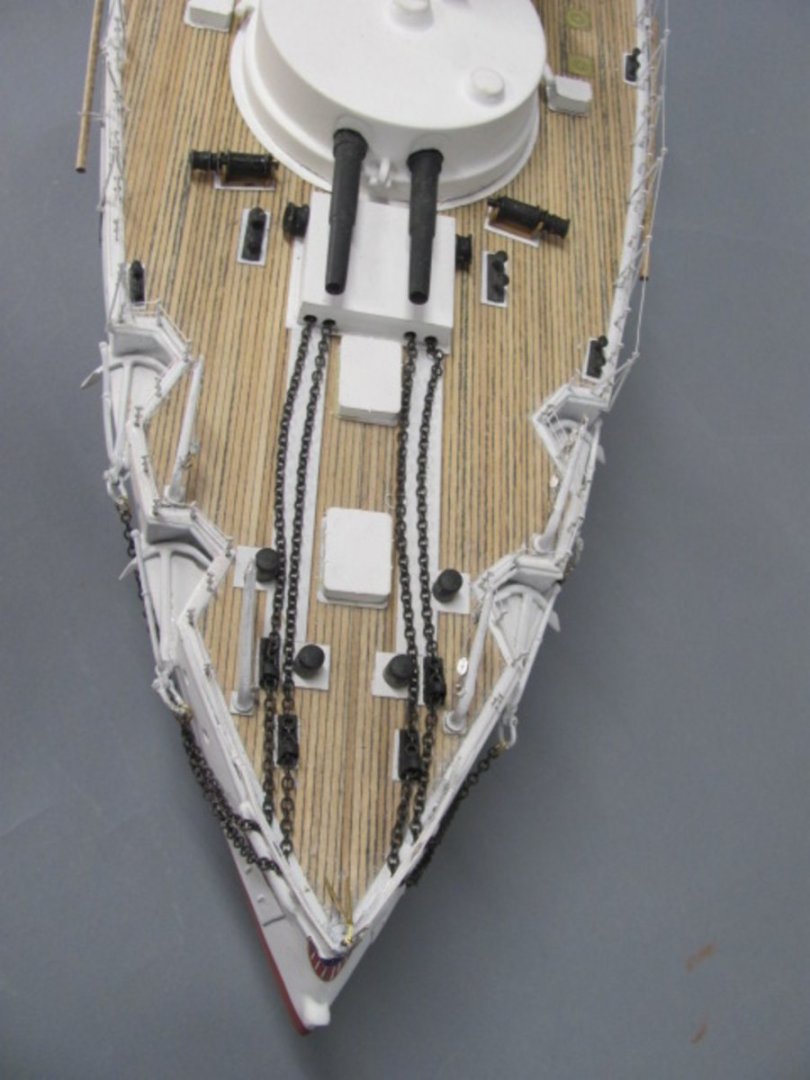
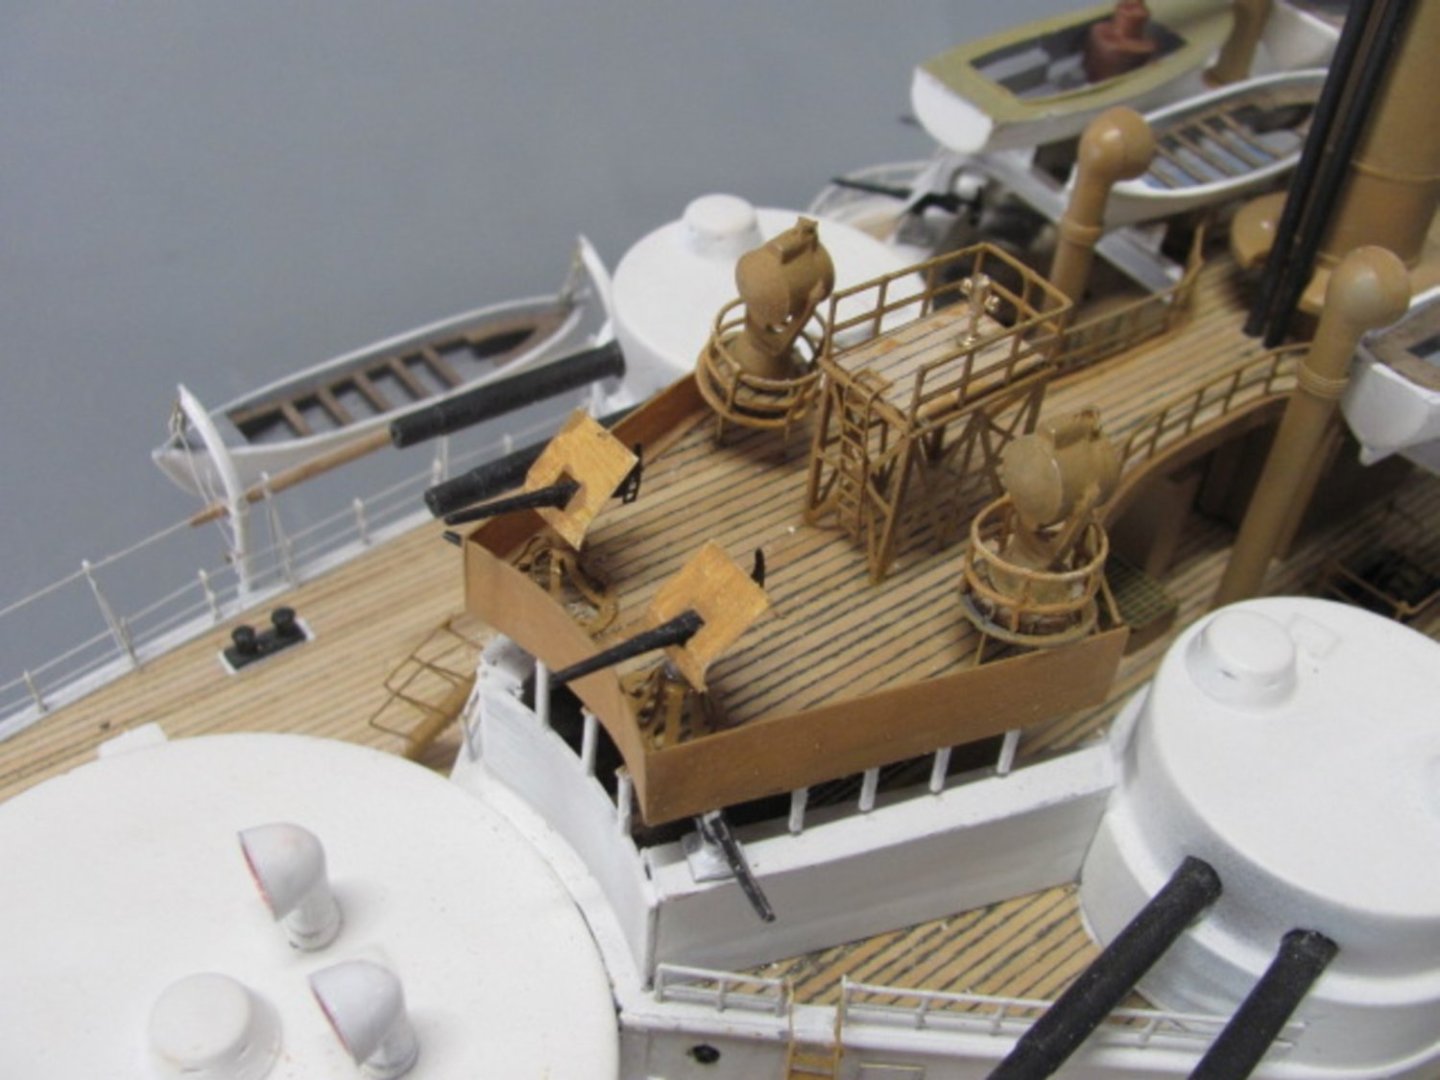
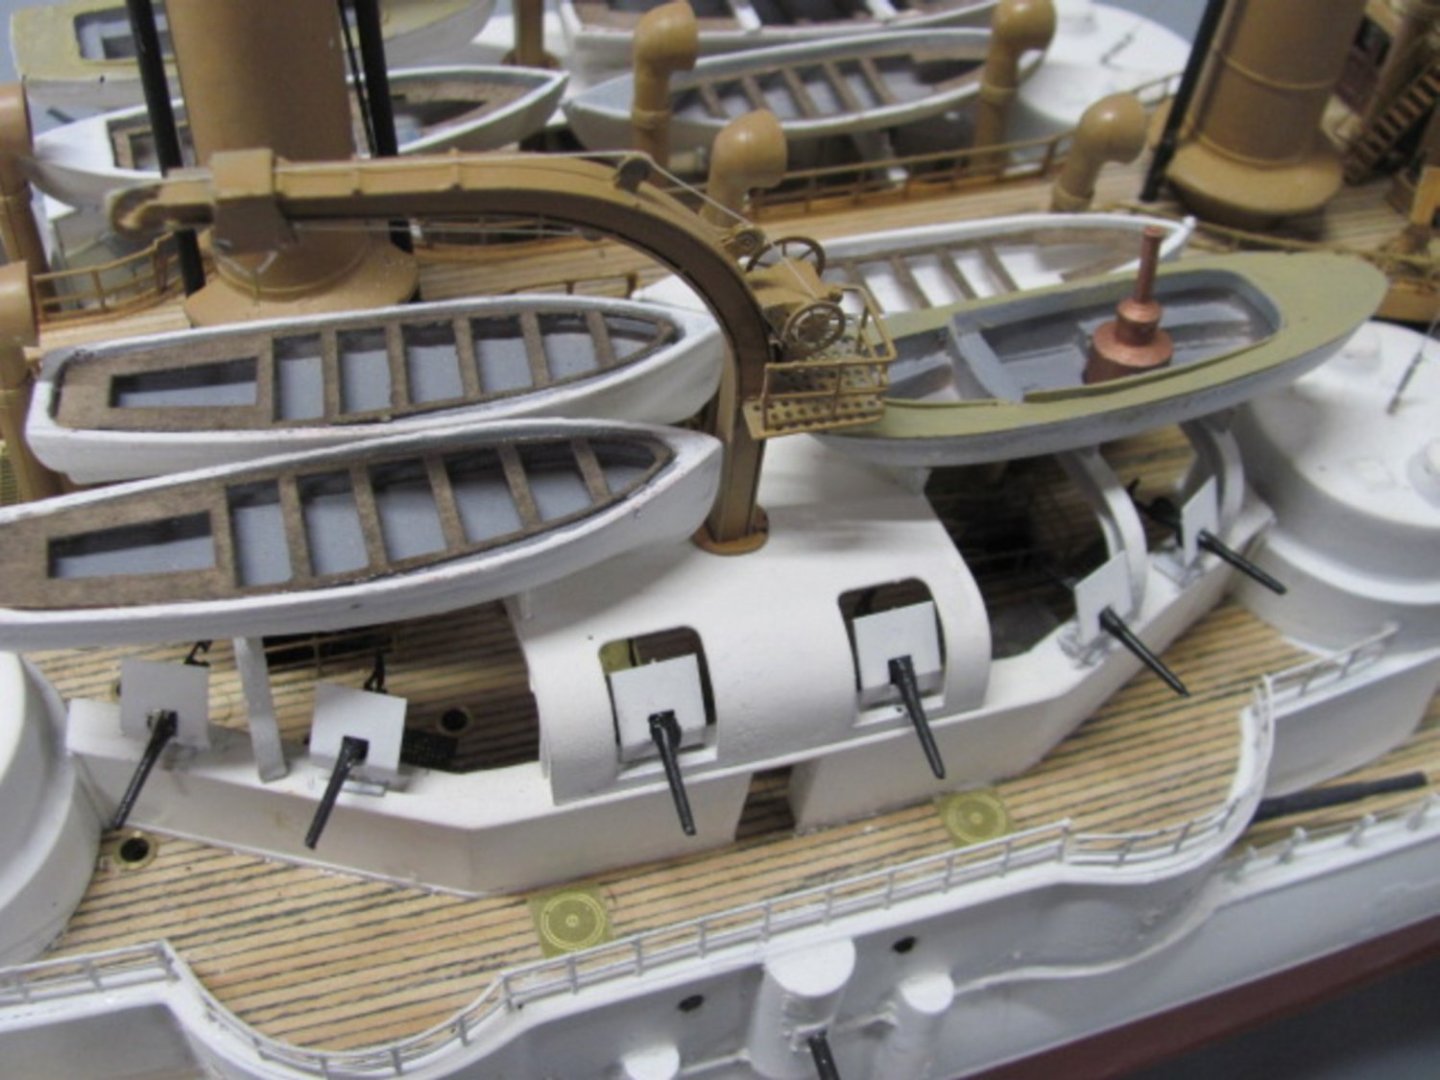
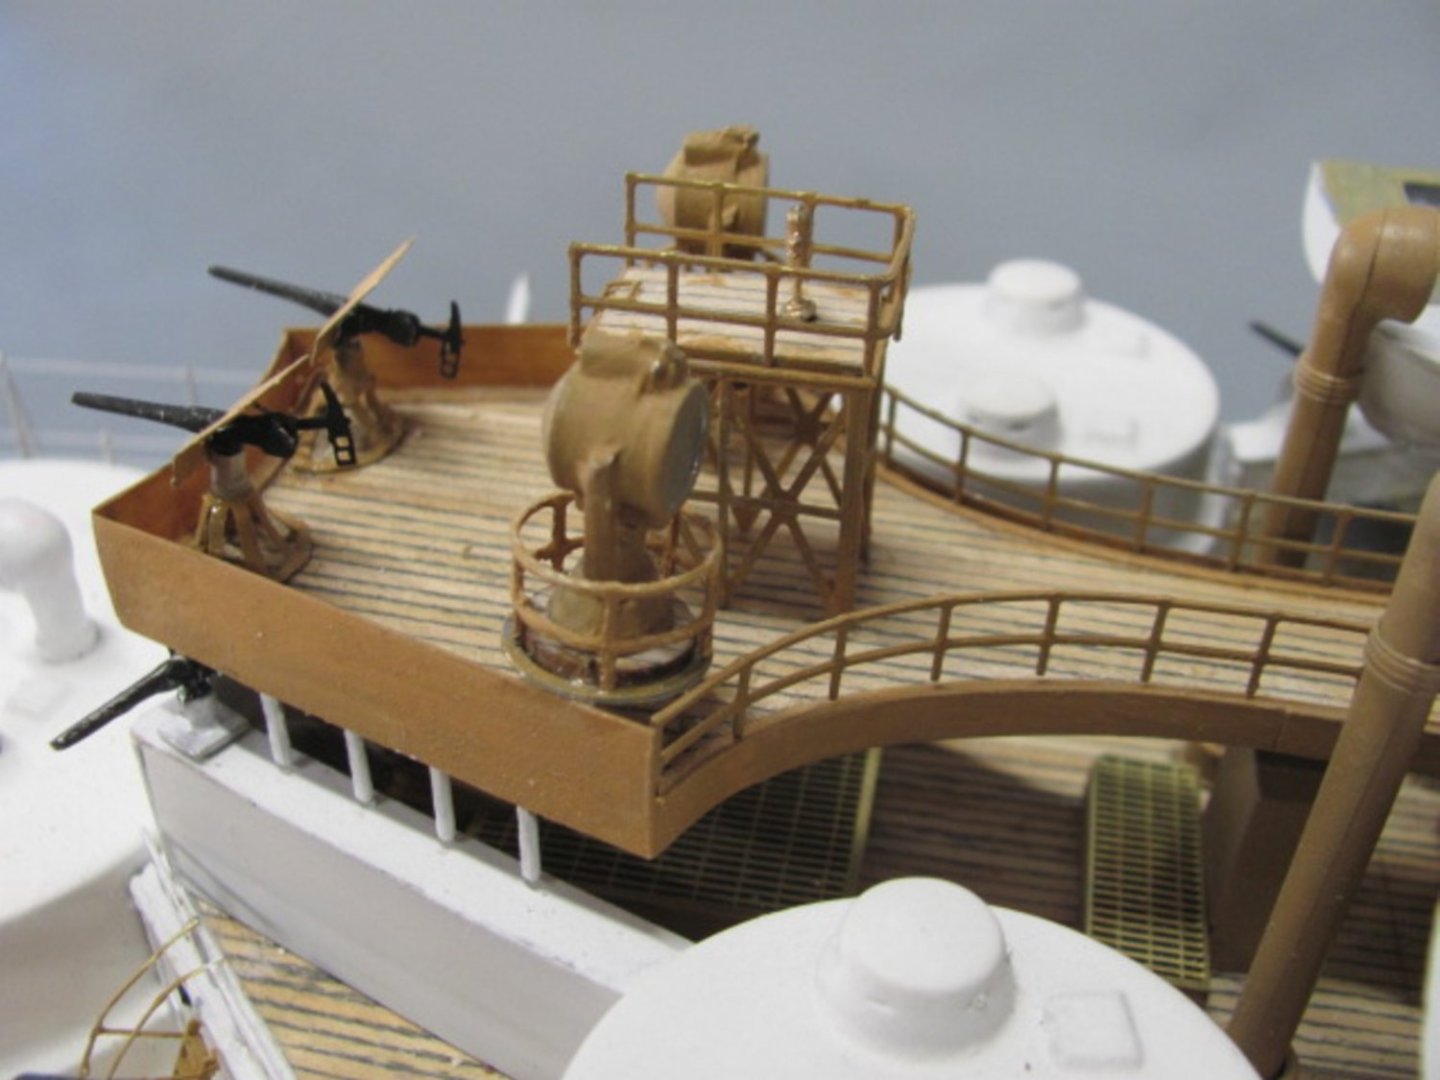
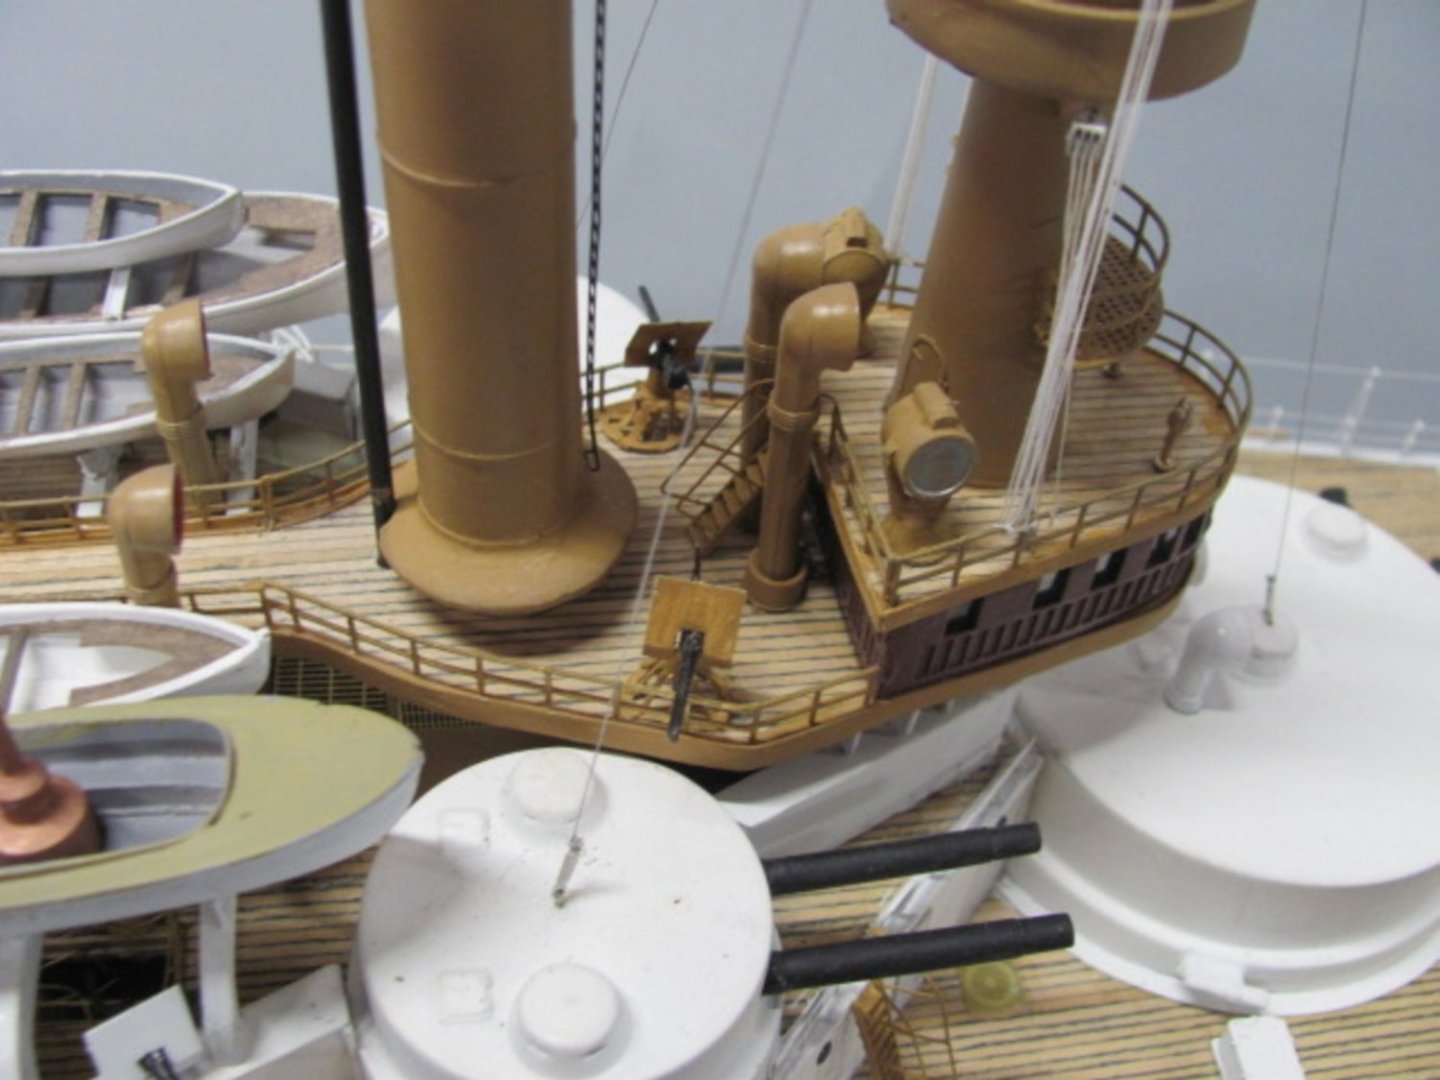
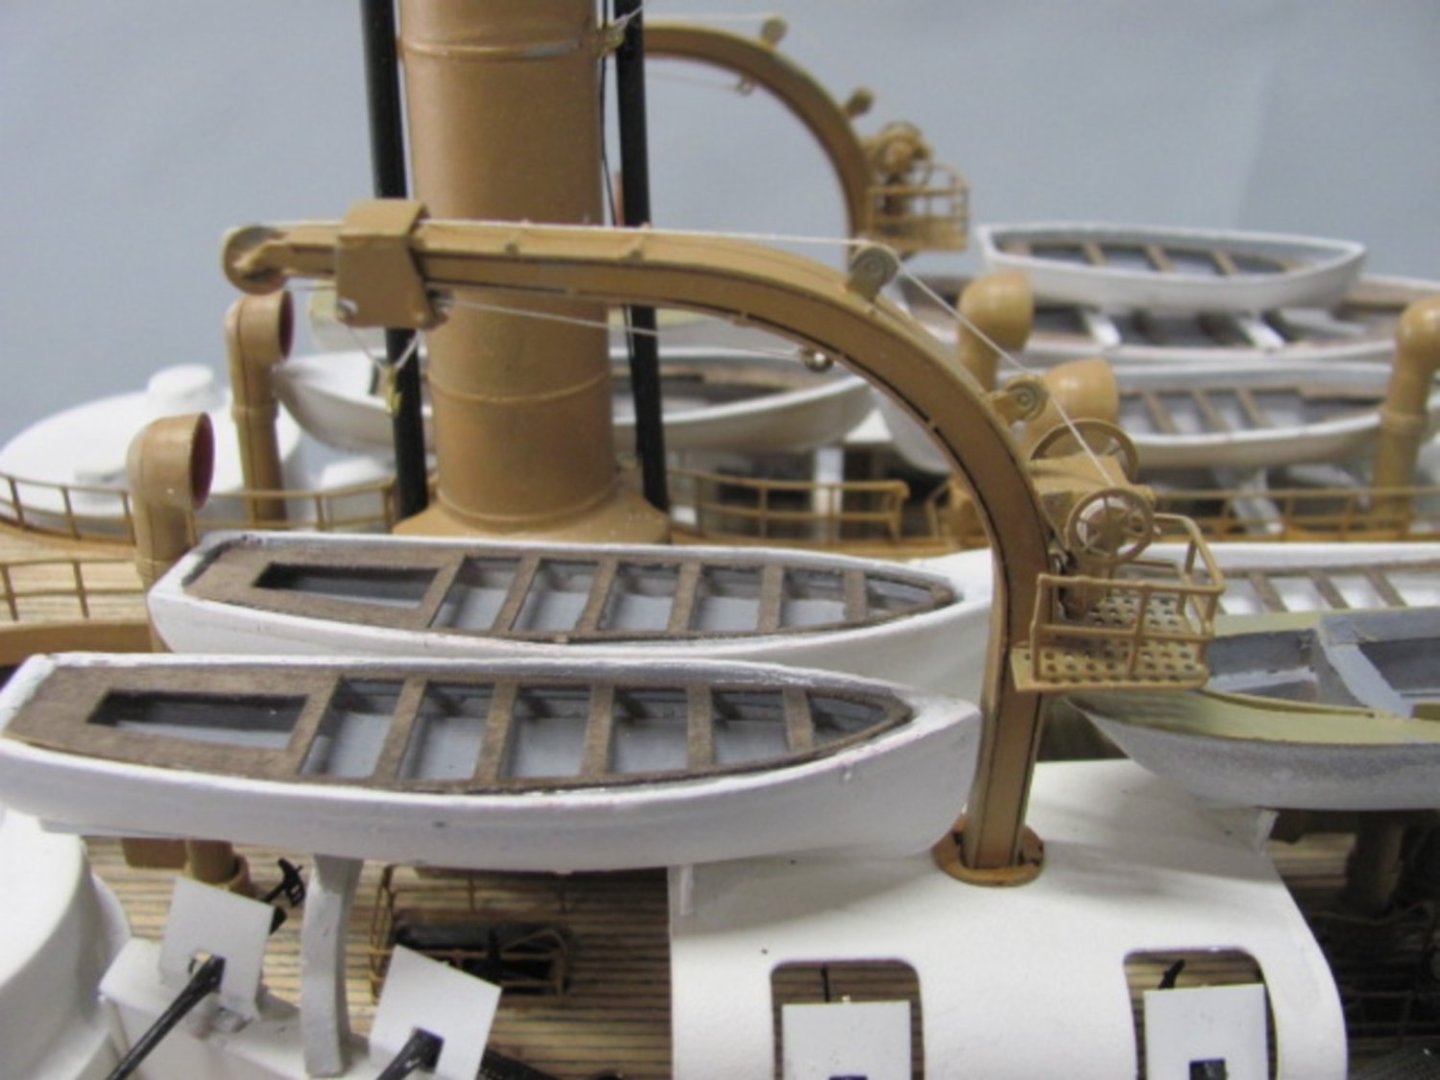
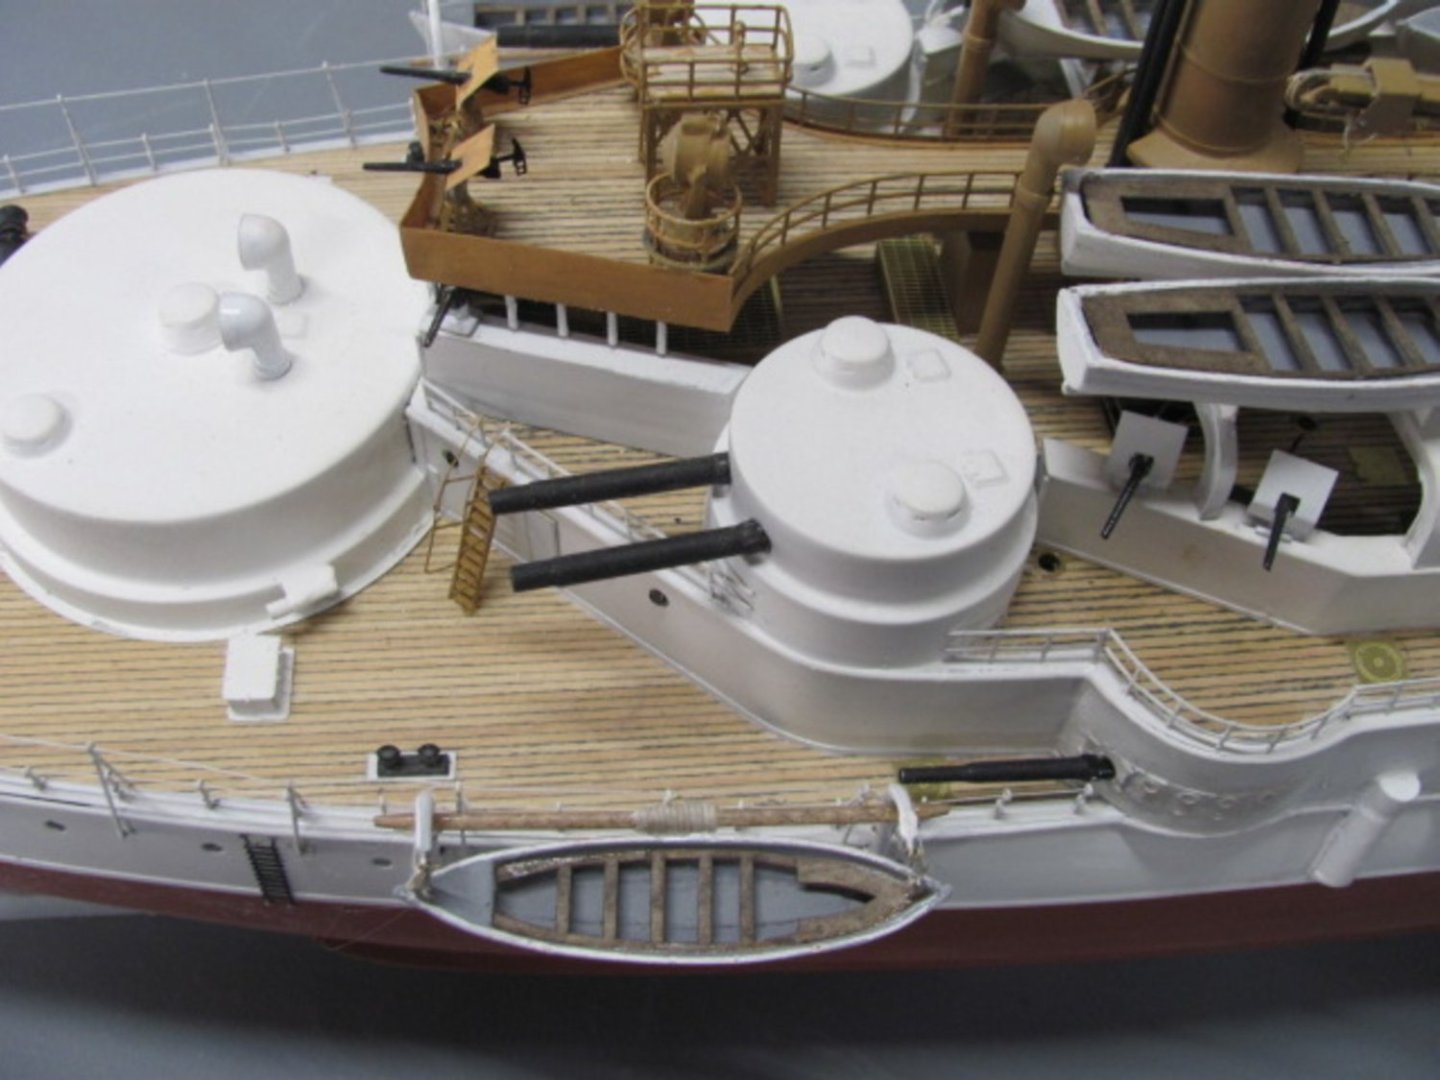
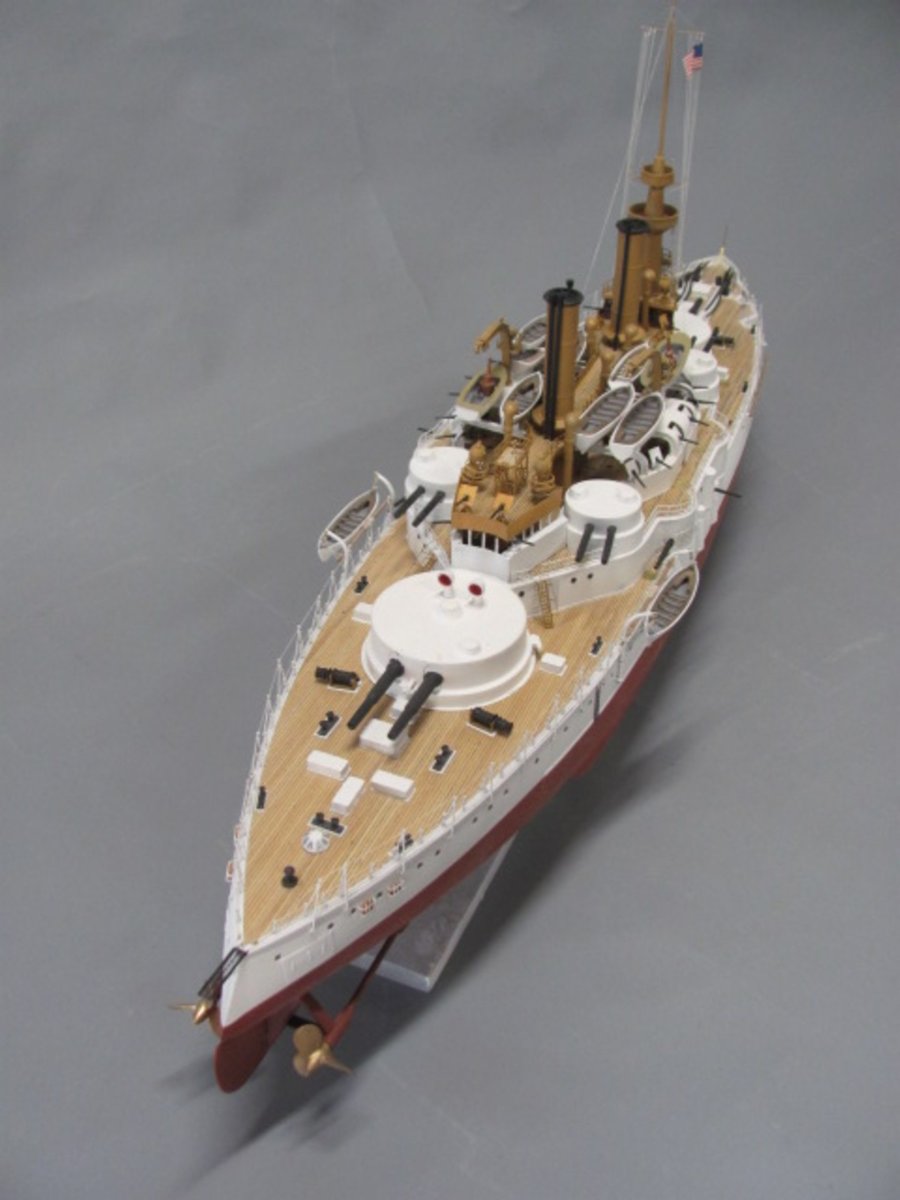
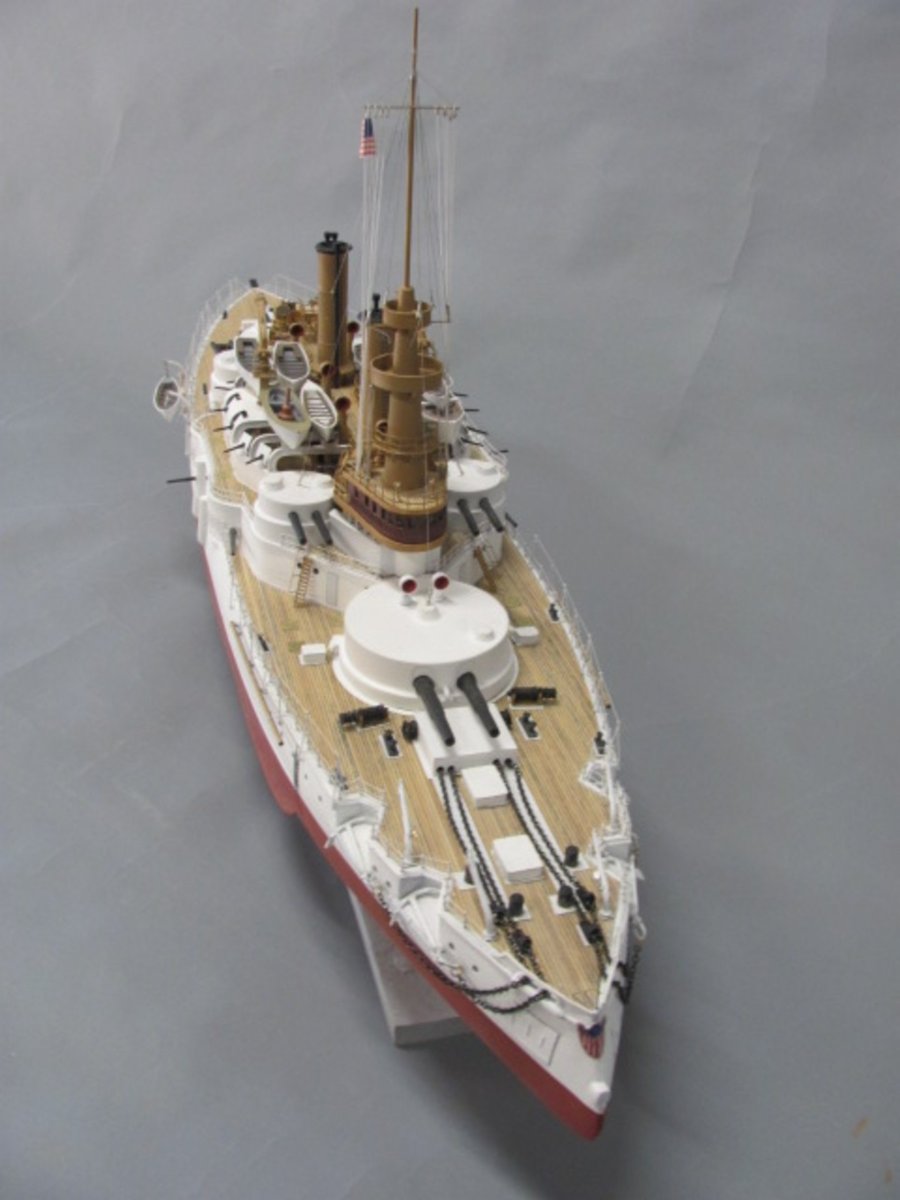
I'm finished with the display model of OREGON and she's about to go into production. Here are a few shots of her.


-
We're both talking about the hull below the waterline, right?🙂
- 166 replies
-
- 2
-
-
- Maine
- BlueJacket Shipcrafters
- (and 1 more)
-
Now that you are at this point, let's talk a bit about the bottom color. After the original display model was built, I discovered a doctoral dissertation from Florida State University that focused on a news reporter named Sylvester. He was present at the raising of the wreck in 1912 and commented that the bottom was as green as the day she was lost. A follow-up conversation with Dana Wegner (Curator of Ship Models at the David Taylor Basin) indicated that during her last yard period, an experimental bottom paint identified only as McInnis Green was applied. We couldn't come up with a color chip so I used FLOQUIL Dark Green to repaint the bottom on the original display model just before she went to the Naval War College. I also have my doubts about her having a black boot top over the red anti-fouling, although there is a photo of her in drydock that shows what certainly appears to be one. If I were to build the kit again today, I would paint her green or leave off the boot top over the red.
- 166 replies
-
- 4
-
-
- Maine
- BlueJacket Shipcrafters
- (and 1 more)
-
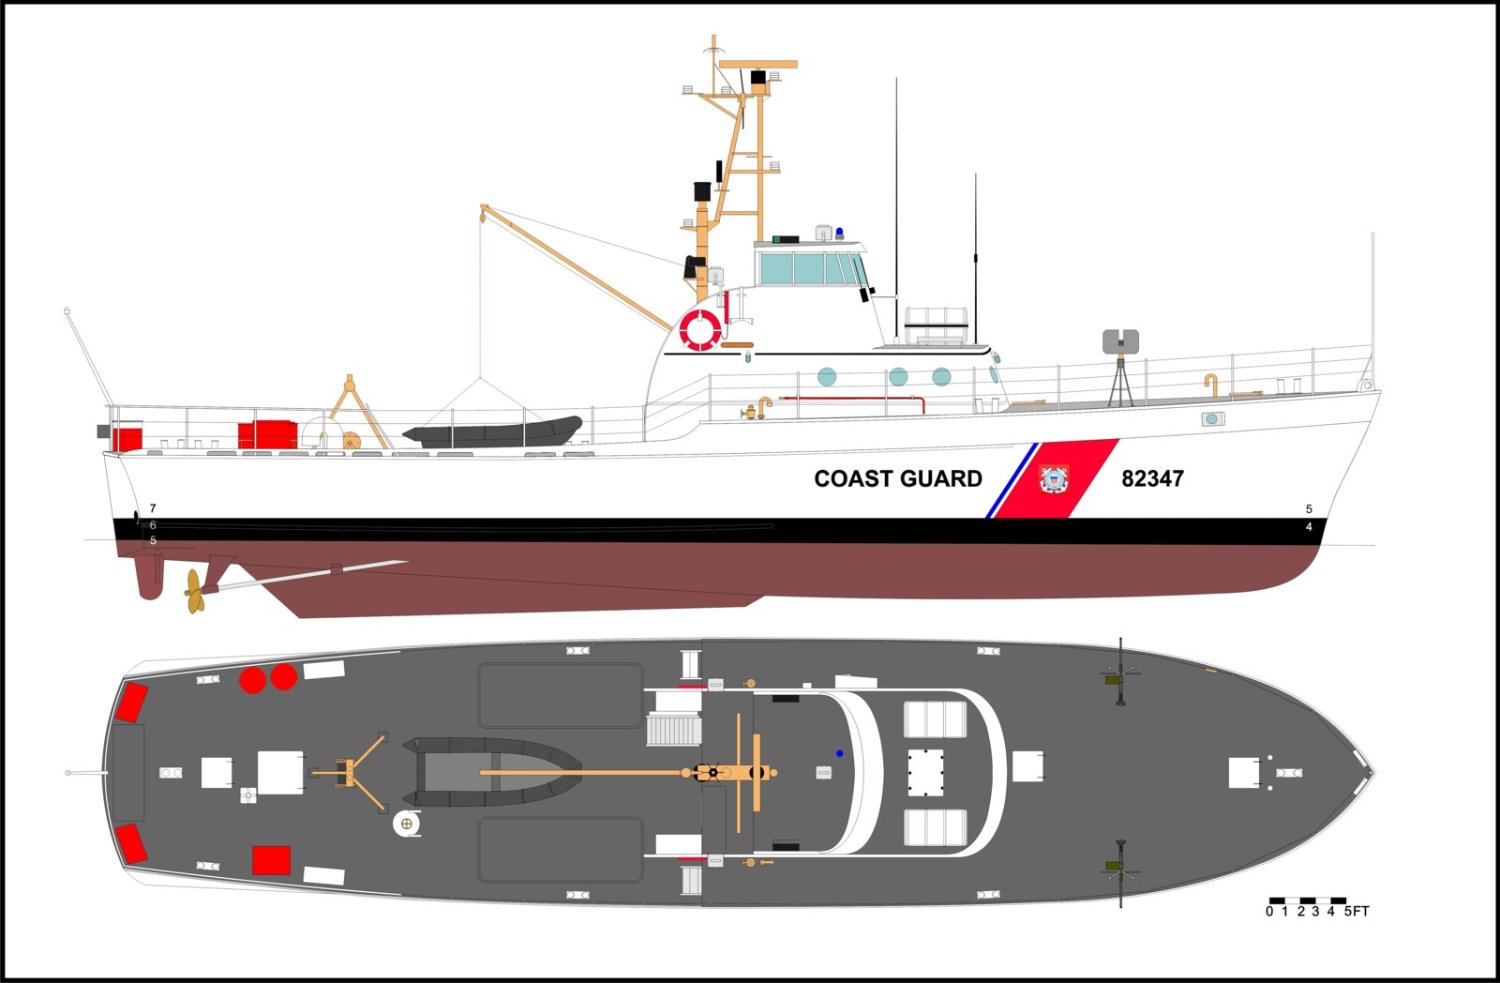
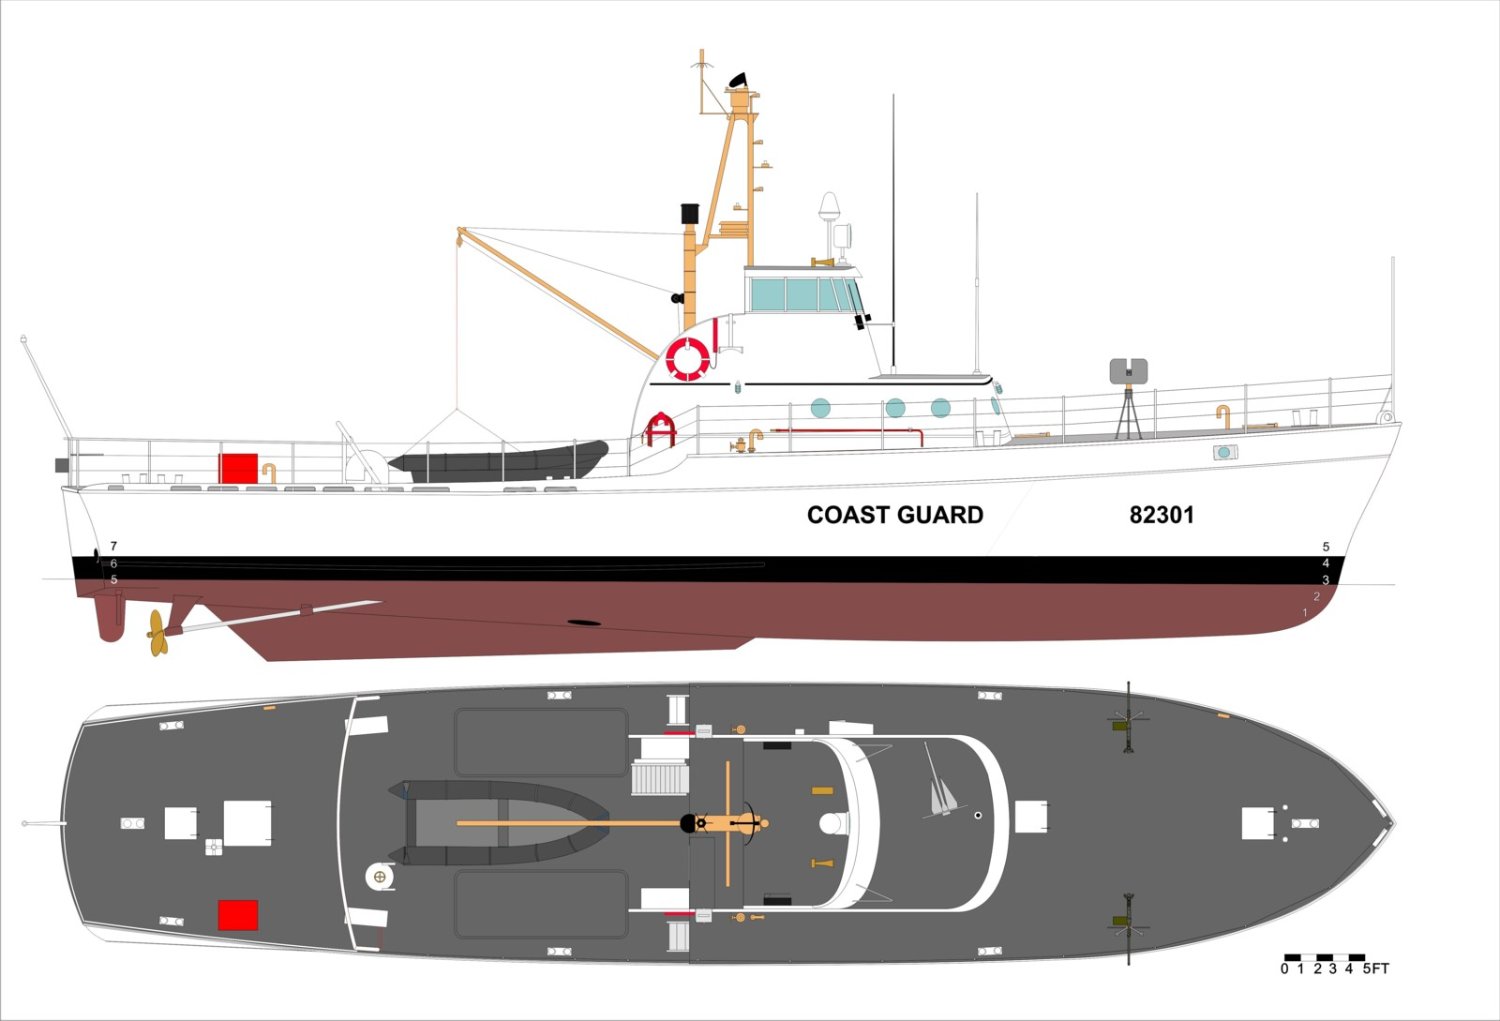
I've decided to go with the original design (82301) and include the major items fitted to later versions. On 82301, the towing bitt was on the king post/stack and there was a towing bow at the aft pipe rail. On later boats, the towing bow was removed and a tripod towing bitt was mounted on the deck in the same area covered by the towing bow. Radars were different, later boats had the inflatable life raft cannisters and different lockers, and the mast varied somewhat from boat to boat. I may do the Viet Nam fit, but that will probably be a separate fittings kit which will include the 81mm/50 mount, the ready service lockers, additional .50s, the grate around the 81mm mount, and a few other items. Here is 82301 in pre-"racing stripe" days. However, the "racing stripes" will be included in the kit, along with names for all of the boats and enough numbers to do any of them.

-
BlueJacket does custom laser work. I do all of their laser drawings and use an older version of Corel Draw. Contact them for a quote.
-
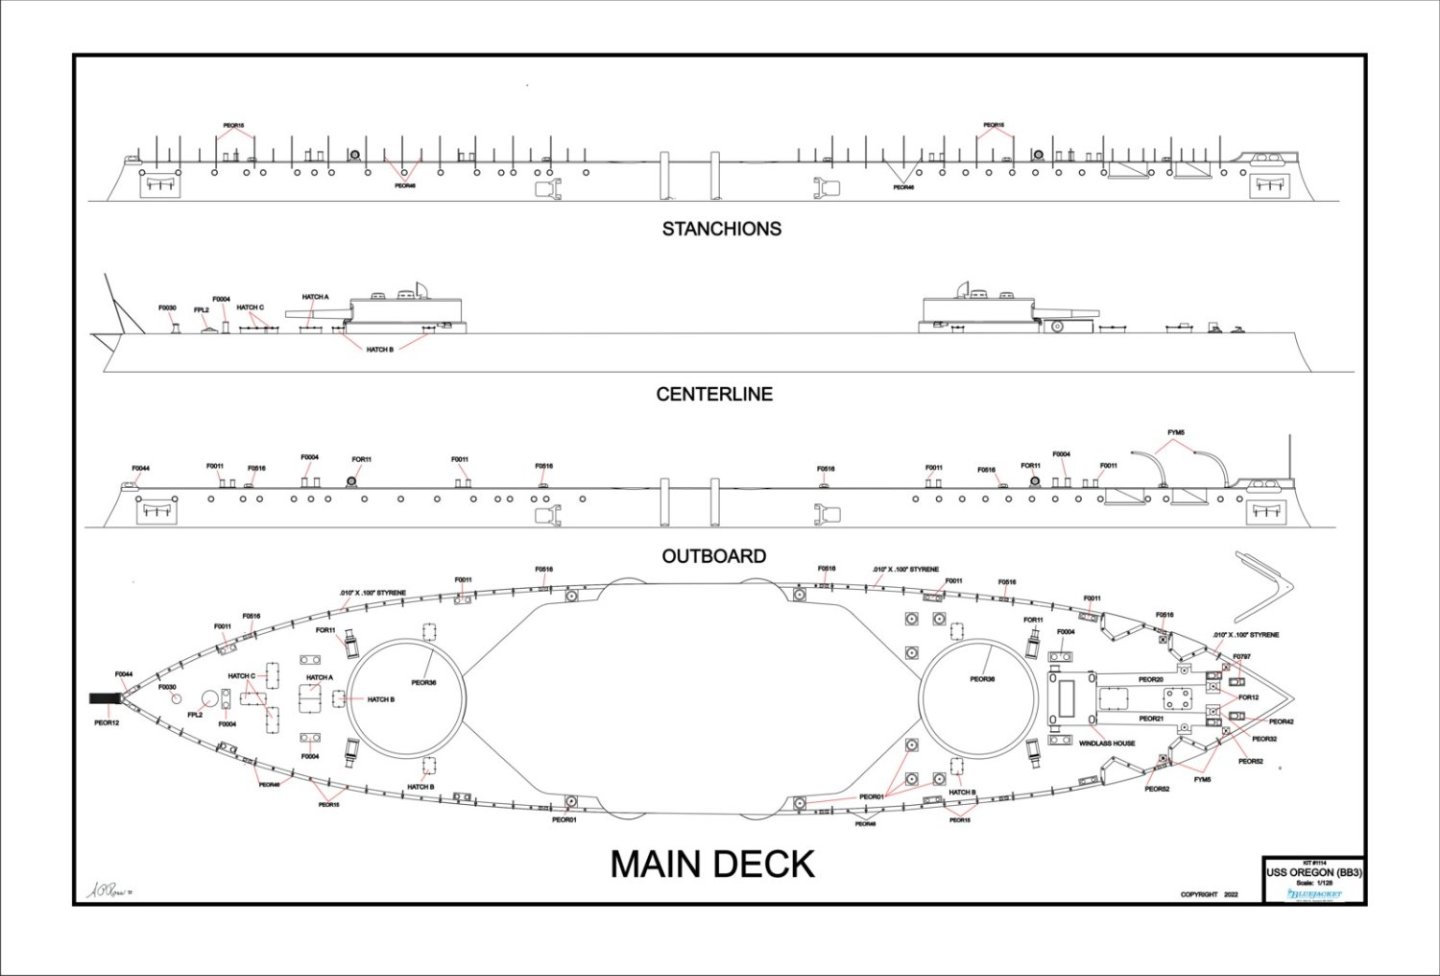
I finalized (if there is such a thing as finalizing...😁) the plans for OREGON today. There are two large (about 28" x 40") sheets and forty 11" x 17" spiral-bound sheets. This is a much-reduced copy of the second large sheet, the other being the General Arrangement above.
-
This will be the only large sheet in the OREGON kit (28" x 40"). The rest will be 11" x 17" in a spiral-bound book. With a few exceptions, all of the drawings on the smaller sheets will be full scale. This takes up a lot less bench space.
- 194 replies
-
- 14
-
-
-
Started conceptualizing the pilot house. At this scale and all that glass, it will have an interior, The lower structure will be laser-cut lifts.

-
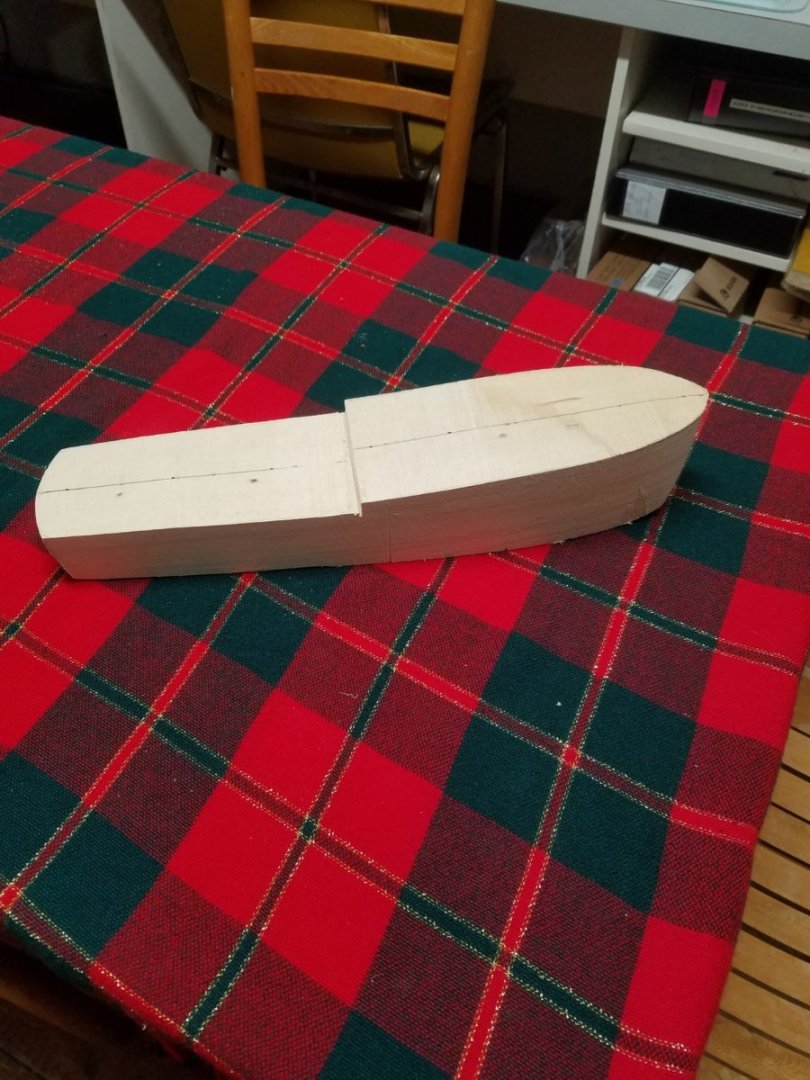
OK, I started a bit early. This is the roughed-out blank for the master hull. This will be carved to final shape and have lugs added to the bow and stern to fit the carving machine.
-
It only took me 25 years to get this one approved...😁
-
In January, I'll be starting on a 1/64 scale kit of the 82' POINT class WPB. This will be part of the Great American Workboats series. It will have a solid hull just under 16" long and the usual laser, britannia, and probably some resin, maybe some photoetch. It's still in the formative stages and I haven't decided whether it will be the initial design or a specific boat. I may also include fittings suitable for a Viet Nam era boat in country.

- 8 replies
-
- 10
-
-
-
-
Get Capt. Doug Lee's A SHIPYARD IN MAINE. It has some very detailed plans for NOTMAN in the back. Doug was very helpful when I designed the kit for BJ.


.JPG.bd0ec1577422105fe36e0b9e2ef12930.JPG)
.JPG.cbedf80d9c1bbef49dcd3244c9a88cdb.JPG)
.JPG.bc36164ed3ba0ebd4d10566ddc307a2a.JPG)
.JPG.bd6a875cf0ee8ea219d38ef0b853bed6.JPG)
.JPG.06523906947aeb9f0e2cac8ec03762cb.JPG)
.JPG.55c046ebb10bd349391b8fddd4c3aa0e.JPG)
.JPG.0c3fe9275cdce0a3e24c164a9c0505ef.JPG)
.JPG.bfa279496029bbe9e8ad61840dea2b92.JPG)
.JPG.9c6cc2fa196632a8827e306a7c5b7266.JPG)