HOLIDAY DONATION DRIVE - SUPPORT MSW - DO YOUR PART TO KEEP THIS GREAT FORUM GOING! (Only 13 donations so far - C'mon guys!)
×

alross2
-
Posts
408 -
Joined
-
Last visited
Content Type
Profiles
Forums
Gallery
Events
Everything posted by alross2
-
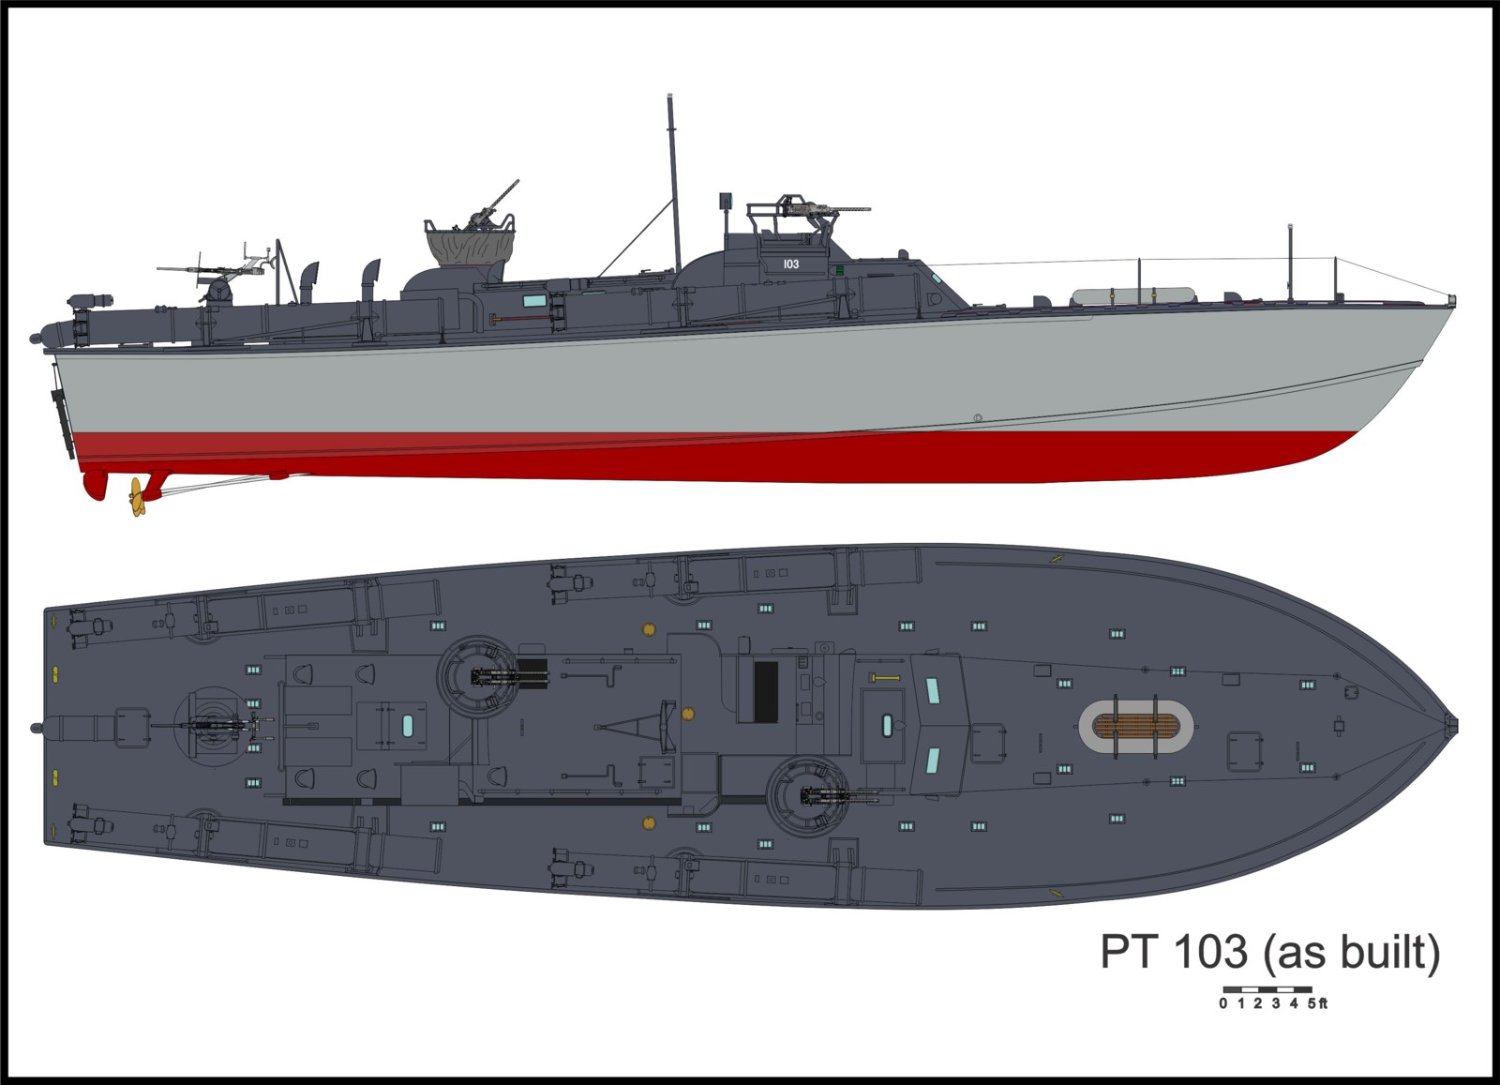
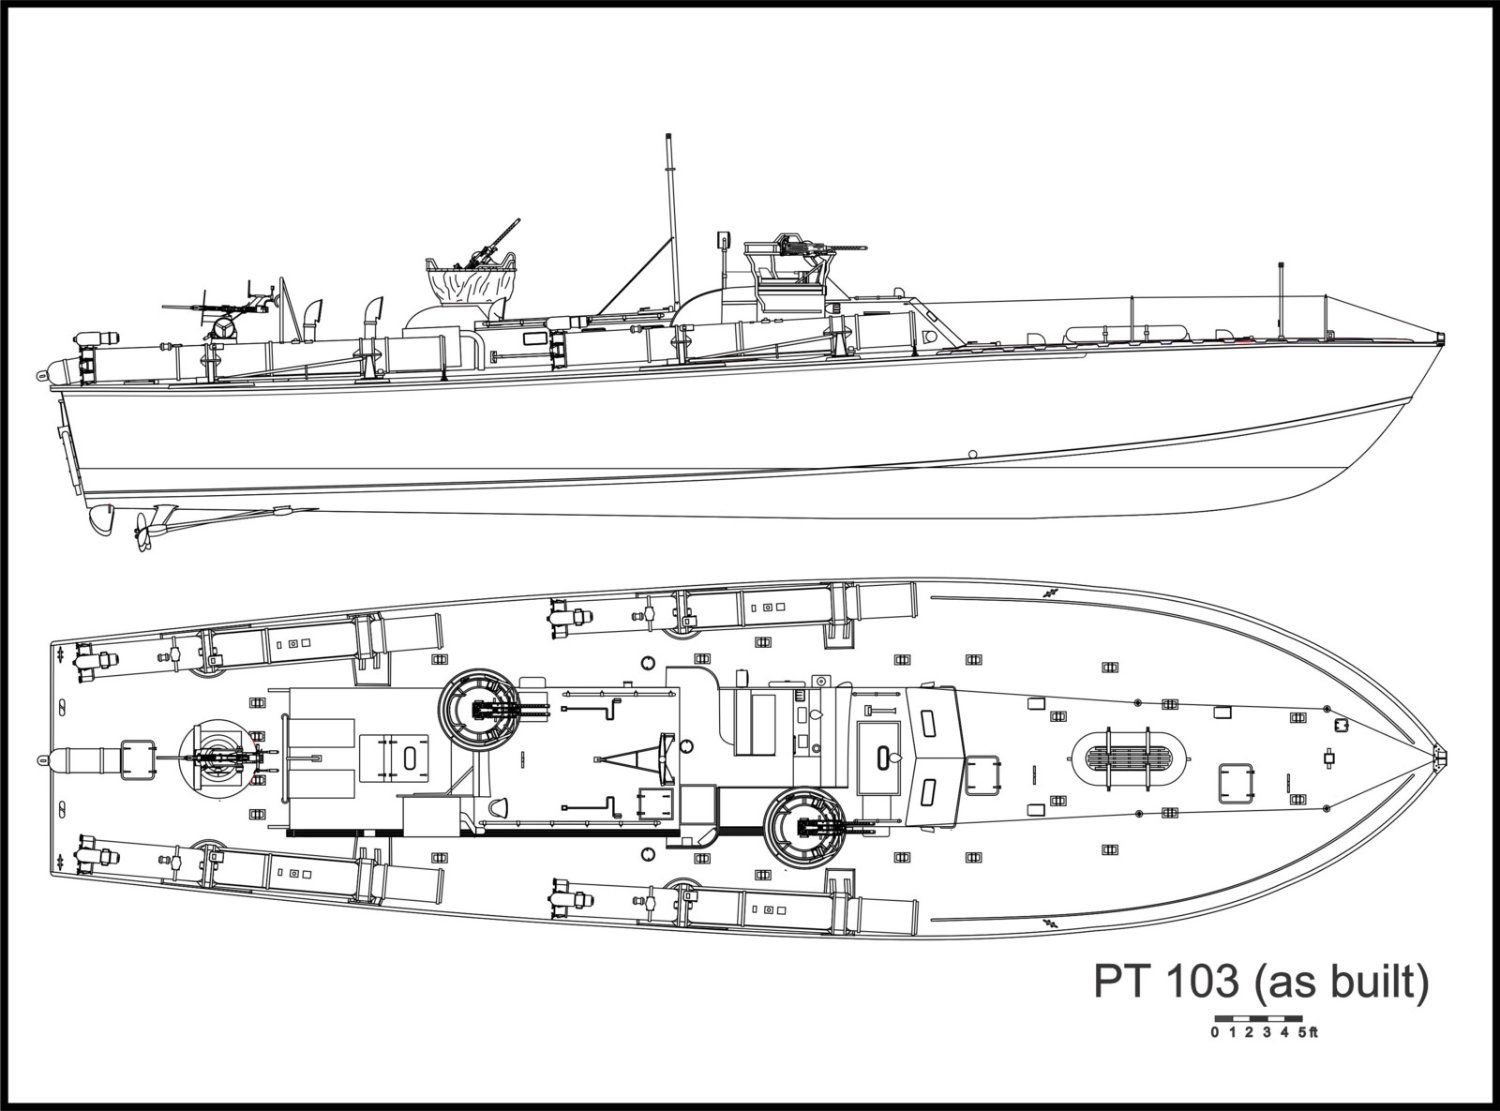
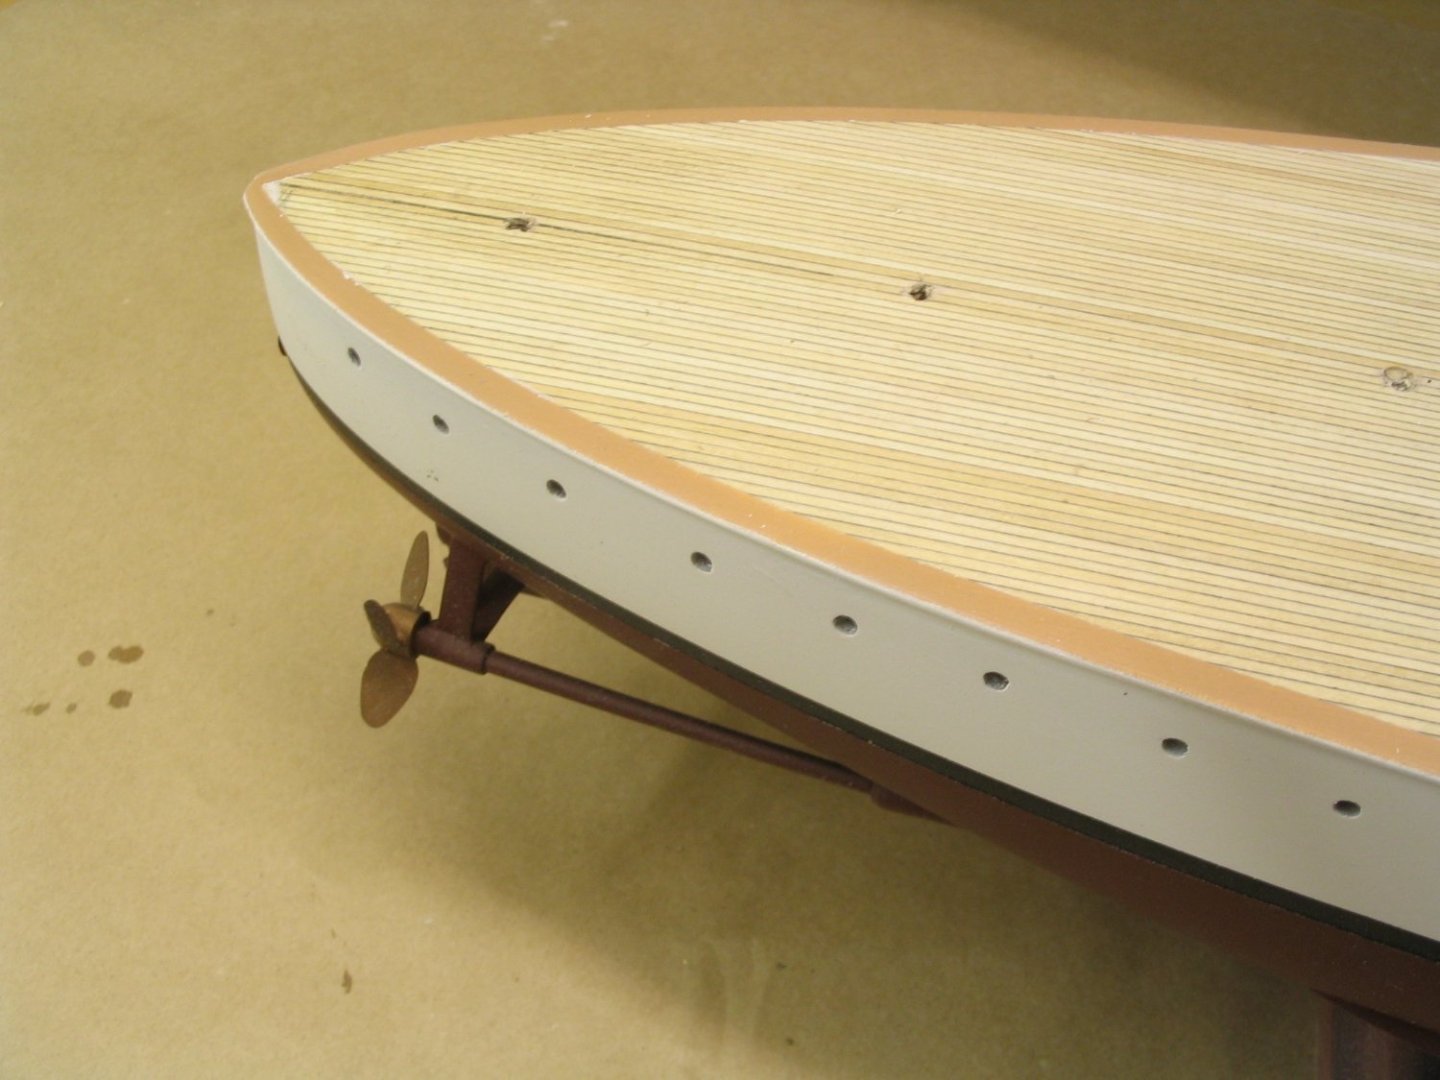
 The hull is about 44" long but it's plank on bulkhead. It only weighs a couple pounds or so.
 -
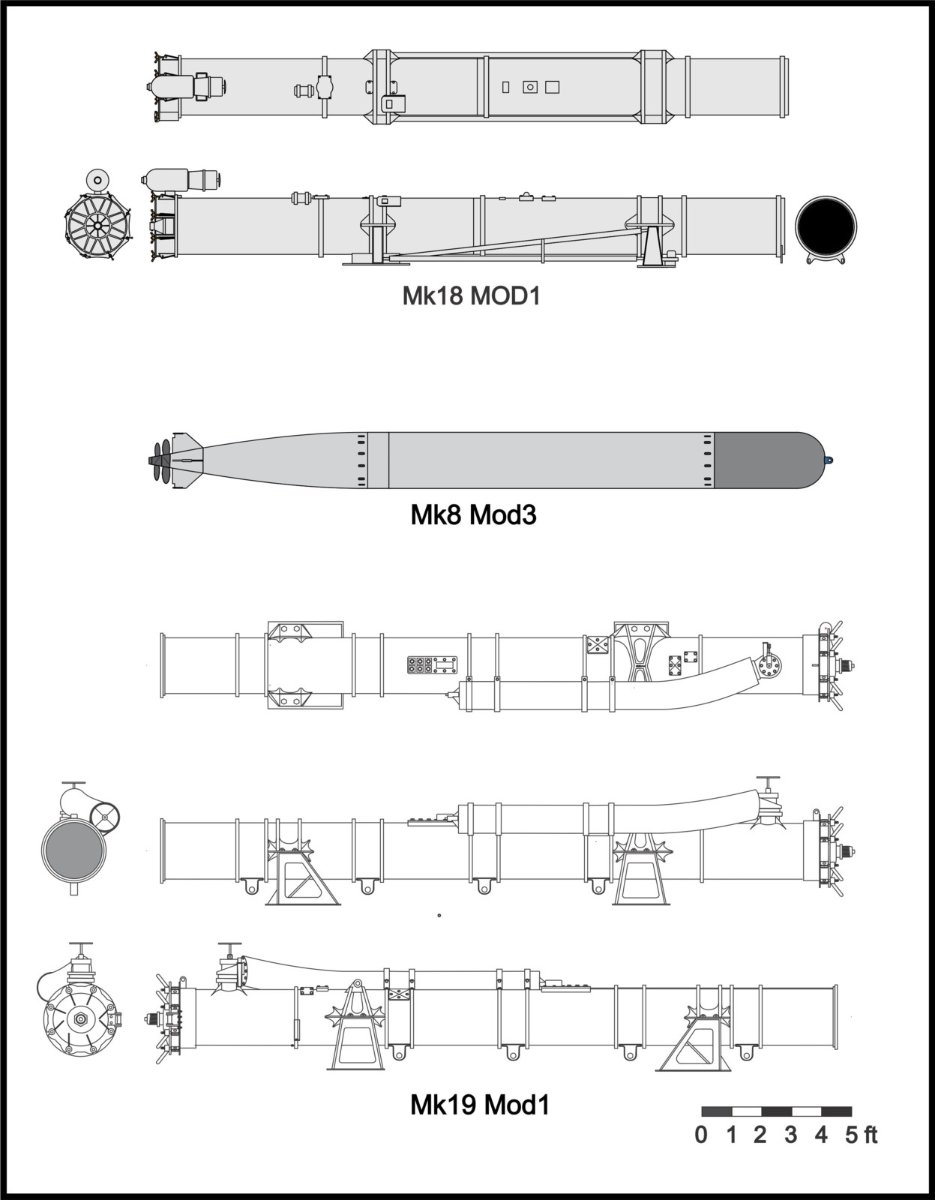
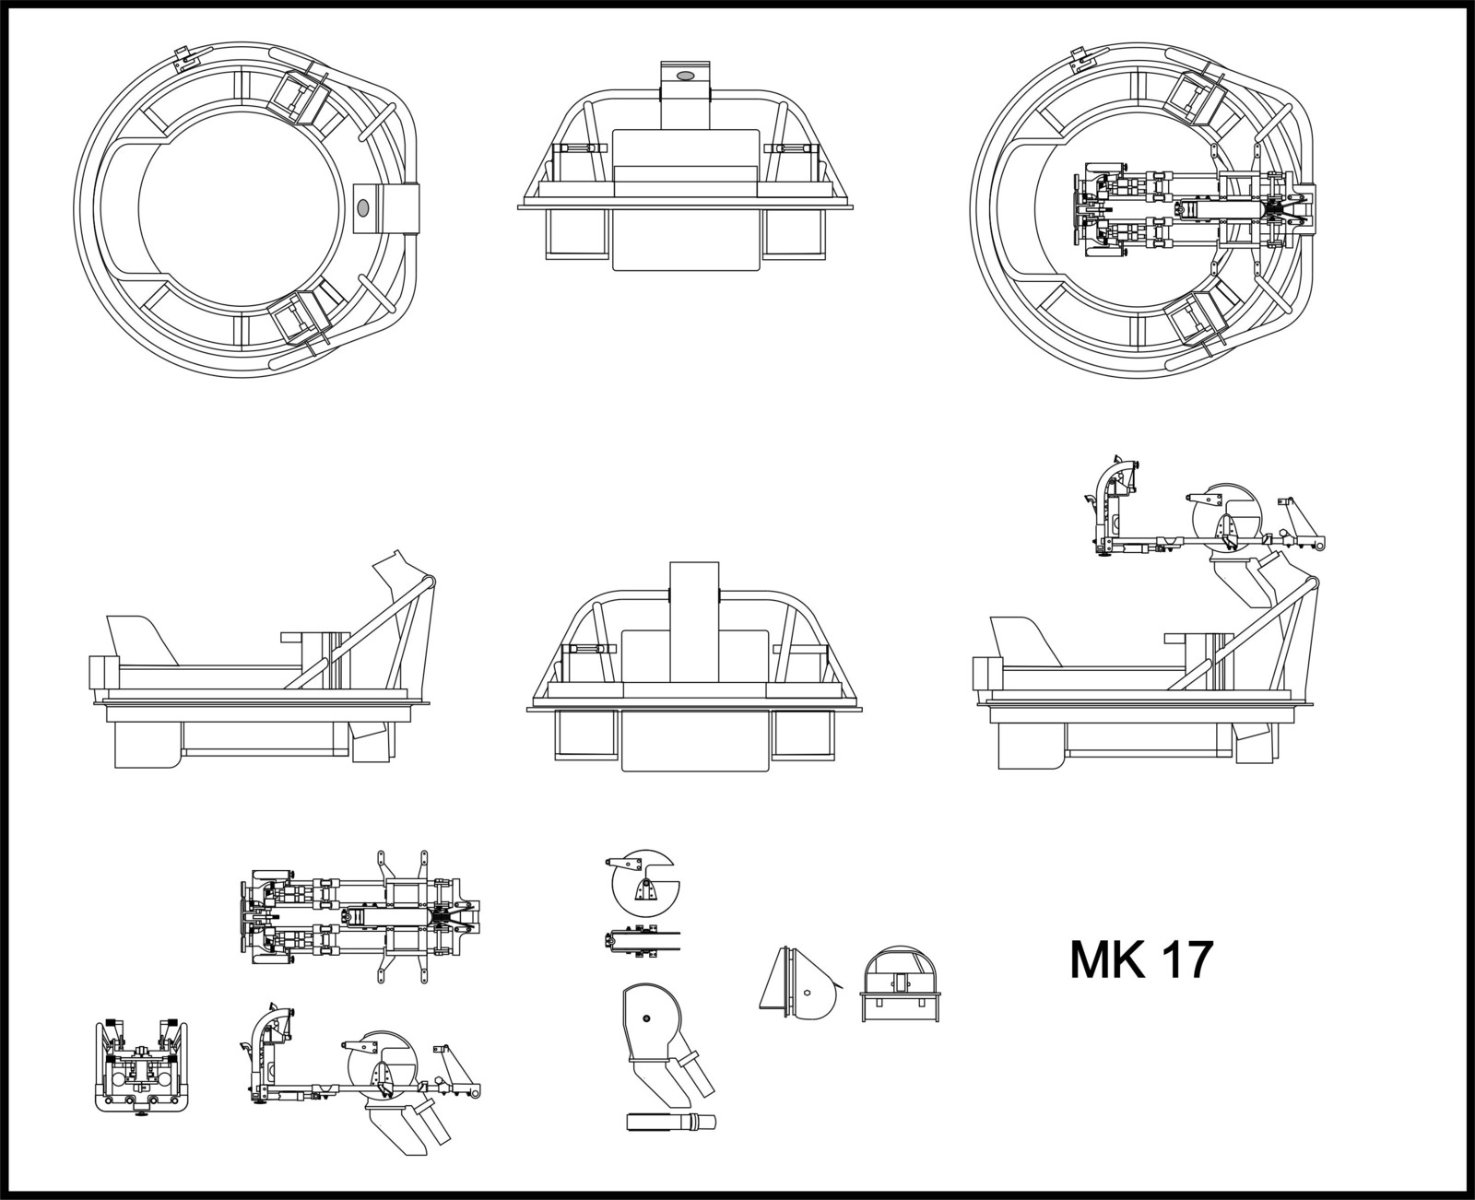
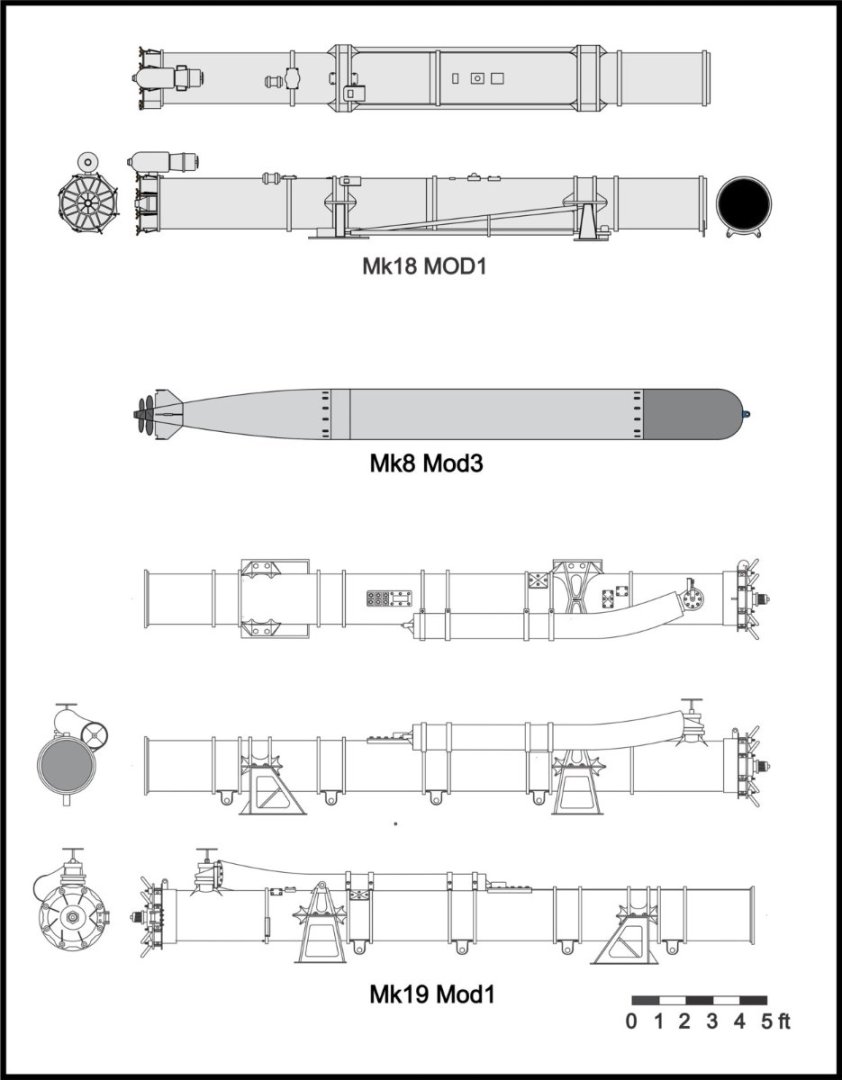
The MK18 (upper) used the powder charge and was fitted to ELCO and Huckins PTs. The MK19 (lower) was the Higgins compressed air tube.
-
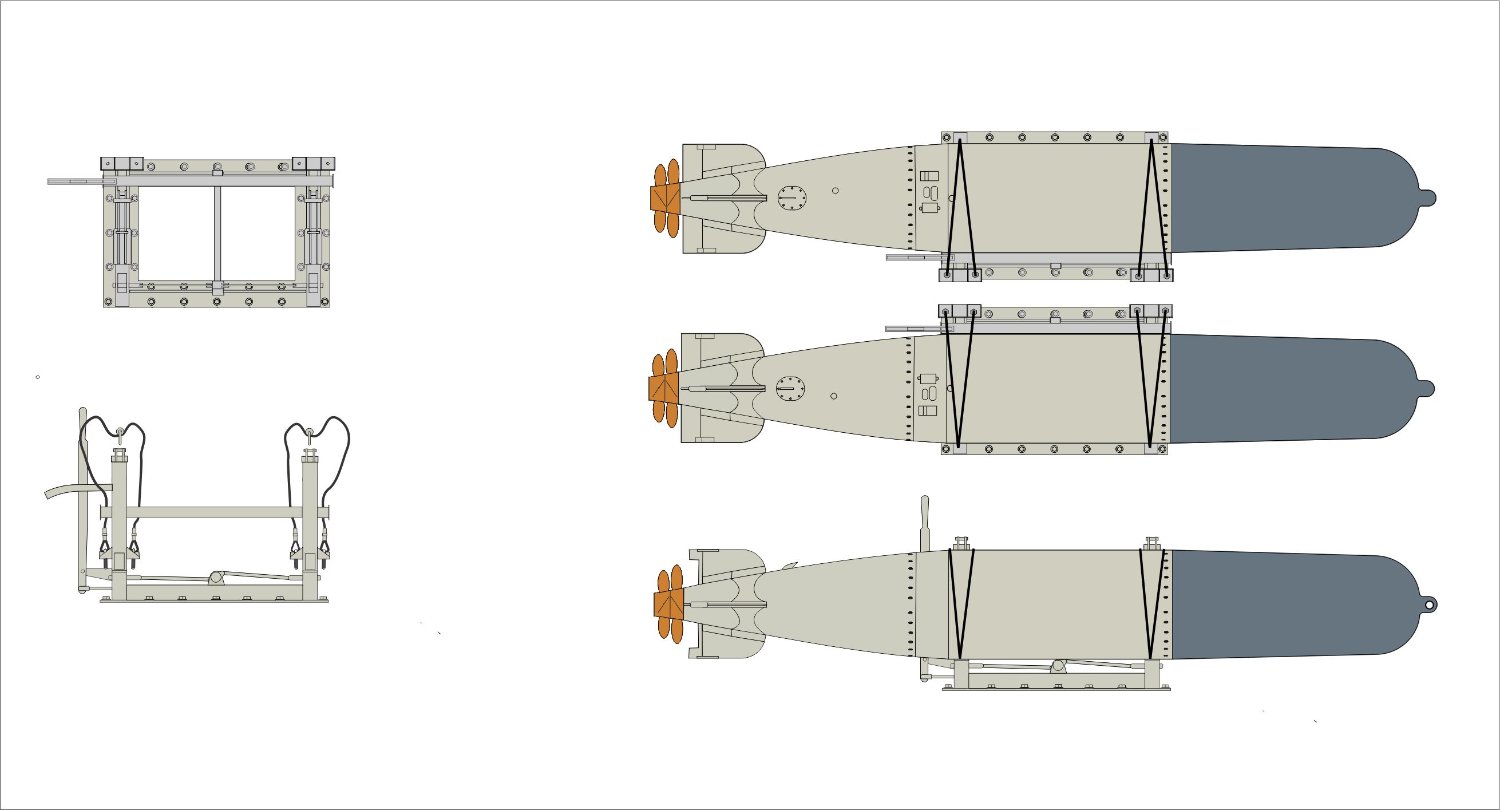
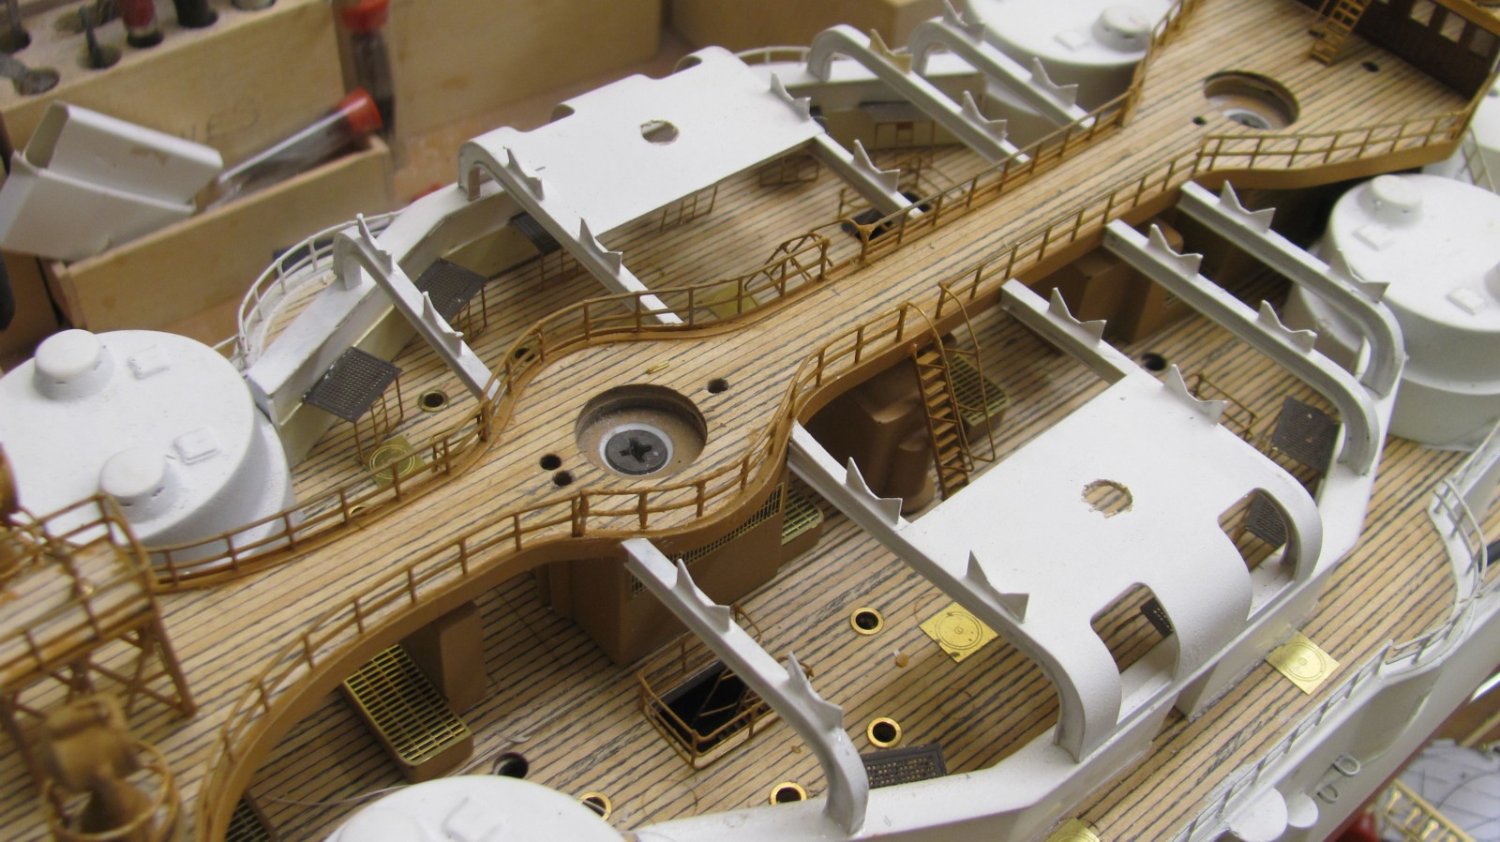
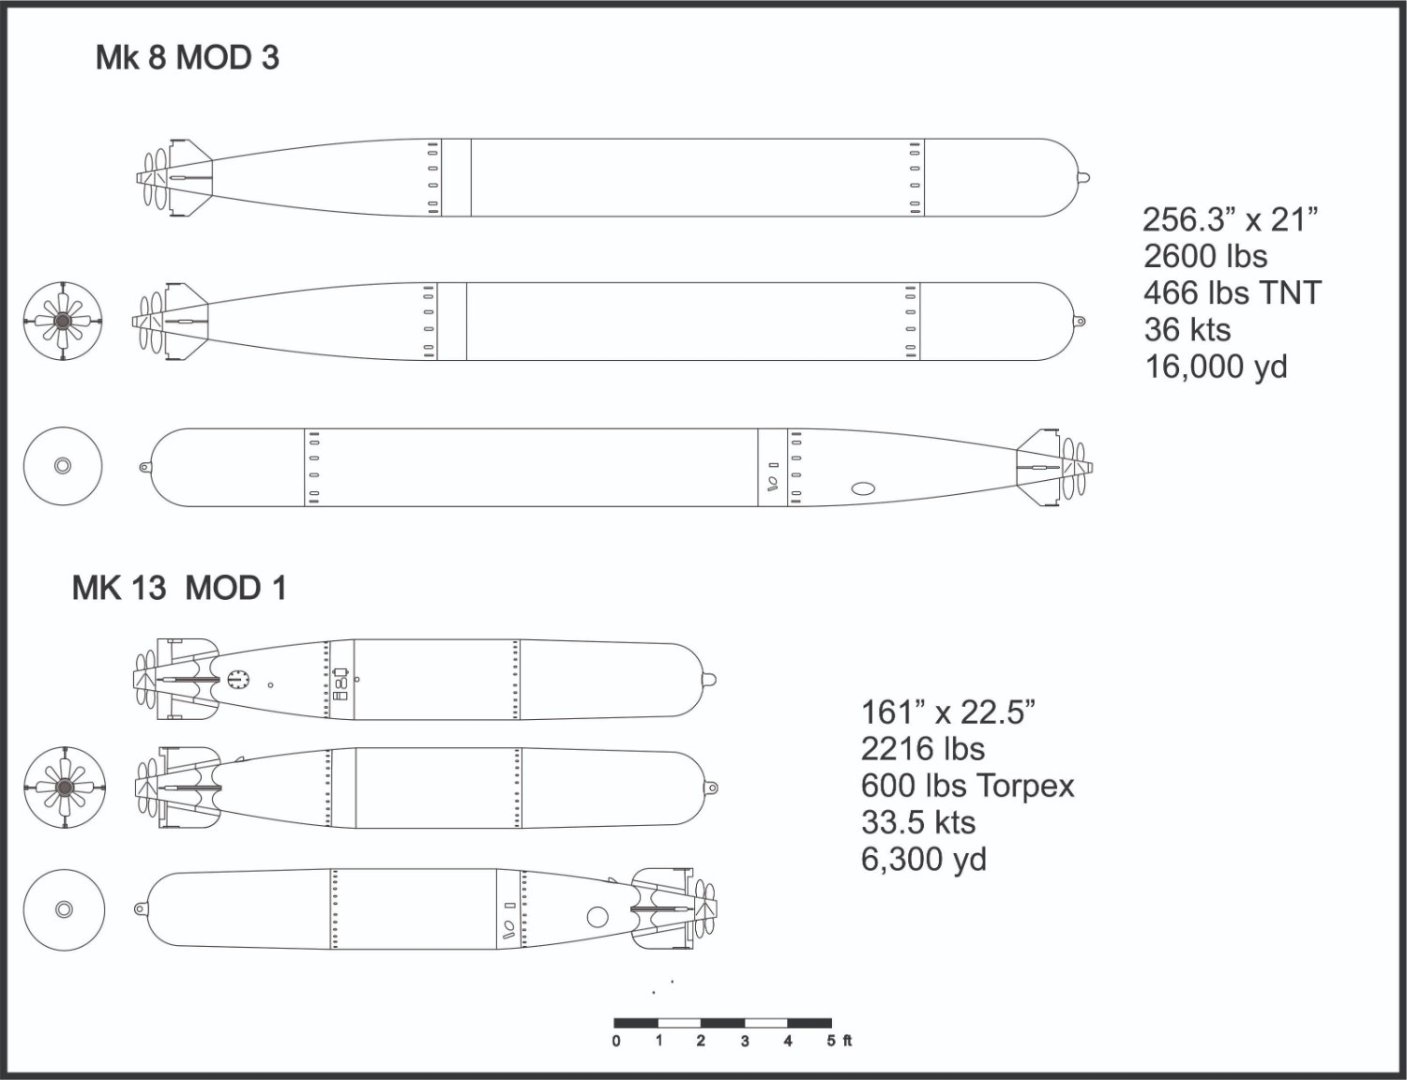
Here's a comparison between the MK8 and the MK13, as well as the MK1 rack for the MK13. Typically, the torpedoes came from the factory with flat medium gray (like Ocean Gray 5-0) warheads and everything aft of the warhead in a yellowish brown preservative. Props were bronze.

-
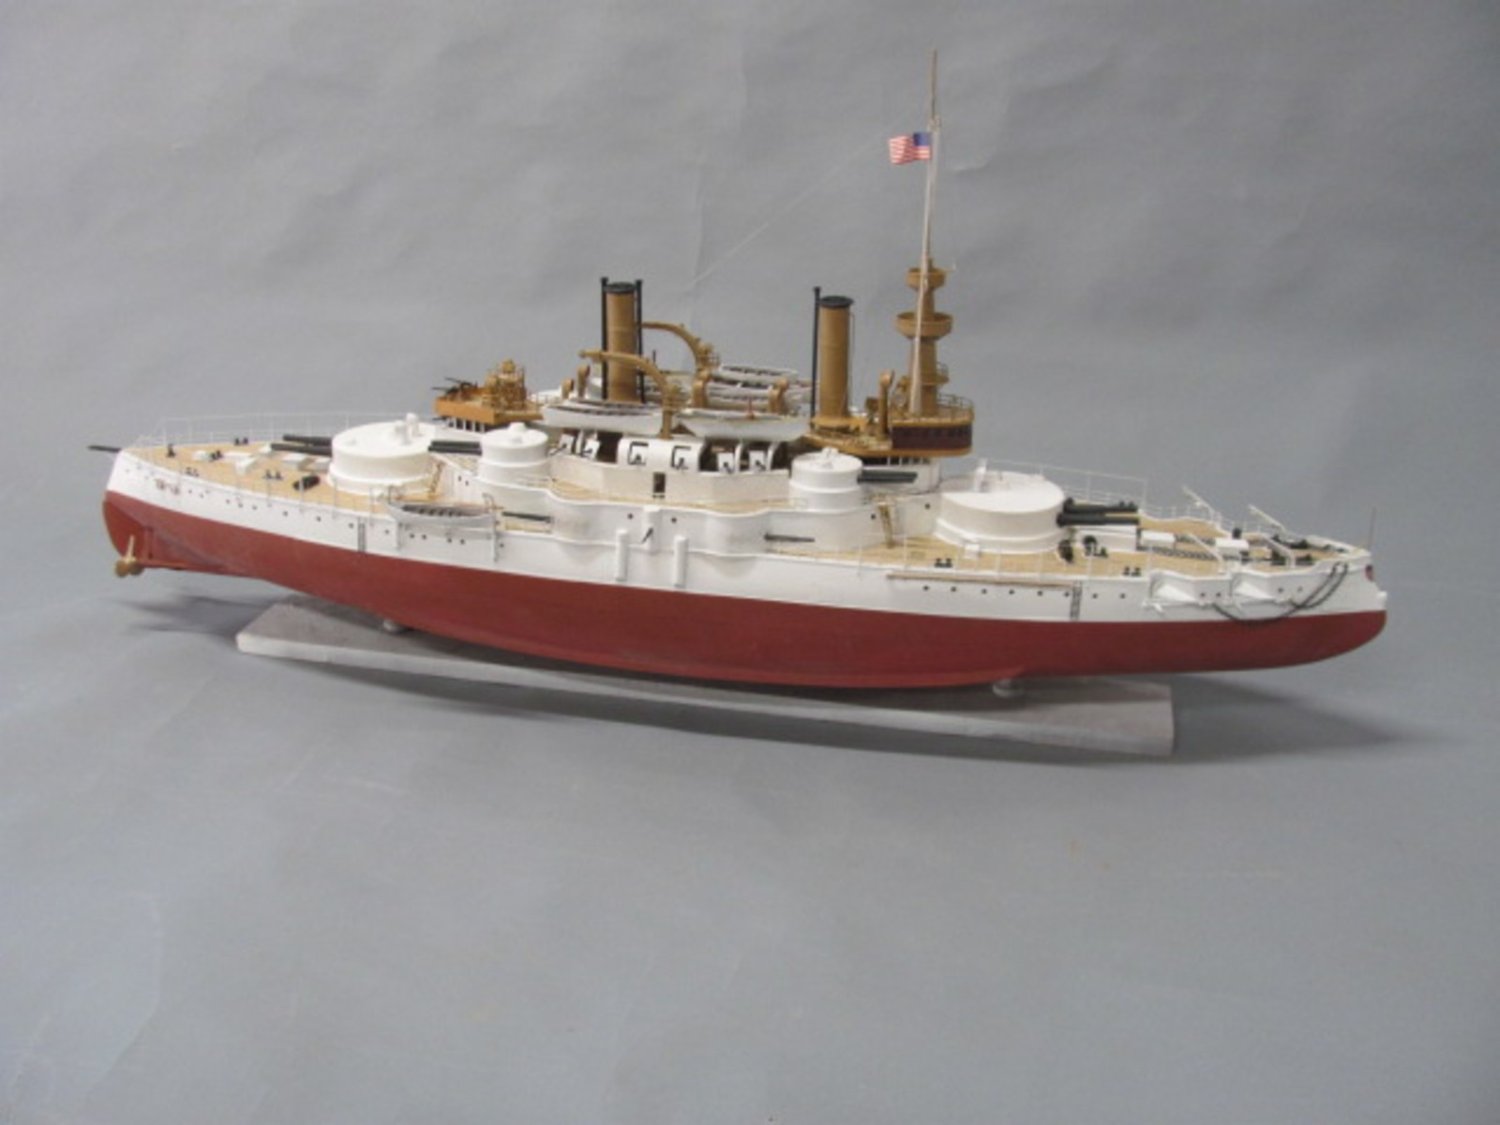
The original display model of the kit.
-
Did the kit have the CD? It has about 100 images of the build of the display model from start to finish. You can still get one from BlueJacket.
- 166 replies
-
- 3
-

-
- Maine
- BlueJacket Shipcrafters
- (and 1 more)
-
When you're a little further down the road...
- 166 replies
-
- 9
-
-
- Maine
- BlueJacket Shipcrafters
- (and 1 more)
-
100 in 2005. They were gone in a couple months, most being sold before the catalog came out.
- 166 replies
-
- 5
-
-
- Maine
- BlueJacket Shipcrafters
- (and 1 more)
-
I designed it back in 2005, so if you have questions, feel free to ask. If you break or lose anything, we still have the stuff to replace it.
- 166 replies
-
- 8
-
-
- Maine
- BlueJacket Shipcrafters
- (and 1 more)
-
a drafting tool or paper weight
alross2 replied to garyshipwright's topic in Modeling tools and Workshop Equipment
I have 18-20 (that's about 80 pounds!) of these and haven't used them in several years. They were a great tool when I drew ink on mylar, but now I'm using CorelDraw and haven't touched a drafting pen in about four years. Probably should get rid of them. -
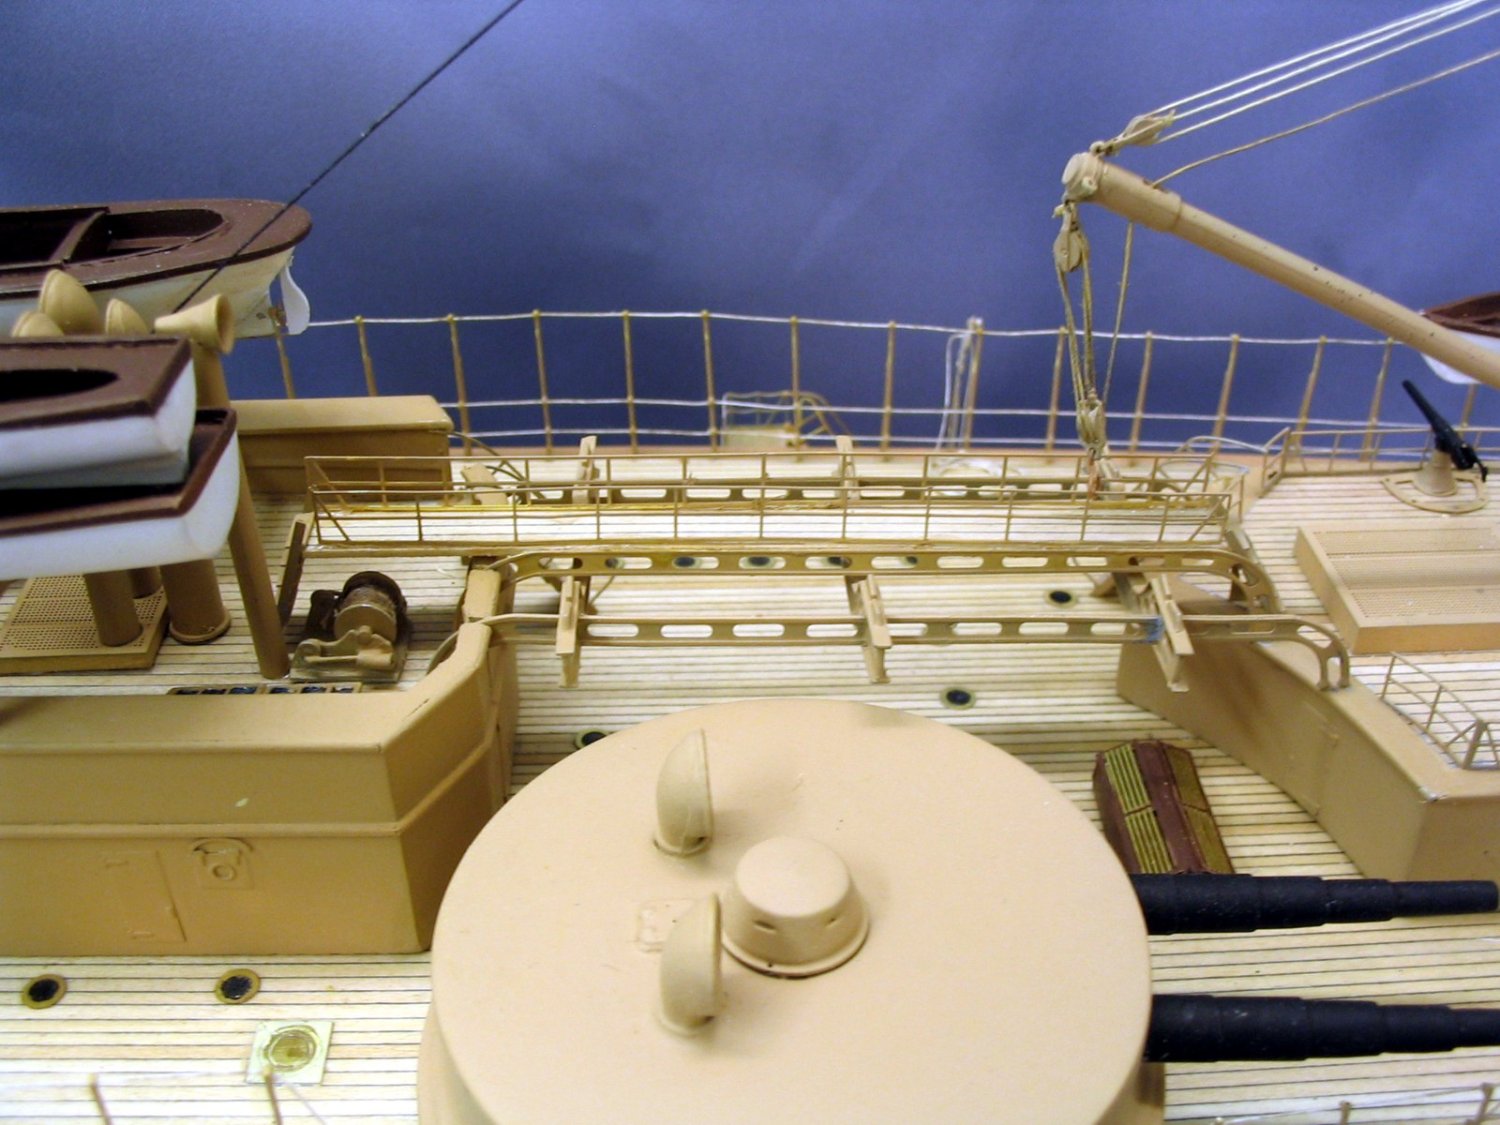
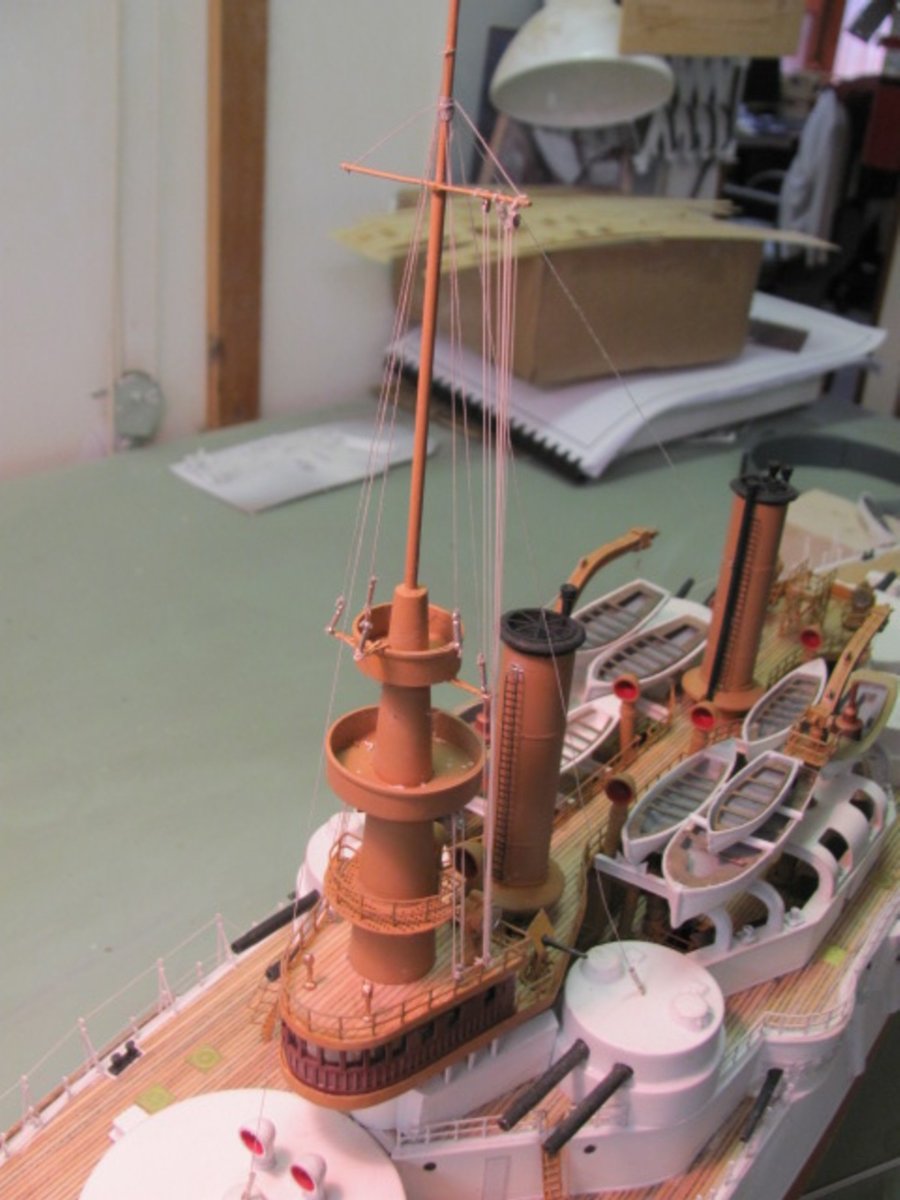
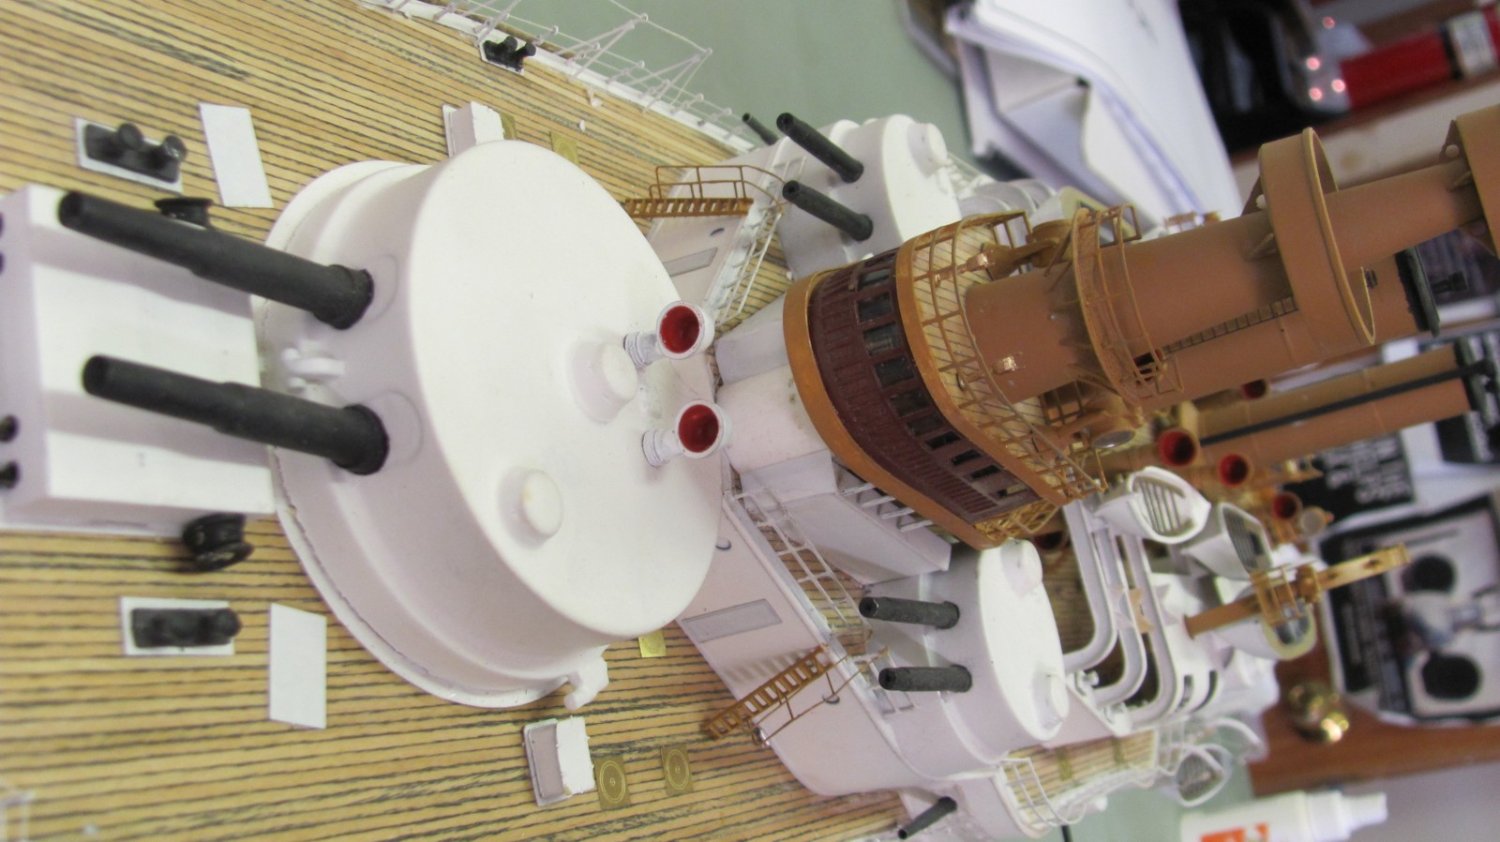
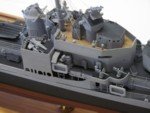
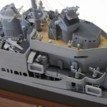
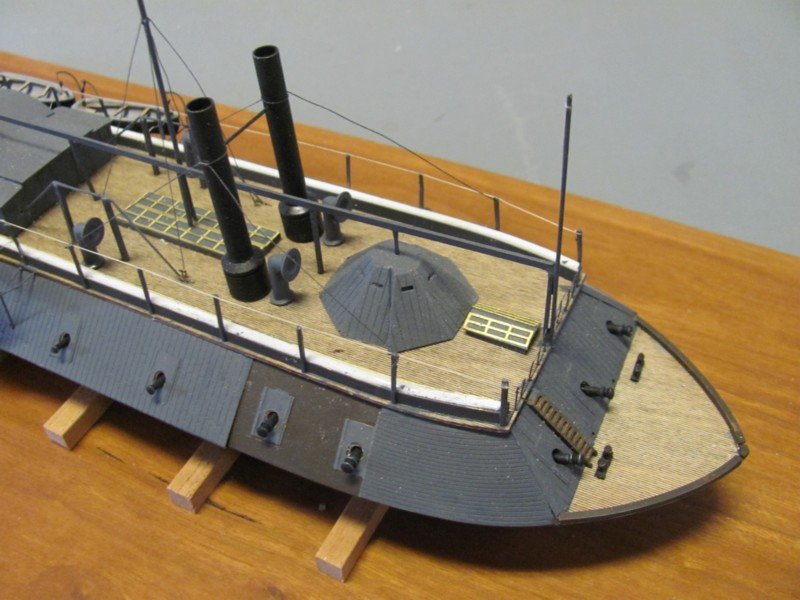
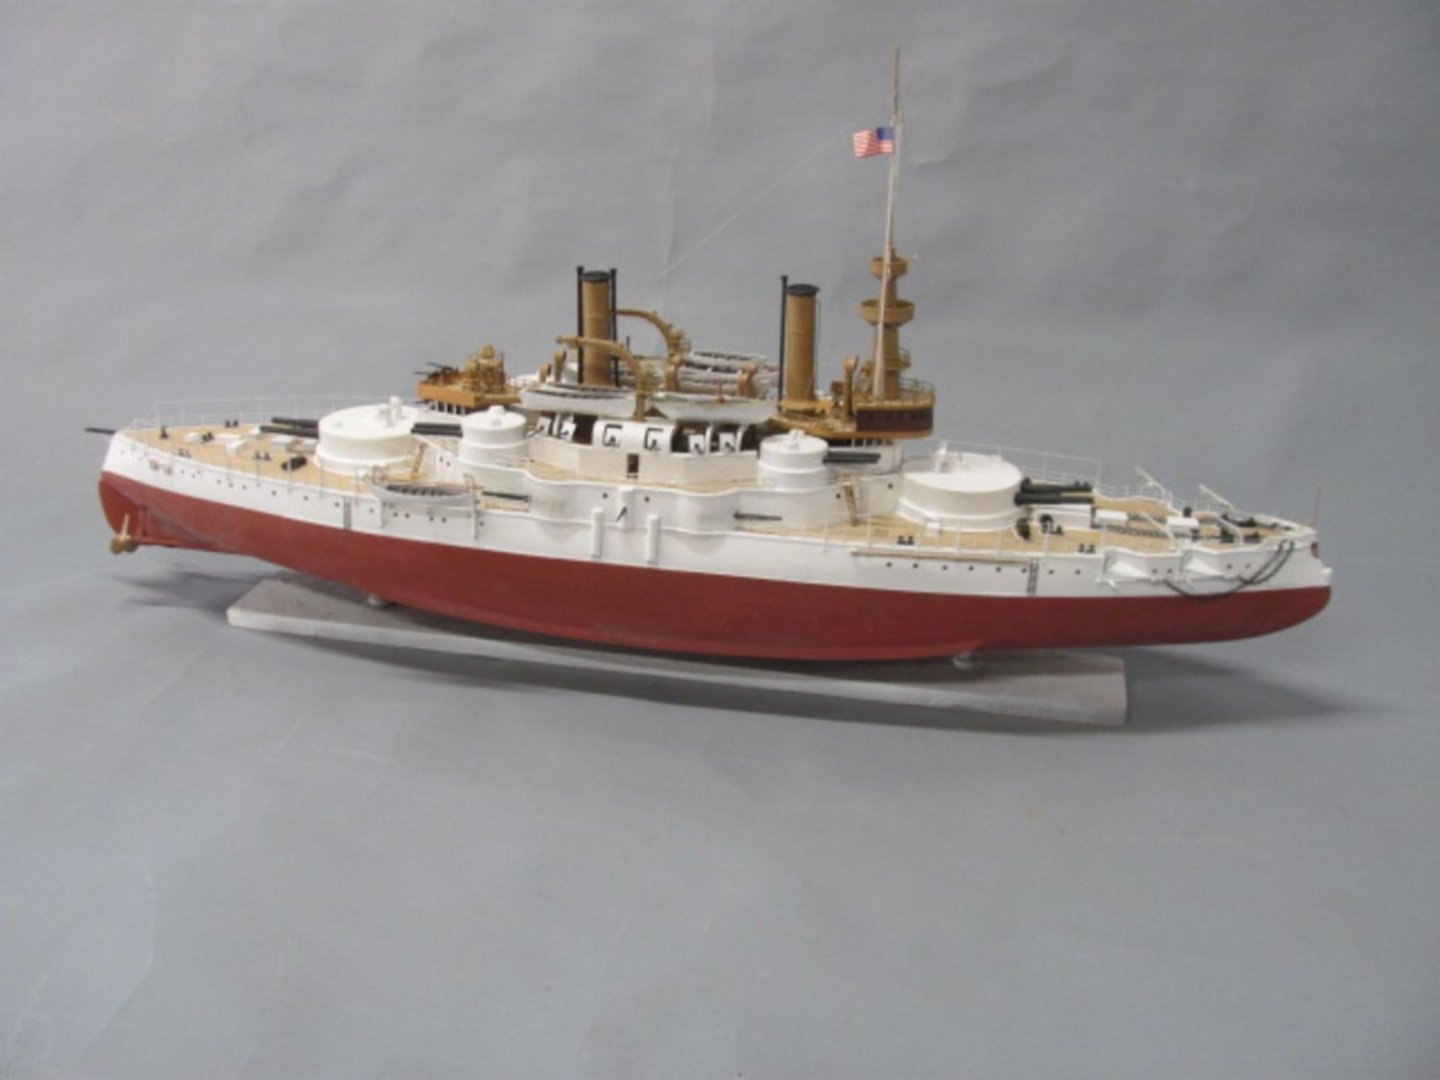
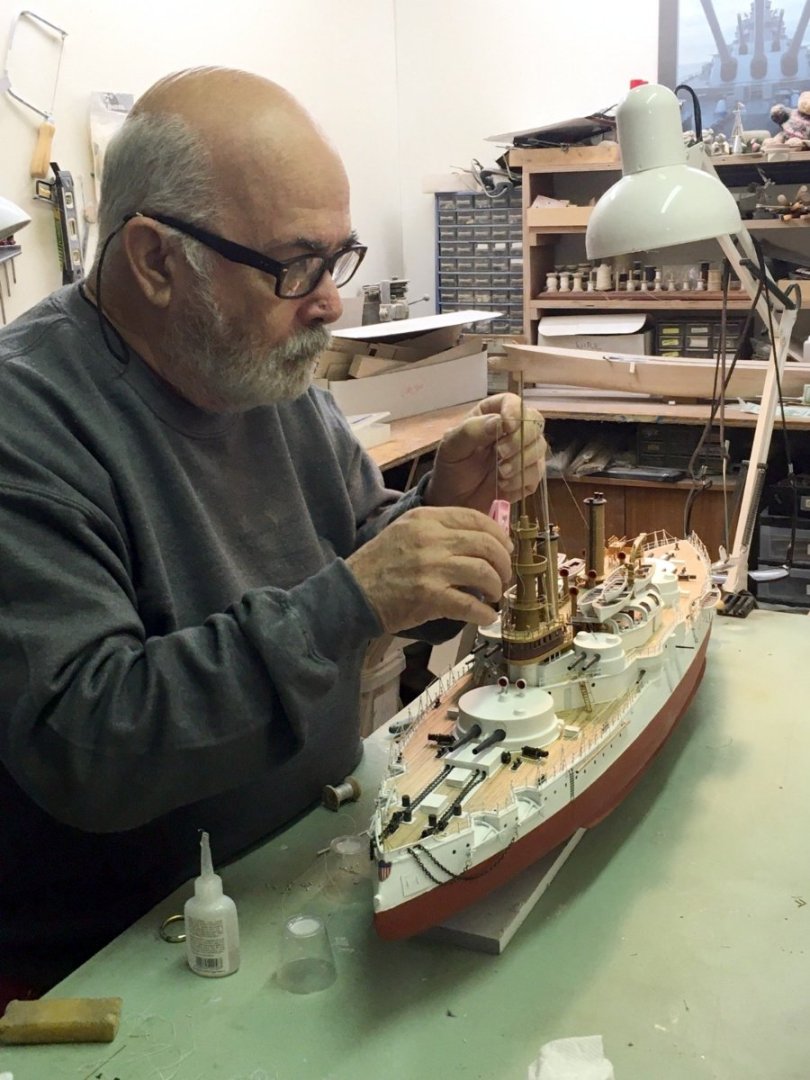
OK, the display model is done. Next week, I'll look it over and do any necessary touchup. It's always better for me to leave a finished model for a few days and look at it with fresh eyes. It's still on the building board as the case isn't done yet and the case base needs to be in place when Josh puts in the glass. Once she's mounted on the case base, I'll get some better photos.


- 194 replies
-
- 17
-
-

-
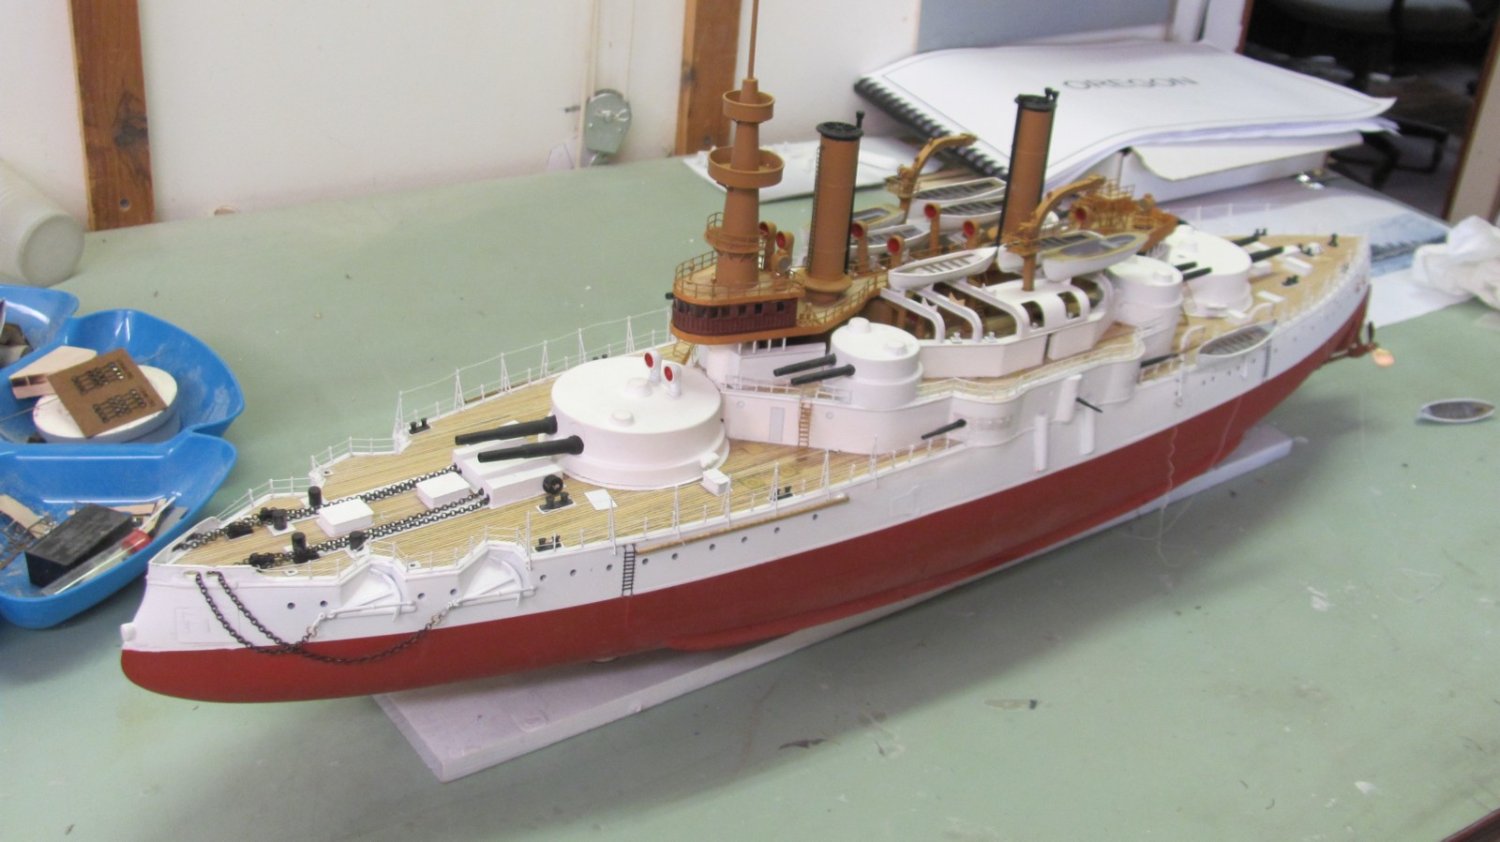
OREGON (and me) as of this afternoon. Josh made me the rest of the parts, so the model should be done in a day or so. Next week I'll update the plans and complete the instruction manual.
-
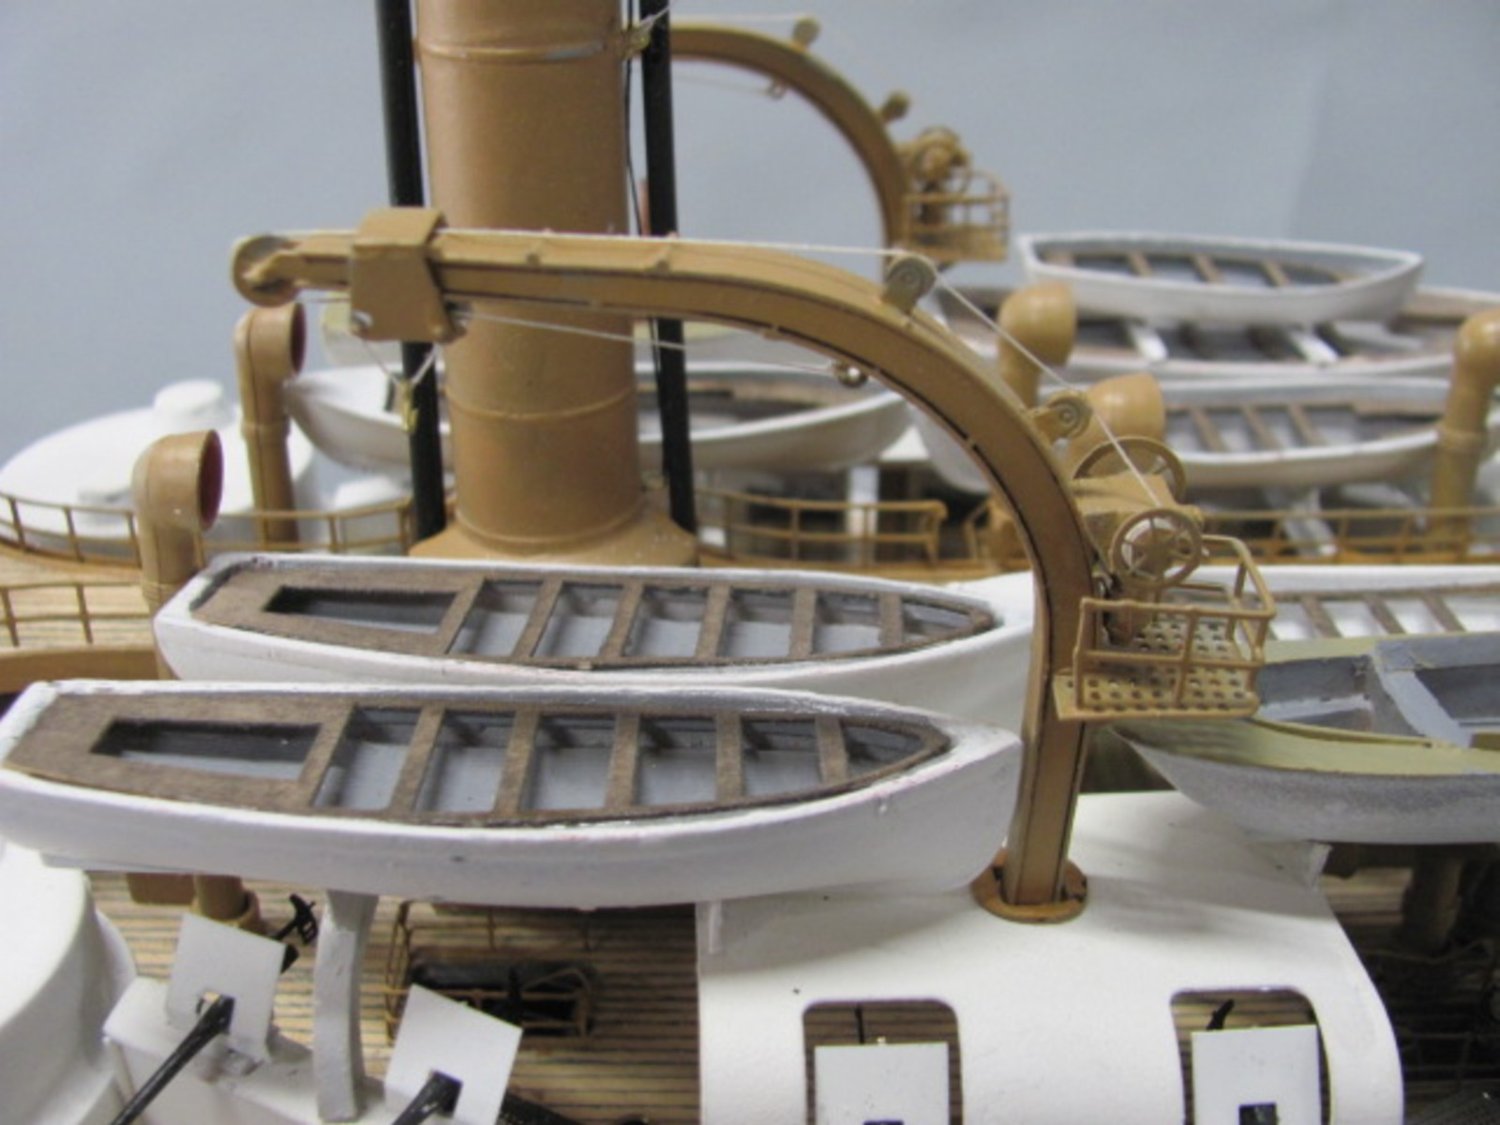
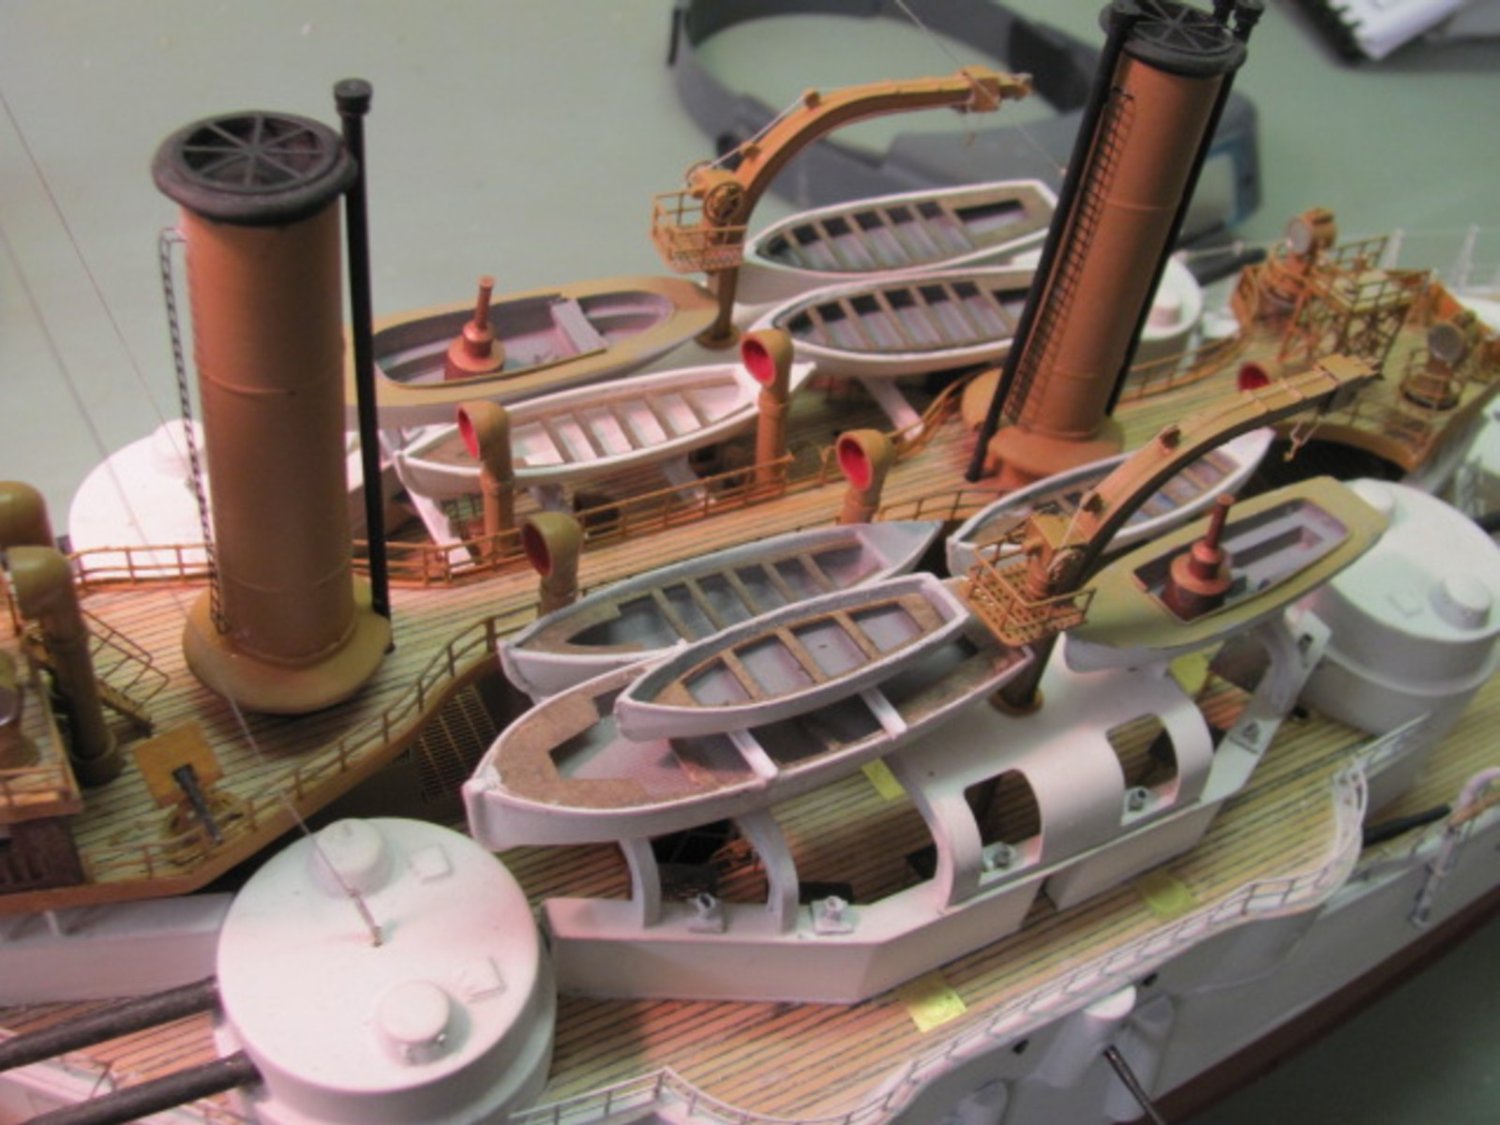
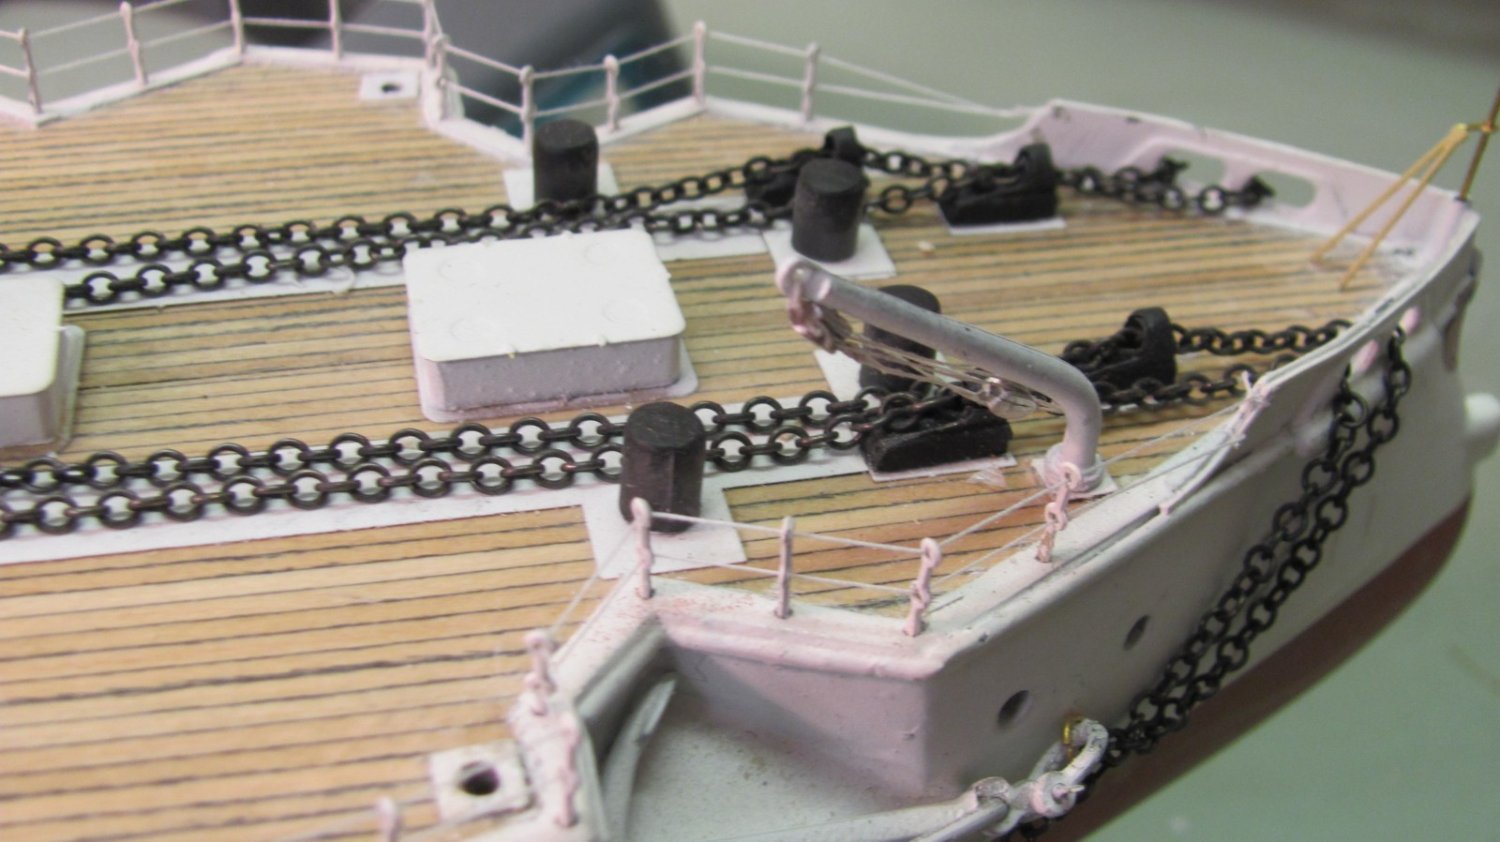
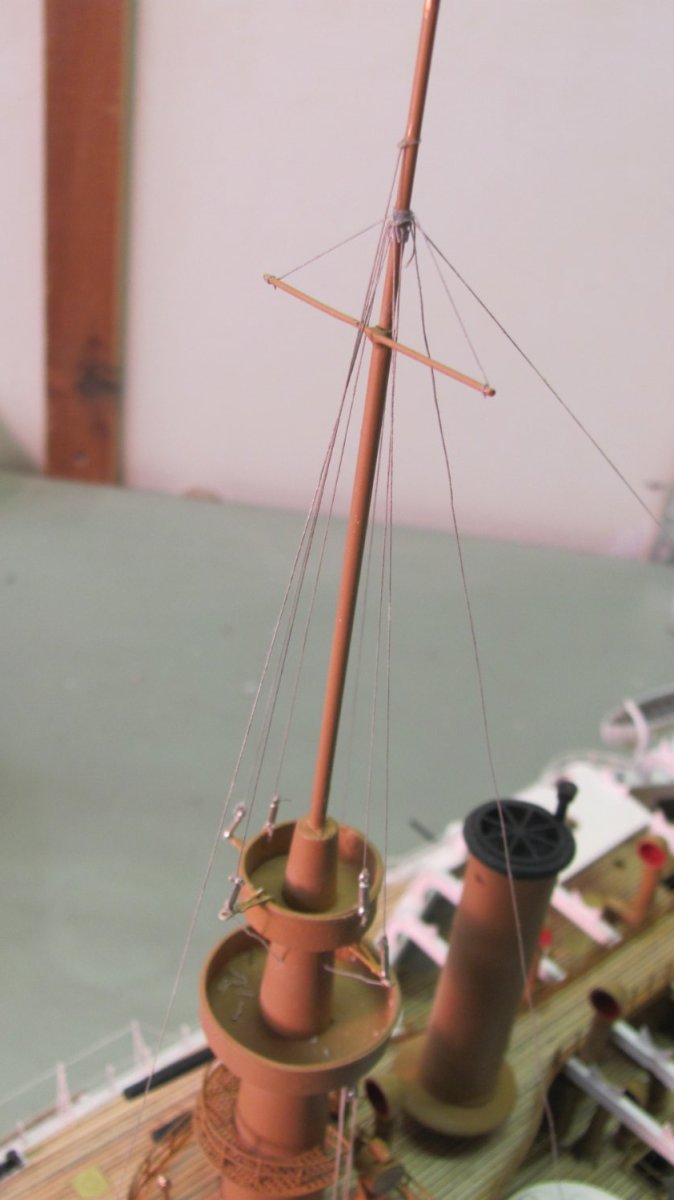
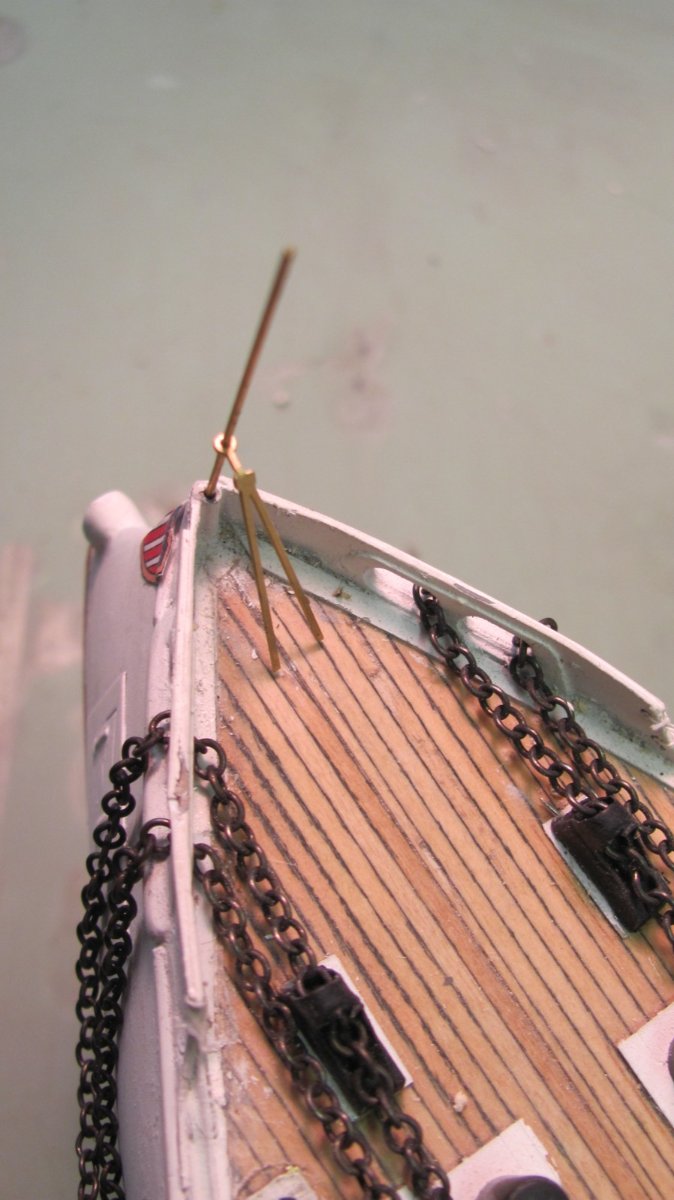
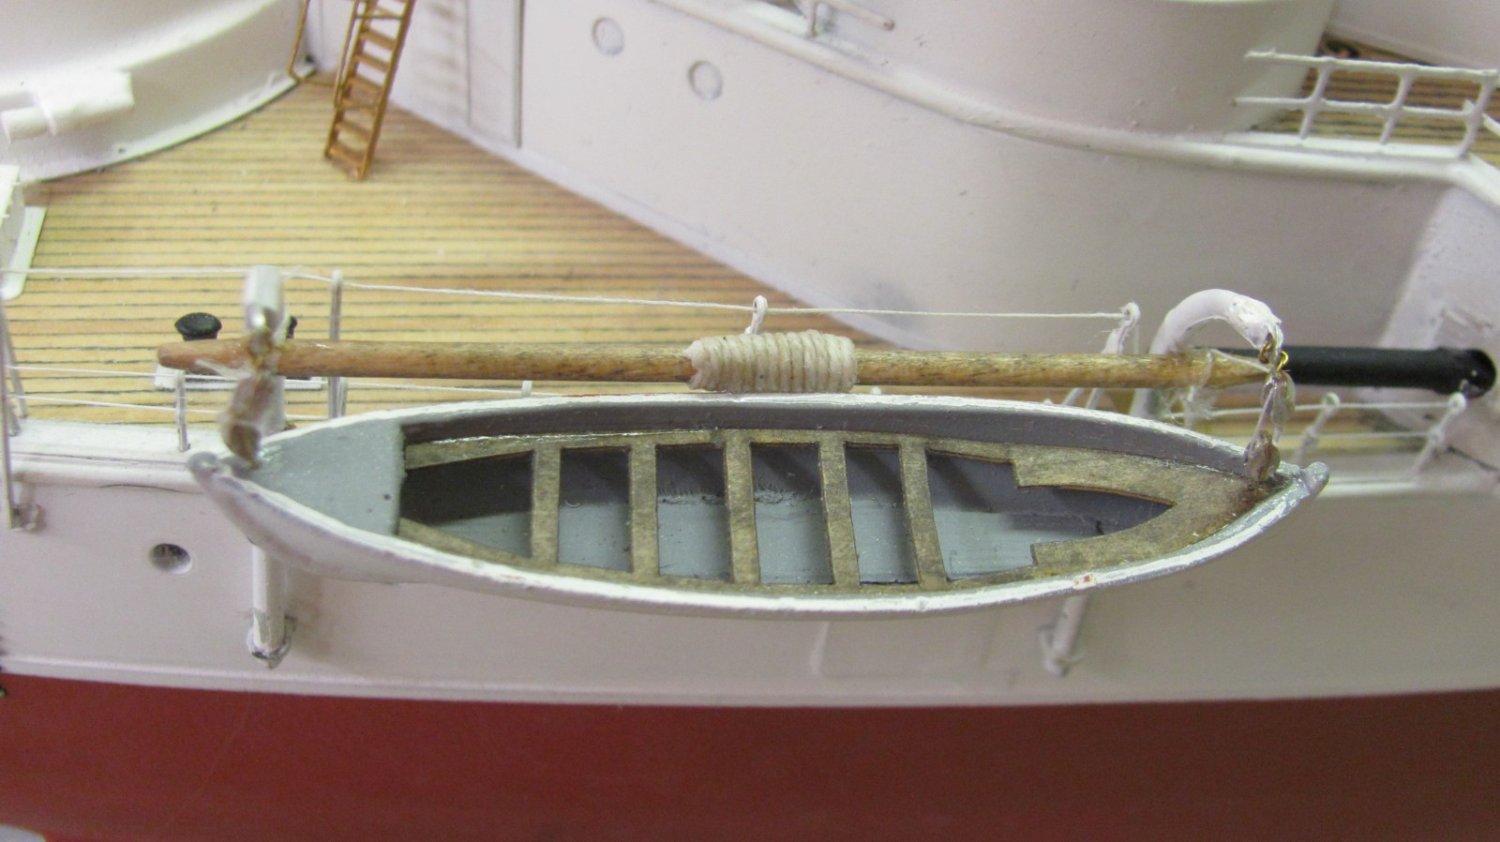
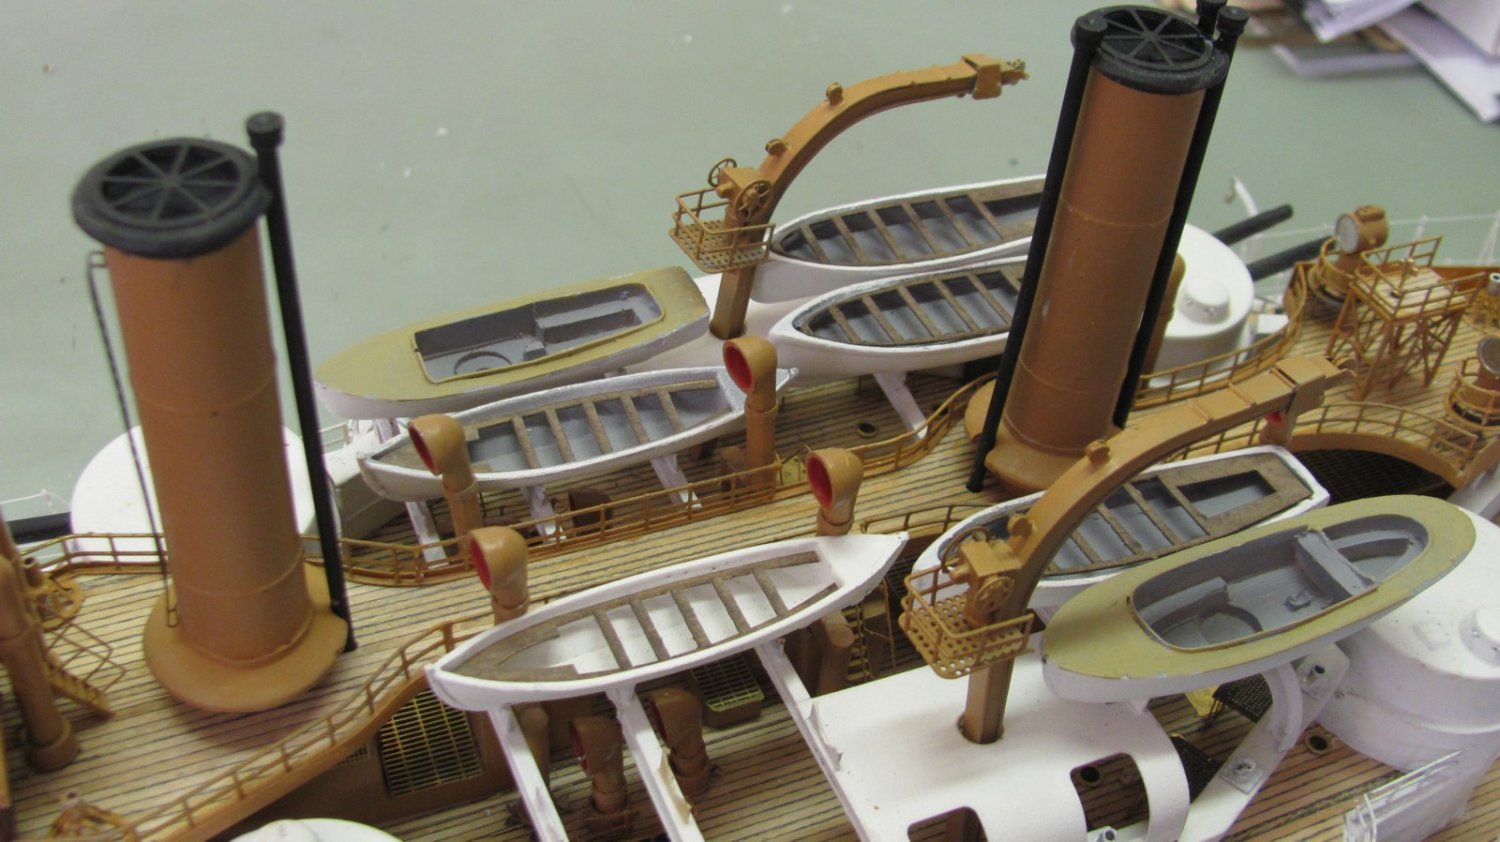
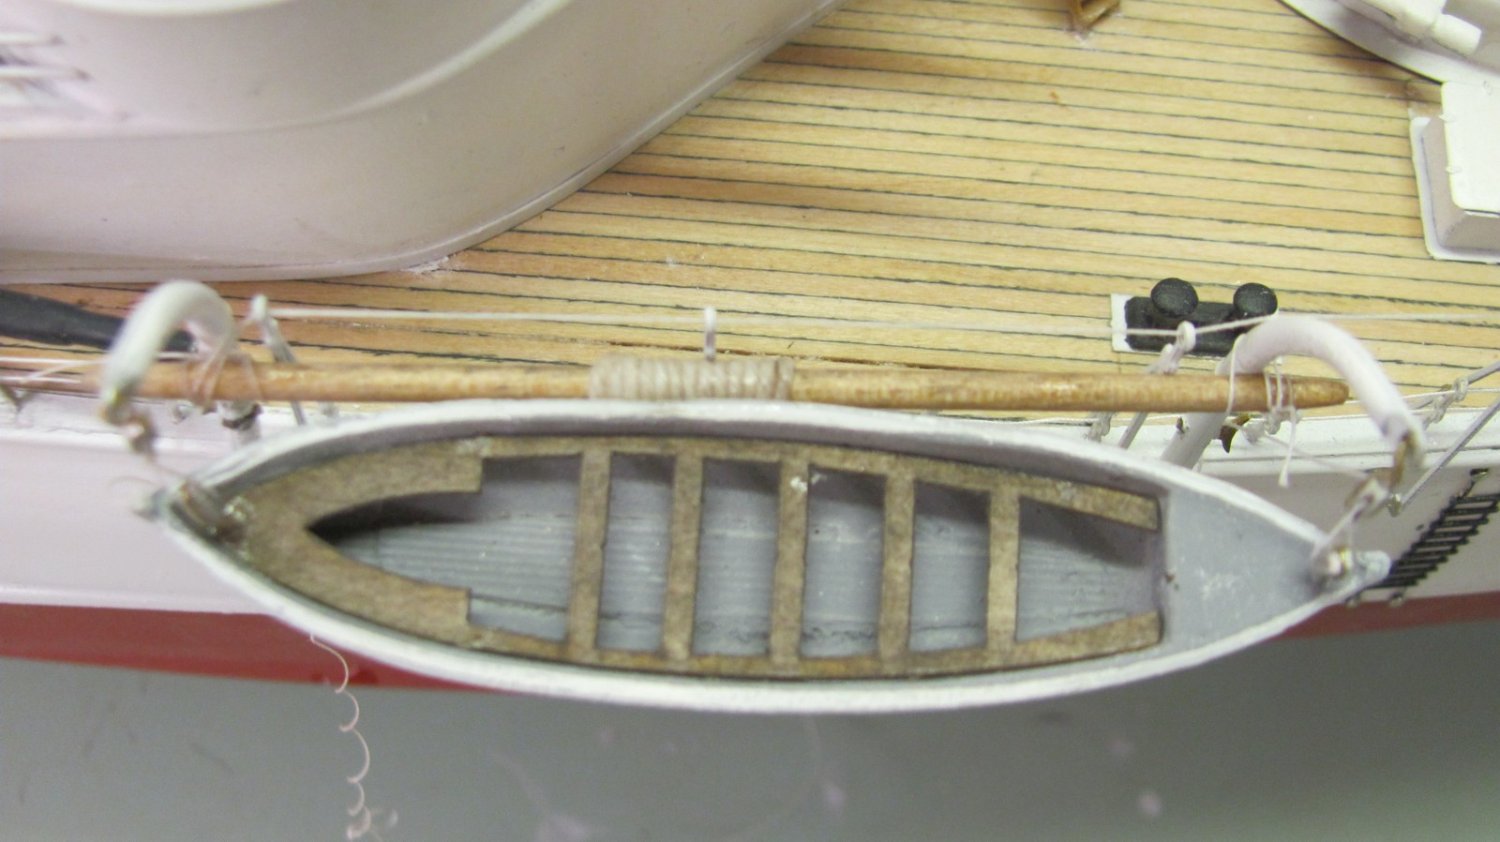
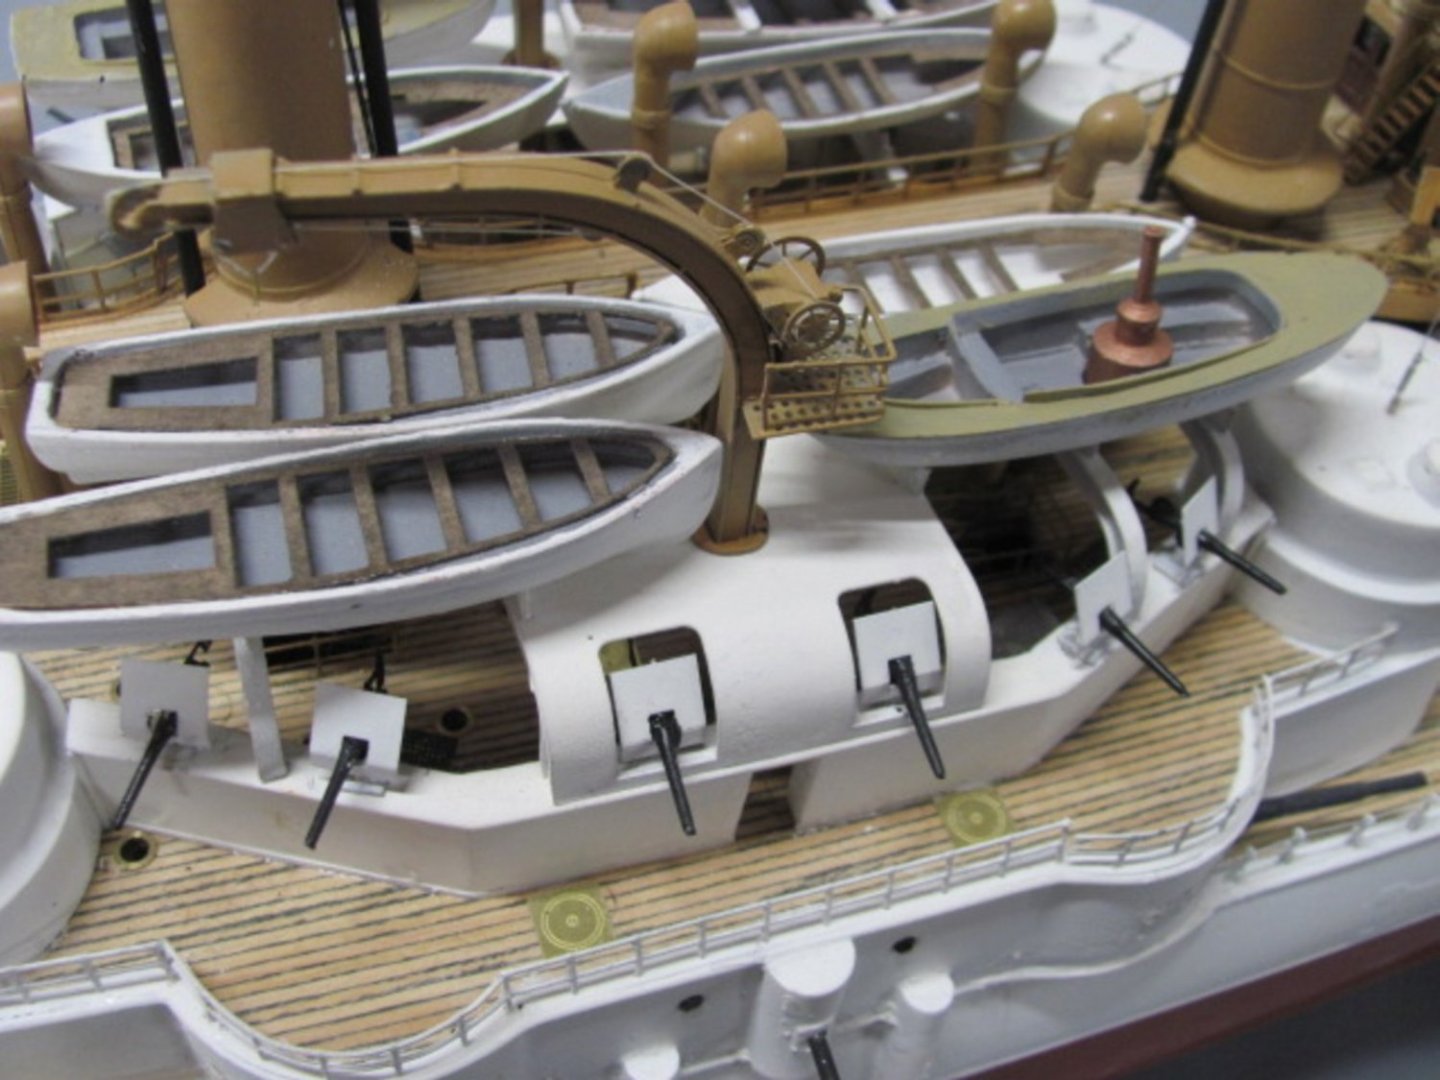
The full complement of boats is on and half of the signal flag halliards.
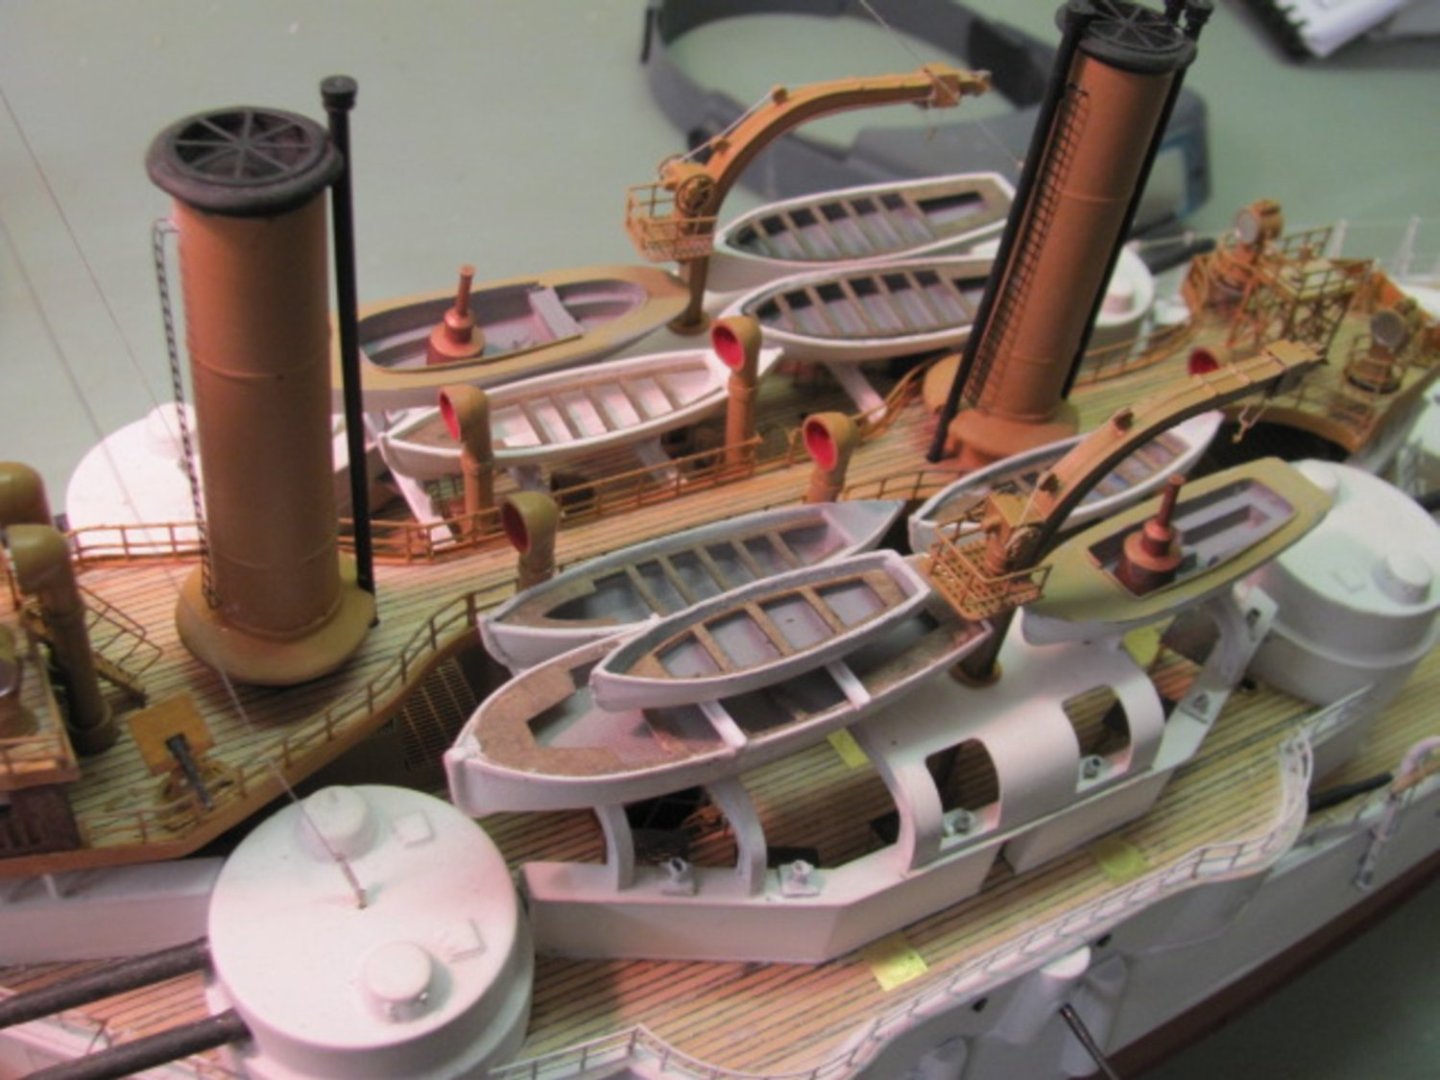

-
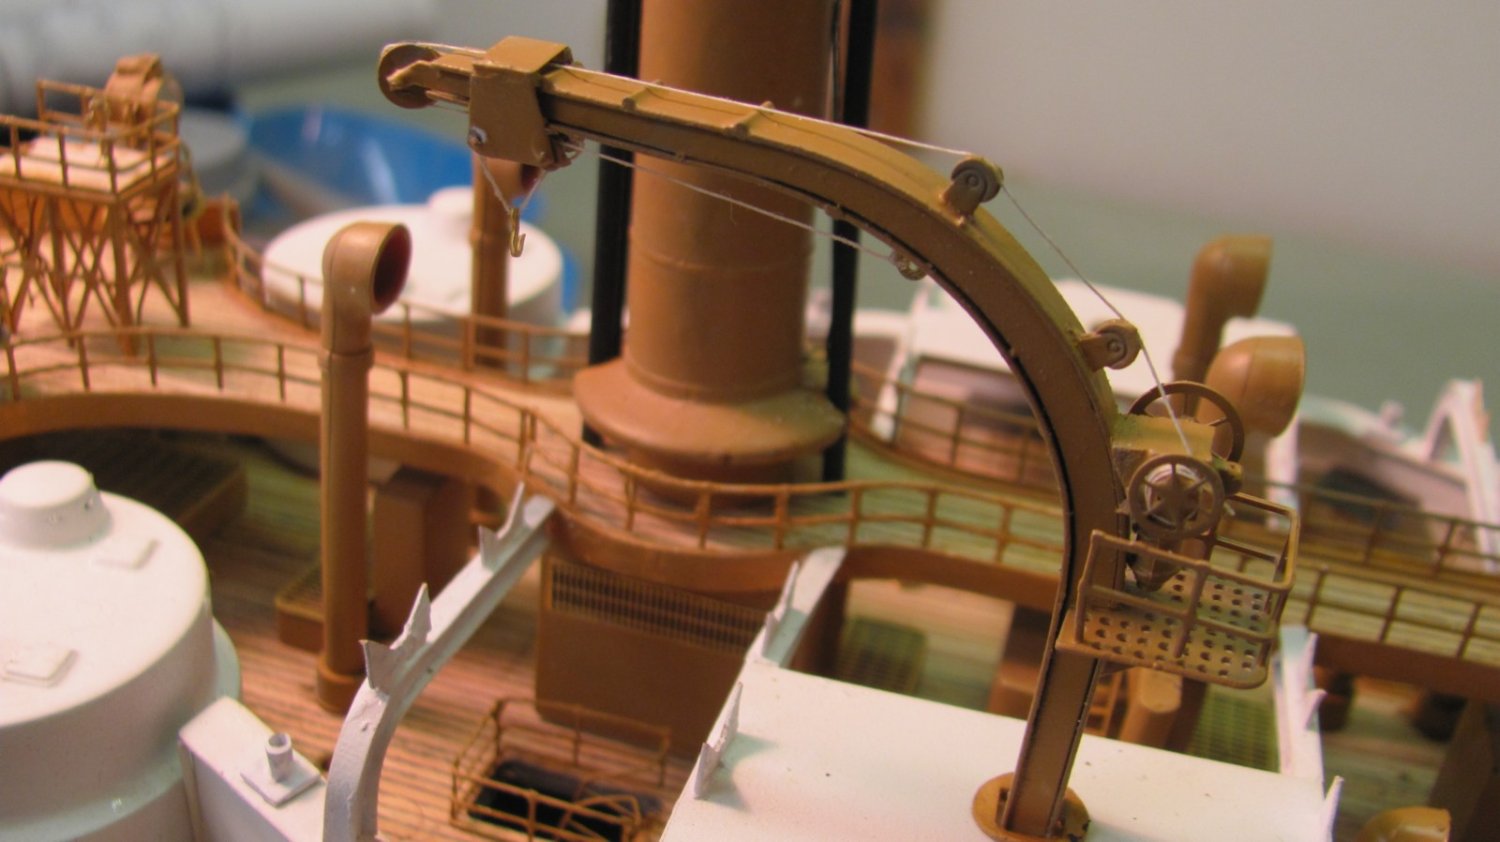
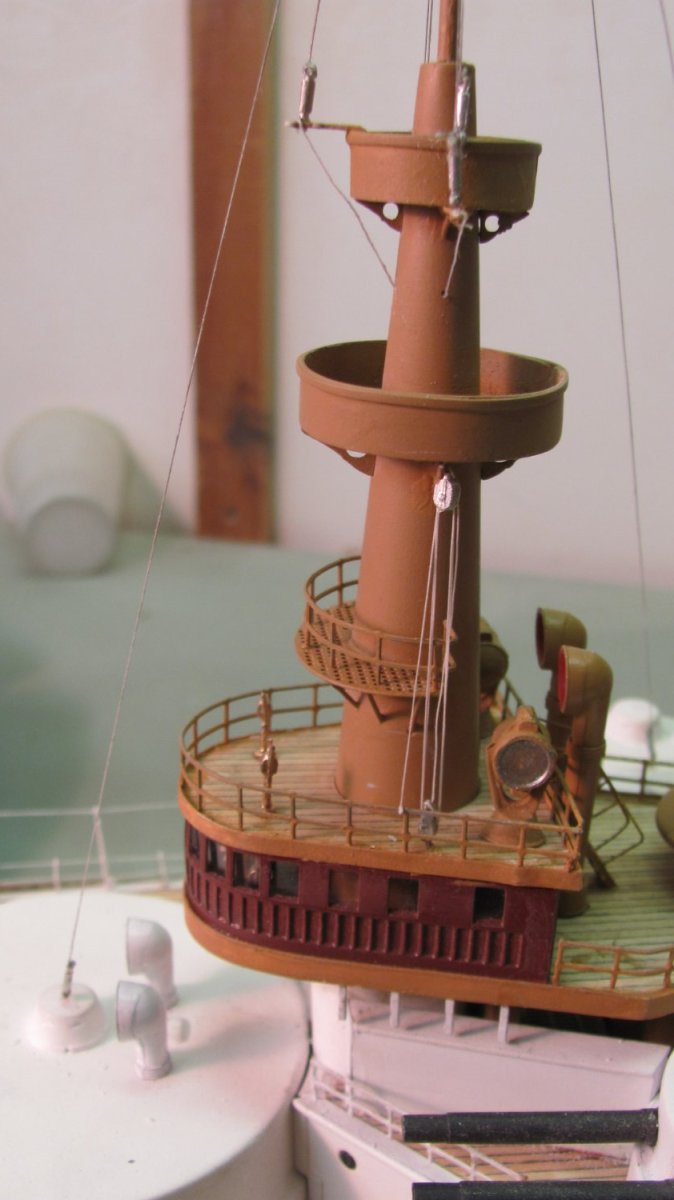
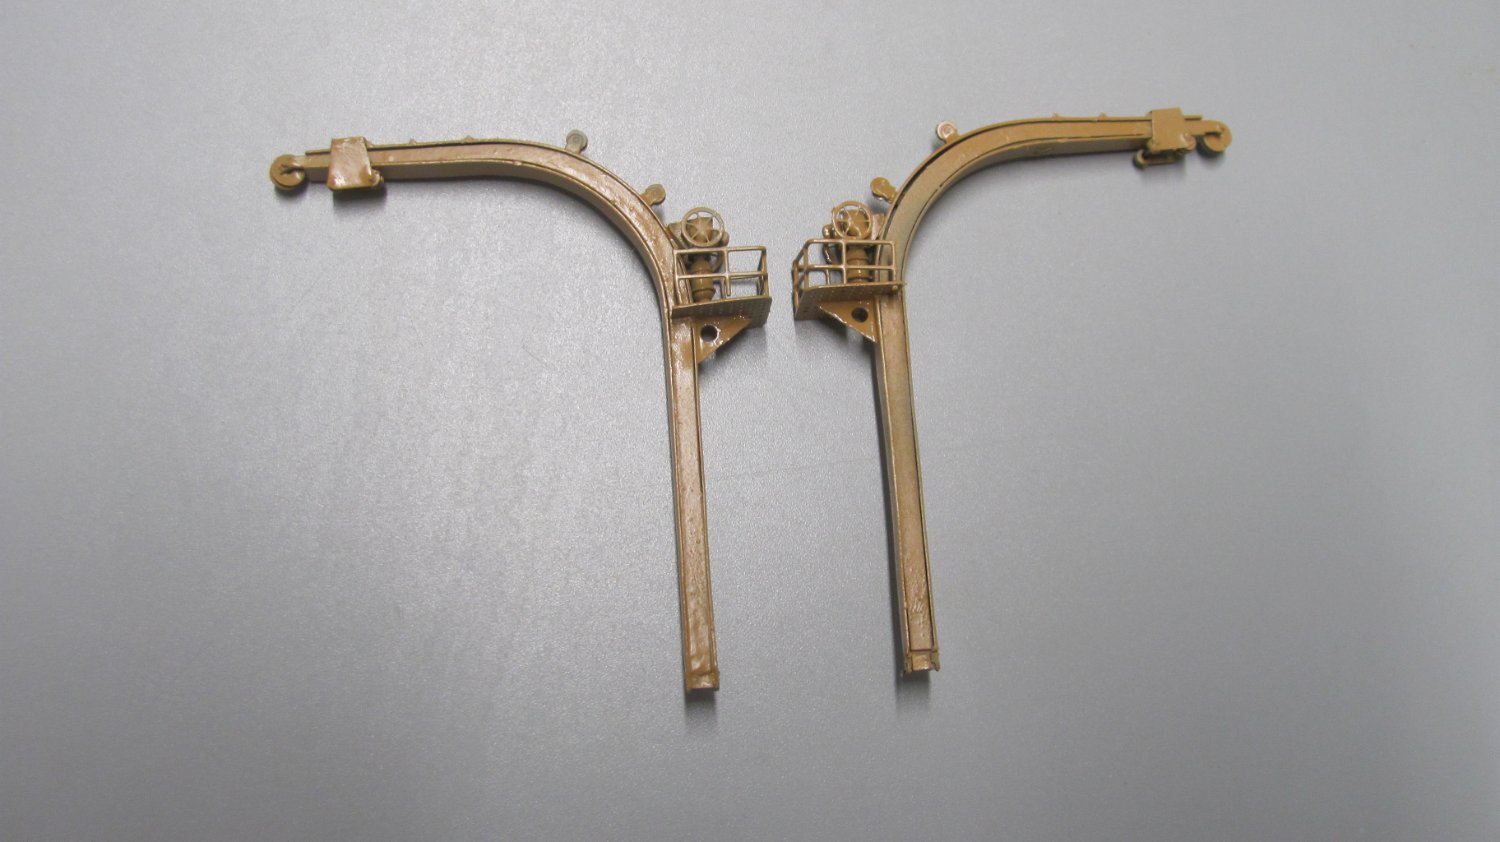
One of the boat cranes and one anchor davit rigged. Boats go on next.

-
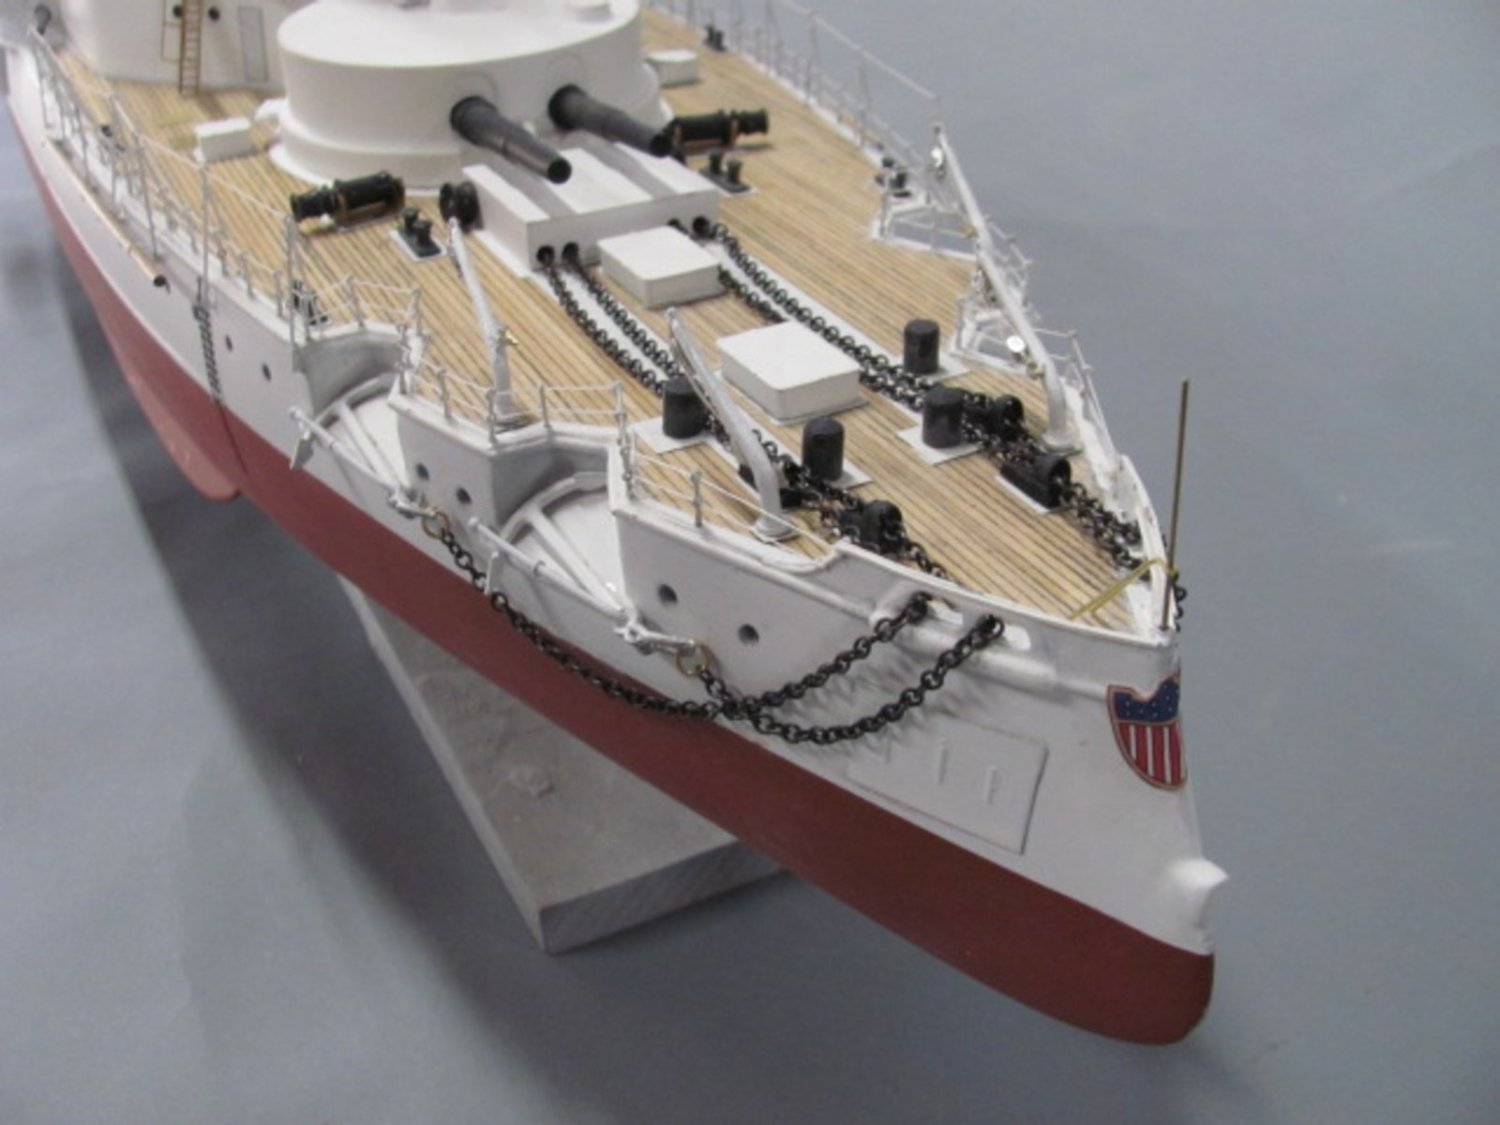
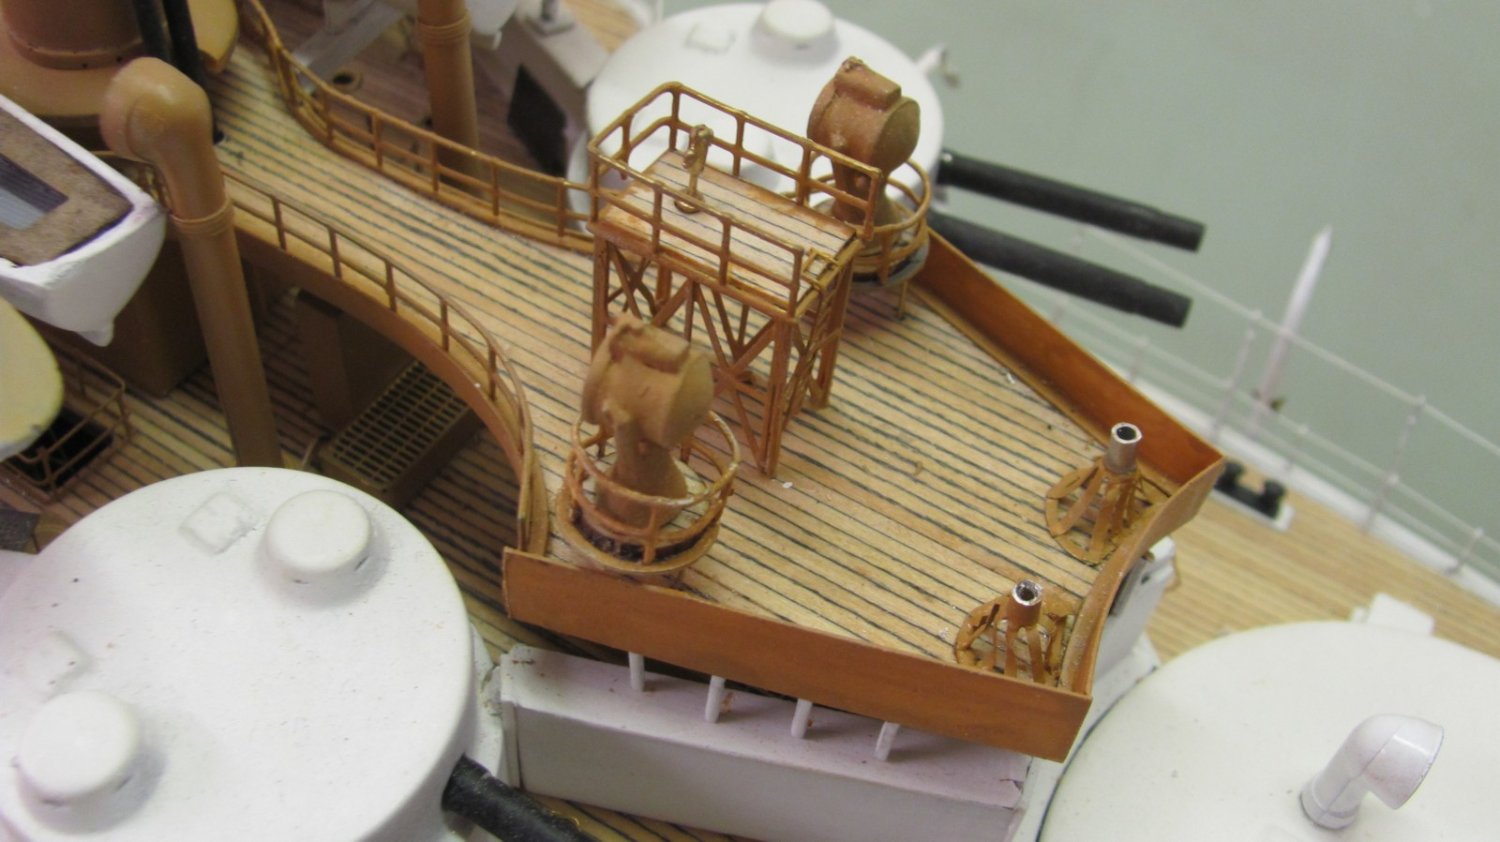
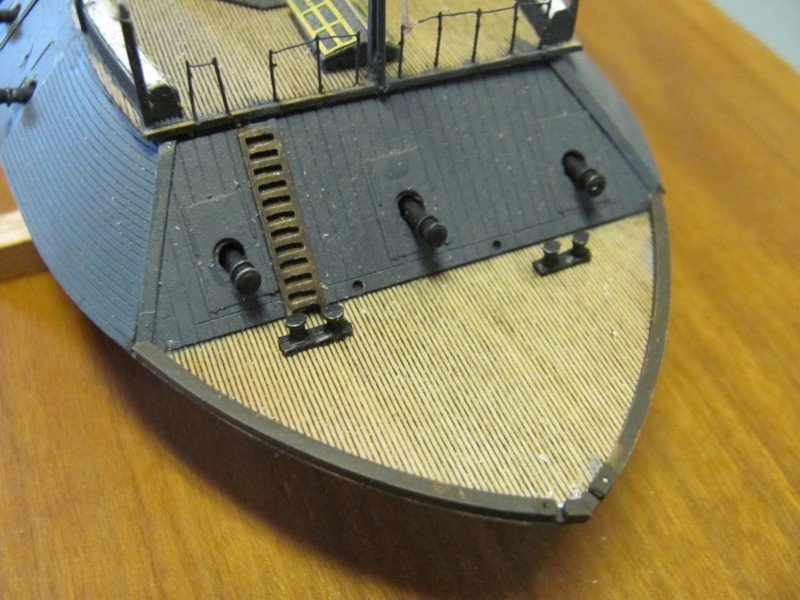
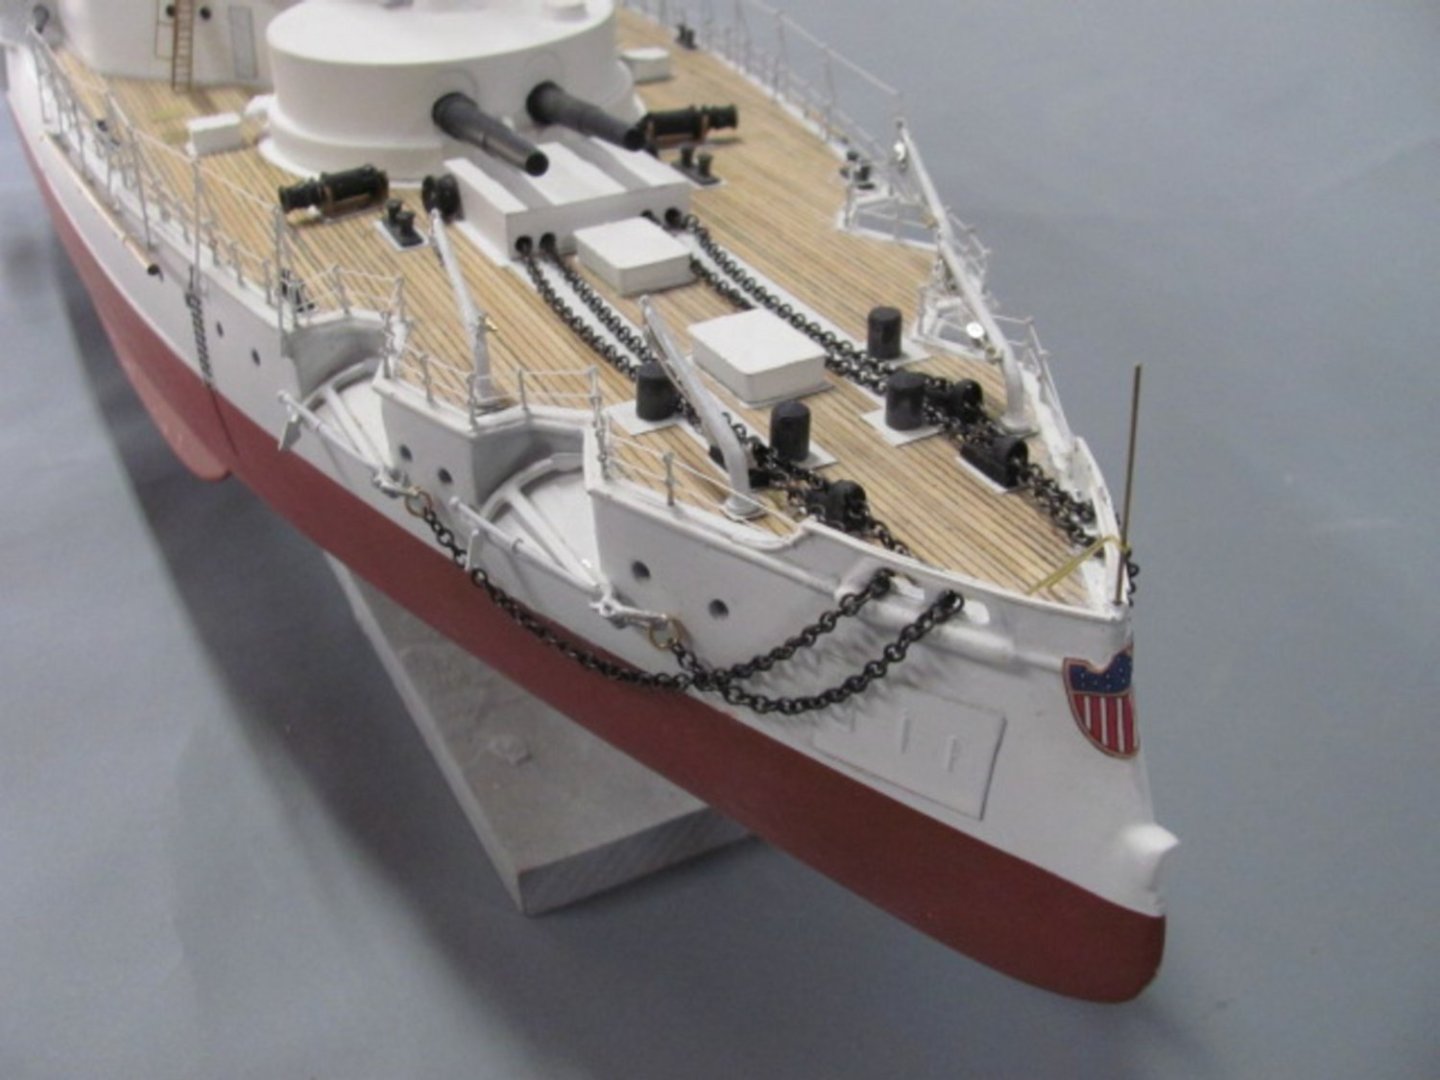
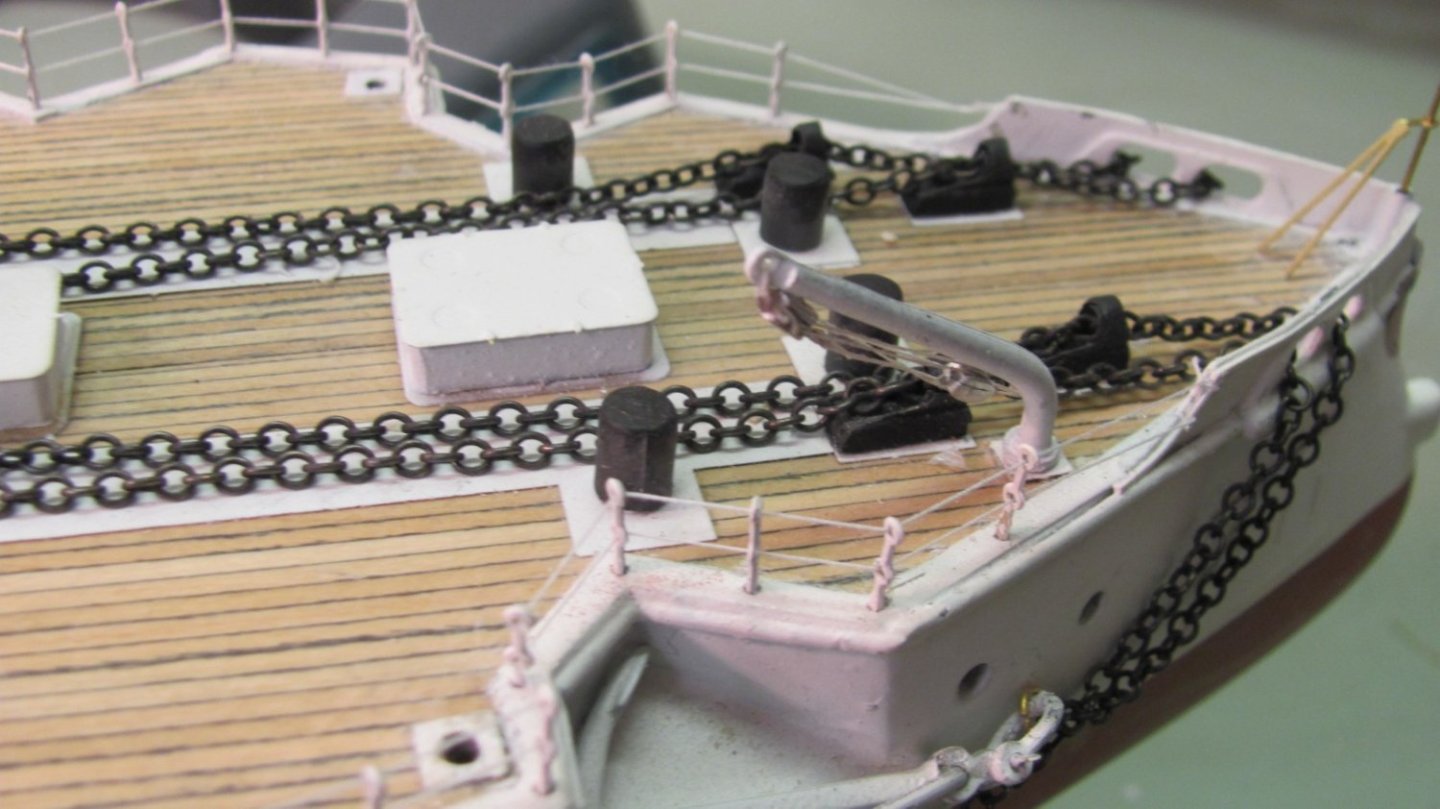
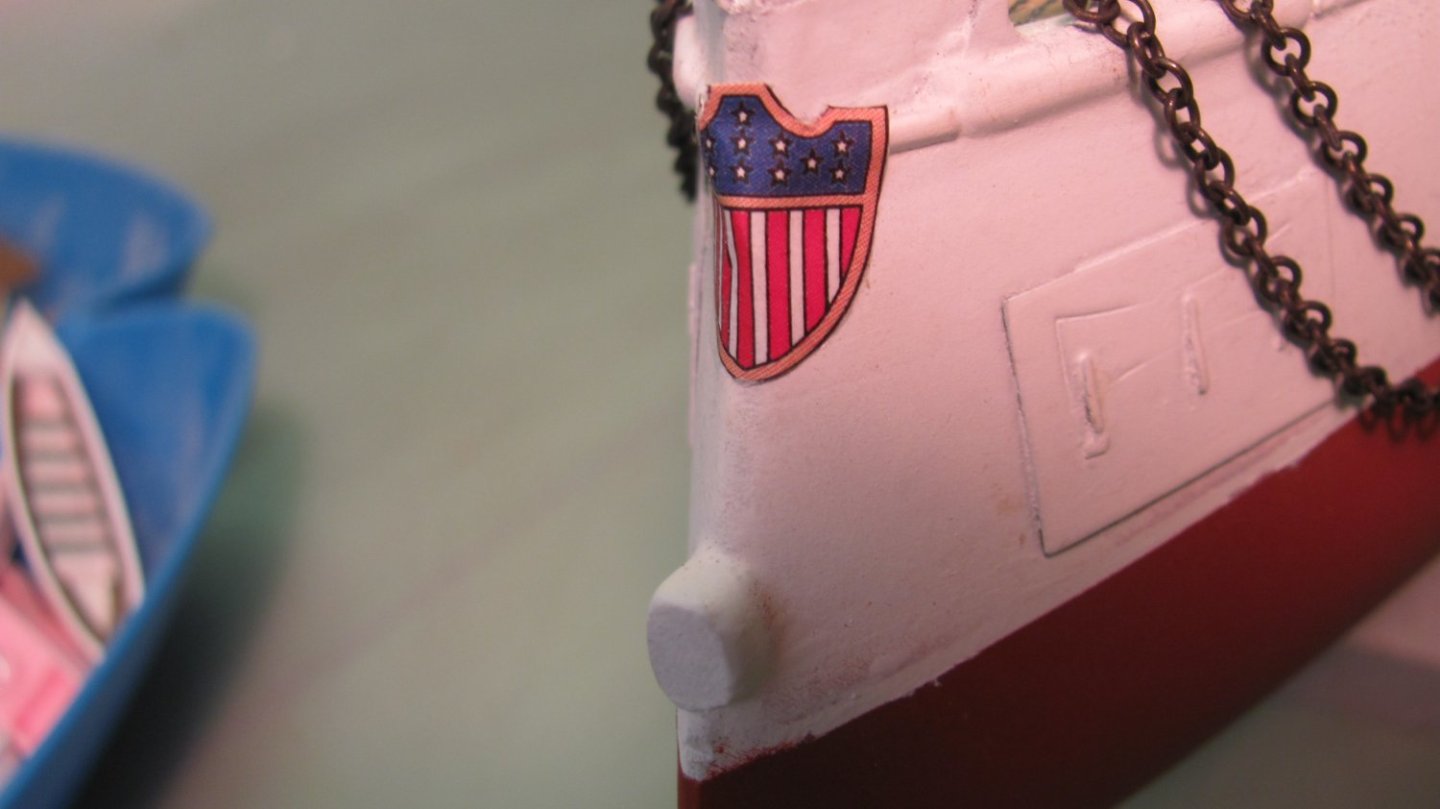
Doing my favorite thing - rigging (grump...). There are two bow scrolls in the kit - one photo-etched brass and one printed paper. The brass one is for those with really, really, really fine paint brushes. The stripes and stars are raised. The paper one is for those of us who want really nice sharp paint lines, but can't paint for crap...


- 194 replies
-
- 11
-
-
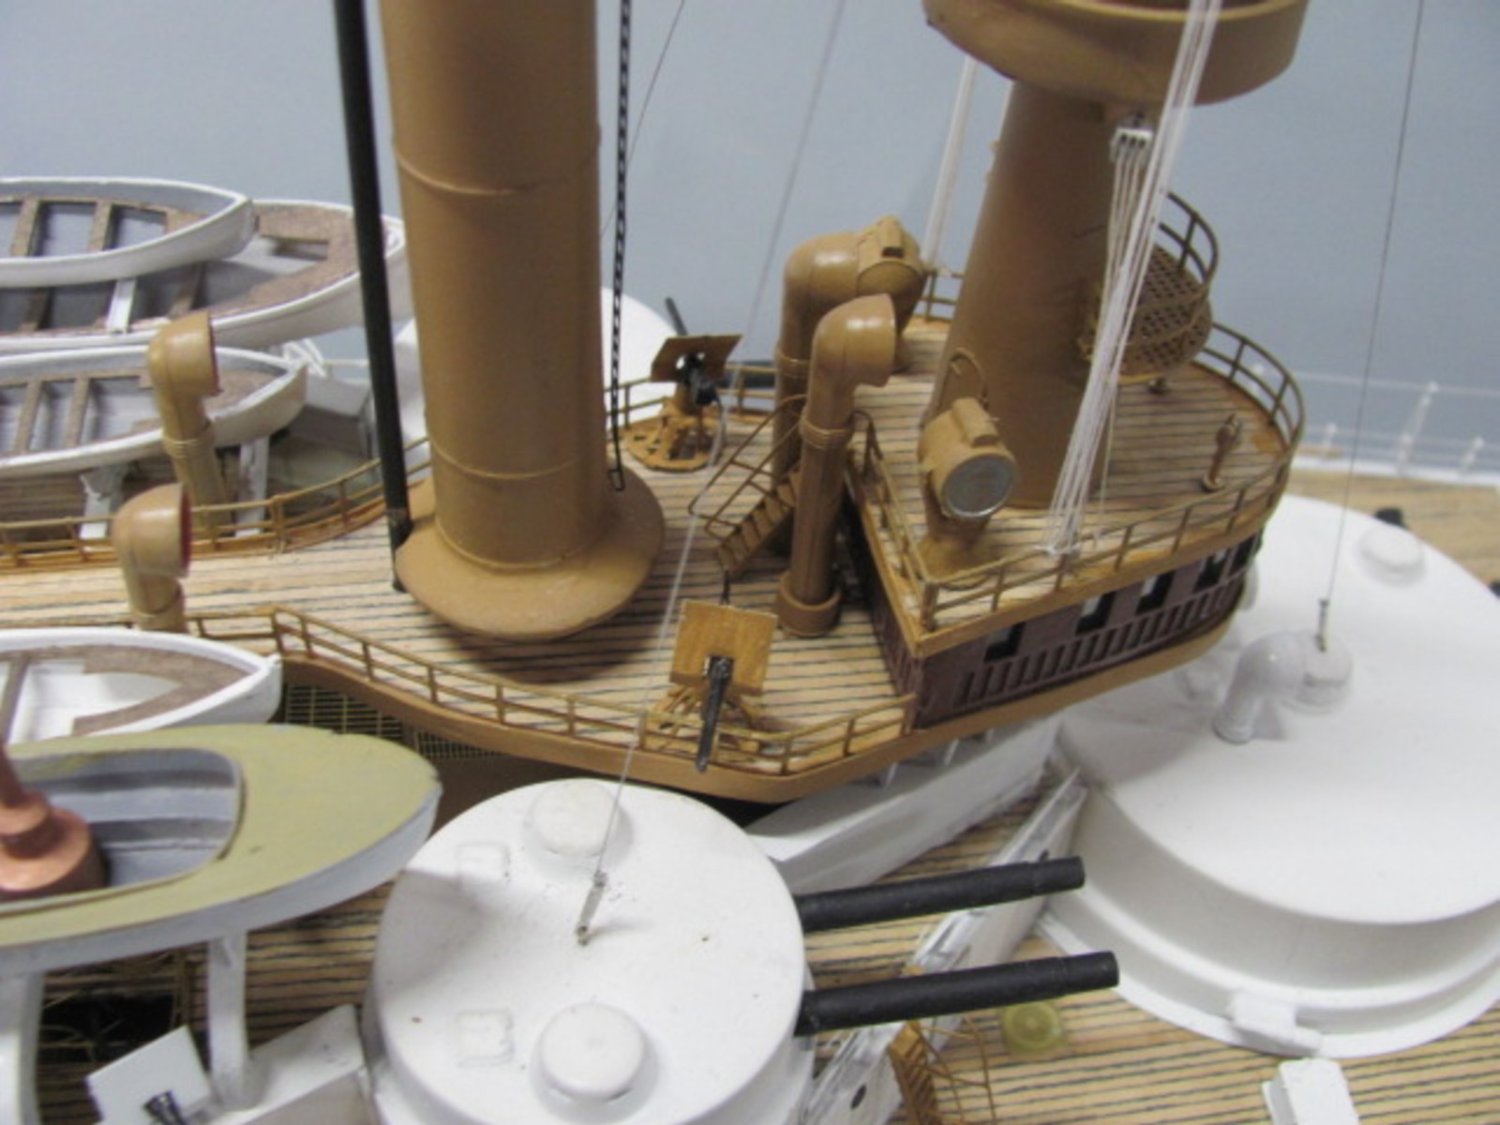
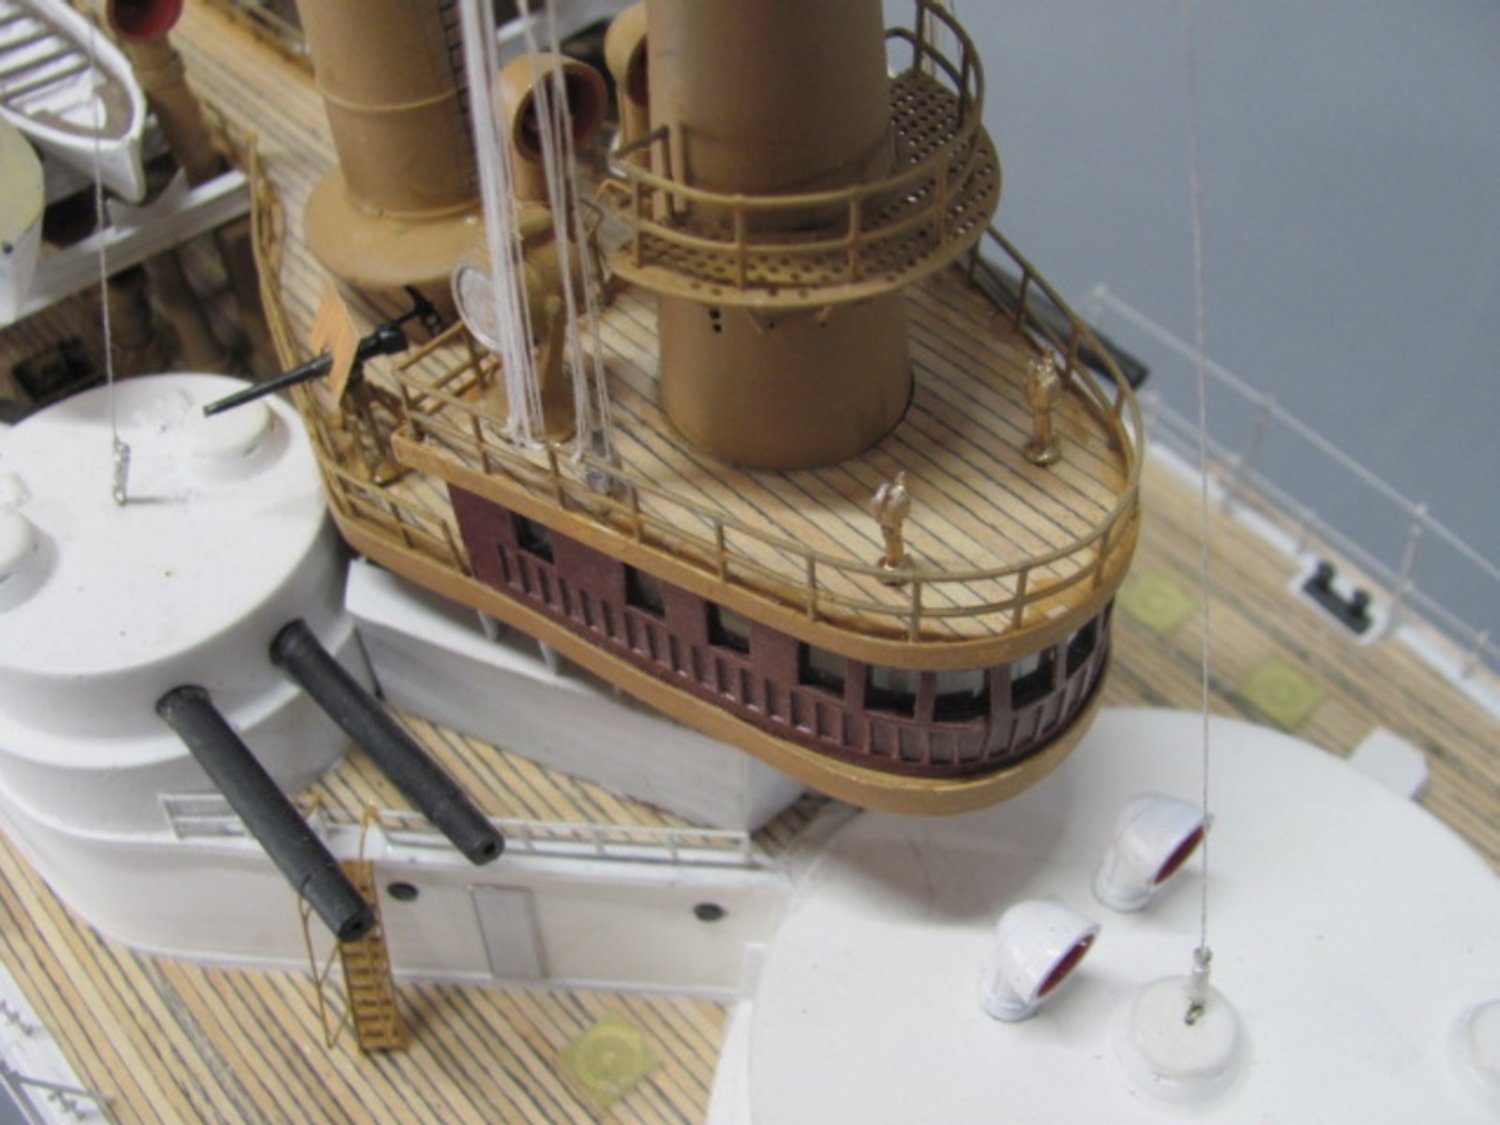
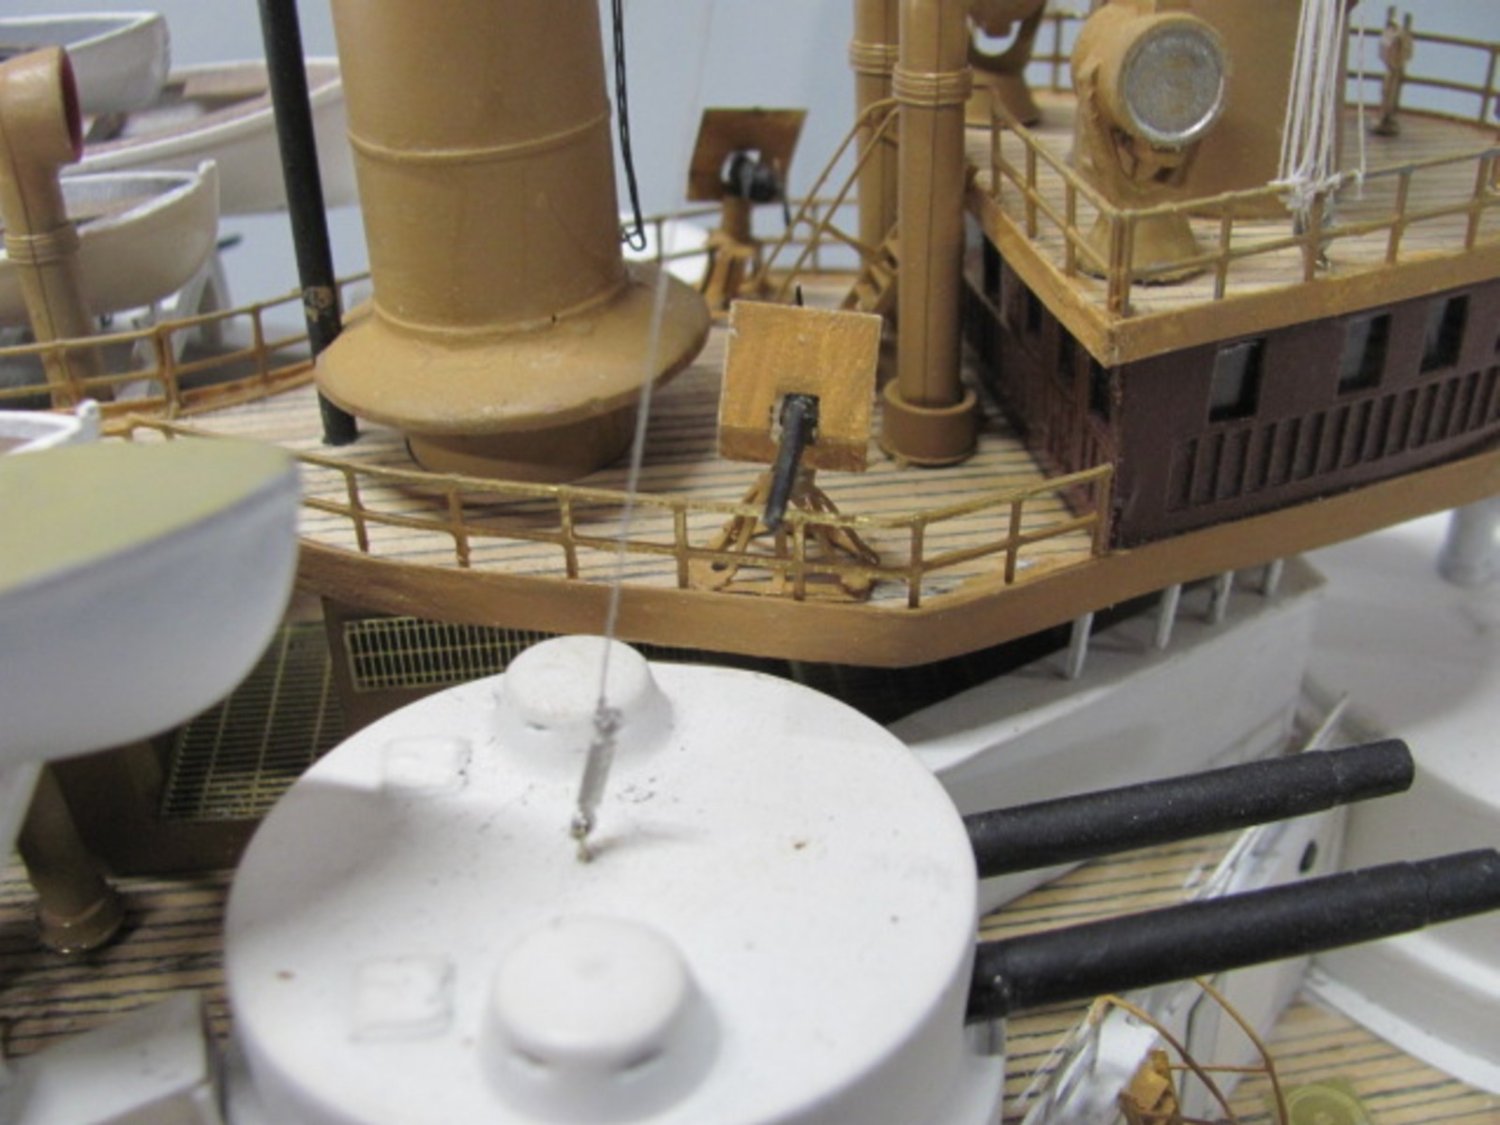
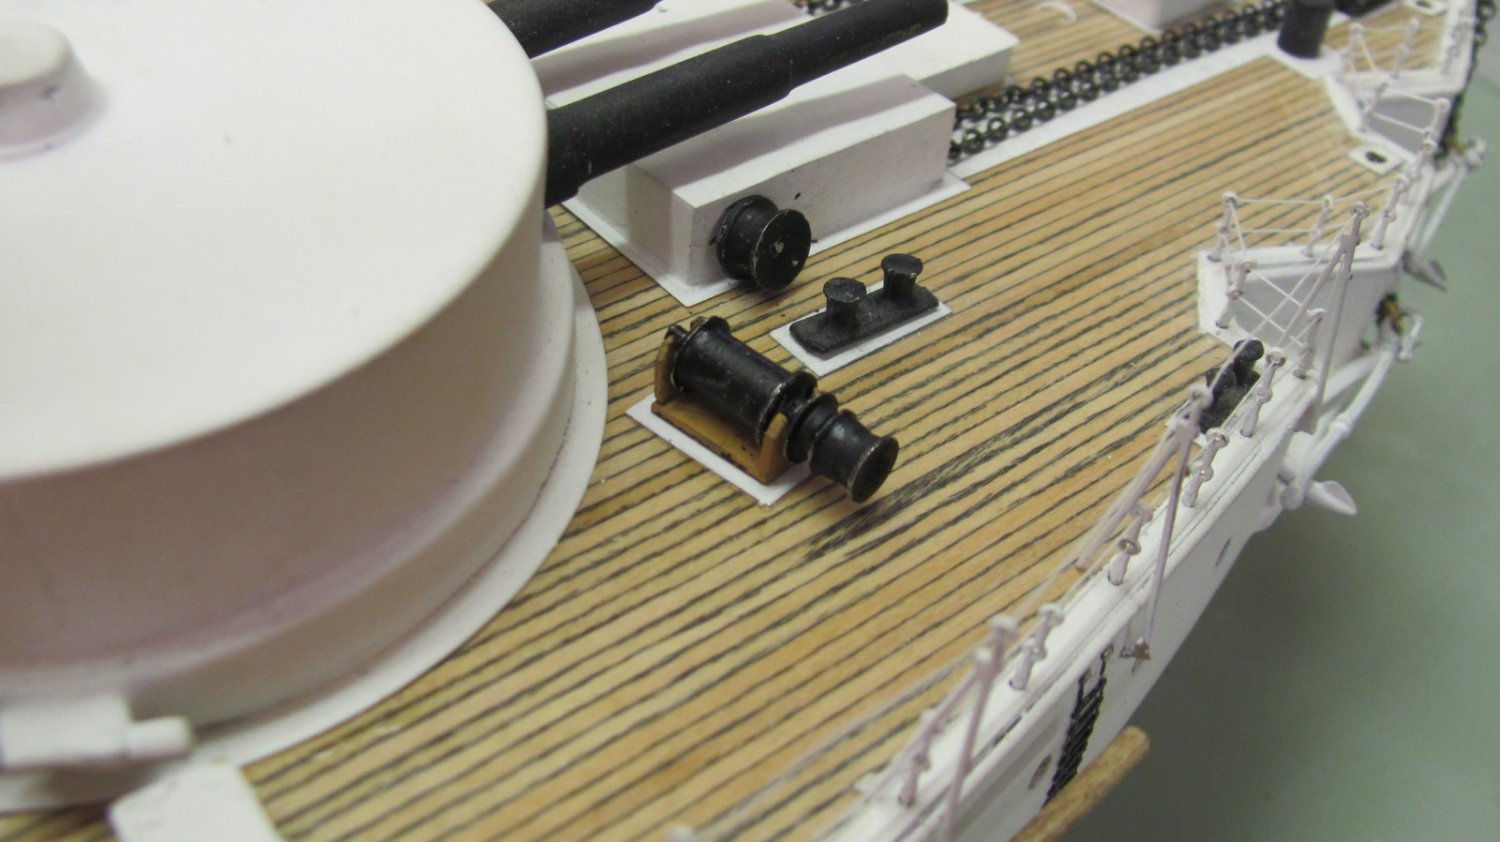
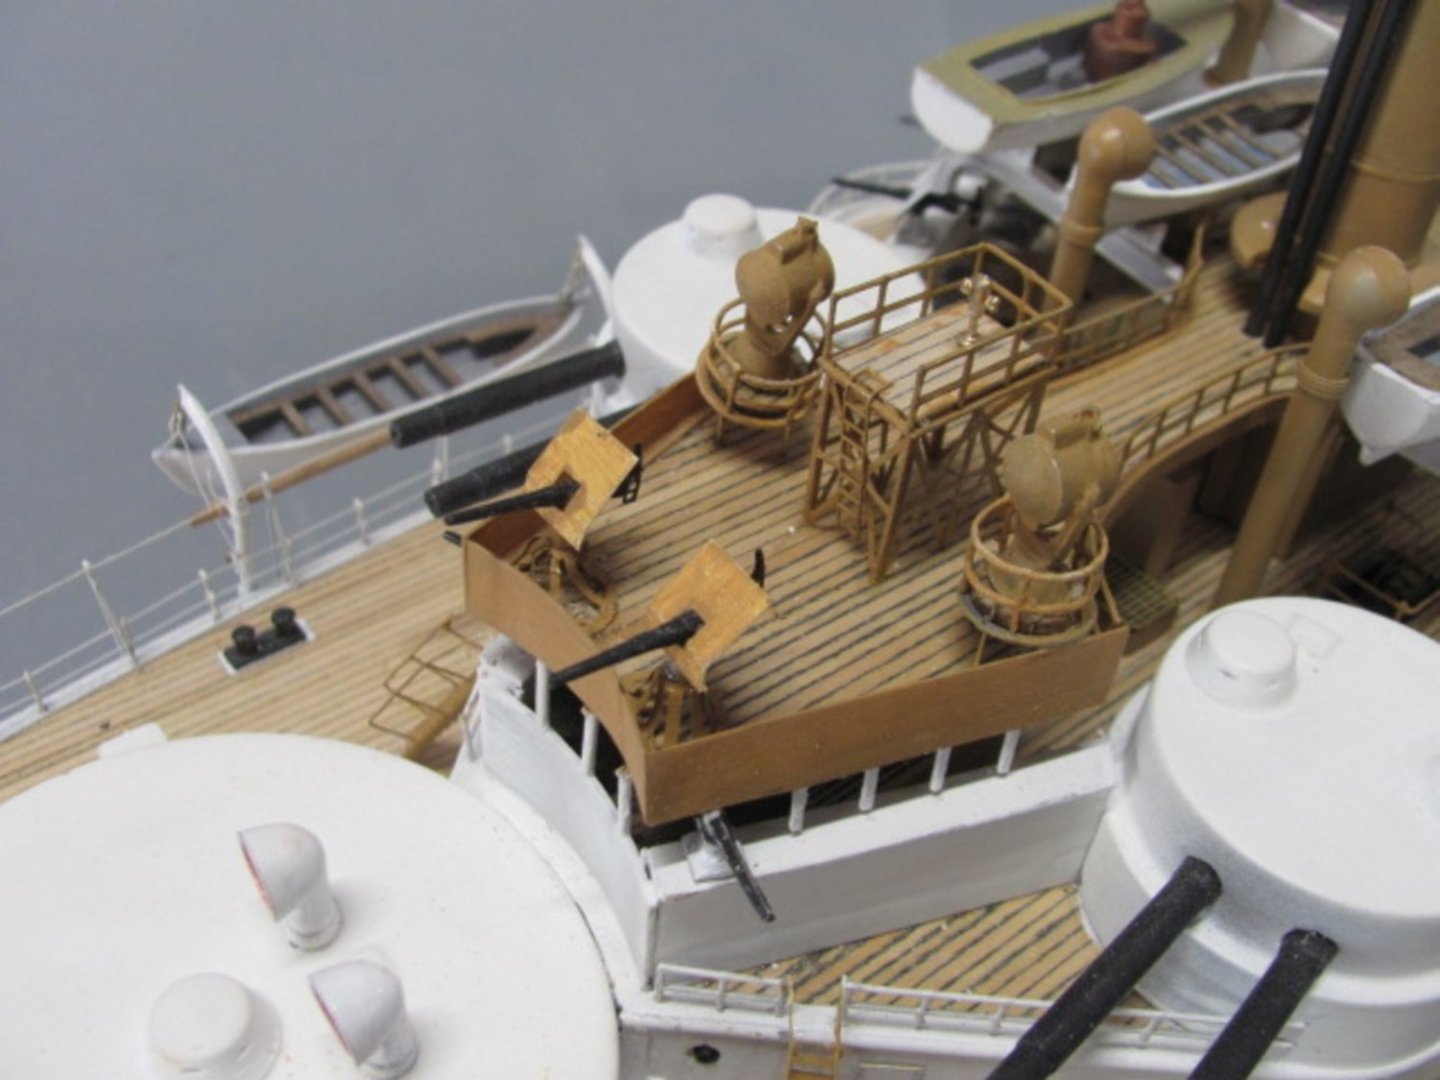
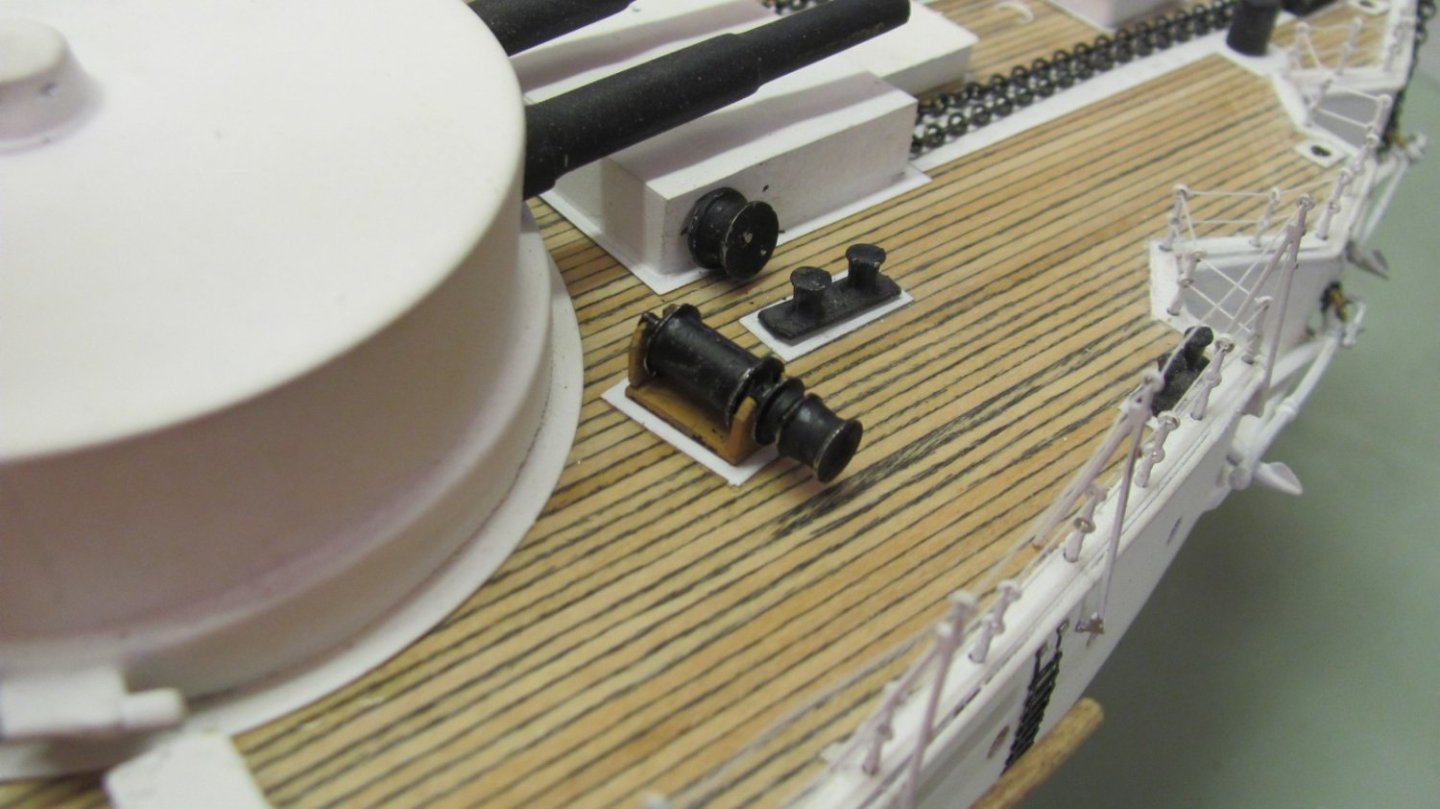
Winches are on. Each one comprises three laser-cut sections for the base and a cast Britannia barrel.
-
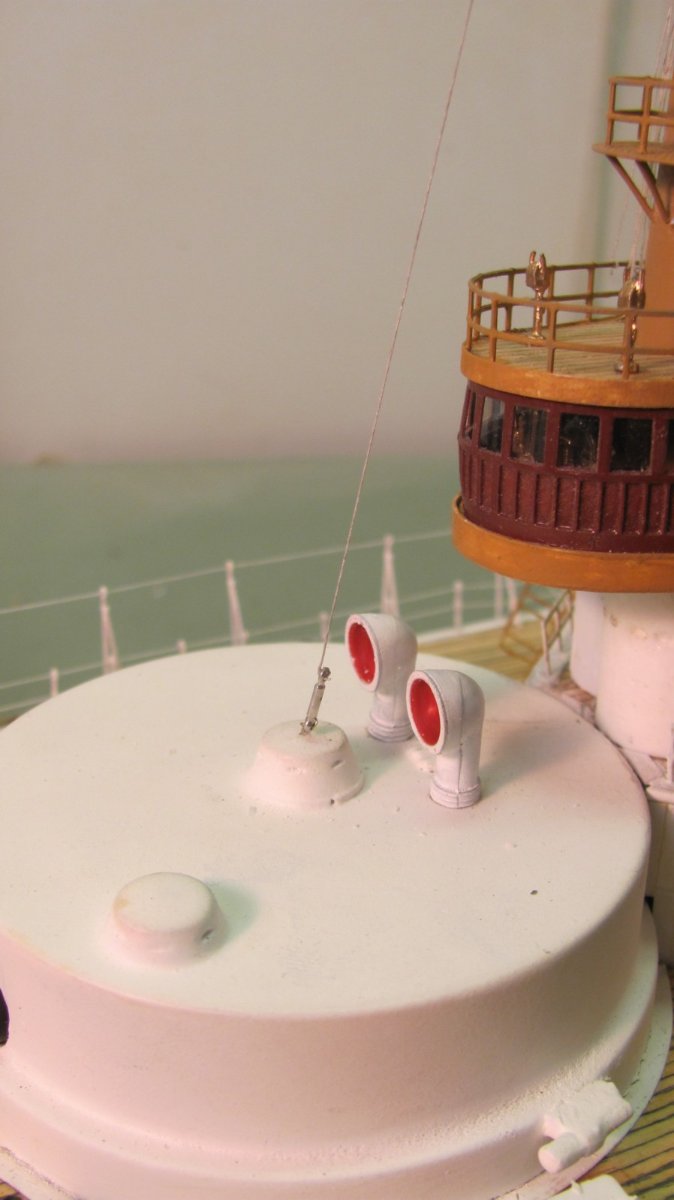
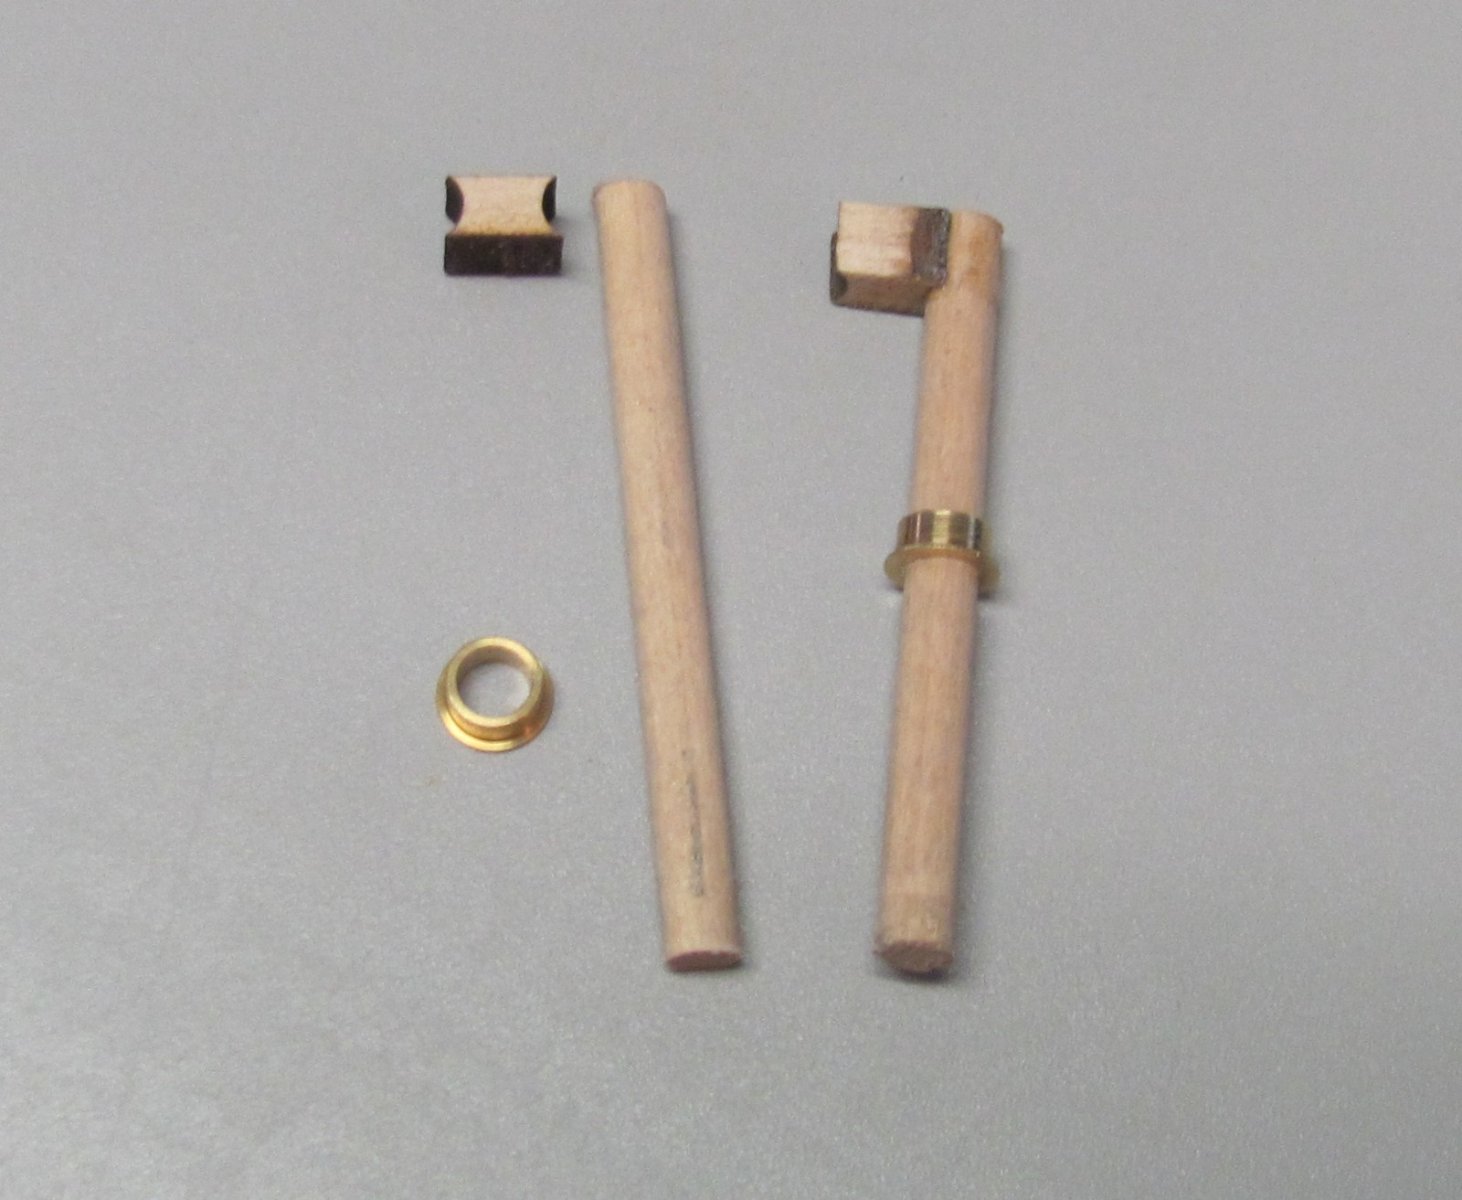
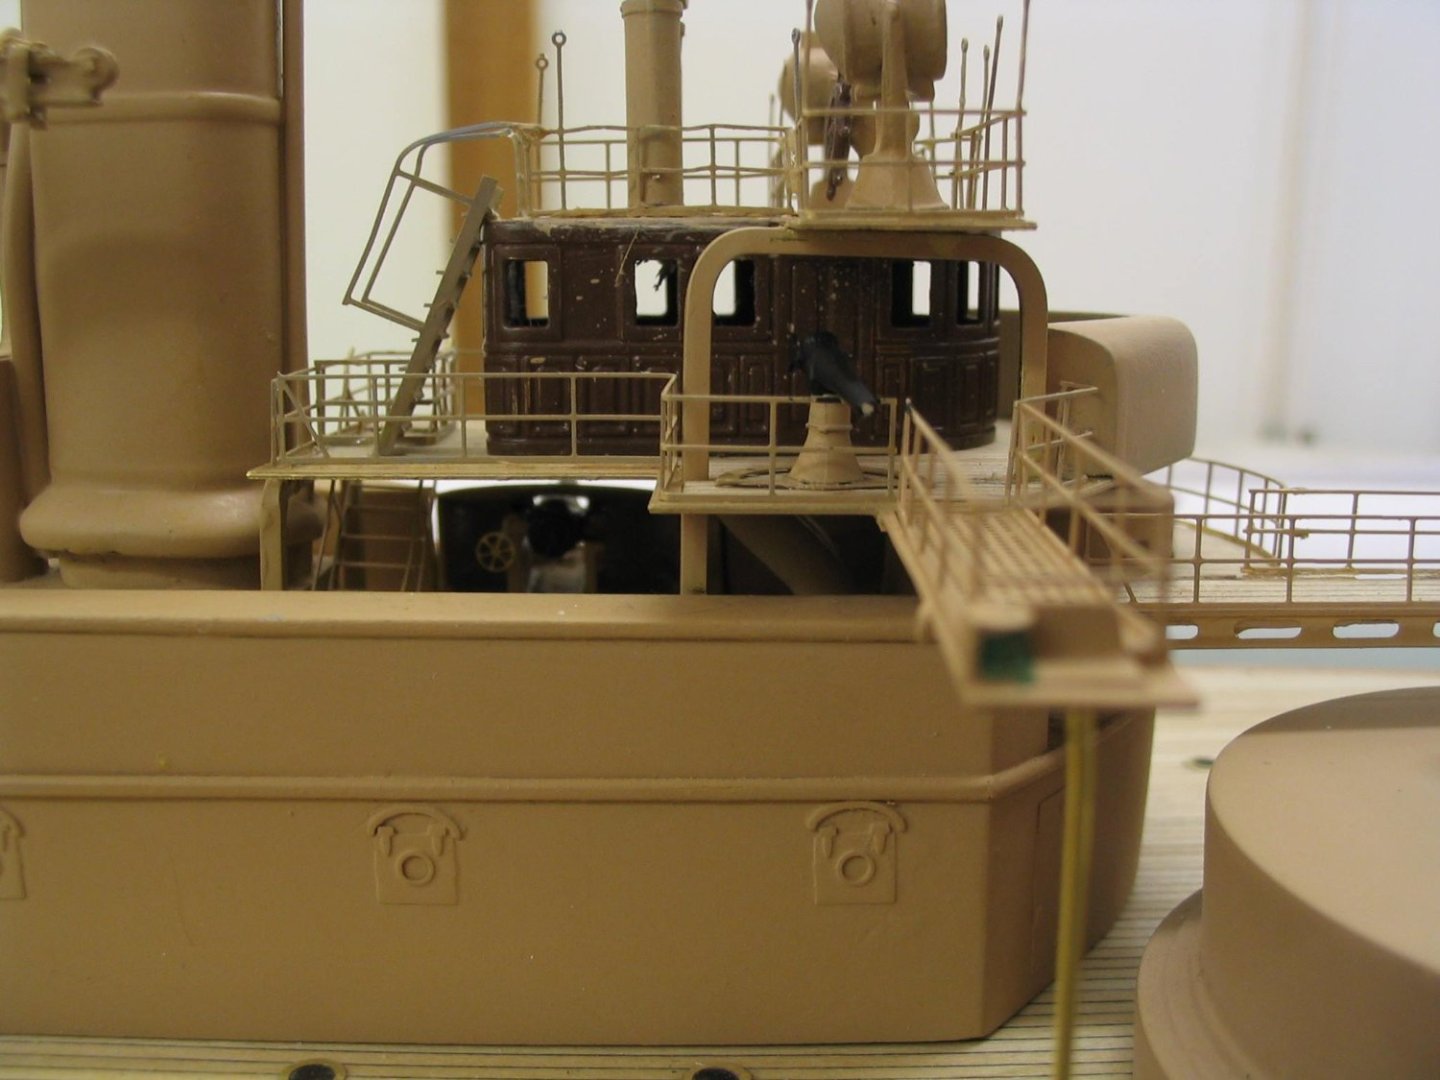
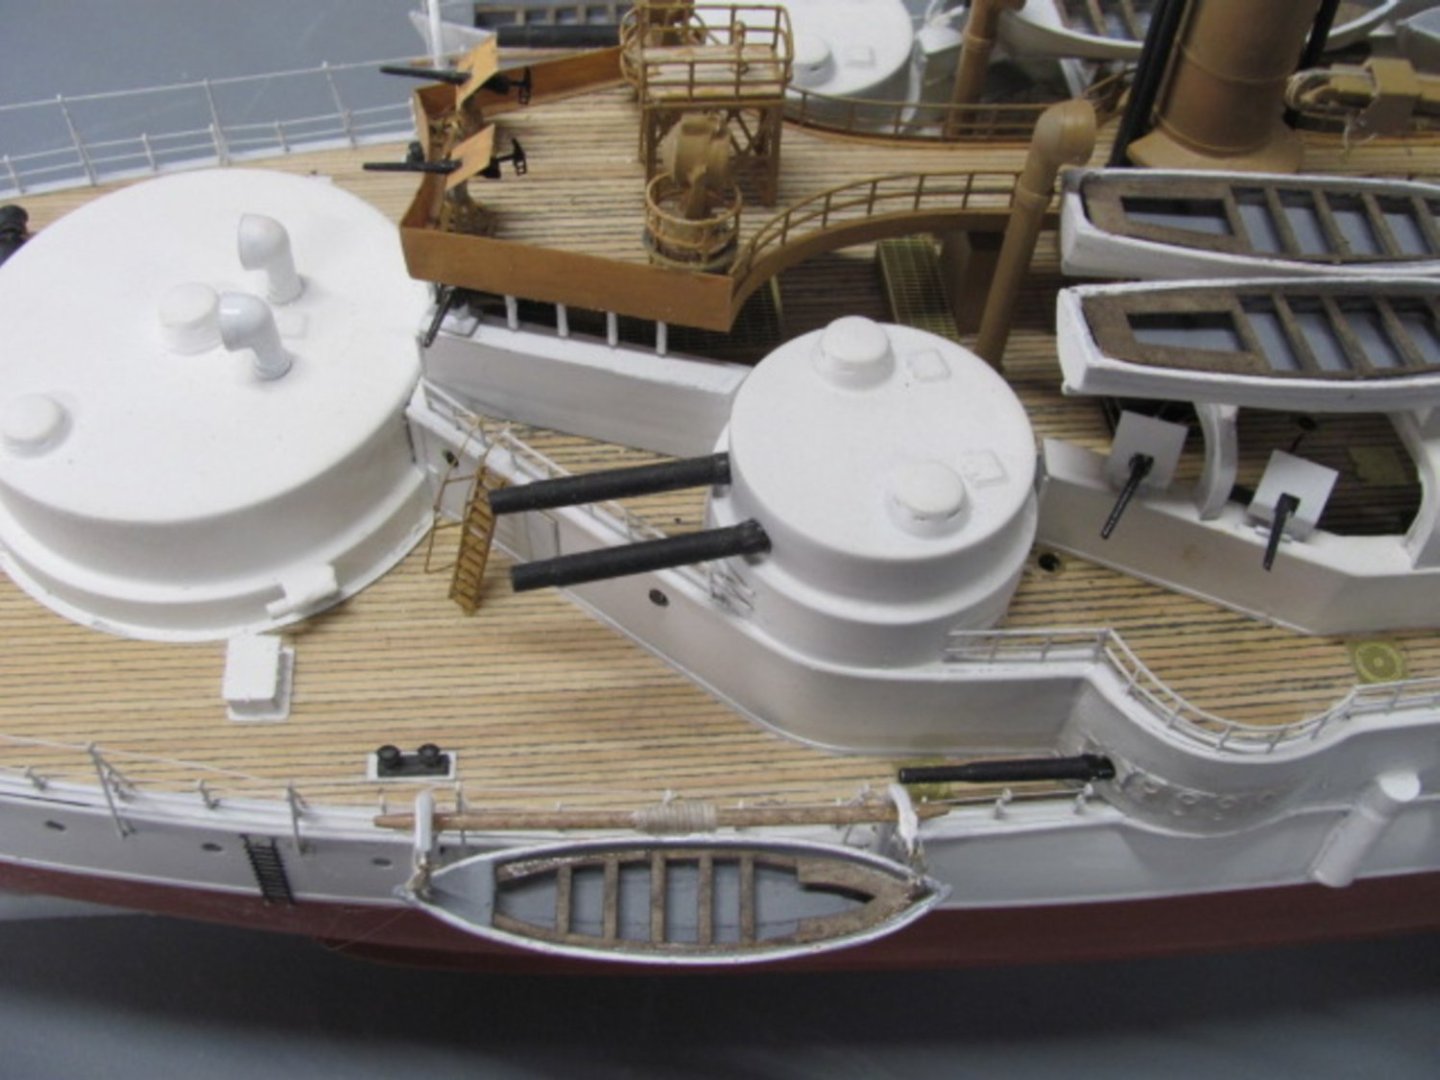
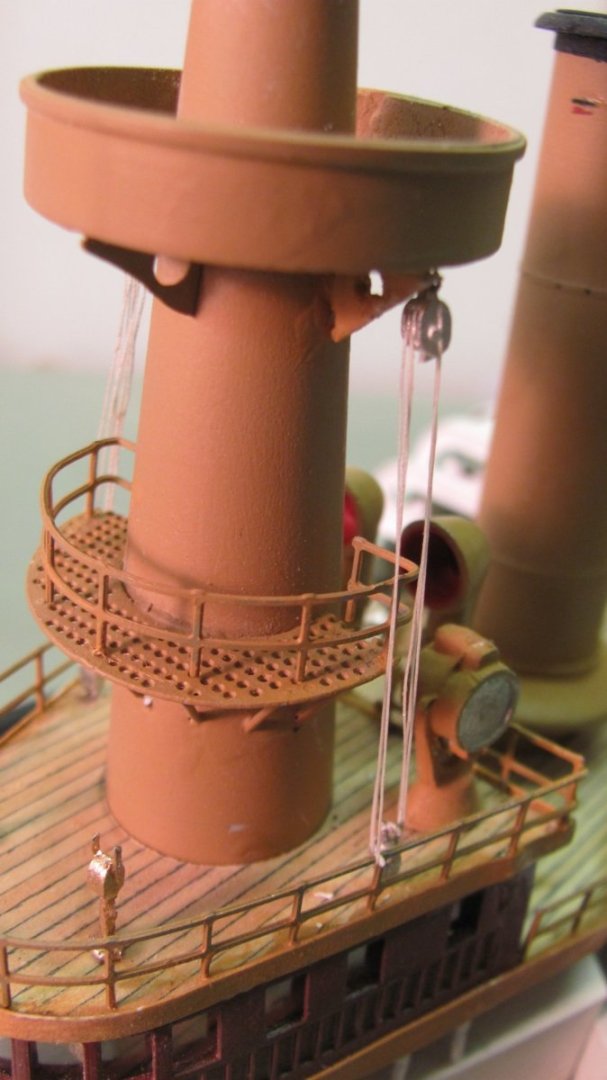
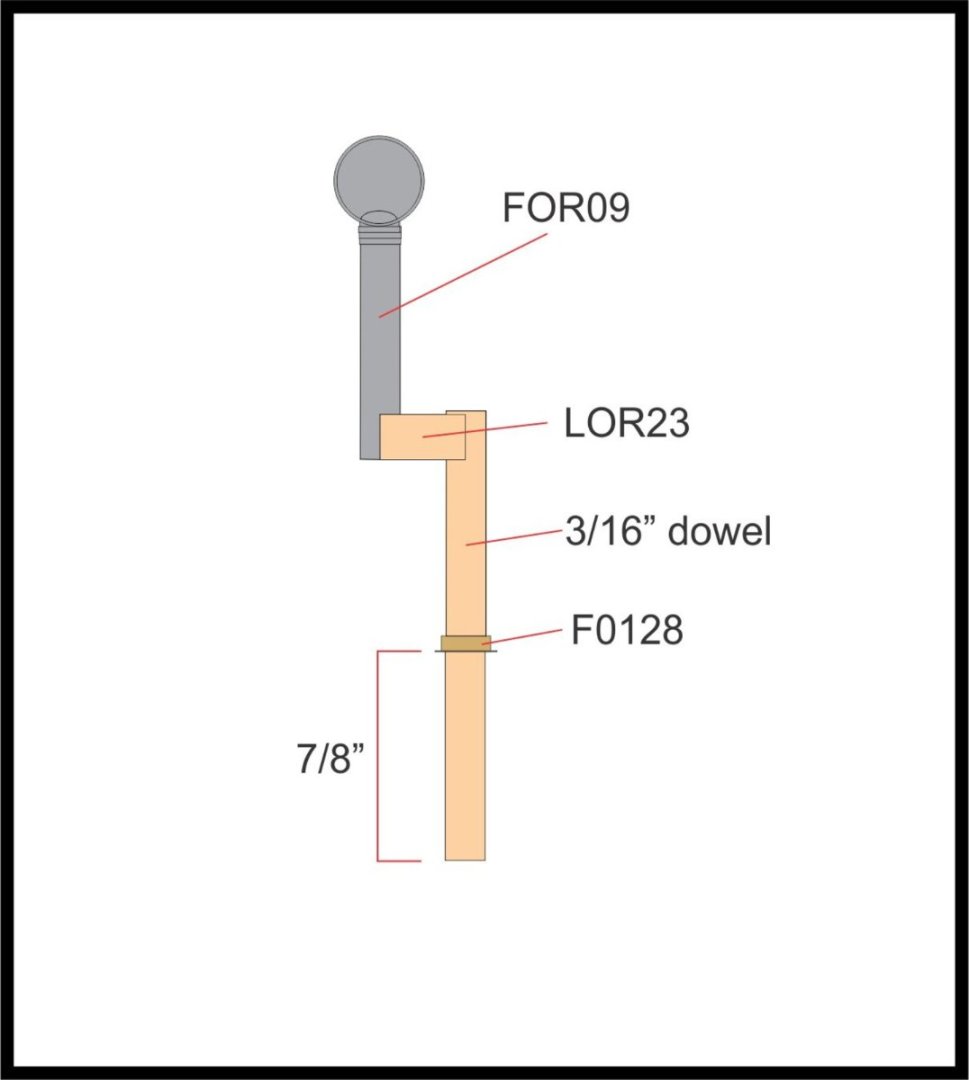
Four of OREGON's cowl vents had an offset. In the kit, they will be made up of a dowel, lasered offset, brass air port, and a cast cowl vent (not shown).

- 194 replies
-
- 12
-
-
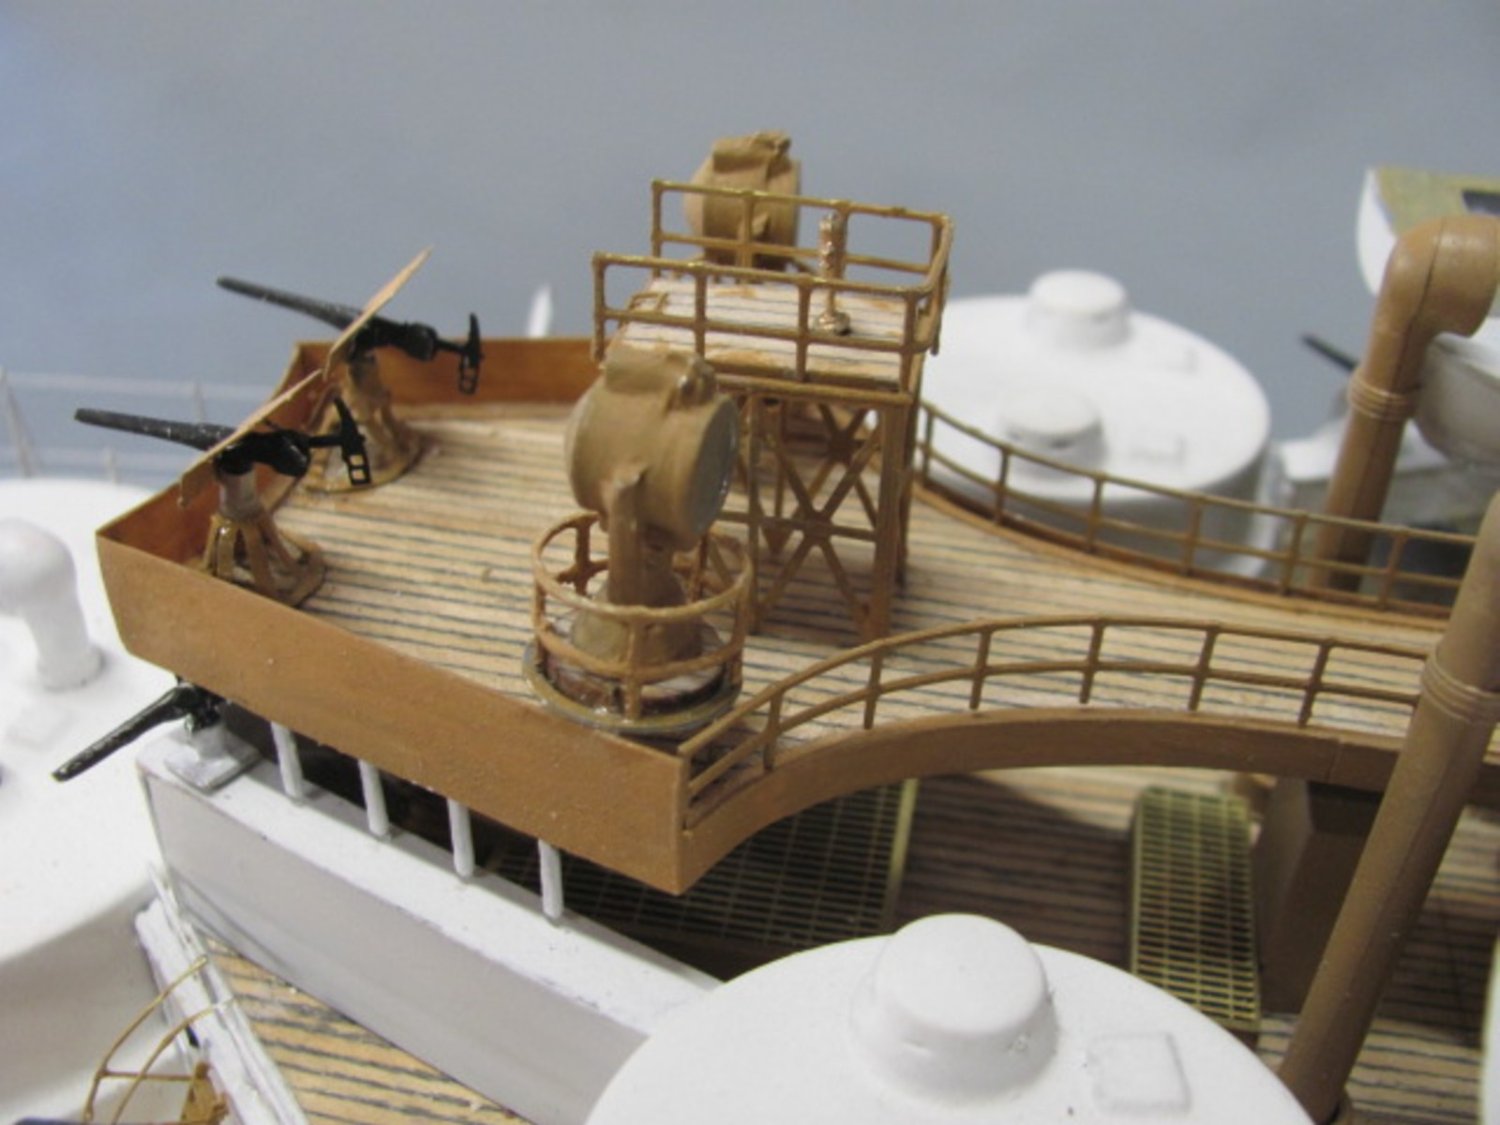
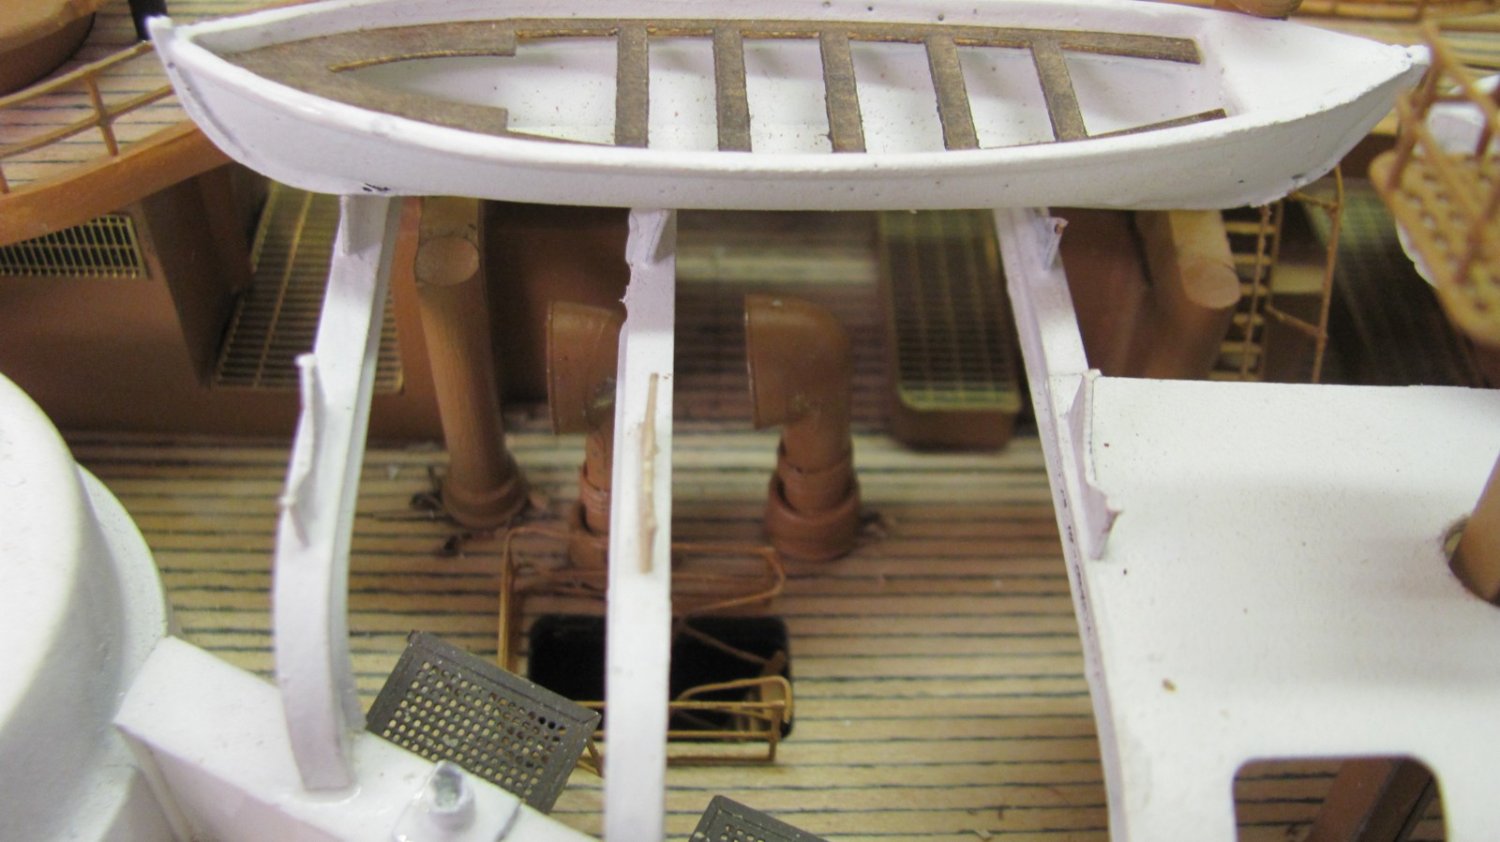
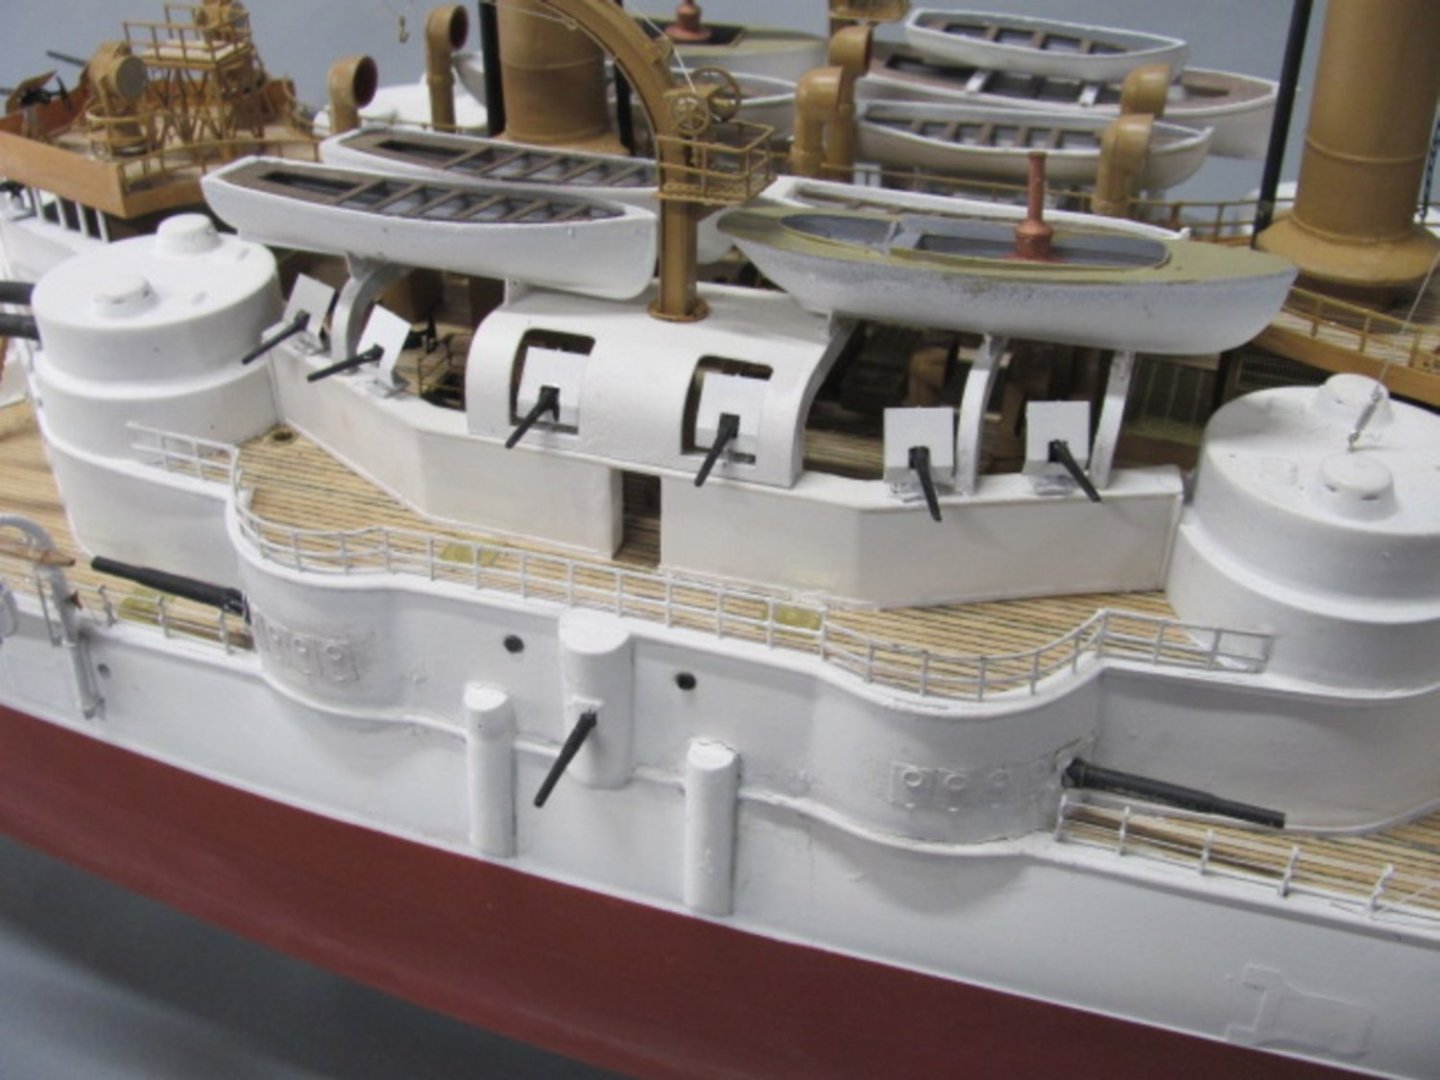
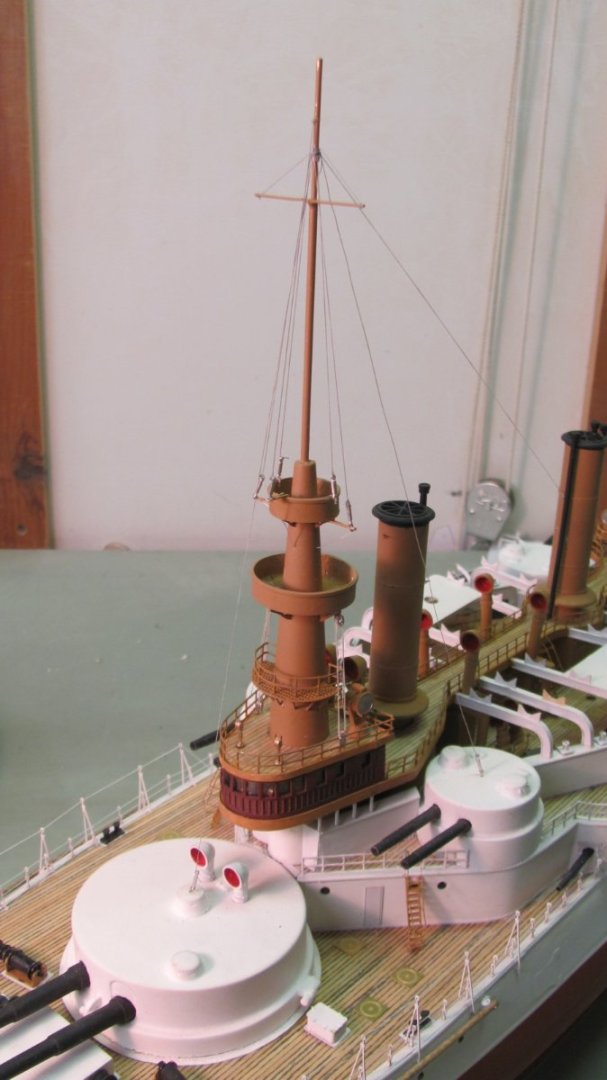
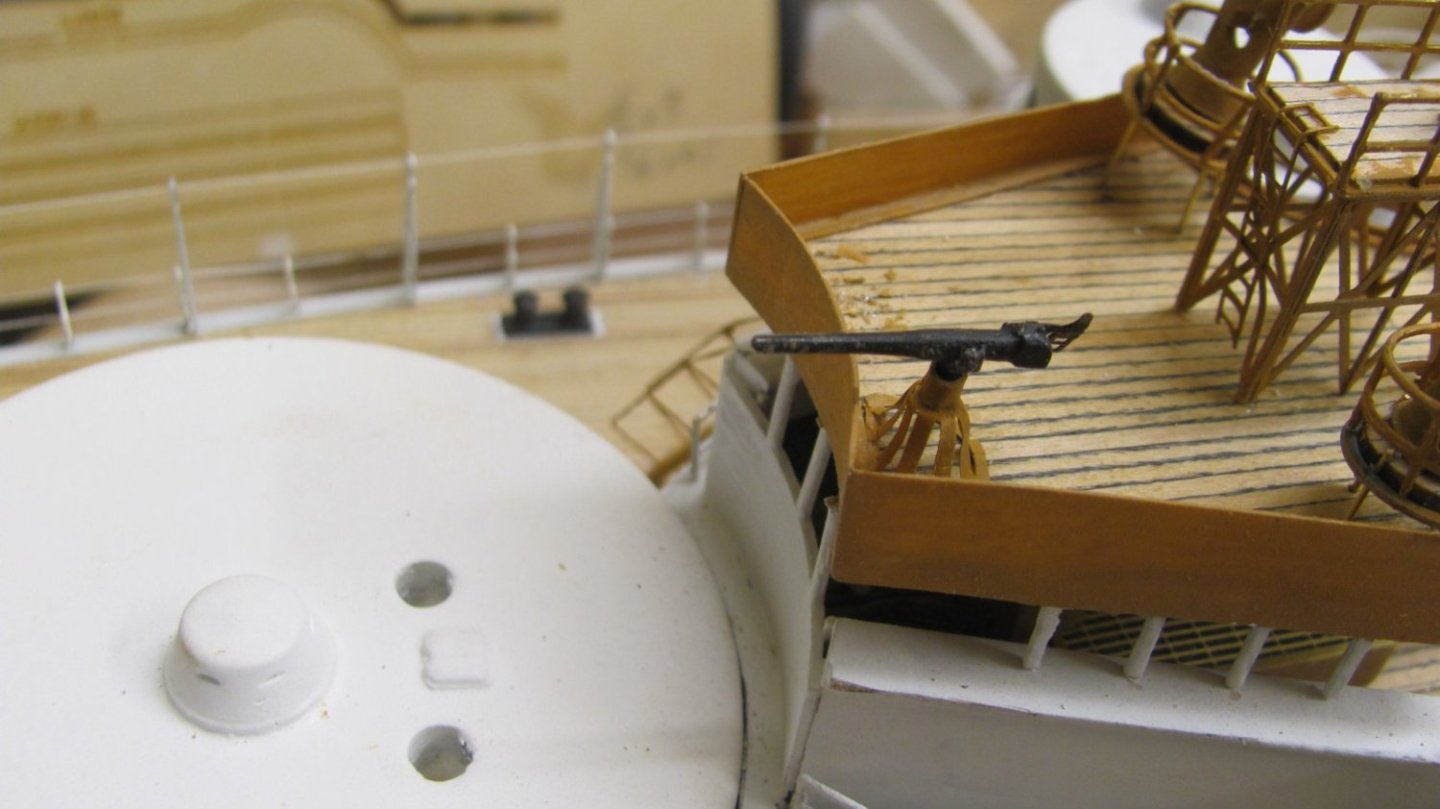
Back from a great week teaching ship modeling at the WoodenBoat School, guess I have to work on OREGON.... Boat skids are all in and the boat cradles attached and painted. The boats are drying and will have their thwarts attached sometime today. Also attached one of the 6 pdrs on the hurricane deck.

- 194 replies
-
- 11
-
-
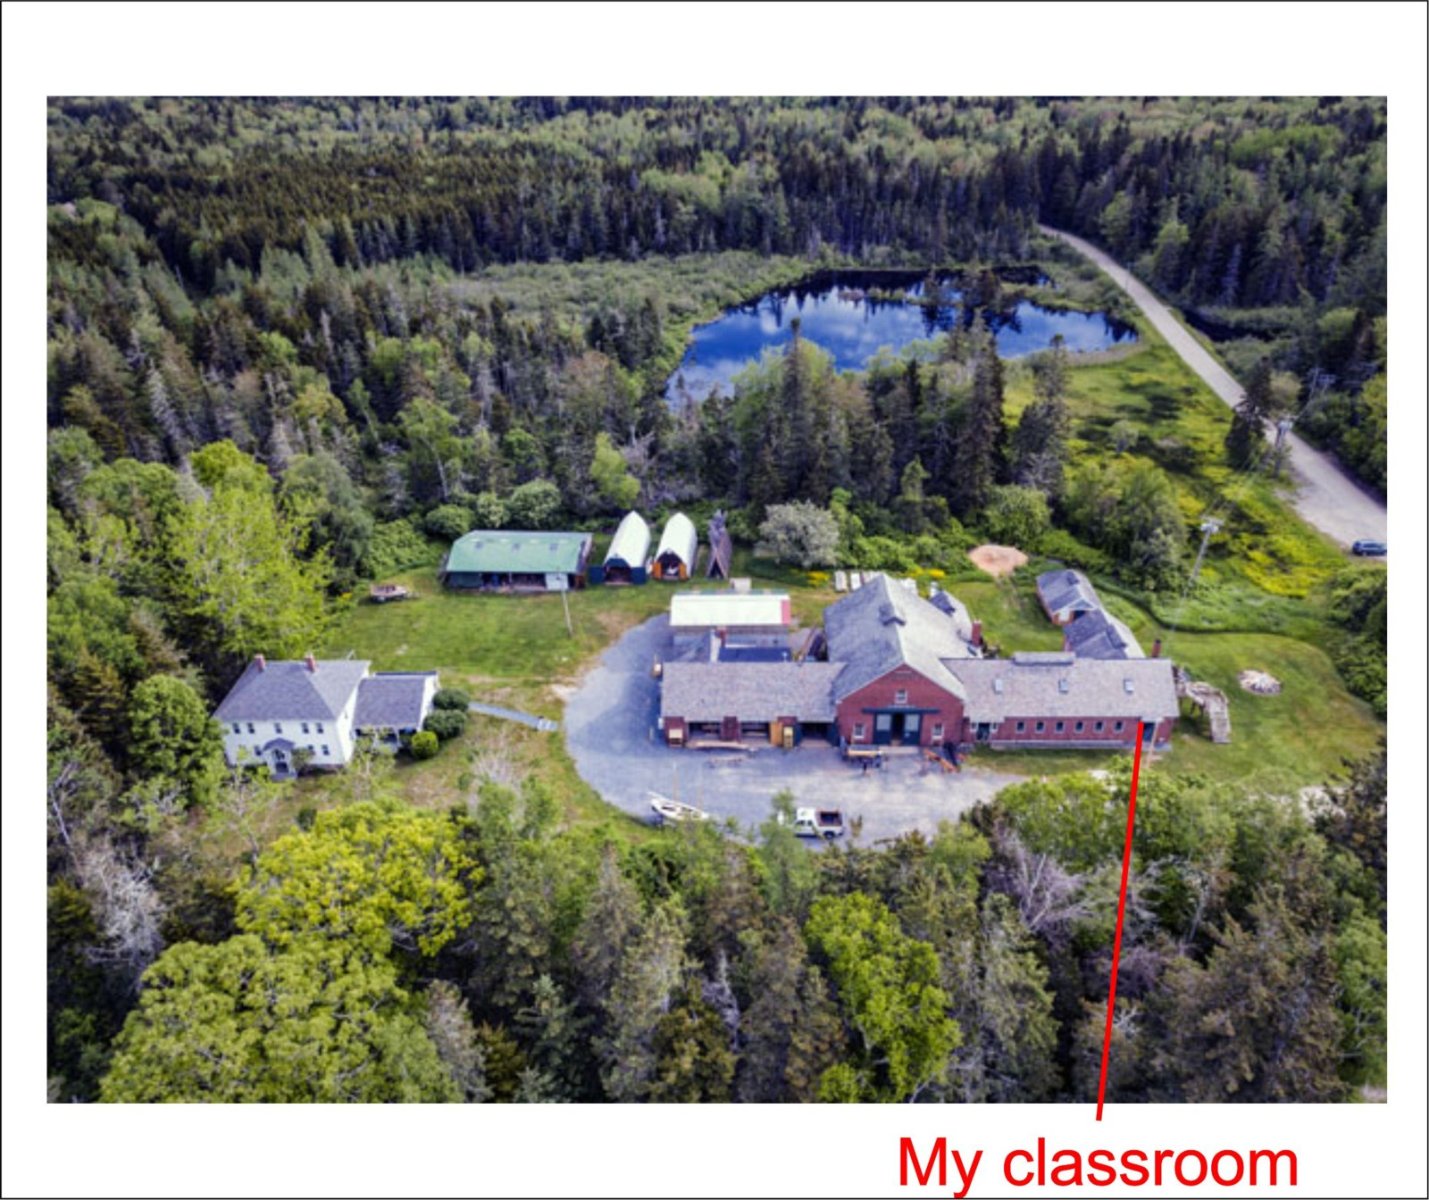
No more posts for a week or so. I'm teaching at the WoodenBoat School from Sunday to Friday next week. Love that place!

- 194 replies
-
- 10
-
-