HOLIDAY DONATION DRIVE - SUPPORT MSW - DO YOUR PART TO KEEP THIS GREAT FORUM GOING! (Only 20 donations so far - C'mon guys!)
×

alross2
-
Posts
409 -
Joined
-
Last visited
Content Type
Profiles
Forums
Gallery
Events
Everything posted by alross2
-
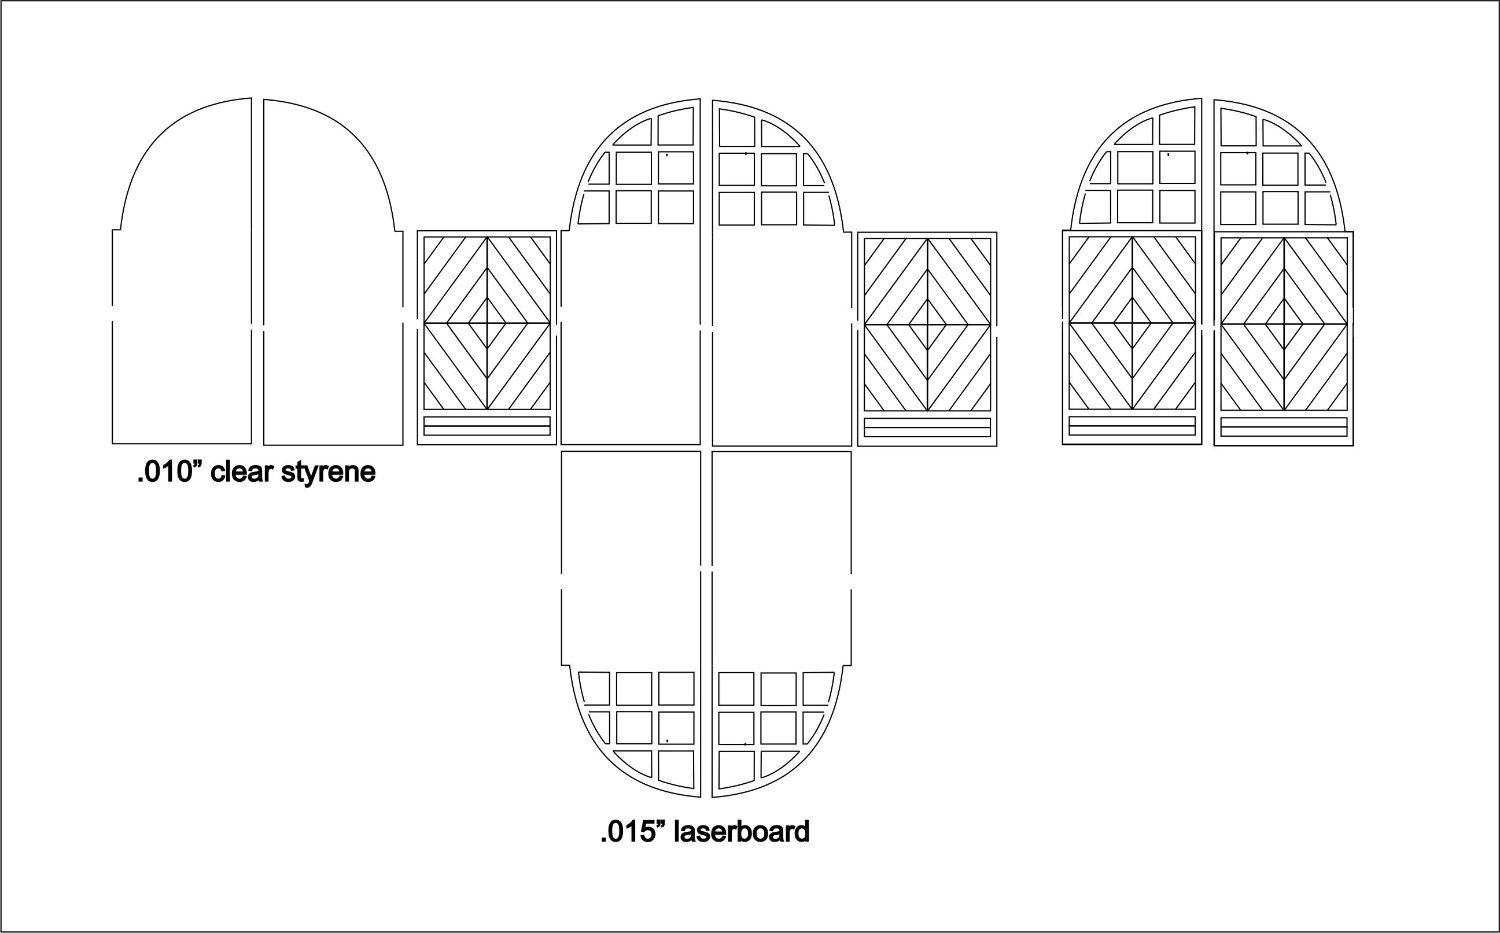
 Tired of making all those repetitive parts by hand? Bluejacket Shipcrafters offers custom laser work in laser board, styrene, and wood. Here are a couple examples. The top image is a portion of a .015" laser board sheet that has gratings, scroll work, companion doors, and mast hoops. The lower image shows a custom laminated door for a customer who was designing and building an HO scale fire station. From left to right - clear styrene for the window glass, .015" laser board components, and the assembled doors. For more information or to discuss a potential project, contact al@bluejacketinc.com .
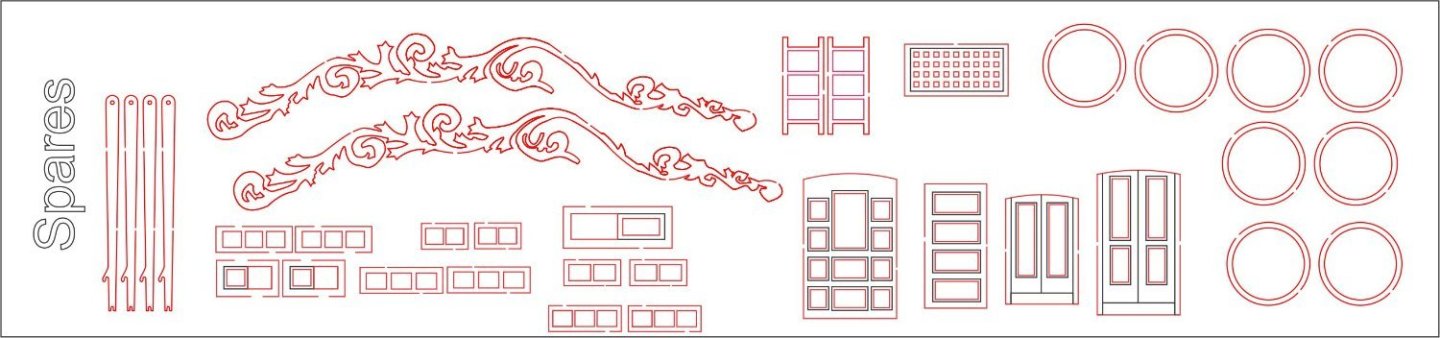

-
- 12
-

-

-
Has anyone purchased any 3-D parts printed in metal? If so, how would you describe the surface finish? We're considering using 3-D for making casting masters but they have to be brass or aluminum to withstand our mold-making process.
- 1 reply
-
- 3
-
-
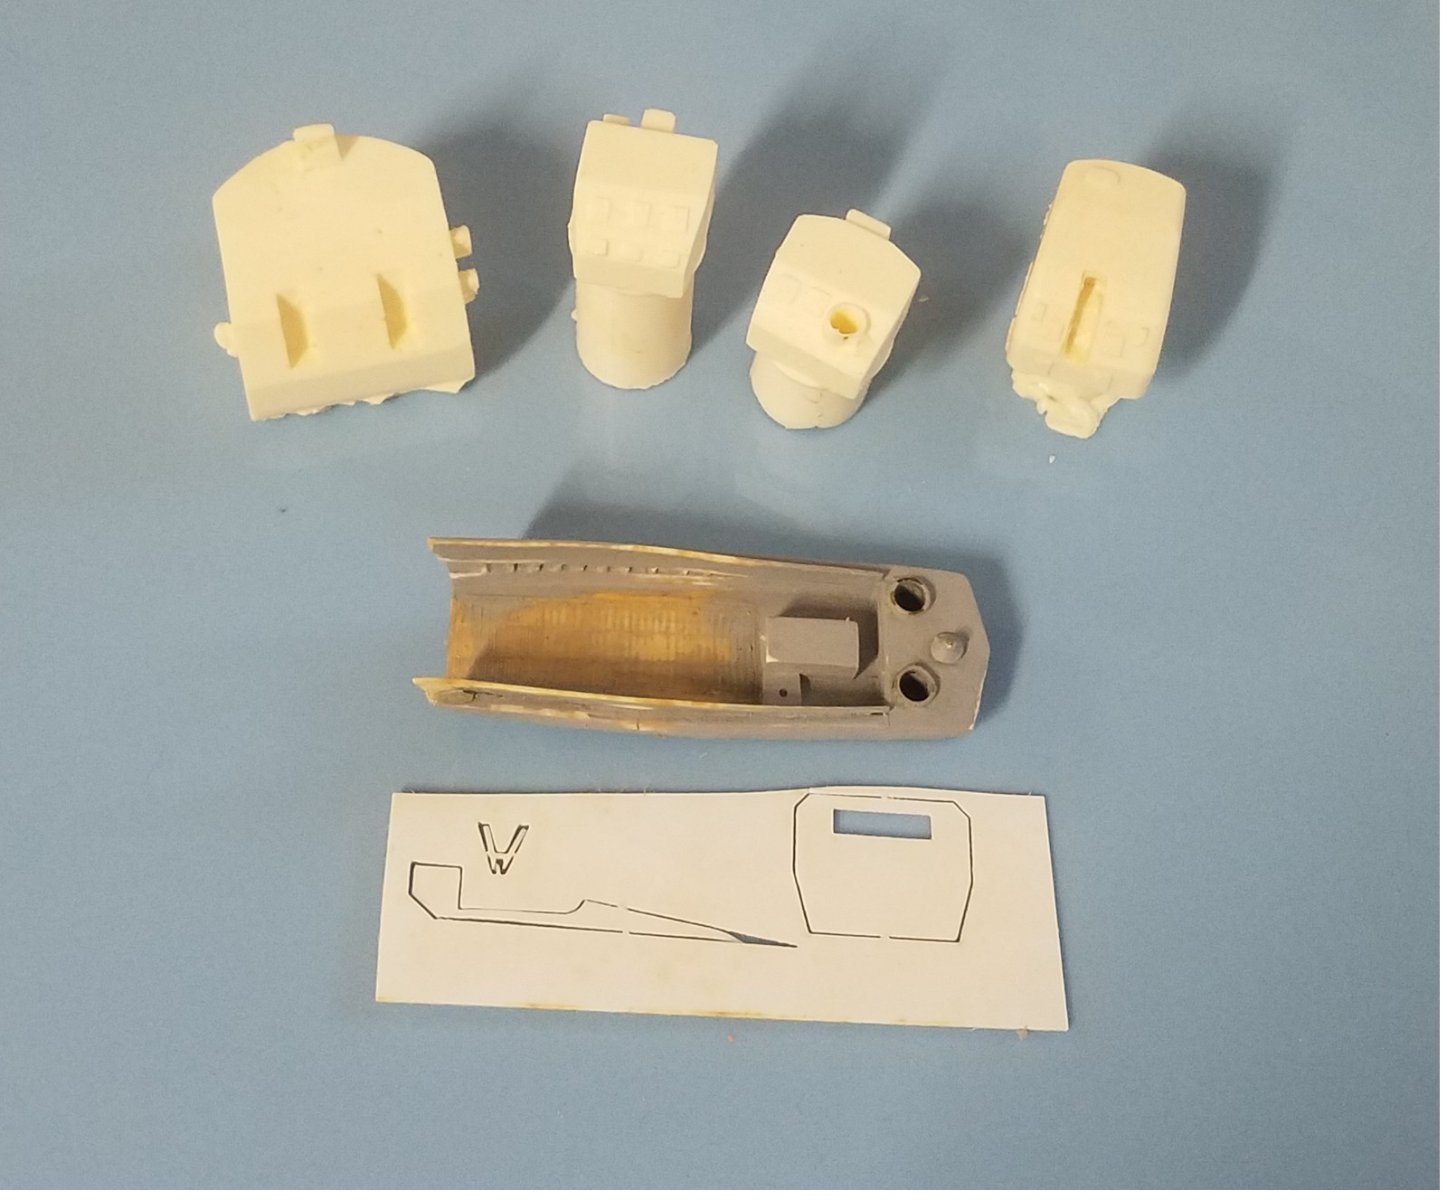
BlueJacket Shipcrafters has a large number of fittings that are specific to given kits and are not listed in our catalog. At the moment, I'm slowly putting together a list of them that are specific to 1/192 WW2 USN warships. There are over 100 listings so far, mostly cast Britannia but also a few in resin. It will be a while before the list is complete, but if you have specific needs in this area, make a list that includes the ship's name, type, and required fittings and send it to me ( al@bluejacketinc.com ). I'll send you back a list of what we can supply and their prices. The photo shows several of the cast resin items available: from left to right, twin 5"/38 gun house, two different MK37 gun directors, single 5"/38 gun house, and an LCVP with laser-cut ramp and skeg.

-
- 3
-
-
There were 150 or so responses to the survey. Respondents were primarily from two major online groups like this one and the BlueJacket website. The results covered a wide range of ship types and were also somewhat surprising given the time period and types of models being built by modelers on both of the online groups (essentially 18th and 19th C Royal Navy types). No single named vessel got more than four mentions. The most suggested vessels were US Navy types from the Civil War through WWII. Vessel sizes ranged from about 20' through 1000+'. Model lengths for all suggestions were calculated at the following scales: 1/192, 1/128. 1/96, 1/72, 1/64, and 1/48. In a few weeks, we will take a long look at the results and make a decision.
- 1 reply
-
- 10
-
-
But imagine summering on the coast of Maine...☺️
-
BlueJacket Shipcrafters is looking for a person to join our fittings casting crew. For more information, contact josh@bluejacketinc.com .
-
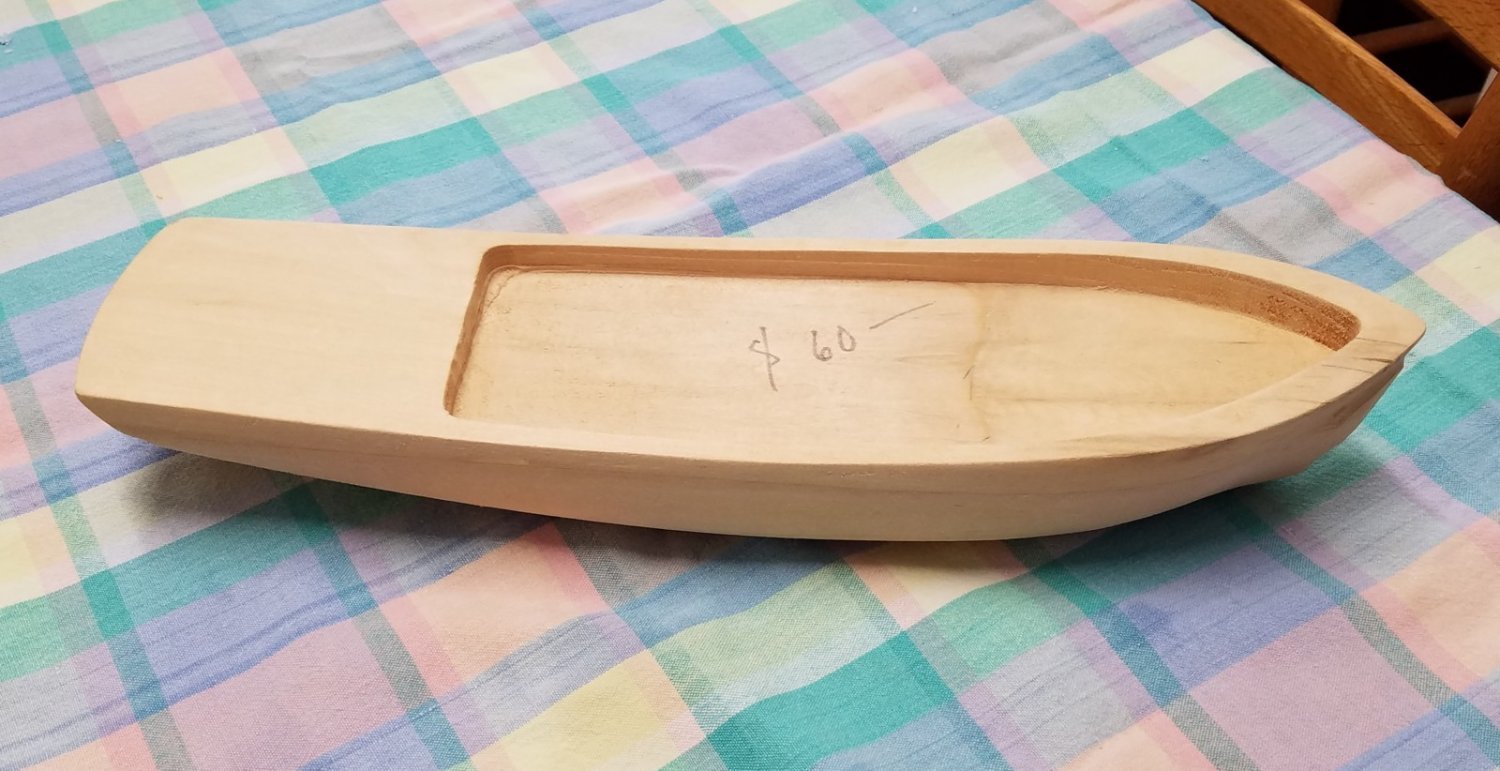
On occasion, we end up with solid hulls that we can't put in kits because they are chipped or gouged, have an unexpected knot, etc. These defects are easily repaired by anyone with minimal skills or scratch-building experience. Because the hulls are shaped to the point at which they would have been ready for final shaping, they save the modeler the time it would take to cut out the necessary lifts, glue them up, and carve the hull. The list of on-hand hulls is constantly changing. As of this post (February 16, 2024), we have one each of the following hulls available: 1/192 ARLEIGH BURKE (DDG-51) 1/96 ATLANTIC 1/96 FANNIE GORHAM 1/192 FLETCHER class destroyer 1/192 NS SAVANNAH nuclear cargo vessel 1/32 RED BARON Holland 32 lobster boat 1/96 310' CLEMSON class destroyer For more information and prices, contact al@bluejacketinc.com .

-
- 2
-
-
Naming of British Motor Torpedo Boats WW2
alross2 replied to Amanda G's topic in Nautical/Naval History
In this time period, RN MTBs, MGBs, and most other Coastal Forces craft were officially referred to by designator and number, e.g., MTB 34. Some may have had unofficial nicknames, but I'm not aware of any RN types. US PTs, on the other hand, while also only referred to by their designator and number, e.g., PT34, commonly had nicknames. These nicknames would often change with a new skipper, as well. -
😆 Thank you for your subtle attempt at influencing the outcome...😆 Actually, it's not what piques my interest so much as what seems most likely to sell well and I'm fine with that.
-
The kit survey will end this Friday, Feb 16, so you still have a few days to suggest some potential candidates. To date, I've received over 150 suggestions with a very broad range of types and time periods. The most responses any named vessel received was 4, so there are no overwhelming results in that area. The largest group of named vessels was naval vessels, mostly USN and from the pre-dreadnaught and WWII periods. Most sailing vessel suggestions were from the late 18th C to mid-19th C and were trading vessels. Vessel lengths ranged from 20' to 1013'. Almost all suggestions were for US vessels. I'll provide more details after the survey ends.
-
Thanks to all who responded to the survey. There were over 100 responses with a wide range of subjects. I'm going to run the survey for another week, then we'll analyze the results. If you have a wish list, let us know.🙂
-
If you are on Facebook, go here: Warship Camouflage Research Group | Facebook The admins are all extremely knowledgeable about naval camouflage. They are also very blunt, especially when it comes to paint schemes listed in most kits.🙂 Al Ross
-
If you build multiple models and keep them, space to display them can become an issue. Obviously, the length of the actual vessel and the desired scale determine the actual size of the model, so ultimately one has to consider available display space when making their choice of kit. BlueJacket's kits range in length from about 2” (N scale lobster boat) to about 60” (1/96 scale WYOMING); most fall within the 18”-36” range. So, as part of the new kit survey, I'm asking what folks consider a reasonable length range for their models so that they can be comfortably displayed in their home. These parameters will help us determine which subjects and at what scale will best meet our customers' preferences. As before, please send your thoughts to al@bluejacketinc.com or post them here. Thanks.
-
WW2 navy ship colors?
alross2 replied to wmherbert's topic in Painting, finishing and weathering products and techniques
Don't be led astray by generalist statements about the colors of naval vessels in WW2...🙂 LCTs (like most USN vessels) were painted in a variety of Measures (camouflage schemes). If you know the number of your Dad's boat, go to www.navsource.org, select the AMPHIBIOUS button, select LCT, and find it in the list. Hopefully, there will be a photo of her, which will display the pattern. After that, you can look for a camouflage measure sheet which will list the appropriate colors by official designation (5-HG, 20B, etc.). I'd be happy to assist you with this process, if you like. -
It's time to be thinking about the next new kit(s) from BlueJacket and we would like to know in what subjects you folks would be interested. If you'd like to make a suggestion, please list the vessel's name, type, time period, and desired scale. Email your suggestions to al@bluejacketinc.com within the next two weeks. Thanks, Al Ross
-
I use a single-action Paasche airbrush that I've had for at least 40 years - works great. For fillers and primers, I use automotive body putty (like Bondo) and rattle can primer surfacers you can get at your local automotive supply house (NAPA, Pep Boys, etc.). Bondo is the approximate hardness of basswood and sands beautifully. As a polyester resin, it also acts as an adhesive. When the cracks are filled, the wood isn't going anywhere. The automotive primer surfacers are hard-drying and sand well with wet-or-dry sandpaper for an excellent finish. Avoid the hardware store primers as they are often soft and clog your sandpaper.
-
Jeff, you have an older kit. The revised kit uses .060" square styrene to form the keel and stem. It's a lot easier to bend...🙂 Al Ross
- 29 replies
-
- 2
-
-
- Nantucket Lightship
- BlueJacket Shipcrafters
- (and 1 more)
-
Yes, they are made by a number of companies, including True North. Because P564 operated with the OSS, you might want to confirm her paint scheme, as many of the "spook" boats had specific schemes at different times.
-
I drew those plans decades ago using the yard drawings. Here are a couple variations on paint schemes applied to them. One (white, yellow, orange) is the "clown" scheme applied to boats post-WWII. The other is the standard Sea Blue (5-S) and Deck Blue (20-G) of the WWII period. I have the boat manual and quite a few photos of this type and would be happy to attempt to answer any detail questions you might have. A number of these boats had the USN's MK12 20mm mount in the well deck aft. That shown on my old drawing is a MK4 mount, which was on the original drawings.

-
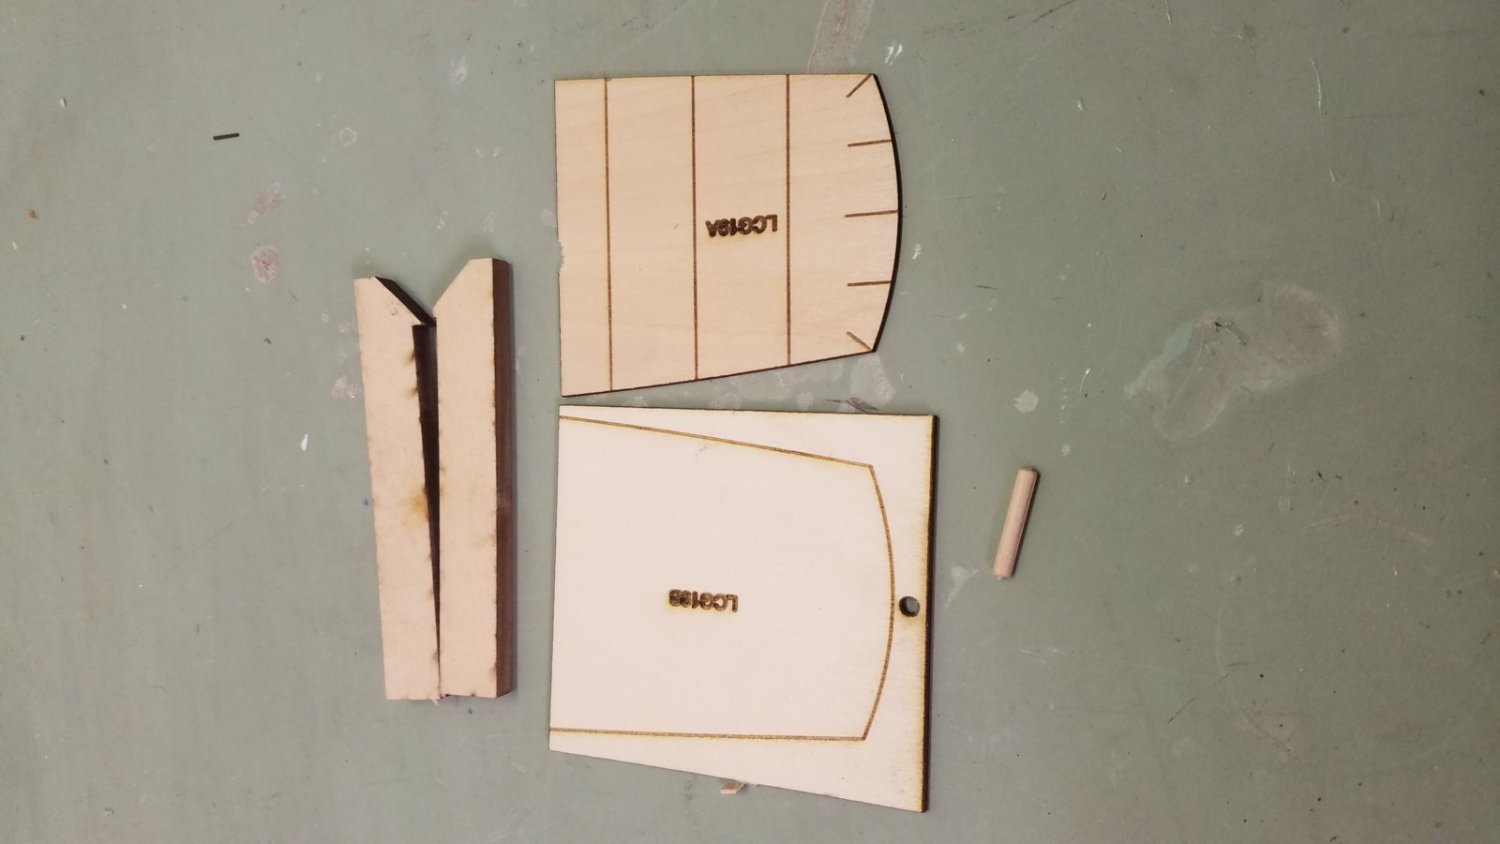
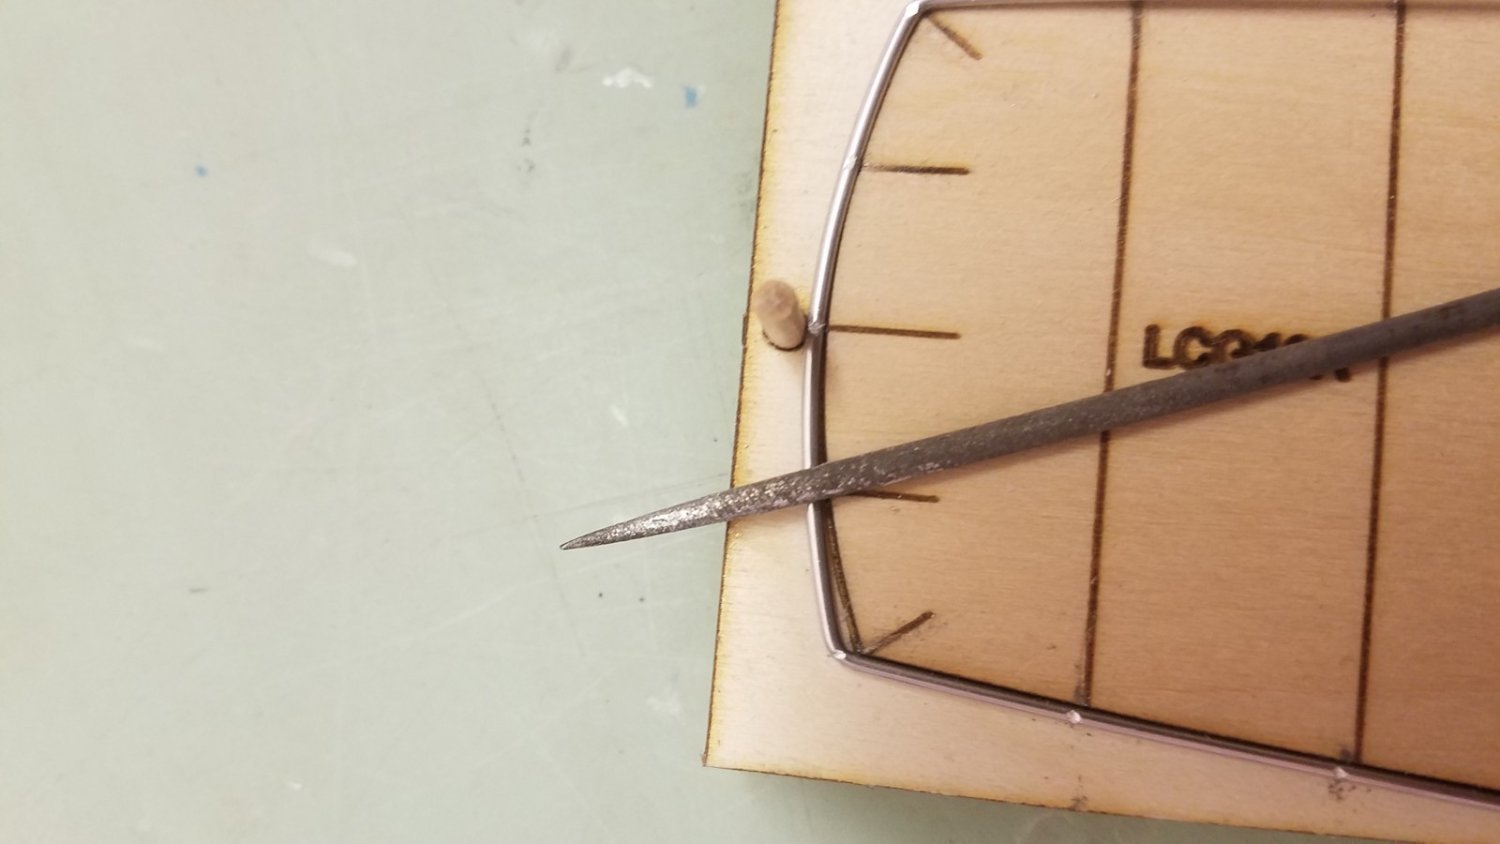
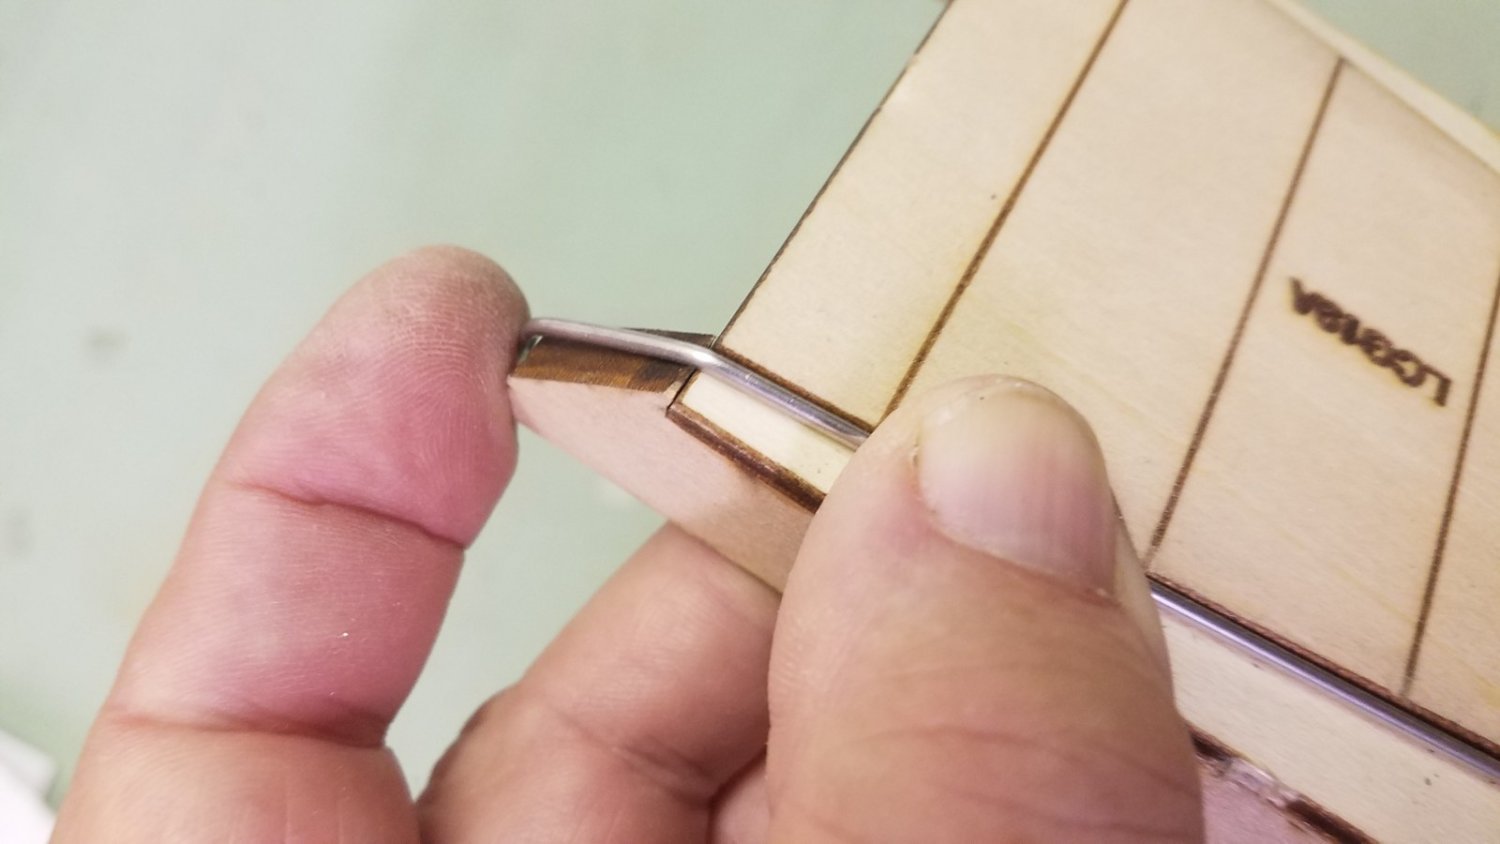
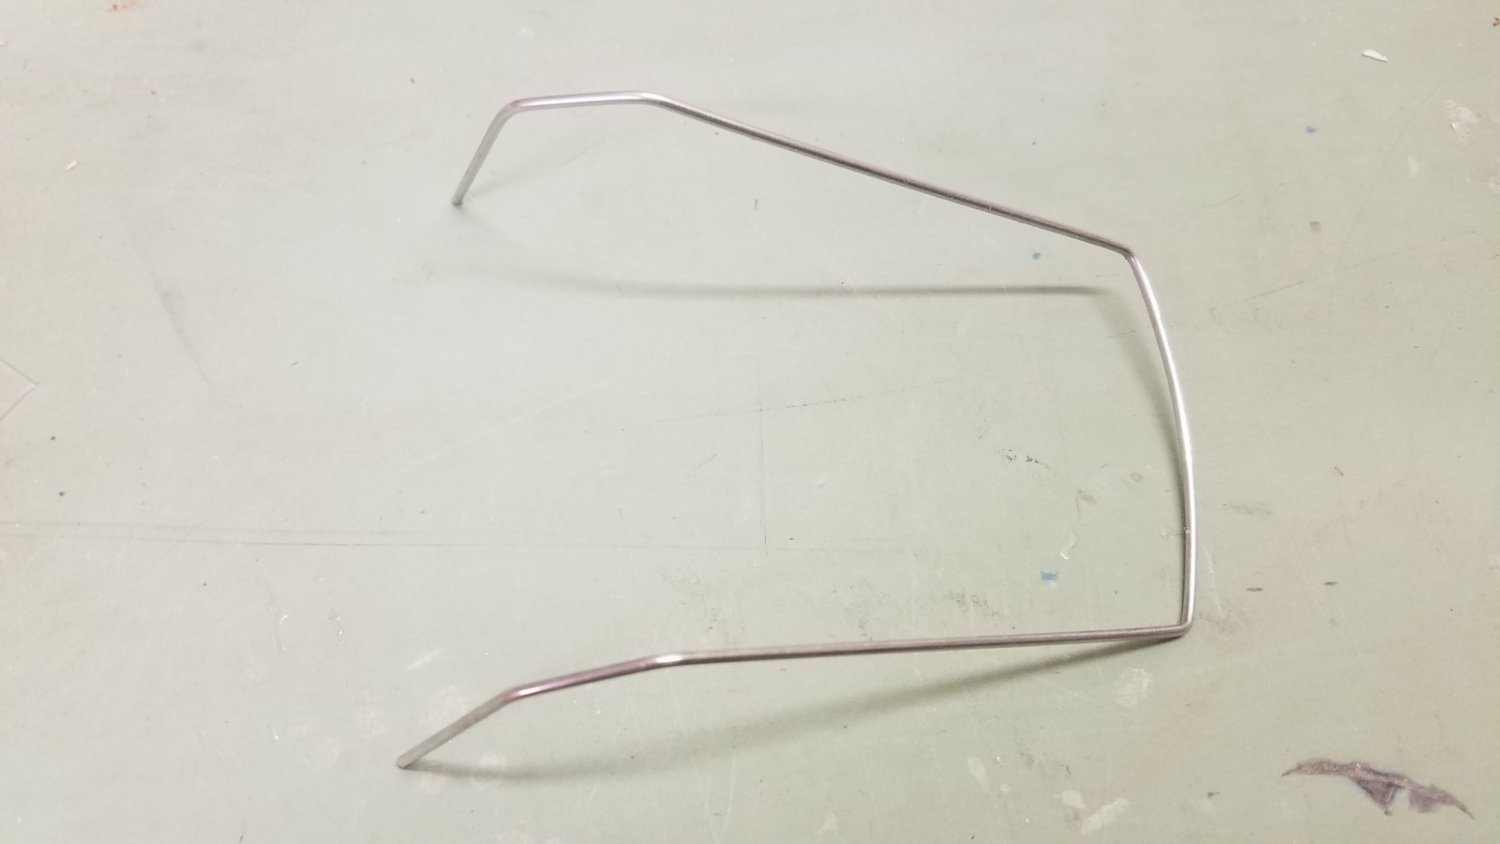
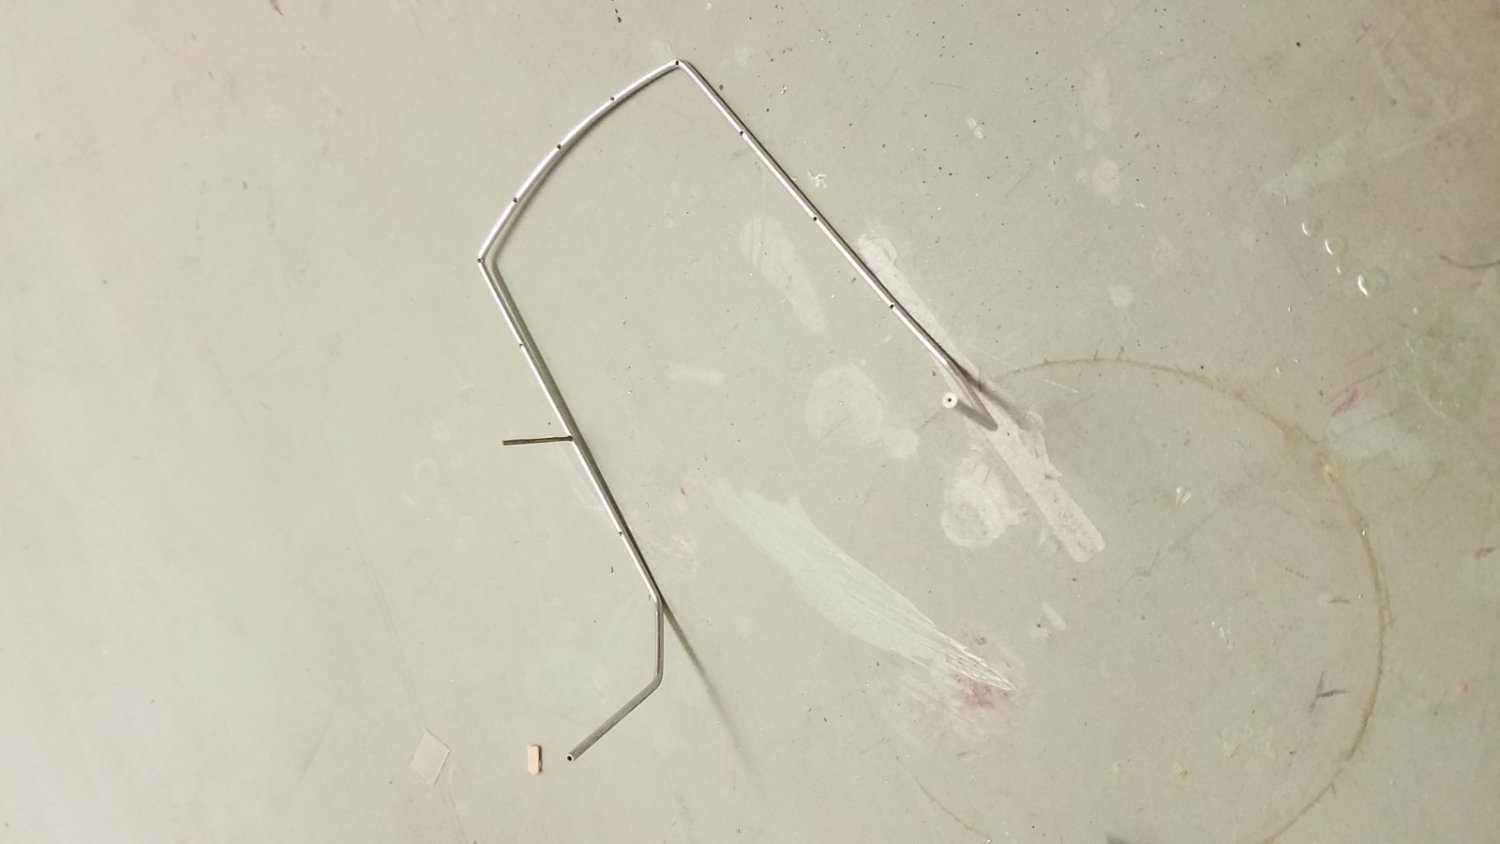
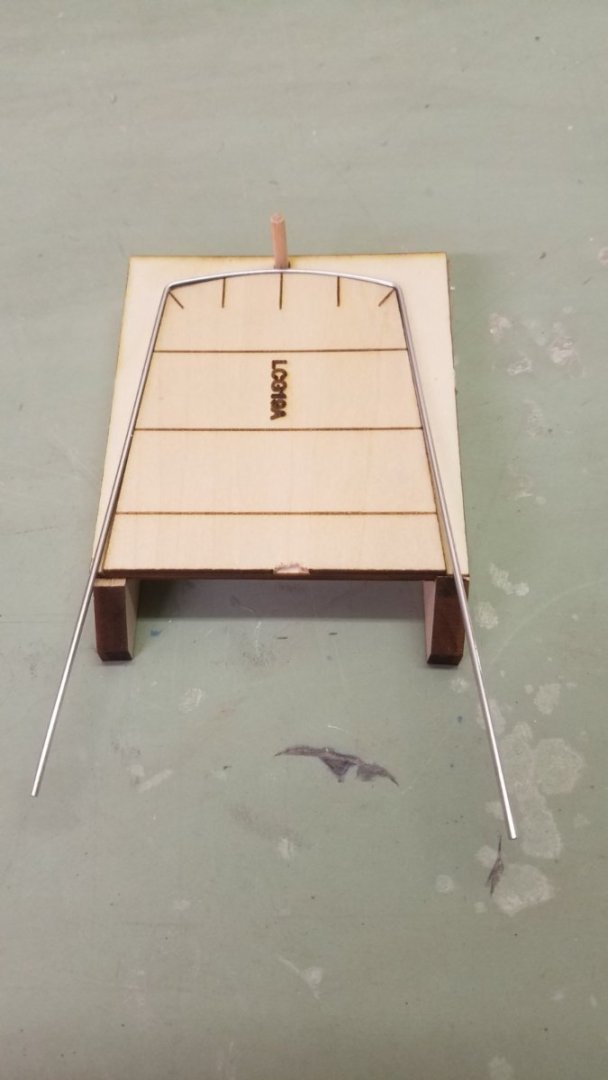
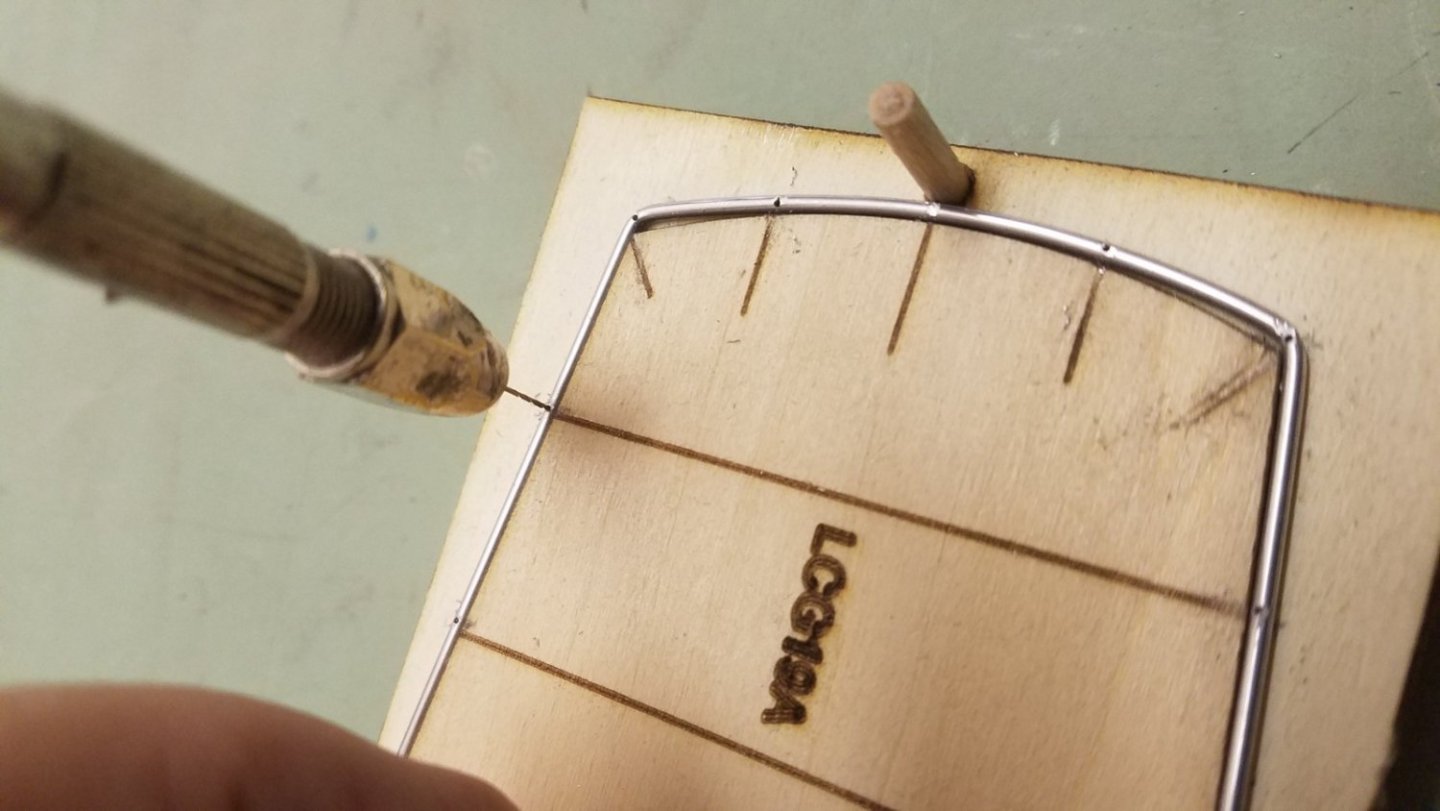
This is the fixture that will be included in the kit for bending and drilling the aft railing.


-
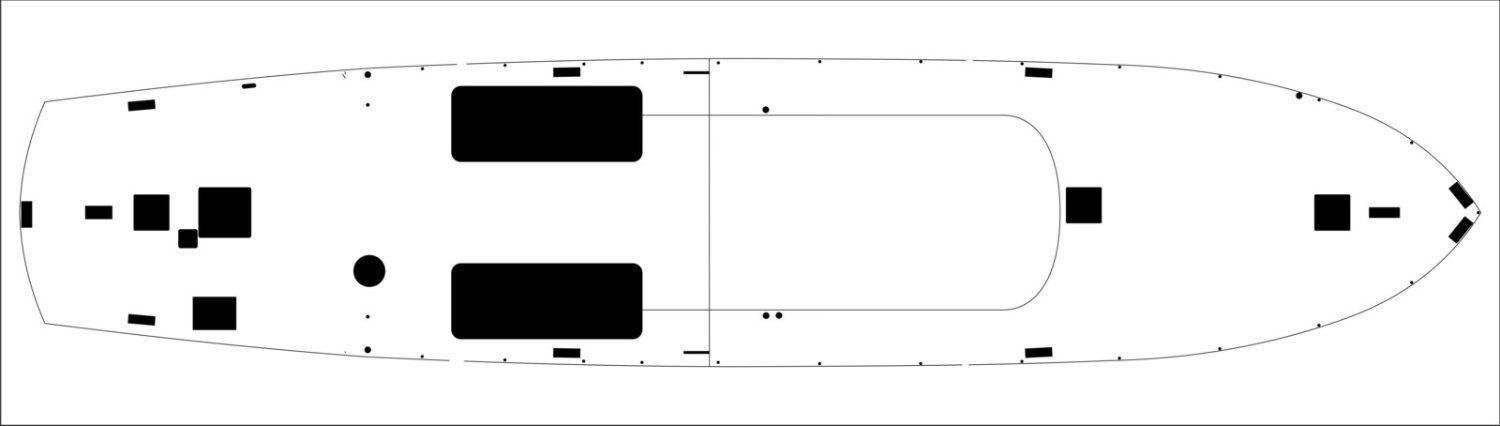
Experimenting with this template. All of the black areas are deck fittings and will be cutouts on the template. The modeler just places the template on the deck and marks the openings with a pencil. This eliminates the tedious measuring of the location of each part from the plans. I'll probably add the part numbers for each on the template, too.

-
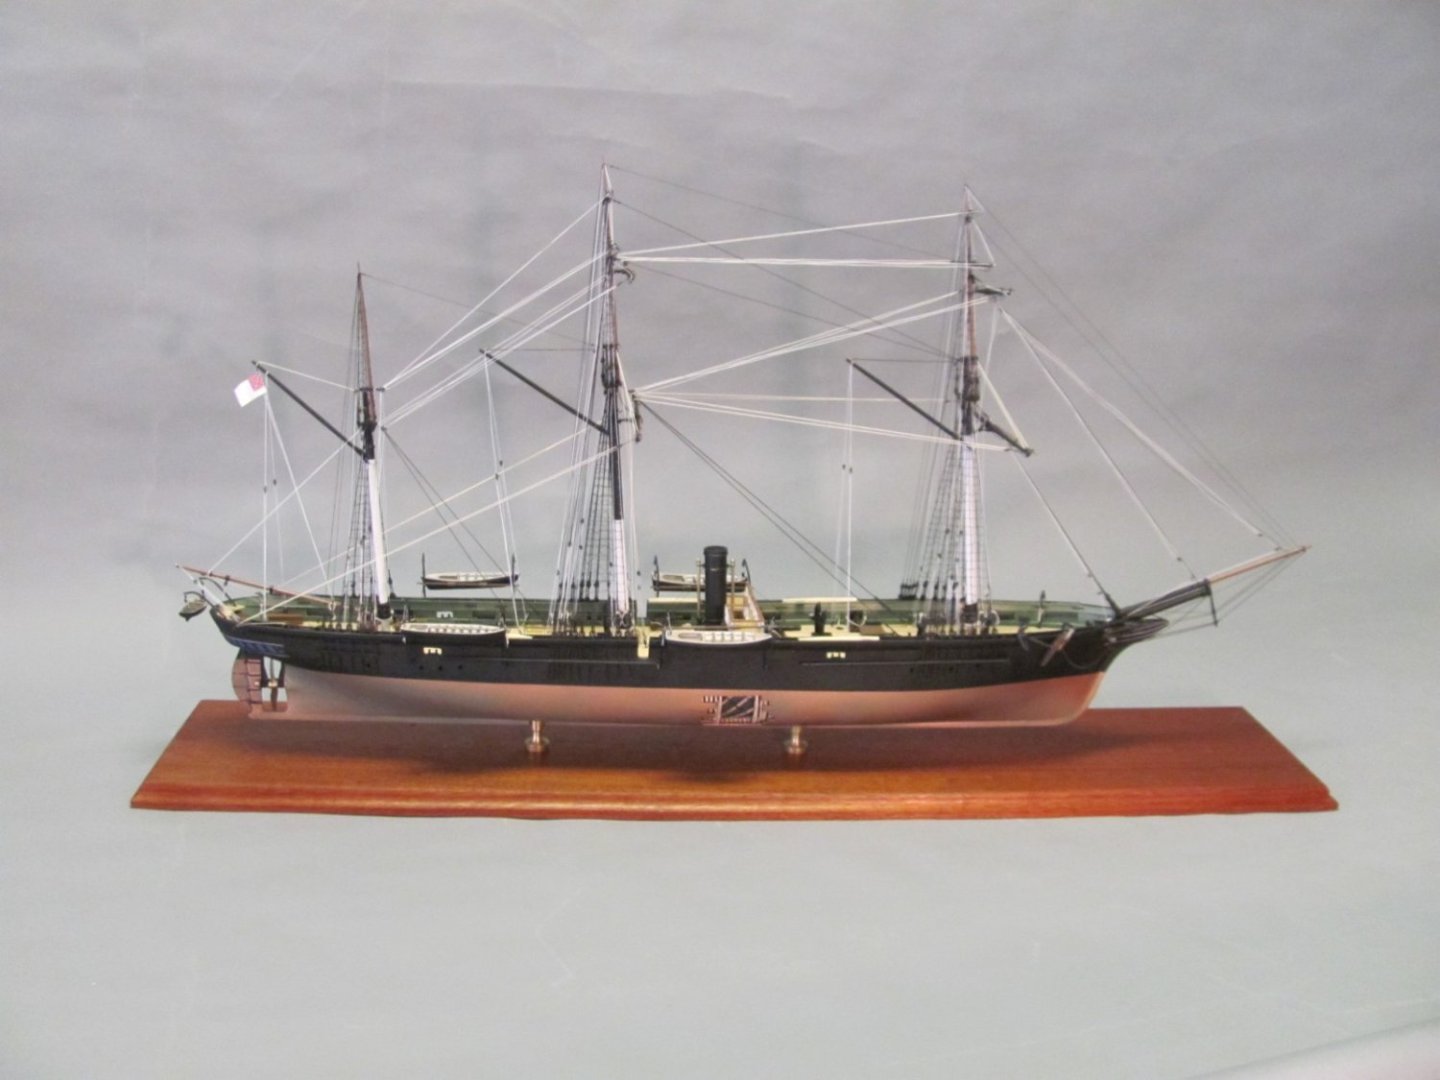
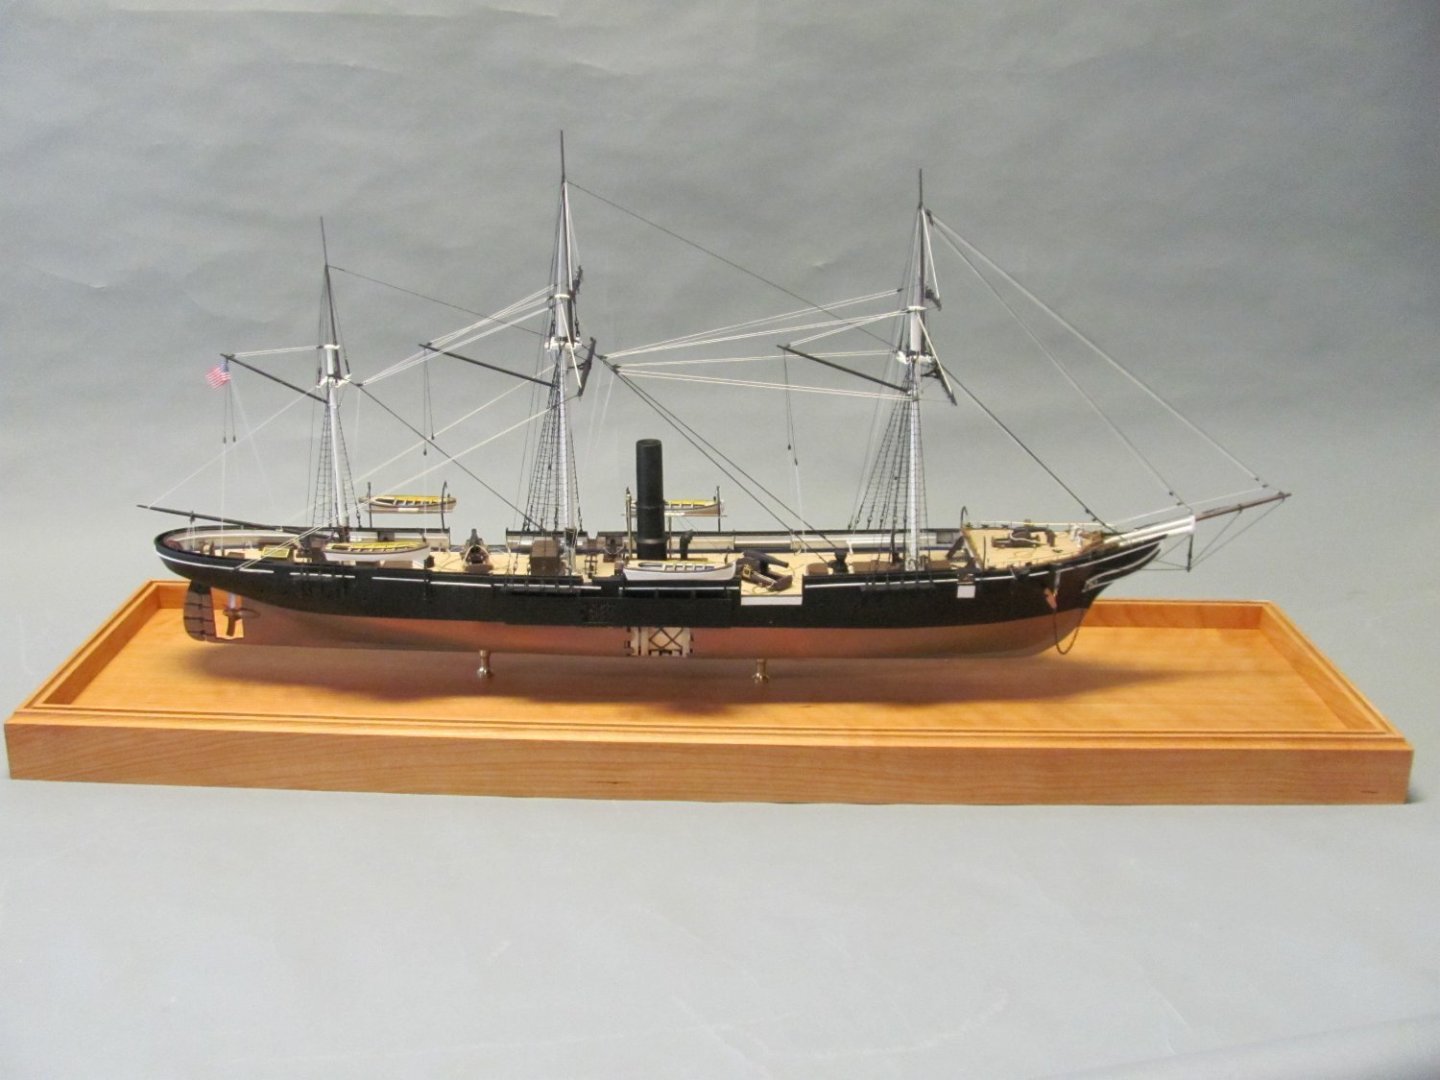
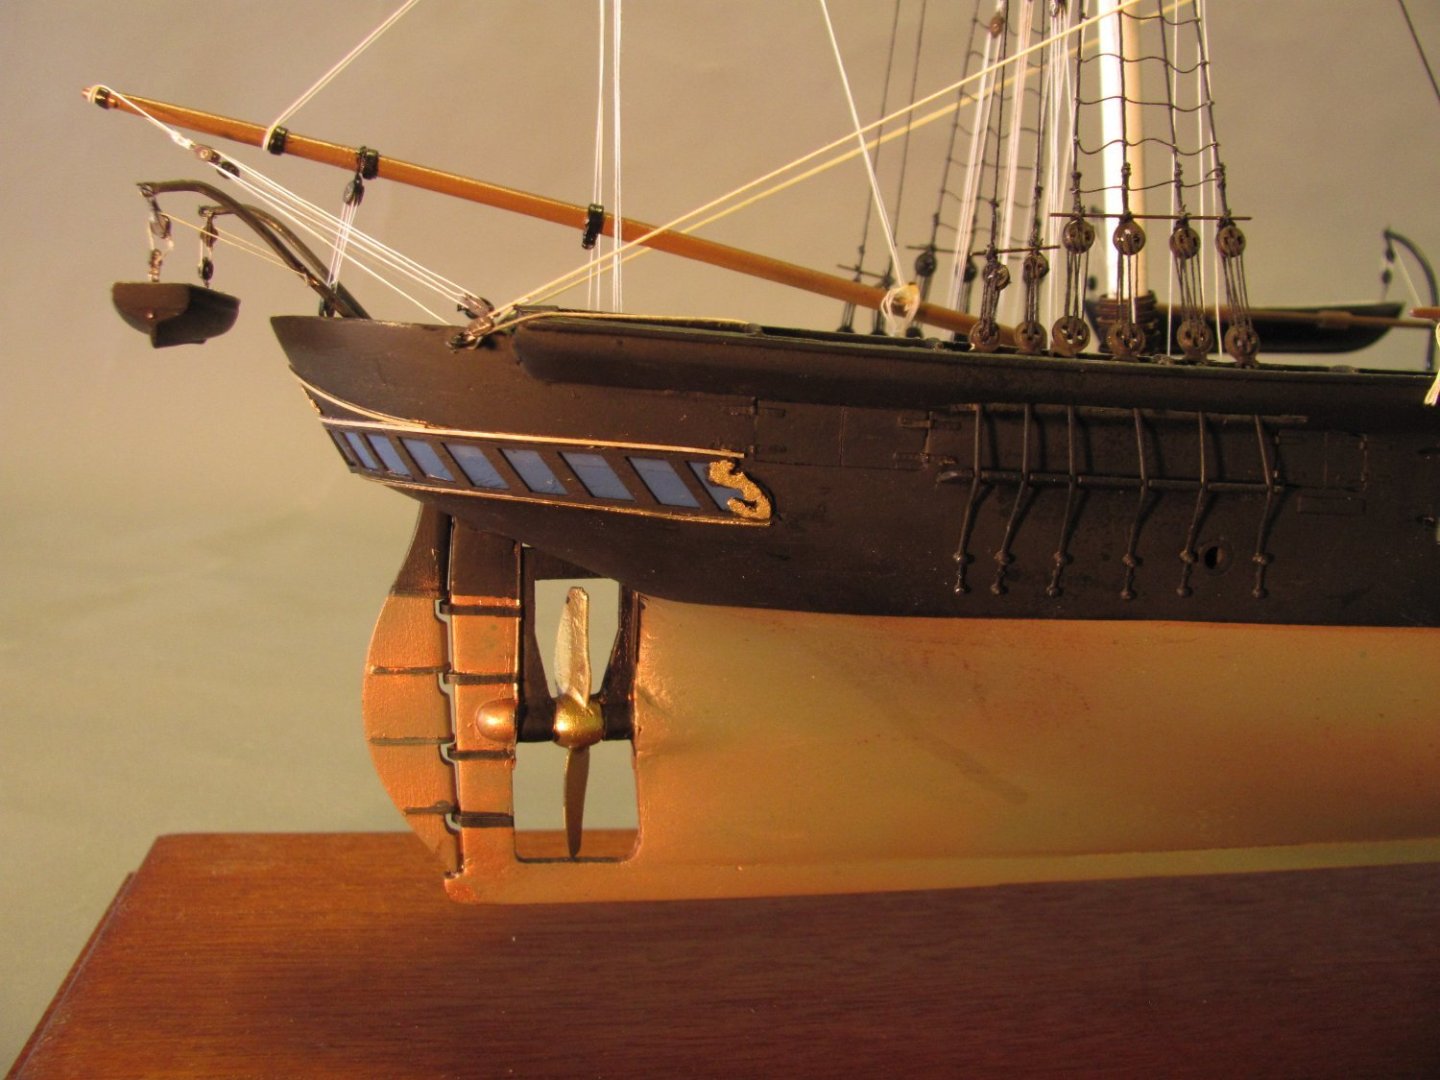
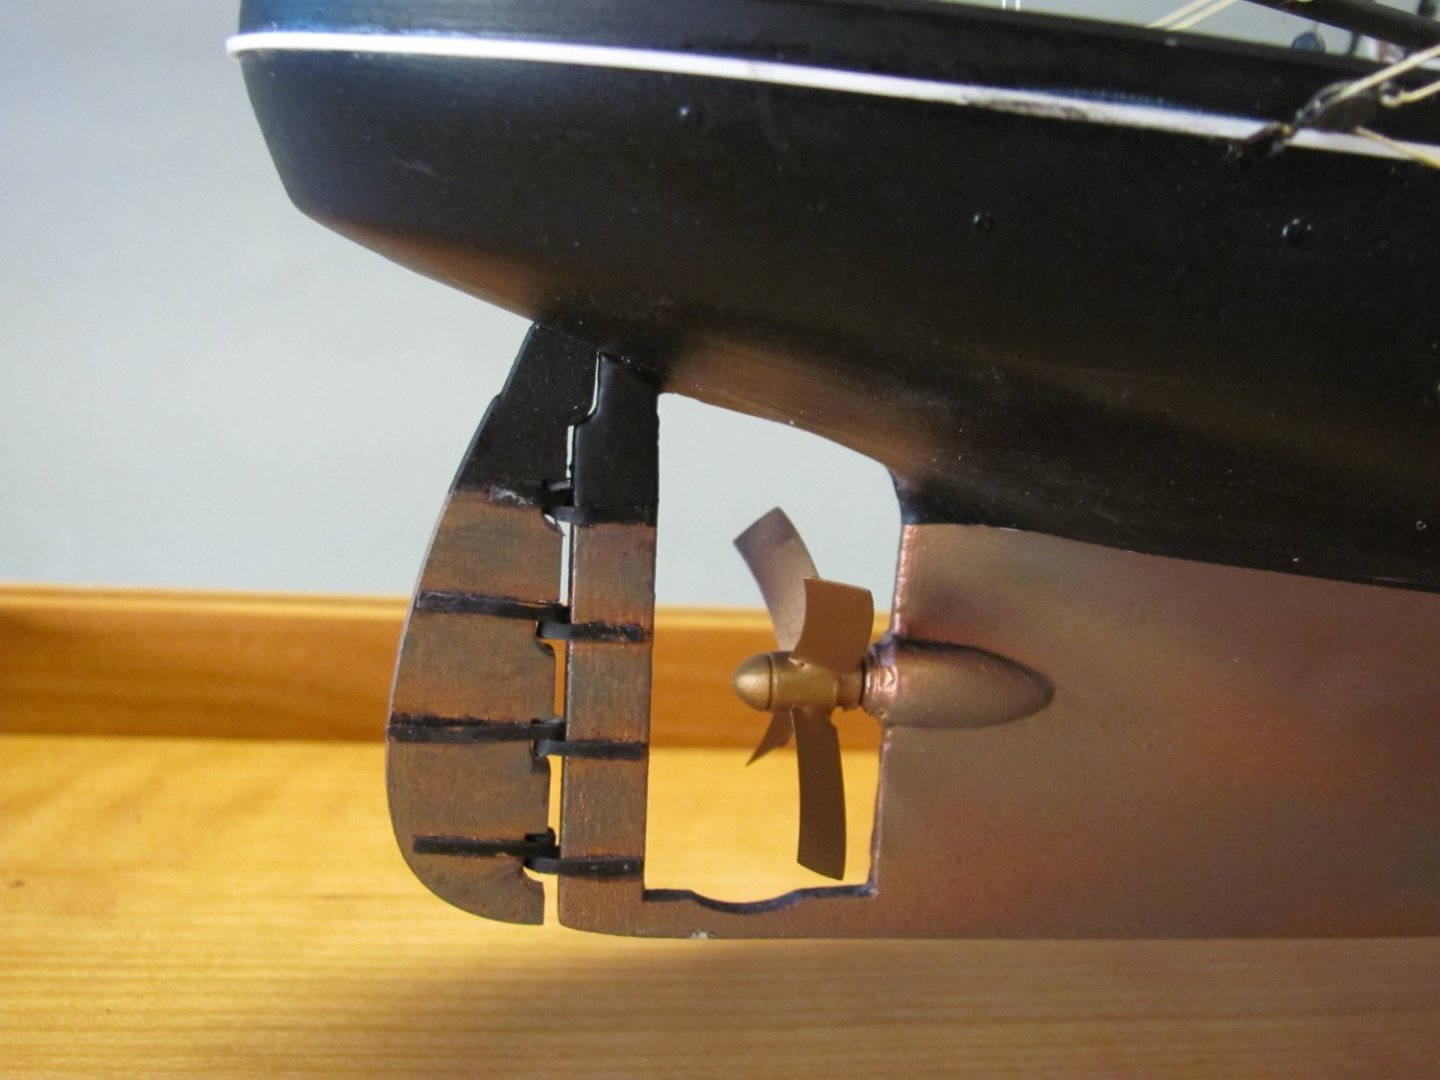
These are the BlueJacket kits. The stem on the ALABAMA is quite straight with a smaller radius at the bottom. The stem on the KEARSARGE has a large radius. The propeller on ALABAMA was in a frame that allowed the prop to be retracted into a well in the hull while the KEARSARGE prop was fixed. The forecastle of the ALABAMA had a relatively fine entry while that of KEARSARGE was more bluff and decked over. ALABAMA KEARSARGE KEARSARGE ALABAMA
-
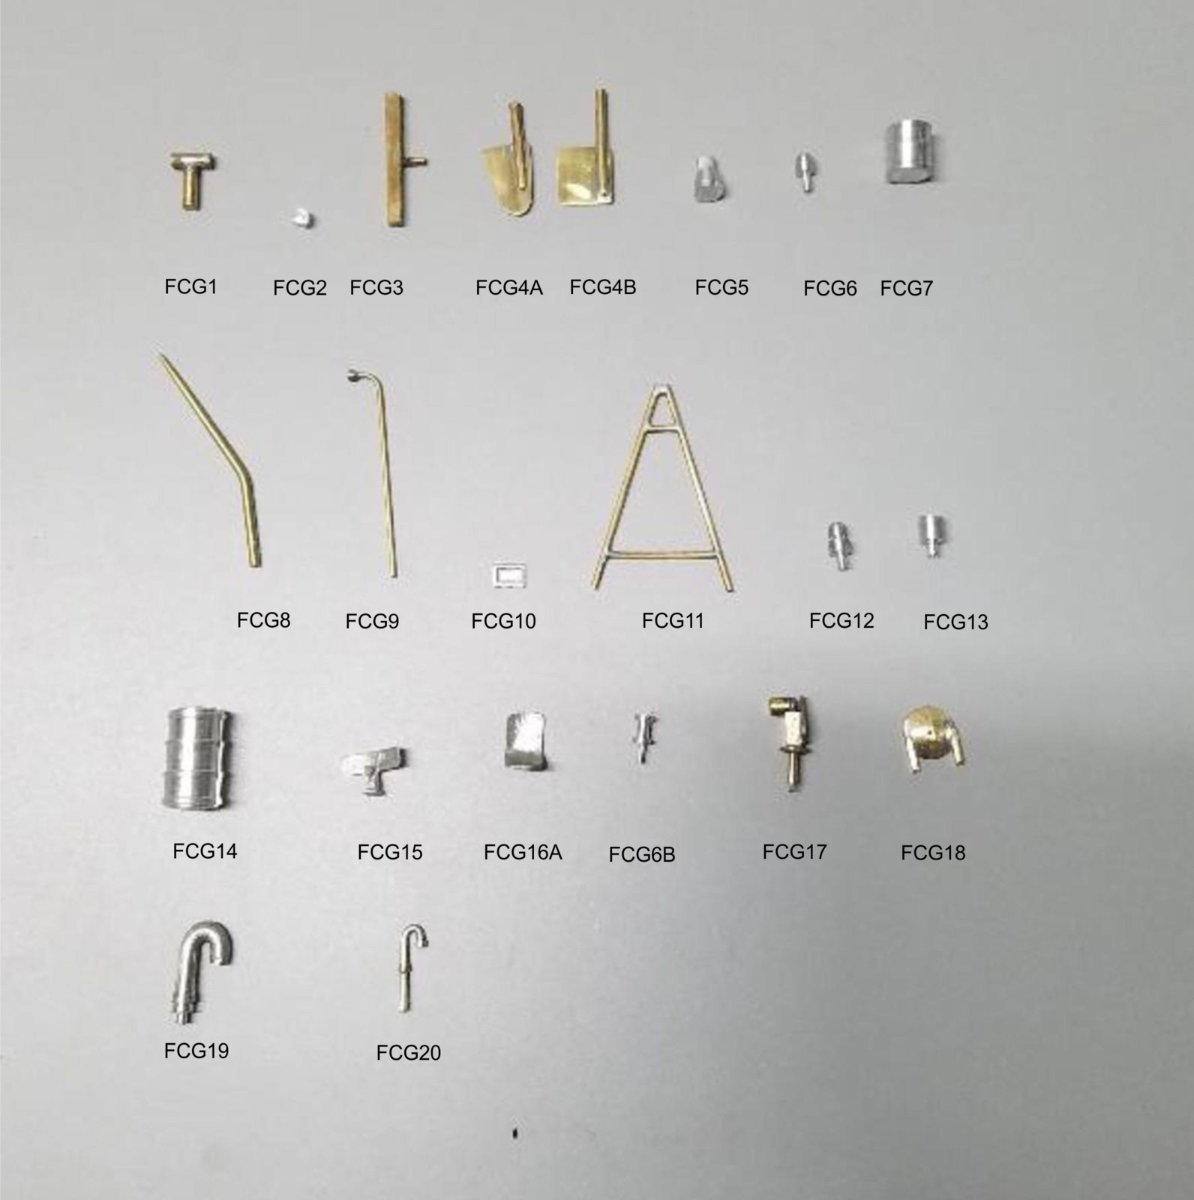
As of today, these are the brass and aluminum masters for the fittings specific to the 82' WPB kit.