Beef Wellington
-
Posts
2,249 -
Joined
-
Last visited
Content Type
Profiles
Forums
Gallery
Events
Everything posted by Beef Wellington
-
 Hi Robert, I too had missed your build before, shes looking very nice indeed, simply beautiful! If it weren't too much trouble, could you share the technique you used to build the waterways and tackle the scarf joints and which tools. Not sure I would know where to even start!
 -
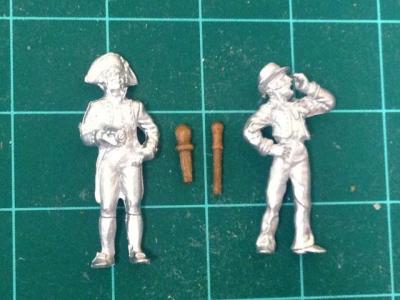
Robert, appreciate the kind words. Heres a photo below of the comparison (as supplied on the left, new on the right), couldn't quite figure out where to put it in the "rebuilt log". I got the replacement pins from Jotika/Caldercraft via their online site www.shipwrightshop.com. The improved pins are 9.75mm long and 1.5mm wide (although they are closer to 1.2mm when drilling out the pin-rail holes)
-
NOTICE: Build log from here is current progress, all prior what I was (incompletely) able to recover/re-create. My sincere thanks to Jim_Smits for sending me what he luckily had saved in his cached history from my prior log!
-
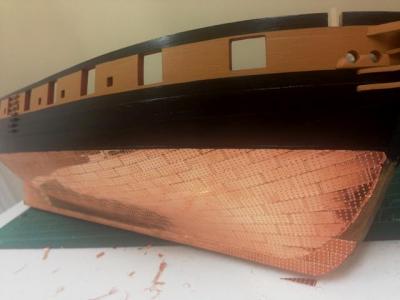
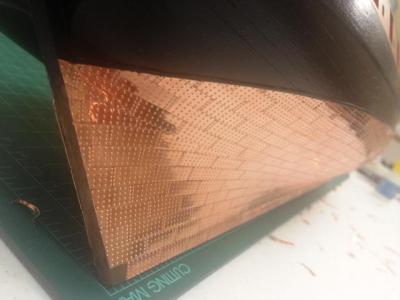
Coppering update - boy, this seems to go on and on! Wanted to post a couple of progress pictures which show how I handled what proved to be the more challenging areas. The good news is that I feel much more proficient after much fumbling a rework. Overall, I'm pretty happy, but still have not completed one side yet. Key lessons I've learned: - The plates are definitely most easily cut with good scissors - If you make a mistake, plates are pretty easy to pop-off even when well glued pretty well - Some very slight overlap is necessary along the edges to avoid gaps, even witht the small scale, rectangles just don't fit perfectly on a curved surface! - I'm using the thick Pro CA glue for Caldercraft, and it seems to work well with 3 SMALL drops of glue evenly spread - Where 'steelers' are needed in the tricky bow and stern areas, I decided to overlap the plate above as I think it gives a a better look. I found that using a sharp metal edge to flatten the nail heads makes this much easier and makes the overlap hard to see. The coppering will continue....
- 800 replies
-
- 2
-

-
- snake
- caldercraft
- (and 1 more)
-
A big step forward, have started on the coppering. This has caused concerns because mistakes will be much harder to correct. However, it seems to be easier than I expected. I found the first row along the keel to be a challenging start because I had to bend the copper plates to follow the hull. I'm using thick CA glue and no obvious problems so far. It seems to be difficult to know whether there is enough glue but the plates seem firmly attached. Don't think I've had any 'CA seepage' issues like others have described. Once placed I've been rubbing the plates with a soft cloth for 10-20 secs until its set to try and get the appropriate curvature, it also seems to polish each plate - I will leave to tarnish naturally, the polished finish shows the most microscopic misalignments. In general, I've found the coppering to easier than I expected, really where the plates require simple glueing to the hull. That being said, the areas of detail have been killing me. Particularly challenging has been the lower bow area. Trying to get the copper plates to bend smoothly to conform with the hull has been pretty challenging. Add to that the need to trim the plates to shape has resulted in a lot of thought and reflection. I wanted to reflect the coppering as depicted on the majority of referennce materials, basically the plates on the hull follow the lines of the hull, but the plates on the stem continue parallel to the keel. This causes a gradually increasing seperation in the horizontal joint lines, but this is how it should be. The lines of the Snake make this very difficult to do (for me anyway!) and bring back the struggles of this area when doing the second planking. The approach I finally took was to trim the hull plates to shape at the stem, leaving a little overlap, and then curring another plate to shape to butt up against the line of the stem. Hopefully this will speed up as I get more proficient, but I'm OK with how things are looking - whichever way you tackle it, these copper plates are a challenge and I can see why the copper tape is a popular alternative.
- 800 replies
-
- 2
-
-
- snake
- caldercraft
- (and 1 more)
-
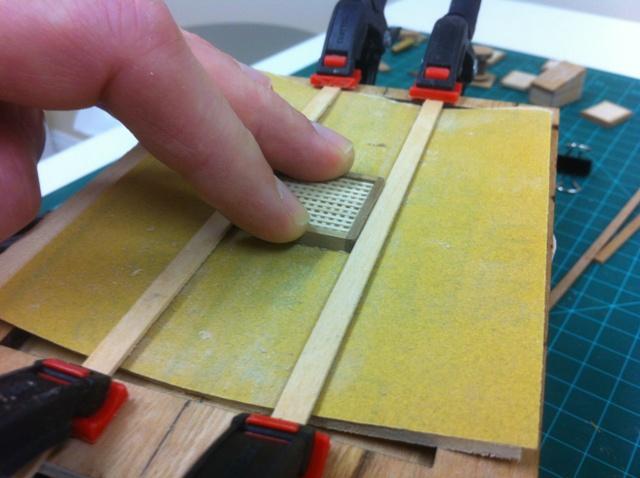
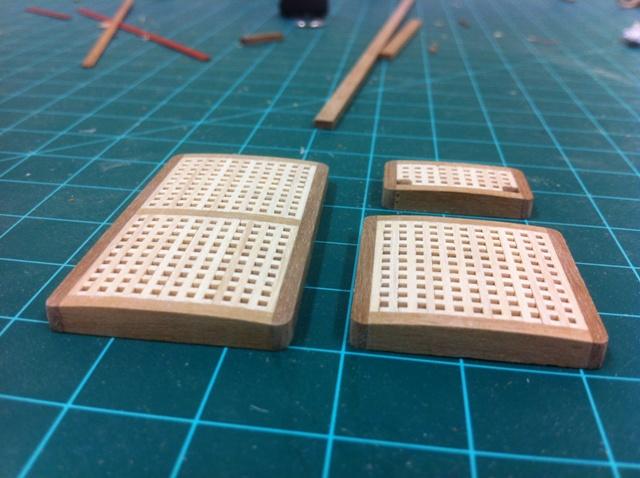
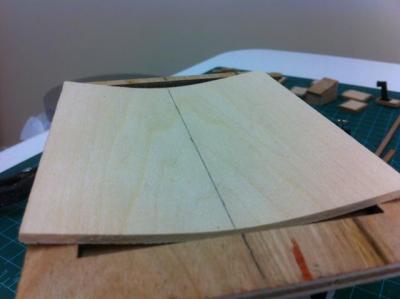
Here is the method I used to get what I feel to be a consistent top camber on the gratings, despite extensive searching I just couldn't find anything on this site to help. In the end, I took the following approach: 1) Built a small frame and place a thin sheet of bass wood into the frame at what I thought would be an appropriate curvature, I simply glued a thin line along the center to secure it (I know this is really forms a parabola, but it is certainly close enough to circular in the center to pass muster) 2) After putting a fine grain sandpaper on the curve, I then used a couple of spare strips of lime wood to act as 'guides'. Its then just a simple matter of moving the grating back and forth carefully until the curve has taken. The guides ensure that the camber remains centered for consistent result.

- 800 replies
-
- 5
-
-
- snake
- caldercraft
- (and 1 more)
-
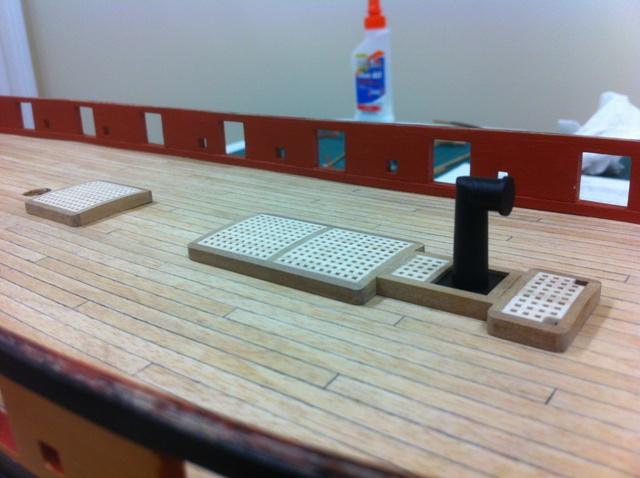
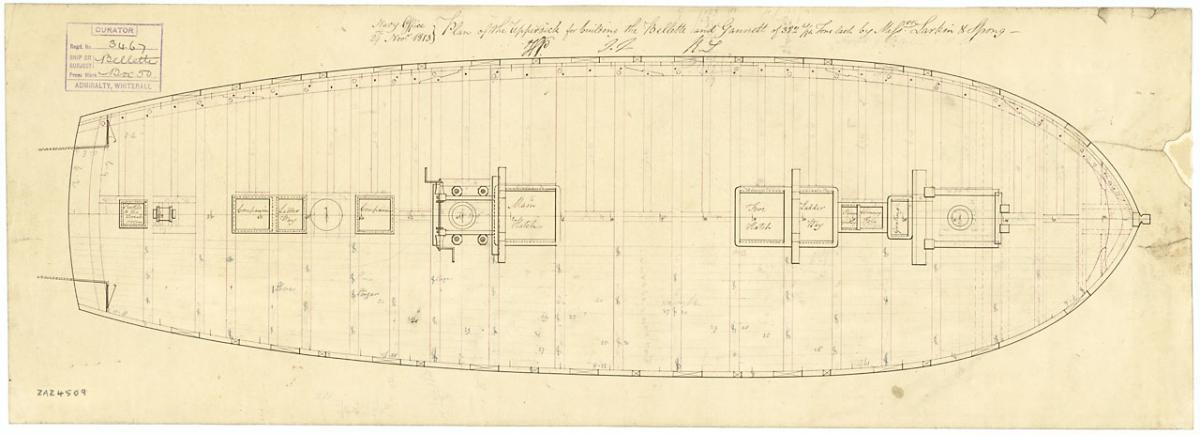
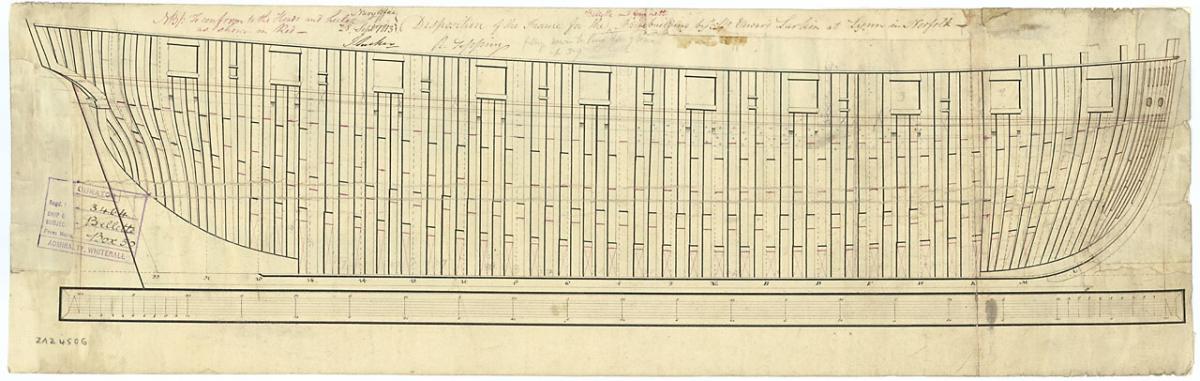
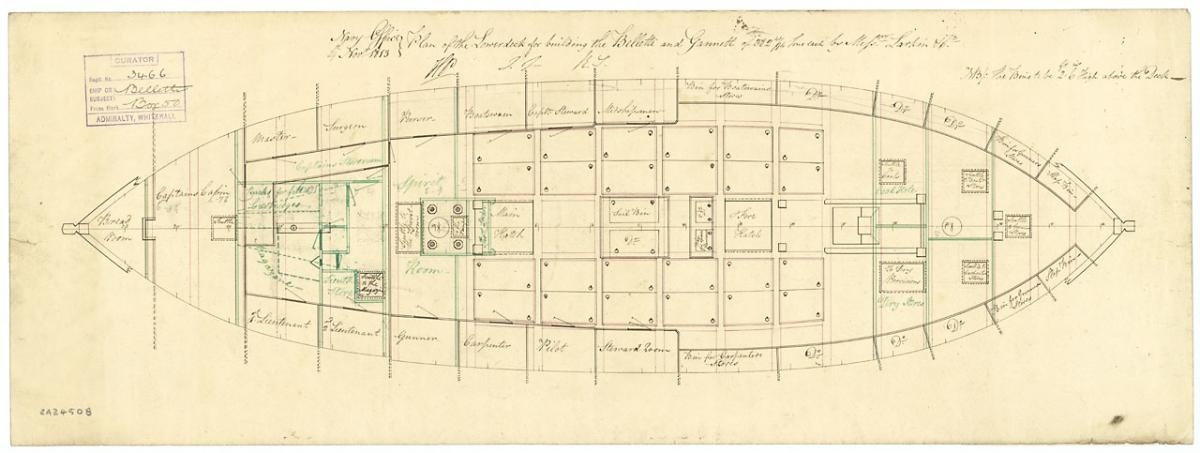
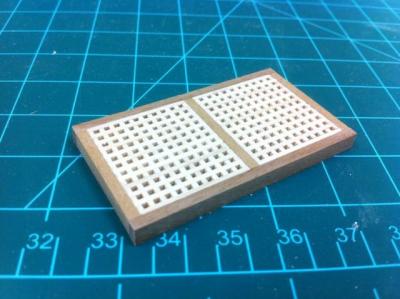
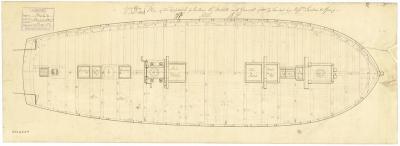
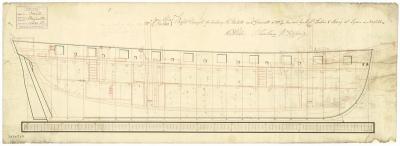
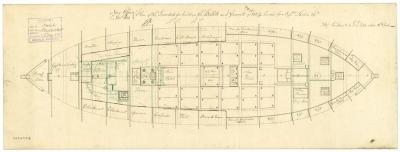
I plan to use a modified deck layout as per HMS Gannet NMM plans as this should allow me to install a ships boat. Even though Gannet was two masted, the layout should require little modification to account for Snake's 3 masts. I've added the NMM plans below. This required the addition of a galley chimney, I ordered one of suitable size from Caldercraft. One thing that intially bothered me was that the chimney was 'solid', but after some research it appears that the galley chimney's were fitted with a cover that when closed looks exactly like the white metal casting. Took me quite a bit of time to round the coaming corners and put some camber on the gratings, the aft gratings/companionway are still in very early stages. I will probably reduce the size of the companionway to size it more to the opeing indicated on the plans. The companionway size has always bothered me for some reason, it just seems too large in every dimension for the ship.


- 800 replies
-
- 1
-
-
- snake
- caldercraft
- (and 1 more)
-
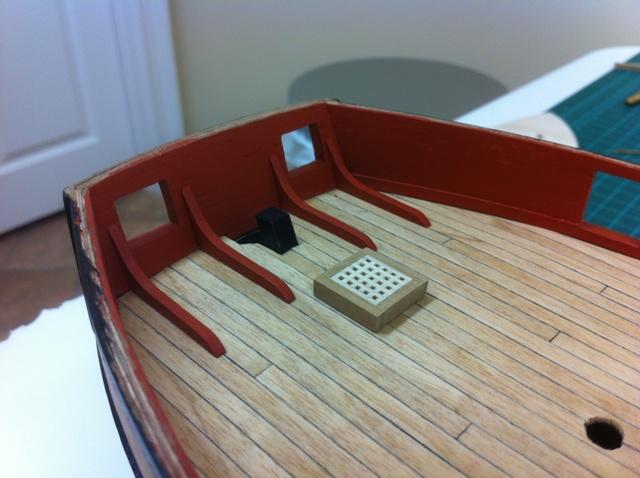
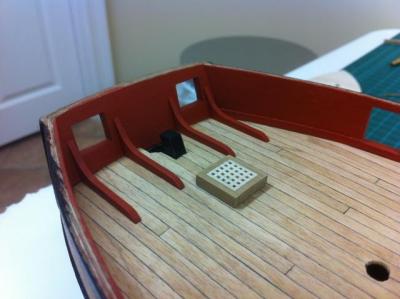
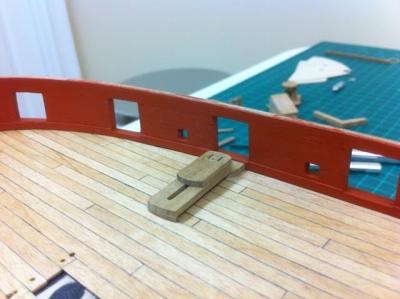
Managed to get the stern fascia knees installed, I found these needed a bit of reshaping to get the angle right and the usual compound angles of the deck and stern fascia and stern fascia curve. Its not perfect but should be mostly hidden by the aft platform when installed.
- 800 replies
-
- 2
-
-
- snake
- caldercraft
- (and 1 more)
-
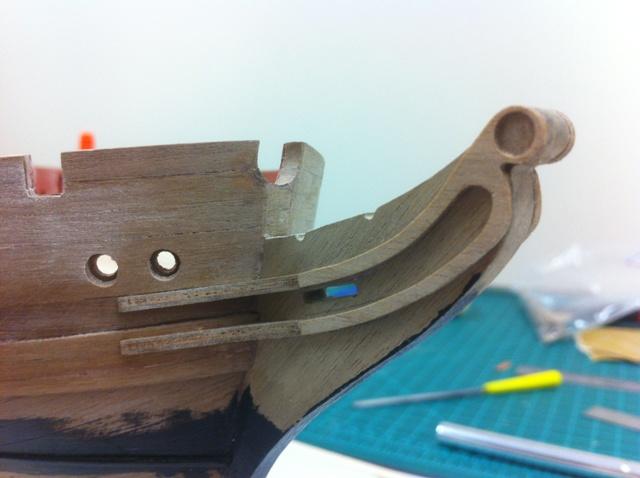
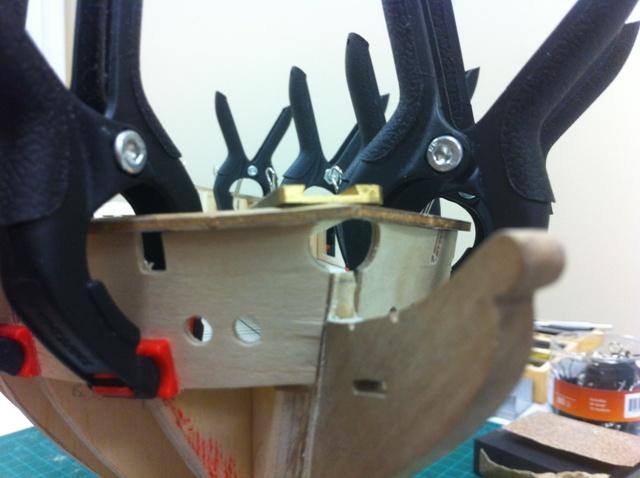
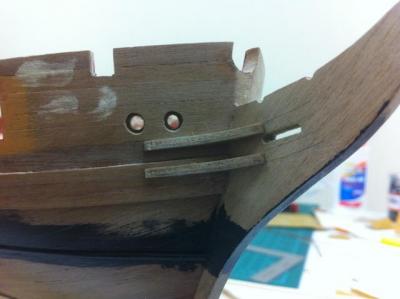
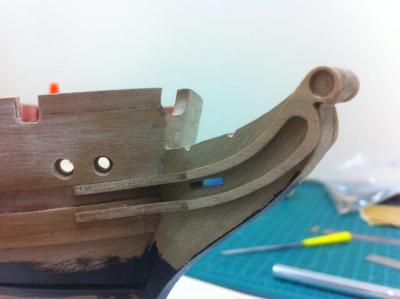
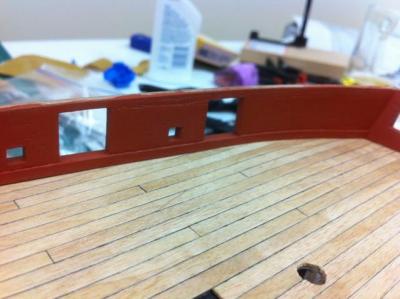
...and the result with the new bow grating angle. I lost the close up photo, but one thing you can just see in the bottom picture was the enlargement of the slots for the gammoning. As supplied, these slots were not long enough to allow the gammoning to be done properly but it was pretty easy to extend these using a needle file.

- 800 replies
-
- 4
-
-
- snake
- caldercraft
- (and 1 more)
-
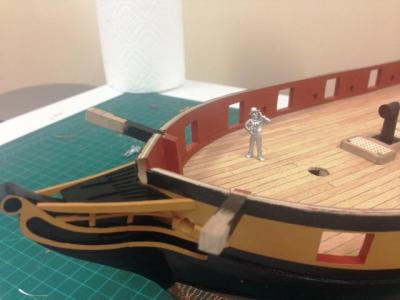
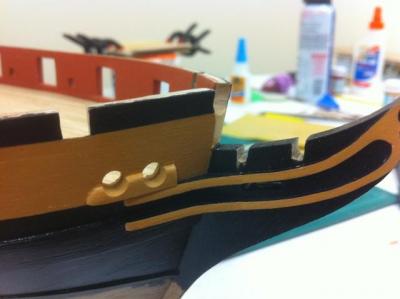
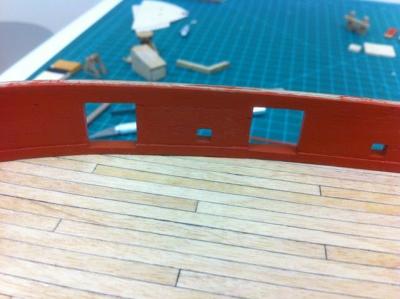
You can see in the picture below how even after fitting these, the bow grating does not lie correctly and would interfere with the bowsprit, simple adjustment to make but required a lot of dry fitting with the appropriate parts to get it to look right...
- 800 replies
-
- 1
-
-
- snake
- caldercraft
- (and 1 more)
-
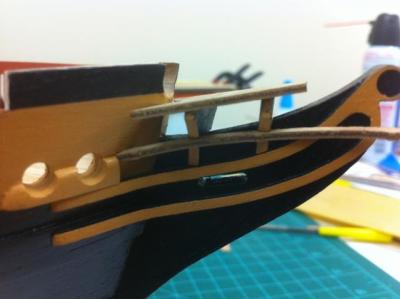
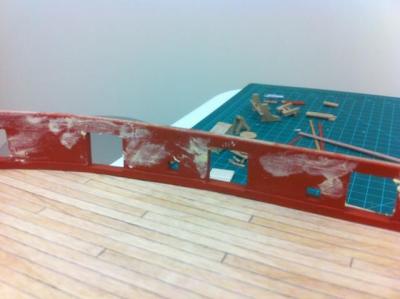
I had decided to paint the hull in the Nelson Chequer pattern using the Admiralty acrylic paints for authenticity (enamels are not supplied anymore). I found these to do the job, but do require good stirring, and also a few coats to get decent coverage. The bow fittings proved to be quite tricky. Picture below shows how I needed to expand the slots in the bow piece to accomodate the Bow Head rails, see subsequent posts for the pictures and procedure followed...
-
After spending quite a bit of time on the interior getting it to where I wanted it, time to move onto the exterior. As previously mentioned, I will be painting the hull black with a yellow ochre band or stripe, exactly how to be determined. Knowing that I will need to be using masking tape to get a clean line, I want to get as many of the features installed that will be key to figuring this out, while leaving off those things that will make this harder or impossible. At the bow, after much deliberation (and deviating from the instructions) I decided to install the bow cheeks first after dry fitting the bowrails to determine the alignment. These tool a lot of time and patience to get right as pretty much every face has a compound angle. To get the right look, I used 4mm spacers from some spare walnut planking to ensure that the seperation was uniform fore to aft on the cheeks. I found the plans less than helpful in this, as each elevation (and even the box art) has the cheeks in different place. Once I was happy with the cheeks, it was relatively simple to gradually trim the bow railings to get the right alignment. You'll notice I have not yet completed finishing the hawse holes. This is deliberate, my hope is to fit the hawse hole bolsters first so that hawse holes can be finished so they can be in alignment.
- 800 replies
-
- 3
-
-
- snake
- caldercraft
- (and 1 more)
-
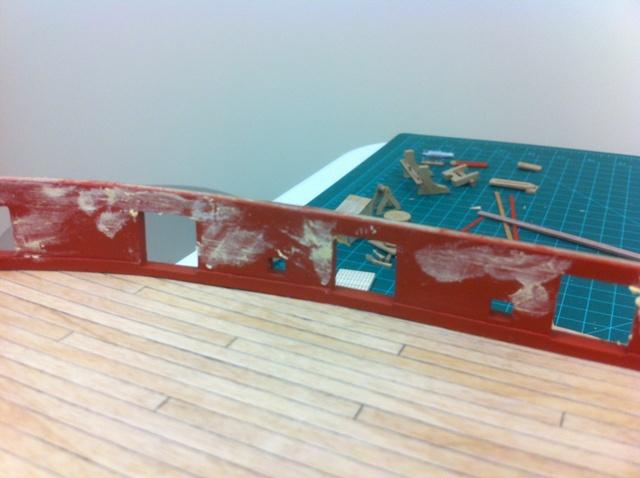
Had a chance to finish up on the interior bulwarks. After painting red ochre, there were a number of cracks and splinters around gunports I wanted to tidy up. Used a quick drying light wood filler, minor sanding and a fresh coat of paint it looks much better (hard to tell from photos unusually!). I'm not looking to have a compeletely smooth finish as these seem to be a little less finished on real ships. I'll probably do a final coat once I've had chance to tidy up the exterior, but more to come on that...befor eand after are reversed, haven't figured out how to fix that yet.

- 800 replies
-
- 2
-
-
- snake
- caldercraft
- (and 1 more)
-
Carl, thanks for the kind words, I'm only thankful the ship didn't revert to its pre-build log state as well! Jim, thanks a bunch for sending through you, much appreciated! I'll try to get up to date tonight. I wish I could say that with the site being down I've made a tone of progress, but alas no!
-
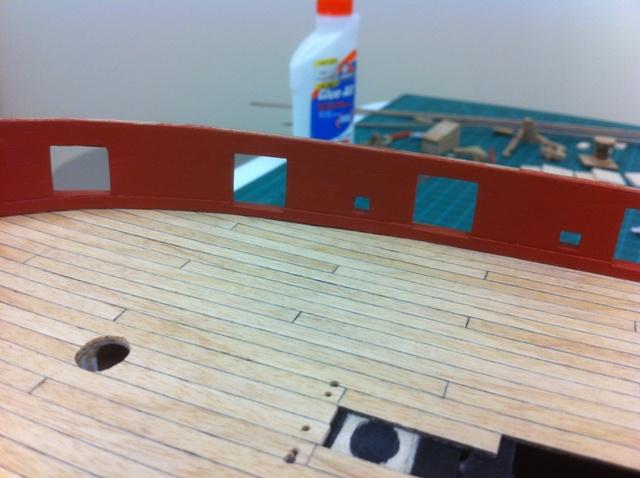
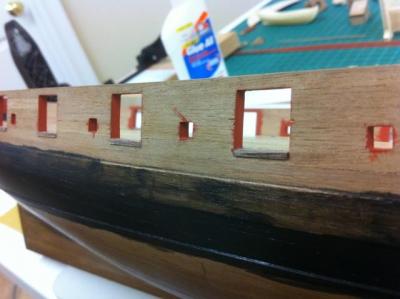
I added a thin strip of .5x3mm walnut strip purchased seperately to simulate spirketting and painted this before glueing in place. Purpose was to try and make the deck/bulwark transition as clean as possible, as I found the deck ply was not 100% true at the edges once the false gunport patterns had been nstalled. I not quite sure it would measure up to being 100% accurate, and I did not do any sort of waterway or margin plank. I have started to remove the small section to allow the cathead to fit flush. Prior to this, last photo, I'd raised the height of the gunport sills. I sanded these back flush with the hull as I'm planning on using the turned brass Caldercraft 32lb carronades instead of the kit supplied ones. These mount to a block ont he deck rather than to a protruding sill as required by kit supplied peices, you can see this in the second photo.
- 800 replies
-
- 2
-
-
- snake
- caldercraft
- (and 1 more)
-
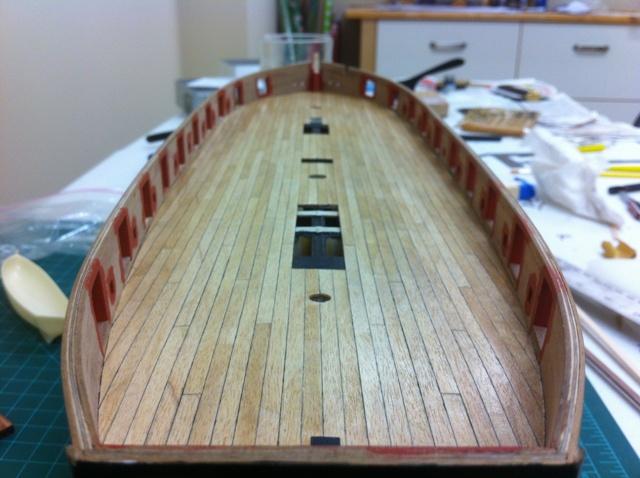
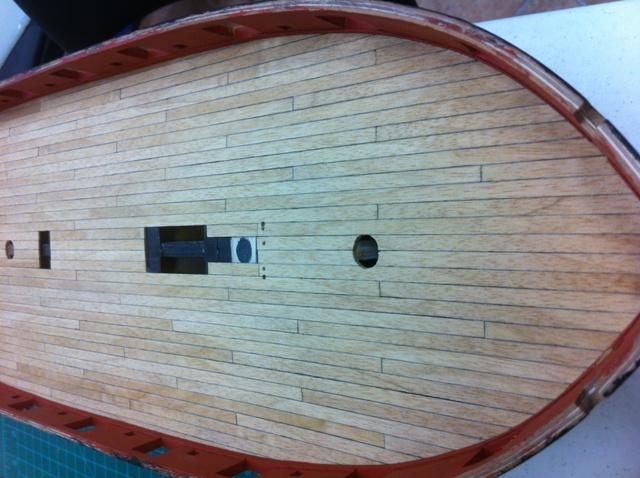
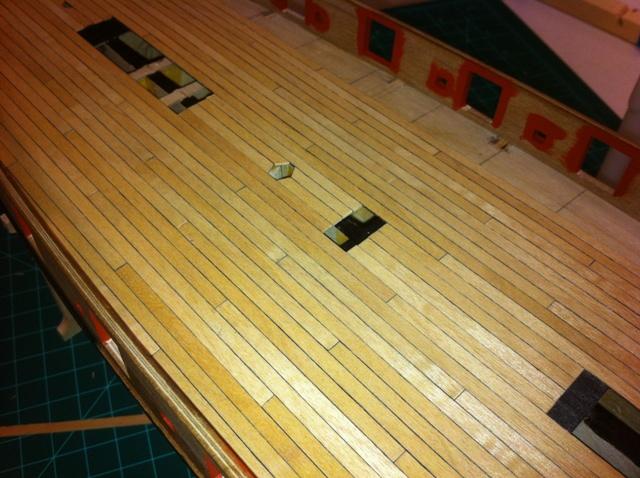
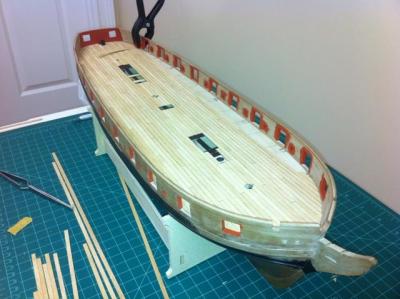
Deck after finishing. I'm planning to adjust the layout of the deck using the HMS Gannet/Bellete plans freely available for download from the NMM. Decidied not to do any treenailing as I didn't think it really needed it as the deck seemed a nice backdrop for all the furniture to come, and its questionable whether these would be very visible at this scale...personal opinion only.


- 800 replies
-
- 6
-
-
- snake
- caldercraft
- (and 1 more)
-
Gun port templates installed, had some difficulty with this as there was little space to attach with glue along ships length. I found the bulkhead extensionsdid not seem to follow the correct lines,but they do add some protection at this early stage. The height of these patterns were determined by measuring from the bottom of the gunport to the the false deck - accounting for the thickness of the decking and the gunport sills. I used the capping rails to try to get these as much in line with these as possible after soaking. Decided to use the capping rails as the guide rather than the plans as they do not match closely at the bow. Decking was done using soft pencil on the side of planks, and I decided to go with a 1-3-5-2-4 butt shift pattern and individual plank lengths of 15cm. Finished with a couple coats of satin varnish which enhanced the colour a bit, but put a final coat of matt to finish.


- 800 replies
-
- 1
-
-
- snake
- caldercraft
- (and 1 more)
-
This is my first post to try and recreate my old build log from before the great crash of 2013. I'll do my best to find what I have from the old log and will resurrect what I can. Unfortunately, if this can be believed, my PC had a hard drive failure around the same time so I'm still int he process of trying to recover what I am able(I hadn't been too studious keeping photos assuming that once posted they would be safe and backed up - never assume!). My commiserations to all the others out there who have lost so much work, it really is a big loss, I hope that we can collectively get the knowledge capital back up to where it once was.
- 800 replies
-
- 1
-
-
- snake
- caldercraft
- (and 1 more)
-
Hi Jim et al, this feels a bit like recovering from a natural disaster. Unfrotunately my PC hard drive failed right around the time the site was being upgraded, what happened!?! Anyway...appreciate you being able to recover some of my log, I think I may have lost the pictures that I had posted. Such a shame if indeed all the collective knowledge from so many builds is lost! I'm going to start another build log when I can picking up from where I left off...oh well, "don't panic and carry on" and all that. All the best, look forward to more posts.