-
Posts
2,249 -
Joined
-
Last visited
Content Type
Profiles
Forums
Gallery
Events
Everything posted by Beef Wellington
-
Hopefully someone can help. I'm currently building the Caldercraft HMS Snake kit and planning ahead have purchased Lennarth Petersson's excellent book "Rigging the period ship model" for additional guidance. I notice that ship rigged models all seem to incorporate crowsfeet, yet the HMS Snake kit does not make reference to them. Would it be more accurate to include these on the ship rigged Snake, or was there a reason they would not have been used? Finally, what do the crowsfeet do?
-
Don't worry, I'm still enjoying this enormously and moving onto fresh challenges. If it hasn't already been named, there has to be a fundamental law of model ship building that states that the amount of work completed in a given period of time follows an inverse square relationship to the fraction of a day worked. For example, it takes 4 times the amount of time to acheive the same result if you can only work of the ship in 1/2 day (4 hrs) sessions, and 16 times the amount of time if you can only devote 1/4 day (2hr) blocks of time. I need to give this some more thought ... but the statement by Caldercraft about the Snake that it can be built in 3 months with evening work has to be questionable!
- 800 replies
-
- snake
- caldercraft
-
(and 1 more)
Tagged with:
-
I'll post the info on my log when I get home, maybe it is also available in the great Hellenic Republic.
- 1,144 replies
-
- snake
- caldercraft
-
(and 1 more)
Tagged with:
-
Reading the text on the tube, 'mirror finish' and 'gloss formula' will mean you will have a very shiny end result, maybe too shiny! The product I used just cleaned the surface and did not give a polished finish as I doubt they would have looked that way in real life. Its probably just down to personal taste.
- 1,144 replies
-
- snake
- caldercraft
-
(and 1 more)
Tagged with:
-
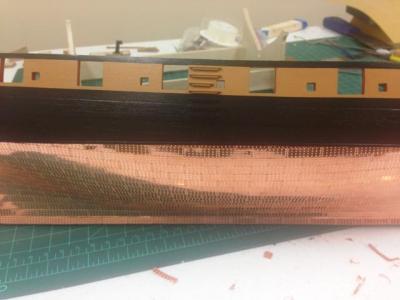
Mort, Sjors - thanks for kind words Carl - maybe an excuse to put tools down for a bit! Stergios - At the stern I have 7 uninterupted plates before needing a stealer, at the bow I could only go with 5 because of the difference in the hull shape. I would definitely do some dryfitting to ensure this works for you as I suspect small changes in hull shape could make you want to adjust.
- 800 replies
-
- snake
- caldercraft
-
(and 1 more)
Tagged with:
-
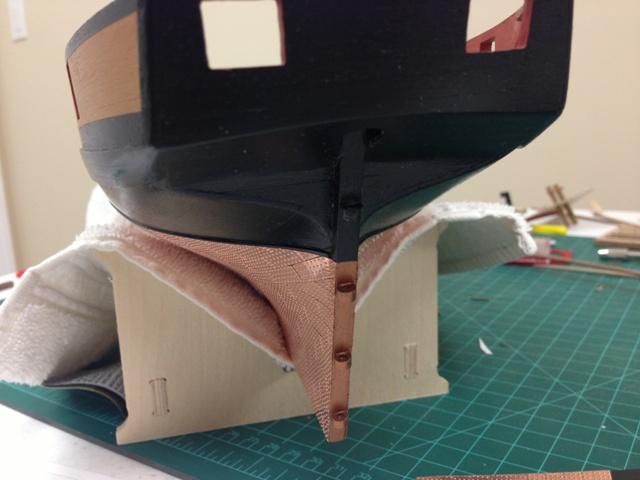
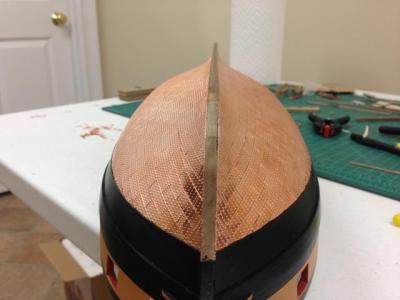
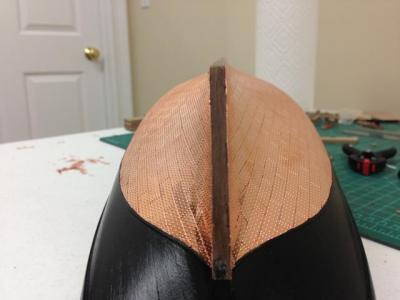
Jim, I have not coppered the bottom. I was going put in a false keel as described in some AOTS books I've been referencing (mainly HMS Pandora). Still figuring out what and how. For the plates on the front of the bow and the rear edge of the rudder I simply glued them on vertically as they are. The thickness of the wood and the previously mounted plates were only very slightly narrower than the width of the copper plate. I then just took a small file and carefully filed away the edge at a 45 degree angle help them meet the side plates to smooth it (the plates tend to bend back a little in this process which makes for an even more seamless result). Hard to describe, but simple, and turned out a lot better than I had dared hope. Hope that helps.
- 412 replies
-
- snake
- caldercraft
-
(and 1 more)
Tagged with:
-
Echo that, very nice Jim, all looks very familiar :-)
- 412 replies
-
- snake
- caldercraft
-
(and 1 more)
Tagged with:
-
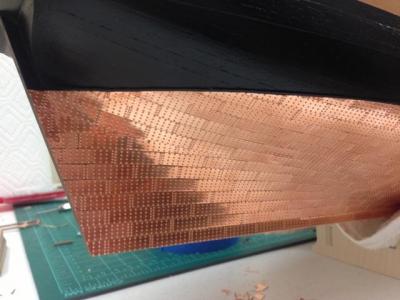
Hi Stergios, welcome to the coppering club! Looks like a nice startm you've made. If I may make a suggestion, I bought some CA glue debonder in case of emergencies, it does a really nice job of removing CA glue if you get the odd smear on the plates and is very easy to use. It also does a nice job cleaning up finger tips! I just added to my log answering your question on the cleaner. After I finished the coppering I did use a metal cleaner for copper to clean off the fingerprints as these had already started to tarnish. It was a simple procedure, dulled the copper a bit and returned it to the more pinkish colour. I did this before posting my final picture so you can see the effect is not dramatic, but I took comfort knowing that it should oxidize more evenly which is the look that I want.
- 1,144 replies
-
- snake
- caldercraft
-
(and 1 more)
Tagged with:
-
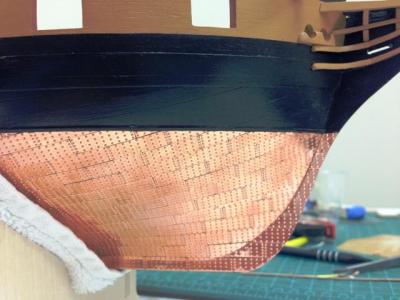
Blue Ensign - appreciate you stopping by, please feel free to make any comments or suggestions anytime. The Snake instructions are totally silent on the matter, its one of their older offerings and the instructions are very rudimentary compared to the newer kits, but you're right, copper paint is the way to go. Jim, Stergios - hope its useful, I did for get to add the comment that I wasn't 100% sure that the waterline at the stern was in the right place. Despite many repeated measurements earlier in the process it looks like copper upper edge at the rudder is maybe 5mm too low. Nothing I can do about it now, it looks fine to me, but your results may vary slightly. I also decided to wipe over the copper plates with a metal cleaner - because it took me so long to do the coppering I had a lot of fingerprints from handling the hull and the oxidation was accelerated in these areas. It worked nicely, bringing the copper back to a slightly duller hue (it wasn't a polish) and slightly more 'pink'. Results were not dramatic, and you can see (or not!) the result in the middle picture in the post above. I will leave the copper to gradually tarnish and hopefully this will be a little bit more even now.
- 800 replies
-
- snake
- caldercraft
-
(and 1 more)
Tagged with:
-
Ray, after your fantastic Pegasus build very keen to see more of this build, she really is a beauty...something I'm aspiring to. I've just finished coppering my Snake build, I felt a little wary with the Caldercraft copper plates as well as I've seen them criticized in this forum, however I was pleasantly surprised with the overall effect once complete as it was not as 'in your face' as I had feared, but just my humble opinion. Best of luck and eagerly waiting to see more!
- 536 replies
-
- diana
- caldercraft
-
(and 1 more)
Tagged with:
-
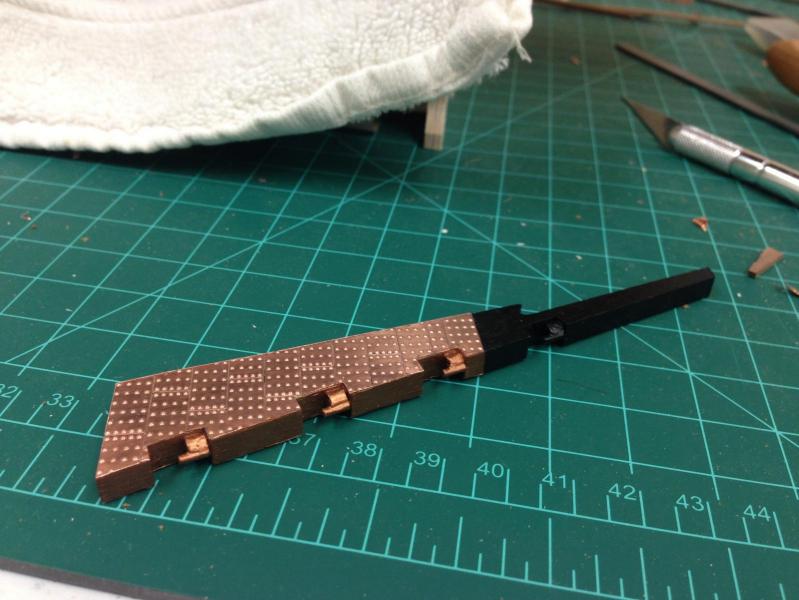
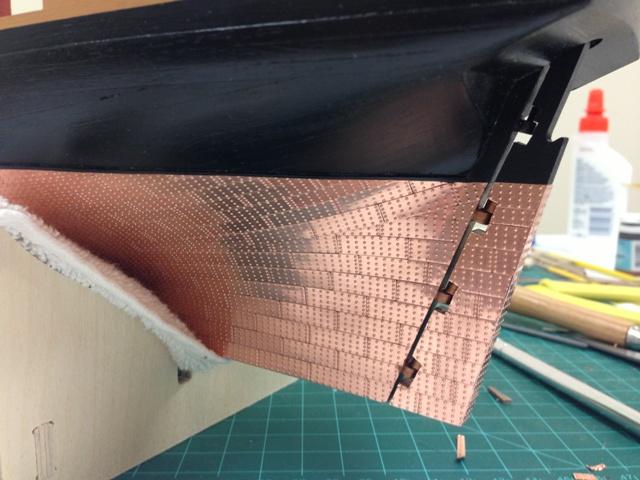
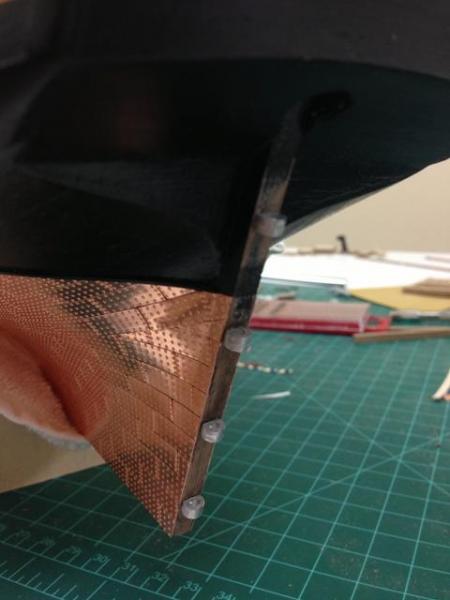
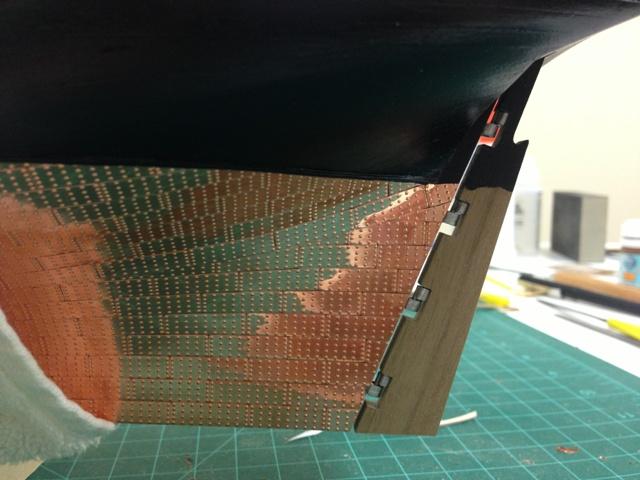
Once work on the mounting hardware was done, moved onto the coppering (of course) and other finishings aspects. I did not bother to copper the sternpost or the front side of the rudder as these cannot really be seen, and simply painted these copper. Coppering the rudder was definitely a challenge due to the rudder mounting recesses. Overall pretty happy, and just the mounting straps to go before being able to move back to the deck with conviction.
- 800 replies
-
- snake
- caldercraft
-
(and 1 more)
Tagged with:
-
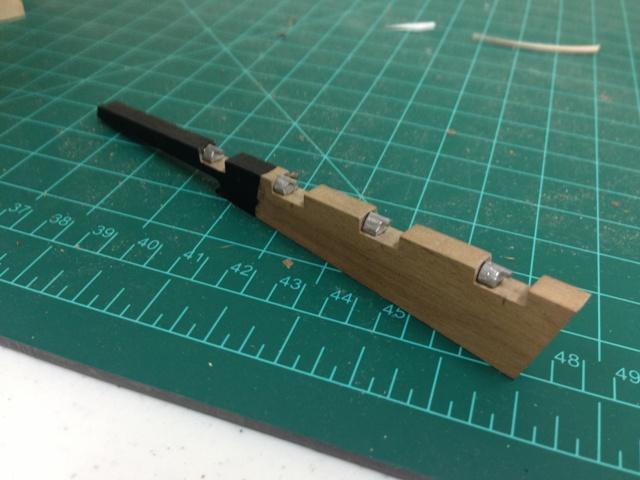
After completing the hull coppering, moved onto the rudder. This felt a bit like the last 385 yards at the end of the 26 mile marathon! Had to file down the rudder openings and the pintles so they were fully square, square needle file a flat needle file did this easily enough with a bit of patience. Care is needed to make sure the gudgeons are installed in the right spot, I decide to first get the rudder positioned correctly and install the top gudgeon first and use this as a basis for the others to ensure all are supporting the rudder. Simple matter with thick CA glue. Small holes are needed to be drilled in the sternpost to accomodate the cast 'nail' on the gudgeons, care is definitely needed with these, the last one broke off while dryfitting. Hopefully I won't regret this, but I simply glued this to the sternpost as the others should bear a lot of the strain.
- 800 replies
-
- snake
- caldercraft
-
(and 1 more)
Tagged with:
-
Nice Jim, keep at it! I kept trying to force myself to look at the big picture, if you obsess over every plate it just isn't fun. I noticed you've painted the pintles black, I know for authenticity the straps should be painted copper and was going to do the gudgeons/pintels copper as well in the absence of a reference. Did you find anything to suggest which way to go? Cheers
- 412 replies
-
- snake
- caldercraft
-
(and 1 more)
Tagged with:
-
And again, welcome back Stergios! In case you didn't figure it out yet, hit the "More Reply Options" button. I think the photos load the opposite way to the way they used to, so you want to load the first picture you want to see first. She looking very nice by the way with the black painted.
- 1,144 replies
-
- snake
- caldercraft
-
(and 1 more)
Tagged with:
-
Think the majority would be either red ochre or black...think its just a personal choice, but I would like to have at least a bit of real wood showing. I had looked over a lot of the old build logs and seems most have taken this approach.
- 412 replies
-
- snake
- caldercraft
-
(and 1 more)
Tagged with:
-
Hi Jim, fully appreciate your coppering boredom! One thing I'm conscious of with the wood is that some of the pieces are solid and some are laminated. Unfortunately I don't think the laminated bits look that good just varnished but maybe I'm being picky, I'll probably paint these items but haven't decided yet. As for the coppering, I agree with you. I thought I would get a better result by overlapping, the copper plates seem to curl up when being cut very thin which just adds to the difficulty. I tackled it by cutting to stealers to the approximate shape and then dry fitting the plate over the top to see what would be overlapped. I then used the edge of a needle file to flatten the protruding nail heads to try and keep the top plate as flush as possible....if that makes sense. I also took this approach at the waterline in many places.
- 412 replies
-
- snake
- caldercraft
-
(and 1 more)
Tagged with:
-
Daniel, you never cease to amaze me with the detail you put in. I'll be watching again now build log 2.0 is back up and running. Very impressive!
-
As Carl points out, there seem to be a multitude of options, and there was a lot of opinions on the old site! (Carl I think I saw people had used both linseed oil on decks (boiled or regular!) as well as tung oil (sp.?) I decided to stick with simple polyurethane (mainly to reduce the chance of screwing up!). My experience showed with the brands I had available (water based) the matt finish seems to leave the wood looking almost untreated, the satin finish brings out a bit more of the colour. I'm probably going to use a satin finish to bring out the colour and then give a coat of matt (I'm not planning to use wood stains)
- 412 replies
-
- snake
- caldercraft
-
(and 1 more)
Tagged with:
-
Very nice build Sjors, it now somehow easier to find the great build logs now that there are fewer of them (I had missed yours before). Will definitely be following closely.
- 1,873 replies
-
- occre
- san ildefonso
-
(and 1 more)
Tagged with:
-
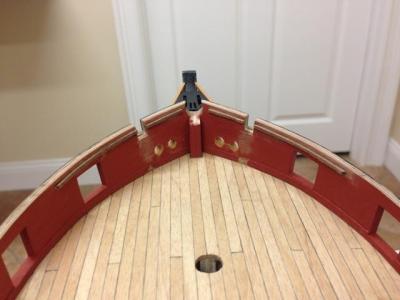
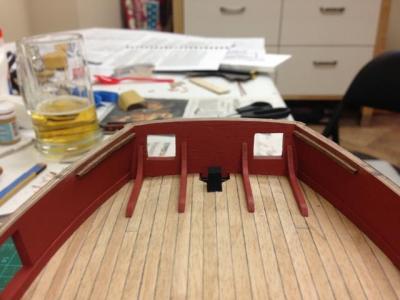
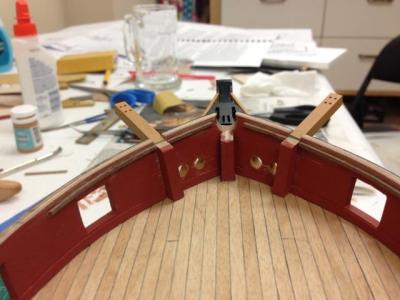
Installed the small ledges need to support the fore and aft platforms. Also added in the catheads as these need to go in ahead of the platforms, even though they are not mentioned in the instructions. I am deviating from the order described in the instructions, and am somewhat glad that I am as I'm finding it a little easier. I do forsee some questions coming up on the bow area, as I think it may be necessary to shape the bowsprit and ensure this can be fitted properly before the fore platform and fore-bits/bowsprit brakcet are installed. I would like to install the false deck ply first and then plank in situ rather than doing in advance. You can see that I needed to file back the elbow of the cathead so it is flush with the platform ledges and doesn't interfere with the fore platform fitting. Also will need to do some paint touch up in this area, even though I don't think it will be very visible.
- 800 replies
-
- snake
- caldercraft
-
(and 1 more)
Tagged with:
-
Finally...pretty much completed the coppering on the hull. Only have the leading edge of the bow to go and I want to think about how to approach that, no urgency and should be relatively easy to do. I followed the coppering pattern as shown in the HMS Pandora AOTS book as there seems to be so little information around on how this was done. Result came out pretty close. Only other coppering to be done is the rudder, but this should be straight forward now, but I need to deal with the gudgeons and pintles first. I'm also running worryingly low on copper plates, my numerous "re-dos" have caught up with me but still glad I did. I've ordered some more just in case to avoid any work stoppage.
- 800 replies
-
- snake
- caldercraft
-
(and 1 more)
Tagged with:
-
Glad you are back Andy, had been following your old log closely and will be looking forward to more updates!
- 1,148 replies
-
Ray, thank you so much for recreating your build log, it is a real wealth of knowledge on the basic techniques that are invaluable to learn from others by 'seeing'. A really beautiful build!
- 102 replies
-
- victory models
- pegasus
-
(and 1 more)
Tagged with:
-
Good to hear from you Stergios! I think the question you asked Jim was a little different, but to answer this, no I didn't use an additional finish on top of the paint. Personally, I like the look of the Admiralty paint finish. Looking forward to more updates from you.
- 800 replies
-
- snake
- caldercraft
-
(and 1 more)
Tagged with:
About us
Modelshipworld - Advancing Ship Modeling through Research
SSL Secured
Your security is important for us so this Website is SSL-Secured
NRG Mailing Address
Nautical Research Guild
237 South Lincoln Street
Westmont IL, 60559-1917
Model Ship World ® and the MSW logo are Registered Trademarks, and belong to the Nautical Research Guild (United States Patent and Trademark Office: No. 6,929,264 & No. 6,929,274, registered Dec. 20, 2022)
Helpful Links
About the NRG
If you enjoy building ship models that are historically accurate as well as beautiful, then The Nautical Research Guild (NRG) is just right for you.
The Guild is a non-profit educational organization whose mission is to “Advance Ship Modeling Through Research”. We provide support to our members in their efforts to raise the quality of their model ships.
The Nautical Research Guild has published our world-renowned quarterly magazine, The Nautical Research Journal, since 1955. The pages of the Journal are full of articles by accomplished ship modelers who show you how they create those exquisite details on their models, and by maritime historians who show you the correct details to build. The Journal is available in both print and digital editions. Go to the NRG web site (www.thenrg.org) to download a complimentary digital copy of the Journal. The NRG also publishes plan sets, books and compilations of back issues of the Journal and the former Ships in Scale and Model Ship Builder magazines.


