MORE HANDBOOKS ARE ON THEIR WAY! We will let you know when they get here.
×


malmoerik
-
Posts
81 -
Joined
-
Last visited
Content Type
Profiles
Forums
Gallery
Events
Everything posted by malmoerik
-
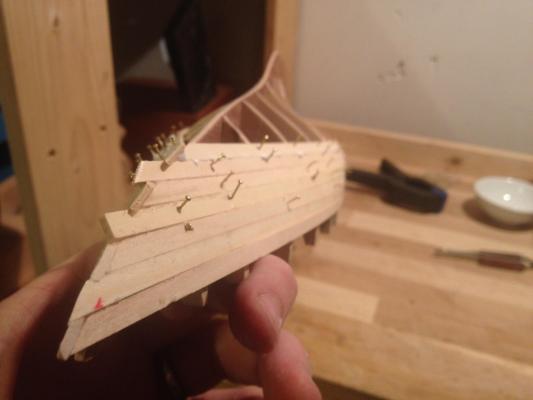
Richard, I really don't see how the tapering is to be done. This is what I did: - First I placed three planks, without any bending at all, on the hull, dividing it into 4 sections. - The planks correspond to to the red lines 1-3 in the pic, with resulting sections A-D. If you look at section A it is hugely wider at the middle than towards stern and bow. Hence this can't be planked simply by tapering then ends of the planks. I will need a lot of drop planks and then I end up with "meetings" as you refer to it. If I move line 1 closer to the deck, so that the width at stern/bow is roughy 1/2 of the distance at the middle, then I could plank this section simply by tapering. But then section B will look like a lemon (poorly illustrated by my blue line). So then I have just moved the problem from section A to B. The problem is reversed in section C, there the mid part is thinner than bow and stern parts. Does this at all sound familiar?

-
Hi Richard, looks very good! About the waterline, don't know if you've thought about it already, but I think the waterline is supposed to be wider towards the stern because of the perspective. See what I mean? I cheated and just taped a waterline along the whole hull on my 1:80 Endeavour and it actually looks a bit strange. I think that effect may be more striking on your huge monster of a yacht ;-). About the "posh-line" (that's the Swedish directly translated word for it), i.e the very thin one just below deck, my father came up with a good technique. On a smooth surface he placed a long stripe of wide masking tape. Using a scalpel and ruler he then removed the "posh-line" with two cuts 0.5mm a part. Then he taped over the whole thing with a second layer wide masking tape. That way he could lift the whole masking, place it on the hull and remove the second layer tape. That way he was left with a properly masked "posh-line". Finally, I'm doing something wrong when planking my Britannia. Would you mind having a look in my log? Of course everybody else is more than welcome to tell me what I'm doing wrong too! Cheers
-
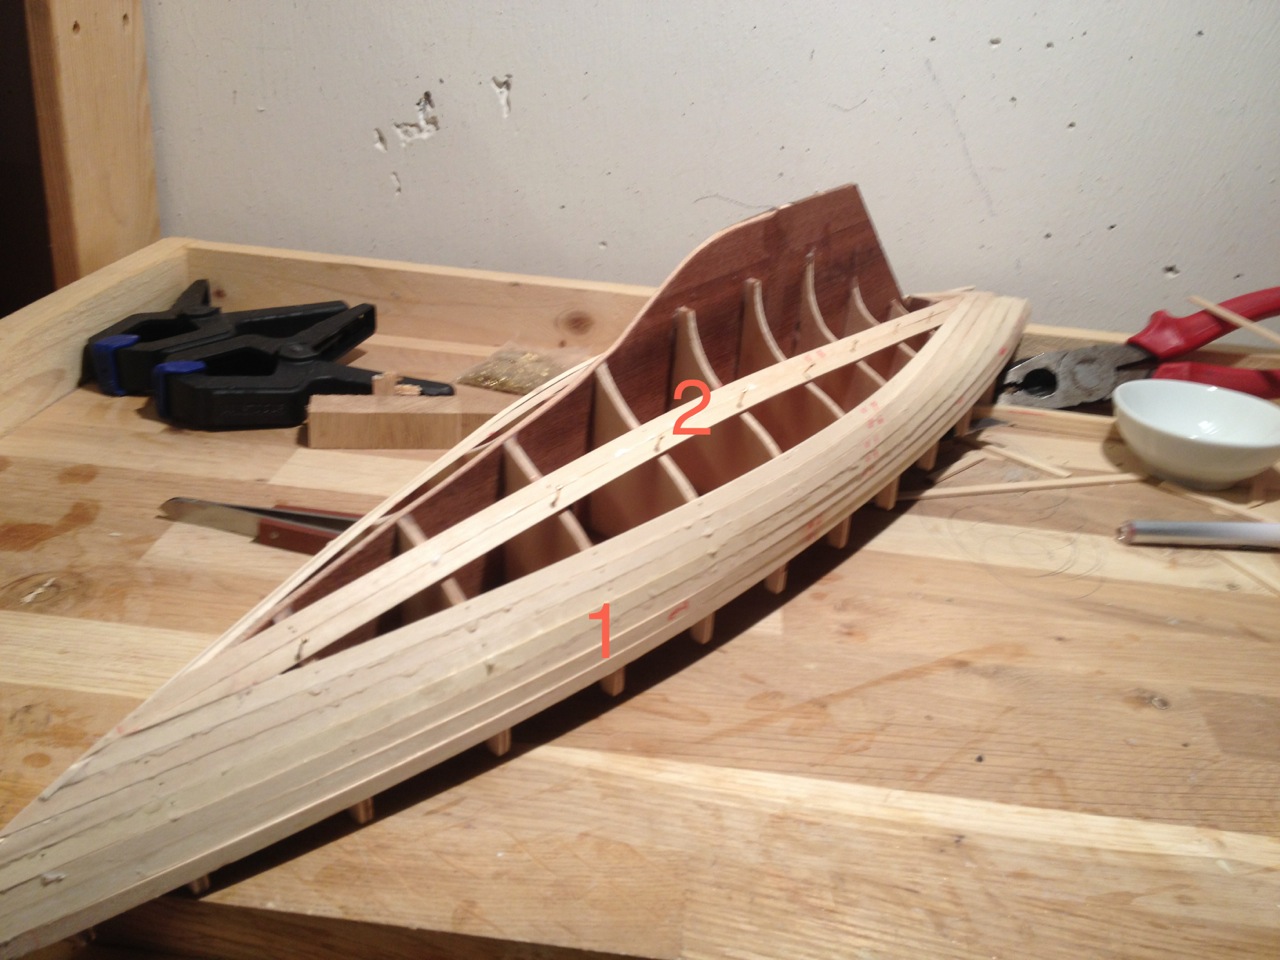
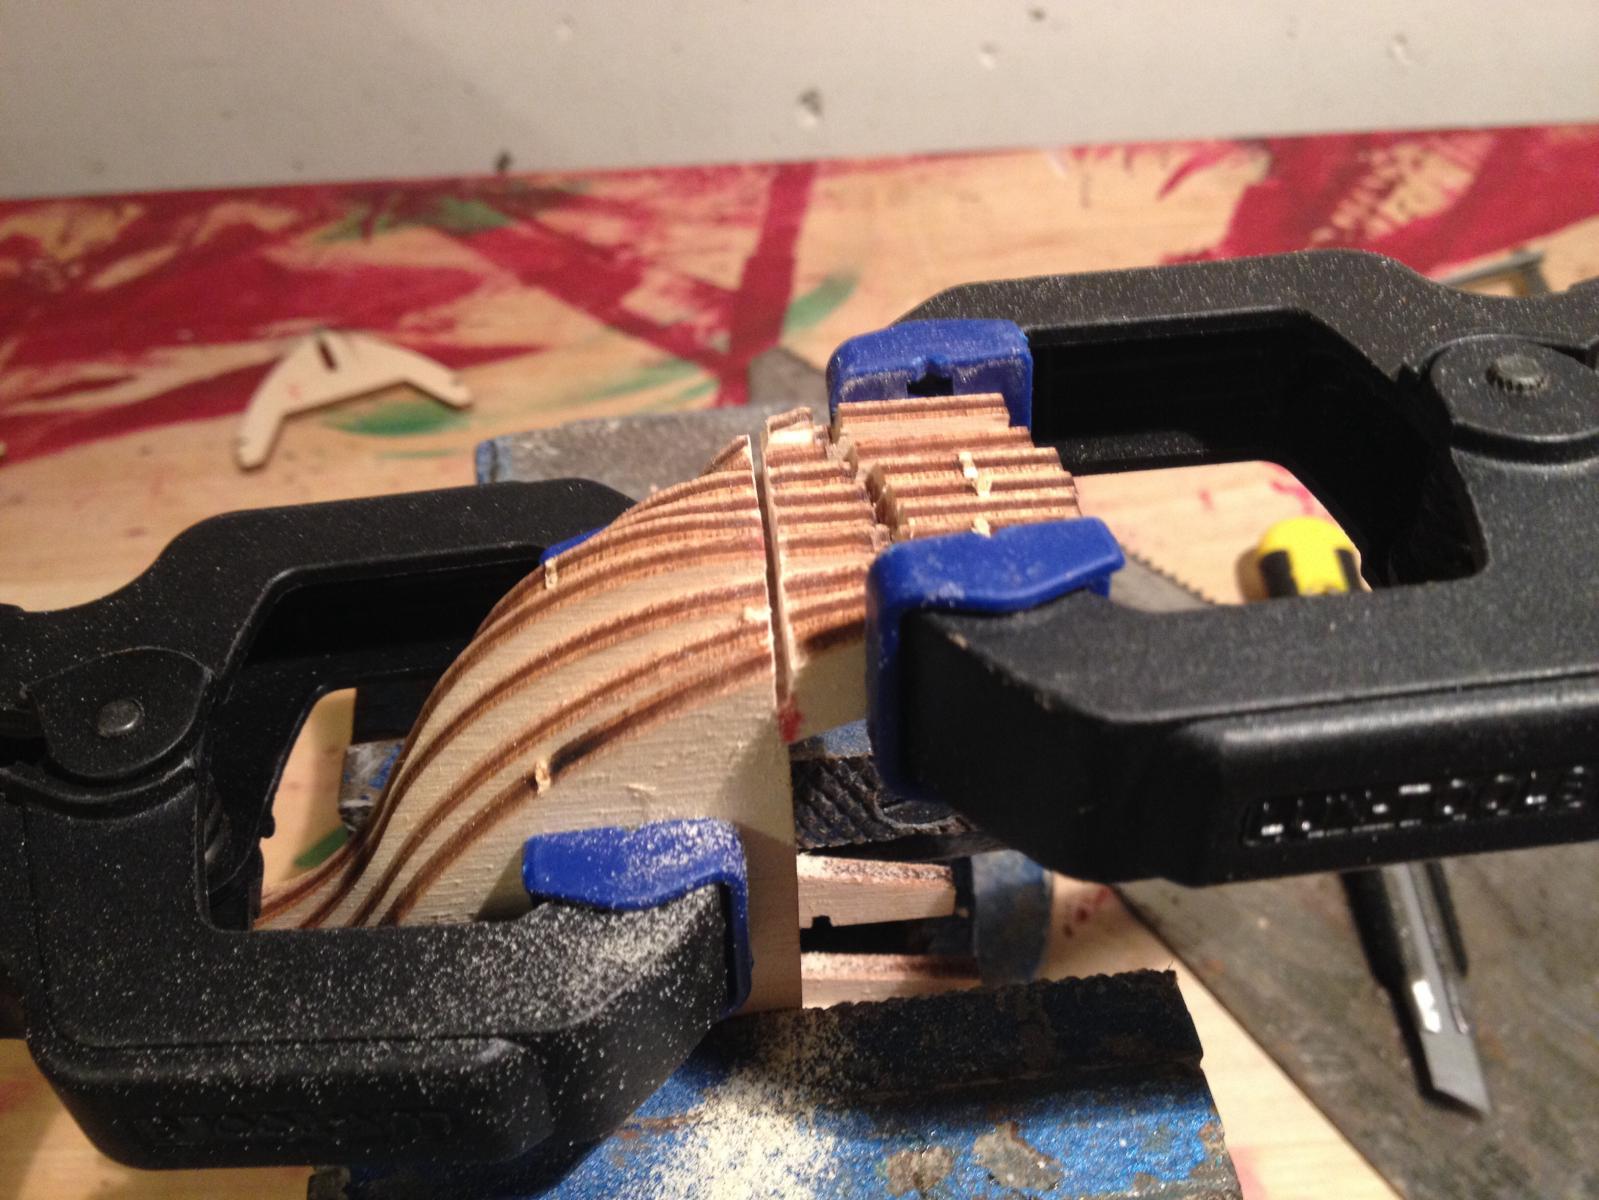
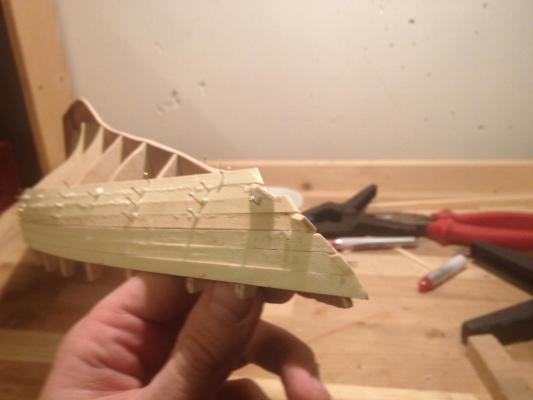
I'm doing something wrong, help would be appreciated. I started with the 1-planks in the picture. I didn't taper any of them but I had to bend more and more the further down the hull I came. I then mounted the 2-planks in the picture, without neither bending nor tapering. And then I filled the gap between 2 and 1, starting from 2 working towards 1. And this is where the problem is. It looks ugly, see second picture. The red square is misleading, the ugly part is below it, where the tapered planks meet the 1-planks. Makes the hull look divided into two sections. I too realize it's not the end of the world, there will be a second layer of course, but for this mahogany layer I'd like to do it right. And the effect is less striking once sanded, see further pics. Would the right methodology however be to taper the 1-planks too in order to be able to work with full lengths planks all the way down to the keel so that a gap like the one between 1 and 2 does not arise? I've read the planking guides where they talk about measuring the hull etc, but to me that seems a bit harder to apply on a sailing yacht hull.


-
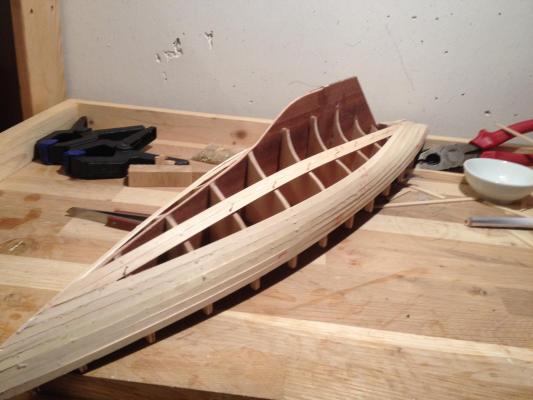
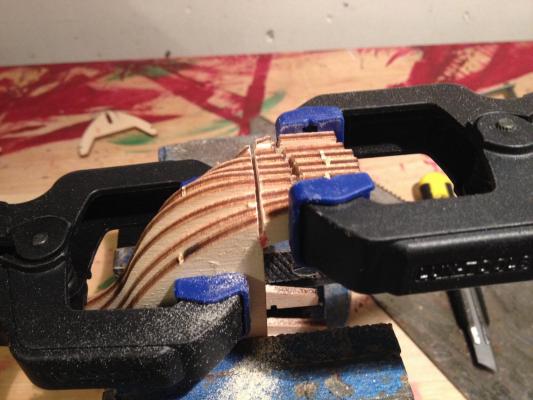
A few more planks in place, now the tapering has started. No idea why, but the bottom part of the keel is not planked (not with first layer at least), instead two solid pieces of wood are attached that will later have to be shaped.
-
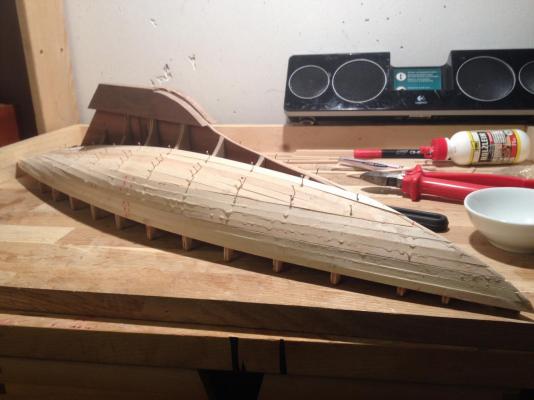
Planking well under way. I think it worked quite well to soak the planks, fit them and let them dry, remove them and then glue them. So far I haven't tapered any of the planks but it's time for that now. By the way, maybe my method for planking the bow is a bit unorthodox?
-
Richard, really nice work. Impressed with how you manage to plank so tightly despite curvature. Floyd, the 1:35 Endeavour is rated as 4 out of 5 by Amati (in difficulty). The 1:80 Amati Endeavour that I built is rated as 2 out of 5. I asked Cornwall boats about why the bigger one is so much more difficult to build but didn't get any answer that made any sense. Regarding difficulty of planking I'd actually expect the opposite, that it's slightly easier to plank a bigger model because the curvature is not that extreme in relation to the plank size. Richard, did you find any particular section of the hull tricky to plank?
-
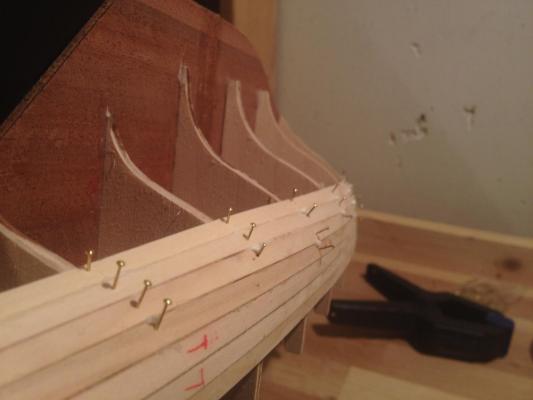
Yes I find her a bit more complicated, but it's also a different manufacturer than the Endeavour kit. I've just started planking and the first layer is made of 1.5mm thick strips. I did the first two planks without soaking and that was problematic. Today I soaked 12 planks and then nailed them into preliminary positions without glueing. And when dry I happily concluded that they have adapted the new shape which will make the planking easier. Will post some pictures. The strips were a lot thinner in the Endeavour kit and I didn't have to soak or do anything like that. These thick planks also mean that I need to shape the long side of the planks in order not to have small gaps. Since the hulls of racing yachts have a lot of shape (keel for example) the planking is a bit tricky. Did a lot of misstakes on the Endeavour, I'm curious about whether my result on this one will be better :-)?
-
Looking good Mike, I was going to mail you to check up on progress before Christmas but forgot, cool that I found your build log here. I'll be watching!
-
Thanks, don't forget to post more pics of your Endeavour. I'd be happy to see more close-ups of details like how you join the starboard and port planks at the bow for example. Not to mention how you're going to paint the hull. I painted my Endeavour in several layery, sanding in-between and then thinning the paint for every layer. Don't know if that was necessary though. One thing that I've noted on the Britannia is the deck. The instructions tell you to "blacken" the joining long-sides of all deck planks to better see the contours, looks nice on the pictures on the box. Erik
-
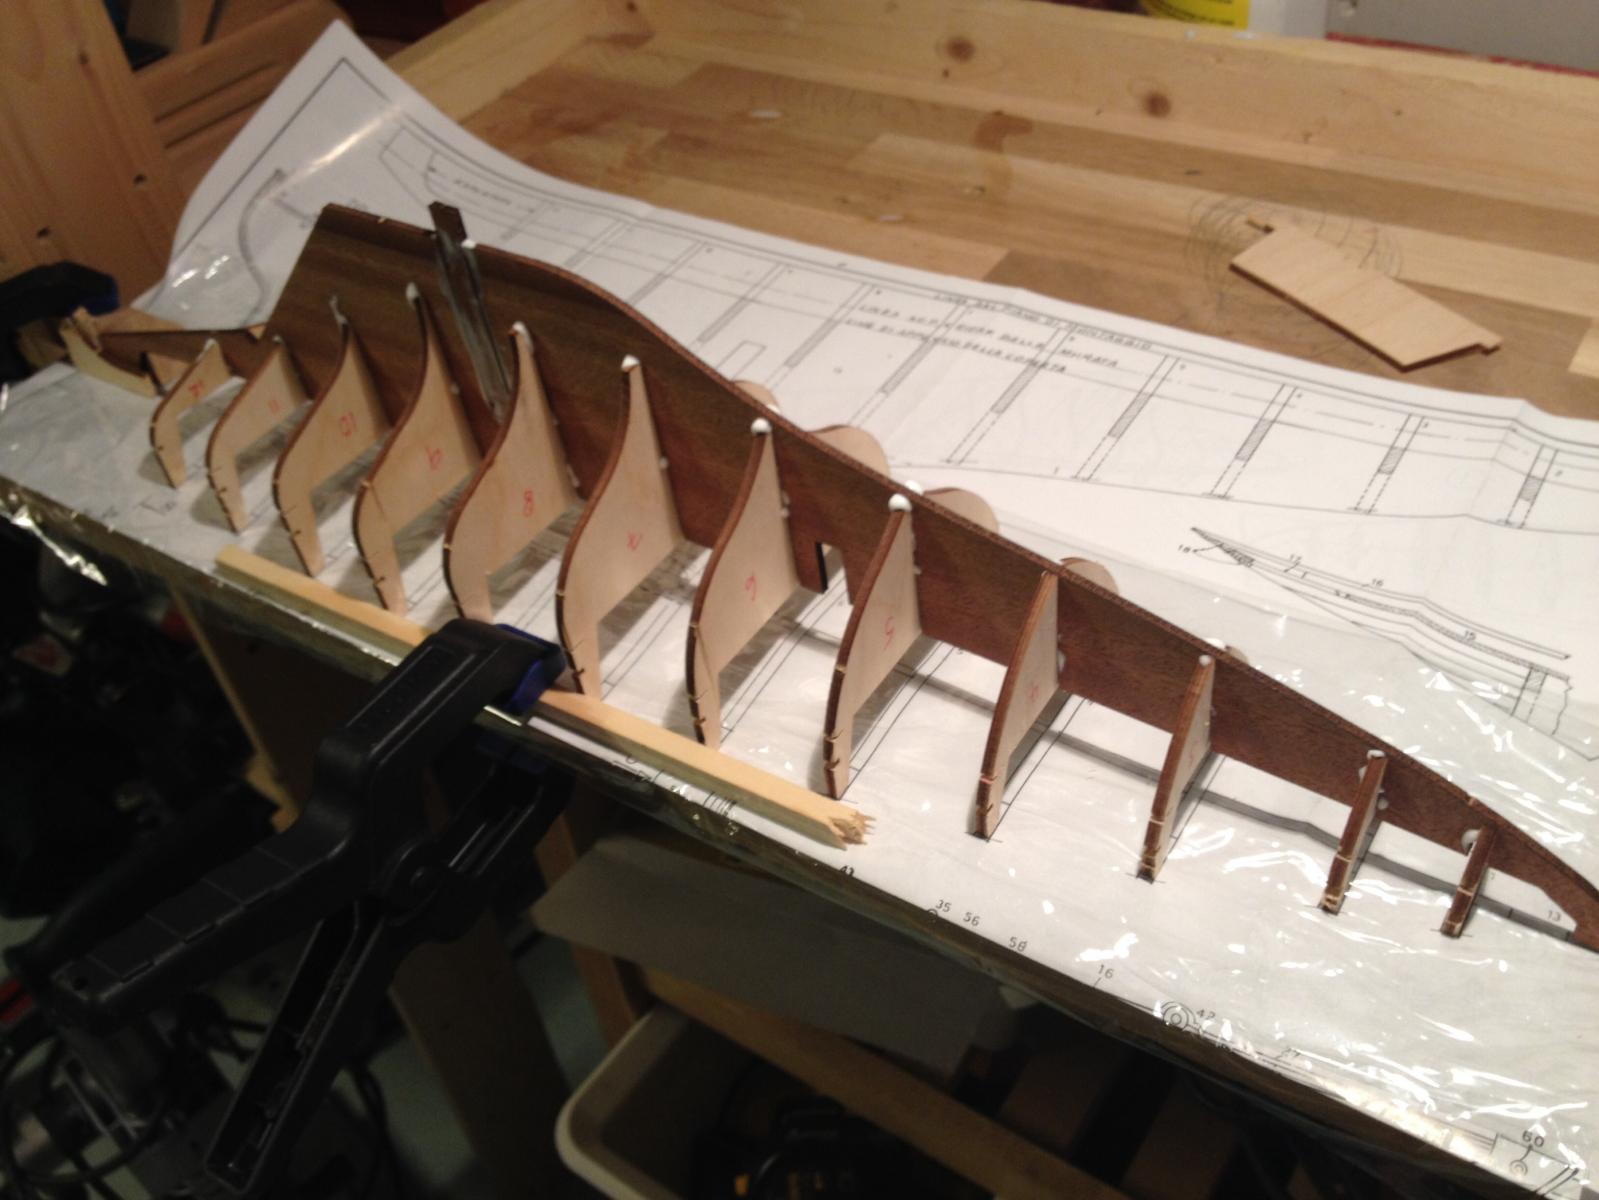
That's the easy part... According to the instructions the part of the bulk-heads above deck shall simply be broken off after planking has been done. Then the support for the planking is obviously gone but I assume that with two layers planking that won't be a problem. I'm a bit afraid about the "breaking off"-part, so before I mounted the bulkheads I sawed half-through them, to make the breaking easier and not risking to destroy anything. This is the first picture.

-
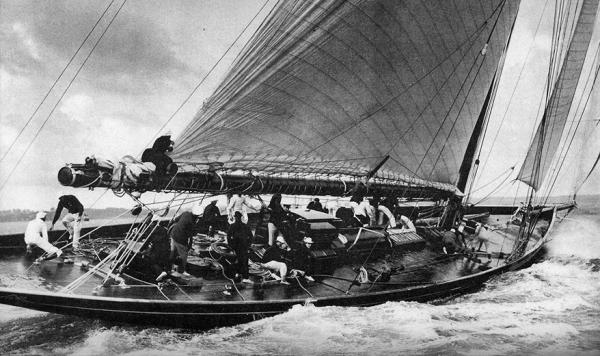
Hi Just started my second build, King George's Britannia. She was the predecessor of the famous J-Class and the British King actively raced with her. In the 30s her rig was converted to a Bermuda rig. A replica is under construction and on its' website there are some fantastic original photos, do have a look, k1britannia.org.
-
Thanks for your explanation Richard. In the 1:80 kit there were no special A-planks, nor any instructions what so ever about how to plank the keel, hence my curiosity. Please keep the photos coming, especially close-ups! The A-planks look very curved, did you use steam or anything like that to shape them or were they thin enough to bend just with some force?
-
Hi Richard. Looking great! Do you think you could walk me through how you planked the keel? If I understand your pictures correctly you started with the A-planks (see my picture). Why did you use 2x2 planks here? Did you then do the B-part? Why did you use separate strips here instead of just letting the A-strips continue? When you planked the rest of the keel, did you then start by doing the C-plank and continued with the D-part or vice verse? Are you going to apply the same "methodology" for the second layer? Cheers Erik

-
Hi I was extremely happy to find this log, thank you so much for sharing. I built the 1:80 Amati Endeavour a year ago, it was my first build. I had no clue how to plank the keel in a nice way, now I know how it should be done . Have to admit that I smiled when I read about you using super-glue at the stern, been there done that. I have just ordered the 1:64 1893 Britannia. Cornwall model boats Ltd advised me to go for the Mamoli one over the Mantua one. Would be interesting to know why you thought Mamoli kits are bad. Back to Endeavour, any idea how you're going to paint the ultra-thin line just below the deck (don't know what that line is called in English)? Cheers