


Captain Al
-
Posts
613 -
Joined
-
Last visited
Content Type
Profiles
Forums
Gallery
Events
Posts posted by Captain Al
-
-
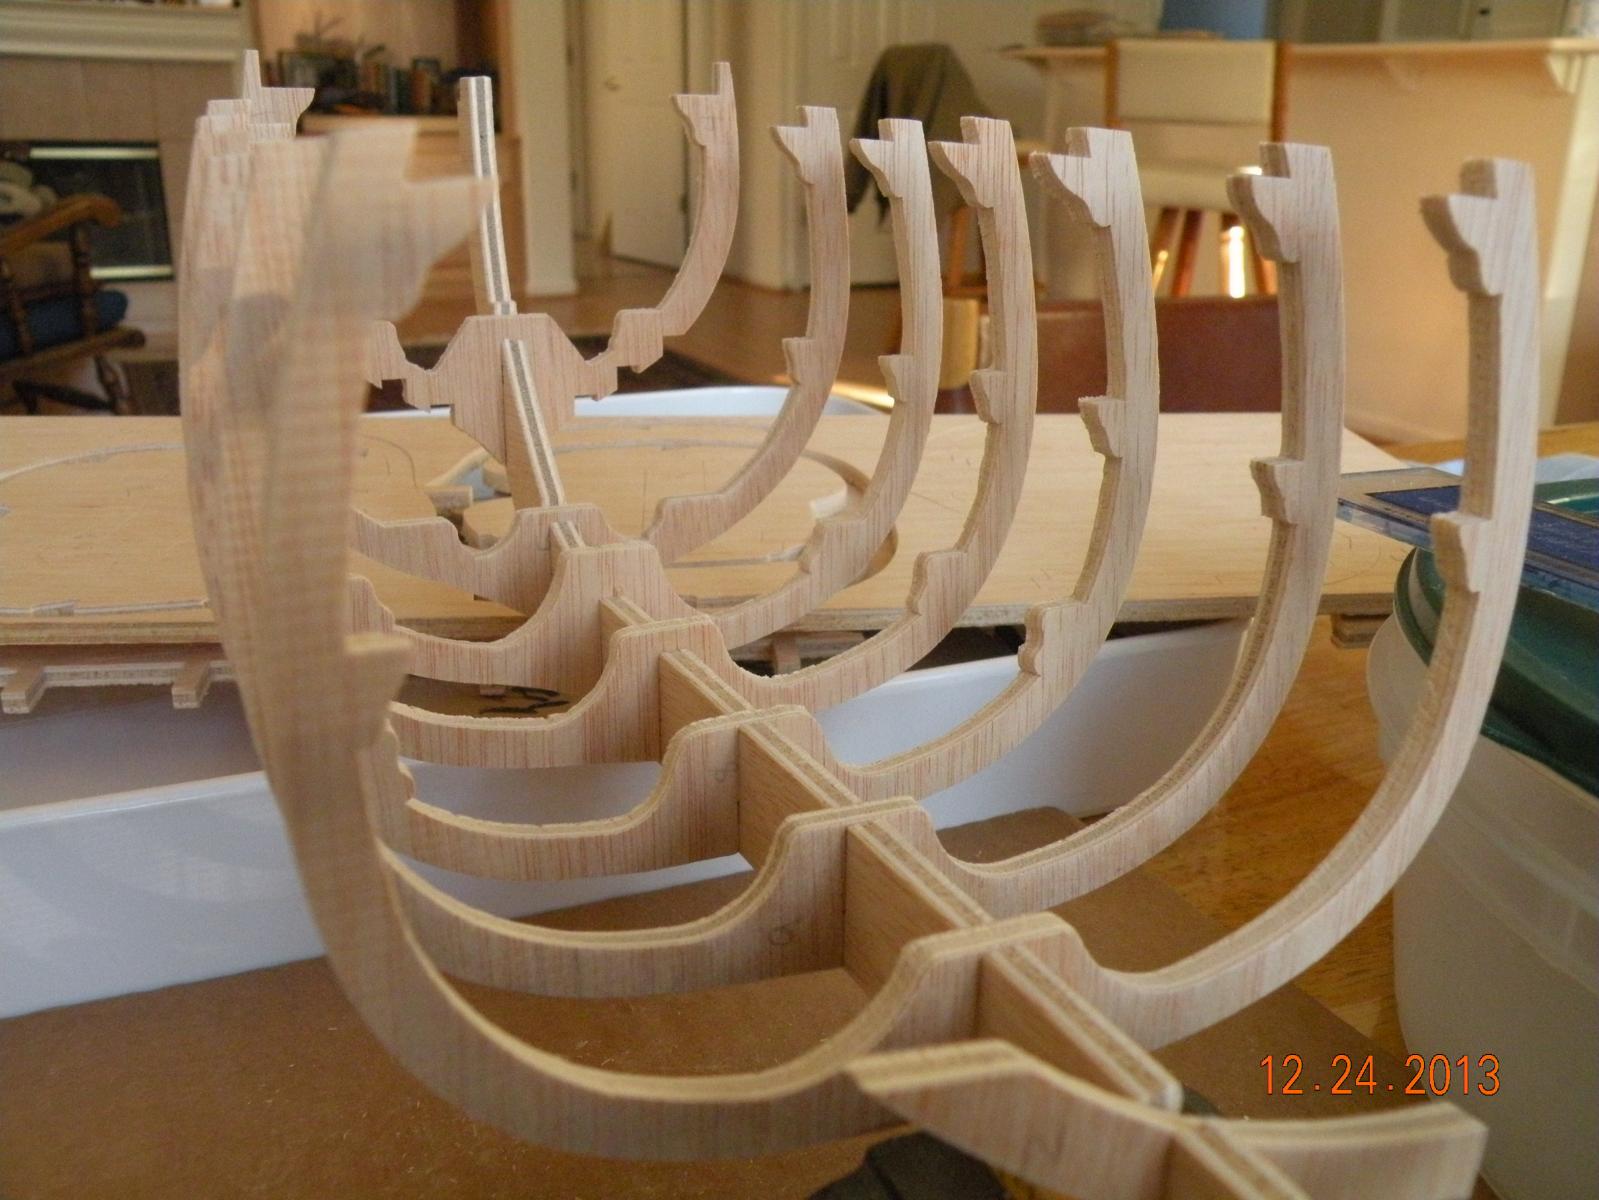
Voila, all I had to do was search this website further to have my question regarding gluing and staining answered. This is an amazing site. Nothing goes unanswered. So here was my question. I have started the Bounty by Art. Latina and their instructions were to stain certain parts that would be hard to get to once installed in place. So I then took it upon myself to stain a lot more....particularly the ribbing because with an open hull some of them would be visible. Well I stained both the inside and outside of four frames (ribs) before I said to myself, "Is the stain going to seal the pores and create a problem when it comes to gluing on the planks?" I stopped until I found the answer. Seems from what I've read here there will be no problem. But I am going to test some scrap before continuing to stain any gluing surfaces. And, one might ask, why am I bothering to stain the surfaces of the ribs that will be planked over anyway? Only answer I have is that right now I can't be sure which will end up on the starboard side (unplanked) and which on the closed/planked port side. So its easier to do all of it. Now that I think about it, its not easier, certainly takes more time, than just remembering to glue in the frames oriented properly.
-
Vivian, thanks for posting these pics. I am learning a lot just from looking at photos. I need to visualize things before I really get a grasp of what the H someone is talking about. I wanted to say thanks as well for your recent encouraging reply to my Bounty build. And also to mention (off the wall) that the gentleman who gifted me this kit lived in Sao Paulo for many years. In fact his wife was born there. The world grows smaller every day; despite Mauna Kea's efforts to enlarge it.
-
Great advice A. I have not yet put the lower decks into place. Not even the frames permanently onto the false keel. As I've said, each step is a learning process so I am taking things verrrrrry slow. Looking at a lot of pictures and reading stuff until I am quite sure I am ready. I think this weekend will take me through the gluing up of the forward frames to midships and possibly the bow stiffeners and forward lower deck beams. Your advice re the alignment of the deck for the mast(s) is quite well taken. I have put together the mast steps and placed them (dry) on the false keel. This is when I noted that care must be taken to line up and maintain that perpendicular line through the decks and into the step. As regards "adding material to the bow" you wrote:
"I DO recommend adding material to the bow, if you are planning to nail. That's because the ribs in the bow are straight, but the planks are at an angle - which means the nails might be grabbing mostly air before it touches a rib. I simply broke off bits of wood from the templates, glued them together and sanded them to shape."
Do I understand you correctly in that you are recommending adding tiny bits of wood to the ribbing so as to fill the gap that would otherwise be there when the plank (running at an angle to the squared rib) meets the rib? I thought (I believe this is actually in the instructions in not so many words) that this gap was eliminated by filing down (mitering) the ribs slightly as they approach the bow. I can visually see how this would solve the problem, but now I am wondering if it is the correct way to go? I would think the same will need to be done to the aft most frames as well. I hope that before I reach that point you can clarify the process for me.
My last question for the morning (you're probably fast asleep now) is what parts to stain/varnish prior to assembly. This is more rhetorical since before you awake I will probably have made the decision after looking at pictures (particularly your's) and those in the kit, and will have done it. Given the open hull nature of the build, I think all these ribs can be seen and should be stained. That's my project for after breakfast. For now, thanks again. I'll post some pix probably after the weekend when I have something to show.
-
Interesting time zone difference. BTW, my wife and I spent 2 months in Australia in 2003, about a week in the Melbourne area, and we had the time of our lives. Just loved the country and your countrymen (and women). Thanks for showing us a great time. We're anxious to return.
On the subject of planking (again). I've been reading a lot about it, particularly in the tutorials on this site, and while it appears straightforward in theory, I know it is not so in practice. Those open frames are flexible, without any beams installed, so cutting the beams to size was carefully done. I know I have them to the precise specs, but precise to what degree?? I'm beginning to see that even a half mm can cause an imperfection in the fairness of the hull. Then there was the beveling of the ends of these first 4 beams (bow end) to fit precisely into the knees precut on the ribs. This might have thrown the length off by a hair. But I think I will continue the build as I noted yesterday. My wife, being a skilled pattern maker, seems to understand the curves and tapers and angles even better than I do so when we reach that stage, if she is willing and I have read up on it enough, we'll go for it. My generous neighbor is really pressing me not to give up on this particular build. I'm mulling over the method of pinning the planks (and temporary ones) to these ribs, given not too much solid wood behind them. Any suggestions? Do those nailer tools work well? Should I be thinking of temporarily blocking the inner side of the ribbing somehow? Anything to give it some resistence to a pin being driven in. Or can the whole thing be done (all the markups and measurements etc) with just clamps? I truly appreciate your interest in this project. Thanks.
-
Hi Amfibius,
Just read your post and want to thank you much for imparting these warning tips to me. Before starting it I thought long and hard about it, thinking along the same lines as you. I have no experience in planking, and as I work toward assembling the framing I have come to learn the difference in double planked models and single planked, as well as those that have ribs for frames v. solid bulkheads. All in all the thought of doing the planking is the one part that has been keeping me up at night, even though I am days if not weeks away from starting that process. I am going to consider your suggestion to get some planking experience on something less daunting (and inexpensive) before I go forward. But I think that given the state of my work table with ribs, keel etc. all cut out and ready, I will take it up to the planking process before stopping. I was also thinking that maybe it would be a good idea to build the launch and the jolly early on. I see that you did the Bounty launch as a kit in itself, and of course it therefore had all the rigging and detail. But the launch in the Bounty kit still requires planking on ribbing. Do you think this would be a good practice run? I also wanted to mention how great it is (for me at least) to have your pictures of the Bounty build in your history (profile?). They are going to help me tremendously. Thanks for picking up on my build and for your observations.
-
Greg, I will be following your progress closely. I am interested in what looks like makeshift clamps you're using for the planking. Am I correct in thinking that what you did was take the handles off some of these paper type clamps (for want of the name for them) and insert them into another clamp to make the extension to the clamp that will hold the plank to the ribs? I'm still thinking about what to use when I get to planking. I'm also wondering how different mine will be -- mine are open ribs, not solid bulkheads.
-
Kooyu, Im new here so I don't know you but wanted to say you do fabulous work. I learned a lot just by looking at your pictures. Thanks.
-
Scott, this looks a lot like the Bounty I am embarking on. Glad to note though that the Artesania Latina kit has been pretty accurate in its cut outs. Your's seems to require sanding and/or cutting certain parts down to size and shape. Mine requires no such work.
-
Nothing more for now. I think I just hit the wrong button.
-
Having looked at the pix myself, I apologize for several being pretty redundant. Also might mention that the last pic I did not take myself; its from the net and just serves to show what this build should end up like.
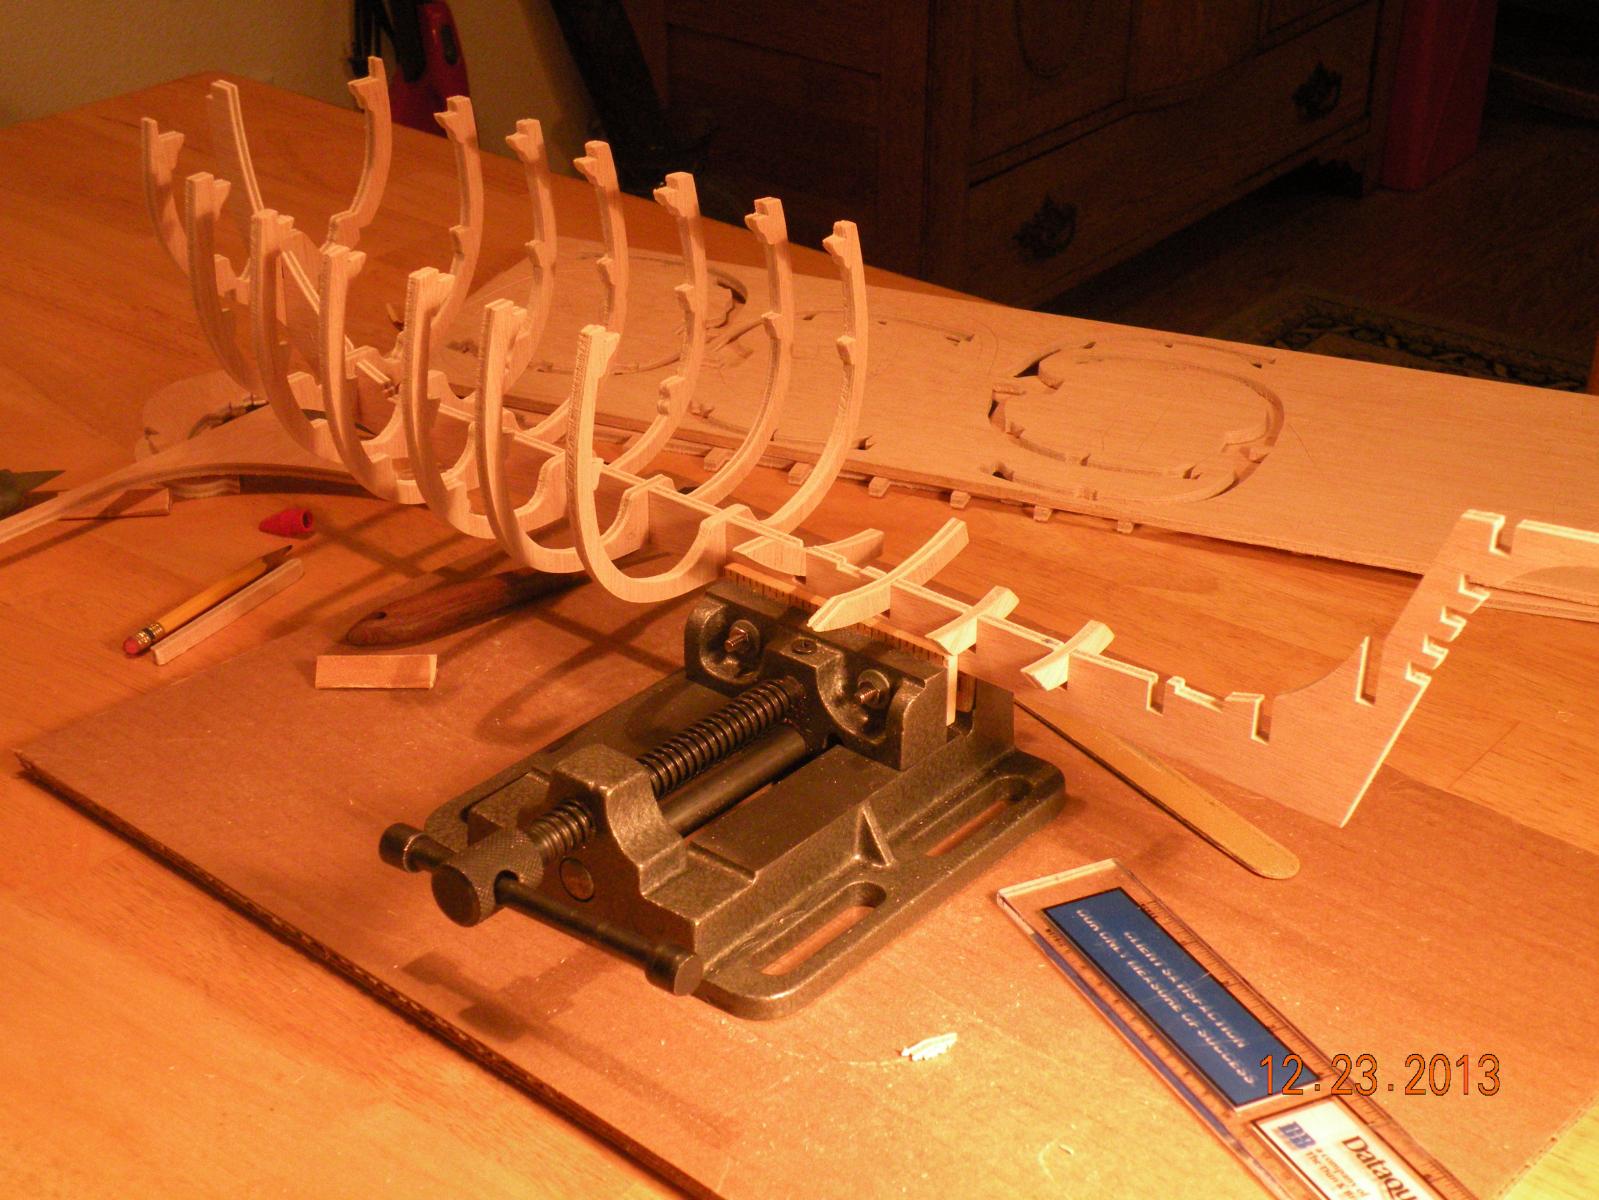
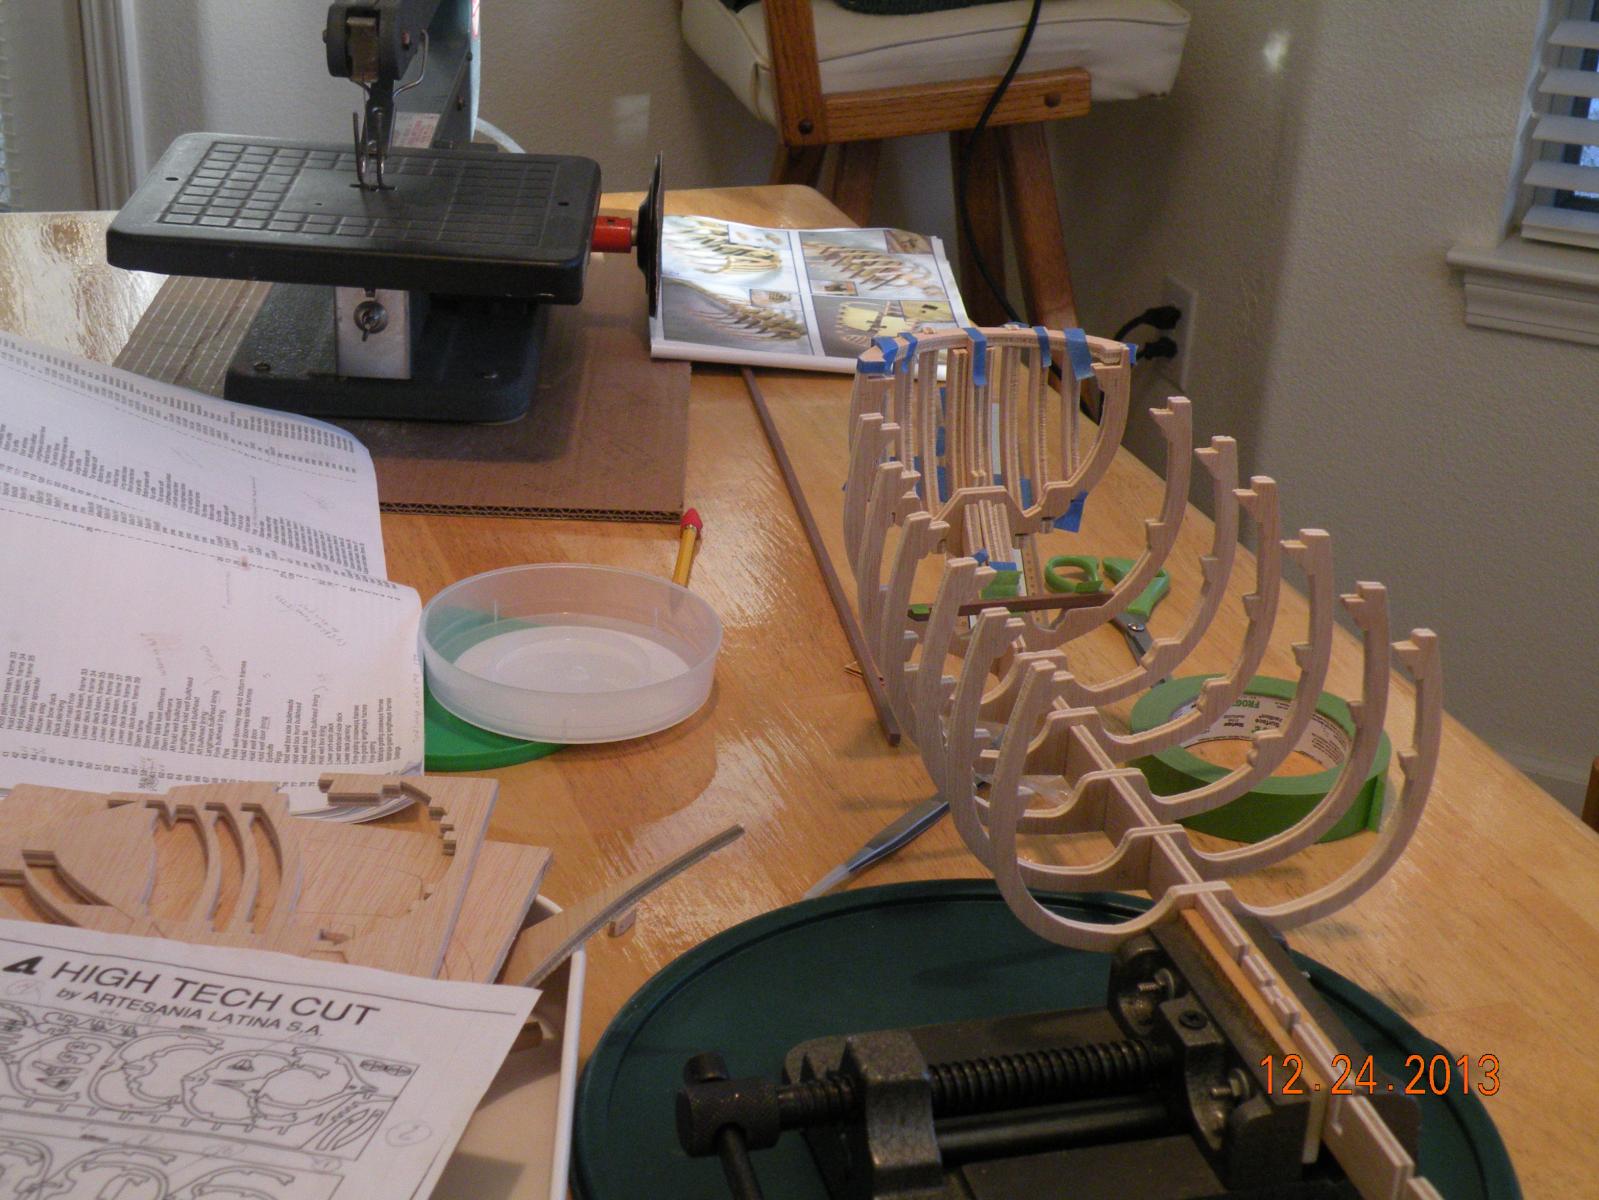
I used the sanding disk on the dremel jig saw to carefully bevel the ends of the Afr walnut beams. I think this was more accurate than trying to saw them with either the jig saw or a Dremel moto tool. BTW, does anyone know where sanding disks (4") can be had. The one on the tool is my last and I can't find them in stores or on the net. This Dremel is almost 30 years old. I've cut down a 7" disk and might have to continue doing that if I can't find the four inchers.
-
For those who did not see my introductory post when I first joined about a week ago, I will summarize:
I am 68 years young and have been retired a few years. My wife and I have been sailors on SF Bay and coastwise for 25 years but sold our last boat (a Baba 30 by Perry) a few years back. Over the years I have accumulated lots of woodworking tools both hand and power and have a modicum of skill with them. I've wanted to start ship modeling for a long time in order to satisfy my love of woodworking, sailing and everything nautical. A week ago, while discussing woodworking and shop talk in general with a neighbor (91 years of age -- don't know why that is relevant) he offered me a gift of a model ship kit. When I went to the garage to get it I was overwhelmed. This was a model that is for advanced modelers (so all the brochures say) and cost $400 or so. I am neither advanced, nor would I have spent that kind of money on my first build. I had been looking for something in the beginners class and for maybe $100. To make a long story short, my neighbor friend insisted I take it and give it a try; nothing ventured nothing gained he said, and "what's the worst that can happen? " Having no answer to that question, and with encouragement from various members herein, I have commenced my build.
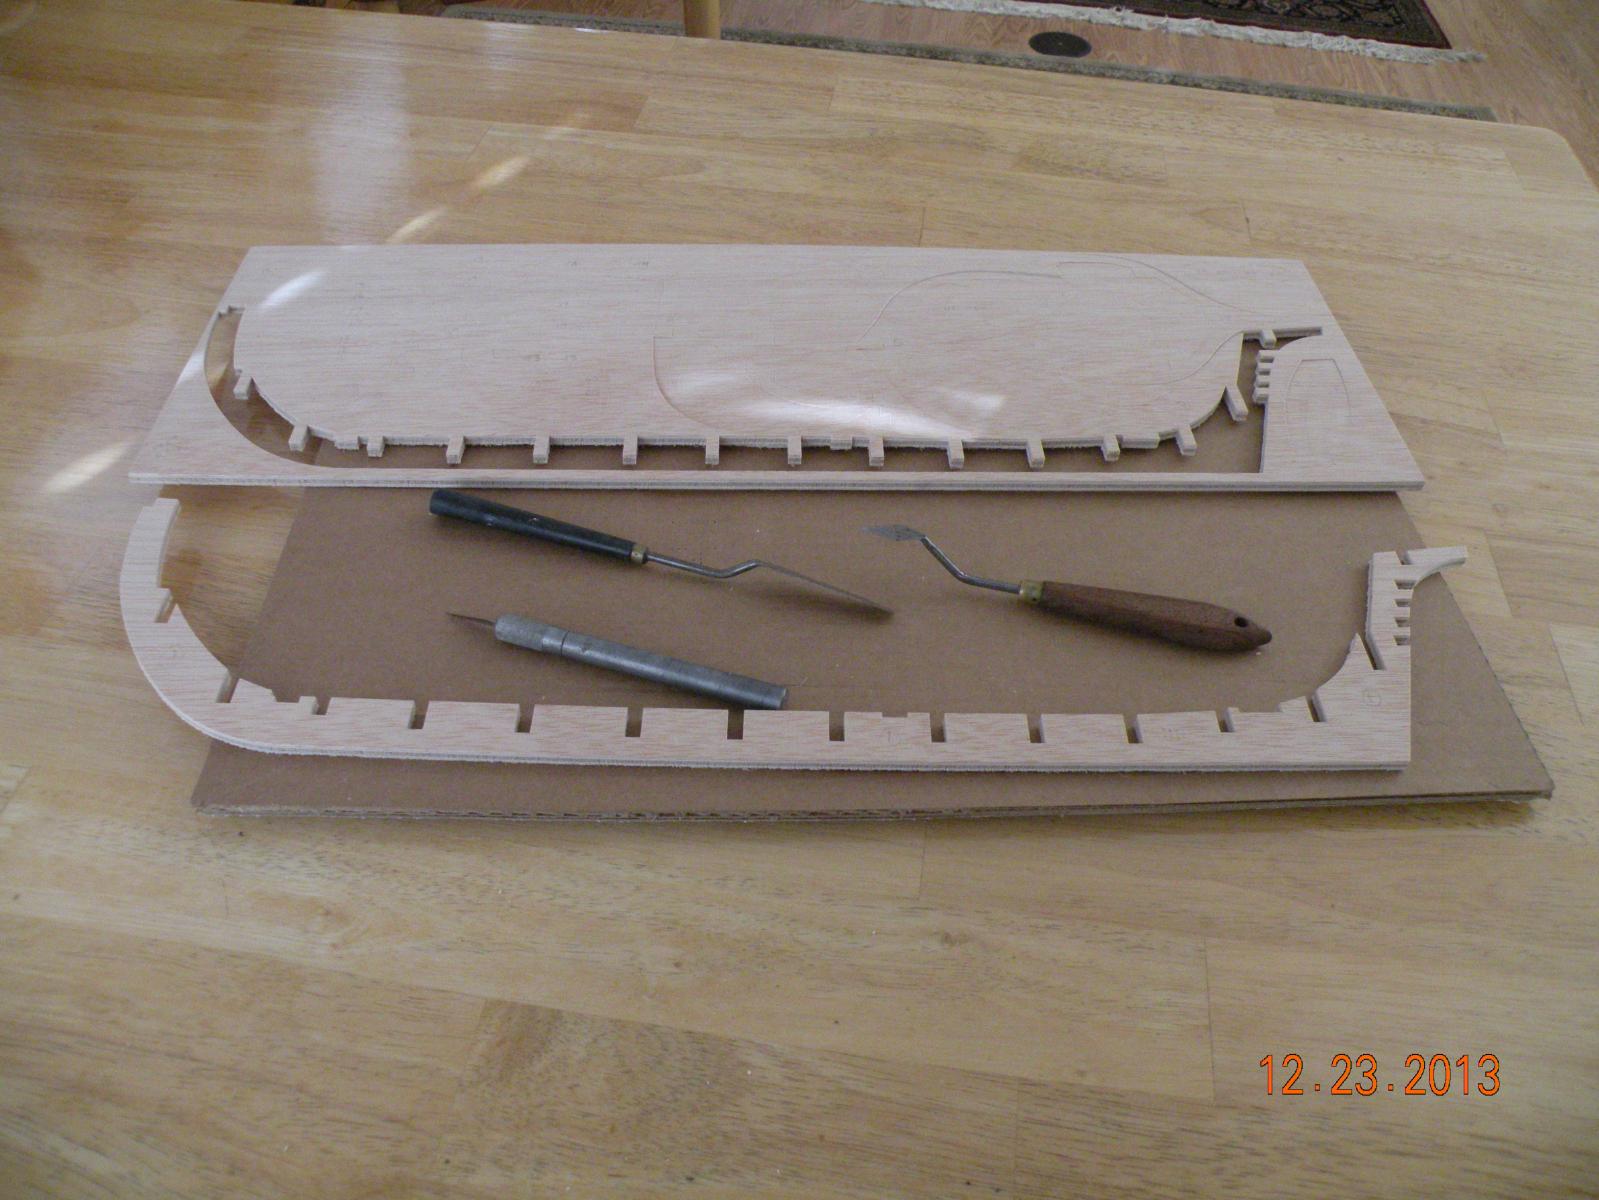
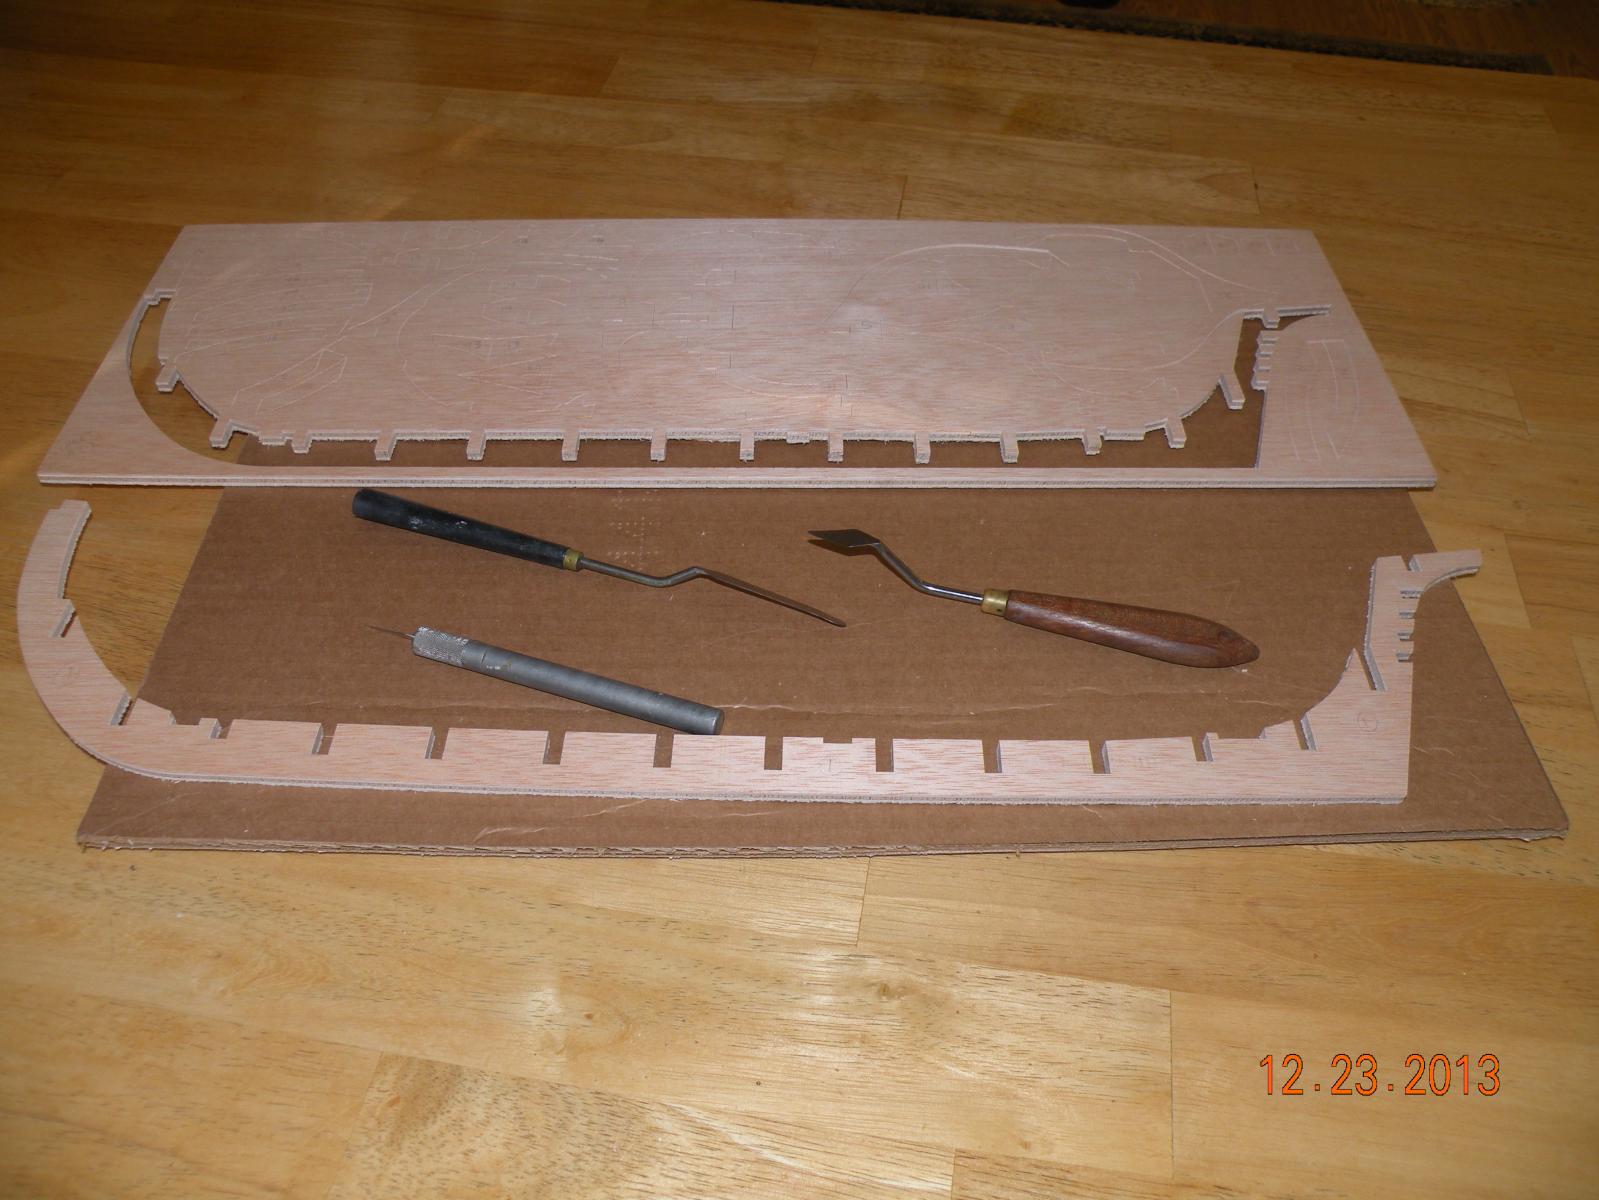
I first decided I would jury rig a vise from one I had for my 15" drill press. I replaced the jaws with some soft wood I took from a wooden yardstick. Works pretty well but I think it'll eventually be replaced by something more versatile.
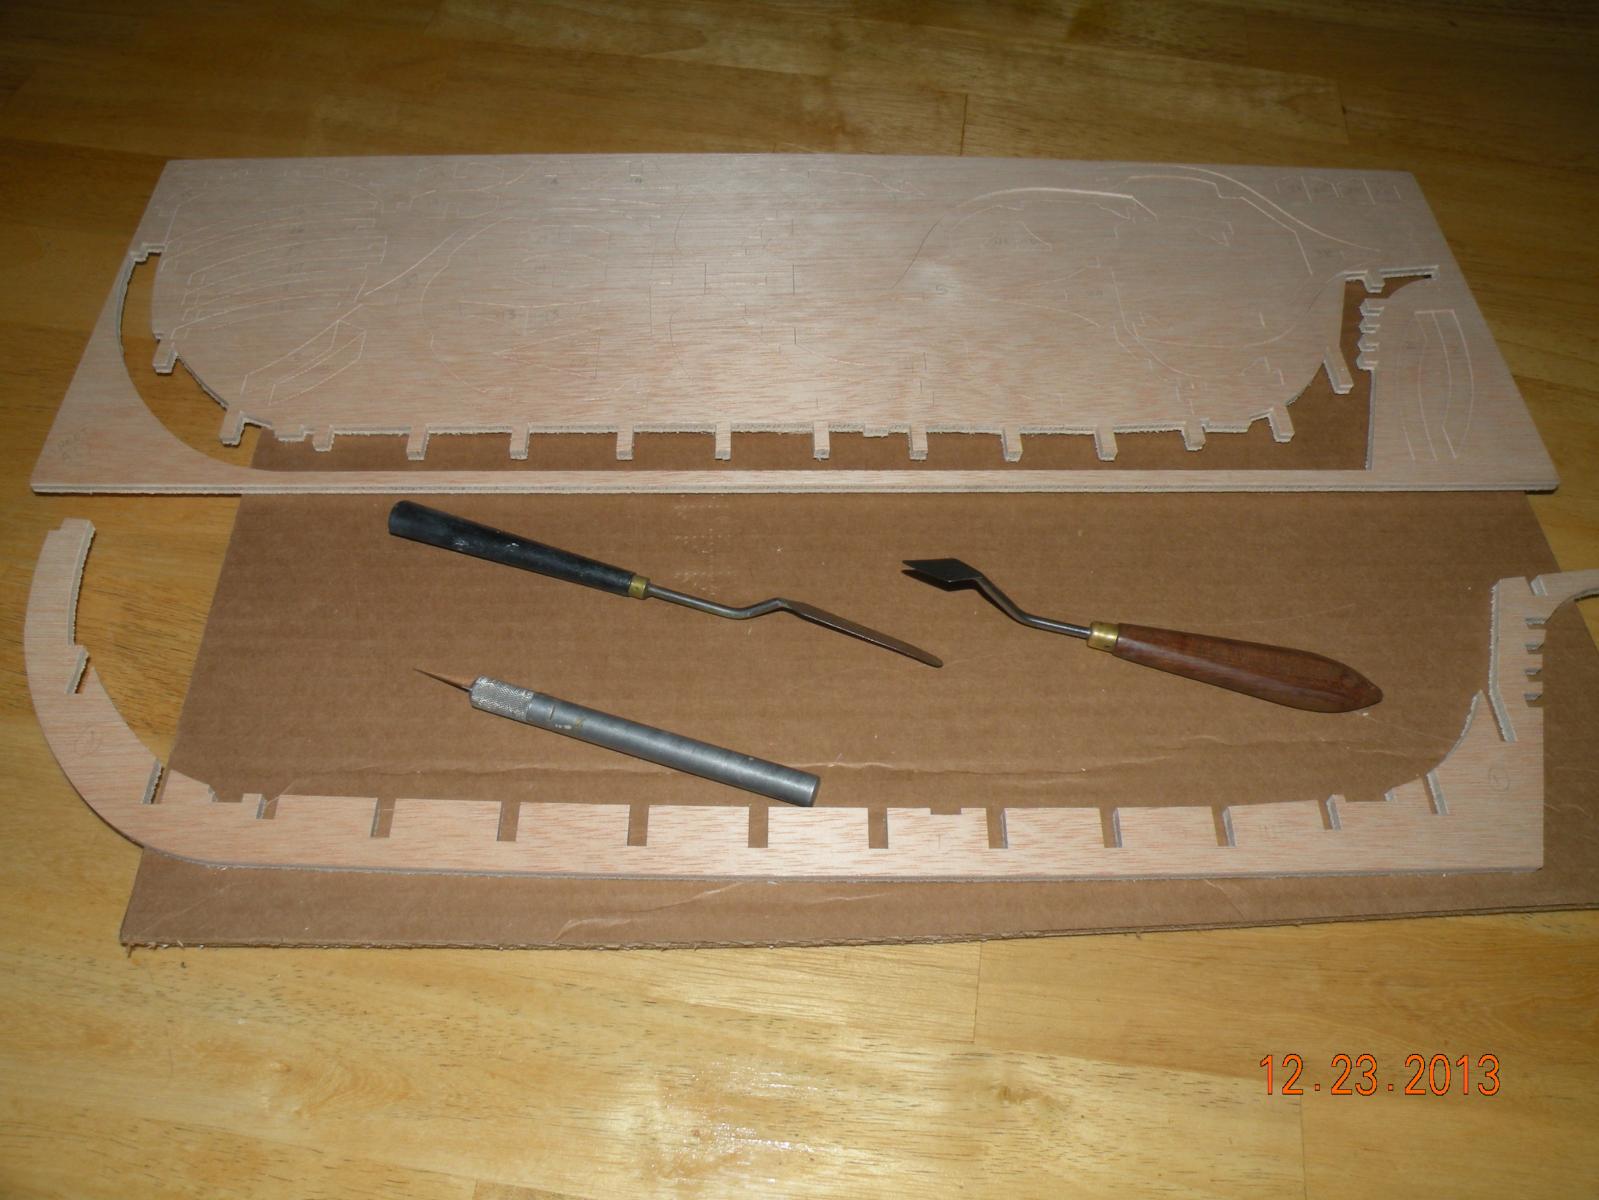
My wife (who is a pattern maker and has worked in electronics assembly) and I spent a few days just reading the instructions, looking at the step by step pictures and then identifying and labeling each and every precut part. Next step was popping out these parts from their sheets. I found they didn't pop very easily, and not wanting to bust any, I took the precaution of sort of cutting them fully through the sheets using a very small artist's palate knife (super thin blade and dull edge). Once I'd scored through the cuts, the parts popped out easily. Time consuming but effective.
I've popped out only enough parts to lay the false keel, attach the ribs (frames), stiffeners and lower deck beams, and sanded them pretty well. I want to finish sanding with 320 grit, but I wonder if, for these parts, most of which won't be visible, if this is overkill. I have dry assembled the parts just so I will be fully aware of where things go before I do anything drastic with glue. I plan to use carpenters glue on these parts. I've also put in a supply of CA glue for future use.
The instructions suggest that since half the hull will remain open, a more finished look will be had by staining and varnishing these parts before gluing. I am going to use Minwax's pretinted walnut/urethane for this. I'll test it out first on scrap. Any better suggestions? I wanted varnish but did not want to try tinting varnish myself (read here that it can be tricky), so for these I think urethane will be OK.
Varnishing parts prior to assembly gives rise to how to do it efficiently and as quickly as practical. My plan is to build a little painting enclosure out of a cardboard box with a dowel run through it. I will stick a sewing pin into each part's edge and use that to hold the part while I paint it. Then I'll hang it from the dowel with something like dental floss or thread.
So that's where I'm at now. I know I'll have lots of questions in the coming days, weeks, and months. I am hoping to finish this build before my friend who gave it to me passes away. He is 91 as I said, and his doctor gave him just a few months to live almost a year ago. I'm sure he would be saying, "don't worry about me; take your time and do the best you can. Everything you do will give you experience." So I will take that unspoken advice.
Attached are photos I have taken and I will continue to document the build with photos. I am using a Nikon P80.


-
I love that you are involved with your beautiful children on this project. Much better for them than to be on their cell phones all day.
Question regarding the painting of the hull: Did you mask off the unpainted sections or do the lines free hand?
-
Great photos of a nice build. Thanks for sharing. As a noobie I am about to start building the Bounty's Jolly Boat that comes as part of AL's large/fullblown 1:48 kit. I hope to do as well as you have. I wonder if the detail is as full when it is just included as a tender atop the deck of the ship? We shall see.


The hazardous chemicals we use
in Painting, finishing and weathering products and techniques
Posted
Good information all. Important to me as a newbie. Something that didn't cross my mind. I wonder, however, if the quantity and duration of the exposure is more of a factor that isn't often noted. I mean when these MSDS s are written, aren't they normally warning against prolonged use and breathing of the stuff? Would a half pint can of turp and stain give off the same fumes as an open gallon container of something? And how long does it take for the adverse reaction to various things take to manifest themselves? Move into a home with asbestos, you don't get cancer the next day. Breath in some fumes today, how long until it becomes palpably noticeable? I have a form of cancer (non-Hodgkins lymphoma). My oncologist on first diagnosis said "You'll probably die of something else." I'm 68. Should I concern myself with things that would take decades to manifest? This isn't meant to diminish the importance of the topic. Many hobbyists are much younger and probably do much more work with these things than I. For them the topic should be very important. But perhaps the best lesson to be learned is to handle with care and use in moderation.