


Captain Al
-
Posts
613 -
Joined
-
Last visited
Content Type
Profiles
Forums
Gallery
Events
Posts posted by Captain Al
-
-
Hope someone sees this after the thread has been unused for almost a year. My question regarding tapping in pins with a small hammer is: how to brace the piece (eg the hull, particularly if its built with open frames) so the force of the hammer isn't wasted. Maybe having never done it (yet) I will discover it takes very little force from the hammer and a simple backing can be temporarily put in place.
-
Dan, I should have replied weeks ago but personal circumstances have prevented me from paying much attention to my hobby. But I did want to thank you for providing insight into the imperfections of some of the pieces provided by Art. Latina's kit. I presume that there are very few kit manufacturers that are absolutely perfect and I've come to learn that finding their imperfections before using any particular part is part of the task of modeling. It is comforting to know though that there are not too difficult ways of remedying situations, and that not all the imperfections in my build are my fault. When I am finished with Bounty (which could be a long while) and looking for another kit, I will raise a topic discussing which manufacturers are better than others and which should be avoided.
Capt. AL (I see I need to be careful when abbreviating the name of Artesania Latina lest readers think I am referring to myself).
-
Thank you Dan. Good suggestions. My drill, collet and bits are all brand new. But the pin vise was pretty cheap (about $9) so maybe not the best. I think I'll go over to the hobby shop this weekend and investigate.
-
Its been a week since posting and I have not done a whole lot but lay the ramin planks over the forward hold deck, and drill pin prick holes (.5 mm) to simulate pegs. I got my first lesson in using a pin vise. I have two practical questions regarding its use: (1) how to set such a tiny drill perfectly straight in the collet of the pin vise (I did the best I could but still got a little wiggle when I turned the drill), and (2) is there any way other than visual and extreme care to prevent drilling through the underlying wood? (I couldn't imagine a collar on the bit and the bit would not go deep enough into the collet to expose only so much bit. I confess, out of the 120 holes I drilled I broke through on three. This is for the lowest decking and it will be hard to see, but I want to avoid that completely on the upper decks. I am also debating whether or not to fill then sand these holes. I did so on some scrap and the holes are so small that I think they look better (more noticeable) with nothing in them. I could have used darker filler but all I had was balsa color. What do you folks think? Go get some dark filler and do it right or move on?
So I am at the point where the instructions would have me glue in this deck. But before doing so I will want to do that filling or not, and also have to decide when to add material to the ribs/frames as many here have suggested doing. My plan is to use 3/8" balsa, jigsaw out copies of the ribs, then laminate 4 of these together to make a 1 1/2 inch fill between each rib. If its a bit too wide I will sand down and if a bit too narrow I'll add another layer of veneer out of 1/8" balsa. Each of these fillers will either have to be done in sections (above and below the decks) or I will need to cut notches in them to accommodate the deck. Any opinions as to how to go about this and whether to glue these in before the decking or after?
I feel I'm making progress. Probably its going about 90% as it should. The other 10% is giving me the opportunity to learn from my mistakes and be innovative and resourceful. As they say now-a-days, its all good.
I'm attaching a couple pictures. My previous attempt at a hobby was Photoshop and obviously I've moved on. I hope I get better at modeling than I was using PS.


-
Did read that post Dan and appreciate your time. All very good suggestions which I will be employing.
-
Colin, I assume you've done this syringe method so you must know about needles. I think I can get some on line. What size would you use to make a .5 mm circle?
-
I'll inquire but we have a needle problem as it is so its hard for me to imagine them selling them over the counter in drug stores. Thanks for the tip though.
-
Thank you much Dan. I also want to thank you for your contributions to this site ... you do beautiful work and what you pass on to others like me is invaluable. Without this resource I'd be floundering.
-
Found a drill size chart on the web which showed that a .5mm bit would be a #76 (which is actually .02 inches).
So I just need now to know if my estimate of actual real life size is somewhat close.
-
Don't know where to get a hypo needle so I think I will go with the drill and fill method. My question now though is what diameter bit/hole to put in. I'm calculating that with a 1:48 scale model and 5 mm planking, the actual Bounty must have had planks of around 240mm or 9.5 inches. They would probably have used two pegs in parallel per each plank along the length of the plank. Here's where I'm guessing -- I would figure the pegs would need to be around 1 inch or 25mm in diameter. If all the scaling were done for all the parts of the ship model, this would mean a diameter of .5 mm or .02 inches (or 1.3/64ths). Is this reasoning close to correct? How are these mini bits sized? In mm or fractions of an inch? Or, I've seen them numbered like a 60 or 80 bit. What do those numbers mean?
-
Good answers; thanks much. I suspected this pencil method was less than ideal. I don't like the smear factor either. I'll be using the drill and fill probably but the toothpick method is also pretty realistic. Thanks again.
-
My instructions for the deck planking recommend using a sharp #4 pencil to "simulate the nailing." I don't know why this seems kindof mickey mouse to me, but it does. Is there any other way? Only other way I can think of is to poke tiny holes and then fill and sand, using a darker wood filler than the light Ramin wood of the planks. More work but not that much more. Any comments/suggestions/experiences?
-
Thank you all. You've renewed my faith in carpenters glue. I am right now waiting to look at the results of a test I did a couple hours ago with the white glue -- actually I also have the yellow stuff by Elmers. I have a feeling it is going to bond just fine. Thank you Druxey for the tip re dampening the planks....they are extremely thin. I would think a good way to do this is to do the planking then swipe the whole thing once or twice with a damp sponge. Thanks again.
-
My instructions call for contact glue in laying down the planks over the precut plywood subfloor (deck). I have worked with this stuff on scrap pieces and it is kind of tricky and a bit messy to coat such narrow and thin surfaces as are the planks. I've devised a "jig" to lay them all out side by side and clamp down the ends on a piece of cardboard, allowing me to coat all 15 planks at once. When dried I would then place them one by one onto the deck which poses no problem in coating. I am wondering though if anyone has used plain ole white glue for this purpose? It would be much easier to coat the surfaces and any excess is more easily cleaned up. Only drawback I see is that the planks could slide a bit when being laid down. But this could be solved easily enough. Any suggestions or comments?
-
Instead of swim noodles, most hardware stores sell lengths of foam pipe insulation in various diameters which also have a hollow core if a broom handle dowel is to be inserted.
-
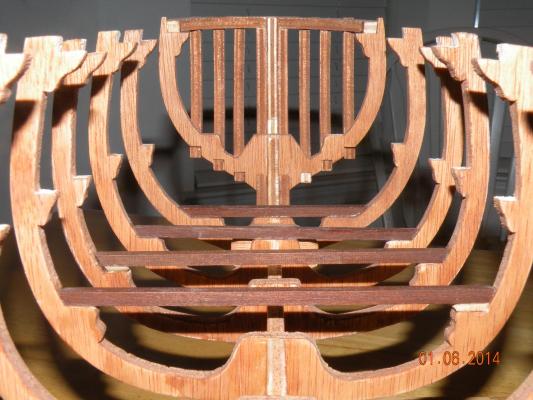
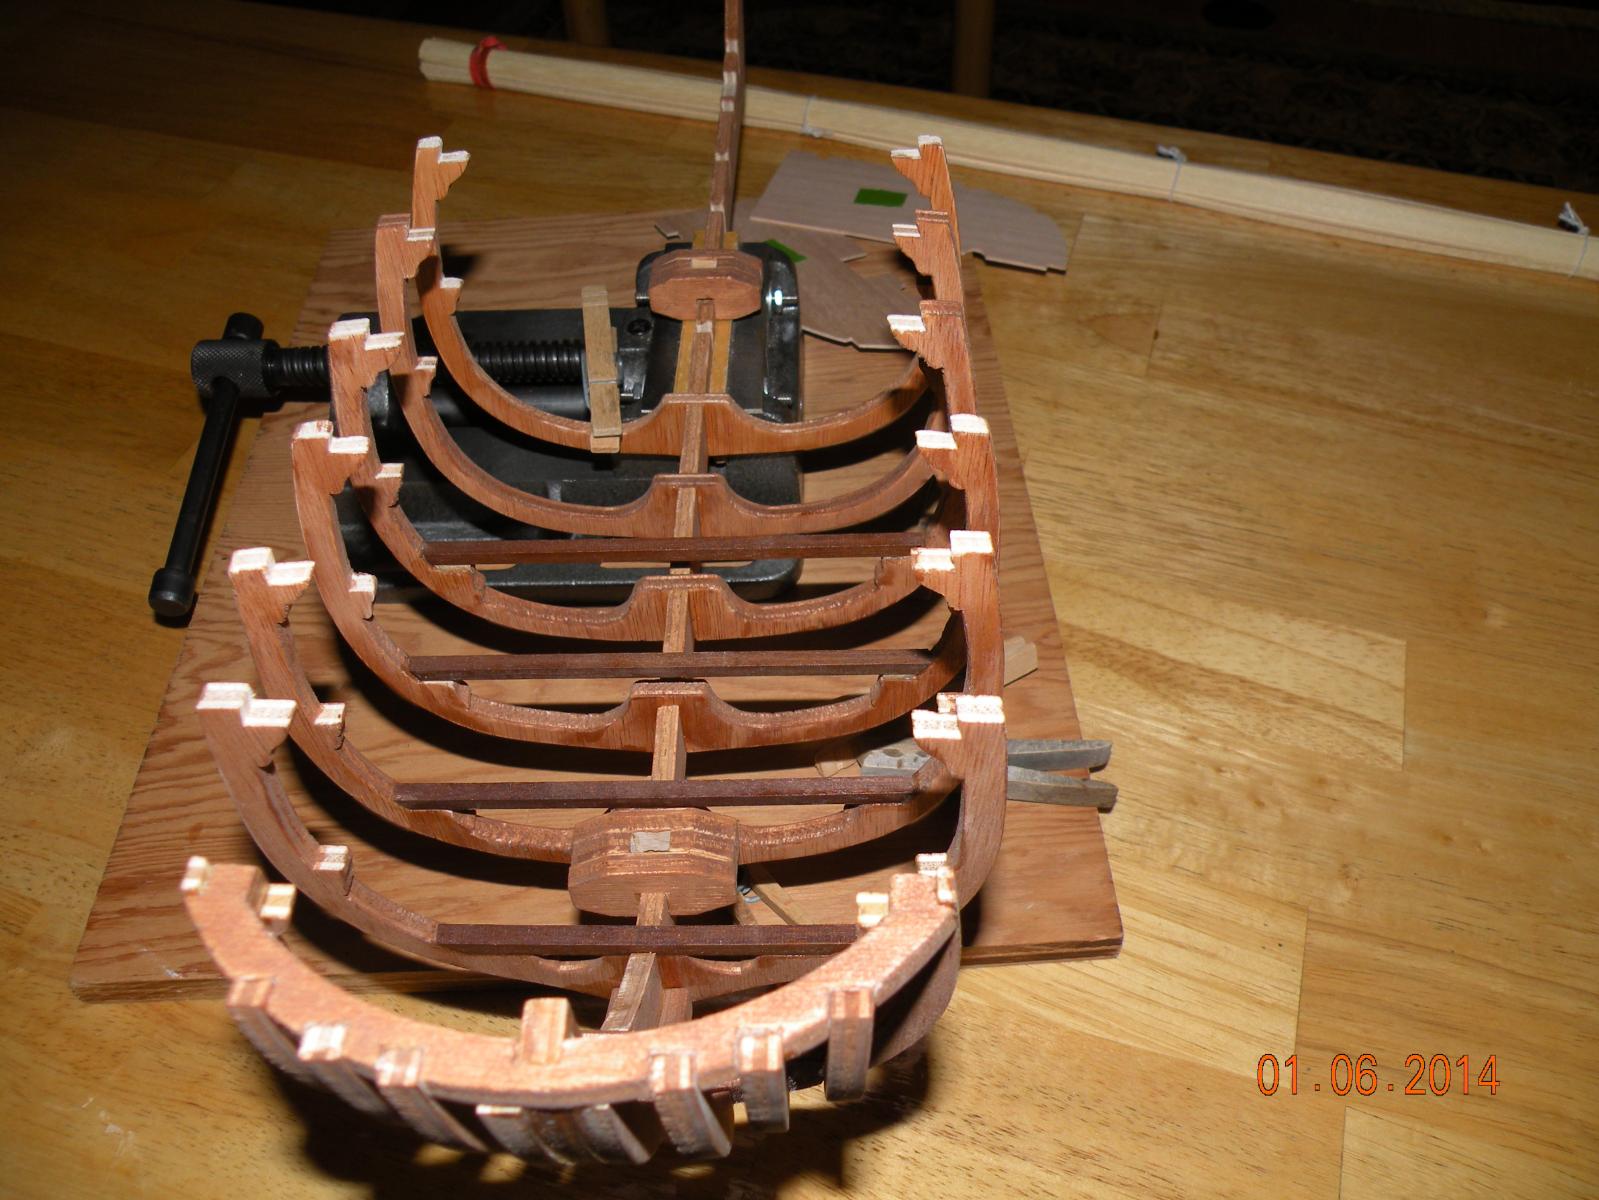
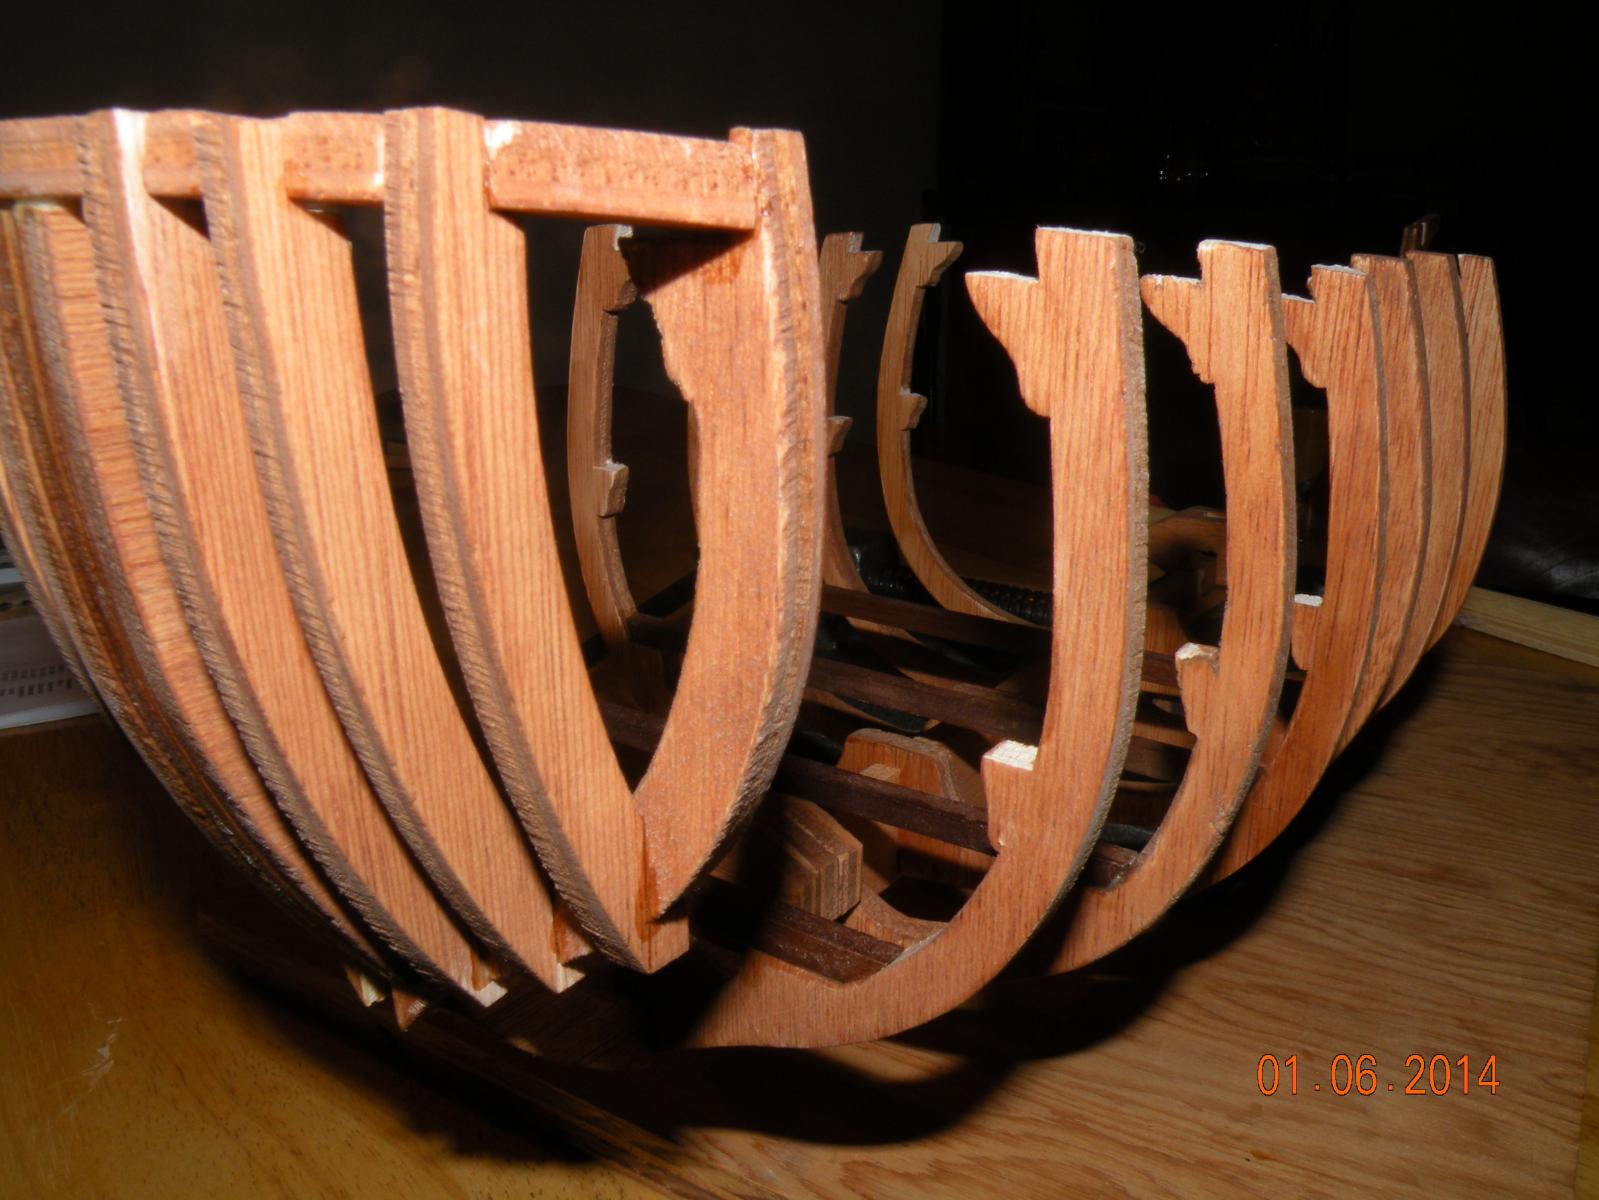
Along the same topic.... what is a good way to test the fairness of frames? I am building HMS Bounty with open frames and I can sense that they are not all going to lay in perfectly fair for planking. I have glued in 7 of the total 15 frames, added the lower deck support beams, and am ready to put in the lower forward deck. I laid a strip of paper from station (frame) 4 back to 10, and I see that planks won't lay up against station 8 as they should. I am conjuring up laying on a piece of thin wood (probably some excess deck planks) to build up that side. Interestingly though the opposite side does not have as great a reverse problem. I think sanding will take care of any excess material on that frame. Before I move on to add the aft 8 frames, is there a tried and true technique for positioning these (rather flexible) frames so that a good degree of fairness is achieved? Like Brett who started this forum I thought I was taking as much care as possible. Used perfectly square braces at the false keel joints, measured to the mm the distances between frames, etc. etc. but still got this one (and maybe others) a bit off. Is it possible that with the addition of accurately cut beams (for all 3 decks) that what now looks and feels like a frame is out of line, may right itself? I am going to attach a photo, but don't know if I do that correctly.

-
Thanks for that clarification Brian. I was just about to Google PVA glue. I was thinking it was another form of CA glue.
-
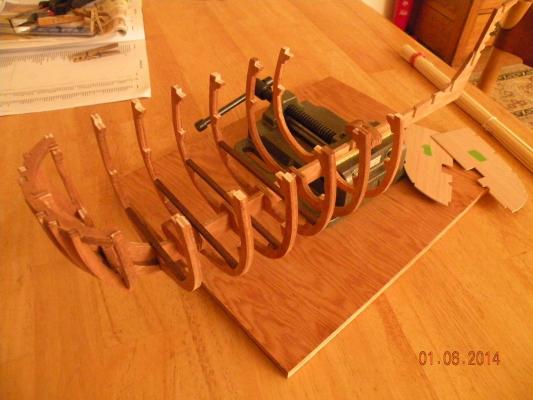
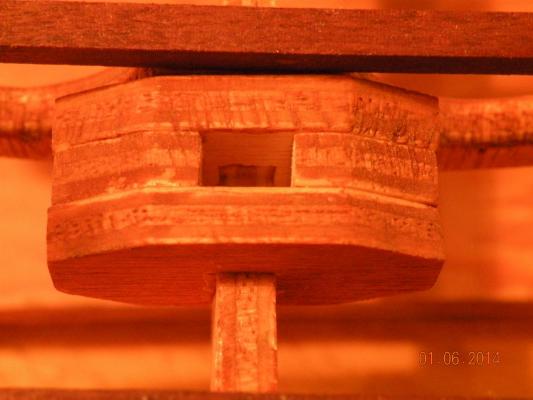
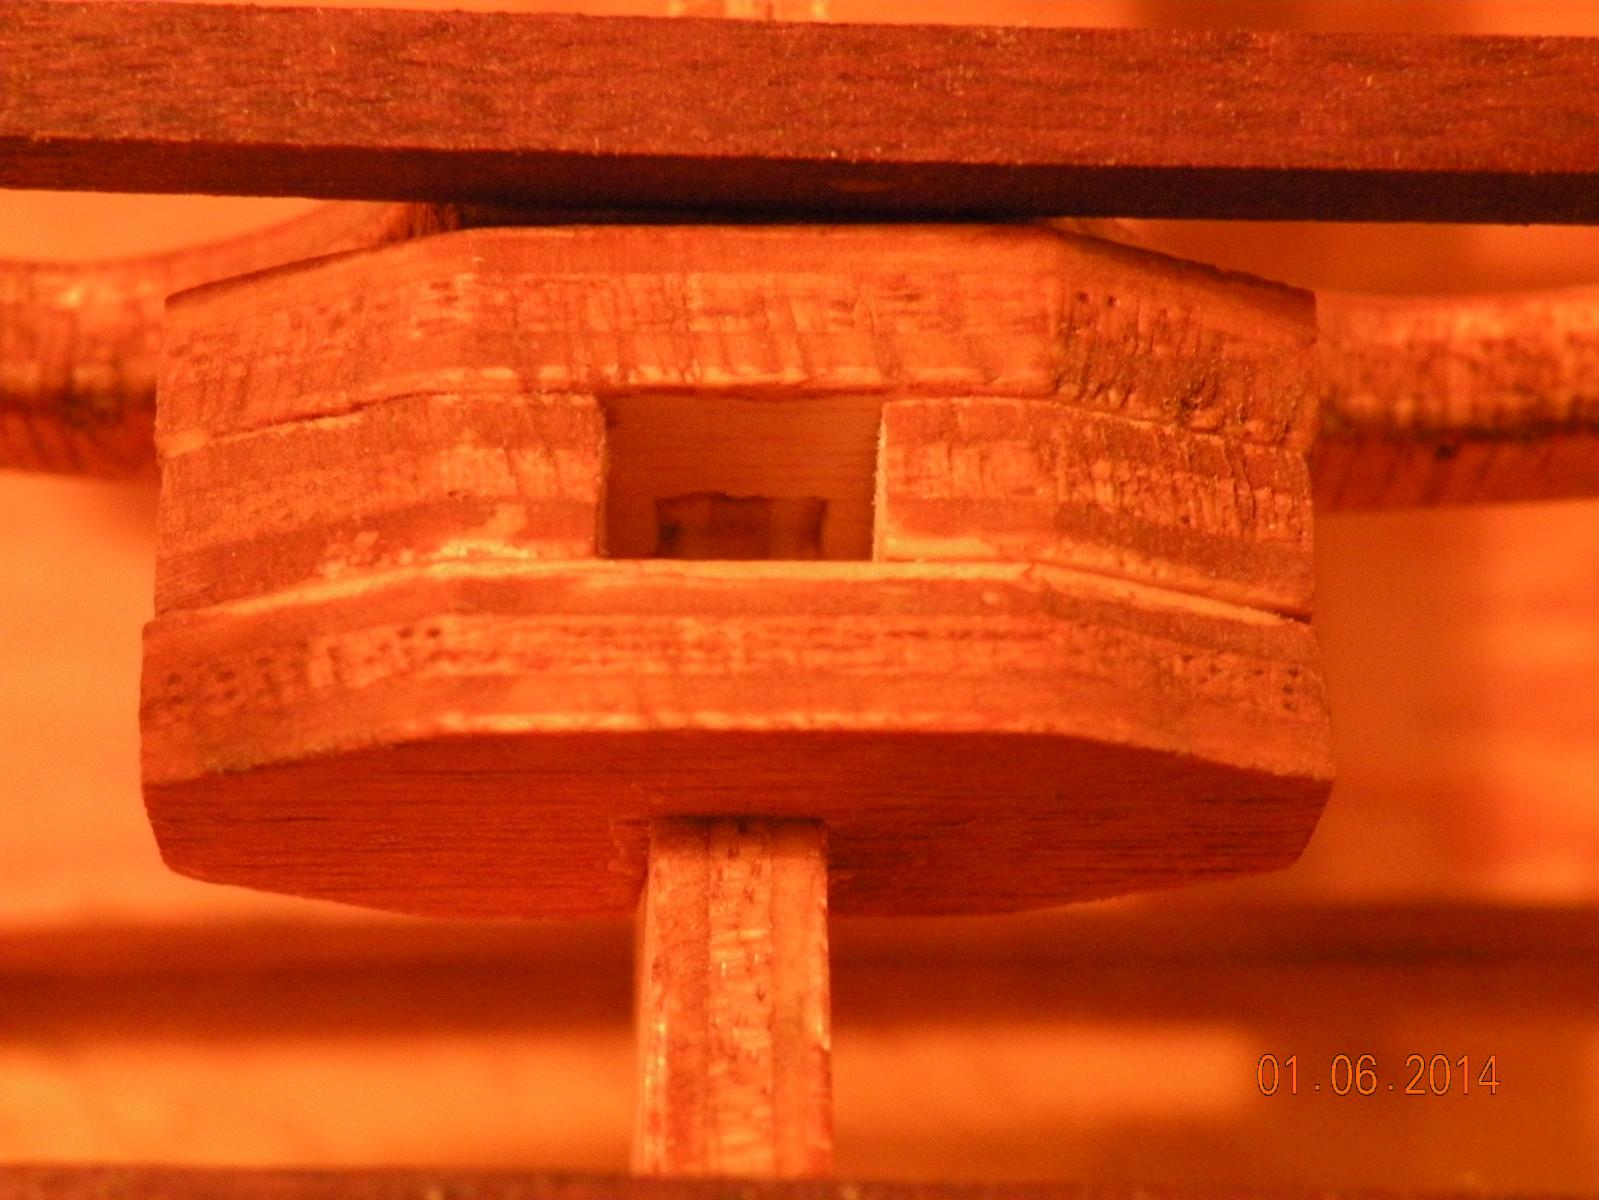
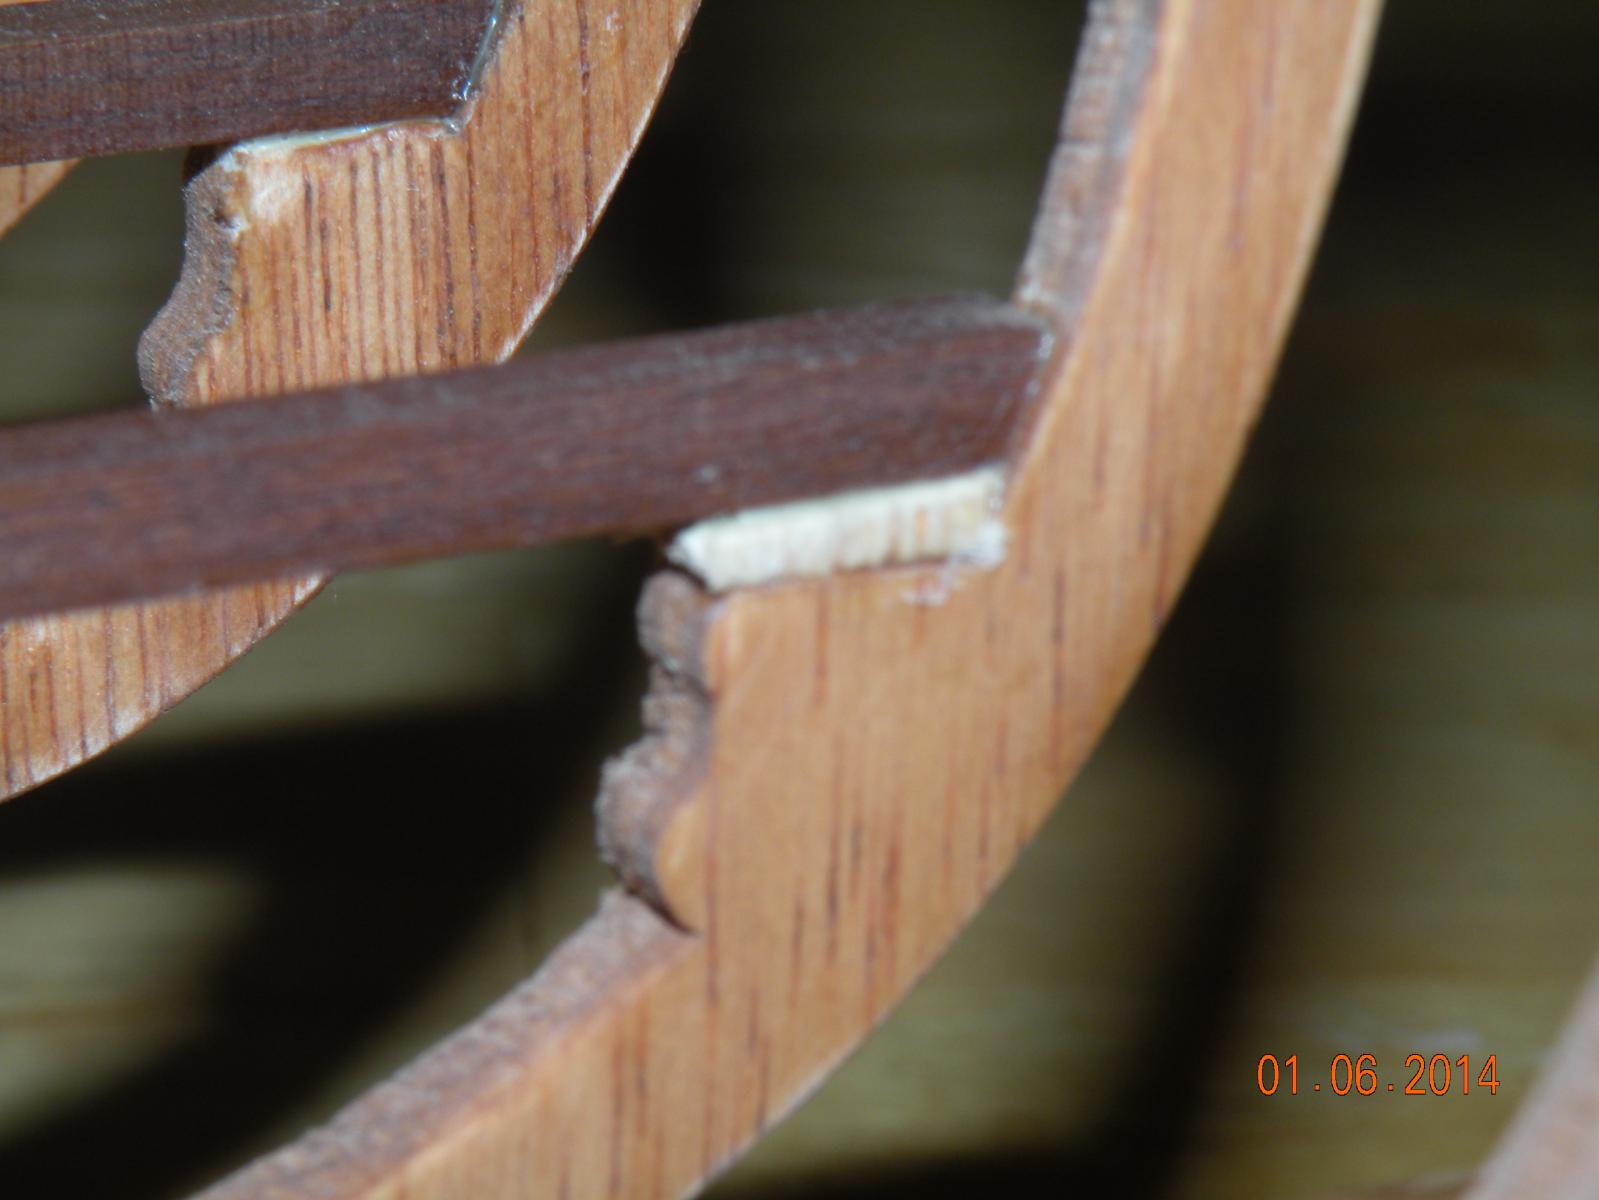
 Well the Holidays are over and I made some modest but significant progress on Bounty. I finished staining all the ribs and glued them into the false keel. Despite my diligence in making sure they were perpendicular and spaced according to the plans, when the process was over I was only 90% satisfied with my work. The first issue I had was the spacing between ribs. I had to place temporary spacers (made of matchsticks) between a couple of them to achieve the desired space. When I took the spacers out the flexibility of the ribs went back to being off by a mm or two. I decided not to sweat this as I figure the notches on each level of decking will be spaced properly and these ribs will flex enough to slide into them. The more troubling issue (and I still cannot understand what caused it) was that one of the beams, cut to perfect length, would not sit level between its two ribs. As can be seen in two of the pics, I solved this with a small piece of wood glued to the top of the knee. I am wondering, and seeking advice, on possible causes. I know the laser cut notches in the rib and the false keel are pretty well cut and result in a squared up mating; no play side to side which would have thrown the two knees out of level. I did take a swipe with 320 sandpaper over most surfaces and edges of all these ribs, but nothing close to removing that much material. So my conclusion (without being arrogant for a newcomer to the hobby) is that sometimes S happens at the factory and this may be one of them. I fully expect that along the way there will be times when imperfections in the kit and mistakes I make will need to be remedied. The other question I have re this fault, is did I choose the best way to fix it? I couldn't think of any other, so I'm interested to hear if others have had to do something similar.
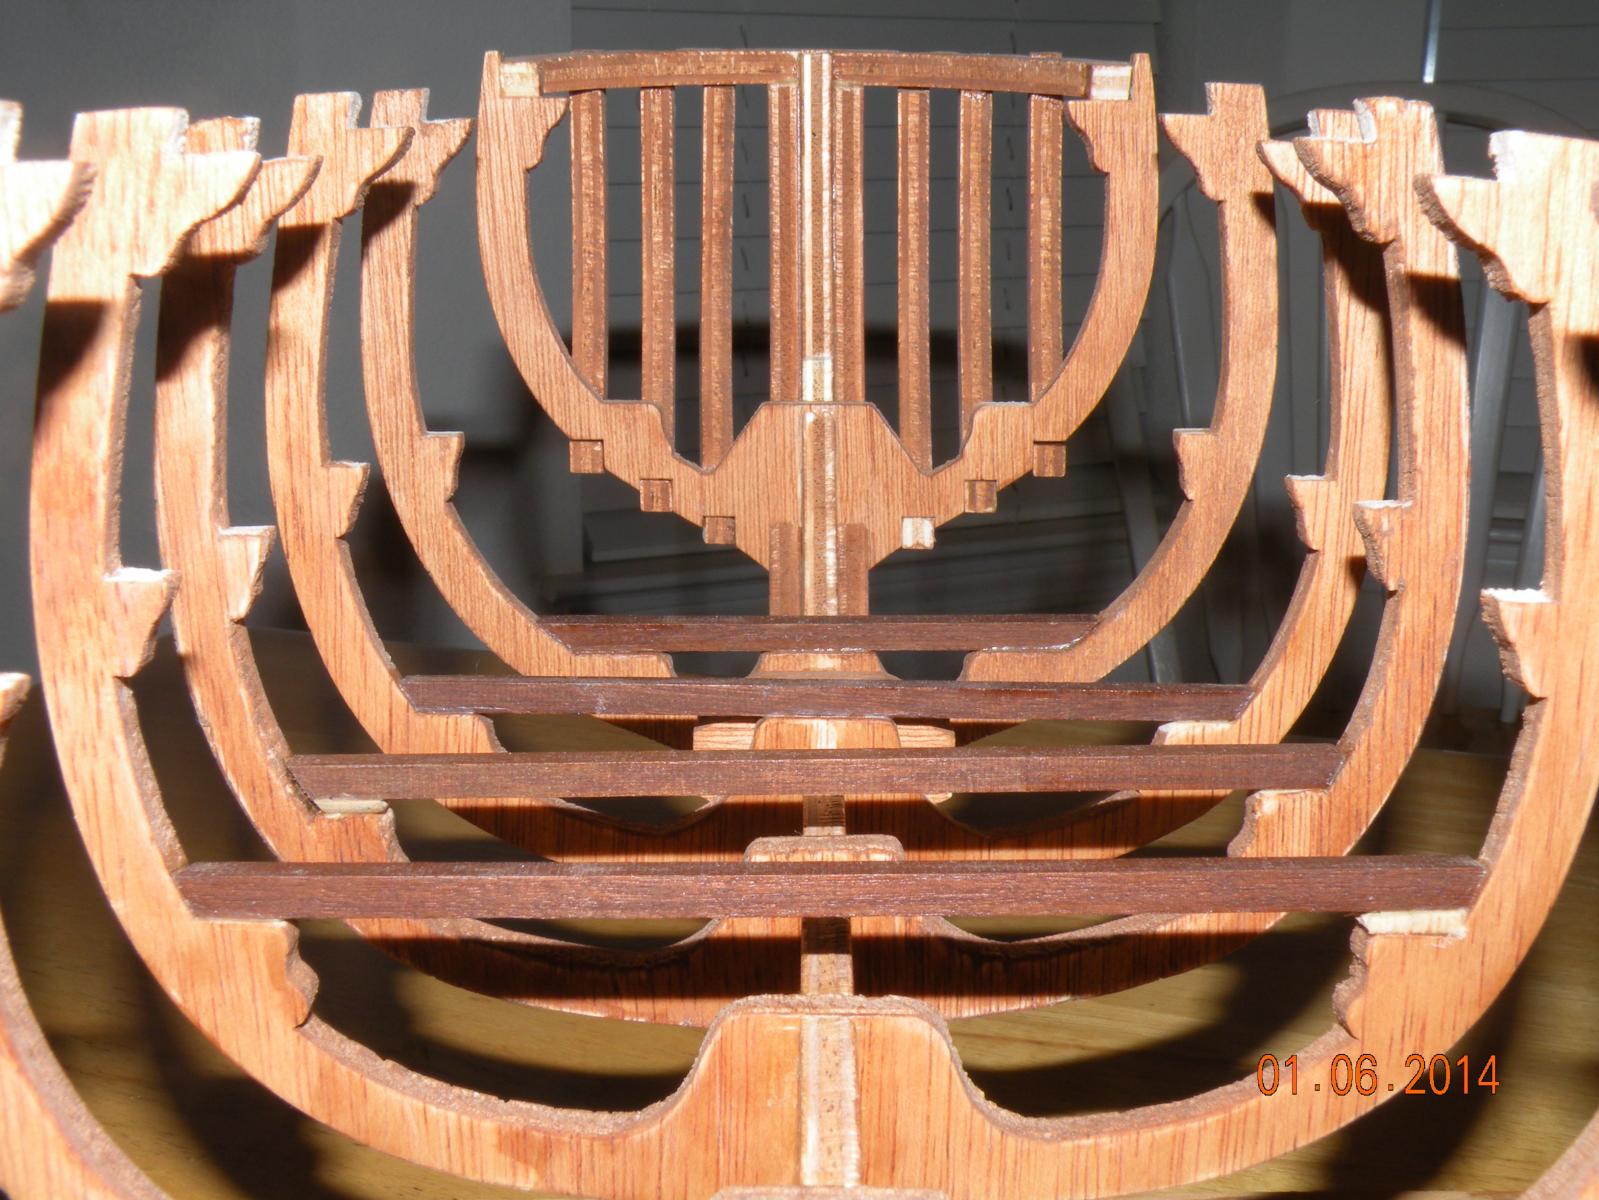
So now with the forward 7 ribs, stiffeners and beams in place I am ready to plank the lower deck and put it in place. I've done a dry run with the unplanked deck halves and the fit is nice. The deck sits atop all the beams flat and the only gap there is is from the flexibility of the plywood. This will either come true when the planking is glued to it or I will apply some small weight to it from atop which puts it flat onto the beam. I'm coming to expect that these thin pieces of ply will always have some flex or warp to them.
Questions I have before I dive into the planking and placing of this lower deck:
1. Is it best to plank from the center line out since this is the straight edge?
2. The instructions recommend contact glue to affix the planks to the underlying deck pieces. Is there agreement from all that this is the best?
3. Should each plank be coated, then placed on the deck separately or can they all be coated then set aside as each is laid in place? I forget exactly how contact glue works (I'll experiment before doing it) but I think the two contact surfaces are allowed to dry before being placed together. They are easily handled when dry but once contact is made with the other surface its all she wrote. They stick fast. Is that how it basically works?
4. Last question -- what type of glue should be used to secure the deck to the beams, and if white glue, should the entire beam be coated?
Thanks for any advice, answers and critique of what I've done. This is quite fun.


- Vivian Galad and JesseLee
-
 2
2
-
Thank you all for further explaining and showing the use of the pins to hold down the planks. I also think its a good idea to shorten the planks. Since my build has open ribs I am thinking of a way to buttress them from inside temporarily during planking. I thought this will give them support as I push pins into them. With predrilled holes that might not be necessary. It's hard for me to imagine a drill bit that small, but I assume they are readily available. Probably use my Dremel tool. Thanks again all. This morning I begin setting in the frames.
-
Thanks for the encouraging words Arjan. I do not believe in perfection here on earth so I just try my best. I agree wholeheartedly that this build should have come later, but I decided to accept the challenge and just see where it leads. I do read a lot and look at lots of pictures. Its all a learning experience and I'm having great fun doing it. Thank you for your advice on the keel warp. Tomorrow I will start gluing in some frames and not worry about it. I don't actually understand the difference between nailing down the planks (as Amfibius suggests) and pinning them into the frame. Are you saying the pins should be removed after glue has dried? Is that why you call them drawing pins cause they can be drawn out?
-
Building the HMS Bounty by AL. I've popped out, deburred and stained all the pieces to build the forward framing. I'm ready to start gluing in the ribbing from bow to midships. I laid the false keel on the perfectly flat table top and noticed that there was a slight bow to it. 1.5 mm at the midship point to be exact. I've contemplated whether this will affect the final orientation of the ribs and ultimately the entire build. I think that once the deck is laid (assuming both halves are perfectly symmetrical), the keel has to straighten out. It's plywood, 24 inches long and 6mm thick and 1 inch wide along most of its length. So its pretty darn flexible. (note that it may have bowed some cause it was sitting in its box in a garage for 6 years).
Anyway, I am thinking of trying to flatten it with a steam iron and clamping between two perfectly flat boards after the steaming. I am right now waiting to see the results of doing this to the scrap of template from which the false keel was taken. Question I have is: is this necessary and is this technique the best solution if it is. Or is 1.5mm flex not enough to worry about and will putting in the deck straighten it out? Thanks for any help offered.
-
I've searched this forum but could not find a similar topic, so I'll go ahead and start one.
Building the HMS Bounty by AL. I've popped out, deburred and stained all the pieces to build the forward framing. I'm ready to start gluing in the ribbing from bow to midships. I laid the false keel on the perfectly flat table top and noticed that there was a slight bow to it. 1.5 mm at the midship point to be exact. I've contemplated whether this will affect the final orientation of the ribs and ultimately the entire build. I think that once the deck is laid (assuming both halves are perfectly symmetrical), the keel has to straighten out. It's plywood, 24 inches long and 6mm thick and 1 inch wide along most of its length. So its pretty darn flexible. (note that it may have bowed some cause it was sitting in its box in a garage for 6 years).
Anyway, I am thinking of trying to flatten it with a steam iron and clamping between two perfectly flat boards after the steaming. I am right now waiting to see the results of doing this to the scrap of template from which the false keel was taken. Question I have is: is this necessary and is this technique the best solution if it is. Or is 1.5mm flex not enough to worry about and will putting in the deck straighten it out? Thanks for any help offered.
-
All very well when the ribbing is a solid bulkhead across the full beam of the ship. What do you do when (1) the ship model has all open ribs, and (2) one side of the model will be left mostly unplanked so the interior details can be seen. In this case, adding material, while perhaps even more important for the strength and trueness of the fore/aft line, becomes much more problematic. What to do? I'm building HMS Bounty with some rad curves stem and stern and its been suggested I add some material to the ribs at least in those areas. I want to take the suggestion but am not sure how. I am thinking (its been suggested by Amfibius) that I use scrap from the templates that the ribs came off of.
-
Vivian, my wife mentioned you to my Sao Paulo neighbor and he said he'd like to correspond with you (at least once). She said she'd have to check with me if that was possible other than via this website. I don't think it is. I don't see any feature here for off line direct contact with members. So, with his permission, I am giving you his email address:email address removed by moderator, if you so desire, drop him a line. He's 91, wife is 86 and they are both great people. If you don't, so be it.
Al,
Please send Vivian the email addy via PM. Posting it is an invitation to spammers to harvest it and use it.


Pin pusher
in Modeling tools and Workshop Equipment
Posted
Appreciate the new comments on hammers and pushers. I will experiment I suppose and see what method(s) and tools work well. So far that has been the way I've progressed, along with some great tips and advice from MSW members.