Mike 41
-
Posts
439 -
Joined
-
Last visited
Content Type
Profiles
Forums
Gallery
Events
Everything posted by Mike 41
-
 Nice work Dave, the maple frames look great.
 -
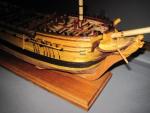
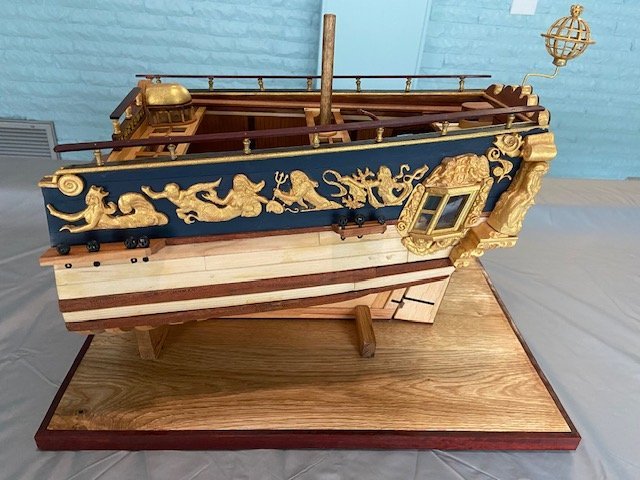
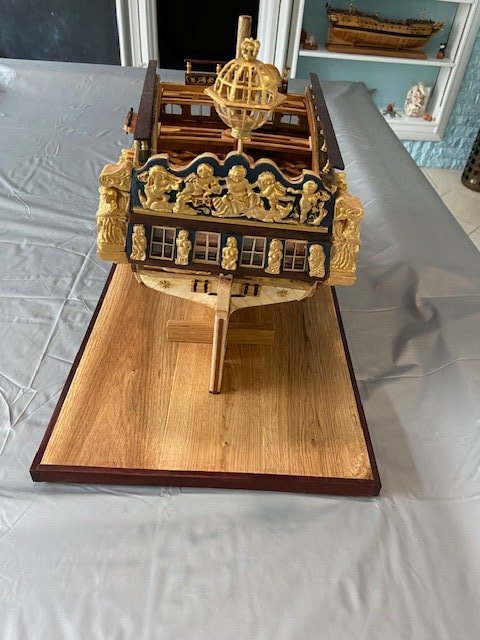
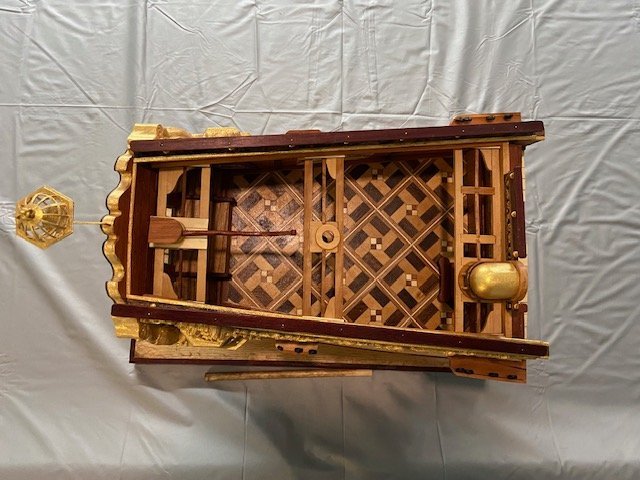
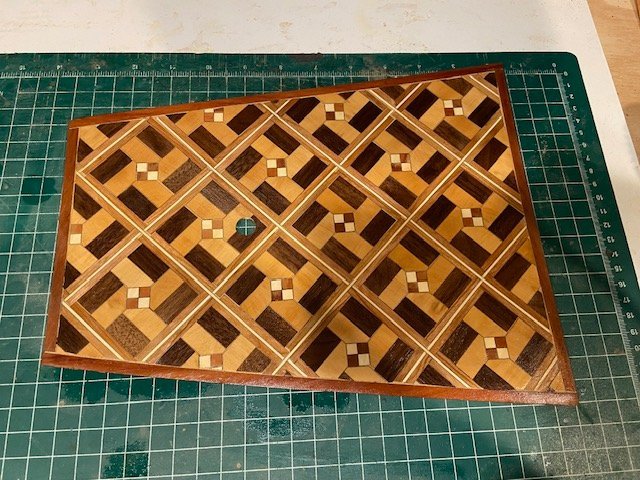
Display stand / Finished Pictures I used white oak and bloodwood for the stand and my pool table for the photos background. The Fubbs Stern Section was the largest section model I have made, three months from start to finish was possible due to the precision parts in the kit by Mike Shanks and the artwork by Jodie.

- 47 replies
-
- 7
-

-
- Fubbs
- Weasel Works
- (and 1 more)
-
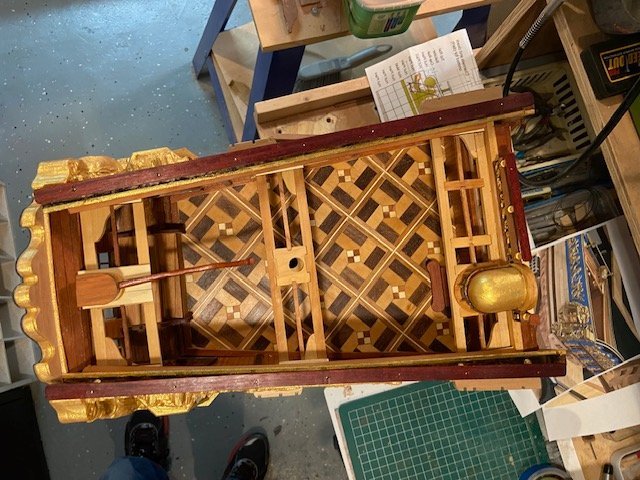
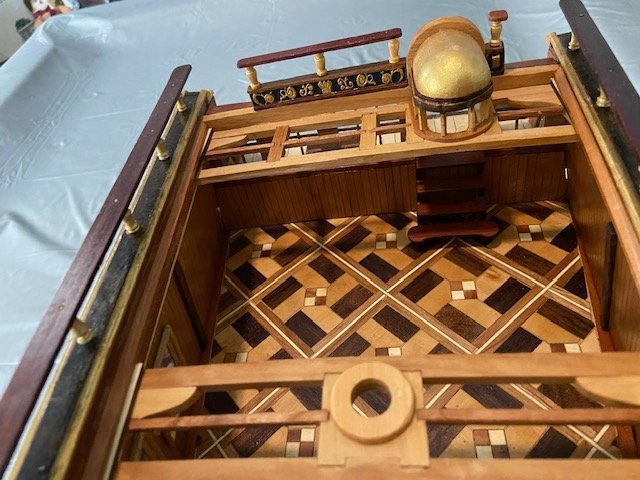
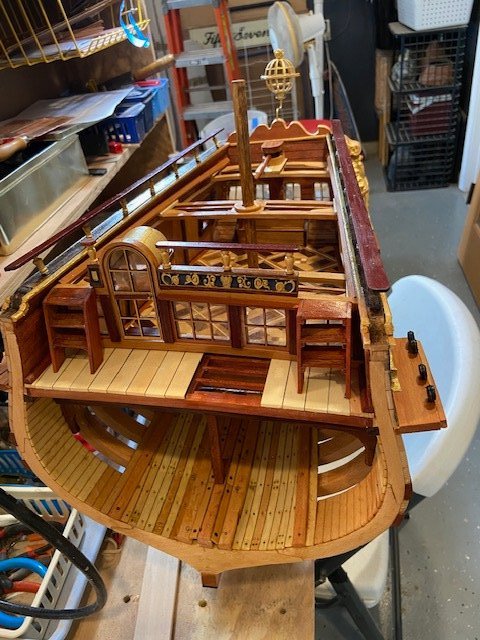
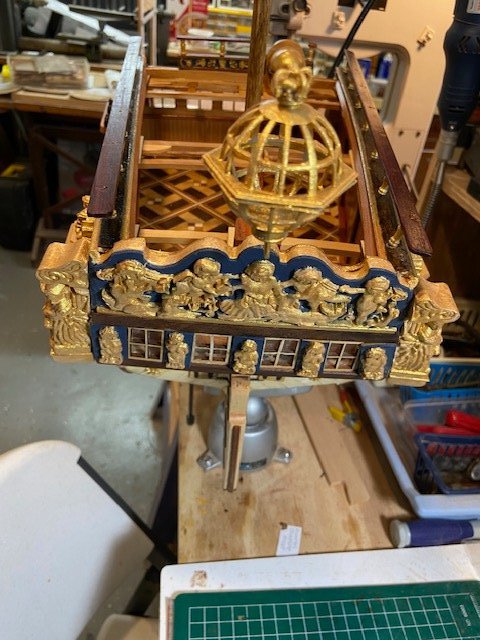
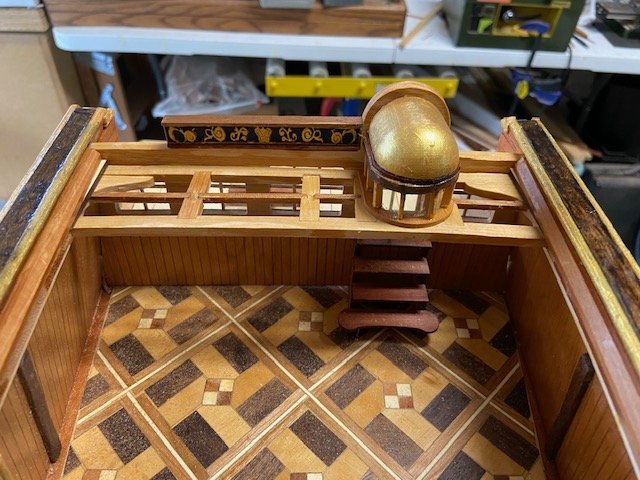
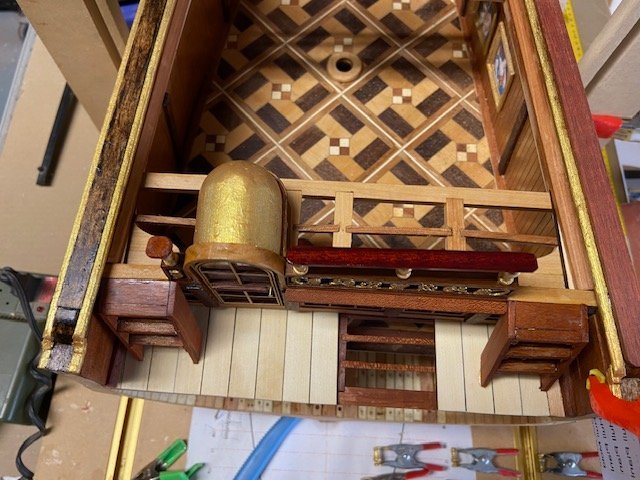
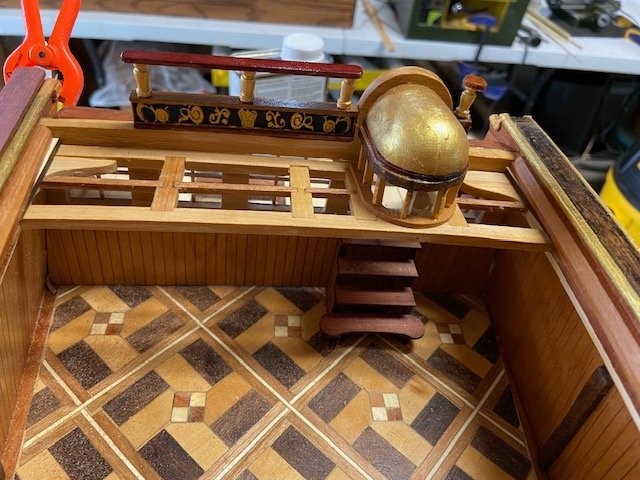
Mizzen Mast, Channels and Lantern The last remaining items were added to the model. The display stand will be next. Progress photos:

- 47 replies
-
- 6
-
-
- Fubbs
- Weasel Works
- (and 1 more)
-
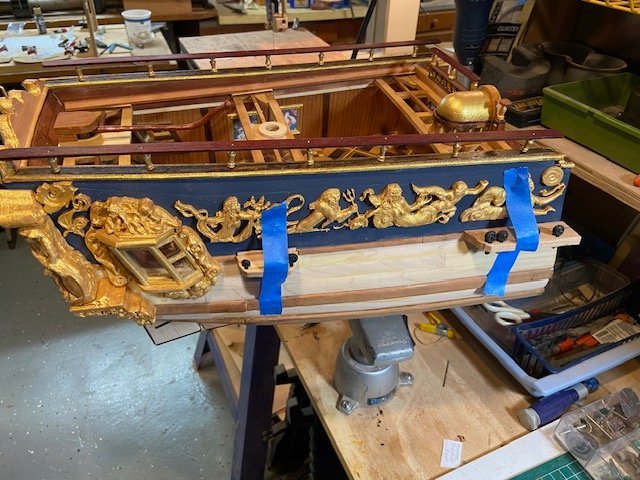
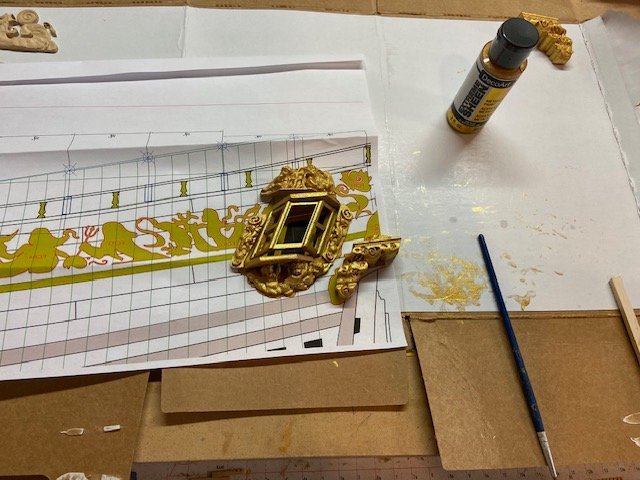
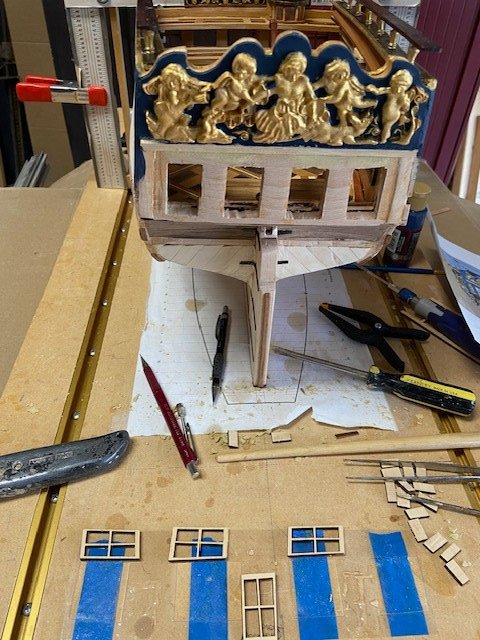
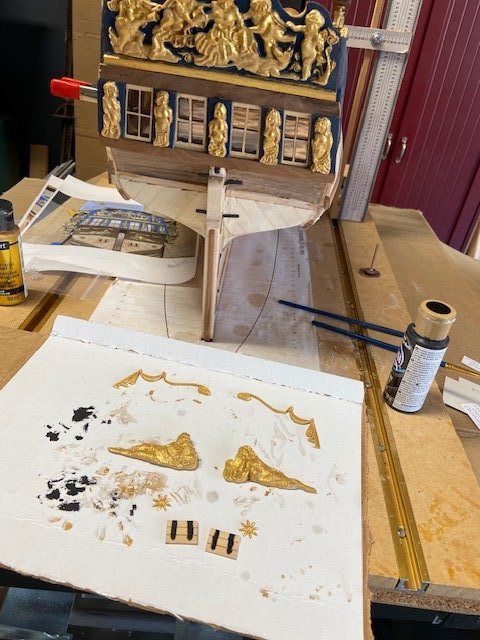
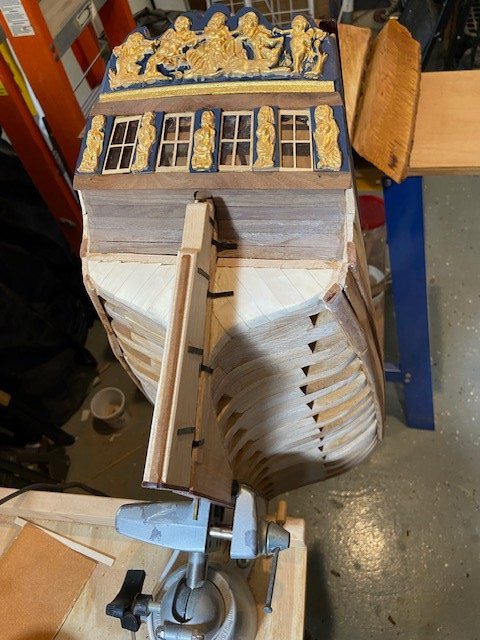
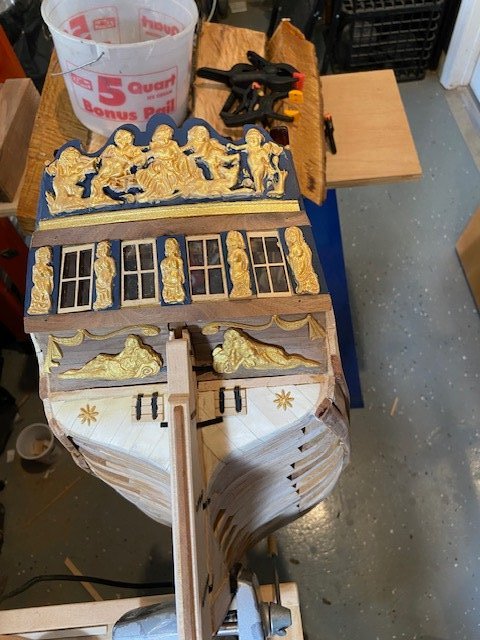
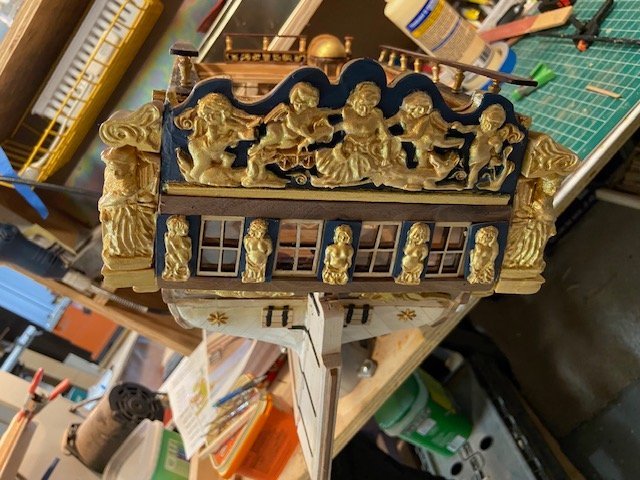
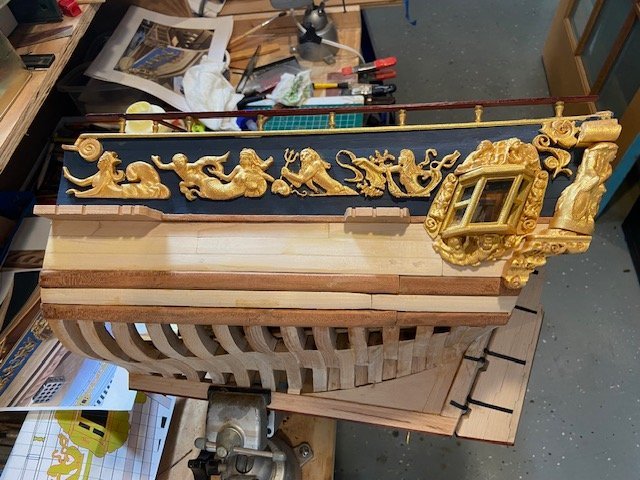
All the carvings are CNC carved boxwood. This is a few photos of the starboard installation.

- 47 replies
-
- 3
-
-
- Fubbs
- Weasel Works
- (and 1 more)
-
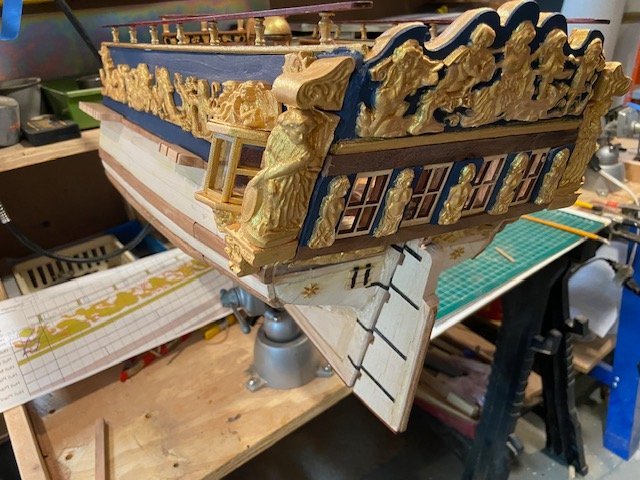
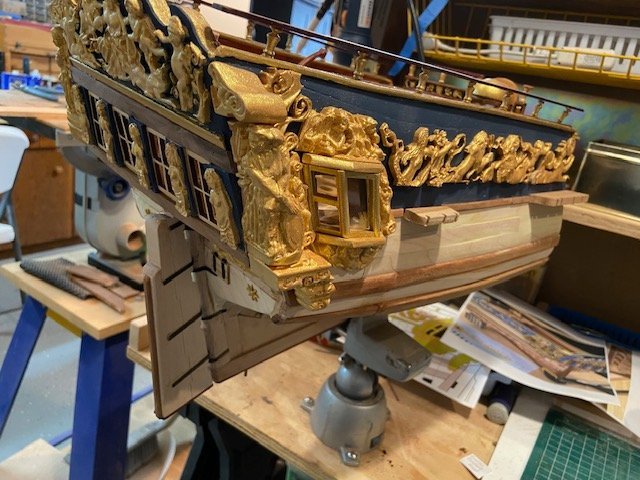
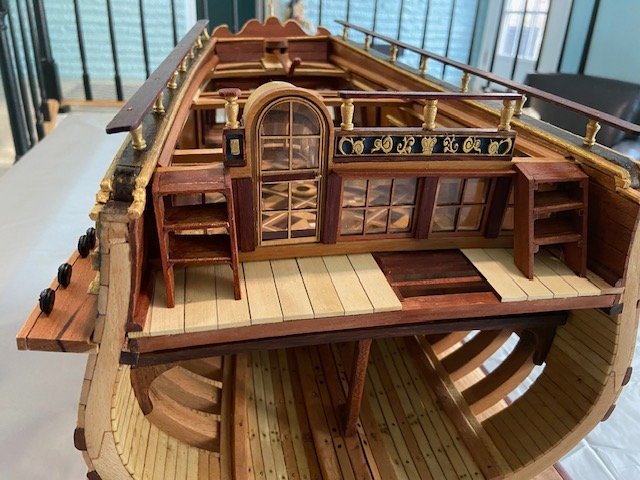
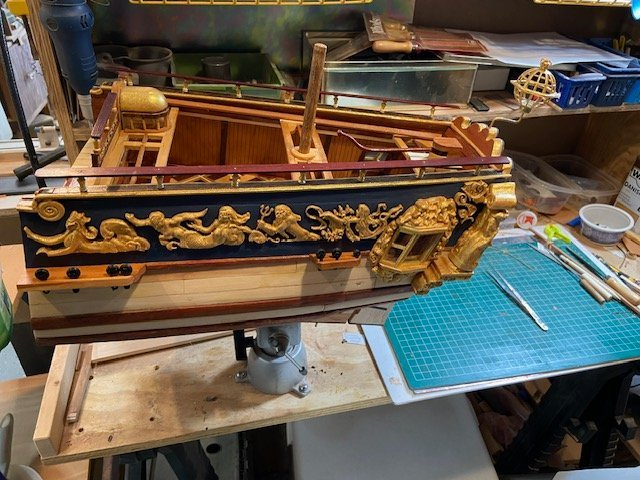
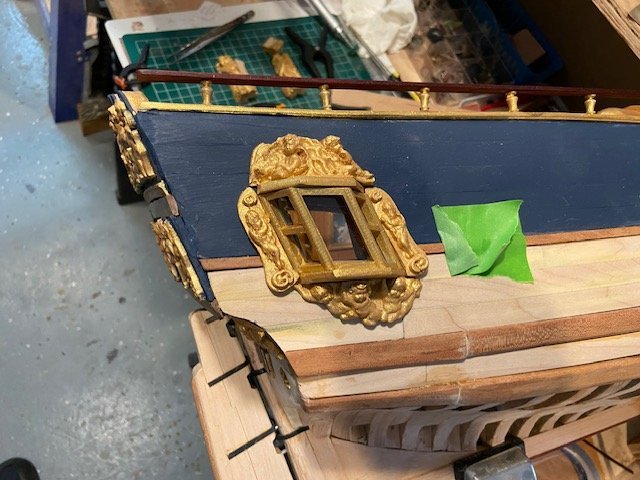
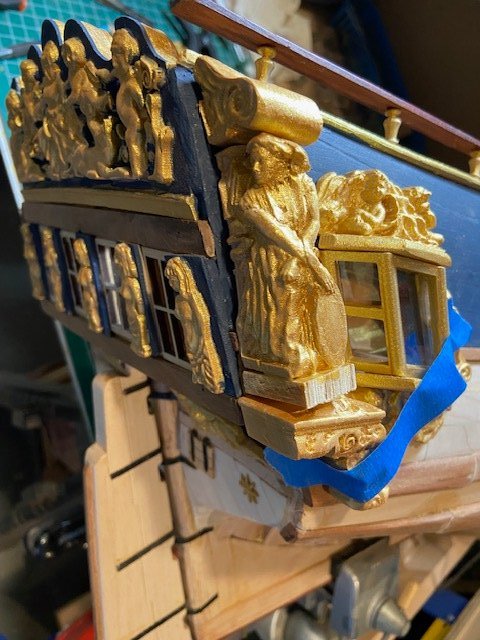
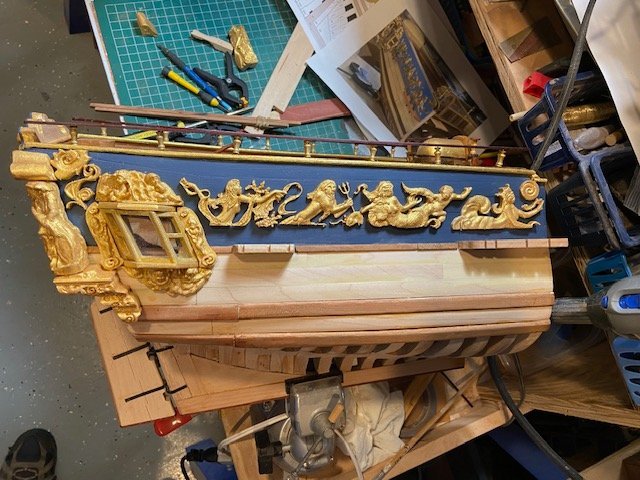
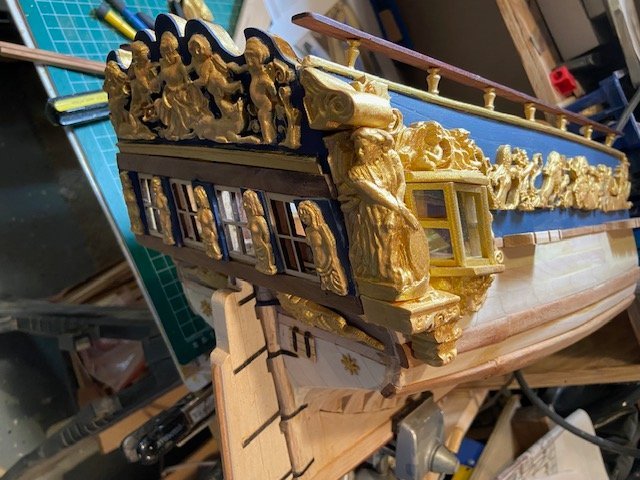
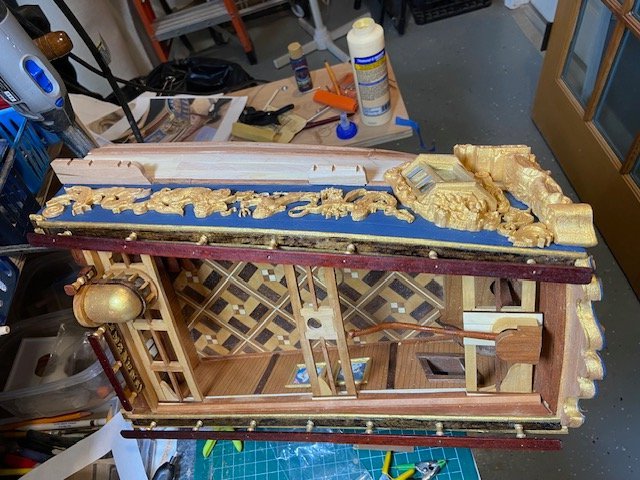
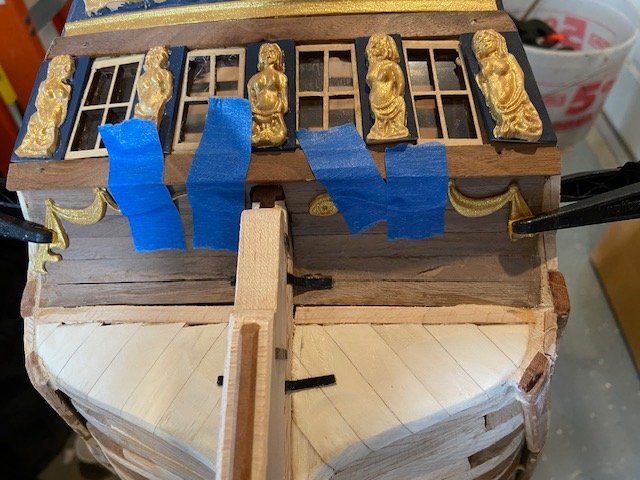
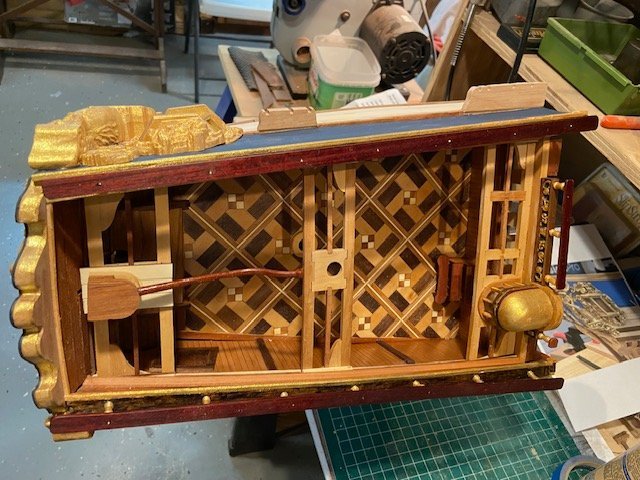
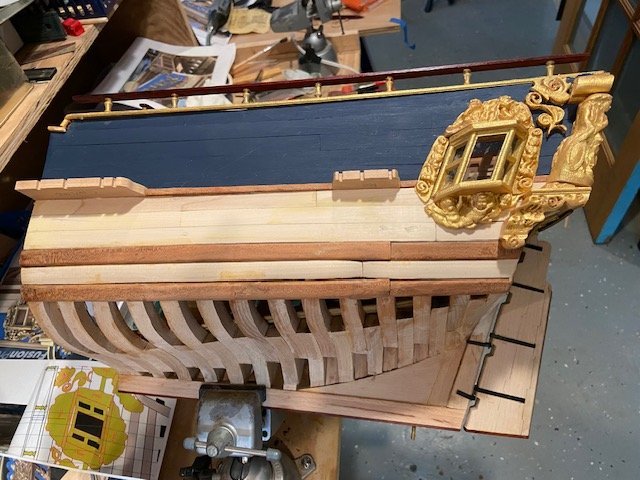
Stern Décor. The stern decorations were easy to install after a few hours of cleaning and painting. This is a few photos of the stern décor.
.jpg.63ecda1b4cfa7b187f596da4173b5910.jpg)

- 47 replies
-
- 4
-
-
- Fubbs
- Weasel Works
- (and 1 more)
-
Stern Décor. This is a few photos of the model before the addition of the stern decorations.


- 47 replies
-
- 1
-
-
- Fubbs
- Weasel Works
- (and 1 more)
-
Hi Navarcus, this looks a little off topic maybe you posted it in the wrong place.
-
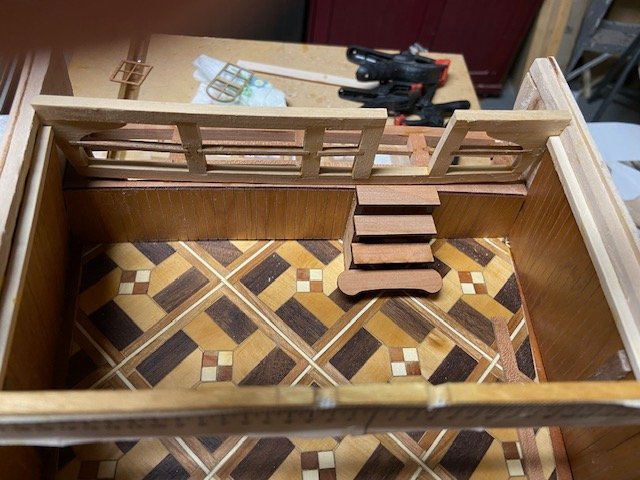
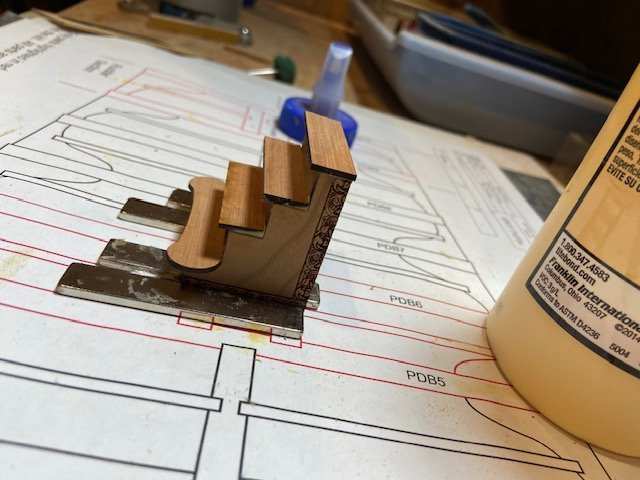
Bulkhead Break Cap Rail I made some minor to the poop deck cap rail and added access stairs to the poop deck. Progress photos.

- 47 replies
-
- 2
-
-
- Fubbs
- Weasel Works
- (and 1 more)
-
Thanks, Mugje! The kit contained a large variety of woods that makes the model colorful.
- 47 replies
-
- 1
-
-
- Fubbs
- Weasel Works
- (and 1 more)
-
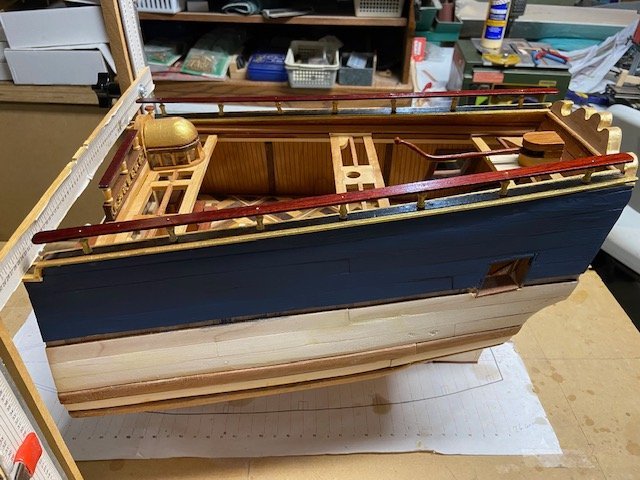
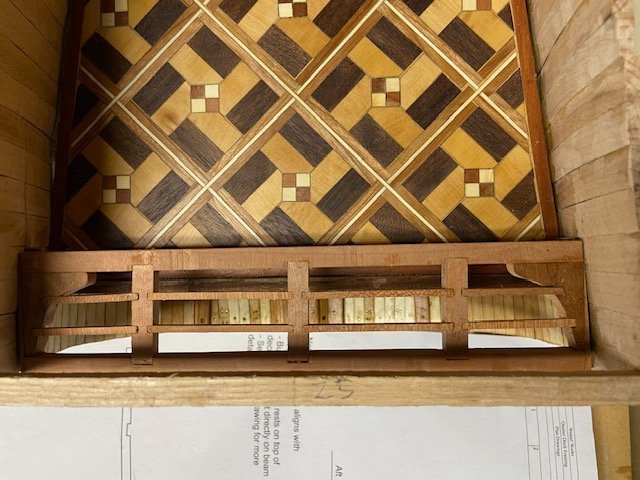
Cap Rail and Bulkhead Break The cap rail with gold molding was added next. The bulkhead break pieces were precision laser cut and fit very well.


- 47 replies
-
- 4
-

-
-
- Fubbs
- Weasel Works
- (and 1 more)
-
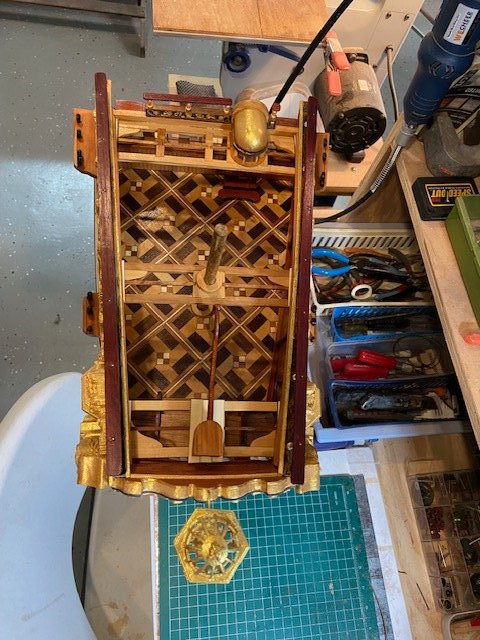
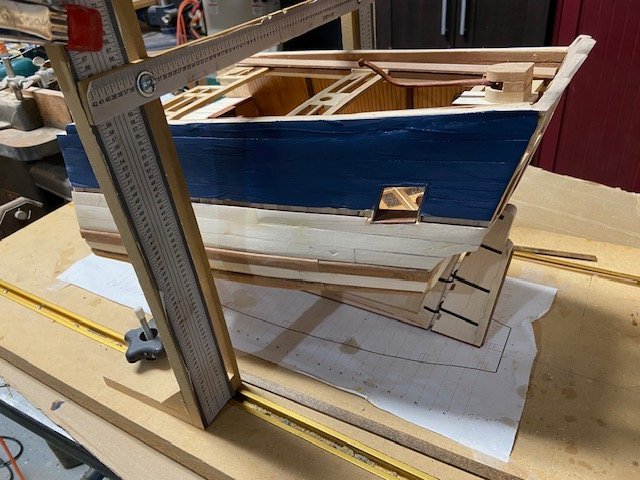
Poop Deck lining, Hull painting. I used Myrtle wood for the lining and dark blue paint for the hull painting. Progress photos.
.jpg.d94af430fba8a9c41095f640f9ec3302.jpg)


- 47 replies
-
- 2
-
-
- Fubbs
- Weasel Works
- (and 1 more)
-
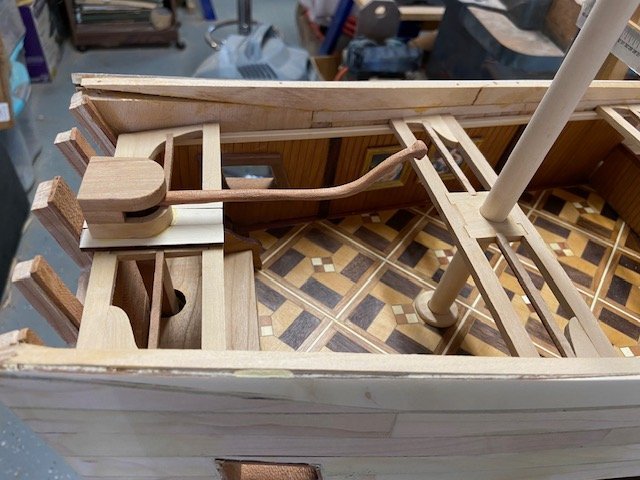
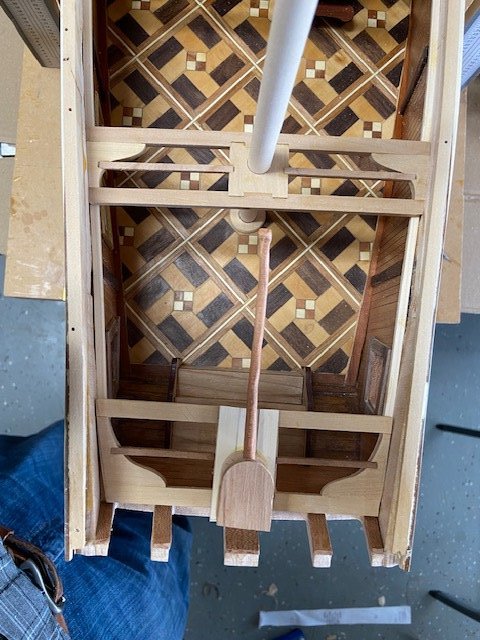
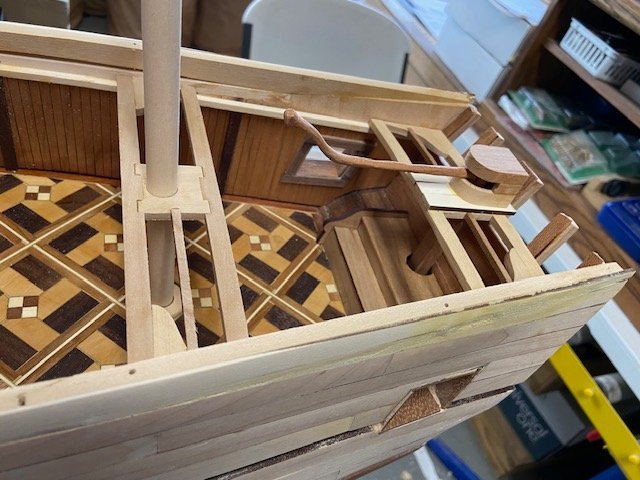
Tiller This is a few photos of the tiller installation.

- 47 replies
-
- 5
-
-
-
- Fubbs
- Weasel Works
- (and 1 more)
-
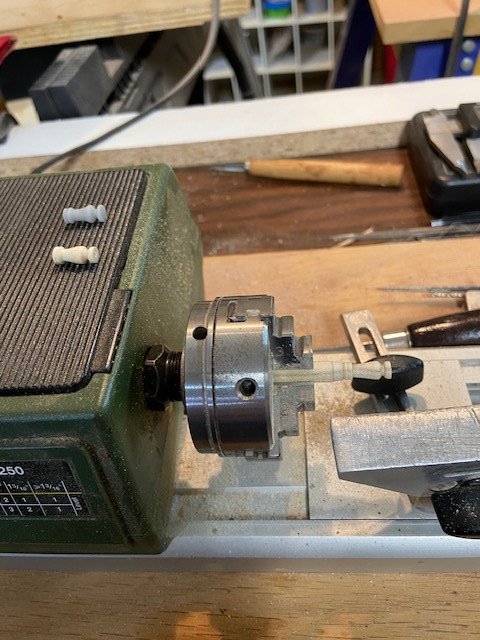
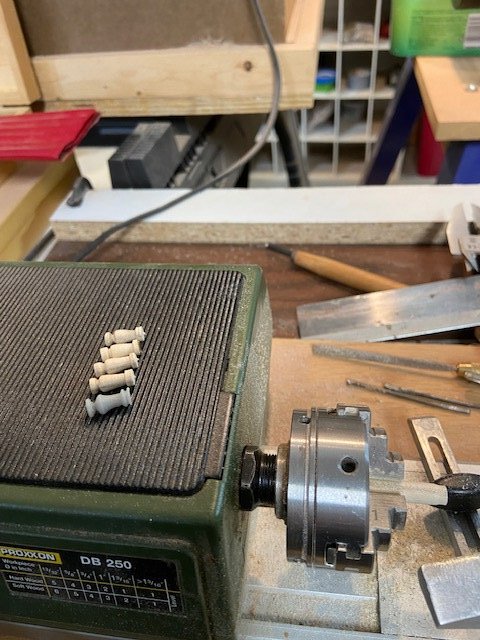
Rudder The rudder consists of five CNC cut pieces that fit very well together very well. The rudder and stern post needed to be beveled at 45 degrees and the top of the rudder needed to be trimmed and shaped at the poop deck. Progress photos.


- 47 replies
-
- 2
-
-
- Fubbs
- Weasel Works
- (and 1 more)
-
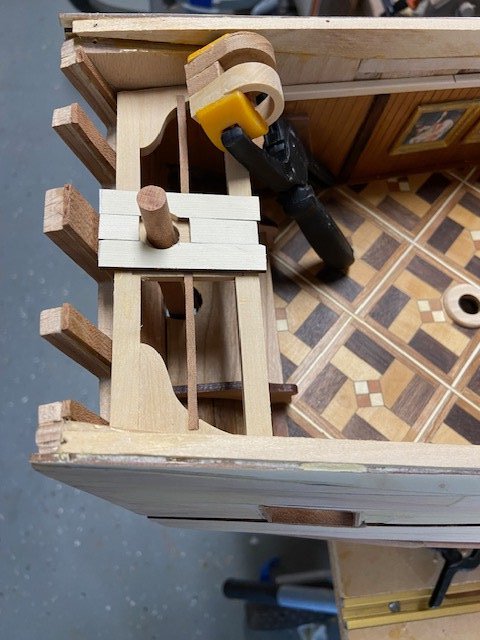
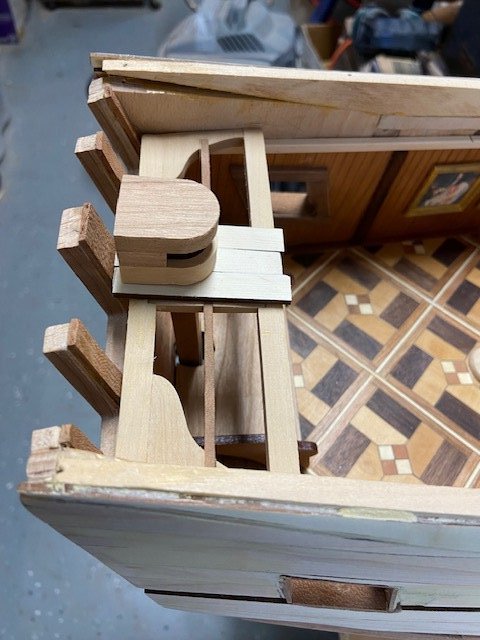
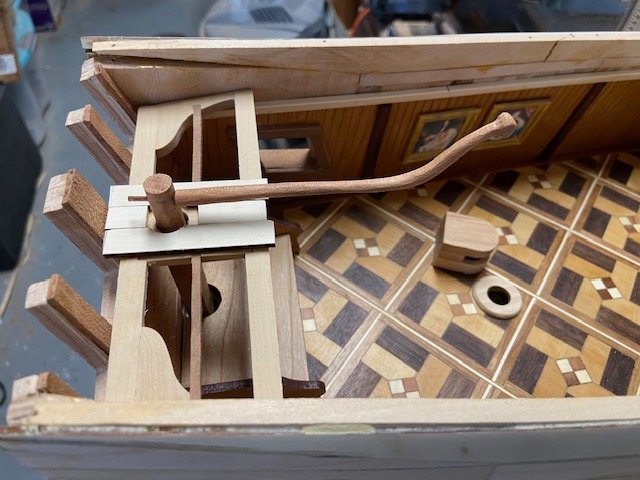
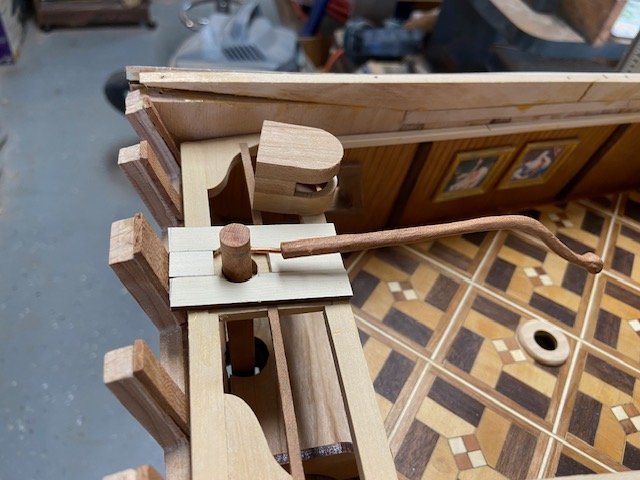
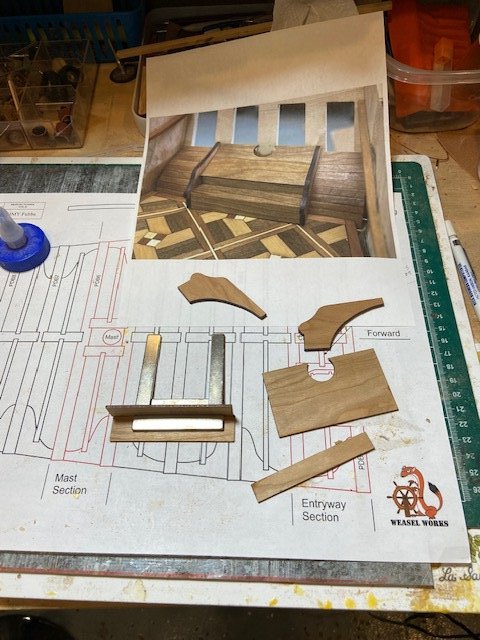
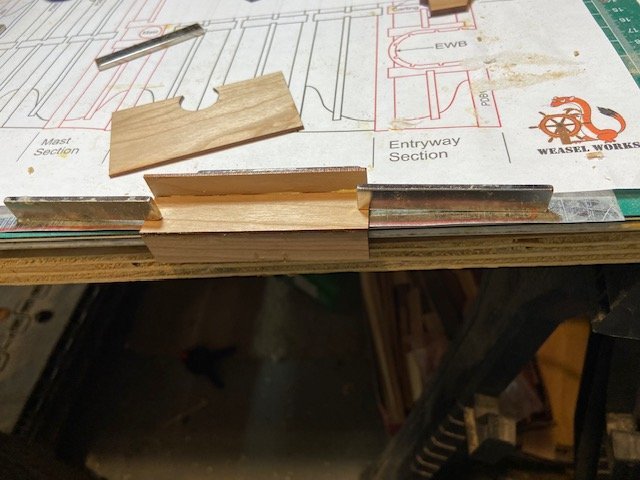
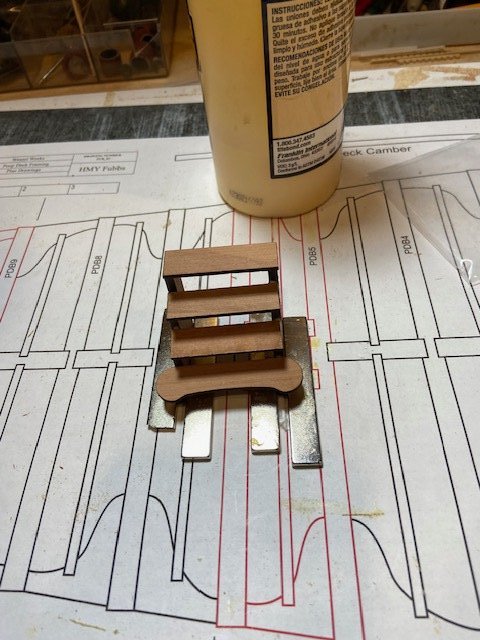
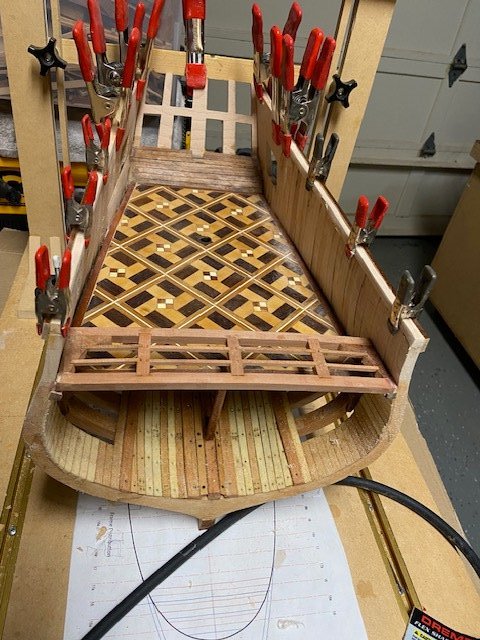
Settee The settee was built next. The construction is fairly simple. This is a few photos of the assembly.
- 47 replies
-
- 4
-
-
- Fubbs
- Weasel Works
- (and 1 more)
-
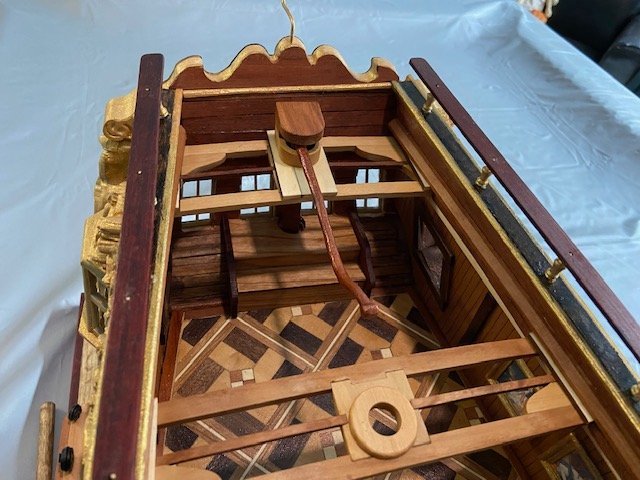
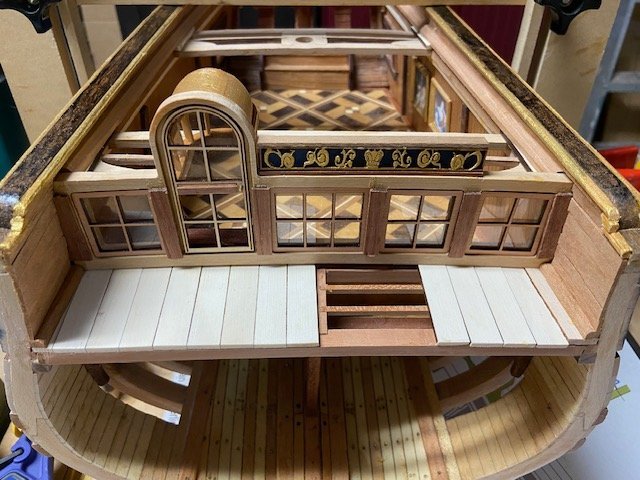
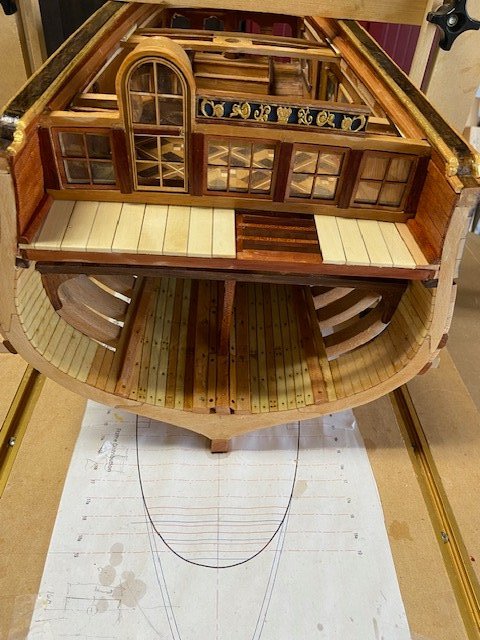
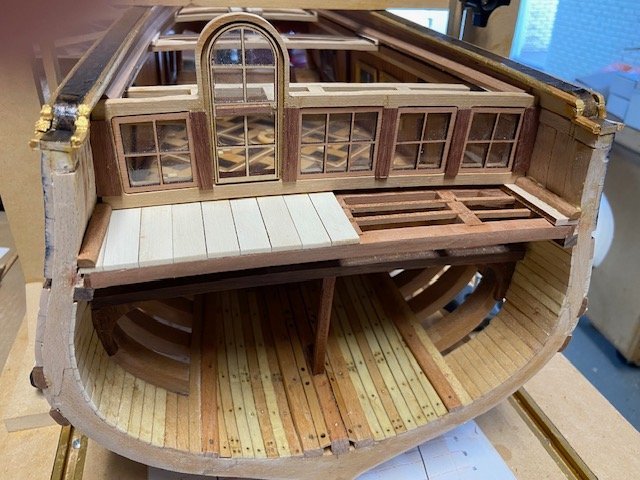
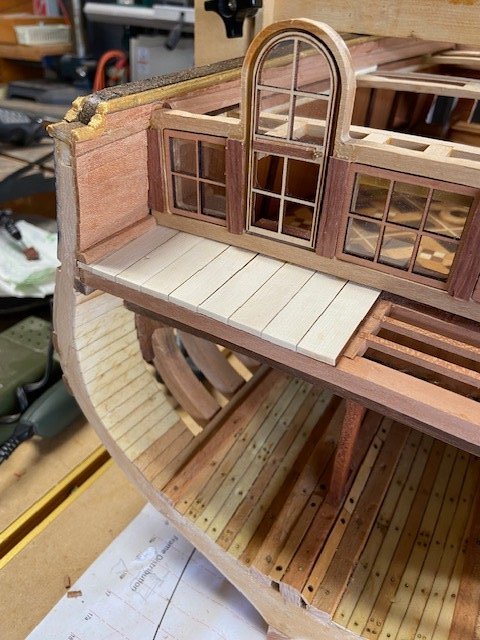
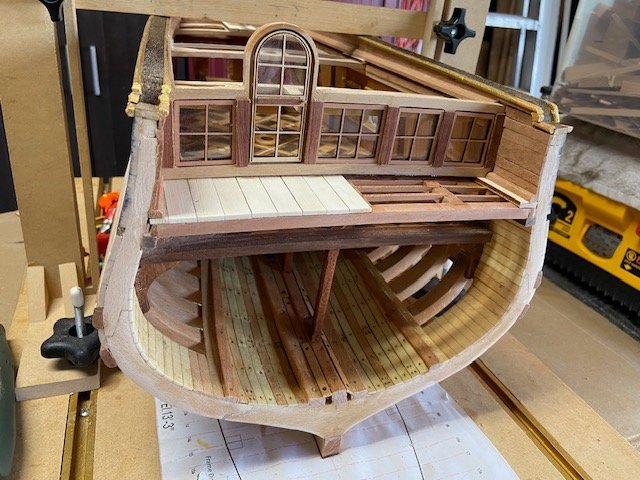
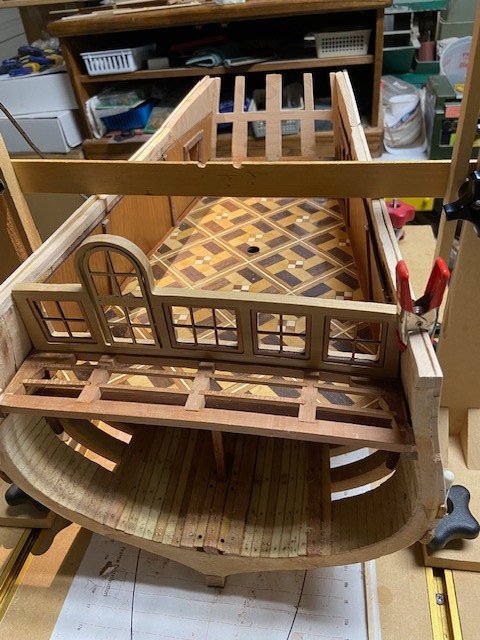
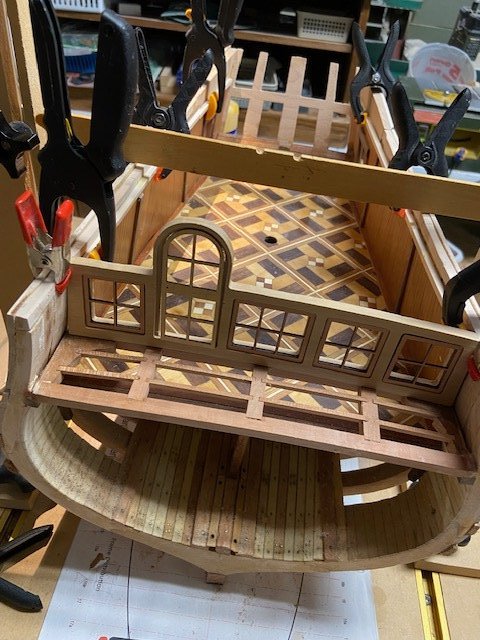
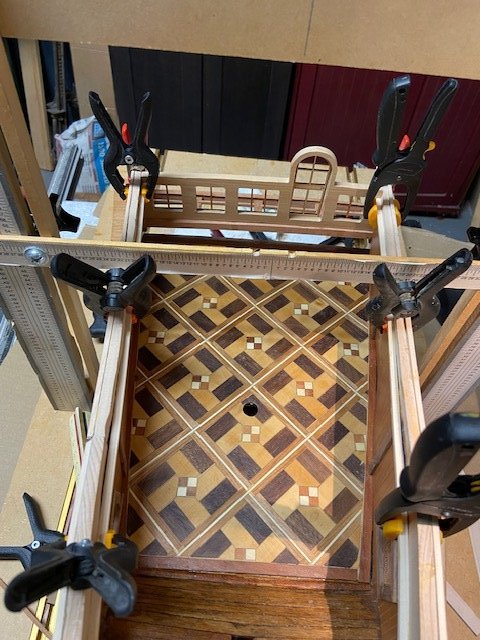
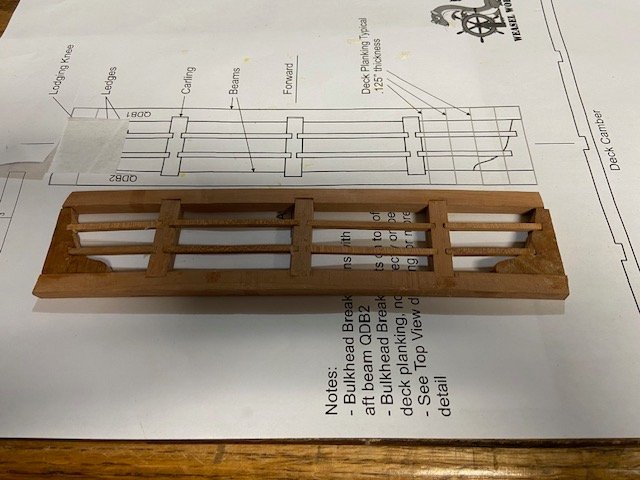
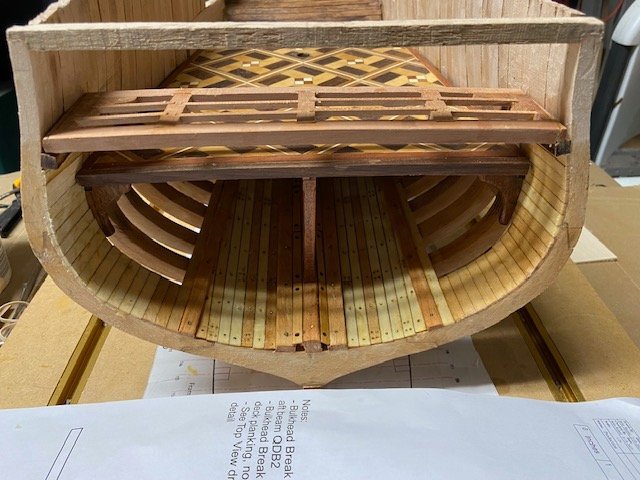
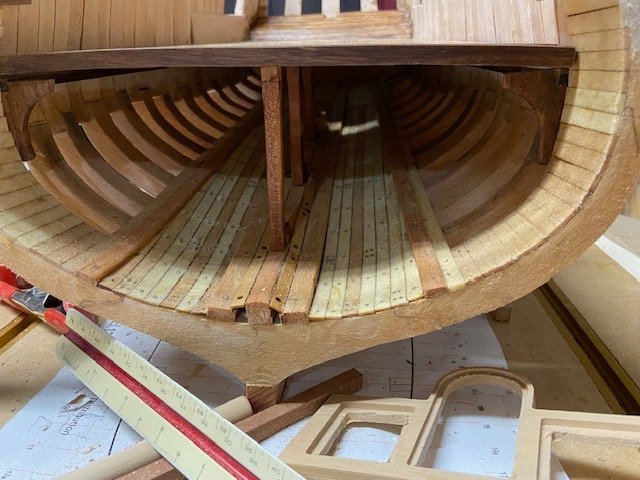
Poop Deck The poop deck clamps were installed next. The deck framing was constructed in three sections to allow viewing of the great cabin interior. The bulkhead break was assembled and set in place to verify elevations. Progress photos:
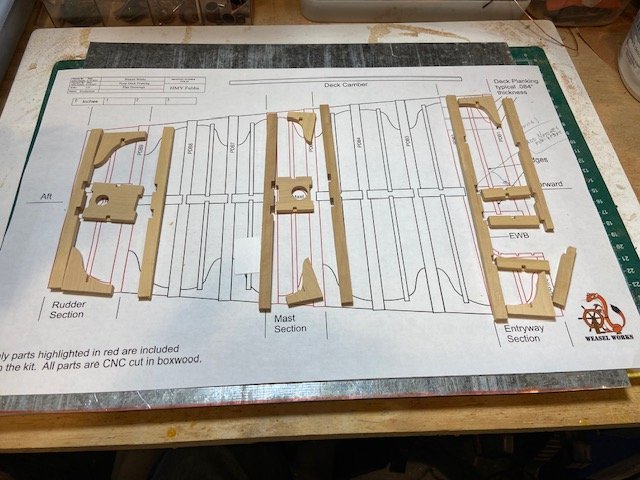
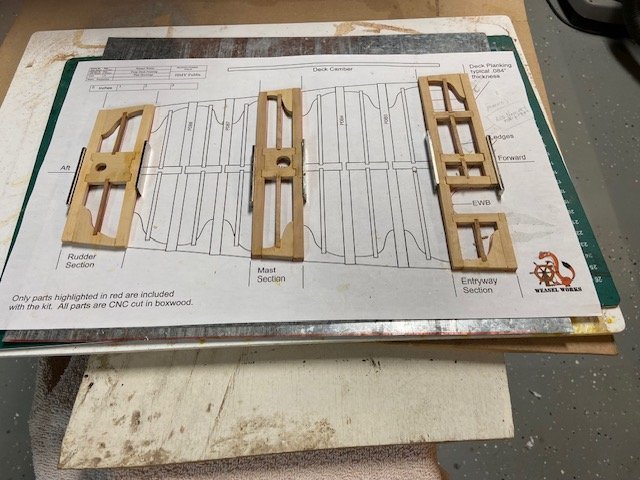
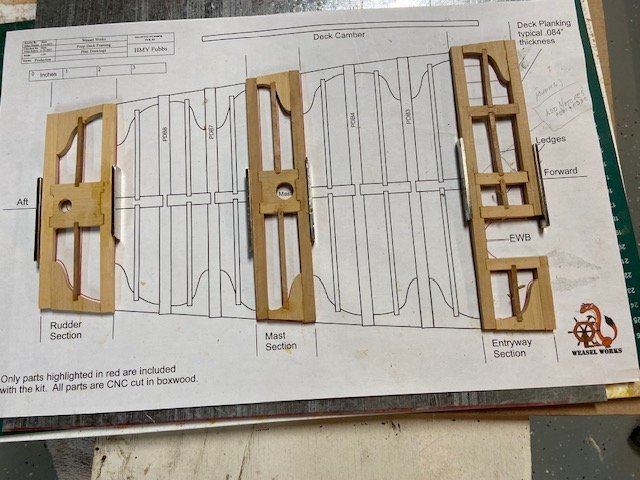

- 47 replies
-
- 6
-
-
-
- Fubbs
- Weasel Works
- (and 1 more)
-
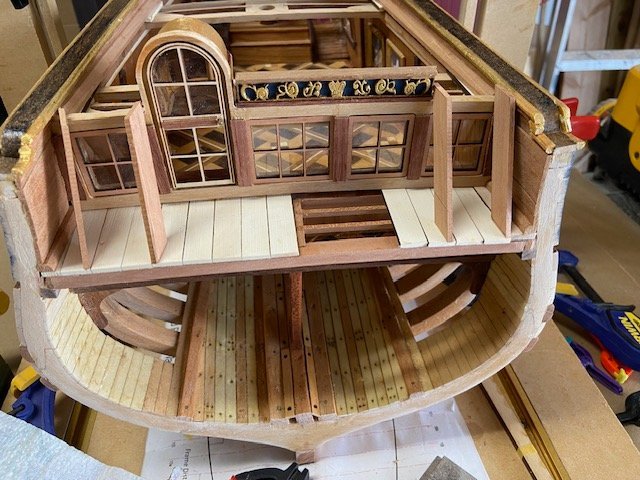
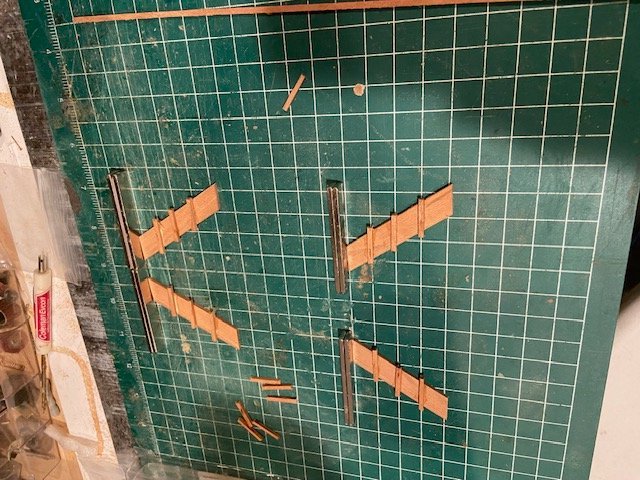
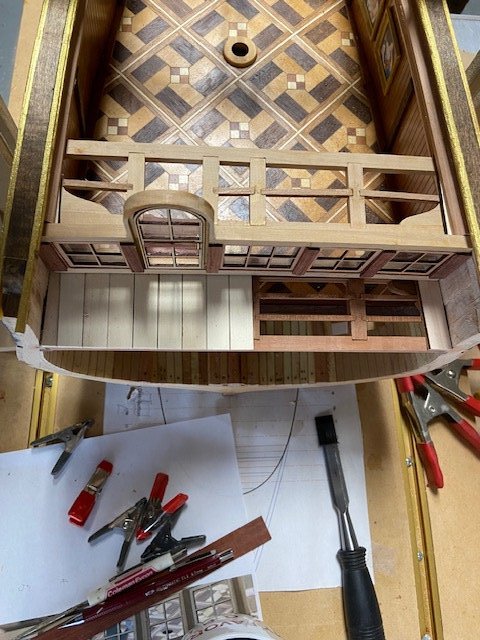
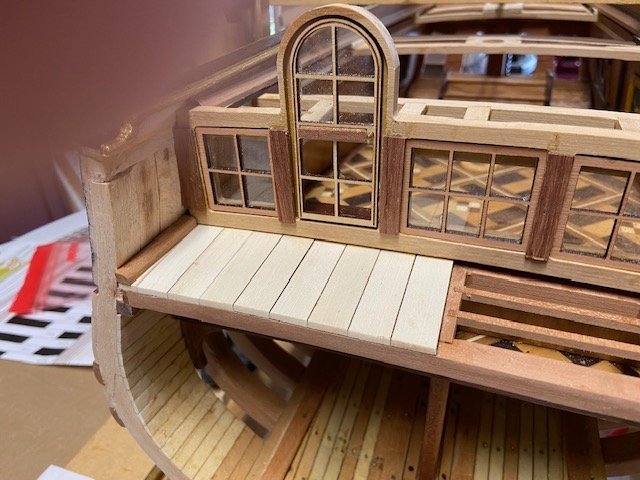
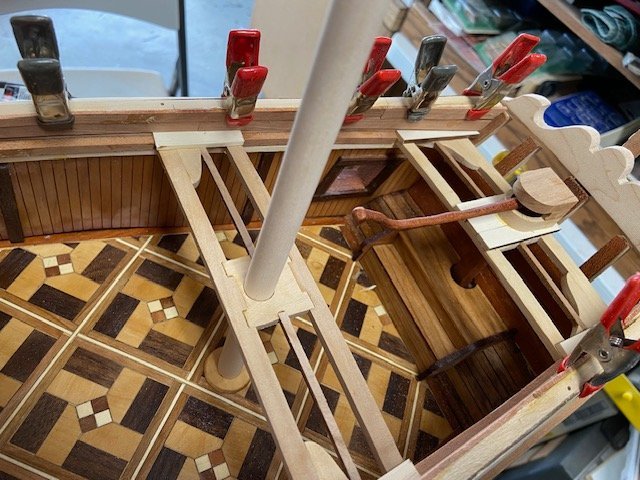
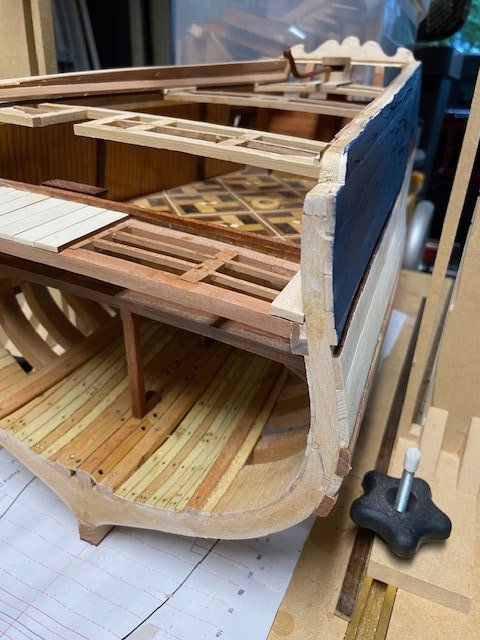
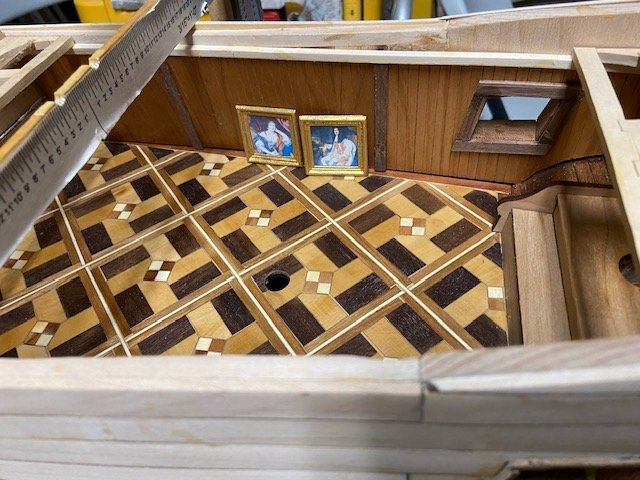
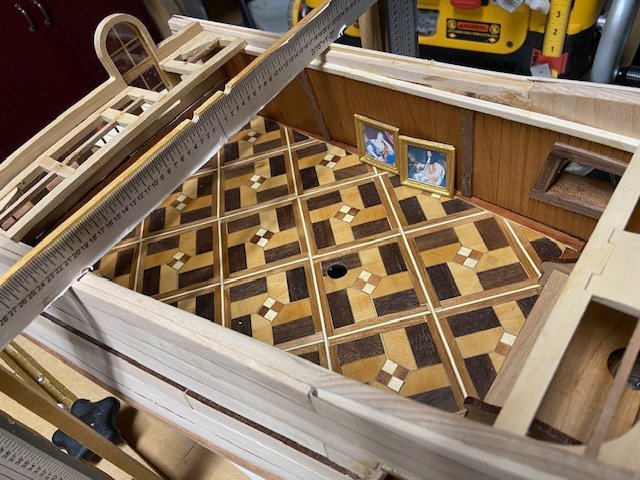
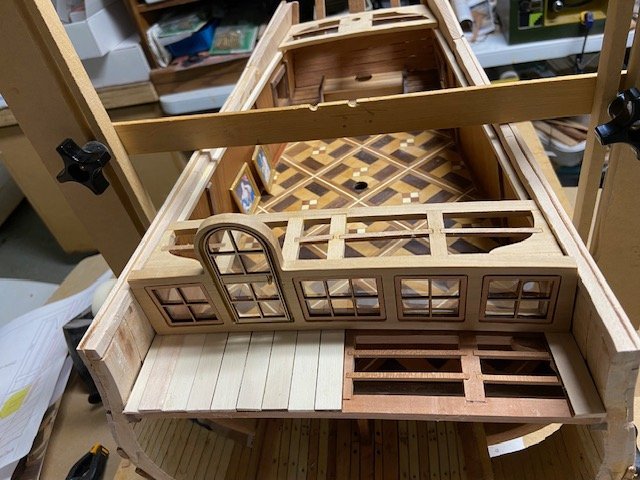
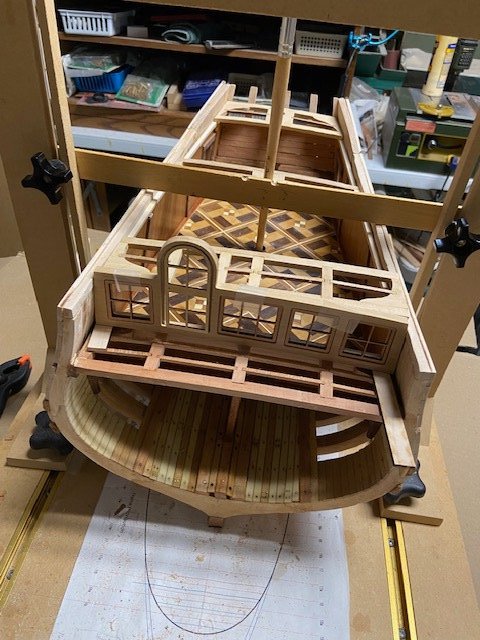
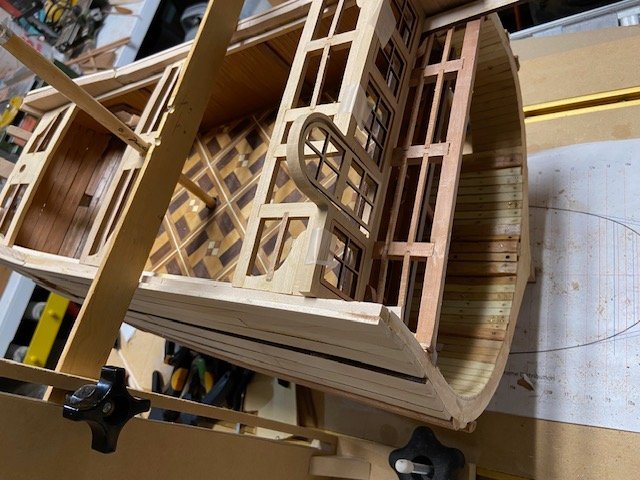
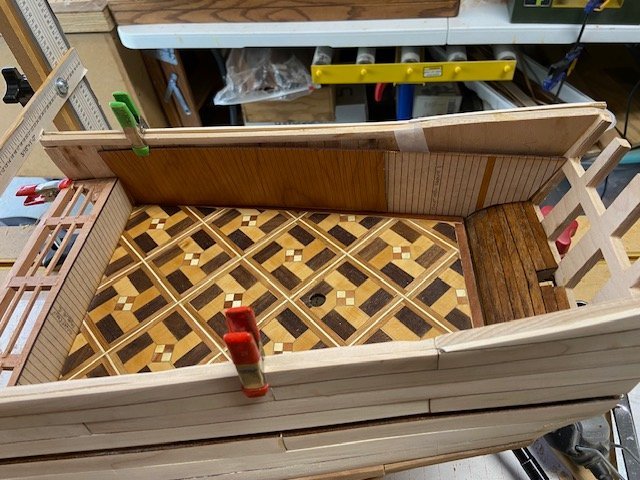
Great Cabin Paneling The great cabin paneling is cherry with lines etched to represent individual boards. The five panels were easy to install. I used a router bit in a Dremel tool to cut the window openings, it was fast and required using a file for cleanup work. Progress photos

- 47 replies
-
- 4
-
-
- Fubbs
- Weasel Works
- (and 1 more)
-
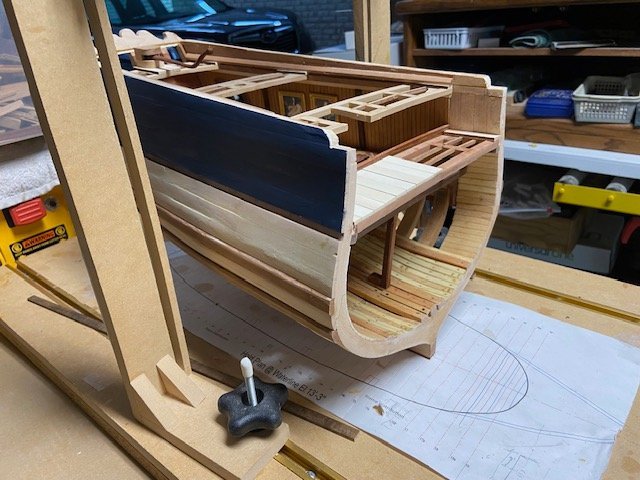
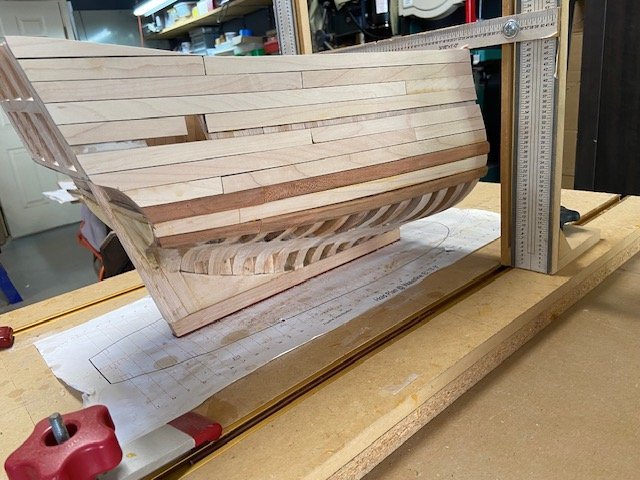
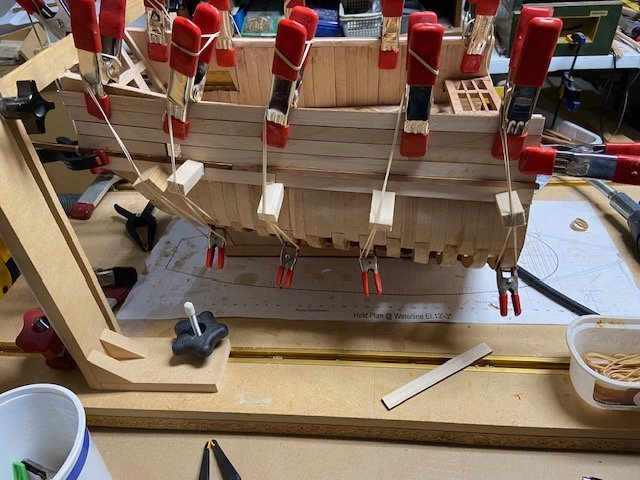
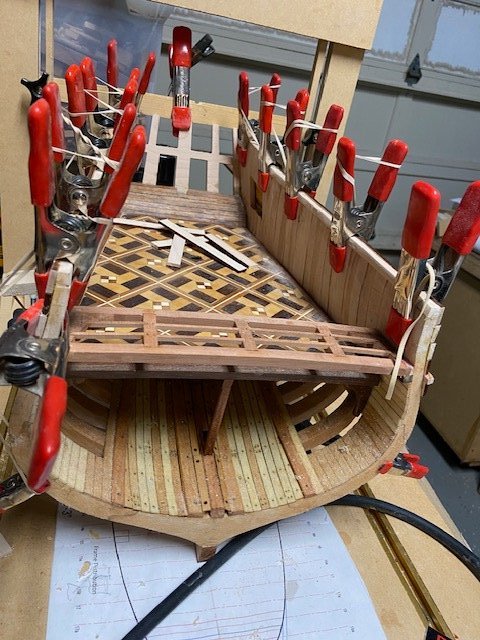
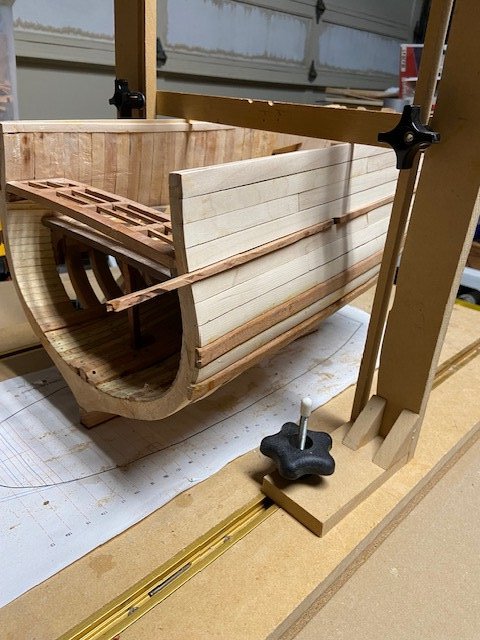
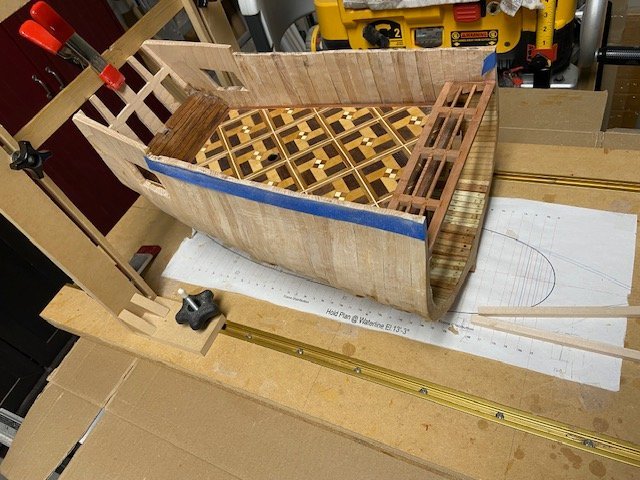
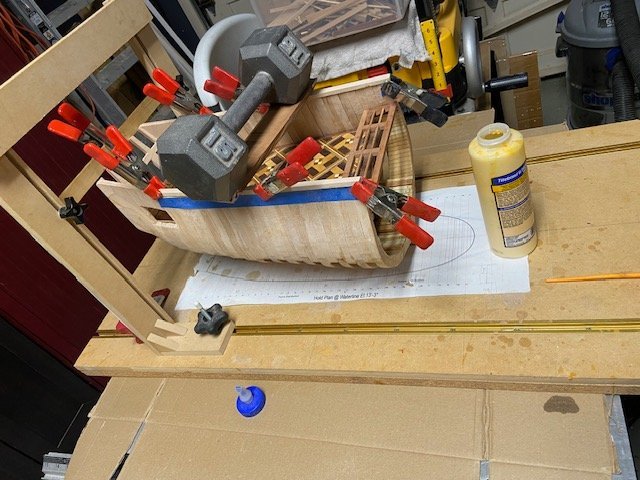
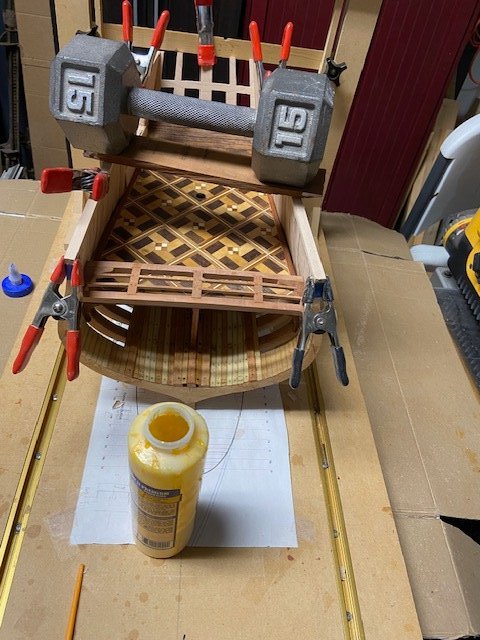
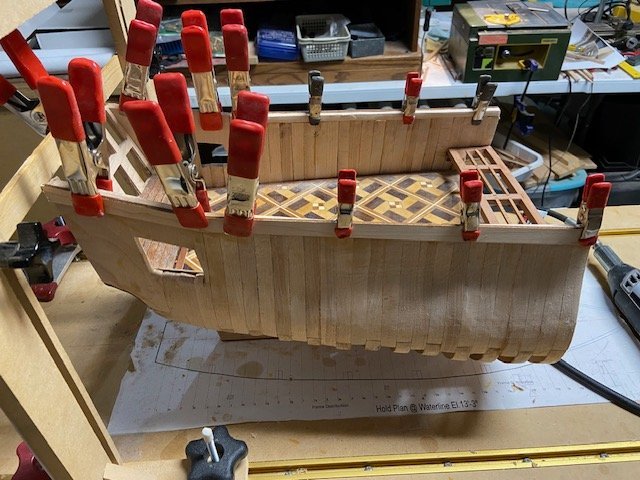
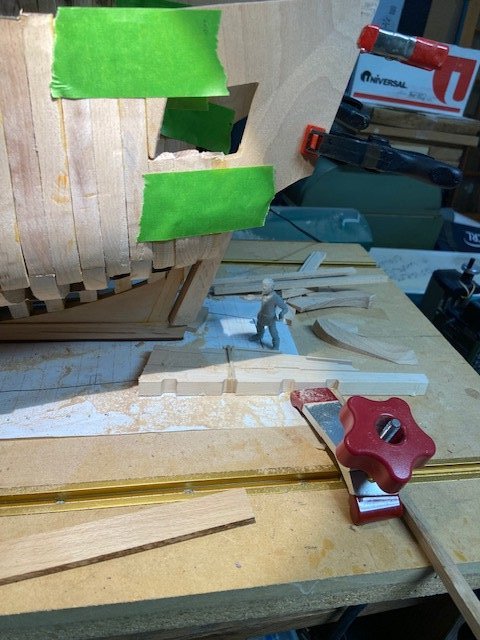
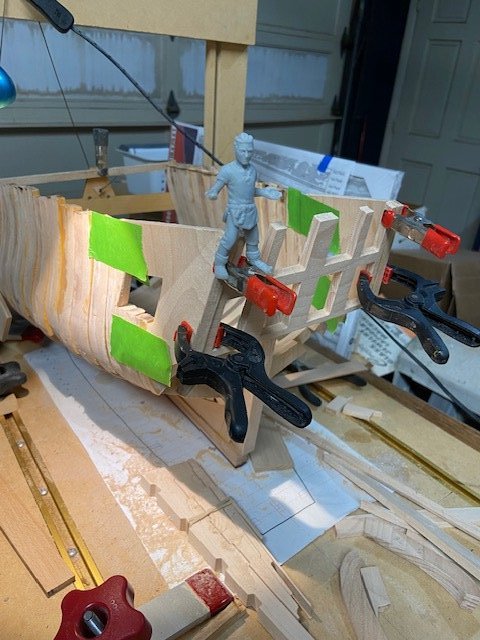
MikeS reminded me I should not have glued the floor in place before the exterior planking so it would not get dirty with sawdust. No damage was done, just some extra work. Exterior Planking The exterior planking is typical with the exception of a slot for the main and mizzen masts channels. The planking is Maple, and the wales and channel filler pieces are Walnut which makes a nice contrast. Progress photos.
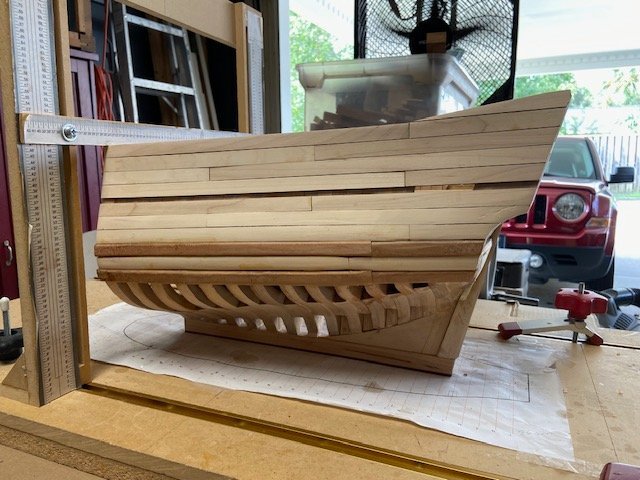
- 47 replies
-
- 5
-
-
- Fubbs
- Weasel Works
- (and 1 more)
-
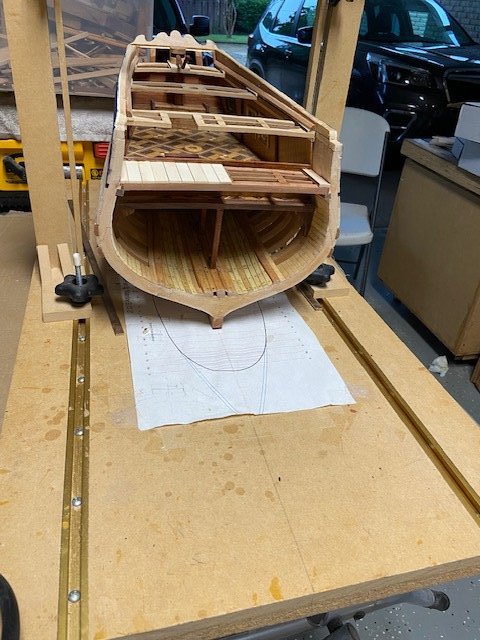
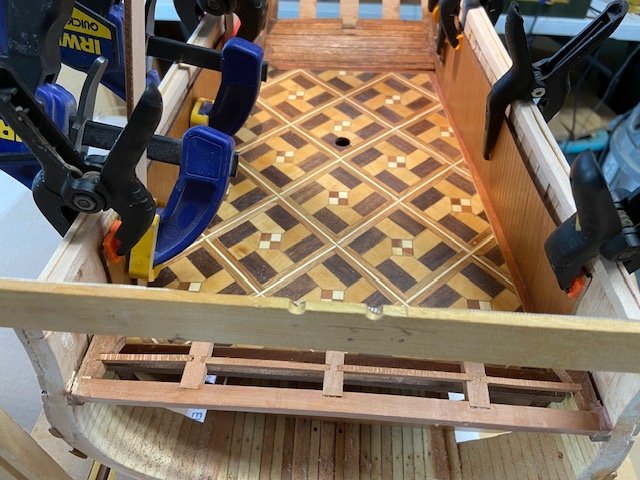
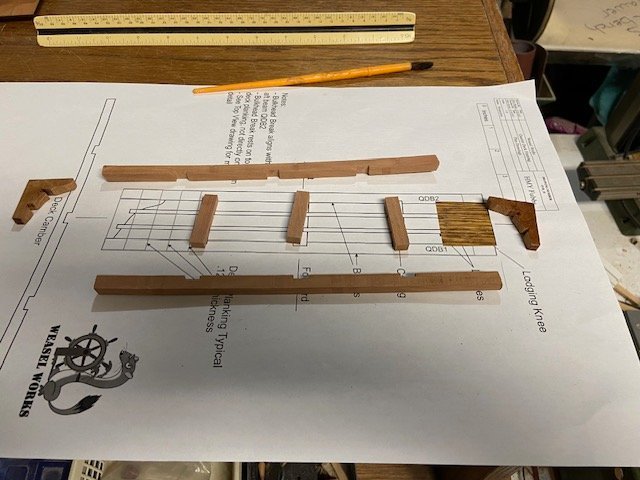
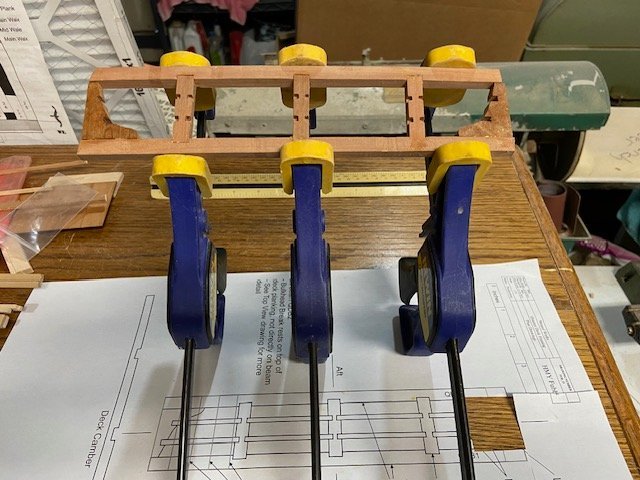
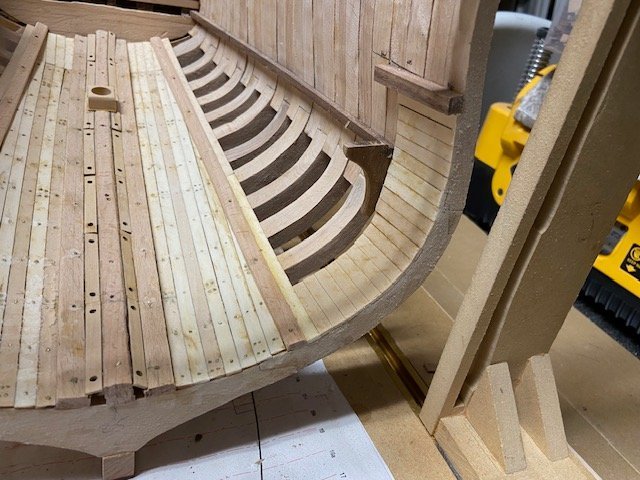
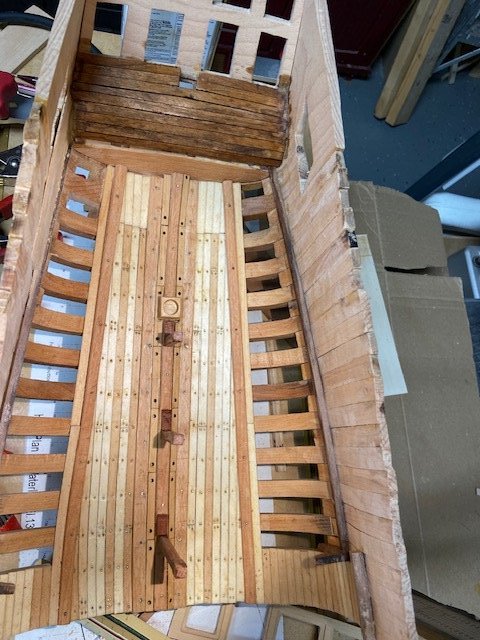
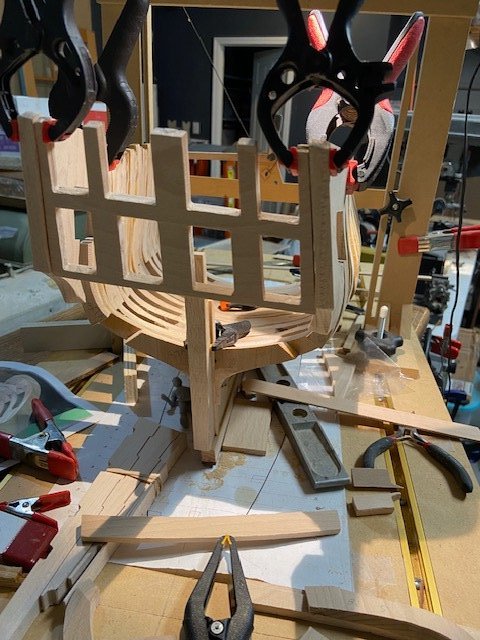
Quarterdeck Framing A small section of the quarterdeck for the entre to the great cabin. I glued the floor in place and trimmed the frames.

- 47 replies
-
- 4
-
-
- Fubbs
- Weasel Works
- (and 1 more)
-
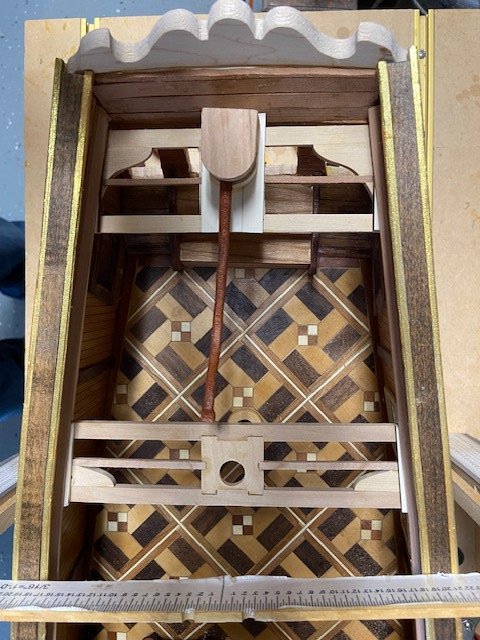
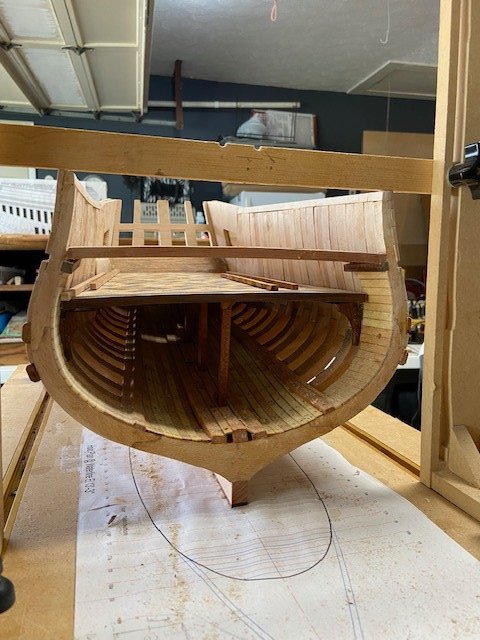
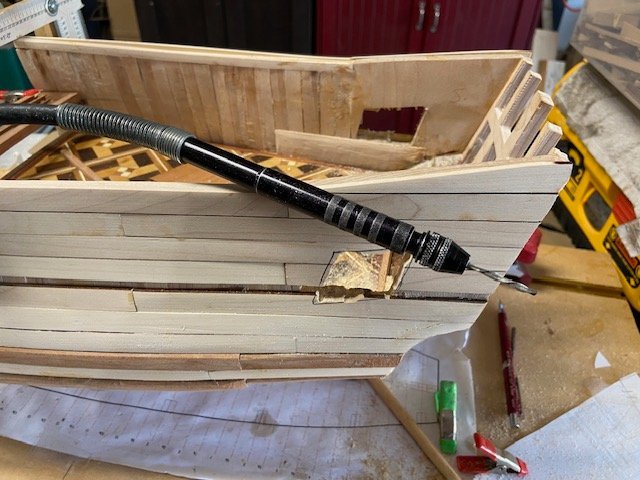
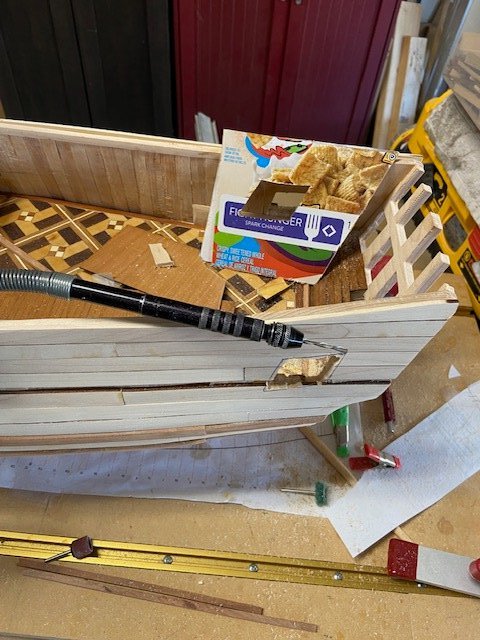
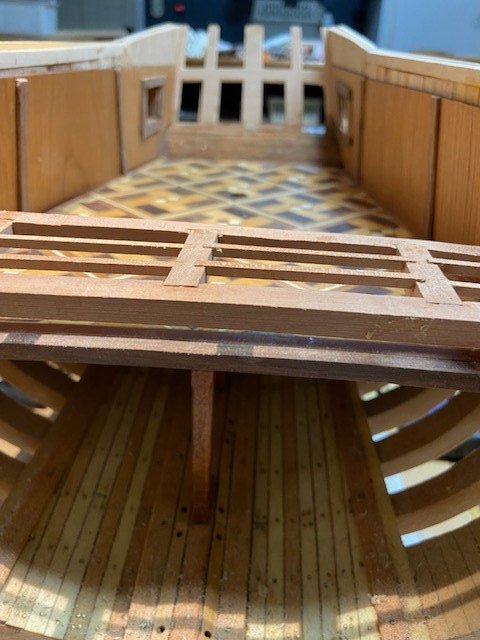
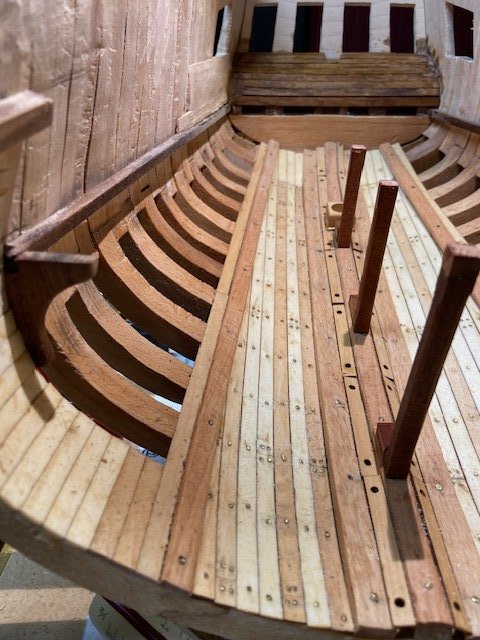
Great Cabin Floor. The hanging knees were added next along with the support pillars. The framing for the small section of the quarter deck will be added next.
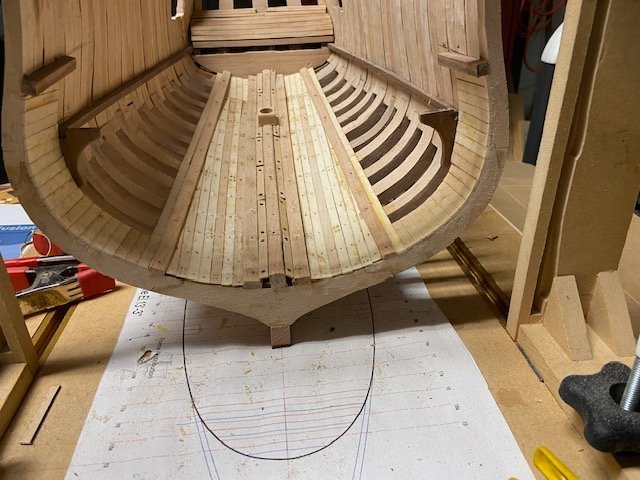
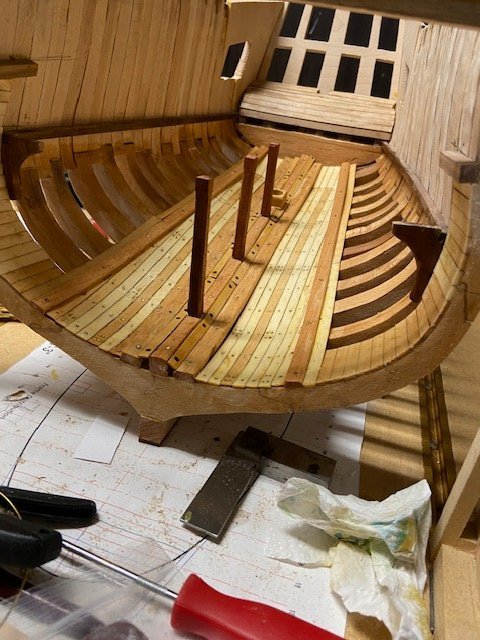

- 47 replies
-
- 5
-
-
- Fubbs
- Weasel Works
- (and 1 more)
-
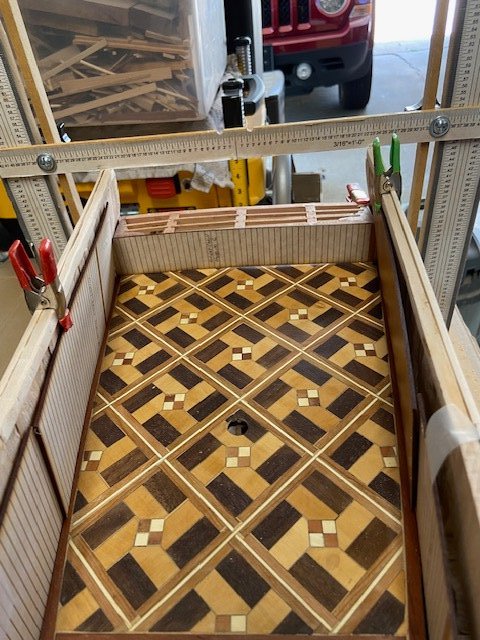
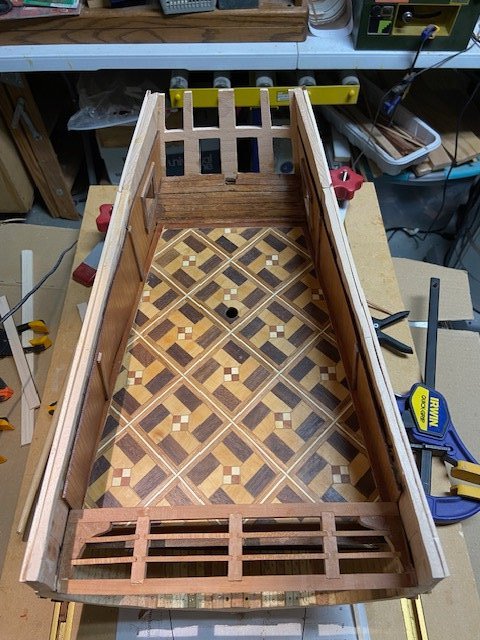
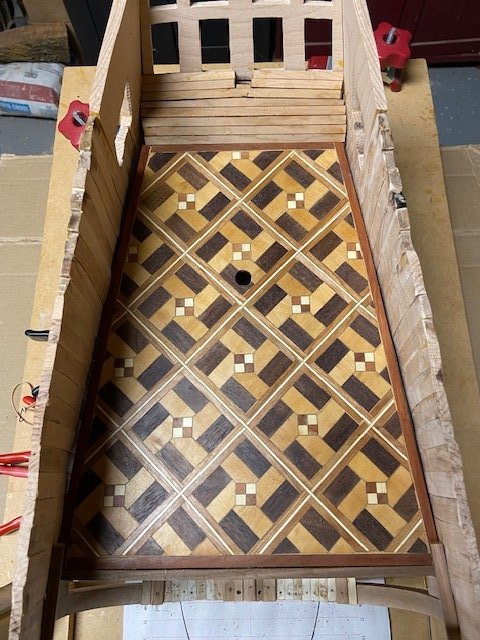
Great Cabin Floor. This post shows the placement of the mast step, interior lining of the stern timbers and placement of the great cabin floor. The floor has not been attached to the deck clamps until the support columns art in place. Progress photos:

- 47 replies
-
- 7
-
-
- Fubbs
- Weasel Works
- (and 1 more)
-
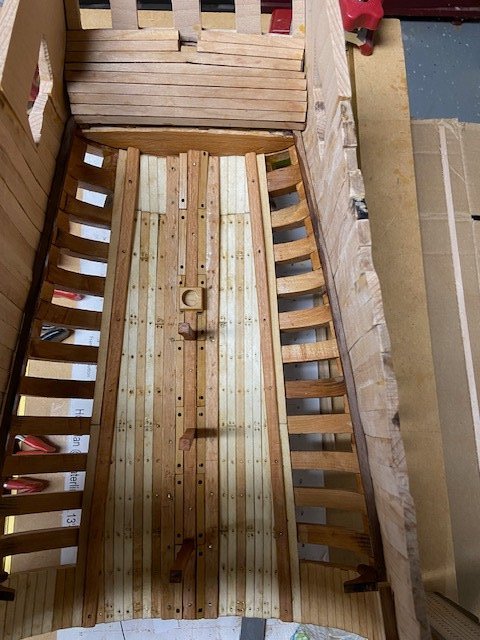
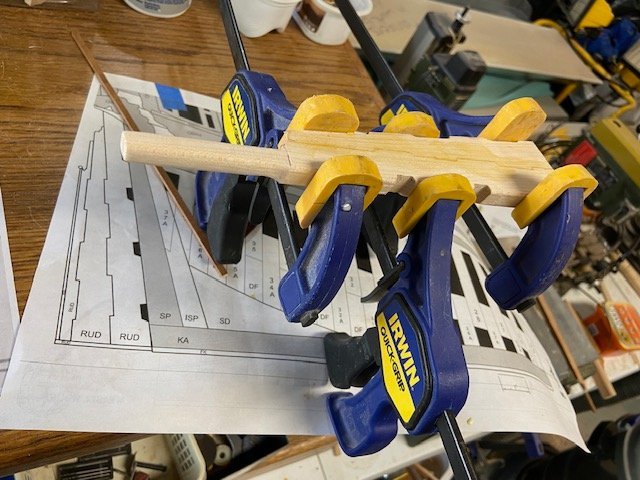
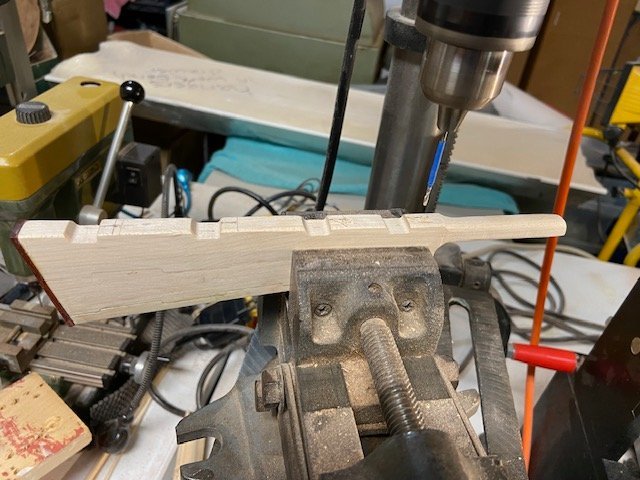
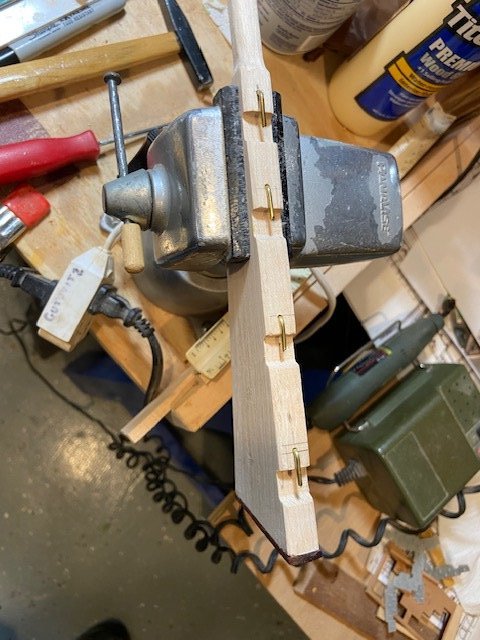
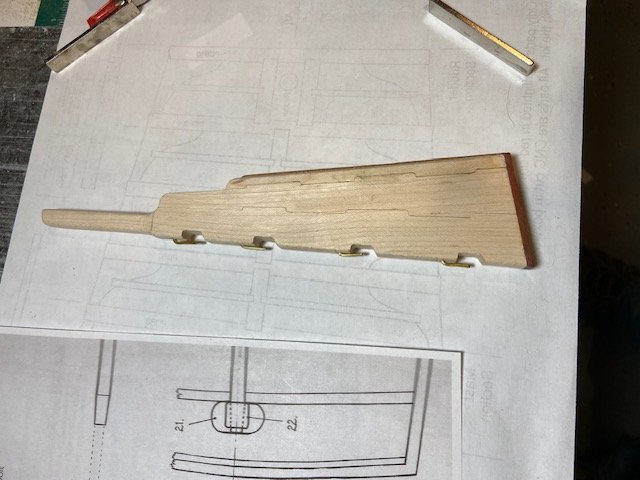
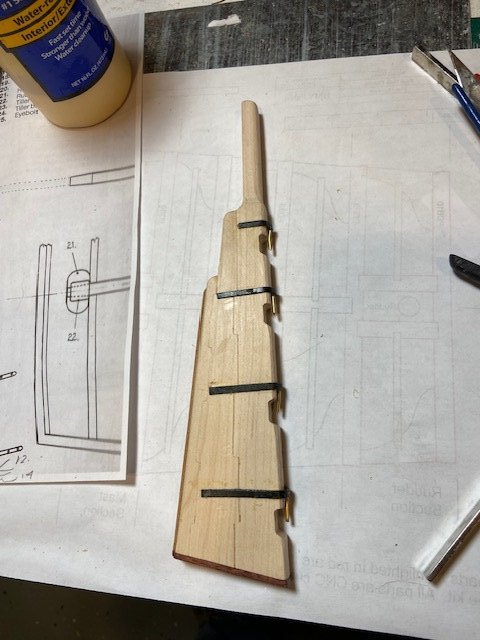
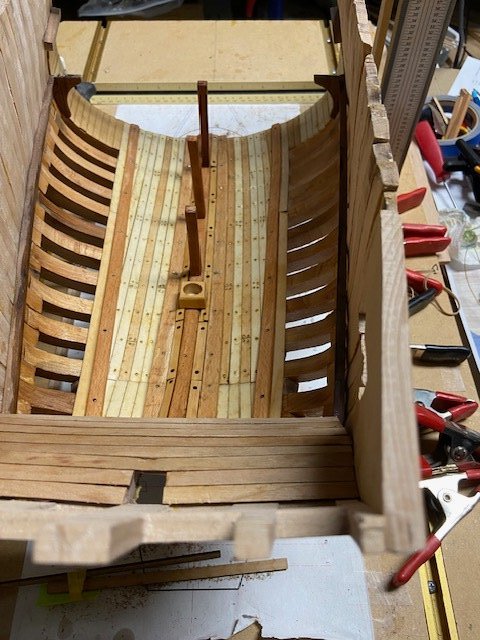
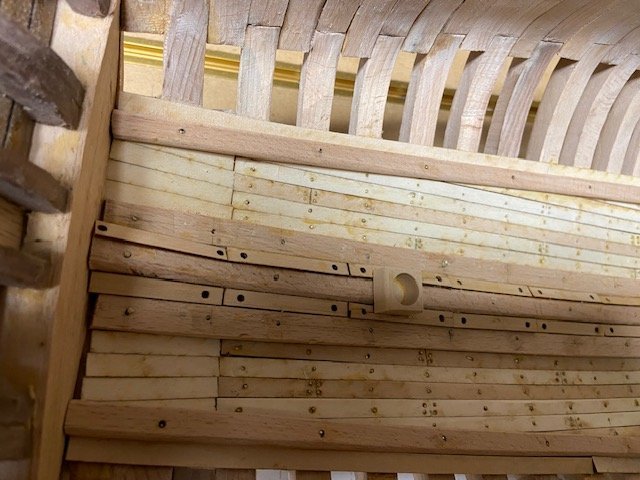
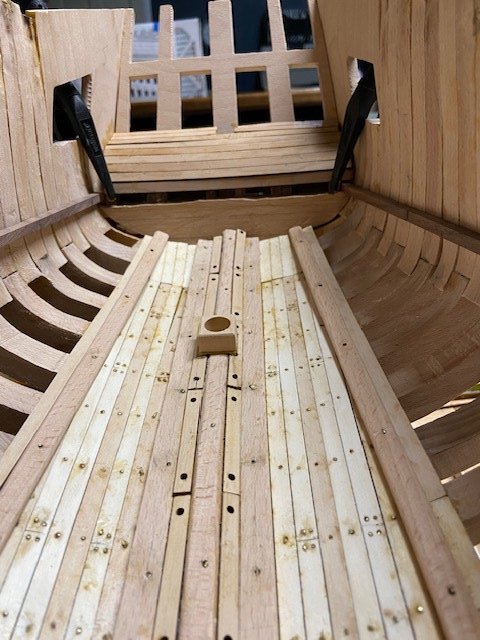
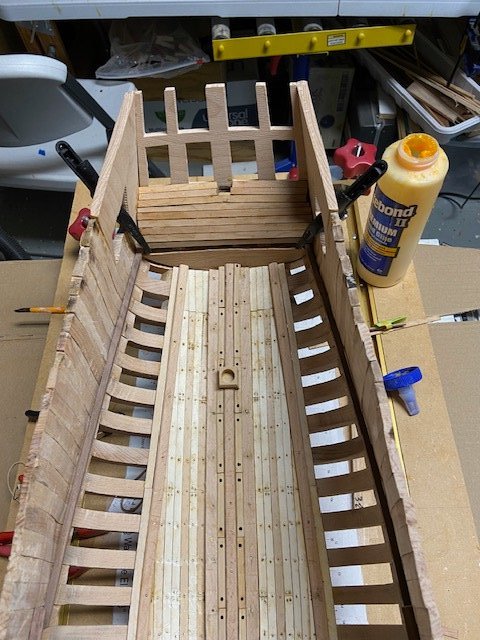
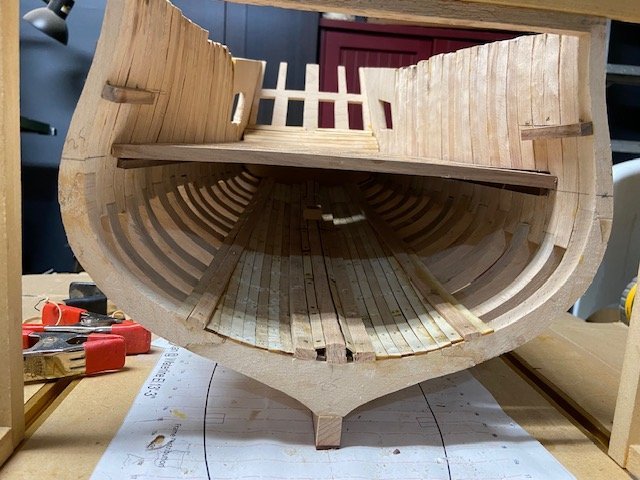
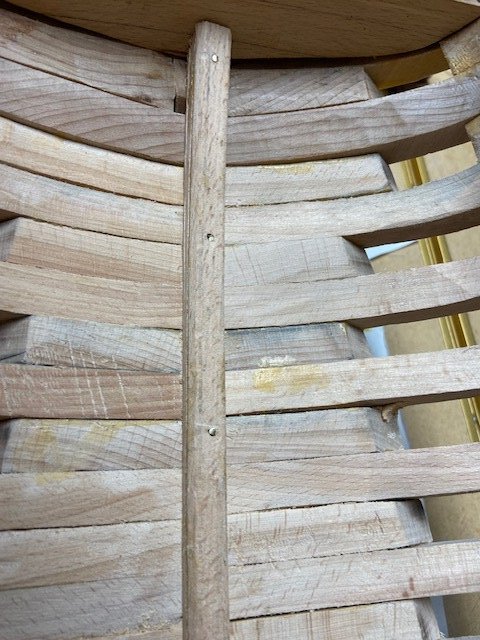
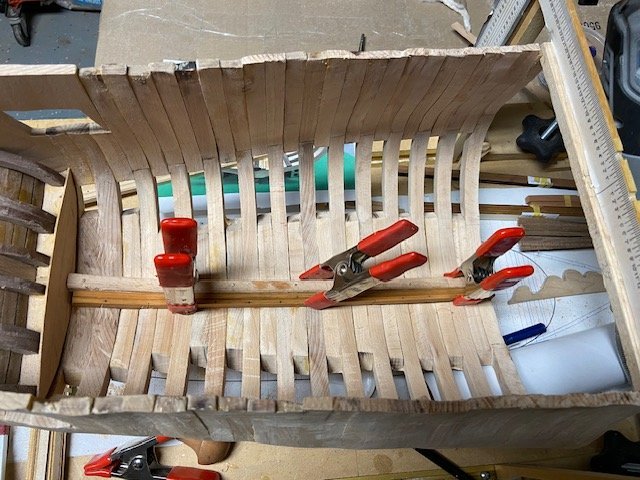
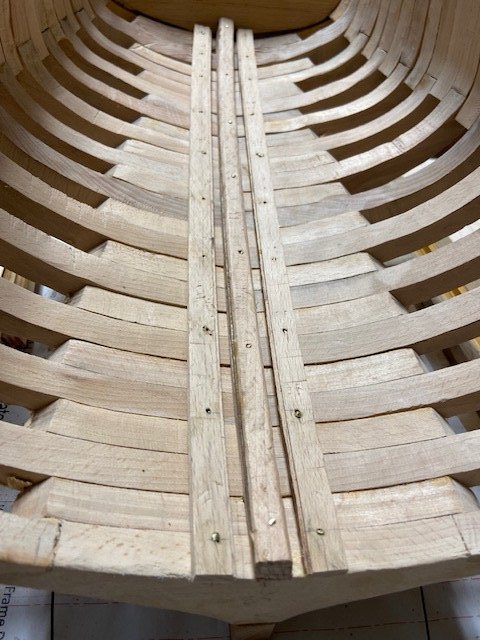
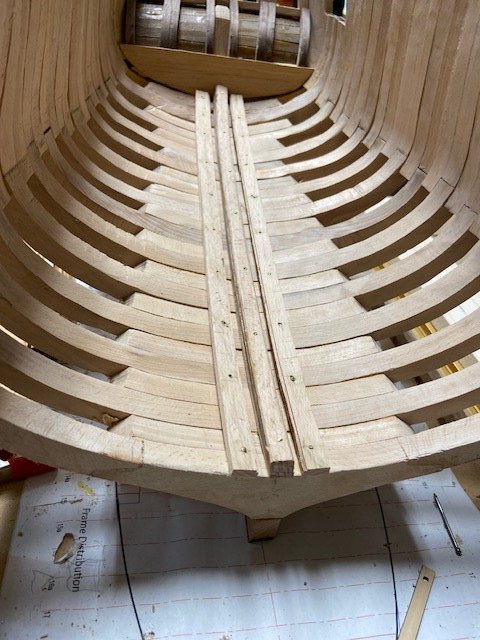
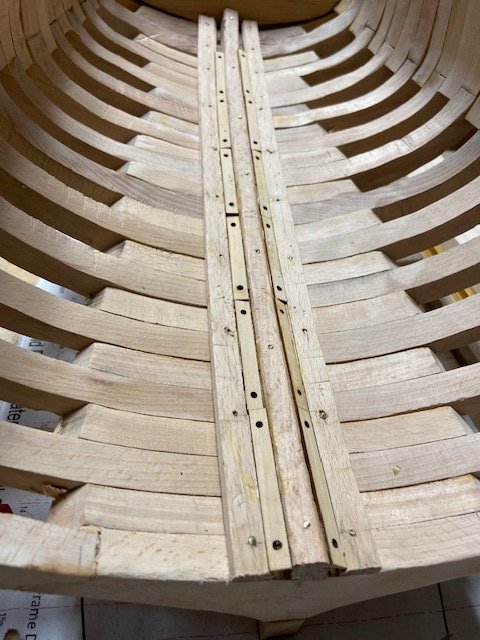
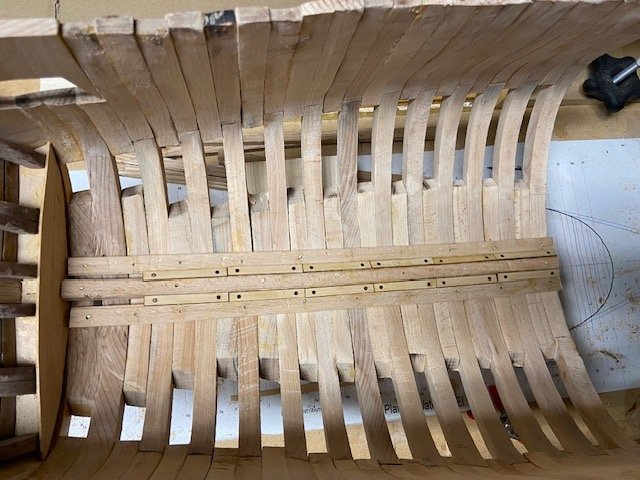
Kellson & Waterway Limber Boards. The keelson was soaked in hot water and bent to fit the curvature of the frames. I used glue and brass wire pins to secure the keelson to the frames. The limber boards were soaked in hot water and clamped to the keelson to dry. When dry I used spacers between them and the keelson and glued and pined them in place.
- 47 replies
-
- 5
-
-
- Fubbs
- Weasel Works
- (and 1 more)
-
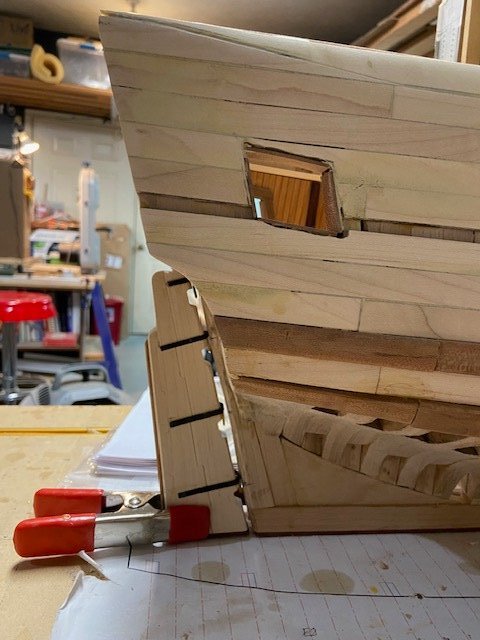
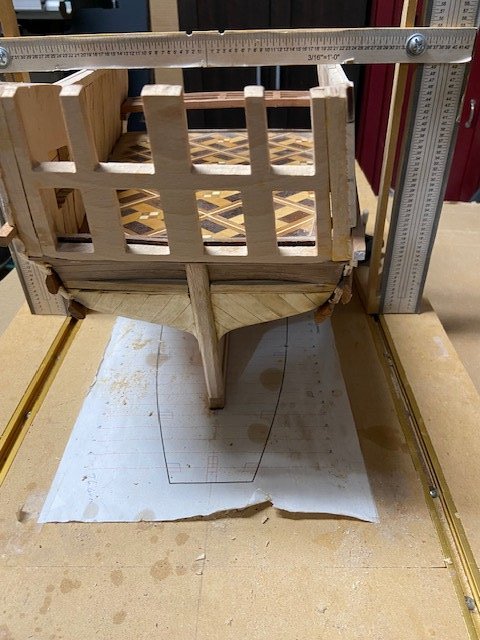
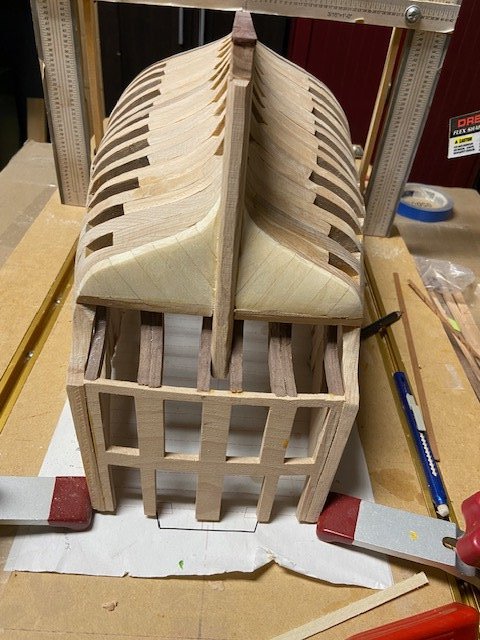
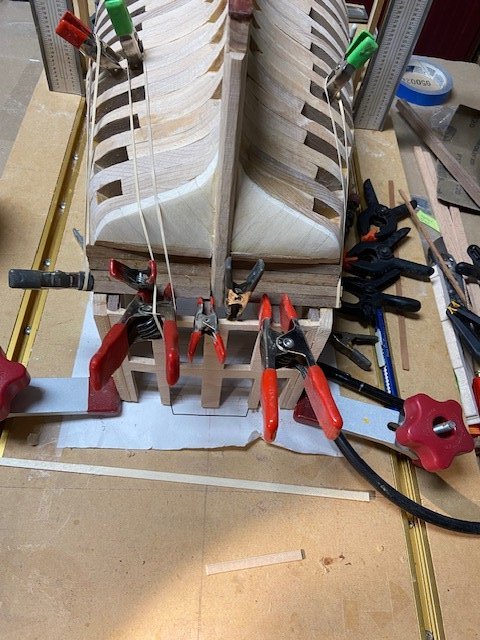
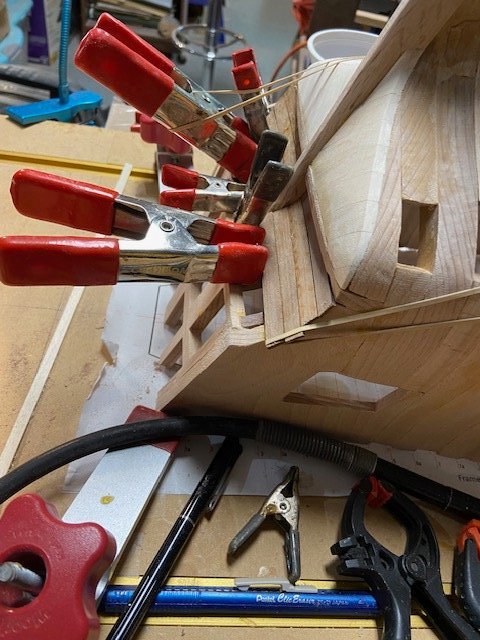
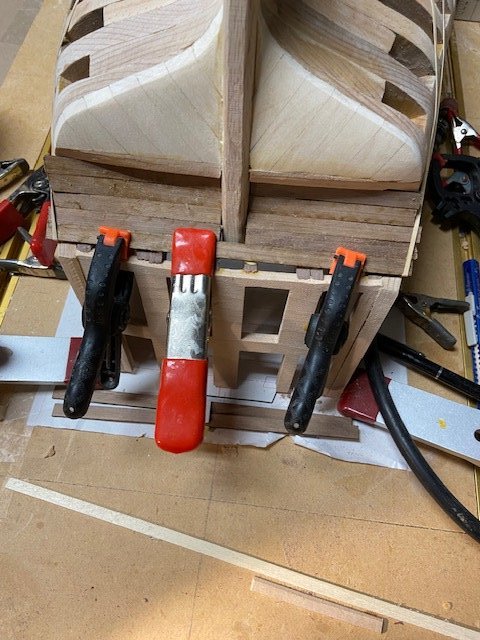
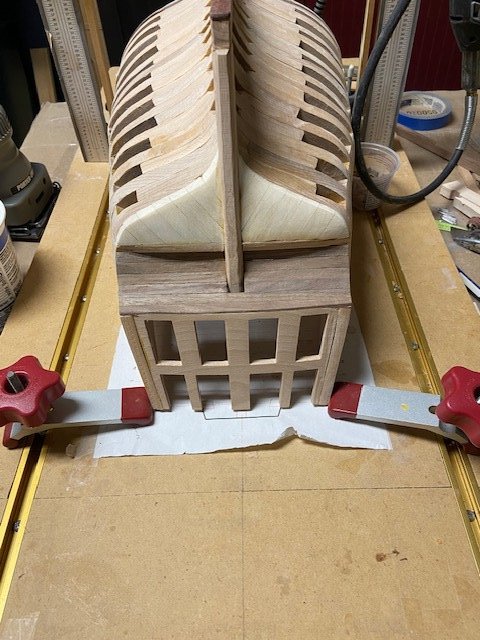
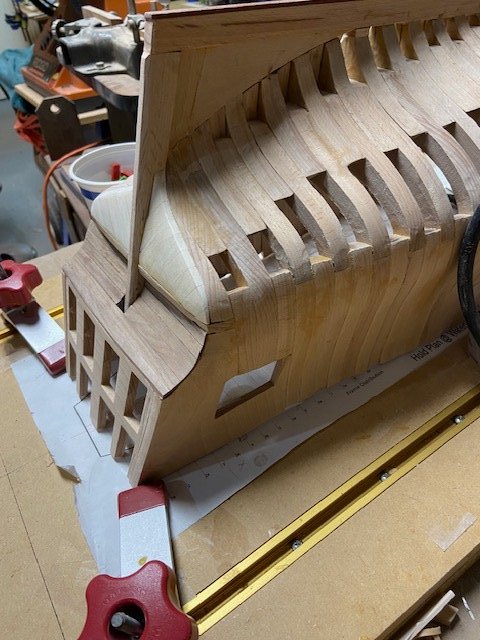
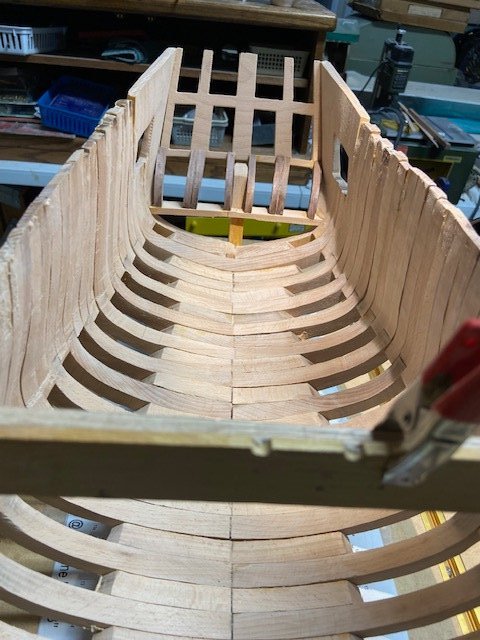
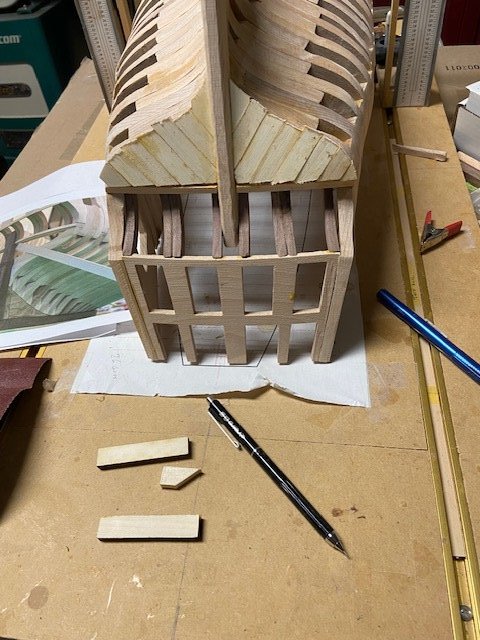
The Stern Framing continued. These photos show the planking of the stern and finished framing.

- 47 replies
-
- 7
-
-
- Fubbs
- Weasel Works
- (and 1 more)
-
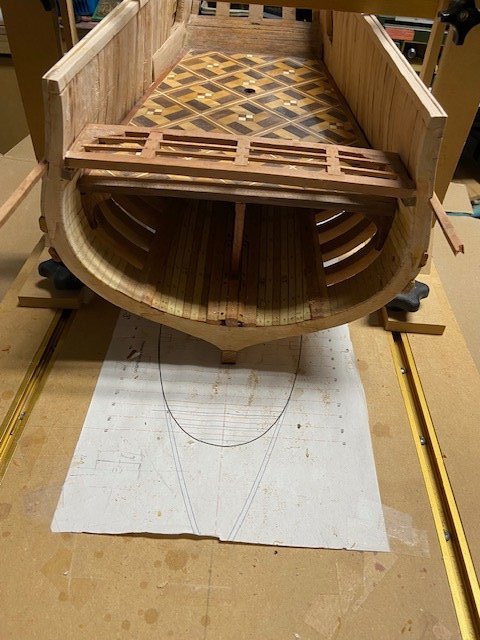
The Stern Framing continued. This is a few more progress photos of the stern.


- 47 replies
-
- 8
-
-
- Fubbs
- Weasel Works
- (and 1 more)
-
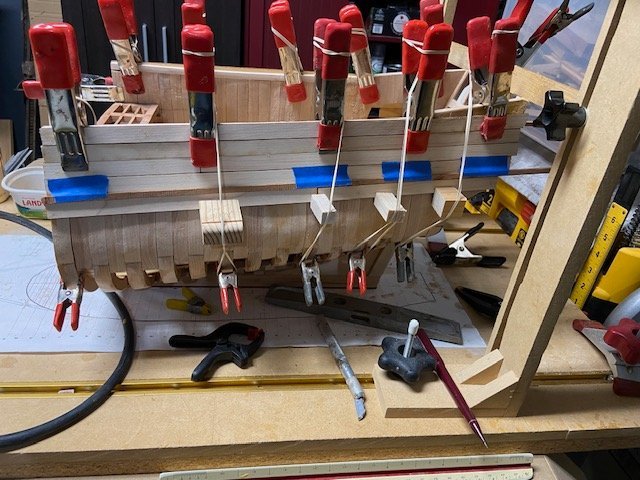
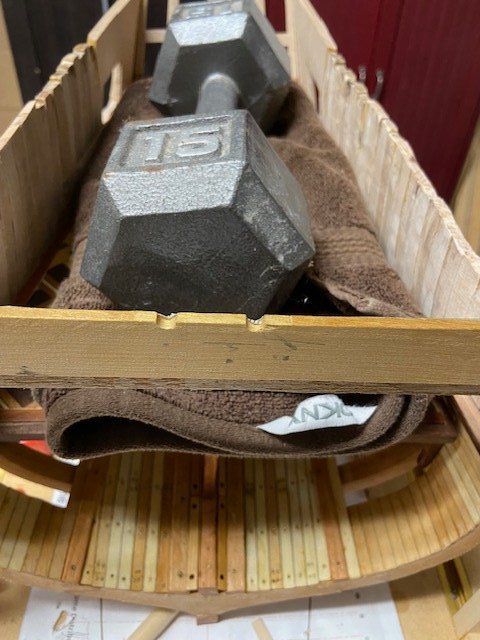
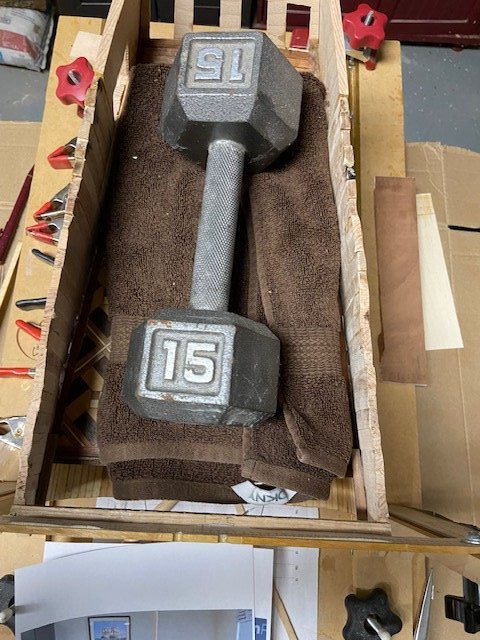
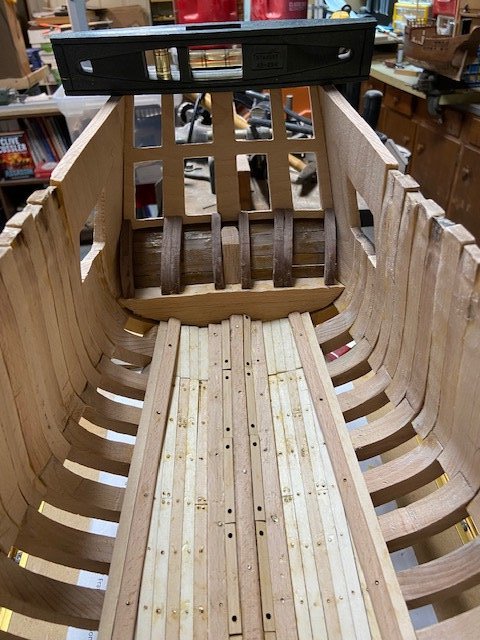
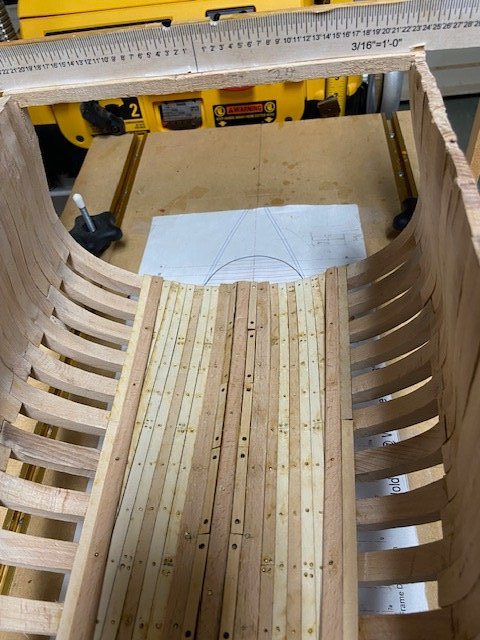
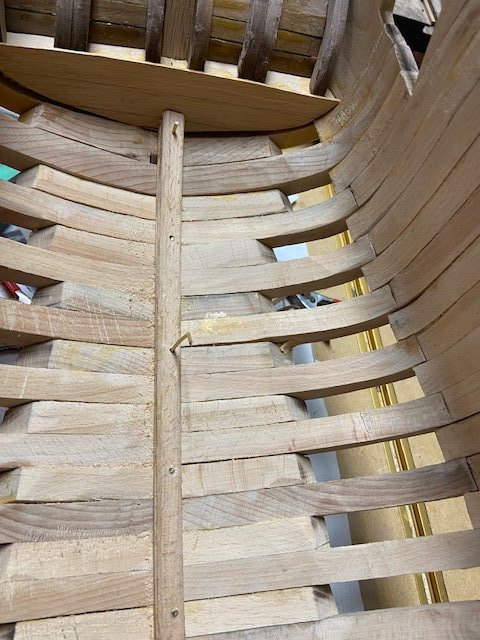
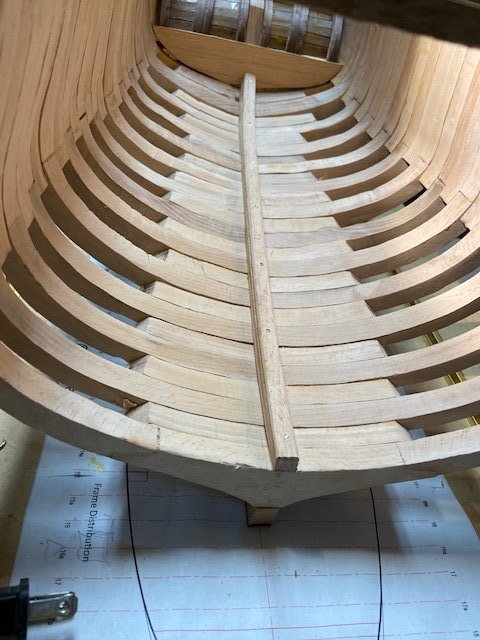
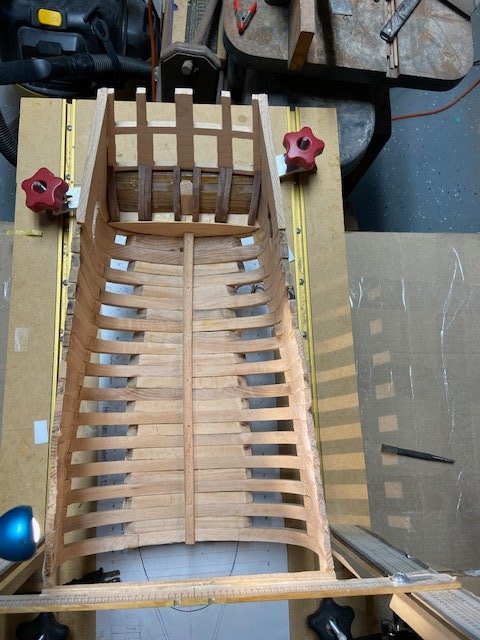
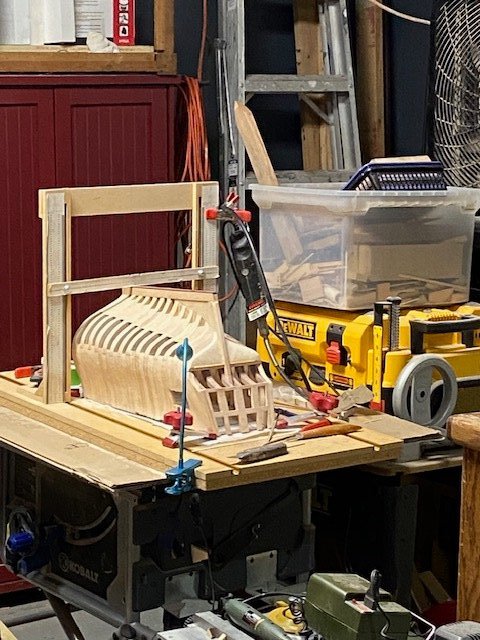
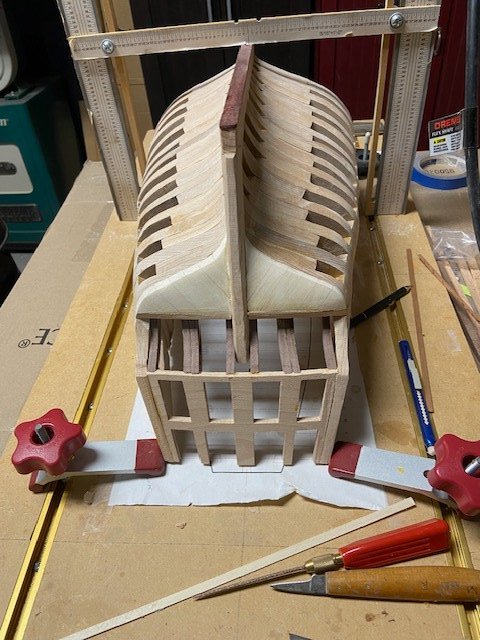
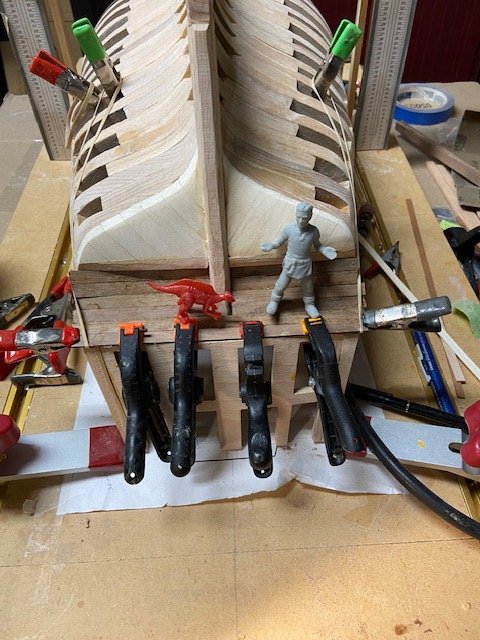
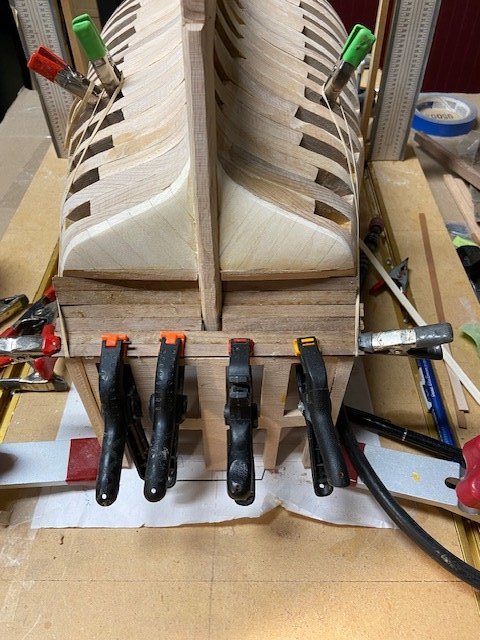
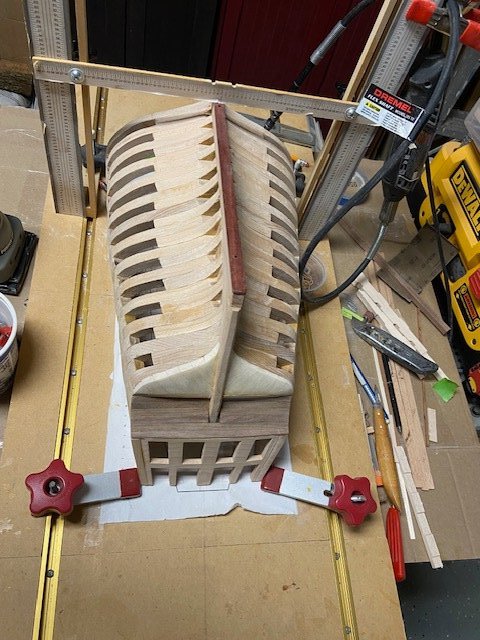
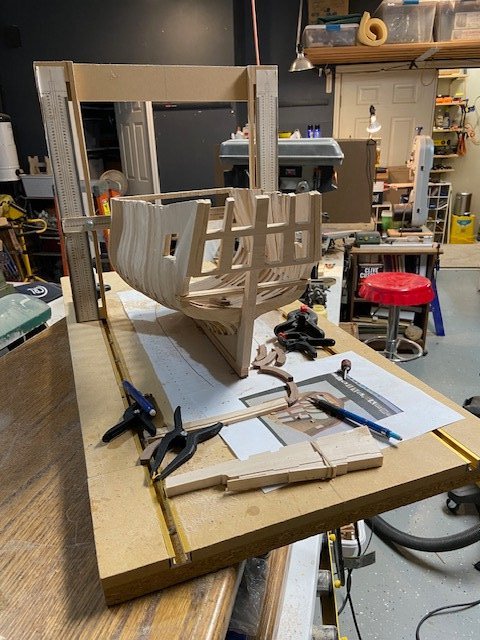
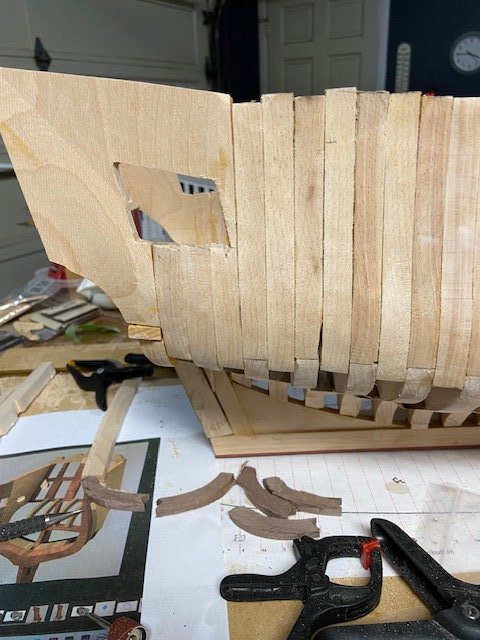
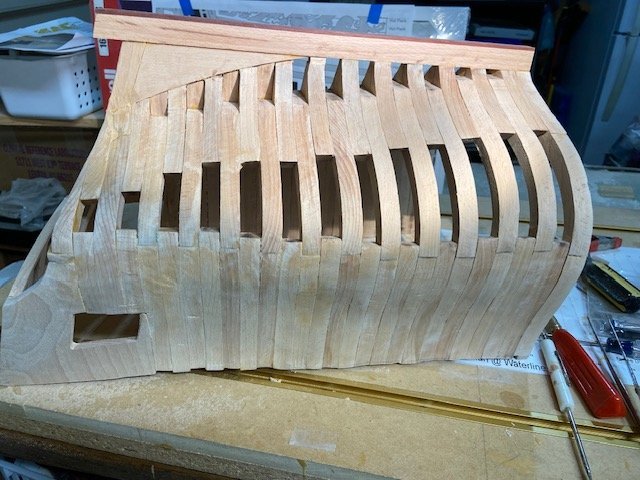
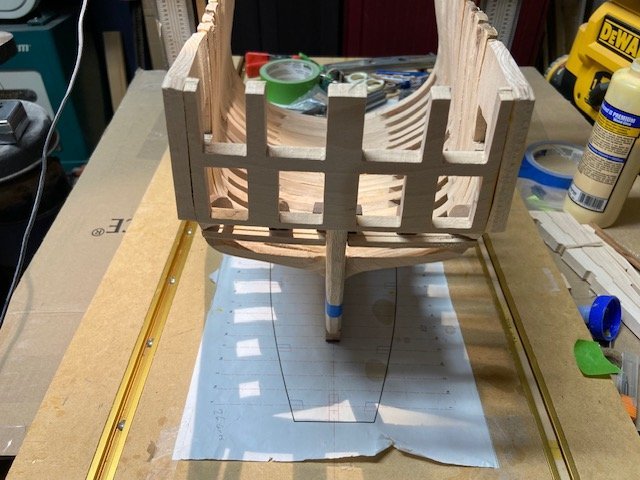
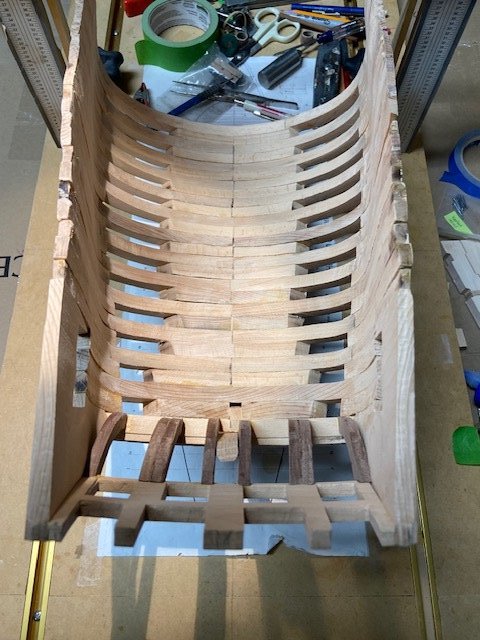
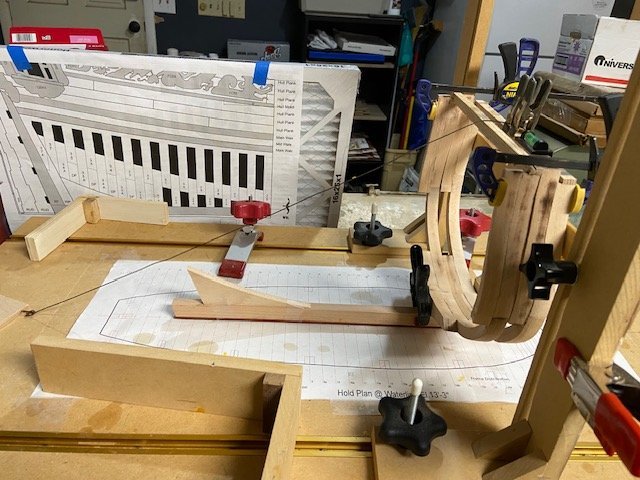
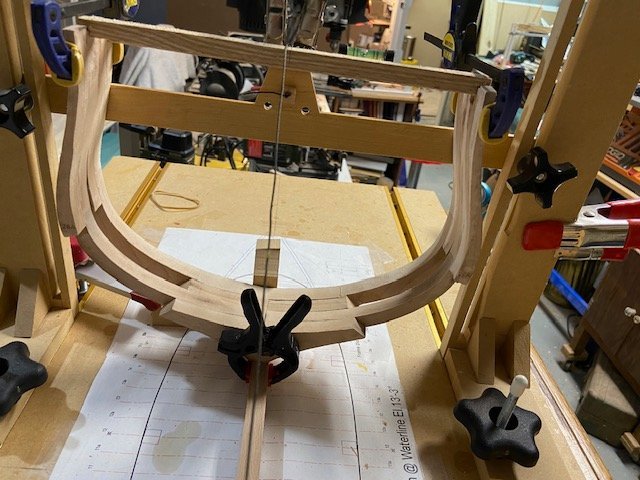
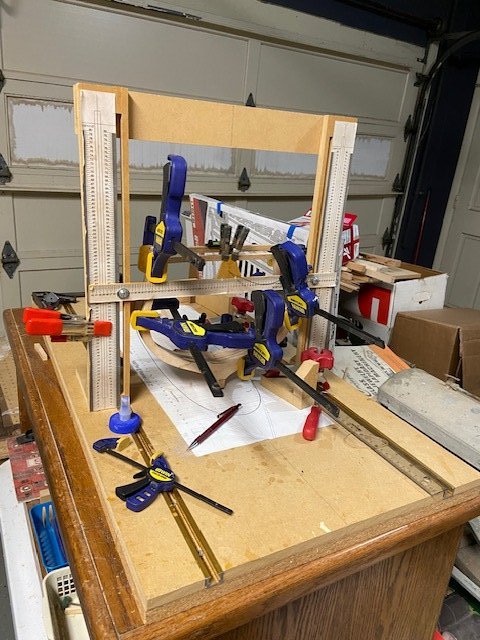
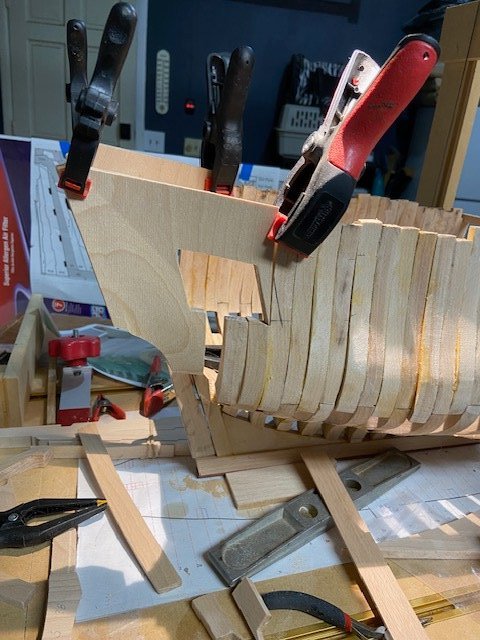
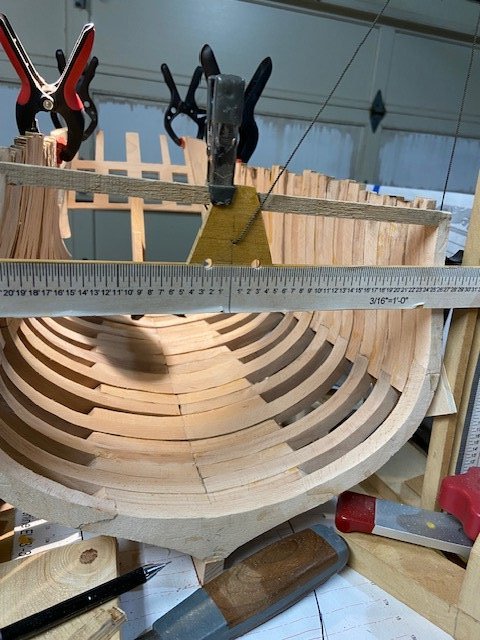
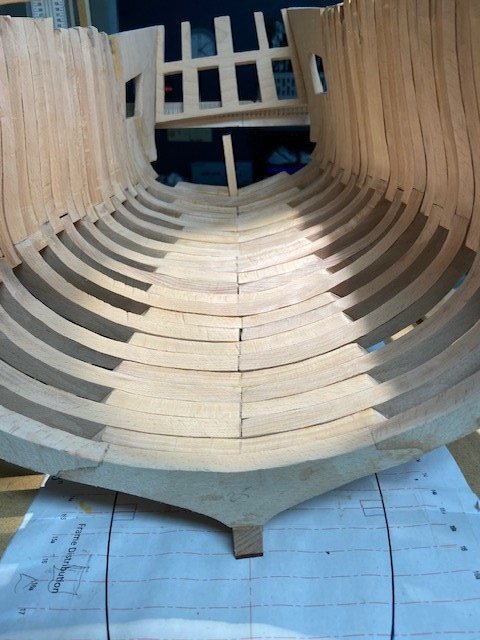
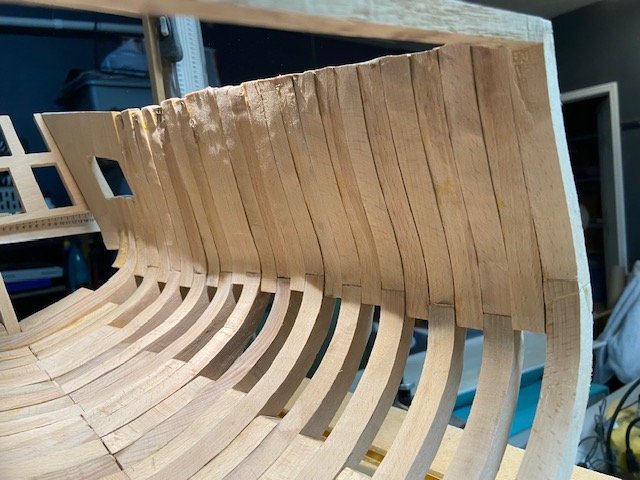
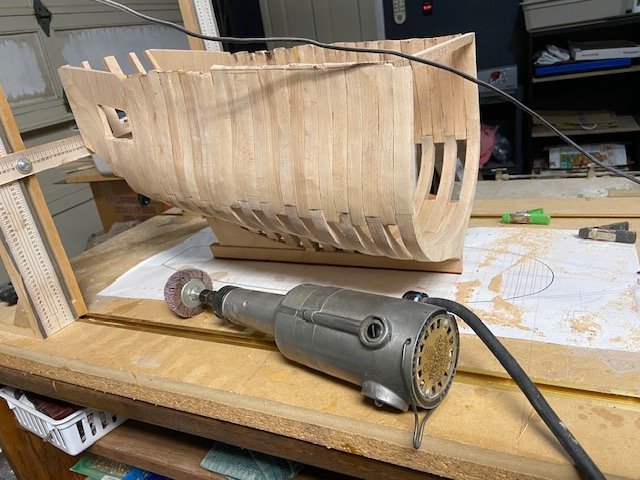
The hull: After the frames were assembled, I glued them in place on the keel using a string line to keep the frames centered, clamps to align the internal bevels and a small level on top of the spacers. The bottom of the frames required trimming at the start of the dead wood, it is easy to do by measuring and trimming each frame before gluing it in place. After the basic hull was complete, I removed the top spacers and used a hand grinder with a flapper wheel to even out the frames. Progress photos:
- 47 replies
-
- 4
-
-
- Fubbs
- Weasel Works
- (and 1 more)
.jpg.48dd1358bd283ad61ec9926b7dedad3e.jpg)