HOLIDAY DONATION DRIVE - SUPPORT MSW - DO YOUR PART TO KEEP THIS GREAT FORUM GOING! (89 donations so far out of 49,000 members - C'mon guys!)
×


Cannon Fodder
-
Posts
147 -
Joined
-
Last visited
Content Type
Profiles
Forums
Gallery
Events
Everything posted by Cannon Fodder
-
I am trying to be, I am my own worst critic. Every time I look at the hull all I see is the giant huge gaping gaps.
- 37 replies
-
- 1
-

-
- jolly boat
- artesania latina
- (and 2 more)
-
There are alot of good remarks about his designs, I am afraid of the four I should only consider the longboat. Lots of builds here of it. Very similar to what I am finishing fundamentally albeit more complex with frames versus bulkheads. The Emma C. Berry looks interesting. Similarly rigged sails. I might actually use those instructions to help me finish the Jolly boat. The instructions on the Jolly are poor at best. All I have to go on right now is "The hard part is over, just follow the pictures." 18th Century Longboat by Chuck vs Emma C. Berry- the longboat would probably win out since there are a ton of builds in the community thing going. The Syren by Chuck is on my list for when I feel confident enough with further acquired/practiced skills. I have come across some "practicums" out there. Something like the Phantom? Anyone have comments on those.
-
Amphibius, The instructions actually did say to plank then clamp on the keel. Rubber bands works well, thanks for the tip. The instructions also show the rigging coated in something. I've read hear everything from beeswax to some fancy smancy preservative, to just running it through a flame to burn off the fuzz. I'm looking for a cheap poor mans product, would Chapstick work?
-
I am working on completing my first wood model ship, Bounty Jolly Boat from AL. I really like the look of Model Shipway's Fair American and it's large scale. But I am afraid I have not the skill to do it justice. Is there another smaller build any of you would recommend to build to help me get there? Maybe a couple more boats. I am in no hurry but have learned that i like this hobby. Thanks in advance Cannon Fodder
-
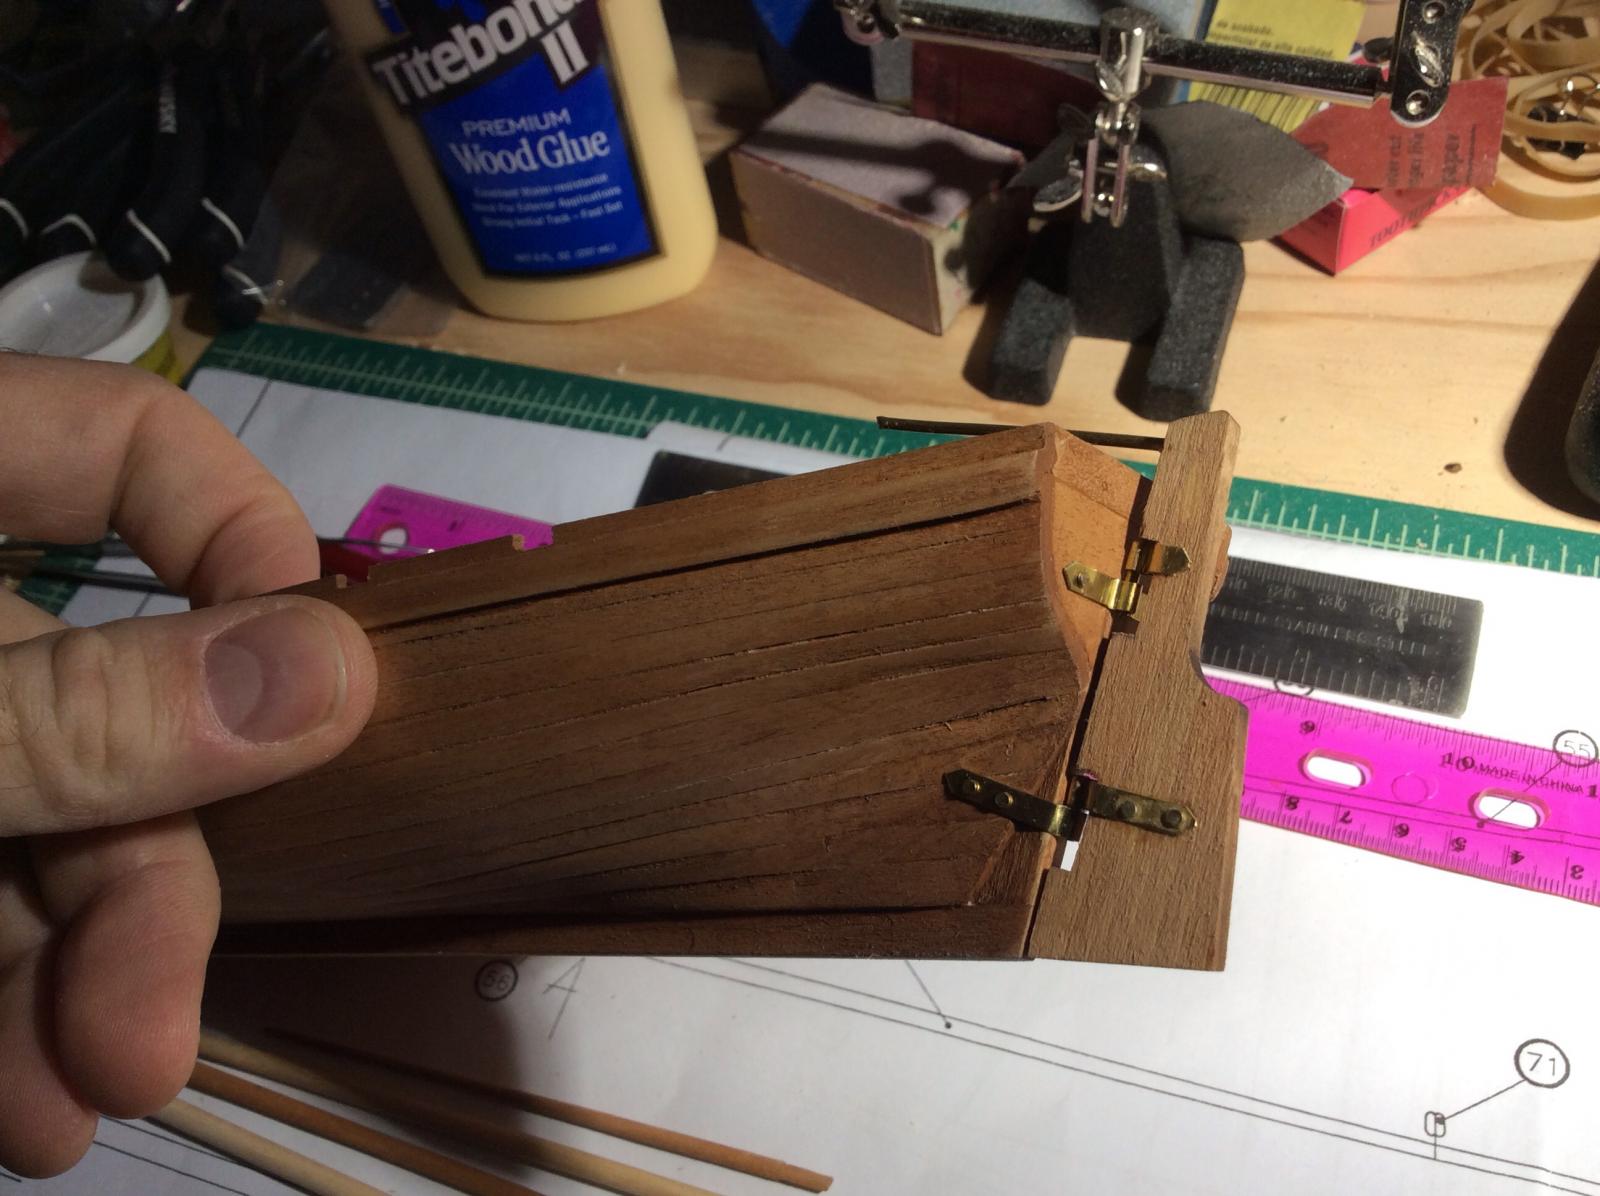
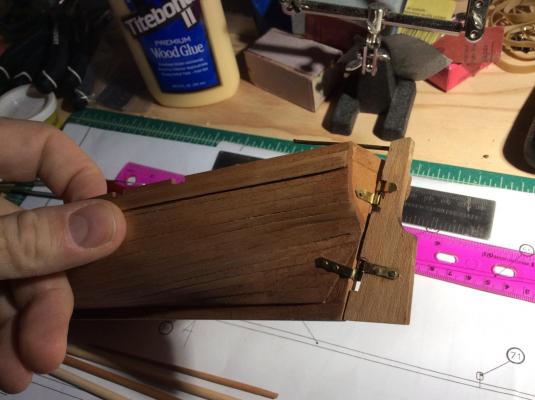
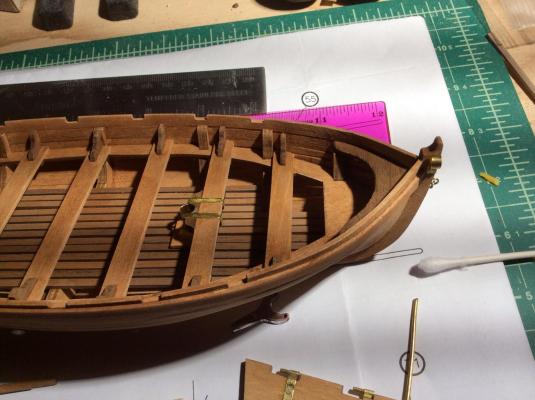
Good progress with the small bits. Rudder complete, some other metal work complete, and about to raise the mast.
- 37 replies
-
- 2
-
-
- jolly boat
- artesania latina
- (and 2 more)
-
Stained and the seats installed. I am pleased with my choice. And a picture of my next step. So tiny!
- 37 replies
-
- 2
-
-
- jolly boat
- artesania latina
- (and 2 more)
-
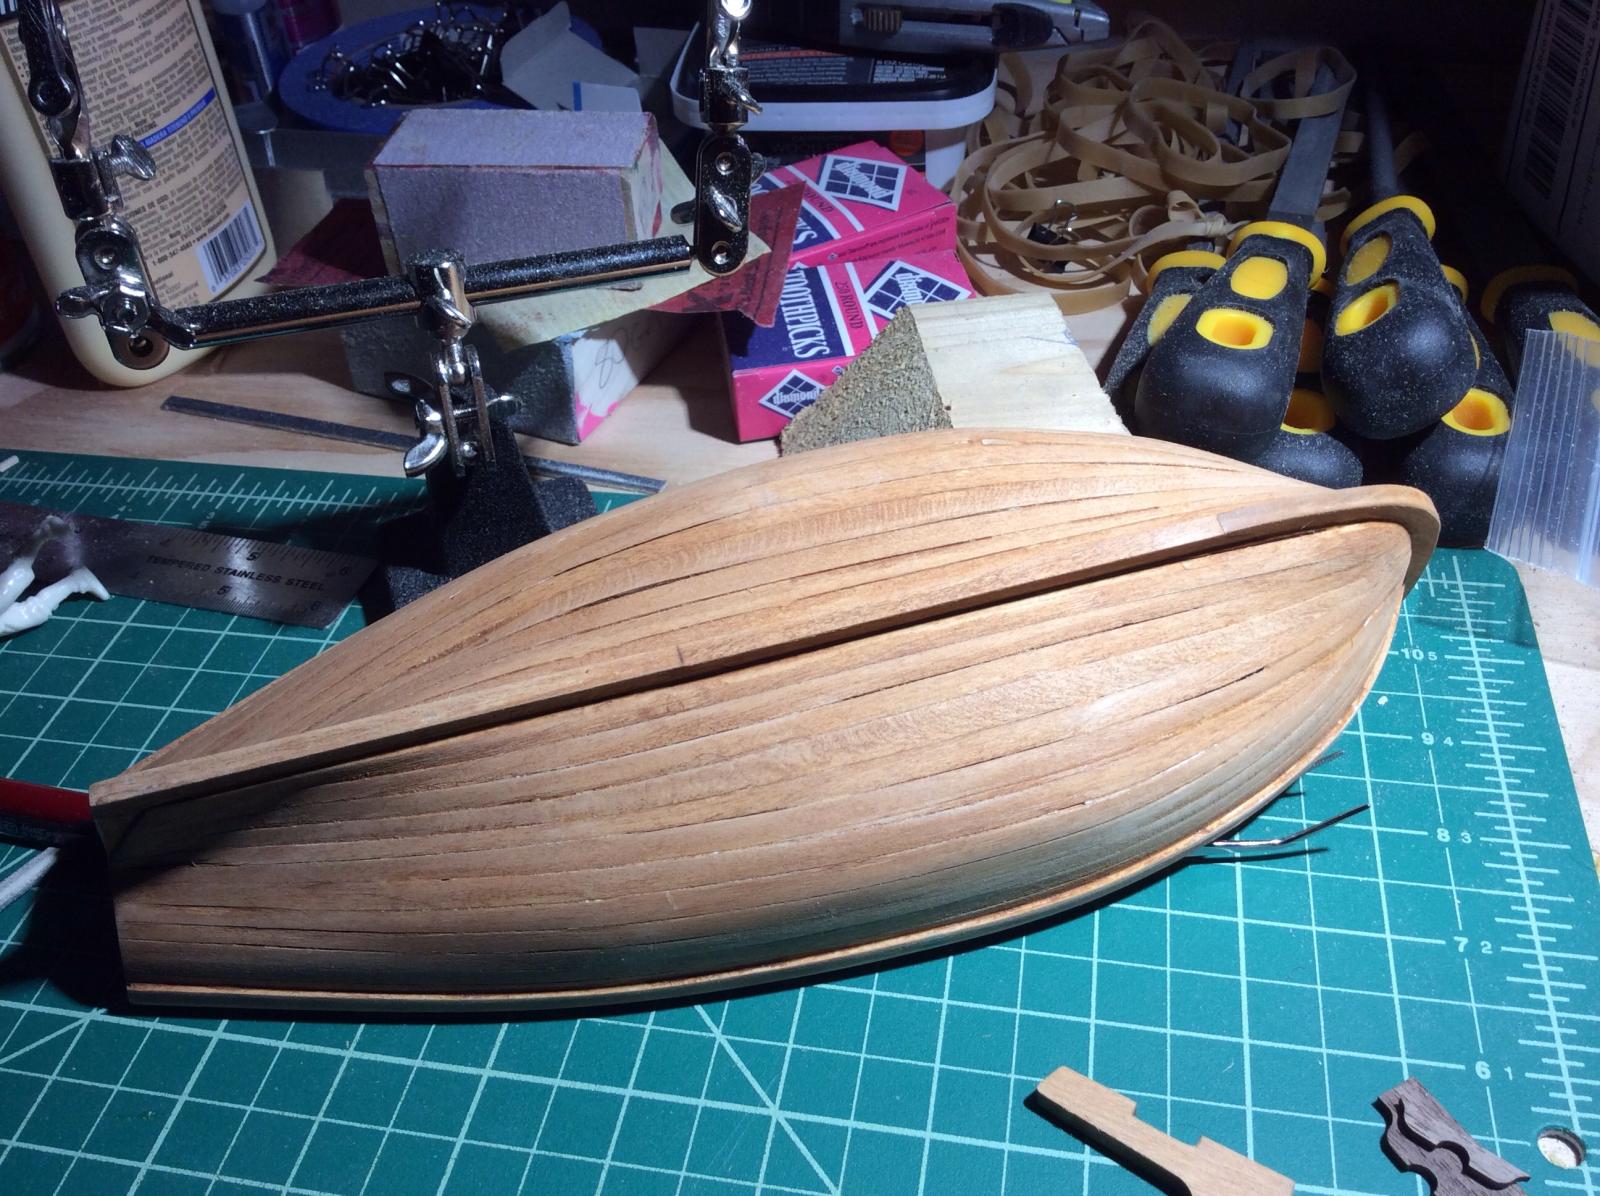
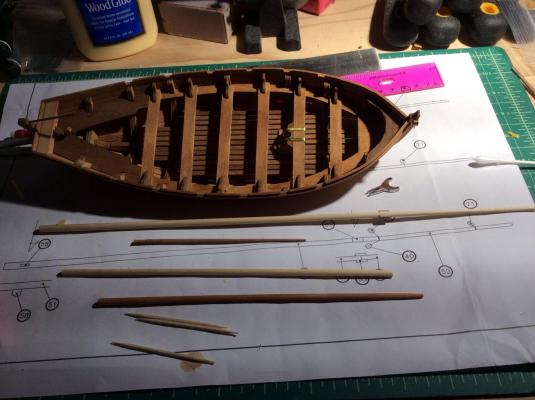
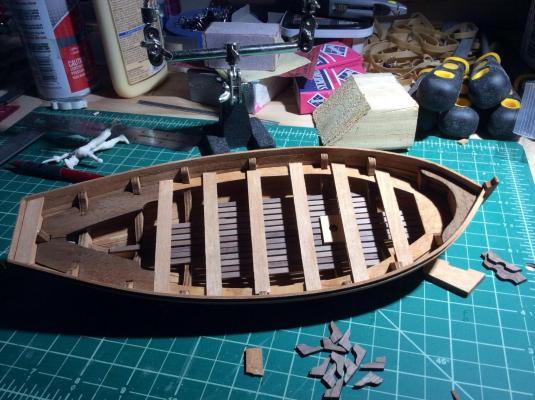
Done planking! Gaps! I filled the big ones by gluing in slivers. A few others with some glue and sanding sawdust according to some recommendations on this site. But there are stil gaps. Stain or paint? What do you think? And I am wondering how I can clamp this keel on there?


-
Hopefully I am doing this right, the last place looks hard to fit...

-
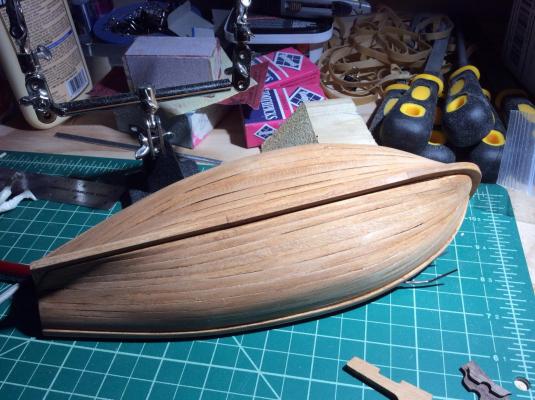
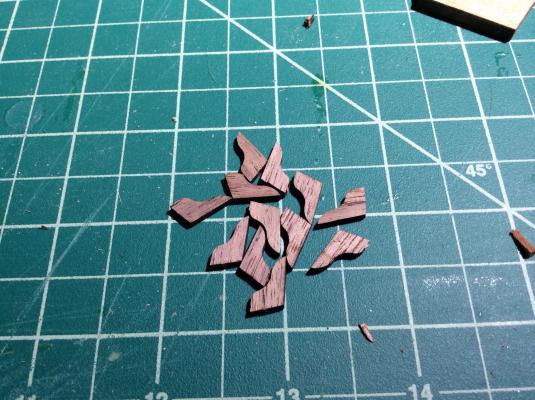
Is this called a "stealer"? Or a "drop" plank? I've run out of room at the bow for planks but got plenty in the middle. I guess I did not taper enough... But I did not want to go below half the width of the plank, clearly not super uniform. And I ventured into the rudder stuff...waiting to glue as I am indecisive on stain. Kind of waiting to see if my planking after finishing is good enough doe stain for my eye. Comments welcome, even encouraged. This being my first foray with planking, finding the scale hard to work with, trying to experiment with the techniques I've read about. How do you better transfer the taper evident on the hull to the plank pre soaking and bending? I've read something about wide scotch tape? Thanks CF


-
Hey all, Frustrating progress tonight, I ruined three planks in a row trying to shape and taper them. So I only got one on this evening. Here are the glamour shots...I fondled some of the small parts with tweezers... Oi! I have a question about the rudder assembly, I might try and tackle that one night while watching glue dry. I doesn't look like the slot in the rudder where the pin assembly is has enough clearance for the rudder to actually come off like it might in real life...?


-
Where to buy wood ship models on Internet?
Cannon Fodder replied to warship's topic in Wood ship model kits
How about for Seattle, WA, USA? The local hobby shop had nothing I was interested in building. -
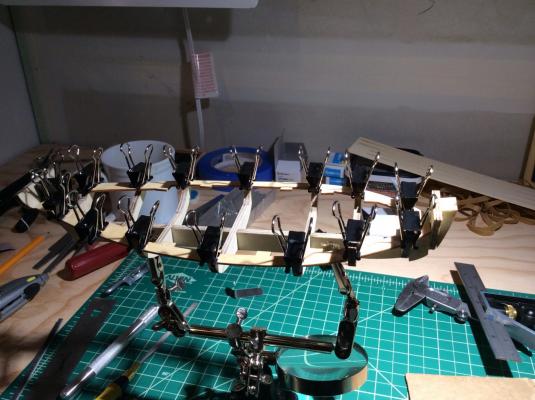
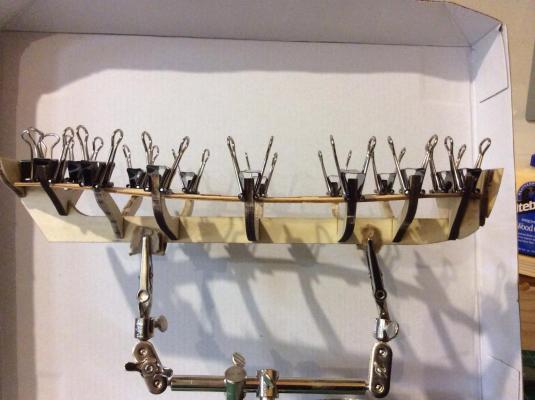
Been busy, I swear there's a boat taking shape under the clamps. I've figured out the process with the hull lined out for the taper on the bulwarks. I shape the taper on the plank, then soak it to get it pliable, then clamp in in place, let it dry and then glue it and clamp that in place. I figure this process will take me a month to complete with only about an hour per night to model. Getting the planks to fit tightly given this a single planked boat is a challenge, I will say. Thoroughly enjoying my new hobby resurrecting a childhood pastime my father shared with me via model railroading.

- 37 replies
-
- 1
-
-
- jolly boat
- artesania latina
- (and 2 more)
-
Fairly good fairing progress this evening. Eagerly anticipating the planking to come. I have not figured out how you do more than one plank in a sitting with a soaked plank clamped to dry then clamped with glue before moving on to the next? That is without pinning them, while the kit comes with nails I am loathe to use them since I am not painting the hull...


-
There a bit straighter, me thinks. Not perfect but probably as close as my skills allow.


-
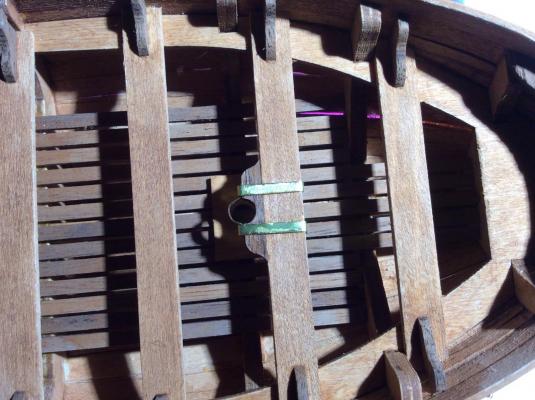
I answered my own question of what to do next by trying to fit the next pieces. The bow piece will fit but the rear two piece bench won't it should lay flat on the circular frame. So u delicately backtracked using q-tip and hot water and gentle prying.

-
I think I have more of a problem than one simple piece, more pics for your assessment of my issues...at this point nothing looks straight. FYI it is all glued with titebond II for about 24 hrs now.


-
Here is my attempt number one on this delicate number. Photo one my clamp job and photo two the curves the piece makes.
-
Planking- I do plan on following the guides from this forum in regards to planking. Dan - thanks for the heads up about needing extra planks. Paint vs stain- I plan on staining to show off the wood and simulating tree nails. Dan- I read your build log, nice paint job. Thank you Amfibus, your build is part of my inspiration. Off to find planks. CF
-
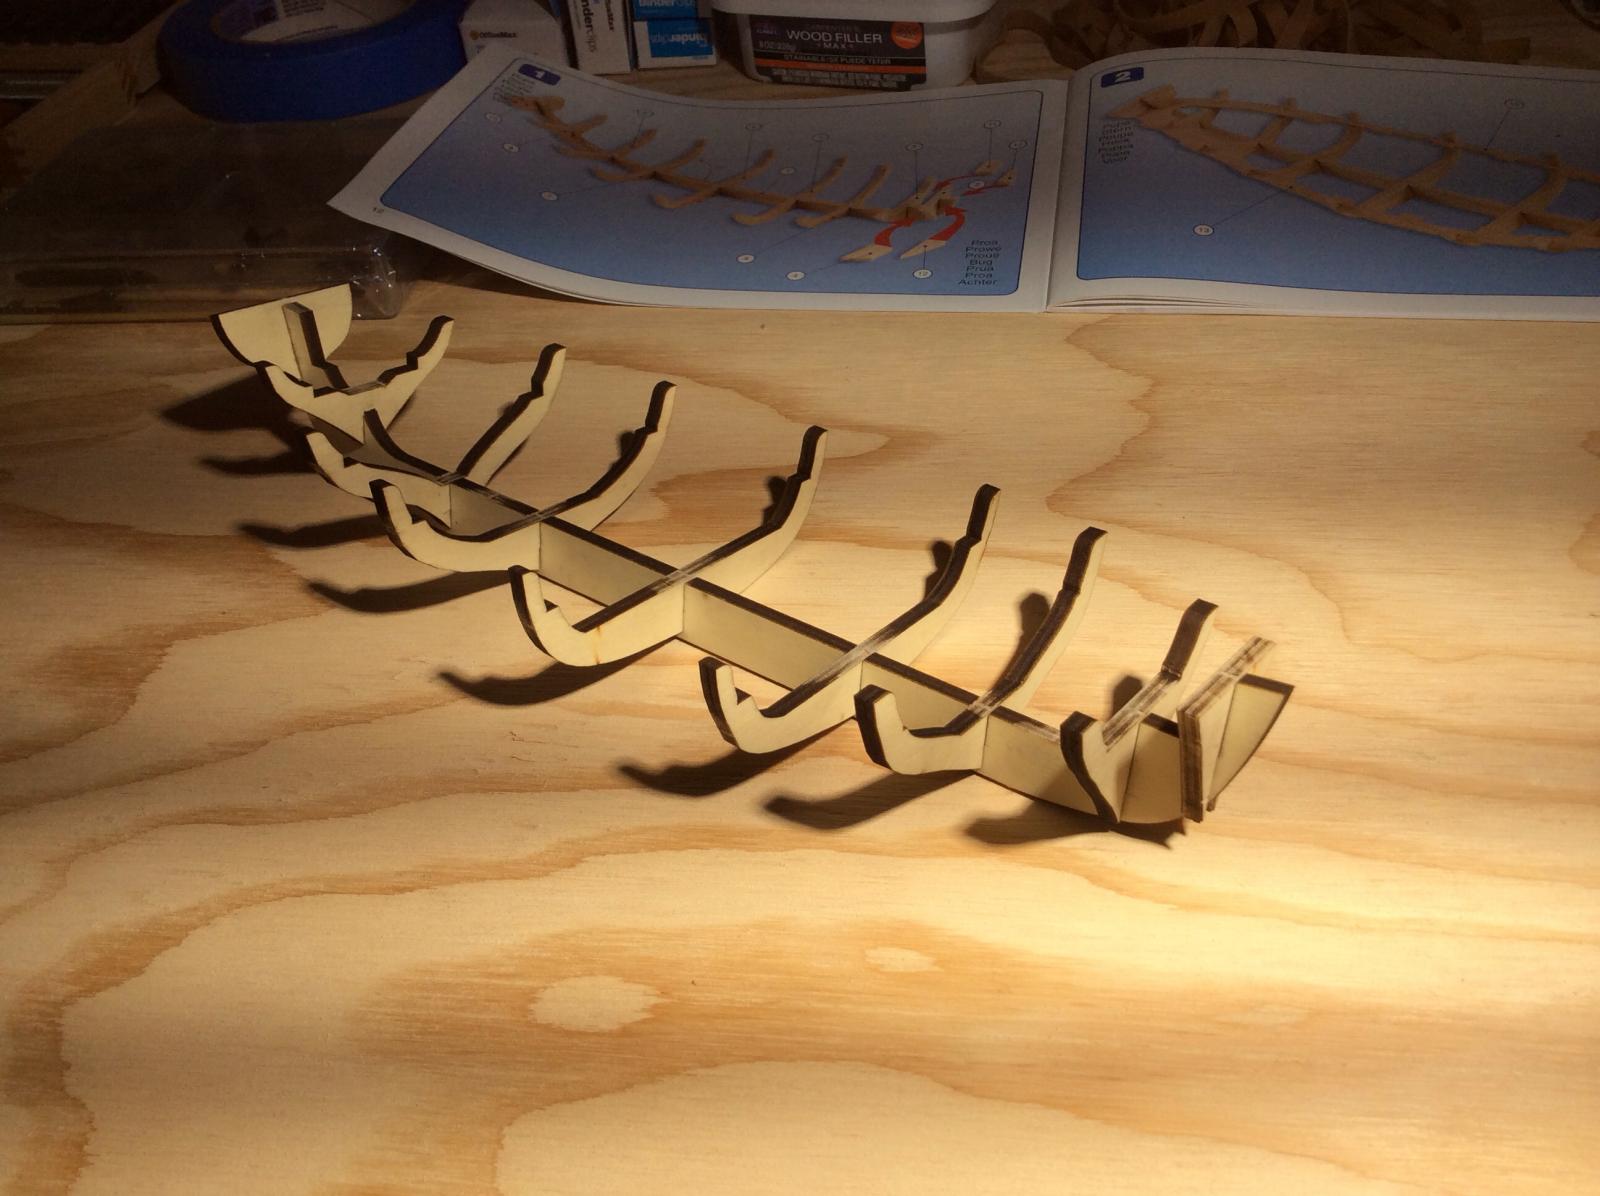
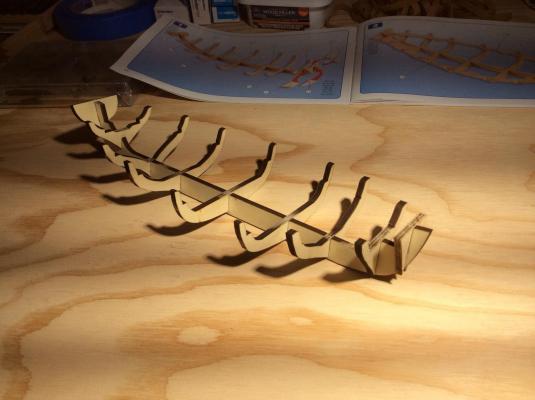
Hello all. It finally came in the mail today and I broke it open tonight. I will spare you all with the unboxing as there are already several good build logs of this kit. The HMS Bounty Jolly Boat by Artesania Latina -Scale 1:25 The first notable newbie sensation I would share is the unnerving snap as your x-acto blade cuts through the flashing of the wood surrounding the laser cut pieces. Being unfamiliar with the strength of the pieces of wood it unsettled me. I'm sure the master builders are used to it by now. I would like someone to confirm what I feel my research in this site seems to have revealed to me about the sanding completely of the laser scars on the edges of every piece of wood and it's effect on the strength of the glue. Answer: no effect. It's more of an aesthetic as this boat is open and single planked with exposed bulkheads that one would need to sand it all off. Or you are just OCD, glad I found an outlet. The photo below is the bulkheads fitted not glued. Are there tips you would share with respect of the application of the wood glue. Q-tip? Brush? Toothpick? And how best to clean up the excess that will inevitably squooge out the sides? I am struck by the miniature scale of this model. Even at 1:25 things are really small with really tight spaces to work in. I am reading Bligh's account of the voyage in this boat after the mutiny, aggressive natives on all islands, yikes. Is is bad that I am shopping for my second build?
- 37 replies
-
- 1
-
-
- jolly boat
- artesania latina
- (and 2 more)