HOLIDAY DONATION DRIVE - SUPPORT MSW - DO YOUR PART TO KEEP THIS GREAT FORUM GOING! (89 donations so far out of 49,000 members - C'mon guys!)
×


Cannon Fodder
-
Posts
147 -
Joined
-
Last visited
Content Type
Profiles
Forums
Gallery
Events
Everything posted by Cannon Fodder
-
Lower decks planked! I am a little intimidated by the top deck and how I will need to bend/warp it to the model. Almost seems like and impossible set of bends. Deck planking was super fun. I was thinking of trying to add some detailing to them, either caulking or treenails. I will probably apply varnish before adding the top deck.
- 84 replies
-
- 1
-

-
- swift
- artesania latina
- (and 1 more)
-
Those were the same sort instructions for the jolly boat I did. It certainly minimizes the plank tapering you need to do. I didn't end up following them and tried to plank according to the shall we call it "experienced" way of doing it. It was hard. I ended up with all sorts of gaps but the model was small cheap and not overly committing. You seem to have more invested here. And in the end the first planking gets covered up. You will still get some practice trying to shape the wedges to fill the gaps that will happen with the instructions. This will be good experience for plank shaping. There is no cheating in modeling. Everyone seems to have there own way, preferred glue, level of detail, scale they work with, methodology. Filler blocks are a very useful technique to reinforce the bow and stern to allow for good planking it seems to me. I'm probably got to add some to my Swift. Even though I could probably get by without. I can't wait to see more pictures. CF
-
MD, abbreviating your name makes you a doctor! Anyway, I suggest you plank according to the instructions. I mistyped and corrected my post, "first bulkhead" was what I was meaning. From what I can tell from your photos it's the solid bulkhead at the bow. The goal being flush first planking and bow filler block making a very smooth surface the veneer planks can adhere to. Wood filler can help I hear. I will say you have done a fine job on the innards and the building of an open side model is appealing to me. I am sure if you take the planking one step at a time I'm sure you can do it. Cannon Fodder
-
I'm going to pull up a chair and popcorn, I hope to one day complete this same model soon.
-
Re: stern, I would fill the gaps with blocks in the stern it will make it easier to plank given you have no choice but to plank twice there. Re: bow. your choice is that of: following the order in the instructions or planking more like a real ship might be planked. If you fill first you will have the challenge of planking clear to the bow of the boat which in every bounty build is probably the hardest bit If you plank to the first bulkhead then fill flush with the planking per the instructions you avoid some of the difficulty of planking the bow much of the tapering and likely stealers and drop planks. Making the bounty bow bend in those planks is hard as well. Ultimately you need to decide what you want.
-
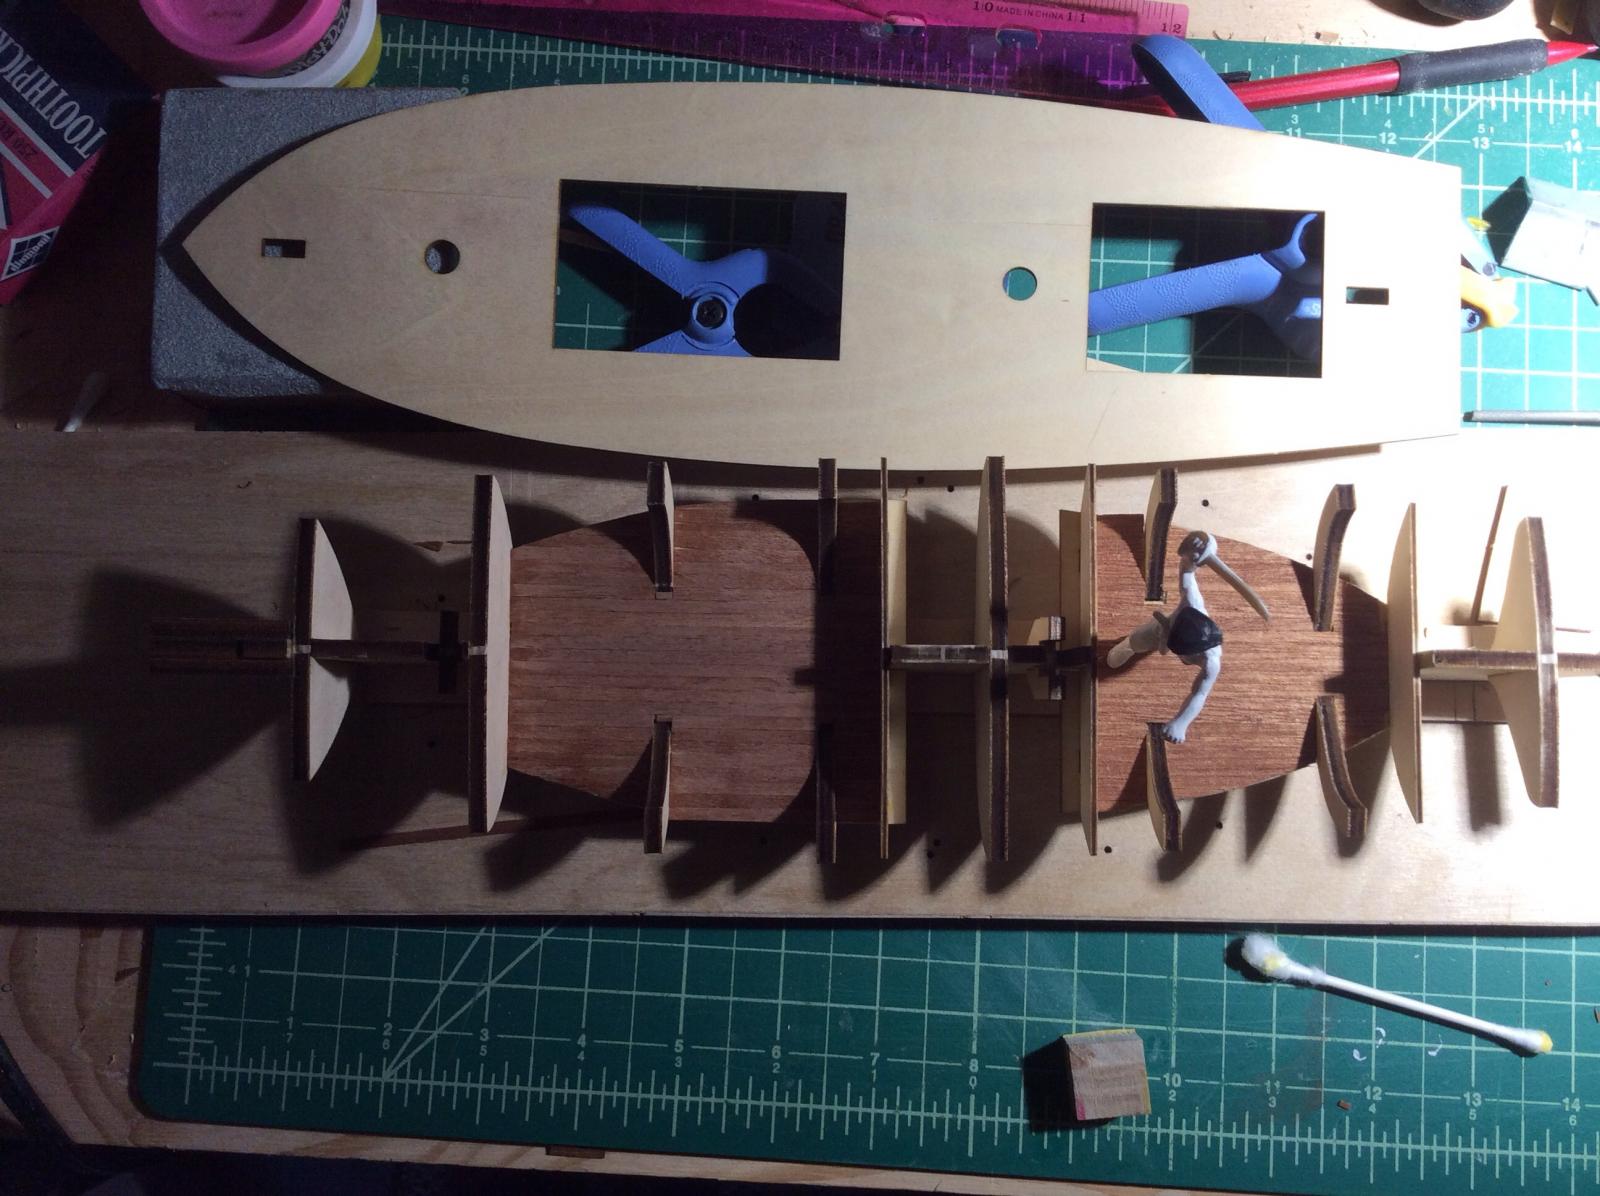
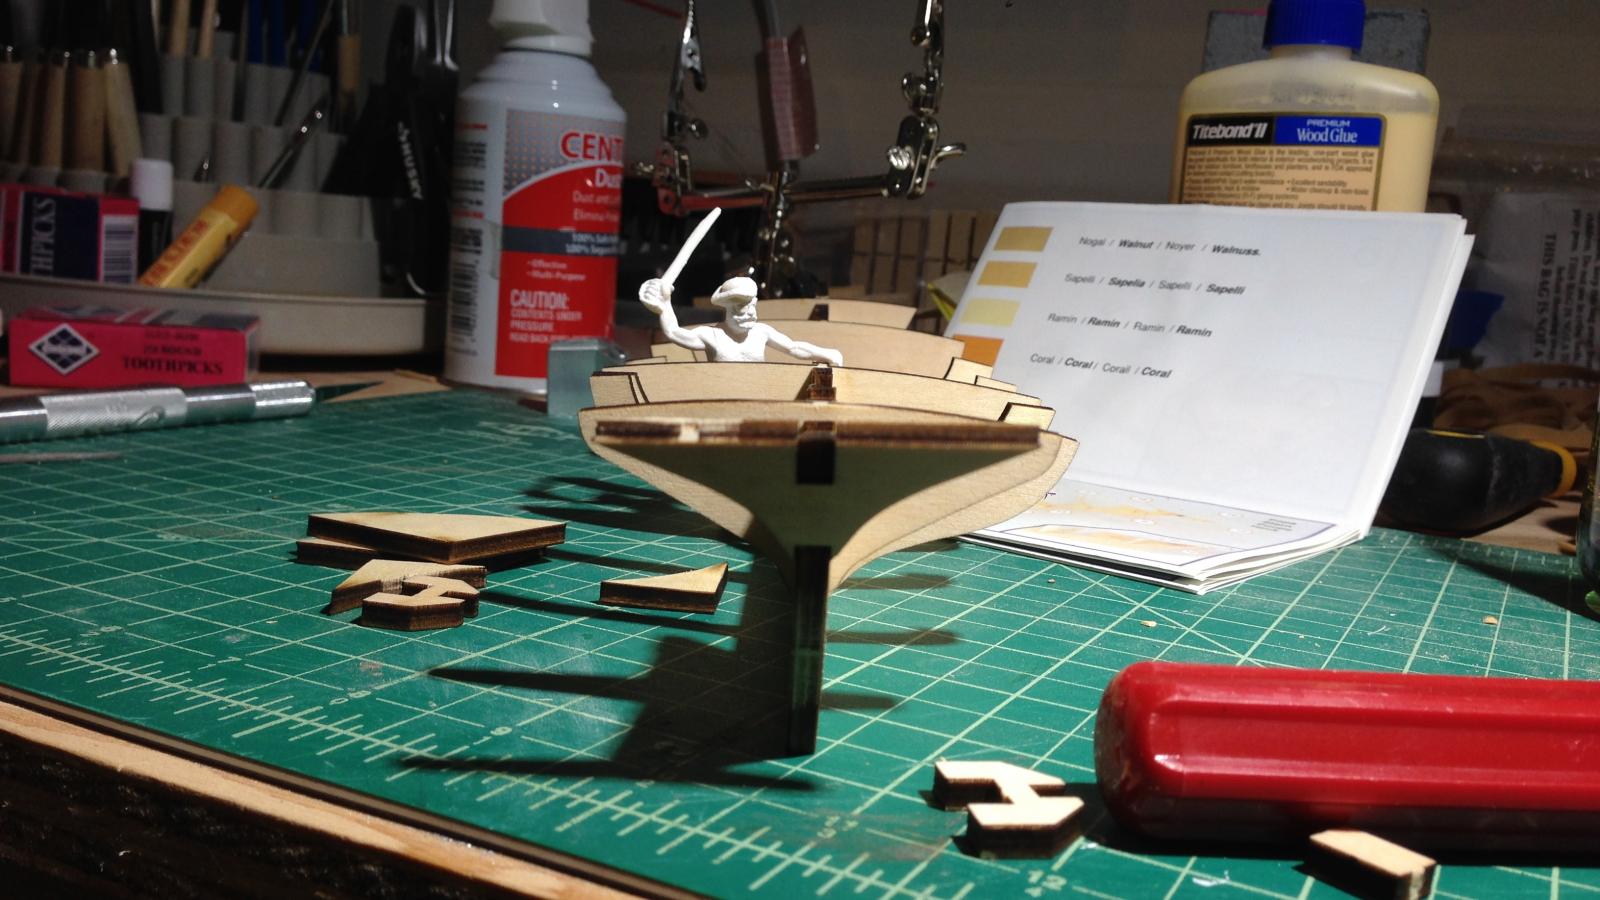
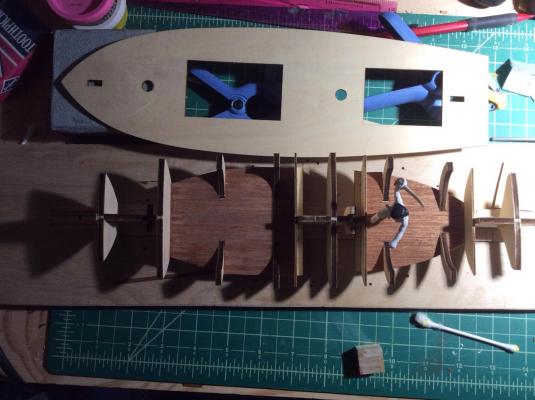
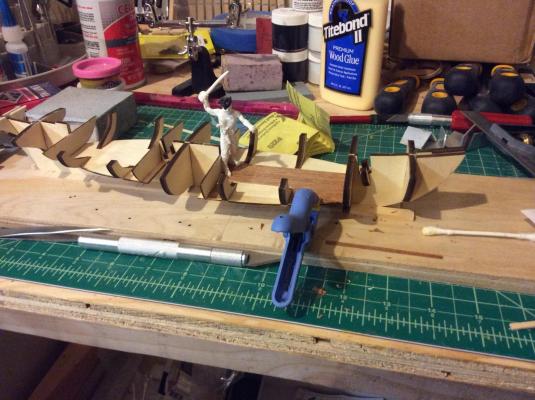
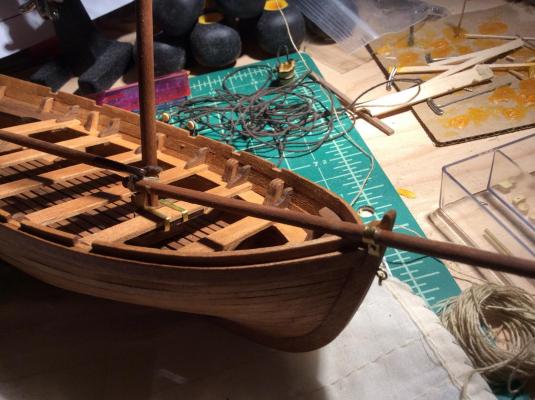
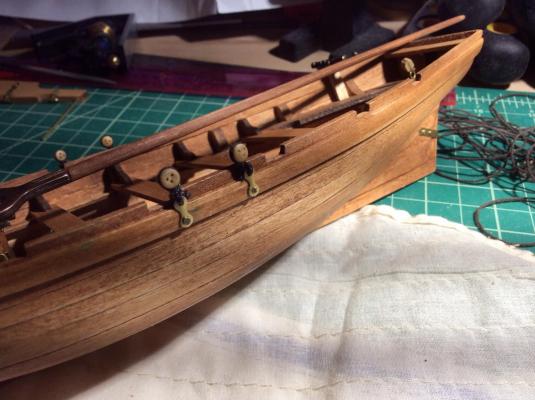
Moving along I am now planking the false decks or lower decks. Sadly not gun decks but, deck planking none the less. The kit has made some improvements as far as I can tell. Some wood has changed and it's hard to tell from the parts list and supplies what is what. I've noticed that only some of the photos in the instructions have been update and not all. Having fun. This might be my favorite part of building... Assembling the hull framing and bulkheads. It went far to quickly on the Jolly boat the first boat I built. Making me think I might like a Fully Framed model project one day. Cheers
- 84 replies
-
- 3
-
-
- swift
- artesania latina
- (and 1 more)
-
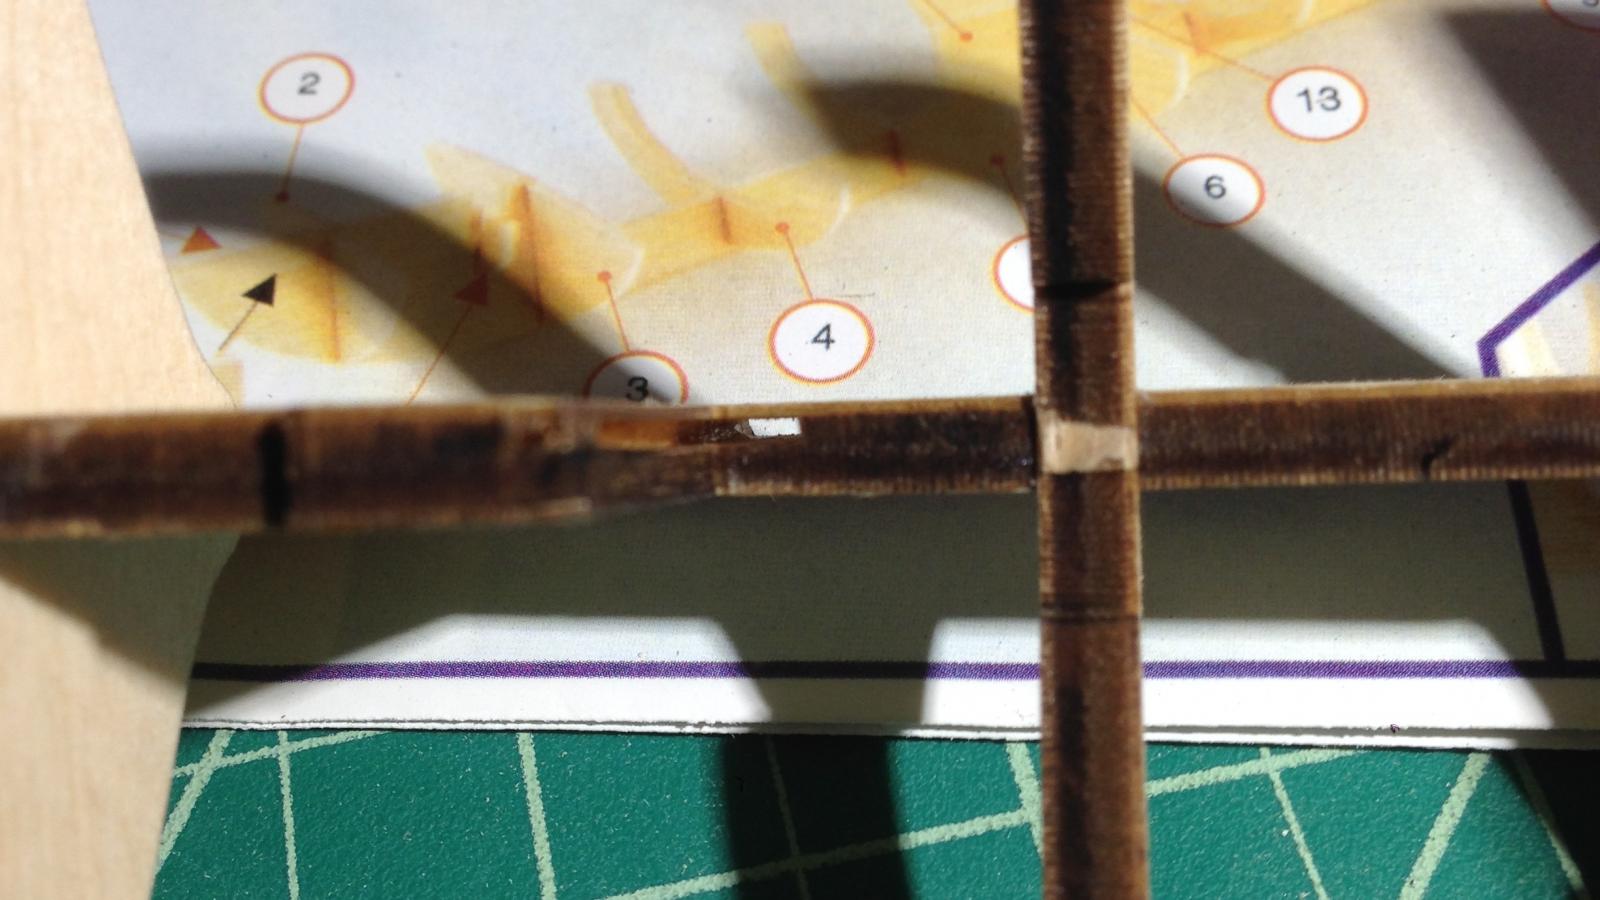
The top deck actually has holes in it already. I have seen the build logs with complicated jigs trying to drill the mast holes at just the right angle. I hope the lower decks can help straighten things as well. Thanks for the advice, the jig is helping me get things straight.
-
We'll work from the bow to the stern. Hopefully straightening as we go with I don't really know what yet.
-
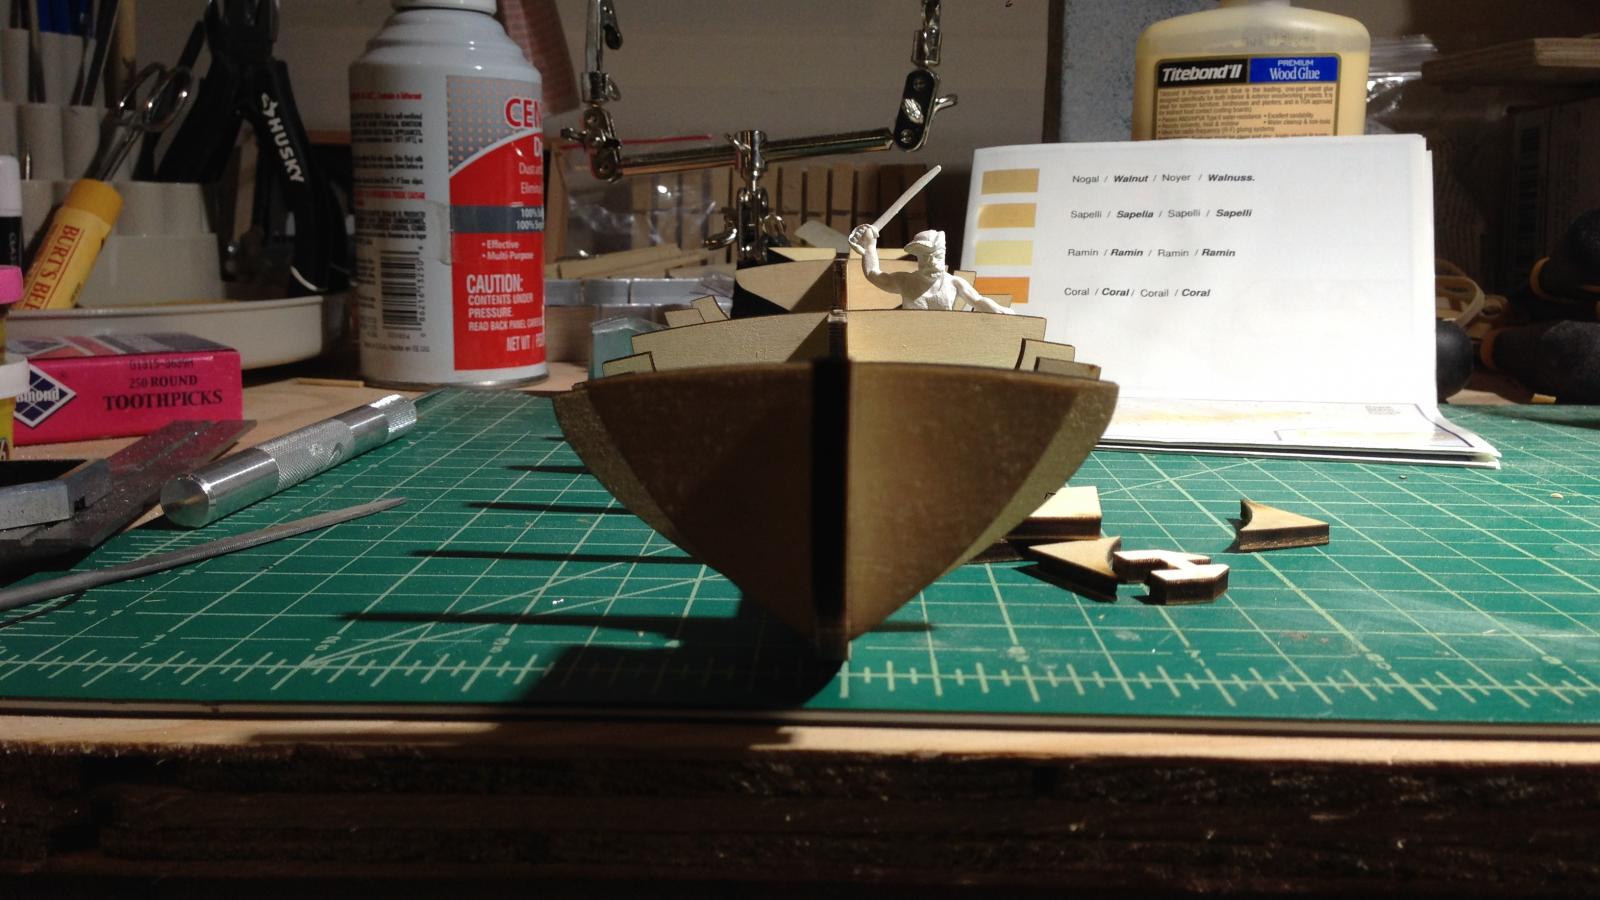
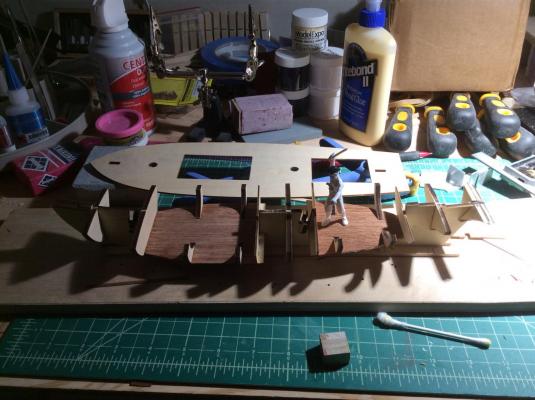
It was time to break out the keel and see if it was warped. I'm prepared with my cutlass and whiskey. Unfortunately even before starting I noticed this piece of plywood was warped. And upon putting it together, it was painfully obvious I would need extra work to get it straight. This is dry fitted. I also noticed a serious flaw/hole in the plywood. I am just thinking of filling it with wood filler. Anyone have experience with this sort of thing? Another picture of the warp. Kind of a rough start to a project, immediately finding flaws. But I guess if this were easy it would not be as satisfying once you're done.


- 84 replies
-
- 1
-
-
- swift
- artesania latina
- (and 1 more)
-
themadchemist- I've been studying your build and generating ideas. Hope to start soon, working in wood I like to show it off with stain. I wonder of these kits could be built in the more traditional manner with keel attached first? Vs planking then shaping to fit the keel on ...
-
You are referring to width of the ship from left to right. For planking the "widest bulkhead" refers to the one with the greatest measurement from the keel(center bottom of boat ) along the hull to the gunwale(the railing at the side of the ship) the pointy piece of the bulkhead at the edges of the boat. This bulkhead is the one you need to calculate the number of full width planks that might be used on the ship. This might be fore or aft of the midpoint of the ship. And it might coincide with the "widest" part of the ship left /right however not always. It more depends on the shape of the hull in cross section. The bounty has a very blunt bow. It is easier to conceive the taper of planks on a pointy bow. For instance the Phantom from Model shipways.
-
Post a picture of your bow and stern as these are the business ends of planking. Not sure if your instructions mentions using filler blocks for either end but now would be the time to consider it as I hear it helps on planking the bounty from what I've seen others build logs.
-
It might help to take it one step at a time as well. Start with the batens. If you refer to a document available on the download section of this website, "Simple Hull Planking Techniques for beginners" on page 11 it addresses this. I used this document a lot when for sorting out this technique. With theses batens you are breaking up the hull into workable chunks. The batens to be removed as you progress with planking. Post a pic of your batens. Then we can work out the next steps. When you think of planking the whole ship it might get overwhelming but it really is just a series of small steps.
-
I'm back having completed my second deck!! A bit if a challenge owing to the 'bendy' character of wood but eventually all the bits fitted as required. The dreaded planking gets ever closer and I am still trying to get my head round the procedure. So far I understand 'fairing' the hull and don't have a problem with it. 'Lining off' is a different matter! Some people seem to advocate the use of temporary battens whilst others favour using string or similar. What I can't understand is that if you use battens without subjecting them to any lateral stress, they seem to me to sit differently from using string. The latter seems to be placing the string by eye for a pleasing curve rather than where the wood 'wants' to go. Help please! I would prefer baten over string because it behaves like wood. Not from experience mind you. Also, I assume when working out the number of planks that are needed I should measure the widest bulkhead which would be midships and divide that by the maximum width of the planking wood provided. Is that right? Yes, start with midships bulkhead, I used a small piece of paper lined it up on the bulkhead and cut it to length. Then took the measurement and figured out how many full width planks would fit. I don't understand the purpose of a fan template. I can see that it would provide a regular taper but boats are not like that. It seems you would have to have one for the stem and one for the stern but the template starts at one point and expands theoretically to infinity so where do you start from. You see I am really struggling with the concept here!! More help please. The fan template- you can take that piece of paper with the tick marks from the full width planks that you just figured above at the above midships and place it in the middle of the template and find where it matches up. This is your starting point. Moving to the bulkhead either fore or aft, take the full width measurement on a new piece of paper. move to the fan template and slide from your starting point to where that new piece lines up identifying the taper and a new set of tick marks from the fan template for the taper from the full width planks from the midships bulkhead to the the current one fore or aft. You are figuring out how much each plank tapers at each bulk head if at all. You will find it may or may not differ from your current bulkhead, usually the midships bulkheads dont change much. But as you near the bow or stern it will. Take those tick marks and transfer to bulkhead. Here is a goal to keep in mind, the bow or stern planks should taper no more that 50% of their full width. If they do you will need to drop a plank in there. Drop planks, separate discussion really. This becomes even more complicated with this particular kit and the 'nose' section of the boat is not fitted until after the first planking. It is eventually covered by the second planking. The recommendation is to treat the first planking like the second. The second is that much easier then. I dont know about your nose however. I would defer to others. The instructions advocate using as many straight pieces as possible and filling in the gaps afterwards with long wedge shaped pieces. Whilst I am sure this would do the job I am also sure that the good ship builders out there would throw up their hands in horror. What shall I do?? Instructions are often contrary to the methods discussed here at MSW. Instructions make it possibly easier yet less like how actual ships are planked in turn the model looks less realistic especially when it is a single planked hull and the wood work is exposed or unpainted. hope that helps.
-
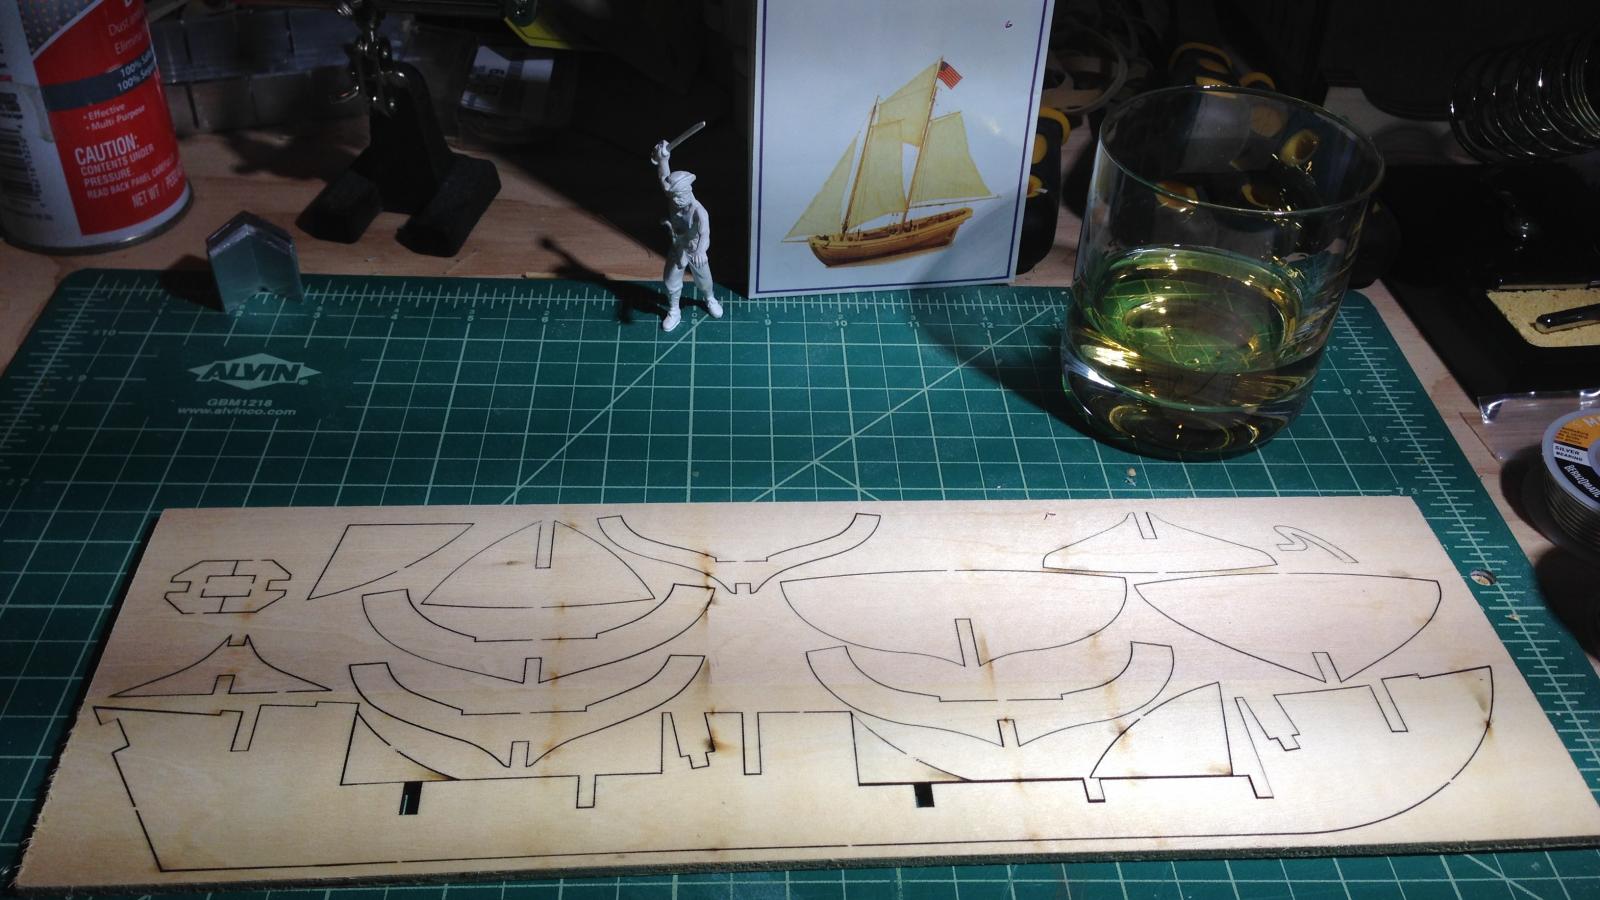
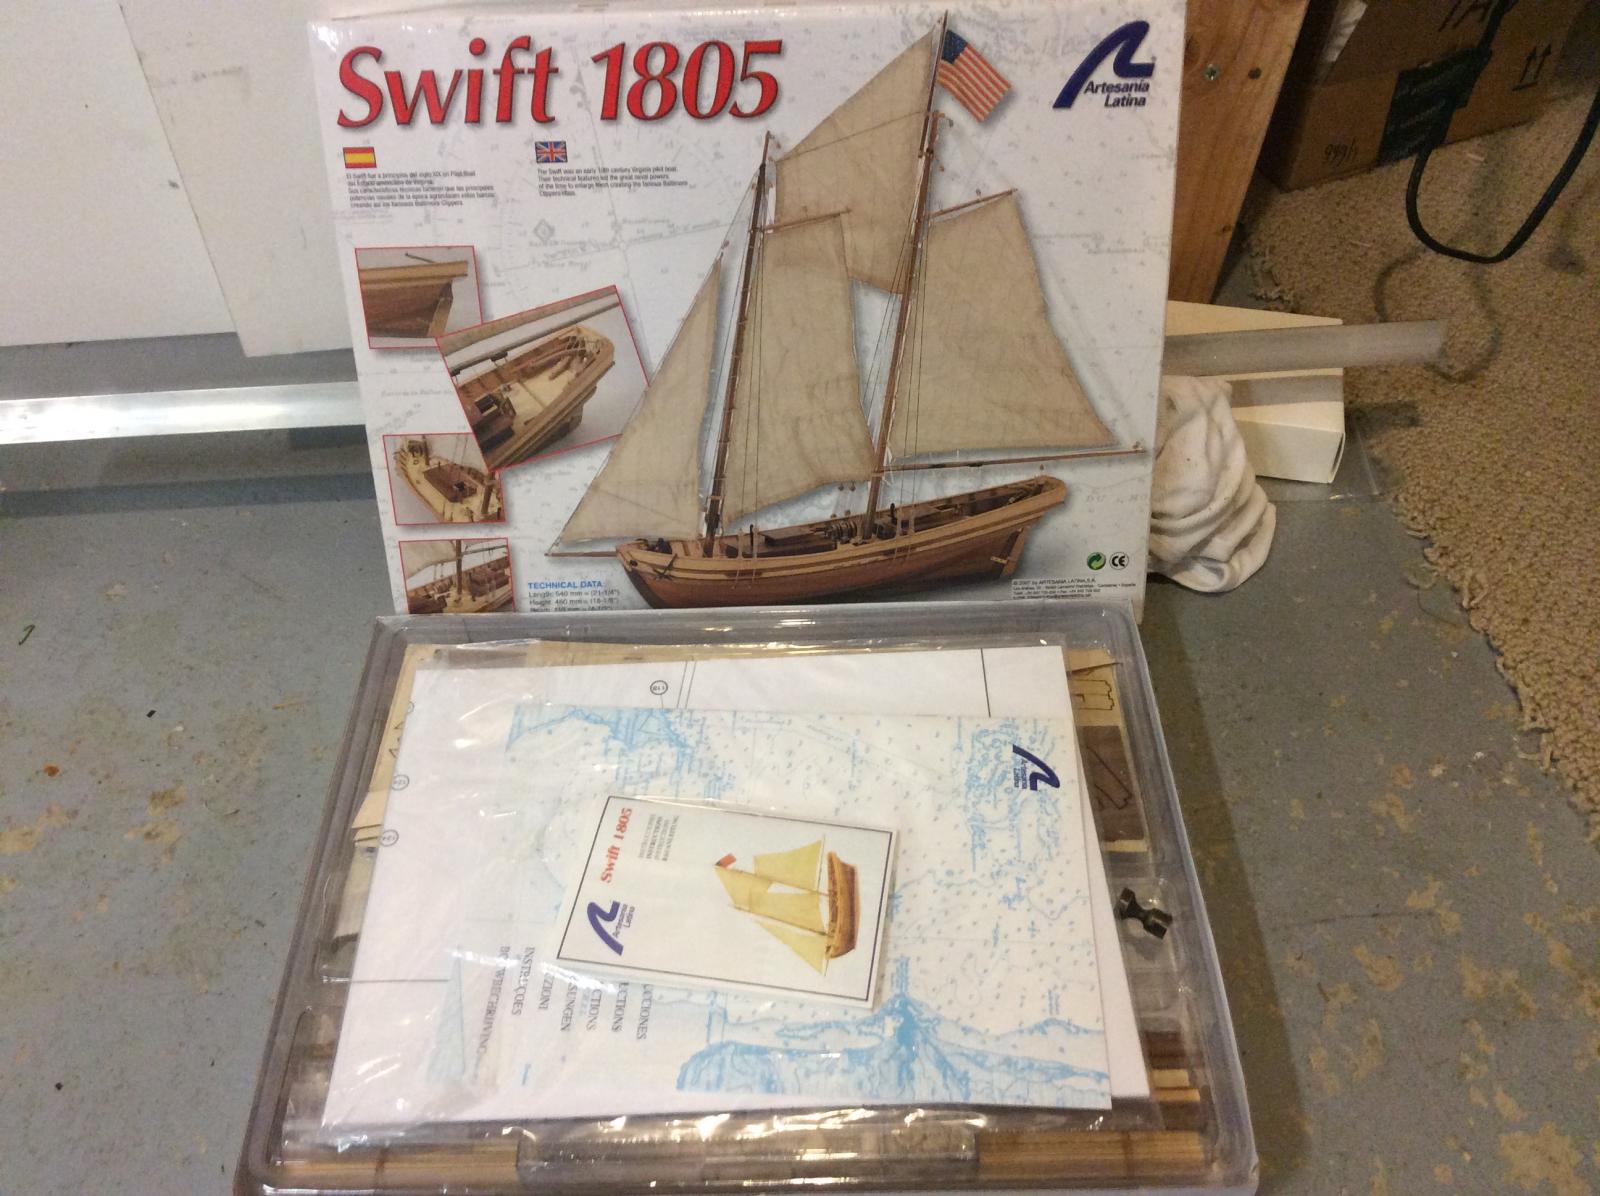
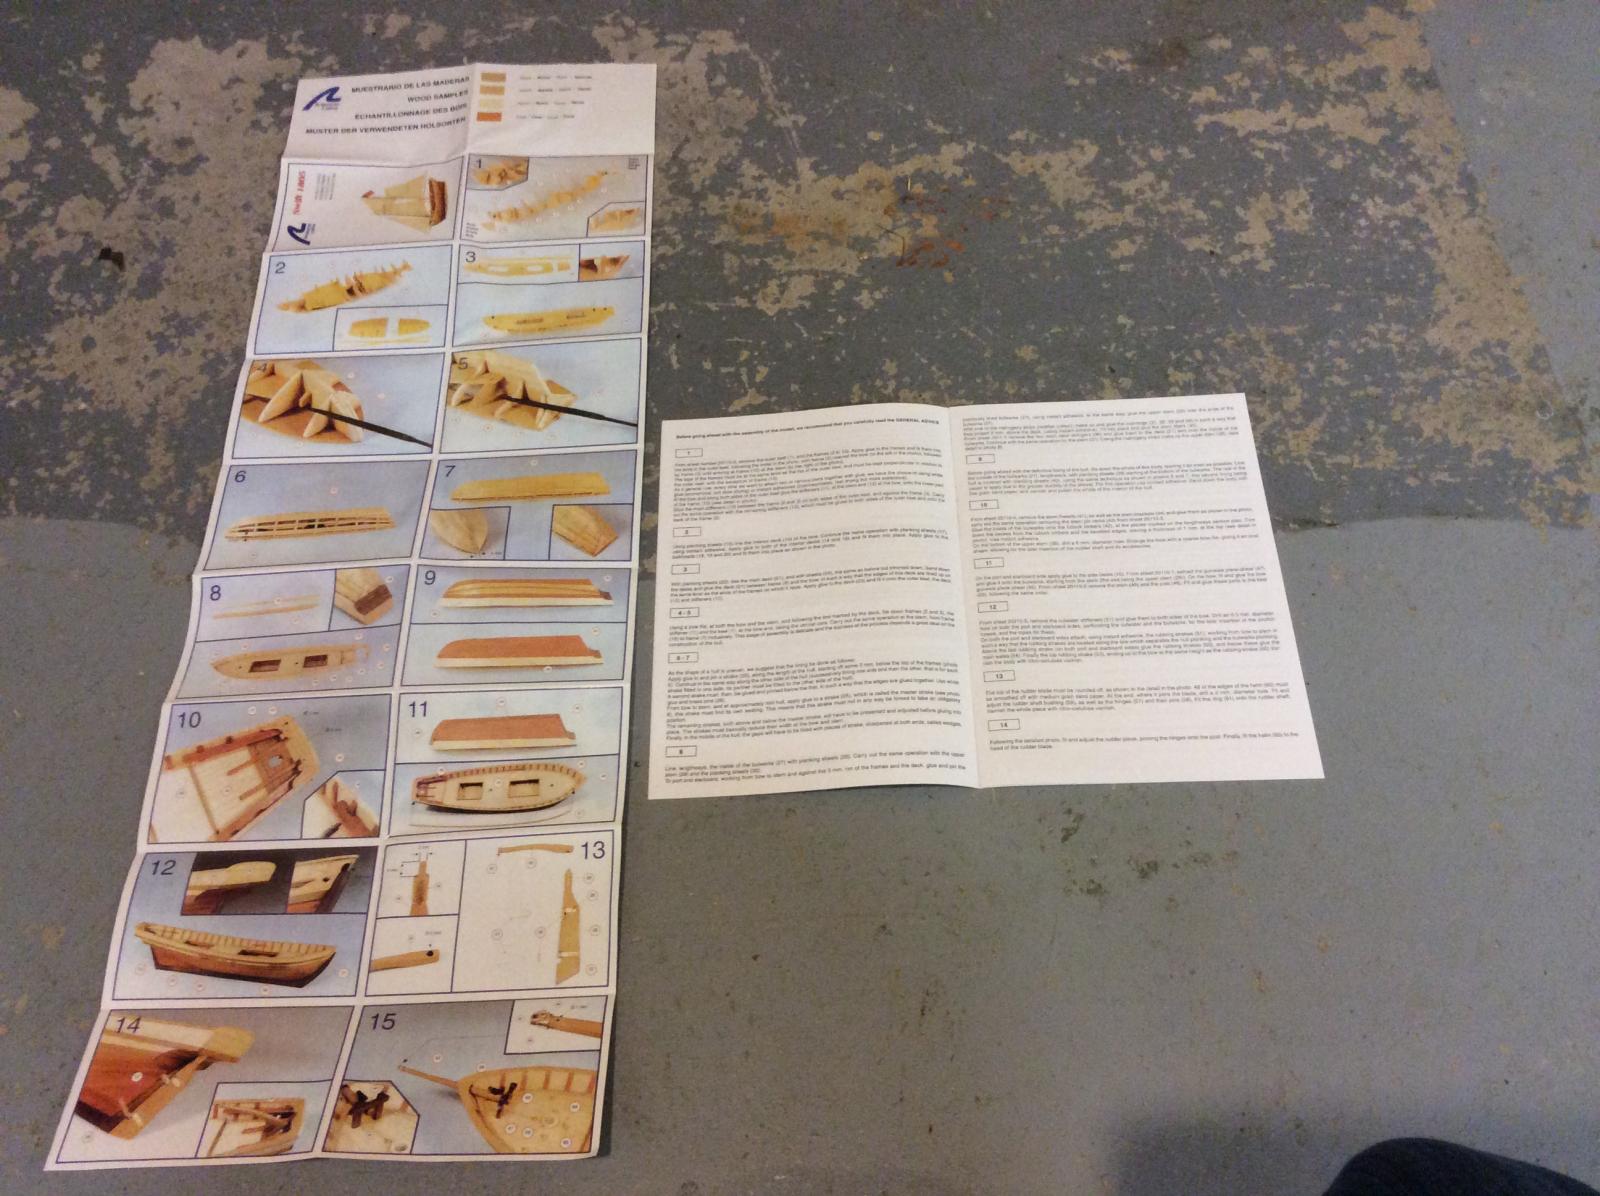
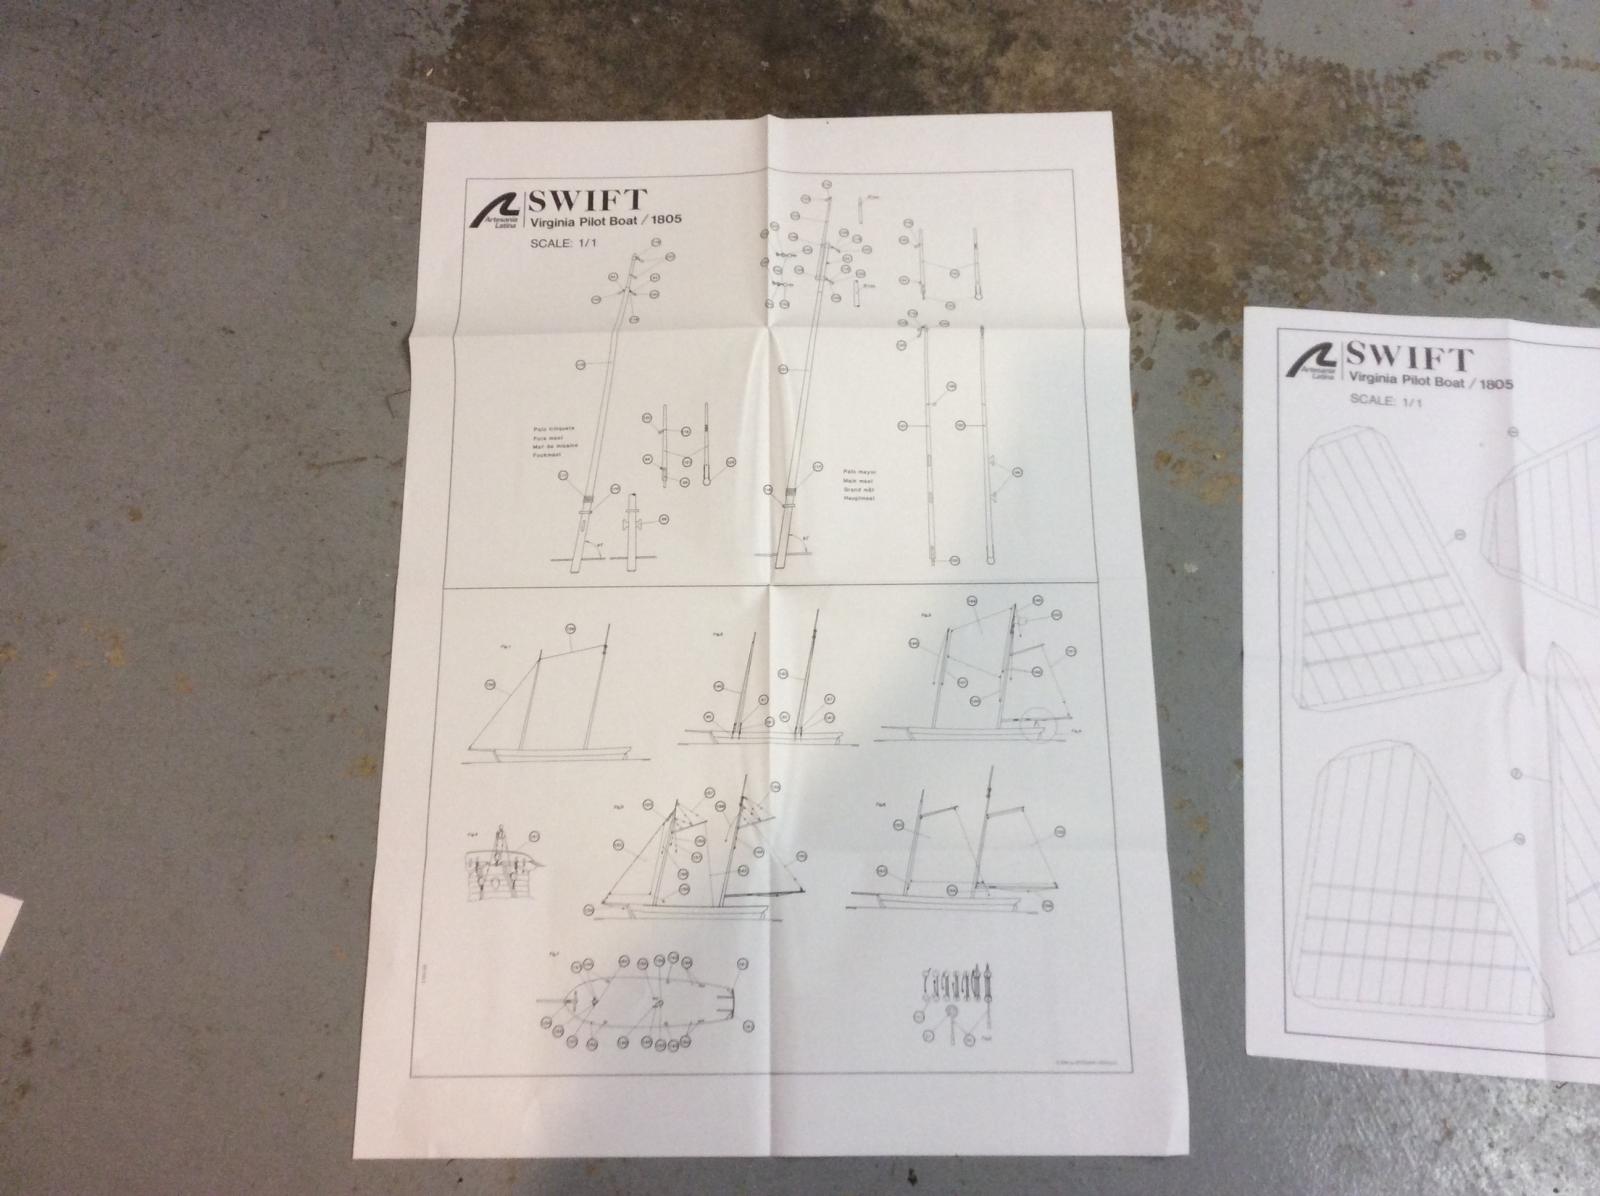
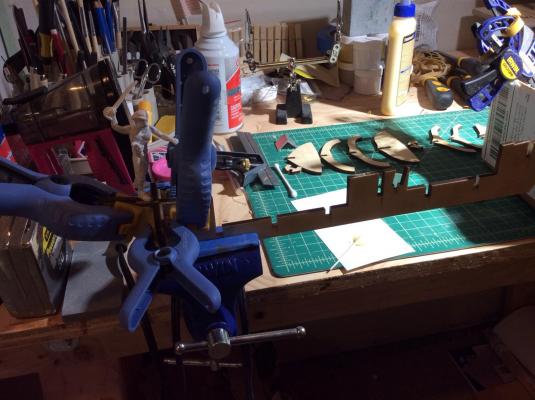
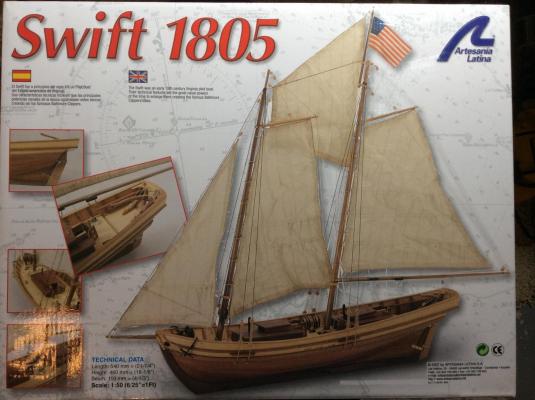
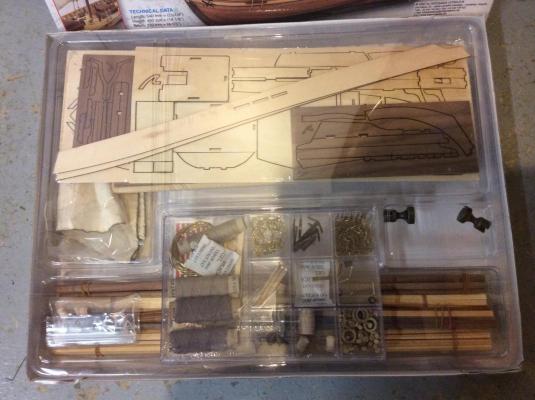
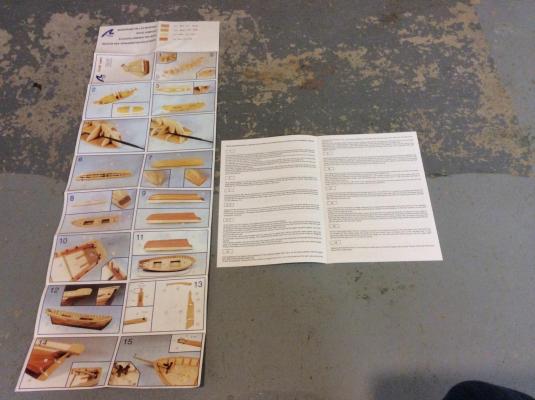
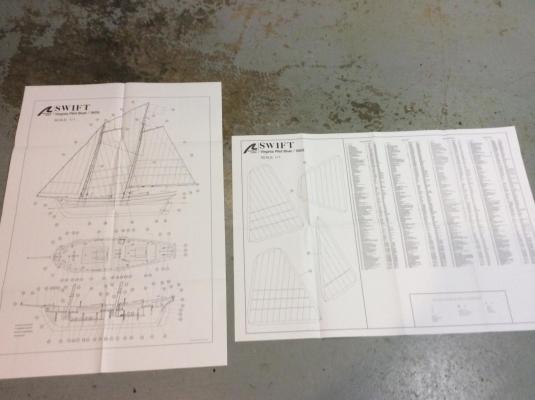
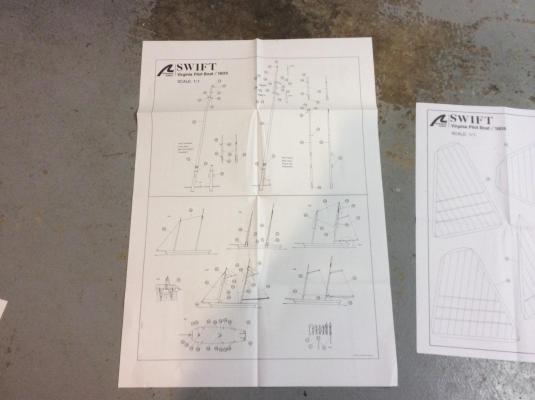
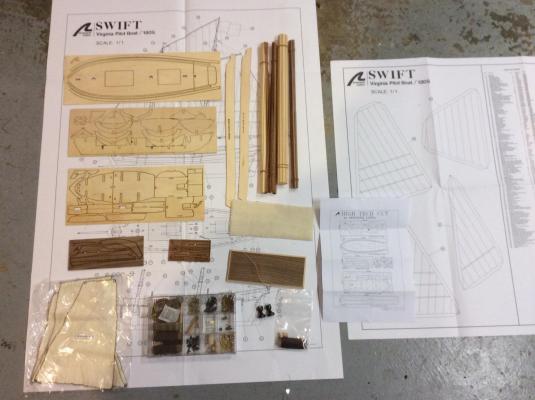
This build is coming right on the heels of the Bounty Jolly Boat. I decided to go with the same maker, Artesania Latina, while I was not particularly impressed with their instructions it did leave me with some creative license in the end. I chose the Swift 1805 at 1:50 scale. I wanted increase in size and complexity, double planking and two masts. The following is the unboxing and contents. I noticed it was definitely bigger but not by much. Much bigger than this and I will need a bigger shipyard. Admiral?! Some nice selection of parts. I noted 167 parts on the part list. Here is a picture of the simplistic instructions. One picture of the completed step to be paired with a short two or three sentences on what to do. Make note here, never do they say how to do it. But that was this forum is for, and build logs! I really excited about the two little decks under the main deck, don't know what they might be call beyond a hold. The plans, nice, they say 1:1, big readable, I'll have to check to make sure they are 1:1. Long part list. Spar/mast lay out as well. A fair bit more rigging diagrams, but I have bought a reference for that since the Bounty had basically no guidance. And here are the wood bits and pieces. Comes with sails. And a base and mounts. (Still trying to figure out the base for the Jolly Boat)

- 84 replies
-
- 4
-
-
- swift
- artesania latina
- (and 1 more)
-
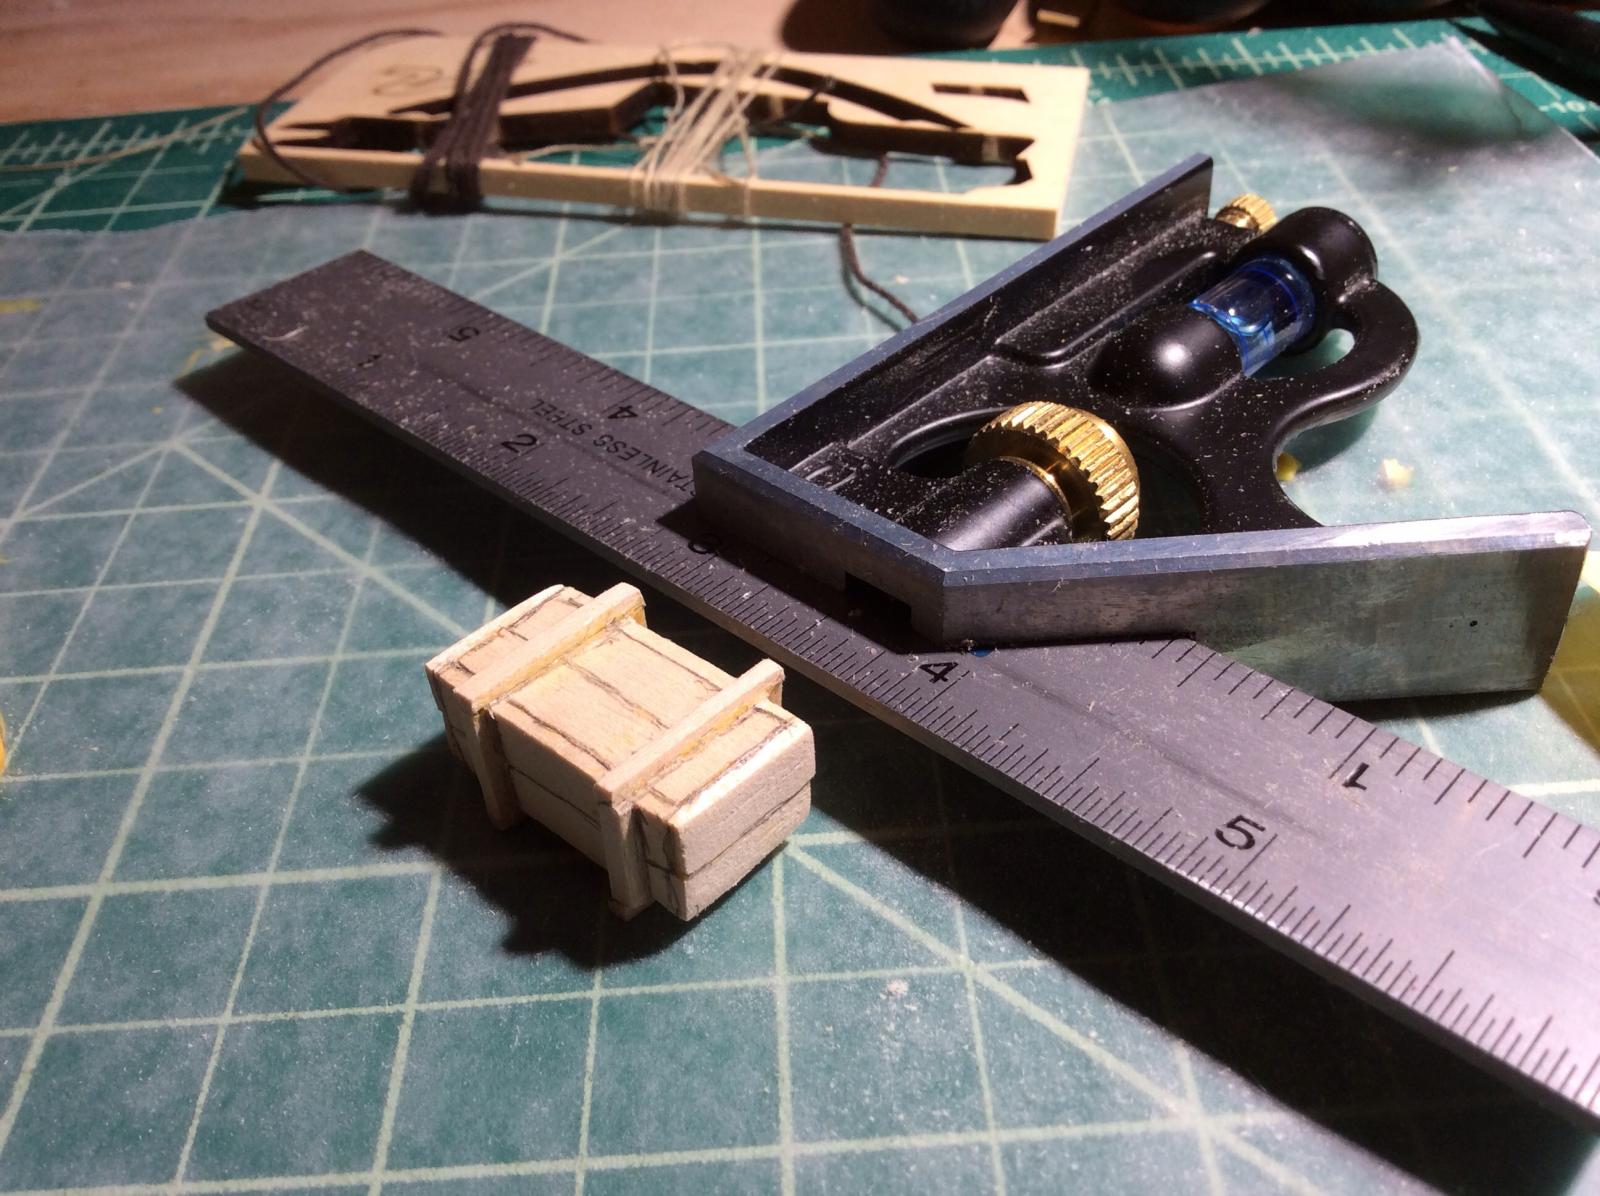
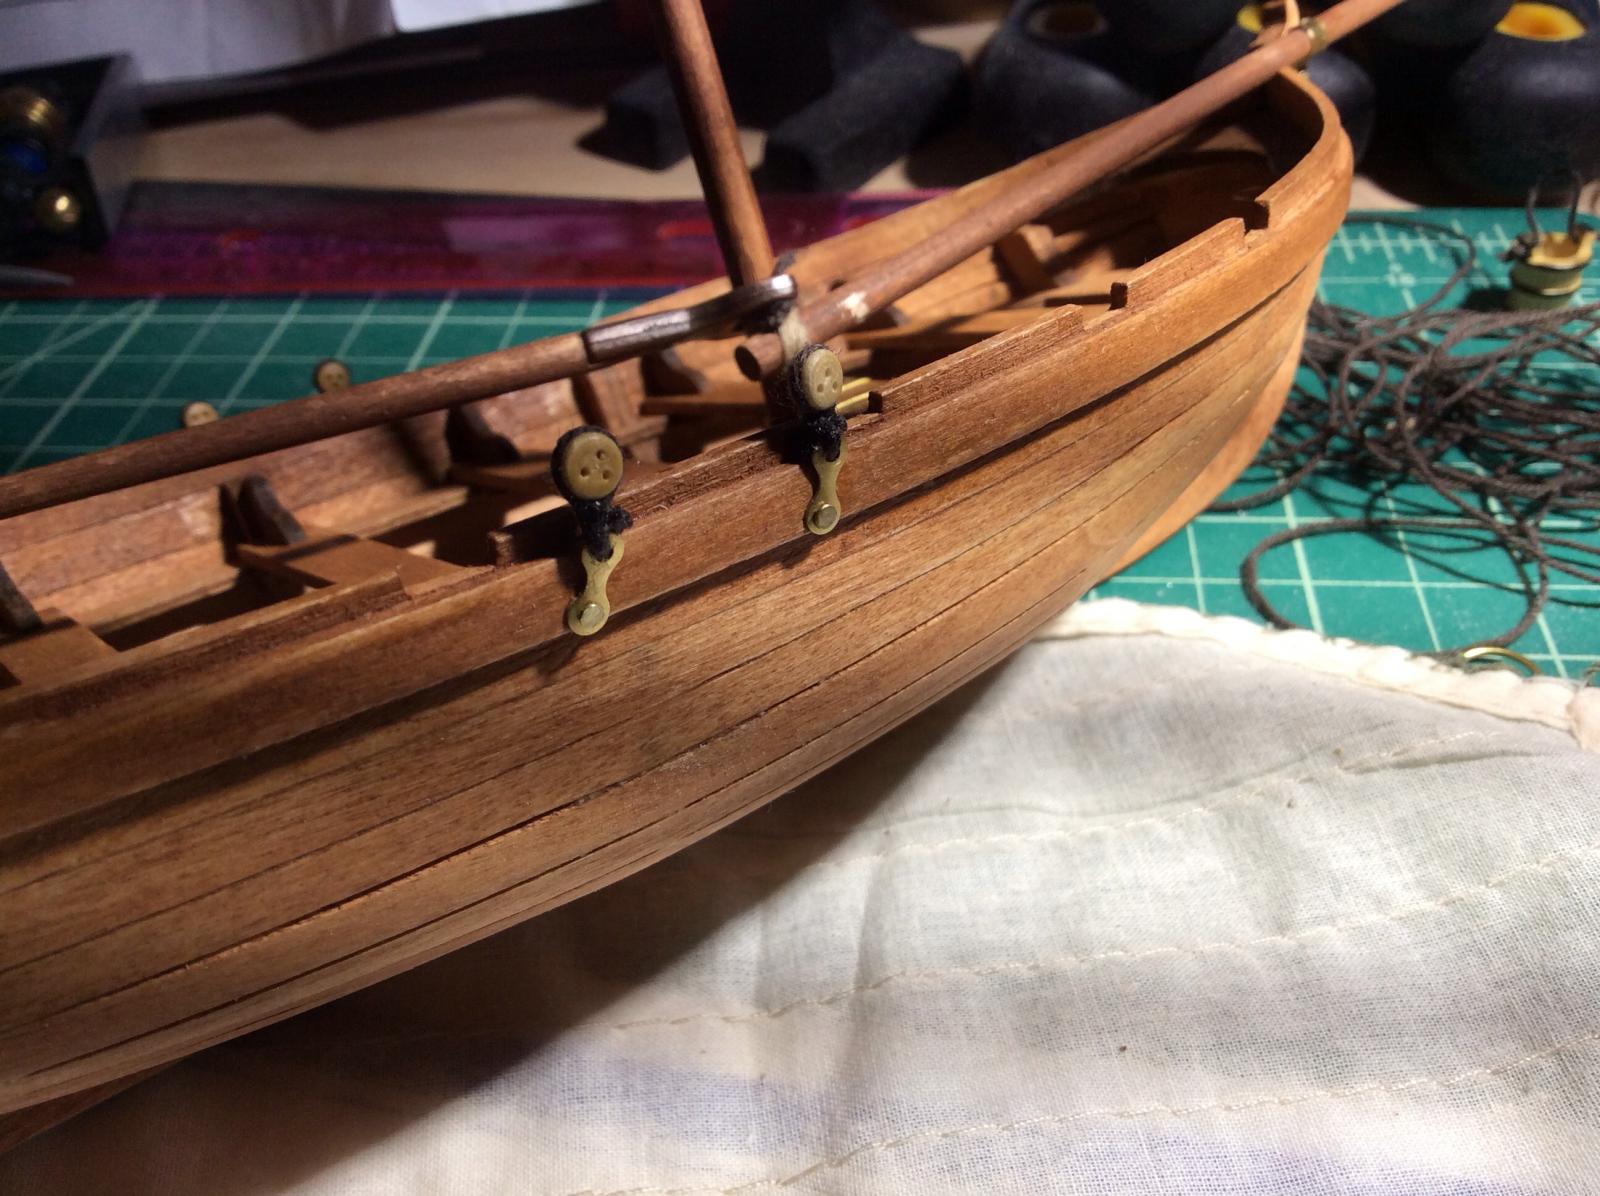
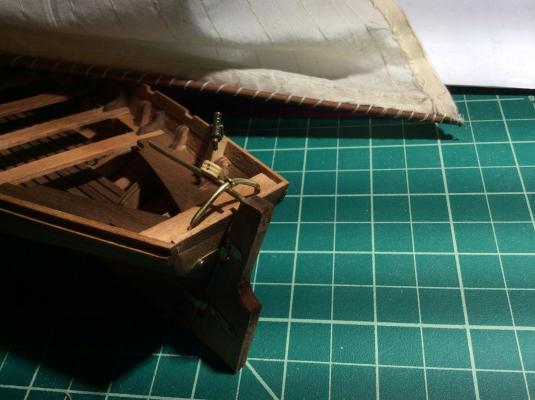
Thar she is waiting for her cleats to dry before I string up the sails to them. Spent the rest of the evening making a box to go in the boat.


- 37 replies
-
- 2
-
-
- jolly boat
- artesania latina
- (and 2 more)
-
Holy moly nice hinges on that chest. Impressive!
-
This is my next build, looking forward to following your progress.
-
I just bid on the Emma C Berry, interesting hull to build. You have point about the Swift though, I might have to do that one too. And the longboat. And voila I have a list of builds to do... Dr. I need help.
-
My fascination with ships of war is Has been cemented with reading Master and Comander by Patrick O'Brian. And since I don't have quite the space yet to take up something like the Syren, I am leaning towards the Armed Virginia Sloop. Smaller ship but with cannon however not too many. Anyone whose has experience withy his kit have opinions?
-
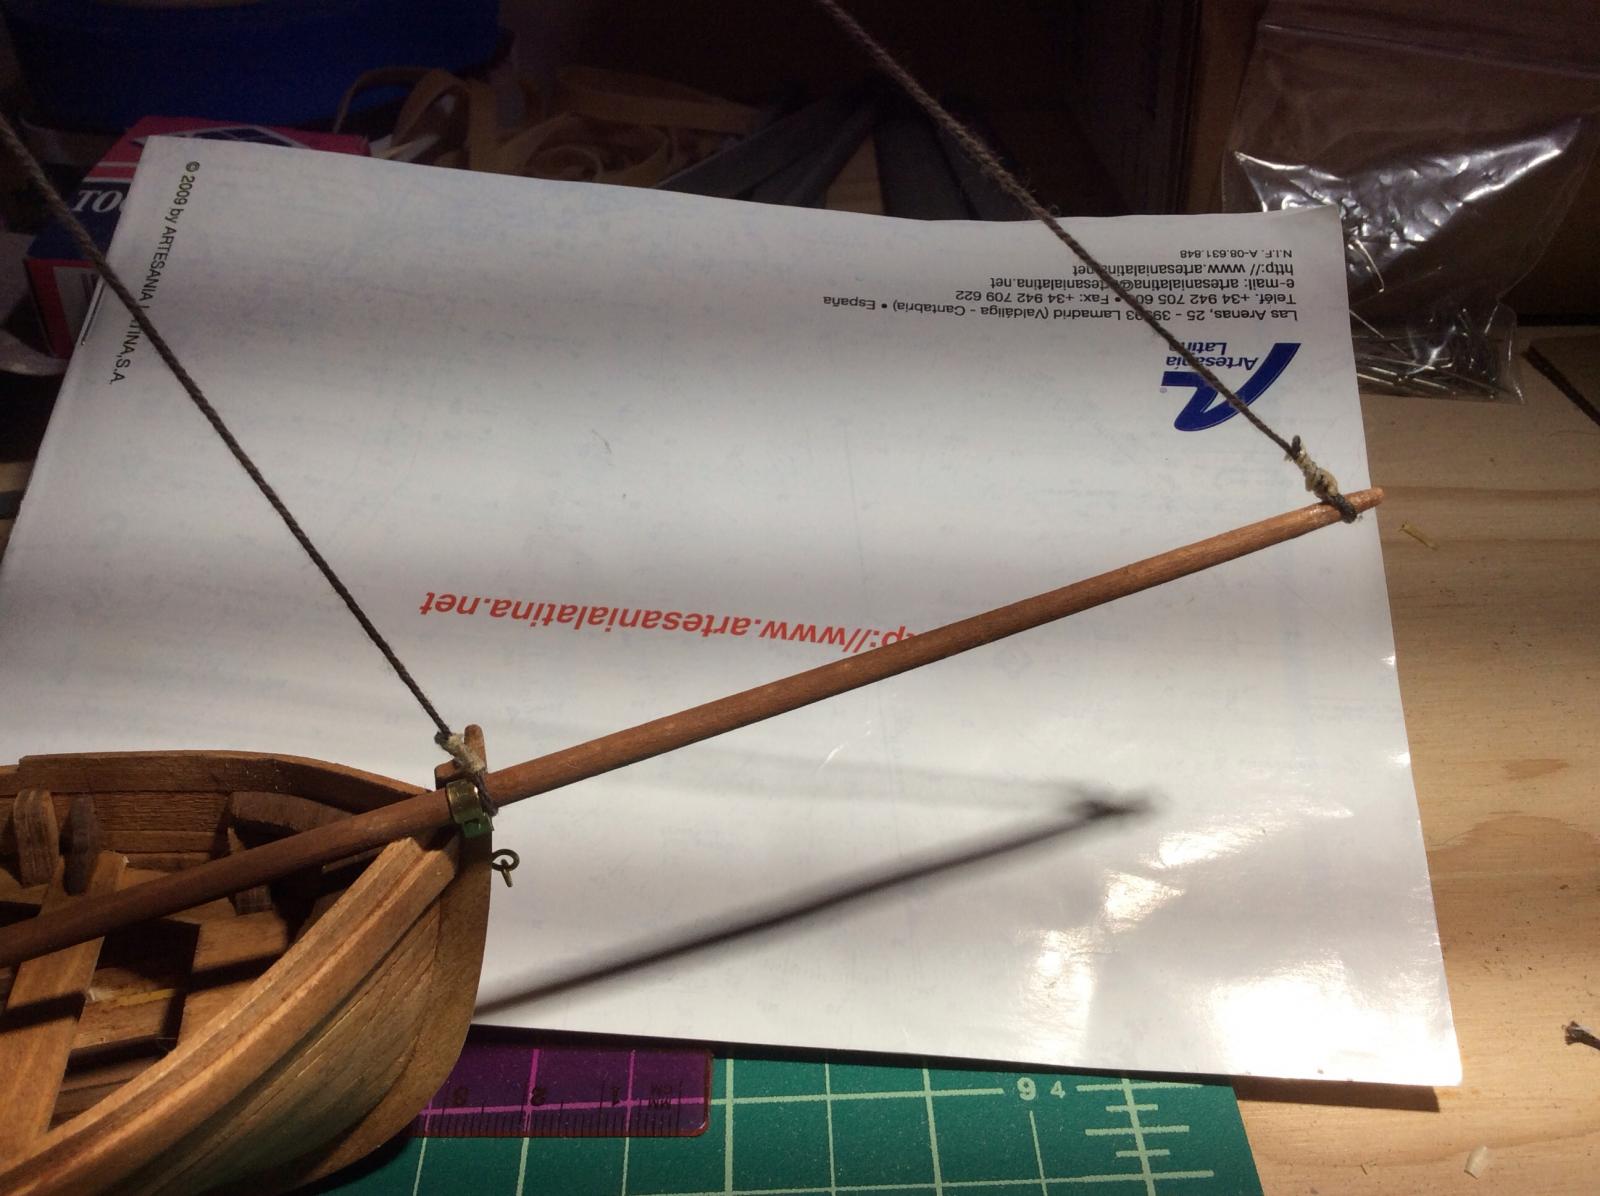
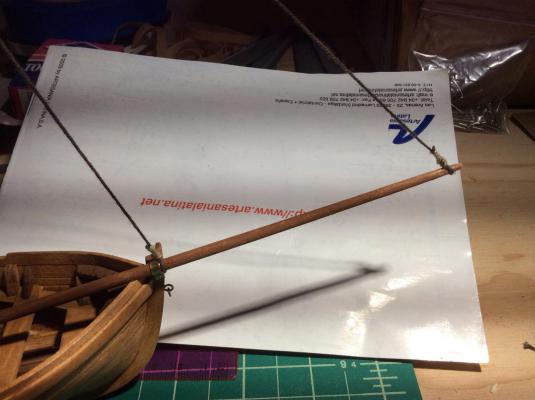
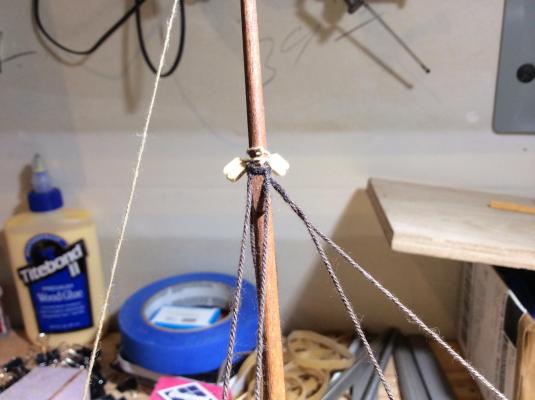
Picture update, I got inspired my staring the Master and Commander books by Oneil. In there is a small modification so the lines don't foul on the tiller to control the mainsail.

- 37 replies
-
- 3
-
-
- jolly boat
- artesania latina
- (and 2 more)
-
Hello, welcome from a fellow new ship builder. I chose the Bounty Jolly Boat as my first build and the Bounty is on my wish list and will follow your build with much interest.
-
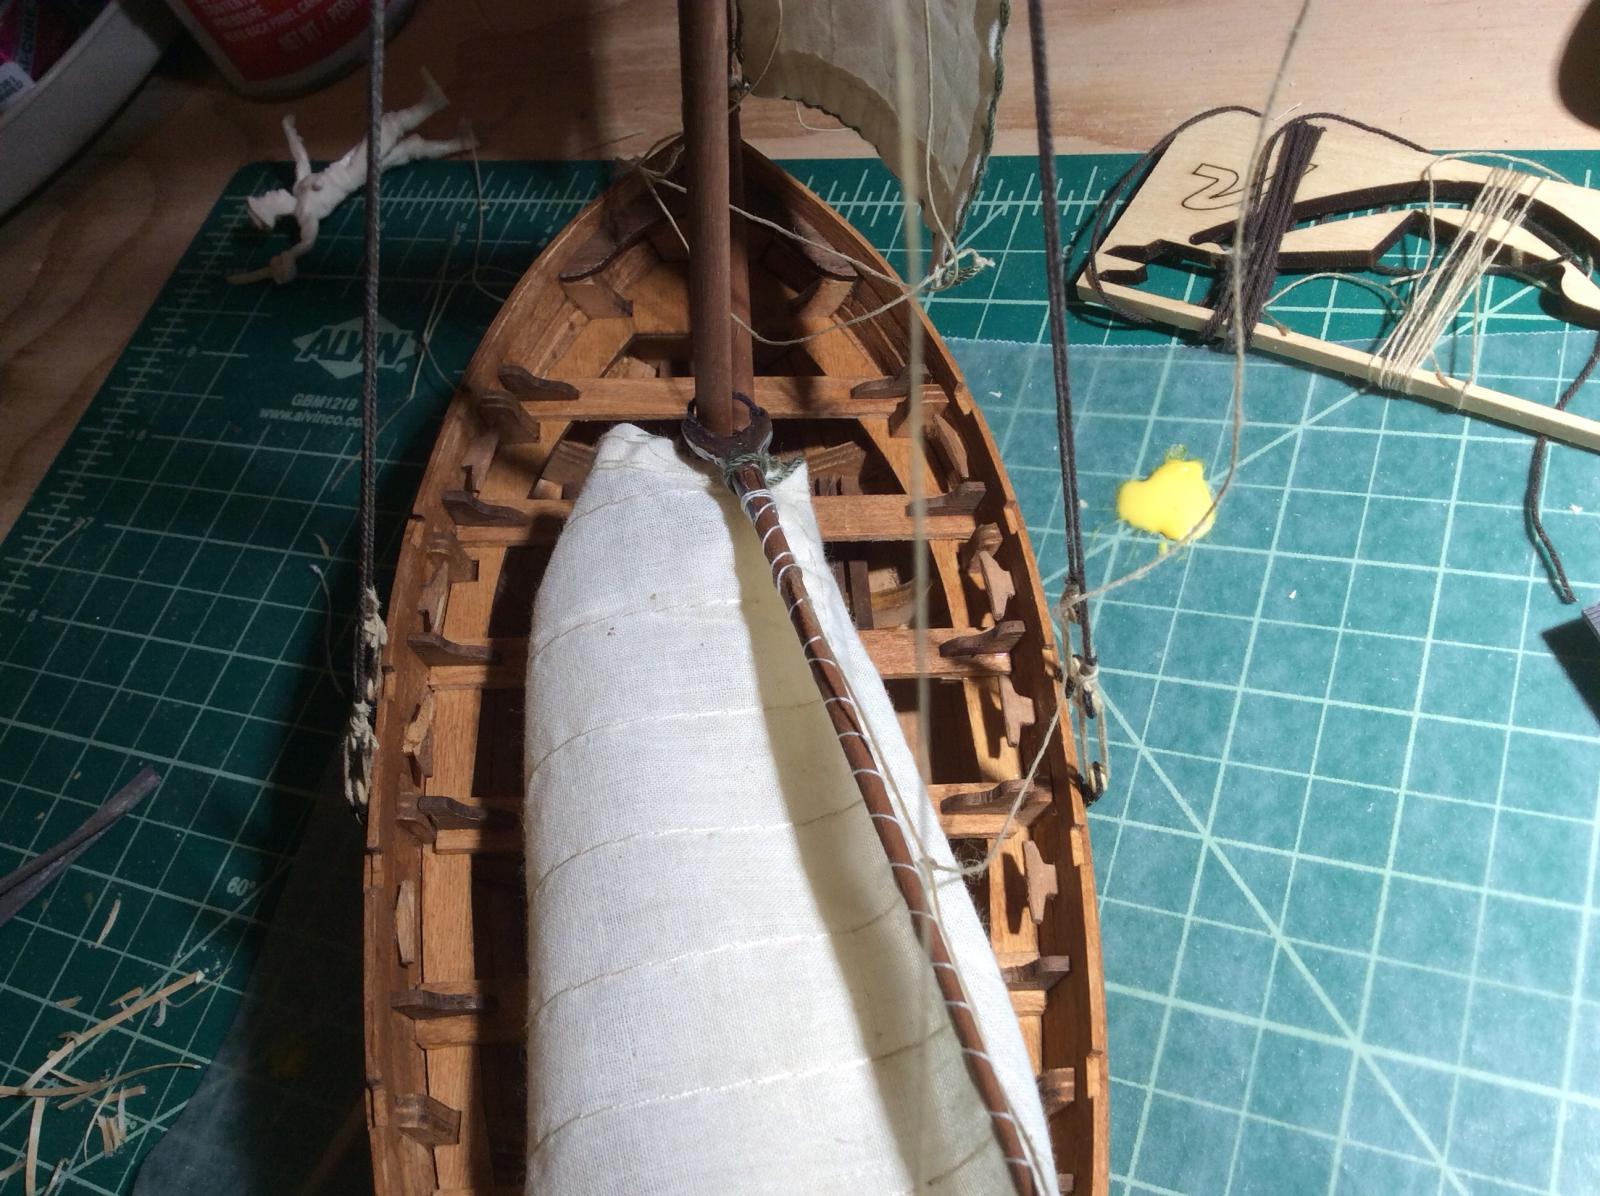
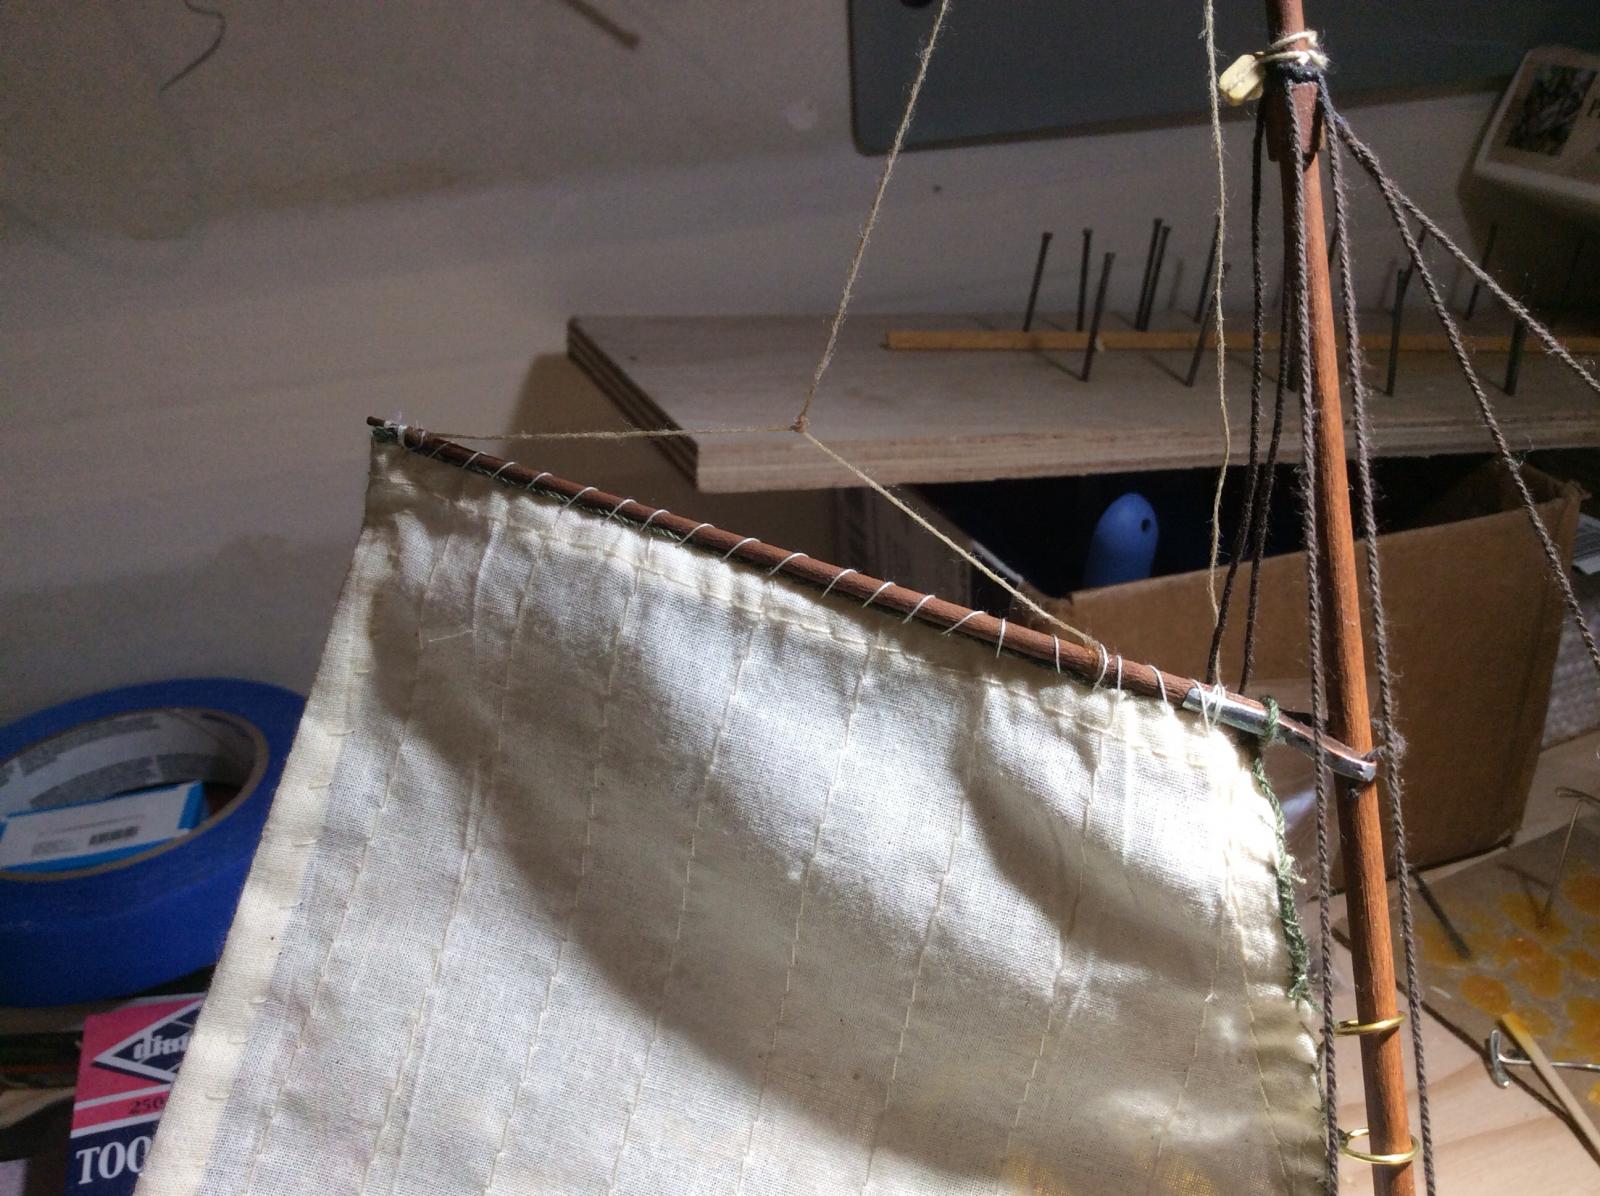
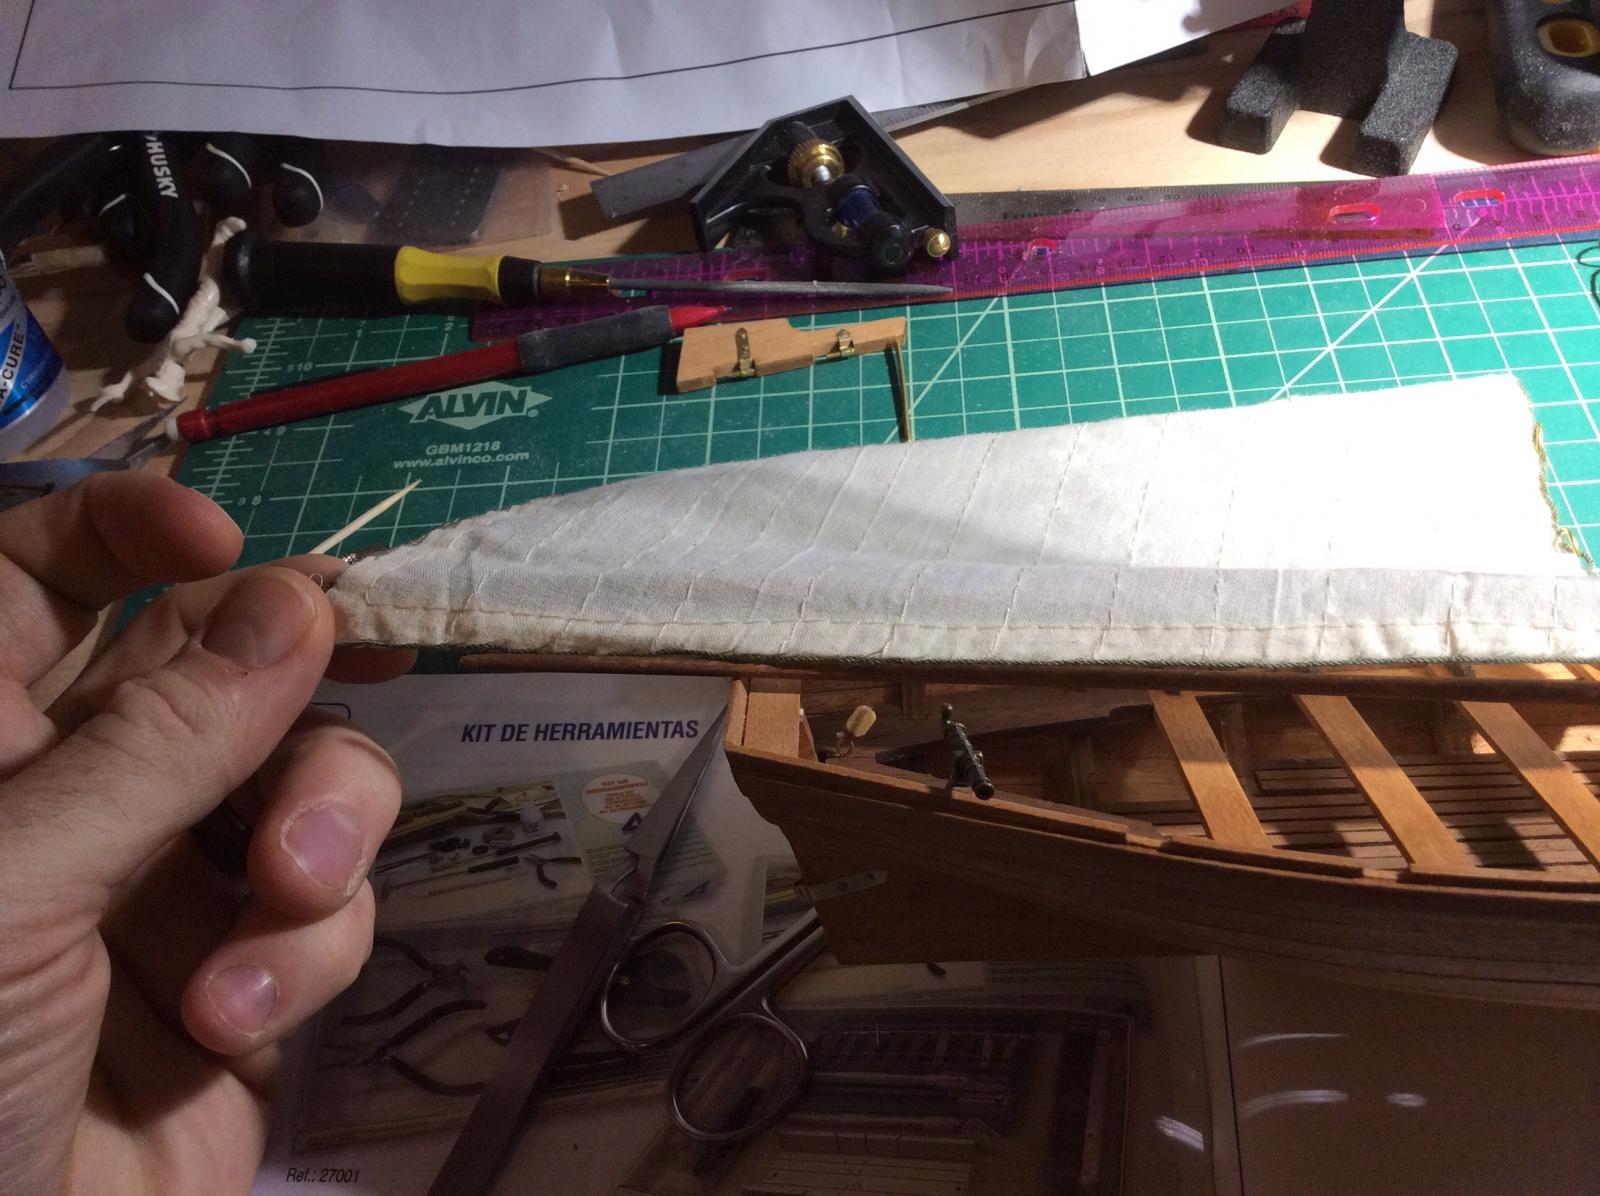
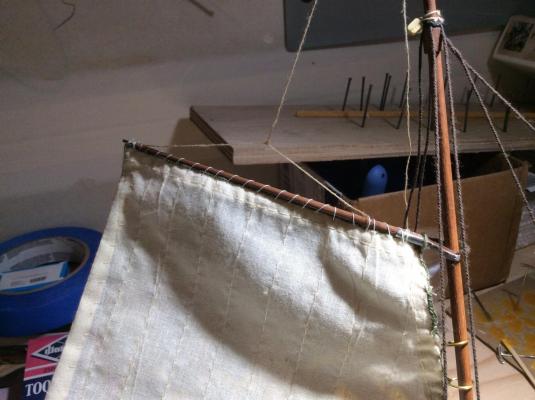
Photo update. Sail too big and some of the non committal rigging things.


- 37 replies
-
- 1
-
-
- jolly boat
- artesania latina
- (and 2 more)
-
Turns out the instructions sort of end with incomplete pictures once you get to the rigging part. The sail provided is too large by about and inch and I am researching rigging and will likely adopt some techniques from similar models and others build logs. Anyone know what this boat might have had given the period cleats versus a pinrail to secure line used to secure halyards and the like?