HOLIDAY DONATION DRIVE - SUPPORT MSW - DO YOUR PART TO KEEP THIS GREAT FORUM GOING! (89 donations so far out of 49,000 members - C'mon guys!)
×


Cannon Fodder
-
Posts
147 -
Joined
-
Last visited
Content Type
Profiles
Forums
Gallery
Events
Everything posted by Cannon Fodder
-
So I opted out of the video, and went with pictorial. I posted it in my Swift log as I found it impossible to try and explain without a model. The way I see it, you either try to learn this now with the bonus of your mistakes getting covered or learn it with your second layer of planks and your booboos are all out for people to admire. How else are your going to plank that second layer... Embrace this journey...picture yogi instructor...find your chi... Feel free to inundate me with PM's about it.
-
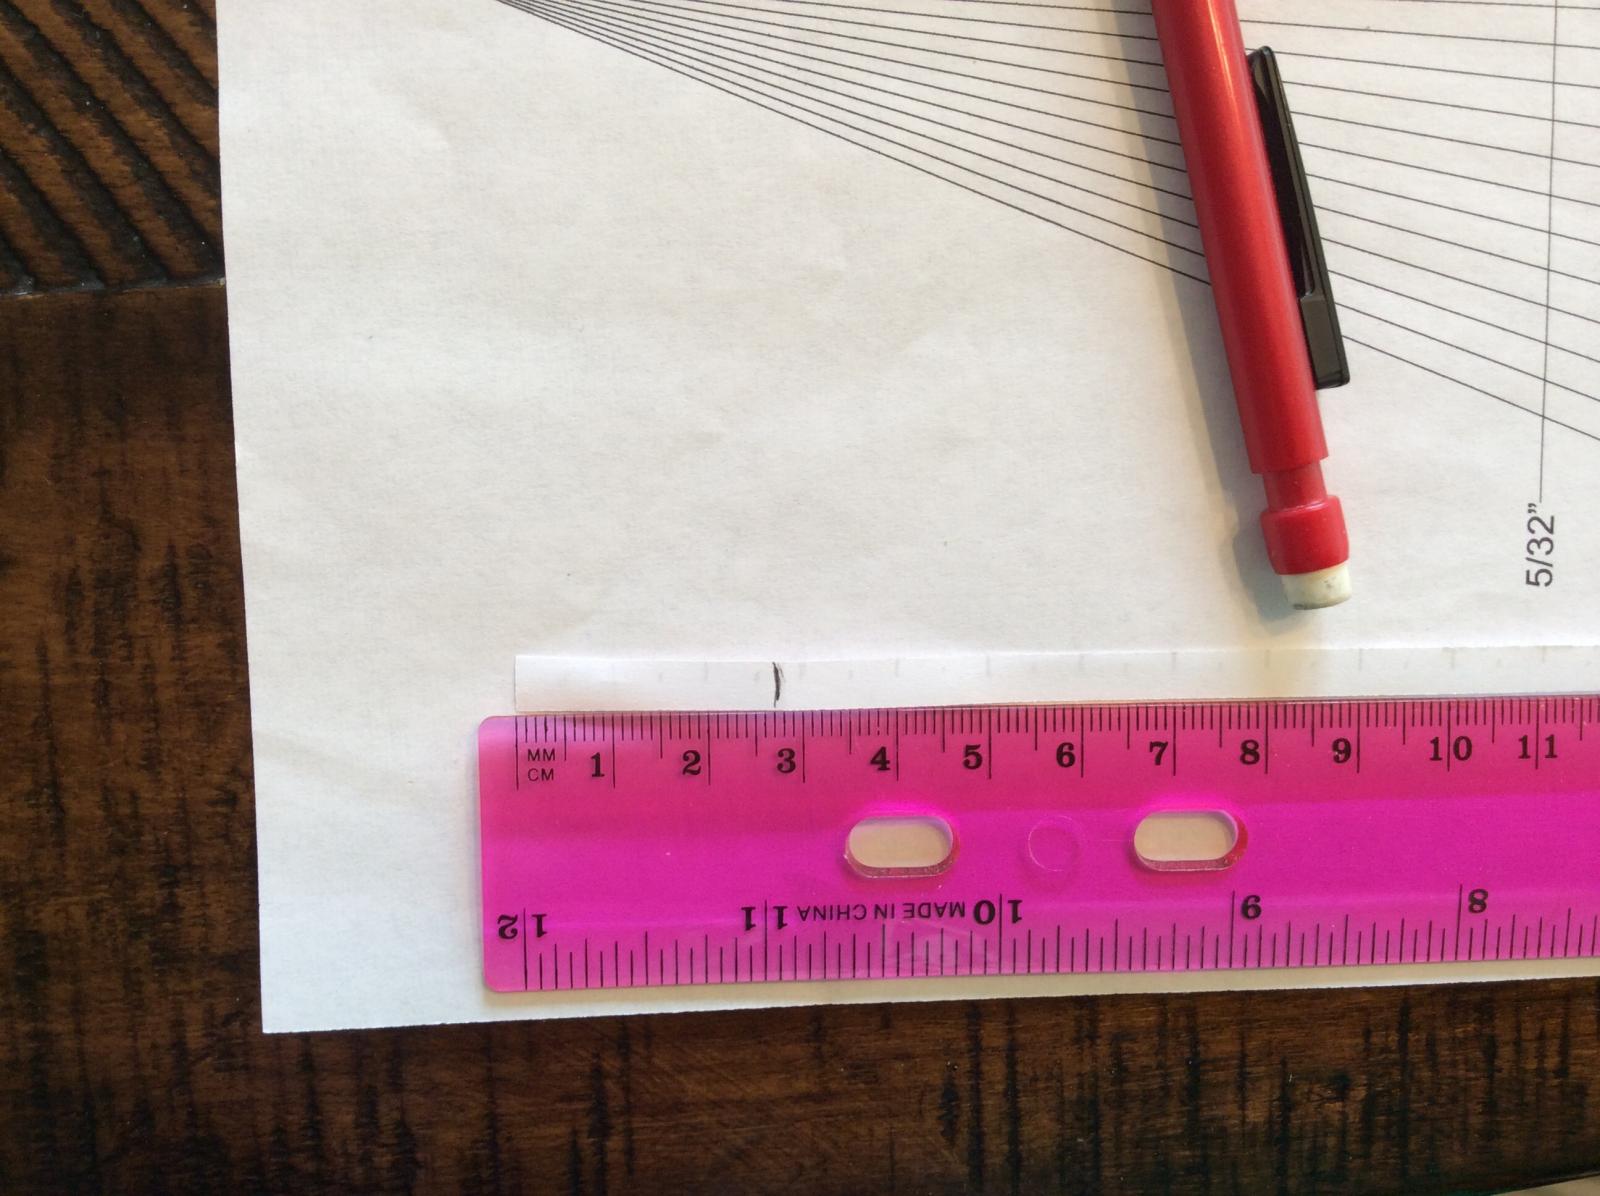
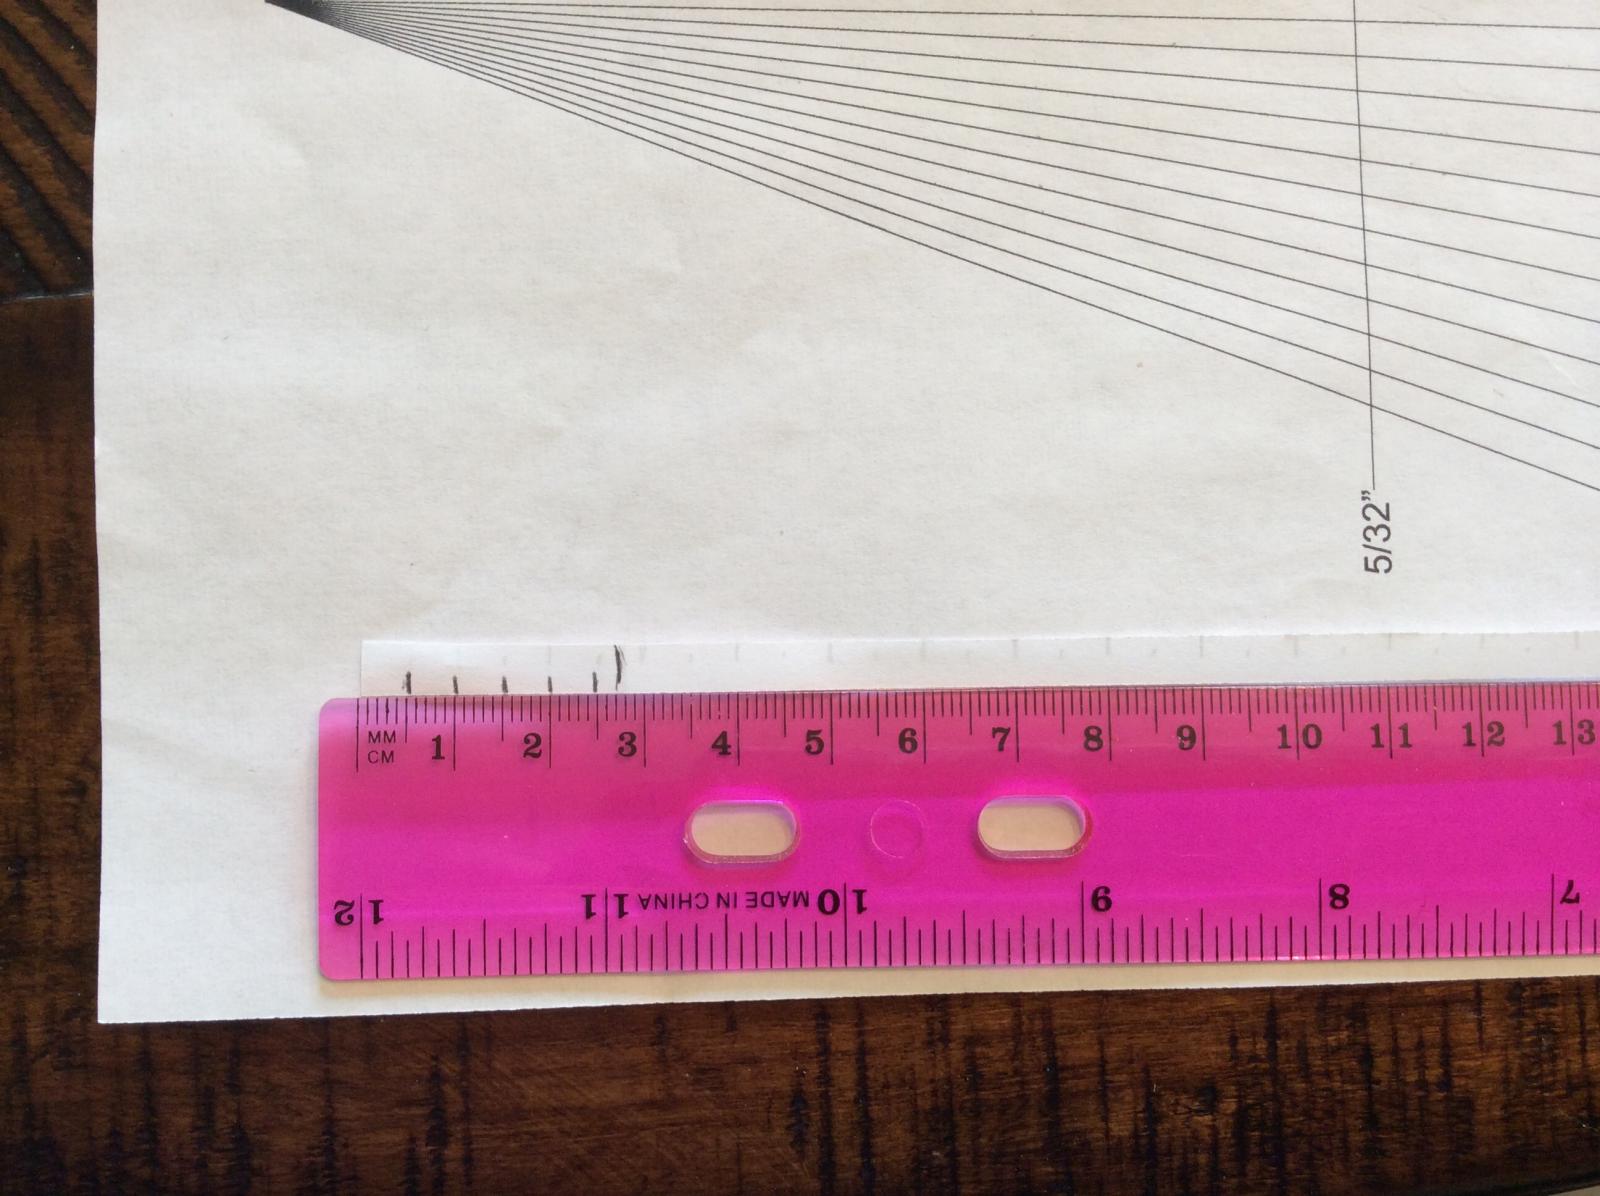
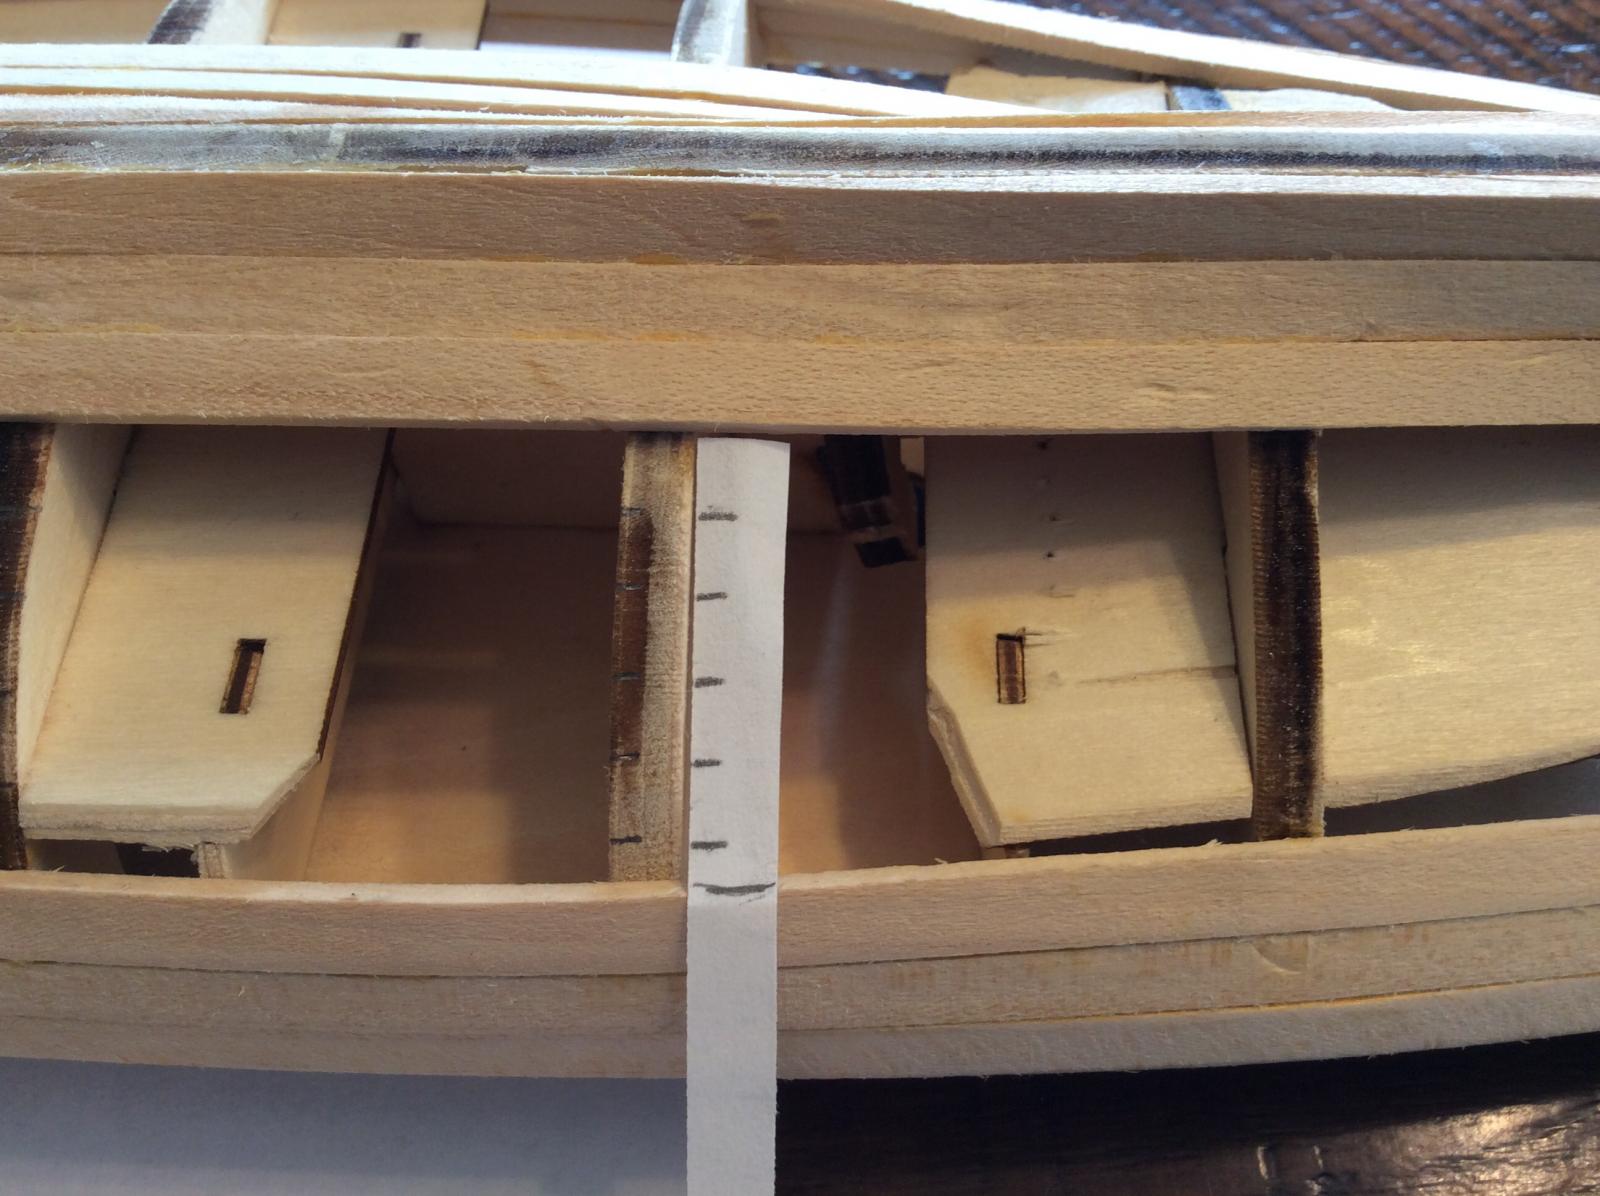
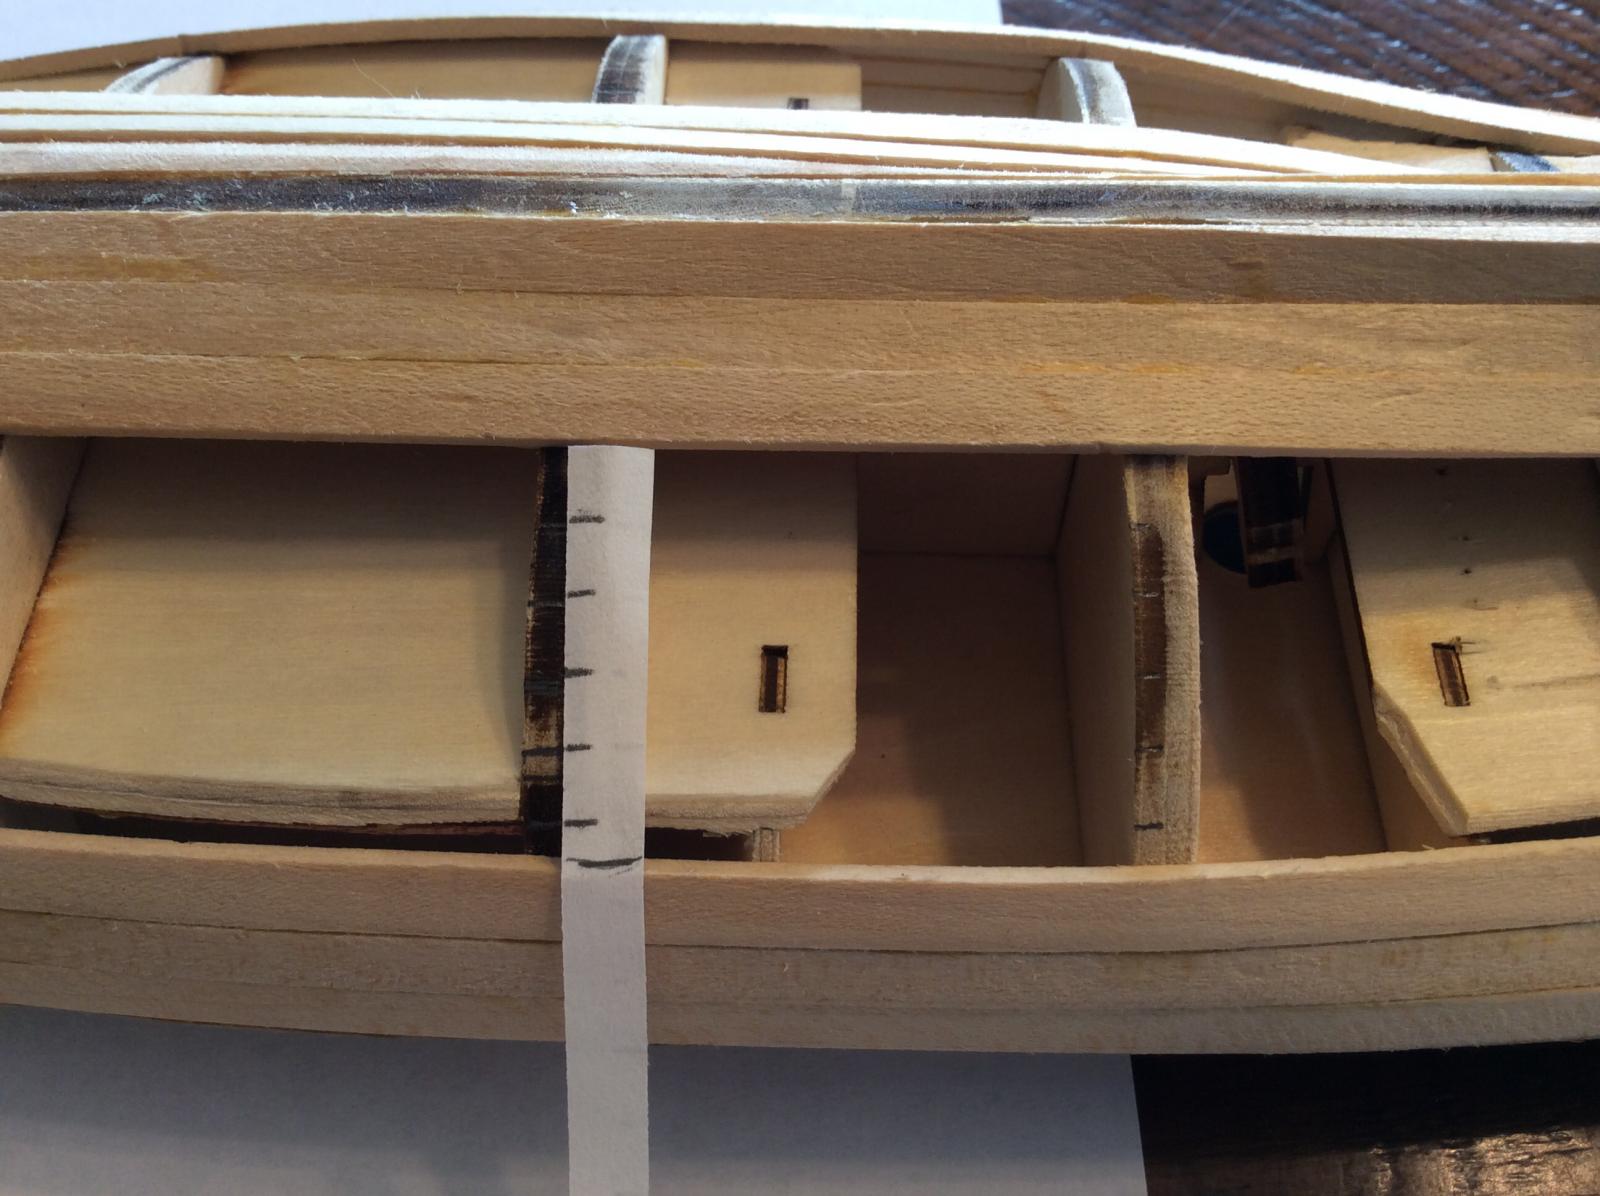
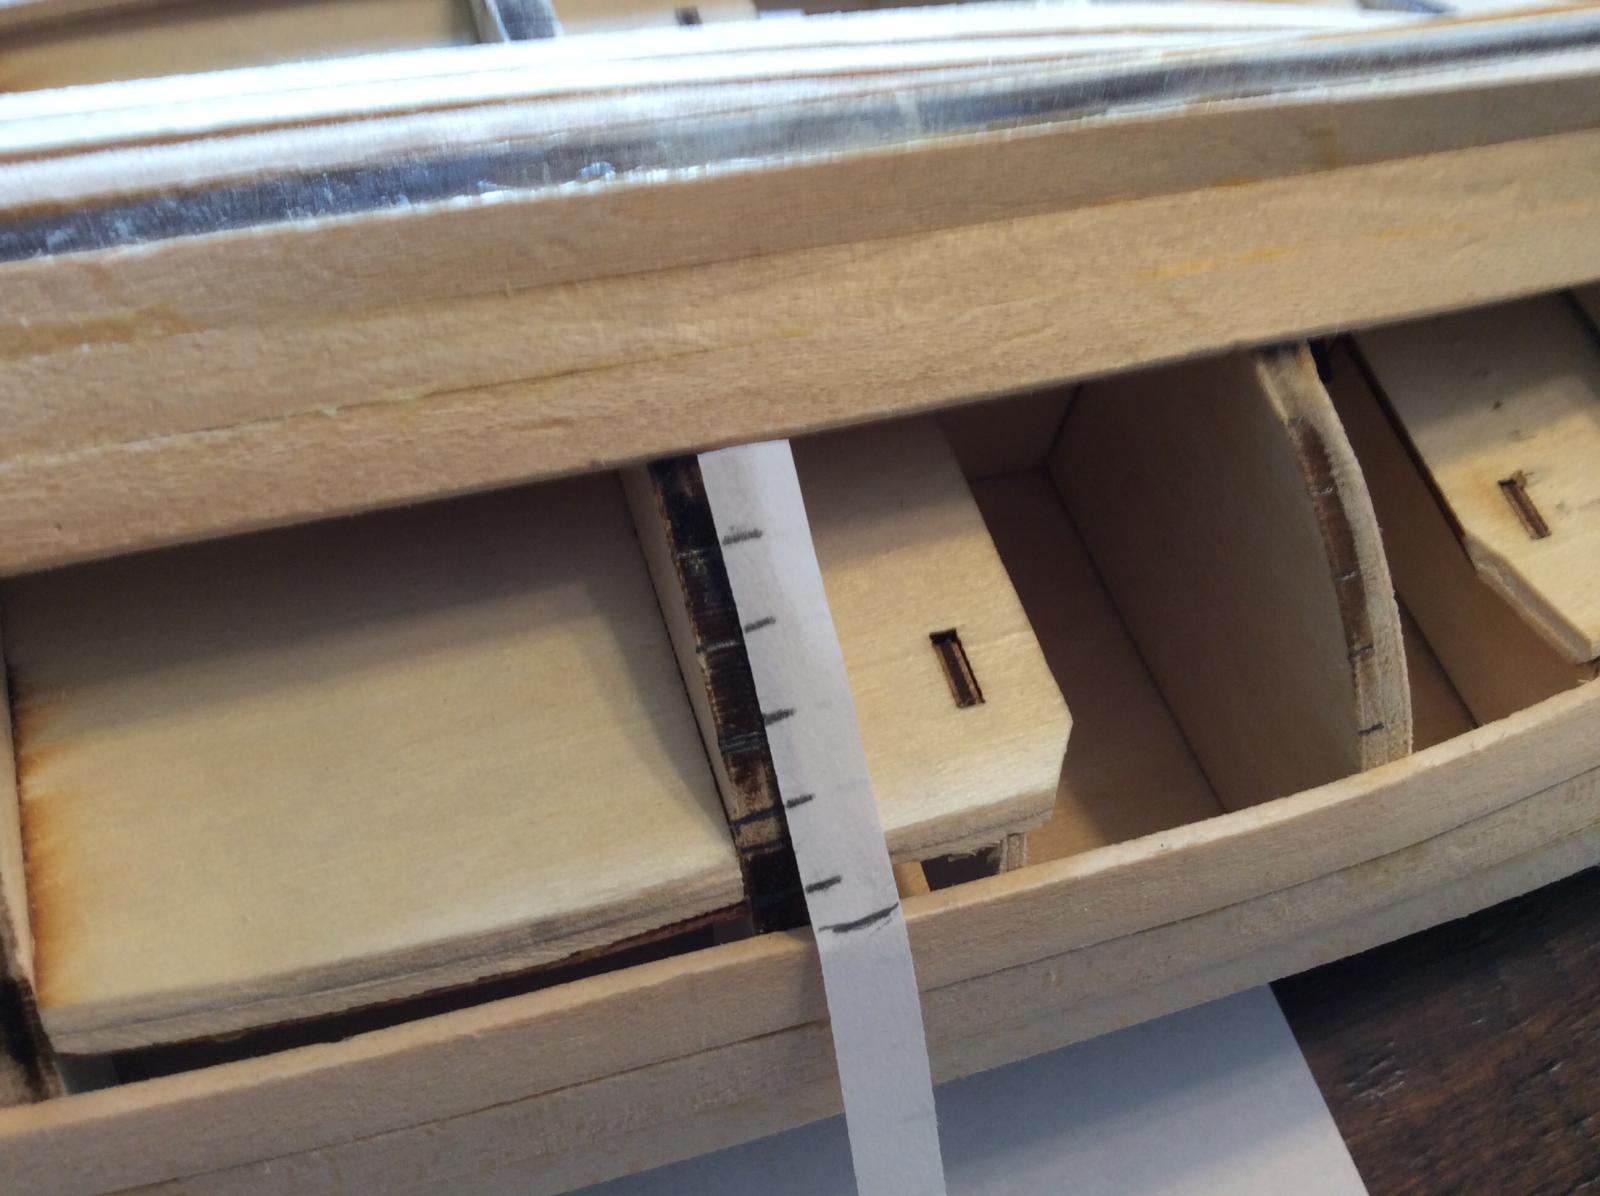
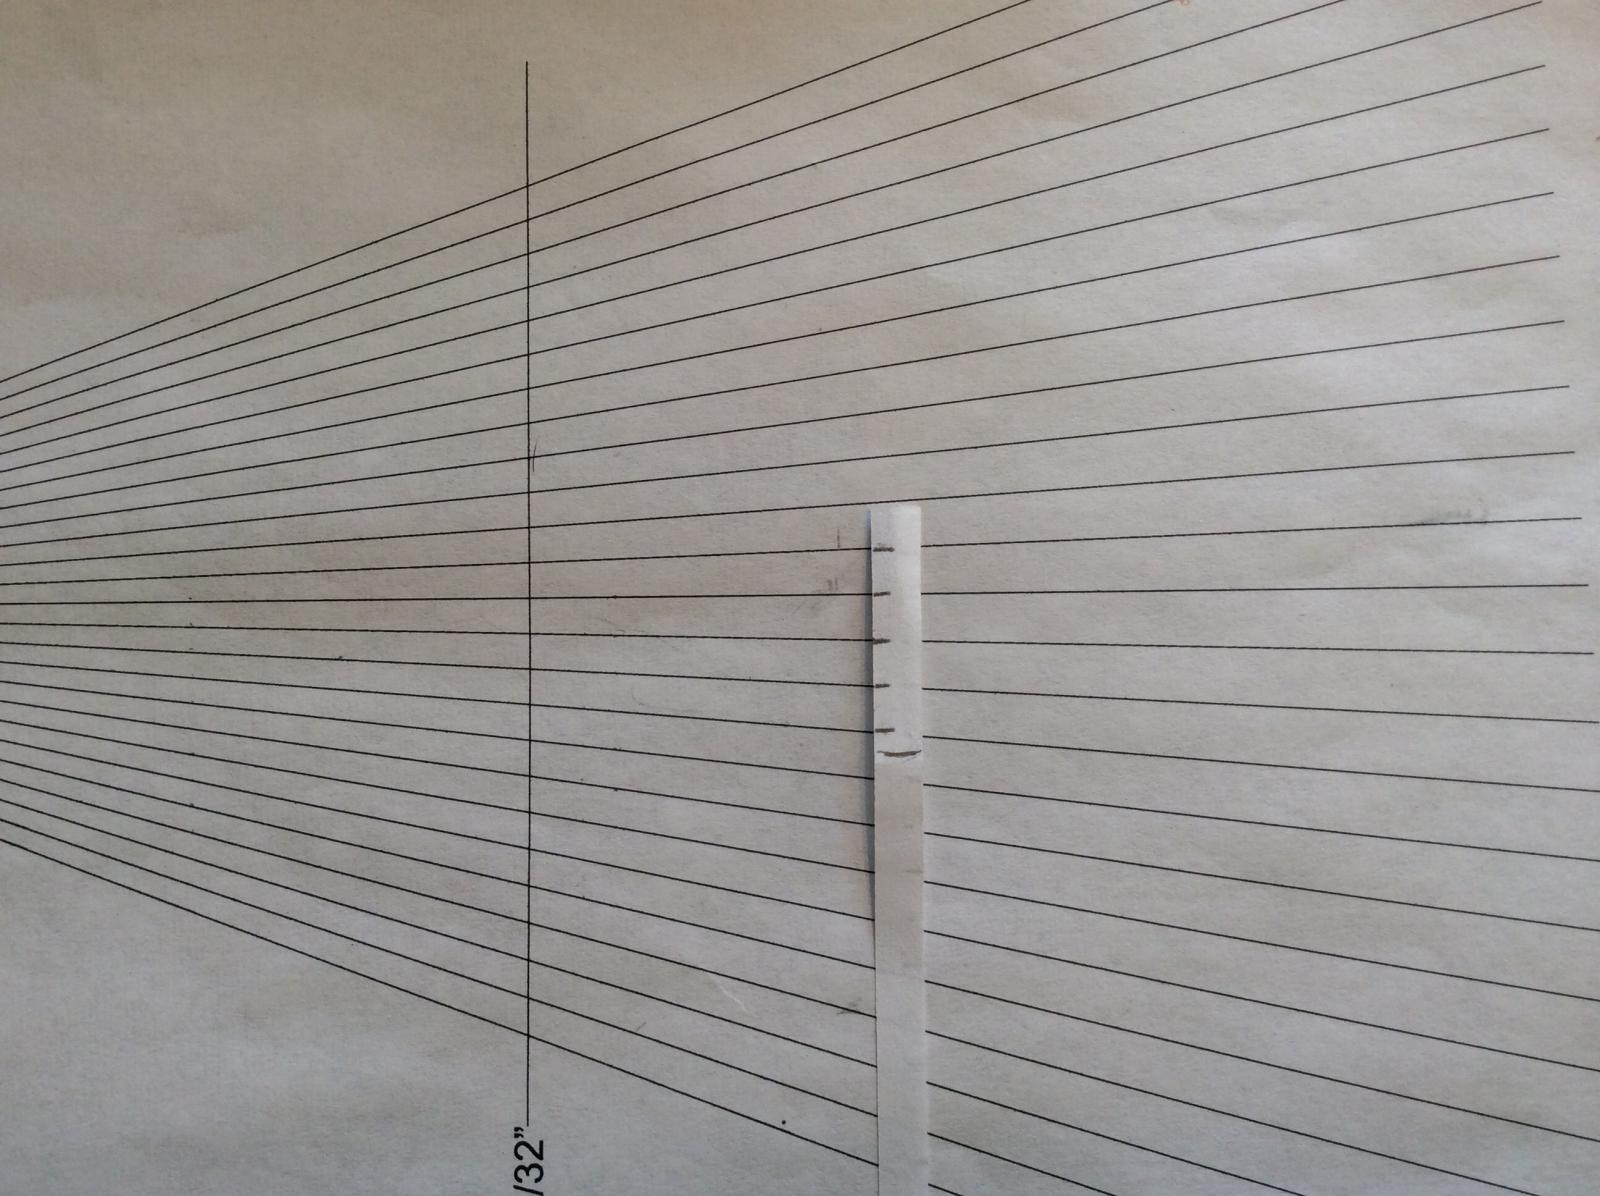
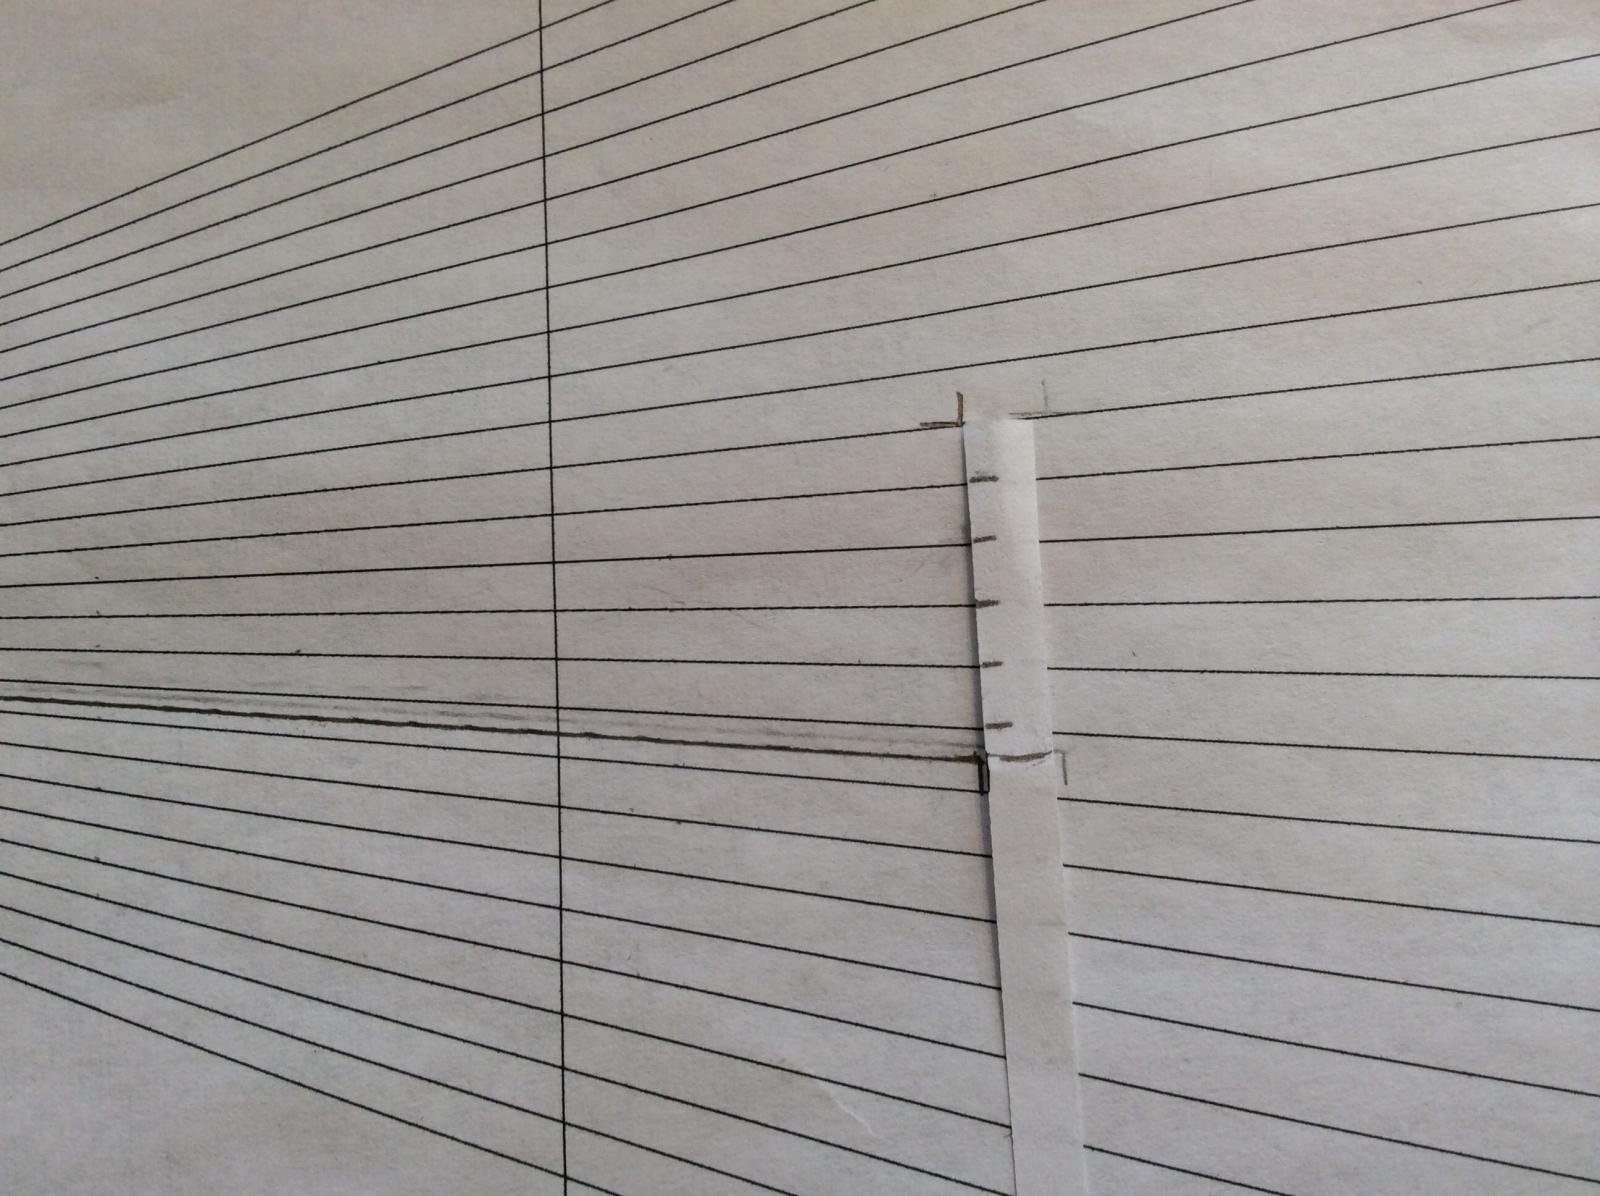
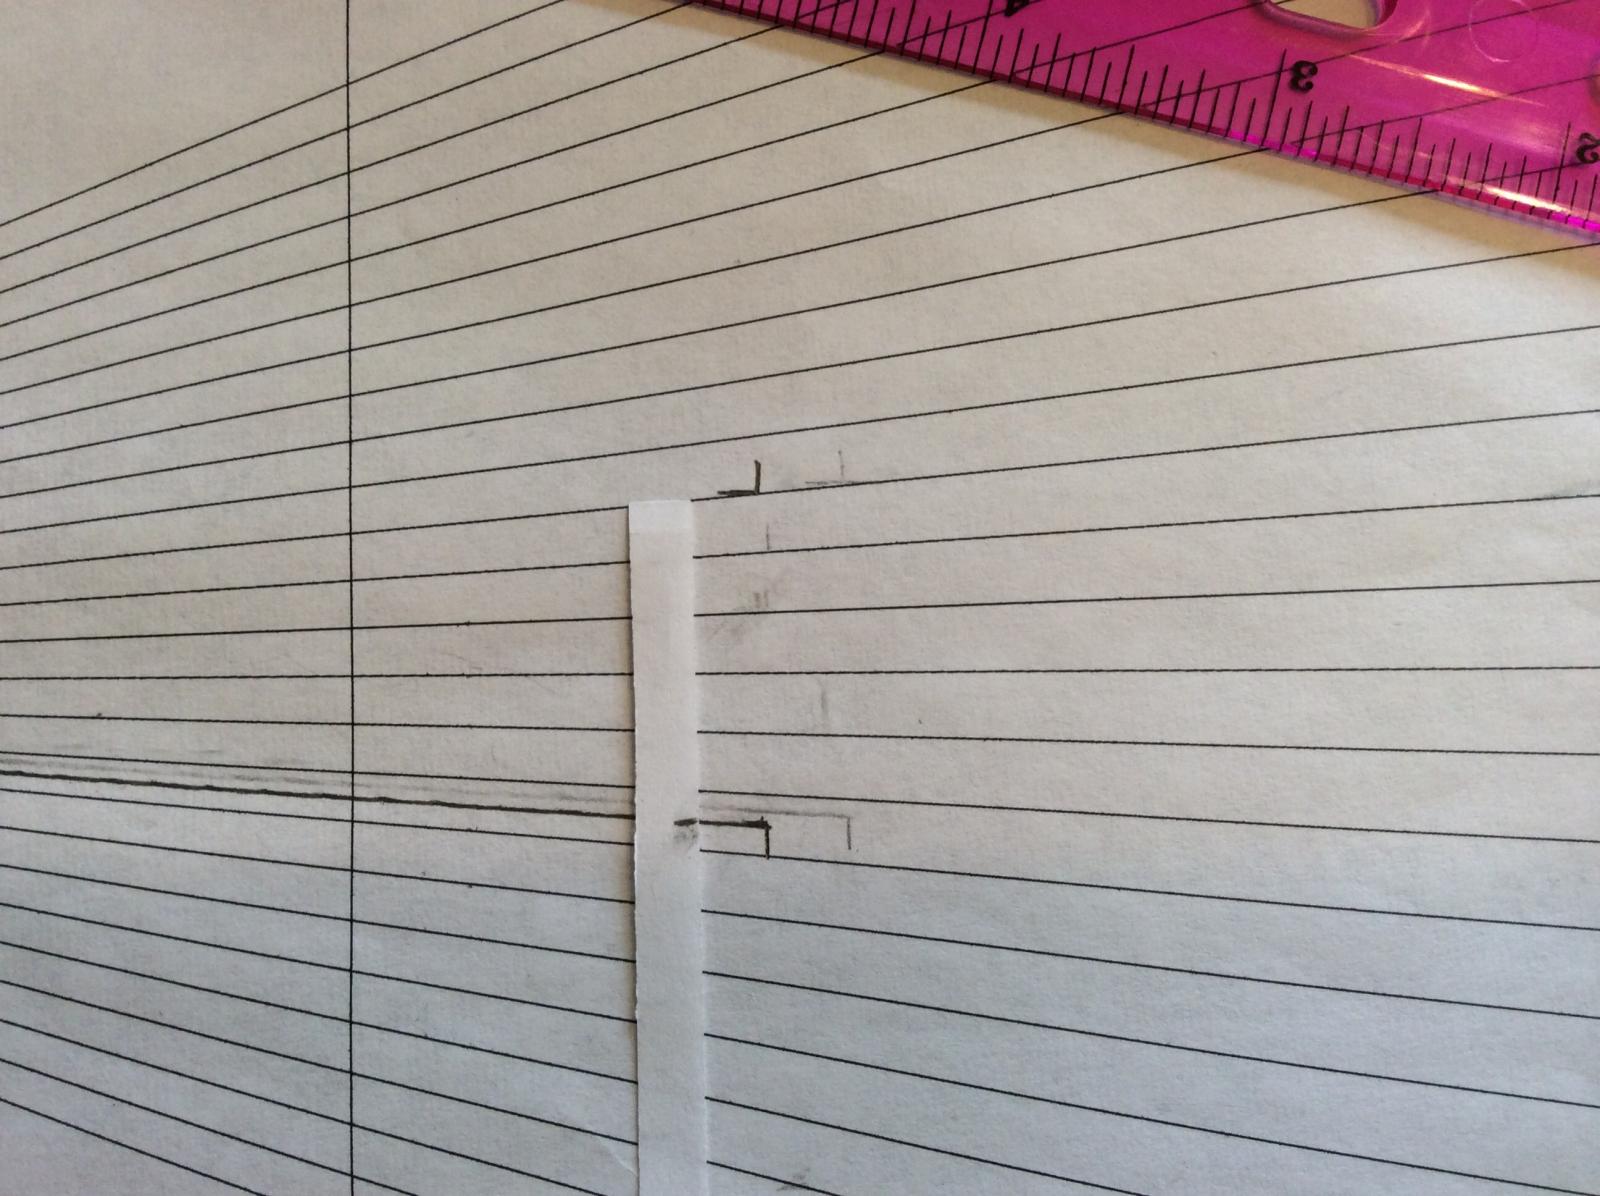
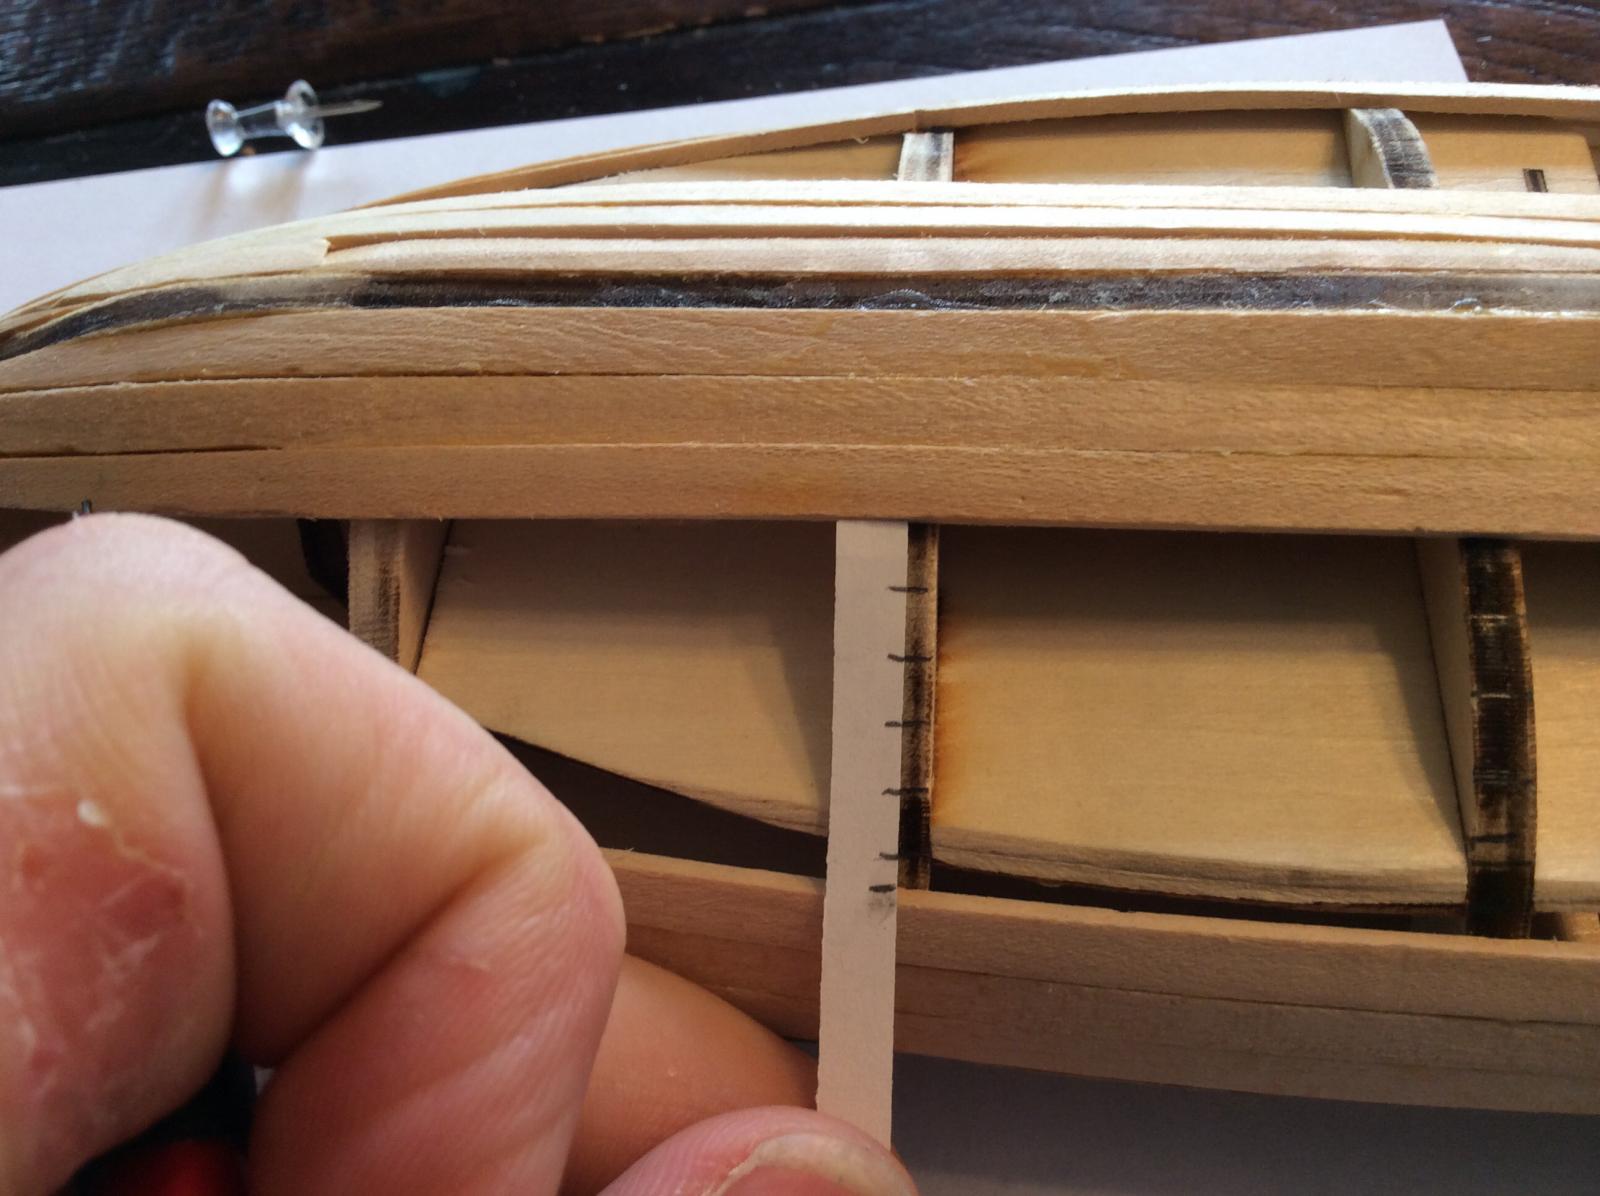
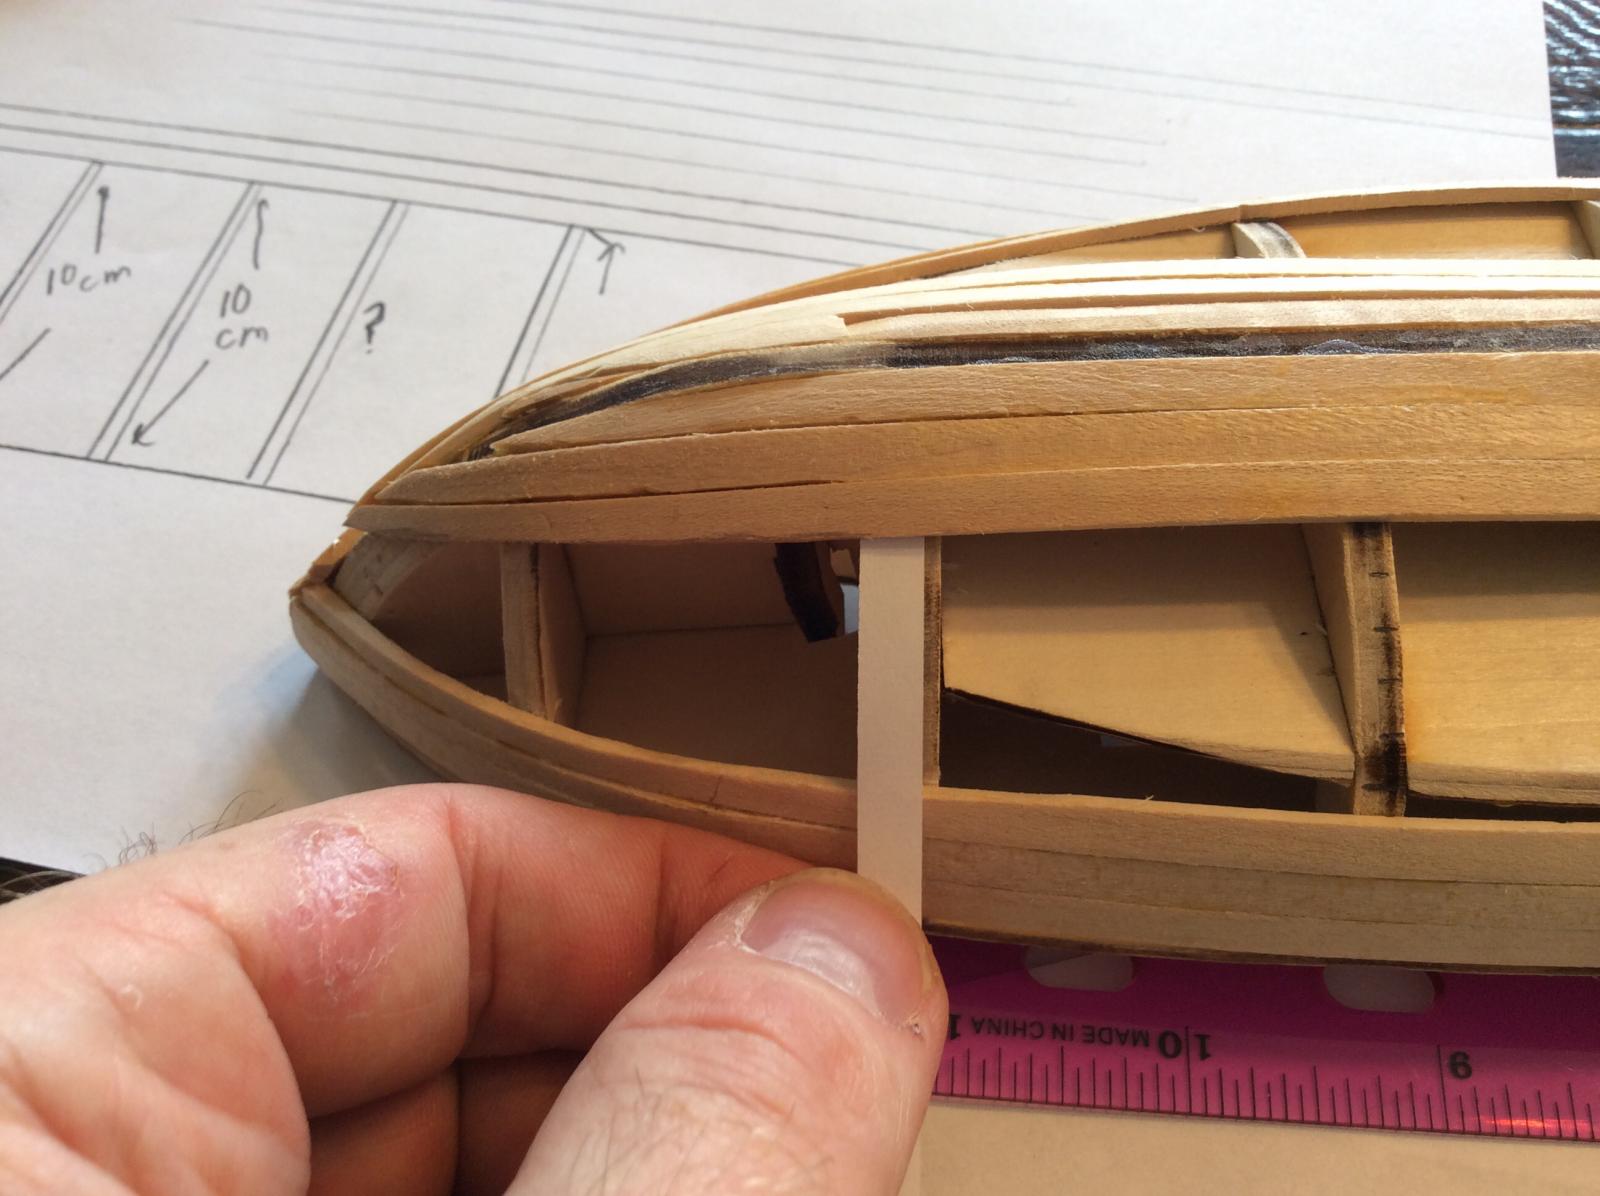
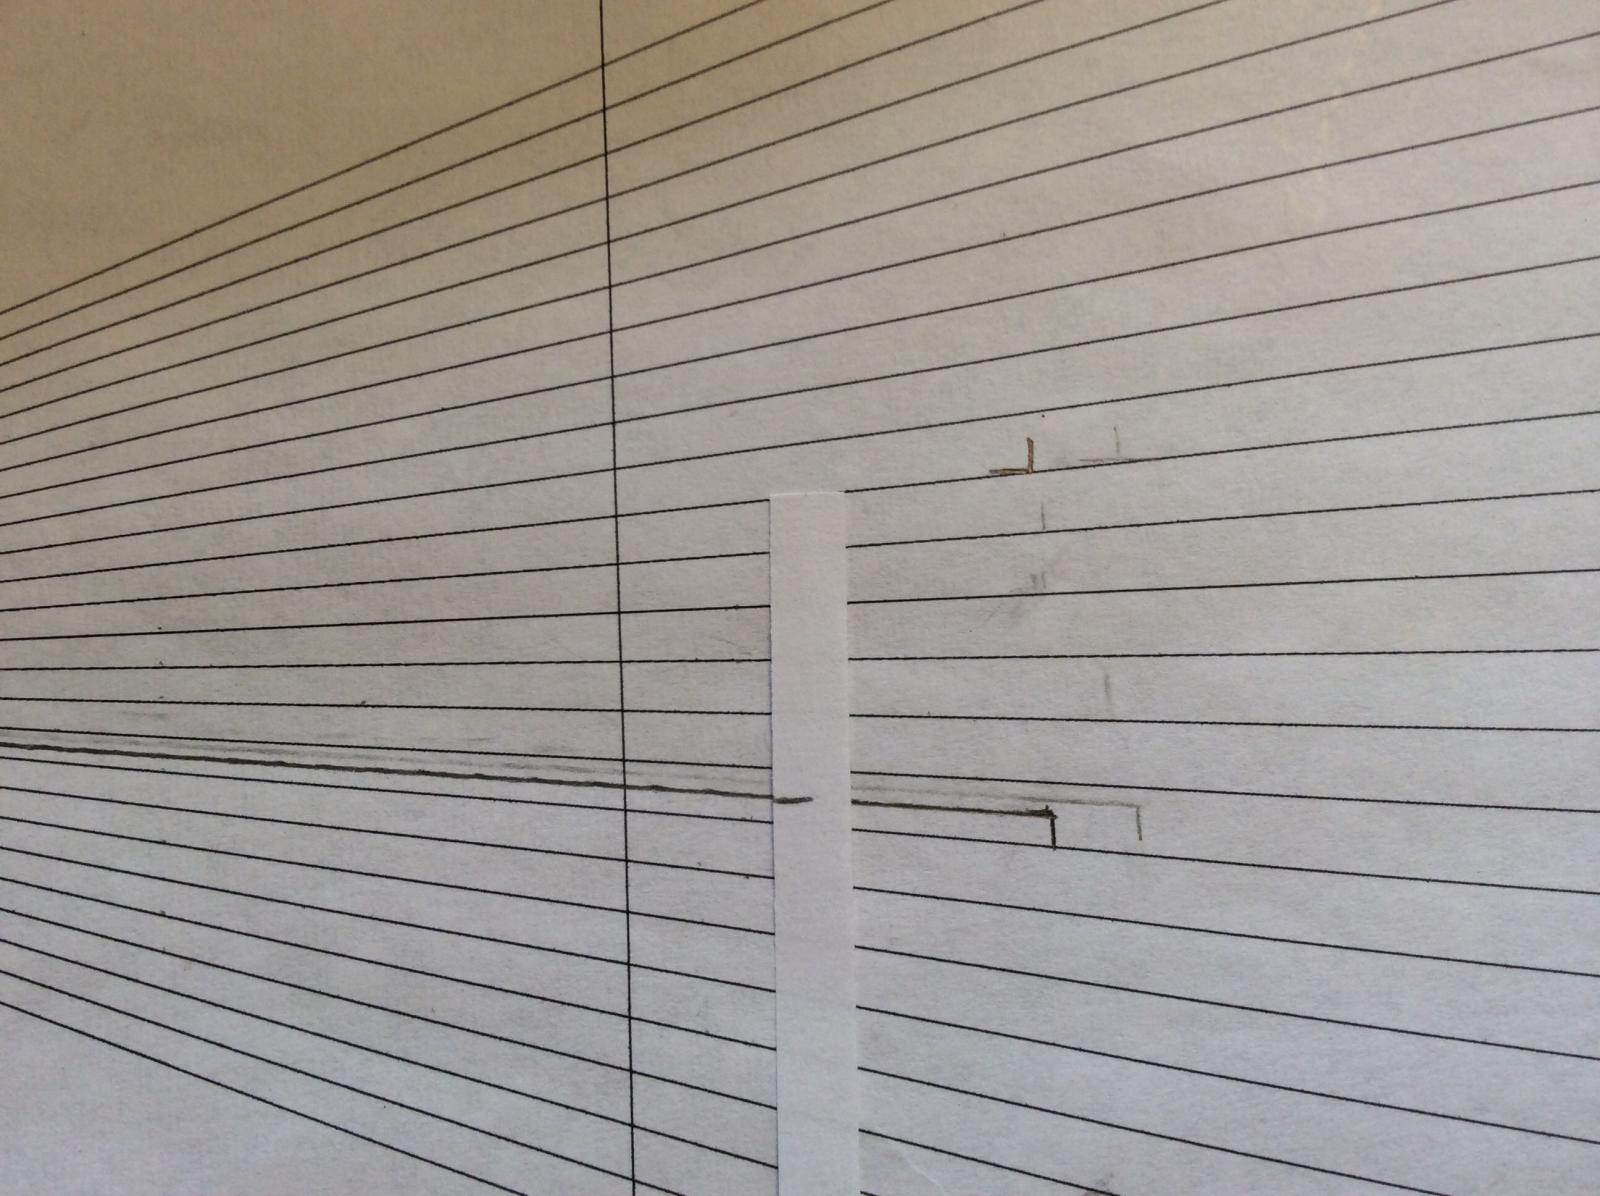
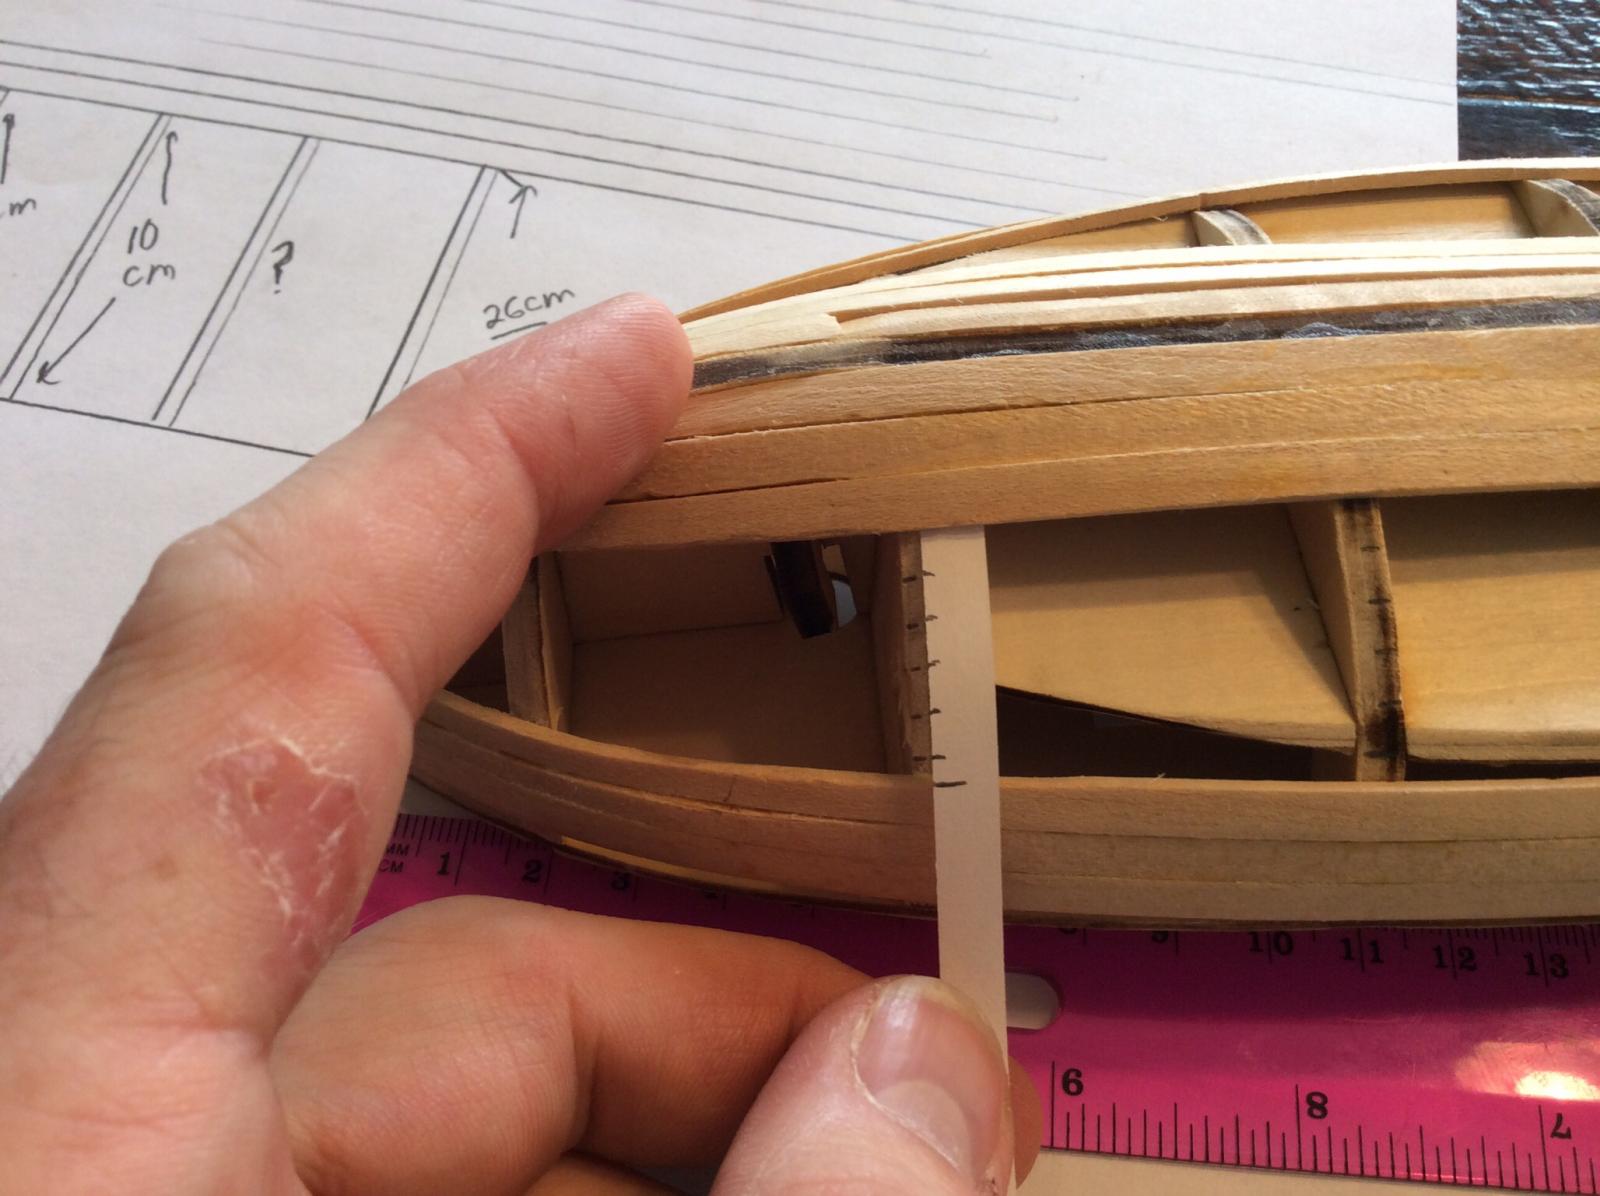
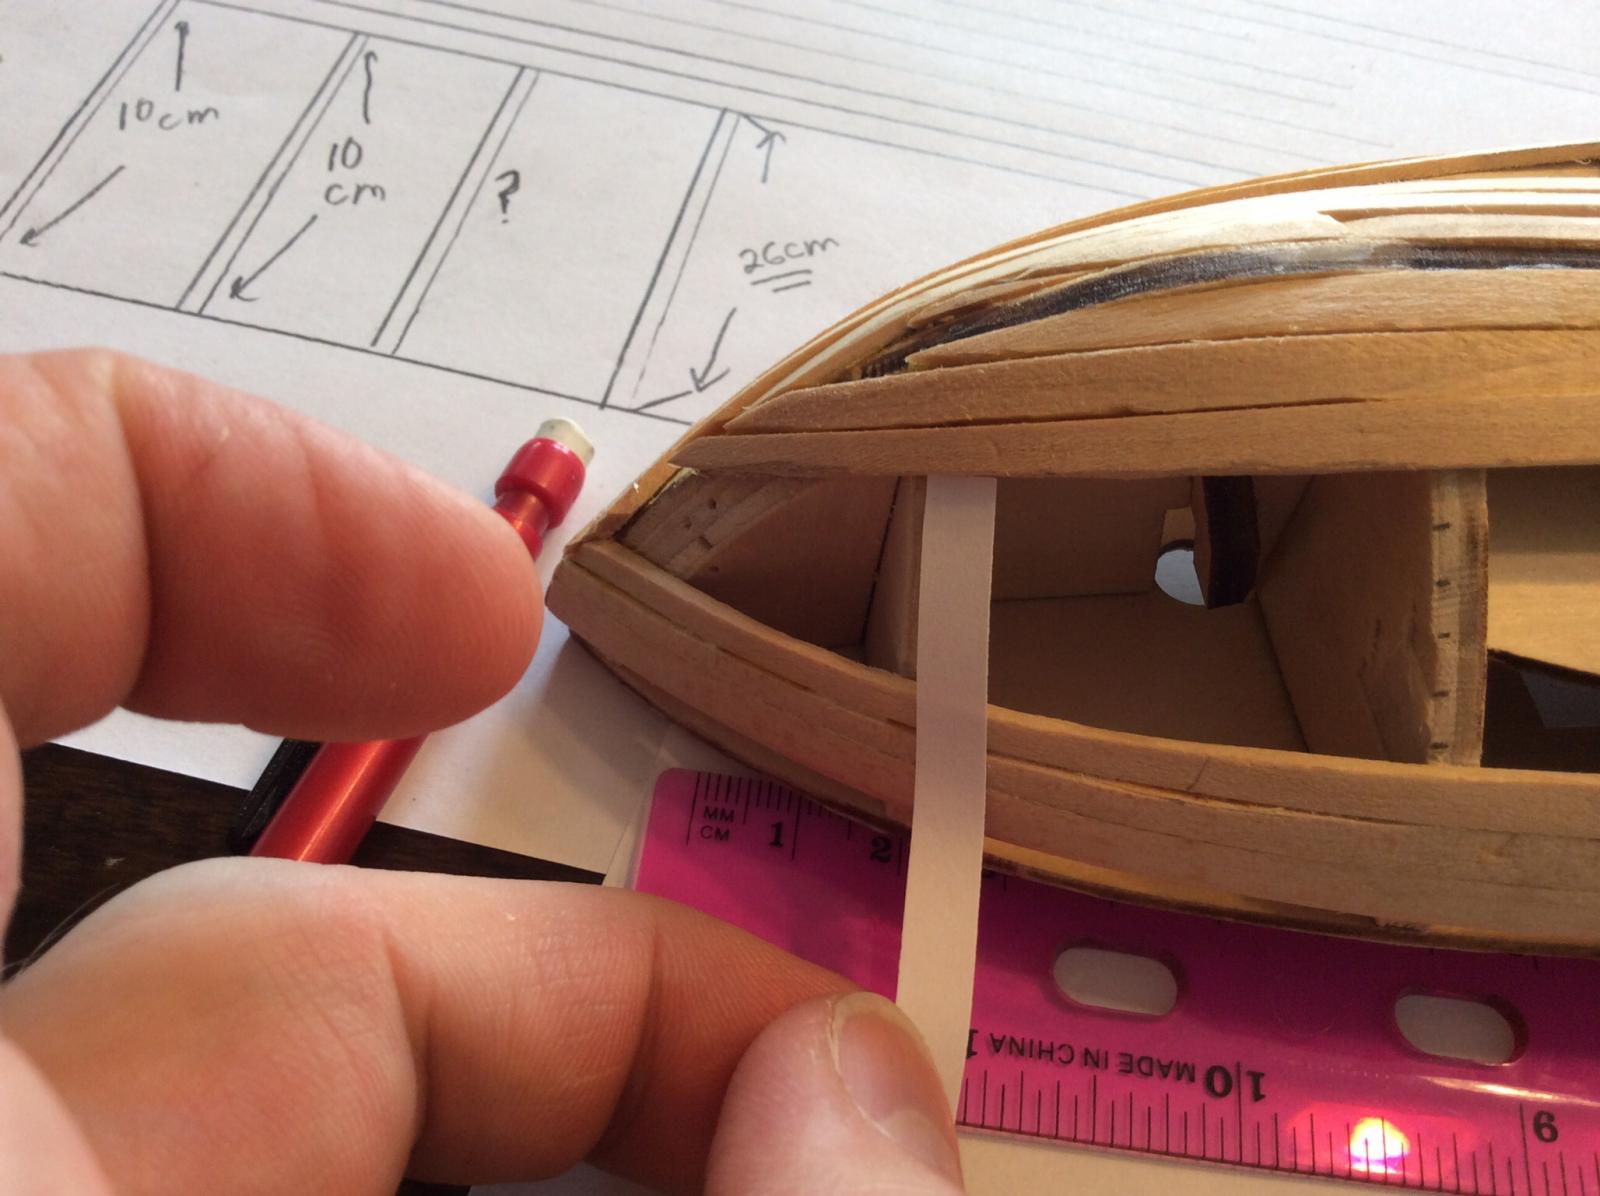
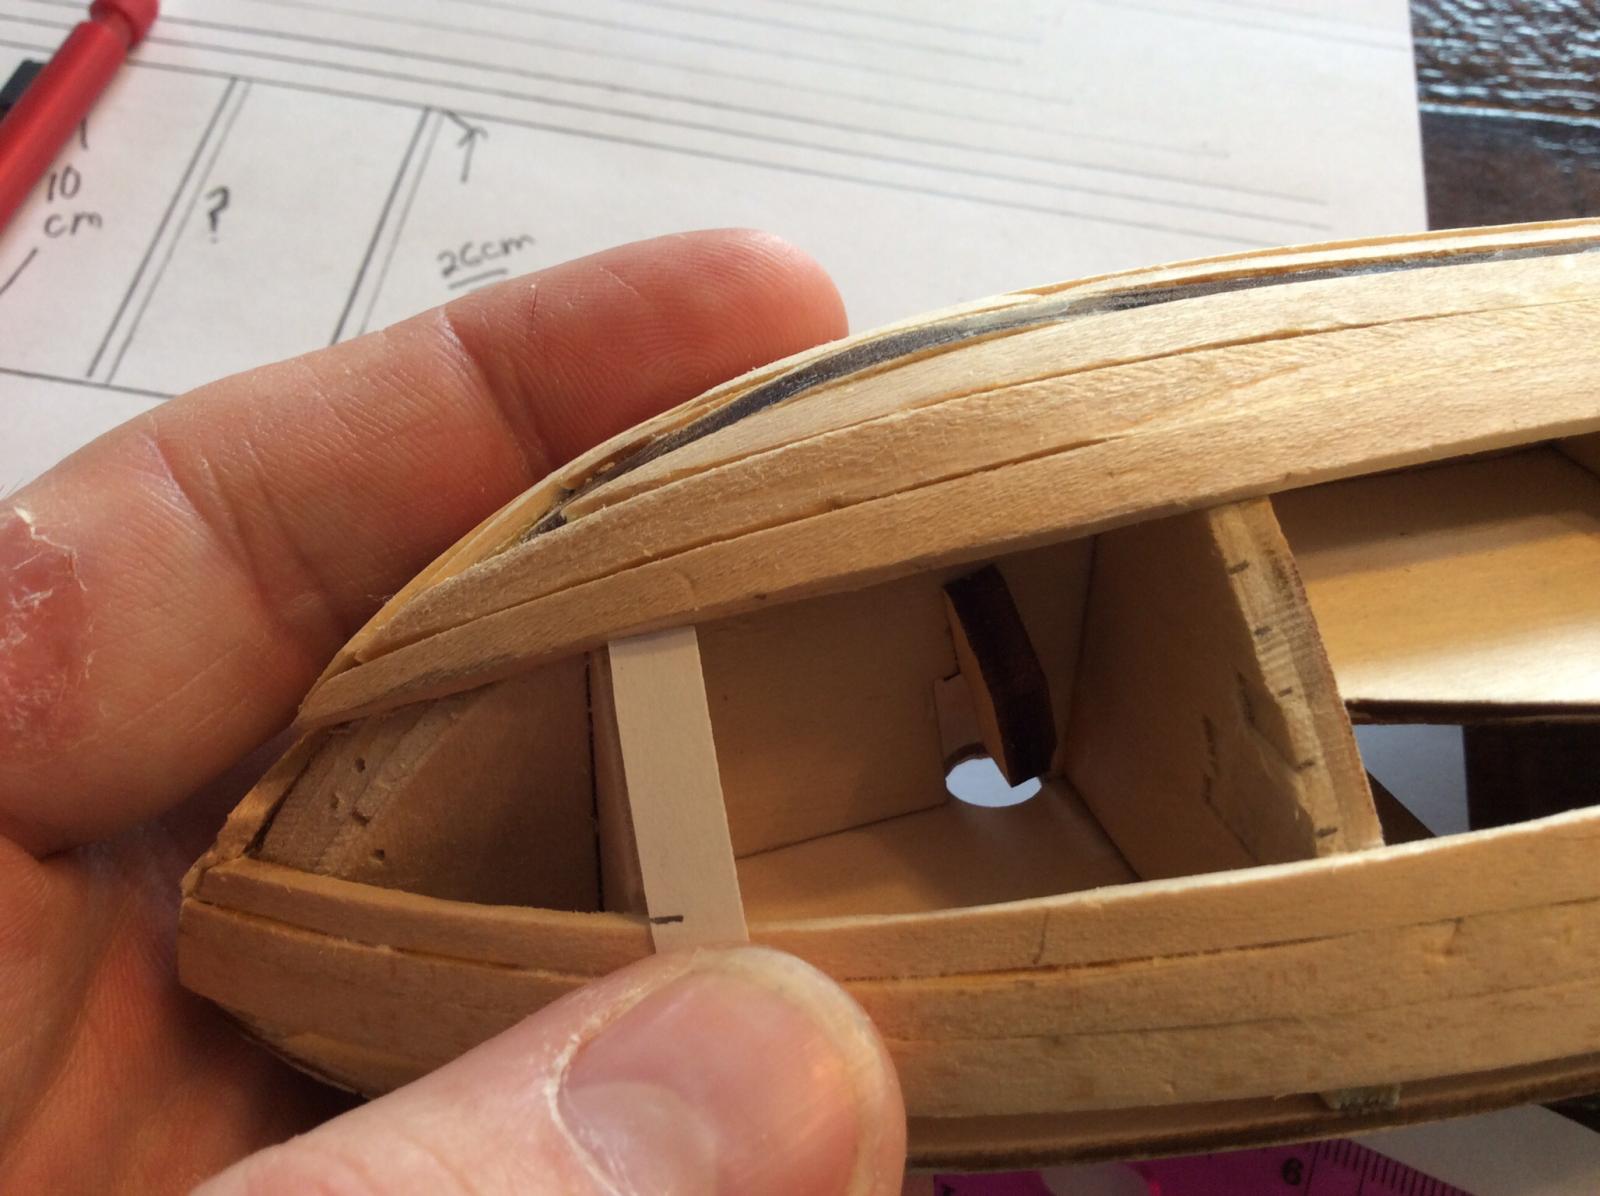
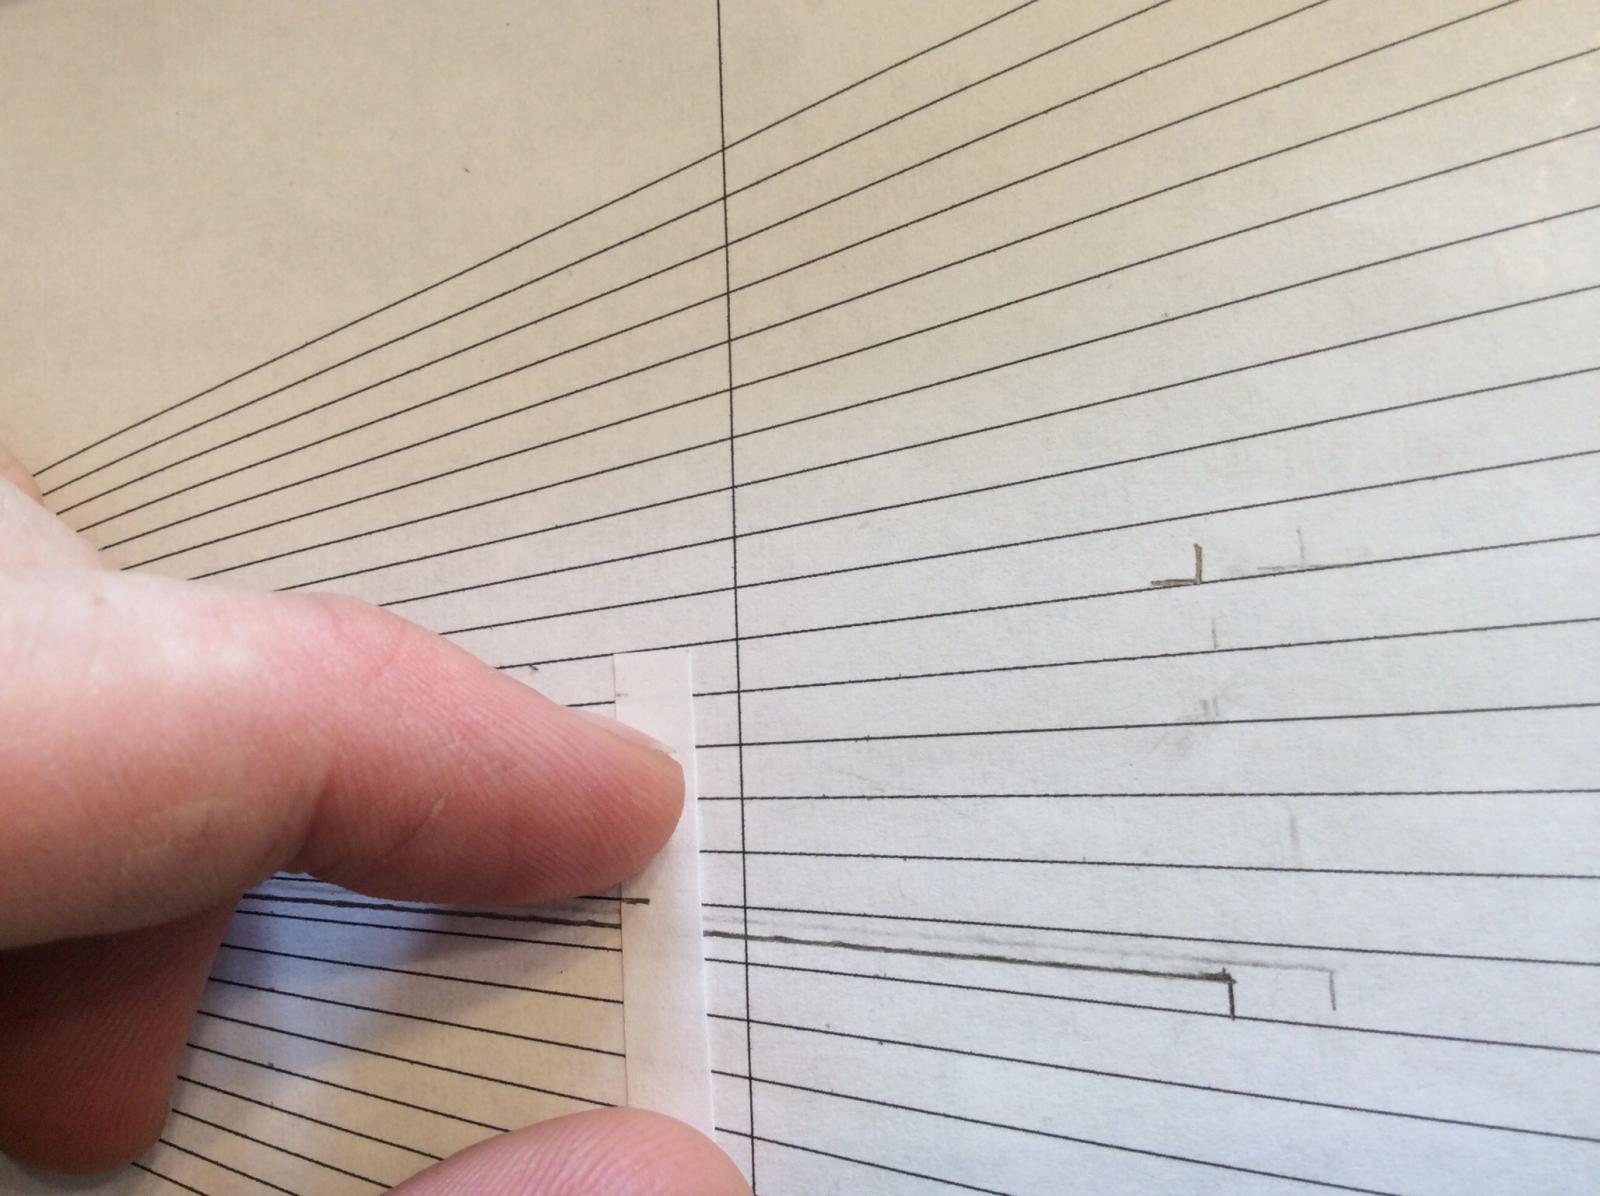
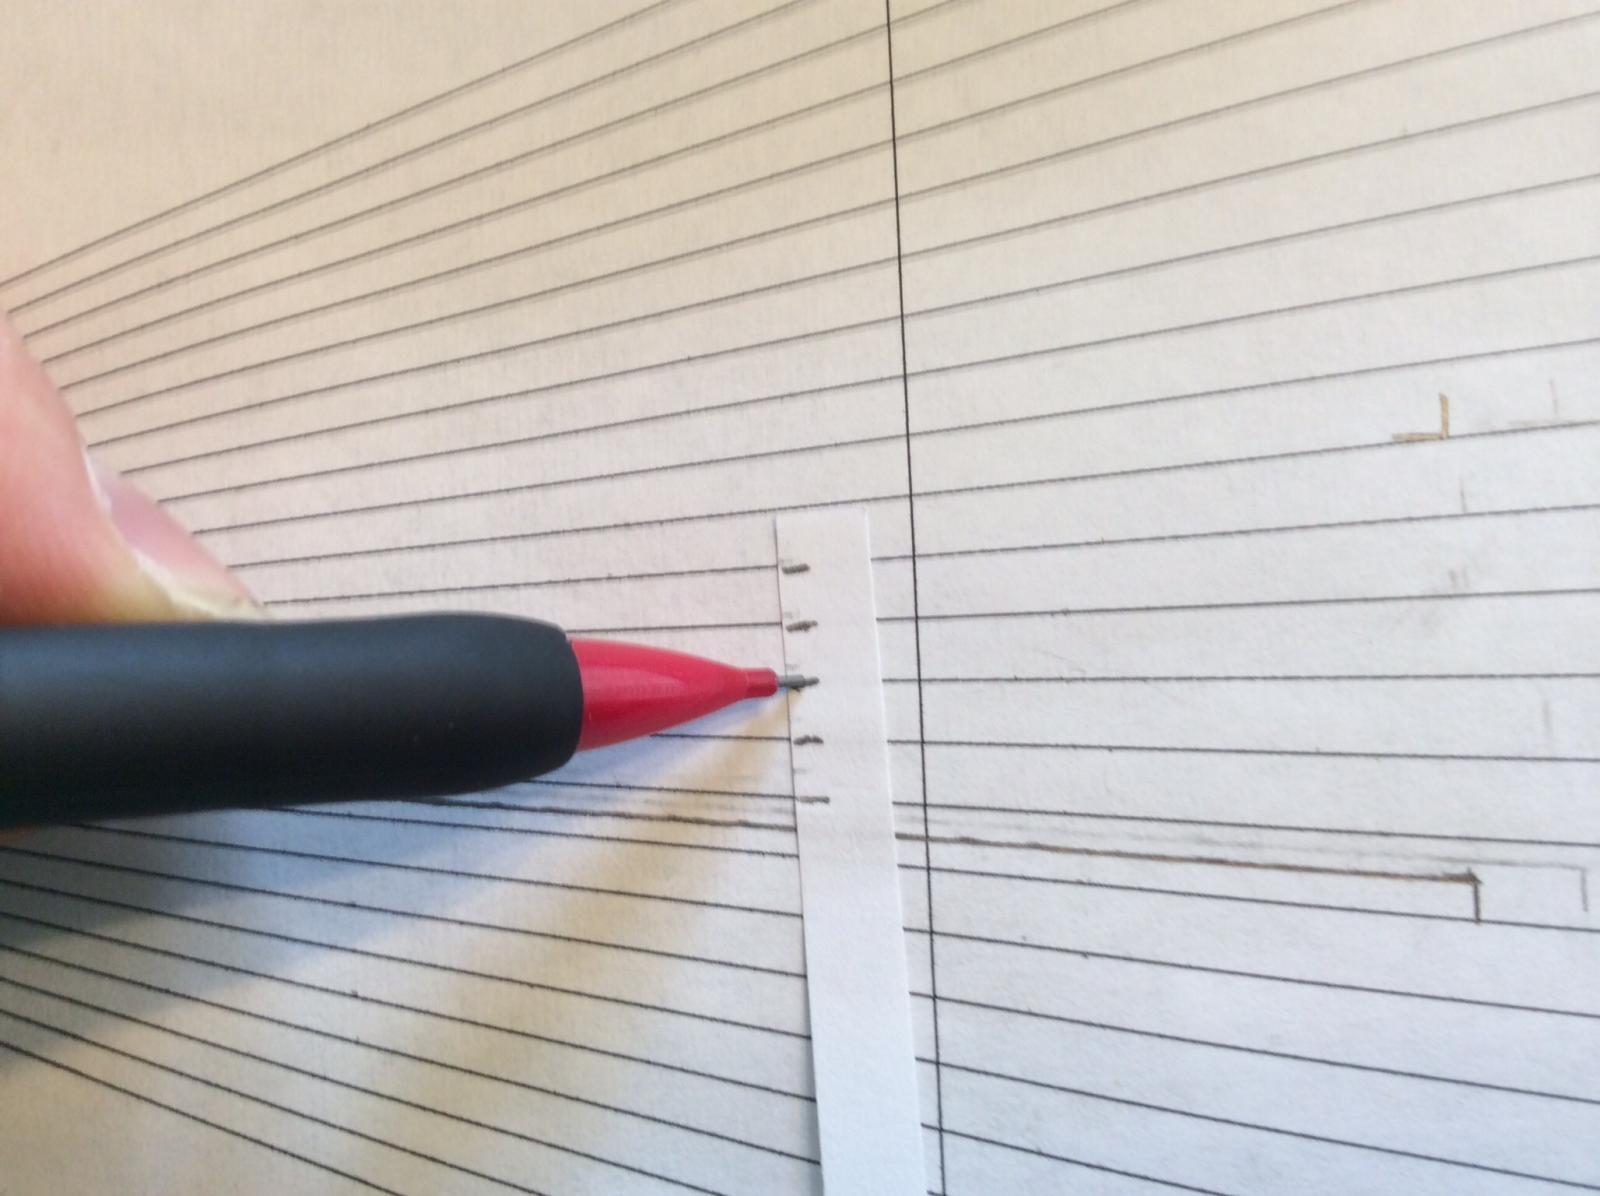
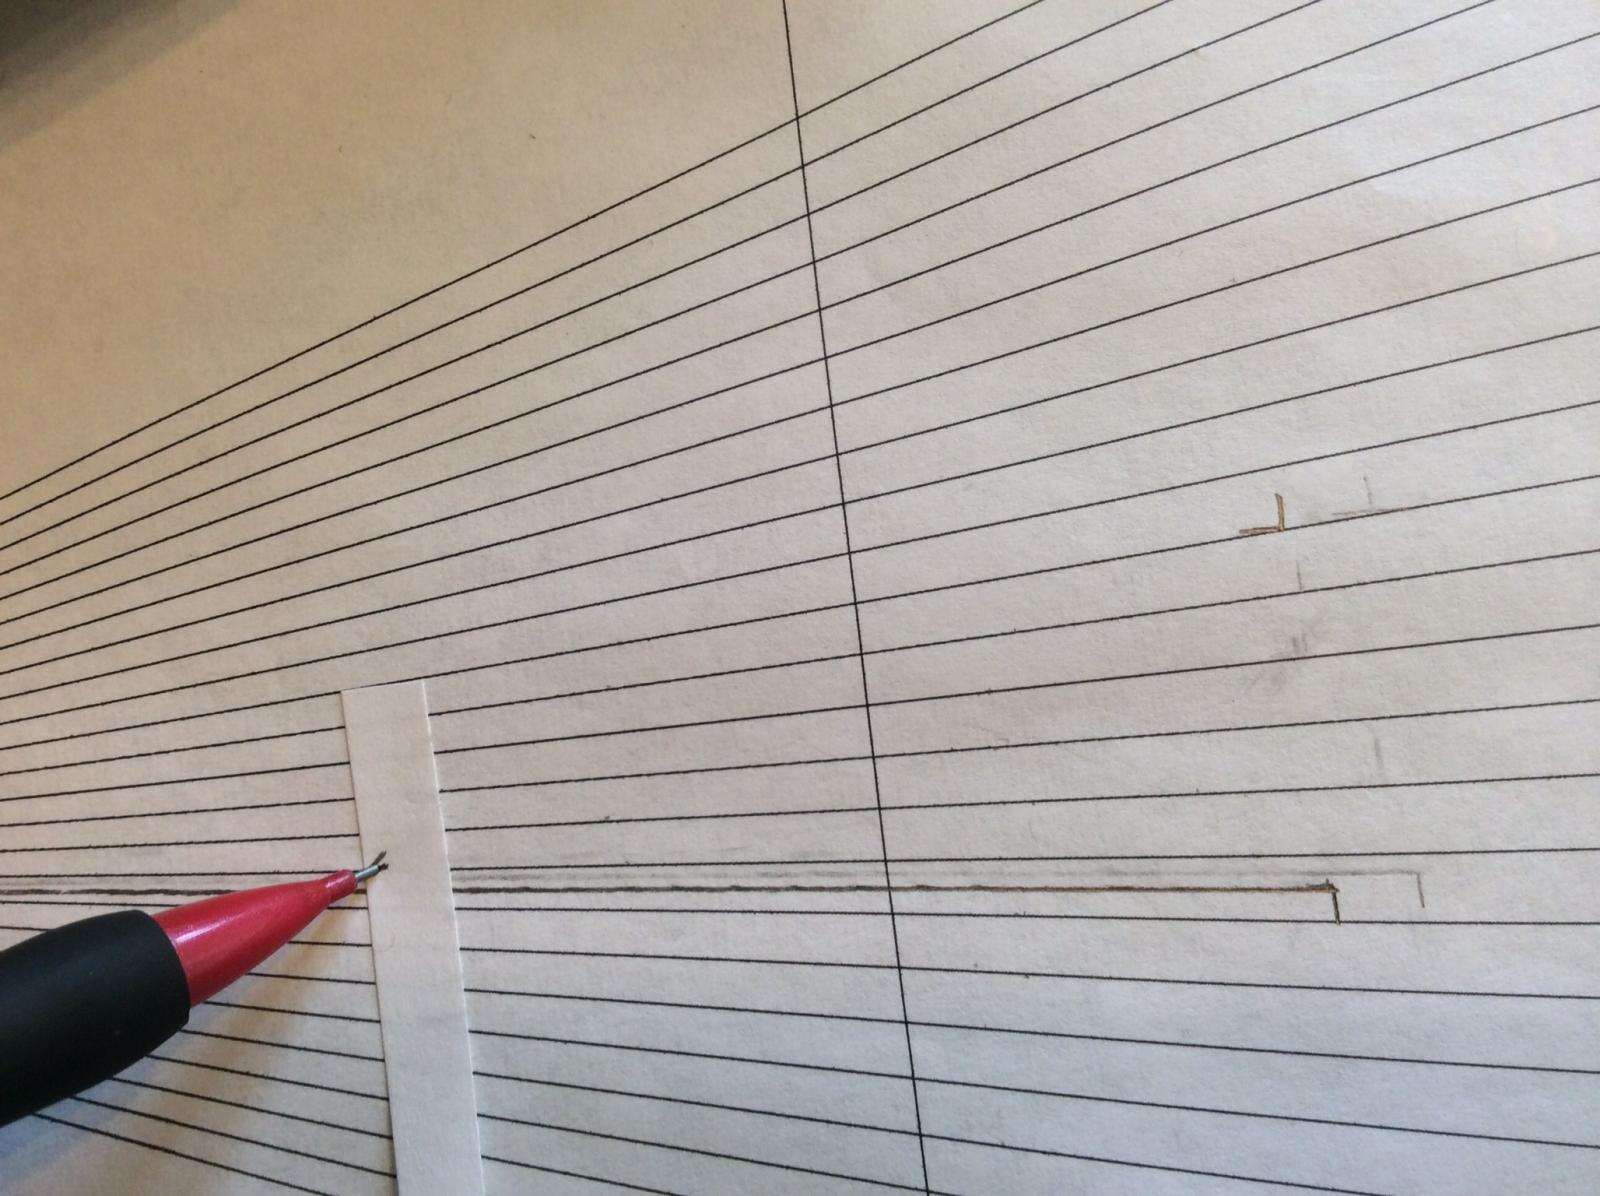
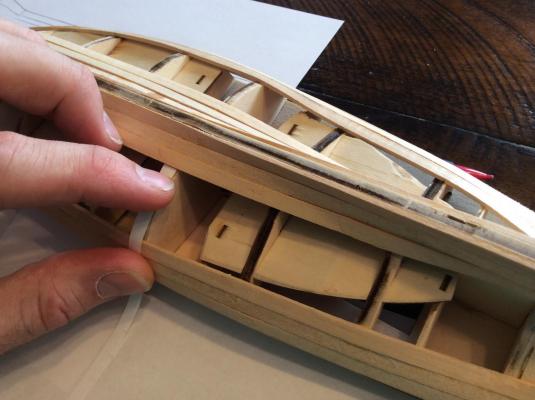
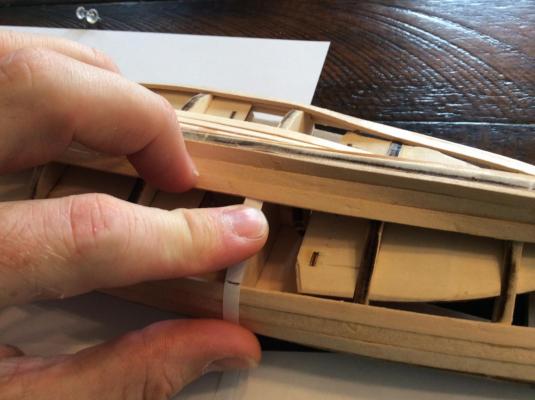
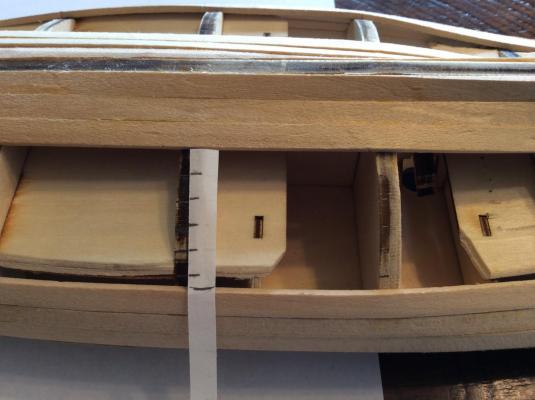
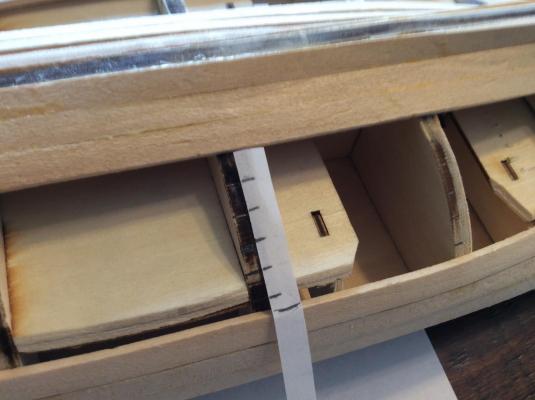
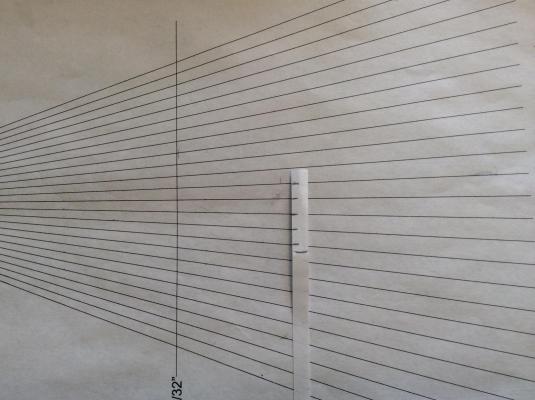
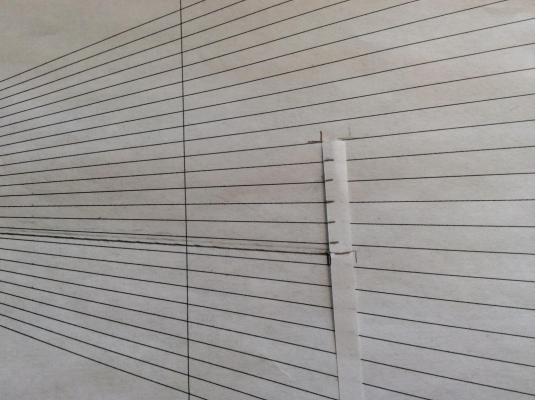
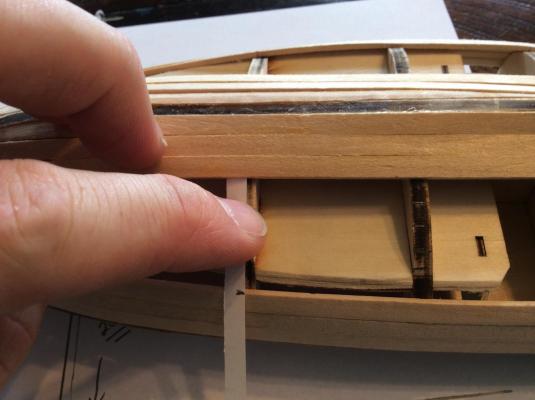
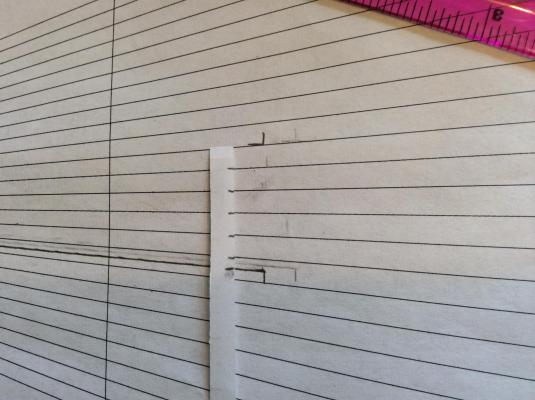
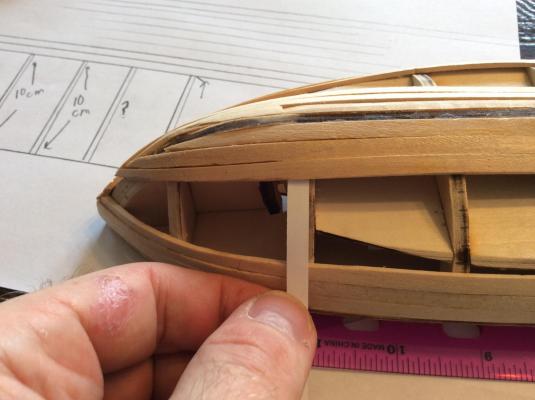
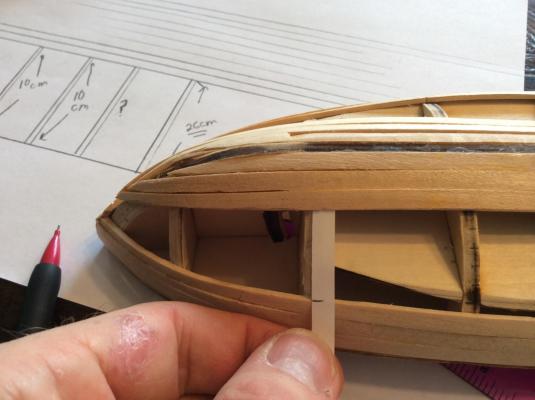
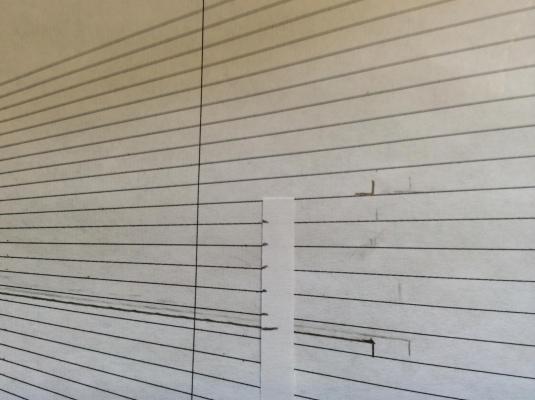
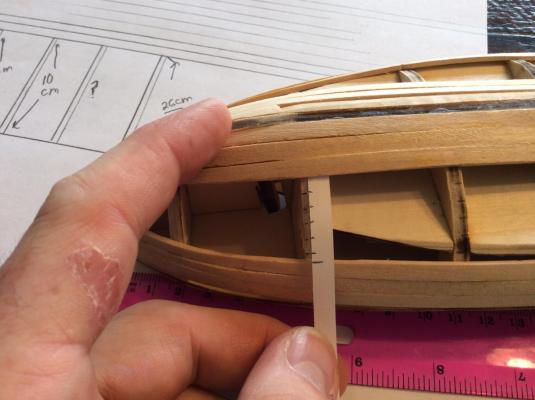
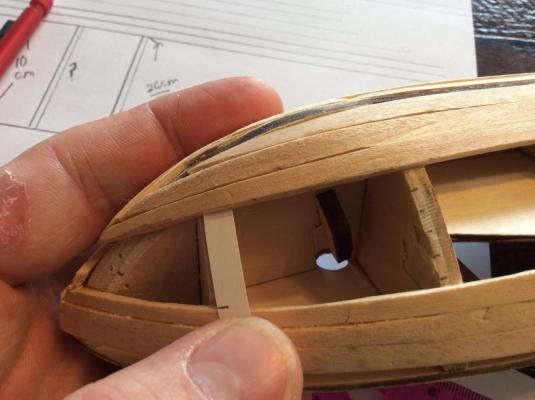
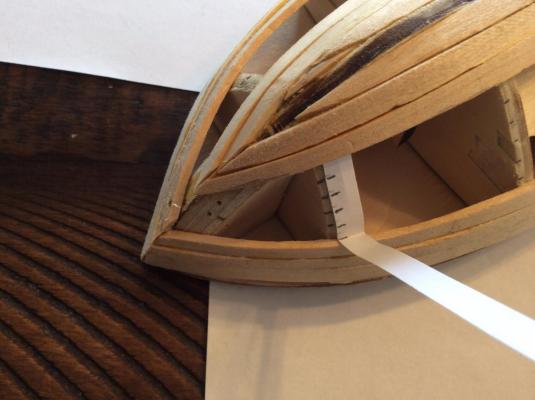
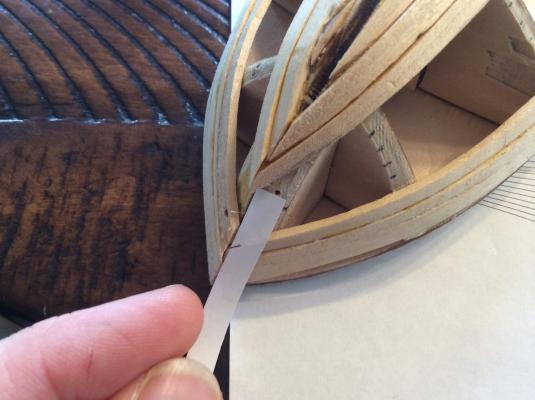
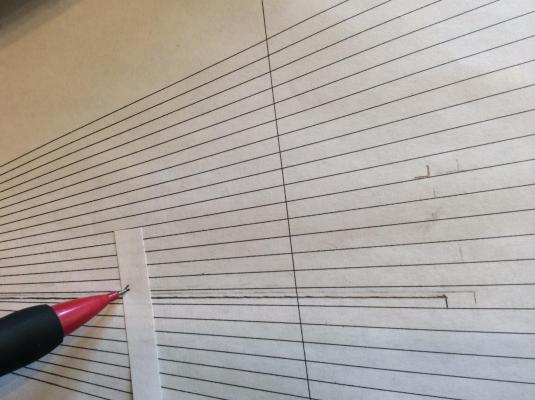
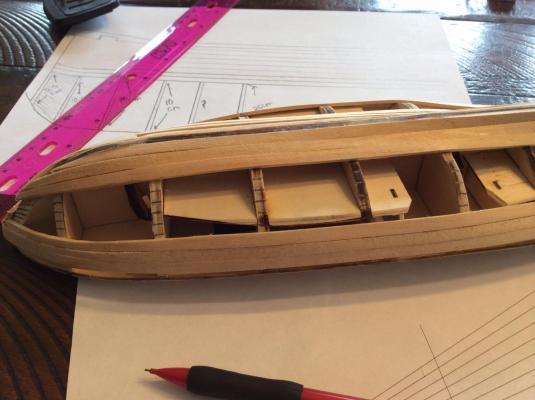
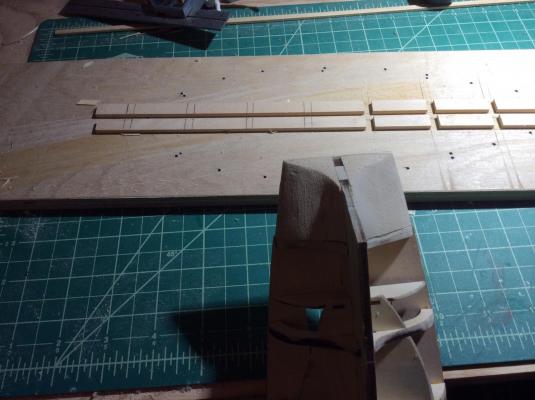
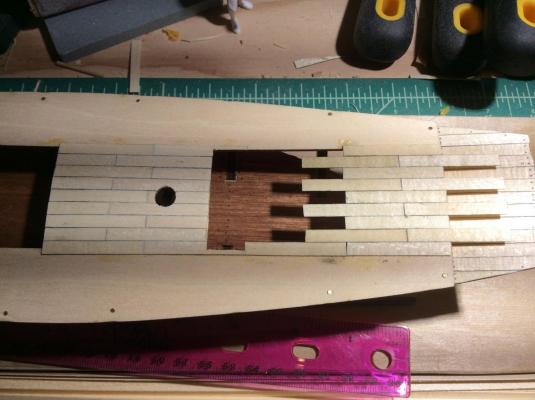
Fan Template use in pictures. This is for the benefit of Mike who on his bounty in struggling with how to figure out plank tapering. I was going to do a video but got cold feet. And I was actually was going to wing my tapering instead of measuring. Starting at the fifth bulkhead I measured it off. I took the slip of paper I was using and marked off 5mm wide planks and transferred that back to the fifth and fourth bulkhead which happened to be imperceptibly smaller. I took this same measurement to the planking fan and found where the 5mm ticks matched up with the lines if the fan and the distance between them. I marked this as my starting point and drew in my own edge of my planks. I then went back to the model and measured the third bulkhead. Taking this new measurement to the fan, I slid it to the left of my starting point until it fit top to bottom from my edges and then marked the new width of my planks at that bulkhead as determine by this fan. And transferred this to the bulkhead on the model. Rinse and repeat for the second and first bulkheads and bow. And the result, plank widths marked on my bulkheads to which I can taper my planks to.


- 84 replies
-
- 3
-

-
- swift
- artesania latina
- (and 1 more)
-
Mike I need some more information. You said 26cm from edge of last installed plank to the keel?! Along the edge of the largest bulkhead. Is this correct? Which bulkhead is it? And roughly 5.5 cm at the first bulkhead. 5mm planks that leaves you with 52 planks to go! On the one side. I have hard time seeing the 26 cm. I would measure again. And post a pic, while you're at the camera a straight-on bow shot will help as well.
-
Hey Mike, for your birthday I'm going to make a video on how you can use this planking fan to figure out your taper with some of the measurements you've shared. Some I will make up however for demonstration purposes. STAY TUNED. I'll have it up my tomorrow, I promise. Reading out it hasn't helped but maybe a video might...
-
Don't hate me. You're gonna need this: http://modelshipworldforum.com/resources/Framing_and_Planking/plankingfan.pdf
-
One thing you can do is measure your first bulkhead from the most recent plank down to the keel along the curve of the bulkhead where you are gluing the ends of the planks at the bow and measure the bulkhead you thought to be the biggest same method from the last plank edge down to the keel and then compare. It will give you a gross idea of how much taper there is at the bow in the space that is left. First do this with that we can work forward.
-
Post a pic of your bow, from what I can tell you haven't tapered at all yet each plank. You will need to start. I'm doing this on my current Swift. Starting at the third bulkhead shaving down each plank gradually towards the bow to where at the tip the width of the plank is exactly half the width in the middle of the ship. I do this with an xacto knife then and smooth with 220 grit. On my Swift I have room for 6 more full width planks in the middle of the ship. I only have room for two at the bow. I will drop my next plank and cut it off at the third bulkhead cutting out a little notch for it to rest in the existing plank. I did this on my bounty launch as well. I will taper it down too to half width at the tip too just ending way before I get to the bow. Hope that helps. Look into how to do drop planks. Even just search MSW for "drop plank" you probably get a lot of pictures of it.
-
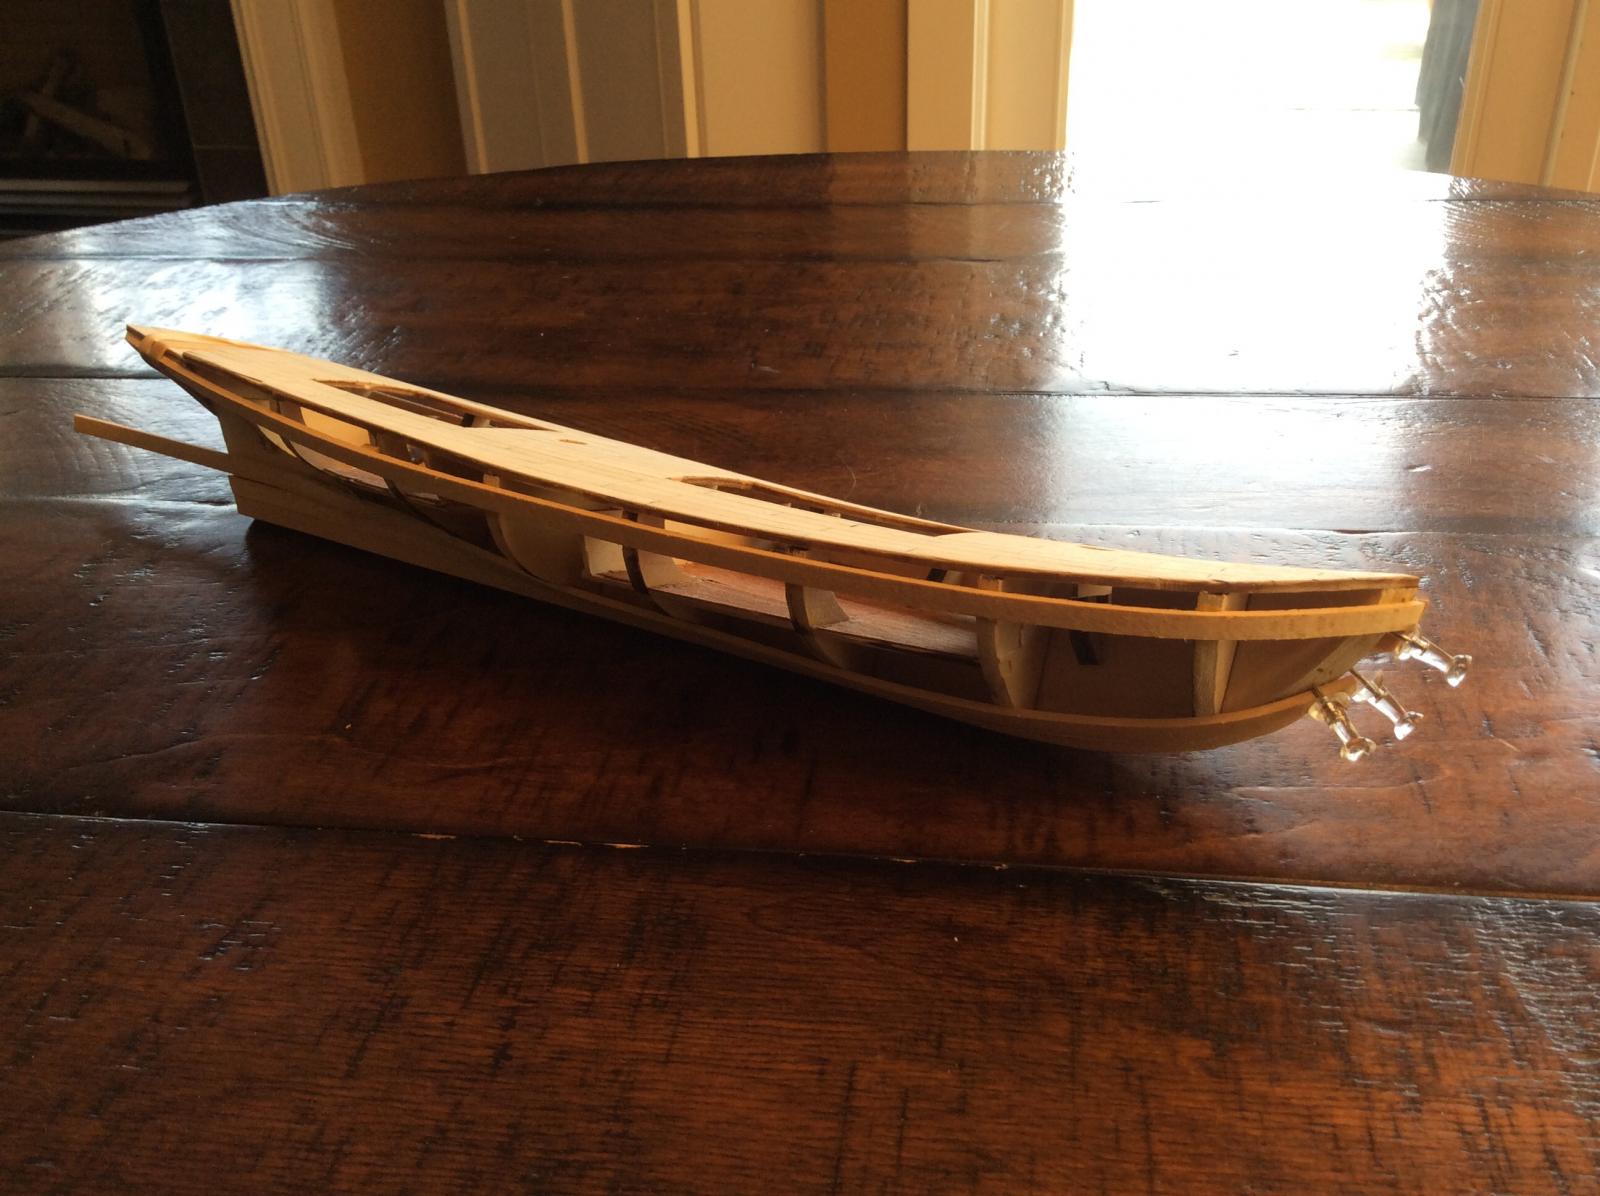
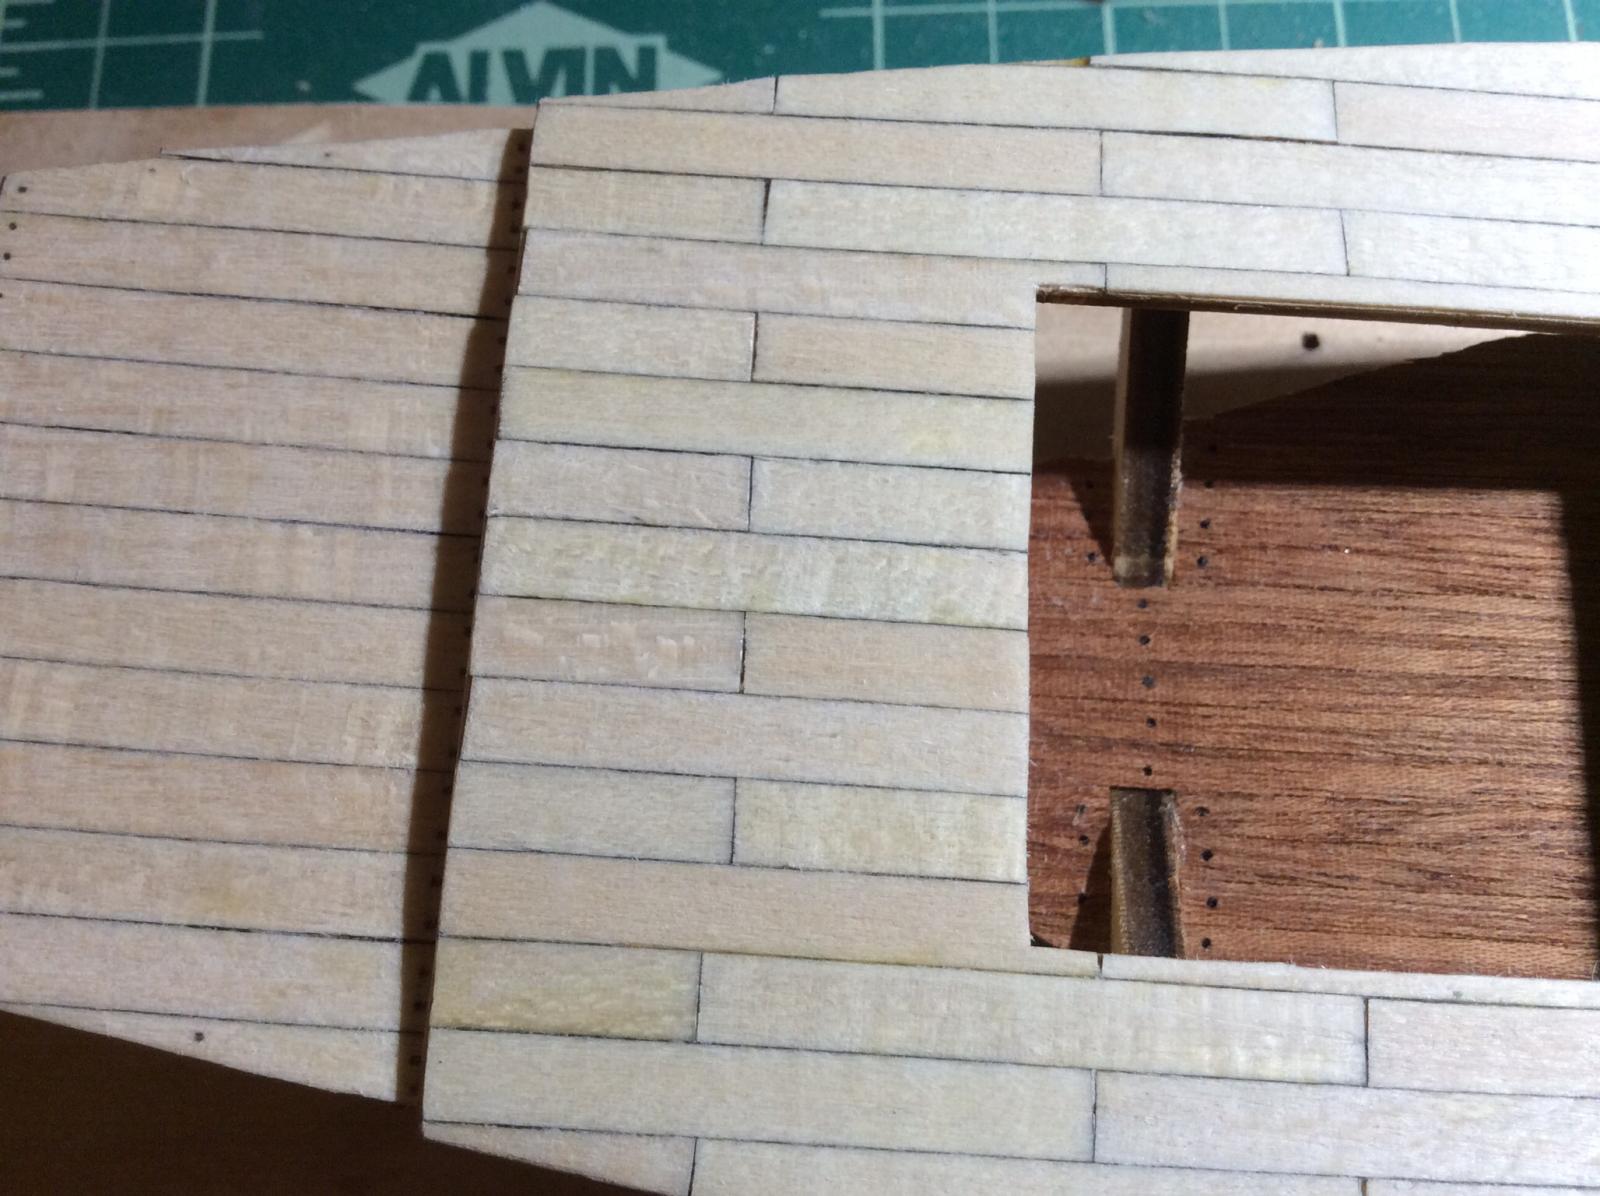
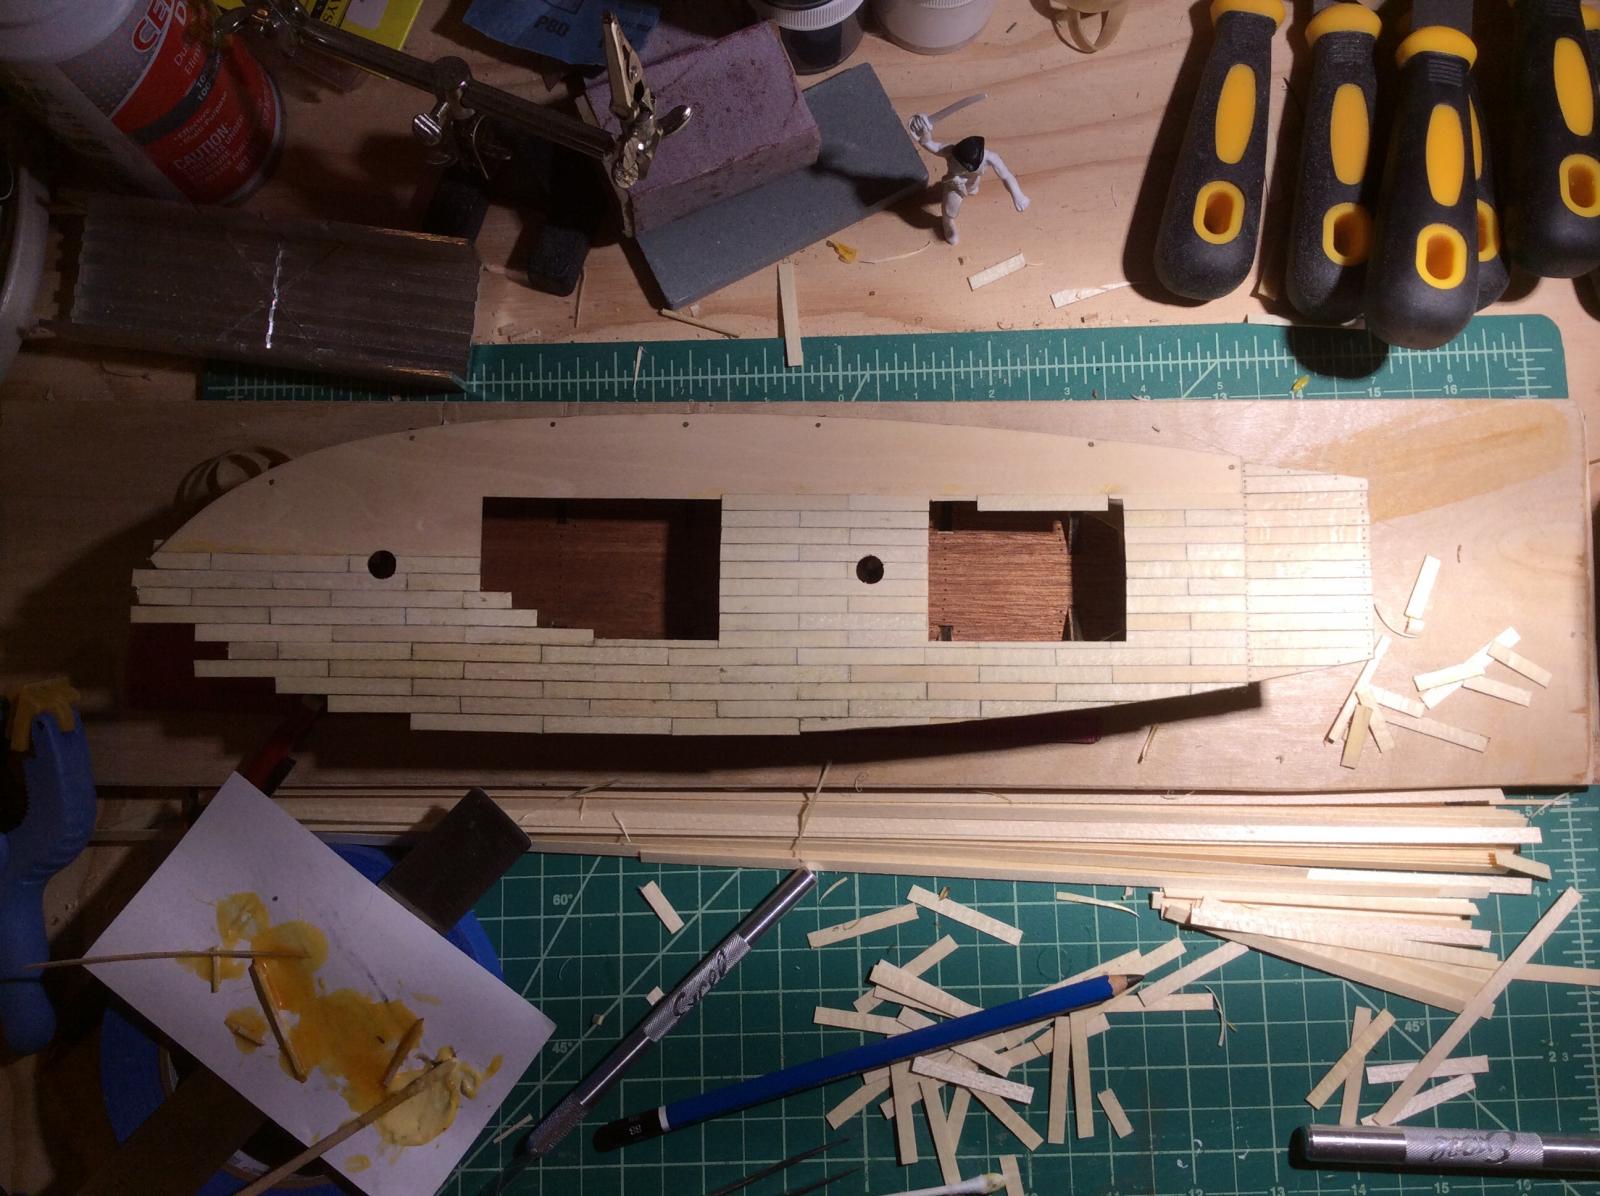
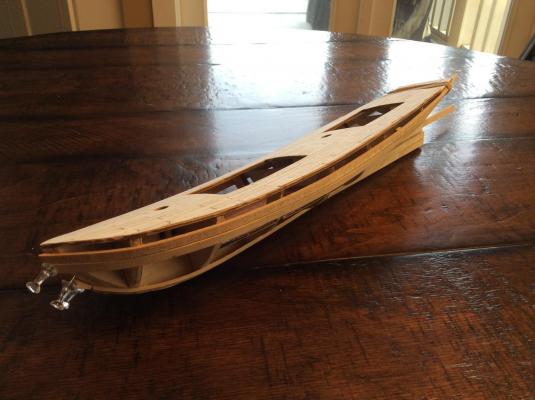
I'd rather not replace the kit wood despite its quality. I'm learning how to deal with wood. I imagine I'll run into a great degree of variation on quality of wood over the coming years. At the same time I am not thinking about that step yet. And that filling method worked perfectly there. Thanks Gabe, Here is an update, with a couple more strakes in place. Because I left my garboard go so far forward I have crowding at the front. I plan on dropping the next plank near the bow. Cheers.


- 84 replies
-
- 2
-
-
- swift
- artesania latina
- (and 1 more)
-
Pictures Yay! That garboard is a bastard ain't it. Once I get a strake or two in everything goes smoother for me. She's looking beautiful. Would you plank or place moulding on the edge of your decks to hide the burn marks from the laser cutting of the deck material?
-
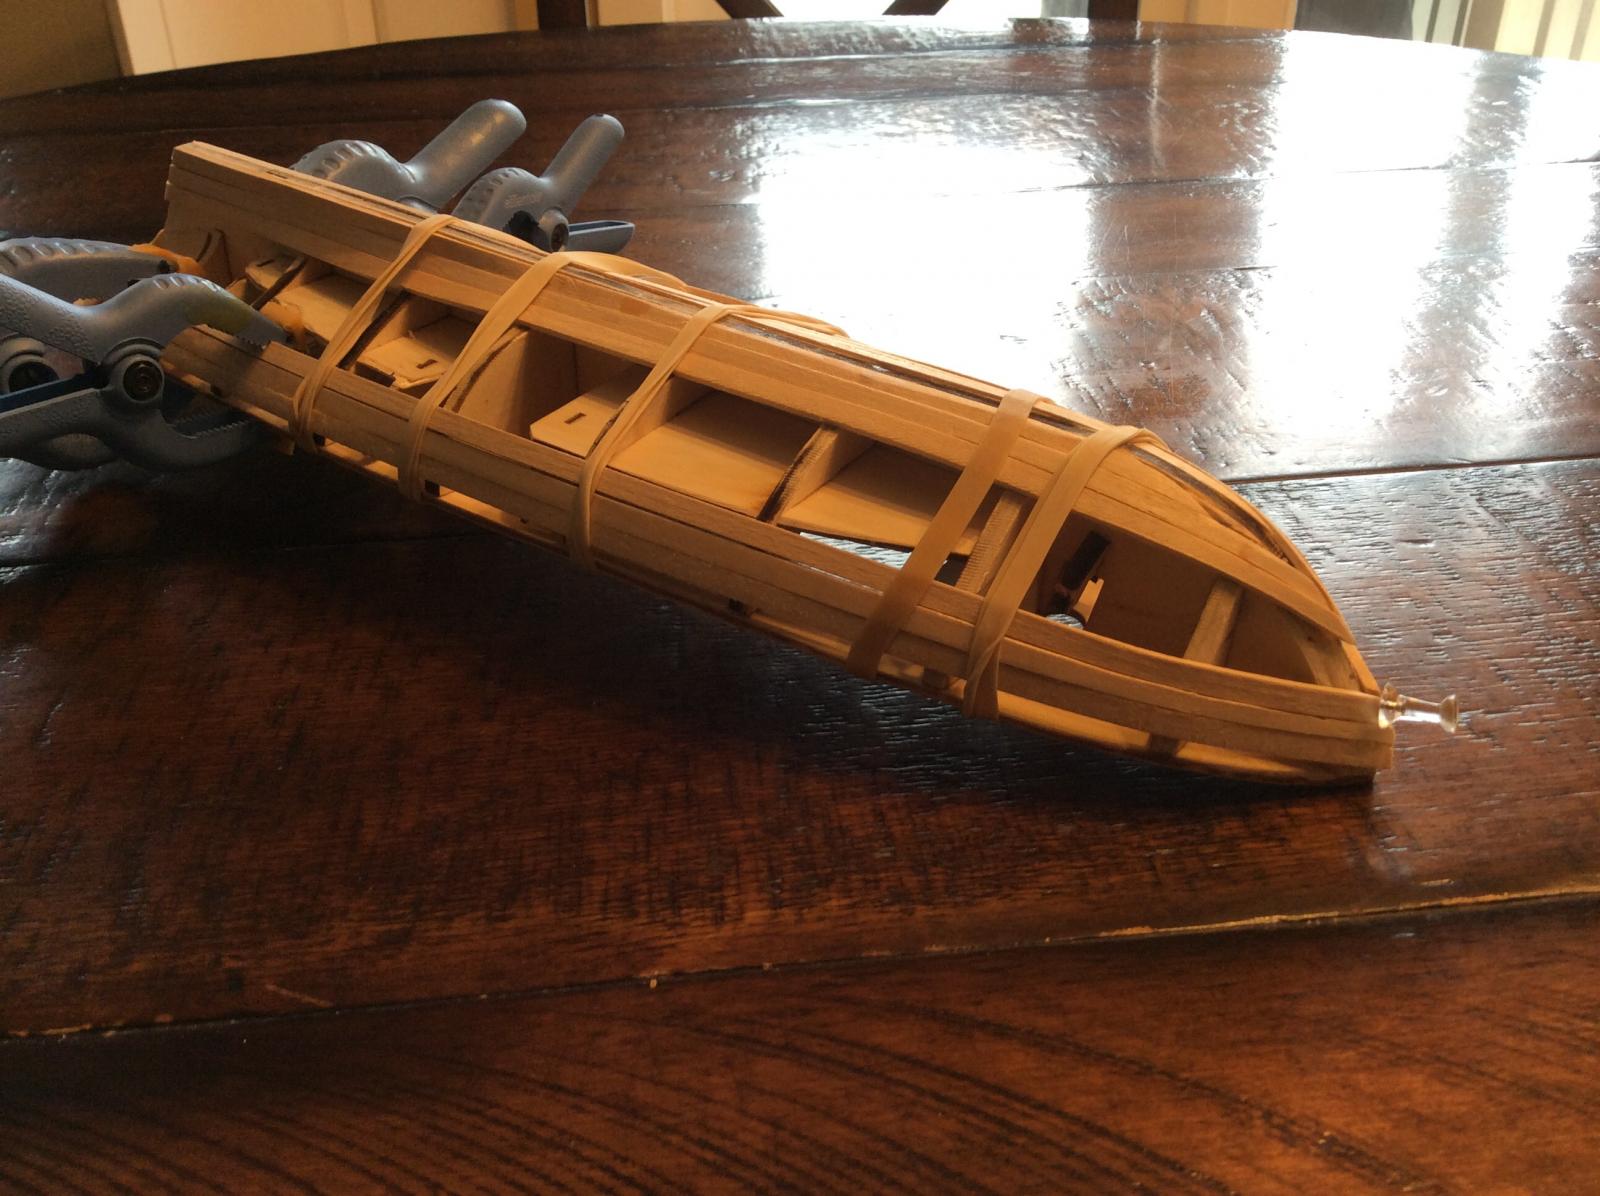
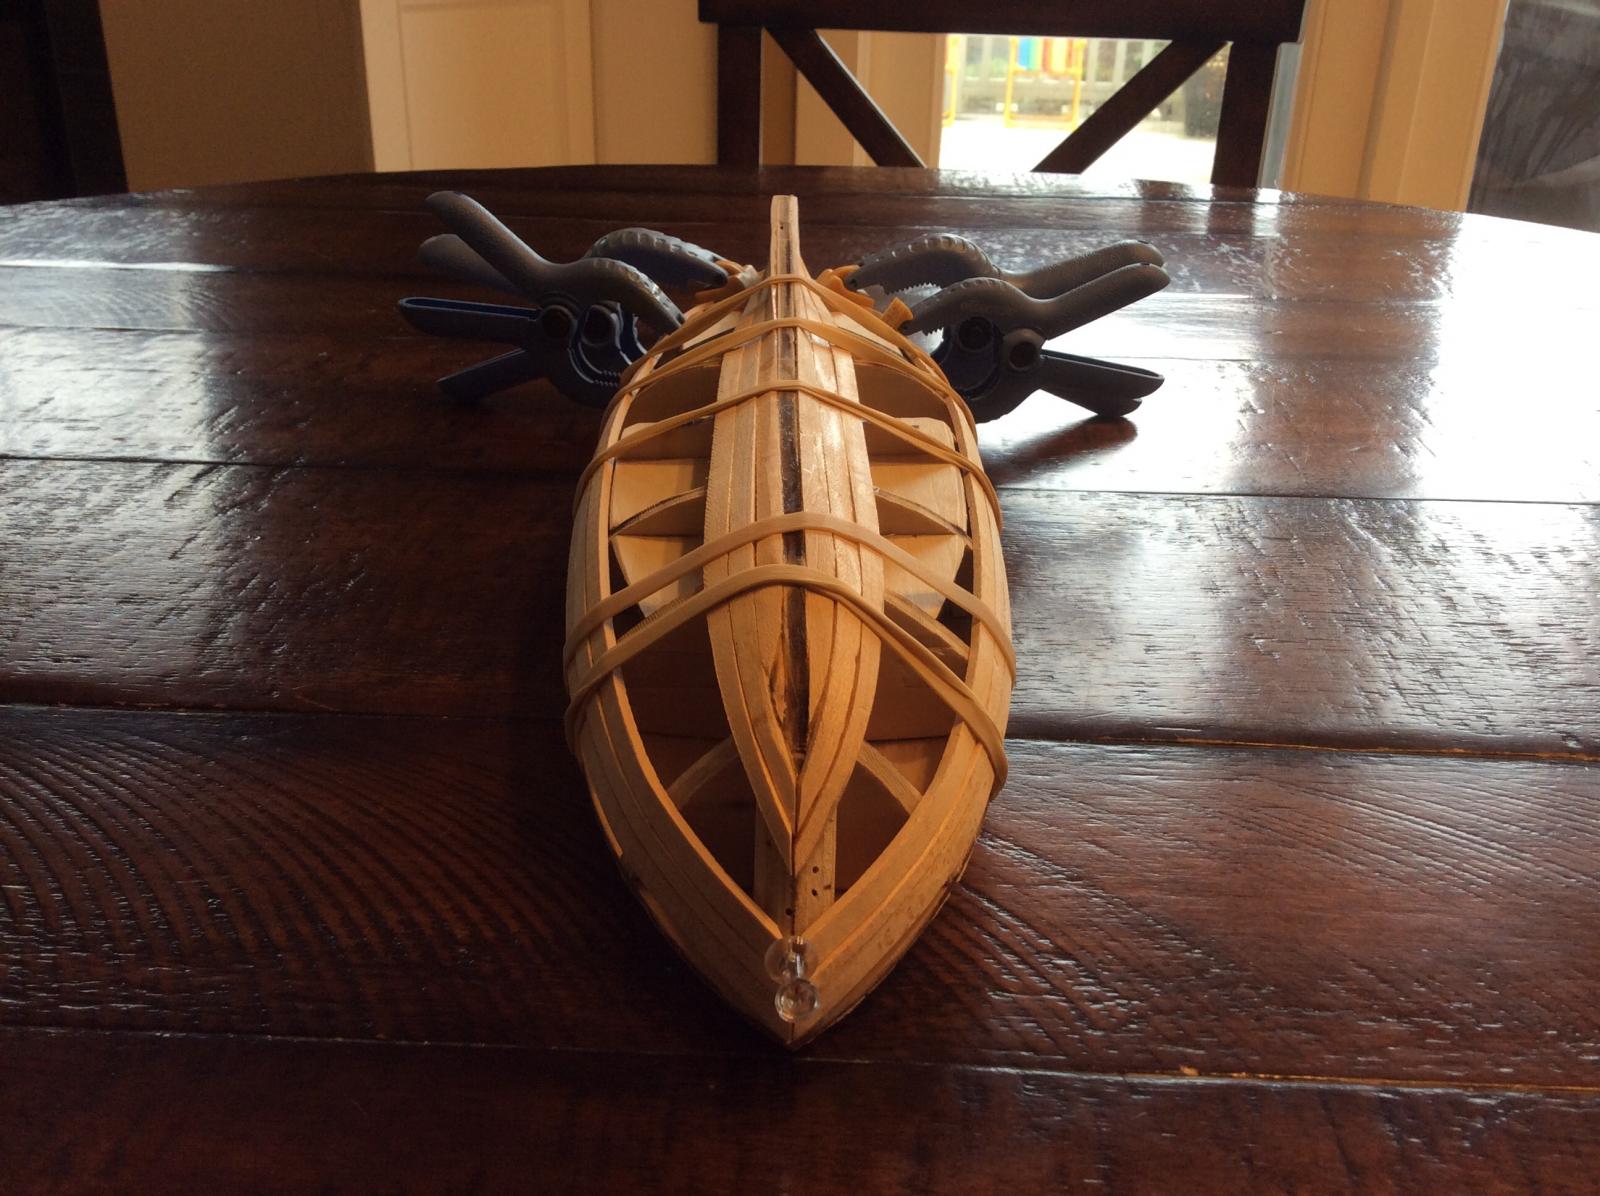
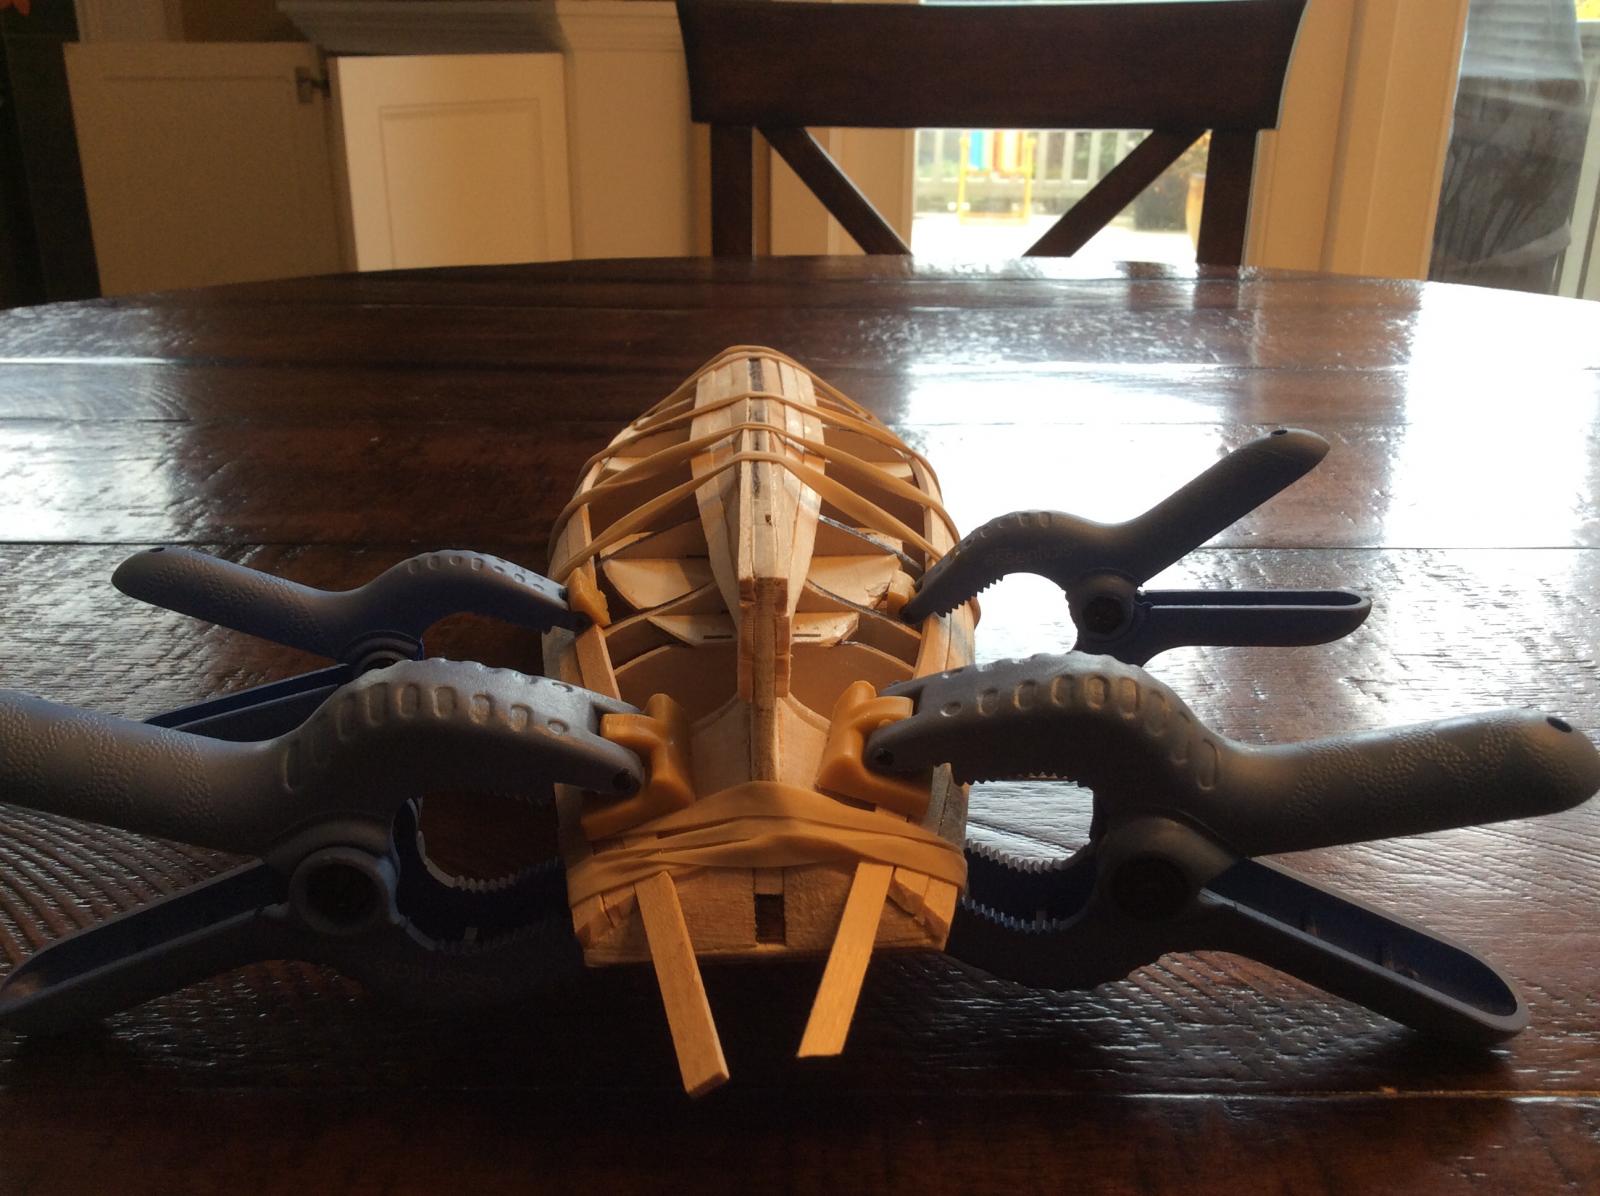
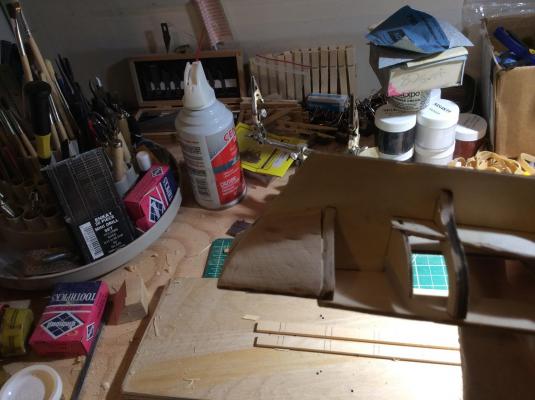
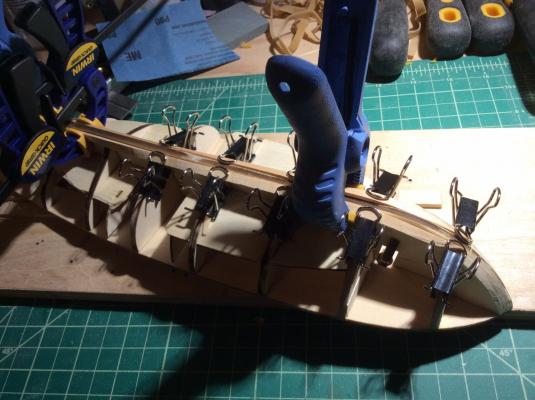
cdogg- they are 2mm thick. Measured three times with my calipers. I have gotten the plank bender to work some now. I believe I was impatient. It needed to get up to temperature. So I have been taking my soaked planks working the over the plank bender into a curve and clamping to the hull to dry. Once it's bent and dry I shape it and taper it. Captain Al- I do not like the quality of the wood in the AL kits. But I am trying not to blame the wood and learn some new techniques. themadchemist- you're probably right about the hot water, that worked well the few times I went those lengths with the jolly boat. My garbord plank is not perfect, and you're probably right, I have studied your build log extensively. This time around I plan on filling with wood filler more my mistakes, I'm trying not to dwell on them but in my learning I don't want to undo too much. Being double planked I have that luxury. Here are some pictures with the current state of affairs. The last planks are not glued FYI just dry fit. One starboard and one port side. It's good advice to slow down, and not try to do too much. Each plank a model unto itself...I'm gonna have to meditate on that one, that's deep.


- 84 replies
-
- 2
-
-
- swift
- artesania latina
- (and 1 more)
-
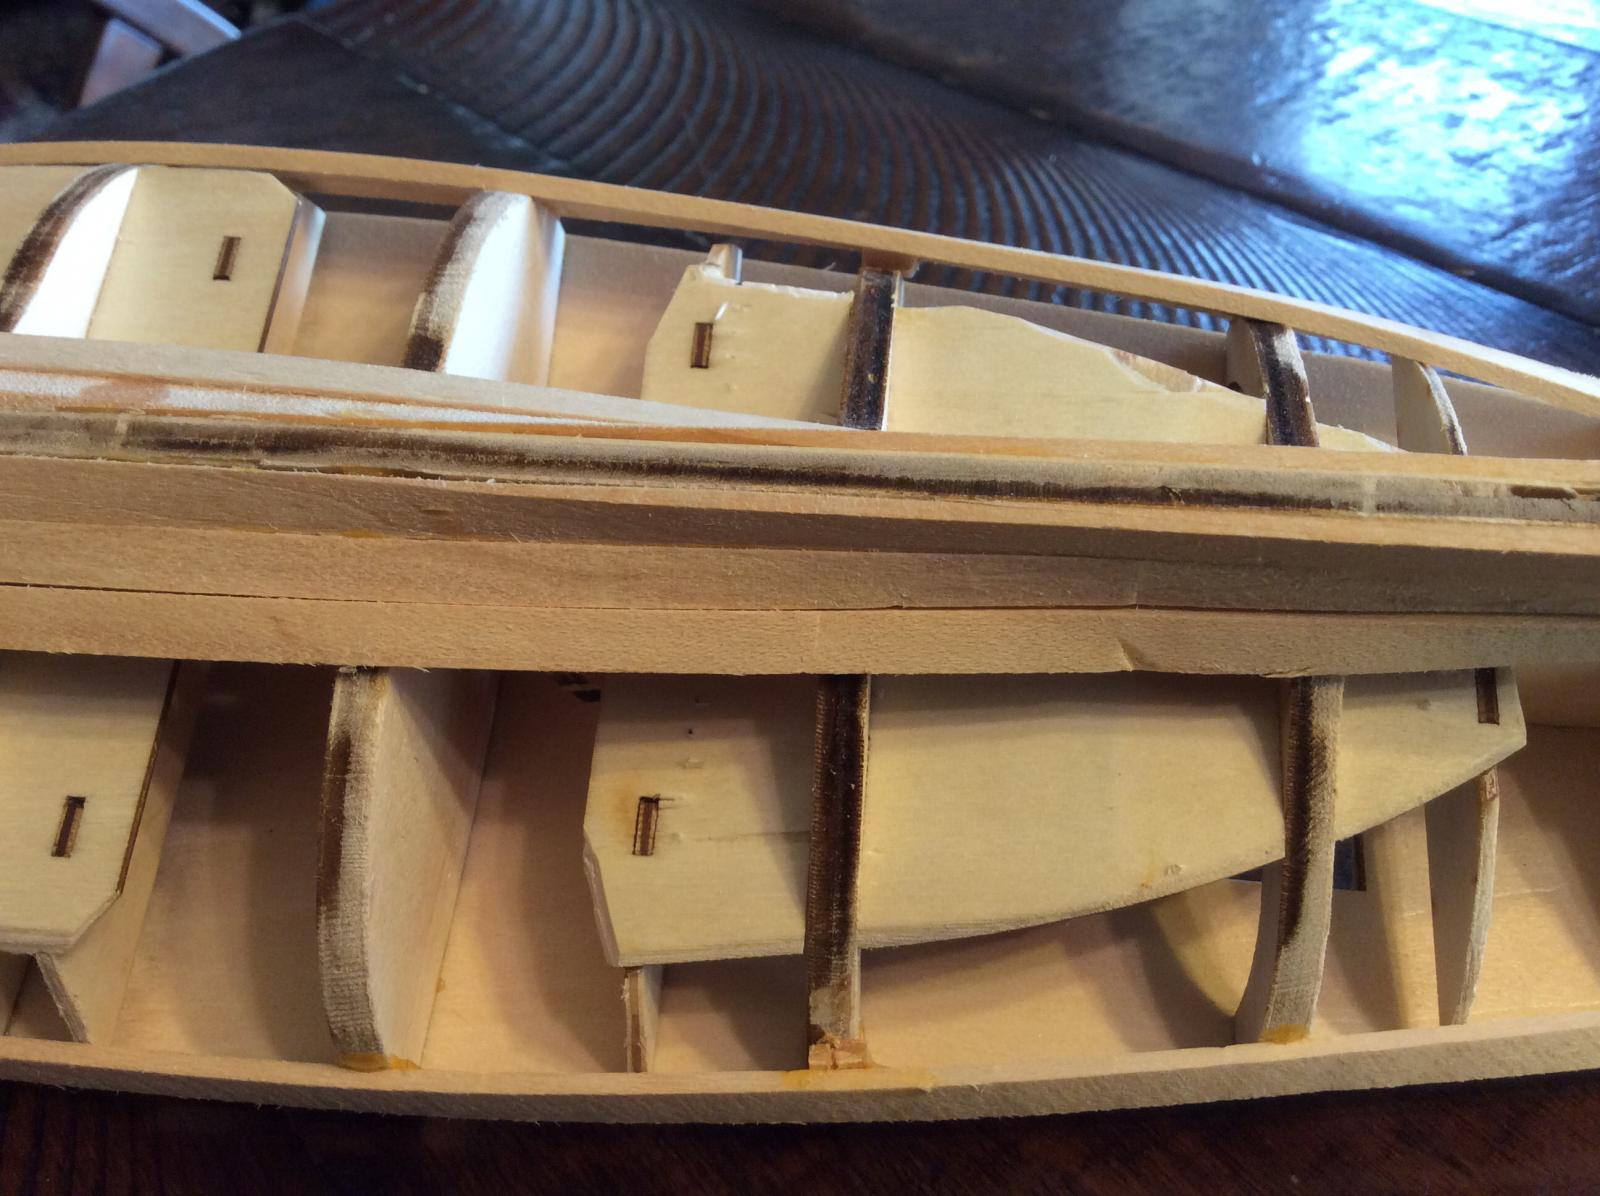
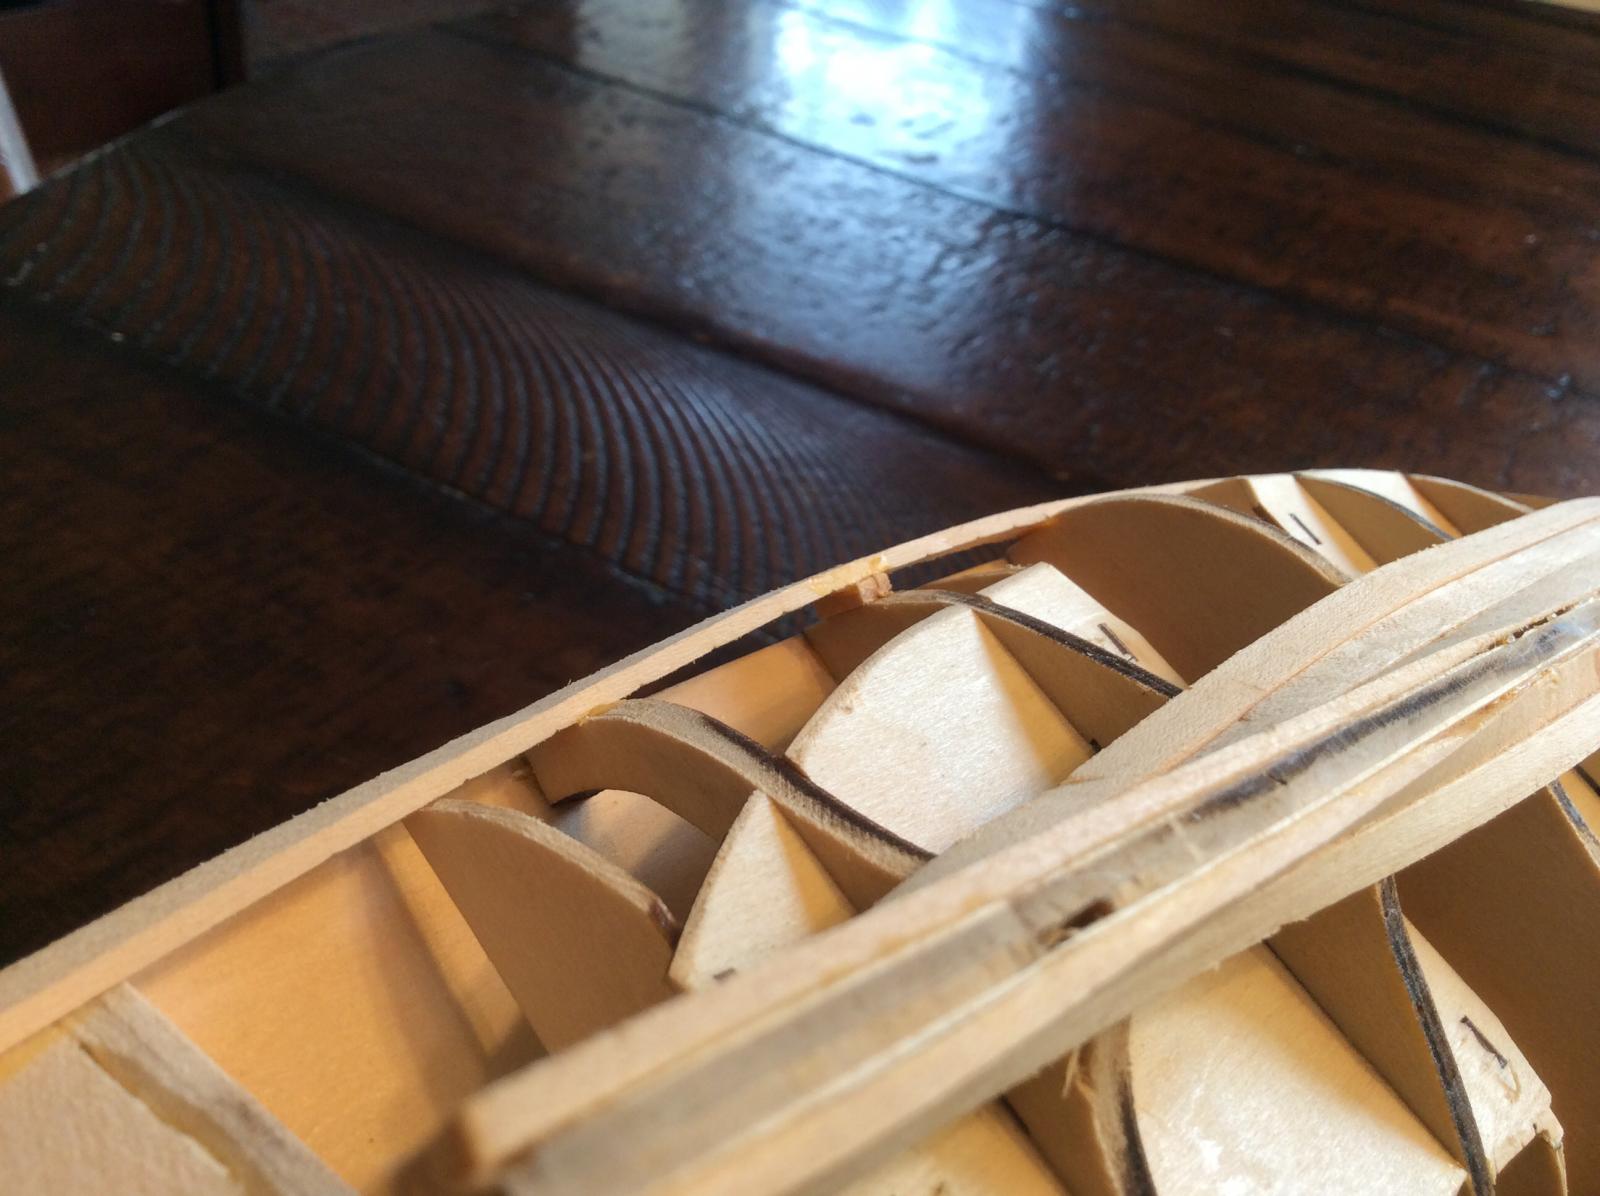
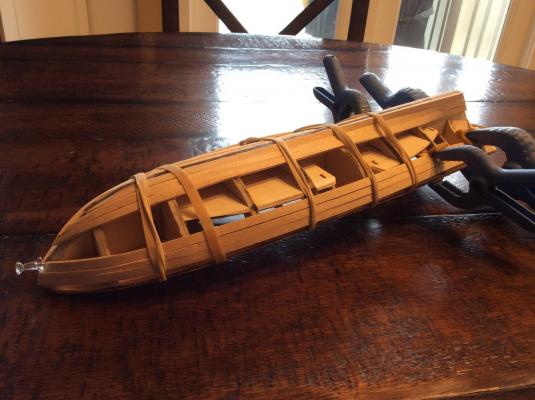
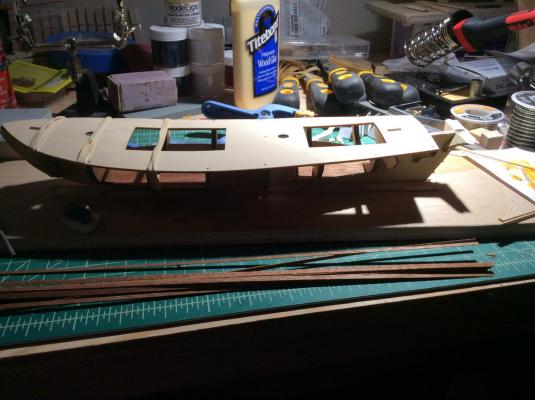
I've started planking but am struggling with the timber in this kit. It is thicker and narrower than the planks in the Jolly boat kit. Even soaking it overnight I have had trouble with breakage when trying to bend it about the bow. The only method I've had any success with is the plank bender crimps that I have. I've ruined enough to almost make a scale bonfire beside the ship. Pins are tending to split the planks and or the bulkheads and clamps are of minimal usage as the lower decks are in the way. Rubber bands are being employed mostly. Also one of my bulkheads is a bit small and I have had to shim under the planks. I'll post some pictures tonight. My stowaways and admiral have left for the week so I get some extra time down in the shipyard.
-
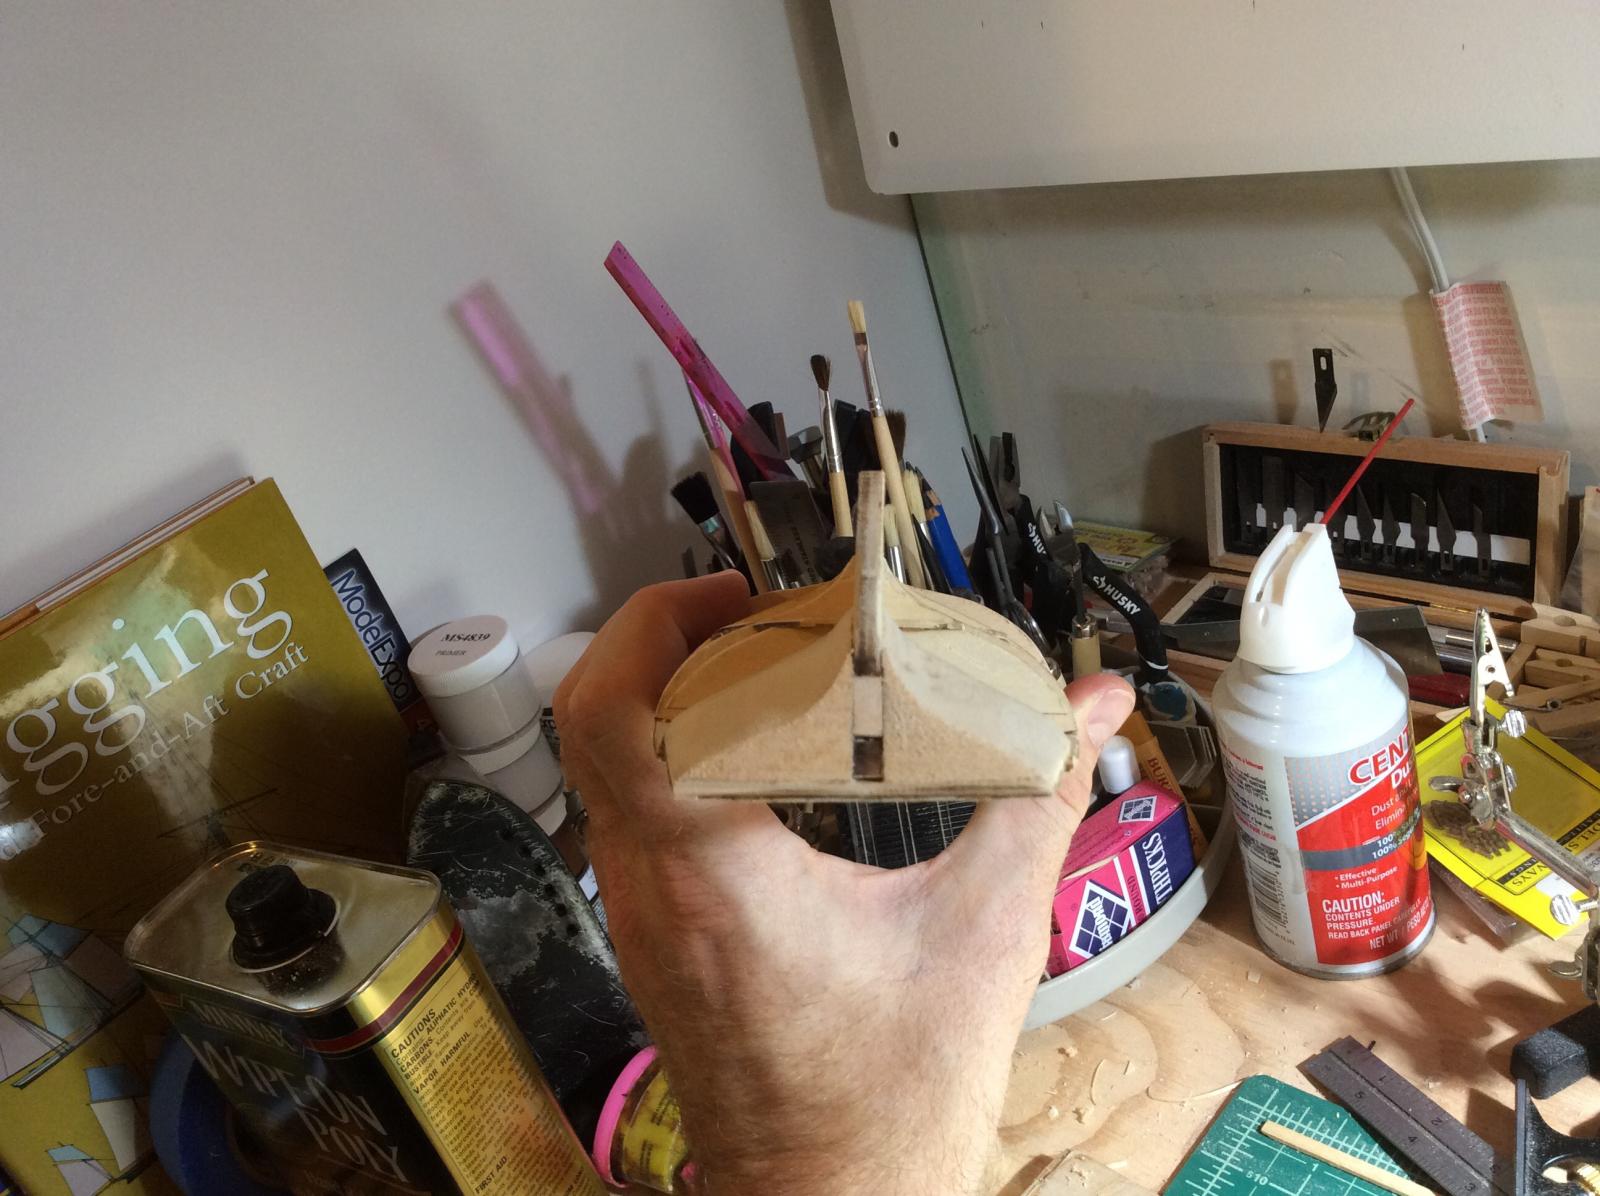
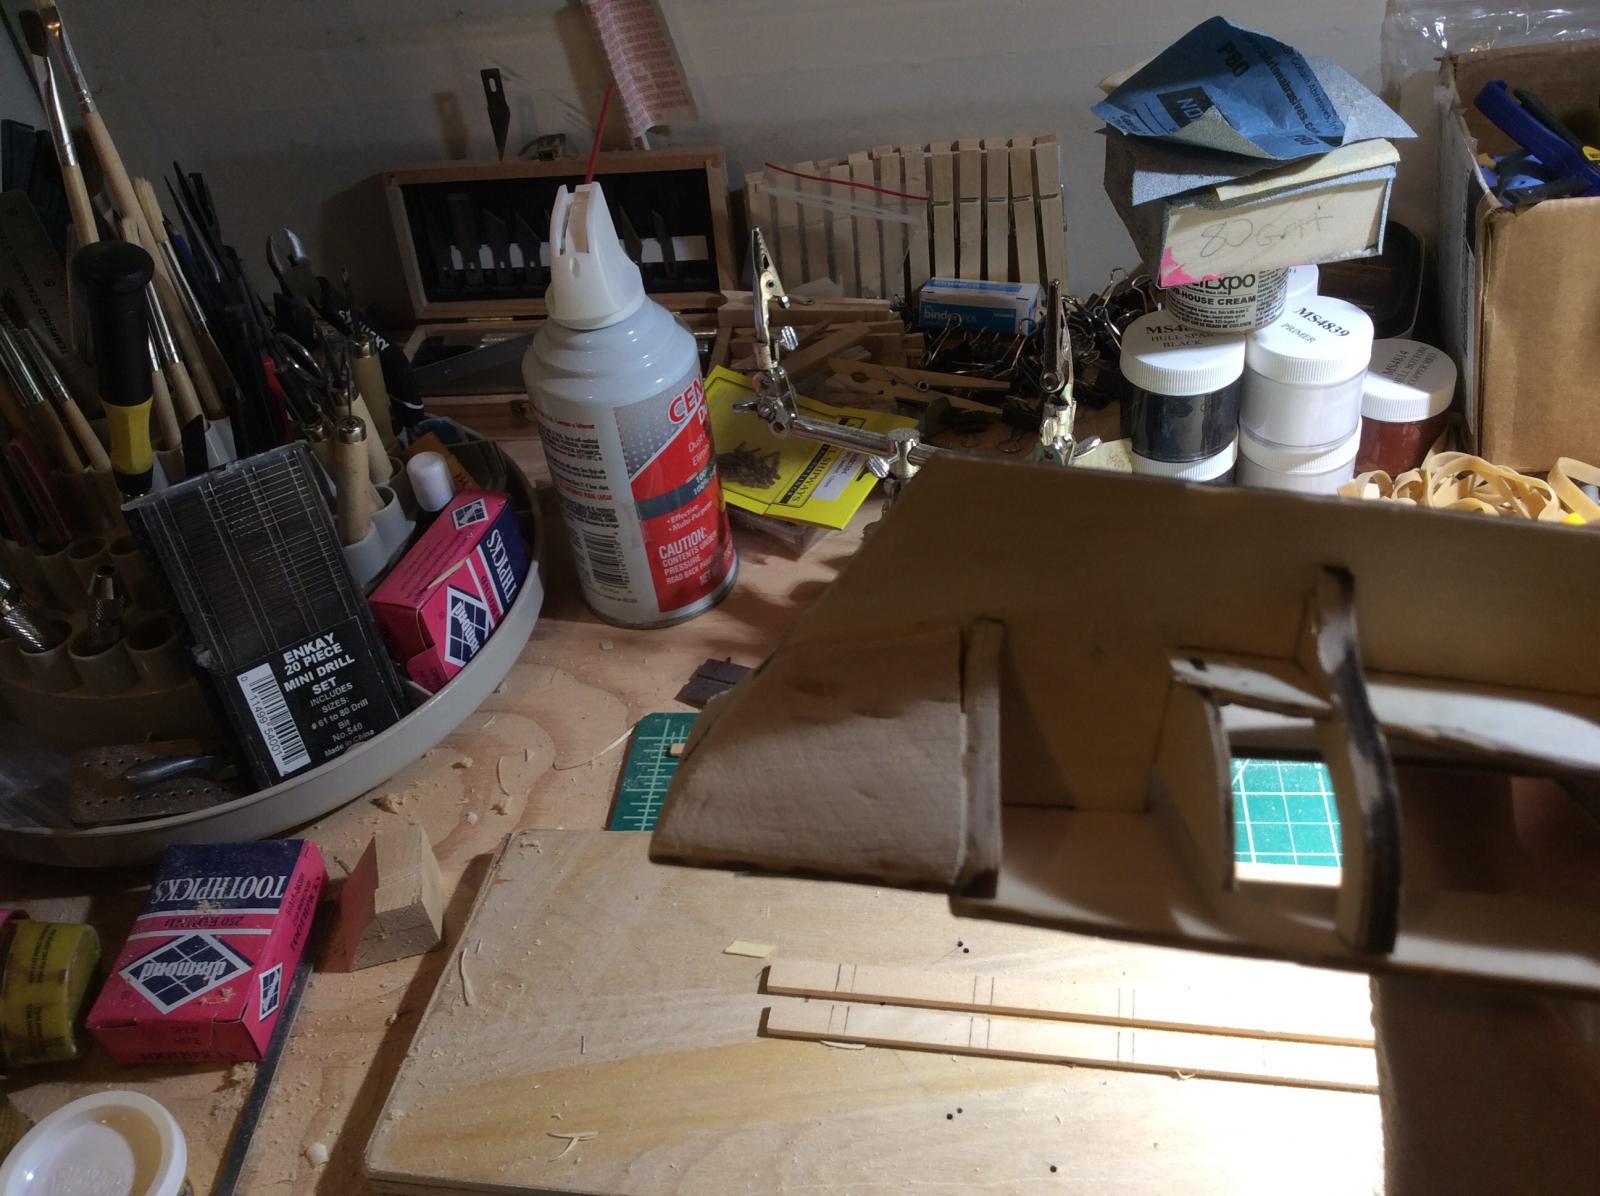
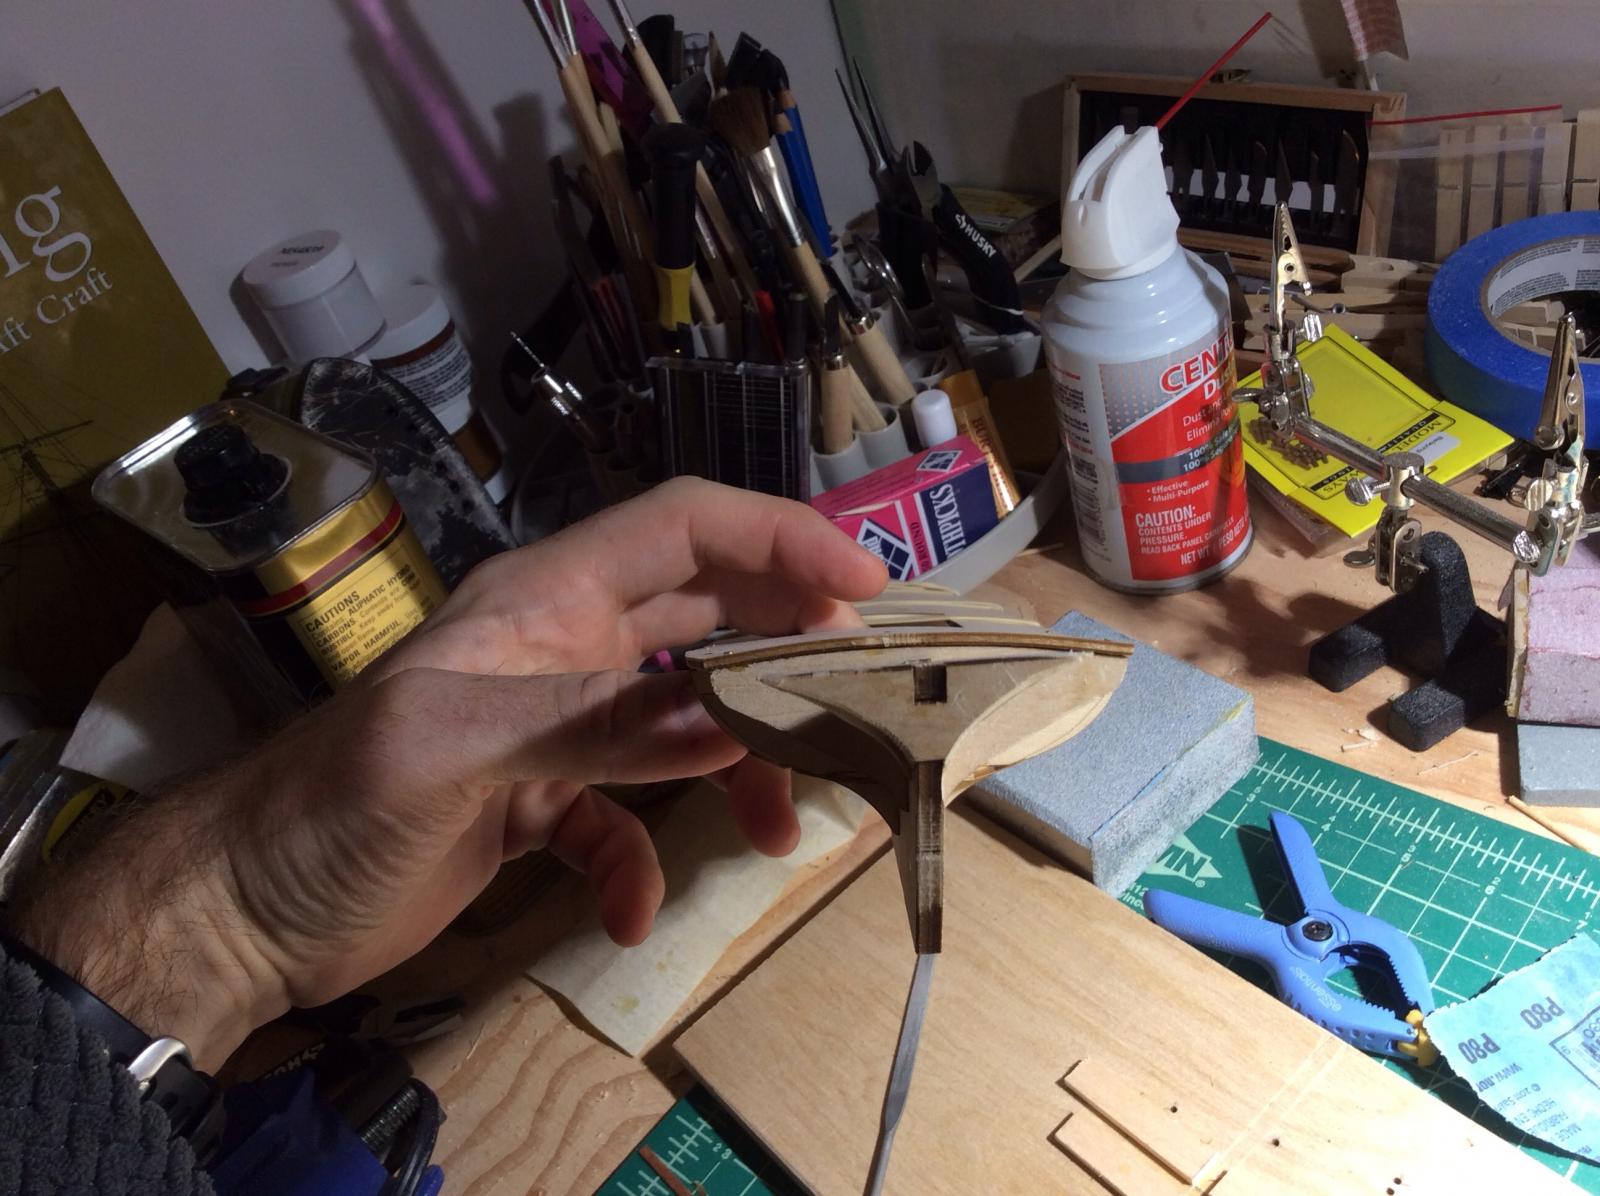
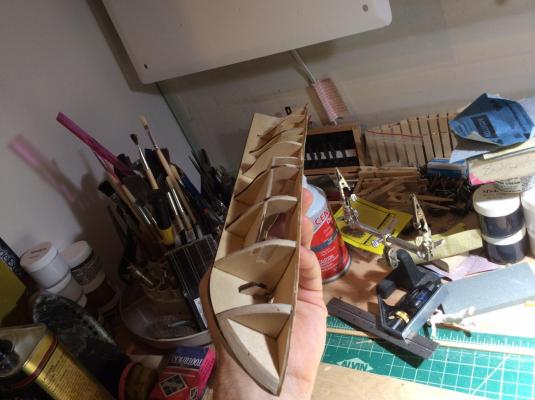
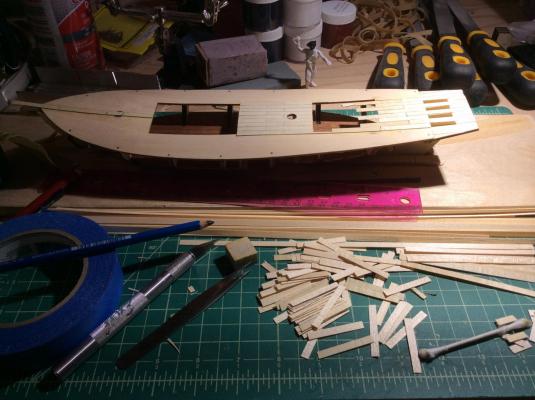
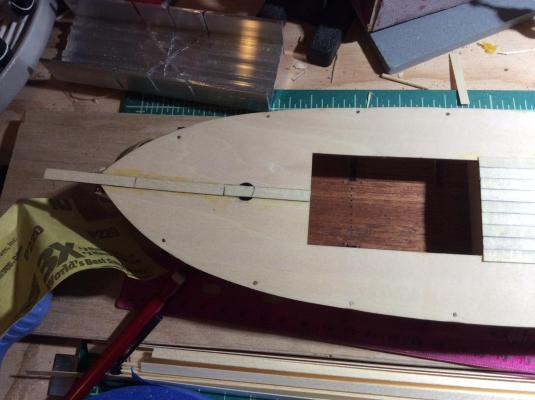
I have finished the top deck planking. Treenails to come. I replaced the stern most bulkhead or in think it's called the transom if my new ship part internal dictionary serves me well, please correct me if I am wrong. The piece in the rear in any case or landlubards terms. And I've started planking.


- 84 replies
-
- 1
-
-
- swift
- artesania latina
- (and 1 more)
-
Rules I keep in my head. Rule one: don't glue wet wood. You will get gaps if you do, learned that on my last ship. Not even damp wood. Gotta be really dry. Drying time increases the longer you soak. Rule two: direct application of heat with a plank bender or iron actually is most effective in getting the wood to remember the curve you want to give it. On really tough bends it might take more than one soaking bending and clamping and drying to get it to keep the shape. Rule three: remember rules one and two. That's all well and good about bending but what about shaping and tapering the planks. If I were you I would map out with tick marks on the bulkheads where your hole will be, where each plank will end for you cutaway window into the hull. For the places where the plank will just not bend far enough you will have to leave gaps and fill in like you did up top with "stealers". A sliver of a plank at the end filling the gap between two full length planks that just won't lay together at the ends. The bottom most plank is called "The garboard" plank. It's pretty challenging and you should fit it sooner rather than later. i.e. Don't make it the last plank.
-
Captain AL: you are right with respect to your planking steps. Firguring out the shape is the hardest part. How much tapering and where at the stern and how to trim down the plank. Especially at the beginning because you have such a blank slate. That is where the math and measuring and plank fan and alternative methods come I to play or the instructions in terms of plank layout. Next is soaking. Hot water helps. There has been mention of adding something to the water. Sometime I leave the plank overnight soaking. Next is pinning or clamping in place. Or using plank bender or iron. To get the plank to the shape of ship. Let it dry. Important cause wet planks are swollen and you never want to glue a wet plank in place cause you end up with gaps. Next is gluing and clamping. Letting it dry. Working one side the. The other in the process. I get one plank or two in a sitting.
-
Nice work MD! It's coming along nicely. I hear planky planky in the distance. I would fill more at the stern all the little holes. Then use wood filler to get it baby smooth there and in the bow. Are you going to plank to the first bulkhead then?! according to your instructions. That is an awesome little launch there sans instructions. CF
-
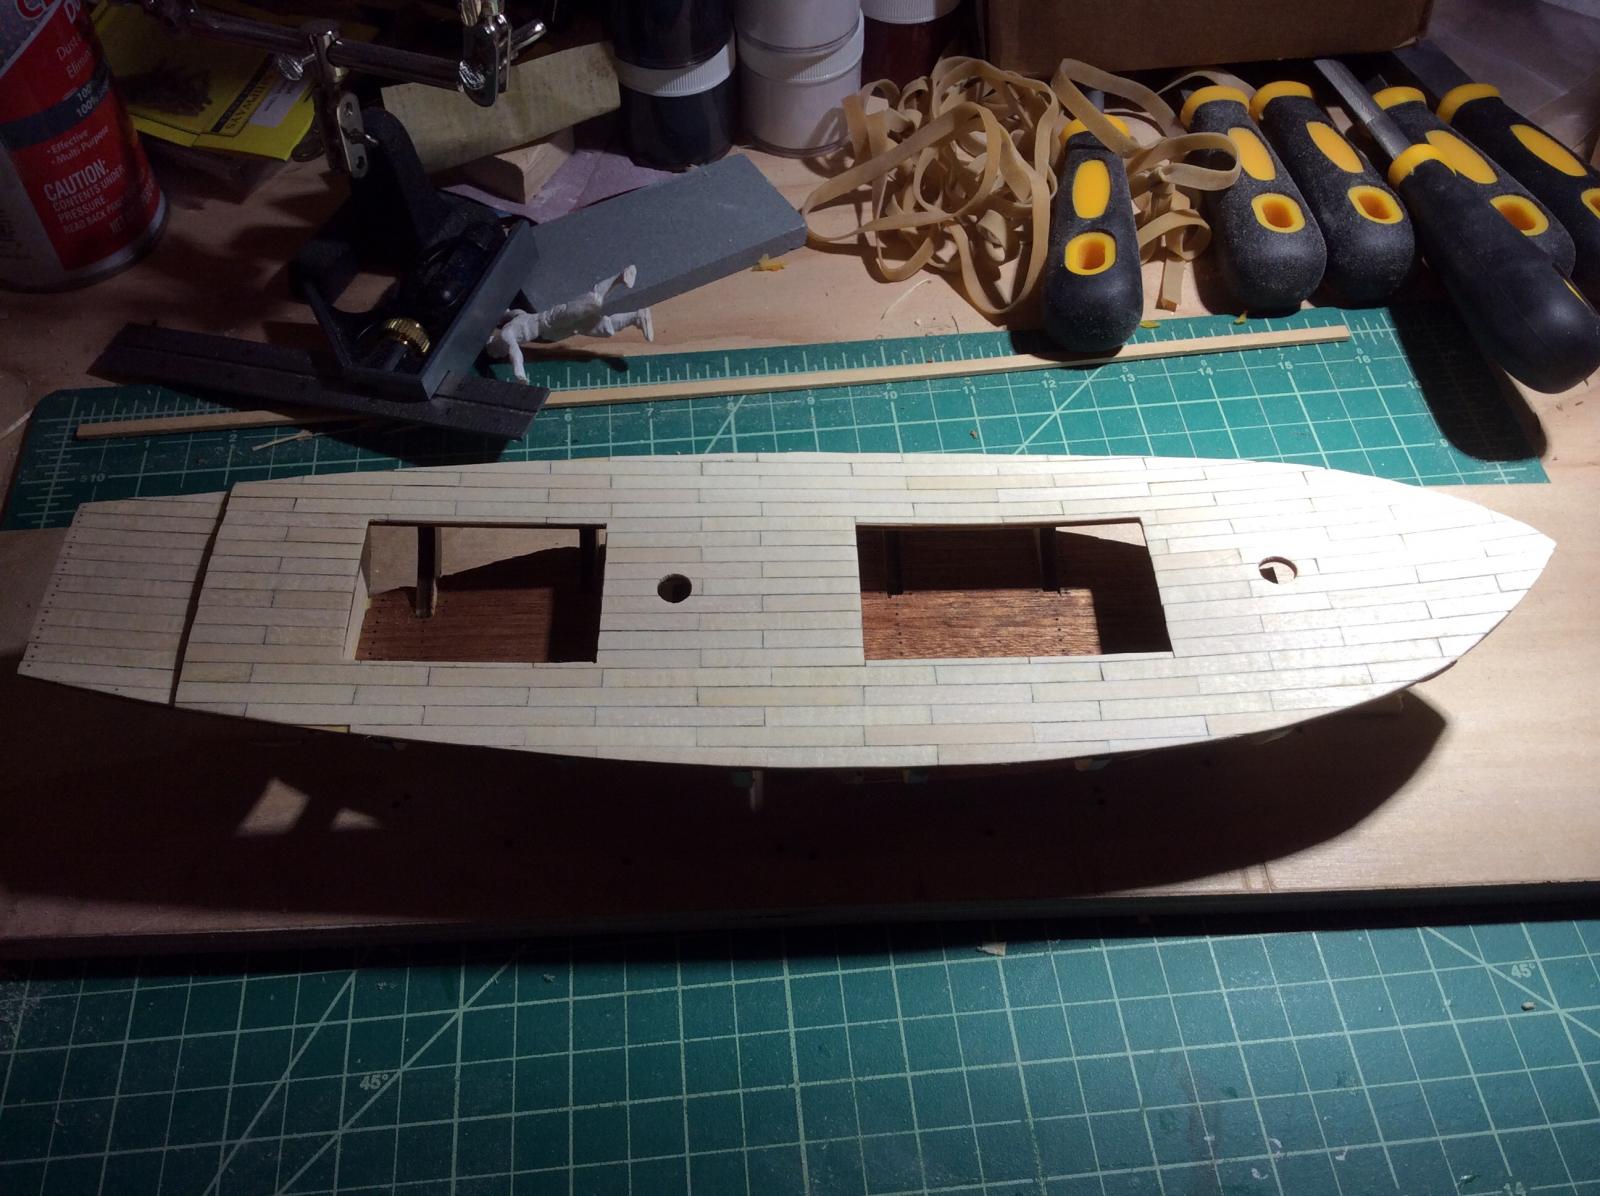
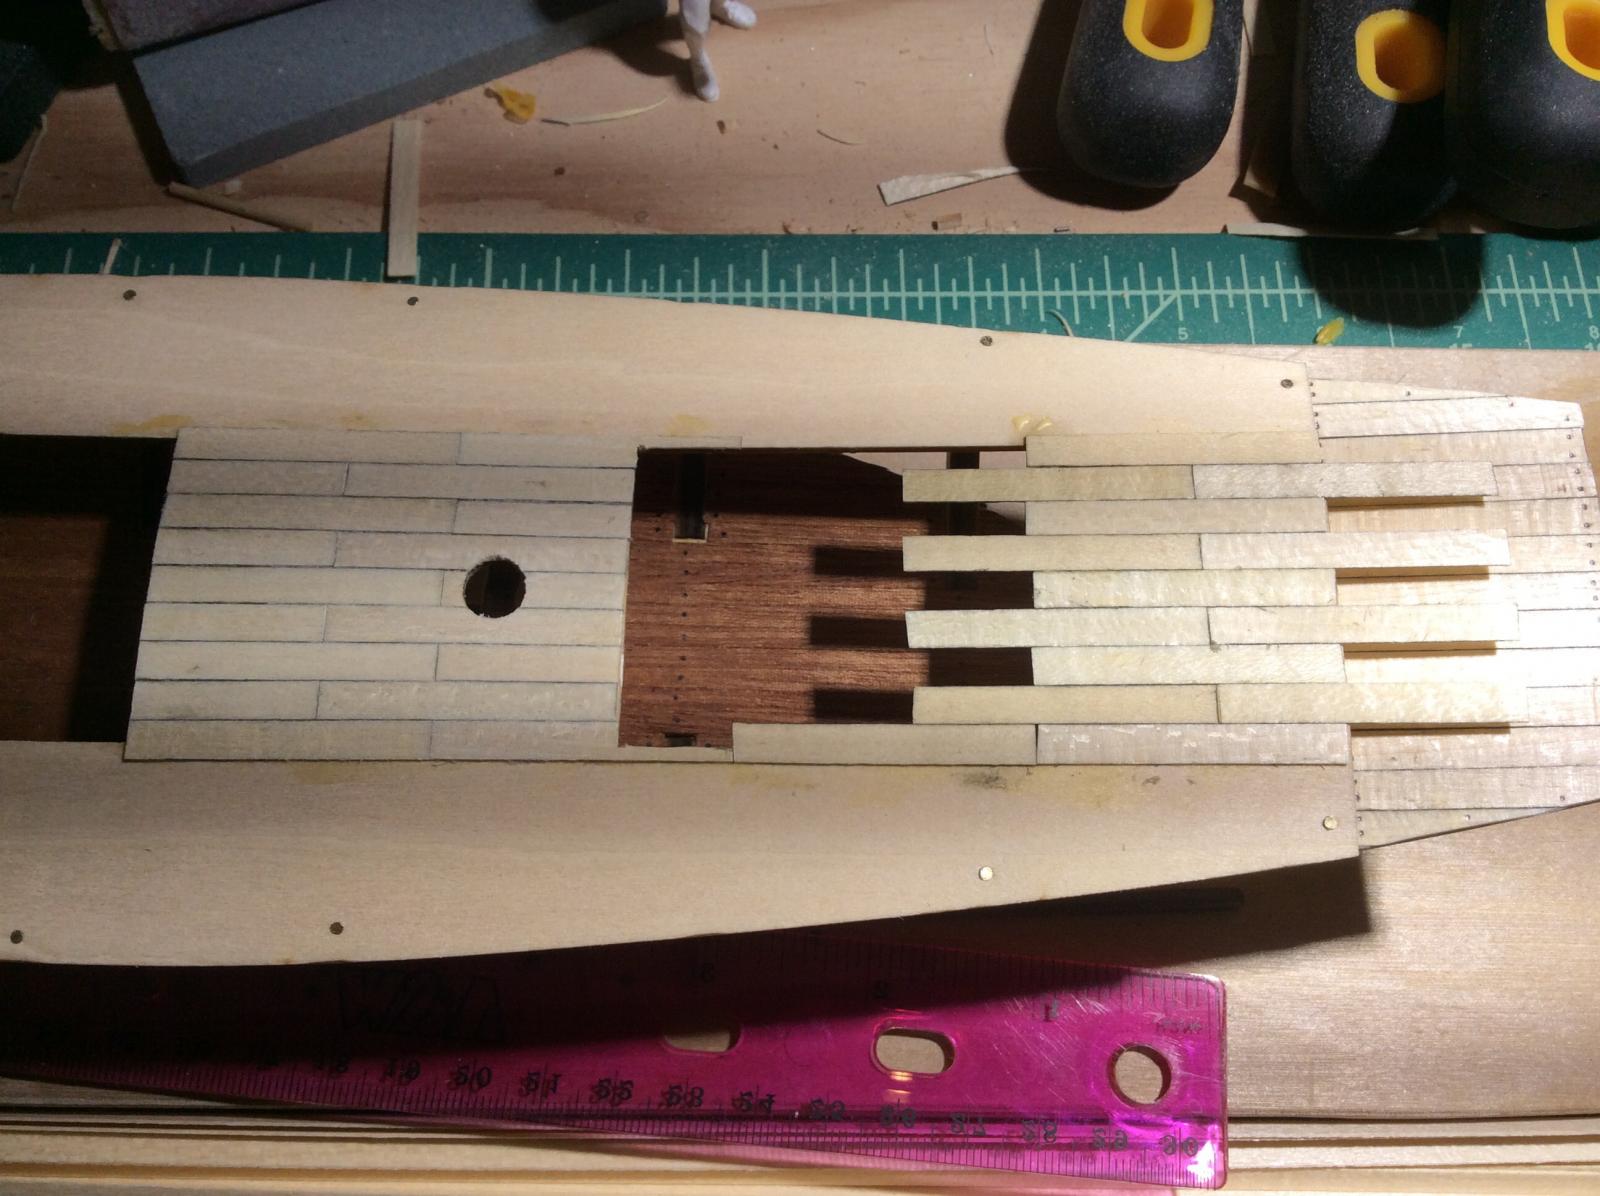
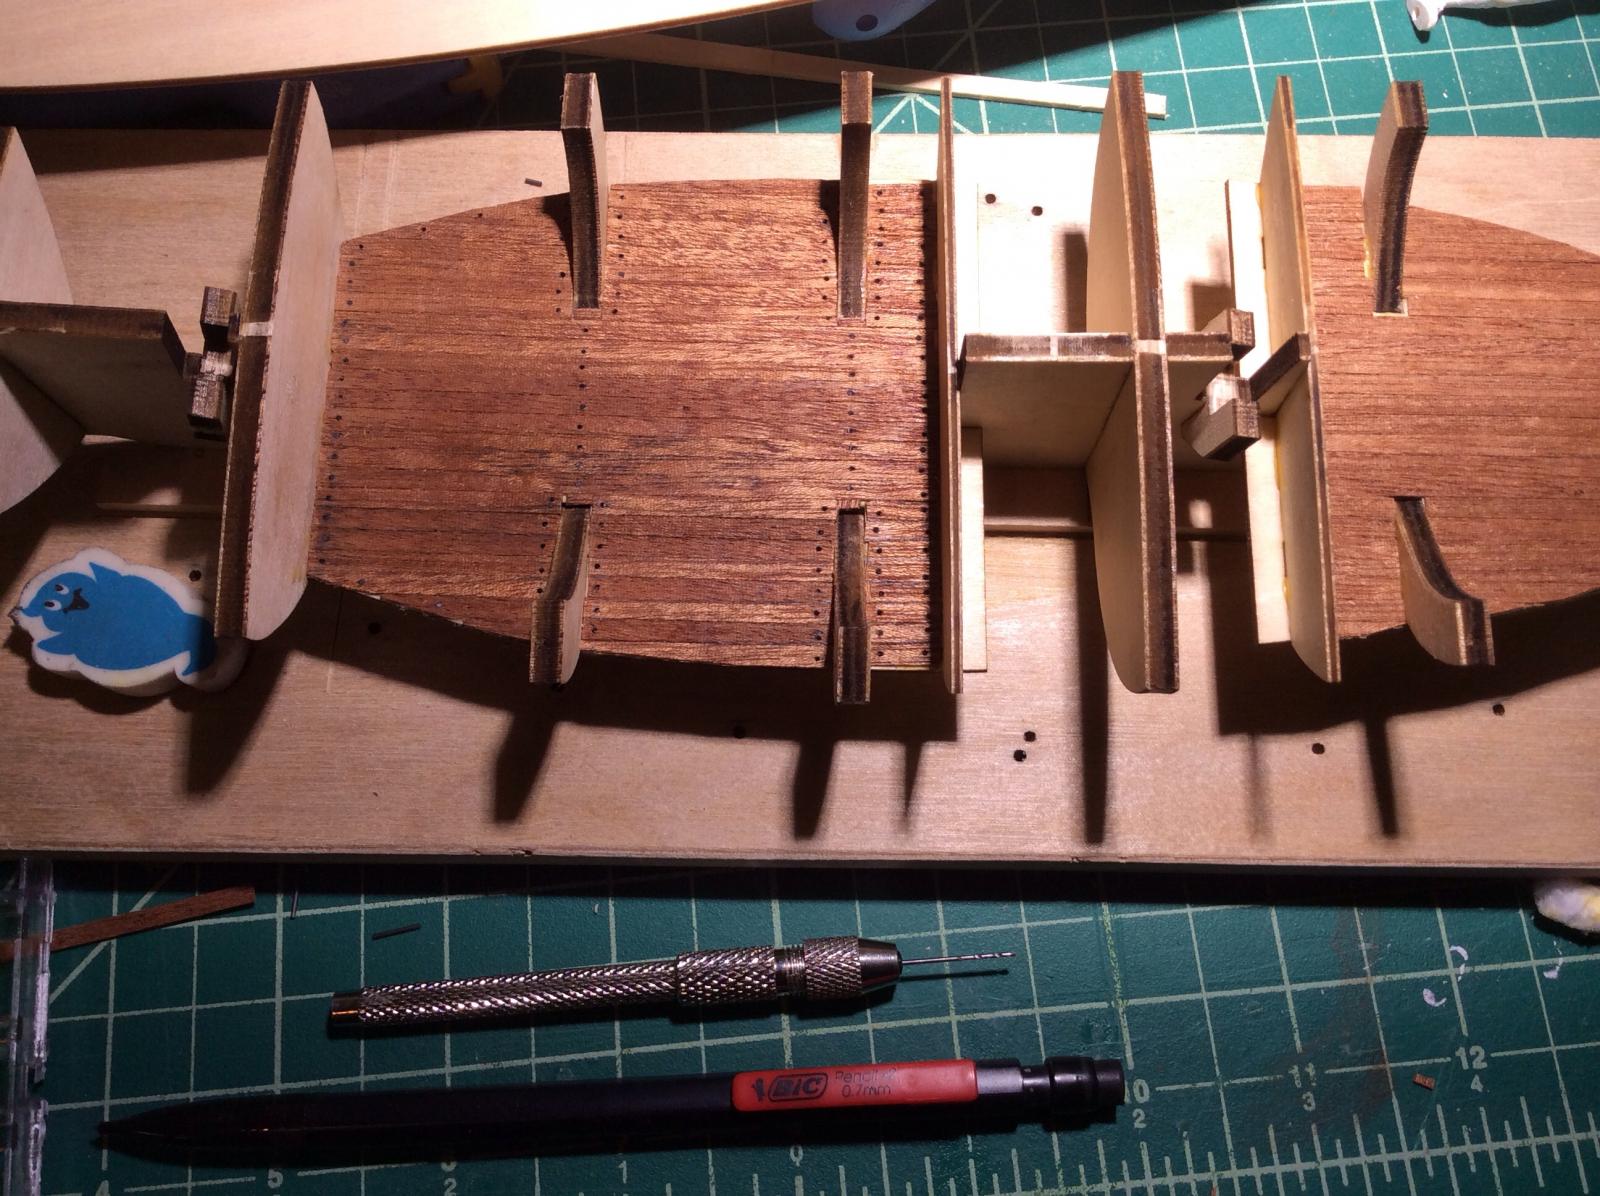
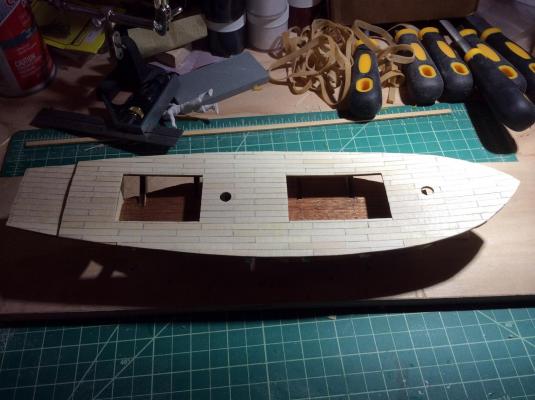
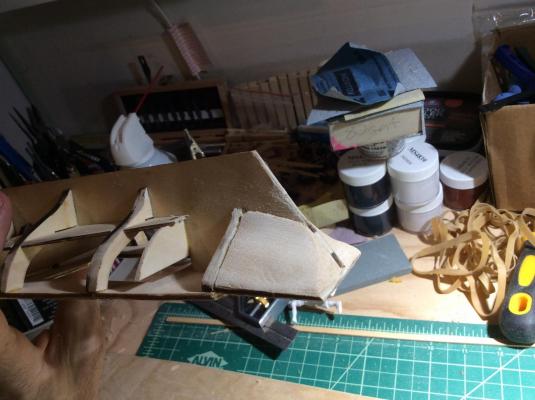
I began planking the main deck. I cut all my planks and colored the edges with pencil in batches as I went. I got glue all over my fingers. I made sure I was symmetric and off the cuff with the pattern. And am halfway done now. I plan on simulating the treenails as I did with the rear deck sanding and staining with wipe-on.


- 84 replies
-
- 4
-
-
- swift
- artesania latina
- (and 1 more)
-
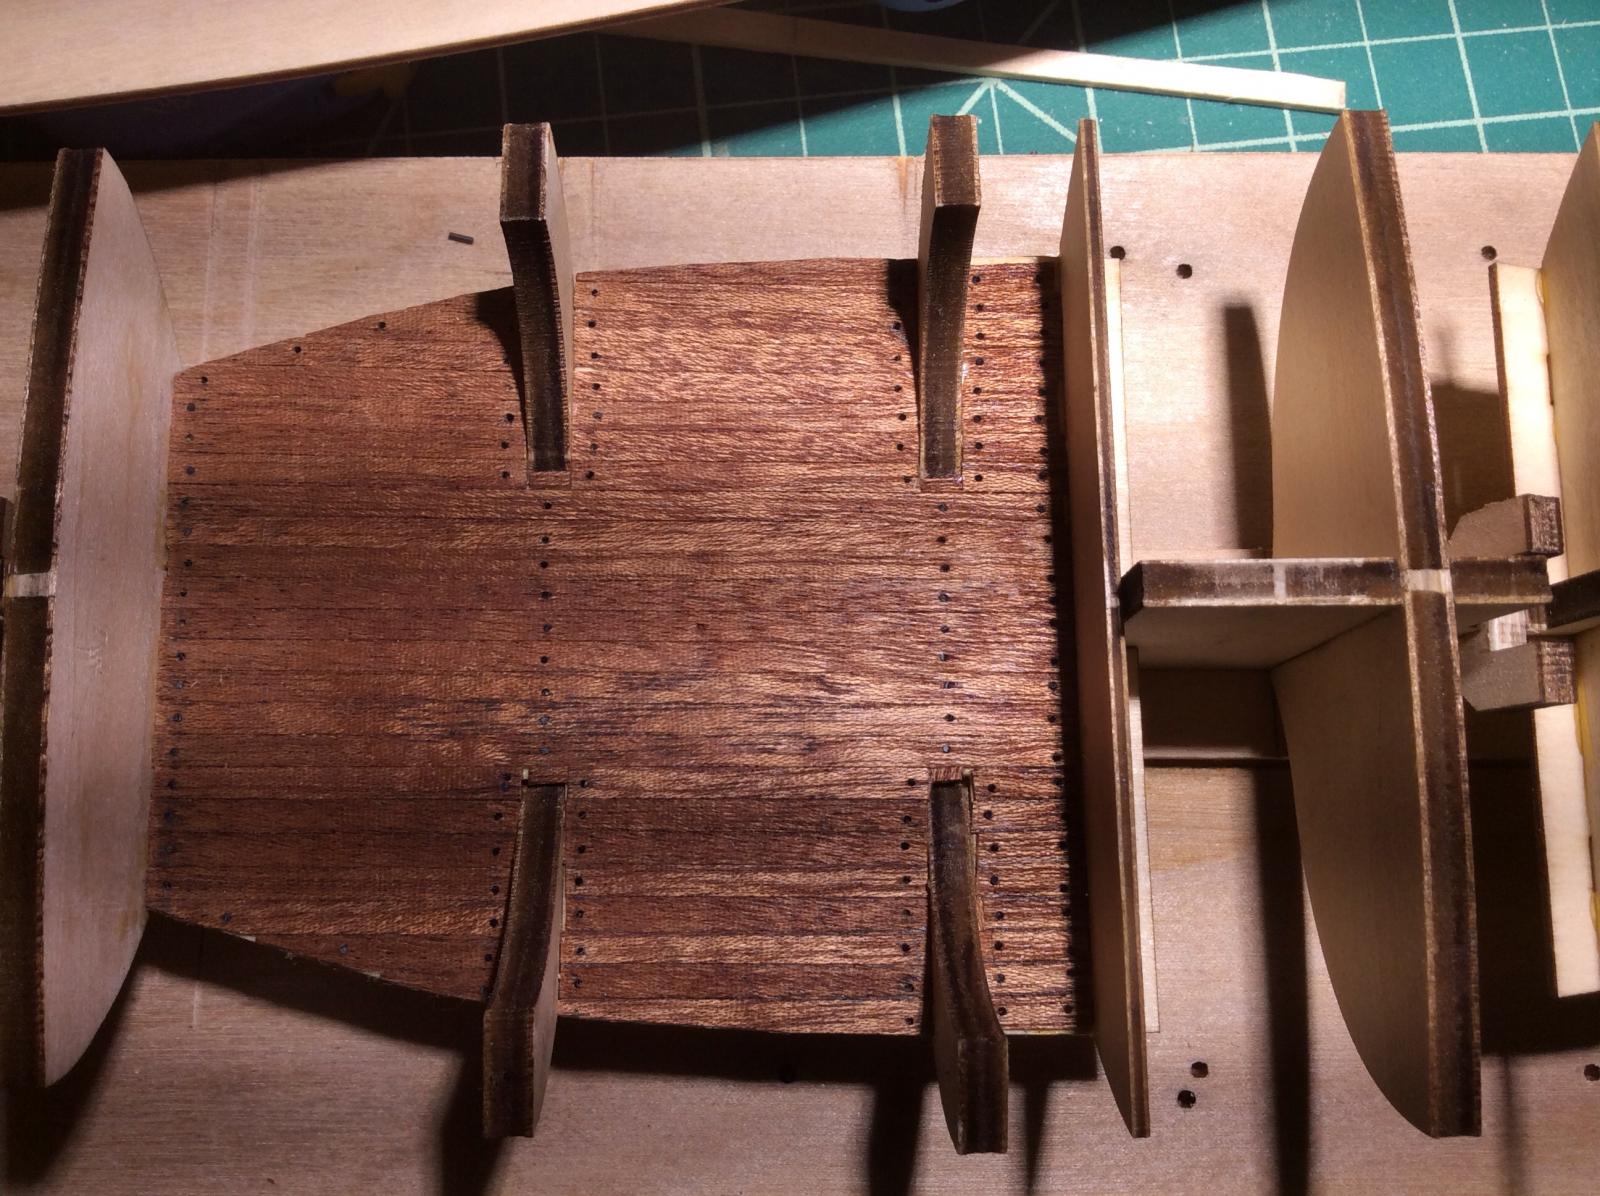
Rear top deck in place and planked with caulk and treenails using the pencil along the edges and simulated nails drawn on.
- 84 replies
-
- 6
-
-
- swift
- artesania latina
- (and 1 more)
-
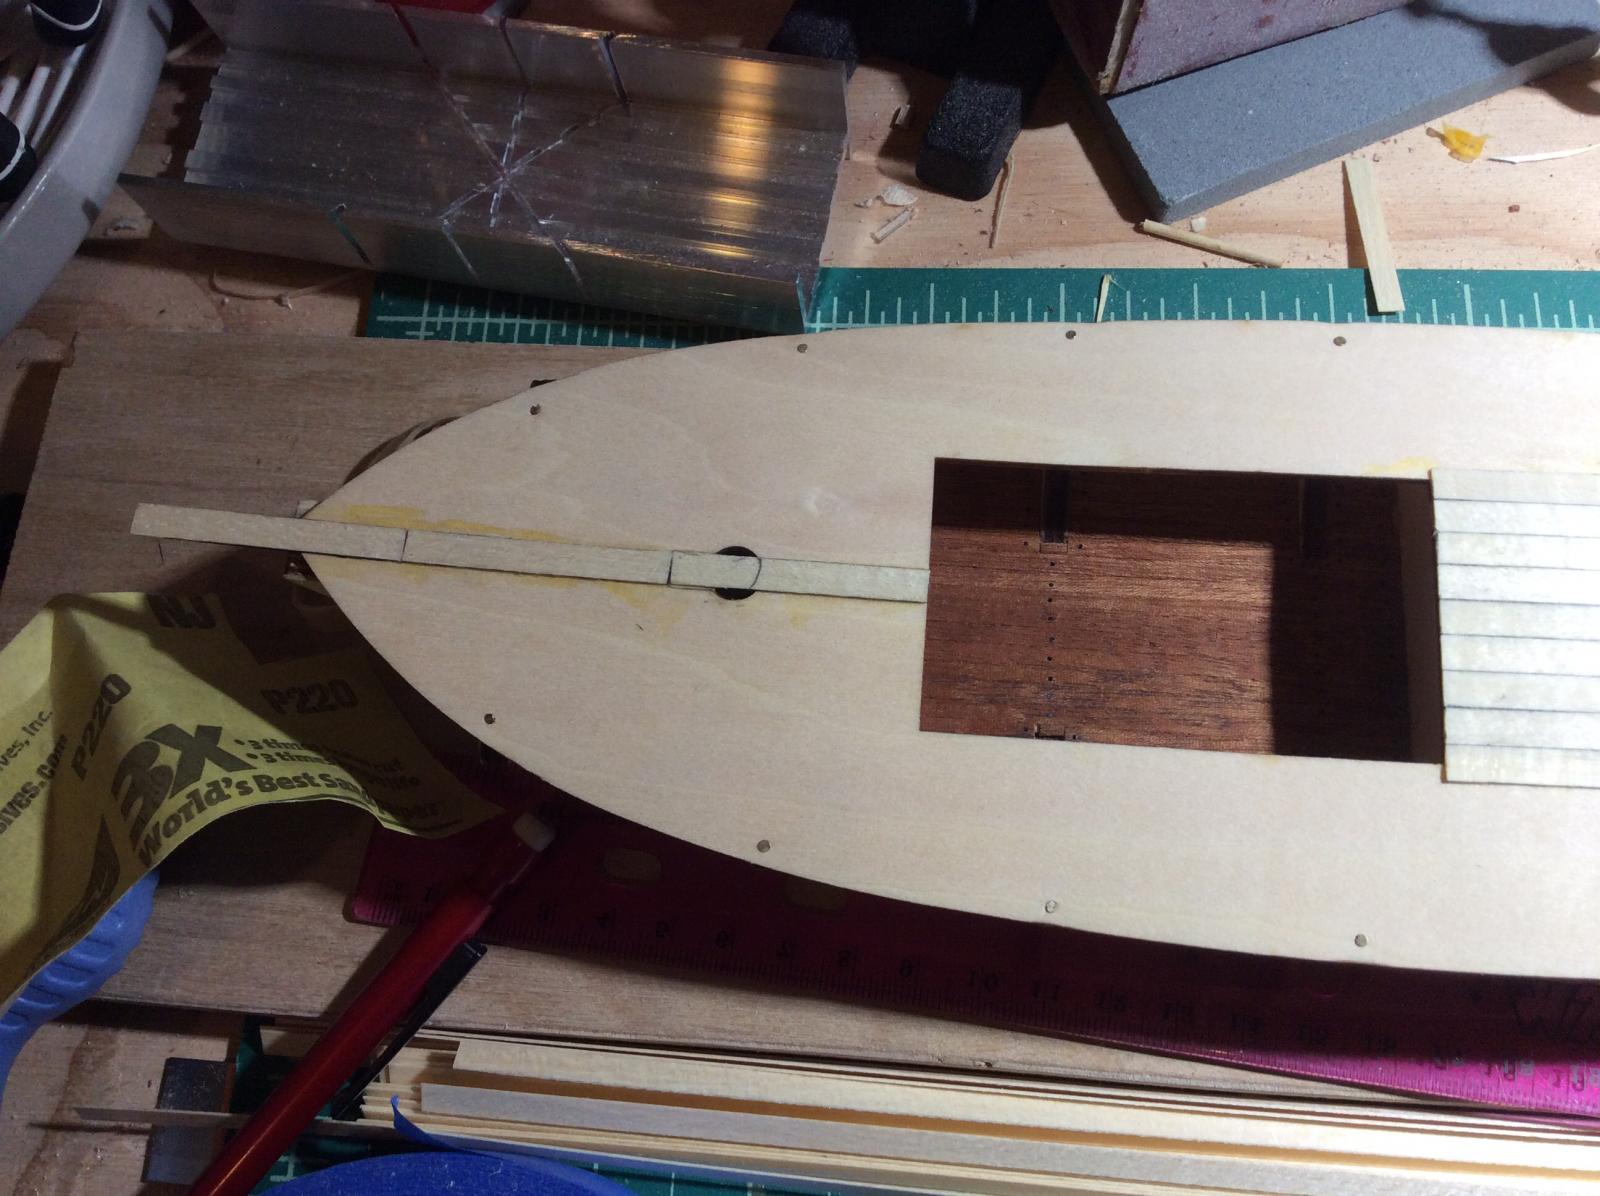
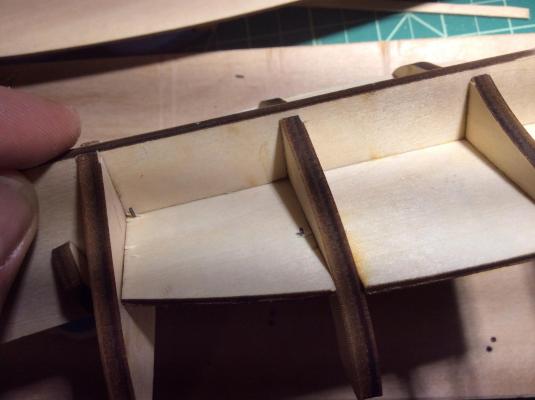
Top deck warping: By wrapping the deck in soaked paper towel and two minutes in the microwave I was able to rubber-band the deck in place and let it dry. Then I glued it and nailed it down and set it off to dry again with some rubber-bands. The rear bulkhead suffered some slightly aggressive sanding by someone and I might have to redo it. I was trying to flatten it out to put the deck on but as you can see it is a little off. Does anyone know if that rear deck should have the same curve as the main deck?

- 84 replies
-
- 1
-
-
- swift
- artesania latina
- (and 1 more)
-
I am going to blame autocorrect on that one. Bullhead that's funny! I did like the repair job. Did you not soak the plank enough before attempting the bend?
-
If it were me I would fill the stern as previously described with balsa or basswood. It will also help you fair the bullheads in the region.
-
I've read if you stare long enough at the planks and then the model, they start to apply themselves. Maybe you can independently verify this theory?
-
If it feels unruly to handle the full length planks you can and should shorten them. All that matters for length is that they start and end at bulkheads to be glued down. It looks like some of the planks for the cut out side break this rule, but for good reason, to show off all your goodies on the inside. Enough chit chat, I want pictures! You broke a cardinal rule! You made a mistake and did not take pictures of what went wrong nor how you fixed it!!!!!! Shame on you. We want dirty bits too. That way we learn.
-
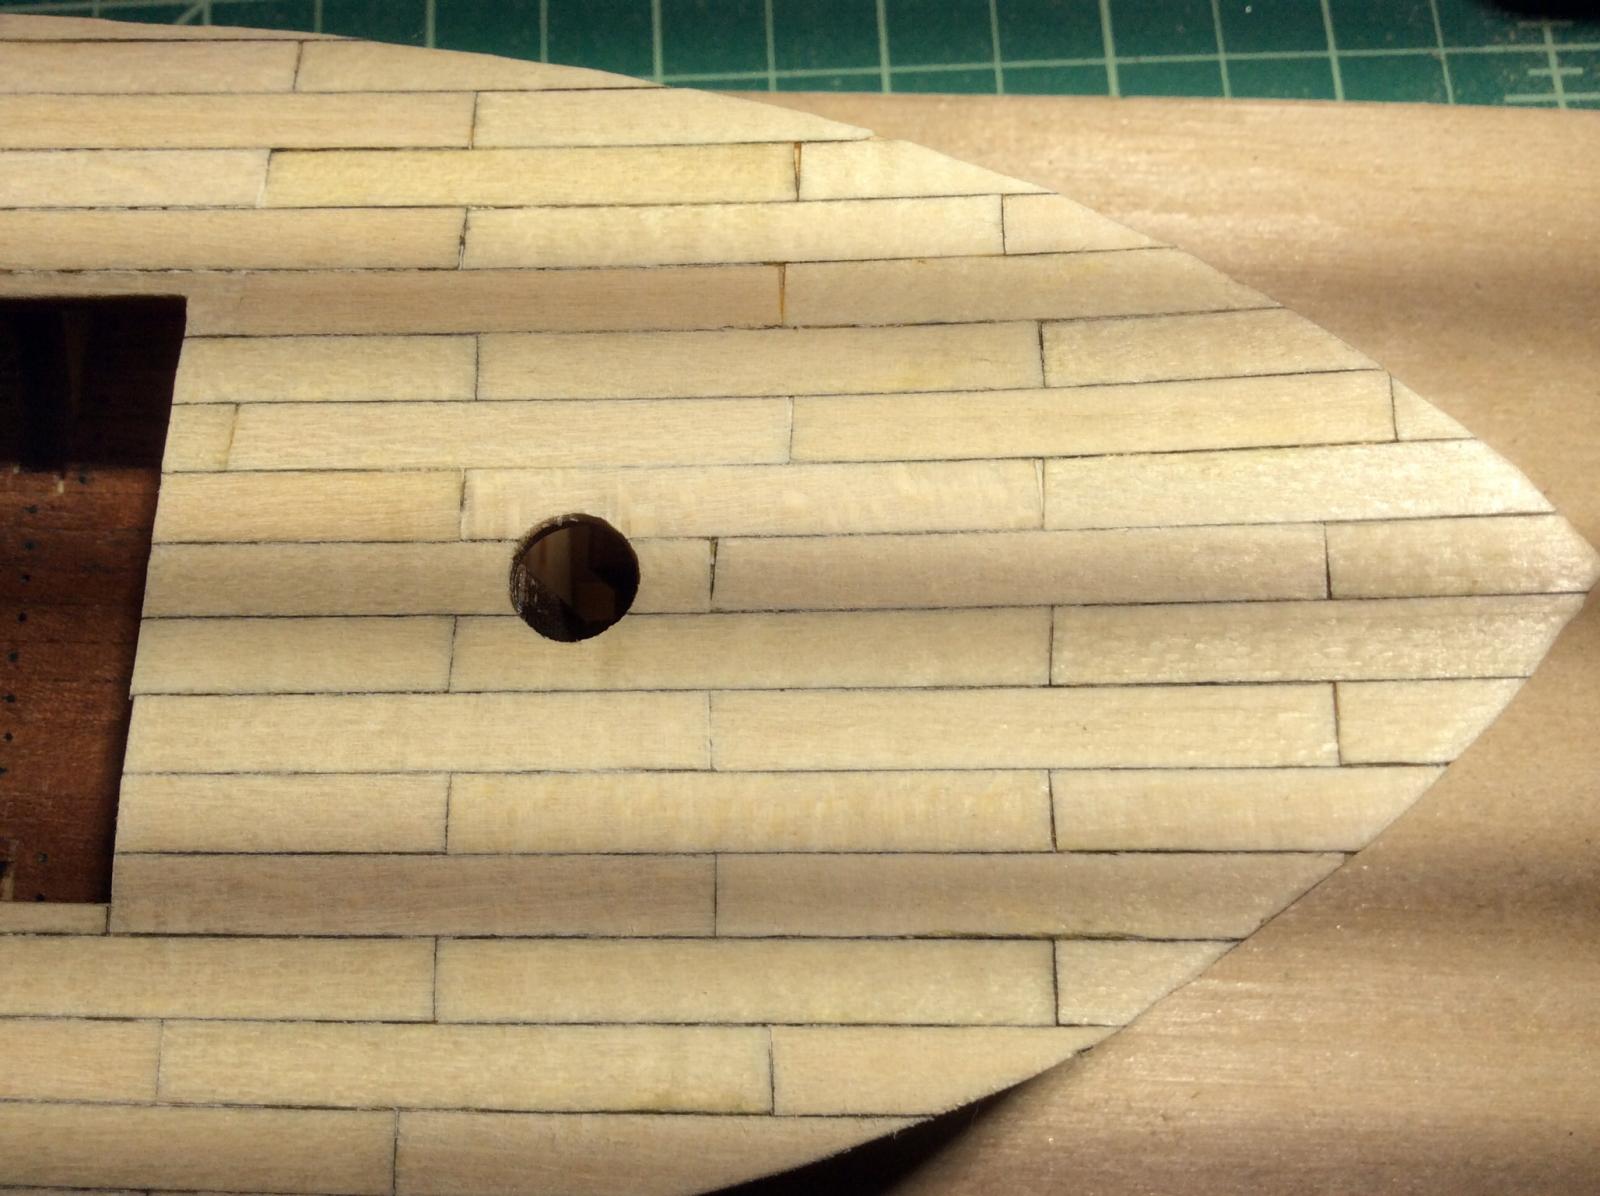
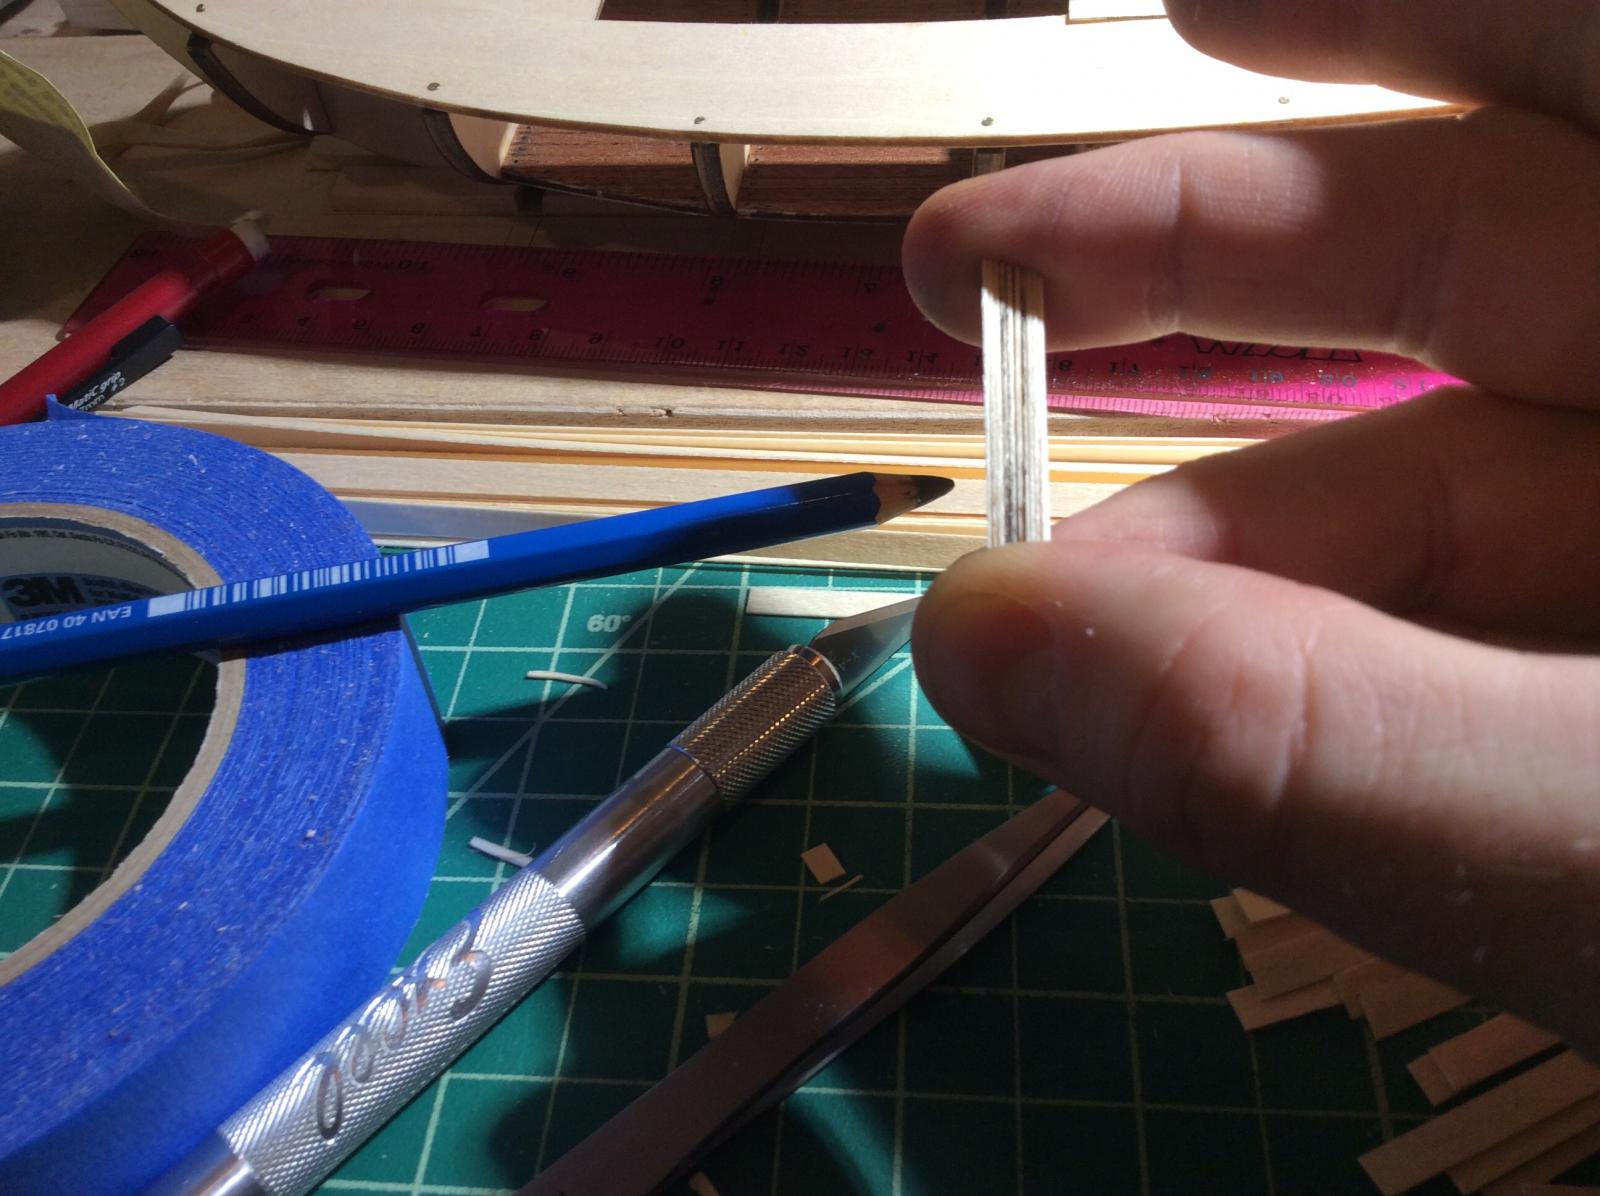
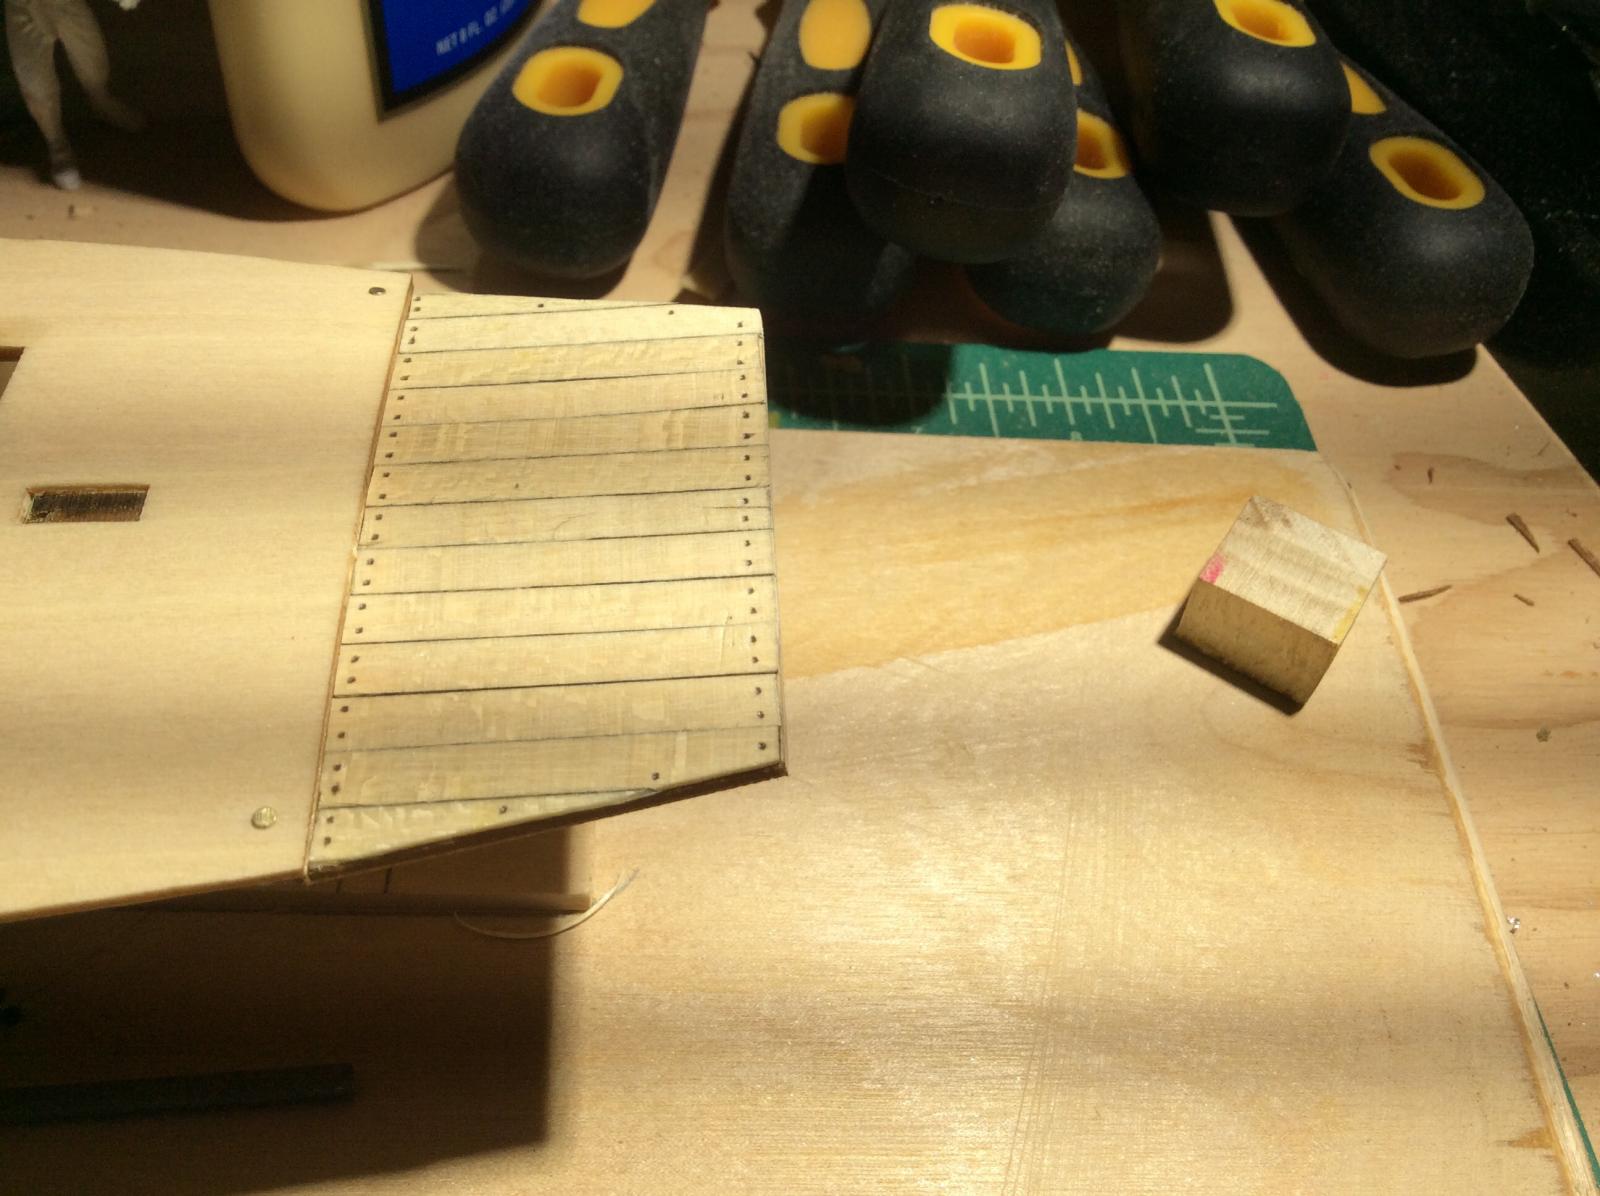
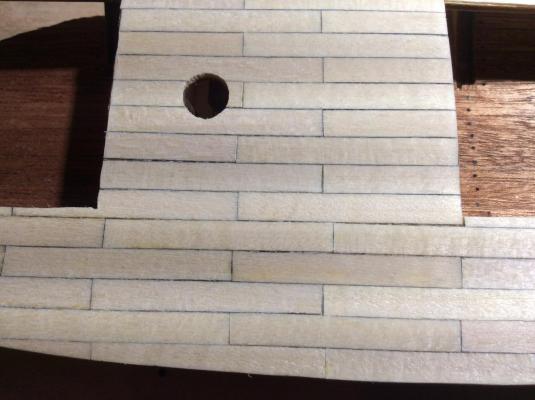
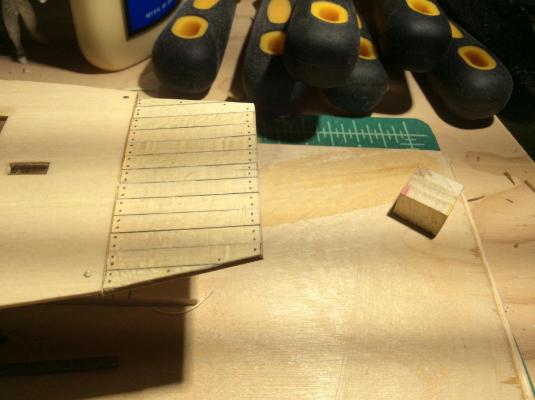
My first ever treenails! Tools: #69 drill bit and pin vise Bic mechanical pencil 0.7mm lead I had tried with the #70 drill bit but it turned out to fit better with the #69, not to mention I broke my #70 bit in the first few holes drilled I also tried fitting the lead in by hand and by tweezer, it worked best right out of the pencil and just snapped off. This is also sanded with 220 grit and treated with wipe-on poly from min wax clear satin. A few of the holes went clear through. Oops. I am quite pleased with the result however.


- 84 replies
-
- 1
-
-
- swift
- artesania latina
- (and 1 more)