Javlin
-
Posts
1,681 -
Joined
-
Last visited
Content Type
Profiles
Forums
Gallery
Events
Everything posted by Javlin
-
Thanks Fellas appreciate the input glad to get this off the desk... now off to the sisters for Thanksgiving down in the Gainesville area.
-
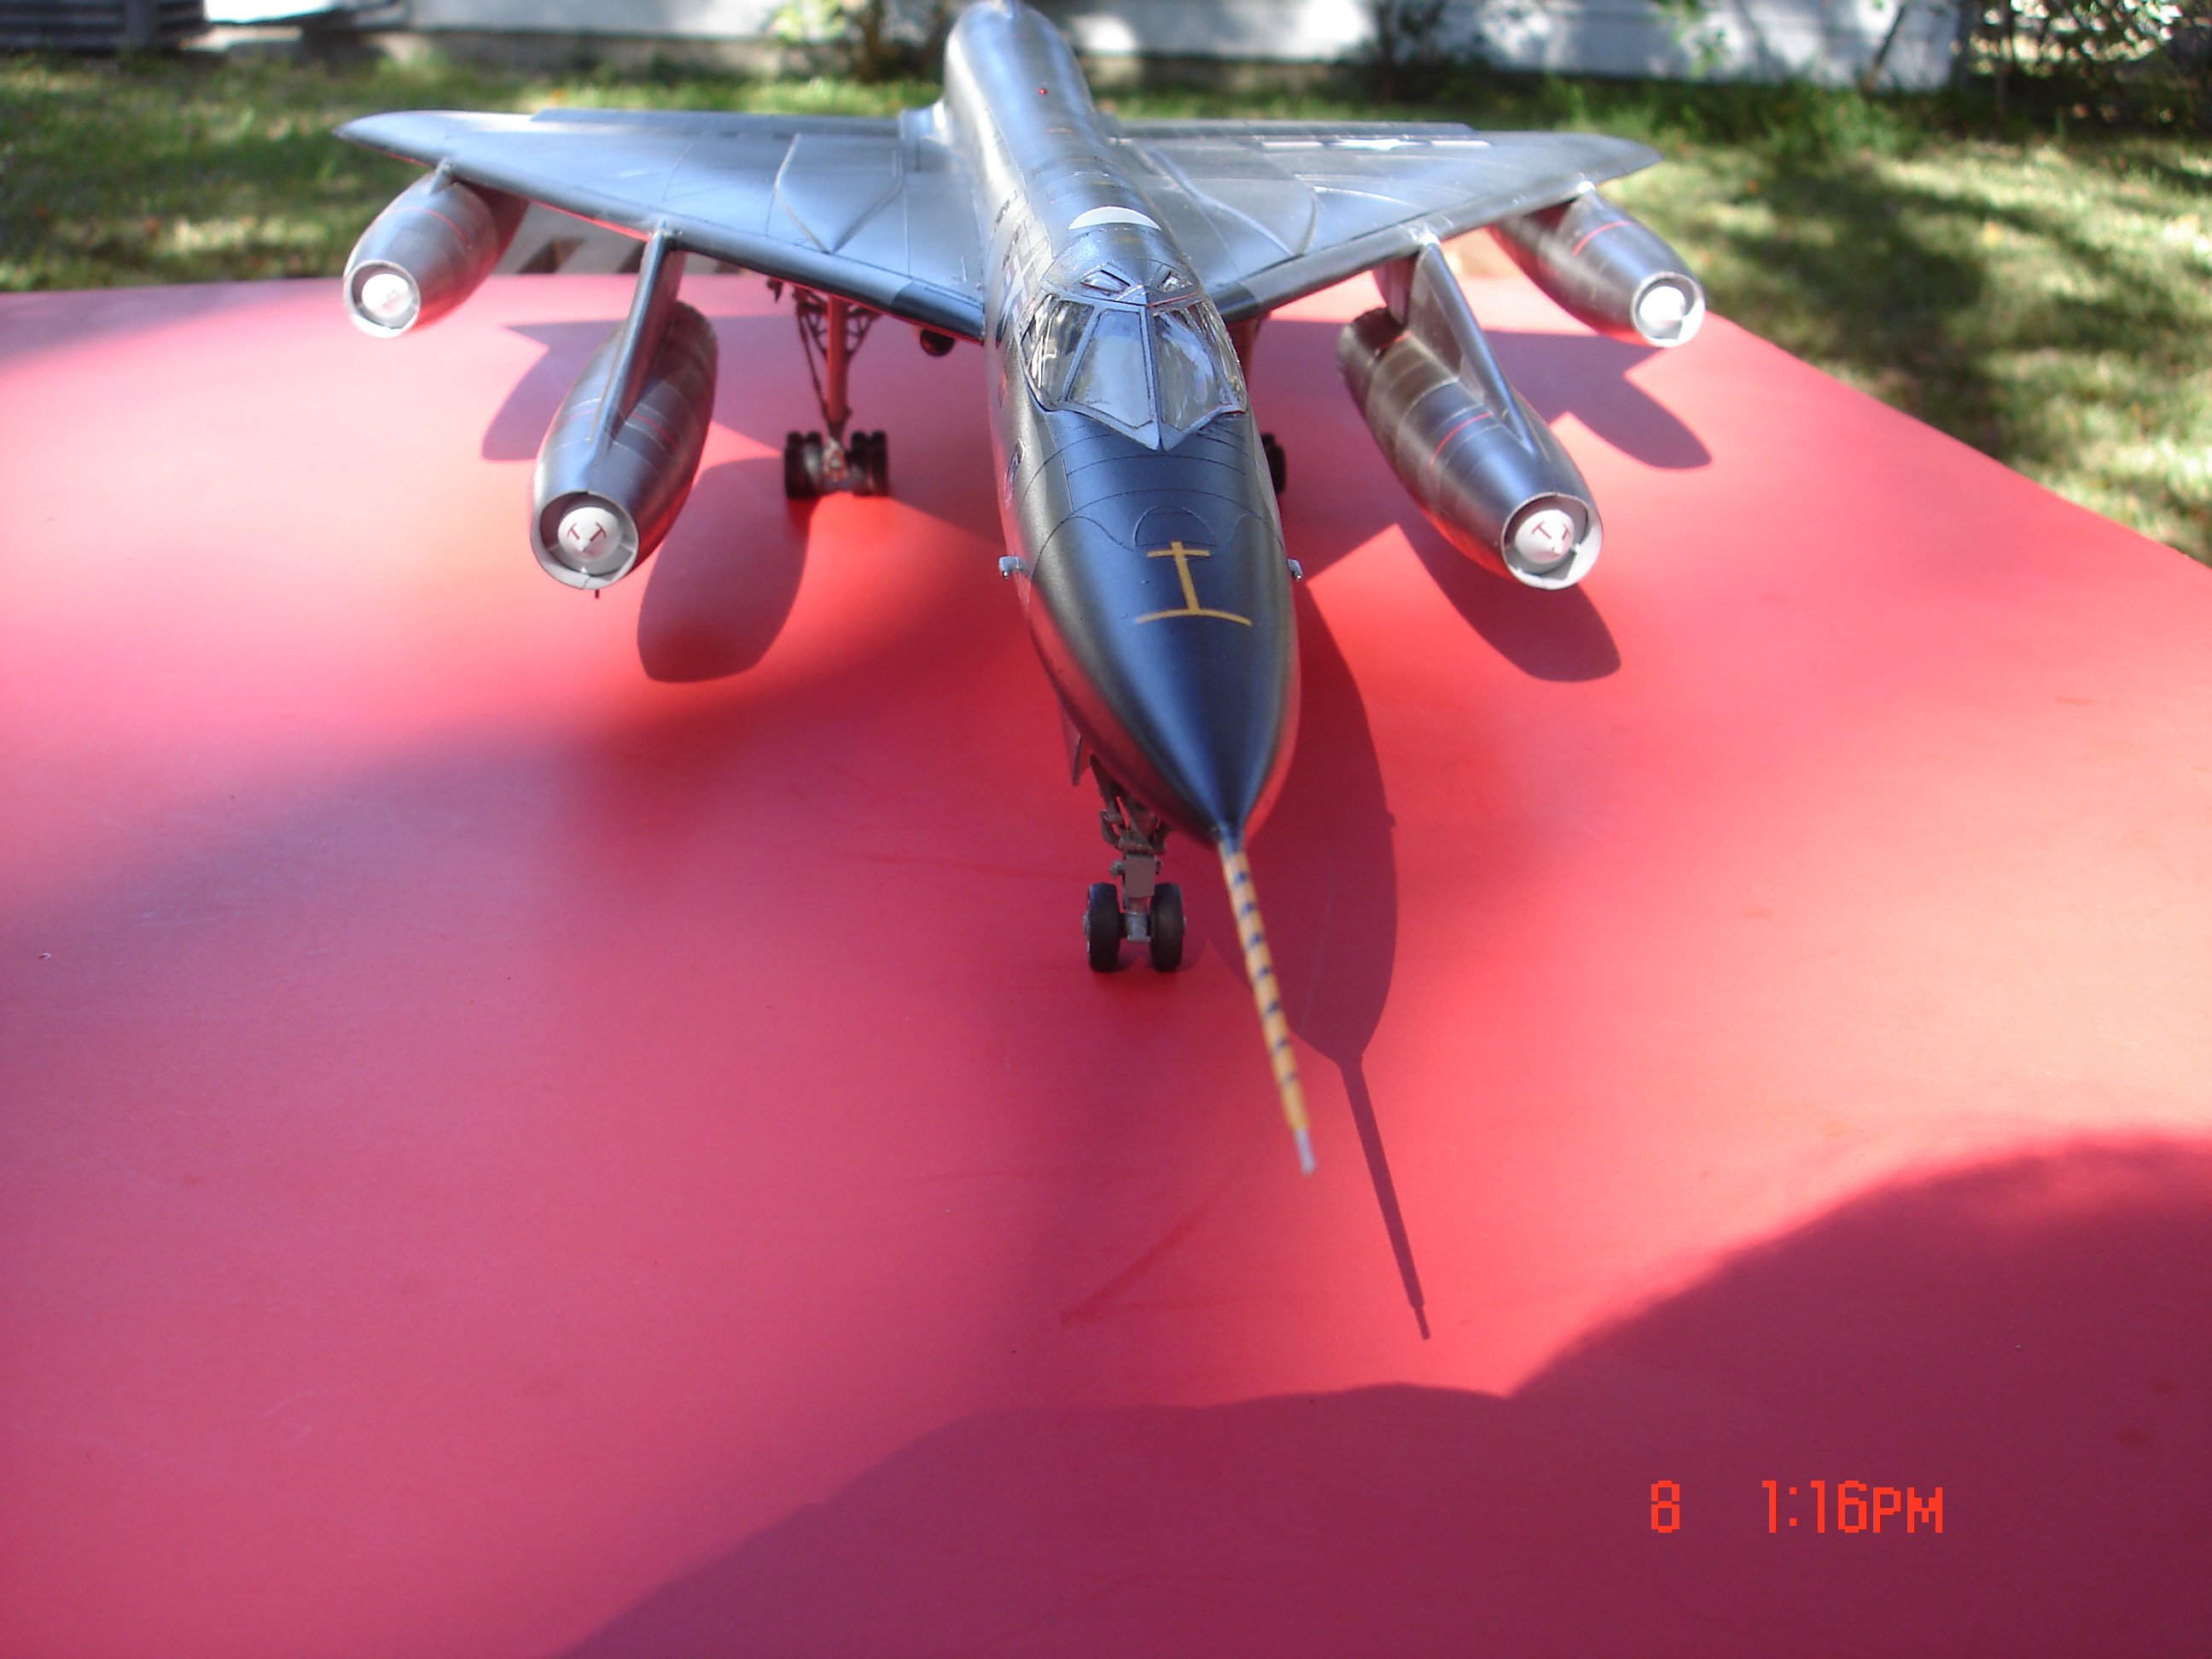
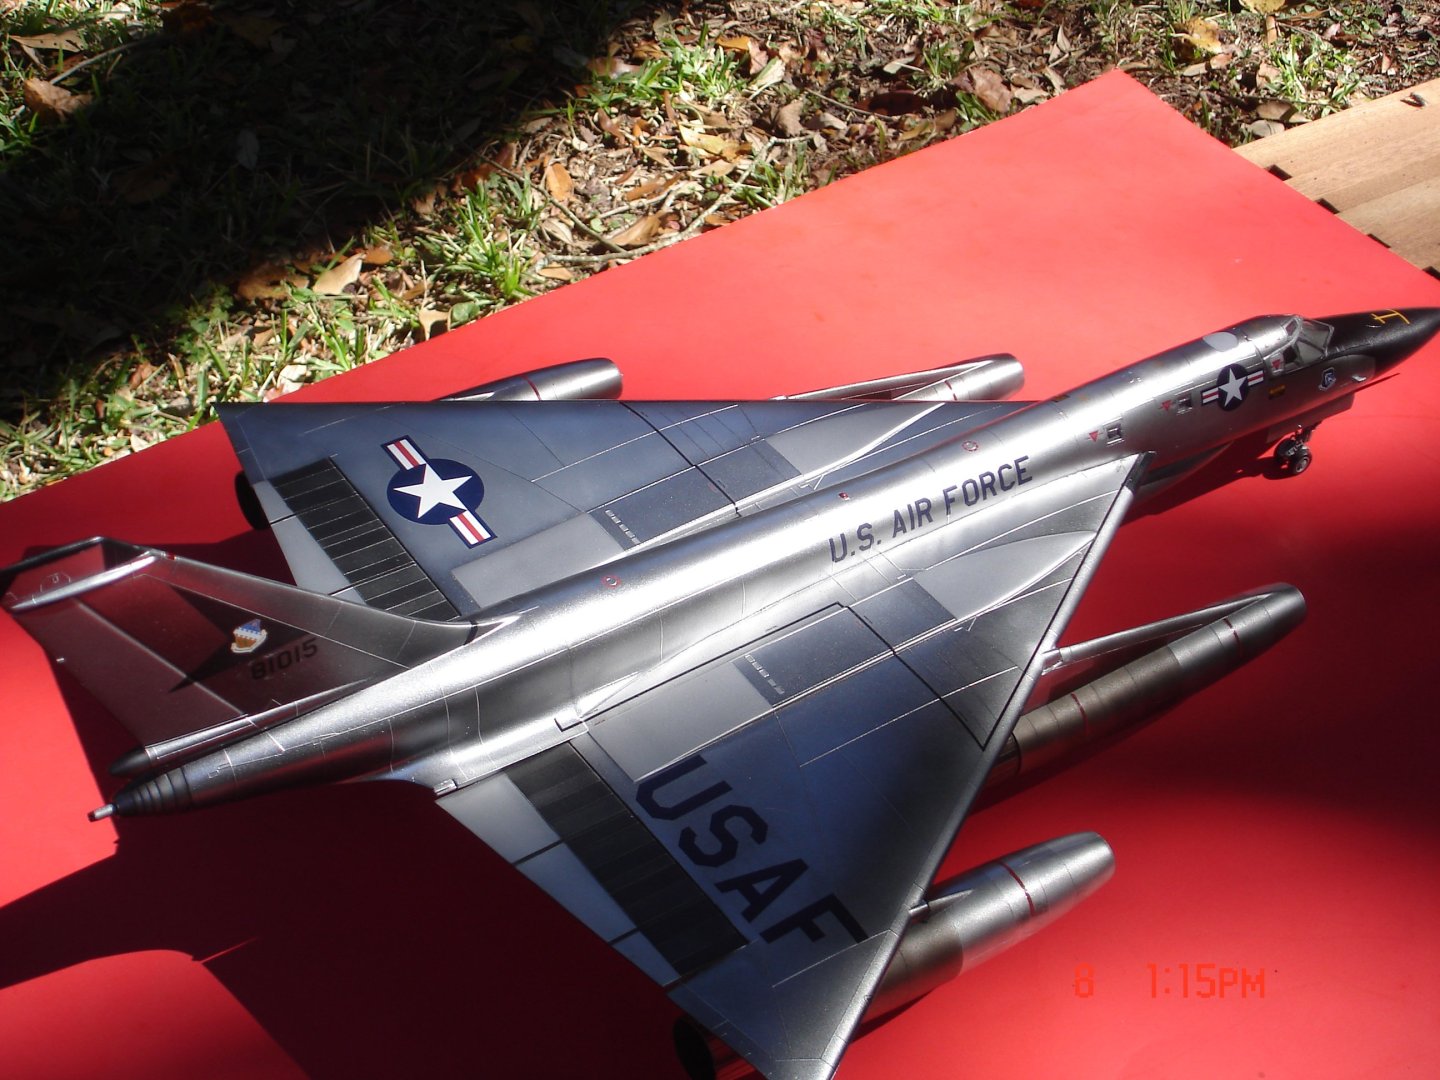
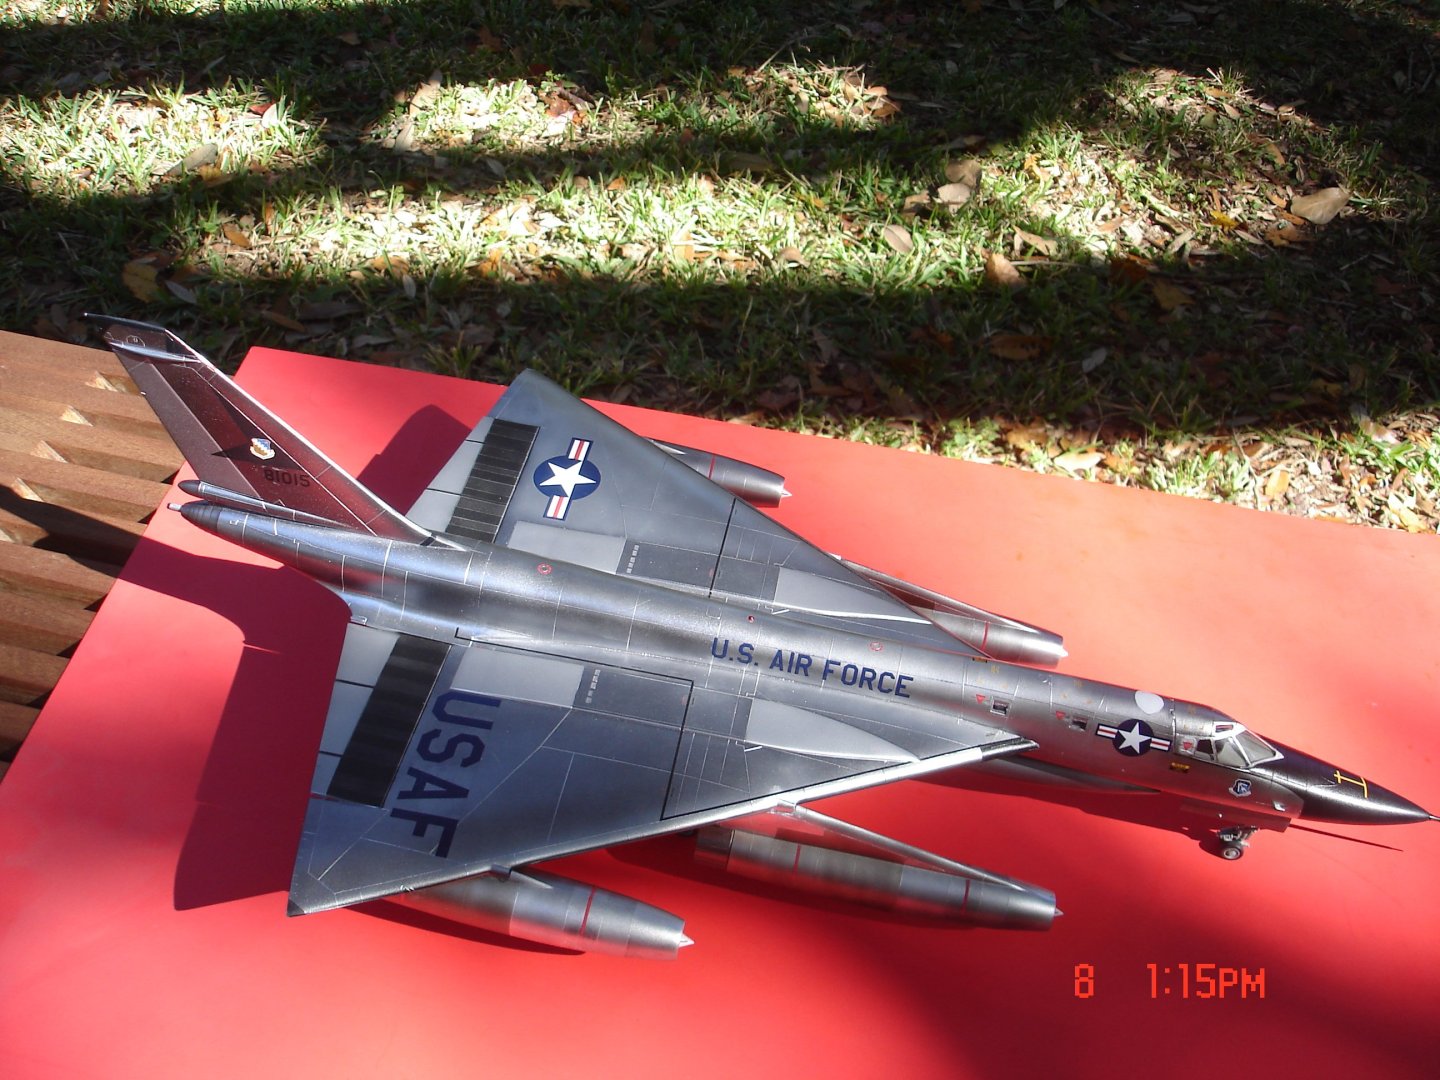
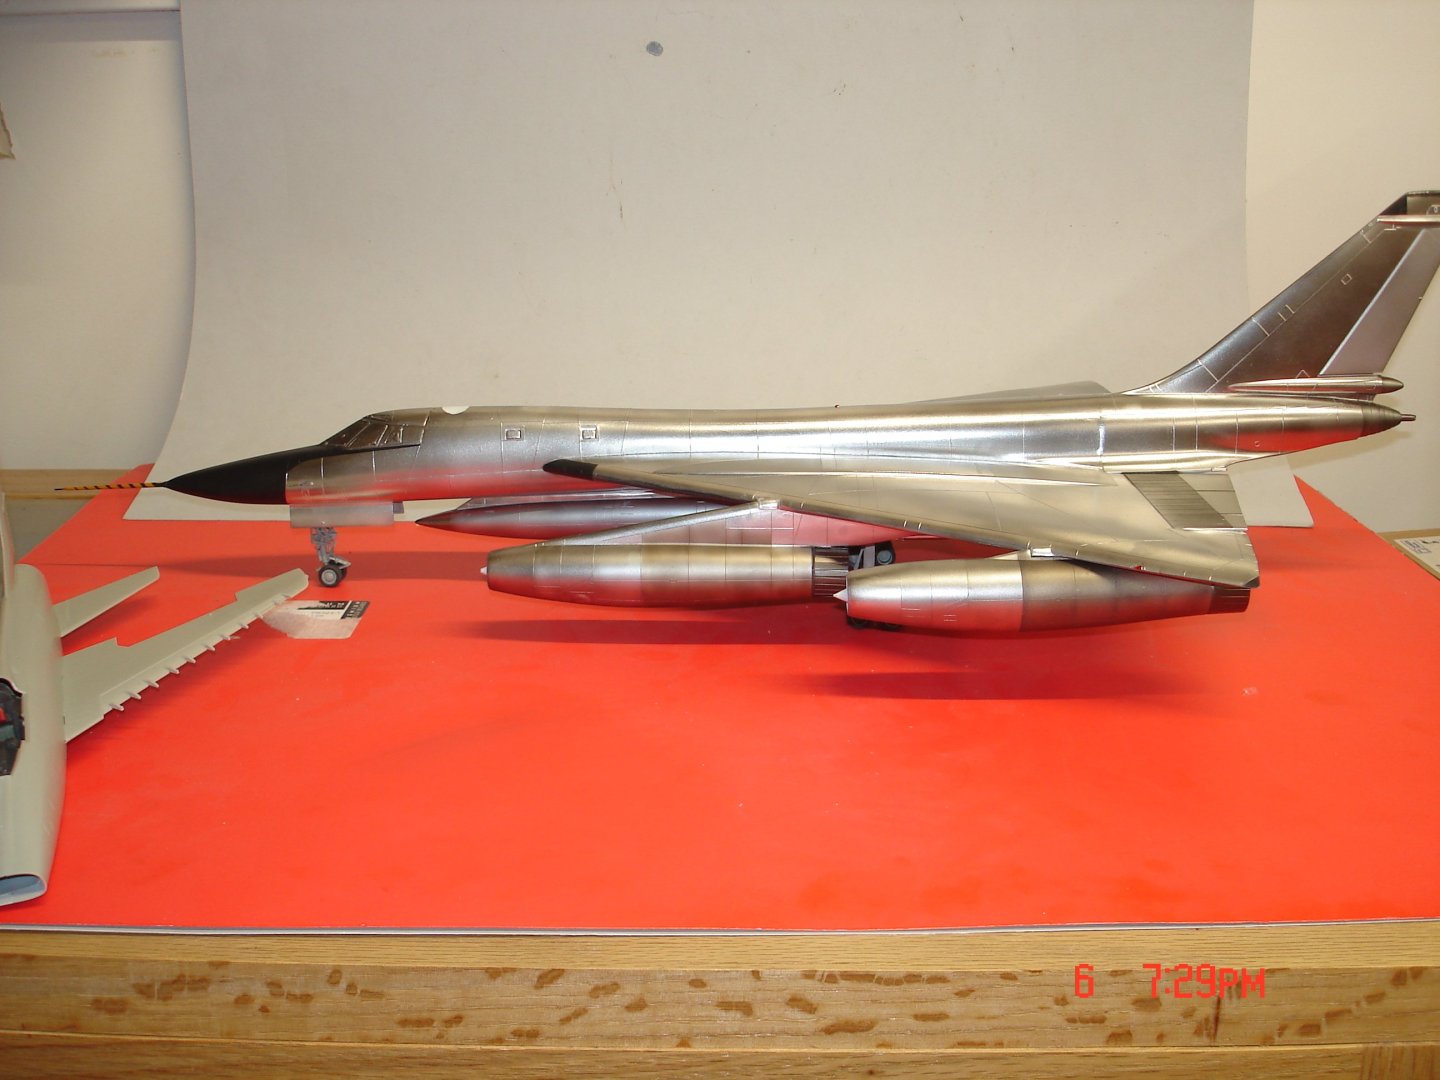
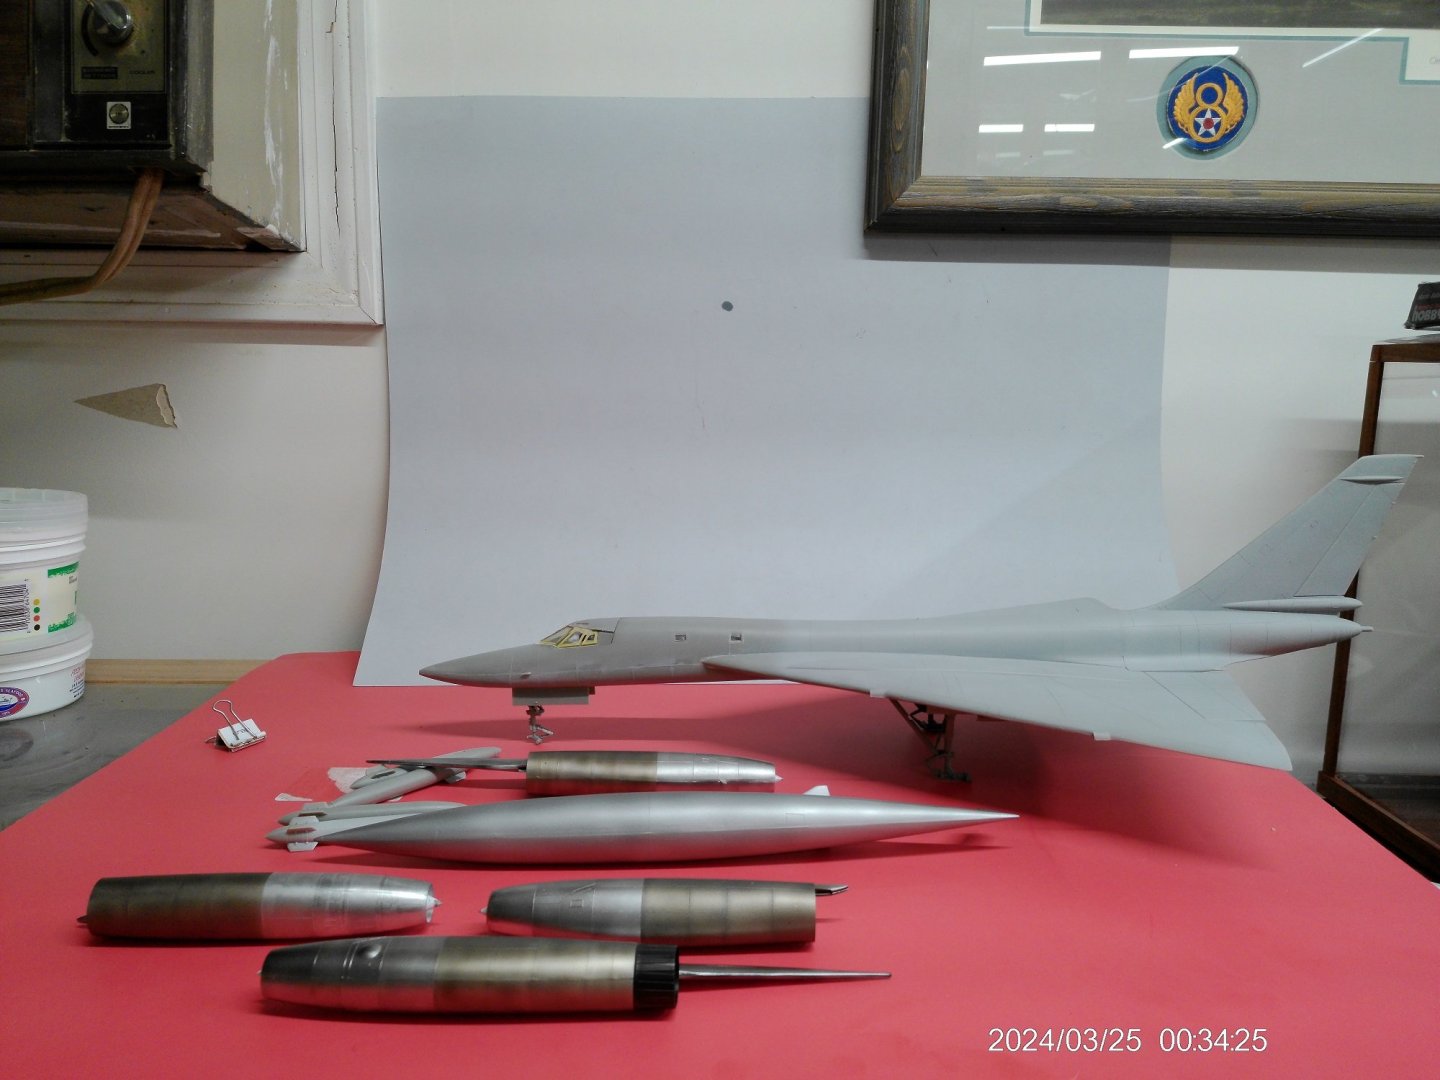
Another one hits the cabinet not as good as the Hustler but pretty decent.I was able to cut away the most offending out register decal on the L/tail area while on the plane straight edge/razor/water.One can still see some register problems on the yellow arches but at this point it is what it is.The blue of the engine area I played with clear blue kinda worked just those areas usually had silver w/blue on top ...next plane.


- 13 replies
-
- 14
-

-

-
Mike I go MrColor 1500 primer grey as a base coat when dry buff with a worn out 800 grit scotch brite smooth it out.I then spray Tamiya acrylic either gloss or semi-black and then hit with the AlClad back again to a lacquer.This plane being so big I used gloss black from a rattle can something I just had on hand.
-
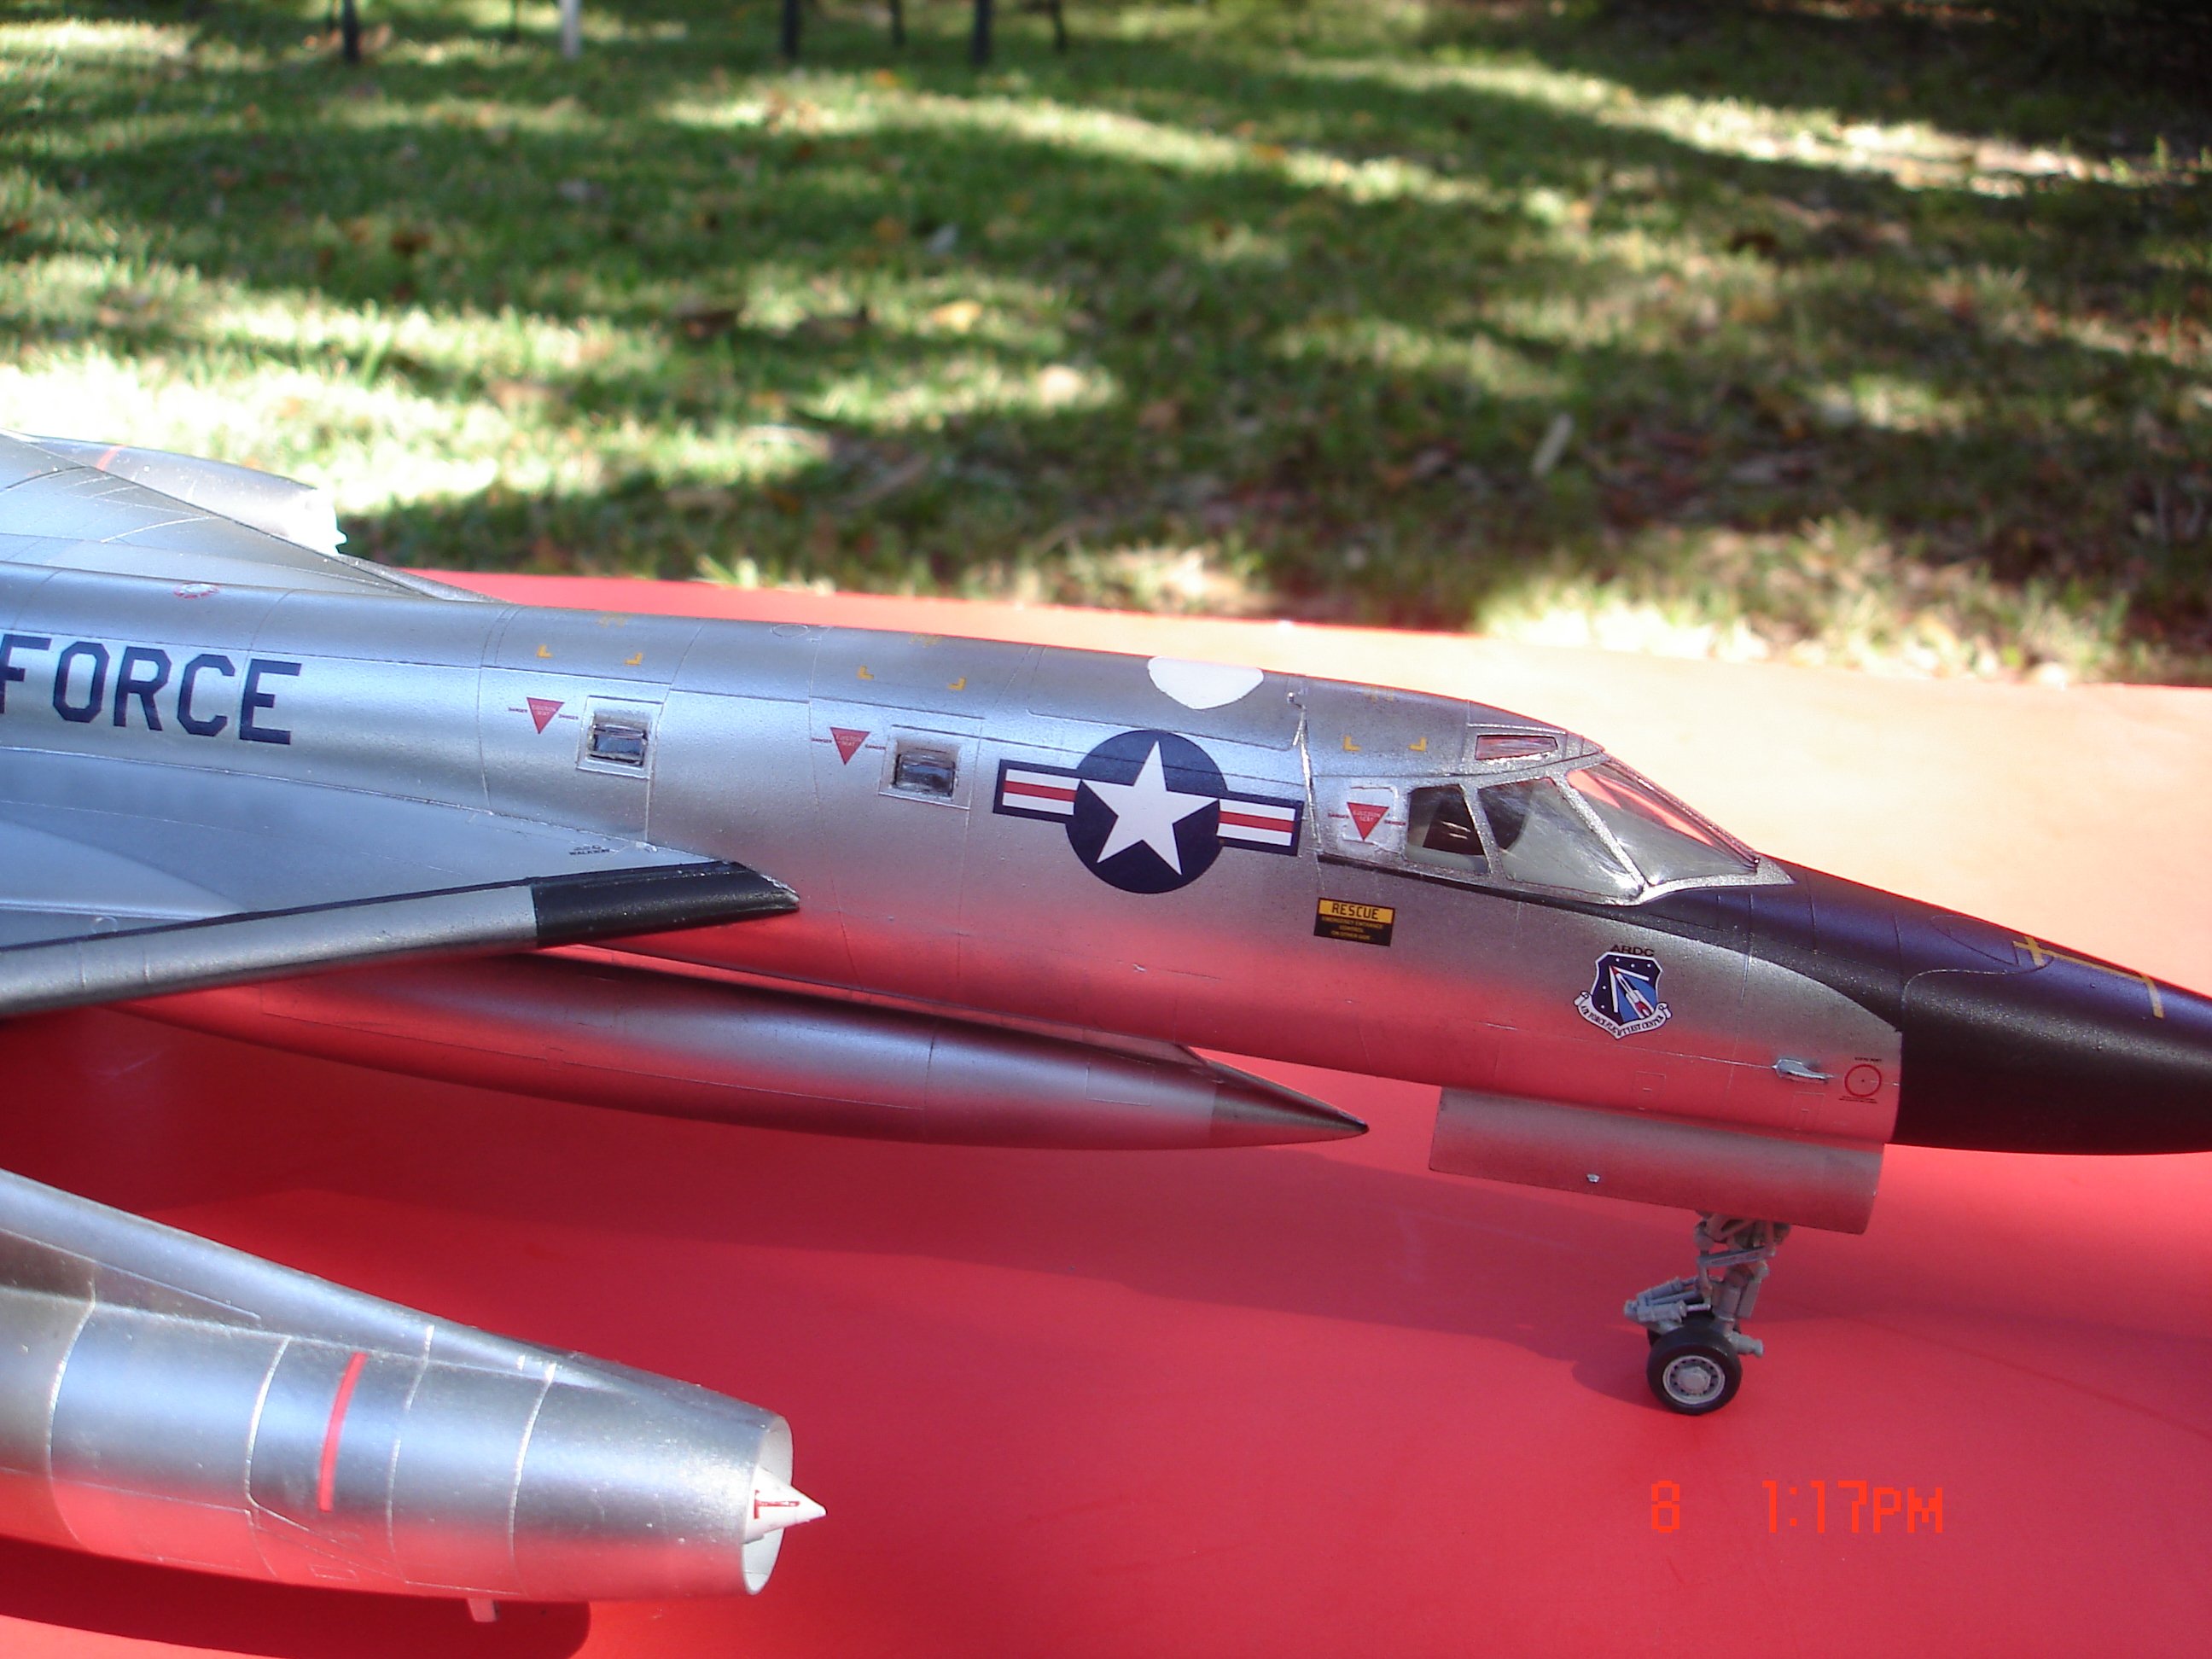
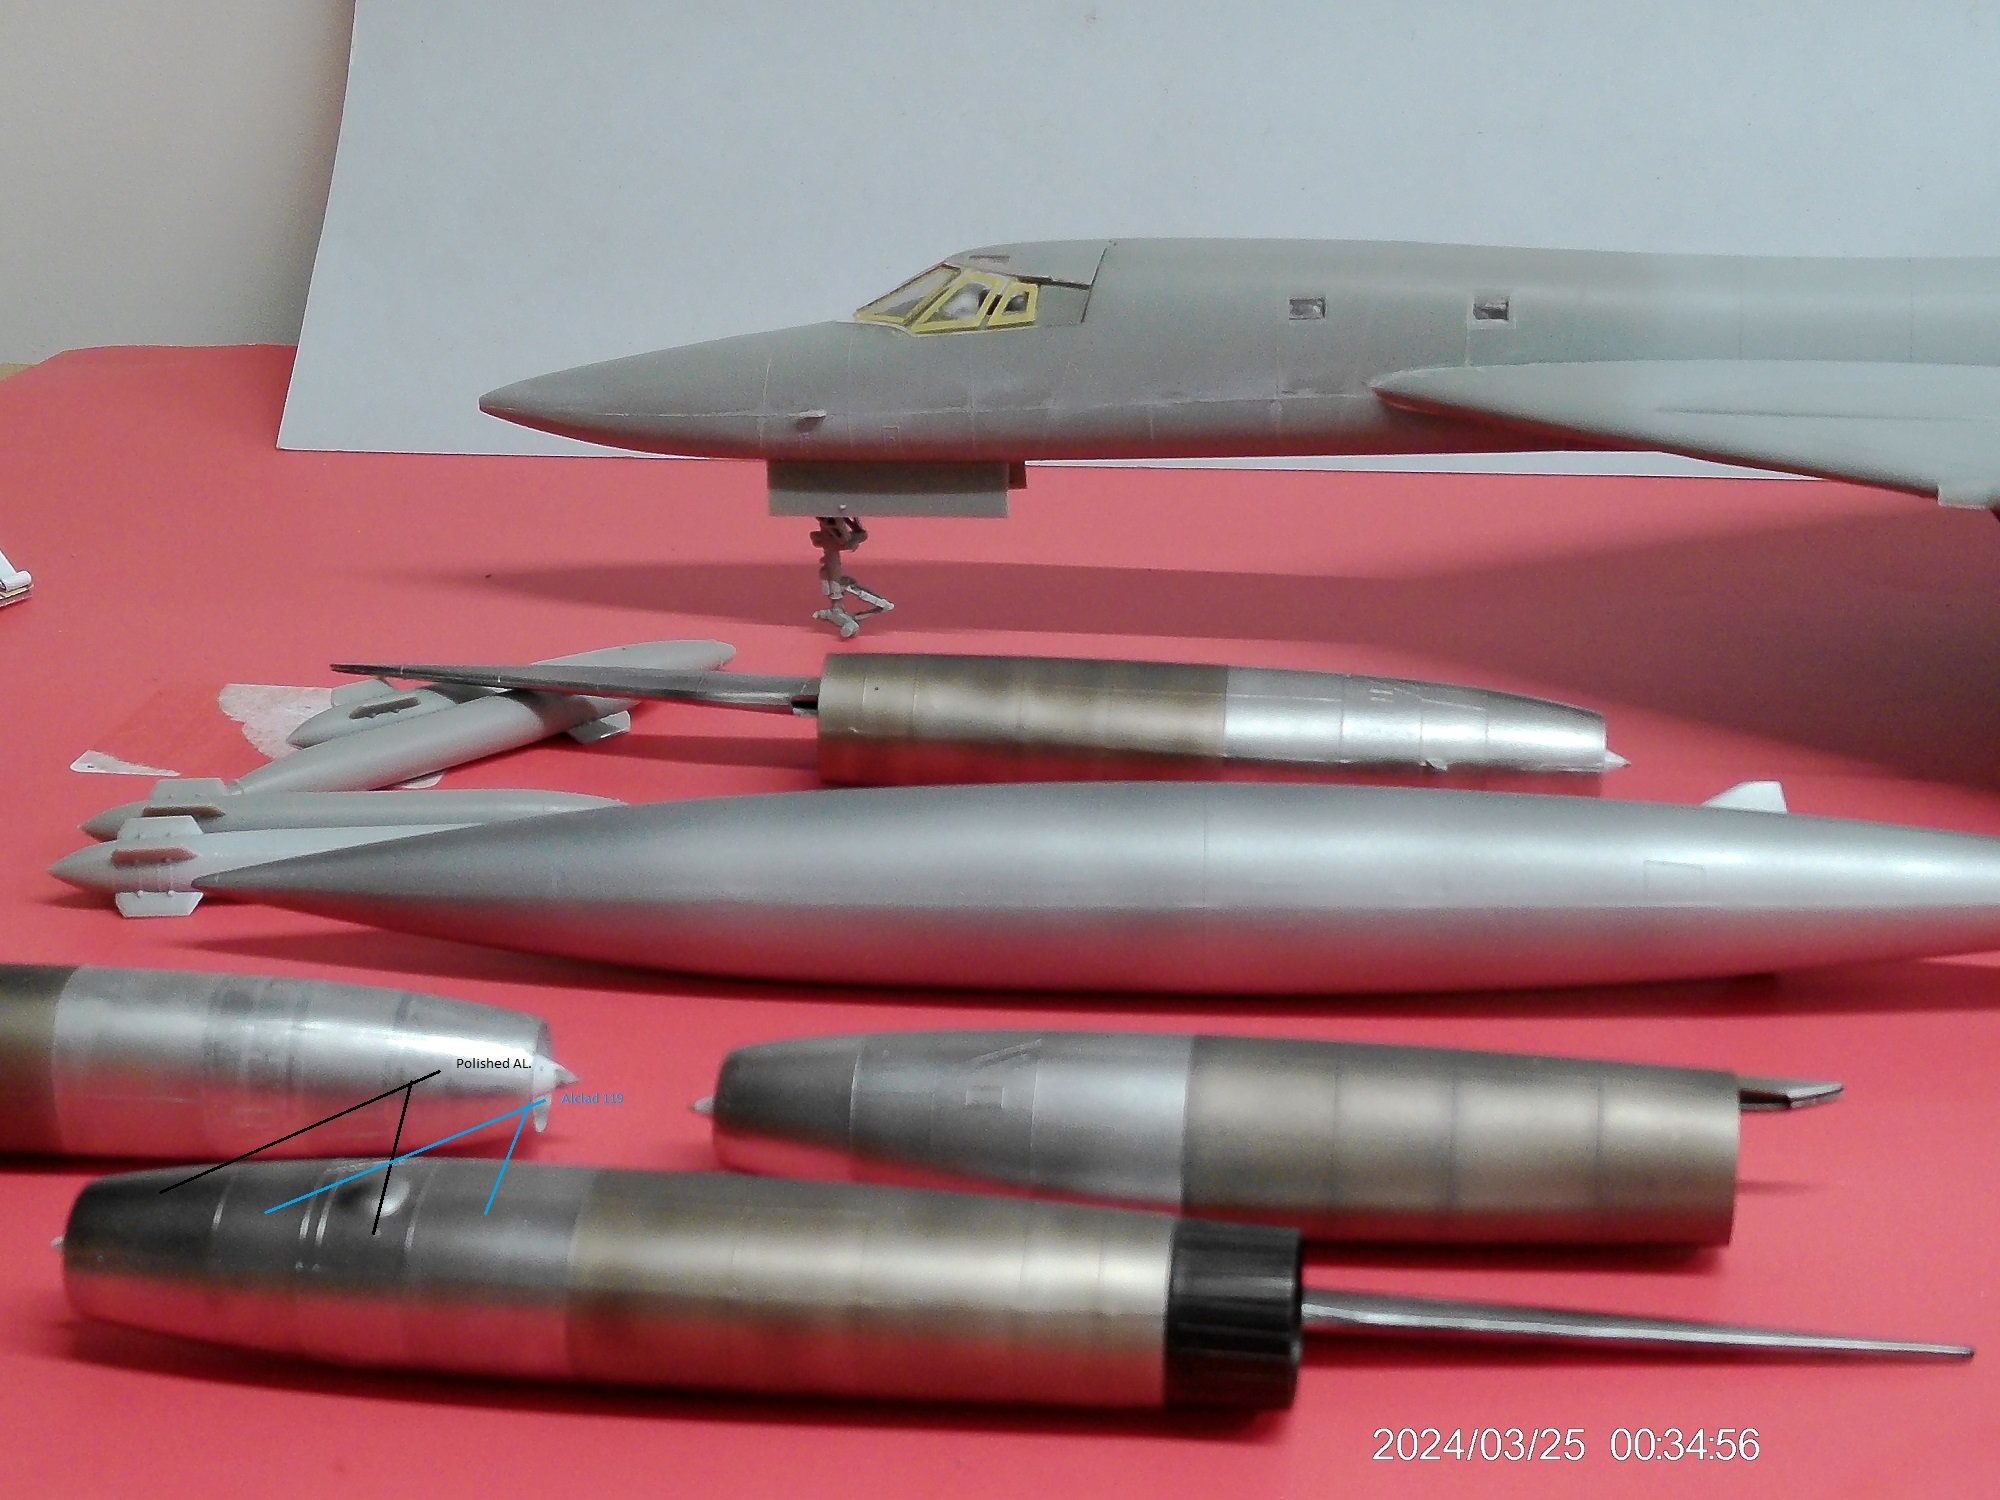
I used AlClad 105 (polished AL.),#101 Standard AL.(panels) and Steel.Thanks I have been wondering where you have been of late?
-
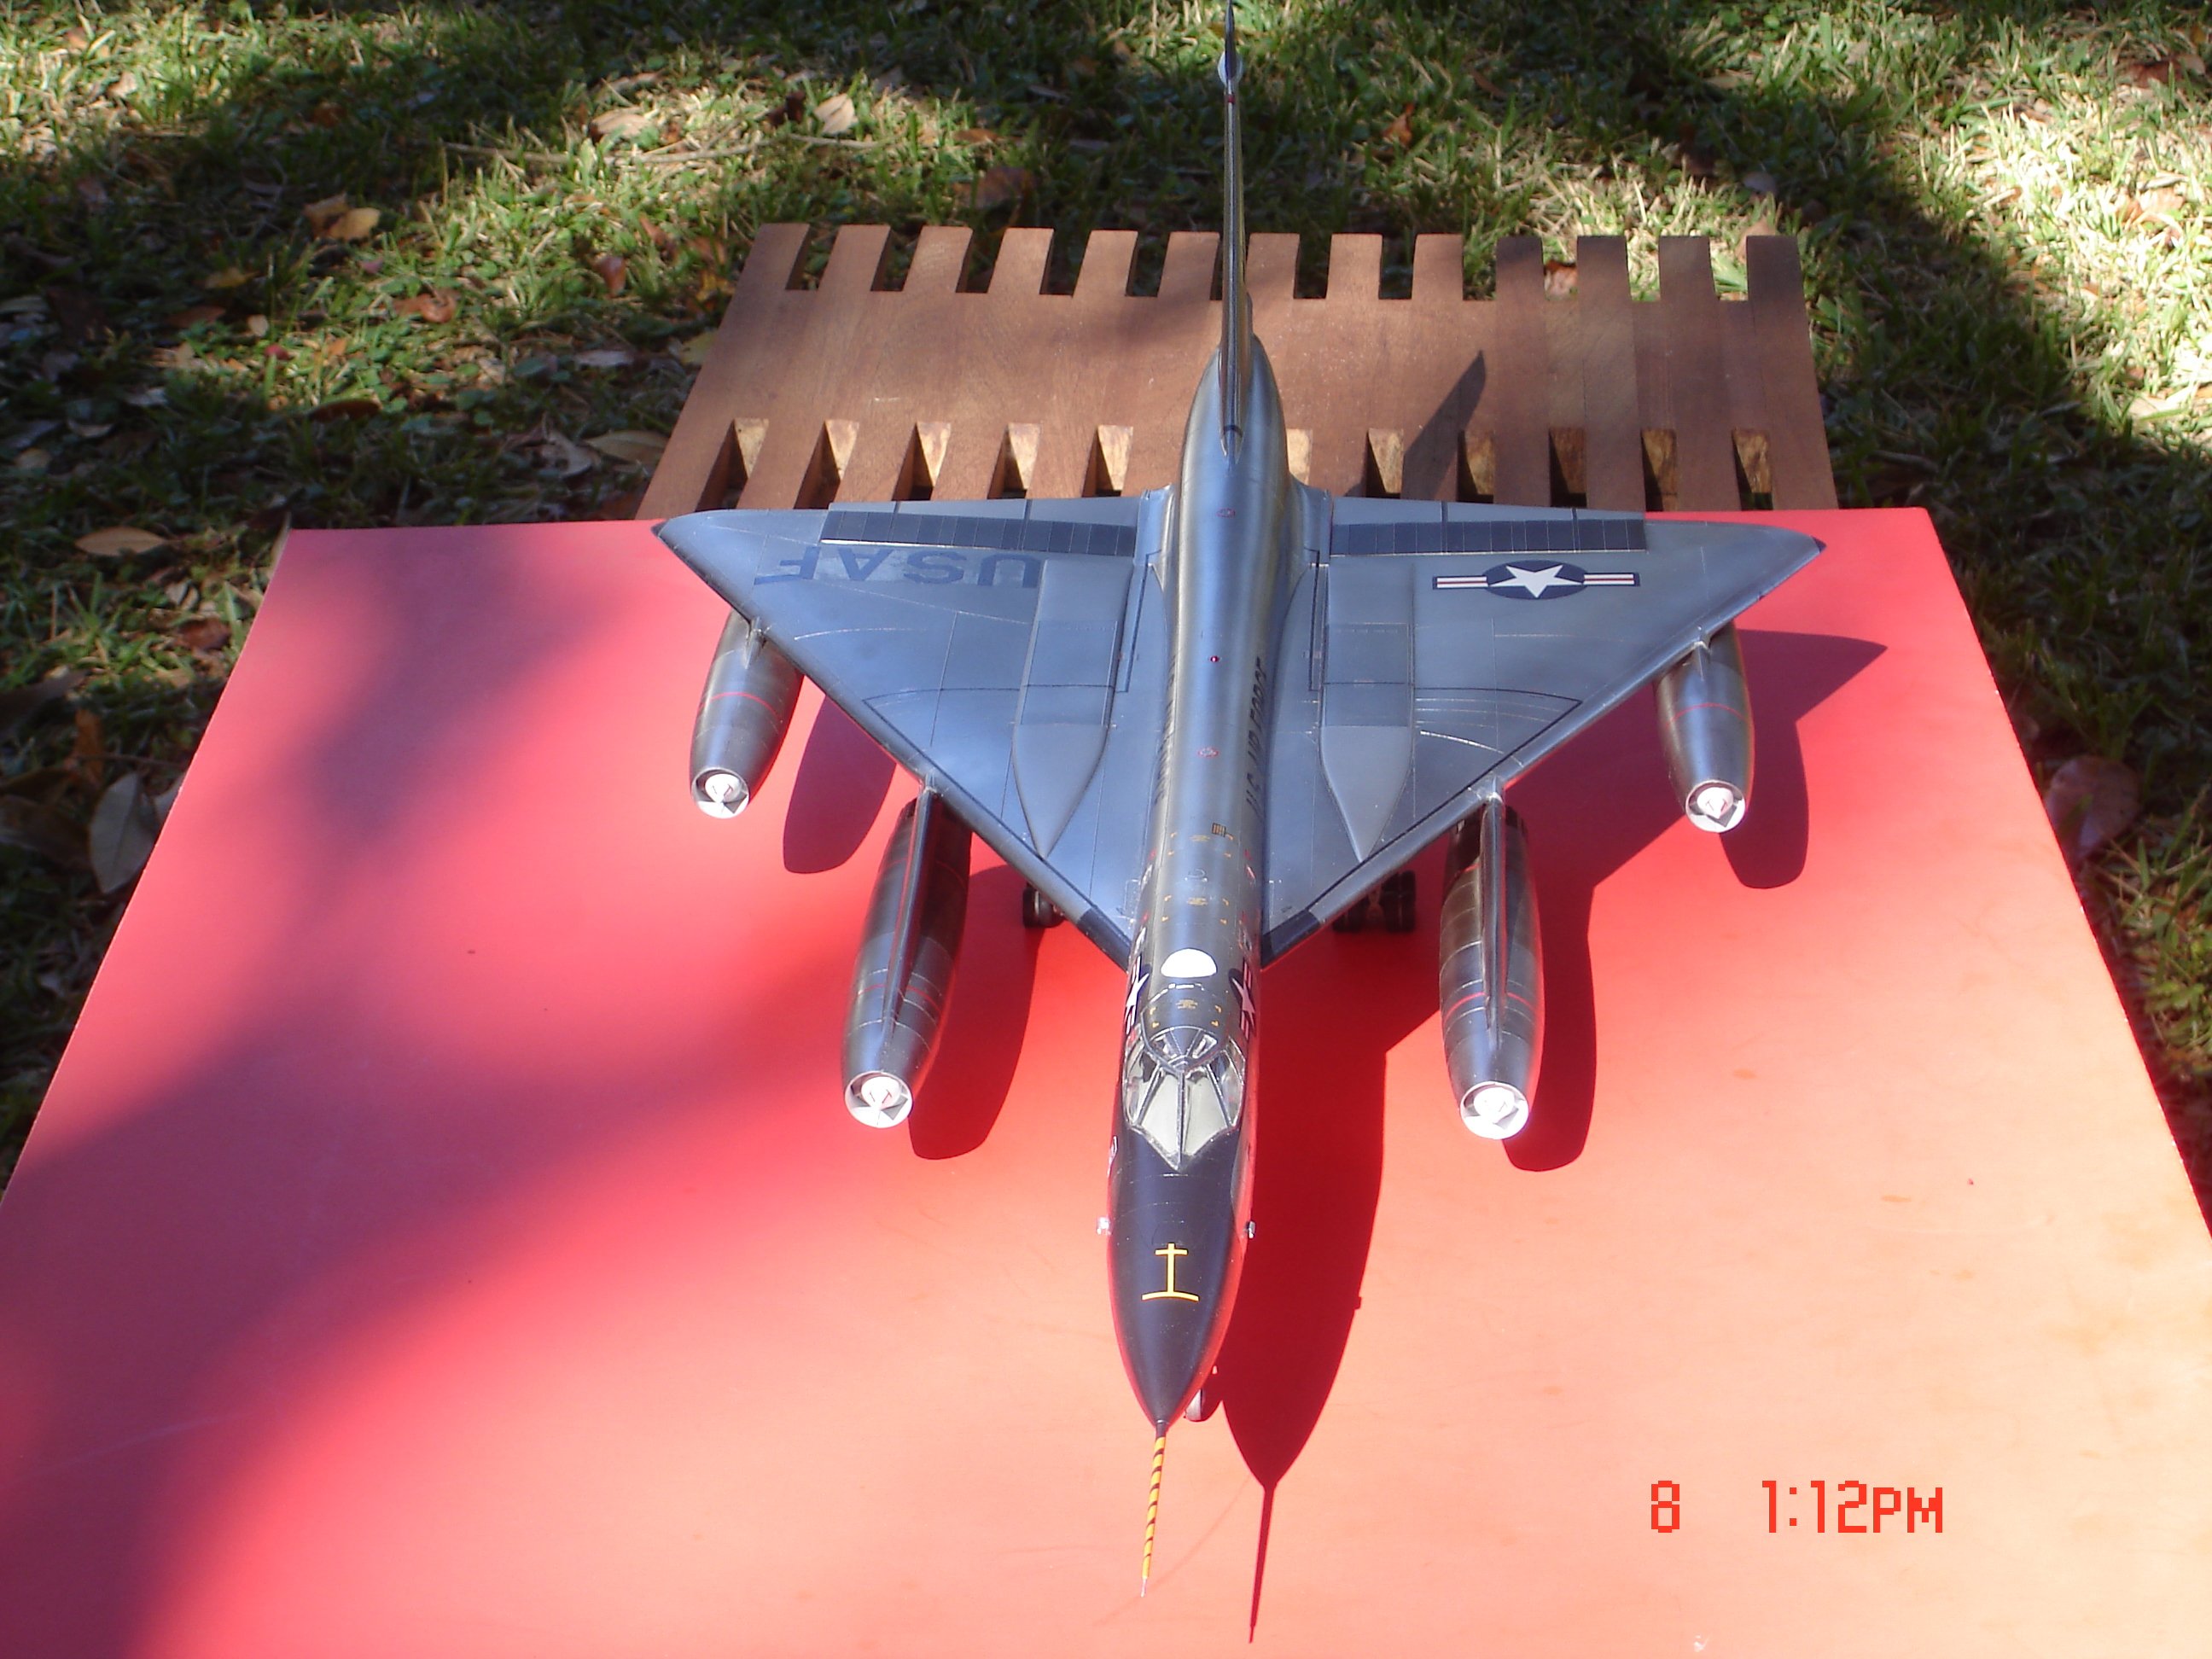
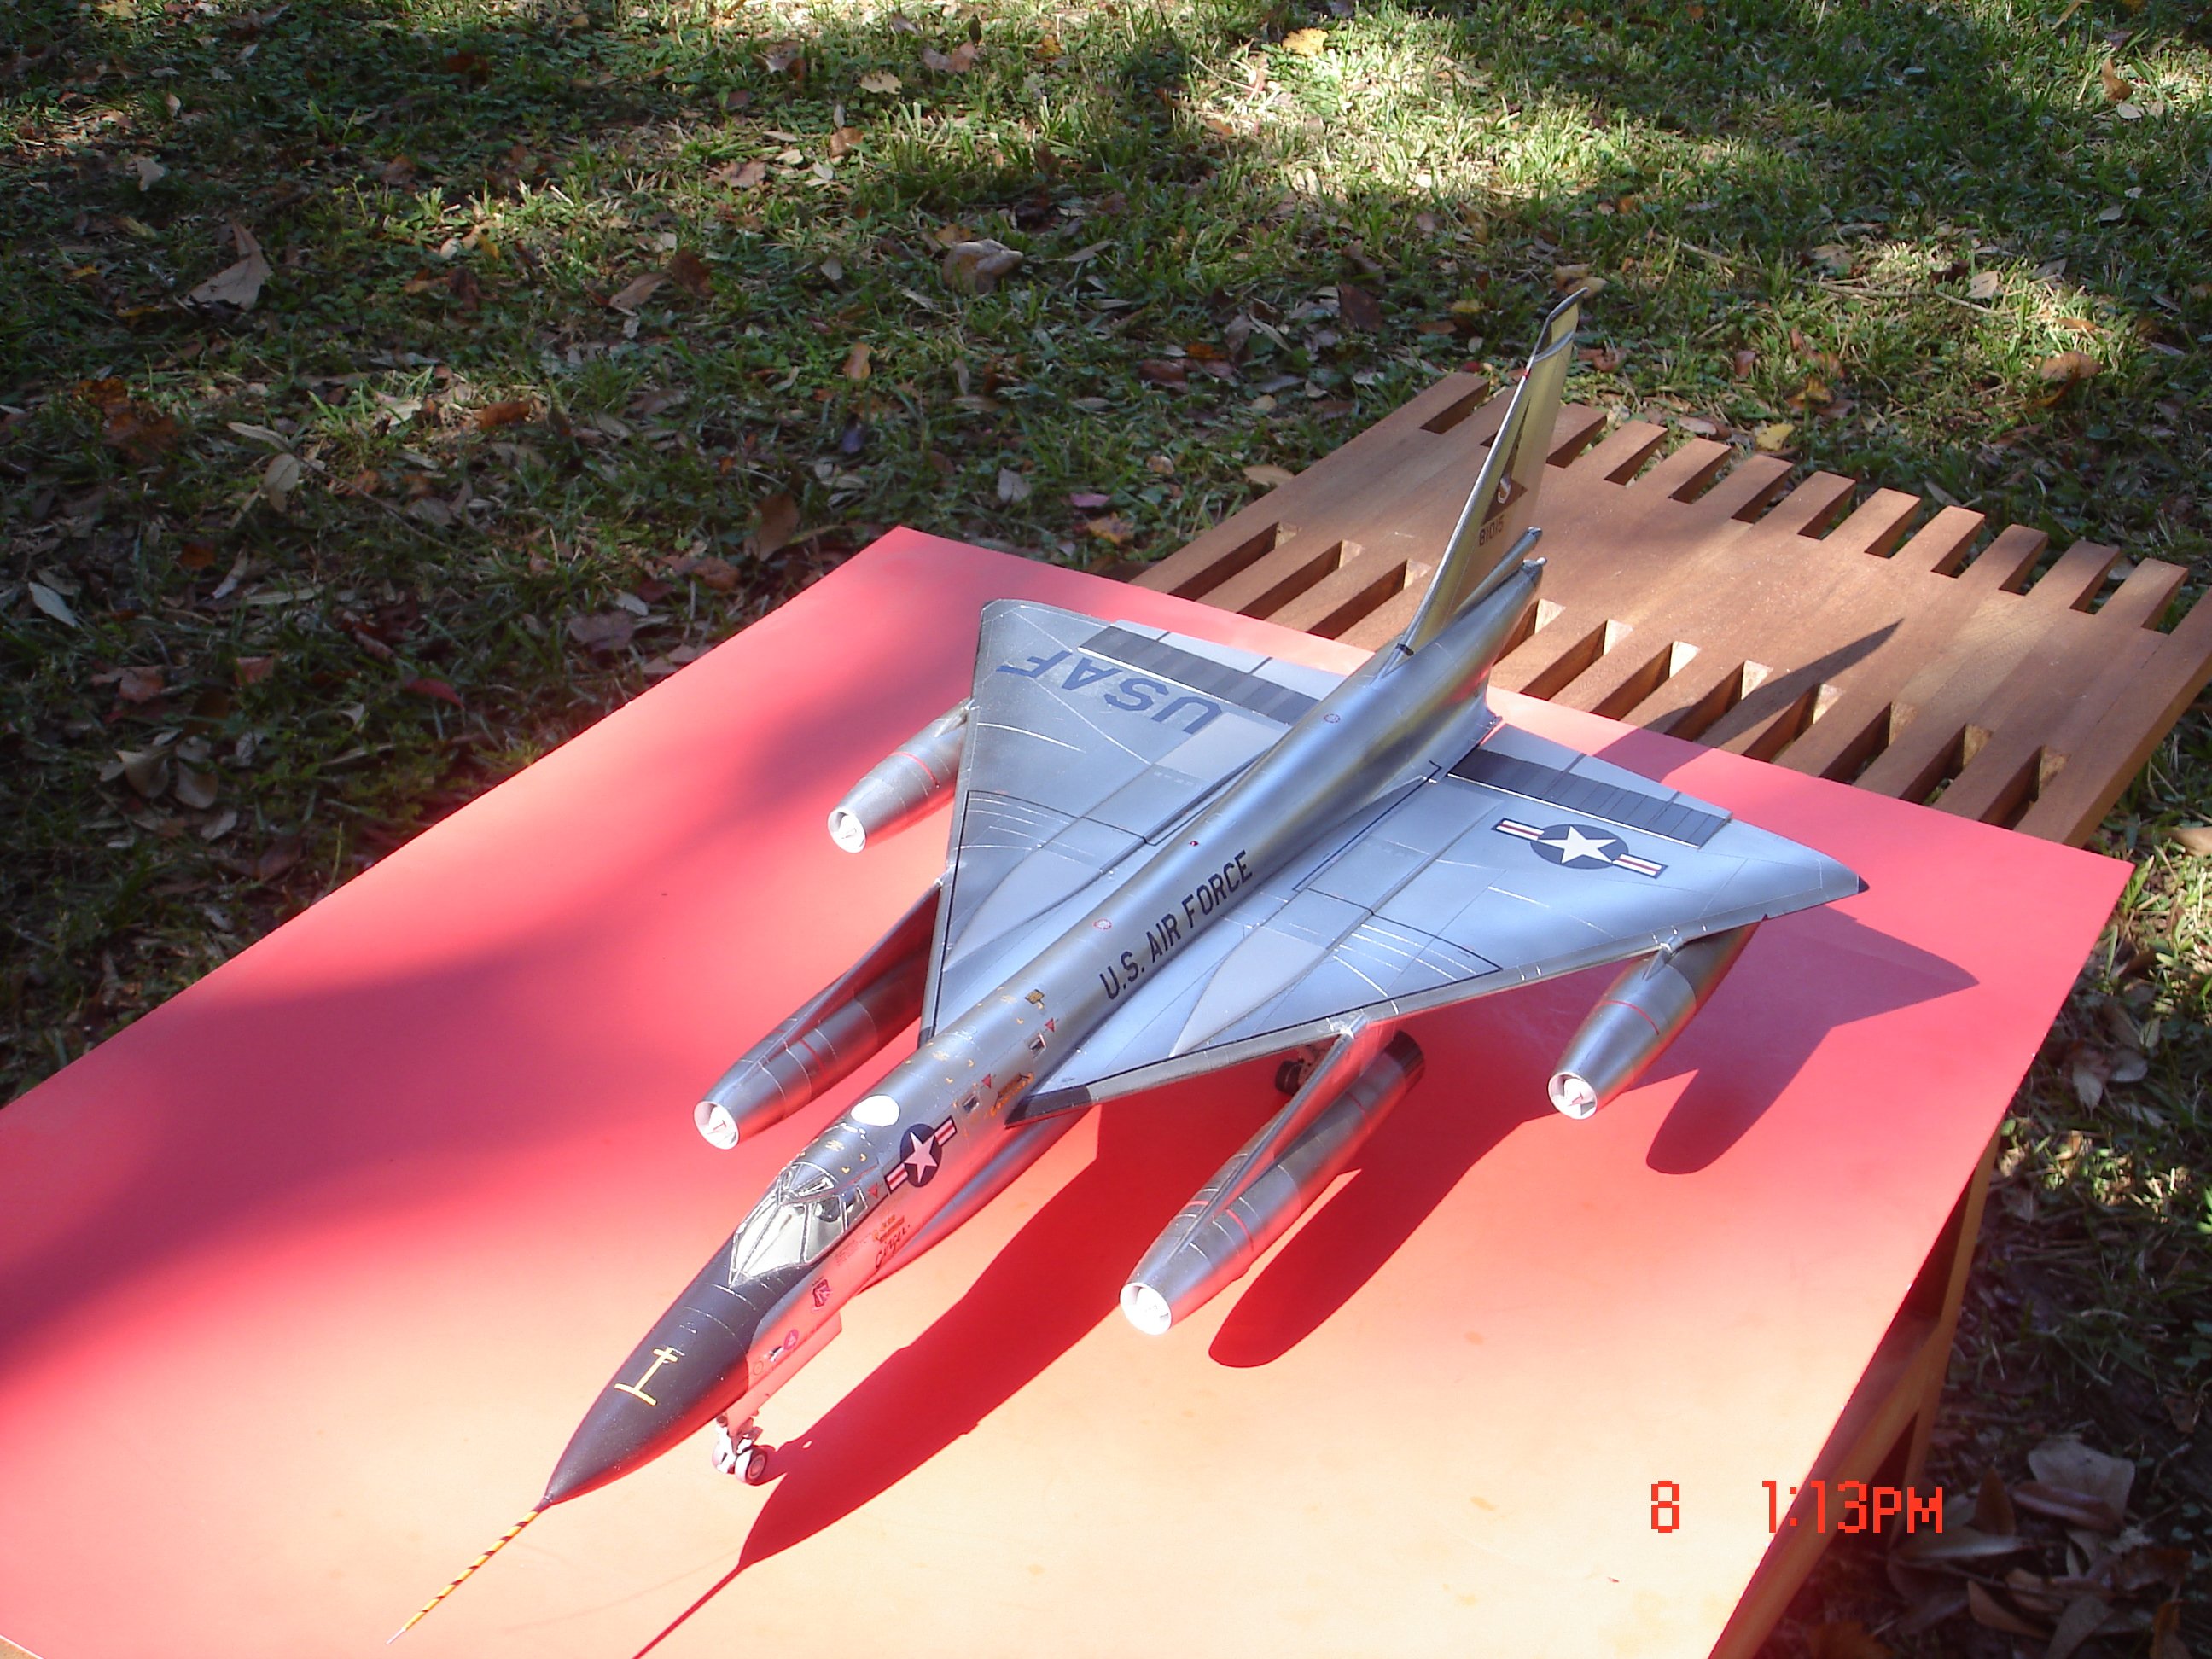
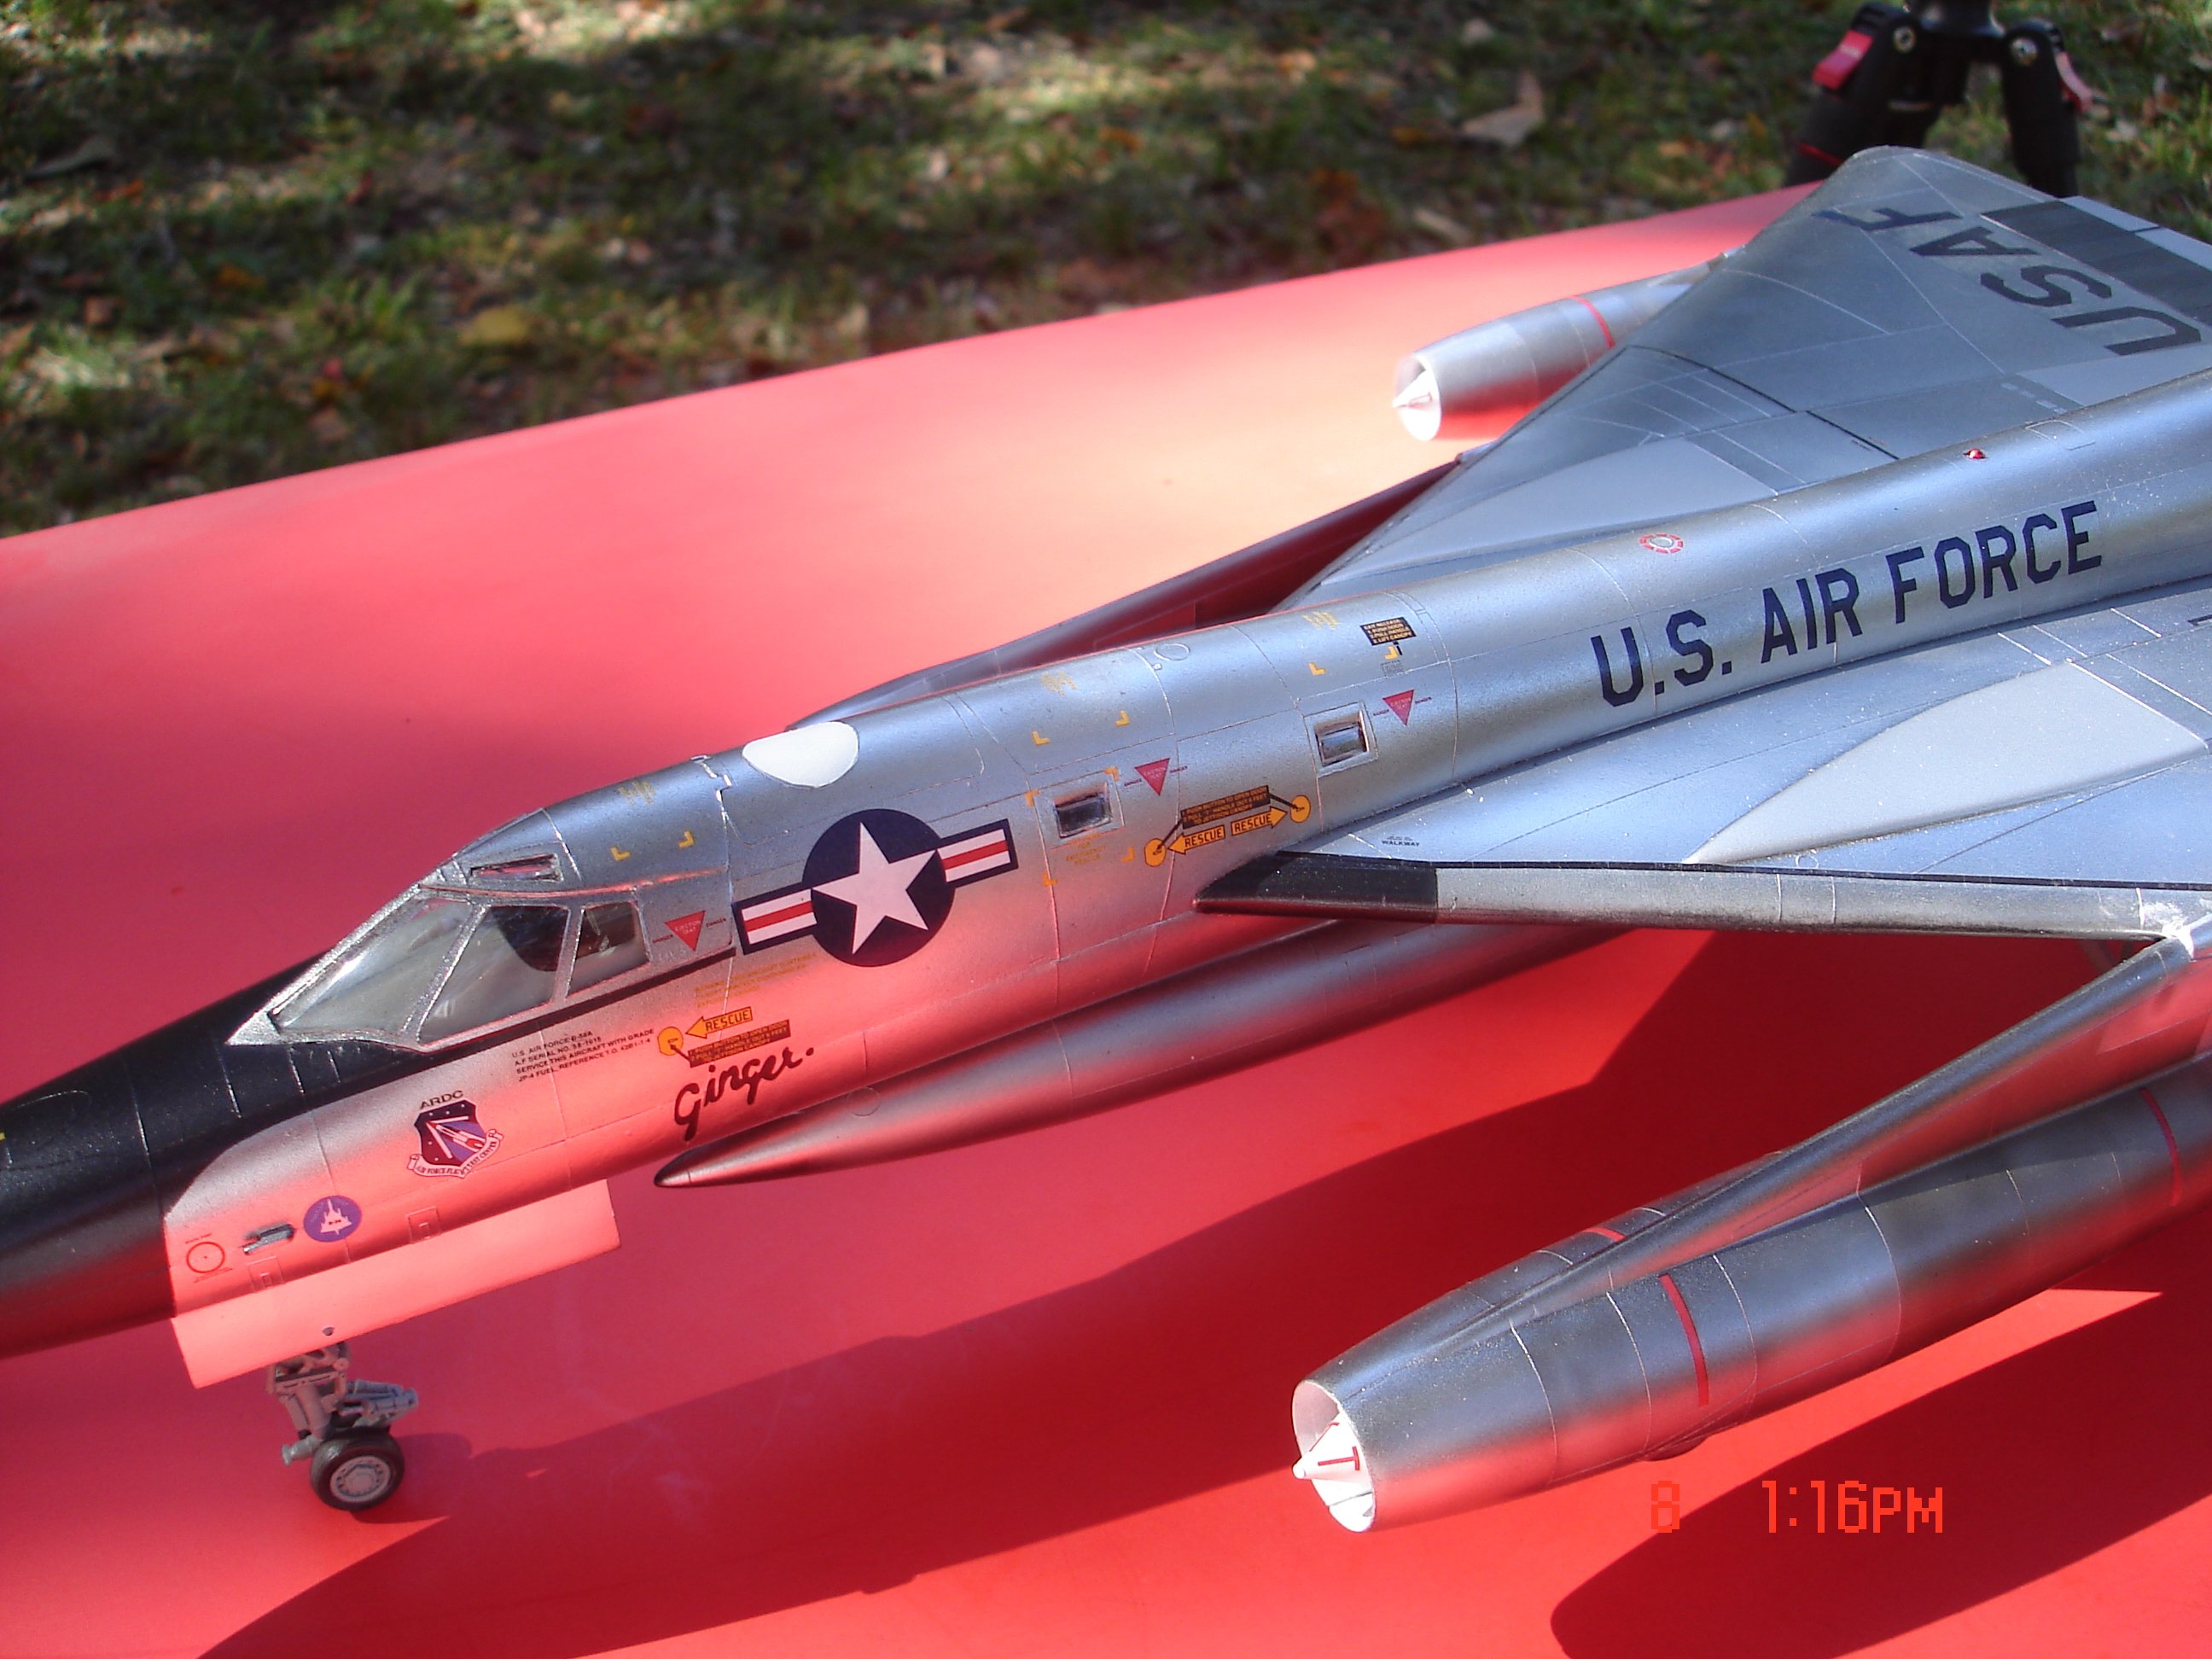
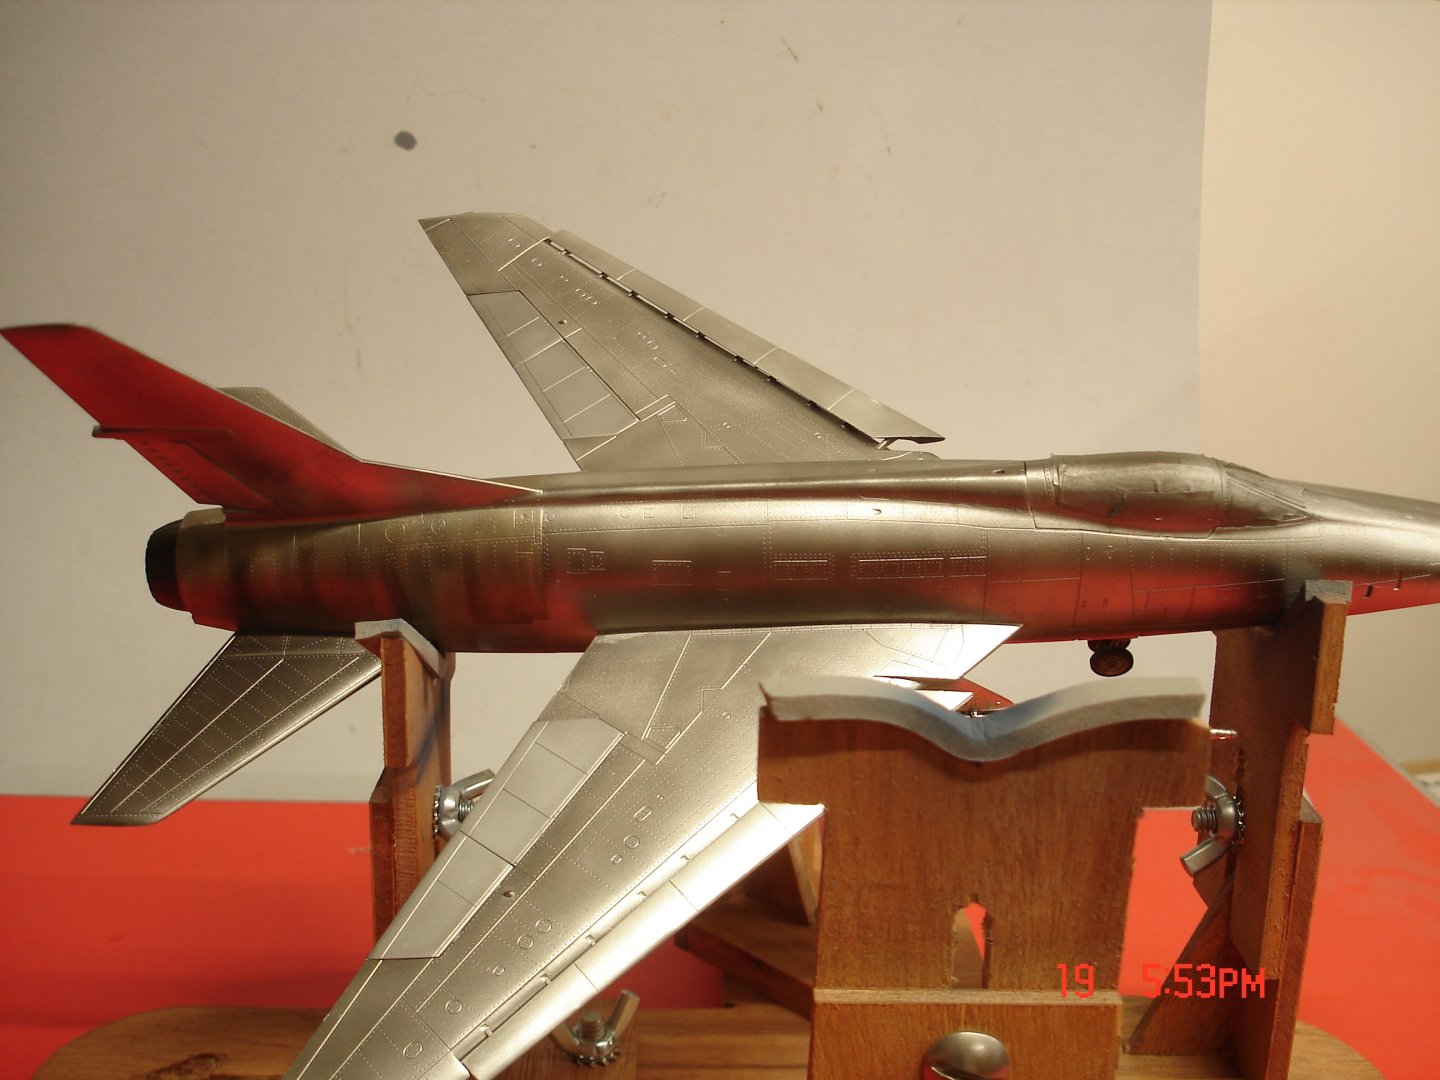
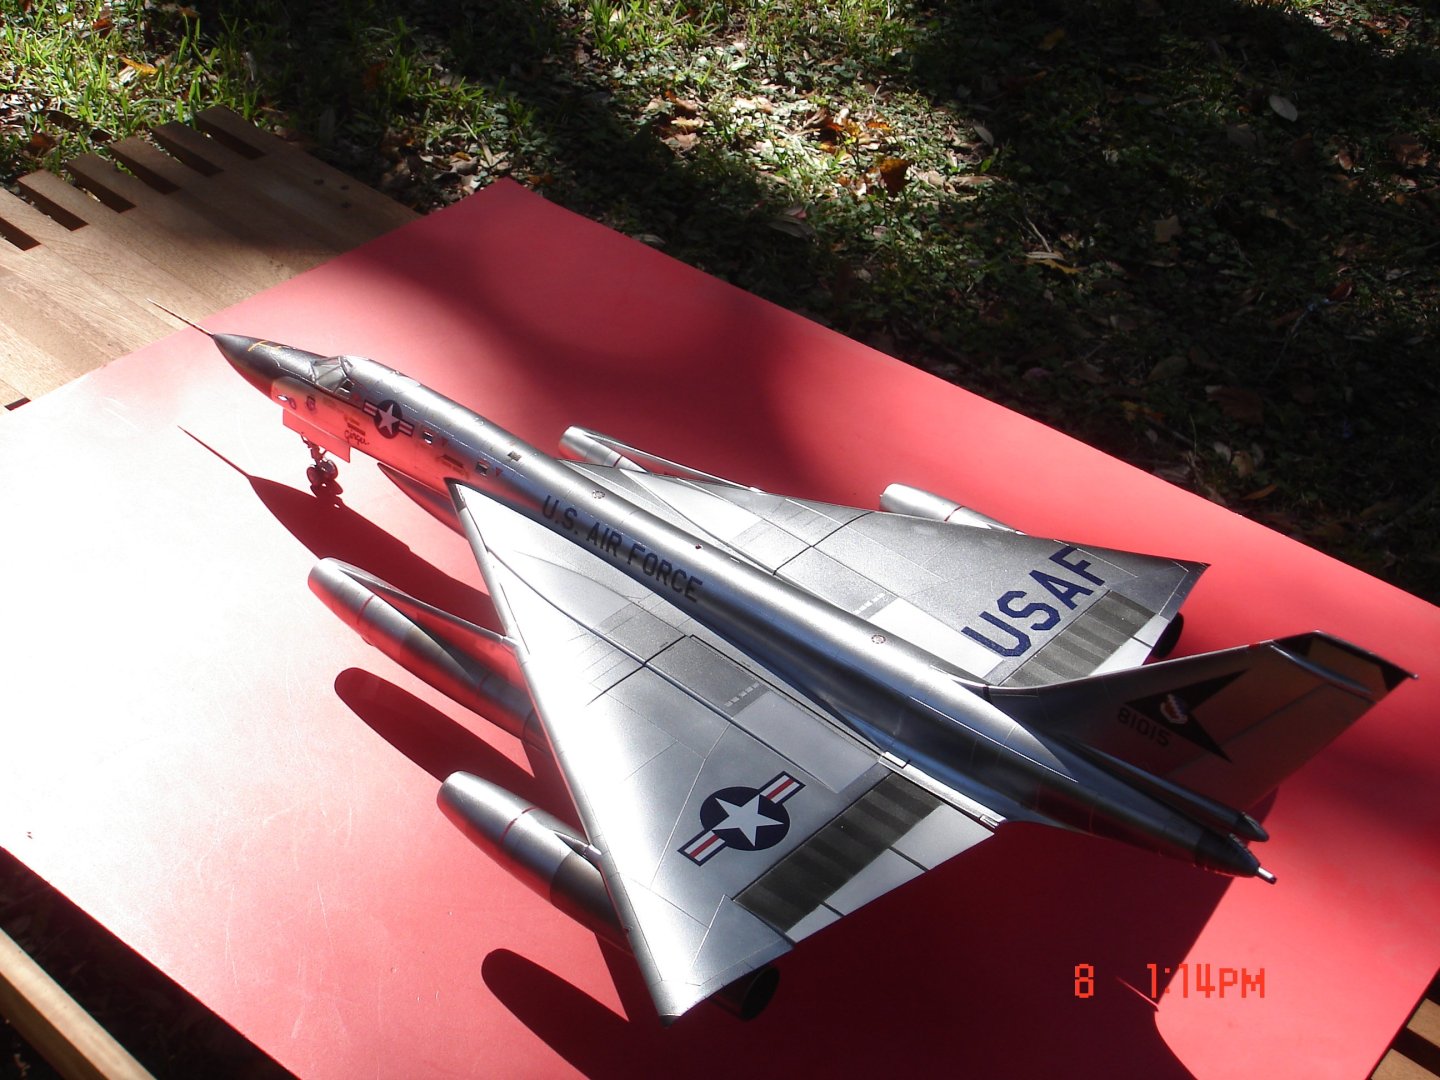
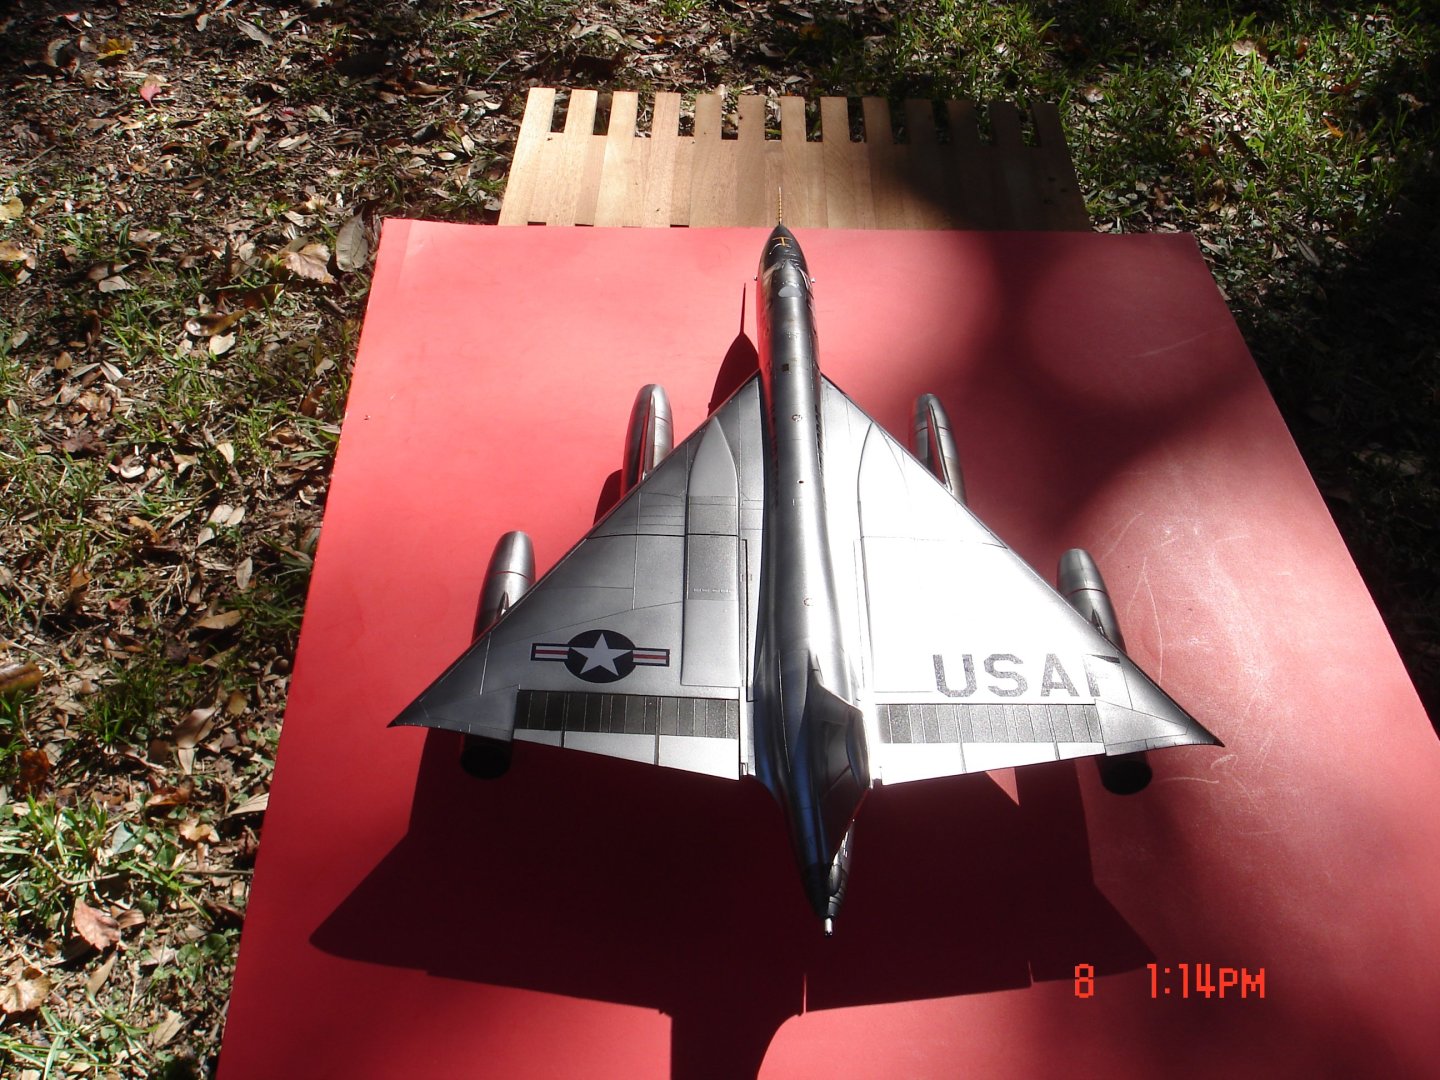
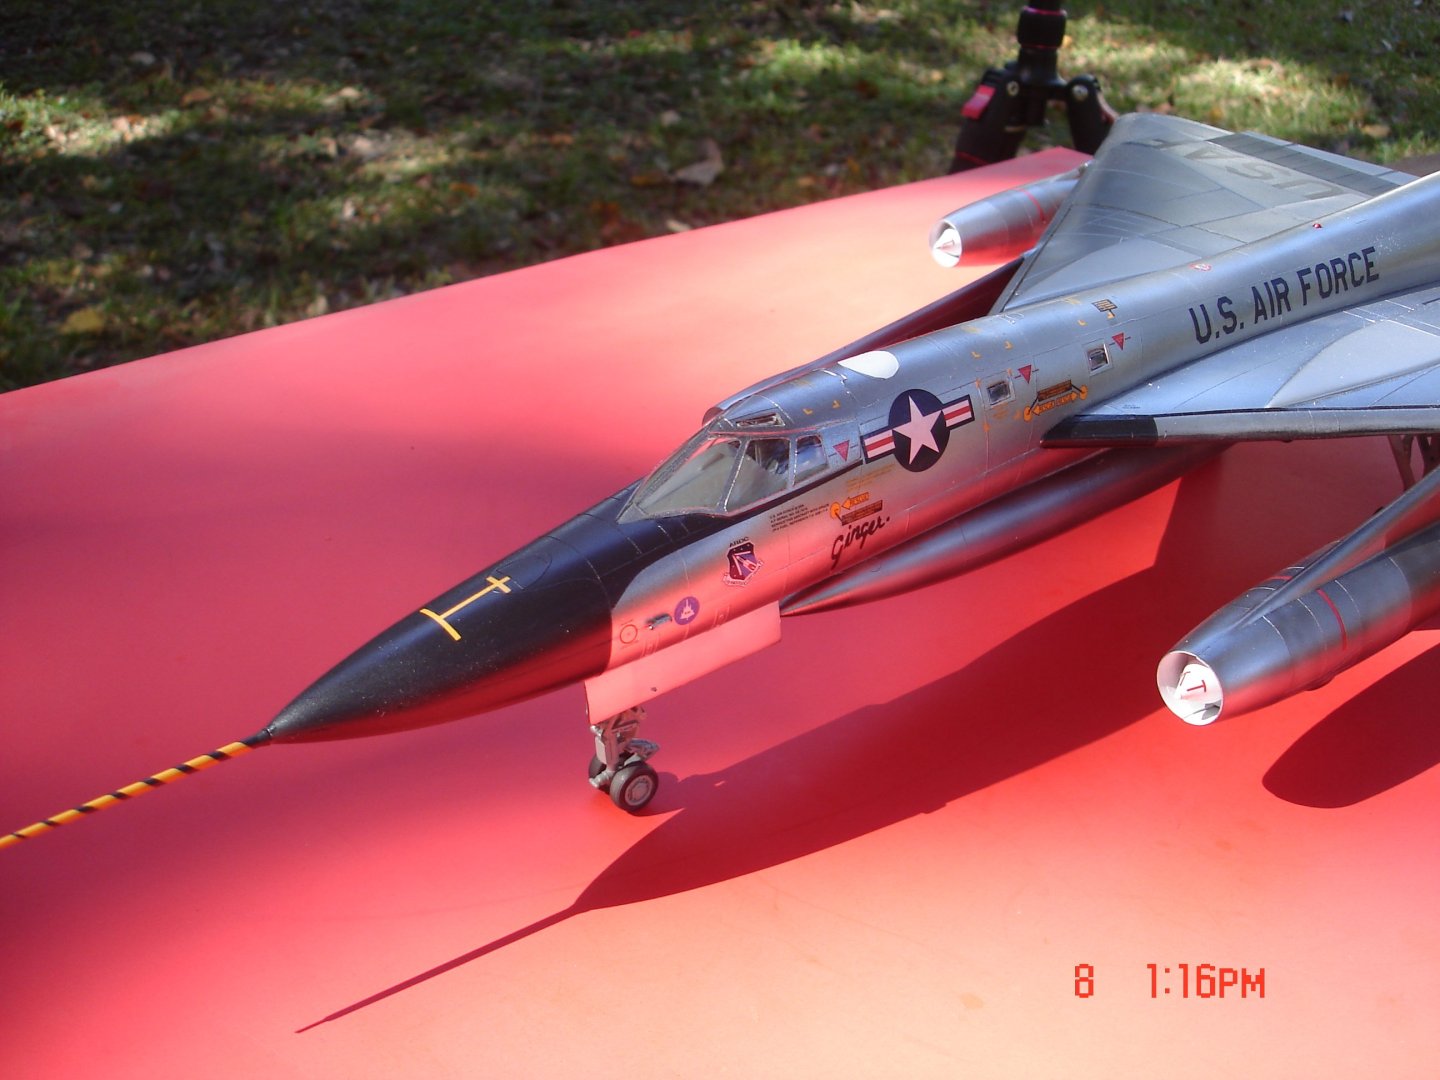
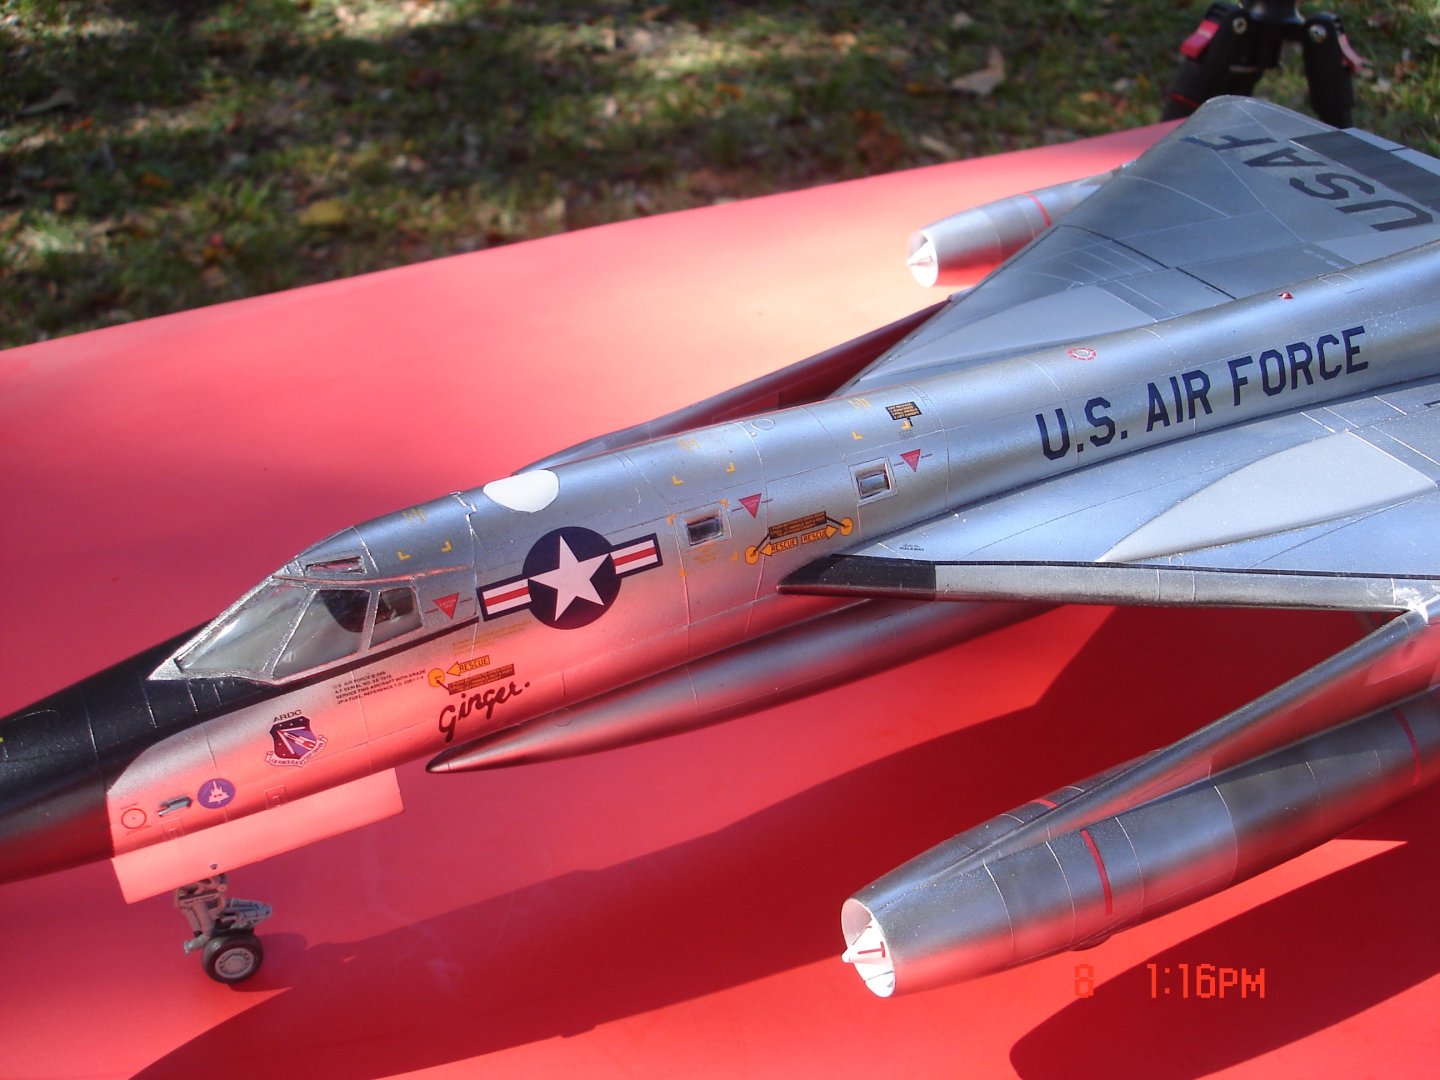
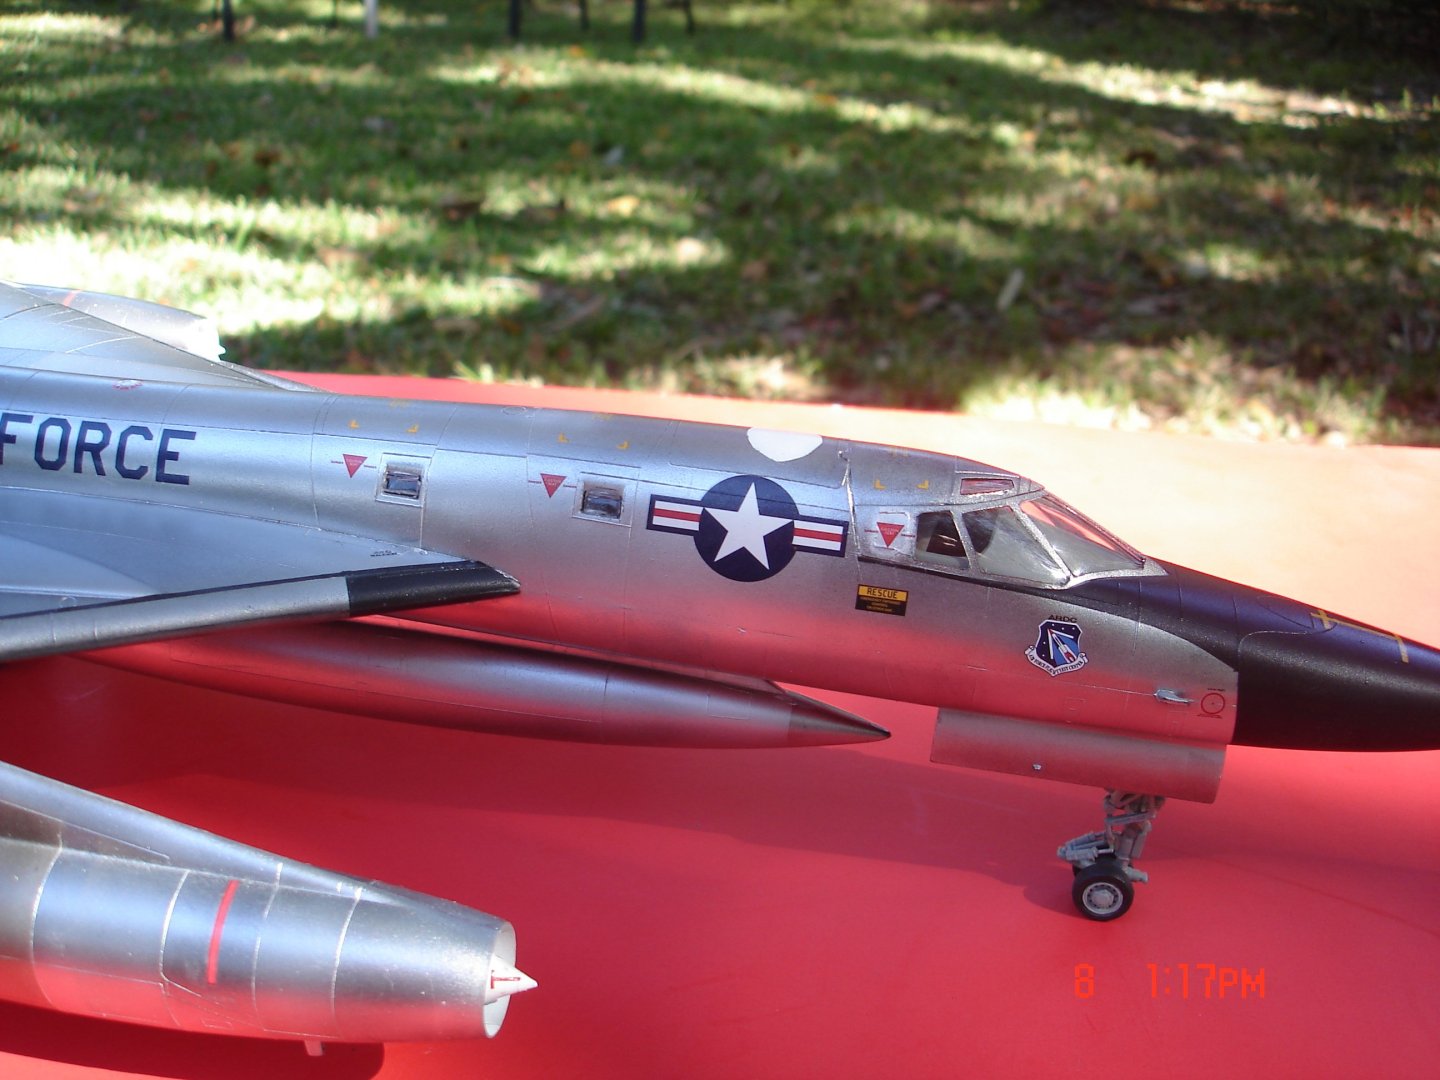
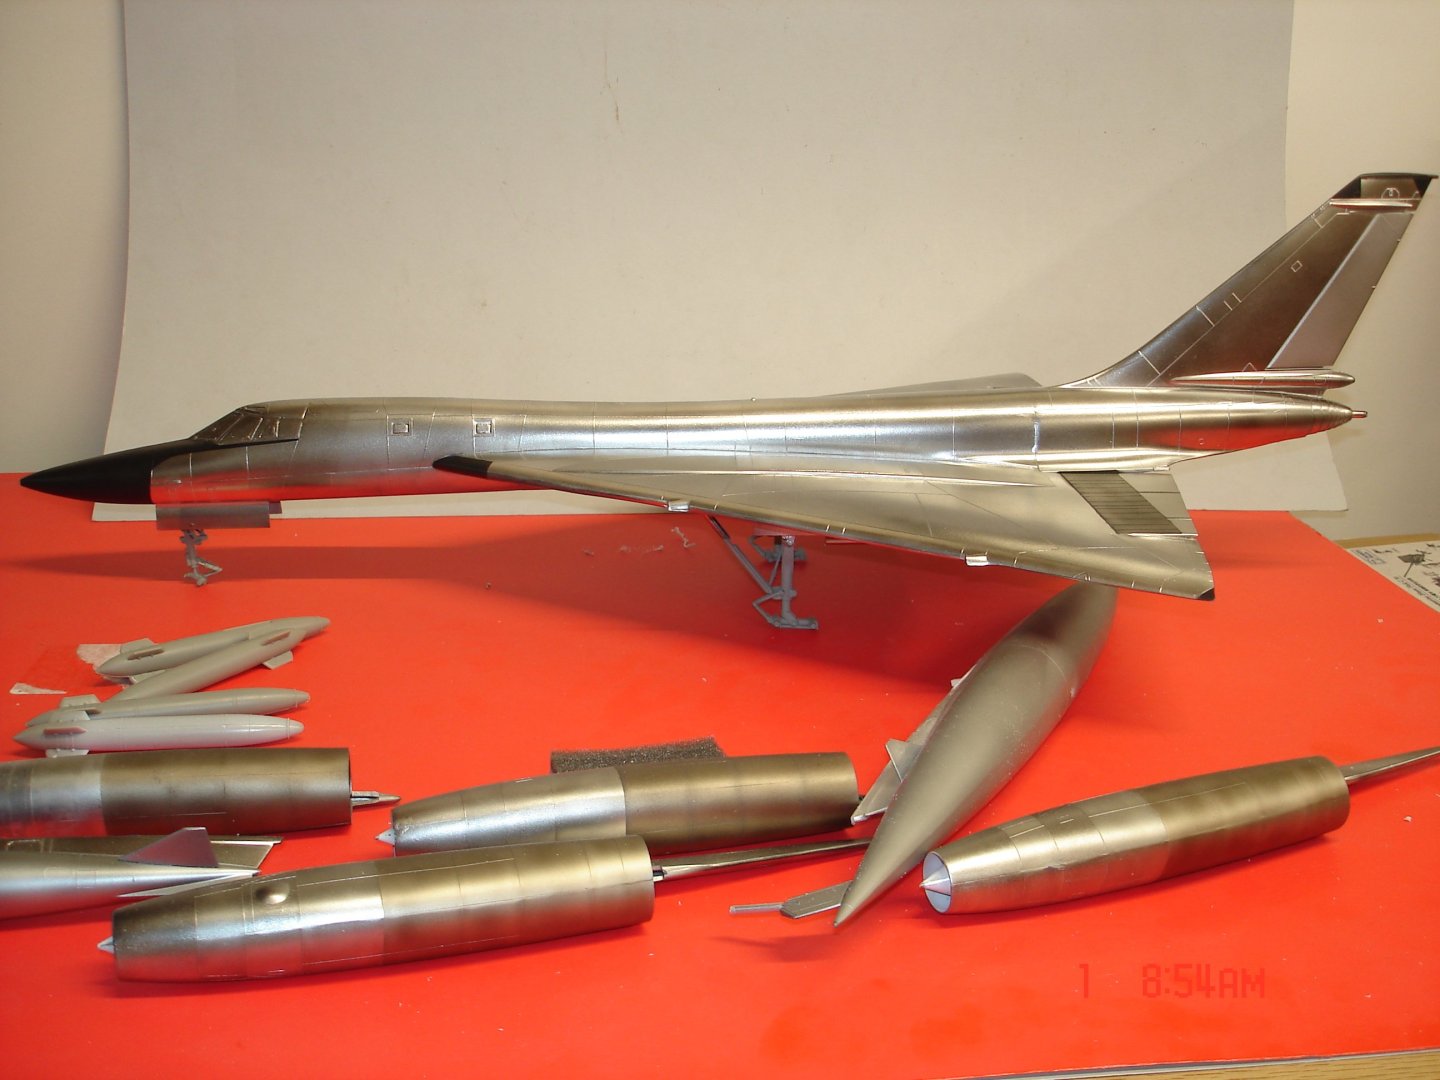
So lets start with that the decals suck 1/2 of the yellows are out of register and the same with the stars and bars.The red stripes on the engine area were just to then all the decals are so off to painting.I am having to handle this A/C way to much broke off one of the fuel pods no biggie just the point.I am at the point I want to just finish and move on.🤨


-
I am moving slowly along on this one the LG's are in place kinda tricky all three!The LG's need to be built while stilling drying to get the proper alignment of three different actuator arms on the main gear and two on the front.The instructions are not the best in drawing or location and to do one side a couple times hence work while drying.I am hoping the decals work well on these curves or I will have to come up with a plan B?I can find lots of D's/F's decals C's hmnn....🤨


-
Thanks Fellas she will be in the Iowa National Guard is what the decals represent if memory serves me right.🤨
-
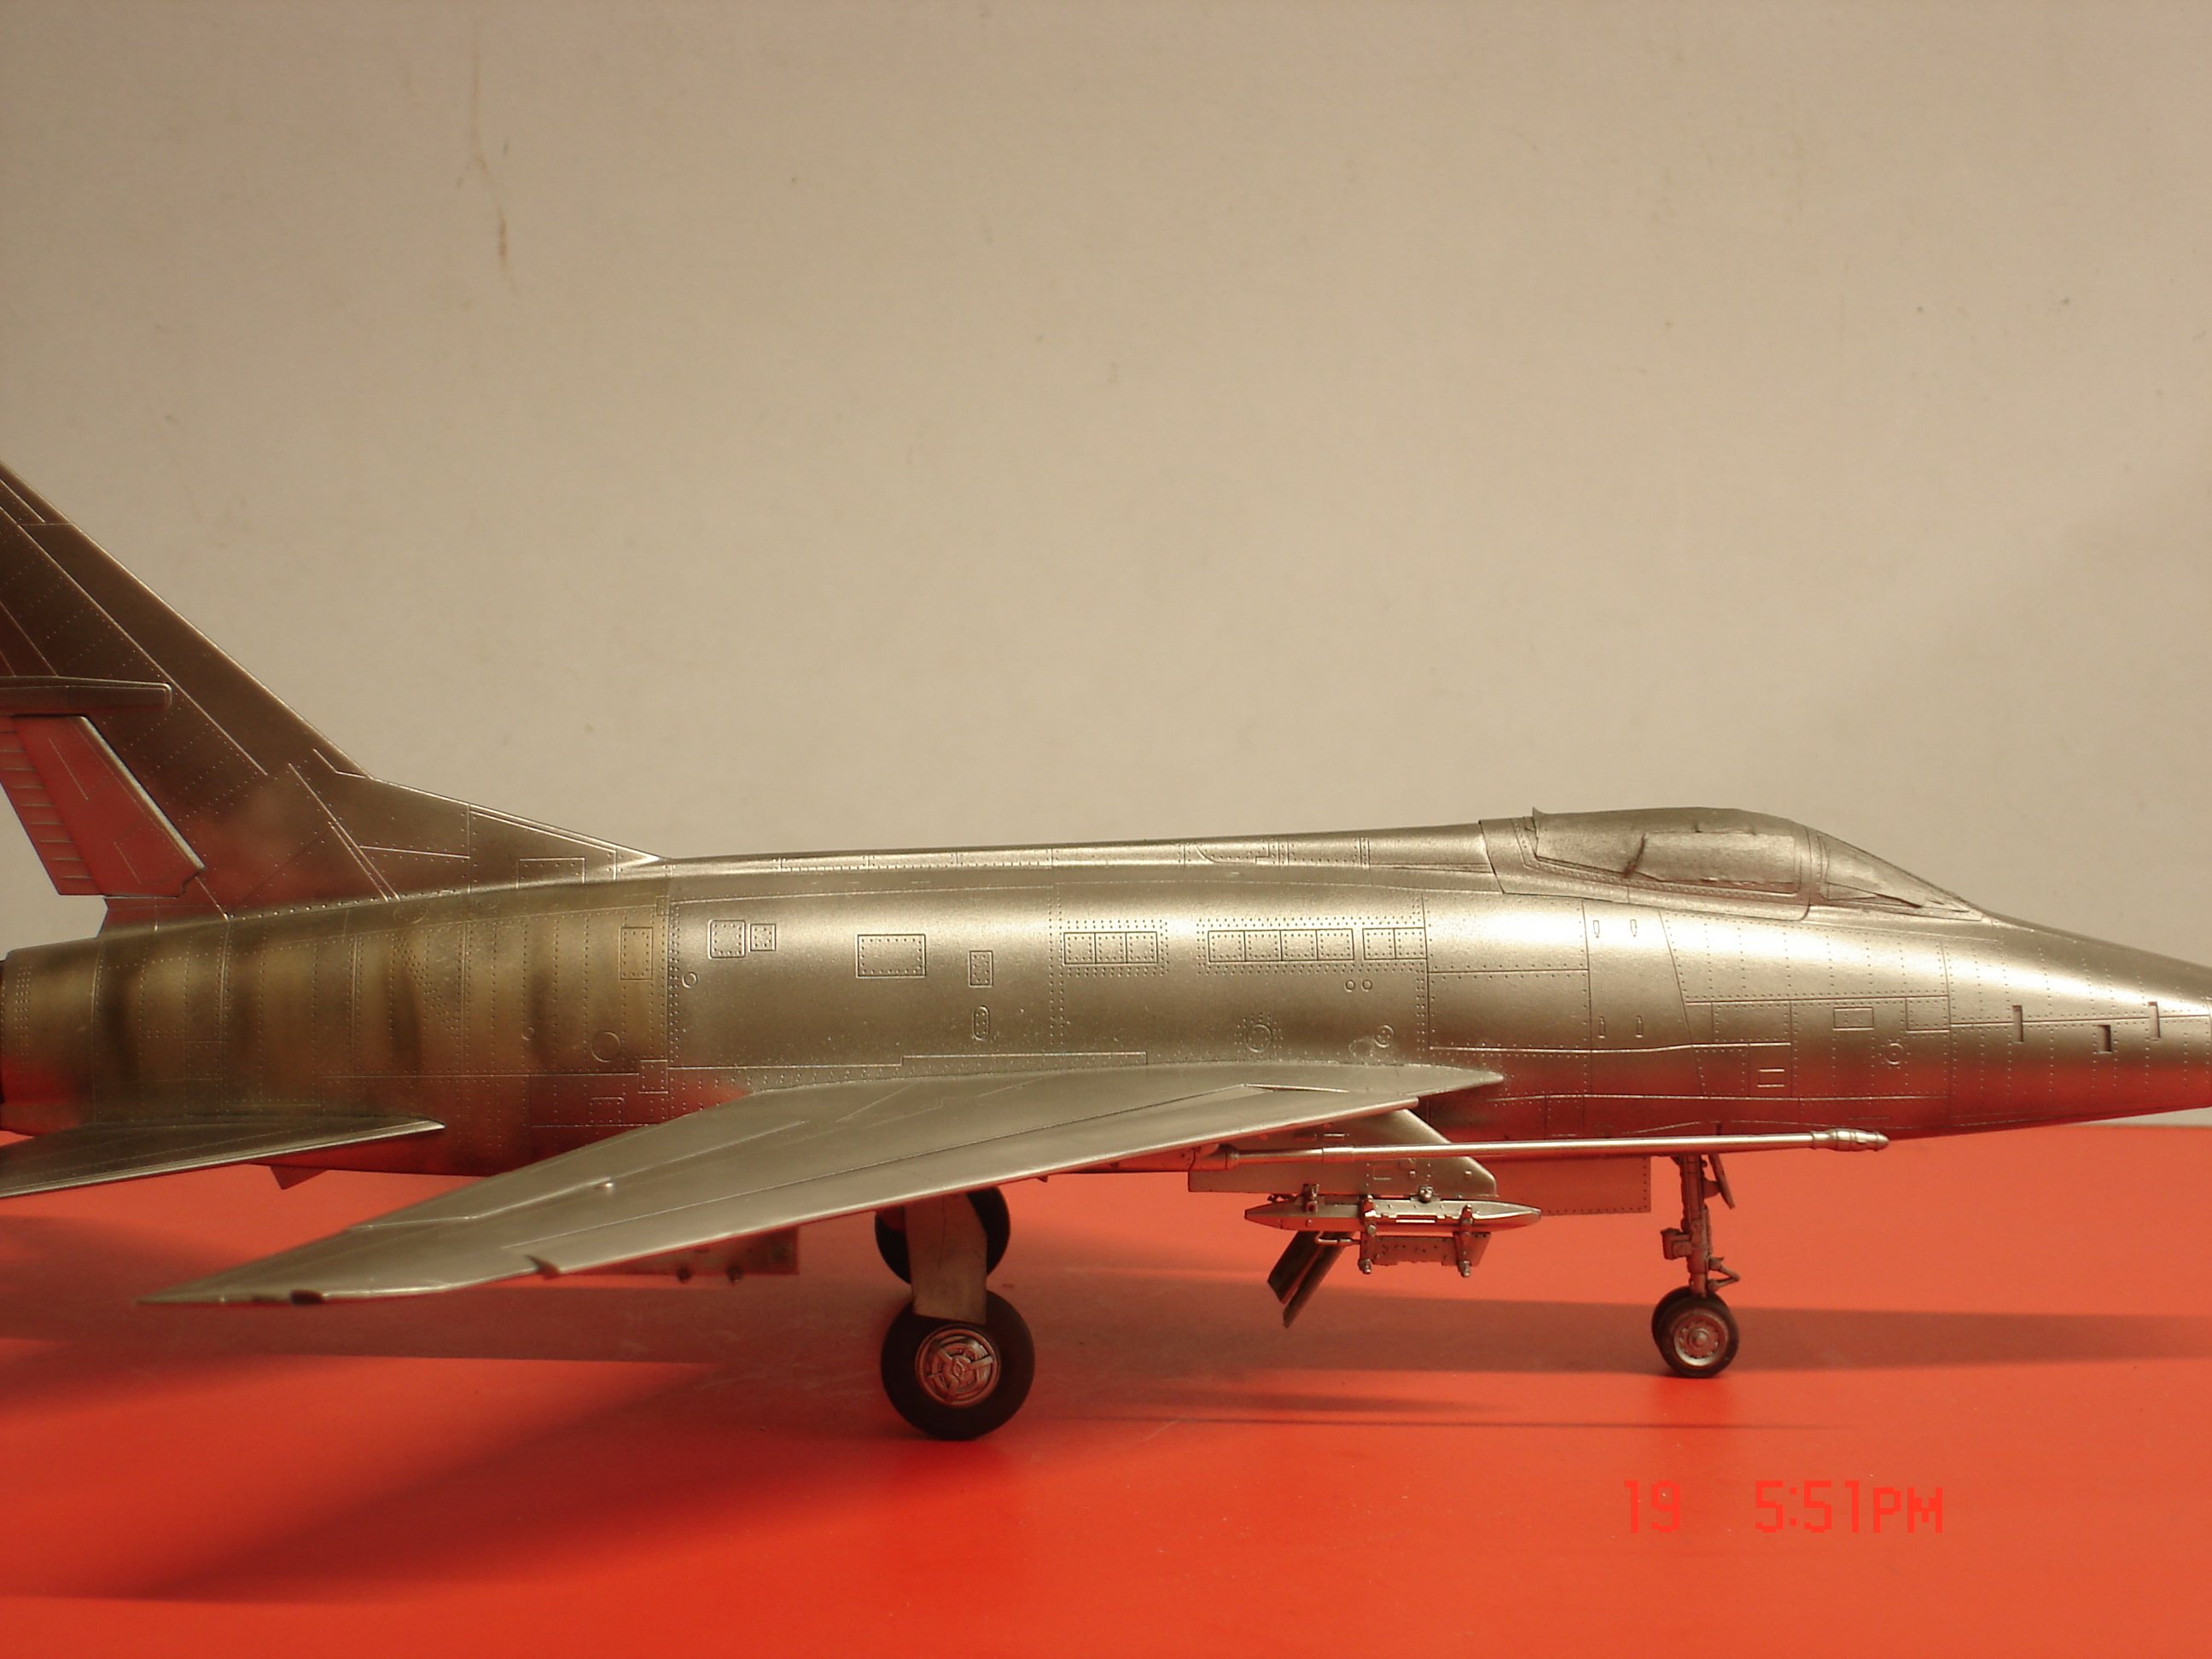
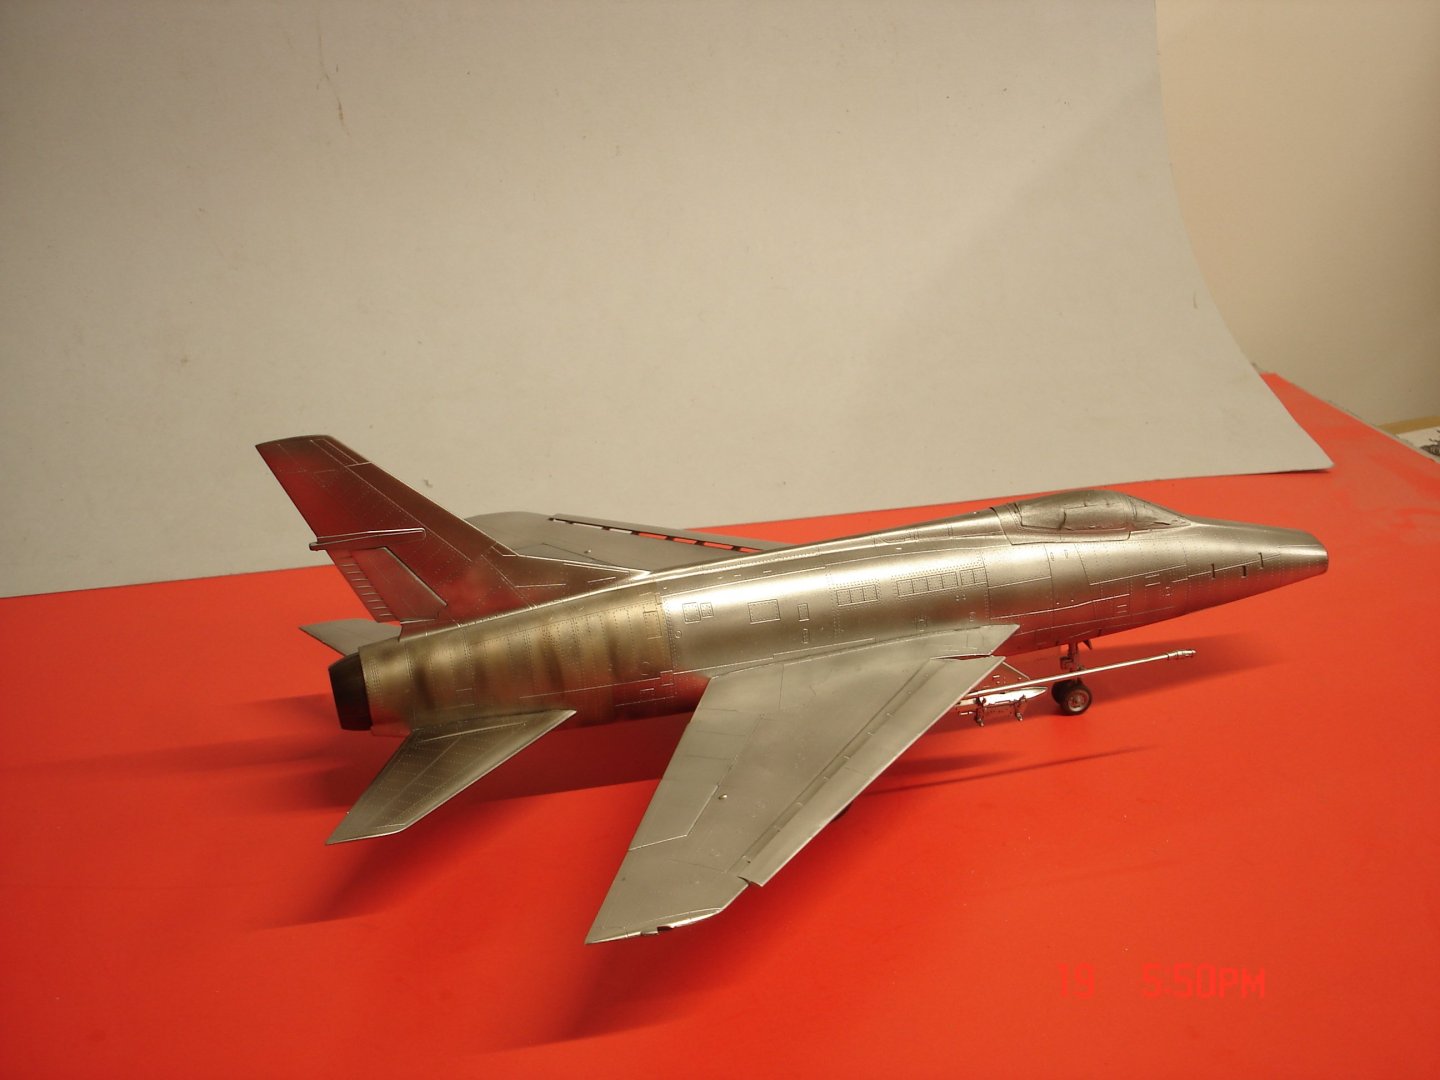
Now I have the Trumpter 1/48 F-100C main color is Alclad #126High Shine AL. Rudder is Alclad #101 Basic AL..The tail are was first Alclad Exhaust manifold,Pale burnt metal a darker Burnt metal all applied in a vertical motion if I had a blue vary sparing some of that would of happened.I had to do some touch-ups on the 126 from paint and I started noticing it was just a tad different and I started doing verticals on the fuse.I hope it last overnight and stays just breaks up the scheme to my liking. This build will be quick guys shoot I have maybe 3/4 hours thus far easy kit with a Nice fit
- 13 replies
-
- 11
-
-
Thanks Alan not much really happened on these planes panel wise but what you see.I saw two A/C on videos with those strange colored aileron's decided to incorporate it into the build used AlClad Steel first then it was every other panel I used SNJ powder with a q-tip re-taped and sprayed steel again.
-
Thanks Phil sanding/scrapping was a big chore with this one.🤨 I appreciate that Chris They sure did Phil had their teething problems thanks for looking in The others who have looked in giving likes and wows I really appreciate it!
-
I had one major flaw R/side had frames thought it was a window but not so did the best repair after decals applied.She came out a little better than anticipated.


- 34 replies
-
- 16
-
-
-
What exactly is a TAG?🤨
-
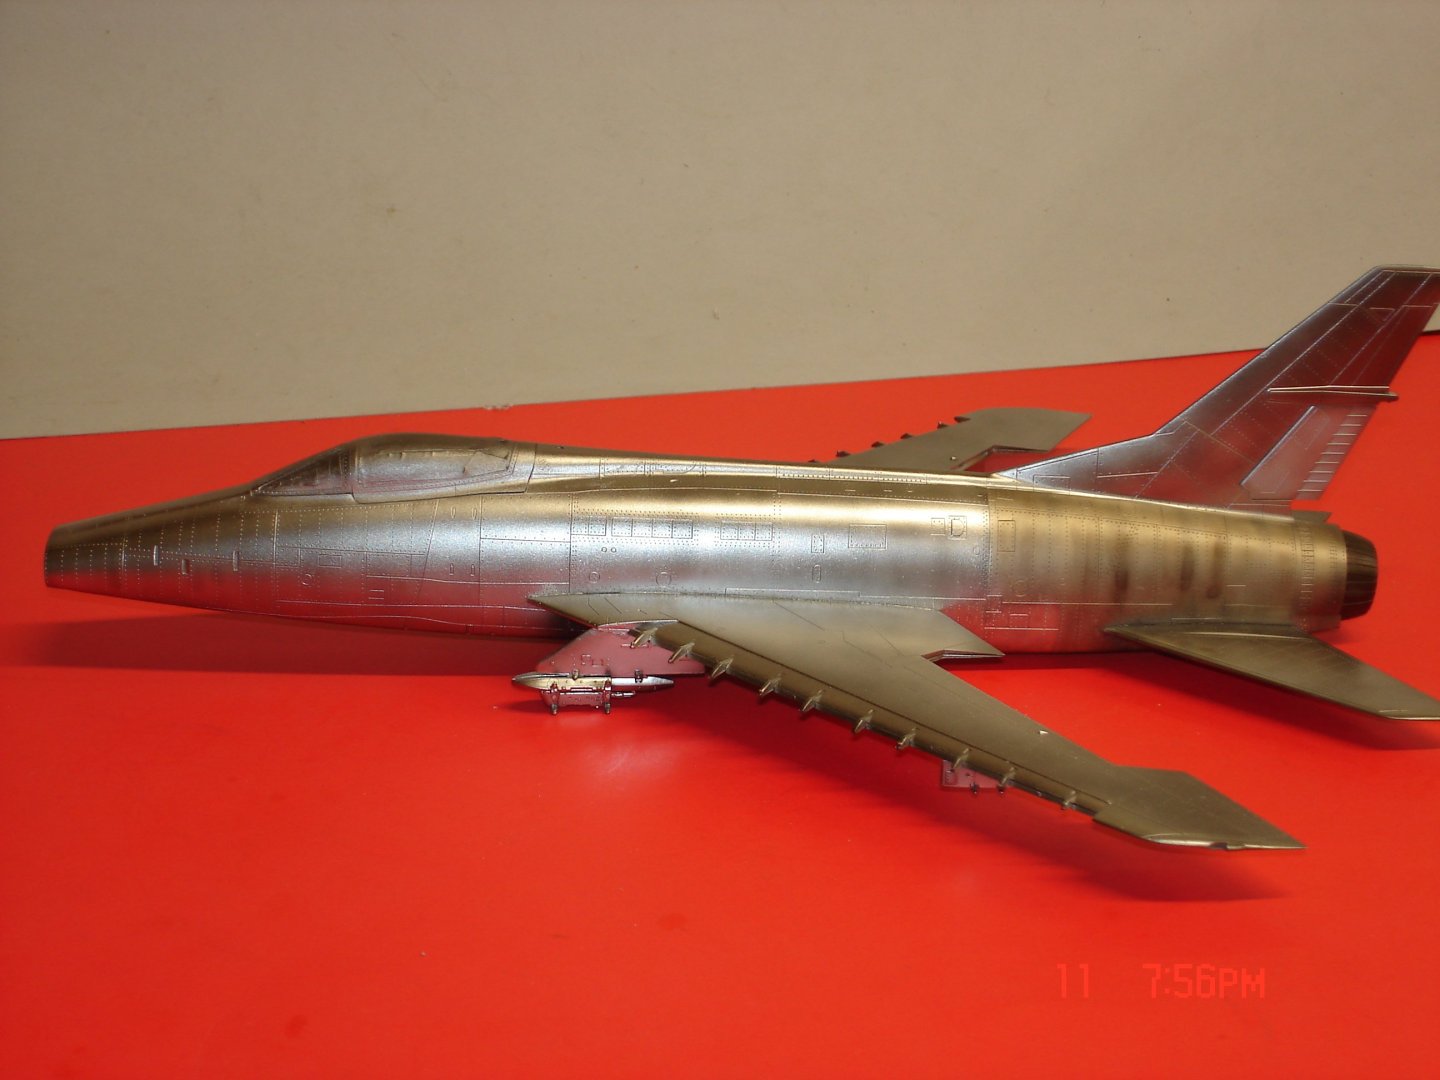
I will clear coat tomorrow with Pledge thinned with Mr.Leveling thinner makes it lay smooth and drys much quicker .The engines are what they are I got a no seam in what you look from the outside but inboard side I did not mess with.I found out doing the belly tank just putting putty and paint does not work still looked white in a sense.I painted a hairline color of black on the engine seams to the wing sprayed AlClad 105 and all was good.I think once all said and done it will not be a bad looking build giving it a B grade.🤨 The F-100C is the Trumpter kit got good vibes on this no seams hardly at all.
- 34 replies
-
- 14
-
-
-
Maybe Dan but what I am doing to the hood of my Son's Truck you absolutely could can see the overhead rafters ATTM. It's a work in progress Dave I am getting better with each build already have a F-100 on the desk 1/48
-
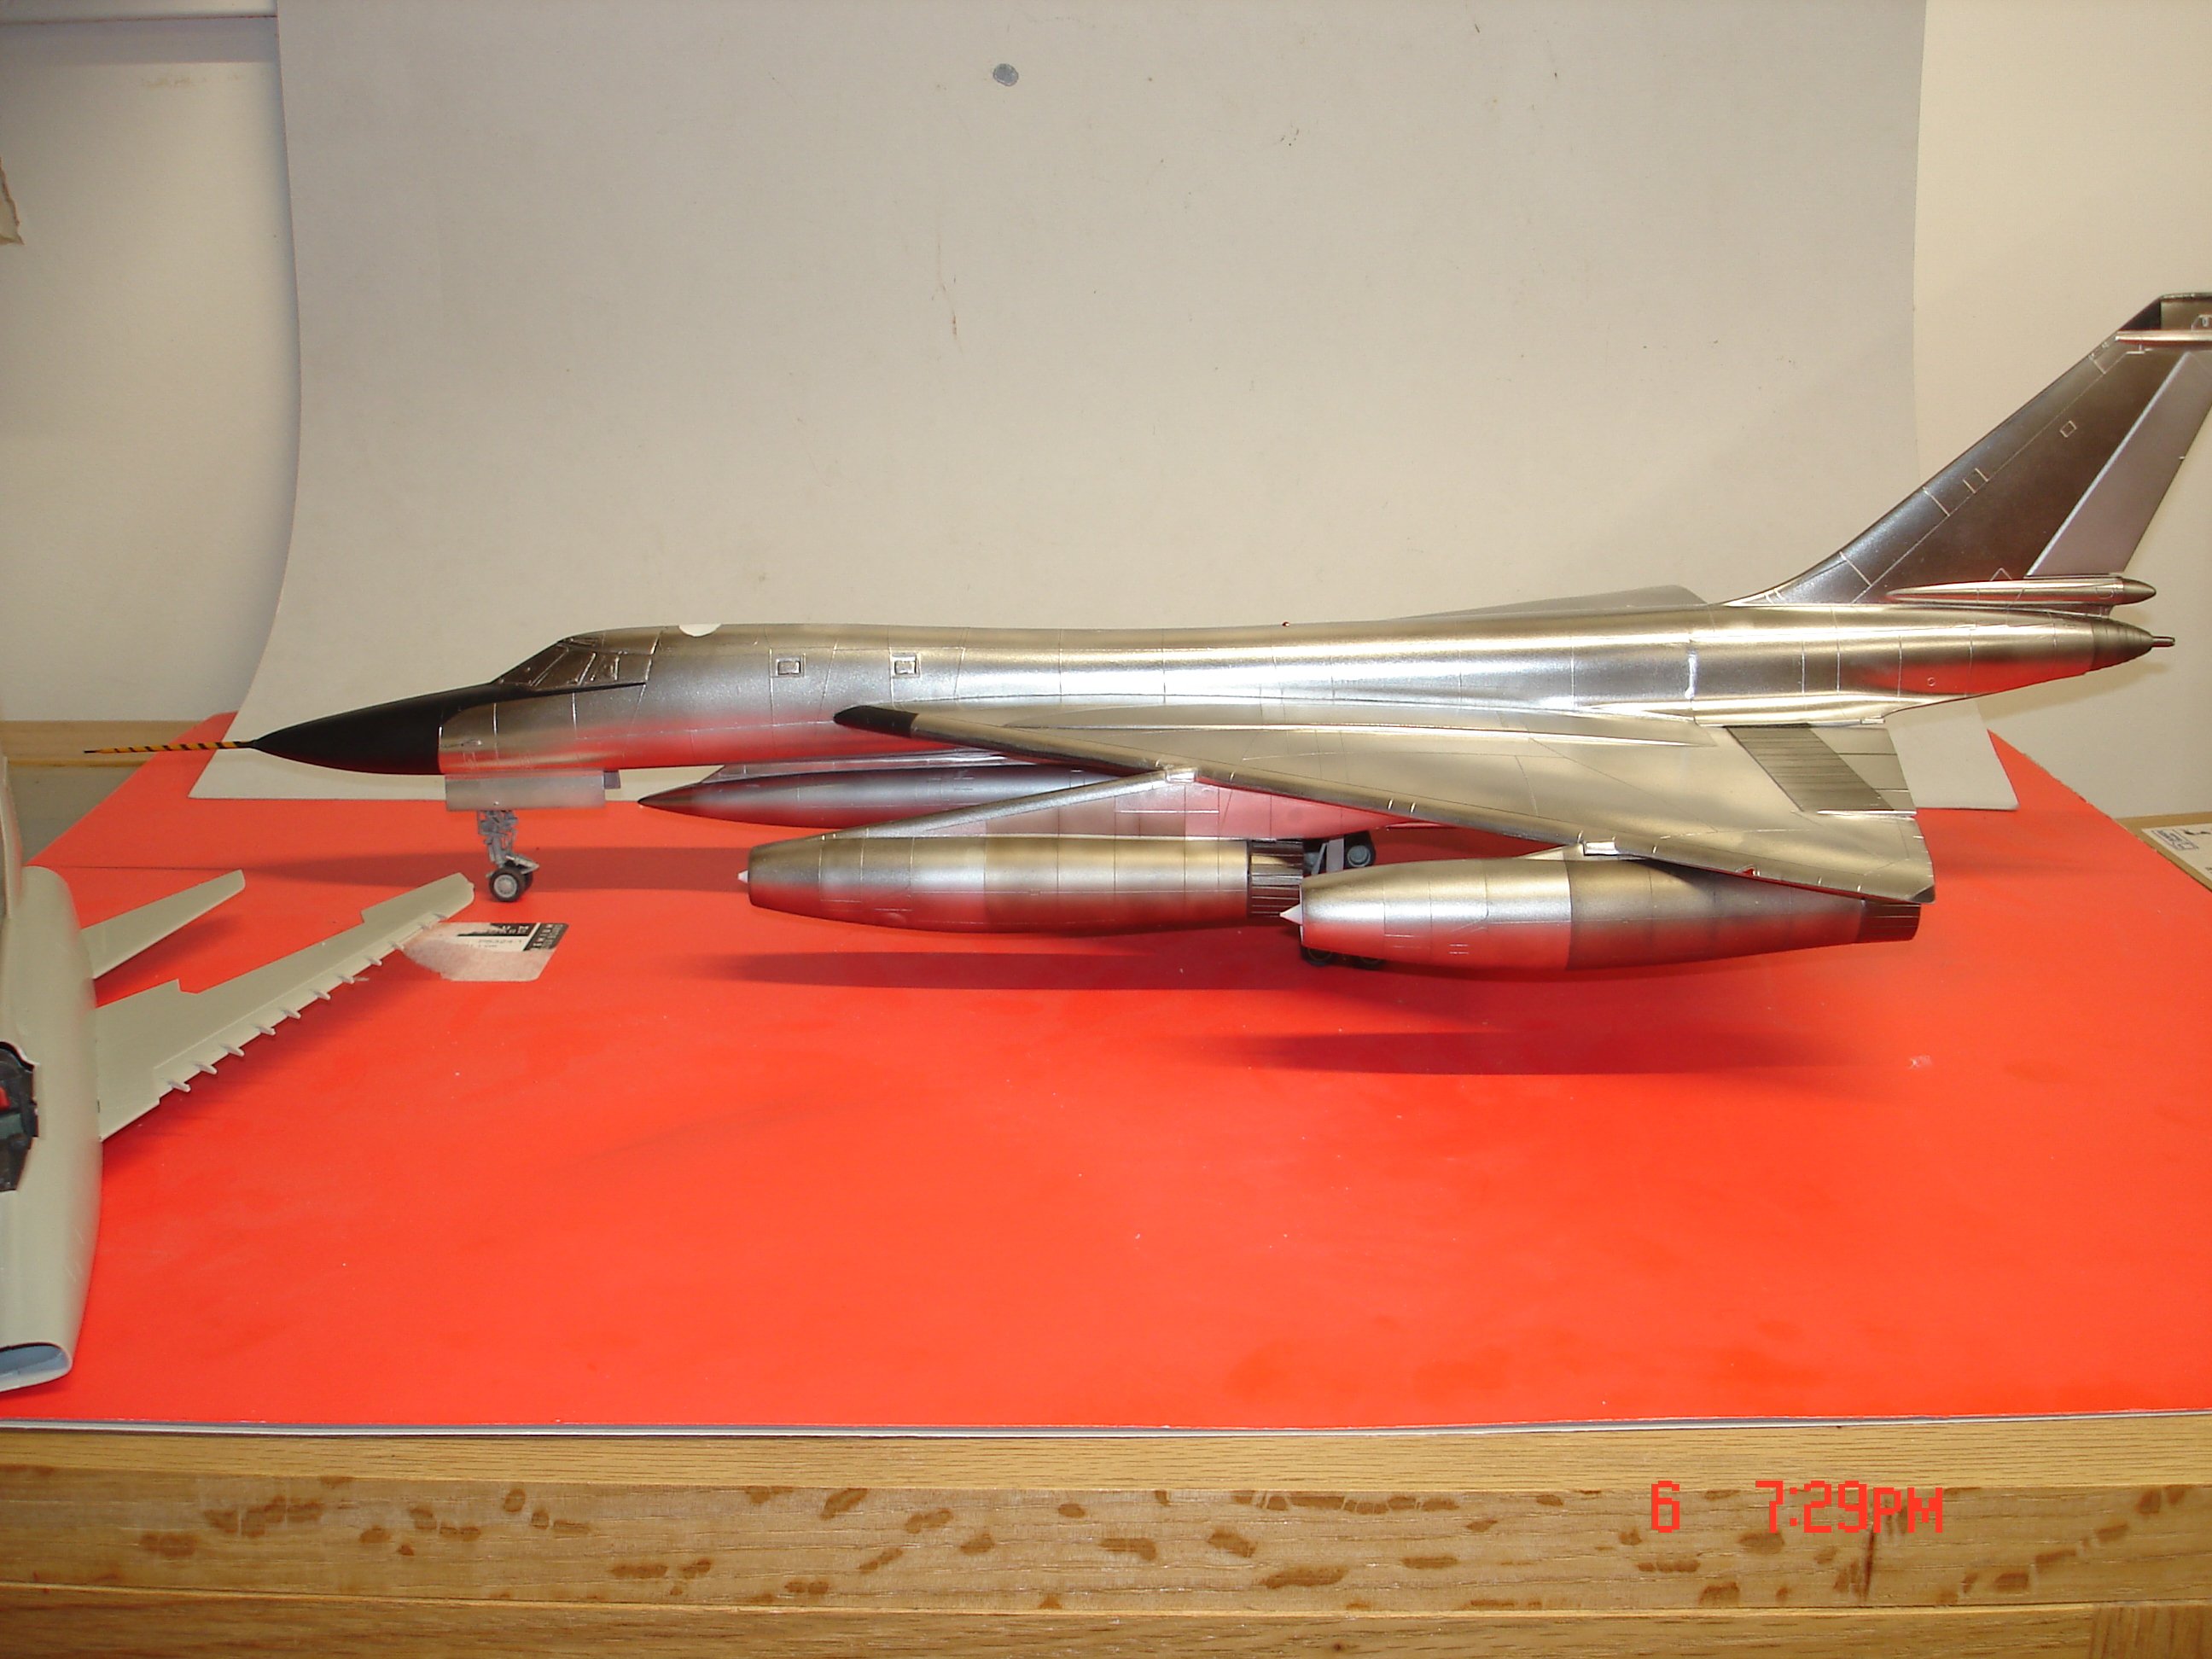
I keep plugging along sometime one step forward two back?I am going to give myself a C= or B on this one the problem being I used rattle can for the black (it's a big canvas).The more I add color wise the better it starts to look so the decals shall help also.I looked at many videos these planes were polished. I have a coworker who was around these planes mentioned many models flat AL his head tilted eyes moved"No,they were shinny"

- 34 replies
-
- 11
-
-
-
Thanks Alan I did one per night took 1/2 hours each evening now lets see if the rest of the plan works out.The idea is to primer the whole plane then buff and apply the gloss black then go polished aluminum .The next step will be to pick out panels,flaps and rudder.I will then SG the pods on fill the seams and retouch the paint.🤨 apic of panel colors

-
Progress has been slow but steady lots of sanding old molds/technology.I painted the engines primer,black,polished silver,silver119(panels) pale burnt metal,paneled line with rubber,pale metal(very thin) then burnt iron.The body of the plane has only been primed up top ATTM but is silky smooth after using a worn out 800grit scotch brite

- 34 replies
-
- 10
-
-
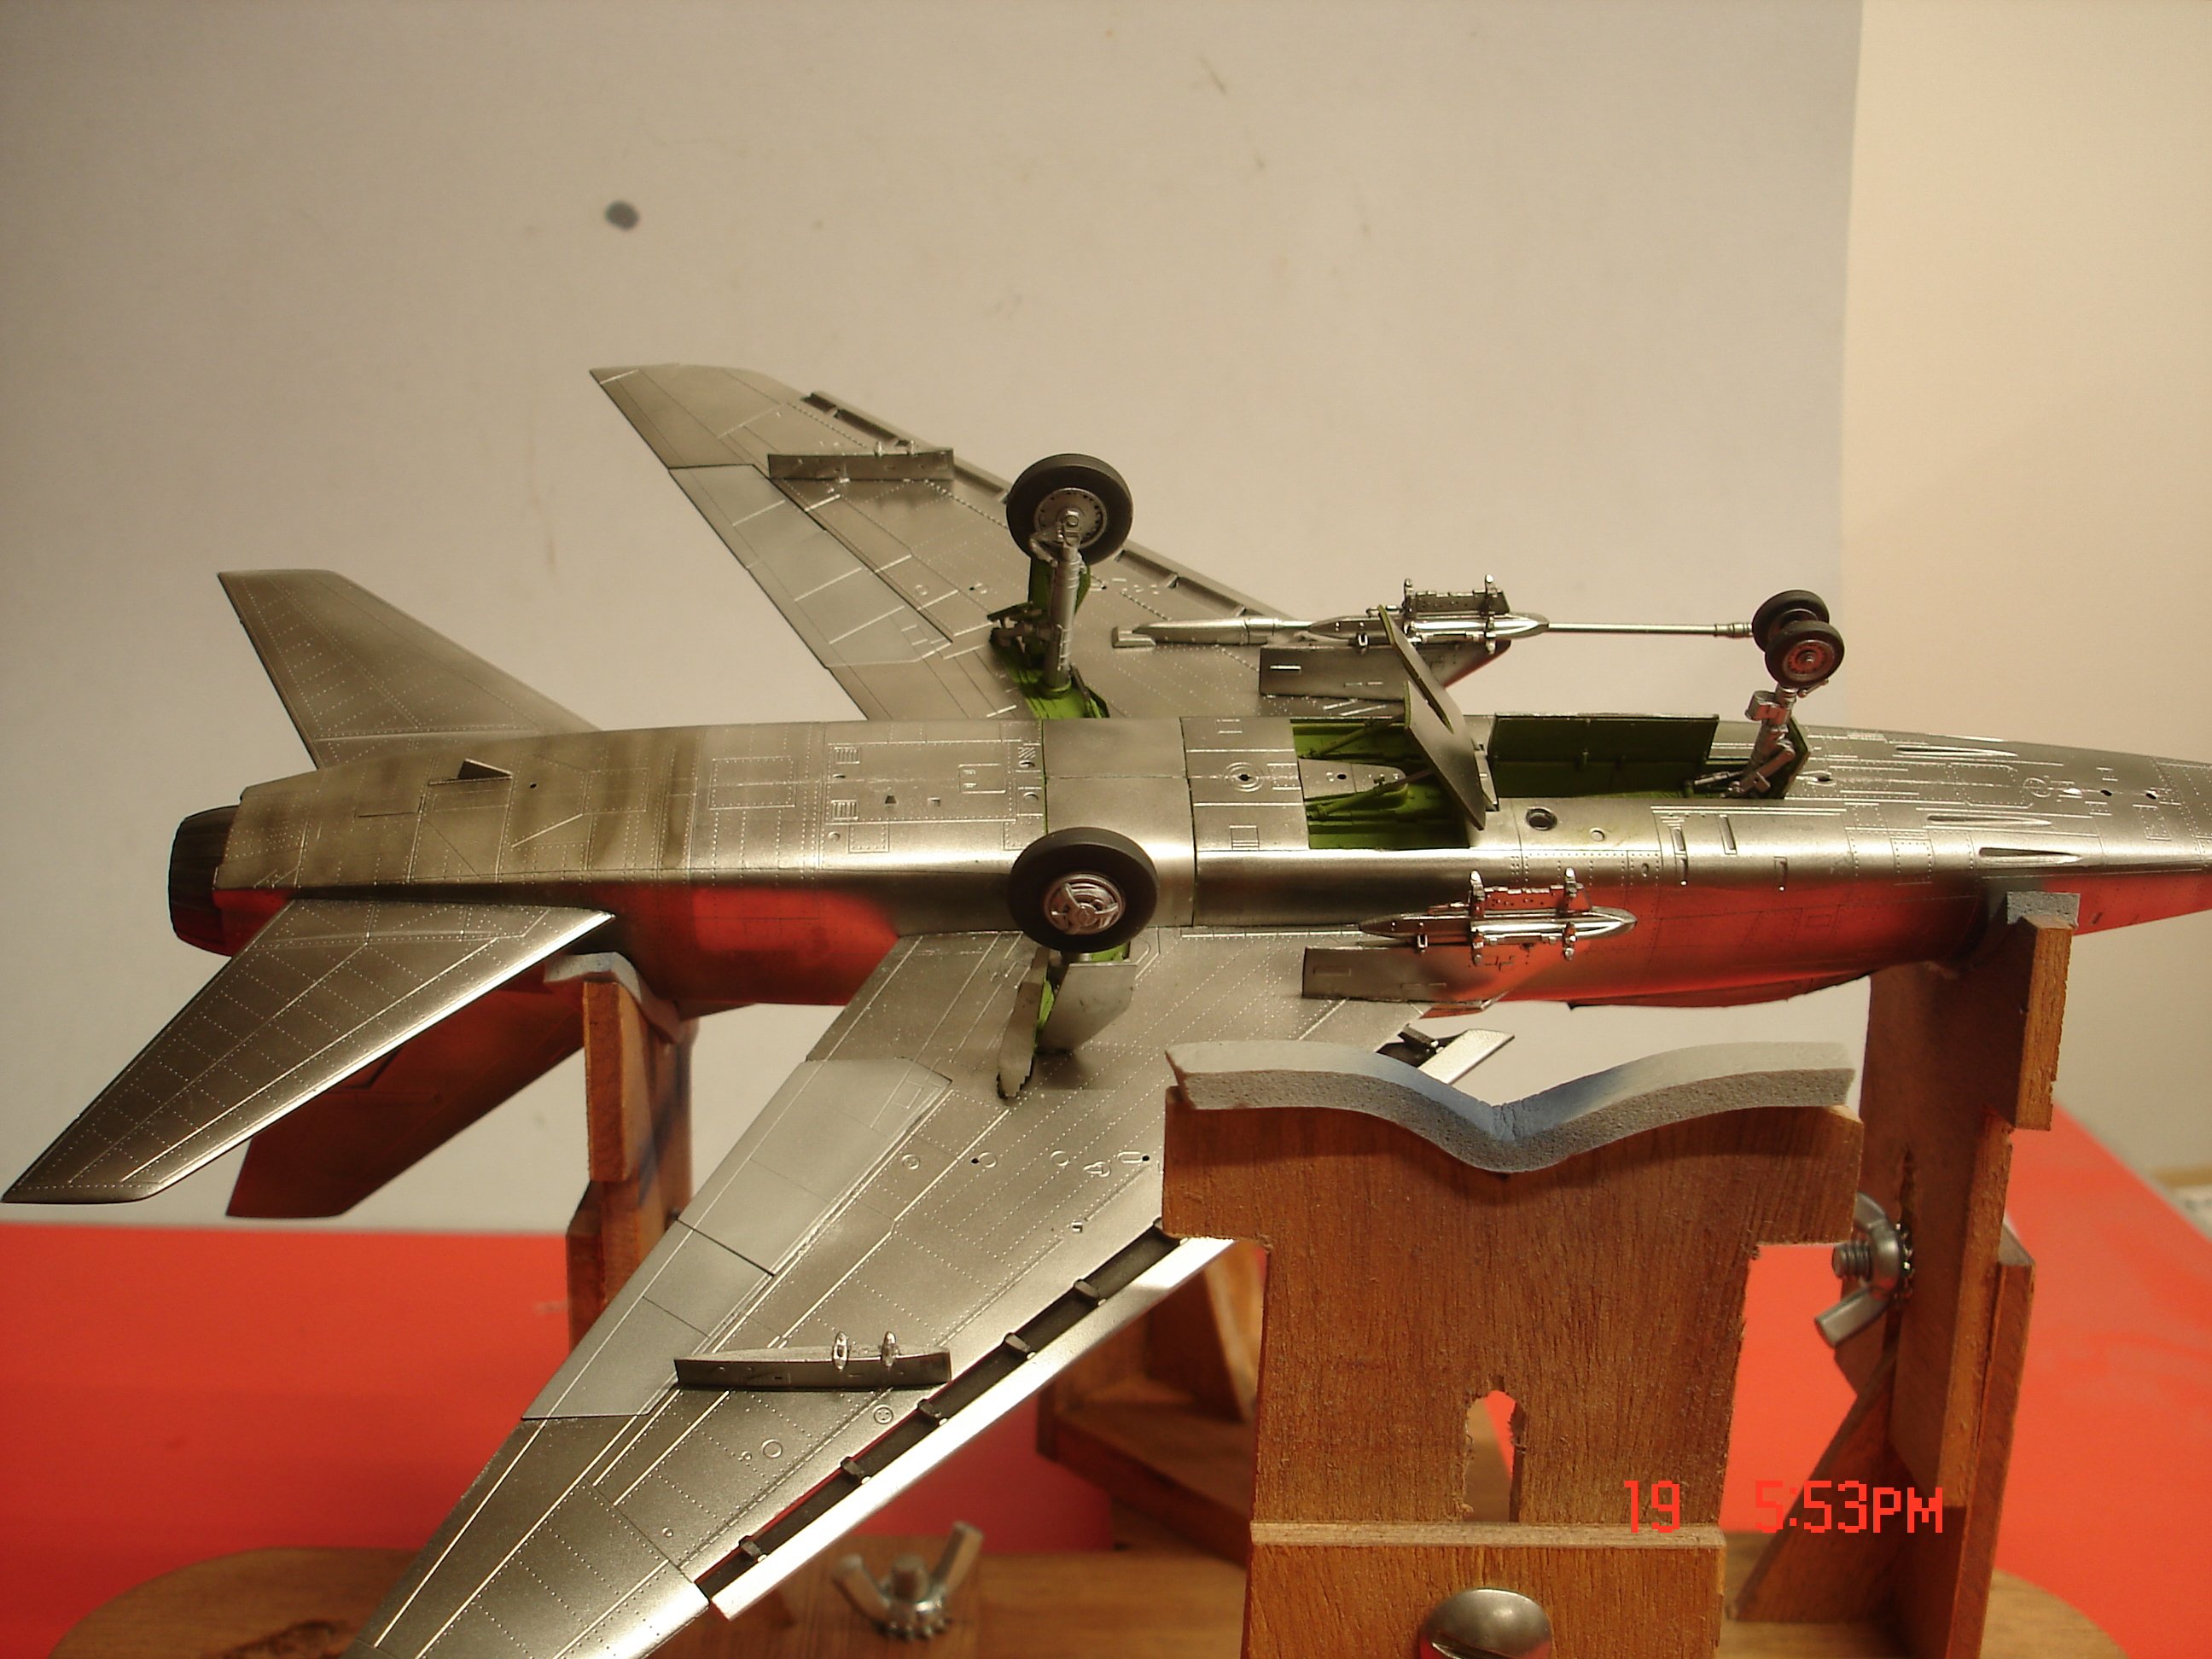
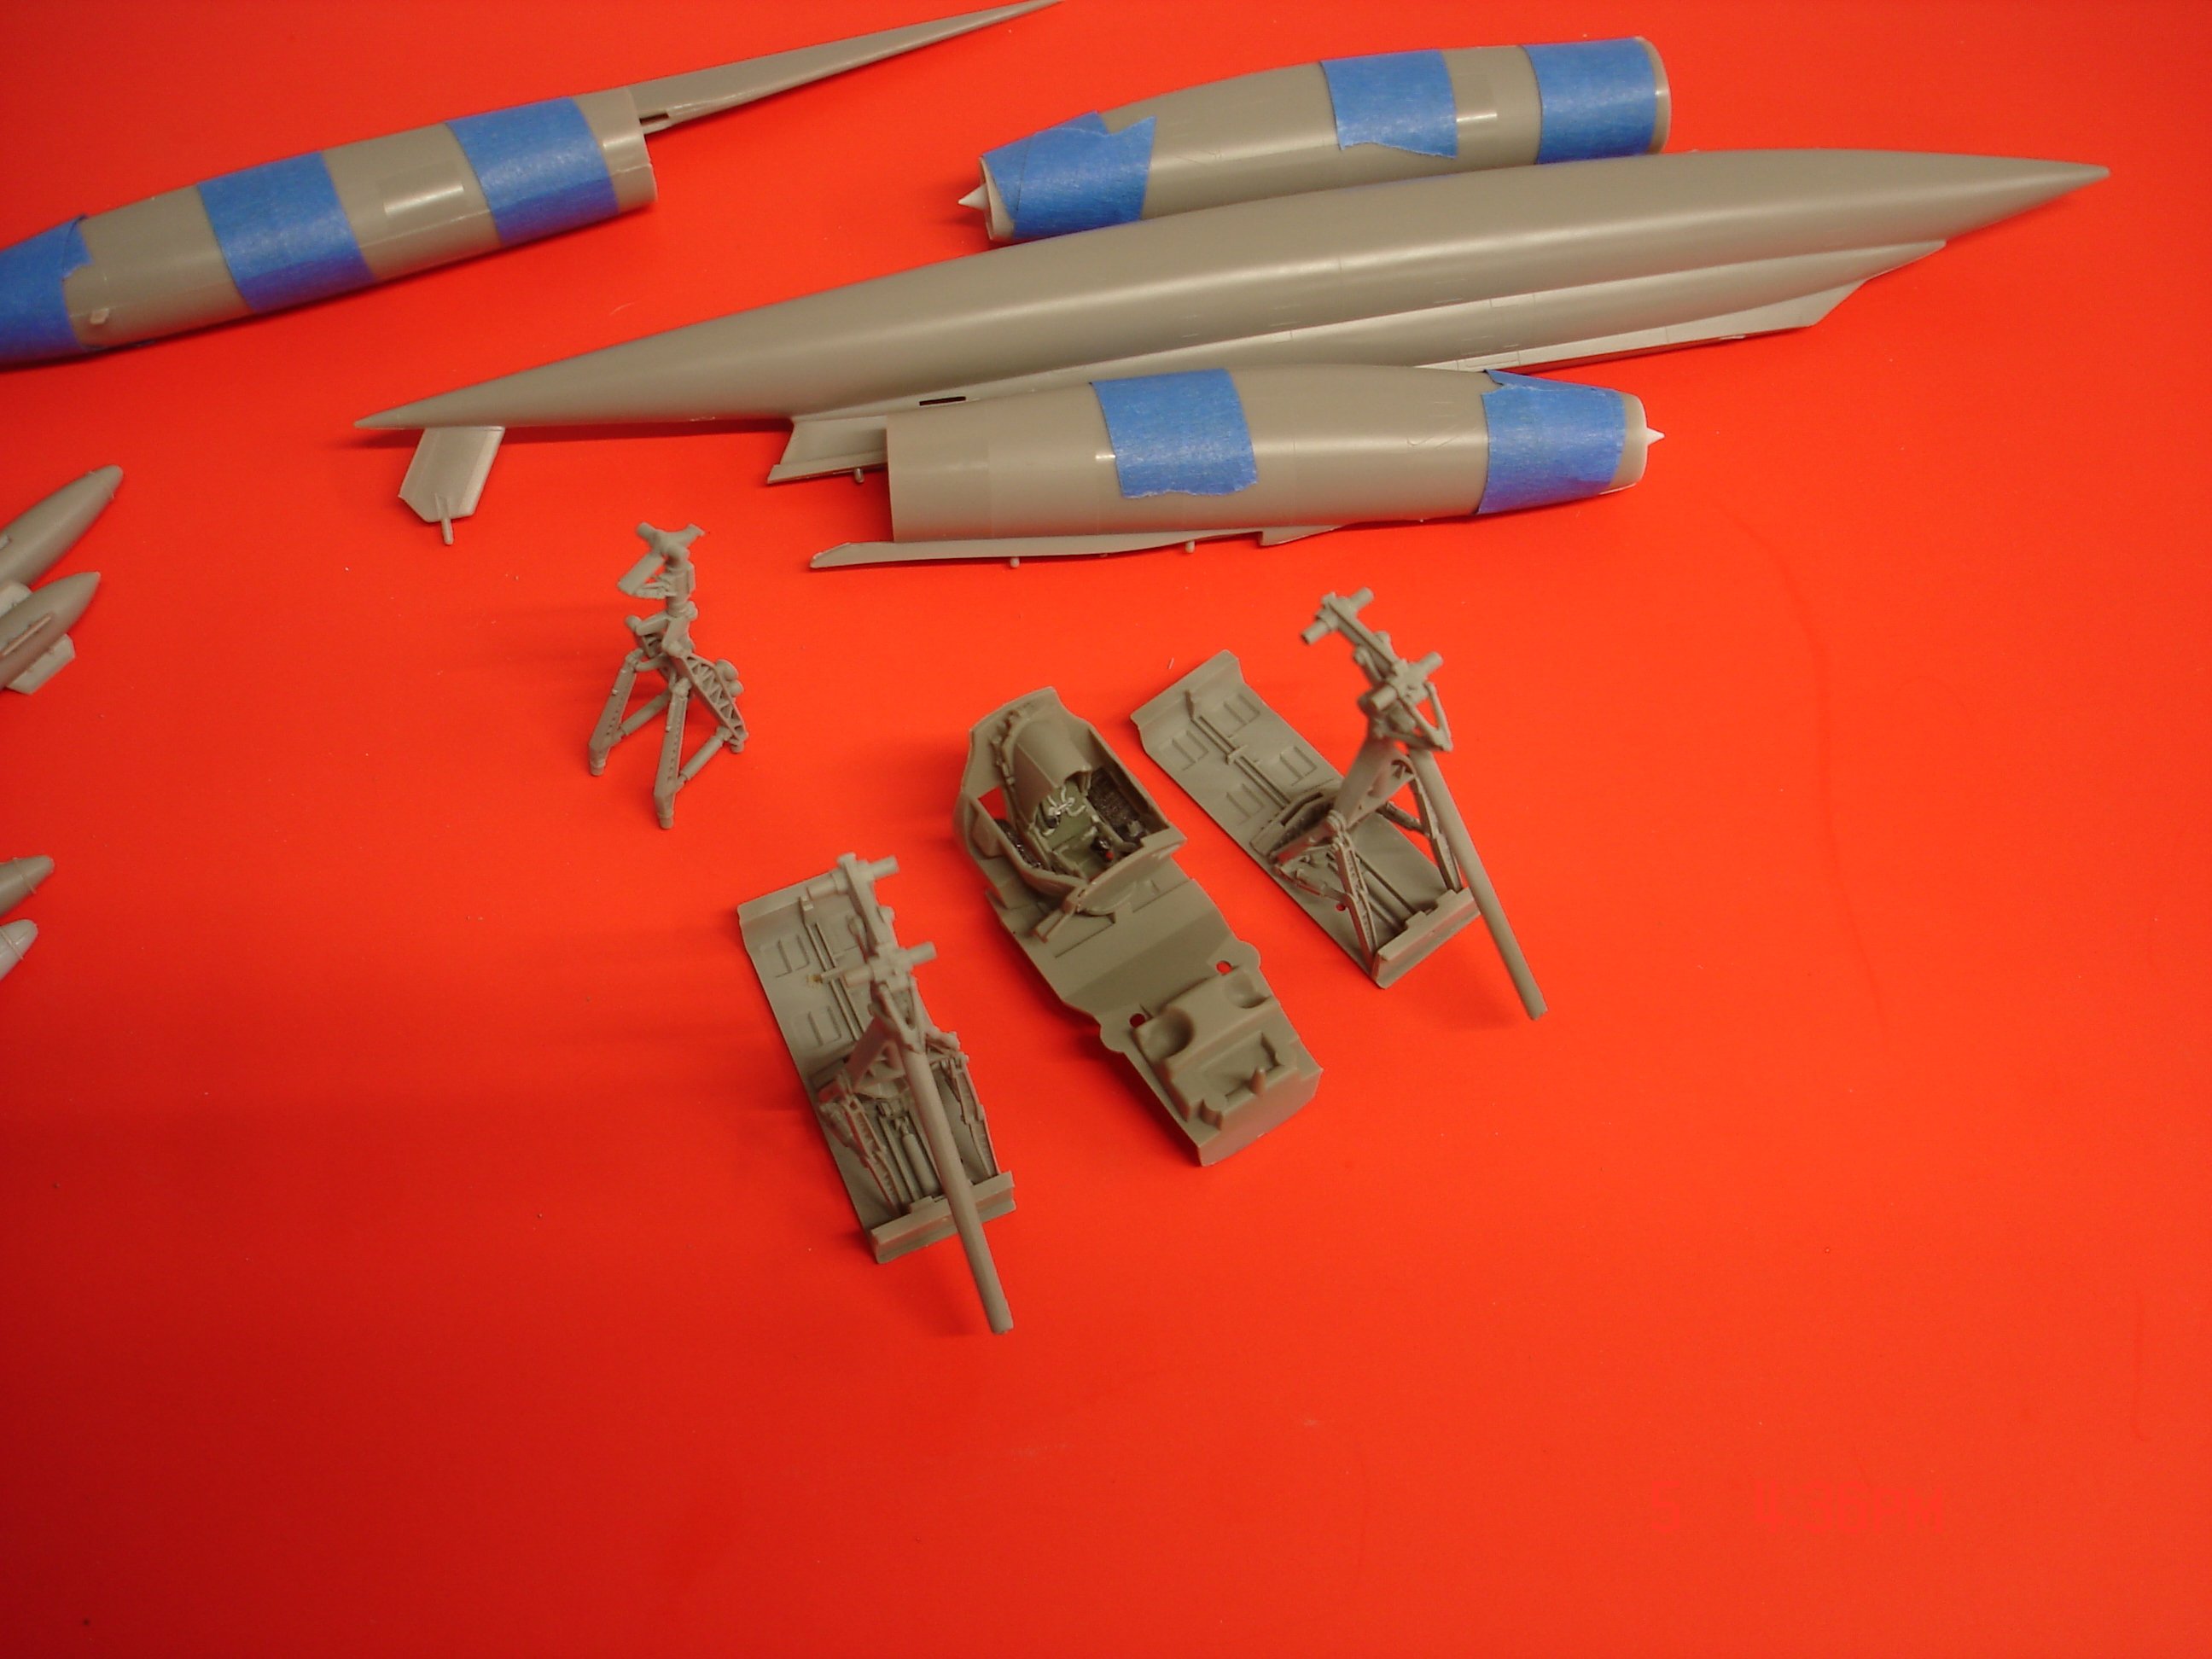
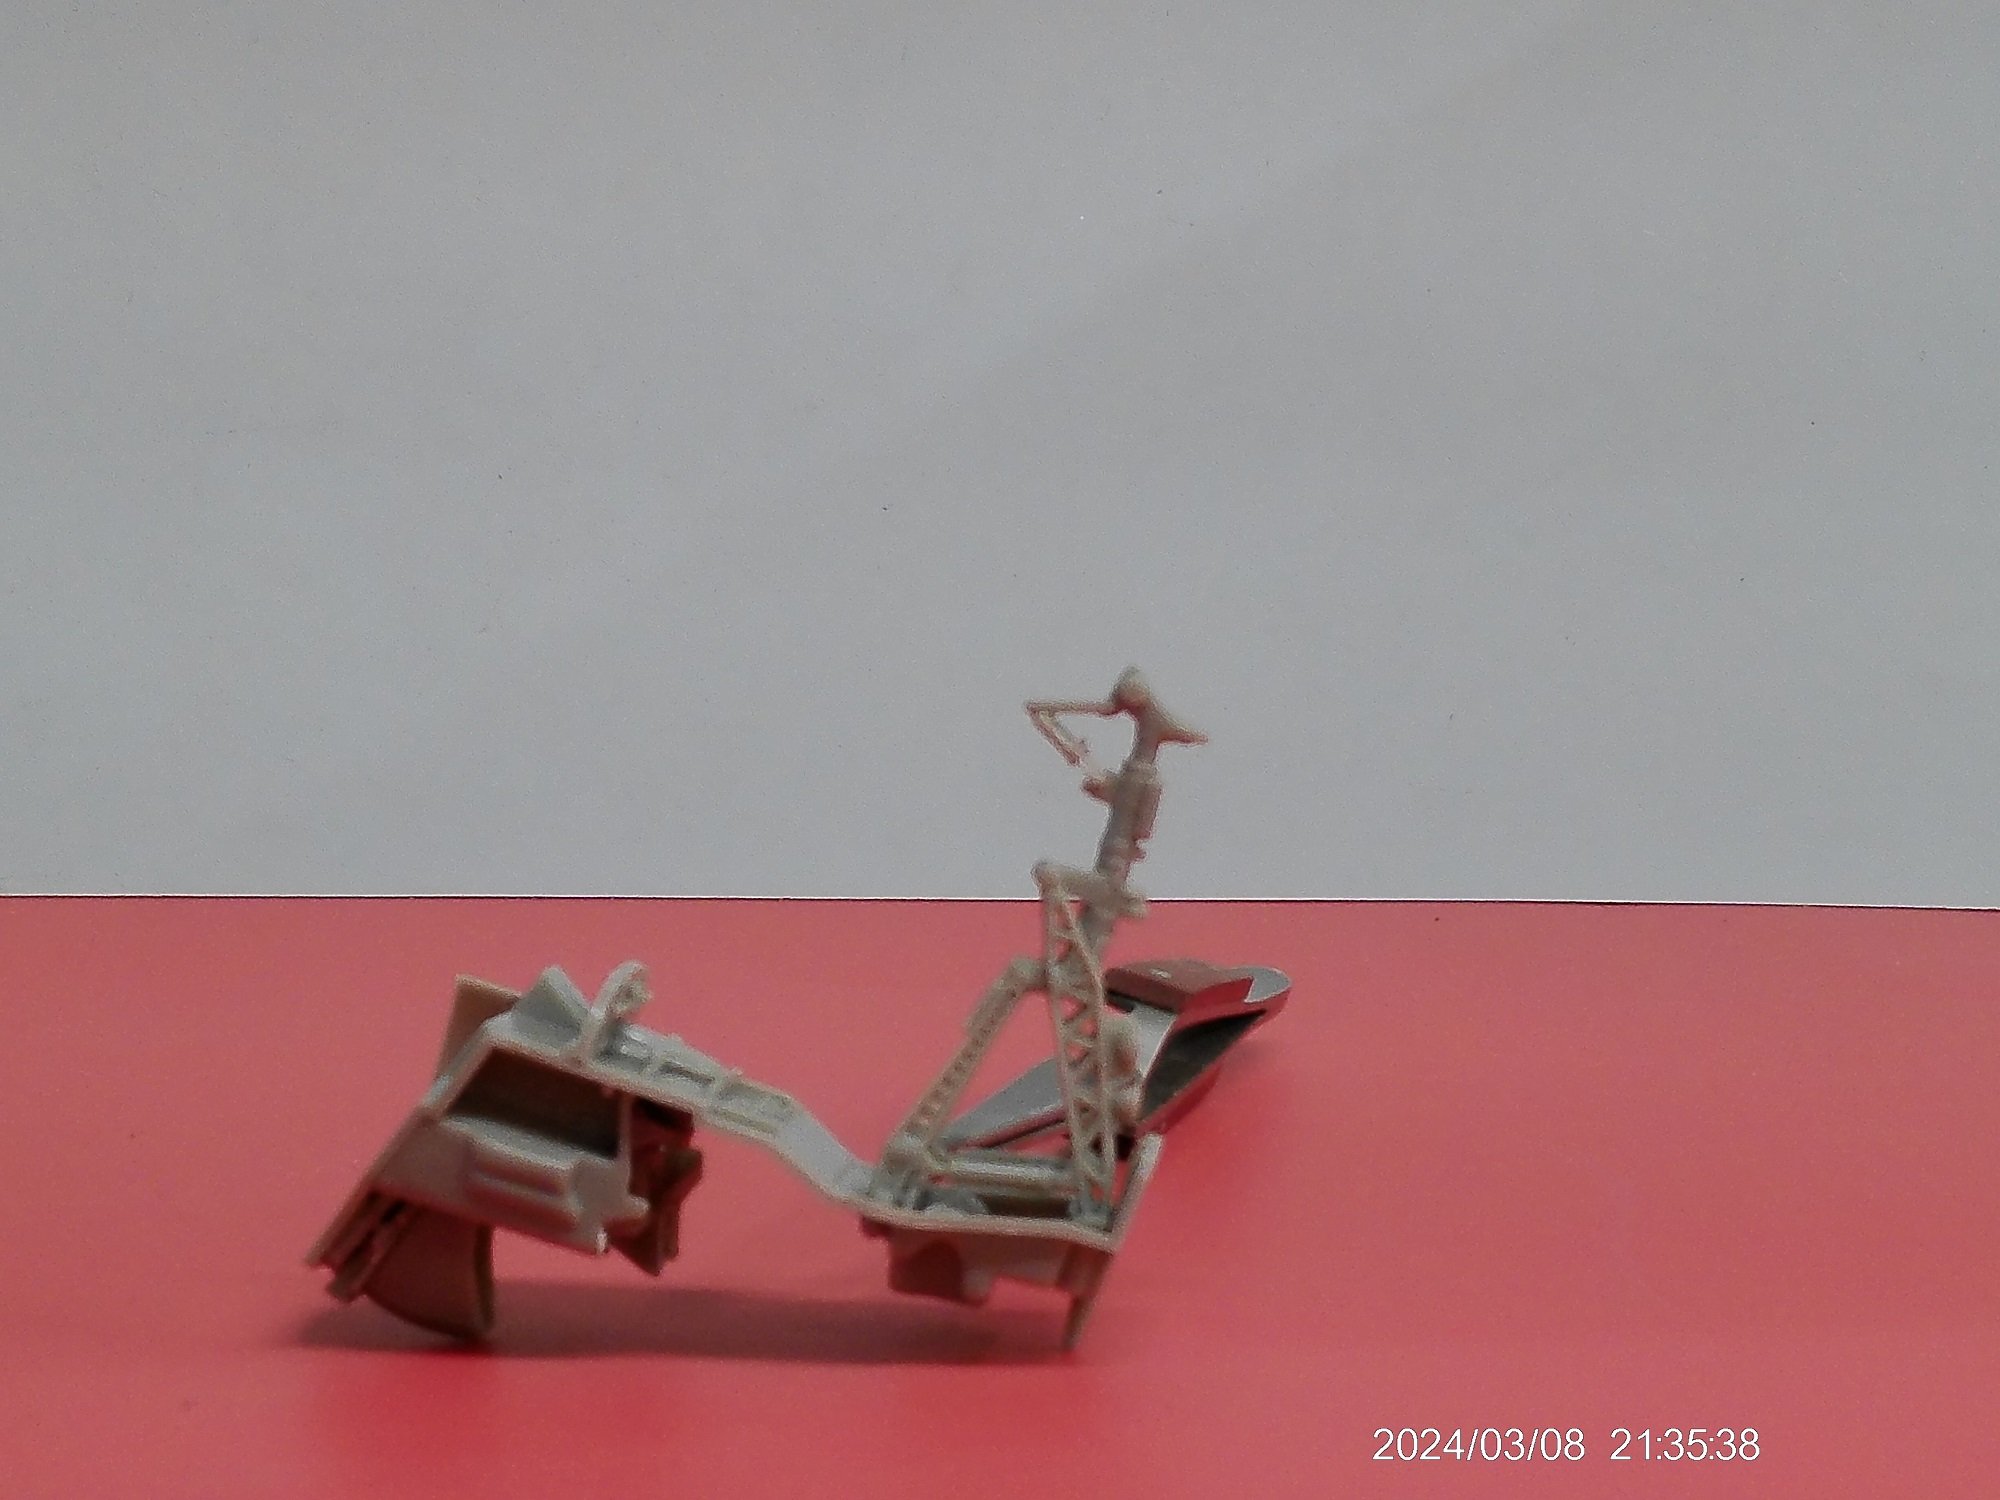
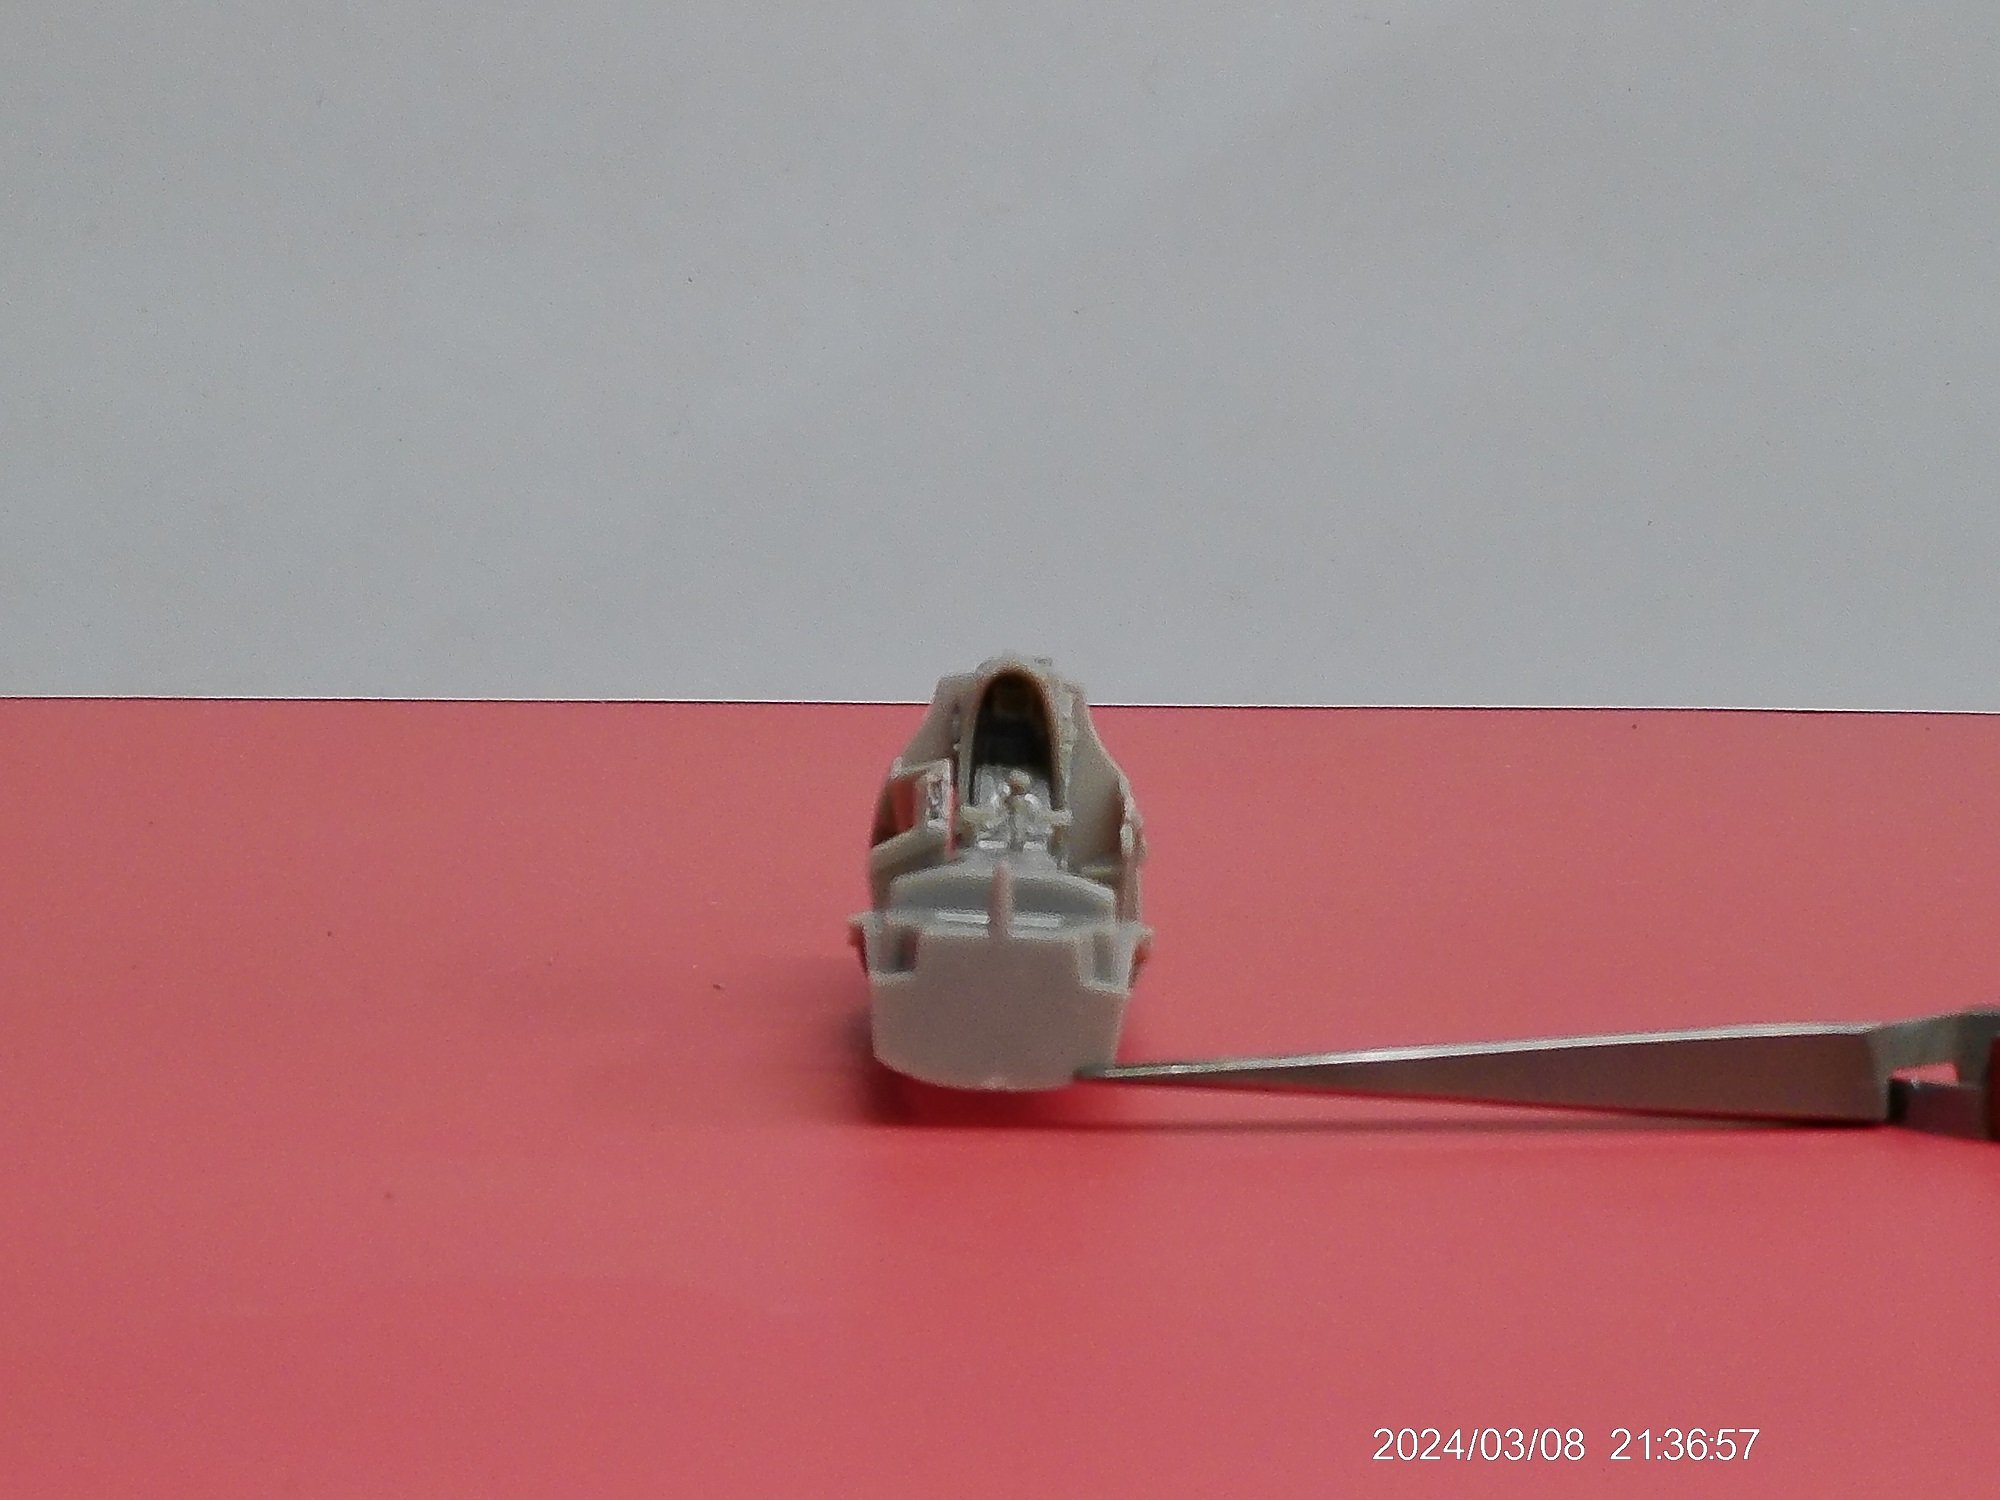
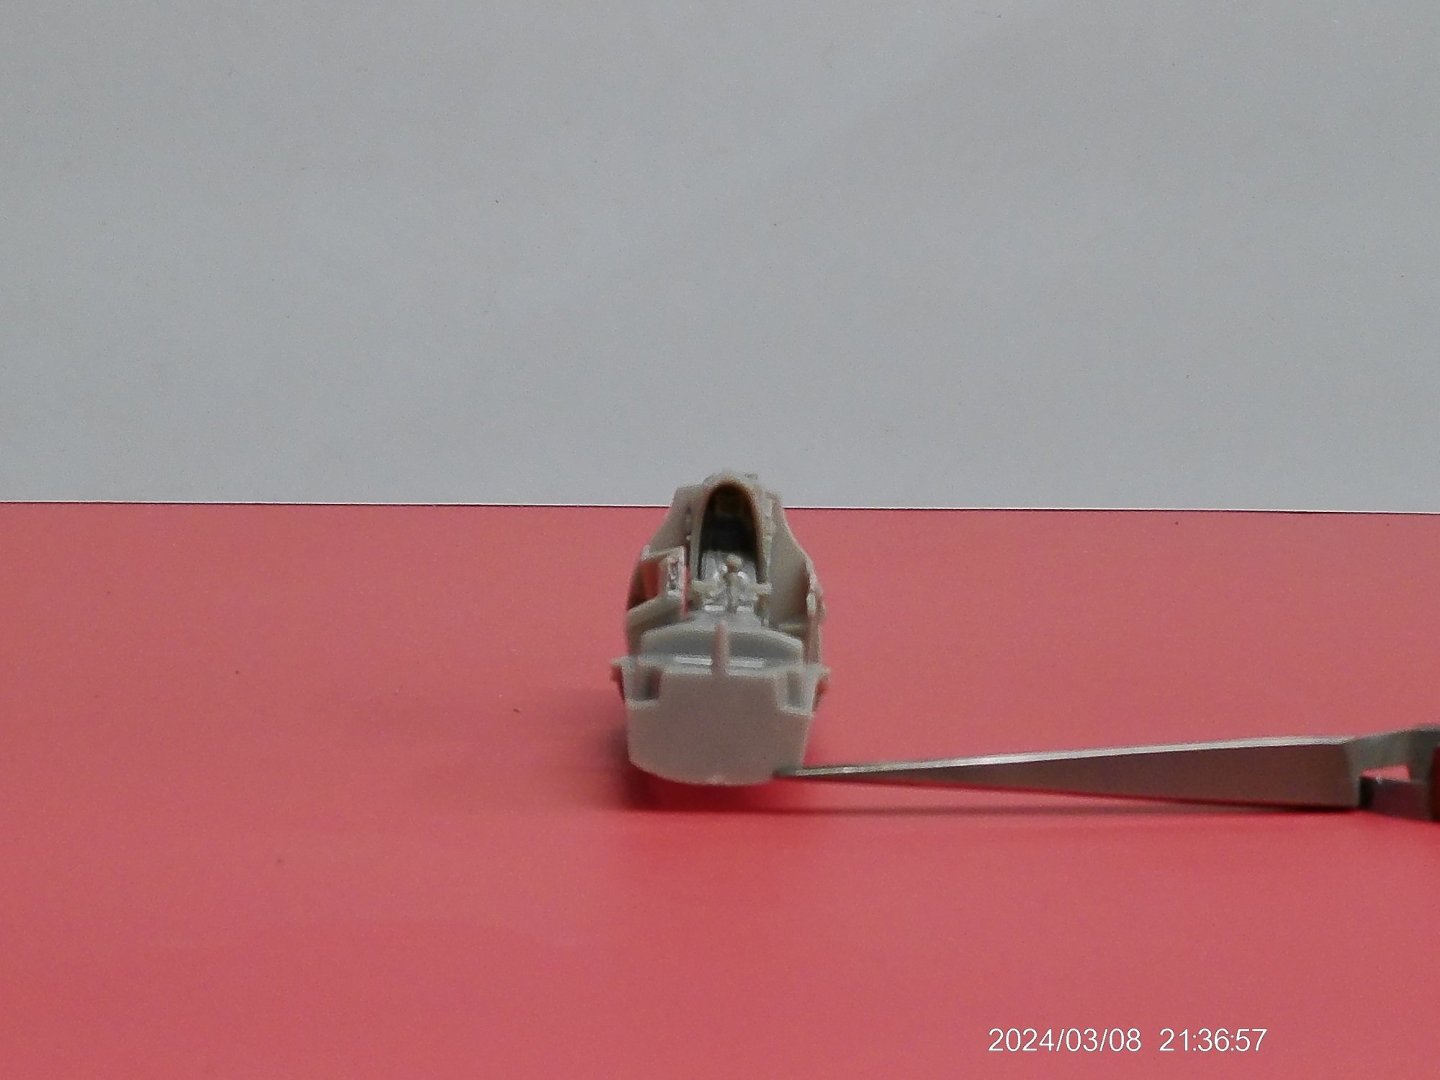
I have been assembling a lot of the sub assemblies LG's,Pit and the engines.The LG's though it does not look like it have been repainted into a light grey poor lighting on my part and nighttime on the shots,The copit was laft in the US Naval Dark Grey which really looks like RLM 02 in my eyes.The copit ATTM has been installed with a couple of lead weights just in case.I cut the nose pitot tube from it's attachment inside the nose and installed onto that a hollow tube it worked and is straight no breakie on that part I am thinking yellow/black for that part.I have been thinking since last night these engine pods need to be painted before they are installed to bring out panel effects masking and such is still swirling in the head?Too I am going black base the plane and maybe paint the bottom do panel and then attach the engine pods.Yves this plane is not hard at all to build just lots of sanding and some raised panel lines go away for me on the pods were most happened doing different panels should fix it.Just one pic ....

- 34 replies
-
- 10
-
-
I think grey it will be I found three pics looking like Silver,White and Grey
-
Yves she is actually quite light in weight being their really is no weight inside the plane just that small copit area but it's been a lot of scrapping old molds you know. Thanks Ken for info but staying with the plastic thick hard plastic.I know it's stretching back into that memory file Ken call out is dark grey for the wheel well area but silver on the LG's themselves?But I know it's Navy but white WW's usually white LG but the AF/AAC zinc chromate and silver gear was it grey or silver ..I have not done any research if I find one pic grey they are grey just to break up the color pattern.🤨
-
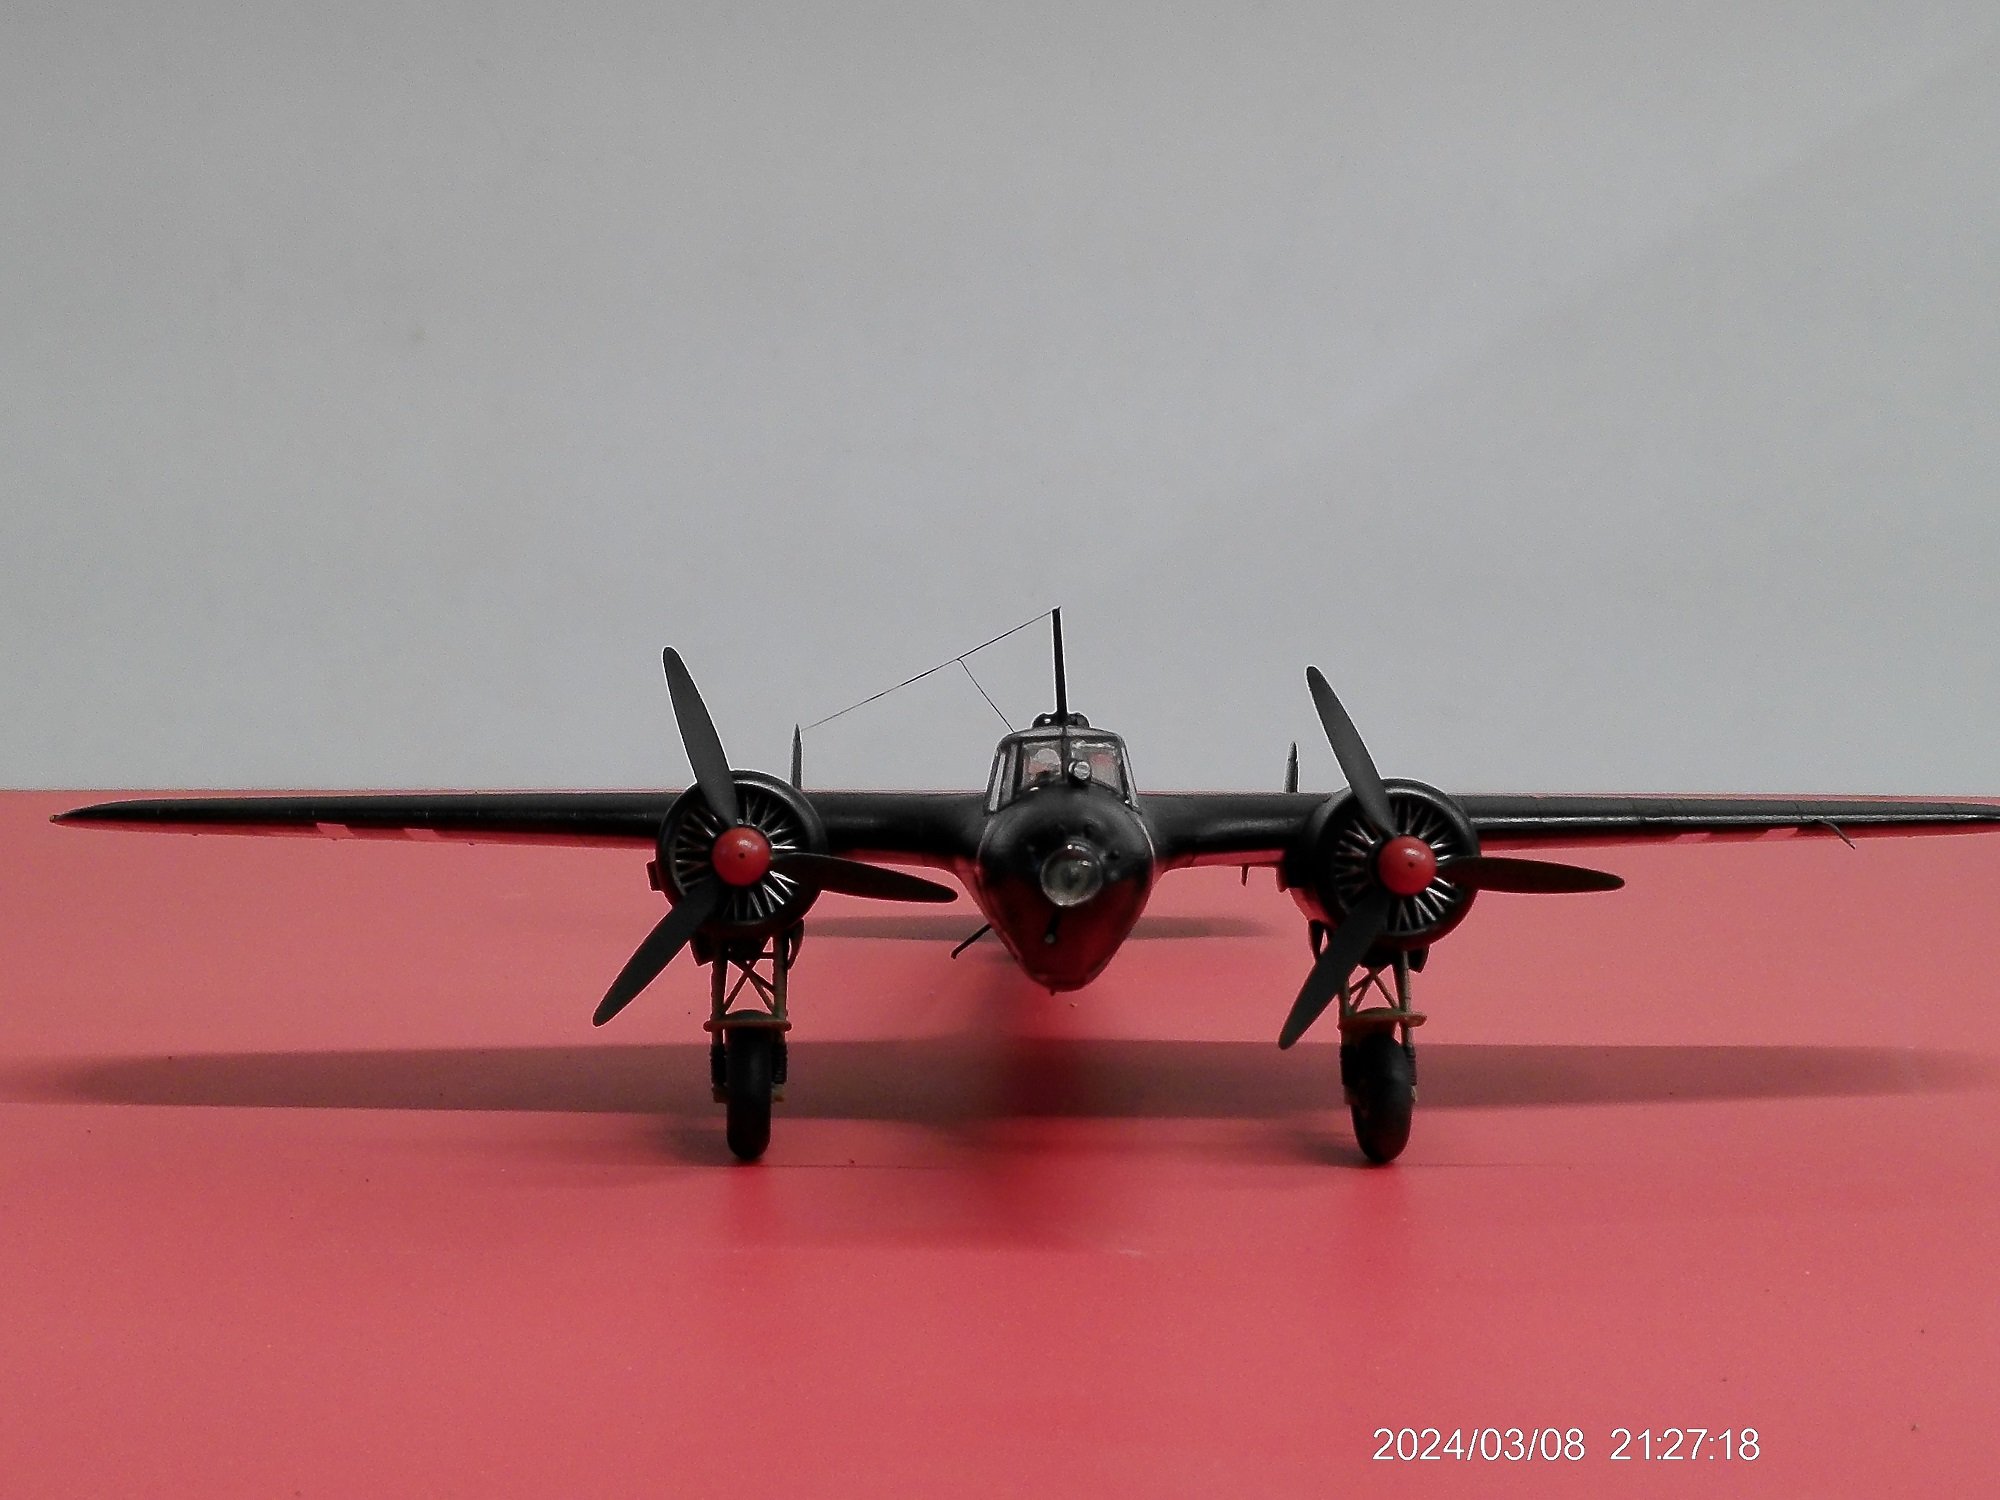
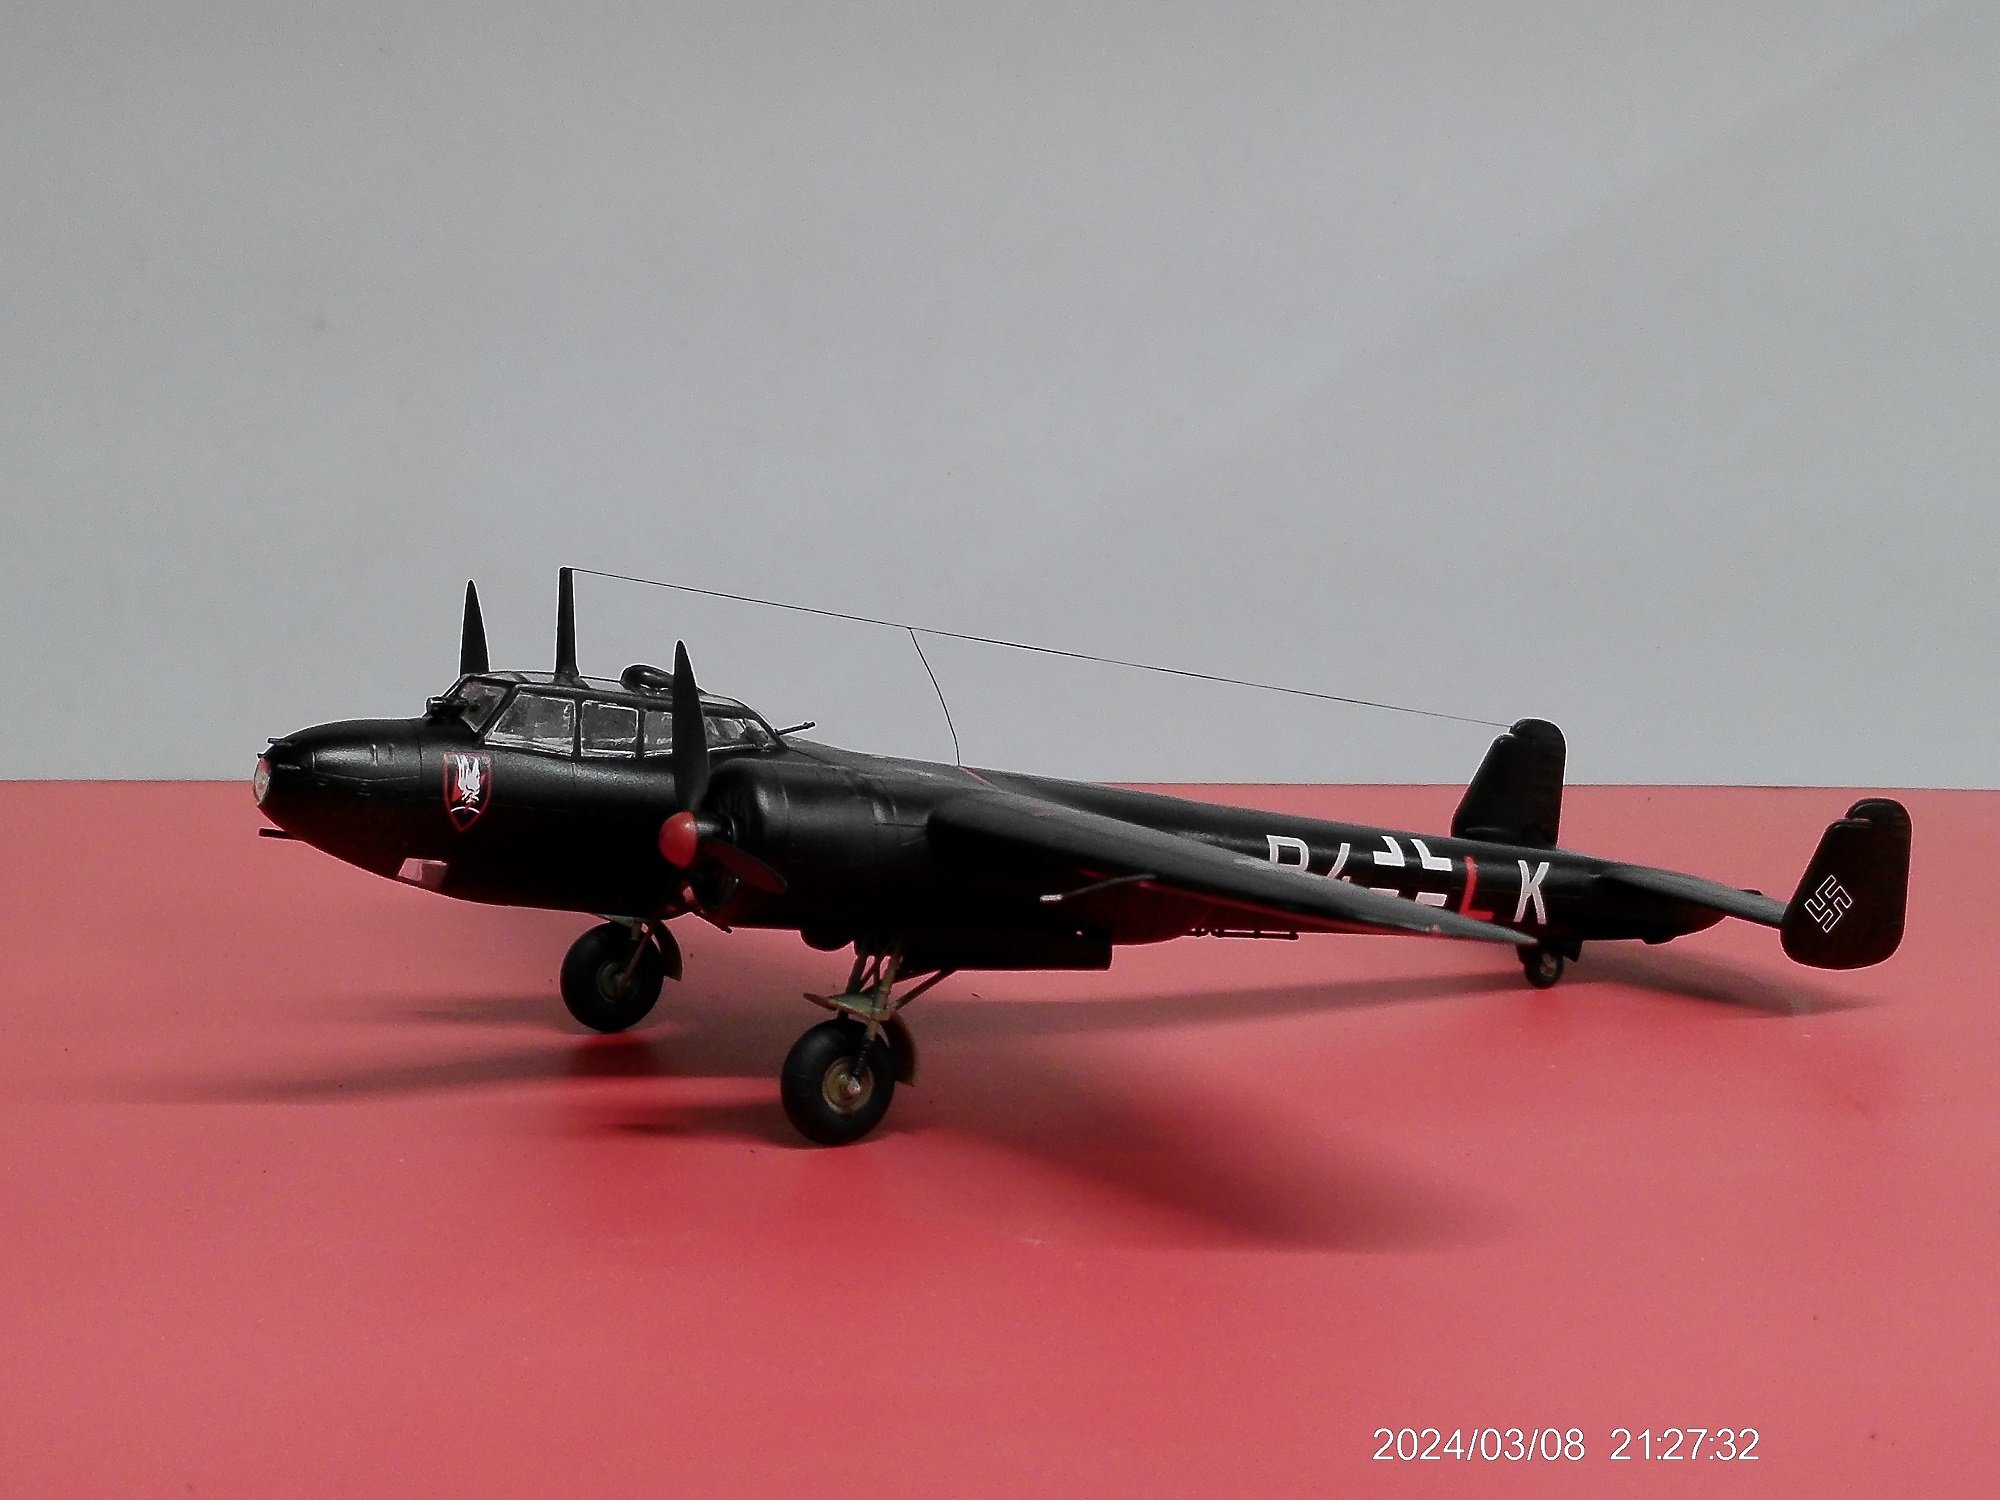
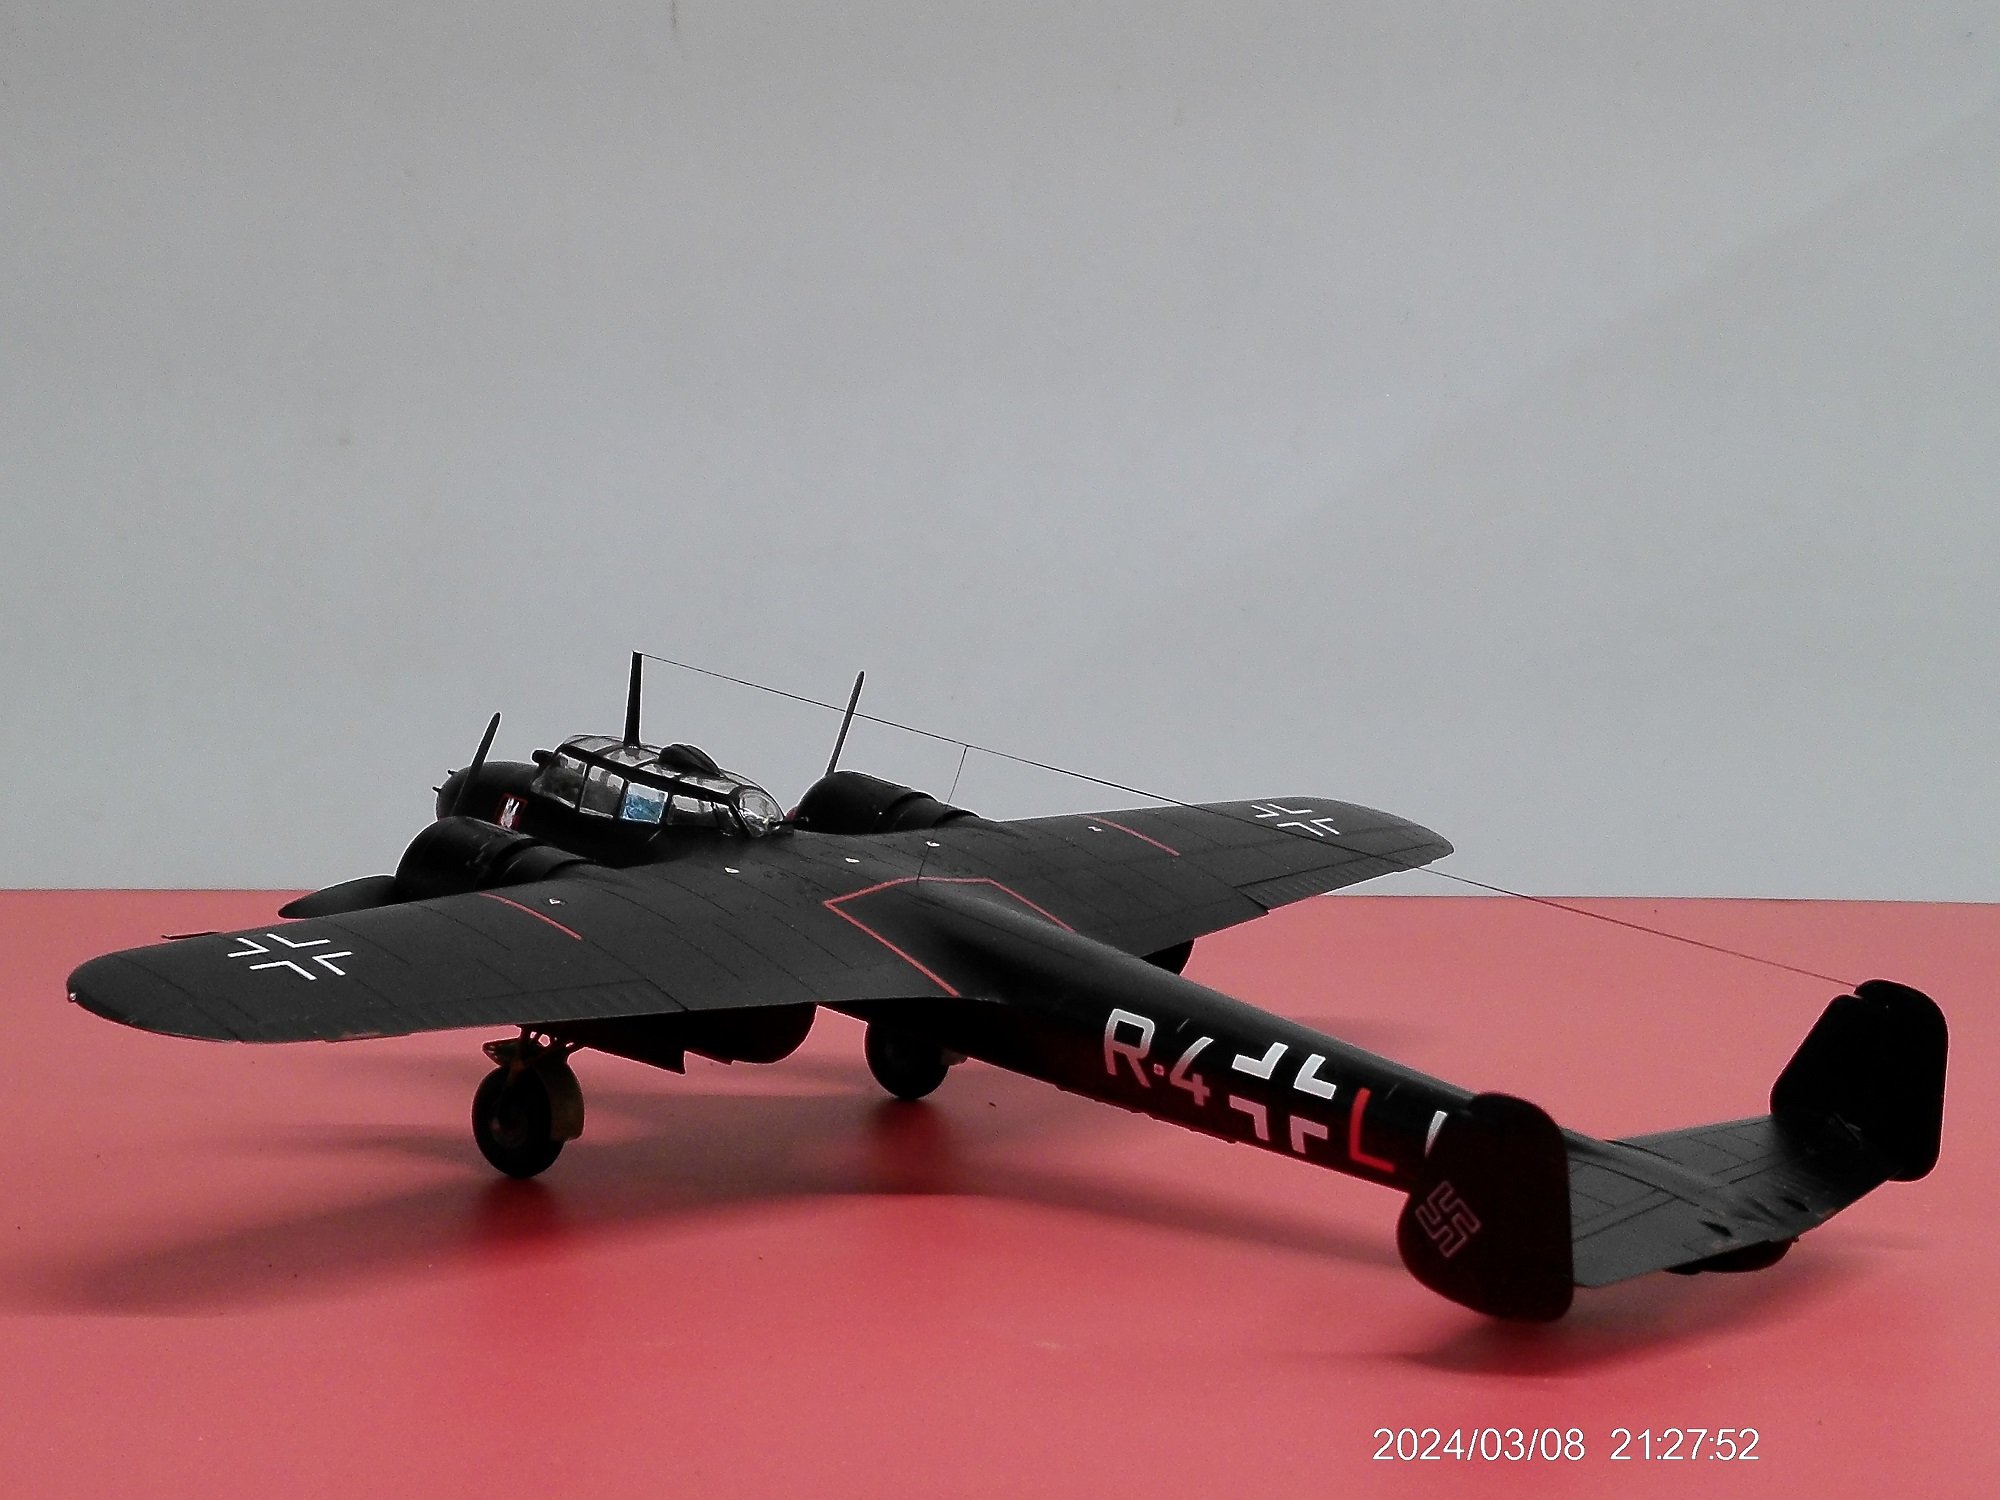
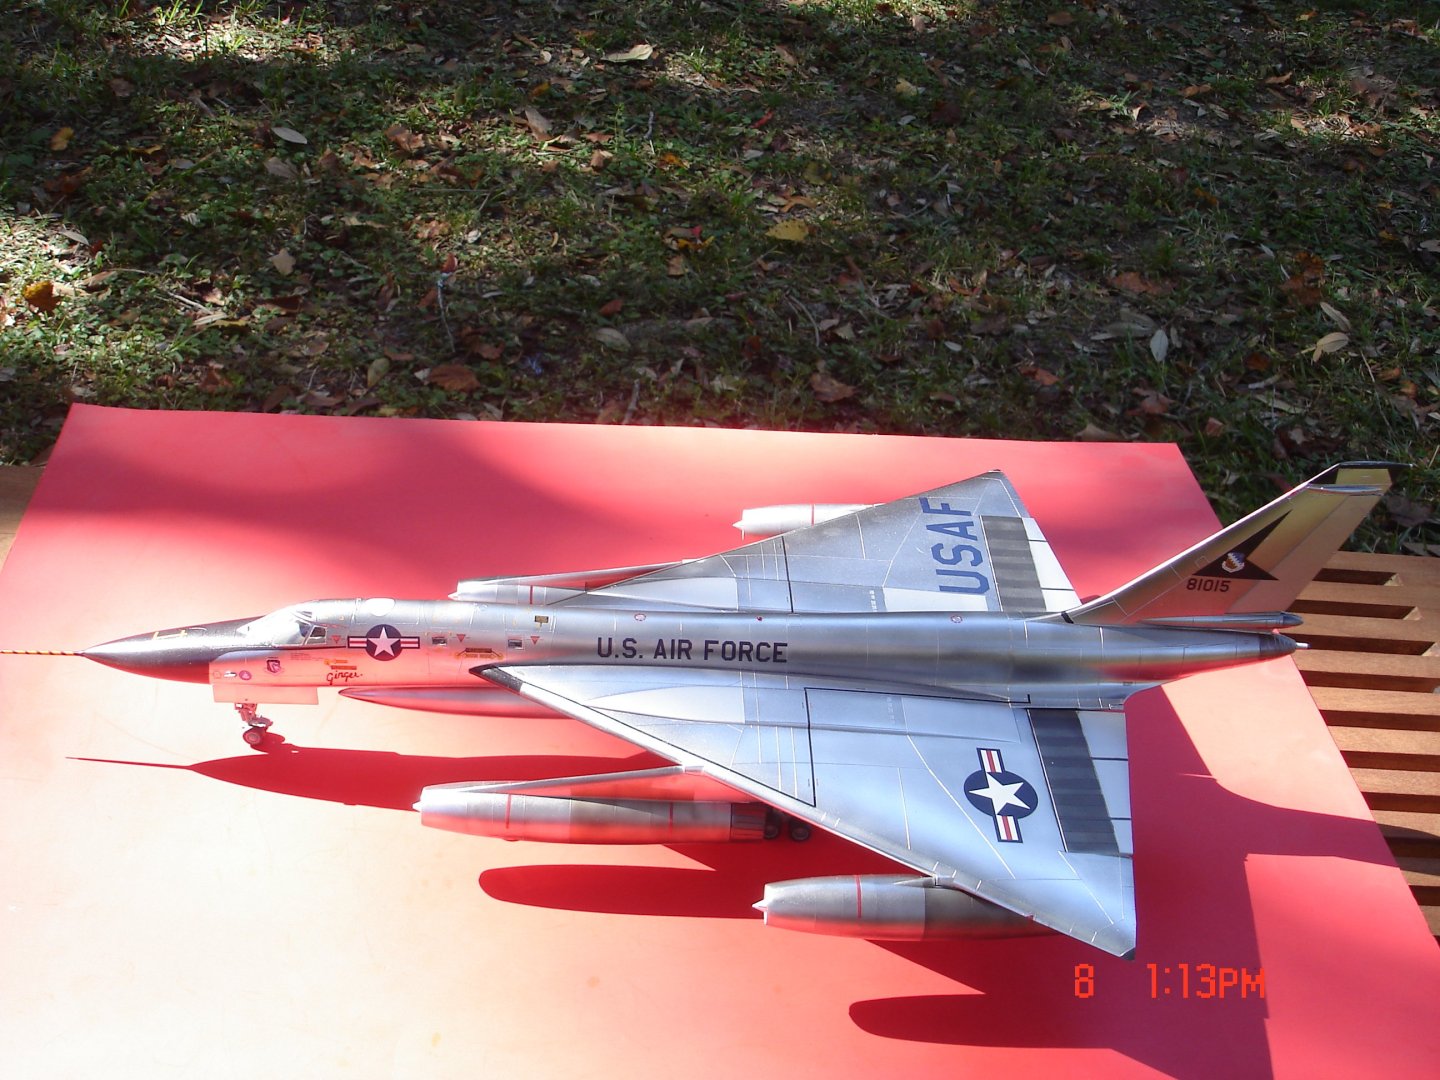
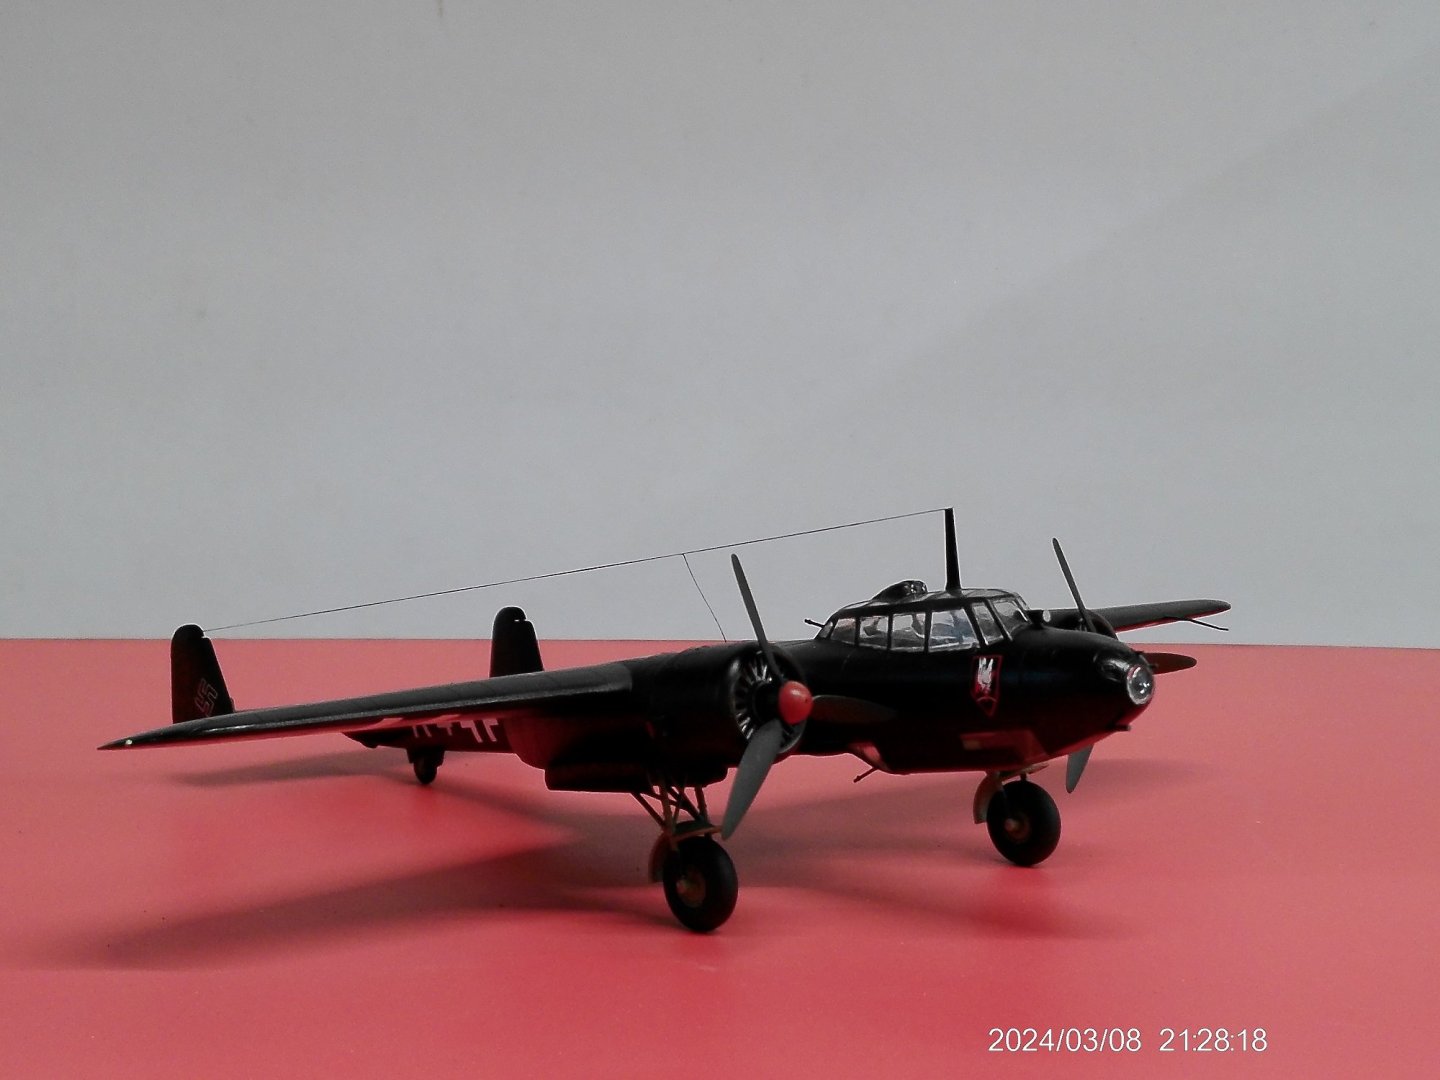
Dornier Do-17 Night Fighter by Javlin - Revell - 1/72 - PLASTIC
Javlin replied to Javlin's topic in Completed non-ship models
Thanks Dan that was the one part of the build that worked.I sprayed 1500 Mr.Surfacer and once dry smooth it out with a 800 grit scotch bright for auto use that was worn out so more like a 1000/1200 grit. -
That's me also Alan but some of the newer stuff is starting to grow on me I have another F-16 and F-18 SH both 1/48 in the stash.
-
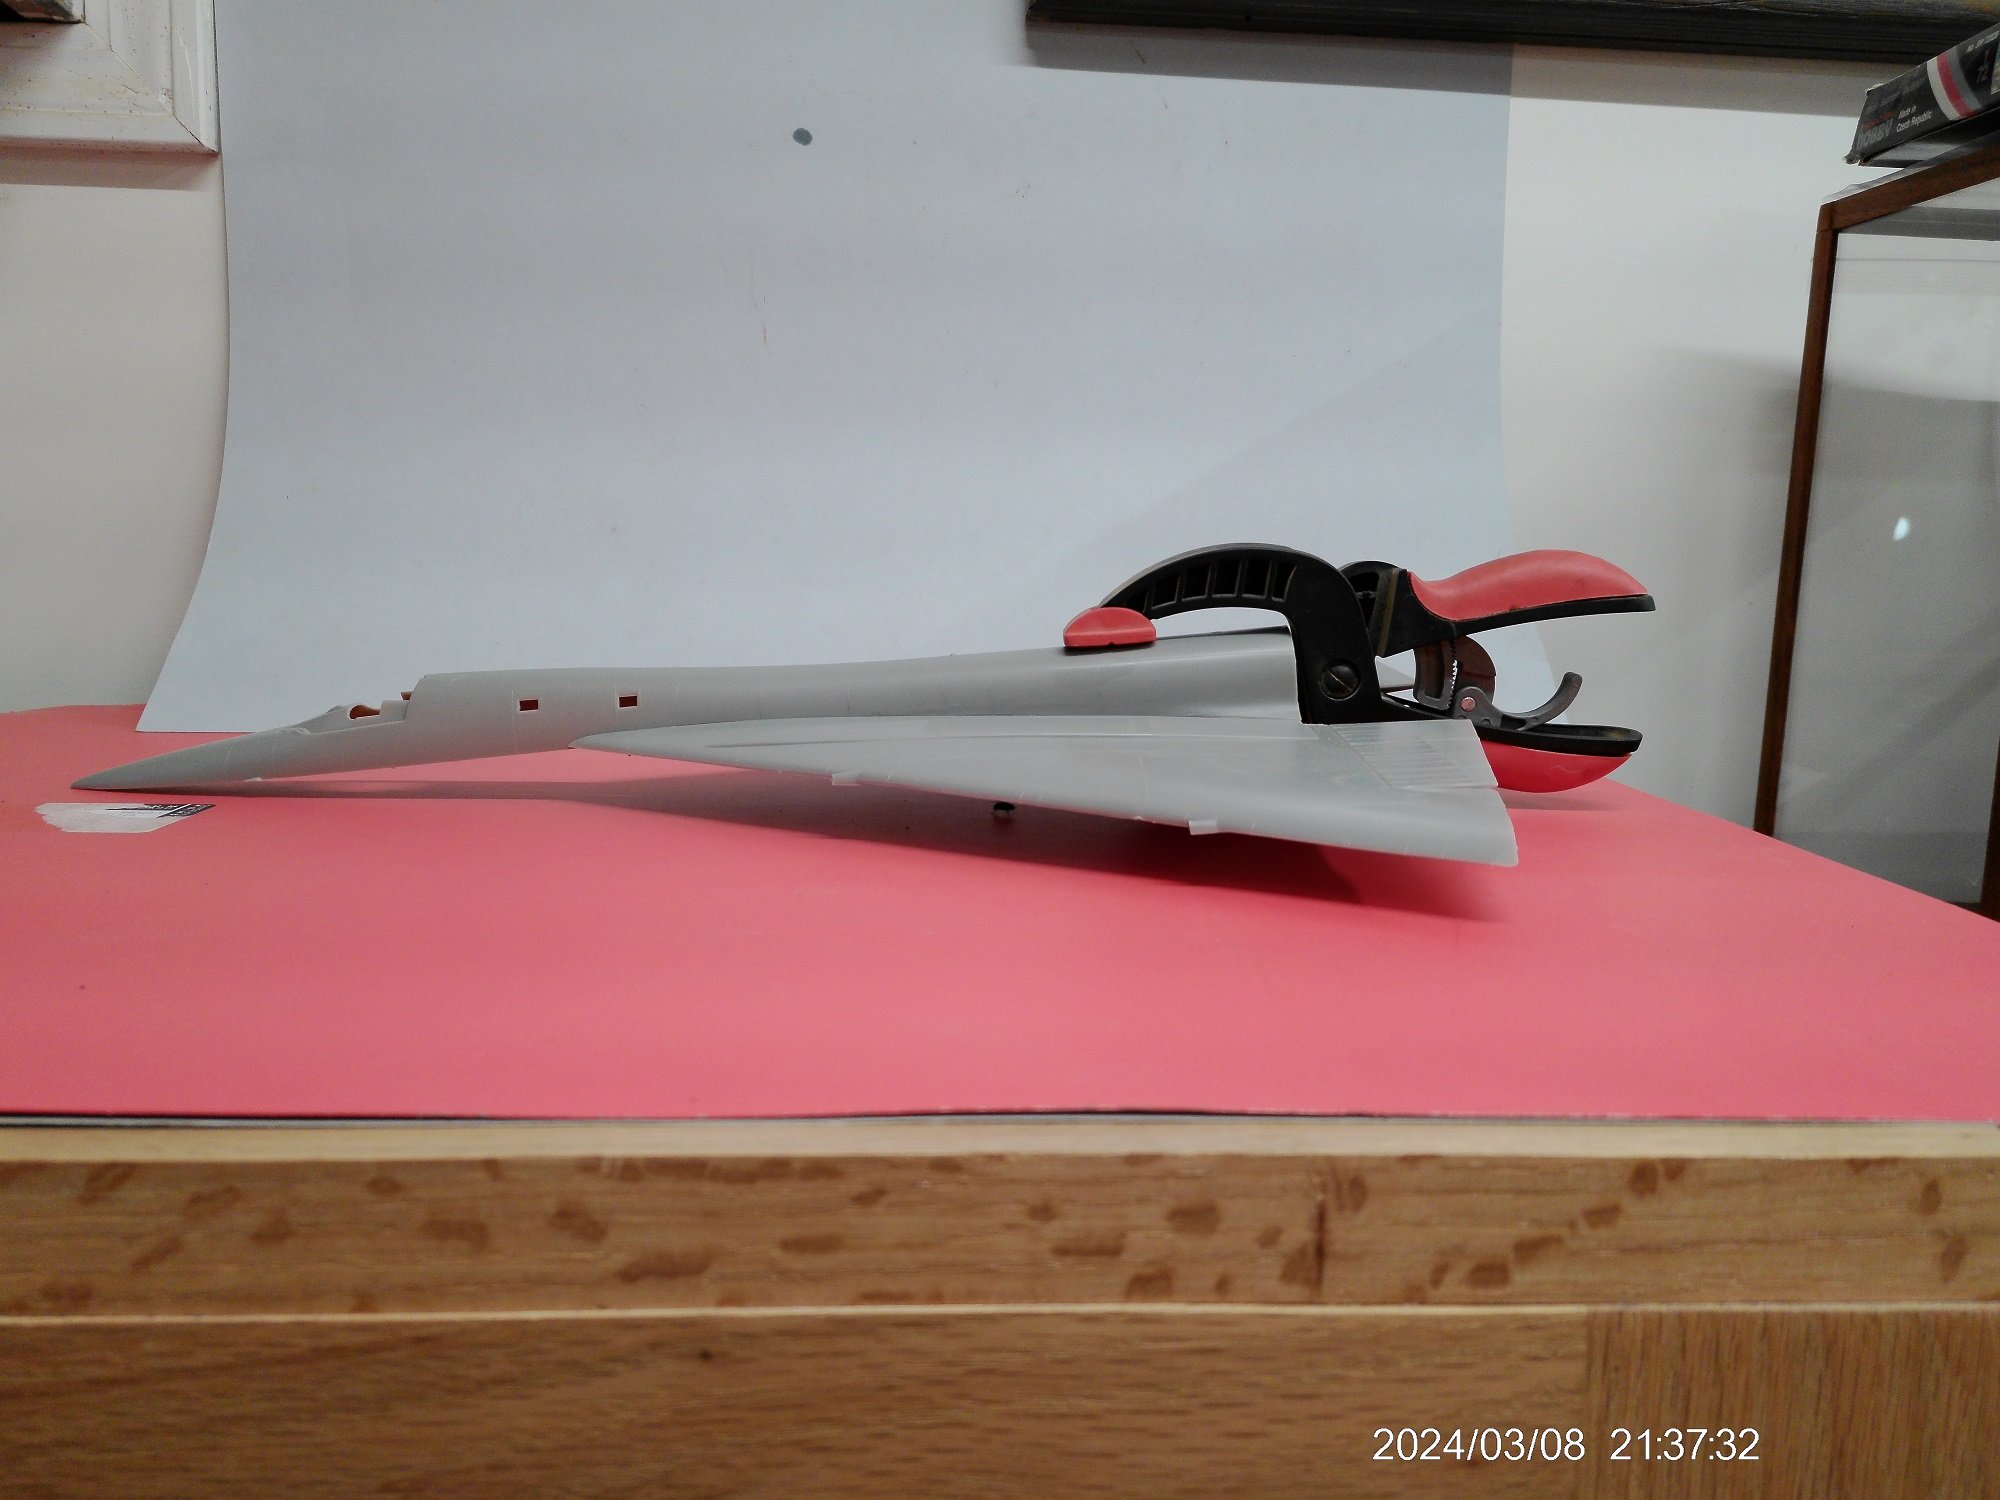
I have to take breaks from the ship at times and do a couple planes and dwindle down the inventory.I have long wanted to rebuild this kit from my youth but the molds show their age lots of seam clearing and a touch of flash.The copit is going to get the basics seeing how you cannot see much the main attention will be the a focus on the external paint and finish.I sanded the all the seams on the front LG and afterward treated to a swath Tamyia thinner to smooth it out a bit more.I actually wanted to do her wheels up and hang her but the kit parts do not look like they will be of use in that regard...I will keep pondering though.


- 34 replies
-
- 11
-
-
Just or was suppose to be a quick build (2weeks) went together quite well.The canopy and the L/tailplane were my blunders not the kit.I would give myself a grade of C+/B- on this one.🤨


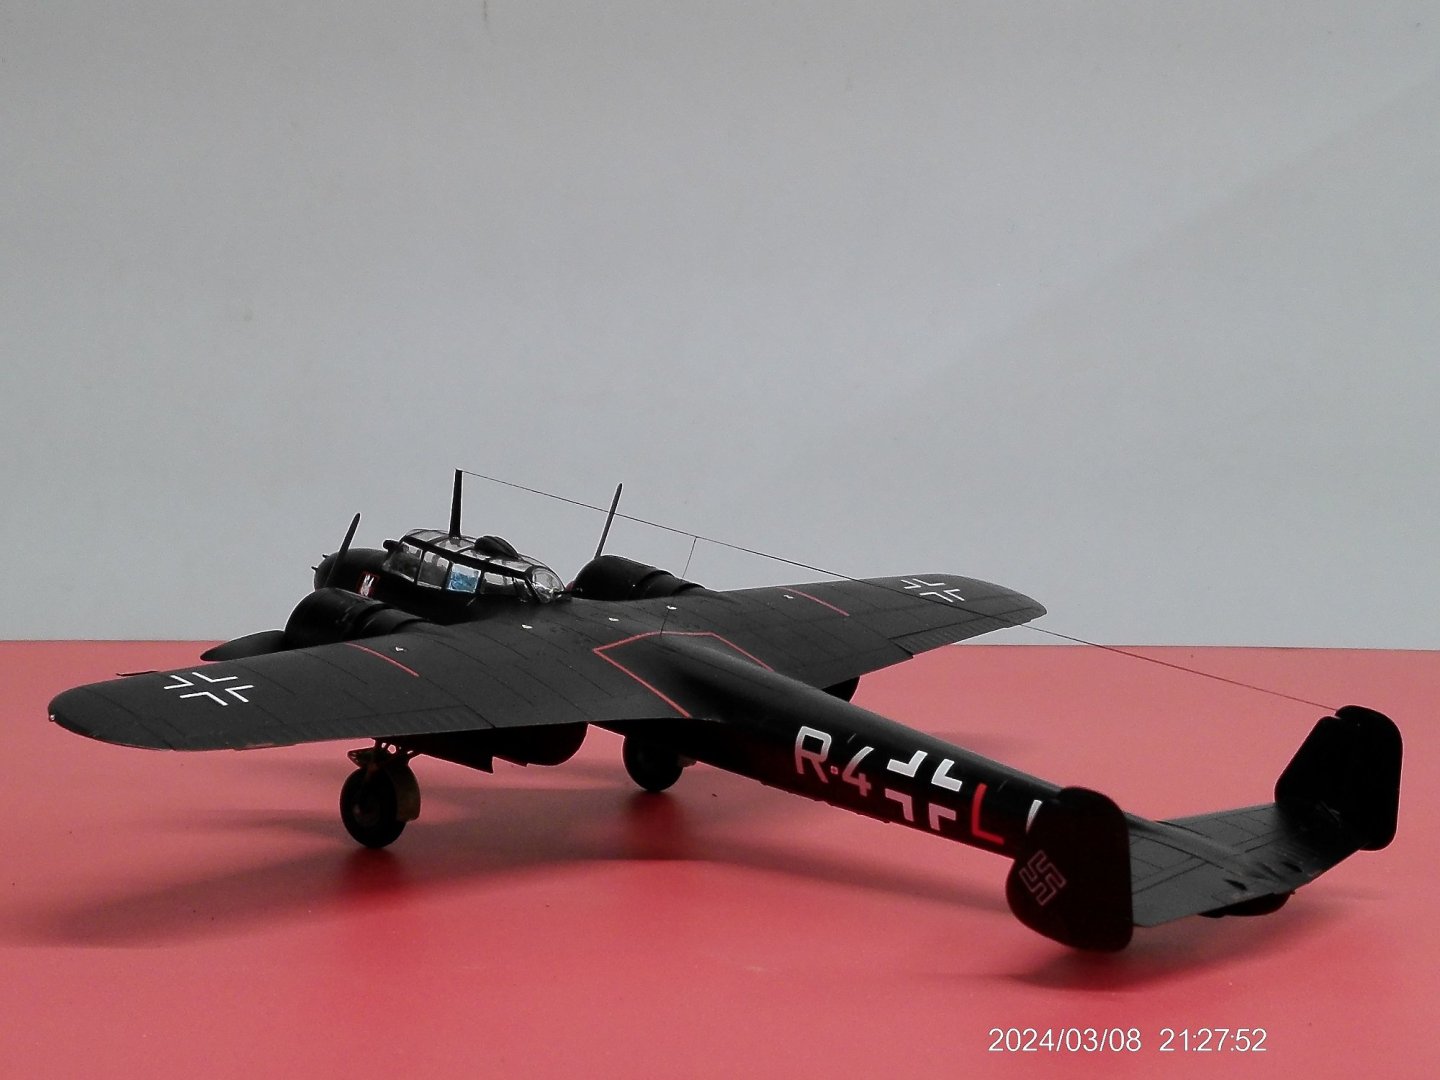
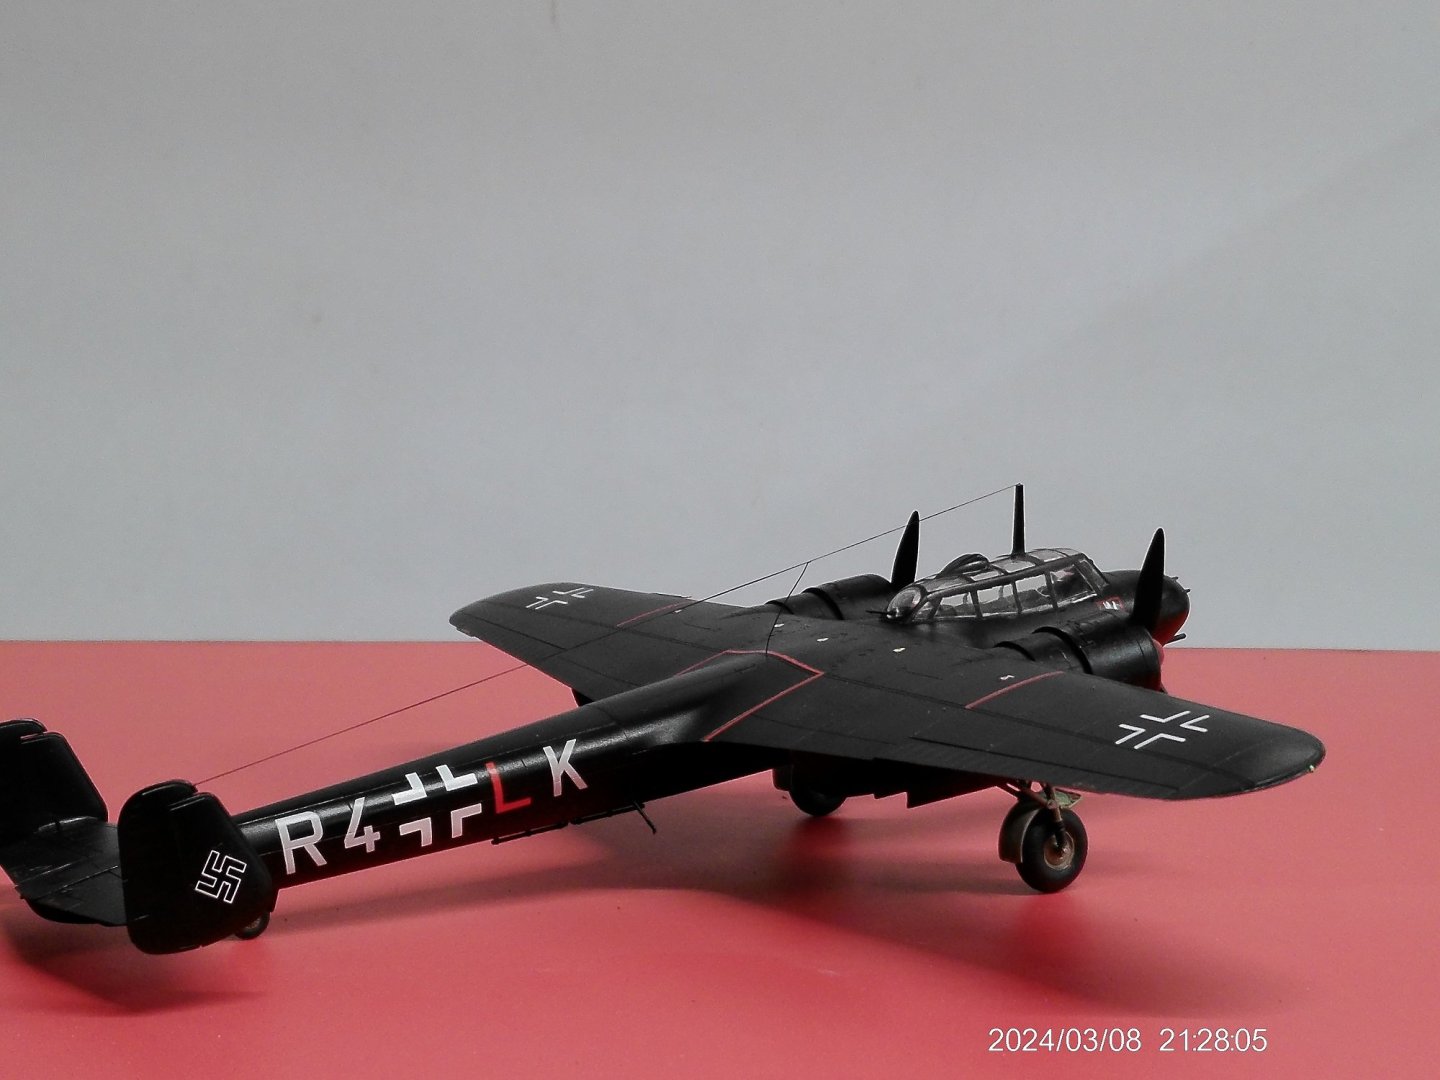
-
Some very Nice work there Dan going to look cool once the other green hits the airframe/wheel hubs.