HOLIDAY DONATION DRIVE - SUPPORT MSW - DO YOUR PART TO KEEP THIS GREAT FORUM GOING! (Only 51 donations so far out of 49,000 members - C'mon guys!)
×


jablackwell
-
Posts
304 -
Joined
-
Last visited
Content Type
Profiles
Forums
Gallery
Events
Everything posted by jablackwell
-
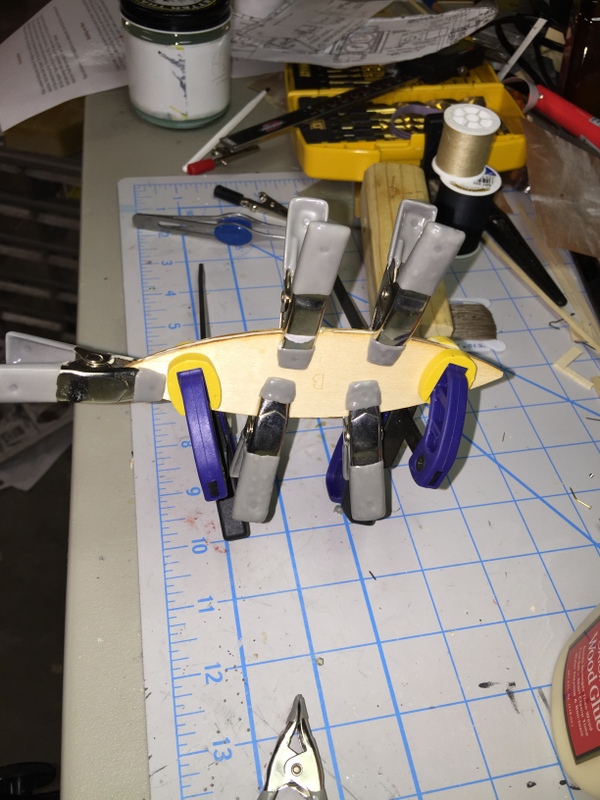
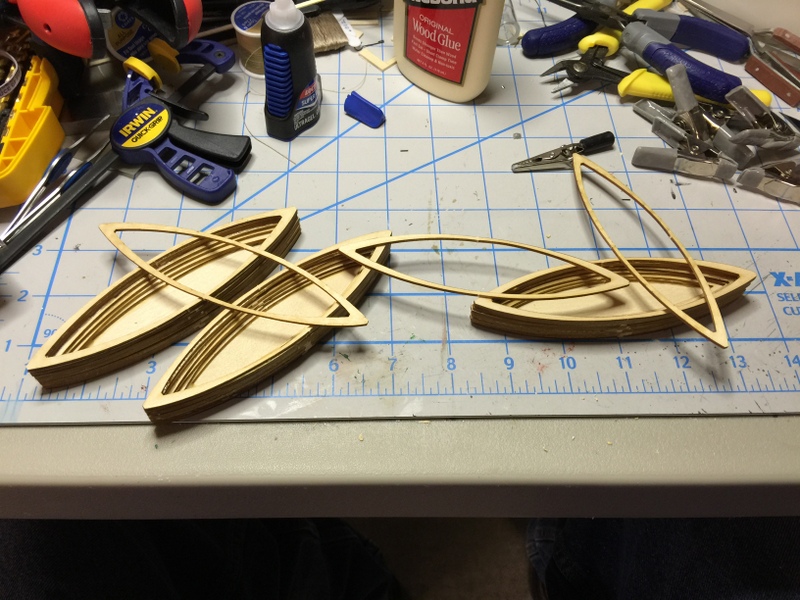
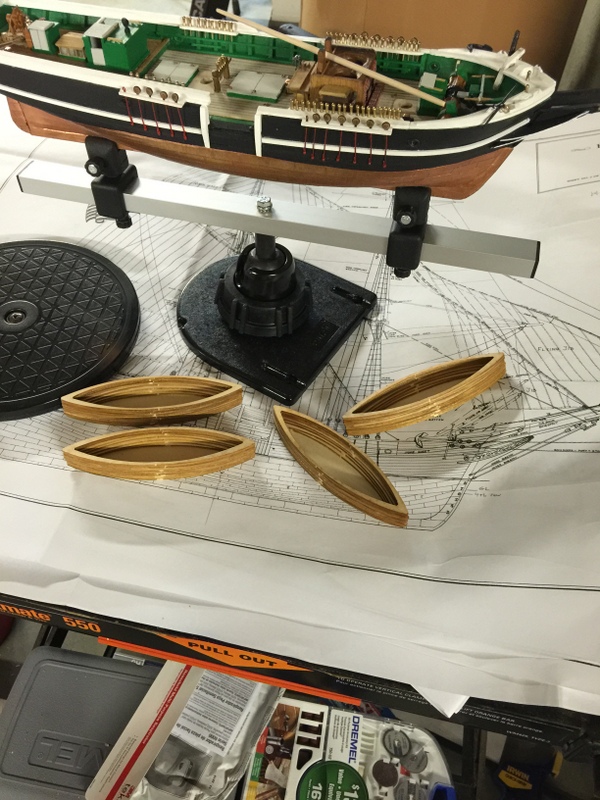
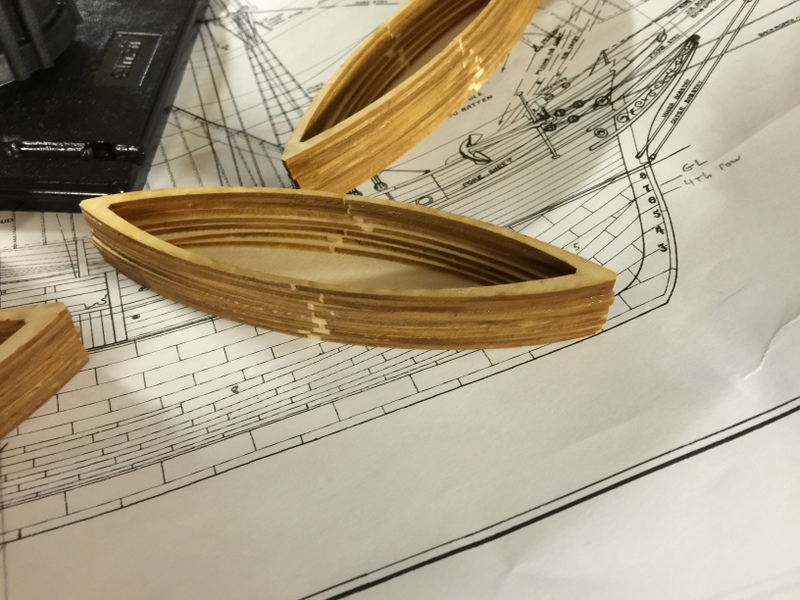
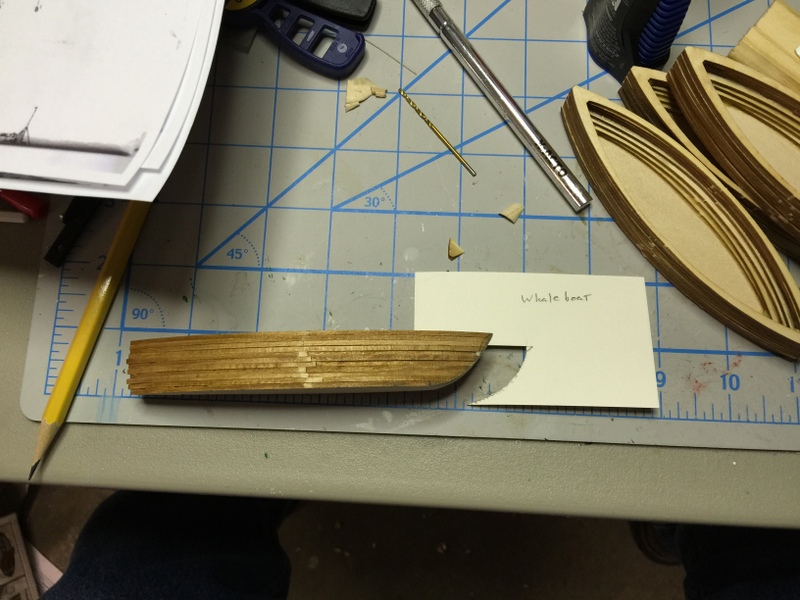
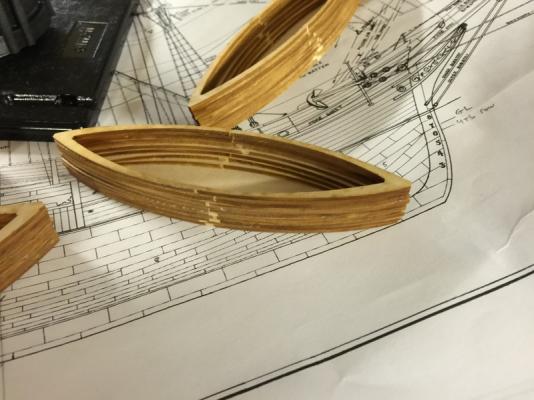
 Now started work on the whaleboats...four smaller and fine-detailed models in their own right. This method is to use small wooden flats, called lifts, that build the boats from keel level up. They then get carved and sanded out in the following order: Bow, Stern, and sheer (all outside) first. Then the interior is brought to shape followed by completing the exterior outboard sides. They get really thin.... 1/16" to 1/32" so no messing around with a Dremel for me (I have shaky hands with that thing). I'm going to carve closely, then hand sand or use a small electric mini sander to get into tight spaces.


-
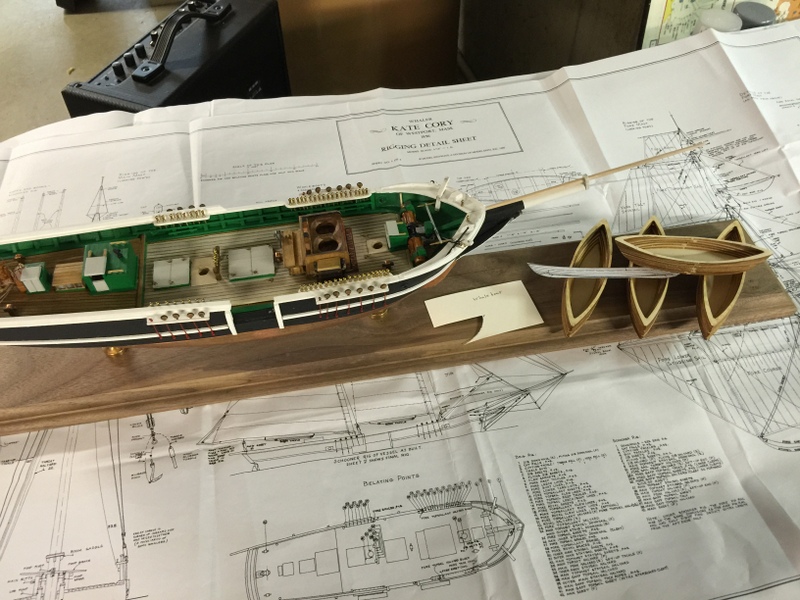
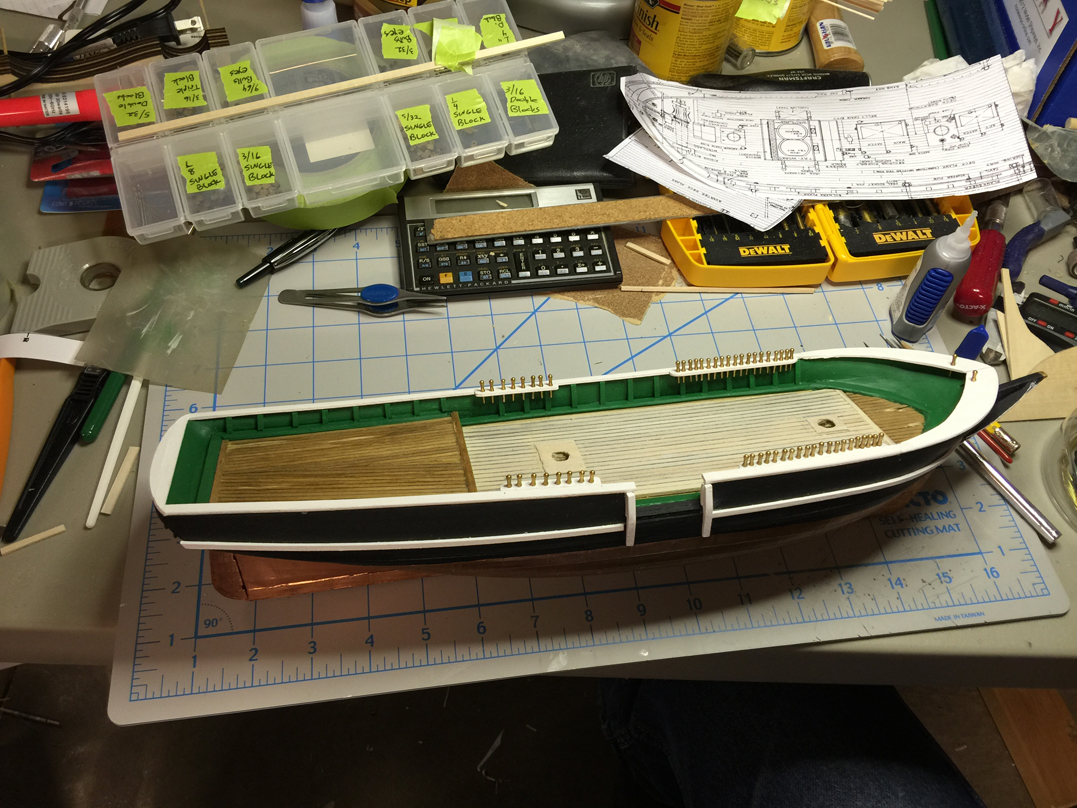
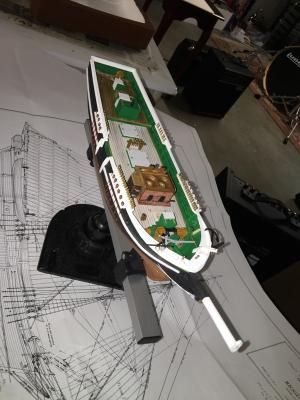
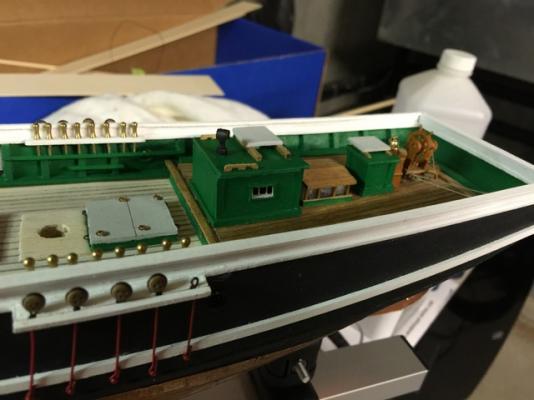
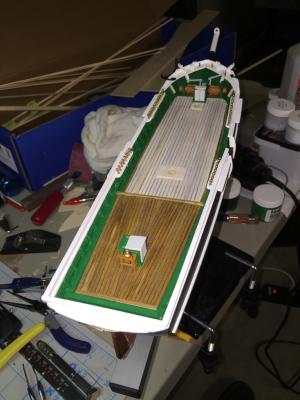
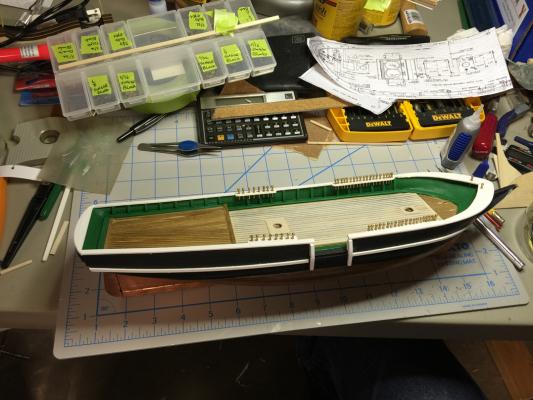
Now ten months into the build, and I can say that the hull details are complete for now. I can begin work on the whaleboats, masts, spars, rigging.... oh my. So much more to do ;-) I love it.

- 159 replies
-
- 10
-

-
Thanks everybody. The try works was a lot of fun to build. Slow going, but lovely turnout. Joe - the Kate Cory that they are about to release (again) is a solid hull version again and not POB yet. Some day! It would be a really excellent model for that. I am now finishing up the deck details. Not too much longer before I head into masts, yards, and rigging. Still to complete first (there is light at the tunnel's end ;-) - Chain links - Cooling tank - Try works knees - Chicken coop / work bench details - Fore sheave holes (I keep forgetting to do those!) - Pump assembly (might wait until the mast is done) I also have to really start thinking about the whale boats. They're going to be a challenge. The kit provides lifts to glue up in layers. This then requires a lot of milling, sanding, etc to thin the walls out. I am worried that I'll just grind them away and make big holes ;-) Not good. Any ideas on how to work this would be awesome. In the meantime, I can get out there and research whale boats and get some internal detail thoughts flowing in my mind. ~john
-
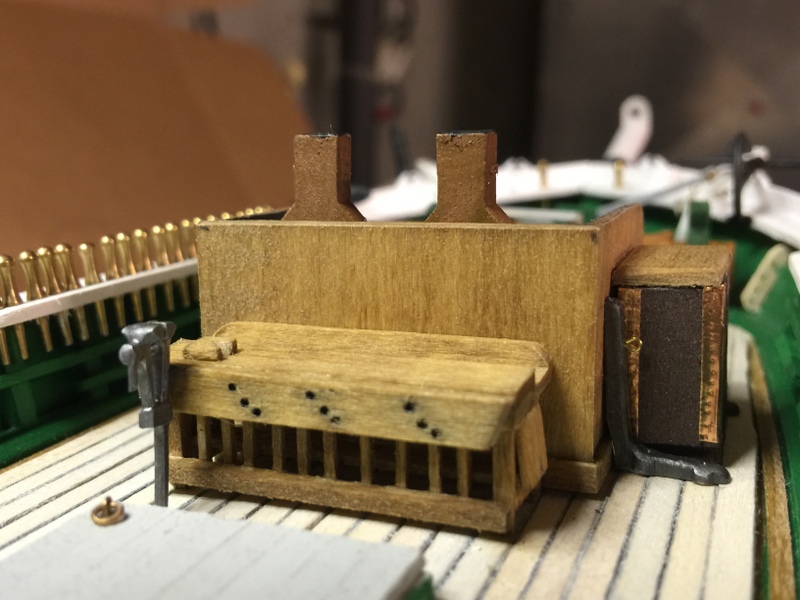
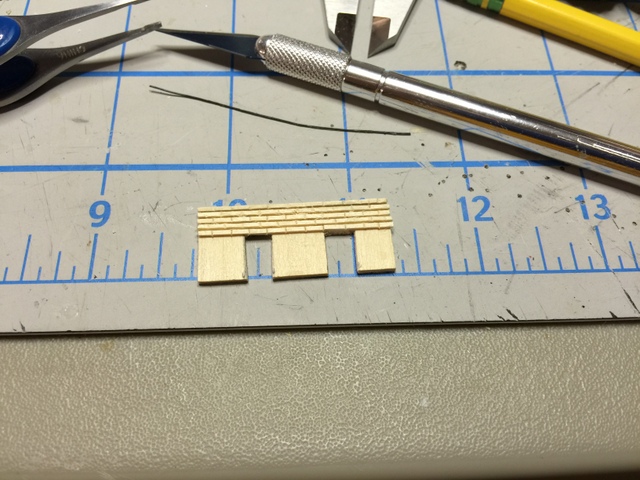
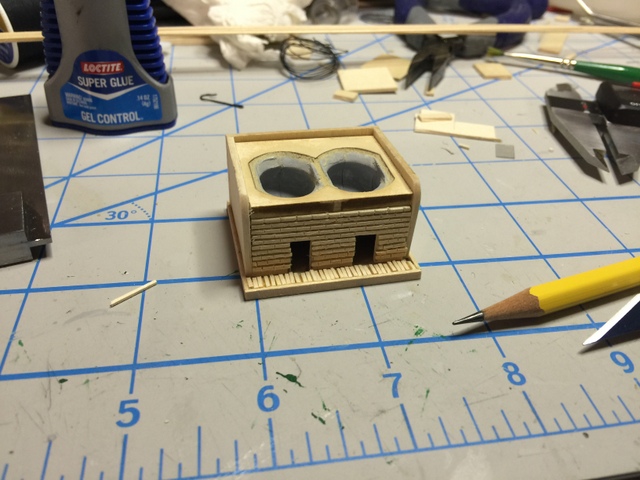
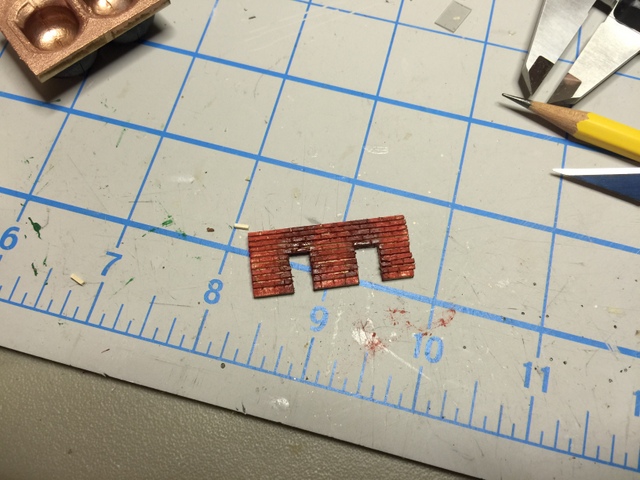
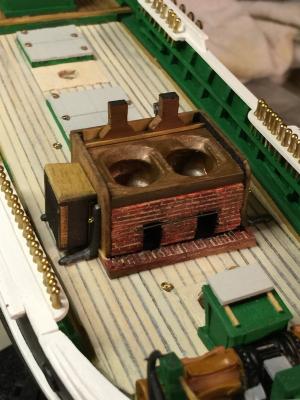
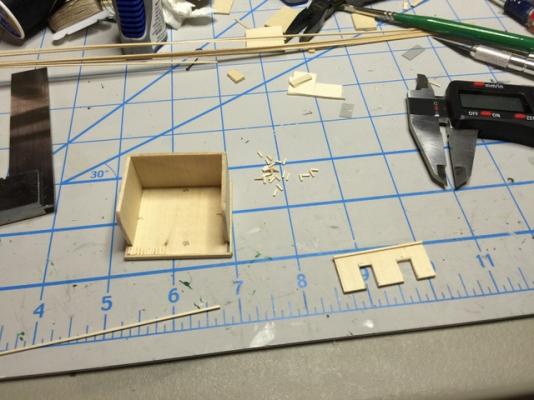
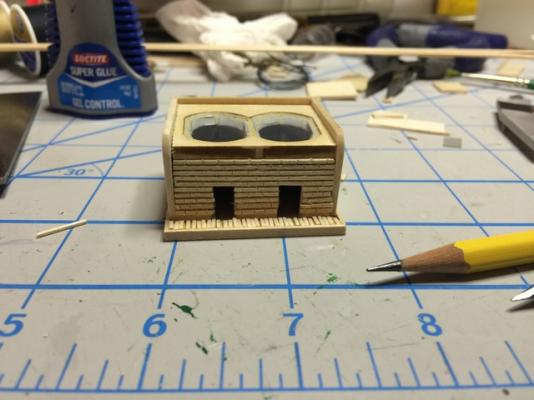
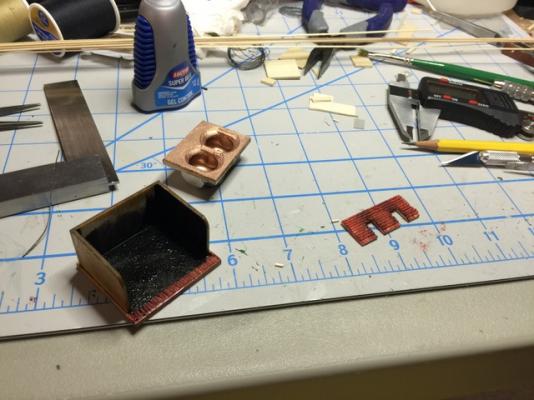
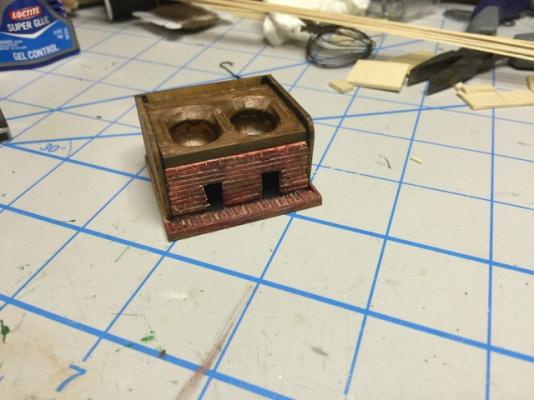
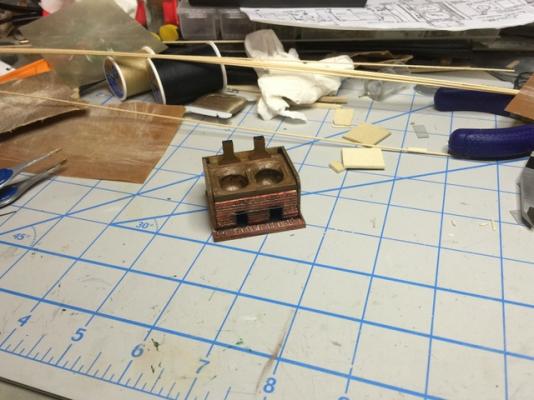
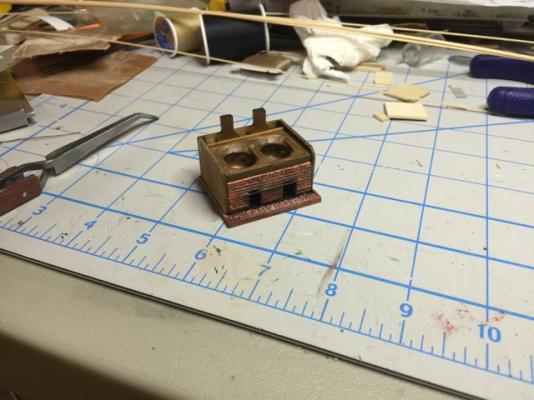
Spent this last week on the try works. I was really stuck on the brick facing. I figured I could just use some HO or N scale brick wall, but nope - wrong look and feel. Wrong scale. I decided to make bricks with 1/32" square pieces. Slow going, but a really nice turn out. Here's the construction series below, ~john


- 159 replies
-
- 14
-
-
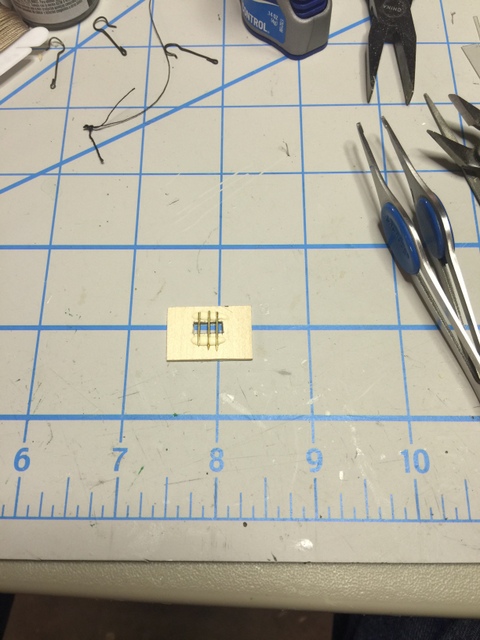
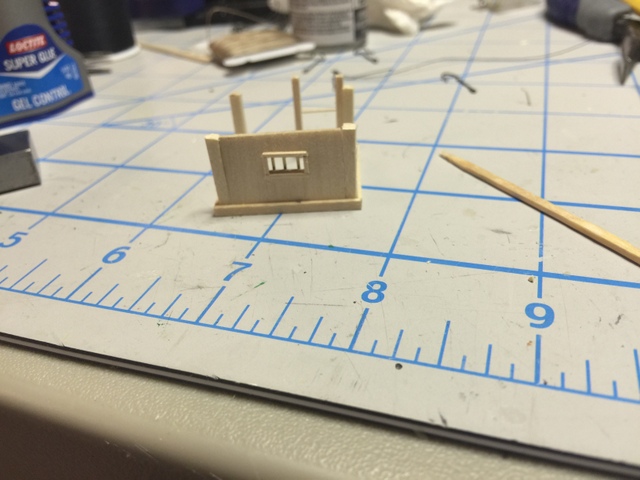
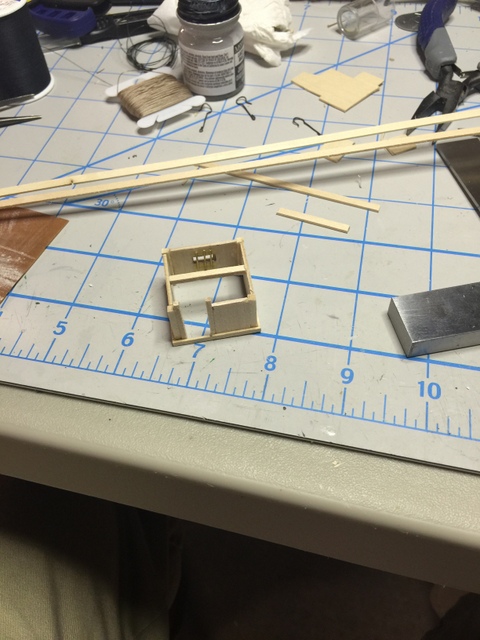
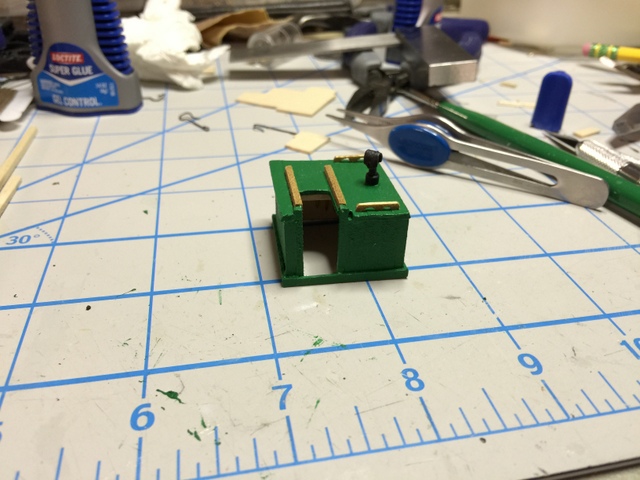
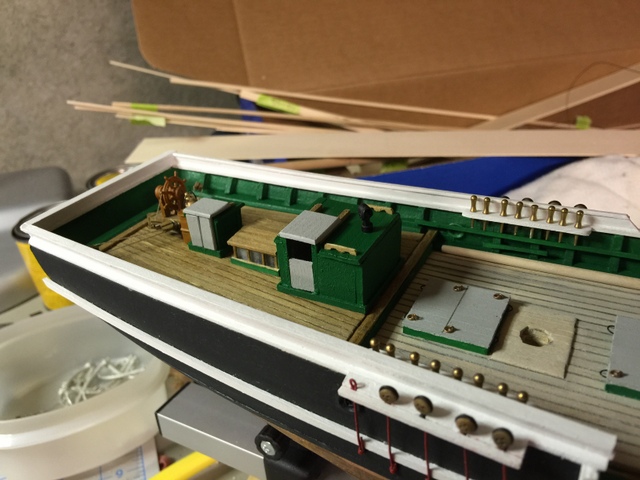
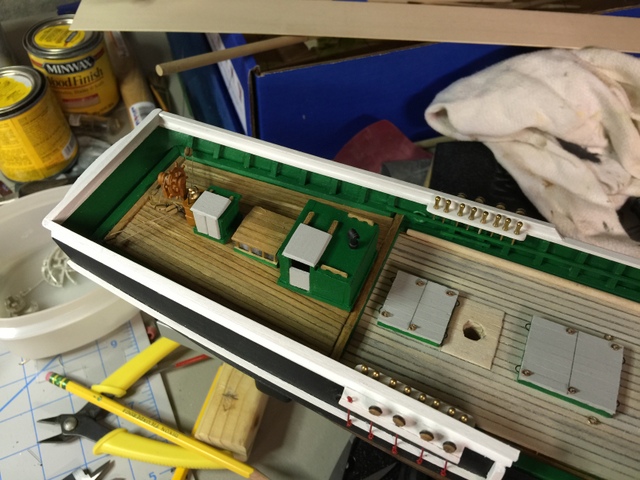
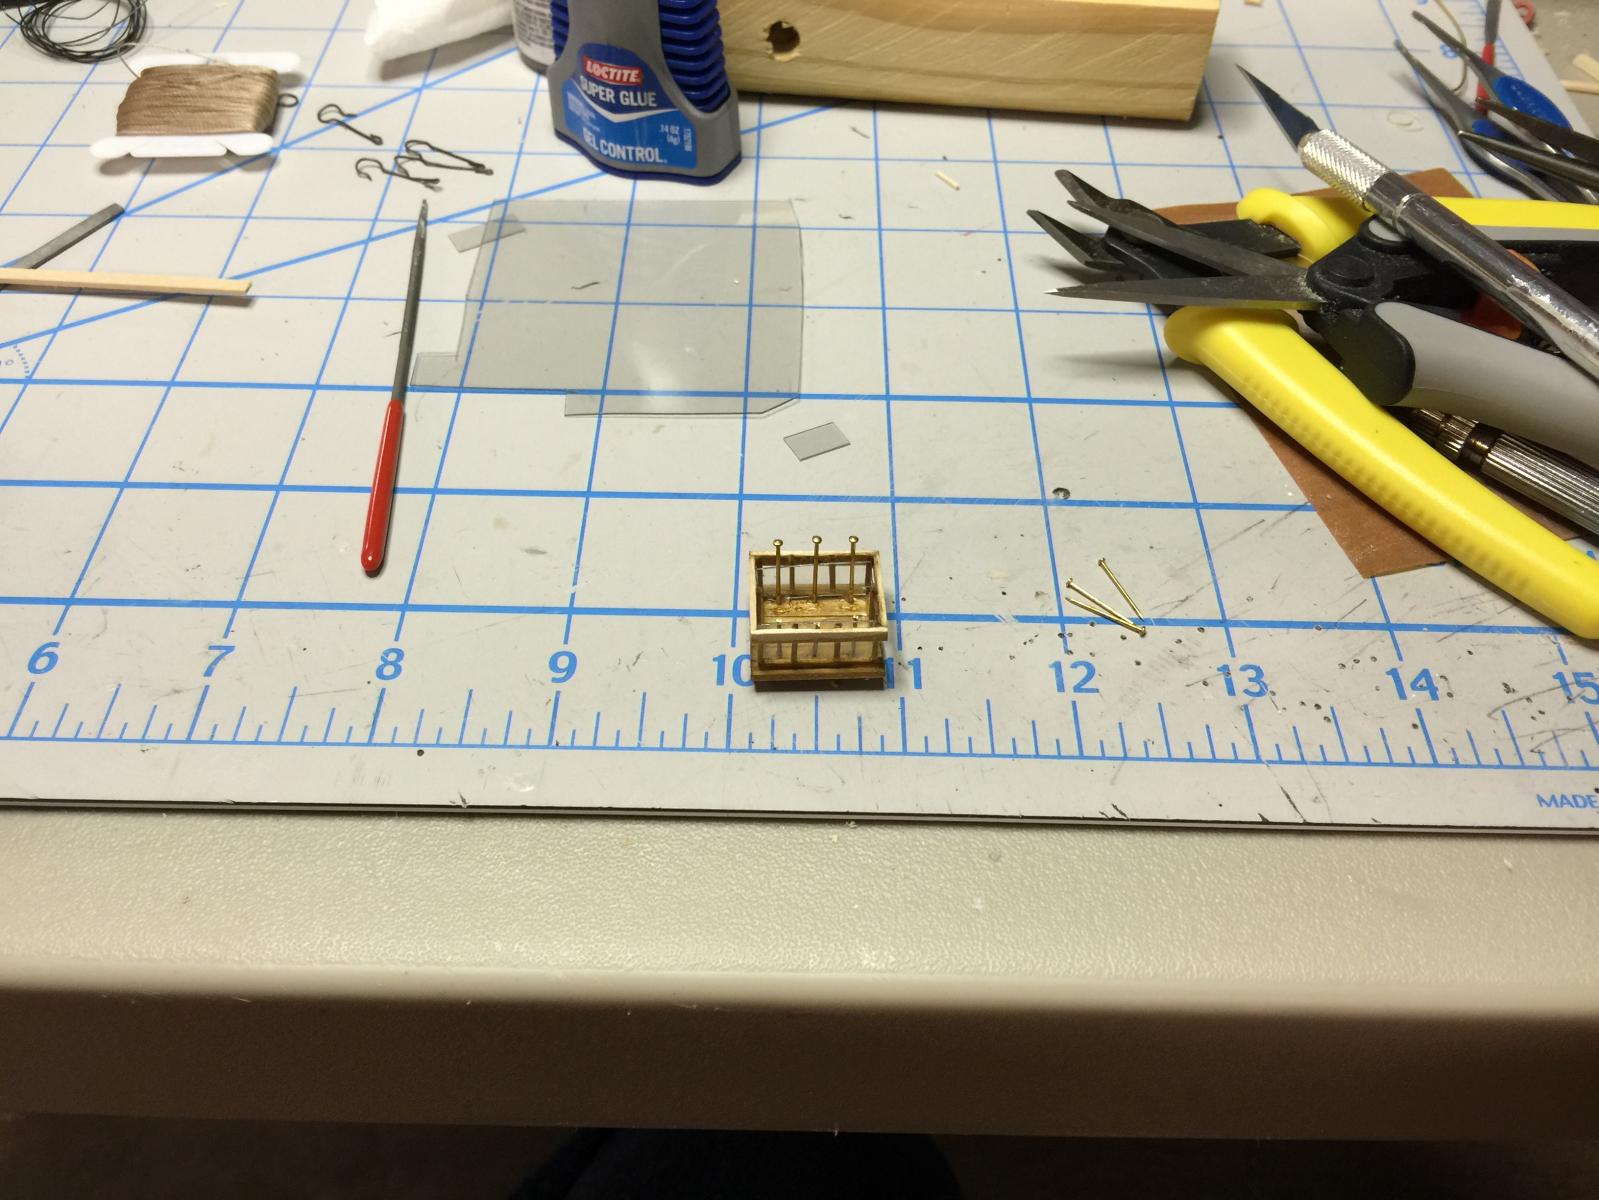
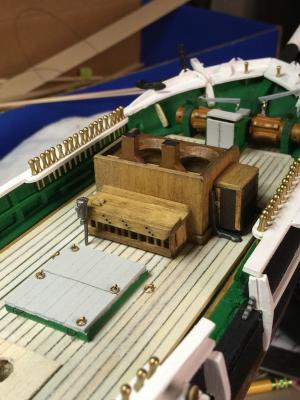
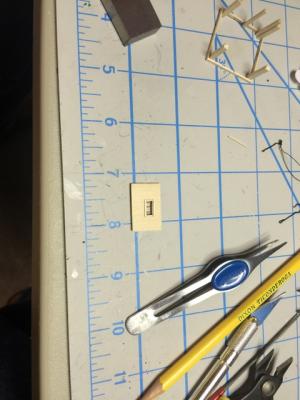
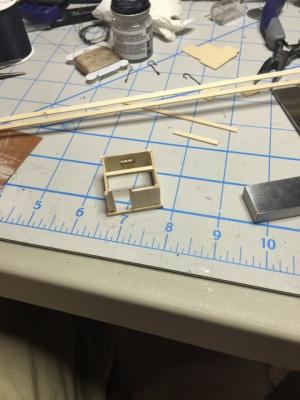
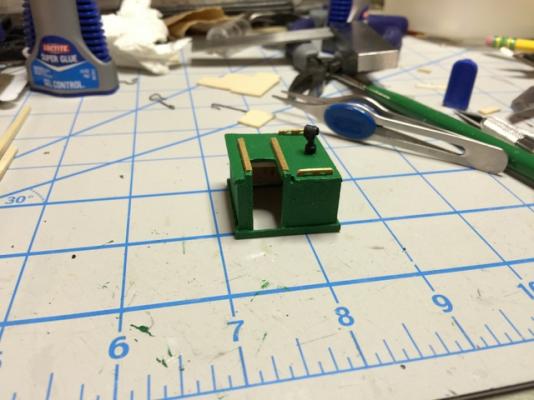
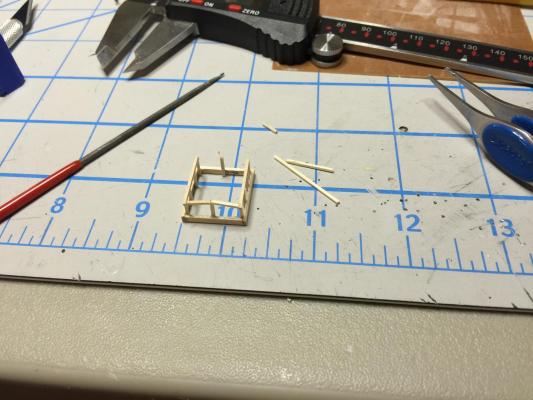
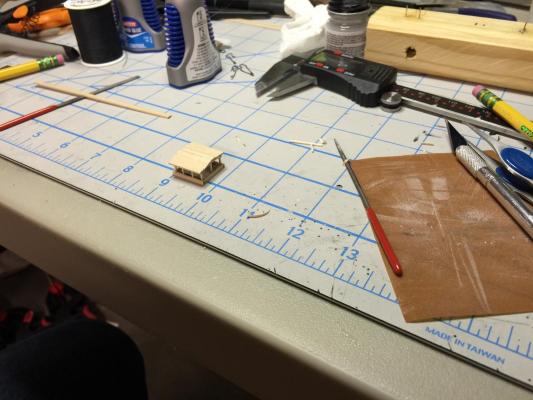
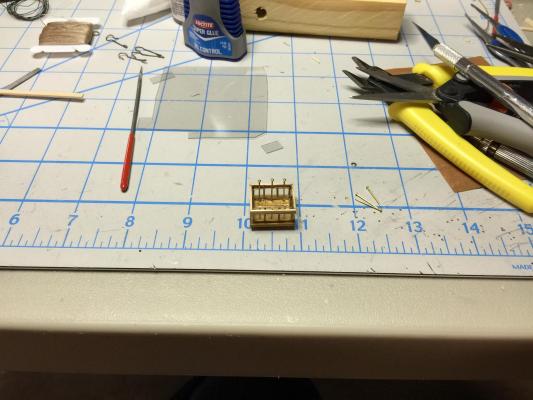
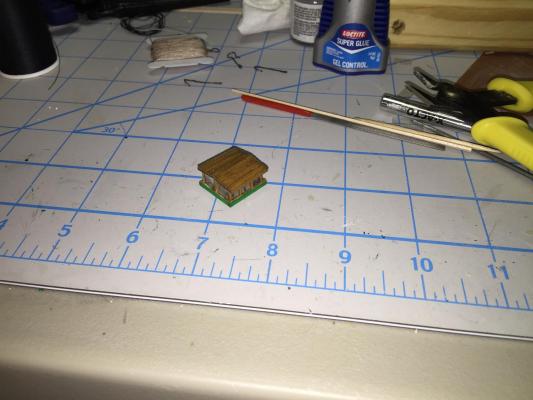
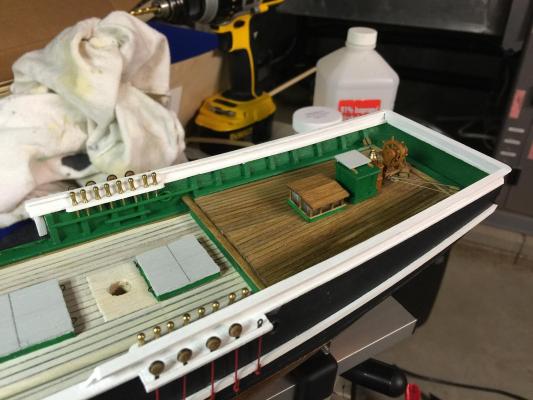
This last week I spent on the galley, the last piece of the quarter deck structures. I didn't have a vertical to look at for fore and aft, but did have a starboard view. First work on the framing: Then on the port side wall with small grated window. I used pins for the bars. Walls then went in place along with an interior brace. Some paint, handrails and chimney.... Then lastly the hatches. I decided to leave the top slide-out hatch away to give a neat looking piece of detail.


-
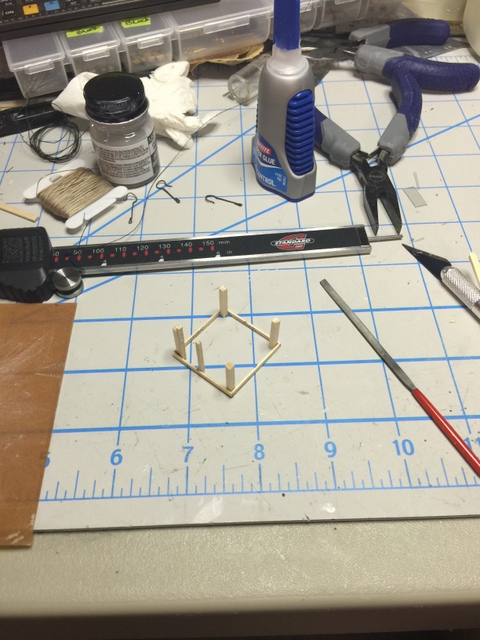
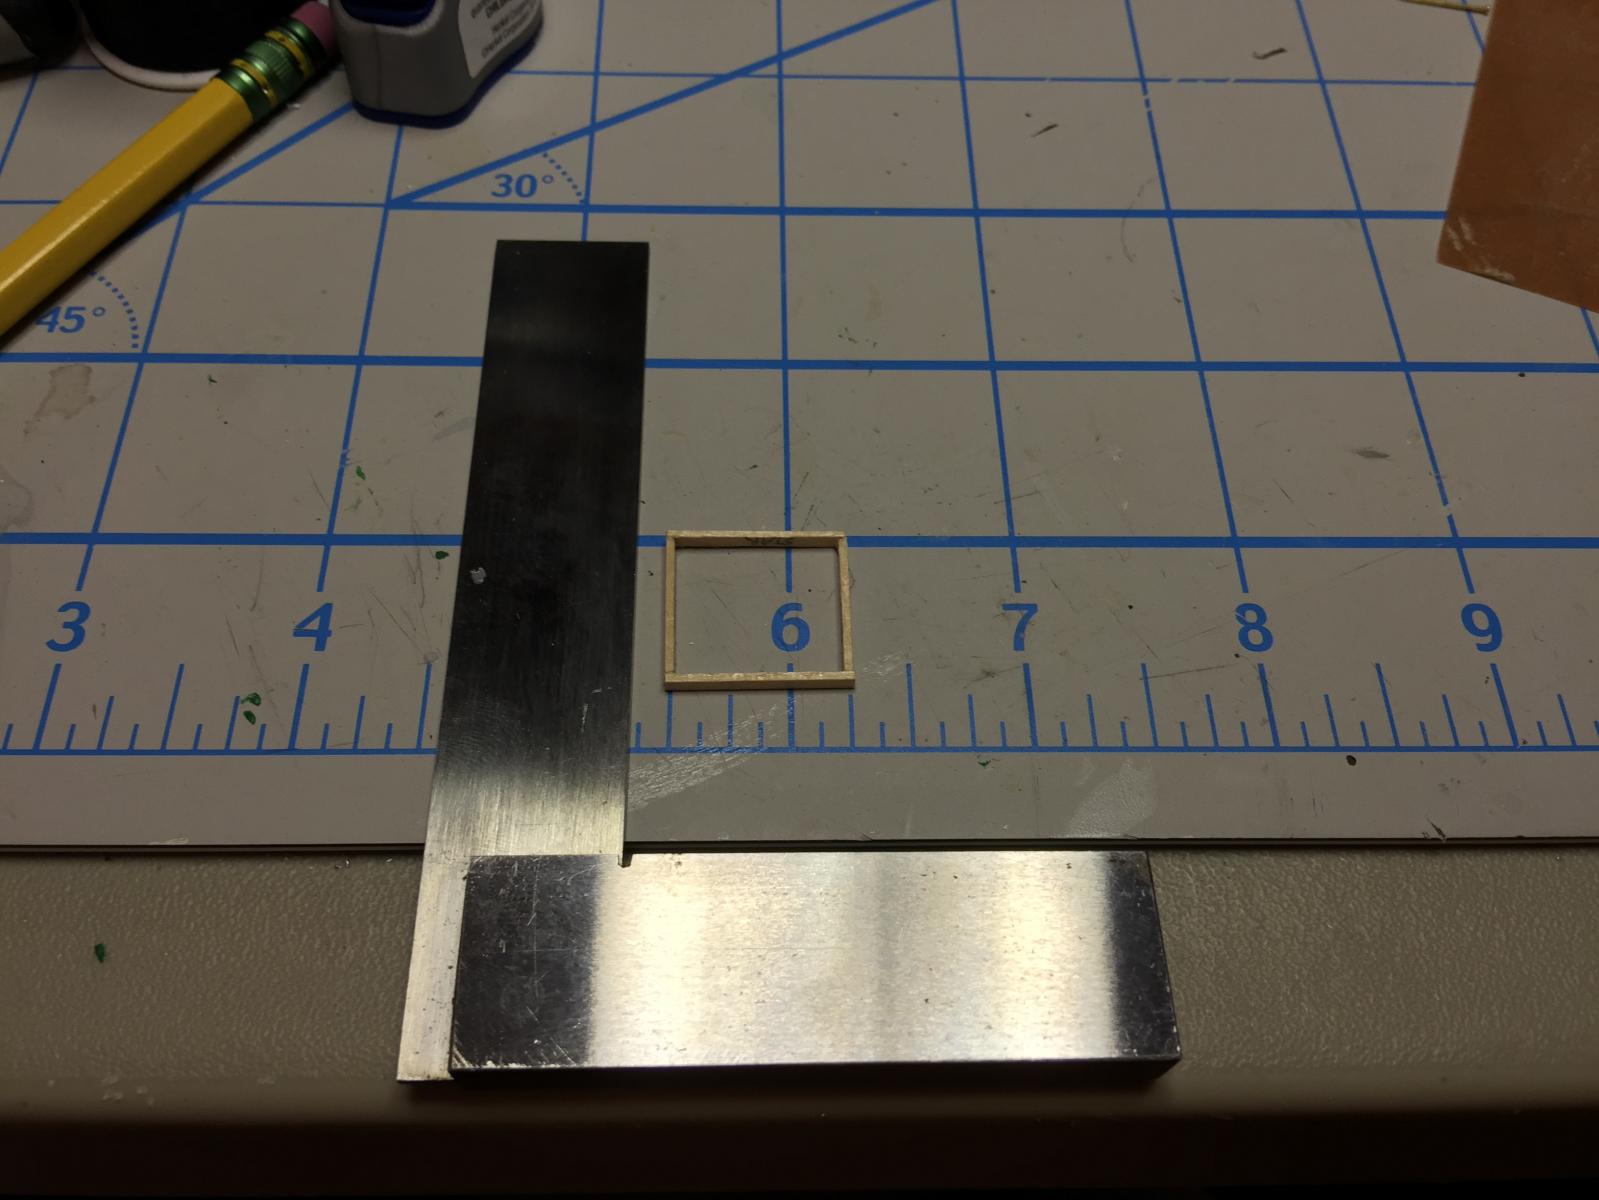
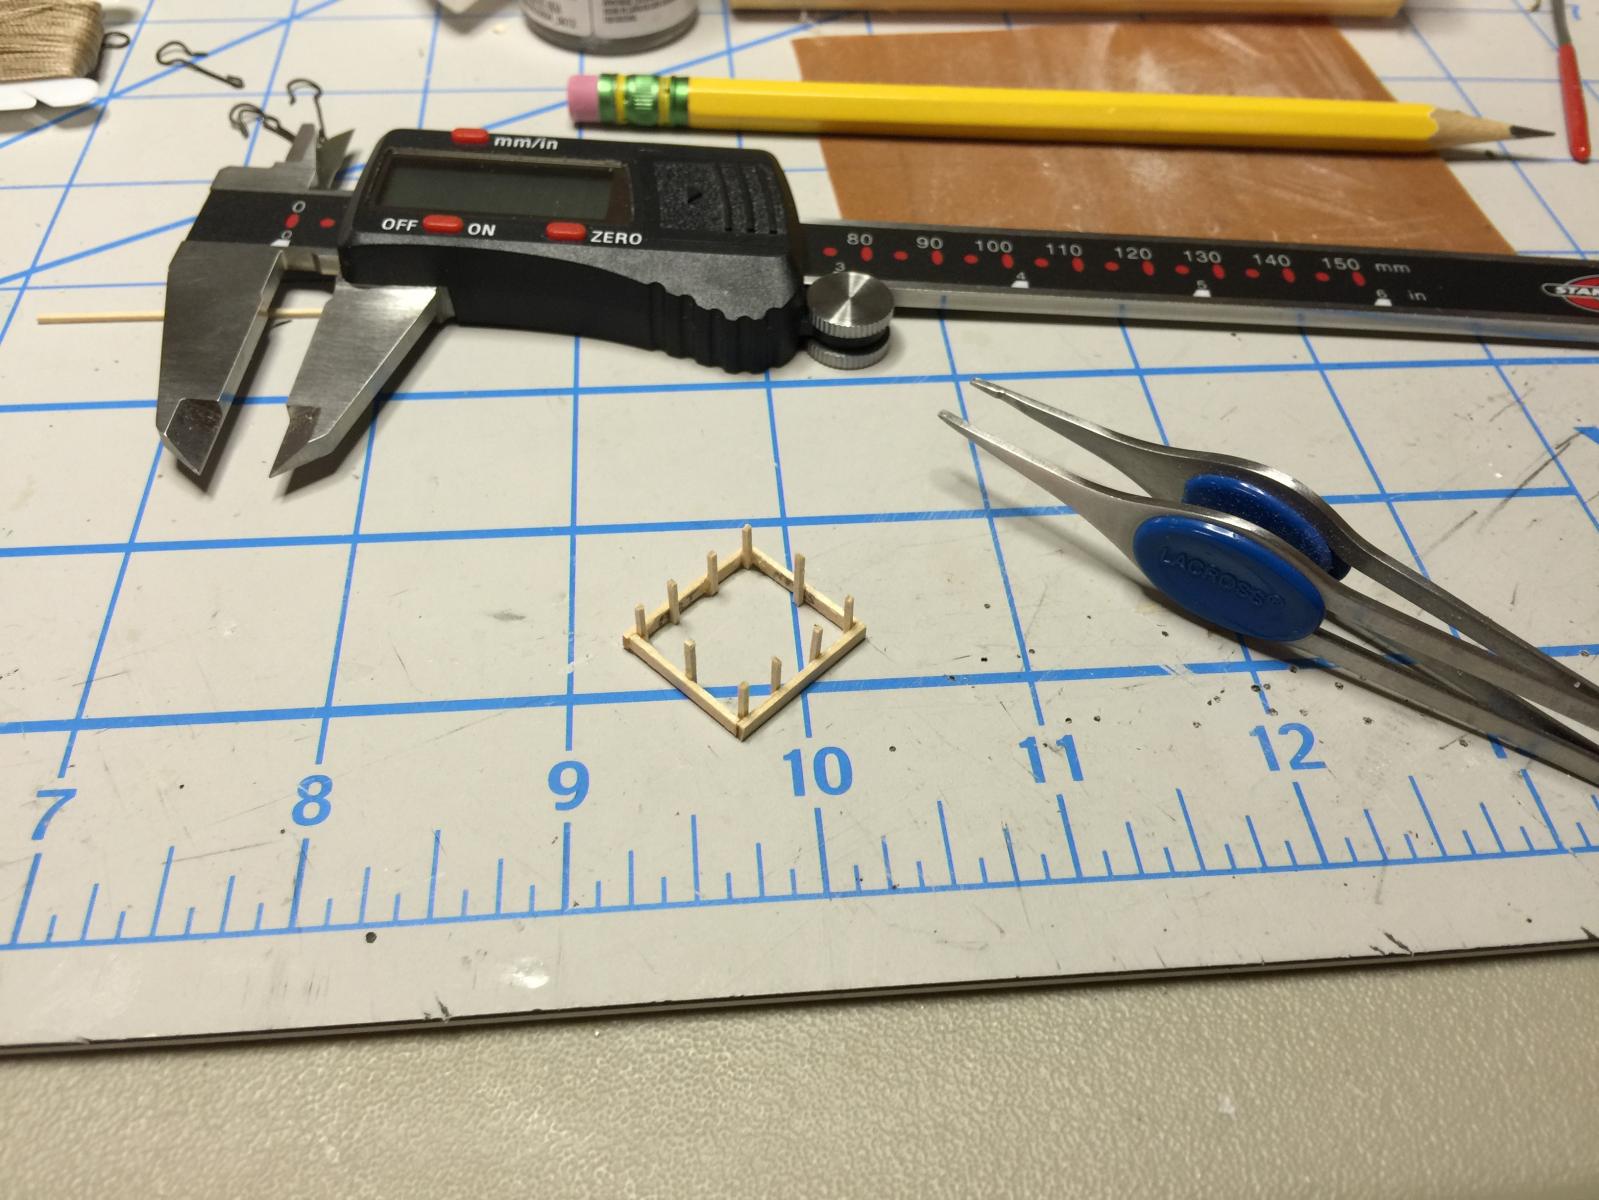
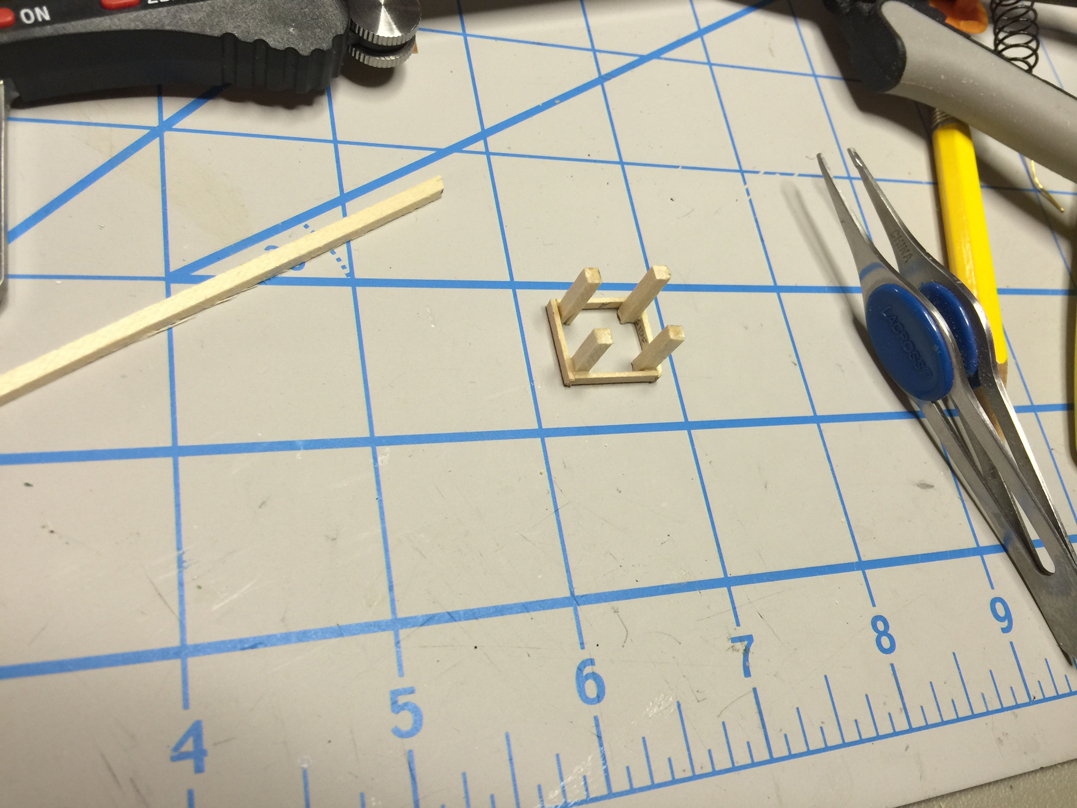
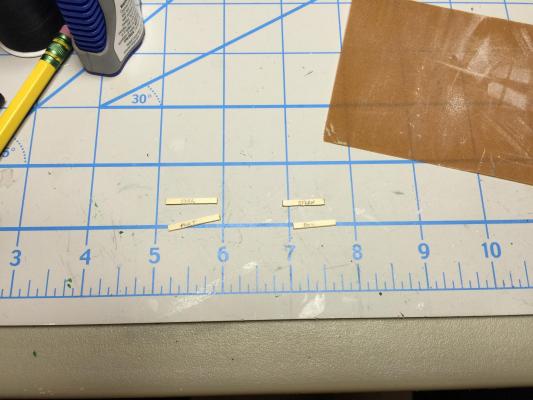
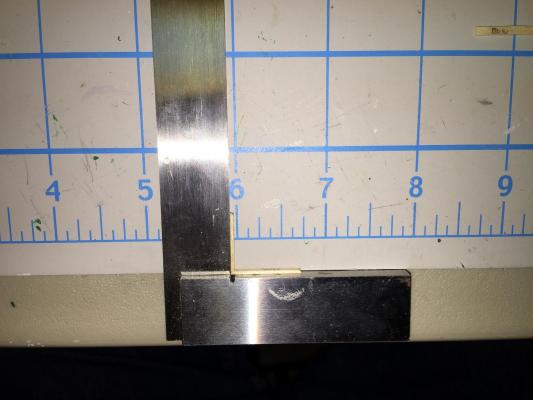
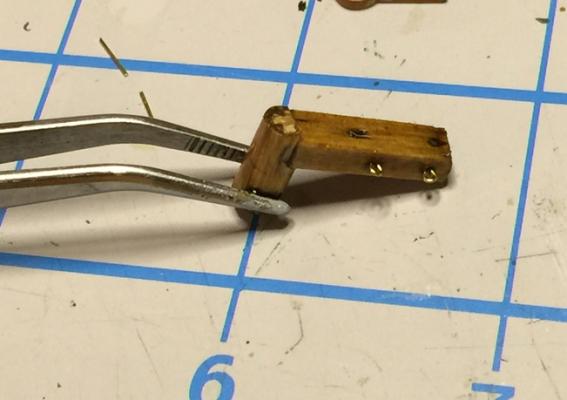
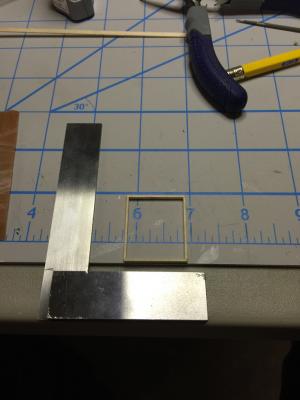
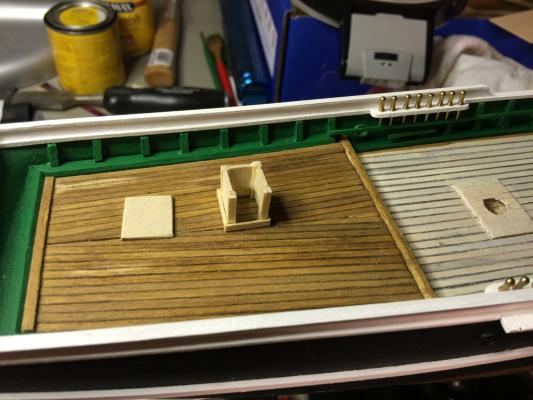
All about that skylight I spent the better part of yesterday working on two crucial items around the house (;-) the skylight for the Kate Cory and reinstalling a PC from scratch. I enjoyed the skylight a whole lot more, obviously! Here's the process in pics: Parts were pre-labeled for the base. Built the base for the structure using my trusted mini-square. I added verticals for the main wood frame next as the support for the roof frame. Then installed the roof frame: this was a tricky bit here. I used 10 second gel cyanoacrylate. I cut and placed the roof planks next. The two that join in the top center had their edges mitered to join properly as the roof was slanted/curved a hair. I used standard slow-acting wood glue here to allow adjustments before things set. Once set the whole thing needed sanding (not seen here) to get the edges perfectly straight and flush. I stained the top structure first, as this would be difficult with the "glass" pains in place. The windows have glass and then vertical brass bars. I used pins for the bars which I stuck in place and snipped flush. The glass was some flat stiff clear plastic I had from a berry-punnet. Painted the coaming green, and placed onto the decking after some mild sanding of the base. Looks pretty good.


-
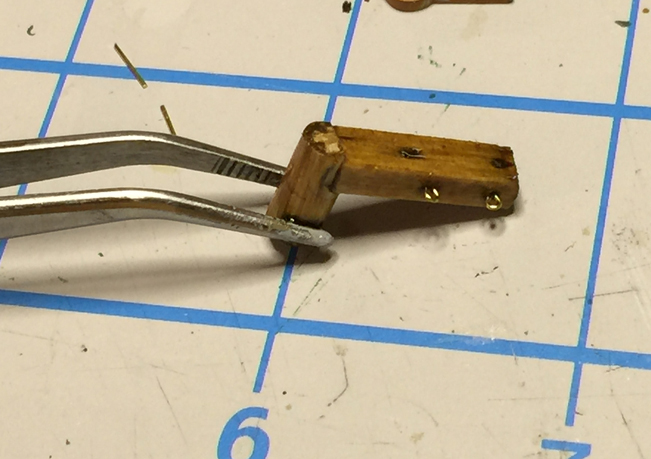
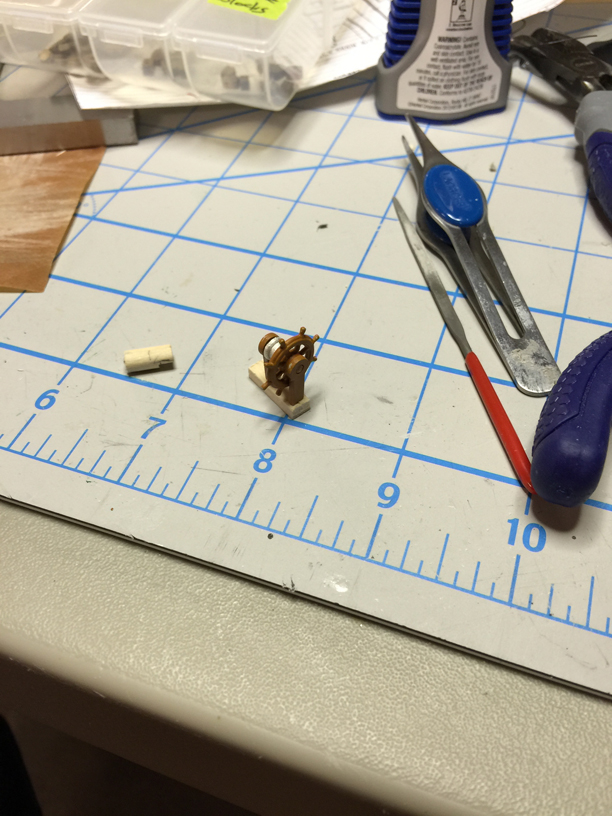
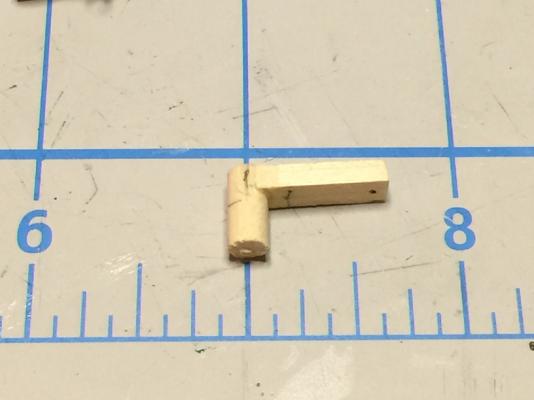
Yes, it is looking alright! - the thing is tiny tiny tiny.... I can't wait to get the blocks attached to the tiller and get it installed. Right now the tiller is drying from its staining and the eyebolts have been glued in place. ~john
-
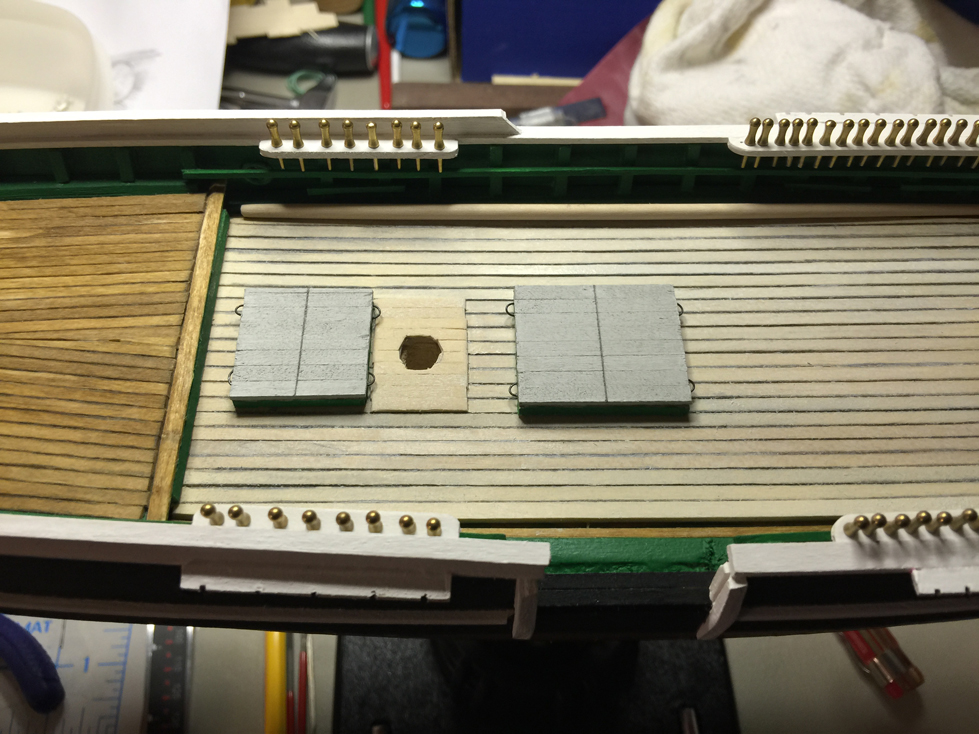
Worked on the hatches before heading off for a business trip. Such fun to get out to Seattle for a week! What a nice city and so much warmer than here in NH during the winter. While NH had -15F, Seattle was a balmy 50F with rain. Not bad at all. So, the hatches are done, and then worked on the bell and binnacle installation. Today spent more time on the tiller and wheel assembly. Going slowly to get these little details right and to get as much detail as possible into each one. I am finding that I am doing ALL my work now with magnifying lenses in front of my face. Age? Or small scale ;-) I ain't tellin'. Making the frame for the hatches: I find the little square to be an invaluable tool. The two hatches in place complete with handles. I still have to add rings to the tops. Binnacle in place behind the stern companionway. Adding the bell in this small scale was just awesome. A small piece of wire was used to hold the bell up. Two tiny holes were drilled into the top of the binnacle into which the wire was glued with cyanoacrylate. Starting work on the tiller and the wheel assembly here. There is a lot of detail to add here: eyebolts, metal reinforcement strips and rope. I'm going to enjoy some Led Zeppelin and make this part last. ~john


-
Skipping the anchors for now. Working on the aft companionway. Does anyone do this? I sign my name inside one of the structures and date it. It's not like anyone will ever see the inside of this companionway, but hey, I thought it was a cool idea. ~John

-
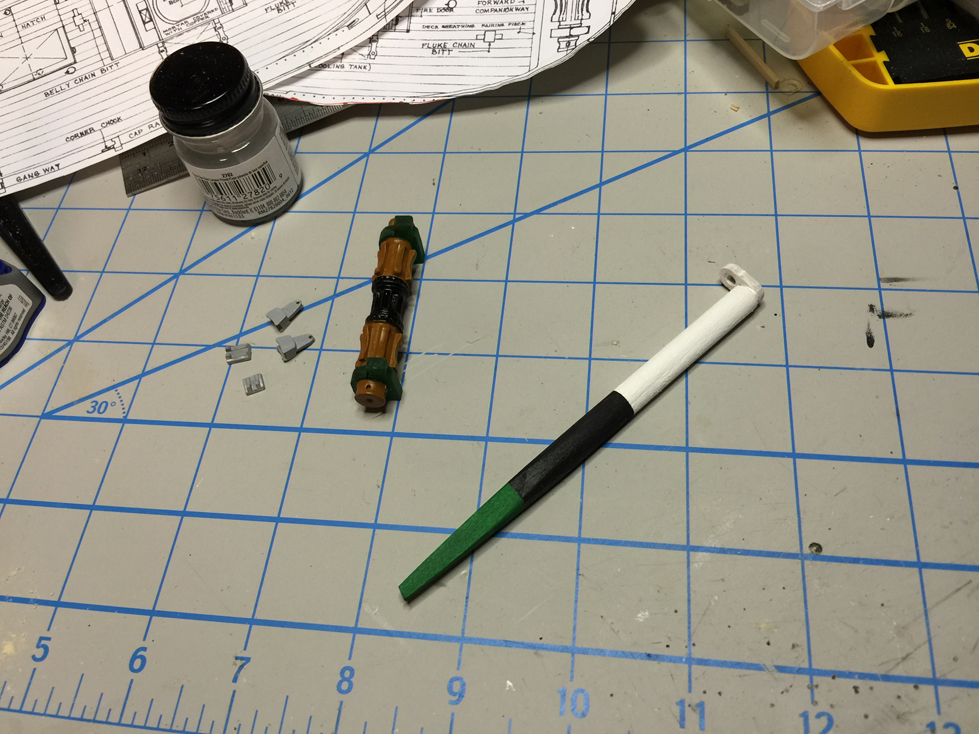
Taking the peaceful diversion into making the bowsprit. Got it painted nicely thanks to the masking properties of Tamya masking tape. Love that stuff.

-
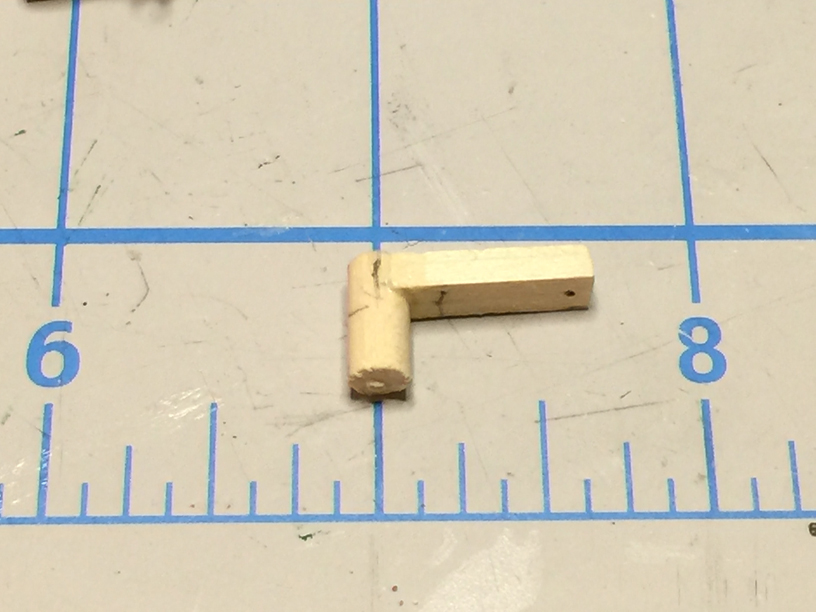
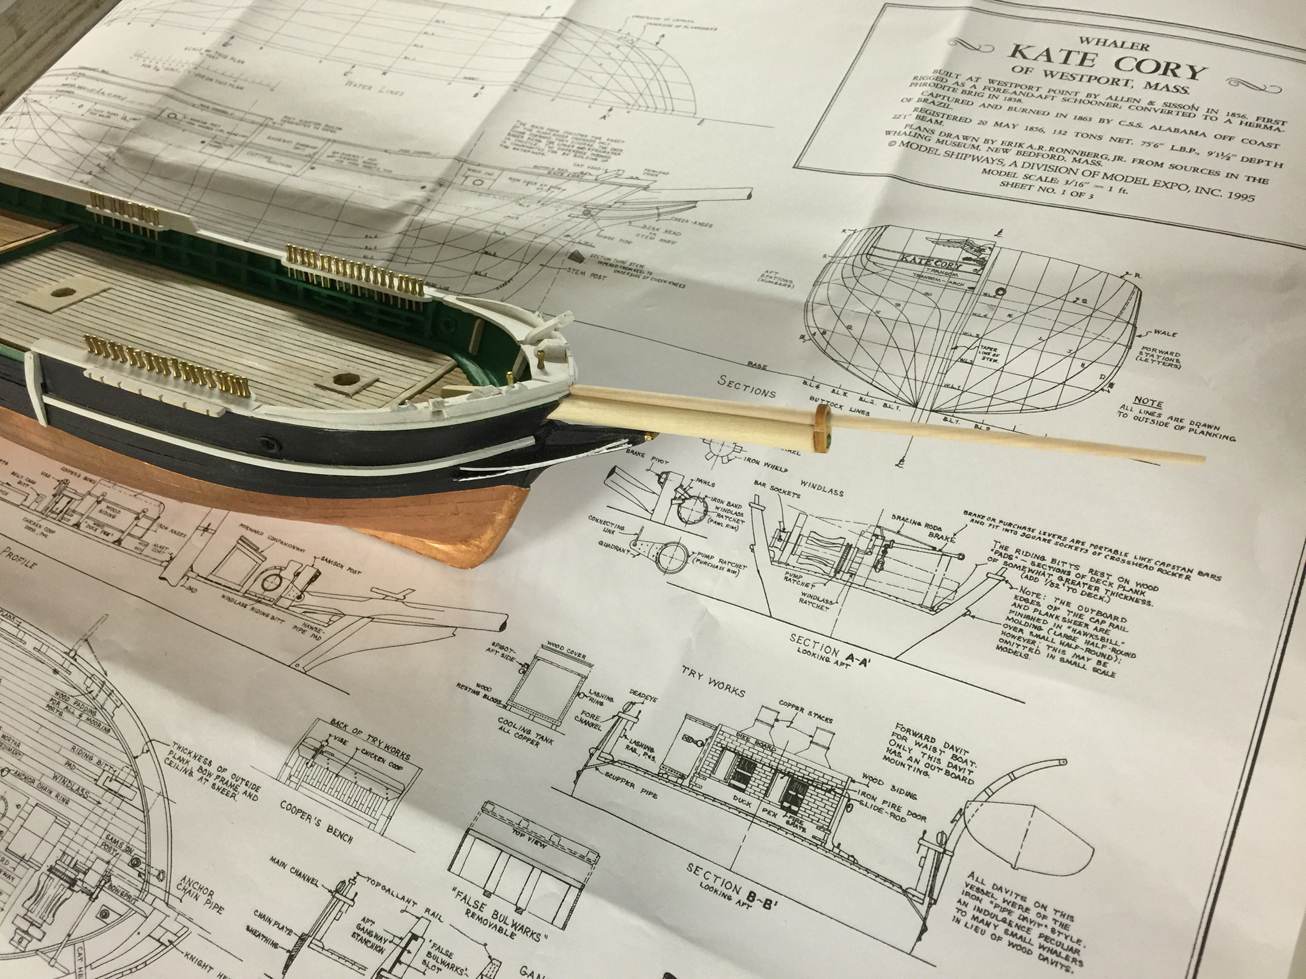
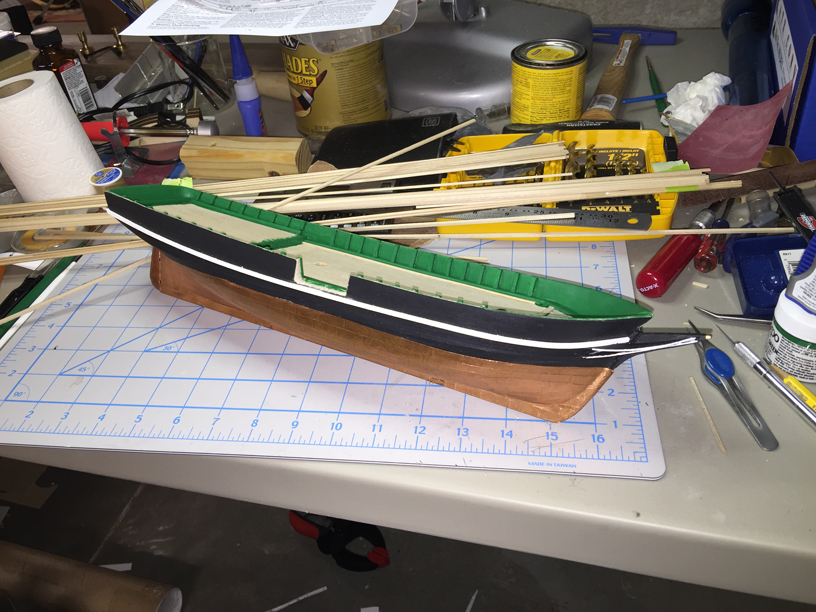
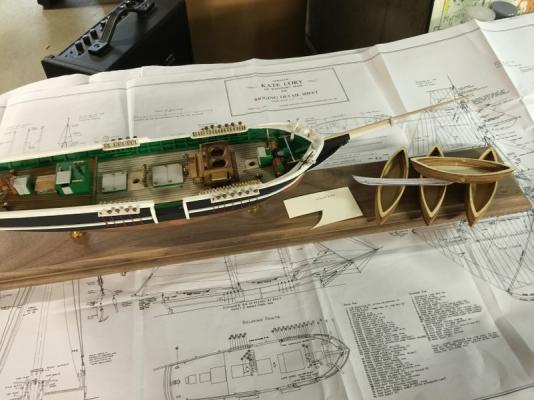
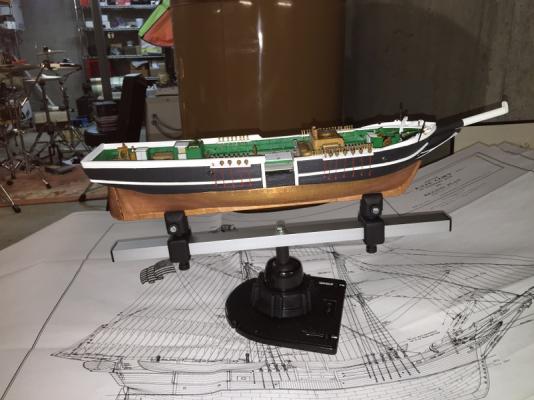
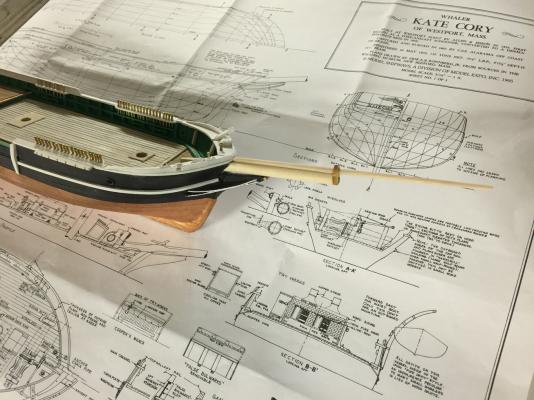
Worked this weekend on the bowsprit and jibboom. The first time through with the bowsprit resulted in failure of symmetry. The second time through was just right. I put it in place for a gander at the overall scale (see below). There is something magical about the moment the bowsprit and boom are in place. It somehow completes things and makes it all the more ship-like to me. Now to work on the martingale. All of this is, of course, a diversion from the capstan installation. I wanted to get the bowsprit done so that I could properly make the samson post mortise for the bowsprit. Ahhh the tangled web we weave ~john
-
Ok - finished up the top gallant rail and the bow's buffalo rail this week. Onto the inner bulwark details which I honestly should have done before adding the cap rail. Well, we live and we learn ;-)
-
Got the cap rail and pin rails completed yesterday - nothing beats a little free time to work on projects! Kick on the stereo and sit to some detailed work, and that equals an awesome afternoon. The results are here. I am pretty happy with the bow rail. The stern took a little effort as did those pin rails. I was lucky that none of them cracked with the extensive drilling (by hand). I need to work on the channels now and then the chain plates. Anyone out there have a good method for this type of vessel (1860s whaler)? I would like to make chain plates to appear as they would to the best of my ability. Right now I am thinking about wire with soldering. Thoughts? ~john
-
Deck planking is complete so I went to work on the gangway today and finished the padding and guard stanchions. There's a little more detail to do there (some metal work and then some vertical side wall planking to protect the wales. After that it is time to think about the cap rails and various miscellaneous holes in the hull and bulwark. I am looking for scale brick-like patterns for the tryworks (1:64 scale - which is the old model railroad S Scale). Anyone know of a supplier? This might be time for me to improvise ;-) ~john

-
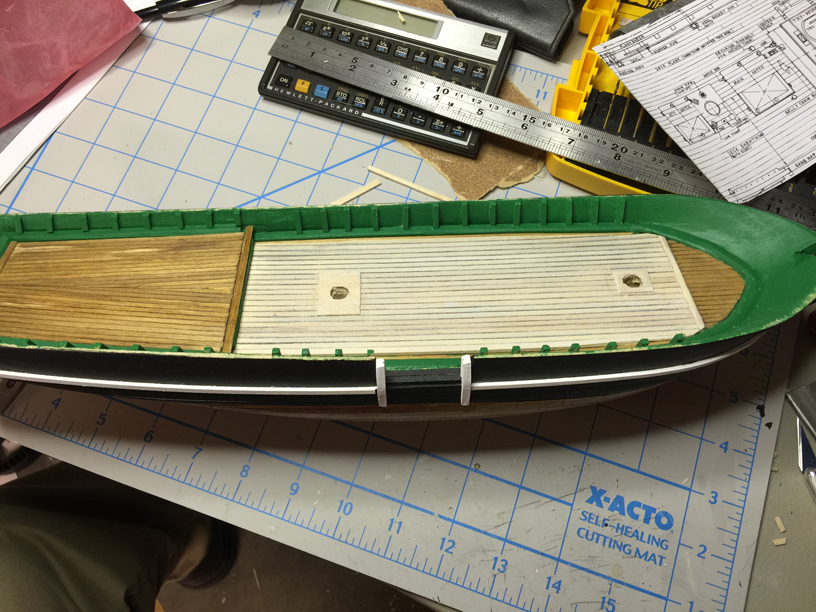
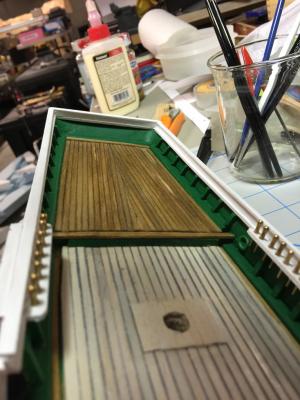
Deck Sheathing and Planking done for now. It'll need sanding/scraping and staining. I am going to leave the sheathing on the main deck as a light grey color and a natural wood color for the decking itself. Now to work on some hull specifics: holes for lighting between decks, mooring cable holes, anchor holes, etc... then onto the rails. Anyone out there know a good way to build the hatches for the KC? The plans are a little shy on info. I have seen them as gratings by some builders, though I suspect with whaling they covered the hatches pretty much 100%. Thoughts? Wisdom? Thanks ;-) ~john

-
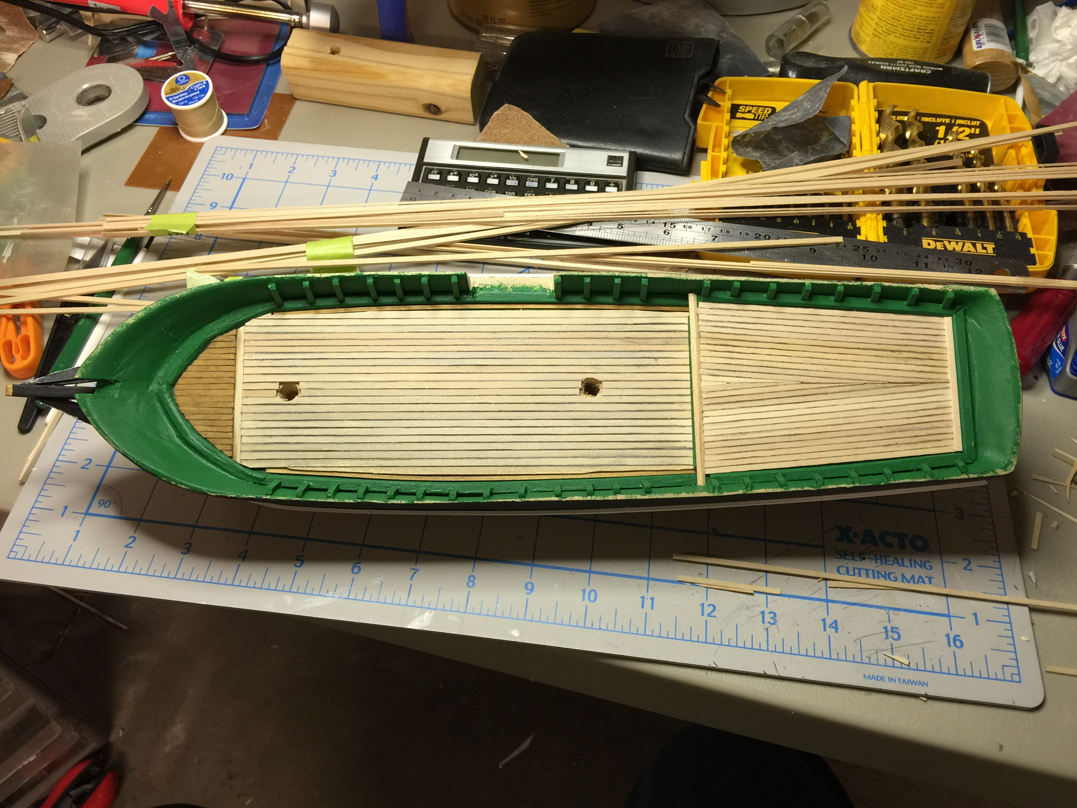
Had some time today to work on finishing painting the inner bulwarks and then adding the exposed bow decking. I am going to work on the sheathing after I get the decking stained. I'm going to look about for a much light stain for the sheathing, perhaps a little grayer than brown.... Have to remember to drill holes ;-) ~john
-
More work done on the stanchions and a new cut in the bulwark for the gangway. That was fun! Taking my time and enjoying listening to music at the same time.... ~john
-
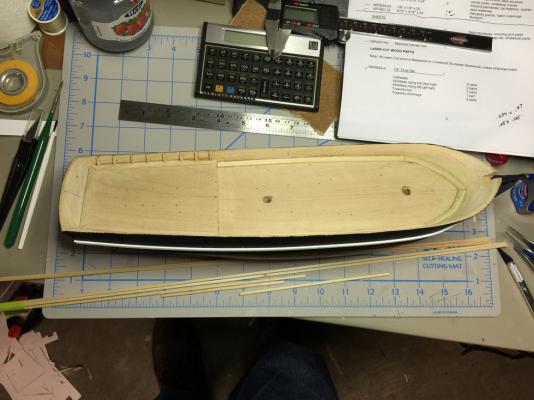
That's an HP11c, an oldie from ca. 1982 which I needed as a physics major in college. I love RPN, and still use it as much as slide rules... all the time. I have a rebuilt HP15 upstairs in the office ;-)
-
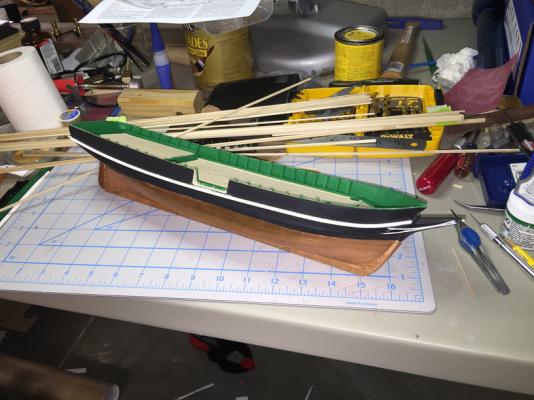
Finished with inboard planksheers and waterways. Added about 1/4 of the bulwark stanchions. Took me a couple to realize that the bottoms should be beveled to accept the outward angle onto the top of the waterways. Live and learn! A little wood filler will do marvelously here. Next steps: finish the stanchions and then paint the inboard bulwarks/waterways/planksheers green, then onto the decking.
-
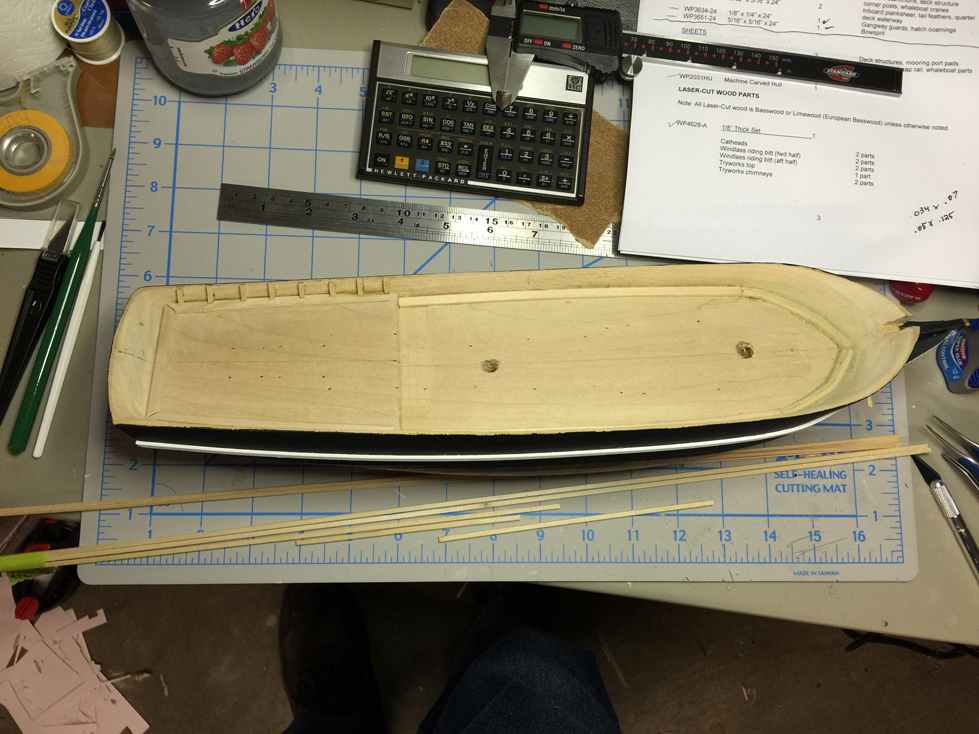
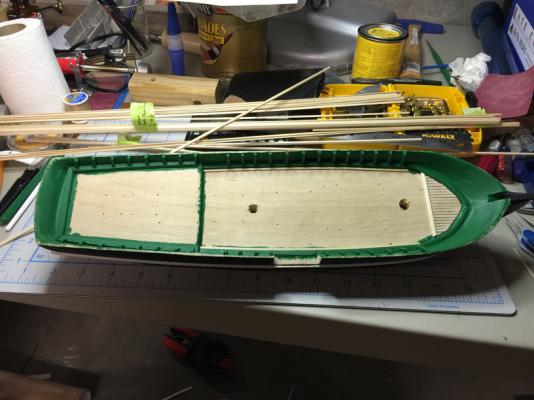
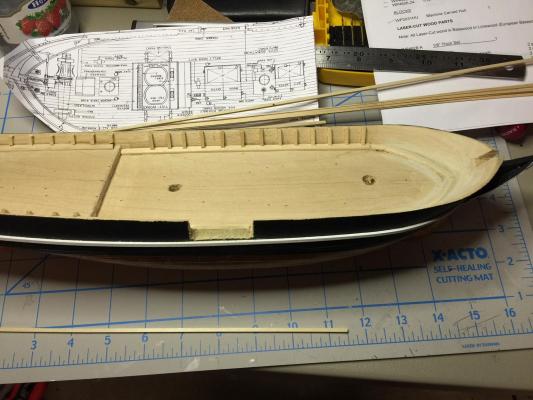
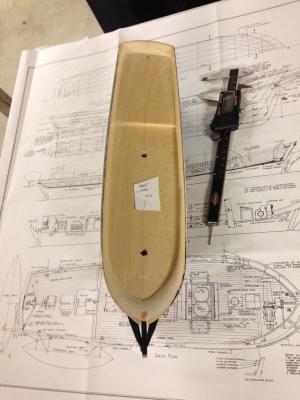
Did the dreaded (to me) drilling of the mast holes and cutting of the bowsprit entry point today. There is some pretty serious pre-measuring needed. The rake of the masts requires a little care. I made a card-stock rake angle measurer and used that as a guide to a smaller drill bit for some precision. I then enlarged the bits until I got to the final diameter. I think all will be fine. If not, then making a slightly larger diameter hole and using some shims will also be just fine in the end. Ending out the day: Made a paper cutout of the deck furniture and major planking spots and used these to mark up the deck for the next phase: adding the decking!
-
All, Thanks for being patient ;-) School started up again and a teacher's life is never one of rest when things need prepping, grading, planning, and all. To top it off, I teach a full load, am the current science department chair, and teach astronomy on clear nights. There is little rest much less time to work on the model. I'm planning to get back to it very soon, maybe even tomorrow, with some hole drilling and prep for planking the deck. ~john
-
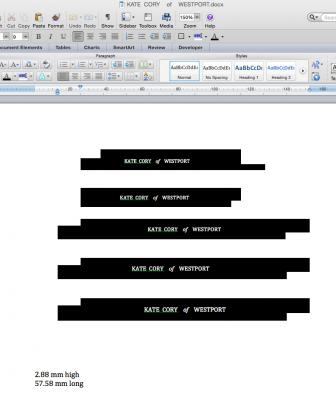
Hi Don, Sure thing. I had been worrying a lot about getting lettering on this model and doing it appropriately. I finally figured out a method that worked out reasonably well. I used MS Word to print out the lettering using an appropriate font. Then, copied and pasted that a bunch of times on the page, all in slightly different font sizes. I then added TAB characters all around the wording, selected everything and selected font color to be white. The text is now invisible. I selected everything again and then used the Word highlight feature to, well, highlight the text. I then chose black as the highlight color (not the normal yellow). Done! All that was needed was to slice out the strips and see which one best fit the model. I used some contact cement to attach. Hope this helps. See attached screen shot. ~john