HOLIDAY DONATION DRIVE - SUPPORT MSW - DO YOUR PART TO KEEP THIS GREAT FORUM GOING! (Only 51 donations so far out of 49,000 members - C'mon guys!)
×


jablackwell
-
Posts
304 -
Joined
-
Last visited
Content Type
Profiles
Forums
Gallery
Events
Everything posted by jablackwell
-
 Patrick, I am totally enjoying your build. You're doing an excellent job of it. All the scratch building of the deck furniture and such makes this shine.... considerably better than the provided Britannia-metal pieces that are provided... and that I used when I made my rendition of the Sultana. So.... rock on! I look forward to seeing the results as your progress. ~john
- 449 replies
-
- 3
-

-
- sultana
- model shipways
- (and 2 more)
-
That is most helpful, L.H. Thank you! ~john
-
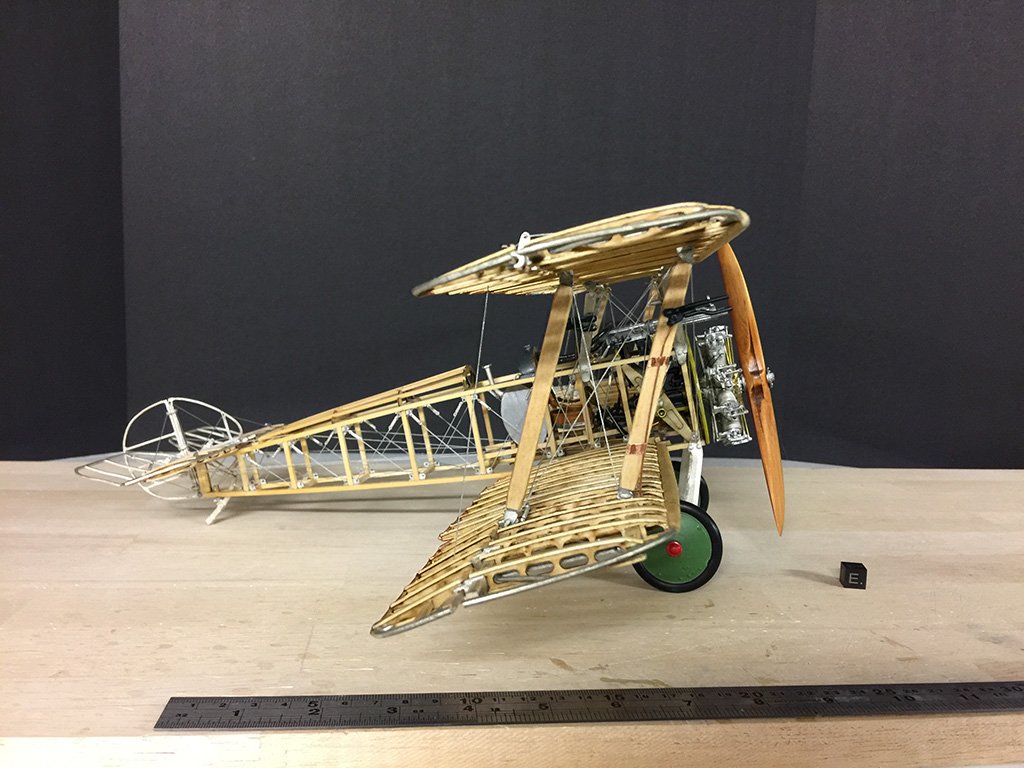
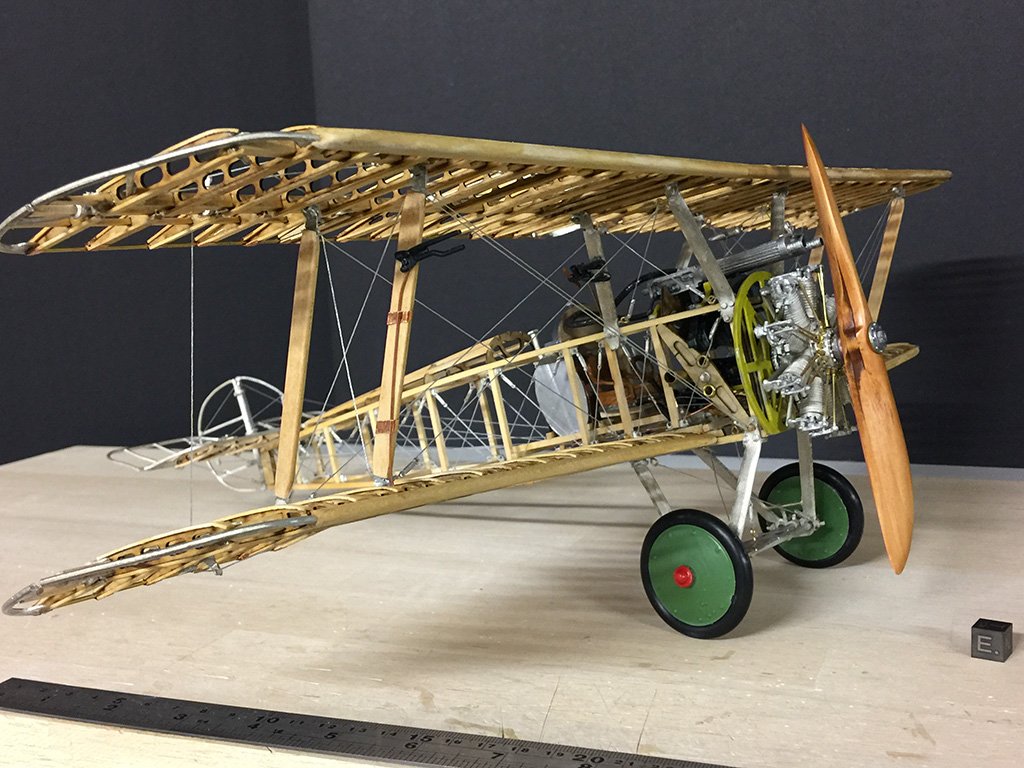
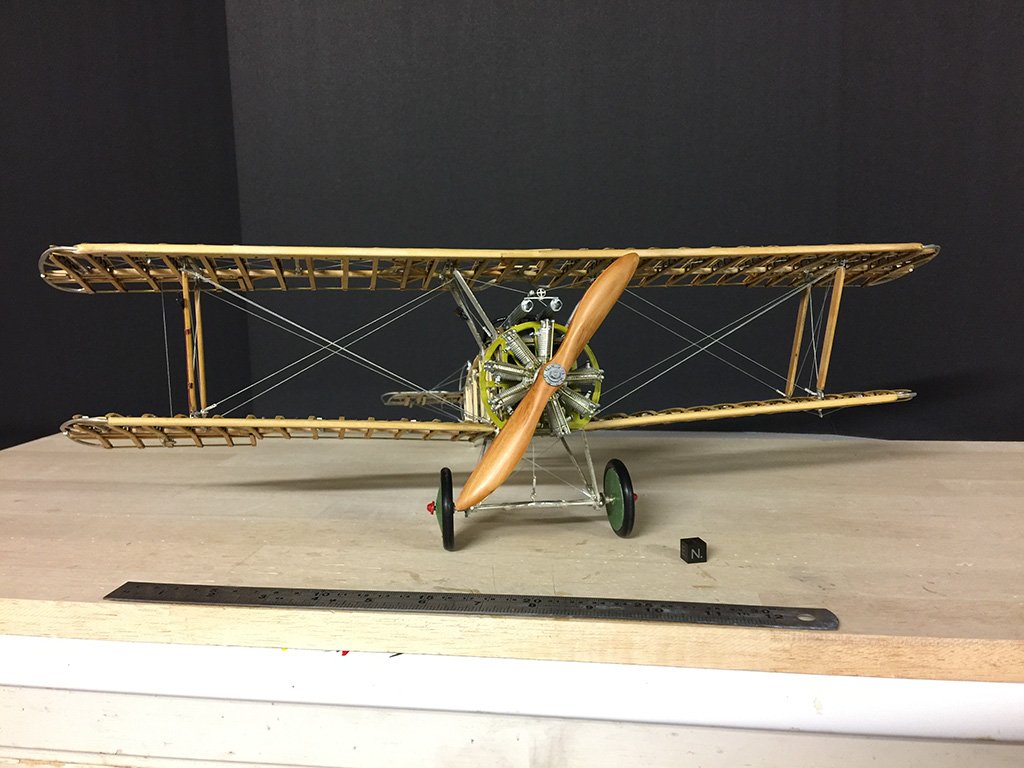
All, Here is the completed build, sans diorama for now. I'm now in the middle of cleaning out the workspace, ordering new drill bits (and other tools) and getting ready to sink my teeth into building the Syren. I think I am ready for a ship, haven gotten the plane out of my system. ~john

- 114 replies
-
- 17
-
-
L.H., That was very helpful to note the 120mm scale.... I hadn't searched for that specific term, but was looking more for "1:16" or 1/16. A lot of figures have popped up, so I should be all set. Something about scales does seem a little odd.... a 120mm tall individual (if that is what this means) would be some 6'4" tall.... a pretty tall pilot. Perhaps the 120mm is referring to something else? Build status: wheels on. Engine on. I am working on the cockpit coaming. Eventually this will be on a diorama for display. ~john
-
Agreed Scott. Rigging is a little tricky in a biplane: all of the cables have to be taught. No slack allowed anywhere. Nothing "moves" as yardarms on ships... so, the angles all matter, and the tensions all matter. I struggled a bit with the Camel's tension settings a lot. The toughest part were the ailerons. They now move and correctly, but the thread is stretchy, so the motions are not realistic in the end. Still, I am content. How often are these going to be moved back and forth anyway while on display? Not much, I bet. Right now I am looking for a scale pilot: WWI British 1:16 scale. Anyone know where I will find one of these? I have found a lot of other scales... I'd like to get this into a case in diorama format, grass, pilot, etc. ~john
-
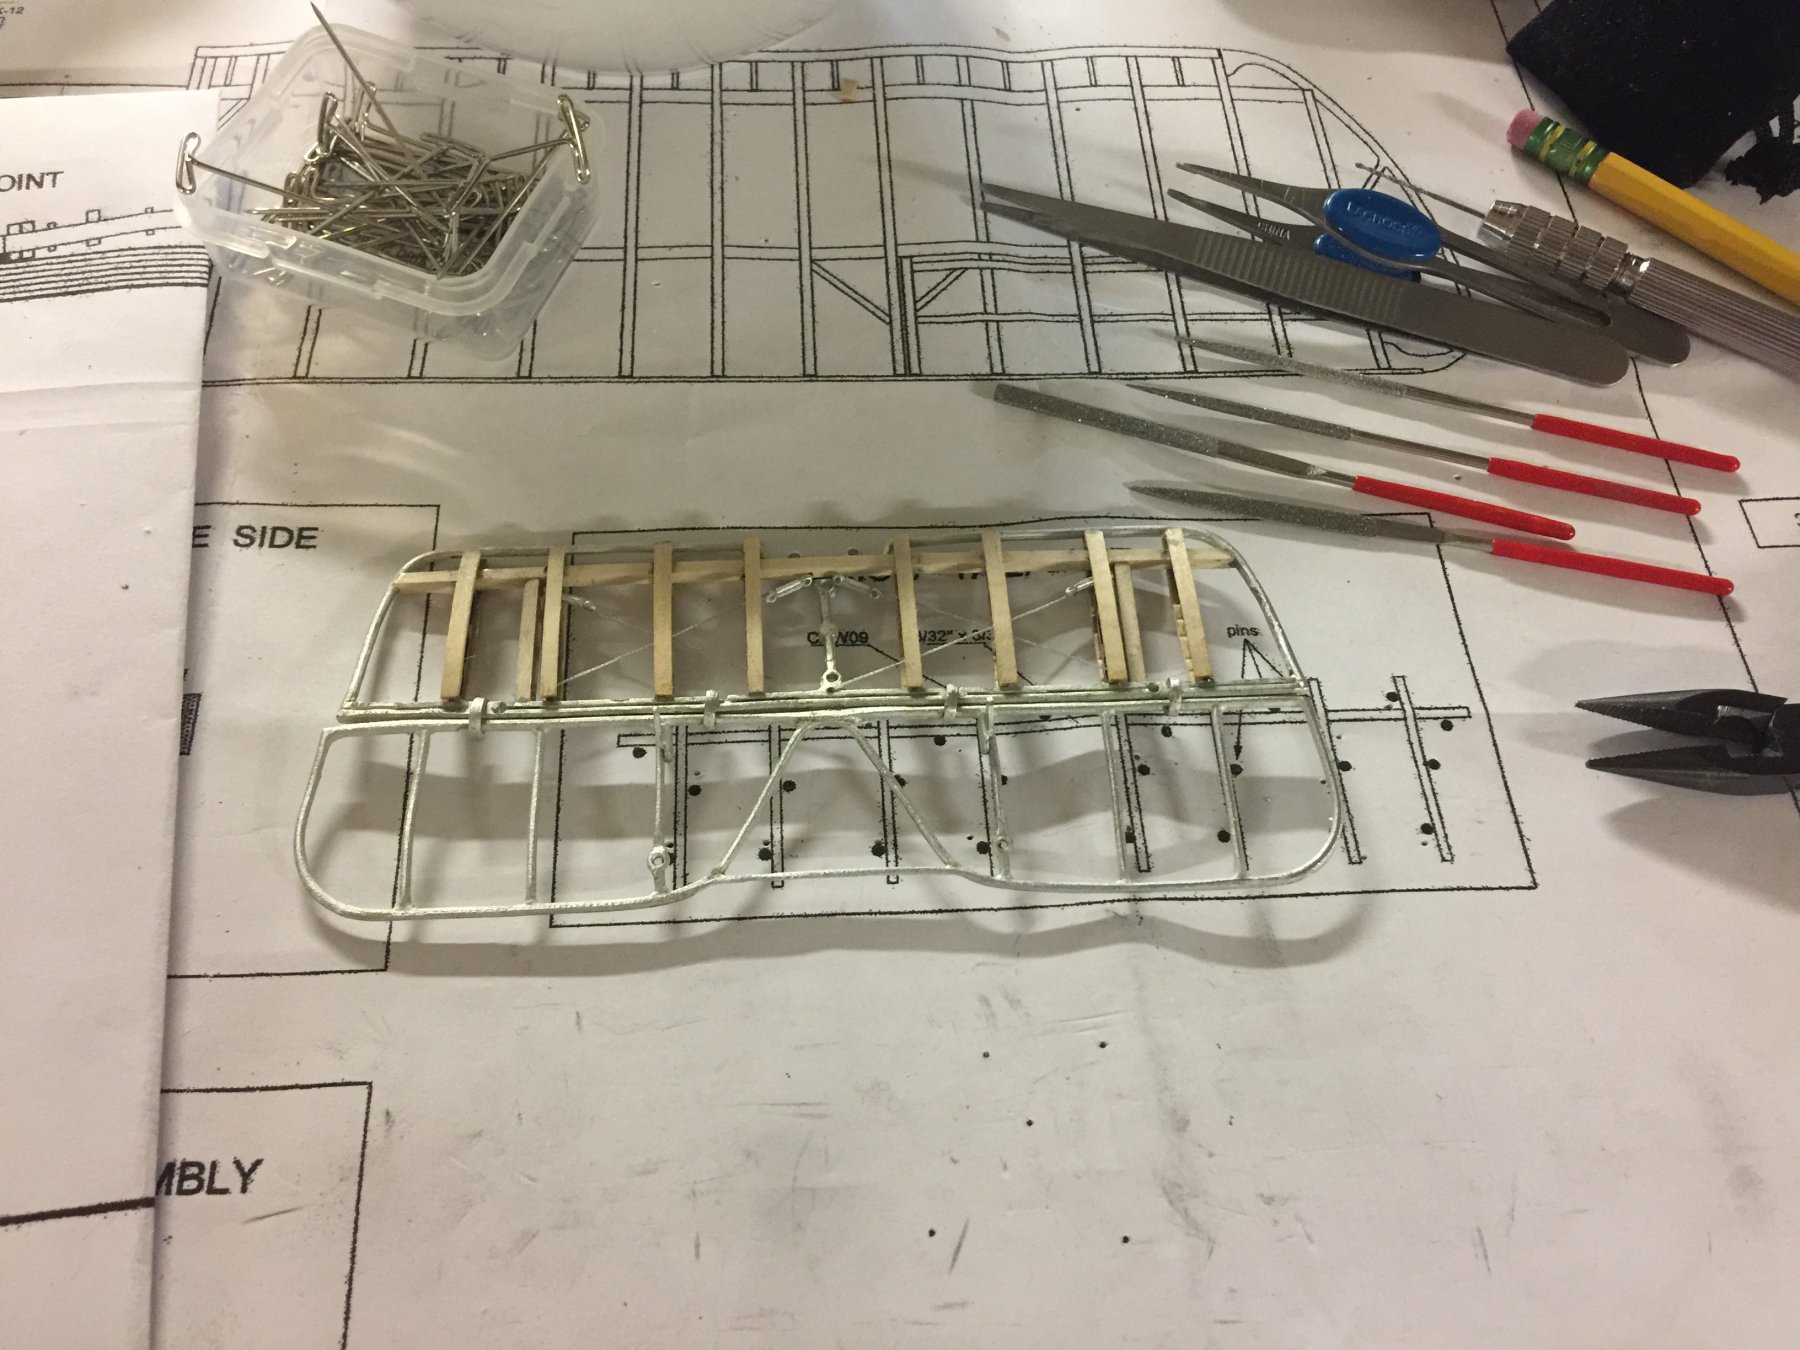
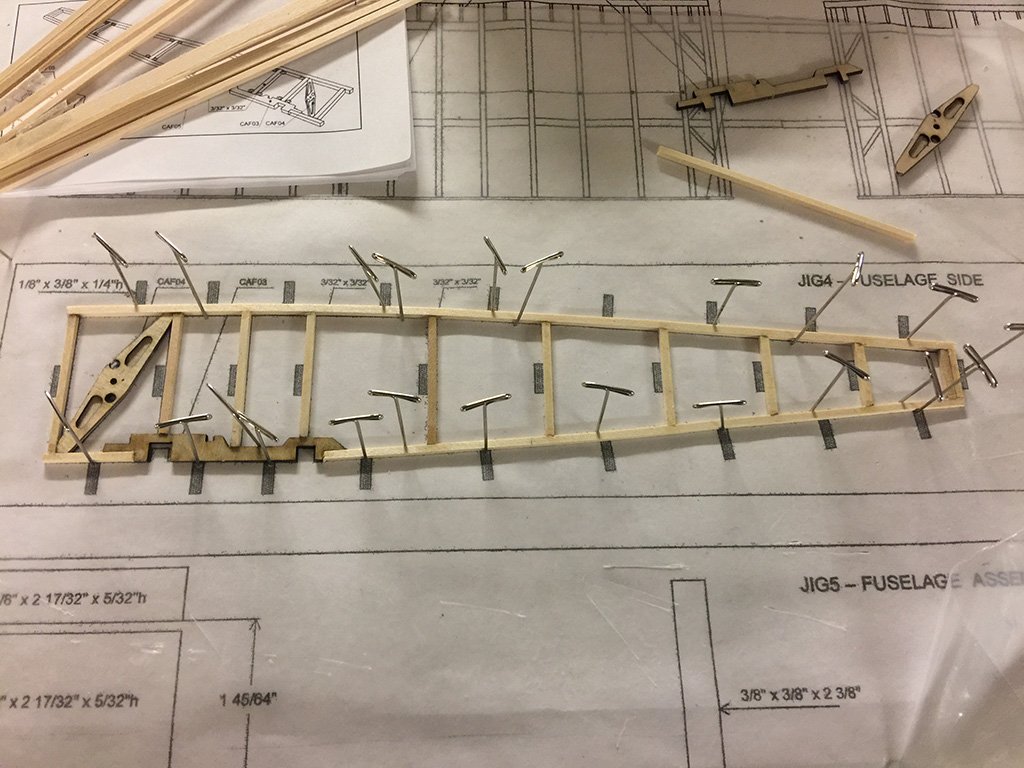
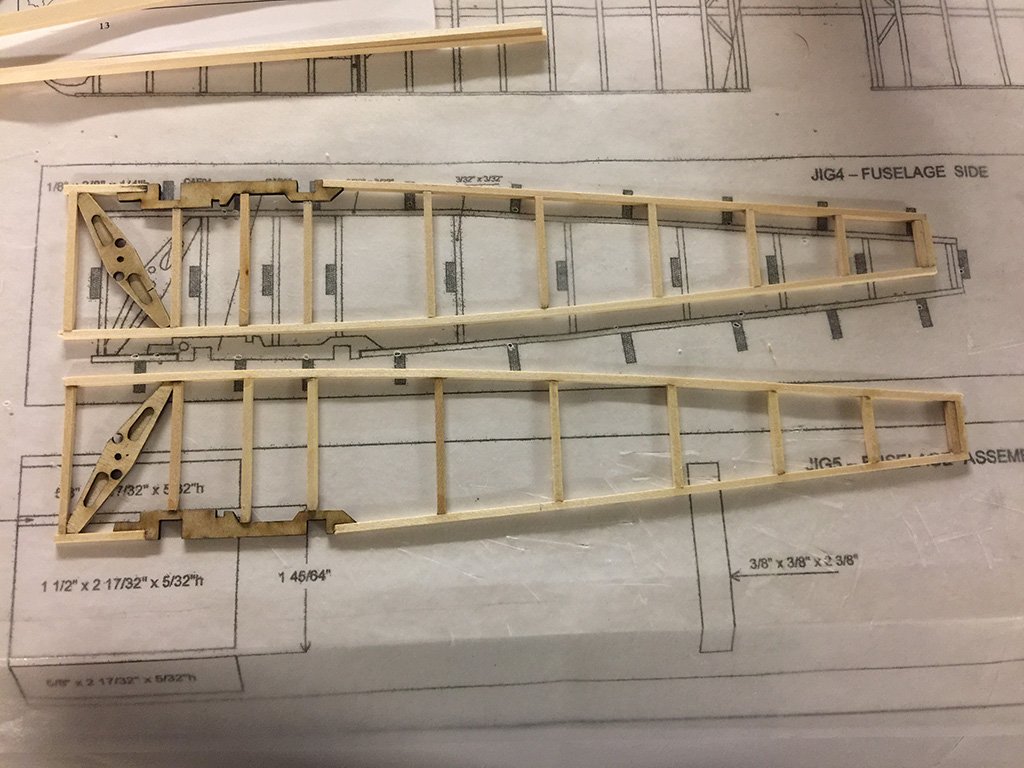
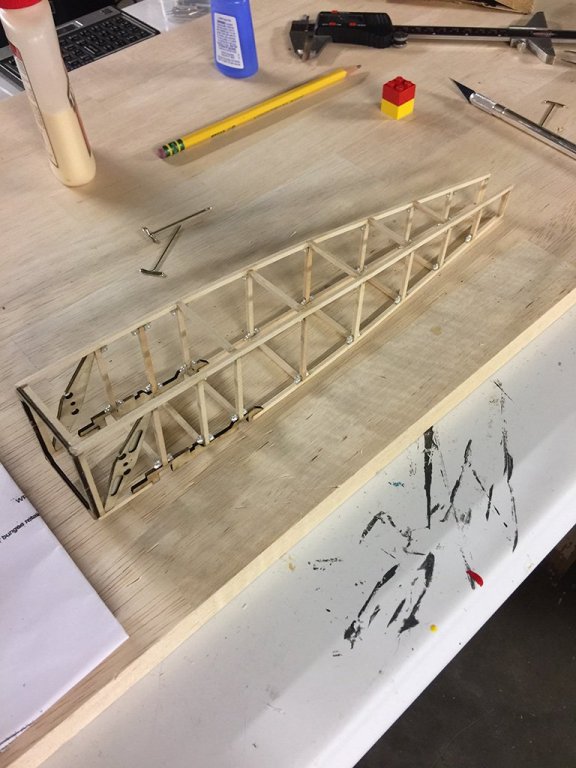
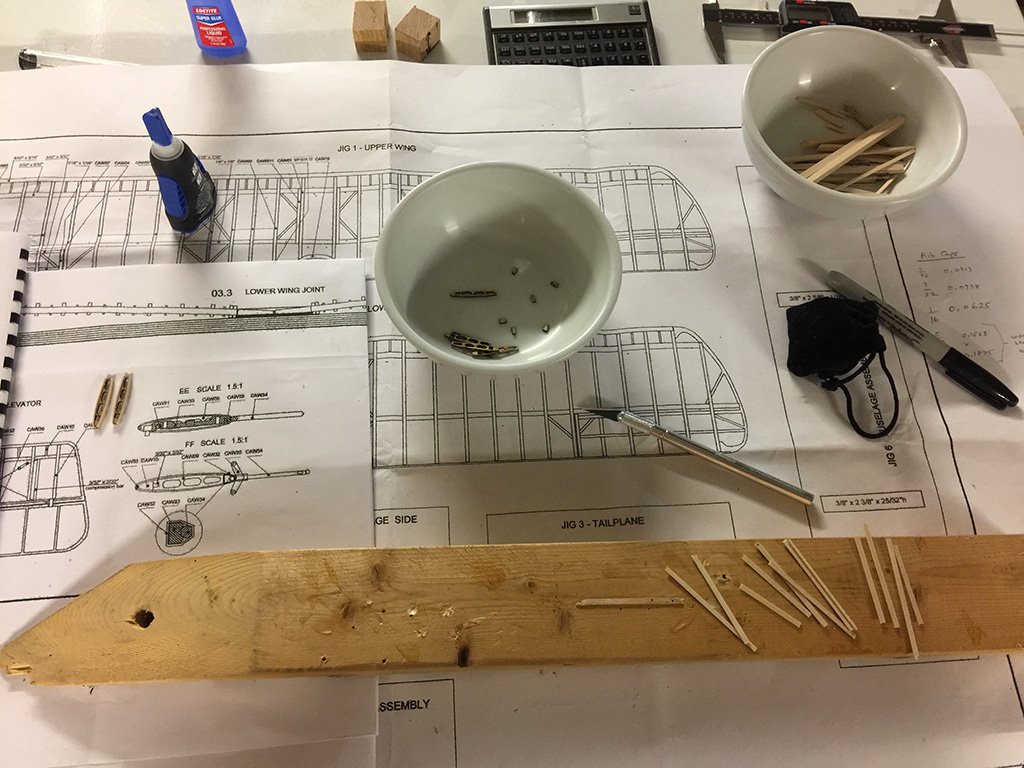
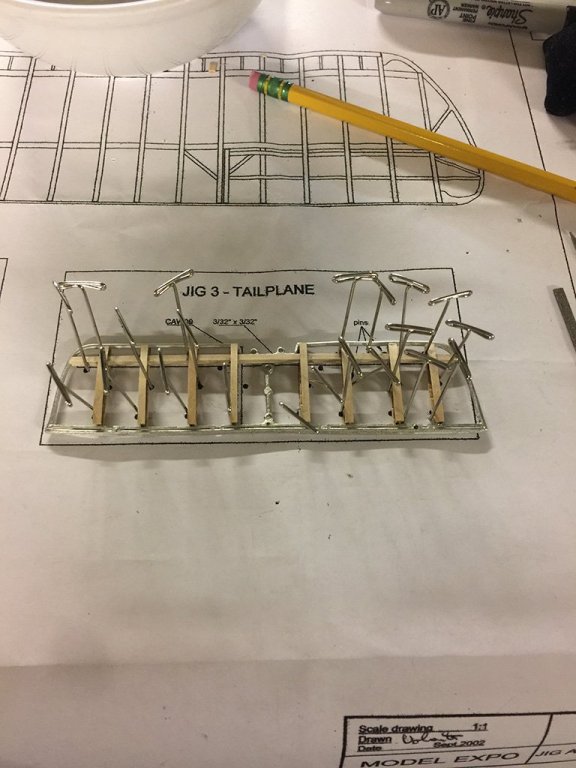
Scott, The Ludwigs with the Black Beauty make a fine set.... combined with the Zidjians of old, and it just hums right along. A lot of good music happens in the basement ;-) Jigs: I used jigs for the fuselage final assembly. That was the only way to keep things straight and normal. The wings were build right onto the plans using pins to hold the wood onto the plans at precise locations until the glue set. The plans are mounted onto a flat building board, this one from planed balsa. The ailerons to actually work as of late last night! I am somewhat surprised actually. A larger scale, like the 1/6 or 1/4 that you are planning would be optimal for all the details. This would be something in the right ballpark:
-
All, Thank you so much for such kind words and thoughts. You make this the wonderful community that it is. Specifics to the build: Yes, the gun barrels, are definitely on the list of things to complete. They need boring and they need blackening. Concerning the ailerons: In theory they will work as they should. The cables are rigged in such a way so that they should work when the stick is moved side to side. The rudder works with the motion of the pedals, and the elevator works with the stick. I have yet to permanently connect the aileron cables. Getting there ;-) ~john
-
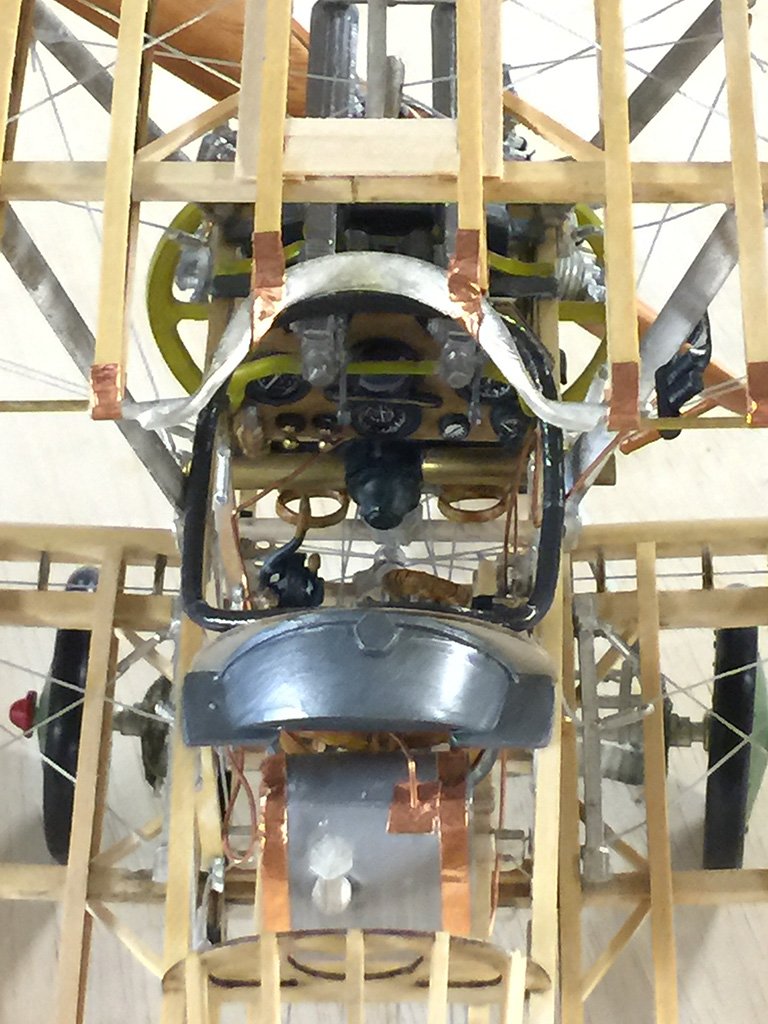
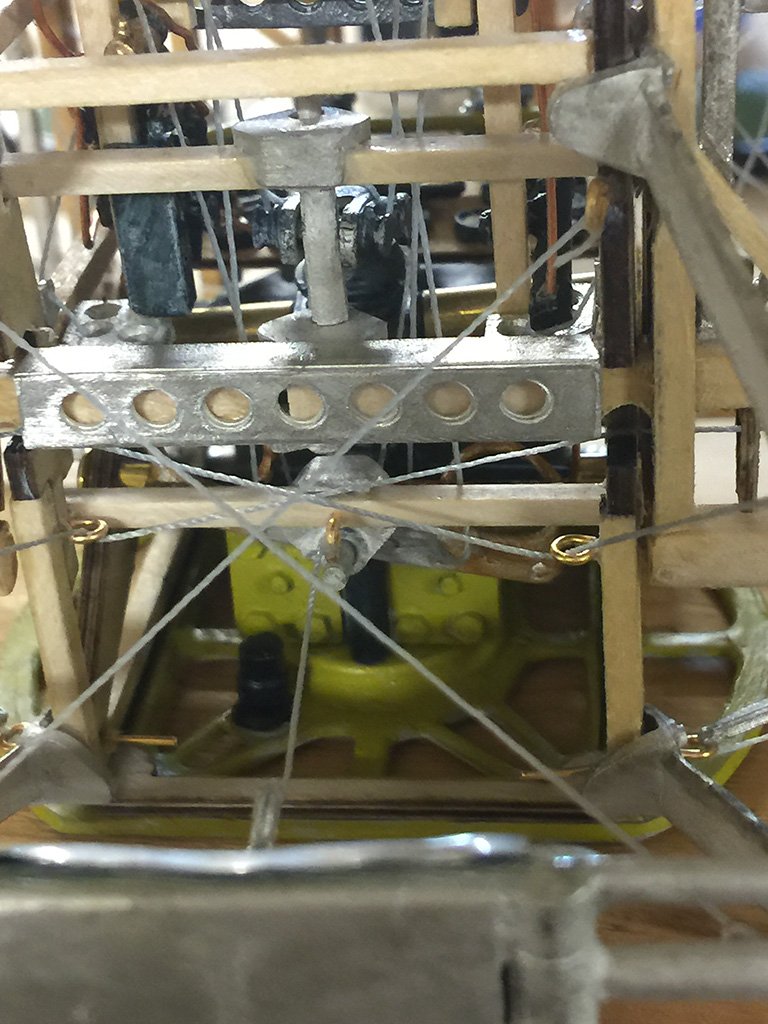
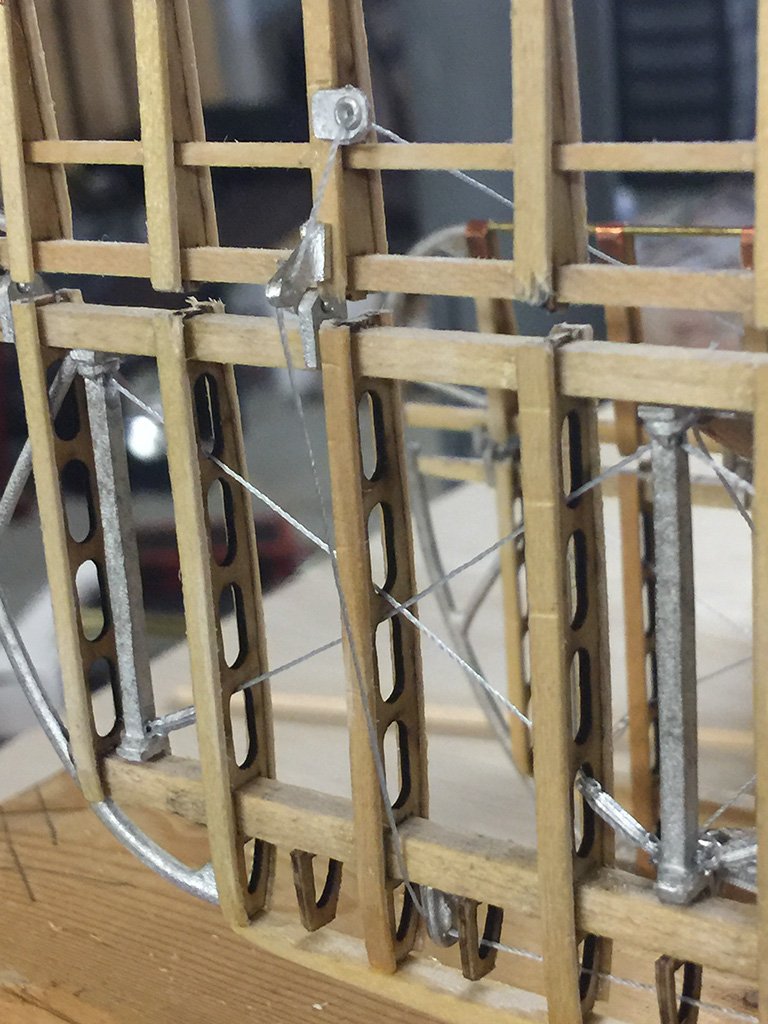
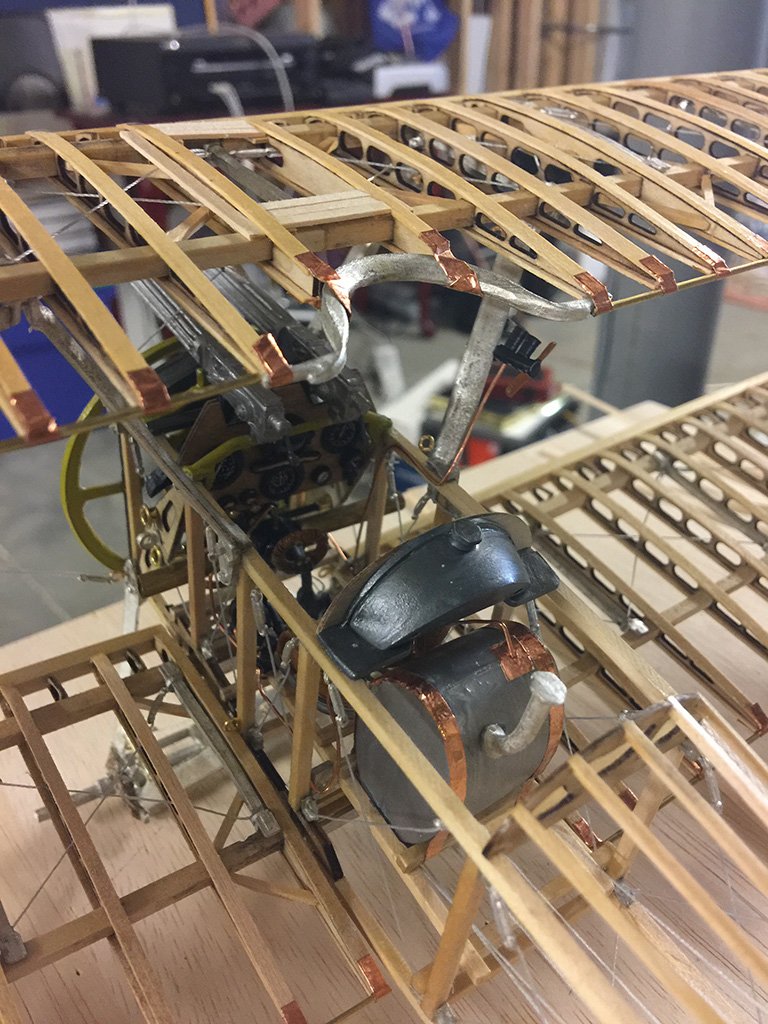
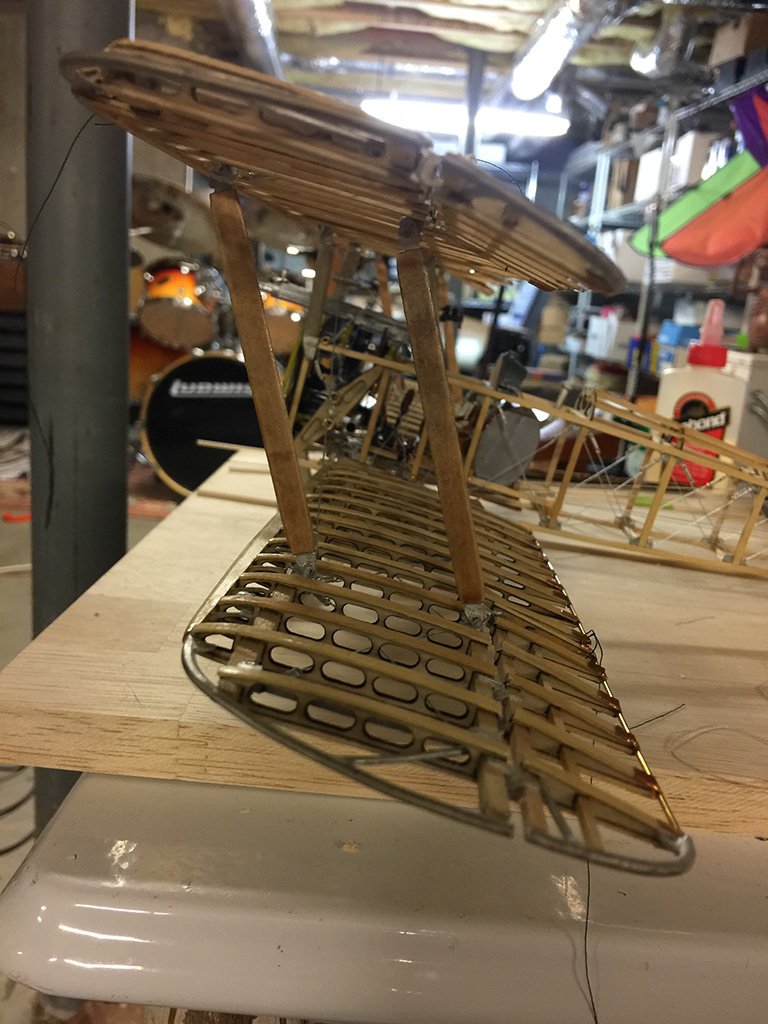
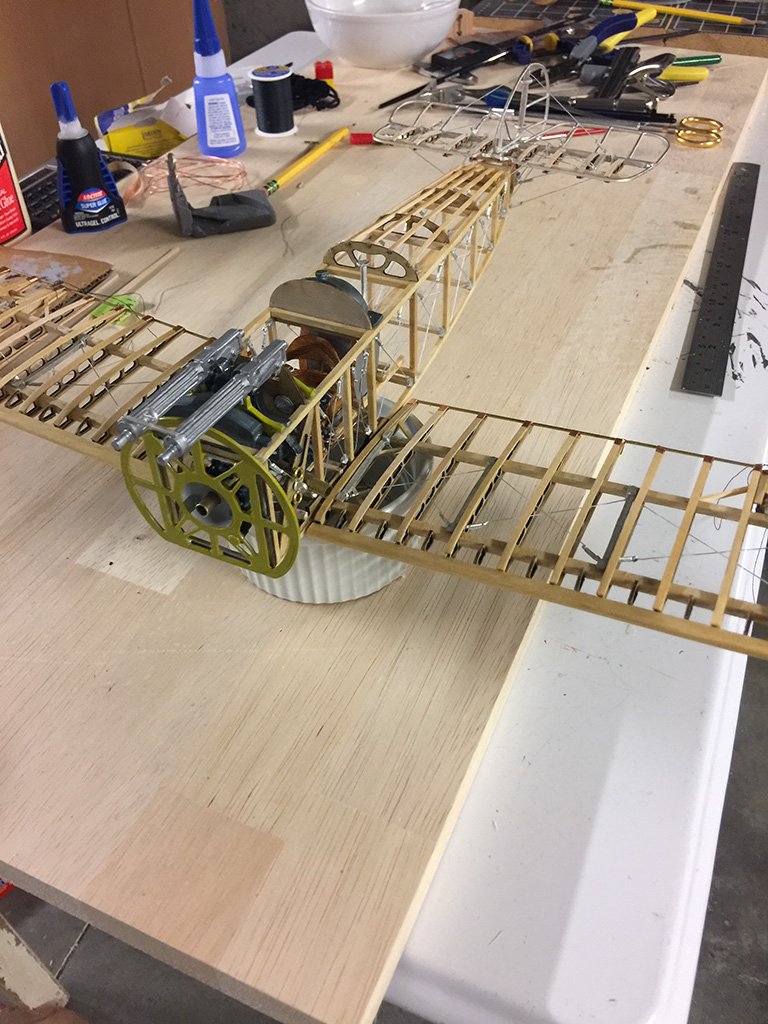
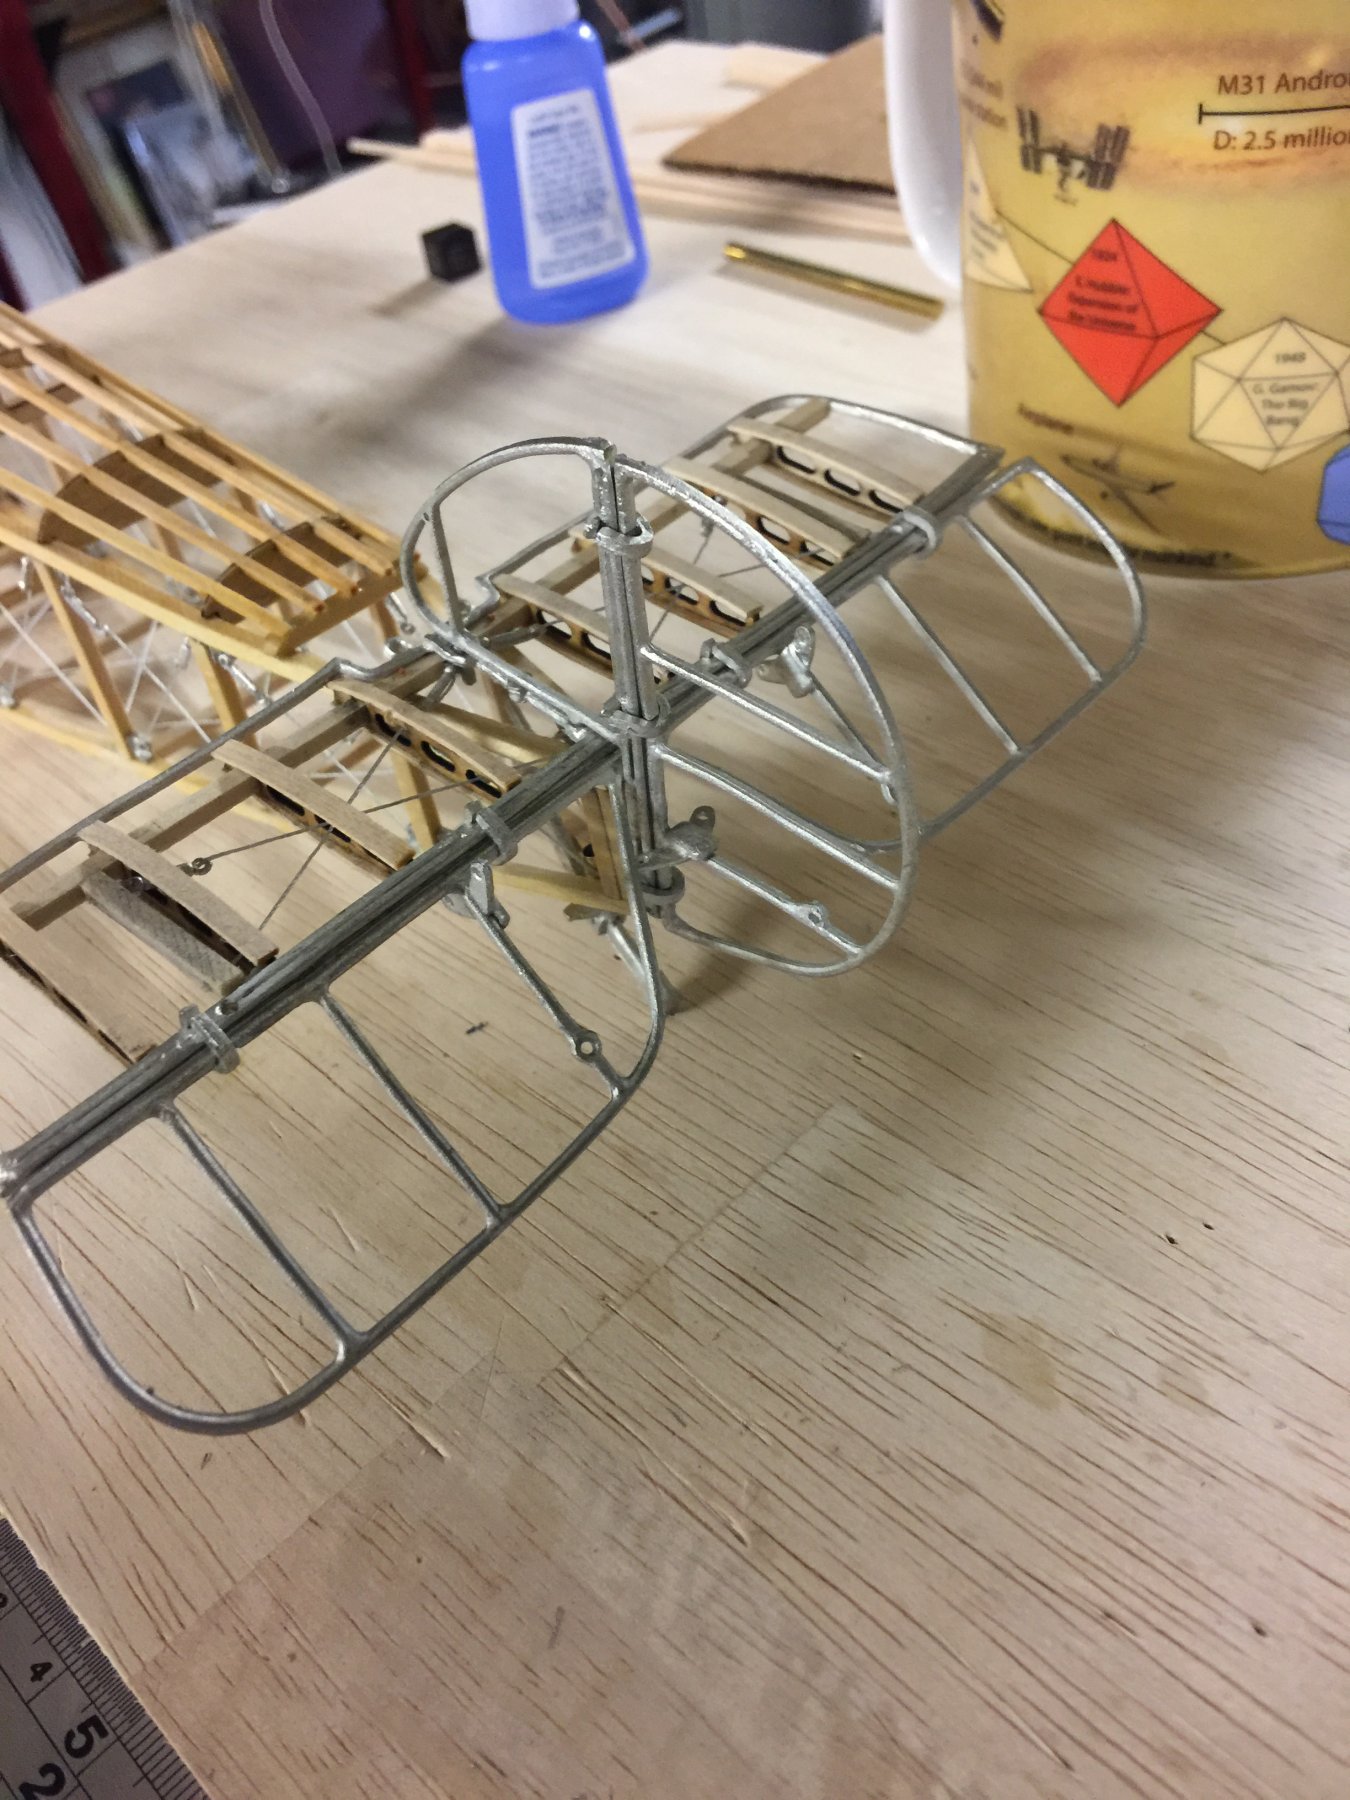
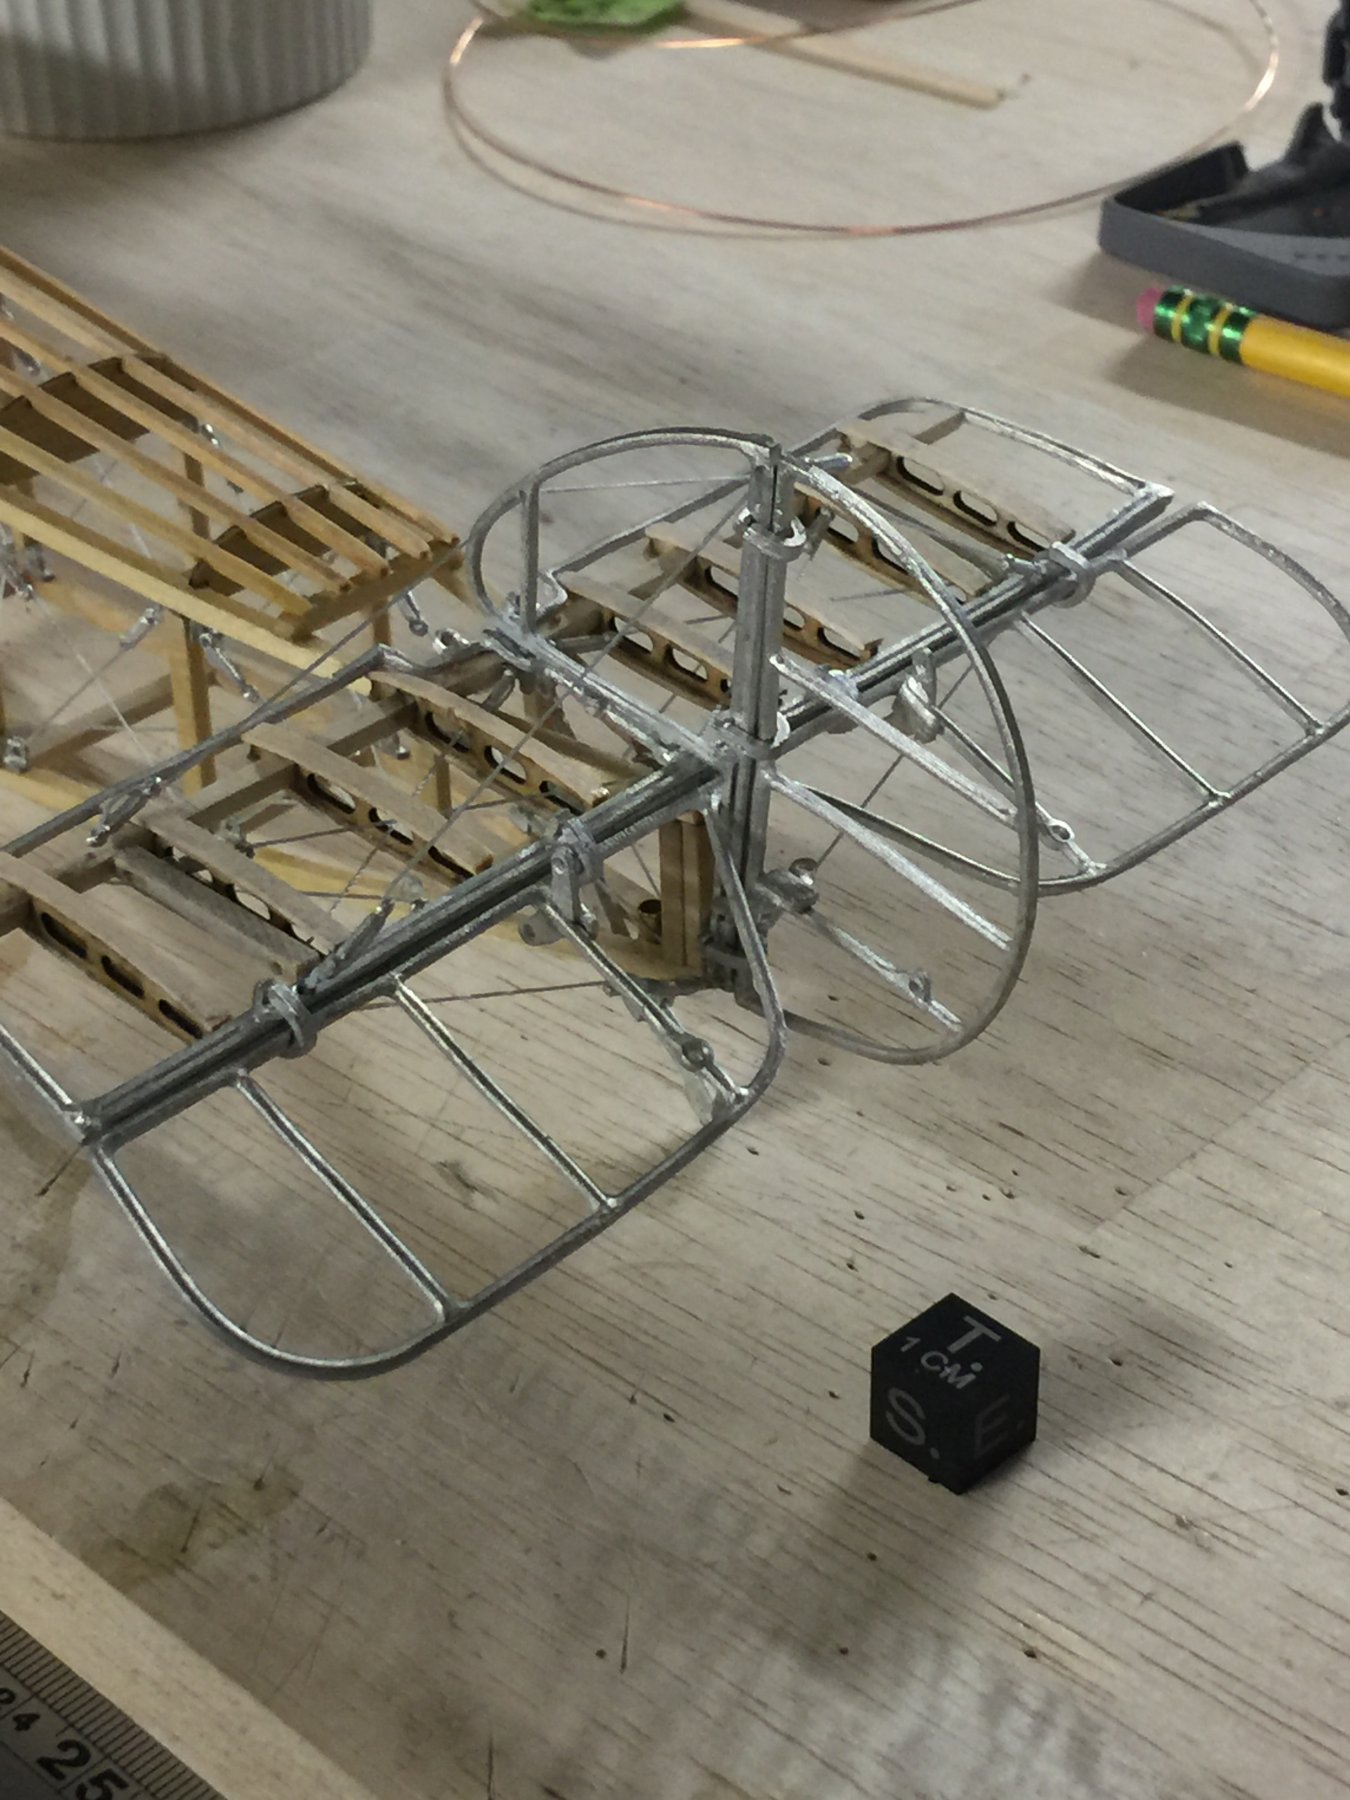
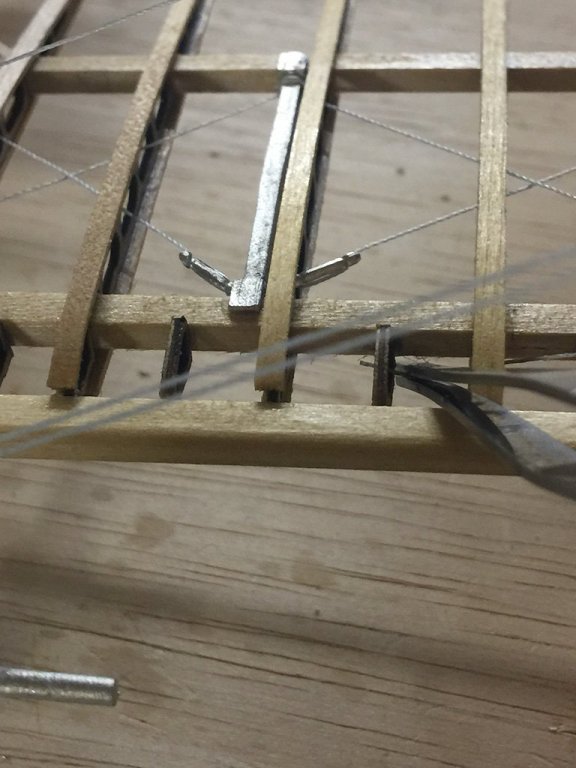
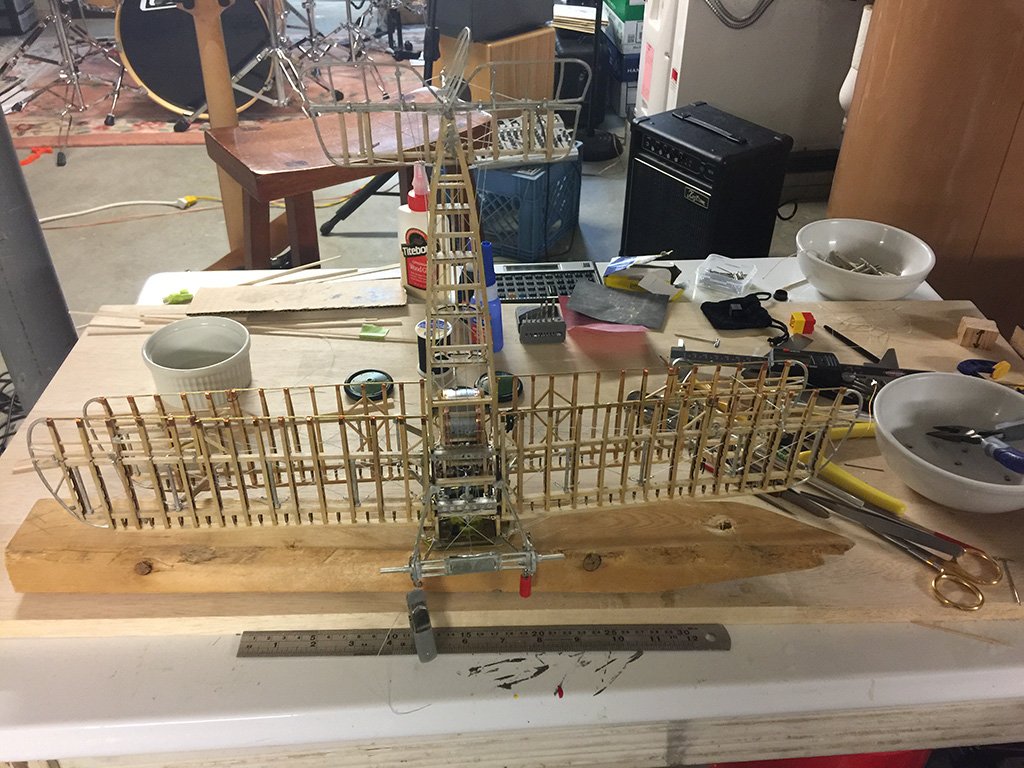
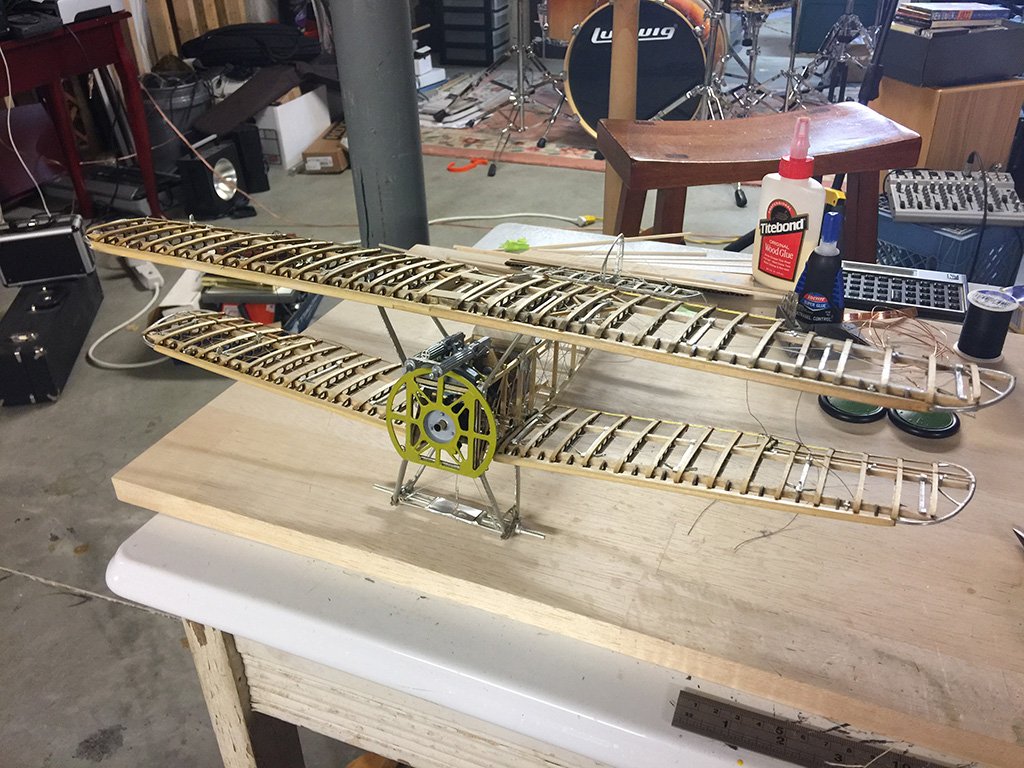
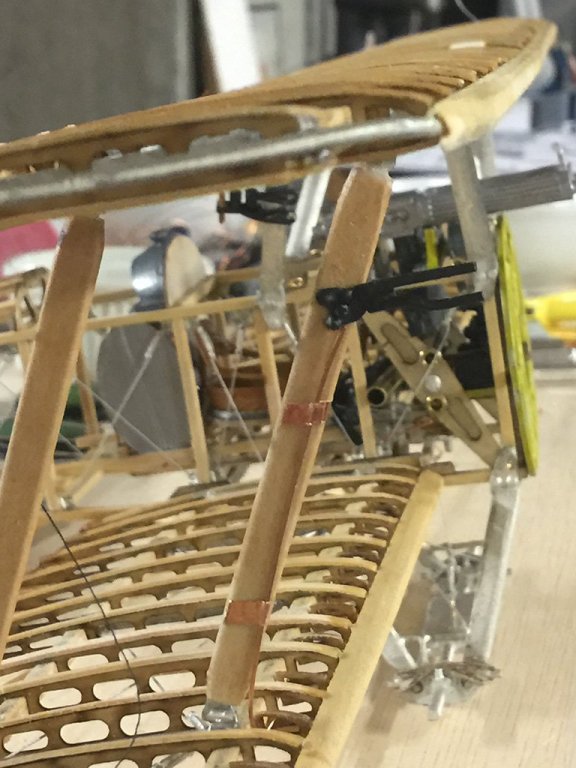
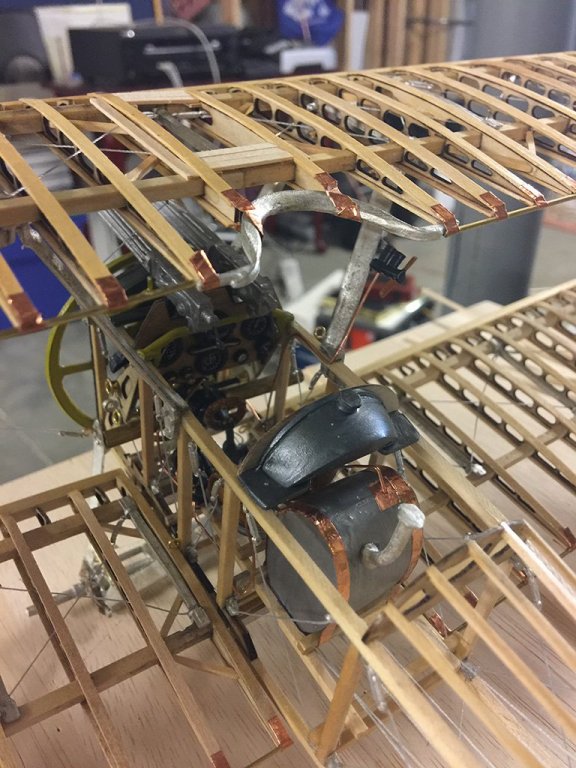
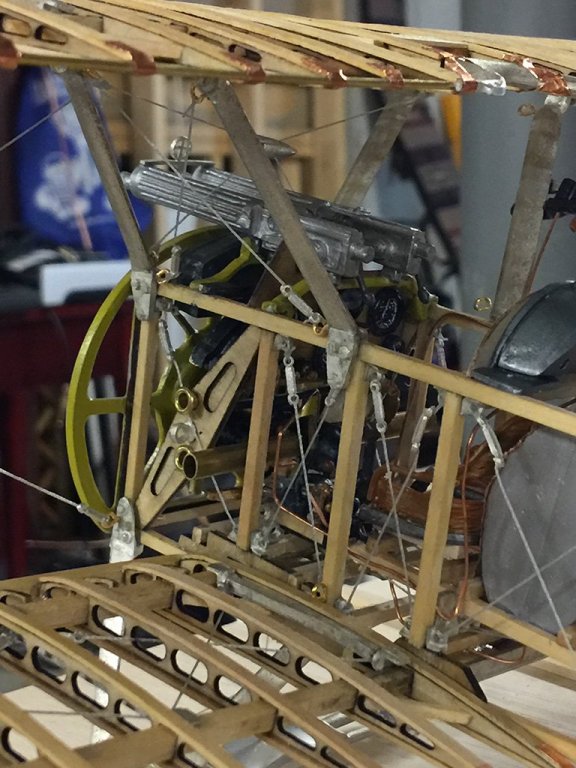
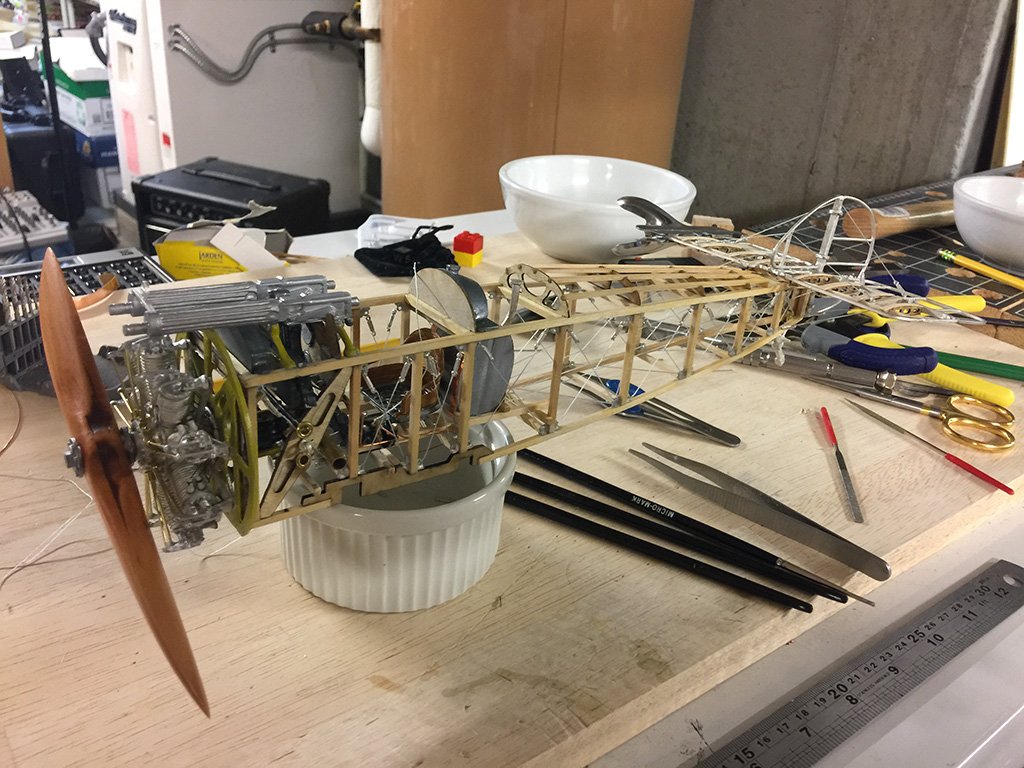
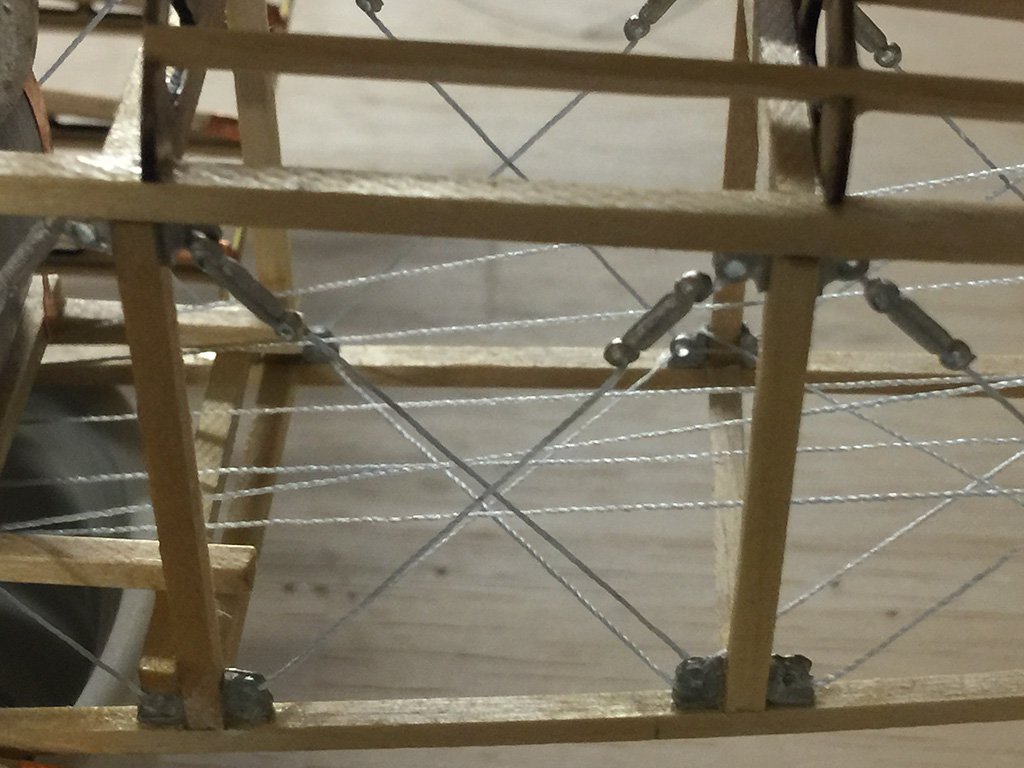
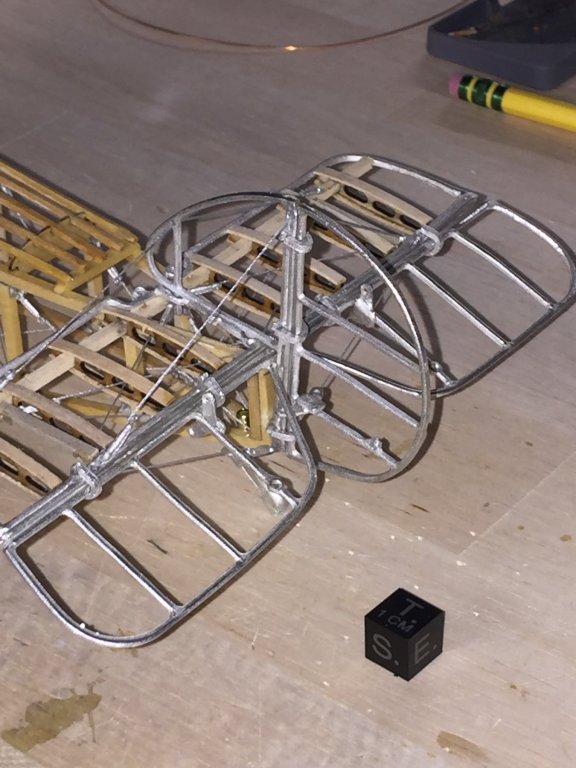
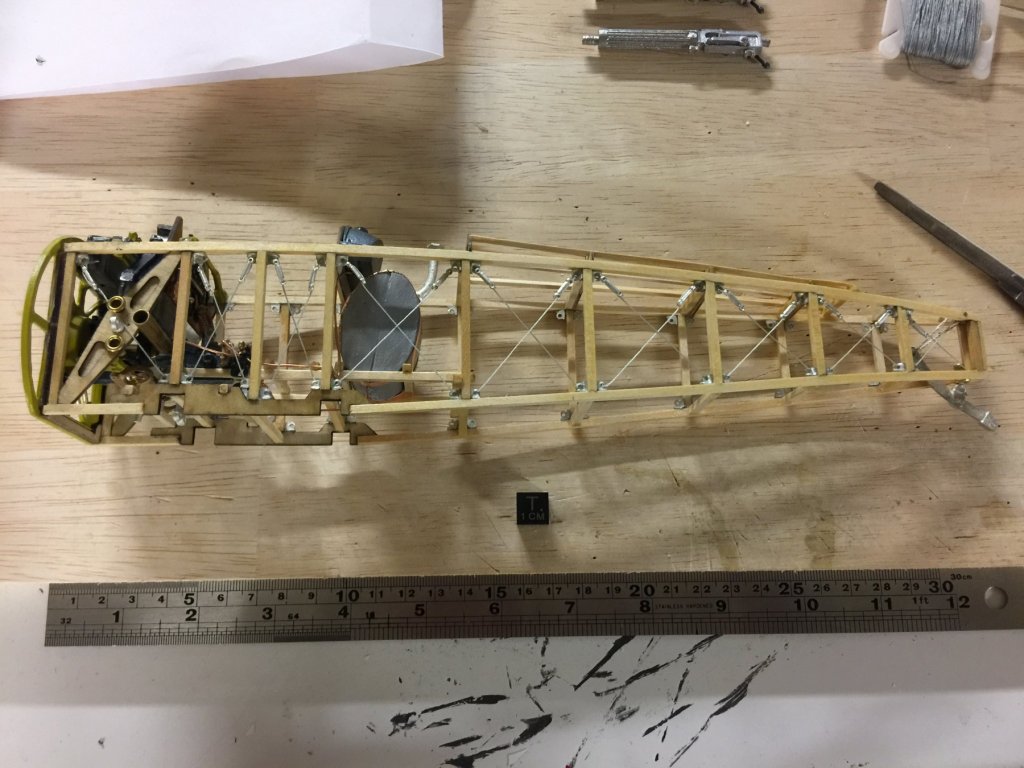
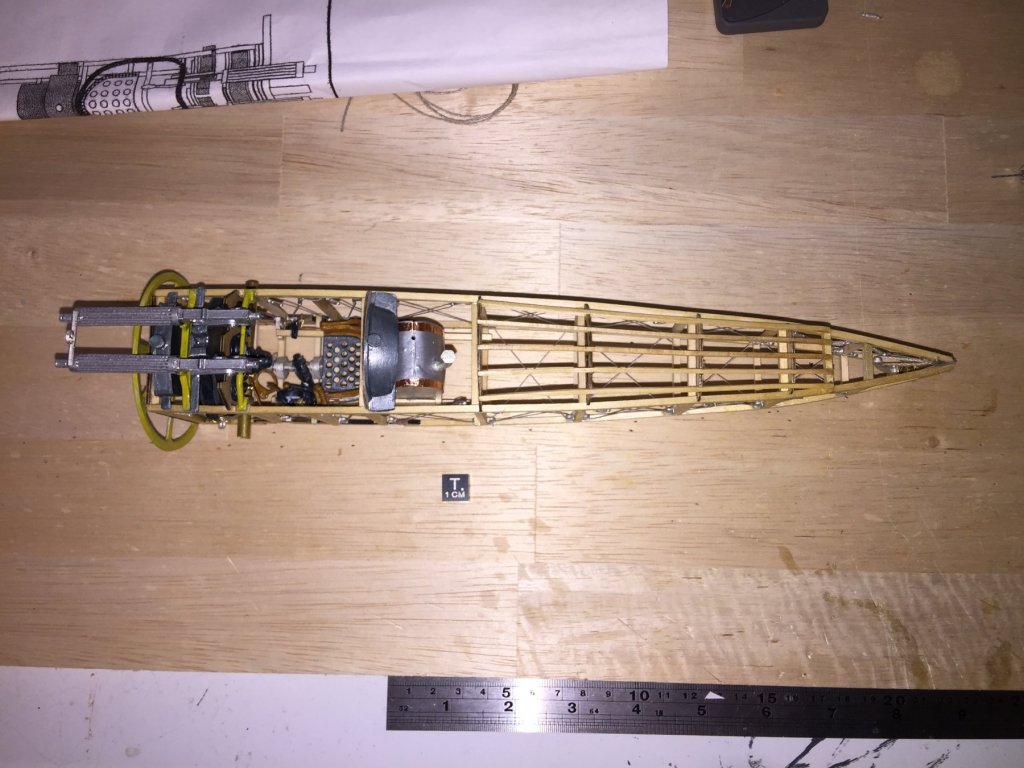
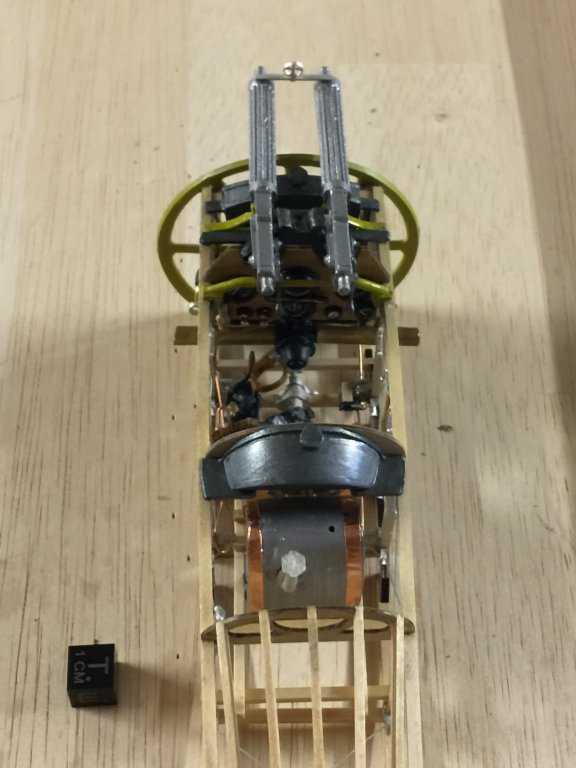
Good afternoon, all. It has been a while since my last posting. The light is at the end of the tunnel for the Sopwith build, but I was held short by some upsetting news. My dad passed away on the 22nd (Sept) after a prolonged and horrible battle against cancer. He was 82. He lived in Houston to make matters even more complicated. Houston is a mess as they rebuild and clean up all the debris from the flooding. There are a lot of displaced people. Dad's service was very nice. I'll post a shot of him here.... This build is for him, the guy who marveled at all the ship building and airplanes throughout the years, and supported them all, from the first model to getting all my pilot ratings. He was a good guy. The Sopwith: I have completed the cable runs for the ailerons, though not tied them to the control stick just yet. I need to let the cable stretch out more before committing to the final tie-off. Talking about a having a single point of failure.... the cable is ONE run from stick to lower right wing pulley to bottom right aileron to top right aileron to right front wing pulley through the entire top wing's front, to the left pulley to the left top aileron to the bottom left aileron to the front left pulley along the front of the left wing and to the stick. YIKES. Images attached: Running the aileron cable through the front of the lower right wing using tweezers. A view from under the cockpit of the plane at all the control cables getting to the stick. The aileron cables are unattached and pulled off to the side. Detail of the aileron cable coming from the wing's leading edge to the pulley that redirects it to the aileron horn and attachment point. A view of the whole plane held in place so I can get to the underside of the cabling. Looks precarious!!! Best to All, ~john


- 114 replies
-
- 11
-
-
I have made some progress, though slowly: classes have started up again, and I am back into the full swing of teaching for the fall term. That said, the top wing is in place as are the inter-wing struts and some of the cabling. It's tedious, slow and very rewarding. I also have the pitot tube installed as well as the air pump for the gas tank (odd flying machine!). I am also in the middle of my biennial flight review (FAA requirement) as a pilot, and have been blocked from flying due to the remnants of storm Jose. Phew! Lots going on! Some pics: ~john


- 114 replies
-
- 13
-
-
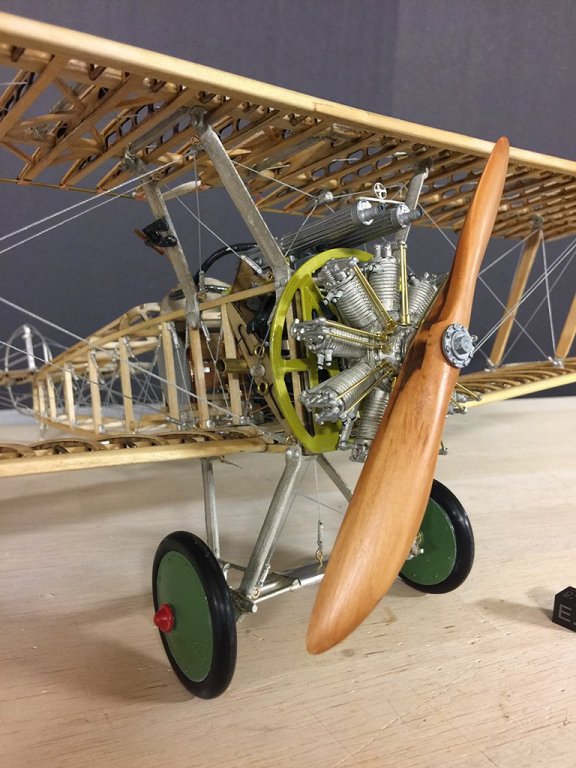
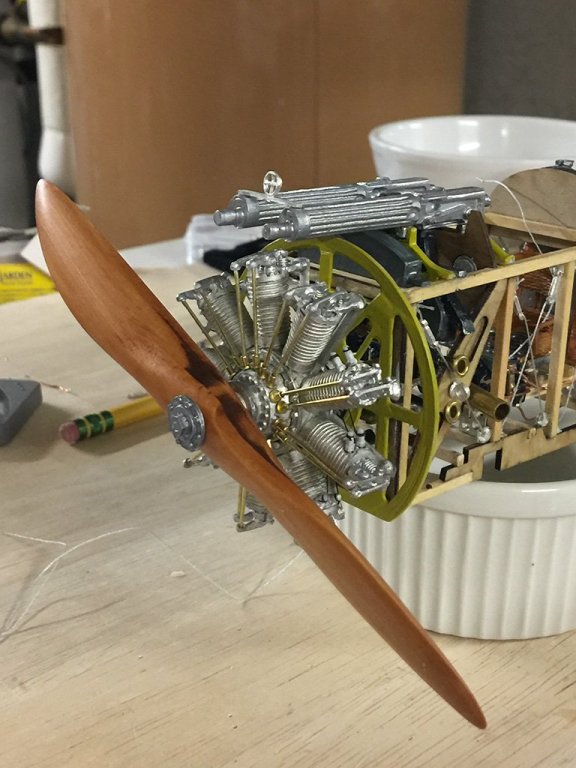
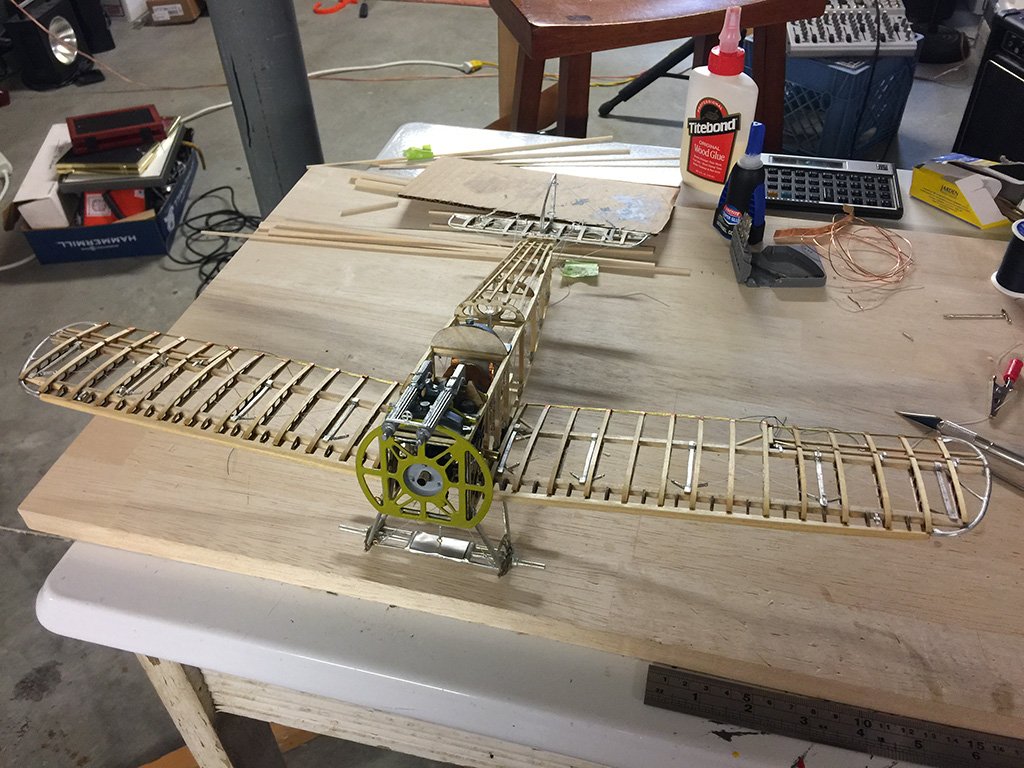
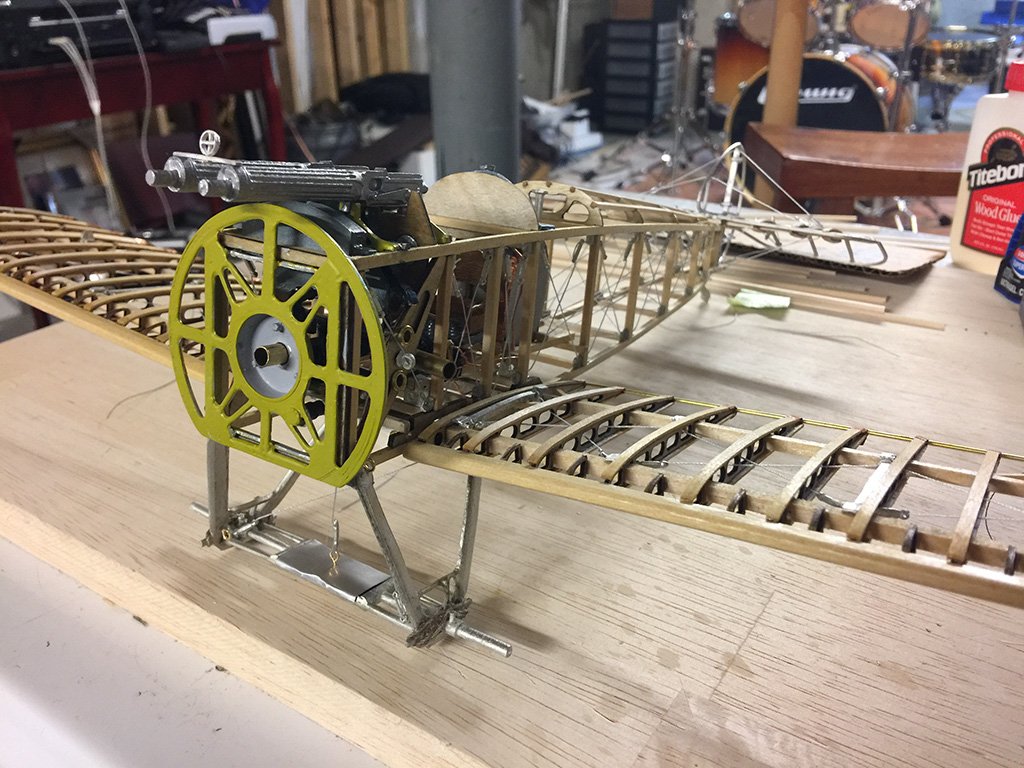
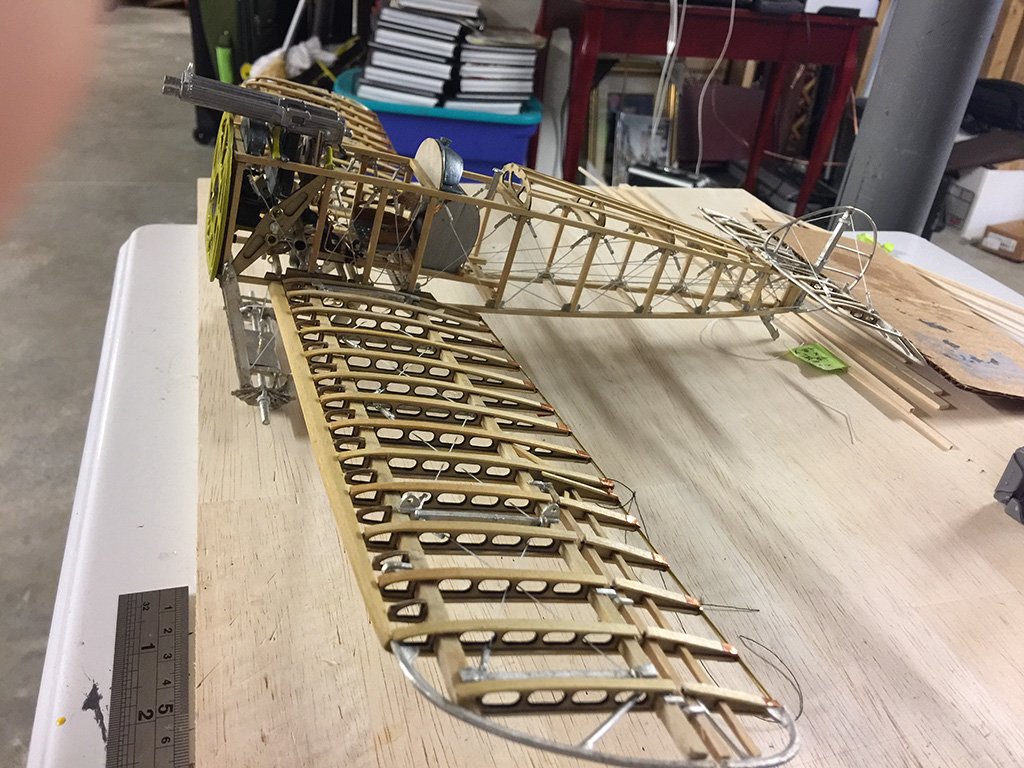
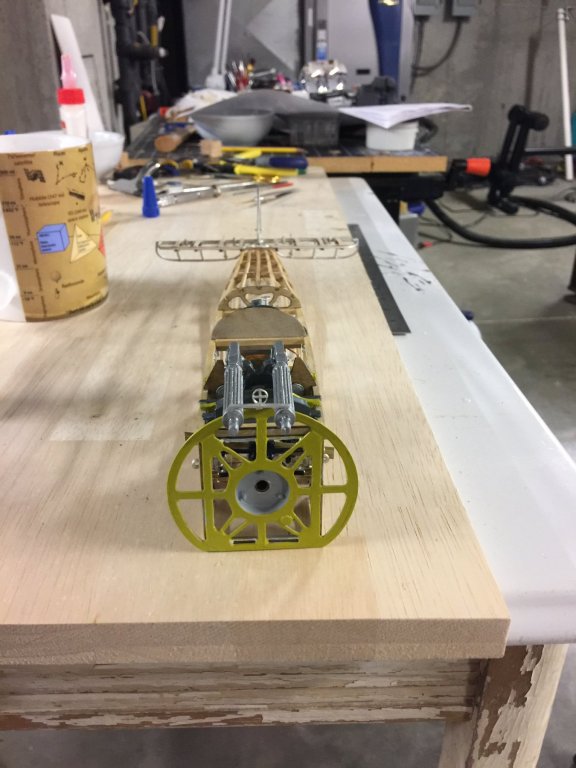
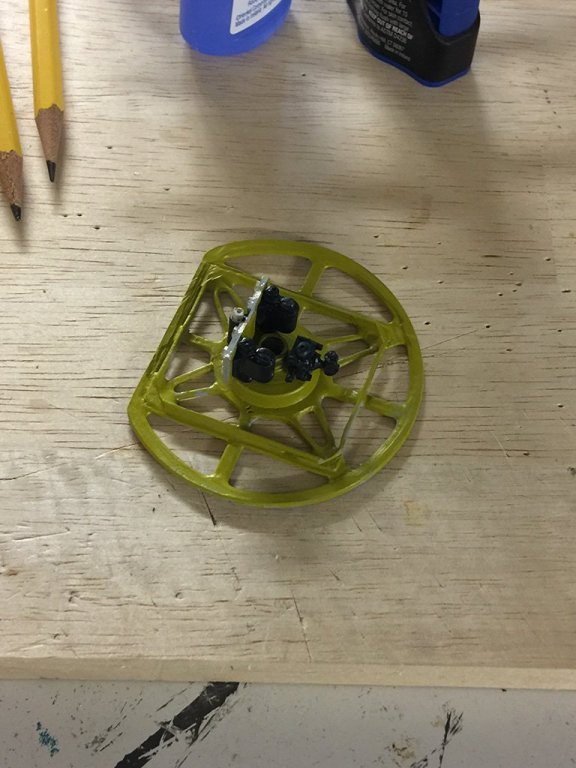
Attaching the rudder and horizontal stabilizer is one thing.... getting all the control cables from the cockpit to the empennage is a whole other story! My goodness, this was a taxing effort, but well worth the patience. Using a pair of tweezers, toothpicks with cyanoacrylate glue and a ton of time, I have the rudder pedals moving the rudder and the control stick moving the elevators, and all in the proper directions! Phew. I have provided a closeup image of the fuselage which shows the control cables running back to the control surfaces. I also could not resist an image of the engine in place.... just to see what it's going to look like in the end. Having finished the empennage, it was then time to work on the lower wing and undercarriage assembly. This was straightforward enough. The wing actually needed little adjustment to be level and square to the fuselage.... I was happy with that! The undercarriage frame and axle are in place. I am beginning work on the cabane struts for the upper wing. The wheels are also being painted a nice OD green... ready for their day in the light. ~john


- 114 replies
-
- 16
-
-
Thanks, Gary! Glad you are enjoying the build. I've been watching your progress on the Blue Jacket, and that has been fun. Also - thanks for the kind words r.e. the eclipse images. I have some 65GB of imagery from the event. It's going to take a long while to sort it all out! If interested, I just posted a new video of the event in wide field: Back to the Camel: The empennage is almost completed. The horizontal stabilizer and rudder were attached. I used some small snips of copper wire as brads to reinforce their attachment, and it seems to be working rather well. Those can be seen in the close-up shot below. The bracing wires are in place, too. The last bit is to attach the control cabling from the rudder pedals and stick.... I got the rudder lines installed, but I am not quite sure how I am going to get the elevator cabling done... the drawings in the manual have them backwards(!), but I think the verbiage in the text is correct. Ah, well.... language! Here are some images.... ~john
- 114 replies
-
- 10
-
-
Finished stringers on the fuselage. I learned, again, and again, to read the instructions before diving into things, having glued some cables into place only to find out that the glue clogged holes I needed for future cabling down the road. D'Oh! .. and finished the fuselage for now. With wings and empennage completed, it is time to assemble all the parts together with control cabling..... ~john

-
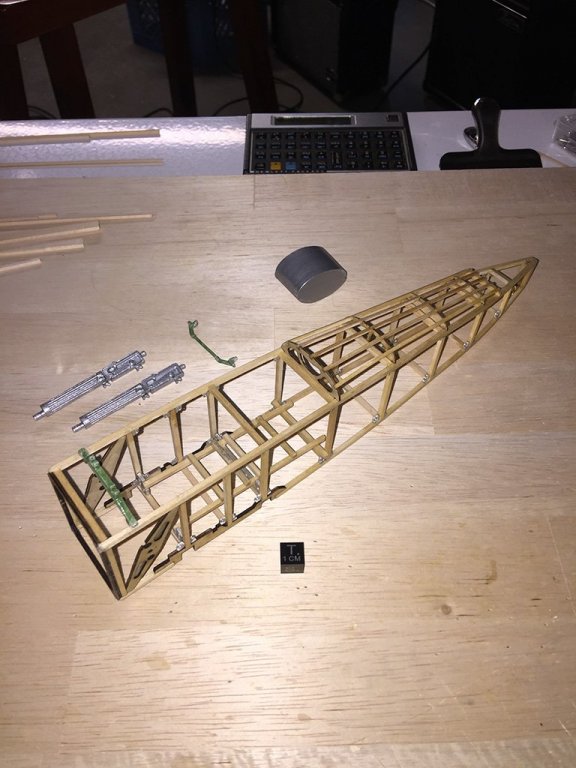
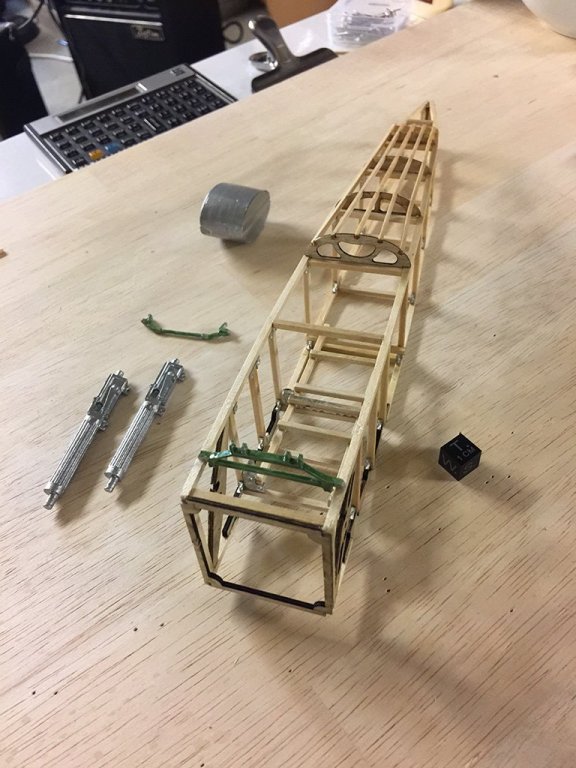
Oil tank, ammunition cans and instrument panel in place along with the rear gun mounts. Now working on the frame stringers along the fuselage. ~john
-
Hi GMO2, Yes, indeed - the Camel was a real beasty to fly - it was dynamically unstable given the weight and balance configuration.... the spinning massive engine, and the fact that the gas tank losing mass with flight brought the CoG up front even more. Certainly not a Cessna 172 by any means! ;-) ~j
-
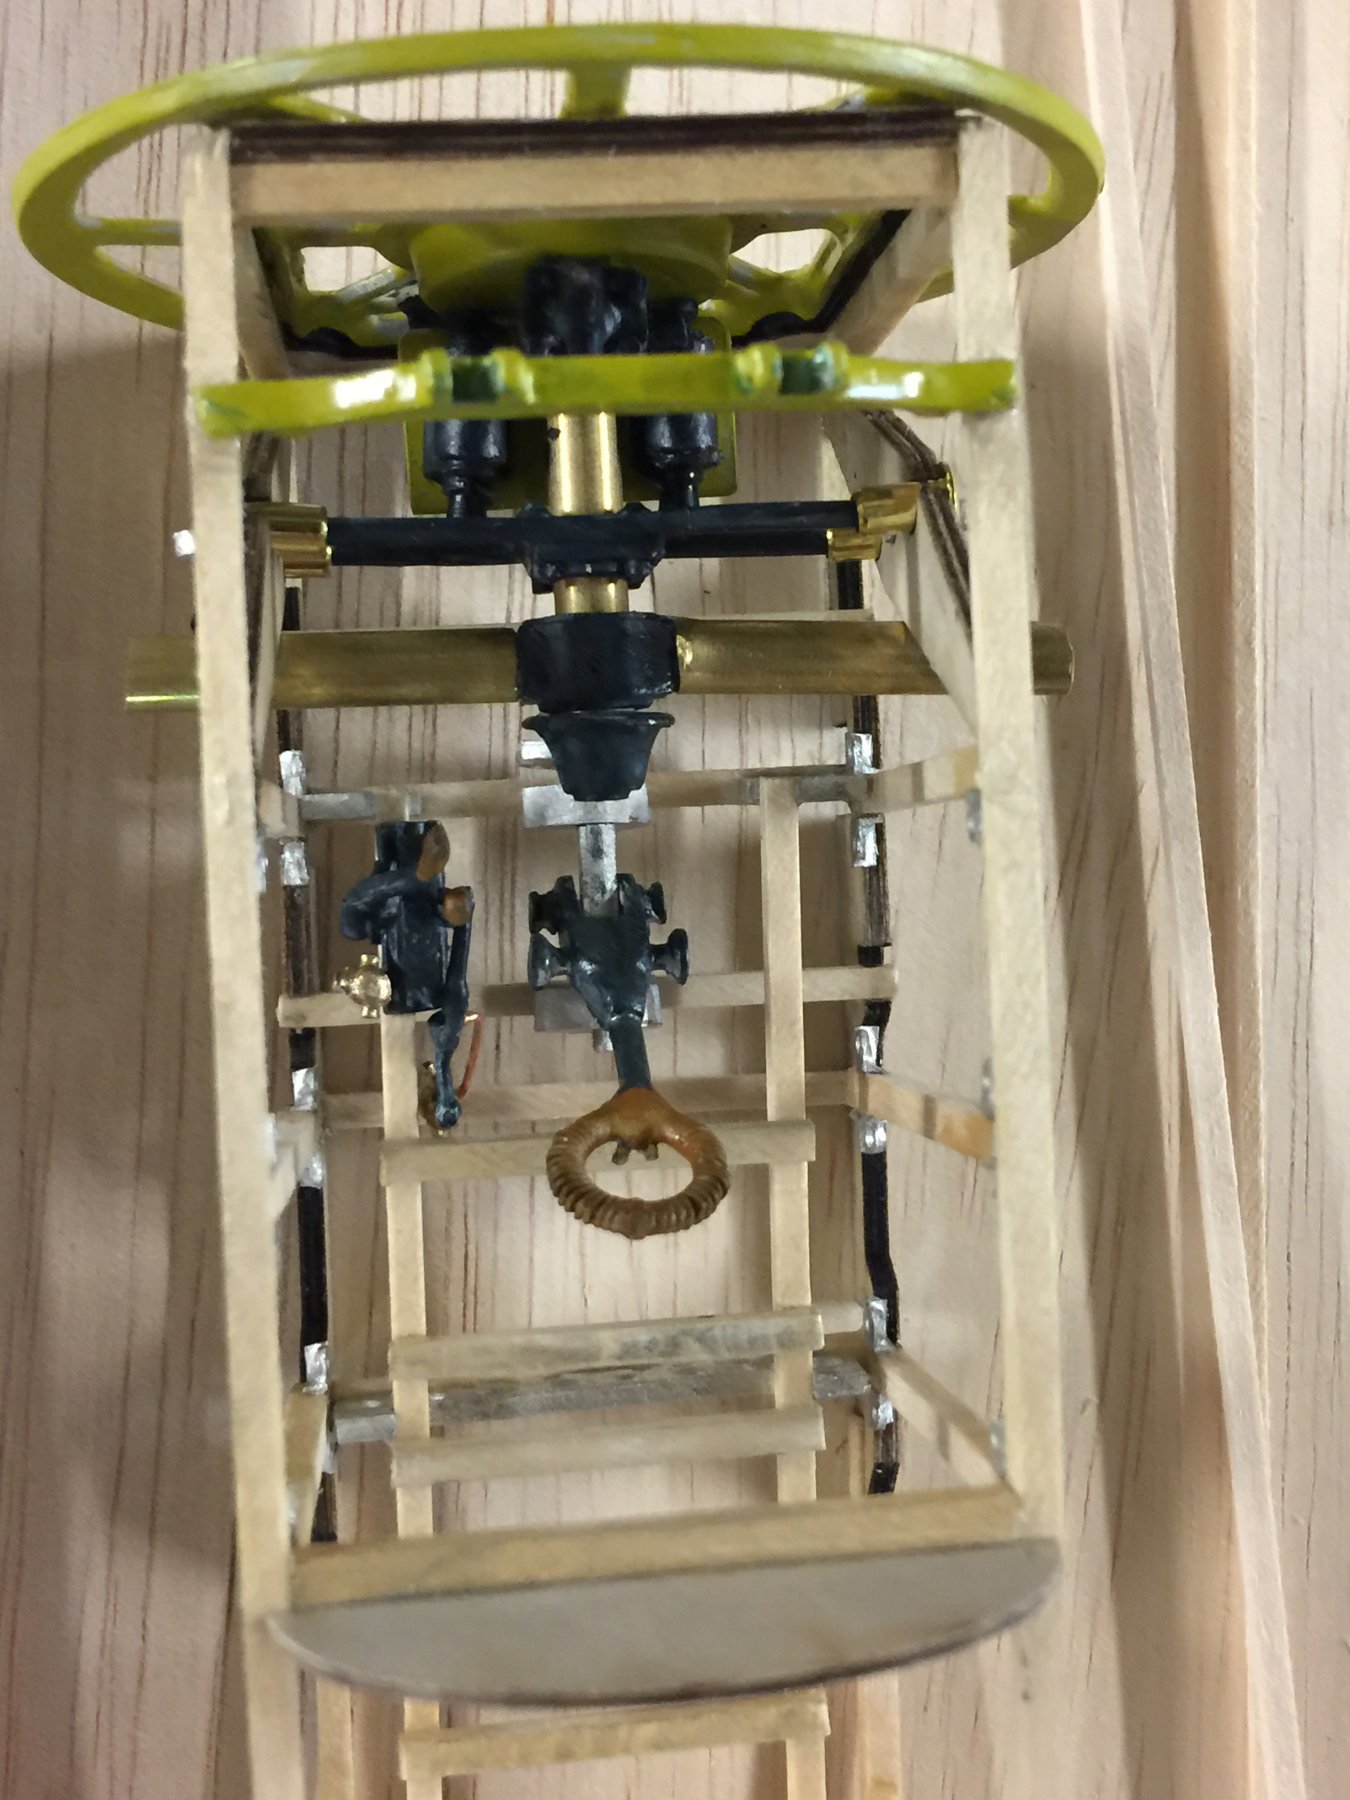
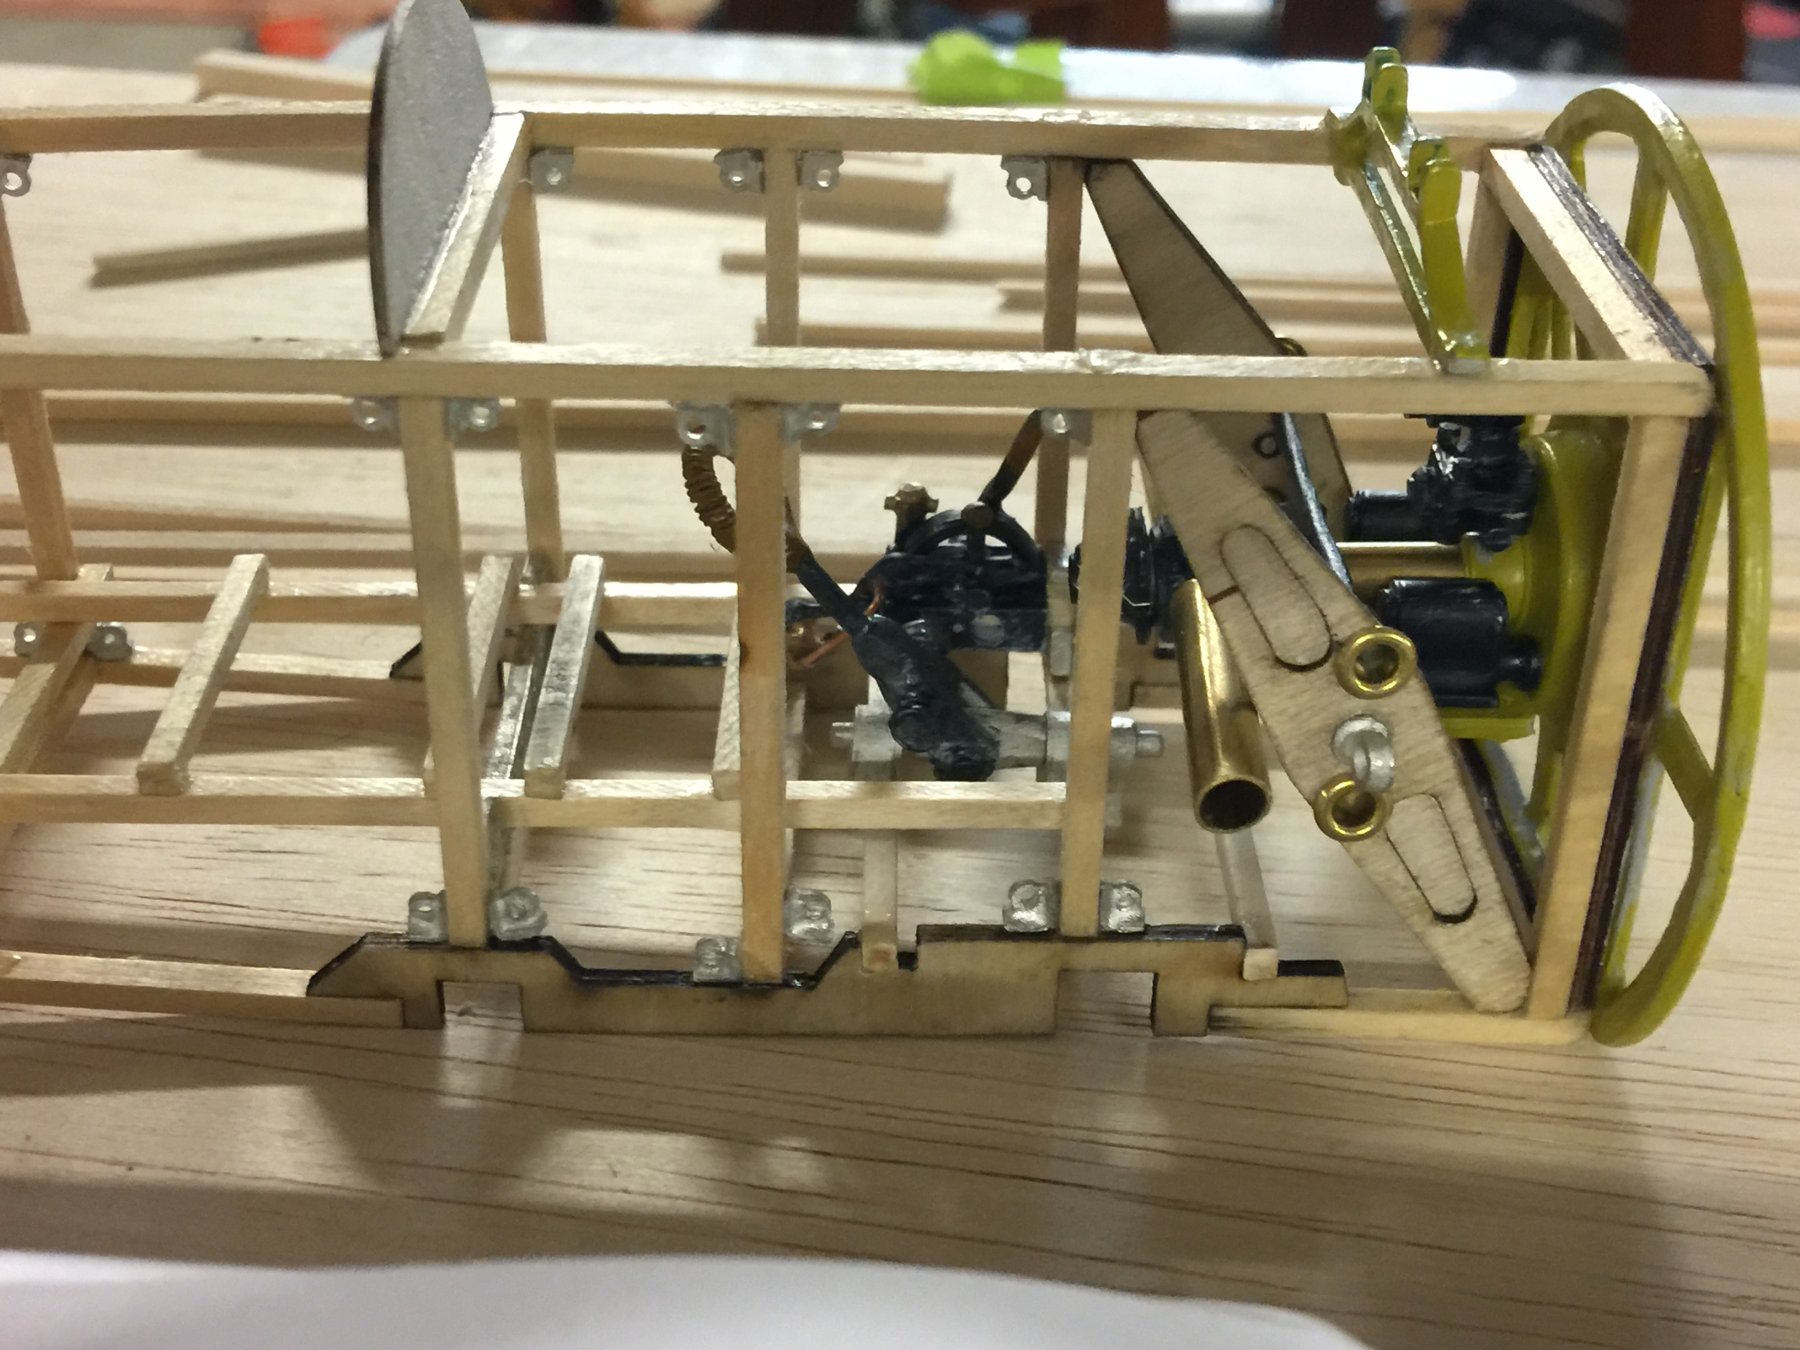
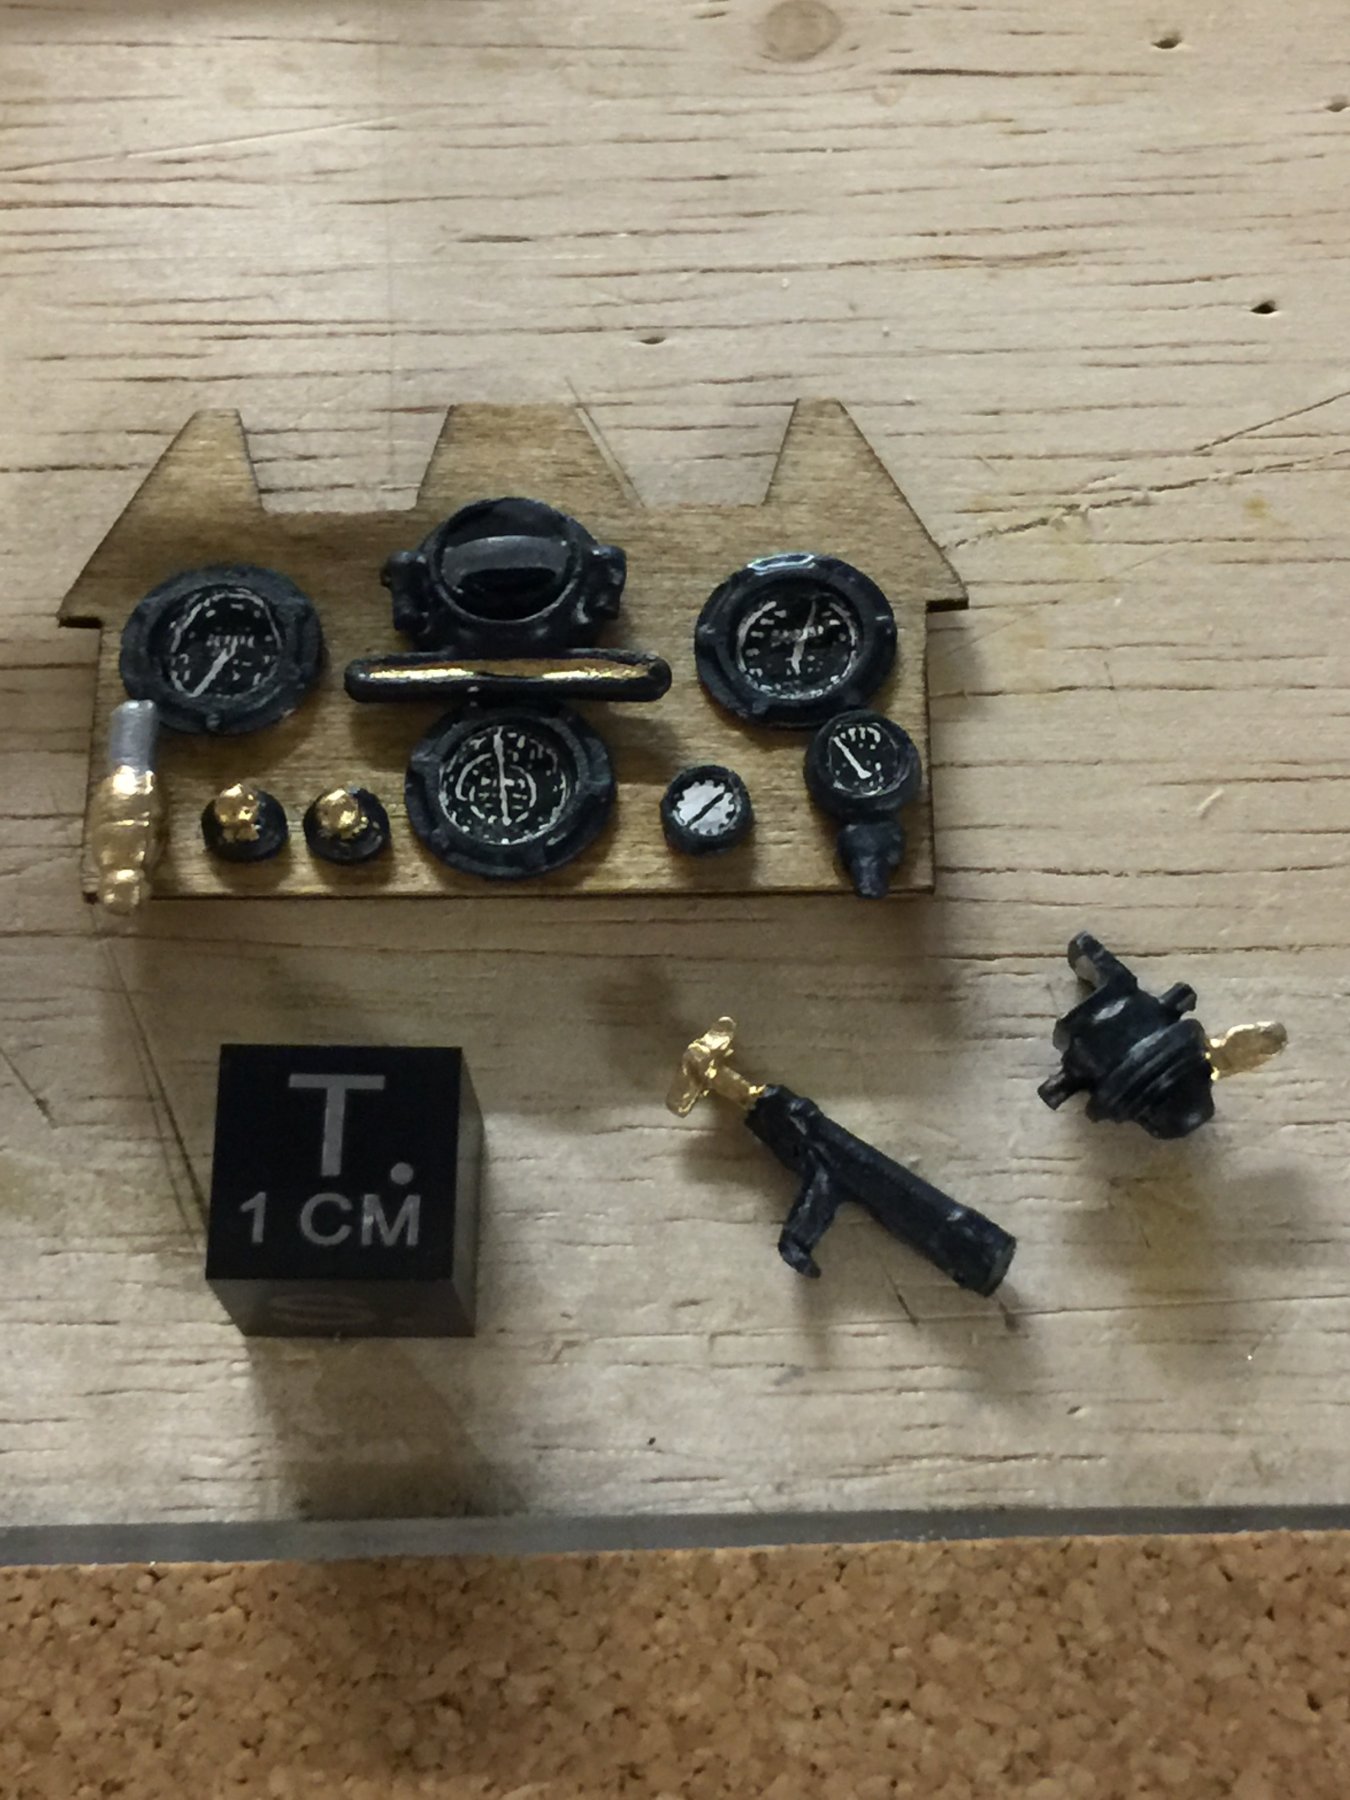
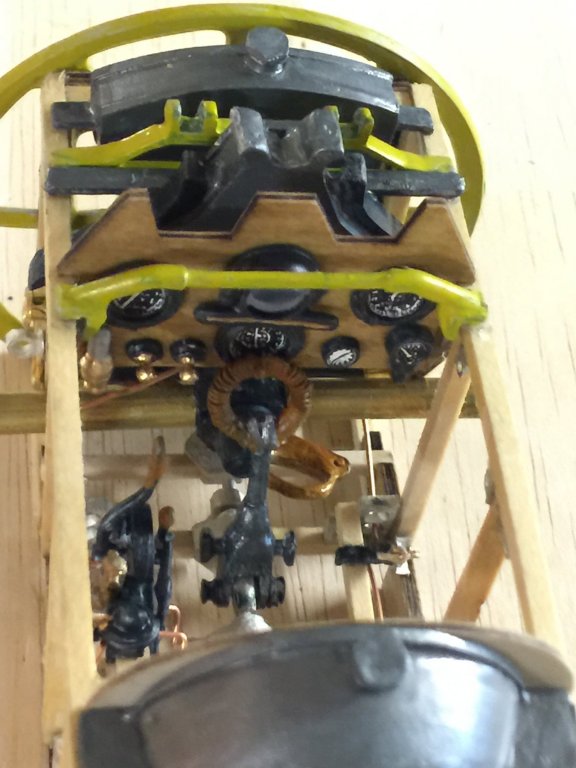
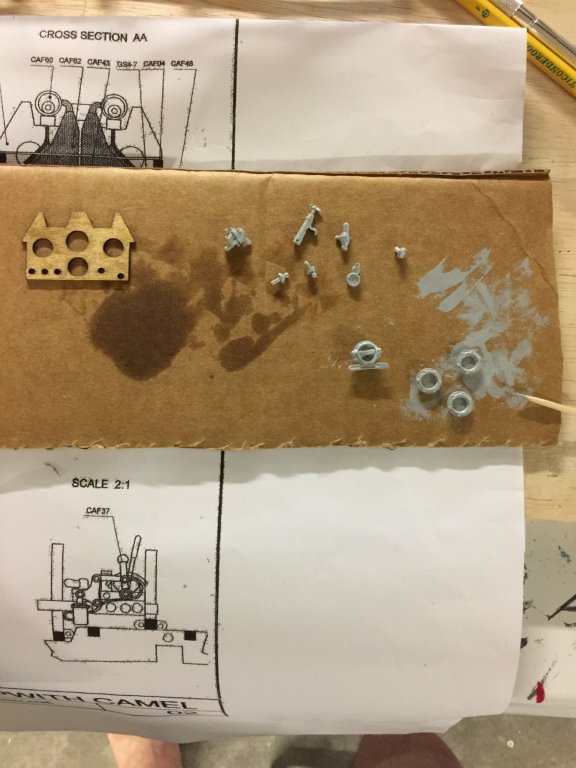
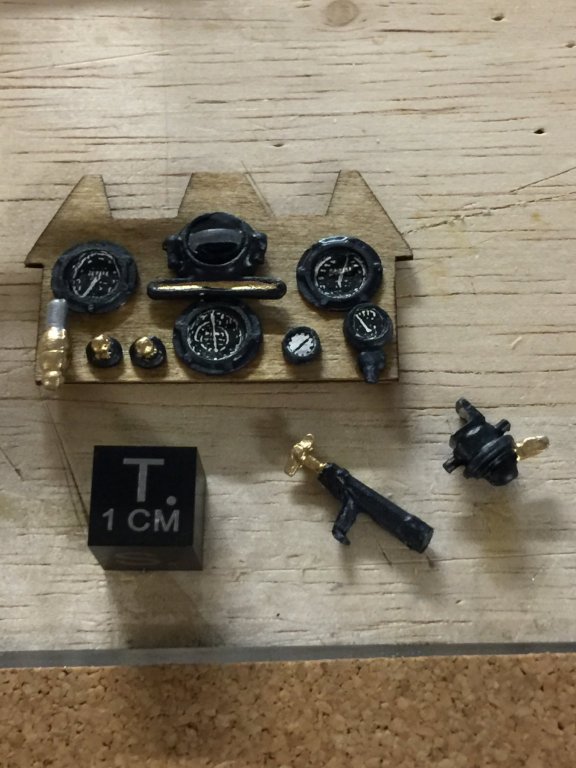
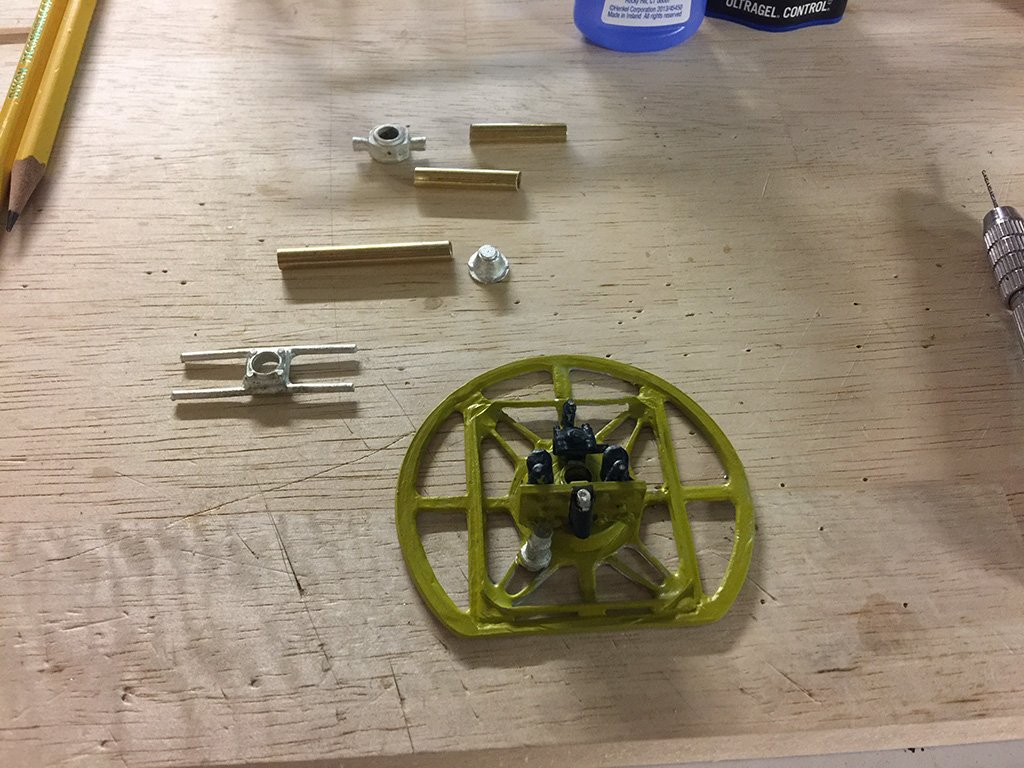
All, Back home from the eclipse data collecting trip. If interested, feel free to peruse my blog on this and other topics: http://www.regulusastro.com/ - And now to work... and to work on the Sopwith. Not much to report. Status: - Working on all the cockpit connections for air, oil and fuel lines. It is a rather convoluted bit of artistry with little in the way of help in mapping it all out. I have been trying to rely on various images and plans found online and in books, but a good set of blueprints would be best. Images attached: The makings of the instrument panel, the interior of the cockpit looking down and from the side, and the finished panel. You'll see the throttle assembly and the control "stick" assembly are now in place. ~john


-
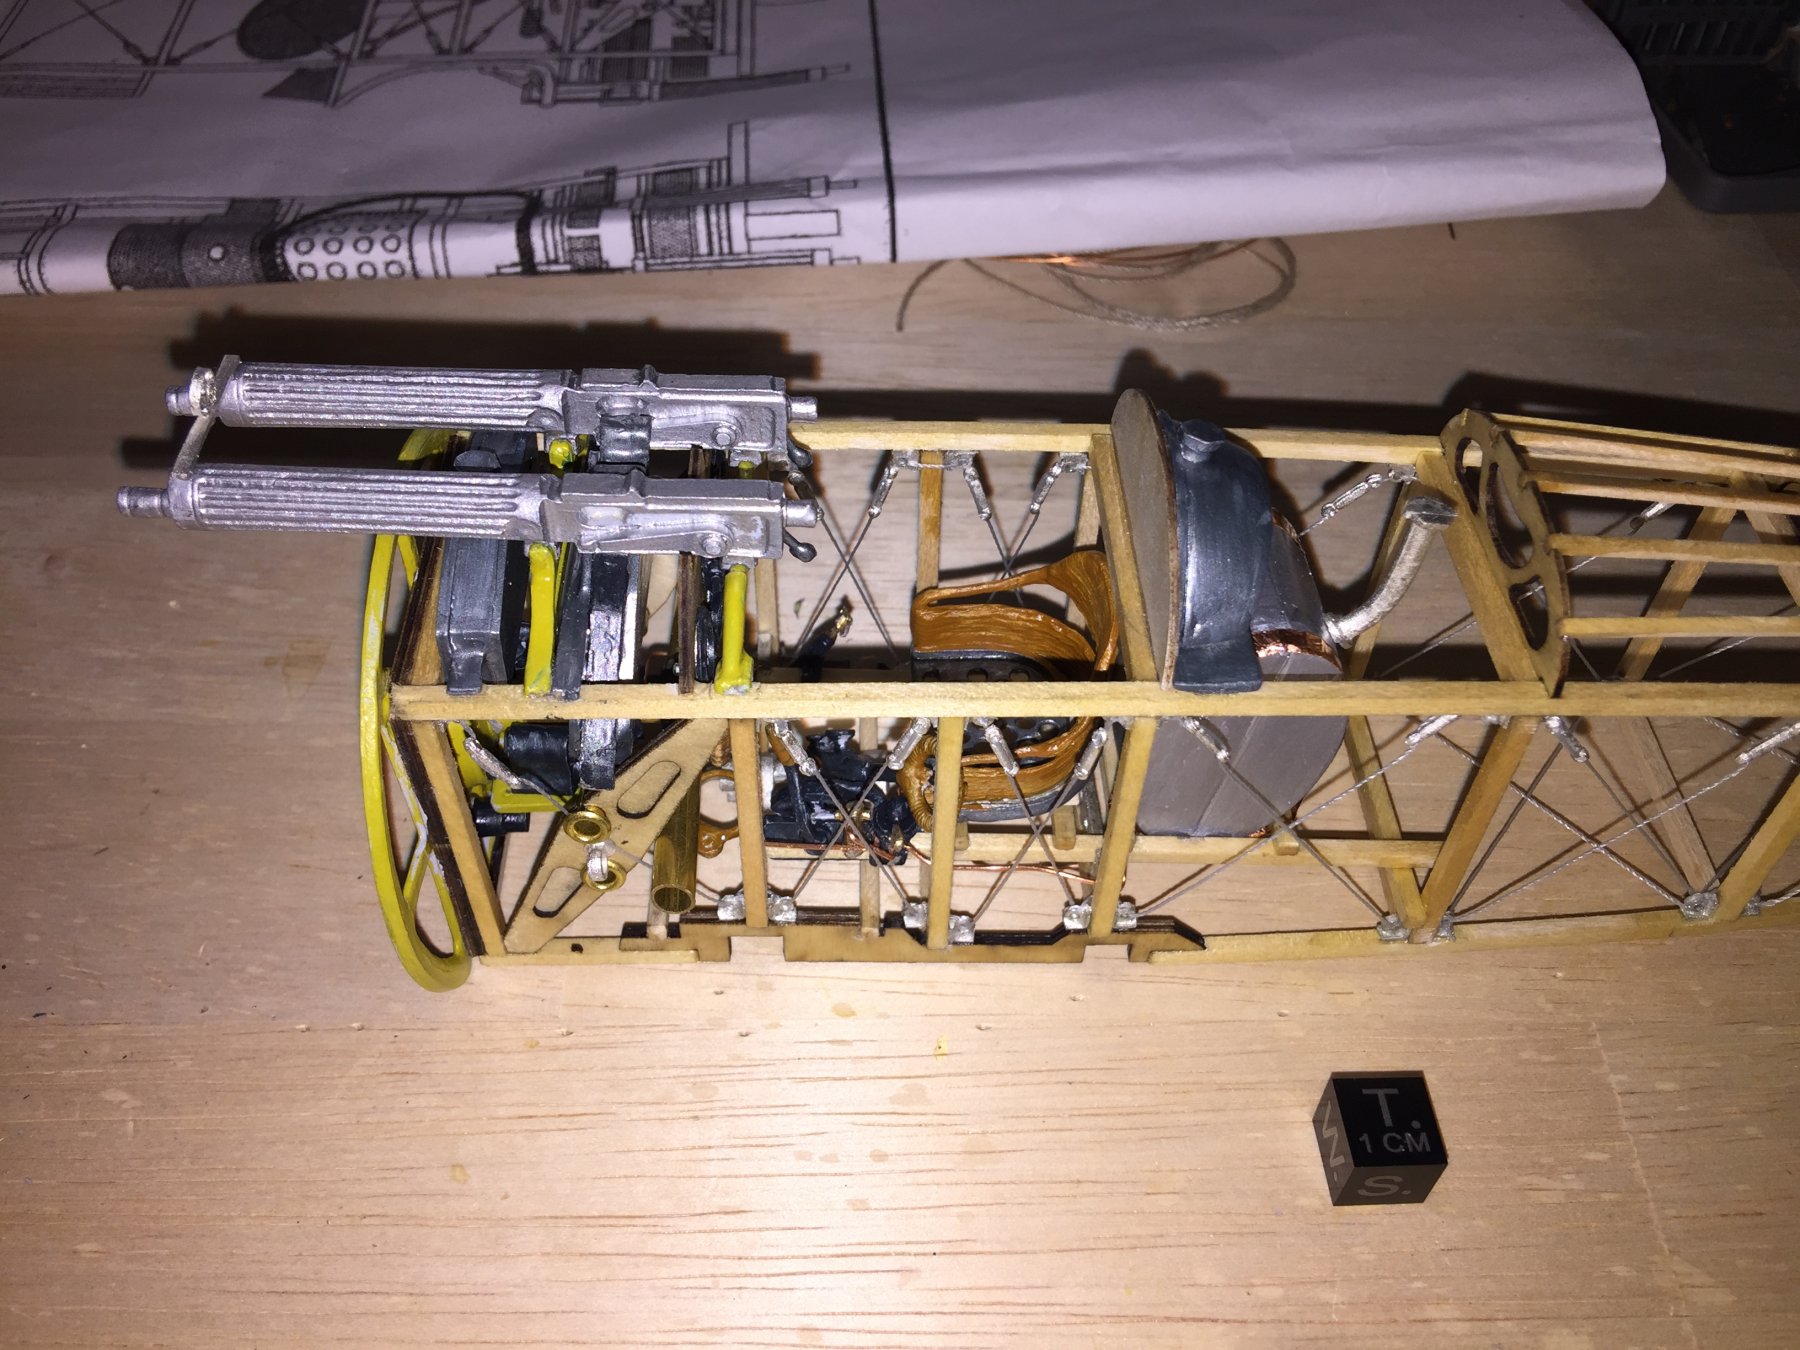
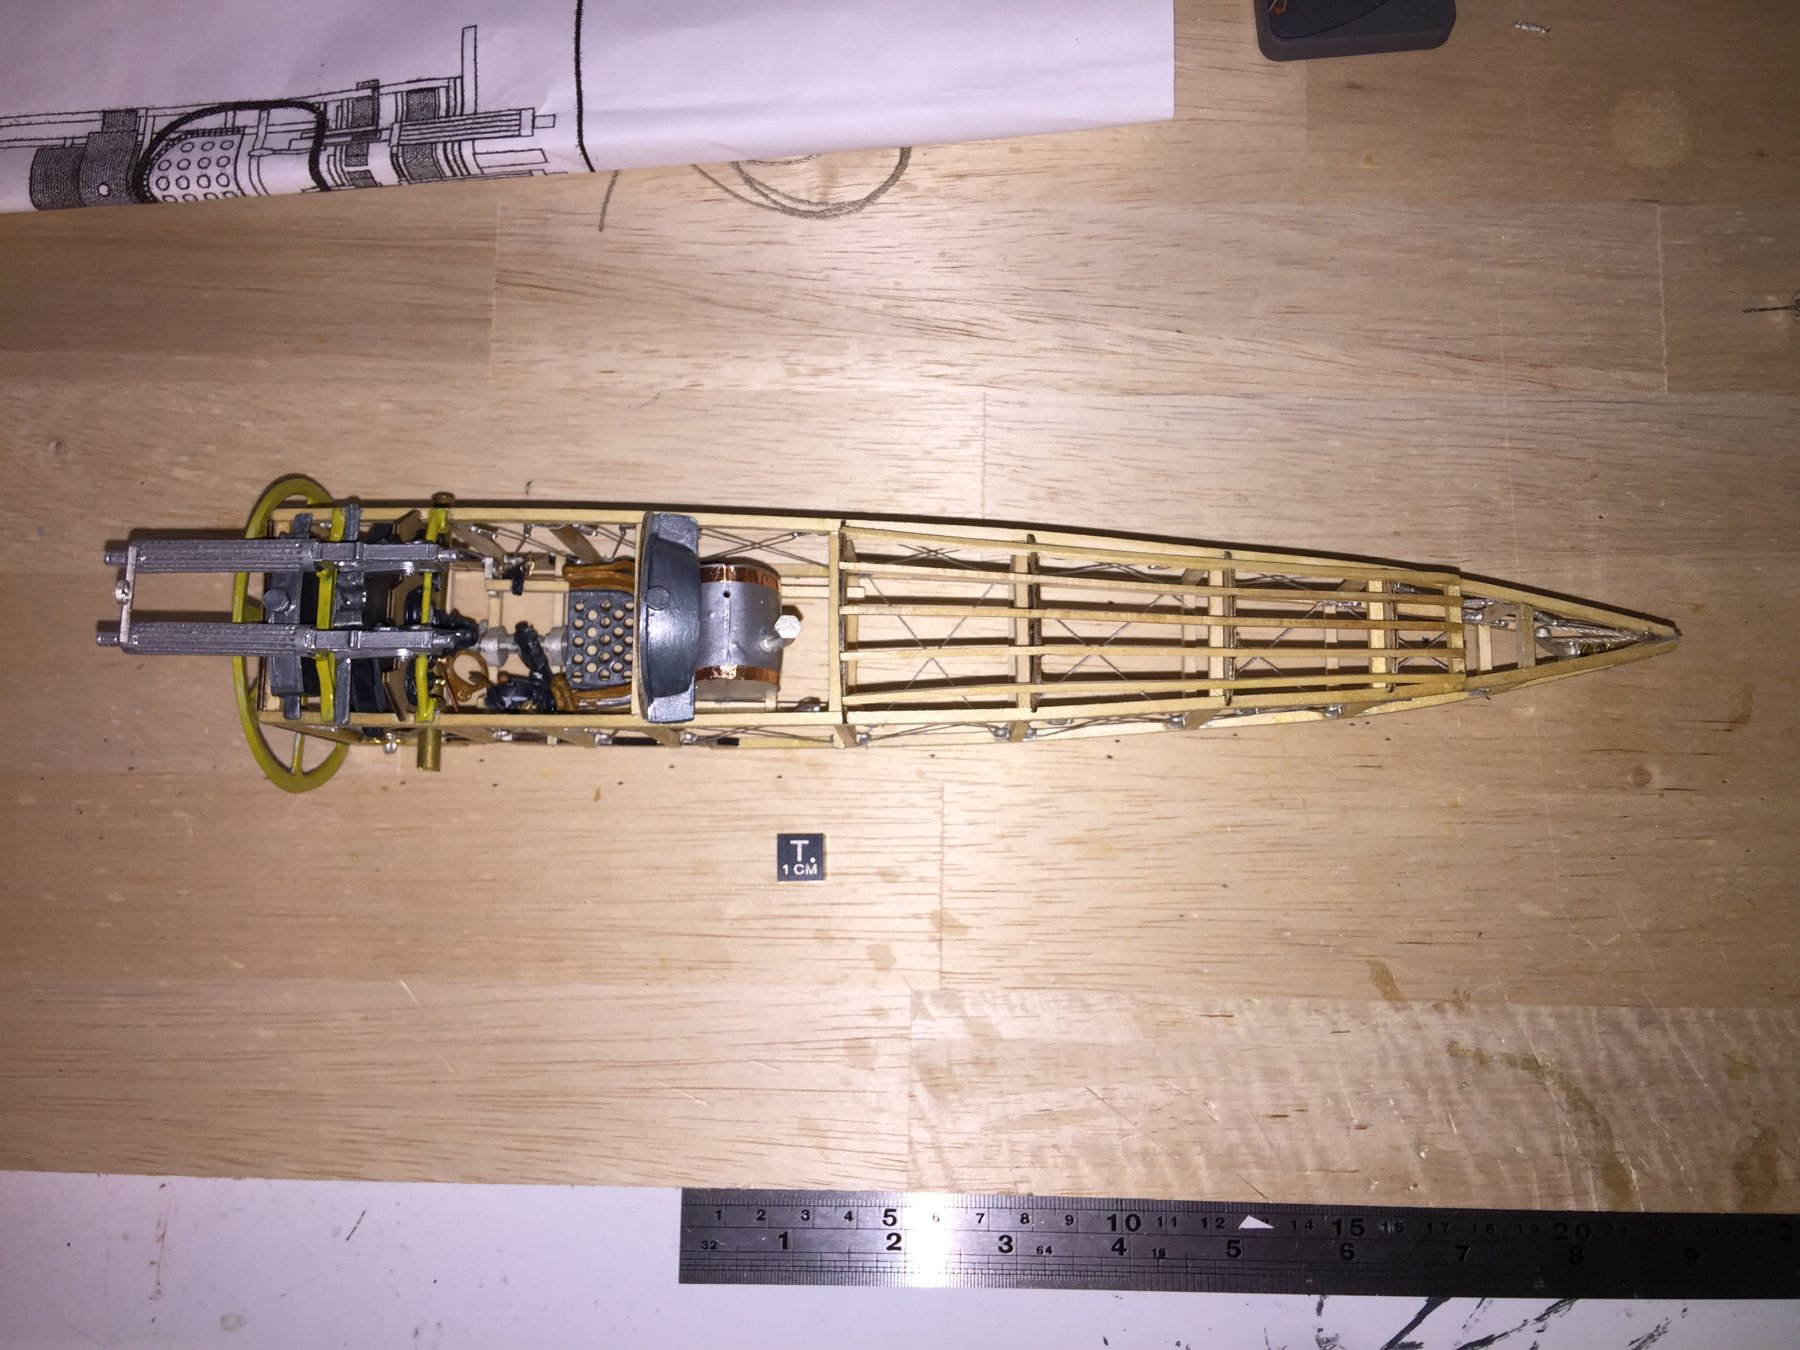
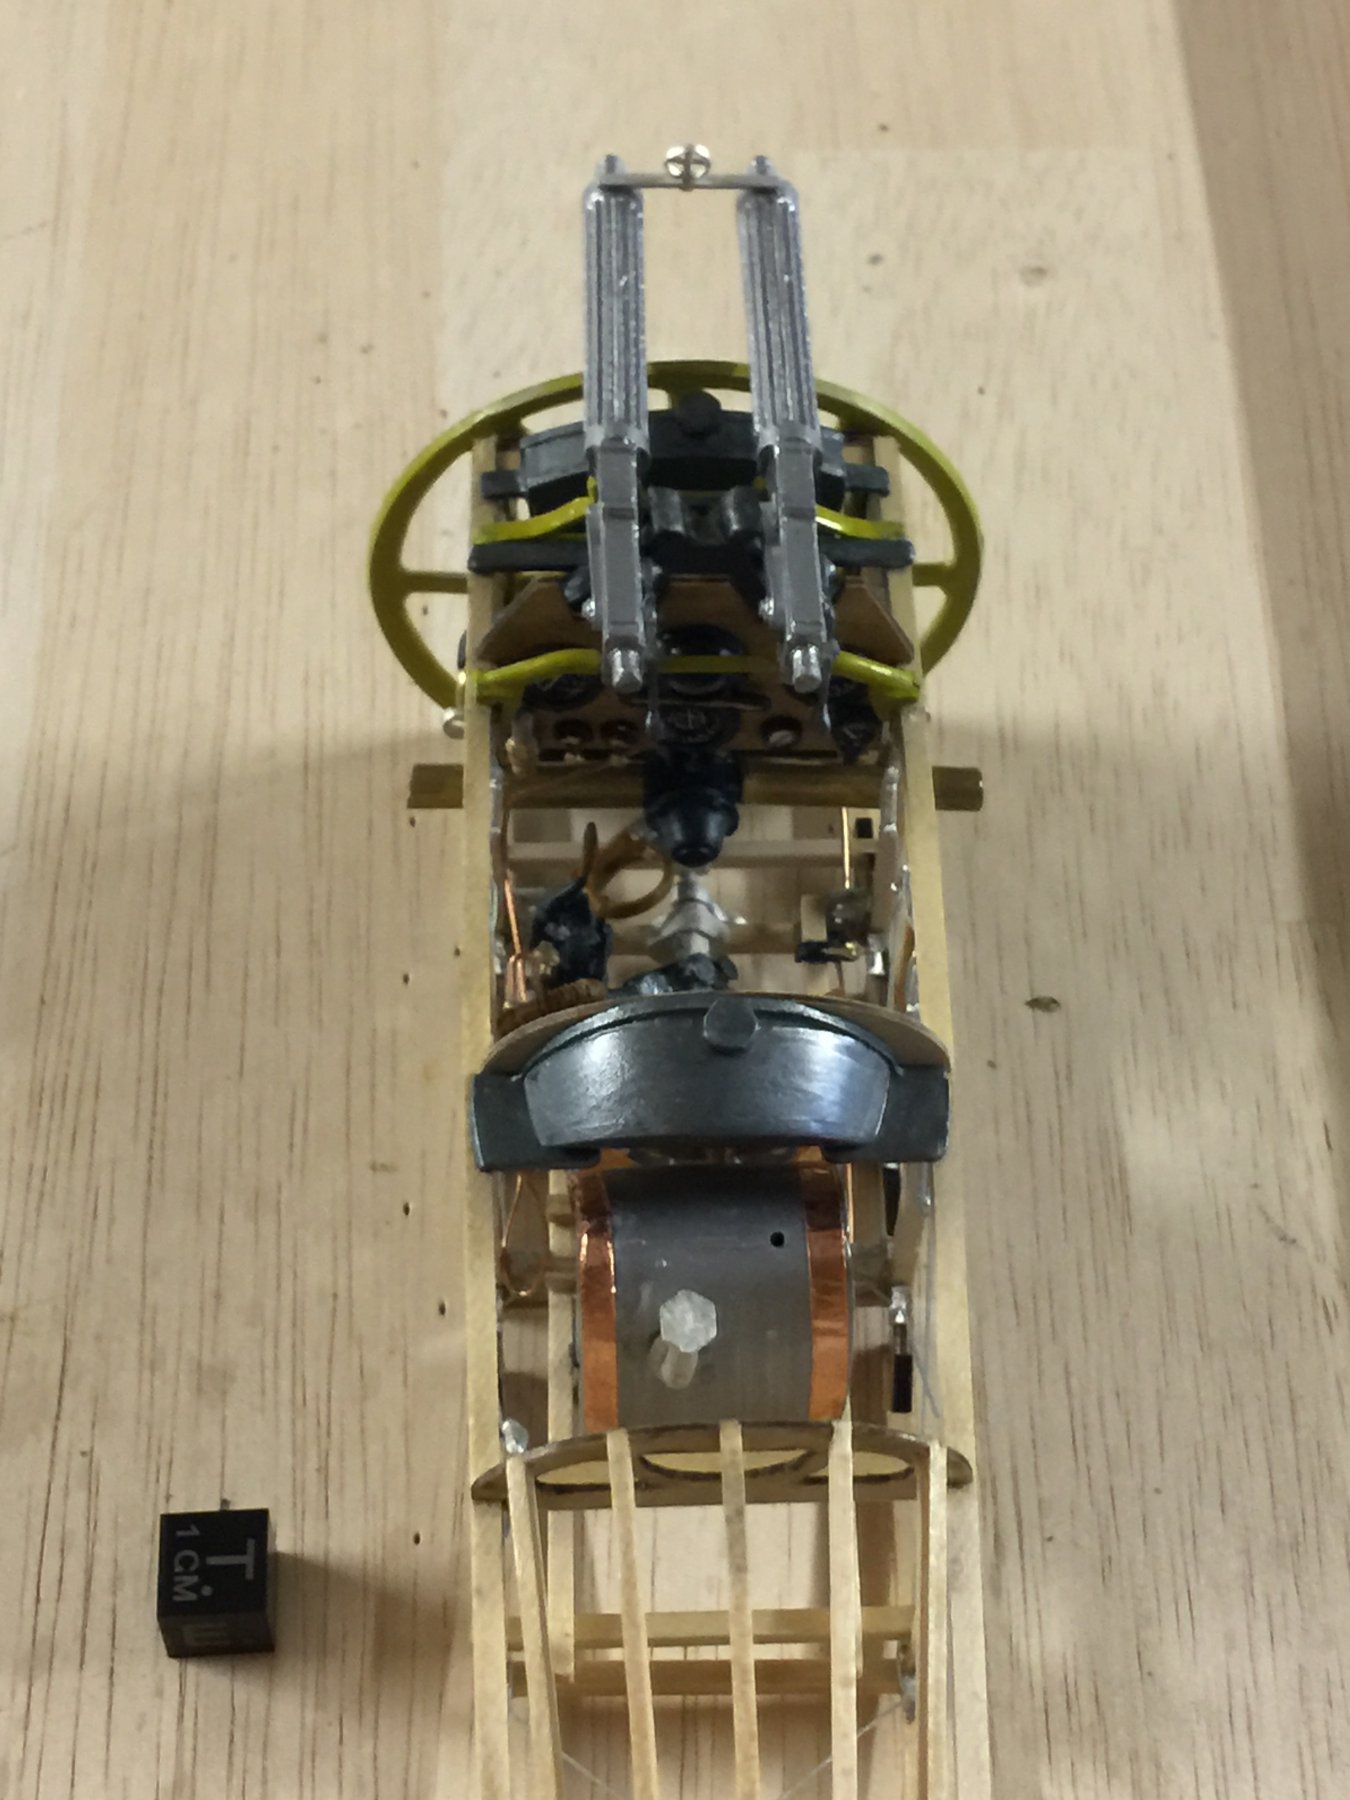
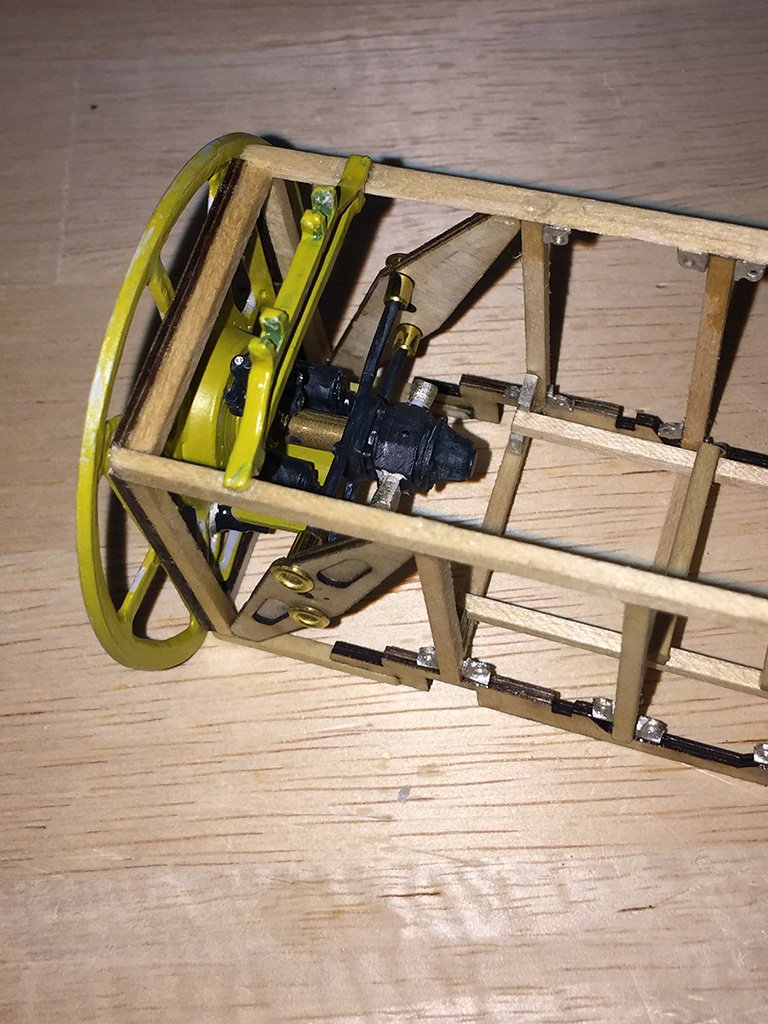
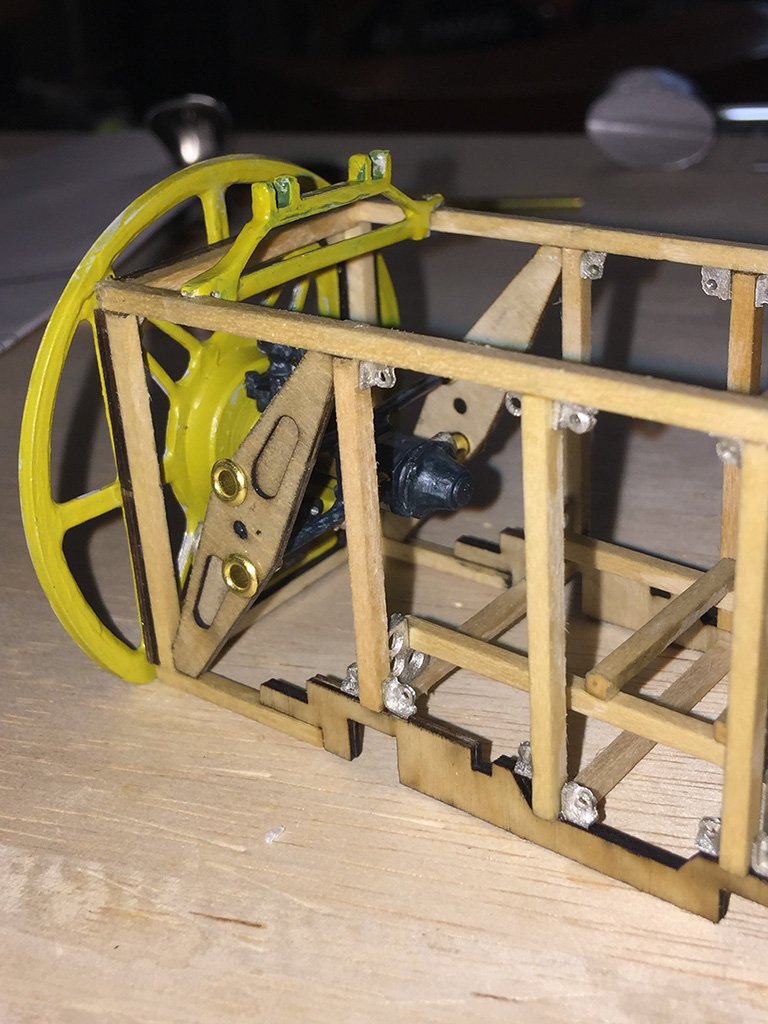
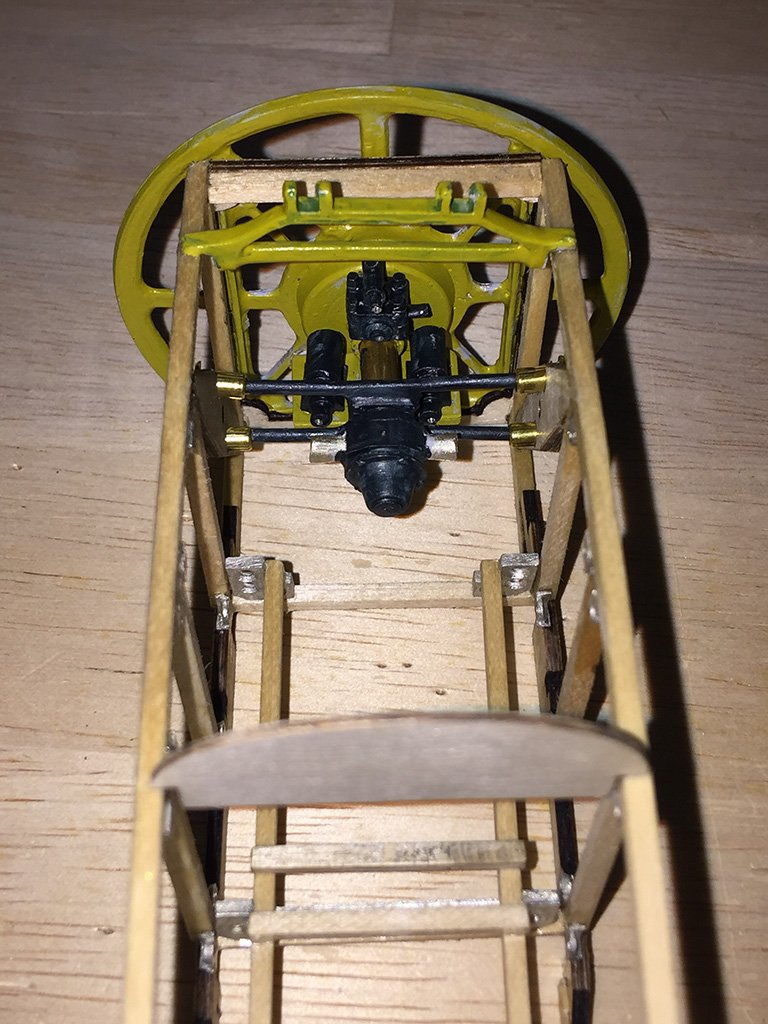
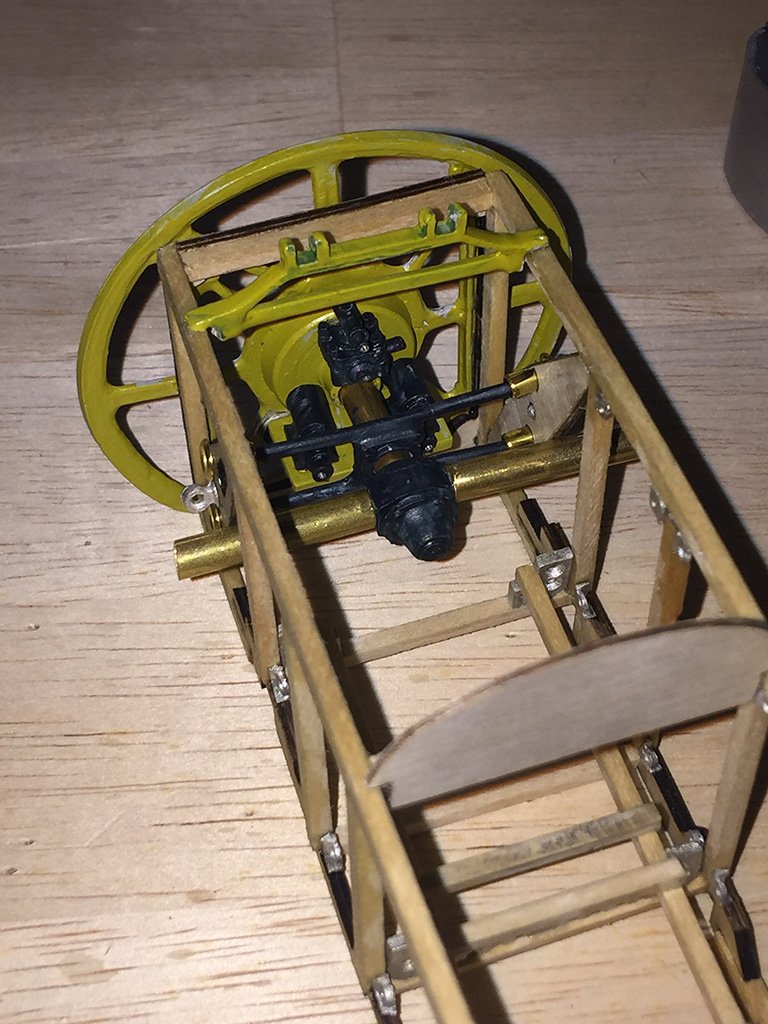
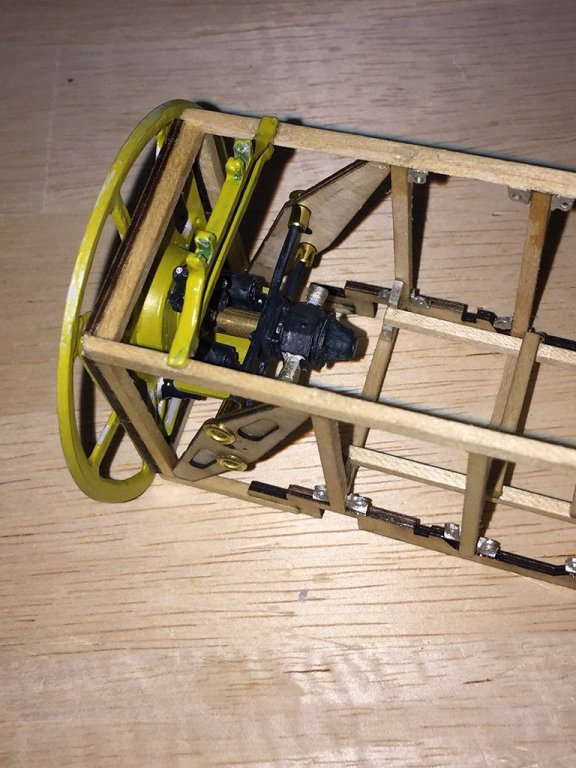
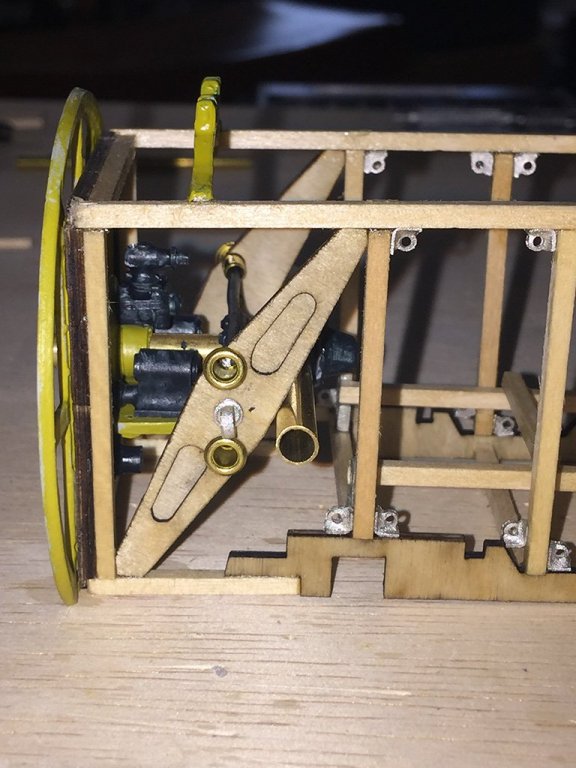
Thanks, Mike. It is a fun model. The kit? Well, it has its good points and its not so good points, like all kits, I imagine. Like ship building, I have found that reading ahead really helps! I am also not such a fan of Britannia castings.... With some effort, filing, cutting, drilling and sanding, then some primer and paint, it can look pretty good. Continued progress on the front end of the Sopwith. The engine mount is in place along with the rear supports and engine accessories. On many modern planes, this stuff is in front of the firewall with the engine, but not here. Behind the firewall is the carburetor, the magnetos, the starter (manual), and pumps. The brass tubing going out to both sides of the fuselage are air intakes that go right to the carburetor. THAT assembly literally rests right at the pilot's legs, just in front of the control stick. Talking about exposed!... a fuel tank behind you, and the engine right in front.... ~john


- 114 replies
-
- 14
-
-
The fuselage is complete: phew! The front gun mount is in place (the rear mount waits until the engine accessories are installed). The seat and gas tank support rails are also installed. Now onto the engine accessories before tackling the cockpit, panel and controls. The hangar and shipyard will have to close for the upcoming eclipse: headed out to see mom in Denver then onto Wyoming for the eclipse itself. I'll post some pics assuming we have clear skies. ~john
-
Hello and welcome, Tom! I am also in New Hampshire.Maybe we'll run into one another some time. Great work on the longboat! ~john
-
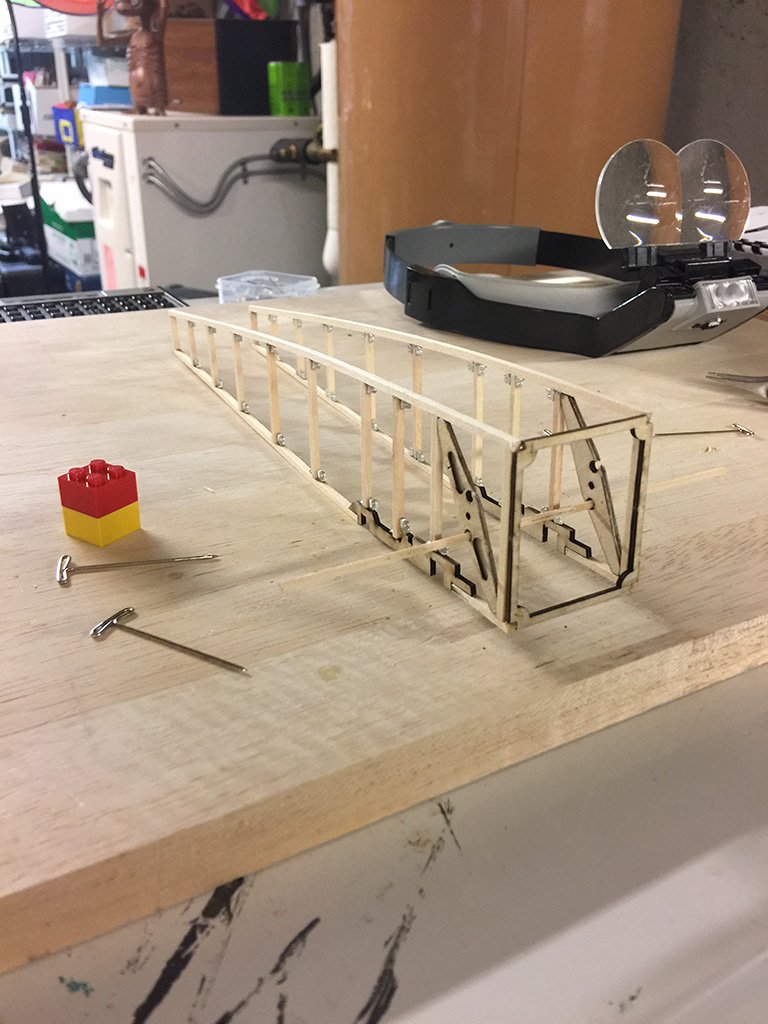
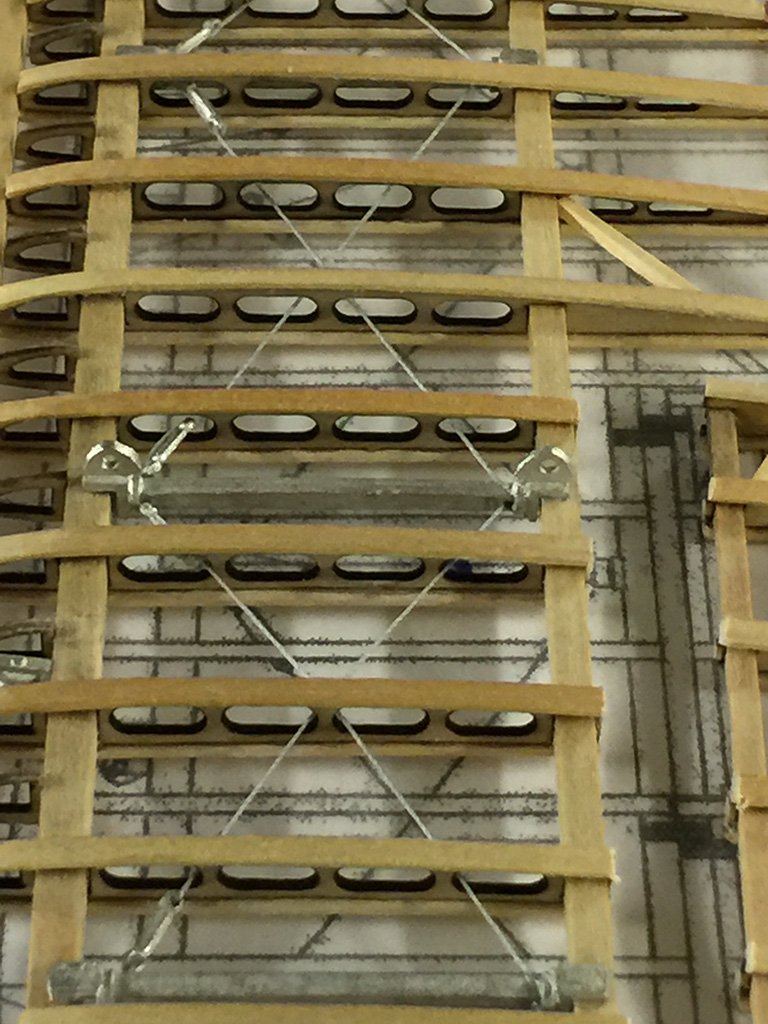
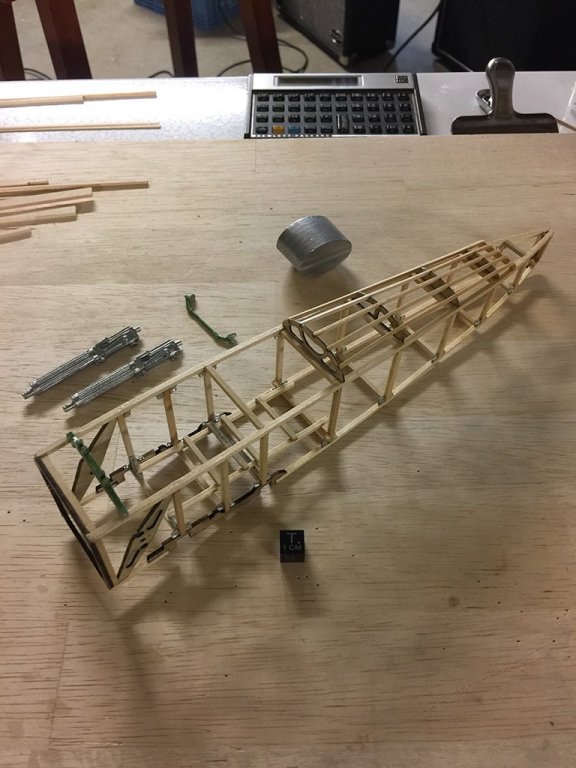
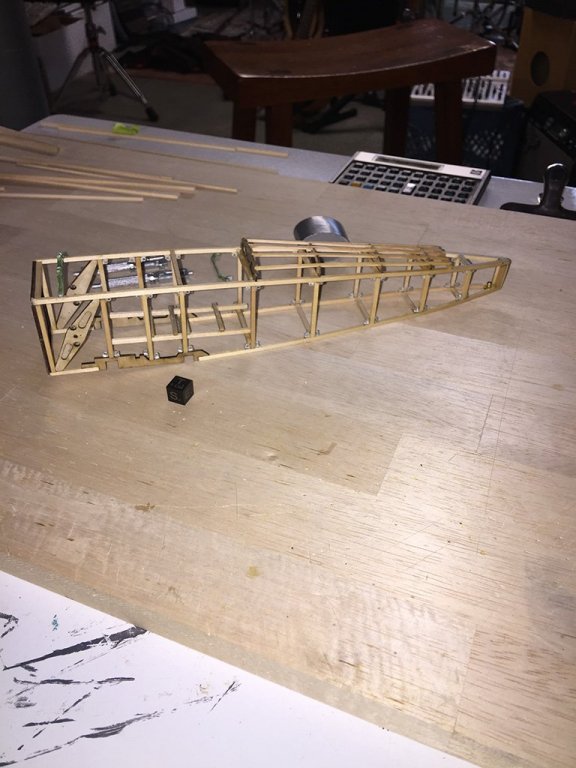
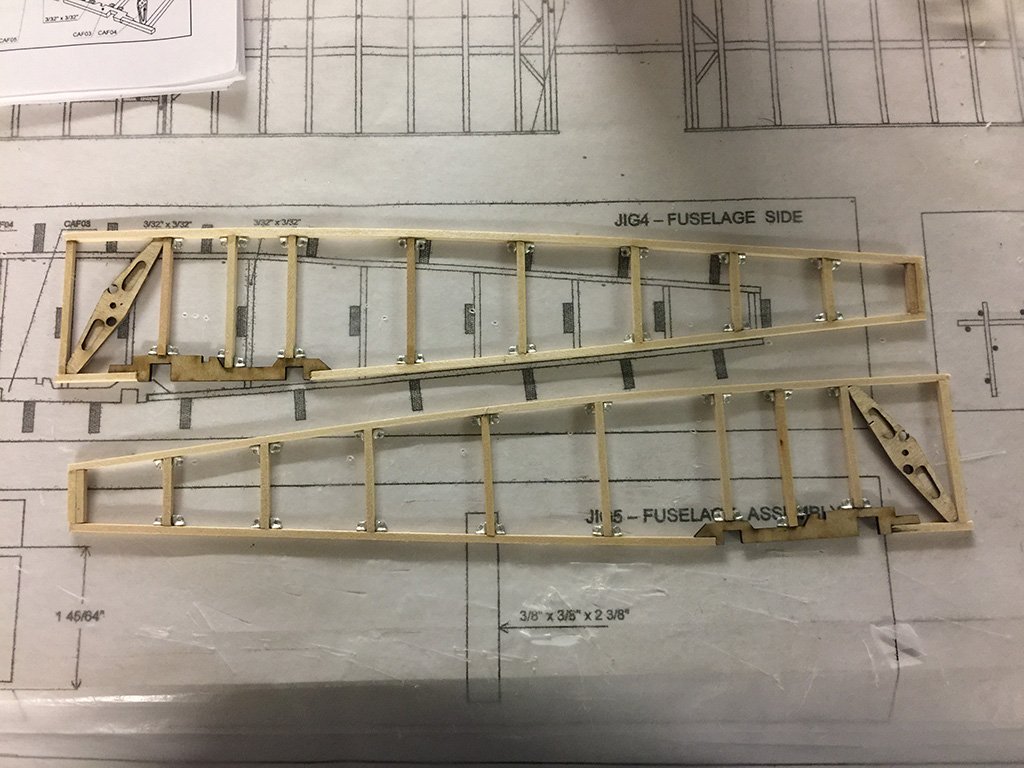
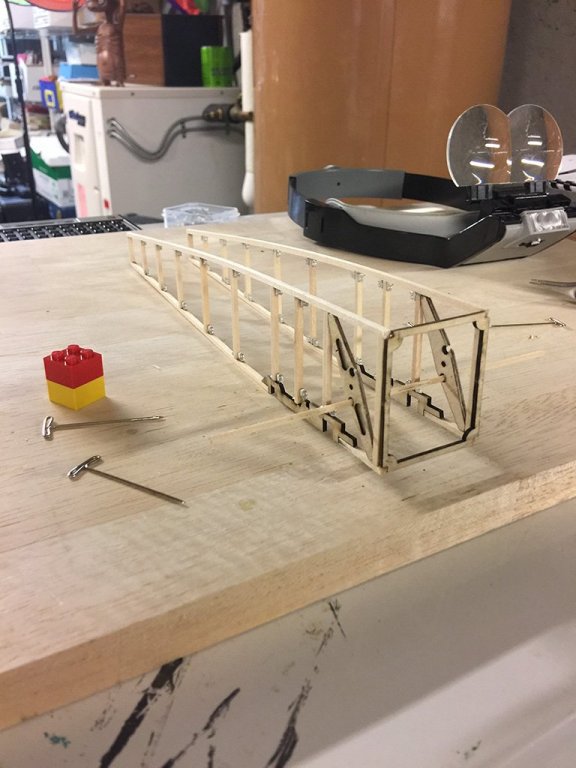
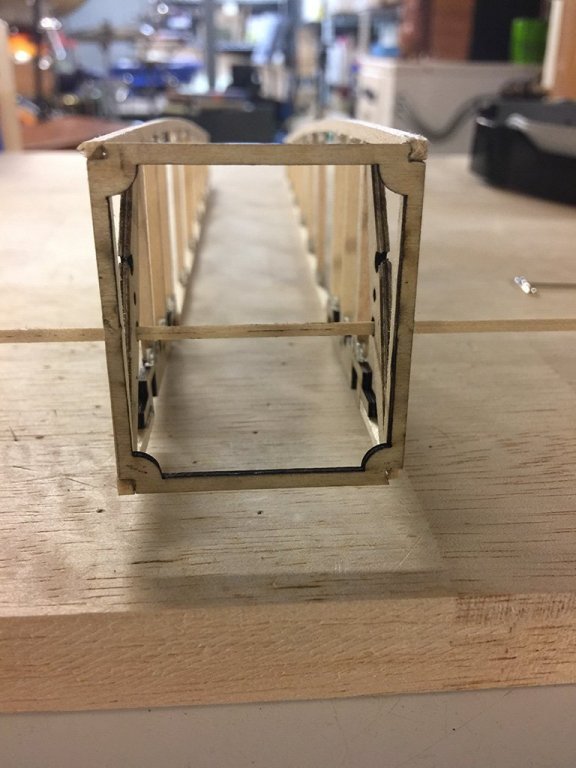
Serious headway made on the fuselage these past couple of days. The port and starboard sides were done first, and triple checked for alignment. They were then joined at the nose with what will become the engine mount later on in the build. Horizontal formers were then placed on the top and bottom along the length of the fuselage. This will end tomorrow with the joining of the two fuselage sides at the tail. Note the little metal tensioner eyes in the corners. Wires and turnbuckles will go in there. Along the top will be run a series of stringers from the tail to the back side of the cockpit. Such fun keeping this all aligned! I had better finish this soon so I can catch up with the other Syren builds! ;-) ~john
- 114 replies
-
- 15
-
-
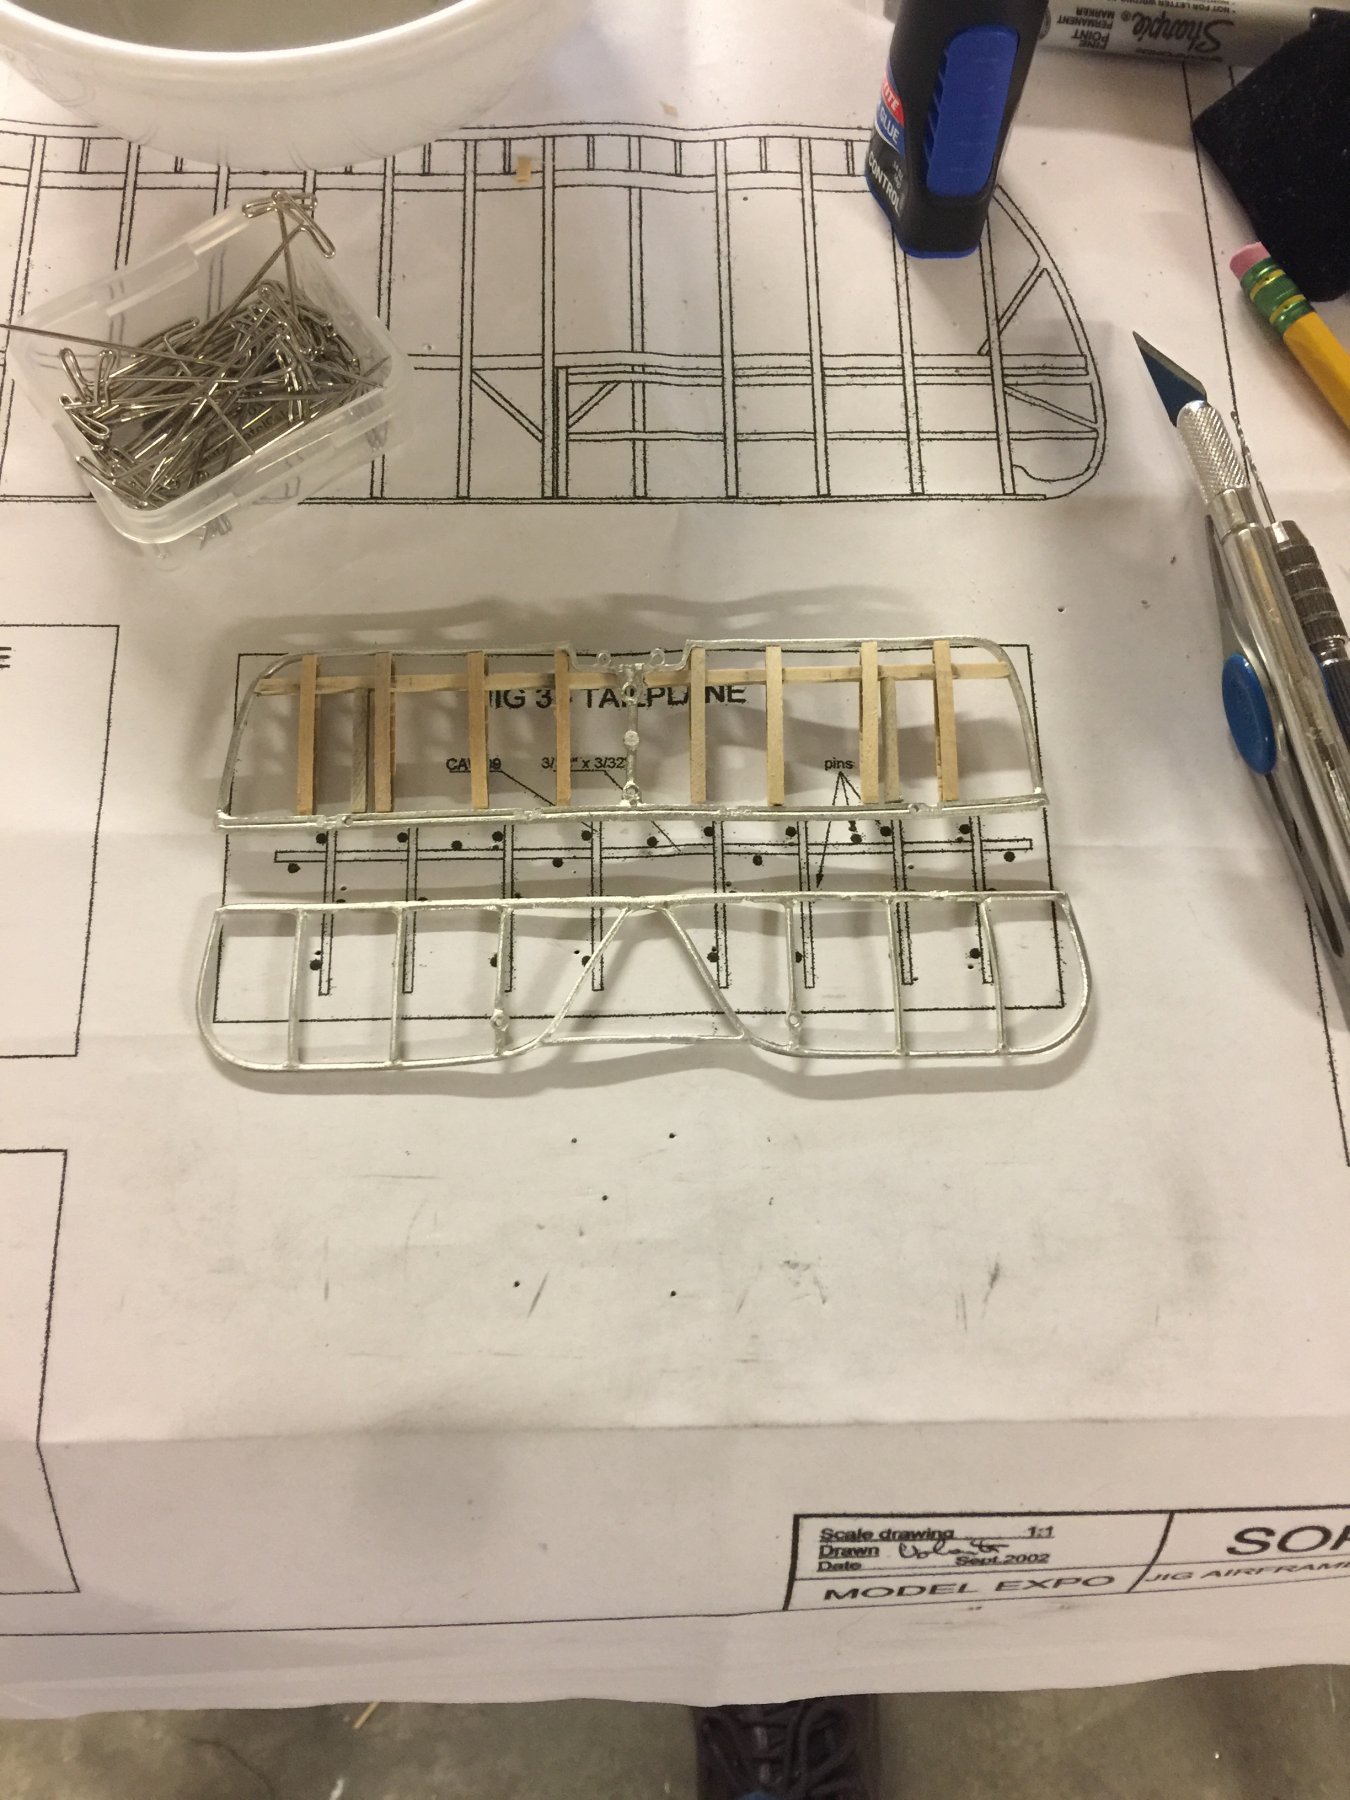
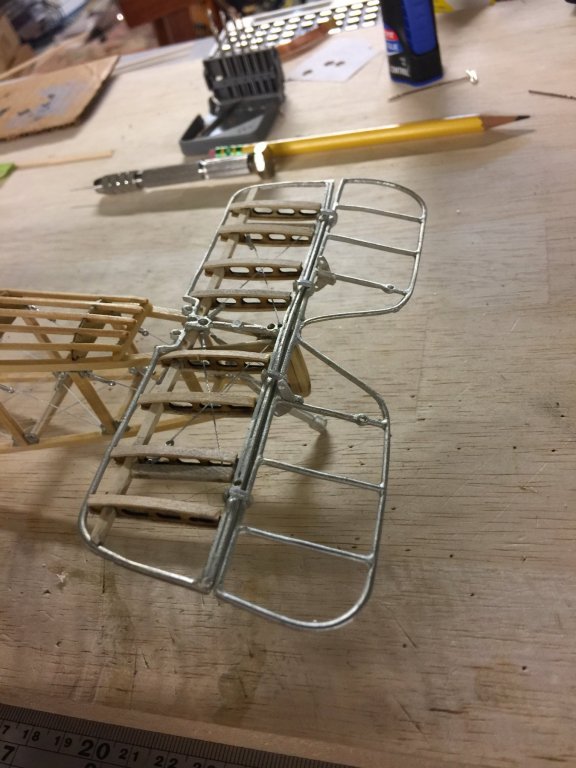
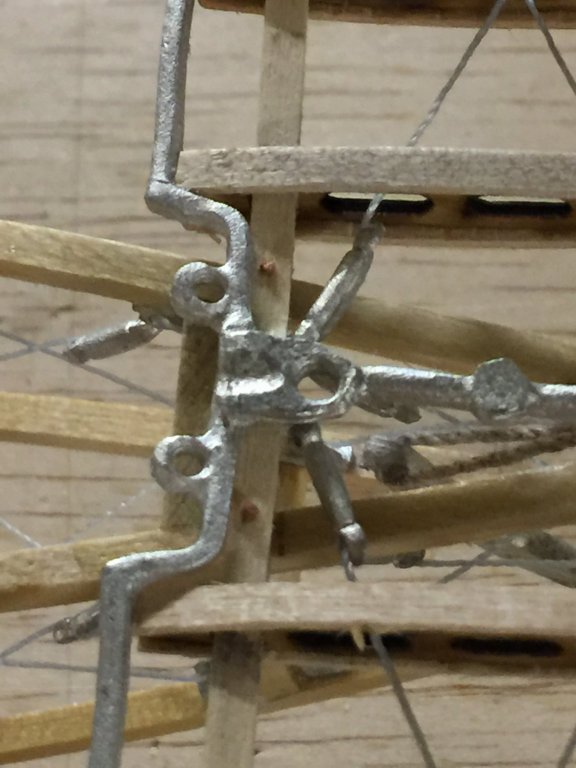
Continued work on the elevator today - all done, now. Once the rudder is complete, I'll snip away the central support (left from the manufacturing process) and then have a completed empennage. ~john

- 114 replies
-
- 10
-
-
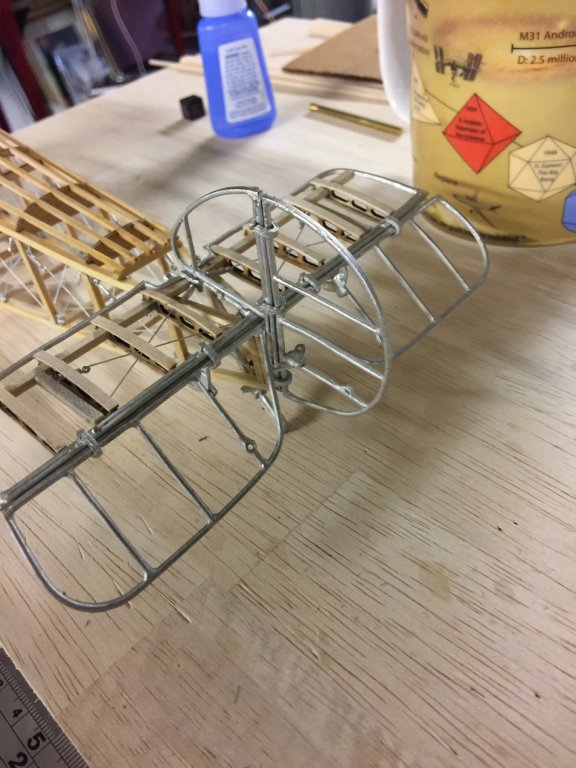
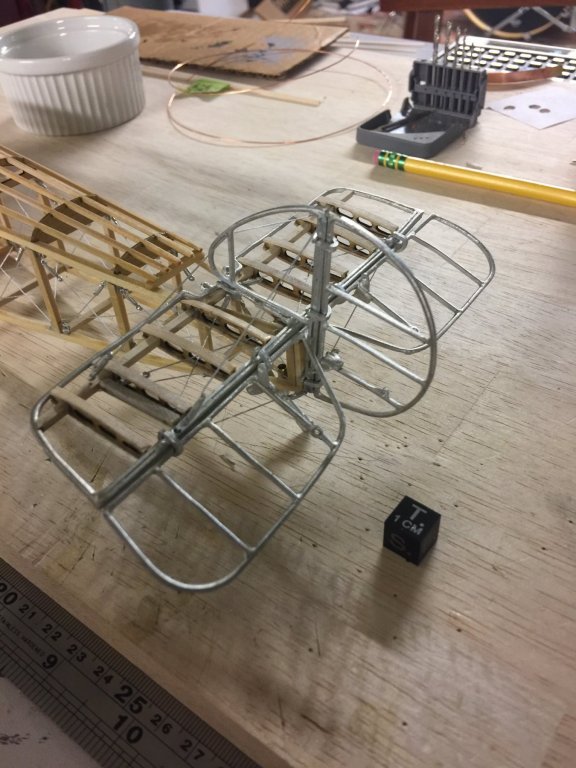
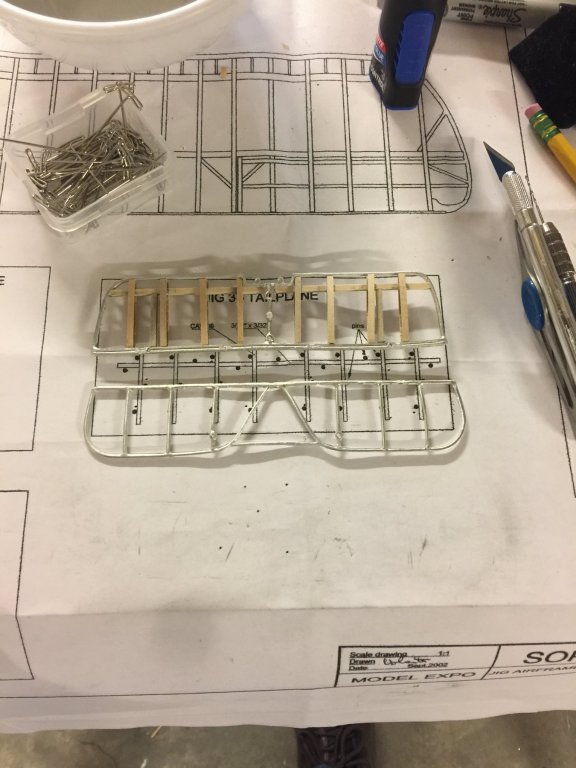
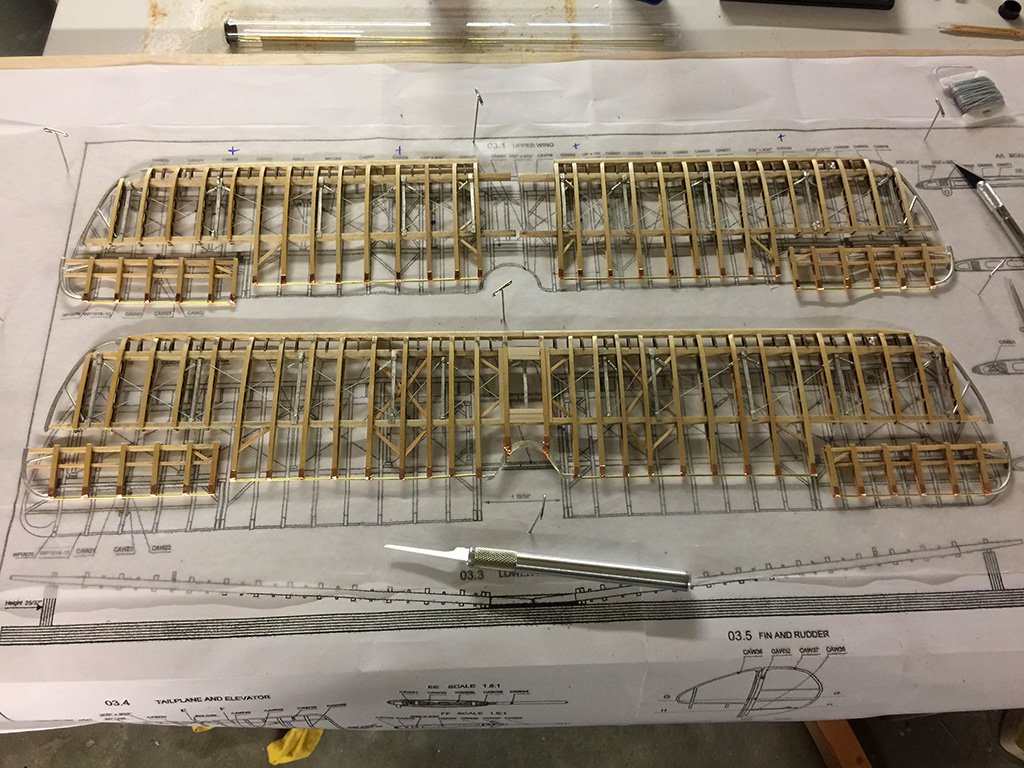
Wings, top and bottom, completed. Dihedral added to the lower wing. Hinges added to the ailerons. Now working on the empennage (elevator first). Lots of metal bending going on ;-) ~john
- 114 replies
-
- 11
-
-
Awesome work! The detail is fabulous, Jesse. ~john
- 1,306 replies
-
- 11
-
-
- syren
- model shipways
- (and 1 more)
-
<chuckles> Yep, Bill, that would be one awesome and swift method to cut those ailerons right off! Once and for all! <hehehe> I was actually thinking about that as I was sawing them apart, one swipe, after swipe, after swipe, with the saw blade. It was slow, and even a little bit damaging, but easily cleaned up and repaired as needed. I am adding the hinges now for the ailerons, and that is also presenting its challenges. For all the airplanes I have made, this one is a workout. ~john
-
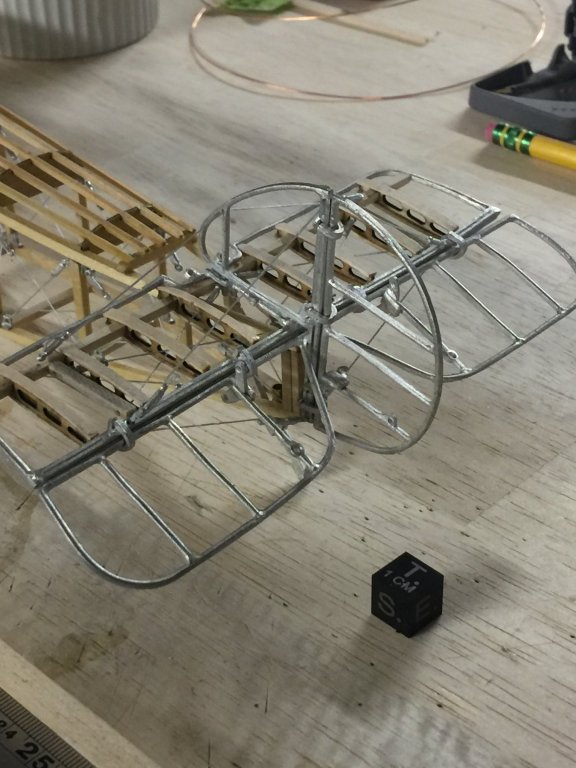
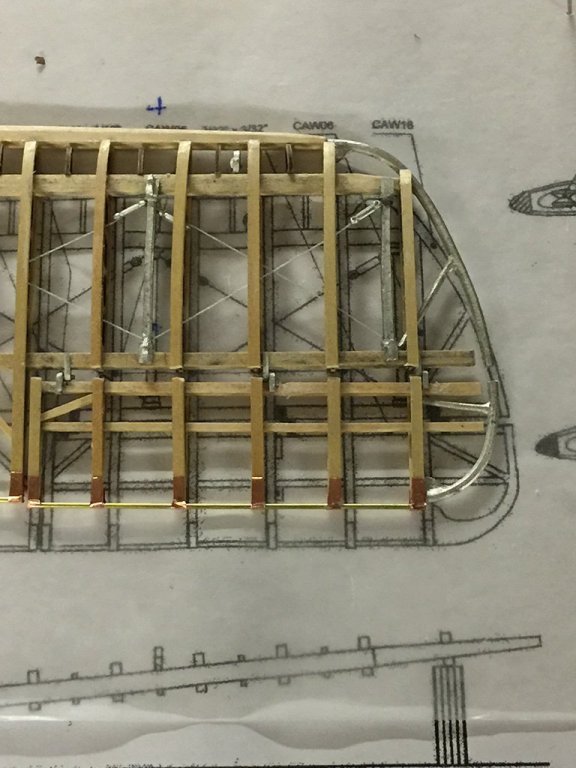
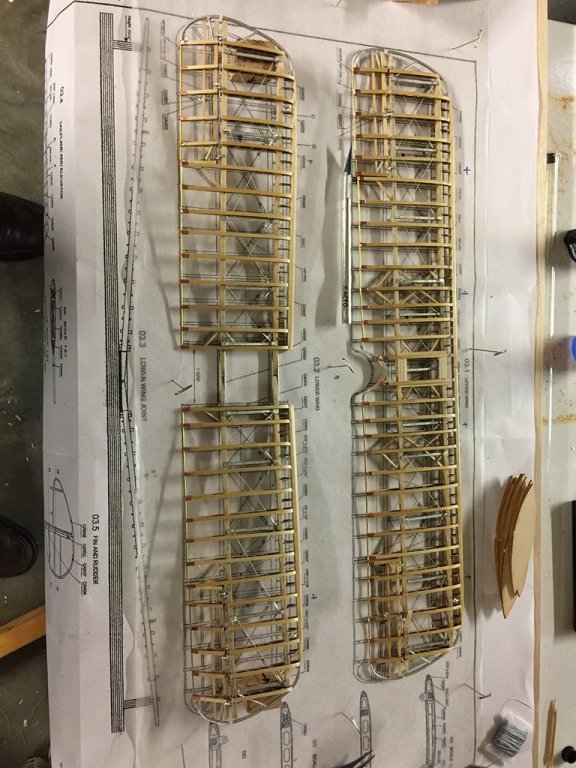
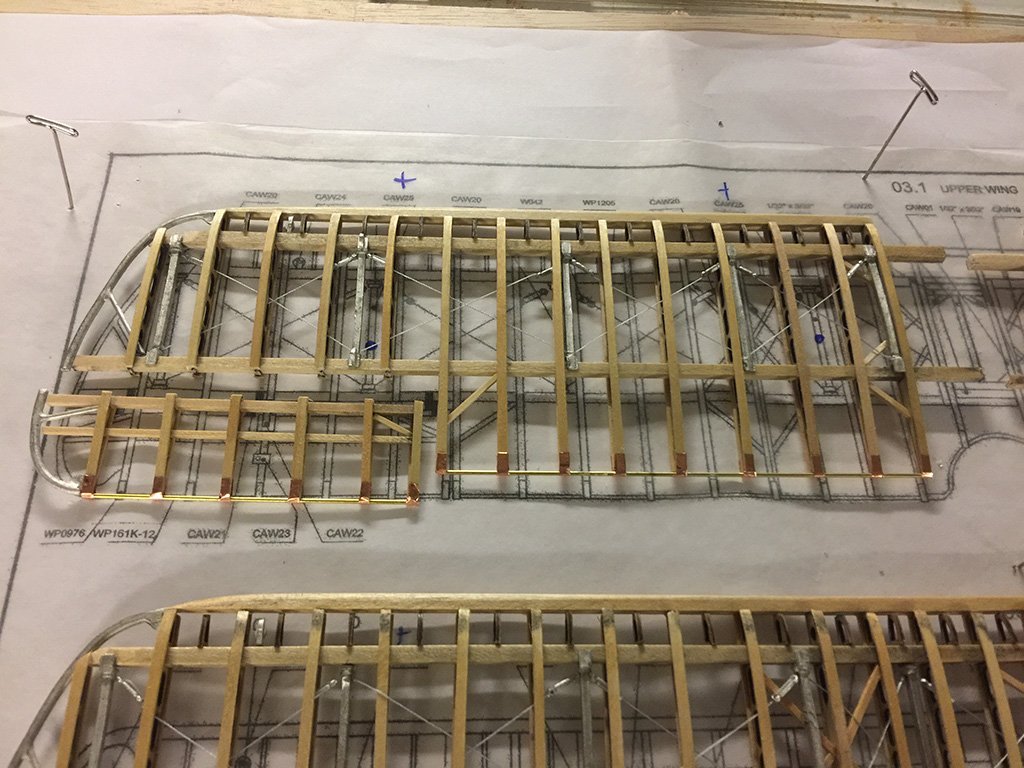
Top and bottom wing now have tensioners. The trailing wing edge has been added. Ailerons have been separated from the wings (using a small XActo saw... very nerve wracking). Now to hinge the ailerons and then move onto the fuselage. ~john

- 114 replies
-
- 15
-
-
Doug, I am aiming to get to it as soon as I can finish the <ahem - not a ship> model of a Sopwith Camel. I am well into the wings... but then the empennage and fuselage must follow. I would day some time in September I will be into the Syren. As you note in your post, there are a lot of really good logs for the Syren here on MSW: some finished and others in progress. The Syren will be my first POB build, so I am taking as many notes as possible from the masters out here. ;-) I see you also had issues with the provided plywood. Interesting. I'll have to check my parts and see if I have been given the same dreaded material. Looking forward to your progress. Have fun with your build! ~john