HOLIDAY DONATION DRIVE - SUPPORT MSW - DO YOUR PART TO KEEP THIS GREAT FORUM GOING! (Only 51 donations so far out of 49,000 members - C'mon guys!)
×


jablackwell
-
Posts
304 -
Joined
-
Last visited
Content Type
Profiles
Forums
Gallery
Events
Everything posted by jablackwell
-
 Thomas: amazing work to watch. Your ship is coming along wonderfully, and the detail is astounding. The Syren is on my list... and I could only hope to aspire to such levels. I do have a question that maybe you could help me with... from a beginner's perspective having never built a ship with cannons or other deck based arms: do you glue the cannons, etc, to the deck? If so, what do you use for that? Thanks! I shall be sitting back and enjoying your build. ~john
 -
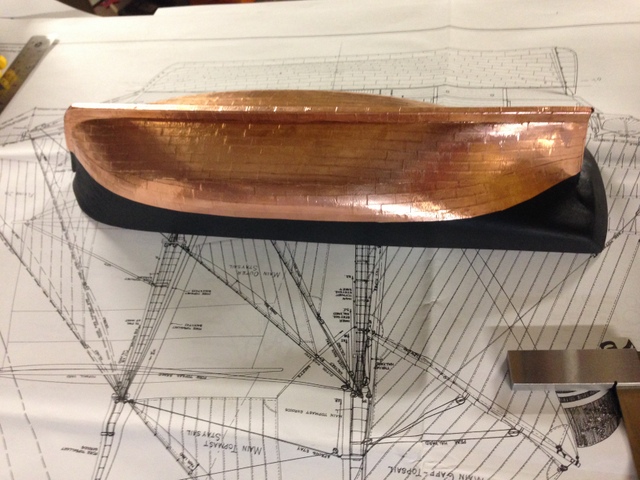
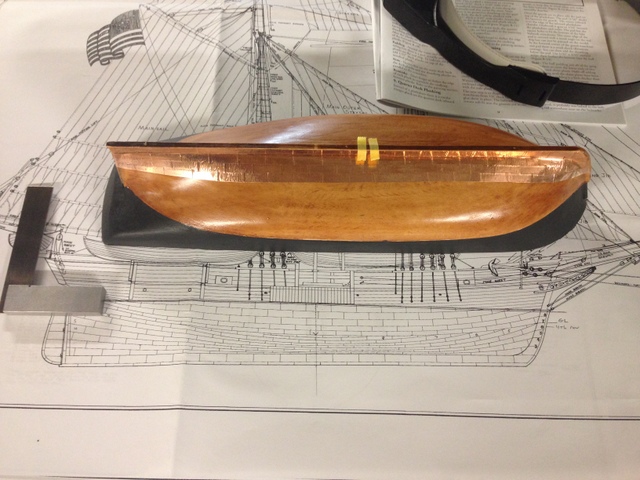
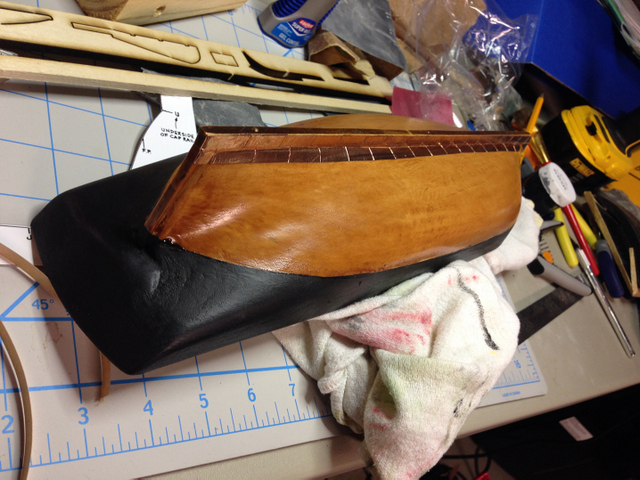
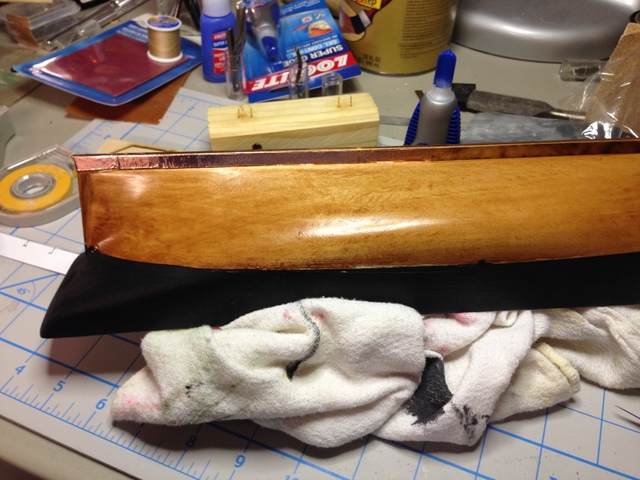
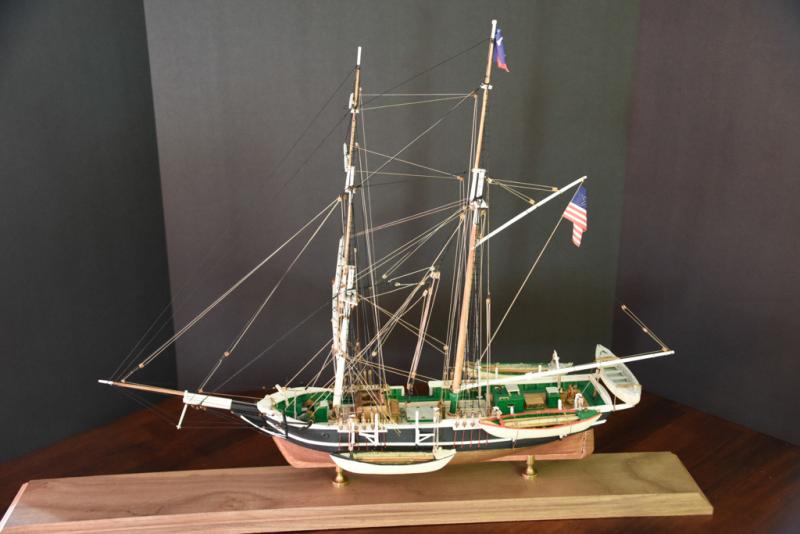
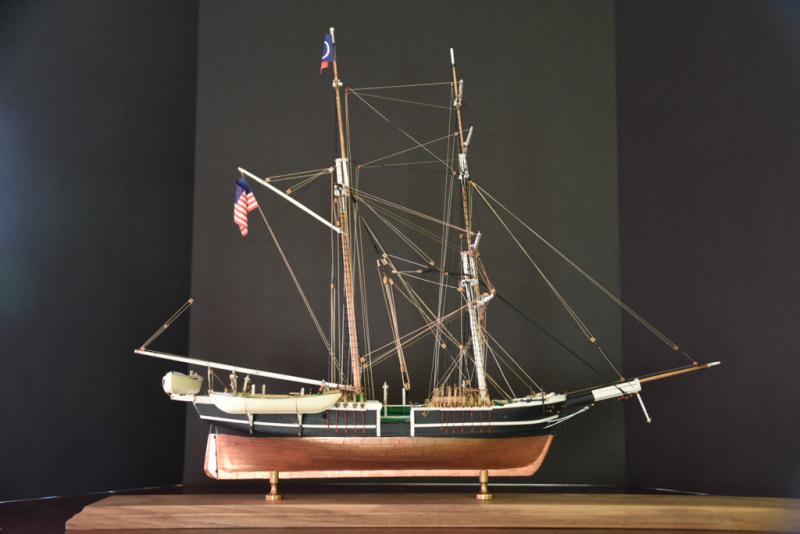
Hello Phil, All, The Eagle was not my build. Those were images posted by someone else to help me along with my build of the Kate Cory. The Kate Cory is 3/16" = 1 foot (1:64). Hull length is 15.25". The copper is 1/4" tape. I applied it over the solid hull after I had given the hull a couple of shiny layers of varnish. This makes it stick much better. Pieces are overlapped just a tiny bit. Here are some images I have from those portions of the build, then a couple of the completed model. I think the copper came out rather well overall. No need for the added complexity of nail patterns at this scale. Each to their own, though. If you want to add that level of detail, go for it! It's your build, after all.

-
Just finished the Kate Cory late last year... used copper tape cut into plate-sized strips and applied onto a varnished surface. They do not have the nail or rivet pattern. I have done nothing to maintain their shine, and will enjoy seeing it darken with age. http://modelshipworld.com/index.php/topic/6842-kate-cory-by-jablackwell-finished-model-shipways-scale-164/?p=211568 At this scale, nail patterns would be just too much, in my opinion. ~john
-
Need tips on deadeyes rigging
jablackwell replied to Tallsails2's topic in Masting, rigging and sails
Hi Eddie, Looks like some really good solutions to keeping the deadeyes all the same height.... I am taking notes as well. I used a wire jig (already noted here in message #4 above, Richvee. http://modelshipworld.com/index.php/topic/6842-kate-cory-by-jablackwell-finished-model-shipways-scale-164/?p=350446 My solution was to have the lower deadeye in place already. Get the jig to hold the upper eye in place. Thread the shroud into place at the top of the mast and tension it with a alligator clip. Tie the top deadeye onto the shroud using whatever methods... I wrap the shroud around the eye, then clip it and then seize it. Release the clips to get them out of the way. Remove the spacer jig, and finally thread the lanyards through the deadeyes. I am really liking davec's method above as well. A jig is the key. All the best, ~john -
Cyanoacrylate (CA) Glue for Rigging
jablackwell replied to EdT's topic in Masting, rigging and sails
Hi Ed, Thanks for the information here. I, too, have used CA for years on models: ships, planes, trains, etc etc. No ill effects. My planes spend time outdoors, but the glue joints are hidden: no direct UV. Most window glass if effective at blocking much if not all UV light these days. Depends on the house, age of materials and such. There are UV reactive plastic beads that one can use to detect UV easily and affordably: https://www.amazon.com/Ultraviolet-Detecting-Beads-250-Pack/dp/B00906M148 if anyone wants to see what their ships are exposed to. I am now tempted to generate a long term experiment with thread, CA, and a variety of conditions: inside, outside, behind glass, under stress, etc. Tempting. Let me give it some thought. ~john -
Guidance, Encouragement, or just a Sanity Check
jablackwell replied to RFP's topic in Wood ship model kits
The Kate Cory is a lovely ship. The readily available kit for it is a solid hull as you know, but it makes for a fun and detailed build with opportunities for as much ingenuity and kit bashing as one wishes. Plans for her are available from the New Bedford Whaling Museum: https://www.whalingmuseum.org/ In all cases: encouragement! Go for it! Have fun! Go at whatever pace your heart desires. ~john -
Thanks, Jean-Pierre. I think she is a lovely ship, but I can tell you that there are plenty of errors lurking in there if one gets close. I'm thinking about the next builds... taking a break first with some airplane work... then back to ships. ~john
-
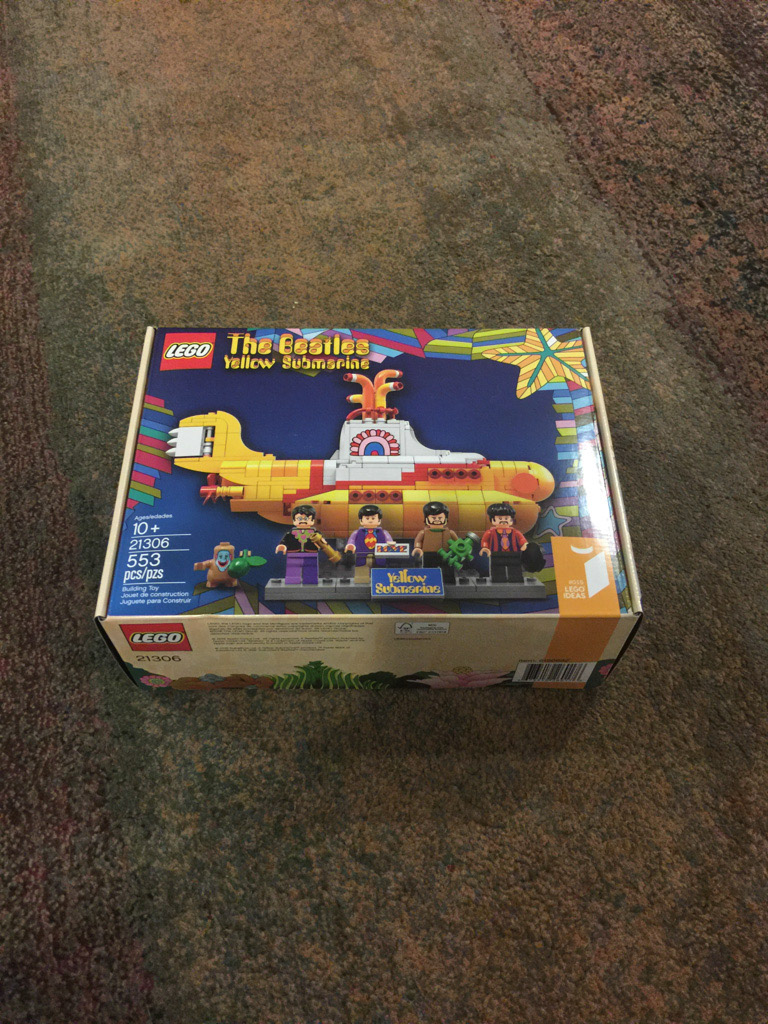
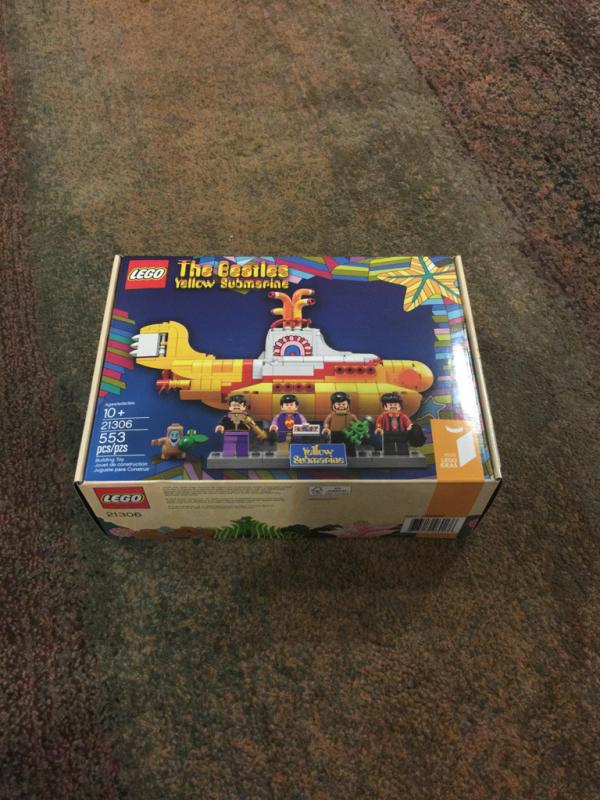
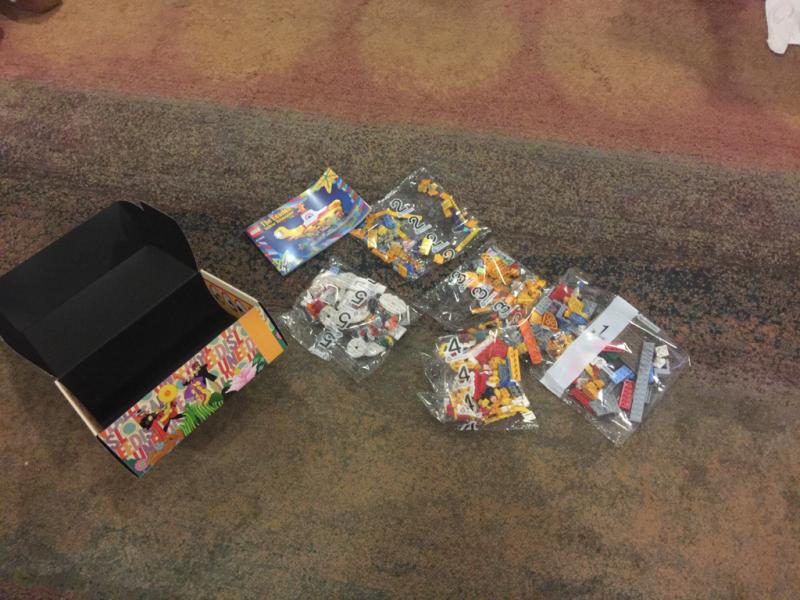
Thanks Hamilton. Good question! I was <almost> joking when I said I was going to go play with some Legos for a while. This kit just came out, so my daughter and I are building the Yellow Submarine together in small stints after school. My next ship will either be a very detailed whale boat in a larger scale, or perhaps the Syren. Both would be my first model using planking. The whaleboat is a framed plank design, so perhaps a little more challenging than the plank on bulkhead design of the Syren. We'll see! I have to get the plans out and make a decision. In the meantime, I am working on a large scale Sopwith Camel. I love airplanes. What a world! ~john

-
Thanks, Chris! ~john
-
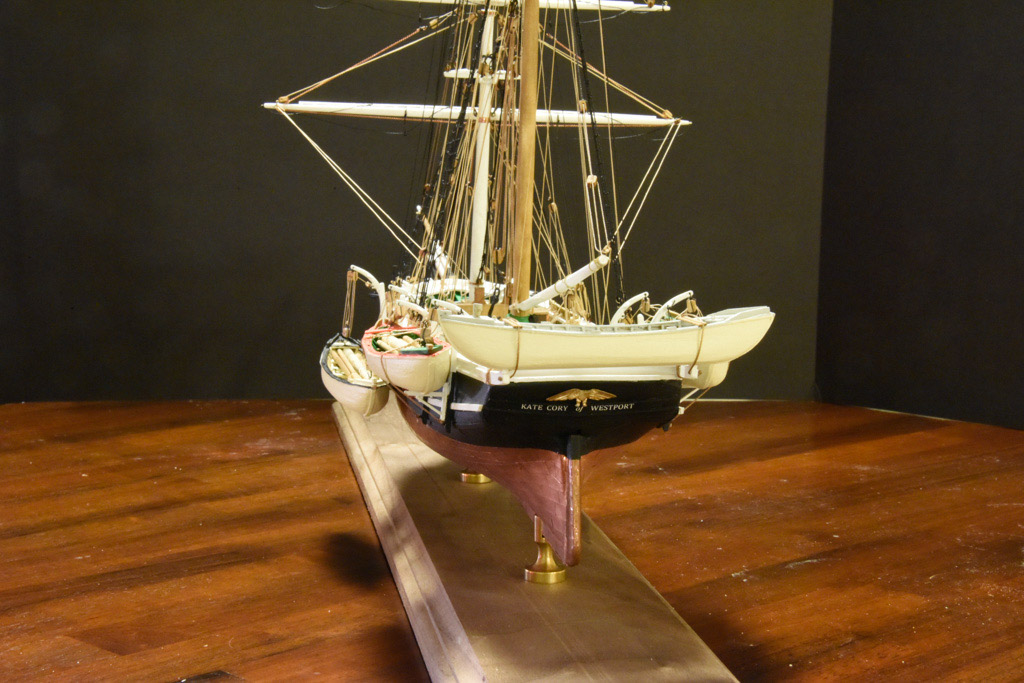
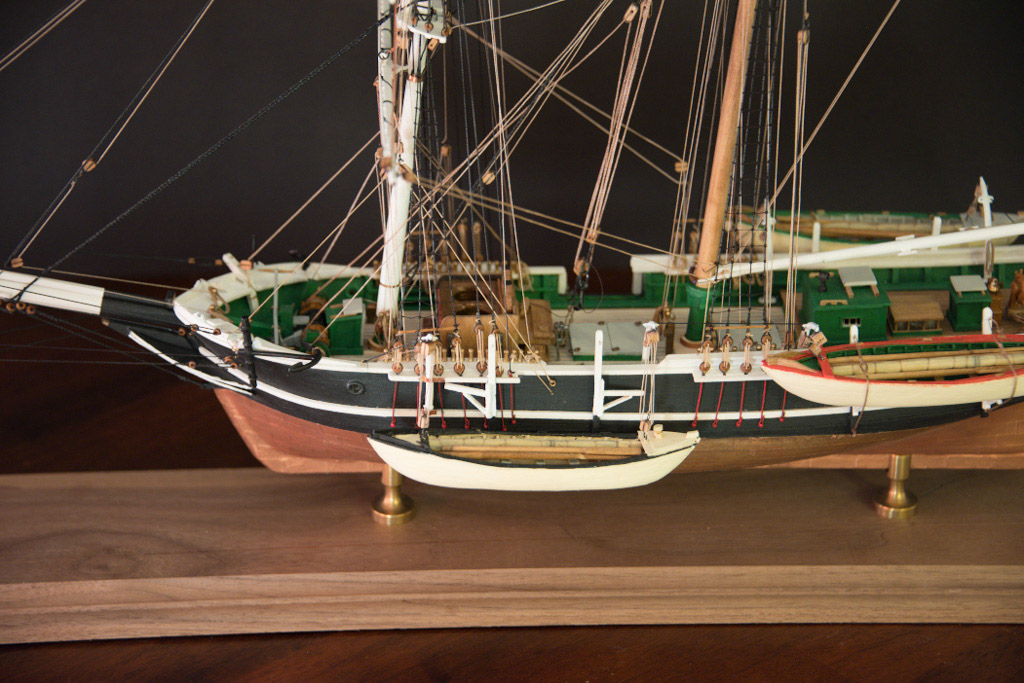
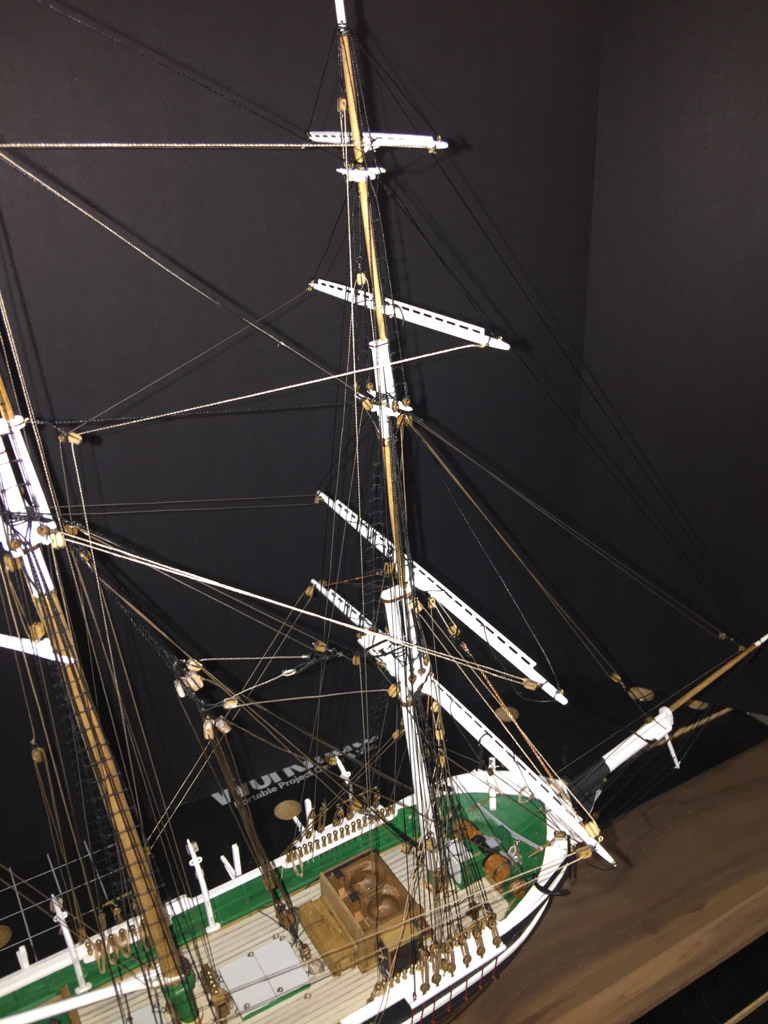
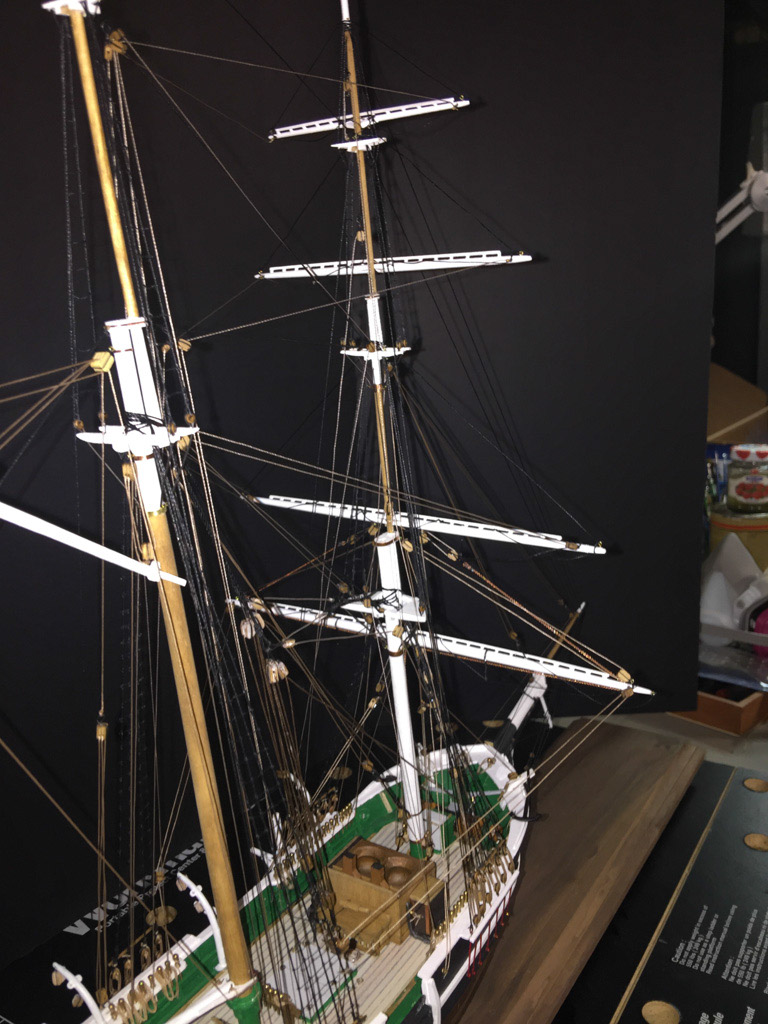
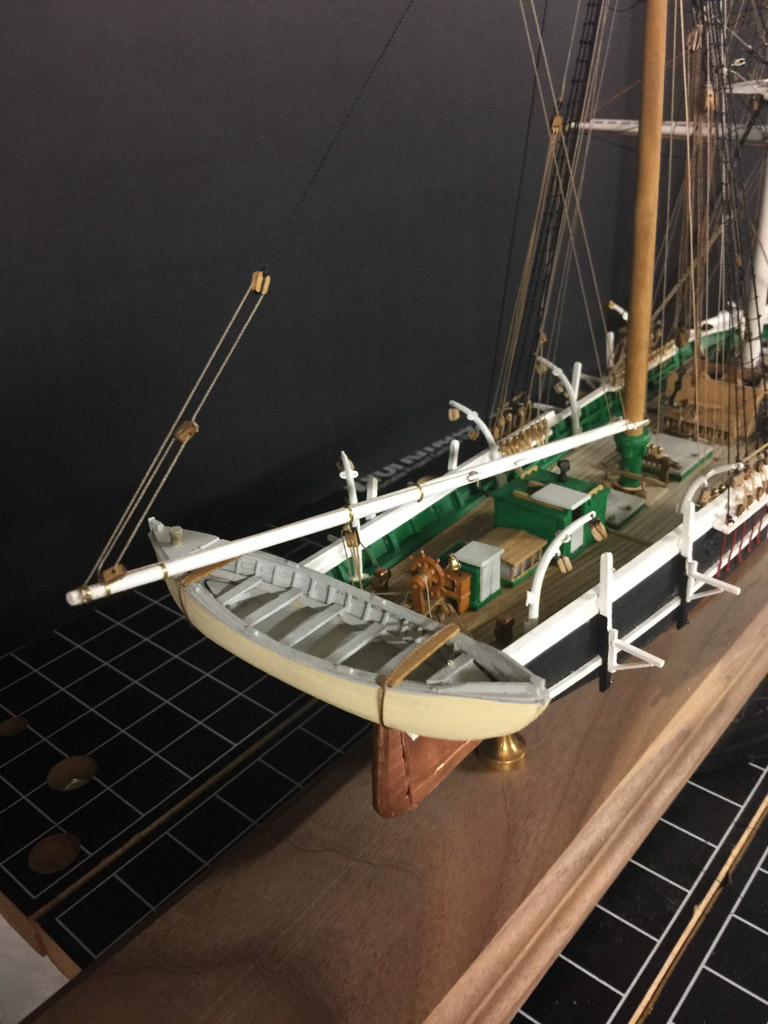
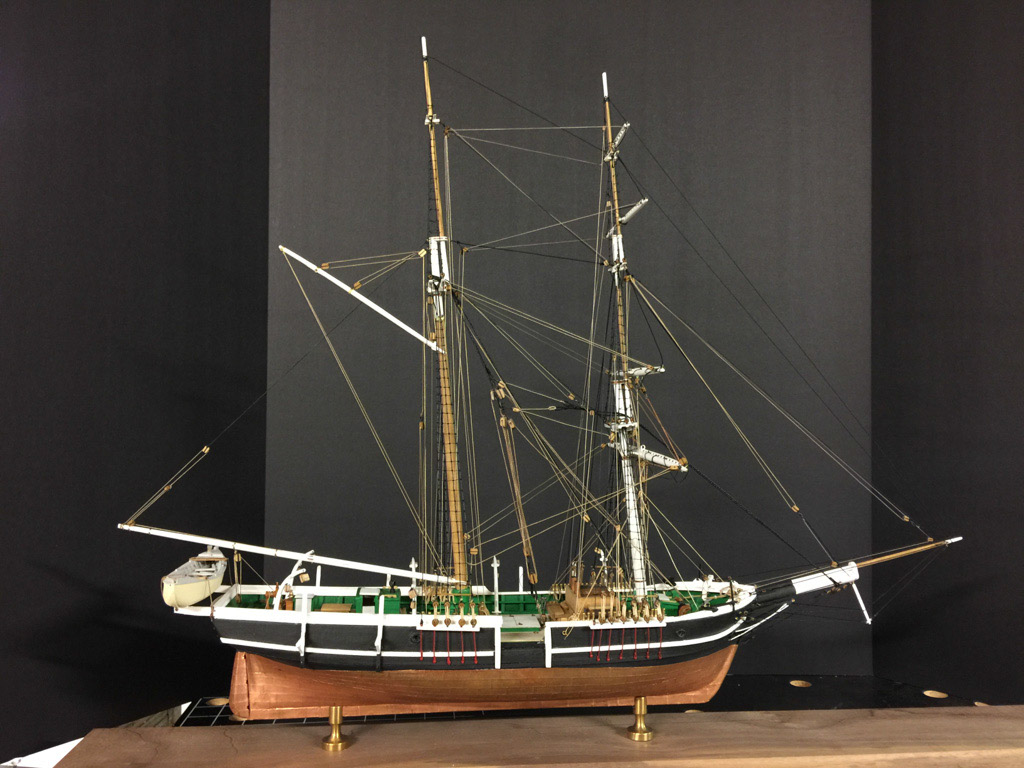
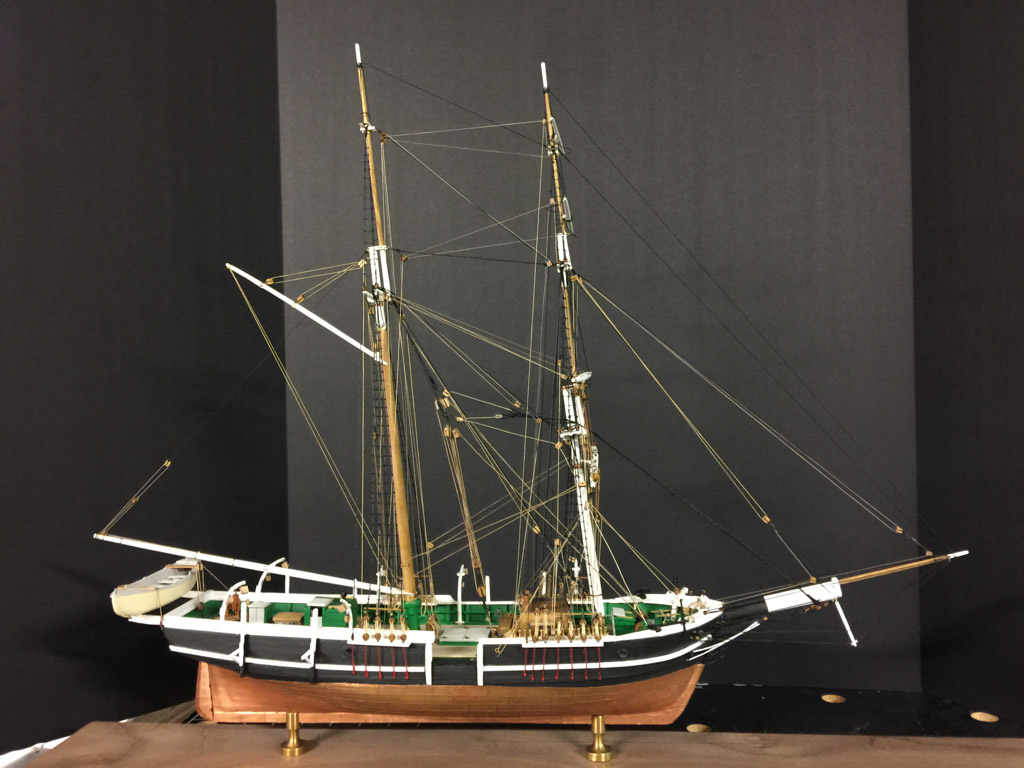
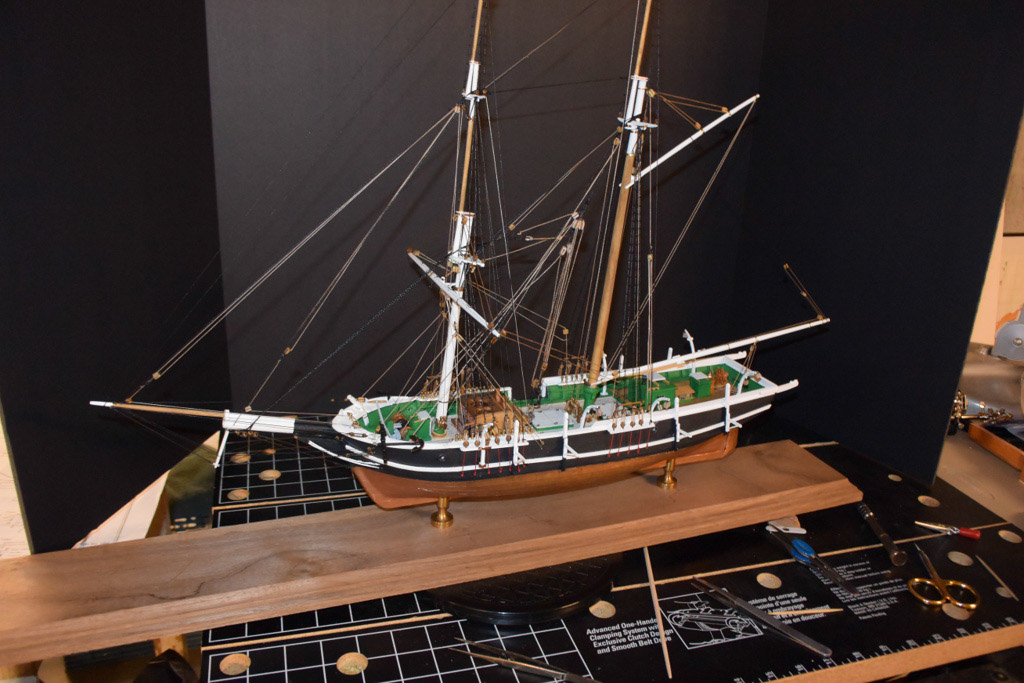
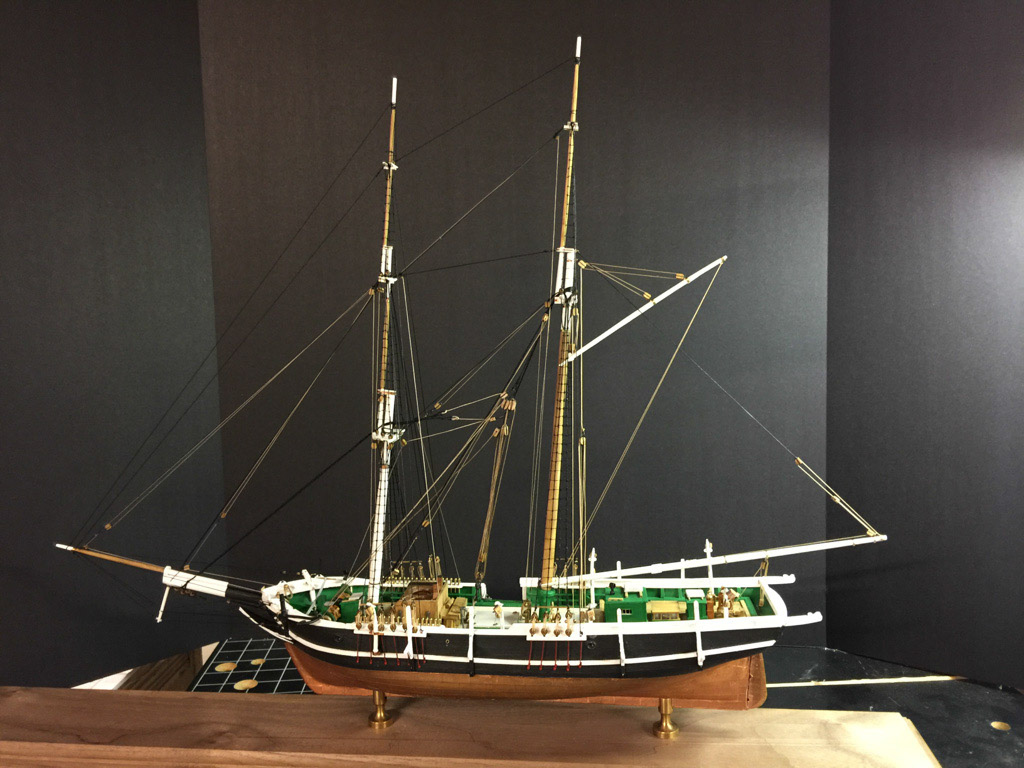
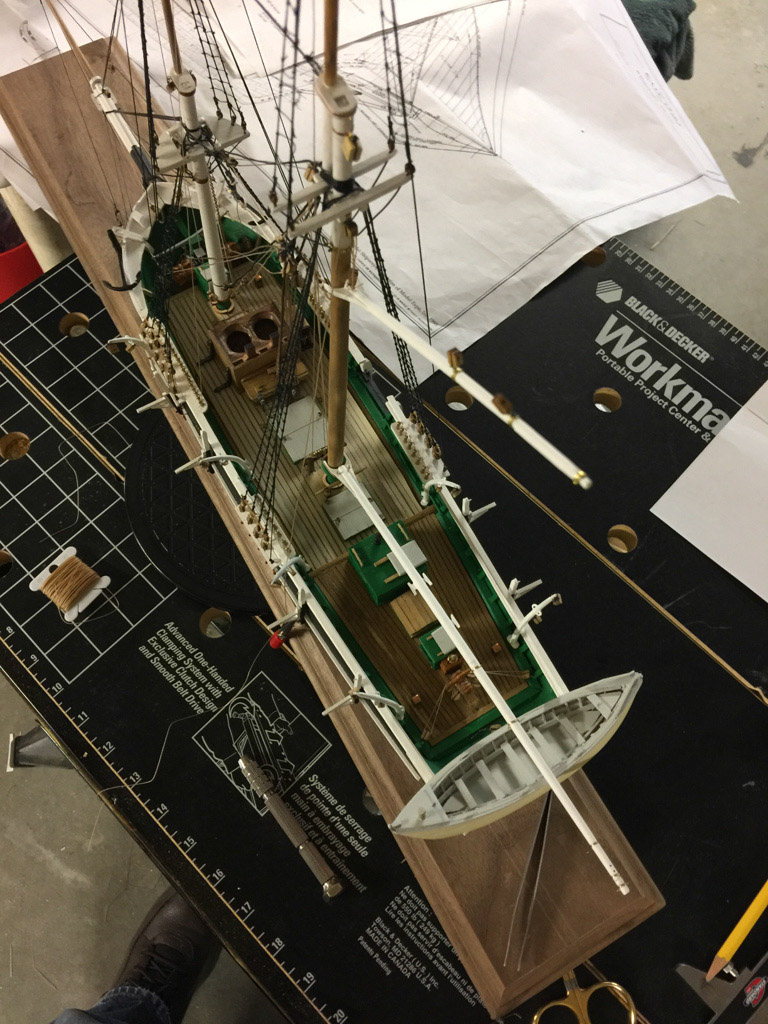
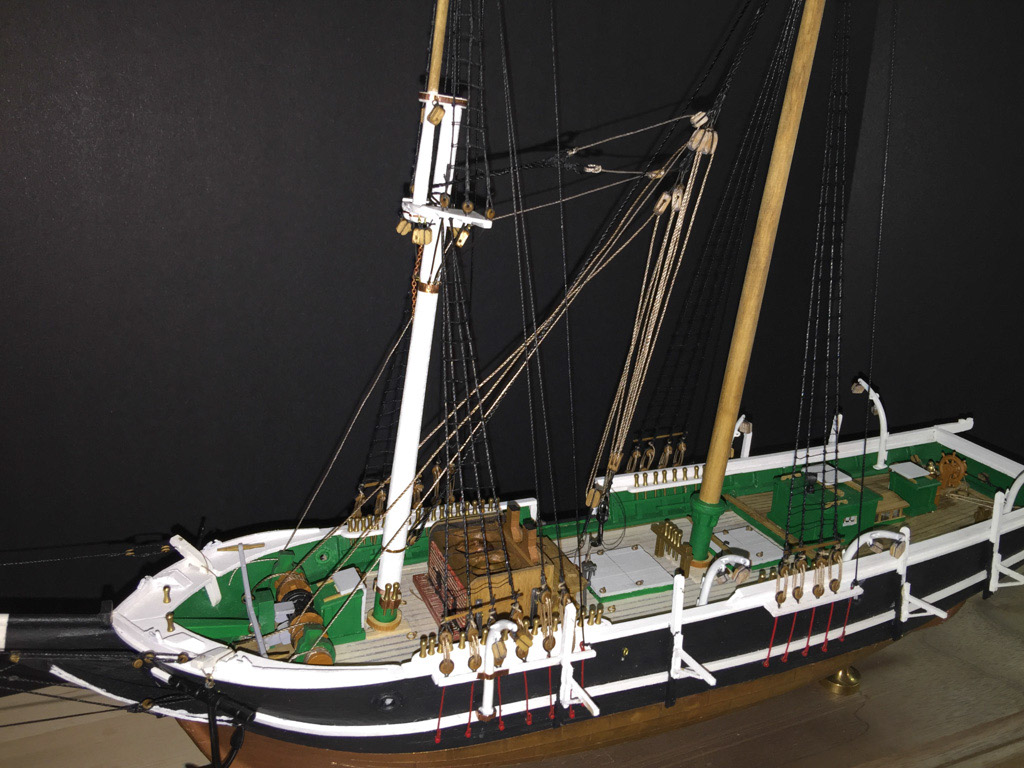
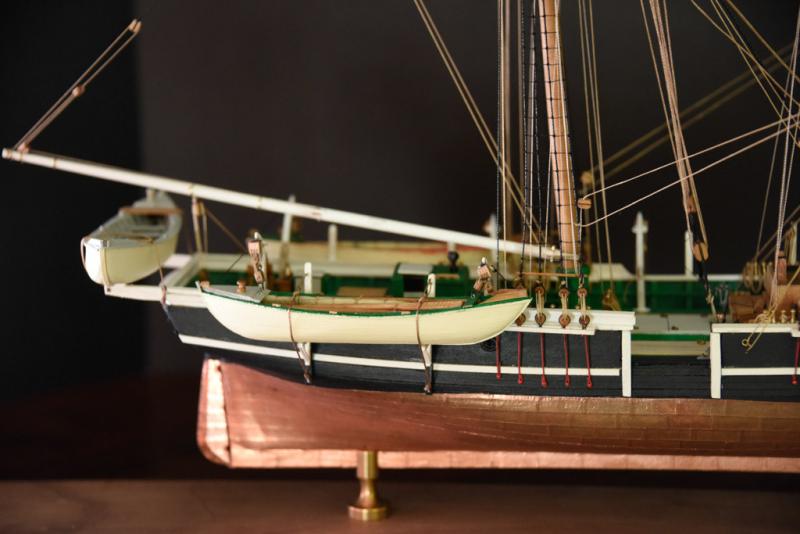
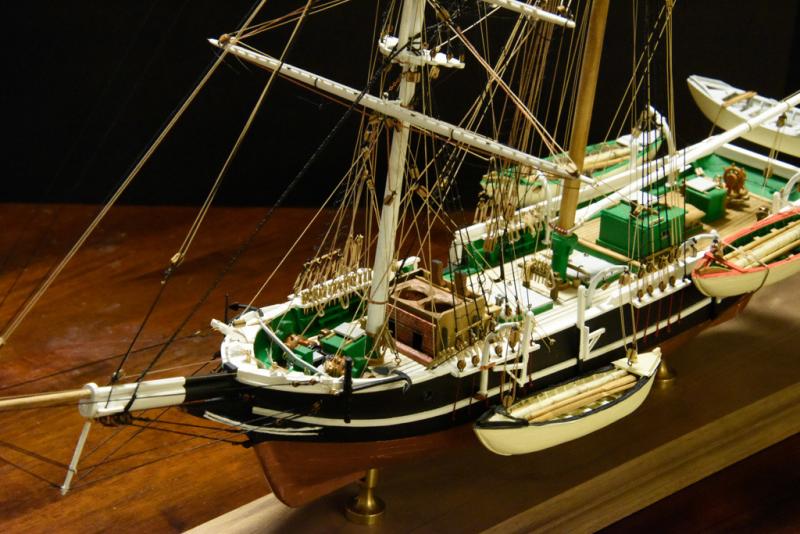
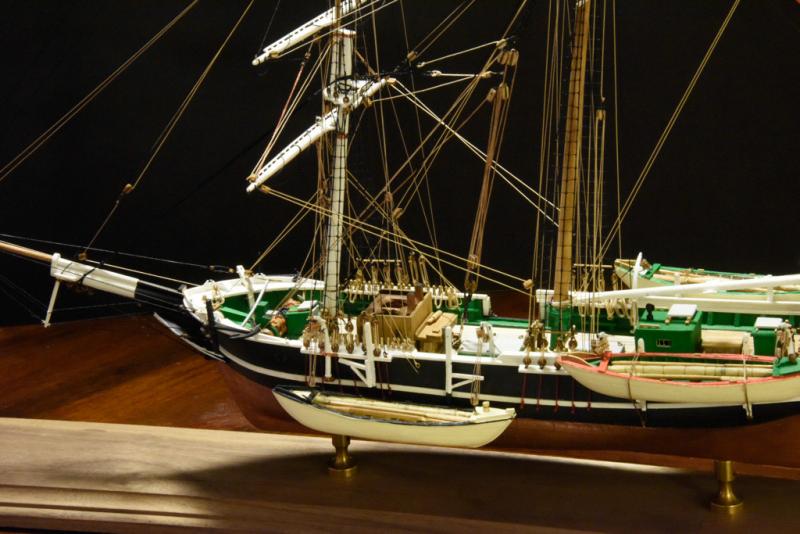
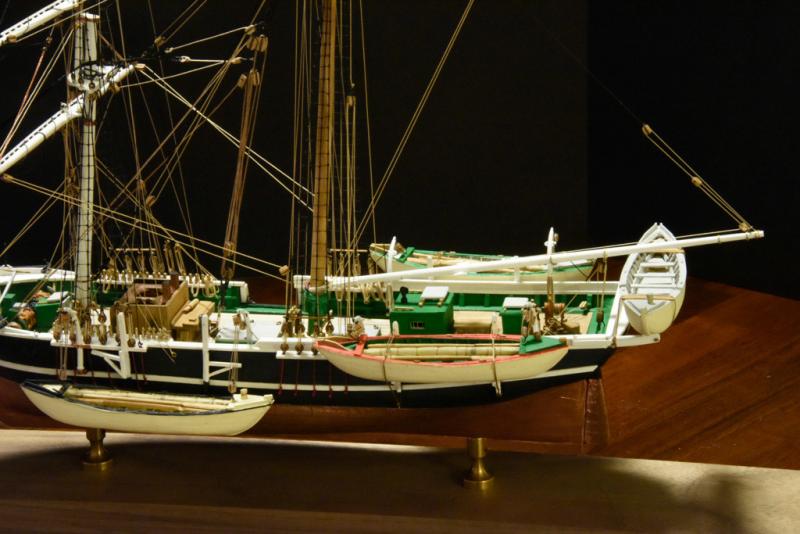
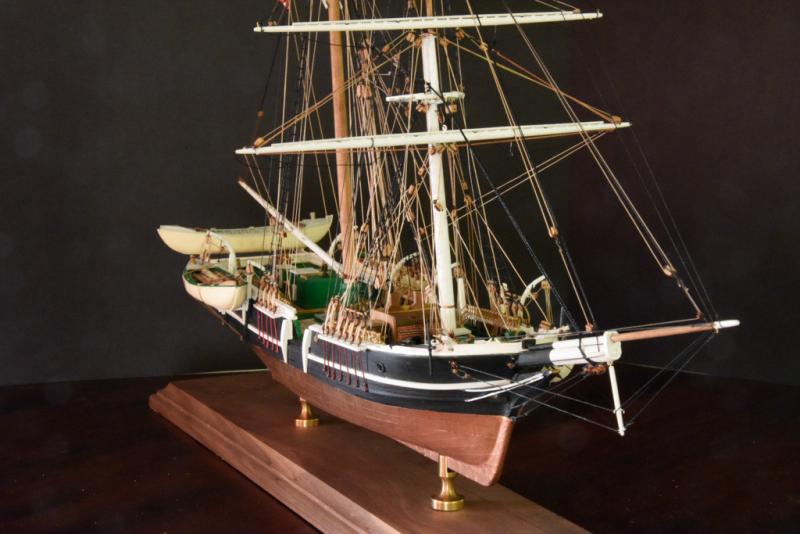
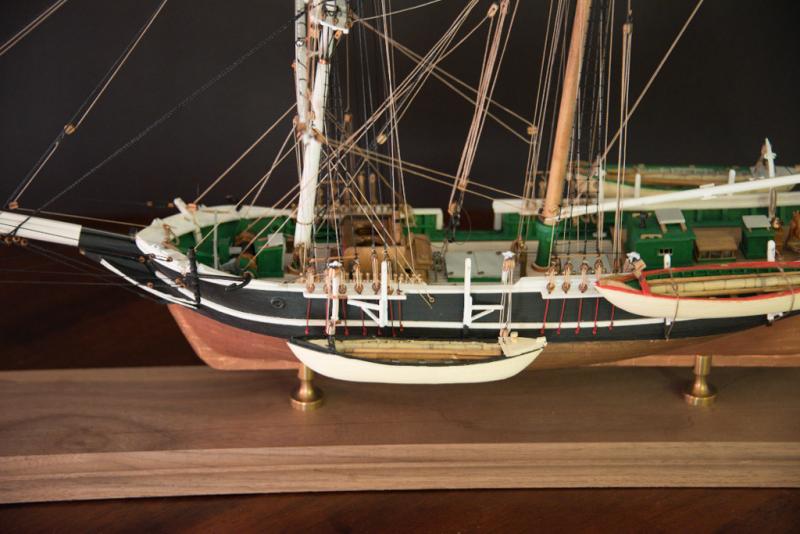
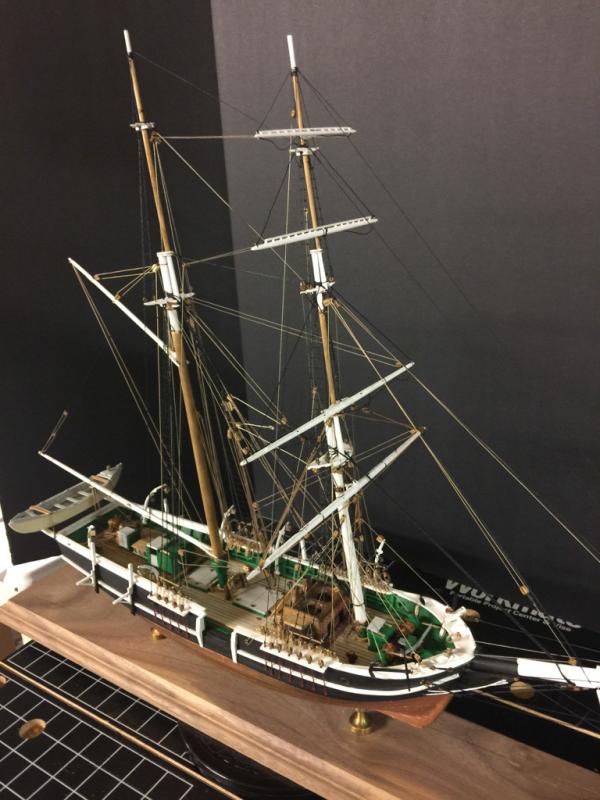
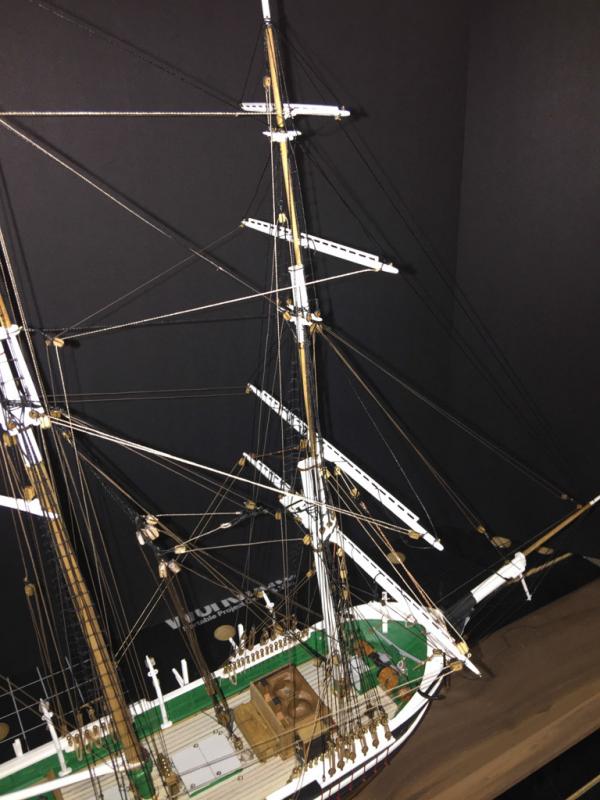
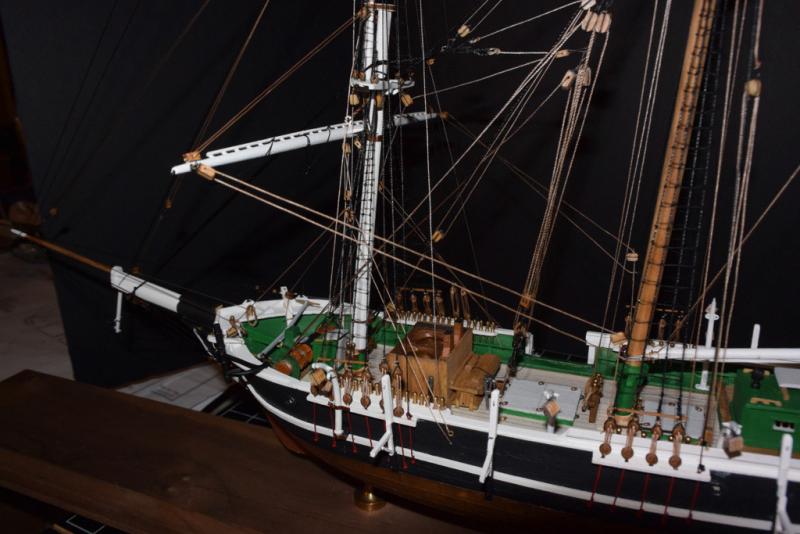
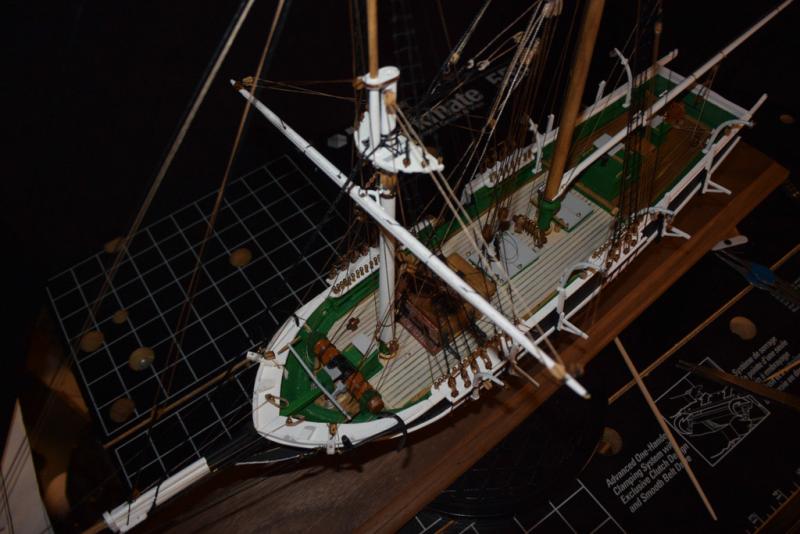
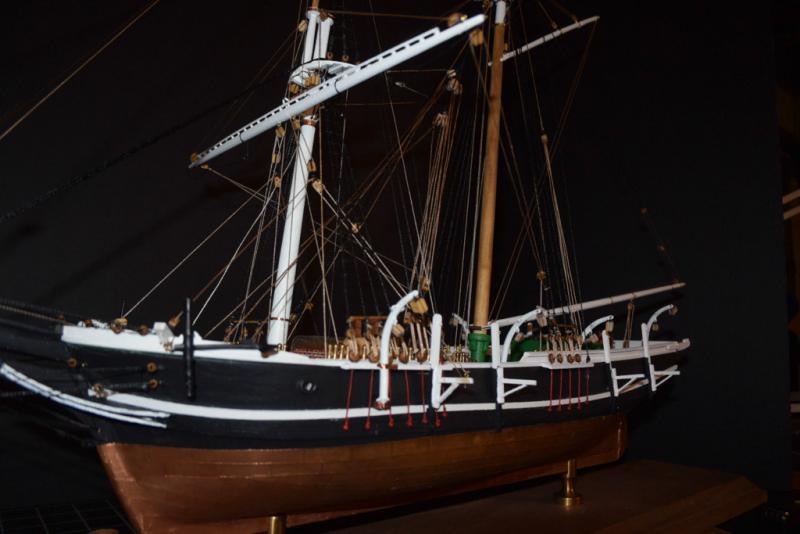
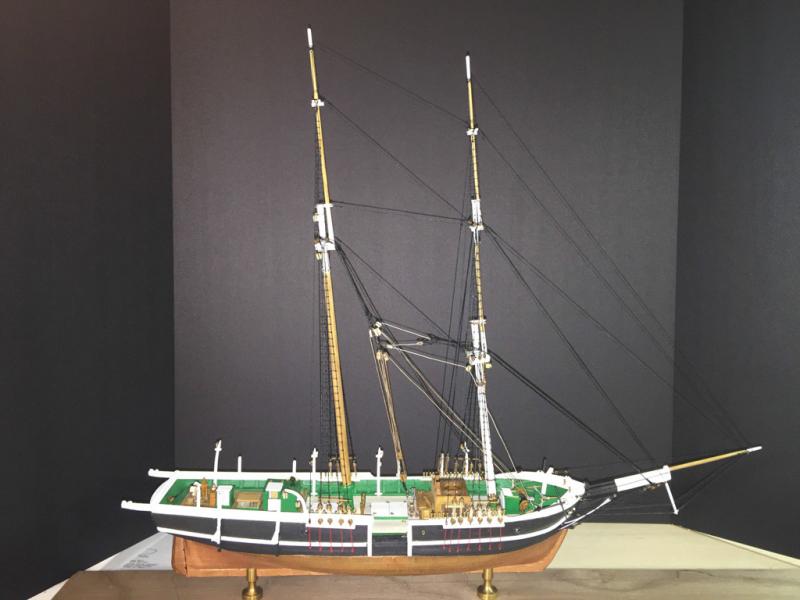
All, I present to you the completed Kate Cory! It has been a two-and-a-half year long build, with a couple of stumbles, well, a lot of stumbles, some pretty amazing errors, and a lot of learning! Thank you ALL for all your help in so many ways, from the simple to the complicated, from the esoteric to the obvious. Every day is one to grow by. Without this group... I would not have gotten this one done. Really. In this last section of the build: I completed the running rigging, added flags, and lastly rigged the whaleboats into place. I wanted to be a little different, so placed one of the whaleboats in a position down alongsides as if being lowered into the sea. Obligatory images below. I did my best to stop the aperture down a lot to get as much in focus as possible. Enjoy, ~john


- 159 replies
-
- 10
-

-
I will certainly pull up a seat to pay attention to this one. Thank you! My next build (whenever that will be) is going to have treenailing. ~john
-
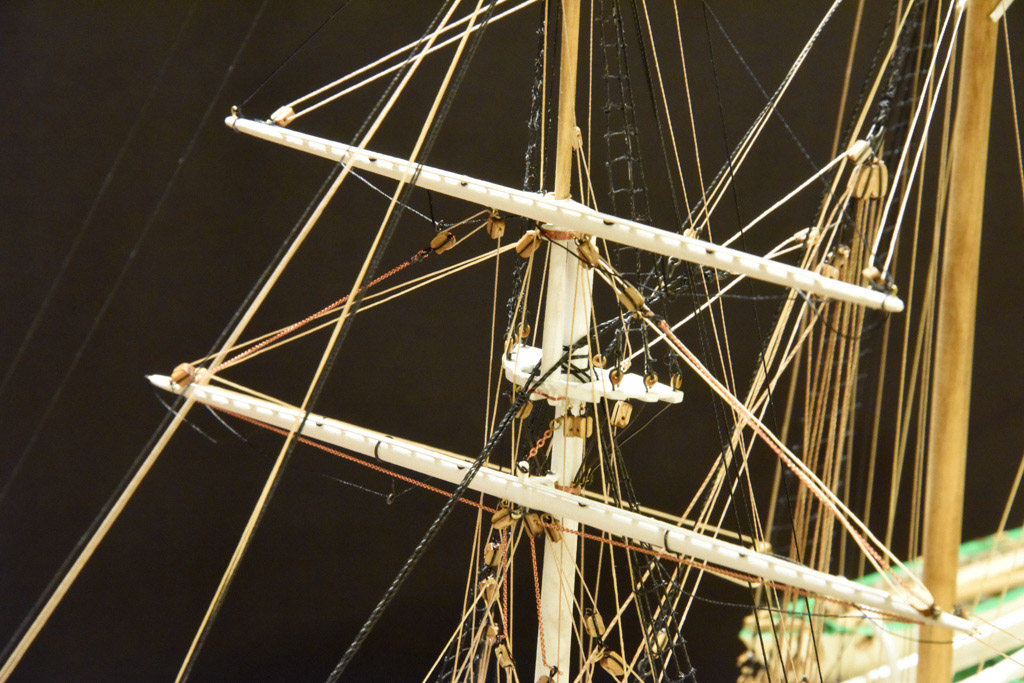
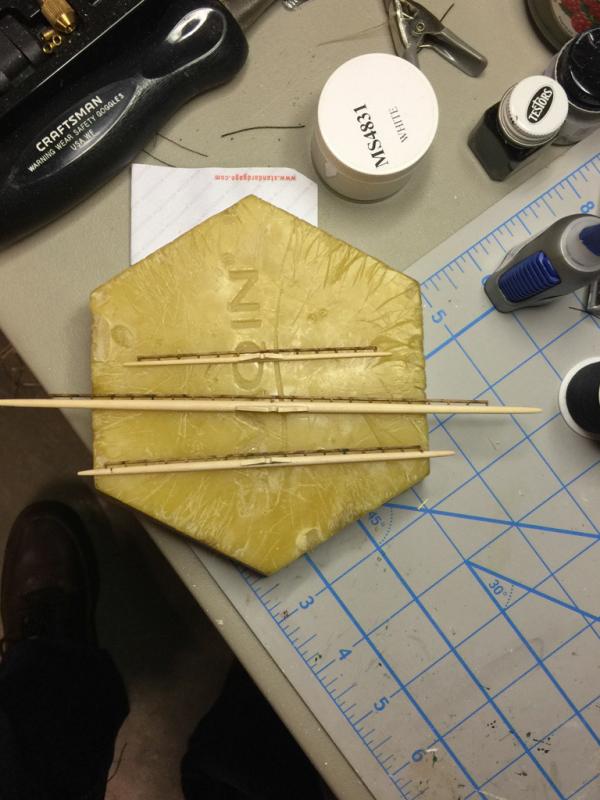
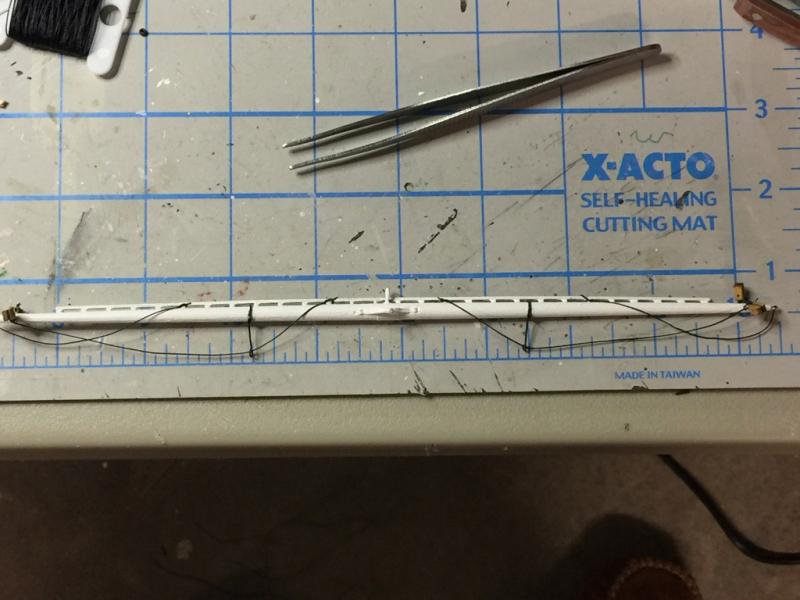
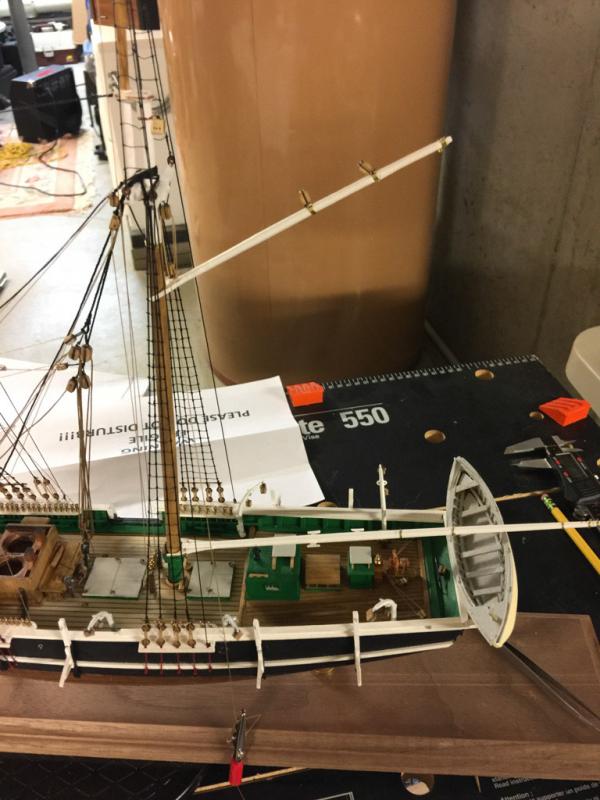
A busy last couple of weeks for the Kate Cory. I was able to finish all the fore yards and get the running rigging completed. I am learning that having thin fingers would help a lot in ship modeling! Alas, my fingers may be long, but they are not thin! Tools to the rescue. I got an old model paintbrush, removed the brush and added on a needle which I then clipped the eye off (in half) leaving a nice little pusher-type-tool. Next steps? Get all the little rope coils in place. I have about half done right now... and to do so without making a big mess of the installed rigging. Maybe I'll make some more tools for the job. Here are some pics of the latest stage. So close! I can see that I need to think about a case now. ~john


-
Nice looking build! A comment - and not from an expert in any way :-) Those backstays that are to the aft of the shrouds... they really got in the way of my working on all the ratline knot tying that comes later. I'd recommend leaving those off until the ratlines are tied. I ended up removing the backstays until I was finished with all those all-too-many clove hitches. ~john
- 648 replies
-
- 3
-
-
- niagara
- model shipways
- (and 1 more)
-
Thanks, Hamilton. I am working on the fore topsail now - the chain sheets had me going through all sorts of tribulations, which I think I got figured out. Basically I needed larger diameter holes in the blocks and sheaves to make its installation easier.... but drilling new holes is a bit tricky when all those parts are already installed on the mast! Oops. Live... learn! ~john
-
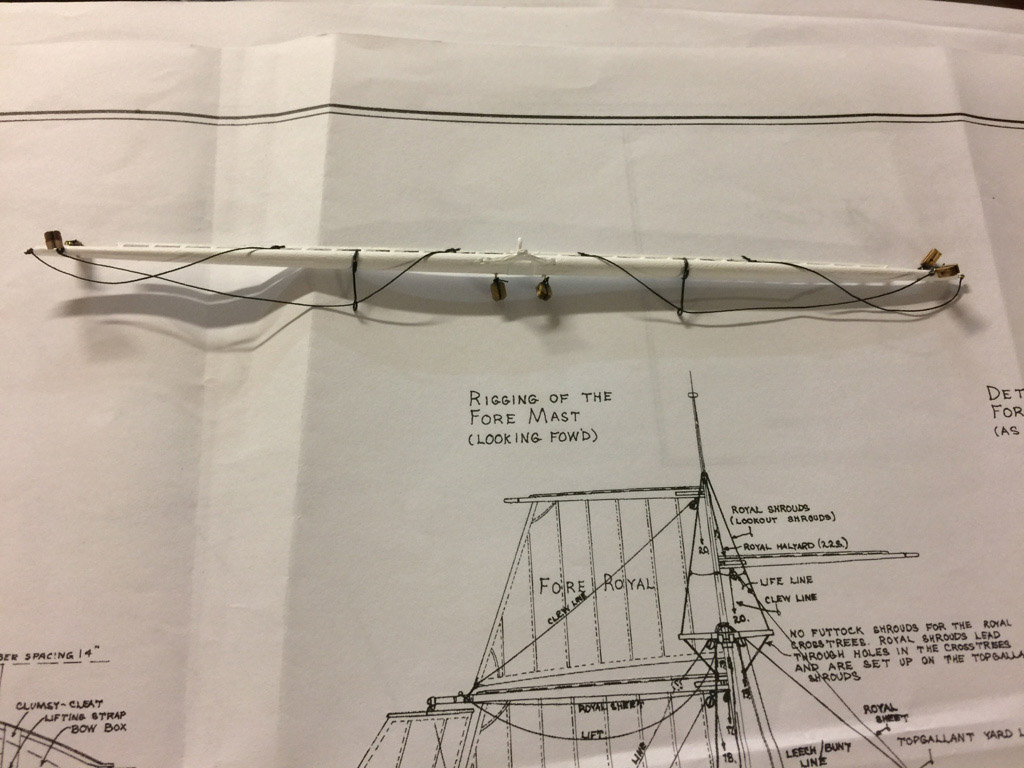
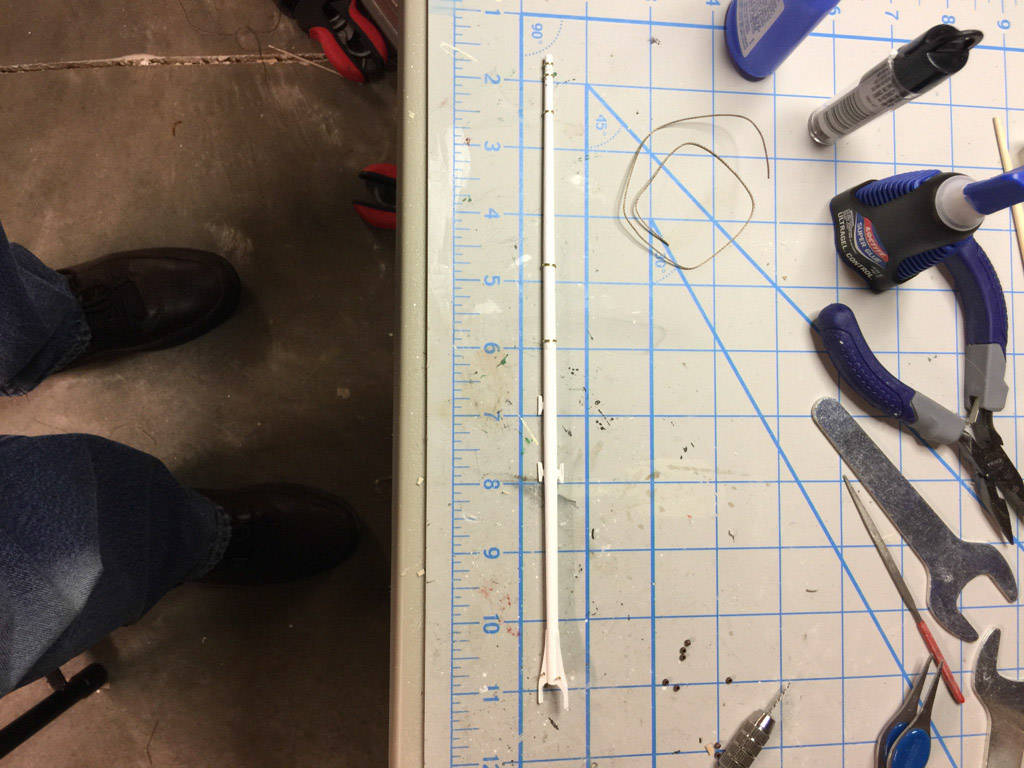
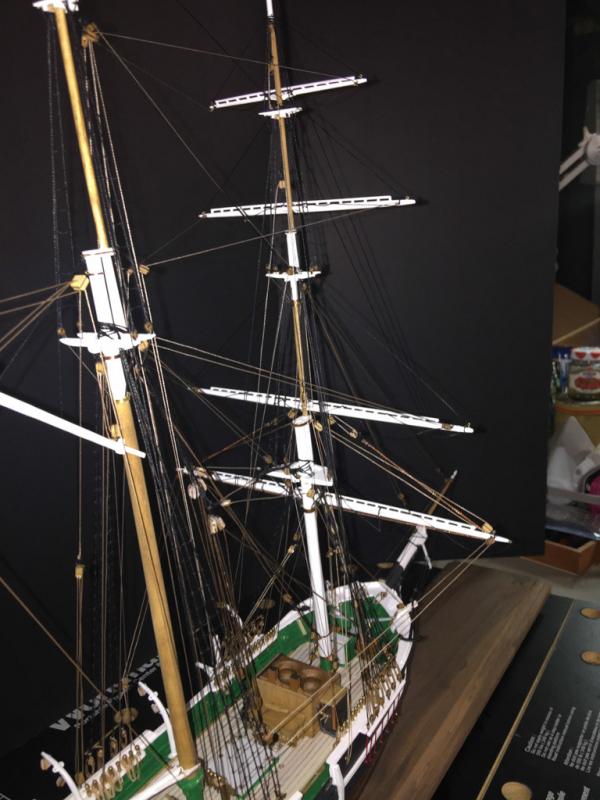
This past couple of weeks, I worked on the foremast course spar and all the trimmings. I am also trying out some new photography methods... and, while I am not impressed with my work in that regard, it still more-or-less shows the spar and its various riggings. I need to figure out a better lens with depth of field to match the scale of the model. Things learned in this stage: - Make sure all things needed are attached or done to the spar before getting it onto the mast. - Relax. Breathe a lot between attaching lines and making knots. Take time off between stages of rigging. - While I rigged this to be operational on the model, I am no longer wedded to that idea! There are points where a model has to be made more robust. Here are some images. Sorry about the darkness and blurriness in a couple. I'm working on that! ;-) ~john


-
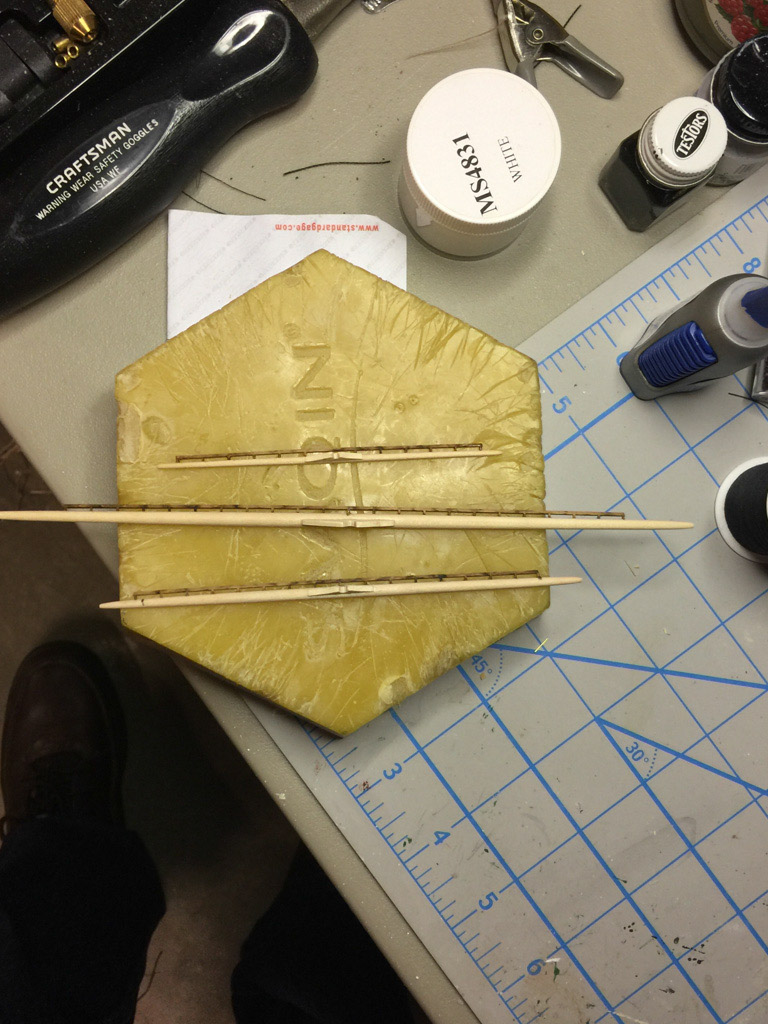
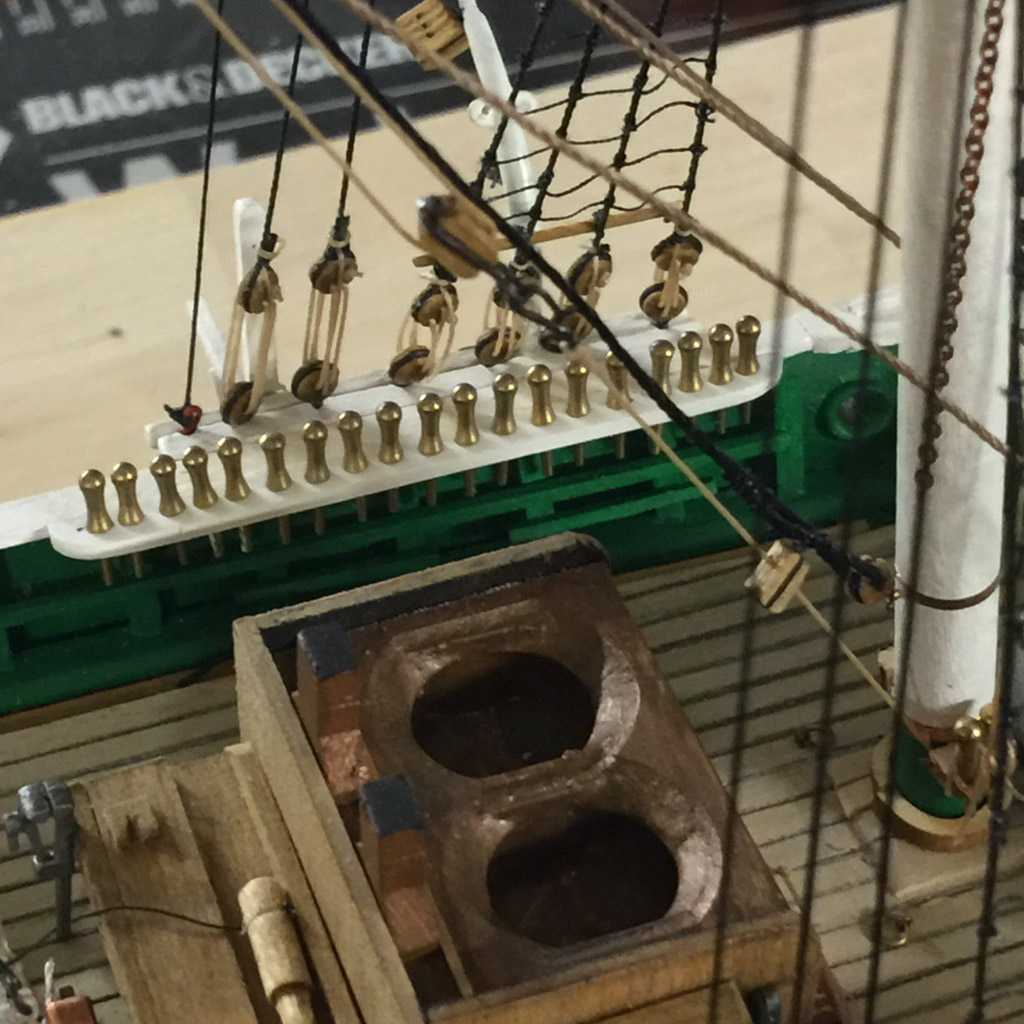
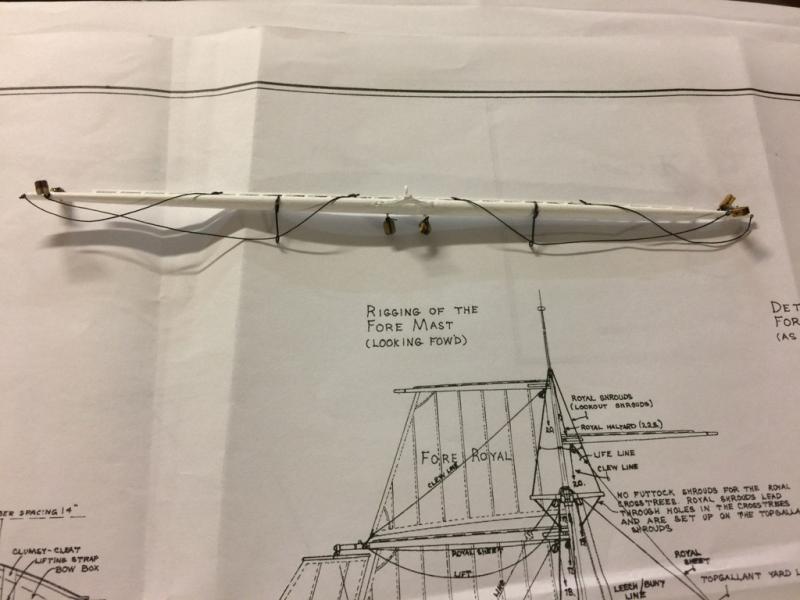
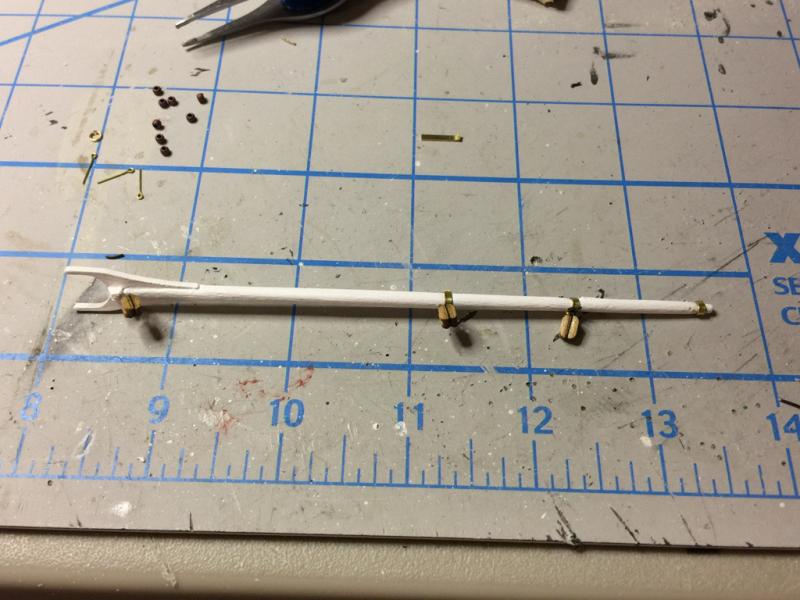
Been working on the fore course yard. Things I have learned in this exercise: - Keep lots of mini clamps hanging around to hold onto the jack stays while they are being glued along a straight line onto the yard. - CA glue is sometimes really helpful! - Read the directions and confirm with the plans, again and again. Take notes of all the little items, holes, bands, eyes and blocks that need to be added to the yard before even getting close to the mast. - Britannia metal is soft....thin piece bend and then break easily. Sigh. - Waxing lines heavily allows them to keep their shape. Using a separate cloth to vigorously rub the wax into the line (friction = heat = melting wax into line) works well. I used this for the foot ropes. Through all that, I think it's looking pretty good! ~john
-
Hervie, It's good to see another Syren build here on the forum. I have bookmarked them all, and have added yours to the list. Why? Some day.... I'm going to build her. Thank you for your log, great images, commentary and wisdom. Now, I will pull up a chair and watch the build! :-) Thanks! ~john
-
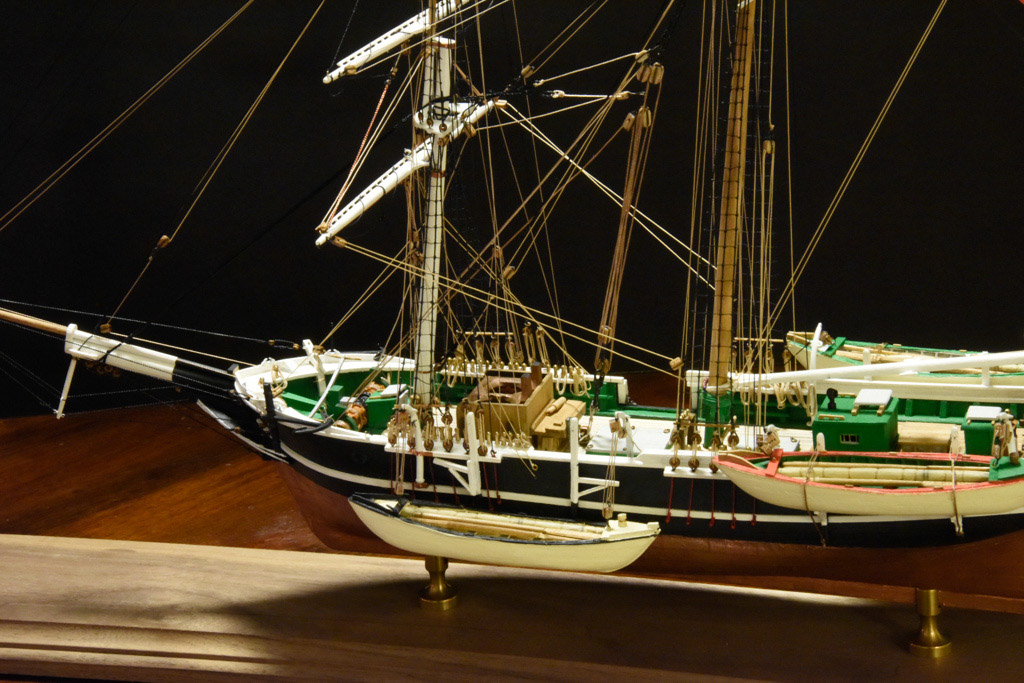
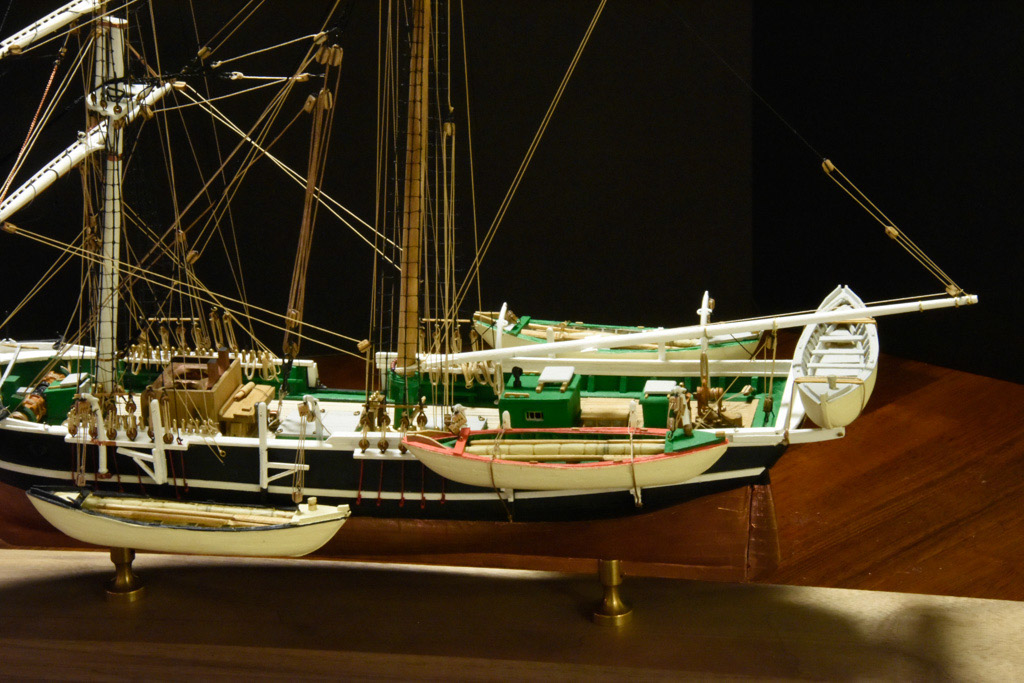
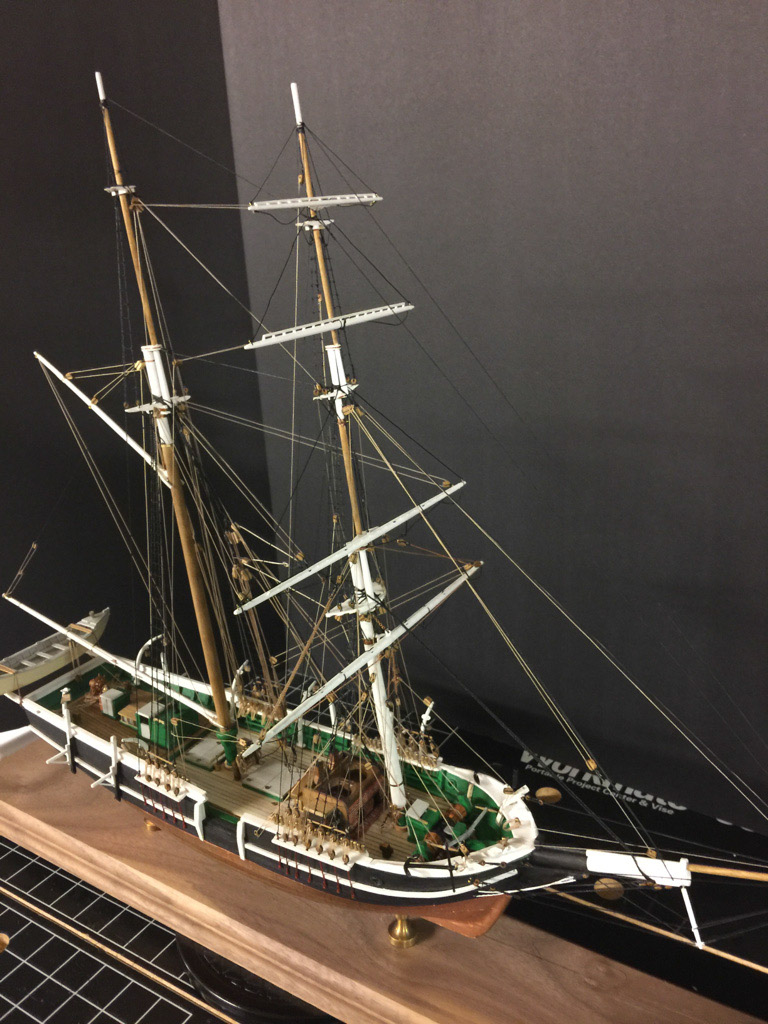
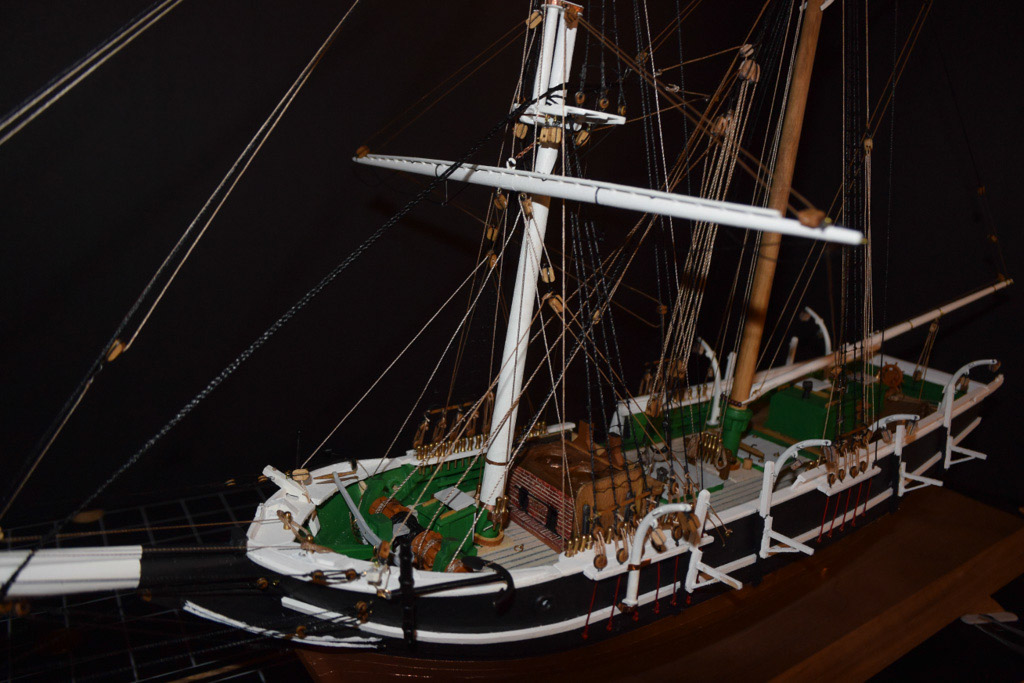
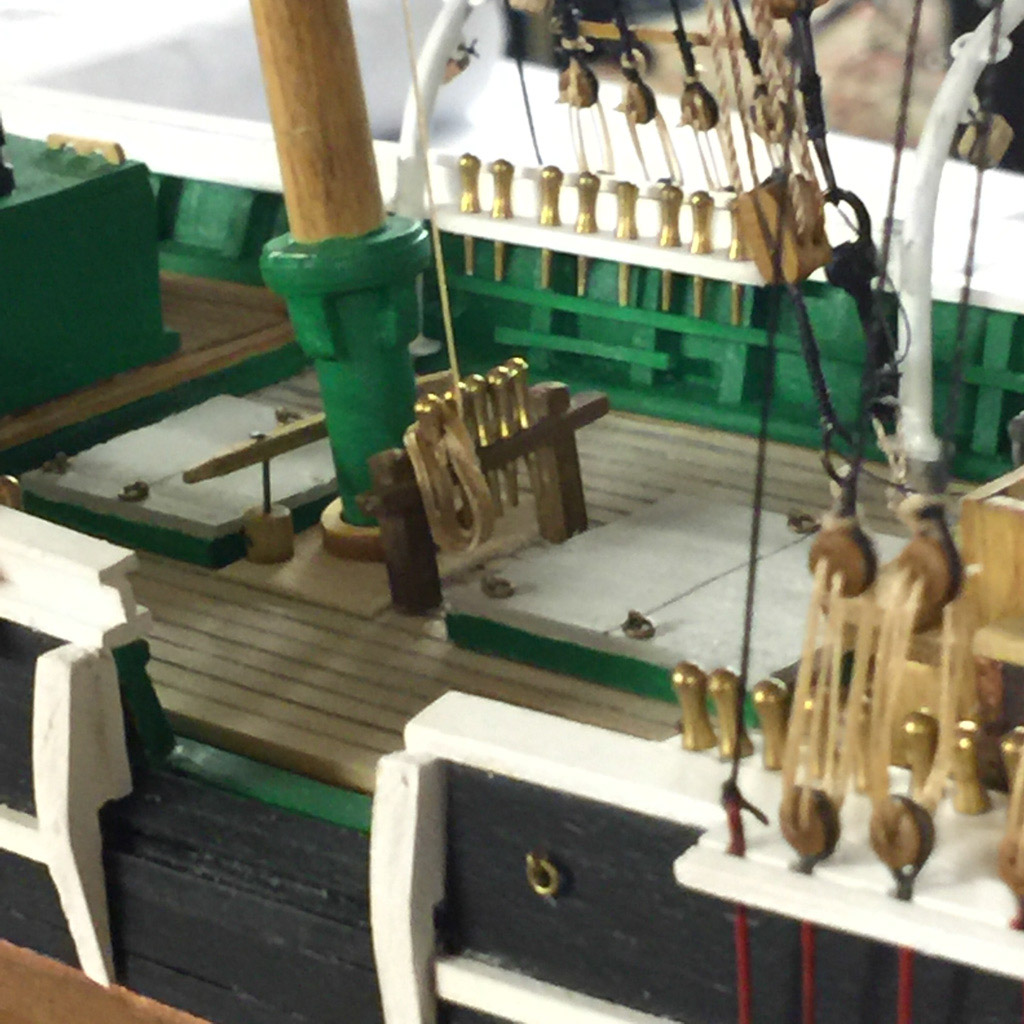
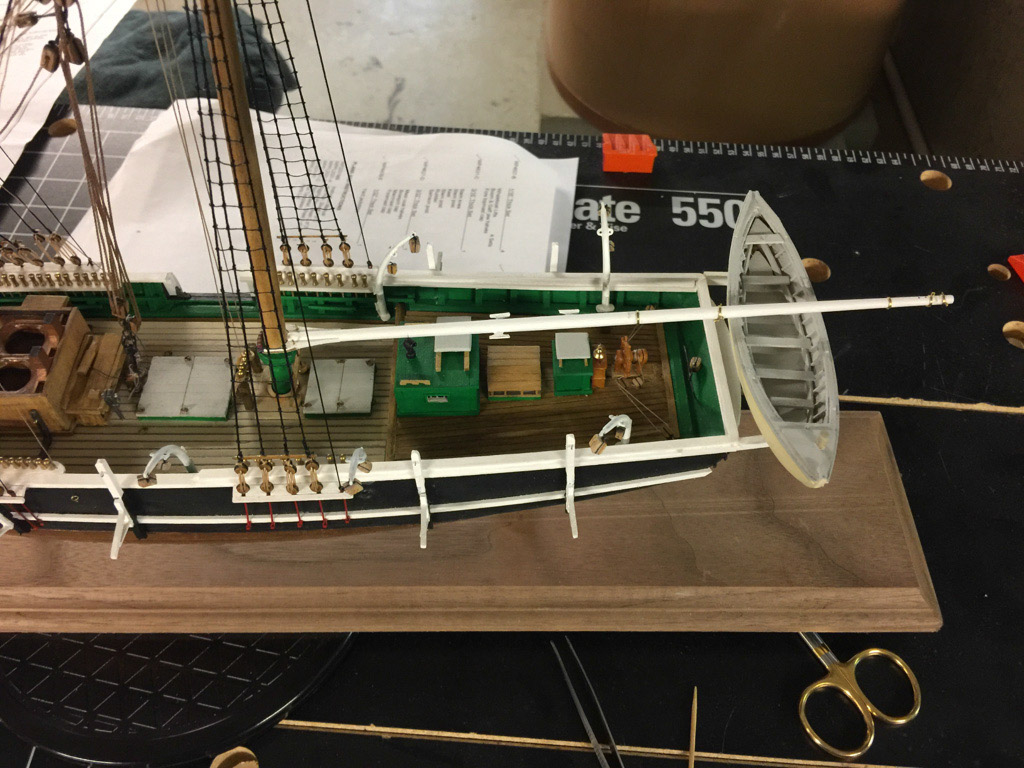
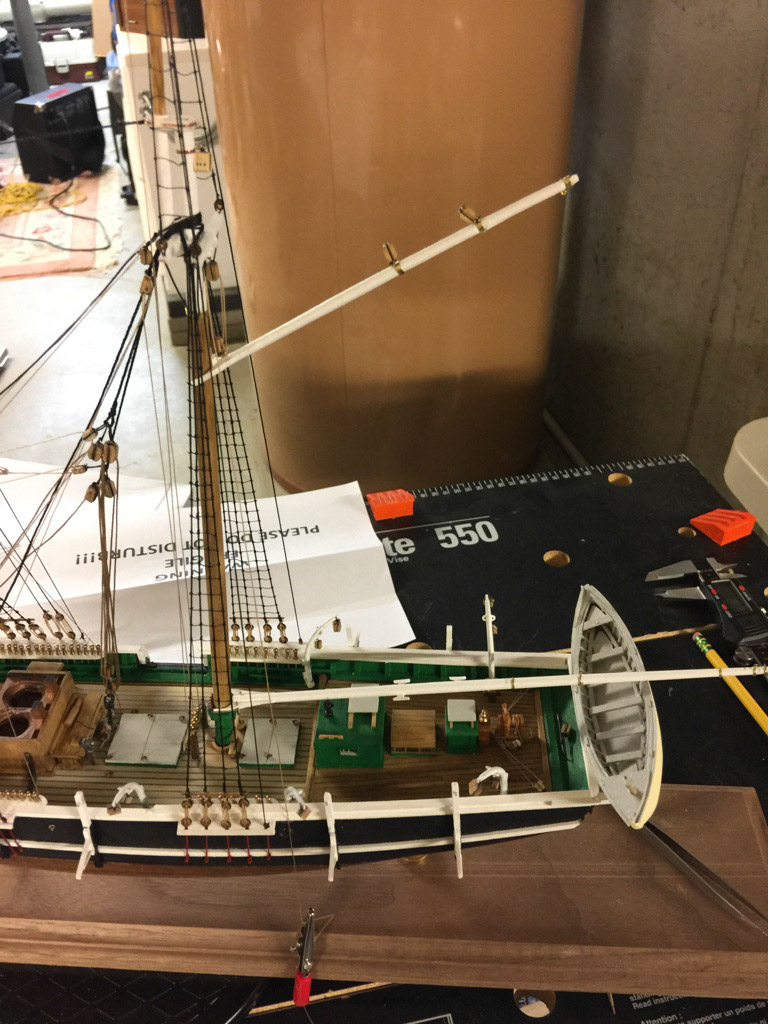
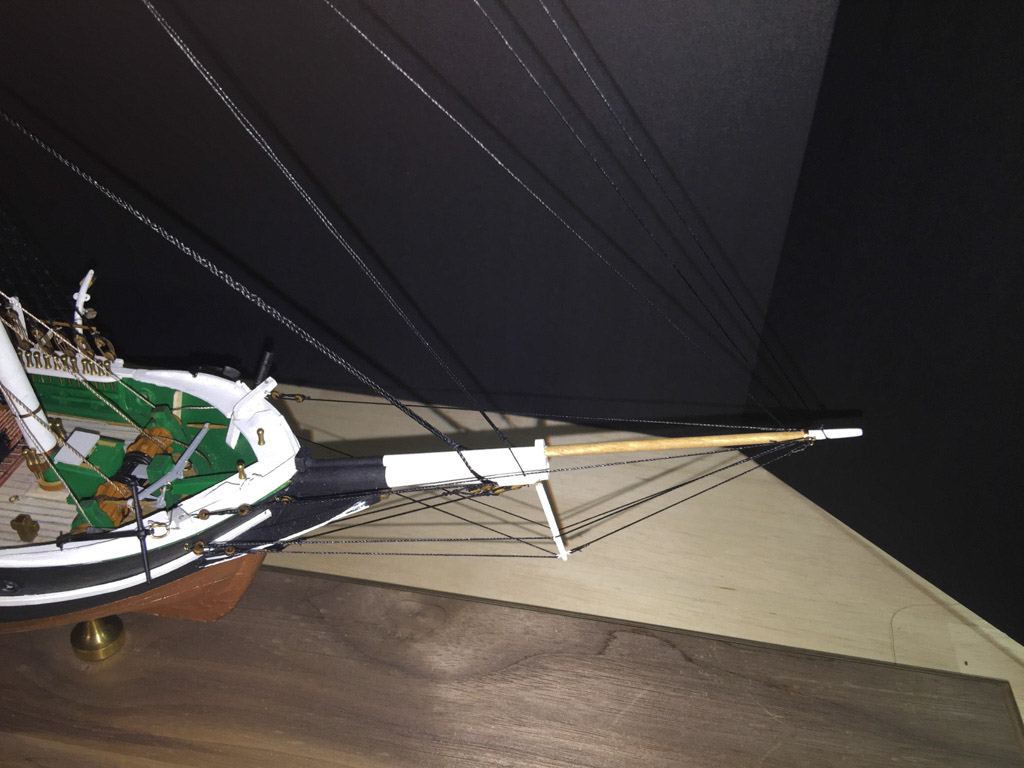
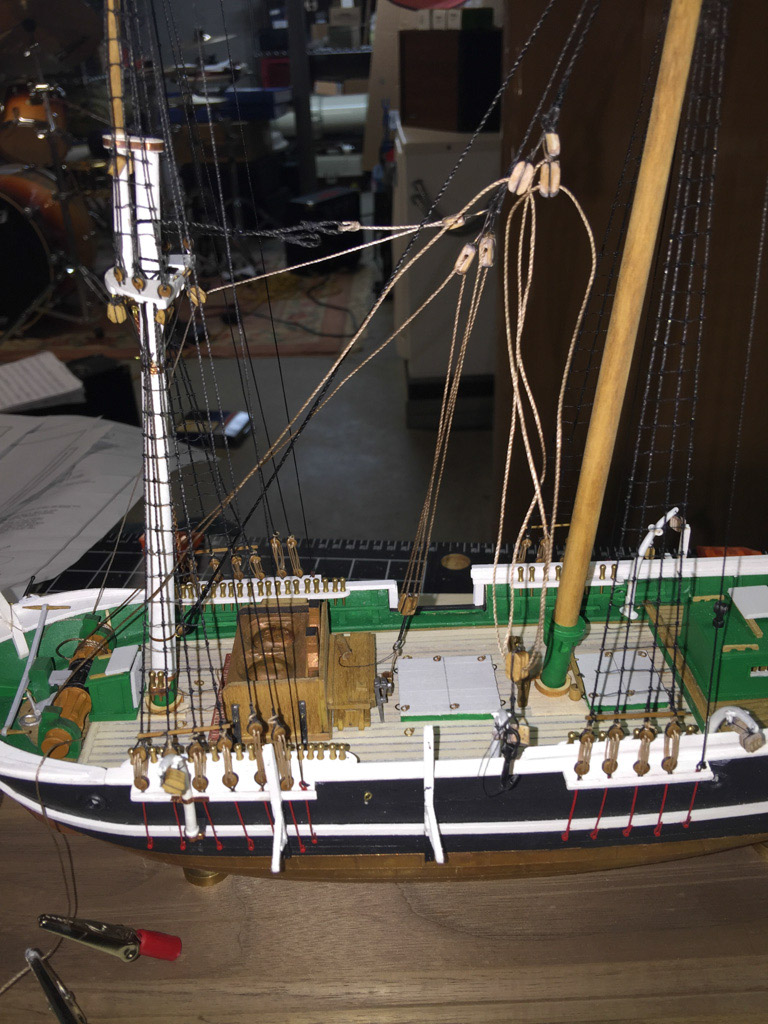
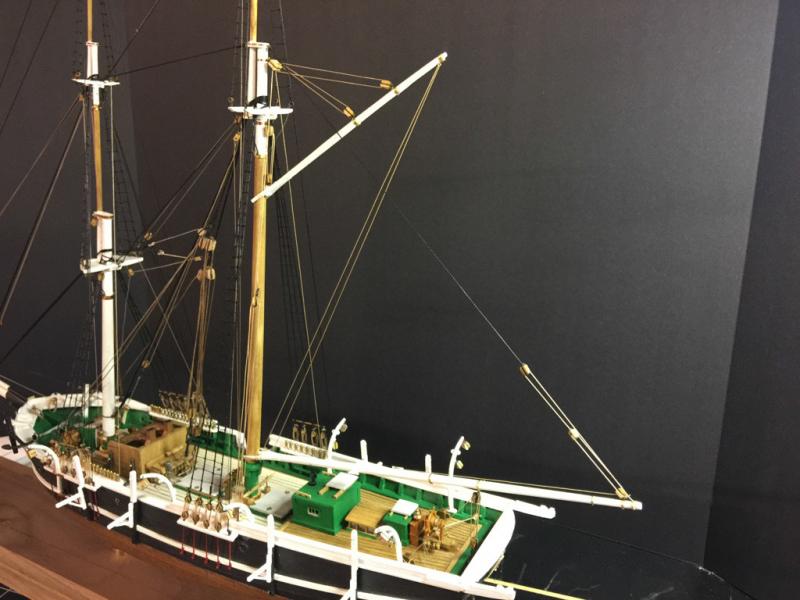
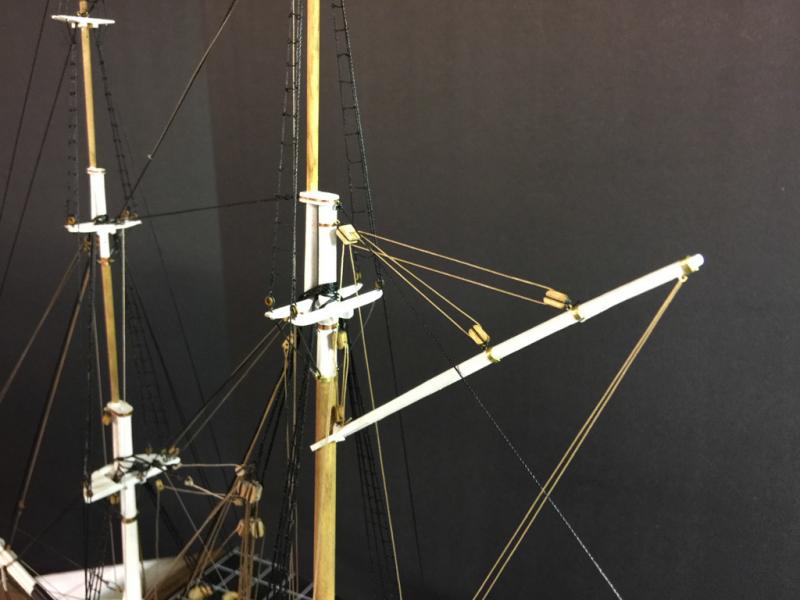
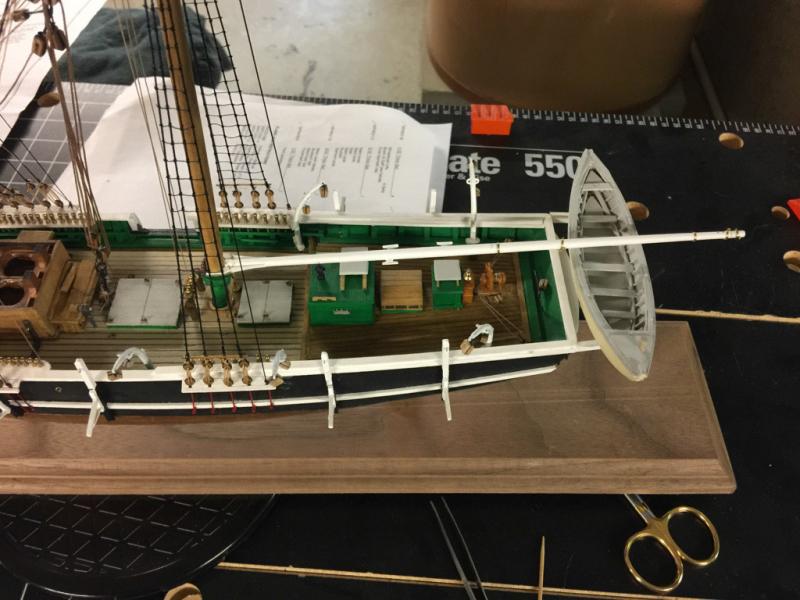
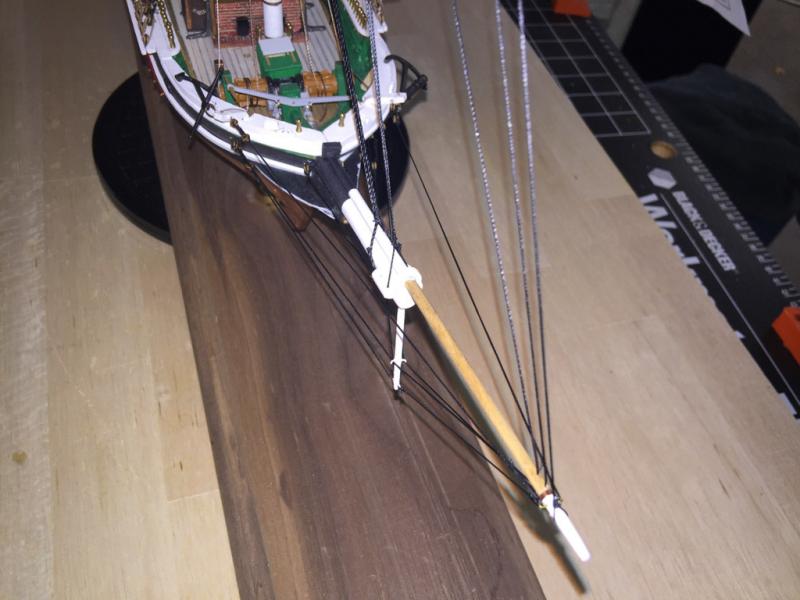
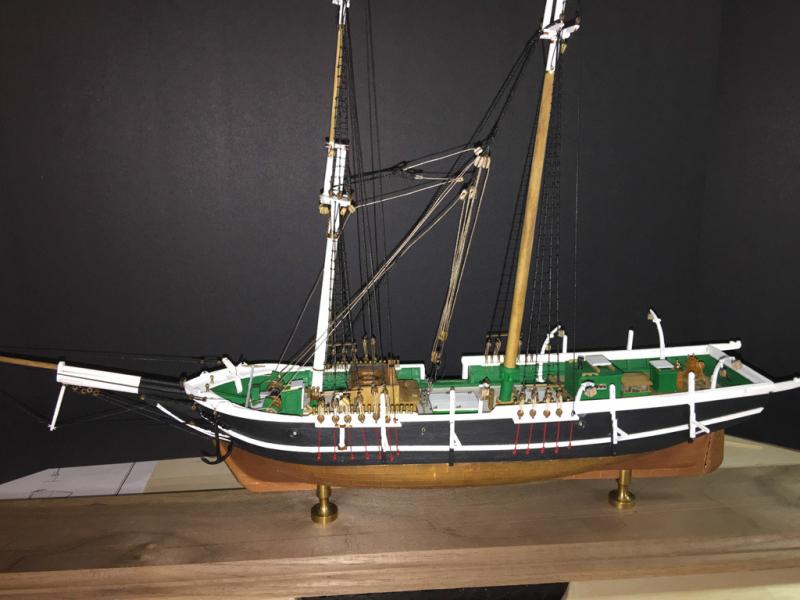
Mainsail boom and gaff are now in place. Phew! Also got the flag halyard in there for the finishing touches later on. Now to the foremast yards, then the lashing of the whaleboats.... Things learned this time through: use longer tweezers that have a flat grabbing area capable of holding onto thread with some strength. ~john A view of the whole ship as it stands today. Just the stern section here to show the boom and gaff in place. Getting all those lines tensioned properly was a bit of juggling. The boom topping lift was a piece of work! Closeup of the peak and throat halliards for the gaff. Closeup of the boom sheet which rides on a traveler on the transom.

-
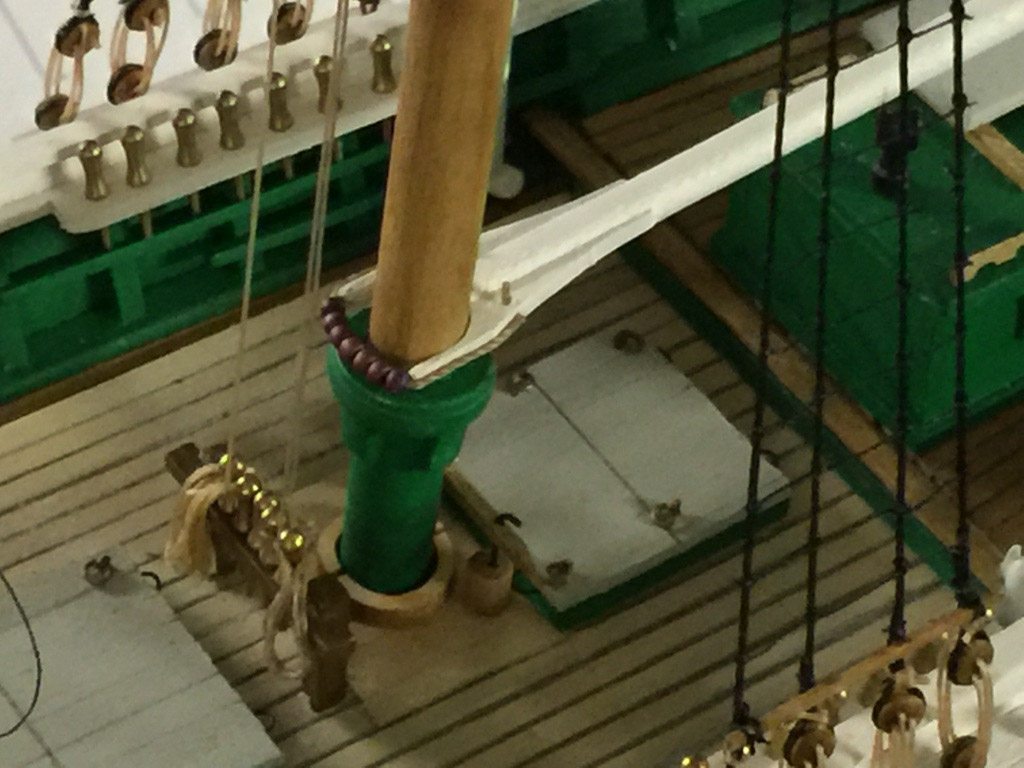
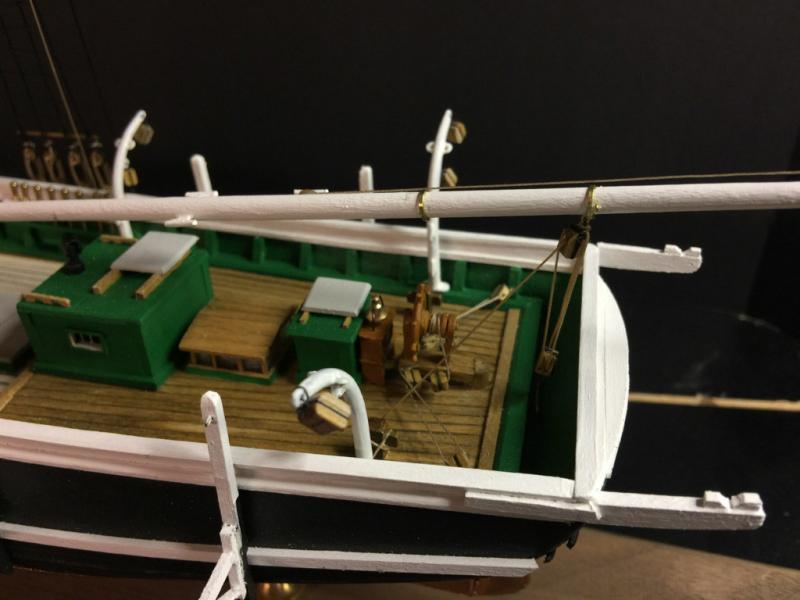
This has been a busy week for the old Kate Cory build! Having finished the cutting-in tackle (** thanks to all who chipped in to help with some of that! **) I began work on the running rigging. Jibs first then staysails followed by the mainsail boom and gaff. I decided to place the gaff up the mast, even though this would normally not be the case with a sail-less ship... normally it would be down by the boom. Also, without vangs on this vessel, I had to pin the gaff into the main mast to prevent it sloshing around all over the place. Here are some images of the progress. I see light at the end of the tunnel! ~john The extra whaleboat is there just to give some precautions for scale and location of the boom... it has't been permanently mounted yet... Lesson one: always know where things will be in the future !


-
Finished the standing rigging today! Huzzah! Now I must get back to working with wood to make spars and such for the running rigging. I am very happy to have done the cutting-in work first... it would be very difficult to add that rigging later on in the process. Rule: read ahead in the instructions! Do not be fearful to change the order of operations! Some pics follow, and as I look at these I think a white background would be better: ~john

-
Got some serious work done this week before having to get back to teaching classes(!): finished the cutting-in tackle and rigging. What an interesting workout this ended up becoming. Applying the correct balance of tension is key to this one. Some images follow. I worked on the starboard side first, then the port. By the time the port side was complete, I had to go back and re-tension the starboard side again. It ended up being somewhat iterative, but looks quite good in the end. Now it's time to work on the stays! ~john


-
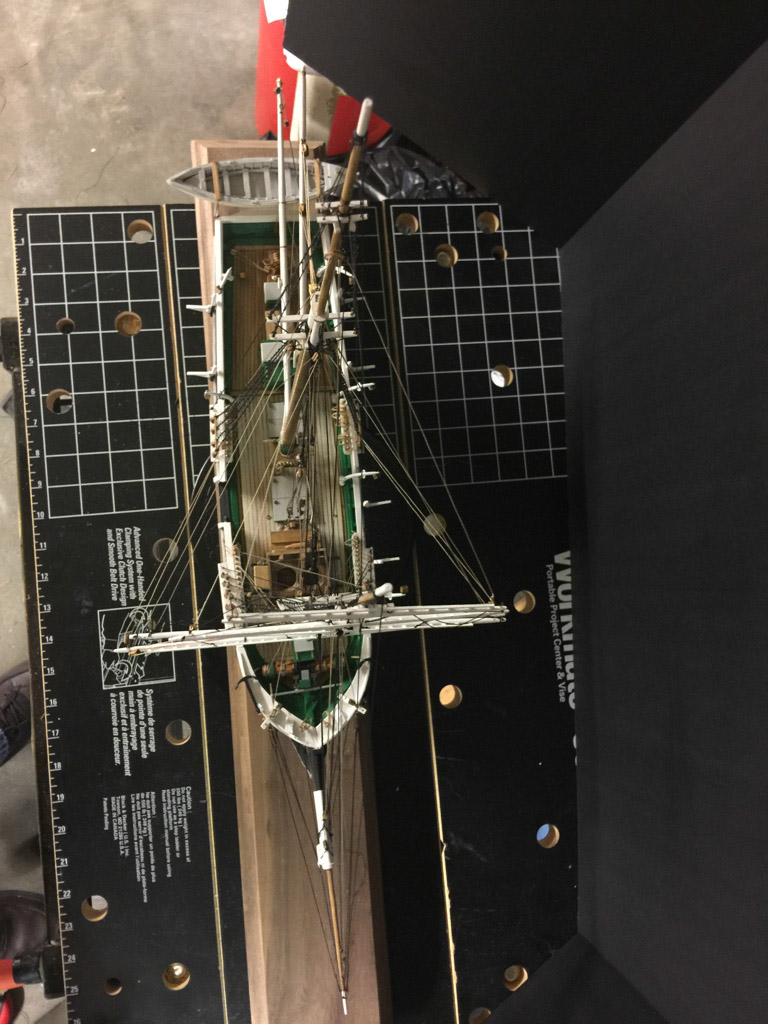
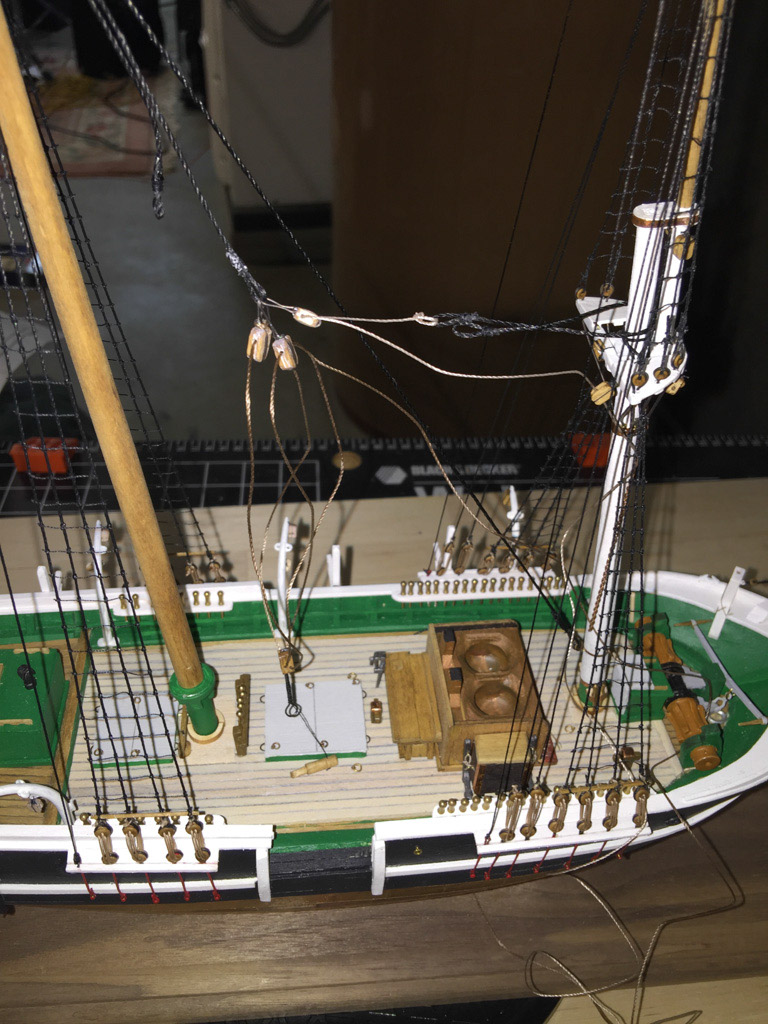
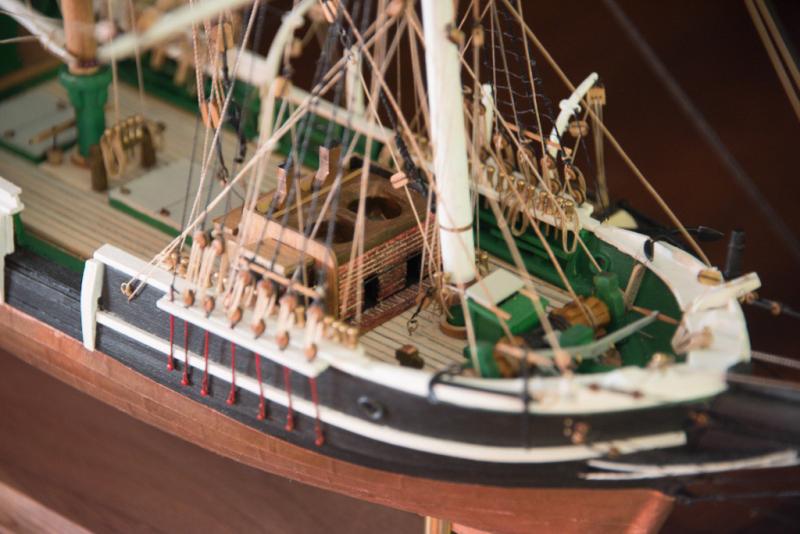
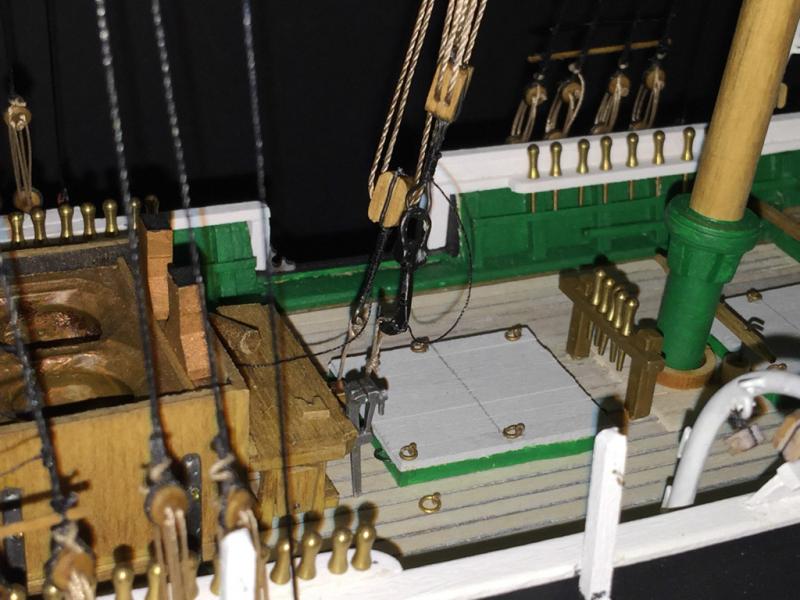
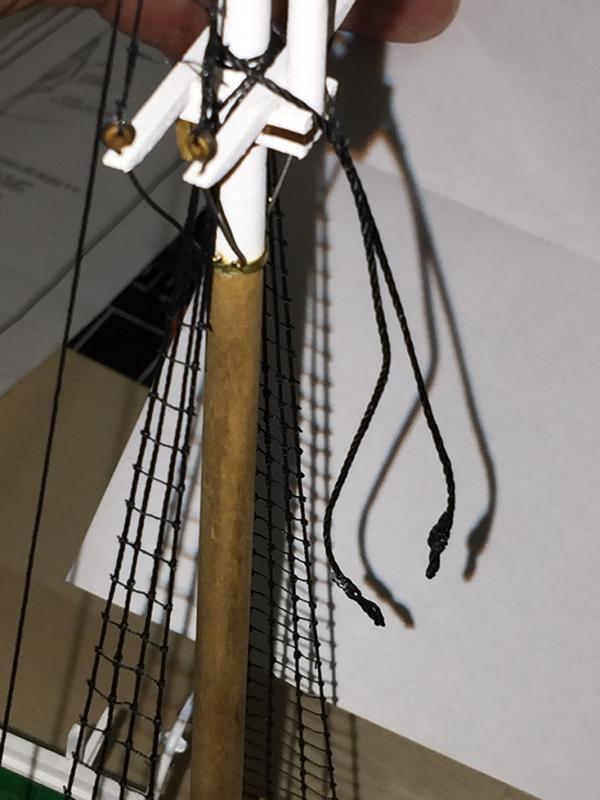
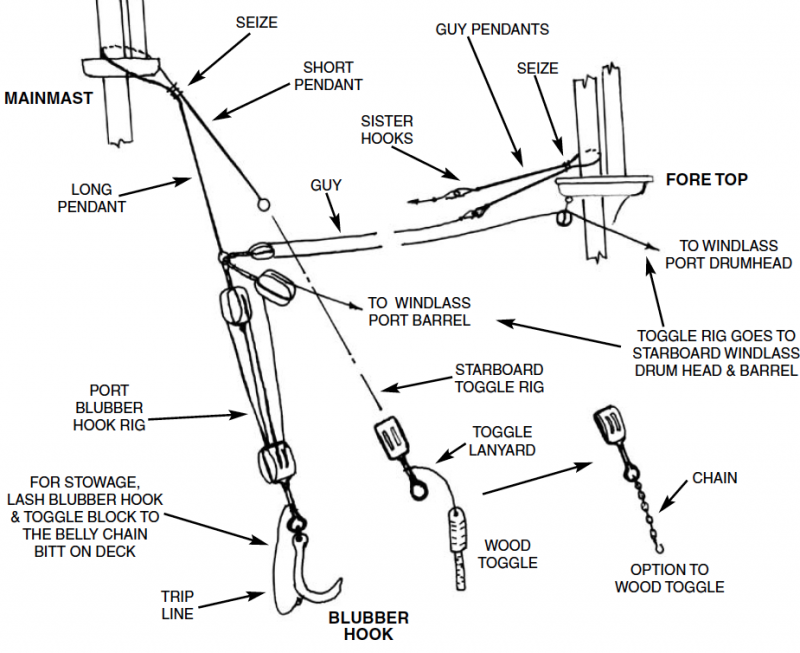
Thanks Michael for checking in. Always nice to have folks check into the log. Been working on the whale-craft rigging and parts/pieces associated with that. Today got the two pendants installed on the mainmast, along with the toggle and hook for the blubber. I am thrilled to find much detail about these assemblies online and in books. Some diagrams and info in these which helped: The Whale Fishery and its Appliances James Temple Brown Washington Government Printing Office 1883 Pp20ff: Blubber-Toggles 2 feet long and six inches in diameter of hardwood. OLD DARTMOUTH HISTORICAL SKETCH Number 53 WHALING EXHIBITS OF THE OLD DARTMOUTH HISTORICAL SOCIETY Prepared by: Arthur C. Watson, Assistant Curator Published in 1924 by the Old Dartmouth Historical Society 51. Blubber-hook, used to hoist up the blanket-piece or body blubber of a whale. 52. Eye-strap used for the same purpose. The eye would be put through a hole in the blanket-piece and made fast by a wooden toggle or pin. THE REAL STORY OF THE WHALER WHALING, PAST AND PRESENT BY A. HYATT VERRILL D. APPLETON AND COMPANY NEW YORK LONDON 1916 (sorry about the ALL CAPS!)

-
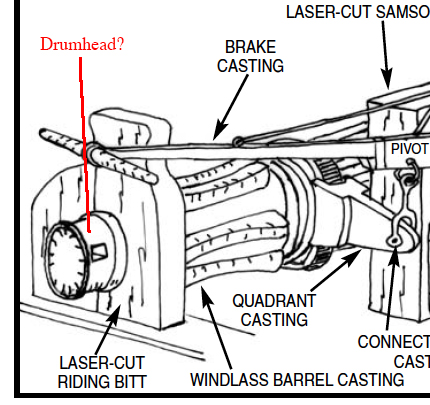
All, In the case of whalers, the rig to lift blubber and assist in the carving of the whale have two main pieces. One rig holds a blubber hook, the other a dowel or peg (large). These are manipulated by a fall and a guy for each rig. These, according to docs, head on to the windlass. Interestingly, whalers rarely had use for anchors unless not arriving dockside at port. So, anchors were usually lashed to the sides and the chain for it was stowed. The question about the windlass has to do with which line goes to which part of the windlass: the fall ends up on the barrel and the guy to the drumhead. Henry, SpyGlass - thanks for ID'ing the drumhead. That is the key! Just what I needed! Best, ~john
-
Hello All, Working now on the Kate Cory's whale-craft rigging, some of which (the downfalls and guys) end up on the windlass at the bow of the ship. The windlass is a horizontal affair as shown in the attached diagram. The barrel takes some of the rigging while the rest goes to the "drumhead". I think that this "drumhead" is the outer portion of the windlass? Am I correct here or is it some other piece? I have labeled my question in red. Thanks! ~john